

My regular opponent, Neil, and I played scenario 3D from the Vyazma or Bust supplement yesterday: On The Road To Pochinok. This is one of the climatic, campaign-ending scenarios from VoB pack and involves a final Soviet assault on a German position.

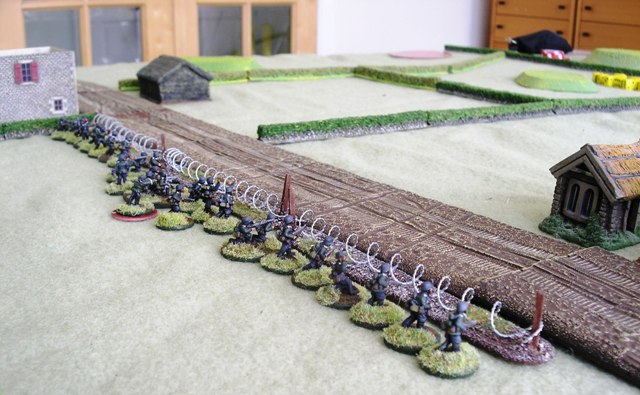
As you can see in the photo above, the Germans are defending two small villages on their side of the table. The Soviets will attack down the hill.
We rolled dice for who played whom and, unusually, I ended up playing the Germans. Looking at the briefing and terrain, and well aware of my tendency to lose any game based on a scenario I've written myself, I decided to try something a bit different. Each village would be defended by a skeleton force of only one or two squads, with my main force lined up along the back of the main road. The briefing allowed me to have a small 'forlorn hope' north of the road area, so I guessed that Neil would attack down my right flank and placed a squad of Pioneers and two flamethrowers in the wood half way up the hill.
My plan was that the forlorn hope would force his Blinds to deploy, slowing down his advance and giving me time to shoot them up as they came in. Not only that, but he would attack the villages, leaving my main force free to either counter-attack disorganised troops or, again, shoot them up as they came in. Of course, if he decided to attack down my left flank, I was in big trouble!

Fortunately for me, Neil did decide to attack down the right flank and, entirely to plan, ran four Blinds right into my forlorn hope. As they drew closer, the automatic spotting rules forced him to deploy his lead Blind: revealing a platoon of infantry.

There were however consequences for the forlorn hope. We decided that although the Soviets didn't know exactly what was in the wood, they now knew that there was some kind of enemy unit there: forcing me to place a Blind down rather than remain totally hidden.

Here's a couple more shots of the Soviet infantry:
Neil then cunningly sent a Blind straight at the woods. This turned out to be a Dummy Blind, representing a small scouting team of a couple of men only, but forced my forlorn hope to actually deploy. The German Blinds chip was proving extremely elusive, the Soviet one less so: Neil had the opportunity to deploy a small platoon of four T-26s onto the table (you can just see the noses of two of them on the right hand side of the photo below), and to fire HE at my forlorn hope, pinning it down.
Pinned doesn't mean harmless, however. One T-26 got hit by one of the flamethrowers, brewing up instantly; the other flamethrower doing a small amount of damage to the originally-deployed Soviet infantry platoon.
That, unfortunately, was the high point of the forlorn hope's success. The combined fire of tanks, MMGs, and two platoons of infantry) one of them SMG armed) knocked out half of them and shocked the rest into immediate retreat.

They had, however, done their job. The Soviet attackers had been slightly damaged but, more importantly, forced to deploy. That meant that I could open fire from one of my hidden platoons: causing nasty casualties to the SMG platoon despite the long range.
The action still focused on my right flank. Waiting for the Soviet hammer to fall was the force defending the right hand village. A couple of squads of infantry initially supported by one StuG, with another joining a moment later.
The wounds on the infantry squad are from the initial Soviet stonk. Another good thing about slowing down the Soviet attack was that it gave my Big Men time to get rid of this shock, so the Soviets faced an unshaken force rather than one already half way to awe.
The climax of the battle approached now, and fewer photos were taken as the action heated up!
The remains of the initial infantry platoon, the SMG platoon, and another full platoon under a Blind, charged the village. Again the defence in depth took its toll. Although the front house was taken, the effort disrupted the Soviet attack, and the back house defenders survived a very close Close Combat: equal dice with the Germans winning by just one! You can also see that the Soviet assault forced deployment of one squad from my other infantry platoon: further bolstering the defence.
The action now switched to the other side of the battlefield. Three Soviet Blinds had been lurking up there, and now spotting revealed them as a platoon of scouts and a platoon of four T-34s.

All I now needed was the German Blinds chip to appear. Luck was with me, and it was just about the next chip out of the bag.
Not shown in a photo, on the right hand side of the table the rest of my second platoon deployed and effectively blew the rest of the Soviet infantry off the table. Two squads and an MMG firing at point blank range at troops reeling back from an unsuccessful assault!
On the left and centre of the table, now that some nasty Soviet tanks had appeared, I could reveal my anti-tank guns and Panzerjaegers: two of each.
The Panzerjaegers fired first, forcing the crew of one T-34 to bail out after their main gun was destroyed and double shock taken from hideen fire. Okay, so one Panzerjaeger crew was themselves bailed by fire from one of the T-26s, but I was happy with the rate of exchange so far.
The anti-tank guns fired next, and another T-34 crew bailed from the shock.

At this point, Neil conceded. All he had left were three T-26s, some MMGs and two T-34s versus two full platoons of infantry, three MMGs, two StuGs, one Panzerjaeger and a couple of Pak-36s, all dug-in firing over fairly open ground. My success, we agreed, was down to the forlorn hope (although it was a good thing he chose to assault my right rather than my left) and deployment.
A great game that played out in about 2½ hours from first chip being drawn.
Robert Avery