A 6mm I Ain't Been Shot Mum game played at Gigabites Café, Marietta January 2016.

I wanted a fairly small late war, East Front game so went with this skirmish from the Knight Gunner book. The scenario takes place Feb 3, 1945. Fallschirmjaegers are trying to retake a series of villages with the aid of 276 StuG Abt.

Mark Luther


A monstrous tank bash game in 6mm played at my place in October 2015.

This was a rather ambitious attempt to make a game out of the large tank battle outside of Radekhov on June 23, 1941. It was a 4 to 6 player game that would involve dozens of tanks on both the German and Soviet side.

The Germans were from the II Battalion, 15th Panzer Regiment, 11 Panzer Division. A mix of the usual Panzer IIs, IIIs and a few IVs.

The Russians units were tanks from the 20 Tank Regiment, 10th Tank Division, 15th Mechanised Corp. A mix of KV1s, T28s and T26s. Lots of KV1s: fourteen vehicles

Mark Luther


Another game of IABSM dating back to 2012, the main aim of which is to further explore how the rules work. No scenario: just some terrain laid out on the tabletop, a couple of armies and off we go. Strategus Maximus and Burt play the Soviets, Fasbender and Daemon play the Germans...and, for the first time, we are introducing the IABSM concept of Blinds.

Objectives: The Germans must capture a bombed out town, the Russians must stop them doing so.

As soon as the game starts, Soviet aviation begins to punish the German armor.

And where Soviet armor was supposed to have been, Soviet motorized artillery appears instead: and proves very effective as panzerjaegers.

It all looked as if the speed of the German advance was going to quickly end the game in their favour, but an unfortunate die roll reversed the situation and, from here on, it was an easy battle for the Soviets, and a hard slog for the Germans.
 

The German advance constantly bumped up against hidden Soviet units, and those that they did pre-spot were exactly what they didn't want to find: Soviet anti-tank guns and artillery! 

Although it was getting more complicated for the Germans, especially with their dodgy dice rolling, the game was not yet decided, but it really did now look as if they were going to have some difficulties in achieving their objective, especially with the Soviet mobile artillery firing away and  holding their positions like lions despite taking extreme punishment!

When the Germans managed to cross the river, which had become their own personal Calvary, they realised that they still had some chance of achieving their goal...provided the dice didn't keep rolling against them.

Given the line of Soviet anti-tank guns in front of them, the Germans then decided on an infantry assault.

Meanwhile, behind a hill, a company of Soviet T-34 tanks was spotted by the Germans. These they could not budge from their strategically important position, although they did do them some damage.

The T-34s, ignoring what the Germans are doing to them, decided to continue with their commander's plan: part of them would attack the Germans approaching them from the other side of the hill in order to delay them for long enough for the others to retreat.

Meanwhile, in the town, the Russian infantry moved into their defensive positions, just before the Tigers started to appear outside the village.

Soviet aircraft, however, aware of the damage they've been able to do to Germans tanks earlier in the day, attacked the Tigers, managing to inflict enough casualties to make the German tanks begin to rethink their attack. On top of this, the T-34s, retreating as planned toward the village, hunted down the rest of the Tiger unit, catching them off guard.

In the end, the only Tiger that remained intact headed for the entrance to the village, more to protect itself from the Soviet aircraft and T-34s than with the aim of taking the town, and found itself assaulted and destroyed by Soviet infantry.

The T-34's, on the other hand, although they've taken heavy casualties, are still following orders and ready for the fight.

The T-34 that have gone to meet the troops on the other side of the hill, are also received "with love and affection" by advancing German tanks.

Meanwhile, the German mechanized infantry, seeing that the Soviet mobile artillery are Pinned from repeated impacts, manage to surround them. Suddenly, however, one of the armored transports jumps in the air, with troops inside included:  an IS-2 unit appears from behind the forest, hitting the undefended flank of the half-tracks.

Meanwhile, the German infantry assault on the anti-tank gun battery has still not yet been fully resolved. Each side has lost about half their men, and one Soviet gun crew has limbered up in order to retreat.

Meanwhile, the infantry in the village had barricaded every position in preparation for the German assault.

Although we would have liked to continue, at that point we ran out of time and had to stop.

The German assault had four clear stages:

  • The first was an advance without too much opposition.
  • The second was confusion in their orders (how we interpreted the bad luck they had from those rascally dice!)
  • The third was a resurgence of confidence and a new breakthrough.
  • And the fourth was the advance halted as they ran into unexpected Soviet units.

The Germans really did very badly in the game, especially considering that the bulk of their troops didn't even manage to cross the river, and were effectively held up by small units of Soviet antitank artillery and a few T-34s.

In the end, although it was very clear that the Germans weren't in a very good position, we agreed on a draw, especially as much of the poor German performance could be blamed on the dice!

Burt Minorrot, with some of the images by VIIII Legion.


This is a game dating back to 2012 (I'm slowly working my way through the archives) played between Burt and Strategus (the Soviets) and Fasbender and Dae (the Germans). It's a random 15mm set-up using I Ain't Been Shot, Mum! As usual, the Germans were defending a town, with the Soviets attempting to re-take it.

The Germans used their Blinds to try and hide where they deployed, whereas the Soviets, much more numerous, although also using Blinds, didn't bother to try and hide, but spread out right the way across their edge of the table.

The game began with the Russians advancing forward cautiously, almost immediately coming under fire from German artillery concealed within the town.

The Soviets then sent tanks forward in an attempt to outflank the German positions.

The Germans revealed their armour, hidden at the edge of some dense woods. The Soviets, determined to take the town, brought up their katyushkas.

Soviet machine guns units deploy on the top of a hill in order to cover the advance of the infantry. German aircraft attempt to drove of the Soviet T-34s, now approaching dangerously close to their positions.

The Soviet outflanking force of tanks does seem to be having an effect:

Some of the small villages surrounding the town are now in Soviet hands:
 

But the Germans aren't beaten yet, and their response is not long in arriving, forcing the Soviets to re-locate both to defend themselves and to protect the advance of the infantry, as in the case of their machine guns.

Unfortunately, at this stage we ran out of time, and had to end the game before it became clear who was the winner.

Burt


A 6mm I Ain't Been Shot Mum game played at Gigabites Cafe in July 2015. Folks wanted a tank bash so I went with the Kampfgruppe Stachwitz vs 6th Tank Corps near Verkhnopenye on July 10, 1943. The action starts very early in the morning with the mixed task force of KG Stachwitz from the Grossdeutschland Division moving on to some higher ground after learning of a large concentration of Soviet tanks to the southwest.

Soviet crews were rated as having three action points and the Germans four with a couple of +1 tank aces, so quality to the Germans.

Mark Luther


"So what do you fancy playing?" I asked Bevan: "More Poland?"

"No, I fancy a change. Can you do US Marines assaulting a Japanese-held beach in the Pacific" he replied.

"No" I said, "but I can do US Rangers assaulting a beach in Sicily..."

On 10th July 1943, as part of Operation Husky, a special grouping of Rangers and combat engineers known as Force X was sent in ahead of the main US 1st Division assault on Gela, Sicily and the high ground immediately behind the town. Their aim was to secure the town's pier...but unfortunately their landing craft were spotted as they came in and the pier destroyed before they could get to it. Force X landed anyway, and were very surprised when they came up against Italian troops from Major Rubellino's 429th Coastal Battalion who actually fought back and showed no signs of surrendering or retreating. It took four hours of hard fighting before the town's defenders were eventually subdued.

That's the abbreviated background to the fourth scenario from the Sicilian Weekend scenario pack for the company-sized WW2 wargame, I Ain't Been Shot, Mum! and was the battle that Bevan and I would play. Bevan took the part of the American Rangers and Engineers, I played Major Rubellino's Italians.

Gela, looking down towards the beach where the American landing craft have just appeared

Force X

Force X, commanded by Captain James B. Lyle, consisted of two platoons of Rangers, each consisting of two 8-man assault squads and two 5-man LMG squads. One platoon had a sniper with them, the other a 60mm mortar. The Rangers' HQ had an extra Big Man, as befits veteran troops, and a couple of bazooka teams. With them was a platoon of combat engineers led by Lieutenant Walter "Monday" Poniedzialek consisting of three 10-man engineer squads backed up by a single chemical mortar (a 4.2" heavy mortar). The Americans could also call in fire support from the destroyer Shubrick's 5-inch guns.

Each platoon would disembark from its own landing craft.

The Italians

The Italians would begin the game with just two MMG teams on table, each in its own pillbox on the beach. Historically, these were very successful, with one Rangers platoon just about wiped out when caught in a crossfire between two pillboxes.

The rest of the Italian force consisted of a full company of keen but Green troops: an HQ platoon of two 8-man squads, and then three platoons of four 8-man squads each. They would therefore outnumber Force X about 2:1 and arrive by trucks along the main road at the top of the table.

Crucially, however, the Italian Big Men, unlike their American counterparts, were of universally poor quality: the company commander was Level II, each of the platoon commanders was Level I. This would prove crucial in the coming battle, as I found out how unresponsive and fragile that made my force!

The Italians were defending a ruined church at the opposite end of the table to the beach. All the Americans had to do was dispossess the defenders of the church...but they only had three hours of game play in which to do it.

the objective

the italian infantry arrive

The Game

The game began as the American landing craft hit the beach. The first platoon of Rangers immediately charged out of their boat and headed straight for the nearest, concrete, pillbox. This they took, but not without losing half of one of their assault squads on the way in, and another couple of men and their commander in the assault itself. As happened historically, the Rangers were finding out the hard way that the Italians were actually here to fight!

The Engineers and the other Ranger platoon originally headed straight inland, trying to get into cover among the dunes at the back of the beach.

Realising, however, that they weren't going to make it all the way, the Rangers changed their minds and ended up emulating their colleagues and charged the pillbox the second pillbox anyway.

They, too, captured their pillbox, and they, too, sustained quite a few casualties doing so, also including their commander, but at least the beach was now secure, and the chemical mortar team could begin setting up their weapon.

Meanwhile, the Italians had de-bussed a couple of their platoons, anxious that the chip pile was looking all too green (unit activation is by poker chips, with the Americans using green chips, the Italians blue chips) and that they could easily get trapped under their Blinds as Force X danced rings around them. Players of IABSM will know that one of the crucial decisions is when to move your force off their Blinds (used for concealment and rapid movement) and onto the tactical table top.

Italian platoons 1 and 2 deploy in the narrow streets of Gela

Death from Above!

Having dealt with the pillboxes on the beach, the Americans then started to work their way forwards into the town itself. As the going was tough (a combination of sand and poor dice) they took the opportunity to call down fire from their on- and off-table artillery assets. This proved disastrous for the Italians, as both the chemical mortar and the Shubrick not only started their shoots almost as soon as they were called upon (calling up artillery support can take a bit of time in IABSM!) but landed their initial shells almost exactly where they wanted them too.

Firstly, Italian Platoon 2 was caught in the narrow streets of the town by a barrage from the chemical mortar, directly hitting the centre of the platoon's deployment area. It wasn't so much the fatalities, which were few, but the fact that the platoon was now Pinned down and taking Shock: something that the single Italian Level I Big Man (Tenente Guiseppe Udine) was incapable of doing much about!

Much worse than that, the Shubrick then scored a direct hit on Italian Platoon 3 as it was still in its trucks at the back of the town.

All trucks were destroyed, and casualties amongst the closely packed troops were high!

Vicious Streetfighting

With the Italians reeling from the effects of the artillery fire (the chemical mortars also caught the Italian Company HQ in their trucks, but it wasn't a direct hit, so casualties were comparatively light) the Americans were now able to make their way into the town unmolested.

The Engineers, who had remained under a Blind, now led the way, charging down the main side street of the town to take Italian Platoon 2 in the flank. The Italians, seeing them coming, didn't bother to hang around: with their ears still ringing from the effects of the mortar fire, they routed, fleeing backwards with some squads now having eight or more points of Shock!

This shot was taken half way through the Italian rout: two squads have already been moved backwards

Now, however, things bogged down a bit for the Americans. Yes, the Italians were battered, but there had been an awful lot of them to start with, and those that were left had now hunkered down in houses and factories and were shooting anything American that moved. Not only that, but the Shubrick and chemical mortar now had to cease fire as they ran the risk of dropping shells on their own men.

Slowly the Rangers and Engineers edged forward, but time was ticking on, and, with their limited numbers, even the occasional casualty was painful in the extreme.

Climax

At this point, looking at the clock, I actually thought that the Italians might hold on.

As you can see in the photo below, although two squads of Engineers (top left) can now see their target, it's still quite heavily defended: two untouched Italian squads with their Big Man.

Likewise, the Rangers coming up from the beach in the house top right are blocked by three (admittedly battered) Italian squads led by Capitano Ravenna, their company commander.

Bevan and I looked at the clock. The Americans were so close to being out of time. One more turn, and that's it, we decided.

The turn began slowly, with the third Italian platoon and second Rangers platoon continuing to exchange fire in the factory area of the town.

Then up came the Shubrick's chip. 

There was a pause, and then Bevan said: "Right, let's go for it: rain down fire on the church!"

Leaving aside the question of whether this was a legitimate target, being a House of God, only the slightest of deviations would have the Shubrick's shells landing on American rather than Italian heads!

The Shubrick's guns fired, the diced were rolled: direct hit! 

Falling masonry, clouds of smoke: the Italians in the church were battered, Pinned and distinctly unhappy!

"You still haven't taken it" I pointed out helpfully, glancing at the clock in a meaningful fashion.

Me and my big mouth!

Next chip out was [American Heroic Commander].

If you look at the pic above again, you'll see Captain Lyle himself lurking in the house next to the two Engineer squads.

This was the opportunity he'd been waiting for. The Level IV Big Man, also an Infantry Ace, led the Engineers in a charge past the gas tank into the church.

One squad was shot down almost as soon as it left the shelter of its house, but the other crashed into the defenders, the assault engineers effectively wiping out their battered opposition.

When the smoke cleared, the Americans were in possession of the church, and had therefore won the game, but Captain Lyle lay dead.

Aftermath

A great game of IABSM that literally went down to the wire. I honestly thought that I could snatch victory from the jaws of defeat, holding onto the church for long enough for the clock to run down...but it was not to be.

Casualties on both sides were horrendous. Historically, the Italians lost 45% of their force before losing Gela, and I think we more than equaled that here. The Rangers lost about half their men, including every Big Man except one; with the Engineers only really having one decent squad remaining as well.

Cracking stuff...and not a tank in sight!

Robert Avery


This scenario, played out by myself (Germans) and Kev (Americans) at the club last Sunday concerns a company of US Airborne troops dropped inland from Utah Beach as part of the D Day landings. C Company’s dropzone is in the region around La Forge, a small hamlet on the road west from Sainte-Marie-du-Mont. Unfortunately, the company’s three platoons have been dispersed and need to join up in La Forge and consolidate their position and prevent German troops from attacking the landing zone. 

Capt. Eugene O’Neill, commanding C Company has set up his Command Post in the hamlet and deployed Able platoon in defence. Baker and Charlie platoons are scattered around and are attempting to find their comrades. Capt. O'Neill has to hold on until troops from Utah Beach can reinforce him. These are represented by a platoon of M5A1 light tanks.

So far, the US troops haven't been attacked, but German forces moving towards Utah Beach have spotted the Americans and need to eject them before joining the forces opposing the seaborne landings.

US Forces

HQ : (1 blind +1 dummy)

  • Capt Eugene O’Neill (L4)
  • Lt. Marvin Doolittle (L3)
  • 2 x bazooka teams (2 men each)
  • 2 x Browning 0.30 LMG (3 crew each)

Able Platoon: (2 blinds + 1 dummy)

  • Lt Doug Gatsby L3)
  • 3 x sections(10 men)
  • 1 bazooka team
  • 1 60mm mortar (4 man team)

Baker Platoon:

  • Lt Steve Austin (L3)
  • 3 x sections (10 men)
  • 1 bazooka team
  • 1 60mm mortar (4 man team)

Charlie Platoon:

  • Lt Harry Cooper ( L3)
  • 3 x sections (10 men)
  • 1 bazooka team
  • 1 60mm mortar (4 man team)

Tank platoon (on the road, heading for the village)

  • 5 x M5 light tanks
  • Lt Lou Reed (L2) 

La Forge: a sleepy Norman hamlet

The first US platoon arrives from this side of the village

German Briefing

American parachute troops have landed and are all over the countryside. One group is in the vicinity of La Forge. A company of Panzergrenadiers with vehicles has been dispatched to round up the Americans and prevent them securing the roads. Because of the risk of attack by fighter-bombers against large columns moving on roads, the German forces will arrive in separate groups. Two Panzerjägers are available but will not arrive immediately.

The Germans will approach from this side

German Forces

Wave One (arrives when German blind chip is first drawn) 2 blinds plus 2 dummy

HQ Element

  • Oberleutnant Stefan Wurst (L4 Big Man)
  • 3 MG42 MG teams (2 men each)
  • 3 Panzerschreck teams (2 men each)
  • 1 SdKfz 250/10 with 37mm PaK and 1 SdKfz 250/9 with 2cm cannon and MG42

Zug One

  • Feldwebel Otto Klein (L3 Big Man)
  • 3 rifle squads (8 men each)
  • 2 Panzerfausts
  • 1 additional MG42 team

Wave Two (chip goes in the bag when German blind chip is next drawn) 2 blinds

Zug Two

  • Feldwebel Uwe Seeler (L3 Big Man)
  • 3 rifle squads (8 men each)
  • 2 Panzerfausts
  • 1 additional MG42 team
  • 2 x SdKfz 251/9 (75cm L24 howitzer)

Wave Three ( chip goes in the bag when German blind chip is drawn for the third time) 3 blinds

Zug Three

  • Feldwebel Hans Helder (L3 Big Man)
  • 3 rifle squads (8 men each)
  • 2 Panzerfausts
  • 1 additional MG42 team
  • 3 x SdKfz 250/9 with 2cm cannon and MG42

The German A/T chip goes in the bag with Wave Three

Panzerjäger Zug

  • Leutnant Georg Ritter (L3 Big Man)
  • 2 x Marder III 75mm Pak 40

The Game

The Germans begin their advance under blinds, spotting the Airborne platoon in the paddock surrounded by hedges in the hamlet. On the right more German troops move to occupy the walled garden, again under blinds.

Having been spotted by the Americans in the village, the German Zug takes cover in the walled garden. This will prove to be a problem in the coming battle. 

Both sides exchange fire, no casualties are caused but both sides take some shock. The noise of the shooting is bound to attract other troops to the area. First to arrive is a second US airborne platoon, quickly followed by more Panzergrenadiers and some SdKfz recce halftracks. A couple of SdKFz 251 halftracks with short 75mm howitzers also arrive.

Things start hotting up as more fire is exchanged. So far, neither side has suffered many casualties, but shock is slowing things down. The Germans seem reluctant to advance and this allows the US Airborne to start consolidating their position when the final platoon arrives.

This platoon takes up a defensive position behind the bocage lining the road to prevent the hamlet being outflanked by German infantry. The German SdKfz 251/22 with a 75mm Pak 40 near the walled garden opens fire on the hamlet but misses, and this brings an instant response from the US bazooka teams, who destroy the vehicle after a couple of shots. 

More German troops arrive

The final US platoon arrives

Things begin to hot up

Bazooka fire destroys the half track

By now, all forces apart from the US tanks and the German Panzerjäger Zug are in action. Both sides are also taking casualties, mainly to heavy fire from the LMGs of both sides.

The platoon defending the hamlet is suffering from MG42 and howitzer fire as the Panzergrenadiers begin to advance across the open fields towards their enemy.

Realising that being stuck in the walled garden is pointless and unable to move along the road due to a US platoon behind the bocage, the German troops climb over the wall and begin to advance across the ploughed field towards the hamlet. A second Zug moves up in support.
 

However, time is running out because the US cavalry has arrived in the shape of five M5A1 tanks. Where are the Marder anti-tank guns when they are needed? 

The M5s immediately open fire with machine guns on the Panzergrenadiers caught in the open, inflicting both shock and casualties. The much-needed Panzerschreck teams seem paralysed with fear and are stuck in the middle of nowhere, unable to do anything useful. 
 

A section of Panzergrenadiers eliminates the US LMGs in the hamlet and advances over the wall towards the houses, causing the US commander to beat a hasty retreat. 

There is still no sign of the Marders, who must have fallen foul of the Allies elsewhere in the area, and the machine guns of the American tanks are decimating the Panzergrenadiers caught in the open in the ploughed field. Elsewhere on the battlefield, the third American platoon defending the road behind the bocage, has destroyed a whole section of Panzergrenadiers and pinned another in the open. Oberleutnant Wurst, the German commander is forced to admit that his assault has bogged down and reluctantly decides to beat a hasty retreat before the US tanks destroy his complete company.
  
We had to call a halt at this point because we had run out of time, but I think that my position (i.e. the German one) was decidedly weak. My infantry were taking a pounding from the tank machine guns and I doubt that my SdKfz 250 halftracks would have stood much of a chance against the fairly weedy 37mm guns of the M5s. I am assuming that their 20mm guns would have been pretty ineffectual against the slightly tougher armour of the US tanks. I really needed those Marders and it was a huge mistake to get the 75mm SdKfz 251 involved early on because it would always have been vulnerable to bazooka fire.

Getting a whole platoon of Germans boxed into the walled garden was a mistake too, especially as an American platoon pitched up almost immediately on the other side of the road, effectively blocking the exit.

Another thought-provoking game, with the victor's crown going to Kev's American Airborne troops.

Carole


The fifth scenario from my September War scenario pack for I Ain't Been Shot, Mum! covers the German 5th Panzer Division's assault on the Polish 6th Infantry Division as it held the line near the town of Pszczyna. And, no, I can't pronounce it properly either!

It's a straight attacker/defender scenario, with the Poles beginning the game holding the town which, as I'm a bit short on Poland-specific terrain, I had built out of what buildings I happened to have available. So please excuse the French look to the place: all I would say is that typical of any beautiful village in the UK, the developers have plonked a brand new "eye-sore" housing estate right in the middle of the town!

As Dave had things to do later on, the Germans would, as the scenario suggests, be on a time limit. So although having what looked like overwhelming numbers, they would have to really get moving to winkle the Poles out of their positions. The German force consisted of a Schutzen infantry company (three platoons, with each squad having two LMGs) supported by a platoon of five Panzer Is and a platoon of three Panzer IIIs. The infantry also had an MMG platoon, an infantry gun platoon, and access to both off-table mortars and air support.

The Poles, although dug in, faced an assault from the Germans that could enter the table anywhere along two sides of the table i.e. they would have to make sure their defence covered a lot of ground. They had at their disposal a couple of platoons of infantry, each with two (huge!) twelve-man squads, supported by three anti-tank guns, a couple of medium mortars, a couple of tachanka-mounted MMGs, and two TKS tankettes borrowed from the division's recon assets. They also had access to off-table artillery.

Plans

The German plan was a little unorthodox (spelt r-u-b-b-i-s-h!) as it invovled not the traditional combined arms approach, but a three-pronged attack designed to keep the Poles permanently off-balance. My panzers would attack from one end of the table, sweeping in to the 'back' of the town; my dummy Blinds would simulate an assault on the other end of the town; and my infantry would come on half way between the two, aiming to capture the church as a good jump-off point for the rest of their attack.

The Poles, unfortunately, largely sussed what my intentions were (I must be getting predictable!). They created a strongpoint with one infantry platoon at one end of the town (the 'back', where my panzers were due to attack) and another strongpoint overlooking the village green and objective marker. The mortars were way out of town at the back, the machine guns split, one to each strongpoint.

The Game

The German Blinds swept onto the table as per the plan outlined above. The fake attack of the dummy Blinds was soon spotted as such, and thus had little effect, but the assault on the church took place almost entirely as planned: with the German 2nd Infantry Platoon not only taking the church (a very surprised Polish FOO was quickly captured at his position in the tower, to be quickly replaced by his German equivalent!) but investing the nearby wood as well.

One slight glitch was that one German squad got caught ambling towards the church by a Polish MMG firing from the new housing estate, and was effectively pinned down out in the open, and then gradually reduced to inefficiency over the course of the next few turns. No matter, I thought, I had the church, and the wood: everything was going to plan.

Meanwhile, the panzers, supported by the infantry guns, had swept on to the other end of the table. The Panzer IIIs were leading, and quickly dispatched a lone Polish anti-tank rifle team for the loss of a bit of paintwork.

The Panzers then failed to spot the Polish strongpoint in the house with the garden (well, it is hard to see out of a buttoned-up tank) and thus began to sweep past it only for one of them to come under a hail of fire from infantry entrenched behind the hedge. Far more dangerous, an MMG opened fire from the upper windows of the house with the blue shutters.  

As mentioned above, the panzers had the infantry guns backing them up, and they immediately opened on the MMG's position: not so much damaging the gun or its crew, but causing the building itself to creak and groan and threaten to collapse at any moment. The MMG would have to vacate the property as soon as possible, or risk being crushed under rubble!

Now what I should have done at this point, was to concentrate my fire (the Panzer IIIs, Panzer Is and the infantry guns) on that single Polish section, quickly eliminating it before moving on. Unfortunately, the infantry guns were too busy congratulating themselves on knocking the blue-shuttered house down to do much for the next few turns; the Panzer Is swept past apparently intending to take the town on their own, and the Panzer IIIs got into a duel with the infantry that lasted most of the rest of the game, with machine gun fire killing a Polish infantryman every now and then: most of them safe within their trenches.

The clock was ticking, and the German medium tanks had let themselves get tied down!

Meanwhile, the Panzer Is had, as mentioned above, swept past the Panzer IIIs and headed into town. One broke off and headed for the mortars, which had just started ranging in on the German infantry force, and was immediately engaged by a Polish anti-tank gun. This Panzer I would spend a few turns recovering from being hit, and then go on to force the mortars to retreat off-table, leaving a few bodies behind.

The other Panzer Is attempted to pounce on the anti-tank gun they had now spotted, not realising that actually its position was one of a nest of three guns.

The first anti-tank gun was taken out fairly promptly, the German tanks getting the drop on the crew, but the next took out the German tank commander's vehicle before its crew were driven away from the gun by Shock. Note the Panzer I with all the damage to it bottom-left: that had taken fire from another Polish anti-tank rifle firing from the infantry strongpoint in the town.

Meanwhile...

Meanwhile, the German infantry had been consolidating their position around the church, the house by the church, and the barn by the side of the main road. 

That was all well and good, but what now. The infantry in the church couldn't do much, as a charge across to the Polish infantry in their strongpoint would be suicidal without weakening the defenders first...and unfortunately there was no line of fire into their buildings (walls not windows!) for the German MMGs to ply their trade. Yes, they had taken out the final Polish anti-tank gun with a concentrated hail of fire, but they were now just covering the objective marker's position, just as the Poles were too...but the Poles still had possession of the position.

Worse, a thought about trying to work north from the barn had been stymied when the Polish tankettes appeared: happy to block that direction of advance.

So, yes, the Germans were winning, but appeared to have come to a bit of a grinding halt as they came up against the Polish strongpoint in the middle of the town.

Yes...but what now?

To Break the Deadlock

Action was needed: dramatic action. The barn doors swung open and the German 3rd Infantry platoon charged the Polish tankettes! Surely two of the tin cans couldn't stop my platoon for very long?

No, they couldn't, but they weren't going down without a fight, and the German infantrymen found themselves embroiled in a nasty little fight that caused them far too many casualties. I was knocking bits off these tankettes like there was no tomorrow, but I just couldn't kill the damn things!

I was now running out of time. My plan needed updating, and fast.

I decided to bring up the Panzer IIIs and hammer the Polish strongpoint in the town. If I could break that, then the objective was mine and I would win the game. Everything else, I now realised, was both metaphorically and literally peripheral! I would blast the buildings until they fell down, then machine gun the Polish infantry as they fled the rubble.

[Those of you who know their German armour should be chuckling at this point: knowing that the 37mm anti-tank gun on a Panzer III is just about useless for knocking down buildings but, in the heat of battle, I had forgotten this and just fastened on what looked like my largest asset!]

Endgame

Then disaster struck. With just about their last shot before being driven off by the Panzer I, the Polish mortars managed a direct hit on the building holding my machine guns, collapsing the house and forcing the machine gunners to abandon their positions before being buried under rubble.

Things looked a bit grim. Assuming my infantry drove off or destroyed the tankettes, now realising the un-power of the guns on my Panzer IIIs, how was I going to get the Polish infantry out of their strongpoint. I began to contemplate an all out assault. It would be painful, very painful, but might just work.

At that moment, the drone of aircraft engines was heard and, much to my delight, the Jericho horns began to sound and out of the sky dove a Stuka, finally responding to the request of my company commander for a bit of aerial intervention.

The Stuka scored a direct hit on the house, causing lots of casualties to the Poles entrenched inside.

This was it!

The game was mine!

Now was my moment!

My moment, unfortunately, to realise that I had run out of time!

The clock had ticked on to the point where Dave had to go.

We quickly examined the table, and agreed that I would eventually have succeeded in my objective...but eventually was not, according to the scenario conditions, good enough. I was, however, close enough that we both agreed to call the game a draw.

It had been a hard fought game which I should have won, had I not spent so much time shilly-shallying around and not getting properly stuck in. That said, Dave's reading of my intentions and then deployment to block my plans was superb. Without the intervention of the Stuka, I would have had to bring up my infantry guns to shift the Poles with, presumably, my casualties mounting all the time.

A great game.

Robert Avery


This game was played out at Lincombe Barn on Sunday 2nd April. The Americans were commanded by Chris and I was leading the Germans.

The AAR covers a fictional scenario representing an action between American forces attempting to break out from the Cotentin peninsula and clear a path southwards towards St Lô and the German defenders attempts to contain them in the weeks immediately after the initial landings.

US Briefing

Capt. Travis Perkins, commanding A Company has been ordered to secure the road south from Ste Eulalie-en-Bocage to allow the passage of armour and guns towards the main objective south-east towards St Lô. The company has suffered some casualties since the landings at Utah Beach but morale is good.

The Weapons Platoon has been detached and is not available for this operation, however a single platoon of M4 tanks is available. These are fresh from training and have not seen combat previously. The armour has a morale level of 3 but from lack of combat experience have the potential to be cautious. To represent this the Hesitant card will be present in the game deck but will only affect the tanks on their next activation or on the next activation of the tank Big Man. The infantry will be unaffected by Hesitant.

All the American troops are rated as Regular.

The company consists of; 

Company HQ

  • Capt. Travis Perkins (L3 Big Man)
  • Sgt (Enrico Fermi (L2 Big Man)
  • 2 x .30mm MG teams (4 crew each)
  • 1 x M3 halftrack with .30 MG and 2 crew

Platoon One

  • Lt Ernie "Brick" Wall (L3 Big Man)
  • 3 x rifle squads (10 men each)
  • 1 x bazooka team (2 men)

 Platoon Two

  • Lt Roscoe P. Coltrane (L2 Big Man)
  • 3 rifle squads (10 men each)
  • 1 bazooka team (2 men)

Platoon Three 

  • Sgt Cooter Davenport (L2 Big Man)
  • 3 x rifle squads (10 men each)

 Tank platoon

  • Lt Ricky Reeves (L2 Big Man)
  • 5 x 75mm M4 Sherman tanks

The Americans have one dummy blind.

Before the Battle

Recce teams report that German troops are active in the area and that armour is likely to be present. The ground is flat but criss-crossed with bocage hedges. A shallow but wide drainage ditch runs alongside the main road for part of its length before turning off across a field which is muddy and counts as broken terrain. The ditch can be forded by infantry but should be counted as a major obstacle. There is a bridge over this ditch that is suitable for light vehicles only. Vehicles cannot cross the ditch. There are two lanes running at right angles from the main road. At the far end of the road there is a walled farm on some raised ground, with a couple of outbuildings, surrounded by an orchard enclosed by a fence. Northwards beyond the orchard is a field of corn.

The bocage hedges are a major obstacle and take one action for infantry to get through. Tanks will take one action to break through and count as broken terrain to cross once a breach has been made.

Capt. Perkins must secure the road by clearing any defenders from the area and take the farmhouse. However, the terrain is difficult and every hedge or obstacle should be treated as a potential hiding place for enemy troops.

German Briefing

It is imperative that the American advance towards St Lô is halted. Reconnaissance has indicated that the Americans intend to push down along this road to outflank our troops to the north-west of the town. Although our resources are stretched, Oberleutnant Hans Knopfel has been sent to guard the road with a weakened company of Panzergrenadiers. These are rated as Regular.

Oberleutnant Knopfel has also been provided with some armour, but not much, few vehicles can be spared. They are, however, rated as Veteran. Their commander Leutnant Heinz Scribner is a Tank Ace.

His forces consist of:

Company HQ

  • Oberleutnant Hans Knopfel (L4 Big Man)
  • Obergefreiter Stefan Schtupp (L1 Big Man)
  • 4 x MG42 MG teams (2 men each)
  • 2 x Panzerschreck teams (2 men each)
  • 1 x SdKfz 250/9 with 2cm cannon and MG42
  • 1 x SdKfz 251 with MG42 and 2 crew

Zug One

  • Feldwebel Ewald Schmidt (L3 Big Man)
  • 3 x rifle squads (8 men each)
  • 2 x Panzerfausts

Zug Two

  • Unterfeldwebel Fritz Blick (L2 Big Man)
  • 3 x rifle squads (8 men each)
  • 1 x Panzerfaust

Panzer Zug

  • Leutnant Heinz Scribner (L3 Big Man)
  • 3 x Stug III Ausf. G 75mm
  • 1 x PzKfw IV Ausf. H 75mm

The Germans have two dummy blinds.

Oberleutnant Knopfel's orders are to prevent the Americans from advancing down the road and to cause maximum casualties.

The Game

The game opened with the Americans advancing through the bocage under blinds. Because of the nature of the terrain attempts at spotting were difficult. The non-arrival of the German Blinds chip didn't help matters much either.

Before long, American M4 tanks had crashed through the bocage (presumably aided by Culin Hedgecutters, and were confronted by a single Zug of Panzergrenadiers. Despite the explosion of one tank from a short range hit from a Panzerfaust, the M4s opened up with a devastating salvo of HE shells which soon caused significant casualties and much shock, suppressing the German troops and soon forcing the survivors to withdraw.

US Tanks Attack the panzergrenadiers

HE Fire decimates the first zug

At the same time, US infantry began to advance across the ploughed fields, to be met with a devastating hail of fire from MG42s in the roof of the farmhouse and also closer along the fence around the orchard.

It all seems to be going the american way

Unfortunately for the Germans, the German Blinds chip (also the chips for the German armour and second Panzergrenadier Zug) refused to emerge from the bag for a number of rounds. Only the endless rain of bullets from the MG42s was keeping the Americans pinned, together with the Hesitant chip preventing the tanks from advancing any further. Finally, in a bloody bout of close combat around the fence, the German defenders were eliminated. However, more MG42 fire from the farm forced the Americans to withdraw in shock with heavy losses. All this time Capt. Perkins and the third American platoon remained behind the bocage, seemingly unwilling to advance into the cauldron of fire.

German Armour and more panzxergrendiers arrive

Eventually though, the Germans to the west of the main road started to move and soon the accurate 75mm fire of the veteran Panzer troops started to knock out the US M4s.

The arrival of fresh German infantry and the loss of their supporting armour seemed to cause a weakening of resolve among the previously confident Amis.

The Shermans take heavy losses from accurate German shooting

The tide turns as the american start to pull out

With Panzerschreck teams making their way through the orchard and a devastating series of bursts of MG fire from both the farmhouse and the advancing PzKfw IV, the remaining Americans realised that the tide had turned and began to pull back, leaving many dead and three brewed-up tanks behind.

The final position before the US retreat

So, a pretty tense and exciting encounter. From a German perspective, the early stages of the battle were dismal, mainly because of the non-appearance of most German chips from the bag. In fact, the chip for the L4 Big Man, Oberleutnant Hans Knopfel didn't come out at all (neither did that for his US counterpart Capt. Travis Perkins either), but the German L1 Big Man, Obergefreiter Stefan Schtupp's chip emerged frequently enough for him to activate the MG42s in the farmhouse, which pretty much stopped the US advance until the Panzers and the second Zug of Panzergrenadiers finally got moving. From that point on, the balance shifted decisively towards the defenders and the Americans pretty much had to retreat.

Carole


It is Fall, 1943. The Russians have had quite a summer, pushing the Germans back along a broad front after their failed Kursk offensive. The local situation is fluid. 

A small infantry force of two Russian platoons holds a ford and bridge over a river with the aid of a couple of 76.2mm AT guns. Their job is to push across the other side and pave the way for a platoon of SP guns and two platoons of T-34/76s to push across and exit the far side of the board. The tanks are expected in the not too distant future. 

Unbeknownst to the Russians, a strong German armored reconnaissance force of armored cars, panzergrenadiers, and a couple platoons of tanks are on their way to spoil the anticipated offensive. They're tasked to reach and blow the bridge if possible or at least jam up any attempted Russian crossing.

Brandon and Young Sam commanded the Russians and were soon joined by Juan Carlos as well. The Russian plan was a simple one:  they intended to put one platoon across at the ford to occupy the intersection near the wrecked mill, and the other across the bridge to secure the crossroads. 

Soon, German Blinds (some dummies and some very very real) came probing, under the command of Mike and Will. One German Blind occupied the mill while the Russians were still splashing across the ford, leaving them in an extraordinarily exposed spot. They summoned up their courage and pushed forward, bayonets  fixed, and learned the German Blind was a dummy. Soon they learned the Blind following thereafter was a very potent German 8-wheeled heavy armored car platoon which took them under fire, sending them diving for cover in the cratered street. 

Recce Runs Into Russkies

Before the Germans could swoop down on the Russian platoon in the street, Russian AT guns dug in on the bluff  revealed themselves and took a potshot at the Panzer Grenadiers coming around the other side of the building.  They blew up one loaded half-track and bounced a shot off its mate, causing it to disgorge its  passengers and run for cover. The heavy armored cars took this occasion to inch back behind cover. 

Grenadiers Push Toward the Mill

AT Guns on the Bluff Open Up

Knocked out and Dismounted Grenadiers

Meanwhile near the bridge, Will pressed his platoon of Grenadiers forward. His platoon chit just would not come up thereafter, stalling the attack. Young Sam had deployed his platoon in the pines nearest the bridge, posing a difficult but not insurmountable obstacle  to a run at the bridge. Soon, the Germans learned that Sam's platoon, and perhaps the other one as well, had some captured panzerfausts. The umpire gave each Russian squad a one time 20% chance of having a ready rocket. One hit a heavy armored car, only to cause no damage whatsoever. Still, the Germans seemed to have less stomach to run the gauntlet to the bridge after that!

Russkie Platoon 2 Holds the Center

Panzergrenadiers Press the Bridge

Neither force had any artillery support, which was a severe restriction. The Russians, however, did have the chance of a rocket-armed Sturmovik attack at a random armored target. Twice the storm bird came down and sent it's rockets harmlessly  off target. Still, it was fun for the umpire.

Sturmovik Pitches In Too

As armoured cars armed with 20mm autocannons whittled down the gun crews on the bluff, and were in turn knocked out, the main body of German tanks finally came up the road and deployed. 5 Pz IVs rolled up to hull down positions and begin shelling the AT  guns to good effect. Soon, they knew, two Panthers would roll into line and assist them. At this point, no Russian armour had shown its head. Unbeknownst to the Germans, however, three brand new Su-85s and a ISU-152  had just rolled up under the brow of the hill behind the Russian bridge.

Sdkfz 251s Get Clobbered Too

Panzer IVs Shell the AT guns on the Bluff

The Russian armour soon climbed up the bluff and joined the fight. We called the game after a couple more turns in which those big tank guns failed to get their chips pulled or failed to hit what they were shooting at. The only consistent gunnery success was had by the AT guns. The brave Lieutenant commanding the guns had been killed after he knocked of a good portion of the recce vehicles. The Russian Captain ran up the bluff to assist the one remaining gun. His level 4 skills and  the frequency with which his personal chit was called allowed for some extraordinarily accurate shooting at the exposed turrets of the Pz IVs.

Finally, the Panthers Arrive

Russian SPs to the Rescue

On to Berlin:  Soon Anyway

What Might Have Been:  German Armour at the Bridge

All agreed that neither force had signficant infantry strength left at the end, and without infantry the Germans certainly did not have enough horsepower left to rush the bridge, even if they could win the gun dual, which was looking less and less likely. The Germans did succeed in jamming up the Russians on their side of the river and so, in spite of their frustrations, I think both sides partly achieved their given goals. Great game Brandon, Sam, Juan Carlos, Will, and Mike!

Joe Patchen

Benny the Schnauzer Roots for the Germans


It’s off to Poland, 1939, again, as Bevan, Dave and I play another action from my scenario book for IABSM: The September War.

This time, the game was from scenario #03:  Charge at Krojanty. Based on an episode from the larger fighting around the Tuchole Forest that took place over the first couple of days of September 1939, the action would involve a large force of Polish cavalry surprising a German infantry platoon that had paused for a rest. Each side would then gradually be reinforced, developing into quite a large encounter.

The table was largely flat, covered by a significant number of clumps of trees, and with only a couple of farmhouses, one at each end and linked by forest tracks, to show the former presence of man.

The table and German deployment

Germans start the game suppressed

Das field kitchen!

The Germans, a single platoon of three ten-man squads supported by a couple of MMGs, had set up a field kitchen about midway between the two farmhouses, and were busy munching knockwurst and sauerkraut for their dinner. The Polish, initially two 16-man platoons of cavalry supported by a couple of tchanka-mounted MMGs, would enter the table from any combination of either the west or the north. Each time their Blinds card appeared, each side could roll for reinforcements, with the Poles having two more platoons of cavalry and then a platoon of armoured cars waiting in the wings; and the Germans having another platoon of infantry and then a very strong recon platoon of six SdKfz 231 heavy armoured cars at their disposal.

Game One: Robert (Poles) vs Bevan (Germans)

The Germans set up around the perimeter of their deployment area: their three squads quite spread out. The rules mechanic used to represent their unreadiness was for them to start the game Suppressed. Without the intervention of Big Men (their officers), they would therefore spend a turn unable to move or fire, and then another turn unable to move, as they grabbed for their boots and rifles.

The first two platoons of Polish cavalry arrived from the west, immediately within charge range, with the tchankas arriving from the north and heading towards a small hill overlooking the German positions.

Now at this point, for those of you who might play this scenario, I want to say a few words about the psychology of playing Polish cavalry in a WW2 setting:  Polish cavalry in a WW2 setting look really impressive and, from the moment they hit the tabletop, will be screaming at you to charge the enemy who, being WW2 infantry, look really spread out and feeble, especially when they start the game Suppressed. The lancers, especially, will be screaming the loudest.

my, but they look powerful and strong: surely nothing could stop them if they charge...

The trouble, of course, is that those “spread out and feeble” looking Germans all have modern bolt-action rifles, SMGs, and LMGs…and some of them even have MMGs. They might look feeble, but there are ten of them to a squad, only six less than a two squad Polish cavalry platoon. Not only that but, being German, they have loads of officers and NCOs to shout things like “Raus! Raus!” and “Achtung Uhlans!” so they don’t stay suppressed for long.

Back to the action.

So the Polish cavalry arrived on table within charge distance of one side of the spread out German perimeter. An immediate charge looked like just the thing to do, so as soon as I could, I sent both platoons forward: one (lancers!) charged a squad of enemy infantry, the other charged an MMG.

Charge!

Bashed up and bounced back! 

Unfortunately, the squad of infantry had had a chance to sort themselves out, and repelled my lancers without too much trouble.

The brave lancers ended up bounced back nine inches, Pinned, and with five (out of sixteen) empty saddles. And their Big Man was killed as well.

Now the dragoons thundered forward. They had much more success, a victory even, but it was a Pyrrhic victory.

Yes, they had wiped out the machine gun crew and then gone forward to hit the flank of the German infantry squad, sending them fleeing off the table, but of the sixteen dragoons that had gone forward, only eight remained, split between two weak squads.

Charge!

Victorious but, er, mullered!

Meanwhile, the other German squads and remaining MMG, had retreated into the nearby trees, and formed a firing line that it would have been suicidal to charge, as demonstrated when they easily wiped out my remaining dragoons. I desperately needed reinforcements, but the Polish Blinds card had only come out once, and I had failed to roll what I needed to get help.

Worse, my opponent had managed to get reinforcements: a second platoon of infantry that headed forward to engage my tchanka teams. This they did, wiping out the first team for the loss of only three men and a Big Man, and forcing the other to fall back looking for cover.

What happens when you let the Germans get too close

Although my Blinds card then came out twice in quick succession, again the dice were against me, and no reinforcements arrived. To put the final nail in the Polish coffin, Bevan then rolled the arrival of his six heavy armoured cars.

At that point I gave up the ghost and retreated from the table to lick my wounds!

Game 2:  Robert (Poles) vs Dave (Germans)

Now with Captain Hindsight attached to my staff, I prepared to take on the German invaders for a second time, as Dave deployed his men in a much less spread out circle around the field kitchen. This time I was determined not to just charge in, so had my tchankas with me on the western flank.

Game Two begins

Powerful and strong...no...must resist...

As the game began, my cavalry held their positions, being quickly spotted and thus deployed, but the tchankas sped forward to the crest of a small hill, and set up so they could almost immediately fire down from cover onto the German campsite.

My cavalry were Pinned down and suffered a few casualties as the Germans got themselves sorted, but my two MMGs, this time with a clear, fairly close range, field of fire, did some serious damage to the nearest German infantry squad.

My cavalry, this time remembering that they all had rifles as well as swords and lances, also opened fire: and one German squad was effectively toast.

Even better, my rolling for reinforcements was actually working for a change, and I quickly had another platoon of cavalry at my disposal. This one took up a position near the tchankas, and now the Germans were surrounded by a semi-circle of guns, all pouring out fire.

Ah ha: we have guns too!

Must resist...

The Germans had also received reinforcements, their second platoon, but they hadn’t arrived yet, and my cavalry were still screaming at me to send them in to dispatch the invaders at sword and lance point.

I resisted for a turn, then weakened: sending in my newly-arrived platoon to sweep through the German position, smashing the enemy aside.

Well, that was what was supposed to happen, and a German MMG team was indeed dispatched, but then my lovely new platoon took a round of fire from the others, and was reduced to half strength. When will I learn, especially as the second German platoon was coming up fast.

Charge!

I got a grip, and had whoever ordered the last charge removed from command. My cavalry, now reinforced by my fourth platoon of cavalry (disguised as Cossacks as even I can’t field more than three platoons of Polish cavalry!) then retreated into cover (trees, crests of hills etc), dismounted, and began shooting the Germans for all they were worth. My tchanka had changed position, as well, and caught one German squad from the newly arrived platoon out in the open, effectively wiping it out.

The fourth platoon of Polish cavalry arrive, dressed as Cossacks!

As in the last game, the Germans also now retreated to a nearby treeline, and the game settled into one of attrition, as both sides settled down just to shoot at one another. Although positions were about even, numbers were in my favour:  five Polish squads vs four German squads; two Polish MMGs to one German MMG. I also had a slight advantage because my squads were from four different platoons, each with a Big Man, whereas his were from only two units: so I got to shoot first more often than Dave did, so was generally shooting un-Pinned and before damage.

Right, men, form a neat line whilst we wait for the armoured cars

Although I was whittling down the Germans faster than he was whittling me down, both sides were now desperate for their final reinforcements: six German armoured cars with autocannon to three Polish armoured cars with MMGs. Polish luck held, and my armoured cars, three Wz.34s, arrived first.

These took up position on the end of my line, slightly flanking the German line, and prepared to hammer the nearest German squad. I was now quite happy, because as long as the German armoured cars stayed away, I was confident I would shoot his remaining force to death. No more charges for me!

i thought we were playing WW2, not Napoleonics!

Unfortunately, the Gods felt my smugness, and the German armoured cars arrived next turn!

[Note that although the forthcoming pics show three SdKfz 222s, two 6-rad SdKfz 231s, and one 8-rad SdKfz 231, the scenario gives the Germans three SdKfz 231s and three SdKfz 232s, which is what we played.]

I was seriously alarmed. With six of the beasties, he could send three to take out my armoured cars and, even more deadly, three to outflank my dismounted firing line and then roll me up. And all I had to take them out were the tchankas, the armoured cars and a couple of anti-tank rifles.

Fortunately for me, Dave had become as fixated on the armoured cars being the indestructible Holy Grail to his problems as I was the lancers charging. Rather than splitting them up and working at my vulnerable flank, he slammed them straight forward to a position in between the two sides’ firing lines.

This, of course, put them slap bang in the middle of where I could shoot at them with both MMGs, the armoured cars and both anti-tank rifles. That gave the Poles seven things able to shoot the armoured cars, with the armoured cars having six things they could shoot back with. Even on average die rolls, the Poles were going to have an advantage, and even more so as all the Polish troops were under cover or prone on the crest of hills and the armoured cars were slap bang in the middle of open ground.

Well the law of averages adjusted by cover played out, and soon I had forced the crews of two of the German AFVs to bail, knocked the main gun out on another, immobilized another…you get the picture. In return, I’d lost an armoured car shot to bits, another knocked about a bit, and a handful of cavalrymen who caught an accurate burst of autocannon fire.

We had to end the game at this point for time reasons, but Dave agreed that it would probably play out into a Polish victory. There was much post-match discussion into how fixated one can become when gaming:  me with my cavalry charges, Dave with his Holy Grail armoured cars.

Aftermath

So, just like Chojnice (c.f.), another day with the same scenario played through twice in the same session, with a different result the second time as the losing side from the first game learns a lesson and wins the second game.

Here, the main lesson for me to learn (re-learn?) was to remember that no matter how strong they look lined up on the table, cavalry in modern warfare are a strategic as opposed to tactical advantage.

Historically, the Germans fell back before the initial Polish cavalry onslaught, but then recovered and used the arrival of their armoured cars as a base from which to move forward again and clear the enemy from the area.

Robert Avery


Last Saturday Jon and I got together and played through two of the battles from the "Highway to Hell" mini-campaign from the Too Fat Lardies 2013 Summer Special. My son Evan was with me and did the majority of my dice rolling.

Jon soon found that beginners and little kid luck were hard to beat. Before the battle we rolled for a "Super Stonk" from the artillery that pounded the Germans before the battle. I instructed Evan to "roll a lot of 5's and 6's". This is normally done in secret, but for Evan's sake we wanted to give him the opportunity to roll a bunch of dice right off. Well I wasn't sure what was getting hit where, but from all the high dice rolls and Jon's reaction I knew that things were not starting off well for him (after the battle we found that two AT guns, an MG team, his Big Man, and 2 out of 3 Panzerknacker teams were killed).
 

The three smoke puffs on the left are the two AT guns and the MG team (I didn't know this during the battle, I just knew it was significant). My squadron of 5 troops of tanks heads up the road. I send two out of three platoons into the woods and the other rides in on the tanks of the third tank troop. I can win the battle if I get 4 tanks off the close board edge but I wimp out a bit when I get the opportunity. I drew both a blind card and armoured bonus move on the first two turns, but didn't take my full move, cheating myself out of about 18 inches. 

Jon's surviving AT team pops up out of the woods just ahead of the nearest British infantry platoon and takes out a Sherman tank. I rush my leading team towards the board edge to try and end the game before more damage is done and bump into two StuG III G's in the woods. At turns end we exchange simultaneous fire. 

We lose the first tank and then return fire. Despite having a large number of shots we only take out one tank )it seems that Evan's luck is faltering). The following turn we lose another Sherman to the Panzerknacker team before it retreats into the woods. The turn ends. Our infantry finally get another move and they advance to contact with the Panzerknacker team which is wiped out. We advance our second Troop forward just far enough that the leading Firefly tank has a shot at the remaining StuG and it brews up and that is the last of the German forces.

The British advance to the next of the four highway segments to Valkenswaard after losing only three out of twenty tanks in one of their three available Squadrons.

The next game we played after a quick lunch did not go as well. It was an infantry battle in an adjacent sector to the west with Devons D Company vs. roughly a platoon of German infantry. Jon lost nine troops in the pre-game Super Stonk leaving him even more outnumbered.

Despite all the games of IABSM Jon and I have played, we've never used the rules for what they are designed for:  company-sized games in WW2. Our Infantry Blinds in Africa or the Middle East are for single squads, so when I deployed a platoon off a blind I deployed it much too bunched up (we were using small cards instead of 2" x 8" blinds, which didn't help). My platoon got cut to pieces by MG fire and couldn't recover, being suppressed for three turns in a row. I did manage to use my Big Man to separate them a bit, but by then it was too late. One of the lead squads had taken too much shock and lost its bottle and retreated *through* the one behind it, causing a chain reaction. The platoon had lost seven men but was no longer an effective fighting unit. An object lesson in how the IABSM morale system works.

Meanwhile my other two platoons moved forward on the flank and Jon decided to withdraw since he couldn't do much more damage before being overwhelmed. The fact that Evan was totally bored by this game and our bickering over the rules (which I'm not proud of) had something to do with it as well. I hope Evan wants to play again, in general I'd say he had fun. In the first game he gave Jon some first class trash talking.

Jon and I have since sorted through our rules difficulties and we're looking forward to the next set of games.

Mark Kinsey


Some pictures of a game featuring a clash between Japanese and Indian troops of the British army near Singapore in February 1942.

We played a scenario from the Fall of the Lion Gate campaign pack from the Too Fat Lardies. The rules were I ain't Been Shot, Mum, and more specifically the scenario played was #20:  Nee Soon.

Indians troops near the village of Nee soon need to defend the road against Japanese attacks. George led the Japanese, but failed to break through the British defense led by Andrew.

The Stipsicz Hussars


The Benson boys (Dave, John, Bevan) and I got together yesterday to playtest the first scenario in my  The September War scenario pack for I Ain’t Been Shot, Mum (due for release Wednesday 15th March 2017). The pack will contain thirty-three scenarios covering the 1939 Invasion of Poland, and is part one of two, with the second (another 36 scenarios) to be released in the autumn. Both packs are very much based on Anatoli’s FoW scenario pack, Poland in Flames, but with the games fully adapted for IABSM, and presented as I usually do my scenarios: full briefings, force lists, stats etc.

The battle for Chojnice involves the Poles defending a railway bridge for long enough for their engineers to place and then explode demolition charges. In game terms, the Poles have to make sure that after the fifth appearance of the Turn Card, there are no Germans within 4” of the bridge on their side of the river, and that they have men close enough to actually push the plunger. If both criteria are satisfied, then each time the Turn Card appears, the bridge is blown on a roll of 5 or 6 on a D6.

The rest of the terrain is fairly open, except for the right hand side of the battlefield (from the Polish point of view) where a road runs over the river via another bridge. Along the road are a series of buildings including, close to the bridge on the Polish side of the river, a church which, for our game, had obviously been built as an homage to Norman architecture! Opposite the church, on the other side of the river, is a large farm.

The Forces Involved

To defend their position, the Poles had a couple of two-squad infantry platoons supported by a couple of medium mortars and three taczankas carrying MMGs. They had a bit of a shortage of Big Men, only three, but did have an FOO with supposedly unlimited access to off-table artillery. In the event, the Polish artillery played no part in either of the two games we played: never arriving at all.

The Poles would begin the game in prepared positions under hidden Blinds, so would not be placed on the table at all to start off with. The Germans would therefore effectively have to spot them twice: once to establish the position of the Polish Blinds, and once more to spot what was actually underneath the Blind.

The German assault force consisted of a three-platoon company of dismounted kradschutzen infantry (they had left their motorbikes off-table…I really must get around to buying and painting some!) supported by an MMG platoon of four guns and an armoured car patrol of two SdKfz 221 and two SdKfz 222. They had a plethora of Big Men, and were very fast moving: benefiting from a Recon Bonus Move card as well as the usual German Rapid Deployment etc.

The First Game

The Poles, played by Bevan, set up with one platoon defending the bridge and the other defending the church. Two of their taczanka supported the troops at the bridge, one lurked next to the church, ready to help defend either bridge as required. Their mortars were at the back of the battlefield, but with a good line of sight to the railway bridge.

The Germans, with John commanding, planned to suppress the troops on the bridge with firepower from their MMGs and armoured cars, then charge across with their infantry. Nothing like the direct approach!

The Germans therefore hit the tabletop running, moving their Blinds towards the bridge with all possible speed. One platoon had managed to start the game in the farm just by the footbridge, and began spotting the Polish positions around the bridge and church so, following their plan, the Germans deployed their MMG platoon at the edge of a small wood just in front of the railway bridge and opposite where they could now see the Polish trenches were positioned. Their armoured cars were also moving up.

At this point it all started to go horribly wrong for the Germans.

Miscalculating where they needed to be to stop the Poles blowing the bridge, the Germans moved an infantry platoon forward right up to the start of the bridge on their side of the river. They didn’t have much cover, so when the Poles shot at them with a whole platoon supported by a couple of MMGs, they were unsurprisingly pinned down and could advance no further. Worse, they were blocking most of the fire from the German MMGs. Worse, the Polish mortars had found their range and were dropping bomb after bomb on the German MMG platoon, who were finding out that being in a wood under mortar fire is not a very pleasant experience: wood splinters flying everywhere.

Desperate to do something to distract the Poles from mullering their troops by the bridge, the Germans then advanced an infantry platoon across the footbridge to the Polish right. Unfortunately they chose to do this through a slow, squad-by-squad advance: easily stopped by the other Polish platoon defending the church.

At this point the German commander gave up in disgust. His MMGs were neutralised, he had a platoon pinned down and taking heavy casualties by the railway bridge, his armoured cars were shooting, but also being shot at by some very nasty anti-tank rifles, and his other platoons were also getting nowhere fast. The Germans retreated to lick their wounds.

The Second Game

In the second game, played immediately afterwards, I took command of the Germans against Dave, playing the Poles.

With Captain von Hindsight telling me that the direct approach would probably have as little success as in the first game, I decided to throw caution to the wind and throw everything I had at the bridge on the left. My aim was to get over the bridge then roll up the Polish line, their right to their left. That way I could hit their trenches from the flank or rear.

Dave had set his infantry up in the same way as had worked for Bevan in the first game: one platoon at the bridge, one platoon defending the church. Suspecting I might try something different to John, however, he kept his taczankas back behind the front line, but made the crucial mistake of not putting a Big Man with them: in IABSM, support weapons only move if in company with a Big Man.

The game therefore opened with a long line of German Blinds throwing themselves forward at the riverline. Unknown to Dave, the entire right side of my line was Dummy Blinds, with the real things on the left.

The cards fell well for me, and my troops quickly got up to the bridge on the left, and here’s where I got a bit overexcited and made a crucial mistake. Well, I think it was actually a combination of the quite large amounts of red wine and strong coffee I’d drunk between games, which just goes to show that you should never wargame fuelled by Malbec!

Getting the opportunity to move forward again, rather than soften up the Polish troops defending the church, I decided just to hurl a whole platoon forward in a surprise assault on the troops in trenches in front of the church.

Well, the Poles were certainly surprised, but not surprised enough not to resist. My entire platoon was wiped out: very credible really when you consider I was assaulting twenty-four men in trenches with twenty-four men running across open ground! Blame the Malbec!

The game now looked like being a disaster for the Germans, so there was nothing for it but to pretend that this was all part of some great masterplan, and carry on throwing stuff forward.

Untruthfully claiming that the initial unsuccessful assault had been just the cover I needed to get into position, I moved my MMG platoon and the armoured cars up into a position from which I could bring the somewhat battered Polish troops defending the trenches in front of the church under fire.

Four MMGs at Close range, plus the armoured cars, inflicted more damage on the Poles, and Pinned them in position, so I then sent a second platoon forward to charge the trenches. This time the assault was successful, with the defending Poles being largely wiped out as my troops took possession of their trenches.

This is where Dave needed to bring up his taczankas and pin my troops down but, as mentioned above, the taczankas weren’t moving without a Big Man...and one Polish Big Man was dead, one was defending the trenches, and the third was nowhere near the taczankas.

Dave desperately tried to sort out his defences: his free Big Man rushed for the taczankas, and the infantry platoon by the bridge redeployed to face the threat from their flank. This, of course, meant that some of them had to leave their trenches, which made them sitting ducks for my third infantry platoon, and the armoured cars/MMGs who, using their Big Men, had now moved into positions from which they could bring the Polish works under fire.

At the same time, the German infantry platoon across the river moved into the church itself, and brought the Poles under fire as well, with the shots coming down from the church tower proving especially effective.

Time, and the timers on the Polish explosives, was ticking on however, and at any moment the Turn Card could appear and give the Poles the opportunity to blow the bridge. Unfortunately, the Turn card seemed to have gone on holiday, and the Polish troops were driven back away from the bridge by the sheer weight of firepower heading their way. With seconds to spare before the bridge was blown, the Germans managed to get men across the bridge, and the explosives were defused.

Aftermath

A cracking game which could so easily have proved a complete and utter disaster for the Germans. Fortunately, Dave’s deployment of the taczankas gave me enough leeway to soak up the loss of the first infantry platoon (just!) and to eventually take the Poles in the flank as planned. A very high butcher’s bill for the Germans, however, with their commander definitely at risk of fragging in the future!

Overall, it was a very successful playtest, with the scenario proving finely balanced and very much dependent on the tactics employed. Scenario #01 now approved for publication!

Robert Avery


The first game of the club's IABSM campaign, which has migrated from being "Blenneville or Bust" to being "29: Let's Go Large" to "oh, sod it, let's make something up based in Italy because Italy is a) fun and b) not Normandy"! So much fun, in fact, that I only took one photo!

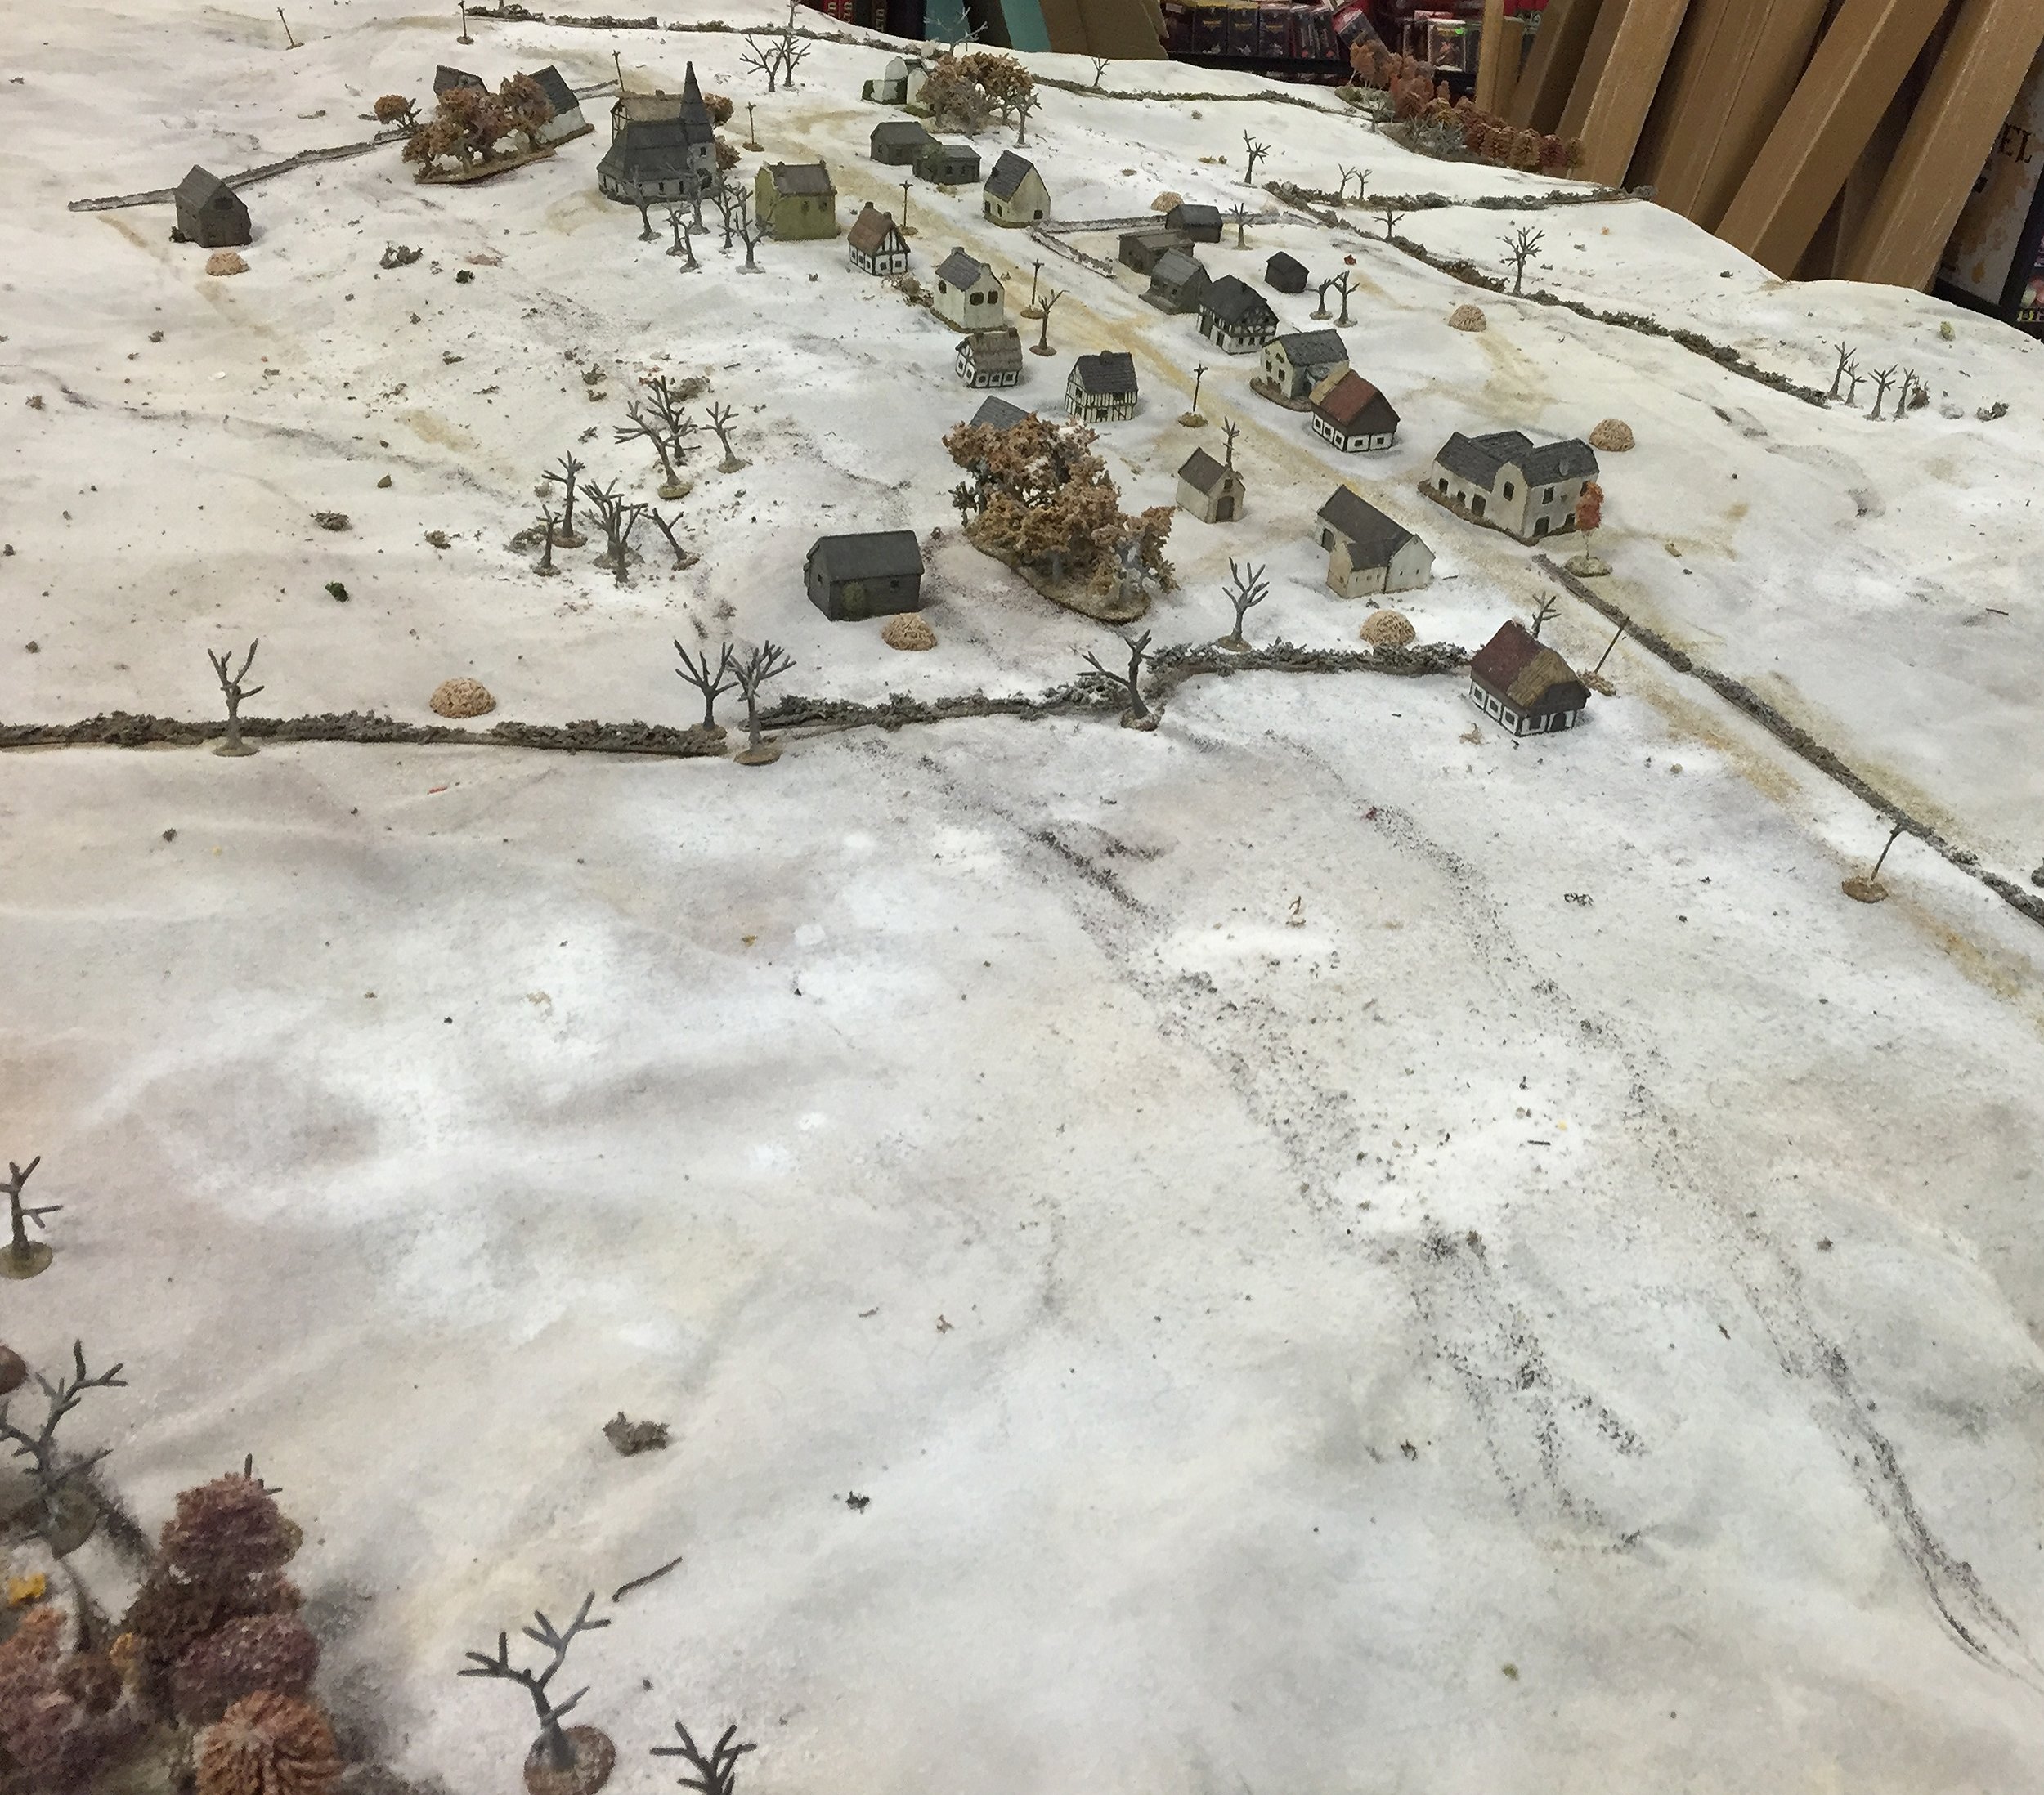
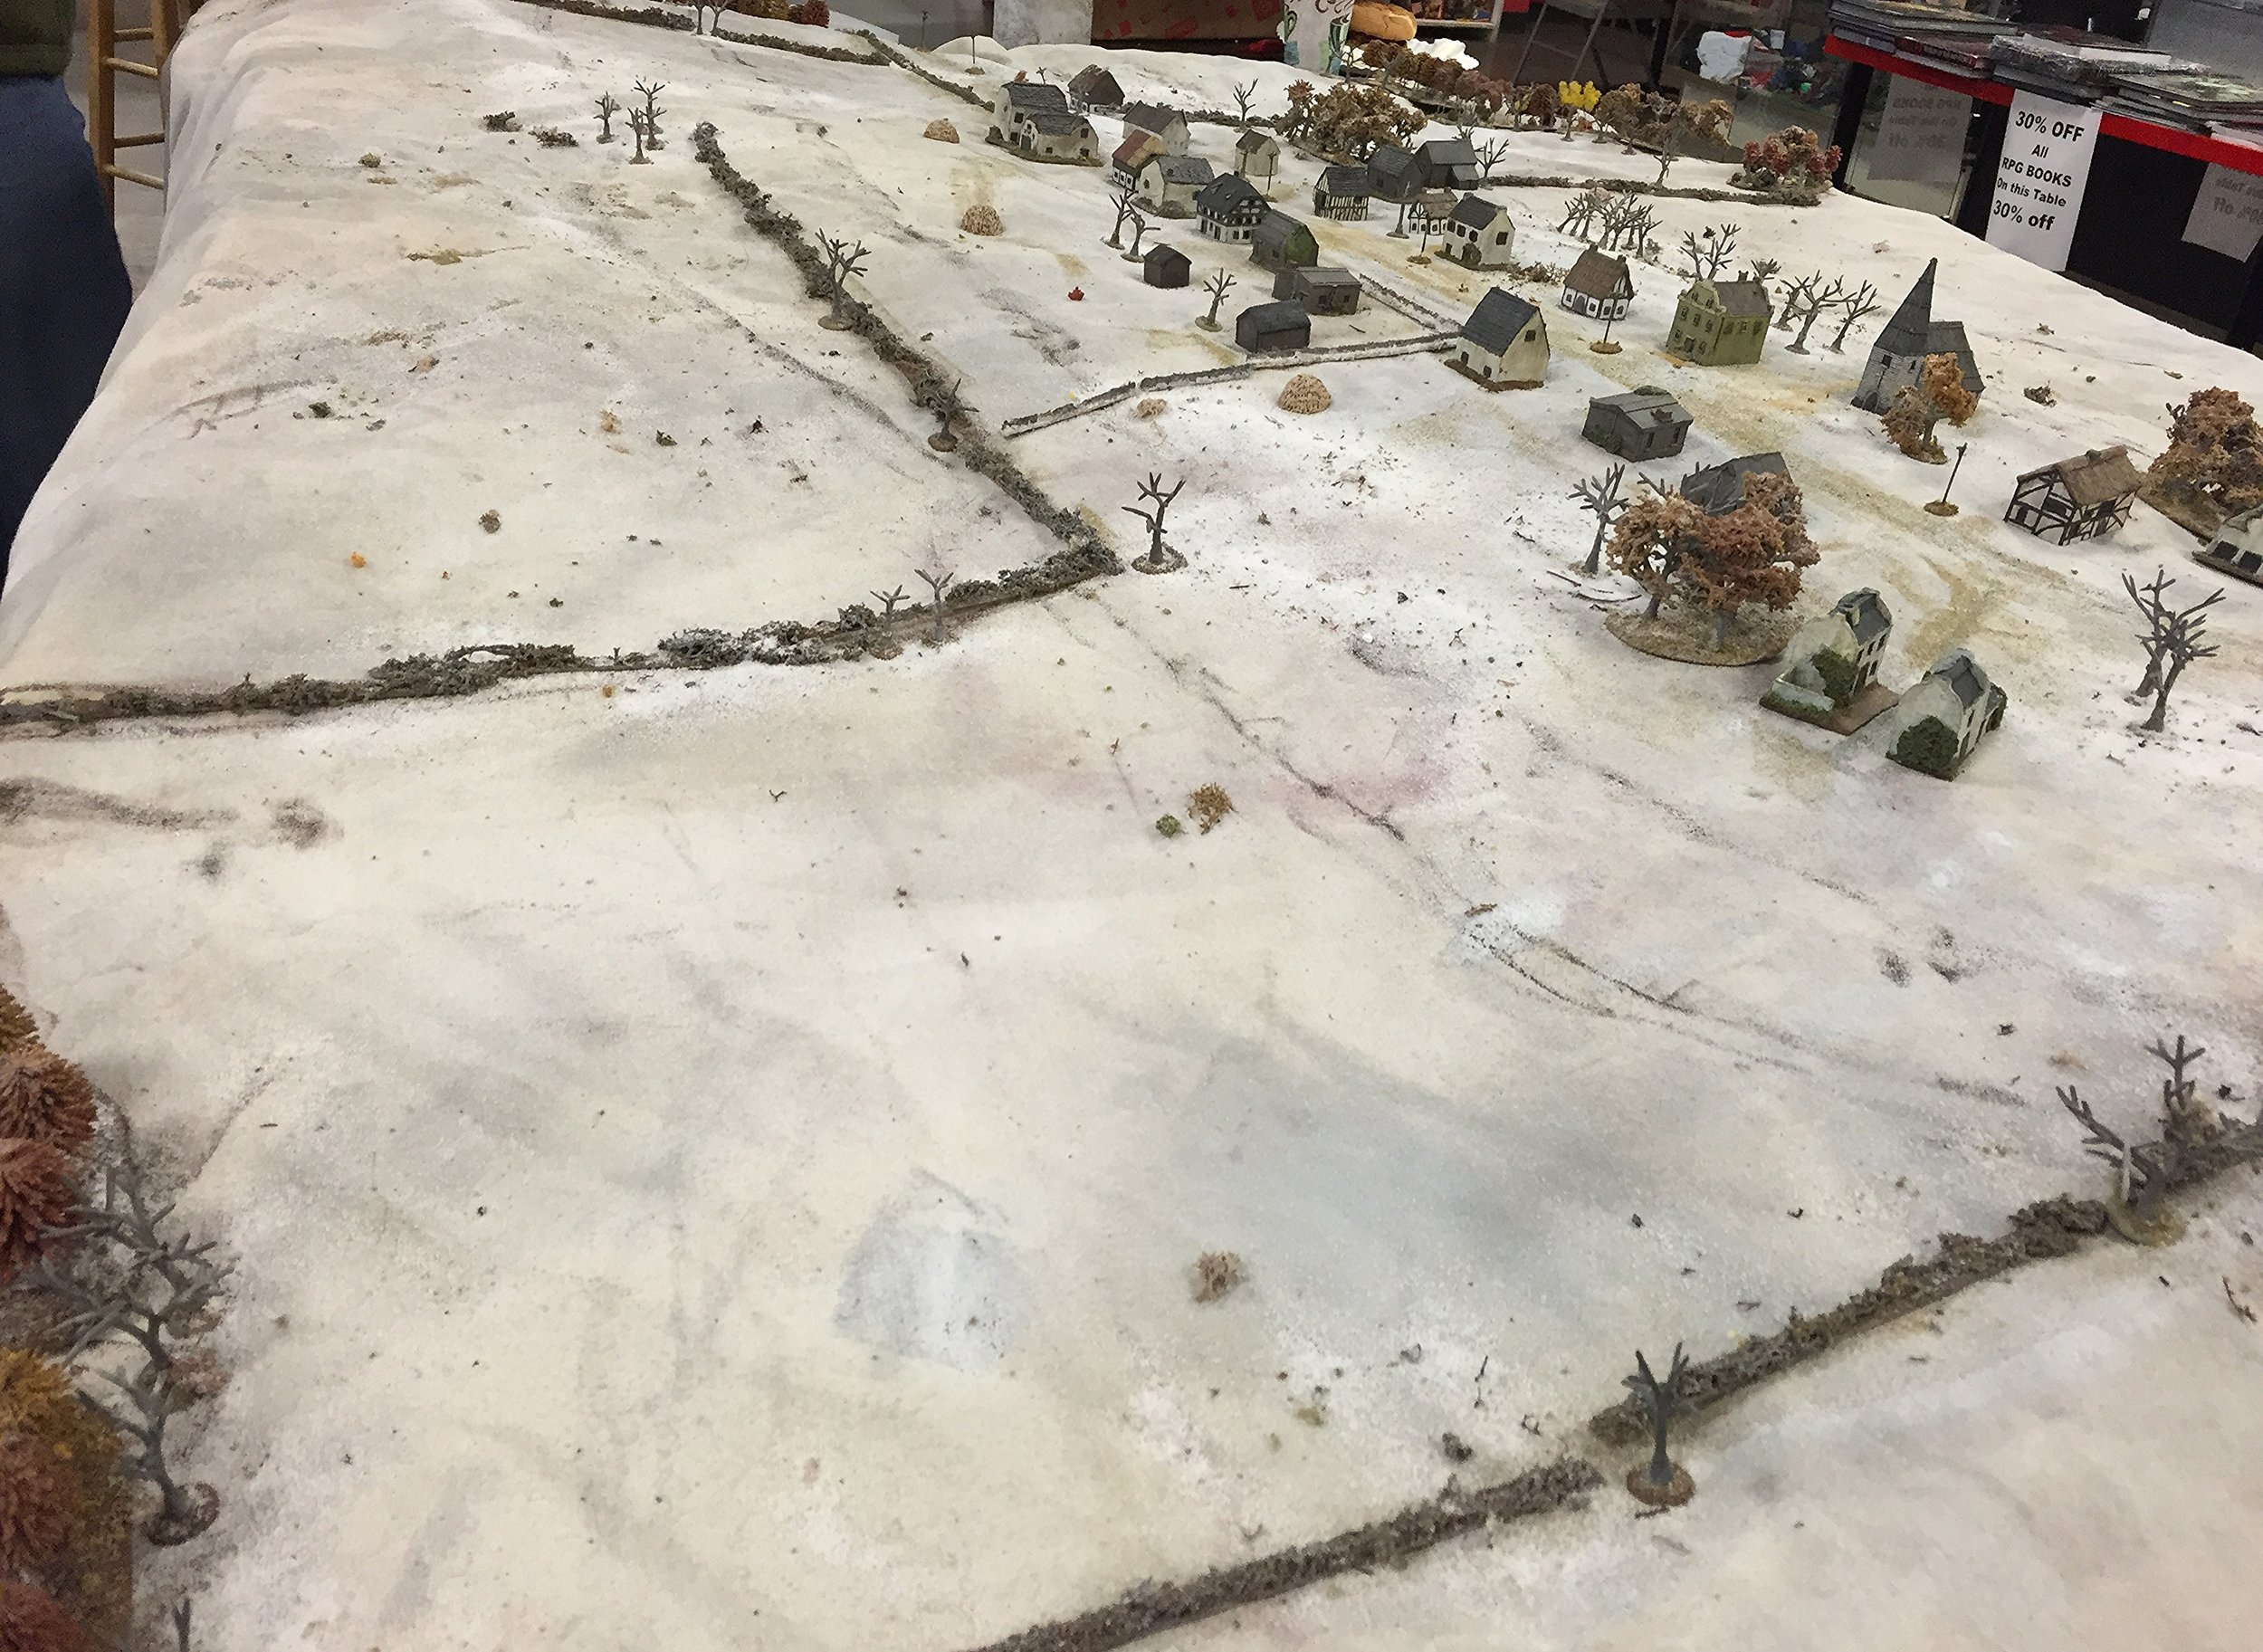
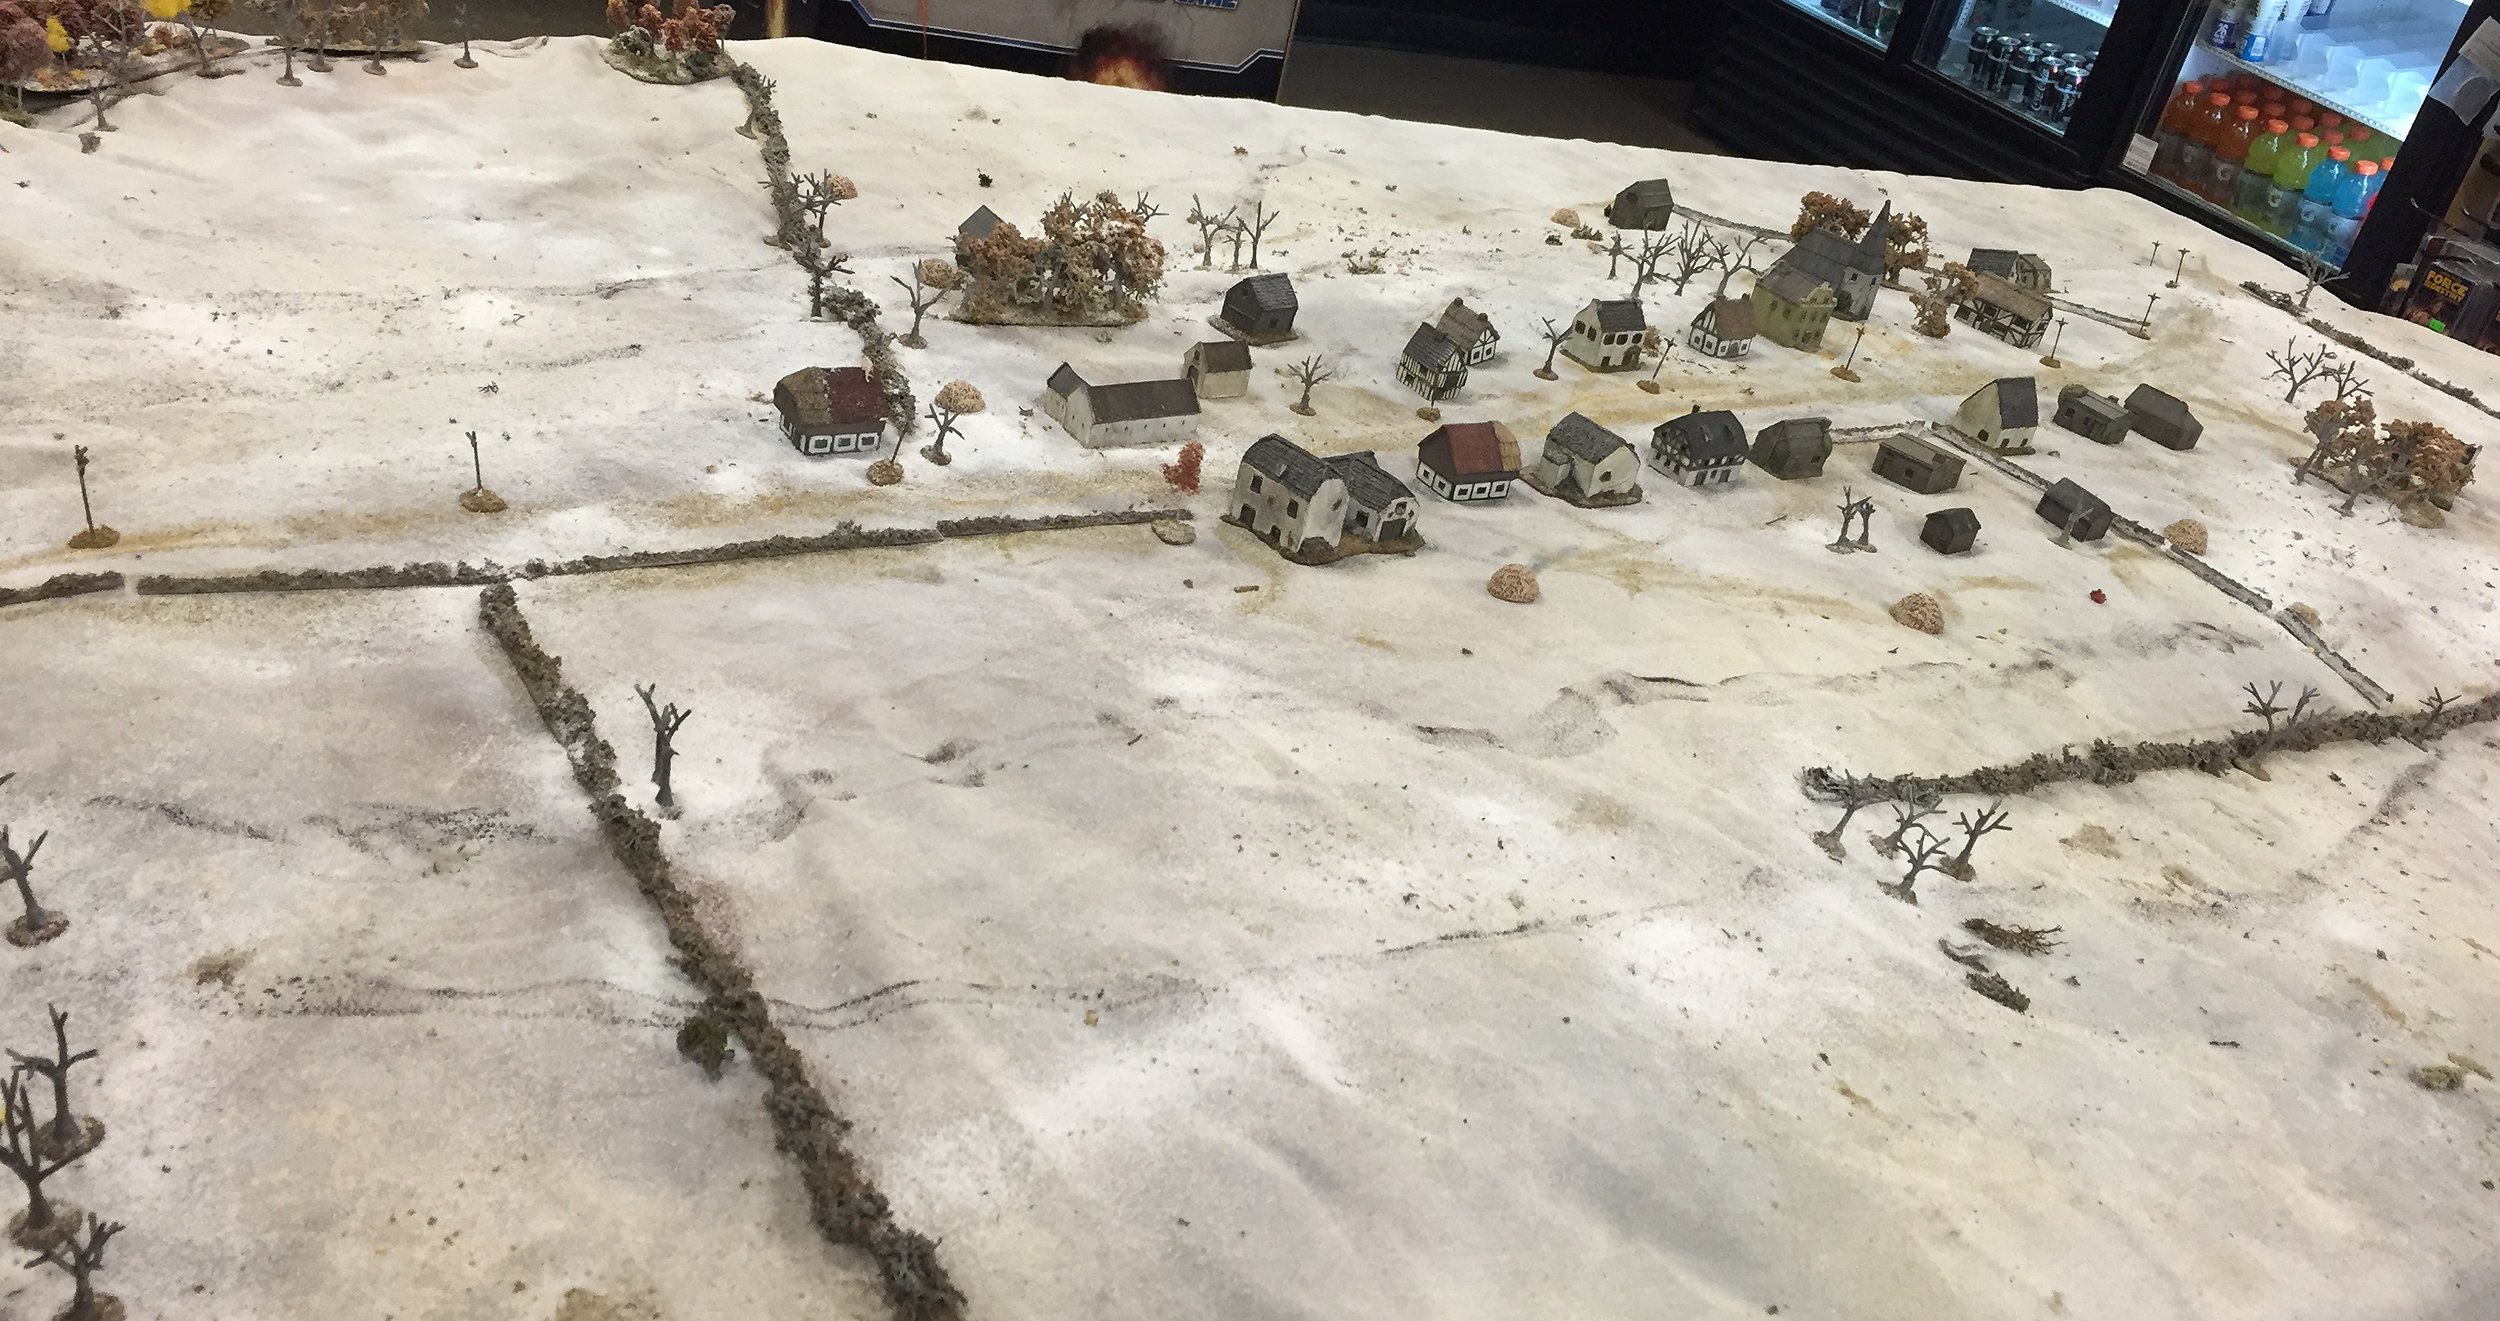
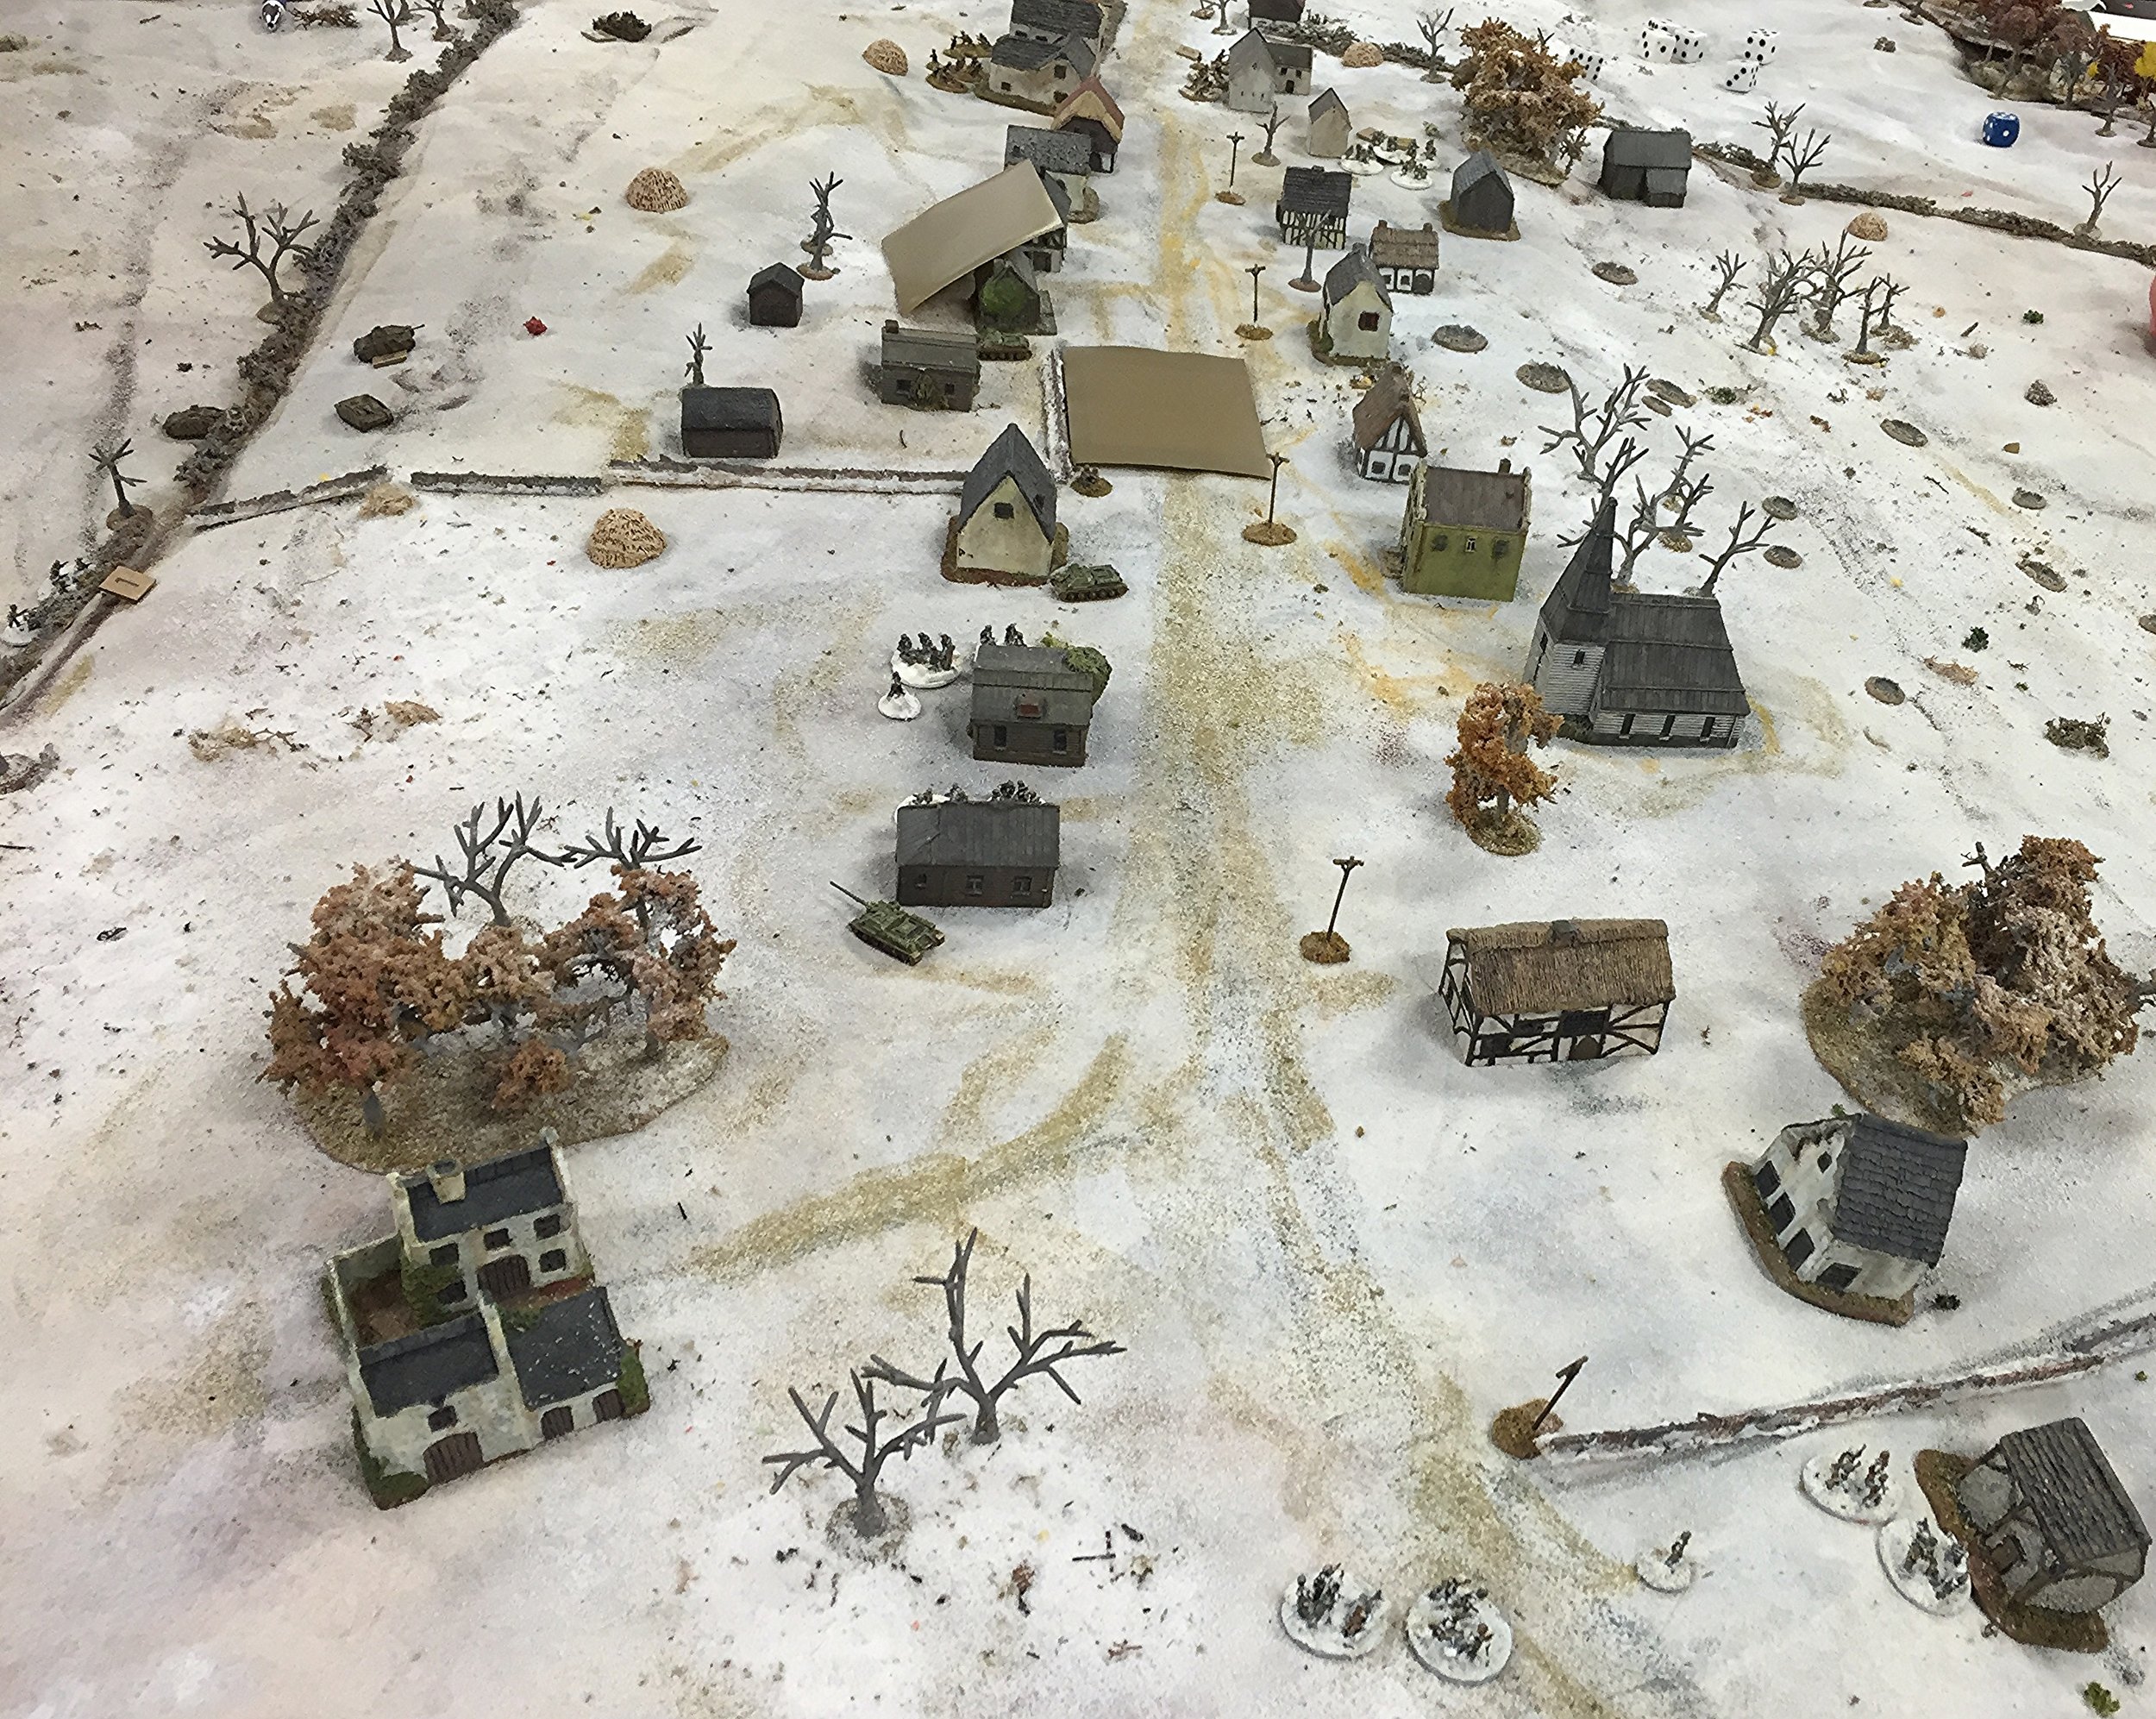
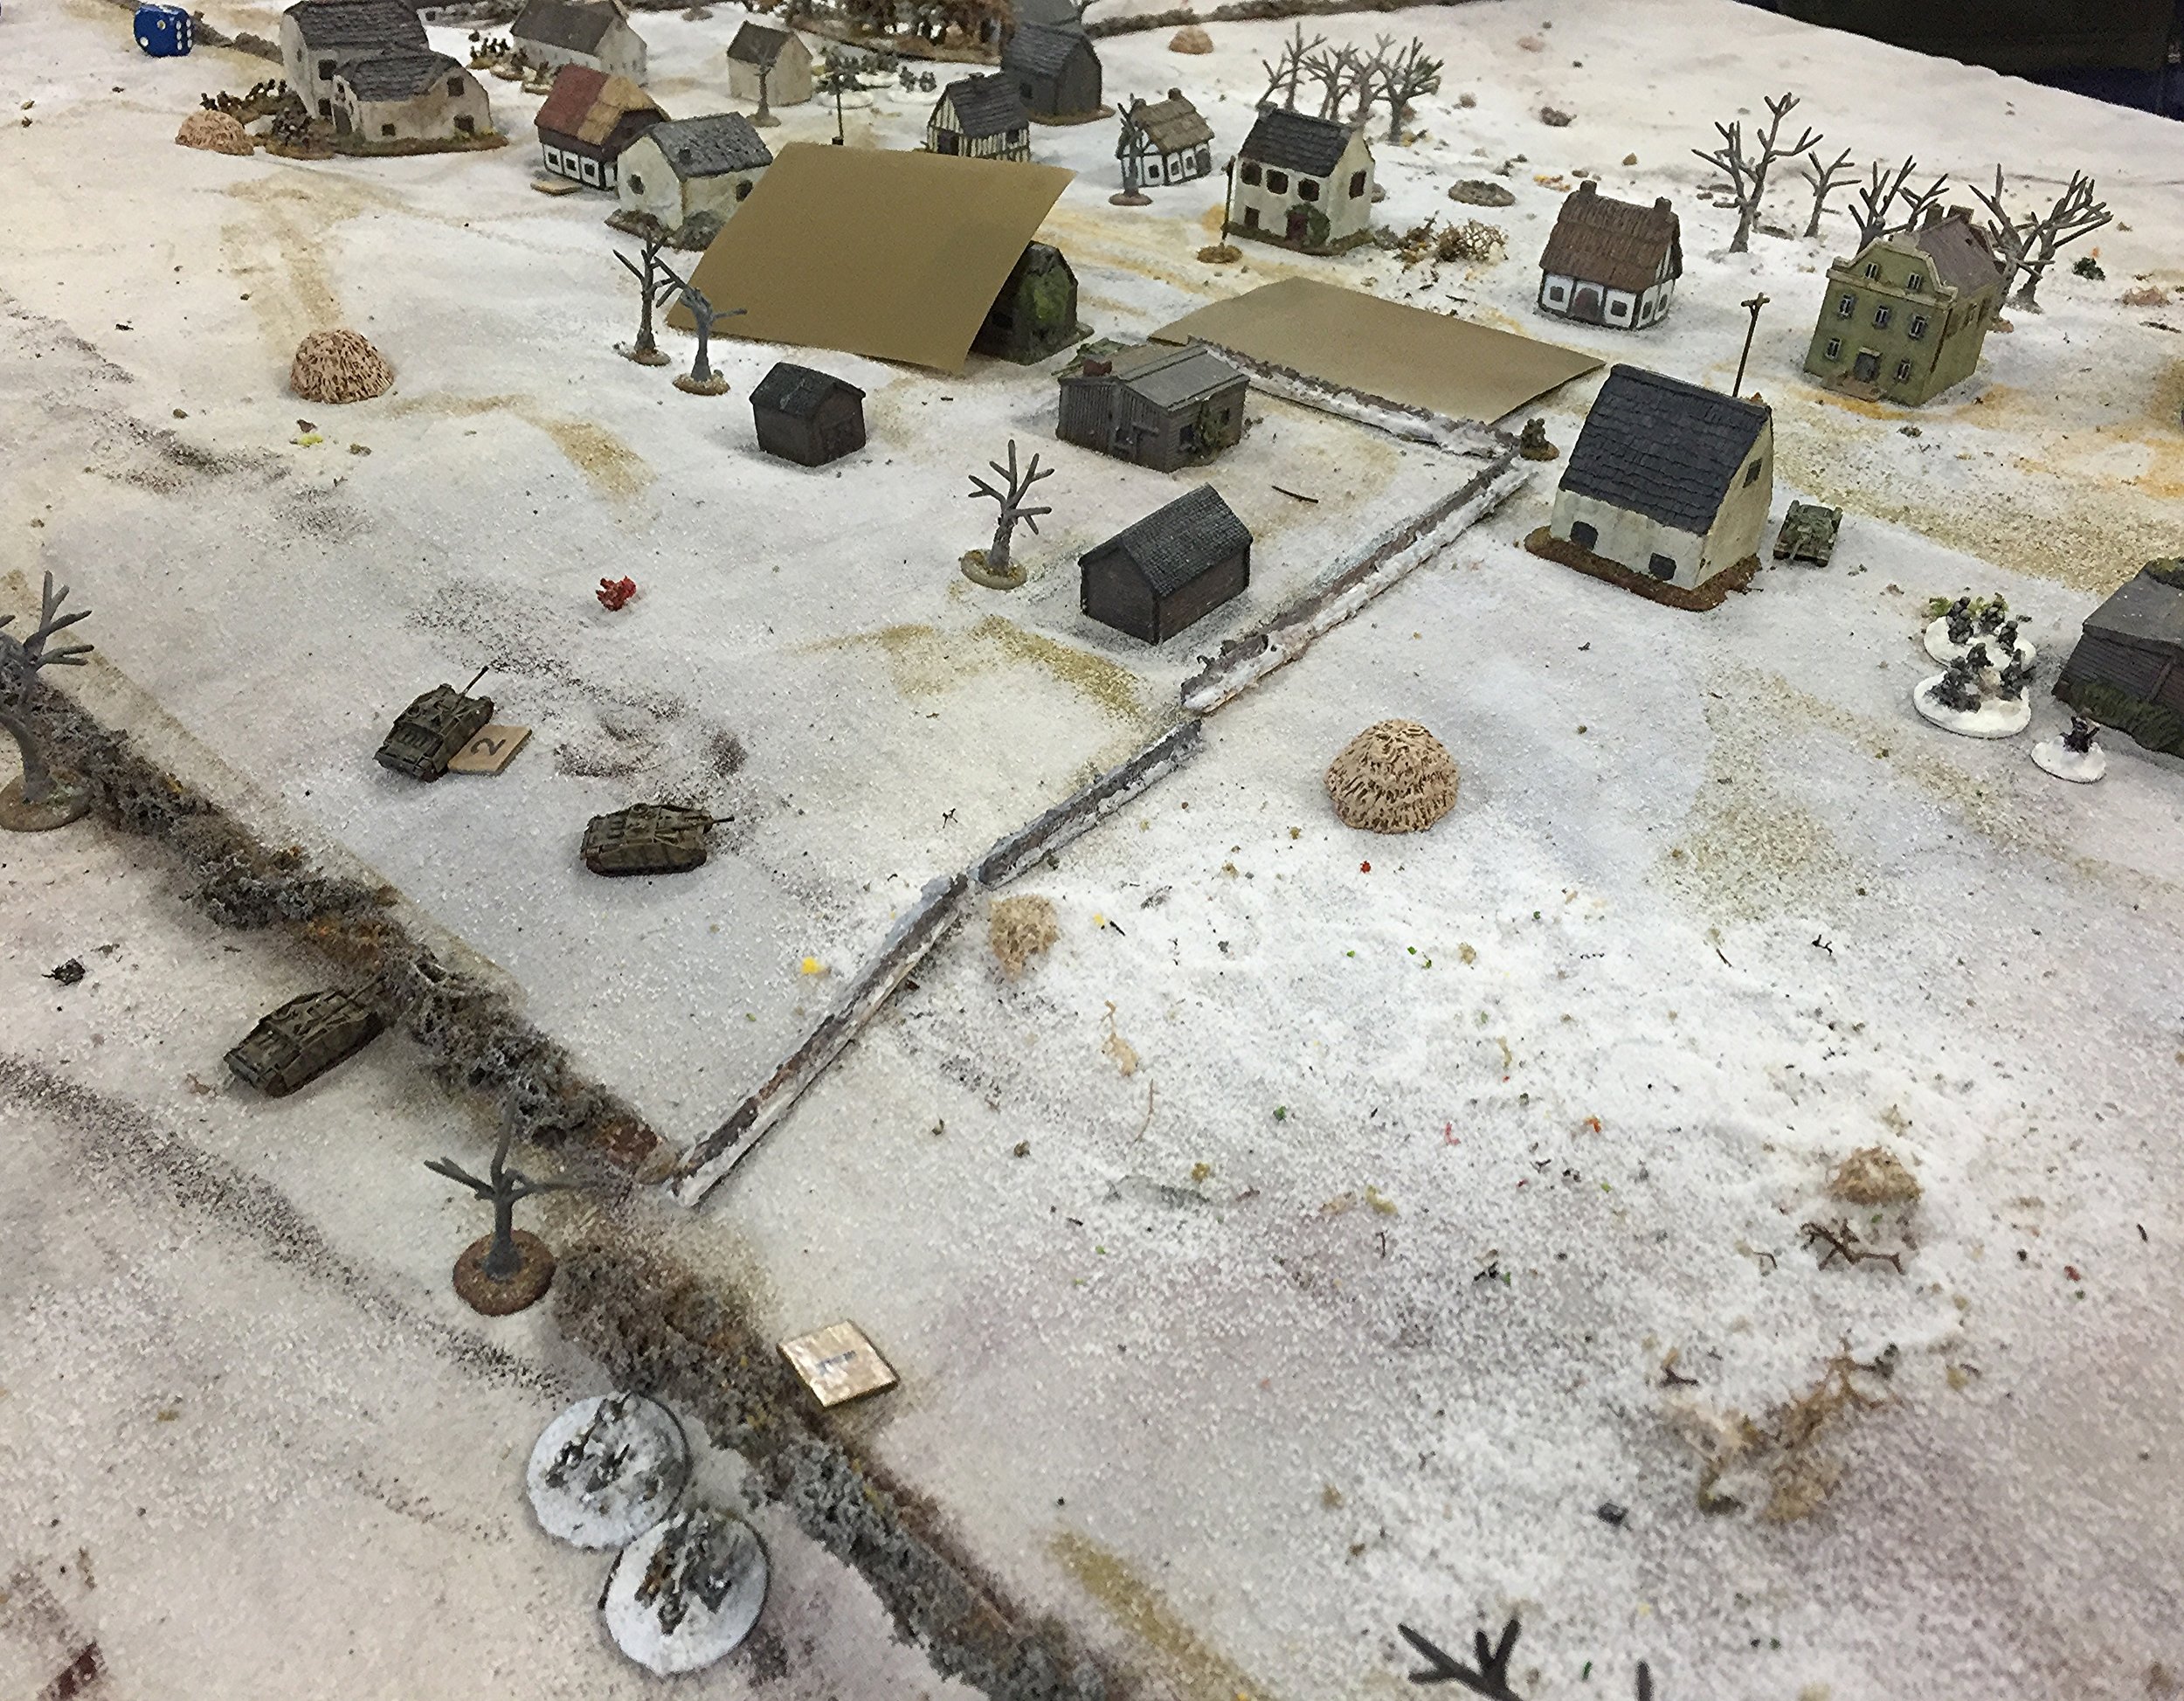
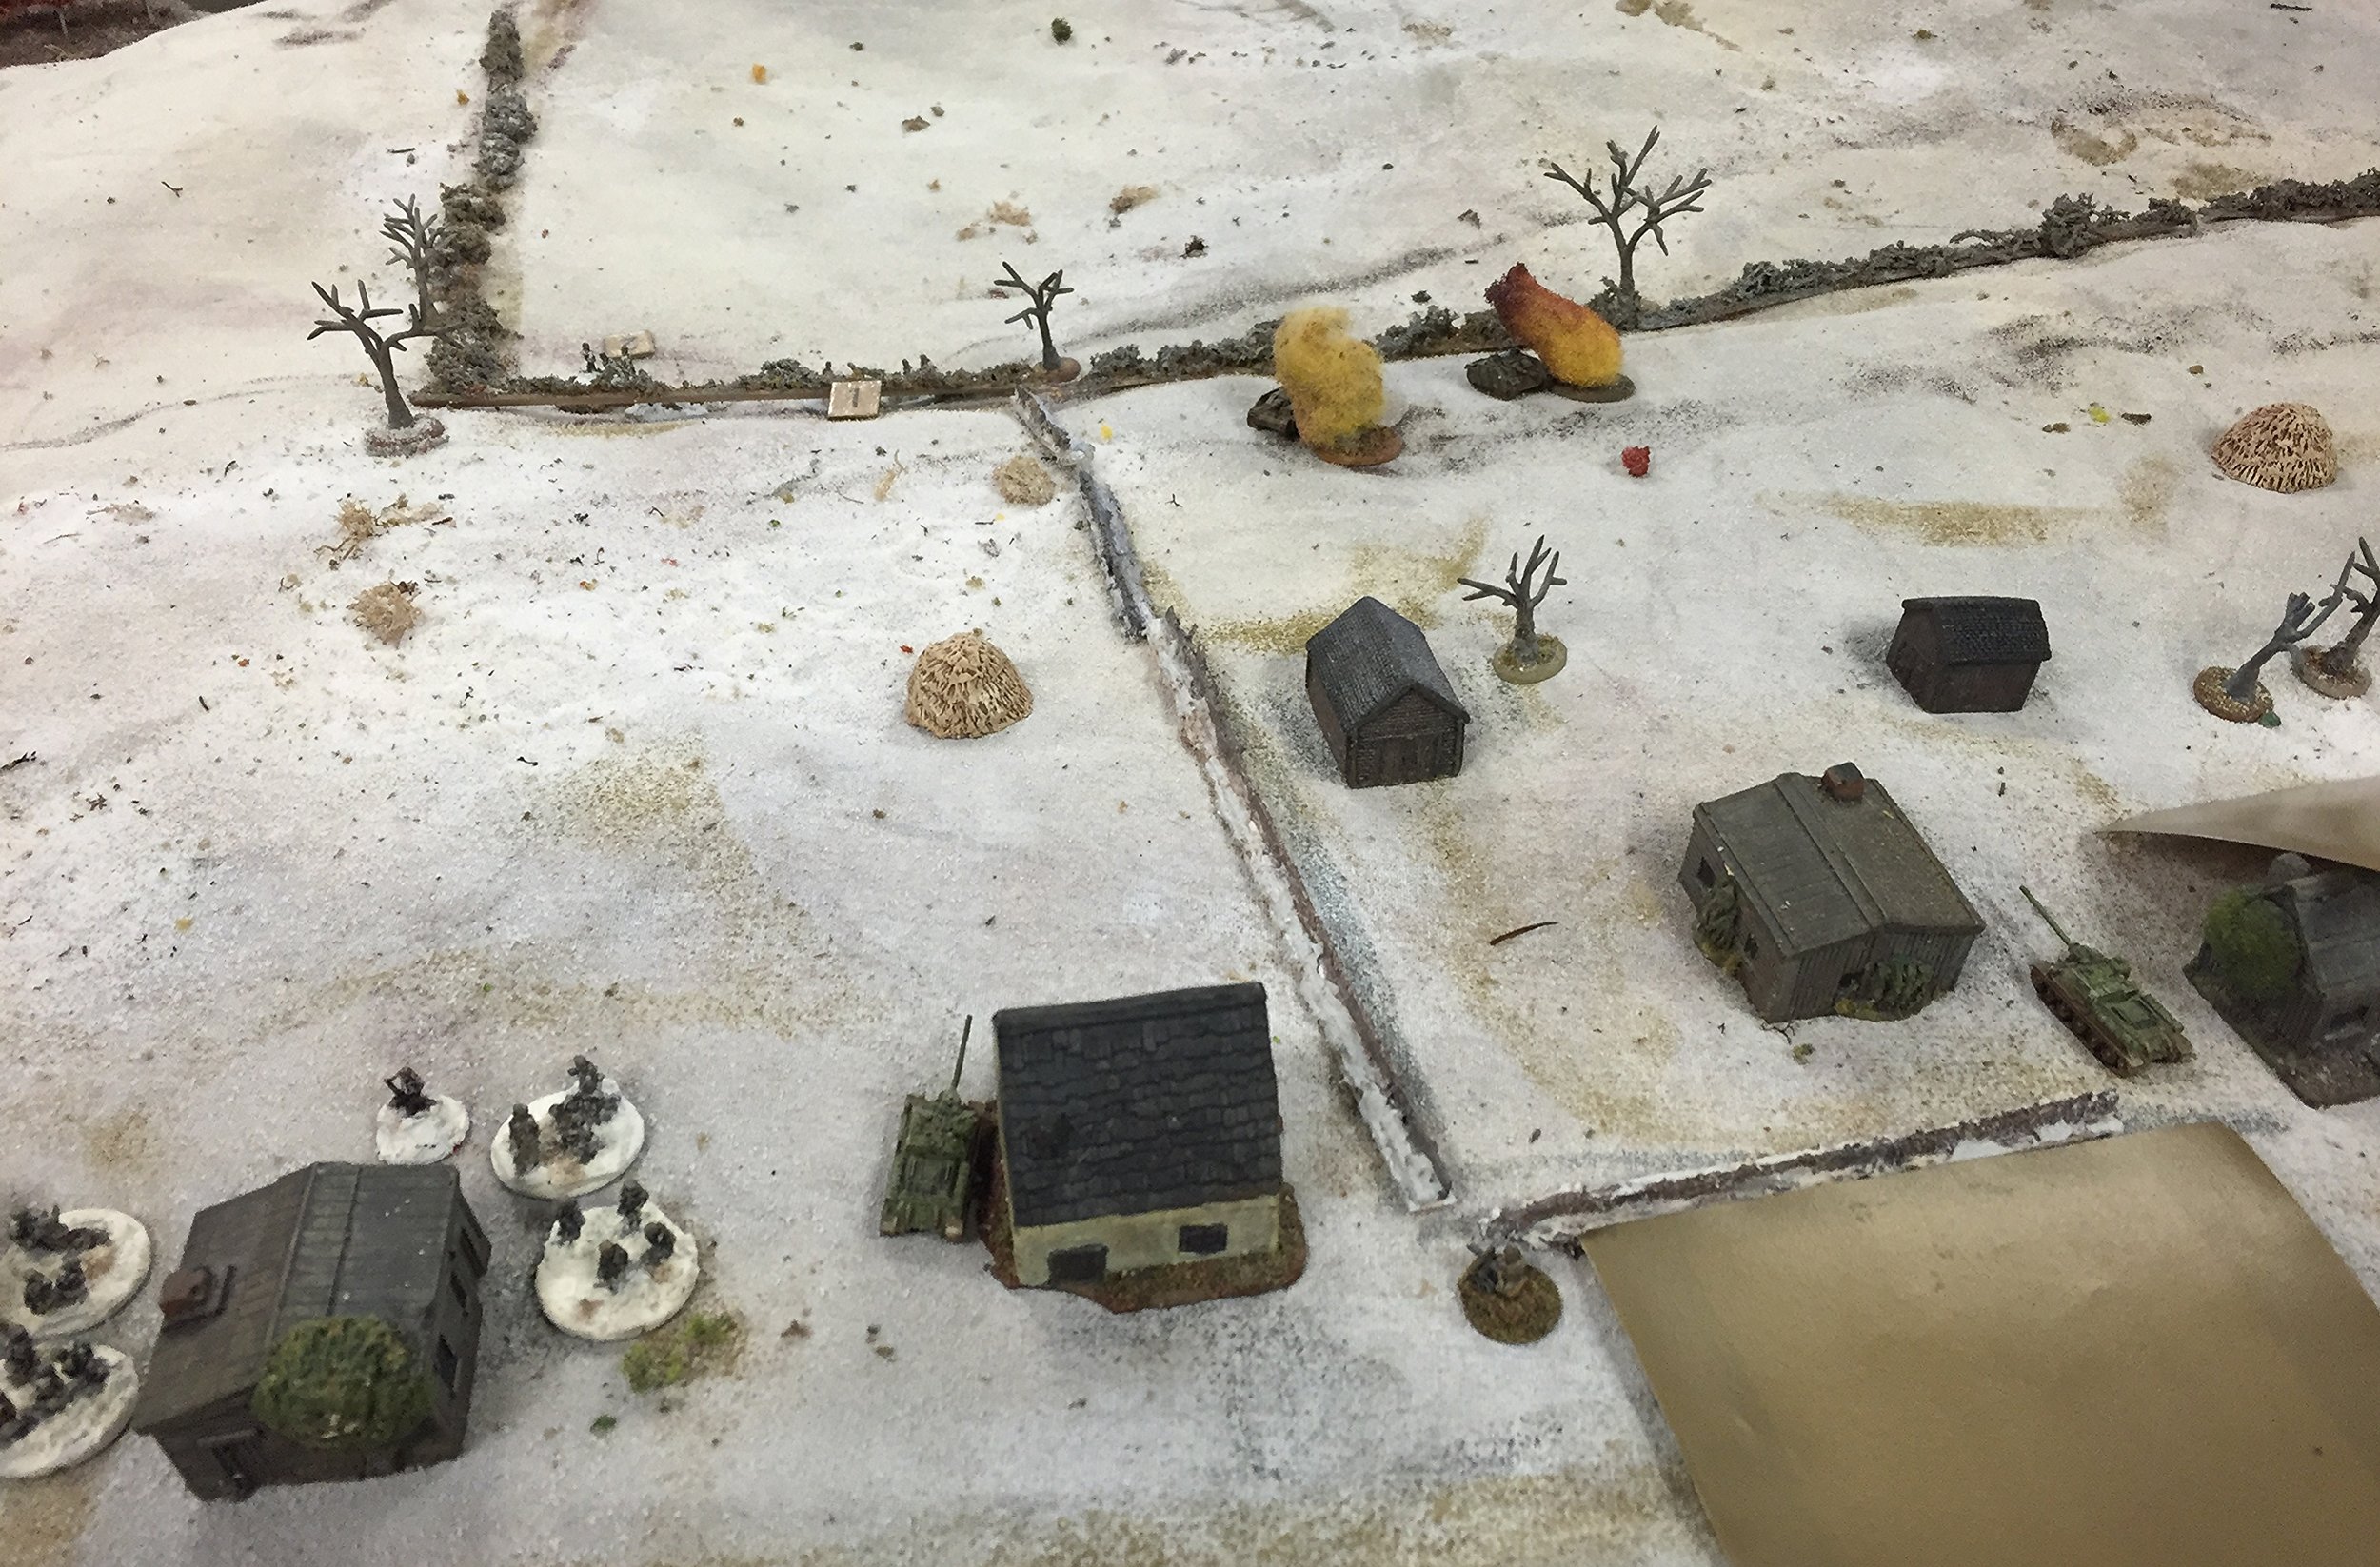
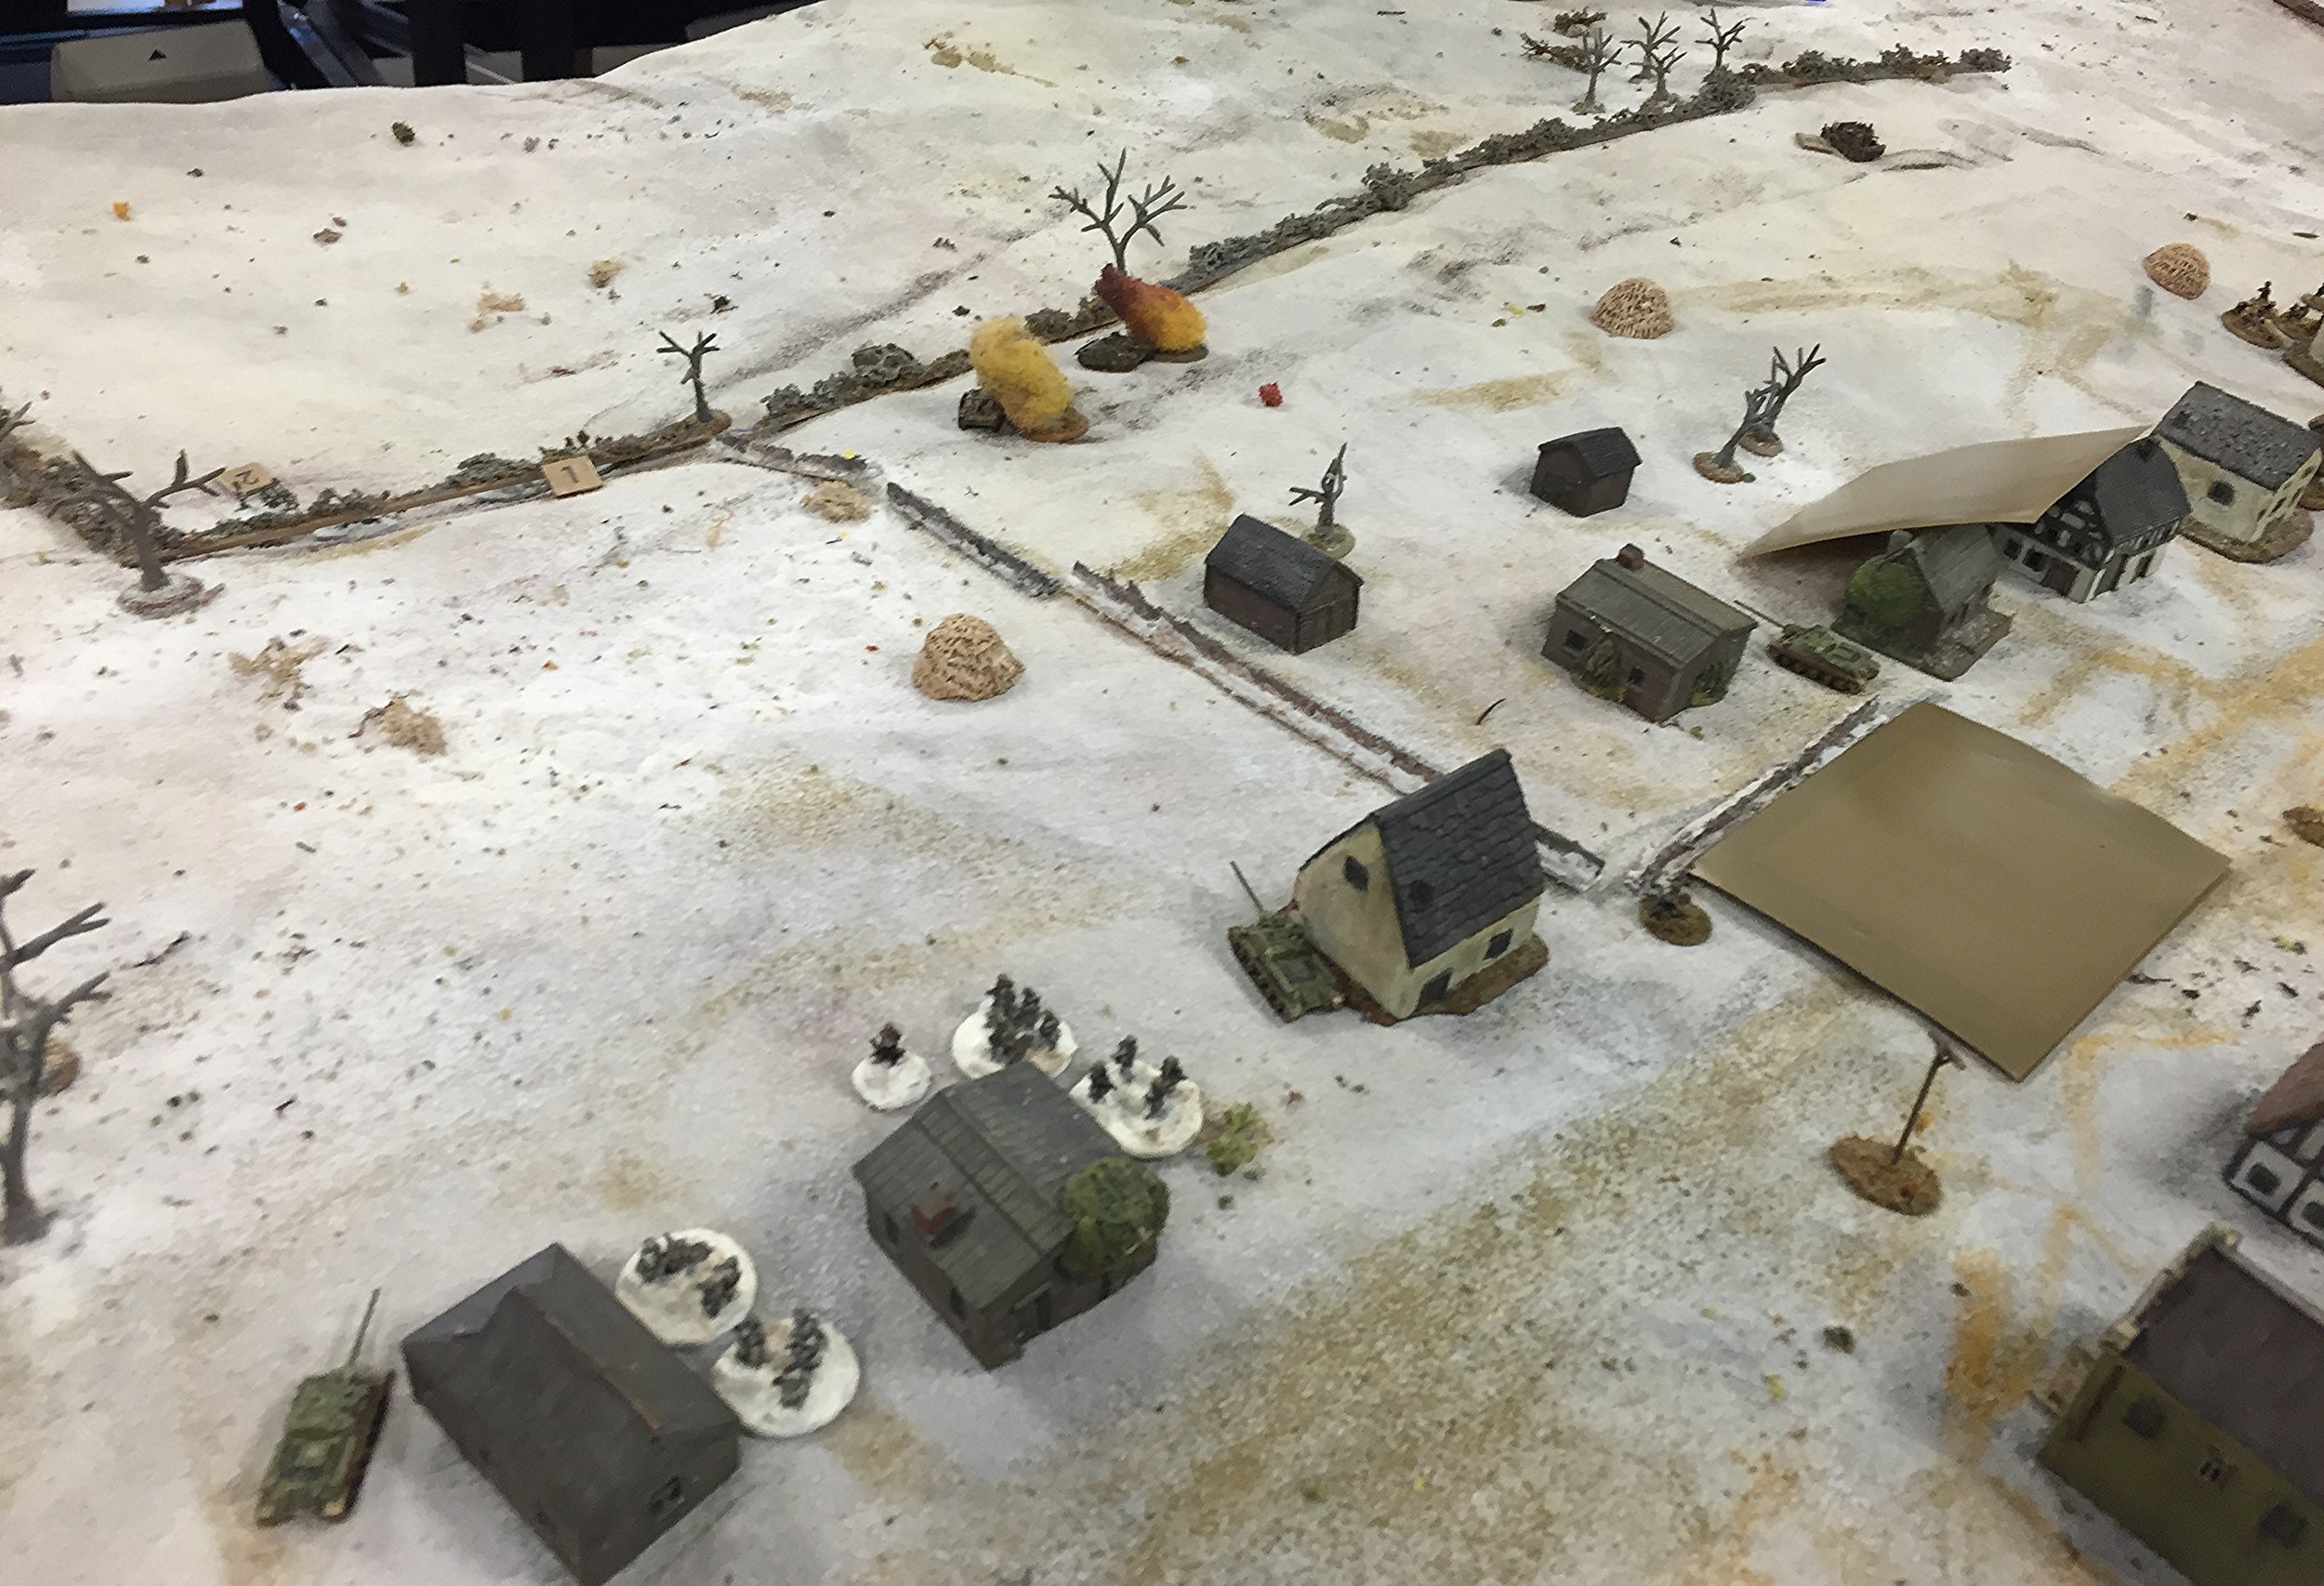
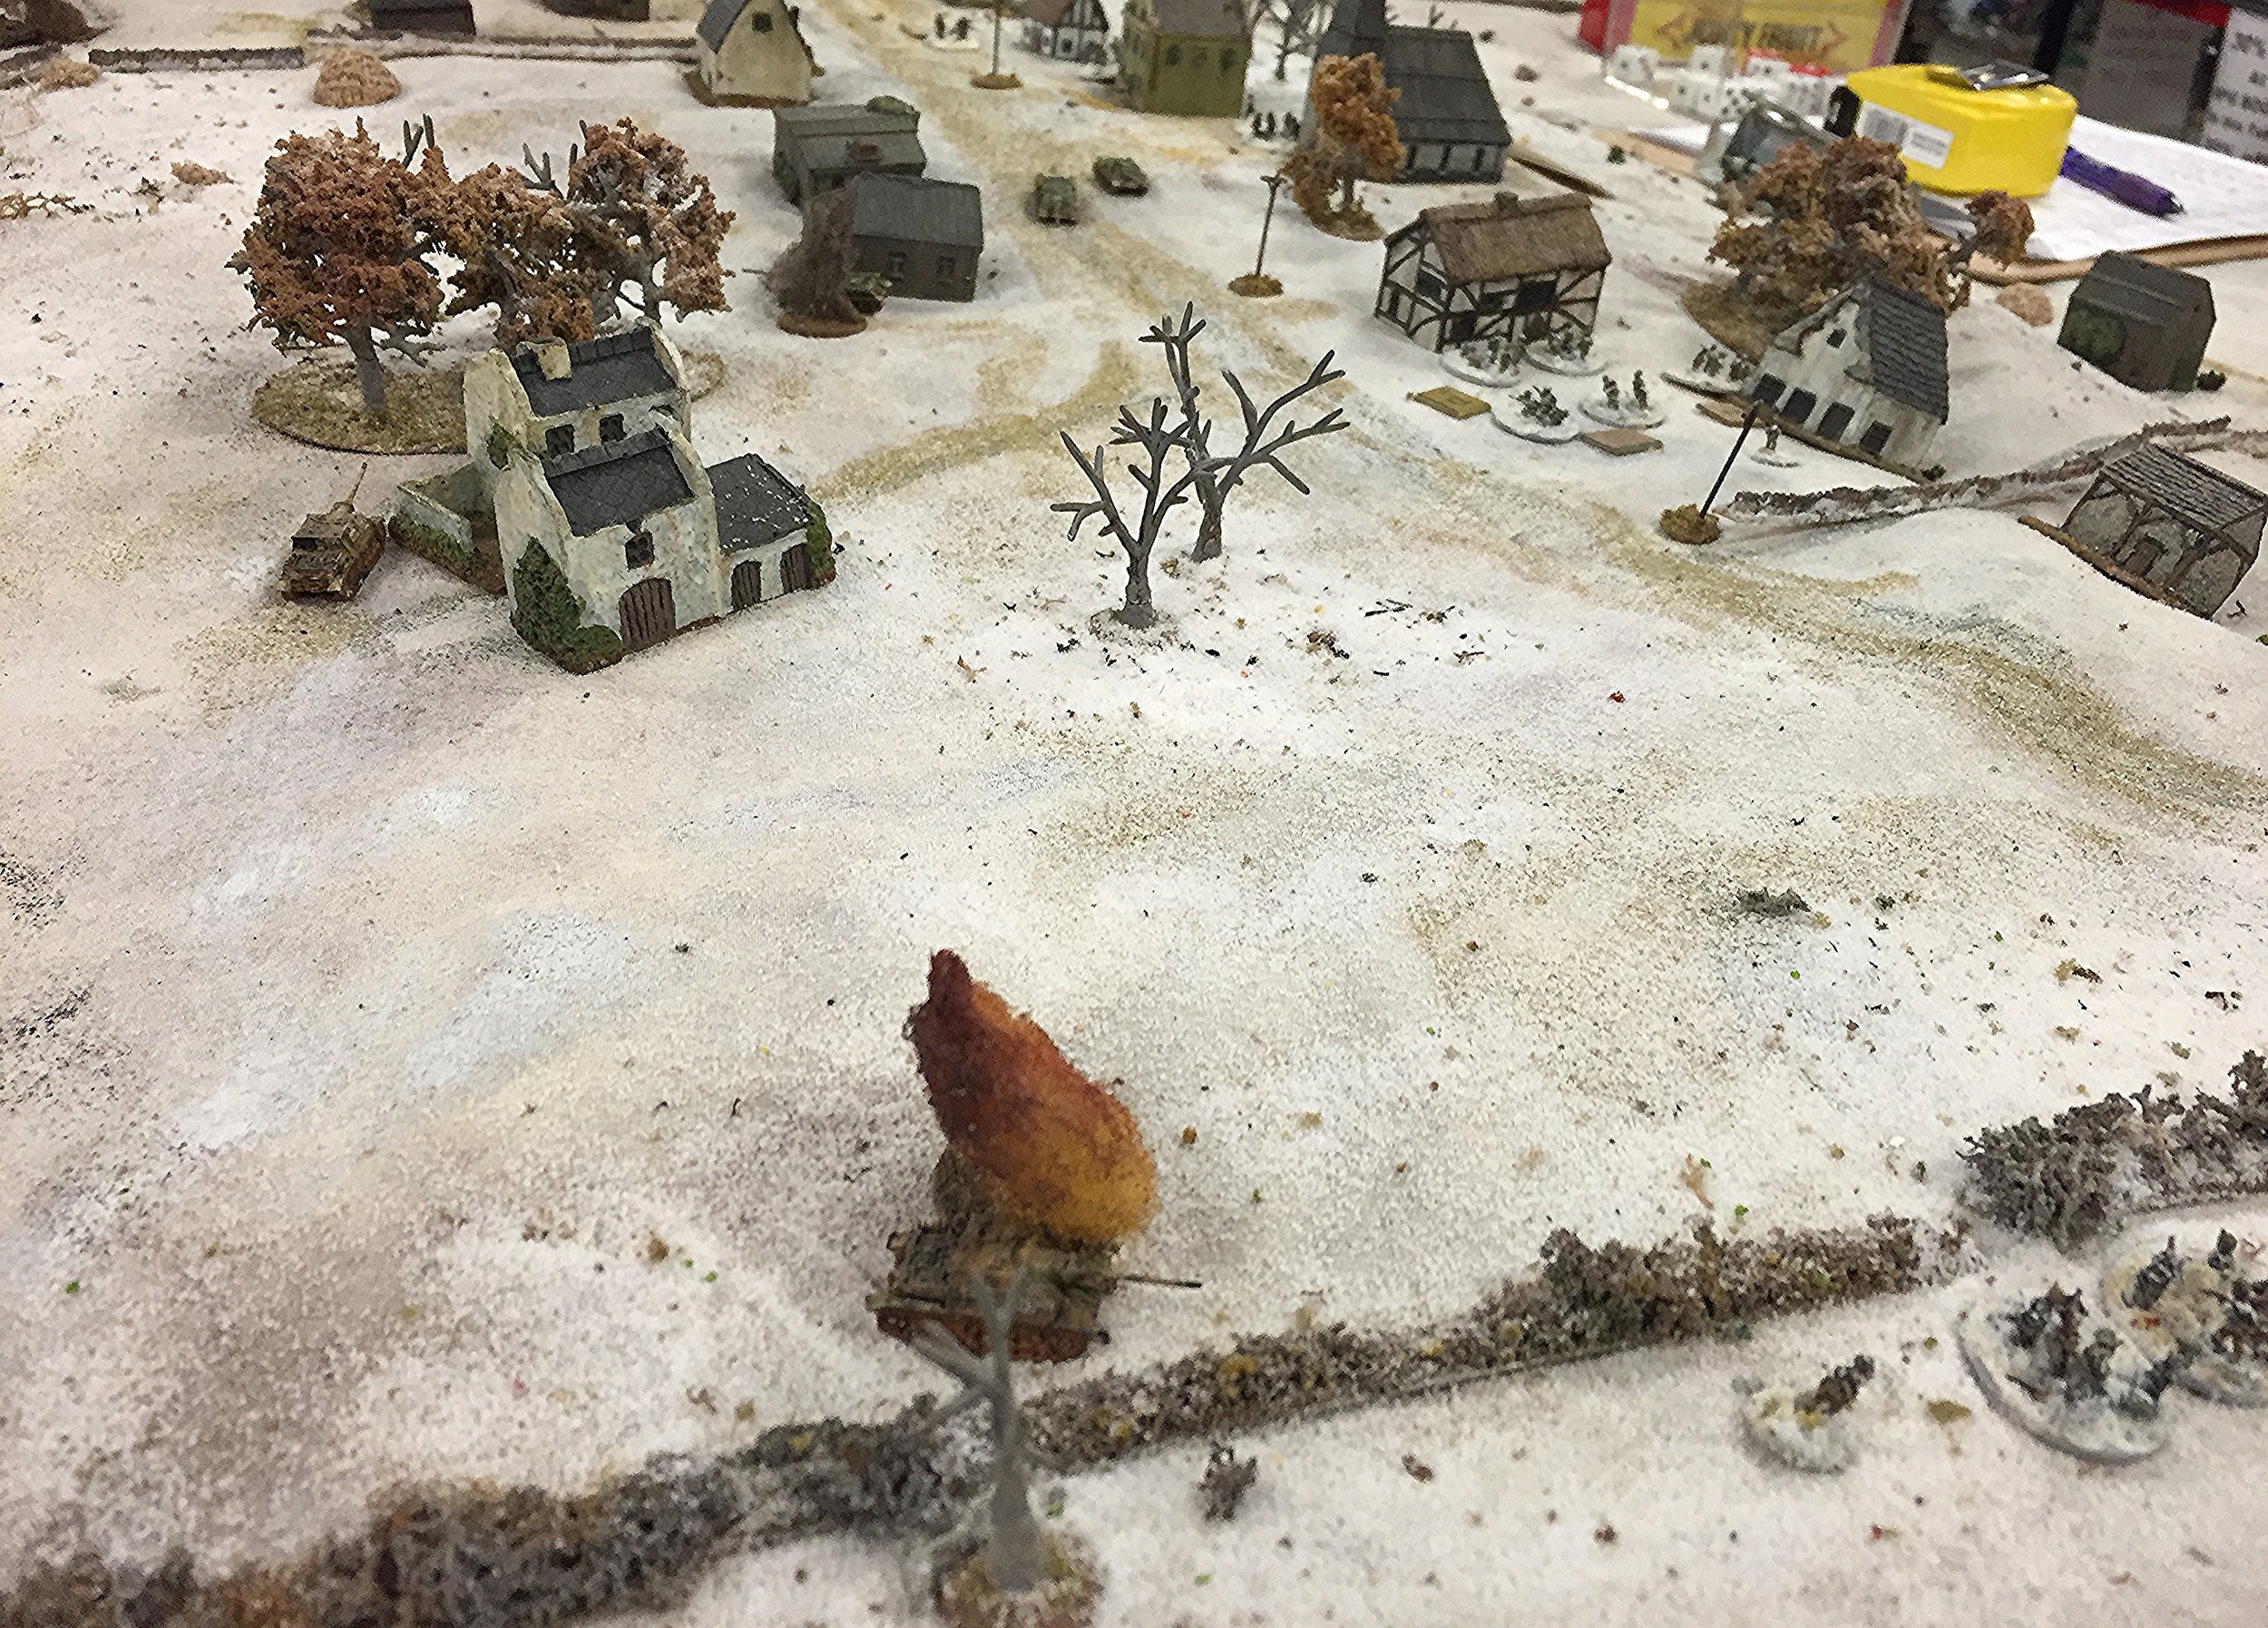
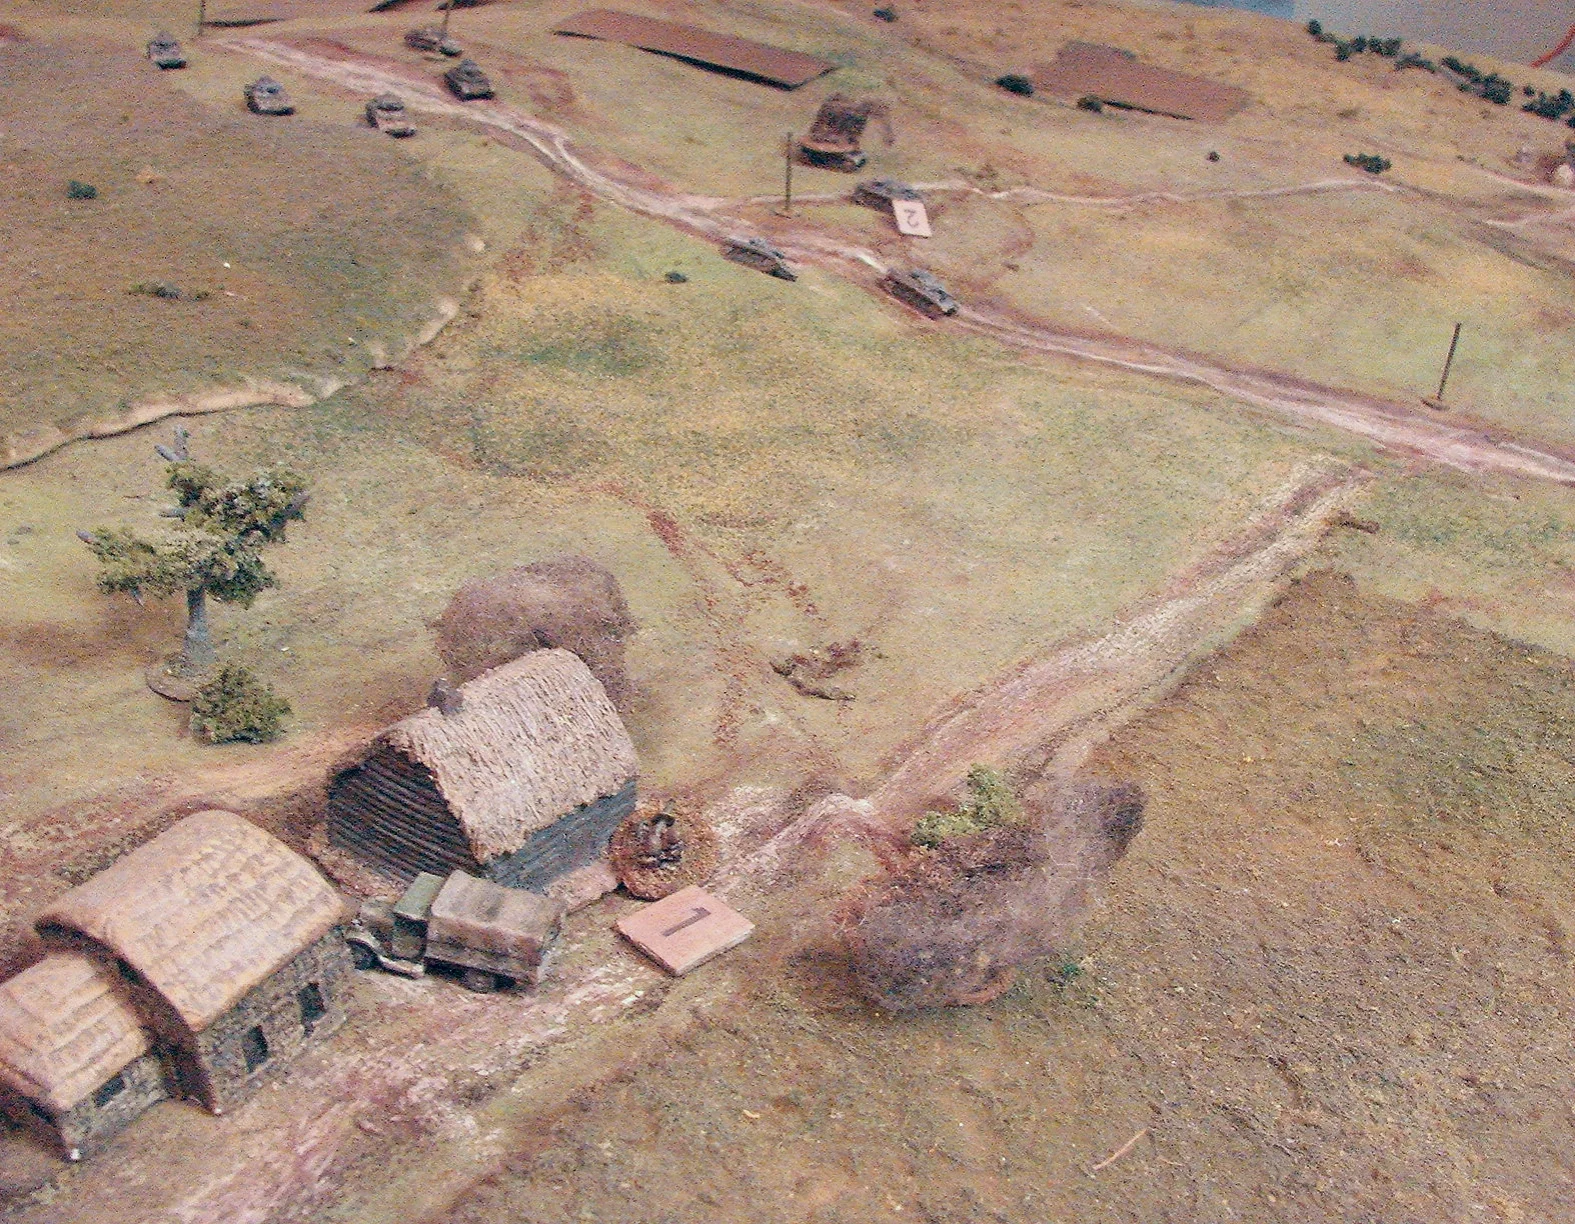
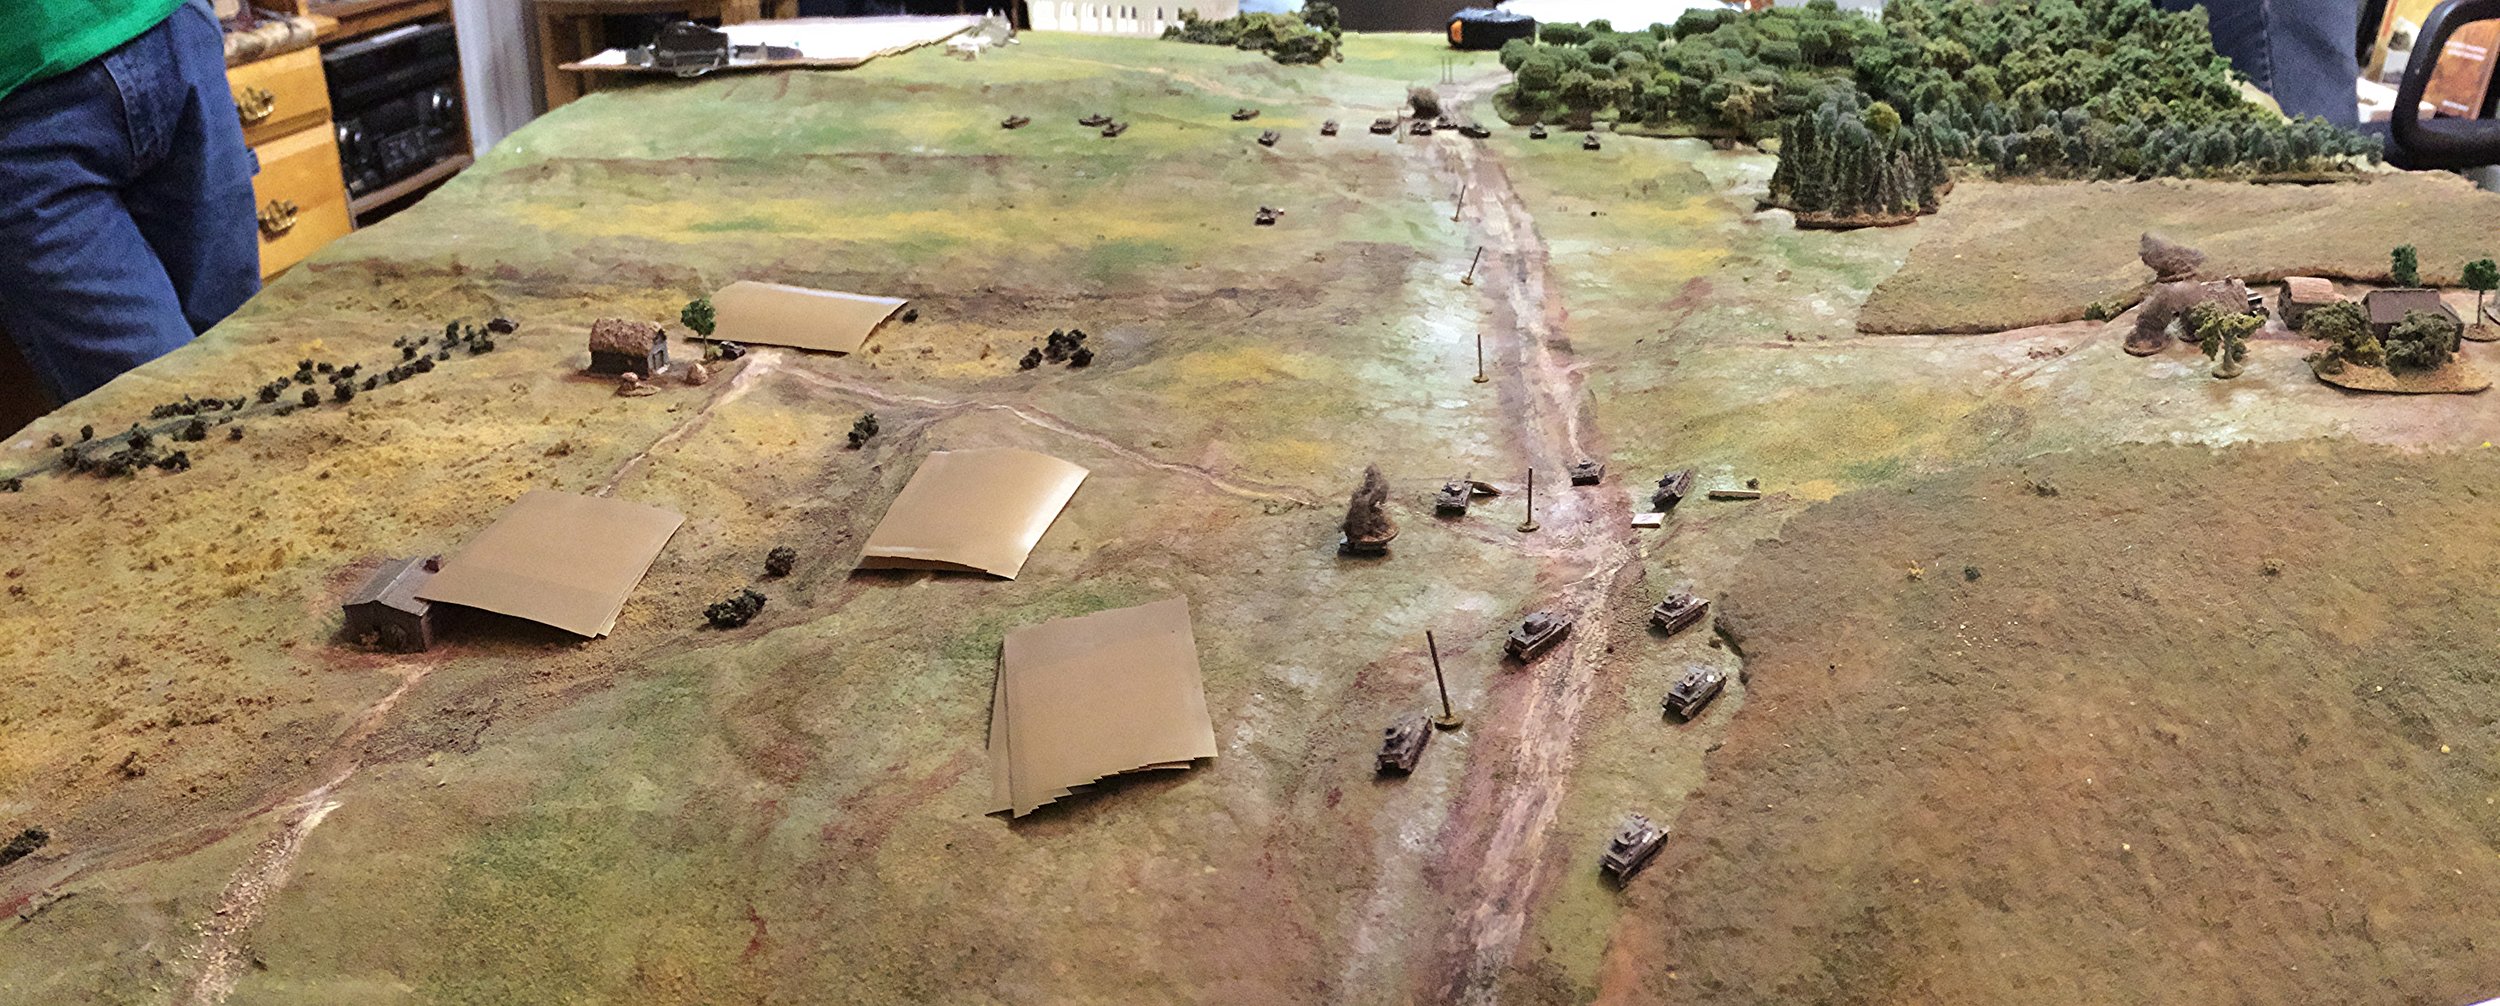
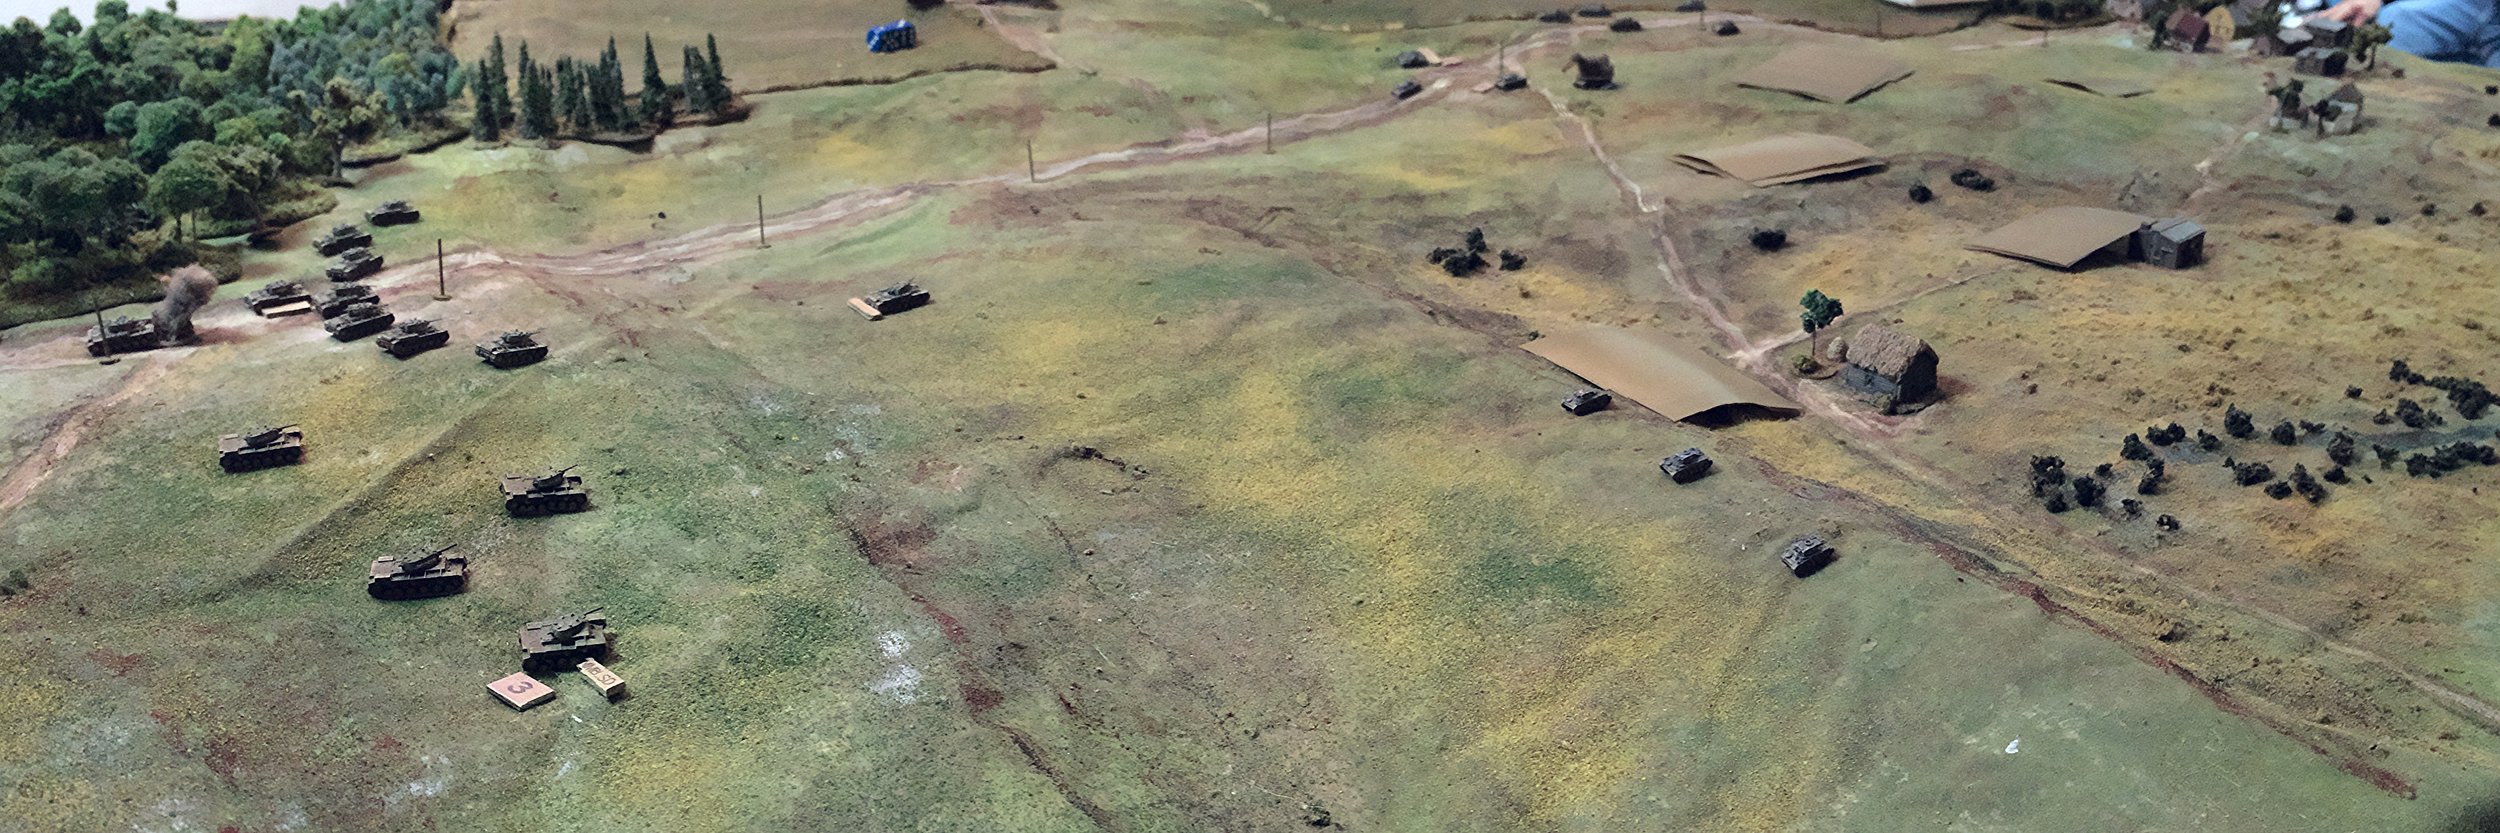
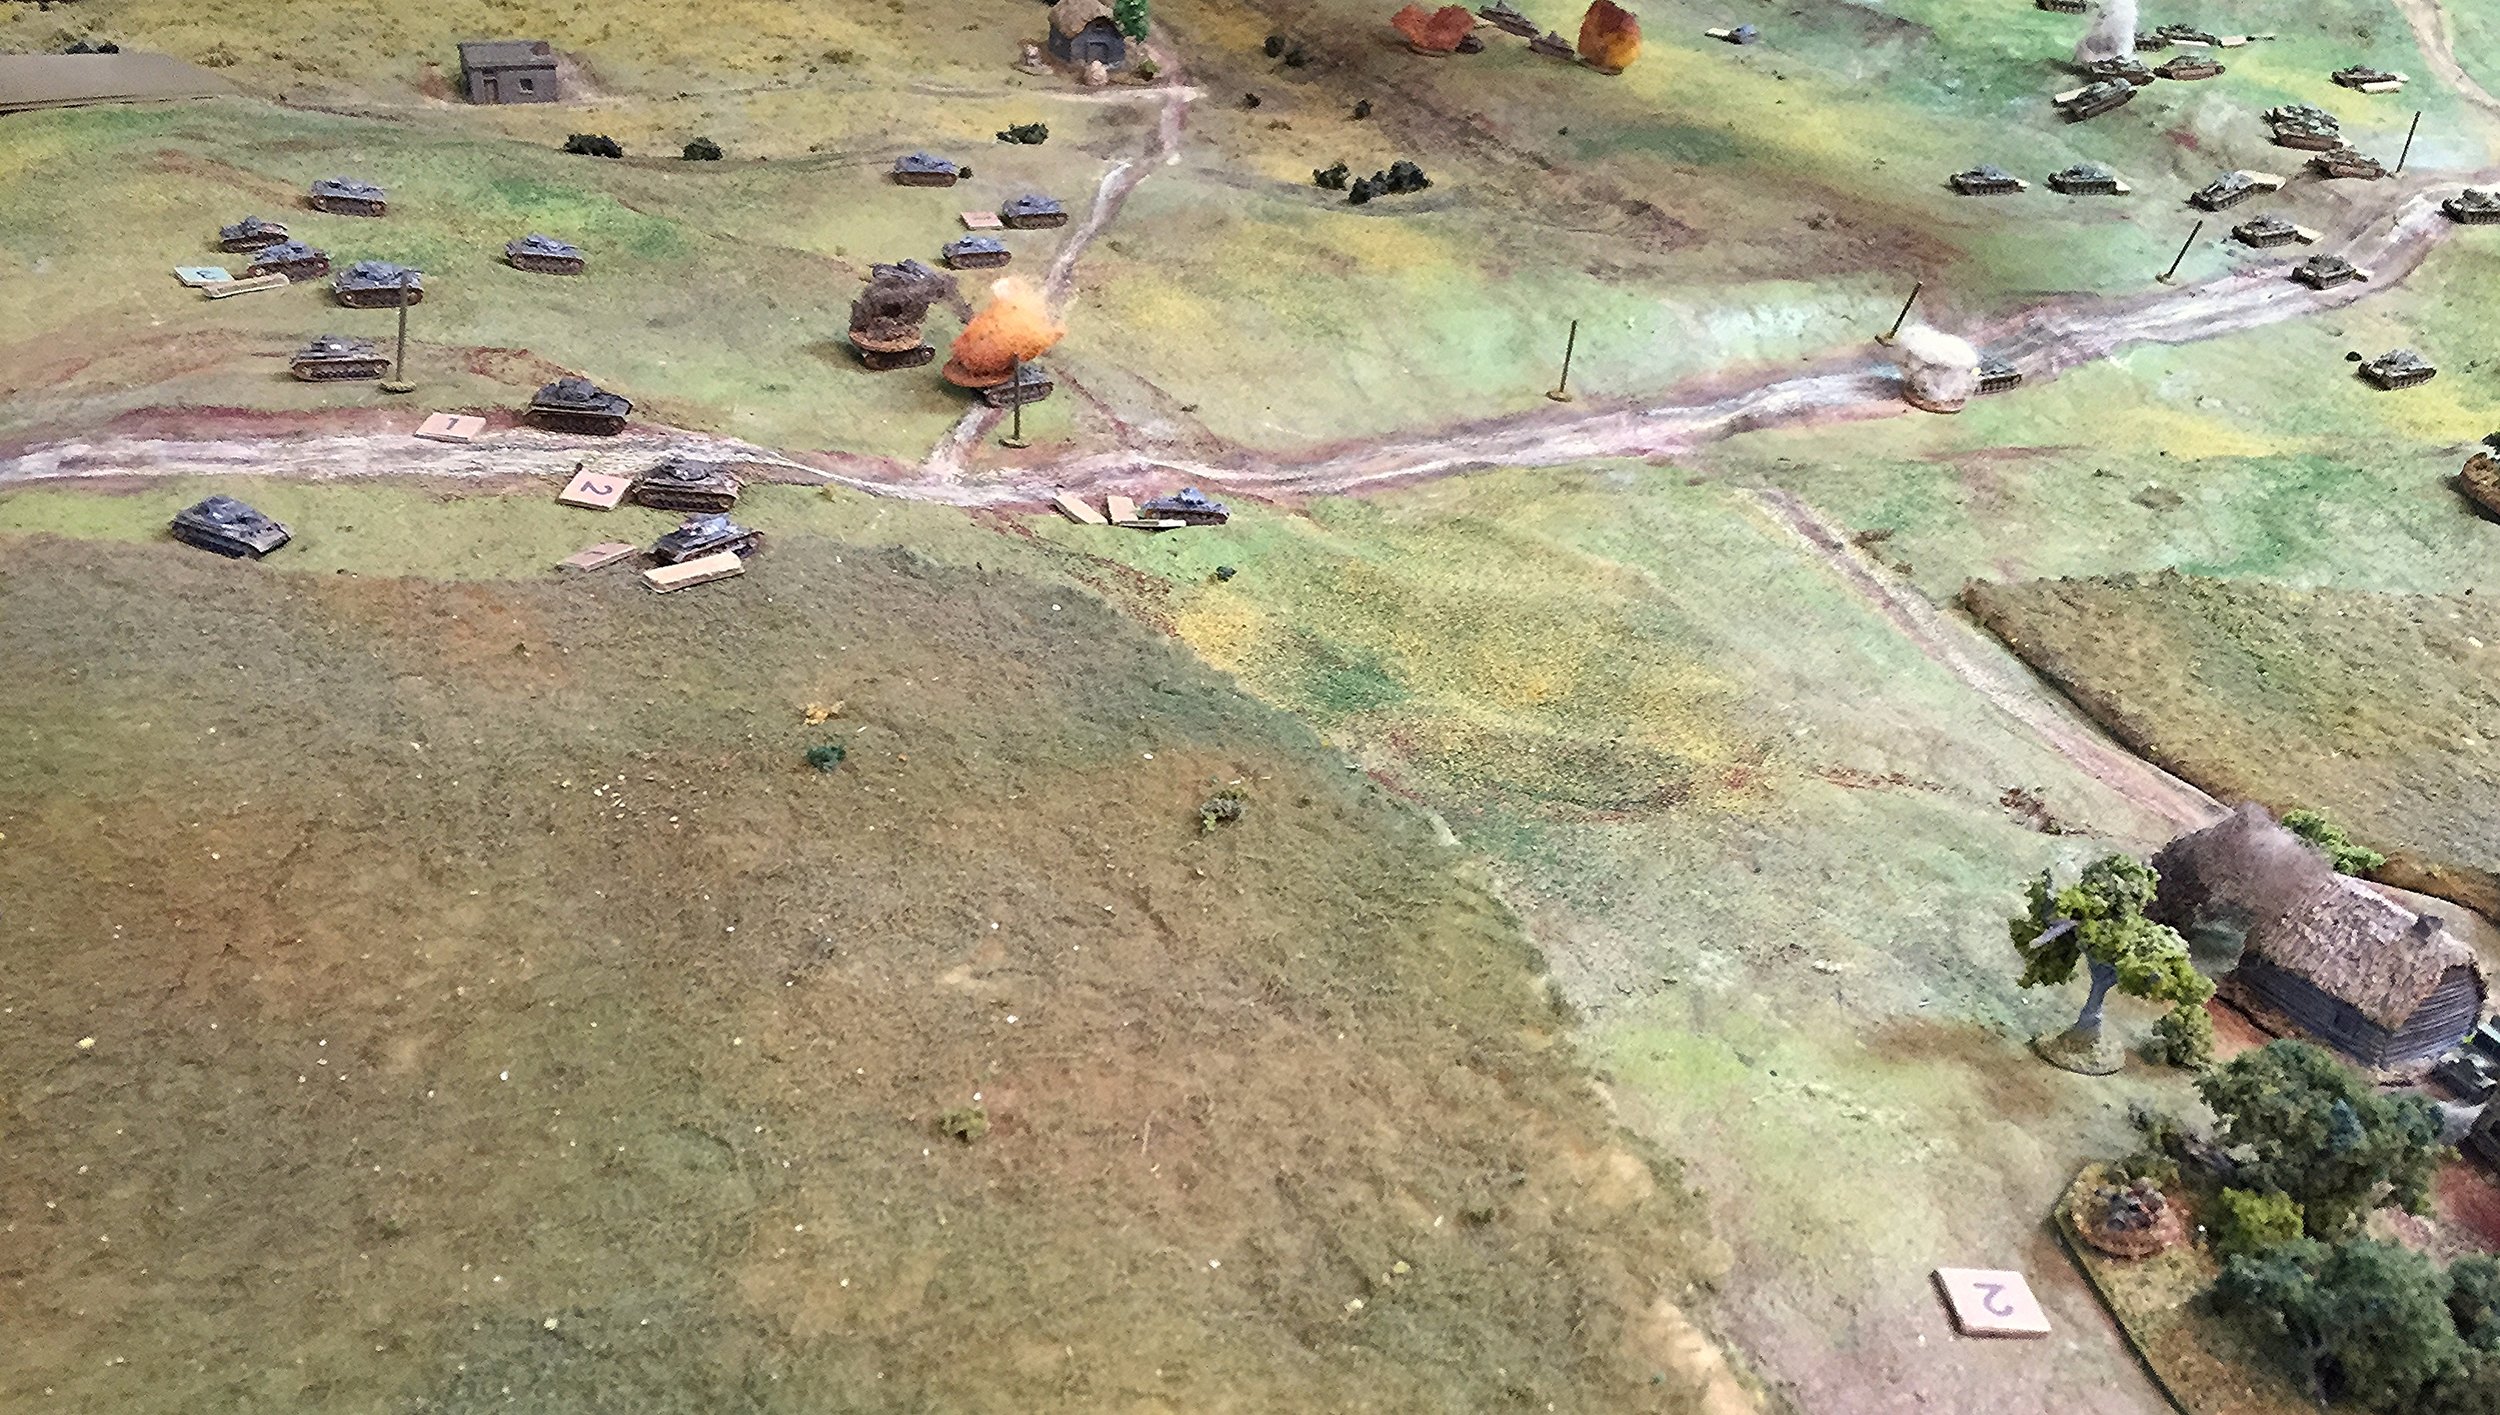
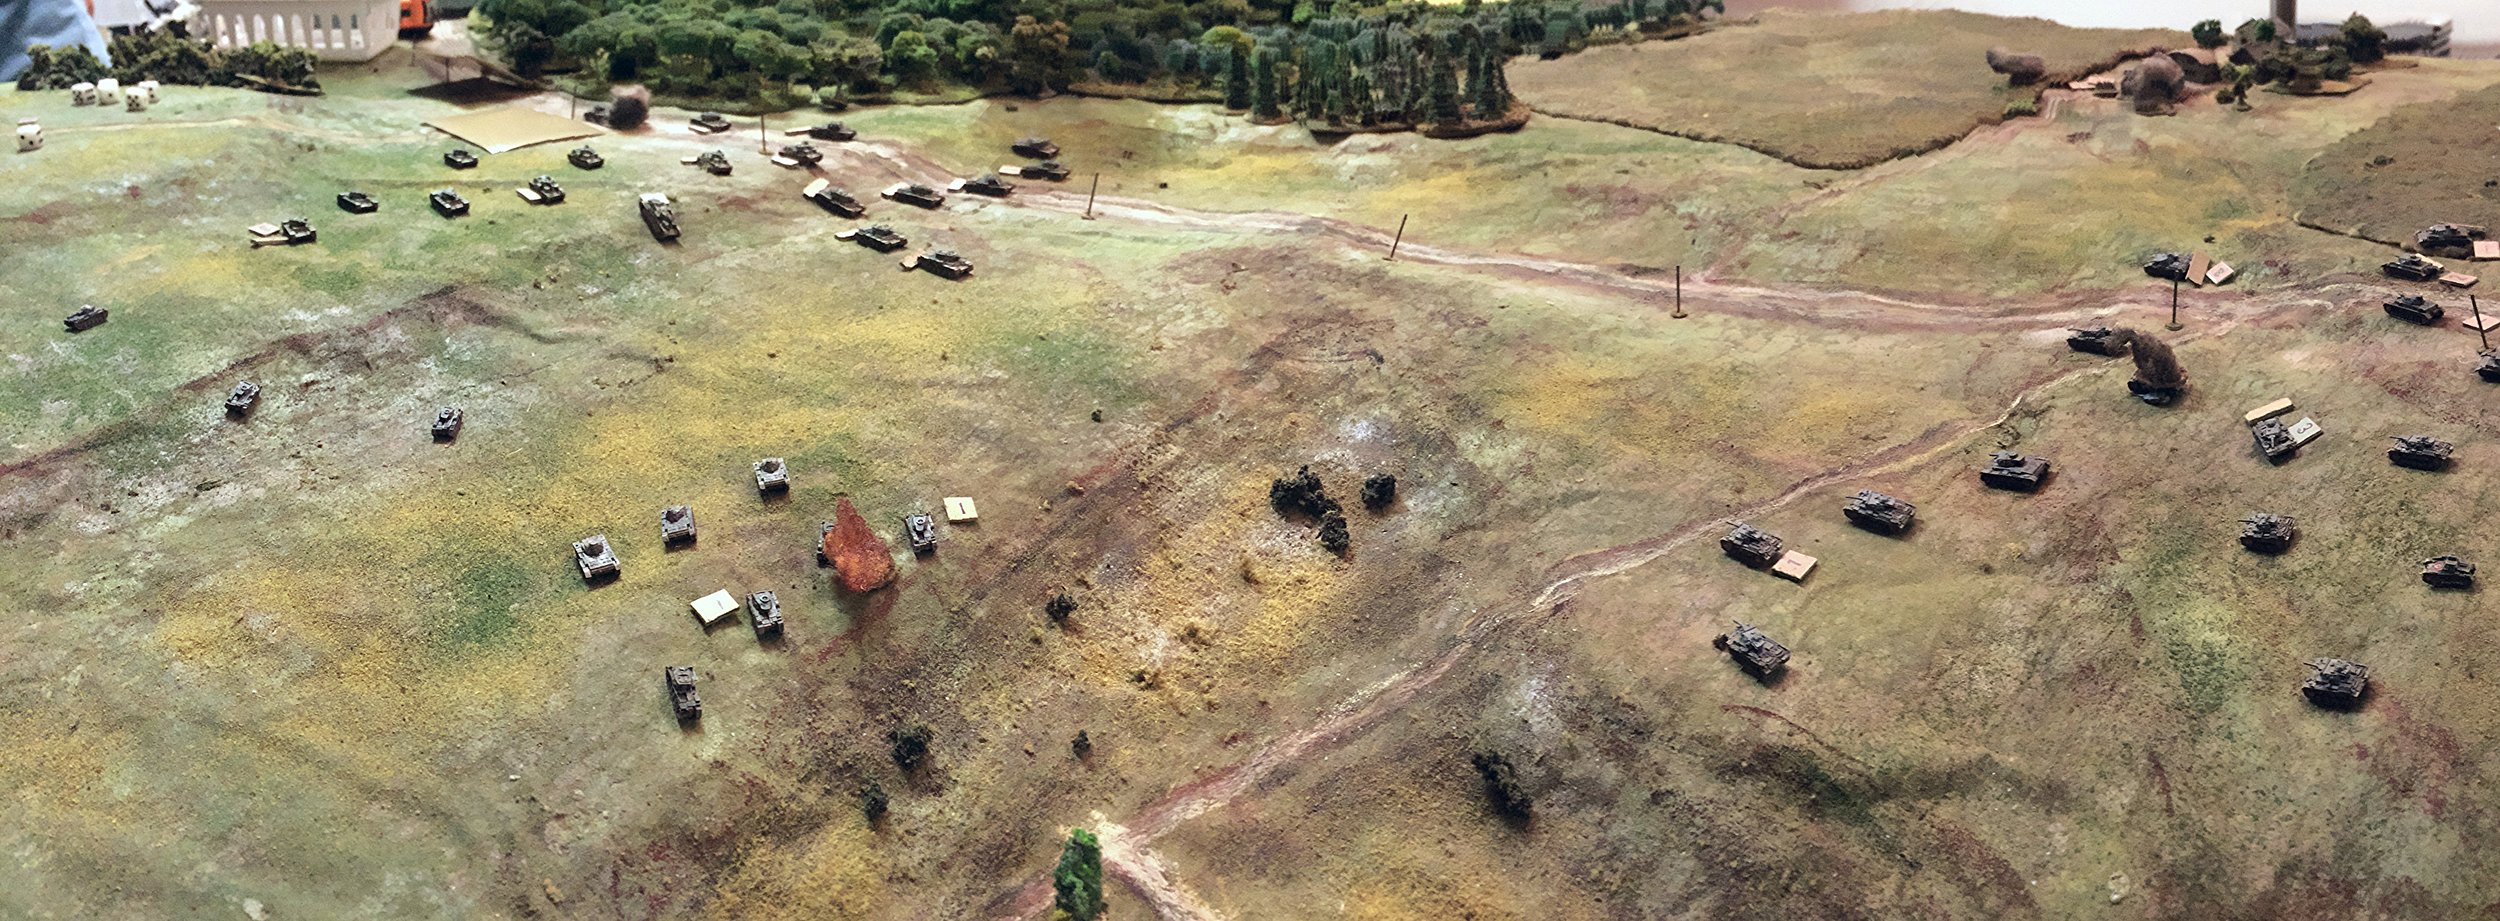
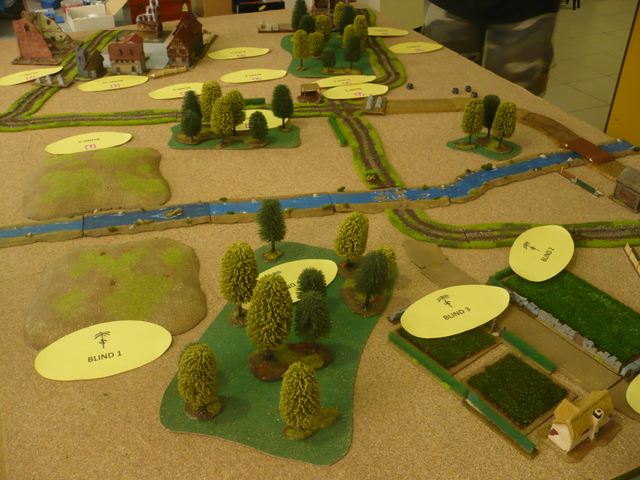
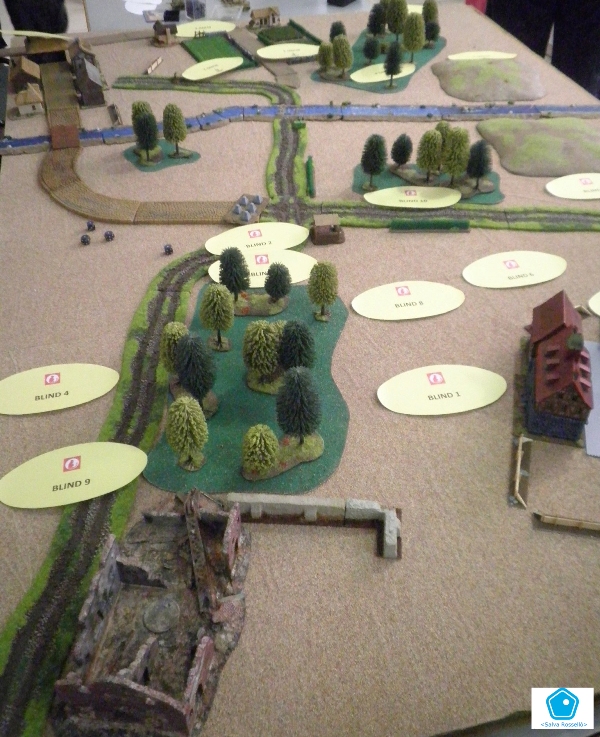
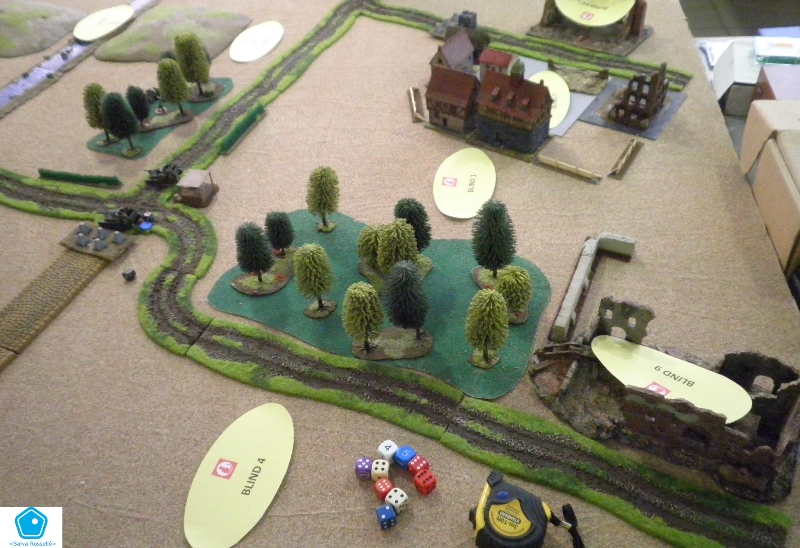
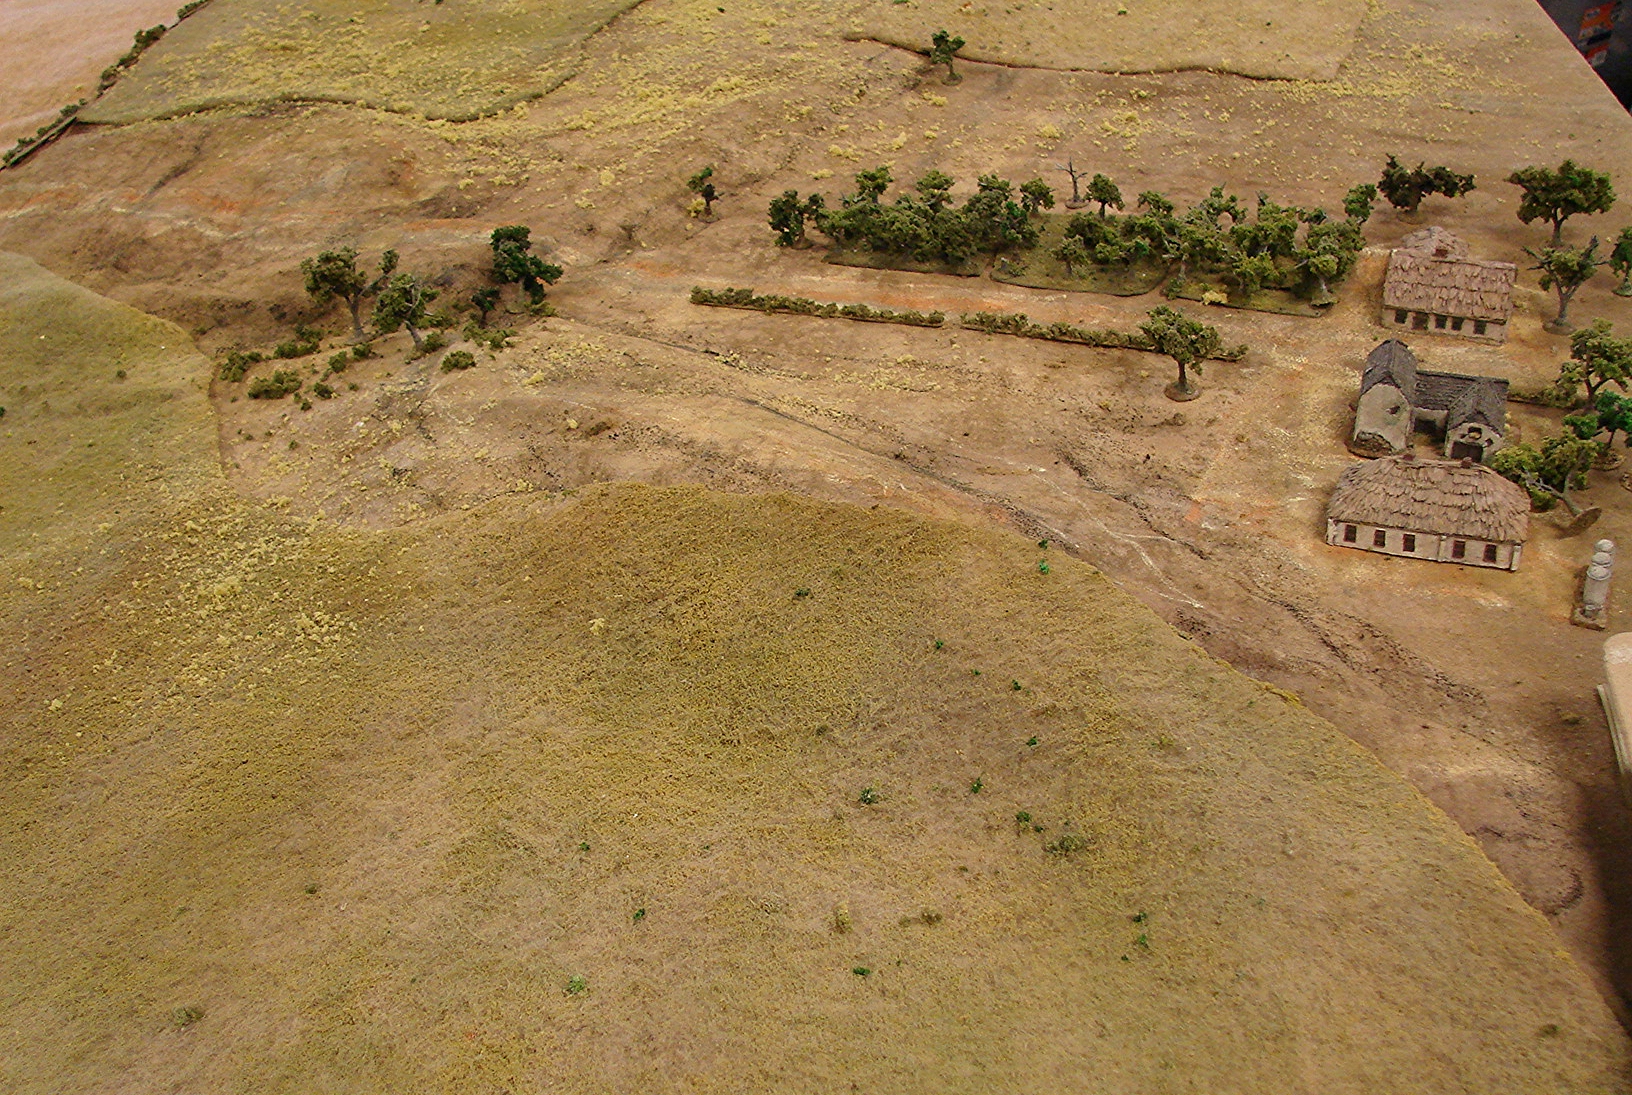
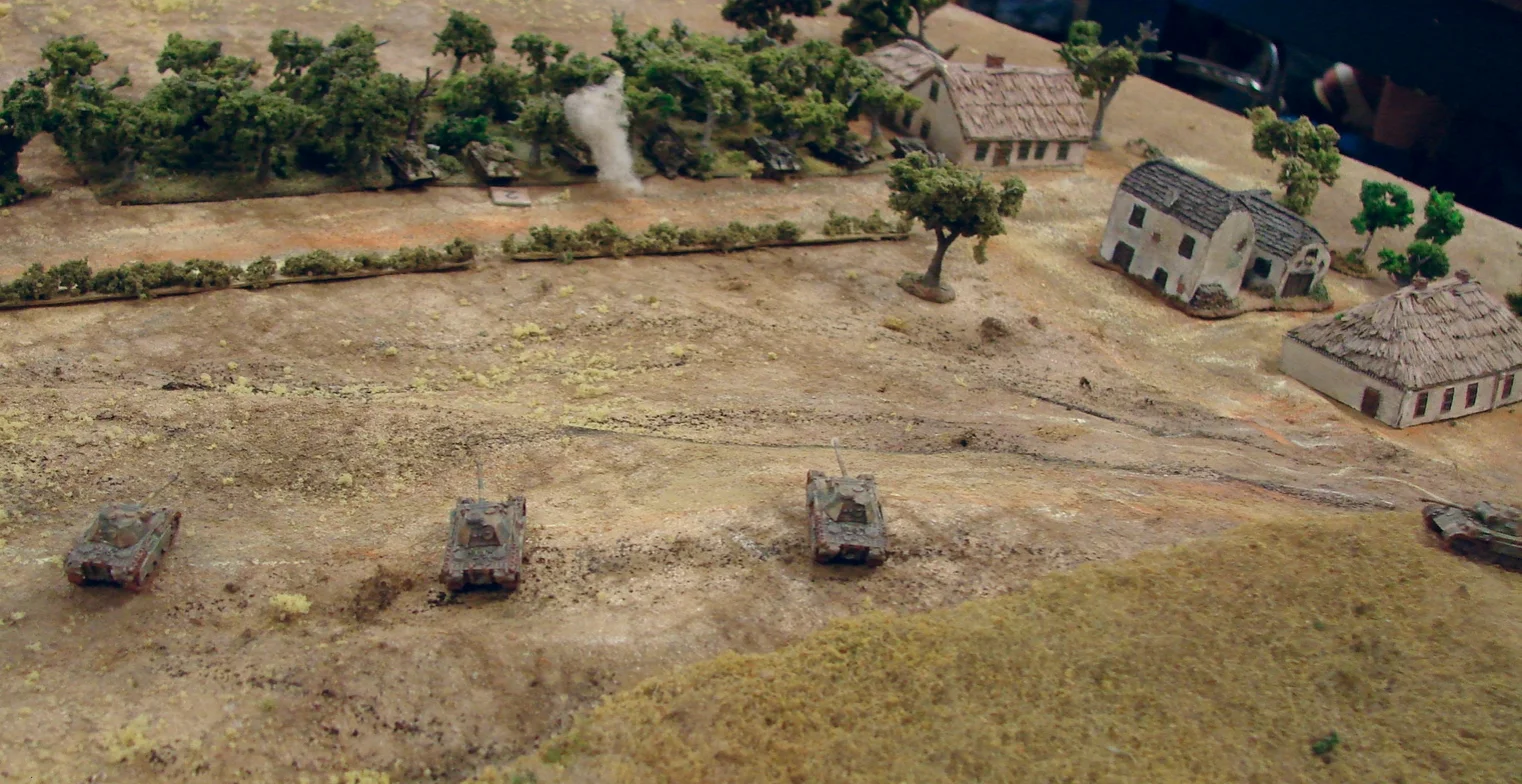
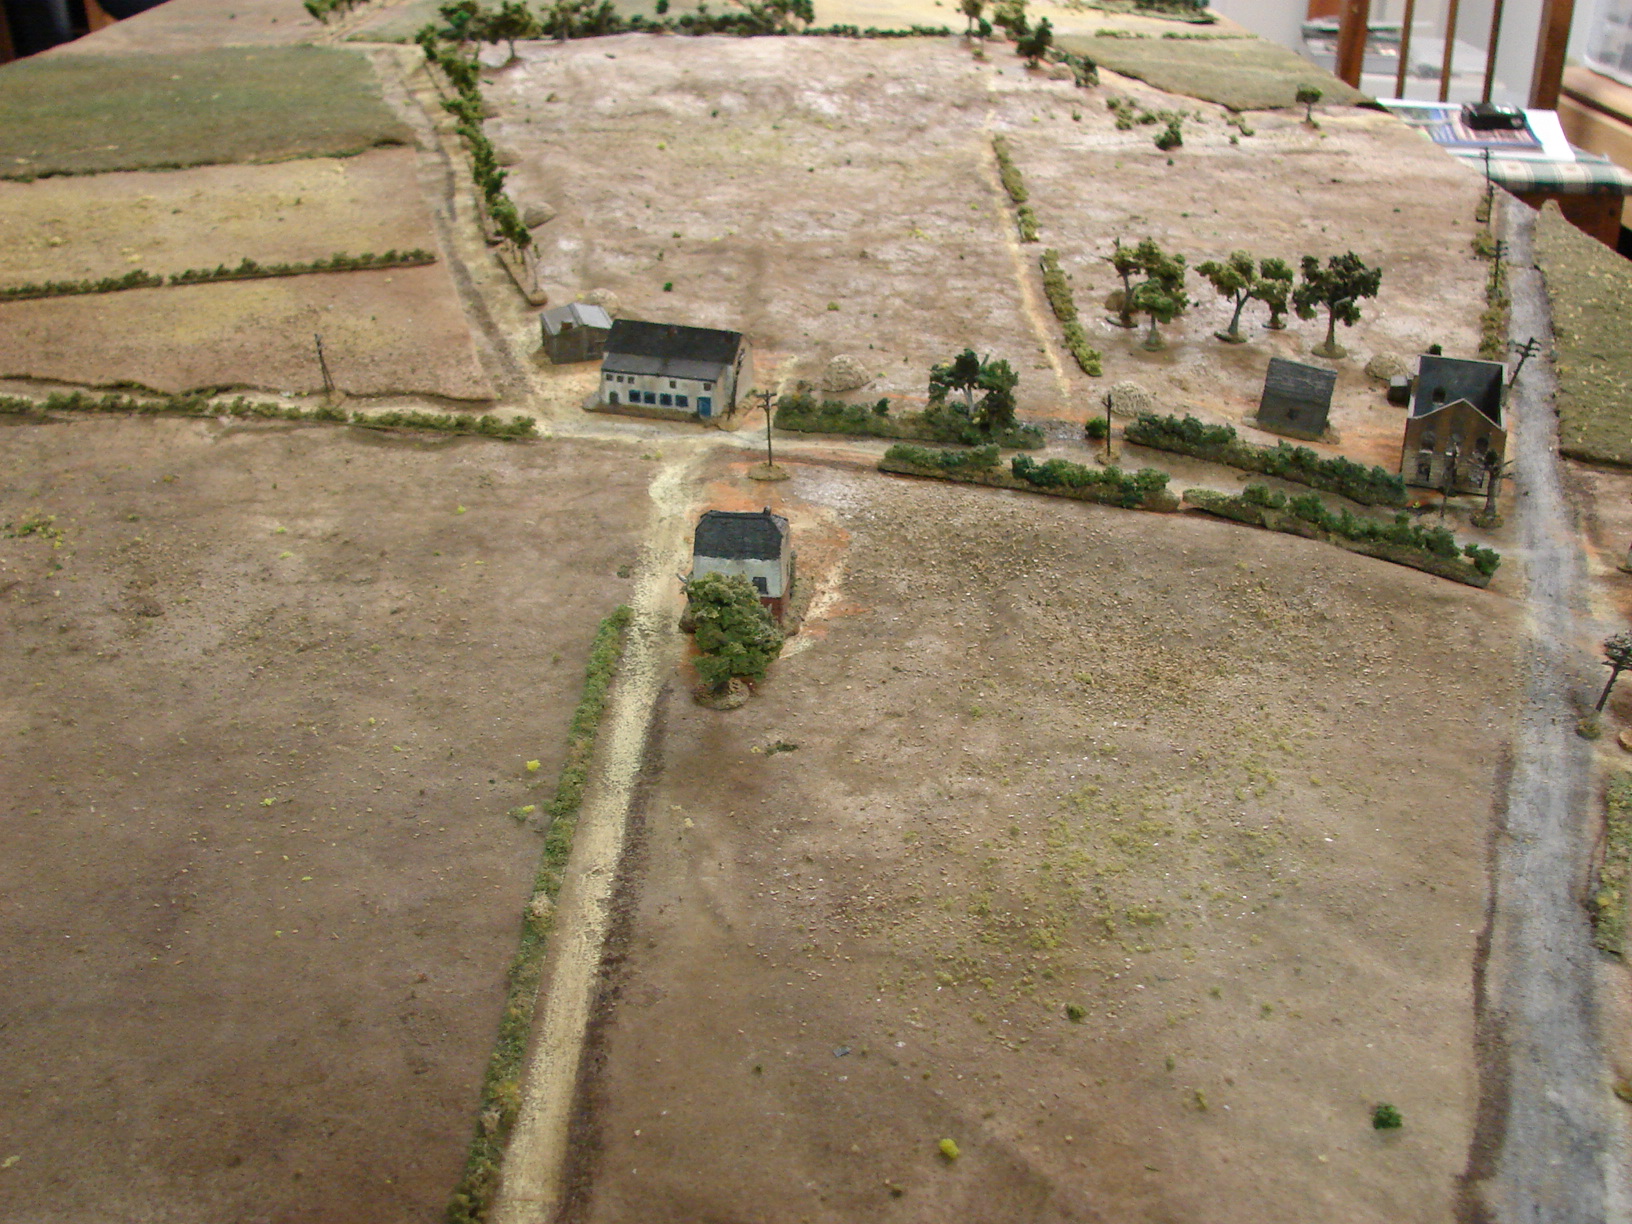
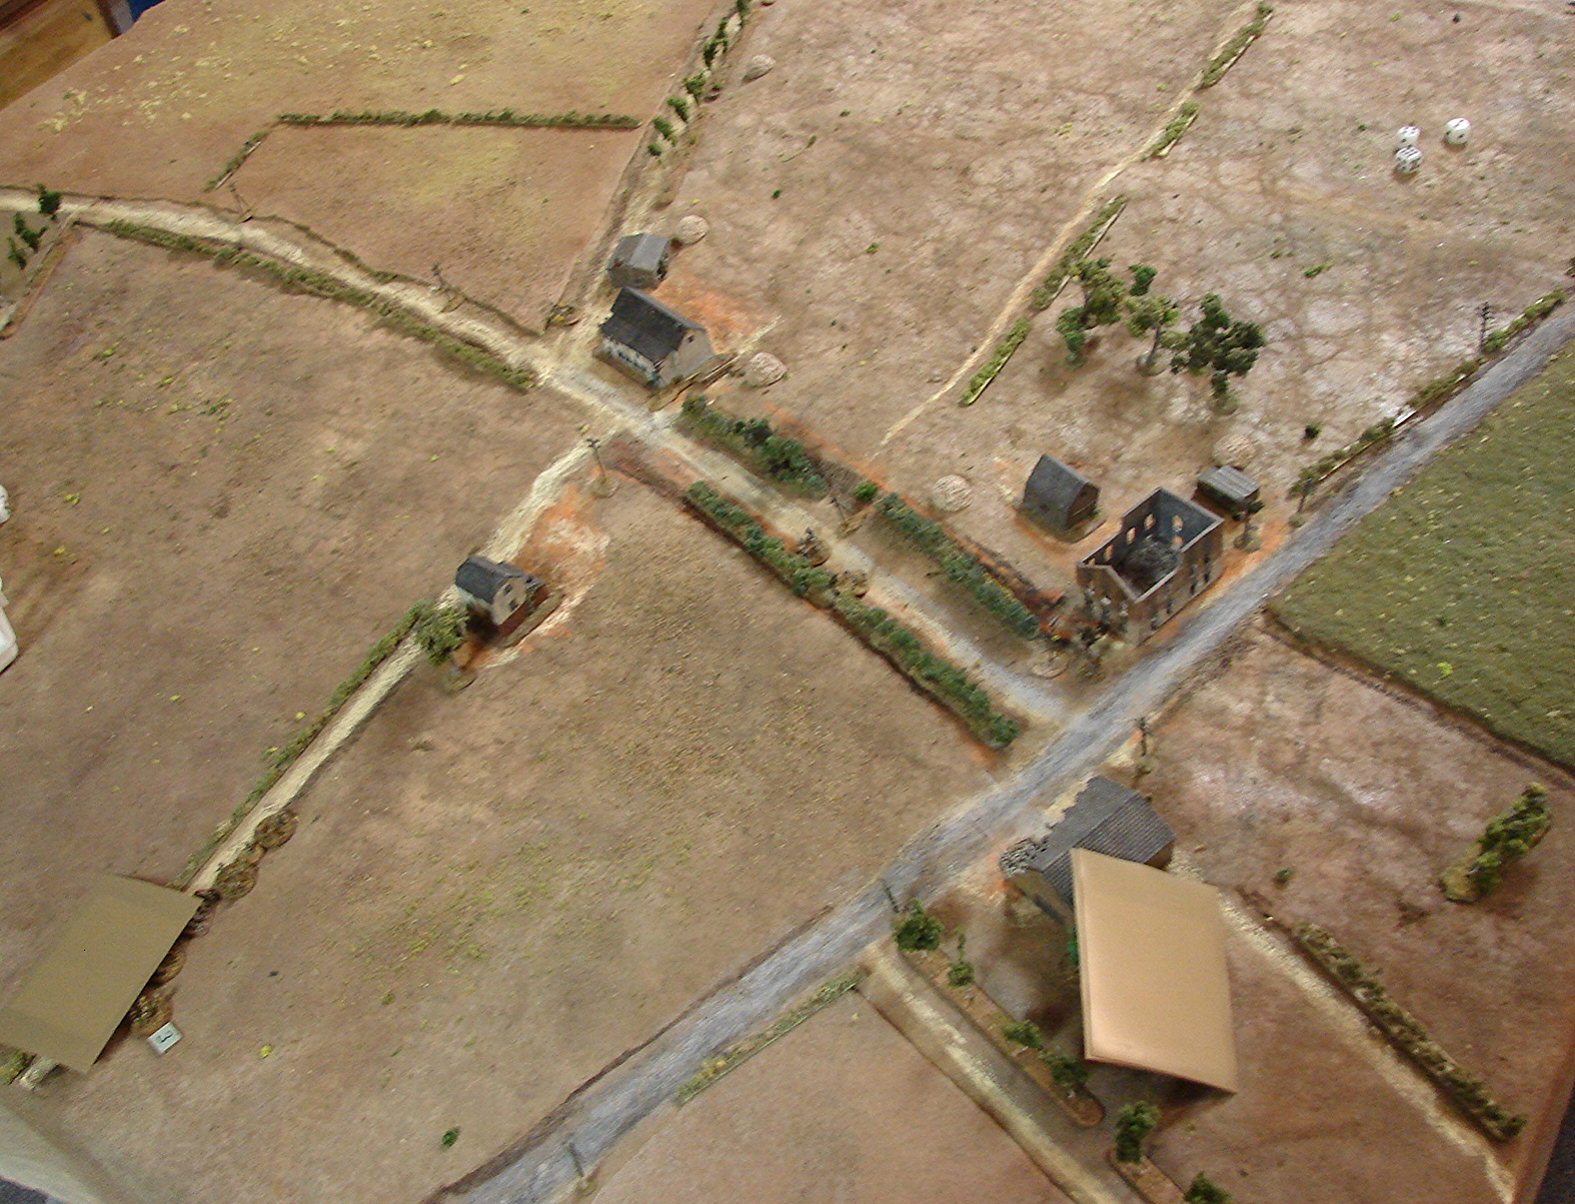
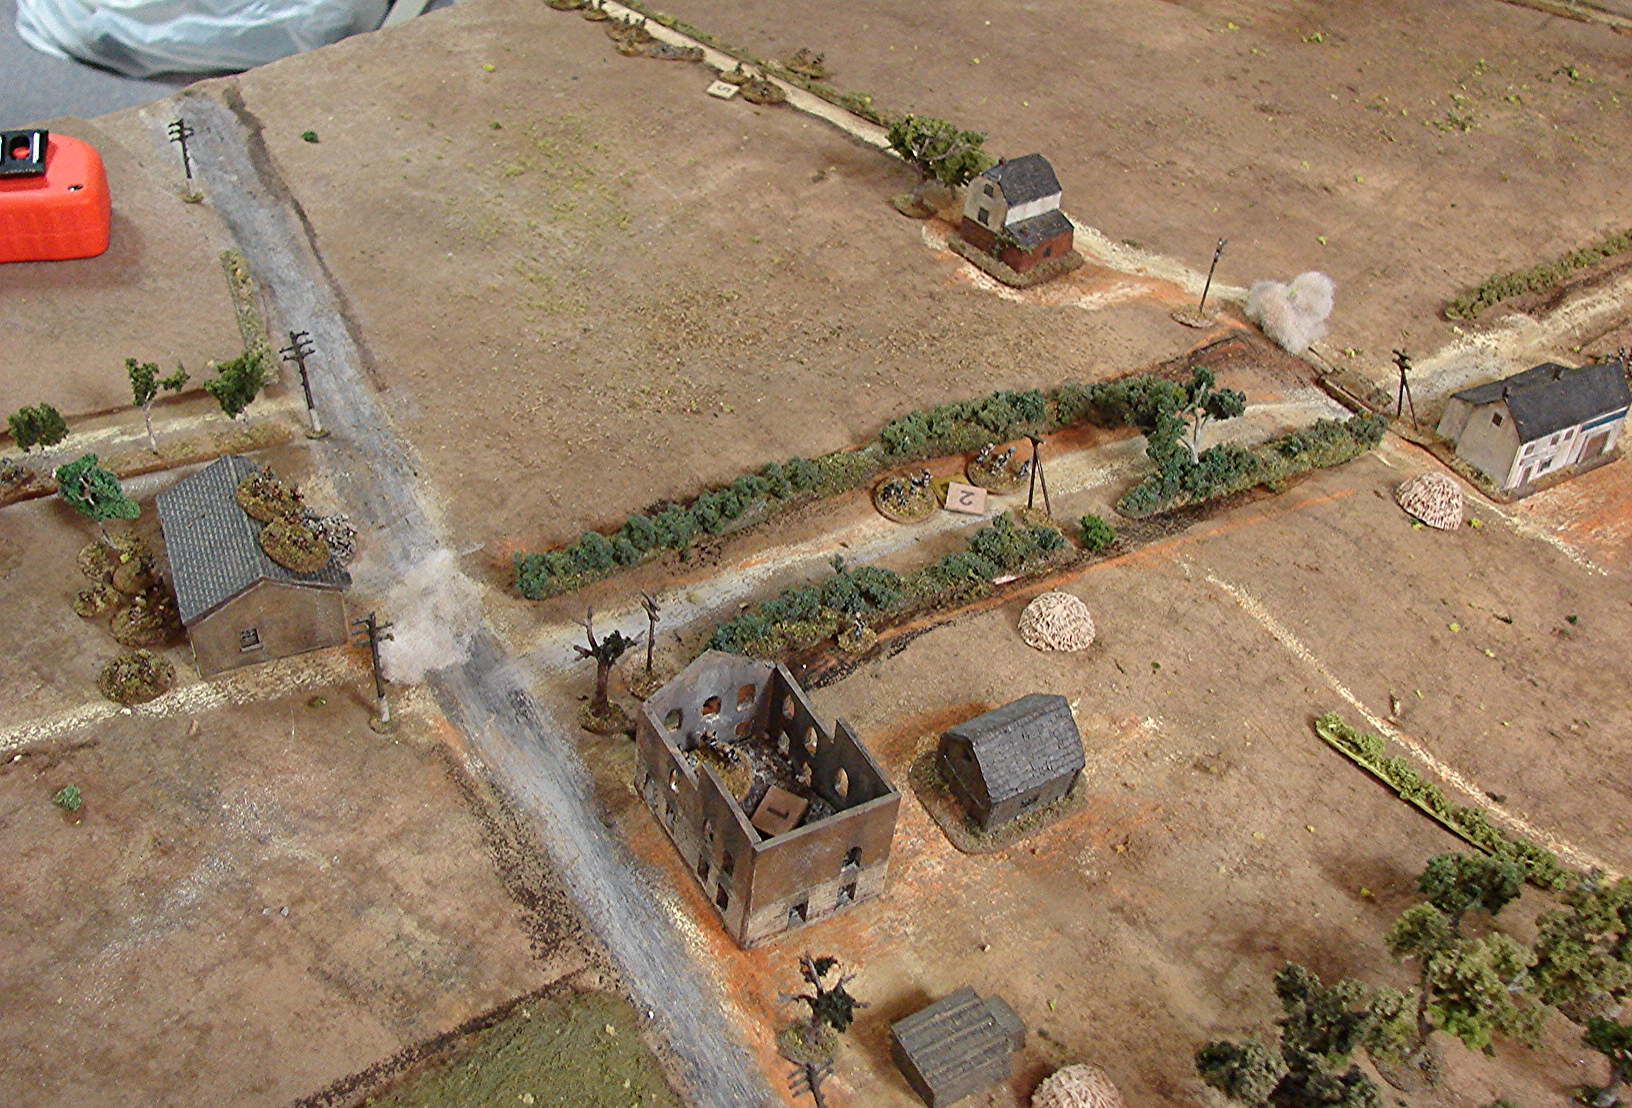
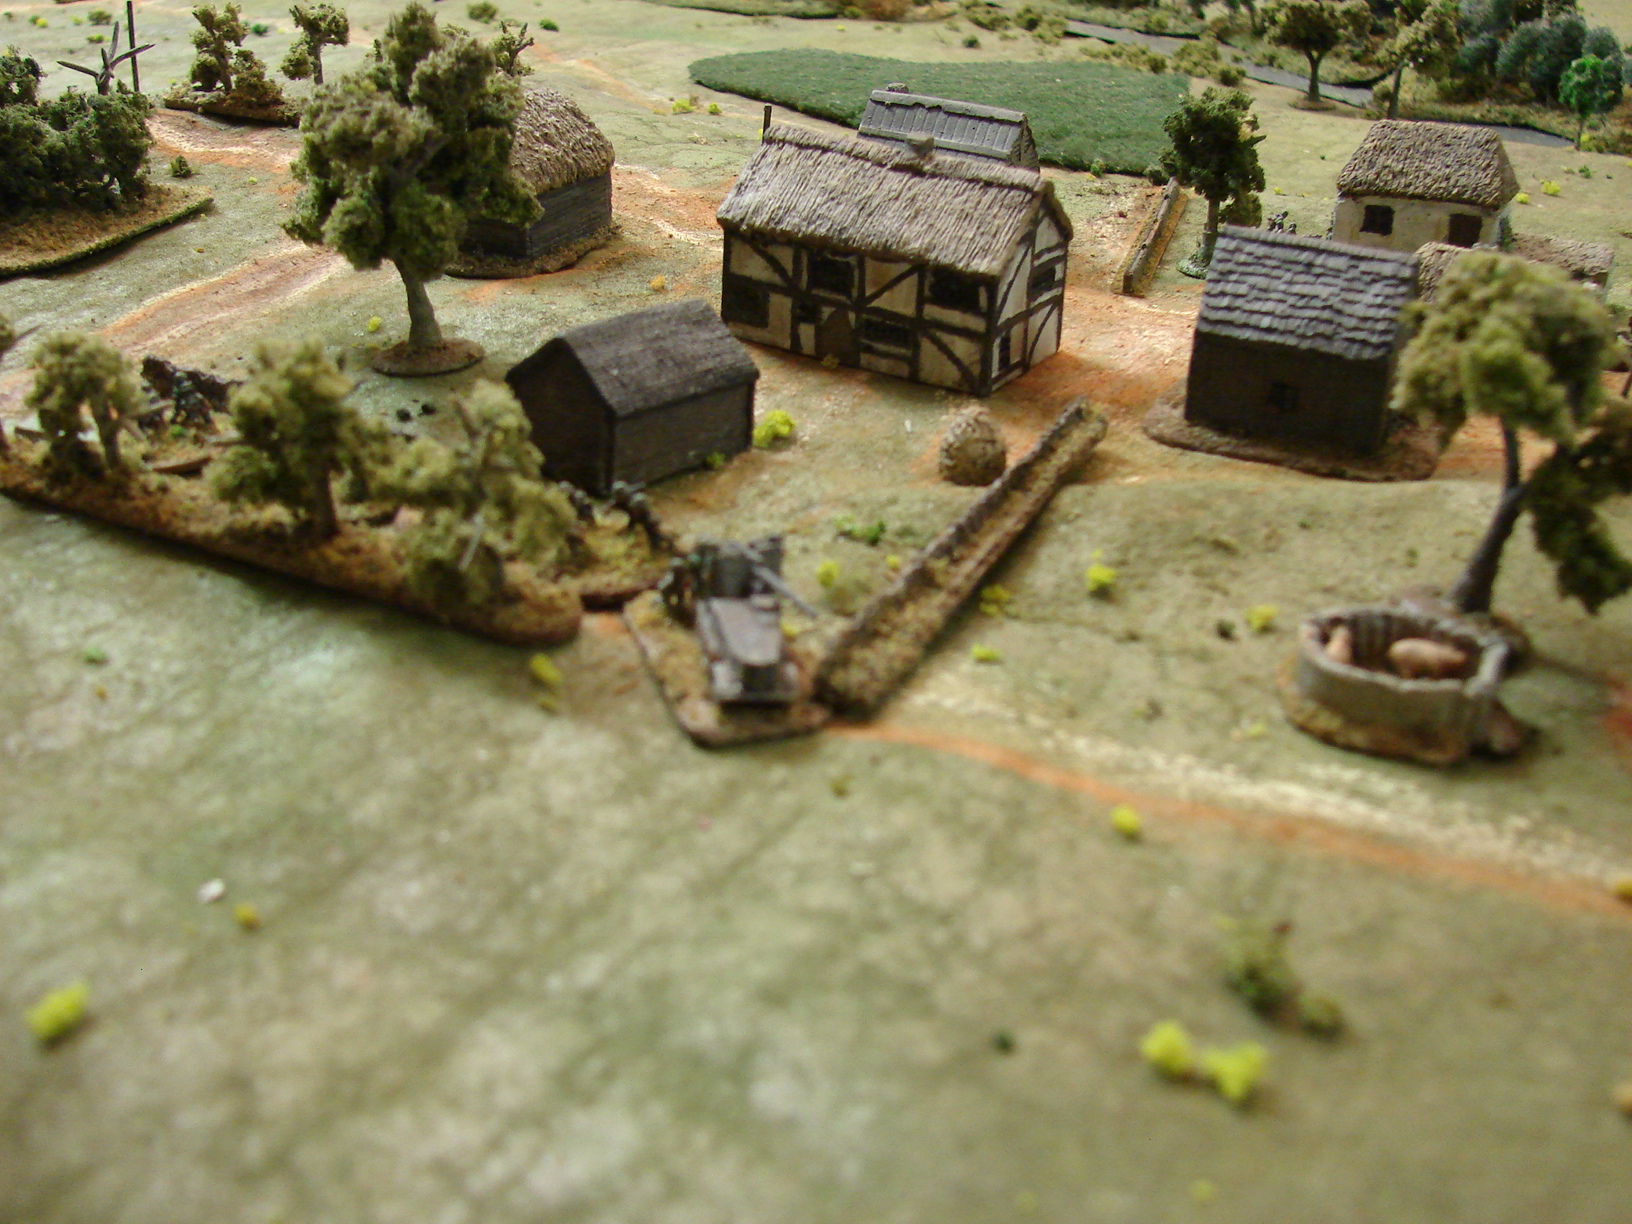
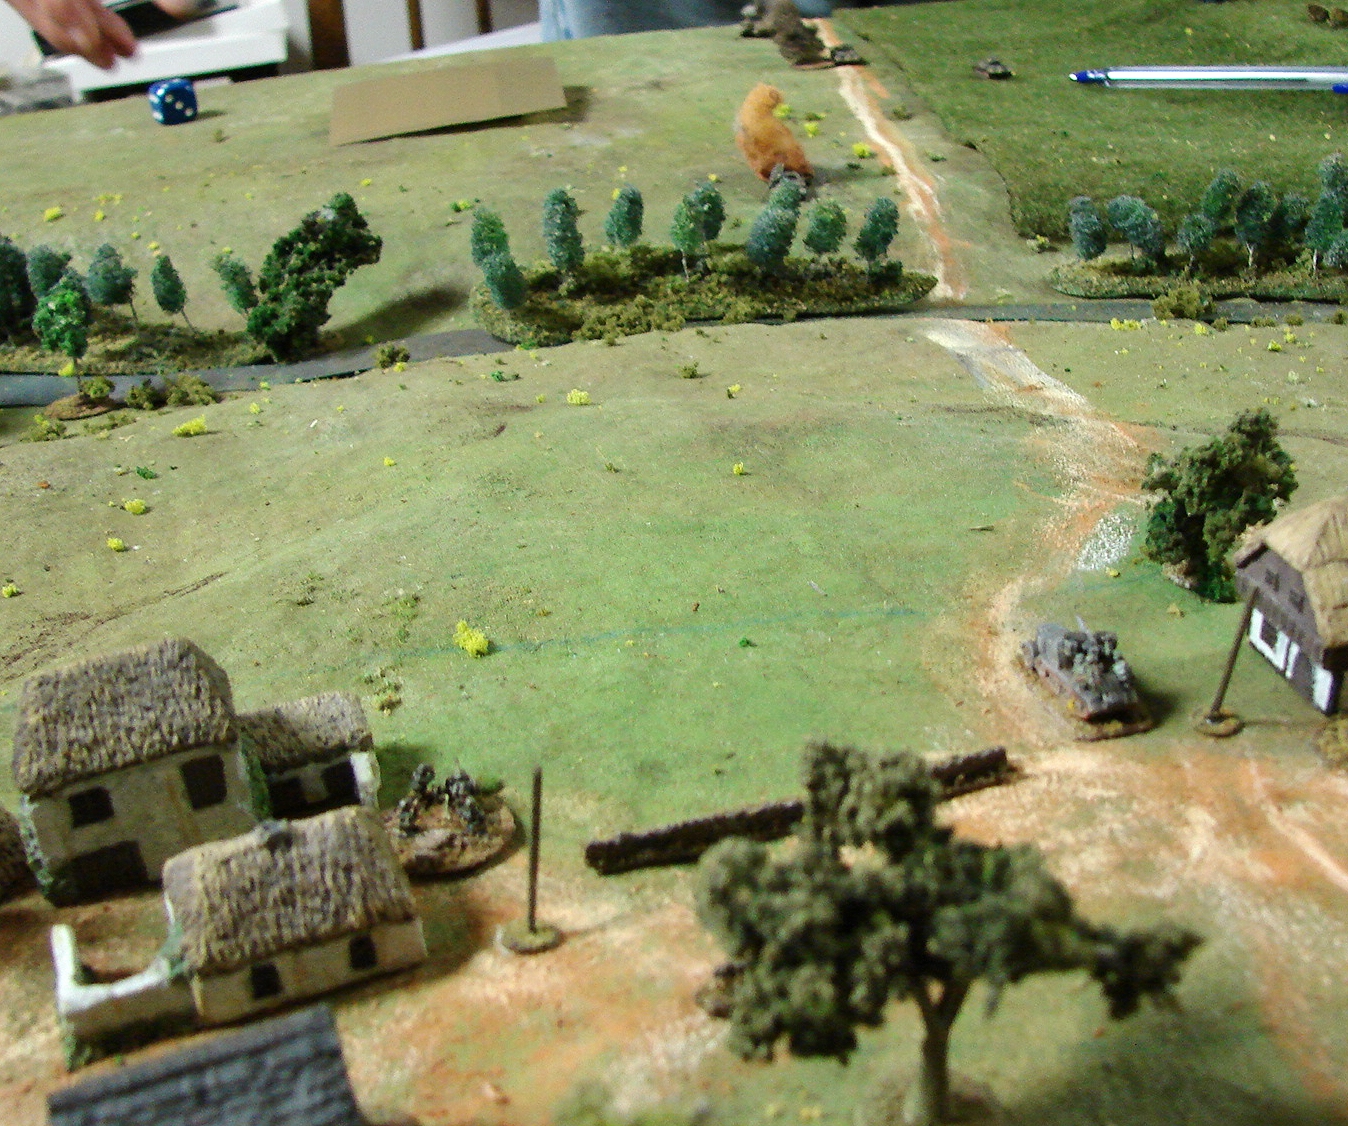
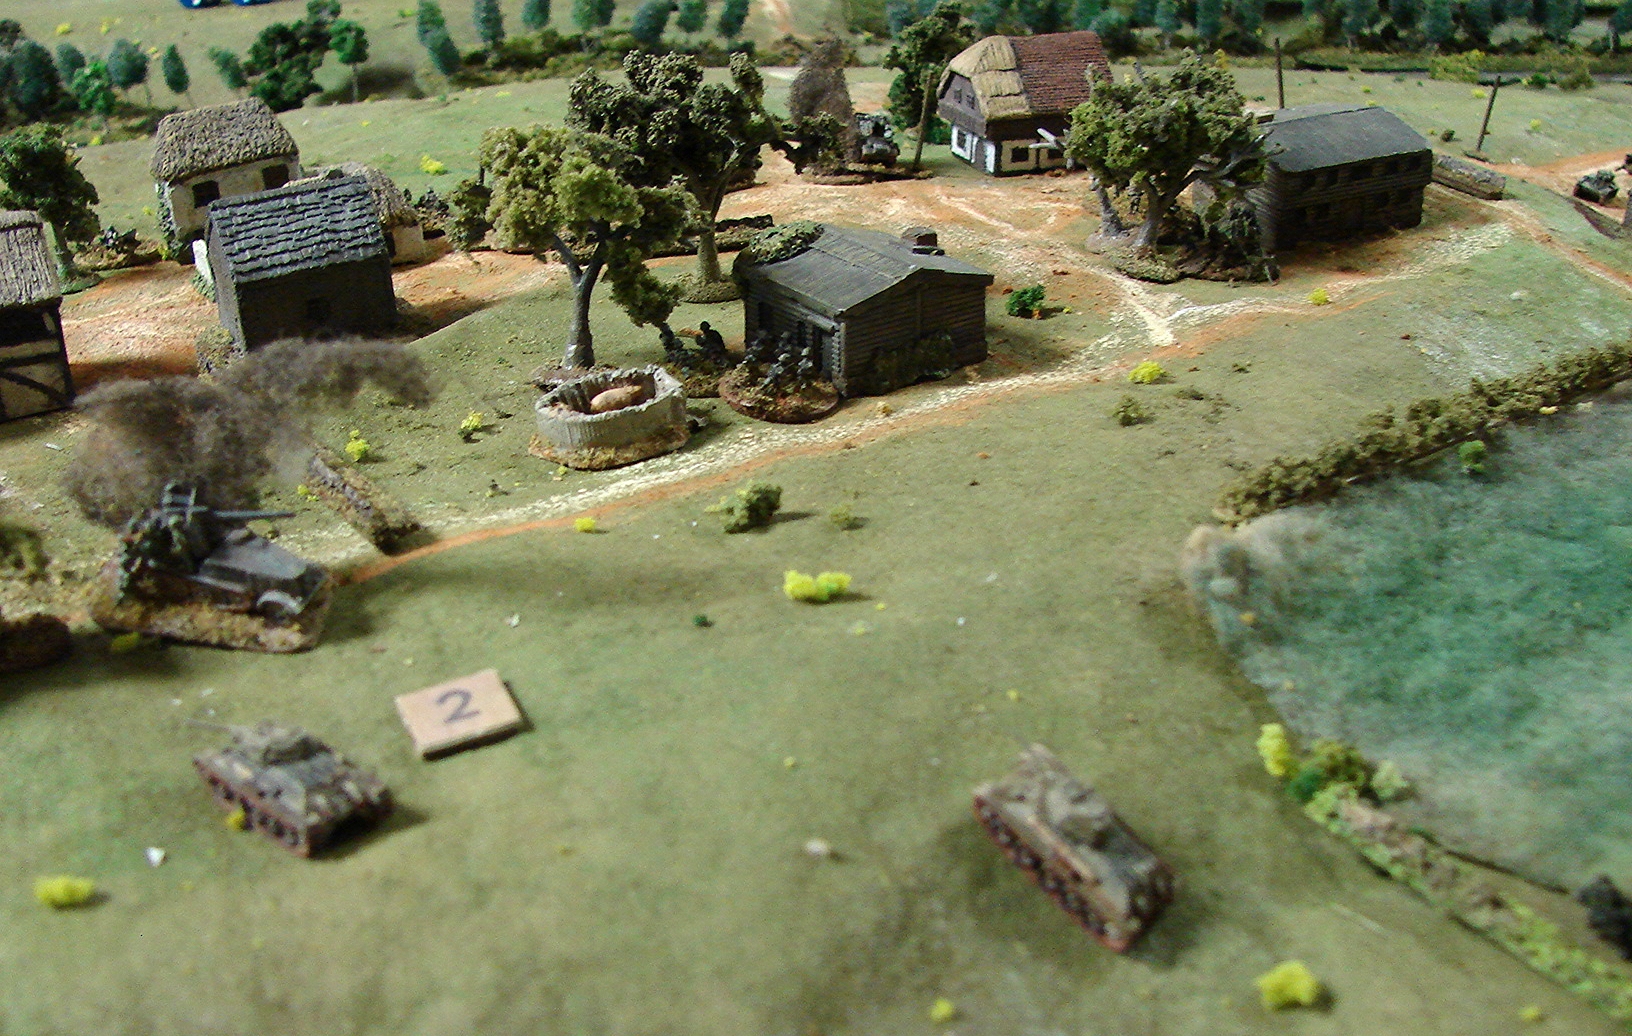
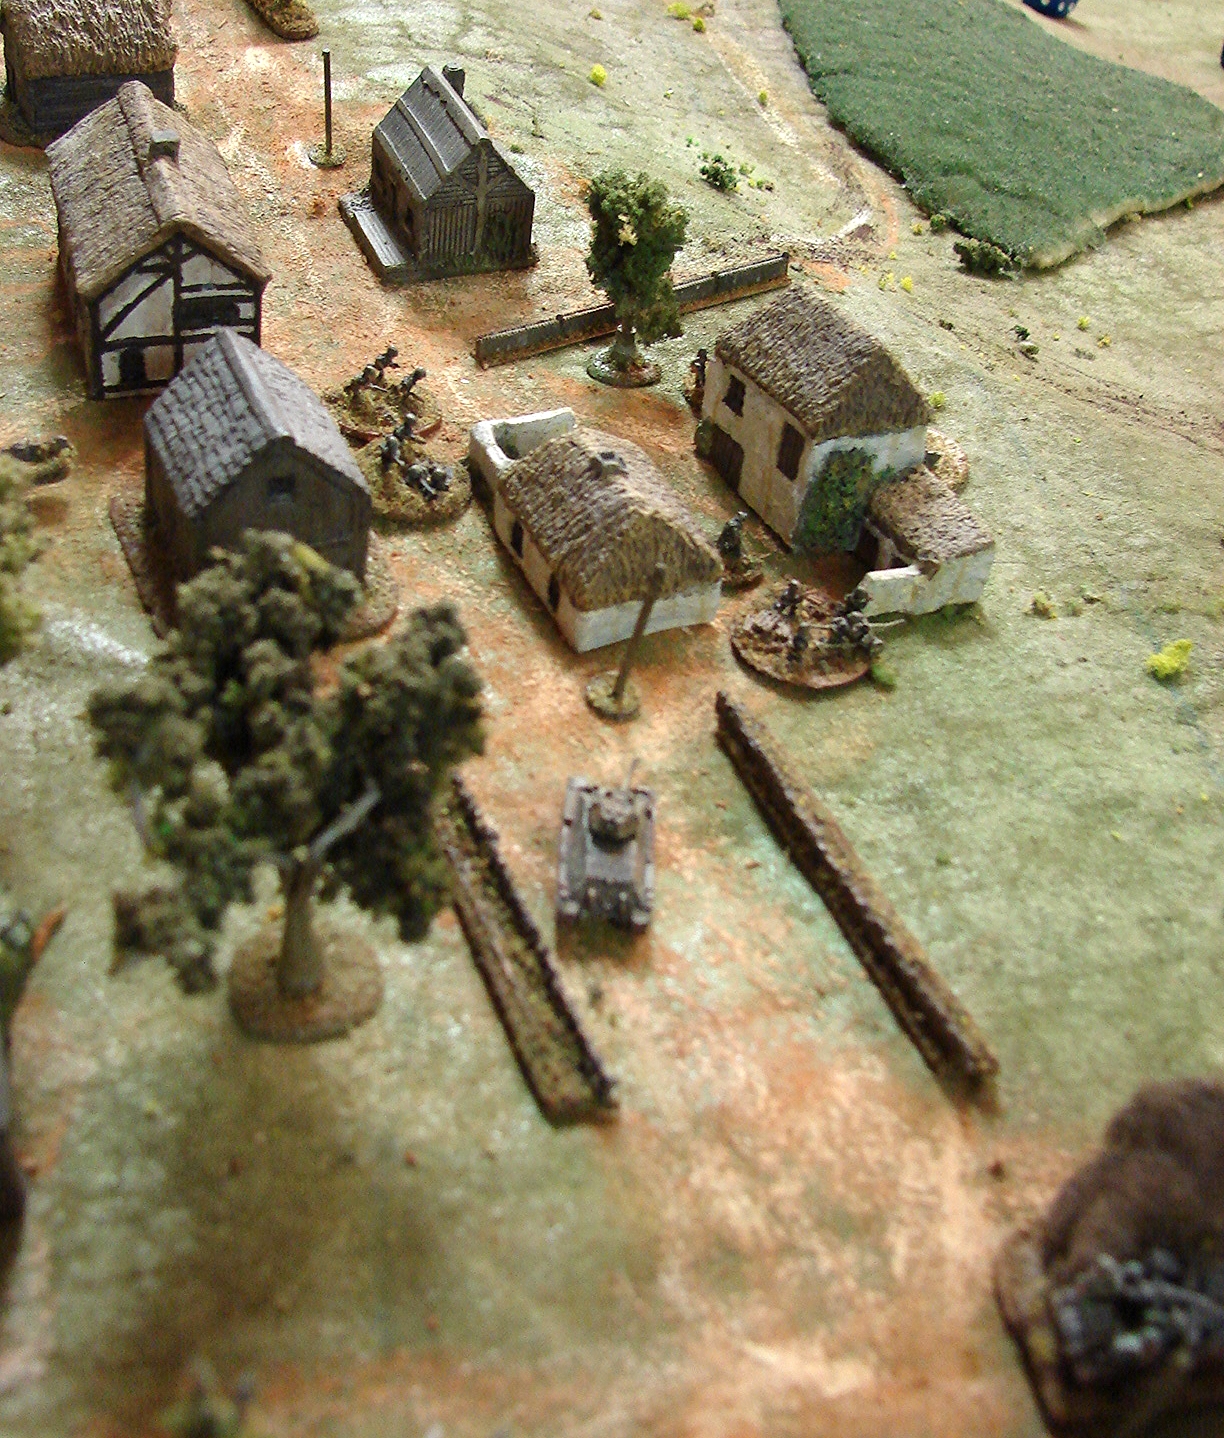
So, check out the table to your right. North to the top, the village of Santa Magdalena nestling under the church, and the remains of the village of Santa Maria to the southeast, having undergone a pretty heavy bombardment from the Allies in an abortive attempt to take it the day before.

It's 26th August 1944, and A Company, the Hereward Fusileers (commanded by Carl, aided by Pippa, Ash and AndyB), have been tasked with taking both villages from the Germans (Gary, with help from AndyM and Tom) before nightfall. The latter had the classic slightly understrength company (which is a roundabout way of saying "I must paint those last two German sections!").

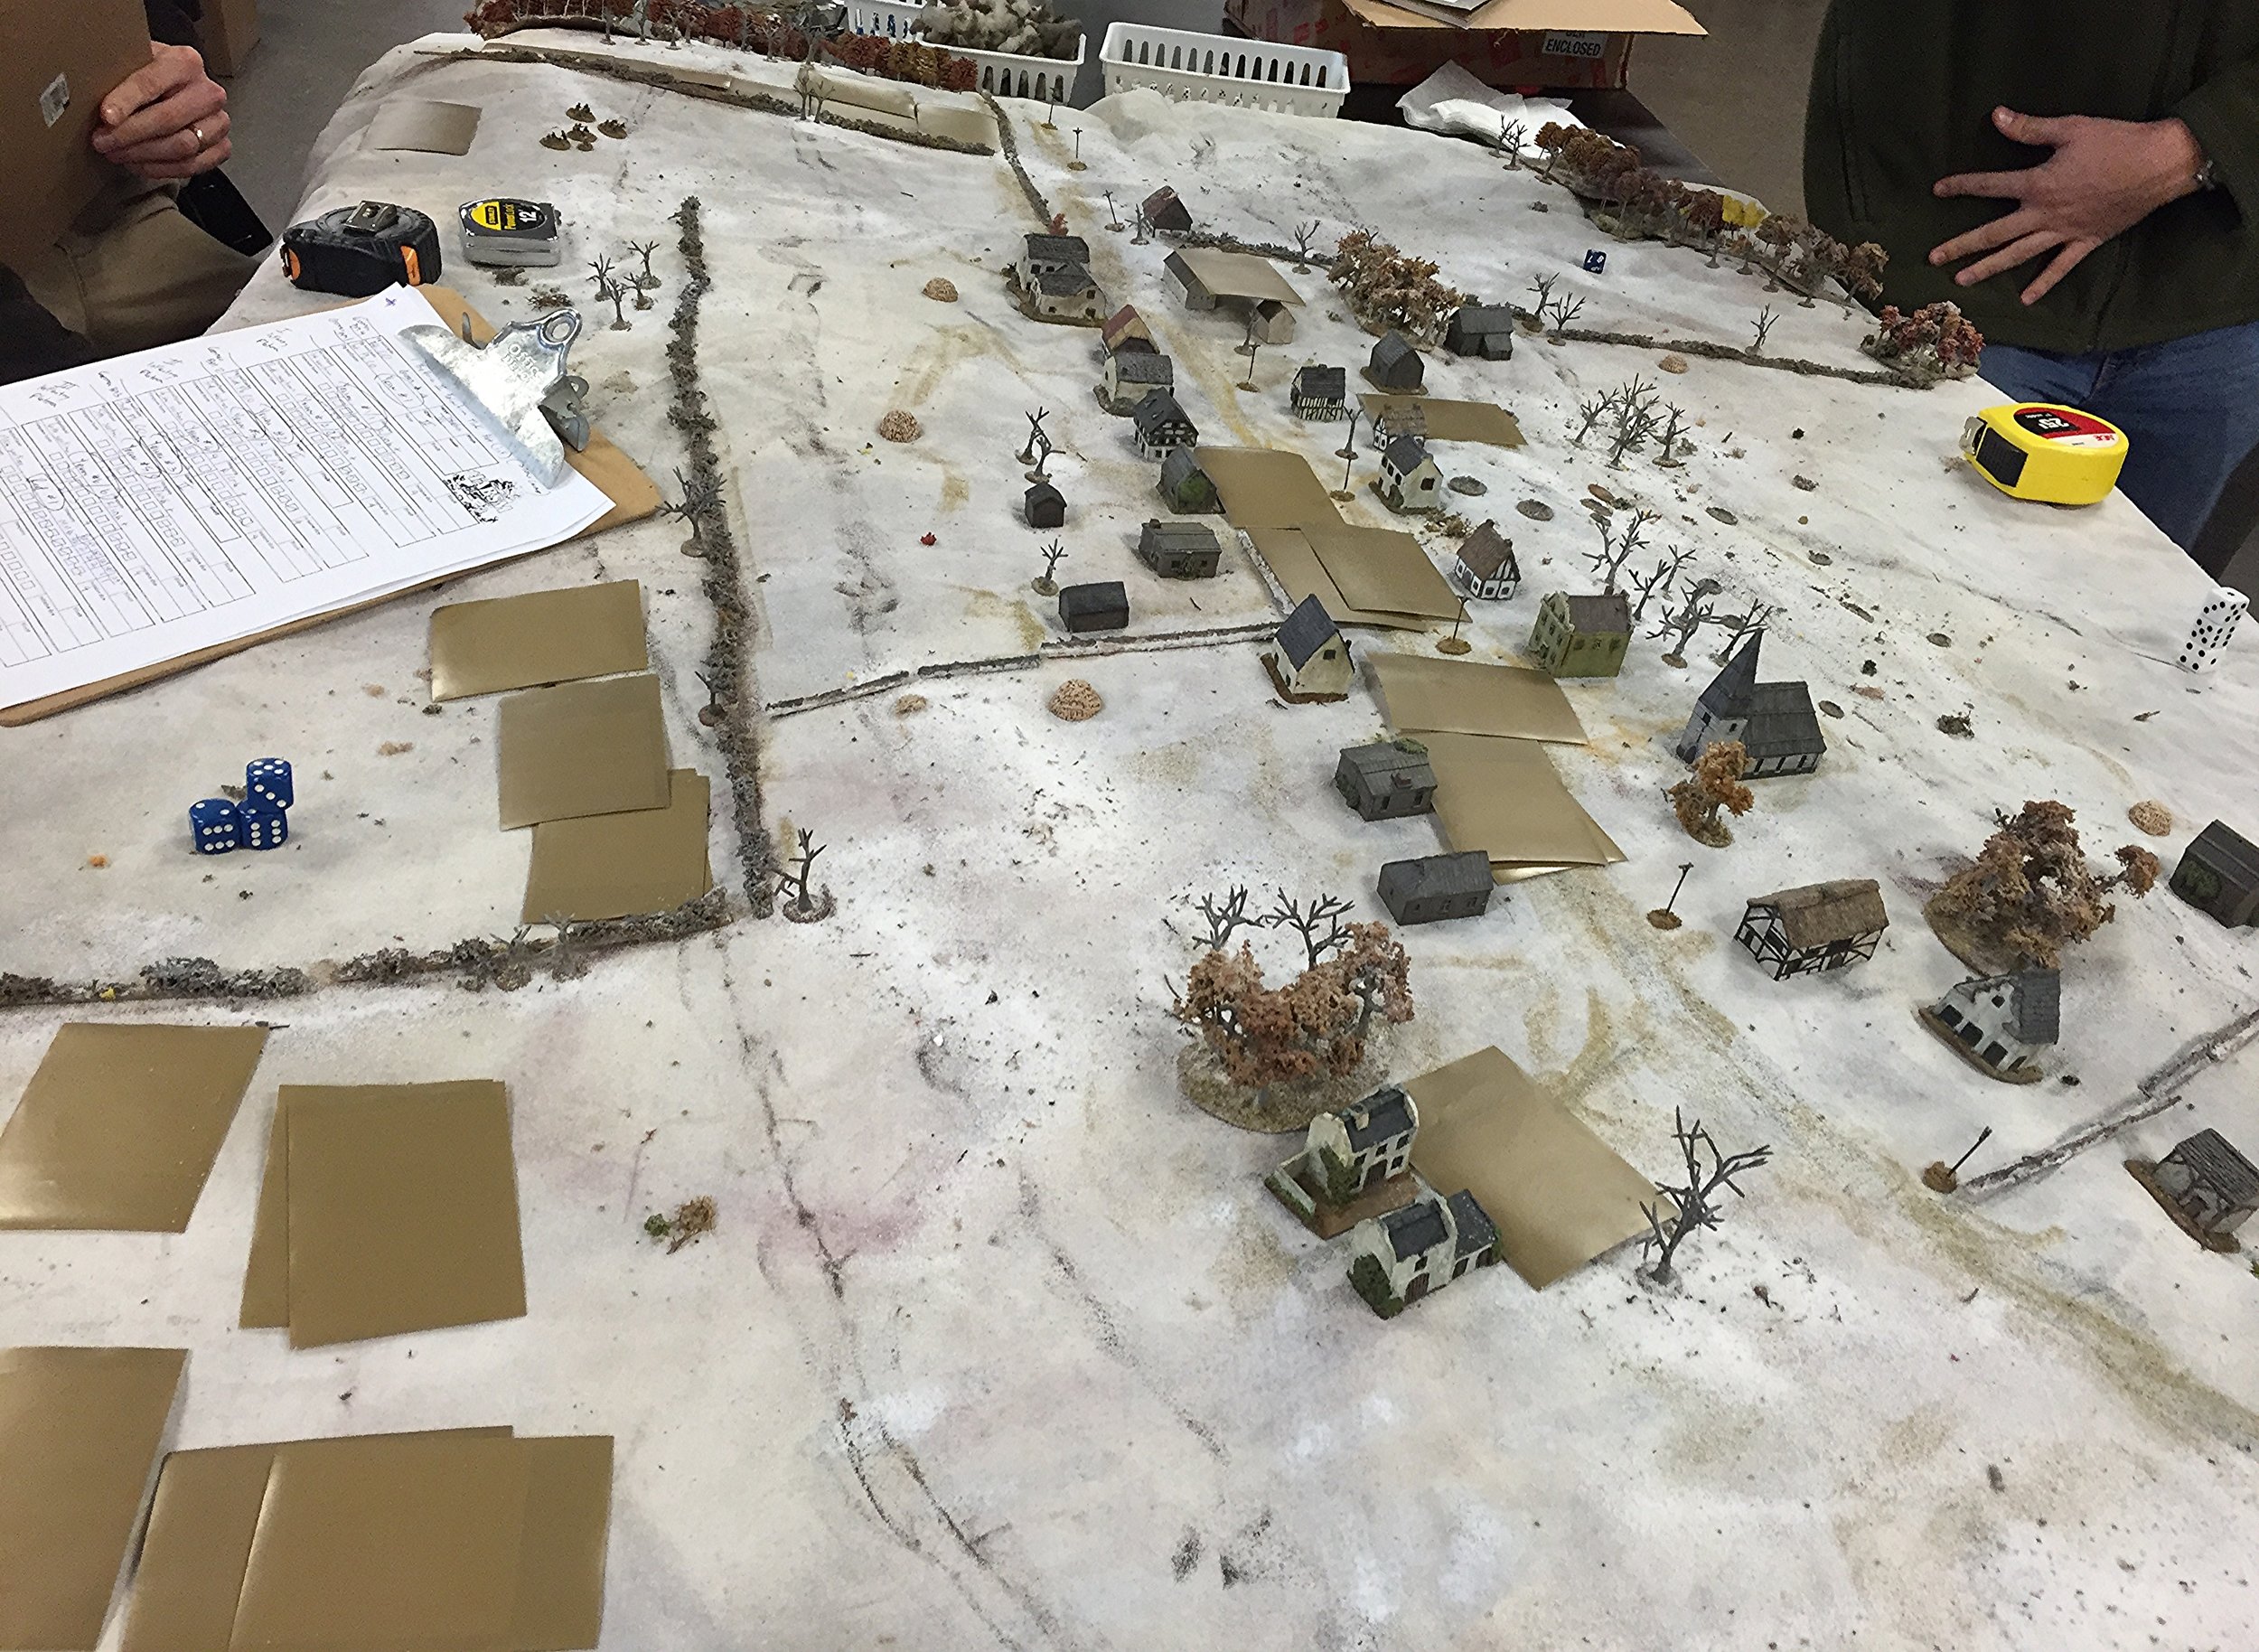
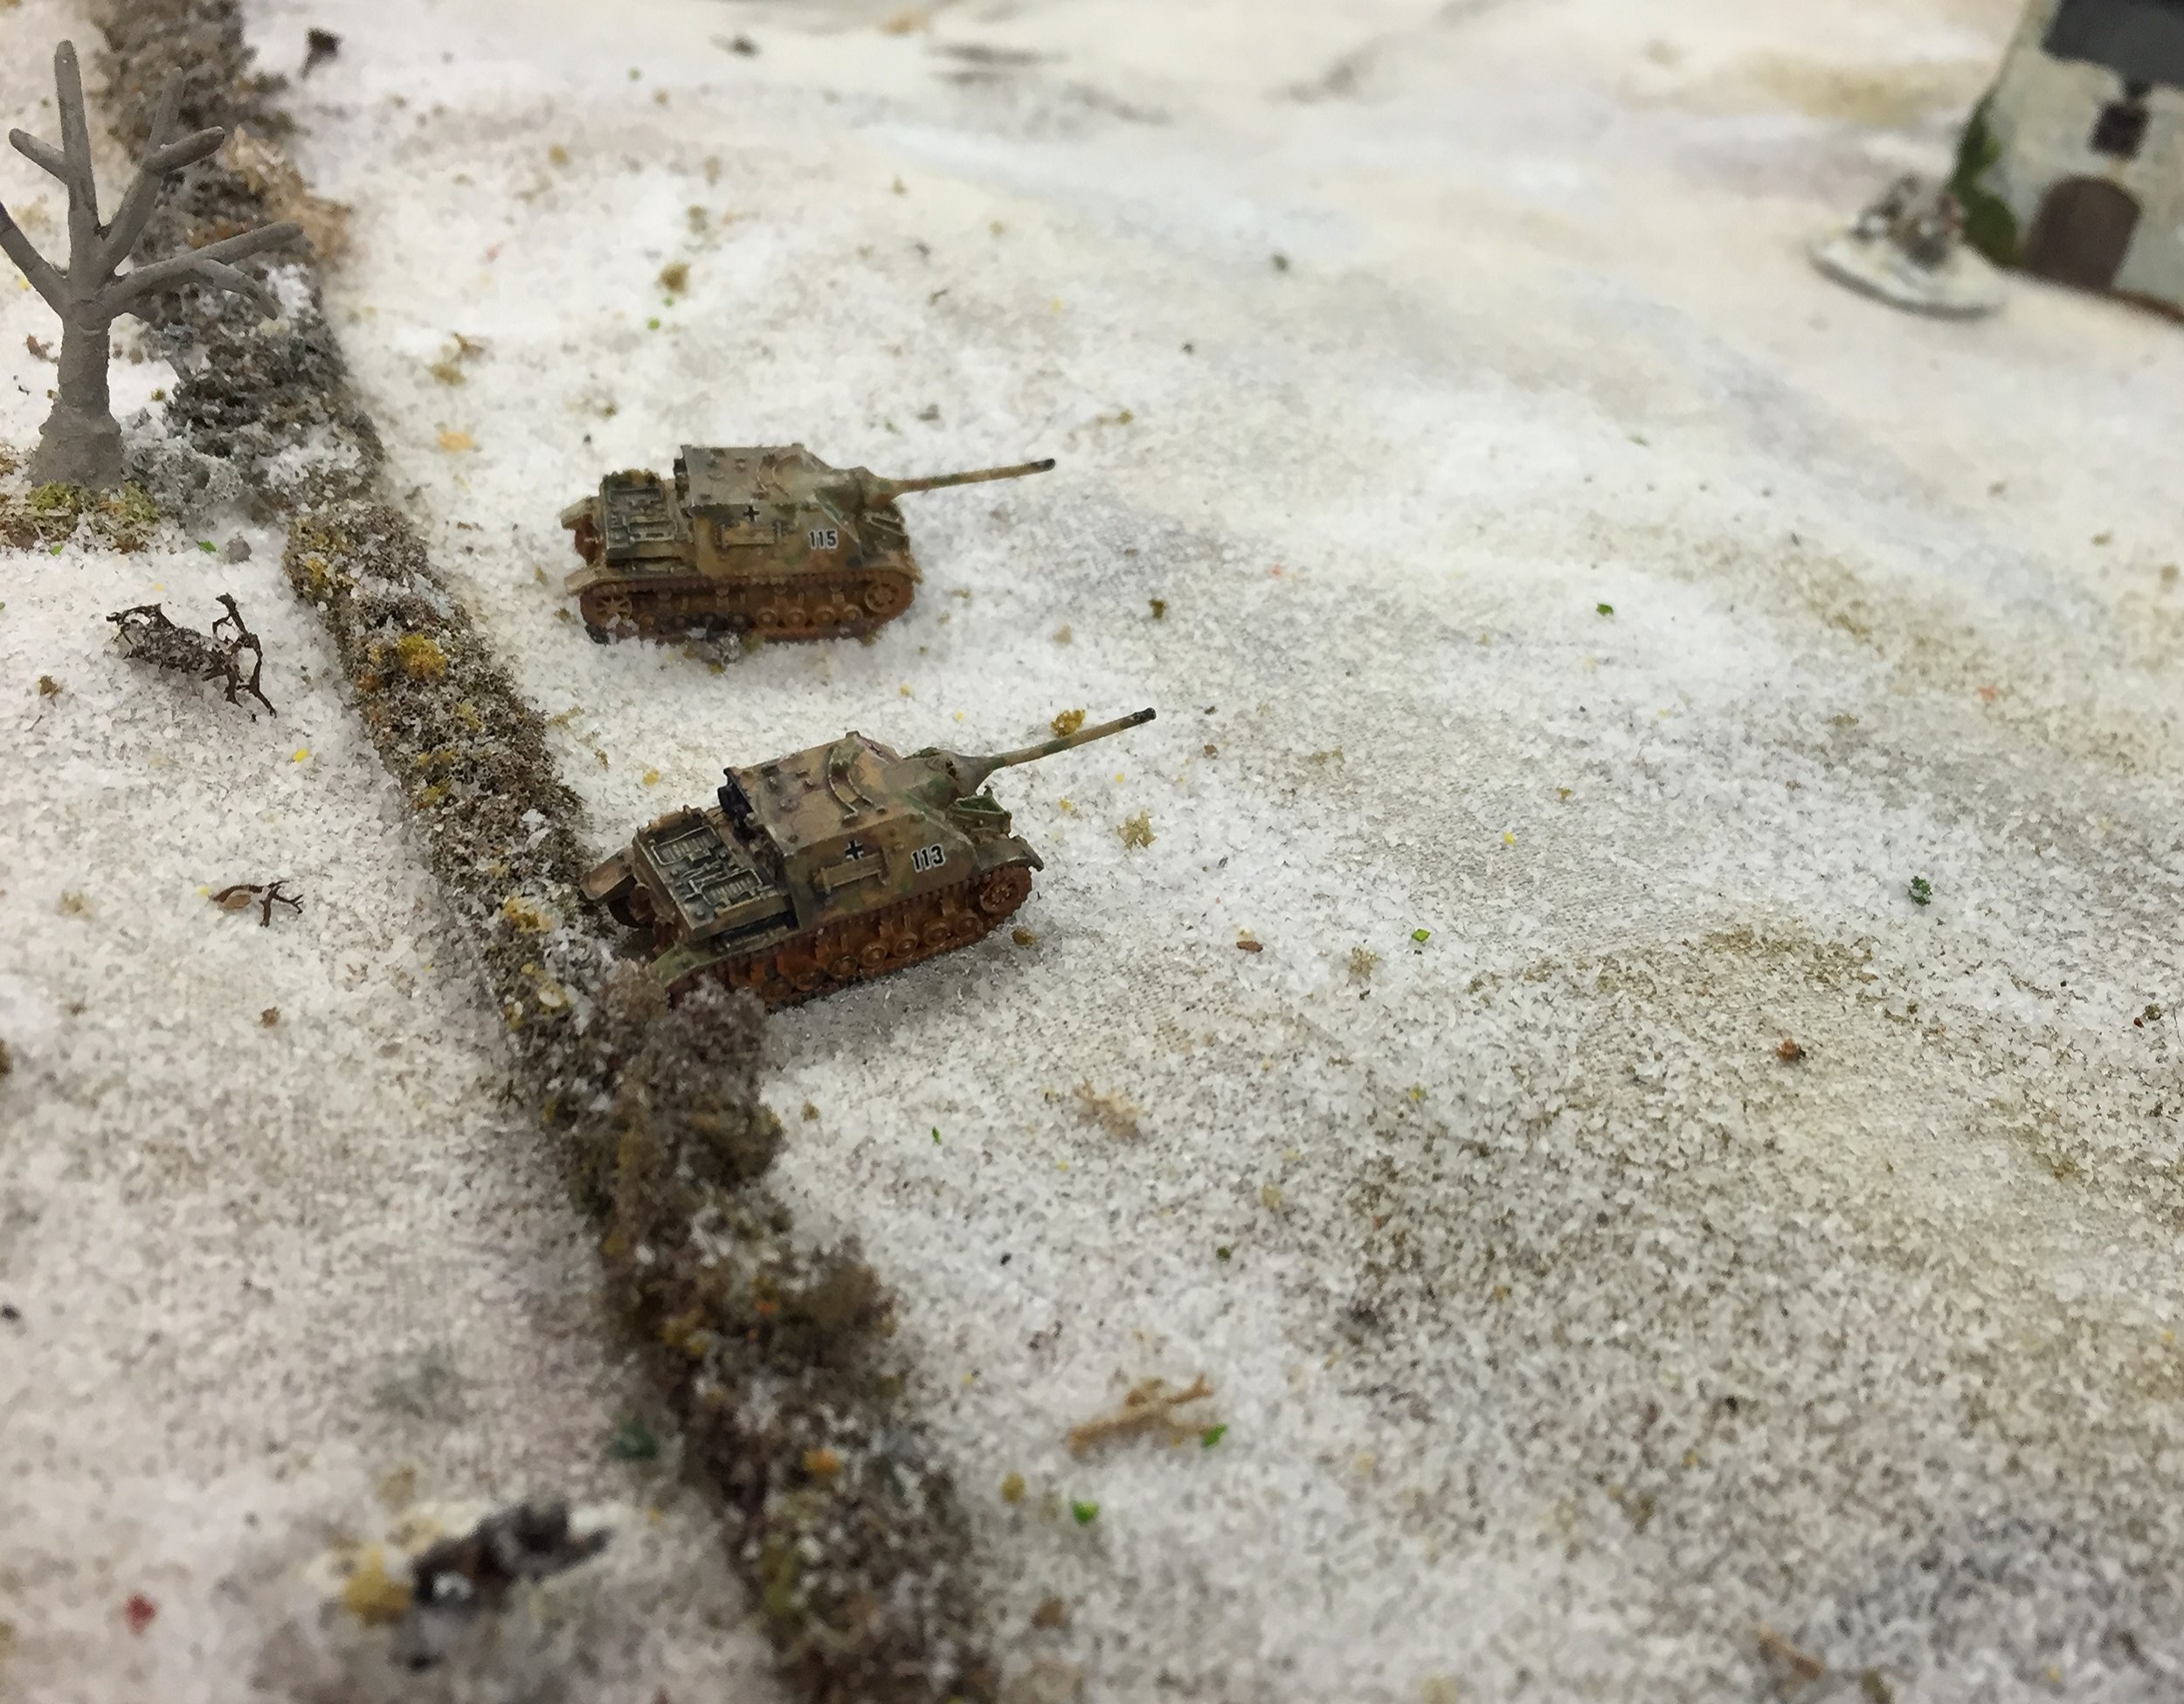
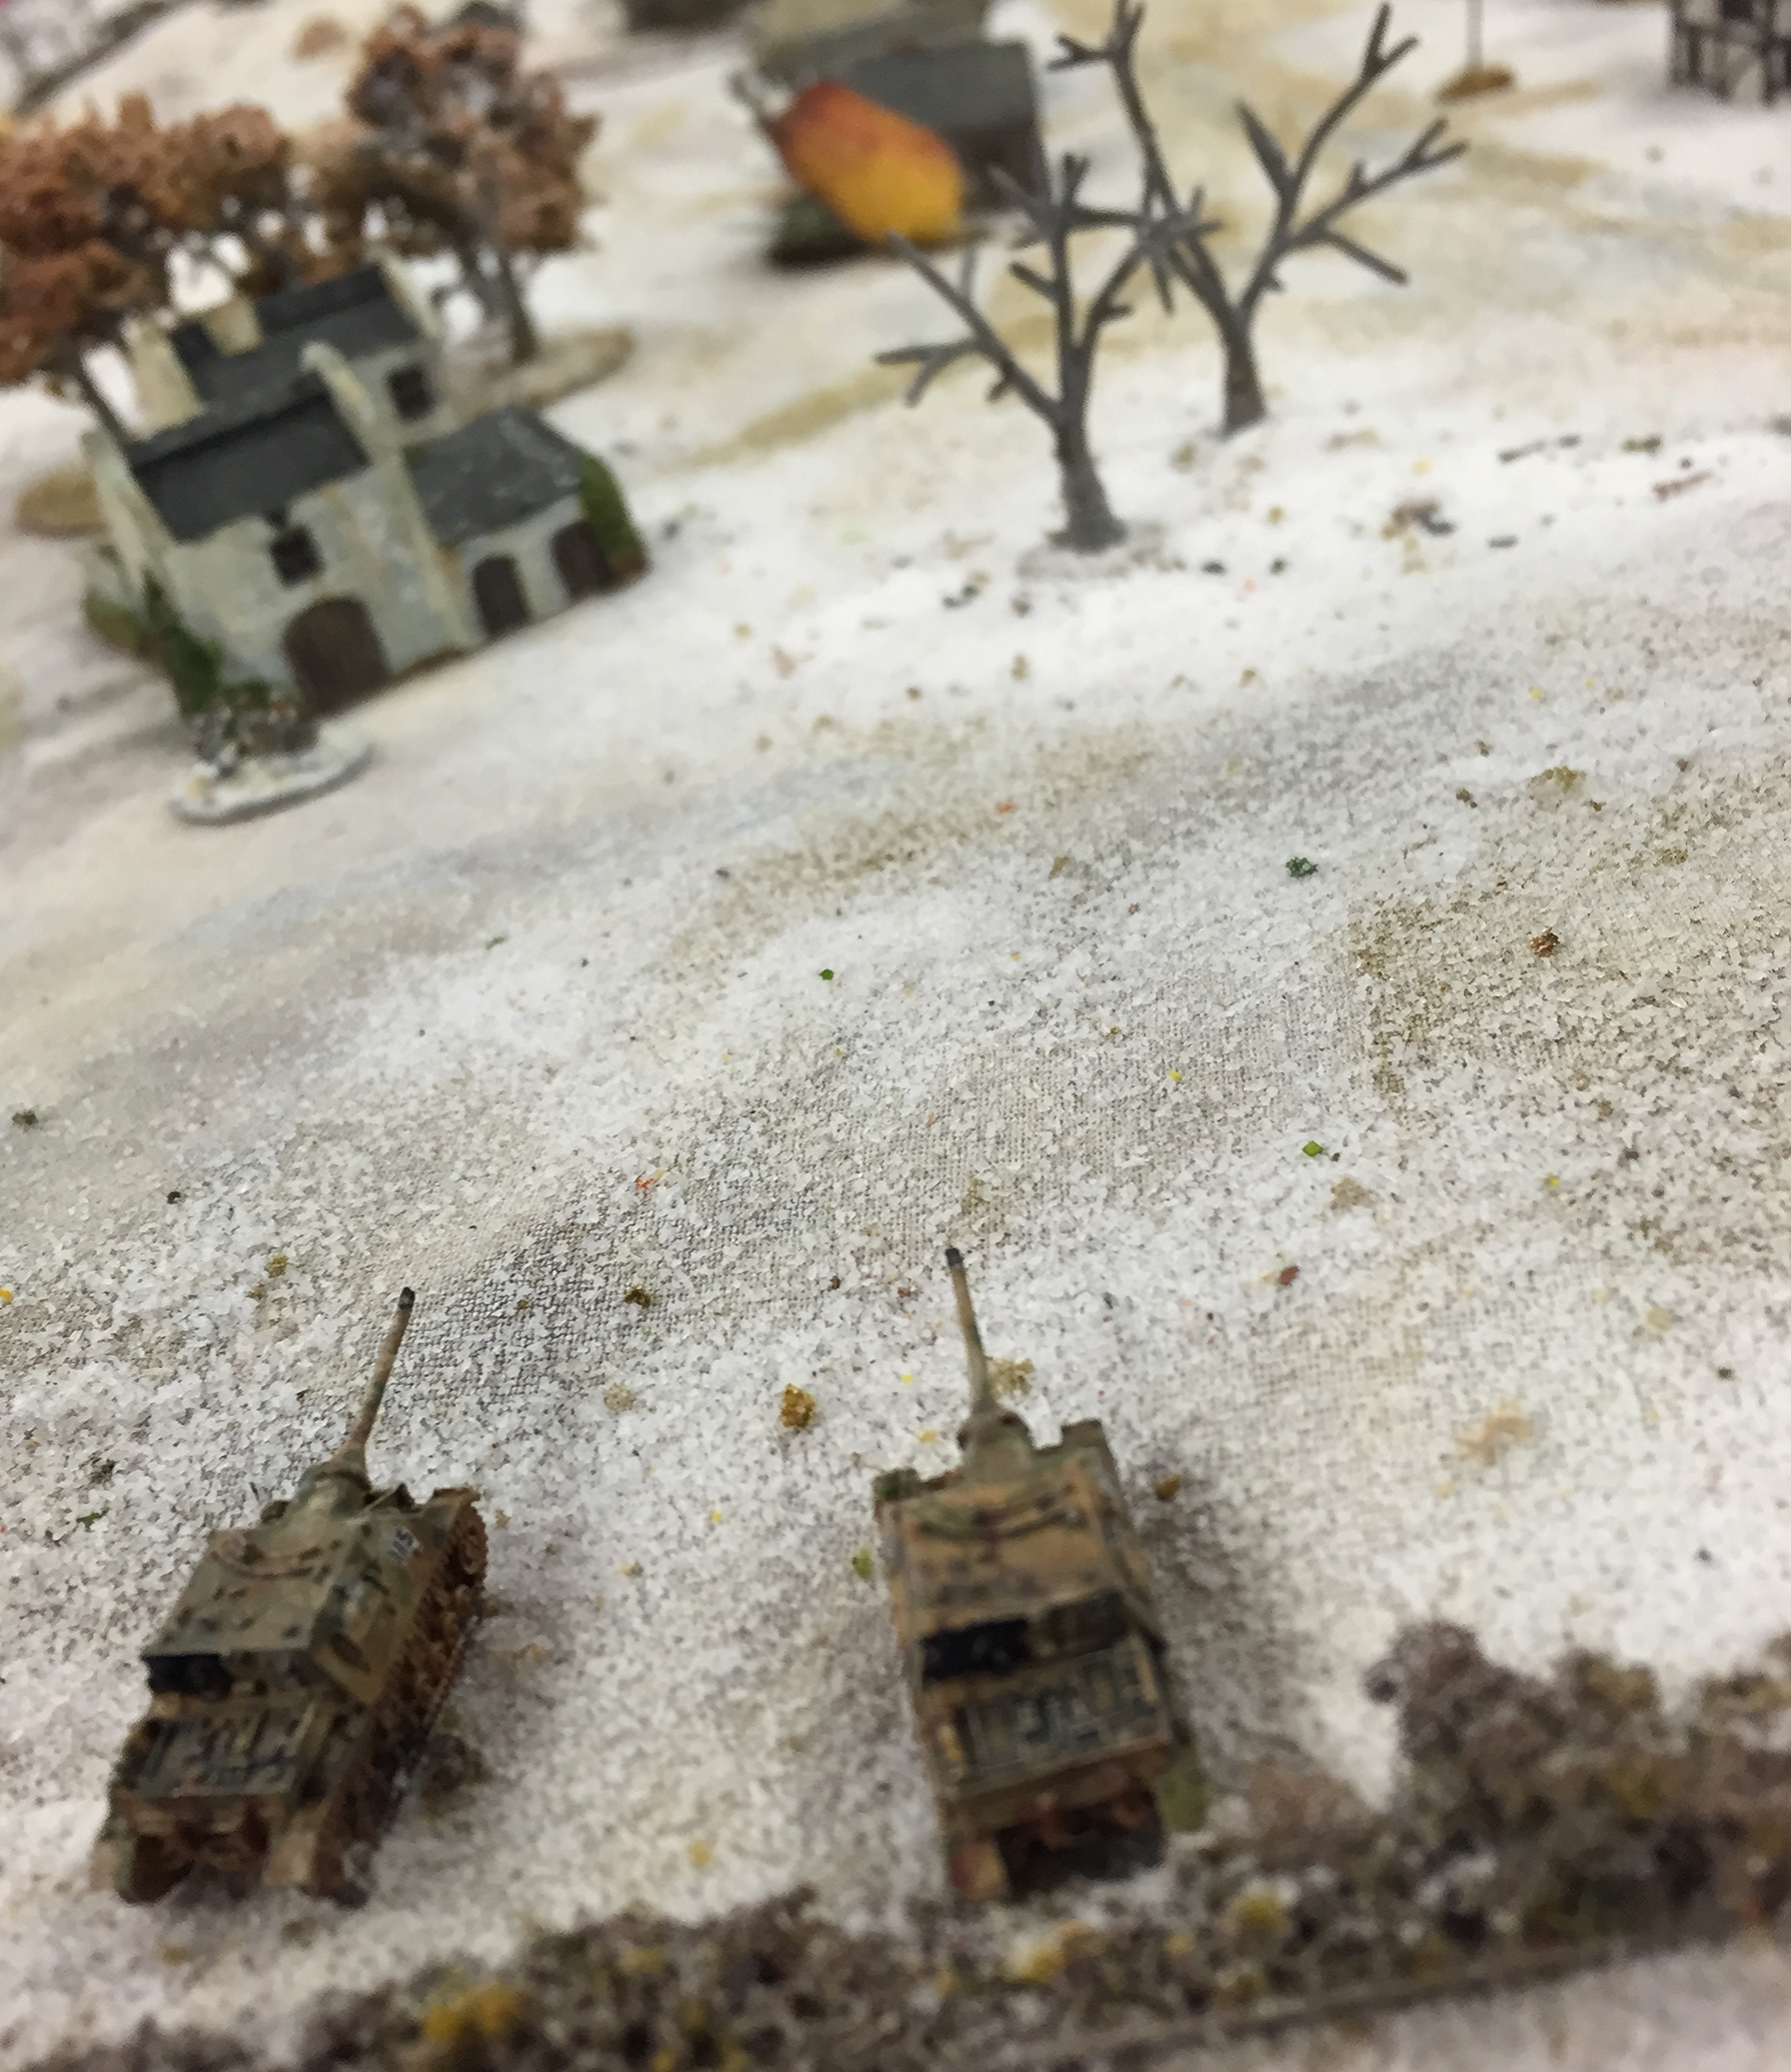
Both sides got support lists to choose from, rather à la Chain of Command. The British chose a Firefly, two Sherman IIIs, two pre-game stonks, a FOO and battery of 25pdrs, a sniper and a Kittyhawk off the 'cab rank': I suspect rather too much of this might have been in the spirit of 'oo, wonder what this does' (still surprised they declined the Churchill MkV CS - 95mm howitzer on tracks!), and I'm sure I overpointed the P40, as only activating on a 6 when its card comes up makes it markedly less useful, and possibly the stonk. The Germans went for the coldly practical: 4 off-table 80mm mortars, a Tiger, two StuG IIIG's and a sniper.

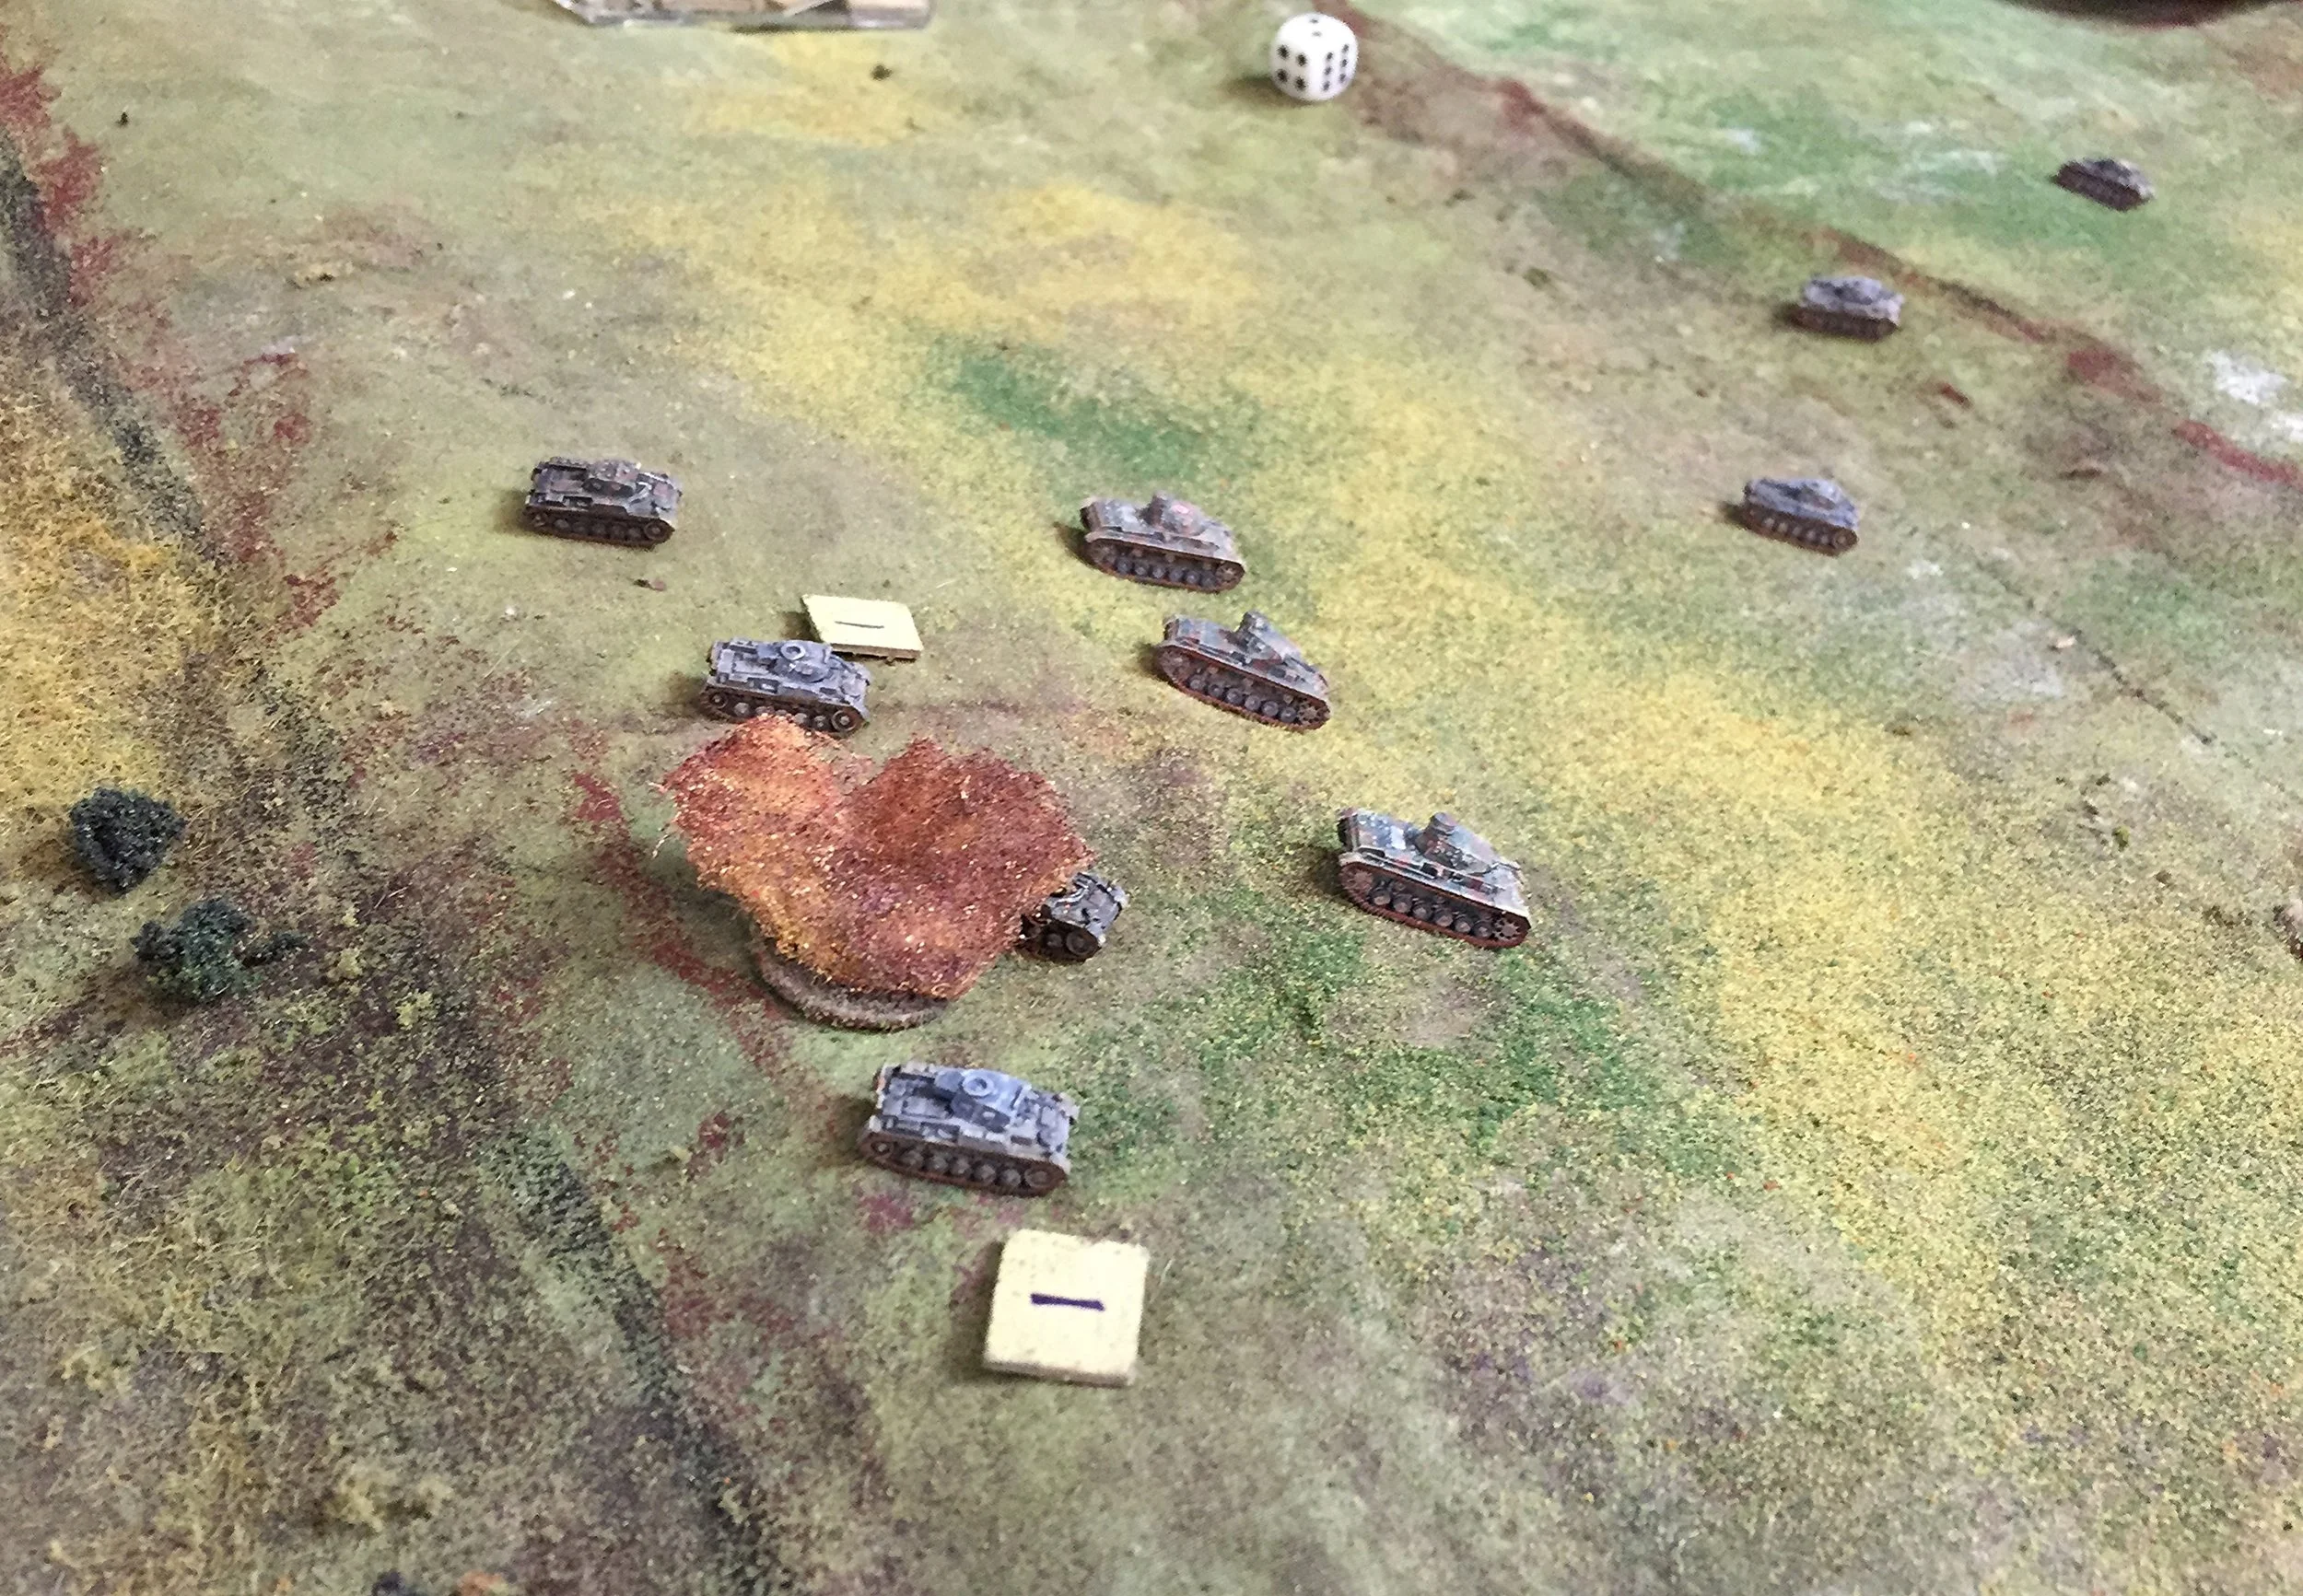
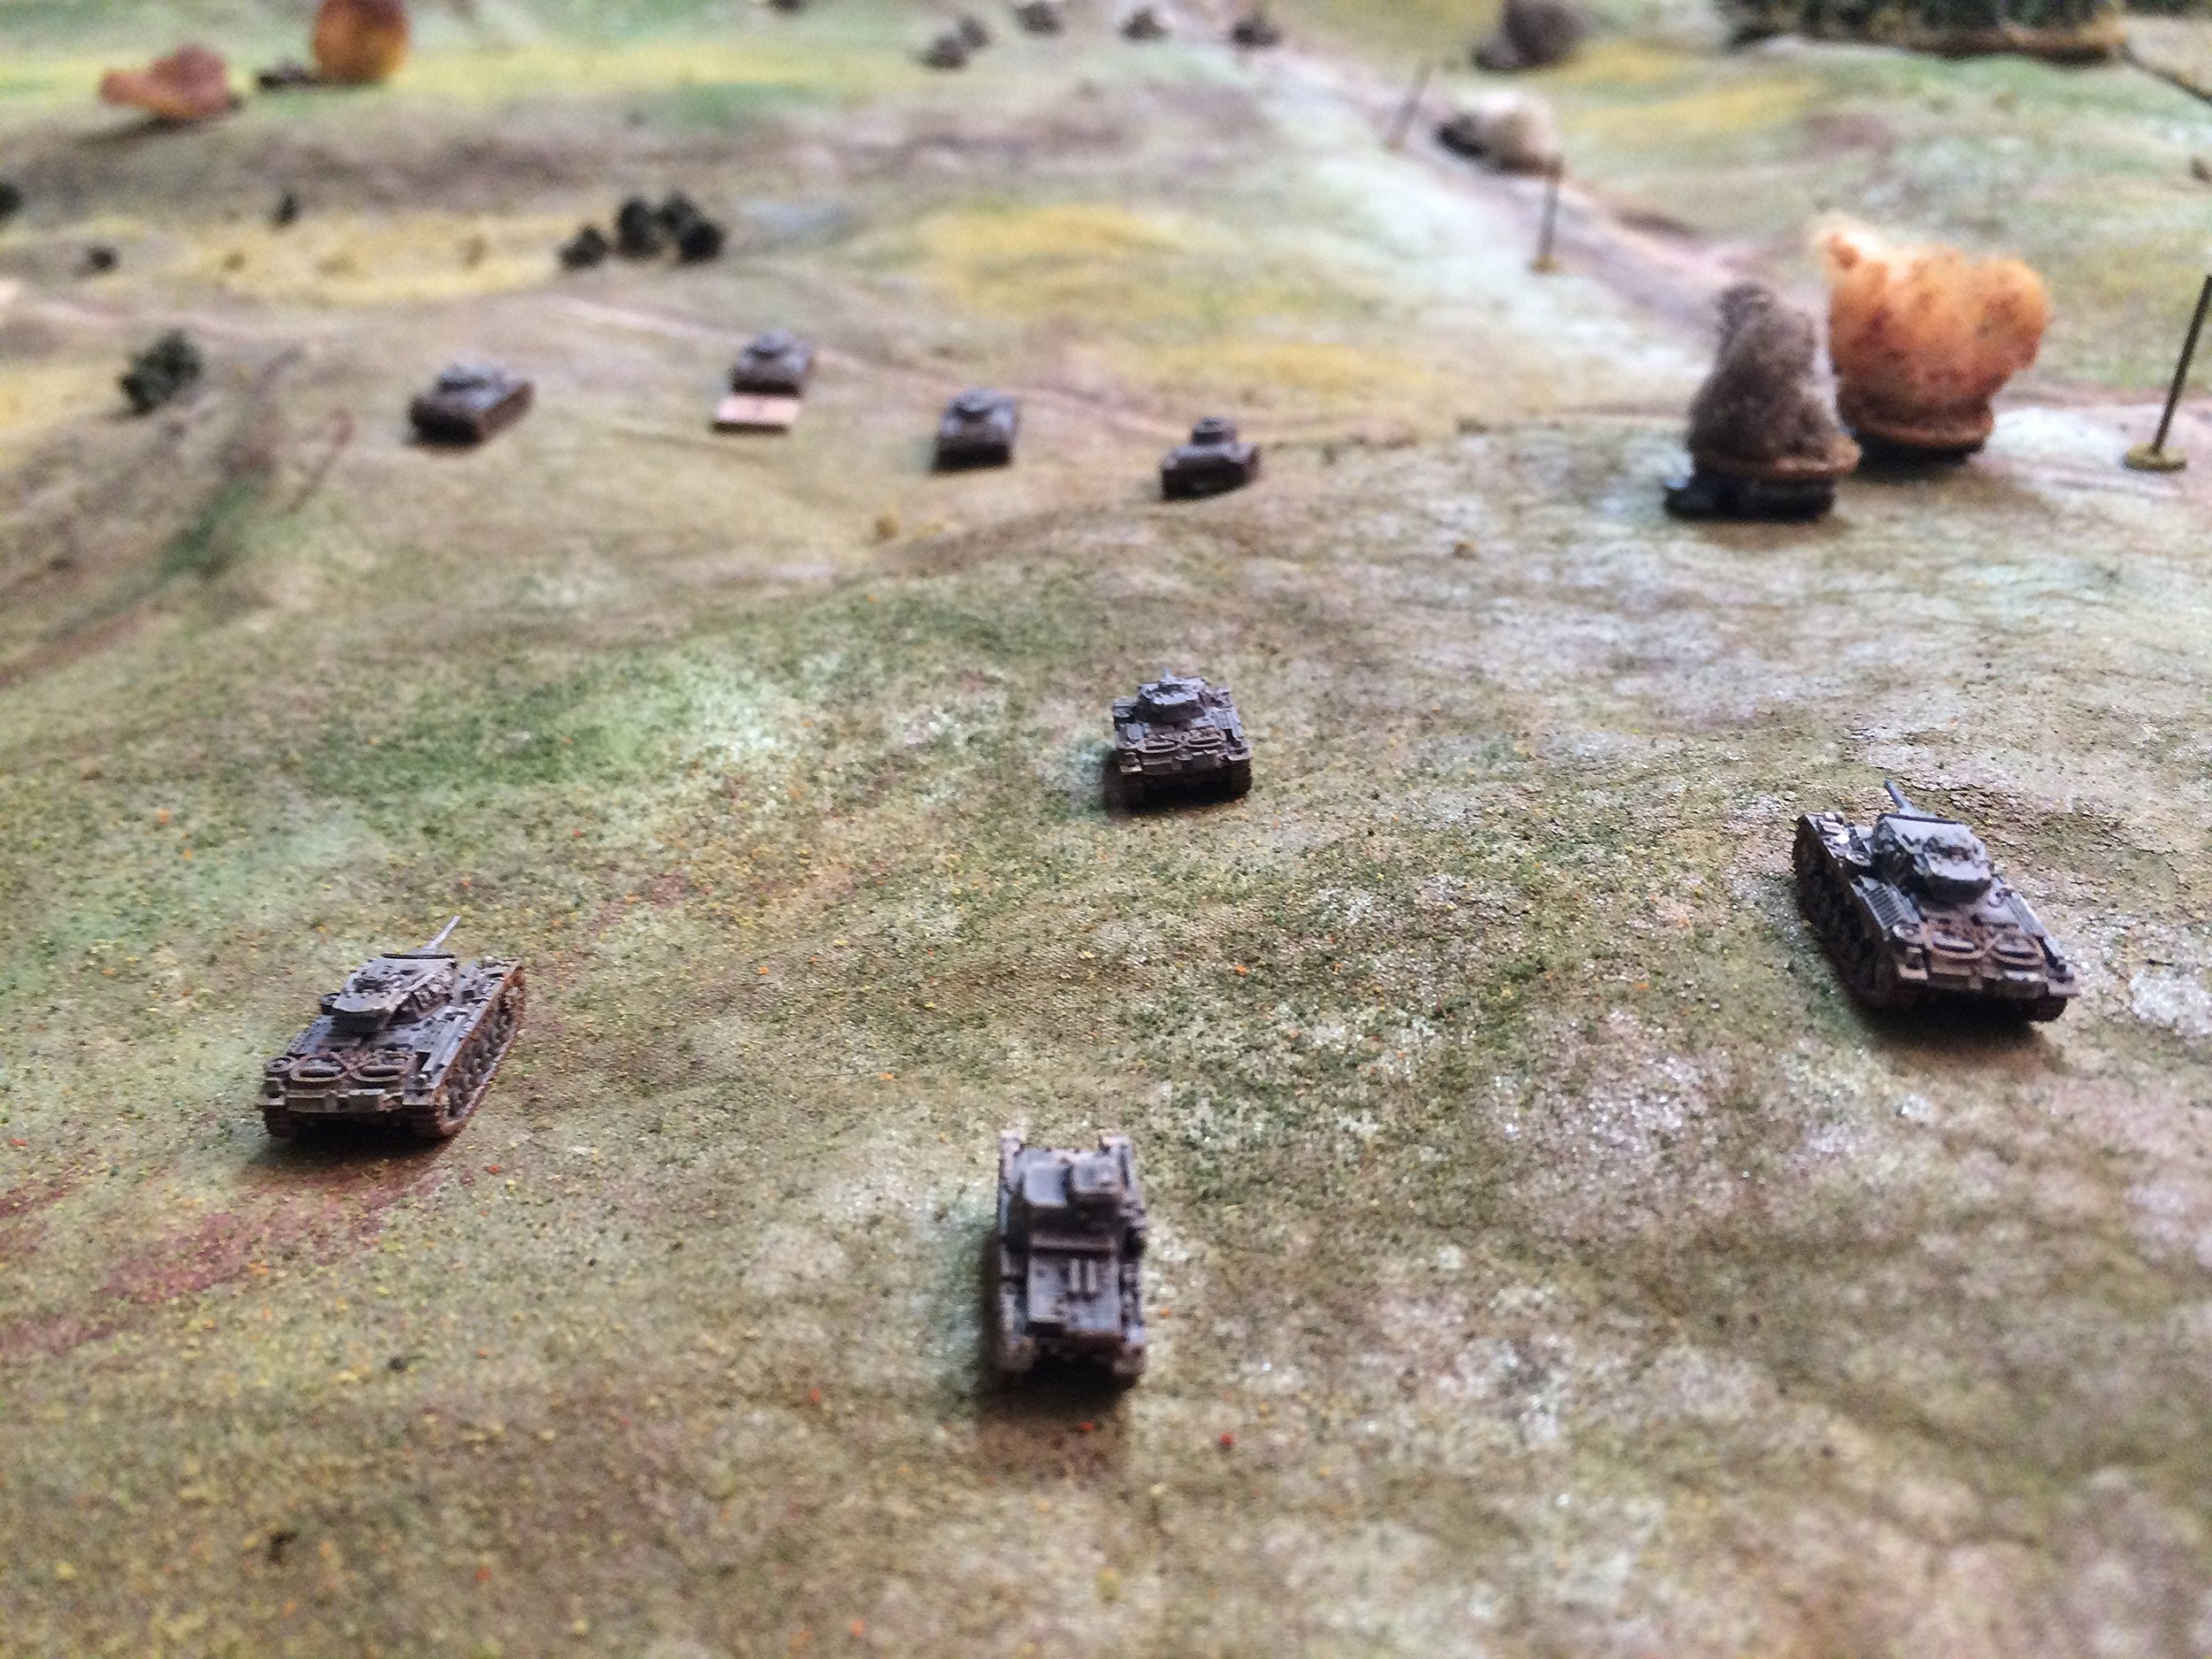
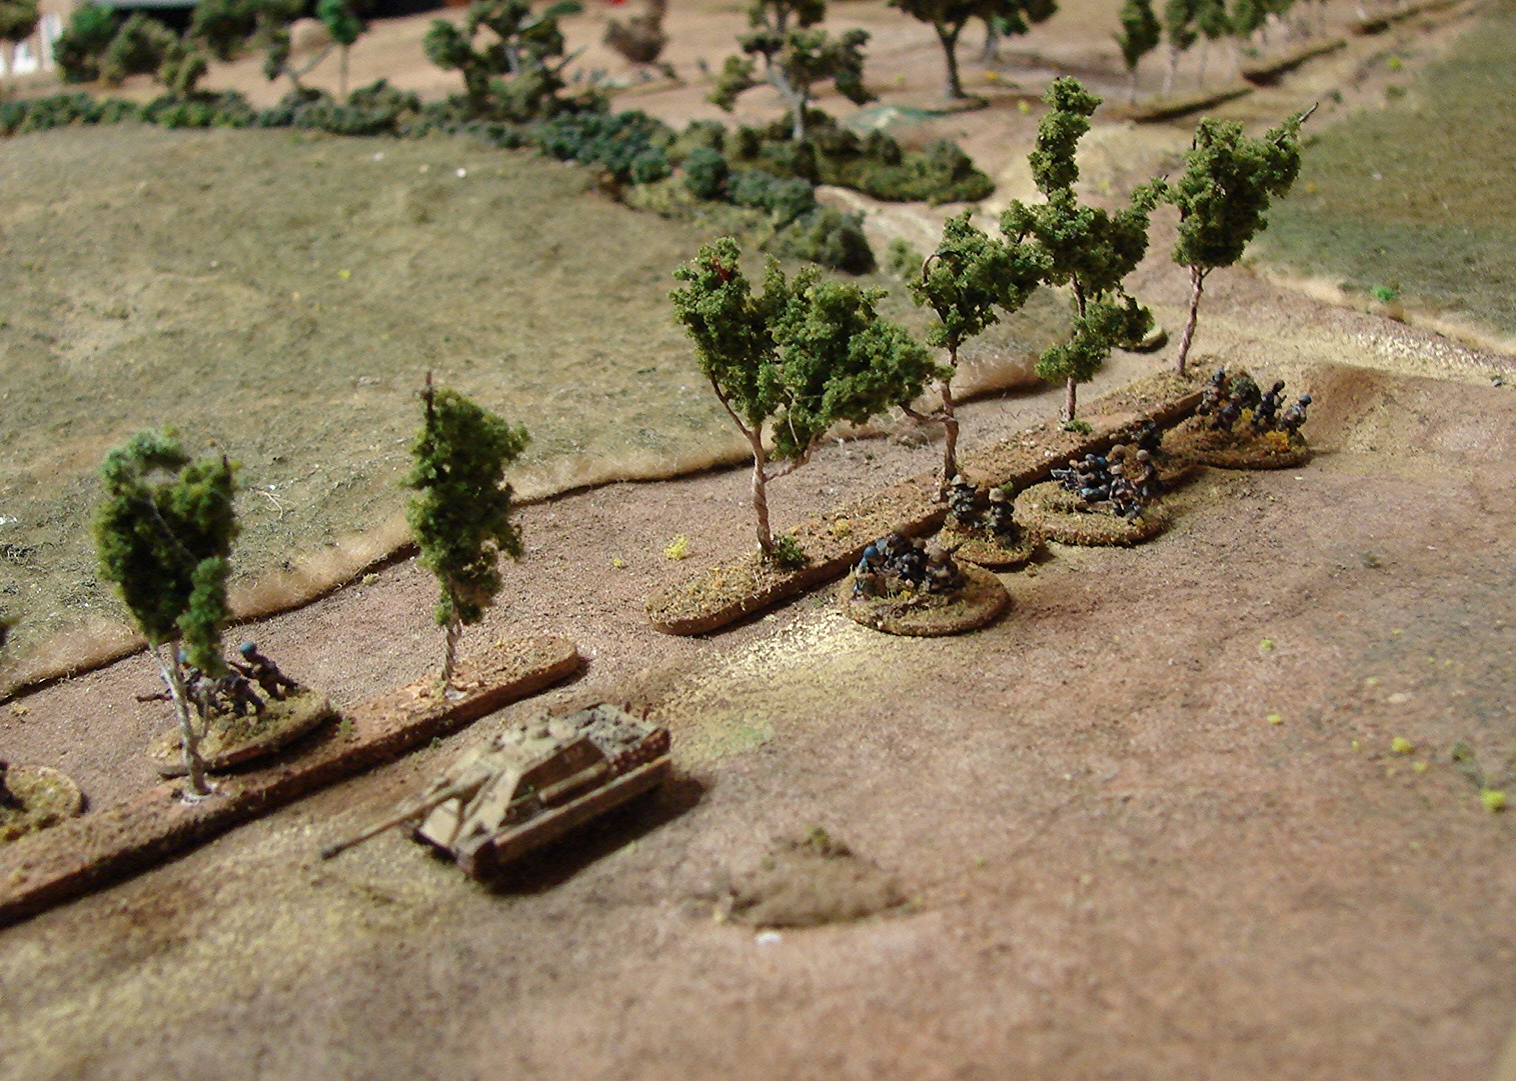
As umpire and campaign adviser, I stood back once I'd devised the scenario, and before listening to the players' plans, and asked myself what I'd do with both forces: the Germans pretty much agreed with me, placing a Zug in Santa Maria, one in Santa Magdalena, the third in the olive grove/vineyard area. They plonked the Tiger in the ruins of the churchyard, with a nice view of the battlefield, and hid the StuGs.

Were I the British, I'd have bypassed Santa Maria entirely barring a small force to keep the Germans interested (a blind and a platoon, perhaps), laid smoke west of the road into Santa Magdalena and gone for it, foot on the floorboards, on the theory that if I can take Santa Magdalena I can mop up at my leisure.

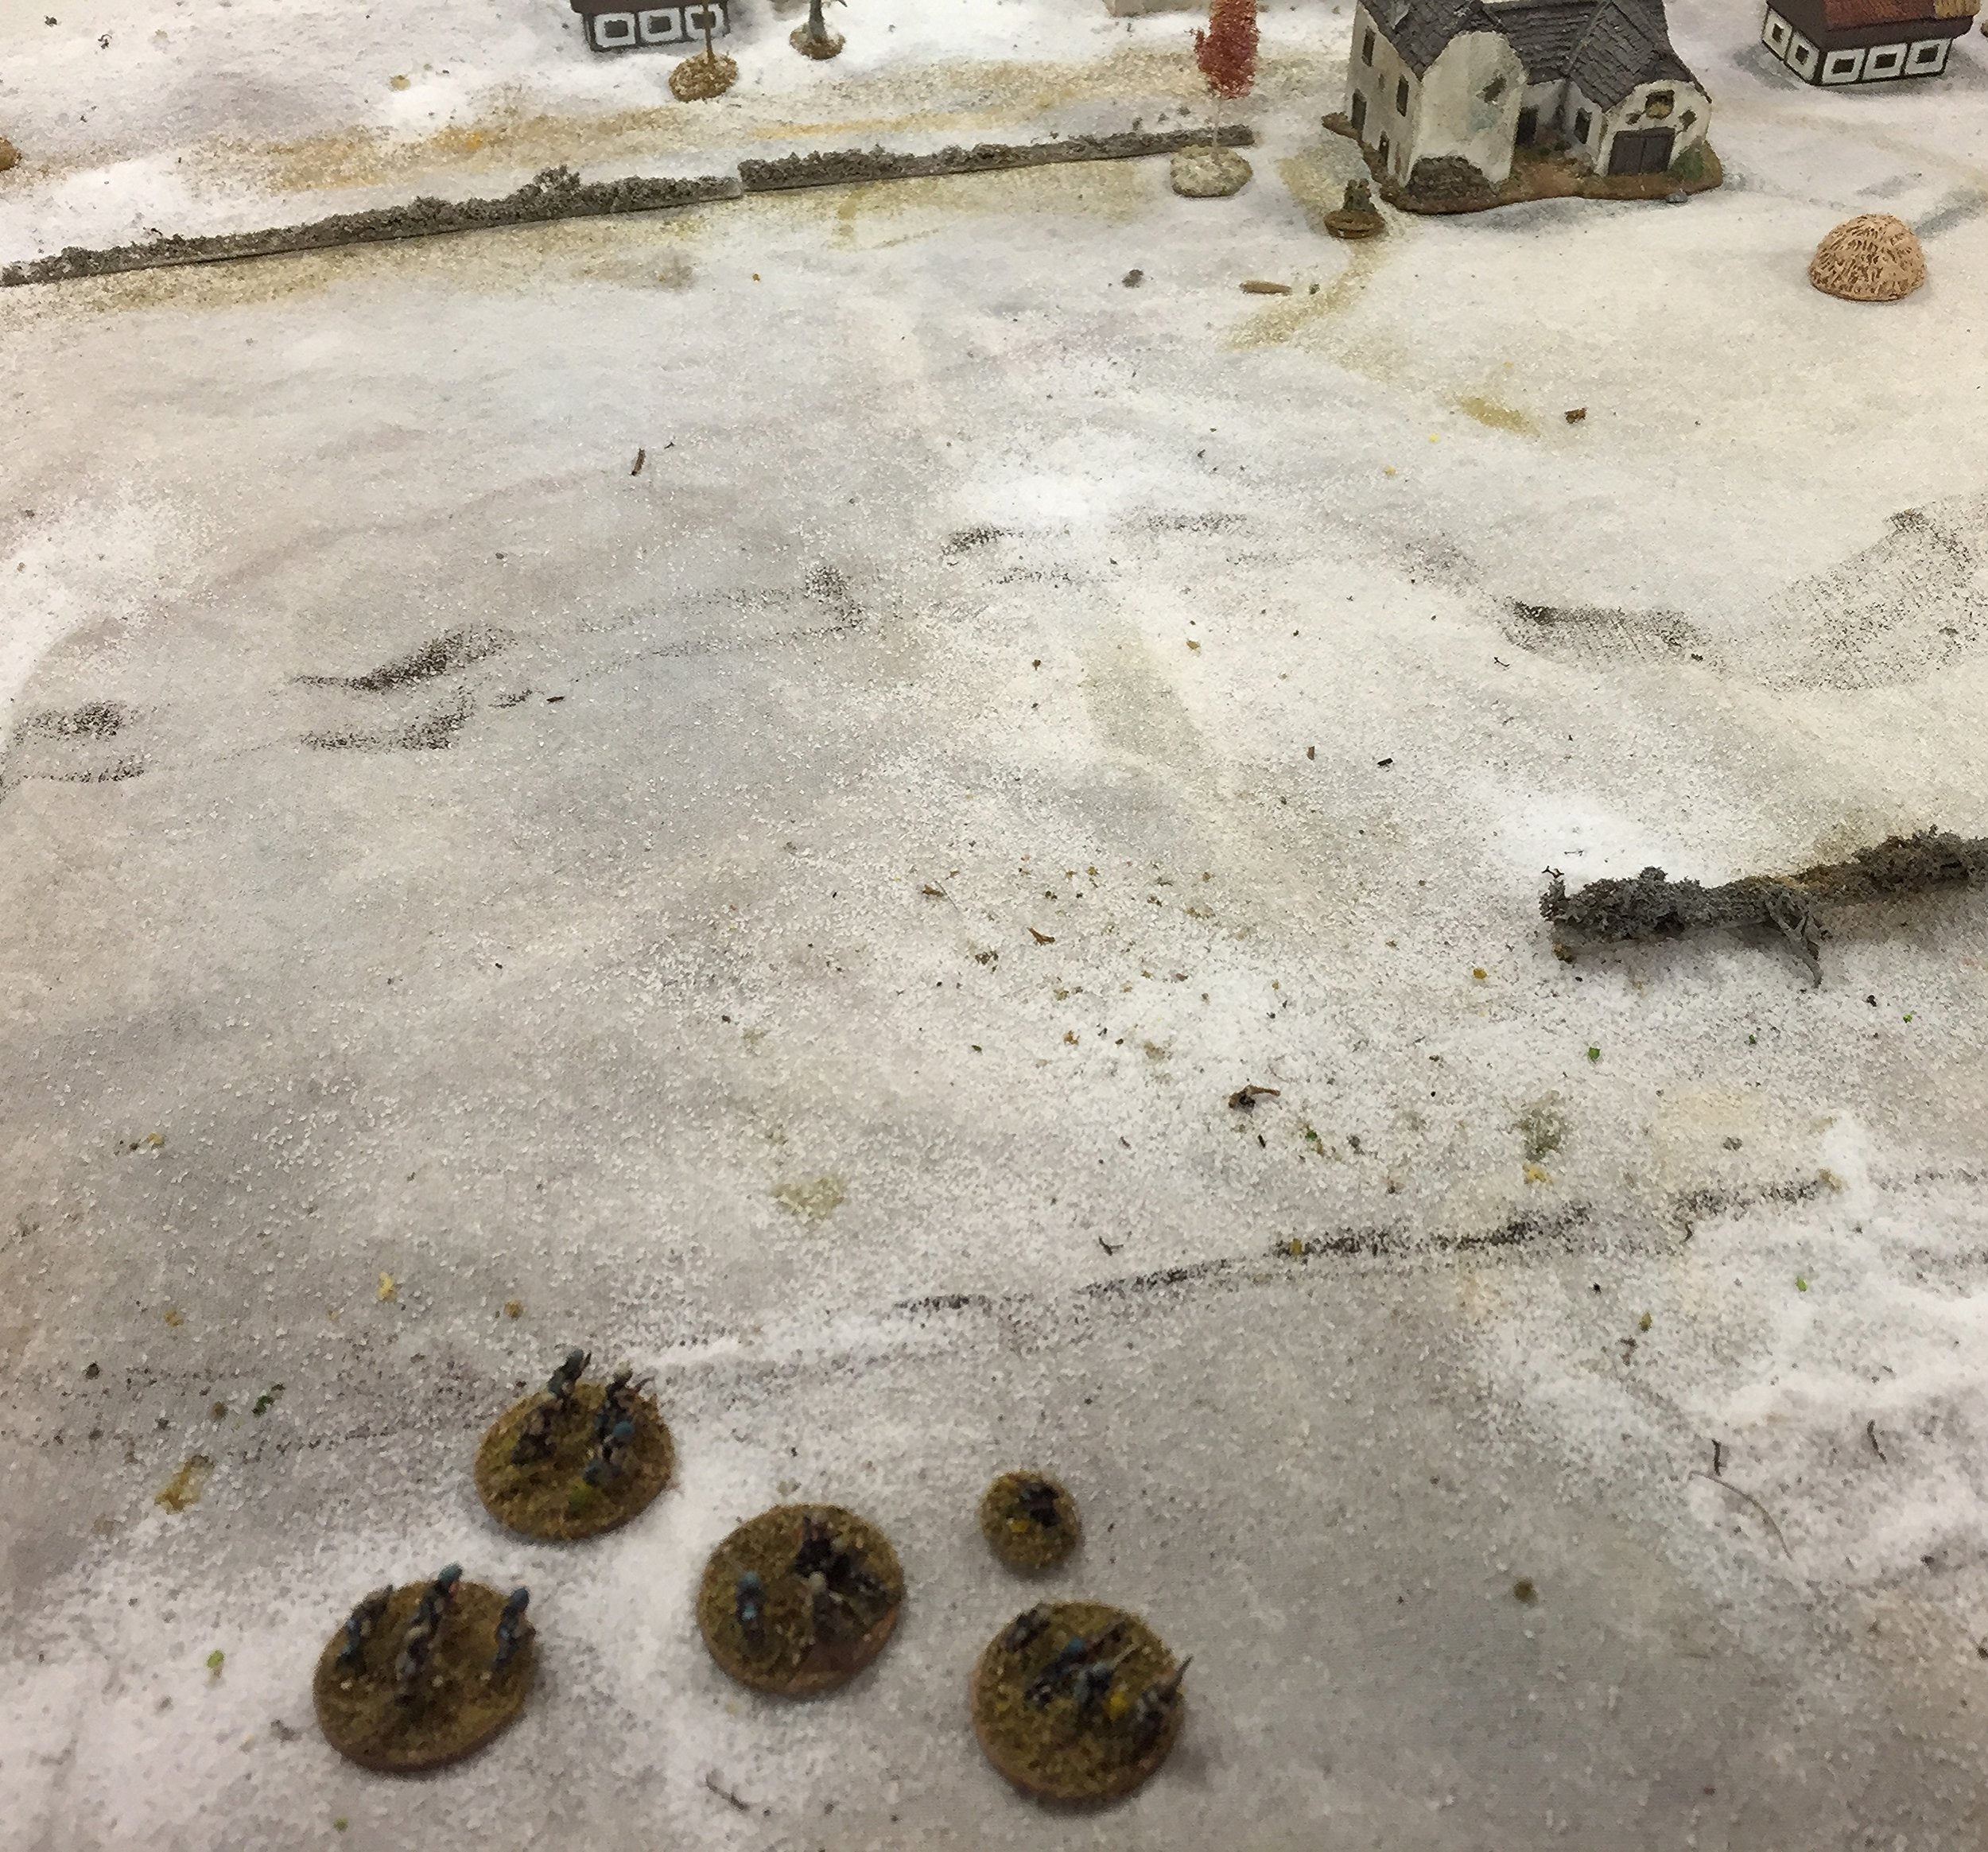
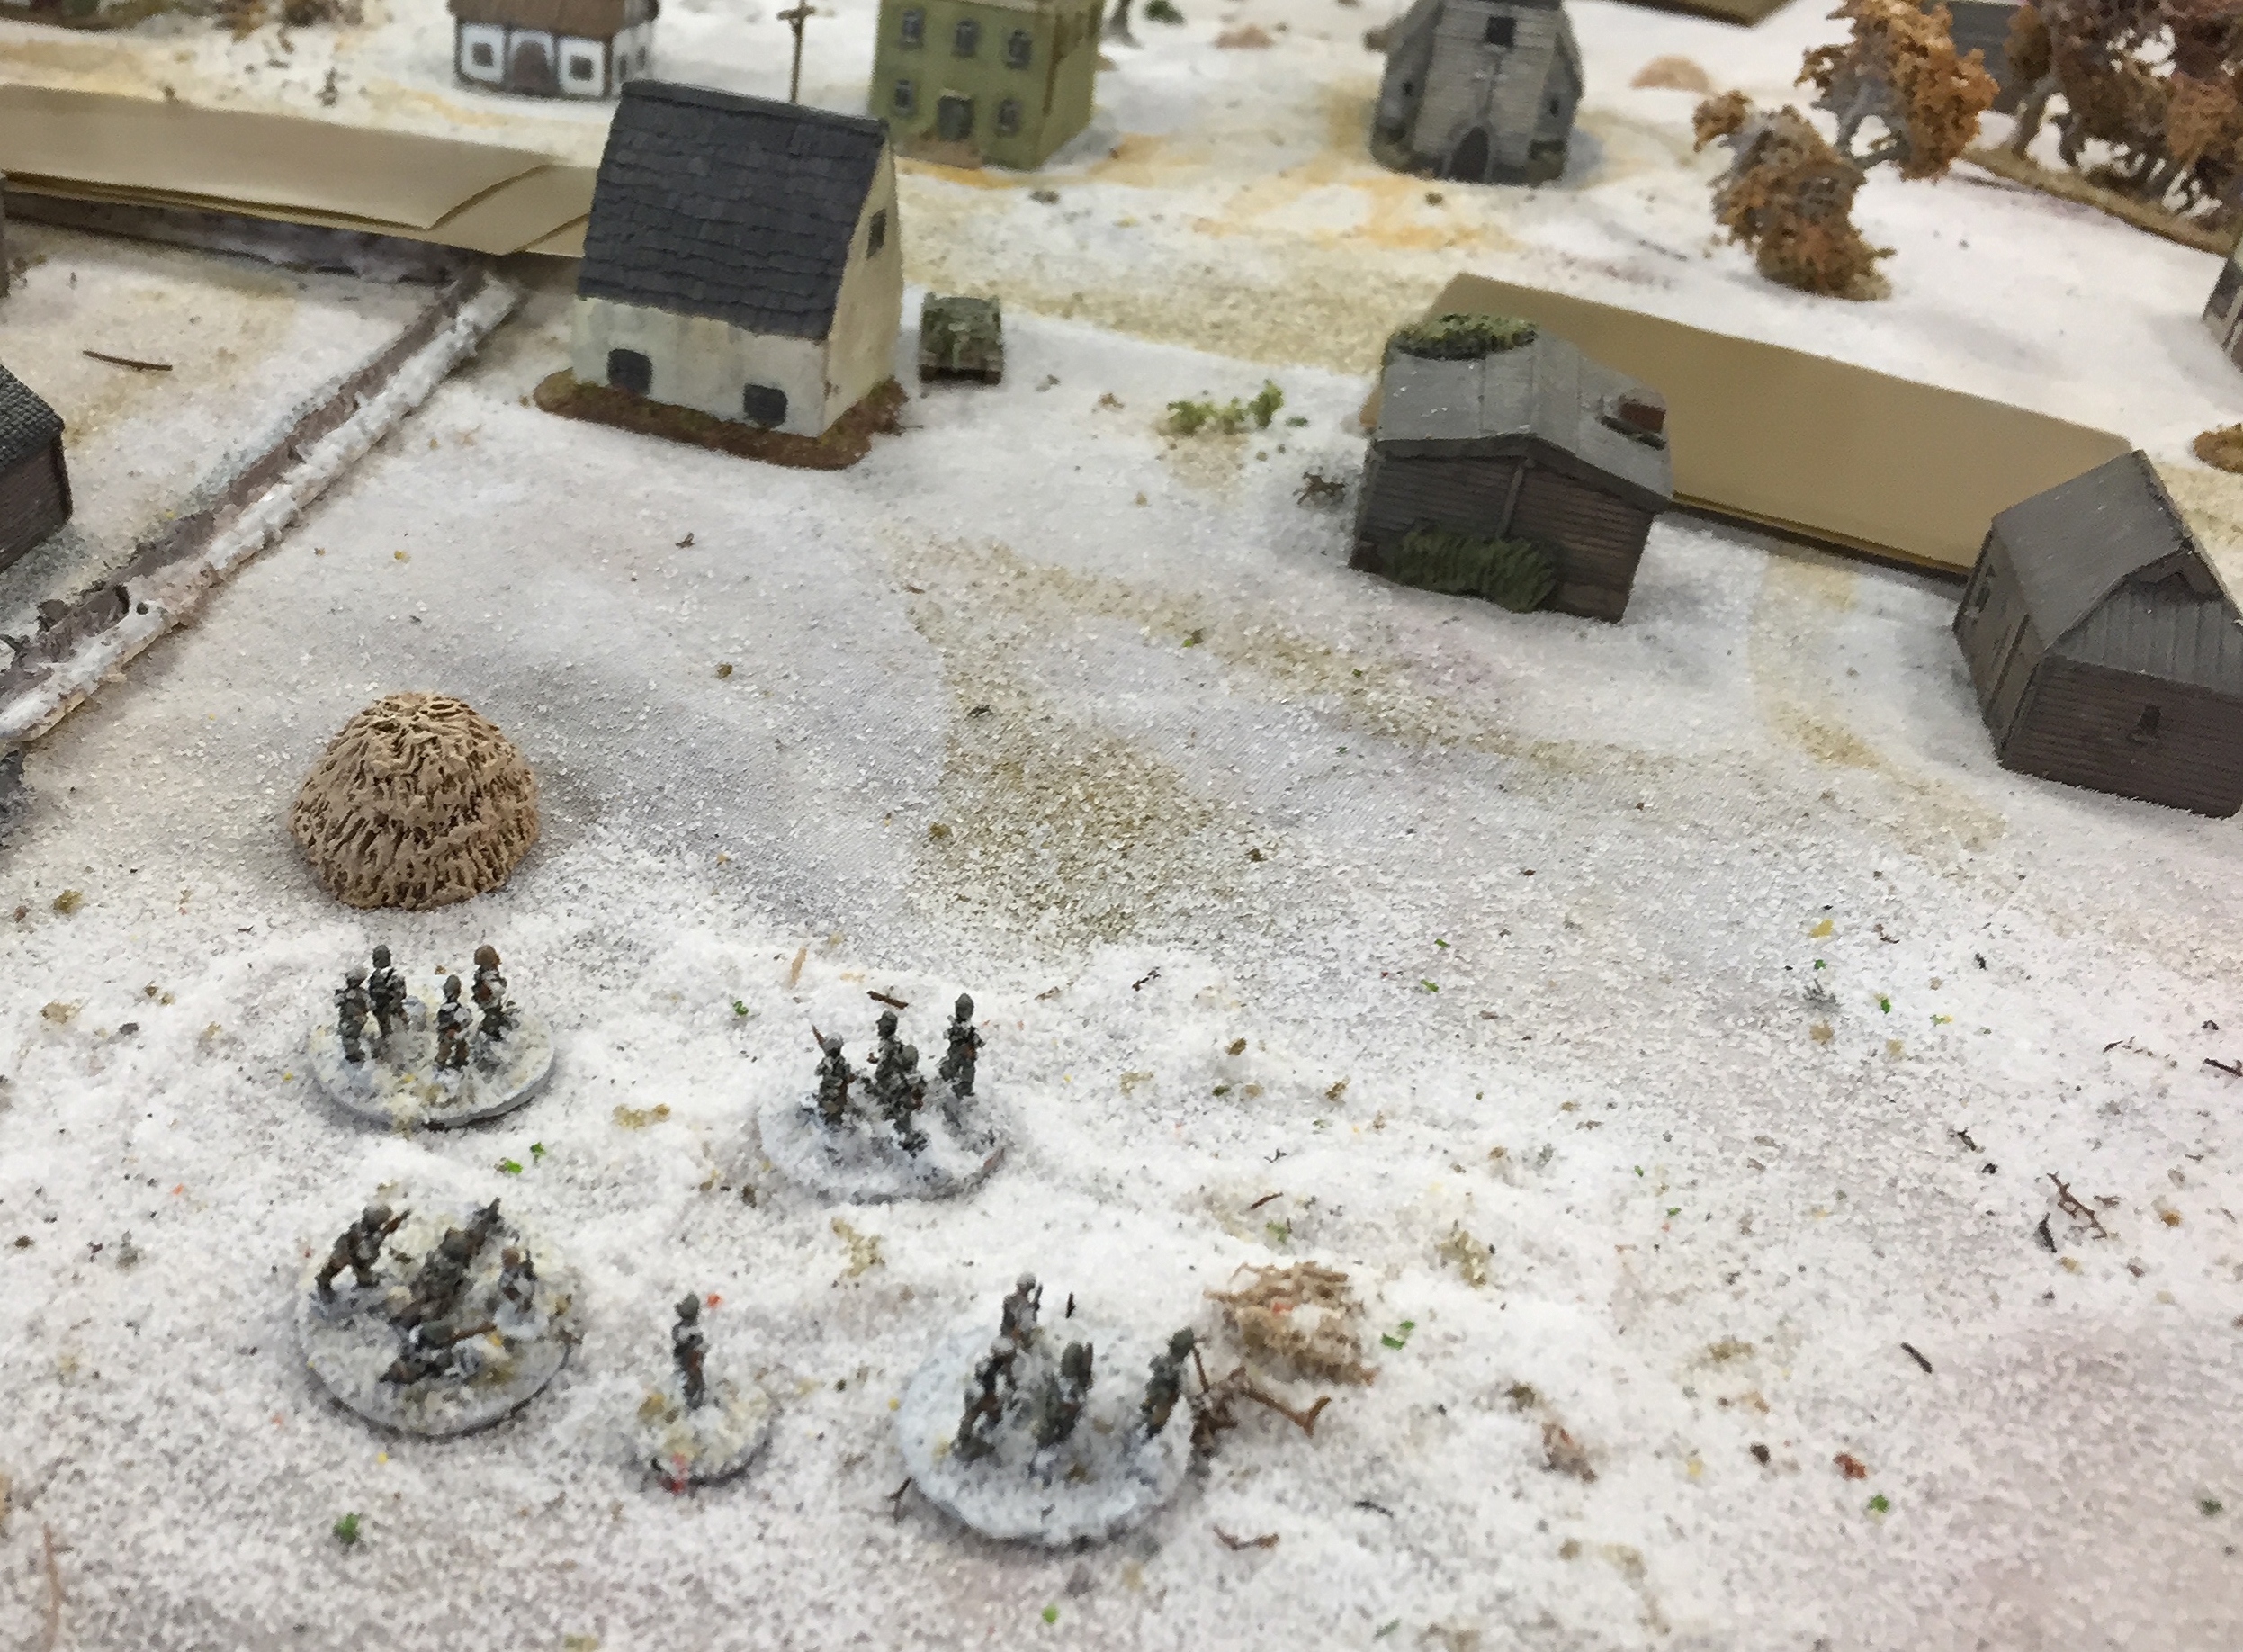
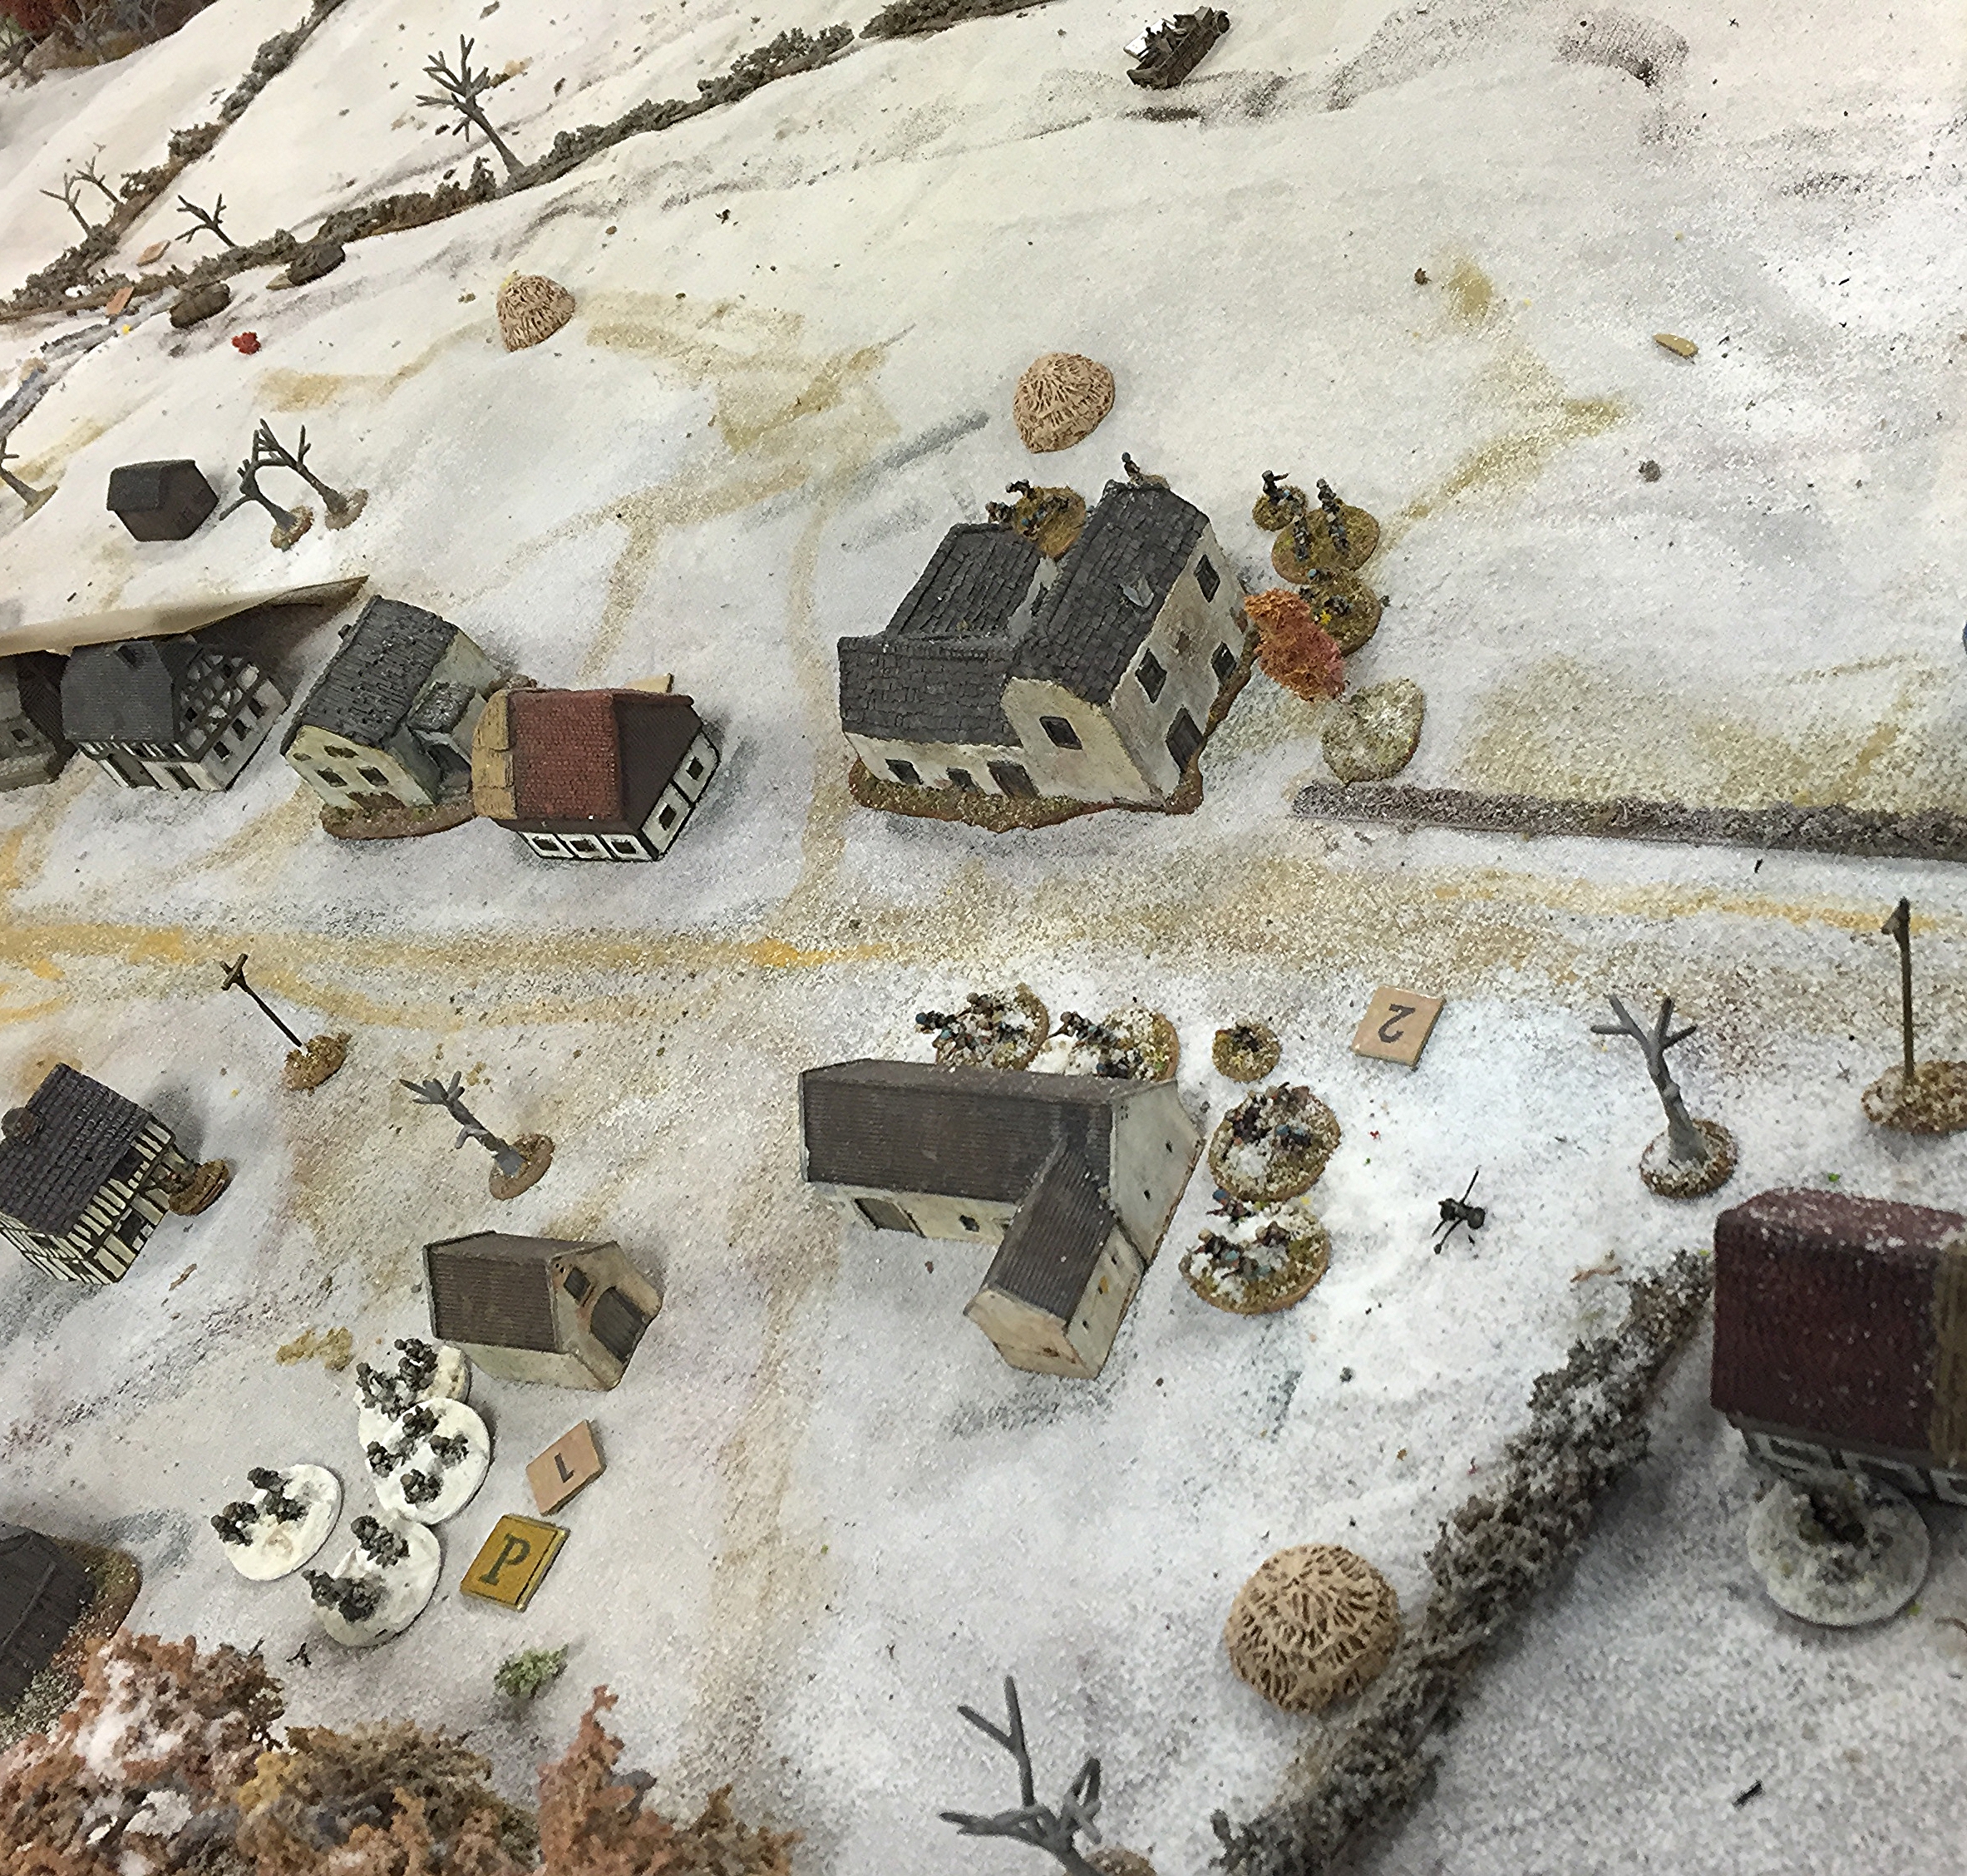
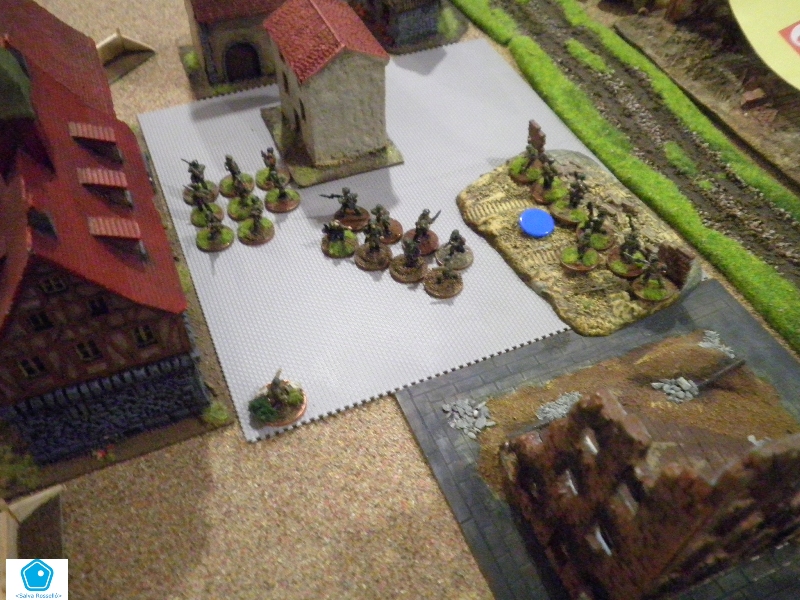
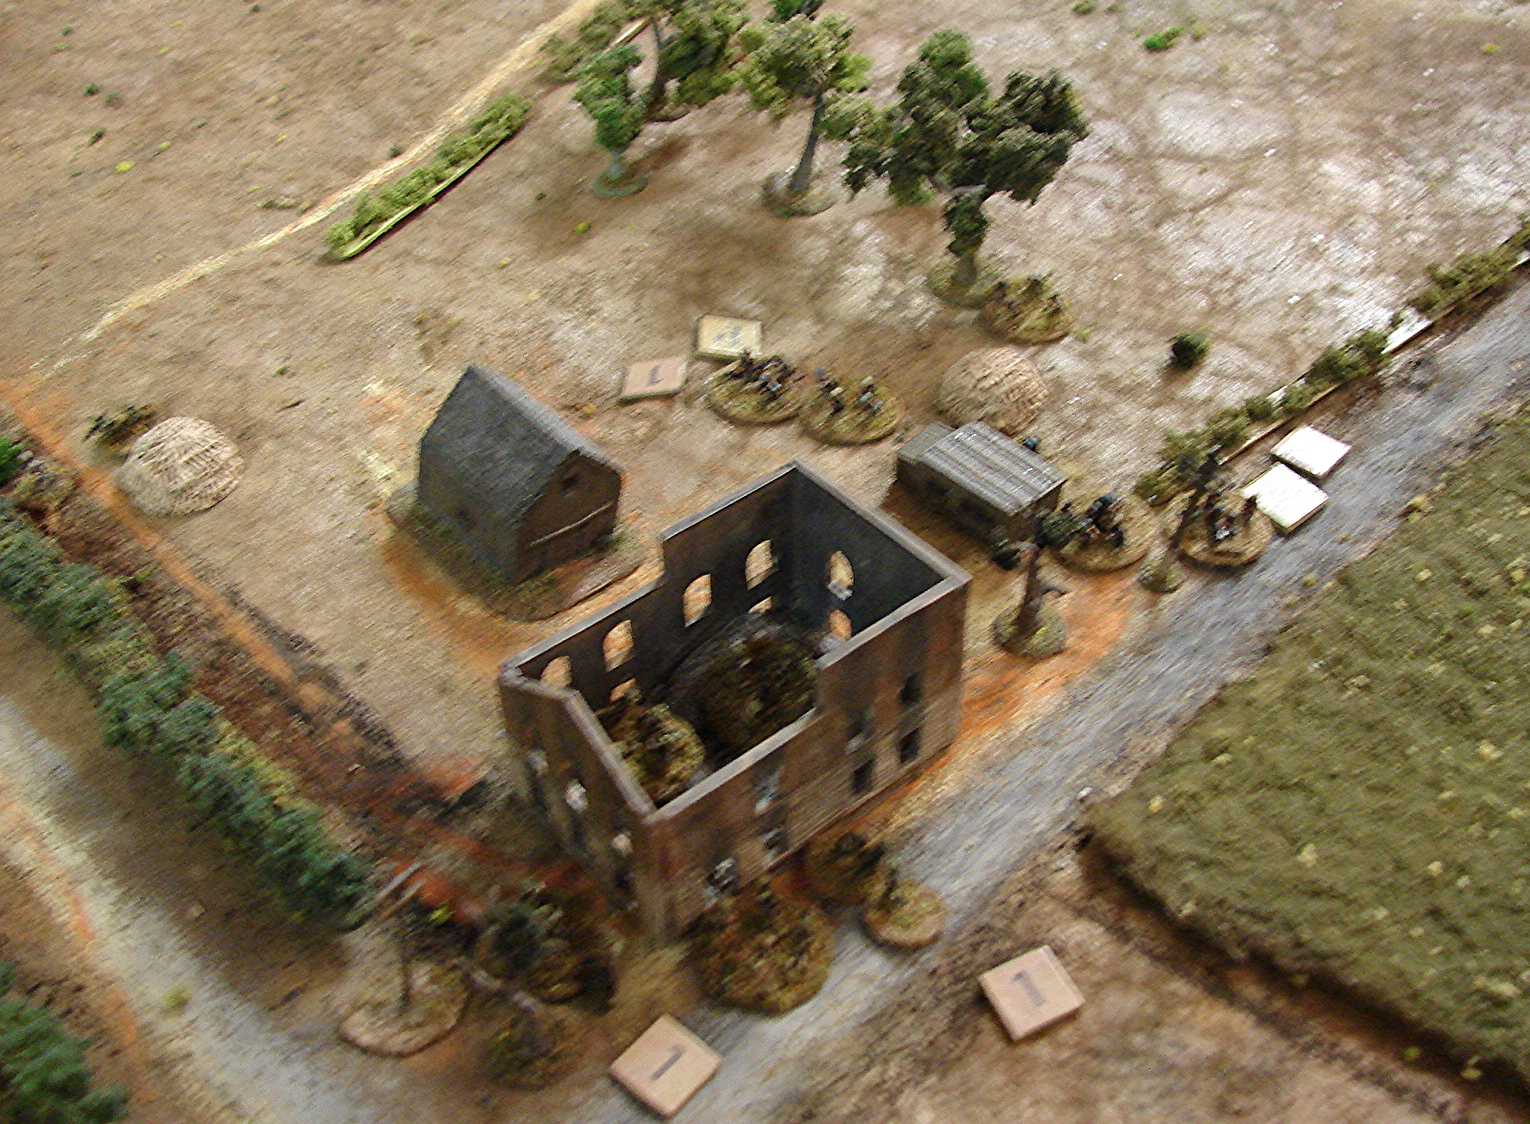
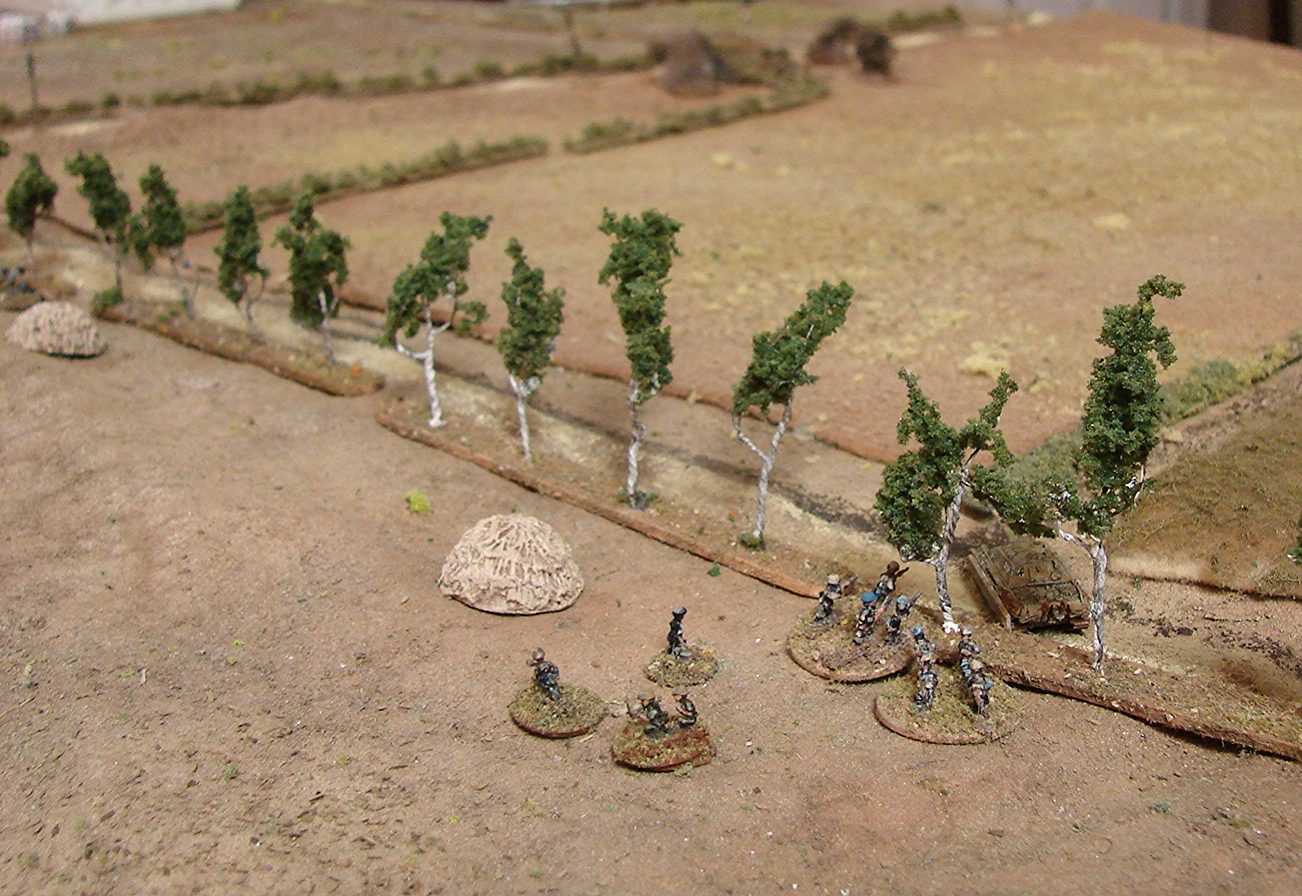
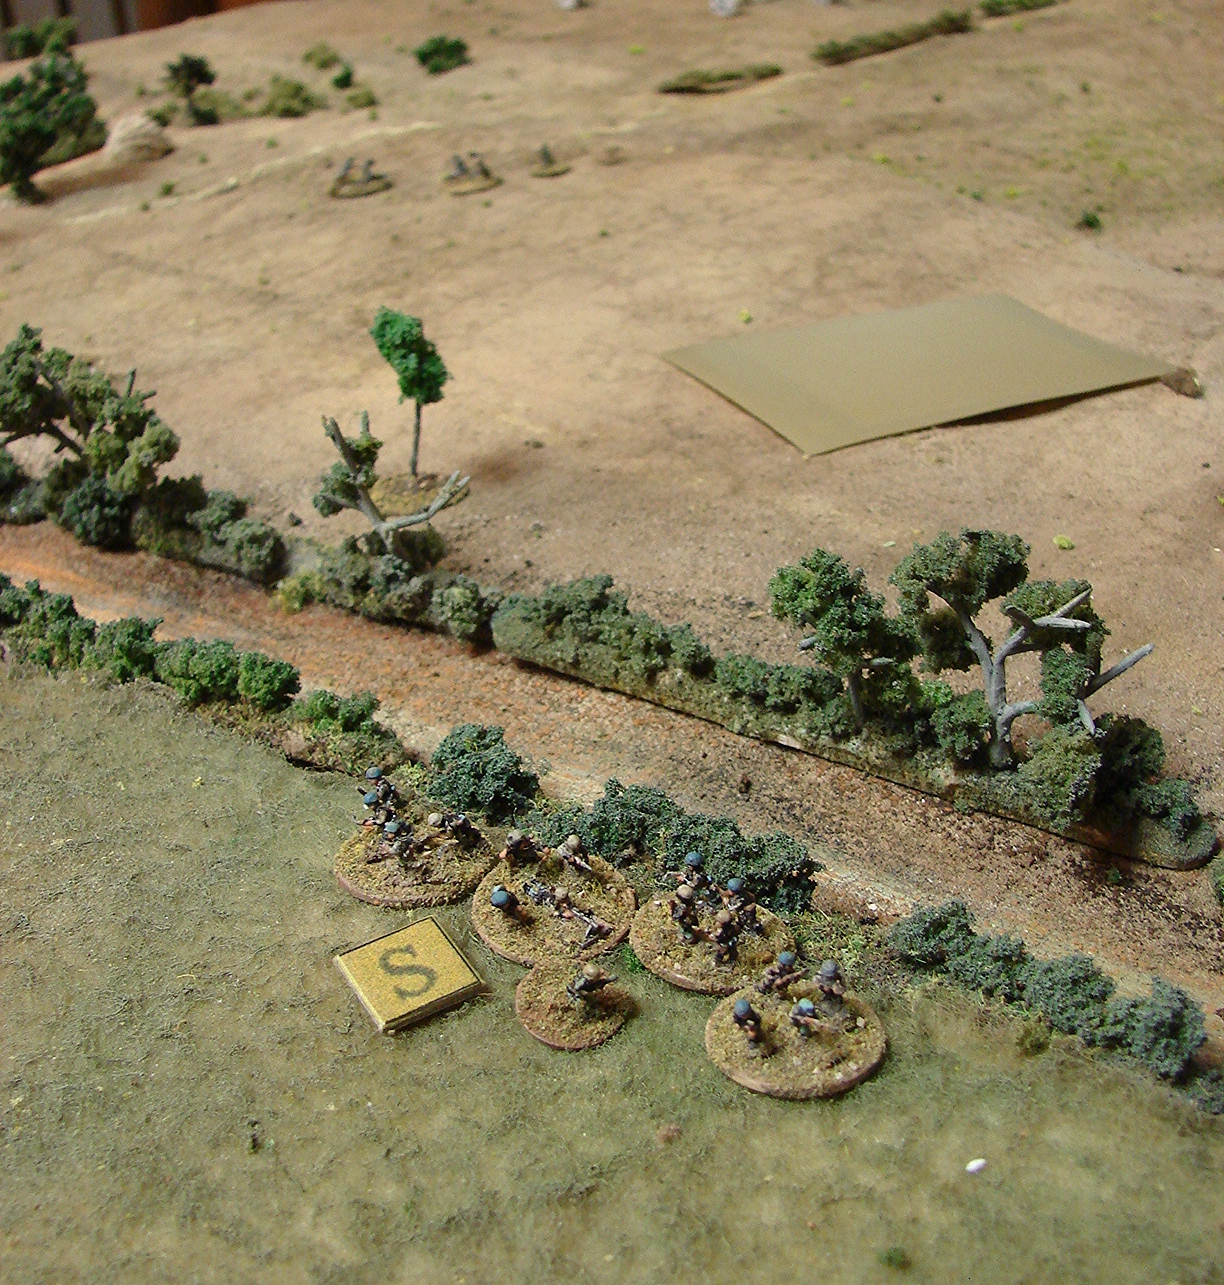
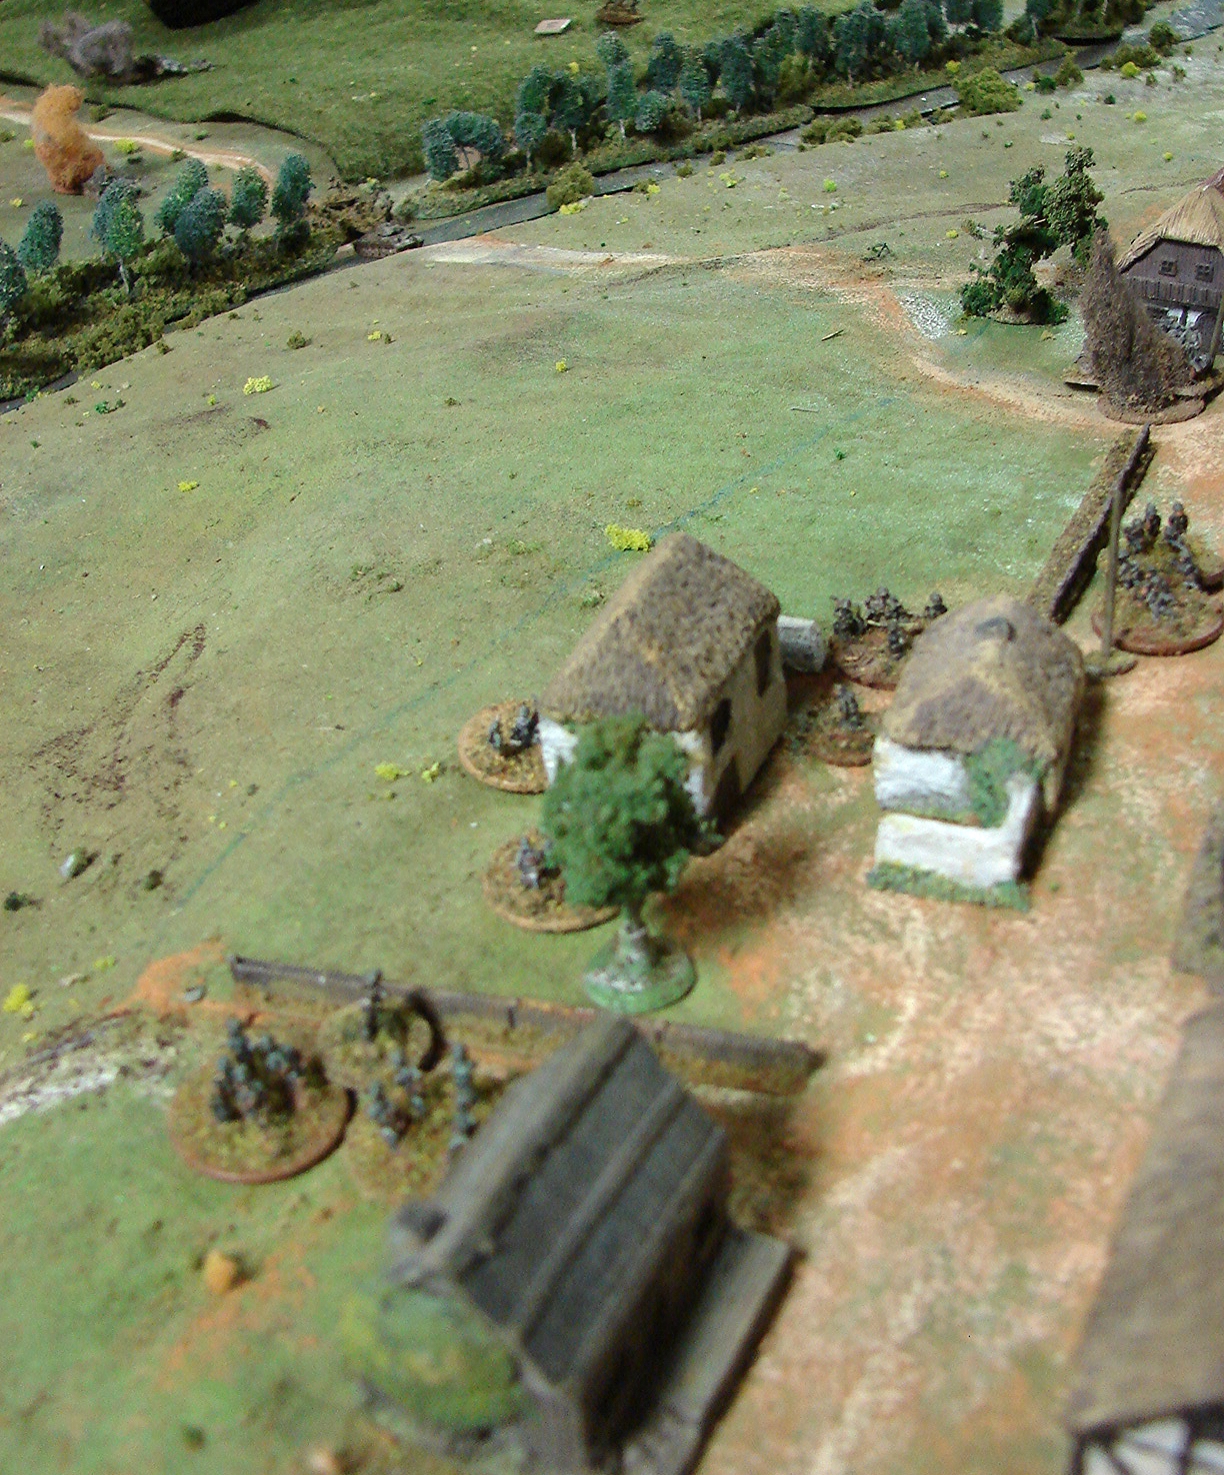
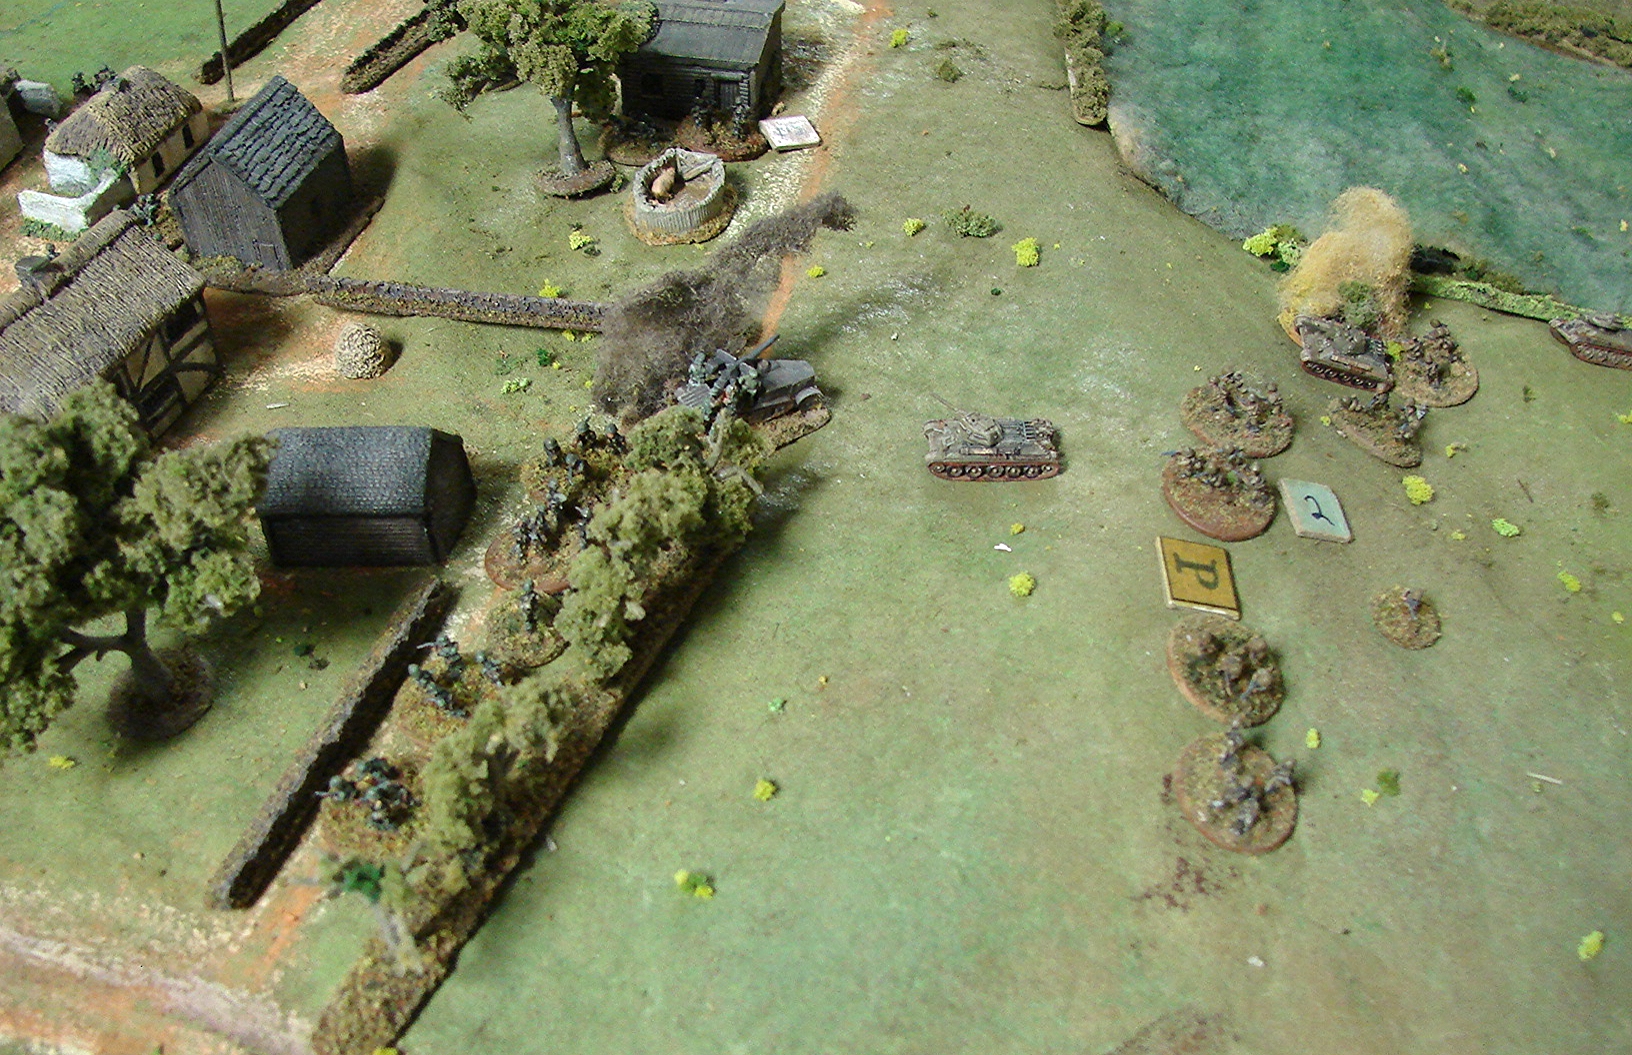
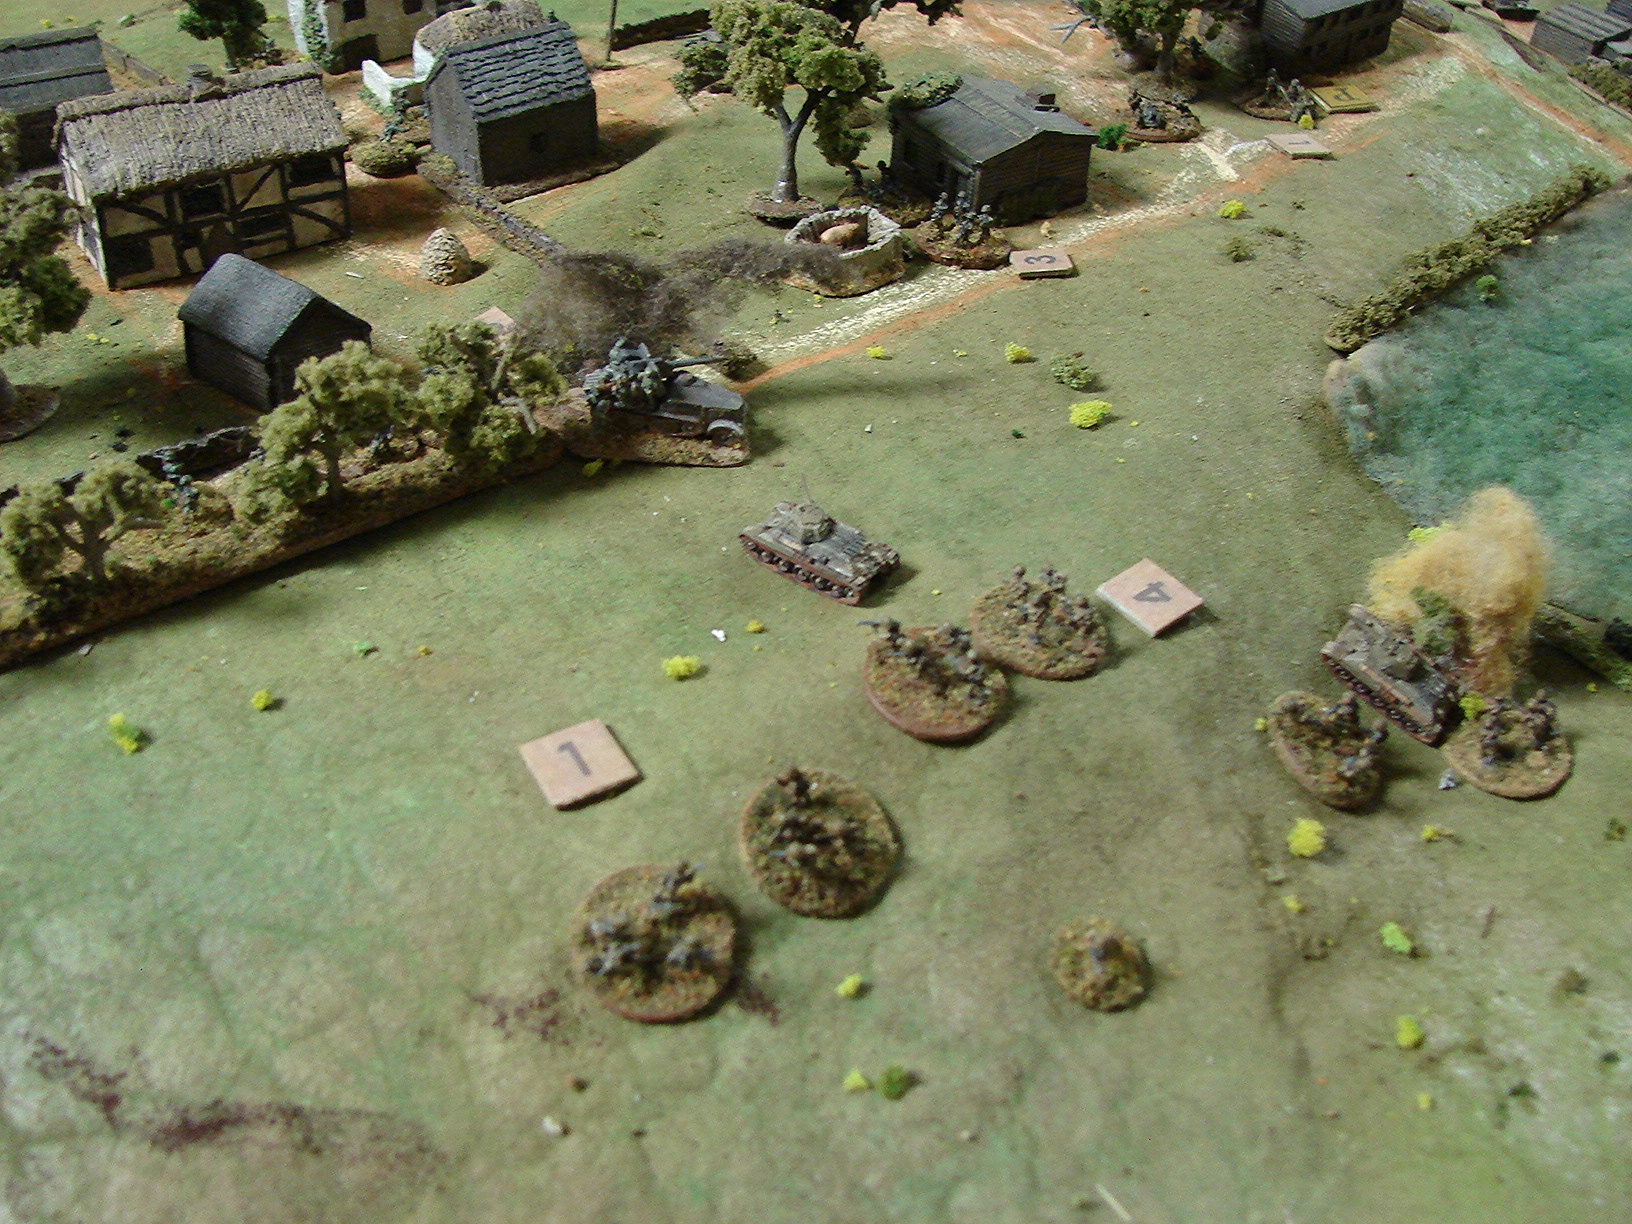
The British had a degree of internal debate before deciding to go the roundabout route, essentially doing the exact reverse: strike at Santa Maria, push round on the eastern road. To be fair, the initial strike was pretty classically beautiful: AndyB's platoon were briefly pinned by mortar fire in the woods before the platoon's 2" coughed up a wall of smoke across the front of the buildings and all three sections came in from the south side. There then followed a textbook house clearance - Nos. 1 and 2 sections fired on the first building containing a German section, did it a couple of shock, a couple of kills and more importantly a pin, and in went No. 3 section to close assault, winning by one kill and driving them out.

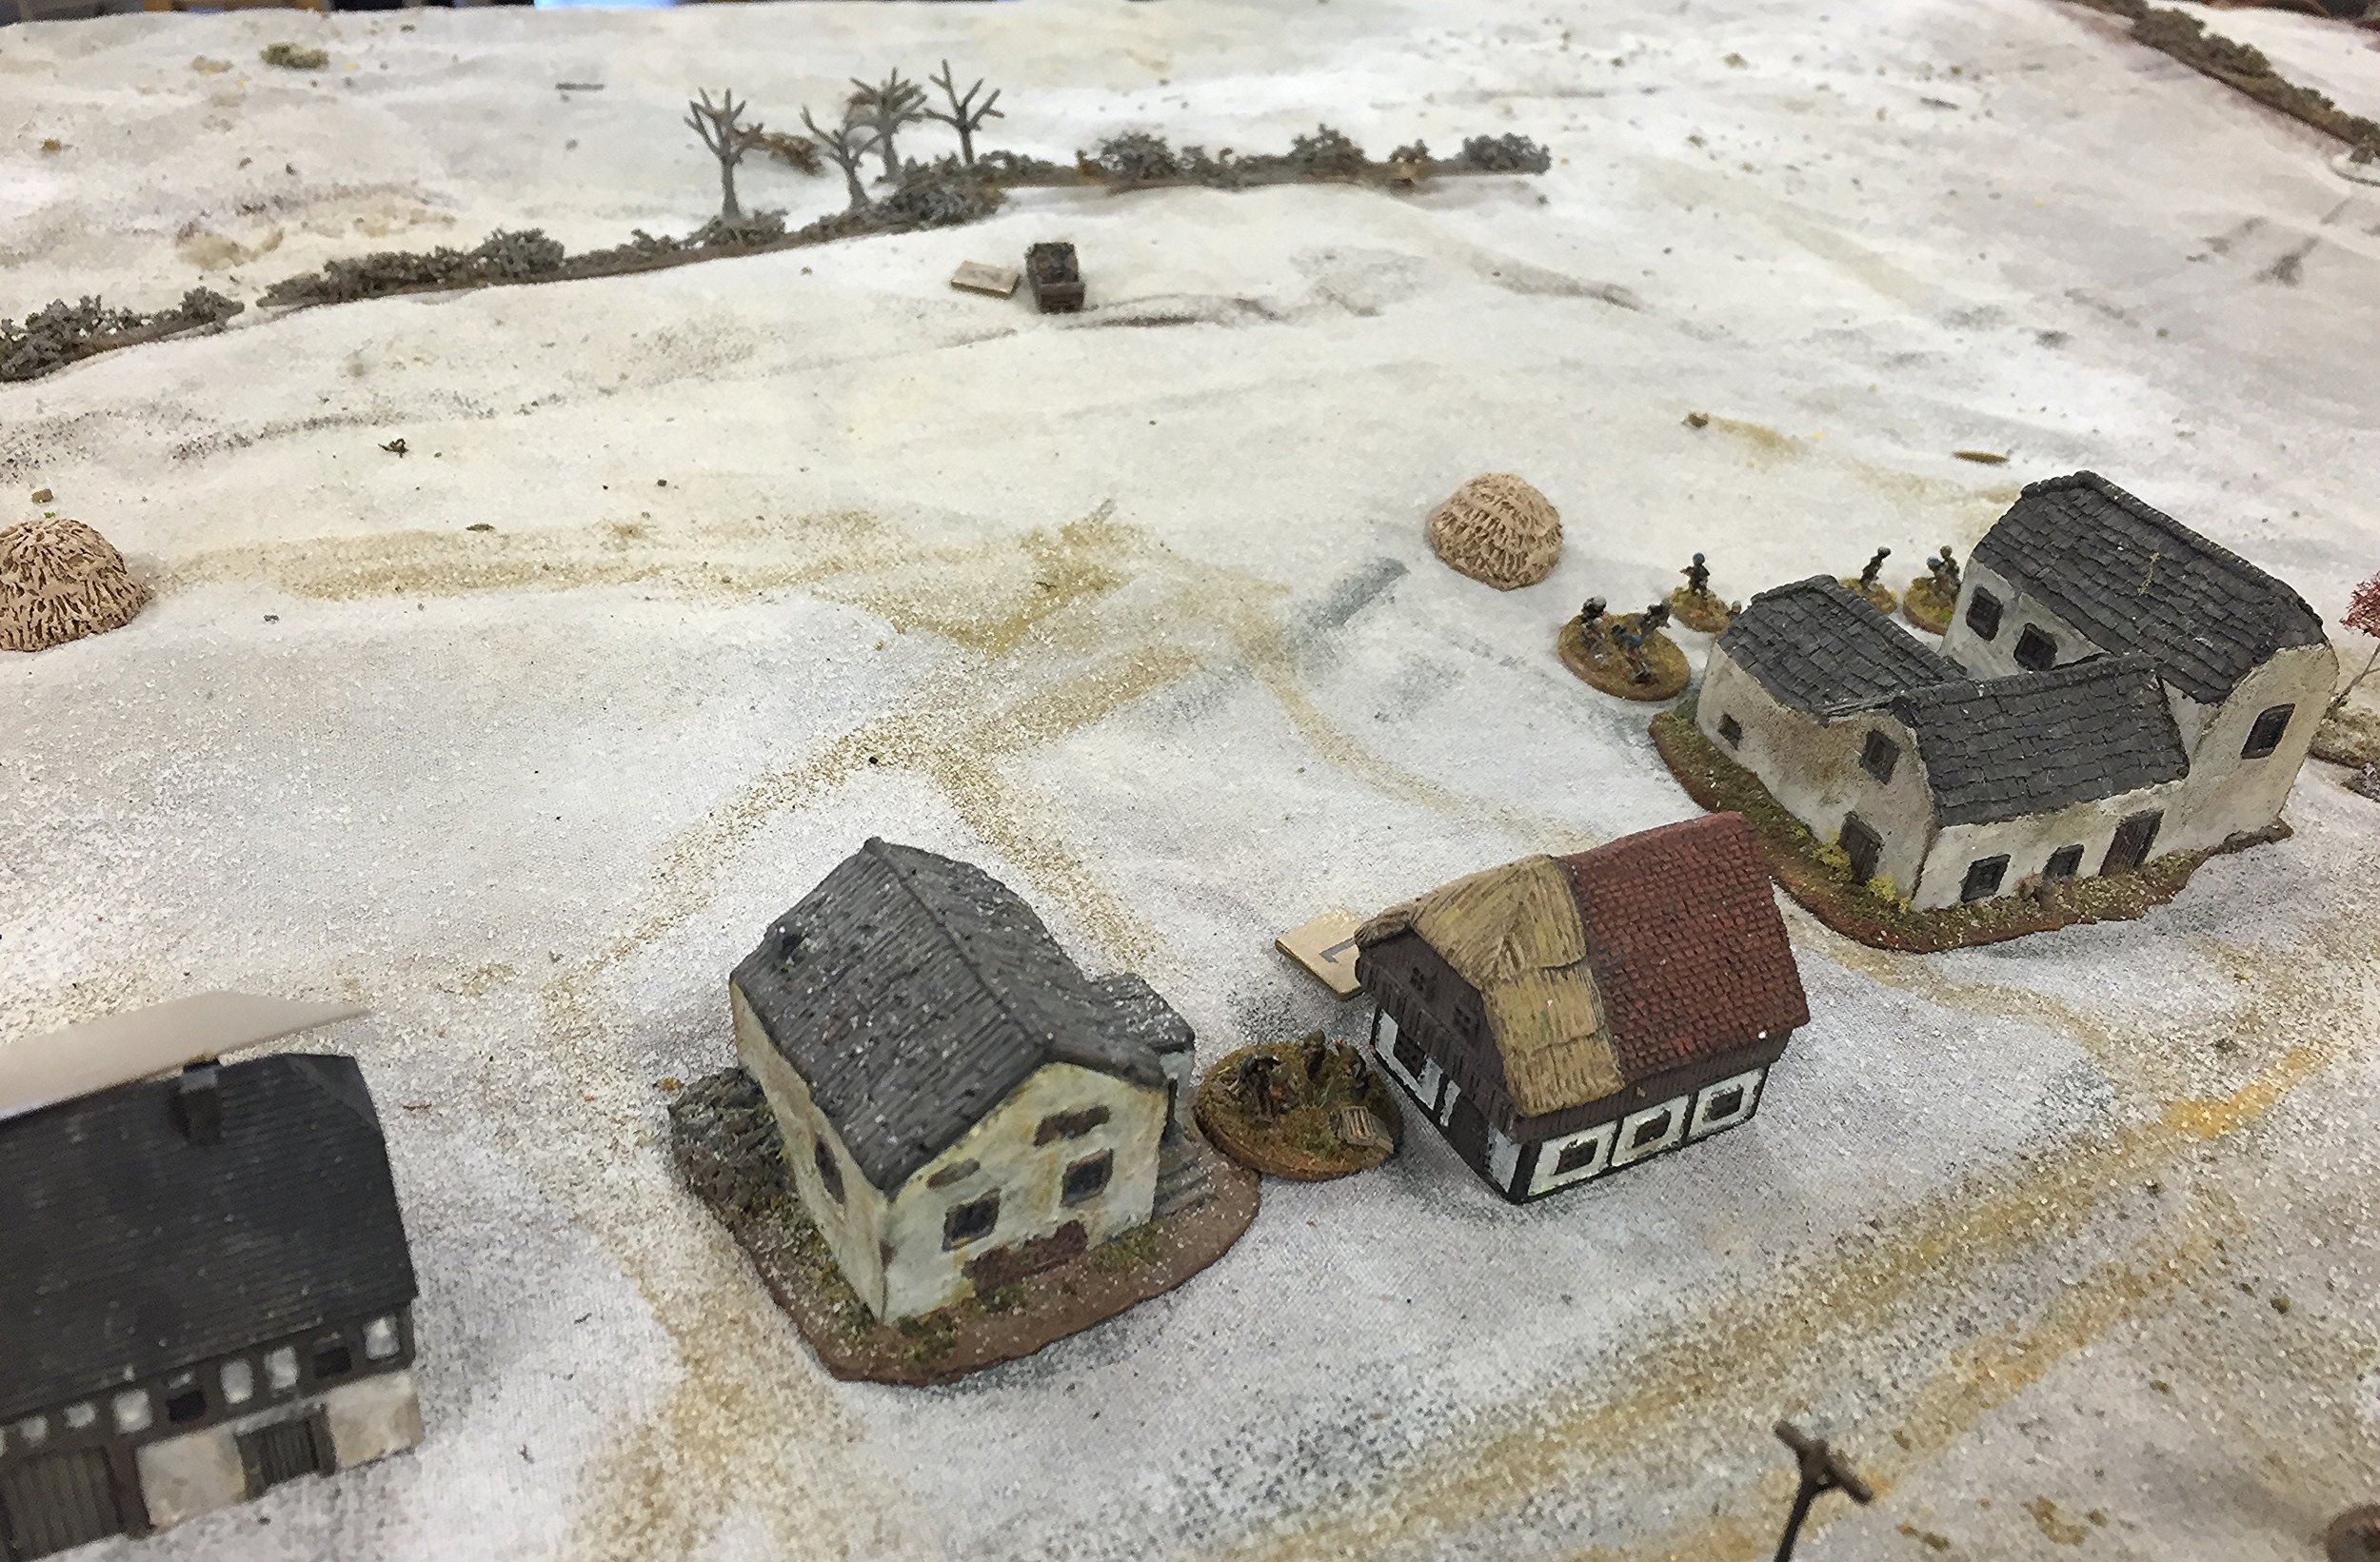
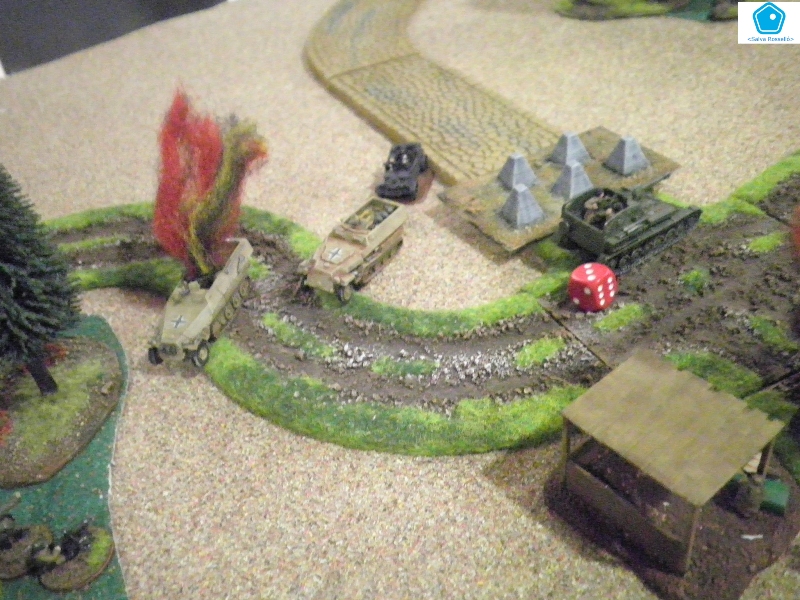
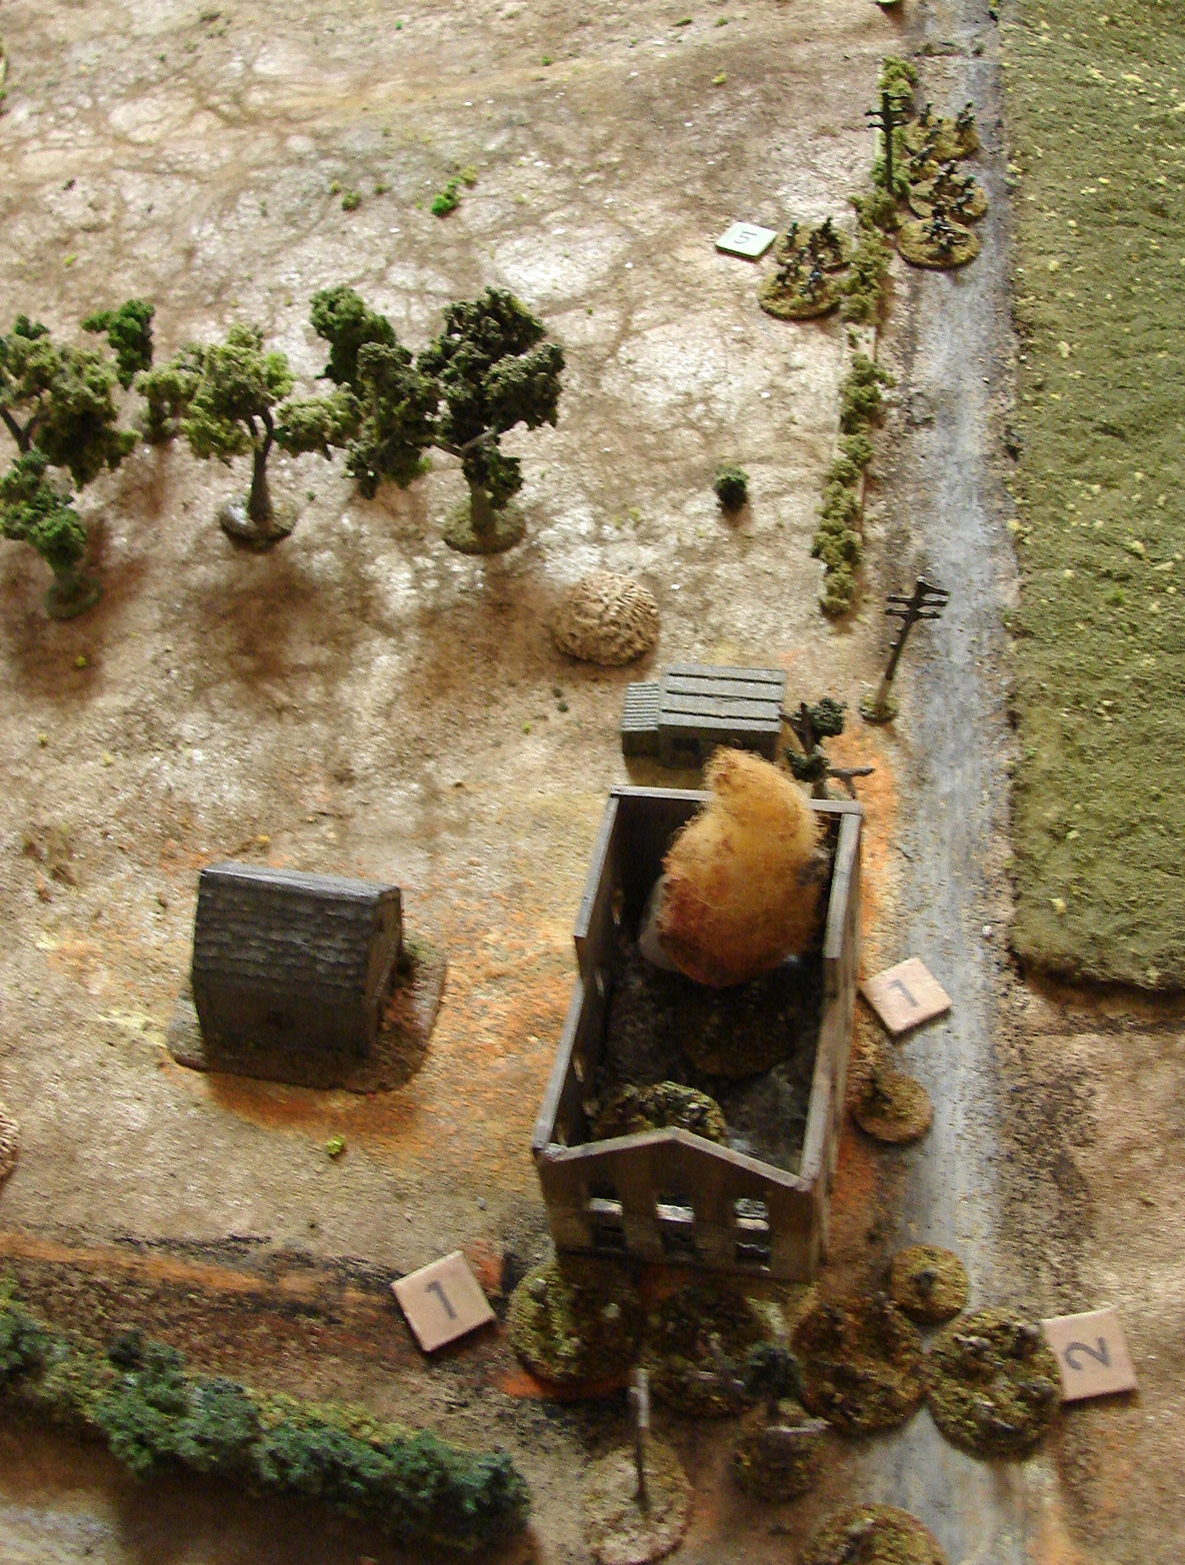
By this time the Shermans had turned up, and one tossed a couple of HE rounds in the other building containing a German MG42, set it on fire, drove them out and pretty much wiped them out. That was the cue for the other German section to bail out of the village towards the vineyard, and it got caught in the open on the way out.

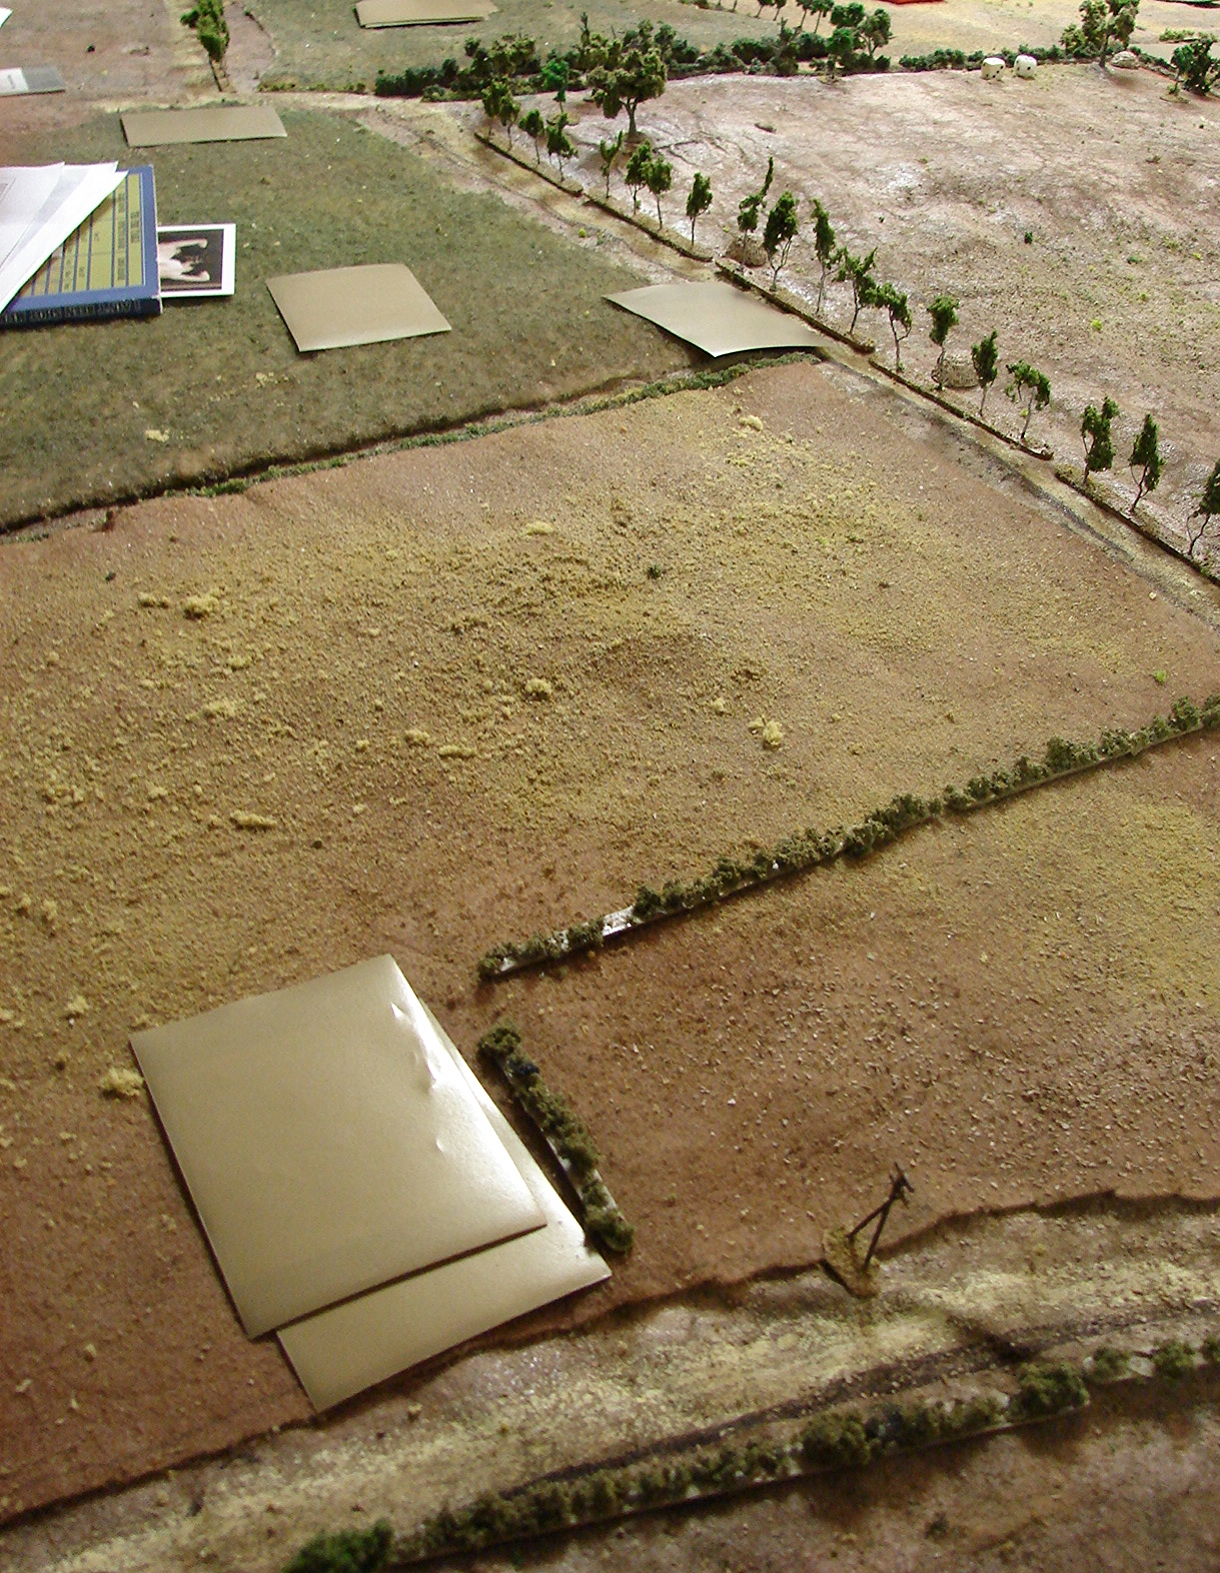
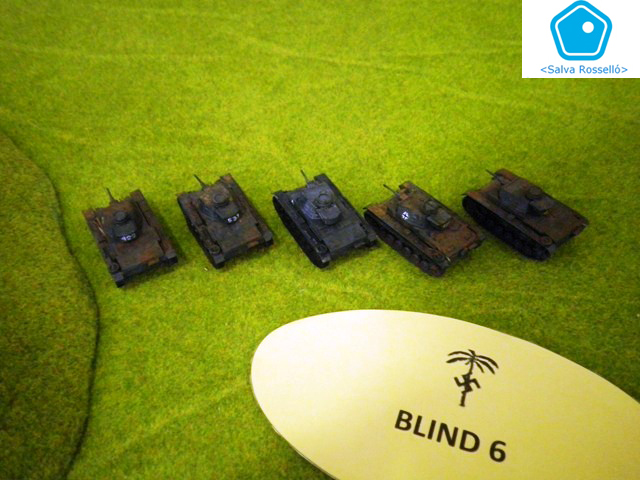
Meanwhile, a dummy blind headed along the wheat field to the west towards Santa Magdalena, and proceeded to make a pain of itself by simply failing to be spotted while not spotting anything either - it did keep the Germans in the village interested though!

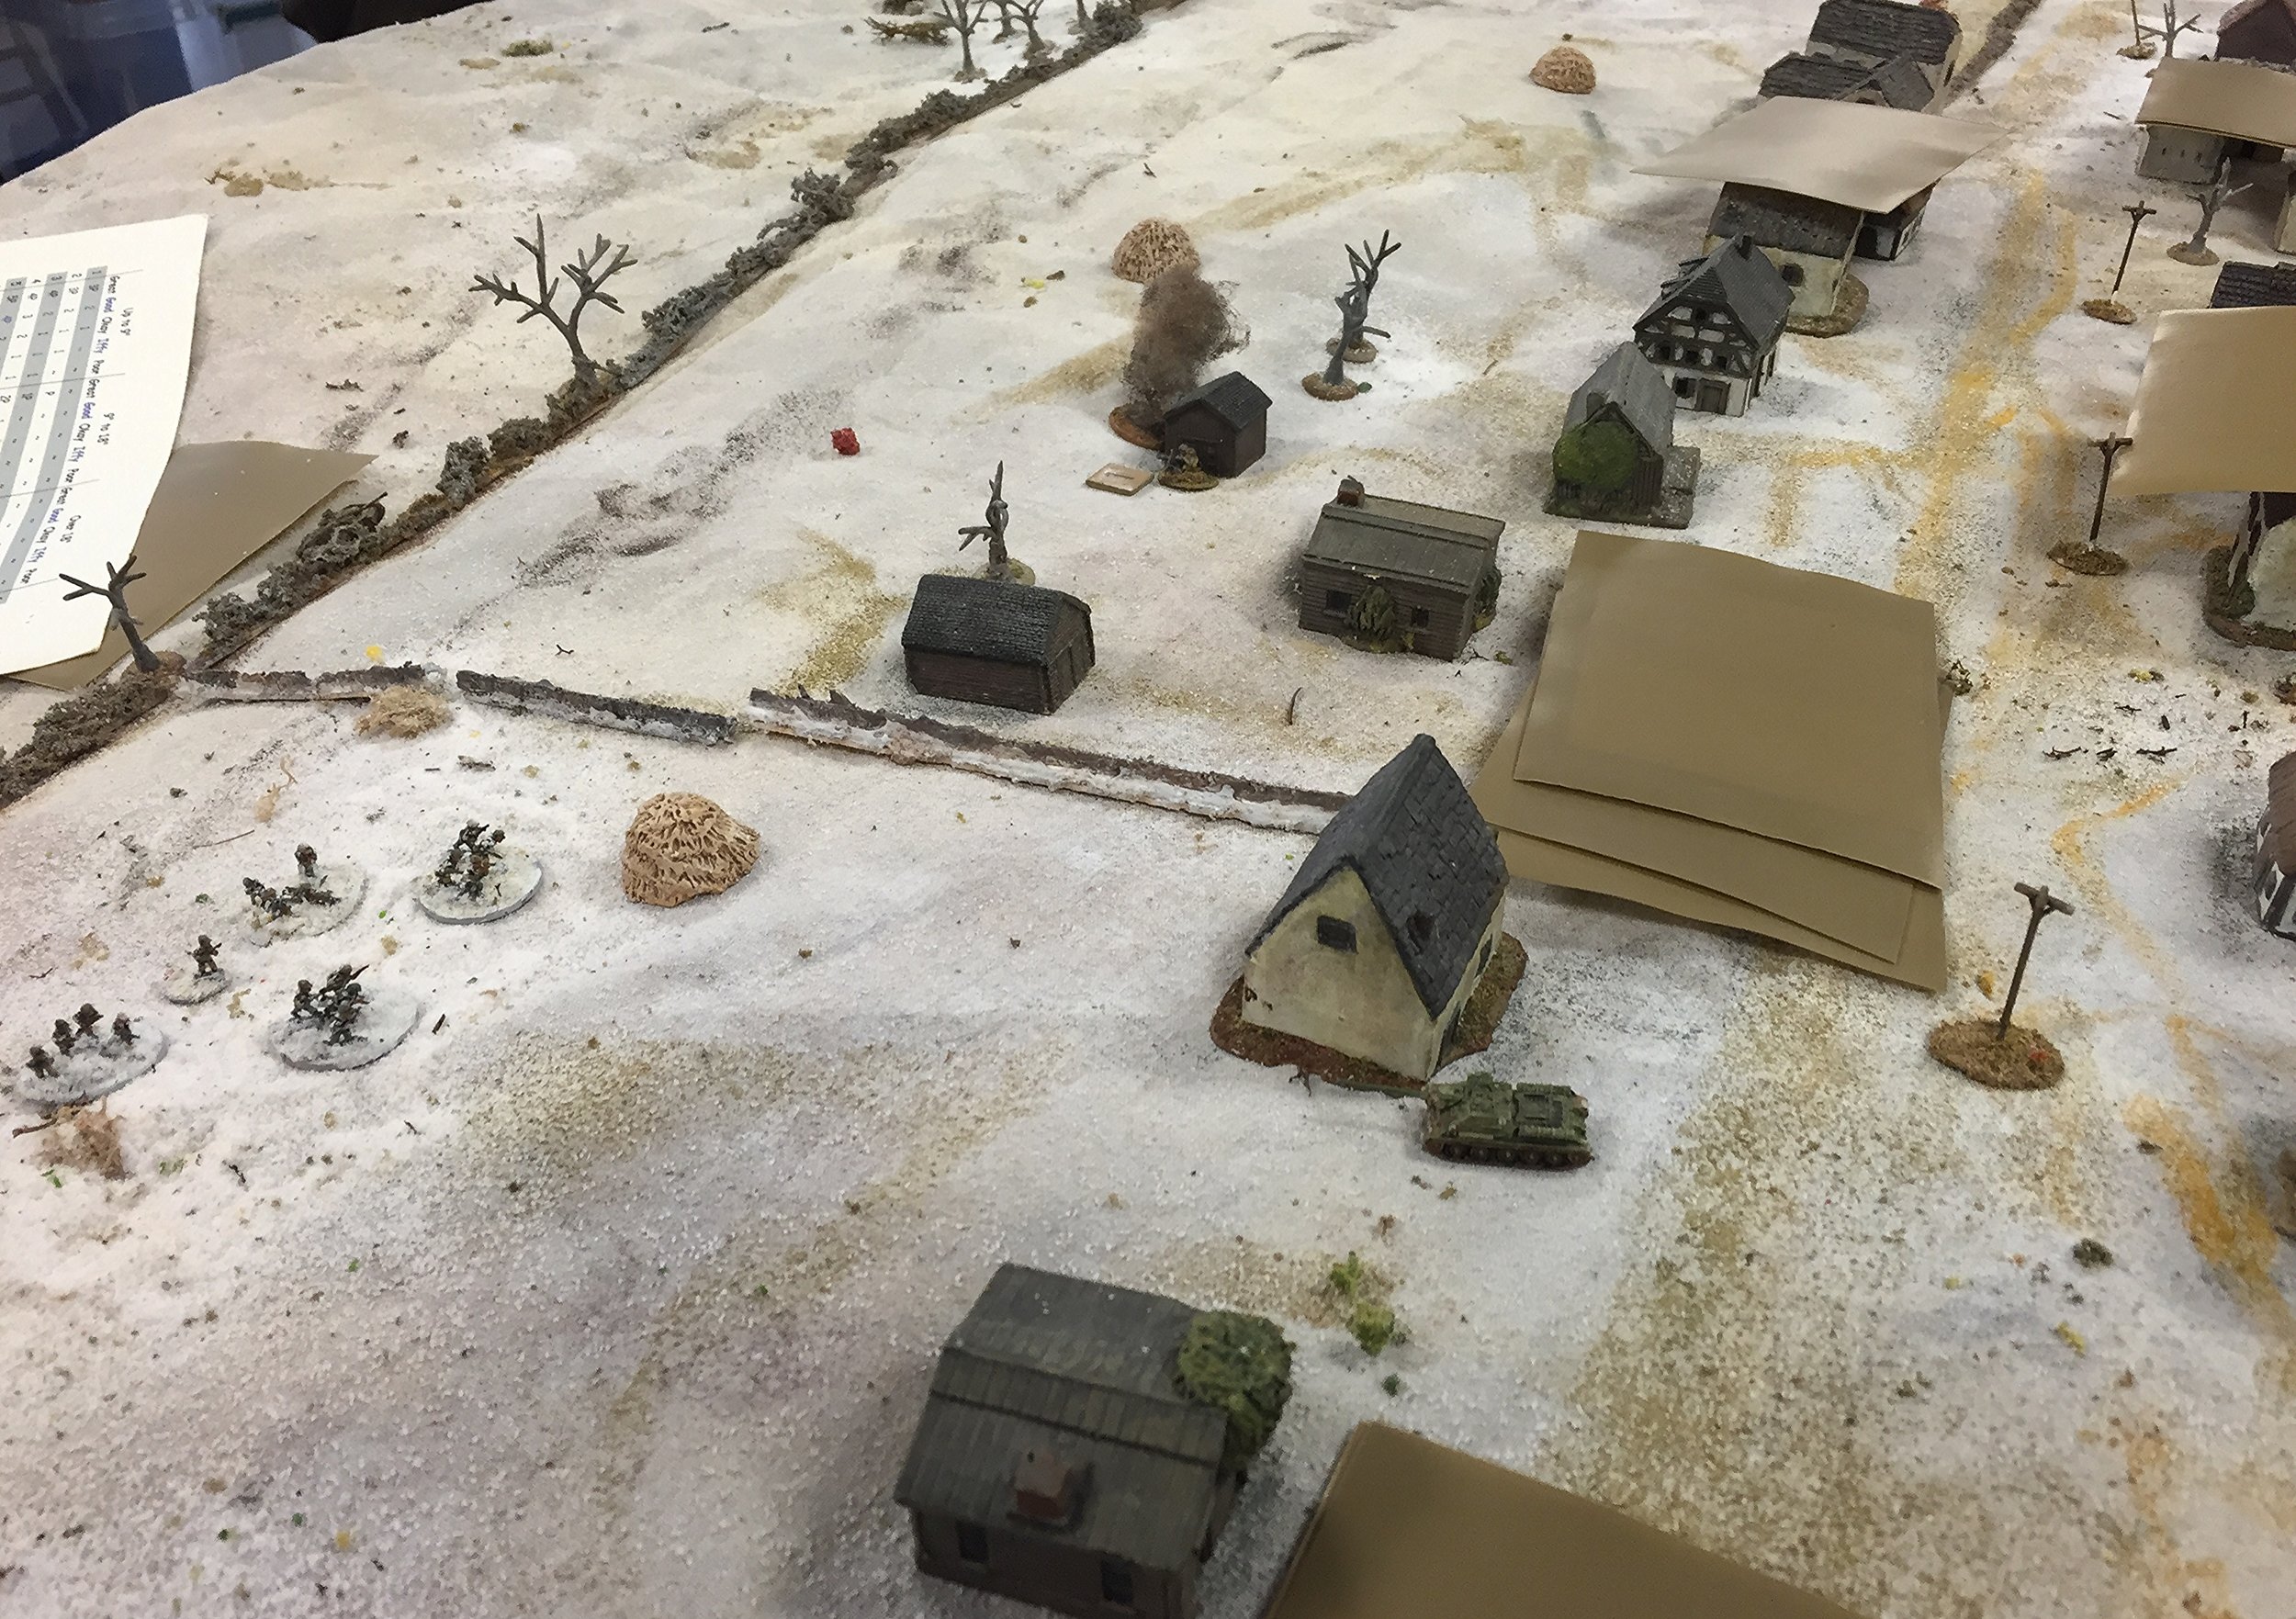
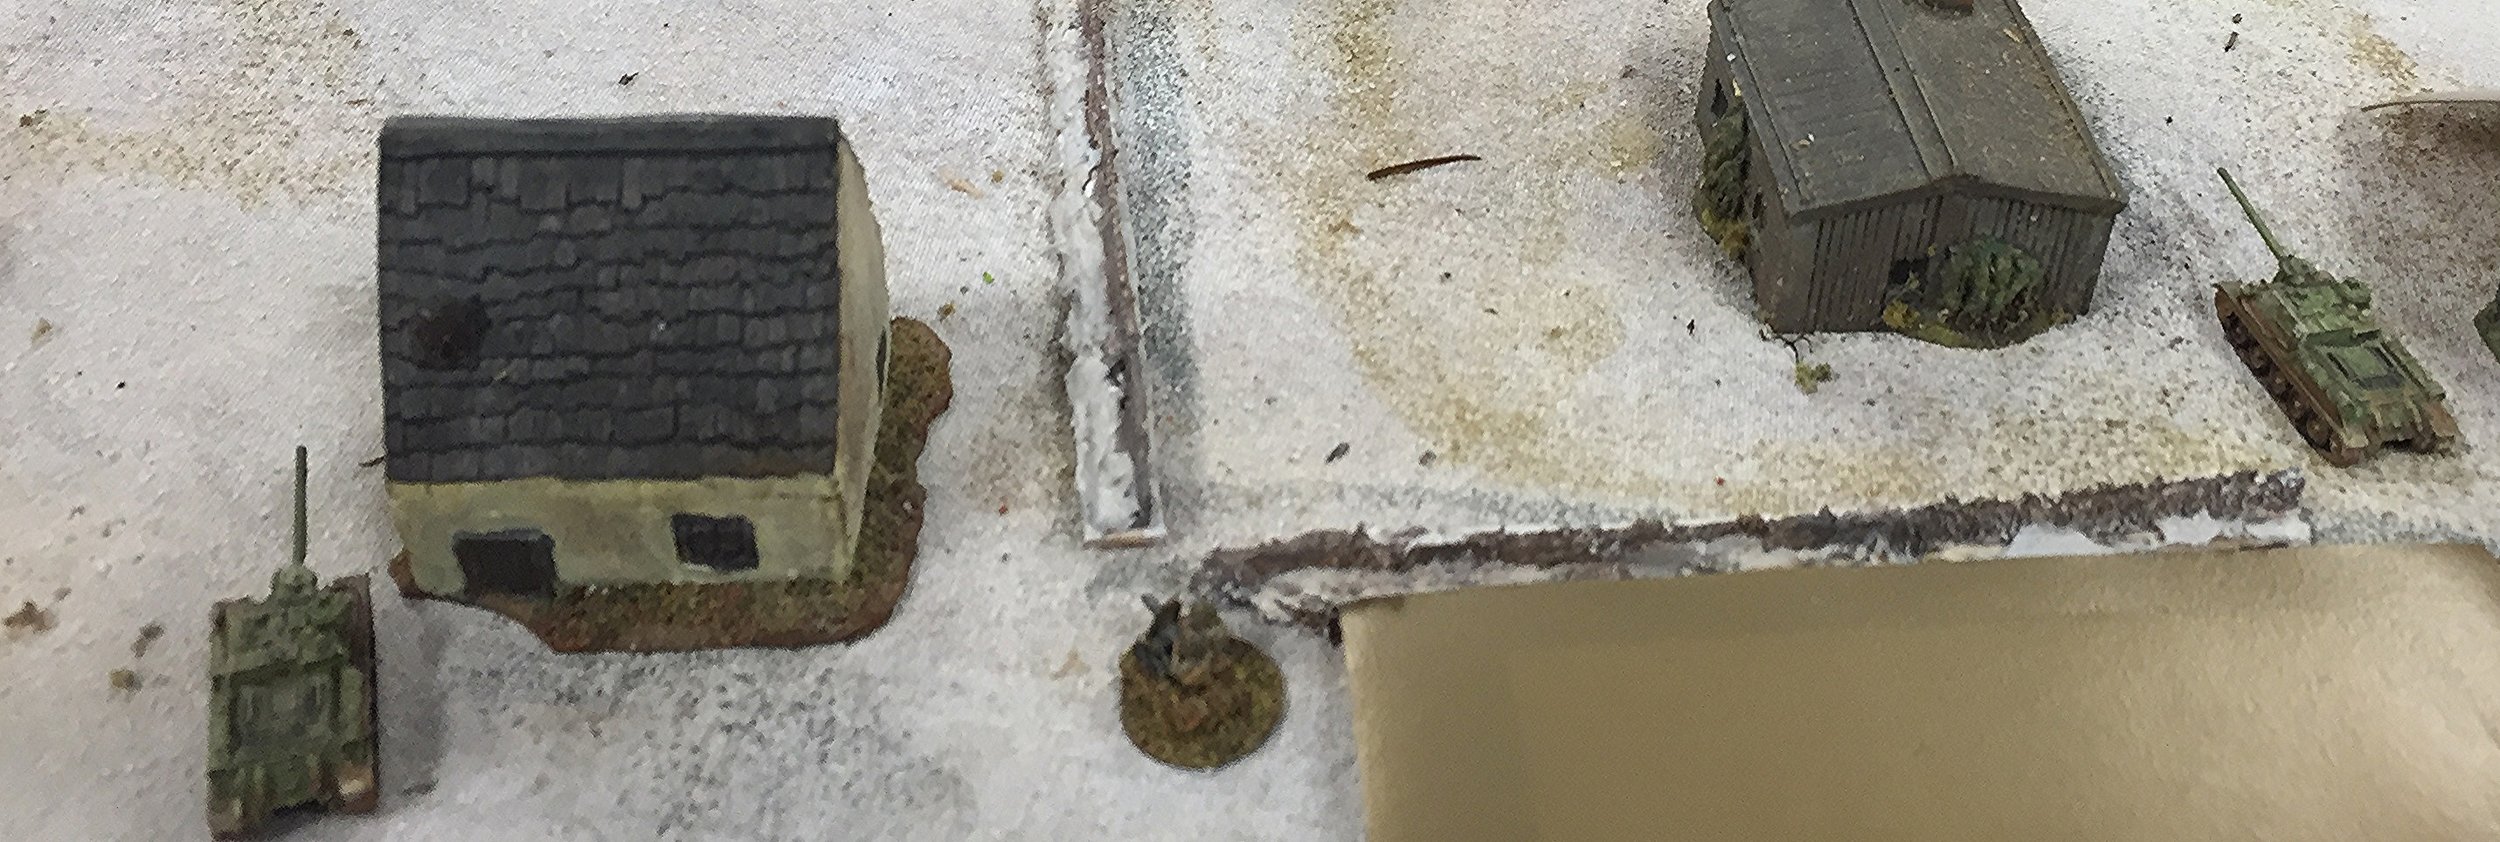
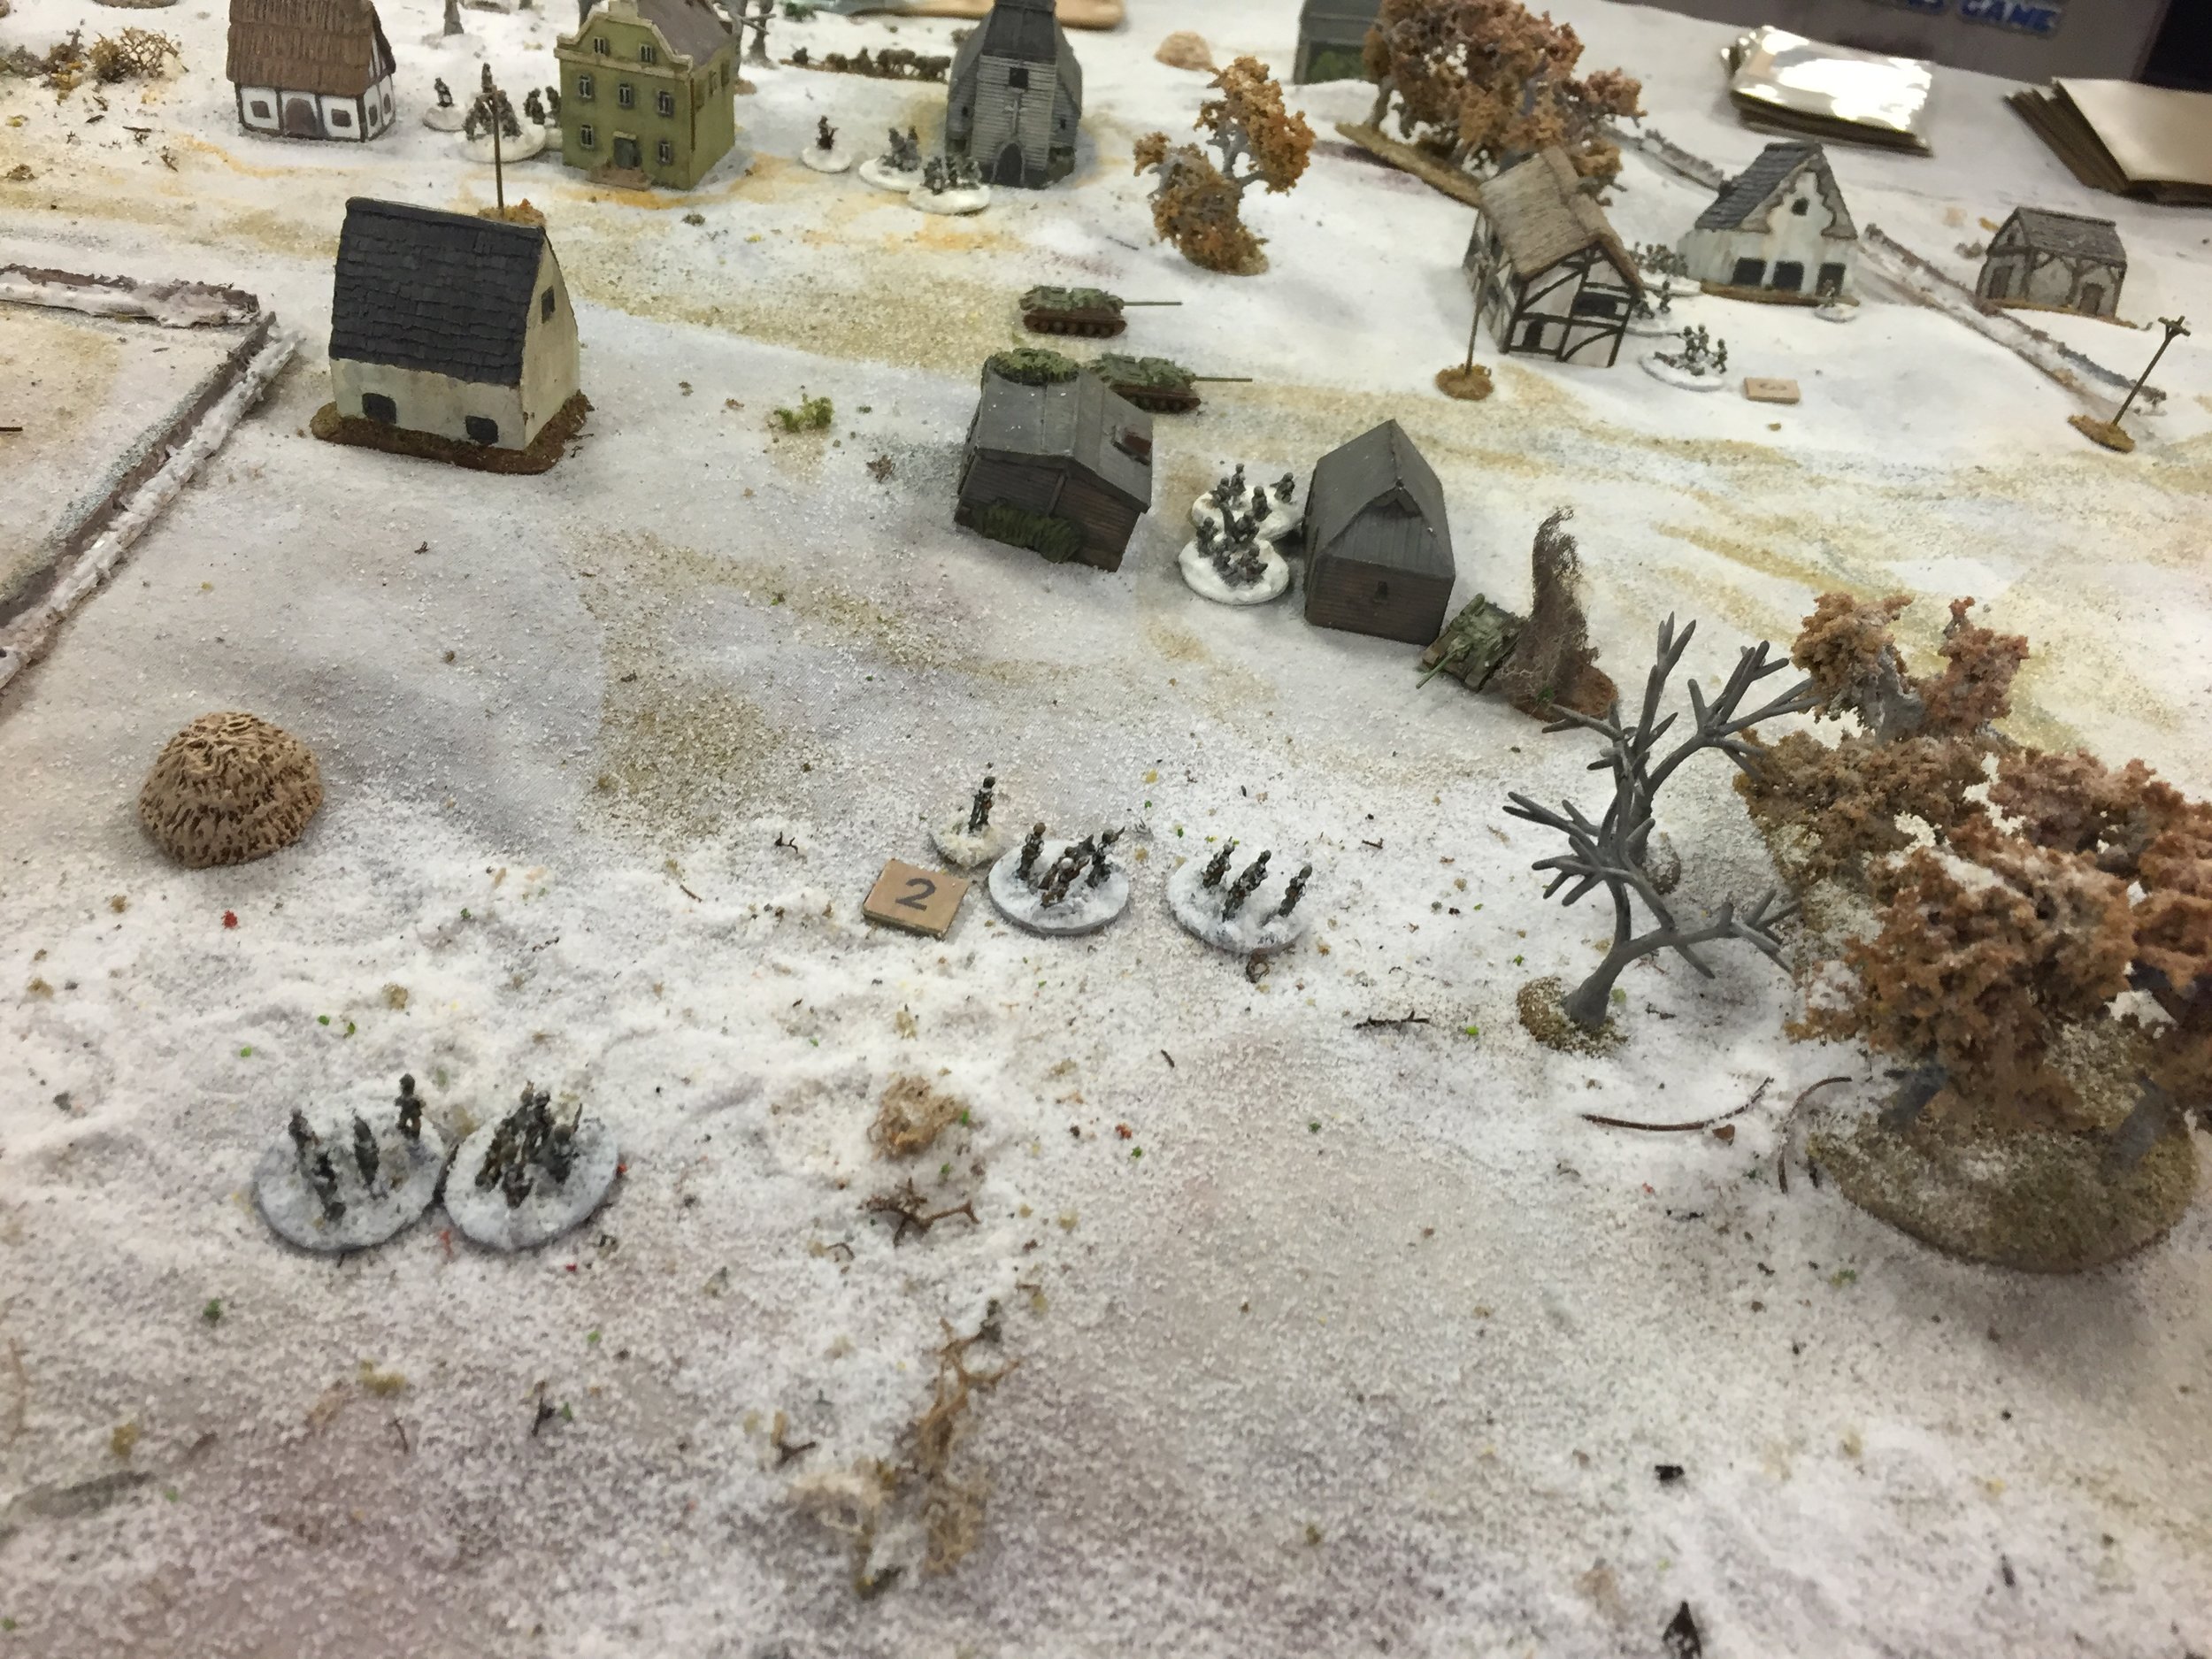
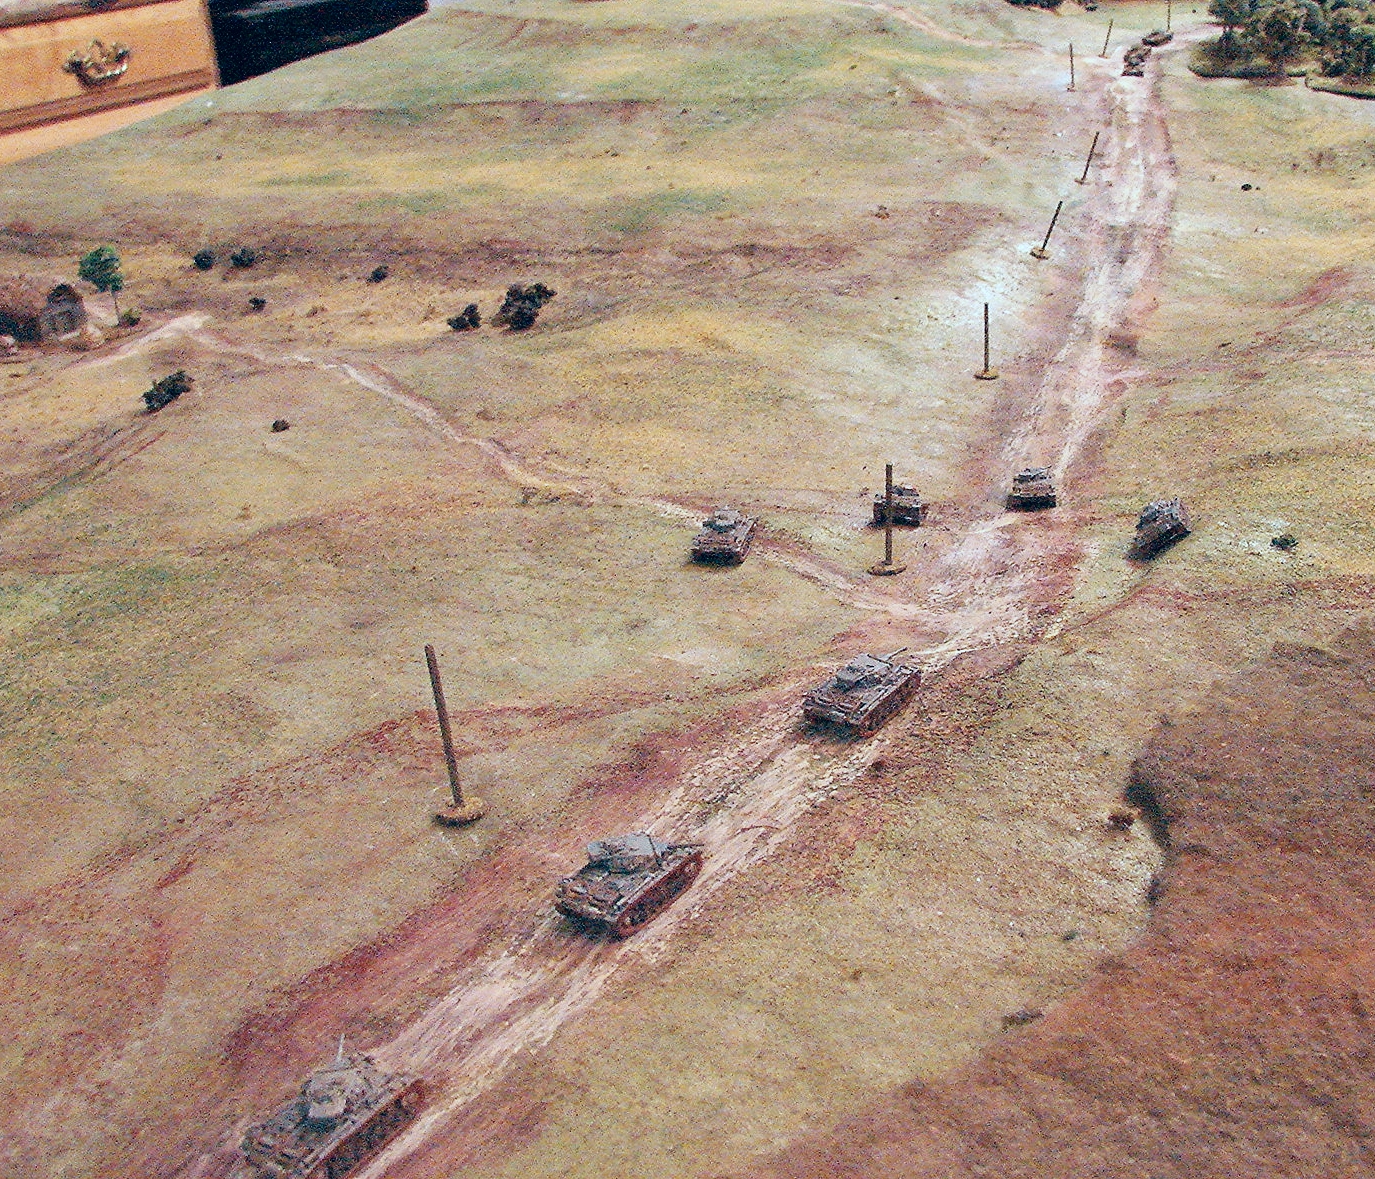
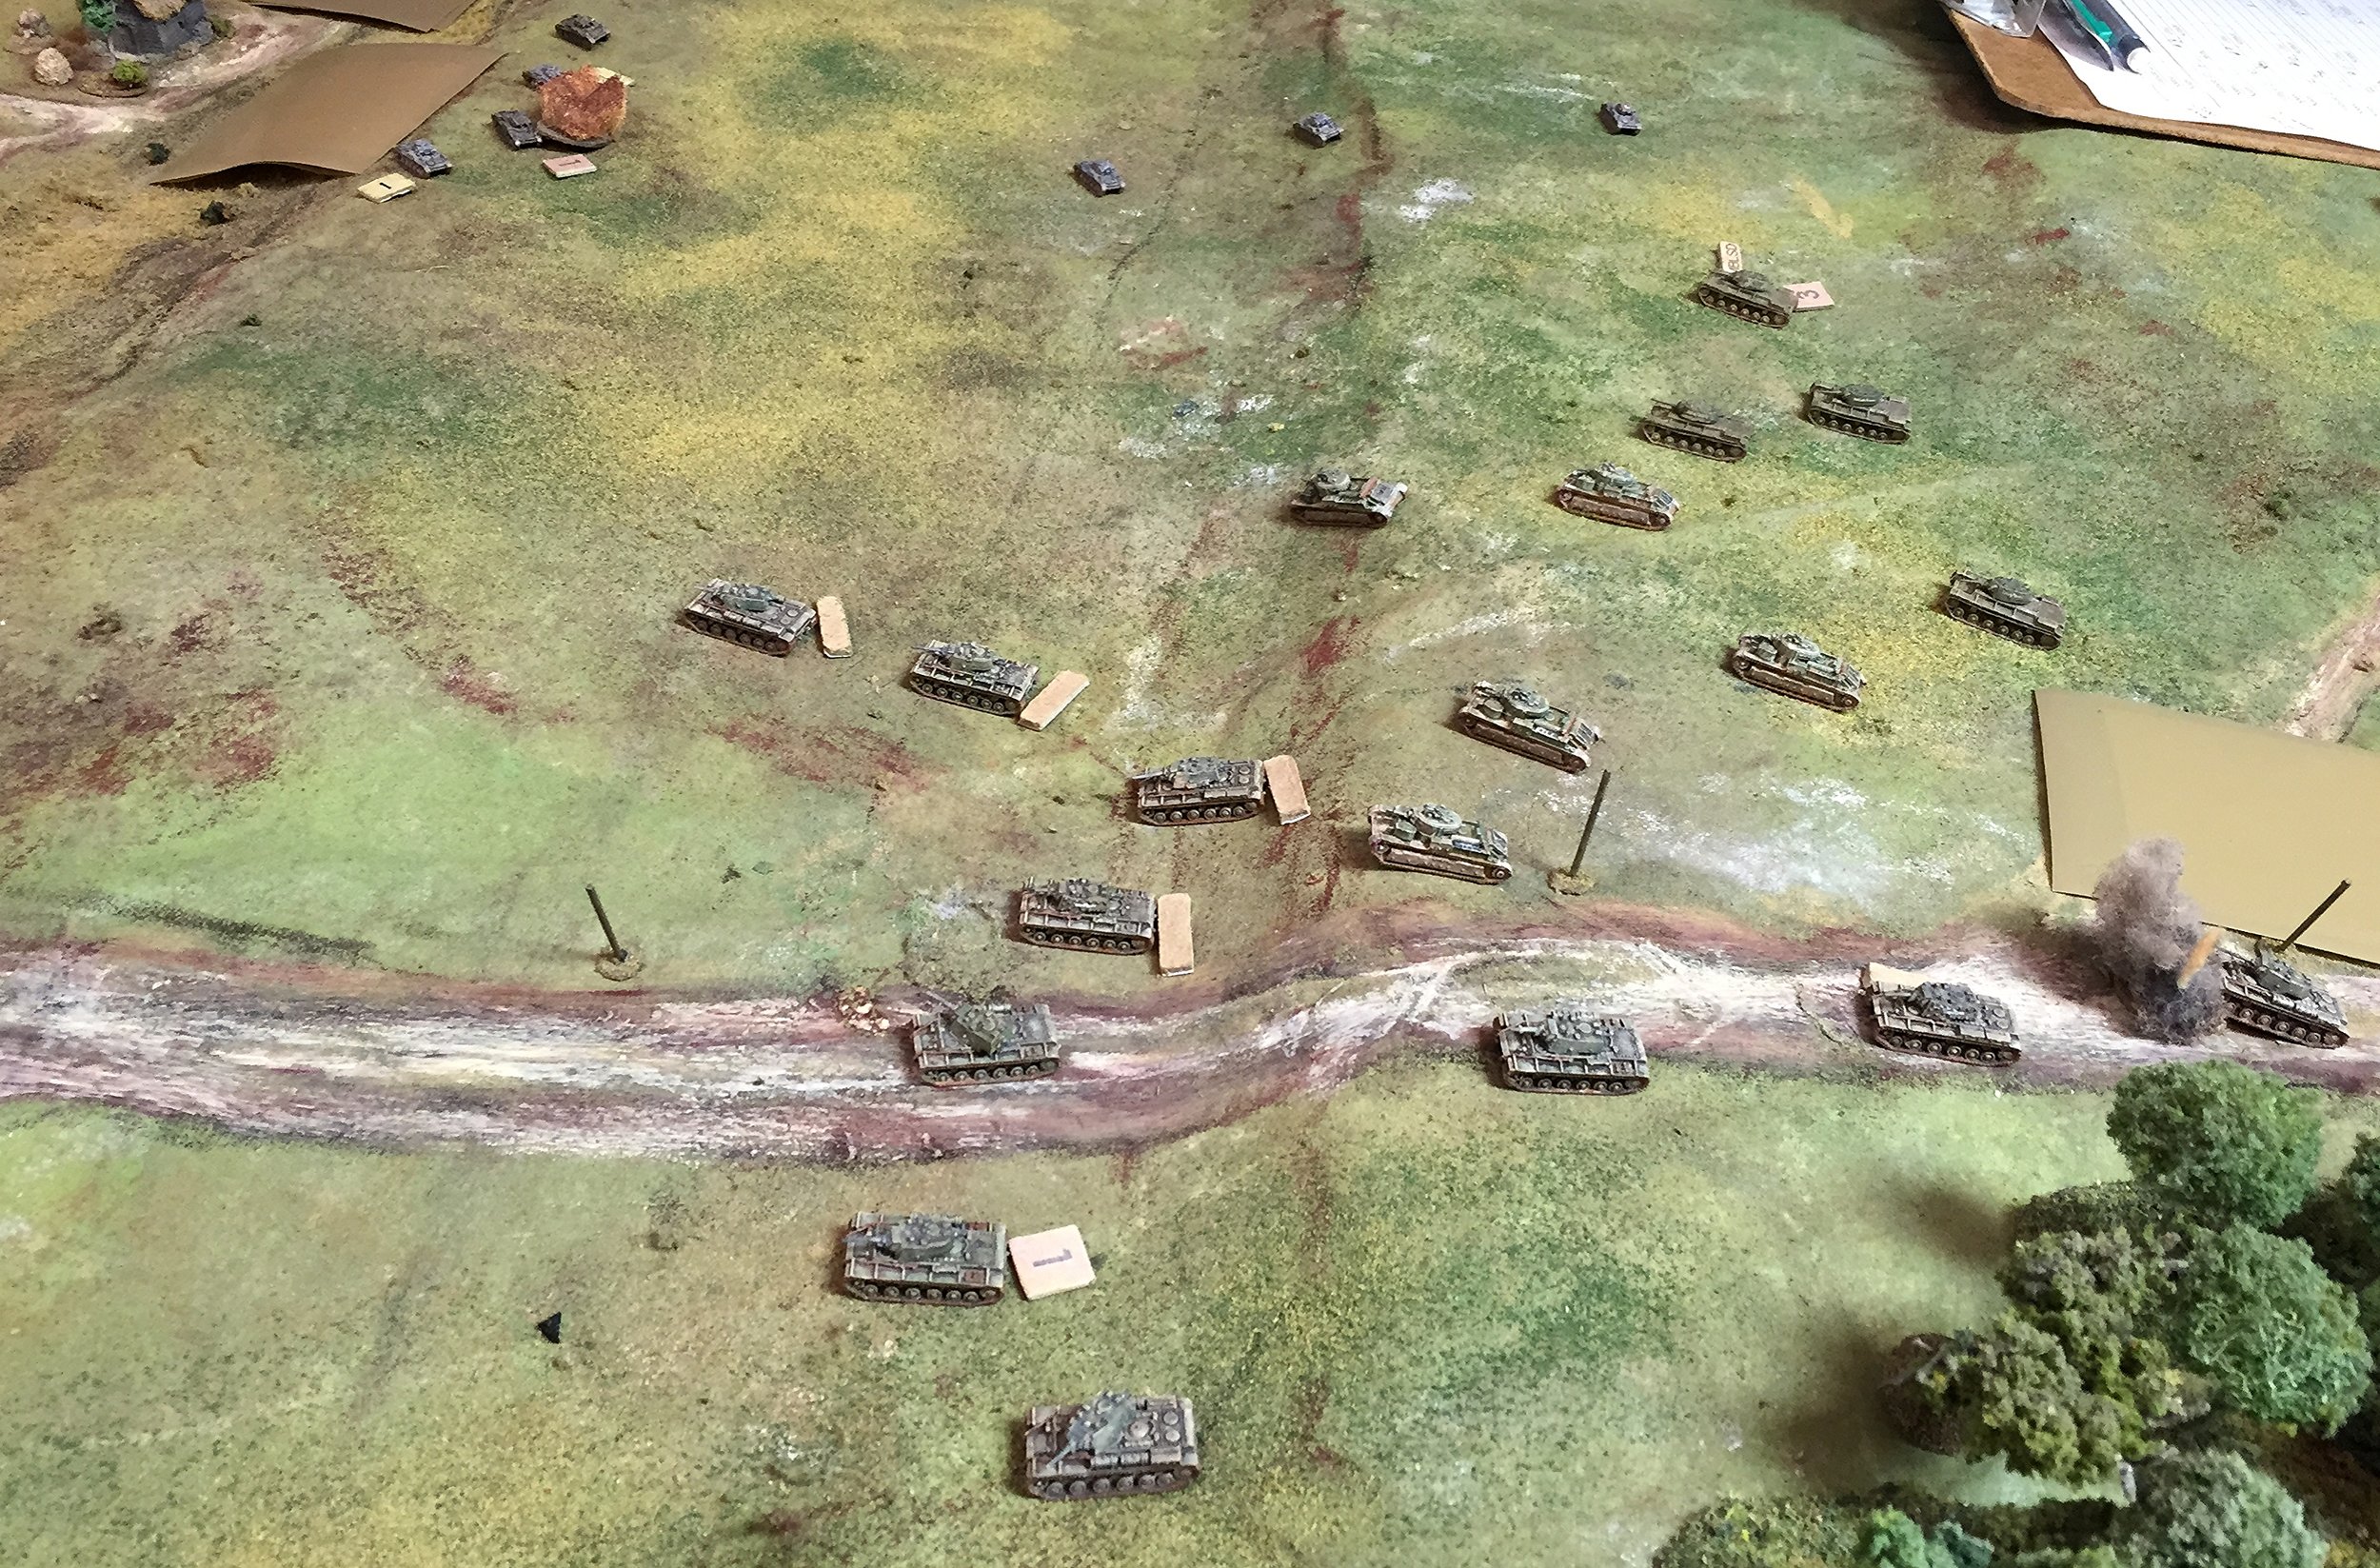
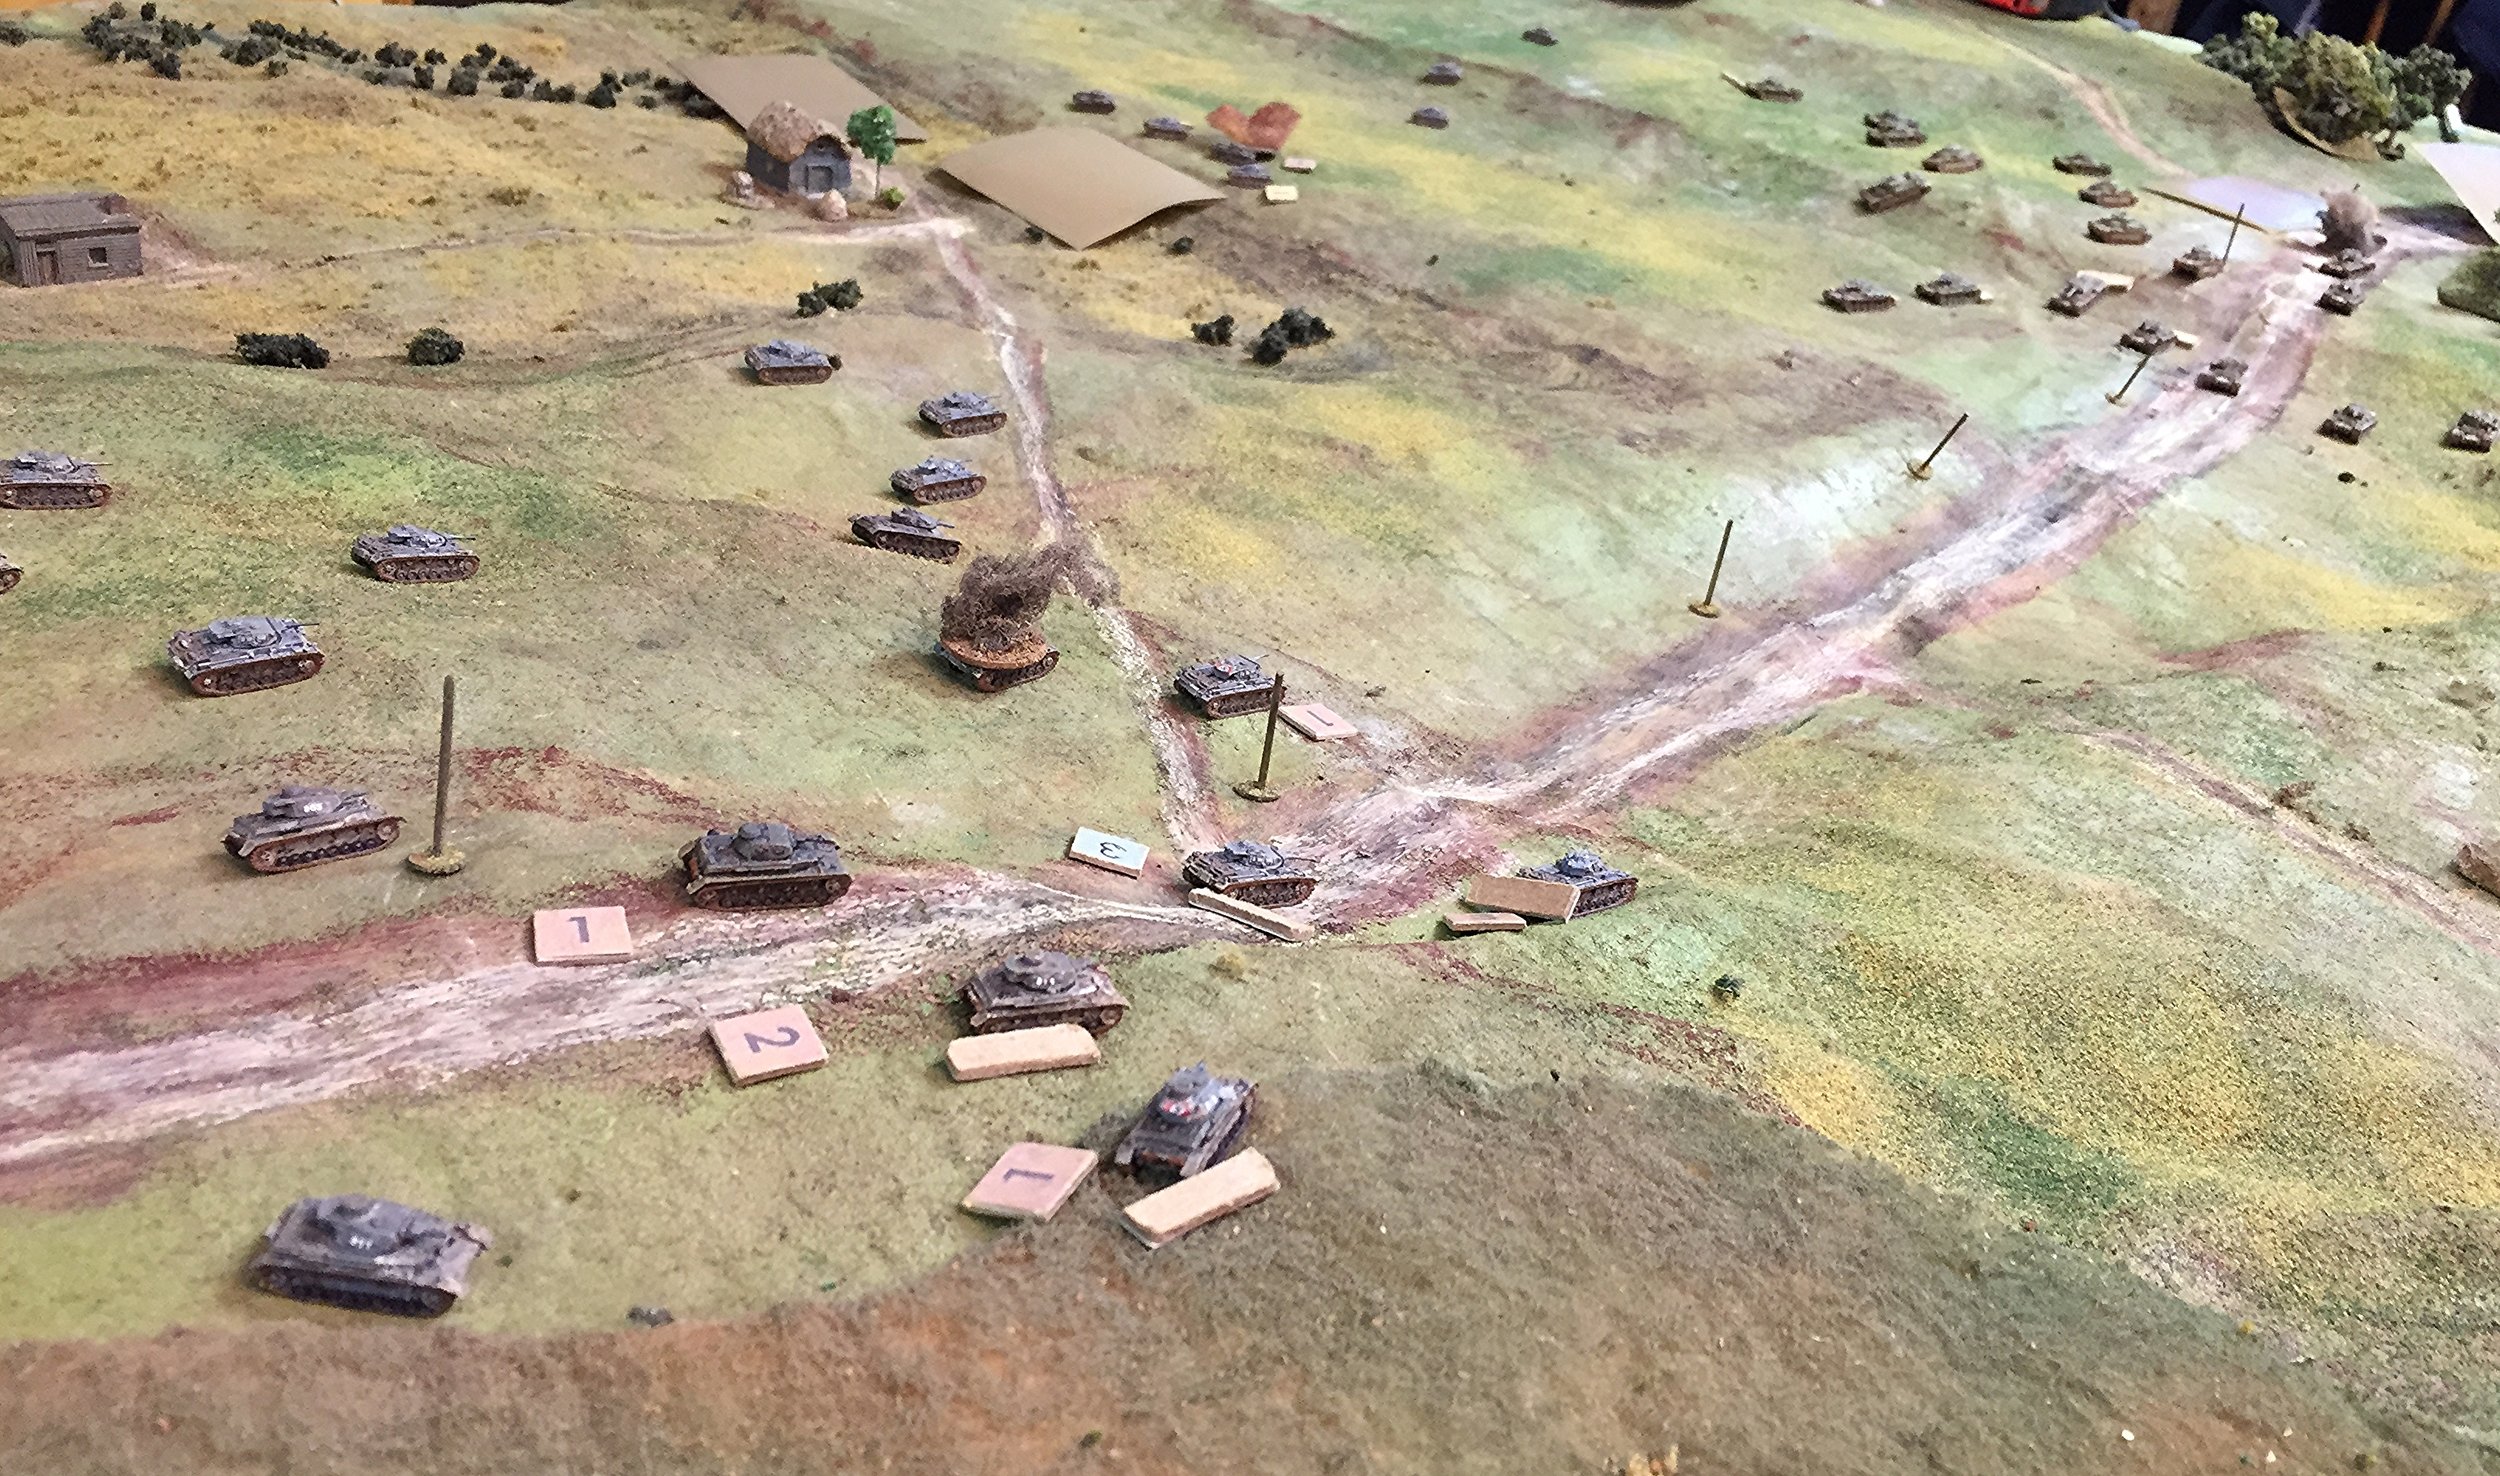
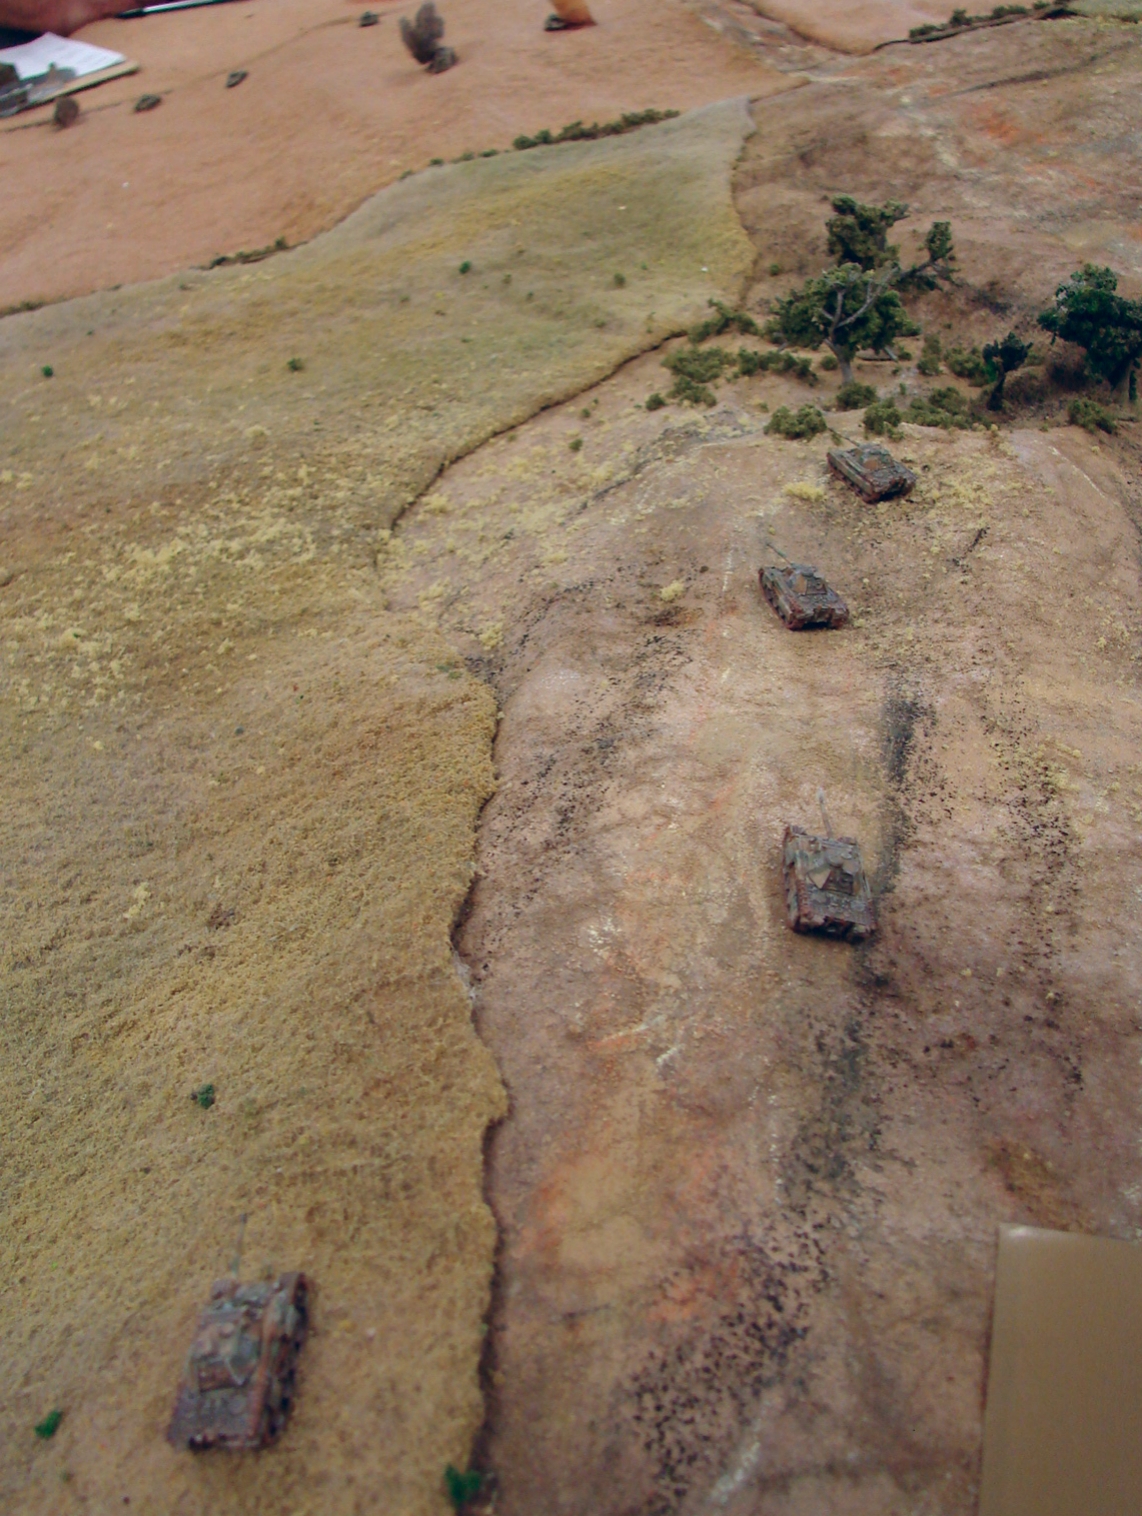
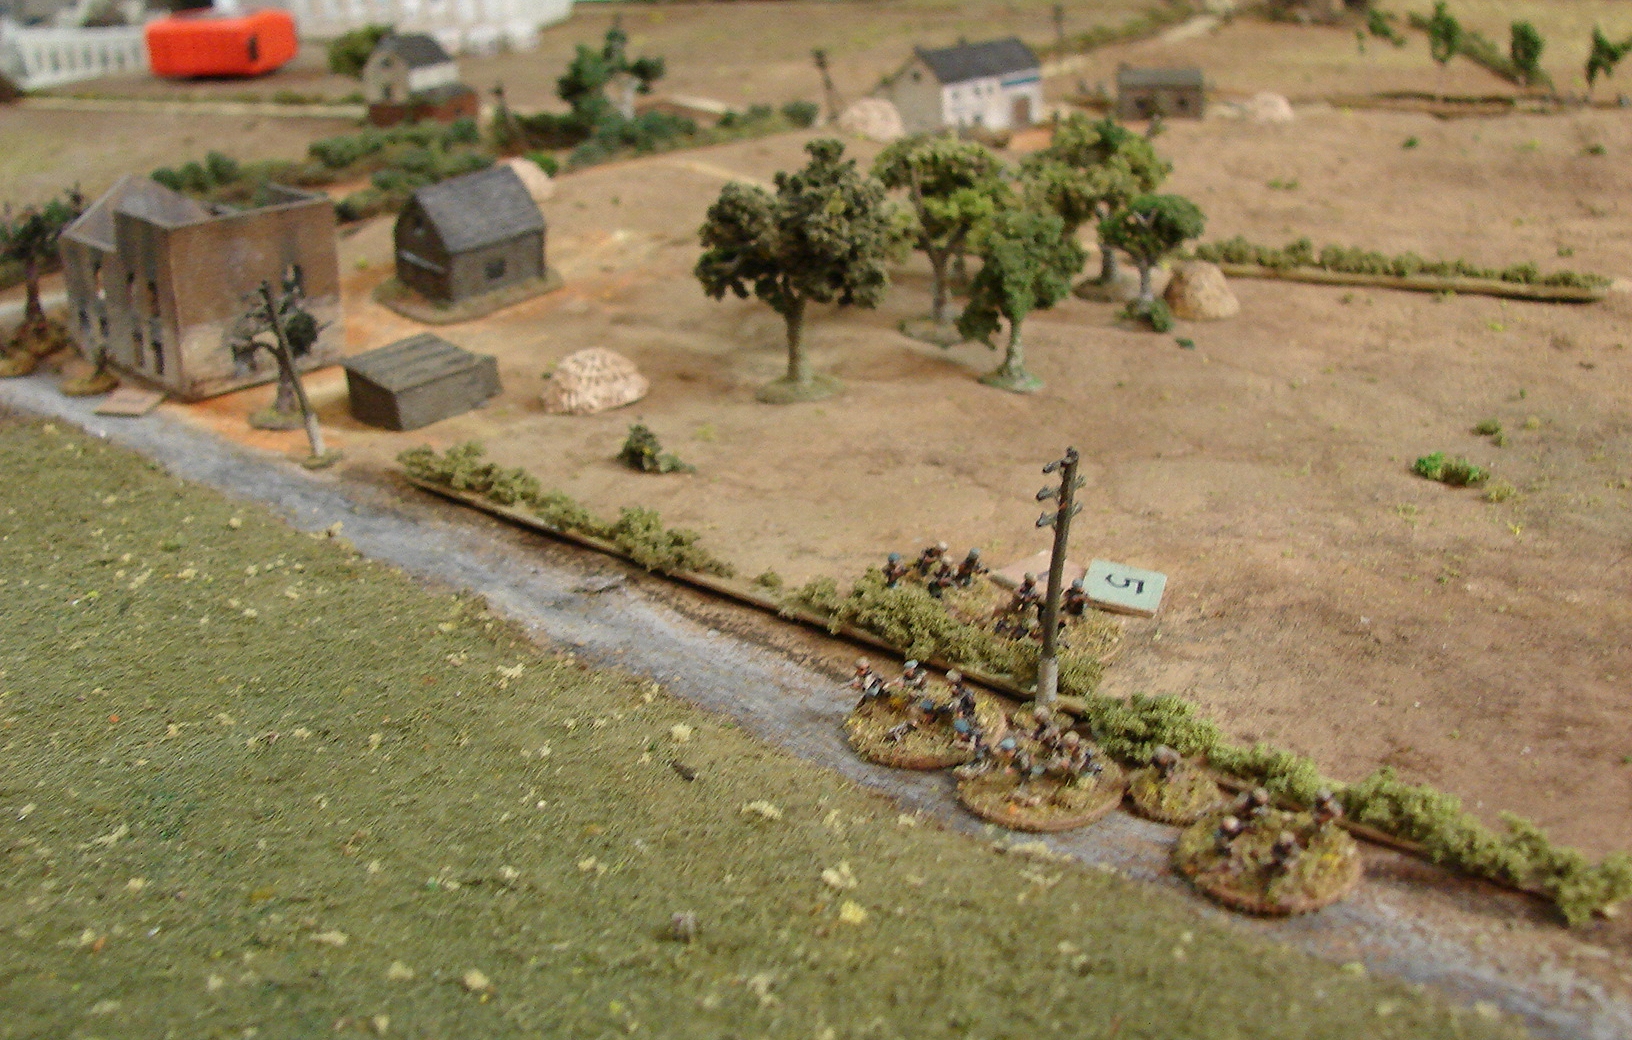
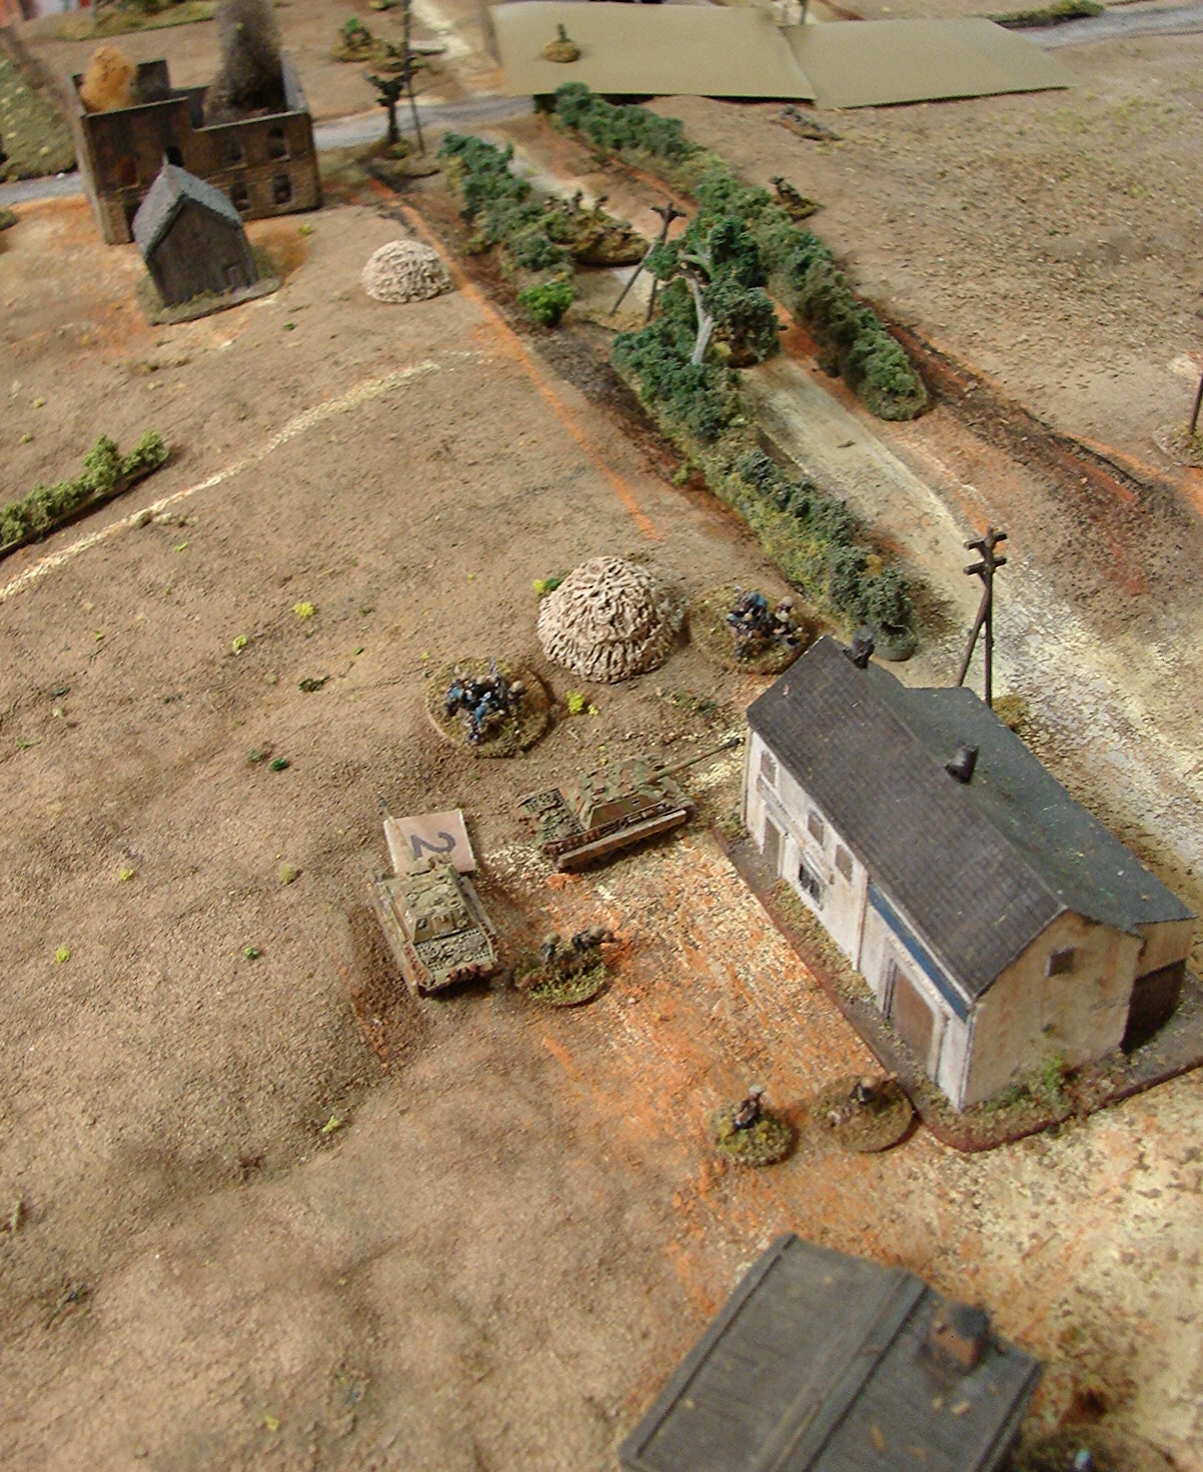
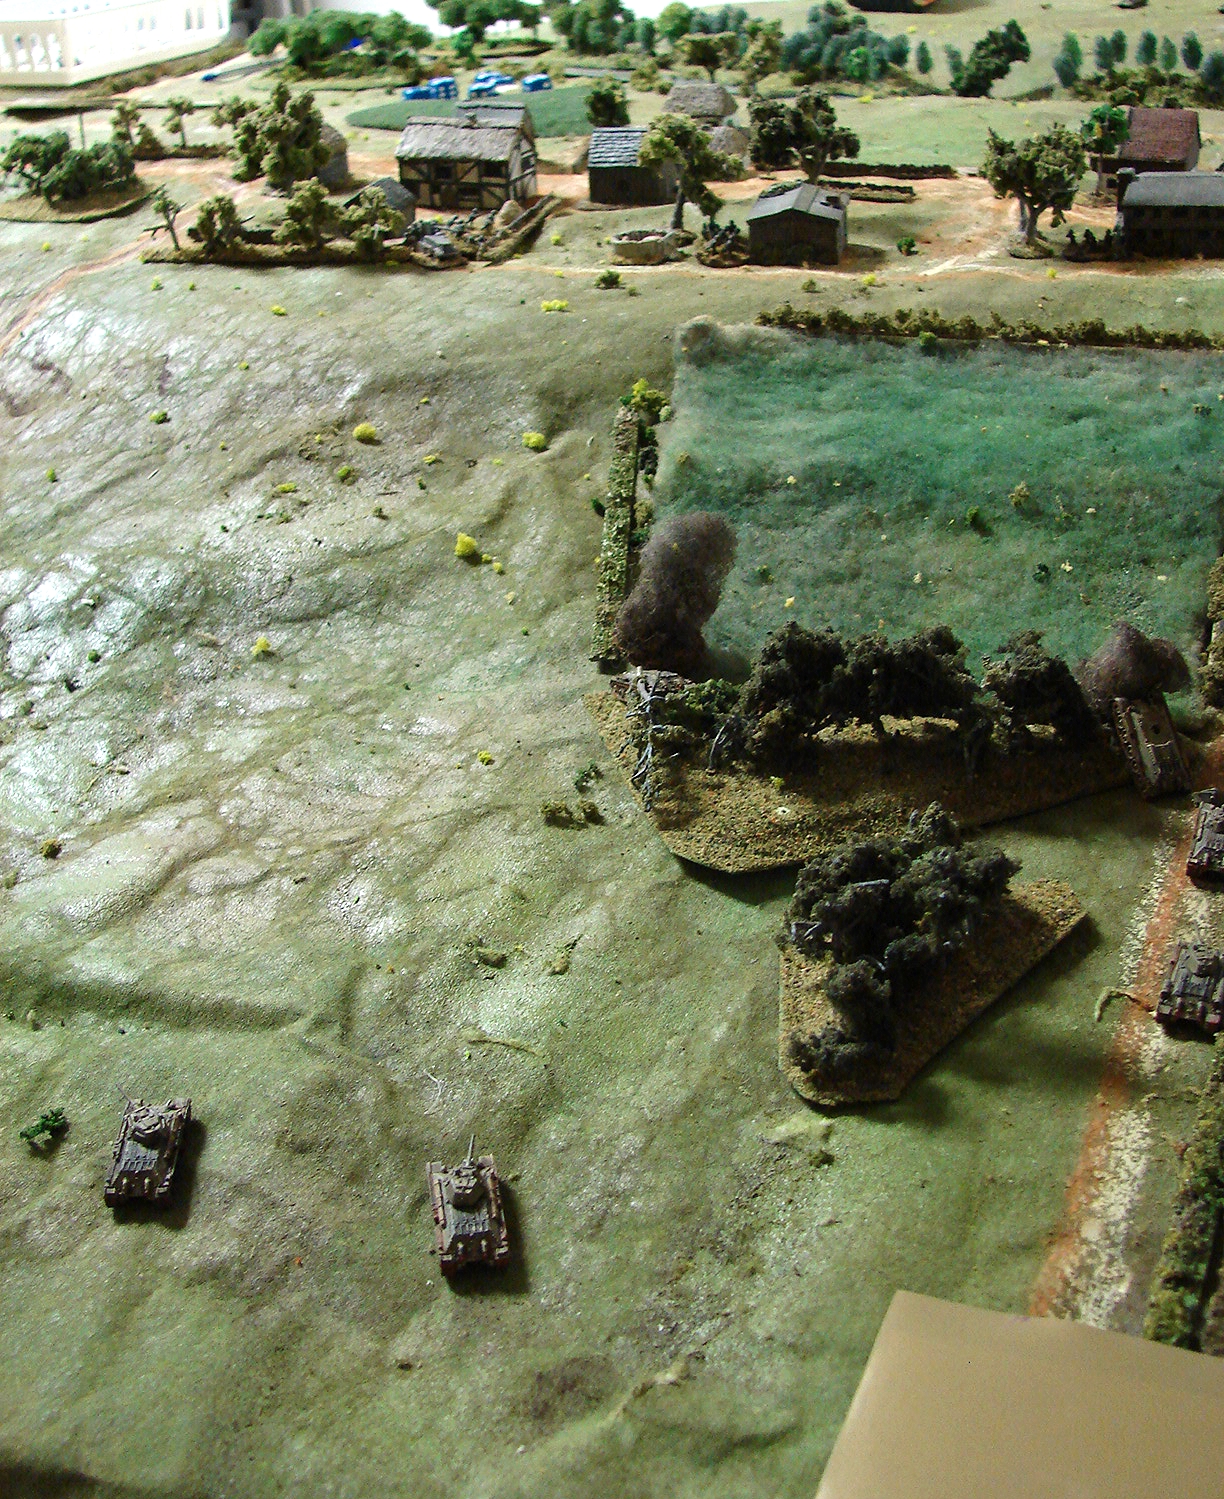
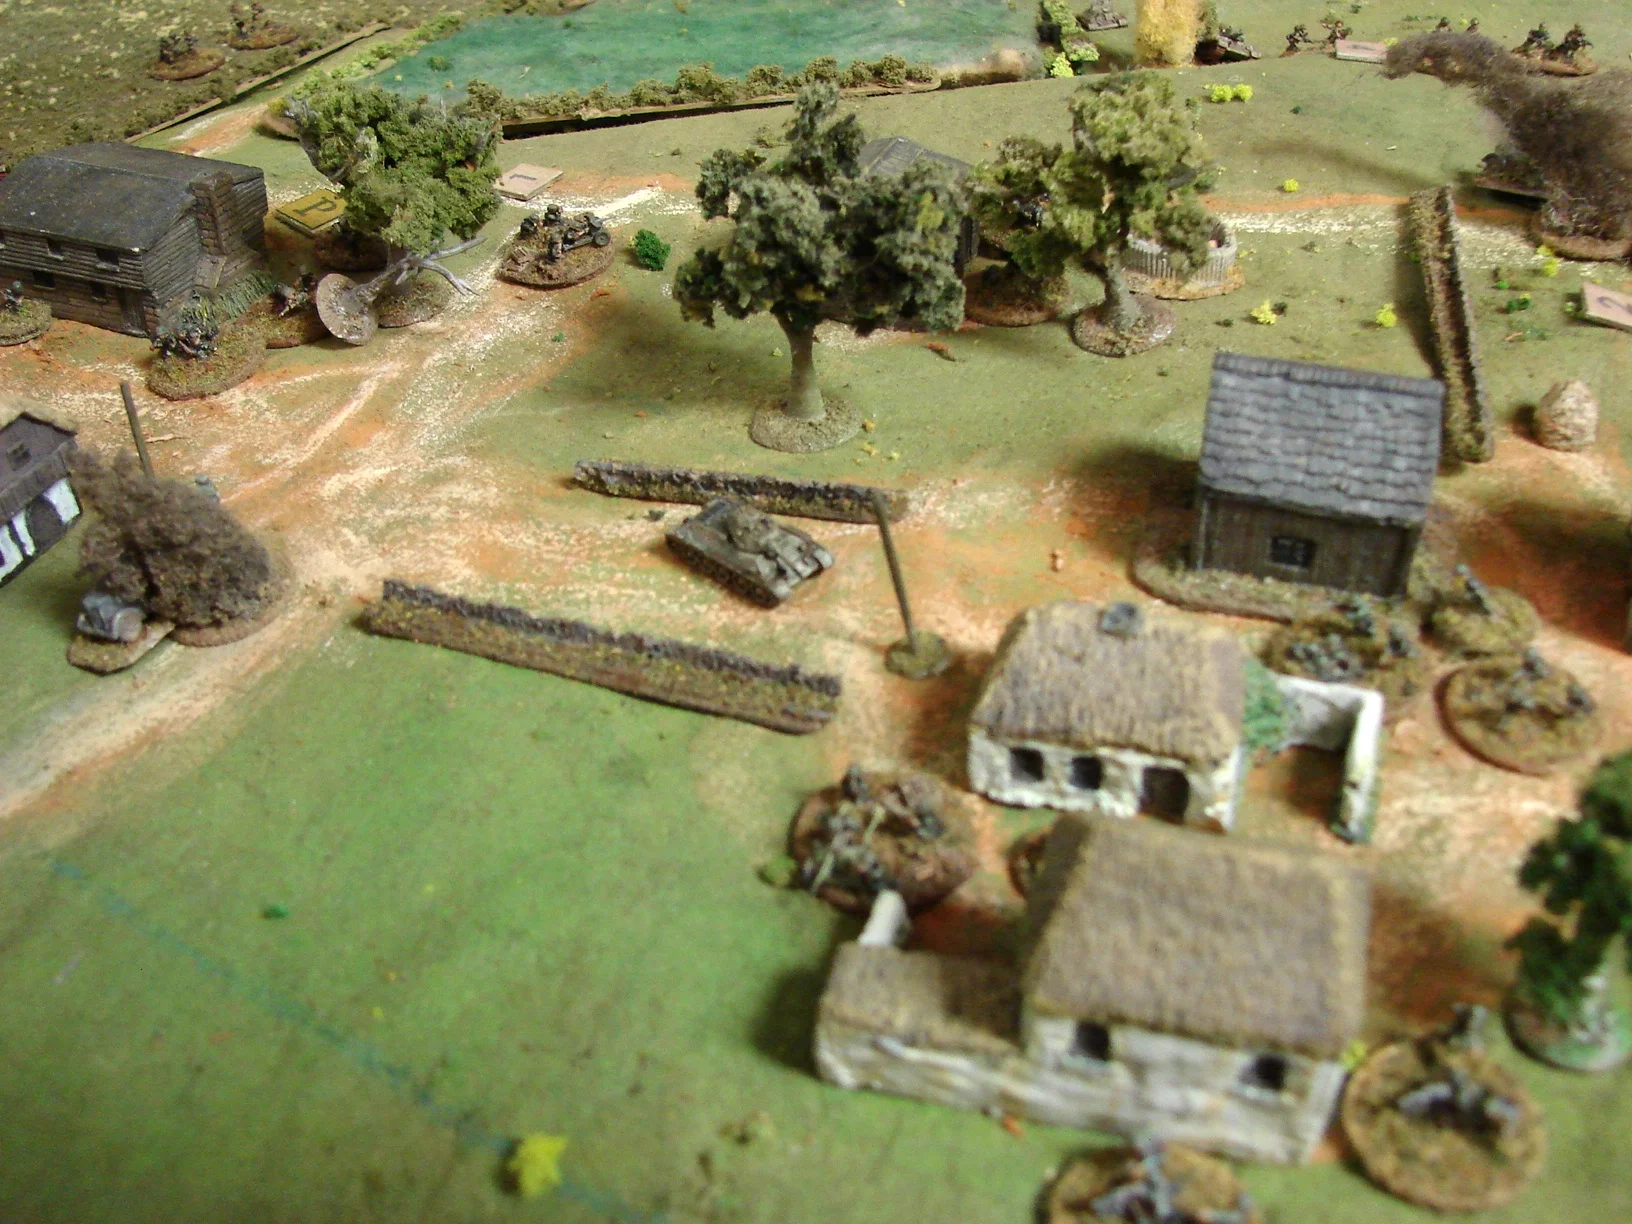
7 Platoon deployed on the edge of the woods, in support of the tanks, preparatory to advancing on the olive grove under a 25pdr barrage...

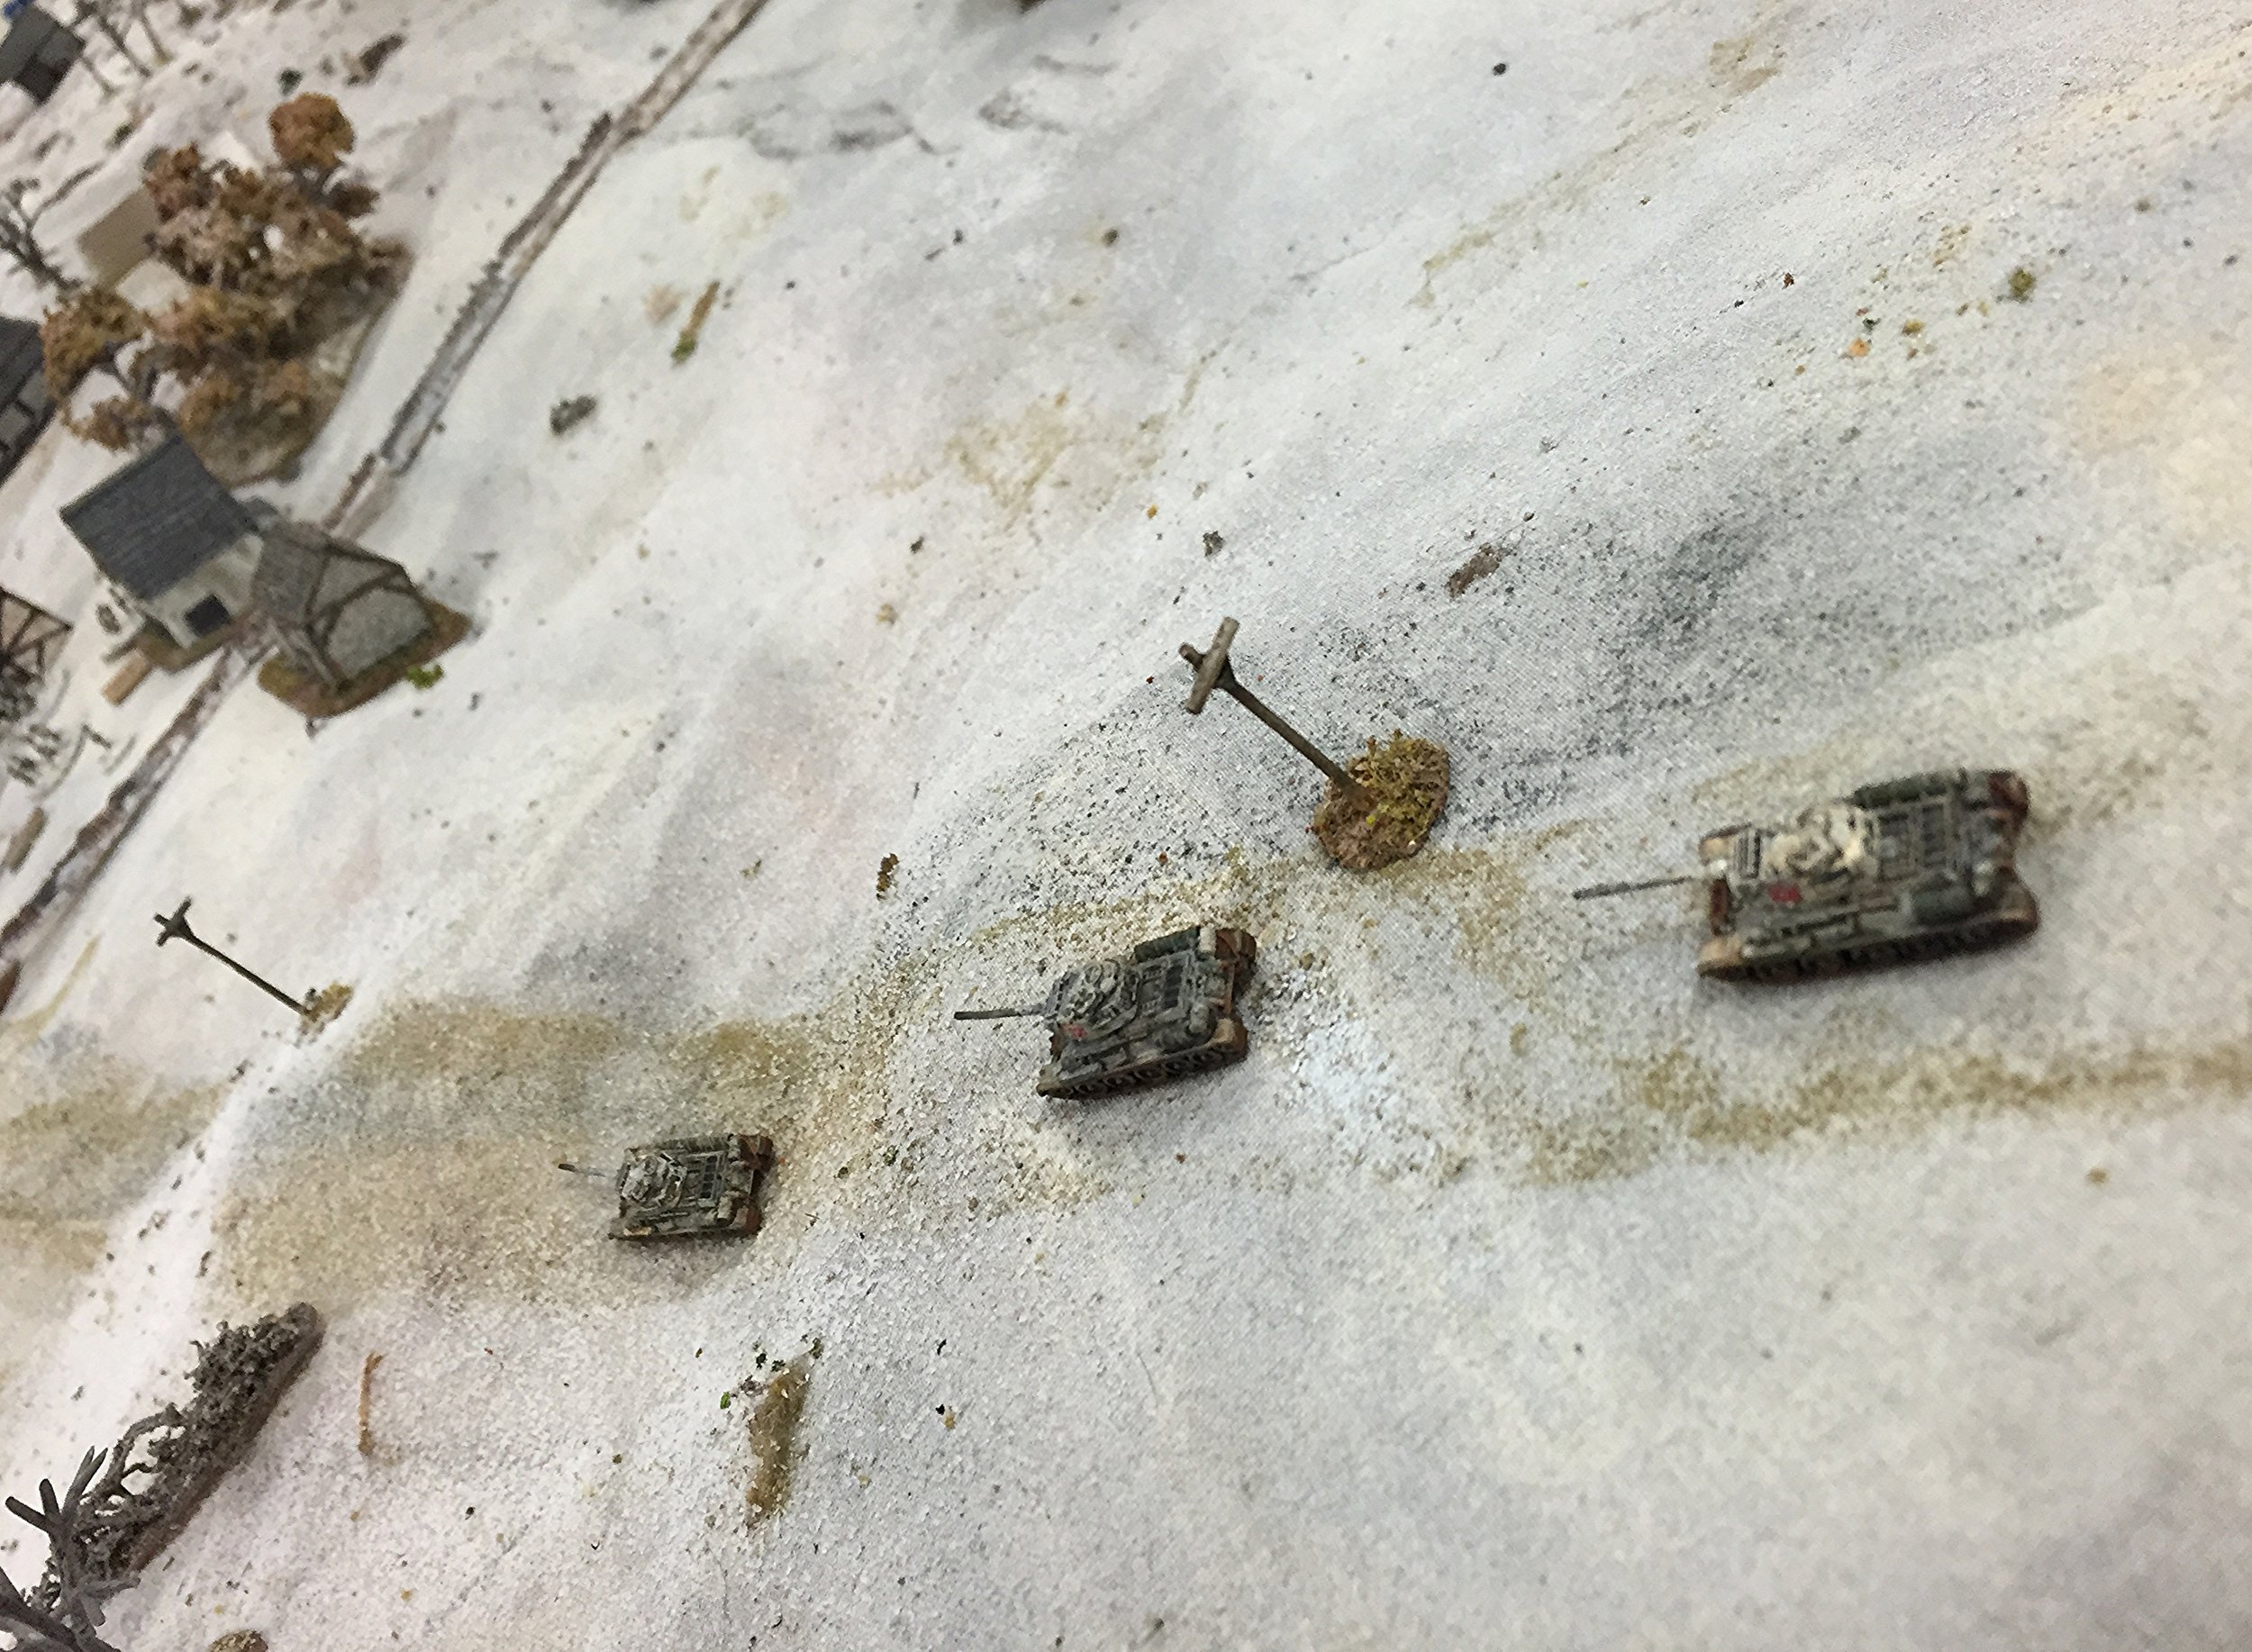
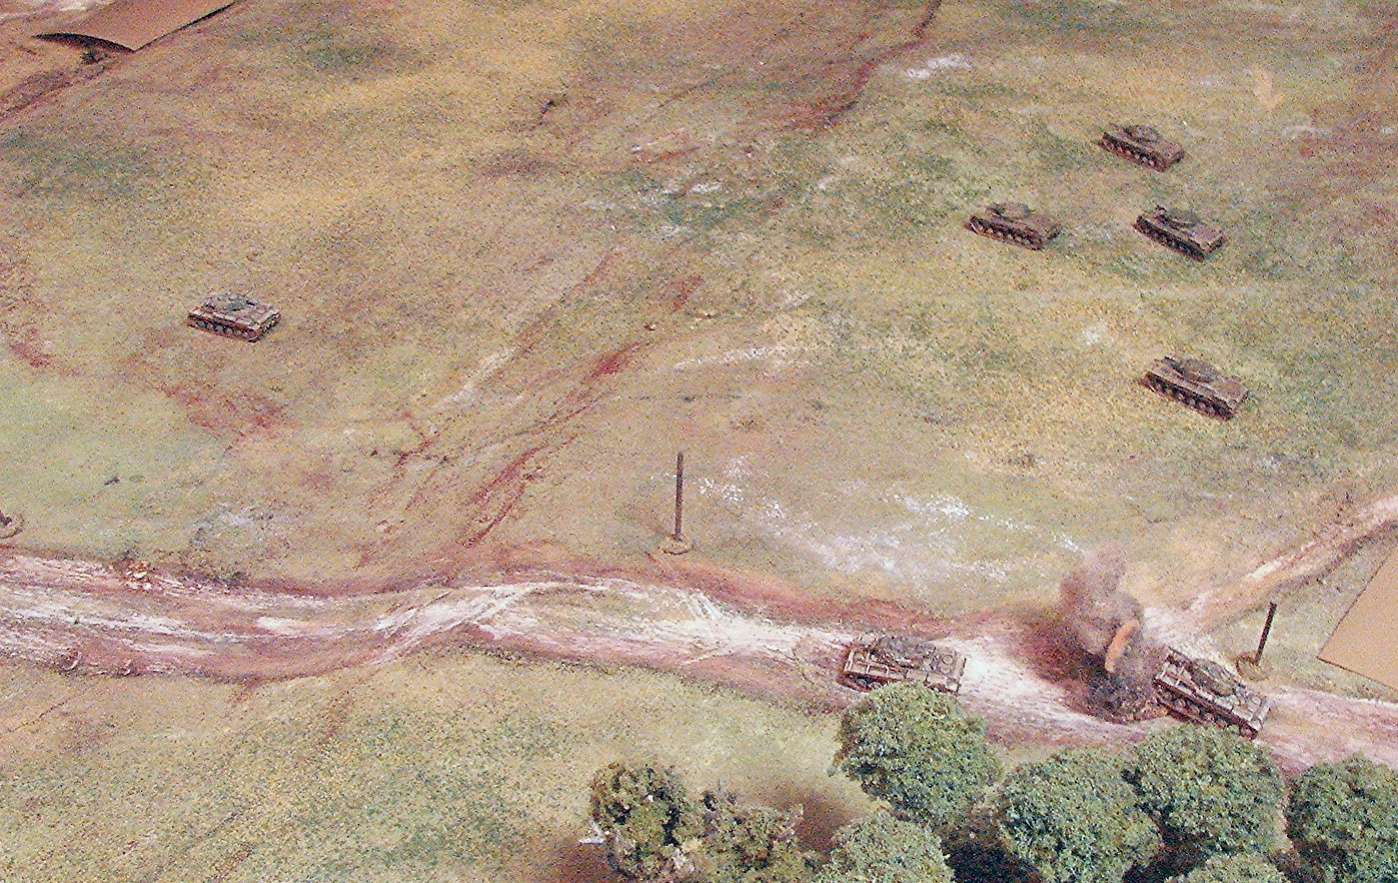
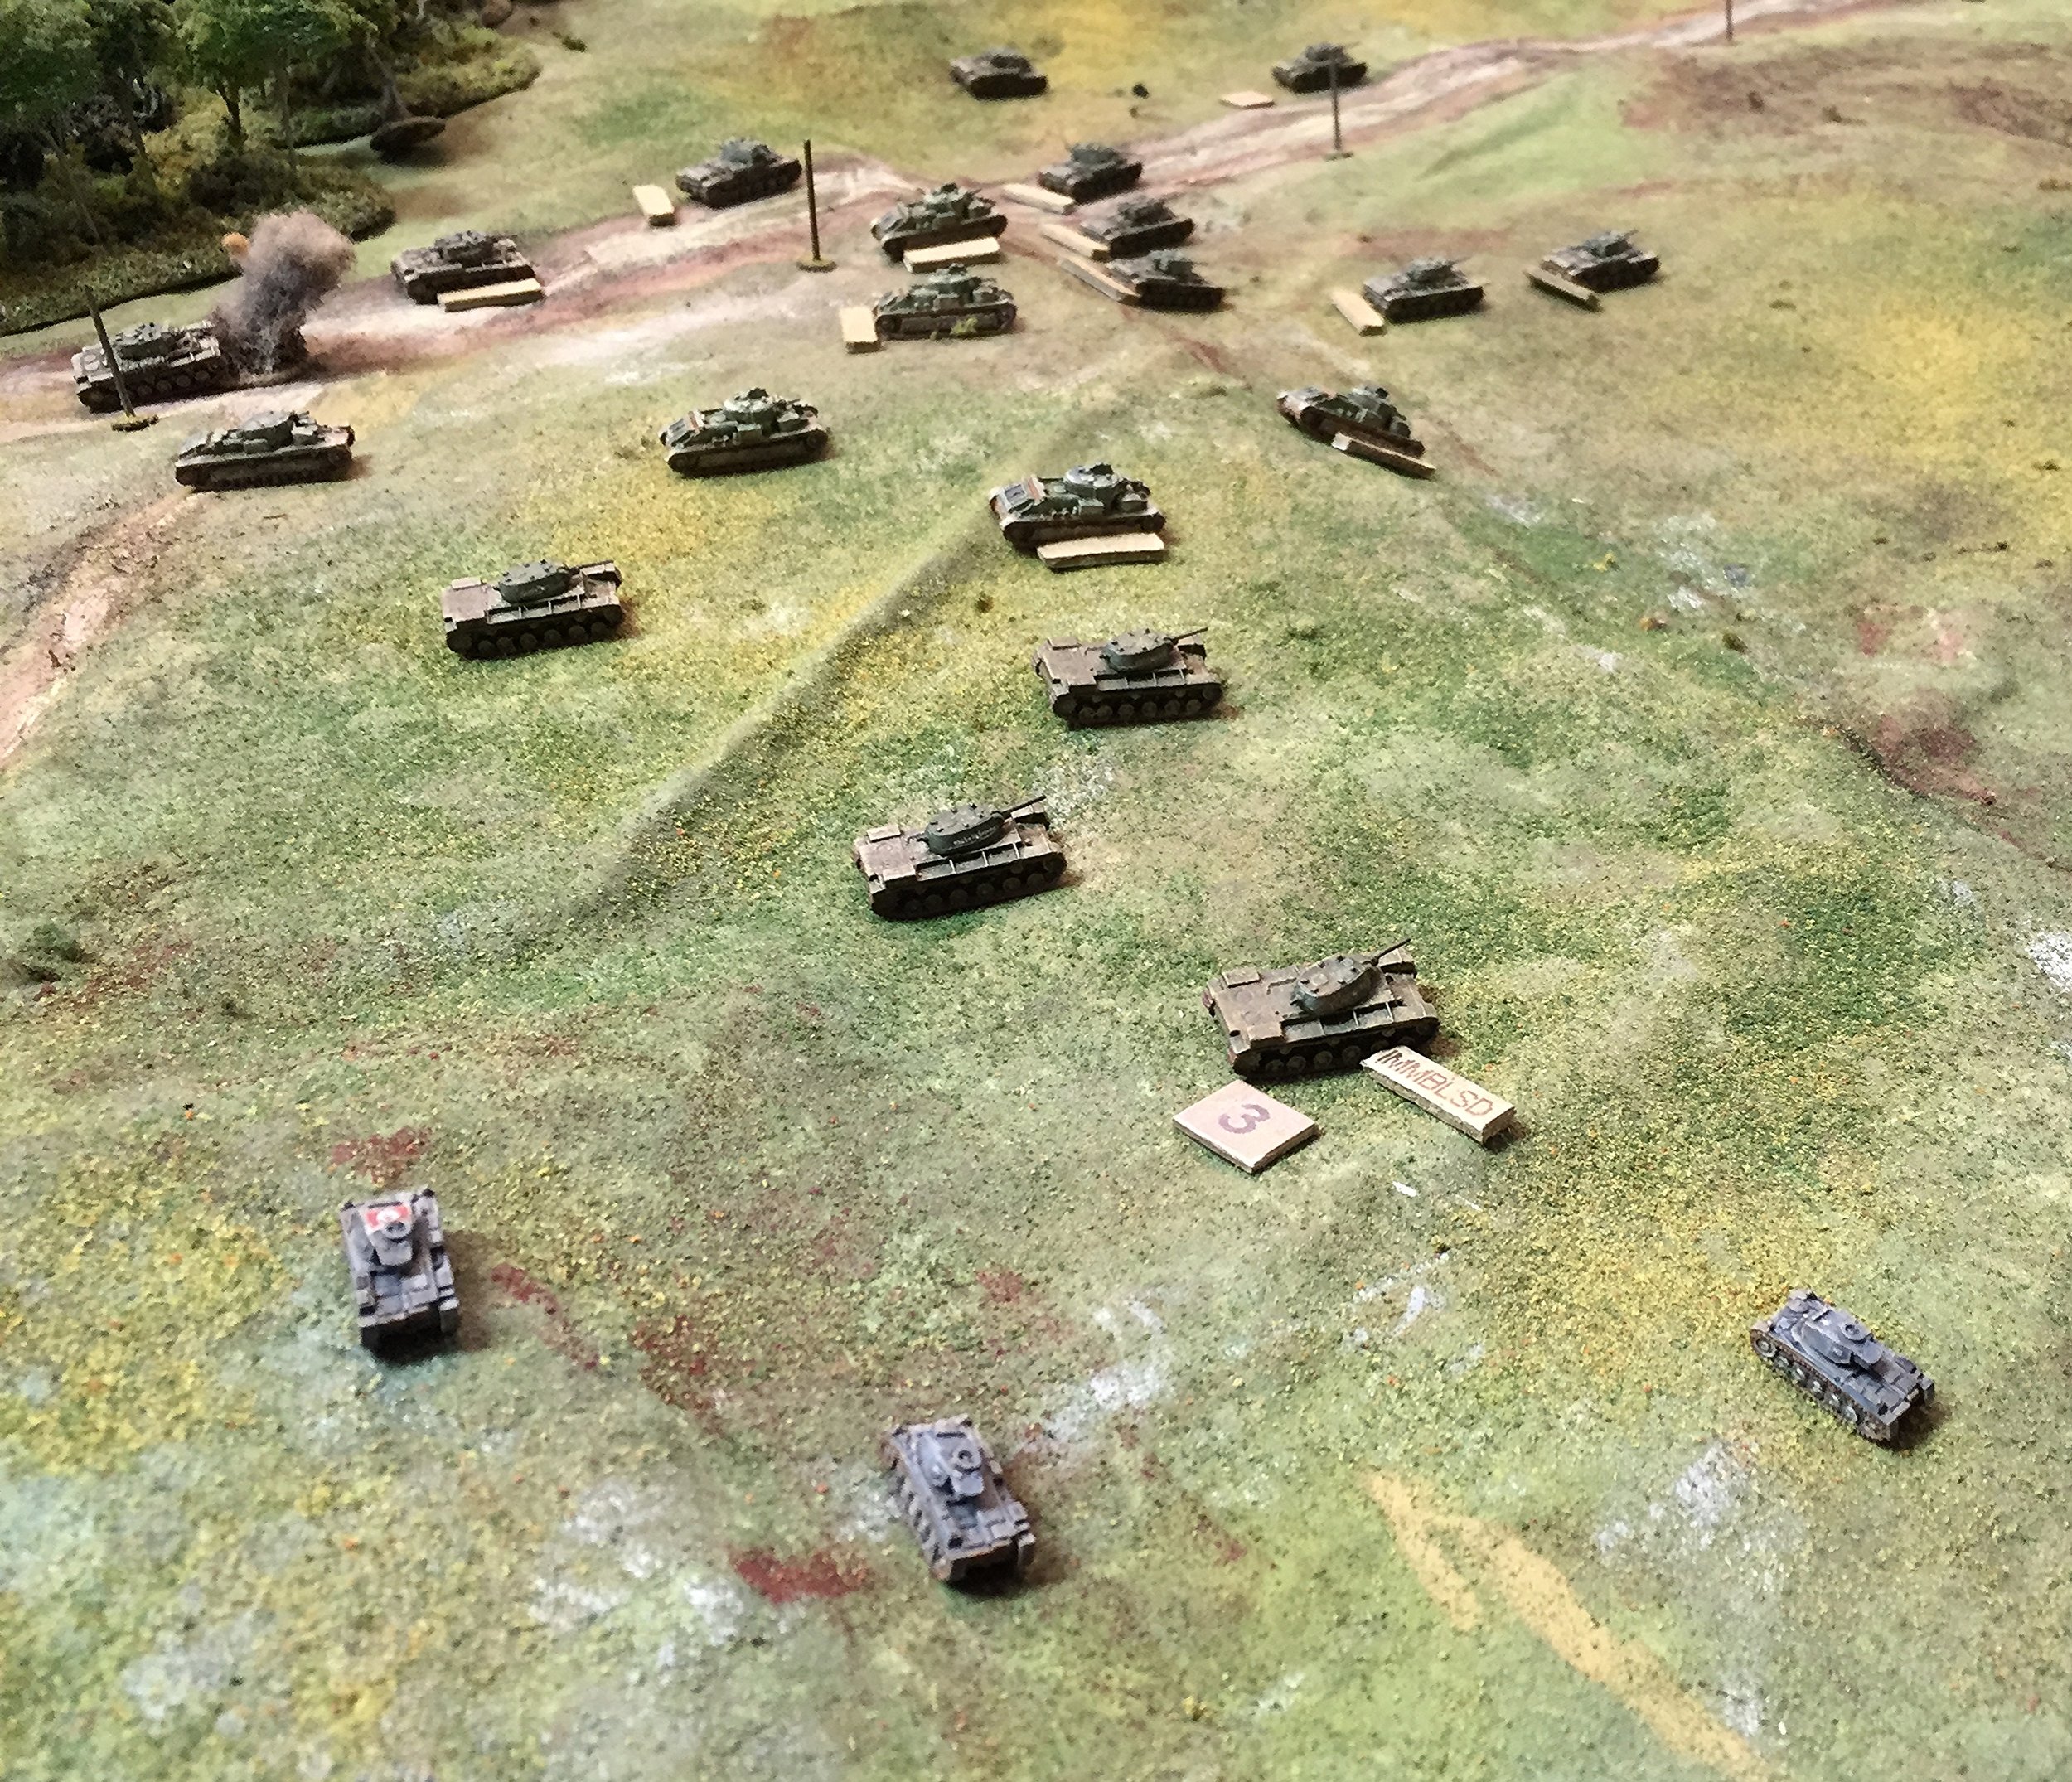
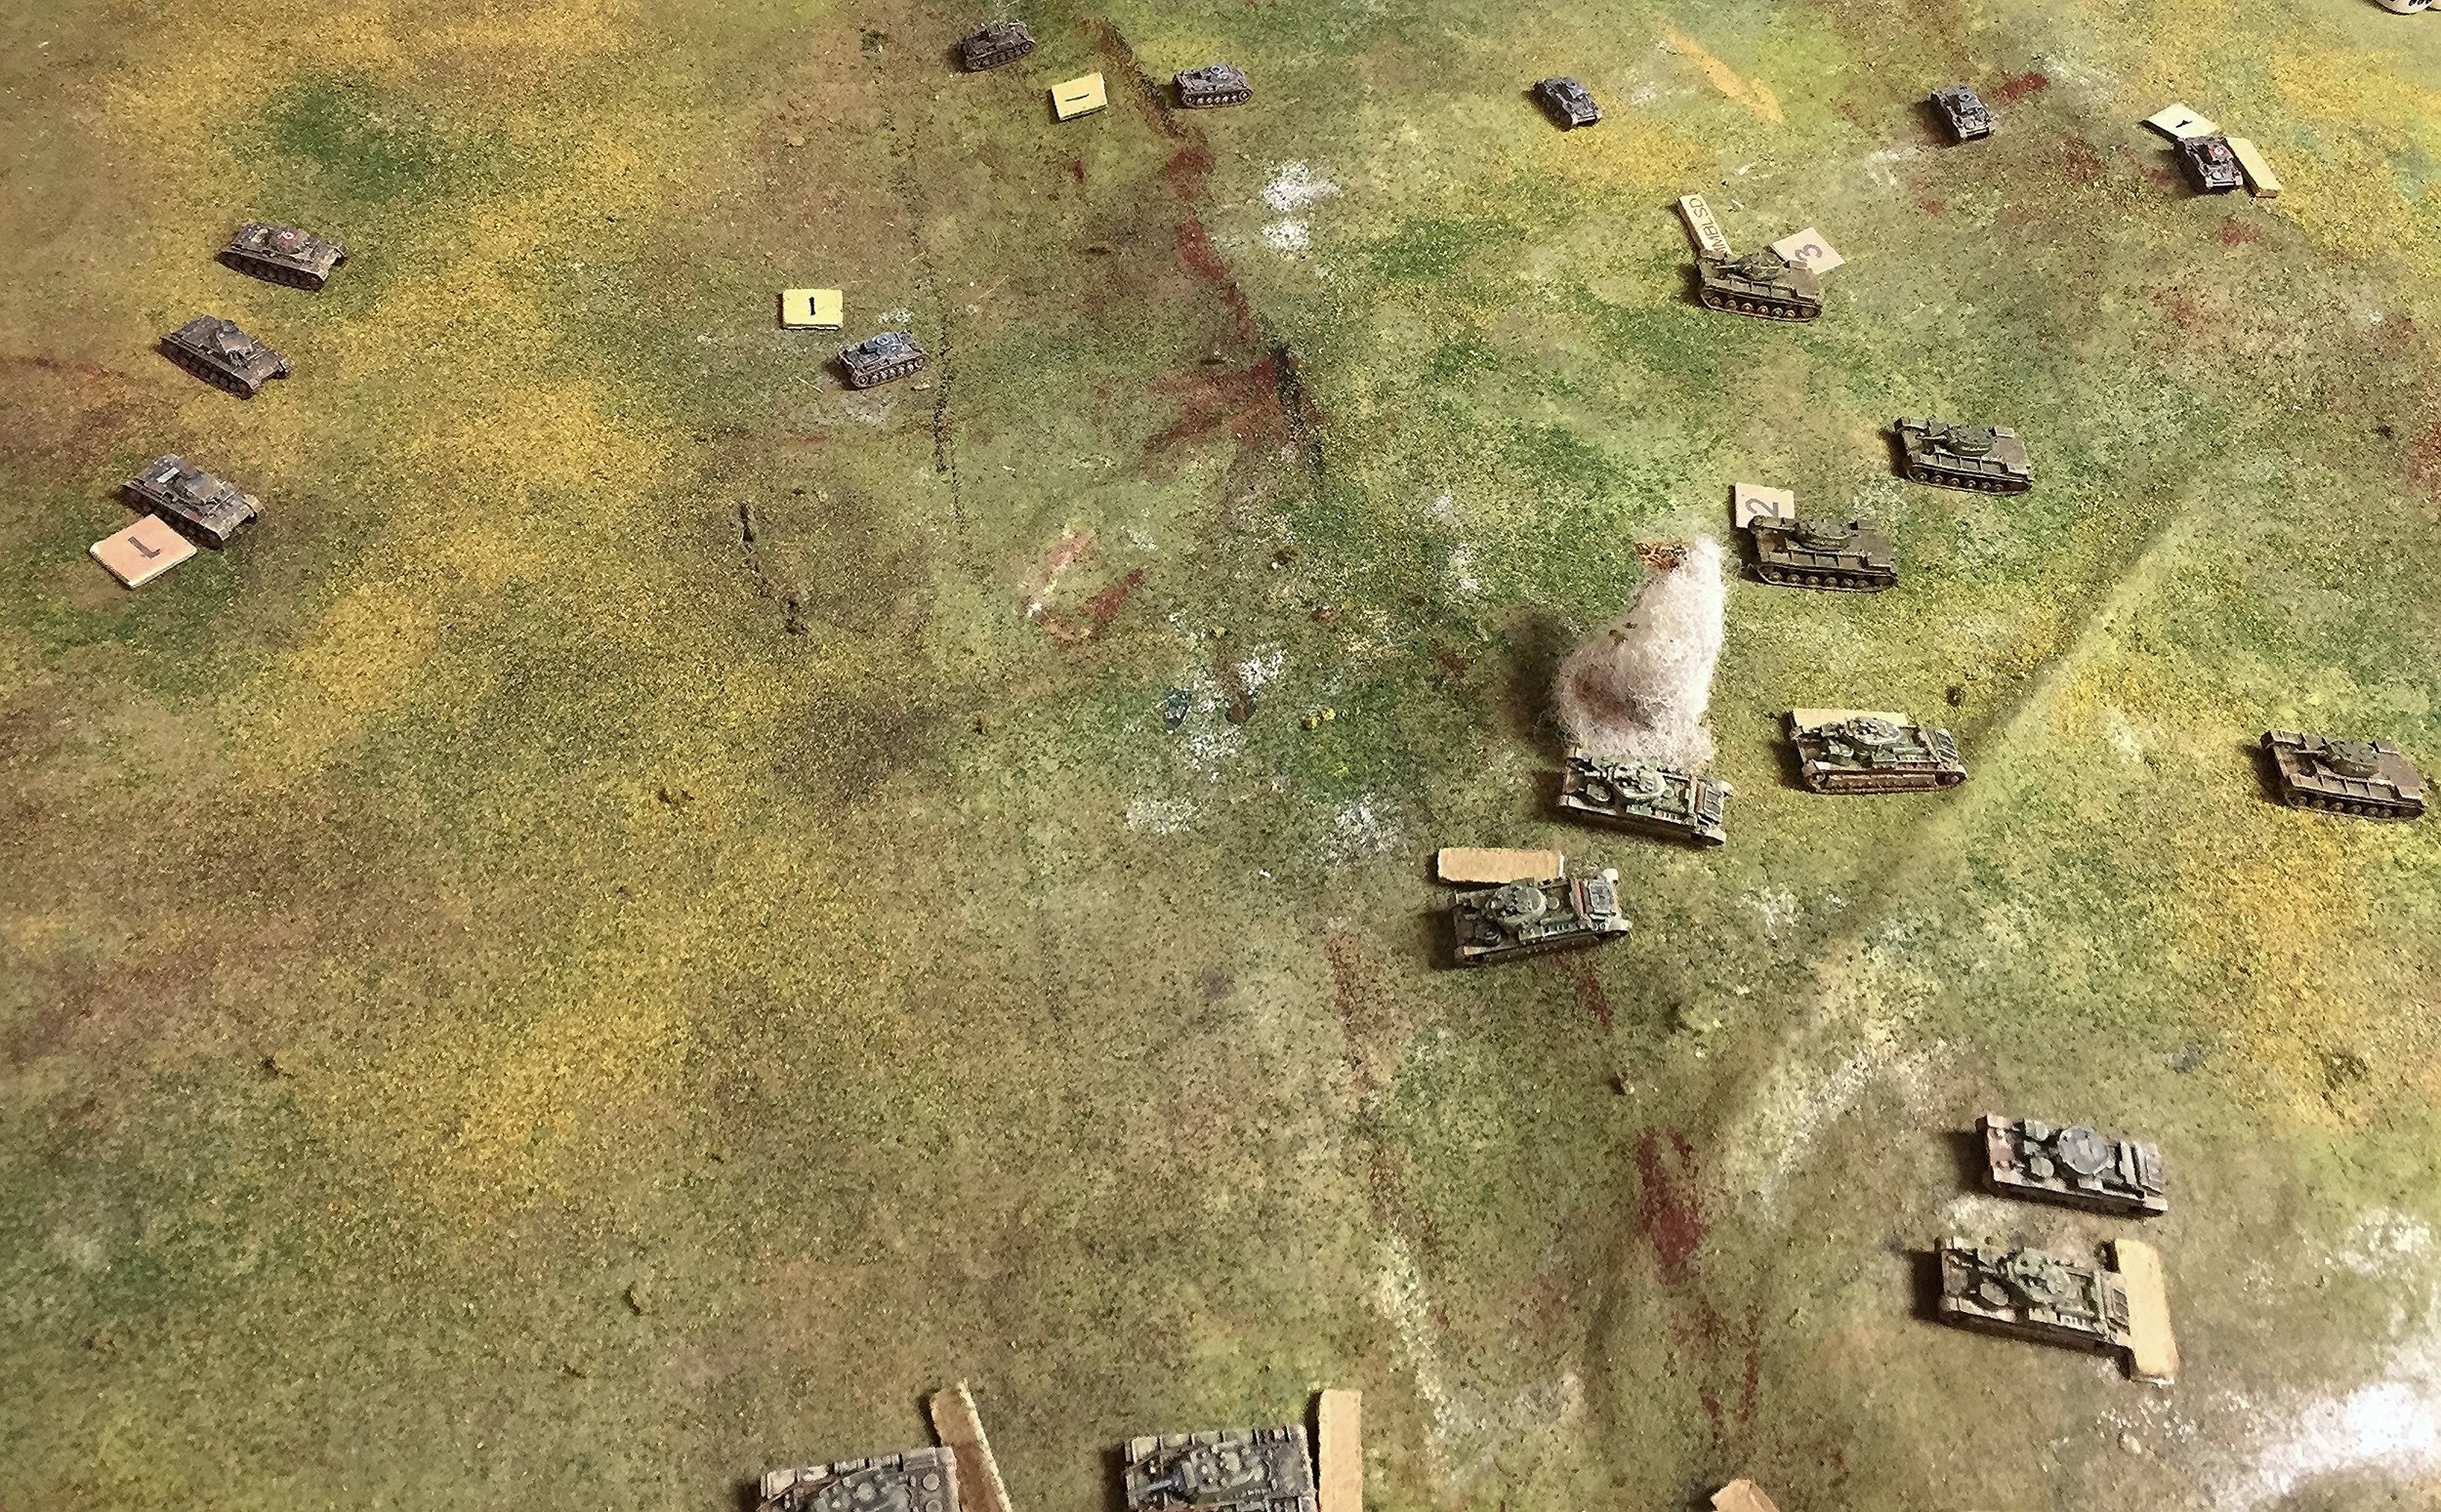
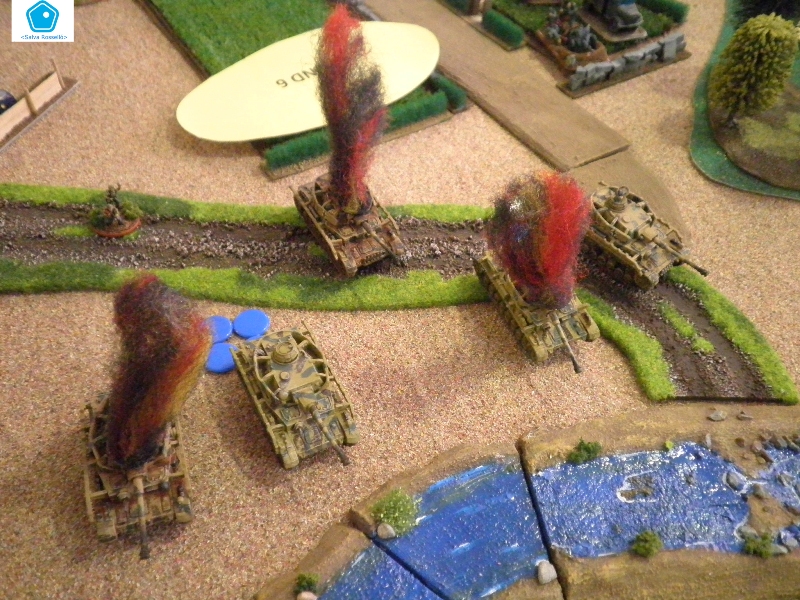
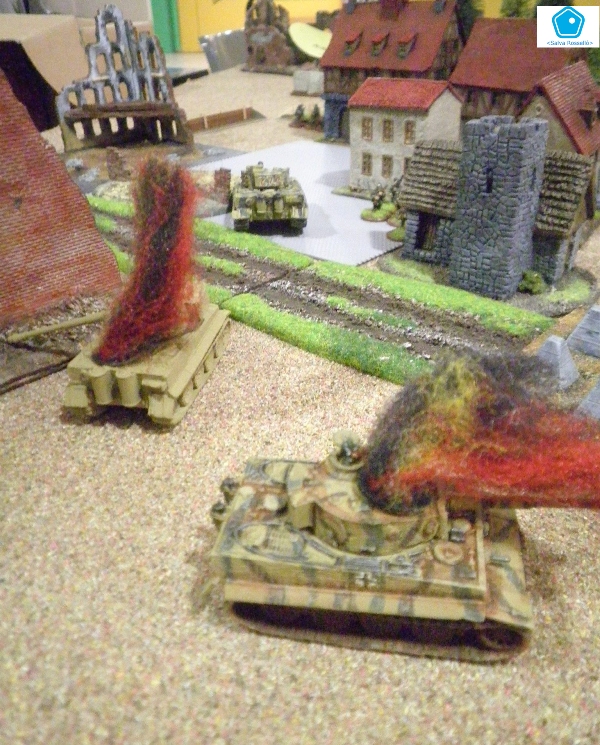
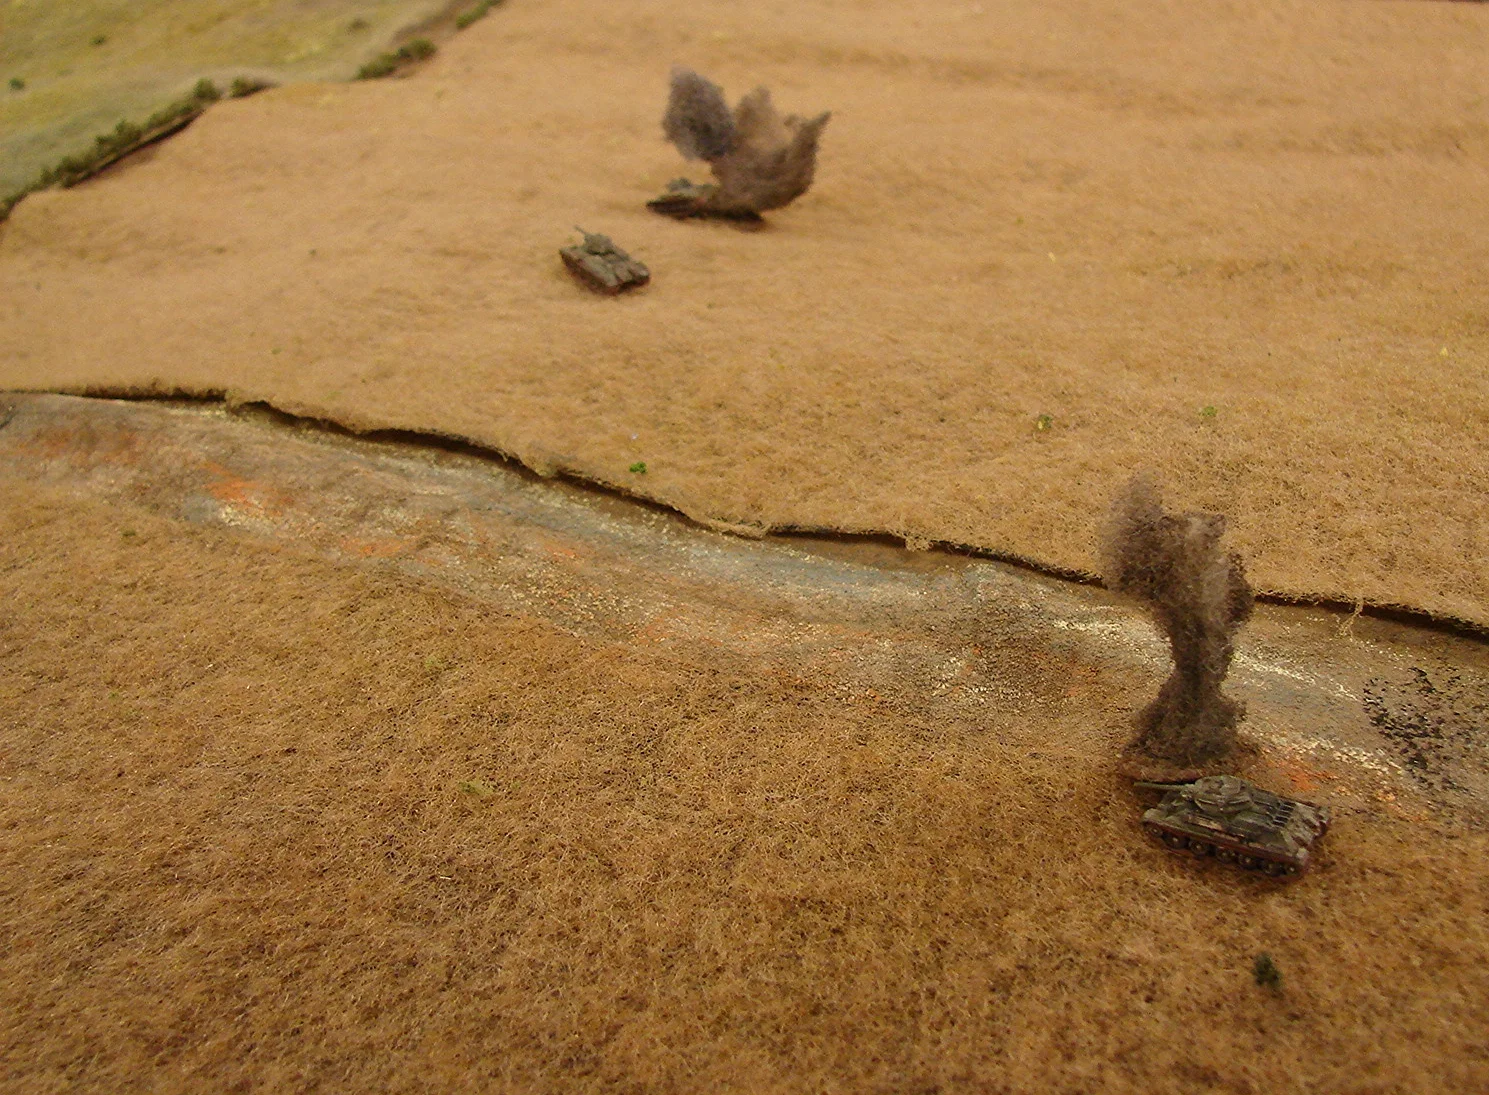
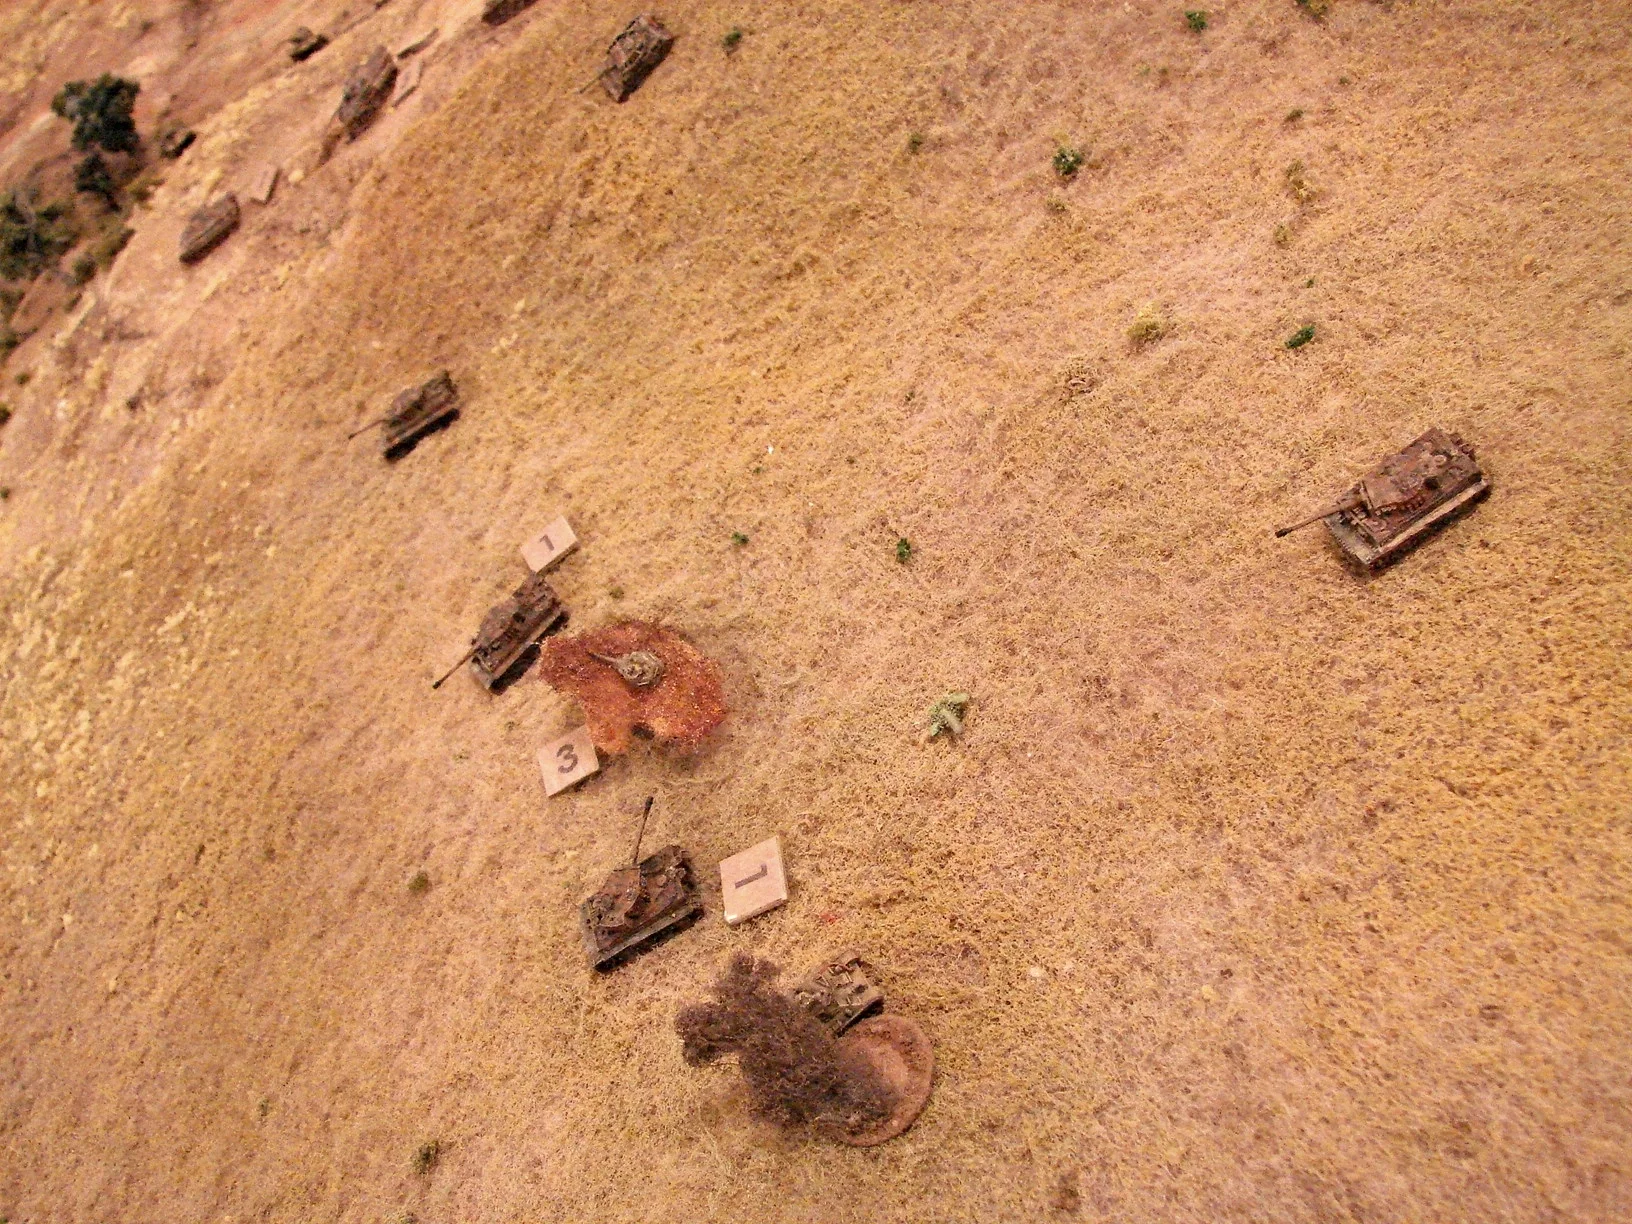
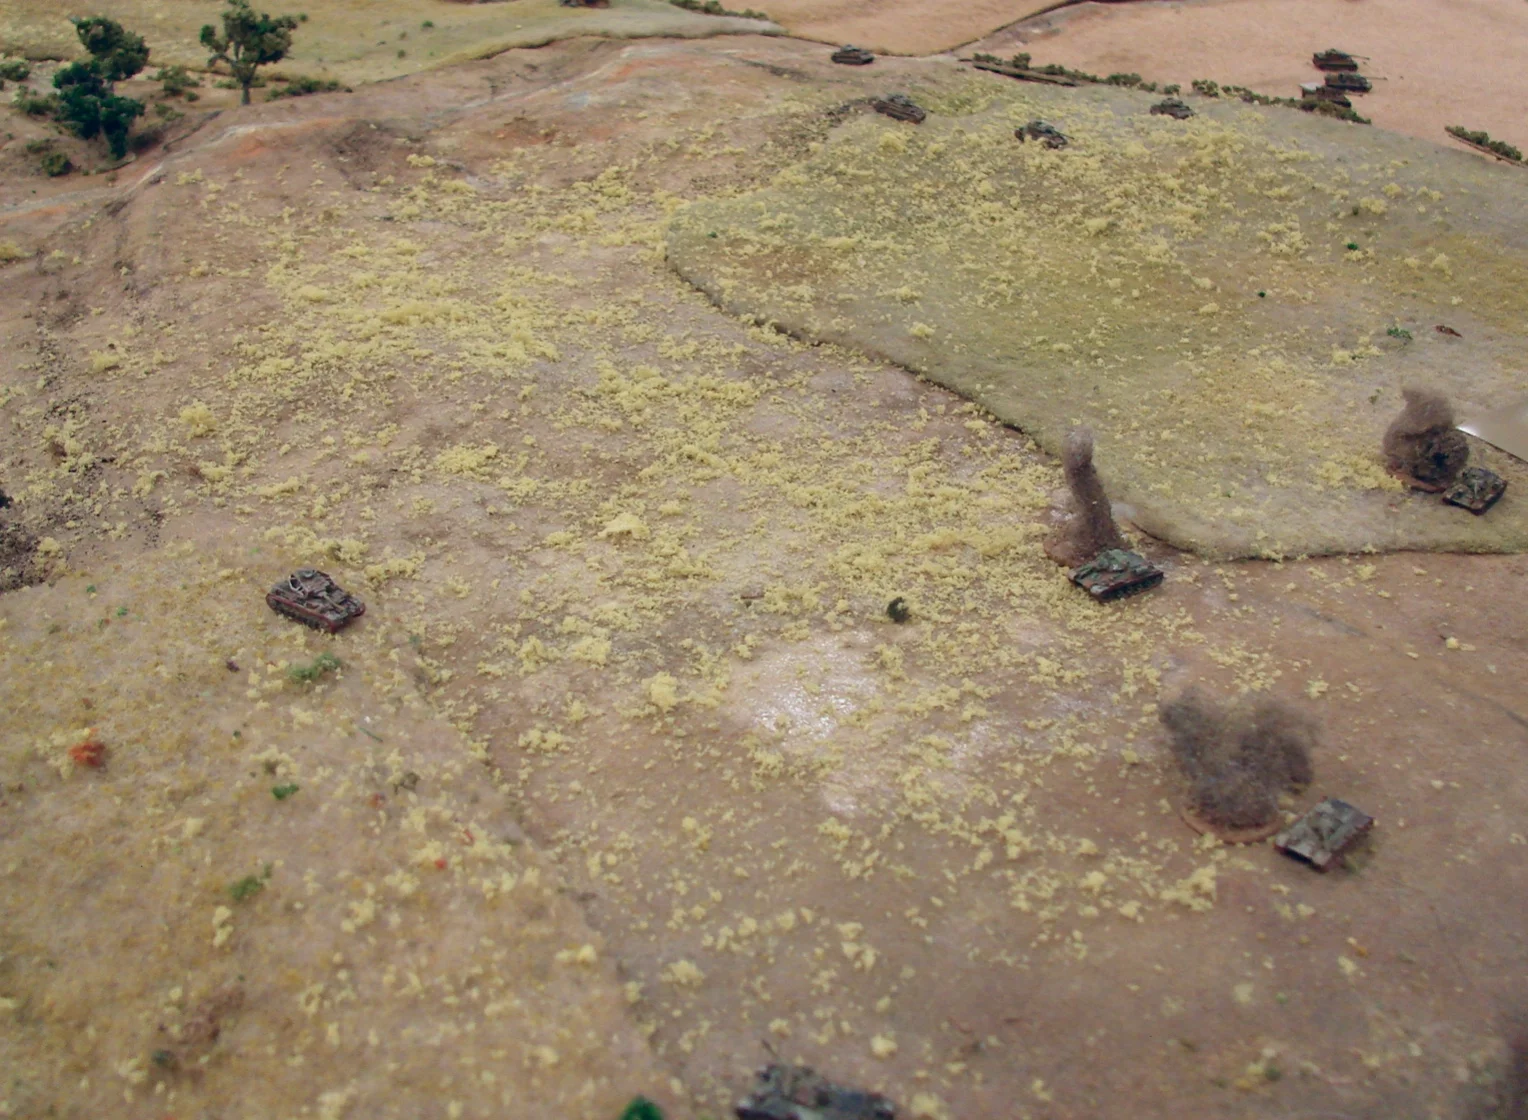
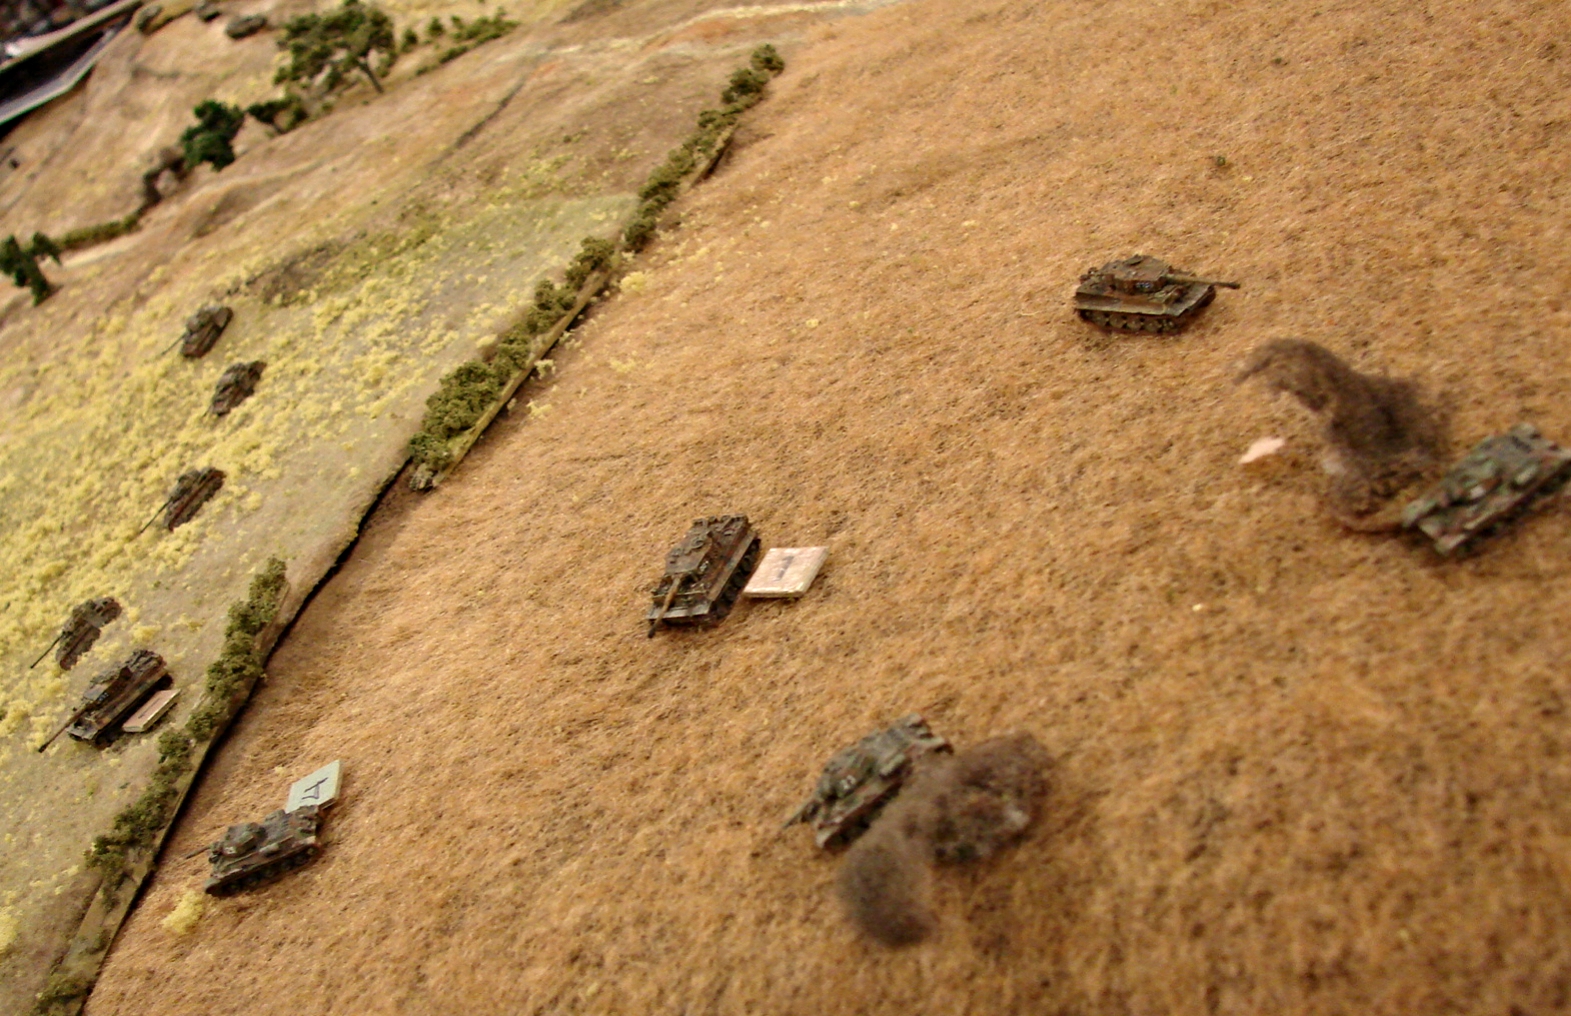
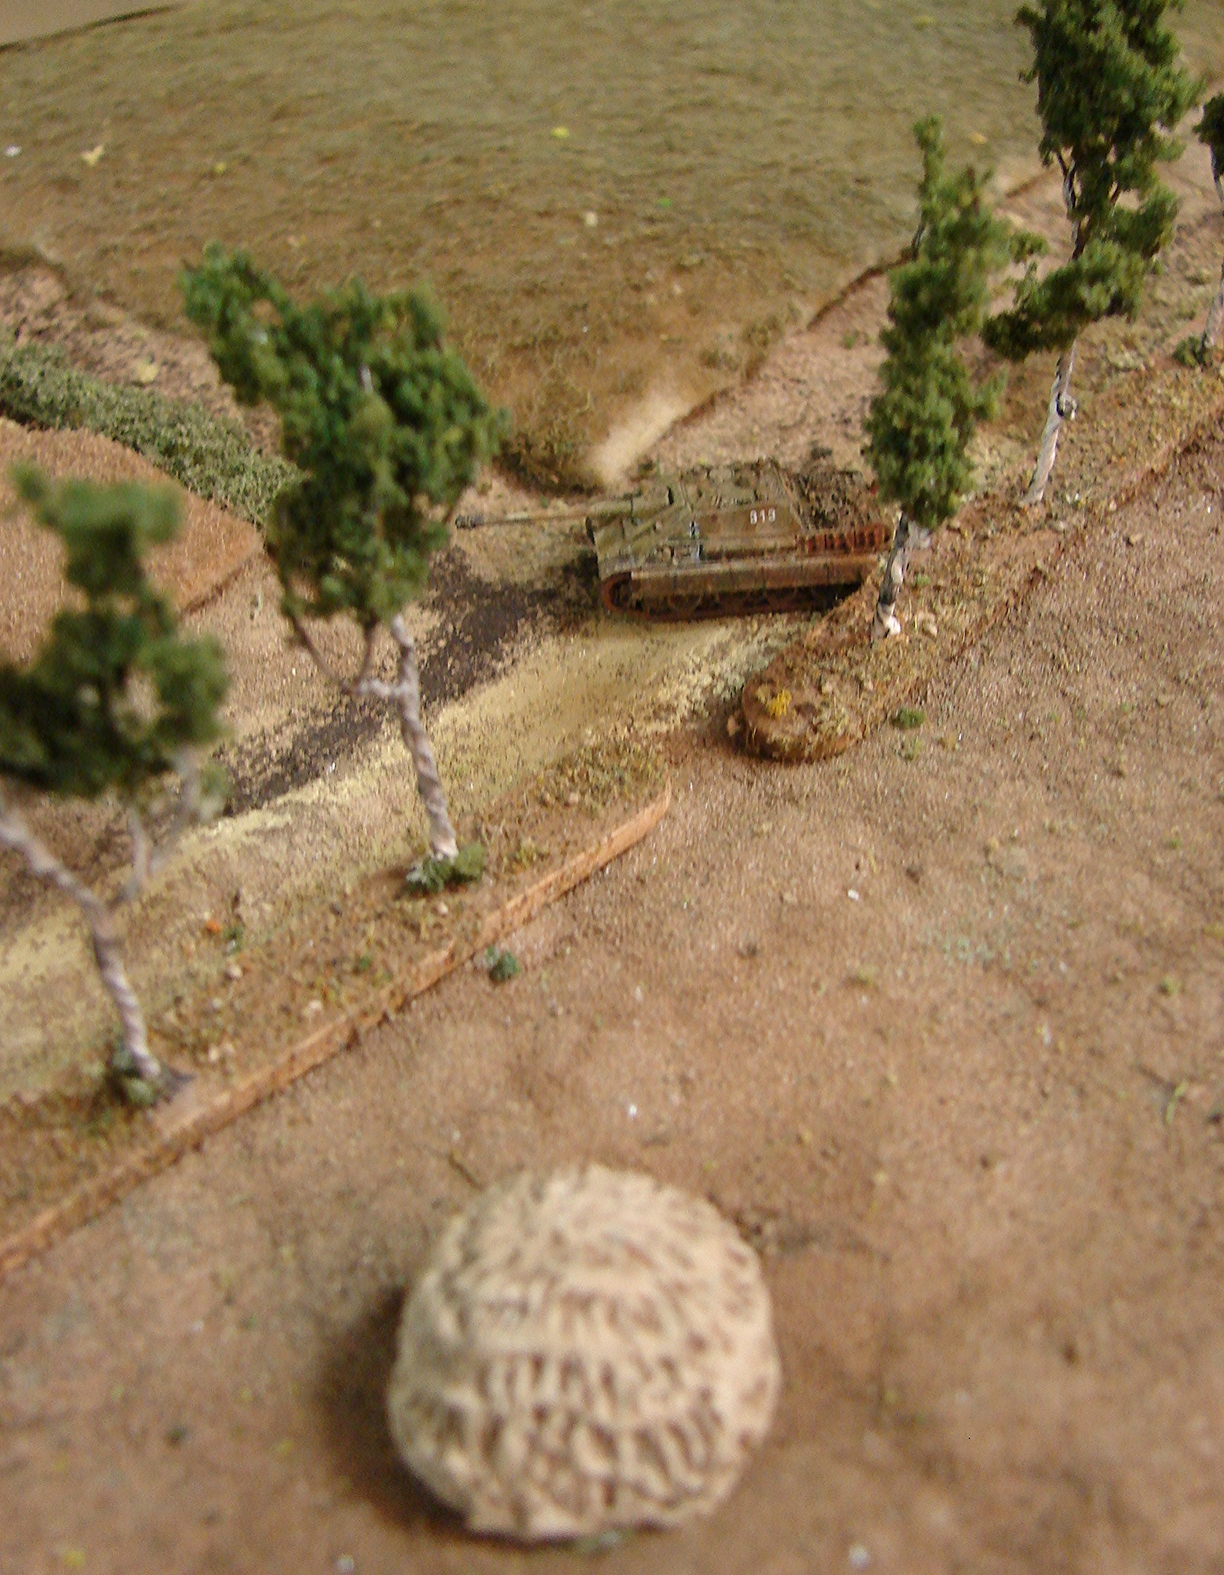
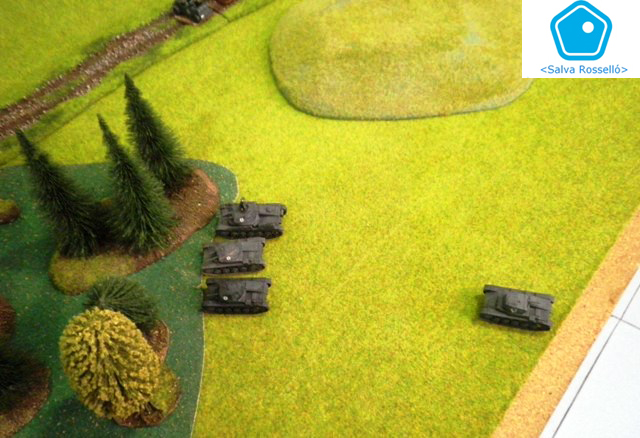
At which point... the Tiger (in the church, with a glorious field of fire) and the StuG in the vineyard deployed off blinds, and it all went horribly wrong for the British. Within about four actions from the two tanks the Firefly's gun was out, one Sherman was disabled, with its crew bailing for cover, and the other went up with a bang. Unteroffizer Honisch in the Tiger is well on his way to Junior Ace.

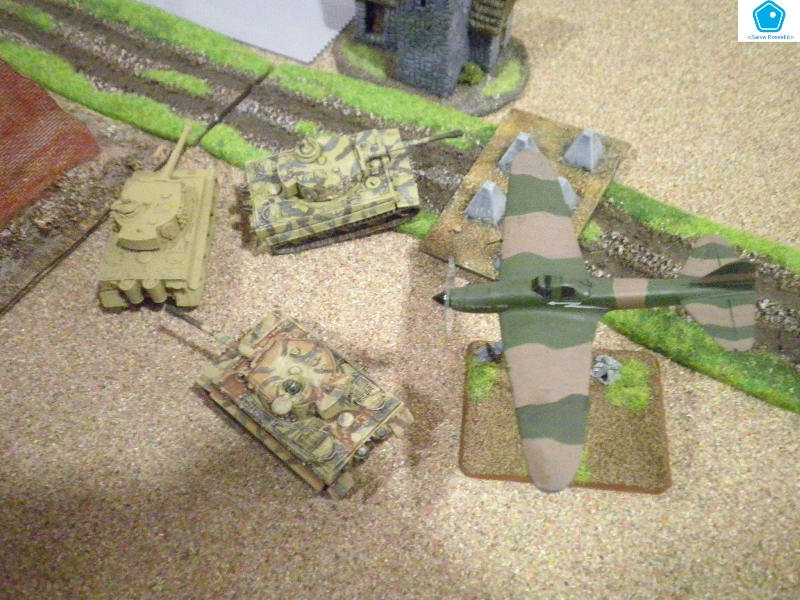
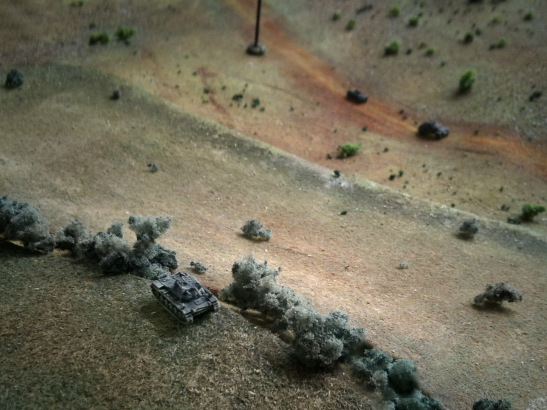
The British are, understandably, hollering for any kind of support that will turn up: first up a fire mission from the 25 pounders that fails to do more than scratch the paint. It's followed by a P40 peeling off the cab rank, dropping a bomb on the Tiger, just missing and doing some damage to the church that they're going to have to explain to High Command.

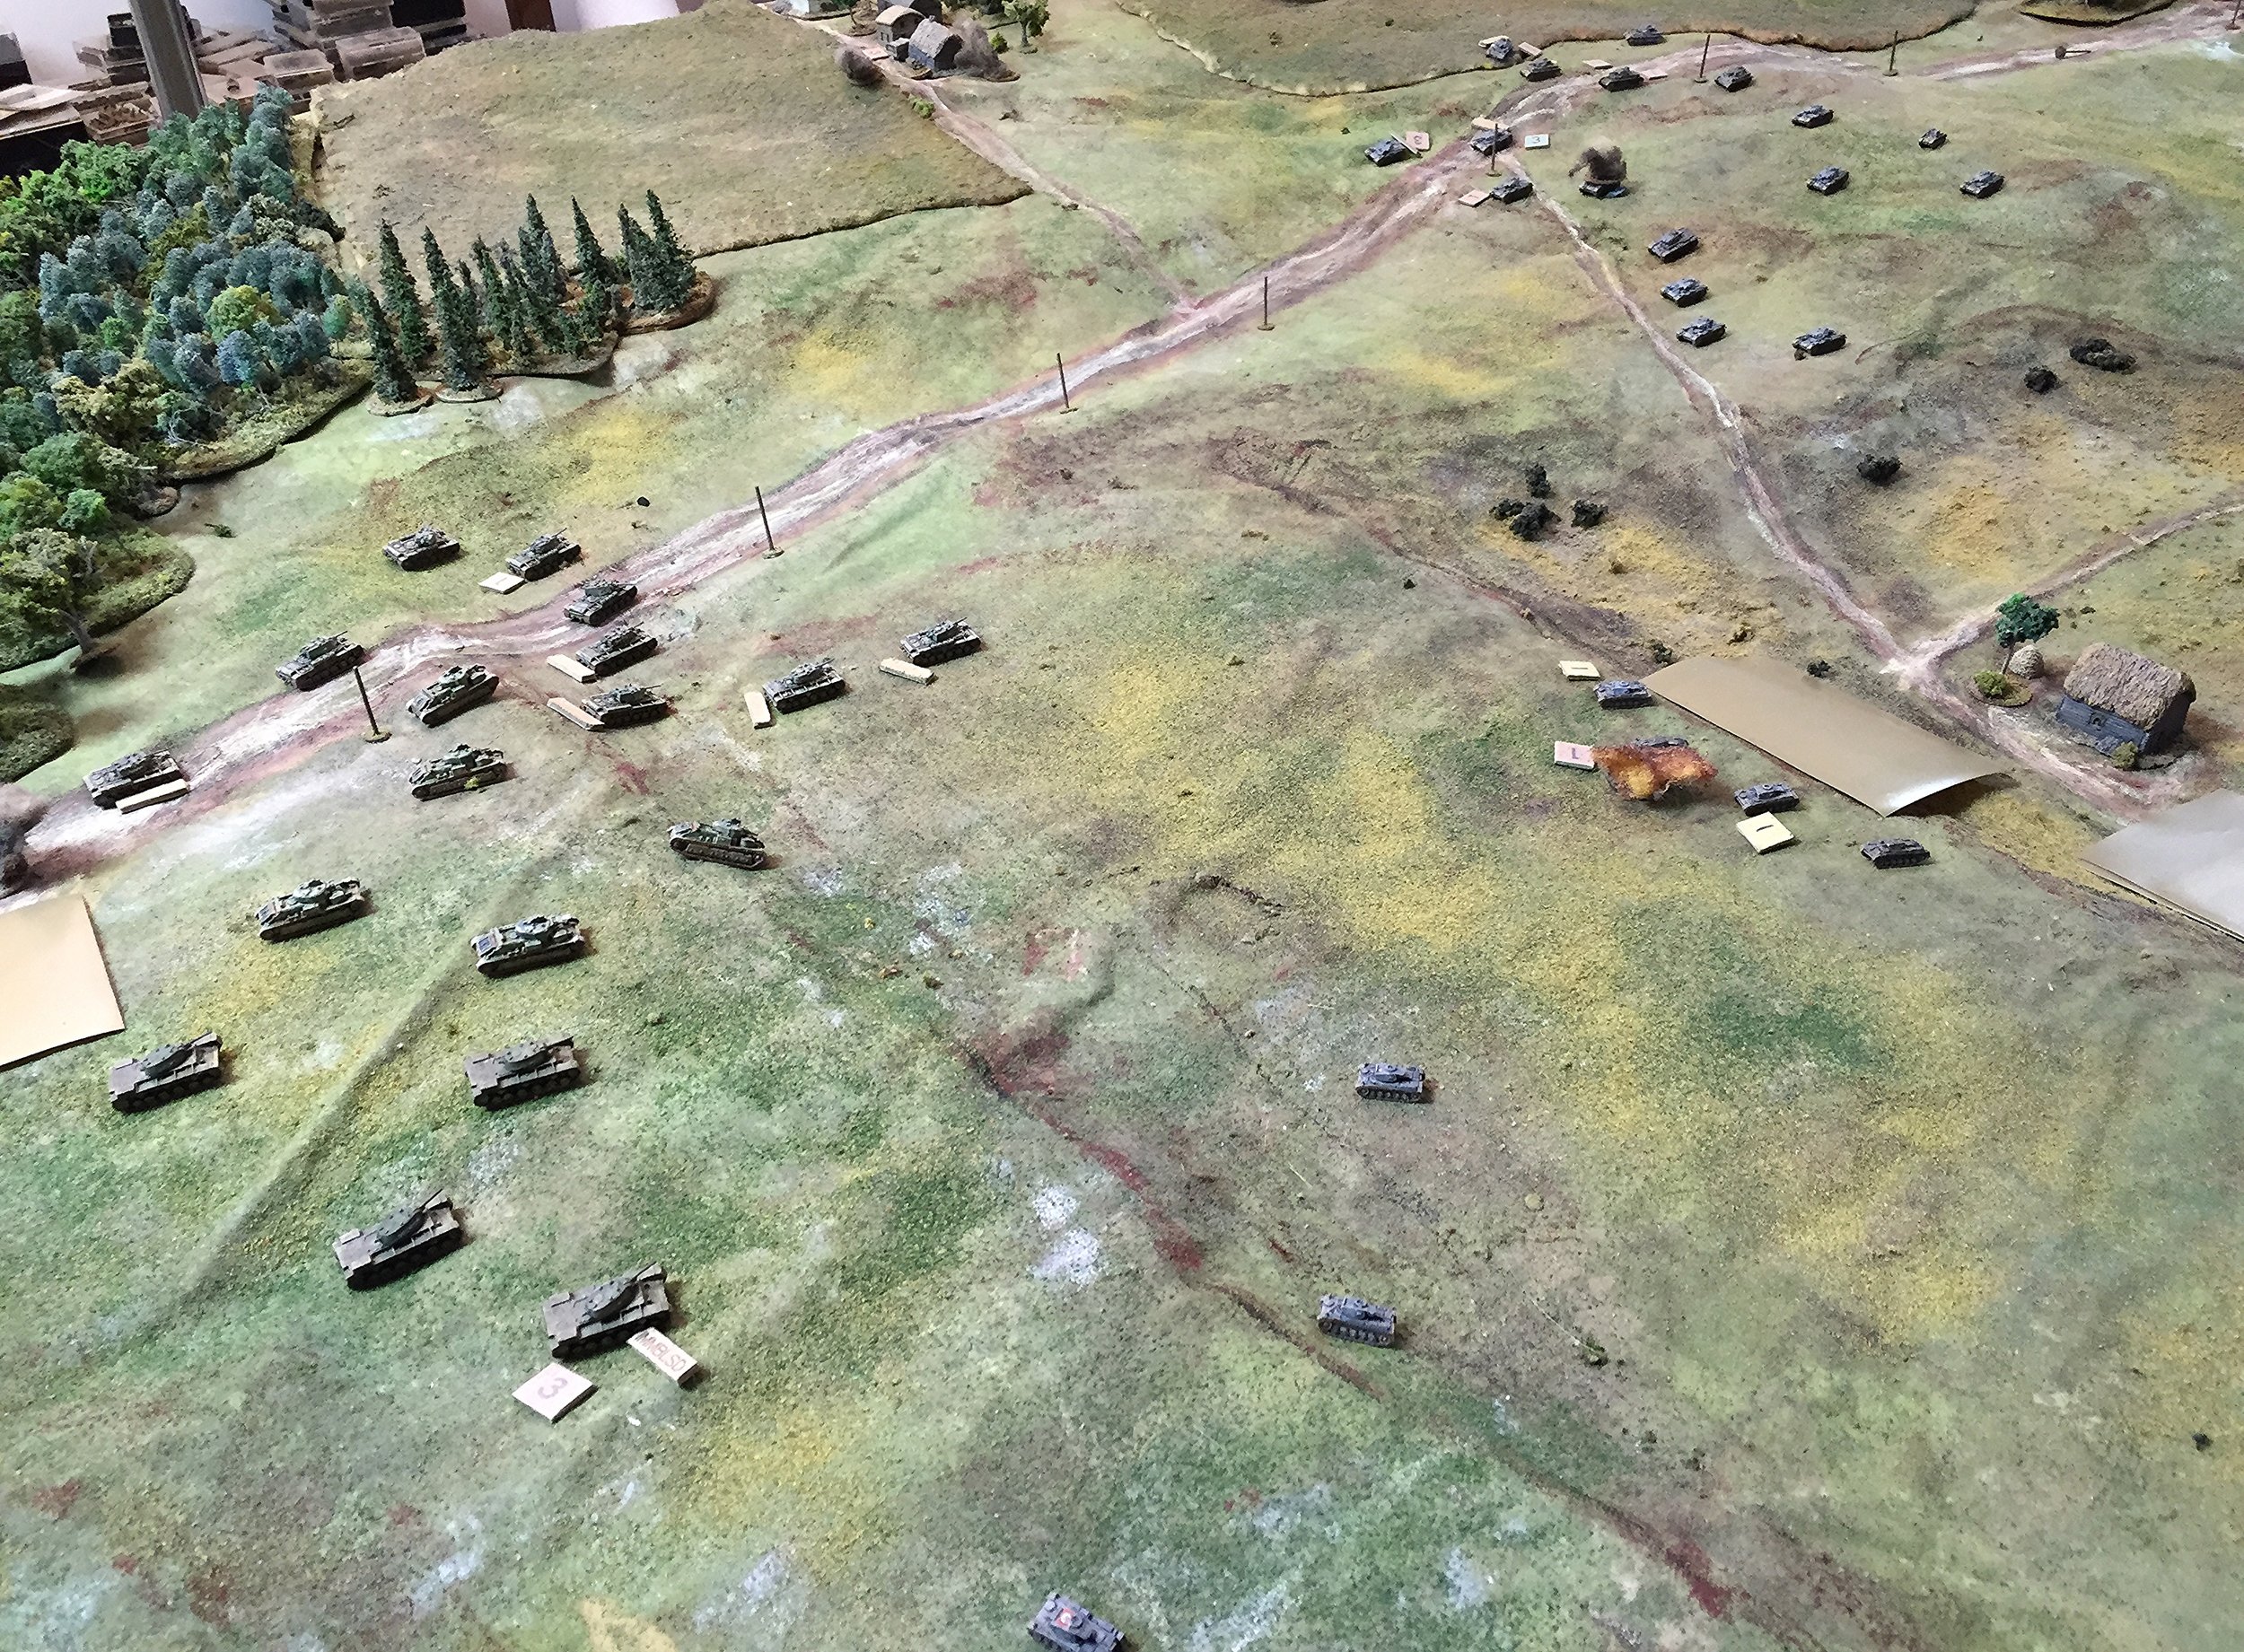
The British push 7 Platoon into the olive grove, but it's clear they are now in a position where they're not going to manage to take Santa Magdalena, not with a Tiger on the loose. To quote the post-session summary for the players:

It's a 'winning draw' for the Germans, in campaign terms.

The British have a reasonable hold on Santa Maria, though a strong German counter-attack could dislodge them, but they made no appreciable dent (other than a couple of architectural ones) in Santa Magdalena. The German battalion 80mm mortars will be called onto another target, as will the British 25pdr battery, allowing both sides to consolidate as dusk falls where they are, with the British A Company holding Santa Maria and  the southern woods, and the Germans Santa Magdalena and the heights above it. The olive grove, the vineyard and the wheat field on the east of the road are contested no-mans land, as I don't think either side has done enough to claim to actually hold them yet (yes, the British had men in both, but hadn't demonstrated that they could stay there). 

Mike Whitaker


A 6mm I Ain't Been Shot, Mum game played by Mark Luther in May 2015


And at this point we called the game for the Germans.

The Soviets lost every tank:  six T26s and fourteen T34s and the two Ba 10 armoured cars. In addition they lost 31 men and three Big Men.

The Germans lost the two Sfl and two PaK 35s outright and one crew was down to one man. Two PaK 38 crew men were KIA. But the grenadiers only had three casualties in their sections . Over a 4 to 1 kill ratio for the ATGs.

Another fun and tense game.

Mark Luther


On this occasion I bring you another blast from the past, kept in the dossier marked "Top Secret" and only declassified today. The photos, by the way, don't do the game justice: it was an intense encounter that really absorbed the interest of all the players.

The scenario was a simple one: the Germans must take a small town defended by the Soviets.

The German set up, to the right of the photo to the right, was quite orthodox, but with some troops advancing onto the table not under Blinds: hoping to suggest, I suppose, that there were other troops we couldn't yet see.

The Soviets, with a much smaller force, concentrated their few troops within the town and its immediate surroundings. They didn't bother to conceal their artillery under a Blind, as they wanted it in action right from the start of the game.

As soon as the game began, the Soviet artillery began to punish the Germans for deploying some of their troops in the open.

The Germans, on the other hand, were totally committed to sending their truck-bound infantry straight into an assault on the town's defenders.

And from that moment, the surprises began! 

The Soviets thought that the Germans were going to have off-table artillery to hammer us, but what they actually had was airborne artillery! Fortunately, the Soviet artillery we had on the hill was very well hidden, so the German air attacks failed to take it out.

Taking advantage of the fact that his aviation was "distracting" our artillery, the German tanks and other fast-moving units, began their advance.

Even the troop transports were emboldened enough to drive straight through the small village and head straight for the town itself.

More surprises:  the Germans had brought artillery with them, 105mm howitzers, which they quickly deployed on a nearby hill in their deployment area.

Since the Soviets appeared to have no off-table artillery, the Germans gradually dared to reveal their troops, with the Soviets quickly following suit:

But the Soviets also had a surprise for the Germans, as they had also brought along some air support! In their first fly-pass, Soviet ground-attack aircraft let loose a stick of bombs right onto a unit of enemy armour that was getting dangerously close to the town.

The results were pleasing: as the smoke from the explosions dissipated, one German tank was on fire.

The German artillery found that it could only fire at our artillery, since the only elevated position where it could deploy was not suited to covering the advance of their troops.

Meanwhile, the Soviet guns, and the tanks hidden in the grove, did their job very well:  leaving the Panzer unit severely punished.

The German infantry, believing there to be no opposition within the town, "cheerfully" entered it...only to find the place full of a Soviet platoon that also received them "cheerfully", but in the Russian style!

At this point in time, on the verge of having to pack up, the Germans had suffered many casualties and were not in a very good condition to make another assault on the town. The Soviets, on the other hand, freshest and most fortunate in chance, were fully operational and ready to give more "love" to the Germans.

It was a good afternoon of laughter.

Burt Minorrot with pictures from Salva Rossello


The second battle of Rob Avery's campaign booklet Vyazma or Bust! takes place in late September 1941 as the Germans continue Operation Teifun (Typhoon), with an attempt to take Sychevka, a town just to the north of Vyazma.

The German player is tasked with capturing the bridge at the hamlet of Urk which his division will use to outflank a strong Soviet position. The Soviet player, currently in disgrace after defeat in the last game, commands a motley bunch of poor quality conscript troops dug in around Urk.

After the loss of his armor, the German player didn't have the will to continue the battle and retreated. An impressive display of Soviet firepower in combination with a lot of German tactical mistakes gave the victory to the Soviet side.

Vaggelis


This was scenario 1 from Cymru Am Byth, the Welsh Guards scenario book by the TooFatLardies. The countryside is flat leading towards the railway embankment where the British defenders were. One section of French infantry with a Big Man were in the house on the far left of the map.

The Germans enter from the bottom of the map

The Germans were quickly spotted, and advanced on Arras, with the Panzers quickly leaving their infantry behind. The German CO seemed to become quite enamoured with the farmer's daughter and didn’t move out of the farm all game: we later discovered that his card hadn’t been given to the umpire to add to the deck!

The unstoppable forces of the Fatherland advance

The Germans spotted there was movement in the houses by the railway bridge but weren’t able to see what it was. The French section had retired from their position in the house at the end of the village and very astutely took up a position on the railway embankment (by the green tape) from where they kept the left hand German platoon pinned just out of view for the rest of the game:

The German Panzers made a rush for the railway underpass, forgetting that they only have tin cans. They were ambushed by British infantry who, while not destroying any, did knock several bits off them, at which point due to how slowly the Panzers had been advancing, the British reinforcements of two troops of Vickers MkVIBs arrivedand gave them the coup de gras, causing two to be abandoned.

The second Panzer zug, in Panzer 1s, and the third infantry zug were still on Blinds in the background. They didn’t get past the railway line, which was now strongly held by the Welsh Guards.