Overlord 2023/Valour & Fortitude

I went to Abingdon Wargames Club’s Overlord 2023 show at the weekend. This was the first one back after lockdown and COVID, and a very pleasant little show it is too.

Whilst it’s not the biggest show in the world, it had all the important elements needed: demo games, trade stands, car-parking, reasonable food and drink, and only a £4 entrance fee.

I didn’t buy anything, for a change, I’m still painting Normans and working on the lead mountain, but I did get to play in a very nice 6mm game of Valour & Fortitude: the fast-play, skeleton Napoleonic/19th Century rules from the Perry twins.

It’s quite a brutal game, in the same style as the Neil Thomas rules I have been using for the post-Napoleonic 19th Century period, in that battalia take a few hits then go shaken then are removed from the table, all of which can happen in one round of melee…but it was a fun encounter where myself and a chap who’s name I didn’t catch, as the French, successfully defended a river/bridge against large numbers of Prussians.

My thanks to Si, Mark and John for running the scenario, and to my opponent and fellow player for making it an enjoyable game. As I said, above, the French hung on, just, for long enough to win…but it was the very narrowest of narrow victories!

If you can get to Abingdon without too much trouble, put Overlord into your diaries for next year: definitely worth going to.

AoE AAR: Heilsberg

A couple of weeks ago it was over to Benson to play in a huge re-fight of the Napoleonic battle of Heilsberg.

From Wikipedia:

On 24 May 1807, the Siege of Danzig ended when Prussian General Friedrich Adolf, Count von Kalckreuth capitulated to French Marshal François Joseph Lefebvre. This gave Napoleon the opportunity to engage the Russian forces led by Levin August von Bennigsen. On 2 June, before Napoleon could act, Bennigsen ordered his columns to converge on Marshal Michel Ney's exposed VI Corps. Outnumbered by 63,000 to 17,000, Ney fought a rear guard action at the Battle of Guttstadt-Deppen on 5 and 6 June. Though he lost his baggage train, two guns, and 2,042 men, Ney managed to escape to the southwest over the Pasłęka (Passarge) River with the bulk of his soldiers.

Within two days, Napoleon had ordered his 190,000-man army to close in on the 100,000 Russians and 15,000 Prussians. Aware of their approach, Bennigsen ordered his troops to fall back on Lidzbark Warmiński ("Heilsberg" in German). The Russian army took up strong defensive positions around the town, which stood on the Łyna (Alle) River. The French army, under Marshals Murat and Lannes, attacked on 10 June. Bennigsen repelled several attacks, resulting in huge French casualties, but had to withdraw towards Friedland the following day. Four days later, the decisive Battle of Friedland occurred, ending the War of the Fourth Coalition with the passing of the Treaty of Tilsit.

And about the battle itself:

The French cavalry under Joachim Murat was selected to lead the frontal attack, but Napoleon did not arrive on the field in person until Murat had already led a disastrous charge. Marshal Mortier and Marshal Davout advanced on the Königsberg side. Soult and Lannes, leading separate cavalry units, and Ney, with the infantry, moved forwards on both sides of the River Łyna. These smaller units proved ineffective, especially when Prussian reinforcements arrived, sent by Anton Wilhelm von L'Estocq at Bennigsen's request. Lannes made an unsuccessful attack which cost the French 3,000 casualties. On the Russian side, Bennigsen was suffering from fever and had difficulty remaining in command.

On 11 June, the substantial casualties on both sides and the success of the Russian defence gave Bennigsen and Napoleon little choice but to call an undocumented truce to end hostilities. The French had lost an estimated 12,000 men. The truce was focused primarily on the recovery of wounded soldiers. The battle ended with medics and soldiers from both sides helping the wounded and retrieving the dead. When Napoleon entered the deserted Russian positions the following day, he found that all except the wounded had been evacuated overnight.

I would play Murat, commander of the French cavalry, with Anon and Mark leading the French infantry. The Russians would be played by Edward and John. We also had two referees (and the architects behind the game): Bevan on the French side and Dave on the Russian side. The rules used were Age of Eagles.

The French cavalry corps, with me as Murat commanding, arrive on the edge of the table. Our objective is the town that you can just see top right.

I knew that historically Murat had just thundered forward and charged up the slope at the waiting Russians. I also knew that that hadn’t worked, so my aim (and orders from our Napoleon) was to head to the left and try and get through the gap in the ridge past the trees with the house in front of them.

I duly headed off in that direction as fast as I could, but my troops quickly got a bit strung out. The Lights were okay, but the Heavies were having none of this fast-moving malarky!

Meanwhile, the Russians pulled back so all their troops were on the ridge and our infantry started to arrive on table.

The Russians were waiting for me with two strong (well, large) units of Cossacks and a battery of guns, so rather than recklessly trying to force the gap with the Lights, I waited until my Heavies actually deigned to arrive.

Meanwhile, the Russians were receiving reinforcements.

Time to earn my spurs! I brought the Heavies up along with my Horse Artillery and thundered through the gap, with the enemy Cossacks counter-charging my advancing cavalry.

I didn’t smash the Cossacks from the table - their large sotnias absorbing a lot of the impetus from my smaller but much better quality units - but definitely pushed them back, allowing me to start to pour through the gap.

Meanwhile, the French infantry was advancing forwards as fast as possible, and fighting had broken out around the village on the Russian left. This benighted place would change hands several times before finally falling to the French.

The Russian reinforcements were still streaming towards the fighting!

As the French infantry continued to pour forward, I kept the pressure up on the Cossacks and the regular cavalry that had begun to arrive to reinforce them.

By now, battle was becoming general across the whole of the front of the ridge.

On my side of the table, my cavalry were now definitely starting to push the Russian horse backwards, even with their reinforcements, and were starting to push forward onto the ridge itself: the flank of the Russian infantry beckoned, and I even managed to overrun a Russian artillery piece in its redoubt.

The French infantry were also getting well stuck in, and the Russians were gradually being pushed back all along their line.

This was not an easy fight, I hasten to add. French casualties were mounting up, and the action was a see-saw backwards and forwards rather than a steady advance from the French. My cavalry were facing a lot of fresh Russian regular horse and I was having to attack in surges: charge and get disordered, hopefully survive enemy actions, re-order and charge in again…but the enemy were definitely starting to crumble under our relentless assault!

What finally broke the Russian horse were a series of flank charges: my smaller units being much more manoeuvrable than his massive columns.

With my cavalry now dominant on the left side of the ridge, and my horse artillery on the way, and the Russian infantry in the centre starting to crumble, it was looking deadly serious for the Russians.

The clock was ticking, however, and we had to end the game there having fought 16 of the 23 turns that the scenario allowed.

So, who had won?

Well the French were definitely winning, and had secured two of their four objectives: the river line in front of the ridge and the ridge itself. They had also inflicted 41% casualties on the Russians whilst taking approximately half that themselves. Admittedly they technically only had seven turns to secure the riverline behind the ridge (that would have been very, very do-able) but taking the town, with its infantry defenders would have been very tough to do indeed within that time limit.

In the end, the referees ruled that extreme Russian casualties would have meant that their army abandoned both the field and the town, giving victory to the French. Huzzah!

It is, however, only fair to mention that the Russians disagreed vehemently with this interpretation of the result: claiming that they would have quite happily holed up in the town and waited for nightfall and the technical end of the action, giving them the victory despite their enormous casualties and loss of 75% of their objectives. I leave it up to you, dear reader, to decide who was right!

I was quite relieved to have done better than my historical counterpart, and was pleased with the way I had forced the Russian right flank.

The Age of Eagles rules give a good, fast-moving game, although I find the fact that you’re always rolling one die for a test or combat rather than two makes things uncomfortably random: there’s no normal distribution with just one die, and the fact that it’s a D10 gives you a nine point variance in result…it’s just that bit too random for me.

My thanks to all involved, but especially to Dave and Bevan who organised and ran the game. Perhaps a last word from one of the Russian commanders…

Really good to see some of you on Saturday, and big thanks for such a fun day and battle. The Russian right flank (which was weakly defended) took a pounding from some very skillfully handled French cavalry…but I think if we'd strengthened the flank from the start, the French infantry would have cleared the central high ground even quicker than they did. Even though we lost, I really enjoyed playing the Russians…an excellent defence over such a long period.


If you enjoyed reading this post, please add Vis Lardica to your list of favourites or, even better, to the list of favourite blogs on your own site.

www.vislardica.com

SP AAR: The Hundred Days

Here’s the first of my two battle reports from the TFL Games Day, Operation Market Lardon: a game of Sharp Practice set not only in the Hundred Days campaign but actually at Waterloo itself. As you’ll see below, Joe McGinn put on a great-looking game

John and I played the French, commanding a force ordered to stop an ammunition cart getting to the British Guards in Hougement. The Allies were played by Ally and Phil

The French were quite lucky in that our Voltigeur skirmishers got onto the table quite quickly and managed to almost immediately drive the British guards away from the cart. One set of skirmishers was then able to take possession of the cart and get ready to move it towards our baseline.

The Allies then brought on a large force of German infantry in column that headed straight for the cart and managed to recapture it, forcing our skirmishers to withdraw, but they withdrew just far enough to put the Germans under fire again, with concentrated.fire from the two Voltigeur units then driving the column back.

This meant that the French had time to bring on both their main infantry force (conscripts) and a decent sized support unit (line infantry). The former headed towards the cart and were able to finish the German column off, the latter formed a blocking force that quickly got into a fire fight with some Nassau infantry coming up from the direction of Hougemont itself.

The blocking force and Nassau were fairly evenly matched until one unit of French Voltigeurs was able to break away from harassing the German infantry (who had been broken by the arrival and volley fire of the French conscripts) and lend its fire to the battle. The Nassau infantry started taking heavy casualties and were forced to withdraw.

As the battle ended, the French had the ammo cart in their possession and well on the way to their baseline; the German column and British guards were on the run; and the Nassau skirmishers were starting to backpedal fast.

It was a glorious victory for the French: we did not lose a single point of Force Morale and had reduced the Allied force to just one Force Morale point. We had also lost just two Voltigeurs whereas dead Allied infantry lay strewn over the field.

Here’s the game in photos:

More Napoleonic French

I went straight from painting my second battalion of early period French Napoleonic infantry to painting the third battalion and, on the way, proved an old wargaming trope that the third unit is always the best painted!

As before, these are the excellent AB Figures 18mm range painted with GW Contrast Paints. The bases and movement tray are custom ordered from Warbases; and the flag is from the equally excellent Maverick Models (go for the “Effect on Material” ones).

Only another nine battalions still to go!

More AB Napoleonics

I completed my first battalion of early period French infantry in April this year, but have then spent the last four months trying to decide whether they are too big to match my existing collection of 15mm figures and scenery.

A recent 15mm re-fight of Talavera re-awakened my interest in the period, and I loudly assured everyone there that I had now made up my mind: the AB figures are too big and I would get ride of the battalion I’d painted, and the two unpainted ones as well, and swap to true 15’s.

I then went looking for a range of true 15’s to take their place.

I couldn’t find one.

Or, to be more accurate, I couldn’t find one that I liked as much as the AB figures!

So I changed my mind again, and am back on the 18’s!

Here’s the next battalion of Frenchies done…although I really must get better at painting the rosettes on the bicornes!

And just to make sure I won’t flip-flop again, the next battalion (the 3ieme!) is already undercoated and part-painted and I’ve just ordered another three battalions as well.

Age of Eagles AAR: Talavera

I played in a big Age of Eagles Napoleonics game this weekend just gone: a re-fight of Talavera. Most amusingly, given that I’d rarely played the rules or, indeed, any Napoleonics before, I was given the role of Wellesley i.e. in command of the allied British and Spanish team lined up against the evil French.

I’d like to be able to say that I emulated the soon-to-be Duke of Wellington and won a noble victory but, alas, the day did not go our way at all!

The Allies are lined up along a tributary of the river Tagus, Brits on the left, Spanish on the right, with the French coming at them across the stream.

The French planned to demonstrate towards the centre of the Allied line whilst attacking around the Allied left. If that didn’t work, the centre would turn into the main attack.

As the French came forward on our left, effortlessly brushing a single Spanish brigade aside, I moved some of our reserves (Mackenzie’s infantry Division) to counter the threat. With their advance there countered, the French changed their axis of attack and came forward strongly in the centre and on their left.

The Spanish held a fortified farm on our right, and the troops there performed brilliantly: their artillery slowing down the French advance and then a battalion of conscript infantry lurking just outside the farm holding off a charge by French heavy cavalry.

Unfortunately, the British in the centre performed less well. Firstly, closing up from extended line to line left several gaps in the British line. The French spotted this, massed their artillery and blew a British battalion away to widen one of the gaps into something they could move through…and move through the gap they did: French cavalry and infantry bursting through to totally disrupt the British line.

I had, as mentioned, already committed my infantry reserves elsewhere, and my heavy cavalry just didn’t get across the table fast enough to properly intervene.

As the British line began to crumble, the Spanish remembered they had an important appointment elsewhere (Cuesta was under orders to preserve the army) and the day was firmly to the French.

A great game, and all kudos to Mark and Bevan as the French commanders who, respectively, pinned and then dissected the Allies: great tactics. Thanks also to Dave for setting up and running the game; and to my unfortunate co-commander, John.

One last thing to mention, John had one Spanish battalion that despite initially recoiling from a combat then stubbornly refused to be broken no matter what the garlic-eaters threw at them. It seems like it was the Spanish that shone all day.

Here’s a gallery of the game (excuse the rather curly roads!):

First of the Napoleonics

it’s all your faulT, mate!

it’s all your faulT, mate!

Regular visitors will know that I’ve been looking for a new project to work on. My choice was the bottomless pit of Napoleonics: not a period I’ve ever collected figures for before.

After a bit of research, I decided to get some early-period French: the uniforms are less ornate than later on and one might as well start at the beginning! The next choice was what figures to use. The rest of my collection is all 15mm, so it had to be 15mm, but I had heard good things about AB’s range of 18mm models: 18mm/15mm: surely not that much difference, so I decided on them!

Next choice was size of units and basing.

I found the rather excellent Napoleonistyka website which gave me the sizes of the various units, so I decided to start by building a battalion of early war French infantry i.e. nine companies: one grenadier company of 80-90 men, seven fusilier companies of 120 men, and one company that was either another fusilier company (pre-1805) or a voltigeur/light company. About 1,000 men in all.

I then looked at basing. This was an absolute ‘mare, as I didn’t have a particular set of rules in mind. I investigated as much as I was able, and eventually settled on a 32-man battalion of 1 x grenadier base (4 figs), 1 x voltigeur base (4 figs), then two double company fusilier bases (each 8 figs, one with the 4 command figures in it) and two single company fusilier bases (each 4 figs).

That gave me a nice approximately square unit eight figures wide and four figures deep which seemed to be able to be used for most major rules systems. It could form an attack column eight wide, four deep; a march column four wide, eight deep; a square with each side being four figures facing, two figures turned away; or a line sixteen men wide and 2 deep.

That made each figure equal 30 men, and the only annoying thing was that the battalion was therefore technically eight companies strong, not nine…but my solution if the rules demand nine 4-figure companies is to have enough battalions to always be able to split one into spare companies if necessary!

I could have gone with six 6-figure bases, but couldn’t see how that would improve things in terms of portraying the companies correctly: logic would say that if you wanted to use 6-figure bases, you should drop the figure ratio to 20 men per figure and have nine 6-figure bases per battalion, which seems like an awful lot of figures!

The figures for my battalion arrived from Eureka UK quite quickly. Interestingly, you choose and buy the figures individually: time consuming but quite fun. They did look a bit big, but I decided to crack on and paint them anyway. GW Contrast paints for the most part, with colour choices via research into what other people had used.

So how did they turn out?

Well they are very nice figures and have painted up well despite my rudimentary skills. The faces, in particular, look good, and the Contrast white is ideal for their main uniforms. The blue is stronger than it looks in the picture, and the only weak point is perhaps the black for the hats…but re-watching Sharpe last night most of the hats were faded anyway.

One thing: I’m not very good at painting the rosettes on their hats!

DSCN2522.jpg

There is only one teensy-tiny problem.

Their size.

It seems that 18mm is very different to 15mm! Which I should have known!

Here’s a comparison with my ECW figures from Hallmark/Peter Pig:

I’m now trying to work out if this is a problem for me. As I mentioned above, all the rest of my collection is 15mm…so can I count these as big 15’s, or have I started a new scale?

I just can’t decide. I haven’t really got any 18th/19th Century European terrain, but most of my trees and other 15mm buildings are big enough to work…

I need to decide quickly, however, as I have another two battalions on order. What do you think? Let me know via the comments, below.

AAR: Virtual Lard V

One of the few good things to come out of lockdown has been how people have found ways of gaming remotely.

The Virtual Lard Games Days are an excellent example of this. Using the Lardy Discord server to co-ordinate, vast numbers of games run simultaneously all around the world, with a virtual pub also available for those all-important post-game discussions. The Virtual Lards are, in effect, online conventions.

Virtual Lard V took place last weekend, and I was lucky enough to get a place on two games: one in the morning and one in the afternoon (this isn’t guaranteed: the sessions are often over-subscribed).

Sharpe Practice in the AM

The morning’s session was a terrific game of Sharp Practice Napoleonics with Col Murray running a session that involved the French (commanded by the two Bobs: Lucky Bob C and myself) attempting to stop some Austrians (commanded by Andrew and Grizzlymc) making away with some items that had best remain nameless.

I won’t detail the step-by-step action, but suffice to say that my masterful mismanagement of the French Grenadiers kept a large proportion of the Austrians so busy shooting them to bits that the rest of our force (Bob’s Line and my Skirmishers) were able to drive the rest of the enemy off the table, so reducing their Force Morale to zero and giving us the game.

It was very exciting. At one stage it looked like being a certain Austrian victory as their Dragoons headed off-table with “the items”…but their movement rolls were poor, giving Bob and I (well, mainly Bob) time to hammer the Hungarians with musket fire again and again until they broke and fled. The last turn could have gone either way, but the draw of the cards, for once, favoured the French, and victory was ours.

Here are some pictures:

As an afterthought, one of the amusing things about Virtual Lard is the way that it brings people from different time zones together. Grizzlymc was actually in Sydney, Australia, and sipping whisky at what, for us, was early morning!

IABSM in PM

My afternoon game was I Ain’t Been Shot, Mum!, with Jim Catchpole running a scenario set in France in 1944. Dan Albrecht and I were commanding a company of British infantry moving forward to clear a village that may or may not have been in German hands. A pleasant chap called Michael was playing the Germans: he hadn’t played IABSM before.

All went well for the British until we hit a major chokepoint: a bridge that proved to be the single crossing point over a fast-flowing river right outside the village in question.

We began by doing everything right: probing over the bridge with out recon carriers, laying down smoke to cover a German MMG, but then the cards turned against us and the German artillery came hammering down.

An abortive attempt to break out of our “beachhead” by the carriers failed dismally (my fault entirely, Dan!) and then we just couldn’t get out of the artillery kill zone. If we moved forward, the waiting Germans shot us; if we stayed where we were we got hit by shells from above.

We lasted a couple of turns then ordered a retreat!

It was a difficult scenario, but we could have done a whole lot better. Which was a pity, as our leapfrogging advance to the bridge was a speedy thing of beauty! What we should then have done was to take the time to spot properly, lay down smoke properly etc but the arrival of the German artillery mucked up our plans.

Well played Michael, well umpired Jim, and I think Dan and I both agreed that our solution was to pull back and call in the artillery. Or, to put it another way: I say we take off and nuke the entire site from orbit...it's the only way to be sure!

Here a few shots of the game right up to the point where the German artillery arrived:

Afterword

All in all, another great Virtual Lard. My thanks to the organisers and game-runners, and can’t wait until the next one.

Napoleonic AAR: Austerlitz on Zoom!

83913e8a07c789812726c2453331098f--military-art-military-uniforms.jpg

Another remote game: this time a re-fight of Austerlitz.

The set up was similar to that for Ostrolenka (see earlier this year) but with a few improvements. Two teams of three players each: the French (Mark, Peter and I) and the Austro-Russians (Dave, Steve and Trevor) each in their own Zoom breakout room.

Each team could see each other and a limited view of the battlefield, and each was periodically visited by an Aide de Camp (Bevan) who took our orders and passed them on to the Umpire (Edward) who ran the table.

Eight participants, eight different locations: the wonders of modern communication!

Set Up

The game would be played with the Age of Eagles ruleset but scaled at divisional level i.e. the smallest units were divisions grouped into corps.

Each turn would be one hour of battle time, and the battlefield was about 8 by 9 miles in size. Each side would decide their deployment and send in orders for their first (7.00am battle time) turn before the day of the game itself, with the aim being that each turn would take 20 minutes to play, meaning that playing nine turns would give us all a game lasting from 7pm to about 10pm.

Each turn, each team would be able to move their Army Command location and issue orders to each of their Corps. Or the team could decide to “ride about a mile and a half round your army to inspect things for yourself” instead of issuing orders.

As a guideline, we could issue a one sentence order with a one sentence advisory to each corps:

  • "V Corps to deploy between villages A and B. Artillery well to the front"

  • "II Corps to attack enemy to front. Cavalry in reserve prepared to take opportunities"

  • "IX Corps to assault village C. Watch out for enemy Corps behind hill to your left"

  • "III Corps to advance and pin enemy to front. Attack only if enemy corps disordered"

  • "VII Corps to withdraw behind XX stream line. Conscripts to form rearguard"

Corps would continue to follow their previous order until changed. We were further warned that:

  • If you issue an order to each Division you will run out of competent Aides de Camp to take orders before you get very far.

  • If you issue long and complicated orders with multiple conditions and sub clauses the Aide de camp will pass on a random selection that he remembers to the Corps commander.

Background

For those of you unfamiliar with Austerlitz, our briefing was as follows:

Napoleon’s successes against the Austrians during the second half of 1805 have been extraordinary, with Vienna taken and many prisoners seized. However, Czar Alexander of the Russian Empire has now come west to help his ally Emperor Francis. Despite the French triumphs, Paris is swirling with rumours about Napoleon’s imminent defeat and fall from power, especially after Nelson’s victory at Trafalgar. The French Emperor needs one final triumph on the battlefield, and the hilly ground near Austerlitz makes a perfect setting.

img22.jpg

Deployment

Our army could deploy anywhere in the western third of the map (roughly bordered by the line of the stream running between Kritschen and Tellnitz). The Emperor Napoleon could place his HQ wherever he likes within that area, but the battle is lost instantly if he is captured or killed.

Terrain

Streams were all easy to cross with only a modest loss of pace. Ponds and marshes were frozen, but would hinder movement somewhat. The battlefield was very hilly, with various plateaus. Santon Hill and the Goldbach Heights tower above all the other ground.

Victory Conditions

Our victory conditions were simple: victory would be achieved if significantly more casualties were inflicted on the enemy than were suffered by the French army, or if Czar Alexander was captured or killed. In either case, Austria would sue for peace and the Confederation of the Rhine could be established.

Our Troops

Our army consisted of six corps:

  • Bernadotte

    • Rivaux’s Infantry Division (some 5,500 men)

    • Drouet’s Infantry Division (some 6,500 men)

    • 1 Foot Artillery Detachment

  • Davout

    • Friant’s Infantry Division (some 7,700 men)

    • Bourcier’s Heavy Cavalry Division (2,700 Dragoons)

  • Soult

    • Vandamme’s Infantry Division (some 8,700 men)

    • St Hilaire’s Infantry Division (some 9,000 men)

    • Legrand’s Infantry Division (some 8,600 men)

    • Beaumont’s Heavy Cavalry Division (2,700 Dragoons)

    • 2 Foot Artillery Detachments (1 with heavy guns)

  • Lannes

    • Suchet’s Infantry Division (some 8,600 men)

    • Cafarelli’s Infantry Division (some 7,600 men)

    • Oudinot’s Infantry Division (some 5,400 Grenadiers)

    • 2 Foot Artillery Detachments

  • Murat

    • Kellerman’s Light Cavalry Division (about 2,100 Chasseurs and Hussars)

    • Wathier’s Heavy Cavalry Division (1,700 Dragoons)

    • Nansouty’s Armoured Heavy Cavalry Division (1,700 Cuirassiers)

    • d’Hautpol’s Armoured Heavy Cavalry Division (1,600 Cuirassiers)

    • 1 Horse Artillery Detachment

  • Bessieres (Imperial Guard)

    • Hulin’s Old Guard Foot Division (some 4,500 of the finest veterans)

    • Savary’s Old Guard Heavy Cavalry Division (1,600 elite horsemen)

    • 1 Foot Artillery Detachment

The Plan

As we didn’t expect the enemy to follow history and conveniently deploy in two easily-beatable chunks, we decided that we would go for the Pratzen Heights and then hold against all comers, waiting for the opportunity to exploit an opportunity.

We therefore issued the following orders to our corps commanders:

  • SOULT:

    • Deploys on Schlappanitz.

    • Turn 1 Orders:

    • Orders: Move as fast as possible east, keeping south of Girschkowitz and Blasowitz and up onto the northern end of the Heights.

    • Commentary: You must get up onto the Heights before the enemy.

    • Anticipation: Deploy along the edge of the Heights facing N-NE, with left flank covering Krug.

  • LANNES:

    • Deploys on Puntowitz.

    • Turn 1 Orders:

    • Orders: Move as fast as possible east keeping north of Pratzen and up onto the central mass of the Heights.

    • Commentary: You must get up onto the Heights before the enemy.

    • Anticipation: Form on Soult's right flank.

  • BERNADOTTE:

    • Deploys on Kobelnitz (or as close as our deployment limit allows)

    • Turn 1 Orders:

    • Orders: Move as fast as possible east via Pratzen and up onto the southern part of the northern end of the Heights.

    • Commentary: You must get up onto the Heights before the enemy.

    • Anticipation: Form on Lannes' right flank.

  • DAVOUT:

    • Deploys on Marxdorf

    • Turn 1 Orders:

    • Orders: Move to Puntowitz.

    • Commentary: Keep a sharp eye for Allied troops approaching from the south.

    • Anticipation: Guard against an Allied approach from the South

  • MURAT:

    • Deploys on Kritschen

    • Turn 1 Orders:

    • Orders: Move east to where the road crosses the Bosenitz Brook.

    • Commentary: Send scouts up onto the Santon Hill

    • Anticipation: Be ready to head either east or south dependent on what the enemy does.

  • BESSIERES:

    • Deploys on the Zurian Heights.

    • Turn 1 Orders:

    • Orders: Move to Girschkowitz.

  • FRENCH HQ & NAPOLEON:

    • Deploys with Lannes.

    • Turn 1 Orders:

    • Orders: Establish yourselves at the juncture between Soult and Lannes.

aust.png


The idea was that once our strong centre had encountered the enemy, we would either crush them straight on (if they had come straight at us) or pin them so that a flank could roll them up (if they had weighted their opposite flank).

We actually predicted to ourselves that they would go strong up north, so we were anticipating Soult and Lannes being engaged, Murat pinning, and Bernadotte swinging north and rolling the enemy up from the south.

The Game

In the event, I think it fair to say that things went sort, but not entirely to plan!

Here’s a series of snapshots from the game, with commentary where appropriate:

From left to right:

  • Bessieres takes the Guard forward to Girschkowitz to protect the left flank.

  • Soult (the three central columns) heads up the hill and encounters Russians

  • Lannes (top centre right) is already engaged!

  • Bernadotte is moving forward slowly, Davoult is in reserve. Why is all our artillery (the grey blocks) in a stream bed?

2021-02-09 (2).png

The Guard have been hit by three divisions of Austrian Cuirassiers. Better send Murat to help.

Soult has a 3:2 advantage: should be okay.

Lannes still going strong.

Come on Bernadotte: get moving!

And will someone please get our artillery out of the stream!

2021-02-09 (3).png

The Guard have been smashed backwards! How can this be? Bessieres is sacked!

Murat (off screen to the left) is engaged and reports that he’s doing well.

Soult has been pushed back? Does not compute: we had a massive advantage! Get back up the hill immediately!

Lannes is still going strong.

Urgent messages going to Bernadotte, and don’t even talk to me about our artillery!

2021-02-09 (4).png

Murat still doing well to the left, but there seem to be lots of Russians coming towards him. No probs, we’ll break their centre and turn their right flank soon!

The Guard have retreated to a village and are sorting themselves out.

Soult goes back up the hill…but why has one division stayed behind?

Bernadotte is finally moving forward on the right. We bring Davoult forward to breakthrough the centre.

2021-02-09 (5).png

Murat is starting to feel the pressure…but he needs to keep fighting to hold our left.

Soult is knocked back again! What is wrong with you, man, you are French and outnumber the enemy! Get up that hill now!

Lannes (lovely boy, lovely boy) is back moving forwards again.

Bernadotte est un escargot (snail) reborn as a French marshal. Will you please hurry up and hit them hard on the right so you can swing round and roll them up!

The guns! The guns!

2021-02-09 (6).png

Murat has been dispersed, with only one division left, holding the Santon Hill. This is not good, but his sacrifice should have bought us time to win the centre and right and, as he said himself, any Hussar who is still alive at 30 is a blaggard and a coward!

The Guard have been pushed back (again!) but have determined to re-take the village. They’d better, Bessieres, as your future prospects are right in the middle of it!

Soult, Lannes and Bernadotte are pushing forward hard. Looking good: lots of blue, not so much green and white!

The guns are finally moving as well!

2021-02-09 (10).png

Hmmm…there are some Russian coming from the left now but (Gallic shrug) the battle seems to be won in the centre and on the right.

We just need Bernadotte to push forward, but he’s whining about Austrian cavalry holding him up!

2021-02-09 (11).png

A pity the battle didn’t end last picture: the enemy is resurgent!

This is where the battle ended.

Soult is barely holding, Davolut is under pressure, but Lannes and Bernadotte seem to be doing okay.

2021-02-09 (13).png

The End

And that is, indeed where the battle ended.

Up to that last picture, we thought we’d been doing pretty well, but we were starting to come under lots of pressure.

Remembering the victory conditions, casualties were counted. We had taken 50% more than the opposition! Oops! Throwing Murat away like that had not been very helpful, and it was hard fighting all the way.

The Austro-Russians were claiming a glorious victory, but we thought that, situationally, we were on the cusp of a massive roll up, and we had taken the Heights and pushed the enemy back. That said, the victory claims from the French camp were much more muted: we knew that, whatever the situation, we had been quite badly roughed up.

Analysis

What did we do wrong?

Well, we deployed to perfection, but underestimated how long it would take to get our guns into play.

We were also a bit passive in issuing orders sometimes. I think we could have pushed some divisional orders onto our marshals to improve the tactical situation (although there wasn’t that much room for tactics given our charge forward!) and definitely used ADCs to get the guns and Bernadotte moving forwards more quickly.

Using Capitaine ‘Indsight again, Soult initial set back was a real surprise and really turned the tide against us really early on. The unit that turned him back was the Russian Guard, who were, to coin a phrase “immense” and held us up far too long. Without their resistance, we’d have been over the hill and into Austerlitz by lunchtime!

Our huge mistake, however, was not going to see what was going on with Murat. We left him to get on with it, even when things turned against him. we then threw him away…in that he should have disengaged and pinned the Russian right flank advance. That’s how cavalry do things, after all, but we just ordered him to keep fighting. Funnily enough, it’s what the Austrian cavalry did to Bernadotte on our right.

So, in summary, a good plan, that could have worked, but we should have been more active. I blame the hours I’d already spent on Zoom working that day: my equivalent of Napoleon’s Waterloo malaise!

Good play from the enemy too. We might have had a good plan, but I think it fair to say that they made no serious mistakes once battle was joined. Well done Dave, Trevor and Steve!

Anyway, onto…

The Result

For a final decision, let’s hear from the Umpire:

It was something of a heavy-weight bout, with both sides launching head-on attacks! It felt like two battering rams crashing into each other!

I'd call it a costly draw, although strategically more of a set-back for Napoleon perhaps.

To be honest, as one of the French players, I think we were relieved to be awarded a draw, but a draw had been declared and all that now remained was for Napoleon’s excellent propaganda machine to spin it into glorious victory!

To finish, my thanks to Edward and Bevan for running the game so smoothly, and to all the players for participating. It was a brilliant experience, and one I look forward to repeating soon.

From the Austro-Russians

A very enjoyable account, much like the reports I think Le Moniteur printed from time to time! 

Very roughly, the Allies anticipated where your main attack would come from and placed our strongest Corps to block it. Sadly, Buxhowden was apparently a little hungover and they moved very slowly at the start.  Our main plan was to hold the French on the Heights, with as compact a line as possible, whilst Bagration’s huge cavalry Corps savaged whatever you had on your left and then swung down the valley to smash into your advancing infantry on their flank.  The Russian Imperial Guard were nicely positioned to help stop and then drive back the initial French attack.  

Like a lot of things on the battlefield it don’t quite work out that way! Still Kutusov fought like a lion whilst always being outnumbered, Constantine’s Guards were magnificent, Bagration’s Cavalry did the business (Murat was always all trousers and whiskers) and once Buxhowden sobered up he know what to do. Oh and I suspect we got a few very timely dice rolls…

However our troops were all ordered to cut out the glorious but fatal charges on the French and to cause maximum casualties in defence.  This seemed to work and according to our victory conditions it looked like an Allied victory – but half way through we would have settled on the draw, so no complaints about the decision.

Yes, a really good idea which produced a great game. Well done Edward & Bevan.
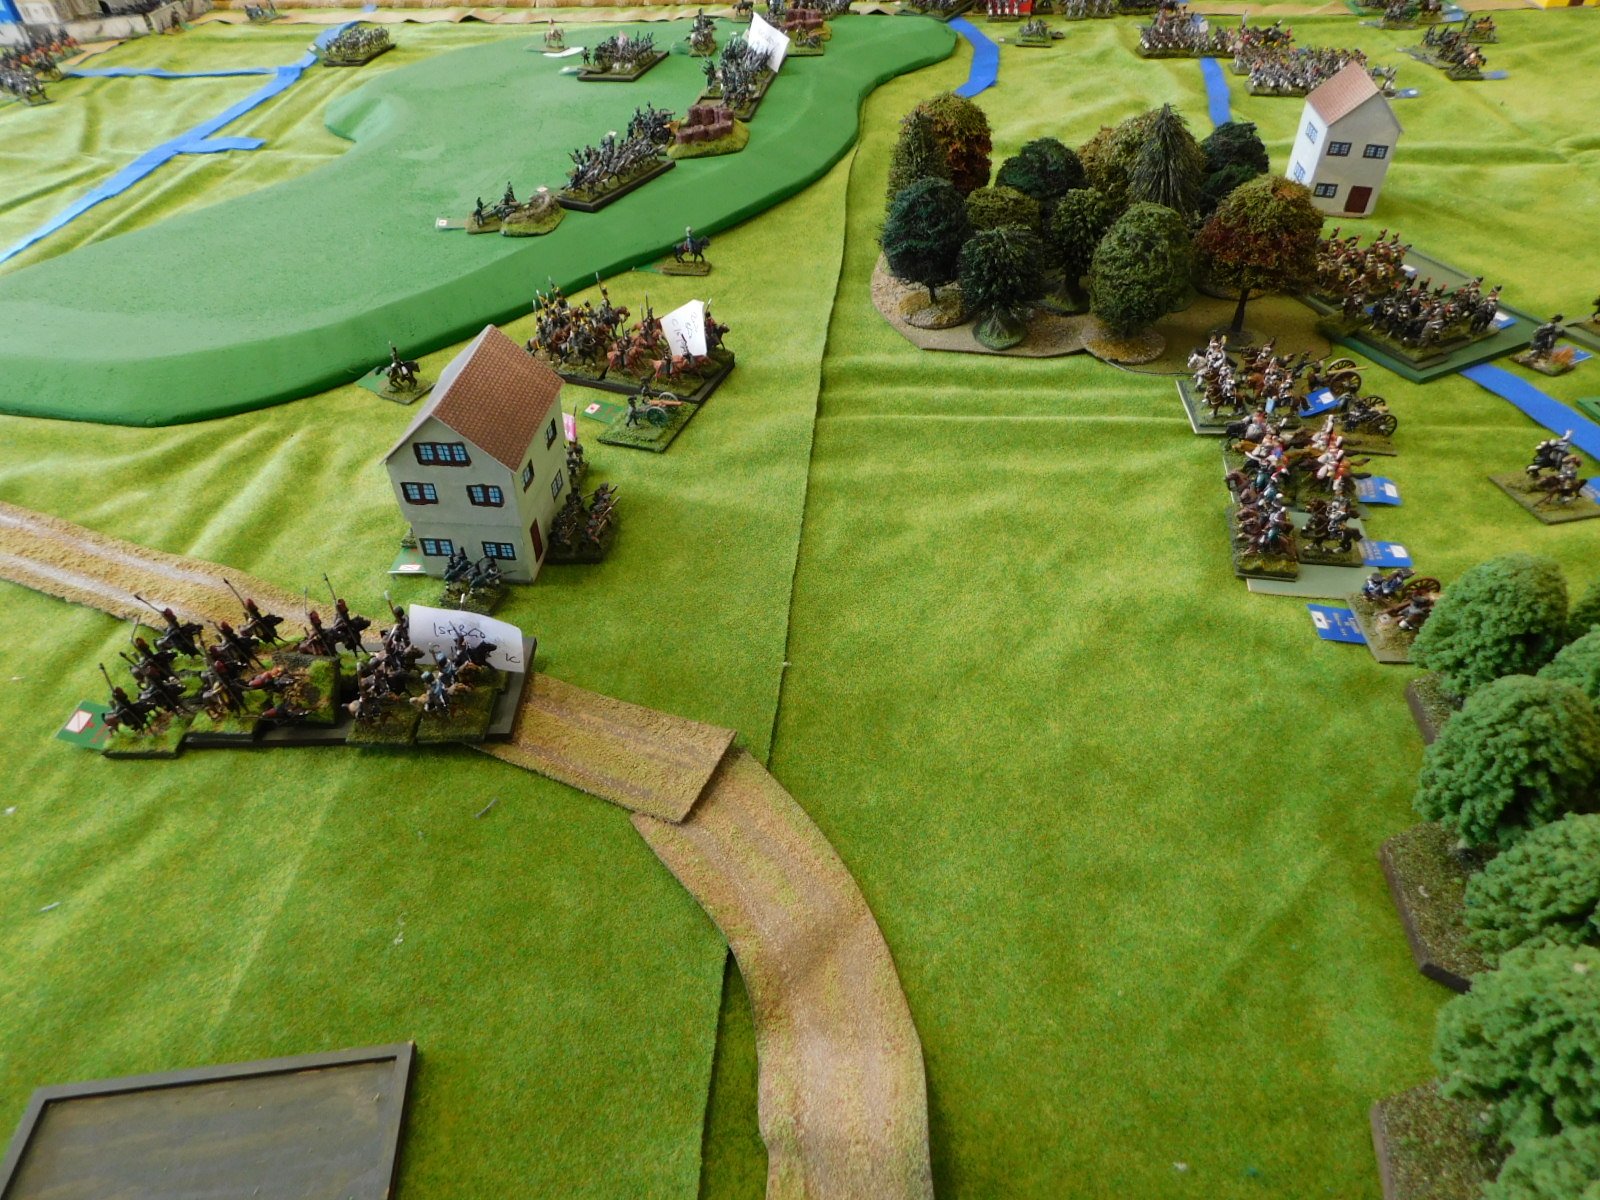
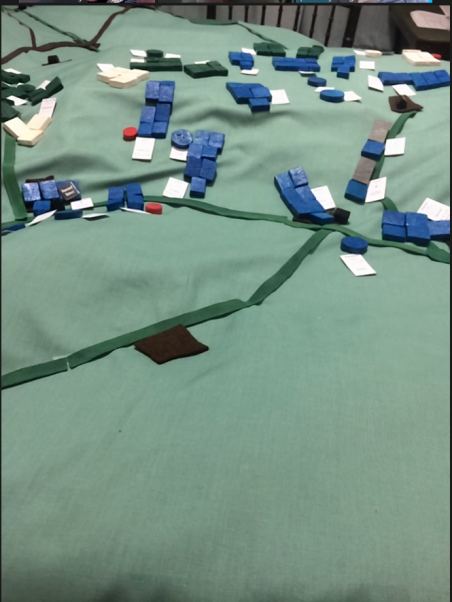
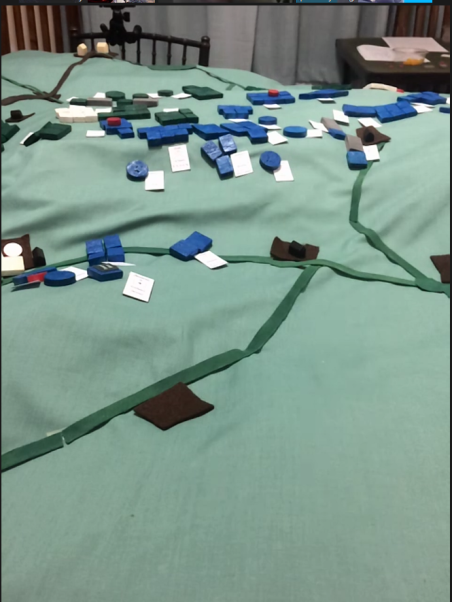
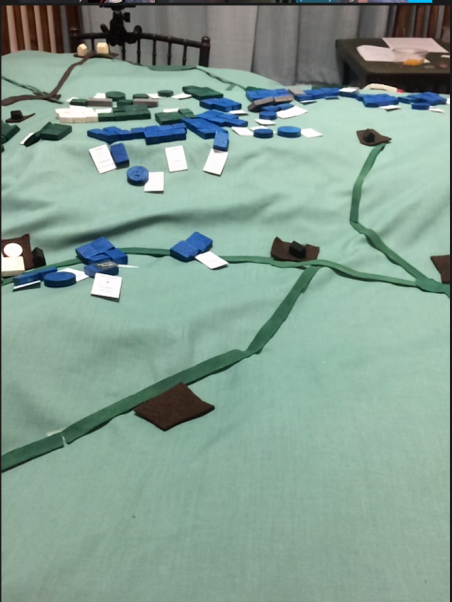
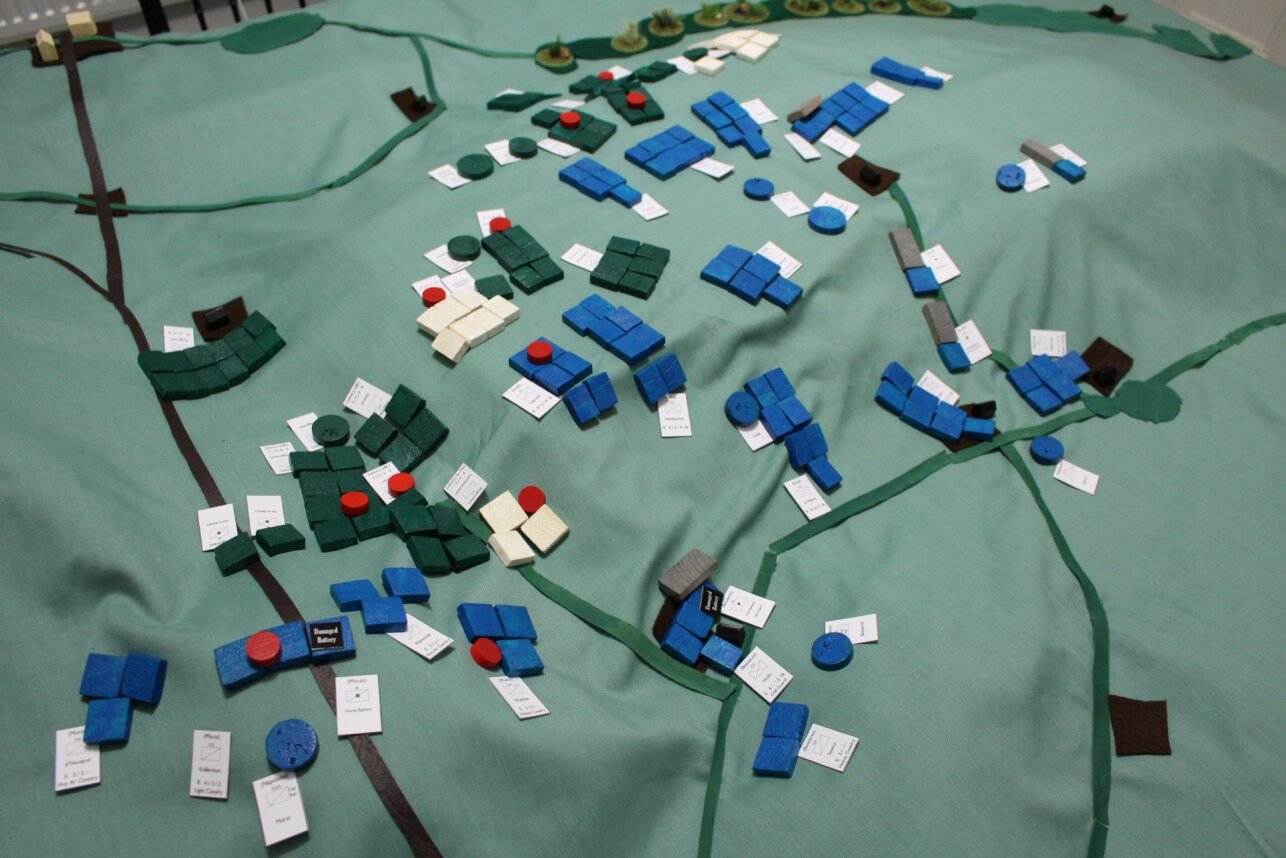
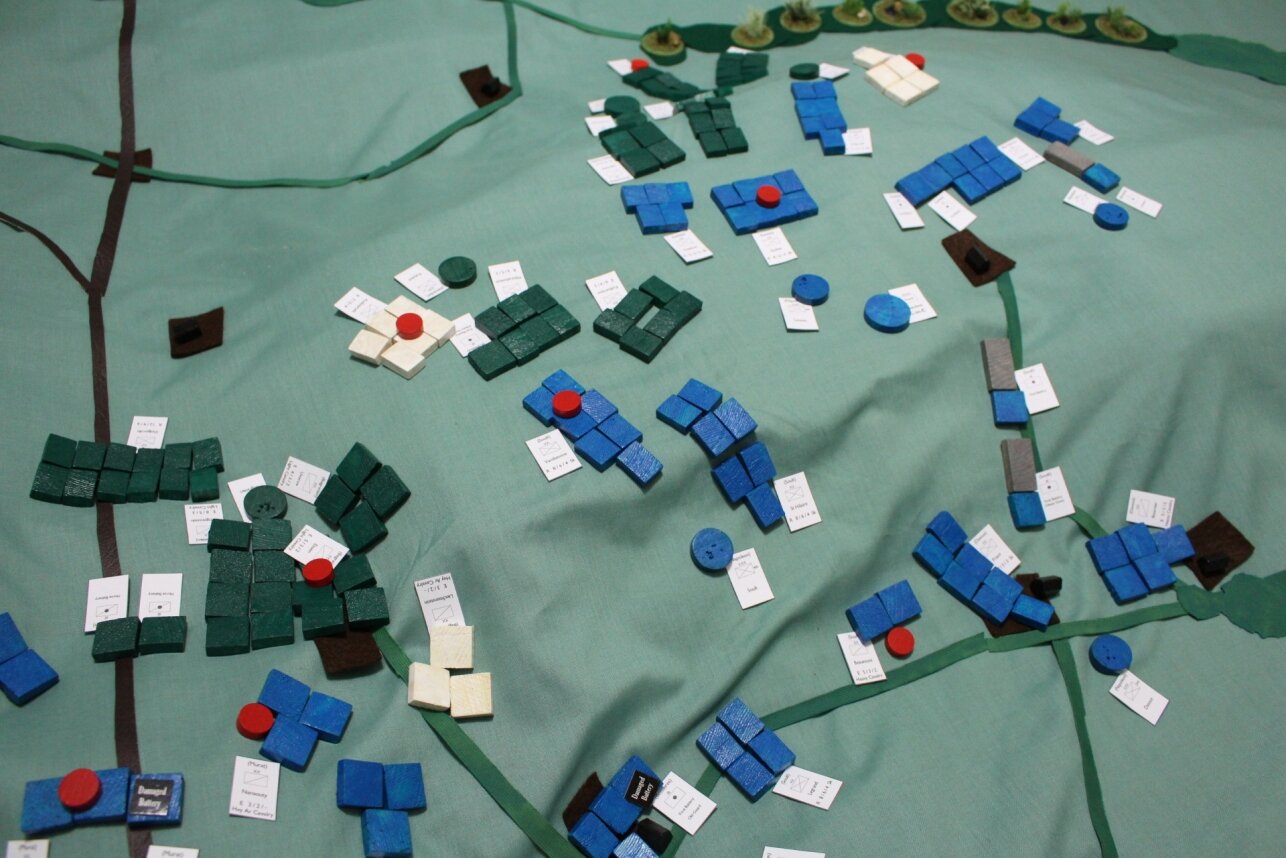
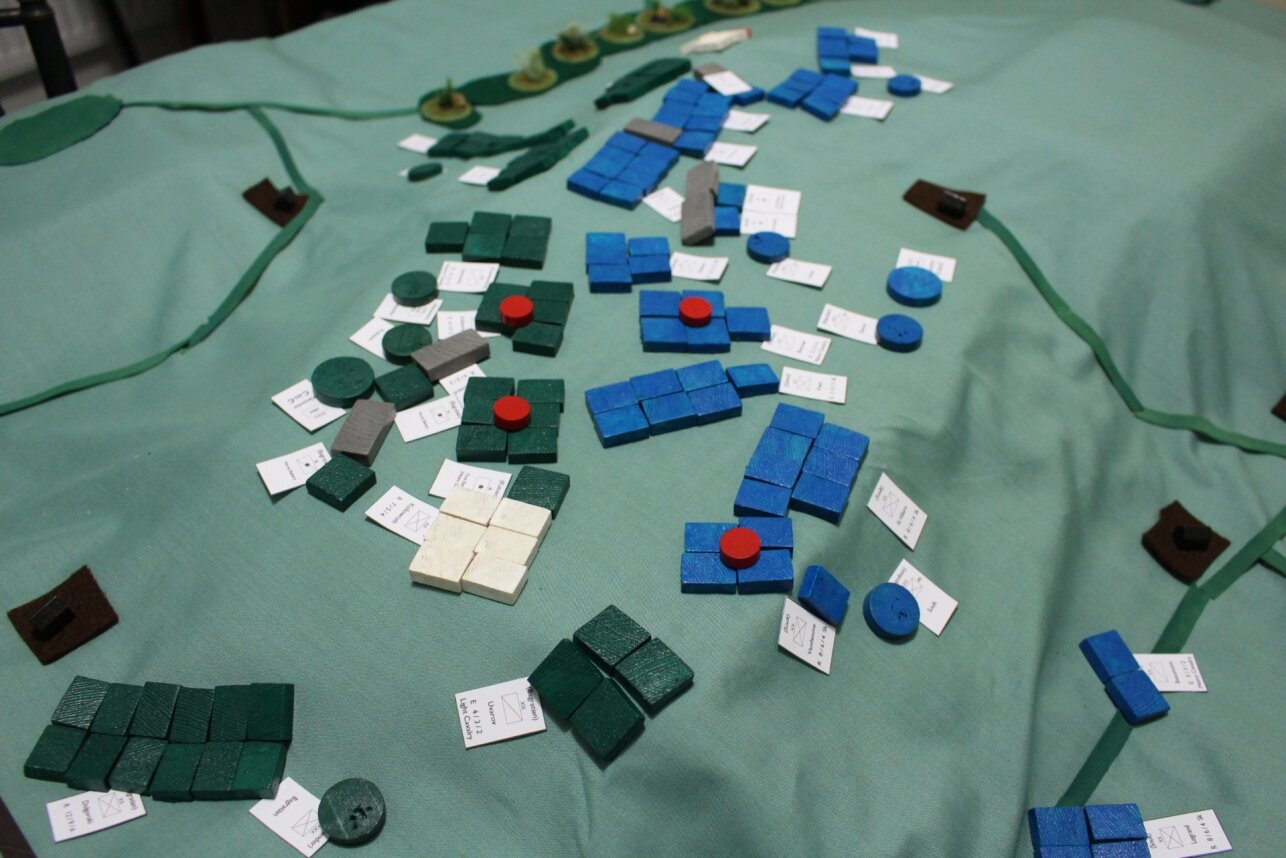
Finally…

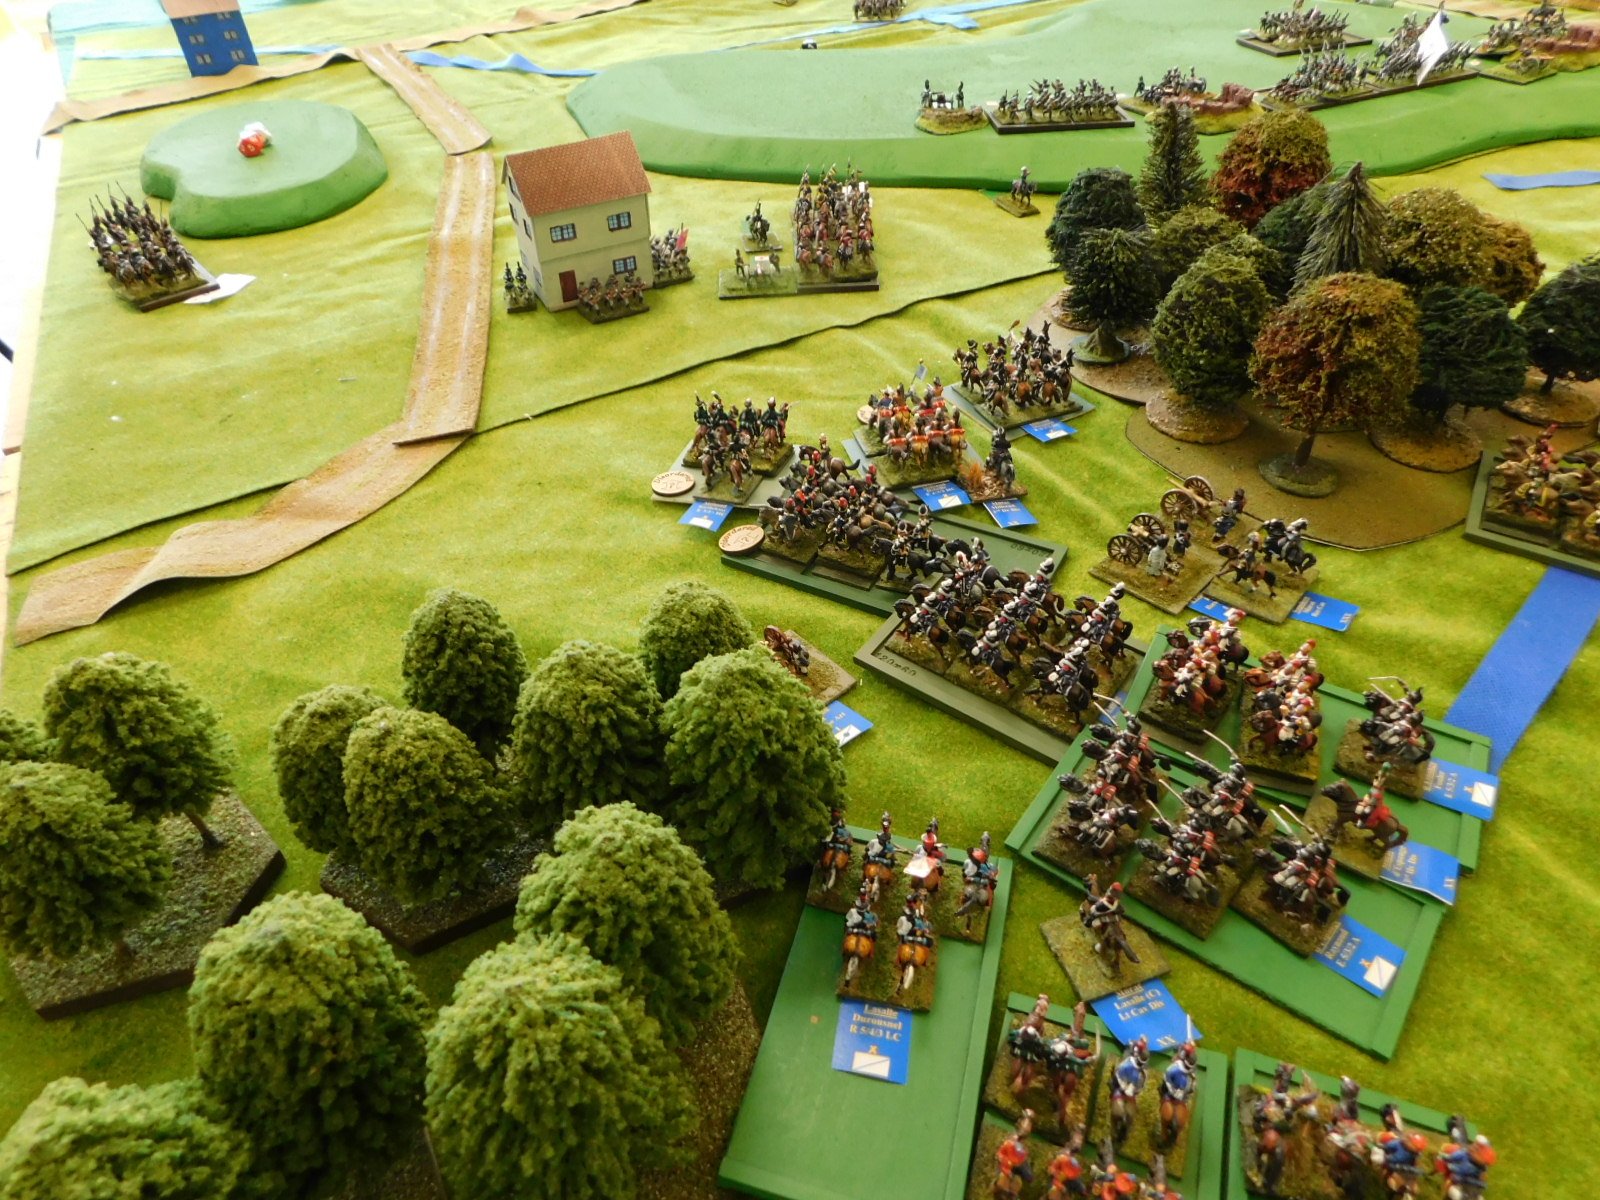
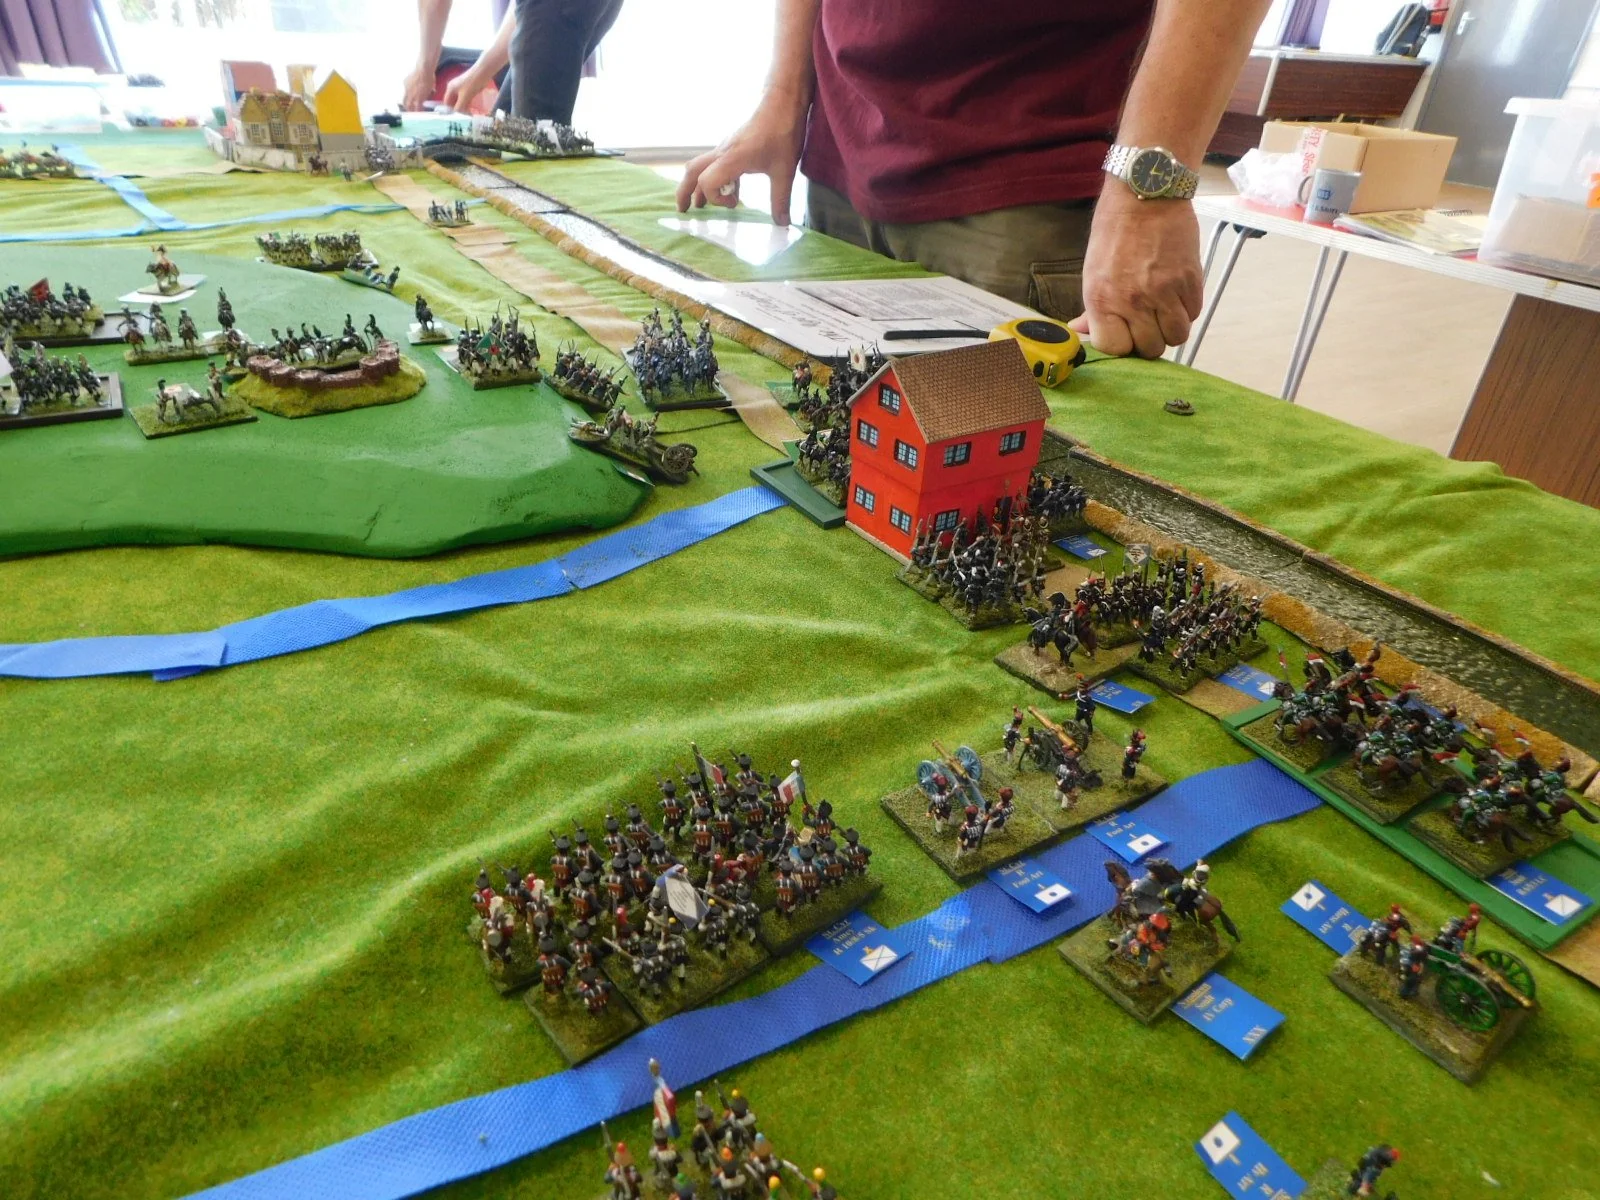
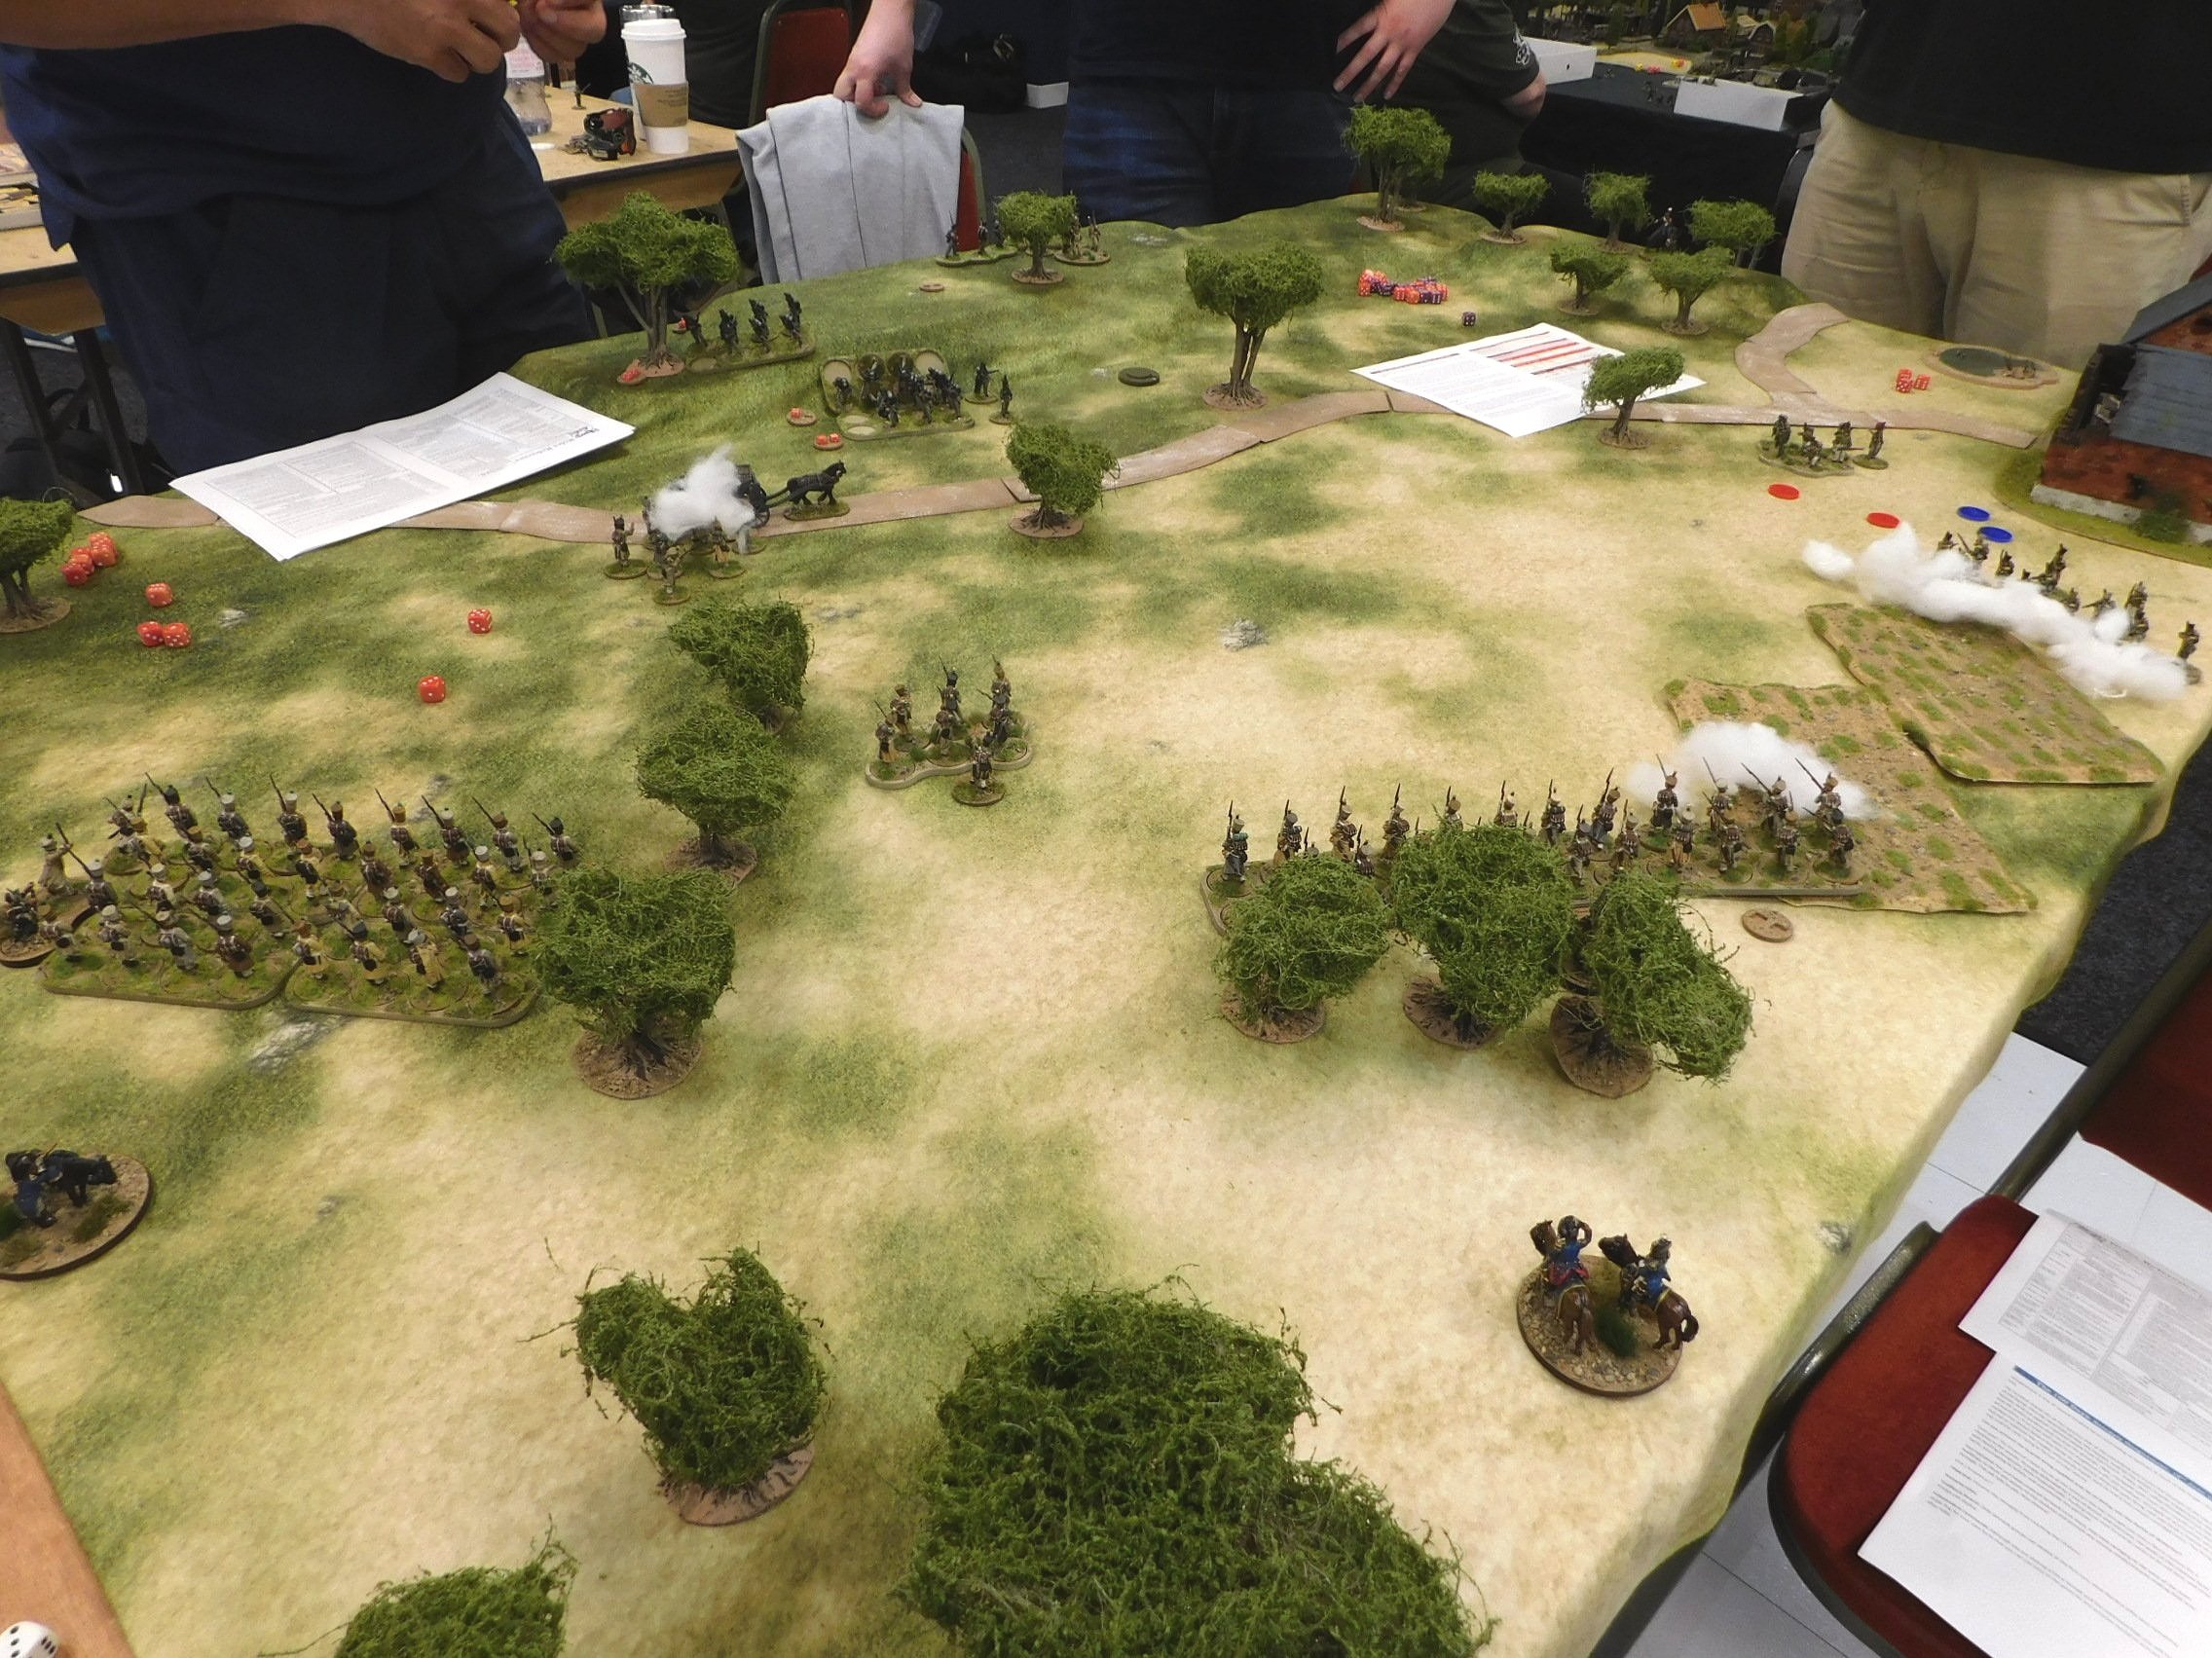
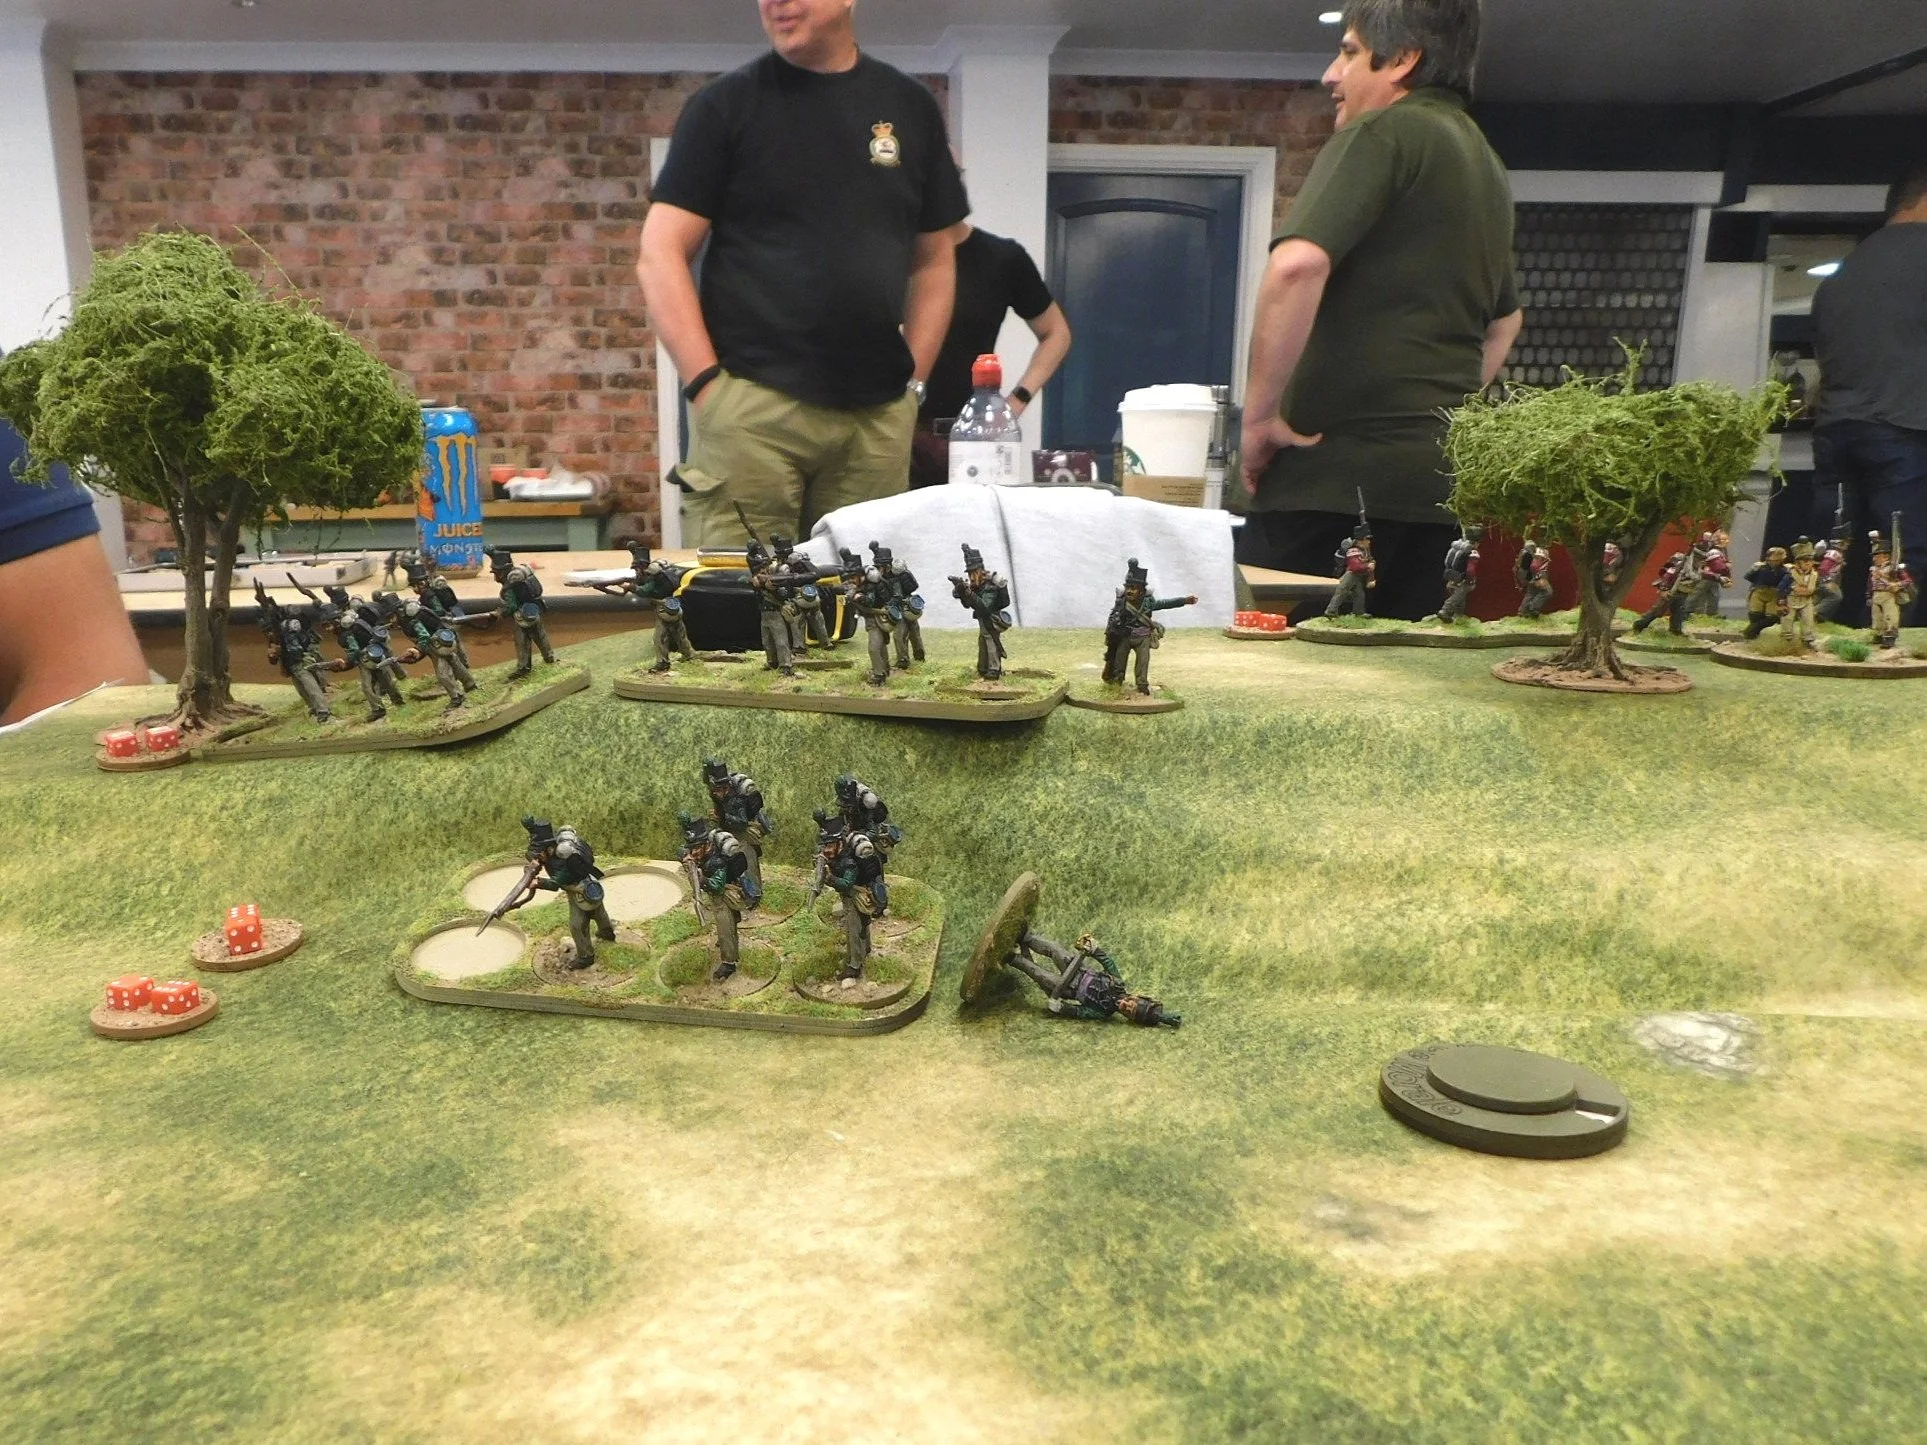
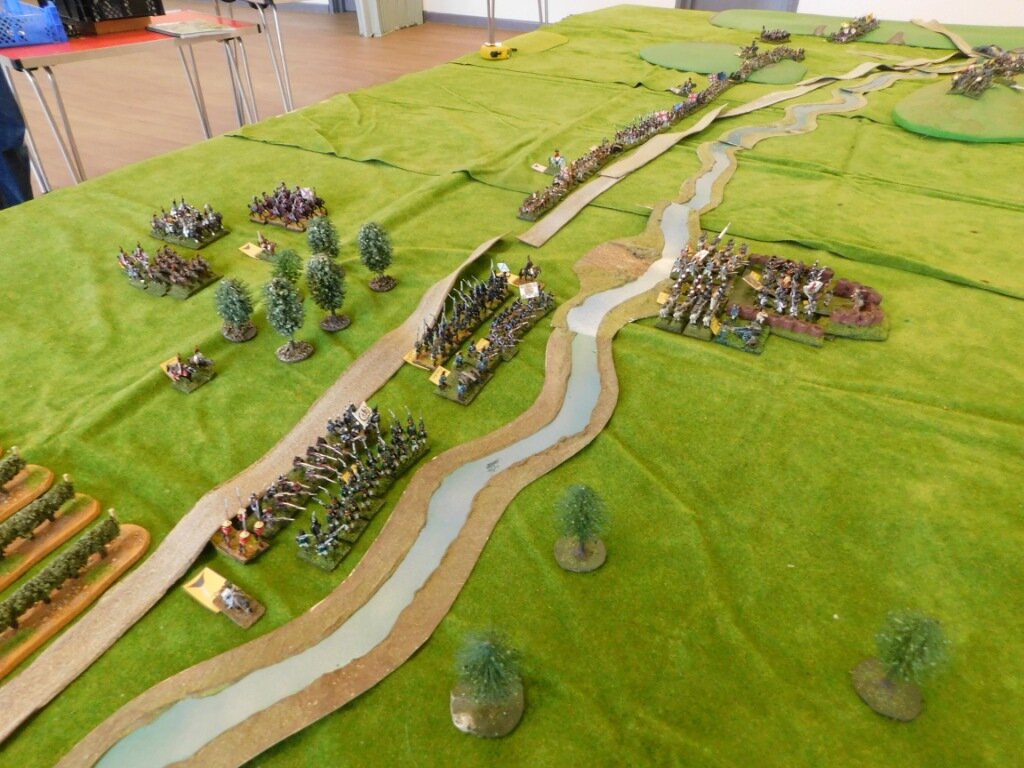
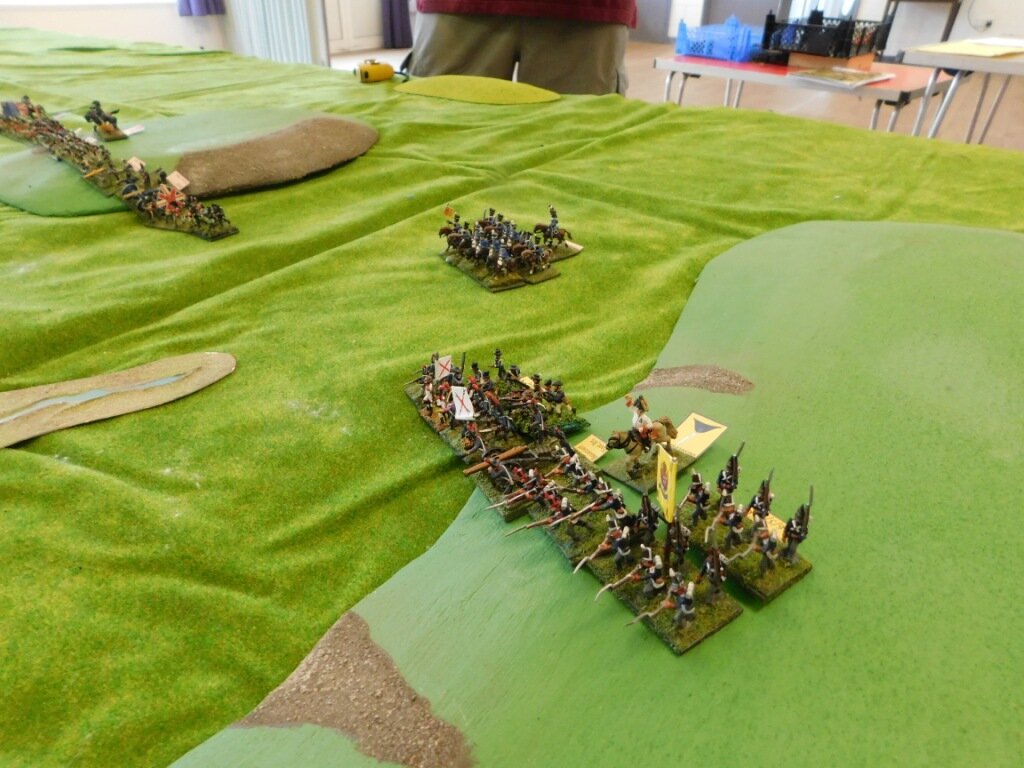
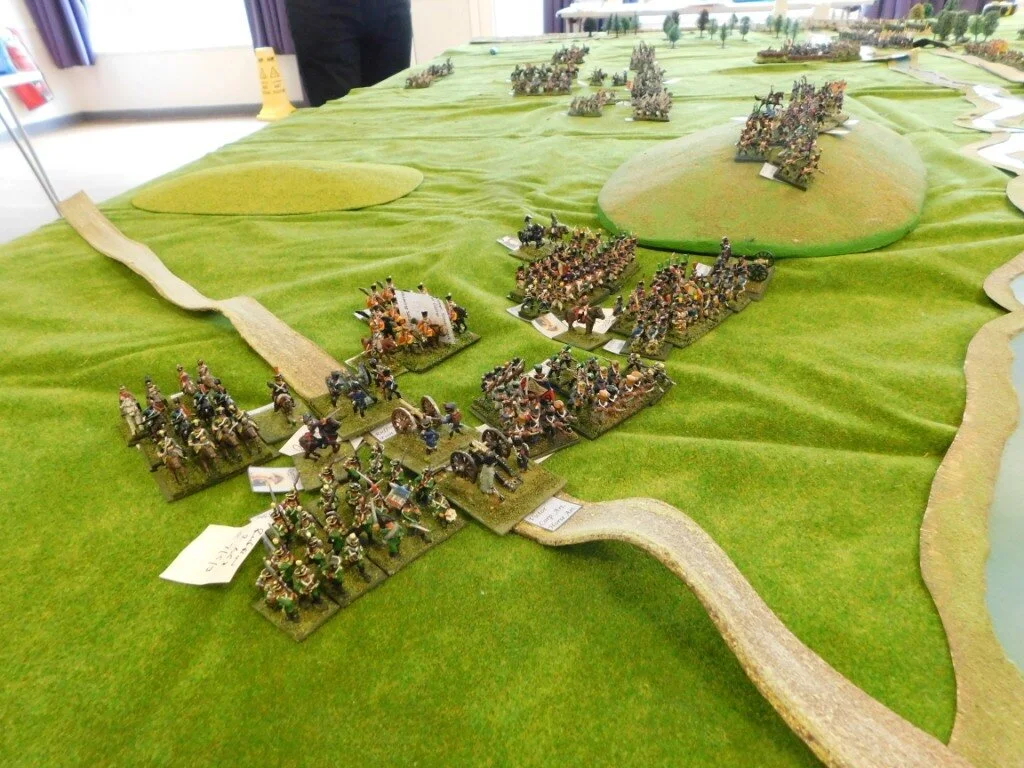
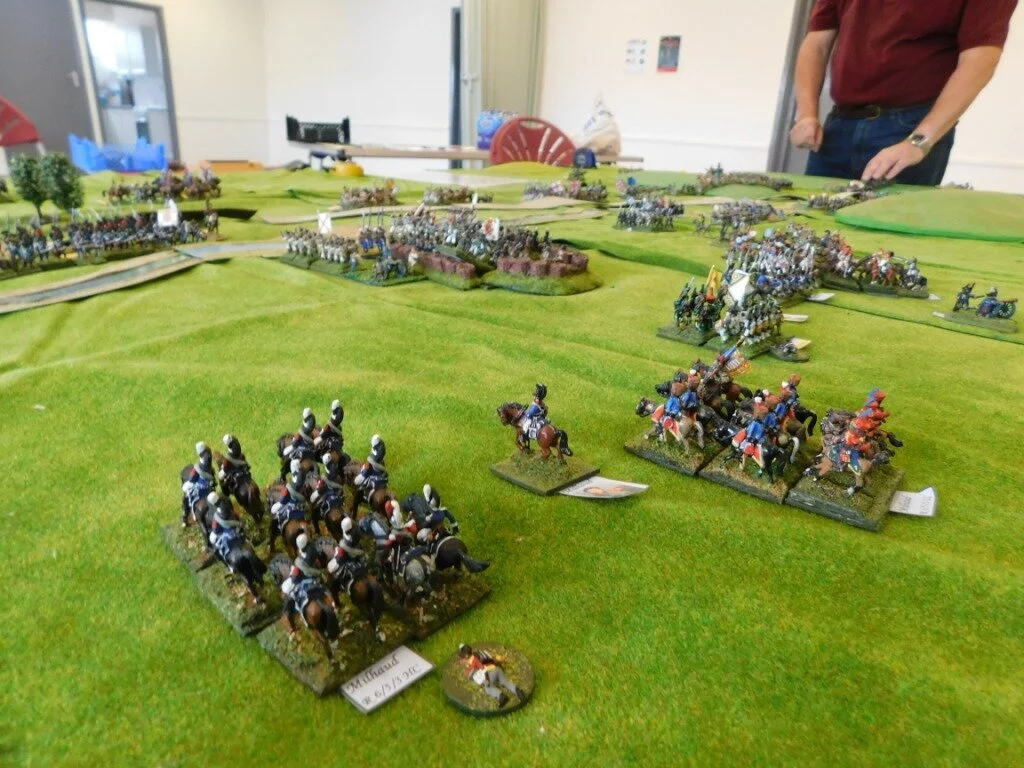
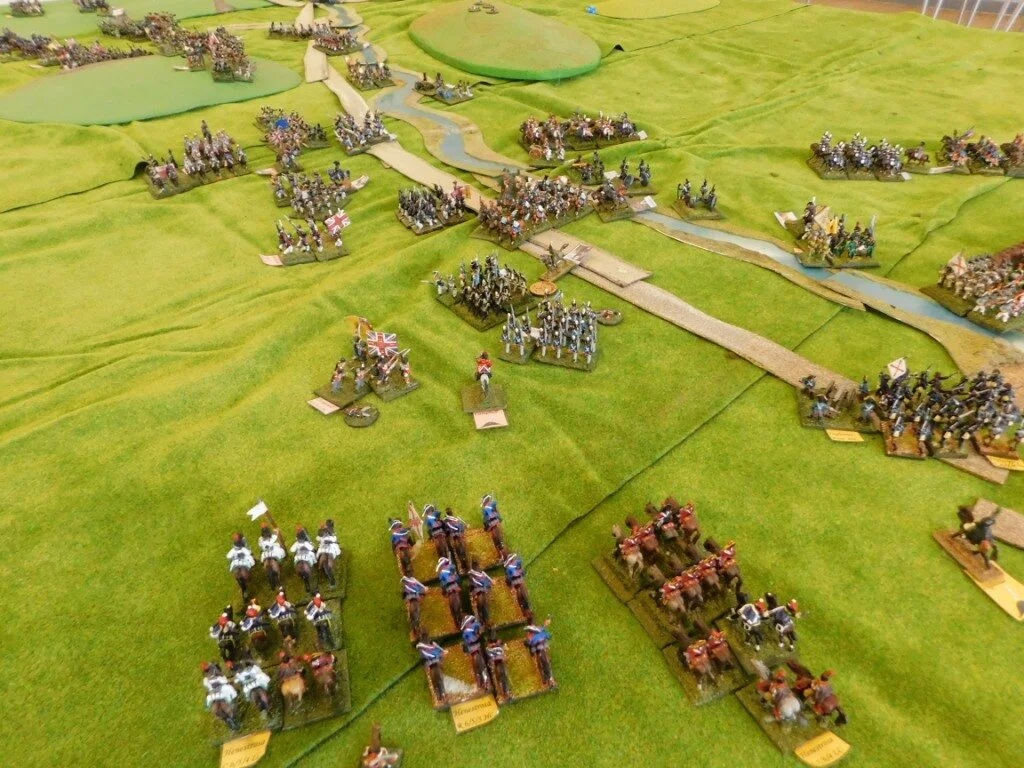
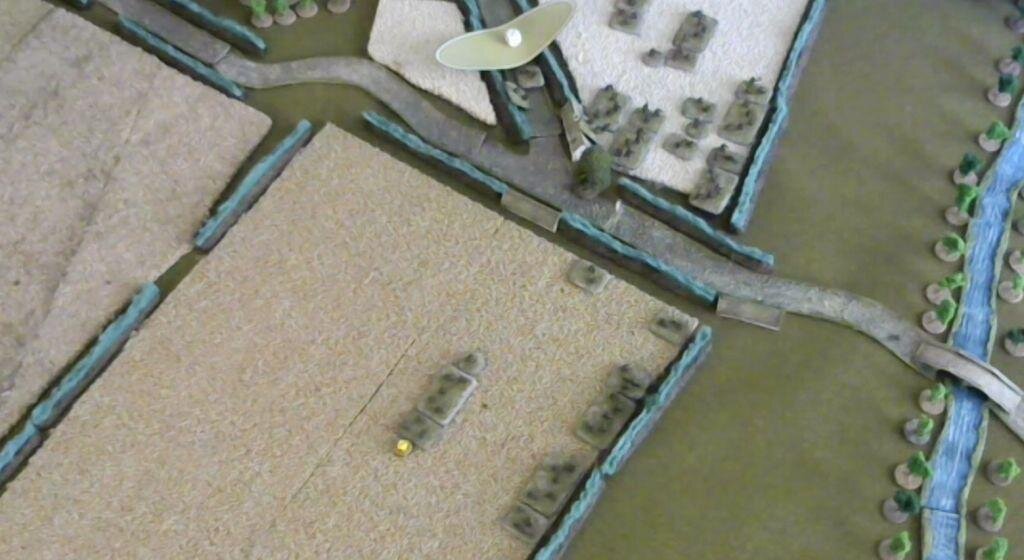
Here are some final, Umpire’s, shots of the game:

Napoleonic AAR: Ostrolenka by Zoom

Having very much enjoyed my first remote wargame last week, I took part in another last night: a Napoleonic clash between the Russians and the French based on the battle of Ostrolenka, 16th February 1807.

Re-enactors fight Ostrolenka

This was run quite differently to my last remote game. Three players a side, with initial briefings sent out a couple of days before the battle itself. Once all on Zoom and initial banter done, each side was put into its own breakout room, where we waited until our “Chief of Staff” (Edward: the gamemaster, or GM, for want of a better word) arrived to either (a) give a report on the progress of our troops and take orders or (b) escort us on a tour of the battlefield, or at least those parts of it that it was judged that we could see.

Screenshot of a battlefield tour

Screenshot of a battlefield tour

This last was particularly clever, as the GM had hooked up two mobile phones to the Zoom session, so each breakout room had four participants: three players and a camera. Rather than being the traditional wargame helicopter view, however, the ‘phone (with its camera) was only turned on when we elected to tour the battlefield, and was held in a way that showed us only what we could see from horseback. As it was a misty day, this meant that we could only see certain sectors of the battlefield each time we toured, and only see a short way in front of our most forward troops.

This meant that, as commanders, we really felt the “fog of war”: issuing orders based only on the reports we received and, if we did tour the battlefield, we had to wait until our next turn to issue orders based on what we had seen. A novel experience for those used to the traditional wargamer omniscience!

Introduction To The Game

Steve, Bevan and I were the Russians, facing Dave, Peter and Trevor as the French. Here’s an extract from the Russian briefing that sets the scene:

Following the costly battles, especially the blood-bath at Eylau, which drew the 1806 campaigning to a close, the opposing armies of France and Russia have both paused as the winter takes grip. Prussia has collapsed and Berlin fallen to Napoleon, but the French have found it harder to make headway against the Russian forces.

General Bennigsen, who has the bulk of the Russian army to your North, has ordered you to threaten and throw back the French right flank, which is anchored at Ostrolenka, so as to cause Napoleon to withdraw from his winter quarters. To achieve this you have been given a significant portion of the Army of Moldavia: Volkonski’s and Sedmarkatzki’s Divisions.

Well before dawn your two divisional commanders, who have their units ranged North of Ostrolenka on both sides of the River Narew, have arrived to receive your instructions.

They’ve both assured you that they are ready to move before sunrise, and that cavalry scouts have located French units at Ostrolenka. A captured enemy soldier says that they are not expected to break camp soon.

The Russian Plan

Seeking to achieve a concentration of force, we elected to keep all our forces west of the river Narew, effectively attempting to attack down the axis of the Kadzidlo Road. We didn’t necessarily expect to get that far west and south without first encountering the French, but the plan was to follow that strategy as much as possible until we did run into the enemy.

Our strongest division, Volkonski’s, would therefore march down the Zbotna Road until the end of the Sandy Hills, then loup around to the west. Our second division, Sedmarkatzki’s, would march down the line of the west bank of the river.

Once we encountered the enemy, we planned to deploy all our artillery and pound them to death, with Sedmarkatzki covering the guns and awaiting an opportunity to punch forward, whilst Volkonski kept edging around Ostrolenka to the west, pushing forward against what we assumed would be the far left of the French line.

GM’s Summary of the Action

(my thanks to Edward, who has also provided an excellent time-lapse video of the action, link below )

Before dawn the Russian leader General Essen sent both his divisions, led by Generals Volkonski and Sedmarkatzski, South towards the important town of Ostrolenka, in the valley West of the River Narew, hoping to concentrate his force and overwhelm the French. The strategic Russian aim was to threaten Napoleon’s southern flank, as he settled into his Winter quarters following the battle at Eylau.

The French corps commander, General Savary, made his dispositions as dawn broke, with Suchet’s division out to the East of the town, Gazan’s men to the North in the valley, Becker’s cavalry covering the left flank, and Oudinot’s three brigades of elite grenadiers held in reserve.

The Russians proceeded cautiously, deploying guns and spreading their rather crowded forces up onto the hills North-West of the town.

Becker’s dragoons mounted some charges up the hill, attacking Volkonski’s division, which was on the Russian right flank. Casualties mounted, with the Russians generally coming off the best and one of Becker’s brigades routed.

Savary, hearing that there were no Russians East of the river, eventually re-called Suchet back to Ostrolenka, but meanwhile the Russians increased the pace of their attacks and pressed on. Gazan came under increasingly heavy pressure, falling back, while Oudinot’s French grenadiers, which had been held in reserve, were committed by Savary to shore up his left flank. In fact, they took the attack to Volkonski’s forces with considerable success as the afternoon wore on.

As the light faded, Sedmarkatzki’s lead brigades pressed the attack more forcefully down the line of the river, advancing to within a few hundred paces of the town and capturing some French guns. Suchet having been inexplicably slow in coming West was too late to buttress the French position satisfactorily. Oudinot’s successes on the French left flank could not be followed up.

Although not a disaster for Savary, the French casualties were significantly higher, and as night fell he pulled his shaken corps away to the South, leaving Ostrolenka to the Russians. Napoleon, with the main French army to the North, was forced to detach a further corps to rescue his right flank. Historians have recorded this as a minor but important victory for the Russians under General Ivan Essen.

Historical Note

In reality Sedmarkatzki’s powerful division never made it to this battle, having been ordered North the day before. Essen none-the-less planned two separate attacks from the North against Ostrolenka. Savary, with the advantages of interior lines and numbers, was able to repulse the Russian probes in detail and secure the French position.

French Commander’s Report

(my thanks to Dave for this)

My Emperor,

I am hoping that Gerard has carried the news to you of our tactical withdrawal from Ostrlenka. Knowing how you planned to stetch the Russian Army and make it fight over too large an area for its pathetic logistic chain, I’m sure you will appreciate the efforts which have gone into this achievement.

I would wish to pay due respects to the brave men who fell for La France on the 16me, and also to the tenacity and audacity of Generals Gazan and Oudinot who fought against great odds with all their might.

Sadly I have to recommend to you that certain officers be recalled from their posts for not achieving the standards you so reasonable expect of your senior officers. Gen Debelle, although commanding one of the finest Light Cavalry Brigades in the Army, somehow failed to observe and report the entire Russian army being within a km of his position whilst Gen Becker sadly failed to maintain sufficient discipline of his Division, such that one Brigade of our finest heavy cavalry charged the enemy without orders and were effectively destroyed. Such indiscipline cannot be tolerated in the Grande Armee, we pride ourselves on not behaving like British cavalry!

You may well wish to interview Gen Suchet yourself, his tardiness in obeying his orders to withdraw cost us many casualties and compounded his initial error in advancing too far from his assigned position, although he did later make every effort to redeem himself and valiantly led his men into the fray.

I believe the Russians will now be critically extended and ripe for your offensive.

Vive La France

Anne-Jean-Marie-Rene Savary, General de V Corps

Conclusion

A narrow victory for the Russians and a great evening’s gaming. The fog of war experience worked really well, with our command team very much having to issue division-level orders as we didn’t really know the exact position of any of the brigades: ours or the enemy’s!

Our plan worked, although not as overwhelmingly as we had thought it would. Our guns, although acting to the overall plan, could have done with a better deployment tactically to maximise the effect of their fire; and we needed to keep better control of Volkonski out on the far right. We only just got Sedmarkatzki into the fight in time, although that did mean that our reserve cavalry were perfectly positioned to repulse the French infantry crossing the frozen river. The French Grenadiers, under Oudinot, really caused us problems. Without their intervention, or rather their highly successful intervention, we would have won a more resounding victory.

An excellent experience, and one I’m looking forward to repeating soon.


Sharp Practice: Advanced Orders Now Being Taken

Exciting news from Lard Island: with advanced orders for Sharp Practice now being taken.

Sharp Practice is the TFL large scale skirmish game designed for use from the Napoleonic era to the end of the catalytic wars.

Here's what Big Rich had to say about the release:

The rules are at the printers, the cards are being produced, the Poker Chips are en route and the Game tokens are rolling off the production line.  That can only mean one thing: Sharp Practice will be released on St George’s Day later this month and we are now taking advanced order.

And what spankingly good advanced orders we have for you too.  You can, of course, get the rule set on its own, but there are also five bundle deals which you can select from which provide some assistance when playing the game.  Let’s take a look at what these bundles contain.

The Rules

It's a 120 page book which contains the rules and Army Lists for five different conflicts.  These are the French Indian War, the AWI, Peninsular War, ACW and Indian Mutiny.  

However, the rules won’t stop there.   We have lost of other periods ready as free downloadable Army lists covering stuff like Garibaldi in Italy, Napoleonic warfare, Revolutionary Wars in Italy, US Mexican Wars and a whole host of other exciting stuff.

The Cards or Poker Chips

You can choose whether you want to use a card deck or pull chips from a bag or cup.  It’s entirely up to you which you use.  You will need ONE set or cards or chips to play a game.  You do not need one per player.  

The poker chip set are 34 tokens in engraved MDF which are very easy to paint up and look superb when they are done.  The cards are a proper poker standard set with rounded corners and come in a tuck box.  As it happens we got 40 cards to a deck as this suited the printer card sizes so the card deck is slightly larger.

Game Tokens

A set of 18 acrylic tokens to indicate when units Present (ready to fire a controlled volley), when they are firing an uncontrolled volley and when they are broken.  We have played many many games and this set of 18 tokens have been all we needed for any game situation.  No need to duplicate unless you are really going to push the boat out on game size.

We will be posting photos of all of the items as they arrive from suppliers, for now you’ll have to trust us as to the fact that they are all designed for purpose and rather swish.  Here’s the bundles in detail.

The Bundles

Bundle 5

The monster of a bundle with everything anyone would wish for on the Sharp Practice front.

  • Hard Copy rules with 120 pages packed with army lists, scenarios and, of course, the game rules.
  • Bumper Card Deck of 40 cards
  • MDF Poker Chip Set of 34 Chips
  • Game Token set in acrylic
  • Free PDF of the rules.

At £38 this saves you £21 as a bundle.

Bundle 4

Chips with everything  (as per Bundle 5 but no card deck)

  • Hard Copy rules with 120 pages packed with army lists, scenarios and, of course, the game rules.
  • MDF Poker Chip Set of 34 Chips
  • Game Token set in acrylic
  • Free PDF of the rules.

At £34 this saves you £19 as a bundle

Bundle 3

Card Sharp (as per Bundle 5 but no Poker Chips)

  • Hard Copy rules with 120 pages packed with army lists, scenarios and, of course, the game rules.
  • Bumper Card Deck of 40 cards
  • Game Token set in acrylic
  • Free PDF of the rules.

At £35 this saves you £19 as a bundle

Bundle 2

Rules & Chips

  • Hard Copy rules with 120 pages packed with army lists, scenarios and, of course, the game rules.
  • MDF Poker Chip Set of 34 Chips
  • Free PDF of the rules.

At £28 this saves you £17 as a bundle

Bundle 1

Rules & Cards

  • Hard Copy rules with 120 pages packed with army lists, scenarios and, of course, the game rules.
  • Bumper Card Deck of 40 cards
  • Free PDF of the rules.

At £29 this saves you £17 as a bundle.

These bundle orders are for the hard copy rules with extras and they PDF comes free as a “thank you” for placing an advanced order.  Please note, the free PDFs will be sent out on the 23rd of April, the release date.

We will be releasing the PDF bundles on the 23rd of April which will cover the PDF versions of the rules along with bundles of hard copy cards, chips and tokens, so if that’s your bag keep your eyes on the web site or Lard Island News for more details.

The TooFatLardies shop can be reached by clicking here.

TFL January Sale

News from the front: the TooFatLardies are having a January Sale. Here's what Rich said on Lard Island News:

"It wouldn’t be January without a Sale, and this month we have not one but two great deals on offer.  Firstly we have all of the Sharp Practice range available at 35% off list price, that’s the rules in hard copy or PDF format and all of the supplements.  You can find them on our web site here:  Sharp Practice

"Secondly, we have a focus this month on I Ain’t Been Shot Mum, our hugely popular Company sized rules for the Second World War.  The rules and all of the huge range of supplements are available at 20% off for the rest of January.  Our IABSM products are listed here:  IABSM

"There’s never been a better time to get hold of two Lardy classics!"

You can click on the titles in bold to go straight to the TFL online shop.

Playtesting the new Napoleonic Rules at Lard HQ

I went over to Lard HQ last night to try out the new TFL divisional level Napoleonic rules that are currently in playtesting.

Although the game shares the same activation dice system as Chain of Command, everything else is new. The basic infantry unit is the battalion: three to seven bases of four figures each, with each figure representing about 120 men. Horse are organised in a similar fashion, with guns being either grouped into batteries or, a nice touch this, integral to the battalion they support.

As you would expect from any new Lardy product, although it has a familiar feel to it, it is a genuinely different game, not just a re-hash of one system to another period or scale.

In last night's game, Mr Clarke and myself played the early French (I forget the exact date), versus Alan playing the dastardly Austrians, no doubt seeking to strangle our infant republic before we had a chance to assume our rightful position as masters of all Europe. Our task was to wrest control of a ford and a bridge held by a smaller but still substantial enemy force. Here is the set up:

The French are to the left, the Austrians to the right. Mr Clarke's big battalions will cross the bridge and hit the Austrians in the built up area (the big house with four windows). I would hold the left flank in case the Austrians counter-crossed the ford. There were a lot of Austrians in front of me:

As the game started, Rich duly advanced his men over the bridge and headed for the built-up area.

His plan was to line up his multiple battalions and hit the town all at once, but unfortunately one of his units took an excess of heavy artillery fire on the flank, and then routed back across the bridge. This caused a massive traffic jam on the bridge and severely unnerved the rest of his troops, meaning that rather than hitting the town all at once, his battalions were fed in piecemeal.

An initial assault was repulsed, then he fought off an enemy cavalry charge as the enemy sought to take advantage of the resultant confusion, then his next assault was successful...but the time taken for all this had given the Austrians time to reinforce the town and slowly Rich's men started to be pushed back out again.

Meanwhile, on the left flank, the Austrians had decided to counter attack:

I had turned to meet them, and then let a couple of battalions cross the ford before marching forward to take it myself: neatly splitting his force in two.

At that point, unfortunately, the game had to end as we were out of time. The Austrians were declared the winners, as Rich's attack was about to fail utterly and things had not yet got properly started on my flank. All agreed that it was a close run thing: with Rich being literally at match point a couple of times before Alan's Austrians, holding on doggedly, managed to turn things around.

It was a great game and a really positive try-out for the rules. Everything seemed to work just fine, and I found that I could quickly pick up the basic mechanics without difficulty. I would love to try this out using 15s rather than 28s and, perhaps more importantly, I think the game would work brilliantly for the whole of the 19th century...well, through to the end of the Franco-Prussian War at any rate.

My thanks to the Lardies for their hospitality. I'm off to look at Napoleonic figures in 15mm now!