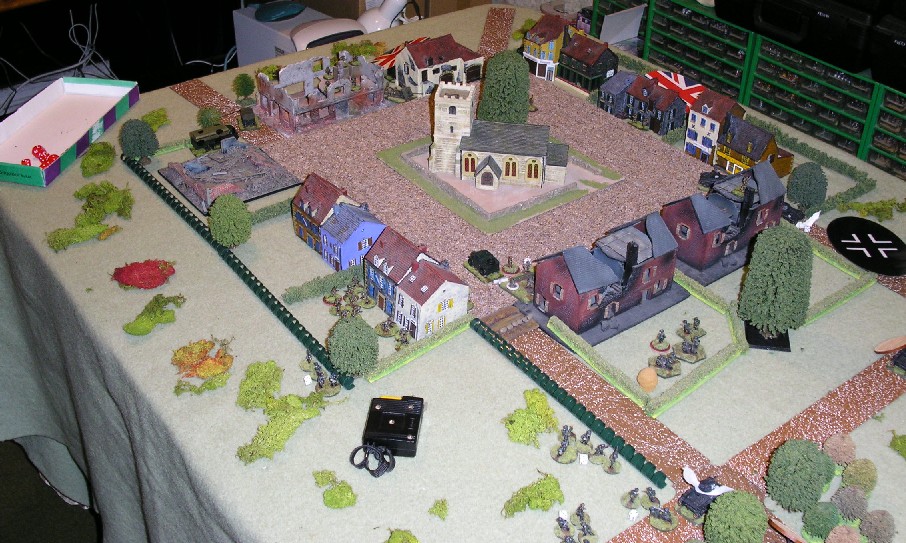
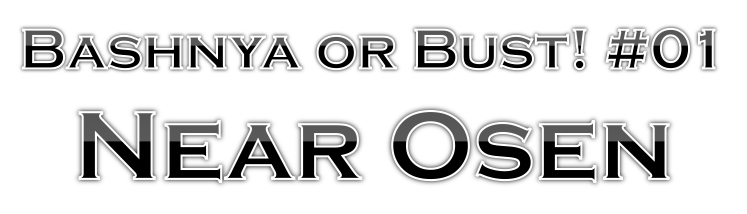
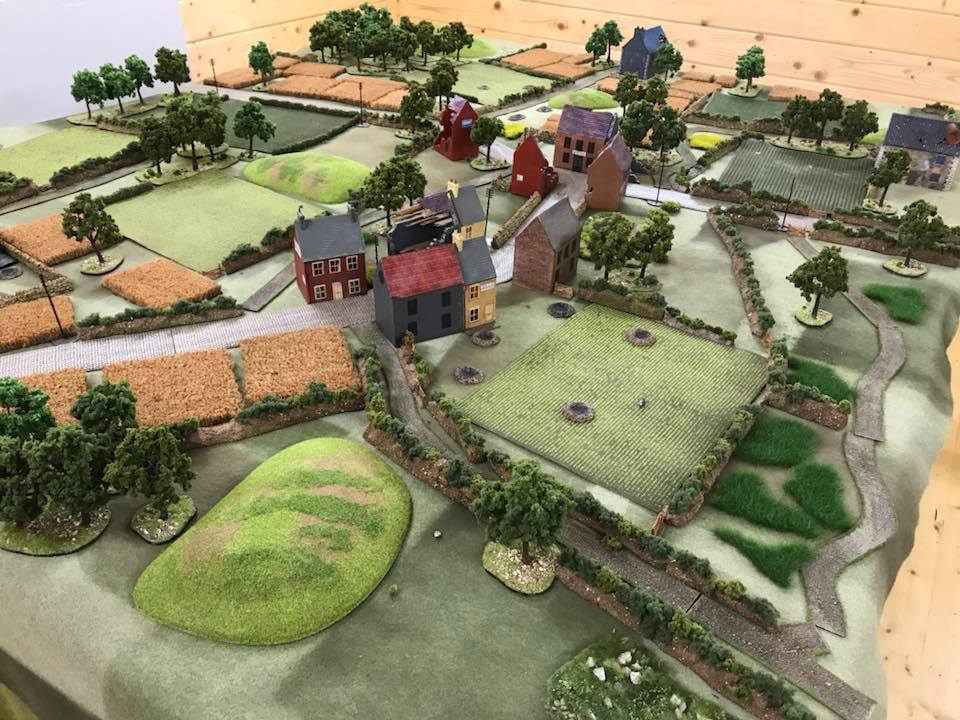
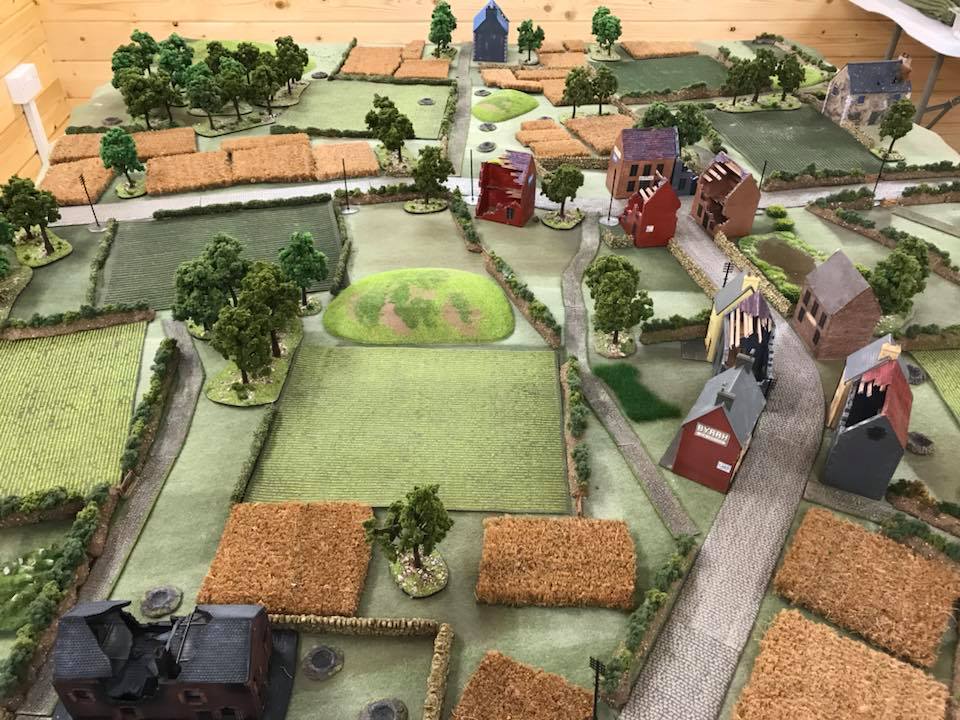
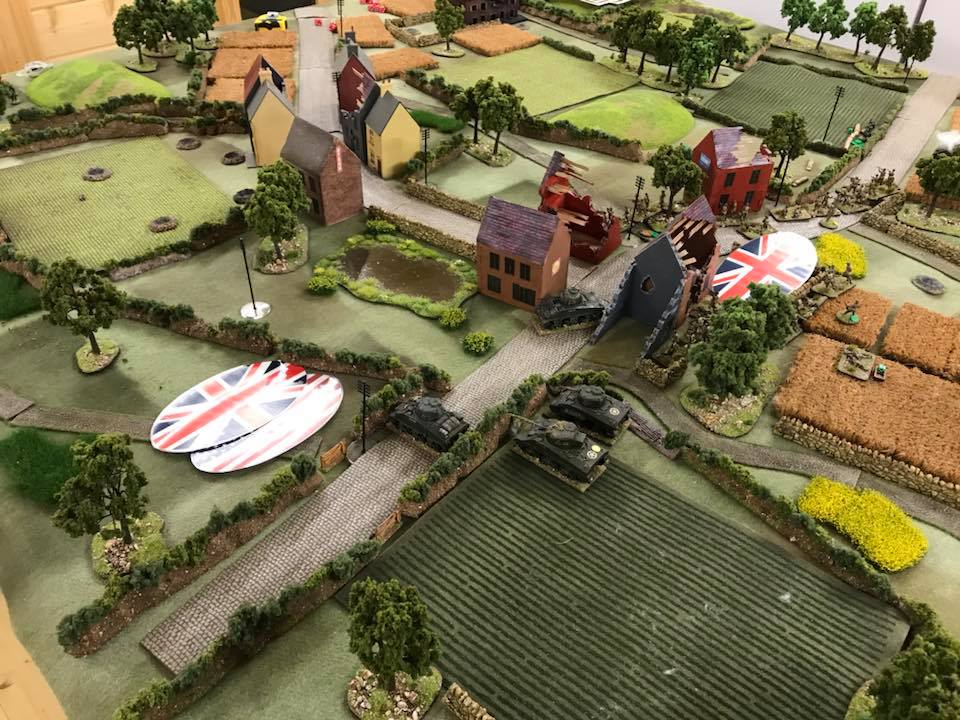
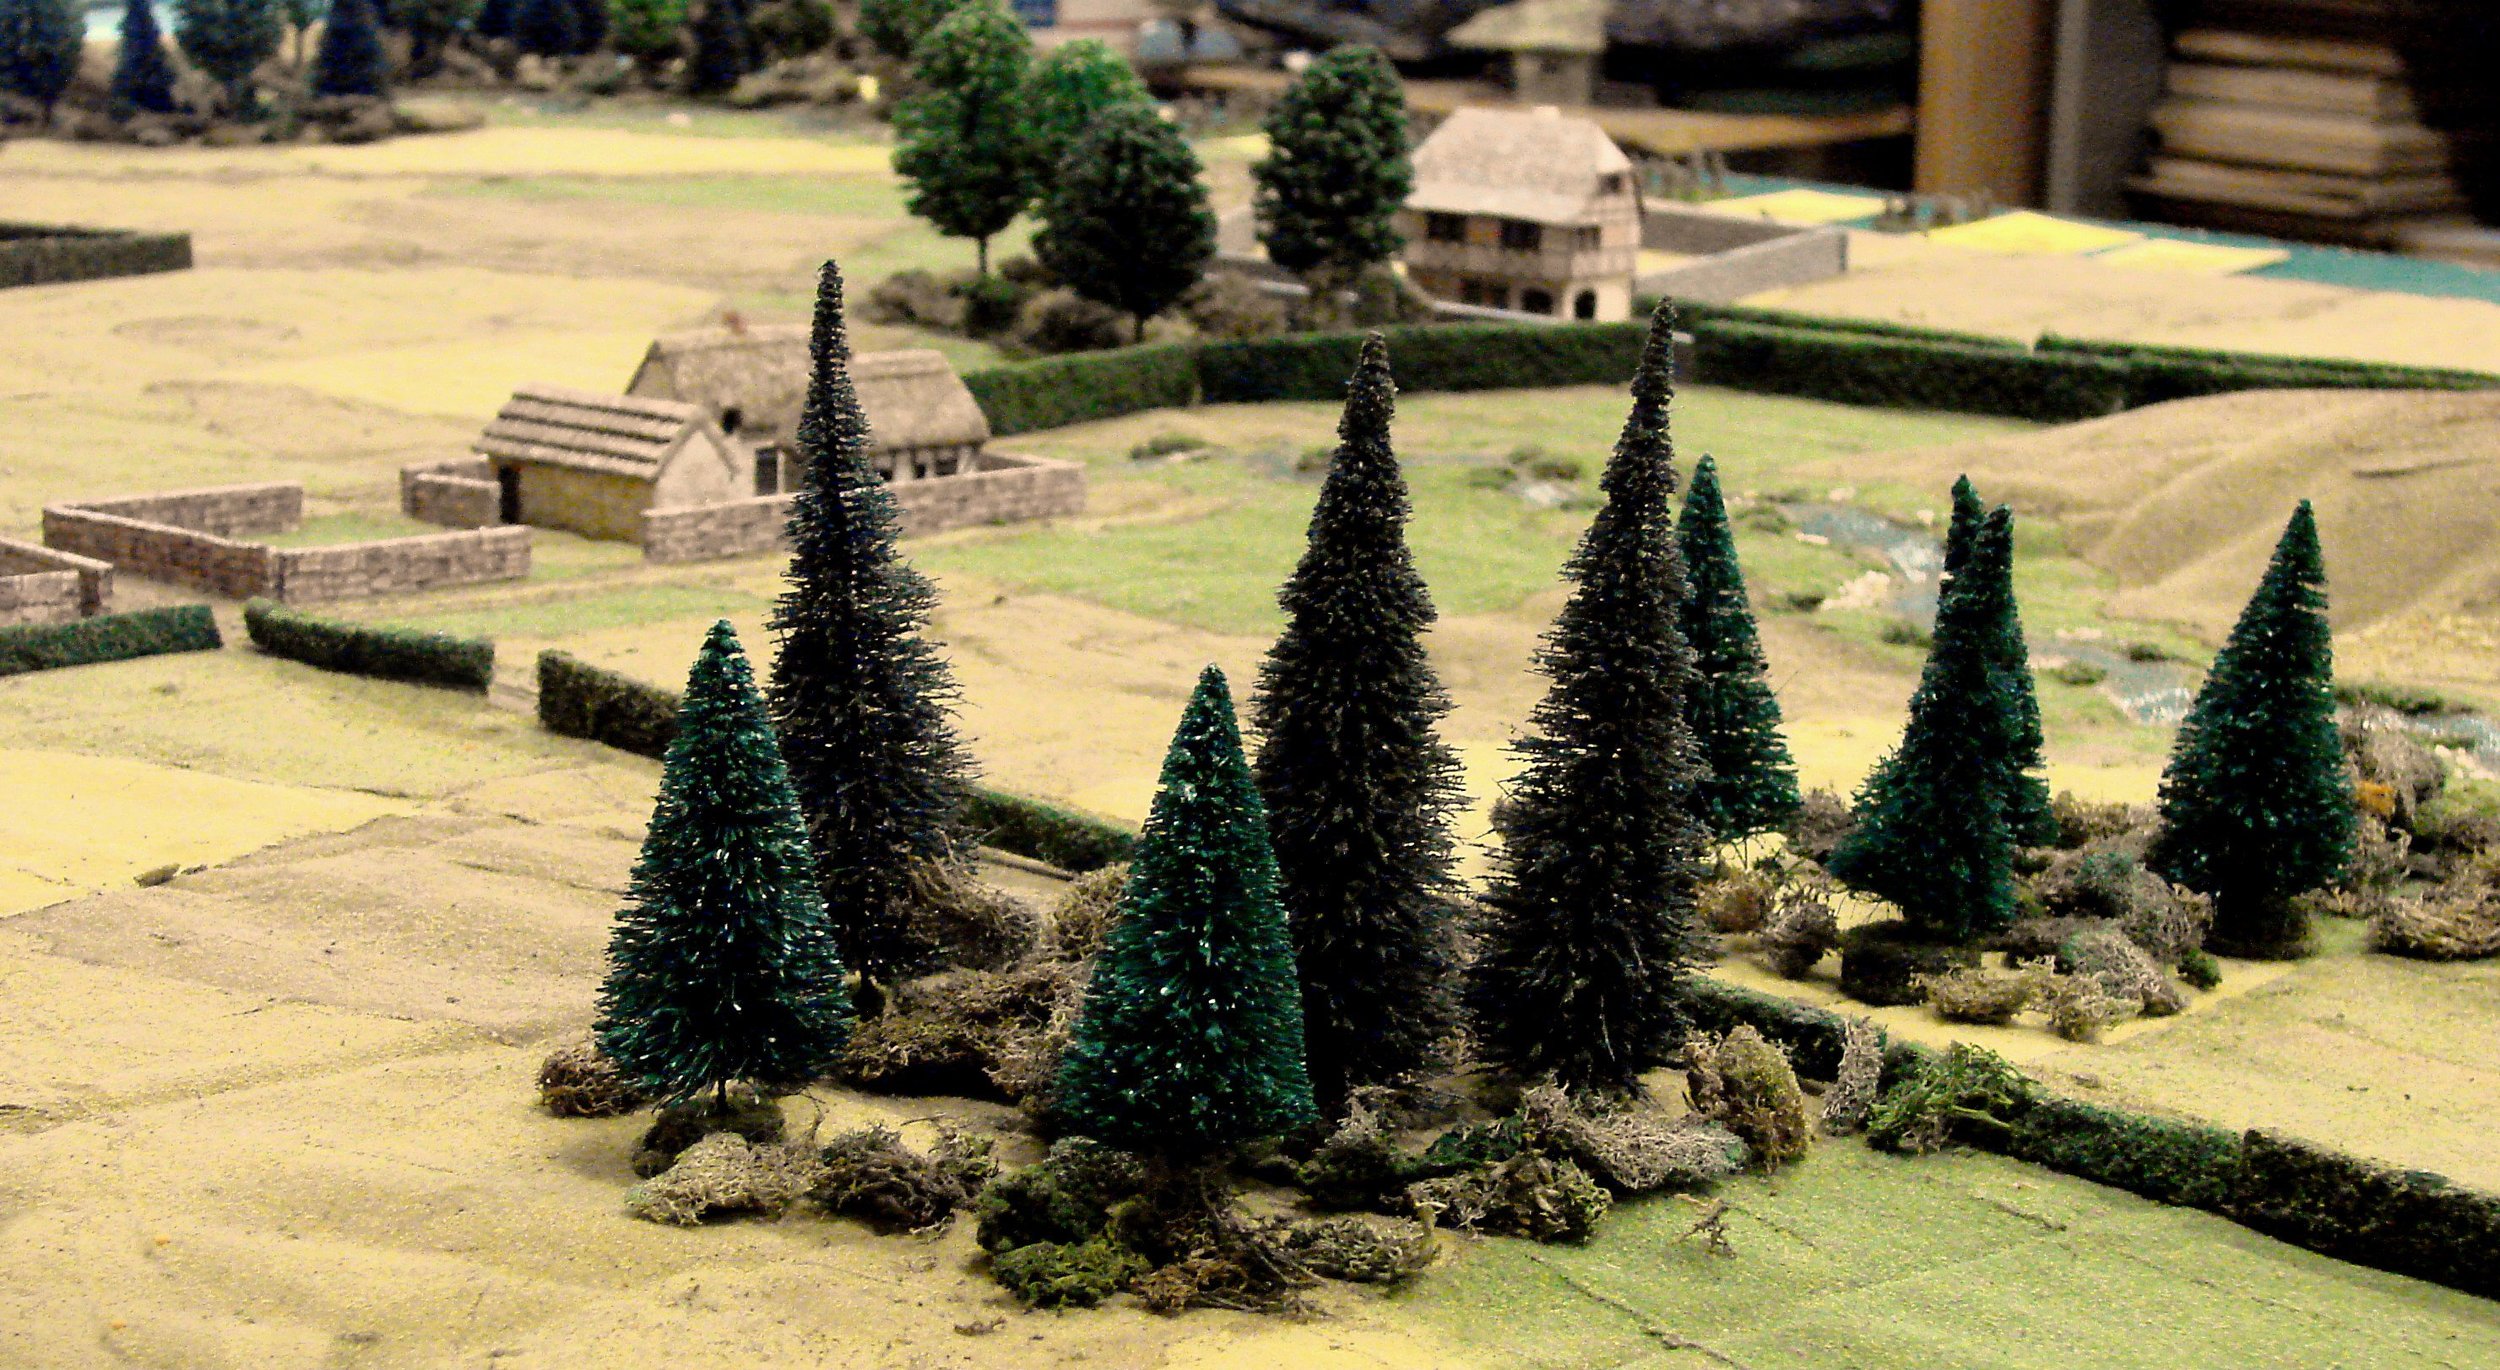
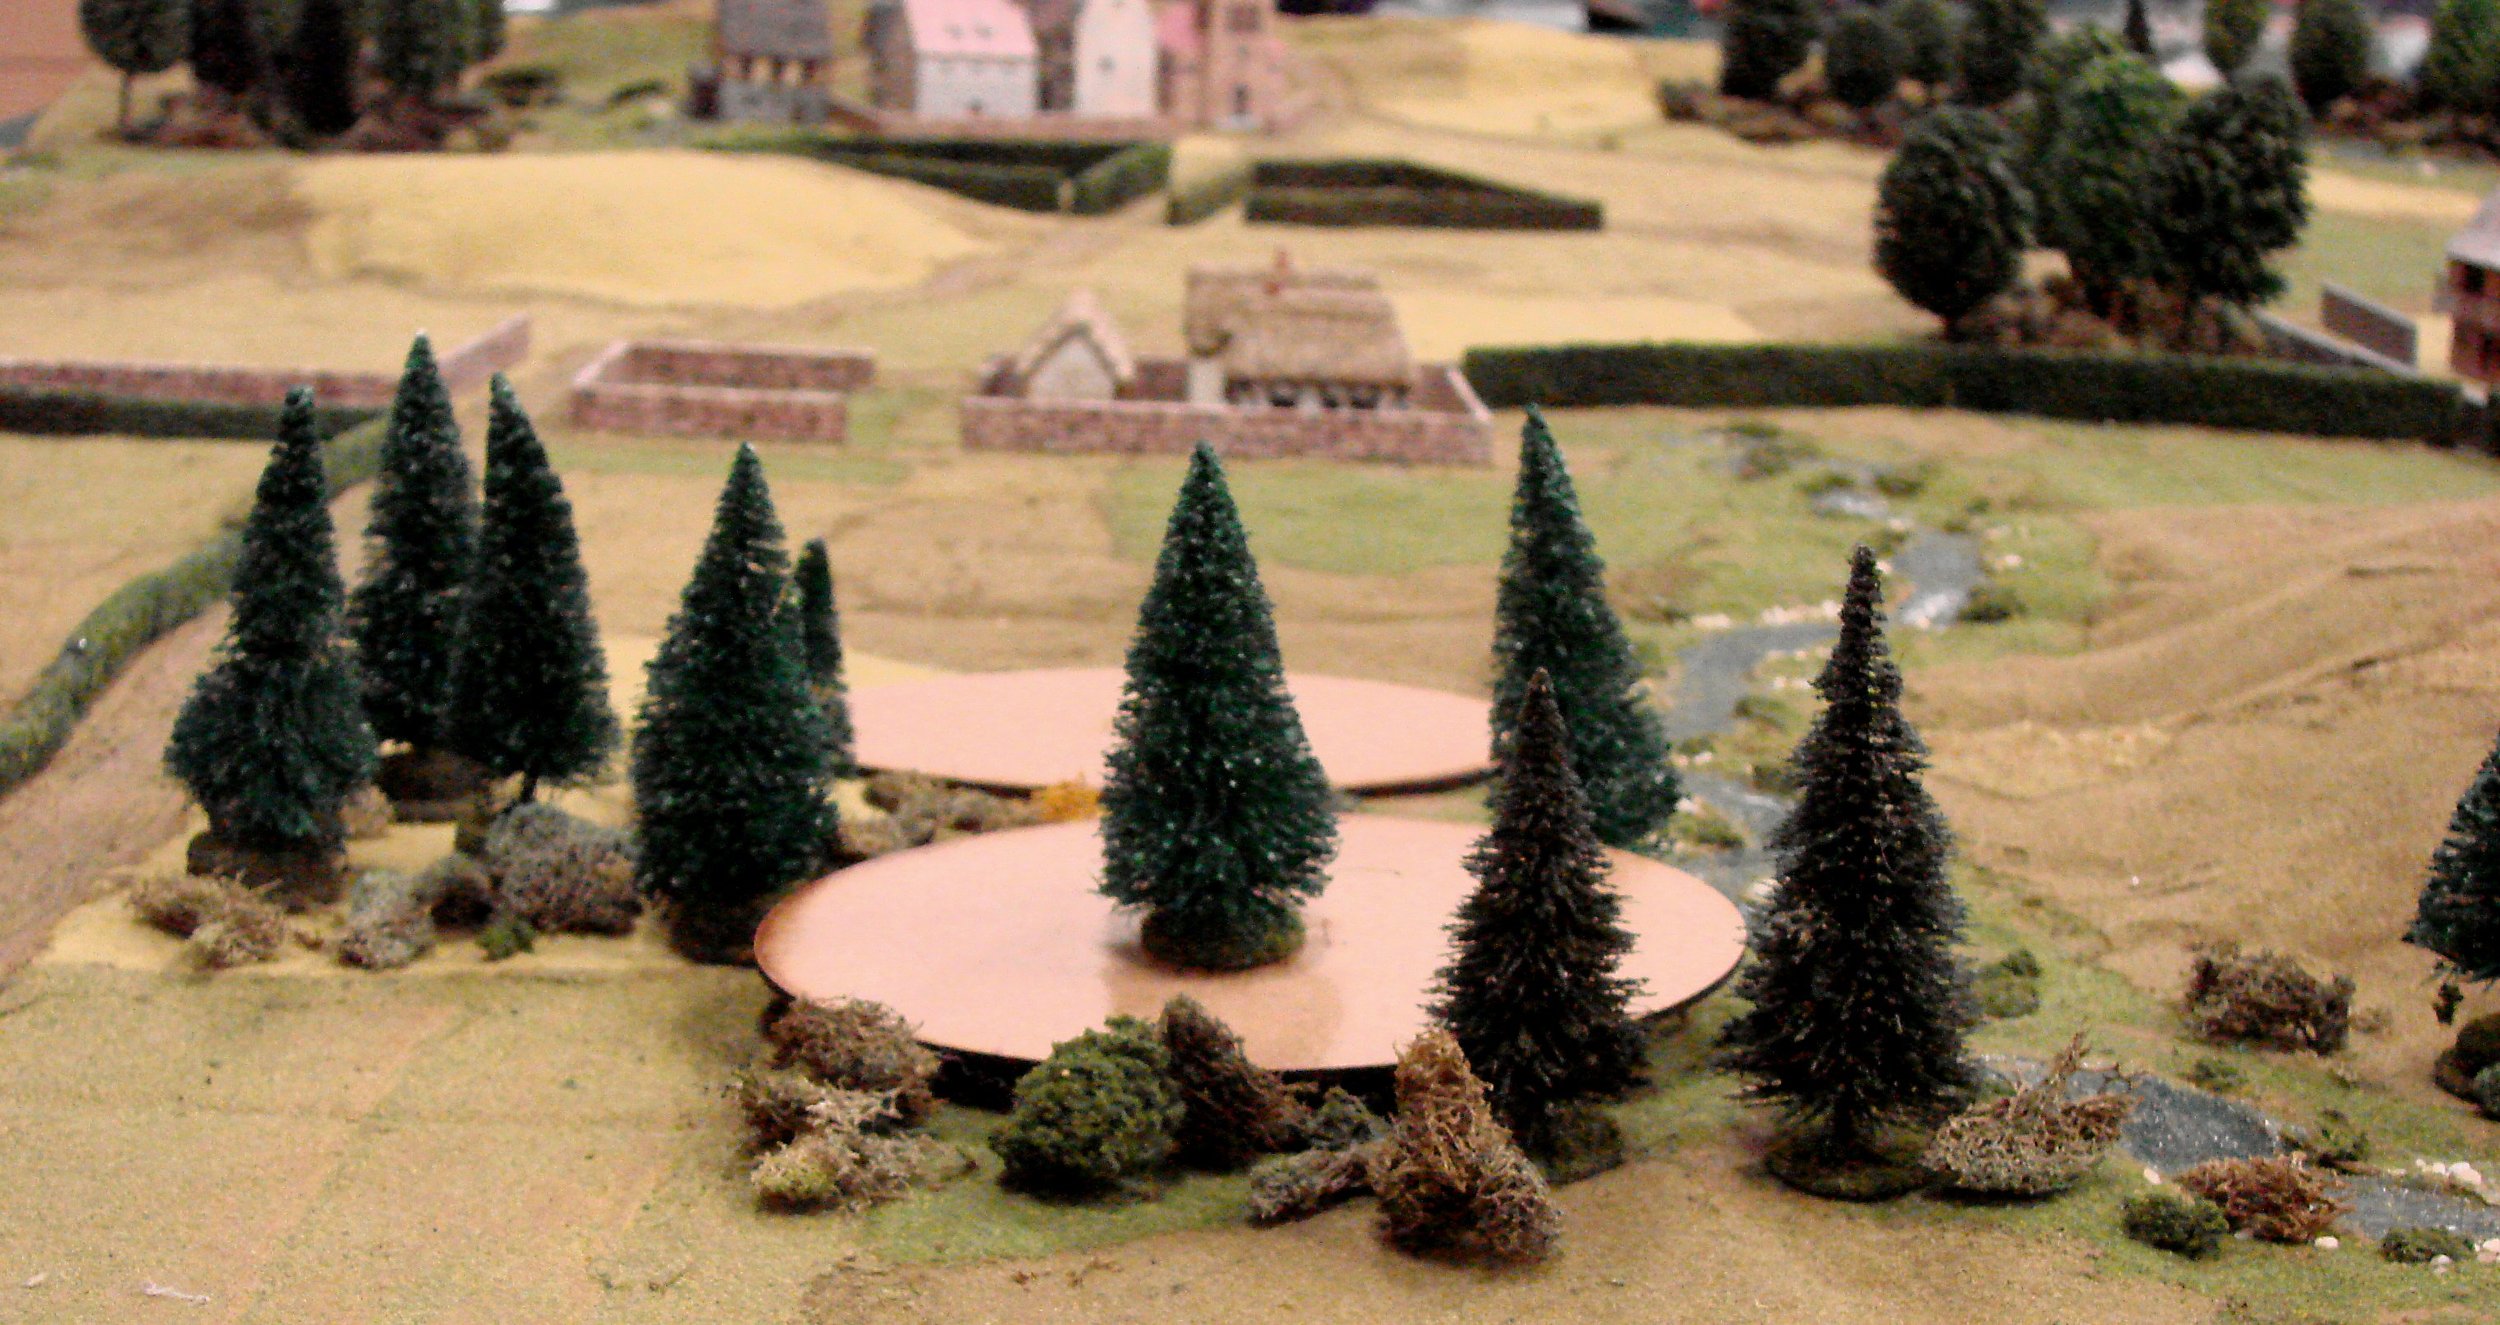
Those of you who live in the UK may be aware that the Wyevale Garden Centres always sell off their winter model Christmas trees in early January (see previous post here). This year, I’d taken full advantage of the sale and bought several packets worth, and then added a new snow mat from Tiny Wargames to put them on. Now all I needed was an excuse to get everything onto the tabletop, and a game this Saturday just gone gave me the opportunity to do so.

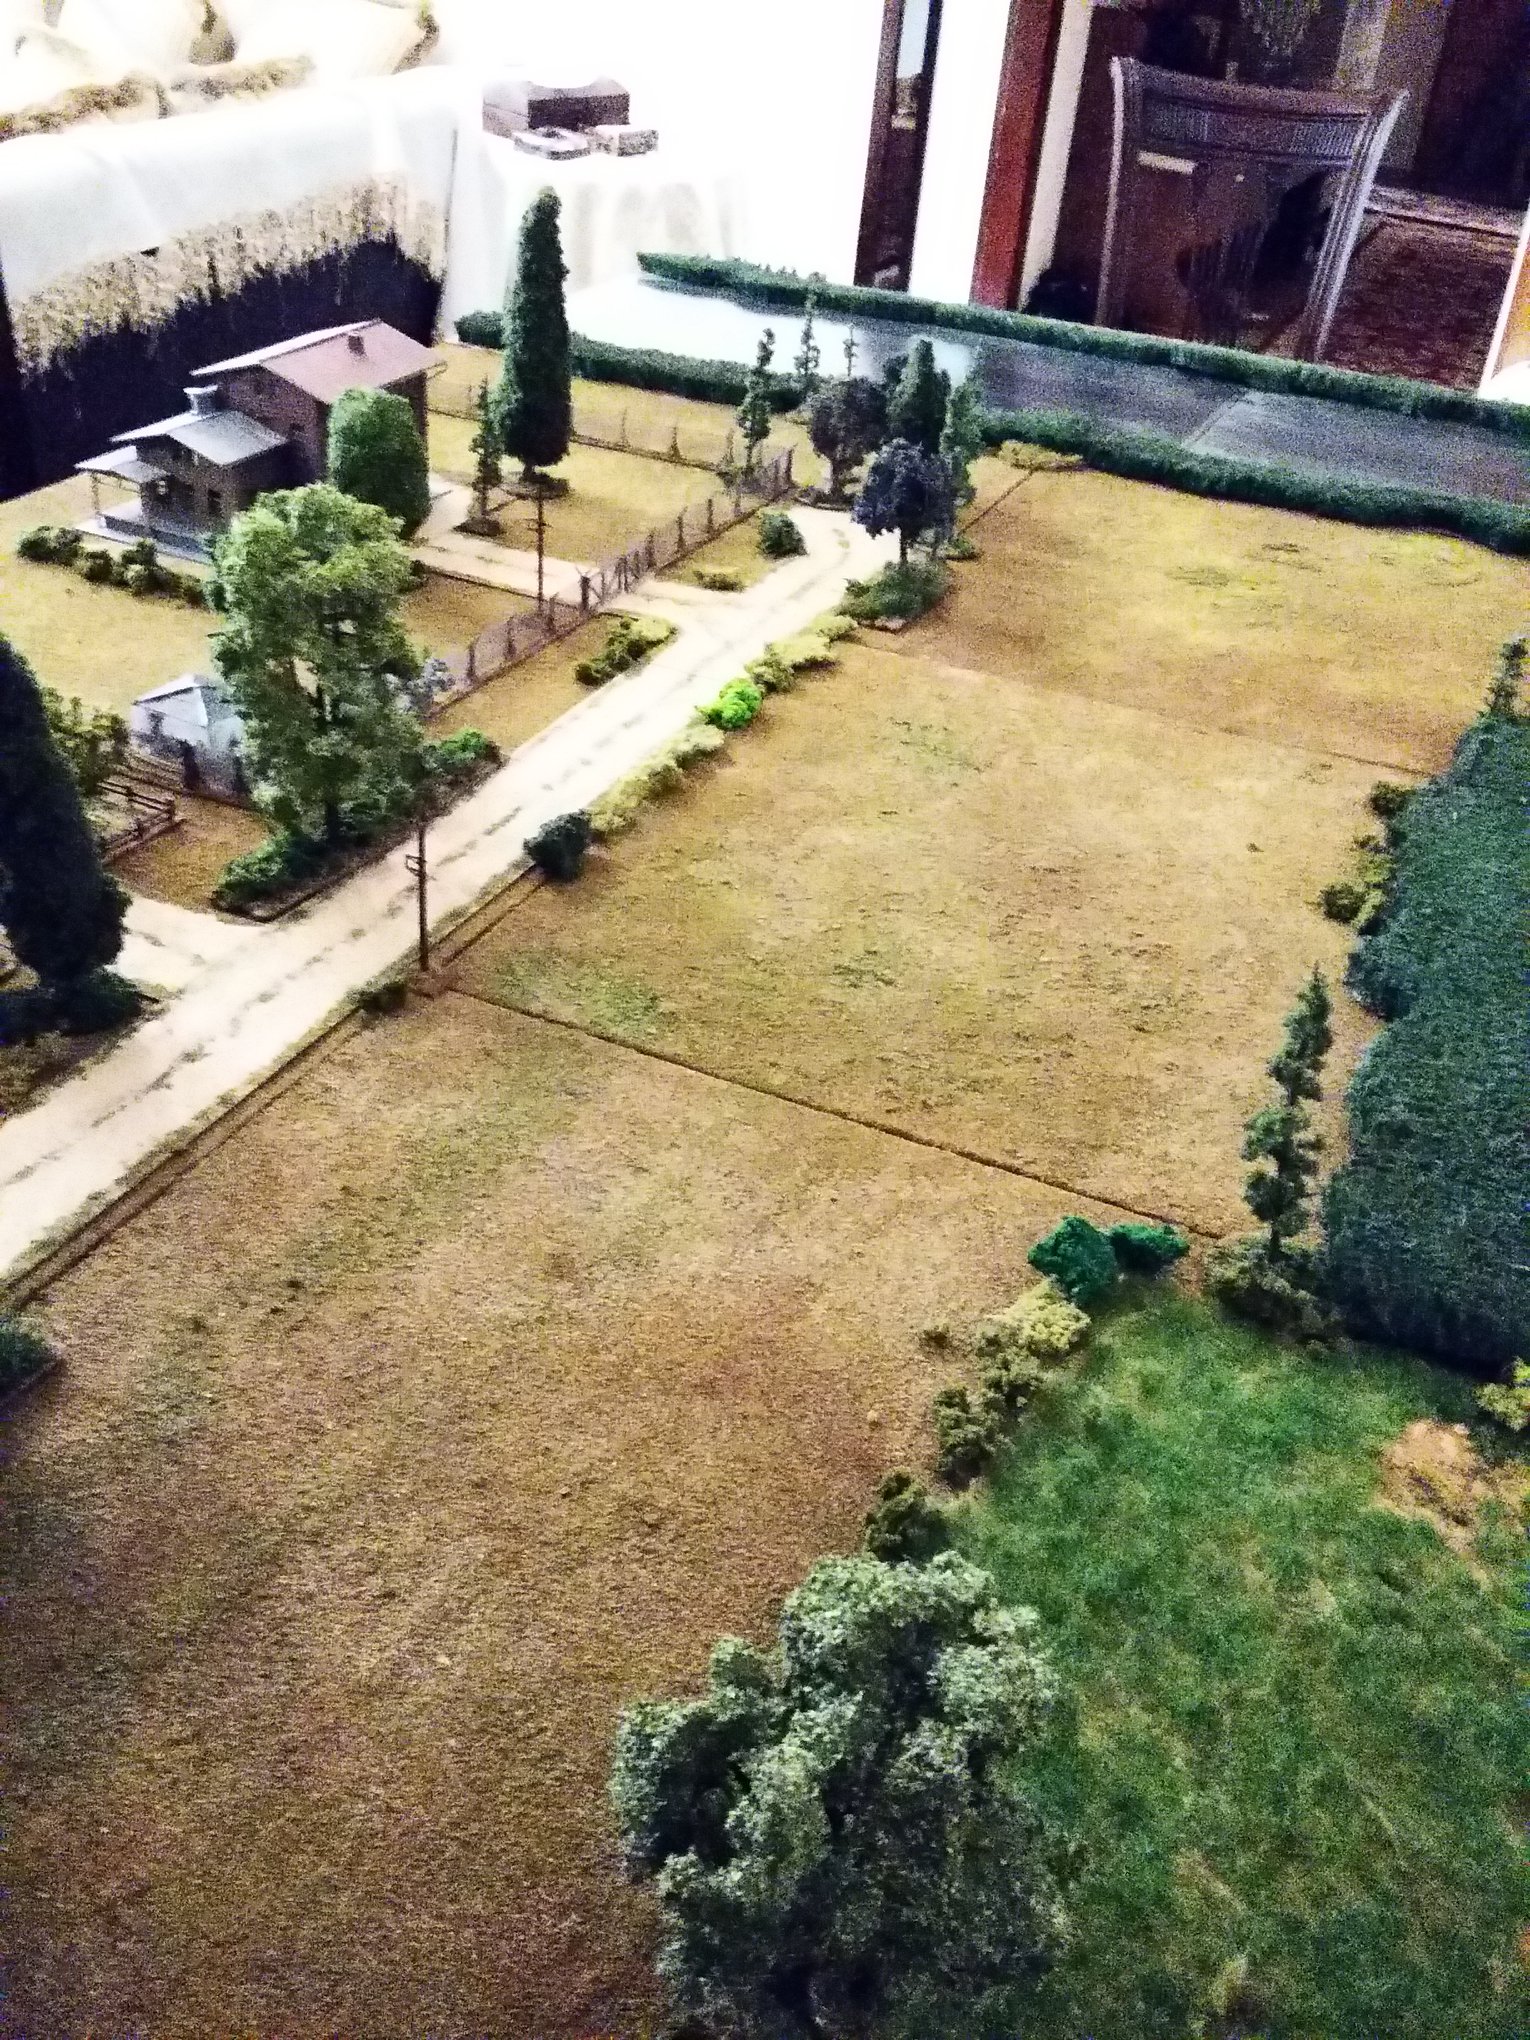
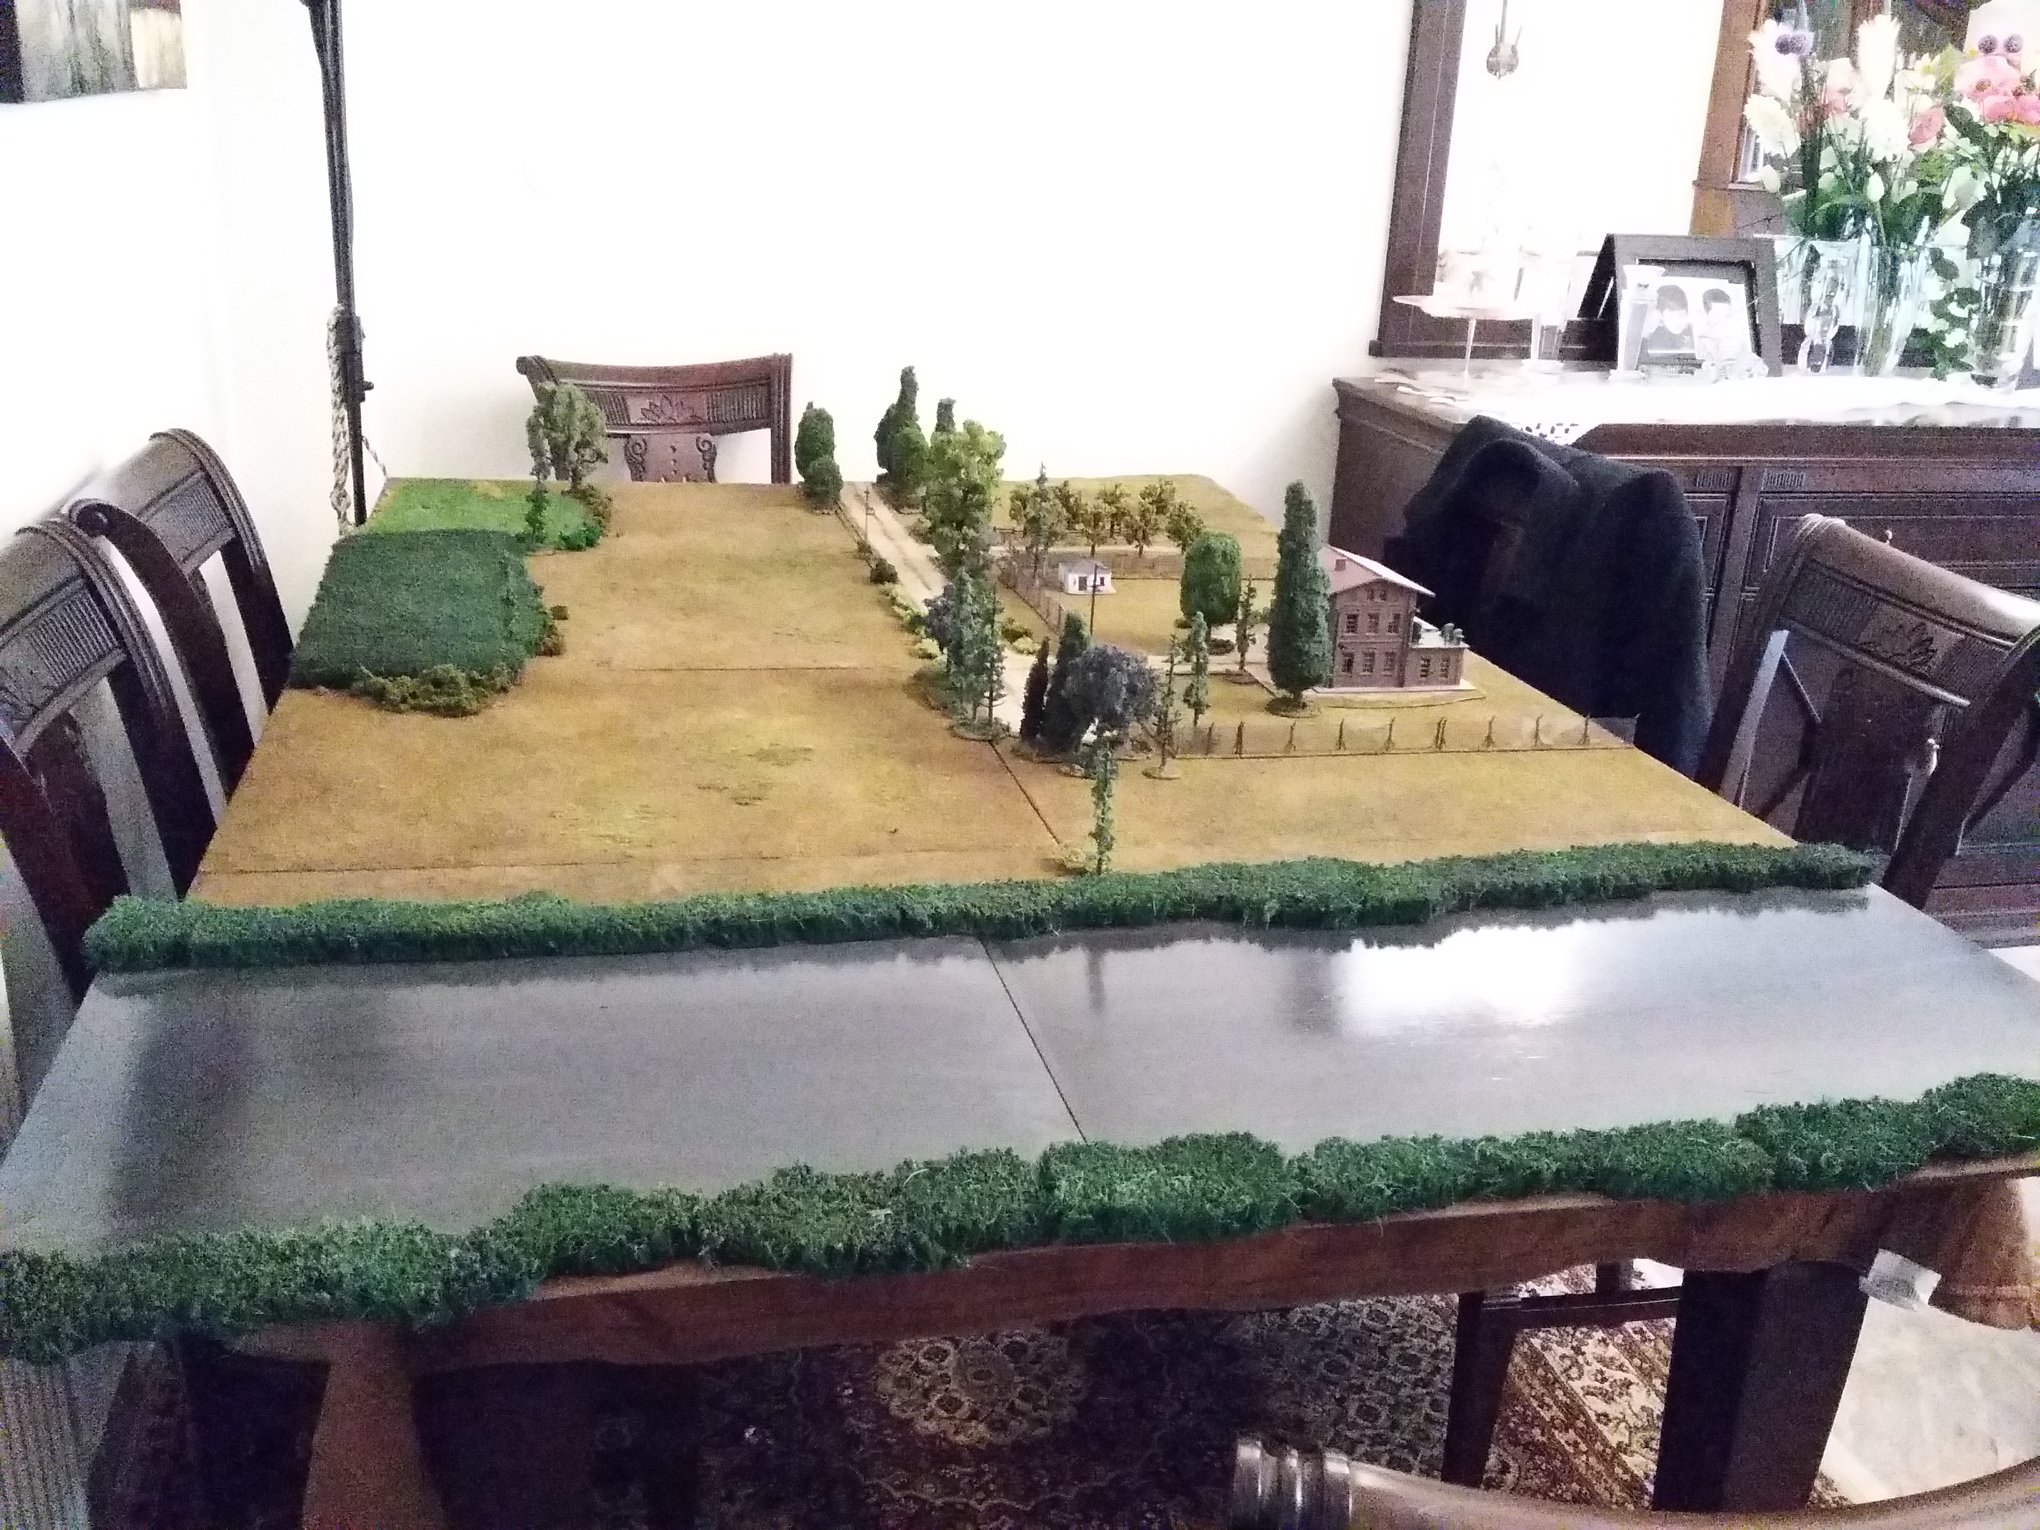
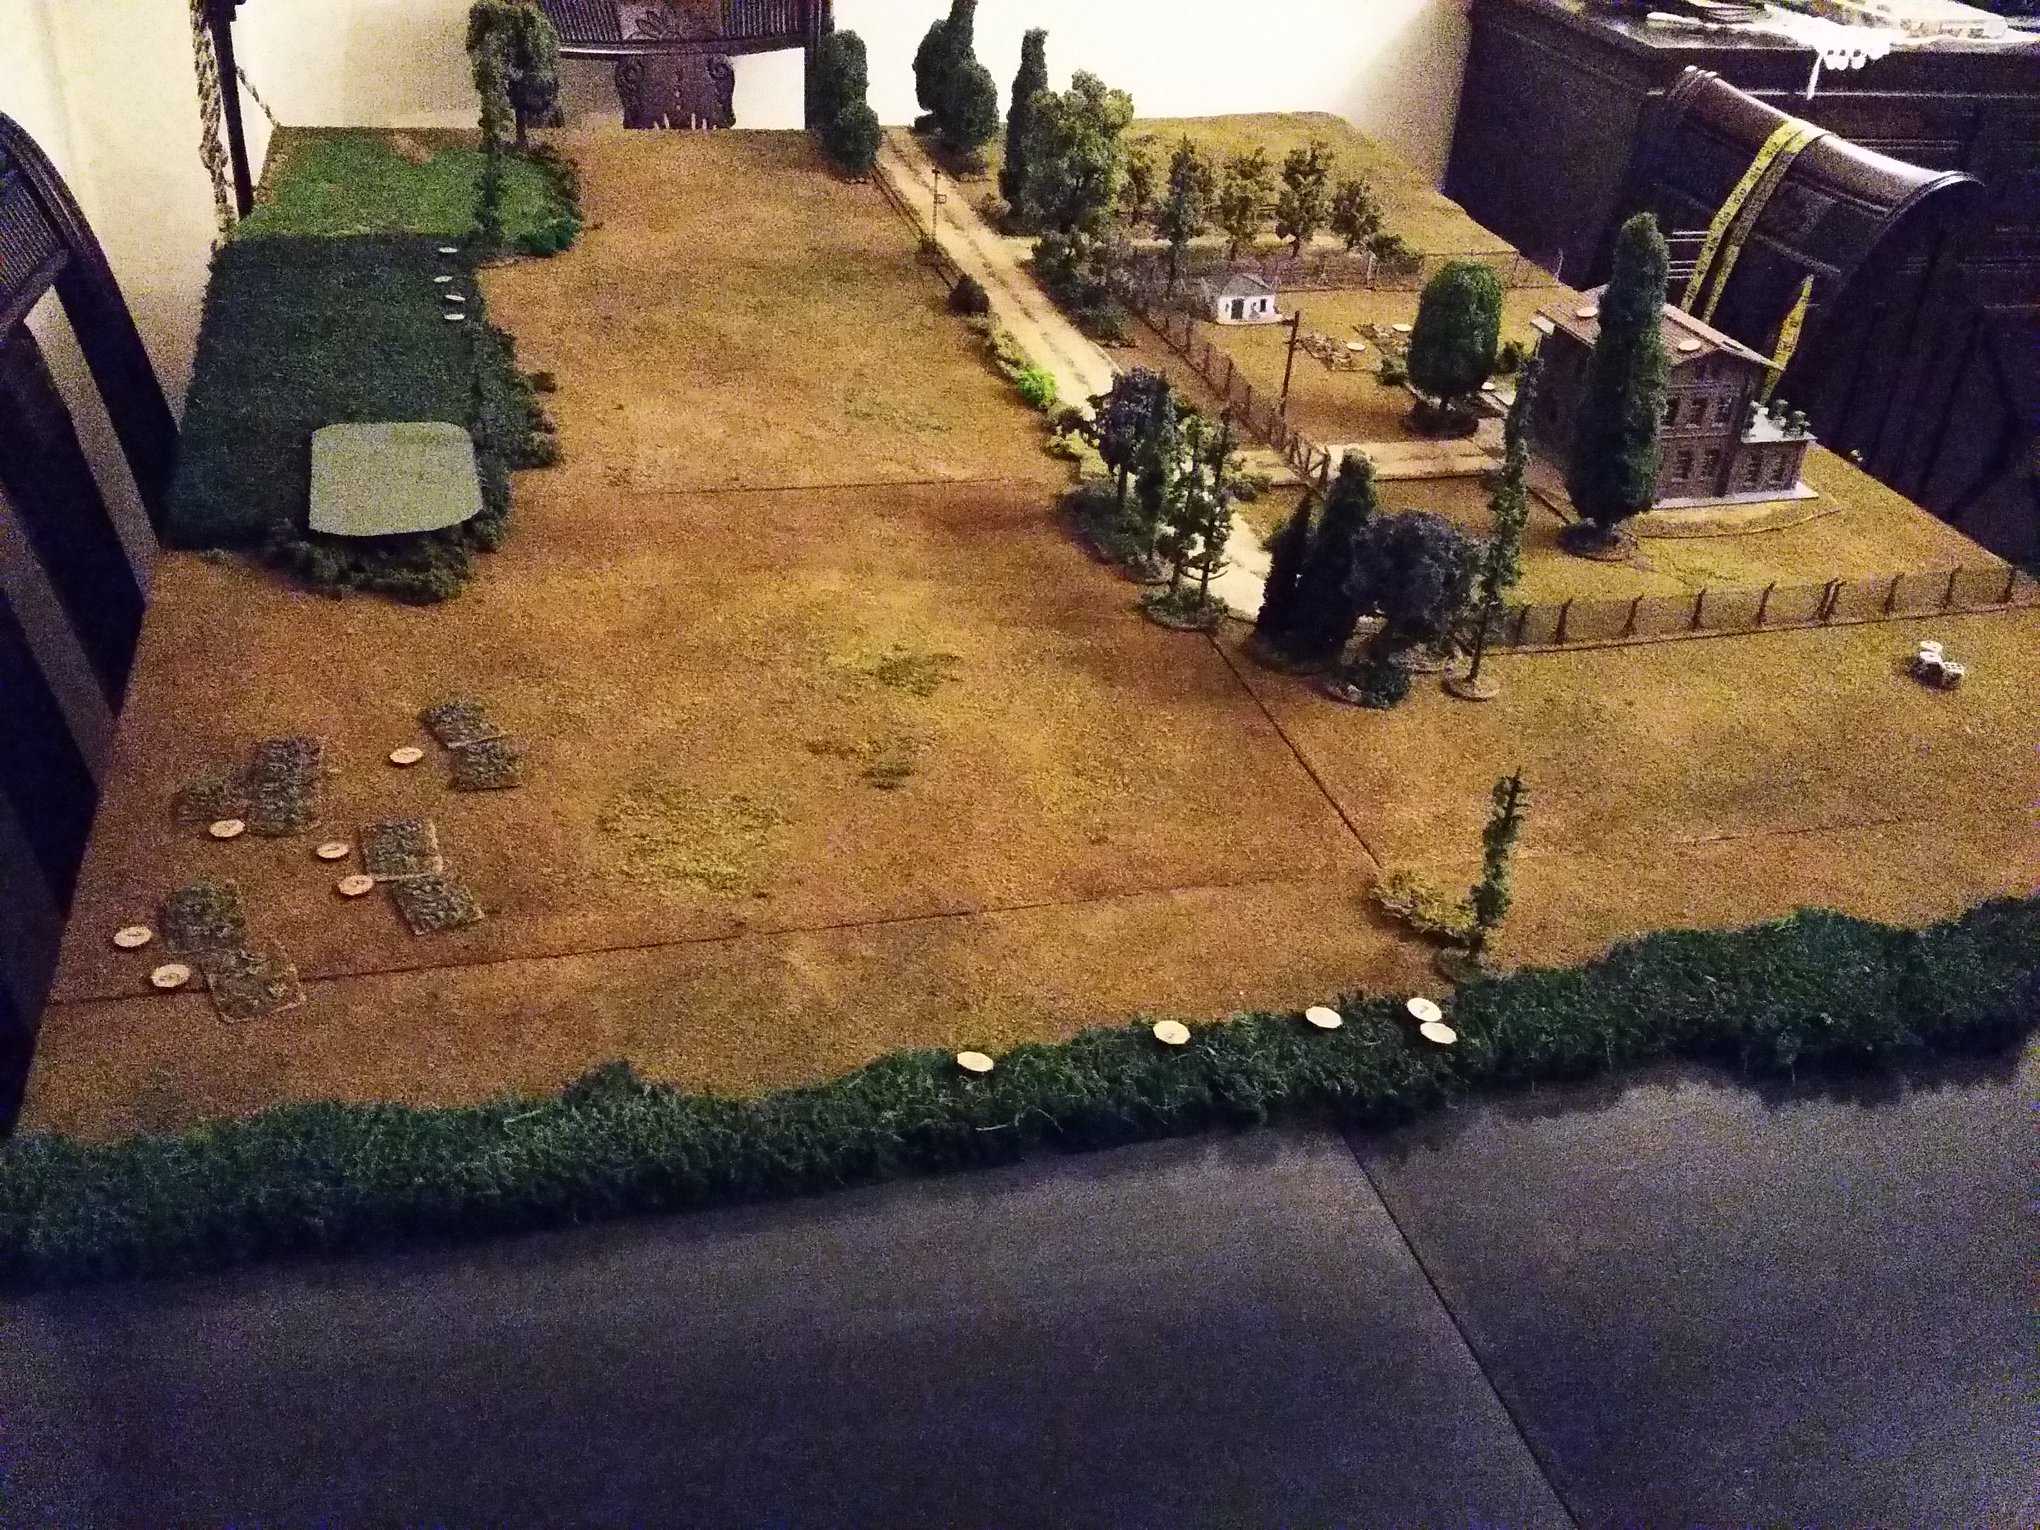
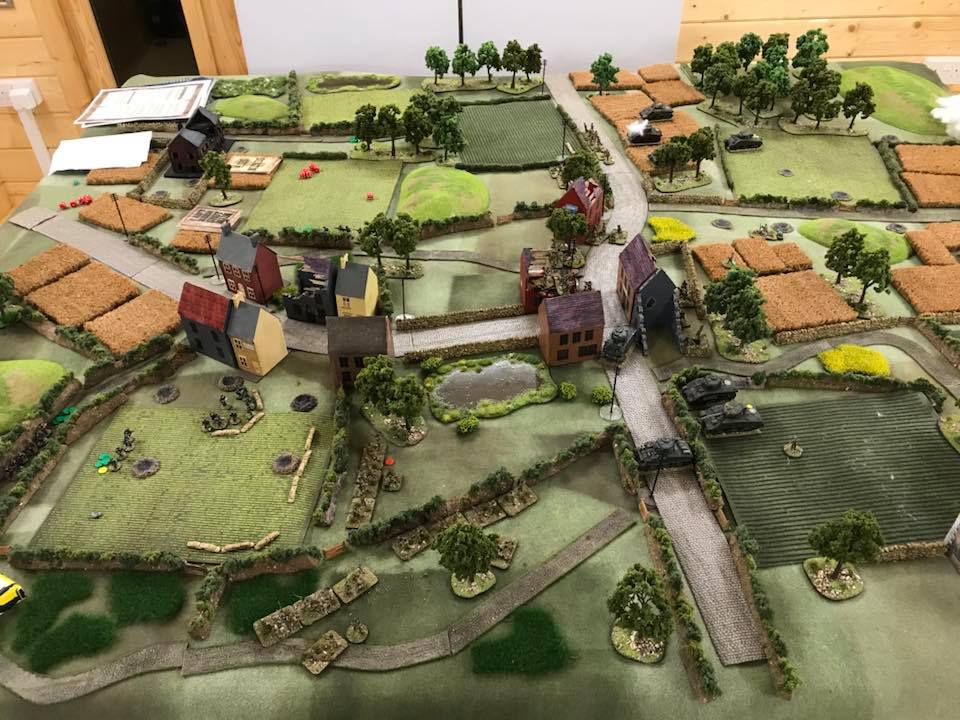
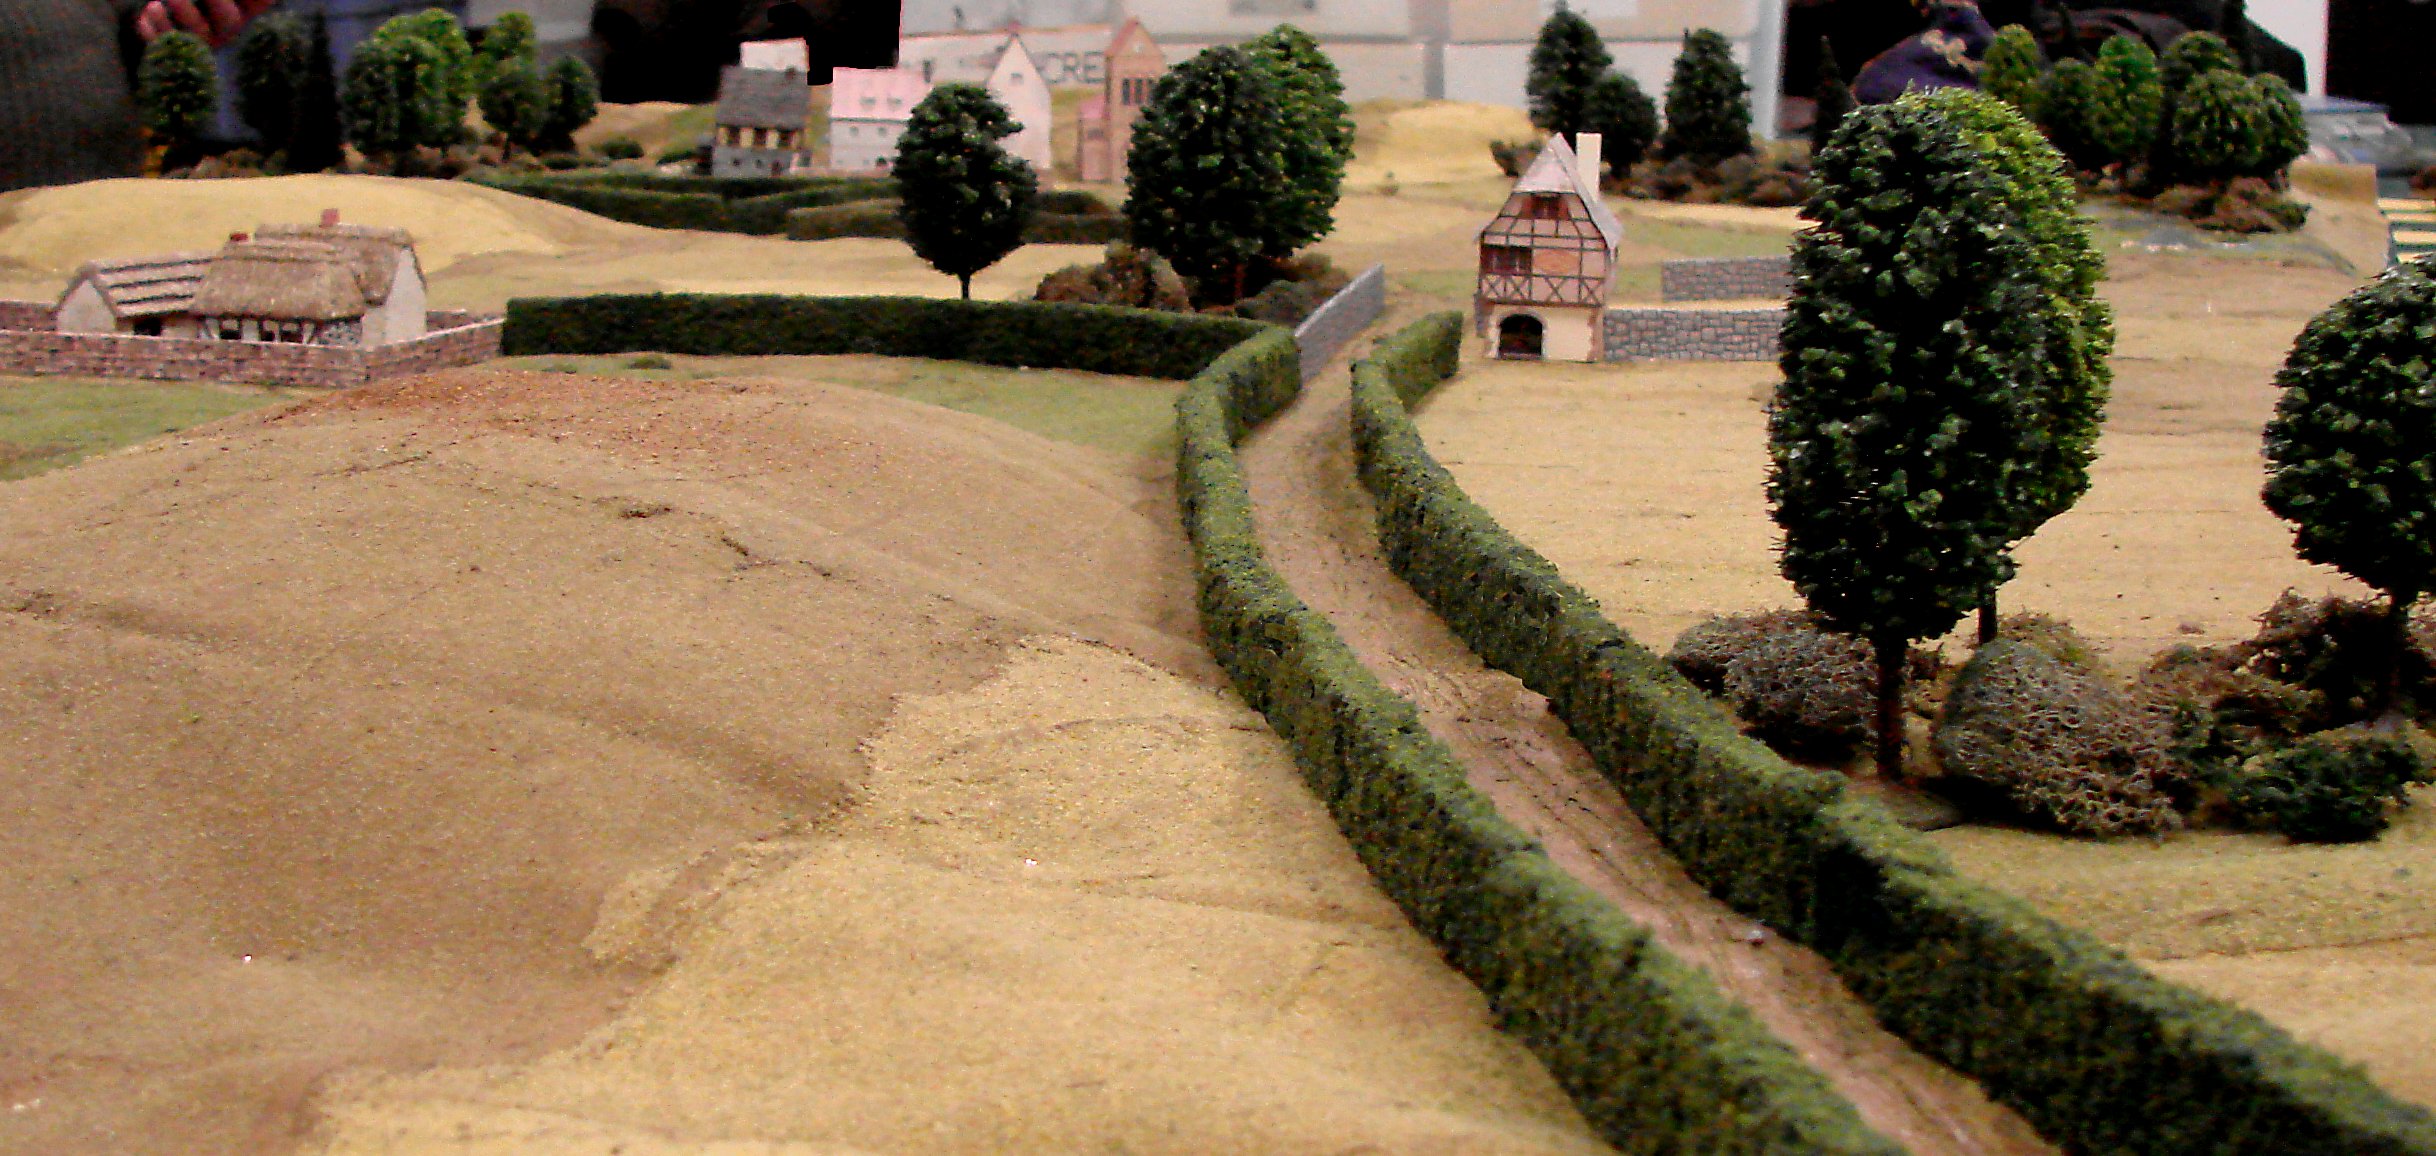
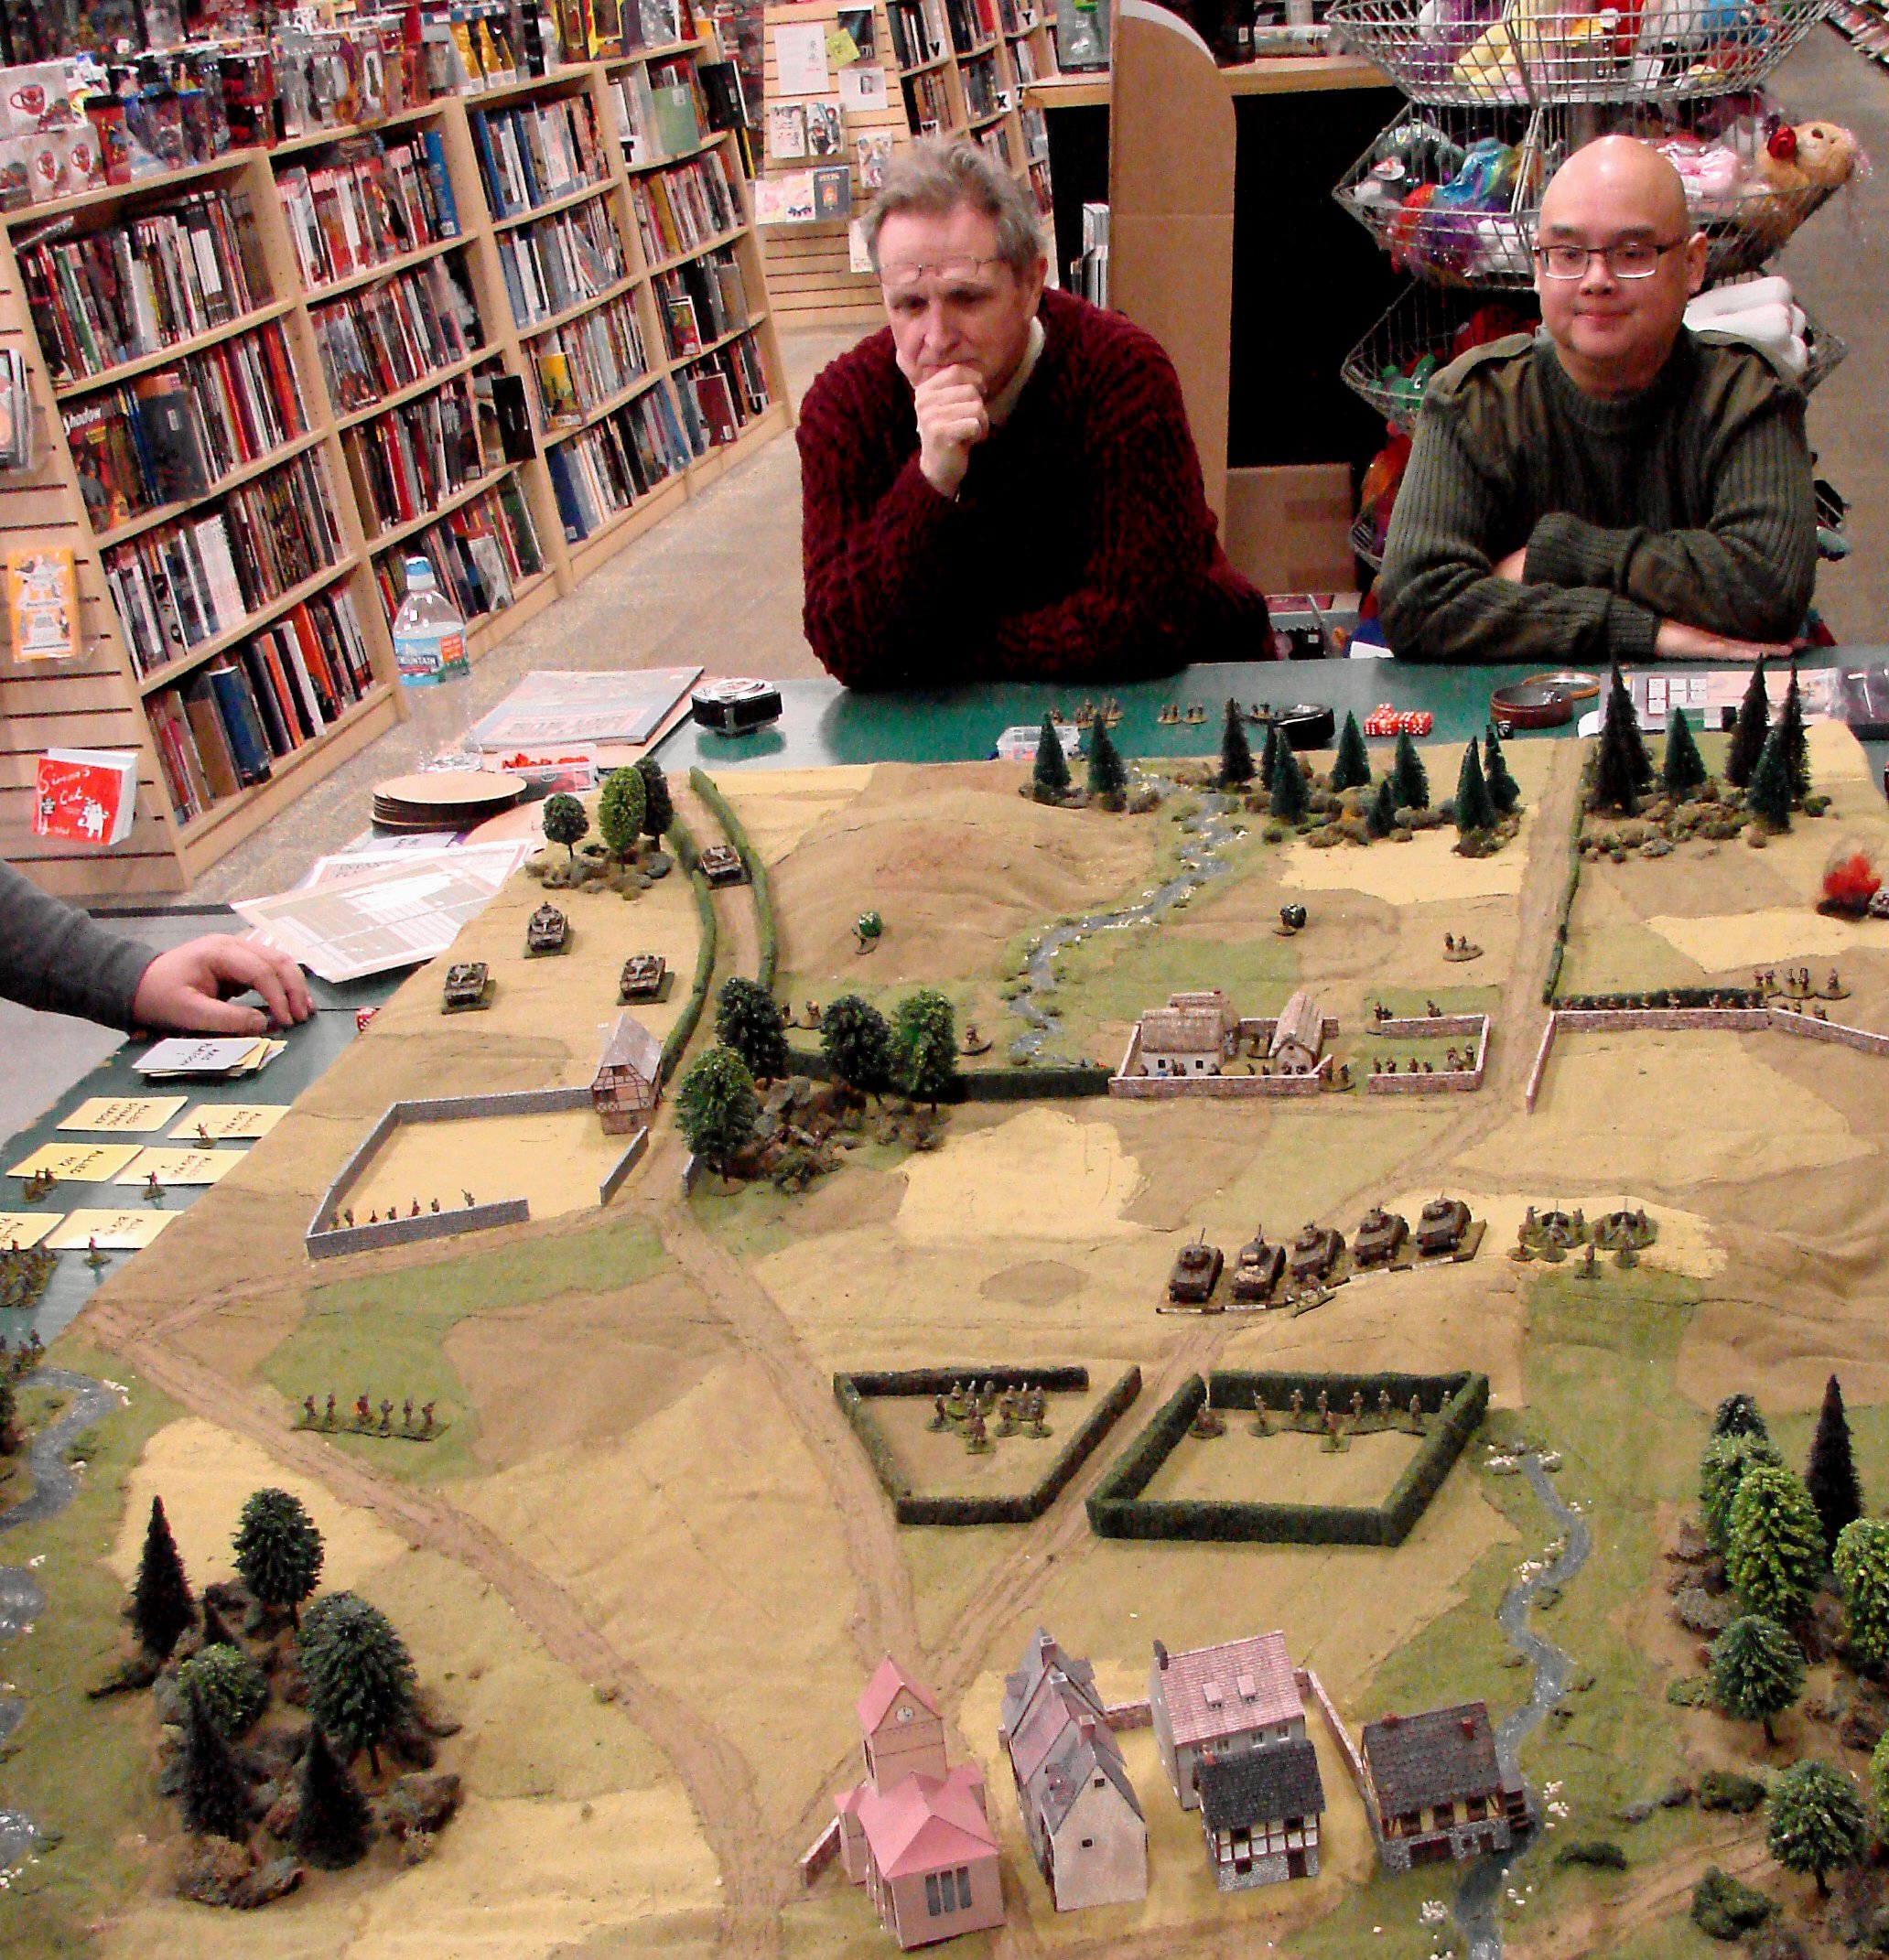
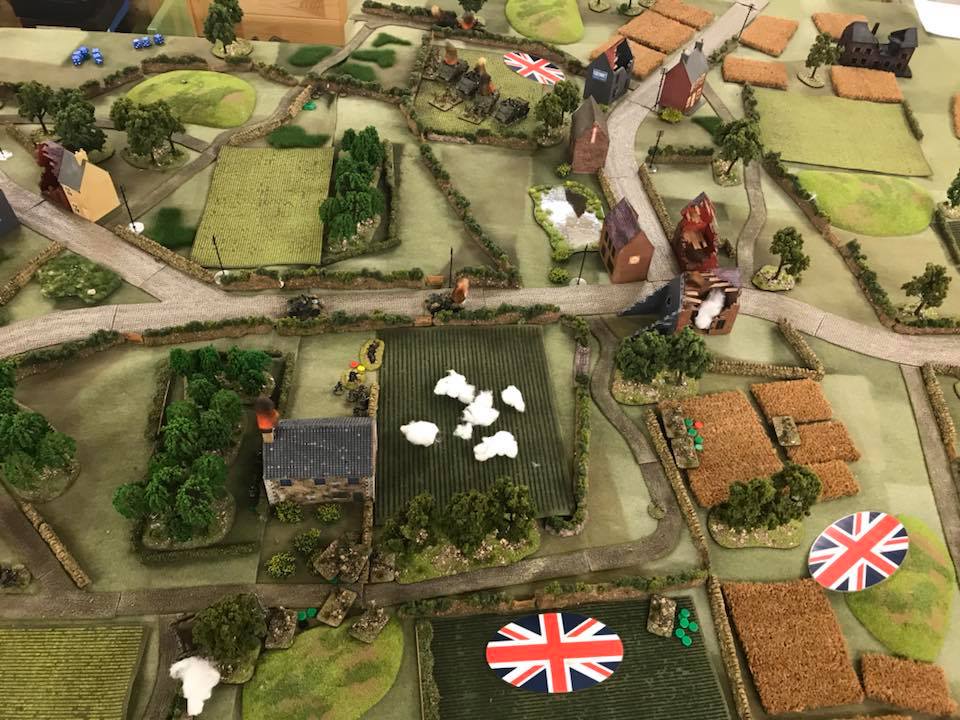
As I seemed to have bought lots of trees, it would need to be a big game. Out came the extra bit of table, giving me an 8’ by 5’ playing area, on went the new mat, and on went the new trees. The result: a winter wonderland of epic proportions.

The Forces

This was to be a Soviet/German encounter battle set sometime in and around January 1944. As I found myself short of time in the preparation stages, I used the troop lists from one of the scenarios from the IABSM Bashnya or Bust scenario pack. A couple of the scenarios give listings of a re-inforced company for each side from which the players pick a number of platoons. As this was to be a big game, I used those lists but gave each side the entire list, not just a proportion of the list.

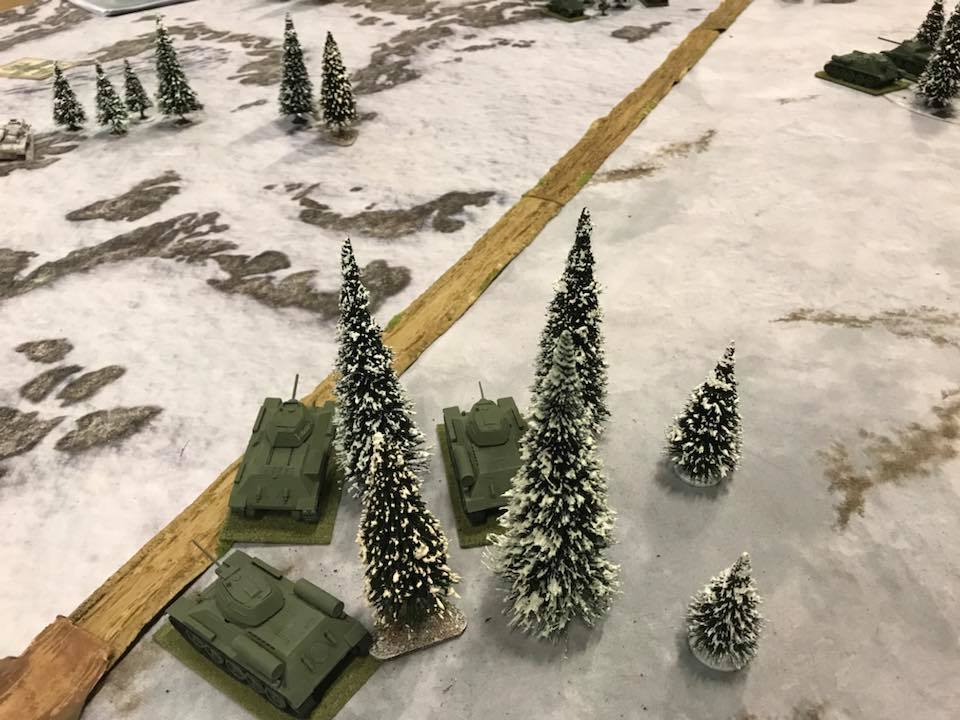
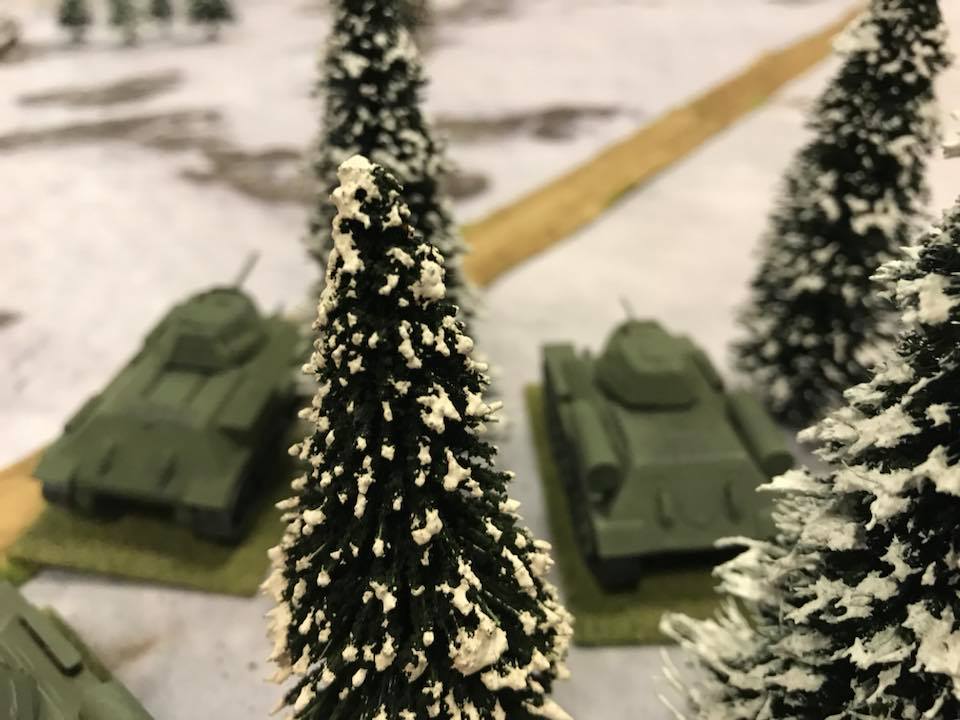
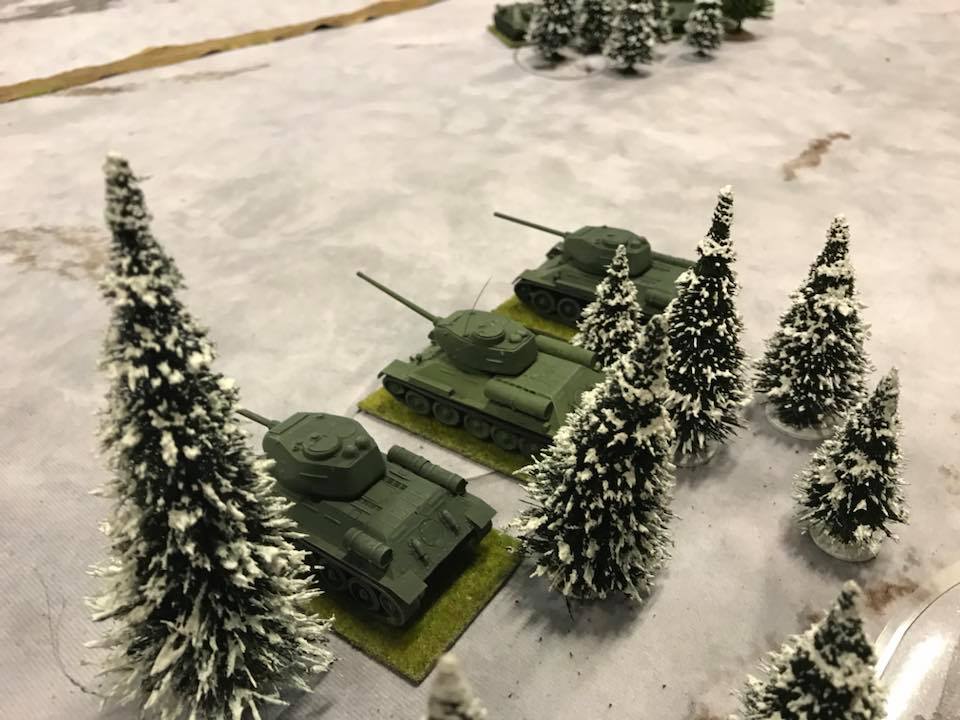
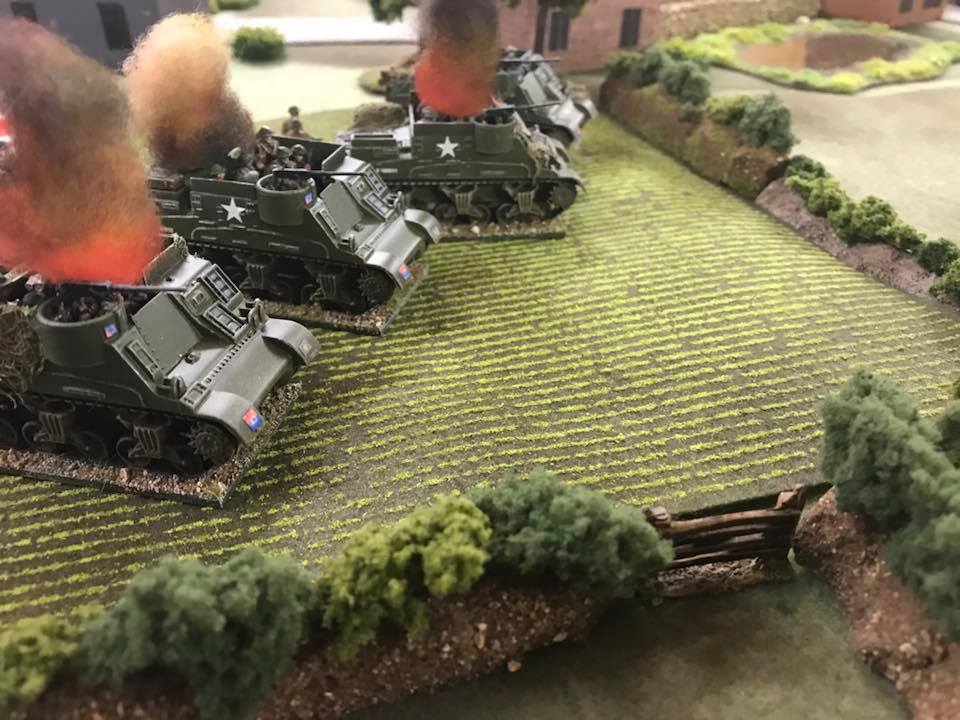
This meant that the Soviets (played by John) ended up with a company of ten T-34s, most of which were T-34/85s, supported by a re-inforced company of infantry: three platoons, an MG platoon, and a medium mortar platoon. As reconnaissance, the Soviets had a platoon of armoured cars and a platoon of scouts in lend-lease M3 halftracks. As support (well, it was supposed to be a big game), they also had a platoon of four SU-85 tank destroyers and a platoon of SU-76 SP guns.

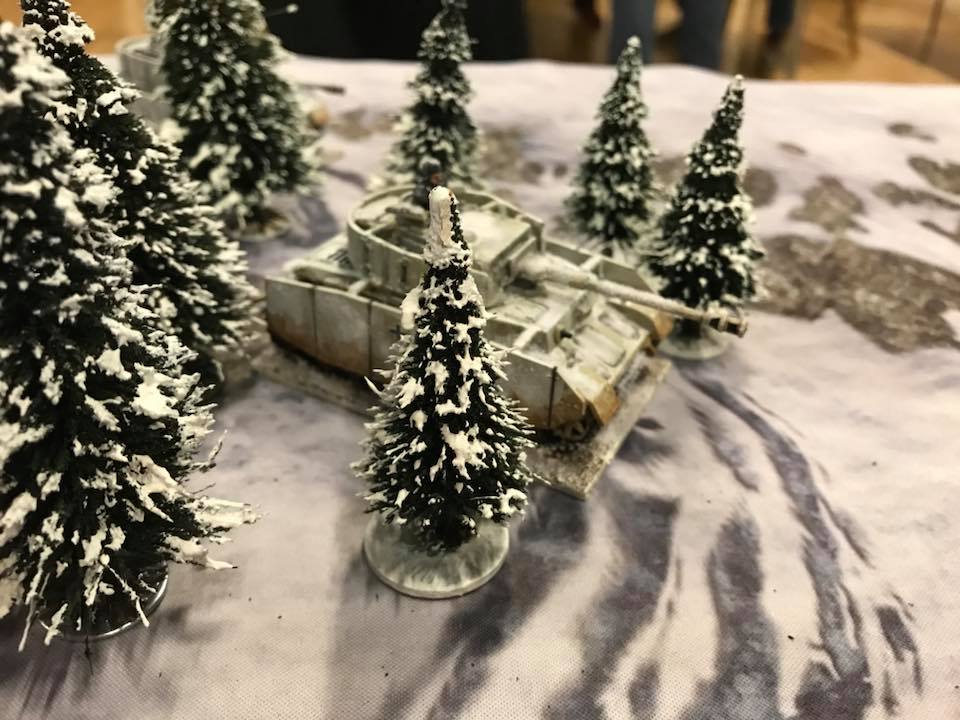
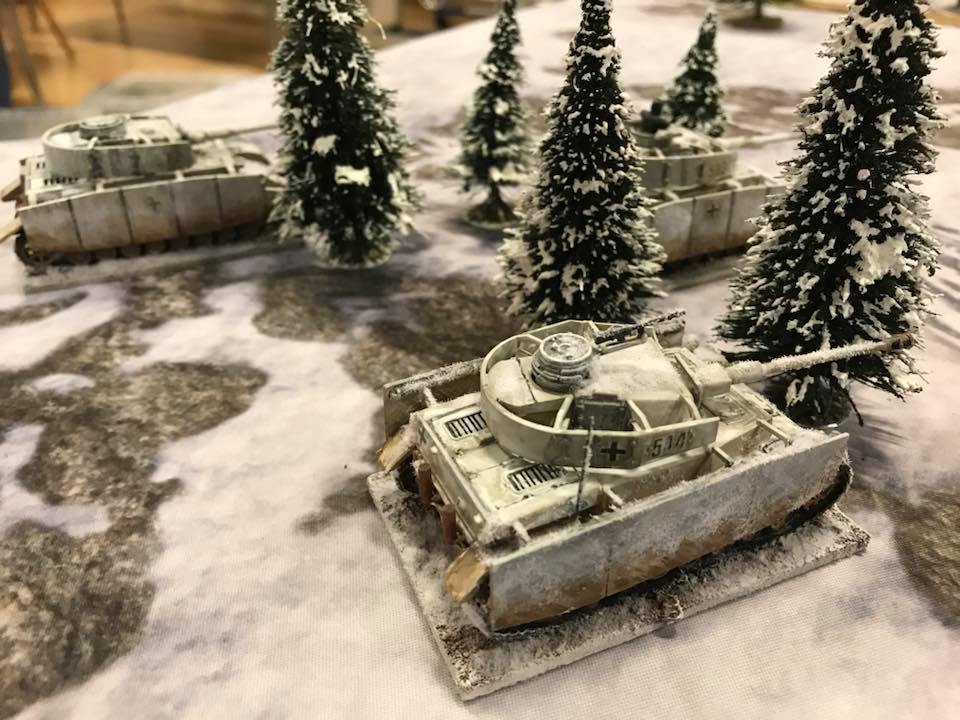
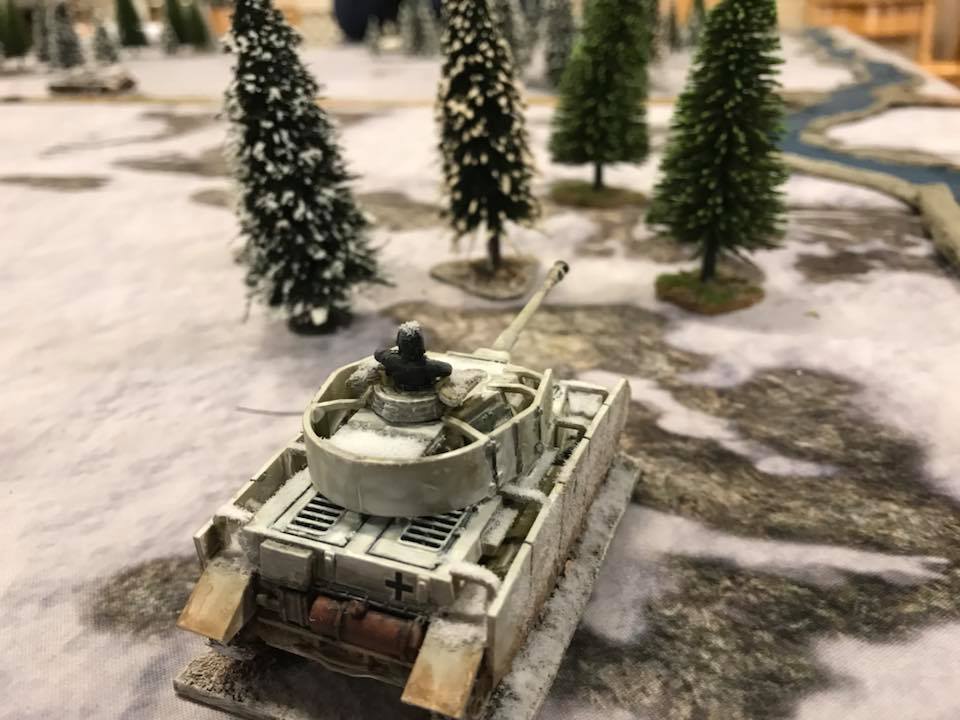
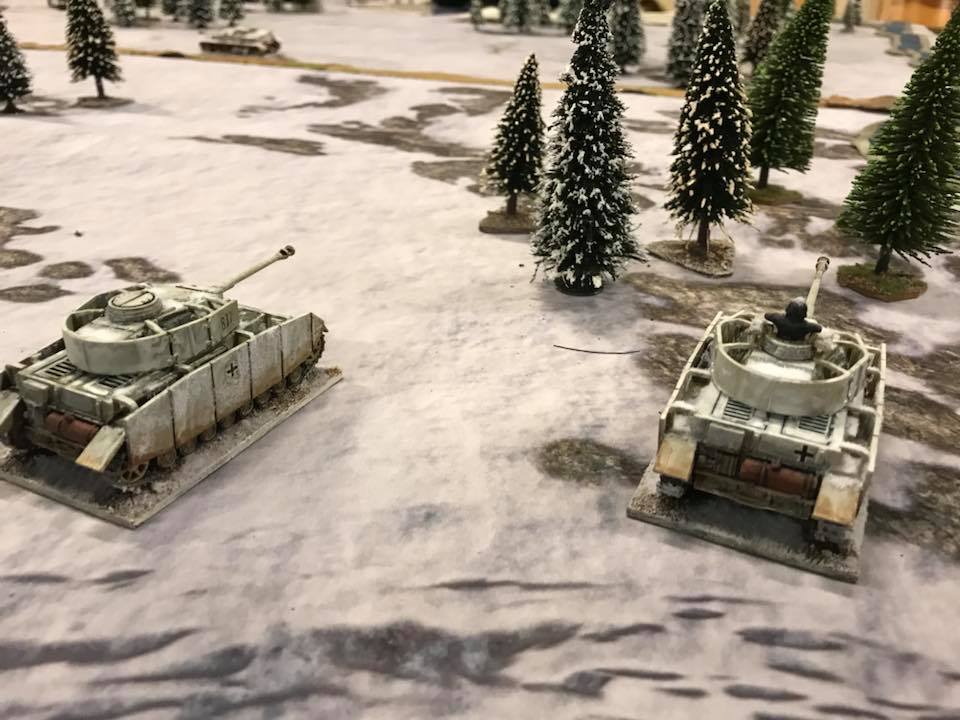
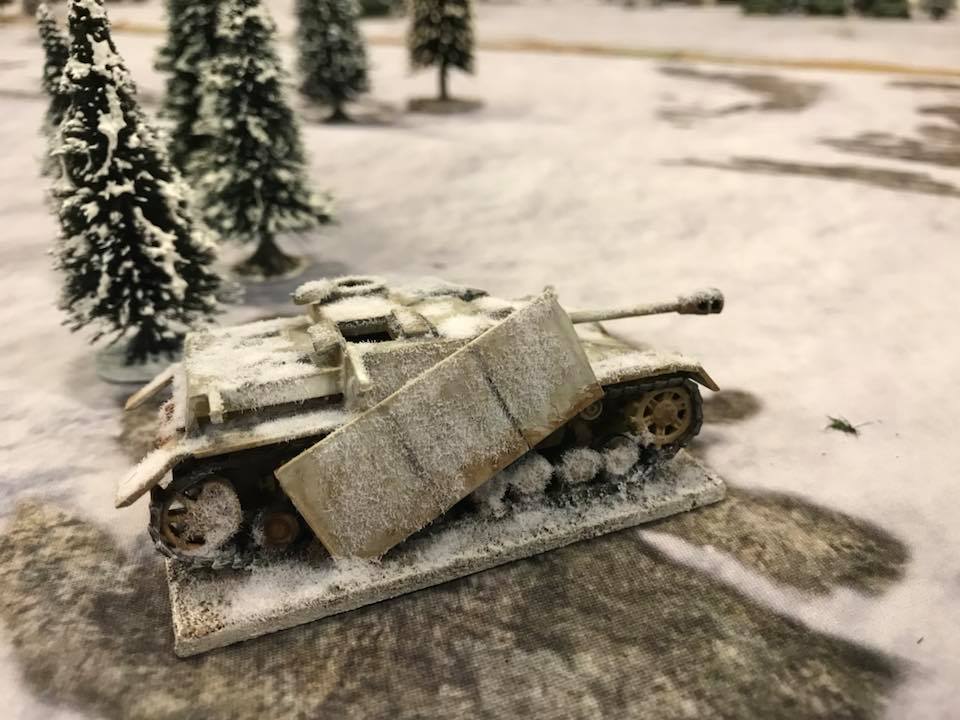
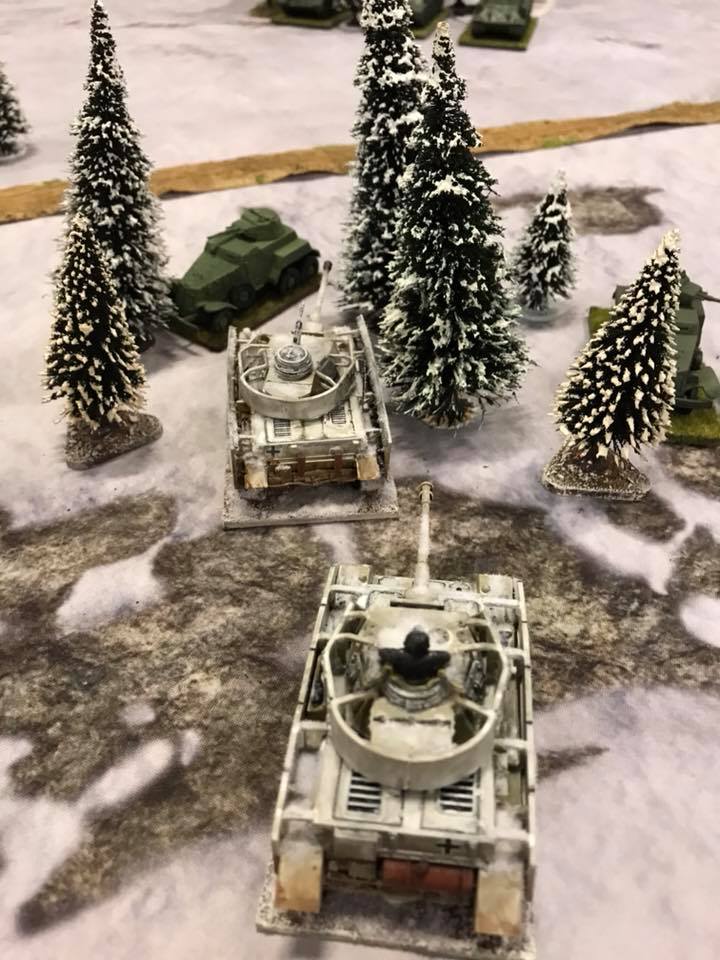
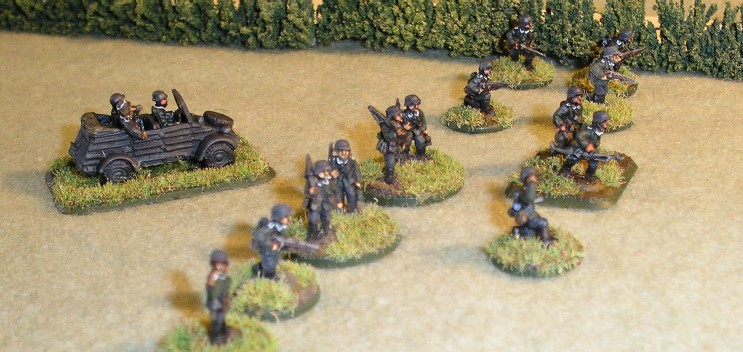
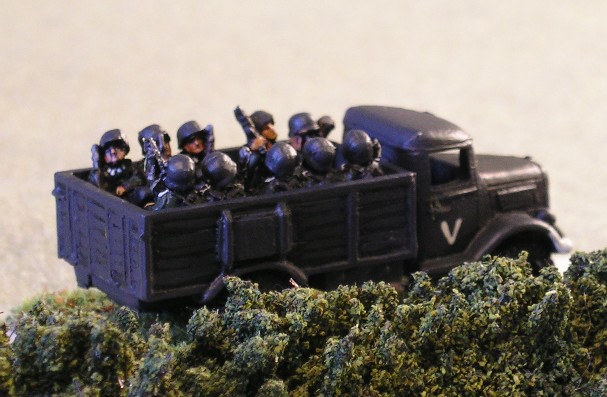
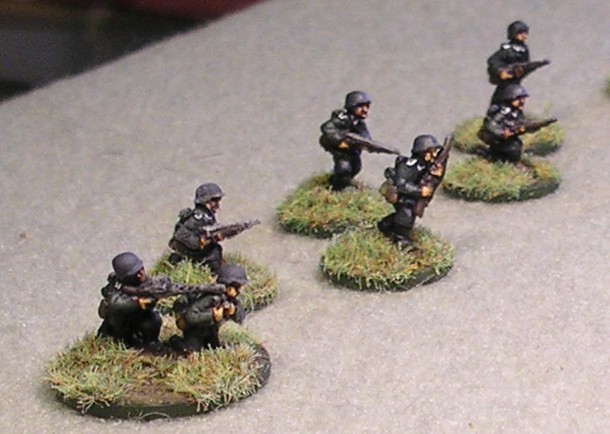
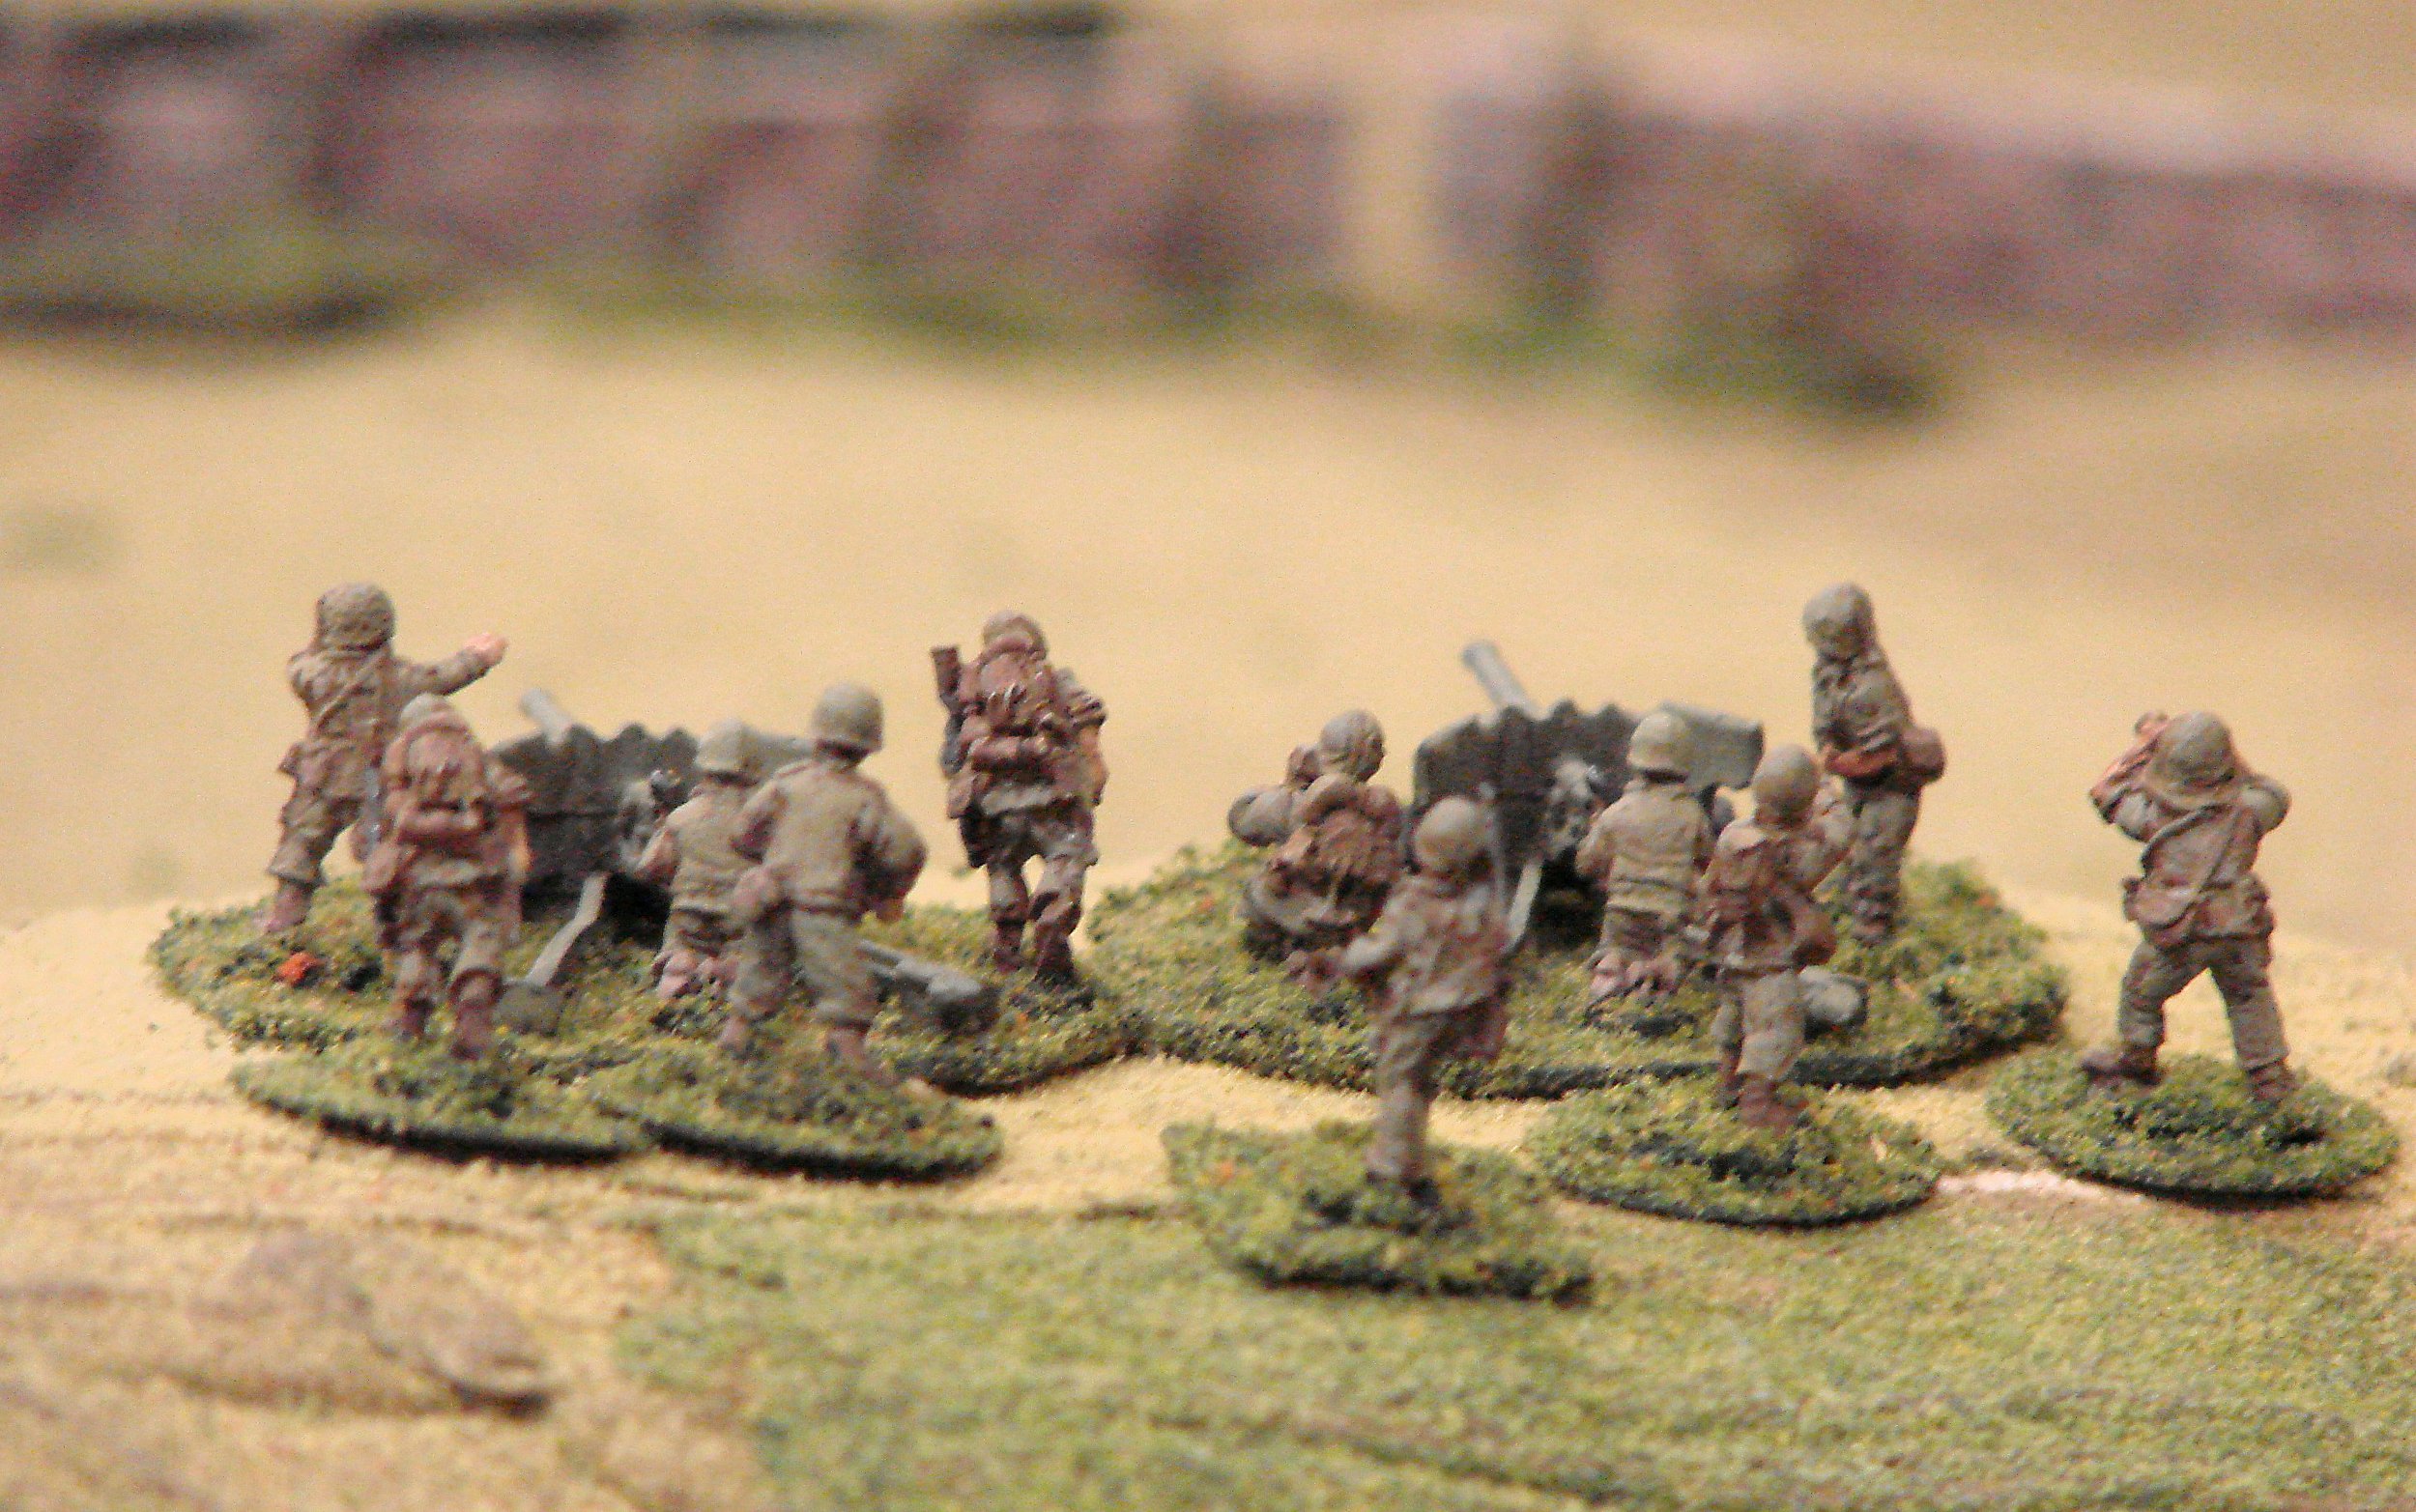
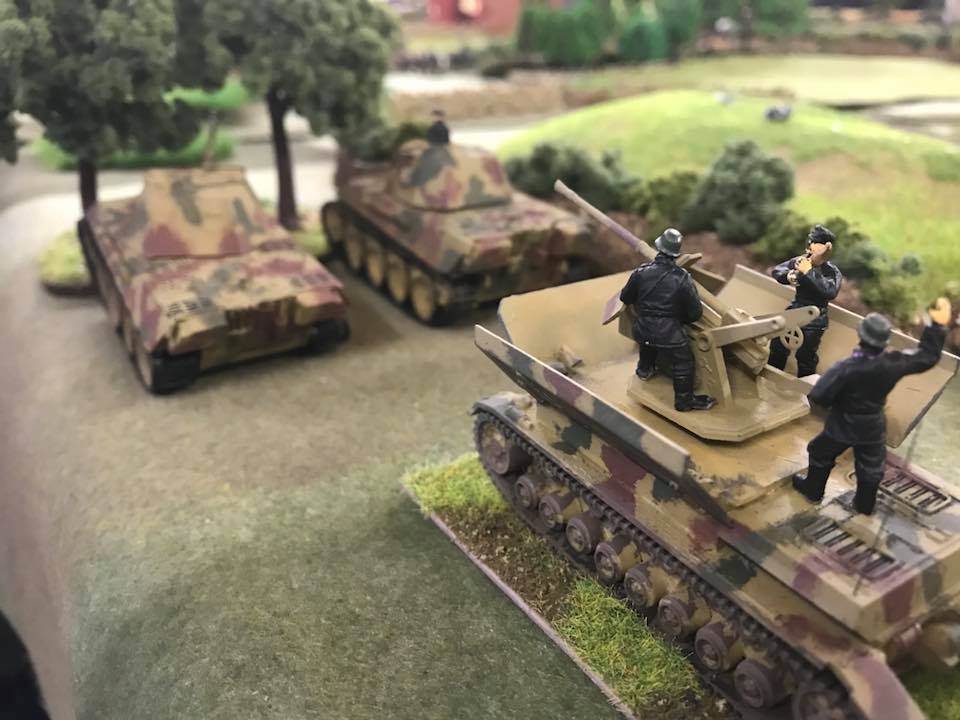
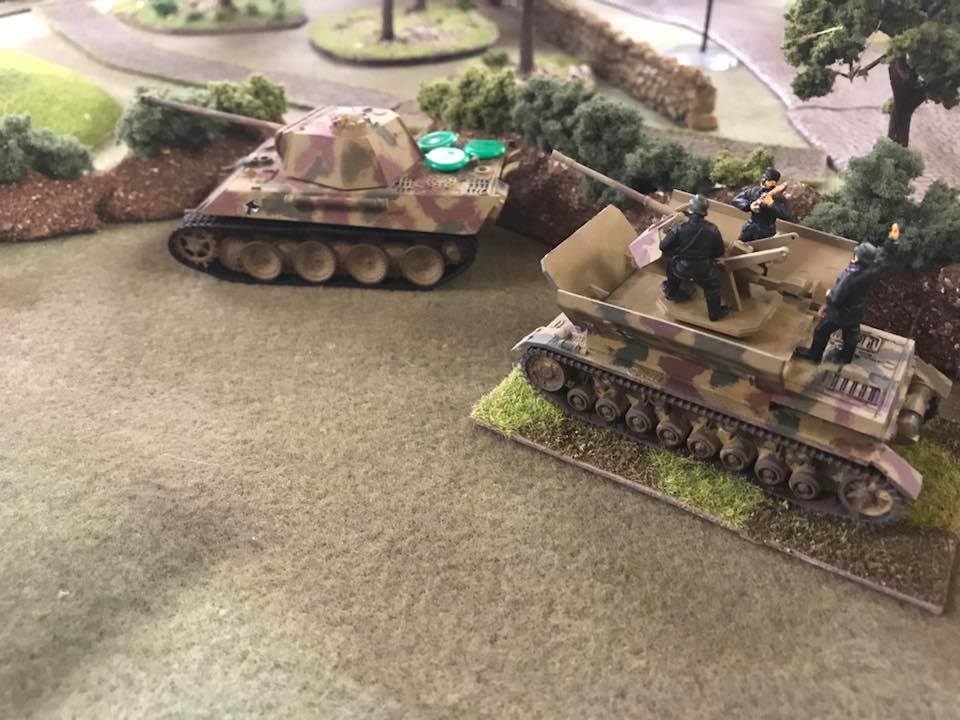
The Germans (played by Dave), on the other hand, had a company of Gebirgsjaeger mountain infantry supported by an MG platoon and a mortar platoon. On top of this, they had a platoon of two infantry guns and a platoon of three Pak 40 anti-tank guns from regiment. Finally, they had a platoon of four StuG IV assault guns and a platoon of four Hetzer tank-killers.

The Objectives & Special Rules

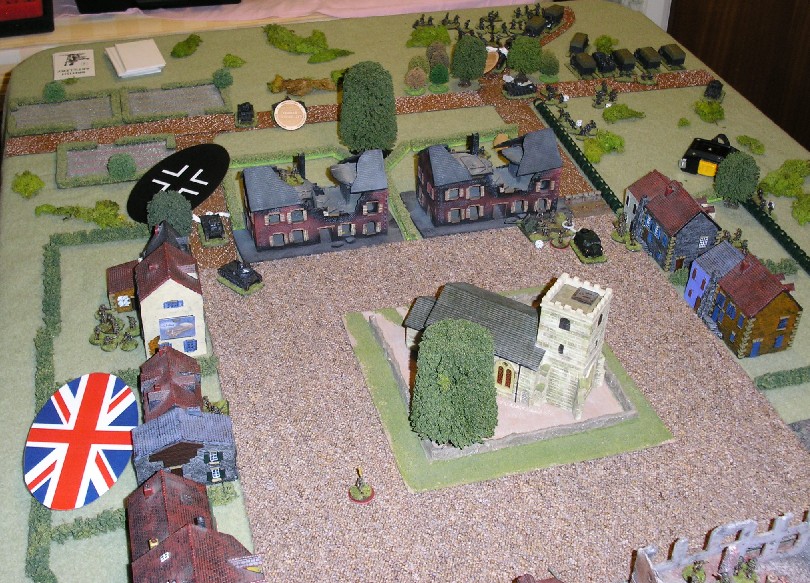
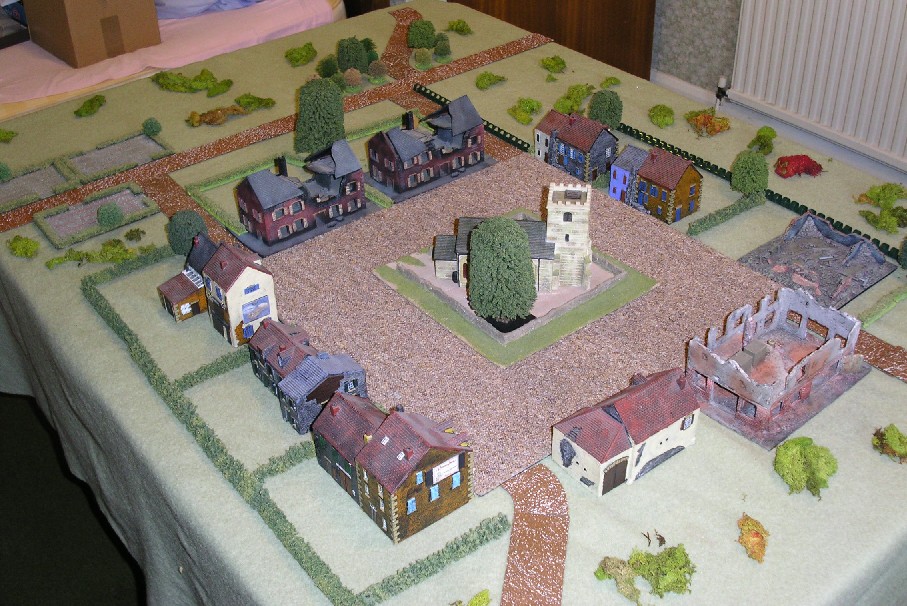
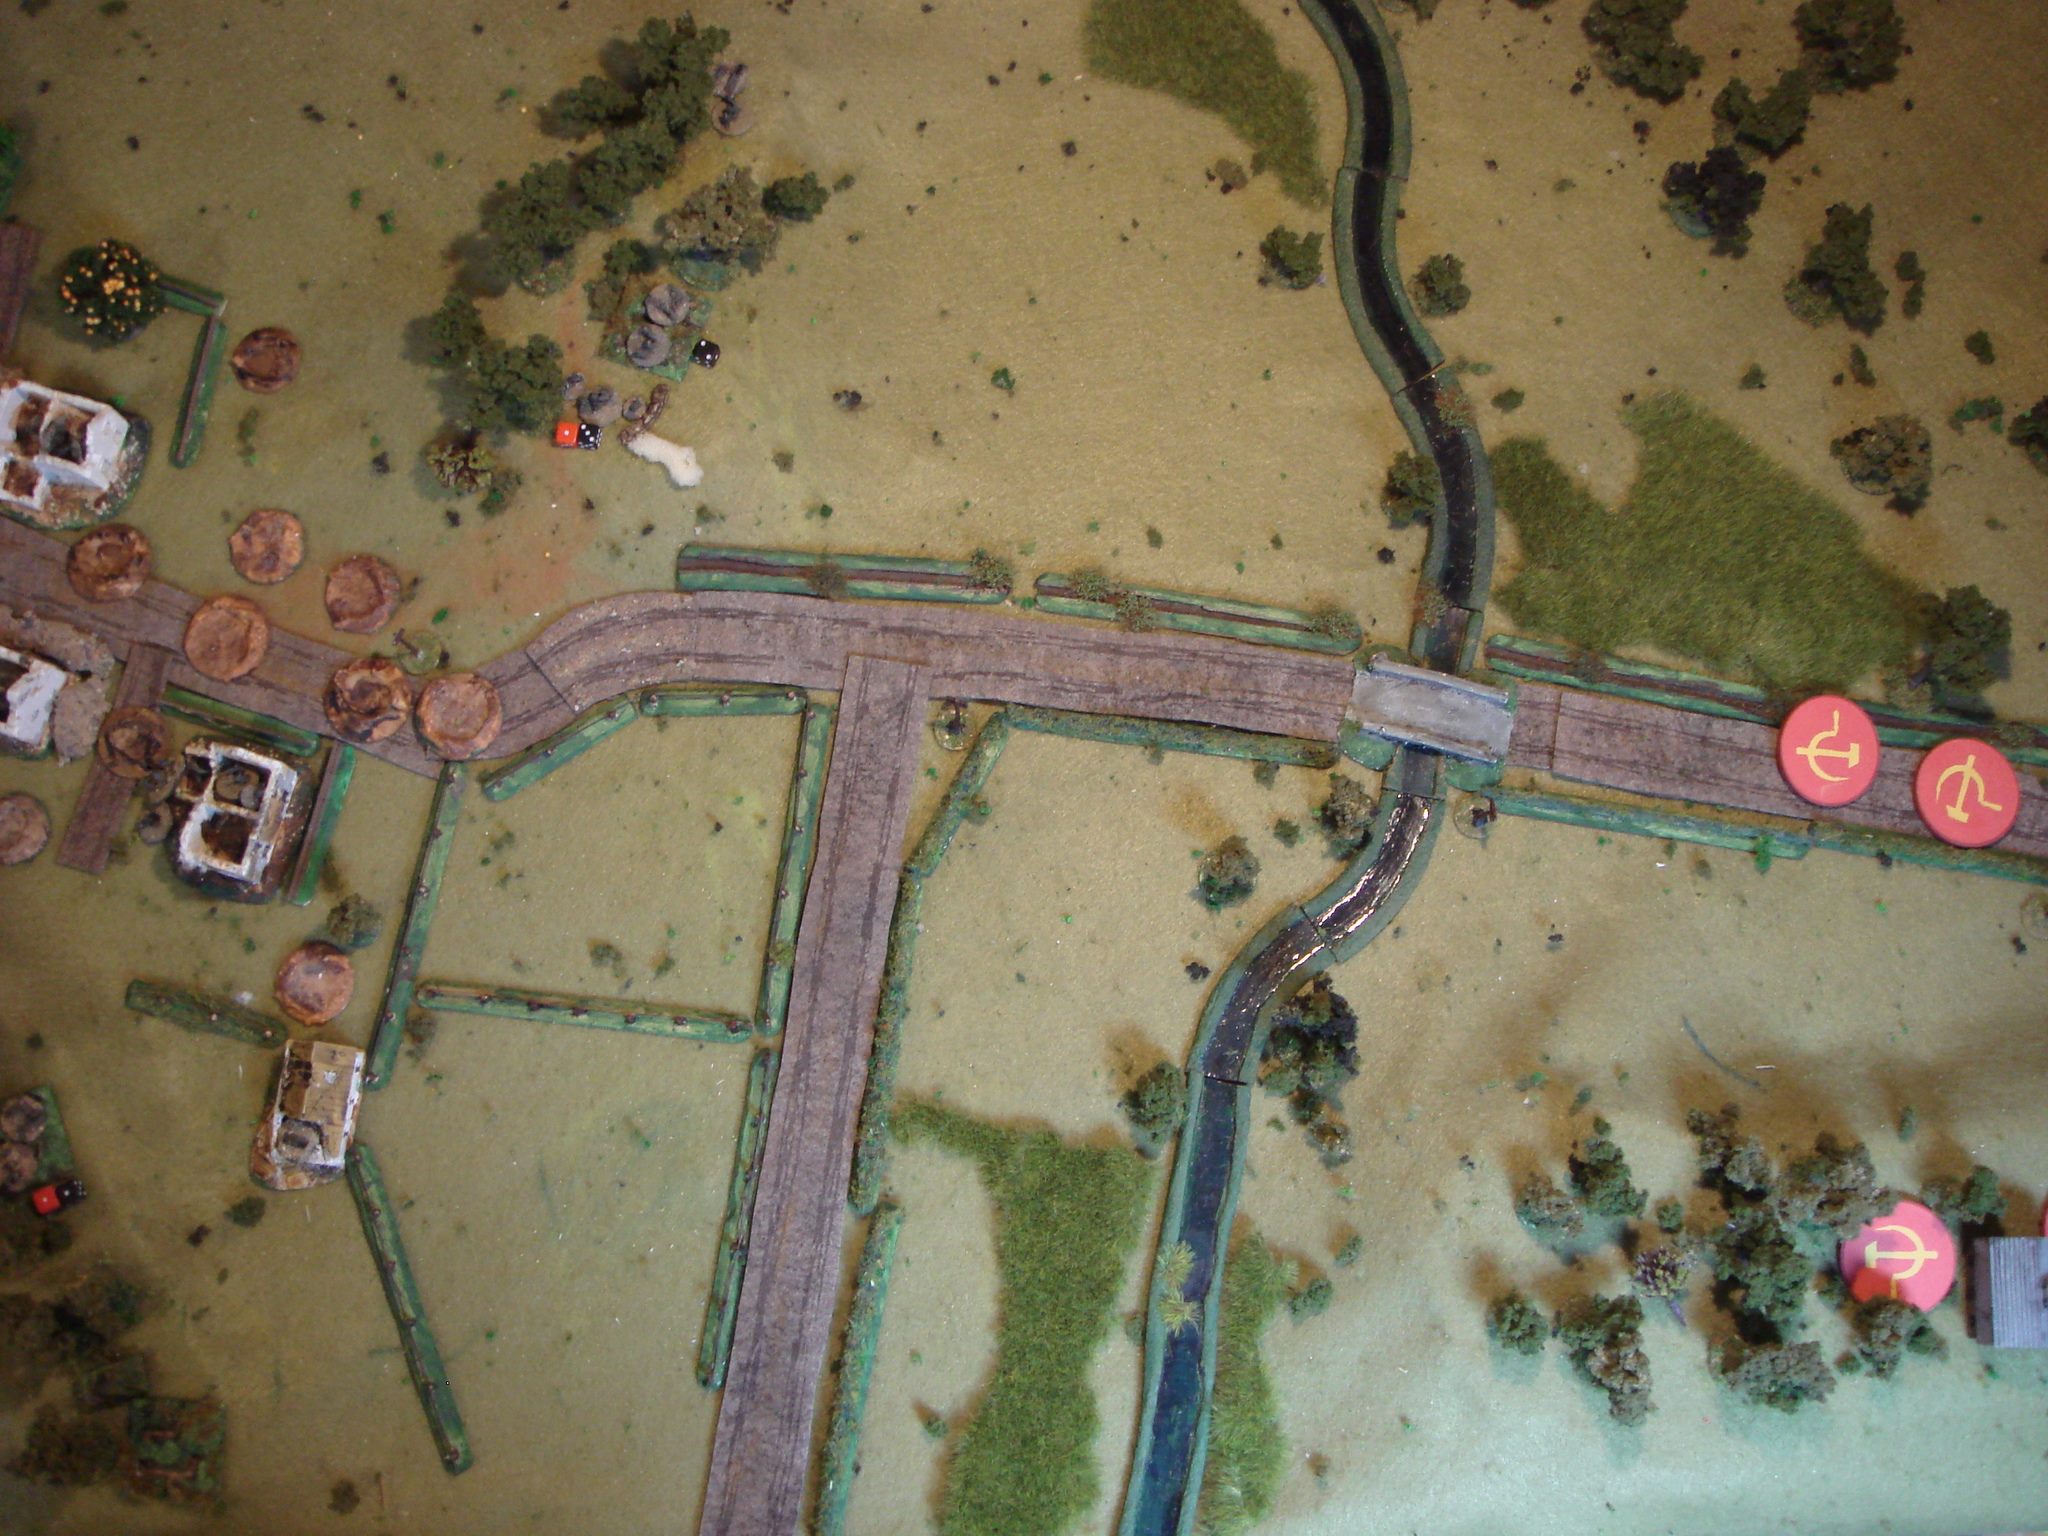
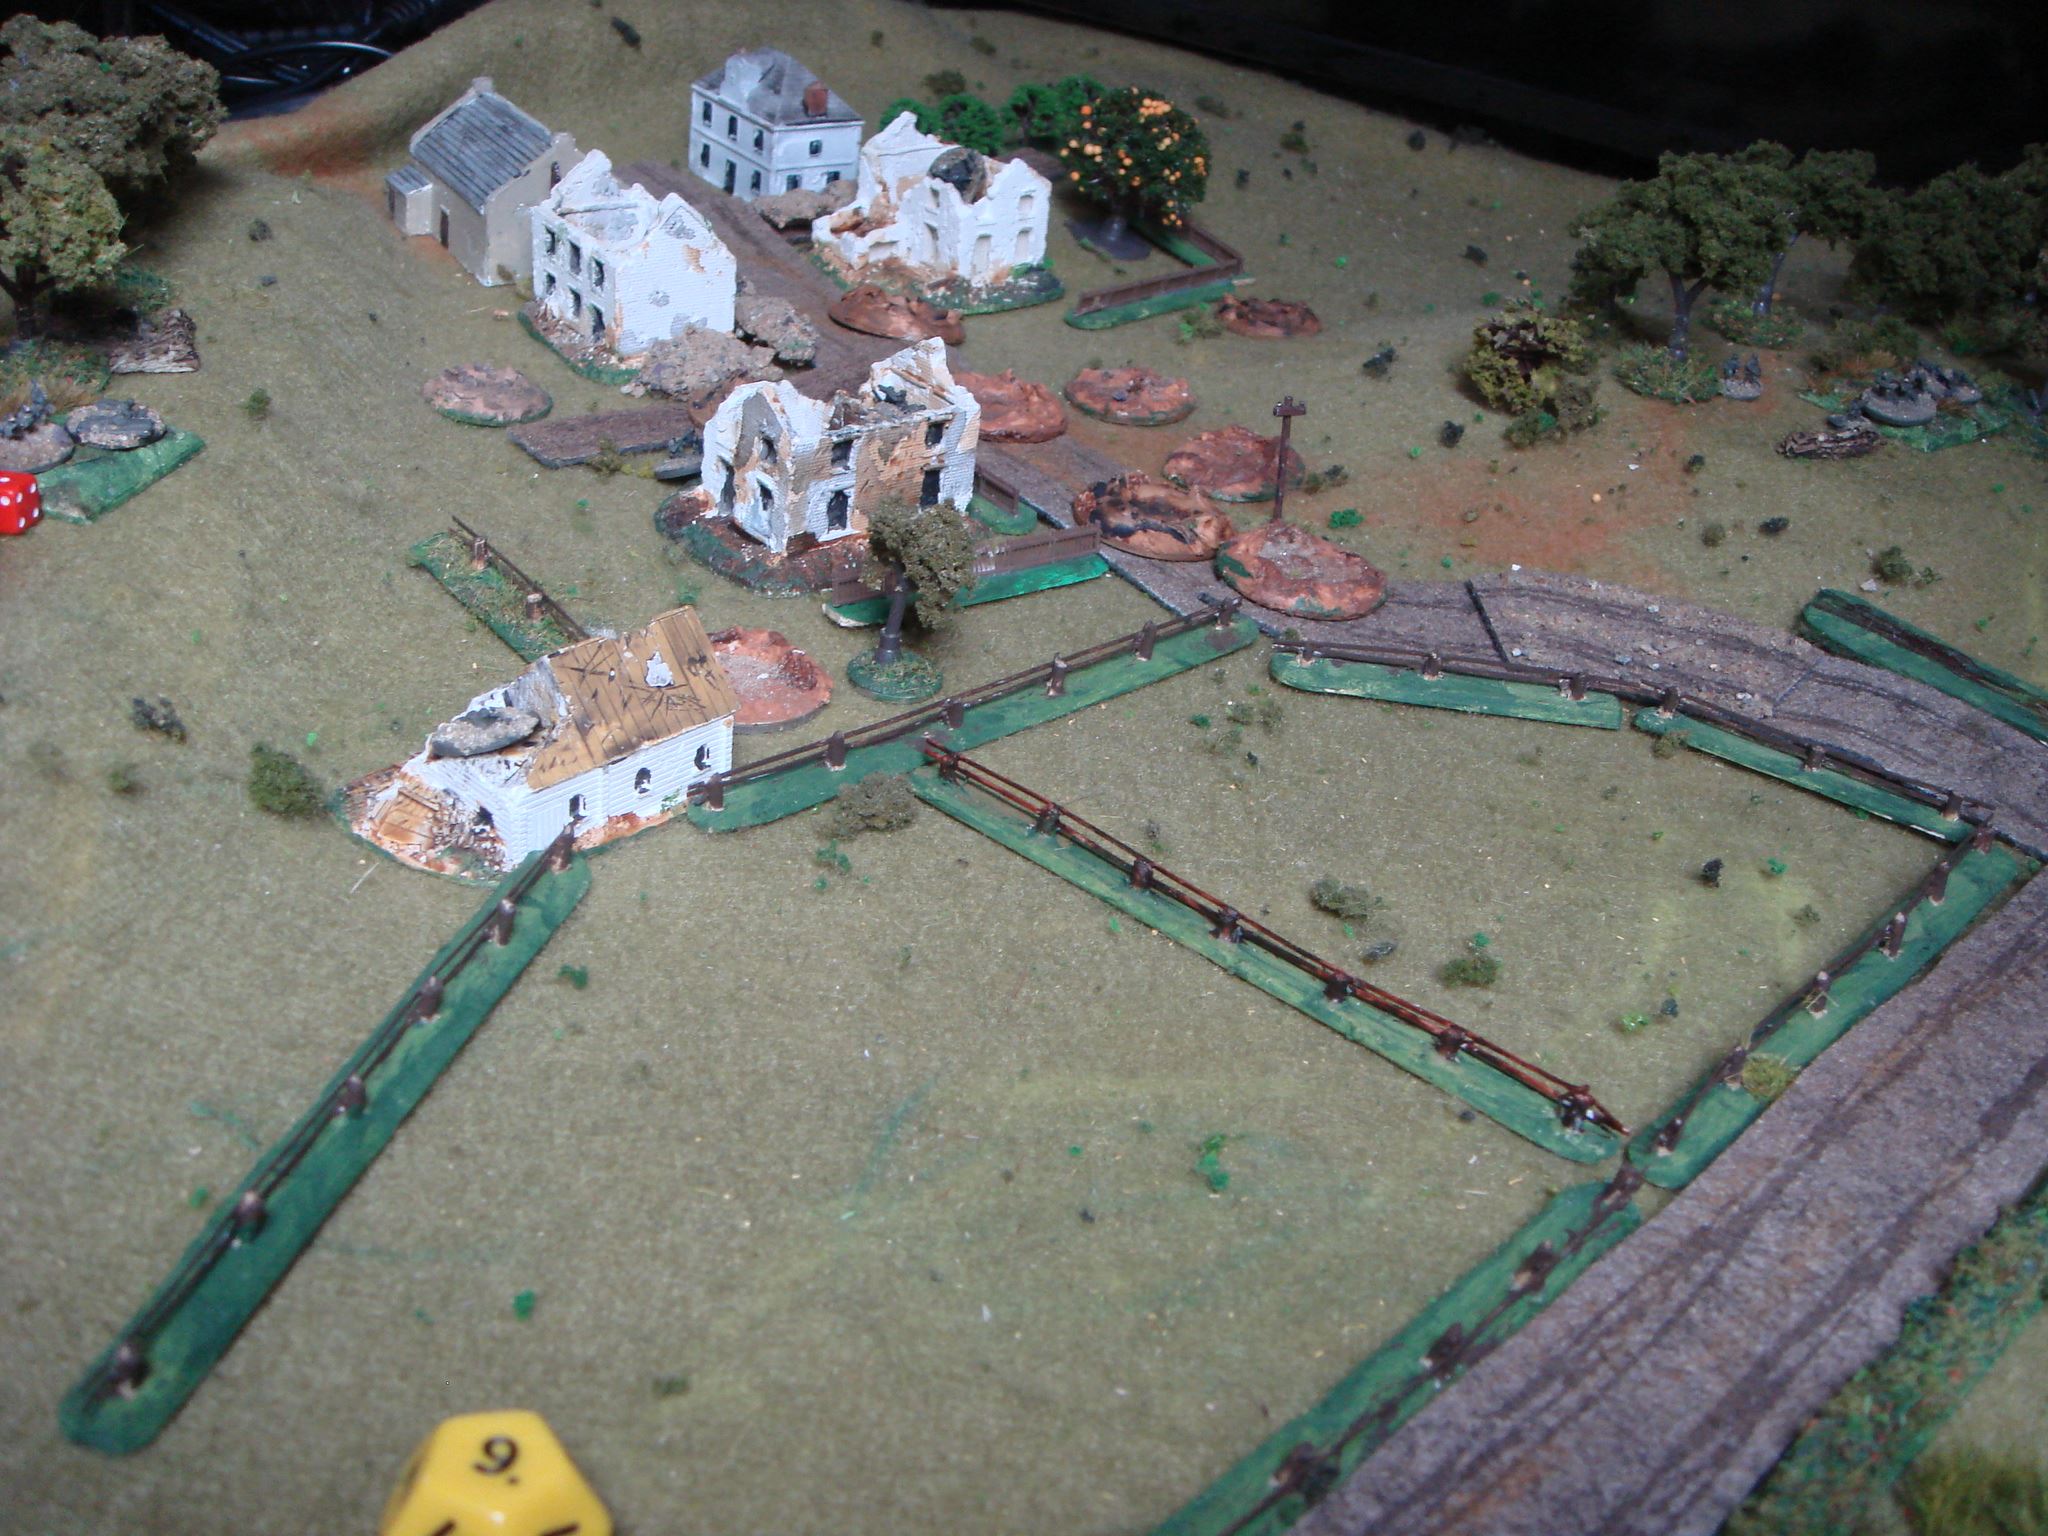
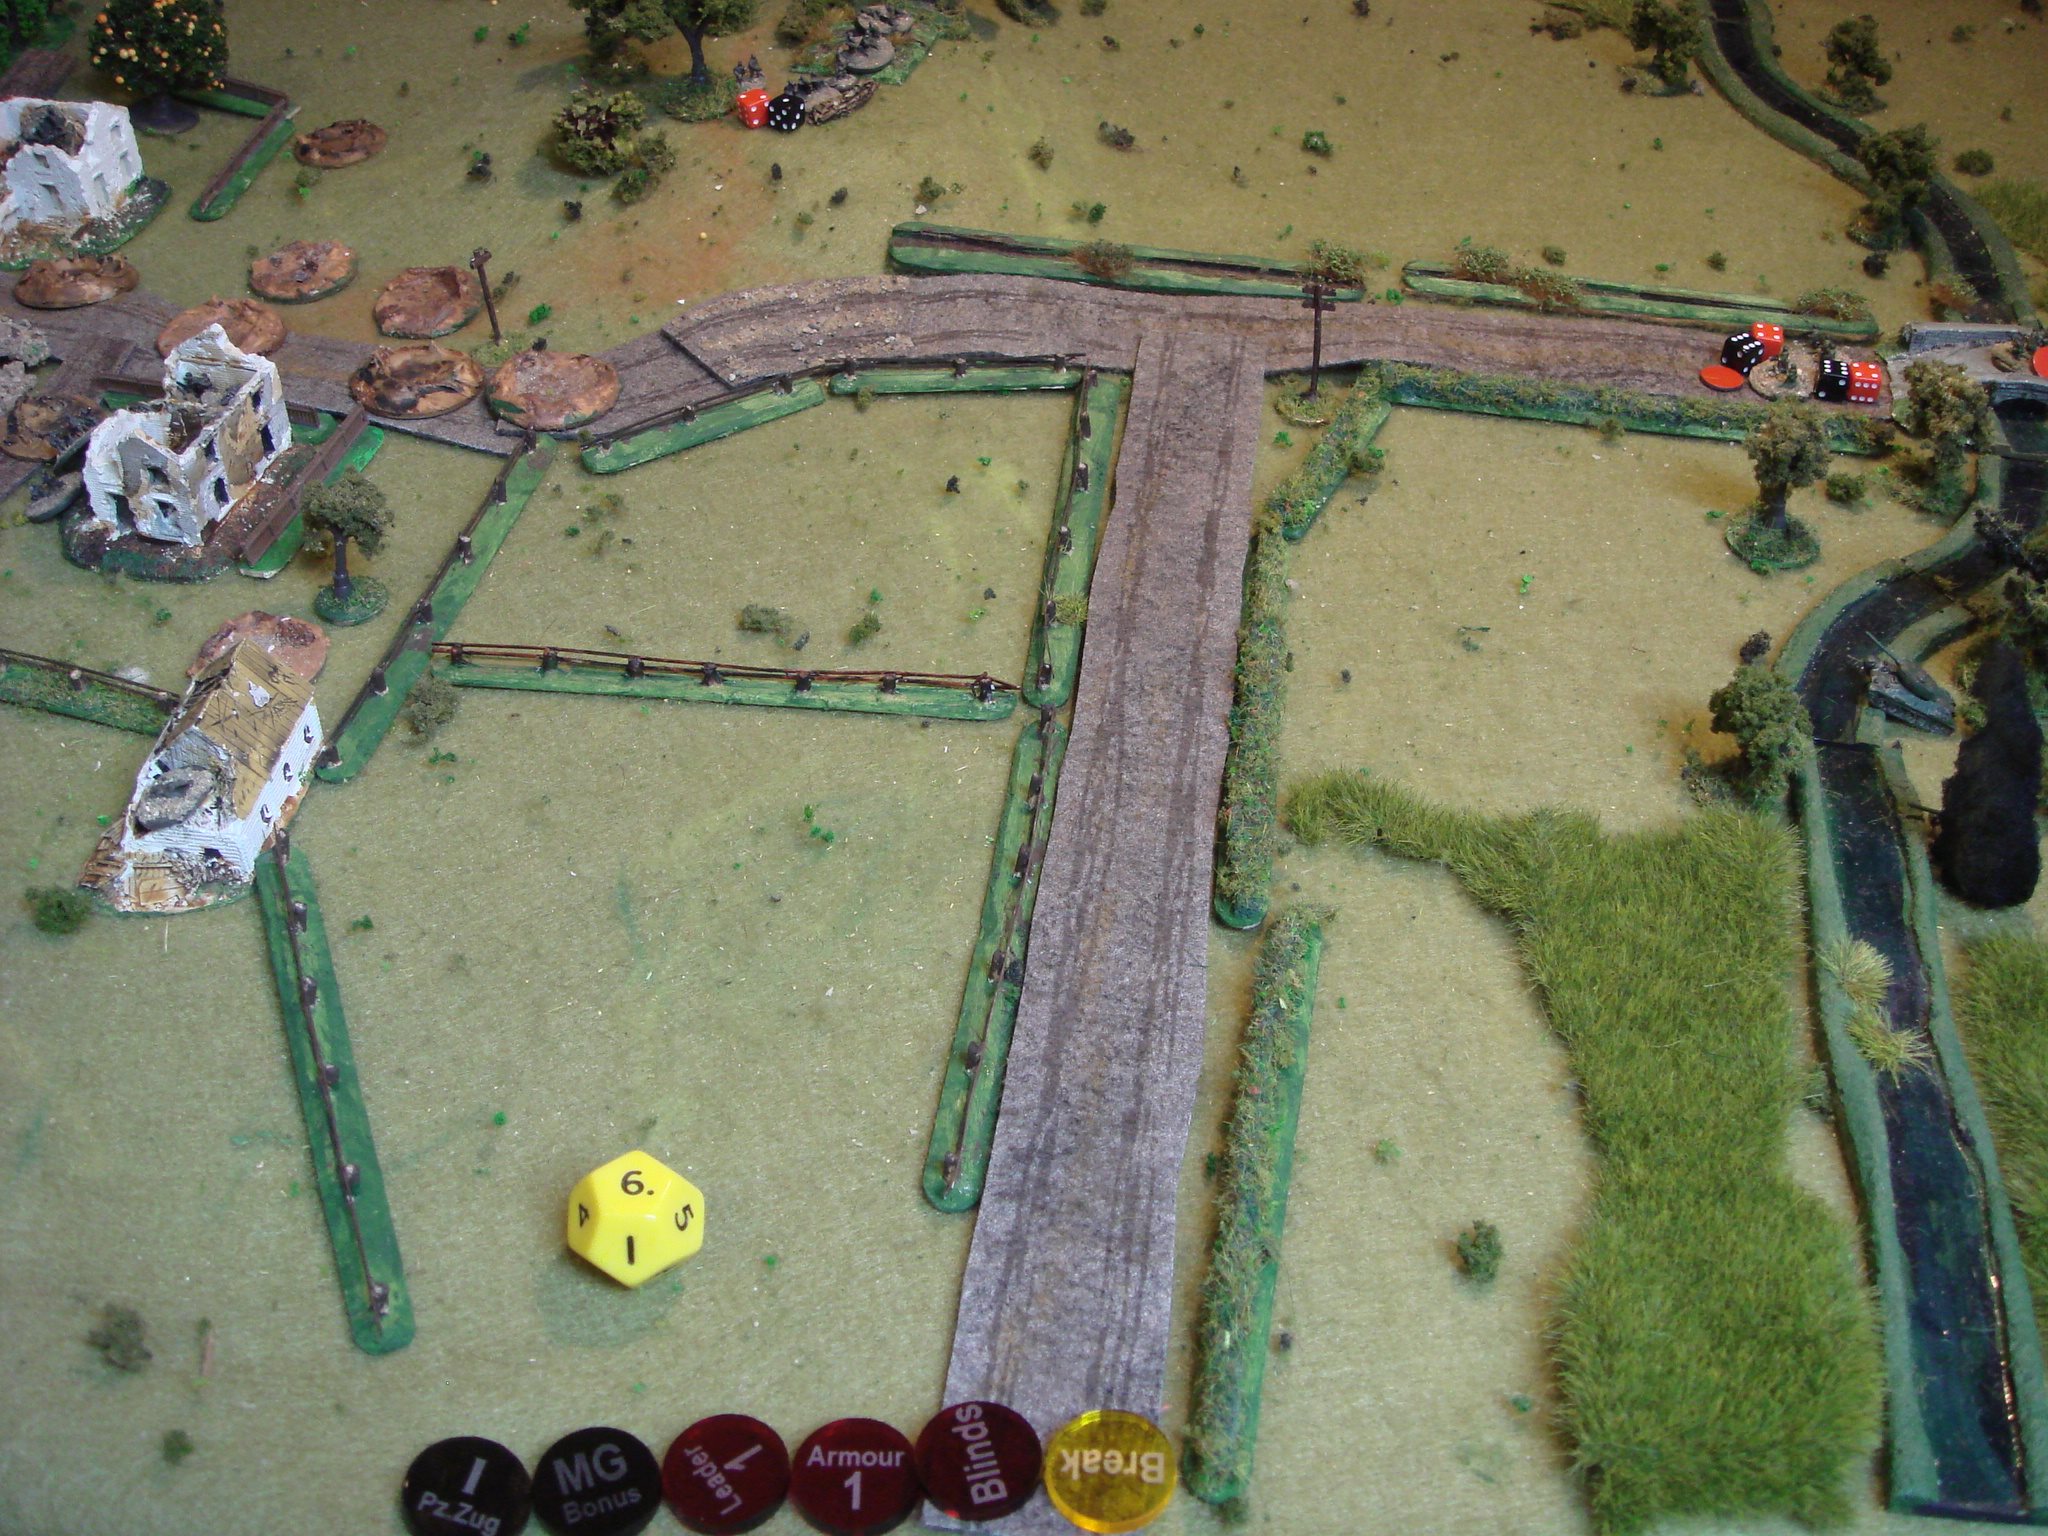
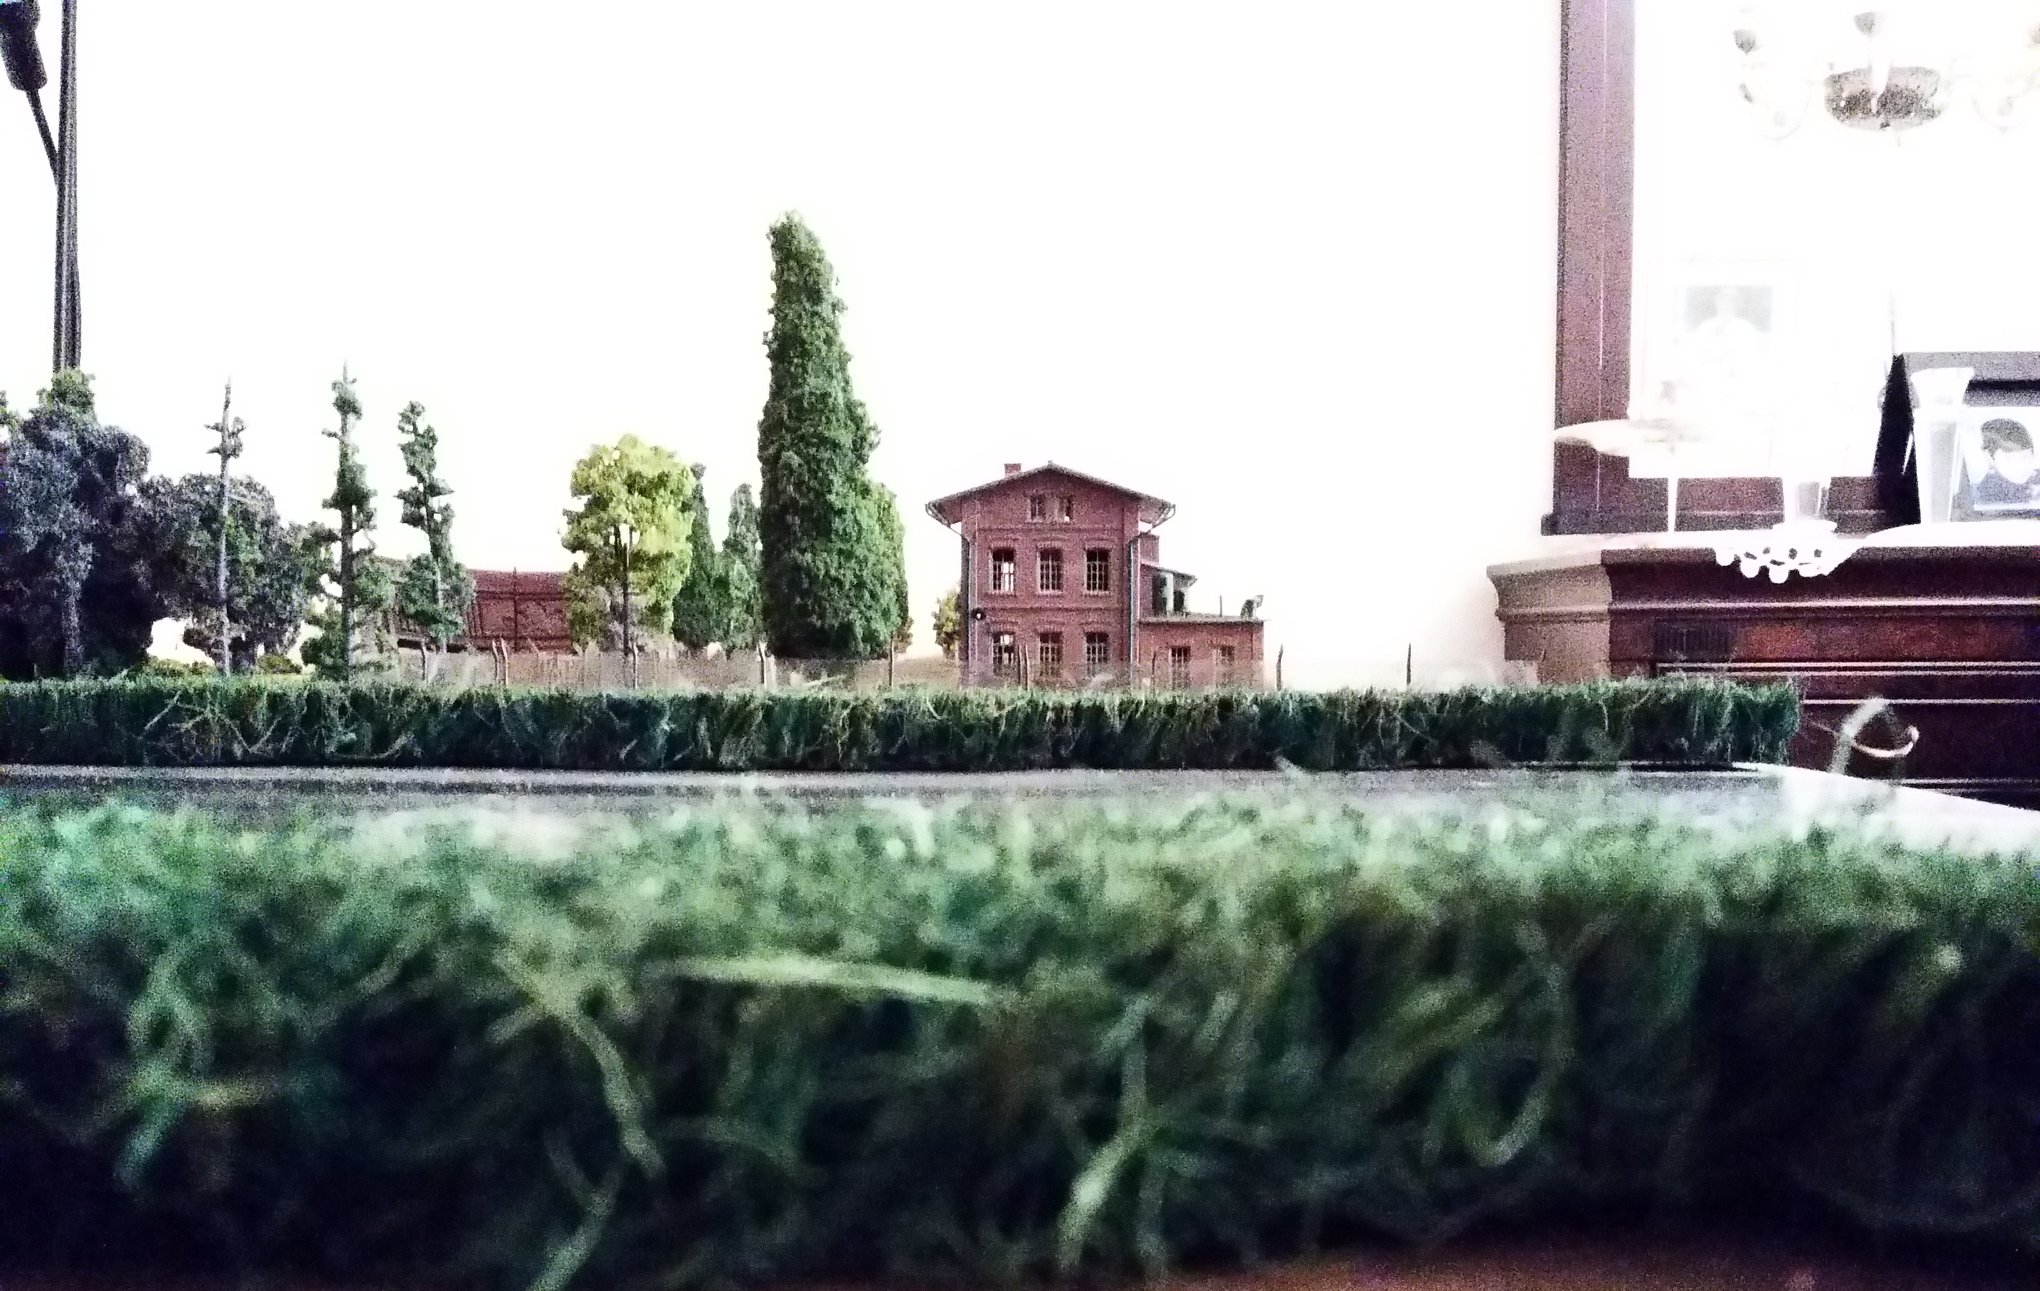
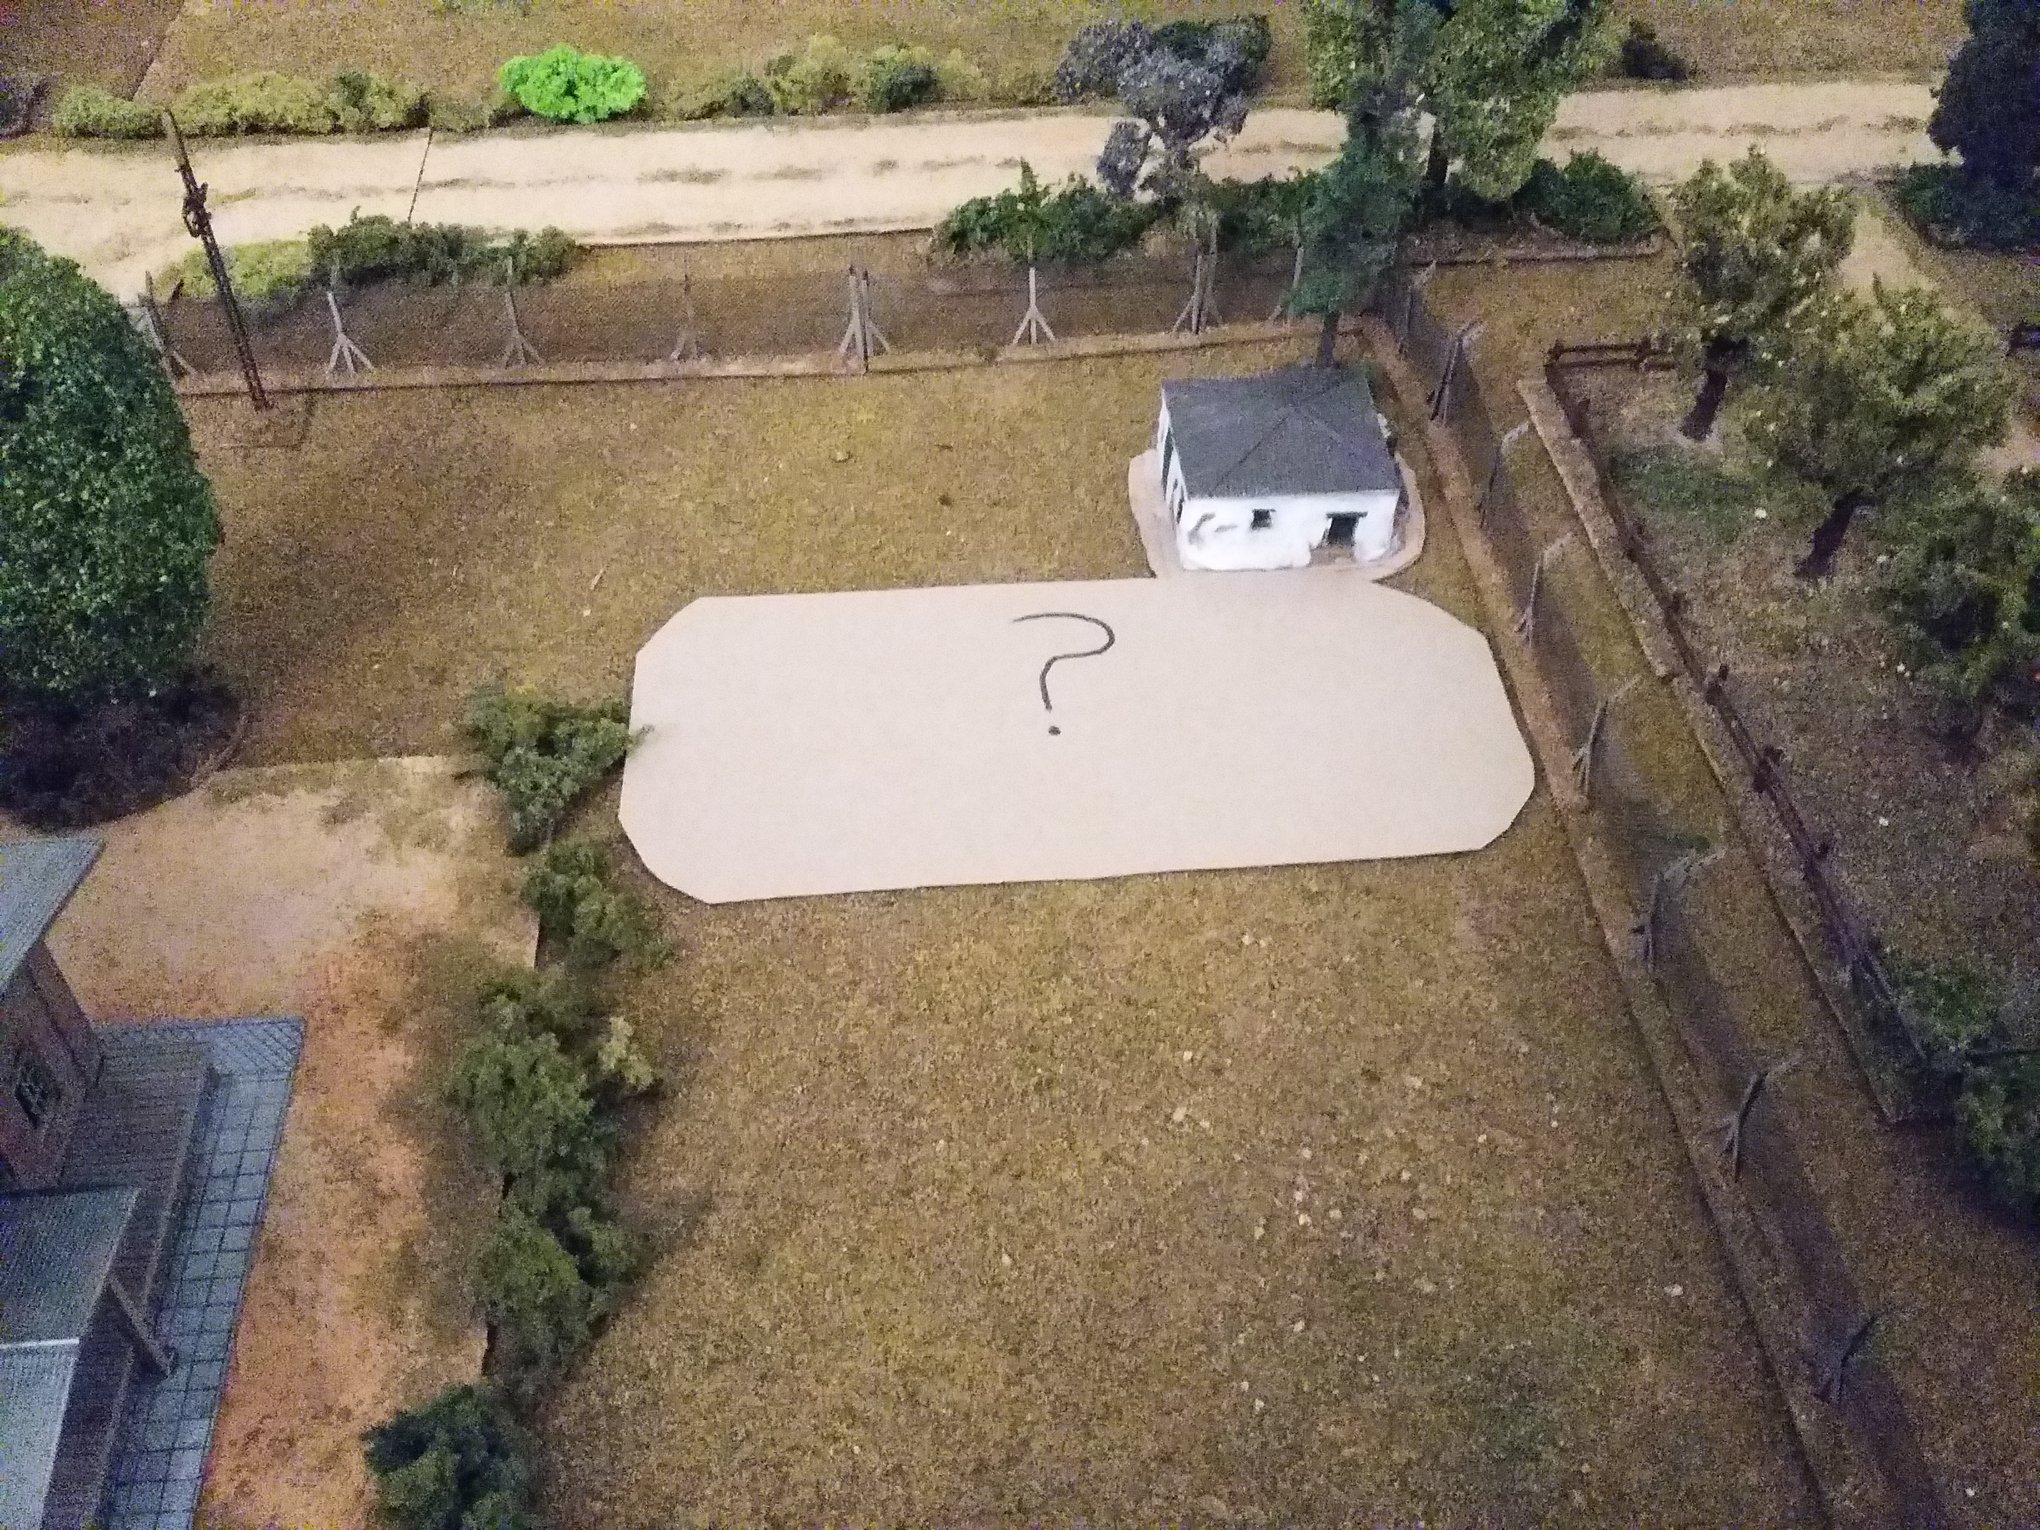
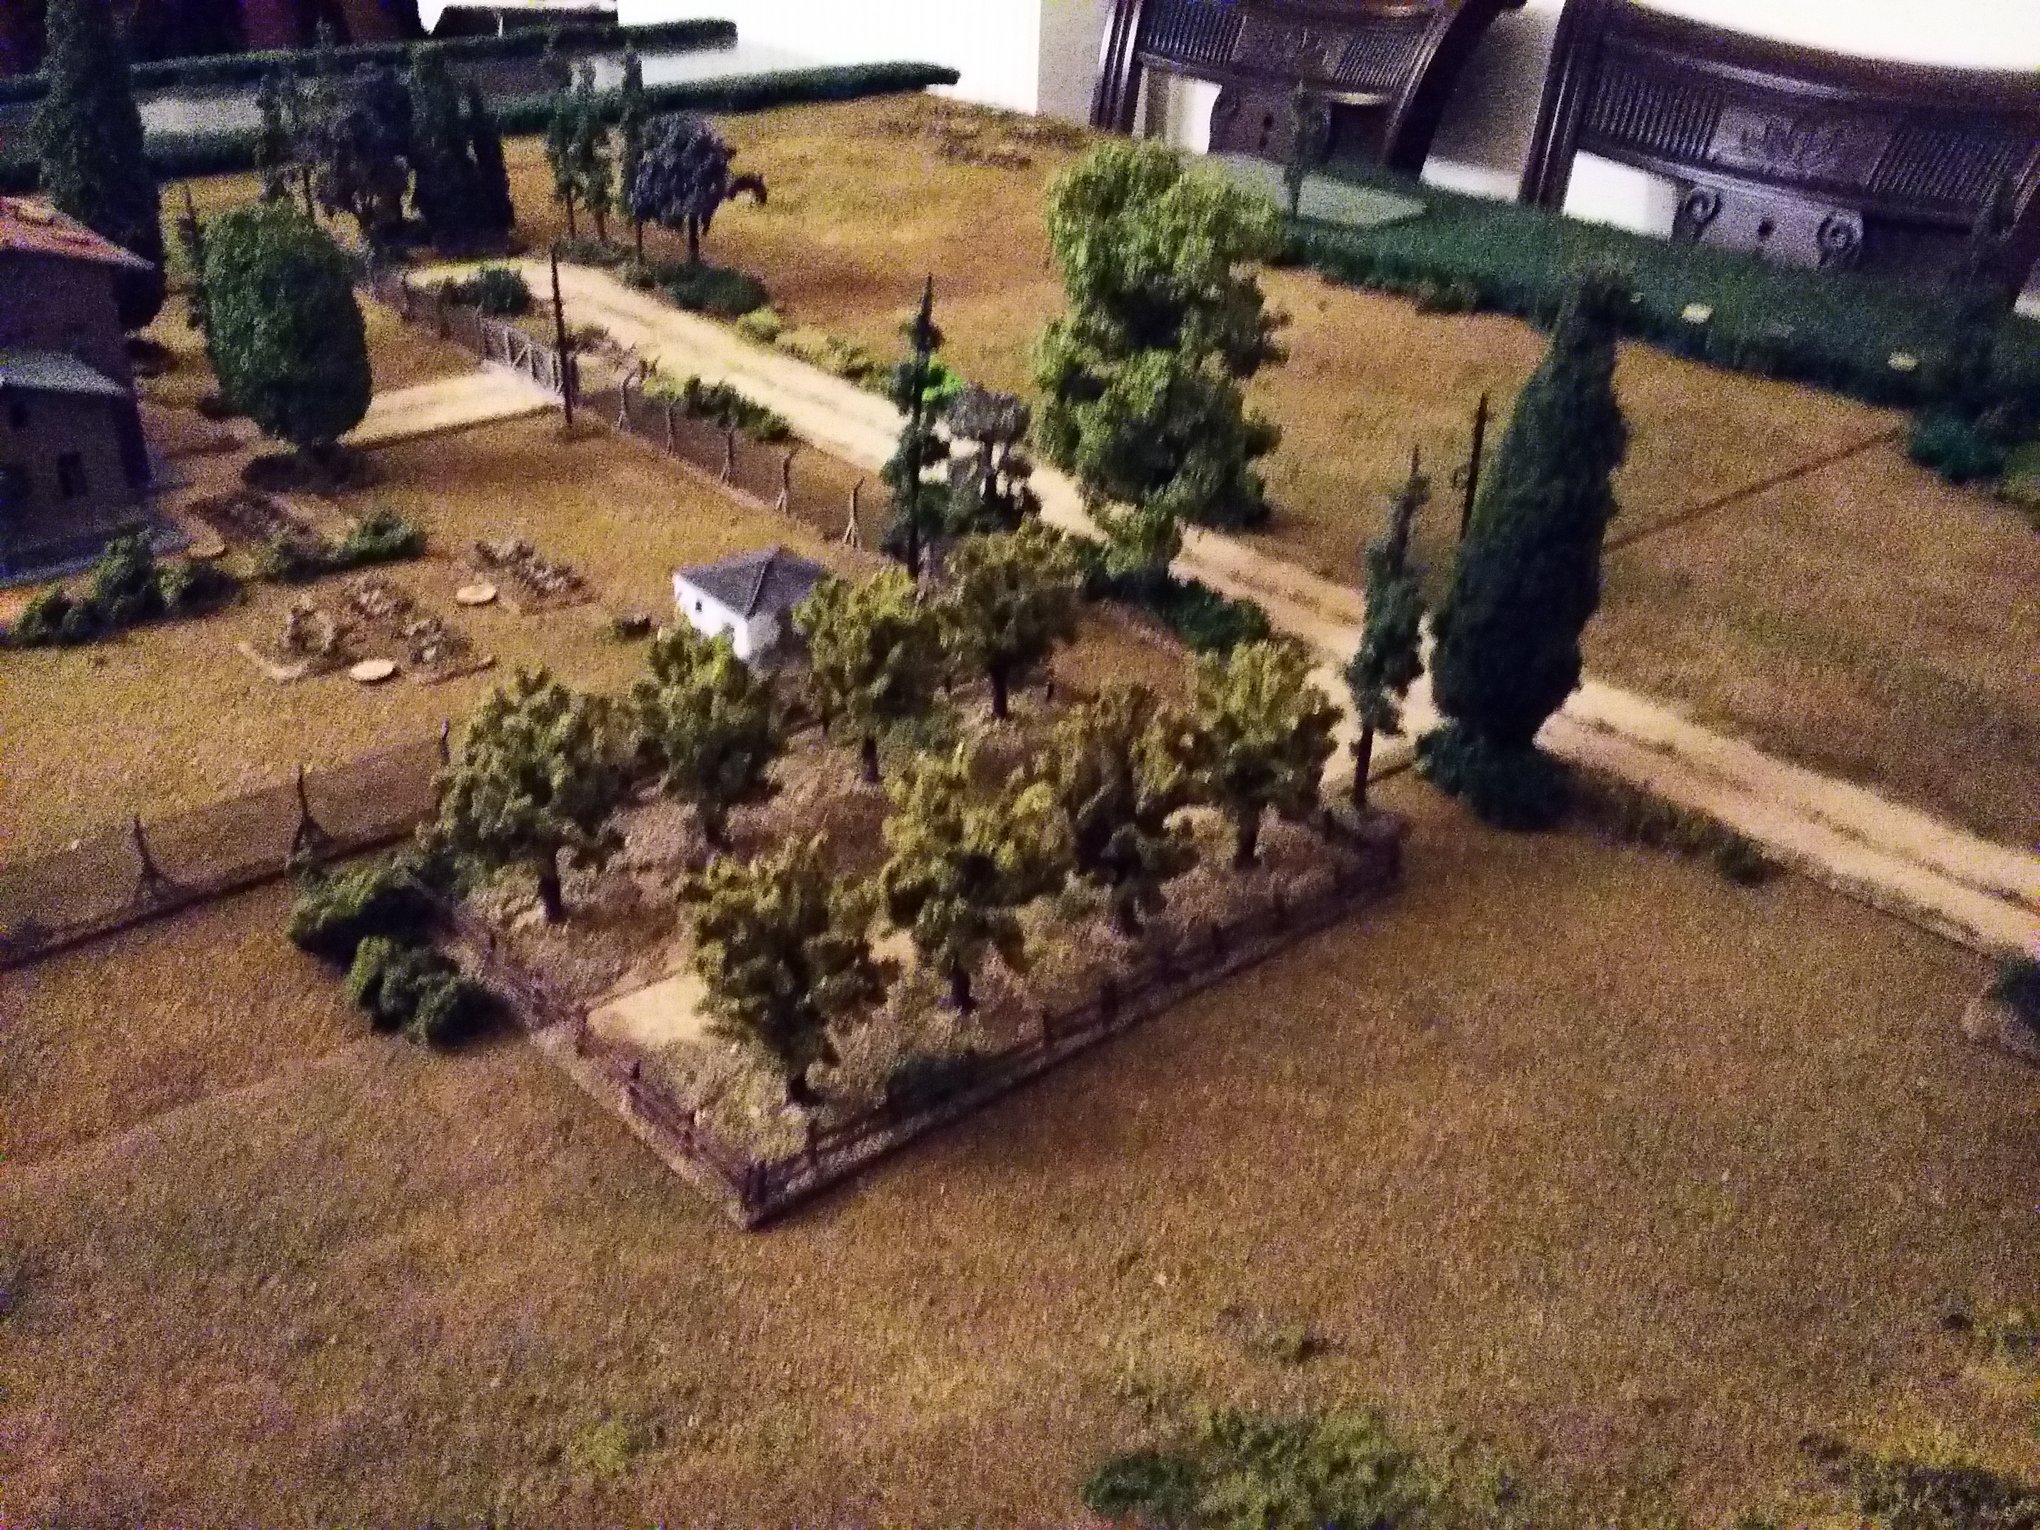
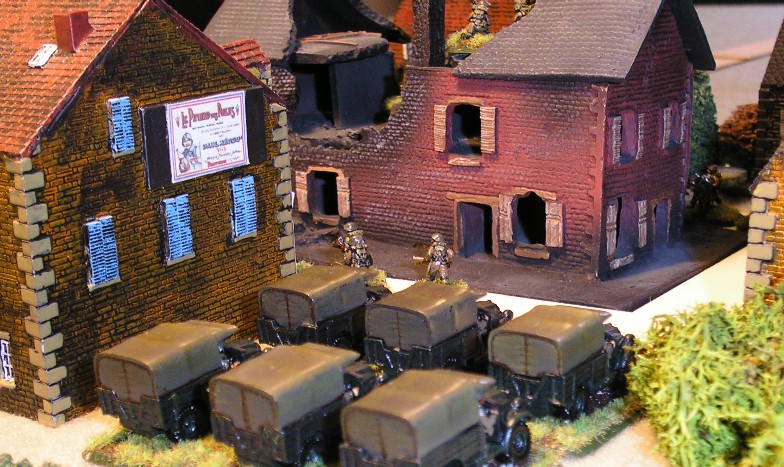
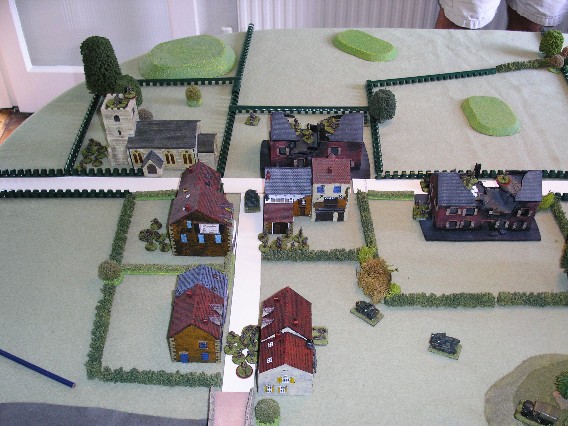
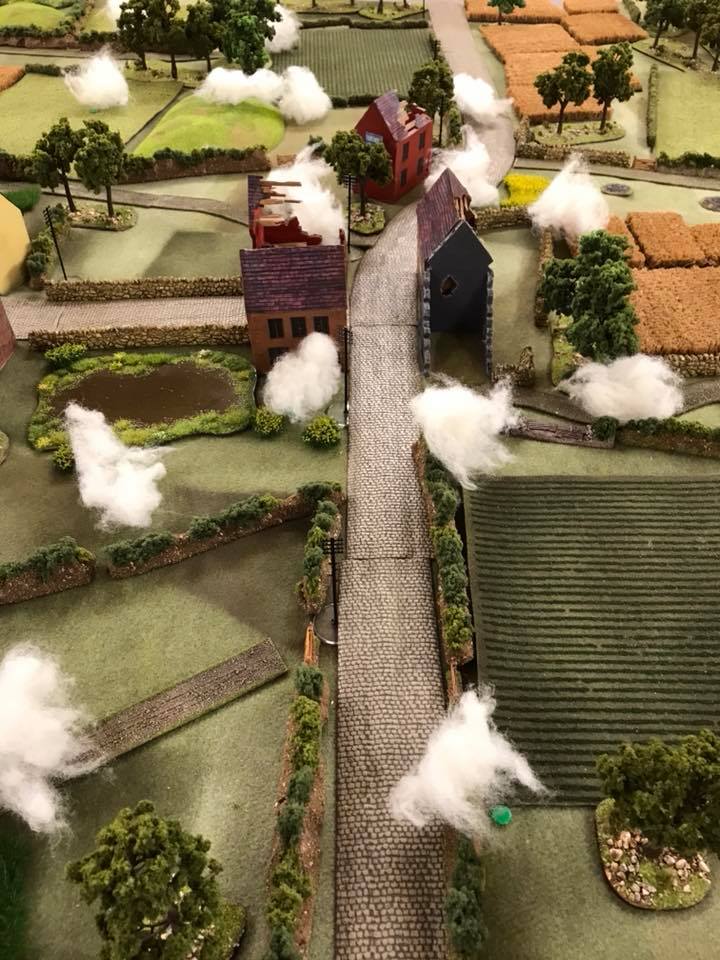
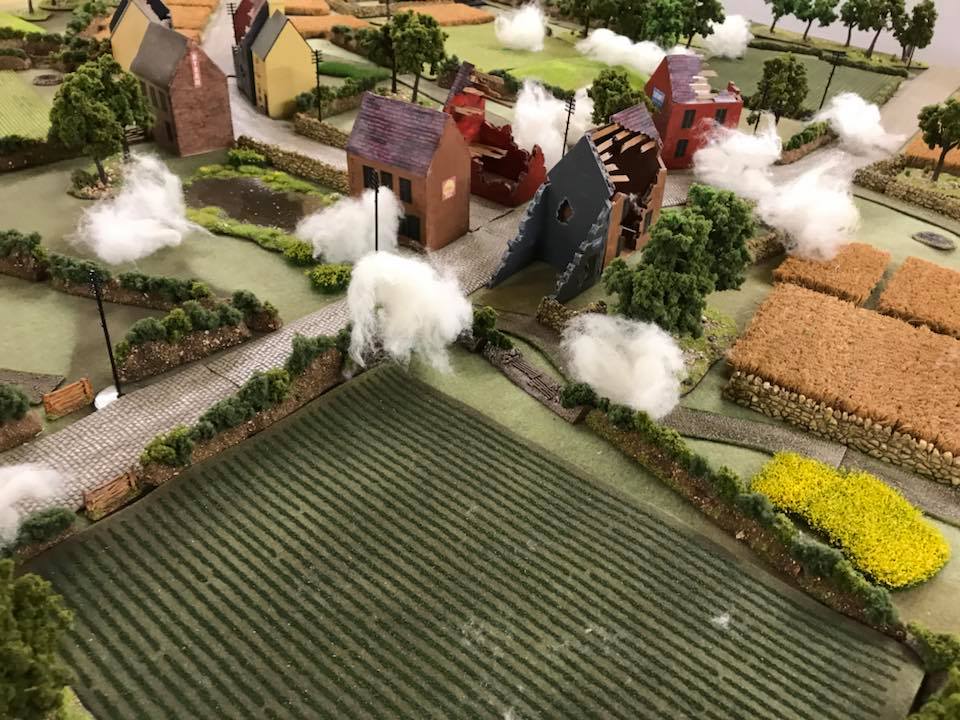
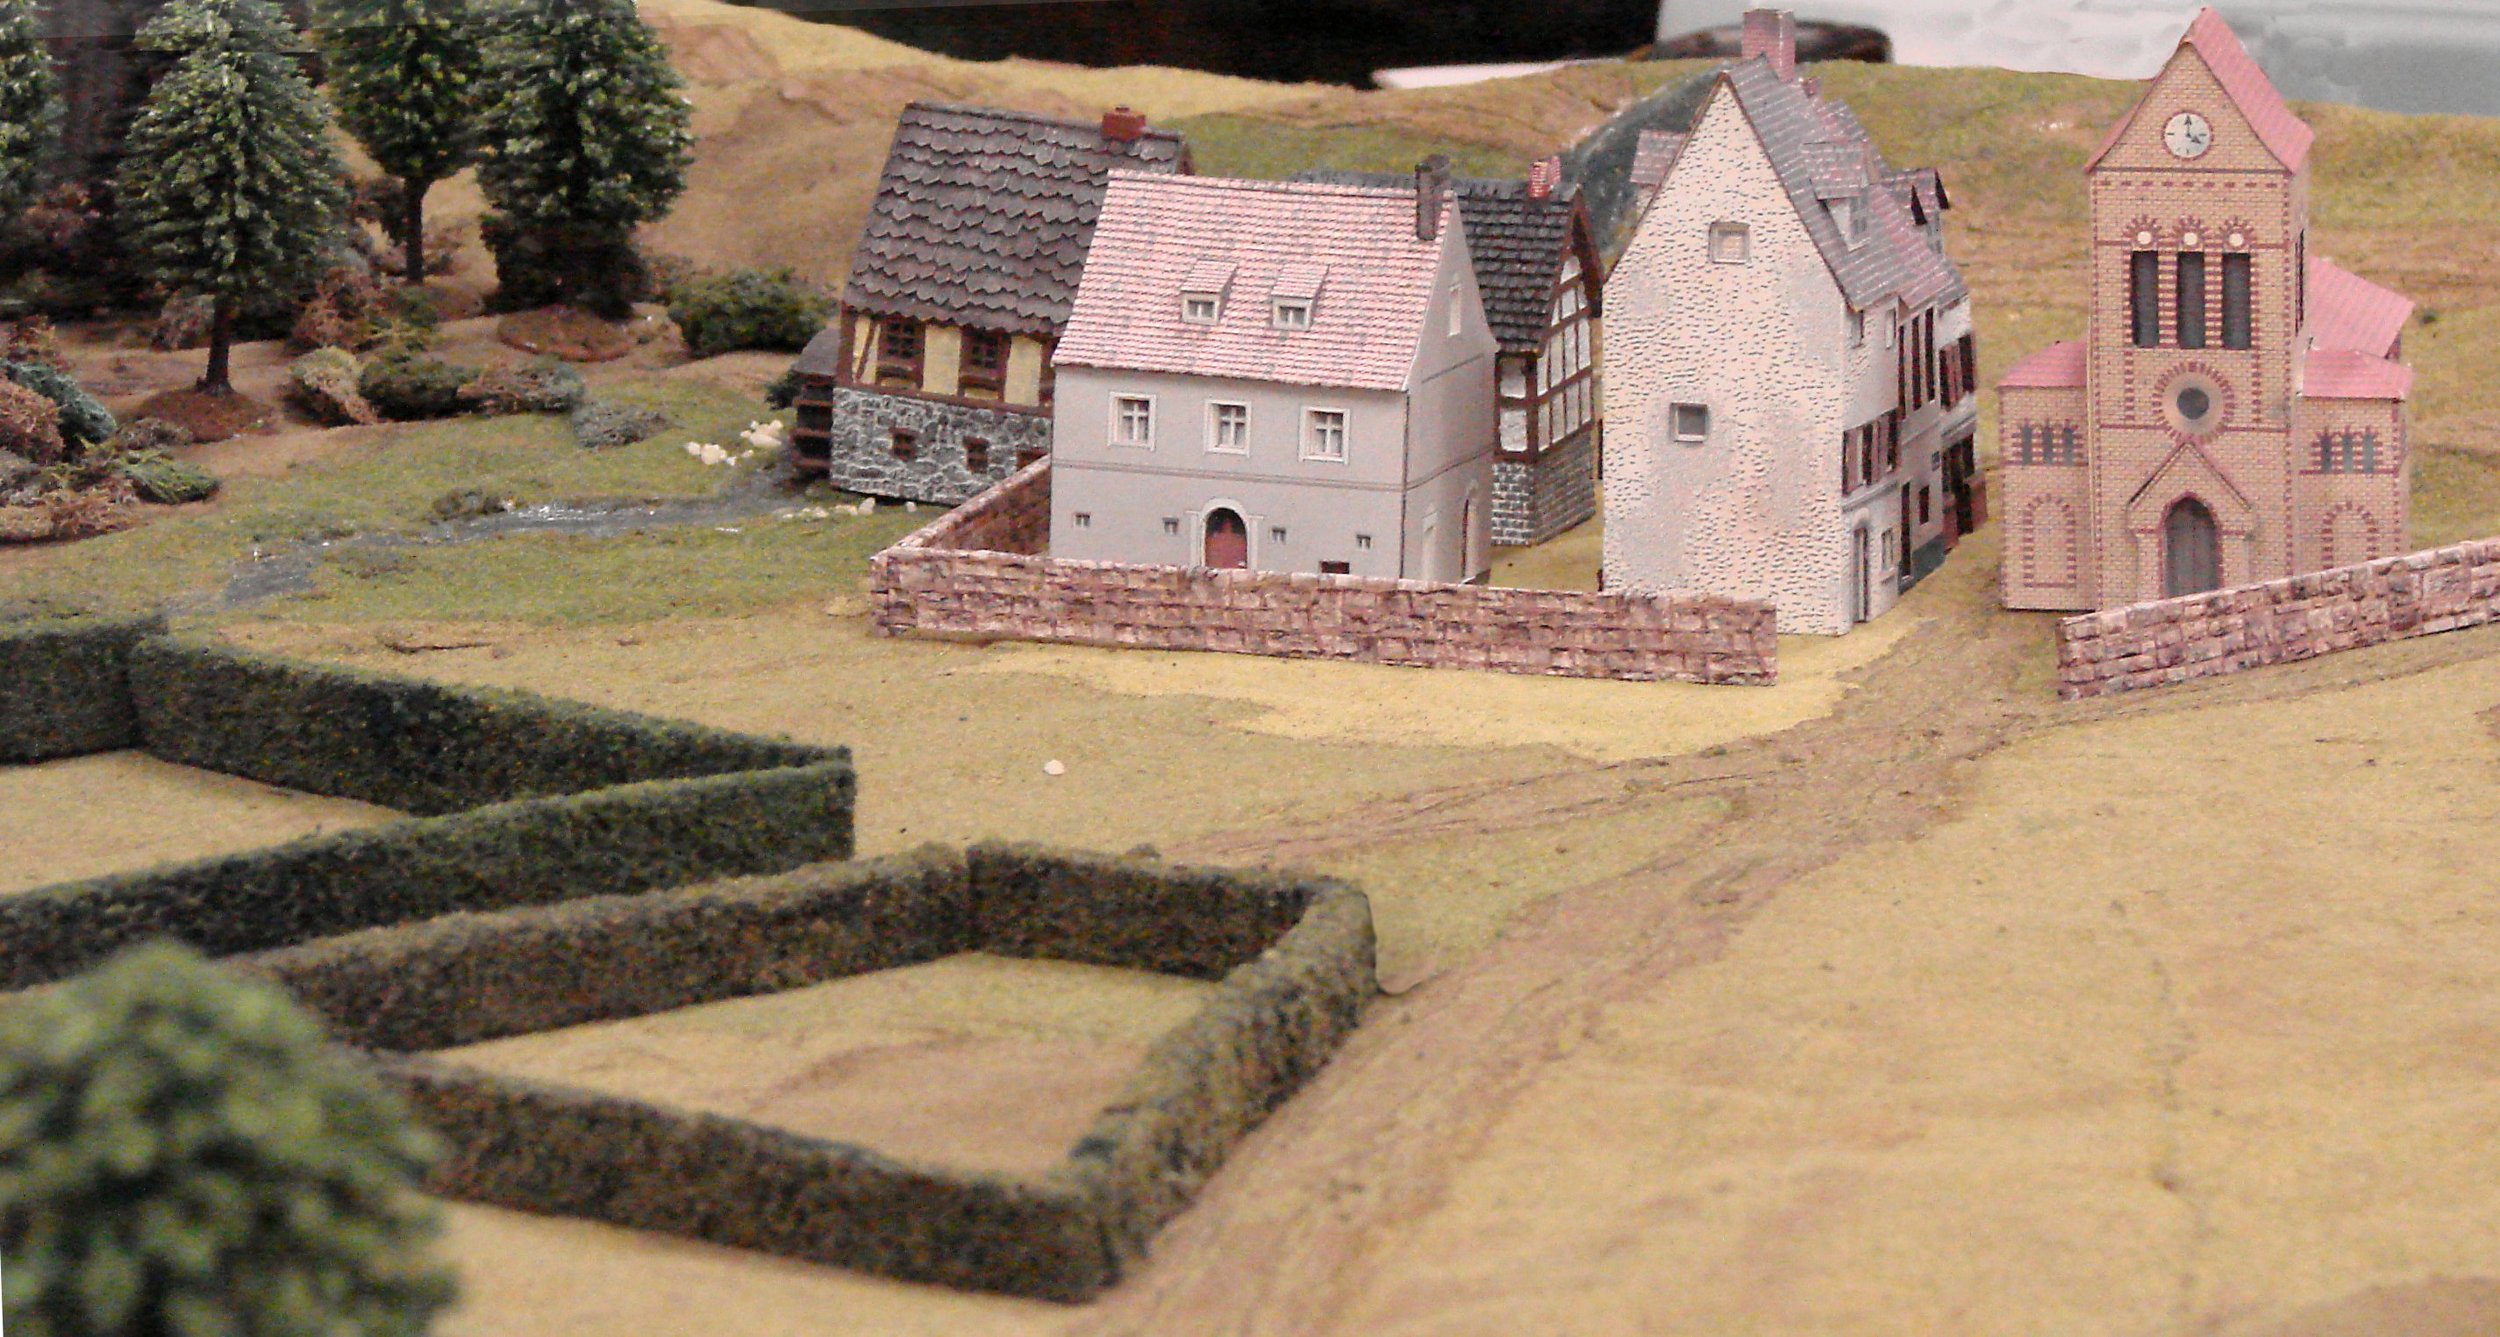
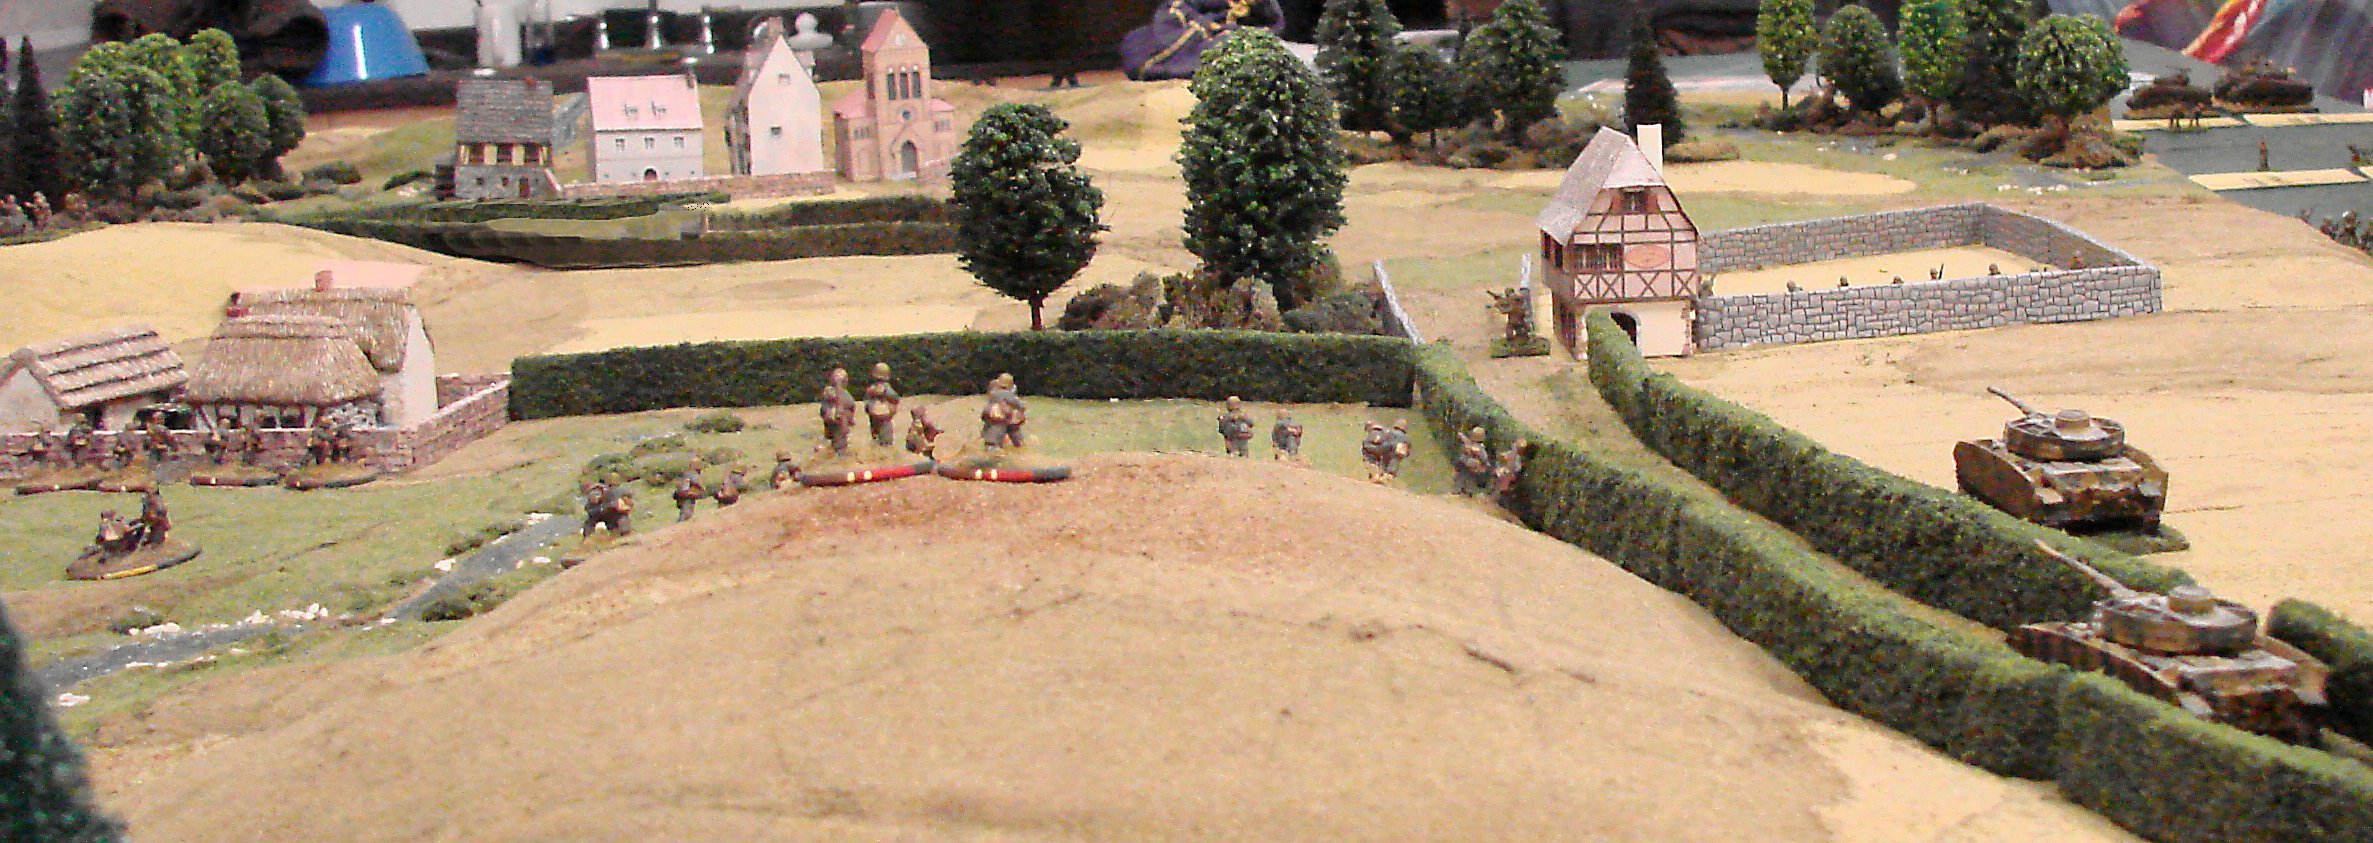
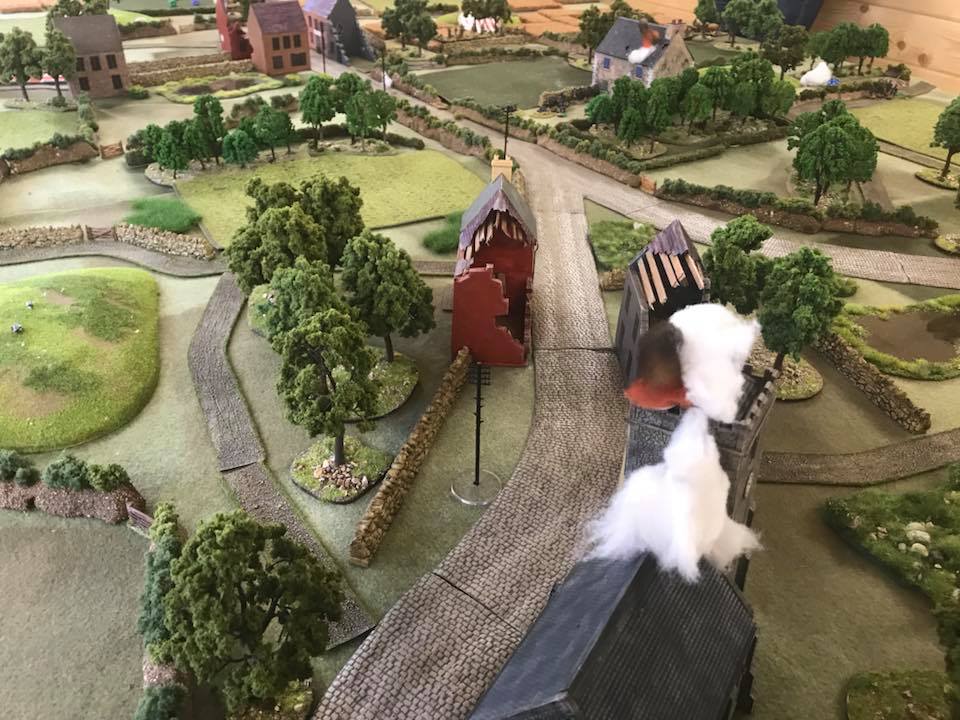
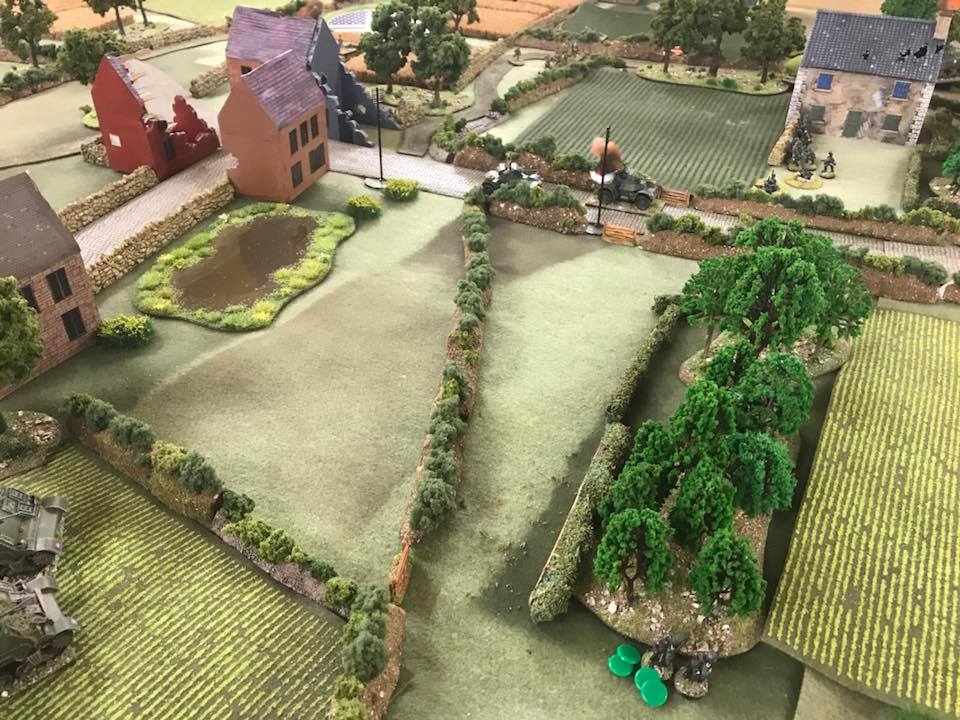
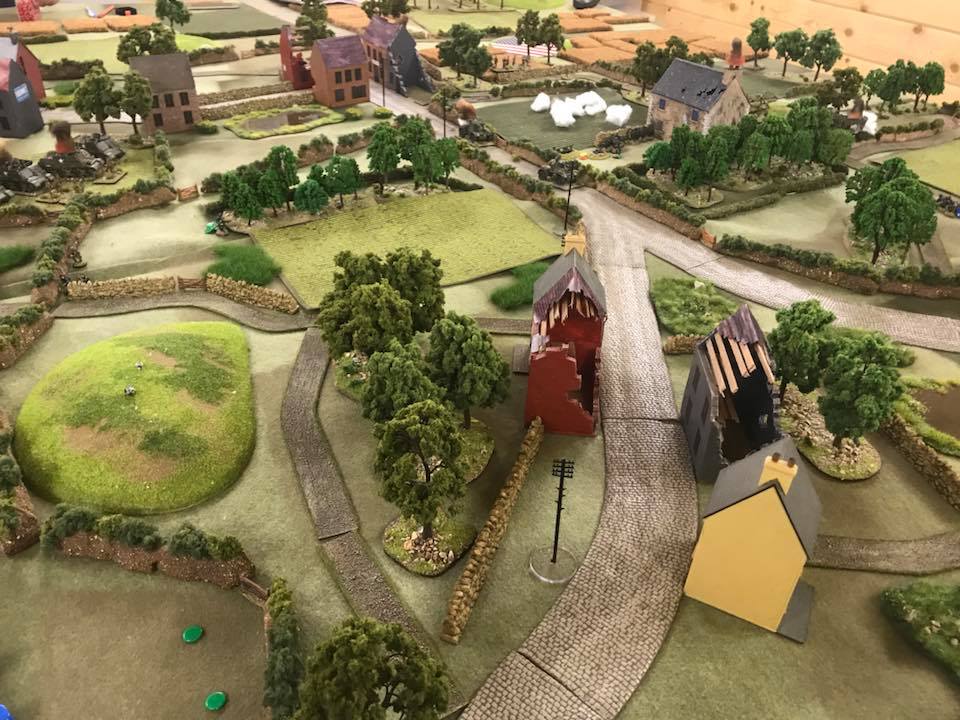
As this was an encounter scenario by two reconnaissance-in-force kampfgruppes, I declared the initial objective to be the sawmill in the centre of the village. The secondary objective would be to exit the table on the opposite edge from each side’s start position. This would obviously necessitate defeated any enemy troops encountered en route. As the Germans were somewhat outnumbered, they would start at the table’s edge closest to the mill.

As this was a big battle, and taking place in winter, I had three special rules that would apply. Firstly, each time the Blinds card appeared, a d10 was rolled: with players only able to activate that number of Blinds. The other, non-activated Blinds would be assumed to be bogged down in tackling the wind and snow.

Secondly, there were two additional cards in the pack: the Snowdrift card and the Blizzard card. When the Snowdrift card was pulled, the next unit card out of the pack would be unable to move, being caught in a snowdrift. It could fire or spot, but not move. Once that unit’s activation was completed, both cards would then go into the discard pile. When the Blizzard card was pulled, the next unit card out of the pack could do nothing – being caught in a mini-blizzard – with both cards immediately going into the discard pile.

Thirdly and finally, as we were all on a 3½ hour time limit, we would use the force morale rules from Chain of Command adapted for IABSM from one of the recent Specials (and also used in several of the scenarios in the second September War scenario pack). For those of you unfamiliar with the mechanic, both sides started with ten force morale points; each time something bad happened to them (the loss of a Big Man or an AFV or an infantry squad etc) a dice was rolled, with certain results reducing the side’s force morale points by one or two points. Once force morale reached zero, that side would retreat from the battlefield.

Initial Moves

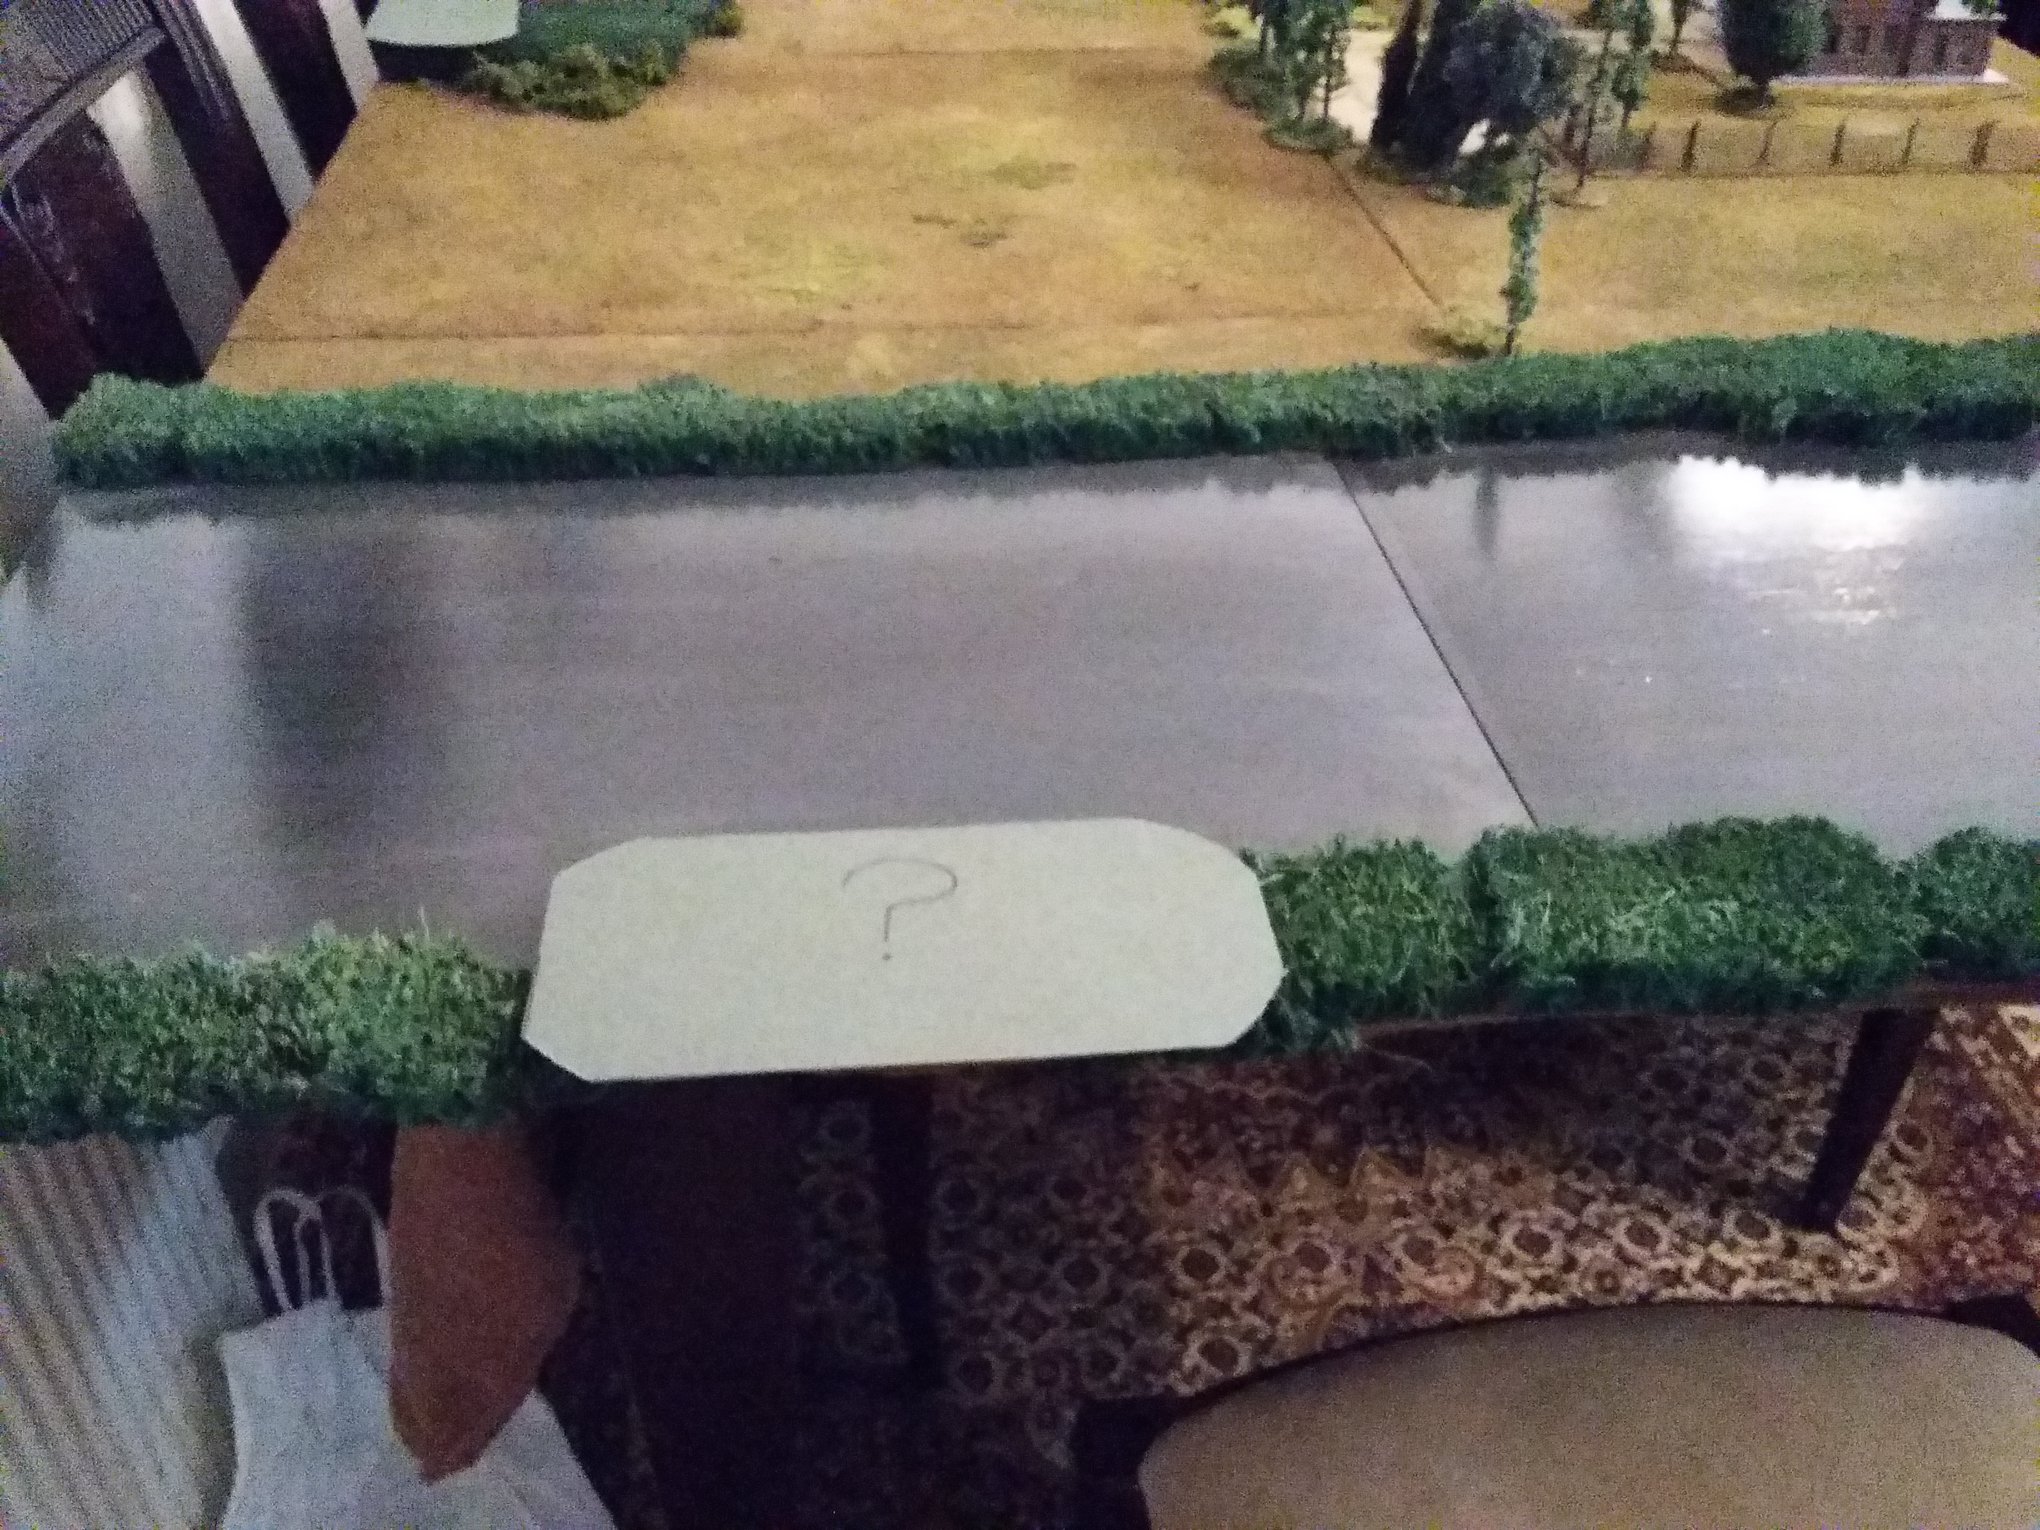
The game began with both players making a complete Blinds move onto the table with all their Blinds.

The Germans decided to split their armour, the StuGs on the right and the Hetzers on the left, and pack their infantry into the middle. Their plan was to take advantage of their initial advantage and get to the sawmill as soon as possible and then halt and defend from there. They would allow the Soviets to destroy themselves on their defence, and then carry out their secondary objective once the enemy were sufficiently weakened.

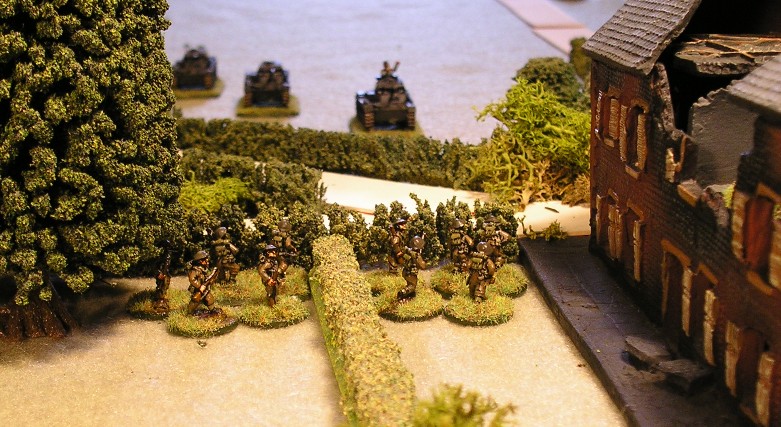
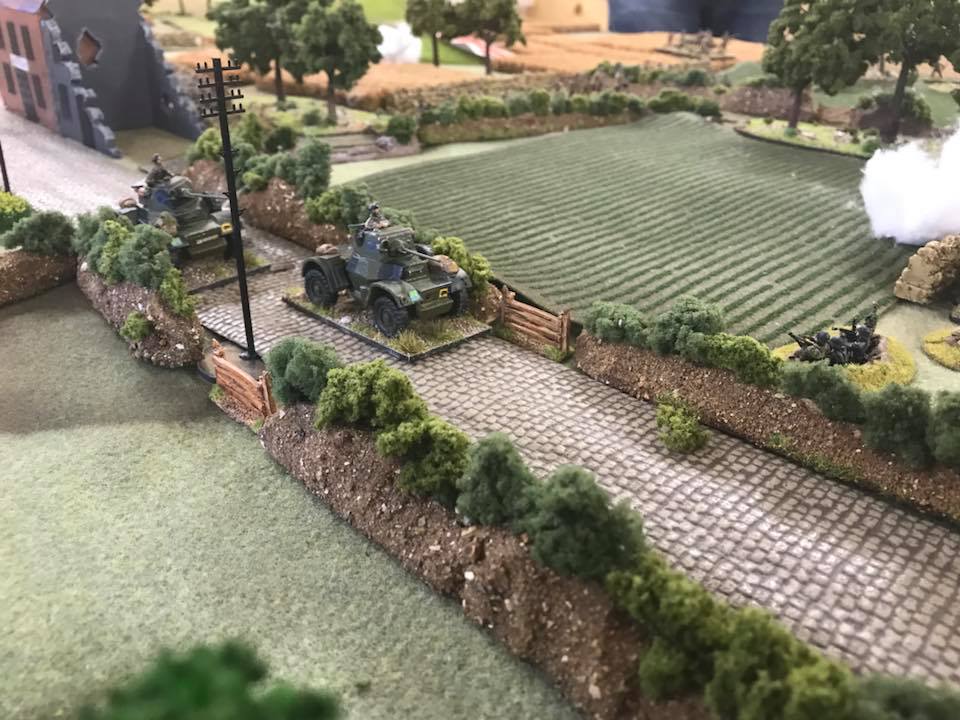
The Soviet plan involved sending their reconnaissance units forward to find the enemy, and then a broad advance right across the front: the Soviet steam roller in action. His armoured cars and scouts were therefore in front, with his infantry and armour evenly spread out in a line behind them.

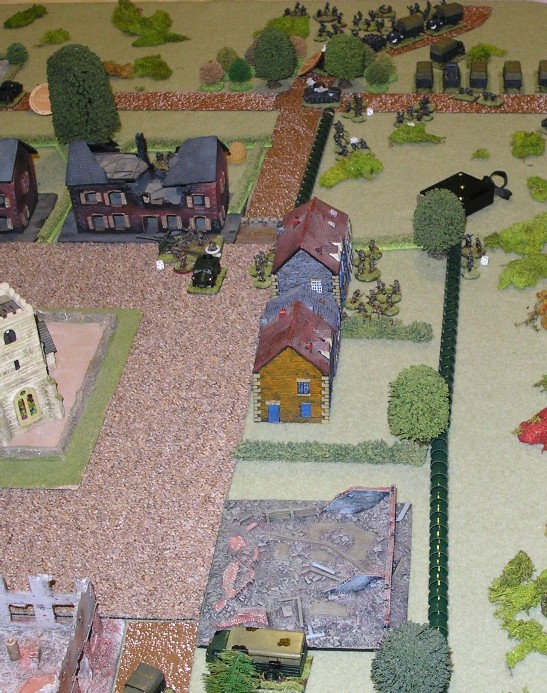
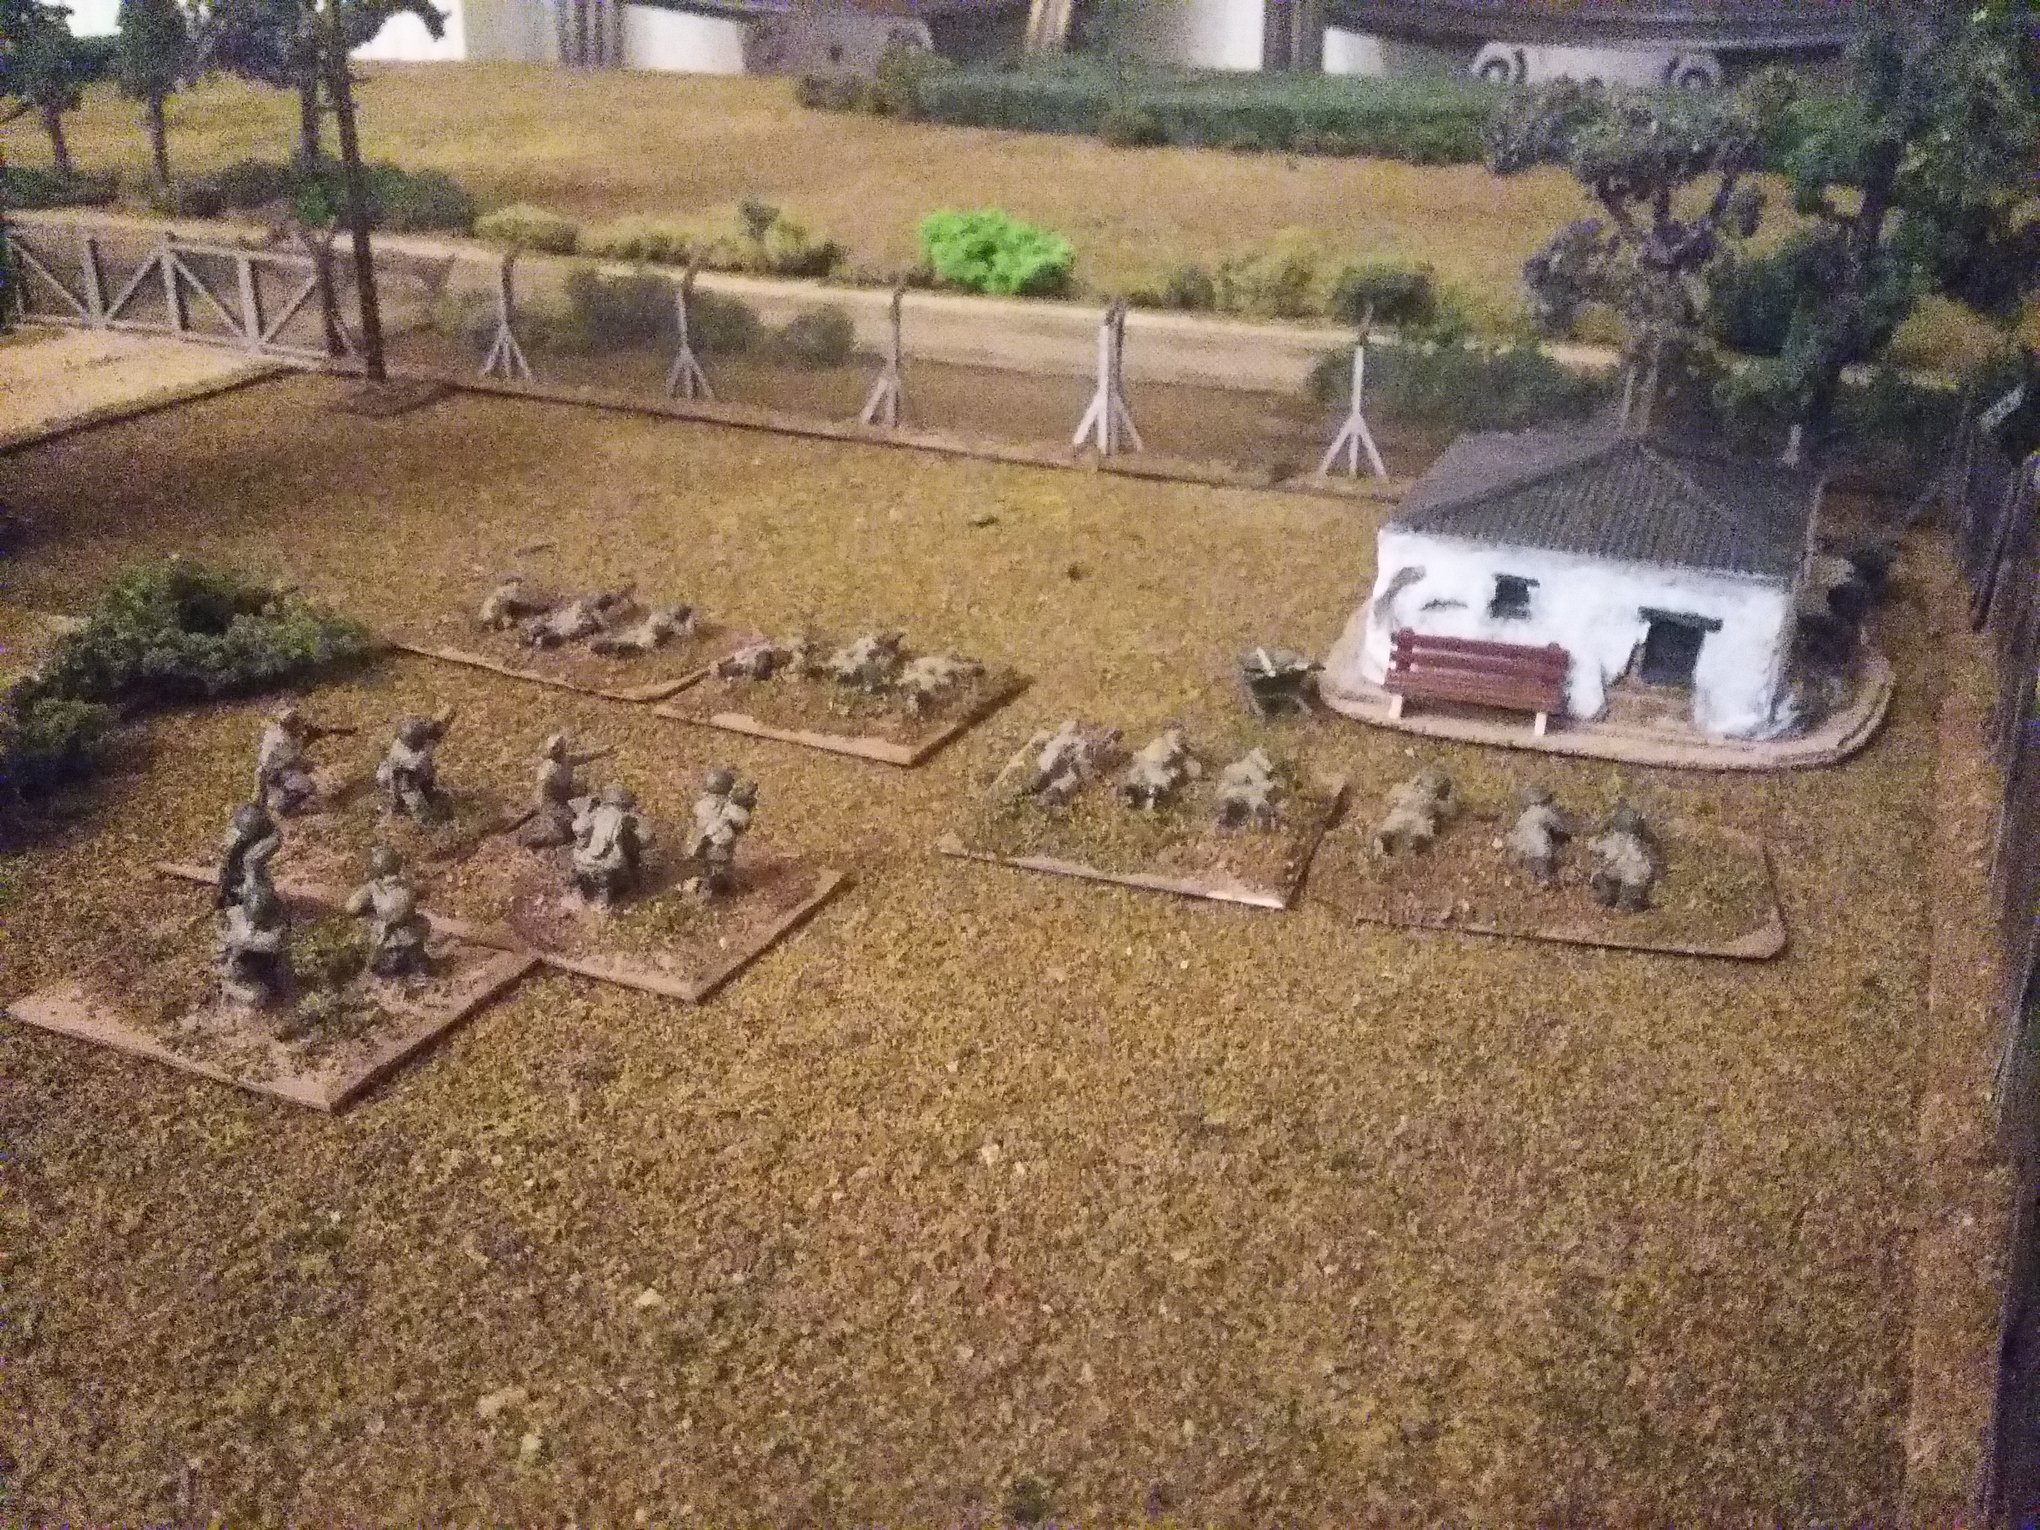
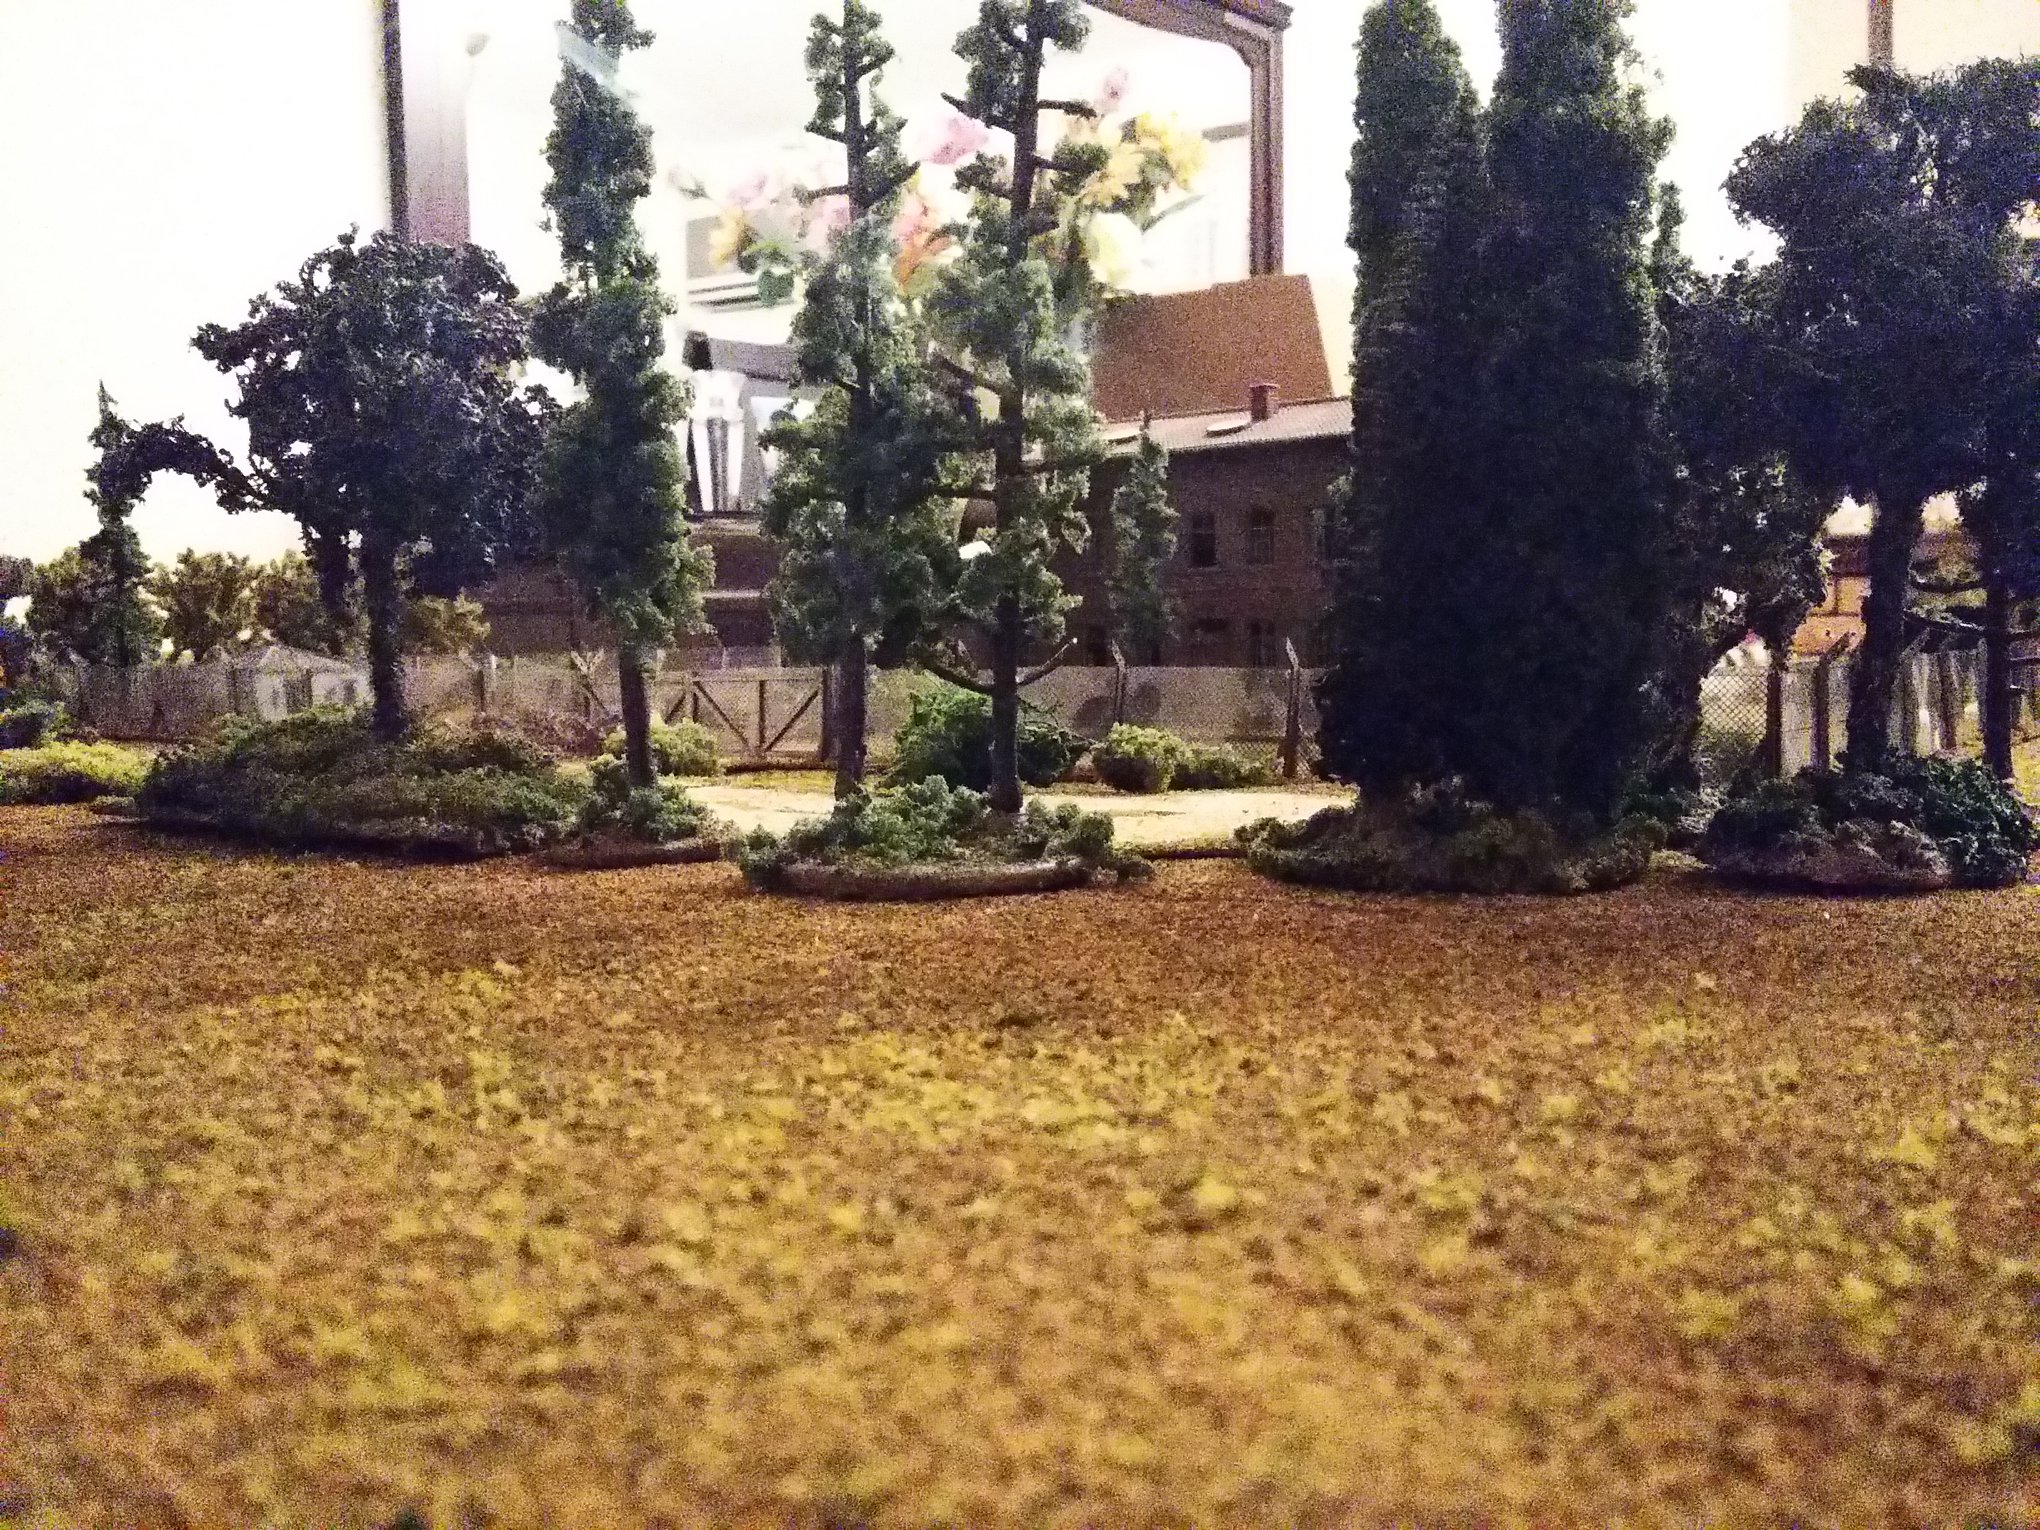
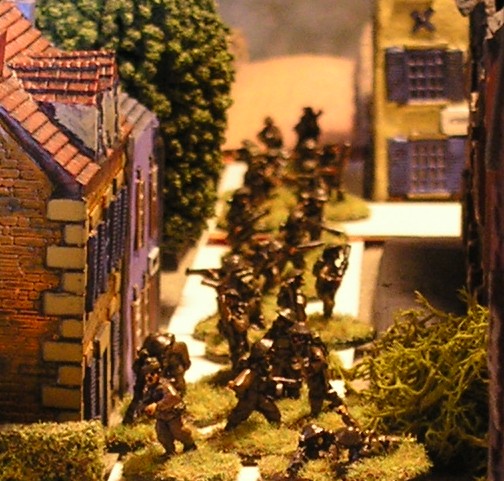
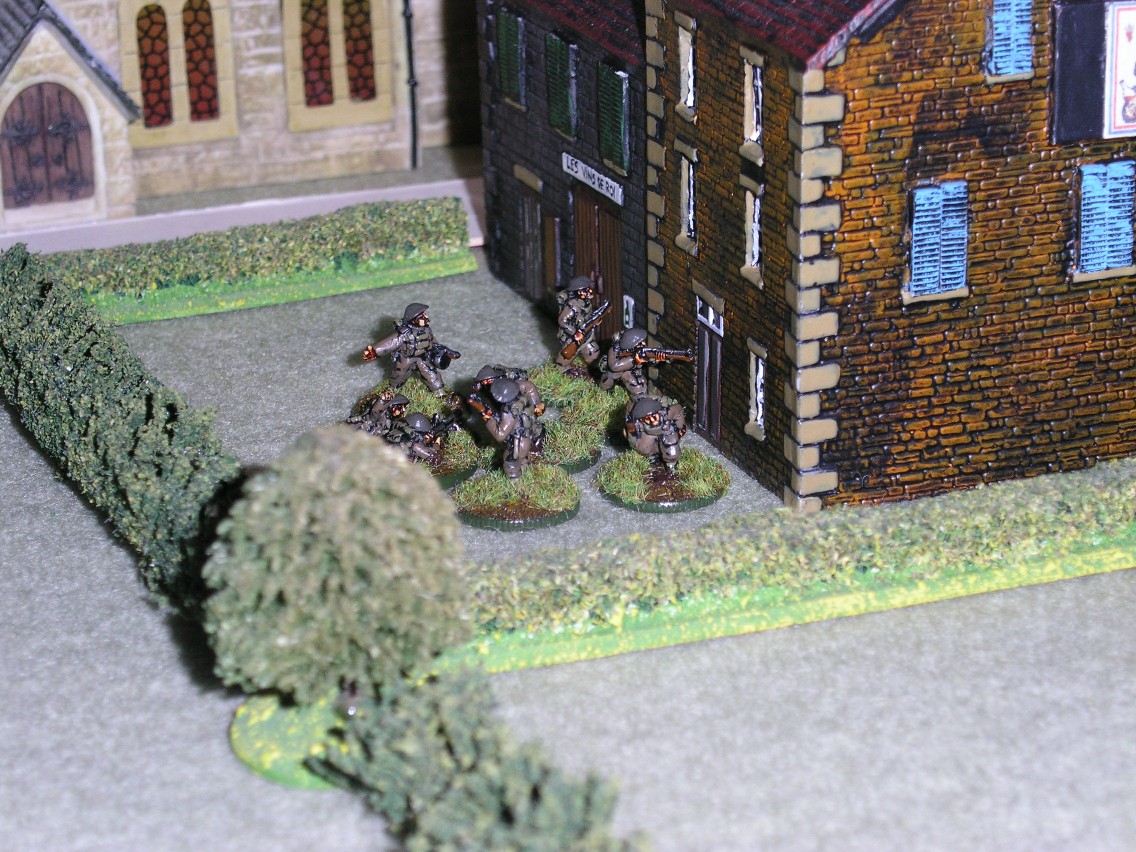
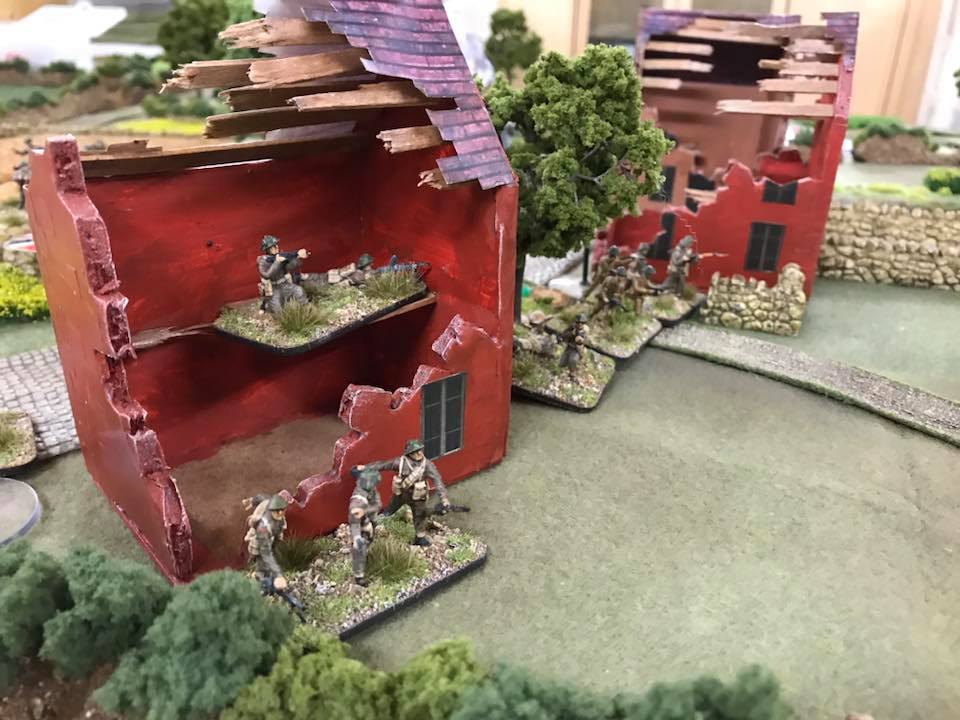
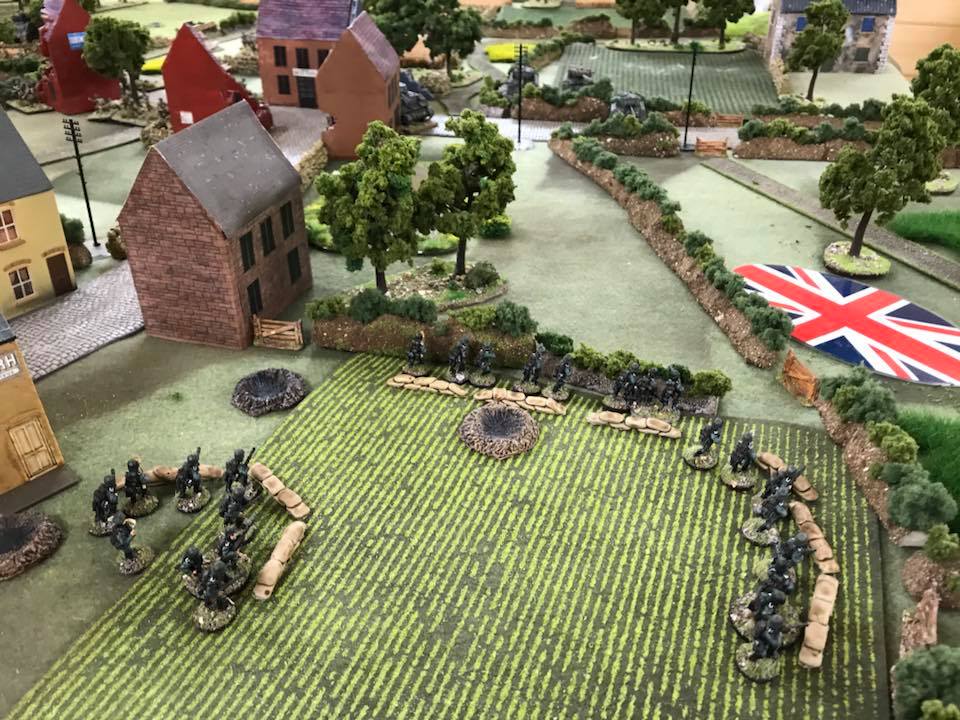
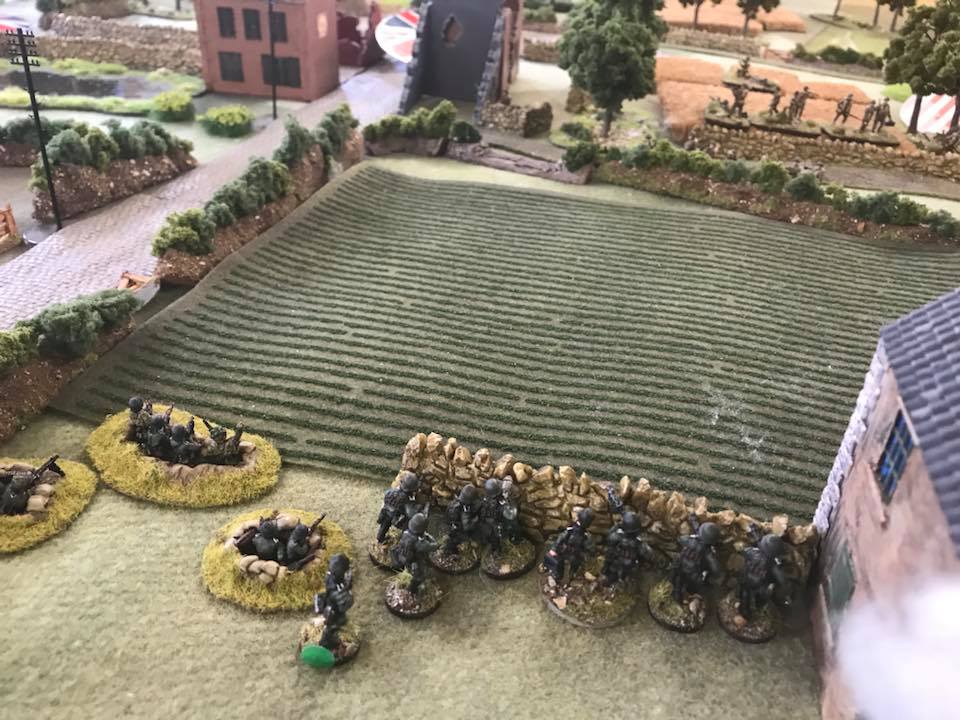
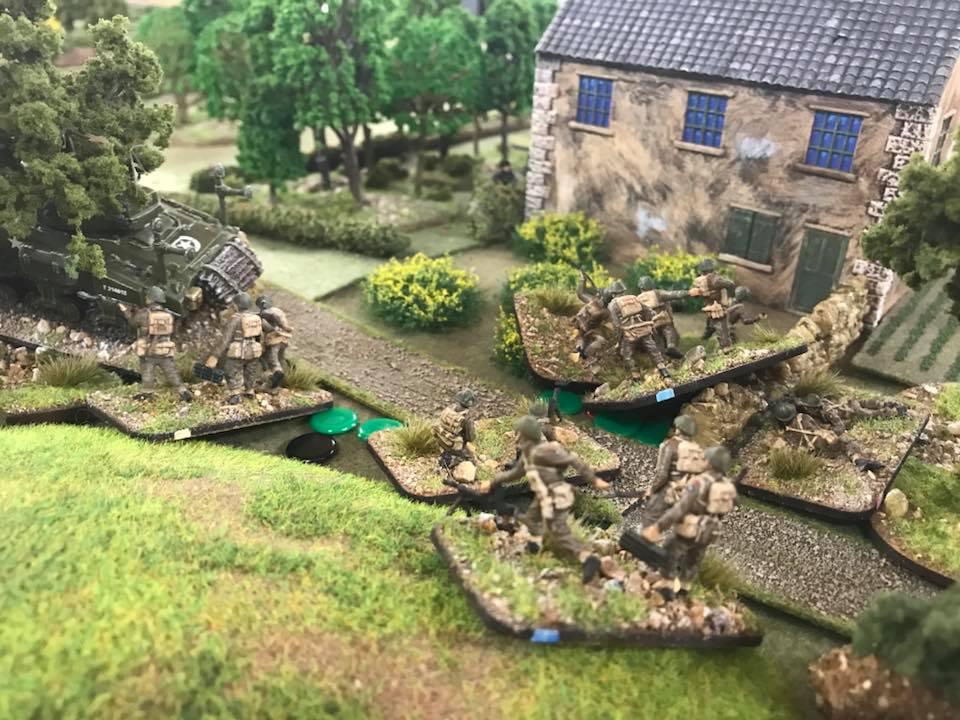
The Germans continued to move their Blinds forward rapidly, and managed to get their company HQ into the vicinity of the sawmill before they were spotted and forced to deploy. A platoon of infantry would soon occupy the sawmill itself, with their MG platoon and Hetzers moving up on their left.

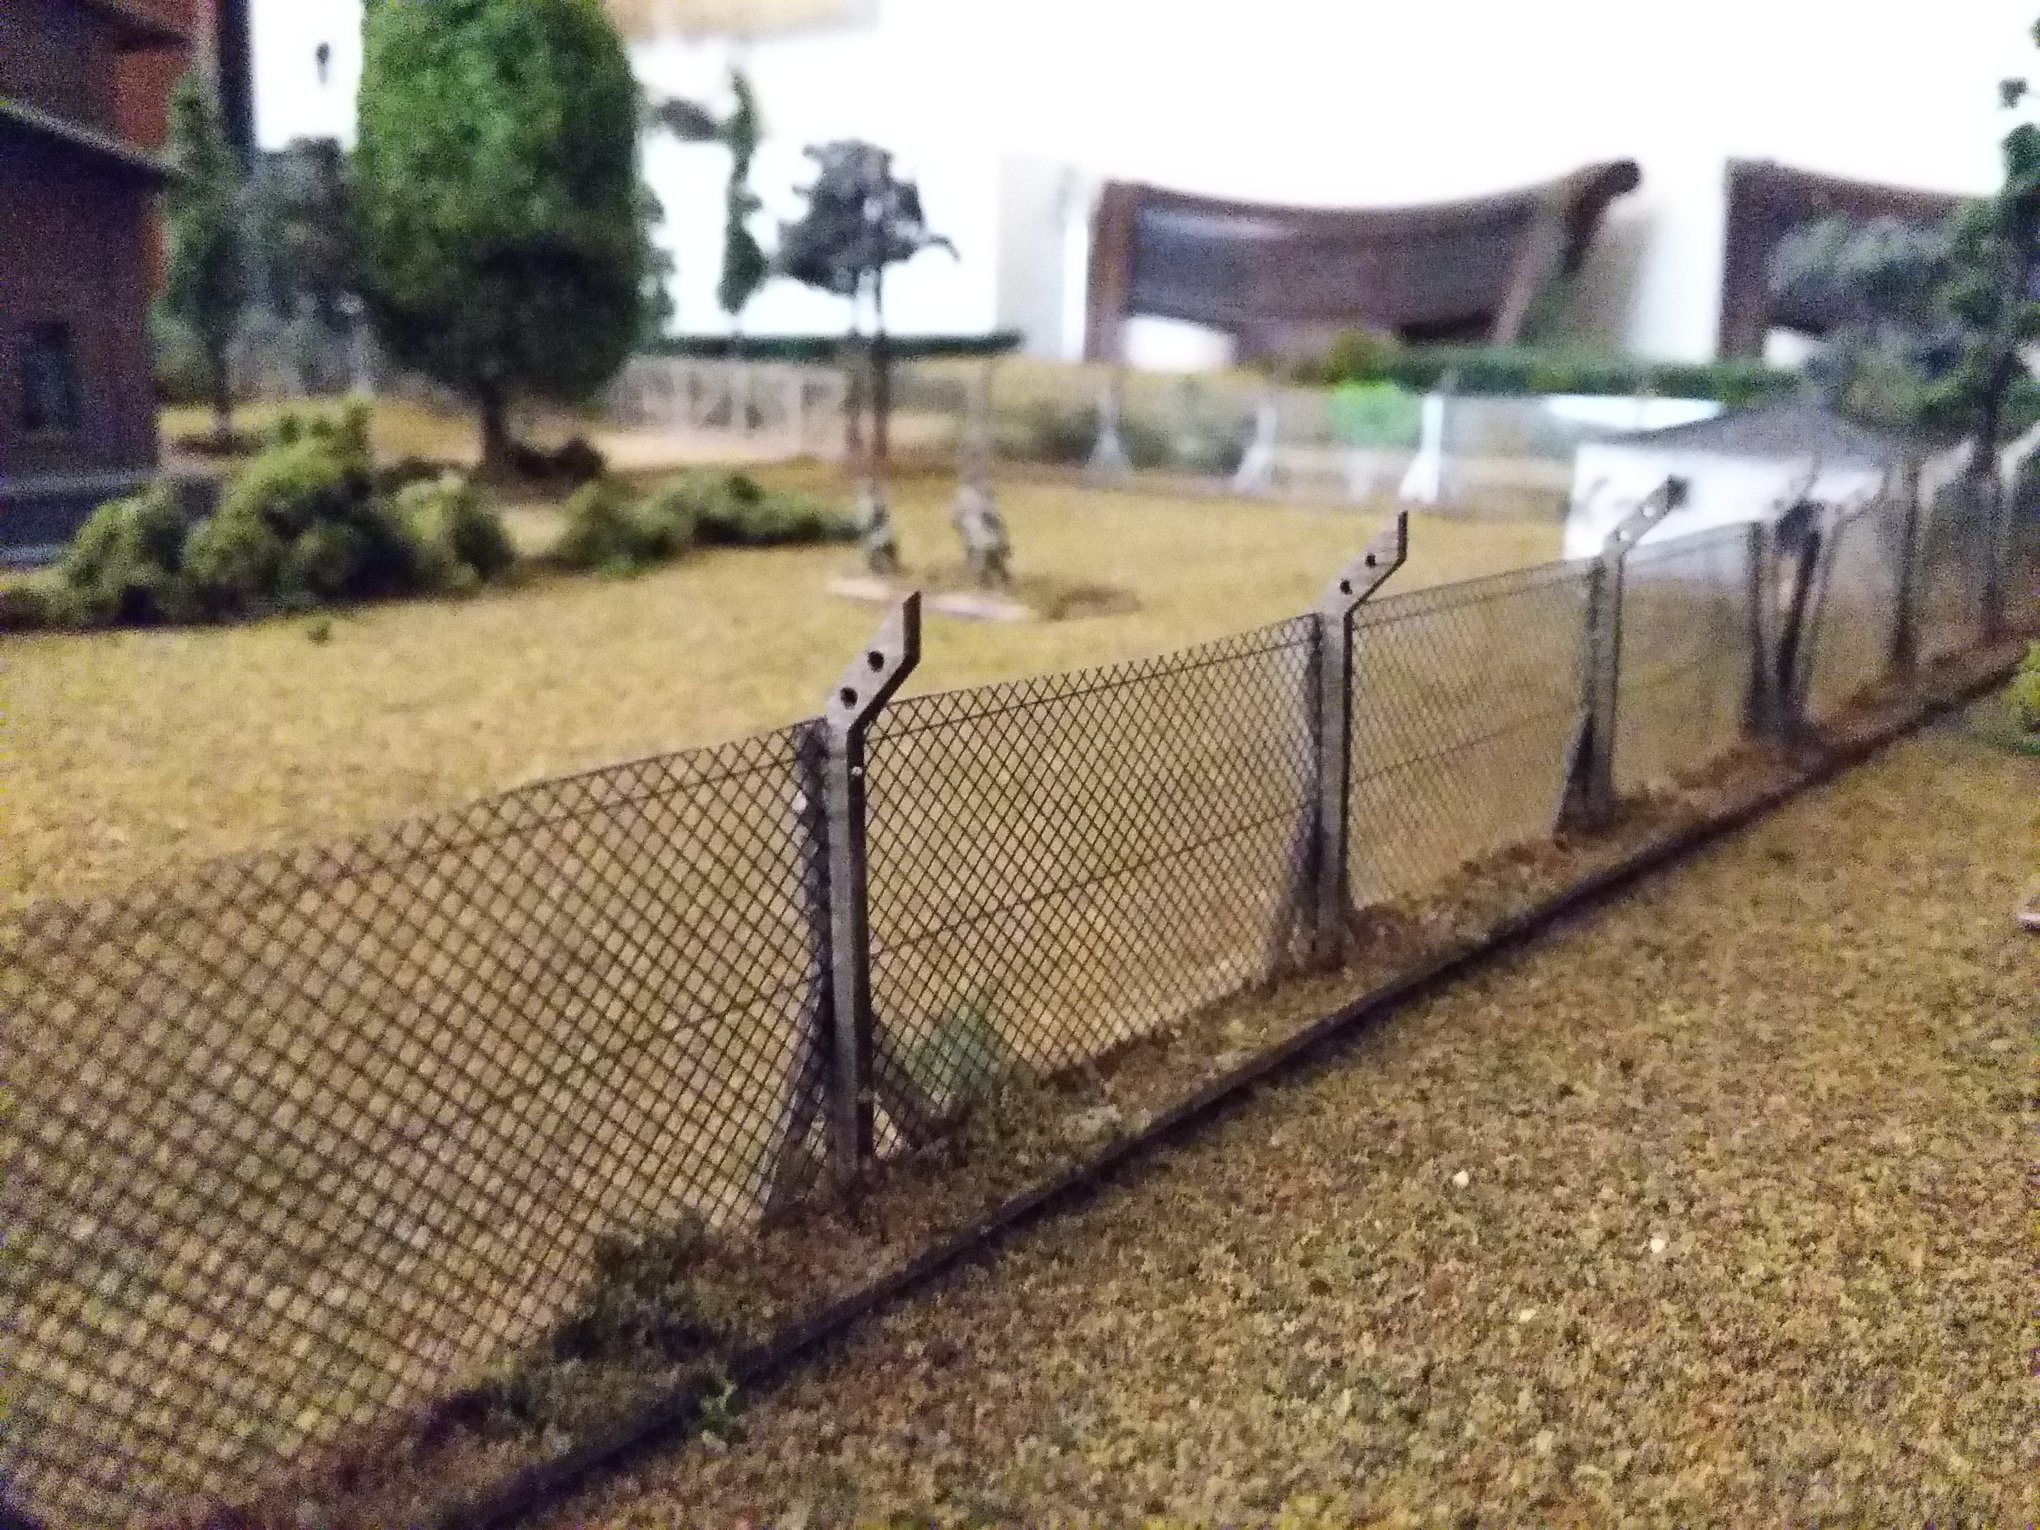
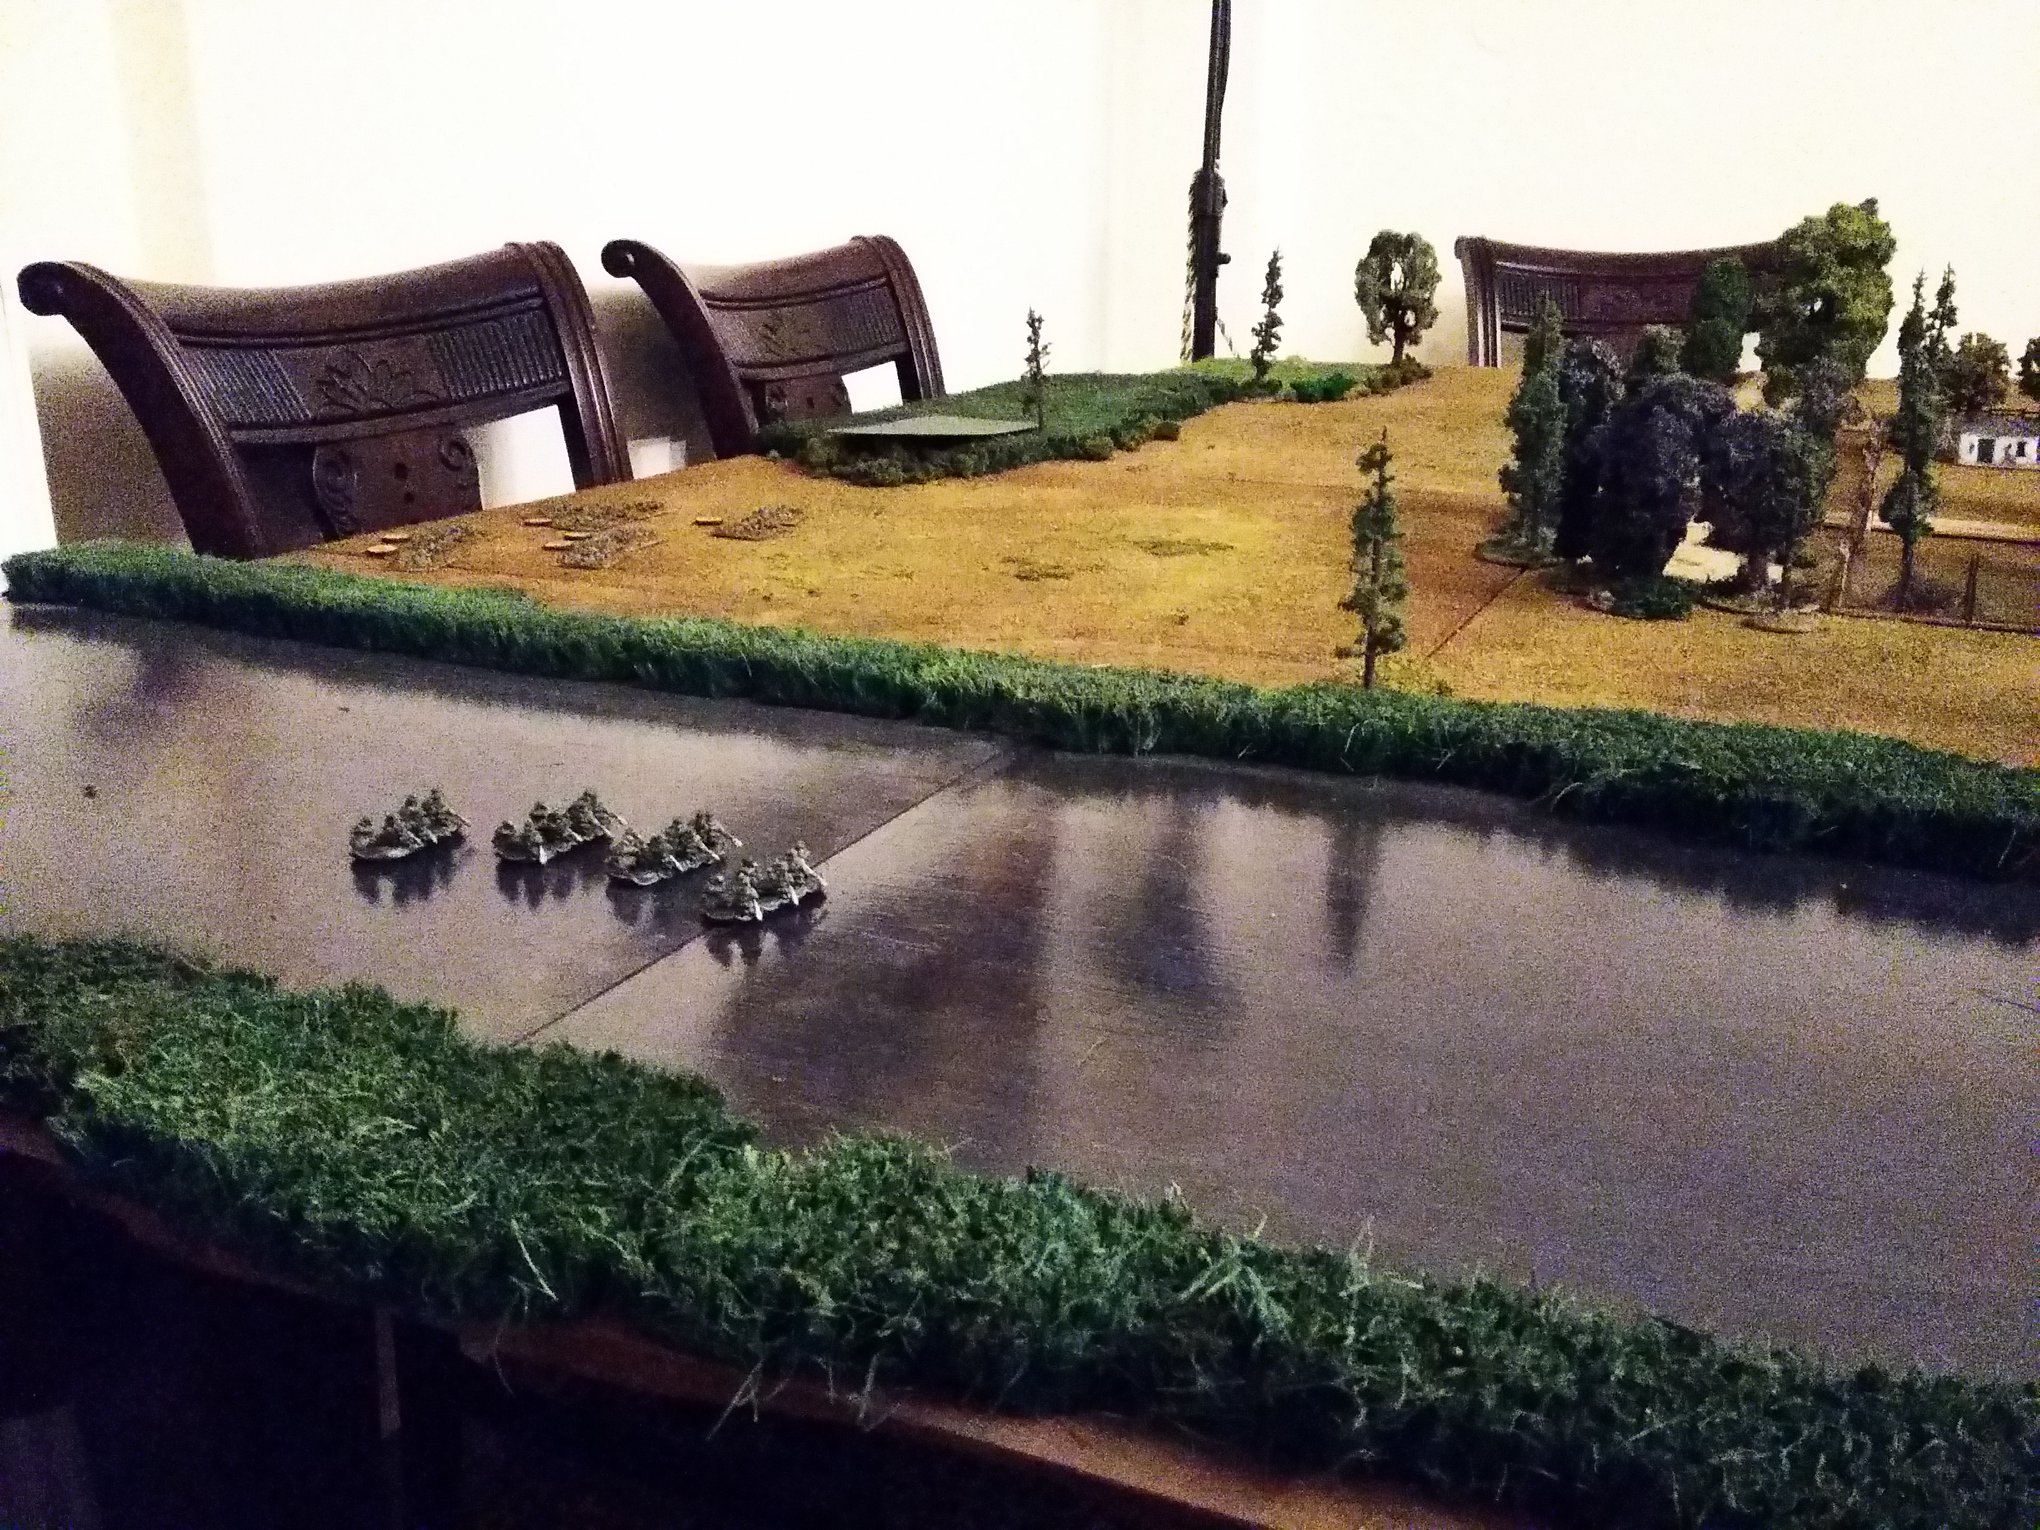
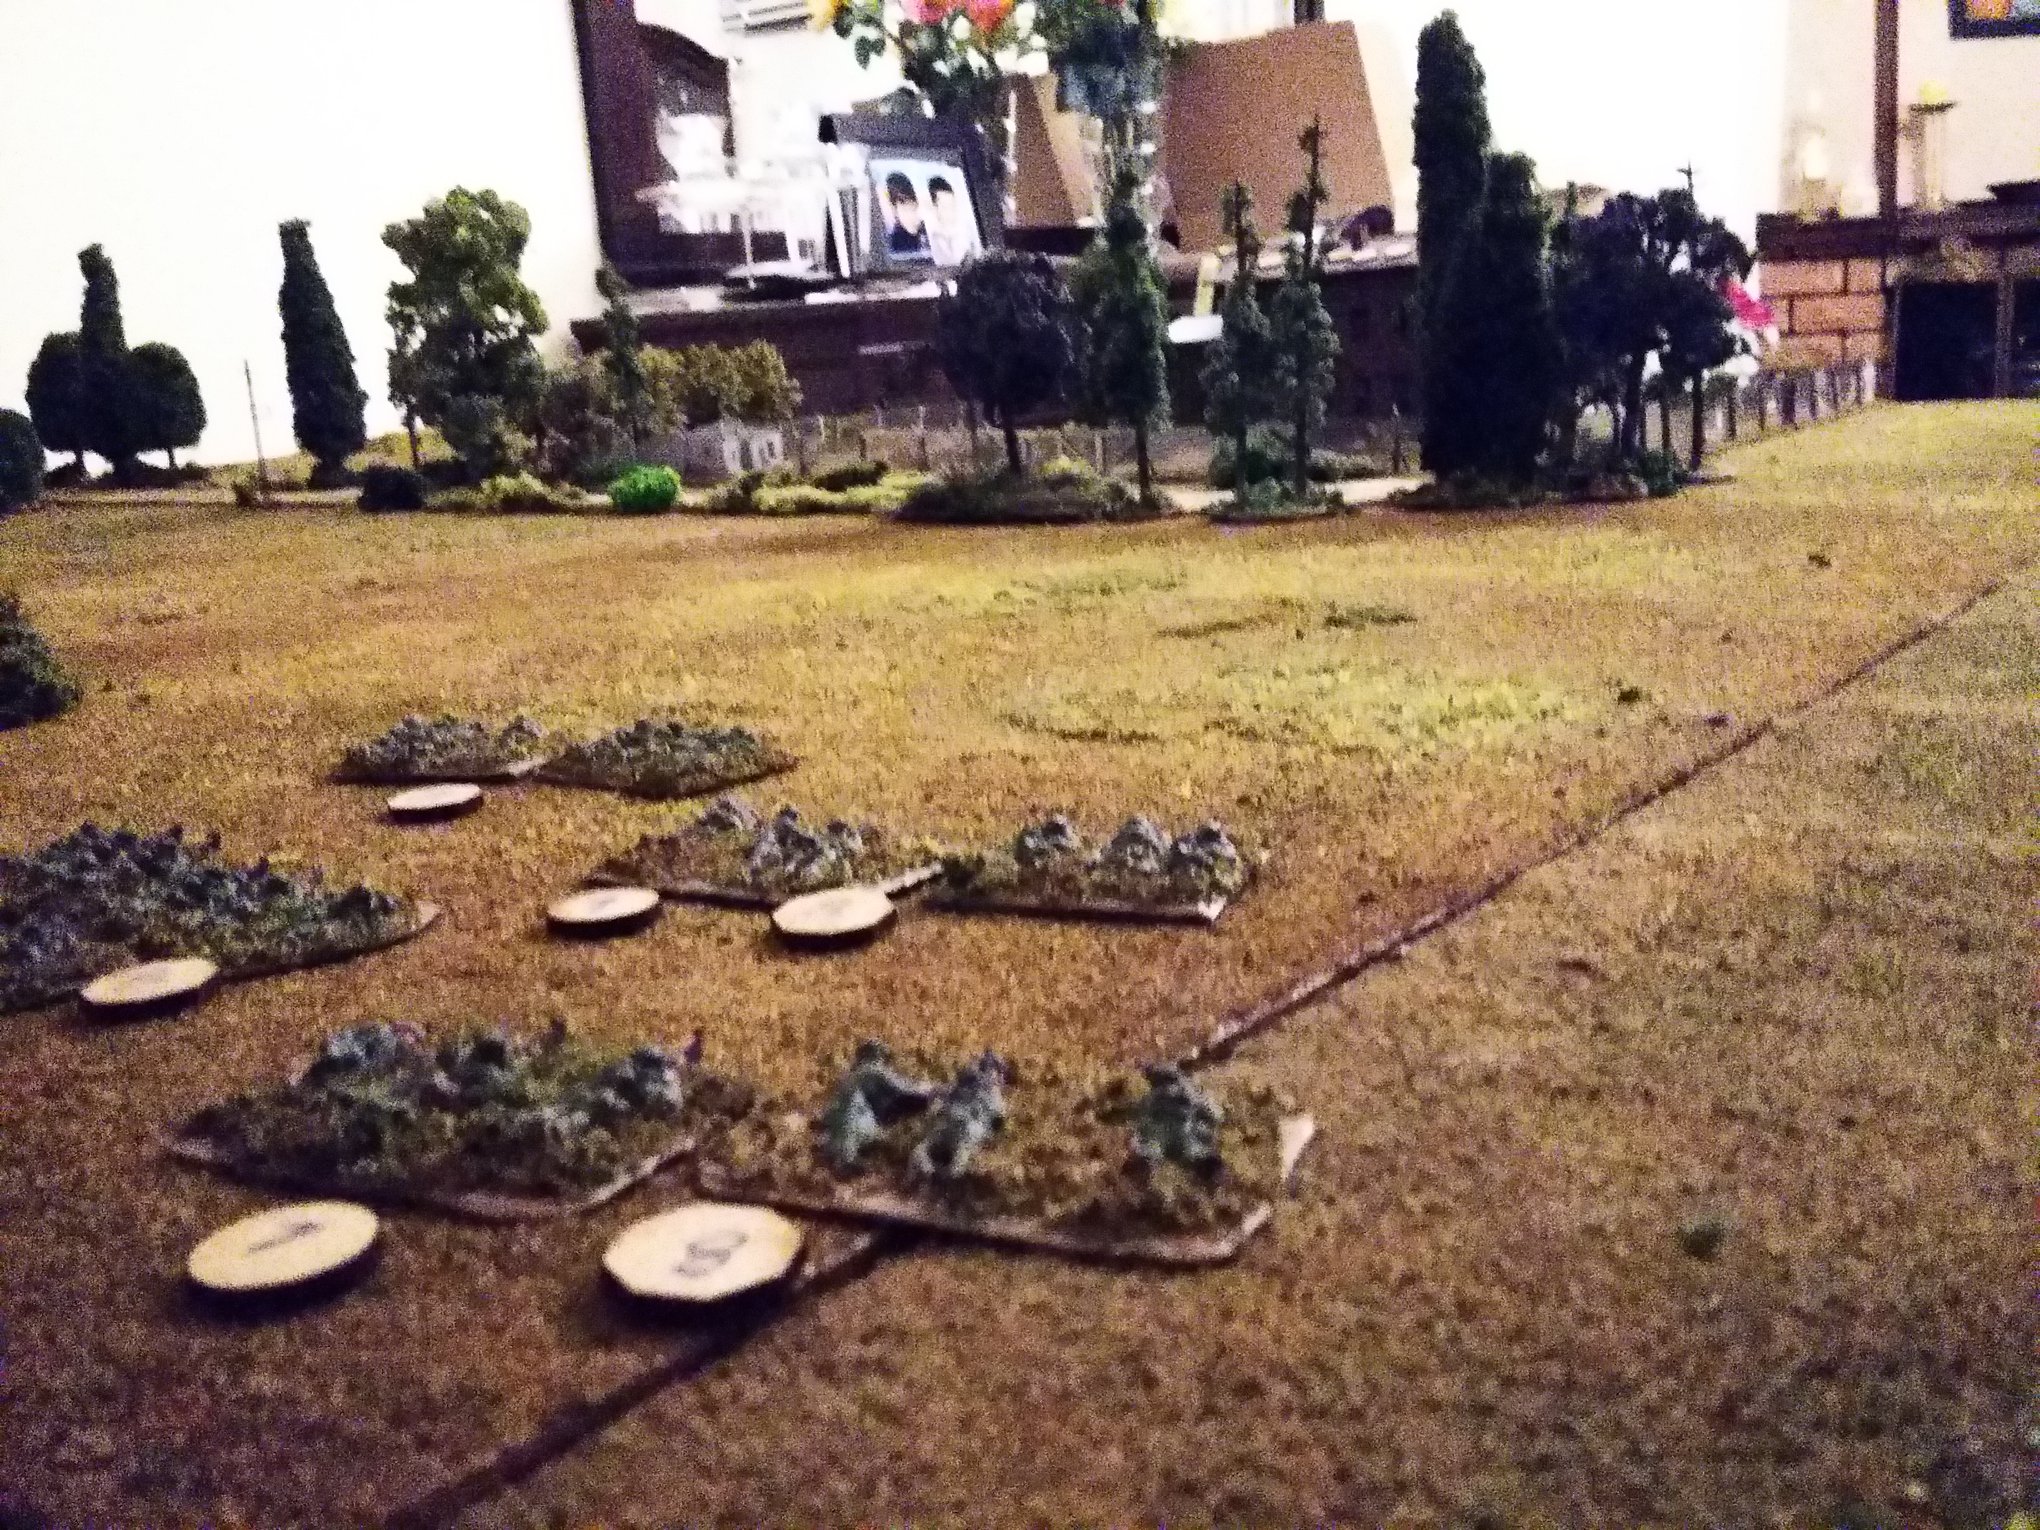
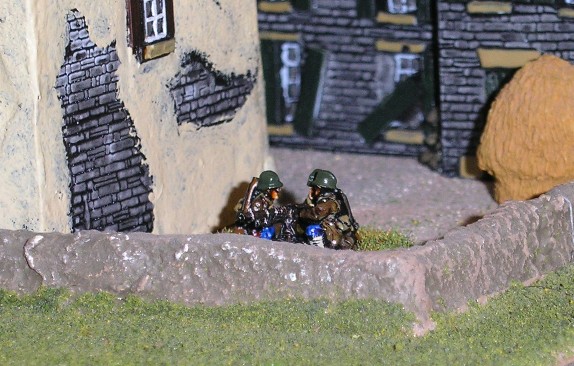
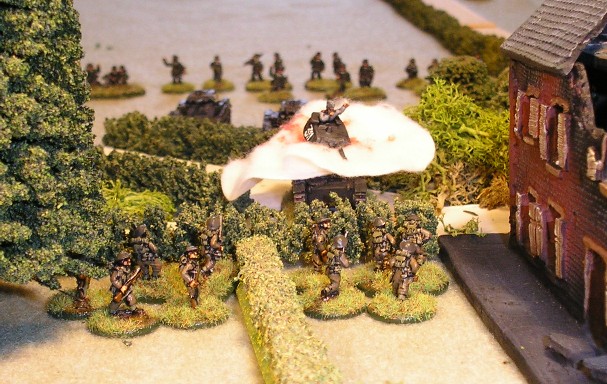
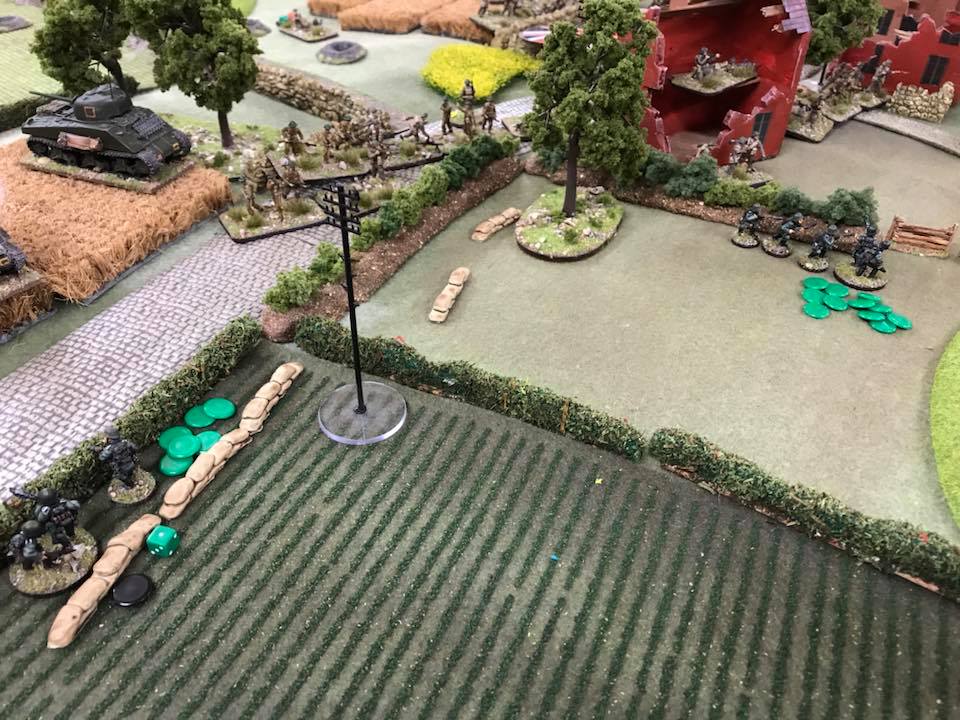
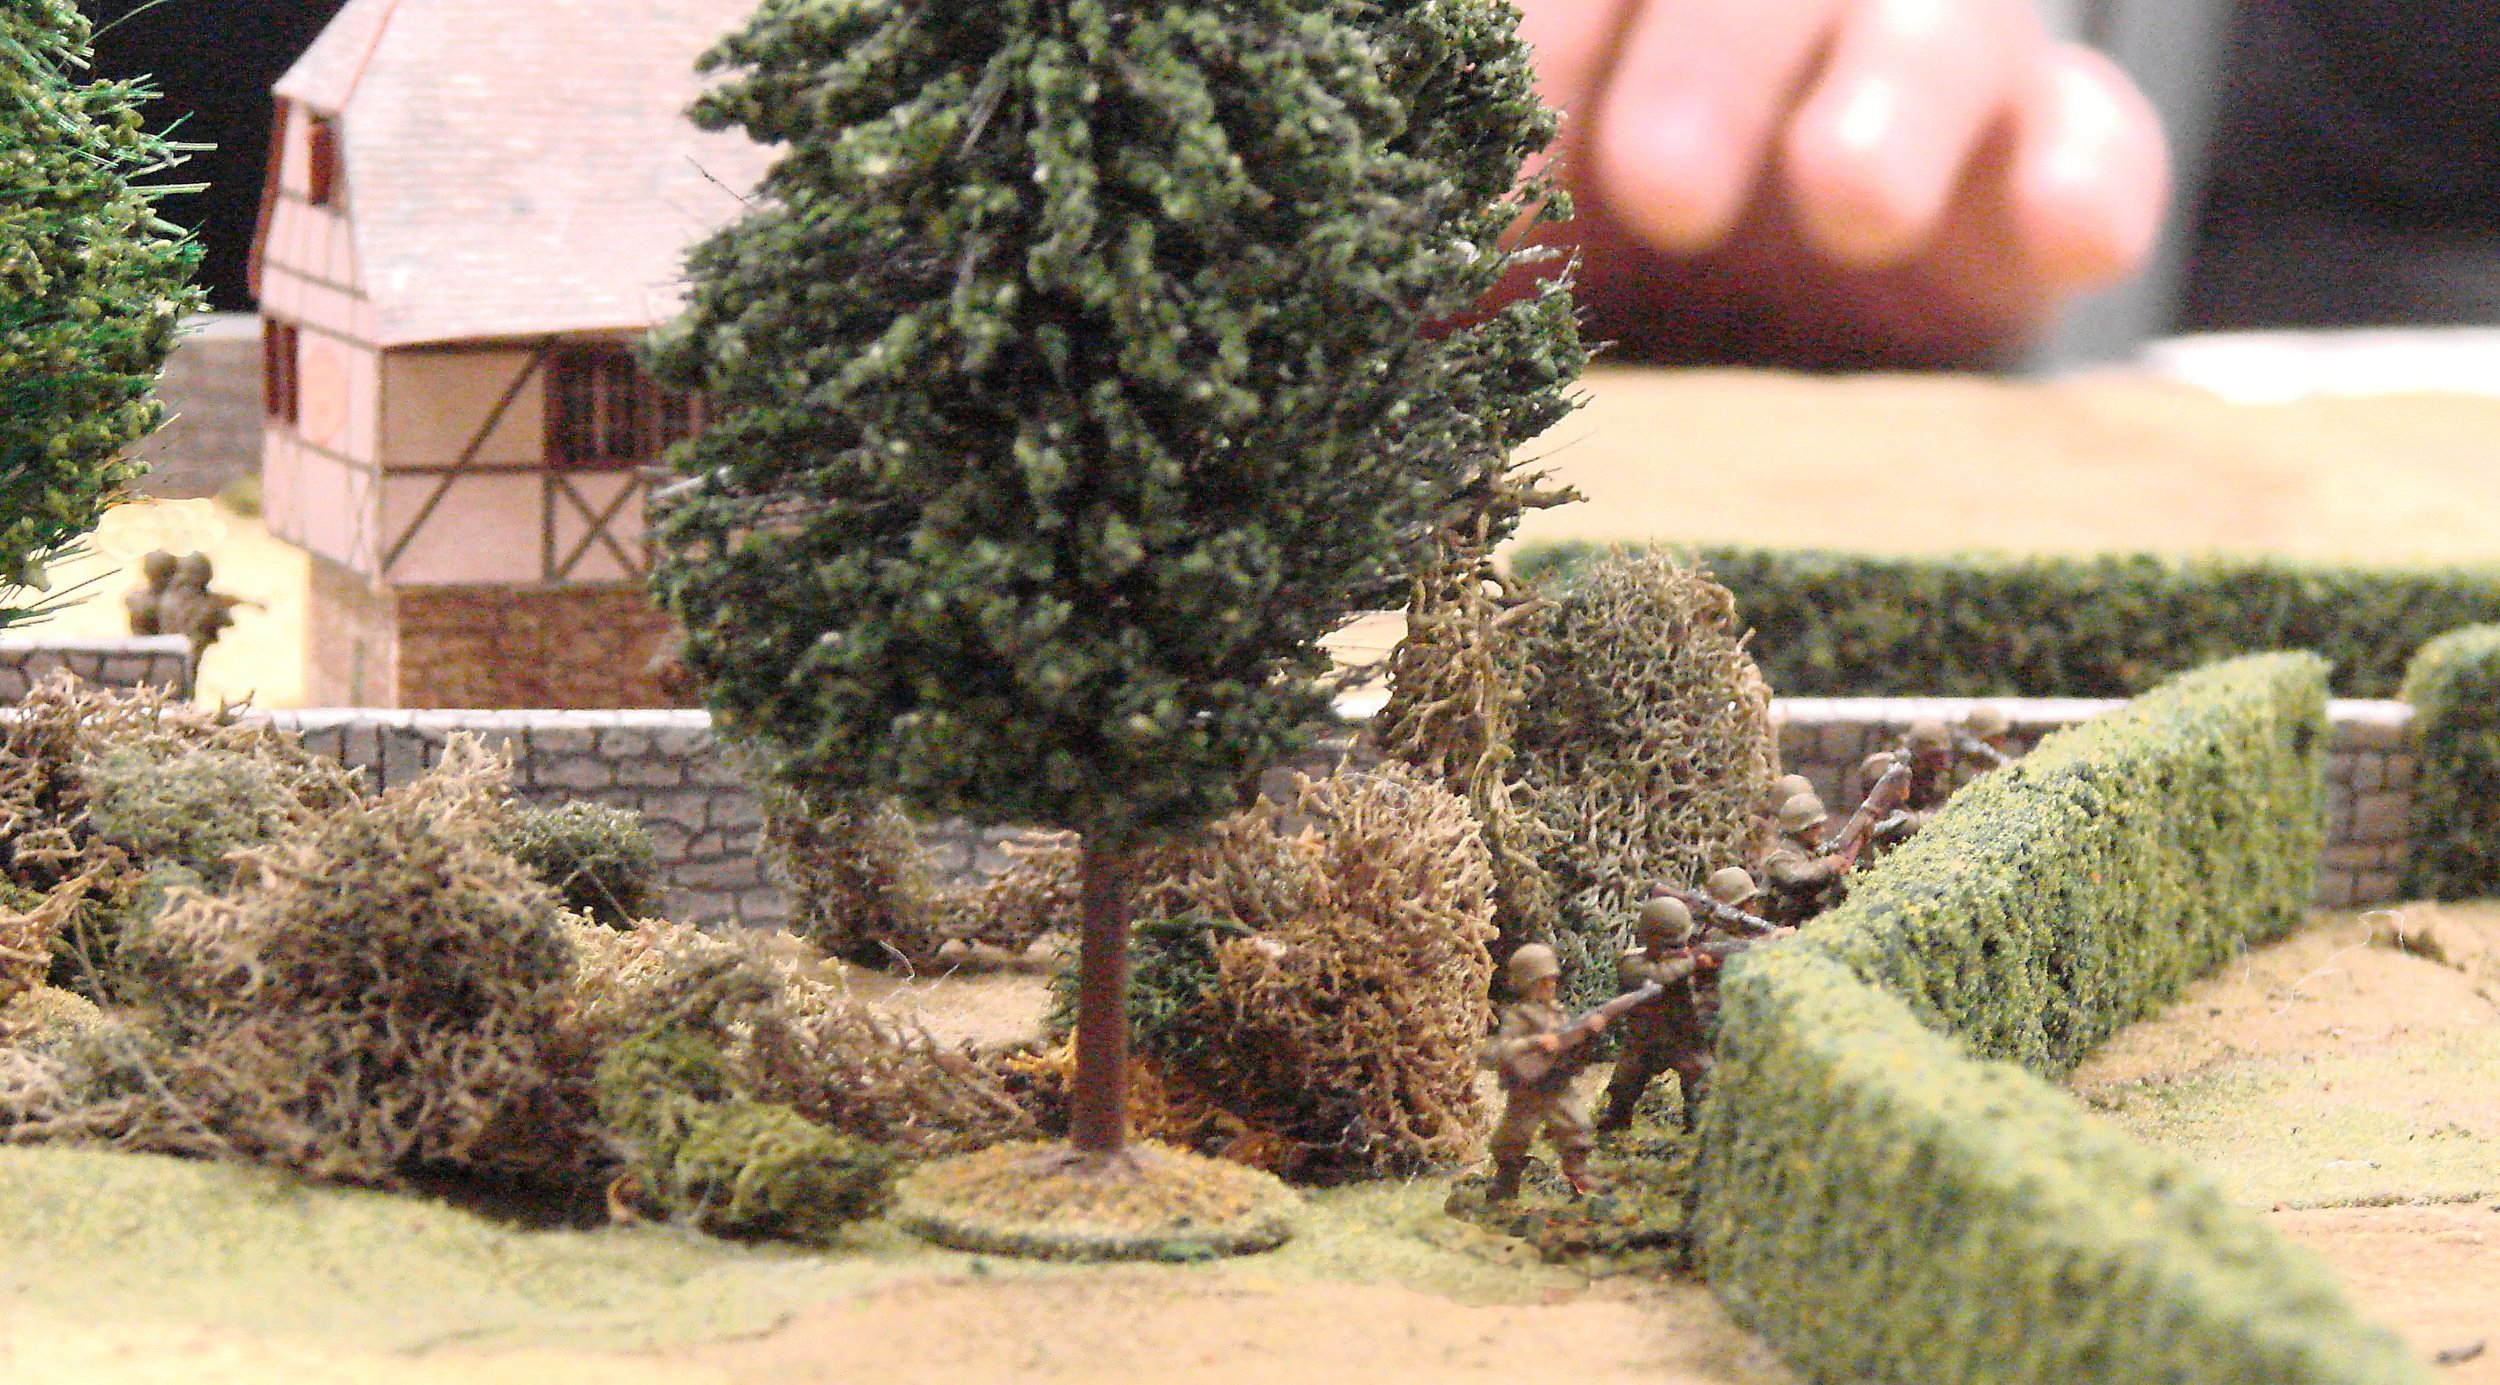
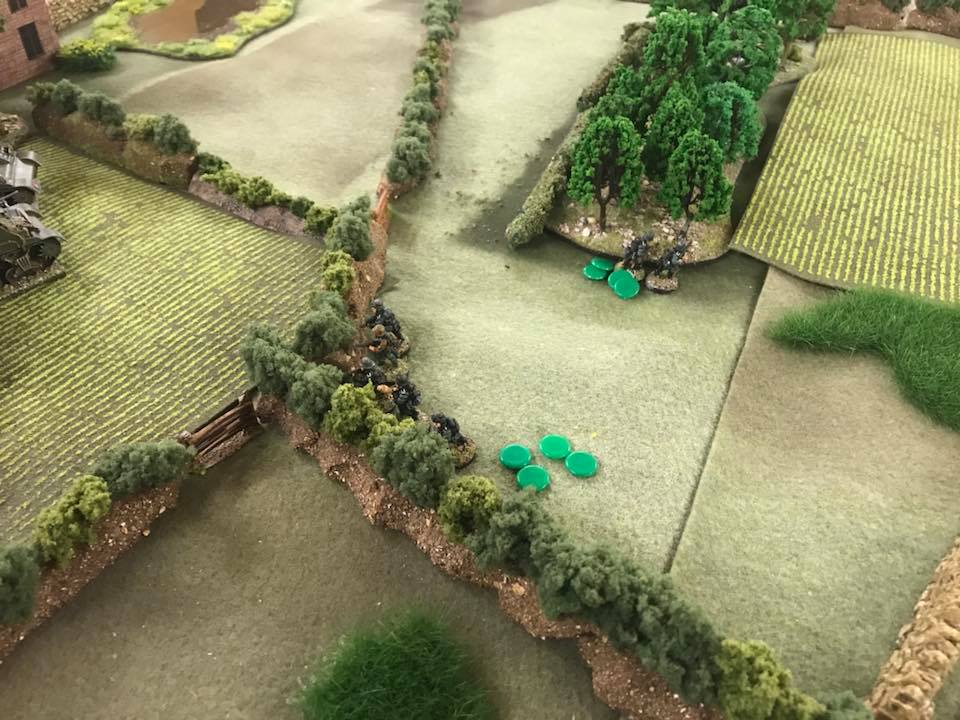
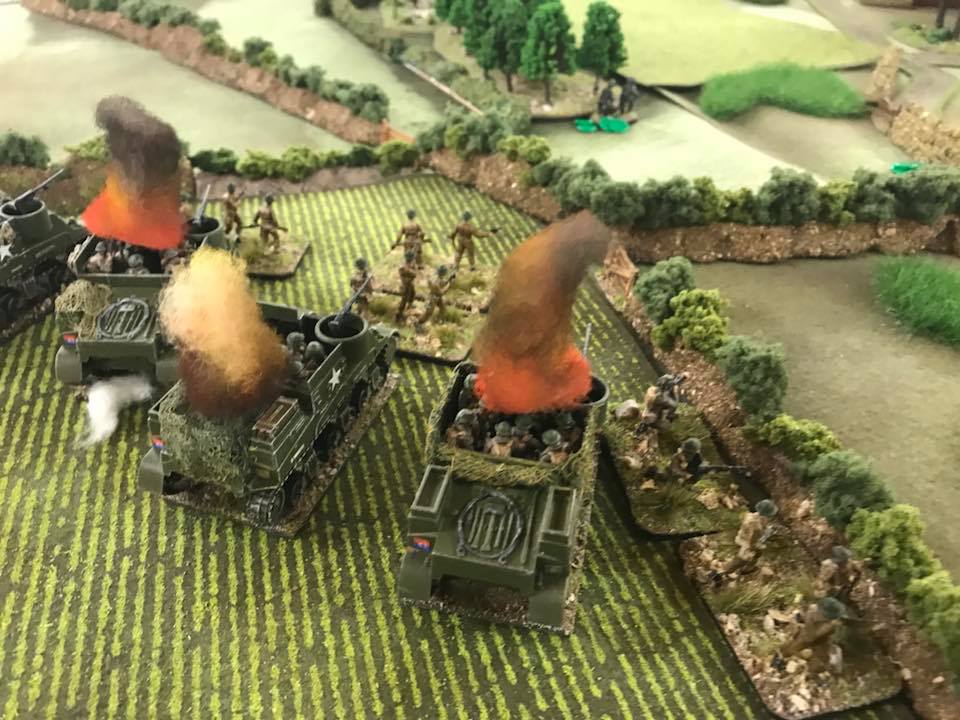
As for the Soviets, their reconnaissance forces quickly reached the tree line and started spotting the German Blinds. Unfortunately, they were themselves spotted in return, with the German commander calling in support from his mortars aiming to blow the scouts right out of their half-tracks.

The German Mortars card turned up remarkably quickly, and Dave rubbed his hands with glee. His rubbing became even more gleeful when he rolled a direct hit with no deviation!

Unfortunately, all this gleefulness had attracted the attention of the pixies, and his rolls for effect were so poor that all the Soviet scouts suffered were a few scratches to the paintwork and a single point of Shock.

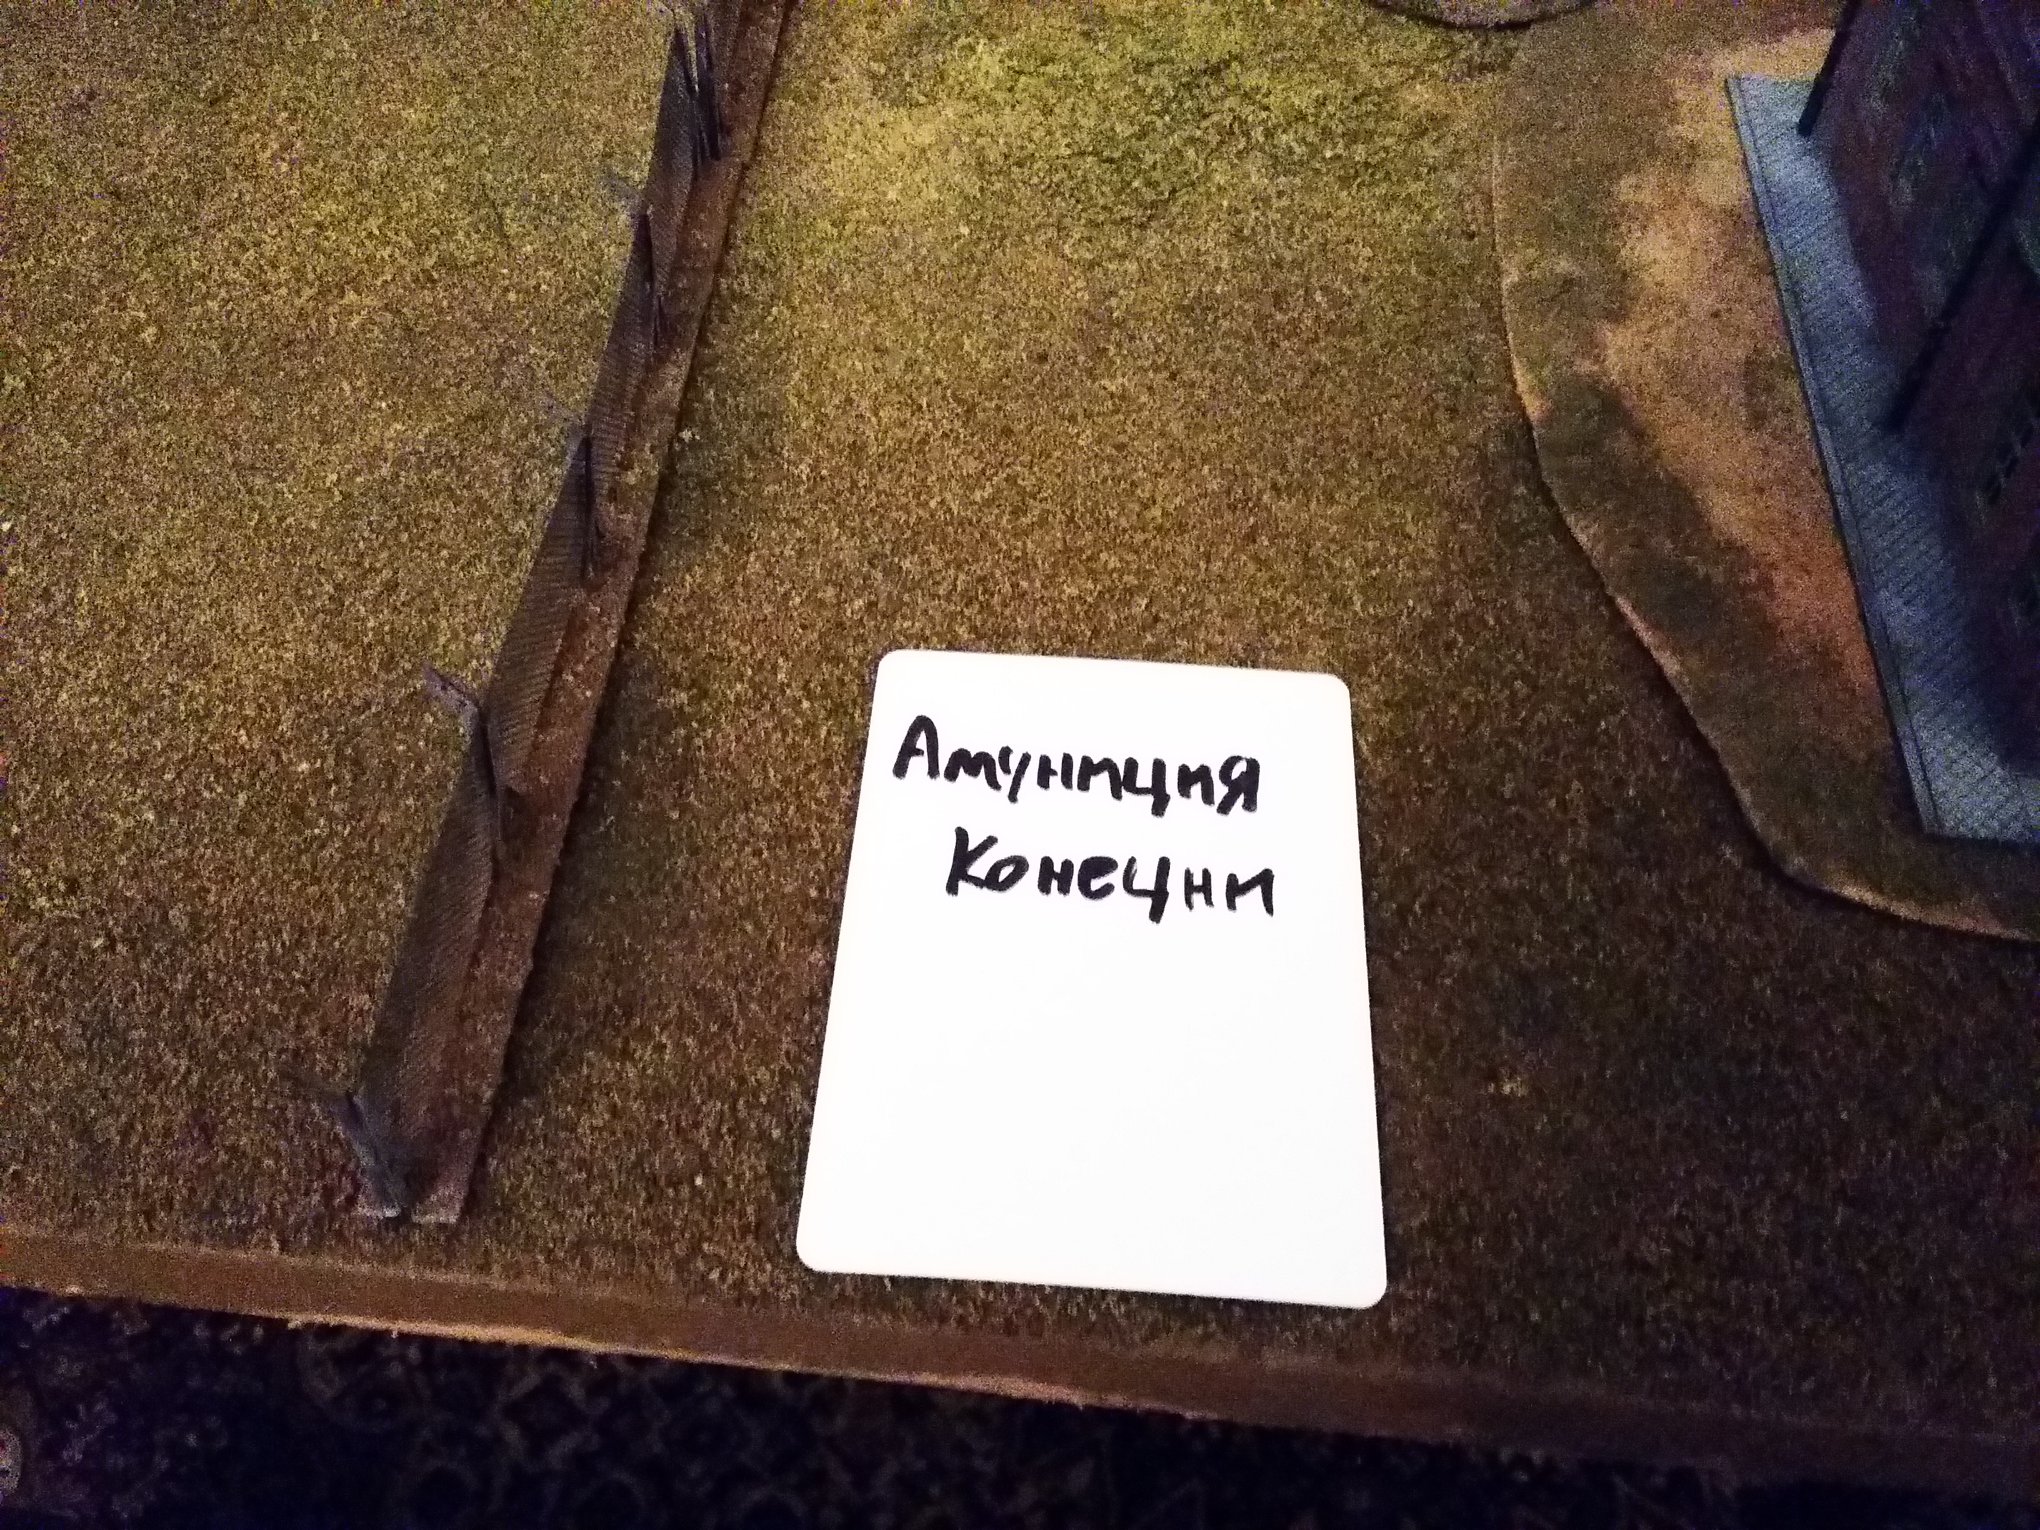
Oh, sorry, I meant to say that the first box of ammunition opened turned out to have been ruined by being exposed to the elements for too long and was full of duds, so all the Soviet scouts suffered were a few scratches to the paintwork and a single point of Shock!

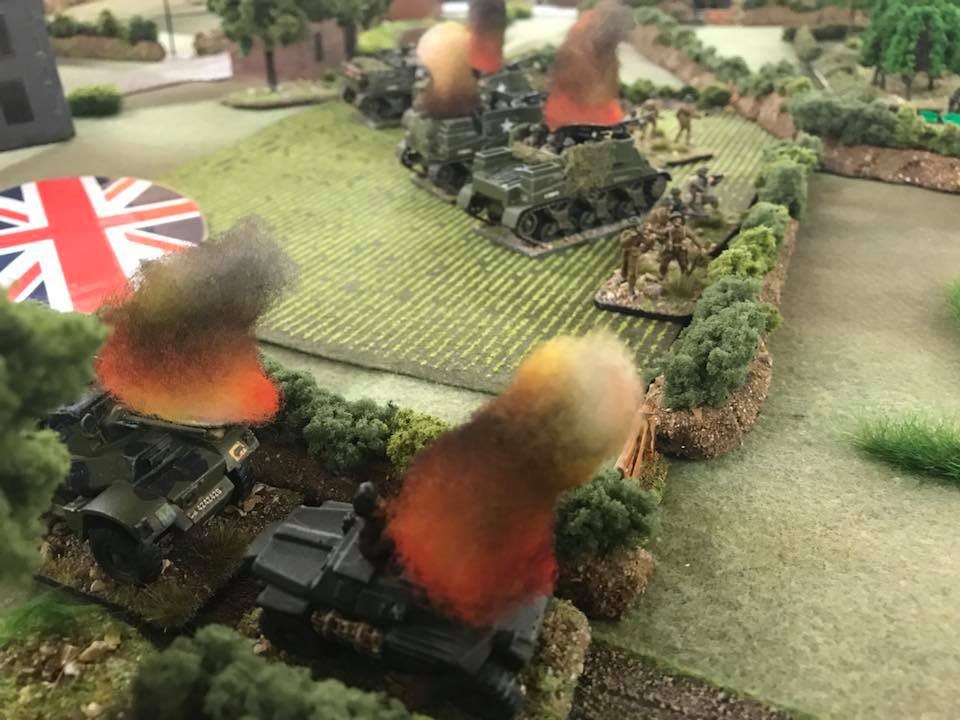
The pixies were only teasing, however, as the next card out of the pack was the German Mortars Bonus Fire, and this time the ammunition was good, and two of the half-tracks took a direct hit and were destroyed, with scouts bailing out everywhere before desperately trying to take cover.

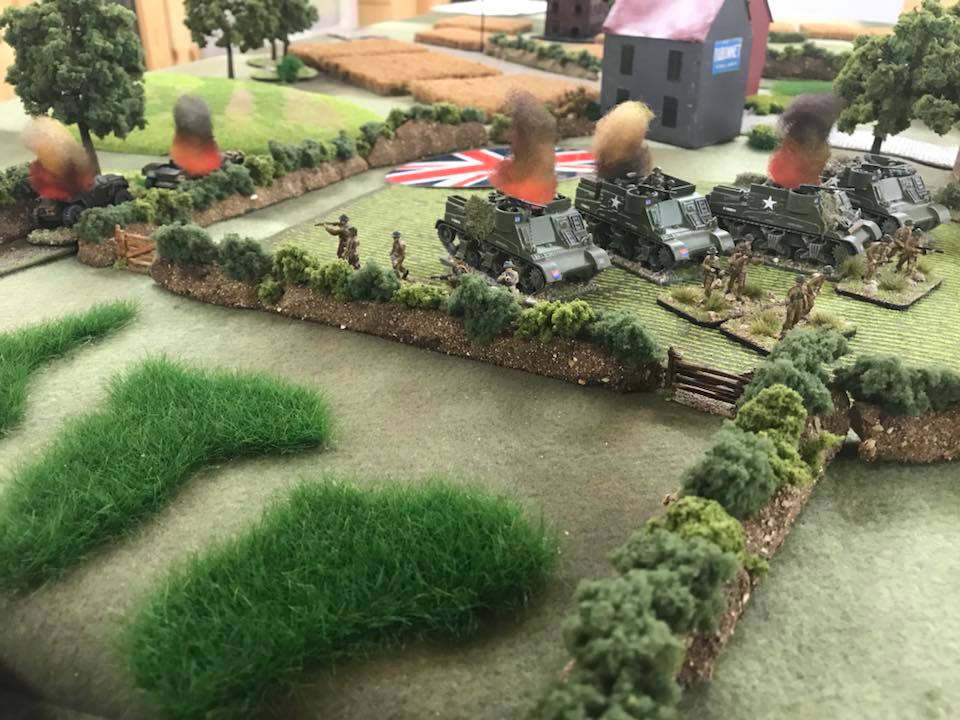
It’s All About The Armour

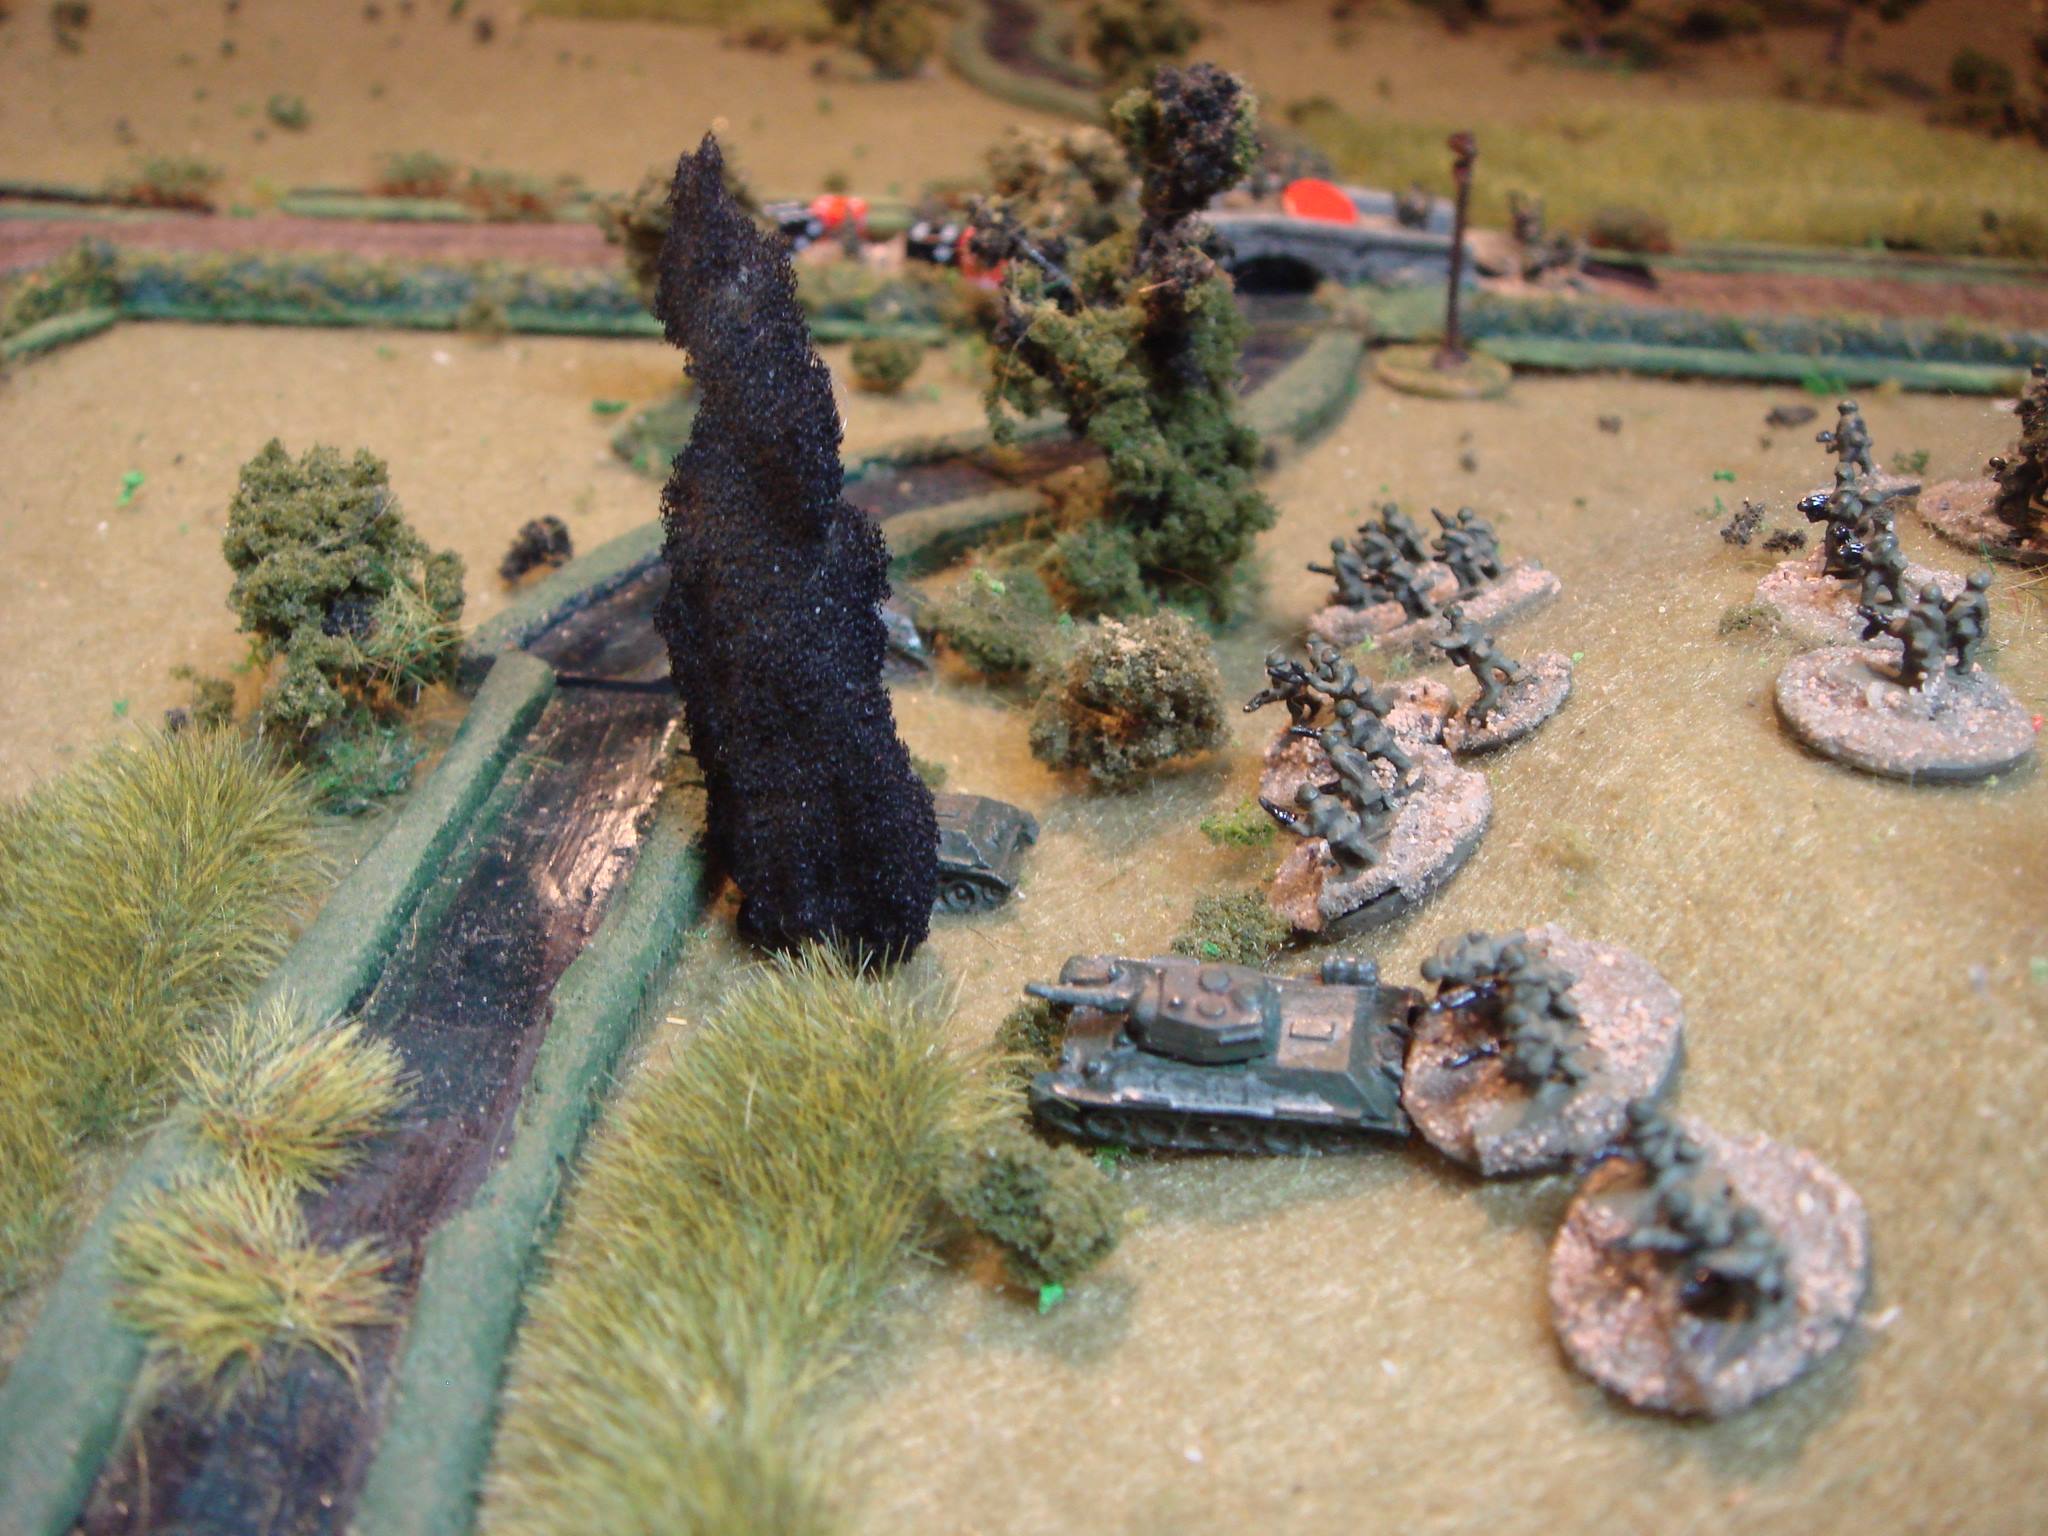
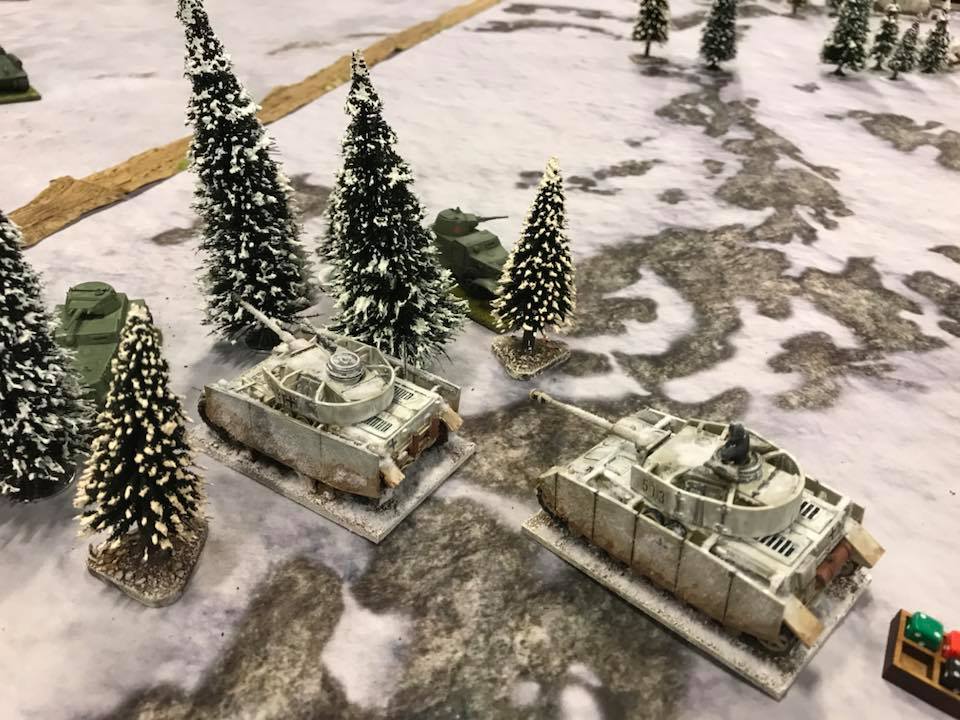
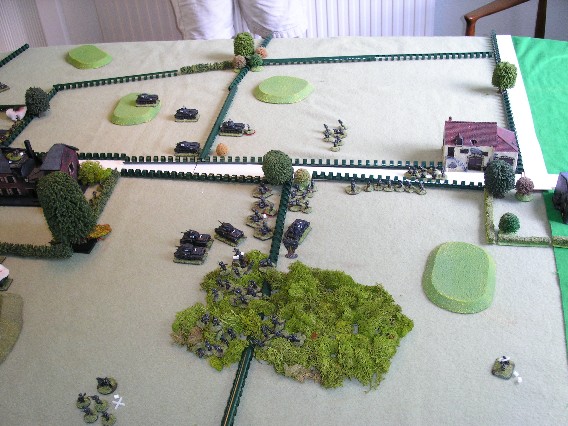
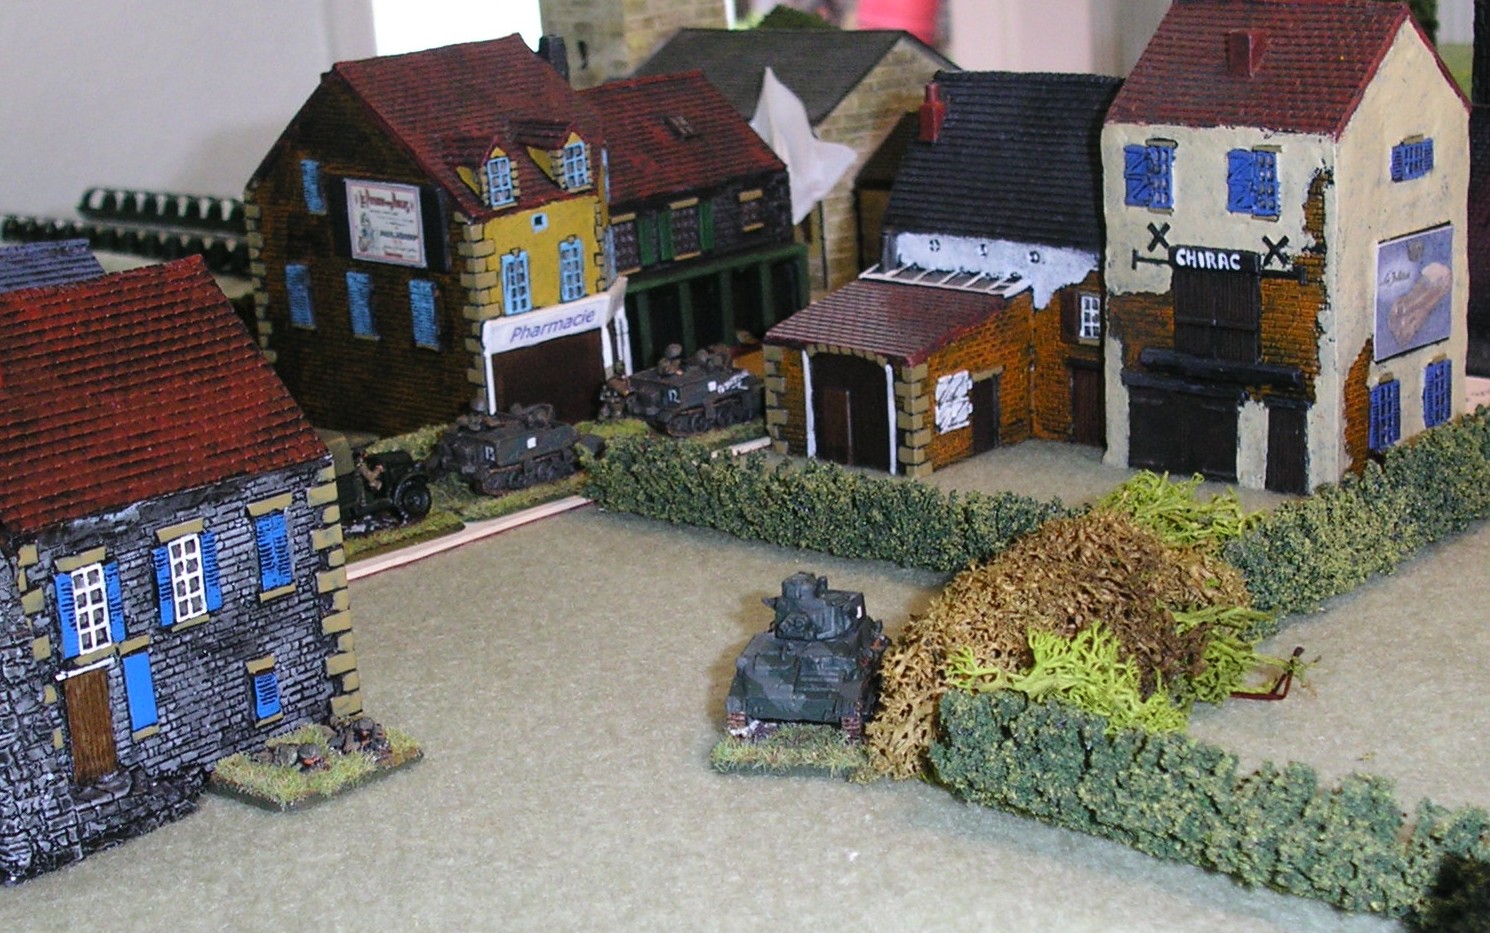
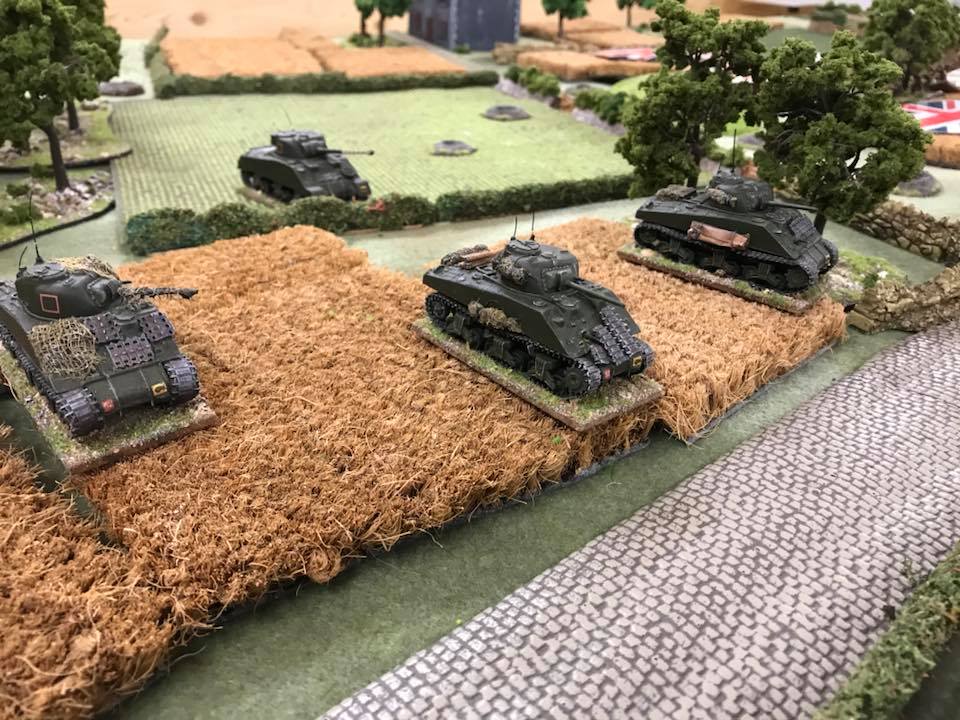
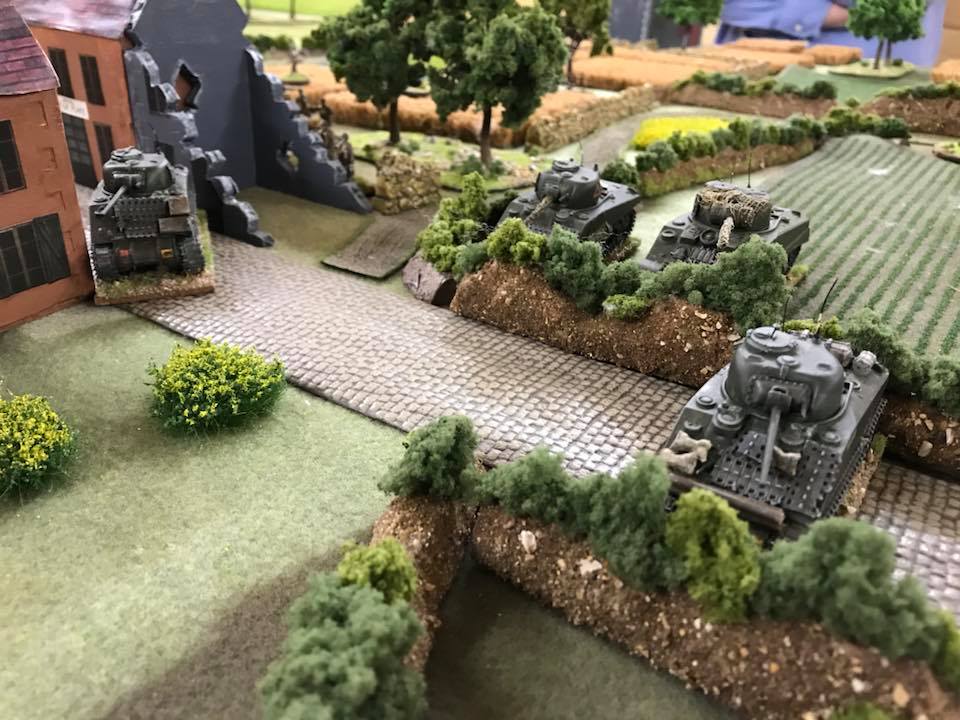
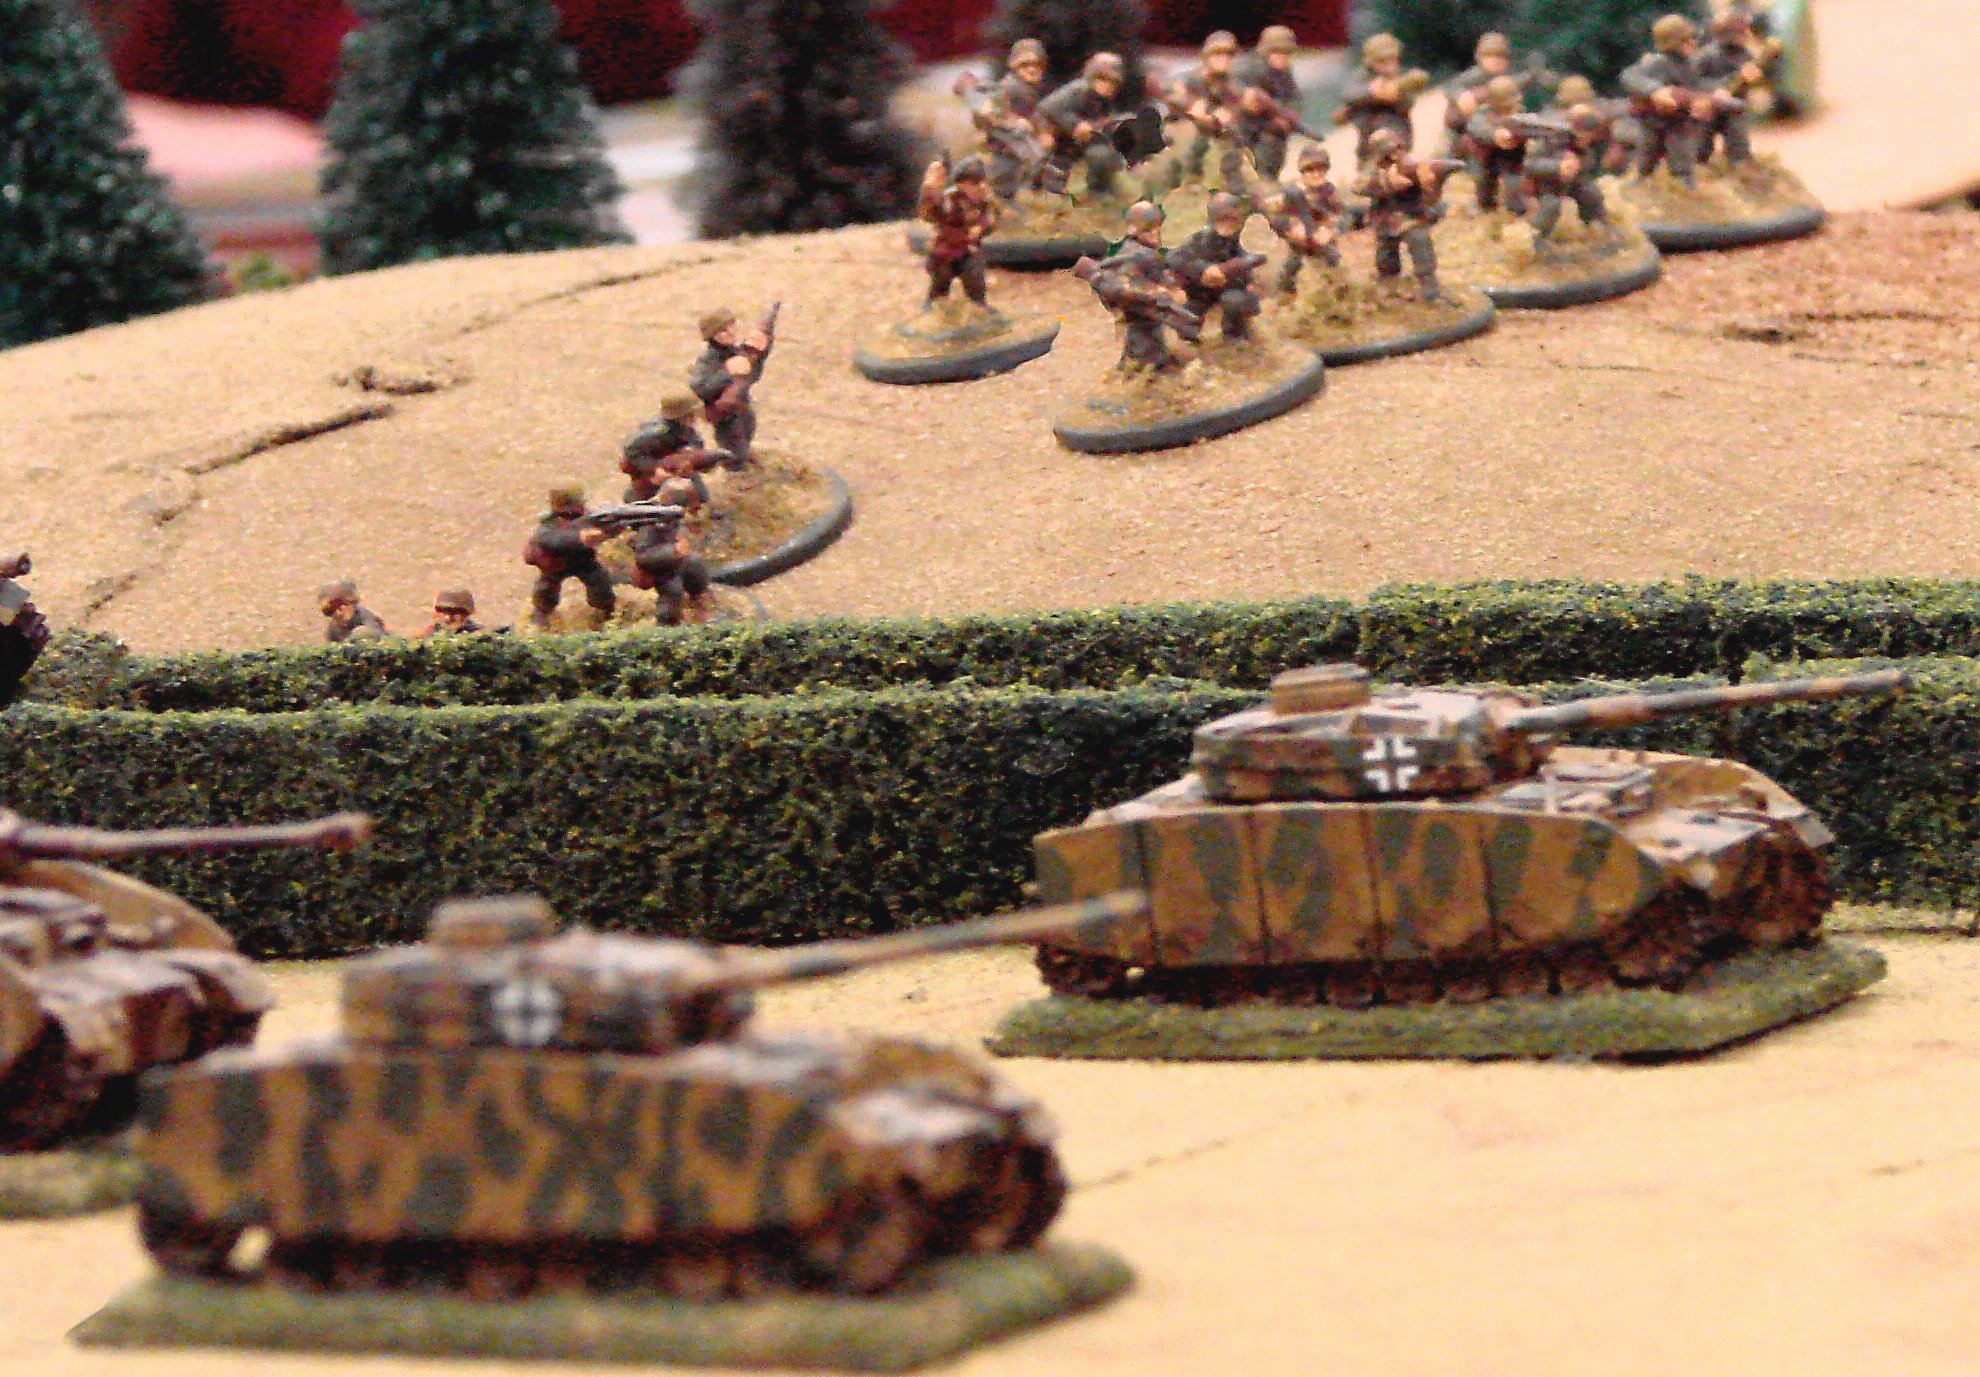
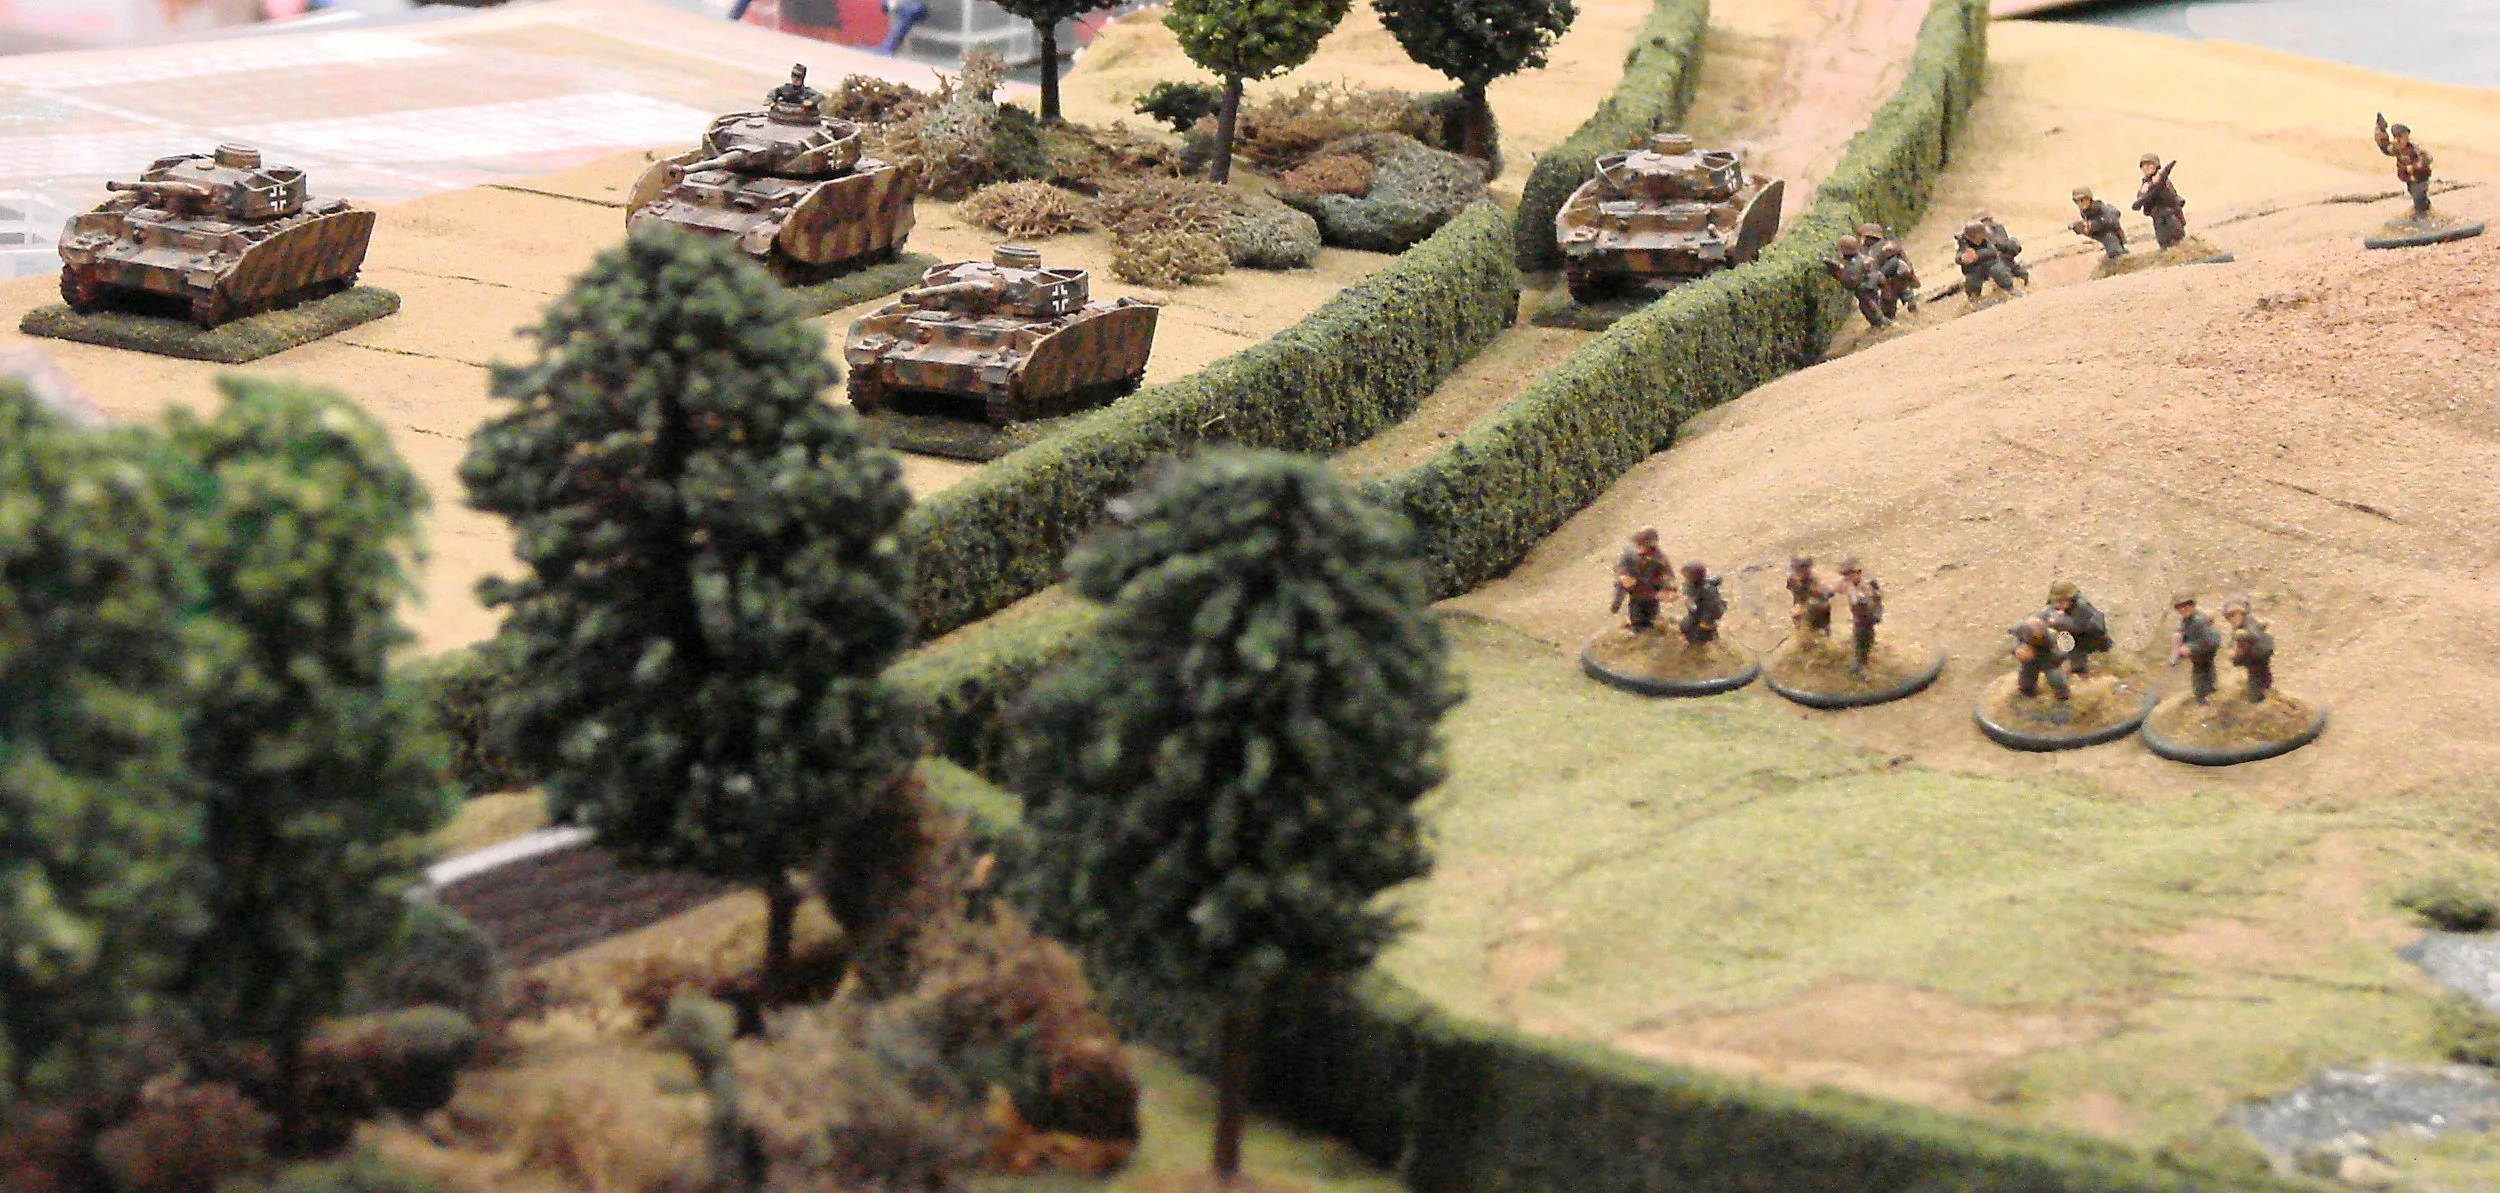
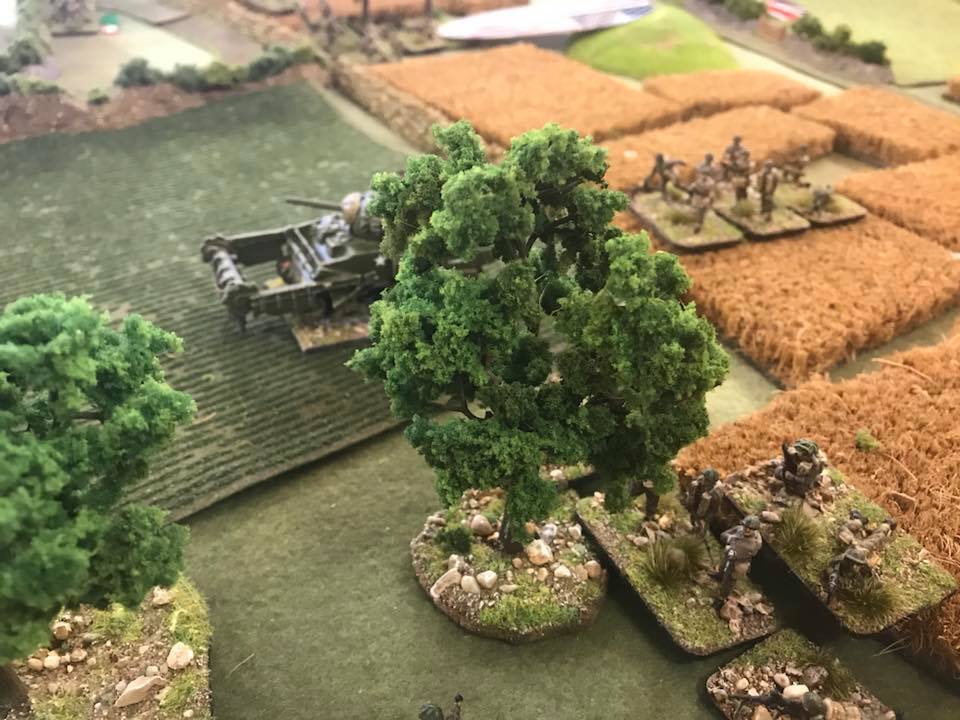
The action now switched to the flanks and the various units of armour rolling forward through the snow.

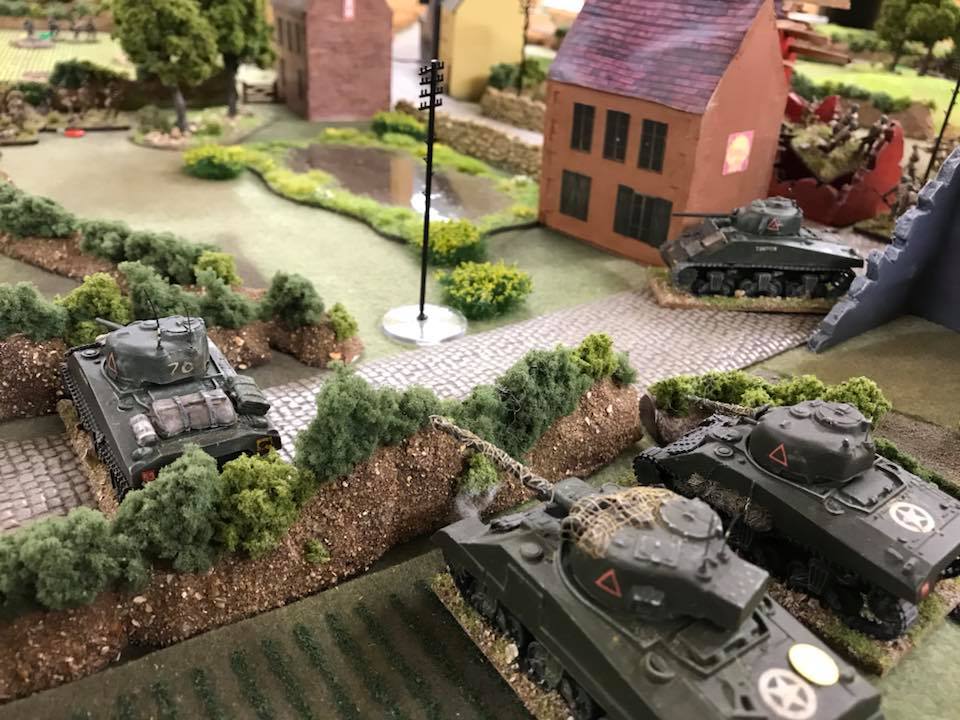
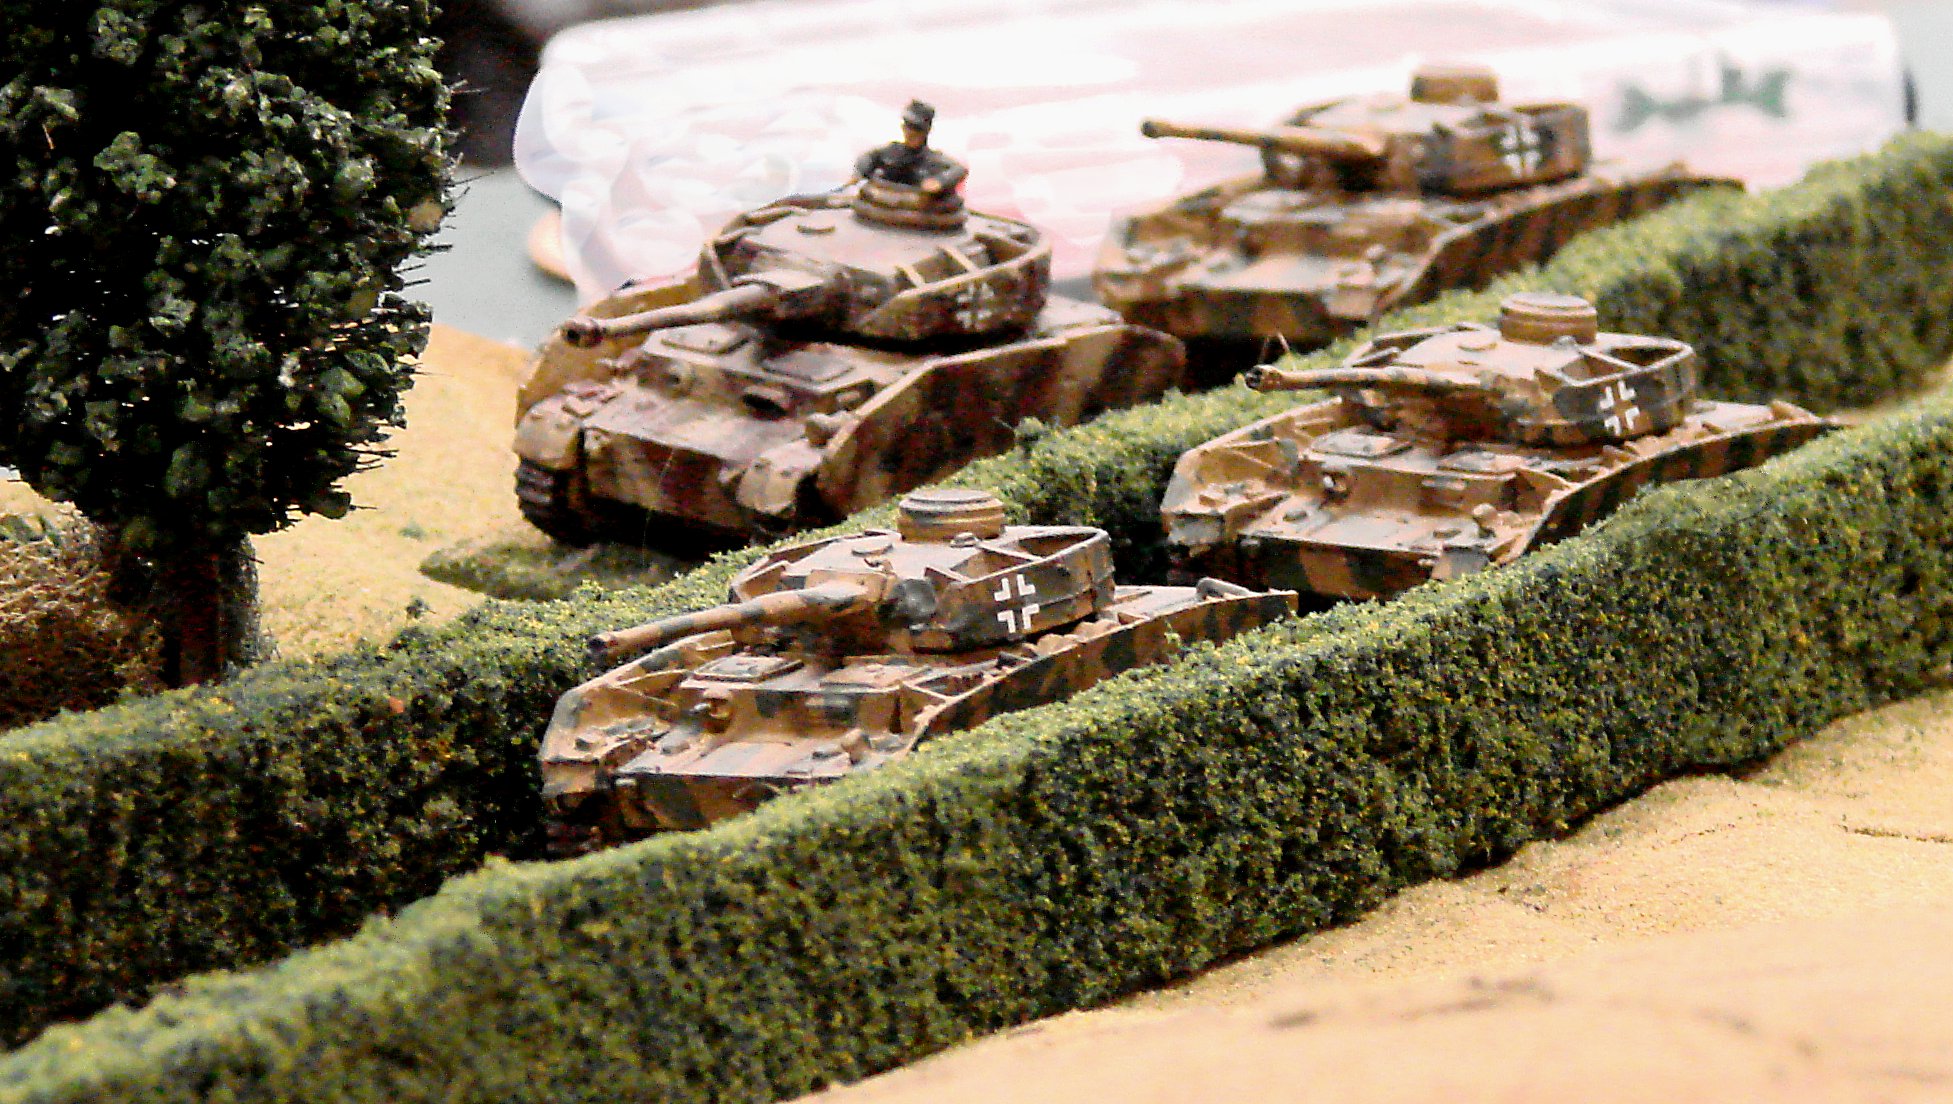
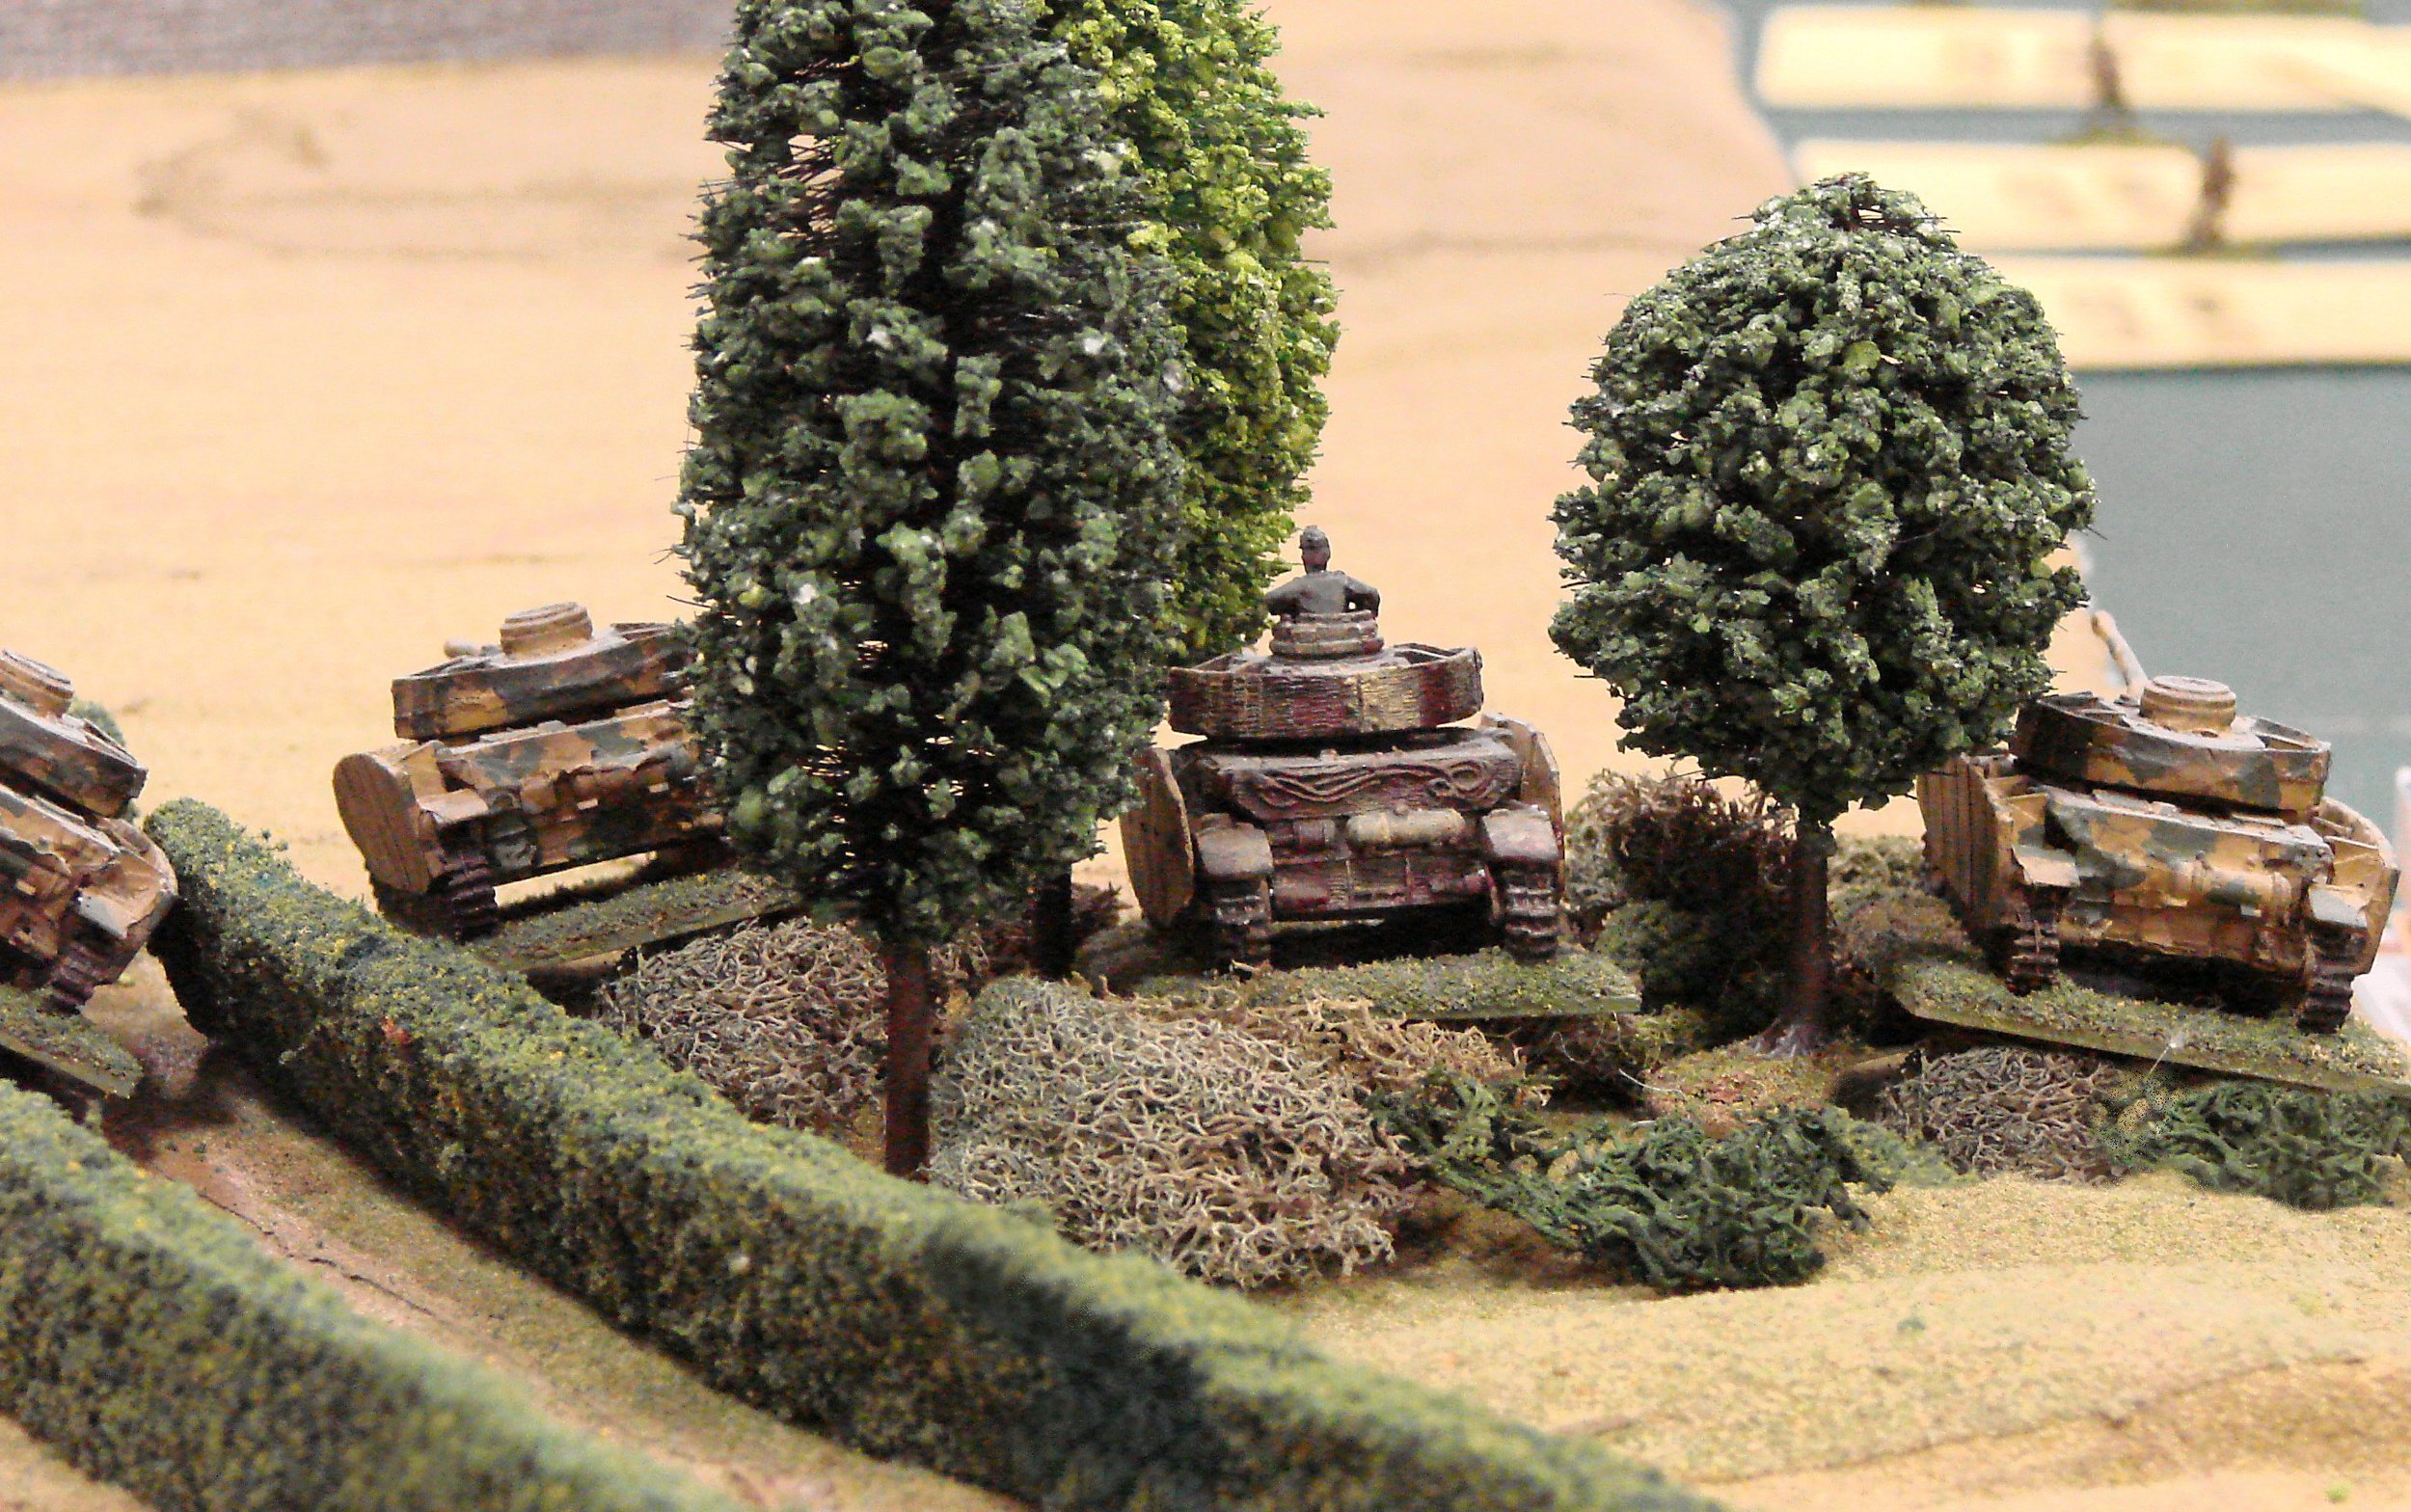
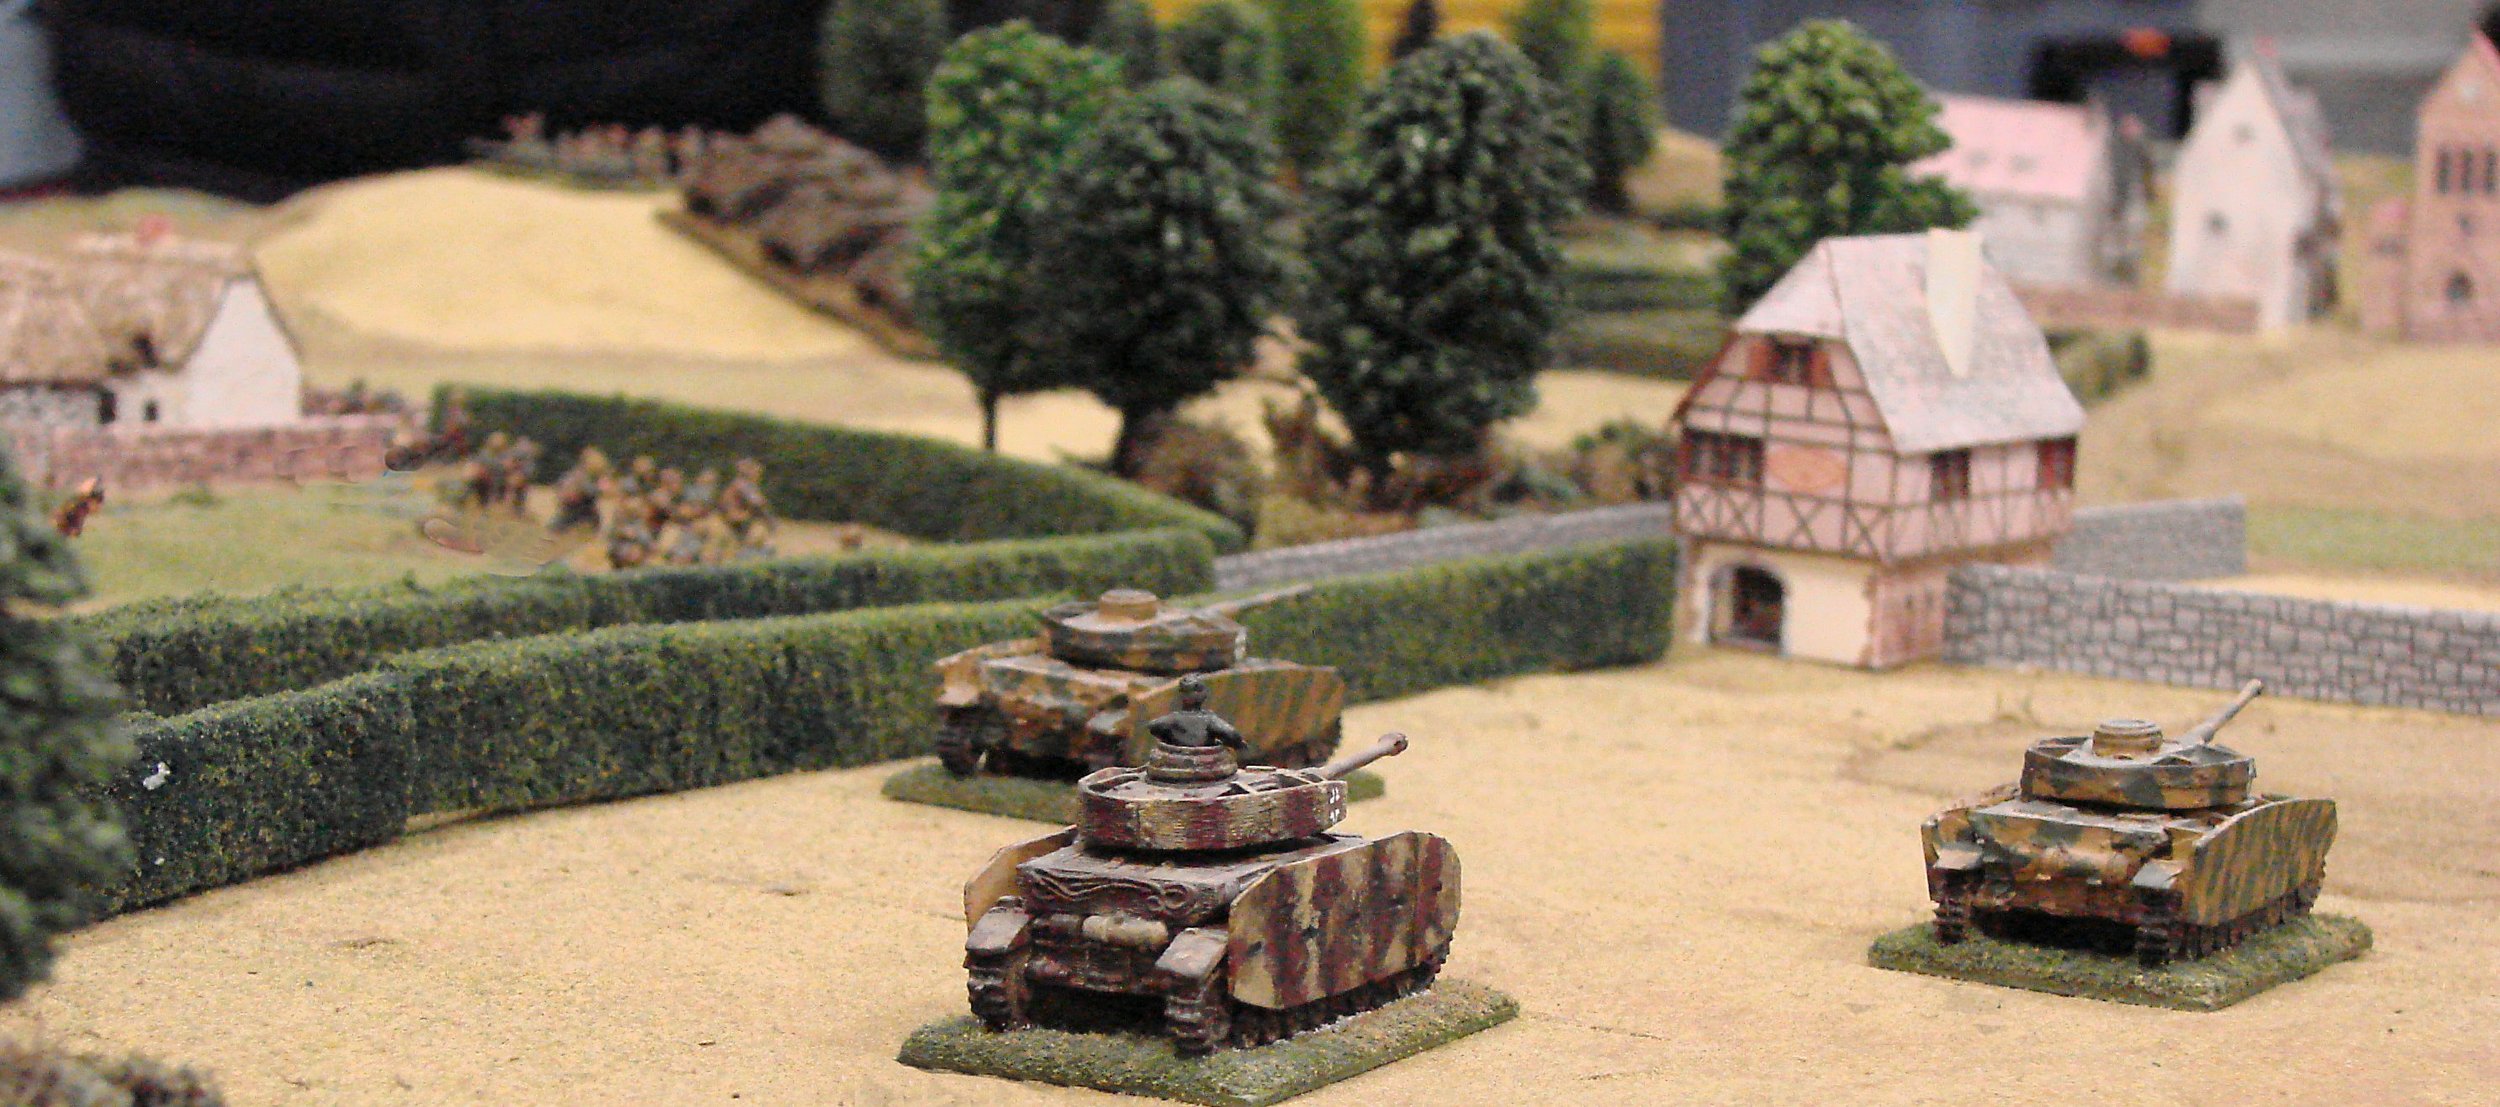
On the German left, the Hetzers faced off against a platoon of T-34/76 tanks. The Germans had a numerical advantage, four to three, and were “low profile” but the Soviets had some cover from the edge of the treeline. Despite this, two T-34/76s were soon ablaze, with the third immobilised but still able to shoot. Good work from the Hetzers.

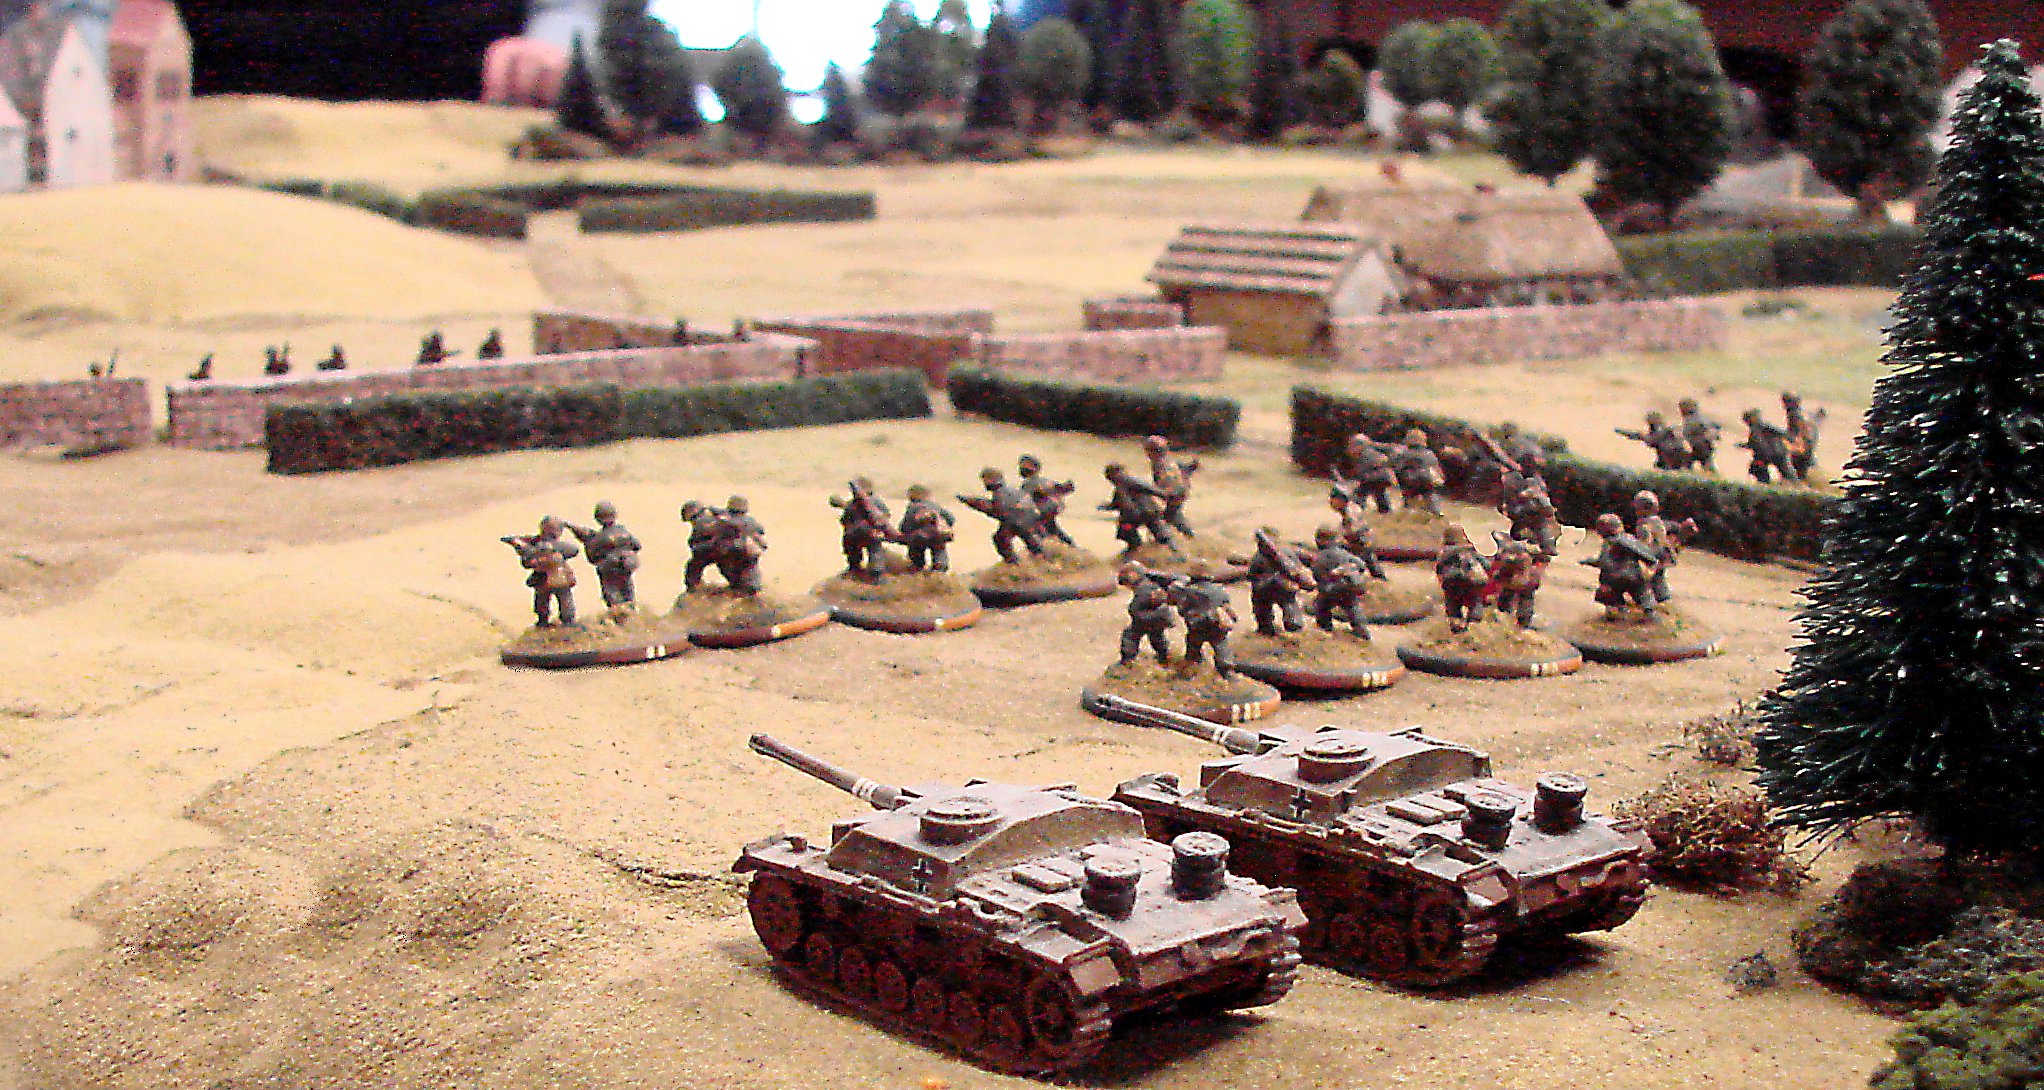
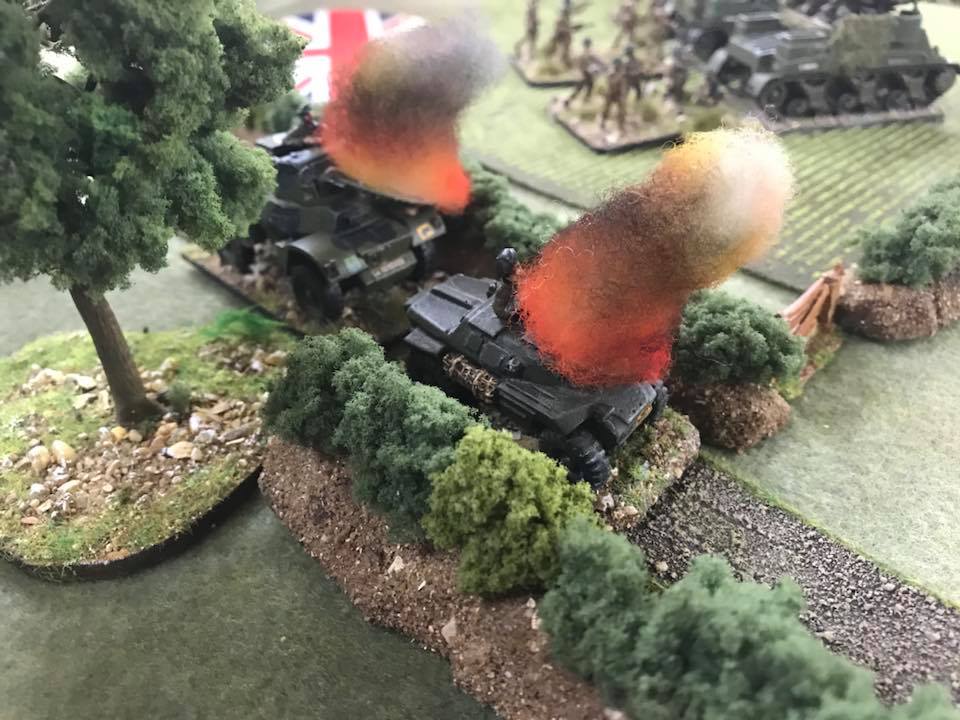
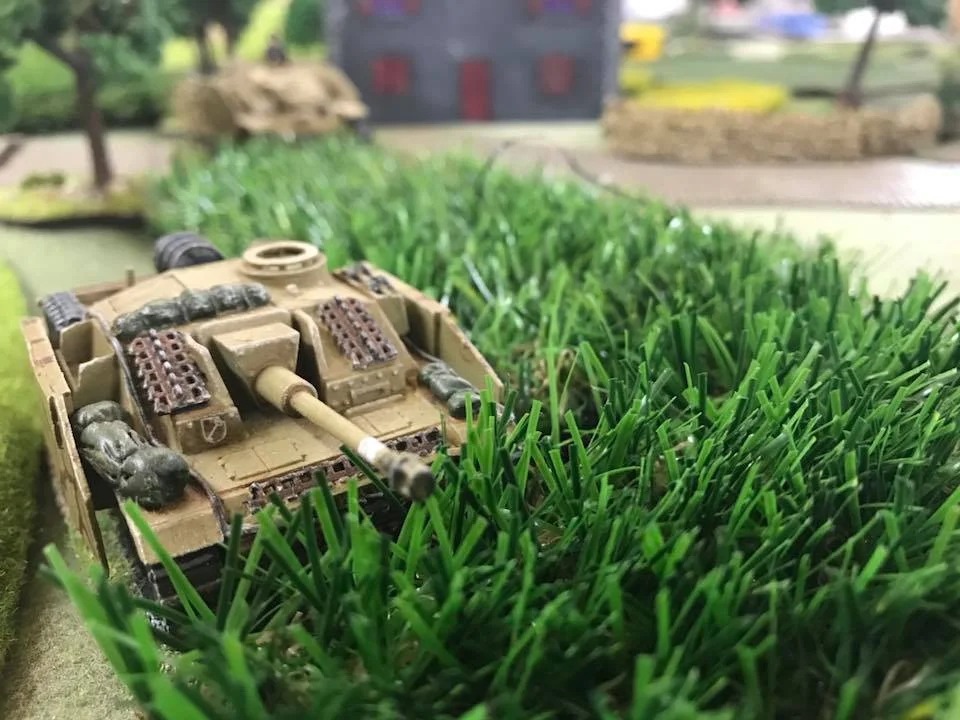
On the Soviet left, the lead platoon of T-34/85s bumped into the four StuGs. One StuG was immediately destroyed, with another having bits knocked off it right, left and centre. This was, however, just a temporary setback for the Germans: a moment later, two of the three T-34/85s had been destroyed.

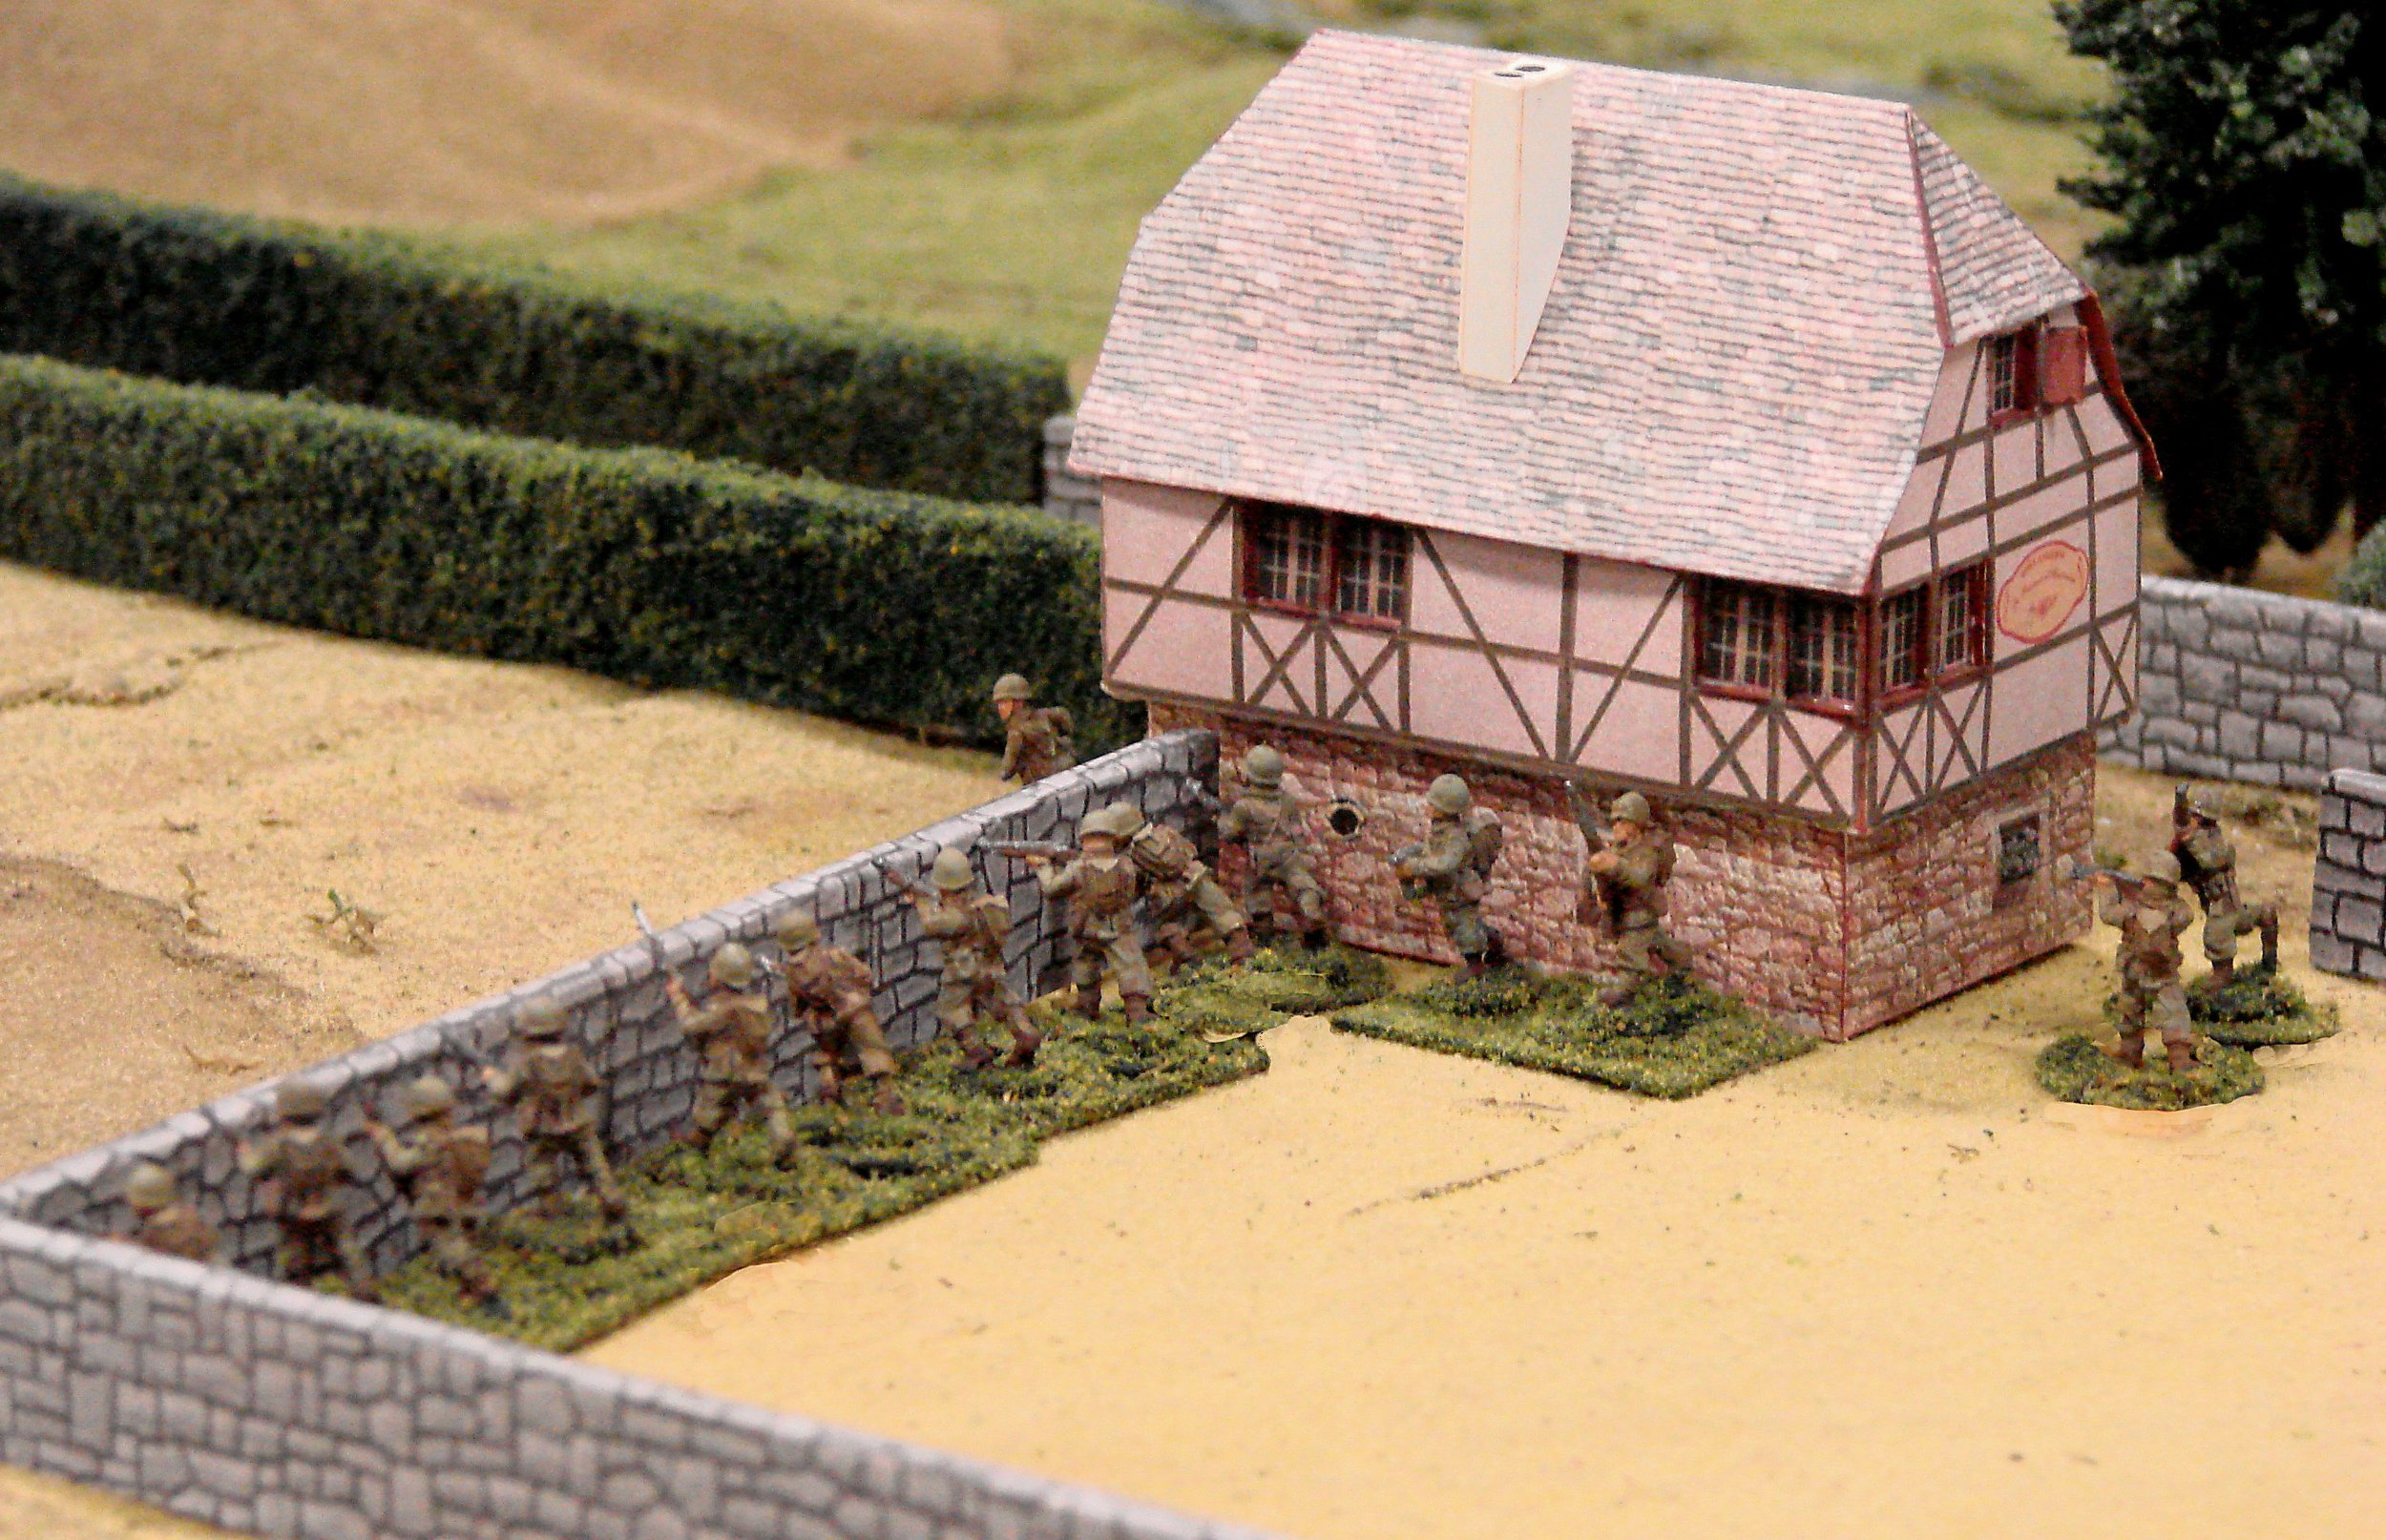
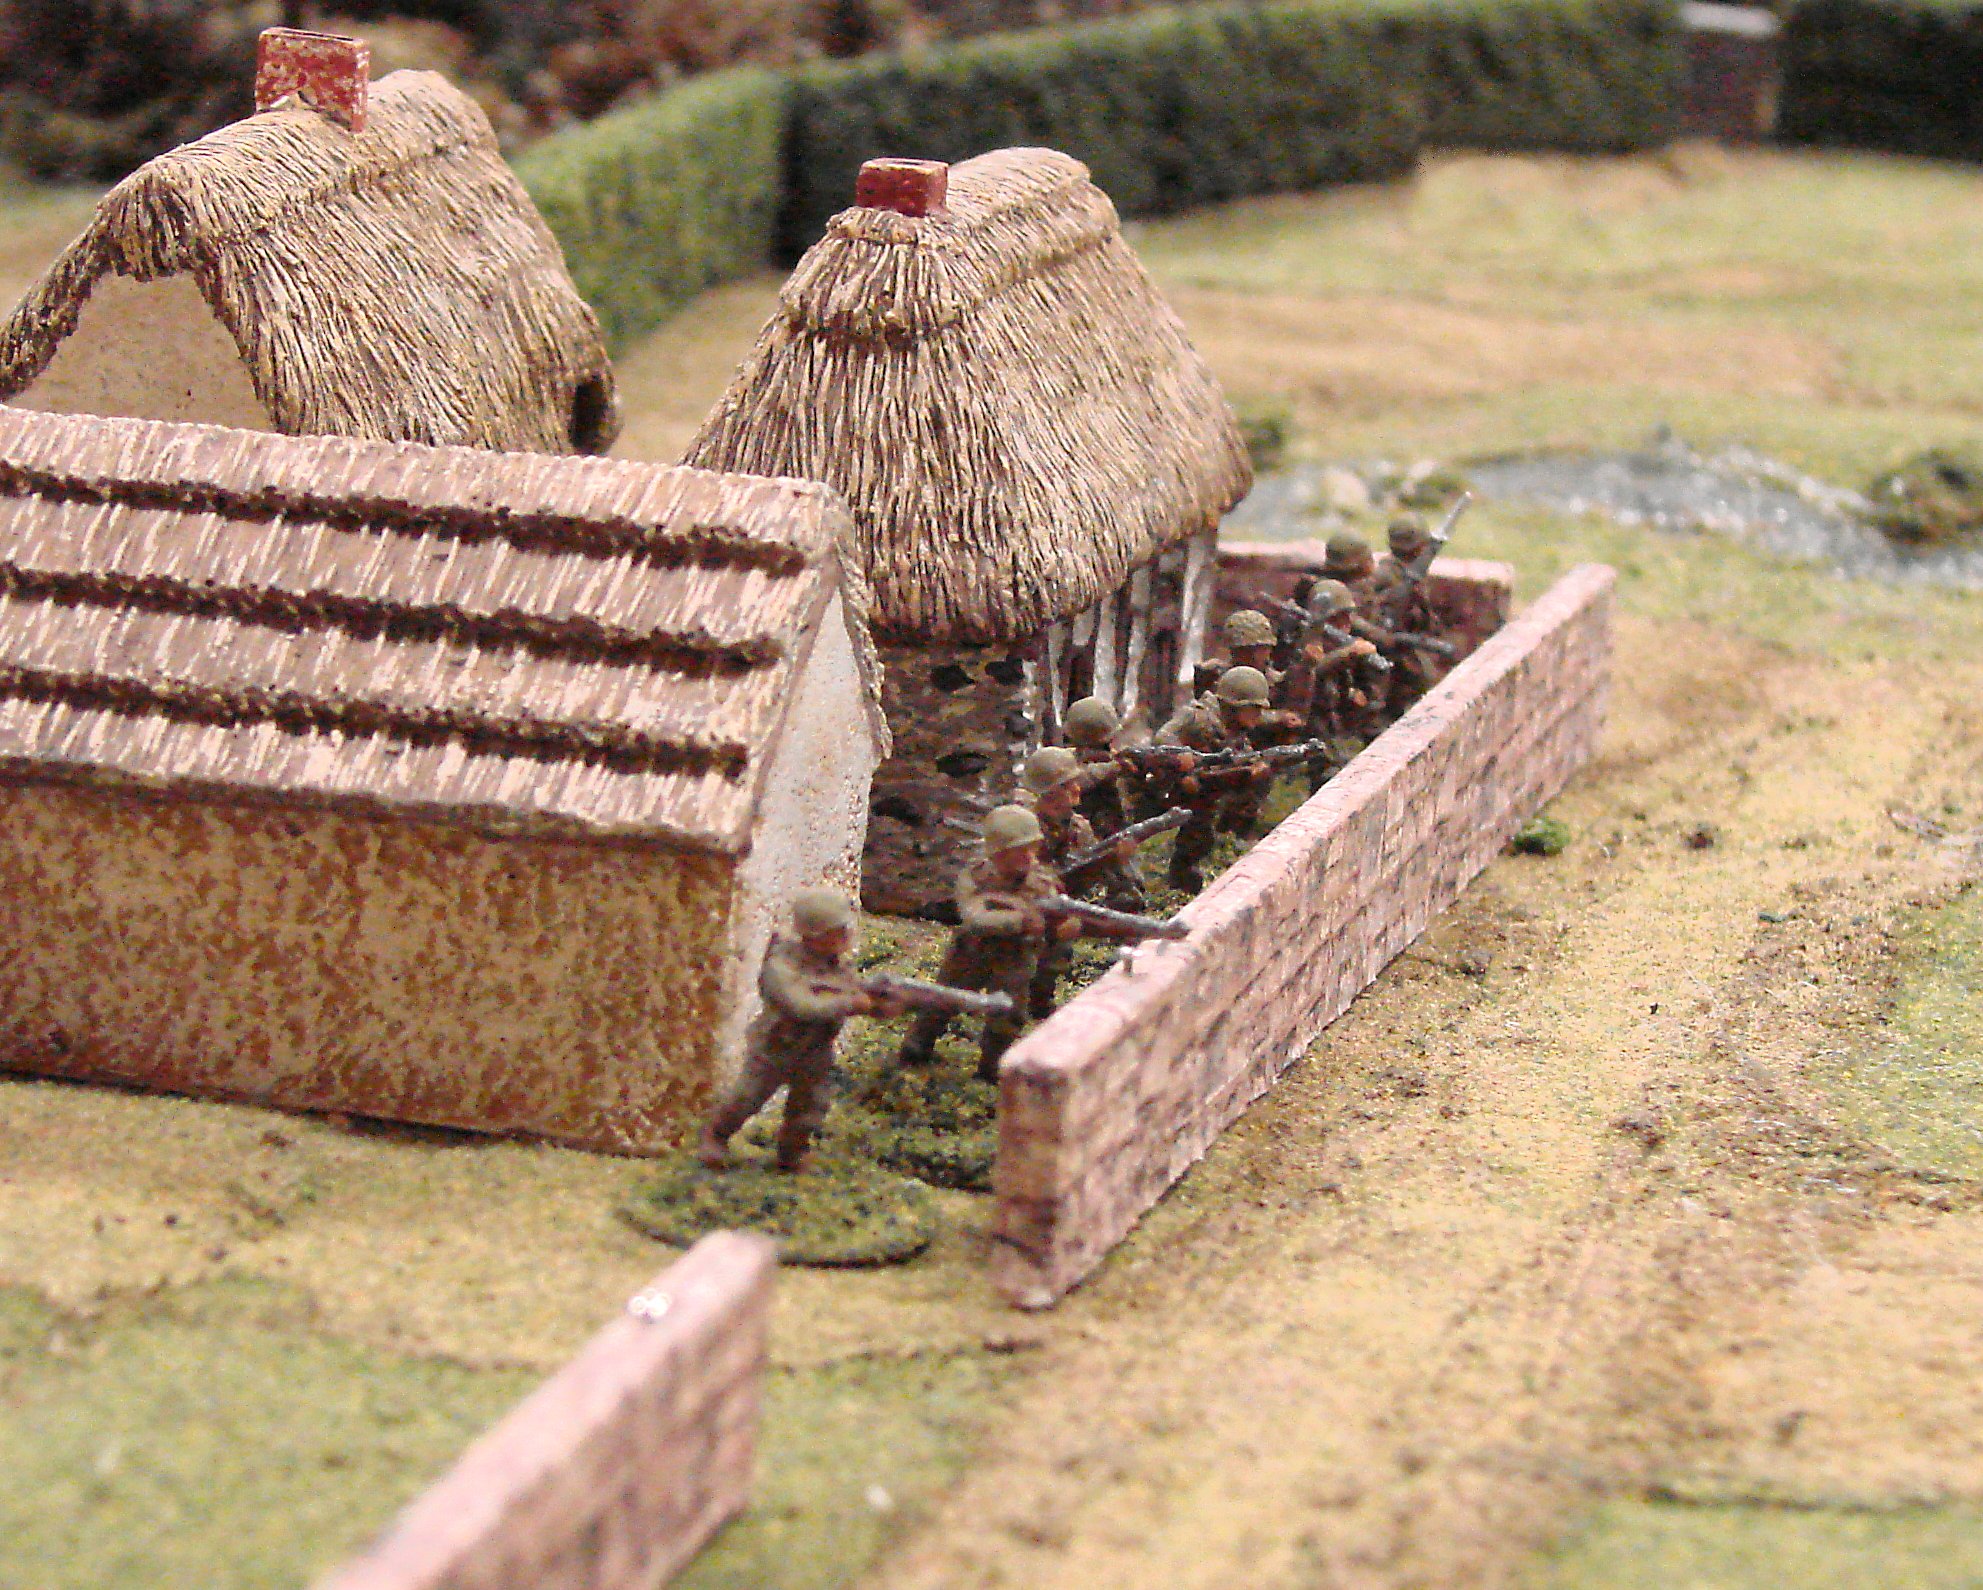
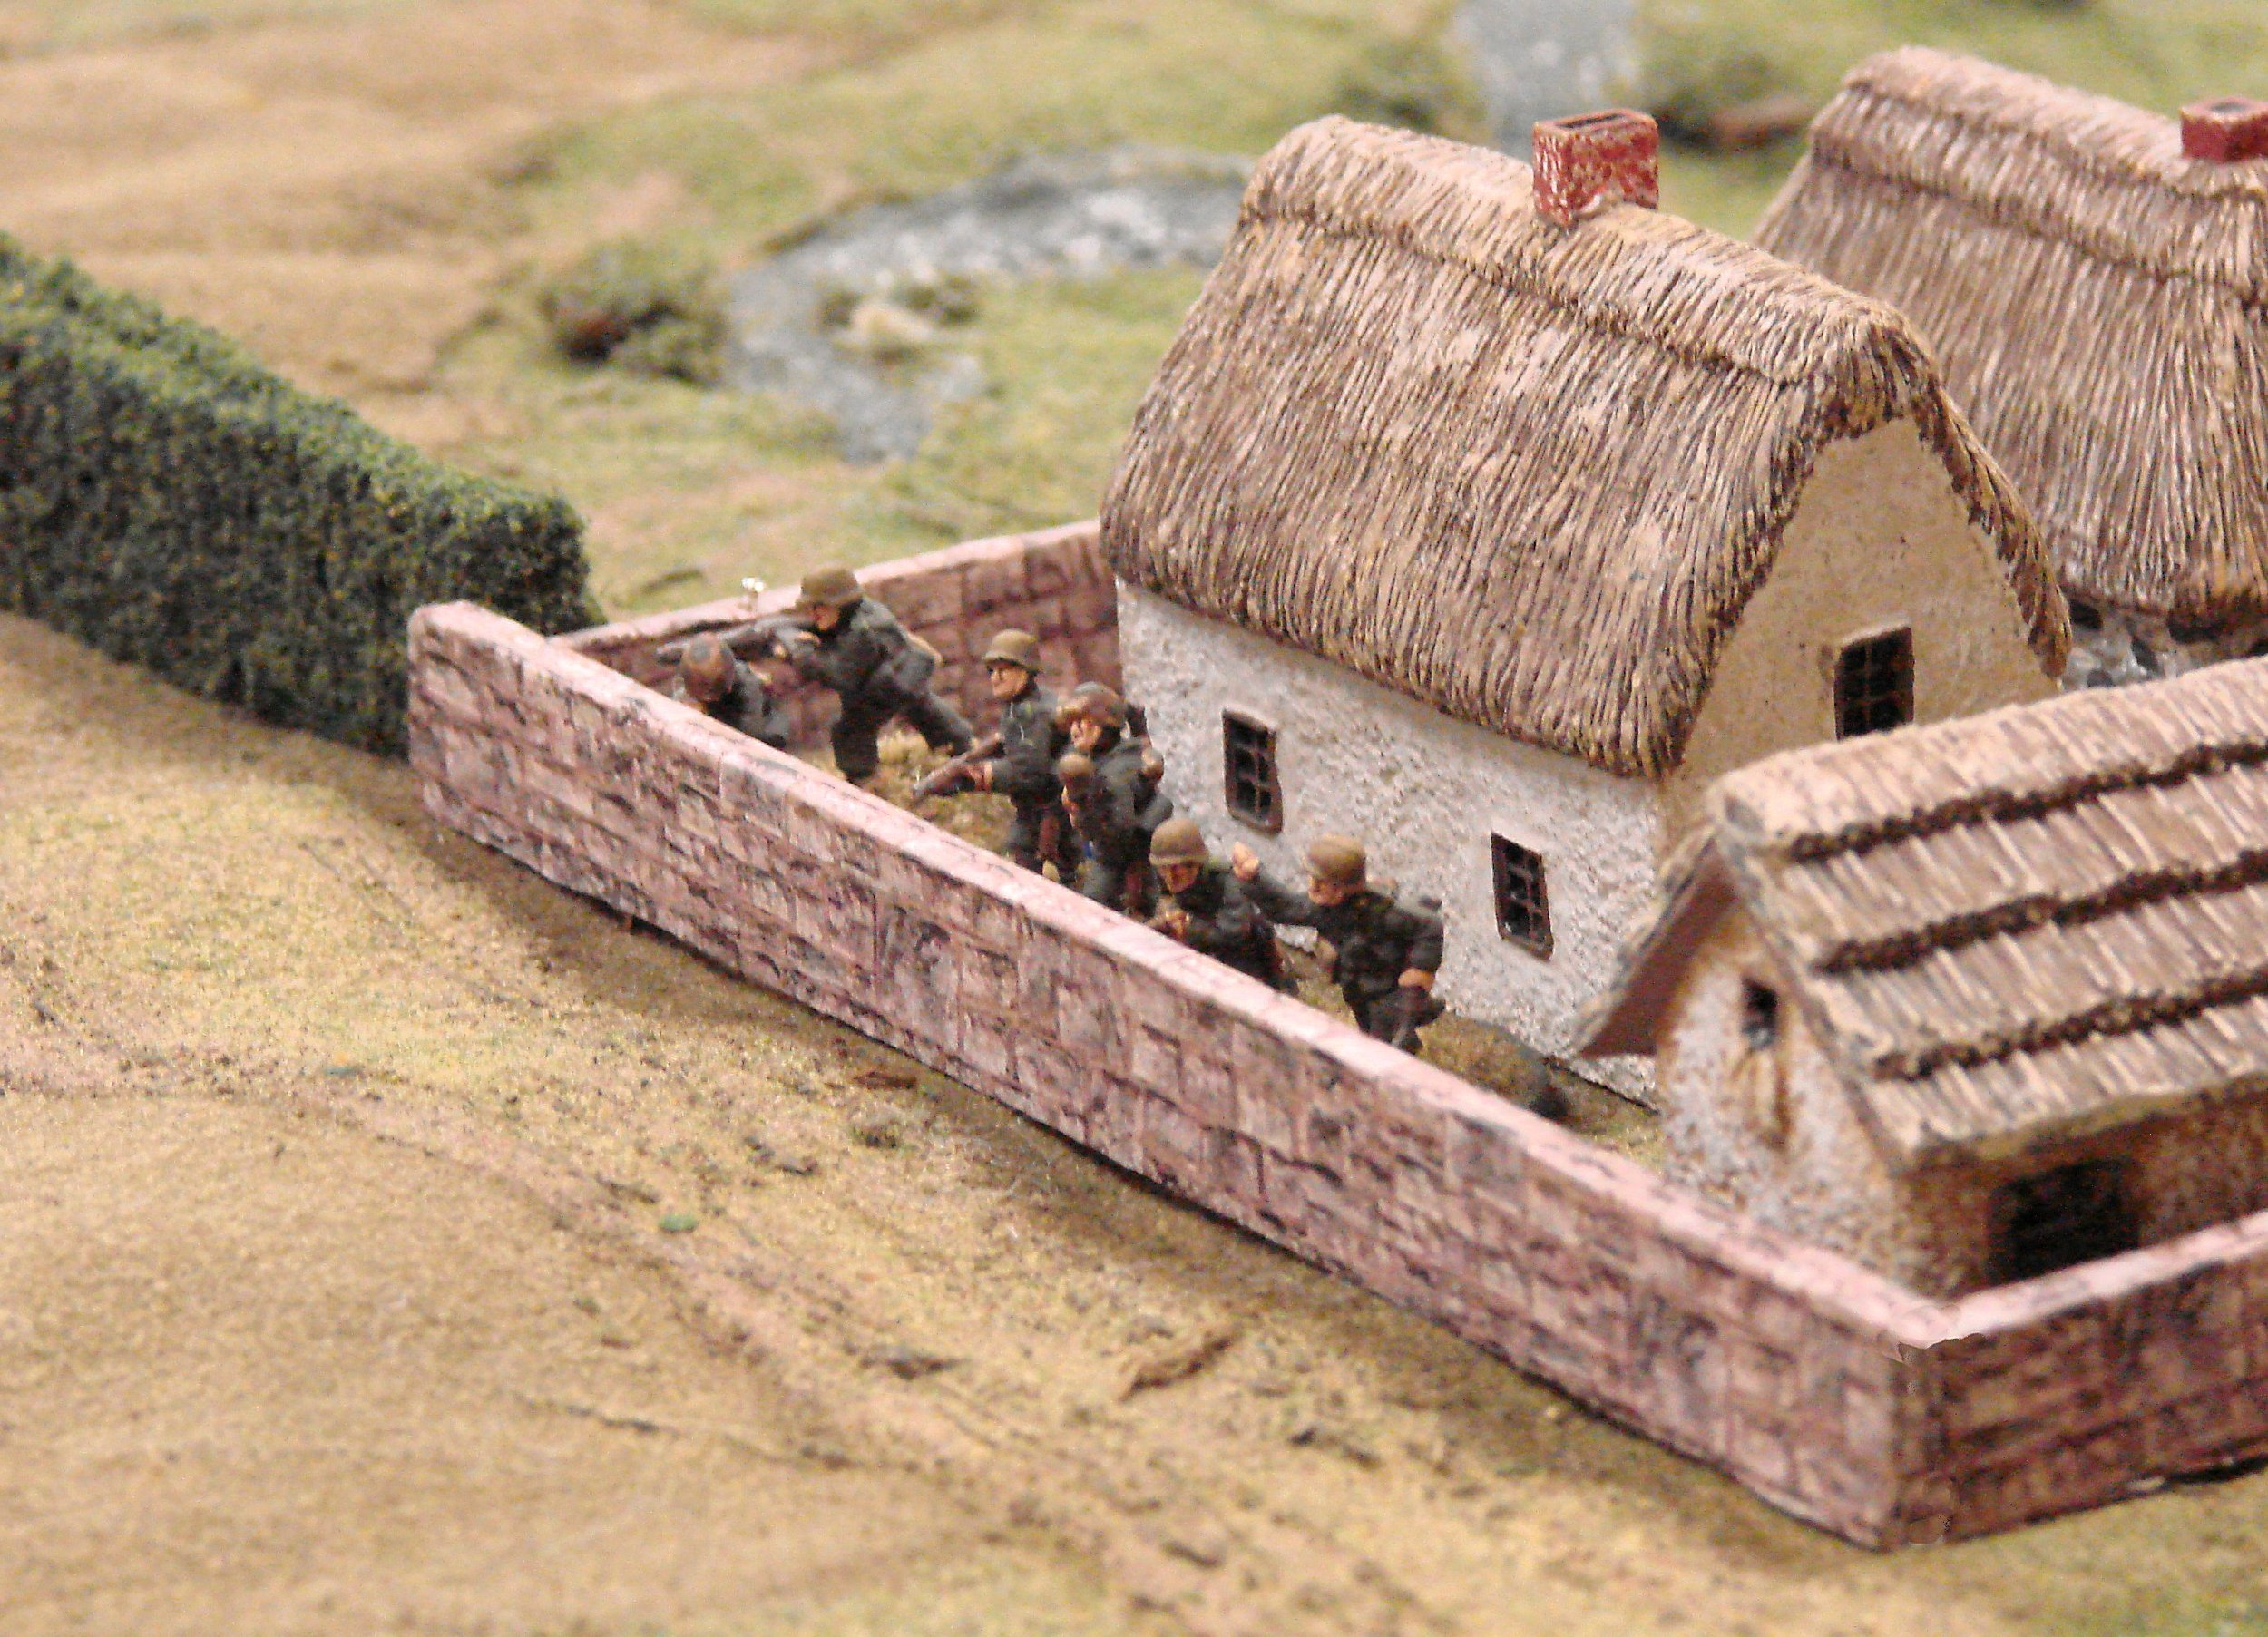
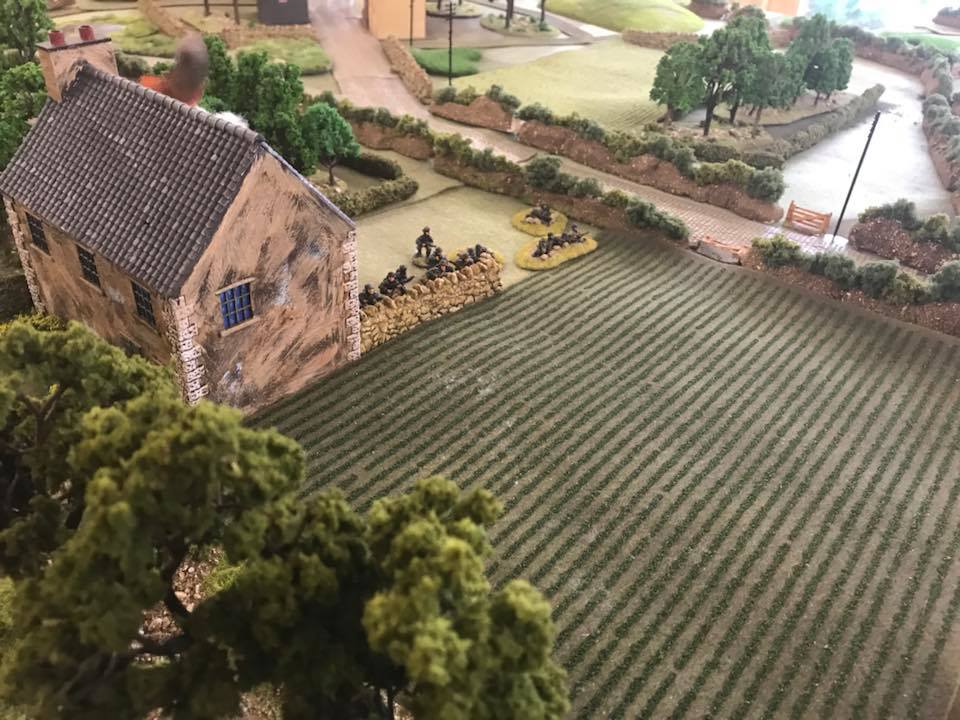
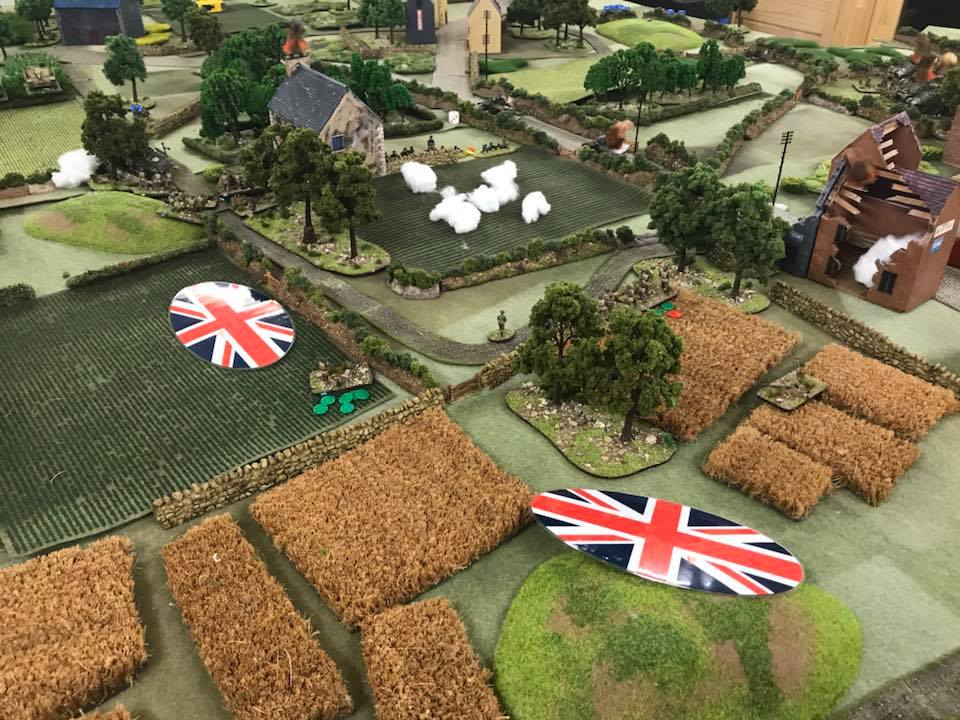
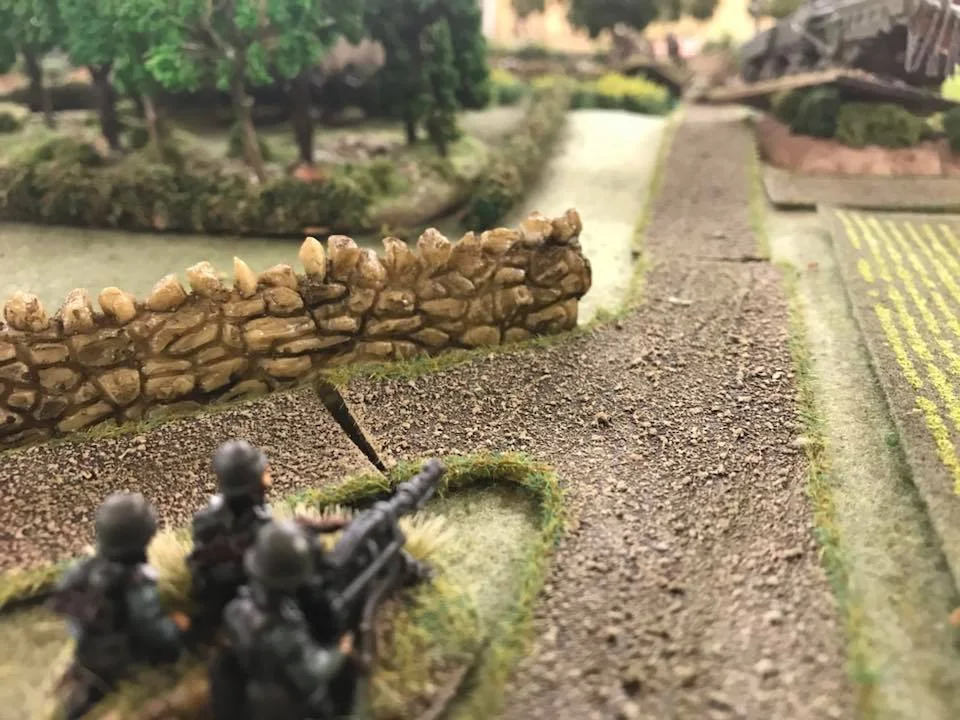
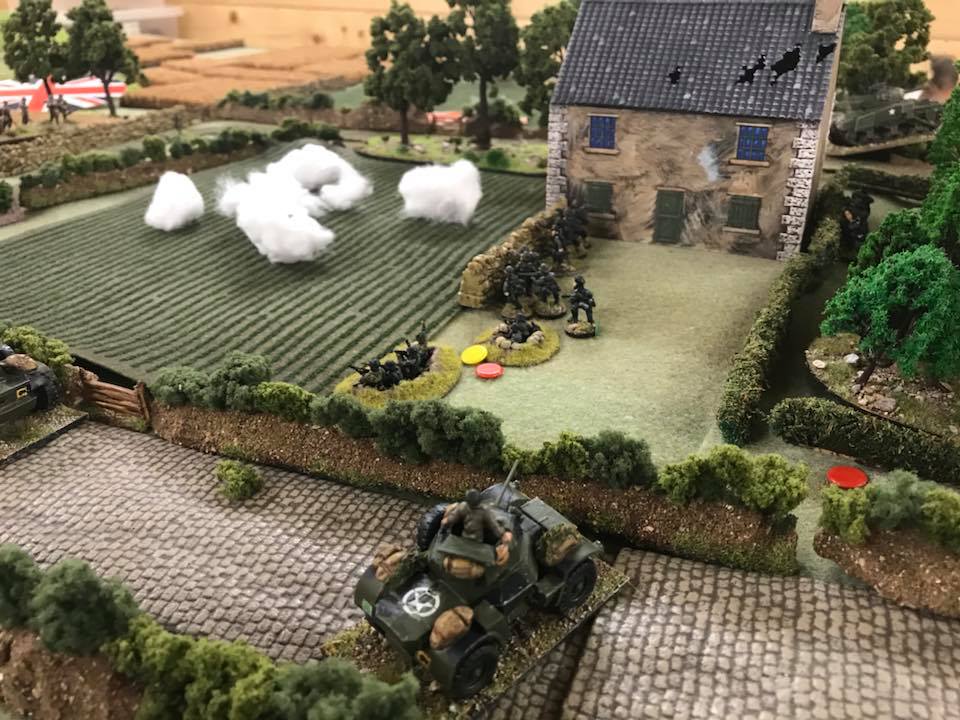
Meanwhile, in the centre, the German machine gun platoon had occupied a small dwelling on the flank of the Soviet armoured cars. They opened fire, but their initial volley was pretty ineffectual despite the flank-fire advantage. The BA-64s, on the other hand, returned fire and promptly took out the MG team in the house itself.

All this action had had quite an effect on each side’s force morale, with the Soviets already being down to under half their initial allocation, with the Germans not far behind them.

The Steamroller Reveals Itself…Too Late!

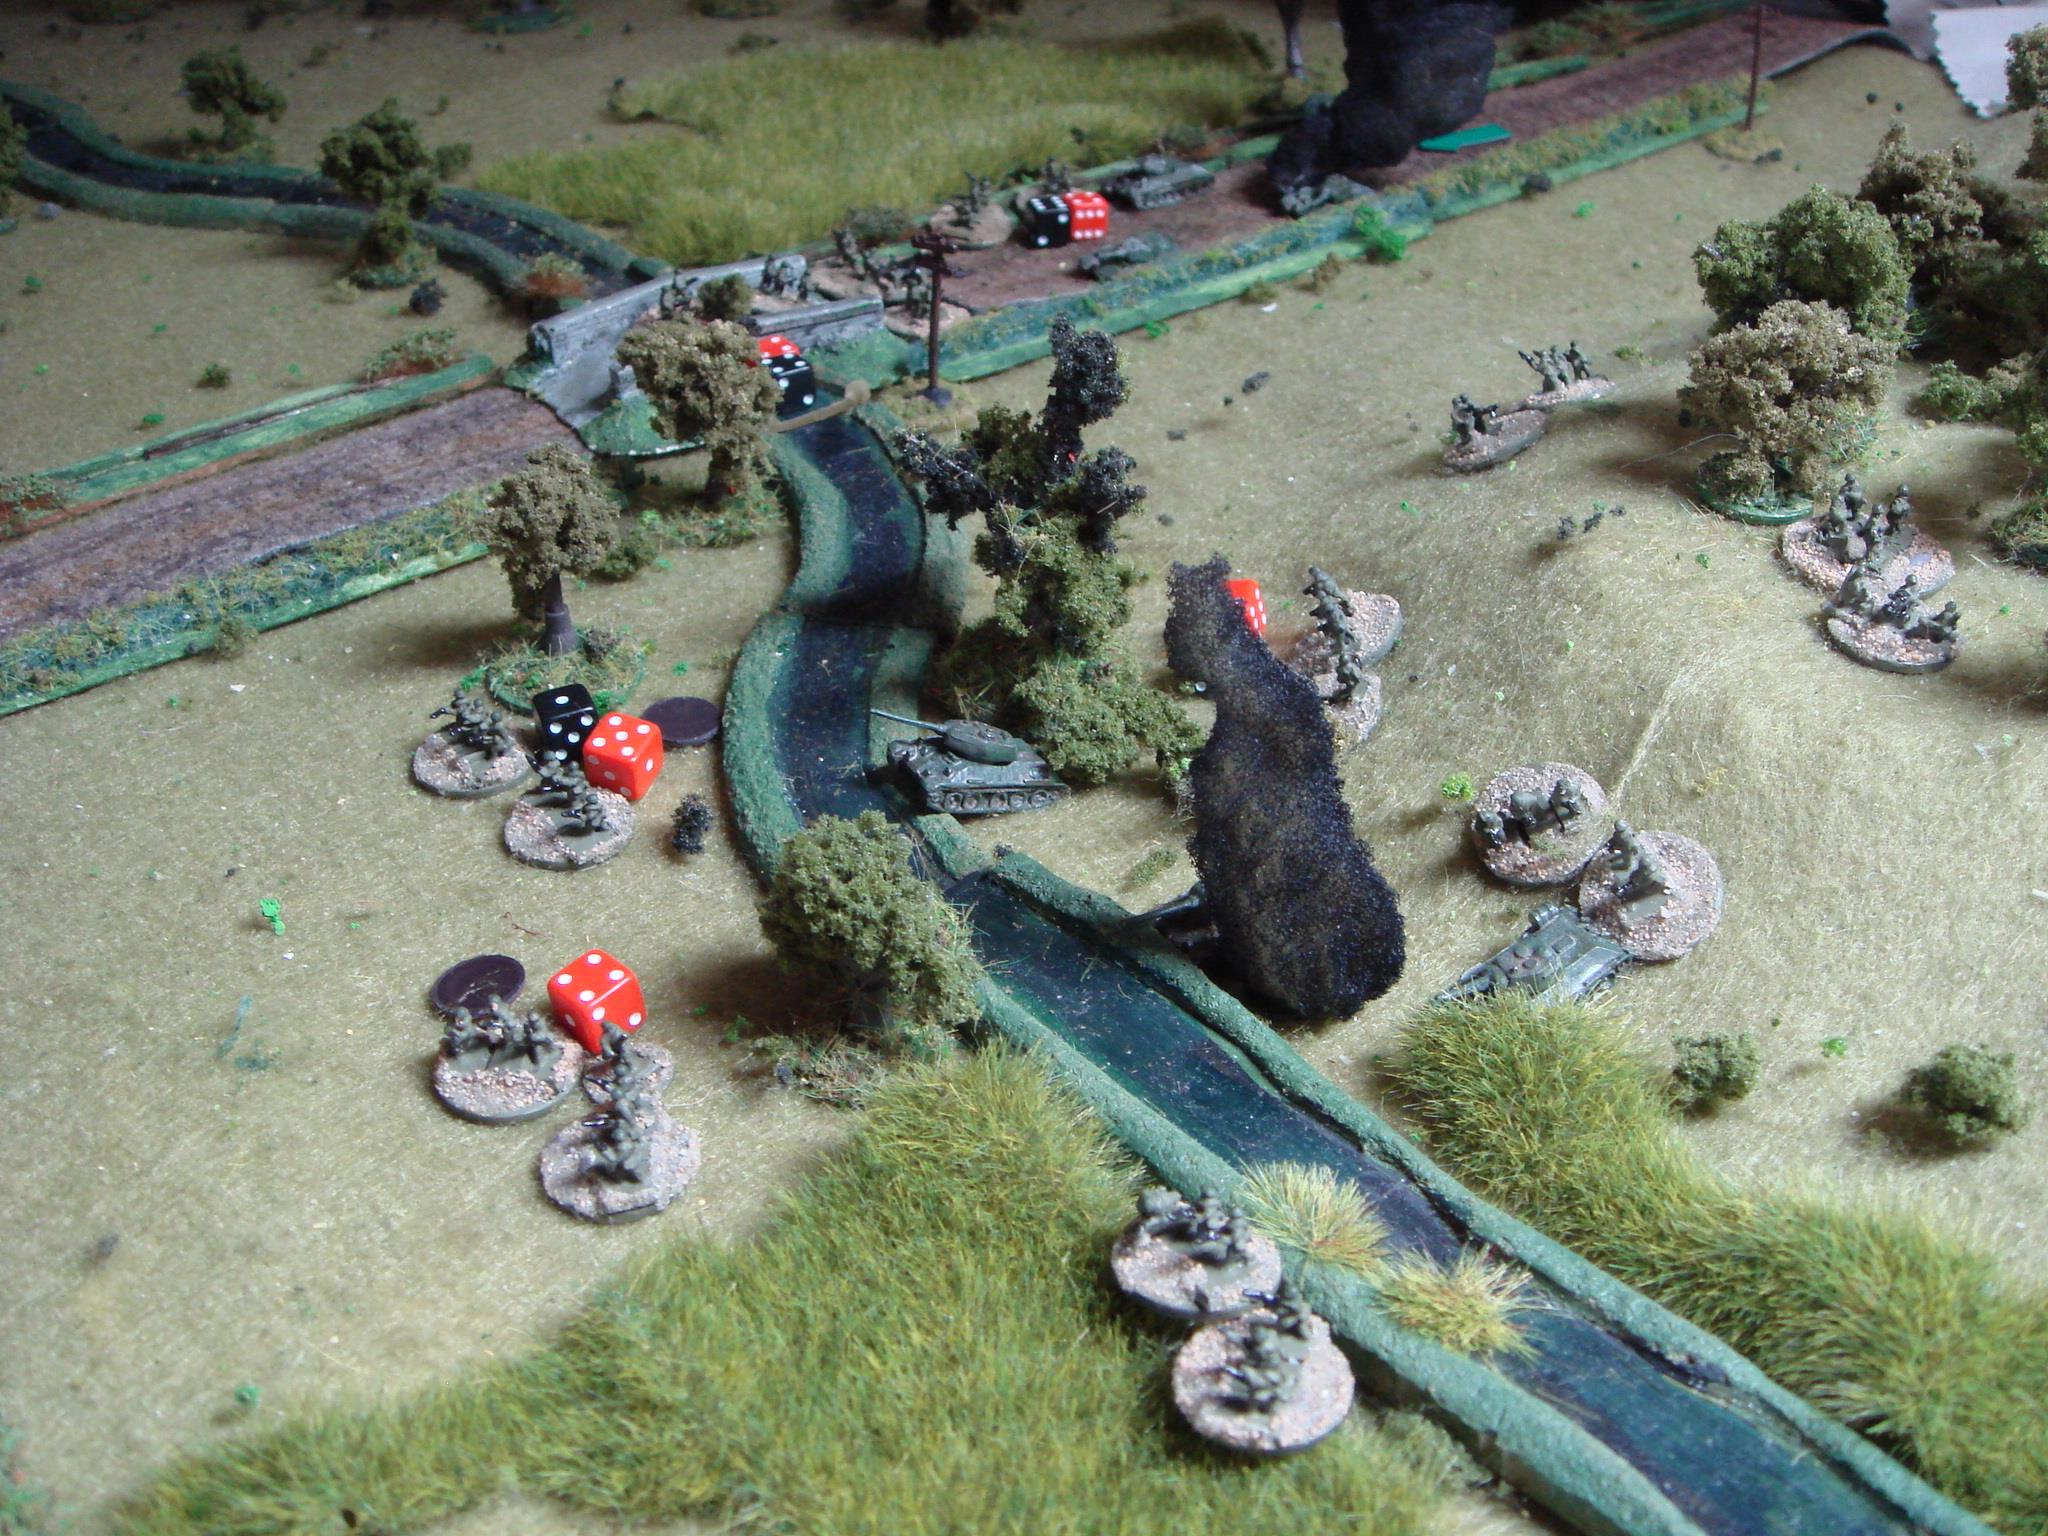
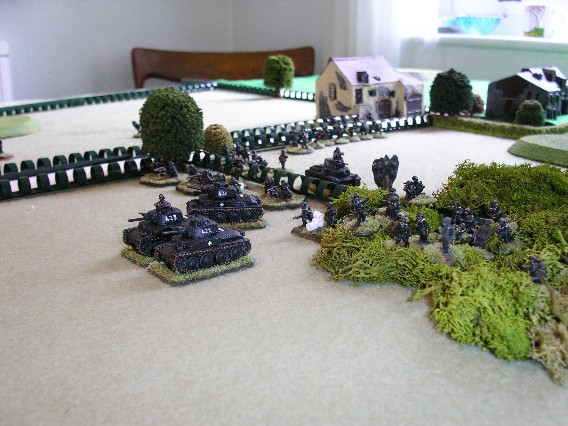
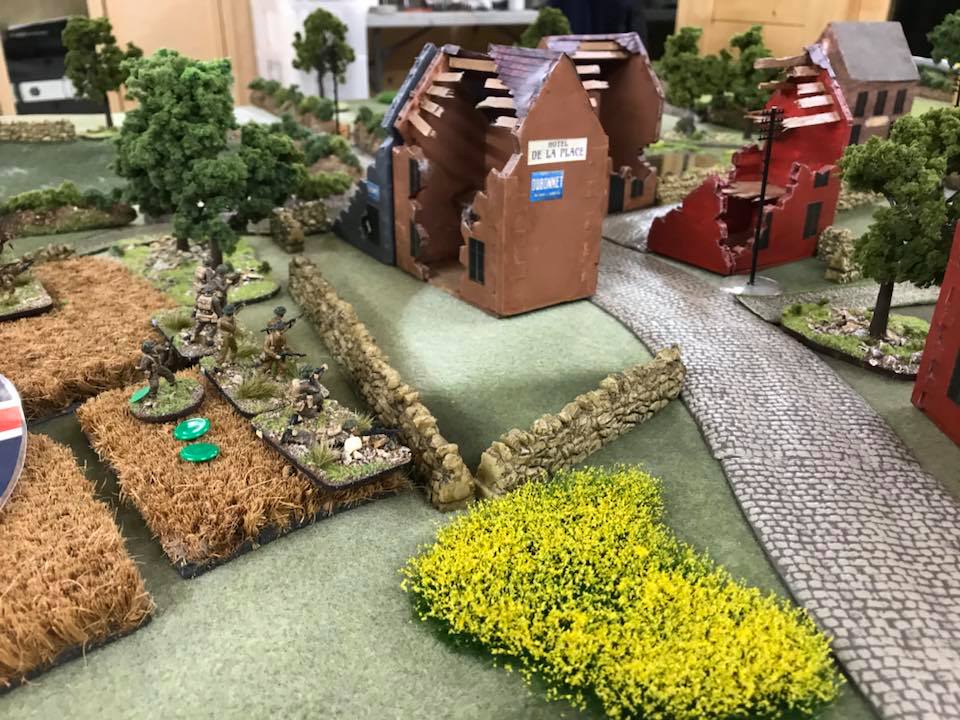
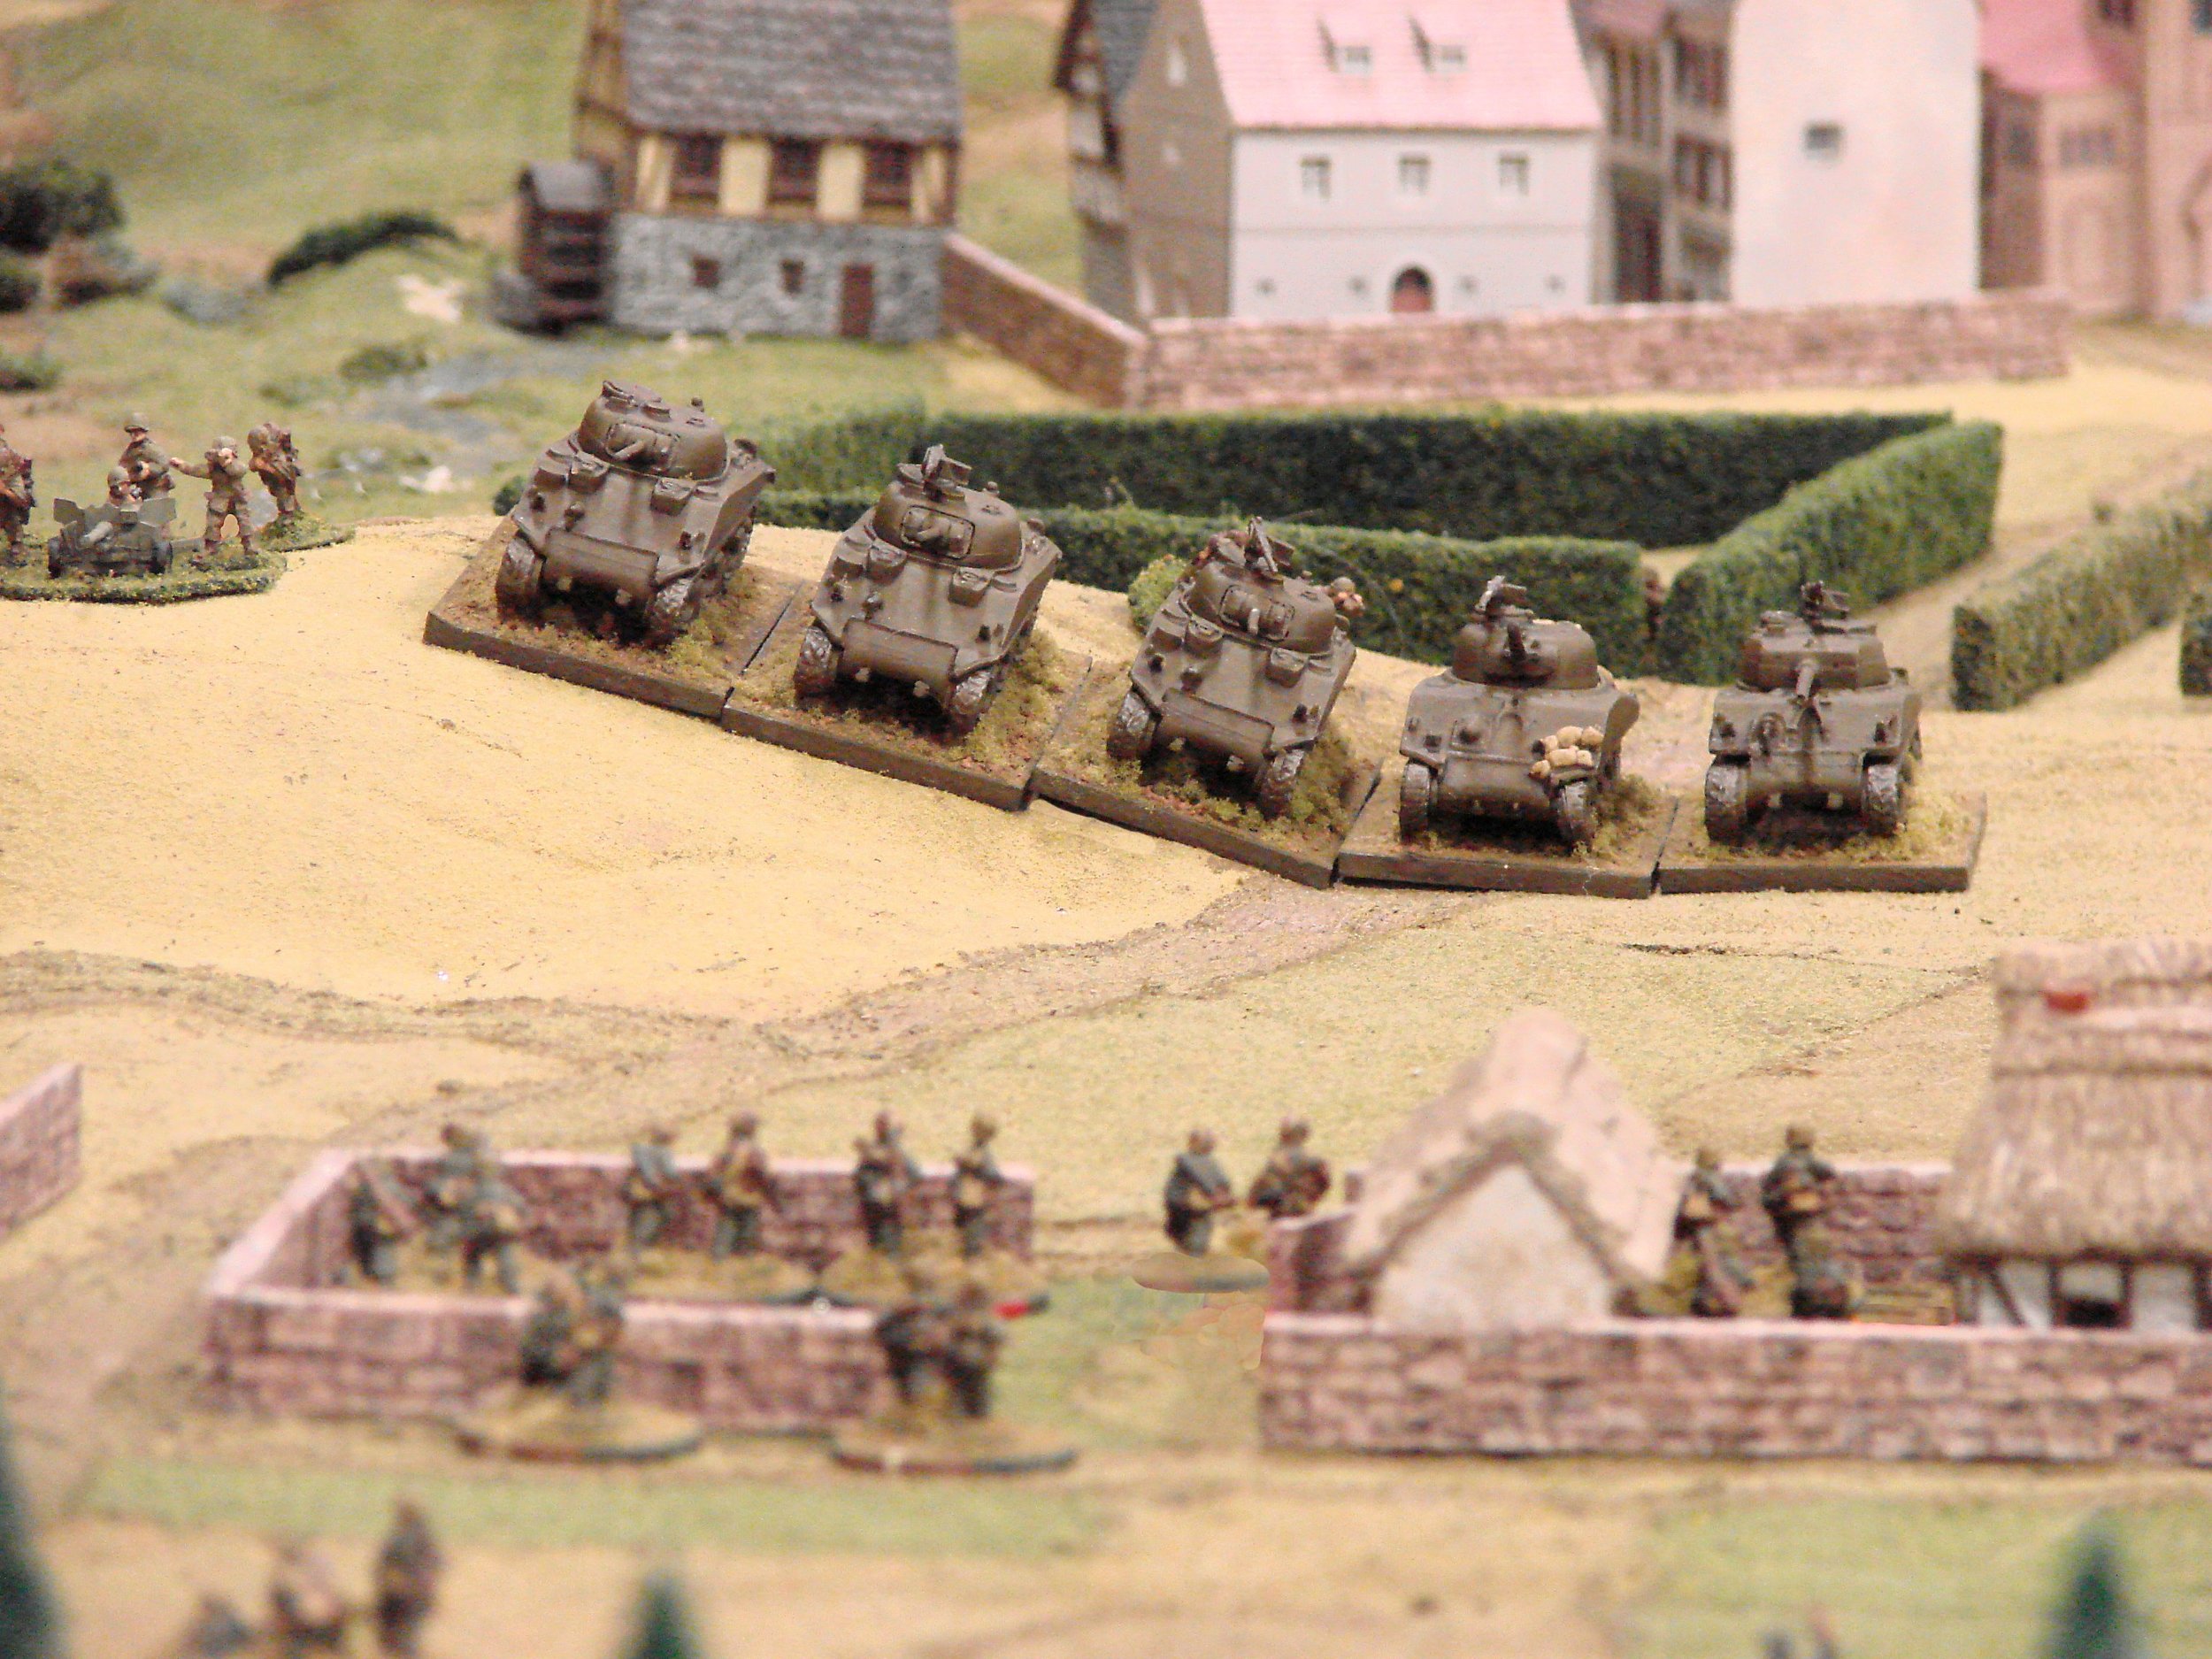
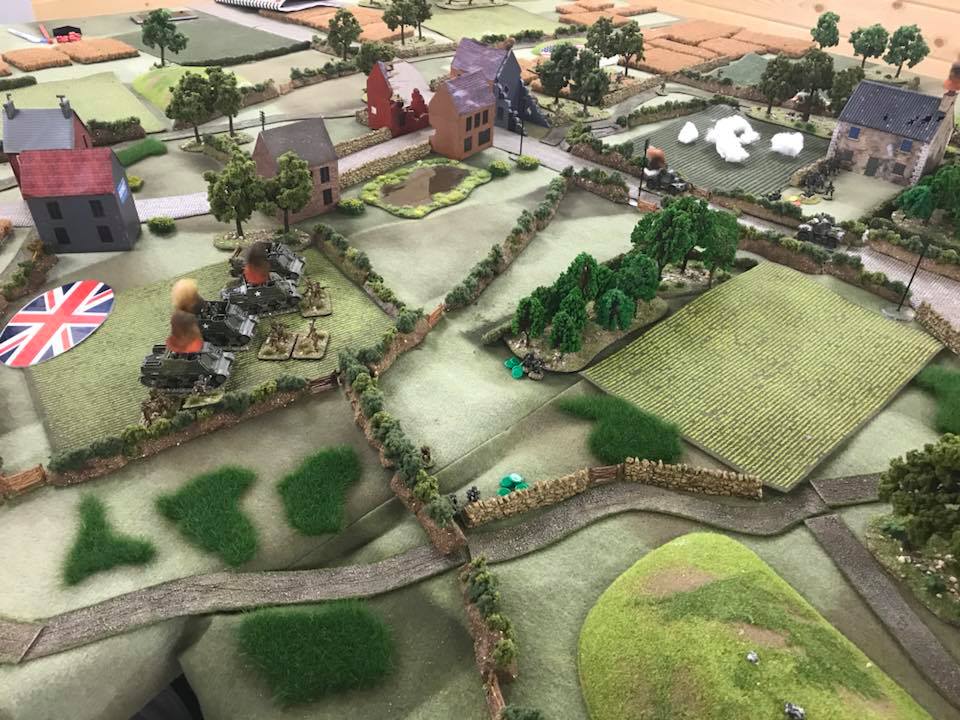
Now that they had located their enemy, the Soviet Blinds all moved forward and deployed. On their right, the largely destroyed T-34/76s were reinforced by the four SU-85 tank killers and a single T-34/85. In the centre, their infantry moved forward towards the edge of the treeline. On their left, the rest of the T-34/85s (three of them) appeared and moved forward to engage the StuGs.

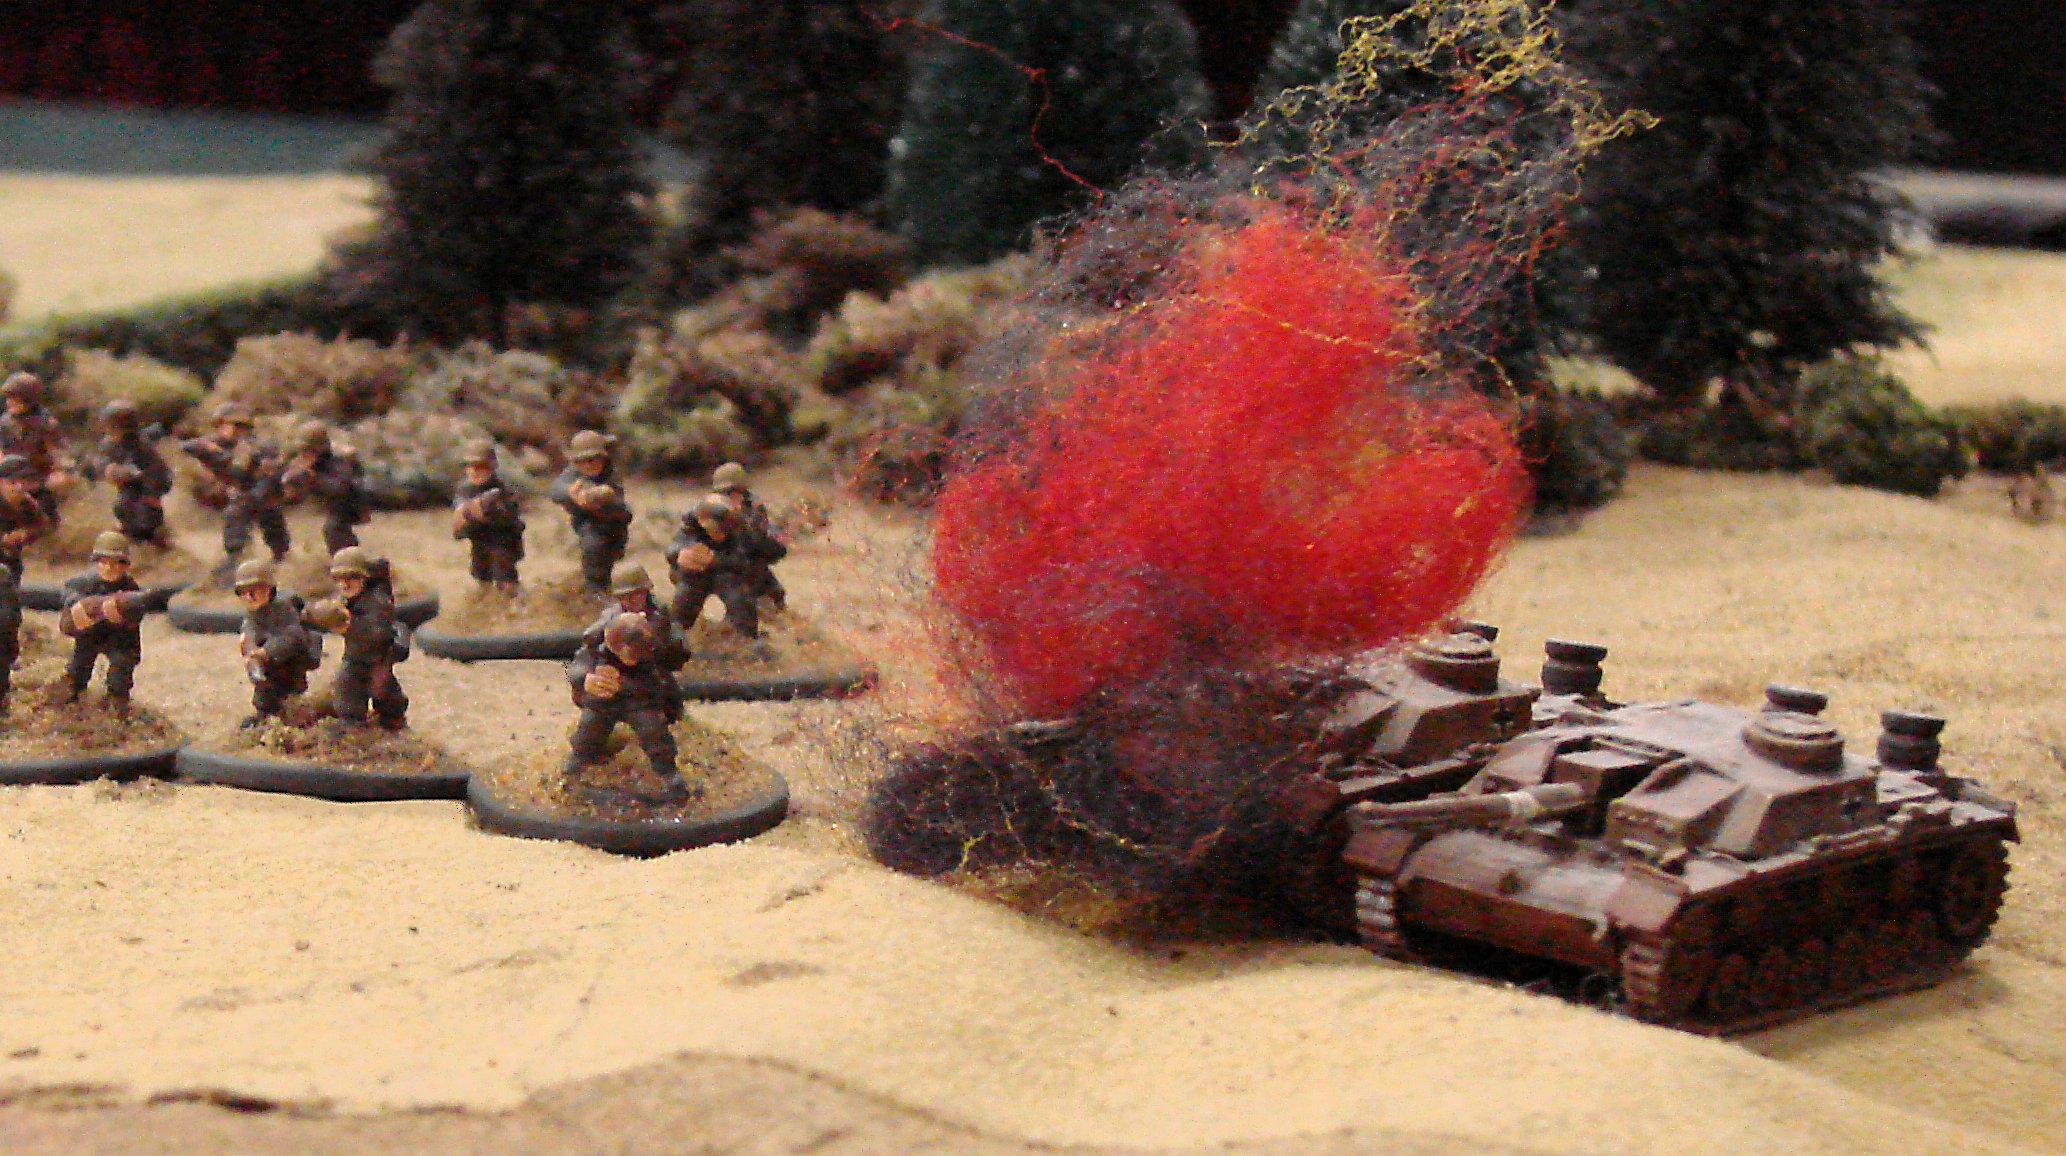
Unfortunately, the cards gave the waiting German Hetzers another round of fire, which they hammered into the newly-arrived SU-85s which, as tank killers, have a very big gun but pretty rubbish armour.

The Soviets had just thrown the tank-killers forward with no consideration for cover, and two were knocked out/forced to bail out almost immediately. This tipped the Soviet force morale into negative numbers, and they were forced to retreat. They would probe forward elsewhere…somewhere where the opposition was not quite as strong.

Aftermath

Both players declared it to be a great game.

John, commanding the Soviets, was frustrated that he hadn’t been able to bring his numbers to bear properly. In retrospect, he also thought that, as per Clausewitz, he should have concentrated his attack on either of the flanks or the centre rather than just advance on a broad front across the entire tabletop.

Dave, playing the Germans, was happy to have survived the Soviet onslaught. He was pretty happy with the way that his plan had worked, although had a few improvements that he would have made to his deployment.

As for me: well, I was happy too. A big game that both players had enjoyed on a big table with my new mat and with lots of new trees. What more could one want!

Robert Avery


I've been wanting to try out IASBM for ages, particularly when Chain of Command didn't "float my boat". Knowing how long it would take to set up (and tear down) a 20mm game I decided to go for 6mm instead, using my eight man section hexes as half-sections, so I've got sixteen figure sections...but who cares.

One of the nice things about doing in 6mm is that with ~30m = 4cm hexes its almost 1:1 ground to figure scale. Needless to say I'm converting the rules to hex!

The overall layout looks really nice. Both sides start on Blinds (like the Blinds idea). A weak German platoon is defend the village from an advancing British platoon.

The Brits get three 12" square (3 x 7 hex) stonks at the beginning of the game. But I then discovered that since all the Germans are on Blinds then all the Brits can do is reduce German Activations for next turn (but see Update below): which they do for two of the Blinds, despite one salvo being so widely off it picks up the next target (like the deviation dice). Doesn't look like the artillery rules give any benefit from being entrenched that I could see either (whether on Blinds or not).

Preliminaries out of the way then, on with the fight...

Long shot:  British at bottom, Germans in village at top

German Blinds in the village

Update

Realised that "stonk" is a specific thing in IASBM (it doesn't mention that at the start of the Indirect Fire chapter). Far nastier. Rolled for the damage on the two Blinds that got it: one twice. Not revealing to myself which of the two Blinds are real troops 'til I need to (by dice), so (as a German) hoping that the Germans are defending forwards!

Stonk results: Red Marker = Shock, White Puff = Dead

Going Well So Far

The effectiveness of the initial (corrected) stonk was blunted somewhat by the first few turns having Tea Break cards after the Axis Big men (removing Shock - ah, are they allowed to do that to Blinds?) but before the Brits could move!

Eventually the Brits got going, using the cover of the corn-field and in two turns were crossing the small hedges into the first orchard. The Germans spotted the far right British Blind - but that was revealed to be the dummy (1-3 on D6).

The next left British 3 platoon were also spotted by the German Blind in the forward house, but spotting back this was revealed to be a dummy - so there were no Germans in the first two buildings. The Company Commander doubled 3 platoon towards the house, and they quickly moved in, spotted the German Blind in the next house, and  tried to get off some rounds but not being at full effect caused no damage.

Interesting how simple the IABSM fire chart is:  no modifiers, just three range band and three target/shot categories...seems very odd! 2 Platoon also pushes forward and into the left hand near house, being spotted as they do so. Spotting working well and love the Blinds.

Now that the situation was clear, the German's defending the two rear houses (left and centre) and his forces balanced also to the left it was time for the company commander to sit down and do his appreciation or Tactical 7 Questions.

In "normal" wargames mode the Brits might just push on, squaring up against the two German strongpoints, and their two MG42, and probably get wiped out. All the Sandhurst training though says to focus on the right building, leave 3 Platoon as a fire base and then go right flanking with Platoons 1 and 2 with bags of smoke. So our gallant company commander calls for 1 Platoon to swing across to the right, followed by 2 Platoon (do they leave the 2nd house vacant?) to make their way to an FUP and start line. We'll see how it goes...

The picture above shows the situation at end of Turn 3.

Only 1 Platoon is left on a Blind on the British side. At the 1:1 scale, 3 Platoon by the right near house is only just visible.

The Action Continues

After about another turns of damage which forced one section of 3 Platoon to withdraw under the "loss of bottle" rule (and down to three men!) the Platoon Commander finally managed to get the 2" mortar to lay a smoke screen in front of the German position.

At the same time 1 Platoon (still on a Blind) and 2 Platoon started to swing right behind 3 Platoon ready to launch a right-flanking, bags of smoke assault.

1 Platoon in position, 2 Platoon almost there. The screen is now fully stoked so has four turns left, and the German Zug 2 commander has brought up his reserve Gruppe to cover his left flank in expectation of a British assault.

Should be time to test the hand-to-hand rules!

The Attack Goes In

The British attack finally goes in. 3 Platoon is providing the smoke and firebase, everyone else is going right flank, bags of smoke, with 2 Platoon on the left and 1 Platoon on the right.

2 Platoon realise too late that making a full 2-3 Activation move to reach the enemy will lose them dice in the melee, so they stop short in the smoke to await the next turn. 1 Platoon has swung nicely wide and sends 2 and 3 Sections against the Gruppe lining the hedge (a flank guard recently moved up), whilst 1 Section goes in against the rear of the dug-in  MG42.

2 & 3 Sections get surprisingly bounced, but inflict a fair amount of damage. 1 Section also has a tough time and takes two rounds to get the MG42 team (well, one man) to retreat.

Next turn 2 Platoon finally goes in, and again take a lot of damage from assaulting the emplaced infantry head on. 2 & 3 Sections are going against the Gruppe lining the hedge, and 1 Section against the weak Gruppe in the house.

1 Section gets bounced - unsurprisingly - but 2 & 3 manage to secure their objective and the German Gruppe is reduce to one man, pulls back, and loses it's Big Man.

Next turn, the smoke finally clears:

2 Platoon activates first and sends 2 Section left against the building and 3 Section right against 1 Platoon's opponent. Despite their losses, 3 Section wins out, but 2 Section is repulsed, although only one man is left in the building (and only one Shock so okay!).

3 Platoon then activates, and pours in all its firepower, which ends up being far more effective than earlier in the game (was I doing something wrong?) and kills the brave bloke!

1 Platoon and 2/3 Sections recover in the Orchard whilst 3 Section/2 Platoon finishes their work, right

The 3 Platoon firebase and target house

A quick regroup and then its time to turn the British focus onto the second German Zug, still on a Blind in the other house the other side of the T-junction.

1 Platoon is just about battle-worthy (two men down per section, so only two Activations each). 2 Platoon has lost one section and has quite two weakened, so they'll join with 3 Platoon (which has lost 1/2 section) to provide the firebase. It might be nice to swop 1 & 3 but 1 is in a better position to go right flanking and get right behind any German emplacements. 2 Platoon can also provide 3 Platoon with its smoke for the screen.

The next objective - the remaining German Zug, still on a Blind!

Overall this phase went quite nicely. Juggling men lost and Shock seems a pain at times for no real benefit. Also I ended up with quite a few units at 2-3 men, so that meant they had no Actions, so could only sit and be assaulted - so I decided to just remove them from the table if they weren't in a good defensive position.

I also forgot about the 2" mortar rapid HE fire in the assault: I think that might be needed as its now a pretty even match for the last fight and the Germans can hole up in the buildings if they want.

Could be a close run thing which is about right given the ratios.

The Conclusion

Well that ended quickly! 

3 Platoon provided a mediocre fire-base as they couldn't really see the target: certainly not after the smoke went down. 1 Platoon started moving though the open orchard but started taking casualties from the German Zug. 3 Platoon started laying smoke late, but the wind was pushing it back towards 3Platoon, so they couldn't adjust well to cover the rear of the building (off to the left in the image below).

View from 3 Platoon. 1 Platoon attacking from right to left

As a result, as 1 Platoon emerged they were due to edge of table too much in line with the German defence (especially as the reserve Gruppe had moved to close the back-door), and not obscured by the smoke. In one round the reserve Gruppe inflicted three hits on each unit which, added to the three they already had, reduced each section to two men, and so no longer effective.

With only 3 Platoon left, and that a bit battered, and the German Zug more or less untouched and in a strong defensive position, the British Company Commander decided to call it a day. Game over.

1 Platoon (centre top) raked by fire on leaving the orchard by Germans at upper left

Analysis

Overall not bad. Quite a realistic result.

I remember being taught that a good MG position is a Platoon attack target, the Germans had two of them, plus the two platoons which are each Company attack targets, so trying to do this with one un-reinforced company was always going to be a tall order!

What I liked about IASBM:

  • The Blinds - but is the CoC patrol phase better?
  • The very simple modifiers
  • Spotting
  • The mortar and smoke mechanism
  • The variable movement
  • The Tea Break card
  • Card-based activation
  • Bucket of dice - becoming a convert
  • And playing at 1:1 figure to ground scale. But 6mm is just too small for 1:1 men, and looking forward to using the new 10mm figures and happy to have only a ~2:1 error ratio.

What I liked less:

  • Suppression seemed secondary to damage, not the other way around
  • Shock and damage didn't seem to achieve much different, in this game damage dominated
  • Big Men rarely got the change to use their range of actions (since a small game?)
  • Not sure that every Platoon needs a Big Man, if the Platoon activates as a unit anyway - gets confusing
  • The damage table - you have to look everything up

David Burden


Last Sunday I had the pleasure of having Chip and Chris over for a game of I Ain’t Been Shot Mum. After looking at various options for scenarios I figured that the easiest way was simply to translate the starter scenario in the rulebook to the Eastern Front. So it changed from a fictional encounter outside Caen, to a fictional encounter during Operation Kutusov: an infantry company from the Soviet 63rd Army (my figures, used by Chris) attacks a company from the German 262nd Infantry Division (Chip’s SS).

I replaced the three pre-game stonks in the starter scenario with two Soviet style Super Stonks, but that was a little more awesome than necessary, one is quite enough. Chip decided to deploy all his troops early so they could be rallied, as Chris was making pretty good progress down the table with his Blinds.

Chip’s Germans deployed. We had just enough shock markers.

Chris’s Soviets advance on the German company, reeling from the pre-game bombardment.

Chris advanced into the orchard, closing on Chip’s 2nd (right) platoon.

Chris races into the orchard, hoping to catch the Germans while they still have a lot of shock.

Chip promptly had a run of good luck on the cards, his MGs, in houses behind the front line trenches, spotted the advancing Soviets and let rip with both standard and bonus activations, decimating the Soviet platoon in the orchard. Chris began pushing his Blinds toward the German left flank.

Chris’s 2nd platoon heads past the half of his 3rd platoon that remained.

They are ready for their closeup.

These were closely followed by his support platoon, which soon began chewing up the German platoon and the MG that had been doing so much damage.

Chip’s 1st platoon finally realised that the movement in the wheat to their front was just a patrol, so they began displacing to assist their comrades, and none too soon, as the German 2nd platoon was getting pretty chewed up. But most of the German first platoon ended up in firefights with the Soviet first platoon, which had deployed behind the orchard, and the remnants of third platoon, who stayed in the fight despite their heavy casualties.

The hand of Chip removes some German casualties.

Because time was running out, we decided to see what a Human Wave looked like. So Chris pulled a couple of sections from his 2nd platoon, and charged the remaining section of Chip’s right platoon.

The initial round of combat was inconclusive because of the distance that the Soviets had had to move, but the second round, predictably led to the Soviet weight of numbers and the German’s pinned status resulting in a Soviet win. Equally predictably the next card were the two German units closest to the melee, and the Soviet squads were cut down.

If we’d had more time, that charge wouldn’t have happened, and I think we would have seen the Germans rolled up, if they didn’t withdraw. It was great fun to play IABSM again. I realised this was actually the first game of IABSM I’ve ever played at my place, and the second one involving my figures. I definitely need to do this more often!

Small Sagas


Whilst sorting and rationalising all the files on my computer, I found these four photographs from one of the first IABSM games that I ever ran: Hondeghem

Highlights of these photographs are the hedges made out of green ring binders...which I made the secretaries at work order specially so that I could borrow a few and use them like this! Well, everyone's collection of terrain has to start somewhere!

Robert Avery


6th Royal Scots Fusiliers in action, 26th June 1944, during Operation Epsom, clearing the village of St Manvieu Norrey with the strain of battle obvious on their faces

One of the games arranged this month was an IABSM scenario produced as a free PDF download by Rich Clarke the author and co-partner of Too Fat Lardies during the early incarnation of the rule set and easily converted to the latest version of the rules.

Ian brought along his 15mm collection of WWII Normandy troops and Bob and myself took command of the British and German forces respectively.

The scenario along with others is available to download from the Lardies Yahoo Group, which is well worth joining if you are interested in what I and many of the chaps in the DWG would consider one of the best WWII Company level rule sets available.

https://groups.yahoo.com/neo/groups/Toofatlardies/info

The map below lays out the terrain for the game which sees a British infantry company of three platoons supported with a Vickers HMG section and a troop of Shermans tasked with taking Hill 203 at Belle Vue Farm. Their attack is preceded by a good old "stonk" (pre-bombardment) provided by the Royal Artillery.

The German troops defending this sector are a two platoon Panzer Grenadier company from the Hitlerjugend 12th SS Panzer Division supported with a machine gun section, anti-tank platoon and some off table on call 105mm howitzers

The German defenders are able to set up in the hedges in front of the British deployment line marked on the map all the way back to Hill 203.

Historical Background

On June 6th, 1944, as part of the largest amphibious operation the world had ever witnessed, the British 50th Infantry Division - the Northumbrian - was given the task of assaulting Gold Beach. A seasoned unit and veteran of the North African campaign, the 50th stormed ashore, and by day’s end had achieved nearly all of their initial objectives.

But that was two weeks ago, and Allied forces have suffered one setback after another since then. The Germans have successfully contained the invaders within the beachhead area, having repulsed every attempt to break out.

But the dawn of a new day brings with it another attempt to break the entrapment. The next big push - Operation Epsom - is about to begin, but before it can commence, the Allies need to be able to see “Over the Hill.”
 

View from the British jump off line with German 'blinds' dotted about the table ahead

British Briefing

It is June 20th, 1944, and you are Captain Roger Roughshaft of the Cheshires, fighting your way through the dense bocage and orchards of Normandy in the face of stiff Jerry resistance.

Ahead of you lies Hill 203, a mere pimple on the face of the French “campagne”, but now of some import. Ferme Belle Vue apparently commands striking views across into the enemy rear, so you and your men must risk life and limb to capture it.

Hill 203 is only accessible by one road, and the bocage means that your supporting armour will be restricted to it. From what your chums have told you, the hill is defended by enemy infantry and AT guns – and they should know, most of ‘em got shot up trying to capture it afore you!

You have persuaded HQ to give you a bit of preliminary bombardment before the show starts. You may allocate three stonks to the table before starting off.
 

The view from the German held Belle Vue Farm atop Hill 203

German Briefing

It is June 1944, and the Allies have invaded Normandy, set on destroying the great dream of a united Europe. In the Reich all energies are being trained on throwing this enemy back into the Channel in order that the great liberating crusade against bolshevism can continue in the east.

You are Hauptsturmfuhrer Wim van Hemker, commanding a company of the newly raised 12th SS Panzer Division, Hitlerjugend. Two years fighting in the east with Nordland has made you a tough soldier, and you worry for the young volunteers that surround you. Two weeks fighting around Caen has seen you slow down the Allied advance to a snail’s pace, and cause losses that you are sure they cannot endure for long.

Now your Company, reduced to two platoons, is responsible for holding the critical Hill 203. Little more than a ridge, this formerly  insignificant piece of French farmland is now of strategic importance and must be held at all costs. Thus far you have repelled three Tommy attacks. The bocage country in which you are operating limits Tommy armour to a single track that runs up the hill, you will hold firm against any fresh attacks.

Your men are in good spirits, the fresh influx of volunteers have found their feet thanks to the experienced cadre within the group. You may call upon a battery of four 105mm artillery pieces if you require support; Hauptmann von Englers of the 328th Artillery Regiment has been allocated to you to act as a spotter if needed. All artillery will be called in through him. You have no vehicles, all have been withdrawn due to allied air activity.
 

British artillery fire starts to search out suspected German positions, with hits and shocks recorded on blinds near the farm

The Game

With the German positions marked up a amid plenty of dummy positions, the British artillery stonk announced the start of the British attack and needless to say the bulk of fire was directed to the commanding heights of Hill 203 where the German anti-tank gun platoon with its Pak 40 and Panzershreck teams set up in the nearby hedgerows took early shocks and a casualty from the British fire.

The farm with its commanding view of the fields below came in for a good battering from the British guns

Fields close to the farm didn't escape a thorough 'going over' by the 25 lbrs 

The action began with the usual 'cat and mouse' manoeuvring as the opposing blinds attempted to get to the best positions whilst doing their best to spot any likely opposition and get their fire in first.
 

British blinds indicate a move to infiltrate the left flank of the German positions

The British advance quickly developed and the blinds movement soon indicated a successful infiltration down the left flank of the German positions, using the cover offered by the thick bocage hedgerows that allowed them to build up a strong position to base an attack from once the enemy were spotted.

It was now a question of who would get the drop on who by being able to open up from an advantageous position.
 

Spotted from the hill a British section breaks cover to sprint to the opposite hedge-row, covered by the other sections

As the ranges between opposing blinds dropped rapidly the first dummies were identified and removed from the table, but inevitably others revealed opposing troops and the first units on to the table started to appear.
 

Meanwhile the British advance closes in on Ferme Valle

One such are that revealed a Panzergrenadier platoon in occupation was the forward farm at Ferme Valle where the flanking infiltration ha rapidly unhinged the German position but unable to relocate in time the German commander soon realised he had Sherman tanks knocking at the front gate only to find his position suddenly raked from a different direction as Vickers heavy machine-guns opened up from his left flank devastating his command in one fell swoop.
 

The Battle for Ferme Valle erupts in a hail of Vickers machine-gun fire as German troops are spotted in the vicinity

It is a tribute to the determination of the SS soldiers that the defence didn't collapse in the first fusillade of British fire, but their return fire when it came was feeble due to the shock and casualties sustained with the only real success being a solid Panzerfaust strike to the lead Sherman which began to burn fiercely with no survivors as its ammunition started to 'cook off'.

The tankers revenge was soon in coming as their 75mm HE shells ripped the farm house to pieces killing SS men at the windows and setting the farm house alight with the SS Commander dead among it shattered rafters and smashed walls.
 

The German defenders are are caught by the rapid flanking move by the British heavy weapons teams

As the British tanks and heavy machine guns pour it on to the farm house other British infantry fire from across the road

The battle for Ferme Valle was over as soon as it started and the surviving SS soldiers attempted to fall back across the field and nearby dried up pond to its rear, but they were not to get very far as British troops and tanks moved in to mop up cutting down any of the SS who showed the slightest resistance.
 

The German return fire when it comes is limited due to the shock and casualties sustained but they manage to inflict a few casualties and knock out a Sherman that burns on the road by the farm

The battle is over at Ferme Valle and German survivors attempt to escape across the muddy pond to their rear

As the battle lower down the valley erupted, another one commenced soon after as the defenders on the top of Hill 203 started to identify British troops movements to their left with a request sent of to the supporting guns for a mission among the hedgerows to their front.

Despite successive calls for support, the guns were unforthcoming and so the German defenders were forced to resort to other options.
 

With the battle for the first objective over the British troops move in to mop up and cut down the retreating Germans

The decision to open up with the weapons close at hand was made more easy with the sight of British troops pushing out across the large open field to the their left, supported by carriers.
 

Meanwhile the British flank advance on Hill 203 is caught in open ground by a hail of machine gun fire and anti-tank shells

As the British troops made a dash for the cover of the next bocage hedge line the carriers were struck by Pak and Panzerschreck shells rapidly reducing two of them to burning wrecks as the troops on foot were subjected to raking fire from the infantry and MG42's set up close to Belle Vue Farm.
 

SS Panzergrenadiers vainly attempt to get back too the hill top but are cut down by following British infantry

The German attack was damaging, effectively knocking out two sections of British infantry, but leaving the other two able to close in on the hedges lining the left flank of the German position, now threatened by the other unopposed British platoon, supporting heavy machine guns and tanks advance to their right front along the road.
 

The remaining SS troops prepare to sell themselves dearly as the British advance develops around them

We stopped the game there, but as the German commander, I rather felt the position was becoming untenable leaving the remaining German troops with two options, to either sell themselves dearly atop their hill or to try and cause casualties whilst relinquishing control. Either way was not a good German result.

Any counterattack on the weakened British platoon at best supported by the German artillery when or if it came would likely leave the rest in such a parlous state as to be in a poor condition to resist the follow up British troops with tanks.

This is the first time I had played this particular scenario and I have to say it gave a very good game, posing questions for both sides.

On reflection I might have put my AT assets further forward to try and ambush the tanks early and to have kept my infantry platoons in closer support of one another rather than the spread out in defence in depth as I used in this game. The first fire coming off of a blind on spotted enemy troops can, as we see, be battle turning and the German troops, very often not moving, are at an advantage to getting the drop on their British counterparts.

Bob made very good use of his blinds to rapidly advance through weakly held German areas and thus set up his troops in very advantageous positions when the inevitable spots allowed both sides to open fire.

Thanks to Ian for pulling the game together and to Bob for a very fun fight among the hedgerows.

Carojon


Inspired by reading the Cinderella Campaign and the dash across France in Sept 1944 plus the table I set up Friday to try out my new buildings, I thought that a Breakthrough scenario would be spiffing good fun. I also haven't had a lot of Shermans out in years. Playing solo I could take my time, enjoy a glass of port and not worry about comments about play balance.

So two platoons of Grenadiers with a platoon of three PaK 40s and a platoon of three StuGs are holding the town as a rear guard. For the German company HQ I opted for two MG42 teams. Each platoon also had two panzerfausts.

The attackers get a company HQ plus five platoons. So I took an armoured squadron HQ, three troops of tanks and two platoons of infantry mounted in carriers and trucks.

Both sides also rolled well for air support, which gave my FW 190 and Spitfire a chance to see some table action for the first time since I bought them ten or twelve years ago!

The Canadians deployed into two elements: Squadron HQ, 1 Troop and a platoon of infantry in 15 cwt trucks advanced up the road past the farm. The other two troops and a platoon of infantry in carriers advanced through the fields on the left. The Germans put some infantry in the hedges and trees in front of the town. An MG42 was positioned in a  building to cover each flank of the town. One PaK40 was in the trees covering the Canadian left, but the second was back closer to the town to shoot down the road and the third was dug in near the bridge. The StuGs were held in reserve. In hindsight I should have deployed the infantry in the houses and put the StuGs forward to engage the allied armour right away.

The Canadian plan was to use a rapid advance to get to the bridge before the twelfth turn of the "blank/special" card, which designated the end of the game (or in my version the pioneers blow the bridge) and try not to get bogged down in firefights. The scenario specified "Armoured Bonus Move" card really helped with that, especially in the early turns.

Opening moves. Squadron HQ spots German infantry lining the hedge and deploy into the field, hosing the poor landsers with HE and .30 cal. fire. 1 Troop roars past along the road spraying the German flank.

A FW 190 strafes the road, stopping the allied advance.

More air power overhead. A Spitfire buzzes the Germans.

A PaK 40 reveals itself, brewing up the lead Sherman. 

The PaK 40 in the woods in front of the town also opens fire, getting a few ineffective hits.

Using an "Armoured Bonus Move" card a troop of Shermans rush forward. Infantry in their carriers swing to the left. But the PaK 40 card comes up first and brews up the troop leader.

Meanwhile, demonstrating how fire and maneuver works. A section from the right platoon clears the first line of trenches taking six POWs .

1 Troop roars forward with another "Armoured Bonus Move" card, overrunning the second trench line. The Germans hunkered down and tried assaulting the tanks without effect. Once the Canadian infantry came up, the combination was able to eliminate the trench line.

The troop leader is positioned just short of crushing the dug in PaK 40. But he got stunned by a shot from a StuG in the town and delayed crushing the gun. But I didn't let the gun fire, having a tank on the edge of the gun pit and all.

Middle troop of Shermans breaks into the German position, flanking the right hand platoon. Fire from both troops shattered the Germans and destroyed the Pak 40.

Canadians deploy from their carriers on the flank of the town, end running the German defense.

Shermans then overrun the shocked Germans at the tree line avenging their dead troop leader. Only three Grenadiers  make it back to town.

Flanking platoon sends out its PIAT team to hunt StuGs.

On the Canadian right, there is a traffic jam, with a mass of tanks and one narrow road, down which high velocity 75mm AP shells are screaming. 

The StuGs deployed at the crossroads, firing down each street at advancing Canadian armour. Canadian and German armour spend a few turns banging away at each other.

With the German position crumbling, I decided they should try and save what they could. One StuG followed by a truck towing the last PaK 40 try escaping over the bridge. A Spitfire swoops low, 20mm cannon chattering, pinning the truck in place.

The left hand Canadian platoon dash to the river and engage Germans on the bridge, knocking out the truck with rifle fire. Gun crew dismount as a half section of infantry.


The surviving German infantry had retreated to the central house and spent a few turns having their shock rallied off by the surviving German Big Men. The tank duel was going badly. Shermans are at both ends of the street and getting a mobility kill on the StuG in the picture, causing the crew to bail out. The Canadian Squadron commander and one of his troop tanks advance up the street. The surviving Germans fired off their remaining panzerfausts, causing minor damage and then ran for the bridge.

The last StuG was heavily damaged in a shoot out with a Firefly and tried retreating to the bridge but got brewed up trying to squeeze by the disabled truck and PaK 40.

A German MG42 team had relocated to the green house, firing on the Canadians near the bridge. Seeing this two Shermans poured fire into the lower floor setting the house on fire.

Here you can see the end as Shermans roll up each street, squeezing past the knocked out StuG to round up the fleeing Germans.
 

The Squadron commander advanced his tank to the bridge, machine gunning the fleeing Germans. Those who survived surrendered.

Aftermath

The Germans were utterly destroyed (except for one damaged StuG) and the Canadians still had five turns of the special card to secure the bridge. The Canadians lost eleven KIA plus three tanks brewed up (so 26 total dead) and took thirteen POWs including two Big Men.

Playing solo I could also play this out to it's bitter end, pausing Saturday night for bed and then resuming action on Sunday. I also "live Tweeted " this game which was an interesting way to record events as they unfolded, taking and tweeting an awful lot of pictures with commentary. But it would be annoying if I hadn't been playing solo. I did garner some "retweets " and likes from strangers, which is all very odd. But Twitter is rather ephemeral and strange.

James Mantos


Mike Whitaker reports an amusingly lucky shot in a recent club-night game of IABSM:

Last night's club game...in the Italy '44 campaign.

The Germans are attacking (for once) in the pouring rain:

  • one range bracket worse for spot/autospot
  • -2 to hit for AFVs
  • one range bracket worse outside 18" for all infantry fire

The German Elefant was the first thing to deploy. The British in the villa lucked out on a spot roll, so the 17pdr took a shot from across the table.

Hit by one pip, then rolled 7 hits on 12 dice vs 4 saves on 14 dice...boom!

Mike then adds:

I should add that despite that, the British lost. Without the Germans even deploying their StuG's.

Gary Martin played the Germans:

It was a good game and I learnt a couple of important lessons.

The Bridge was the objective so the expectation was that one of the two British platoons would be around there and the small wood next to it.

The second platoon almost certainly in and around the farm complex. We also perceived the 17pdr platoon would be in the wood on the plateau.

This meant they would only have a few bits and pieces and maybe the Churchill defending the area around the ploughed field and small wood in the foreground of the first pic.

Using this as our planning assumption we decided to set up a base of fire into the wood opposite the farm (just out of view on the right, north edge of first photo), consisting of two MMG and the Elefant. However they would remain on the Blind initially to soak up some spotting of the enemy and do some of our own to establish their positions. Previous experience had seen our opponent tend to shoot at everything that moved so we were hopeful this would reveal themselves quickly.

The first error I made was to over think the pre-game stonk. Initially we considered dumping it on the plateau , however I was concerned they would recover from it before it became an issue, instead we brought it down on the ploughed field to little effect.

To the right and left of this base we advanced two dummy Blinds with two key objectives: confirm the defences around the bridge and its small wood; and strength of enemy near the ploughed field and its wood.

We intended the ploughed field and wood to be our main route of advance to put further pressure on farm and unhinge the flank of the plateau all be it we agreed to change this to the Bridge and wood should the brits have left this lightly defended.

Obviously we were wary of the impact the 17pdrs could have on our StuGs, but felt confident that the Elefant, concealed in the wood, in driving rain, the other end of the table would be ok!!!!

So spotting efforts were ineffective initially. The Brits immediately deployed an MMG in the small wood by ploughed field which shot up a section from a zug following up the dummy. Then the impossible: an unlikely spotting roll revealed our base of fire.

The Brits deployed a 17pdr and fired. First shot, unlikely hit: 14 Armour dice v 12 Strike dice and we lost by three knocking the Elefant out. Not happy!!!

However fire from the MMGs on farm and from the deployed zug caused damage and the right flank dummy Blind successfully spotted nothing in the wood, causing us to move reserve zug and StuG Blinds onto the right following up the dummy toward the bridge and wood. Xmas arrived early and cheered us after the loss of the Elefant.

The dummy moving toward the apparently empty wood near the bridge was the first confusion in my head as I thought that you spot the terrain piece. If successful you reveal any hidden Blinds. If they occupy a piece of the terrain not visible (in this case further than 4” into the wood) then a Blind was placed indicating that something was around but not clear.

So it was a bit of a surprise (well two actually) when the dummy Blind entered the wood and bumped into a 2-man PIAT team at the back of the wood. The second surprise was that the bridge was only defended by a 2-man PIAT team.

The dummy was removed and we immediately deployed the following zug Blind into close combat destroying the PIAT and effectively capturing the objective. The StuG Blind moved up behind the wood keeping it out of sight ready to attack the plateau.

In the centre the platoon in the farm was being steadily depleted by the base of fire and a barrage from four medium mortars. The British MMG was destroyed.

Again confused over the status of this small wood I quickly moved up the final zug Blind to the edge. Here I was spotted and as I deployed the zug into the wood it bumped into the second platoon arranged shoulder to shoulder at the rear and a big close combat took place. Our zug was devastated and pushed back Suppressed, effectively out of the game. However the British platoon had also taken a battering and was Suppressed.

A bit of further fire from our first zug reduced the platoon further, making it pretty much ineffective. The game was called shortly after. Time was short and the British had nothing with which to make any attempt to threaten the bridge.

Good scenario, chastened by the couple of mistakes I made. Looking forward to the campaign finale.

Mike Whitaker, Gary Martin


A recent quick solo game: a Soviet assault on a German defended village.

Two platoons of German regulars (plus two MMGs)  in the village and low hills either side, backed up by a lone Tiger I.

The Soviets: three infantry platoons plus a depleted mixed T-34/76 & /85 tank company. The Soviets also get a couple of pre-game stonks.

Lessons Learned:

  • MMGs are lethal against infantry at Close Range (as designed)
  • The attackers were desperately in need of more support, either a couple of SU-85/100s to take on the Tiger, freeing up the T-34s to support the infantry or some mortars to suppress the MMGs.
  • Smoke! Oh, for a 2" mortar!


Custom Rules:

  • Infantry fire with a height advantage gets an extra dice - maybe causing the MMGs to be too powerful.
  • Vehicles are either moving or stationary, with one Action to stop. Firing at a moving vehicle or more difficult and fire from a moving vehicle gets a -4 on the Direct Fire table.
  • Changed the direct fire HE rules to something that was suggested on the forum as the originals seem odd.
  • Changed the ground scale to 10m = 20mm because of the small playing area.


Thoughts:

  • IABSM is great for a solo game as using 'cards' for to generate the turn sequence is easy to follow!
  • Perhaps next time add a couple of SU-100s or use a Stug rather than the Tiger I which seriously over-matched the T-34s.

James Tree


This is a small battle we modelled taken from the book Летом сорок первого (Summer of the Forty First) by Giorgi Sviridov using IABSM rules.

It's the morning of Sunday 22 June 1941, near the ferry station of modern day’s Niemirow. A Soviet border guard detachment has fallen back in disarray after being attacked by superior numbers of German infantry with machinegun and mortar support, and losing its political officer.

The survivors have withdrawn to an old workshop recently used as a barracks, without communications and without orders, effectively surrounded on all sides by the fast-moving Germans. This was to be a last stand for these poor soldiers. Their opponents were a German company held back and ordered to neutralize this small pocket of resistance. The Germans have the numbers, the firepower and the support.

The Soviet commanding officer and the Maxim MMG were began the game strongly, but peaked too soon: very early and very unfortunately, the Soviet commanding officer was incapacitated and the MMG ran short of ammo.

Great planning from the German side by my good friend Mick Harney. Mick used his firepower to suppress Soviet attempts to see what was going on whilst a third of his force took the difficult route across the river into my blind spot to achieve surprise, suppress even more, and then move to capture the building.

Unfortunately, we did not manage to finish the game due to time restrictions and a slow start (me explaining the game mechanics to Mick) but IABSM worked really well in my opinion and we really enjoyed it.

We were so preoccupied and really into the game presentation and the history around the event that I did not take enough pictures of the game table, but below you'll find a few. 

‎Ioannis Pavlidis‎ 


Played the first scenario from the "Bashynya or Bust!" 1944 Operation Bagration campaign tonight at the SLW.

Very odd game with the Soviet Blinds, Rapid Deployment and Armoured Bonus cards repeatedly coming up. The Germans had to wait almost 4 turns before getting some forces on table.

Subsequently it was hard for the Germans, but it got worse as Ian was on fire tonight: bringing in his air cover three times in a row, Pinning what forces we had on table!

Ian’s Soviet tankers were also on the ball and we lost most of our forces trying to reach the bridge. Cracking game, just a bit one sided in the way Lady Luck played out!


Desmondo Darkin


Whilst sorting and rationalising all the files on my computer, I found these five photographs from one or two of the first IABSM games that I ever ran.

I say "one or two" because I think that these shots are actually from two games: a scenario called "Close Encounters of the First Kind" that appeared in Wargames Illustrated before it went all Battlefront; and another game called "Pont Neuf".

Highlights of these photographs are the white cardboard roads and the hedges made out of green ring binders...which I made the secretaries at work order specially so that I could borrow a few and use them like this! Well, everyone's collection of terrain has to start somewhere!

Robert Avery


The club normally meets on Sunday afternoons, but over the Festive Season, we didn't meet up on either Christmas Eve or New Year's Eve. However, we did have a Thursday afternoon session on the 28th. I offered to put on and umpire a big game of I Ain't Been Shot Mum for two players a side. This would be a 1944 game, with the British forces pushing forwards into the Low Countries after the Liberation of France as part of the advance towards the Rhine.

What I wanted to do was put on a game with a lot of tanks but also have plenty of obstacles to aid the weaker side (in this case weak was relative). The field was laid out on four tables, creating a long battlefield with plenty of cover and dead ground. Here it is, seen from behind the German position.

The Scenario

The scenario was as follows: after the end of the Battle of Normandy, Allied forces are pushing eastwards into the Low Countries. German resistance is stronger than expected but patchy in places. Defence in many cases depends on ad hoc formations made up from whatever troops are available to counter the advance of the Allied armour. This scenario is one such encounter.

A British tank squadron and a company of motorised infantry have been tasked with taking a river crossing.

An ad hoc German Kampfgruppe is opposing the British advance.

The German force was:

A weakened Kompanie of Panzergrenadiers (veterans):

  • Company HQ (with 3 Panzerschrecks) and a L3 Big Man (2 x SdKfz 251)
  • Two Zugs, each with a L2 Big Man
  • One section of 4 x MG42

An improvised Rifle Kompanie (poor regulars):

  • HQ of two tripod MG42, 2 x Panzerschrecks, a L2 Big Man and a L1 Big Man
  • A rifle Zug with a L1 Big Man
  • A Zug of Panzerknackers (two MG42 teams, four riflemen, eight Panzerfaust shooters) and a L2 Big Man

An ad hoc Panzer Kompanie:

  • HQ: one Tiger I with a L3 Big Man (veteran crew)
  • One Panzer IVH (average crew)
  • Zug 1:  3 x Panther G L2 BM (average crews)
  • Zug 2:  4 x Panzer IVH L2 BM (green crews)

An Anti-tank Zug:

  • 3 x Stug III (average crews)

The British force was:

A squadron of Cromwell IV and Sherman Vc tanks (all average crews)

  • An HQ of three Cromwells (one with 95mm CS howitzer) and a Sherman Firefly with L3 Big Man
  • Four troops, each with three Cromwells and a Sherman Firefly, each with a L2 Big Man

A company of motorised infantry (the infantry are dismounted from their vehicles) all good regulars:

  • A Company HQ of one 8 man rifle section with a L3 and a L1 Big Man (in a halftrack)
  • Three rifle platoons, each with a L2 Big Man
  • A carrier section: four carriers with Vickers MMGs (can be mounted or dismounted)
  • A flamethrower section (four teams in a halftrack)

For this scenario, the following conditions were applied:

  • The Germans may defend in depth on both sides of the road. The Germans must defend a river crossing at their end of the table.
  • Some of their tanks have been recycled from battle-damaged vehicles and the German deck includes the Vehicle Breakdown chip. When this is drawn, roll 1D6 for each tank that has already been deployed (don’t roll for tanks under Blinds). Only roll once for each tank.
  • Any tank that rolls a 1 is broken down and will be immobilised for the rest of the game, but can continue to fire. Any shock against an immobilised vehicle will be doubled.
  • Any tank that rolls a 2 will suffer a failure of the turret traverse and will only be able to fire in a 90 degree forward arc.
  • The Panzerknacker Zug is split into two sections, each with an MG42, two riflemen and four men with Panzerfausts. Once the Fausts have been fired, these troops revert to being ordinary riflemen.
  • The Germans have four pieces of field earthworks and one small pillbox.
  • The Germans can deploy hidden or under Blinds, They have no dummy Blinds.
  • The British will deploy under Blinds and have two dummy Blinds.
  • The 95mm CS howitzer fires smoke shells only, as do the 2” mortars in the British platoons.
  • The British are to advance along the road, which is hemmed in by trees on both sides to take the two bridges over a river defended by a German force. Only the larger bridge can support the weight of tanks, but smaller vehicles can cross both bridges. The terrain is undulating and visibility is broken up by the trees and hedges. The ground suits the defenders and is not prime tank country.
  • Intelligence reports that the bridges are well-defended.
  • I allowed the Germans to deploy up to halfway  along the length of the table, with the British being limited to a deployment zone that was one quarter of the table deep.

The Game

The Germans chose to deploy with everything hidden in their deployment zone. I didn't know where they had placed their units, but I assumed that the pillbox would play a role. The British deployed under blinds on both sides of the road but pretty soon they had had a number of elements spotted.

The 2" mortar of this platoon quickly started to lay down smoke to prevent the defenders from firing on them. On the British right, more tanks and infantry advanced towards a hill, spotting some German defenders, Panzerknackers and MG42 teams from the weak Landser Kompanie. These were quickly eliminated by mass machine gun fire from the tanks (well, the Cromwells actually, the Sherman Firefly tanks not having hull MGs) and the Vickers-armed Carriers. The power of the machine guns was pretty much devastating.

The Germans were unwilling to show their hand at all and most of their troops remained unspotted and hidden, holding their fire and pretty much inviting the British to advance. The British managed to discover a Zug of Stug III tank destroyers behind a hedge.

Despite massed fire from the two British left flank tank troops, these Stug IIIs remained unharmed and soon caused havoc on the single Cromwell troop in front of them. The infantry platoon was also suffering from accurate fire from a tripod-mounted MG42 in an earthwork. The British advance appeared to be stalled on the right.

On the British left, the tanks were pretty much stuck in a traffic down in the unsuitable ground on this side of the road.

The platoon supporting these tanks, cleared away the German infantry screen  opposing them and started spotting more Germans. These were a tougher prospect than the Landsers: hull-down PZKfw IVs and the Tiger.

On the German left, the remaining tanks were revealed (a poor photo, unfortunately):

And the Germans also revealed a previously unseen Zug of Panzergrenadiers covering the central lake and road junction.

A different view of the German Panzerfront, a daunting sight for the British tanks.

At this point, the  clock was ticking and there was little time left to reach a conclusion. However, it didn't look too healthy from the point of view of a British tanker. Regretfully perhaps, the British commanders decided that discretion was the better part of valour. One tank troop was a set of burning wrecks and one infantry platoon had taken a lot of casualties from machine gun fire. The Germans remained in a solid defensive posture, with the only casualties being from the screen of Panzerknackers and MG42 teams.

Aftermath

So, an interesting game, the Germans playing a canny waiting game and the British being unwilling to advance too far into the unknown, even declining to use the Allied Armour Bonus chip whenever it emerged from the bag. Discussing this afterwards, the consensus was that after the attritional horrors of the Normandy campaign, the British regulars tended towards self-preservation rather than Tally Ho-style heroics. We agreed that once the location of the German tanks was known, the appeal of advancing towards those long 75mm guns (not forgetting the 88mm on the Tiger) was limited, to put it mildly, especially as they were adequately protected by those unharmed and fresh veteran Panzergrenadiers.

Carole Flint


View from the German end of the table

The scenario was taken from the Sea Lion examples, and represented the first serious counter attack against the German invasion forces. A British force from 42nd Division was to hit the extended German front at Boreham Street near Heathfield, attempting to break through and thus divide the German invaders stretched along the coast.

On the British side, Major Standish Chappleton (Mark) had overall control, and his armour consisted of  a total of 9 AFVs – a mix of A13's, A10's, A10CS and some Vickers Vib's. Capt Corky Caldwell (John) commanded the infantry with 3 full platoons of regulars, although only two had reached the start line at  H hour.  Hauptman Harald Kamp (Robert) was in charge of the German defenders, with two full platoons plus HQ and a third platoon on it's way allegedly. The German infantry were supported by 4 MG's,  two PaK35's with a couple of 75mm IG's drafted in to help.  Both sides expected air support and off table mortar support was promised the Germans. The gallant infantry of the 39th Regt were also expecting a small Panzer detachment to help out at some point.

The British decided to attack on a broad front instead of concentrating, whilst the Germans elected for a very forward defence line, placing their infantry under cover of hedges well outside the village. Their HQ Command plus MG's were placed in buildings on the edge of the village, giving their FOO a good view of the terrain and a superb field of fire for the MG's.  The four ATG's were placed carefully to cover both flanks as well as any possible thrust straight down the road.

In the event, whilst the British light tanks gallantly did their job and probed forward to the NE of the village – taking heavy casualties as they advanced – only 1 Vickers actually penetrated the defence line, knocking out a gun as it did so. The two A10's stood off and sprayed their MG fire wherever possible, whilst a thrust down the road by the A13's was quickly defeated by accurate ATG fire.

1st Platoon suffer. 2nd Platoon are the neighbouring Blind.

Meanwhile the infantry advance NW of the village was turning into a disaster. They advanced in close order for some reason, with both platoons alongside each other and the sections closed up. This offered a superb target for the German MG's, plus a later mortar barrage and even a Stuka attack; quite naturally the result was carnage. Not a single section was left combat worthy as the survivors flattened themselves into a cornfield as best they could.  The two supporting A10 CS's managed a couple of rounds of HE with encouraging results, but gradually came under rapid and accurate ATG fire which knocked pieces of A10 all over the countryside. The surviving tank was not put off by this however and gallantly pressed on.

However the gallant German defenders were also slowly taking casualties, with two guns knocked out as well as infantry casualties, and the Germans slowly gave ground in a controlled withdrawal under fire back towards the village.

The German defensive line

One recce tank bursts through, but note the  german atr teams, bottom left

Finally, when the third British infantry arrived and made their advance, sadly they were also bunched together and were also hit by damaging German fire.  The British support mortars were hit and damaged, the promised air support had now materialised and the British CIC wisely decided that the chances of winkling the Germans out of a heavily defended village were slim to zero and broke off the attack. The Germans had held the line and the British attempt at a breakthrough had failed.

Overall, a superb defence by the Germans, but a disappointing attack by a potentially dangerous British force.

Trader Dave


Played a training game tonight with Mr T.

Forces were from the main rules, but the terrain made up from parts of my last game. Mr T was the British, attacking to liberate the village and eliminate any defenders on the way. Ultimately his armour was to use the main road to move off table. 

Nice little game that saw some quite amazing sequences of cards come up for the British. I lost the village and in the end redeployed north in the hope of delaying the Allies, only to lose another platoon , leaving my flank up in the air. We are fighting this again in a week, swapping sides.

Highlight was the pre game stonks that put six shock on two of my infantry Blinds, six on my tank killer team and killed my FOO!

Desmondo Darkin


For this game at The Source, the Centurions wargame club welcomed guest gamemaster, Mike Whitaker (co-host of the Meeples and Miniatures Podcast) who ran a demo game of the Too Fat Lardies rules, "I Ain't Been Shot Mum".

A company of infantry with armor support on each side provided an afternoon of great entertainment. We'll be playing these rules again.

War Artisan

Umpire's Report

The first of the two games I played in Minneapolis, organised by Jeff Knudsen for the Centurions group. Actually, it should come as no surprise to regulars to know that I didn't play it, but umpired it, having stuck the rulebook, blinds, markers, cards and microdice in my suitcase :D

The scenario pitted an American company in defence against a German attack, in some far flung corner of the Ardennes in winter '44. Snowy table, sadly, unavailable, (barring Photoshop trickery!).

Fitz (aided by Elliot and N (argh, blanking on names)) took the Germans, and Jeff and... hrm, I should have taken notes!... the Americans. The latter deployed two platoons across an obvious defensive hedge/wall/building line, holding a third in reserve back at the village. The Germans advanced across a wide front down both roads, one side with a platoon backed with a pair of StugIIIs, the other four PzIVs, while two full platoons pushed through the woods and downslope. Their pre-game stonk hit the obvious targets (farm and chateau), and caused a fair amount of shock.

The Americans retaliated with some 105mm battery fire, which blew a track off one of the Panzers and somewhat discomfited the other. The Axis advance took a fair amount of fire from the defensive line, but the key breakthrough came when, under MG, tank and mortar fire, one of the American sections in the farm was pinned, and a somewhat unintentional and lucky close assault drove them out.

The Germans then consolidated their attack, by which time frantic requests for support from the Americans had turned up a troop of Shermans including a '76, as well as revealing two 50cals on tripods and a pair of 57mm AT guns on a hill in back of the defensive line.

Cue derisory German comments about the efficacy of 57mms.

Cue a brewed up StuG.

The second StuG got brewed by the Shermans not long after, leaving an interesting position in which the Germans had hold of their initial objective, but the Americans were falling back to their command HQ, under cover from the Shermans, 57mms, and 50cals. It would have been interesting to see what happened next.

Much positive feedback - most of the group hadn't played IABSM before, and I think they enjoyed both the mechanics and the feel of the system.

Thanks again to Jeff and the Centurions, and The Source Comics and Games shop for hosting the game.

Mike Whitaker


Extracts from the Operation Compass scenario pack:

The Italians invaded Egypt on 13th September 1940. Their main problem was the narrow coastal strip. A good road ran the length of Libya, but this stopped at the border with Egypt some five miles west of Sollum.

From that point, troops would have to advance down a narrow track along the narrow coastal strip, or advance along the plateau at the top of the escarpment with their right flank wide open to the south. The escarpment could only be traversed at two places: at Sollum, where the escarpment actually meets the coast with a small trail joining the two; or through the Halfaya Pass some five miles further into Egypt. Both the Sollum trail and the Halfaya Pass made excellent bottlenecks for any defensive action from the British.

1st “23rd March” Blackshirt Division and 1st Libyan Division would advance along the coastal track and attack Sollum. Opposing them at the border was part of the Support Group, under command of Lt. Colonel J. Moubray of 3rd Coldstream Guards, consisting of: 3rd Coldstream Guards; the 25-pounder guns of C and later F Batteries RHA; one company from 1st KRRC; and a company of machine-guns from 1st Royal Northumberland Fusiliers.

The above is the background to my last game of 2017: the third scenario from the Operation Compass scenario pack, #03: The Invasion of Egypt. 

View from the Italian end of the table

I would play the British attempting to do as much damage to the invading Italians as possible before being forced to retreat through sheer weight on numbers. Bevan would play the Italians: unenviable targets in potentially the biggest duck-shoot ever. The table was big: 8ft long by 5ft wide, and devoid of anything of interest except a few hills and lots and lots of folds and creases in the very rough ground.

The Forces

The British

Lt. Colonel Moubray had a small but perfectly formed force. Up front, hiding behind the ridge line on the (his) left of the road closest to the Italians, he had a couple of A9 Cruisers borrowed from 1RTR. Behind them on the next ridge back was a platoon of Guardsmen and one of the Northumberland's MMG teams.

Then, at the back of the table, near the small outcropping to the right of the road, he had placed his two 25lbs of Royal Horse Artillery and another MMG. Behind them, his reserve consisted of another platoon of Coldstreams. 

A tiny force compared to what he could see coming at them down the desert strip, but well-prepared, mostly elite troops keen to give the Italians another bloody nose.

You are Captain, the Honourable Michael Brodrick of 3rd Battalion, the Coldstream Guards. It is September 1940, and the Italians have finally begun their invasion of Egypt, what, what?
Two days ago, you watched in amazement as a huge column of Italians - motorcyclists in front, followed by infantry in trucks, followed by those tin cans they call tanks - streamed across the border in almost a parade ground formation. By your reckoning, five divisions-worth! And in front of them? Why, just you and your boys, supported by some gunners and grease monkeys from 1RTR. A sticky wicket, if ever there was one!
Luckily, the Eyeties have to keep to a narrow strip of land near the coast - no good in the desert these foreigners: takes an Englishman to do the business, eh? - so can’t project their force properly around your flanks. Means as well that you can punish them as they come forward, eh? What?
Right, orders are not to lose any guns or any tanks, but to delay and do as much damage as possible to our pizza-loving chums. Pisa-loving chums as well, eh? Hah! Hah!
Alright, Sergeant-Major, carry on: let’s show them what for, eh? Middle stump, please...fire!
— British Briefing

The Italians

Captain Porcini, in charge of the Italians column had the opposite problem: he had loads and loads of men, but they were all of mediocre quality and he could only bring them onto the table in the order in which they were marching.

That meant that most of his infantry (four platoons worth) was up front, and his tanks and artillery (a platoon of four AT guns, a platoon of four field guns, and a platoon of four tankettes) were at the back and would therefore be last to get involved in any action.

Not knowing what was waiting for him either, all he could do was get onto the table and re-act to circumstances. Bevan and I both agreed afterwards that this one of those scenarios that you play a lot better the second time!

Avanti! Avanti! On to Cairo!
You are Captain Pietro Porcini of 23rd March Blackshirts Division. It is 13th September 1940, and you currently have the honour of leading Il Duce’s invasion of Egypt.
For months you felt nothing but frustration as you twiddled your thumbs in a variety of desolate holes many miles from civilisation. You got used to a numbing boredom alleviated only by the occasional harassing attack from the enemy. Finally, however, the moment has come, and you will lead the way to victory.
You are currently advancing down the rough track that forms the only “road” into Egypt along the coastal strip. You got off to a slow start this morning as your men became entangled with a column of Libyan colonial infantry, but a few swift kicks up the backside soon got things moving again.
The English have been firing artillery at you since dawn, but other than that all you have seen of them is the odd dust cloud on the horizon.
If the invasion is to succeed, you must keep your vanguard column moving. In front of you is another seemingly endless expanse of rough, dirt terrain. Keep moving forward and disperse any enemy you encounter en route.
— Italian Briefing

The Game

As it happens, getting their column onto the table unmolested proved to be no problem to the Italians, as the British Blinds card proved to be incredibly elusive for the first few turns.  Before the Brits had a chance to anything, the Italians had six units onto the table, and had deployed a platoon of infantry and anti-tank guns  to counter the two British tanks that they had spotted lurking behind the first hill. Faced with four AT guns and having no HE, quite sensibly the tanks withdrew below the crest of the hill to await developments.

The Italians continued to flood onto the table

Finally the British finished their tea and decided it was time to act. Despite the dust they had kicked up, the tanks had spotted the main Italian deployment point, so the RHA opened fire. Useless! Their initial ranging shots proved so far off the mark that it was doubtful the Italians had even noticed any shellfire heading their way!

A different story elsewhere, however. A quick bit of spotting revealed the lead Italian Blind to be a small platoon of motorcyclisti and the order was given  to the nearest Northumberland MMG to open fire. A huge roll of 22 effectively annihilated the lead squad of motorcyclists: ouch!

Meanwhile, the A9s had decided to get into the act. No HE, but their AT rounds would work nicely against the two lorries that had been spotted just next to the motorcyclists. Two solid hits and both were aflame, with stunned Italian infantry leaping out of them in all directions.

As anticipated, it was turning out to be a duck shoot: it was just a question of whether the Italians could organise themselves to do anything about it. Not that that would be easy for them: only two Big Men for the whole force, and a force of only two Actions at that.A good run of the cards, however, meant that an Italian platoon shook itself out and headed up the slope to the ridge behind which lurked the two British Cruiser tanks. With their thin armour, they could be vulnerable to an infantry attack!

Unfortunately for the Italians, the RHA chose that moment to get their eyes in, and shells landed all around the Italian infantrymen, pinning them to the ground.

Most of the Italian column was still under Blinds, so next time the Italian Blinds card came up, Bevan decided to get everything onto the table...and I mean everything. Each remaining Blind shot forward as far as it could and then deployed. Time to bring those numbers to bear...

As I think you can see in the pictures above, the Italians had now developed a plan. The tankettes, anti-tank guns and as much infantry as was around would head for the ridgelines near the British tanks and attempt to drive down that side of the table, presumably outflanking their enemy as they went.

Meanwhile, the Italian field guns would set up and soften up the enemy troops on the ridgelines, with their flanks protected by the remains of the motorcyclists and now-lorry-less infantry.

With Capitano Porcini booting more backsides, and despite the best efforts of the RHA, it wasn't long before the Italians managed to get up onto the ridgeline, and into a position where they could look and shoot down on the British tanks.

The British A9s promptly retreated over the next ridgeline, well aware how vulnerable their flanks were. The British also set their second platoon moving to reinforce the ridgeline: the advantages of having a reserve!

This was a good thing, as the Italian guns had finally set up and found their range. The first platoon of Coldstreams began taking fire: only one death, but being Pinned wasn't going to help them stop the Italian column.

Worse, one of their tanks was hit by an Italian anti-tank gun as it reversed over the ridgeline and prompt brewed up. A catastrophe! Below are the picture of that phase of the battle:

Meanwhile, the rest of the British had been hitting the Italian guns with everything they could, recognising that they were actually the only really dangerous bit of the Italian column. It had taken some doing, but finally the Italian guns had been neutralised.

This was good as, just in time, it meant the two 25pdrs were now free to engage the Italians on the hilltop. They'd better make it quick, however, as things were getting distinctly sticky over there.

Now the RHA had not been shooting very well all game: obviously suffering in the desert heat. If they didn't hit the Italians soon, then it would be too late: the anti-tank guns would take out the remaining A9, and then the tankettes and infantry could swarm forward and perhaps overwhelm the British line.

Fortunately, they chose this moment to get their act together, and the top of the ridge disappeared in a cloud of smoke and dust:

That was enough for the Italians. 

This turn they were Pinned on the ridgetop, and the British had an Artillery card, an Artillery bonus card, and their CinC with the guns to make sure they stayed that way...and down blow, there was so much Shock being suffered that it would have taken a legion of Big Men to sort it out, not the mere two available.

With regret, the Italians began to turn back. The coastal road was effectively blocked for now.

Aftermath and Analysis

Well that had been quite an unusual game of IABSM: rather than a more usual attacker/defender scenario or similar, that had been a duck-shoot and attacker scenario, with victory dependent on whether enough damage could be done to the Italians before they got their act together, and it was quite a close run thing.

Yes, the troops along the road had been comprehensively malleted, and were going nowhere until a lot of Shock had been removed, but on the other hand, the Italian ridgeline force had got itself into a position where a successful attack on the rather small British line did look possible. Thank heavens for the RHA!

Here are a couple of pictures of the final position:

Captain Hindsight

As mentioned before, both Bevan and I agreed that this was a scenario that one would play better the second time. Between us we sketched out what we thought the Italian plan should be:

  • pause as far from the Brits as possible
  • deploy the artillery and machine guns on the large hill on the Italian baseline
  • send forward the motorcyclisti to spot the enemy
  • give them a good pounding with the guns before sending the column forward.

Not historically accurate (our game was much more in tune with what actually happened), but stood a good chance of working.

Our battle had been a great and very interesting game of IABSM: all we now needed was the chance to play it again!

Robert Avery


The Introduction

Big IABSM tomorrow with some of the guys from the SLW. Scenario is a Canadian attack, driving to the objective of the main rail line from Caen.

The Canadians will have Kangaroos to transport one company, tank support, artillery with a pre-game stonk, and a few little surprises as additional support.

The Germans will be made up of a reinforced company, with elements of other units grouped as a Kampfgruppe. The problem will be how they decide to deploy. The table is 12 foot by 6 ft, with the Canadians fighting up the length of the table. 

This is by far the biggest game we have attempted with IABSM. My hope is the size of the table will give the Germans depth to deploy , and give the Canadians a lot to think about. The key will be their plan of attack. 

Here is the table set up. 20mm figures etc to be added tomorrow.

The Game

The Big IABSM game was a cracker! Five players slugged it out over the Caen countryside, with the Canadians pushing slowly but surely through the German defences, towards the railway line. The OOBs were as follows:

Canadians

1 x rifle company of three platoons
1 x rifle platoon in Kangeroo carriers
1 x recce troop
2 x Sherman troops
1 x battery of 25pdr off-table artillery support
3 x pre-game stonks

The Germans

1 x rifle company of three platoons
2 x Tiger tanks
2 x Panther tanks
2 x STuGs
1 x recce adhoc formation with a section of infantry
1 x 120mm mortar battery off-table and FOB.

The forces were not too different, but:

  • Allied artillery was far more reliable and easier to get.
  • The Germans had no idea the point of attack, and had to spread their forces thinly, and hold reserves to plug the gaps.

The Plans

The Canadian plan was a two pronged attack, probing for the enemy, and when found, massed firepower deployed against it.

The Germans split the defence in two, dividing the commands, separated by the main road. The infantry company was deployed in a line across the table with pockets of armour further back. The ad hoc Kampfgruppe was held in the rear as a last gasp force to be thrown in if things got nasty.

The Canadian stonks were a huge success (or so it seemed to the Canadians!) with a host of damage done to any forces in the radius of the shells. Rolling three successive sixes also meant three key buildings were also set alight, denying the church, a key farmhouse for defence. Crucially the FOB had lost the church steeple!!

The Action

The Canadian assault went in and made good progress on the right flank, driving halfway up table before getting bogged down in a firefight with the first line, eventually breaching it, but with heavy losses on both sides.

In the centre, the recce unit initially did well and infantry moved in, again halted at the main line of defence, which they never overcame.

On the left, the advance was slow, and the Kangaroo-mounted platoon were ambushed, taking heavy losses. But what of all the Canadian armour? The armour was on the Blind cards, and turn after turn this card failed to come up. They were also out of spotting range, so never auto-spotted, so they just sat there, unable to influence the battle, much to the frustration of the Allied player.

We agreed that despite the Canadian losses, they had in-fact breached the main line and were close to breaking out. The Tigers were still hidden, and the ad hoc unit available, but they were on the wrong side of the table, and with eight Allied tanks still on table, the chances were getting slimmer of preventing the Canadians from winning the game.

Highlights

The Daimler AC engaging a Panther and inflicting enough shock to drive it off!
The Kangeroo troop being ambushed. Three of the four vehicles were ablaze in minutes.

Hopefully this gives you a flavour of the game.

Desmondo Darkin


On 8th September 1939, German Gebirgsjaegers moving along the Carpathian mountain range bumped into a unit of Polish Border Protection Corps mountain troops near the Dukla Pass. After a short battle, the Poles withdrew, leaving the pass open for the Gebirgsjaeger to continue their advance.

That was the background to scenario #39: The Dukla Pass, taken from my just-published scenario booklet, The September War, Part 2: another thirty of so scenarios for IABSM covering the German invasion of Poland in September 1939.

The game would involve both sides wrestling for control of two objectives, with victory going to side that controlled both objectives on any appearance of the Tea Break card.

The town of Dukla, from the Polish side. Note the two objectives.

Each side would start with a certain number of troops on the table, with more due as time goes by. The Poles are outnumbered overall, but get their troops onto the table faster than the Germans, so must use that advantage to try and defeat their enemy in detail rather than facing them all at once.

The Forces

The Poles have two understrength infantry platoons, a unit of mounted scouts, two medium machine guns and two mountain guns. 

I call the Polish platoons understrength, as they only have two squads of infantry instead of the paper-strength three, but those Polish squads are 12-men strong each, making them hard to whittle down.

The Germans have two strong platoons of infantry: each having three eight-man squads, two MMGs and a light mortar. They also have a weaker platoon with only two infantry squads; a platoon of mounted scouts; and a couple of GB mountain guns. All in all, a very tidy force, provided they could get all their troops onto the table.

Game One

I would play the Poles in both games. In the first game, my plan was to storm the left hand objective with my mounted scouts, then hang on grimly whilst the main part of my force took the other.

Accordingly, my first moves were to get the scouts onto the table as fast as possible.

Unfortunately, it seems like my enemy has the same idea, with a Blind suddenly appearing from the hills to the left, followed up by other two Blinds coming up fast from his baseline.

The cards didn't fall my way either, allowing the Germans to occupy the house and barn next to the objective marker before my mounted scouts could even get there. Worse, the rapidly deploying Germans also managed to get a unit near enough to the other objective to count it as "taken", so unless I did something very drastic very fast, this was going to be a very short game indeed.

Fortunately, my scouts knew what was expected of them, so spurred their mounts forward into combat!

Hit in the flank, the first squad of German scouts were bounced out of the hut they had just occupied, losing three of their number in the process. Unfortunately I also lost two men, and was now facing the whole German scout platoon plus a squad of Gebirgsjaeger infantry that had now arrived.

The result was a foregone conclusion and, despite their valiant efforts, the first squad of Polish mounted scouts was soon bounced back and down to zero Actions.

Meanwhile, on the other side of the field, the Germans had managed to get a squad of infantry into the copse of trees holding the other objective marker. I sent in one of my two infantry squads (the other was still off table) to try and shift them, but quickly came under fire from more Germans in the village itself.

Dukla:  twinned with Stalingrad (look at the fountain!)

Although I could probably shift the German squad given time, time was what I did not have, as if the Tea Break card came up, that was it: game over with both objectives in enemy hands. Time for more drastic measures: back to the mounted scouts!

In went the second squad of scouts, desperate to shift the Nazis from the objective by the hut.

An epic charge, with my scouts outnumbered two to one and facing infantry in buildings. The first round of fighting was, unbelievably, a draw, but then numbers began to tell, and soon the second squad of scouts was also reeling backwards and out of any further fighting.

It was then only a matter of time before the Tea Break card appeared and the game declared over and a resounding Polish defeat.

Intermission and a Stewards Inquiry

As the above had only taken about ninety minutes to play, we had plenty of time for a second game. As we cleared all the figures from the table, we discussed the game, with me remarking how extraordinary it was that the Germans managed to get so many of their Blinds onto the table, given the fairly crippling rules about their deployment.

A pause and awkward silence from the other side.

A hastily convened Stewards Inquiry then discovered that the Germans had accidentally fielded at least one platoon too many at the start of the game, giving them the opportunity to take both objectives almost immediately with the plethora of troops therefore available to them.

Ah well, no harm done (can you hear my teeth grinding together?) and lucky we have time for another game!

Game Two

In the second game, I decided to deploy my two infantry platoons first, with my scouts and MMGs the units that I would have to  wait for. One platoon would head for each objective: surely enough to hold out until my reinforcements arrived, particularly as the Germans would only be dripped onto the table this time round.

Blind Six in the picture above is my infantry platoon, with two Dummy Blinds to try and scare the Germans off. Blind Seven is the other infantry platoon, Blind Three my mountain guns.

Unfortunately, the Germans had also come up with a cunning plan: they sent the one infantry platoon they had at their disposal (!) straight for the  objective by the church as well.

Here I made a tactical error. Although my men got up to the objective first, I only sent one squad into the hut to hold it, keeping the other back to (presumably!) offer fire support.

All that this meant was that when the full platoon of Gebirgsjaeger arrived at the hut and stormed it, numbers were thirty German mountain troops versus twelve Polish Border troops.

So I had lost that objective already, and a squad of infantry I could ill afford to lose!

On the other side of the battlefield, however, I had my second platoon of infantry, my machine guns and my CinC (plus FOO) happily positioned in the wood surrounding the objective. Not much to shoot at, though, as the Germans (what little there were  of them) were all on the other side of the village. If only I had some artillery...

The next phase of the game involved me dropping round after round onto his men by the objective, quite happy to wear him down.

In addition to the pin markers and growing number of empty German bases caused by my artillery, you can see in the picture above that the Germans have managed to get their mounted troops into the churchyard. This was starting to put some pressure on my squad at the top of the picture  and, additionally, although I was quite enjoying the stalemate, I wasn't actually getting very far towards winning the game, and those German reinforcements would arrive eventually.

Fortunately, my Blinds card came up, giving me the opportunity to bring on my mounted scouts...and what an opportunity it was.

sorry about the blurry picture: I was getting all excited!

Thundering onto the table under a Blind, the scouts smashed straight into the rear of the German troops lining the hedge in the churchyard. These were annihilated for no loss to my scouts, and even when the other squad moved up to shield the flight of their comrades, I only lost two men.

However, moving his scouts into a position to shoot at my scouts meant that he exposed himself to fire from my squad in the house, and suddenly the Germans had lost their entire unit of mounted scouts for the loss of only two Polish horsemen. The rest of the scouts moved around the church, preparing to make a quick break for the nearby objective should the opportunity arise.

The Germans did then manage to get one platoon of reinforcements onto the table, but we had unfortunately run out of time. One objective was hedl by both sides, so we declared a draw, but the advantage was definitely to the Poles.

Aftermath

A couple of great games of IABSM and a very good testing of the Dukla Pass scenario. We called "honours even" on the day as a whole, which suited both of us nicely (can you still hear my teeth grinding!)

Also goes to show that you can have a great WW2 game without any vehicles and, in my case, giving me anything with a horse is bound to lead to a charge or three!

Robert Avery


With the launch of the second half of The September War, my scenario pack for Poland 1939, I thought it was time to do some last minute play-testing. The scenario chosen was #58: Jablon.

It's late September 1939. The surprise Soviet invasion has shattered the Polish border troops left in the east of the country. All looks lost, so any remaining Polish formations have been ordered to break for the nearest border with a neutral country so the fight can continue at a later date. Soviet columns drive deep into Poland hunting out the fleeing Poles. Isolated Polish units engage and block these Soviet columns wherever they can, trying to hold them off for long enough for the bulk of their comrades to escape.

One such encounter took place on 28th September, with a contingent of mixed Polish troops (border troops, dismounted cavalry, naval infantry) trying to hold the advancing Soviets at bay in and near the village of Jablon.

The game premise was simple: the Poles would start the game by placing an objective marker anywhere in or around the big farmhouse opposite the church. If the Soviets managed to capture and hold the objective marker on any appearance of the Tea Break card, then they win the battle. The Poles, however, are trying to slip away under cover of darkness, which would fall sometime after the sixth appearance of the Tea Break card. If the Poles still hold the objective on any appearance of the Tea Break card after darkness has fallen, then they win the game.

The Soviets would start the game advancing towards Jablon. Looking at the picture, above, Soviet Blinds would start the game as far onto the table as the far side of the Polikarpov's flight stand base. The Soviets had a company of infantry and a company of T-26 light tanks (well, nine) at their disposal. The Soviet platoons were three squads of ten men each, with a Level I Big Man in charge. They  had only a couple of MMGs and three light mortars as support: the column had outstripped its other assets. There was also a small chance the Polikarpov would intervene.

For their part, the Poles began the game with their support weapons and a platoon of infantry on table under Blinds, with a further two platoons of infantry arriving when the Blinds card and dice allowed! The Polish platoons were all fairly battered two-squad platoons. Their support consisted of four somewhat ancient 75mm guns and a couple of tchankas.

Not knowing exactly where the Poles were, the Soviets decided on a double-pronged attack. One platoon of tanks and an infantry platoon would go up each side of the battlefield, aiming to swing round and hit the large farmhouse from the side. The third infantry platoon would augment the right hand thrust (Blinds #3, #5 and #6 in the picture above). Finally, the MMGs and Company HQ mortars would lay down fire from a central position. 

Not phased by the sea of red thundering towards him, Dave, playing the Poles, began to spot from his hidden Blinds. As he was spotting into open ground, before long he had a very good idea of what he was facing. Amusingly, this also meant that the chips were stacked very much against him...and, yes, I was using my blue French poker chips for the Poles.

As the Russians got closer, the Polish guns and machine guns opened fire from their concealed positions. The big farmhouse held a tchanka and a field gun. The hedge line in front (i.e. towards the Soviets) held the other tchanka and another gun. Finally there were two more guns dug-in towards the rear of the table, but still able to direct fire into the oncoming Red Army horde.

but how did they get the horses up the stairs?

time was ticking on: the poles had received reinforcements

The Soviet light tanks opened up as well, and this exchange of fire between the T-26s and Polish support weapons would take up the next phase of the game: the Russians edging their infantry forward whenever they could. As the climax of the game approached, honours stood fairly even: one T-26 each side had bailed, and the Polish tchanka crew and gun crew by the church had been so battered that any survivors had abandoned their weapons and fled.

The Climax

The Soviet approach phase actually took longer than the simple paragraph, above, implies: about 45 minutes of playing time and around four appearances of the Tea Break card. It was getting late and the Poles still looked pretty comfortable. Then came the very rapid climax of the game.

Up came the Soviet Human Wave chip, formerly known as the Uraaaaaaaaagh! chip. This was too good an opportunity to miss, and Bevan, playing the Soviet infantry, hurled a platoon at the Polish positions in the farmhouse. The extra charge bonus that the chip gave him meant that the whole platoon went in okay, but another squad from the other Soviet infantry platoon came up short, giving rise to the first of quite a few "if only's".

A huge Close Combat broke out between the charging Soviets and the troops in that section of the farmhouse. If you look closely at the above picture, you can just see the barrel of the Polish artillery pieces in the middle window: it couldn't fire, but its crew grabbed their weapons and piled in, giving the Poles about 15 men with which to fend off the 29 Soviets, many of whom were puffing and panting after their long run in.

In the event, this first round of melee was a draw: with each side losing five men. This could have been disastrous for the Poles, but they had a second squad on the other side of the building, and the tchanka crew from upstairs along with a couple of Big Men including the company commander,who joined in for the re-match.

Desperate to hold on to the objective marker, the Poles fought like lions: this time sending the Soviet platoon, or what was left of it, fleeing backwards, completely mullered. It would take no further part in the game.

This victory was at a high cost, however. Both Polish Big Men were killed, and an anti-tank rifle team that had been doing sterling work against the enemy T-26s. In all, the Poles were left with one squad of infantry, the tchanka (four crew left), and the artillery piece (four crew left)...all of whom were carrying quite a bit of Shock.

The Soviets, however, had plenty of men left, and moved their next infantry platoon, still at full strength, up into position to charge into the farmhouse on their next activation. With them they had their Big Man, and Commissar Dushkin to make sure they understood the, er, seriousness of the situation!

All the Soviets needed was the opportunity to go in, and the objective was surely theirs.

Unfortunately, and here's another "if only", the Gods of the chip bag had other plans. Despite the huge number of Soviet chips in the bag, the first three  out of the bag were:

The three remaining Polish guns fired into the Russian infantry platoon as it lined up to start its charge, effectively annihilating one squad. Dave began to relax slightly.

Big mistake.

The next chip out of the bag was the Soviet Heroic Commander chip: and in went the infantry again!

Unfortunately, the dice were with the Poles, and only the front Soviet squad made it into Close Combat, so despite the heroic efforts of Commissar Dushkin (with the flag) and the Big Man (both of whom survived), the Soviets were pushed back again.

At that point, dusk fell, meaning that the next appearance of the Tea Break chip would end the game, with victory going to whoever held the objective marker in the farmhouse. The Poles still had two platoons under Blinds, but the surviving Soviet platoon was just as big as those two combined, and there were still seven T-26s in action.

But it was not to be.

I picked up the full chip bag, plunged my hand inside, and drew out...the Tea Break chip.

Night had fallen and, under cover of its all enveloping darkness, the remaining and victorious Poles slipped away.

Aftermath

Well that was a game and a half!

For those who say that IABSM is a slow game, we completed the above in about 2½ hours, and even if night hadn't fallen with such a thump, would probably have fought out the remaining action in a maximum of another hour or so.

I had thought that the Soviets would walk all over the Poles, but all that open ground and the lack of support weapons with which to suppress their opponents really made a difference.

On the Polish side, they effectively fought the battle with only two thirds of their force, so although they didn't have much left in the farmhouse, they could have reinforced the troops in their with ease.

A great game, and one that is definitely passed as ready for inclusion in The September War, Part II.

Robert Avery