Here are the pics from Saturday's Quadrant 13 game "Man Kzin Wars" that I ran at Advance! 2022 in La Mesa, CA, USA. Both players were new to Quadrant 13, but not new to miniature wargaming, and picked it up very quickly.
David J Blood


Here are the pics from Saturday's Quadrant 13 game "Man Kzin Wars" that I ran at Advance! 2022 in La Mesa, CA, USA. Both players were new to Quadrant 13, but not new to miniature wargaming, and picked it up very quickly.
David J Blood
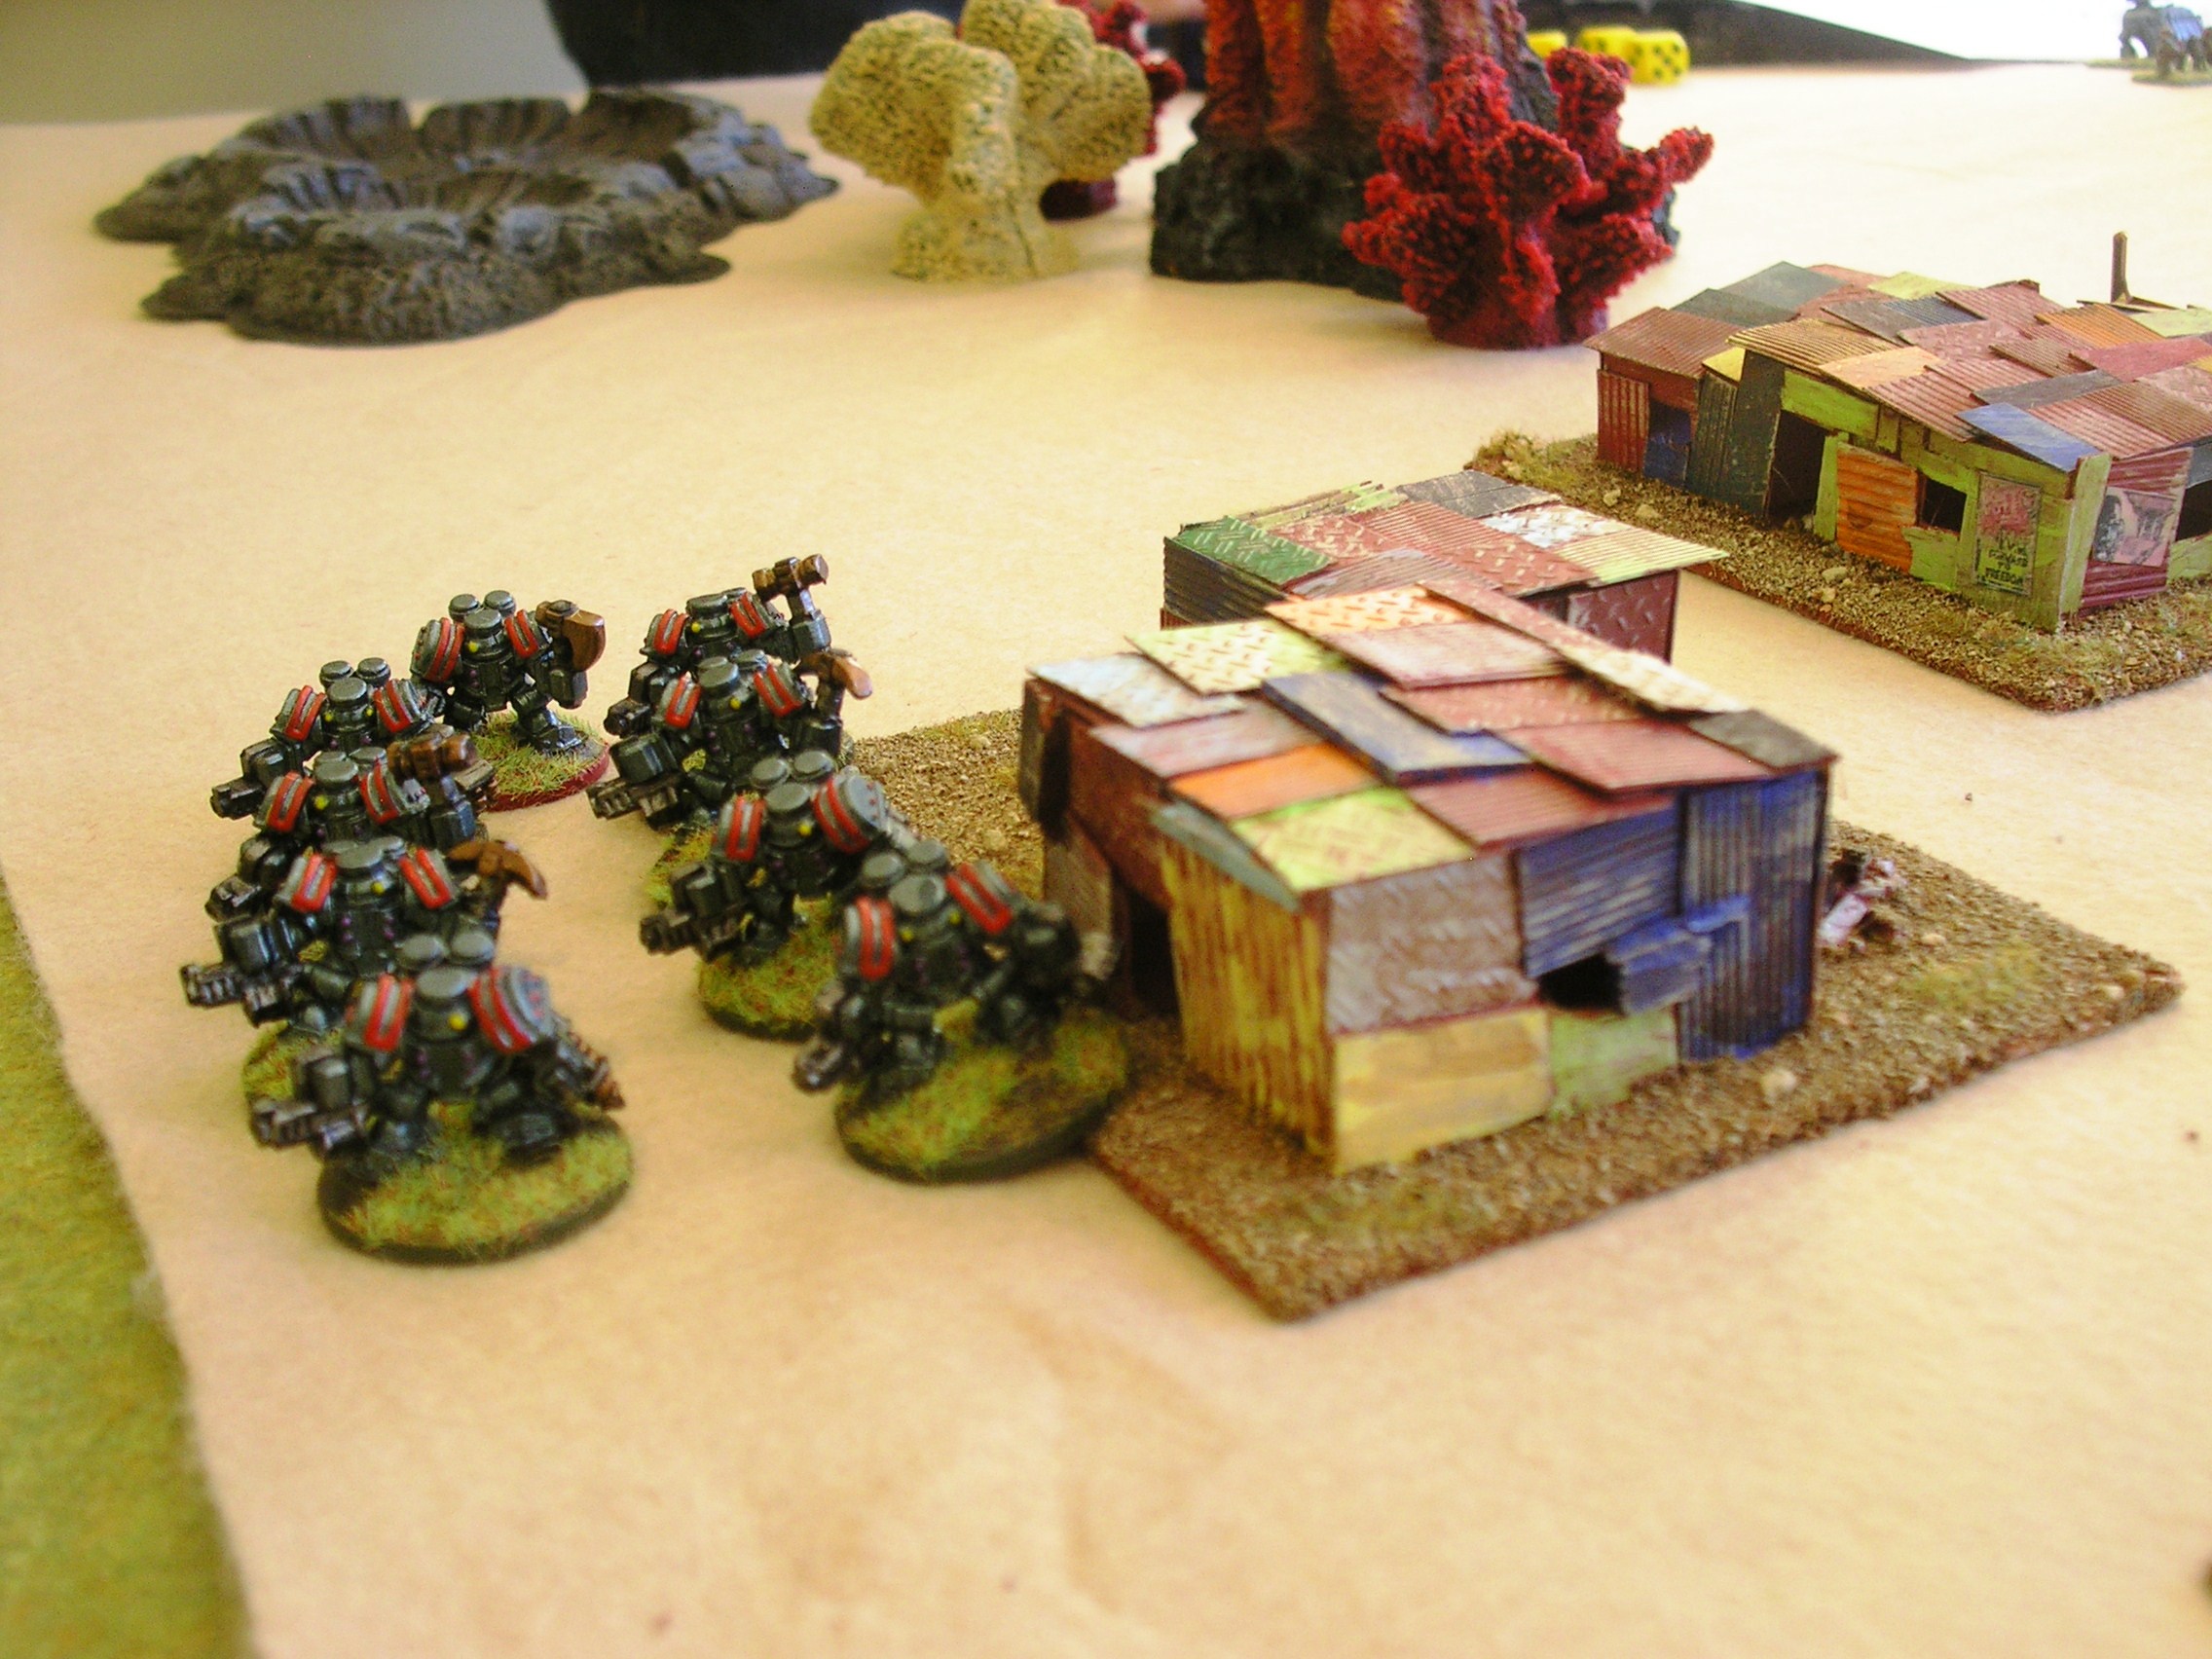
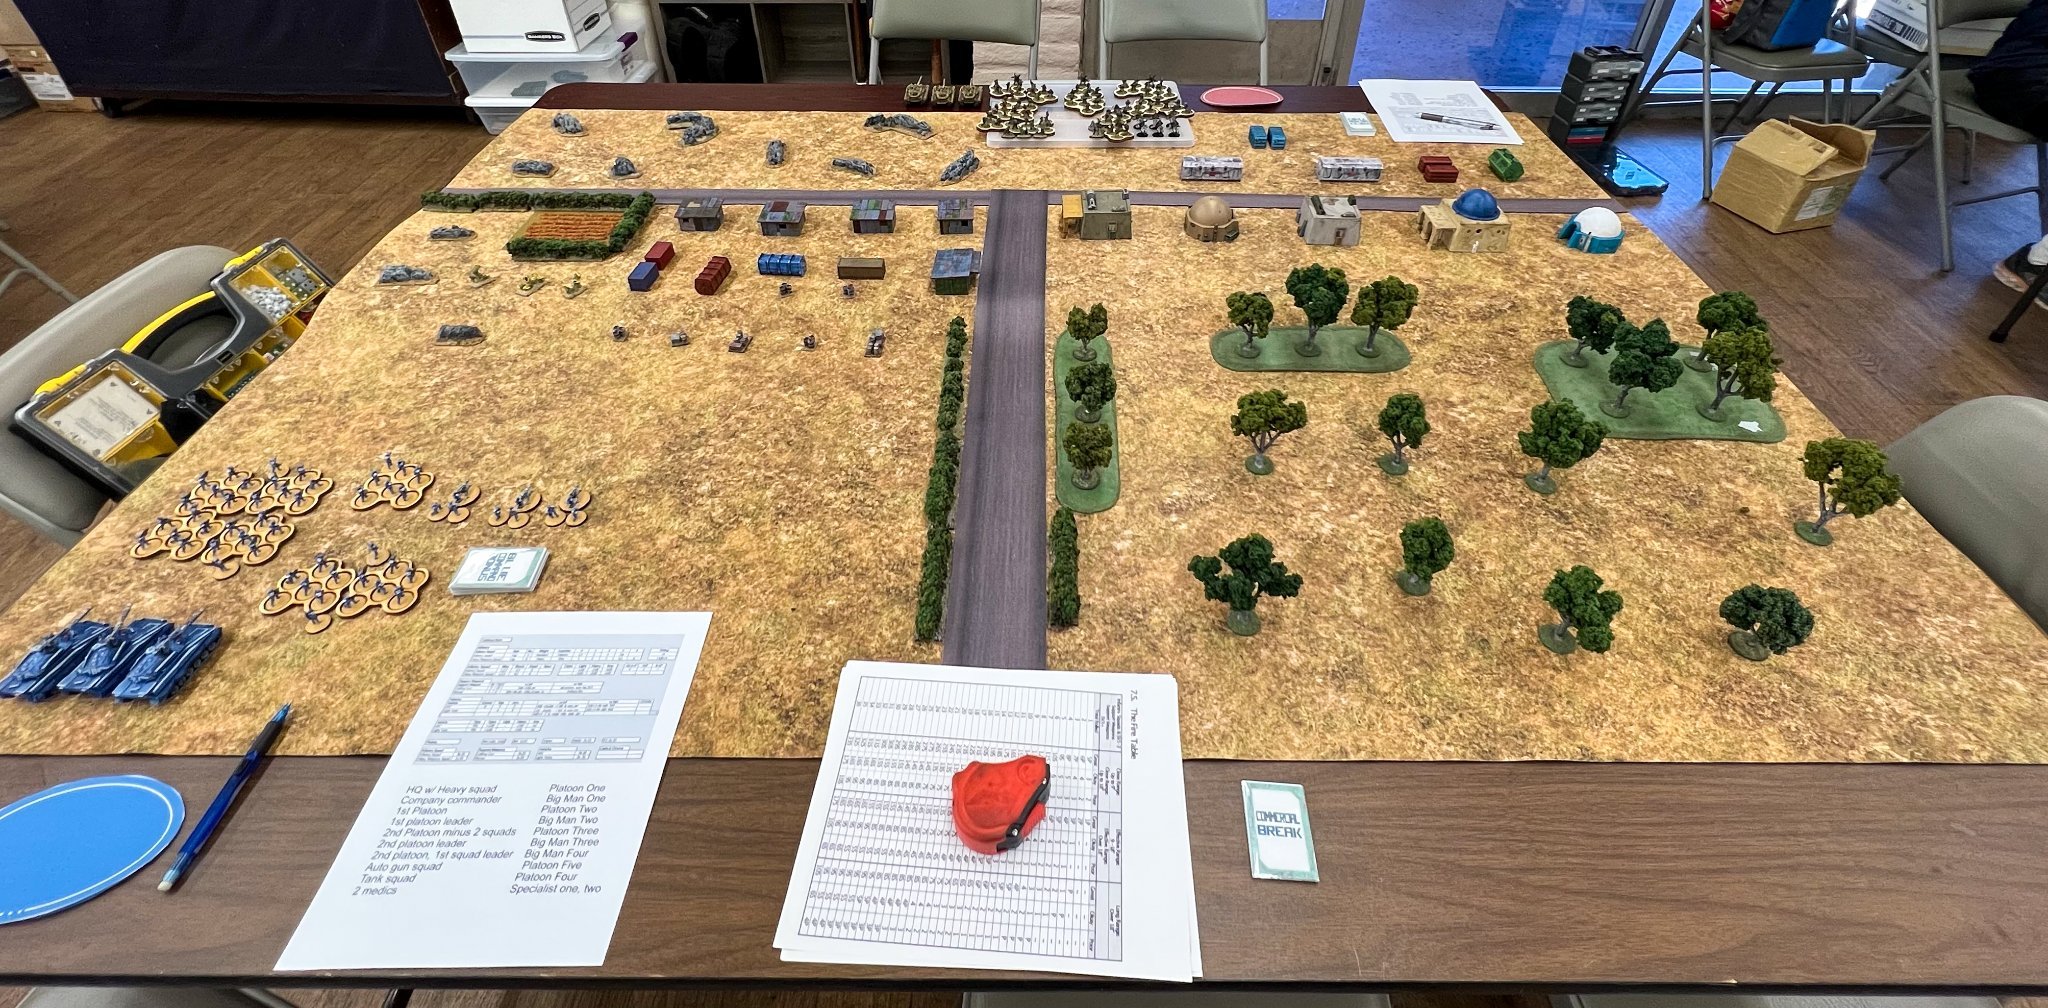
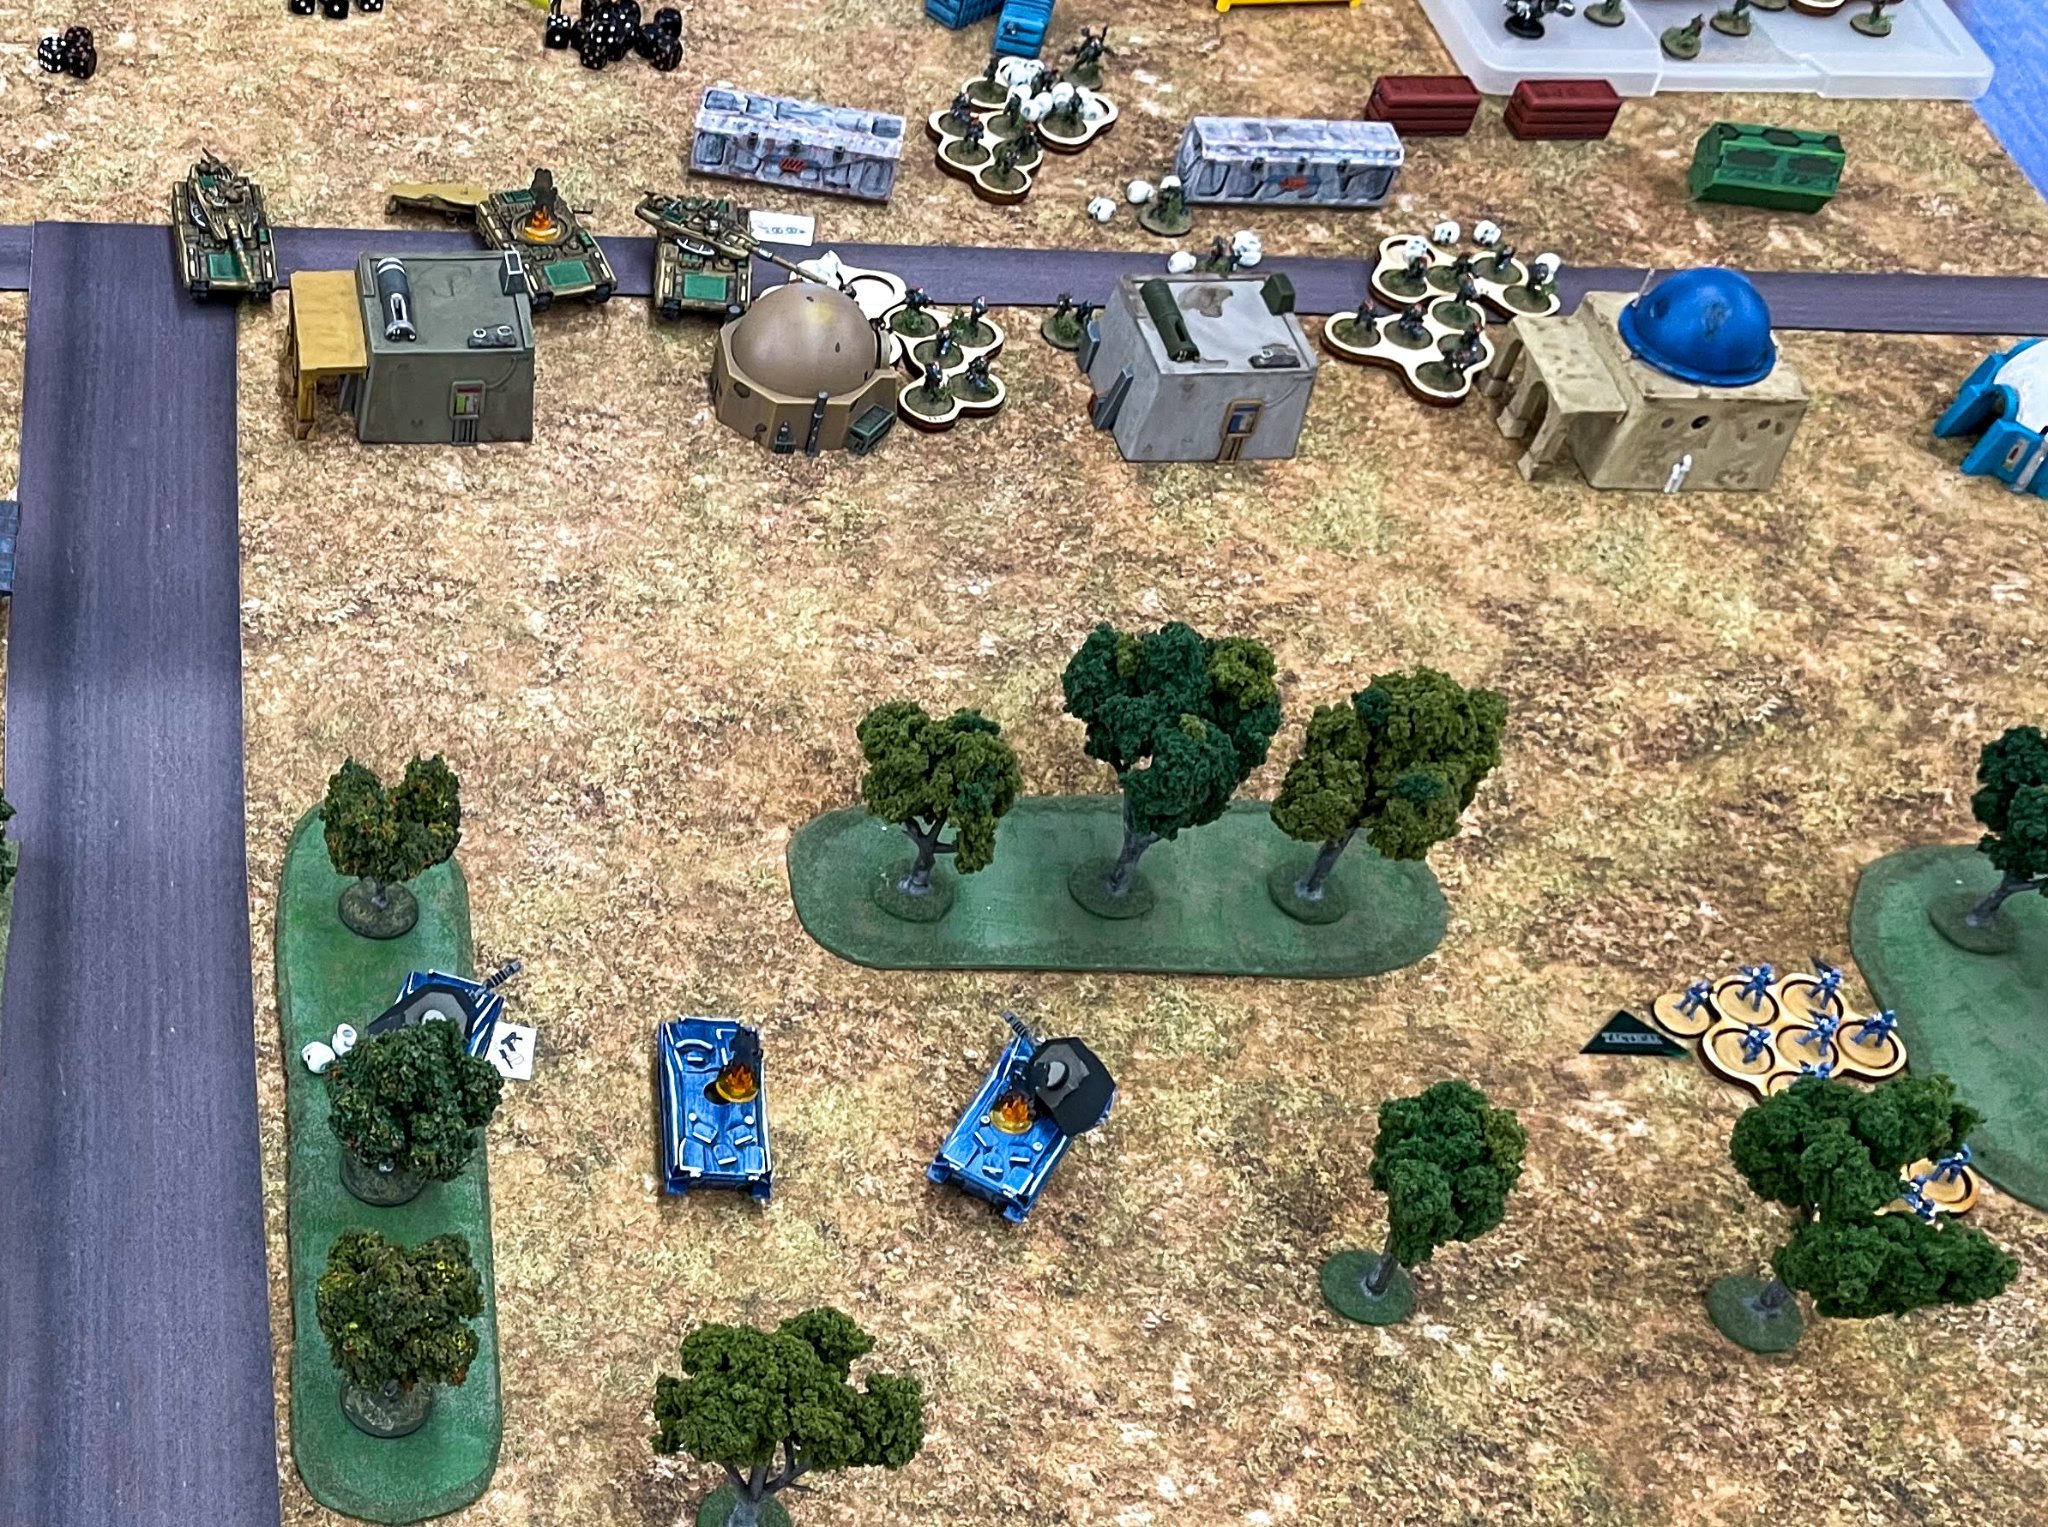
Starting forces for Red, the Kzin. Two platoons of 30 cats w/ three support weapons, 3 medium tanks, a 6 cat scout squad on grav bikes, and a heavy weapons squad.
Starting forces for Blue, humans. One platoon of 24 men, a half platoon of 12, a heavy weapons squad, 3 support weapons, and 3 light tanks.
The Humans had to hold the Cats in place for x number of turns, then retreat off the board, all while not losing for than 50% of their forces.
In the end, the Humans (blue) took more than 50% casualties and lost. The game took about 2 1/2 hours. Great fun was had by all.

One of my main wargaming friends came over to help me put up a blackout blind. I say “help” when, of course, I mean they would put it up whilst I stood around making polite conversation and the tea…my DIY skills being poor in the extreme.
Whilst we were drinking our first cup of tea, we considered how much time we had allocated to the blinds-putting-up task and how much time we had, and calculated that we could fit in a quick wargame as well. The question of which to do first was considered for a nanosecond before the obvious “game first, blind later” answer presented itself, so we immediately repaired to the wargames room.
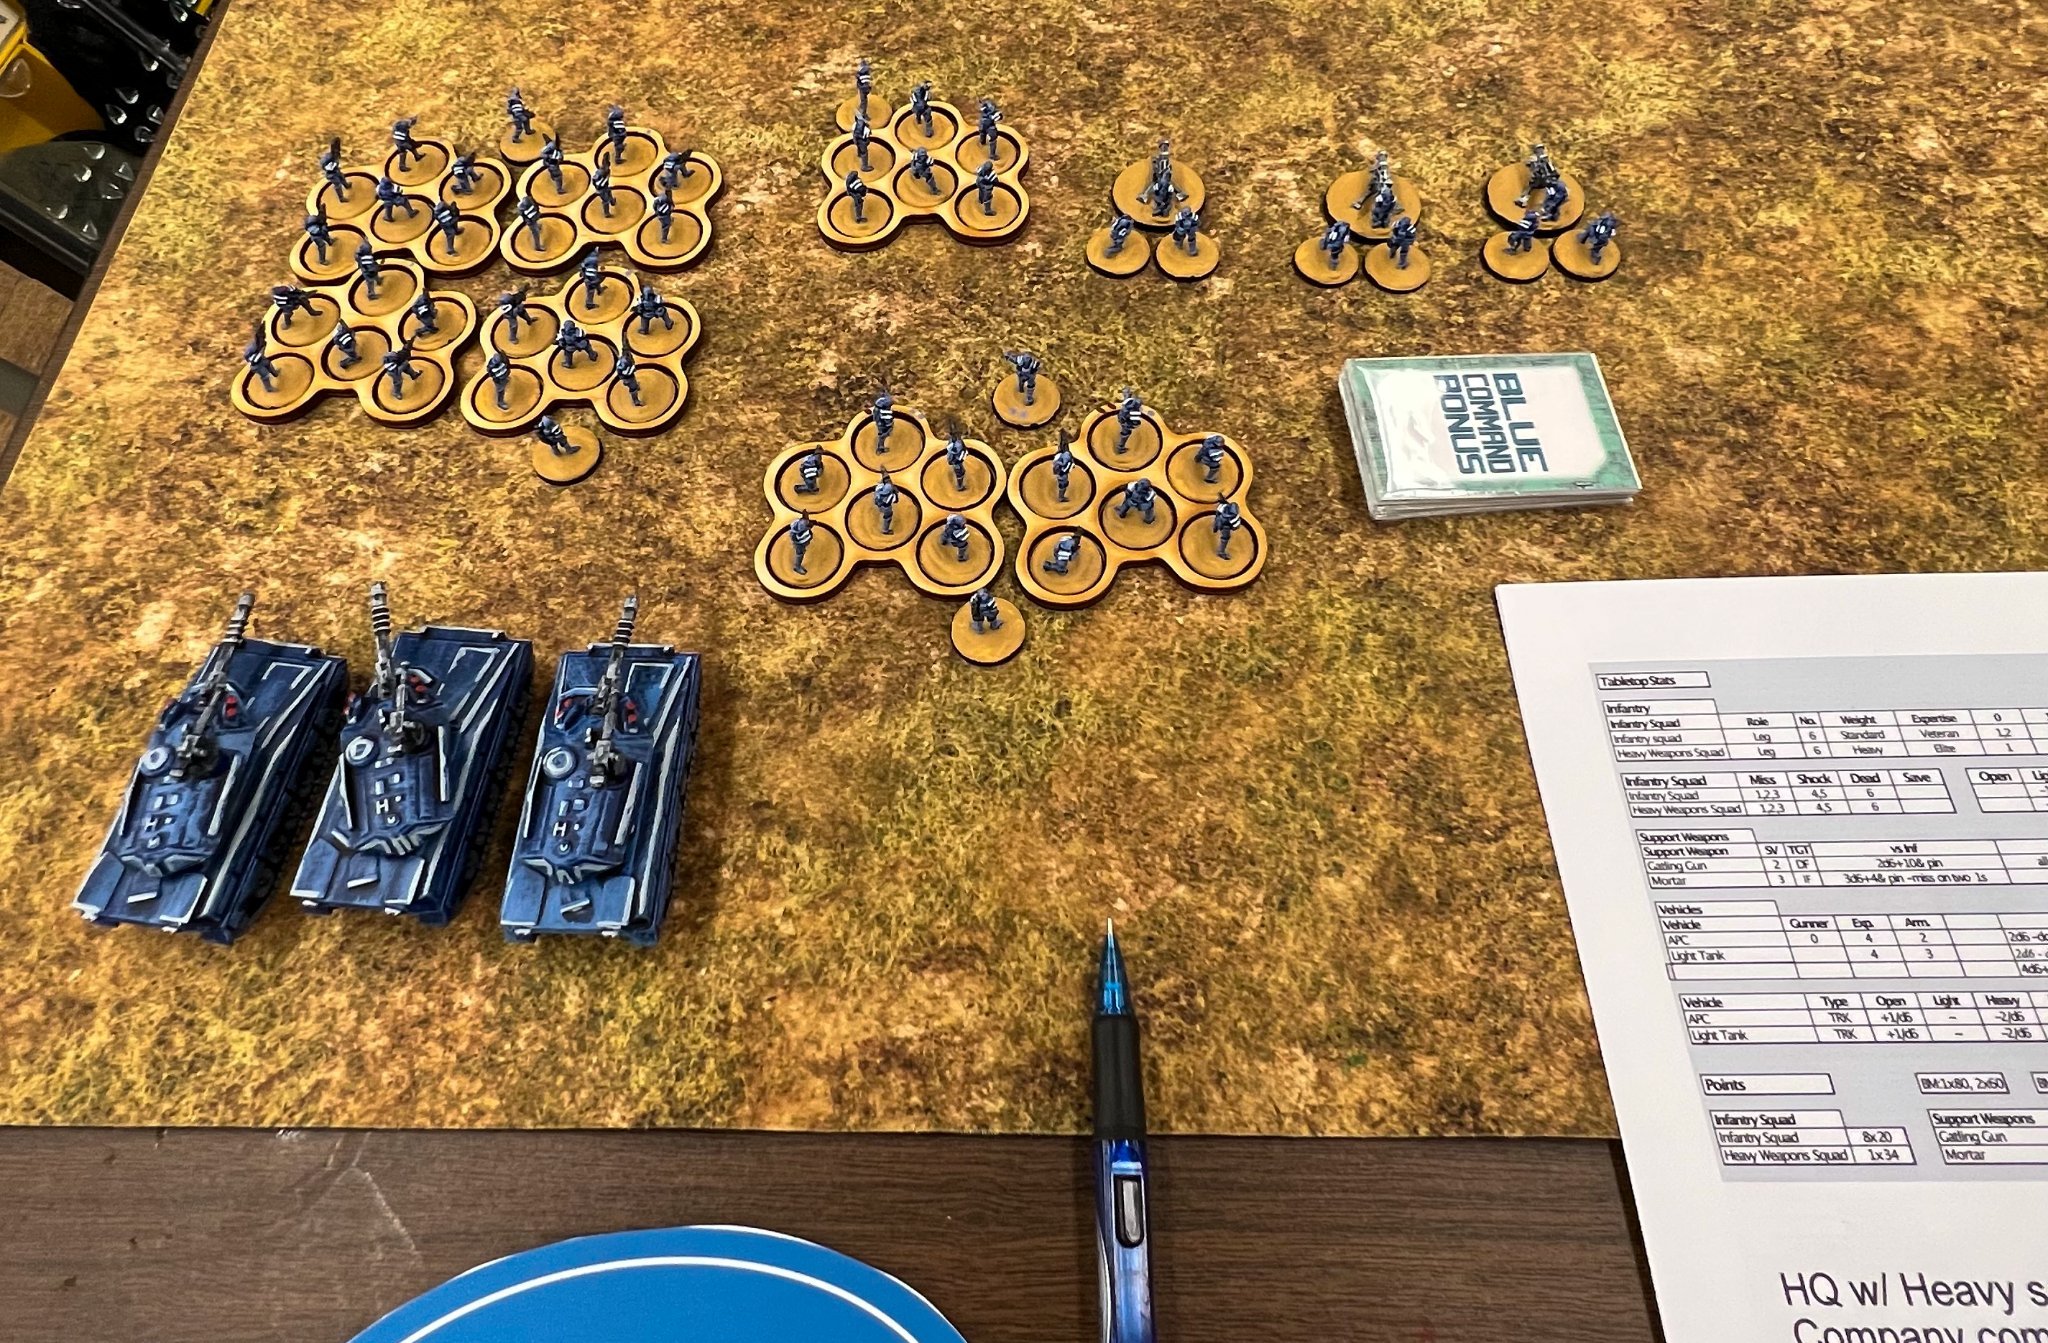
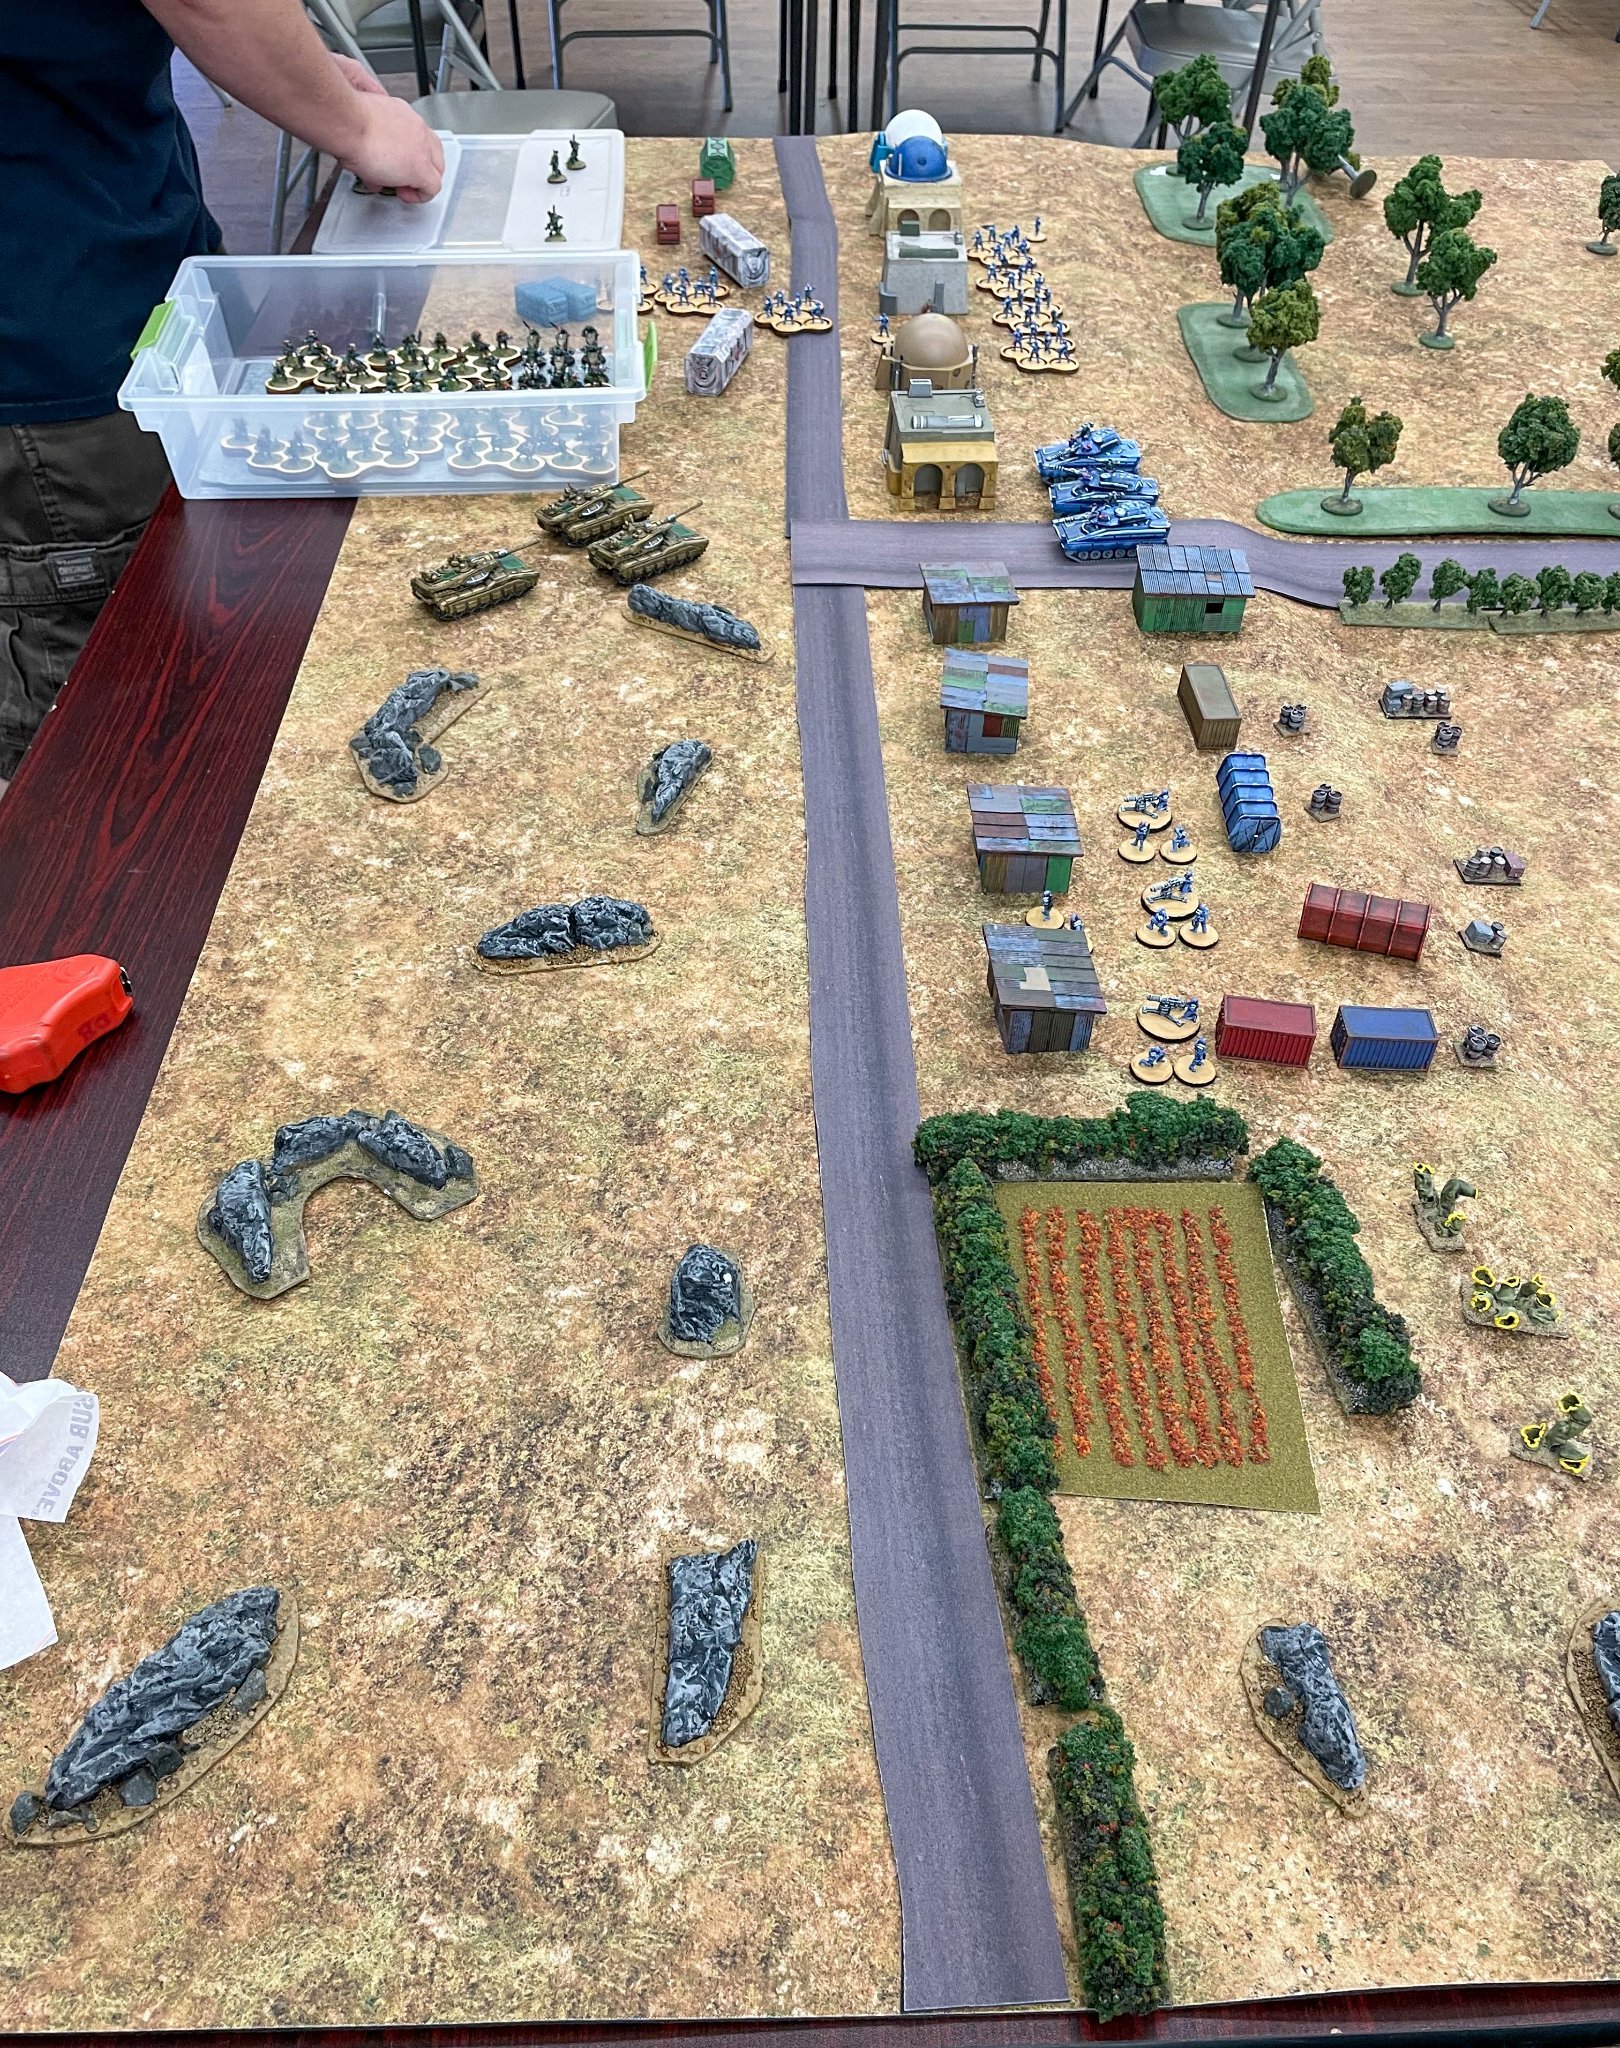
It had been a long time since we had played Quadrant 13, the company-sized sci-fi game using the basic IABSM engine that I wrote for the Lardies, and I had an army all ready (painted during lockdown) that had never been on the tabletop, so that ended up being our choice: I would take the virgin Astagar (space snakes originally from Critical Mass Games and now available from Ral Patha) and John would take the seasoned Protolene Khanate (also Critical Mass but augmented with Dark Star’s Garrhul and Khurasan’s Raug).
The Astagar force consisted of the following:
Company HQ
1 x Big Man
2 x Heavy Cannon
1st (mechanised) Platoon
1 x Big Man
3 x Assault Infantry Squad (each 10 snakes and including a flamer)
3 x APC
2nd (mechanised) Platoon
1 x Big Man in a Volos Assault Mecha
6 x Astagar in Viperia Powered Armour Mecha
1 x Astagar ECW Specialist in a Viperia Powered Armour Mecha
3rd (armoured) Platoon
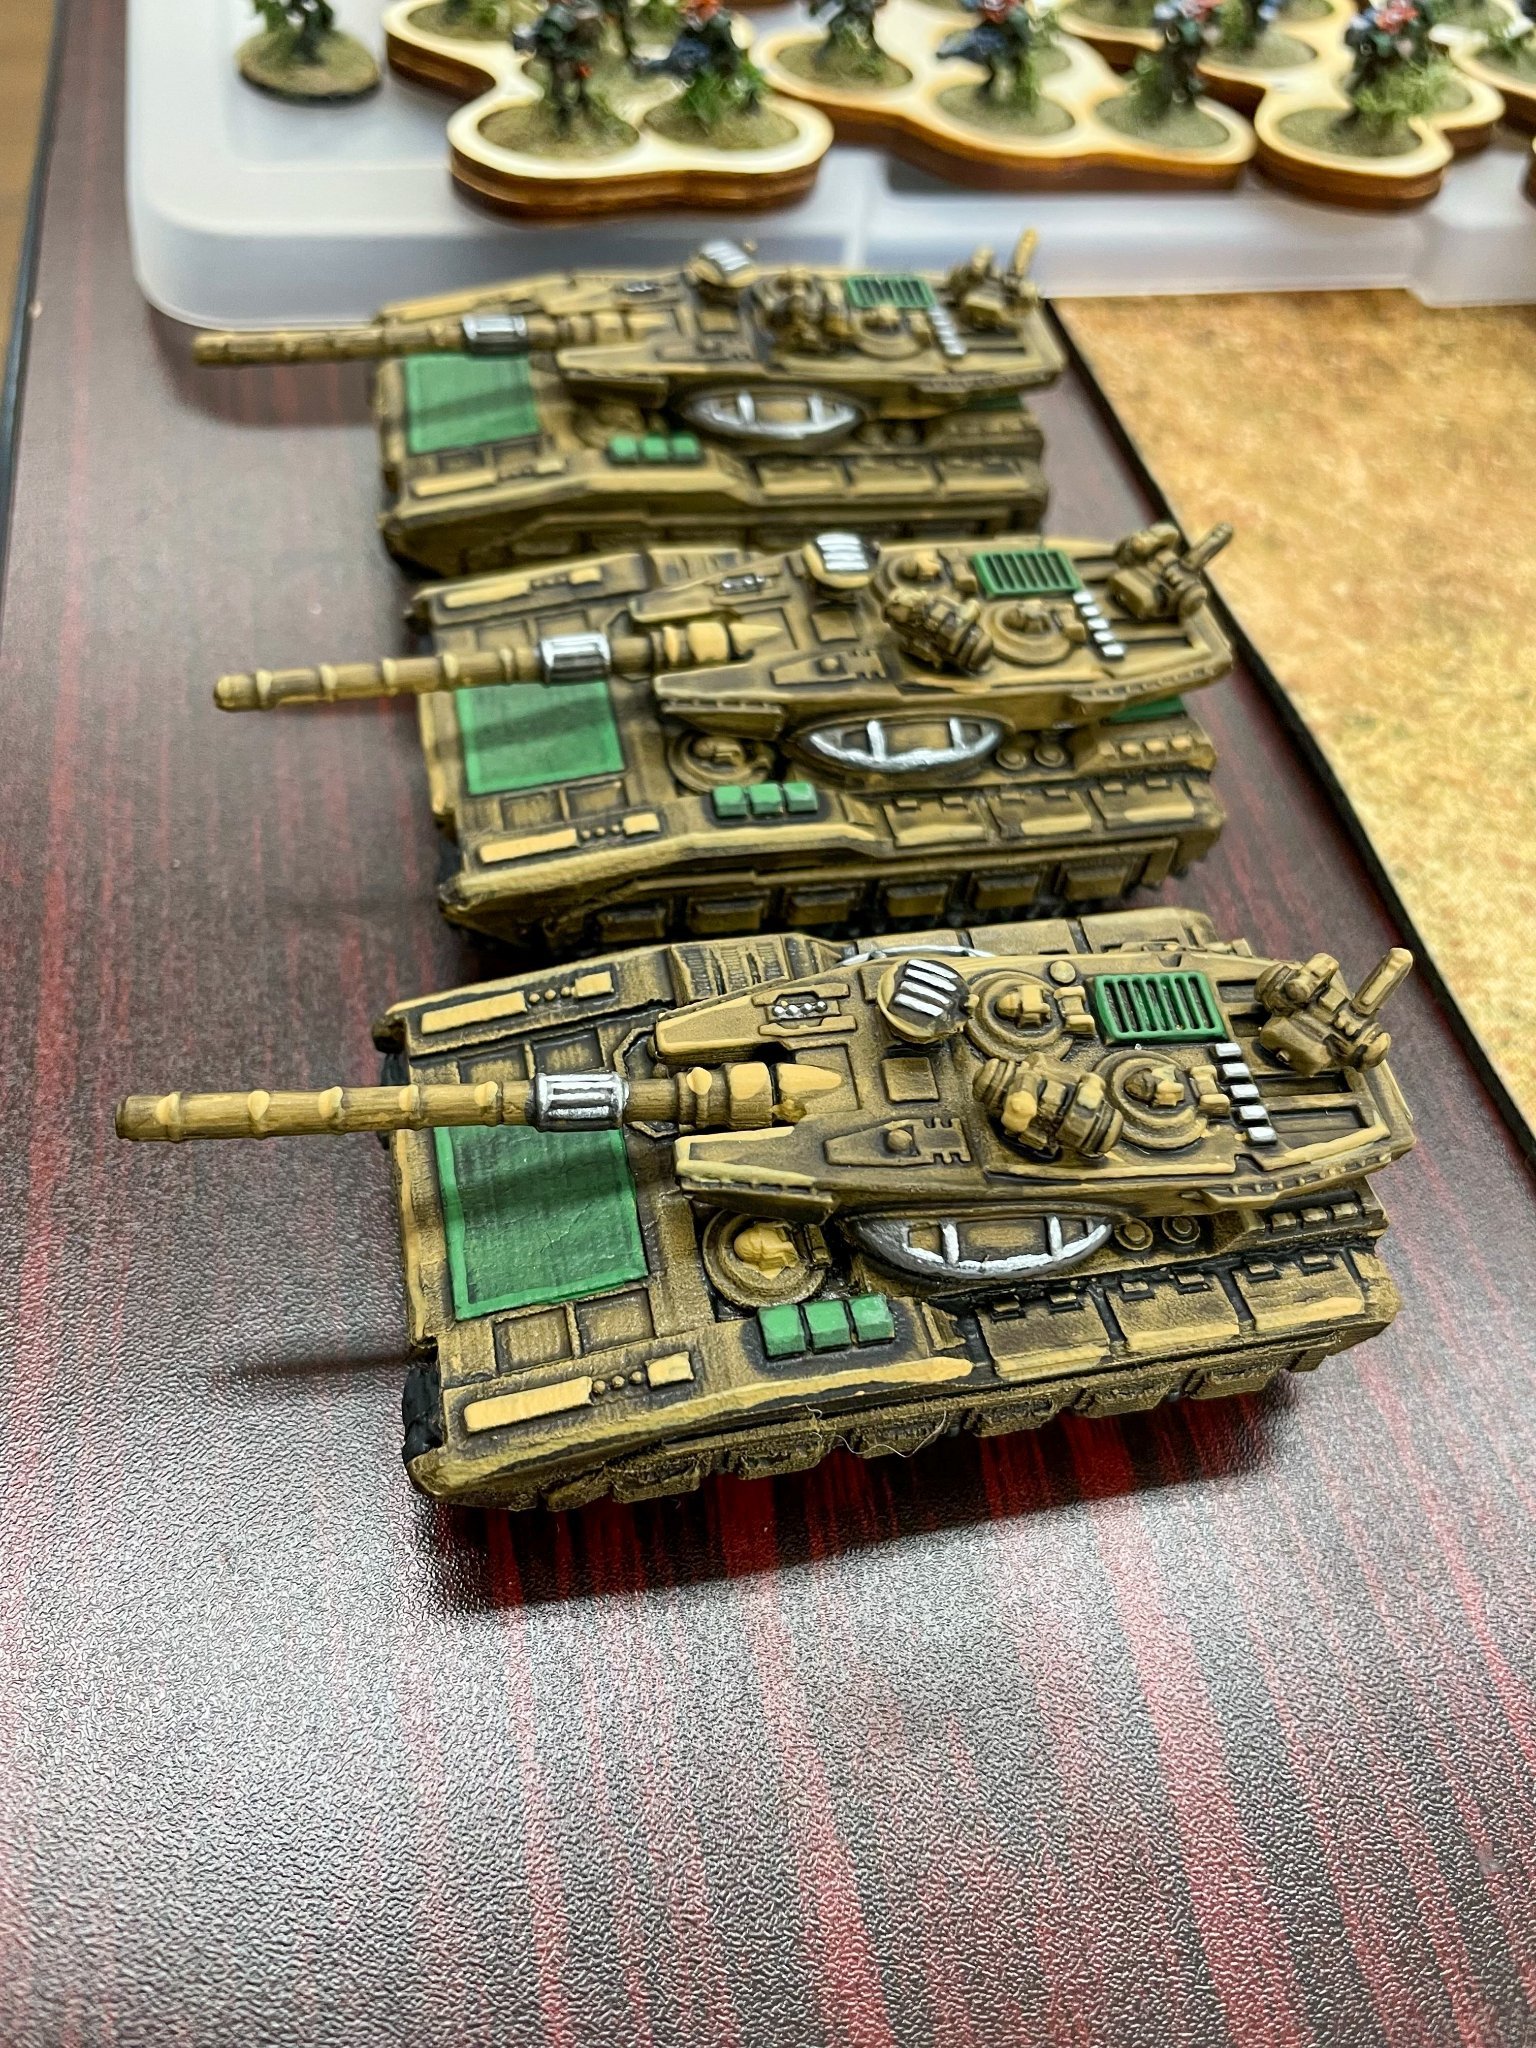
3 x MBT
The Protolene Khanate force consisted of the following:
Company HQ
2 x Big Man
1 x Hunter ECW Specialist in Ayame Khan battlesuit
1st (Scout) Platoon
1 x Big Man in Scout Ayame battlesuit
2 x reconnaissance infantry in Scout Ayame battlesuits
2nd (Assault) Platoon
1 x Big Man in Predator Ayame battlesuit
2 x assault infantry in Predator Ayame battlesuits
3rd (Hunter) Platoon
1 x Big Man in Hunter Ayame battlesuit
2 x infantry in Hunter Ayame battlesuits
4th (Hunter) Platoon
1 x Big Man in Hunter Assault Ayame battlesuit
2 x assault infantry in Hunter Assault Ayame battlesuits
5th (Hunter) Platoon
1 x Big Man in Hunter Marrock battlesuit
2 x infantry in Hunter Marrock battlesuits
6th (Garrhul) Platoon
1 x Big Man
2 x Garrhul infantry squad (each 10 Garrhul)
7th (Raug) Platoon
1 x Big Man
2 x Raug infantry squad (each 12 Garrhul)
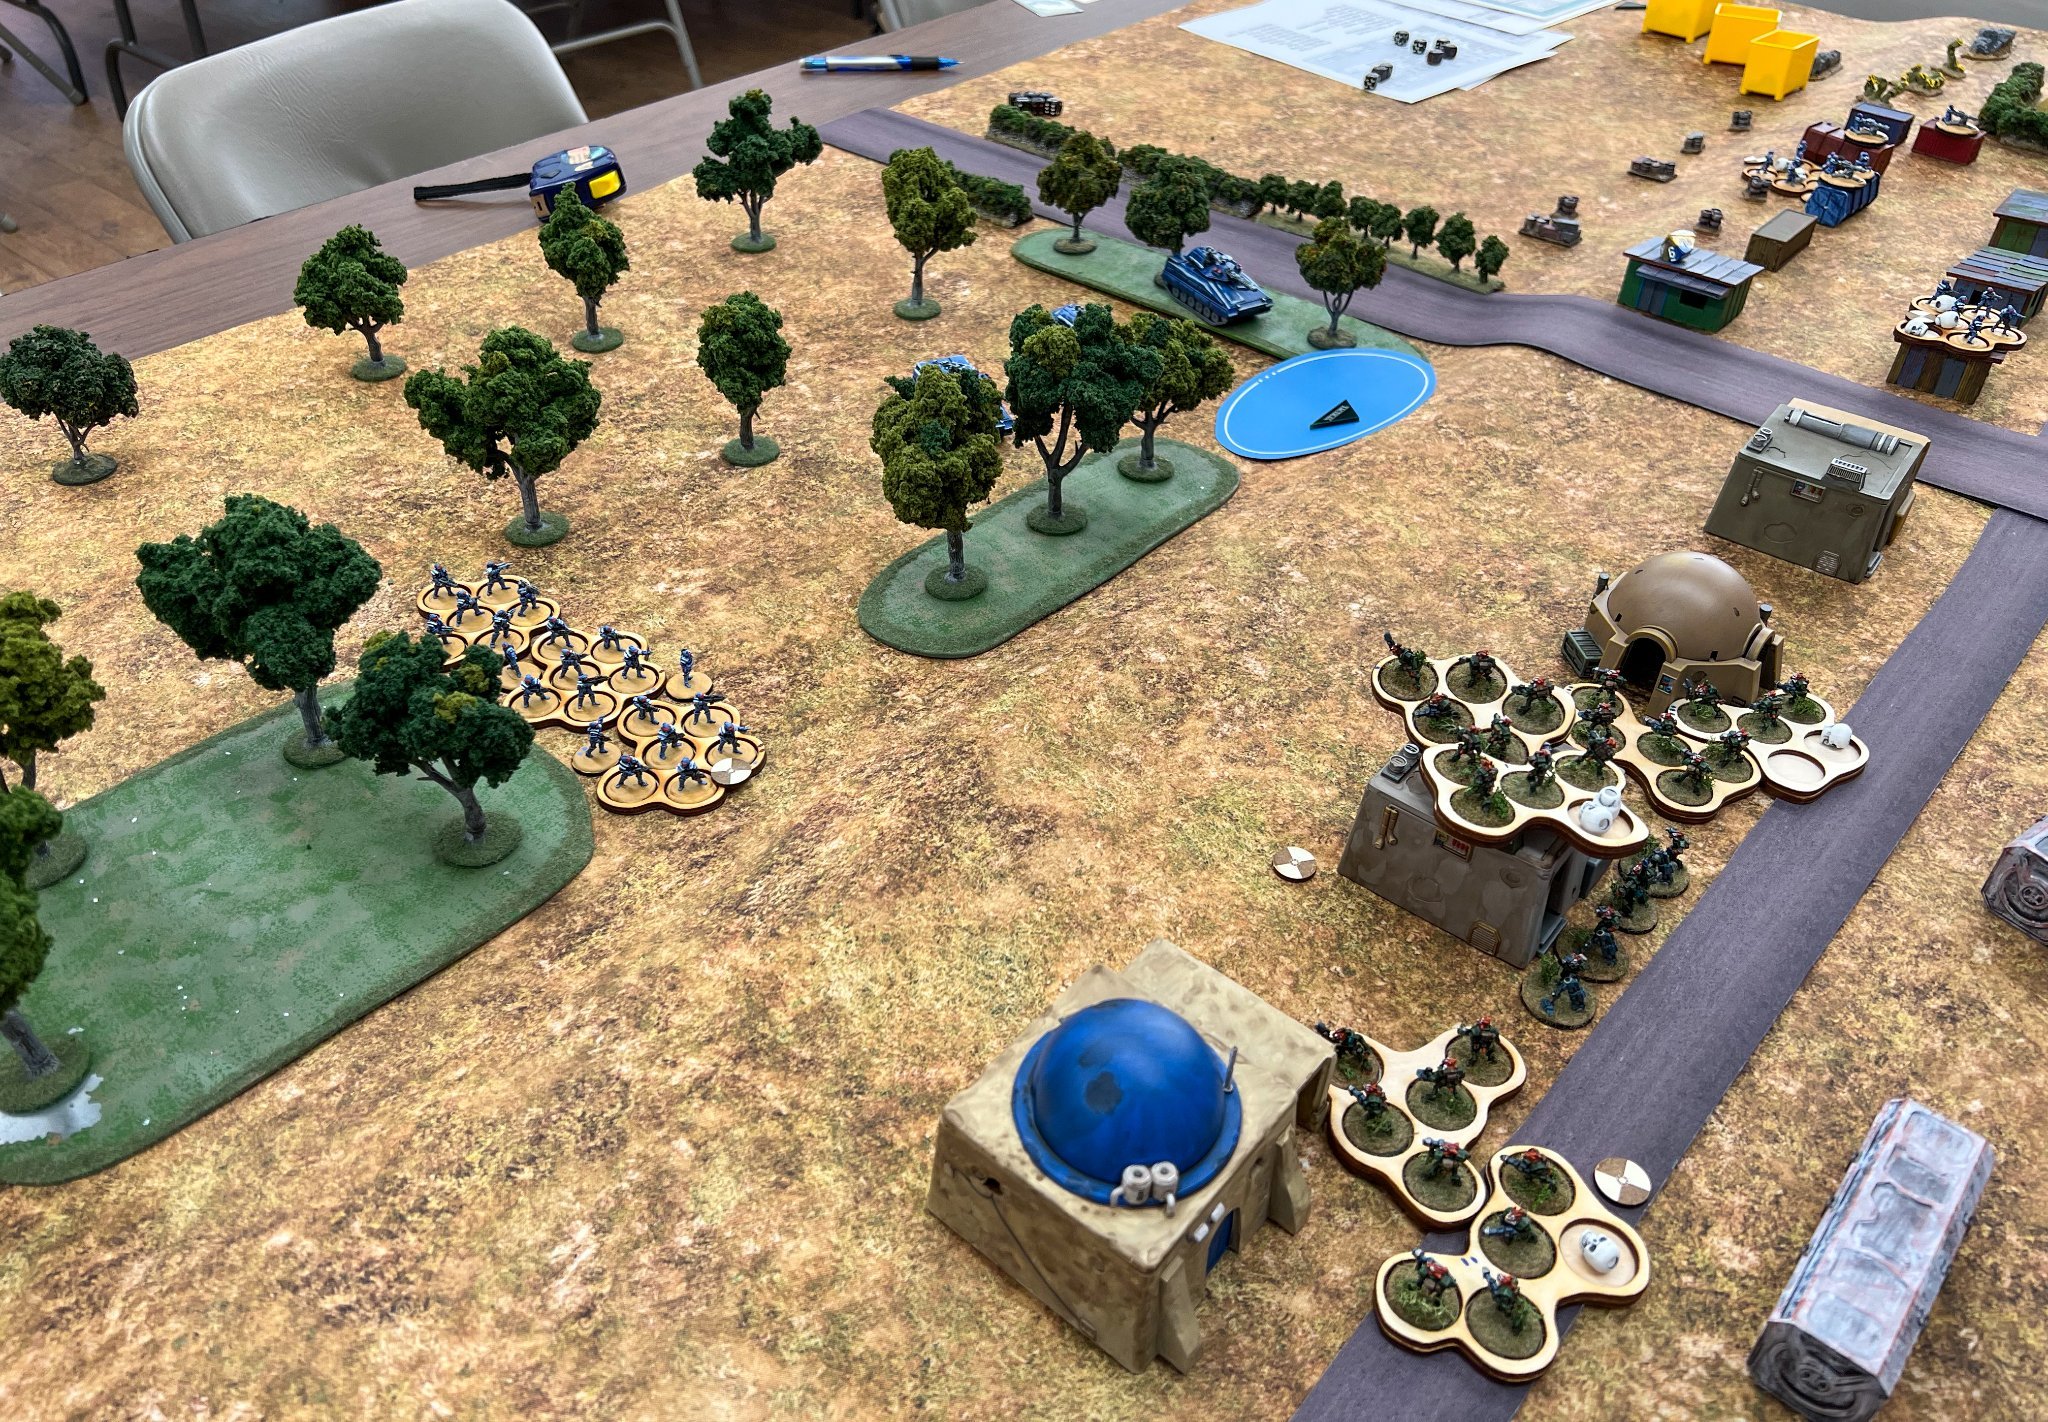
The battlefield was a rugged piece of land studded with hills and clumps of alien foliage. In the centre was the landing site of a large ship, possession of which was each sides’ objective.


The delayed arrival of the Astagar MBTs and infantry seemed to have worked in the snakey’s favour, catching the Khanate’s main force in the flank: an accidental pin and assault from the side tactic.
Although the battle was by no means won, the Khanate commander ordered a retreat at this point. After all, he still had the blind to put up!
It had been a great and fast-moving game, and really good to get the Astagar onto the table top at last. More games of Q13 will follow!

Those of you who read my last Q13 AAR will know that I am currently playing “king of the ring” with my new sci-fi factory complex. Last game, the Felids defeated the Hauk, so now it was their turn to defend, with their opponents being the Aphids: frog-like beings from Zombiesmith.
My opponents were Dave and John, who were on a strict time limit which actually nicely suited the type of game we were playing: they would play the Aphid attackers, and would have almost exactly 2½ hours to reduce my position.
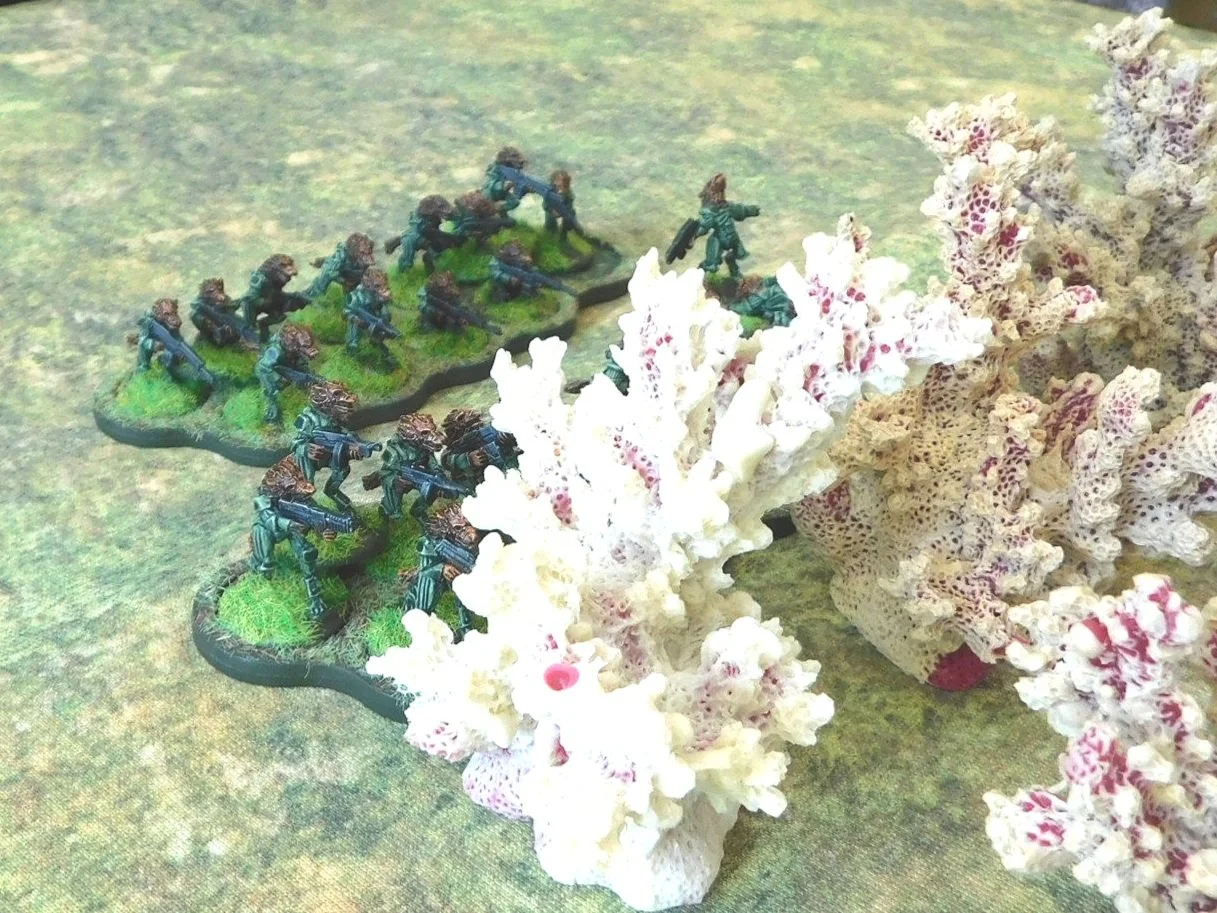
My Felid defenders consisted of a platoon of Prideguard veterans supported by three laser-cannon teams and a platoon of mortars on motor-carriages.
They also had a Whiskers reconnaissance drone to help them spot the incoming frogs, and a section of normal Felid infantry as a backstop.
This was not a very big force at all.
The Aphids, on the other hand, had a plethora of men…well, frogs. To begin, they had a three-platoon company of Aphid grunts supported by a section of mortars.
In support, they had a platoon of three small sections of grav bikes; a platoon of veteran scouts; and a two-section platoon of Aphids in armoured battlesuits.
A bit lacking in artillery, so on top of all the above, they could call in air support from a Tadpole bomber: a lovely model from one of the Spartan Games spaceship lines.
This was easily a five-to-one ratio to the Felid force opposing them.
As before, the terrain consisted of the factory complex on a raised platform surrounded by an alien landscape.
For those of you unfamiliar with Q13, the units are activated by pulling the poker chips you can see from a bag; and the blue pieces of card are Blinds, under which units lurk until spotted.
The Aphids began the game cautiously,moving Blinds up each side of the factory and only sending the Grav Bike Platoon into main complex itself.
As my Whiskers Reconnaissance Drone was having a bad day (there must have been something in the atmosphere: I didn’t make a successful roll all day) I decided to deploy my fixed defensive positions asap. This was to aid spotting and avoid the chip bag getting flooded with Aphid chips.
My forward gun (the one on the right, above) managed to catch an Aphid platoon as it scrambled up onto the factory platform, and hammered them badly, but then came under attack itself as a couple of sections of Grav Bikes boosted them up onto the same level.
My forward laser cannon disappeared, but I did manage to catch the Grav Bikes with fire from a laser cannon I had at the top of the tall tower: not a rate of exchange that I could afford to keep up.
Meanwhile, the final section of Grave Bikes had shot forward and was approaching the gantry where my main force was held. There were only six of the froggies in this section, so I send a squad of Prideguard forward to into melee: surely ten veteran Felids would make short work of the amphibians.
Apparently not.
My Prideguard squad was sent hurtling backwards, five of their number not returning.
Prideguard about to hit the Grav Bikes (below)
Worse, the Aphid Battlesuit platoon had found the accelerator button, and were coming around the corner towards my mortar carriages. Things were not going well!
All was not lost, however: by now I had his Scouts pinned down under the base of the big tower, and had already driven one section to flee.
Unfortunately I had forgotten about the Aphid air support. In swept a Tadpole bomber, and dropped a bomb right on top of the last cannon in the back gantry.
Although the bomb didn’t do a huge amount of damage, it did Pin or Suppress all my units in the blast radius, giving the Aphids time to get properly under cover.
I was now in danger of being swamped, no pun intended, with frogs coming at me from all directions.
The Aphid Battlesuits had, by now, dealt with my one non-Prideguard squad, and were busy pulling bits off the mortar carriages. They weren’t doing this very well, but it was only a matter of time before the mortars were destroyed.
Aphid infantry had also got up onto the main gantry: they were everywhere!
At this point I surrendered: better to live and fight another day than be wiped out by green skinned throat-breathers!
It had been a good battle, and I had knocked out about a third of the Aphid force but, in the end, there were just too many of them for my Felids to deal with.
The key moment was probably losing the Close Combat with the Grav Bikes. Shouldn’t have happened and was a result of a bit of cat-like over-confidence. Should have just shot them to pieces from distance!
Well done to John and Dave, froggy commanders both, and next time it will be the Aphids defending.
Robert Avery

Regular visitors will know that at this year’s Salute I purchased a bargain pack of mdf sci-fi terrain from TT Combat and have spent the last couple of months building it. It was now time to get some figures onto the table and actually use the damn thing!
The scenario was to be a simple attacker/defender game, with the Hauk (sci-fi birdmen from Khurasan) defending the industrial complex against an assault from the Felids (sci-fi lionmen, also from Khurasan). I would play the Hauk, friend Neal would play the Felids, and in order to make things interesting, there was a time limit for the Felids to take the complex.
The two sides were as follows:
Company HQ
Big Man (Level IV)
2 x Sniper
Platoon One
Big Man (Level III)
3 x Hauk Drop Trooper squad (9 Hauk each)
Support Platoon
6 x Laser Cannon Team (5 Hauk each)
Mortar Platoon
4 x Medium Mortar Team (5 Hauk each)
The Hauk were small in number, but Veteran in quality. Their laser cannons would fire not as a platoon, but on an individual chip, but with the chips as unspecific: any one laser cannon that hadn’t already activated could be used when a laser cannon chip was pulled.
Company HQ
Big Man (Level IV)
Drone Operator
3 x Whiskers Scout Drones
1st Platoon
Big Man (Level III)
3 x Rifle Platoon (each 10 Felid)
2nd Platoon
Big Man (Level III)
3 x Rifle Platoon (each 10 Felid)
3rd Platoon
Big Man (Level III)
3 x Rifle Platoon (each 10 Felid)
Support Platoon
Big Man (Level III)
1st Section
Drone Operator
3 x Medium Mortars
2nd Section
Drone Operator
3 x Pounder Light Mortars
3rd Section:
Drone Operator
3 x Pounder Light Mortars
AutoCannon Platoon
Big Man (Level III) in Scout Car
4 x AutoCannon Carrier
Prideguard Platoon
Big Man (Level III)
3 x Prideguard Squad (each 10 Felids)
Scout Platoon
Big Man (Level II)
2 x Prideguard Scout Squad (each 6 Felids on Grav Bikes)
As can be seen, the Felids outnumbered the Hauk by three platoons to one (four if you count the Prideguard, see below) and had plenty of mortars that could be used to soften up the opposition as well. All Felid troops were Standard.
The Prideguard were supposed to be reinforcements i.e. not used unless the situation was critical. Prideguard troopers are Veterans.
There were a few special rules used to cover the unique terrain. There were as follows:
Moving from one level to another could only be done by ladders or stairs, except for the Hauk, who could use their jump packs. Each level moved cost one dice of movement, with one level being about six inches i.e. the first platform on the big tower was two levels up.
It took one dice to climb from the planet’s surface onto the main platform.
If behind cover on a higher level, then you counted as a Poor Shot when targeted.
The game began with the Felids moving their Whiskers reconnaissance drones onto the end of the main platform, and then sending them out to see what they could see.
Almost immediately, they spotted the one forward, Hauk defensive position:
Now knowing that the Hauk were defending deep, the Felids could afford to bring on their mortars for a bit of softening up. As Hauk commander, I just didn’t have the men (birds?) to do anything about this at this stage: my defenses were in largely fixed positions: all I could do is watch the Felids deploy and hope they took their time about it!

With that forward defensive position as the only real target, the Felid mortars soon zeroed in on both the laser cannon team and the squad supporting them, and shells began to rain down as if it were monsoon season.
We did have a bit of a wrangle about minimum ranges and the like (those mortars were just about shooting straight up and down!) but as Neal is not a regular Q13 player and I hadn’t reminded him about minimum ranges as he deployed, we agreed to let the matter go…and within a few turns the laser cannon and squad were KO’d.
This might seem like a bad thing, but it did soak up quite a bit of time, and the two units did do a bit of damage before they passed.
With my forward defensive post down, the Felids began edging forward.
By now, their Whiskers Drones had spotted most of my main defensive line along the back catwalk, so their advance was very cautious, mostly led by their four autocannon carriers carefully moving from cover to cover.
Now, however, it was my turn to rain down fire from above. The four Hauk mortars finally got a chance to act (it had obviously taken them some time to properly lock their mortars into place ) and launched a barrage at all that lovely Felid artillery sitting in neat rows at the other end of the table.
I actually had quite a good chance of severely reducing his tubes: rather than having crews, his mortars were actually drones, with each battery fired by a drone operator. Knock out the drone operator and the battery ceases to fire, which meant that in reality I only had three targets: the three Felids with the big antenna on top of their heads!
Unfortunately, my first shot missed by some way, only catching one mortar team in the blast radius and not KO-ing its operator, but it was good to see the other two scattering for cover and to know that I had at least slowed their rate of fire!
Also unfortunately, my mortar fire seemed to galvanize Neal into action: he suddenly woke up to the fact that time was ticking away and threw everything he had forward at once. His advance was not precipitous, however: one platoon advanced down my right flank, meaning that I had to keep assets there to block them, and the rest advanced not through the complex (slow) but down on the planet’s surface. His aim was to get past the arc of fire of my defensive line, and then get in on them before they had a chance to re-position.
This, of course, is what I had wanted: now surely my laser cannons could blast the kitty-kats off the table!
They were certainly an inviting target, but Neal had anticipated this: the Felid mortars changed load and now dropped smoke onto my main defensive positions. How very annoying!
I did manage to slow him down a bit, however. One of my laser cannon teams managed to swap positions and shoot up a couple of squads (including one from the Prideguard!), and a squad that I’d left to ambush the enemy as they went by emerged from cover and knocked out a couple of Felid squads before being obliterated itself.
Shooting as the cats go by
Remnants of the ambush squad
On top of that, my mortars had got the range on the mass of Felids moving up my left flank, and a couple of rounds of fire kept at least one platoon from keeping up with their colleagues.
But the writing was by now on the wall. Although my mortars were doing sterling work, their time on this earth was, I felt, limited:
But, as it happens, that was not where the real damage was done.
Neal managed to get a squad of Felids with a Big Man underneath the big platform that formed the left bastion of my position.
Predictably, the next chit out was “Felid Heroic Commander”, so up the ladder went the squad and, after a round of fierce melee combat, took out the two of my laser cannon teams on the first floor of the platform.
With my defensive line well and truly breached and my mortars about to be swamped by grav bikes, I surrendered. No need for more bloodshed!
A great game, with the new industrial terrain proving worth every penny and minute spent on it.
All kudos to Neal for his surgical dissection of my position, but even he agreed that I hadn’t had much luck earlier on in the game.
The plan is now for the Felids to defend the complex against the next wave of attackers. I haven’t decided who yet, but it will be nice to see the boot on the other foot!
Robert Avery
I shall return…so if the rest of you could just hold them off for a few minutes whilst I climb aboard!

Time for another game of Q13, so time to get the space Dwarves back onto the tabletop to battle another of my so-far-untested forces: the Tah-Sig.
This would be an encounter battle fought across a battlefield consisting of crop fields separated by a series of access roads and narrow strips of open ground. The storyline was that this time it was the Dwarves who were the aggressors: outnumbering the Tah-Sig by a fair amount and needing to get as many units as possible off the table on the Tah-Sig side.
The battlefield from the Tah-Sig side. The dwarf exit point was the Y-shaped junction bottom left.
Played by John, the Dwarves were a formidable force.
Company HQ
1 x Big Man (Level IV)
1 x Sniper
1st (Infantry) Platoon [Lethings]
1 x Big Man (Level III)
4 x Infantry Squad (8 dwarves each)
2nd (Mechanised Armoured Infantry) Platoon [Young Nobles]
1 x Big Man (Level III)
3 x Armoured Infantry Squad (8 dwarves each)
3 x MDMS Cane Toad APC
3rd (Mortar) Platoon
4 x Light Mortar Team (2 dwarves each)
4th (Spider Drone) Platoon
3 x Spider Drone with Rotary Cannon
5th (Armoured) Platoon
1 x Big Man (Level III)
2 x MDMS Goanna Tanks
1 x MDMS Goanna Shield Tank
Company HQ
1 x Big Man (Level III)
1 x Armadillo Support Unit/EW Specialist
13th (Infantry) Platoon [Hearthguard]
1 x Big Man (Level III)
4 x Hearthguard Squad (8 dwarves each)
14th (Infantry) Platoon [Clansmen]
1 x Big Man (Level III)
2 x Infantry Squad (8 dwarves each)
2 x Flamethrower Team (2 dwarves each)
1 x Medic
Thrainites from Khurasan, except for the Spider Drones from GZG. Boontowners from Boontown Metals, except for the Armadillo from White Dragon.
The Tah-Sig, played by me, had a much smaller force, but all the infantry were heavily armoured, and their tanks were very, very low profile.
Assault Company HQ
1 x Big Man (Level IV)
1 x Big Man (Level II)
1 x Sniper Team (2 crew)
2 x Mortar Team (3 crew each)
1 x Paghgaw IFV with EW Specialist
1st Platoon
1 x Big Man (Level III)
1 x Big Man (Level II)
3 x Infantry Squad (each 8 Tah-Sig)
Support Platoon 1
1 x Floater ISW Team (2 crew)
2 x Particle Cannon Teams (each 2 crew)
2nd Platoon
1 x Big Man (Level III)
1 x Big Man (Level II)
3 x Infantry Squad (each 8 Tah-Sig)
Support Platoon 2
1 x ISW Team (2 crew)
2 x Particle Cannon Teams (each 2 crew)
AFV Squad
1 x Big Man (Level III)
3 x Garshaw GMBT
Tah-Sig foot from Khurasan. “Pizza slice” tanks from Darkest Star.
The Dwarves advanced onto the table in two columns. On their right, the Goanna tanks headed down the main road supported by the Boontown Clansmen and Spider Drones. On their left, the Young Nobles in their APCs headed down the road, supported by the Lethlings. Both columns advanced under Blinds, but some elements were quickly spotted by the Tah-Sig Electronic Warfare specialist deployed with his Paghgaw IFV.
This spotting allowed the Tah-Sig to position their AFVs exactly where they were needed: two would cover the road down which the Dwarf armour would advance, one would face up to the Dwarf APCs.
The Garshaws deployed off their Blinds, and it immediately became apparent that their somewhat unusual profile (“pizza-slice”) was perfectly suited to their “home ground” terrain.
Note how the Garshaws are lower than the top of the crops, but can see over them using their hovering scanning drones. Their guns actually fire missiles that can be guided onto the target.
The Garshaws opened fire at their respective targets. The Dwarf AFV commander was completely unworried by this: he had a shield generator mounted on his third tank and, largely thanks to its extra protection, he had cruised through his last three battles without taking a scratch to his paintwork. Unfortunately, today was the day his luck ran out. Either the first or the second missile from one of the Garshaws penetrated the shield and then slammed through a weak spot in his armour blowing his tank, and him, to smithereens.
The Garshaws’ missiles were rolling 6D6, needing fives and sixes to penetrate. The Dwarf tanks, if behind the shield, were rolling 14D6, needing fives and sixes to stop a penetration. Four successful penetrations were enough to brew up a tank.
Meanwhile, the third Garshaw had hit and blown the track off the lead APC, immobilising it and effectively blocking the road. Armoured Dwarves poured out of their transport (their armour had prevented them from taking any damage) and prepared to advance on foot, flanked by the Lethlings.
On the Tah-Sig left/Dwarf right, the battle became a shooting match between the advancing Dwarves and the first Tah-Sig platoon (wearing red armoured environmental suits) accompanied by both support platoons.
Long range fire from the Dwarves was largely doing nothing to the Tah-Sig: just bouncing off their armour. Likewise, fire from the Tah-Sig infantry and the Garshaw tank was deflected by the Young Nobles’ armour. The Dwarf Lethlings were less well protected, however, and soon two squads of Lethlings were falling back with heavy casualties.
It is worth noting that the Tah-Sig were defending very aggressively: their infantry were taking every opportunity to move into close combat…it just wasn’t working very well for them.
Stalemate.
Shocked by the loss of their commander, the other two Goanna tanks (one with gun, one mounting the shield generator) settled down into an exchange of fire with the two Tah-Sig tanks opposing them.
The superior Dwarven guns and protection were countered by the low profiles and excellent firing positions of the Tah-Sig vehicles, and for the rest of the game the two sides battered away at each other with neither side gaining an advantage.
Stalemate.
Ignore the Tah-Sig wearing green armour top right: they aren’t on the table yet.
Here the Dwarf Clansmen were advancing towards two Tah-Sig mortars that had caught the Hearthguard out in the open as they advanced past one of the large water silos. That’s after the mortars had dropped two rounds of fire in succession onto their own men: the closeness of the two lines causing their targeting systems some problems!
To counter this threat, the Tah-Sig infantry platoon with the green armoured environmental suits advanced through the crops to meet them. Both sides drew up in their battle lines, and twice the Dwarves got the drop on the Tah-Sig: hosing them with fire from their guns and, worse, their two flamethrowers.
Editor’s Note: never aggravate a dwarf…he can build a flamethrower out of almost anything!
The Tah-Sig armour, however, was well made, and unfortunately the Dwarven fire had no effect except to prevent the Tah-Sig firing back effectively.
Again, stalemate.
The Clansmen deployed for battle. Note the chaps with the bright orange berets: they are the ones with the flamethrowers!
The Dwarves soon realised that they were getting nowhere fast. They had not been able to use their superior numbers effectively, and had allowed themselves to be bottled up by the Tah-Sig, relatively safe behind their armoured environmental suits. Reluctantly, and gnashing his teeth somewhat, the Dwarven commander ordered a withdrawal.
It had been an expensive expedition for the Dwarves: the loss of several Young Nobles and Lethlings was bad enough, but losing their military hero tank commander was nothing short of a disaster.
For all that I have used the word “stalemate” three times in the account above, it was actually quite a fast-moving game. There was so much shooting going on that the battlefield must have carpeted in shell casings/discarded energy packs: something that would doubtless cause the combines huge problems come harvest time.
The Tah-Sig defended very aggressively: taking the fight to the Dwarves at every opportunity. This explains how the Dwarves couldn’t get their superior numbers into play. There was much hilarity at the inaccuracy of the Tah-Sig mortars, and both players mourned the passing of the Dwarf tank commander: he had been such a feature of previous games.
Robert Avery


As my recent painting has been almost wholly focused on clearing all the sci-fi dwarves from my lead mountain, I thought it was only right and proper to get them onto the table again for my next game of Quadrant 13. It would also be a good opportunity to give the Xar (six-legged “critters” from GZG) their first outing.
Unfortunately, my early, pre-game shots of the terrain-only table didn’t come out very well, but below is a shot of the whole table, mid-game. You can see that it’s a cratered landscape spotted with the odd volcano and quite a view clumps of alien vegetation. There’s a shanty-town at the far end and, although it’s quite difficult to see, there’s a significant ridge running from the purple “plant” bottom left to the big orange “plant” top left.
The game would be a simple smash-up: no objectives except to force the other side to retreat by reducing their Force Morale to zero.
The Dwarves, played by John, consisted of troops from several different mines (okay, manufacturers!).
Company HQ
Big Man
Armadillo Electronic Warfare system
AFV Platoon
Big Man
2 x Goanna MBT
1 x Goanna MBT with shield generator instead of gun
Hearthguard Contingent
3 x Big Man
4 x Infantry Squad
1 x Sniper
2 x Medium Mortar
2 x Shaker cannon
3 x T-26 walker
Grudd Contingent
2 x Big Men
1 x Rocket Launcher
4 x Infantry Squad (powered armour)
1 x Iron Lord Squad (superheavy powered armour)
Air Assets
Stinger scout ship
This was a strong force full of elements that had caused me problems in the past: the Stinger, the shield generator, and the Armadillo. New problems looked like being the Iron Lords: their superheavy armour would make them nigh on indestructible!
The Xar are a cracking range from GZG. As the range only has infantry, support weapons and one-man flying saucers, I’ve augmented their line up with vehicles from what was CMG’s Kamaados Dominion range, whose exaggerated profiles really fit in.
I would field the following:
Company HQ
1 x Big Man
2 x Electronic Warfare Specialist
1st Platoon & 2nd Platoons, each
1 x Big Man
3 x Infantry Squad
3rd Platoon
1 x Big Man
1 x Flying Saucer Squad (9 Xar on one-man flying saucers)
2 x Support Platoons
3 x AA Missile Launcher Teams
3 x Heavy Beam Weapon Teams
Attack Drone Squad
1 x Drone Operator Specialist
2 x Attack Drone
2 x AFV Platoons
2 x Big Men
3 x Gekotaa Armoured Car (one with scanner)
3 x Dragamaa Main Battle Tank
A good, well-balanced force that had the potential to provide plenty of surprises for the stunties!
The game began with the dwarves marching onto the table almost unopposed: the Xar were slow to finish their breakfasts that morning!
On the dwarf left, their heavy tanks moved forward around the end of the ridge, with the Hearthguard just to their right up on the ridge itself.
Meanwhile, on the dwarf right, the Grudd contingent headed for and invested the shanty town.
My plan had been to swing my light troops around the left side of his line (the one farthest from the shantytown) but this rapid advance neatly negated my plans, as although I had my Xar infantry opposite the shantytown, all I had to oppose the advance of his AFVs were the armoured cars, attack drones (which I had in the “better against infantry” configuration) and flying saucer squad: nothing that was going to do more than chip the dwarf tanks’ paintwork as they rolled on through them!
Time for some rapid movement.
I sent the three armoured cars forward to delay the dwarf tanks, started moving my tanks across to meet their threat, got the flying saucers moving across the table away from the dwarf armour, and used the high speed of the attack drones to shoot past the advancing enemy tanks to get in behind the main dwarf line.
Things were very frantic for a few minutes!
As expected, the dwarf tanks made short work of the armoured cars, but even this quick distraction gave me a chance to get the attack drones into position.
It’s behind you!
Opening up from what was, for them, close range, the drones hammered two dwarf infantry squads up the backside with their auto weapons, rapidly reducing their effectiveness to nil. One drone was then lost to a shot from one of the dwarf tanks…but the tanks had had to withdraw backwards in order to combat the threat of the drones, giving me the opportunity to push forward my heavy tanks until they were cresting the ridge and effectively outflanking the main dwarven line.
I was pretty confident that my three tanks and one remaining drone could not only take the two dwarf tanks (despite their shield generator) but then start to roll up the enemy line. Worst case, two of my tanks could keep his occupied, whilst the other and drone ran riot into the flank and rear of his remaining Hearthguard.
Meanwhile, the battle for the shantytown had begun. Although the dwarves had an advantage, having got their first, by getting my men hunkered down outside the town, I could effectively get off a first shot at the dwarves as they moved forward into positions from where they could shoot me.
This threat caused the Grudd contingent of the dwarves to hesitate for a turn or two, leaving me more time to wrap up the rest of their force.

John soon realised, however, that if he didn’t beat me here, the battle was definitely lost, and a he moved his Grudd forward leading to a huge firefight.
Although the dwarves had the advantage of cover (well, what cover the shantytown buildings offered!) and powered armour, my Critters had tough carapaces and the numbers: six squads and three heavy beam weapons versus five squads. The only fly in my ointment were the Iron Lords: as expected, their superheavy armour proved impervious to just about everything I threw at them!
The firefight was actually pretty even…until my flying saucer squad arrived.
These had whooshed across the table and formed a firing line on the shantytown flank: the two heavy autoweapons on each saucer doing horrendous damage to the dwarves.
But where, I hear you ask, were the dwarf support weapons and the flyer? Two guns, two mortars and the scout ship that had done so much damage last game?
Well one Shaker cannon had been hit and destroyed by one of my tanks early in the game. As for the others…well, every time John called in the air support, I used my superior electronic warfare capability to scramble the communication, as I also did whenever his CinC tried to use the mortars or remaining Shaker.
At this point, the battle had to end for time reasons. Not that the game took long to play, we had just had only a short window of opportunity in which to play it.
Both sides had half the Force Morale they had started with i.e. the same number of points left. Although I’d been hammering him lately, I had lost the armoured cars and a drone early in the game.
We therefore called the game a draw, although John was generous enough to say that he thought that the day would probably been mine if we had continued. Me? I’m not so sure. John hadn’t really had the opportunity to use his Iron Lords yet and, to be honest, I reckon they would have chewed through my infantry in no time: being, as I said, just about indestructible. Maybe I would eventually have Shocked them off the table, but it would have been a pretty painful process to do so!
So, overall, a draw…which, of course, means a re-match!
Robert Avery

Most of my recent painting has been sci-fi kit, so it was good to have a chance to get some figures onto the table and actually play a game. It would be the Hura from Clear Horizon Miniatures versus a force of Dwarves in Space built from a variety of different manufacturers.
The action would take place on a dusty red planet with normal gravity and a breathable atmosphere. Some kind of facility was positioned at one end of the table, surrounded by weird alien vegetation (courtesy of Pets R Us’ aquarium range) growing out of the rough ground. Looking at the picture above, the Dwarves would start from the far side of the table, the Hura from the near side.
The DiS force consisted on three platoons of infantry: one of Cactus Miniatures’ Gruntlings, one of Cactus Miniatures Gruntlings in Exo-Skeletons (powered armour), and one of Rebel Miniatures “Sons of Thunder”. These were supported by three HMG armed Spider Drones (GZG), three lighter laser cannon (cobbled together from the bits box with gunners from Cactus), three scout motortrikes from Cactus, and, last but not least, three Goanna tanks from Khurasan’s Thrainite range. The command element had an Electronic Warfare specialist attached (an Armadillo support unit from White Dragon), with air cover from a somewhat petite fighter-bomber (manufacturer forgotten).
Although a mixed bag manufacturers-wise, it was actually a pretty rounded force. The Dwarves’ key advantages were their air power, and the fact that one of their tanks mounted a shield generator in place on its main gun. Oh, and the fact that they were technologically superior to the Hura, so would always benefit by a factor of one on all dice rolls.
As is so often the case, Clear Horizon’s Hura range comes with a nice set of infantry figures but nothing else. No vehicles, no heavy support weapons, no aircraft, no specialists: nothing except infantry. My Hura force of three infantry platoons (each of two squads of Hura and one squad of modified-Hura, MMG-type support weapons) was therefore augmented with six Xarledi grav tanks from Brigade Games’ Yanpolo range.
This gave me a distinct advantage in the vehicle department but no air power and, even more importantly, no anti-aircraft assets. This would prove one of the deciding factors in the game to come.
Commanding the Hura, my plan was to hold the area opposite the facility with my infantry whilst my grav tanks used their far superior speed to shoot around my opponent’s right flank.
Blinds representing my grav tanks (with a few dummies) swing out to the left
Unfortunately, John had anticipated this move, and one of the Blinds facing my advance was spotted as his AFVs.
Tank on tank!
This led to an immediate exchange of fire between my platoon of four grav tanks and John’s platoon of two tanks and a shield generator tank. I got the drop on the Dwarves and shot first: sending twelve rounds rapid fire across the dusty landscape at a range of only about 100 yards.
Unfortunately, John’s shield generator was up and running, and working at maximum efficiency. Despite hitting with all twelve shots, all I managed to do was knock out tank one’s main gun: excellent in terms of reducing the Dwarves’ firepower, not so good when it came to reducing their overall force morale.
Dwarf tank one then retreated behind the nearby volcano, leaving tank two to blow one of my grav tanks out of the air. Not a bad exchange, I thought: one of two Dwarf tanks effectively crippled for the loss of one of six grav tanks. Bring it on! One more round like that, and I’d be free to ignore the shield generator and head round to the main facility as planned.
Unfortunately, the Dwarf CO then got the opportunity to call in his air support, which appeared promptly: dropping out of the sky just behind my garv tanks and immediately dispatching one with air-to-ground missiles up the exhaust pipe.
Death from Above!
At this point I realised how stuffed I was. With no significant air defence assets, that pooping flyer was going to chase my grav tanks around the board, knocking at least one out of action each turn!
The Dwarves, meanwhile, had managed to get a unit forward into the facility, with more following on behind.
Aware that I needed to do something on the right if I was ever going to rescue the battle, I rushed my infantry forward, but it was really too late to do any good.
Hura infantry rush forward
But the Dwarves have the position
With my last grav tank chased and then destroyed by that poxy flyer, I had no choice but to retreat.
Well that was a crushing defeat for the Hura…and just goes to show the importance, as I say to anyone who asks, of airpower on the sci-fi battlefield.
All credit to John, however: he successfully read my intentions and countered my plan, with the Dwarves losing only six men (and one tank gun!) all battle.
I’m now off to scour the Internet for AA assets for my Hura!
Robert Avery

Here's a battle report of a recent game of Quadrant 13, the company-sized rules for sci-fi games from the TooFatLardies. The scenario is a simple one: the Dwarves must capture a mining base from the Ikwen militia protecting it, with the Ikwen expecting reinforcements from their Chuhuac allies at any moment.
Many years ago, Dwarves began mining on Teruis VI, an unglamorous planet in a nondescript part of the quadrant. With the prime deposits emptied, the mining works were leased to the Ikwen on a 50 year lease. The usual terms and conditions applied.
New deposits of valuable minerals have just been discovered so, activating the appropriate clause in the lease contract, you gave the Ikwen notice to quit, with a three-month window for them to do so.
Demonstrating that no creature in the galaxy can be trusted (except other dwarves…and few of them, besides) the Ikwen have refused to leave, claiming that ancient rights based on “finders keepers” supersedes your contract. It would be laughable – your contract was drawn up by dwarven lawyers, for Gold’s sake – but the Ikwen are still there and still digging up your ore!
The lawyers have argued for long enough. Your mine has sent an expeditionary force to evict the Ikwen squatters. You know the Ikwen are a client race of the mercenary Chuhuac, so you can expect them to intervene, but even the funky chickens (as they are sometimes contemptuously called) will not be able to stand against good, dwarven technology.
The campaign is going well. Now you lead your mine’s household company against one particular Ikwen mining base. Your mission is simple: capture the base, disperse any opposition!
Company HQ
1st Platoon
2nd Platoon
Drone Platoon
Tank Platoon
3rd Platoon
*Most senior Big Man uses whole turn to call in. Each time Blinds appears, roll D6: appear on a 5 or a 6. Battlefield inserted, then Raven can act as usual.
The arrogance of these dwarves is unbelievable! The planet was leased from them, fair and square, with a good price paid...but now superior Ikwen engineering has uncovered new, richer deposits, the little men want it back immediately, with no talk of compensation or recompense.
You have been fighting their claim through every law court you can find, refusing to accept that their so-called 'contract' gives them the right to throw you off Teruis, or certainly not before you have had a chance to reap the rewards of your work. Now, however, the greedy little ankle-biters have sent in troops to take the mines away from you by force.
Unfortunately, the campaign has very much been going in their favour so far: after all, all you have to oppose them is the militia that, really, is no more than a glorified police force...but you have called for help, and your Chuhuac allies have sent a lightly armed expeditionary force to back up your troops.
Their arrival coincides with a dwarven push to capture the mine in Amerge Sector. Time to singe a few Stunty beards!
On Table At Start
Ikwen Company HQ
Ikwen Militia Platoon

On Third Appearance of the Blinds Card
Chuhuac Company HQ
1st Platoon
Strike Tank Platoon
Battlesuit Platoon
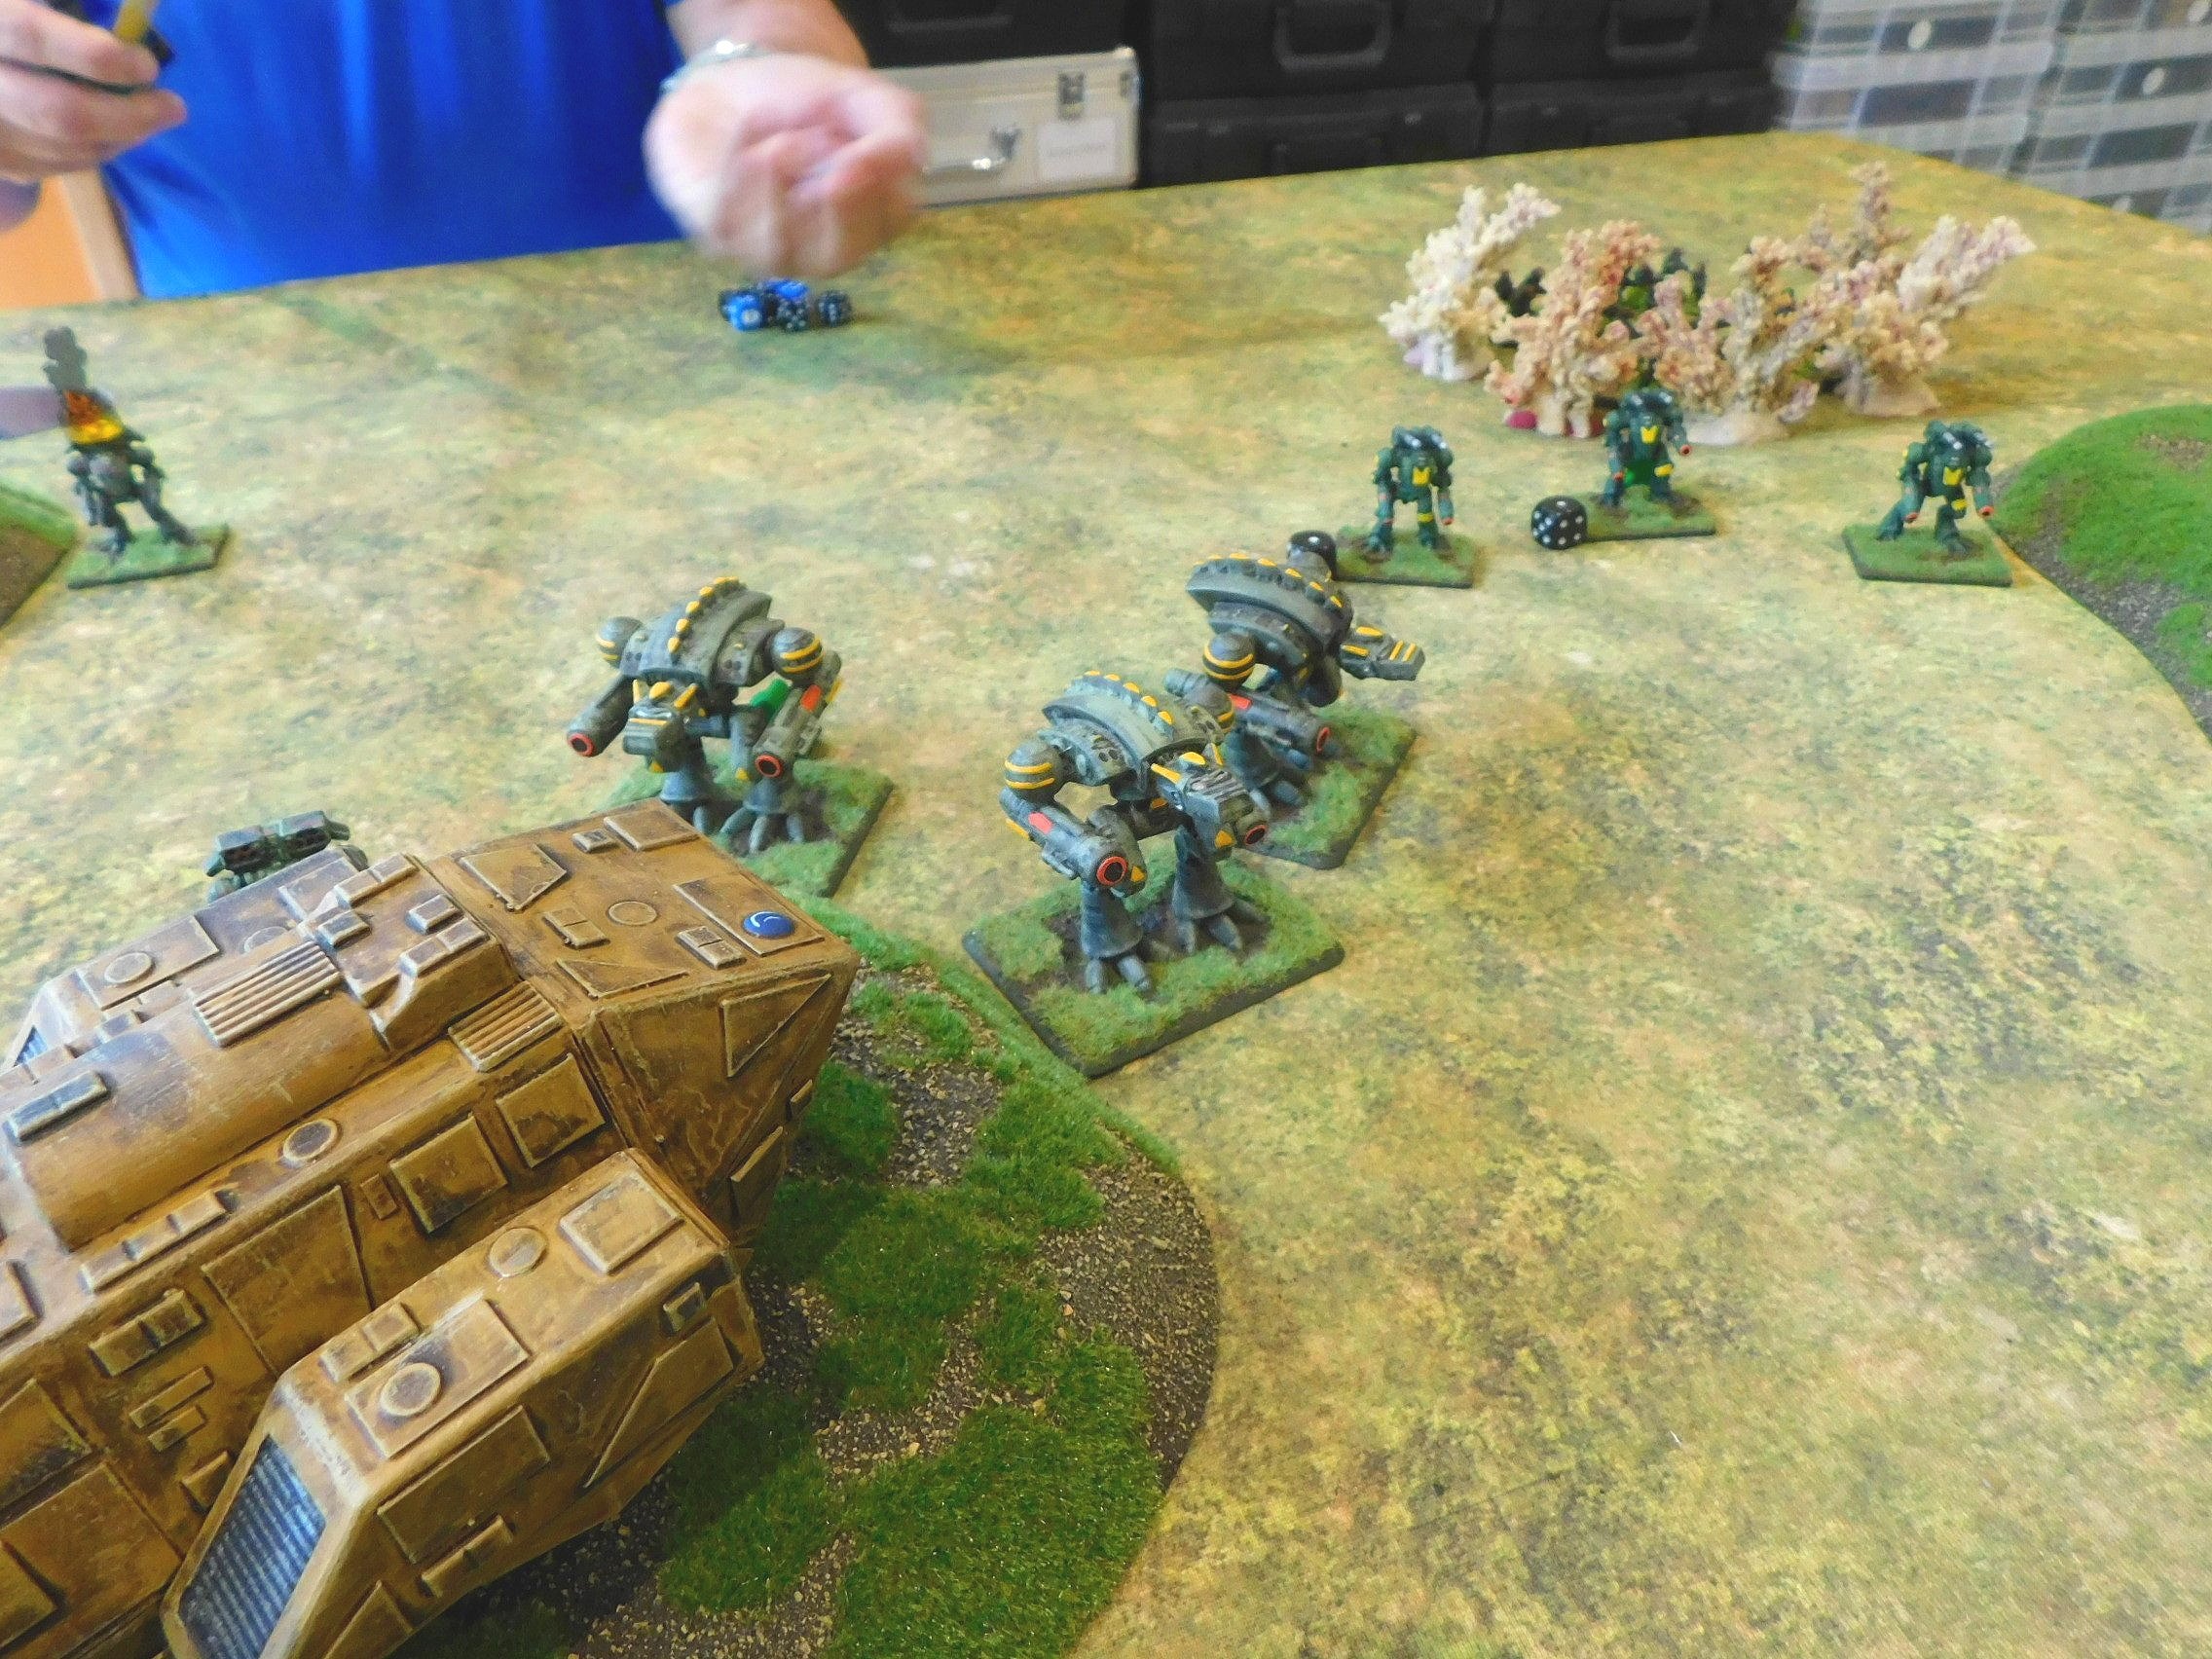
The battle began with the Blinds (nice moustache, shame about the lack of beard!) representing the Dwarven expeditionary force appearing on the road near where it curved around the volcano-like rocky outcrops. The Ikwen militia, clustered within the mining compound itself, kept their heads down, but managed to spot the lead couple of Blinds as one Dummy (a small party of scouts) and a platoon of Goanna heavy tanks. Two of the Goanna's were using the standard railgun as their main weapon, the other was fitted with a shield generator that gave a defensive value of ten in a 90 degree arc positioned 18" from the front of the vehicle.
As the Dwarven tanks grew closer to the compound, they spotted a tracked drone carrying a rotary cannon in the sandbagged emplacement where, presumably, the Ikwen usually kept their rovers. This was lurking there, waiting for something Dwarvish to approach the gate whereupon it would fire into their rear.
This needed to be dealt with, so Goanna 2 just drove straight up and over the side of the sandbagged emplacement, crushing the drone under its tracks. Unfortunately, the tank slipped a track when doing this, and was thus rendered immobile for the rest of the game. This turned out to be not a problem, as all it meant was that the Dwarves now had a sort of pillbox right outside the Ikwen's front door!
Meanwhile, the Chuhuac reinforcements had arrived at the other end of the table, with two of the Blinds being quickly revealed as concealing a platoon of Vasseth Strike Tanks, and a platoon of Battlesuits that had been rushed to the front so quickly they hadn't even managed to be re-painted in desert camouflage.
Two of the Vasseths immediately engaged Goanna 1, but none of their shots even managed to penetrate the shield put up by Goanna 3. In return, Goanna 1 turned its main gun onto one of the Vasseths and blew it to pieces with one shot. Ouch! The other Vasseth retreated into a more hull down position behind a small building.
Thinking that perhaps they could swamp the Goanna, the Chuhuacs sent their Battlesuits forward. This turned out to be a mistake, as Goanna 1 picked off two of them in quick succession. The others scattered, remembering that they were light troops and really shouldn't be trying to square up to a heavy tank head on.
Meanwhile, the last Vasseth has been threading its way carefully through the coral-like alien fauna, trying to get around the rear of Goanna 1 and into where the Cane Toad APCs were waiting on the road for the signal to go forward.
It took a couple of turns, but eventually it emerged from the undergrowth looking straight down the road at the APCs. Excellent, I thought, time to wreak a bit of havoc!
Unfortunately I had reckoned without the intervention of the Cane Toads themselves. Spotting the danger, the lead Cane Toad dropped off it's squad of infantry and then charged forward and rammed the Vasseth right in the snot locker! Both vehicles were written off in the crash, leaving the other two Cane Toads free to move forward safe from interference. A worthwhile exchange...if you're a Dwarf!
With Goanna 1 just about winning the battle on its own (it had now knocked out the main gun on the last Vasseth), the Dwarves moved their APCs up towards the compound and prepared for the final assault.
The Chuhuac, seeing this, moved their APCs carrying their single platoon, into the compound: although they couldn't match the Goannas out in the open, especially not when hidden behind the Goanna 3's shield, perhaps they would have more success in a more built up setting.
Whilst all this was going on, the final Chuhuac Blind, concealing the Company HQ, was working its way around the back of the mining compound, aiming to engage the Dwarf Blinds (presumably concealing their infantry) without having to go through Goanna 1 first.
The regular Dwarven infantry (i.e. the ones without power armour) de-bused, and started to infiltrate down one side of the compound: gas tanks on their left, barbed wire on their right.
To their right, the Dwarven infantry in powered armour moved towards the Chuhuac Blind concealing the Company HQ. The Dwarfs, confident in their powered armour, were somewhat surprised when the Blind de-cloaked, revealing a side-on Sirrus APC, machine guns bristling, and a final Vasseth Strike tank with a very large missile launcher as its secondary weapon.
Both fired at the Dwarves, blasting the three squads backwards but actually doing no damage: the powered armour doing its job. For the rest of the game, the two sides would exchange fire, neither seemingly able to deal a fatal blow to the other.
Things rapidly became very confused indeed.
As Goanna 1, now determined to claim that it had won the battle on its own, drove up the ramp into the compound, it was swarmed by a squad of Chuhuac. Despite their best attempts, however, even attacking from the rear, they just couldn't get through the tank's armour. A Cane Toad APC, following on behind Goanna 1, then cut them down, effectively ending any resistance at the front gate.
A squad of Ikwen militia then close assaulted the lead Dwarf squad infiltrating up the side of the barbed wire. One Dwarven squad was reduced to half strength, but the Dwarves, aided by one of their Spider Drones, had cut the Ikwen down, the few survivors of the squad fleeing across the compound.
Meanwhile, back outside the compound, two Battlesuits had done what they were designed to do, and snuck through the 'forest' and attacked the Dwarfs in the rear: taking out the shield generator on Goanna 3 (but not the tank itself) and one Cane Toad...but one Battlesuit had paid the price, and the immobilised - but still deadly - Goanna 2 was looking to see off the other one too.
Goanna 1 then drove forward, and the remaining Ikwen and Chuhuac decided that perhaps the mine wasn't worth any more lives, and surrendered.
What a battle! The Ikwen/Chuhuac had lost three of seven infantry squads; their drone; two out of four tanks and all but one Battlesuit. All they had left was a few ineffectual infantry and APCs and a single Vasseth.
The Dwarves had won, but it had been fairly painful. One APC was destroyed, with another crippled. One Goanna was crippled, another had its shield generator blown up. And there were seven dead Dwarves as well.
A great game where the sheer might of the Dwarves crushed the Chuhuac, who had made the mistake of trying to take them straight on. The Dwarven shield generator was really effective, as was their infantry's powered armour but, in the end, it was Goanna 1 that won the day for them!
Robert Avery
The Dwarves that John played came from Khurasan, apart from the Spider drones which are from GZG.
The Ikwen and Chuhuac that I played are from Loud Ninja Games (available through Alternative Armies), with their rotary cannon drone again coming from GZG.
The 'vegetation' is all aquarium ornaments bought from Pets At Home. The buildings are nearly all Critical Mass. The roads and two of the gas tanks are from Battlefront.