

'Twas the week before Christmas, and I was off to Benson for a last battle of the year with John, Dave and Bevan. Dave had constructed the scenario; I would play the Germans; Bevan would play the Allies; and John would host and run the game when Dave had to leave just after the game started, unfortunately rendered hors de combat by a nasty bug.
The battle would take place in the Ardennes as part of the Battle of the Bulge. A strong motorised force of Germans was thrusting forward aiming to capture a fuel dump that would provide them with the petrol needed to drive to the channel ports. In their way was a company of Shermans, supported by infantry occupying a small town, and expecting reinforcements from nearby British troops.
The table was long and thin, and covered in snow. The main road was clear, but travel off the road was only really possible for infantry and tracks: wheeled vehicles ran a very real risk of bogging down should they stray from the hard top. The stream at one end (just off the bottom of the photo to the right) was likewise only really fordable by tracks: all other troops would have to use the bridge. All hills and woods were completely impassable to all vehicles, and very heavy going for infantry.
The fuel dump is just visible behind the town in the photo to the right, parallel with the factory at the end of the table.
Dave had provided full briefings for all sides, which I reproduce below in order that you can play through the scenario as well.
German Briefing
So it's Christmas Day, what did you expect – a Christmas Present from the old man? Here I am – Oberst Franz Beckenbauer in command of Kampfgruppe Beckenbauer, part of 2 Panzer Div – about to give the Amis their present.
The big attack – Wacht am Rhein – started well nine days ago, with the Allies taken totally by surprise and the Ami front line troops shattered by our offensive, whilst their High Command seemed paralysed. The weather slowed us down yes, but it also kept their damn air force off our backs, but now however things are more difficult. Supplies are getting fewer every day, fuel is critical, the men are tired and some Amis have actually fought well to delay us – even now that place Bastogne behind us has not been taken, and the pace of advance has dropped
Today could be the critical day I think. Ahead is the small town of Beauraing, with an Allied forward supply depot, and just a little further on is Dinant and the river Meuse. If we can get across the Meuse then Antwerp is ours and the Allies will be starved of fuel as their supply line is cut. If we can just get the tanks filled up in Beauraing, what is to stop us? The troops are tired yes, but our Panzergrenadiers are the best and the new panzers are unstoppable – provided they keep moving.
My Gruppe has been reduced a little over the last week, but I still have a balanced force with a real punch – infantry, tanks, artillery, tank destroyers and engineers as well – so the Amis will know we are here! I know there are some Ami paras up ahead walled up in the town and that they have tanks backing them up, but surely we can handle them? We must be ready for surprises – have they mined the bridge ahead or the road? - but that's what Recon and Engineers are for!
This snow is bad, for whilst the roads are good, anything off road gets slowed down and wheeled vehicles risk getting bogged down. The cloud is still heavy, too much for the Allied bombers perhaps and certainly too much for Goering boys. If it clears later then who knows?
Time to go, forwards!
German Forces
- Gruppe HQ
- Big Man 1 (Level IV)
- Big Man 2 (Level III)
- 1 x FOO
- 2 x Panzerschrek Team (2 men each)
- 1 x Panther
- 1 x Kubelwagon, 1 x Truck
- Zug One
- Big Man 3 (Level II)
- 3 x Panzergrenadier Squad (8 men each, 2 x LMG)
- 1 x Panzerfaust
- 1 x Truck, 1 x SdKfz 251
- Zug Two
- Big Man 4 (Level II)
- 3 x Panzergrenadier Squad (8 men each, 2 x LMG)
- 1 x Panzerfaust
- 1 x Truck, 1 x SdKfz 251
- Panzer Zug One
- Big Man 8 (Level II)
- 2 x Panther
- Panzer Zug Two
- Big Man 9 (level II)
- 3 x Panzer IV G
- Aufklarungs Gruppe
- Big Man 5 (Level II)
- 1 x Panzergrenadier Squad (8 men, 2 x LMG)
- 1 x Panzerfaust
- 1 x SdKfz 251/10
- 1 x SdKfz 221
- 1 x Panzer II Luchs
- Schwerer Gruppe
- Big Man 6 (Level II)
- 2 x 81mm Mortar (5 crew each)
- 2 x MMG (5 crew each)
- 2 x Truck
- Support Zug
- Big Man 7 (Level I)
- 1 x Engineer Squad (1o men)
- Medical Team
- 2 x SdKfz 251
- Schwerer Panzer Zug
- Big Man 10 (Level II)
- 2 x Tiger I
- Panzerjaeger Zug
- Big Man 11 (Level II)
- 1 x Jagdpanther
- 2 x StuG IIIG
American Briefing
It's Christmas Day 1944, and here's you – Colonel Dan Detroit of the 17th Airborne - sadly in charge of some two bit little village in a godforsaken corner of Belgium (or is it France?) The trouble is you have been put in charge of its defense and seem to be right in the middle of the Kraut's line of attack. Feels like the whole Goddamn German army is heading for you! A few miles behind you is the river Meuse and Dinant, which the Krauts need to capture if they are to get to Antwerp – as the top brass seem to think they would like to. Having been there yourself you wonder why.
This offensive really caught Uncle Sam with his pants down, and chaos has been everywhere for the last week. However maybe things are changing now, with places like Bastogne holding out, the Krauts apparently short of gas and the brass finally getting themselves sorted out. Seems that some Limey General has been put in charge of this sector and he has herded up some Brits to act as reserve and they may even be headed this way. Maybe.
In the meantime your orders are to hold at all costs, with the forward supply depot just outside town of special importance. Some big shot three star made it quite clear on the radio that under no circumstances can the Krauts be allowed to capture it, but that since our boysneed the gas as well, blowing it to hell prematurely would not be a good career move. Sounds like the usual Snafu!
You have a mixed bunch to hold with. You have some of your own Golden Talons boys – the 1st Platoon and the Support Platoon of the 513rd – and you know they will fight like hell. But how the bunch of rounded up cooks and orderlies will do..... You have some AT guys from a stray infantry outfit who were just passing through until you enrolled them, and some tanks & tank destroyers have just rolled in assigned to you by Division.
You have been promised artillery support and air support just as soon as this weather lifts. Yeah right!
You have positioned one minefield and also some dummy mines (anything to slow the Krauts down), and have some wire and emplacements.
Time to go!
American Forces
- Support Platoon
- Big Man 5 (Level II)
- 2 x 80mm Mortar Teams (5 crew each)
- 2 x MMG Teams (5 crew each)
- 1 x Bazooka Team ( 2 men)
- 1 x Jeep with LMG
- 1 x M3 ½-track
- Anti-Tank Platoon
- Big Man 6 (Level II)
- 3 x 57mm AT Guns (5 crew each)
- 3 x M3 ½-tracks
- Tank Destroyer Platoon
- Big Man 7 (Level II)
- 3 x M10 Wolverines
- Company HQ
- Big Man 1 (Level IV)
- Big Man 2 (Level III)
- 2 x Bazooka Team (2 men each)
- Platoon One
- Big Man 3 (Level II)
- 3 x Rifle Squad (10 men each)
- 1 x Bazooka Team (2 men)
- 1 x Light Mortar Team ( 4 men)
- Platoon Two
- Big Man 4 (Level II)
- 3 x Rifle Squad (10 men each)
- 1 x Bazooka Team (2 men)
- Tank Company HQ
- Big Man 8 (Level III)
- 2 x Sherman A4M4
- 1st Tank Platoon
- Big Man 9 (Level II)
- 1 x Sherman M4 "Easy 8"
- 2 x Sherman A4M4
- 2nd Tank Platoon
- Big Man 10(Level II)
- 1 x Sherman M4 "Easy 8"
- 2 x Sherman A4M4
British Briefing
Just what you needed! Christmas Day 1944 and your comfortable billet in Dinant is but a memory. You – Capt Robert Moore of the 3rd RTR- have been specially selected to be amongst the first British troops to be thrown in to stop the Yanks from breaking under the strain of the Hun offensive.
You have your own tank platoon from 11th Armoured Div with a small force ofinfantry from 159 Brigade and have been ordered to the front line village of Beauraing where apparently a German attack is imminent. Seems there is a vital forward supply base there being defended by a mixed bunch of Yanks and you are to place your men at his disposal. The Hun must not be allowed to capture the fuel or they'll be over the Meuse and on to Antwerp before the music stops. Not at all what Monty wants for Christmas.
If only the weather would lift and the Typhoon boys could join in, but otherwise it will be down to you and your boys to stop Fritz's Tigers and Panthers. Not a nice Christmas present for Mrs Moore's little boy! You know your men's fighting ability, but who knows how these Yanks will fight? If all else fails your orders are clear – the enemy must not get those supplies.
British Forces
- Motor Company HQ
- Big Man 1 (Level III)
- Big Man 2 (Level II)
- 1 x FOO
- 1 x 3" Mortar (5 crew)
- 1 x Carrier
- 1 x Jeep, 1 x Truck
- Platoon One
- Big Man 3 (Level II)
- 2 x Infantry Section (8 men each)
- 1 x PIAT Team (2 men)
- 1 x 2" Mortar Team (2 men)
- 3 x M5 ½-track
- Scout Platoon
- Big Man 4 (Level II)
- Carrier + LMG
- Carrier
- PIAT Team ( 2 men)
- Troop One
- Big Man 5 (Level II)
- 1 x Sherman Firefly
- 3 x Cromwell
The Game
Although I obviously didn't know what I was going to be facing, my German force seemed very strong indeed. Three Panthers, Two Tiger Is, and a Jagdpanther seemed positively excessive, especially as my opponents were British and American and not Soviets. I therefore determined to follow my orders precisely and drive forward at maximum speed, saving a more detailed plan until I had established where my enemy was.
Looking at the table, there were two possible angles of approach: along the main road, and to the left of the long ridge just in front of the town.
I was able to bring on three Blinds per turn, so I decided to feint to the right whilst my main strength went up the left. Each axis of attack would consist of three waves: a reconnaissance wave, a main armoured wave, and then infantry following on behind.
To the right, along the road, I sent the a Dummy Blind followed by the Aufklarungs platoon followed by the Company HQ and Panther zug followed by an infantry zug; to the left, my other Dummy Blind followed by the Panzer IVs as my recon unit, followed by the Tigers and Panzerjaegers, then followed by the other infantry zug. Whichever attack encountered the enemy first would pin them in place whilst the other curled round to take them in the flank.
My Aufklarungs Blind was soon spotted, but drove up the main road regardless. It was their job to locate the enemy, even if it meant losing them early on in the game. Much to my surprise, however, they were left to advance straight down the road unmolested until, just before the sharp bend in the road in front of the town, I decided that they had pressed their luck far enough. Whilst their vehicles found what cover they could, the scout infantry squad dismounted from their half-track and headed into the small wood to take up positions from which they could observe the town.
Even more to my surprise, as the infantry emerged on the other side of the wood, they ran straight into a platoon of Shermans that were lurking there.
Battle was immediately joined, with the Shermans finding out how unpleasant it is to be swarmed by enemy infantry without any infantry of your own to hold them off.
One Sherman was immediately KO'd for the loss of four infantrymen, then another went up in smoke a turn or so later: things were getting desperate for the Sherman platoon.
However, fortune favours the brave: up came the Allied Heroic Leader card, so Bevan decided that the Sherman platoon's Big Man would clamber out of his tank and take the four remaining Panzergrenadiers on in hand-to-hand combat! Needless to say, Captain Carter managed to dispatch all four Germans for no more than a scratch before calmly climbing back into his tank and preparing to fight on.
A squad of infantry in exchange for two tanks: I was happy with that!
Meanwhile on the left flank...
Meanwhile, on the left flank, my Blinds had been pushing forward as fast as possible: Blinds conveniently making light of terrain obstacles such as the river and deep snow.
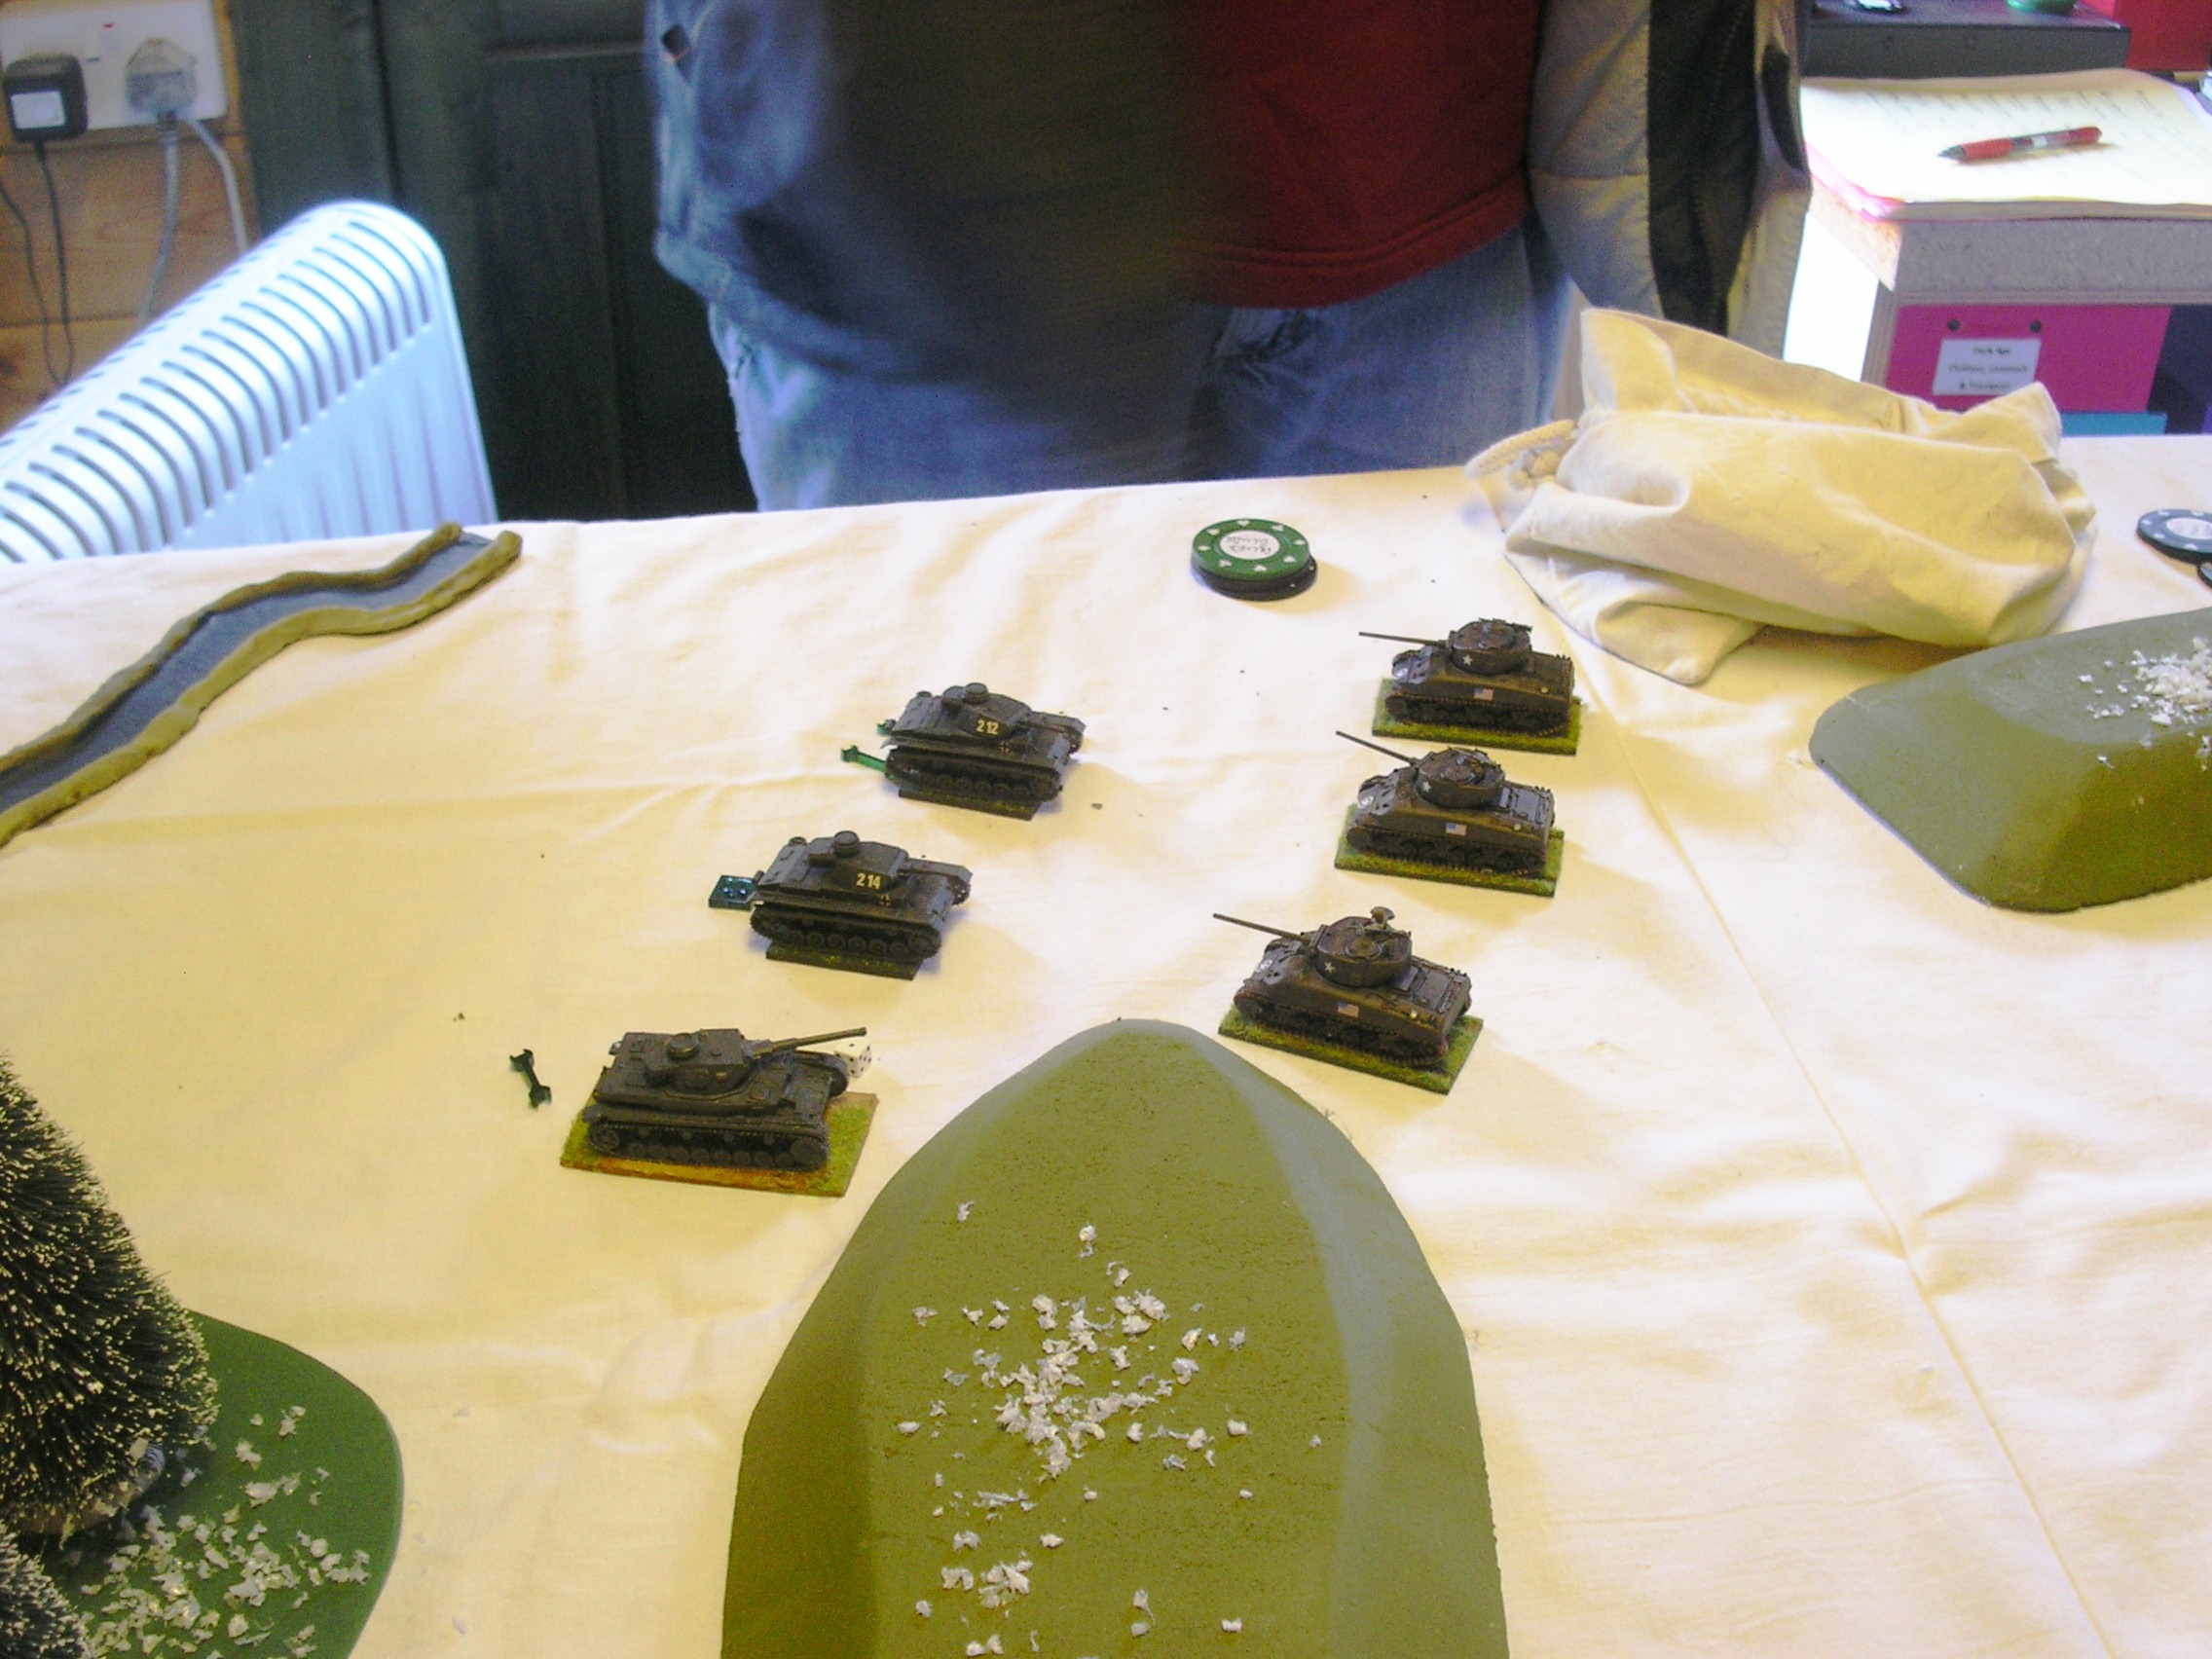
At this point, with my Blinds now quite far forward and cautious of a repeat of the above, Bevan decided that it was time he took up a more proactive defense.
Another platoon of Shermans appeared and immediately engaged my lead Blind: the three Panzer IVs acting in a reconnaissance role. All three American tanks opened fire at just about point blank range and although I didn't actually lose any of the tanks, bits of Panzer IV flew everywhere: tracks and guns being battered and damaged. This was, of course, just what I wanted. Well, not the battering and damaging bit, but certainly the Shermans coming forward into plain sight.
Up came my next Blind: the Tigers. Two of the three Shermans were immediately blown to bits, with the other following shortly after.
Worse was to come. In the centre, as part of his proactivity, Bevan revealed his M10 Tank Destroyer platoon, which promptly wreaked havoc amongst the vehicles of my Aufklarungs platoon.
The problem, of course, is that my recon troops were, as above, followed by some serious armour: two Panthers and, a turn or so behind, the Panther from the Company HQ. These took out the tank destroyers for, annoyingly, the loss of one Panther: hit by a lucky shot that went straight through it's armour like a knife through butter.
The luck was, however, not all one-sided. The two German MMG teams had reached the crest of the hill in front of the town, and opened fire on their US counterparts bunkered up near the hedges bordering some gardens. Their first shot was a "Lucky 17": meaning one of the US MMGs was immediately destroyed.
The Germans Push Forward On The Left
Back to the left hand side of the field. The Panzer IVs and Tigers slowly pushed forward through the gap between the hills heading cautiously for the town. I needed to see what I was facing in the buildings (one of the tank destroyers had fled there as well) so brought forward my engineers, who went flat out towards the building on the left (my left). This meant that they both engaged the tank destroyer in close combat and automatically spotted any US infantry in the buildings.
The tank destroyer was almost immediately dispatched, and squads of enemy infantry revealed in the buildings at that end of the town. I still hadn't brought up my infantry, and didn't want to take my armour into the buildings, so the Tigers switched to HE and blasted away at the enemy-occupied buildings with their powerful 88mm guns. Not many casualties were done, but both buildings were set on fire, meaning that the Americans would have to evacuate the houses as soon as possible.
The British Arrive
Back to the right hand side of the field. Onto the table along the road behind the wood appeared four British tanks: one Firefly and three Cromwells. They faced two Panthers in a rather nasty game of hide-and-seek played amongst the wreckage of the initial Sherman platoon.
The action was incredibly short-ranged and incredibly brutal. Unfortunately, it was the Brits who were brutalised. Their Firefly did hit one of the Panthers, but the rounds from its gun just bounced off the big cat's front armour. The Cromwells' pop-guns did no better, and there were soon another four Allied tanks ablaze in that corner of the field.
The Allies had now lost thirteen armoured vehicles against the German recon vehicles and a single Panther.
And Back To The Left
Meanwhile, on the left, my last remaining Blind headed down the side of the long hill towards where it could curl round into the Allied rear. An Allied Blind appeared in front of it, which turned out to be the two Shermans of the US Armoured HQ. Two Shermans versus a Jagdpanther and two Stugs? The German panzerjaegers were held up for about the same time as if they had encountered a speed bump!
The Panzerjaegers now also headed for the town...but suddenly there was a flurry of activity from the factory. Out came an Allied Blind, which was soon revealed as the US Anti-Tank Gun platoon. They shot down the road, guns still hitched, until someone looked to their right and realised that three German panzerjaegers were heading right for their flank!
I'm afraid it was carnage again: all three guns destroyed for the loss of a bit of paintwork on the Jagdpanther!
At this point, the US infantry poured out of their burning buildings, straight into the remains of the German engineers. Although the Germans were pushed back, this left the Americans vulnerable to HE fire from the panzerjaegers, Panthers and Tigers, and the first platoon of US infantry effectively ceased to exist.
With the remaining British Blinds about to run into the two German Panthers on the right hand side, and the German Blinds concealing the infantry ready to deploy, Bevan realised that all was lost. The second American infantry platoon evacuated their positions around the fuel dump and then blew it to bits with bazooka fire. The game was declared at an end.
Aftermath
Although the Germans had not technically won the game, as they had not captured the fuel dump, they were declared victorious simply because of the amount of damage they had caused the Allies for so little loss of their own. In total, they had taken out fifteen enemy tanks, three anti-tank guns and a platoon of infantry for the loss of one Panther, three half-tracks and a couple of squads of infantry.
Afterwards Bevan admitted that he had been too passive in his defense but, in fairness to him, I did have a really, really powerful armoured punch. I think that he could possibly have massed his Shermans and neutralised one of my thrusts, but then would have had to rely on the arrival of the Brits and/or his anti-tank guns to halt the other. Maybe his anti-tank guns could have done more, but they were technically his reserve, and perhaps the fault was more choosing them as a reserve rather than choosing a more versatile tank platoon to do the job...but then what were a few 57mm guns going to do against Panthers and Tigers anyway.
In all, a great way of rounding out our wargaming year. My thanks to Dave and John for setting up and running the game.
Robert Avery