Vis Lardica
  • New & Updated
  • Introduction & Details Scorecard 2025 Gallery: Burt, Steve Gallery: Cooper, Nick Gallery: Douglas, Mervyn Gallery: Emmett, John Gallery: Flint, Carole Gallery: Helliwell, Andrew Gallery: Luther, Mark Gallery: Plowman, Ralph Gallery: Sapper Gallery: Stumpy Gallery: Vis Bellica
  • Introduction to IABSM Video: How To Play IABSM, Part One Video: How to Play IABSM, Part Two Video: How to Play IABSM, Part Three After Action Reports (IABSM) Army Galleries (IABSM) Buy IABSM Scenario Packs Buy IABSM Theatre Supplements Figure Manufacturers (IABSM) Figure Reviews (IABSM) Game Aids (IABSM) IABSM Facebook Group
  • Introduction to CDS After Action Reports (CDS) Army Galleries (CDS) The Arab-Israeli Six Day War The Arab-Israeli Yom Kippur War After Action Reports (Arab-Israeli Wars) Army Galleries (Arab-Israeli Wars) After Action Reports (Moderns)
  • Introduction to Q13 After Action Reports (Q13) Army Galleries (Q13) Army Lists for Q13 Buy Q13 and/or Five Planets Figure Manufacturers (Q13) Figure Reviews (Q13) Points System Spreadsheets
  • Introduction to 19th Century Army Galleries (19th Century) Army Lists After Action Reports Articles & Essays Quick Guide to the Wars of the 19th Century
  • Introduction and AAR FK&P: The Eastern Front
  • Introduction to Vis Bellica The Rules: Amendments The Rules: Frequently Asked Questions The Rules: Optional Rules After Action Reports (Vis Bellica) Army Lists Articles about Vis Bellica Scenarios for Vis Bellica Other After Action Reports: WRG 6th Other After Action Reports: TTS
  • The Rules: Optional Rules After Action Reports
  • Scorecard 2024 Gallery: Burt, Steve Gallery: Cooper, Nick Gallery: Darkin, Des Gallery: Davenport, Jonathan Gallery: Douglas, Mervyn Gallery: Emmett. John Gallery: Flint, Carole Gallery: Helliwell, Andrew Gallery: Kay, Chris Gallery: Luther, Mark Gallery: Plowman, Ralph Gallery: Sapper Gallery: Scott, David Gallery: Slade, Matt Gallery: Stumpy Gallery: Vis Bellica
  • Scorecard 2023 Gallery: Bowler, Lloyd Gallery: Burt, Steve Gallery: Cooper, Nick Gallery: Douglas, Mervyn Gallery: Emmett, John Gallery: Flint, Carole Gallery: Helliwell, Andrew Gallery: Hodge, Derek Gallery: Kay, Chris Gallery: Luther, Mark Gallery: Plowman, Ralph Gallery: Pollard, Ashley Gallery: Sapper Gallery: Scott, David Gallery: Slade, Matt Gallery: Stumpy Gallery: Vis Bellica
  • Scorecard 2022 Gallery: Bowler, Lloyd Gallery: Burt, Steve Gallery: Cooper, Nick Gallery: Douglas, Mervyn Gallery: Emmett, John Gallery: Flint, Carole Gallery: Goodrick, Pete Gallery: Haines, John Gallery: Helliwell, Andrew Gallery: Hodge, Derek Gallery: Kay, Chris Gallery: Luther, Mark Gallery: Plowman, Ralph Gallery: Pollard, Ashley Gallery: Sapper Gallery: Scott, David Gallery: Slade, Matt Gallery: Stumpy Gallery: Vis Bellica
  • Scorecard 2021 Gallery: Anzani, Joe Gallery: Bowler, Lloyd Gallery: Burt, Steve Gallery: Cooper, Nick Gallery: Douglas, Mervyn Gallery: Duffell, Andy Gallery: Emmett, John Gallery: Flint, Carole Gallery: Haines, John Gallery: Helliwell, Andrew Gallery: Hiett, Travis Gallery: Hodge, Derek Gallery: Kay, Chris Gallery: Luther, Mark Gallery: McGinn, Joe Gallery: Melville, Doug Gallery: Plowman, Ralph Gallery: Pollard, Ashley Gallery: Ralls, Jason Gallery: Sapper Gallery: Scott, David Gallery: Slade, Matt Gallery: Stoesen, Chris Gallery: Stumpy Gallery: Vis Bellica
  • Scorecard 2020 Gallery: Bloggs, Fred Gallery: Bluemoose Ken Gallery: Bowler, Lloyd Gallery: Burt, Steve Gallery: Cornwell, Chris Gallery: Douglas, Mervyn Gallery: Duffell, Andy Gallery: Emmett, John Gallery: Flint, Carole Gallery: Haines, John Gallery: Helliwell, Andrew Gallery: Hiatt, Travis Gallery: Hodge, Derek Gallery: Hooge, Neil Gallery: Kay, Chris Gallery: Luther, Mark Gallery: McGinn, Joe Gallery: Melville, Doug Gallery: Plowman, Ralph Gallery: Pollard, Ashley Gallery: Ralls, Jason Gallery: Sapper Gallery: Scott, David Gallery: Slade, Matt Gallery: Stoesen, Chris Gallery: Stumpy Gallery: Vis Bellica
  • Scorecard 2019 Gallery: Bloggs, Fred Gallery: Blue Moose Ken Gallery: Bowen, Ed Gallery: Bowler, Lloyd Gallery: Burt, Steve Gallery: Clarke, Richard Gallery: Cornwell, Chris Gallery: Davenport, Jon Gallery: Douglas, Mervyn Gallery: Duffell, Andy Gallery: de Terre Neuve, John Gallery: Emmett, John Gallery: Fat Wally Gallery: Flint, Carole Gallery: Haines, John Gallery: Helliwell, Andrew Gallery: Hiett, Travis Gallery: Hodge, Derek Gallery: Hooge, Neil Gallery: Johnston, Owen Gallery: Kay, Chris Gallery: Luther, Mark Gallery: McGinn, Joe Gallery: Melville, Doug Gallery: Plowman, Ralph Gallery: Ralls, Jason Gallery: Sapper Gallery: Scott, David Gallery: Slade, Matt Gallery: Stoesen, Chris Gallery: Stumpy Gallery: Vis Bellica Gallery: Yuengling, Jon
  • Scorecard 2018 Gallery: Bloggs, Fred Gallery: Blue Moose Ken Gallery: Bowen, Ed Gallery: Bowler, Lloyd Gallery: Burt, Steve Gallery: Cornwell, Chris Gallery: Davenport, Jonathan Gallery: de Terre Neuve, John Gallery: Douglas, Mervyn Gallery: Duffell, Andy Gallery: Fat Wally Gallery: Flint, Carole Gallery: Freerange Egg Gallery: Haines, John Gallery: Helliwell, Andrew Gallery: Hiett, Travis Gallery: Hodge, Derek Gallery: Hooge, Neil Gallery: Johnston, Owen Gallery: Kay, Chris Gallery: Lampon, Steven Gallery: Luther, Mark Gallery: McGinn, Joe Gallery: Melville, Doug Gallery: Plowman, Ralph Gallery: Ralls, Jason Gallery: Sapper Gallery: Scott, David Gallery: Slade, Matt Gallery: Stoesen, Chris Gallery: Stumpy Gallery: Treadhead Gallery: Vis Bellica Gallery: Yuengling, Jon
  • Scorecard Gallery: Bond, Geoff Gallery: Bowen, Edward Gallery: Bowler, Lloyd Gallery: Burt, Steve Gallery: Cabey Cabey Gallery: Catchpole, Jim Gallery: Davenport, Jon Gallery: Davies, Keith Gallery: de Smedt, Kohn Gallery: de Terre Neuve, John Gallery: Douglas, Mervyn Gallery: Duffell, Andy Gallery: Fat Wally (Kev) Gallery: Flint, Carole Gallery: Freerange Egg Gallery: Gatzemeyer, Garrett Gallery: Gilbride, Chris Gallery: Haines, John Gallery: Helliwell, Andrew Gallery: Hodge, Derek Gallery: Hooge, Neil Gallery: Humm, Dave Gallery: Kay, Chris Gallery: Lampon, Steven Gallery: Luther, Mark Gallery: MacNeill, Craig Gallery: McCarthy, Andrew Gallery: The Mad Padre Gallery: McGinn, Joe Gallery: Melville, Doug Gallery: Naylor, Richard Gallery: Nissvik, Thomas Gallery: Old Pivot Gallery: Owen Gallery: Pollard, Ashley Gallery: Plowman, Ralph Gallery: Ralls, Jason Gallery: Sapper Gallery: Scott, David Gallery: Slade, Matt Gallery: Stoesen, Chris Gallery: Stumpy Gallery: Treadhead Gallery: Vis Bellica Gallery: Weathersby, Brian Gallery: WillieB Gallery: Yuengling, Jon
  • Scorecard 2016 Gallery: Baldwin, Paul Gallery: Blankenship, Paul Gallery: Bloggs, Fred Gallery: Bond, Geoff Gallery: Bowen, Ed Gallery: Bowler, Lloyd Gallery: Burt, Steve Gallery: Catchpole, Jim Gallery: Clarke, Richard Gallery: Davenport, Jon Gallery: Davies, Keith Gallery: de Smedt, Koen Gallery: Douglas, Mervyn Gallery: Duffell, Andy Gallery: Egg Gallery: Fitch, Doug Gallery: Flint, Carole Gallery: Gatzemeyer, Garrett Gallery: Gilbride, Chris Gallery: Helliwell, Andrew Gallery: Hodge, Derek Gallery: Hooge, Neil Gallery: Humm, Dave Gallery: I Am Bruce Gallery: Lowth, Kev (Fat Wally) Gallery: Luther, Mark Gallery: The Mad Padre Gallery: McCarthy, Andrew Gallery: Melville, Doug Gallery: Naylor, Richard Gallery: Nissvik, Thomas Gallery: Oracle Gallery: Owen Gallery: Plowman, Ralph Gallery: Pollard, Ashley Gallery: Ralls, Jason Gallery: Sapper Gallery: Slade, Matt Gallery: Stoesen, Chris Gallery: Stumpy Gallery: Treadhead Gallery: Vis Bellica Gallery: Willie B Gallery: Yuengling, Jon
  • Scorecard 2015 Gallery: AJH Gallery: Bairos, Vidal Gallery: Baldwin, Paul Gallery: Bax, Dick Gallery: Blankenship, Paul Gallery: Bloggs, Fred Gallery: Bond, Geoff Bond Gallery: Bowler, Hat Gallery: Burt, Steve Gallery: Corbett, Wulf Gallery: Danziger, Richard Gallery: Davies, Keith Gallery: de Smedt, Koen Gallery: de terre neuve, john Gallery: Douglas, Mervyn Gallery: Duffell, Andy Gallery: Egg, Freerange Gallery: Eggman Glass Gallery: Eriksson, Leif Gallery: Fat Wally Gallery: Flint, Carole Gallery: Gilbride, Chris Gallery: Hedglin, Nils Gallery: Helliwell, Andy Gallery: Hodge, Derek Gallery: Hooooge, Neil Gallery: Humm, Dave Gallery: I'm Bruce Gallery: Luther, Mark Gallery: The Mad Padre Gallery: Maerk Gallery: McCarthy, Andrew Gallery: Melville, Doug Gallery: Miller, Andrew Gallery: Miller, Steve Gallery: Milne, Neil Gallery: Mikkola, Topi Gallery: Mr Nouveau Gallery: Naylor, Richard Gallery: Nissvik, Thomas Gallery: Owen Gallery: Pedivere Gallery: Pingu Gallery: Pollard, Ashley Gallery: Plowman, Ralph Gallery: Ralls, Jason Gallery: Sapper Gallery: Skelton, Dom Gallery: Slade, Matt Gallery: Stapells, Tony Gallery: Stoesen, Chris Gallery: Strom, Joakim Gallery: Stumpy Gallery: Topyob Gallery: Treadhead Gallery: Vera, Benito Gallery: Vis Bellica Gallery: Willie B Gallery: Yuengling, Jon Gallery: Catchpole, Jim
  • Scorecard Gallery: Alexandros Gallery: Ambler, Craig Gallery: Armstrong, Keith Gallery: Bailey, Dave Gallery: Bairos, Vidal Gallery: Bax, Dick Gallery: Bloggs, Fred Gallery: Bond, Geoff Gallery: Burt, Steve Gallery: Carnegie, Ron Gallery: Carole Gallery: Catchpole, Jim Gallery: Clarke, Richard Gallery: Corbett, Wulf Gallery: Danziger, Richard Gallery: De Smedt, Koen Gallery: de Terre Neuve, John Gallery: Deeks, Jon Gallery: Douglas, Mervyn Gallery: Duffell, Andy Gallery: Egg, Free Range Gallery: Erikson, Leif Gallery: Fat Wally (Kev) Gallery: Fiene, Ben Gallery: Gilbride, Chris Gallery: Hodge, Derek Gallery: Humm, Dave Gallery: Llano, Manuel Gallery: Luther, Mark Gallery: Melville, Doug Gallery: Mikkola, Topi Gallery: Miller, Andrew Gallery: munsterfan8 Gallery: Murray, Jim Gallery: Nissvik, Thomas Gallery: Owen Gallery: The Mad Padre Gallery: PatG Gallery: Pingu Gallery: Plowman, Ralph Gallery: Pollard, Ashley Gallery: Ralls, Jason Gallery: Slade, Matt Gallery: Stoesen, Chris Gallery: Strom, Joakim Gallery: Stumpy Gallery: Thomas, John Gallery: Treadhead Gallery: Vera, Benito Gallery: Vis Bellica Gallery: Warrior in the Attic Gallery: Weir, Jim Gallery: Whitaker, Mike Gallery: WillieB Gallery: Yuengling, Jon
  • TooFatLardies
Vis Lardica
  • New & Updated/
  • TFL Painting Challenge 2025/
    • Introduction & Details
    • Scorecard 2025
    • Gallery: Burt, Steve
    • Gallery: Cooper, Nick
    • Gallery: Douglas, Mervyn
    • Gallery: Emmett, John
    • Gallery: Flint, Carole
    • Gallery: Helliwell, Andrew
    • Gallery: Luther, Mark
    • Gallery: Plowman, Ralph
    • Gallery: Sapper
    • Gallery: Stumpy
    • Gallery: Vis Bellica
  • I Ain't Been Shot, Mum! (WW2)/
    • Introduction to IABSM
    • Video: How To Play IABSM, Part One
    • Video: How to Play IABSM, Part Two
    • Video: How to Play IABSM, Part Three
    • After Action Reports (IABSM)
    • Army Galleries (IABSM)
    • Buy IABSM Scenario Packs
    • Buy IABSM Theatre Supplements
    • Figure Manufacturers (IABSM)
    • Figure Reviews (IABSM)
    • Game Aids (IABSM)
    • IABSM Facebook Group
  • Charlie Don't Surf! (Vietnam/Arab-Israeli/Moderns)/
    • Introduction to CDS
    • After Action Reports (CDS)
    • Army Galleries (CDS)
    • The Arab-Israeli Six Day War
    • The Arab-Israeli Yom Kippur War
    • After Action Reports (Arab-Israeli Wars)
    • Army Galleries (Arab-Israeli Wars)
    • After Action Reports (Moderns)
  • Quadrant 13 (Sci-Fi)/
    • Introduction to Q13
    • After Action Reports (Q13)
    • Army Galleries (Q13)
    • Army Lists for Q13
    • Buy Q13 and/or Five Planets
    • Figure Manufacturers (Q13)
    • Figure Reviews (Q13)
    • Points System Spreadsheets
  • Vis Imperica (19th Century)/
    • Introduction to 19th Century
    • Army Galleries (19th Century)
    • Army Lists
    • After Action Reports
    • Articles & Essays
    • Quick Guide to the Wars of the 19th Century
  • Vis Lucii (Pike & Shot)/
    • Introduction and AAR
    • FK&P: The Eastern Front
  • Vis Bellica (Ancients)/
    • Introduction to Vis Bellica
    • The Rules: Amendments
    • The Rules: Frequently Asked Questions
    • The Rules: Optional Rules
    • After Action Reports (Vis Bellica)
    • Army Lists
    • Articles about Vis Bellica
    • Scenarios for Vis Bellica
    • Other After Action Reports: WRG 6th
    • Other After Action Reports: TTS
  • Vis Magica (Fantasy)/
    • The Rules: Optional Rules
    • After Action Reports
  • TFL Painting Challenge 2024/
    • Scorecard 2024
    • Gallery: Burt, Steve
    • Gallery: Cooper, Nick
    • Gallery: Darkin, Des
    • Gallery: Davenport, Jonathan
    • Gallery: Douglas, Mervyn
    • Gallery: Emmett. John
    • Gallery: Flint, Carole
    • Gallery: Helliwell, Andrew
    • Gallery: Kay, Chris
    • Gallery: Luther, Mark
    • Gallery: Plowman, Ralph
    • Gallery: Sapper
    • Gallery: Scott, David
    • Gallery: Slade, Matt
    • Gallery: Stumpy
    • Gallery: Vis Bellica
  • TFL Painting Challenge 2023/
    • Scorecard 2023
    • Gallery: Bowler, Lloyd
    • Gallery: Burt, Steve
    • Gallery: Cooper, Nick
    • Gallery: Douglas, Mervyn
    • Gallery: Emmett, John
    • Gallery: Flint, Carole
    • Gallery: Helliwell, Andrew
    • Gallery: Hodge, Derek
    • Gallery: Kay, Chris
    • Gallery: Luther, Mark
    • Gallery: Plowman, Ralph
    • Gallery: Pollard, Ashley
    • Gallery: Sapper
    • Gallery: Scott, David
    • Gallery: Slade, Matt
    • Gallery: Stumpy
    • Gallery: Vis Bellica
  • TFL Painting Challenge 2022/
    • Scorecard 2022
    • Gallery: Bowler, Lloyd
    • Gallery: Burt, Steve
    • Gallery: Cooper, Nick
    • Gallery: Douglas, Mervyn
    • Gallery: Emmett, John
    • Gallery: Flint, Carole
    • Gallery: Goodrick, Pete
    • Gallery: Haines, John
    • Gallery: Helliwell, Andrew
    • Gallery: Hodge, Derek
    • Gallery: Kay, Chris
    • Gallery: Luther, Mark
    • Gallery: Plowman, Ralph
    • Gallery: Pollard, Ashley
    • Gallery: Sapper
    • Gallery: Scott, David
    • Gallery: Slade, Matt
    • Gallery: Stumpy
    • Gallery: Vis Bellica
  • TFL Painting Challenge 2021/
    • Scorecard 2021
    • Gallery: Anzani, Joe
    • Gallery: Bowler, Lloyd
    • Gallery: Burt, Steve
    • Gallery: Cooper, Nick
    • Gallery: Douglas, Mervyn
    • Gallery: Duffell, Andy
    • Gallery: Emmett, John
    • Gallery: Flint, Carole
    • Gallery: Haines, John
    • Gallery: Helliwell, Andrew
    • Gallery: Hiett, Travis
    • Gallery: Hodge, Derek
    • Gallery: Kay, Chris
    • Gallery: Luther, Mark
    • Gallery: McGinn, Joe
    • Gallery: Melville, Doug
    • Gallery: Plowman, Ralph
    • Gallery: Pollard, Ashley
    • Gallery: Ralls, Jason
    • Gallery: Sapper
    • Gallery: Scott, David
    • Gallery: Slade, Matt
    • Gallery: Stoesen, Chris
    • Gallery: Stumpy
    • Gallery: Vis Bellica
  • TFL Painting Challenge 2020/
    • Scorecard 2020
    • Gallery: Bloggs, Fred
    • Gallery: Bluemoose Ken
    • Gallery: Bowler, Lloyd
    • Gallery: Burt, Steve
    • Gallery: Cornwell, Chris
    • Gallery: Douglas, Mervyn
    • Gallery: Duffell, Andy
    • Gallery: Emmett, John
    • Gallery: Flint, Carole
    • Gallery: Haines, John
    • Gallery: Helliwell, Andrew
    • Gallery: Hiatt, Travis
    • Gallery: Hodge, Derek
    • Gallery: Hooge, Neil
    • Gallery: Kay, Chris
    • Gallery: Luther, Mark
    • Gallery: McGinn, Joe
    • Gallery: Melville, Doug
    • Gallery: Plowman, Ralph
    • Gallery: Pollard, Ashley
    • Gallery: Ralls, Jason
    • Gallery: Sapper
    • Gallery: Scott, David
    • Gallery: Slade, Matt
    • Gallery: Stoesen, Chris
    • Gallery: Stumpy
    • Gallery: Vis Bellica
  • TFL Painting Challenge 2019/
    • Scorecard 2019
    • Gallery: Bloggs, Fred
    • Gallery: Blue Moose Ken
    • Gallery: Bowen, Ed
    • Gallery: Bowler, Lloyd
    • Gallery: Burt, Steve
    • Gallery: Clarke, Richard
    • Gallery: Cornwell, Chris
    • Gallery: Davenport, Jon
    • Gallery: Douglas, Mervyn
    • Gallery: Duffell, Andy
    • Gallery: de Terre Neuve, John
    • Gallery: Emmett, John
    • Gallery: Fat Wally
    • Gallery: Flint, Carole
    • Gallery: Haines, John
    • Gallery: Helliwell, Andrew
    • Gallery: Hiett, Travis
    • Gallery: Hodge, Derek
    • Gallery: Hooge, Neil
    • Gallery: Johnston, Owen
    • Gallery: Kay, Chris
    • Gallery: Luther, Mark
    • Gallery: McGinn, Joe
    • Gallery: Melville, Doug
    • Gallery: Plowman, Ralph
    • Gallery: Ralls, Jason
    • Gallery: Sapper
    • Gallery: Scott, David
    • Gallery: Slade, Matt
    • Gallery: Stoesen, Chris
    • Gallery: Stumpy
    • Gallery: Vis Bellica
    • Gallery: Yuengling, Jon
  • TFL Painting Challenge 2018/
    • Scorecard 2018
    • Gallery: Bloggs, Fred
    • Gallery: Blue Moose Ken
    • Gallery: Bowen, Ed
    • Gallery: Bowler, Lloyd
    • Gallery: Burt, Steve
    • Gallery: Cornwell, Chris
    • Gallery: Davenport, Jonathan
    • Gallery: de Terre Neuve, John
    • Gallery: Douglas, Mervyn
    • Gallery: Duffell, Andy
    • Gallery: Fat Wally
    • Gallery: Flint, Carole
    • Gallery: Freerange Egg
    • Gallery: Haines, John
    • Gallery: Helliwell, Andrew
    • Gallery: Hiett, Travis
    • Gallery: Hodge, Derek
    • Gallery: Hooge, Neil
    • Gallery: Johnston, Owen
    • Gallery: Kay, Chris
    • Gallery: Lampon, Steven
    • Gallery: Luther, Mark
    • Gallery: McGinn, Joe
    • Gallery: Melville, Doug
    • Gallery: Plowman, Ralph
    • Gallery: Ralls, Jason
    • Gallery: Sapper
    • Gallery: Scott, David
    • Gallery: Slade, Matt
    • Gallery: Stoesen, Chris
    • Gallery: Stumpy
    • Gallery: Treadhead
    • Gallery: Vis Bellica
    • Gallery: Yuengling, Jon
  • TFL Painting Challenge 2017/
    • Scorecard
    • Gallery: Bond, Geoff
    • Gallery: Bowen, Edward
    • Gallery: Bowler, Lloyd
    • Gallery: Burt, Steve
    • Gallery: Cabey Cabey
    • Gallery: Catchpole, Jim
    • Gallery: Davenport, Jon
    • Gallery: Davies, Keith
    • Gallery: de Smedt, Kohn
    • Gallery: de Terre Neuve, John
    • Gallery: Douglas, Mervyn
    • Gallery: Duffell, Andy
    • Gallery: Fat Wally (Kev)
    • Gallery: Flint, Carole
    • Gallery: Freerange Egg
    • Gallery: Gatzemeyer, Garrett
    • Gallery: Gilbride, Chris
    • Gallery: Haines, John
    • Gallery: Helliwell, Andrew
    • Gallery: Hodge, Derek
    • Gallery: Hooge, Neil
    • Gallery: Humm, Dave
    • Gallery: Kay, Chris
    • Gallery: Lampon, Steven
    • Gallery: Luther, Mark
    • Gallery: MacNeill, Craig
    • Gallery: McCarthy, Andrew
    • Gallery: The Mad Padre
    • Gallery: McGinn, Joe
    • Gallery: Melville, Doug
    • Gallery: Naylor, Richard
    • Gallery: Nissvik, Thomas
    • Gallery: Old Pivot
    • Gallery: Owen
    • Gallery: Pollard, Ashley
    • Gallery: Plowman, Ralph
    • Gallery: Ralls, Jason
    • Gallery: Sapper
    • Gallery: Scott, David
    • Gallery: Slade, Matt
    • Gallery: Stoesen, Chris
    • Gallery: Stumpy
    • Gallery: Treadhead
    • Gallery: Vis Bellica
    • Gallery: Weathersby, Brian
    • Gallery: WillieB
    • Gallery: Yuengling, Jon
  • TFL Painting Challenge 2016/
    • Scorecard 2016
    • Gallery: Baldwin, Paul
    • Gallery: Blankenship, Paul
    • Gallery: Bloggs, Fred
    • Gallery: Bond, Geoff
    • Gallery: Bowen, Ed
    • Gallery: Bowler, Lloyd
    • Gallery: Burt, Steve
    • Gallery: Catchpole, Jim
    • Gallery: Clarke, Richard
    • Gallery: Davenport, Jon
    • Gallery: Davies, Keith
    • Gallery: de Smedt, Koen
    • Gallery: Douglas, Mervyn
    • Gallery: Duffell, Andy
    • Gallery: Egg
    • Gallery: Fitch, Doug
    • Gallery: Flint, Carole
    • Gallery: Gatzemeyer, Garrett
    • Gallery: Gilbride, Chris
    • Gallery: Helliwell, Andrew
    • Gallery: Hodge, Derek
    • Gallery: Hooge, Neil
    • Gallery: Humm, Dave
    • Gallery: I Am Bruce
    • Gallery: Lowth, Kev (Fat Wally)
    • Gallery: Luther, Mark
    • Gallery: The Mad Padre
    • Gallery: McCarthy, Andrew
    • Gallery: Melville, Doug
    • Gallery: Naylor, Richard
    • Gallery: Nissvik, Thomas
    • Gallery: Oracle
    • Gallery: Owen
    • Gallery: Plowman, Ralph
    • Gallery: Pollard, Ashley
    • Gallery: Ralls, Jason
    • Gallery: Sapper
    • Gallery: Slade, Matt
    • Gallery: Stoesen, Chris
    • Gallery: Stumpy
    • Gallery: Treadhead
    • Gallery: Vis Bellica
    • Gallery: Willie B
    • Gallery: Yuengling, Jon
  • TFL Painting Challenge 2015/
    • Scorecard 2015
    • Gallery: AJH
    • Gallery: Bairos, Vidal
    • Gallery: Baldwin, Paul
    • Gallery: Bax, Dick
    • Gallery: Blankenship, Paul
    • Gallery: Bloggs, Fred
    • Gallery: Bond, Geoff Bond
    • Gallery: Bowler, Hat
    • Gallery: Burt, Steve
    • Gallery: Corbett, Wulf
    • Gallery: Danziger, Richard
    • Gallery: Davies, Keith
    • Gallery: de Smedt, Koen
    • Gallery: de terre neuve, john
    • Gallery: Douglas, Mervyn
    • Gallery: Duffell, Andy
    • Gallery: Egg, Freerange
    • Gallery: Eggman Glass
    • Gallery: Eriksson, Leif
    • Gallery: Fat Wally
    • Gallery: Flint, Carole
    • Gallery: Gilbride, Chris
    • Gallery: Hedglin, Nils
    • Gallery: Helliwell, Andy
    • Gallery: Hodge, Derek
    • Gallery: Hooooge, Neil
    • Gallery: Humm, Dave
    • Gallery: I'm Bruce
    • Gallery: Luther, Mark
    • Gallery: The Mad Padre
    • Gallery: Maerk
    • Gallery: McCarthy, Andrew
    • Gallery: Melville, Doug
    • Gallery: Miller, Andrew
    • Gallery: Miller, Steve
    • Gallery: Milne, Neil
    • Gallery: Mikkola, Topi
    • Gallery: Mr Nouveau
    • Gallery: Naylor, Richard
    • Gallery: Nissvik, Thomas
    • Gallery: Owen
    • Gallery: Pedivere
    • Gallery: Pingu
    • Gallery: Pollard, Ashley
    • Gallery: Plowman, Ralph
    • Gallery: Ralls, Jason
    • Gallery: Sapper
    • Gallery: Skelton, Dom
    • Gallery: Slade, Matt
    • Gallery: Stapells, Tony
    • Gallery: Stoesen, Chris
    • Gallery: Strom, Joakim
    • Gallery: Stumpy
    • Gallery: Topyob
    • Gallery: Treadhead
    • Gallery: Vera, Benito
    • Gallery: Vis Bellica
    • Gallery: Willie B
    • Gallery: Yuengling, Jon
    • Gallery: Catchpole, Jim
  • TFL Painting Challenge 2014/
    • Scorecard
    • Gallery: Alexandros
    • Gallery: Ambler, Craig
    • Gallery: Armstrong, Keith
    • Gallery: Bailey, Dave
    • Gallery: Bairos, Vidal
    • Gallery: Bax, Dick
    • Gallery: Bloggs, Fred
    • Gallery: Bond, Geoff
    • Gallery: Burt, Steve
    • Gallery: Carnegie, Ron
    • Gallery: Carole
    • Gallery: Catchpole, Jim
    • Gallery: Clarke, Richard
    • Gallery: Corbett, Wulf
    • Gallery: Danziger, Richard
    • Gallery: De Smedt, Koen
    • Gallery: de Terre Neuve, John
    • Gallery: Deeks, Jon
    • Gallery: Douglas, Mervyn
    • Gallery: Duffell, Andy
    • Gallery: Egg, Free Range
    • Gallery: Erikson, Leif
    • Gallery: Fat Wally (Kev)
    • Gallery: Fiene, Ben
    • Gallery: Gilbride, Chris
    • Gallery: Hodge, Derek
    • Gallery: Humm, Dave
    • Gallery: Llano, Manuel
    • Gallery: Luther, Mark
    • Gallery: Melville, Doug
    • Gallery: Mikkola, Topi
    • Gallery: Miller, Andrew
    • Gallery: munsterfan8
    • Gallery: Murray, Jim
    • Gallery: Nissvik, Thomas
    • Gallery: Owen
    • Gallery: The Mad Padre
    • Gallery: PatG
    • Gallery: Pingu
    • Gallery: Plowman, Ralph
    • Gallery: Pollard, Ashley
    • Gallery: Ralls, Jason
    • Gallery: Slade, Matt
    • Gallery: Stoesen, Chris
    • Gallery: Strom, Joakim
    • Gallery: Stumpy
    • Gallery: Thomas, John
    • Gallery: Treadhead
    • Gallery: Vera, Benito
    • Gallery: Vis Bellica
    • Gallery: Warrior in the Attic
    • Gallery: Weir, Jim
    • Gallery: Whitaker, Mike
    • Gallery: WillieB
    • Gallery: Yuengling, Jon
  • TooFatLardies/
  Mainly flat & wet   The ground slopes up to the right. Terrain is mainly scrubby trees, bushes, and the wetlands with reeds. The Soviets are coming in from the left and the Germans are defending the higher ground on the right.
Vis Lardica

AAR 1941 Eastern Front: Werba by Mark Luther

A battle report or After Action Report (AAR) for I Ain't Been Shot, Mum (IABSM), the company-sized wargaming rules for WW2 from the TooFatLardies. A one-off game or scenario set on the Eastern Front in the year 1941.

Vis Lardica
  • New & Updated/
  • TFL Painting Challenge 2025/
    • Introduction & Details
    • Scorecard 2025
    • Gallery: Burt, Steve
    • Gallery: Cooper, Nick
    • Gallery: Douglas, Mervyn
    • Gallery: Emmett, John
    • Gallery: Flint, Carole
    • Gallery: Helliwell, Andrew
    • Gallery: Luther, Mark
    • Gallery: Plowman, Ralph
    • Gallery: Sapper
    • Gallery: Stumpy
    • Gallery: Vis Bellica
  • I Ain't Been Shot, Mum! (WW2)/
    • Introduction to IABSM
    • Video: How To Play IABSM, Part One
    • Video: How to Play IABSM, Part Two
    • Video: How to Play IABSM, Part Three
    • After Action Reports (IABSM)
    • Army Galleries (IABSM)
    • Buy IABSM Scenario Packs
    • Buy IABSM Theatre Supplements
    • Figure Manufacturers (IABSM)
    • Figure Reviews (IABSM)
    • Game Aids (IABSM)
    • IABSM Facebook Group
  • Charlie Don't Surf! (Vietnam/Arab-Israeli/Moderns)/
    • Introduction to CDS
    • After Action Reports (CDS)
    • Army Galleries (CDS)
    • The Arab-Israeli Six Day War
    • The Arab-Israeli Yom Kippur War
    • After Action Reports (Arab-Israeli Wars)
    • Army Galleries (Arab-Israeli Wars)
    • After Action Reports (Moderns)
  • Quadrant 13 (Sci-Fi)/
    • Introduction to Q13
    • After Action Reports (Q13)
    • Army Galleries (Q13)
    • Army Lists for Q13
    • Buy Q13 and/or Five Planets
    • Figure Manufacturers (Q13)
    • Figure Reviews (Q13)
    • Points System Spreadsheets
  • Vis Imperica (19th Century)/
    • Introduction to 19th Century
    • Army Galleries (19th Century)
    • Army Lists
    • After Action Reports
    • Articles & Essays
    • Quick Guide to the Wars of the 19th Century
  • Vis Lucii (Pike & Shot)/
    • Introduction and AAR
    • FK&P: The Eastern Front
  • Vis Bellica (Ancients)/
    • Introduction to Vis Bellica
    • The Rules: Amendments
    • The Rules: Frequently Asked Questions
    • The Rules: Optional Rules
    • After Action Reports (Vis Bellica)
    • Army Lists
    • Articles about Vis Bellica
    • Scenarios for Vis Bellica
    • Other After Action Reports: WRG 6th
    • Other After Action Reports: TTS
  • Vis Magica (Fantasy)/
    • The Rules: Optional Rules
    • After Action Reports
  • TFL Painting Challenge 2024/
    • Scorecard 2024
    • Gallery: Burt, Steve
    • Gallery: Cooper, Nick
    • Gallery: Darkin, Des
    • Gallery: Davenport, Jonathan
    • Gallery: Douglas, Mervyn
    • Gallery: Emmett. John
    • Gallery: Flint, Carole
    • Gallery: Helliwell, Andrew
    • Gallery: Kay, Chris
    • Gallery: Luther, Mark
    • Gallery: Plowman, Ralph
    • Gallery: Sapper
    • Gallery: Scott, David
    • Gallery: Slade, Matt
    • Gallery: Stumpy
    • Gallery: Vis Bellica
  • TFL Painting Challenge 2023/
    • Scorecard 2023
    • Gallery: Bowler, Lloyd
    • Gallery: Burt, Steve
    • Gallery: Cooper, Nick
    • Gallery: Douglas, Mervyn
    • Gallery: Emmett, John
    • Gallery: Flint, Carole
    • Gallery: Helliwell, Andrew
    • Gallery: Hodge, Derek
    • Gallery: Kay, Chris
    • Gallery: Luther, Mark
    • Gallery: Plowman, Ralph
    • Gallery: Pollard, Ashley
    • Gallery: Sapper
    • Gallery: Scott, David
    • Gallery: Slade, Matt
    • Gallery: Stumpy
    • Gallery: Vis Bellica
  • TFL Painting Challenge 2022/
    • Scorecard 2022
    • Gallery: Bowler, Lloyd
    • Gallery: Burt, Steve
    • Gallery: Cooper, Nick
    • Gallery: Douglas, Mervyn
    • Gallery: Emmett, John
    • Gallery: Flint, Carole
    • Gallery: Goodrick, Pete
    • Gallery: Haines, John
    • Gallery: Helliwell, Andrew
    • Gallery: Hodge, Derek
    • Gallery: Kay, Chris
    • Gallery: Luther, Mark
    • Gallery: Plowman, Ralph
    • Gallery: Pollard, Ashley
    • Gallery: Sapper
    • Gallery: Scott, David
    • Gallery: Slade, Matt
    • Gallery: Stumpy
    • Gallery: Vis Bellica
  • TFL Painting Challenge 2021/
    • Scorecard 2021
    • Gallery: Anzani, Joe
    • Gallery: Bowler, Lloyd
    • Gallery: Burt, Steve
    • Gallery: Cooper, Nick
    • Gallery: Douglas, Mervyn
    • Gallery: Duffell, Andy
    • Gallery: Emmett, John
    • Gallery: Flint, Carole
    • Gallery: Haines, John
    • Gallery: Helliwell, Andrew
    • Gallery: Hiett, Travis
    • Gallery: Hodge, Derek
    • Gallery: Kay, Chris
    • Gallery: Luther, Mark
    • Gallery: McGinn, Joe
    • Gallery: Melville, Doug
    • Gallery: Plowman, Ralph
    • Gallery: Pollard, Ashley
    • Gallery: Ralls, Jason
    • Gallery: Sapper
    • Gallery: Scott, David
    • Gallery: Slade, Matt
    • Gallery: Stoesen, Chris
    • Gallery: Stumpy
    • Gallery: Vis Bellica
  • TFL Painting Challenge 2020/
    • Scorecard 2020
    • Gallery: Bloggs, Fred
    • Gallery: Bluemoose Ken
    • Gallery: Bowler, Lloyd
    • Gallery: Burt, Steve
    • Gallery: Cornwell, Chris
    • Gallery: Douglas, Mervyn
    • Gallery: Duffell, Andy
    • Gallery: Emmett, John
    • Gallery: Flint, Carole
    • Gallery: Haines, John
    • Gallery: Helliwell, Andrew
    • Gallery: Hiatt, Travis
    • Gallery: Hodge, Derek
    • Gallery: Hooge, Neil
    • Gallery: Kay, Chris
    • Gallery: Luther, Mark
    • Gallery: McGinn, Joe
    • Gallery: Melville, Doug
    • Gallery: Plowman, Ralph
    • Gallery: Pollard, Ashley
    • Gallery: Ralls, Jason
    • Gallery: Sapper
    • Gallery: Scott, David
    • Gallery: Slade, Matt
    • Gallery: Stoesen, Chris
    • Gallery: Stumpy
    • Gallery: Vis Bellica
  • TFL Painting Challenge 2019/
    • Scorecard 2019
    • Gallery: Bloggs, Fred
    • Gallery: Blue Moose Ken
    • Gallery: Bowen, Ed
    • Gallery: Bowler, Lloyd
    • Gallery: Burt, Steve
    • Gallery: Clarke, Richard
    • Gallery: Cornwell, Chris
    • Gallery: Davenport, Jon
    • Gallery: Douglas, Mervyn
    • Gallery: Duffell, Andy
    • Gallery: de Terre Neuve, John
    • Gallery: Emmett, John
    • Gallery: Fat Wally
    • Gallery: Flint, Carole
    • Gallery: Haines, John
    • Gallery: Helliwell, Andrew
    • Gallery: Hiett, Travis
    • Gallery: Hodge, Derek
    • Gallery: Hooge, Neil
    • Gallery: Johnston, Owen
    • Gallery: Kay, Chris
    • Gallery: Luther, Mark
    • Gallery: McGinn, Joe
    • Gallery: Melville, Doug
    • Gallery: Plowman, Ralph
    • Gallery: Ralls, Jason
    • Gallery: Sapper
    • Gallery: Scott, David
    • Gallery: Slade, Matt
    • Gallery: Stoesen, Chris
    • Gallery: Stumpy
    • Gallery: Vis Bellica
    • Gallery: Yuengling, Jon
  • TFL Painting Challenge 2018/
    • Scorecard 2018
    • Gallery: Bloggs, Fred
    • Gallery: Blue Moose Ken
    • Gallery: Bowen, Ed
    • Gallery: Bowler, Lloyd
    • Gallery: Burt, Steve
    • Gallery: Cornwell, Chris
    • Gallery: Davenport, Jonathan
    • Gallery: de Terre Neuve, John
    • Gallery: Douglas, Mervyn
    • Gallery: Duffell, Andy
    • Gallery: Fat Wally
    • Gallery: Flint, Carole
    • Gallery: Freerange Egg
    • Gallery: Haines, John
    • Gallery: Helliwell, Andrew
    • Gallery: Hiett, Travis
    • Gallery: Hodge, Derek
    • Gallery: Hooge, Neil
    • Gallery: Johnston, Owen
    • Gallery: Kay, Chris
    • Gallery: Lampon, Steven
    • Gallery: Luther, Mark
    • Gallery: McGinn, Joe
    • Gallery: Melville, Doug
    • Gallery: Plowman, Ralph
    • Gallery: Ralls, Jason
    • Gallery: Sapper
    • Gallery: Scott, David
    • Gallery: Slade, Matt
    • Gallery: Stoesen, Chris
    • Gallery: Stumpy
    • Gallery: Treadhead
    • Gallery: Vis Bellica
    • Gallery: Yuengling, Jon
  • TFL Painting Challenge 2017/
    • Scorecard
    • Gallery: Bond, Geoff
    • Gallery: Bowen, Edward
    • Gallery: Bowler, Lloyd
    • Gallery: Burt, Steve
    • Gallery: Cabey Cabey
    • Gallery: Catchpole, Jim
    • Gallery: Davenport, Jon
    • Gallery: Davies, Keith
    • Gallery: de Smedt, Kohn
    • Gallery: de Terre Neuve, John
    • Gallery: Douglas, Mervyn
    • Gallery: Duffell, Andy
    • Gallery: Fat Wally (Kev)
    • Gallery: Flint, Carole
    • Gallery: Freerange Egg
    • Gallery: Gatzemeyer, Garrett
    • Gallery: Gilbride, Chris
    • Gallery: Haines, John
    • Gallery: Helliwell, Andrew
    • Gallery: Hodge, Derek
    • Gallery: Hooge, Neil
    • Gallery: Humm, Dave
    • Gallery: Kay, Chris
    • Gallery: Lampon, Steven
    • Gallery: Luther, Mark
    • Gallery: MacNeill, Craig
    • Gallery: McCarthy, Andrew
    • Gallery: The Mad Padre
    • Gallery: McGinn, Joe
    • Gallery: Melville, Doug
    • Gallery: Naylor, Richard
    • Gallery: Nissvik, Thomas
    • Gallery: Old Pivot
    • Gallery: Owen
    • Gallery: Pollard, Ashley
    • Gallery: Plowman, Ralph
    • Gallery: Ralls, Jason
    • Gallery: Sapper
    • Gallery: Scott, David
    • Gallery: Slade, Matt
    • Gallery: Stoesen, Chris
    • Gallery: Stumpy
    • Gallery: Treadhead
    • Gallery: Vis Bellica
    • Gallery: Weathersby, Brian
    • Gallery: WillieB
    • Gallery: Yuengling, Jon
  • TFL Painting Challenge 2016/
    • Scorecard 2016
    • Gallery: Baldwin, Paul
    • Gallery: Blankenship, Paul
    • Gallery: Bloggs, Fred
    • Gallery: Bond, Geoff
    • Gallery: Bowen, Ed
    • Gallery: Bowler, Lloyd
    • Gallery: Burt, Steve
    • Gallery: Catchpole, Jim
    • Gallery: Clarke, Richard
    • Gallery: Davenport, Jon
    • Gallery: Davies, Keith
    • Gallery: de Smedt, Koen
    • Gallery: Douglas, Mervyn
    • Gallery: Duffell, Andy
    • Gallery: Egg
    • Gallery: Fitch, Doug
    • Gallery: Flint, Carole
    • Gallery: Gatzemeyer, Garrett
    • Gallery: Gilbride, Chris
    • Gallery: Helliwell, Andrew
    • Gallery: Hodge, Derek
    • Gallery: Hooge, Neil
    • Gallery: Humm, Dave
    • Gallery: I Am Bruce
    • Gallery: Lowth, Kev (Fat Wally)
    • Gallery: Luther, Mark
    • Gallery: The Mad Padre
    • Gallery: McCarthy, Andrew
    • Gallery: Melville, Doug
    • Gallery: Naylor, Richard
    • Gallery: Nissvik, Thomas
    • Gallery: Oracle
    • Gallery: Owen
    • Gallery: Plowman, Ralph
    • Gallery: Pollard, Ashley
    • Gallery: Ralls, Jason
    • Gallery: Sapper
    • Gallery: Slade, Matt
    • Gallery: Stoesen, Chris
    • Gallery: Stumpy
    • Gallery: Treadhead
    • Gallery: Vis Bellica
    • Gallery: Willie B
    • Gallery: Yuengling, Jon
  • TFL Painting Challenge 2015/
    • Scorecard 2015
    • Gallery: AJH
    • Gallery: Bairos, Vidal
    • Gallery: Baldwin, Paul
    • Gallery: Bax, Dick
    • Gallery: Blankenship, Paul
    • Gallery: Bloggs, Fred
    • Gallery: Bond, Geoff Bond
    • Gallery: Bowler, Hat
    • Gallery: Burt, Steve
    • Gallery: Corbett, Wulf
    • Gallery: Danziger, Richard
    • Gallery: Davies, Keith
    • Gallery: de Smedt, Koen
    • Gallery: de terre neuve, john
    • Gallery: Douglas, Mervyn
    • Gallery: Duffell, Andy
    • Gallery: Egg, Freerange
    • Gallery: Eggman Glass
    • Gallery: Eriksson, Leif
    • Gallery: Fat Wally
    • Gallery: Flint, Carole
    • Gallery: Gilbride, Chris
    • Gallery: Hedglin, Nils
    • Gallery: Helliwell, Andy
    • Gallery: Hodge, Derek
    • Gallery: Hooooge, Neil
    • Gallery: Humm, Dave
    • Gallery: I'm Bruce
    • Gallery: Luther, Mark
    • Gallery: The Mad Padre
    • Gallery: Maerk
    • Gallery: McCarthy, Andrew
    • Gallery: Melville, Doug
    • Gallery: Miller, Andrew
    • Gallery: Miller, Steve
    • Gallery: Milne, Neil
    • Gallery: Mikkola, Topi
    • Gallery: Mr Nouveau
    • Gallery: Naylor, Richard
    • Gallery: Nissvik, Thomas
    • Gallery: Owen
    • Gallery: Pedivere
    • Gallery: Pingu
    • Gallery: Pollard, Ashley
    • Gallery: Plowman, Ralph
    • Gallery: Ralls, Jason
    • Gallery: Sapper
    • Gallery: Skelton, Dom
    • Gallery: Slade, Matt
    • Gallery: Stapells, Tony
    • Gallery: Stoesen, Chris
    • Gallery: Strom, Joakim
    • Gallery: Stumpy
    • Gallery: Topyob
    • Gallery: Treadhead
    • Gallery: Vera, Benito
    • Gallery: Vis Bellica
    • Gallery: Willie B
    • Gallery: Yuengling, Jon
    • Gallery: Catchpole, Jim
  • TFL Painting Challenge 2014/
    • Scorecard
    • Gallery: Alexandros
    • Gallery: Ambler, Craig
    • Gallery: Armstrong, Keith
    • Gallery: Bailey, Dave
    • Gallery: Bairos, Vidal
    • Gallery: Bax, Dick
    • Gallery: Bloggs, Fred
    • Gallery: Bond, Geoff
    • Gallery: Burt, Steve
    • Gallery: Carnegie, Ron
    • Gallery: Carole
    • Gallery: Catchpole, Jim
    • Gallery: Clarke, Richard
    • Gallery: Corbett, Wulf
    • Gallery: Danziger, Richard
    • Gallery: De Smedt, Koen
    • Gallery: de Terre Neuve, John
    • Gallery: Deeks, Jon
    • Gallery: Douglas, Mervyn
    • Gallery: Duffell, Andy
    • Gallery: Egg, Free Range
    • Gallery: Erikson, Leif
    • Gallery: Fat Wally (Kev)
    • Gallery: Fiene, Ben
    • Gallery: Gilbride, Chris
    • Gallery: Hodge, Derek
    • Gallery: Humm, Dave
    • Gallery: Llano, Manuel
    • Gallery: Luther, Mark
    • Gallery: Melville, Doug
    • Gallery: Mikkola, Topi
    • Gallery: Miller, Andrew
    • Gallery: munsterfan8
    • Gallery: Murray, Jim
    • Gallery: Nissvik, Thomas
    • Gallery: Owen
    • Gallery: The Mad Padre
    • Gallery: PatG
    • Gallery: Pingu
    • Gallery: Plowman, Ralph
    • Gallery: Pollard, Ashley
    • Gallery: Ralls, Jason
    • Gallery: Slade, Matt
    • Gallery: Stoesen, Chris
    • Gallery: Strom, Joakim
    • Gallery: Stumpy
    • Gallery: Thomas, John
    • Gallery: Treadhead
    • Gallery: Vera, Benito
    • Gallery: Vis Bellica
    • Gallery: Warrior in the Attic
    • Gallery: Weir, Jim
    • Gallery: Whitaker, Mike
    • Gallery: WillieB
    • Gallery: Yuengling, Jon
  • TooFatLardies/


This was an I Ain't Been Shot Mum! 6mm game played in April 2009 on a couple of weekends. This is one of the only battles that T-35s saw action.

This game was based on the attempt of the Russian 8th Corp breaking through to the south from Ptytsch towards Werba. The T-35s were part of the 34th Tank Div that was attacking towards Werba into the 16th Pz Div. Most of the German armor was attacking back towards the east.

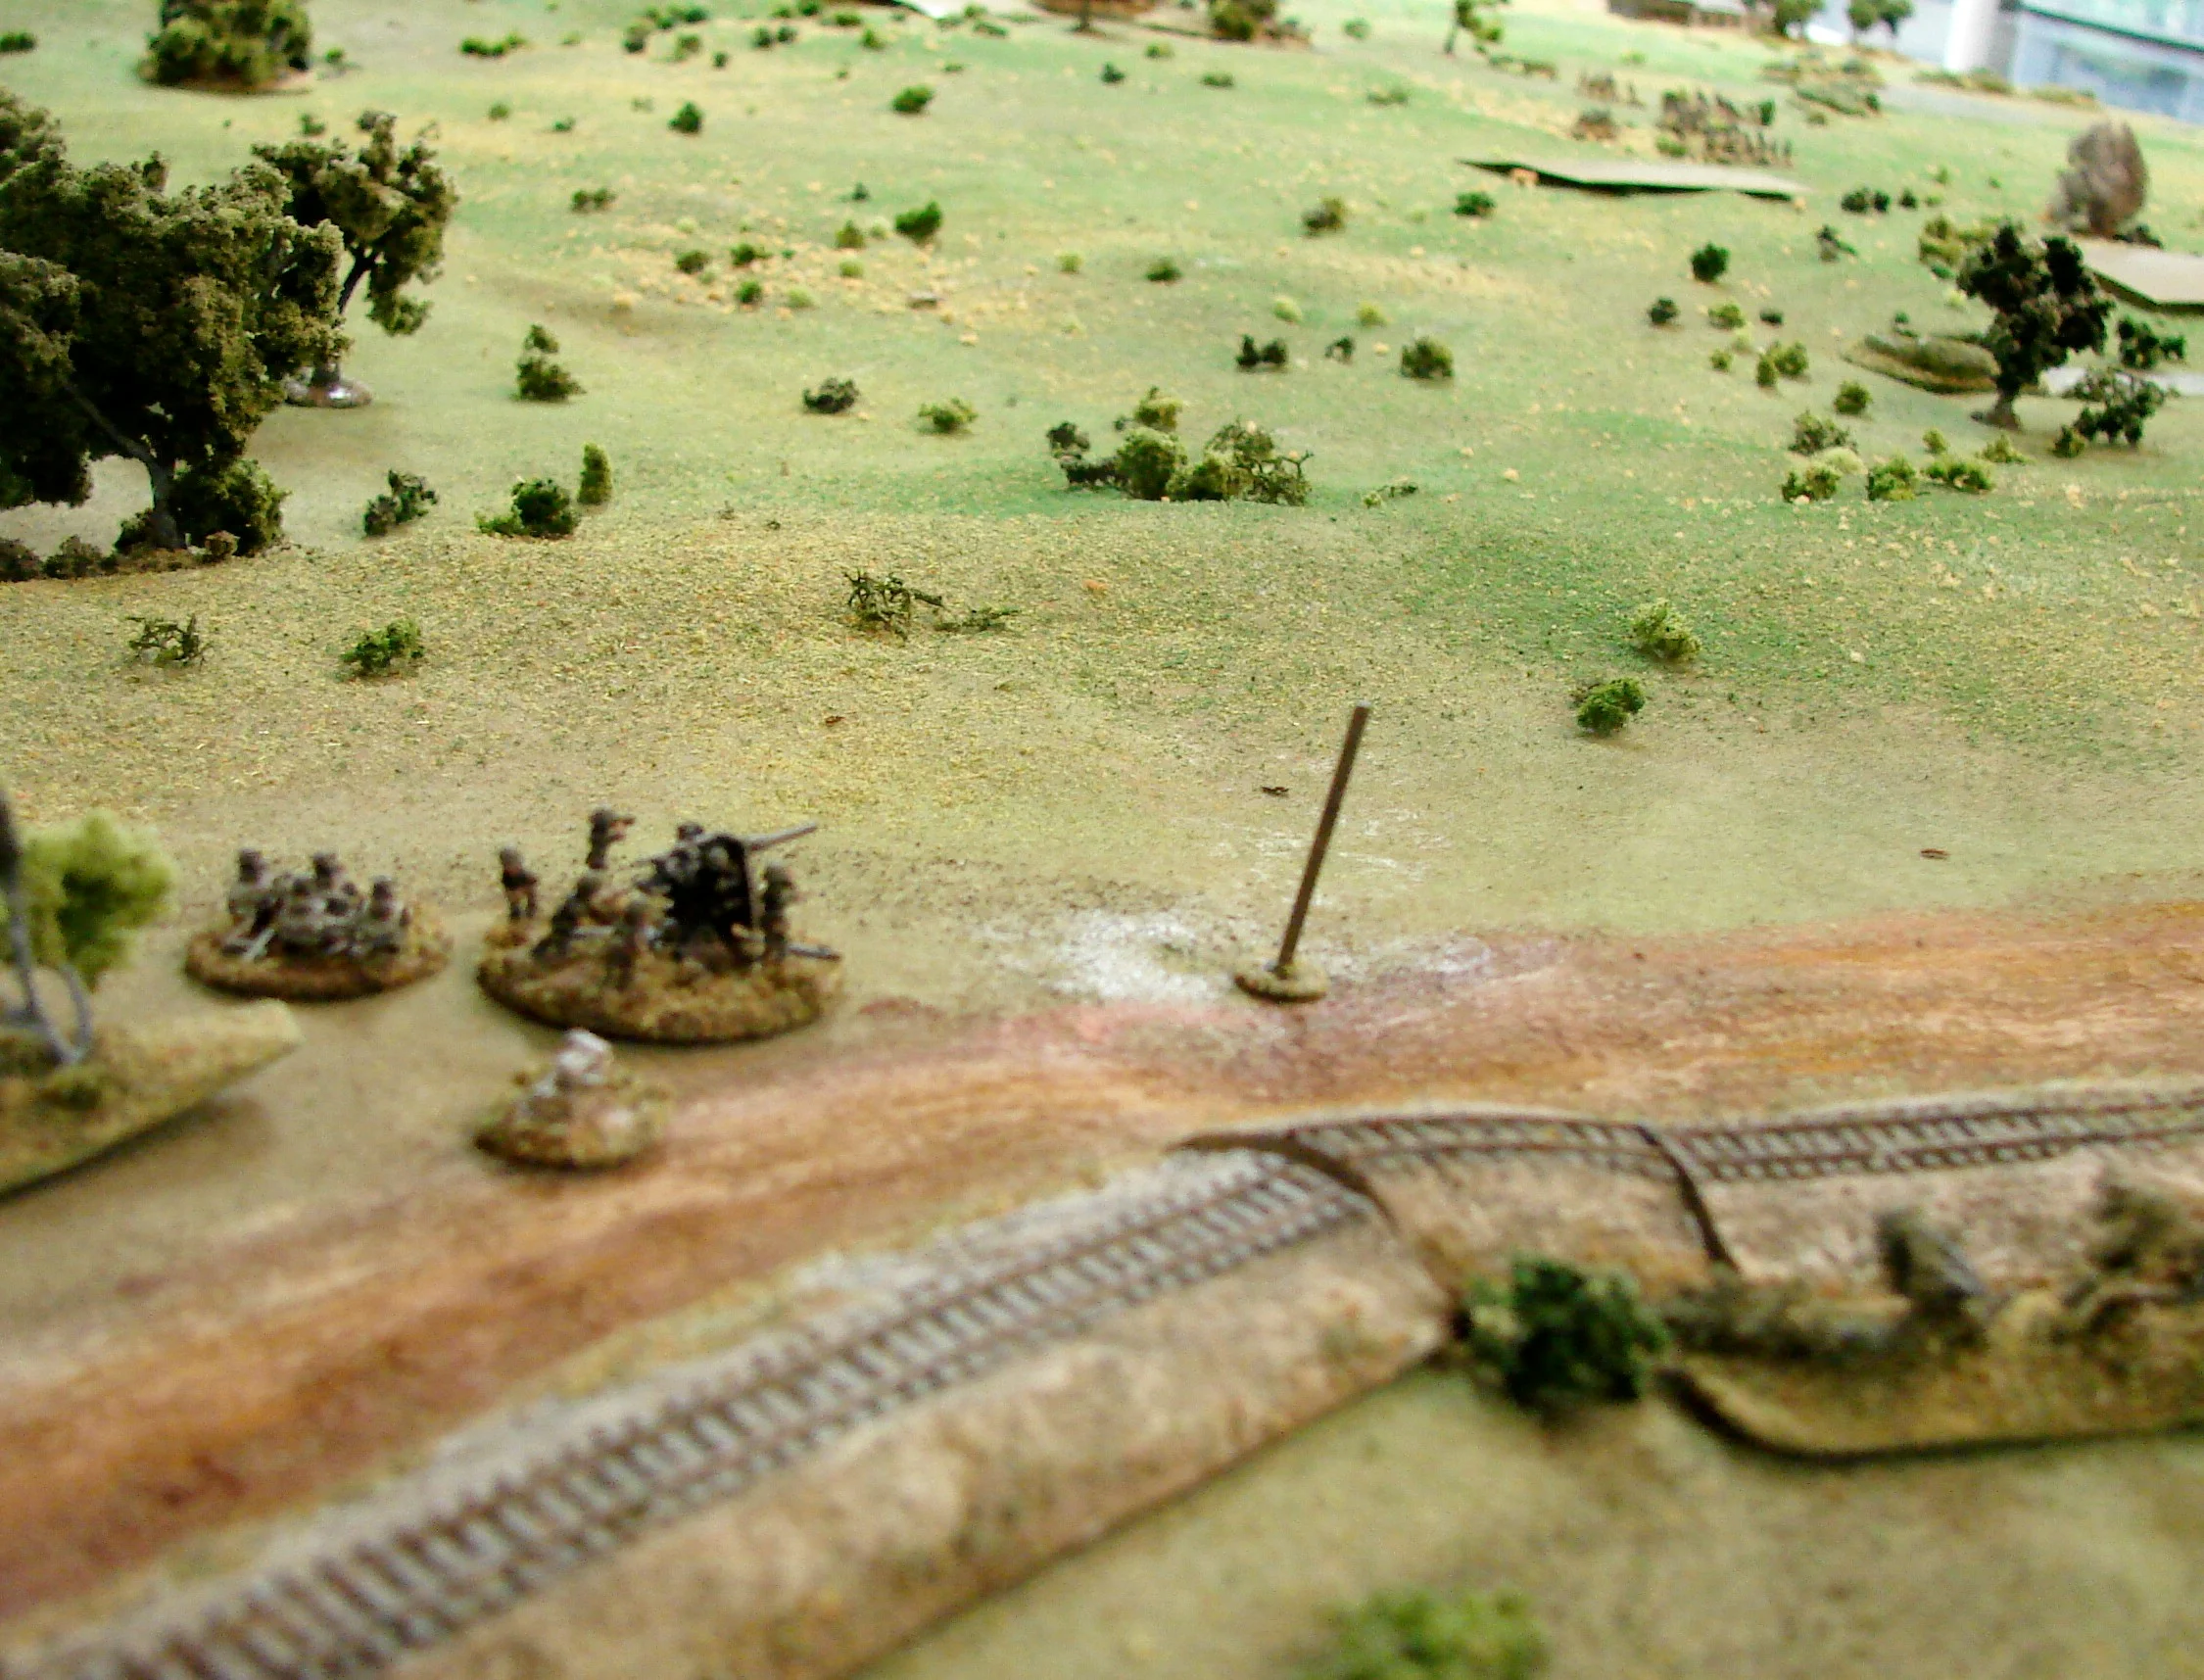
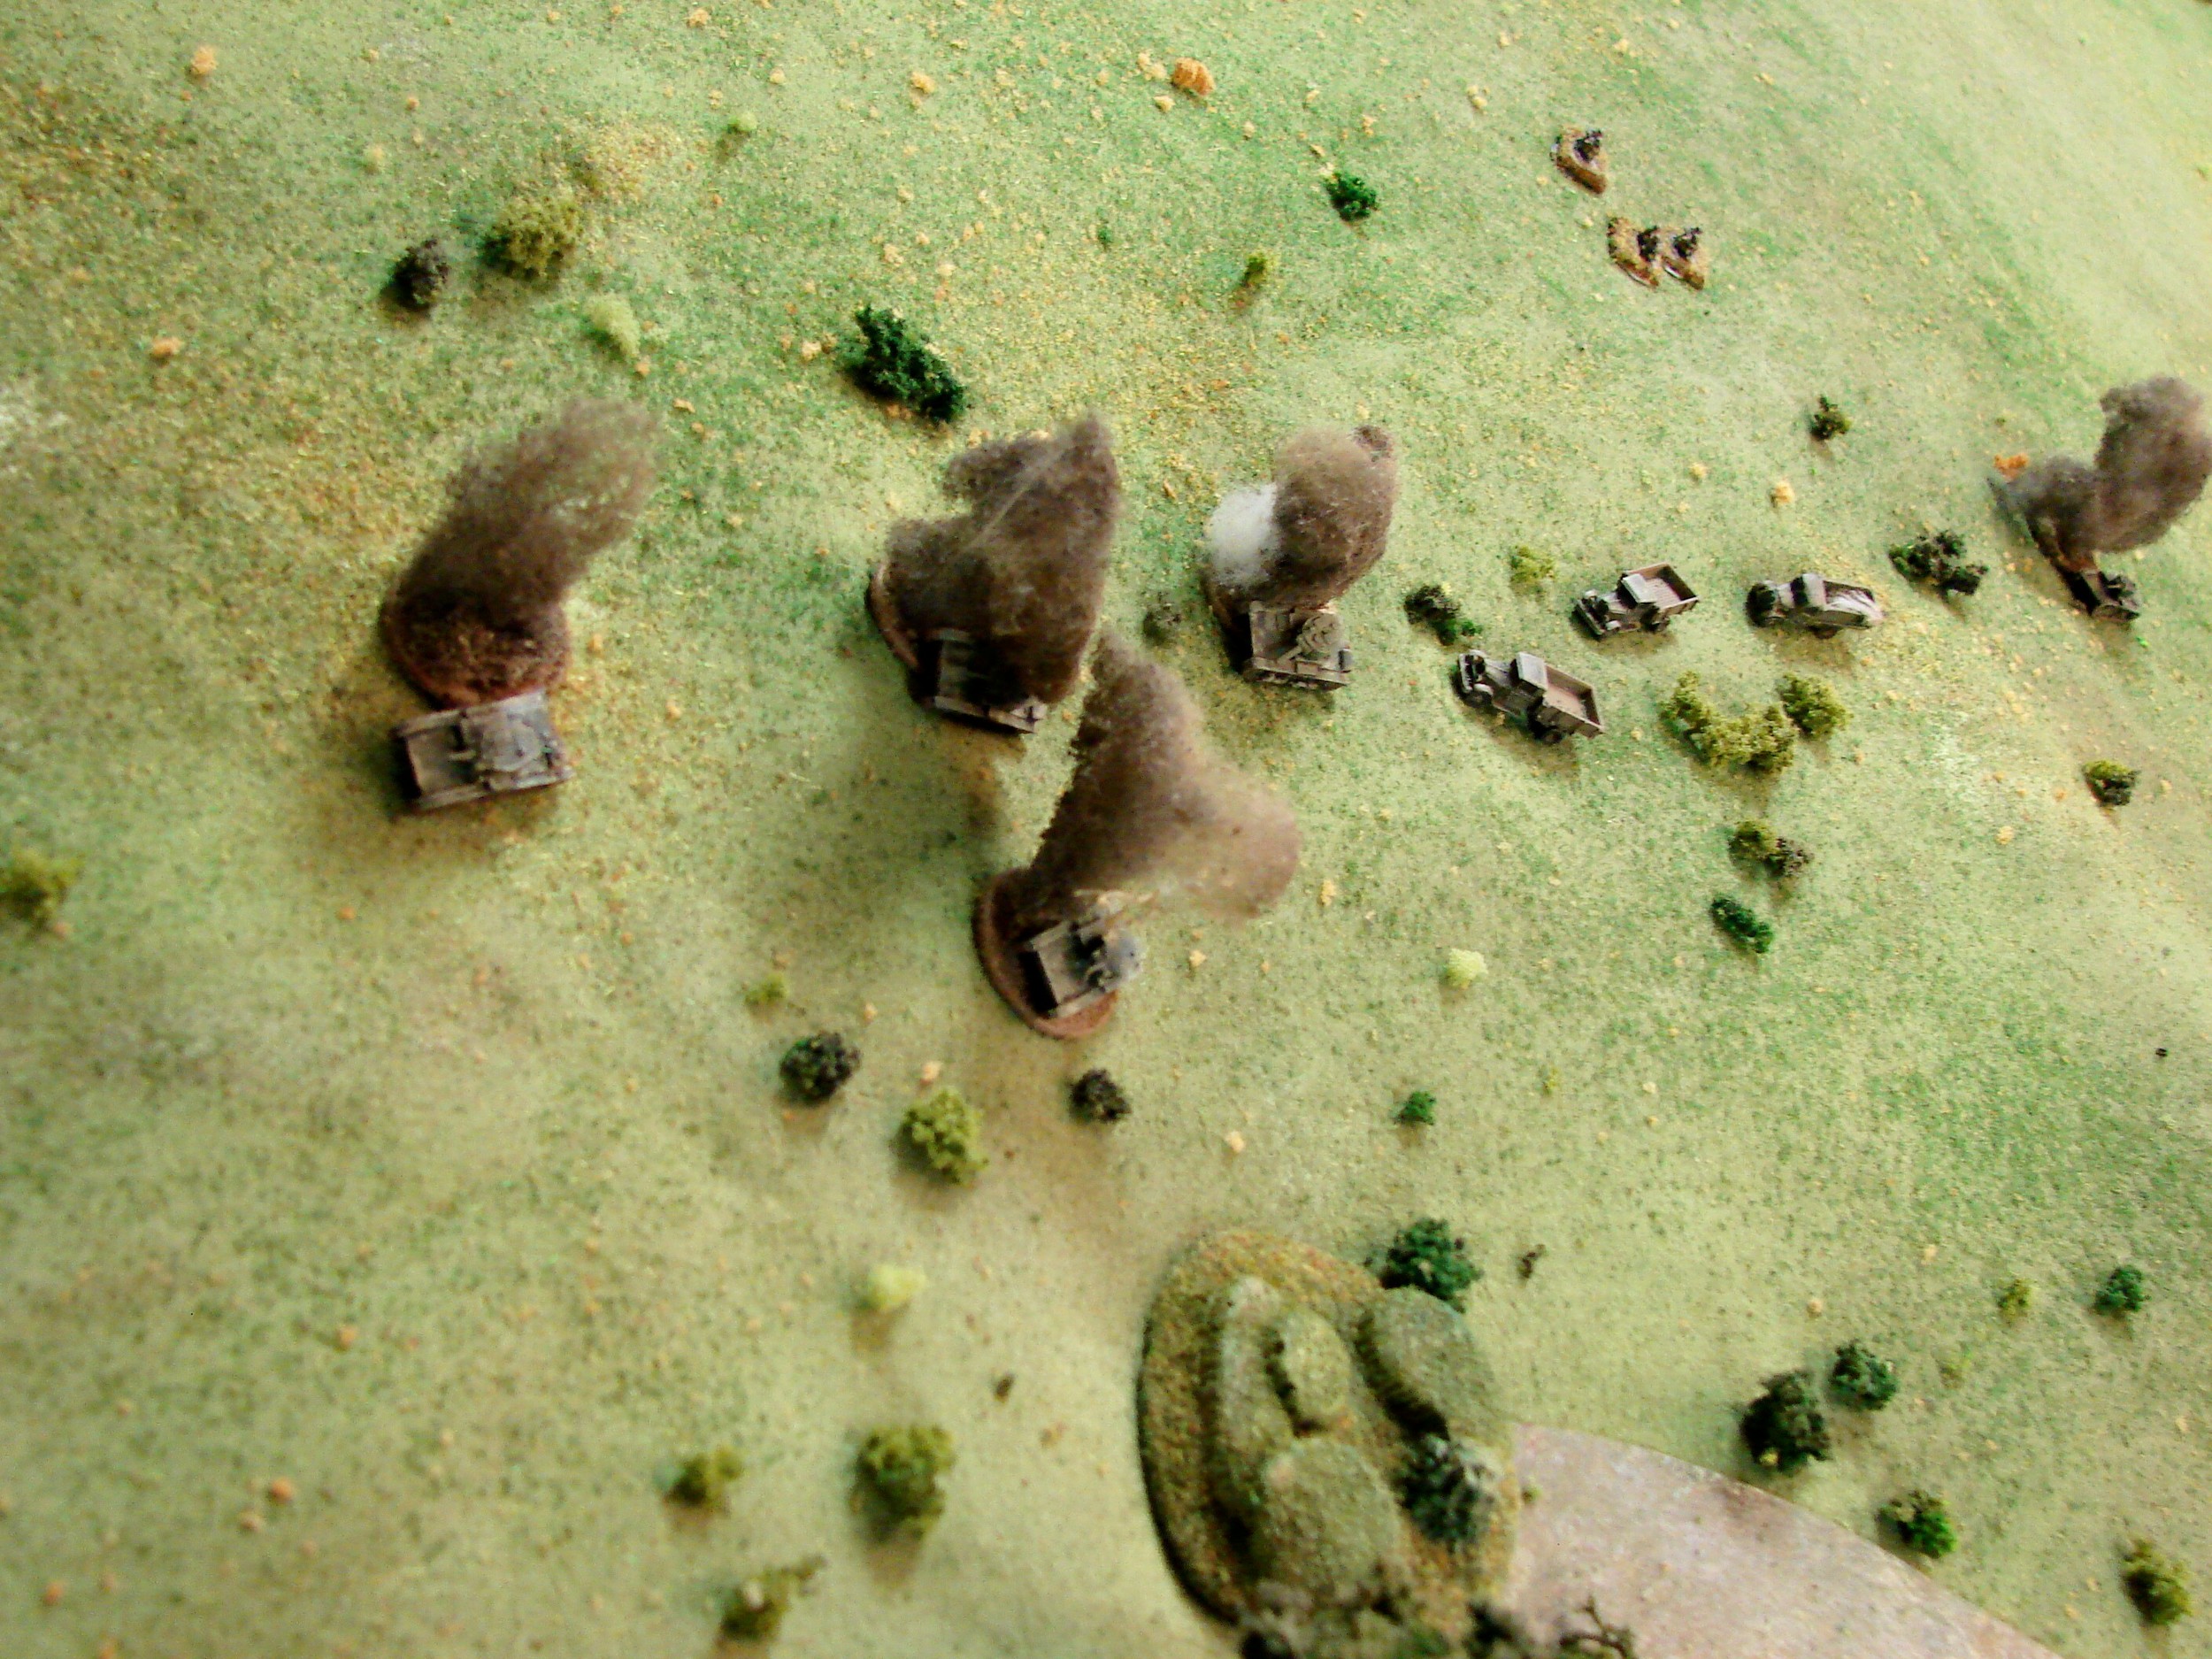
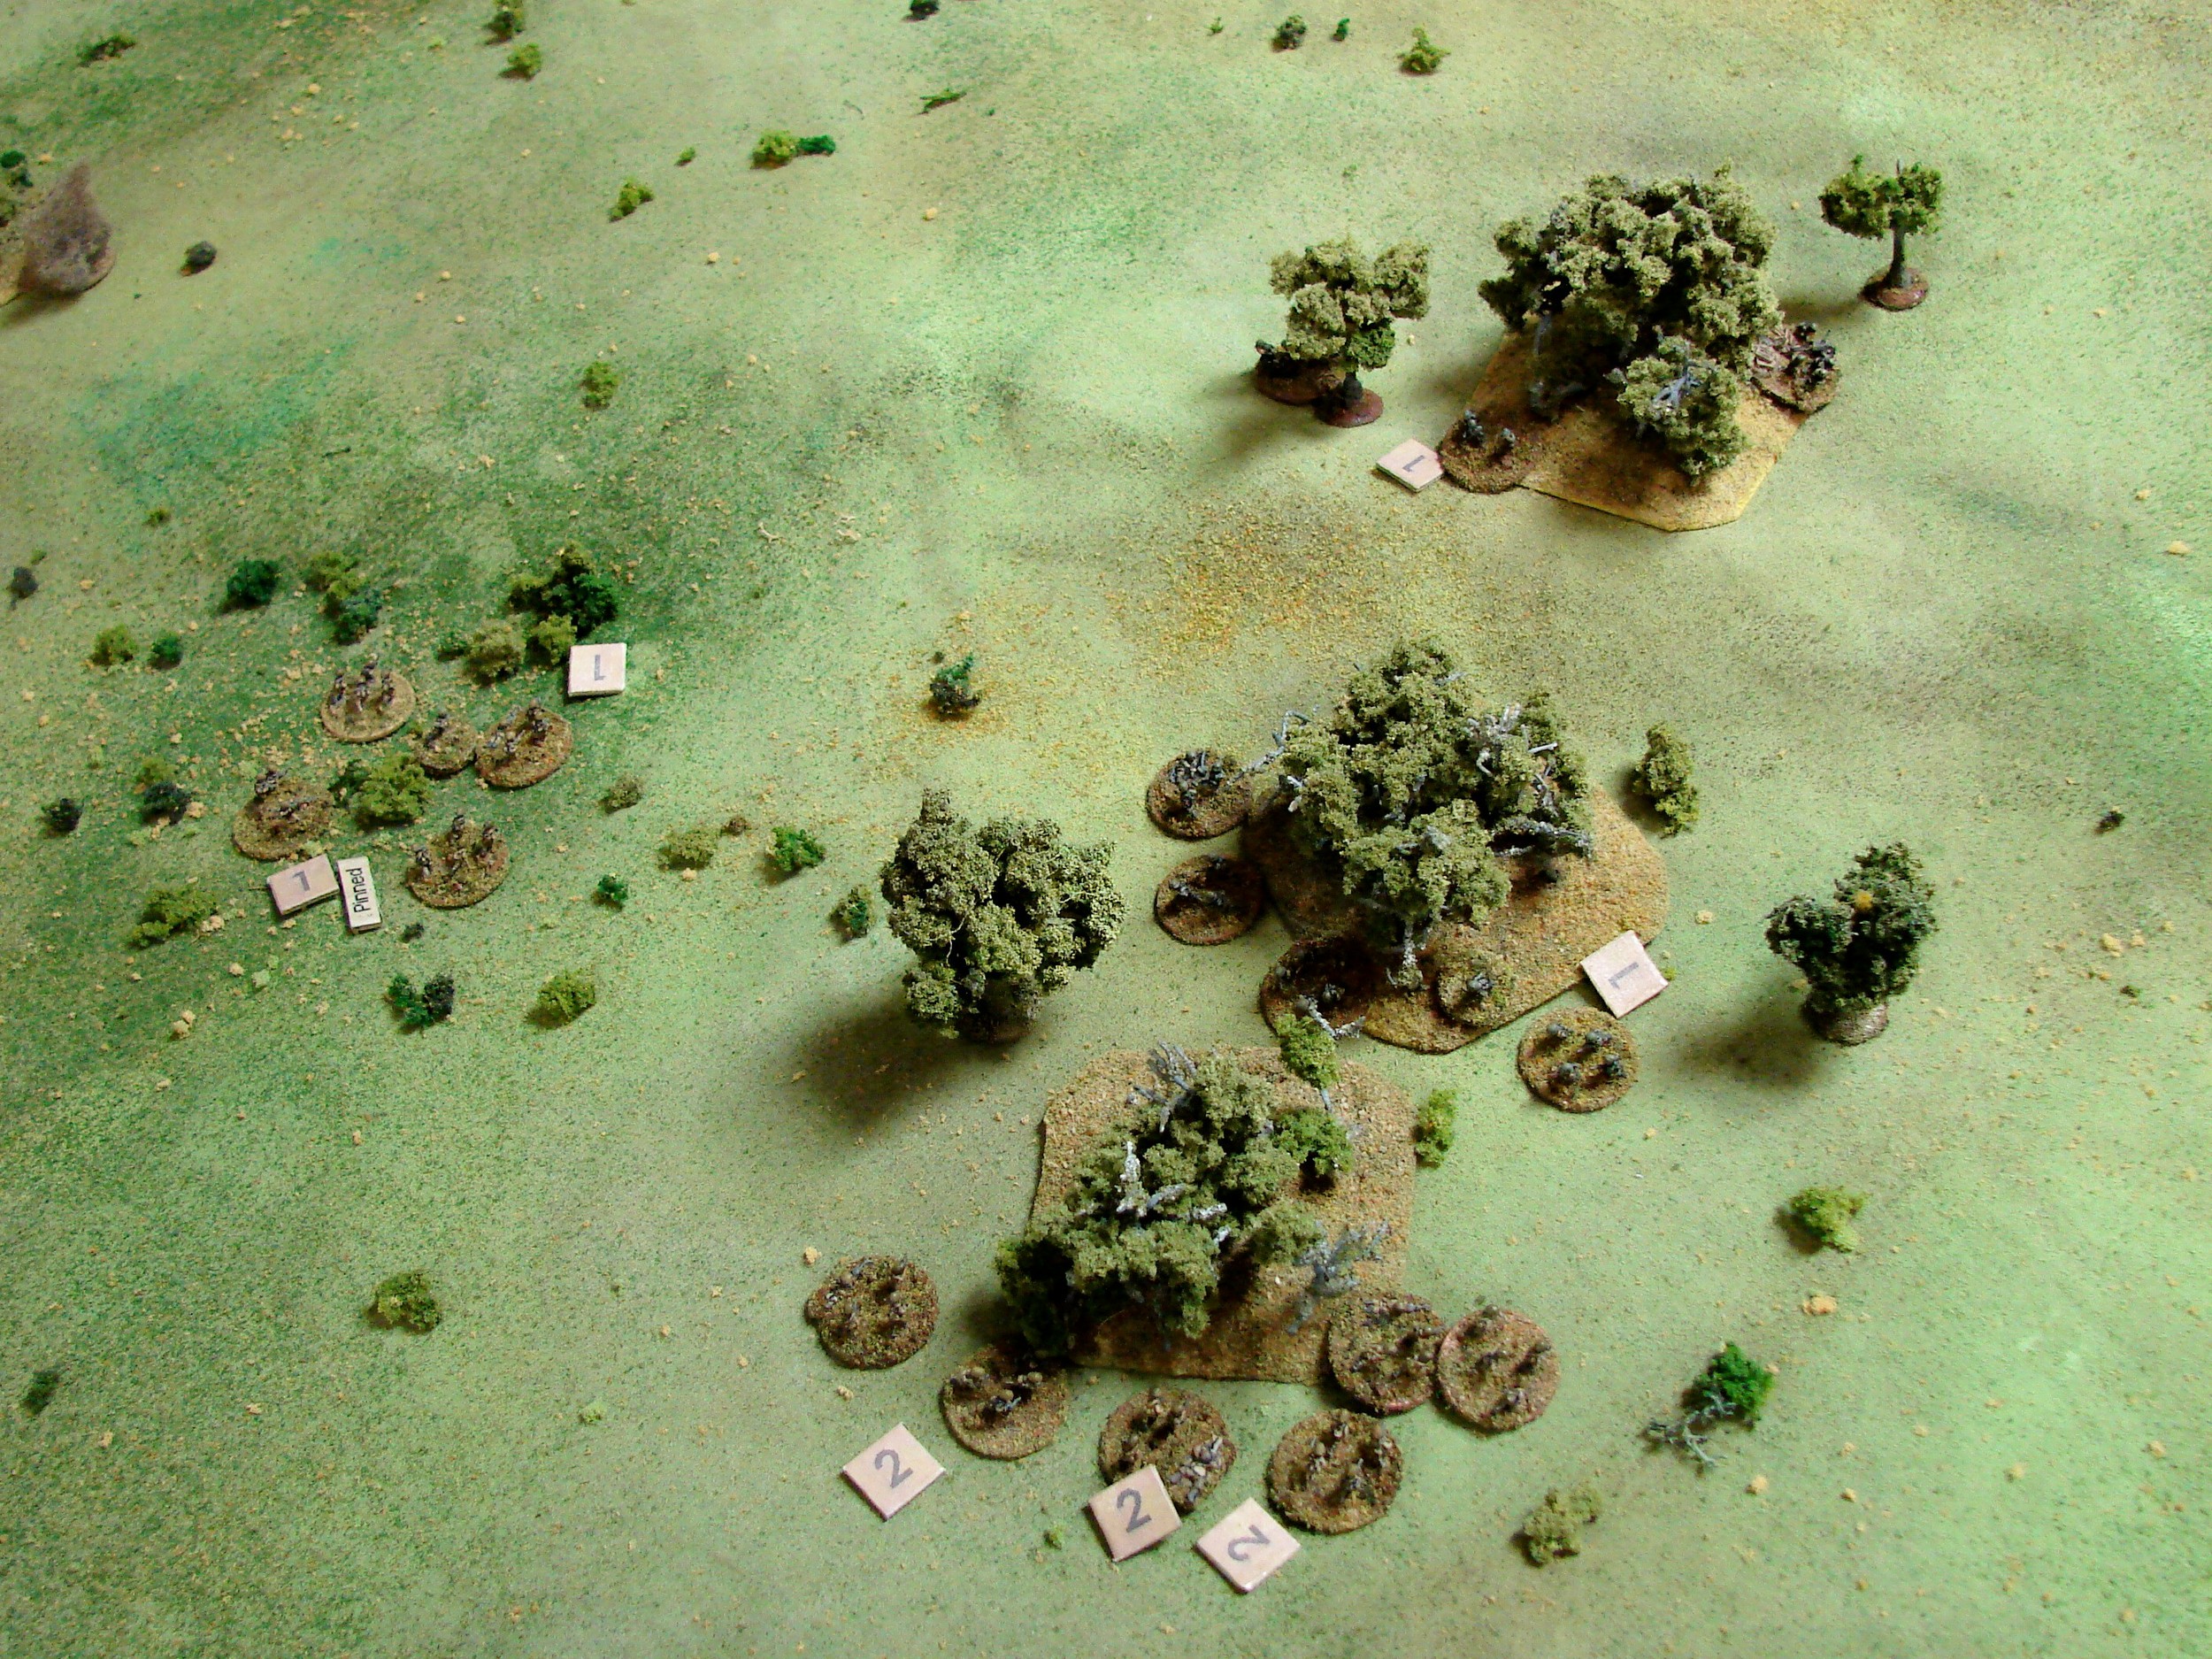
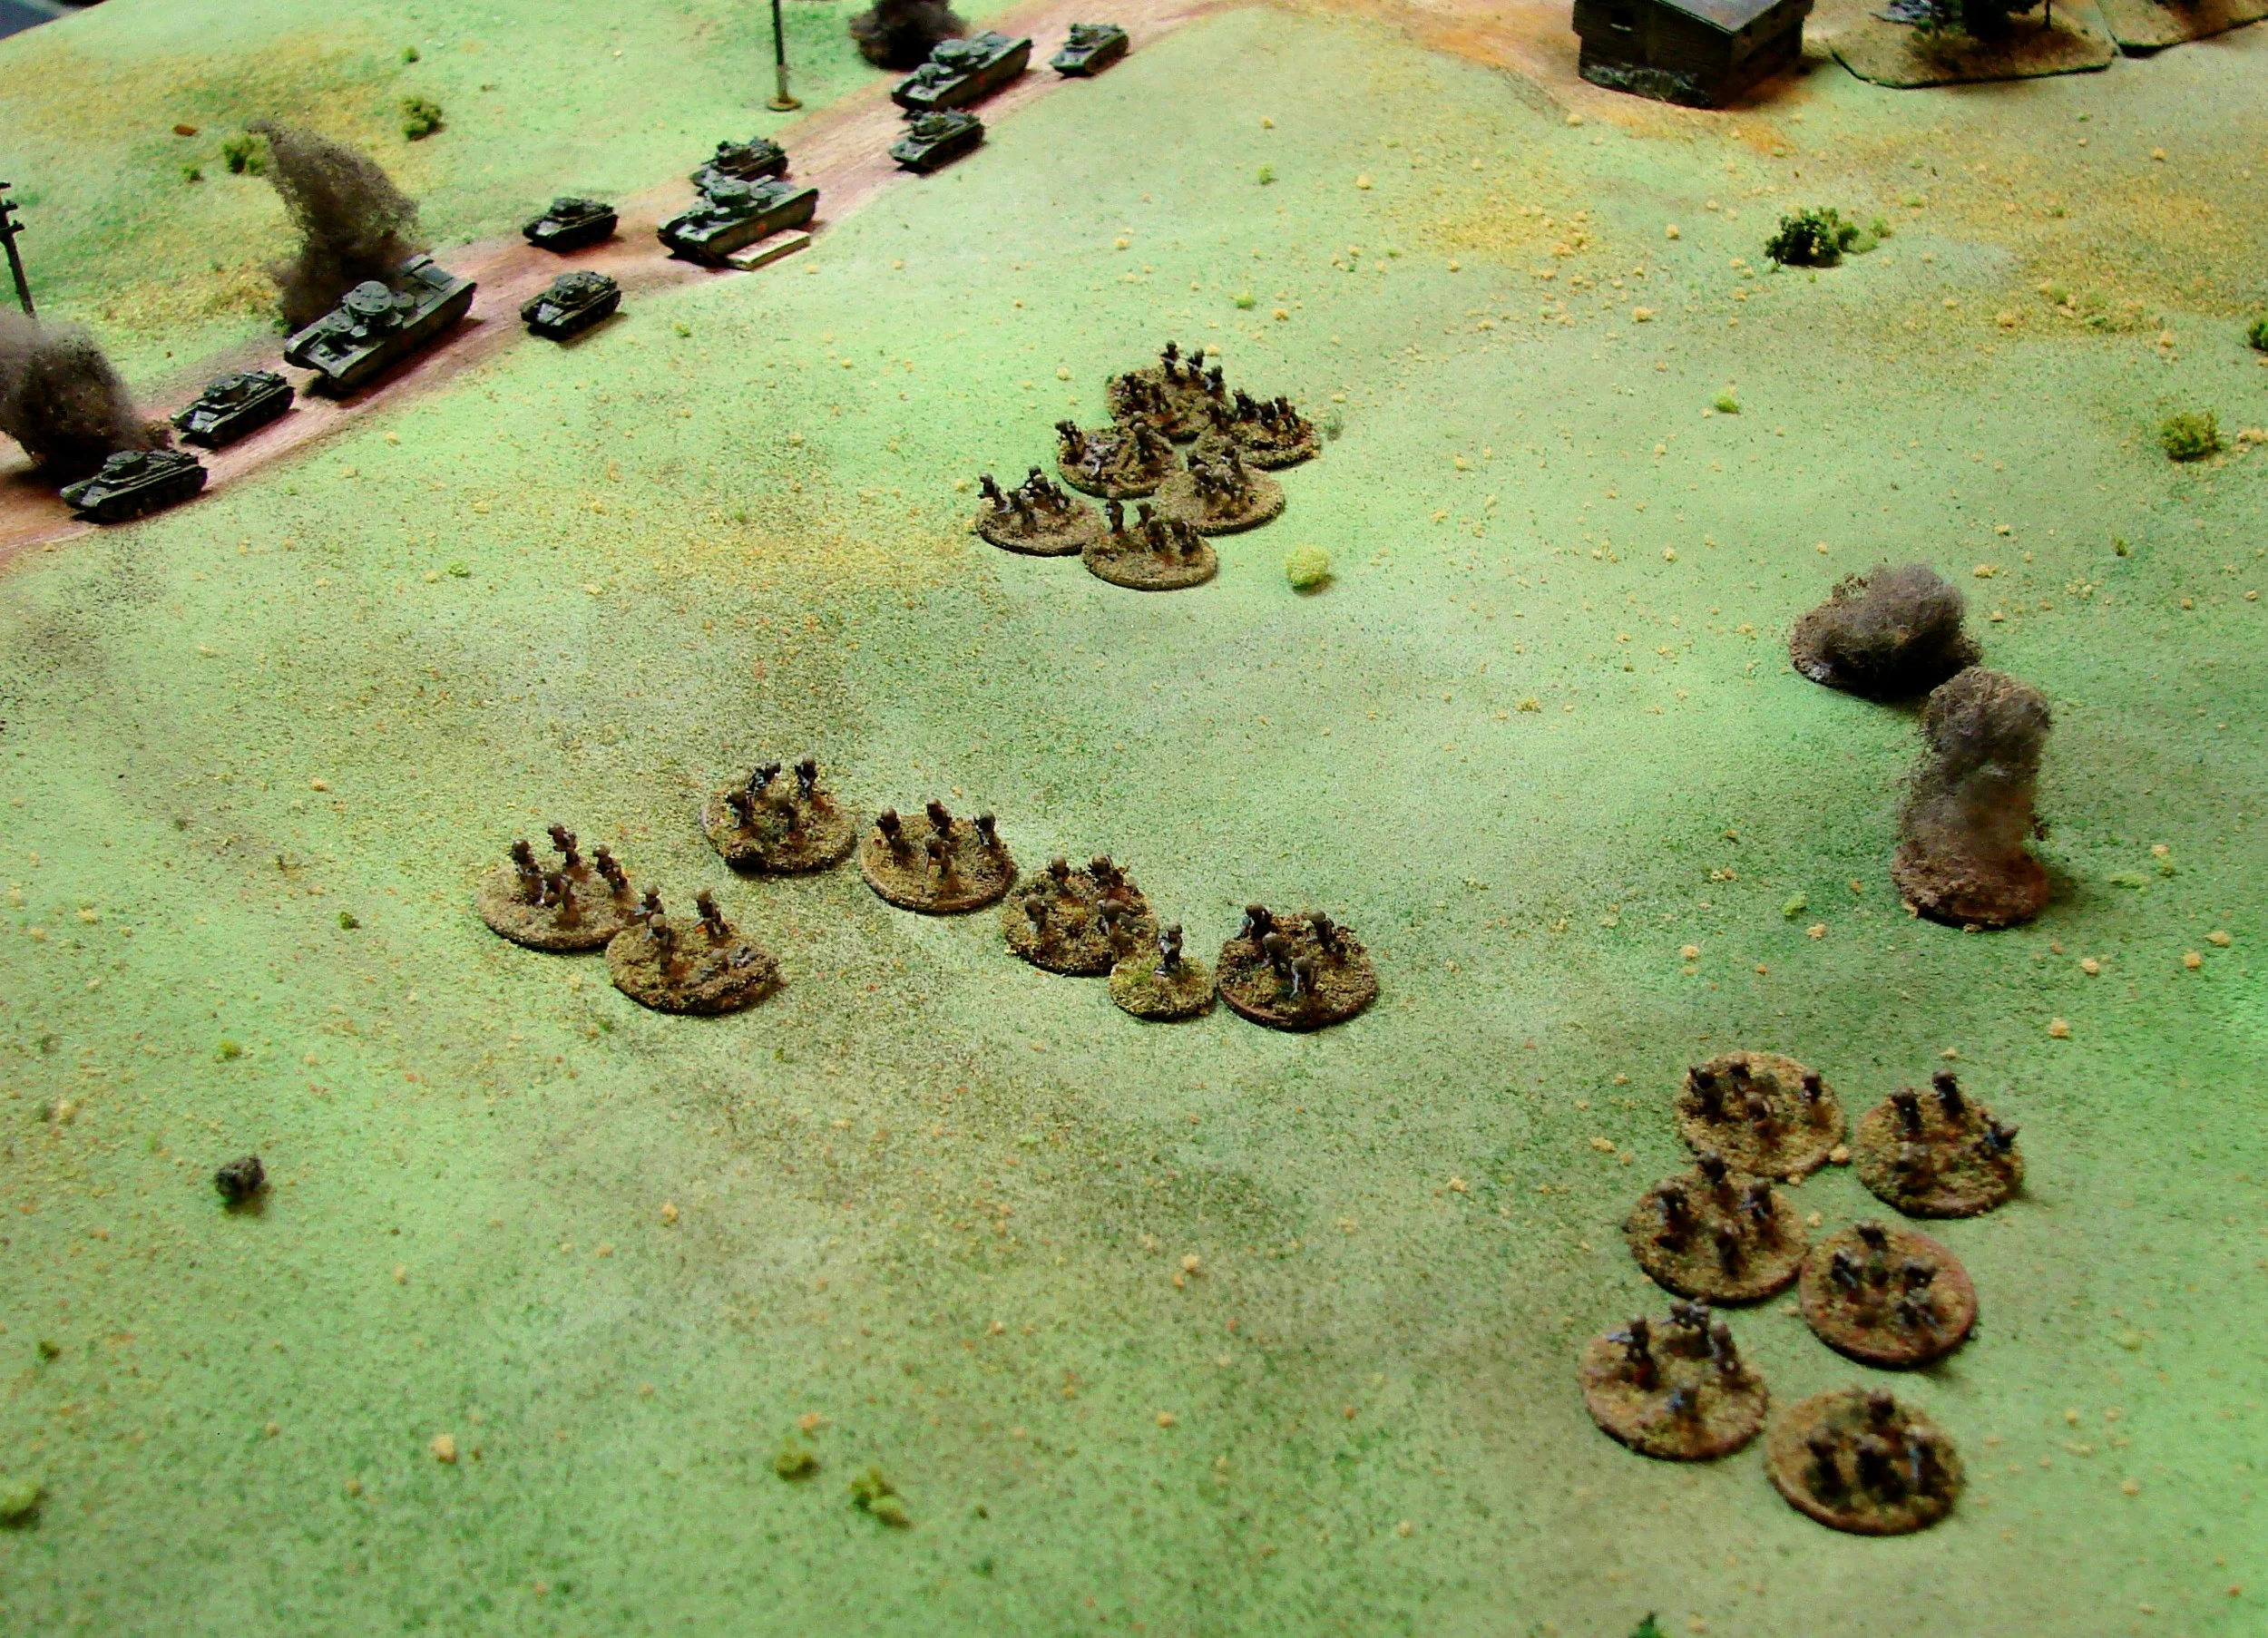
For the game the Soviets started with three T-35s(pretty much limited to clear or the road), mixed company of nine T-26s, an infantry company (only one lmg/platoon), a horse drawn 76mm Inf gun and two MMGs, some medium & light mortars. They had to get across the table.

The Germans defended with a battery of three Pak35s, a battery of three Pak38s, two MMG, two infantry platoons, an 88 (which had to be setup near a road) and an FO for some 105s. Reinforcements would be a platoon of two PzIVs and three PzIIIGs. The second wave of Russians would have a company of eight BT-7s and an infantry company.

 
The terrain was pretty flat and marshy between the two towns. Both sides had a lot of 'planes in the air that day. The Luftwaffe concentrated off-board so that was the cause for the delay and haphazard manner of Russian troop arrivals.

 
  Mainly flat & wet   The ground slopes up to the right. Terrain is mainly scrubby trees, bushes, and the wetlands with reeds. The Soviets are coming in from the left and the Germans are defending the higher ground on the right.

Mainly flat & wet

The ground slopes up to the right. Terrain is mainly scrubby trees, bushes, and the wetlands with reeds. The Soviets are coming in from the left and the Germans are defending the higher ground on the right.

  West at the top edge   The Germans assumed that the main threat would come down the road at the top of the table and deployed three Pak 35s & one grenadier platoon to cover that road with two Pak 38s further back on the rise in the woods. The r

West at the top edge

The Germans assumed that the main threat would come down the road at the top of the table and deployed three Pak 35s & one grenadier platoon to cover that road with two Pak 38s further back on the rise in the woods. The remaining 50mm covered the open ground. Another grenadier platoon was dug in on the railway to protect an 88 set up to cover the railway line and the open ground in the center.

  Those are big   The reason that I planned this game. Not too many actual engagements with these monsters. If they move off road there is a 1/3 chance of breaking down. The breakdown card is also in the deck. The Red Army had a huge number of tanks

Those are big

The reason that I planned this game. Not too many actual engagements with these monsters. If they move off road there is a 1/3 chance of breaking down. The breakdown card is also in the deck. The Red Army had a huge number of tanks but the vast majority of them were in pretty bad shape and had been around since the mid 30s.

  Those houses are coming closer   Well, at least they are a big target. These must have been pretty intimidating to the crew of a Pak35.

Those houses are coming closer

Well, at least they are a big target. These must have been pretty intimidating to the crew of a Pak35.

 Taking fire from the trees

Taking fire from the trees

  First air strike of the day   Both sides had a lot of planes over this area. The Germans start off with some Bf109Es attacking some Infantry moving through the bottom area.

First air strike of the day

Both sides had a lot of planes over this area. The Germans start off with some Bf109Es attacking some Infantry moving through the bottom area.

  Up the Slope   This was as far as the T35s would get. the first one takes several hits from a Pak35 and starts to burn The second tank is immobilsed and the crew only sticks around for a turn before they abandon ship. The third one gets a few shots

Up the Slope

This was as far as the T35s would get. the first one takes several hits from a Pak35 and starts to burn The second tank is immobilsed and the crew only sticks around for a turn before they abandon ship. The third one gets a few shots off towards the trees where the Pak 35 btty is before it also is blazing. They were fun while they lasted.

  Advance to the South   The Russians opted to send everything but the T35s across the low area in the center. The marshy & scrubby terrain tended to break up any attempt at cohesion so the infantry company was soon in three groups and the T26s w

Advance to the South

The Russians opted to send everything but the T35s across the low area in the center. The marshy & scrubby terrain tended to break up any attempt at cohesion so the infantry company was soon in three groups and the T26s were all over the place

  View from the 88   This gives a nice idea of the topography of the table. The railway was elevated as was most of the main road from Ptytscha. Otherwise just scattered clumps of brush a few trees and marshy ponds & streams. The 88 has already t

View from the 88

This gives a nice idea of the topography of the table. The railway was elevated as was most of the main road from Ptytscha. Otherwise just scattered clumps of brush a few trees and marshy ponds & streams. The 88 has already taken out a T26.

  Into the Trees   The rightmost grenadier squad is hosed by the Russian infantry but the rest of the platoon nows engages the Russkies and their lmgs start to take a toll of the advancing troops.

Into the Trees

The rightmost grenadier squad is hosed by the Russian infantry but the rest of the platoon nows engages the Russkies and their lmgs start to take a toll of the advancing troops.

  Burning after a Pak hit   The Pak 38 covering the center took out this T26. (Scotia models)

Burning after a Pak hit

The Pak 38 covering the center took out this T26. (Scotia models)

  More Burning Tanks   Odds are that any tank hit by a Pak 38 or 88 was going to be out of the game. But there were nine of the little fellers and lots of infantry  and just two guns pointing in this direction.

More Burning Tanks

Odds are that any tank hit by a Pak 38 or 88 was going to be out of the game. But there were nine of the little fellers and lots of infantry  and just two guns pointing in this direction.

  The Advance Continues   Most of the Russian infantry escaped being shot at by the grenadiers. They did take a few hits from the air though. (brown cards are unidentified Russian units)

The Advance Continues

Most of the Russian infantry escaped being shot at by the grenadiers. They did take a few hits from the air though. (brown cards are unidentified Russian units)

  Firefight Continues   The Pak 35 was manhandled out of the woods occupied by the Ivans. The veteran grenadiers with their lmgs soon got the best of the Red rifle squads.

Firefight Continues

The Pak 35 was manhandled out of the woods occupied by the Ivans. The veteran grenadiers with their lmgs soon got the best of the Red rifle squads.

  Firing as fast as they can   They had an abundance of targets. (GHQ 88 w/ Adler crew)

Firing as fast as they can

They had an abundance of targets. (GHQ 88 w/ Adler crew)

  Coming in for another run   Bf109E lining up on some T26s. Their presence really helped the defenders and slowed down the Russians.

Coming in for another run

Bf109E lining up on some T26s. Their presence really helped the defenders and slowed down the Russians.

  Yet another Red on Red   Aside from one off target strike on the 88, the SU2s only attacked their own troops. Fortunately, they were not very accurate aiming at their countrymen either.

Yet another Red on Red

Aside from one off target strike on the 88, the SU2s only attacked their own troops. Fortunately, they were not very accurate aiming at their countrymen either.

  More burning tanks   The 88 took out something everytime it had a chance. Some of the tanks fired back, but their mgs did very little damage.

More burning tanks

The 88 took out something everytime it had a chance. Some of the tanks fired back, but their mgs did very little damage.

  Wrong Target

Wrong Target

  Another strafing run   The 109Es made several runs over the table. This one is catching some horse drawn MMGs and infantry. (Navwar model- I really like the Raiden one).

Another strafing run

The 109Es made several runs over the table. This one is catching some horse drawn MMGs and infantry. (Navwar model- I really like the Raiden one).

  Not quite the promised land   Some Russian units (76mm Inf gun, an infantry platoon, the Company Commander and the Commissar) try to organize themselves after crossing the open ground and getting bombed by the VVS.

Not quite the promised land

Some Russian units (76mm Inf gun, an infantry platoon, the Company Commander and the Commissar) try to organize themselves after crossing the open ground and getting bombed by the VVS.

  Trying to work behind the Grenadiers   Most of a platoon following their CO heads up slope into some brush. A MMG team has just moved into place to cover that angle though.

Trying to work behind the Grenadiers

Most of a platoon following their CO heads up slope into some brush. A MMG team has just moved into place to cover that angle though.

  Follow the trail of hulks   Gaz trucks carrying some medium mortars negoatiate the bottom land and burning T26s on their way off board. (It might have been better to use the mortars to target some German defenders)

Follow the trail of hulks

Gaz trucks carrying some medium mortars negoatiate the bottom land and burning T26s on their way off board. (It might have been better to use the mortars to target some German defenders)

  Valley of Victims   The 88 managed to KO several T26s on their way across the table. The only one that was a real threat had engine damage and the crew bailed out when they got to cover.

Valley of Victims

The 88 managed to KO several T26s on their way across the table. The only one that was a real threat had engine damage and the crew bailed out when they got to cover.

  If they can see it they can hit it   I think this picture sums up why I like gaming in 6mm. It allows weapon systems to correspond closer to their actual capabilities. I really can't stand games where the barrel of a weapon is 100 yds in ground sca

If they can see it they can hit it

I think this picture sums up why I like gaming in 6mm. It allows weapon systems to correspond closer to their actual capabilities. I really can't stand games where the barrel of a weapon is 100 yds in ground scale. In 6mm, IABSM is almost 1 to 1 ground scale. Hitting things on the opposite corner of the table is nice. This also gives a good idea of the table terrain.

  Firefight in the trees   The two remaining grenadier squads manage to hold off the assualting Russians and kill their CO. The MMG and ATG behind the trees is firing off to their right.

Firefight in the trees

The two remaining grenadier squads manage to hold off the assualting Russians and kill their CO. The MMG and ATG behind the trees is firing off to their right.

  More Russians Stymied   After getting some scrub on the slope the two Russian squads are chewed up and their CO also killed by a MMG team.

More Russians Stymied

After getting some scrub on the slope the two Russian squads are chewed up and their CO also killed by a MMG team.

  Face off between Pak38 & T26   The Pak misses its first shot and the twin MG tank returns fire taking out half the crew, but the next shot blows the T26 up. The Red infantry in the trees will overrun the ATG in the next couple of turns.

Face off between Pak38 & T26

The Pak misses its first shot and the twin MG tank returns fire taking out half the crew, but the next shot blows the T26 up. The Red infantry in the trees will overrun the ATG in the next couple of turns.

  Friendly Fire   After running the gauntlet of Pak 38 and 88, the Soviets thought they had reached some cover. The I153s must have assumed that anything on this side of the table was German. No big casualties just some wounds & pinned results.

Friendly Fire

After running the gauntlet of Pak 38 and 88, the Soviets thought they had reached some cover. The I153s must have assumed that anything on this side of the table was German. No big casualties just some wounds & pinned results.

  Panzers to the rescue   Most of the armor was attacking back to the west when this breakout attempt was discovered. This mixed platoon of two PzIVs and three PzIIIs was called back to help out with the defense.

Panzers to the rescue

Most of the armor was attacking back to the west when this breakout attempt was discovered. This mixed platoon of two PzIVs and three PzIIIs was called back to help out with the defense.

  Second wave   A follow-up company of BT-7s and infantry finally makes it on to the table. Probably not too happy to see the smoking T35s in front of their advance.

Second wave

A follow-up company of BT-7s and infantry finally makes it on to the table. Probably not too happy to see the smoking T35s in front of their advance.

  Final showdown coming   Both the Panzers and the second wave of Reds show up at the same time (neither sides' Blind cards came up for several turns).

Final showdown coming

Both the Panzers and the second wave of Reds show up at the same time (neither sides' Blind cards came up for several turns).

  Some nice new targets   Probably the reason for the delay in getting on table was getting blasted by the Luftwaffe. On this pass, the Me-110 manages to unload a couple of bombs that miss everything.

Some nice new targets

Probably the reason for the delay in getting on table was getting blasted by the Luftwaffe. On this pass, the Me-110 manages to unload a couple of bombs that miss everything.

  Into the open   Heading toward the sound of small arms!

Into the open

Heading toward the sound of small arms!

  New threat emerges   By this time the grenadiers in the woods are feeling a little overwhelmed. They've held off one platoon that got right next to them, & another platoon that tries to get behind them.

New threat emerges

By this time the grenadiers in the woods are feeling a little overwhelmed. They've held off one platoon that got right next to them, & another platoon that tries to get behind them.

  Looks like a head on clash coming   As the BT-7s weave between the burning and/or abandoned T-35s, the Panzers head towrds the smoking hulks. The first exchanges immobilze a Pz III and KOs a couple of BT-7s.

Looks like a head on clash coming

As the BT-7s weave between the burning and/or abandoned T-35s, the Panzers head towrds the smoking hulks. The first exchanges immobilze a Pz III and KOs a couple of BT-7s.

  Action in the center   The grenadier platoon guarding the RR catches up to the tail of the Soviets-a couple of horse drawn MMgs and some trucks carrying mortars. The MMGs ahd deployed using the cover of burning T-26s to give some fire support to th

Action in the center

The grenadier platoon guarding the RR catches up to the tail of the Soviets-a couple of horse drawn MMgs and some trucks carrying mortars. The MMGs ahd deployed using the cover of burning T-26s to give some fire support to the units moving up slope. They weren't expecting to be attacked from this direction.

  Better late than never   The grenadier platoon spent most of the game watching Russians heading across their left flank. They were reluctant to leave their positions because they knew there had to be something that was going to use the road/RR rout

Better late than never

The grenadier platoon spent most of the game watching Russians heading across their left flank. They were reluctant to leave their positions because they knew there had to be something that was going to use the road/RR route. Alas, nothing ever appeared so they headed out to try to catch the groups coming through the flat area. They manage to take out the MMGs and then start to chew up the Russkies that made it into the trees at the south edge of the table.

  Face off on the road   The 2 lead tanks in ech column get off some shots and the Pak35 in the woods also hits a BT7. End result is 2 KO'ed BTs, one immobilised PzIII and another PzIII forced to retire

Face off on the road

The 2 lead tanks in ech column get off some shots and the Pak35 in the woods also hits a BT7. End result is 2 KO'ed BTs, one immobilised PzIII and another PzIII forced to retire

  Red infantry starts to spread out   They avoid a few 88mm shells thrown their way for the most part and start to take some fire as they move up slope. It wil be hard for one Big Man to keep this unit moving once they start taking hits.

Red infantry starts to spread out

They avoid a few 88mm shells thrown their way for the most part and start to take some fire as they move up slope. It wil be hard for one Big Man to keep this unit moving once they start taking hits.

  Actually going after the right targets this time   One of the I153s strafes the Panzers, but does no damages with its mgs. (Hope it can pull out of that dive)

Actually going after the right targets this time

One of the I153s strafes the Panzers, but does no damages with its mgs. (Hope it can pull out of that dive)

  Infantry in the open   Hard to resist this mass. The Me-110 manages to pin a whole bunch of Ivans.

Infantry in the open

Hard to resist this mass. The Me-110 manages to pin a whole bunch of Ivans.

  Can't outrun the Luftwaffe   The remaining BT7s decide to go to the right and use the cover of the slope to avoid the Panzers they know are on the ridge. But the ever present air support stills catches the tanks and forces another to bail.

Can't outrun the Luftwaffe

The remaining BT7s decide to go to the right and use the cover of the slope to avoid the Panzers they know are on the ridge. But the ever present air support stills catches the tanks and forces another to bail.

  Russkies going full tilt   This is probably the high water mark for the Soviets.

Russkies going full tilt

This is probably the high water mark for the Soviets.

  Targets for the Pak38   This ATG has been waiting patiently the entire game for something to come into view and finally gets a shot. Notice the lone PzIII that was forced to retire last turn

Targets for the Pak38

This ATG has been waiting patiently the entire game for something to come into view and finally gets a shot. Notice the lone PzIII that was forced to retire last turn

  Another look at the Soviet attack   The Panzers went right and encounter infantry coming up the slope. The PzIII that was heading to the rear spots the flanking BTs and alerts its comrades who manage to move to cover the flank next turn.

Another look at the Soviet attack

The Panzers went right and encounter infantry coming up the slope. The PzIII that was heading to the rear spots the flanking BTs and alerts its comrades who manage to move to cover the flank next turn.

  Not expecting to see each other   Panzers were hunting for Russian tanks and Red inf surprised to run into the MkIV.

Not expecting to see each other

Panzers were hunting for Russian tanks and Red inf surprised to run into the MkIV.

  One more run by a 110   The twin 20mm managed to damage one of the BTs(turret jam) causing the crew to bail.

One more run by a 110

The twin 20mm managed to damage one of the BTs(turret jam) causing the crew to bail.

  Another view of the front   Can the BT7s make it around the flank? Will the Russkies overwhelm the grenadiers?

Another view of the front

Can the BT7s make it around the flank? Will the Russkies overwhelm the grenadiers?

  Still lots of Ivans   The left platoon is pretty well chewed up, requiring some attention by the CO, but the other 2 pla are really only getting stymied by the Panzers. 105 ranging round looks pretty darn close to the Germans

Still lots of Ivans

The left platoon is pretty well chewed up, requiring some attention by the CO, but the other 2 pla are really only getting stymied by the Panzers. 105 ranging round looks pretty darn close to the Germans

  Time for the Grenadiers to run   The German 105s start to arrive, (also hitting some Germans). The survivors will have to hope their Panzer comrades can cover their retreat. Only one Big Man in the 2nd Russian coy will make it hard to keep the Russ

Time for the Grenadiers to run

The German 105s start to arrive, (also hitting some Germans). The survivors will have to hope their Panzer comrades can cover their retreat. Only one Big Man in the 2nd Russian coy will make it hard to keep the Russkies moving in the face of the tanks and arty.

  Out of Russian tanks & German Inf   The remaining BT7 looks kinda lonely there. At this point the German artillery is coming down, The 2nd Russian inf coy is getting pinned by the arty and panzers and the grenadiers are hoping to sneak out, so

Out of Russian tanks & German Inf

The remaining BT7 looks kinda lonely there. At this point the German artillery is coming down, The 2nd Russian inf coy is getting pinned by the arty and panzers and the grenadiers are hoping to sneak out, so we decided to call it quits

1 2 3 4 5 6 7 8 9 10 11 12 13 14 15 16 17 18 19 20 21 22 23 24 25 26 27 28 29 30 31 32 33 34 35 36 37 38 39 40 41 42 43 44 45 46 47 48 49 50 51 52
Previous Next
  Mainly flat & wet   The ground slopes up to the right. Terrain is mainly scrubby trees, bushes, and the wetlands with reeds. The Soviets are coming in from the left and the Germans are defending the higher ground on the right.
  West at the top edge   The Germans assumed that the main threat would come down the road at the top of the table and deployed three Pak 35s & one grenadier platoon to cover that road with two Pak 38s further back on the rise in the woods. The r
  Those are big   The reason that I planned this game. Not too many actual engagements with these monsters. If they move off road there is a 1/3 chance of breaking down. The breakdown card is also in the deck. The Red Army had a huge number of tanks
  Those houses are coming closer   Well, at least they are a big target. These must have been pretty intimidating to the crew of a Pak35.
 Taking fire from the trees
  First air strike of the day   Both sides had a lot of planes over this area. The Germans start off with some Bf109Es attacking some Infantry moving through the bottom area.
  Up the Slope   This was as far as the T35s would get. the first one takes several hits from a Pak35 and starts to burn The second tank is immobilsed and the crew only sticks around for a turn before they abandon ship. The third one gets a few shots
  Advance to the South   The Russians opted to send everything but the T35s across the low area in the center. The marshy & scrubby terrain tended to break up any attempt at cohesion so the infantry company was soon in three groups and the T26s w
  View from the 88   This gives a nice idea of the topography of the table. The railway was elevated as was most of the main road from Ptytscha. Otherwise just scattered clumps of brush a few trees and marshy ponds & streams. The 88 has already t
  Into the Trees   The rightmost grenadier squad is hosed by the Russian infantry but the rest of the platoon nows engages the Russkies and their lmgs start to take a toll of the advancing troops.
  Burning after a Pak hit   The Pak 38 covering the center took out this T26. (Scotia models)
  More Burning Tanks   Odds are that any tank hit by a Pak 38 or 88 was going to be out of the game. But there were nine of the little fellers and lots of infantry  and just two guns pointing in this direction.
  The Advance Continues   Most of the Russian infantry escaped being shot at by the grenadiers. They did take a few hits from the air though. (brown cards are unidentified Russian units)
  Firefight Continues   The Pak 35 was manhandled out of the woods occupied by the Ivans. The veteran grenadiers with their lmgs soon got the best of the Red rifle squads.
  Firing as fast as they can   They had an abundance of targets. (GHQ 88 w/ Adler crew)
  Coming in for another run   Bf109E lining up on some T26s. Their presence really helped the defenders and slowed down the Russians.
  Yet another Red on Red   Aside from one off target strike on the 88, the SU2s only attacked their own troops. Fortunately, they were not very accurate aiming at their countrymen either.
  More burning tanks   The 88 took out something everytime it had a chance. Some of the tanks fired back, but their mgs did very little damage.
  Wrong Target
  Another strafing run   The 109Es made several runs over the table. This one is catching some horse drawn MMGs and infantry. (Navwar model- I really like the Raiden one).
  Not quite the promised land   Some Russian units (76mm Inf gun, an infantry platoon, the Company Commander and the Commissar) try to organize themselves after crossing the open ground and getting bombed by the VVS.
  Trying to work behind the Grenadiers   Most of a platoon following their CO heads up slope into some brush. A MMG team has just moved into place to cover that angle though.
  Follow the trail of hulks   Gaz trucks carrying some medium mortars negoatiate the bottom land and burning T26s on their way off board. (It might have been better to use the mortars to target some German defenders)
  Valley of Victims   The 88 managed to KO several T26s on their way across the table. The only one that was a real threat had engine damage and the crew bailed out when they got to cover.
  If they can see it they can hit it   I think this picture sums up why I like gaming in 6mm. It allows weapon systems to correspond closer to their actual capabilities. I really can't stand games where the barrel of a weapon is 100 yds in ground sca
  Firefight in the trees   The two remaining grenadier squads manage to hold off the assualting Russians and kill their CO. The MMG and ATG behind the trees is firing off to their right.
  More Russians Stymied   After getting some scrub on the slope the two Russian squads are chewed up and their CO also killed by a MMG team.
  Face off between Pak38 & T26   The Pak misses its first shot and the twin MG tank returns fire taking out half the crew, but the next shot blows the T26 up. The Red infantry in the trees will overrun the ATG in the next couple of turns.
  Friendly Fire   After running the gauntlet of Pak 38 and 88, the Soviets thought they had reached some cover. The I153s must have assumed that anything on this side of the table was German. No big casualties just some wounds & pinned results.
  Panzers to the rescue   Most of the armor was attacking back to the west when this breakout attempt was discovered. This mixed platoon of two PzIVs and three PzIIIs was called back to help out with the defense.
  Second wave   A follow-up company of BT-7s and infantry finally makes it on to the table. Probably not too happy to see the smoking T35s in front of their advance.
  Final showdown coming   Both the Panzers and the second wave of Reds show up at the same time (neither sides' Blind cards came up for several turns).
  Some nice new targets   Probably the reason for the delay in getting on table was getting blasted by the Luftwaffe. On this pass, the Me-110 manages to unload a couple of bombs that miss everything.
  Into the open   Heading toward the sound of small arms!
  New threat emerges   By this time the grenadiers in the woods are feeling a little overwhelmed. They've held off one platoon that got right next to them, & another platoon that tries to get behind them.
  Looks like a head on clash coming   As the BT-7s weave between the burning and/or abandoned T-35s, the Panzers head towrds the smoking hulks. The first exchanges immobilze a Pz III and KOs a couple of BT-7s.
  Action in the center   The grenadier platoon guarding the RR catches up to the tail of the Soviets-a couple of horse drawn MMgs and some trucks carrying mortars. The MMGs ahd deployed using the cover of burning T-26s to give some fire support to th
  Better late than never   The grenadier platoon spent most of the game watching Russians heading across their left flank. They were reluctant to leave their positions because they knew there had to be something that was going to use the road/RR rout
  Face off on the road   The 2 lead tanks in ech column get off some shots and the Pak35 in the woods also hits a BT7. End result is 2 KO'ed BTs, one immobilised PzIII and another PzIII forced to retire
  Red infantry starts to spread out   They avoid a few 88mm shells thrown their way for the most part and start to take some fire as they move up slope. It wil be hard for one Big Man to keep this unit moving once they start taking hits.
  Actually going after the right targets this time   One of the I153s strafes the Panzers, but does no damages with its mgs. (Hope it can pull out of that dive)
  Infantry in the open   Hard to resist this mass. The Me-110 manages to pin a whole bunch of Ivans.
  Can't outrun the Luftwaffe   The remaining BT7s decide to go to the right and use the cover of the slope to avoid the Panzers they know are on the ridge. But the ever present air support stills catches the tanks and forces another to bail.
  Russkies going full tilt   This is probably the high water mark for the Soviets.
  Targets for the Pak38   This ATG has been waiting patiently the entire game for something to come into view and finally gets a shot. Notice the lone PzIII that was forced to retire last turn
  Another look at the Soviet attack   The Panzers went right and encounter infantry coming up the slope. The PzIII that was heading to the rear spots the flanking BTs and alerts its comrades who manage to move to cover the flank next turn.
  Not expecting to see each other   Panzers were hunting for Russian tanks and Red inf surprised to run into the MkIV.
  One more run by a 110   The twin 20mm managed to damage one of the BTs(turret jam) causing the crew to bail.
  Another view of the front   Can the BT7s make it around the flank? Will the Russkies overwhelm the grenadiers?
  Still lots of Ivans   The left platoon is pretty well chewed up, requiring some attention by the CO, but the other 2 pla are really only getting stymied by the Panzers. 105 ranging round looks pretty darn close to the Germans
  Time for the Grenadiers to run   The German 105s start to arrive, (also hitting some Germans). The survivors will have to hope their Panzer comrades can cover their retreat. Only one Big Man in the 2nd Russian coy will make it hard to keep the Russ
  Out of Russian tanks & German Inf   The remaining BT7 looks kinda lonely there. At this point the German artillery is coming down, The 2nd Russian inf coy is getting pinned by the arty and panzers and the grenadiers are hoping to sneak out, so
BACK