Vis Lardica
  • New & Updated
  • Introduction & Details Scorecard 2025 Gallery: Burt, Steve Gallery: Cooper, Nick Gallery: Douglas, Mervyn Gallery: Emmett, John Gallery: Flint, Carole Gallery: Helliwell, Andrew Gallery: Luther, Mark Gallery: Plowman, Ralph Gallery: Sapper Gallery: Stumpy Gallery: Vis Bellica
  • Introduction to IABSM Video: How To Play IABSM, Part One Video: How to Play IABSM, Part Two Video: How to Play IABSM, Part Three After Action Reports (IABSM) Army Galleries (IABSM) Buy IABSM Scenario Packs Buy IABSM Theatre Supplements Figure Manufacturers (IABSM) Figure Reviews (IABSM) Game Aids (IABSM) IABSM Facebook Group
  • Introduction to CDS After Action Reports (CDS) Army Galleries (CDS) The Arab-Israeli Six Day War The Arab-Israeli Yom Kippur War After Action Reports (Arab-Israeli Wars) Army Galleries (Arab-Israeli Wars) After Action Reports (Moderns)
  • Introduction to Q13 After Action Reports (Q13) Army Galleries (Q13) Army Lists for Q13 Buy Q13 and/or Five Planets Figure Manufacturers (Q13) Figure Reviews (Q13) Points System Spreadsheets
  • Introduction to 19th Century Army Galleries (19th Century) Army Lists After Action Reports Articles & Essays Quick Guide to the Wars of the 19th Century
  • Introduction and AAR FK&P: The Eastern Front
  • Introduction to Vis Bellica The Rules: Amendments The Rules: Frequently Asked Questions The Rules: Optional Rules After Action Reports (Vis Bellica) Army Lists Articles about Vis Bellica Scenarios for Vis Bellica Other After Action Reports: WRG 6th Other After Action Reports: TTS
  • The Rules: Optional Rules After Action Reports
  • Scorecard 2024 Gallery: Burt, Steve Gallery: Cooper, Nick Gallery: Darkin, Des Gallery: Davenport, Jonathan Gallery: Douglas, Mervyn Gallery: Emmett. John Gallery: Flint, Carole Gallery: Helliwell, Andrew Gallery: Kay, Chris Gallery: Luther, Mark Gallery: Plowman, Ralph Gallery: Sapper Gallery: Scott, David Gallery: Slade, Matt Gallery: Stumpy Gallery: Vis Bellica
  • Scorecard 2023 Gallery: Bowler, Lloyd Gallery: Burt, Steve Gallery: Cooper, Nick Gallery: Douglas, Mervyn Gallery: Emmett, John Gallery: Flint, Carole Gallery: Helliwell, Andrew Gallery: Hodge, Derek Gallery: Kay, Chris Gallery: Luther, Mark Gallery: Plowman, Ralph Gallery: Pollard, Ashley Gallery: Sapper Gallery: Scott, David Gallery: Slade, Matt Gallery: Stumpy Gallery: Vis Bellica
  • Scorecard 2022 Gallery: Bowler, Lloyd Gallery: Burt, Steve Gallery: Cooper, Nick Gallery: Douglas, Mervyn Gallery: Emmett, John Gallery: Flint, Carole Gallery: Goodrick, Pete Gallery: Haines, John Gallery: Helliwell, Andrew Gallery: Hodge, Derek Gallery: Kay, Chris Gallery: Luther, Mark Gallery: Plowman, Ralph Gallery: Pollard, Ashley Gallery: Sapper Gallery: Scott, David Gallery: Slade, Matt Gallery: Stumpy Gallery: Vis Bellica
  • Scorecard 2021 Gallery: Anzani, Joe Gallery: Bowler, Lloyd Gallery: Burt, Steve Gallery: Cooper, Nick Gallery: Douglas, Mervyn Gallery: Duffell, Andy Gallery: Emmett, John Gallery: Flint, Carole Gallery: Haines, John Gallery: Helliwell, Andrew Gallery: Hiett, Travis Gallery: Hodge, Derek Gallery: Kay, Chris Gallery: Luther, Mark Gallery: McGinn, Joe Gallery: Melville, Doug Gallery: Plowman, Ralph Gallery: Pollard, Ashley Gallery: Ralls, Jason Gallery: Sapper Gallery: Scott, David Gallery: Slade, Matt Gallery: Stoesen, Chris Gallery: Stumpy Gallery: Vis Bellica
  • Scorecard 2020 Gallery: Bloggs, Fred Gallery: Bluemoose Ken Gallery: Bowler, Lloyd Gallery: Burt, Steve Gallery: Cornwell, Chris Gallery: Douglas, Mervyn Gallery: Duffell, Andy Gallery: Emmett, John Gallery: Flint, Carole Gallery: Haines, John Gallery: Helliwell, Andrew Gallery: Hiatt, Travis Gallery: Hodge, Derek Gallery: Hooge, Neil Gallery: Kay, Chris Gallery: Luther, Mark Gallery: McGinn, Joe Gallery: Melville, Doug Gallery: Plowman, Ralph Gallery: Pollard, Ashley Gallery: Ralls, Jason Gallery: Sapper Gallery: Scott, David Gallery: Slade, Matt Gallery: Stoesen, Chris Gallery: Stumpy Gallery: Vis Bellica
  • Scorecard 2019 Gallery: Bloggs, Fred Gallery: Blue Moose Ken Gallery: Bowen, Ed Gallery: Bowler, Lloyd Gallery: Burt, Steve Gallery: Clarke, Richard Gallery: Cornwell, Chris Gallery: Davenport, Jon Gallery: Douglas, Mervyn Gallery: Duffell, Andy Gallery: de Terre Neuve, John Gallery: Emmett, John Gallery: Fat Wally Gallery: Flint, Carole Gallery: Haines, John Gallery: Helliwell, Andrew Gallery: Hiett, Travis Gallery: Hodge, Derek Gallery: Hooge, Neil Gallery: Johnston, Owen Gallery: Kay, Chris Gallery: Luther, Mark Gallery: McGinn, Joe Gallery: Melville, Doug Gallery: Plowman, Ralph Gallery: Ralls, Jason Gallery: Sapper Gallery: Scott, David Gallery: Slade, Matt Gallery: Stoesen, Chris Gallery: Stumpy Gallery: Vis Bellica Gallery: Yuengling, Jon
  • Scorecard 2018 Gallery: Bloggs, Fred Gallery: Blue Moose Ken Gallery: Bowen, Ed Gallery: Bowler, Lloyd Gallery: Burt, Steve Gallery: Cornwell, Chris Gallery: Davenport, Jonathan Gallery: de Terre Neuve, John Gallery: Douglas, Mervyn Gallery: Duffell, Andy Gallery: Fat Wally Gallery: Flint, Carole Gallery: Freerange Egg Gallery: Haines, John Gallery: Helliwell, Andrew Gallery: Hiett, Travis Gallery: Hodge, Derek Gallery: Hooge, Neil Gallery: Johnston, Owen Gallery: Kay, Chris Gallery: Lampon, Steven Gallery: Luther, Mark Gallery: McGinn, Joe Gallery: Melville, Doug Gallery: Plowman, Ralph Gallery: Ralls, Jason Gallery: Sapper Gallery: Scott, David Gallery: Slade, Matt Gallery: Stoesen, Chris Gallery: Stumpy Gallery: Treadhead Gallery: Vis Bellica Gallery: Yuengling, Jon
  • Scorecard Gallery: Bond, Geoff Gallery: Bowen, Edward Gallery: Bowler, Lloyd Gallery: Burt, Steve Gallery: Cabey Cabey Gallery: Catchpole, Jim Gallery: Davenport, Jon Gallery: Davies, Keith Gallery: de Smedt, Kohn Gallery: de Terre Neuve, John Gallery: Douglas, Mervyn Gallery: Duffell, Andy Gallery: Fat Wally (Kev) Gallery: Flint, Carole Gallery: Freerange Egg Gallery: Gatzemeyer, Garrett Gallery: Gilbride, Chris Gallery: Haines, John Gallery: Helliwell, Andrew Gallery: Hodge, Derek Gallery: Hooge, Neil Gallery: Humm, Dave Gallery: Kay, Chris Gallery: Lampon, Steven Gallery: Luther, Mark Gallery: MacNeill, Craig Gallery: McCarthy, Andrew Gallery: The Mad Padre Gallery: McGinn, Joe Gallery: Melville, Doug Gallery: Naylor, Richard Gallery: Nissvik, Thomas Gallery: Old Pivot Gallery: Owen Gallery: Pollard, Ashley Gallery: Plowman, Ralph Gallery: Ralls, Jason Gallery: Sapper Gallery: Scott, David Gallery: Slade, Matt Gallery: Stoesen, Chris Gallery: Stumpy Gallery: Treadhead Gallery: Vis Bellica Gallery: Weathersby, Brian Gallery: WillieB Gallery: Yuengling, Jon
  • Scorecard 2016 Gallery: Baldwin, Paul Gallery: Blankenship, Paul Gallery: Bloggs, Fred Gallery: Bond, Geoff Gallery: Bowen, Ed Gallery: Bowler, Lloyd Gallery: Burt, Steve Gallery: Catchpole, Jim Gallery: Clarke, Richard Gallery: Davenport, Jon Gallery: Davies, Keith Gallery: de Smedt, Koen Gallery: Douglas, Mervyn Gallery: Duffell, Andy Gallery: Egg Gallery: Fitch, Doug Gallery: Flint, Carole Gallery: Gatzemeyer, Garrett Gallery: Gilbride, Chris Gallery: Helliwell, Andrew Gallery: Hodge, Derek Gallery: Hooge, Neil Gallery: Humm, Dave Gallery: I Am Bruce Gallery: Lowth, Kev (Fat Wally) Gallery: Luther, Mark Gallery: The Mad Padre Gallery: McCarthy, Andrew Gallery: Melville, Doug Gallery: Naylor, Richard Gallery: Nissvik, Thomas Gallery: Oracle Gallery: Owen Gallery: Plowman, Ralph Gallery: Pollard, Ashley Gallery: Ralls, Jason Gallery: Sapper Gallery: Slade, Matt Gallery: Stoesen, Chris Gallery: Stumpy Gallery: Treadhead Gallery: Vis Bellica Gallery: Willie B Gallery: Yuengling, Jon
  • Scorecard 2015 Gallery: AJH Gallery: Bairos, Vidal Gallery: Baldwin, Paul Gallery: Bax, Dick Gallery: Blankenship, Paul Gallery: Bloggs, Fred Gallery: Bond, Geoff Bond Gallery: Bowler, Hat Gallery: Burt, Steve Gallery: Corbett, Wulf Gallery: Danziger, Richard Gallery: Davies, Keith Gallery: de Smedt, Koen Gallery: de terre neuve, john Gallery: Douglas, Mervyn Gallery: Duffell, Andy Gallery: Egg, Freerange Gallery: Eggman Glass Gallery: Eriksson, Leif Gallery: Fat Wally Gallery: Flint, Carole Gallery: Gilbride, Chris Gallery: Hedglin, Nils Gallery: Helliwell, Andy Gallery: Hodge, Derek Gallery: Hooooge, Neil Gallery: Humm, Dave Gallery: I'm Bruce Gallery: Luther, Mark Gallery: The Mad Padre Gallery: Maerk Gallery: McCarthy, Andrew Gallery: Melville, Doug Gallery: Miller, Andrew Gallery: Miller, Steve Gallery: Milne, Neil Gallery: Mikkola, Topi Gallery: Mr Nouveau Gallery: Naylor, Richard Gallery: Nissvik, Thomas Gallery: Owen Gallery: Pedivere Gallery: Pingu Gallery: Pollard, Ashley Gallery: Plowman, Ralph Gallery: Ralls, Jason Gallery: Sapper Gallery: Skelton, Dom Gallery: Slade, Matt Gallery: Stapells, Tony Gallery: Stoesen, Chris Gallery: Strom, Joakim Gallery: Stumpy Gallery: Topyob Gallery: Treadhead Gallery: Vera, Benito Gallery: Vis Bellica Gallery: Willie B Gallery: Yuengling, Jon Gallery: Catchpole, Jim
  • Scorecard Gallery: Alexandros Gallery: Ambler, Craig Gallery: Armstrong, Keith Gallery: Bailey, Dave Gallery: Bairos, Vidal Gallery: Bax, Dick Gallery: Bloggs, Fred Gallery: Bond, Geoff Gallery: Burt, Steve Gallery: Carnegie, Ron Gallery: Carole Gallery: Catchpole, Jim Gallery: Clarke, Richard Gallery: Corbett, Wulf Gallery: Danziger, Richard Gallery: De Smedt, Koen Gallery: de Terre Neuve, John Gallery: Deeks, Jon Gallery: Douglas, Mervyn Gallery: Duffell, Andy Gallery: Egg, Free Range Gallery: Erikson, Leif Gallery: Fat Wally (Kev) Gallery: Fiene, Ben Gallery: Gilbride, Chris Gallery: Hodge, Derek Gallery: Humm, Dave Gallery: Llano, Manuel Gallery: Luther, Mark Gallery: Melville, Doug Gallery: Mikkola, Topi Gallery: Miller, Andrew Gallery: munsterfan8 Gallery: Murray, Jim Gallery: Nissvik, Thomas Gallery: Owen Gallery: The Mad Padre Gallery: PatG Gallery: Pingu Gallery: Plowman, Ralph Gallery: Pollard, Ashley Gallery: Ralls, Jason Gallery: Slade, Matt Gallery: Stoesen, Chris Gallery: Strom, Joakim Gallery: Stumpy Gallery: Thomas, John Gallery: Treadhead Gallery: Vera, Benito Gallery: Vis Bellica Gallery: Warrior in the Attic Gallery: Weir, Jim Gallery: Whitaker, Mike Gallery: WillieB Gallery: Yuengling, Jon
  • TooFatLardies
Vis Lardica
  • New & Updated/
  • TFL Painting Challenge 2025/
    • Introduction & Details
    • Scorecard 2025
    • Gallery: Burt, Steve
    • Gallery: Cooper, Nick
    • Gallery: Douglas, Mervyn
    • Gallery: Emmett, John
    • Gallery: Flint, Carole
    • Gallery: Helliwell, Andrew
    • Gallery: Luther, Mark
    • Gallery: Plowman, Ralph
    • Gallery: Sapper
    • Gallery: Stumpy
    • Gallery: Vis Bellica
  • I Ain't Been Shot, Mum! (WW2)/
    • Introduction to IABSM
    • Video: How To Play IABSM, Part One
    • Video: How to Play IABSM, Part Two
    • Video: How to Play IABSM, Part Three
    • After Action Reports (IABSM)
    • Army Galleries (IABSM)
    • Buy IABSM Scenario Packs
    • Buy IABSM Theatre Supplements
    • Figure Manufacturers (IABSM)
    • Figure Reviews (IABSM)
    • Game Aids (IABSM)
    • IABSM Facebook Group
  • Charlie Don't Surf! (Vietnam/Arab-Israeli/Moderns)/
    • Introduction to CDS
    • After Action Reports (CDS)
    • Army Galleries (CDS)
    • The Arab-Israeli Six Day War
    • The Arab-Israeli Yom Kippur War
    • After Action Reports (Arab-Israeli Wars)
    • Army Galleries (Arab-Israeli Wars)
    • After Action Reports (Moderns)
  • Quadrant 13 (Sci-Fi)/
    • Introduction to Q13
    • After Action Reports (Q13)
    • Army Galleries (Q13)
    • Army Lists for Q13
    • Buy Q13 and/or Five Planets
    • Figure Manufacturers (Q13)
    • Figure Reviews (Q13)
    • Points System Spreadsheets
  • Vis Imperica (19th Century)/
    • Introduction to 19th Century
    • Army Galleries (19th Century)
    • Army Lists
    • After Action Reports
    • Articles & Essays
    • Quick Guide to the Wars of the 19th Century
  • Vis Lucii (Pike & Shot)/
    • Introduction and AAR
    • FK&P: The Eastern Front
  • Vis Bellica (Ancients)/
    • Introduction to Vis Bellica
    • The Rules: Amendments
    • The Rules: Frequently Asked Questions
    • The Rules: Optional Rules
    • After Action Reports (Vis Bellica)
    • Army Lists
    • Articles about Vis Bellica
    • Scenarios for Vis Bellica
    • Other After Action Reports: WRG 6th
    • Other After Action Reports: TTS
  • Vis Magica (Fantasy)/
    • The Rules: Optional Rules
    • After Action Reports
  • TFL Painting Challenge 2024/
    • Scorecard 2024
    • Gallery: Burt, Steve
    • Gallery: Cooper, Nick
    • Gallery: Darkin, Des
    • Gallery: Davenport, Jonathan
    • Gallery: Douglas, Mervyn
    • Gallery: Emmett. John
    • Gallery: Flint, Carole
    • Gallery: Helliwell, Andrew
    • Gallery: Kay, Chris
    • Gallery: Luther, Mark
    • Gallery: Plowman, Ralph
    • Gallery: Sapper
    • Gallery: Scott, David
    • Gallery: Slade, Matt
    • Gallery: Stumpy
    • Gallery: Vis Bellica
  • TFL Painting Challenge 2023/
    • Scorecard 2023
    • Gallery: Bowler, Lloyd
    • Gallery: Burt, Steve
    • Gallery: Cooper, Nick
    • Gallery: Douglas, Mervyn
    • Gallery: Emmett, John
    • Gallery: Flint, Carole
    • Gallery: Helliwell, Andrew
    • Gallery: Hodge, Derek
    • Gallery: Kay, Chris
    • Gallery: Luther, Mark
    • Gallery: Plowman, Ralph
    • Gallery: Pollard, Ashley
    • Gallery: Sapper
    • Gallery: Scott, David
    • Gallery: Slade, Matt
    • Gallery: Stumpy
    • Gallery: Vis Bellica
  • TFL Painting Challenge 2022/
    • Scorecard 2022
    • Gallery: Bowler, Lloyd
    • Gallery: Burt, Steve
    • Gallery: Cooper, Nick
    • Gallery: Douglas, Mervyn
    • Gallery: Emmett, John
    • Gallery: Flint, Carole
    • Gallery: Goodrick, Pete
    • Gallery: Haines, John
    • Gallery: Helliwell, Andrew
    • Gallery: Hodge, Derek
    • Gallery: Kay, Chris
    • Gallery: Luther, Mark
    • Gallery: Plowman, Ralph
    • Gallery: Pollard, Ashley
    • Gallery: Sapper
    • Gallery: Scott, David
    • Gallery: Slade, Matt
    • Gallery: Stumpy
    • Gallery: Vis Bellica
  • TFL Painting Challenge 2021/
    • Scorecard 2021
    • Gallery: Anzani, Joe
    • Gallery: Bowler, Lloyd
    • Gallery: Burt, Steve
    • Gallery: Cooper, Nick
    • Gallery: Douglas, Mervyn
    • Gallery: Duffell, Andy
    • Gallery: Emmett, John
    • Gallery: Flint, Carole
    • Gallery: Haines, John
    • Gallery: Helliwell, Andrew
    • Gallery: Hiett, Travis
    • Gallery: Hodge, Derek
    • Gallery: Kay, Chris
    • Gallery: Luther, Mark
    • Gallery: McGinn, Joe
    • Gallery: Melville, Doug
    • Gallery: Plowman, Ralph
    • Gallery: Pollard, Ashley
    • Gallery: Ralls, Jason
    • Gallery: Sapper
    • Gallery: Scott, David
    • Gallery: Slade, Matt
    • Gallery: Stoesen, Chris
    • Gallery: Stumpy
    • Gallery: Vis Bellica
  • TFL Painting Challenge 2020/
    • Scorecard 2020
    • Gallery: Bloggs, Fred
    • Gallery: Bluemoose Ken
    • Gallery: Bowler, Lloyd
    • Gallery: Burt, Steve
    • Gallery: Cornwell, Chris
    • Gallery: Douglas, Mervyn
    • Gallery: Duffell, Andy
    • Gallery: Emmett, John
    • Gallery: Flint, Carole
    • Gallery: Haines, John
    • Gallery: Helliwell, Andrew
    • Gallery: Hiatt, Travis
    • Gallery: Hodge, Derek
    • Gallery: Hooge, Neil
    • Gallery: Kay, Chris
    • Gallery: Luther, Mark
    • Gallery: McGinn, Joe
    • Gallery: Melville, Doug
    • Gallery: Plowman, Ralph
    • Gallery: Pollard, Ashley
    • Gallery: Ralls, Jason
    • Gallery: Sapper
    • Gallery: Scott, David
    • Gallery: Slade, Matt
    • Gallery: Stoesen, Chris
    • Gallery: Stumpy
    • Gallery: Vis Bellica
  • TFL Painting Challenge 2019/
    • Scorecard 2019
    • Gallery: Bloggs, Fred
    • Gallery: Blue Moose Ken
    • Gallery: Bowen, Ed
    • Gallery: Bowler, Lloyd
    • Gallery: Burt, Steve
    • Gallery: Clarke, Richard
    • Gallery: Cornwell, Chris
    • Gallery: Davenport, Jon
    • Gallery: Douglas, Mervyn
    • Gallery: Duffell, Andy
    • Gallery: de Terre Neuve, John
    • Gallery: Emmett, John
    • Gallery: Fat Wally
    • Gallery: Flint, Carole
    • Gallery: Haines, John
    • Gallery: Helliwell, Andrew
    • Gallery: Hiett, Travis
    • Gallery: Hodge, Derek
    • Gallery: Hooge, Neil
    • Gallery: Johnston, Owen
    • Gallery: Kay, Chris
    • Gallery: Luther, Mark
    • Gallery: McGinn, Joe
    • Gallery: Melville, Doug
    • Gallery: Plowman, Ralph
    • Gallery: Ralls, Jason
    • Gallery: Sapper
    • Gallery: Scott, David
    • Gallery: Slade, Matt
    • Gallery: Stoesen, Chris
    • Gallery: Stumpy
    • Gallery: Vis Bellica
    • Gallery: Yuengling, Jon
  • TFL Painting Challenge 2018/
    • Scorecard 2018
    • Gallery: Bloggs, Fred
    • Gallery: Blue Moose Ken
    • Gallery: Bowen, Ed
    • Gallery: Bowler, Lloyd
    • Gallery: Burt, Steve
    • Gallery: Cornwell, Chris
    • Gallery: Davenport, Jonathan
    • Gallery: de Terre Neuve, John
    • Gallery: Douglas, Mervyn
    • Gallery: Duffell, Andy
    • Gallery: Fat Wally
    • Gallery: Flint, Carole
    • Gallery: Freerange Egg
    • Gallery: Haines, John
    • Gallery: Helliwell, Andrew
    • Gallery: Hiett, Travis
    • Gallery: Hodge, Derek
    • Gallery: Hooge, Neil
    • Gallery: Johnston, Owen
    • Gallery: Kay, Chris
    • Gallery: Lampon, Steven
    • Gallery: Luther, Mark
    • Gallery: McGinn, Joe
    • Gallery: Melville, Doug
    • Gallery: Plowman, Ralph
    • Gallery: Ralls, Jason
    • Gallery: Sapper
    • Gallery: Scott, David
    • Gallery: Slade, Matt
    • Gallery: Stoesen, Chris
    • Gallery: Stumpy
    • Gallery: Treadhead
    • Gallery: Vis Bellica
    • Gallery: Yuengling, Jon
  • TFL Painting Challenge 2017/
    • Scorecard
    • Gallery: Bond, Geoff
    • Gallery: Bowen, Edward
    • Gallery: Bowler, Lloyd
    • Gallery: Burt, Steve
    • Gallery: Cabey Cabey
    • Gallery: Catchpole, Jim
    • Gallery: Davenport, Jon
    • Gallery: Davies, Keith
    • Gallery: de Smedt, Kohn
    • Gallery: de Terre Neuve, John
    • Gallery: Douglas, Mervyn
    • Gallery: Duffell, Andy
    • Gallery: Fat Wally (Kev)
    • Gallery: Flint, Carole
    • Gallery: Freerange Egg
    • Gallery: Gatzemeyer, Garrett
    • Gallery: Gilbride, Chris
    • Gallery: Haines, John
    • Gallery: Helliwell, Andrew
    • Gallery: Hodge, Derek
    • Gallery: Hooge, Neil
    • Gallery: Humm, Dave
    • Gallery: Kay, Chris
    • Gallery: Lampon, Steven
    • Gallery: Luther, Mark
    • Gallery: MacNeill, Craig
    • Gallery: McCarthy, Andrew
    • Gallery: The Mad Padre
    • Gallery: McGinn, Joe
    • Gallery: Melville, Doug
    • Gallery: Naylor, Richard
    • Gallery: Nissvik, Thomas
    • Gallery: Old Pivot
    • Gallery: Owen
    • Gallery: Pollard, Ashley
    • Gallery: Plowman, Ralph
    • Gallery: Ralls, Jason
    • Gallery: Sapper
    • Gallery: Scott, David
    • Gallery: Slade, Matt
    • Gallery: Stoesen, Chris
    • Gallery: Stumpy
    • Gallery: Treadhead
    • Gallery: Vis Bellica
    • Gallery: Weathersby, Brian
    • Gallery: WillieB
    • Gallery: Yuengling, Jon
  • TFL Painting Challenge 2016/
    • Scorecard 2016
    • Gallery: Baldwin, Paul
    • Gallery: Blankenship, Paul
    • Gallery: Bloggs, Fred
    • Gallery: Bond, Geoff
    • Gallery: Bowen, Ed
    • Gallery: Bowler, Lloyd
    • Gallery: Burt, Steve
    • Gallery: Catchpole, Jim
    • Gallery: Clarke, Richard
    • Gallery: Davenport, Jon
    • Gallery: Davies, Keith
    • Gallery: de Smedt, Koen
    • Gallery: Douglas, Mervyn
    • Gallery: Duffell, Andy
    • Gallery: Egg
    • Gallery: Fitch, Doug
    • Gallery: Flint, Carole
    • Gallery: Gatzemeyer, Garrett
    • Gallery: Gilbride, Chris
    • Gallery: Helliwell, Andrew
    • Gallery: Hodge, Derek
    • Gallery: Hooge, Neil
    • Gallery: Humm, Dave
    • Gallery: I Am Bruce
    • Gallery: Lowth, Kev (Fat Wally)
    • Gallery: Luther, Mark
    • Gallery: The Mad Padre
    • Gallery: McCarthy, Andrew
    • Gallery: Melville, Doug
    • Gallery: Naylor, Richard
    • Gallery: Nissvik, Thomas
    • Gallery: Oracle
    • Gallery: Owen
    • Gallery: Plowman, Ralph
    • Gallery: Pollard, Ashley
    • Gallery: Ralls, Jason
    • Gallery: Sapper
    • Gallery: Slade, Matt
    • Gallery: Stoesen, Chris
    • Gallery: Stumpy
    • Gallery: Treadhead
    • Gallery: Vis Bellica
    • Gallery: Willie B
    • Gallery: Yuengling, Jon
  • TFL Painting Challenge 2015/
    • Scorecard 2015
    • Gallery: AJH
    • Gallery: Bairos, Vidal
    • Gallery: Baldwin, Paul
    • Gallery: Bax, Dick
    • Gallery: Blankenship, Paul
    • Gallery: Bloggs, Fred
    • Gallery: Bond, Geoff Bond
    • Gallery: Bowler, Hat
    • Gallery: Burt, Steve
    • Gallery: Corbett, Wulf
    • Gallery: Danziger, Richard
    • Gallery: Davies, Keith
    • Gallery: de Smedt, Koen
    • Gallery: de terre neuve, john
    • Gallery: Douglas, Mervyn
    • Gallery: Duffell, Andy
    • Gallery: Egg, Freerange
    • Gallery: Eggman Glass
    • Gallery: Eriksson, Leif
    • Gallery: Fat Wally
    • Gallery: Flint, Carole
    • Gallery: Gilbride, Chris
    • Gallery: Hedglin, Nils
    • Gallery: Helliwell, Andy
    • Gallery: Hodge, Derek
    • Gallery: Hooooge, Neil
    • Gallery: Humm, Dave
    • Gallery: I'm Bruce
    • Gallery: Luther, Mark
    • Gallery: The Mad Padre
    • Gallery: Maerk
    • Gallery: McCarthy, Andrew
    • Gallery: Melville, Doug
    • Gallery: Miller, Andrew
    • Gallery: Miller, Steve
    • Gallery: Milne, Neil
    • Gallery: Mikkola, Topi
    • Gallery: Mr Nouveau
    • Gallery: Naylor, Richard
    • Gallery: Nissvik, Thomas
    • Gallery: Owen
    • Gallery: Pedivere
    • Gallery: Pingu
    • Gallery: Pollard, Ashley
    • Gallery: Plowman, Ralph
    • Gallery: Ralls, Jason
    • Gallery: Sapper
    • Gallery: Skelton, Dom
    • Gallery: Slade, Matt
    • Gallery: Stapells, Tony
    • Gallery: Stoesen, Chris
    • Gallery: Strom, Joakim
    • Gallery: Stumpy
    • Gallery: Topyob
    • Gallery: Treadhead
    • Gallery: Vera, Benito
    • Gallery: Vis Bellica
    • Gallery: Willie B
    • Gallery: Yuengling, Jon
    • Gallery: Catchpole, Jim
  • TFL Painting Challenge 2014/
    • Scorecard
    • Gallery: Alexandros
    • Gallery: Ambler, Craig
    • Gallery: Armstrong, Keith
    • Gallery: Bailey, Dave
    • Gallery: Bairos, Vidal
    • Gallery: Bax, Dick
    • Gallery: Bloggs, Fred
    • Gallery: Bond, Geoff
    • Gallery: Burt, Steve
    • Gallery: Carnegie, Ron
    • Gallery: Carole
    • Gallery: Catchpole, Jim
    • Gallery: Clarke, Richard
    • Gallery: Corbett, Wulf
    • Gallery: Danziger, Richard
    • Gallery: De Smedt, Koen
    • Gallery: de Terre Neuve, John
    • Gallery: Deeks, Jon
    • Gallery: Douglas, Mervyn
    • Gallery: Duffell, Andy
    • Gallery: Egg, Free Range
    • Gallery: Erikson, Leif
    • Gallery: Fat Wally (Kev)
    • Gallery: Fiene, Ben
    • Gallery: Gilbride, Chris
    • Gallery: Hodge, Derek
    • Gallery: Humm, Dave
    • Gallery: Llano, Manuel
    • Gallery: Luther, Mark
    • Gallery: Melville, Doug
    • Gallery: Mikkola, Topi
    • Gallery: Miller, Andrew
    • Gallery: munsterfan8
    • Gallery: Murray, Jim
    • Gallery: Nissvik, Thomas
    • Gallery: Owen
    • Gallery: The Mad Padre
    • Gallery: PatG
    • Gallery: Pingu
    • Gallery: Plowman, Ralph
    • Gallery: Pollard, Ashley
    • Gallery: Ralls, Jason
    • Gallery: Slade, Matt
    • Gallery: Stoesen, Chris
    • Gallery: Strom, Joakim
    • Gallery: Stumpy
    • Gallery: Thomas, John
    • Gallery: Treadhead
    • Gallery: Vera, Benito
    • Gallery: Vis Bellica
    • Gallery: Warrior in the Attic
    • Gallery: Weir, Jim
    • Gallery: Whitaker, Mike
    • Gallery: WillieB
    • Gallery: Yuengling, Jon
  • TooFatLardies/
Overview of the Table
Vis Lardica

AAR 1943 Eastern Front: Mius River (Part One) by Mark Luther

A battle report or After Action Report (AAR) for I Ain't Been Shot, Mum (IABSM), the company-sized wargaming rules for WW2 from the TooFatLardies. A one-off game or scenario set on the Eastern Front in the year 1943.

Vis Lardica
  • New & Updated/
  • TFL Painting Challenge 2025/
    • Introduction & Details
    • Scorecard 2025
    • Gallery: Burt, Steve
    • Gallery: Cooper, Nick
    • Gallery: Douglas, Mervyn
    • Gallery: Emmett, John
    • Gallery: Flint, Carole
    • Gallery: Helliwell, Andrew
    • Gallery: Luther, Mark
    • Gallery: Plowman, Ralph
    • Gallery: Sapper
    • Gallery: Stumpy
    • Gallery: Vis Bellica
  • I Ain't Been Shot, Mum! (WW2)/
    • Introduction to IABSM
    • Video: How To Play IABSM, Part One
    • Video: How to Play IABSM, Part Two
    • Video: How to Play IABSM, Part Three
    • After Action Reports (IABSM)
    • Army Galleries (IABSM)
    • Buy IABSM Scenario Packs
    • Buy IABSM Theatre Supplements
    • Figure Manufacturers (IABSM)
    • Figure Reviews (IABSM)
    • Game Aids (IABSM)
    • IABSM Facebook Group
  • Charlie Don't Surf! (Vietnam/Arab-Israeli/Moderns)/
    • Introduction to CDS
    • After Action Reports (CDS)
    • Army Galleries (CDS)
    • The Arab-Israeli Six Day War
    • The Arab-Israeli Yom Kippur War
    • After Action Reports (Arab-Israeli Wars)
    • Army Galleries (Arab-Israeli Wars)
    • After Action Reports (Moderns)
  • Quadrant 13 (Sci-Fi)/
    • Introduction to Q13
    • After Action Reports (Q13)
    • Army Galleries (Q13)
    • Army Lists for Q13
    • Buy Q13 and/or Five Planets
    • Figure Manufacturers (Q13)
    • Figure Reviews (Q13)
    • Points System Spreadsheets
  • Vis Imperica (19th Century)/
    • Introduction to 19th Century
    • Army Galleries (19th Century)
    • Army Lists
    • After Action Reports
    • Articles & Essays
    • Quick Guide to the Wars of the 19th Century
  • Vis Lucii (Pike & Shot)/
    • Introduction and AAR
    • FK&P: The Eastern Front
  • Vis Bellica (Ancients)/
    • Introduction to Vis Bellica
    • The Rules: Amendments
    • The Rules: Frequently Asked Questions
    • The Rules: Optional Rules
    • After Action Reports (Vis Bellica)
    • Army Lists
    • Articles about Vis Bellica
    • Scenarios for Vis Bellica
    • Other After Action Reports: WRG 6th
    • Other After Action Reports: TTS
  • Vis Magica (Fantasy)/
    • The Rules: Optional Rules
    • After Action Reports
  • TFL Painting Challenge 2024/
    • Scorecard 2024
    • Gallery: Burt, Steve
    • Gallery: Cooper, Nick
    • Gallery: Darkin, Des
    • Gallery: Davenport, Jonathan
    • Gallery: Douglas, Mervyn
    • Gallery: Emmett. John
    • Gallery: Flint, Carole
    • Gallery: Helliwell, Andrew
    • Gallery: Kay, Chris
    • Gallery: Luther, Mark
    • Gallery: Plowman, Ralph
    • Gallery: Sapper
    • Gallery: Scott, David
    • Gallery: Slade, Matt
    • Gallery: Stumpy
    • Gallery: Vis Bellica
  • TFL Painting Challenge 2023/
    • Scorecard 2023
    • Gallery: Bowler, Lloyd
    • Gallery: Burt, Steve
    • Gallery: Cooper, Nick
    • Gallery: Douglas, Mervyn
    • Gallery: Emmett, John
    • Gallery: Flint, Carole
    • Gallery: Helliwell, Andrew
    • Gallery: Hodge, Derek
    • Gallery: Kay, Chris
    • Gallery: Luther, Mark
    • Gallery: Plowman, Ralph
    • Gallery: Pollard, Ashley
    • Gallery: Sapper
    • Gallery: Scott, David
    • Gallery: Slade, Matt
    • Gallery: Stumpy
    • Gallery: Vis Bellica
  • TFL Painting Challenge 2022/
    • Scorecard 2022
    • Gallery: Bowler, Lloyd
    • Gallery: Burt, Steve
    • Gallery: Cooper, Nick
    • Gallery: Douglas, Mervyn
    • Gallery: Emmett, John
    • Gallery: Flint, Carole
    • Gallery: Goodrick, Pete
    • Gallery: Haines, John
    • Gallery: Helliwell, Andrew
    • Gallery: Hodge, Derek
    • Gallery: Kay, Chris
    • Gallery: Luther, Mark
    • Gallery: Plowman, Ralph
    • Gallery: Pollard, Ashley
    • Gallery: Sapper
    • Gallery: Scott, David
    • Gallery: Slade, Matt
    • Gallery: Stumpy
    • Gallery: Vis Bellica
  • TFL Painting Challenge 2021/
    • Scorecard 2021
    • Gallery: Anzani, Joe
    • Gallery: Bowler, Lloyd
    • Gallery: Burt, Steve
    • Gallery: Cooper, Nick
    • Gallery: Douglas, Mervyn
    • Gallery: Duffell, Andy
    • Gallery: Emmett, John
    • Gallery: Flint, Carole
    • Gallery: Haines, John
    • Gallery: Helliwell, Andrew
    • Gallery: Hiett, Travis
    • Gallery: Hodge, Derek
    • Gallery: Kay, Chris
    • Gallery: Luther, Mark
    • Gallery: McGinn, Joe
    • Gallery: Melville, Doug
    • Gallery: Plowman, Ralph
    • Gallery: Pollard, Ashley
    • Gallery: Ralls, Jason
    • Gallery: Sapper
    • Gallery: Scott, David
    • Gallery: Slade, Matt
    • Gallery: Stoesen, Chris
    • Gallery: Stumpy
    • Gallery: Vis Bellica
  • TFL Painting Challenge 2020/
    • Scorecard 2020
    • Gallery: Bloggs, Fred
    • Gallery: Bluemoose Ken
    • Gallery: Bowler, Lloyd
    • Gallery: Burt, Steve
    • Gallery: Cornwell, Chris
    • Gallery: Douglas, Mervyn
    • Gallery: Duffell, Andy
    • Gallery: Emmett, John
    • Gallery: Flint, Carole
    • Gallery: Haines, John
    • Gallery: Helliwell, Andrew
    • Gallery: Hiatt, Travis
    • Gallery: Hodge, Derek
    • Gallery: Hooge, Neil
    • Gallery: Kay, Chris
    • Gallery: Luther, Mark
    • Gallery: McGinn, Joe
    • Gallery: Melville, Doug
    • Gallery: Plowman, Ralph
    • Gallery: Pollard, Ashley
    • Gallery: Ralls, Jason
    • Gallery: Sapper
    • Gallery: Scott, David
    • Gallery: Slade, Matt
    • Gallery: Stoesen, Chris
    • Gallery: Stumpy
    • Gallery: Vis Bellica
  • TFL Painting Challenge 2019/
    • Scorecard 2019
    • Gallery: Bloggs, Fred
    • Gallery: Blue Moose Ken
    • Gallery: Bowen, Ed
    • Gallery: Bowler, Lloyd
    • Gallery: Burt, Steve
    • Gallery: Clarke, Richard
    • Gallery: Cornwell, Chris
    • Gallery: Davenport, Jon
    • Gallery: Douglas, Mervyn
    • Gallery: Duffell, Andy
    • Gallery: de Terre Neuve, John
    • Gallery: Emmett, John
    • Gallery: Fat Wally
    • Gallery: Flint, Carole
    • Gallery: Haines, John
    • Gallery: Helliwell, Andrew
    • Gallery: Hiett, Travis
    • Gallery: Hodge, Derek
    • Gallery: Hooge, Neil
    • Gallery: Johnston, Owen
    • Gallery: Kay, Chris
    • Gallery: Luther, Mark
    • Gallery: McGinn, Joe
    • Gallery: Melville, Doug
    • Gallery: Plowman, Ralph
    • Gallery: Ralls, Jason
    • Gallery: Sapper
    • Gallery: Scott, David
    • Gallery: Slade, Matt
    • Gallery: Stoesen, Chris
    • Gallery: Stumpy
    • Gallery: Vis Bellica
    • Gallery: Yuengling, Jon
  • TFL Painting Challenge 2018/
    • Scorecard 2018
    • Gallery: Bloggs, Fred
    • Gallery: Blue Moose Ken
    • Gallery: Bowen, Ed
    • Gallery: Bowler, Lloyd
    • Gallery: Burt, Steve
    • Gallery: Cornwell, Chris
    • Gallery: Davenport, Jonathan
    • Gallery: de Terre Neuve, John
    • Gallery: Douglas, Mervyn
    • Gallery: Duffell, Andy
    • Gallery: Fat Wally
    • Gallery: Flint, Carole
    • Gallery: Freerange Egg
    • Gallery: Haines, John
    • Gallery: Helliwell, Andrew
    • Gallery: Hiett, Travis
    • Gallery: Hodge, Derek
    • Gallery: Hooge, Neil
    • Gallery: Johnston, Owen
    • Gallery: Kay, Chris
    • Gallery: Lampon, Steven
    • Gallery: Luther, Mark
    • Gallery: McGinn, Joe
    • Gallery: Melville, Doug
    • Gallery: Plowman, Ralph
    • Gallery: Ralls, Jason
    • Gallery: Sapper
    • Gallery: Scott, David
    • Gallery: Slade, Matt
    • Gallery: Stoesen, Chris
    • Gallery: Stumpy
    • Gallery: Treadhead
    • Gallery: Vis Bellica
    • Gallery: Yuengling, Jon
  • TFL Painting Challenge 2017/
    • Scorecard
    • Gallery: Bond, Geoff
    • Gallery: Bowen, Edward
    • Gallery: Bowler, Lloyd
    • Gallery: Burt, Steve
    • Gallery: Cabey Cabey
    • Gallery: Catchpole, Jim
    • Gallery: Davenport, Jon
    • Gallery: Davies, Keith
    • Gallery: de Smedt, Kohn
    • Gallery: de Terre Neuve, John
    • Gallery: Douglas, Mervyn
    • Gallery: Duffell, Andy
    • Gallery: Fat Wally (Kev)
    • Gallery: Flint, Carole
    • Gallery: Freerange Egg
    • Gallery: Gatzemeyer, Garrett
    • Gallery: Gilbride, Chris
    • Gallery: Haines, John
    • Gallery: Helliwell, Andrew
    • Gallery: Hodge, Derek
    • Gallery: Hooge, Neil
    • Gallery: Humm, Dave
    • Gallery: Kay, Chris
    • Gallery: Lampon, Steven
    • Gallery: Luther, Mark
    • Gallery: MacNeill, Craig
    • Gallery: McCarthy, Andrew
    • Gallery: The Mad Padre
    • Gallery: McGinn, Joe
    • Gallery: Melville, Doug
    • Gallery: Naylor, Richard
    • Gallery: Nissvik, Thomas
    • Gallery: Old Pivot
    • Gallery: Owen
    • Gallery: Pollard, Ashley
    • Gallery: Plowman, Ralph
    • Gallery: Ralls, Jason
    • Gallery: Sapper
    • Gallery: Scott, David
    • Gallery: Slade, Matt
    • Gallery: Stoesen, Chris
    • Gallery: Stumpy
    • Gallery: Treadhead
    • Gallery: Vis Bellica
    • Gallery: Weathersby, Brian
    • Gallery: WillieB
    • Gallery: Yuengling, Jon
  • TFL Painting Challenge 2016/
    • Scorecard 2016
    • Gallery: Baldwin, Paul
    • Gallery: Blankenship, Paul
    • Gallery: Bloggs, Fred
    • Gallery: Bond, Geoff
    • Gallery: Bowen, Ed
    • Gallery: Bowler, Lloyd
    • Gallery: Burt, Steve
    • Gallery: Catchpole, Jim
    • Gallery: Clarke, Richard
    • Gallery: Davenport, Jon
    • Gallery: Davies, Keith
    • Gallery: de Smedt, Koen
    • Gallery: Douglas, Mervyn
    • Gallery: Duffell, Andy
    • Gallery: Egg
    • Gallery: Fitch, Doug
    • Gallery: Flint, Carole
    • Gallery: Gatzemeyer, Garrett
    • Gallery: Gilbride, Chris
    • Gallery: Helliwell, Andrew
    • Gallery: Hodge, Derek
    • Gallery: Hooge, Neil
    • Gallery: Humm, Dave
    • Gallery: I Am Bruce
    • Gallery: Lowth, Kev (Fat Wally)
    • Gallery: Luther, Mark
    • Gallery: The Mad Padre
    • Gallery: McCarthy, Andrew
    • Gallery: Melville, Doug
    • Gallery: Naylor, Richard
    • Gallery: Nissvik, Thomas
    • Gallery: Oracle
    • Gallery: Owen
    • Gallery: Plowman, Ralph
    • Gallery: Pollard, Ashley
    • Gallery: Ralls, Jason
    • Gallery: Sapper
    • Gallery: Slade, Matt
    • Gallery: Stoesen, Chris
    • Gallery: Stumpy
    • Gallery: Treadhead
    • Gallery: Vis Bellica
    • Gallery: Willie B
    • Gallery: Yuengling, Jon
  • TFL Painting Challenge 2015/
    • Scorecard 2015
    • Gallery: AJH
    • Gallery: Bairos, Vidal
    • Gallery: Baldwin, Paul
    • Gallery: Bax, Dick
    • Gallery: Blankenship, Paul
    • Gallery: Bloggs, Fred
    • Gallery: Bond, Geoff Bond
    • Gallery: Bowler, Hat
    • Gallery: Burt, Steve
    • Gallery: Corbett, Wulf
    • Gallery: Danziger, Richard
    • Gallery: Davies, Keith
    • Gallery: de Smedt, Koen
    • Gallery: de terre neuve, john
    • Gallery: Douglas, Mervyn
    • Gallery: Duffell, Andy
    • Gallery: Egg, Freerange
    • Gallery: Eggman Glass
    • Gallery: Eriksson, Leif
    • Gallery: Fat Wally
    • Gallery: Flint, Carole
    • Gallery: Gilbride, Chris
    • Gallery: Hedglin, Nils
    • Gallery: Helliwell, Andy
    • Gallery: Hodge, Derek
    • Gallery: Hooooge, Neil
    • Gallery: Humm, Dave
    • Gallery: I'm Bruce
    • Gallery: Luther, Mark
    • Gallery: The Mad Padre
    • Gallery: Maerk
    • Gallery: McCarthy, Andrew
    • Gallery: Melville, Doug
    • Gallery: Miller, Andrew
    • Gallery: Miller, Steve
    • Gallery: Milne, Neil
    • Gallery: Mikkola, Topi
    • Gallery: Mr Nouveau
    • Gallery: Naylor, Richard
    • Gallery: Nissvik, Thomas
    • Gallery: Owen
    • Gallery: Pedivere
    • Gallery: Pingu
    • Gallery: Pollard, Ashley
    • Gallery: Plowman, Ralph
    • Gallery: Ralls, Jason
    • Gallery: Sapper
    • Gallery: Skelton, Dom
    • Gallery: Slade, Matt
    • Gallery: Stapells, Tony
    • Gallery: Stoesen, Chris
    • Gallery: Strom, Joakim
    • Gallery: Stumpy
    • Gallery: Topyob
    • Gallery: Treadhead
    • Gallery: Vera, Benito
    • Gallery: Vis Bellica
    • Gallery: Willie B
    • Gallery: Yuengling, Jon
    • Gallery: Catchpole, Jim
  • TFL Painting Challenge 2014/
    • Scorecard
    • Gallery: Alexandros
    • Gallery: Ambler, Craig
    • Gallery: Armstrong, Keith
    • Gallery: Bailey, Dave
    • Gallery: Bairos, Vidal
    • Gallery: Bax, Dick
    • Gallery: Bloggs, Fred
    • Gallery: Bond, Geoff
    • Gallery: Burt, Steve
    • Gallery: Carnegie, Ron
    • Gallery: Carole
    • Gallery: Catchpole, Jim
    • Gallery: Clarke, Richard
    • Gallery: Corbett, Wulf
    • Gallery: Danziger, Richard
    • Gallery: De Smedt, Koen
    • Gallery: de Terre Neuve, John
    • Gallery: Deeks, Jon
    • Gallery: Douglas, Mervyn
    • Gallery: Duffell, Andy
    • Gallery: Egg, Free Range
    • Gallery: Erikson, Leif
    • Gallery: Fat Wally (Kev)
    • Gallery: Fiene, Ben
    • Gallery: Gilbride, Chris
    • Gallery: Hodge, Derek
    • Gallery: Humm, Dave
    • Gallery: Llano, Manuel
    • Gallery: Luther, Mark
    • Gallery: Melville, Doug
    • Gallery: Mikkola, Topi
    • Gallery: Miller, Andrew
    • Gallery: munsterfan8
    • Gallery: Murray, Jim
    • Gallery: Nissvik, Thomas
    • Gallery: Owen
    • Gallery: The Mad Padre
    • Gallery: PatG
    • Gallery: Pingu
    • Gallery: Plowman, Ralph
    • Gallery: Pollard, Ashley
    • Gallery: Ralls, Jason
    • Gallery: Slade, Matt
    • Gallery: Stoesen, Chris
    • Gallery: Strom, Joakim
    • Gallery: Stumpy
    • Gallery: Thomas, John
    • Gallery: Treadhead
    • Gallery: Vera, Benito
    • Gallery: Vis Bellica
    • Gallery: Warrior in the Attic
    • Gallery: Weir, Jim
    • Gallery: Whitaker, Mike
    • Gallery: WillieB
    • Gallery: Yuengling, Jon
  • TooFatLardies/


This is a 6mm IABSM game that we played in July 08 depicting the attempt by the 23rd Pz Div to drive down the length of a ridge line. The action takes place on July 19 1943 on the east side of the Mius river.

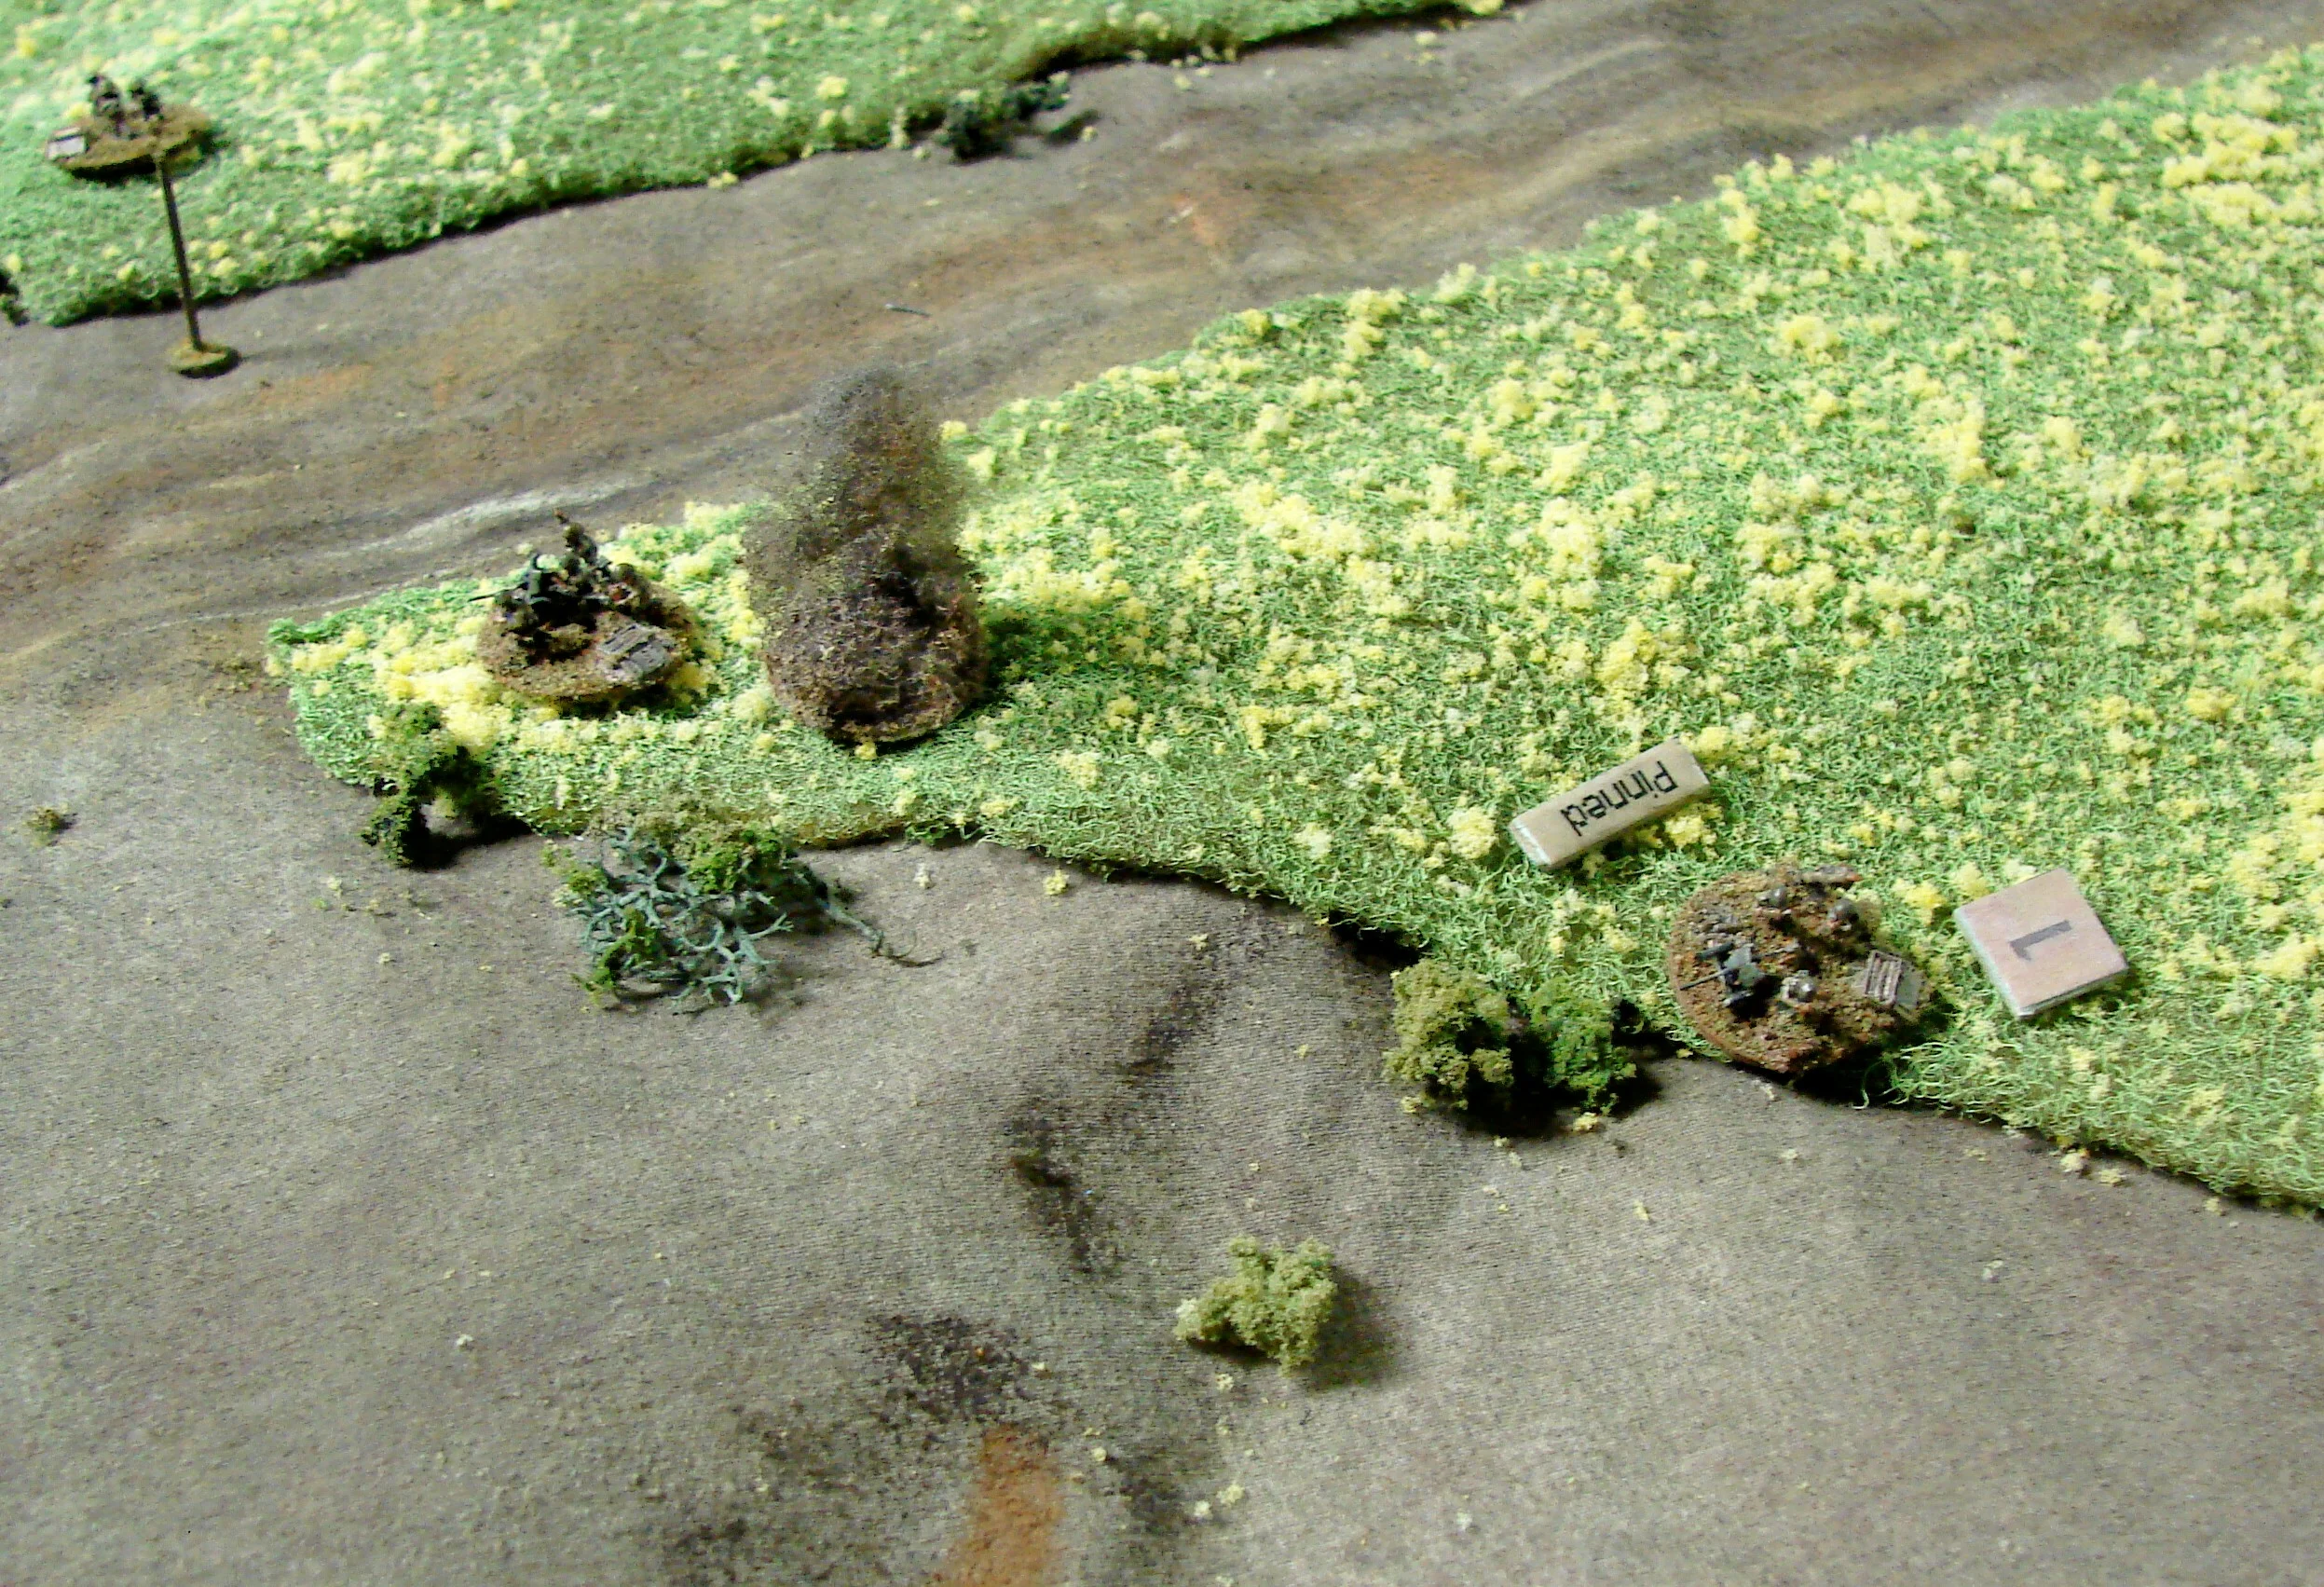
The ridge is dominated by fields of corn and sunflowers, so visibilty is bad. The attack is going down a saddle along the ridge towards a slightly higher point:  the goal of the German attack. Unfortunately this assault can be observed and fired upon from positions offboard on both flanks by 76mm ATGs.

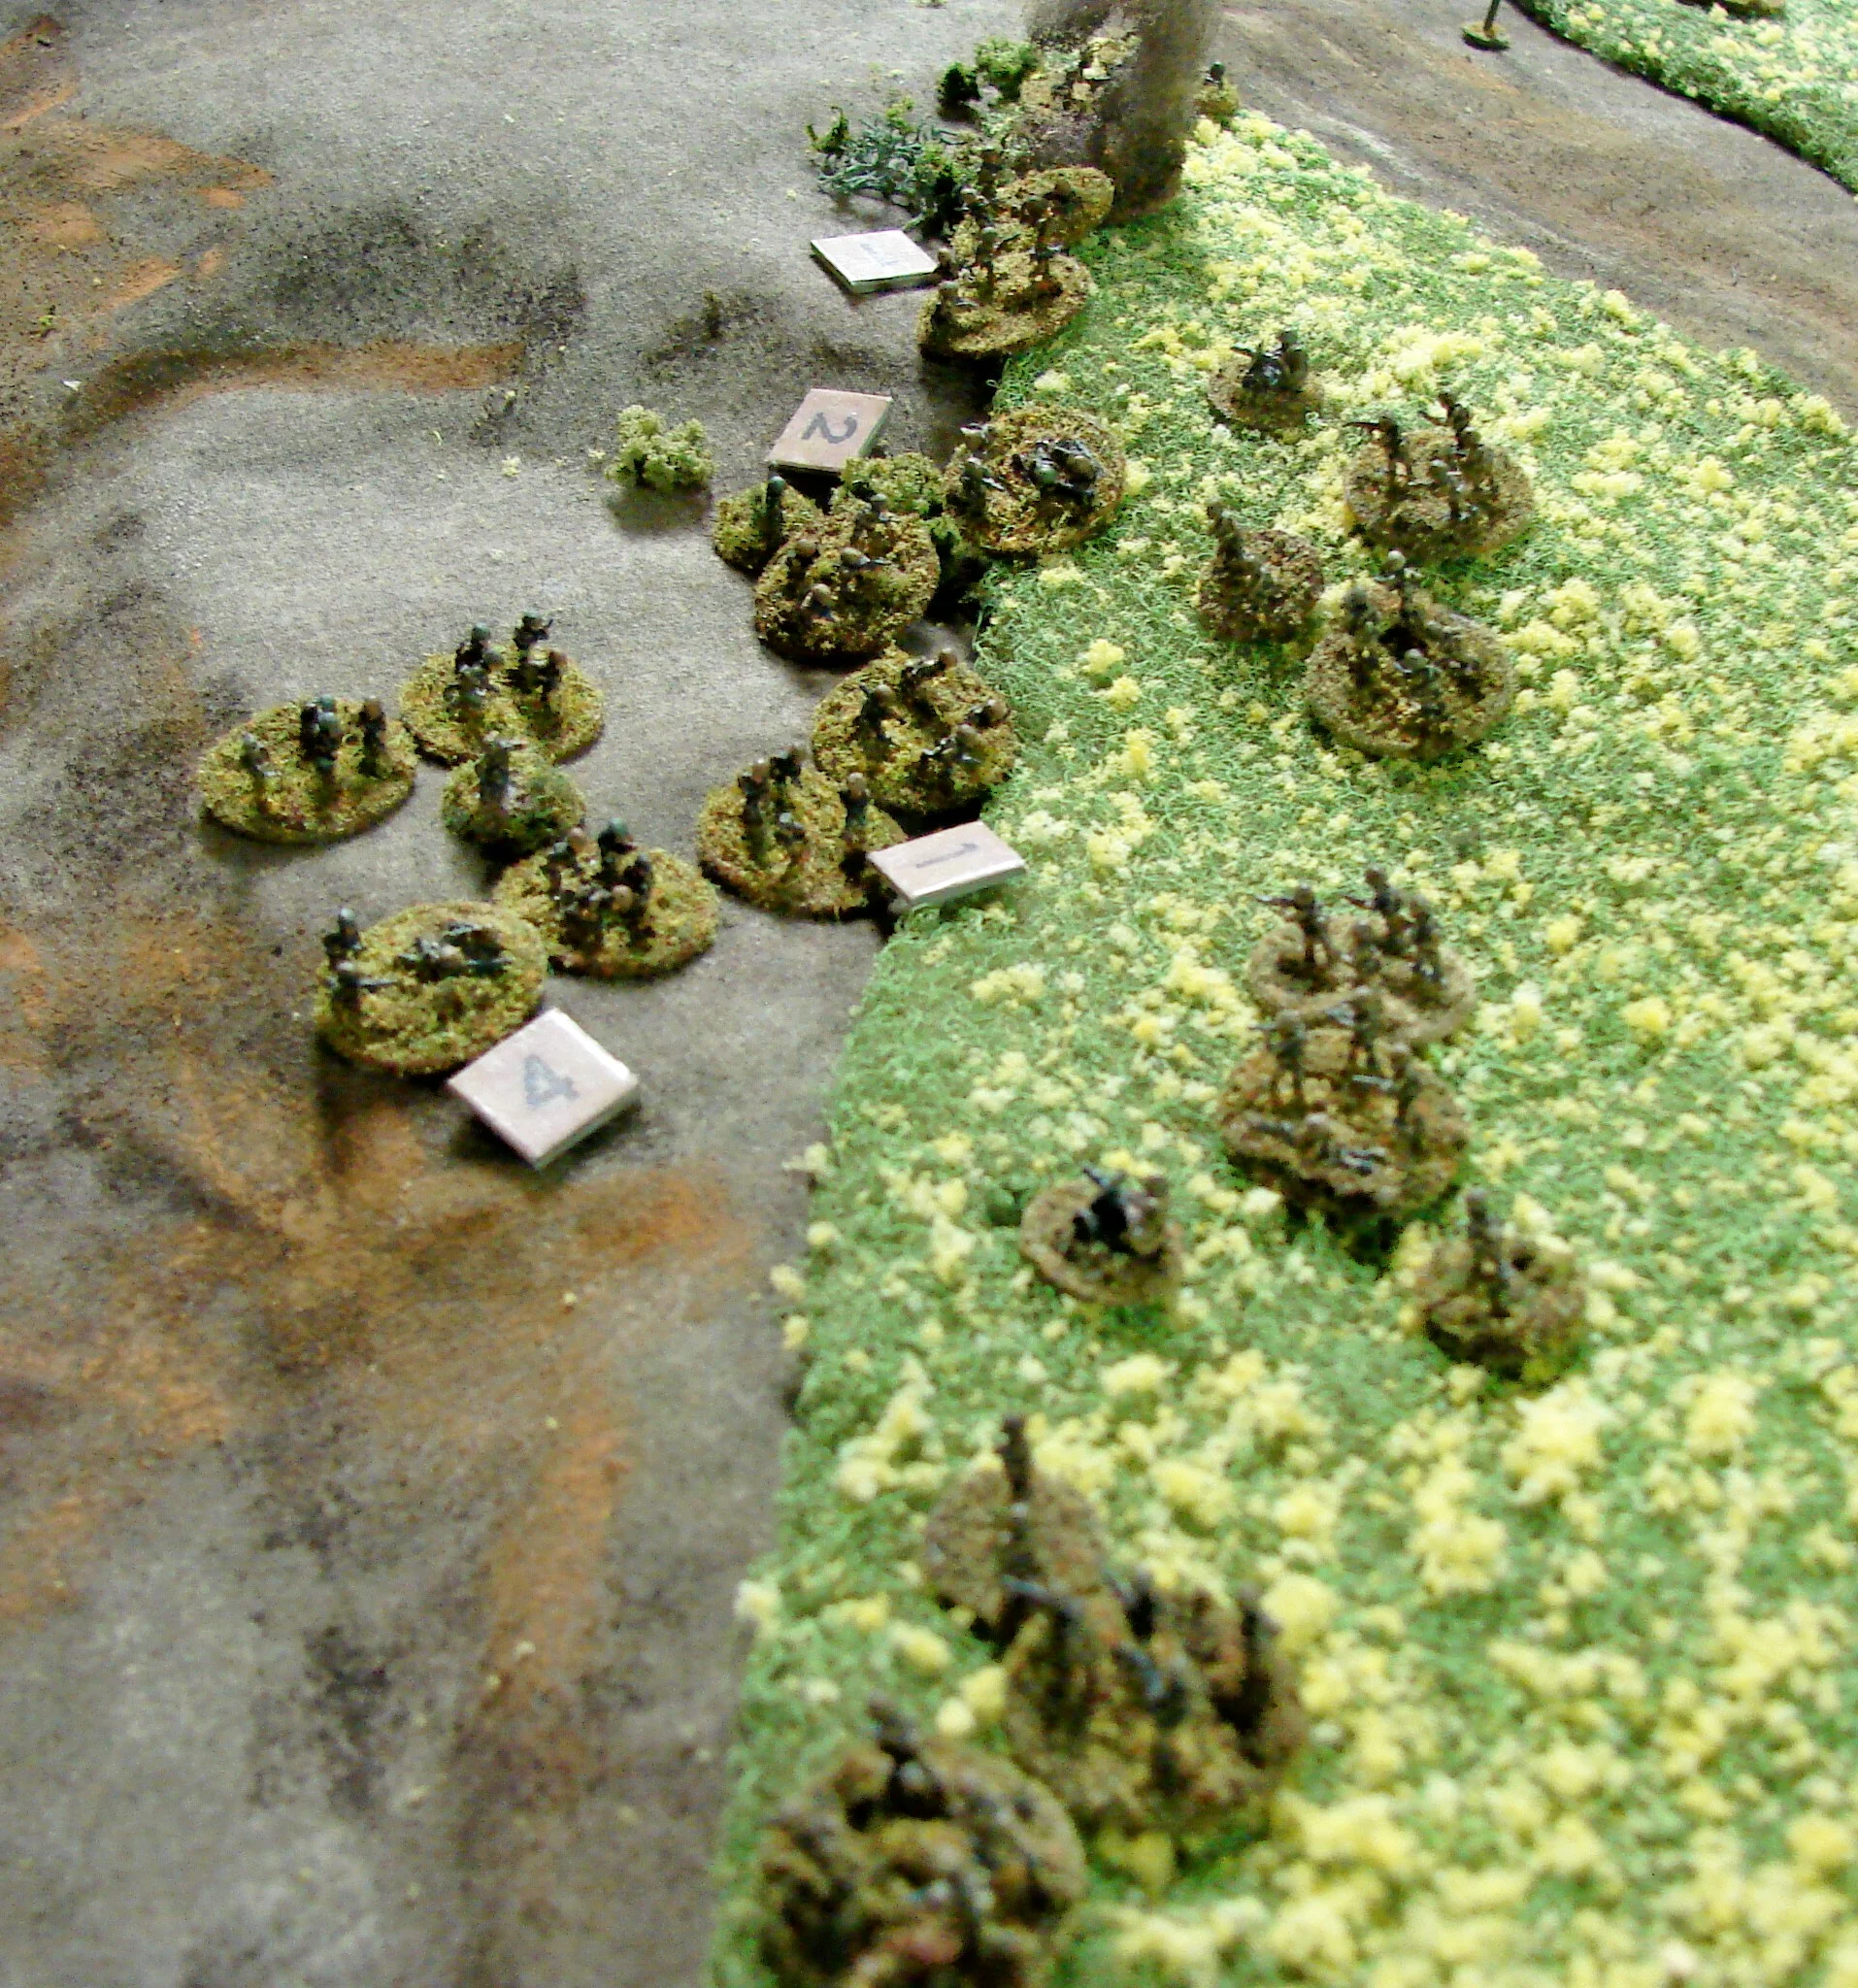
The Soviets have an infantry company: two platoons dug in, and one in reserve. They also had eight 45mm ATGs, eight ATR teams, four MMGs, three Tankhunter squads and a sniper. Both a medium and a heavy mortar battery are available. They have three T70s that are dug in at the start, with the remainder of the company in reserve on their right flank.

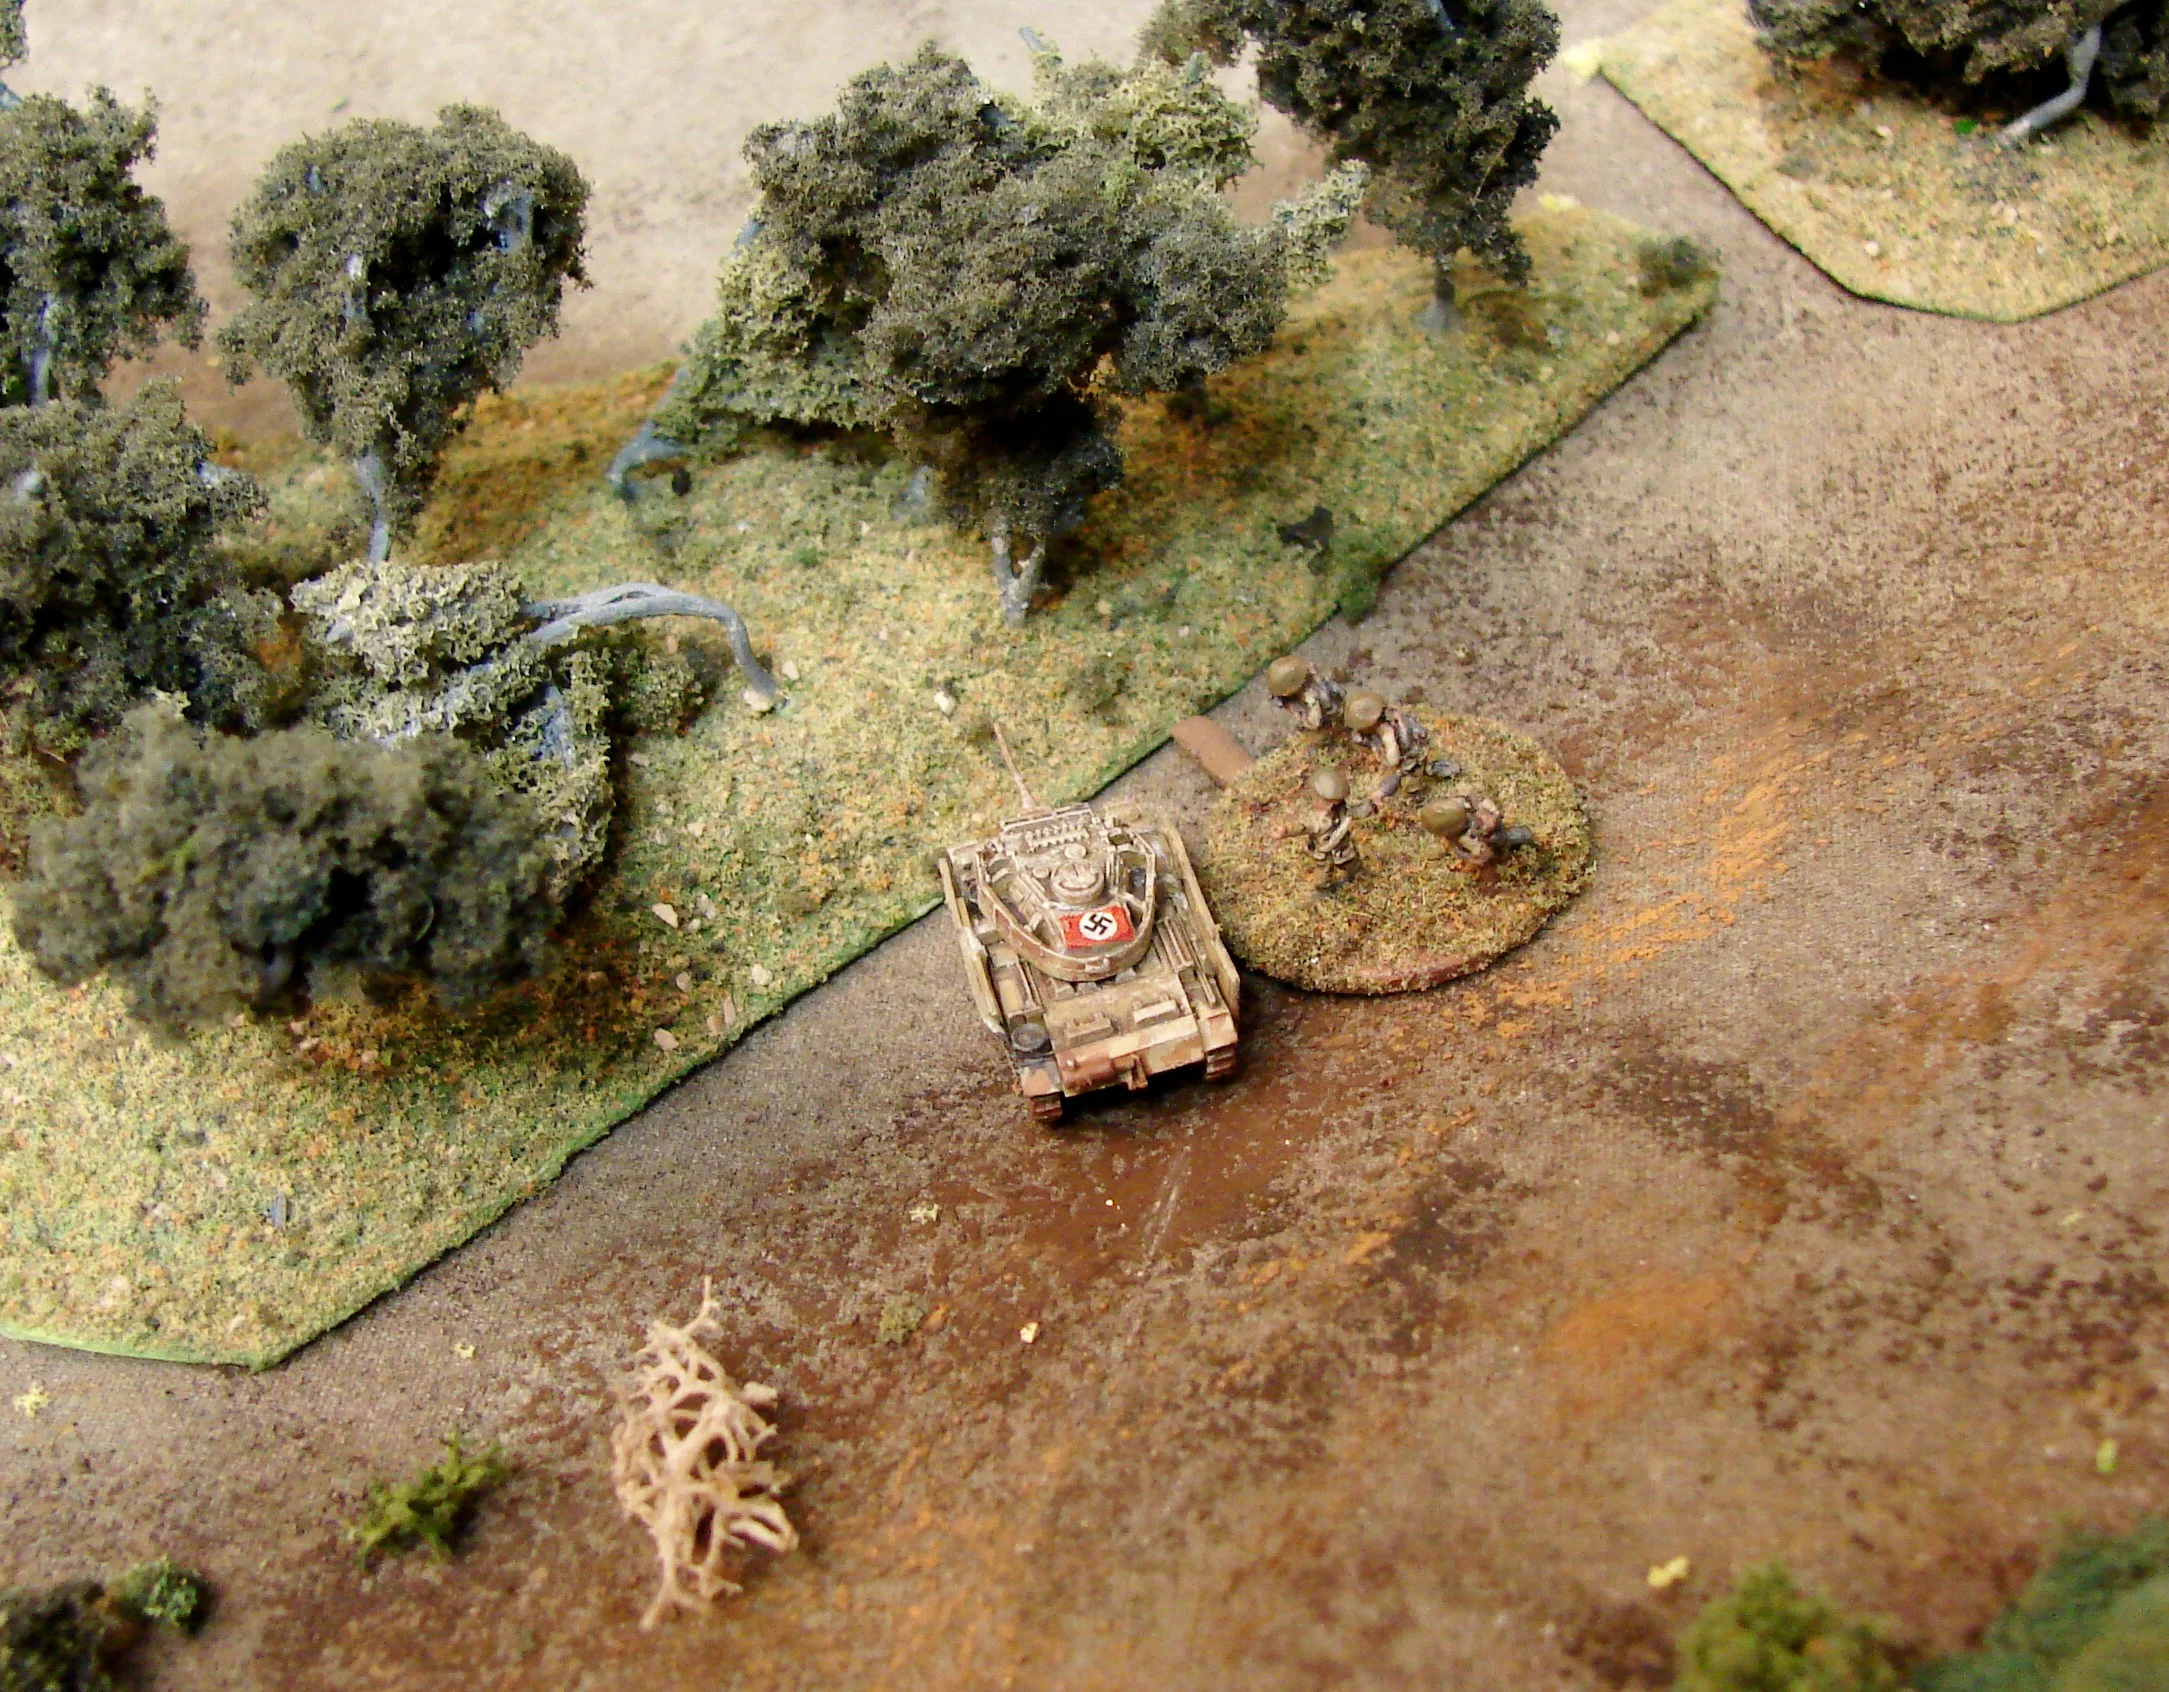
The Germans have a strong tank force of five PzIVf2s, and nine PzIIILs. Unfortunately they only have two platoons of grenadiers, each of three squads with a total of four lmgs. They also had two MMGs and two INF guns and a medium mortar and a 105 battery on call. Most of the German grenadiers would be offboard on the flanks trying to clear the parallel ridge lines and gulleys.

Mark Luther

 
Overview of the Table

Overview of the Table

The road and ridgeline that had to be taken by the Panzers. The intersection at the bottom is the high point that is the goal of the Germans.

German Starting Positions

German Starting Positions

The German forces moved out from the village through the cornfield alog the ridge

View from the Soviet HQ positions

View from the Soviet HQ positions

The Russians could setup up to the edge of the gulley on the other side of the sunflower field. Their forces were divided evenly with an infantry platoon, two MMGs, four 45mm ATGs, four ATRs and a dug in T70 on each side of the road. The HQ is back at Point 219.3 at the bottom of the picture.

Panzer IIIs on the Right Flank

Panzer IIIs on the Right Flank

The two Panzergrenadier platoons are moving through the cornfield. The left flank T-70 position is also shown.

45mm ATGs under fire

45mm ATGs under fire

These are the left flank ATGs coming under fire from the PzIV platoon

The Main German Advance

The Main German Advance

The Germans opted to put their main effort on their right side and move up through a cornfield. Two panzergrenadier platoons, a PzIVF2 platoon and a PzIIIL platoon

More 45mm ATGs

More 45mm ATGs

These two 45s are under fire from the PzIVs opposite them in the cornfield

Pz IIIs on the German left

Pz IIIs on the German left

The left side of the German attack was this platoon. An MMG gun at the edge of a sunflower field is covering this flank also.

Overview of the center

Overview of the center

One 45mm ATG position has been exposed in the small sunflower field. Three more are in the fields behind. Other units are on blinds. The dug in T-70 is to the left

Germans go for broke

Germans go for broke

Both platoons charge across the gap to engage the Russians in the sunflowers. They find more than they expected--a dug in platoon with two MMGs and ATRs and 45mm ATGs. The number chits are 'wounds'. Several 'kills' are also scored on both sides.

Close assault in the sunflowers

Close assault in the sunflowers

One German platoon manages to break into the Russian postions but the other is thrown back to the gulley.

Heavy casualties all around

Heavy casualties all around

Both sides go to ground with all squads taking hits. The right hand German platoon is especially weakened.

Pz IVs

Pz IVs

Afraid of hitting their own troops the Pz IVs wait for the action to settle. They are taking fire from 76mm guns off board. They have managed to take out the dug in T-70 and a couple of 45mm ATGs, but have had twoof their number immobilised (one of which has bailed).

The fight continues

The fight continues

Losses mount on both sides. Visibility is limited among the sunflowers and the fight is bloody at such short range.

Overrunning the 45mm ATGs

Overrunning the 45mm ATGs

Meanwhile the right flank Pz IIIs crush the two 45mm ATGs.

More losses

More losses

The Germans in the gulley are just about wiped out but the Russians are gradually beaten down.

Another dug in T-70

Another dug in T-70

Trading shots with the PzIIIs on the north side on the ridge

Soviet Infantry getting pushed back

Soviet Infantry getting pushed back

The grenadiers use their superior automatic weapons(some squads with two LMGs) and Big Man dice to silence the Red infantry.

Turning to face the 76mms

Turning to face the 76mms

The offboard ATGs try to KO some of the PzIIIs, forcing the panzers to face about. Its pretty lonely in the sunflowers, so the tanks aren't going to stay up here for long.

Fewer infantry every turn

Fewer infantry every turn

One grenadier platoon is just about gone, but the Soviets are also running out of troops.

The bloody sunflower field

The bloody sunflower field

Despite being dug in, the Russians are losing too many troops to the small arms of the grenadiers.

T-70 losses the fight

T-70 losses the fight

After taking several hits from the PzIIIs, the engine finally ignites, forcing the crew to bail.

Pz IIIs to the rescue

Pz IIIs to the rescue

The PzIIIs turn their backs to the offboard 76mm fire to help out the grenadiers.

Mortars on suspected postions

Mortars on suspected postions

The Germans decide to drop some mortar on a likely Soviet postion. The blinds in the gulleys consist of a lonely Red tankhunter squad.

Saving the grenadiers in the gulley

Saving the grenadiers in the gulley

At this point, the pinned down 2nd platoon is so worn down that they must withdraw. They need the cover of the panzers to pull back.

The other flank

The other flank

The PzIIIs have taken out the lone T-70 that they spotted and mortars are coming down on edge of the sunflower field.

Wearing down the first line

Wearing down the first line

The MGs from the PzIIIs combined with fire from the remaining grenadiers are quickly silencing the dug in Russians. Lucky for the PzIIIs the offboard 76mm have been poor shots.

Close assault in the gulley

Close assault in the gulley

The Pz IIIs decide to advance and move through the cornfield and into the gulley. A Soviet tankhunter squad waited all game for this opportunity...only to fail miserably

Pz IVs move up

Pz IVs move up

The remaining Pz IVs decide to advance into the field along with the remaing grenadiers. The Pz IIIs will pull out the survivors of the 2nd platoon.

Soviet reinforcements

Soviet reinforcements

As the Pz IIIs advance and drive off the tank hunter squad, seven T-70s and a infantry platoon move on to the field. The PzIIIs quickly tag a couple of the light tanks.

Heading for cover

Heading for cover

The Russian infantry head for the woods while the T70s face off with the Panzers. Two are quickly immobilised.

Advancing through the sunflowers

Advancing through the sunflowers

The PzIVs and grenadiers look for more Russians while the PzIIIs and the sadly depleted 2nd platoon prepare to head back. Visibility through the field is just a few yards so not much of a blitzkreig here.

Cautious advance

Cautious advance

Between suspecting mines and a ATR or other attack at point blank the Germans are moving very slowly.

Running around the flank

Running around the flank

Two T-70s manage to scoot past the PzIIIs and on to the main road. A recently displaced MMG crew dives for cover in the cornfield while anothe MG hunts for targets in the woods.

Time to head back

Time to head back

The off table 76s have managed to KO one PzIII and damage another, the 2nd grenadier platoon is shot up, two PzIVs are abandoned, and now medium and heavy mortars are starting to fall. And the left flank PzIIIs have radioed that tanks are getting past them.

Russian blinds moving up

Russian blinds moving up

Really not much there. Just the HQ units, sniper, and a tank hunter squad and some dummy blinds. But the Germans have had enough. Meanwhile the Russians on the right have been getting shelled by the German mortars

Cutting down the T-70s

Cutting down the T-70s

The retiring PzIVs are presented with such fine targets. The two German infantry guns in the rear had been firing madly at these fast target to no avail.

Dodging between the shell drops

Dodging between the shell drops

Artillery fire begins to dominate the field. Red medium and heavy mortars on the south side of the road and German medium mortars and 105s on the north side.

Over the battlefield

Over the battlefield

Everyone trying to avoid the artillery

The PzIIIs are winning this shootout

The PzIIIs are winning this shootout

Russian infantry working its way up the gulley through the woods but the light tanks are taking too many hits.

Pulling back

Pulling back

The second breakthrough T-70 is smoking, but the Germans have shot their wad and are heading back.

More of the same

More of the same

Pz IVs looking for more errant T-70s.

Manoeuvring for better shots

Manoeuvring for better shots

Another MMG moves up to stimie the Russian infantry as the PzIII repostion to target the T-70s.

Fires

Fires

One of the PzIIIs and a T-70 light up while two more light tanks are disabled. Another one has pulled into the woods with a KO'ed gun.

Smoke and explosions

Smoke and explosions

The Pz IVs retreat past an abandoned comrade and two burning T-70s

The left flank is stalled also

The left flank is stalled also

Without any infantry support, these panzers are not going anywhere either. They know that there are 45mm ATGs in their front and who knows what else lurking in the cornfield and off board. The game ended with the Germans back at their start line after overrunning the Russian frontline on one flank. Not enough infantry for the close terrain. This attack just didn't have enough resources, but was rushed to drive the Russkies out before they really established themselves.

1 2 3 4 5 6 7 8 9 10 11 12 13 14 15 16 17 18 19 20 21 22 23 24 25 26 27 28 29 30 31 32 33 34 35 36 37 38 39 40 41 42 43 44 45 46
Previous Next
Overview of the Table
German Starting Positions
View from the Soviet HQ positions
Panzer IIIs on the Right Flank
45mm ATGs under fire
The Main German Advance
More 45mm ATGs
Pz IIIs on the German left
Overview of the center
Germans go for broke
Close assault in the sunflowers
Heavy casualties all around
Pz IVs
The fight continues
Overrunning the 45mm ATGs
More losses
Another dug in T-70
Soviet Infantry getting pushed back
Turning to face the 76mms
Fewer infantry every turn
The bloody sunflower field
T-70 losses the fight
Pz IIIs to the rescue
Mortars on suspected postions
Saving the grenadiers in the gulley
The other flank
Wearing down the first line
Close assault in the gulley
Pz IVs move up
Soviet reinforcements
Heading for cover
Advancing through the sunflowers
Cautious advance
Running around the flank
Time to head back
Russian blinds moving up
Cutting down the T-70s
Dodging between the shell drops
Over the battlefield
The PzIIIs are winning this shootout
Pulling back
More of the same
Manoeuvring for better shots
Fires
Smoke and explosions
The left flank is stalled also