Vis Lardica
  • New & Updated
  • Introduction & Details Scorecard 2025 Gallery: Burt, Steve Gallery: Cooper, Nick Gallery: Douglas, Mervyn Gallery: Emmett, John Gallery: Flint, Carole Gallery: Helliwell, Andrew Gallery: Luther, Mark Gallery: Plowman, Ralph Gallery: Sapper Gallery: Stumpy Gallery: Vis Bellica
  • Introduction to IABSM Video: How To Play IABSM, Part One Video: How to Play IABSM, Part Two Video: How to Play IABSM, Part Three After Action Reports (IABSM) Army Galleries (IABSM) Buy IABSM Scenario Packs Buy IABSM Theatre Supplements Figure Manufacturers (IABSM) Figure Reviews (IABSM) Game Aids (IABSM) IABSM Facebook Group
  • Introduction to CDS After Action Reports (CDS) Army Galleries (CDS) The Arab-Israeli Six Day War The Arab-Israeli Yom Kippur War After Action Reports (Arab-Israeli Wars) Army Galleries (Arab-Israeli Wars) After Action Reports (Moderns)
  • Introduction to Q13 After Action Reports (Q13) Army Galleries (Q13) Army Lists for Q13 Buy Q13 and/or Five Planets Figure Manufacturers (Q13) Figure Reviews (Q13) Points System Spreadsheets
  • Introduction to 19th Century Army Galleries (19th Century) Army Lists After Action Reports Articles & Essays Quick Guide to the Wars of the 19th Century
  • Introduction and AAR FK&P: The Eastern Front
  • Introduction to Vis Bellica The Rules: Amendments The Rules: Frequently Asked Questions The Rules: Optional Rules After Action Reports (Vis Bellica) Army Lists Articles about Vis Bellica Scenarios for Vis Bellica Other After Action Reports: WRG 6th Other After Action Reports: TTS
  • The Rules: Optional Rules After Action Reports
  • Scorecard 2024 Gallery: Burt, Steve Gallery: Cooper, Nick Gallery: Darkin, Des Gallery: Davenport, Jonathan Gallery: Douglas, Mervyn Gallery: Emmett. John Gallery: Flint, Carole Gallery: Helliwell, Andrew Gallery: Kay, Chris Gallery: Luther, Mark Gallery: Plowman, Ralph Gallery: Sapper Gallery: Scott, David Gallery: Slade, Matt Gallery: Stumpy Gallery: Vis Bellica
  • Scorecard 2023 Gallery: Bowler, Lloyd Gallery: Burt, Steve Gallery: Cooper, Nick Gallery: Douglas, Mervyn Gallery: Emmett, John Gallery: Flint, Carole Gallery: Helliwell, Andrew Gallery: Hodge, Derek Gallery: Kay, Chris Gallery: Luther, Mark Gallery: Plowman, Ralph Gallery: Pollard, Ashley Gallery: Sapper Gallery: Scott, David Gallery: Slade, Matt Gallery: Stumpy Gallery: Vis Bellica
  • Scorecard 2022 Gallery: Bowler, Lloyd Gallery: Burt, Steve Gallery: Cooper, Nick Gallery: Douglas, Mervyn Gallery: Emmett, John Gallery: Flint, Carole Gallery: Goodrick, Pete Gallery: Haines, John Gallery: Helliwell, Andrew Gallery: Hodge, Derek Gallery: Kay, Chris Gallery: Luther, Mark Gallery: Plowman, Ralph Gallery: Pollard, Ashley Gallery: Sapper Gallery: Scott, David Gallery: Slade, Matt Gallery: Stumpy Gallery: Vis Bellica
  • Scorecard 2021 Gallery: Anzani, Joe Gallery: Bowler, Lloyd Gallery: Burt, Steve Gallery: Cooper, Nick Gallery: Douglas, Mervyn Gallery: Duffell, Andy Gallery: Emmett, John Gallery: Flint, Carole Gallery: Haines, John Gallery: Helliwell, Andrew Gallery: Hiett, Travis Gallery: Hodge, Derek Gallery: Kay, Chris Gallery: Luther, Mark Gallery: McGinn, Joe Gallery: Melville, Doug Gallery: Plowman, Ralph Gallery: Pollard, Ashley Gallery: Ralls, Jason Gallery: Sapper Gallery: Scott, David Gallery: Slade, Matt Gallery: Stoesen, Chris Gallery: Stumpy Gallery: Vis Bellica
  • Scorecard 2020 Gallery: Bloggs, Fred Gallery: Bluemoose Ken Gallery: Bowler, Lloyd Gallery: Burt, Steve Gallery: Cornwell, Chris Gallery: Douglas, Mervyn Gallery: Duffell, Andy Gallery: Emmett, John Gallery: Flint, Carole Gallery: Haines, John Gallery: Helliwell, Andrew Gallery: Hiatt, Travis Gallery: Hodge, Derek Gallery: Hooge, Neil Gallery: Kay, Chris Gallery: Luther, Mark Gallery: McGinn, Joe Gallery: Melville, Doug Gallery: Plowman, Ralph Gallery: Pollard, Ashley Gallery: Ralls, Jason Gallery: Sapper Gallery: Scott, David Gallery: Slade, Matt Gallery: Stoesen, Chris Gallery: Stumpy Gallery: Vis Bellica
  • Scorecard 2019 Gallery: Bloggs, Fred Gallery: Blue Moose Ken Gallery: Bowen, Ed Gallery: Bowler, Lloyd Gallery: Burt, Steve Gallery: Clarke, Richard Gallery: Cornwell, Chris Gallery: Davenport, Jon Gallery: Douglas, Mervyn Gallery: Duffell, Andy Gallery: de Terre Neuve, John Gallery: Emmett, John Gallery: Fat Wally Gallery: Flint, Carole Gallery: Haines, John Gallery: Helliwell, Andrew Gallery: Hiett, Travis Gallery: Hodge, Derek Gallery: Hooge, Neil Gallery: Johnston, Owen Gallery: Kay, Chris Gallery: Luther, Mark Gallery: McGinn, Joe Gallery: Melville, Doug Gallery: Plowman, Ralph Gallery: Ralls, Jason Gallery: Sapper Gallery: Scott, David Gallery: Slade, Matt Gallery: Stoesen, Chris Gallery: Stumpy Gallery: Vis Bellica Gallery: Yuengling, Jon
  • Scorecard 2018 Gallery: Bloggs, Fred Gallery: Blue Moose Ken Gallery: Bowen, Ed Gallery: Bowler, Lloyd Gallery: Burt, Steve Gallery: Cornwell, Chris Gallery: Davenport, Jonathan Gallery: de Terre Neuve, John Gallery: Douglas, Mervyn Gallery: Duffell, Andy Gallery: Fat Wally Gallery: Flint, Carole Gallery: Freerange Egg Gallery: Haines, John Gallery: Helliwell, Andrew Gallery: Hiett, Travis Gallery: Hodge, Derek Gallery: Hooge, Neil Gallery: Johnston, Owen Gallery: Kay, Chris Gallery: Lampon, Steven Gallery: Luther, Mark Gallery: McGinn, Joe Gallery: Melville, Doug Gallery: Plowman, Ralph Gallery: Ralls, Jason Gallery: Sapper Gallery: Scott, David Gallery: Slade, Matt Gallery: Stoesen, Chris Gallery: Stumpy Gallery: Treadhead Gallery: Vis Bellica Gallery: Yuengling, Jon
  • Scorecard Gallery: Bond, Geoff Gallery: Bowen, Edward Gallery: Bowler, Lloyd Gallery: Burt, Steve Gallery: Cabey Cabey Gallery: Catchpole, Jim Gallery: Davenport, Jon Gallery: Davies, Keith Gallery: de Smedt, Kohn Gallery: de Terre Neuve, John Gallery: Douglas, Mervyn Gallery: Duffell, Andy Gallery: Fat Wally (Kev) Gallery: Flint, Carole Gallery: Freerange Egg Gallery: Gatzemeyer, Garrett Gallery: Gilbride, Chris Gallery: Haines, John Gallery: Helliwell, Andrew Gallery: Hodge, Derek Gallery: Hooge, Neil Gallery: Humm, Dave Gallery: Kay, Chris Gallery: Lampon, Steven Gallery: Luther, Mark Gallery: MacNeill, Craig Gallery: McCarthy, Andrew Gallery: The Mad Padre Gallery: McGinn, Joe Gallery: Melville, Doug Gallery: Naylor, Richard Gallery: Nissvik, Thomas Gallery: Old Pivot Gallery: Owen Gallery: Pollard, Ashley Gallery: Plowman, Ralph Gallery: Ralls, Jason Gallery: Sapper Gallery: Scott, David Gallery: Slade, Matt Gallery: Stoesen, Chris Gallery: Stumpy Gallery: Treadhead Gallery: Vis Bellica Gallery: Weathersby, Brian Gallery: WillieB Gallery: Yuengling, Jon
  • Scorecard 2016 Gallery: Baldwin, Paul Gallery: Blankenship, Paul Gallery: Bloggs, Fred Gallery: Bond, Geoff Gallery: Bowen, Ed Gallery: Bowler, Lloyd Gallery: Burt, Steve Gallery: Catchpole, Jim Gallery: Clarke, Richard Gallery: Davenport, Jon Gallery: Davies, Keith Gallery: de Smedt, Koen Gallery: Douglas, Mervyn Gallery: Duffell, Andy Gallery: Egg Gallery: Fitch, Doug Gallery: Flint, Carole Gallery: Gatzemeyer, Garrett Gallery: Gilbride, Chris Gallery: Helliwell, Andrew Gallery: Hodge, Derek Gallery: Hooge, Neil Gallery: Humm, Dave Gallery: I Am Bruce Gallery: Lowth, Kev (Fat Wally) Gallery: Luther, Mark Gallery: The Mad Padre Gallery: McCarthy, Andrew Gallery: Melville, Doug Gallery: Naylor, Richard Gallery: Nissvik, Thomas Gallery: Oracle Gallery: Owen Gallery: Plowman, Ralph Gallery: Pollard, Ashley Gallery: Ralls, Jason Gallery: Sapper Gallery: Slade, Matt Gallery: Stoesen, Chris Gallery: Stumpy Gallery: Treadhead Gallery: Vis Bellica Gallery: Willie B Gallery: Yuengling, Jon
  • Scorecard 2015 Gallery: AJH Gallery: Bairos, Vidal Gallery: Baldwin, Paul Gallery: Bax, Dick Gallery: Blankenship, Paul Gallery: Bloggs, Fred Gallery: Bond, Geoff Bond Gallery: Bowler, Hat Gallery: Burt, Steve Gallery: Corbett, Wulf Gallery: Danziger, Richard Gallery: Davies, Keith Gallery: de Smedt, Koen Gallery: de terre neuve, john Gallery: Douglas, Mervyn Gallery: Duffell, Andy Gallery: Egg, Freerange Gallery: Eggman Glass Gallery: Eriksson, Leif Gallery: Fat Wally Gallery: Flint, Carole Gallery: Gilbride, Chris Gallery: Hedglin, Nils Gallery: Helliwell, Andy Gallery: Hodge, Derek Gallery: Hooooge, Neil Gallery: Humm, Dave Gallery: I'm Bruce Gallery: Luther, Mark Gallery: The Mad Padre Gallery: Maerk Gallery: McCarthy, Andrew Gallery: Melville, Doug Gallery: Miller, Andrew Gallery: Miller, Steve Gallery: Milne, Neil Gallery: Mikkola, Topi Gallery: Mr Nouveau Gallery: Naylor, Richard Gallery: Nissvik, Thomas Gallery: Owen Gallery: Pedivere Gallery: Pingu Gallery: Pollard, Ashley Gallery: Plowman, Ralph Gallery: Ralls, Jason Gallery: Sapper Gallery: Skelton, Dom Gallery: Slade, Matt Gallery: Stapells, Tony Gallery: Stoesen, Chris Gallery: Strom, Joakim Gallery: Stumpy Gallery: Topyob Gallery: Treadhead Gallery: Vera, Benito Gallery: Vis Bellica Gallery: Willie B Gallery: Yuengling, Jon Gallery: Catchpole, Jim
  • Scorecard Gallery: Alexandros Gallery: Ambler, Craig Gallery: Armstrong, Keith Gallery: Bailey, Dave Gallery: Bairos, Vidal Gallery: Bax, Dick Gallery: Bloggs, Fred Gallery: Bond, Geoff Gallery: Burt, Steve Gallery: Carnegie, Ron Gallery: Carole Gallery: Catchpole, Jim Gallery: Clarke, Richard Gallery: Corbett, Wulf Gallery: Danziger, Richard Gallery: De Smedt, Koen Gallery: de Terre Neuve, John Gallery: Deeks, Jon Gallery: Douglas, Mervyn Gallery: Duffell, Andy Gallery: Egg, Free Range Gallery: Erikson, Leif Gallery: Fat Wally (Kev) Gallery: Fiene, Ben Gallery: Gilbride, Chris Gallery: Hodge, Derek Gallery: Humm, Dave Gallery: Llano, Manuel Gallery: Luther, Mark Gallery: Melville, Doug Gallery: Mikkola, Topi Gallery: Miller, Andrew Gallery: munsterfan8 Gallery: Murray, Jim Gallery: Nissvik, Thomas Gallery: Owen Gallery: The Mad Padre Gallery: PatG Gallery: Pingu Gallery: Plowman, Ralph Gallery: Pollard, Ashley Gallery: Ralls, Jason Gallery: Slade, Matt Gallery: Stoesen, Chris Gallery: Strom, Joakim Gallery: Stumpy Gallery: Thomas, John Gallery: Treadhead Gallery: Vera, Benito Gallery: Vis Bellica Gallery: Warrior in the Attic Gallery: Weir, Jim Gallery: Whitaker, Mike Gallery: WillieB Gallery: Yuengling, Jon
  • TooFatLardies
Vis Lardica
  • New & Updated/
  • TFL Painting Challenge 2025/
    • Introduction & Details
    • Scorecard 2025
    • Gallery: Burt, Steve
    • Gallery: Cooper, Nick
    • Gallery: Douglas, Mervyn
    • Gallery: Emmett, John
    • Gallery: Flint, Carole
    • Gallery: Helliwell, Andrew
    • Gallery: Luther, Mark
    • Gallery: Plowman, Ralph
    • Gallery: Sapper
    • Gallery: Stumpy
    • Gallery: Vis Bellica
  • I Ain't Been Shot, Mum! (WW2)/
    • Introduction to IABSM
    • Video: How To Play IABSM, Part One
    • Video: How to Play IABSM, Part Two
    • Video: How to Play IABSM, Part Three
    • After Action Reports (IABSM)
    • Army Galleries (IABSM)
    • Buy IABSM Scenario Packs
    • Buy IABSM Theatre Supplements
    • Figure Manufacturers (IABSM)
    • Figure Reviews (IABSM)
    • Game Aids (IABSM)
    • IABSM Facebook Group
  • Charlie Don't Surf! (Vietnam/Arab-Israeli/Moderns)/
    • Introduction to CDS
    • After Action Reports (CDS)
    • Army Galleries (CDS)
    • The Arab-Israeli Six Day War
    • The Arab-Israeli Yom Kippur War
    • After Action Reports (Arab-Israeli Wars)
    • Army Galleries (Arab-Israeli Wars)
    • After Action Reports (Moderns)
  • Quadrant 13 (Sci-Fi)/
    • Introduction to Q13
    • After Action Reports (Q13)
    • Army Galleries (Q13)
    • Army Lists for Q13
    • Buy Q13 and/or Five Planets
    • Figure Manufacturers (Q13)
    • Figure Reviews (Q13)
    • Points System Spreadsheets
  • Vis Imperica (19th Century)/
    • Introduction to 19th Century
    • Army Galleries (19th Century)
    • Army Lists
    • After Action Reports
    • Articles & Essays
    • Quick Guide to the Wars of the 19th Century
  • Vis Lucii (Pike & Shot)/
    • Introduction and AAR
    • FK&P: The Eastern Front
  • Vis Bellica (Ancients)/
    • Introduction to Vis Bellica
    • The Rules: Amendments
    • The Rules: Frequently Asked Questions
    • The Rules: Optional Rules
    • After Action Reports (Vis Bellica)
    • Army Lists
    • Articles about Vis Bellica
    • Scenarios for Vis Bellica
    • Other After Action Reports: WRG 6th
    • Other After Action Reports: TTS
  • Vis Magica (Fantasy)/
    • The Rules: Optional Rules
    • After Action Reports
  • TFL Painting Challenge 2024/
    • Scorecard 2024
    • Gallery: Burt, Steve
    • Gallery: Cooper, Nick
    • Gallery: Darkin, Des
    • Gallery: Davenport, Jonathan
    • Gallery: Douglas, Mervyn
    • Gallery: Emmett. John
    • Gallery: Flint, Carole
    • Gallery: Helliwell, Andrew
    • Gallery: Kay, Chris
    • Gallery: Luther, Mark
    • Gallery: Plowman, Ralph
    • Gallery: Sapper
    • Gallery: Scott, David
    • Gallery: Slade, Matt
    • Gallery: Stumpy
    • Gallery: Vis Bellica
  • TFL Painting Challenge 2023/
    • Scorecard 2023
    • Gallery: Bowler, Lloyd
    • Gallery: Burt, Steve
    • Gallery: Cooper, Nick
    • Gallery: Douglas, Mervyn
    • Gallery: Emmett, John
    • Gallery: Flint, Carole
    • Gallery: Helliwell, Andrew
    • Gallery: Hodge, Derek
    • Gallery: Kay, Chris
    • Gallery: Luther, Mark
    • Gallery: Plowman, Ralph
    • Gallery: Pollard, Ashley
    • Gallery: Sapper
    • Gallery: Scott, David
    • Gallery: Slade, Matt
    • Gallery: Stumpy
    • Gallery: Vis Bellica
  • TFL Painting Challenge 2022/
    • Scorecard 2022
    • Gallery: Bowler, Lloyd
    • Gallery: Burt, Steve
    • Gallery: Cooper, Nick
    • Gallery: Douglas, Mervyn
    • Gallery: Emmett, John
    • Gallery: Flint, Carole
    • Gallery: Goodrick, Pete
    • Gallery: Haines, John
    • Gallery: Helliwell, Andrew
    • Gallery: Hodge, Derek
    • Gallery: Kay, Chris
    • Gallery: Luther, Mark
    • Gallery: Plowman, Ralph
    • Gallery: Pollard, Ashley
    • Gallery: Sapper
    • Gallery: Scott, David
    • Gallery: Slade, Matt
    • Gallery: Stumpy
    • Gallery: Vis Bellica
  • TFL Painting Challenge 2021/
    • Scorecard 2021
    • Gallery: Anzani, Joe
    • Gallery: Bowler, Lloyd
    • Gallery: Burt, Steve
    • Gallery: Cooper, Nick
    • Gallery: Douglas, Mervyn
    • Gallery: Duffell, Andy
    • Gallery: Emmett, John
    • Gallery: Flint, Carole
    • Gallery: Haines, John
    • Gallery: Helliwell, Andrew
    • Gallery: Hiett, Travis
    • Gallery: Hodge, Derek
    • Gallery: Kay, Chris
    • Gallery: Luther, Mark
    • Gallery: McGinn, Joe
    • Gallery: Melville, Doug
    • Gallery: Plowman, Ralph
    • Gallery: Pollard, Ashley
    • Gallery: Ralls, Jason
    • Gallery: Sapper
    • Gallery: Scott, David
    • Gallery: Slade, Matt
    • Gallery: Stoesen, Chris
    • Gallery: Stumpy
    • Gallery: Vis Bellica
  • TFL Painting Challenge 2020/
    • Scorecard 2020
    • Gallery: Bloggs, Fred
    • Gallery: Bluemoose Ken
    • Gallery: Bowler, Lloyd
    • Gallery: Burt, Steve
    • Gallery: Cornwell, Chris
    • Gallery: Douglas, Mervyn
    • Gallery: Duffell, Andy
    • Gallery: Emmett, John
    • Gallery: Flint, Carole
    • Gallery: Haines, John
    • Gallery: Helliwell, Andrew
    • Gallery: Hiatt, Travis
    • Gallery: Hodge, Derek
    • Gallery: Hooge, Neil
    • Gallery: Kay, Chris
    • Gallery: Luther, Mark
    • Gallery: McGinn, Joe
    • Gallery: Melville, Doug
    • Gallery: Plowman, Ralph
    • Gallery: Pollard, Ashley
    • Gallery: Ralls, Jason
    • Gallery: Sapper
    • Gallery: Scott, David
    • Gallery: Slade, Matt
    • Gallery: Stoesen, Chris
    • Gallery: Stumpy
    • Gallery: Vis Bellica
  • TFL Painting Challenge 2019/
    • Scorecard 2019
    • Gallery: Bloggs, Fred
    • Gallery: Blue Moose Ken
    • Gallery: Bowen, Ed
    • Gallery: Bowler, Lloyd
    • Gallery: Burt, Steve
    • Gallery: Clarke, Richard
    • Gallery: Cornwell, Chris
    • Gallery: Davenport, Jon
    • Gallery: Douglas, Mervyn
    • Gallery: Duffell, Andy
    • Gallery: de Terre Neuve, John
    • Gallery: Emmett, John
    • Gallery: Fat Wally
    • Gallery: Flint, Carole
    • Gallery: Haines, John
    • Gallery: Helliwell, Andrew
    • Gallery: Hiett, Travis
    • Gallery: Hodge, Derek
    • Gallery: Hooge, Neil
    • Gallery: Johnston, Owen
    • Gallery: Kay, Chris
    • Gallery: Luther, Mark
    • Gallery: McGinn, Joe
    • Gallery: Melville, Doug
    • Gallery: Plowman, Ralph
    • Gallery: Ralls, Jason
    • Gallery: Sapper
    • Gallery: Scott, David
    • Gallery: Slade, Matt
    • Gallery: Stoesen, Chris
    • Gallery: Stumpy
    • Gallery: Vis Bellica
    • Gallery: Yuengling, Jon
  • TFL Painting Challenge 2018/
    • Scorecard 2018
    • Gallery: Bloggs, Fred
    • Gallery: Blue Moose Ken
    • Gallery: Bowen, Ed
    • Gallery: Bowler, Lloyd
    • Gallery: Burt, Steve
    • Gallery: Cornwell, Chris
    • Gallery: Davenport, Jonathan
    • Gallery: de Terre Neuve, John
    • Gallery: Douglas, Mervyn
    • Gallery: Duffell, Andy
    • Gallery: Fat Wally
    • Gallery: Flint, Carole
    • Gallery: Freerange Egg
    • Gallery: Haines, John
    • Gallery: Helliwell, Andrew
    • Gallery: Hiett, Travis
    • Gallery: Hodge, Derek
    • Gallery: Hooge, Neil
    • Gallery: Johnston, Owen
    • Gallery: Kay, Chris
    • Gallery: Lampon, Steven
    • Gallery: Luther, Mark
    • Gallery: McGinn, Joe
    • Gallery: Melville, Doug
    • Gallery: Plowman, Ralph
    • Gallery: Ralls, Jason
    • Gallery: Sapper
    • Gallery: Scott, David
    • Gallery: Slade, Matt
    • Gallery: Stoesen, Chris
    • Gallery: Stumpy
    • Gallery: Treadhead
    • Gallery: Vis Bellica
    • Gallery: Yuengling, Jon
  • TFL Painting Challenge 2017/
    • Scorecard
    • Gallery: Bond, Geoff
    • Gallery: Bowen, Edward
    • Gallery: Bowler, Lloyd
    • Gallery: Burt, Steve
    • Gallery: Cabey Cabey
    • Gallery: Catchpole, Jim
    • Gallery: Davenport, Jon
    • Gallery: Davies, Keith
    • Gallery: de Smedt, Kohn
    • Gallery: de Terre Neuve, John
    • Gallery: Douglas, Mervyn
    • Gallery: Duffell, Andy
    • Gallery: Fat Wally (Kev)
    • Gallery: Flint, Carole
    • Gallery: Freerange Egg
    • Gallery: Gatzemeyer, Garrett
    • Gallery: Gilbride, Chris
    • Gallery: Haines, John
    • Gallery: Helliwell, Andrew
    • Gallery: Hodge, Derek
    • Gallery: Hooge, Neil
    • Gallery: Humm, Dave
    • Gallery: Kay, Chris
    • Gallery: Lampon, Steven
    • Gallery: Luther, Mark
    • Gallery: MacNeill, Craig
    • Gallery: McCarthy, Andrew
    • Gallery: The Mad Padre
    • Gallery: McGinn, Joe
    • Gallery: Melville, Doug
    • Gallery: Naylor, Richard
    • Gallery: Nissvik, Thomas
    • Gallery: Old Pivot
    • Gallery: Owen
    • Gallery: Pollard, Ashley
    • Gallery: Plowman, Ralph
    • Gallery: Ralls, Jason
    • Gallery: Sapper
    • Gallery: Scott, David
    • Gallery: Slade, Matt
    • Gallery: Stoesen, Chris
    • Gallery: Stumpy
    • Gallery: Treadhead
    • Gallery: Vis Bellica
    • Gallery: Weathersby, Brian
    • Gallery: WillieB
    • Gallery: Yuengling, Jon
  • TFL Painting Challenge 2016/
    • Scorecard 2016
    • Gallery: Baldwin, Paul
    • Gallery: Blankenship, Paul
    • Gallery: Bloggs, Fred
    • Gallery: Bond, Geoff
    • Gallery: Bowen, Ed
    • Gallery: Bowler, Lloyd
    • Gallery: Burt, Steve
    • Gallery: Catchpole, Jim
    • Gallery: Clarke, Richard
    • Gallery: Davenport, Jon
    • Gallery: Davies, Keith
    • Gallery: de Smedt, Koen
    • Gallery: Douglas, Mervyn
    • Gallery: Duffell, Andy
    • Gallery: Egg
    • Gallery: Fitch, Doug
    • Gallery: Flint, Carole
    • Gallery: Gatzemeyer, Garrett
    • Gallery: Gilbride, Chris
    • Gallery: Helliwell, Andrew
    • Gallery: Hodge, Derek
    • Gallery: Hooge, Neil
    • Gallery: Humm, Dave
    • Gallery: I Am Bruce
    • Gallery: Lowth, Kev (Fat Wally)
    • Gallery: Luther, Mark
    • Gallery: The Mad Padre
    • Gallery: McCarthy, Andrew
    • Gallery: Melville, Doug
    • Gallery: Naylor, Richard
    • Gallery: Nissvik, Thomas
    • Gallery: Oracle
    • Gallery: Owen
    • Gallery: Plowman, Ralph
    • Gallery: Pollard, Ashley
    • Gallery: Ralls, Jason
    • Gallery: Sapper
    • Gallery: Slade, Matt
    • Gallery: Stoesen, Chris
    • Gallery: Stumpy
    • Gallery: Treadhead
    • Gallery: Vis Bellica
    • Gallery: Willie B
    • Gallery: Yuengling, Jon
  • TFL Painting Challenge 2015/
    • Scorecard 2015
    • Gallery: AJH
    • Gallery: Bairos, Vidal
    • Gallery: Baldwin, Paul
    • Gallery: Bax, Dick
    • Gallery: Blankenship, Paul
    • Gallery: Bloggs, Fred
    • Gallery: Bond, Geoff Bond
    • Gallery: Bowler, Hat
    • Gallery: Burt, Steve
    • Gallery: Corbett, Wulf
    • Gallery: Danziger, Richard
    • Gallery: Davies, Keith
    • Gallery: de Smedt, Koen
    • Gallery: de terre neuve, john
    • Gallery: Douglas, Mervyn
    • Gallery: Duffell, Andy
    • Gallery: Egg, Freerange
    • Gallery: Eggman Glass
    • Gallery: Eriksson, Leif
    • Gallery: Fat Wally
    • Gallery: Flint, Carole
    • Gallery: Gilbride, Chris
    • Gallery: Hedglin, Nils
    • Gallery: Helliwell, Andy
    • Gallery: Hodge, Derek
    • Gallery: Hooooge, Neil
    • Gallery: Humm, Dave
    • Gallery: I'm Bruce
    • Gallery: Luther, Mark
    • Gallery: The Mad Padre
    • Gallery: Maerk
    • Gallery: McCarthy, Andrew
    • Gallery: Melville, Doug
    • Gallery: Miller, Andrew
    • Gallery: Miller, Steve
    • Gallery: Milne, Neil
    • Gallery: Mikkola, Topi
    • Gallery: Mr Nouveau
    • Gallery: Naylor, Richard
    • Gallery: Nissvik, Thomas
    • Gallery: Owen
    • Gallery: Pedivere
    • Gallery: Pingu
    • Gallery: Pollard, Ashley
    • Gallery: Plowman, Ralph
    • Gallery: Ralls, Jason
    • Gallery: Sapper
    • Gallery: Skelton, Dom
    • Gallery: Slade, Matt
    • Gallery: Stapells, Tony
    • Gallery: Stoesen, Chris
    • Gallery: Strom, Joakim
    • Gallery: Stumpy
    • Gallery: Topyob
    • Gallery: Treadhead
    • Gallery: Vera, Benito
    • Gallery: Vis Bellica
    • Gallery: Willie B
    • Gallery: Yuengling, Jon
    • Gallery: Catchpole, Jim
  • TFL Painting Challenge 2014/
    • Scorecard
    • Gallery: Alexandros
    • Gallery: Ambler, Craig
    • Gallery: Armstrong, Keith
    • Gallery: Bailey, Dave
    • Gallery: Bairos, Vidal
    • Gallery: Bax, Dick
    • Gallery: Bloggs, Fred
    • Gallery: Bond, Geoff
    • Gallery: Burt, Steve
    • Gallery: Carnegie, Ron
    • Gallery: Carole
    • Gallery: Catchpole, Jim
    • Gallery: Clarke, Richard
    • Gallery: Corbett, Wulf
    • Gallery: Danziger, Richard
    • Gallery: De Smedt, Koen
    • Gallery: de Terre Neuve, John
    • Gallery: Deeks, Jon
    • Gallery: Douglas, Mervyn
    • Gallery: Duffell, Andy
    • Gallery: Egg, Free Range
    • Gallery: Erikson, Leif
    • Gallery: Fat Wally (Kev)
    • Gallery: Fiene, Ben
    • Gallery: Gilbride, Chris
    • Gallery: Hodge, Derek
    • Gallery: Humm, Dave
    • Gallery: Llano, Manuel
    • Gallery: Luther, Mark
    • Gallery: Melville, Doug
    • Gallery: Mikkola, Topi
    • Gallery: Miller, Andrew
    • Gallery: munsterfan8
    • Gallery: Murray, Jim
    • Gallery: Nissvik, Thomas
    • Gallery: Owen
    • Gallery: The Mad Padre
    • Gallery: PatG
    • Gallery: Pingu
    • Gallery: Plowman, Ralph
    • Gallery: Pollard, Ashley
    • Gallery: Ralls, Jason
    • Gallery: Slade, Matt
    • Gallery: Stoesen, Chris
    • Gallery: Strom, Joakim
    • Gallery: Stumpy
    • Gallery: Thomas, John
    • Gallery: Treadhead
    • Gallery: Vera, Benito
    • Gallery: Vis Bellica
    • Gallery: Warrior in the Attic
    • Gallery: Weir, Jim
    • Gallery: Whitaker, Mike
    • Gallery: WillieB
    • Gallery: Yuengling, Jon
  • TooFatLardies/
 Hill 272.1 The Soviet objective  This is the high point of the ridge that looks down on Mokre. The German recon units are covering the right flank of the Pz Div's advance and are not expecting much from this direction. The Russians want to get to th
Vis Lardica

AAR 1944 Poland: Mokre Counter-Attack by Mark Luther

A battle report or After Action Report (AAR) for I Ain't Been Shot, Mum (IABSM), the company-sized wargaming rules for WW2 from the TooFatLardies. A one-off game or scenario set in Poland in the year 1944.

Vis Lardica
  • New & Updated/
  • TFL Painting Challenge 2025/
    • Introduction & Details
    • Scorecard 2025
    • Gallery: Burt, Steve
    • Gallery: Cooper, Nick
    • Gallery: Douglas, Mervyn
    • Gallery: Emmett, John
    • Gallery: Flint, Carole
    • Gallery: Helliwell, Andrew
    • Gallery: Luther, Mark
    • Gallery: Plowman, Ralph
    • Gallery: Sapper
    • Gallery: Stumpy
    • Gallery: Vis Bellica
  • I Ain't Been Shot, Mum! (WW2)/
    • Introduction to IABSM
    • Video: How To Play IABSM, Part One
    • Video: How to Play IABSM, Part Two
    • Video: How to Play IABSM, Part Three
    • After Action Reports (IABSM)
    • Army Galleries (IABSM)
    • Buy IABSM Scenario Packs
    • Buy IABSM Theatre Supplements
    • Figure Manufacturers (IABSM)
    • Figure Reviews (IABSM)
    • Game Aids (IABSM)
    • IABSM Facebook Group
  • Charlie Don't Surf! (Vietnam/Arab-Israeli/Moderns)/
    • Introduction to CDS
    • After Action Reports (CDS)
    • Army Galleries (CDS)
    • The Arab-Israeli Six Day War
    • The Arab-Israeli Yom Kippur War
    • After Action Reports (Arab-Israeli Wars)
    • Army Galleries (Arab-Israeli Wars)
    • After Action Reports (Moderns)
  • Quadrant 13 (Sci-Fi)/
    • Introduction to Q13
    • After Action Reports (Q13)
    • Army Galleries (Q13)
    • Army Lists for Q13
    • Buy Q13 and/or Five Planets
    • Figure Manufacturers (Q13)
    • Figure Reviews (Q13)
    • Points System Spreadsheets
  • Vis Imperica (19th Century)/
    • Introduction to 19th Century
    • Army Galleries (19th Century)
    • Army Lists
    • After Action Reports
    • Articles & Essays
    • Quick Guide to the Wars of the 19th Century
  • Vis Lucii (Pike & Shot)/
    • Introduction and AAR
    • FK&P: The Eastern Front
  • Vis Bellica (Ancients)/
    • Introduction to Vis Bellica
    • The Rules: Amendments
    • The Rules: Frequently Asked Questions
    • The Rules: Optional Rules
    • After Action Reports (Vis Bellica)
    • Army Lists
    • Articles about Vis Bellica
    • Scenarios for Vis Bellica
    • Other After Action Reports: WRG 6th
    • Other After Action Reports: TTS
  • Vis Magica (Fantasy)/
    • The Rules: Optional Rules
    • After Action Reports
  • TFL Painting Challenge 2024/
    • Scorecard 2024
    • Gallery: Burt, Steve
    • Gallery: Cooper, Nick
    • Gallery: Darkin, Des
    • Gallery: Davenport, Jonathan
    • Gallery: Douglas, Mervyn
    • Gallery: Emmett. John
    • Gallery: Flint, Carole
    • Gallery: Helliwell, Andrew
    • Gallery: Kay, Chris
    • Gallery: Luther, Mark
    • Gallery: Plowman, Ralph
    • Gallery: Sapper
    • Gallery: Scott, David
    • Gallery: Slade, Matt
    • Gallery: Stumpy
    • Gallery: Vis Bellica
  • TFL Painting Challenge 2023/
    • Scorecard 2023
    • Gallery: Bowler, Lloyd
    • Gallery: Burt, Steve
    • Gallery: Cooper, Nick
    • Gallery: Douglas, Mervyn
    • Gallery: Emmett, John
    • Gallery: Flint, Carole
    • Gallery: Helliwell, Andrew
    • Gallery: Hodge, Derek
    • Gallery: Kay, Chris
    • Gallery: Luther, Mark
    • Gallery: Plowman, Ralph
    • Gallery: Pollard, Ashley
    • Gallery: Sapper
    • Gallery: Scott, David
    • Gallery: Slade, Matt
    • Gallery: Stumpy
    • Gallery: Vis Bellica
  • TFL Painting Challenge 2022/
    • Scorecard 2022
    • Gallery: Bowler, Lloyd
    • Gallery: Burt, Steve
    • Gallery: Cooper, Nick
    • Gallery: Douglas, Mervyn
    • Gallery: Emmett, John
    • Gallery: Flint, Carole
    • Gallery: Goodrick, Pete
    • Gallery: Haines, John
    • Gallery: Helliwell, Andrew
    • Gallery: Hodge, Derek
    • Gallery: Kay, Chris
    • Gallery: Luther, Mark
    • Gallery: Plowman, Ralph
    • Gallery: Pollard, Ashley
    • Gallery: Sapper
    • Gallery: Scott, David
    • Gallery: Slade, Matt
    • Gallery: Stumpy
    • Gallery: Vis Bellica
  • TFL Painting Challenge 2021/
    • Scorecard 2021
    • Gallery: Anzani, Joe
    • Gallery: Bowler, Lloyd
    • Gallery: Burt, Steve
    • Gallery: Cooper, Nick
    • Gallery: Douglas, Mervyn
    • Gallery: Duffell, Andy
    • Gallery: Emmett, John
    • Gallery: Flint, Carole
    • Gallery: Haines, John
    • Gallery: Helliwell, Andrew
    • Gallery: Hiett, Travis
    • Gallery: Hodge, Derek
    • Gallery: Kay, Chris
    • Gallery: Luther, Mark
    • Gallery: McGinn, Joe
    • Gallery: Melville, Doug
    • Gallery: Plowman, Ralph
    • Gallery: Pollard, Ashley
    • Gallery: Ralls, Jason
    • Gallery: Sapper
    • Gallery: Scott, David
    • Gallery: Slade, Matt
    • Gallery: Stoesen, Chris
    • Gallery: Stumpy
    • Gallery: Vis Bellica
  • TFL Painting Challenge 2020/
    • Scorecard 2020
    • Gallery: Bloggs, Fred
    • Gallery: Bluemoose Ken
    • Gallery: Bowler, Lloyd
    • Gallery: Burt, Steve
    • Gallery: Cornwell, Chris
    • Gallery: Douglas, Mervyn
    • Gallery: Duffell, Andy
    • Gallery: Emmett, John
    • Gallery: Flint, Carole
    • Gallery: Haines, John
    • Gallery: Helliwell, Andrew
    • Gallery: Hiatt, Travis
    • Gallery: Hodge, Derek
    • Gallery: Hooge, Neil
    • Gallery: Kay, Chris
    • Gallery: Luther, Mark
    • Gallery: McGinn, Joe
    • Gallery: Melville, Doug
    • Gallery: Plowman, Ralph
    • Gallery: Pollard, Ashley
    • Gallery: Ralls, Jason
    • Gallery: Sapper
    • Gallery: Scott, David
    • Gallery: Slade, Matt
    • Gallery: Stoesen, Chris
    • Gallery: Stumpy
    • Gallery: Vis Bellica
  • TFL Painting Challenge 2019/
    • Scorecard 2019
    • Gallery: Bloggs, Fred
    • Gallery: Blue Moose Ken
    • Gallery: Bowen, Ed
    • Gallery: Bowler, Lloyd
    • Gallery: Burt, Steve
    • Gallery: Clarke, Richard
    • Gallery: Cornwell, Chris
    • Gallery: Davenport, Jon
    • Gallery: Douglas, Mervyn
    • Gallery: Duffell, Andy
    • Gallery: de Terre Neuve, John
    • Gallery: Emmett, John
    • Gallery: Fat Wally
    • Gallery: Flint, Carole
    • Gallery: Haines, John
    • Gallery: Helliwell, Andrew
    • Gallery: Hiett, Travis
    • Gallery: Hodge, Derek
    • Gallery: Hooge, Neil
    • Gallery: Johnston, Owen
    • Gallery: Kay, Chris
    • Gallery: Luther, Mark
    • Gallery: McGinn, Joe
    • Gallery: Melville, Doug
    • Gallery: Plowman, Ralph
    • Gallery: Ralls, Jason
    • Gallery: Sapper
    • Gallery: Scott, David
    • Gallery: Slade, Matt
    • Gallery: Stoesen, Chris
    • Gallery: Stumpy
    • Gallery: Vis Bellica
    • Gallery: Yuengling, Jon
  • TFL Painting Challenge 2018/
    • Scorecard 2018
    • Gallery: Bloggs, Fred
    • Gallery: Blue Moose Ken
    • Gallery: Bowen, Ed
    • Gallery: Bowler, Lloyd
    • Gallery: Burt, Steve
    • Gallery: Cornwell, Chris
    • Gallery: Davenport, Jonathan
    • Gallery: de Terre Neuve, John
    • Gallery: Douglas, Mervyn
    • Gallery: Duffell, Andy
    • Gallery: Fat Wally
    • Gallery: Flint, Carole
    • Gallery: Freerange Egg
    • Gallery: Haines, John
    • Gallery: Helliwell, Andrew
    • Gallery: Hiett, Travis
    • Gallery: Hodge, Derek
    • Gallery: Hooge, Neil
    • Gallery: Johnston, Owen
    • Gallery: Kay, Chris
    • Gallery: Lampon, Steven
    • Gallery: Luther, Mark
    • Gallery: McGinn, Joe
    • Gallery: Melville, Doug
    • Gallery: Plowman, Ralph
    • Gallery: Ralls, Jason
    • Gallery: Sapper
    • Gallery: Scott, David
    • Gallery: Slade, Matt
    • Gallery: Stoesen, Chris
    • Gallery: Stumpy
    • Gallery: Treadhead
    • Gallery: Vis Bellica
    • Gallery: Yuengling, Jon
  • TFL Painting Challenge 2017/
    • Scorecard
    • Gallery: Bond, Geoff
    • Gallery: Bowen, Edward
    • Gallery: Bowler, Lloyd
    • Gallery: Burt, Steve
    • Gallery: Cabey Cabey
    • Gallery: Catchpole, Jim
    • Gallery: Davenport, Jon
    • Gallery: Davies, Keith
    • Gallery: de Smedt, Kohn
    • Gallery: de Terre Neuve, John
    • Gallery: Douglas, Mervyn
    • Gallery: Duffell, Andy
    • Gallery: Fat Wally (Kev)
    • Gallery: Flint, Carole
    • Gallery: Freerange Egg
    • Gallery: Gatzemeyer, Garrett
    • Gallery: Gilbride, Chris
    • Gallery: Haines, John
    • Gallery: Helliwell, Andrew
    • Gallery: Hodge, Derek
    • Gallery: Hooge, Neil
    • Gallery: Humm, Dave
    • Gallery: Kay, Chris
    • Gallery: Lampon, Steven
    • Gallery: Luther, Mark
    • Gallery: MacNeill, Craig
    • Gallery: McCarthy, Andrew
    • Gallery: The Mad Padre
    • Gallery: McGinn, Joe
    • Gallery: Melville, Doug
    • Gallery: Naylor, Richard
    • Gallery: Nissvik, Thomas
    • Gallery: Old Pivot
    • Gallery: Owen
    • Gallery: Pollard, Ashley
    • Gallery: Plowman, Ralph
    • Gallery: Ralls, Jason
    • Gallery: Sapper
    • Gallery: Scott, David
    • Gallery: Slade, Matt
    • Gallery: Stoesen, Chris
    • Gallery: Stumpy
    • Gallery: Treadhead
    • Gallery: Vis Bellica
    • Gallery: Weathersby, Brian
    • Gallery: WillieB
    • Gallery: Yuengling, Jon
  • TFL Painting Challenge 2016/
    • Scorecard 2016
    • Gallery: Baldwin, Paul
    • Gallery: Blankenship, Paul
    • Gallery: Bloggs, Fred
    • Gallery: Bond, Geoff
    • Gallery: Bowen, Ed
    • Gallery: Bowler, Lloyd
    • Gallery: Burt, Steve
    • Gallery: Catchpole, Jim
    • Gallery: Clarke, Richard
    • Gallery: Davenport, Jon
    • Gallery: Davies, Keith
    • Gallery: de Smedt, Koen
    • Gallery: Douglas, Mervyn
    • Gallery: Duffell, Andy
    • Gallery: Egg
    • Gallery: Fitch, Doug
    • Gallery: Flint, Carole
    • Gallery: Gatzemeyer, Garrett
    • Gallery: Gilbride, Chris
    • Gallery: Helliwell, Andrew
    • Gallery: Hodge, Derek
    • Gallery: Hooge, Neil
    • Gallery: Humm, Dave
    • Gallery: I Am Bruce
    • Gallery: Lowth, Kev (Fat Wally)
    • Gallery: Luther, Mark
    • Gallery: The Mad Padre
    • Gallery: McCarthy, Andrew
    • Gallery: Melville, Doug
    • Gallery: Naylor, Richard
    • Gallery: Nissvik, Thomas
    • Gallery: Oracle
    • Gallery: Owen
    • Gallery: Plowman, Ralph
    • Gallery: Pollard, Ashley
    • Gallery: Ralls, Jason
    • Gallery: Sapper
    • Gallery: Slade, Matt
    • Gallery: Stoesen, Chris
    • Gallery: Stumpy
    • Gallery: Treadhead
    • Gallery: Vis Bellica
    • Gallery: Willie B
    • Gallery: Yuengling, Jon
  • TFL Painting Challenge 2015/
    • Scorecard 2015
    • Gallery: AJH
    • Gallery: Bairos, Vidal
    • Gallery: Baldwin, Paul
    • Gallery: Bax, Dick
    • Gallery: Blankenship, Paul
    • Gallery: Bloggs, Fred
    • Gallery: Bond, Geoff Bond
    • Gallery: Bowler, Hat
    • Gallery: Burt, Steve
    • Gallery: Corbett, Wulf
    • Gallery: Danziger, Richard
    • Gallery: Davies, Keith
    • Gallery: de Smedt, Koen
    • Gallery: de terre neuve, john
    • Gallery: Douglas, Mervyn
    • Gallery: Duffell, Andy
    • Gallery: Egg, Freerange
    • Gallery: Eggman Glass
    • Gallery: Eriksson, Leif
    • Gallery: Fat Wally
    • Gallery: Flint, Carole
    • Gallery: Gilbride, Chris
    • Gallery: Hedglin, Nils
    • Gallery: Helliwell, Andy
    • Gallery: Hodge, Derek
    • Gallery: Hooooge, Neil
    • Gallery: Humm, Dave
    • Gallery: I'm Bruce
    • Gallery: Luther, Mark
    • Gallery: The Mad Padre
    • Gallery: Maerk
    • Gallery: McCarthy, Andrew
    • Gallery: Melville, Doug
    • Gallery: Miller, Andrew
    • Gallery: Miller, Steve
    • Gallery: Milne, Neil
    • Gallery: Mikkola, Topi
    • Gallery: Mr Nouveau
    • Gallery: Naylor, Richard
    • Gallery: Nissvik, Thomas
    • Gallery: Owen
    • Gallery: Pedivere
    • Gallery: Pingu
    • Gallery: Pollard, Ashley
    • Gallery: Plowman, Ralph
    • Gallery: Ralls, Jason
    • Gallery: Sapper
    • Gallery: Skelton, Dom
    • Gallery: Slade, Matt
    • Gallery: Stapells, Tony
    • Gallery: Stoesen, Chris
    • Gallery: Strom, Joakim
    • Gallery: Stumpy
    • Gallery: Topyob
    • Gallery: Treadhead
    • Gallery: Vera, Benito
    • Gallery: Vis Bellica
    • Gallery: Willie B
    • Gallery: Yuengling, Jon
    • Gallery: Catchpole, Jim
  • TFL Painting Challenge 2014/
    • Scorecard
    • Gallery: Alexandros
    • Gallery: Ambler, Craig
    • Gallery: Armstrong, Keith
    • Gallery: Bailey, Dave
    • Gallery: Bairos, Vidal
    • Gallery: Bax, Dick
    • Gallery: Bloggs, Fred
    • Gallery: Bond, Geoff
    • Gallery: Burt, Steve
    • Gallery: Carnegie, Ron
    • Gallery: Carole
    • Gallery: Catchpole, Jim
    • Gallery: Clarke, Richard
    • Gallery: Corbett, Wulf
    • Gallery: Danziger, Richard
    • Gallery: De Smedt, Koen
    • Gallery: de Terre Neuve, John
    • Gallery: Deeks, Jon
    • Gallery: Douglas, Mervyn
    • Gallery: Duffell, Andy
    • Gallery: Egg, Free Range
    • Gallery: Erikson, Leif
    • Gallery: Fat Wally (Kev)
    • Gallery: Fiene, Ben
    • Gallery: Gilbride, Chris
    • Gallery: Hodge, Derek
    • Gallery: Humm, Dave
    • Gallery: Llano, Manuel
    • Gallery: Luther, Mark
    • Gallery: Melville, Doug
    • Gallery: Mikkola, Topi
    • Gallery: Miller, Andrew
    • Gallery: munsterfan8
    • Gallery: Murray, Jim
    • Gallery: Nissvik, Thomas
    • Gallery: Owen
    • Gallery: The Mad Padre
    • Gallery: PatG
    • Gallery: Pingu
    • Gallery: Plowman, Ralph
    • Gallery: Pollard, Ashley
    • Gallery: Ralls, Jason
    • Gallery: Slade, Matt
    • Gallery: Stoesen, Chris
    • Gallery: Strom, Joakim
    • Gallery: Stumpy
    • Gallery: Thomas, John
    • Gallery: Treadhead
    • Gallery: Vera, Benito
    • Gallery: Vis Bellica
    • Gallery: Warrior in the Attic
    • Gallery: Weir, Jim
    • Gallery: Whitaker, Mike
    • Gallery: WillieB
    • Gallery: Yuengling, Jon
  • TooFatLardies/


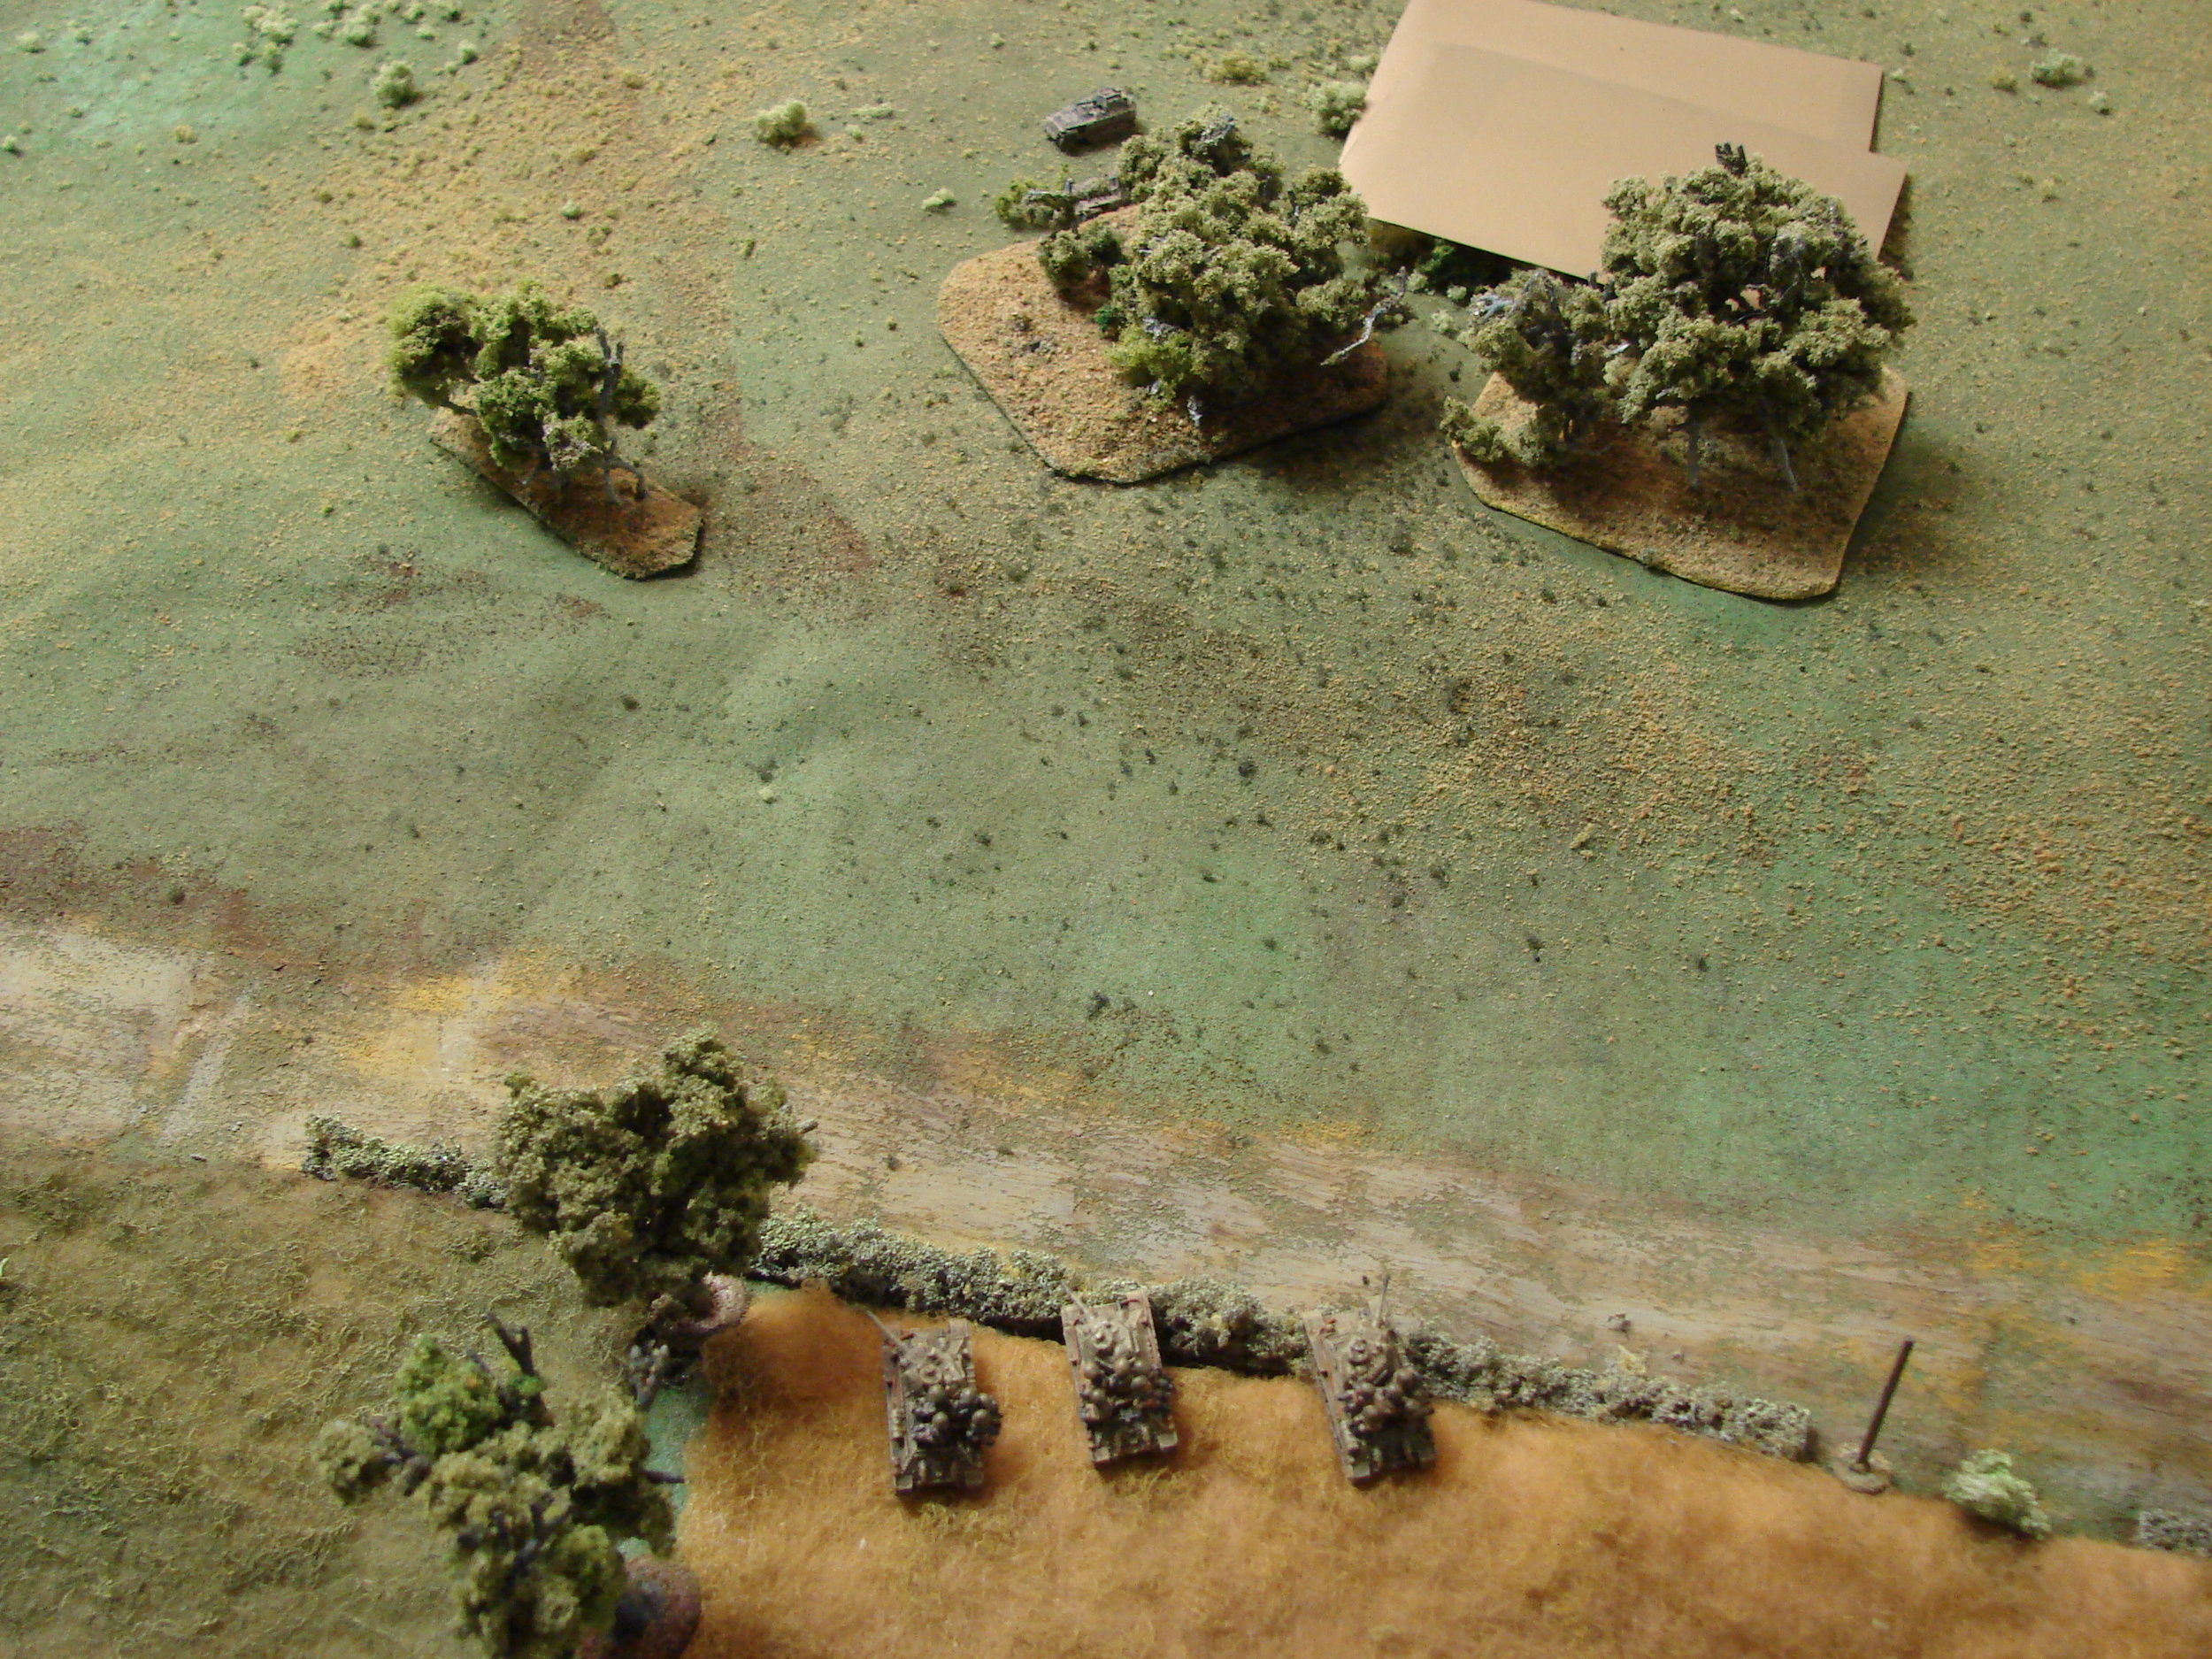
An IABSM 6mm game played December 2009. The scenario involves elements of the Aufkarungs company of the 16 Panzer Division guarding the flank of the division's counterattack on Sandomierz Bulge on August 1th 1944. Meanwhile the Soviet 52nd Tank Brigade has moved into village of Mokre to the south of and on the flank of the German thrust.

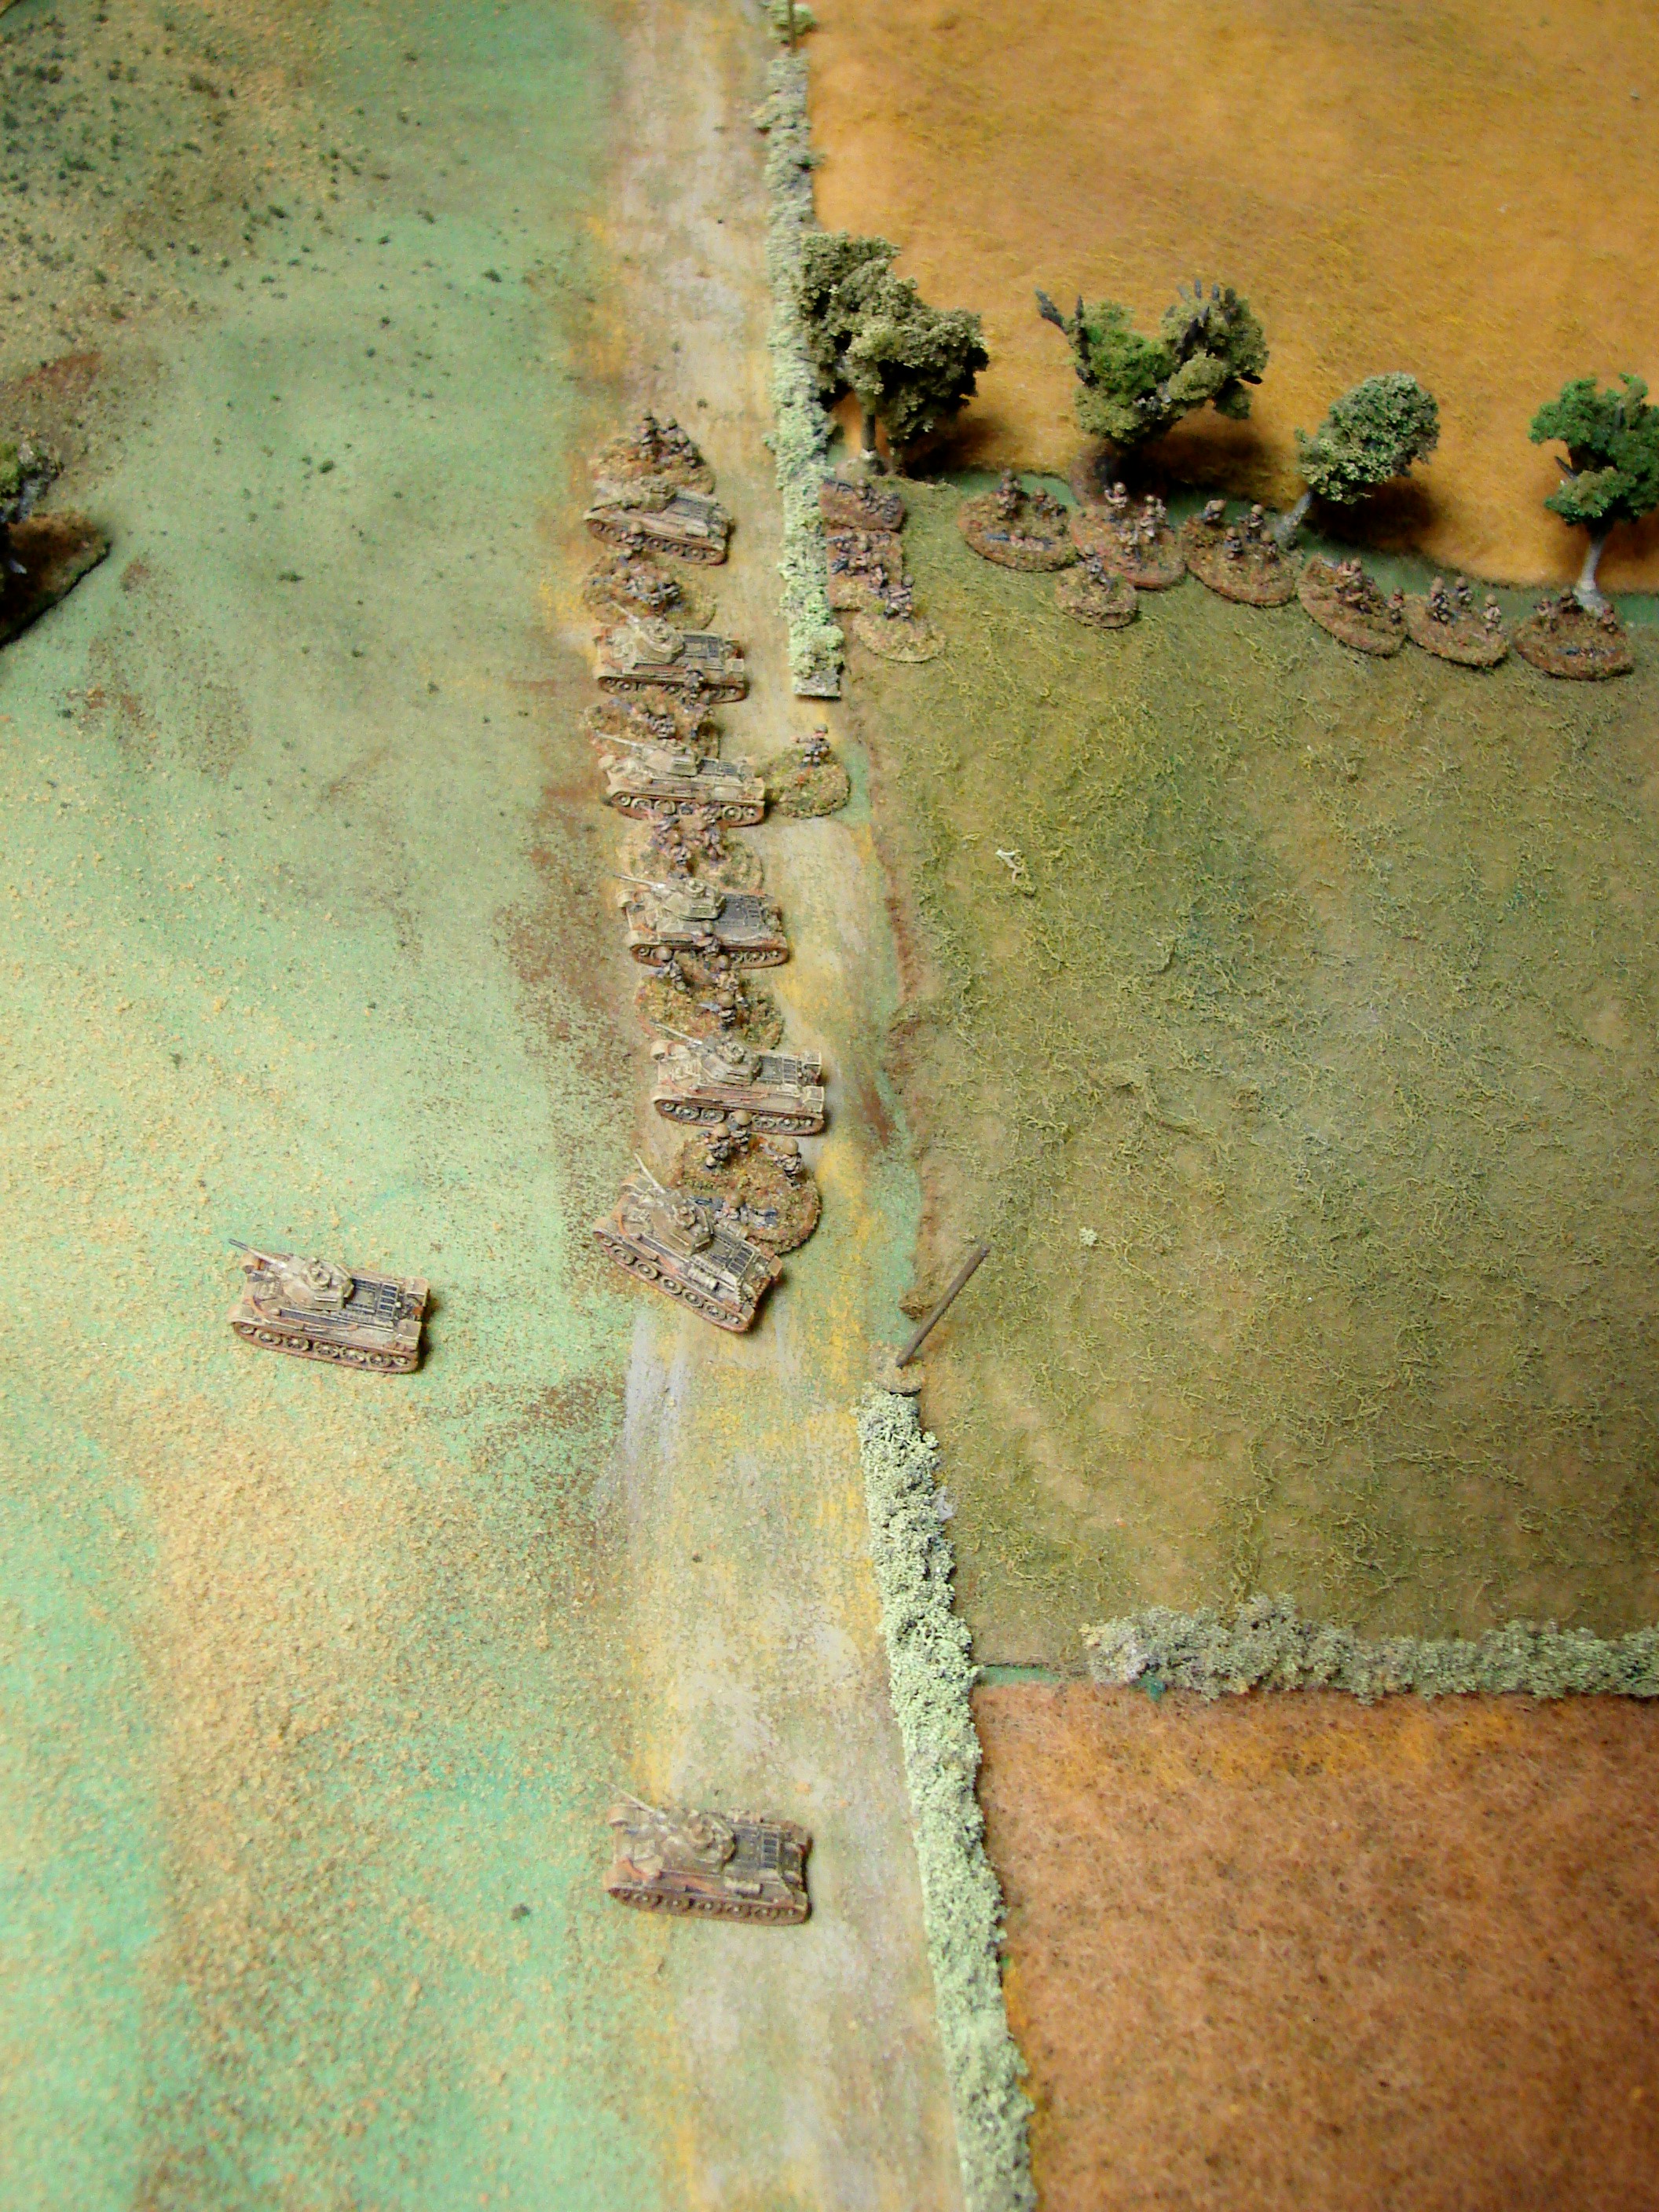
The Panzergrenadier units have the high gound and can see anyone moving out of the village. If this happens they can summon a battery of StuG IIIGs from 1 Komp III Abt, 2 Panzer Regiment. If more help is needed, the remnants of the 501 Heavy Panzer company can be recalled from the front of the advance.

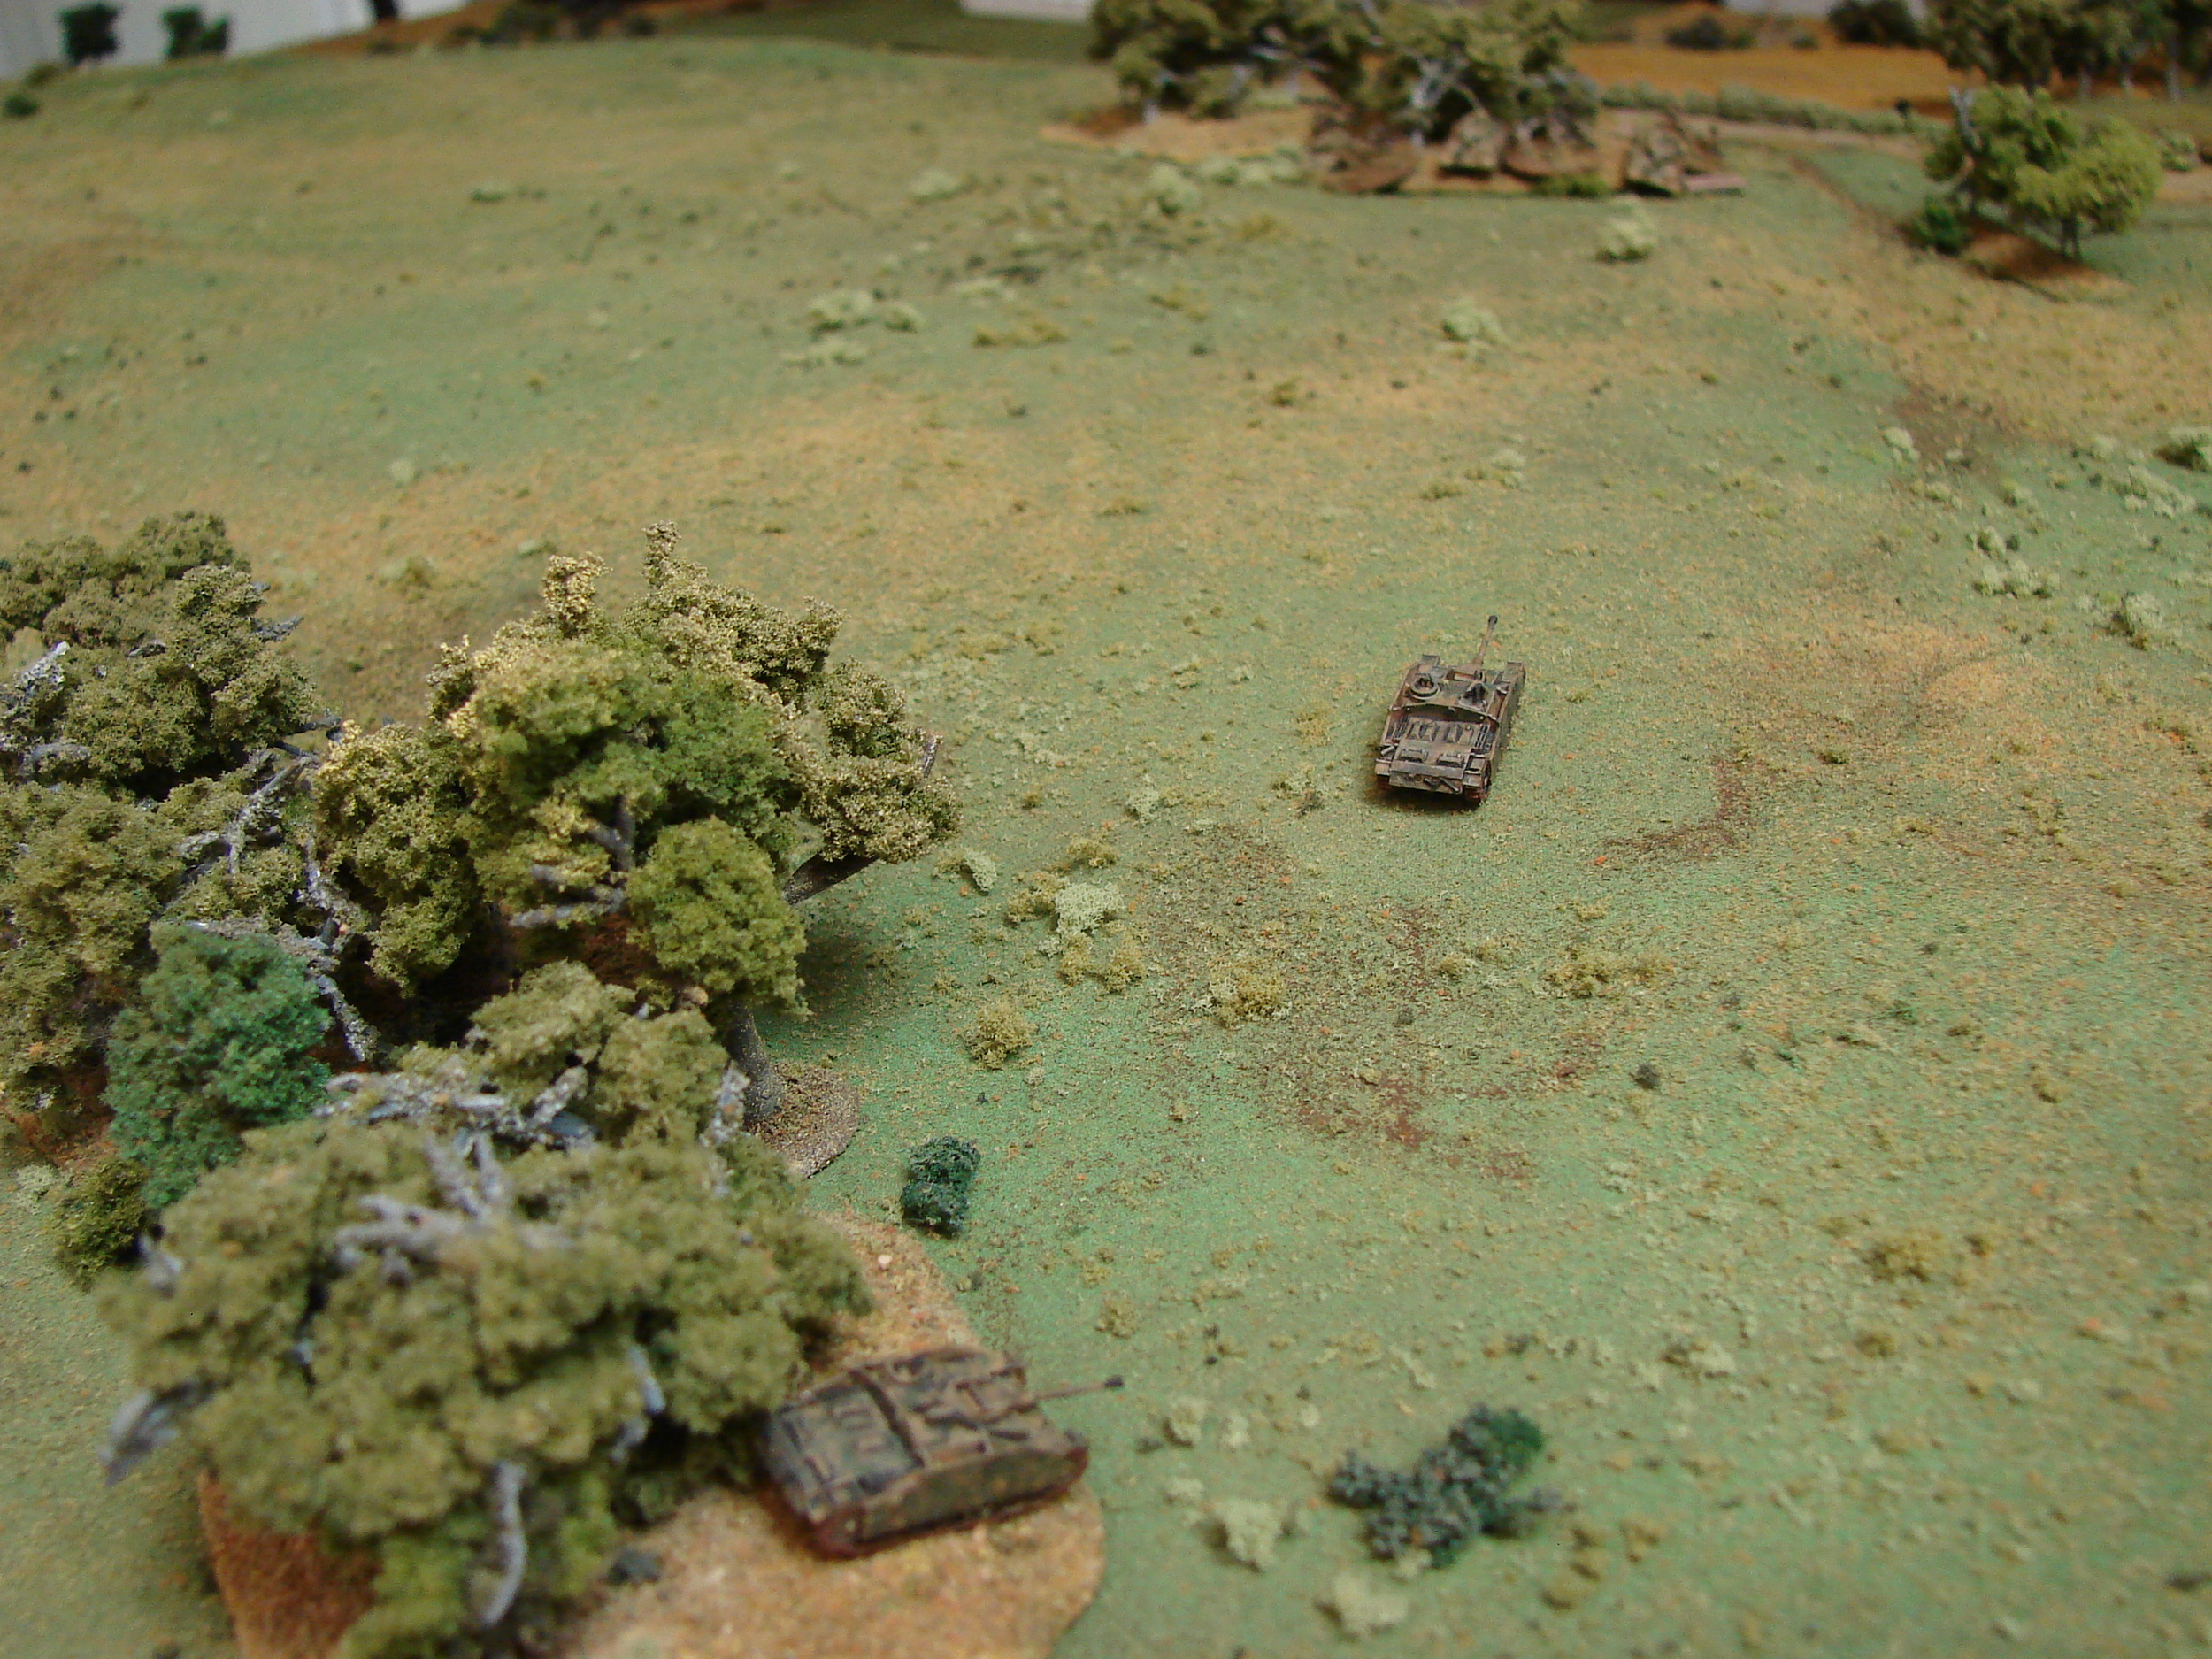
At start the German recce force had: two platoons with Sdkfz 251 (on or off board optional), all squads with Panzerfaust 30s; two Sdkfz 250/9; one Sdkfz 251/9; and an Sdkfz 250/3 command track. The heavy panzer company is down to three Tiger IIs in running order: they got mauled on the 11th.

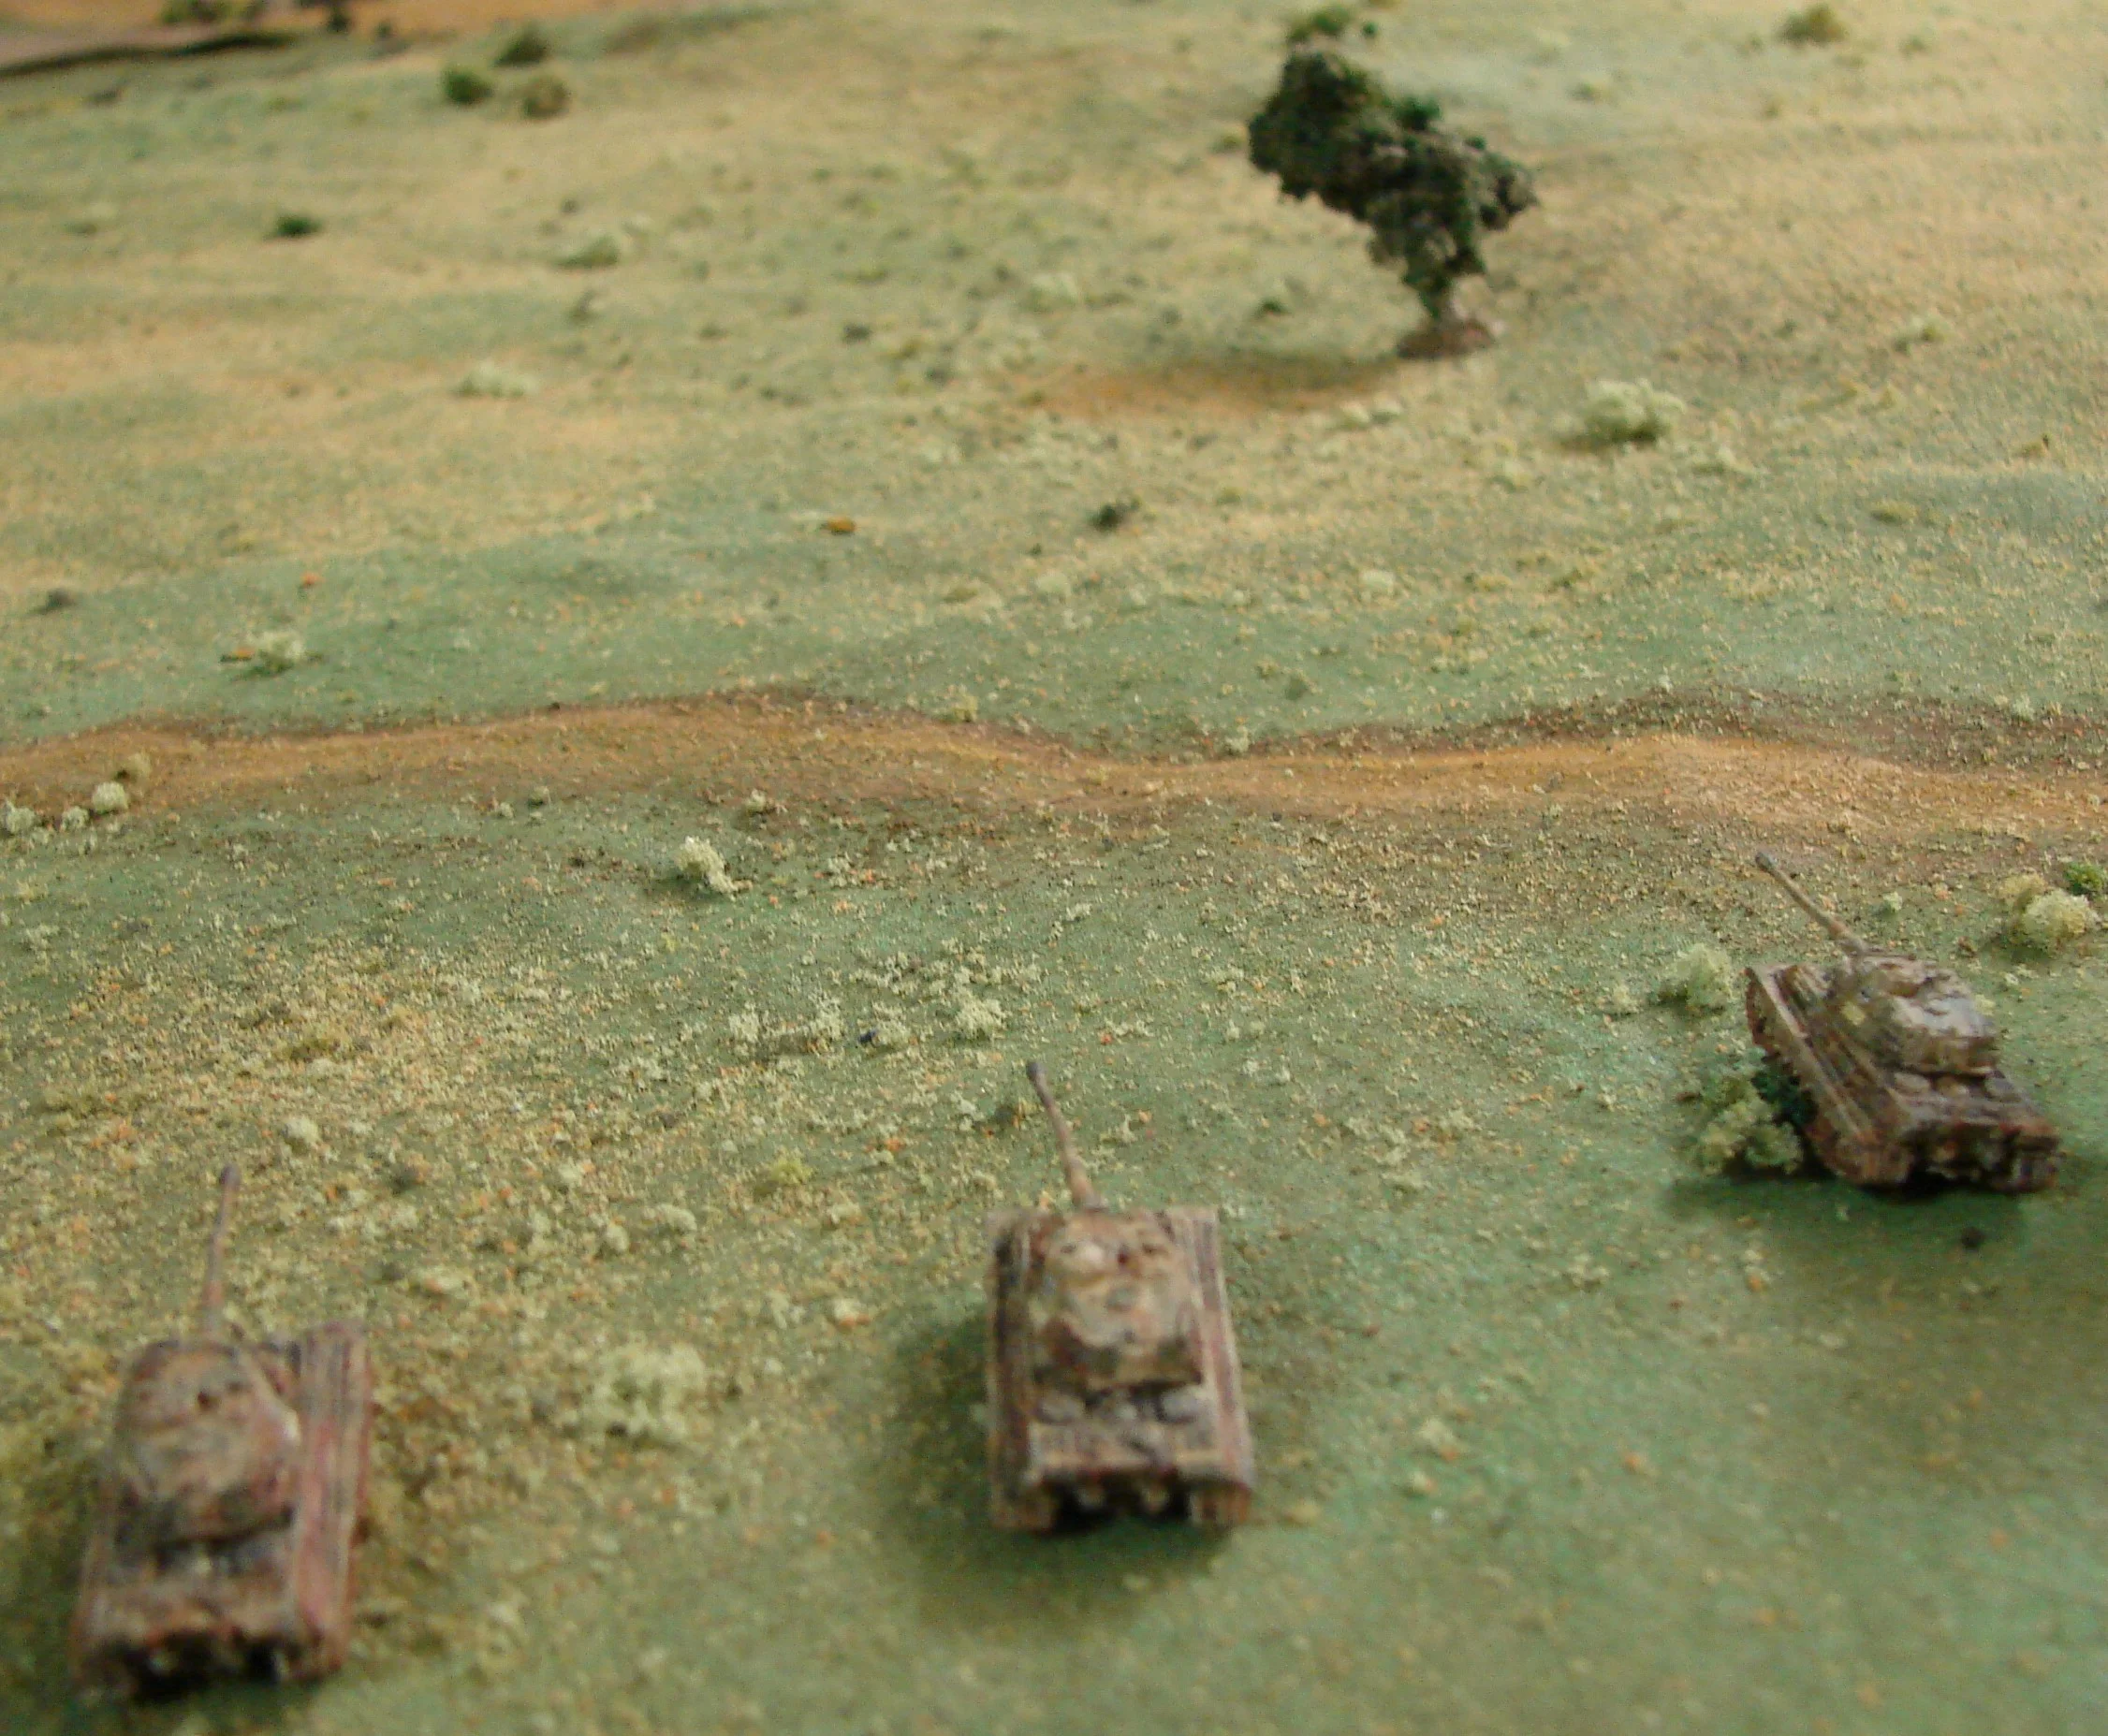
The 52nd Tank Brigade starts off board and come in on a variable number of Blinds (roll a 4-sided dice each turn: that many units come on plus a dummy Blind). They have eight T34/76s; four T34/85s; and a weak company of SMG (tank rider) troops. Three IS2s from the 71st Heavy Tank Regiment are attached.

Air support is possible for each side: FW190s for the Germans; Yak 9s or PE-2s for the Soviets. Roll a 6 when the German or Soviet Air Support card comes up.

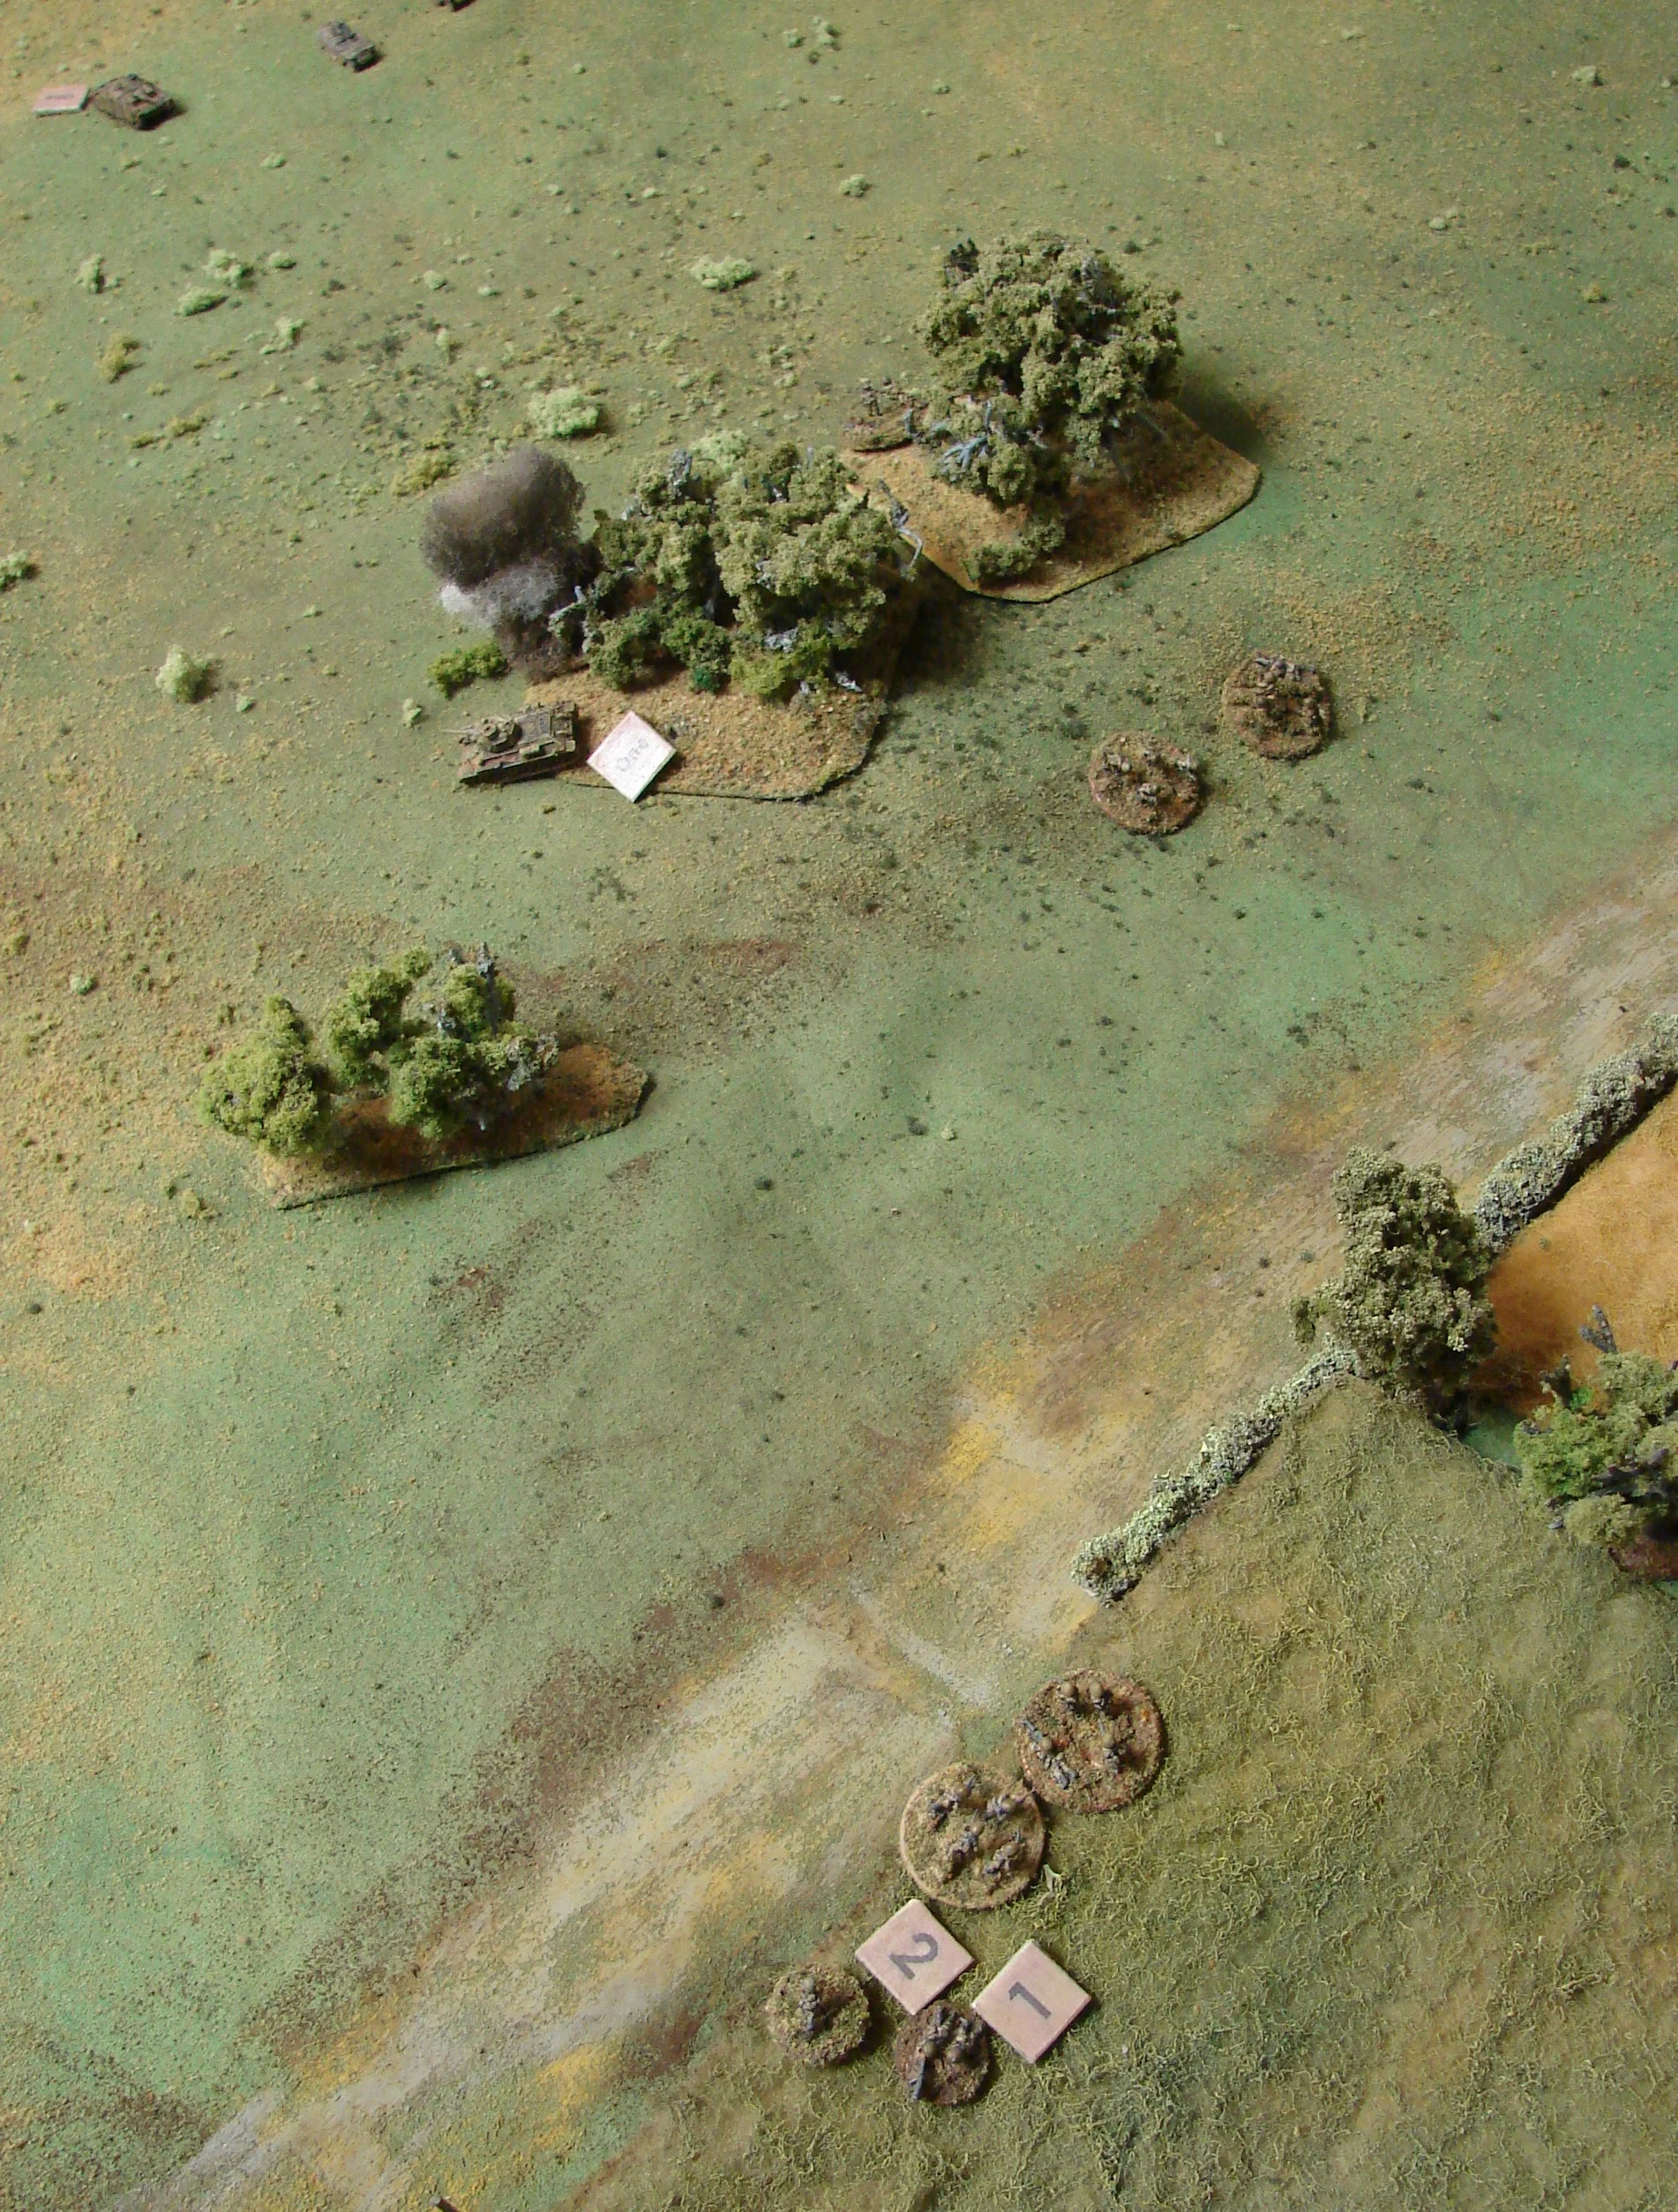
We played this twice. The first game Pieter Michiel as the Russians had a nice game of manoeuvre: all his stuff came in right from the start. The Germans had next to nothing to stop the armor as the Stugs didn't come in until we felt sorry for the Germans. The Tiger IIs also had to be brought in just so PM had something to shoot at. A game that was deserving of an apology. The first game is the last 13 pictures.

Mark Luther

 
 Hill 272.1 The Soviet objective  This is the high point of the ridge that looks down on Mokre. The German recon units are covering the right flank of the Pz Div's advance and are not expecting much from this direction. The Russians want to get to th

Hill 272.1 The Soviet objective

This is the high point of the ridge that looks down on Mokre. The German recon units are covering the right flank of the Pz Div's advance and are not expecting much from this direction. The Russians want to get to the top of the ridge so they can look down and be in the rear of the main group of the Panzers.

 The terrain north of Mokre  Mokre is off board south (to the right) of a ridge line the dominates the town. The main advance of the 24th Panzer Division is to the east. They are unaware that the Soviet 52nd Tank Brigade is on their flank.

The terrain north of Mokre

Mokre is off board south (to the right) of a ridge line the dominates the town. The main advance of the 24th Panzer Division is to the east. They are unaware that the Soviet 52nd Tank Brigade is on their flank.

 First Russians Identified  In this game the Russians came in at different times. The variable deployment really made a big difference and the Germans also managed to get the Stugs on within 3 turns. Here is a couple of the T34/76s with tankriders. T

First Russians Identified

In this game the Russians came in at different times. The variable deployment really made a big difference and the Germans also managed to get the Stugs on within 3 turns. Here is a couple of the T34/76s with tankriders. The other T34/76s and their riders are coming in near the center of the table edge to the right of the picture.

 Cleaning Off The Infantry  The right side grenadier platoon opens up with their LMGs and gets some nice hits on the 'great' target of infantry clinging to the sides of the T-34s

Cleaning Off The Infantry

The right side grenadier platoon opens up with their LMGs and gets some nice hits on the 'great' target of infantry clinging to the sides of the T-34s

 StuGs Opening Up  The StuG battery came in on the 3rd turn and managed to get up on the slope to fire down on the T-34s. They did immobilise one T-34.

StuGs Opening Up

The StuG battery came in on the 3rd turn and managed to get up on the slope to fire down on the T-34s. They did immobilise one T-34.

 Sdkfz 250/9 Chewing Up Some Infantry  The infantry quickly dismounts and heads for cover. This is also different than the first game. The Germans actually get some cards and can engage targets before they are all the way across the table.

Sdkfz 250/9 Chewing Up Some Infantry

The infantry quickly dismounts and heads for cover. This is also different than the first game. The Germans actually get some cards and can engage targets before they are all the way across the table.

 Half of the T-34/76s  Four of the eight T-34s with tank riders coming under fire from Stugs, Sdkfz 250/9 and LMGs from the grenadiers along the intersection.

Half of the T-34/76s

Four of the eight T-34s with tank riders coming under fire from Stugs, Sdkfz 250/9 and LMGs from the grenadiers along the intersection.

 More T-34s  They know something is firing from the backside of the copse. The Blind is the HQ group with an Sdkfz 250/3 and an Sdkfz 251/9.

More T-34s

They know something is firing from the backside of the copse. The Blind is the HQ group with an Sdkfz 250/3 and an Sdkfz 251/9.

 Can't Hit The Tank  This Panzergrenadier squad misses three times with their panzerfaust and winds up being wiped out by the SMGs and the tanks' MGs.

Can't Hit The Tank

This Panzergrenadier squad misses three times with their panzerfaust and winds up being wiped out by the SMGs and the tanks' MGs.

 More Soviets and SMGs  The firefight winds up eliminating this squad of grenadiers and most of the Russian infantry.

More Soviets and SMGs

The firefight winds up eliminating this squad of grenadiers and most of the Russian infantry.

 Stummel fires and retreats  The T34s are too close for comfort so the HQ group shoots and scoots. This allows the Russians to occupy the woods shortly.

Stummel fires and retreats

The T34s are too close for comfort so the HQ group shoots and scoots. This allows the Russians to occupy the woods shortly.

 Stugs vs T-34s  Two of the Stugs move to takeon the T-34s that have moved up to the light woods. The Stug on the right backs out of the fight to recover some shock points and one of the T-34s gets blasted next turn.

Stugs vs T-34s

Two of the Stugs move to takeon the T-34s that have moved up to the light woods. The Stug on the right backs out of the fight to recover some shock points and one of the T-34s gets blasted next turn.

 Firefight Continues  Heavy casualties for both infantry units. The failure to hit the T-34 with a 'faust is a big disappointment.

Firefight Continues

Heavy casualties for both infantry units. The failure to hit the T-34 with a 'faust is a big disappointment.

 This Will Even Up The Battle  So there are eight T-34/76s, four T-34s and three IS2s moving on the table against the three Stugs. Here come the equalizers.

This Will Even Up The Battle

So there are eight T-34/76s, four T-34s and three IS2s moving on the table against the three Stugs. Here come the equalizers.

 Achtung Panzers!  Enemy tanks spotted. Now we'll see how well these Tigers can handle the action (not too well).

Achtung Panzers!

Enemy tanks spotted. Now we'll see how well these Tigers can handle the action (not too well).

 Panzergrenadiers Laying Low As The Armour Drives By  The two platoons were sent out to the flanks to guard the roads. The Russians choose to drive up the middle over the fields. Max 8" range on the Pzfst 30s meant that this tactic worked well for th

Panzergrenadiers Laying Low As The Armour Drives By

The two platoons were sent out to the flanks to guard the roads. The Russians choose to drive up the middle over the fields. Max 8" range on the Pzfst 30s meant that this tactic worked well for the Soviets and the grenadiers would have to move in to engage.

 Overview of the left flank  Tiger IIs spot some T-34/85s and begin a firefight with them. Each of the T-34/85s have 2 HVAP rounds. The Blinds are IS2s and Dummy blinds.

Overview of the left flank

Tiger IIs spot some T-34/85s and begin a firefight with them. Each of the T-34/85s have 2 HVAP rounds. The Blinds are IS2s and Dummy blinds.

 The Recon Support Group and the CO  The Stugs engage the T-34s at long and close range. The Stummel gets a lucky hit on a T-34 and causes it to explode. The Sdkfz 250/9s are moving to the left to engage Russian infantry advancing on the objective.

The Recon Support Group and the CO

The Stugs engage the T-34s at long and close range. The Stummel gets a lucky hit on a T-34 and causes it to explode. The Sdkfz 250/9s are moving to the left to engage Russian infantry advancing on the objective.

 Firefight Continues on the Flank  Burning T-34 from the Stummel hit. The Grenadiers have really chewed up the ex-tank riders. A T-34 with a jammed turret joins the company CO just as it goes up in smoke.

Firefight Continues on the Flank

Burning T-34 from the Stummel hit. The Grenadiers have really chewed up the ex-tank riders. A T-34 with a jammed turret joins the company CO just as it goes up in smoke.

 Volley Fire  The T-34/85s fire off all their HVAP( two rounds each) and put some hurtin' on the Tigers. None KO'd but engine damage and plenty of Shock.

Volley Fire

The T-34/85s fire off all their HVAP( two rounds each) and put some hurtin' on the Tigers. None KO'd but engine damage and plenty of Shock.

 Looking West  The road runs along a slope with fields to the south that the Soviets will advance through.

Looking West

The road runs along a slope with fields to the south that the Soviets will advance through.

 T-34s and dismounted Tank Riders  The company of T-34s and their tank riders dismount using the road berm for cover.

T-34s and dismounted Tank Riders

The company of T-34s and their tank riders dismount using the road berm for cover.

 IS2s Moving Up  The heavies move up the center of the table directly towards the hill objective.

IS2s Moving Up

The heavies move up the center of the table directly towards the hill objective.

 T34/85s Moving to the Left  Spotting some infantry on the left flank, the tanks move to engage them with long range MG fire

T34/85s Moving to the Left

Spotting some infantry on the left flank, the tanks move to engage them with long range MG fire

 Run Away  The Recon HQ flees after missing with a Panzerfaust and taking some MG fire from the Russian at the road. Not only do the Germans not get any cards, but they can't roll decently when they finally get a chance.

Run Away

The Recon HQ flees after missing with a Panzerfaust and taking some MG fire from the Russian at the road. Not only do the Germans not get any cards, but they can't roll decently when they finally get a chance.

 1st Panzergrenadier Platoon Moves Back  No reason to stay way out on that flank and nothing coming up the road so the grenadiers pull back to try to get back to the hill.

1st Panzergrenadier Platoon Moves Back

No reason to stay way out on that flank and nothing coming up the road so the grenadiers pull back to try to get back to the hill.

 IS2s Move Ahead  Nothing to stop 'em, so they just keep moving to take the hill.

IS2s Move Ahead

Nothing to stop 'em, so they just keep moving to take the hill.

 May I join you?  IS2 creeps up the embankment and nails a Tiger II on its first shot.

May I join you?

IS2 creeps up the embankment and nails a Tiger II on its first shot.

 Trading long range fire  The T34/85s w/HVAP were tough enough, but the IS2 manages to blast a Tiger II completely. No hits on the Russkies.

Trading long range fire

The T34/85s w/HVAP were tough enough, but the IS2 manages to blast a Tiger II completely. No hits on the Russkies.

 Grenadiers in the Rear  The left flank grenadier platoon moves through the field to close assault, or at least 'faust, the Soviets. Two out of three miss and one T-34/85 is destroyed.

Grenadiers in the Rear

The left flank grenadier platoon moves through the field to close assault, or at least 'faust, the Soviets. Two out of three miss and one T-34/85 is destroyed.

 Tigers Looking Ragged  The Soviets definitely are winning this exchange. Only one tank, an IS2, has gone up. Meanwhile one Tiger II has blown up, one is knocked out with engine damage, gun KO'ed and subsequently abandoned when it got a 'breakdown' c

Tigers Looking Ragged

The Soviets definitely are winning this exchange. Only one tank, an IS2, has gone up. Meanwhile one Tiger II has blown up, one is knocked out with engine damage, gun KO'ed and subsequently abandoned when it got a 'breakdown' card drawn and the remaining Tiger (the CO who is an 'ace') has a couple of shock points and engine damage.

 Charging the Tigers  No point is sticking around where the grenadiers can hit them with their Pzfst 30s, so the Tanskis head towards the Big Cats.

Charging the Tigers

No point is sticking around where the grenadiers can hit them with their Pzfst 30s, so the Tanskis head towards the Big Cats.

 Trying to Take Out a T-34  One of the grenadier squads moves up to try to panzerfaust a T-34. First shot misses. That T-34 has a stuck turret at any rate.

Trying to Take Out a T-34

One of the grenadier squads moves up to try to panzerfaust a T-34. First shot misses. That T-34 has a stuck turret at any rate.

 Stalled out on the Left  One of the Soviet Big Men tries to rally the troops on the left while under fire from the grenadiers. The two T-34s are trading long range shots with a StuG, causing its engine to catch fire.

Stalled out on the Left

One of the Soviet Big Men tries to rally the troops on the left while under fire from the grenadiers. The two T-34s are trading long range shots with a StuG, causing its engine to catch fire.

 Remaing Russian Infantry Heading Back to the Center of the Board  What's left of the Russki infantry moves back down to try to form a back up and find a CO. Two T-34s duking it out with the StuGs.

Remaing Russian Infantry Heading Back to the Center of the Board

What's left of the Russki infantry moves back down to try to form a back up and find a CO. Two T-34s duking it out with the StuGs.

 Cleaning Up Some Infantry  The Sdkfz 250/9 chase the remnants of the Soviet infantry back to the woods and road. The StuGs are trading fire with the two T-34s. Stummel still moving to get into position.

Cleaning Up Some Infantry

The Sdkfz 250/9 chase the remnants of the Soviet infantry back to the woods and road. The StuGs are trading fire with the two T-34s. Stummel still moving to get into position.

 Non Denominational Smiting  We finally did get an actual airstrike. When a card came up (one for Russians, one for Germans), we had to roll a '6'. After failing to get a 6 around a dozen times, we finally got the Luftwaffe to make an appearance. Wit

Non Denominational Smiting

We finally did get an actual airstrike. When a card came up (one for Russians, one for Germans), we had to roll a '6'. After failing to get a 6 around a dozen times, we finally got the Luftwaffe to make an appearance. With such a confused battlefield, we just rolled to see what unit in the open would be attacked. The gaggle of Soviet tanks was the lucky target and one bomb landed right on target, destroying a T-34 and stunning another next to it. The other bomb went 10" off target, smack into the grenadiers, causing a kill and a few shock points.

 End of the Game  FockeWulfes fly away and we decide to call it. Russkie loses were such that they had next to no infantry left. Still four T-34/76s, two T-34/85s and two IS2s running. Germans were down to a crippled King Tiger and two Stugs along wi

End of the Game

FockeWulfes fly away and we decide to call it. Russkie loses were such that they had next to no infantry left. Still four T-34/76s, two T-34/85s and two IS2s running. Germans were down to a crippled King Tiger and two Stugs along with their halftracks and most of the grenadiers. We decided that the Red tanks wouldn't try to press the attack without more infantry. Time to call in the artillery.

 Stugs Arrive and Immediately Get Hit  Well, after several turns of waiting for the StuG card to show we finally decied to bring them on to try to stymie the Red Rampage of PM.      Two of three are hit immediately and one is destroyed. They did

Stugs Arrive and Immediately Get Hit

Well, after several turns of waiting for the StuG card to show we finally decied to bring them on to try to stymie the Red Rampage of PM. 


Two of three are hit immediately and one is destroyed. They did managed to slightly damage a couple of T-34s.

 Staking Out the Objective  The IS2s and some T-34/76s climb up the hill and search for potential targets.

Staking Out the Objective

The IS2s and some T-34/76s climb up the hill and search for potential targets.

 I See You  The IS2s move over the top of the hill to blast the weapons halftracks. Not much the tracks can do except try to run, which they fail to do before getting KO'd. The run of no German cards continued.

I See You

The IS2s move over the top of the hill to blast the weapons halftracks. Not much the tracks can do except try to run, which they fail to do before getting KO'd. The run of no German cards continued.

 The Other Platoon Hunkers Down  After taking some long rane fire from the T-34/85s the 2nd recon platoon moved back across the road to use the cover of the trees and the backslope. Unless the Russians moved closer they were effectively out of the ga

The Other Platoon Hunkers Down

After taking some long rane fire from the T-34/85s the 2nd recon platoon moved back across the road to use the cover of the trees and the backslope. Unless the Russians moved closer they were effectively out of the game.

 Waiting for the Big Cats  PM consolidates his hold on the hill and lines up the armor to pick off the Tigers

Waiting for the Big Cats

PM consolidates his hold on the hill and lines up the armor to pick off the Tigers

 King Tigers Arrive  We decided that in order for the Soviets to have any sense of threat, we needed to bring on the PZ VIbs. Even though the 'cards' never did come up. The tank on the road managed to break down on its second turn. It just was not a

King Tigers Arrive

We decided that in order for the Soviets to have any sense of threat, we needed to bring on the PZ VIbs. Even though the 'cards' never did come up. The tank on the road managed to break down on its second turn. It just was not a good day for Germans and on that note we called it quits.

1 2 3 4 5 6 7 8 9 10 11 12 13 14 15 16 17 18 19 20 21 22 23 24 25 26 27 28 29 30 31 32 33 34 35 36 37 38 39 40 41 42 43 44
Previous Next
 Hill 272.1 The Soviet objective  This is the high point of the ridge that looks down on Mokre. The German recon units are covering the right flank of the Pz Div's advance and are not expecting much from this direction. The Russians want to get to th
 The terrain north of Mokre  Mokre is off board south (to the right) of a ridge line the dominates the town. The main advance of the 24th Panzer Division is to the east. They are unaware that the Soviet 52nd Tank Brigade is on their flank.
 First Russians Identified  In this game the Russians came in at different times. The variable deployment really made a big difference and the Germans also managed to get the Stugs on within 3 turns. Here is a couple of the T34/76s with tankriders. T
 Cleaning Off The Infantry  The right side grenadier platoon opens up with their LMGs and gets some nice hits on the 'great' target of infantry clinging to the sides of the T-34s
 StuGs Opening Up  The StuG battery came in on the 3rd turn and managed to get up on the slope to fire down on the T-34s. They did immobilise one T-34.
 Sdkfz 250/9 Chewing Up Some Infantry  The infantry quickly dismounts and heads for cover. This is also different than the first game. The Germans actually get some cards and can engage targets before they are all the way across the table.
 Half of the T-34/76s  Four of the eight T-34s with tank riders coming under fire from Stugs, Sdkfz 250/9 and LMGs from the grenadiers along the intersection.
 More T-34s  They know something is firing from the backside of the copse. The Blind is the HQ group with an Sdkfz 250/3 and an Sdkfz 251/9.
 Can't Hit The Tank  This Panzergrenadier squad misses three times with their panzerfaust and winds up being wiped out by the SMGs and the tanks' MGs.
 More Soviets and SMGs  The firefight winds up eliminating this squad of grenadiers and most of the Russian infantry.
 Stummel fires and retreats  The T34s are too close for comfort so the HQ group shoots and scoots. This allows the Russians to occupy the woods shortly.
 Stugs vs T-34s  Two of the Stugs move to takeon the T-34s that have moved up to the light woods. The Stug on the right backs out of the fight to recover some shock points and one of the T-34s gets blasted next turn.
 Firefight Continues  Heavy casualties for both infantry units. The failure to hit the T-34 with a 'faust is a big disappointment.
 This Will Even Up The Battle  So there are eight T-34/76s, four T-34s and three IS2s moving on the table against the three Stugs. Here come the equalizers.
 Achtung Panzers!  Enemy tanks spotted. Now we'll see how well these Tigers can handle the action (not too well).
 Panzergrenadiers Laying Low As The Armour Drives By  The two platoons were sent out to the flanks to guard the roads. The Russians choose to drive up the middle over the fields. Max 8" range on the Pzfst 30s meant that this tactic worked well for th
 Overview of the left flank  Tiger IIs spot some T-34/85s and begin a firefight with them. Each of the T-34/85s have 2 HVAP rounds. The Blinds are IS2s and Dummy blinds.
 The Recon Support Group and the CO  The Stugs engage the T-34s at long and close range. The Stummel gets a lucky hit on a T-34 and causes it to explode. The Sdkfz 250/9s are moving to the left to engage Russian infantry advancing on the objective.
 Firefight Continues on the Flank  Burning T-34 from the Stummel hit. The Grenadiers have really chewed up the ex-tank riders. A T-34 with a jammed turret joins the company CO just as it goes up in smoke.
 Volley Fire  The T-34/85s fire off all their HVAP( two rounds each) and put some hurtin' on the Tigers. None KO'd but engine damage and plenty of Shock.
 Looking West  The road runs along a slope with fields to the south that the Soviets will advance through.
 T-34s and dismounted Tank Riders  The company of T-34s and their tank riders dismount using the road berm for cover.
 IS2s Moving Up  The heavies move up the center of the table directly towards the hill objective.
 T34/85s Moving to the Left  Spotting some infantry on the left flank, the tanks move to engage them with long range MG fire
 Run Away  The Recon HQ flees after missing with a Panzerfaust and taking some MG fire from the Russian at the road. Not only do the Germans not get any cards, but they can't roll decently when they finally get a chance.
 1st Panzergrenadier Platoon Moves Back  No reason to stay way out on that flank and nothing coming up the road so the grenadiers pull back to try to get back to the hill.
 IS2s Move Ahead  Nothing to stop 'em, so they just keep moving to take the hill.
 May I join you?  IS2 creeps up the embankment and nails a Tiger II on its first shot.
 Trading long range fire  The T34/85s w/HVAP were tough enough, but the IS2 manages to blast a Tiger II completely. No hits on the Russkies.
 Grenadiers in the Rear  The left flank grenadier platoon moves through the field to close assault, or at least 'faust, the Soviets. Two out of three miss and one T-34/85 is destroyed.
 Tigers Looking Ragged  The Soviets definitely are winning this exchange. Only one tank, an IS2, has gone up. Meanwhile one Tiger II has blown up, one is knocked out with engine damage, gun KO'ed and subsequently abandoned when it got a 'breakdown' c
 Charging the Tigers  No point is sticking around where the grenadiers can hit them with their Pzfst 30s, so the Tanskis head towards the Big Cats.
 Trying to Take Out a T-34  One of the grenadier squads moves up to try to panzerfaust a T-34. First shot misses. That T-34 has a stuck turret at any rate.
 Stalled out on the Left  One of the Soviet Big Men tries to rally the troops on the left while under fire from the grenadiers. The two T-34s are trading long range shots with a StuG, causing its engine to catch fire.
 Remaing Russian Infantry Heading Back to the Center of the Board  What's left of the Russki infantry moves back down to try to form a back up and find a CO. Two T-34s duking it out with the StuGs.
 Cleaning Up Some Infantry  The Sdkfz 250/9 chase the remnants of the Soviet infantry back to the woods and road. The StuGs are trading fire with the two T-34s. Stummel still moving to get into position.
 Non Denominational Smiting  We finally did get an actual airstrike. When a card came up (one for Russians, one for Germans), we had to roll a '6'. After failing to get a 6 around a dozen times, we finally got the Luftwaffe to make an appearance. Wit
 End of the Game  FockeWulfes fly away and we decide to call it. Russkie loses were such that they had next to no infantry left. Still four T-34/76s, two T-34/85s and two IS2s running. Germans were down to a crippled King Tiger and two Stugs along wi
 Stugs Arrive and Immediately Get Hit  Well, after several turns of waiting for the StuG card to show we finally decied to bring them on to try to stymie the Red Rampage of PM.      Two of three are hit immediately and one is destroyed. They did
 Staking Out the Objective  The IS2s and some T-34/76s climb up the hill and search for potential targets.
 I See You  The IS2s move over the top of the hill to blast the weapons halftracks. Not much the tracks can do except try to run, which they fail to do before getting KO'd. The run of no German cards continued.
 The Other Platoon Hunkers Down  After taking some long rane fire from the T-34/85s the 2nd recon platoon moved back across the road to use the cover of the trees and the backslope. Unless the Russians moved closer they were effectively out of the ga
 Waiting for the Big Cats  PM consolidates his hold on the hill and lines up the armor to pick off the Tigers
 King Tigers Arrive  We decided that in order for the Soviets to have any sense of threat, we needed to bring on the PZ VIbs. Even though the 'cards' never did come up. The tank on the road managed to break down on its second turn. It just was not a
BACK