Vis Lardica
  • New & Updated
  • Introduction & Details Scorecard 2025 Gallery: Burt, Steve Gallery: Cooper, Nick Gallery: Douglas, Mervyn Gallery: Emmett, John Gallery: Flint, Carole Gallery: Helliwell, Andrew Gallery: Luther, Mark Gallery: Plowman, Ralph Gallery: Sapper Gallery: Stumpy Gallery: Vis Bellica
  • Introduction to IABSM Video: How To Play IABSM, Part One Video: How to Play IABSM, Part Two Video: How to Play IABSM, Part Three After Action Reports (IABSM) Army Galleries (IABSM) Buy IABSM Scenario Packs Buy IABSM Theatre Supplements Figure Manufacturers (IABSM) Figure Reviews (IABSM) Game Aids (IABSM) IABSM Facebook Group
  • Introduction to CDS After Action Reports (CDS) Army Galleries (CDS) The Arab-Israeli Six Day War The Arab-Israeli Yom Kippur War After Action Reports (Arab-Israeli Wars) Army Galleries (Arab-Israeli Wars) After Action Reports (Moderns)
  • Introduction to Q13 After Action Reports (Q13) Army Galleries (Q13) Army Lists for Q13 Buy Q13 and/or Five Planets Figure Manufacturers (Q13) Figure Reviews (Q13) Points System Spreadsheets
  • Introduction to 19th Century Army Galleries (19th Century) Army Lists After Action Reports Articles & Essays Quick Guide to the Wars of the 19th Century
  • Introduction and AAR FK&P: The Eastern Front
  • Introduction to Vis Bellica The Rules: Amendments The Rules: Frequently Asked Questions The Rules: Optional Rules After Action Reports (Vis Bellica) Army Lists Articles about Vis Bellica Scenarios for Vis Bellica Other After Action Reports: WRG 6th Other After Action Reports: TTS
  • The Rules: Optional Rules After Action Reports
  • Scorecard 2024 Gallery: Burt, Steve Gallery: Cooper, Nick Gallery: Darkin, Des Gallery: Davenport, Jonathan Gallery: Douglas, Mervyn Gallery: Emmett. John Gallery: Flint, Carole Gallery: Helliwell, Andrew Gallery: Kay, Chris Gallery: Luther, Mark Gallery: Plowman, Ralph Gallery: Sapper Gallery: Scott, David Gallery: Slade, Matt Gallery: Stumpy Gallery: Vis Bellica
  • Scorecard 2023 Gallery: Bowler, Lloyd Gallery: Burt, Steve Gallery: Cooper, Nick Gallery: Douglas, Mervyn Gallery: Emmett, John Gallery: Flint, Carole Gallery: Helliwell, Andrew Gallery: Hodge, Derek Gallery: Kay, Chris Gallery: Luther, Mark Gallery: Plowman, Ralph Gallery: Pollard, Ashley Gallery: Sapper Gallery: Scott, David Gallery: Slade, Matt Gallery: Stumpy Gallery: Vis Bellica
  • Scorecard 2022 Gallery: Bowler, Lloyd Gallery: Burt, Steve Gallery: Cooper, Nick Gallery: Douglas, Mervyn Gallery: Emmett, John Gallery: Flint, Carole Gallery: Goodrick, Pete Gallery: Haines, John Gallery: Helliwell, Andrew Gallery: Hodge, Derek Gallery: Kay, Chris Gallery: Luther, Mark Gallery: Plowman, Ralph Gallery: Pollard, Ashley Gallery: Sapper Gallery: Scott, David Gallery: Slade, Matt Gallery: Stumpy Gallery: Vis Bellica
  • Scorecard 2021 Gallery: Anzani, Joe Gallery: Bowler, Lloyd Gallery: Burt, Steve Gallery: Cooper, Nick Gallery: Douglas, Mervyn Gallery: Duffell, Andy Gallery: Emmett, John Gallery: Flint, Carole Gallery: Haines, John Gallery: Helliwell, Andrew Gallery: Hiett, Travis Gallery: Hodge, Derek Gallery: Kay, Chris Gallery: Luther, Mark Gallery: McGinn, Joe Gallery: Melville, Doug Gallery: Plowman, Ralph Gallery: Pollard, Ashley Gallery: Ralls, Jason Gallery: Sapper Gallery: Scott, David Gallery: Slade, Matt Gallery: Stoesen, Chris Gallery: Stumpy Gallery: Vis Bellica
  • Scorecard 2020 Gallery: Bloggs, Fred Gallery: Bluemoose Ken Gallery: Bowler, Lloyd Gallery: Burt, Steve Gallery: Cornwell, Chris Gallery: Douglas, Mervyn Gallery: Duffell, Andy Gallery: Emmett, John Gallery: Flint, Carole Gallery: Haines, John Gallery: Helliwell, Andrew Gallery: Hiatt, Travis Gallery: Hodge, Derek Gallery: Hooge, Neil Gallery: Kay, Chris Gallery: Luther, Mark Gallery: McGinn, Joe Gallery: Melville, Doug Gallery: Plowman, Ralph Gallery: Pollard, Ashley Gallery: Ralls, Jason Gallery: Sapper Gallery: Scott, David Gallery: Slade, Matt Gallery: Stoesen, Chris Gallery: Stumpy Gallery: Vis Bellica
  • Scorecard 2019 Gallery: Bloggs, Fred Gallery: Blue Moose Ken Gallery: Bowen, Ed Gallery: Bowler, Lloyd Gallery: Burt, Steve Gallery: Clarke, Richard Gallery: Cornwell, Chris Gallery: Davenport, Jon Gallery: Douglas, Mervyn Gallery: Duffell, Andy Gallery: de Terre Neuve, John Gallery: Emmett, John Gallery: Fat Wally Gallery: Flint, Carole Gallery: Haines, John Gallery: Helliwell, Andrew Gallery: Hiett, Travis Gallery: Hodge, Derek Gallery: Hooge, Neil Gallery: Johnston, Owen Gallery: Kay, Chris Gallery: Luther, Mark Gallery: McGinn, Joe Gallery: Melville, Doug Gallery: Plowman, Ralph Gallery: Ralls, Jason Gallery: Sapper Gallery: Scott, David Gallery: Slade, Matt Gallery: Stoesen, Chris Gallery: Stumpy Gallery: Vis Bellica Gallery: Yuengling, Jon
  • Scorecard 2018 Gallery: Bloggs, Fred Gallery: Blue Moose Ken Gallery: Bowen, Ed Gallery: Bowler, Lloyd Gallery: Burt, Steve Gallery: Cornwell, Chris Gallery: Davenport, Jonathan Gallery: de Terre Neuve, John Gallery: Douglas, Mervyn Gallery: Duffell, Andy Gallery: Fat Wally Gallery: Flint, Carole Gallery: Freerange Egg Gallery: Haines, John Gallery: Helliwell, Andrew Gallery: Hiett, Travis Gallery: Hodge, Derek Gallery: Hooge, Neil Gallery: Johnston, Owen Gallery: Kay, Chris Gallery: Lampon, Steven Gallery: Luther, Mark Gallery: McGinn, Joe Gallery: Melville, Doug Gallery: Plowman, Ralph Gallery: Ralls, Jason Gallery: Sapper Gallery: Scott, David Gallery: Slade, Matt Gallery: Stoesen, Chris Gallery: Stumpy Gallery: Treadhead Gallery: Vis Bellica Gallery: Yuengling, Jon
  • Scorecard Gallery: Bond, Geoff Gallery: Bowen, Edward Gallery: Bowler, Lloyd Gallery: Burt, Steve Gallery: Cabey Cabey Gallery: Catchpole, Jim Gallery: Davenport, Jon Gallery: Davies, Keith Gallery: de Smedt, Kohn Gallery: de Terre Neuve, John Gallery: Douglas, Mervyn Gallery: Duffell, Andy Gallery: Fat Wally (Kev) Gallery: Flint, Carole Gallery: Freerange Egg Gallery: Gatzemeyer, Garrett Gallery: Gilbride, Chris Gallery: Haines, John Gallery: Helliwell, Andrew Gallery: Hodge, Derek Gallery: Hooge, Neil Gallery: Humm, Dave Gallery: Kay, Chris Gallery: Lampon, Steven Gallery: Luther, Mark Gallery: MacNeill, Craig Gallery: McCarthy, Andrew Gallery: The Mad Padre Gallery: McGinn, Joe Gallery: Melville, Doug Gallery: Naylor, Richard Gallery: Nissvik, Thomas Gallery: Old Pivot Gallery: Owen Gallery: Pollard, Ashley Gallery: Plowman, Ralph Gallery: Ralls, Jason Gallery: Sapper Gallery: Scott, David Gallery: Slade, Matt Gallery: Stoesen, Chris Gallery: Stumpy Gallery: Treadhead Gallery: Vis Bellica Gallery: Weathersby, Brian Gallery: WillieB Gallery: Yuengling, Jon
  • Scorecard 2016 Gallery: Baldwin, Paul Gallery: Blankenship, Paul Gallery: Bloggs, Fred Gallery: Bond, Geoff Gallery: Bowen, Ed Gallery: Bowler, Lloyd Gallery: Burt, Steve Gallery: Catchpole, Jim Gallery: Clarke, Richard Gallery: Davenport, Jon Gallery: Davies, Keith Gallery: de Smedt, Koen Gallery: Douglas, Mervyn Gallery: Duffell, Andy Gallery: Egg Gallery: Fitch, Doug Gallery: Flint, Carole Gallery: Gatzemeyer, Garrett Gallery: Gilbride, Chris Gallery: Helliwell, Andrew Gallery: Hodge, Derek Gallery: Hooge, Neil Gallery: Humm, Dave Gallery: I Am Bruce Gallery: Lowth, Kev (Fat Wally) Gallery: Luther, Mark Gallery: The Mad Padre Gallery: McCarthy, Andrew Gallery: Melville, Doug Gallery: Naylor, Richard Gallery: Nissvik, Thomas Gallery: Oracle Gallery: Owen Gallery: Plowman, Ralph Gallery: Pollard, Ashley Gallery: Ralls, Jason Gallery: Sapper Gallery: Slade, Matt Gallery: Stoesen, Chris Gallery: Stumpy Gallery: Treadhead Gallery: Vis Bellica Gallery: Willie B Gallery: Yuengling, Jon
  • Scorecard 2015 Gallery: AJH Gallery: Bairos, Vidal Gallery: Baldwin, Paul Gallery: Bax, Dick Gallery: Blankenship, Paul Gallery: Bloggs, Fred Gallery: Bond, Geoff Bond Gallery: Bowler, Hat Gallery: Burt, Steve Gallery: Corbett, Wulf Gallery: Danziger, Richard Gallery: Davies, Keith Gallery: de Smedt, Koen Gallery: de terre neuve, john Gallery: Douglas, Mervyn Gallery: Duffell, Andy Gallery: Egg, Freerange Gallery: Eggman Glass Gallery: Eriksson, Leif Gallery: Fat Wally Gallery: Flint, Carole Gallery: Gilbride, Chris Gallery: Hedglin, Nils Gallery: Helliwell, Andy Gallery: Hodge, Derek Gallery: Hooooge, Neil Gallery: Humm, Dave Gallery: I'm Bruce Gallery: Luther, Mark Gallery: The Mad Padre Gallery: Maerk Gallery: McCarthy, Andrew Gallery: Melville, Doug Gallery: Miller, Andrew Gallery: Miller, Steve Gallery: Milne, Neil Gallery: Mikkola, Topi Gallery: Mr Nouveau Gallery: Naylor, Richard Gallery: Nissvik, Thomas Gallery: Owen Gallery: Pedivere Gallery: Pingu Gallery: Pollard, Ashley Gallery: Plowman, Ralph Gallery: Ralls, Jason Gallery: Sapper Gallery: Skelton, Dom Gallery: Slade, Matt Gallery: Stapells, Tony Gallery: Stoesen, Chris Gallery: Strom, Joakim Gallery: Stumpy Gallery: Topyob Gallery: Treadhead Gallery: Vera, Benito Gallery: Vis Bellica Gallery: Willie B Gallery: Yuengling, Jon Gallery: Catchpole, Jim
  • Scorecard Gallery: Alexandros Gallery: Ambler, Craig Gallery: Armstrong, Keith Gallery: Bailey, Dave Gallery: Bairos, Vidal Gallery: Bax, Dick Gallery: Bloggs, Fred Gallery: Bond, Geoff Gallery: Burt, Steve Gallery: Carnegie, Ron Gallery: Carole Gallery: Catchpole, Jim Gallery: Clarke, Richard Gallery: Corbett, Wulf Gallery: Danziger, Richard Gallery: De Smedt, Koen Gallery: de Terre Neuve, John Gallery: Deeks, Jon Gallery: Douglas, Mervyn Gallery: Duffell, Andy Gallery: Egg, Free Range Gallery: Erikson, Leif Gallery: Fat Wally (Kev) Gallery: Fiene, Ben Gallery: Gilbride, Chris Gallery: Hodge, Derek Gallery: Humm, Dave Gallery: Llano, Manuel Gallery: Luther, Mark Gallery: Melville, Doug Gallery: Mikkola, Topi Gallery: Miller, Andrew Gallery: munsterfan8 Gallery: Murray, Jim Gallery: Nissvik, Thomas Gallery: Owen Gallery: The Mad Padre Gallery: PatG Gallery: Pingu Gallery: Plowman, Ralph Gallery: Pollard, Ashley Gallery: Ralls, Jason Gallery: Slade, Matt Gallery: Stoesen, Chris Gallery: Strom, Joakim Gallery: Stumpy Gallery: Thomas, John Gallery: Treadhead Gallery: Vera, Benito Gallery: Vis Bellica Gallery: Warrior in the Attic Gallery: Weir, Jim Gallery: Whitaker, Mike Gallery: WillieB Gallery: Yuengling, Jon
  • TooFatLardies
Vis Lardica
  • New & Updated/
  • TFL Painting Challenge 2025/
    • Introduction & Details
    • Scorecard 2025
    • Gallery: Burt, Steve
    • Gallery: Cooper, Nick
    • Gallery: Douglas, Mervyn
    • Gallery: Emmett, John
    • Gallery: Flint, Carole
    • Gallery: Helliwell, Andrew
    • Gallery: Luther, Mark
    • Gallery: Plowman, Ralph
    • Gallery: Sapper
    • Gallery: Stumpy
    • Gallery: Vis Bellica
  • I Ain't Been Shot, Mum! (WW2)/
    • Introduction to IABSM
    • Video: How To Play IABSM, Part One
    • Video: How to Play IABSM, Part Two
    • Video: How to Play IABSM, Part Three
    • After Action Reports (IABSM)
    • Army Galleries (IABSM)
    • Buy IABSM Scenario Packs
    • Buy IABSM Theatre Supplements
    • Figure Manufacturers (IABSM)
    • Figure Reviews (IABSM)
    • Game Aids (IABSM)
    • IABSM Facebook Group
  • Charlie Don't Surf! (Vietnam/Arab-Israeli/Moderns)/
    • Introduction to CDS
    • After Action Reports (CDS)
    • Army Galleries (CDS)
    • The Arab-Israeli Six Day War
    • The Arab-Israeli Yom Kippur War
    • After Action Reports (Arab-Israeli Wars)
    • Army Galleries (Arab-Israeli Wars)
    • After Action Reports (Moderns)
  • Quadrant 13 (Sci-Fi)/
    • Introduction to Q13
    • After Action Reports (Q13)
    • Army Galleries (Q13)
    • Army Lists for Q13
    • Buy Q13 and/or Five Planets
    • Figure Manufacturers (Q13)
    • Figure Reviews (Q13)
    • Points System Spreadsheets
  • Vis Imperica (19th Century)/
    • Introduction to 19th Century
    • Army Galleries (19th Century)
    • Army Lists
    • After Action Reports
    • Articles & Essays
    • Quick Guide to the Wars of the 19th Century
  • Vis Lucii (Pike & Shot)/
    • Introduction and AAR
    • FK&P: The Eastern Front
  • Vis Bellica (Ancients)/
    • Introduction to Vis Bellica
    • The Rules: Amendments
    • The Rules: Frequently Asked Questions
    • The Rules: Optional Rules
    • After Action Reports (Vis Bellica)
    • Army Lists
    • Articles about Vis Bellica
    • Scenarios for Vis Bellica
    • Other After Action Reports: WRG 6th
    • Other After Action Reports: TTS
  • Vis Magica (Fantasy)/
    • The Rules: Optional Rules
    • After Action Reports
  • TFL Painting Challenge 2024/
    • Scorecard 2024
    • Gallery: Burt, Steve
    • Gallery: Cooper, Nick
    • Gallery: Darkin, Des
    • Gallery: Davenport, Jonathan
    • Gallery: Douglas, Mervyn
    • Gallery: Emmett. John
    • Gallery: Flint, Carole
    • Gallery: Helliwell, Andrew
    • Gallery: Kay, Chris
    • Gallery: Luther, Mark
    • Gallery: Plowman, Ralph
    • Gallery: Sapper
    • Gallery: Scott, David
    • Gallery: Slade, Matt
    • Gallery: Stumpy
    • Gallery: Vis Bellica
  • TFL Painting Challenge 2023/
    • Scorecard 2023
    • Gallery: Bowler, Lloyd
    • Gallery: Burt, Steve
    • Gallery: Cooper, Nick
    • Gallery: Douglas, Mervyn
    • Gallery: Emmett, John
    • Gallery: Flint, Carole
    • Gallery: Helliwell, Andrew
    • Gallery: Hodge, Derek
    • Gallery: Kay, Chris
    • Gallery: Luther, Mark
    • Gallery: Plowman, Ralph
    • Gallery: Pollard, Ashley
    • Gallery: Sapper
    • Gallery: Scott, David
    • Gallery: Slade, Matt
    • Gallery: Stumpy
    • Gallery: Vis Bellica
  • TFL Painting Challenge 2022/
    • Scorecard 2022
    • Gallery: Bowler, Lloyd
    • Gallery: Burt, Steve
    • Gallery: Cooper, Nick
    • Gallery: Douglas, Mervyn
    • Gallery: Emmett, John
    • Gallery: Flint, Carole
    • Gallery: Goodrick, Pete
    • Gallery: Haines, John
    • Gallery: Helliwell, Andrew
    • Gallery: Hodge, Derek
    • Gallery: Kay, Chris
    • Gallery: Luther, Mark
    • Gallery: Plowman, Ralph
    • Gallery: Pollard, Ashley
    • Gallery: Sapper
    • Gallery: Scott, David
    • Gallery: Slade, Matt
    • Gallery: Stumpy
    • Gallery: Vis Bellica
  • TFL Painting Challenge 2021/
    • Scorecard 2021
    • Gallery: Anzani, Joe
    • Gallery: Bowler, Lloyd
    • Gallery: Burt, Steve
    • Gallery: Cooper, Nick
    • Gallery: Douglas, Mervyn
    • Gallery: Duffell, Andy
    • Gallery: Emmett, John
    • Gallery: Flint, Carole
    • Gallery: Haines, John
    • Gallery: Helliwell, Andrew
    • Gallery: Hiett, Travis
    • Gallery: Hodge, Derek
    • Gallery: Kay, Chris
    • Gallery: Luther, Mark
    • Gallery: McGinn, Joe
    • Gallery: Melville, Doug
    • Gallery: Plowman, Ralph
    • Gallery: Pollard, Ashley
    • Gallery: Ralls, Jason
    • Gallery: Sapper
    • Gallery: Scott, David
    • Gallery: Slade, Matt
    • Gallery: Stoesen, Chris
    • Gallery: Stumpy
    • Gallery: Vis Bellica
  • TFL Painting Challenge 2020/
    • Scorecard 2020
    • Gallery: Bloggs, Fred
    • Gallery: Bluemoose Ken
    • Gallery: Bowler, Lloyd
    • Gallery: Burt, Steve
    • Gallery: Cornwell, Chris
    • Gallery: Douglas, Mervyn
    • Gallery: Duffell, Andy
    • Gallery: Emmett, John
    • Gallery: Flint, Carole
    • Gallery: Haines, John
    • Gallery: Helliwell, Andrew
    • Gallery: Hiatt, Travis
    • Gallery: Hodge, Derek
    • Gallery: Hooge, Neil
    • Gallery: Kay, Chris
    • Gallery: Luther, Mark
    • Gallery: McGinn, Joe
    • Gallery: Melville, Doug
    • Gallery: Plowman, Ralph
    • Gallery: Pollard, Ashley
    • Gallery: Ralls, Jason
    • Gallery: Sapper
    • Gallery: Scott, David
    • Gallery: Slade, Matt
    • Gallery: Stoesen, Chris
    • Gallery: Stumpy
    • Gallery: Vis Bellica
  • TFL Painting Challenge 2019/
    • Scorecard 2019
    • Gallery: Bloggs, Fred
    • Gallery: Blue Moose Ken
    • Gallery: Bowen, Ed
    • Gallery: Bowler, Lloyd
    • Gallery: Burt, Steve
    • Gallery: Clarke, Richard
    • Gallery: Cornwell, Chris
    • Gallery: Davenport, Jon
    • Gallery: Douglas, Mervyn
    • Gallery: Duffell, Andy
    • Gallery: de Terre Neuve, John
    • Gallery: Emmett, John
    • Gallery: Fat Wally
    • Gallery: Flint, Carole
    • Gallery: Haines, John
    • Gallery: Helliwell, Andrew
    • Gallery: Hiett, Travis
    • Gallery: Hodge, Derek
    • Gallery: Hooge, Neil
    • Gallery: Johnston, Owen
    • Gallery: Kay, Chris
    • Gallery: Luther, Mark
    • Gallery: McGinn, Joe
    • Gallery: Melville, Doug
    • Gallery: Plowman, Ralph
    • Gallery: Ralls, Jason
    • Gallery: Sapper
    • Gallery: Scott, David
    • Gallery: Slade, Matt
    • Gallery: Stoesen, Chris
    • Gallery: Stumpy
    • Gallery: Vis Bellica
    • Gallery: Yuengling, Jon
  • TFL Painting Challenge 2018/
    • Scorecard 2018
    • Gallery: Bloggs, Fred
    • Gallery: Blue Moose Ken
    • Gallery: Bowen, Ed
    • Gallery: Bowler, Lloyd
    • Gallery: Burt, Steve
    • Gallery: Cornwell, Chris
    • Gallery: Davenport, Jonathan
    • Gallery: de Terre Neuve, John
    • Gallery: Douglas, Mervyn
    • Gallery: Duffell, Andy
    • Gallery: Fat Wally
    • Gallery: Flint, Carole
    • Gallery: Freerange Egg
    • Gallery: Haines, John
    • Gallery: Helliwell, Andrew
    • Gallery: Hiett, Travis
    • Gallery: Hodge, Derek
    • Gallery: Hooge, Neil
    • Gallery: Johnston, Owen
    • Gallery: Kay, Chris
    • Gallery: Lampon, Steven
    • Gallery: Luther, Mark
    • Gallery: McGinn, Joe
    • Gallery: Melville, Doug
    • Gallery: Plowman, Ralph
    • Gallery: Ralls, Jason
    • Gallery: Sapper
    • Gallery: Scott, David
    • Gallery: Slade, Matt
    • Gallery: Stoesen, Chris
    • Gallery: Stumpy
    • Gallery: Treadhead
    • Gallery: Vis Bellica
    • Gallery: Yuengling, Jon
  • TFL Painting Challenge 2017/
    • Scorecard
    • Gallery: Bond, Geoff
    • Gallery: Bowen, Edward
    • Gallery: Bowler, Lloyd
    • Gallery: Burt, Steve
    • Gallery: Cabey Cabey
    • Gallery: Catchpole, Jim
    • Gallery: Davenport, Jon
    • Gallery: Davies, Keith
    • Gallery: de Smedt, Kohn
    • Gallery: de Terre Neuve, John
    • Gallery: Douglas, Mervyn
    • Gallery: Duffell, Andy
    • Gallery: Fat Wally (Kev)
    • Gallery: Flint, Carole
    • Gallery: Freerange Egg
    • Gallery: Gatzemeyer, Garrett
    • Gallery: Gilbride, Chris
    • Gallery: Haines, John
    • Gallery: Helliwell, Andrew
    • Gallery: Hodge, Derek
    • Gallery: Hooge, Neil
    • Gallery: Humm, Dave
    • Gallery: Kay, Chris
    • Gallery: Lampon, Steven
    • Gallery: Luther, Mark
    • Gallery: MacNeill, Craig
    • Gallery: McCarthy, Andrew
    • Gallery: The Mad Padre
    • Gallery: McGinn, Joe
    • Gallery: Melville, Doug
    • Gallery: Naylor, Richard
    • Gallery: Nissvik, Thomas
    • Gallery: Old Pivot
    • Gallery: Owen
    • Gallery: Pollard, Ashley
    • Gallery: Plowman, Ralph
    • Gallery: Ralls, Jason
    • Gallery: Sapper
    • Gallery: Scott, David
    • Gallery: Slade, Matt
    • Gallery: Stoesen, Chris
    • Gallery: Stumpy
    • Gallery: Treadhead
    • Gallery: Vis Bellica
    • Gallery: Weathersby, Brian
    • Gallery: WillieB
    • Gallery: Yuengling, Jon
  • TFL Painting Challenge 2016/
    • Scorecard 2016
    • Gallery: Baldwin, Paul
    • Gallery: Blankenship, Paul
    • Gallery: Bloggs, Fred
    • Gallery: Bond, Geoff
    • Gallery: Bowen, Ed
    • Gallery: Bowler, Lloyd
    • Gallery: Burt, Steve
    • Gallery: Catchpole, Jim
    • Gallery: Clarke, Richard
    • Gallery: Davenport, Jon
    • Gallery: Davies, Keith
    • Gallery: de Smedt, Koen
    • Gallery: Douglas, Mervyn
    • Gallery: Duffell, Andy
    • Gallery: Egg
    • Gallery: Fitch, Doug
    • Gallery: Flint, Carole
    • Gallery: Gatzemeyer, Garrett
    • Gallery: Gilbride, Chris
    • Gallery: Helliwell, Andrew
    • Gallery: Hodge, Derek
    • Gallery: Hooge, Neil
    • Gallery: Humm, Dave
    • Gallery: I Am Bruce
    • Gallery: Lowth, Kev (Fat Wally)
    • Gallery: Luther, Mark
    • Gallery: The Mad Padre
    • Gallery: McCarthy, Andrew
    • Gallery: Melville, Doug
    • Gallery: Naylor, Richard
    • Gallery: Nissvik, Thomas
    • Gallery: Oracle
    • Gallery: Owen
    • Gallery: Plowman, Ralph
    • Gallery: Pollard, Ashley
    • Gallery: Ralls, Jason
    • Gallery: Sapper
    • Gallery: Slade, Matt
    • Gallery: Stoesen, Chris
    • Gallery: Stumpy
    • Gallery: Treadhead
    • Gallery: Vis Bellica
    • Gallery: Willie B
    • Gallery: Yuengling, Jon
  • TFL Painting Challenge 2015/
    • Scorecard 2015
    • Gallery: AJH
    • Gallery: Bairos, Vidal
    • Gallery: Baldwin, Paul
    • Gallery: Bax, Dick
    • Gallery: Blankenship, Paul
    • Gallery: Bloggs, Fred
    • Gallery: Bond, Geoff Bond
    • Gallery: Bowler, Hat
    • Gallery: Burt, Steve
    • Gallery: Corbett, Wulf
    • Gallery: Danziger, Richard
    • Gallery: Davies, Keith
    • Gallery: de Smedt, Koen
    • Gallery: de terre neuve, john
    • Gallery: Douglas, Mervyn
    • Gallery: Duffell, Andy
    • Gallery: Egg, Freerange
    • Gallery: Eggman Glass
    • Gallery: Eriksson, Leif
    • Gallery: Fat Wally
    • Gallery: Flint, Carole
    • Gallery: Gilbride, Chris
    • Gallery: Hedglin, Nils
    • Gallery: Helliwell, Andy
    • Gallery: Hodge, Derek
    • Gallery: Hooooge, Neil
    • Gallery: Humm, Dave
    • Gallery: I'm Bruce
    • Gallery: Luther, Mark
    • Gallery: The Mad Padre
    • Gallery: Maerk
    • Gallery: McCarthy, Andrew
    • Gallery: Melville, Doug
    • Gallery: Miller, Andrew
    • Gallery: Miller, Steve
    • Gallery: Milne, Neil
    • Gallery: Mikkola, Topi
    • Gallery: Mr Nouveau
    • Gallery: Naylor, Richard
    • Gallery: Nissvik, Thomas
    • Gallery: Owen
    • Gallery: Pedivere
    • Gallery: Pingu
    • Gallery: Pollard, Ashley
    • Gallery: Plowman, Ralph
    • Gallery: Ralls, Jason
    • Gallery: Sapper
    • Gallery: Skelton, Dom
    • Gallery: Slade, Matt
    • Gallery: Stapells, Tony
    • Gallery: Stoesen, Chris
    • Gallery: Strom, Joakim
    • Gallery: Stumpy
    • Gallery: Topyob
    • Gallery: Treadhead
    • Gallery: Vera, Benito
    • Gallery: Vis Bellica
    • Gallery: Willie B
    • Gallery: Yuengling, Jon
    • Gallery: Catchpole, Jim
  • TFL Painting Challenge 2014/
    • Scorecard
    • Gallery: Alexandros
    • Gallery: Ambler, Craig
    • Gallery: Armstrong, Keith
    • Gallery: Bailey, Dave
    • Gallery: Bairos, Vidal
    • Gallery: Bax, Dick
    • Gallery: Bloggs, Fred
    • Gallery: Bond, Geoff
    • Gallery: Burt, Steve
    • Gallery: Carnegie, Ron
    • Gallery: Carole
    • Gallery: Catchpole, Jim
    • Gallery: Clarke, Richard
    • Gallery: Corbett, Wulf
    • Gallery: Danziger, Richard
    • Gallery: De Smedt, Koen
    • Gallery: de Terre Neuve, John
    • Gallery: Deeks, Jon
    • Gallery: Douglas, Mervyn
    • Gallery: Duffell, Andy
    • Gallery: Egg, Free Range
    • Gallery: Erikson, Leif
    • Gallery: Fat Wally (Kev)
    • Gallery: Fiene, Ben
    • Gallery: Gilbride, Chris
    • Gallery: Hodge, Derek
    • Gallery: Humm, Dave
    • Gallery: Llano, Manuel
    • Gallery: Luther, Mark
    • Gallery: Melville, Doug
    • Gallery: Mikkola, Topi
    • Gallery: Miller, Andrew
    • Gallery: munsterfan8
    • Gallery: Murray, Jim
    • Gallery: Nissvik, Thomas
    • Gallery: Owen
    • Gallery: The Mad Padre
    • Gallery: PatG
    • Gallery: Pingu
    • Gallery: Plowman, Ralph
    • Gallery: Pollard, Ashley
    • Gallery: Ralls, Jason
    • Gallery: Slade, Matt
    • Gallery: Stoesen, Chris
    • Gallery: Strom, Joakim
    • Gallery: Stumpy
    • Gallery: Thomas, John
    • Gallery: Treadhead
    • Gallery: Vera, Benito
    • Gallery: Vis Bellica
    • Gallery: Warrior in the Attic
    • Gallery: Weir, Jim
    • Gallery: Whitaker, Mike
    • Gallery: WillieB
    • Gallery: Yuengling, Jon
  • TooFatLardies/
  German players getting their units assembled   Dennis decides on the deployment of his static troops. He didn't have much to work with but could certainly stymie the Soviet advance through a couple of routes. He started with one platoon of grenadie
Vis Lardica

AAR 1945 Austria: Recce Meeting Engagement Vienna by Mark Luther

A battle report or After Action Report (AAR) for I Ain't Been Shot, Mum (IABSM), the company-sized wargaming rules for WW2 from the TooFatLardies. A one-off game or scenario set in Austria in the year 1945.

Vis Lardica
  • New & Updated/
  • TFL Painting Challenge 2025/
    • Introduction & Details
    • Scorecard 2025
    • Gallery: Burt, Steve
    • Gallery: Cooper, Nick
    • Gallery: Douglas, Mervyn
    • Gallery: Emmett, John
    • Gallery: Flint, Carole
    • Gallery: Helliwell, Andrew
    • Gallery: Luther, Mark
    • Gallery: Plowman, Ralph
    • Gallery: Sapper
    • Gallery: Stumpy
    • Gallery: Vis Bellica
  • I Ain't Been Shot, Mum! (WW2)/
    • Introduction to IABSM
    • Video: How To Play IABSM, Part One
    • Video: How to Play IABSM, Part Two
    • Video: How to Play IABSM, Part Three
    • After Action Reports (IABSM)
    • Army Galleries (IABSM)
    • Buy IABSM Scenario Packs
    • Buy IABSM Theatre Supplements
    • Figure Manufacturers (IABSM)
    • Figure Reviews (IABSM)
    • Game Aids (IABSM)
    • IABSM Facebook Group
  • Charlie Don't Surf! (Vietnam/Arab-Israeli/Moderns)/
    • Introduction to CDS
    • After Action Reports (CDS)
    • Army Galleries (CDS)
    • The Arab-Israeli Six Day War
    • The Arab-Israeli Yom Kippur War
    • After Action Reports (Arab-Israeli Wars)
    • Army Galleries (Arab-Israeli Wars)
    • After Action Reports (Moderns)
  • Quadrant 13 (Sci-Fi)/
    • Introduction to Q13
    • After Action Reports (Q13)
    • Army Galleries (Q13)
    • Army Lists for Q13
    • Buy Q13 and/or Five Planets
    • Figure Manufacturers (Q13)
    • Figure Reviews (Q13)
    • Points System Spreadsheets
  • Vis Imperica (19th Century)/
    • Introduction to 19th Century
    • Army Galleries (19th Century)
    • Army Lists
    • After Action Reports
    • Articles & Essays
    • Quick Guide to the Wars of the 19th Century
  • Vis Lucii (Pike & Shot)/
    • Introduction and AAR
    • FK&P: The Eastern Front
  • Vis Bellica (Ancients)/
    • Introduction to Vis Bellica
    • The Rules: Amendments
    • The Rules: Frequently Asked Questions
    • The Rules: Optional Rules
    • After Action Reports (Vis Bellica)
    • Army Lists
    • Articles about Vis Bellica
    • Scenarios for Vis Bellica
    • Other After Action Reports: WRG 6th
    • Other After Action Reports: TTS
  • Vis Magica (Fantasy)/
    • The Rules: Optional Rules
    • After Action Reports
  • TFL Painting Challenge 2024/
    • Scorecard 2024
    • Gallery: Burt, Steve
    • Gallery: Cooper, Nick
    • Gallery: Darkin, Des
    • Gallery: Davenport, Jonathan
    • Gallery: Douglas, Mervyn
    • Gallery: Emmett. John
    • Gallery: Flint, Carole
    • Gallery: Helliwell, Andrew
    • Gallery: Kay, Chris
    • Gallery: Luther, Mark
    • Gallery: Plowman, Ralph
    • Gallery: Sapper
    • Gallery: Scott, David
    • Gallery: Slade, Matt
    • Gallery: Stumpy
    • Gallery: Vis Bellica
  • TFL Painting Challenge 2023/
    • Scorecard 2023
    • Gallery: Bowler, Lloyd
    • Gallery: Burt, Steve
    • Gallery: Cooper, Nick
    • Gallery: Douglas, Mervyn
    • Gallery: Emmett, John
    • Gallery: Flint, Carole
    • Gallery: Helliwell, Andrew
    • Gallery: Hodge, Derek
    • Gallery: Kay, Chris
    • Gallery: Luther, Mark
    • Gallery: Plowman, Ralph
    • Gallery: Pollard, Ashley
    • Gallery: Sapper
    • Gallery: Scott, David
    • Gallery: Slade, Matt
    • Gallery: Stumpy
    • Gallery: Vis Bellica
  • TFL Painting Challenge 2022/
    • Scorecard 2022
    • Gallery: Bowler, Lloyd
    • Gallery: Burt, Steve
    • Gallery: Cooper, Nick
    • Gallery: Douglas, Mervyn
    • Gallery: Emmett, John
    • Gallery: Flint, Carole
    • Gallery: Goodrick, Pete
    • Gallery: Haines, John
    • Gallery: Helliwell, Andrew
    • Gallery: Hodge, Derek
    • Gallery: Kay, Chris
    • Gallery: Luther, Mark
    • Gallery: Plowman, Ralph
    • Gallery: Pollard, Ashley
    • Gallery: Sapper
    • Gallery: Scott, David
    • Gallery: Slade, Matt
    • Gallery: Stumpy
    • Gallery: Vis Bellica
  • TFL Painting Challenge 2021/
    • Scorecard 2021
    • Gallery: Anzani, Joe
    • Gallery: Bowler, Lloyd
    • Gallery: Burt, Steve
    • Gallery: Cooper, Nick
    • Gallery: Douglas, Mervyn
    • Gallery: Duffell, Andy
    • Gallery: Emmett, John
    • Gallery: Flint, Carole
    • Gallery: Haines, John
    • Gallery: Helliwell, Andrew
    • Gallery: Hiett, Travis
    • Gallery: Hodge, Derek
    • Gallery: Kay, Chris
    • Gallery: Luther, Mark
    • Gallery: McGinn, Joe
    • Gallery: Melville, Doug
    • Gallery: Plowman, Ralph
    • Gallery: Pollard, Ashley
    • Gallery: Ralls, Jason
    • Gallery: Sapper
    • Gallery: Scott, David
    • Gallery: Slade, Matt
    • Gallery: Stoesen, Chris
    • Gallery: Stumpy
    • Gallery: Vis Bellica
  • TFL Painting Challenge 2020/
    • Scorecard 2020
    • Gallery: Bloggs, Fred
    • Gallery: Bluemoose Ken
    • Gallery: Bowler, Lloyd
    • Gallery: Burt, Steve
    • Gallery: Cornwell, Chris
    • Gallery: Douglas, Mervyn
    • Gallery: Duffell, Andy
    • Gallery: Emmett, John
    • Gallery: Flint, Carole
    • Gallery: Haines, John
    • Gallery: Helliwell, Andrew
    • Gallery: Hiatt, Travis
    • Gallery: Hodge, Derek
    • Gallery: Hooge, Neil
    • Gallery: Kay, Chris
    • Gallery: Luther, Mark
    • Gallery: McGinn, Joe
    • Gallery: Melville, Doug
    • Gallery: Plowman, Ralph
    • Gallery: Pollard, Ashley
    • Gallery: Ralls, Jason
    • Gallery: Sapper
    • Gallery: Scott, David
    • Gallery: Slade, Matt
    • Gallery: Stoesen, Chris
    • Gallery: Stumpy
    • Gallery: Vis Bellica
  • TFL Painting Challenge 2019/
    • Scorecard 2019
    • Gallery: Bloggs, Fred
    • Gallery: Blue Moose Ken
    • Gallery: Bowen, Ed
    • Gallery: Bowler, Lloyd
    • Gallery: Burt, Steve
    • Gallery: Clarke, Richard
    • Gallery: Cornwell, Chris
    • Gallery: Davenport, Jon
    • Gallery: Douglas, Mervyn
    • Gallery: Duffell, Andy
    • Gallery: de Terre Neuve, John
    • Gallery: Emmett, John
    • Gallery: Fat Wally
    • Gallery: Flint, Carole
    • Gallery: Haines, John
    • Gallery: Helliwell, Andrew
    • Gallery: Hiett, Travis
    • Gallery: Hodge, Derek
    • Gallery: Hooge, Neil
    • Gallery: Johnston, Owen
    • Gallery: Kay, Chris
    • Gallery: Luther, Mark
    • Gallery: McGinn, Joe
    • Gallery: Melville, Doug
    • Gallery: Plowman, Ralph
    • Gallery: Ralls, Jason
    • Gallery: Sapper
    • Gallery: Scott, David
    • Gallery: Slade, Matt
    • Gallery: Stoesen, Chris
    • Gallery: Stumpy
    • Gallery: Vis Bellica
    • Gallery: Yuengling, Jon
  • TFL Painting Challenge 2018/
    • Scorecard 2018
    • Gallery: Bloggs, Fred
    • Gallery: Blue Moose Ken
    • Gallery: Bowen, Ed
    • Gallery: Bowler, Lloyd
    • Gallery: Burt, Steve
    • Gallery: Cornwell, Chris
    • Gallery: Davenport, Jonathan
    • Gallery: de Terre Neuve, John
    • Gallery: Douglas, Mervyn
    • Gallery: Duffell, Andy
    • Gallery: Fat Wally
    • Gallery: Flint, Carole
    • Gallery: Freerange Egg
    • Gallery: Haines, John
    • Gallery: Helliwell, Andrew
    • Gallery: Hiett, Travis
    • Gallery: Hodge, Derek
    • Gallery: Hooge, Neil
    • Gallery: Johnston, Owen
    • Gallery: Kay, Chris
    • Gallery: Lampon, Steven
    • Gallery: Luther, Mark
    • Gallery: McGinn, Joe
    • Gallery: Melville, Doug
    • Gallery: Plowman, Ralph
    • Gallery: Ralls, Jason
    • Gallery: Sapper
    • Gallery: Scott, David
    • Gallery: Slade, Matt
    • Gallery: Stoesen, Chris
    • Gallery: Stumpy
    • Gallery: Treadhead
    • Gallery: Vis Bellica
    • Gallery: Yuengling, Jon
  • TFL Painting Challenge 2017/
    • Scorecard
    • Gallery: Bond, Geoff
    • Gallery: Bowen, Edward
    • Gallery: Bowler, Lloyd
    • Gallery: Burt, Steve
    • Gallery: Cabey Cabey
    • Gallery: Catchpole, Jim
    • Gallery: Davenport, Jon
    • Gallery: Davies, Keith
    • Gallery: de Smedt, Kohn
    • Gallery: de Terre Neuve, John
    • Gallery: Douglas, Mervyn
    • Gallery: Duffell, Andy
    • Gallery: Fat Wally (Kev)
    • Gallery: Flint, Carole
    • Gallery: Freerange Egg
    • Gallery: Gatzemeyer, Garrett
    • Gallery: Gilbride, Chris
    • Gallery: Haines, John
    • Gallery: Helliwell, Andrew
    • Gallery: Hodge, Derek
    • Gallery: Hooge, Neil
    • Gallery: Humm, Dave
    • Gallery: Kay, Chris
    • Gallery: Lampon, Steven
    • Gallery: Luther, Mark
    • Gallery: MacNeill, Craig
    • Gallery: McCarthy, Andrew
    • Gallery: The Mad Padre
    • Gallery: McGinn, Joe
    • Gallery: Melville, Doug
    • Gallery: Naylor, Richard
    • Gallery: Nissvik, Thomas
    • Gallery: Old Pivot
    • Gallery: Owen
    • Gallery: Pollard, Ashley
    • Gallery: Plowman, Ralph
    • Gallery: Ralls, Jason
    • Gallery: Sapper
    • Gallery: Scott, David
    • Gallery: Slade, Matt
    • Gallery: Stoesen, Chris
    • Gallery: Stumpy
    • Gallery: Treadhead
    • Gallery: Vis Bellica
    • Gallery: Weathersby, Brian
    • Gallery: WillieB
    • Gallery: Yuengling, Jon
  • TFL Painting Challenge 2016/
    • Scorecard 2016
    • Gallery: Baldwin, Paul
    • Gallery: Blankenship, Paul
    • Gallery: Bloggs, Fred
    • Gallery: Bond, Geoff
    • Gallery: Bowen, Ed
    • Gallery: Bowler, Lloyd
    • Gallery: Burt, Steve
    • Gallery: Catchpole, Jim
    • Gallery: Clarke, Richard
    • Gallery: Davenport, Jon
    • Gallery: Davies, Keith
    • Gallery: de Smedt, Koen
    • Gallery: Douglas, Mervyn
    • Gallery: Duffell, Andy
    • Gallery: Egg
    • Gallery: Fitch, Doug
    • Gallery: Flint, Carole
    • Gallery: Gatzemeyer, Garrett
    • Gallery: Gilbride, Chris
    • Gallery: Helliwell, Andrew
    • Gallery: Hodge, Derek
    • Gallery: Hooge, Neil
    • Gallery: Humm, Dave
    • Gallery: I Am Bruce
    • Gallery: Lowth, Kev (Fat Wally)
    • Gallery: Luther, Mark
    • Gallery: The Mad Padre
    • Gallery: McCarthy, Andrew
    • Gallery: Melville, Doug
    • Gallery: Naylor, Richard
    • Gallery: Nissvik, Thomas
    • Gallery: Oracle
    • Gallery: Owen
    • Gallery: Plowman, Ralph
    • Gallery: Pollard, Ashley
    • Gallery: Ralls, Jason
    • Gallery: Sapper
    • Gallery: Slade, Matt
    • Gallery: Stoesen, Chris
    • Gallery: Stumpy
    • Gallery: Treadhead
    • Gallery: Vis Bellica
    • Gallery: Willie B
    • Gallery: Yuengling, Jon
  • TFL Painting Challenge 2015/
    • Scorecard 2015
    • Gallery: AJH
    • Gallery: Bairos, Vidal
    • Gallery: Baldwin, Paul
    • Gallery: Bax, Dick
    • Gallery: Blankenship, Paul
    • Gallery: Bloggs, Fred
    • Gallery: Bond, Geoff Bond
    • Gallery: Bowler, Hat
    • Gallery: Burt, Steve
    • Gallery: Corbett, Wulf
    • Gallery: Danziger, Richard
    • Gallery: Davies, Keith
    • Gallery: de Smedt, Koen
    • Gallery: de terre neuve, john
    • Gallery: Douglas, Mervyn
    • Gallery: Duffell, Andy
    • Gallery: Egg, Freerange
    • Gallery: Eggman Glass
    • Gallery: Eriksson, Leif
    • Gallery: Fat Wally
    • Gallery: Flint, Carole
    • Gallery: Gilbride, Chris
    • Gallery: Hedglin, Nils
    • Gallery: Helliwell, Andy
    • Gallery: Hodge, Derek
    • Gallery: Hooooge, Neil
    • Gallery: Humm, Dave
    • Gallery: I'm Bruce
    • Gallery: Luther, Mark
    • Gallery: The Mad Padre
    • Gallery: Maerk
    • Gallery: McCarthy, Andrew
    • Gallery: Melville, Doug
    • Gallery: Miller, Andrew
    • Gallery: Miller, Steve
    • Gallery: Milne, Neil
    • Gallery: Mikkola, Topi
    • Gallery: Mr Nouveau
    • Gallery: Naylor, Richard
    • Gallery: Nissvik, Thomas
    • Gallery: Owen
    • Gallery: Pedivere
    • Gallery: Pingu
    • Gallery: Pollard, Ashley
    • Gallery: Plowman, Ralph
    • Gallery: Ralls, Jason
    • Gallery: Sapper
    • Gallery: Skelton, Dom
    • Gallery: Slade, Matt
    • Gallery: Stapells, Tony
    • Gallery: Stoesen, Chris
    • Gallery: Strom, Joakim
    • Gallery: Stumpy
    • Gallery: Topyob
    • Gallery: Treadhead
    • Gallery: Vera, Benito
    • Gallery: Vis Bellica
    • Gallery: Willie B
    • Gallery: Yuengling, Jon
    • Gallery: Catchpole, Jim
  • TFL Painting Challenge 2014/
    • Scorecard
    • Gallery: Alexandros
    • Gallery: Ambler, Craig
    • Gallery: Armstrong, Keith
    • Gallery: Bailey, Dave
    • Gallery: Bairos, Vidal
    • Gallery: Bax, Dick
    • Gallery: Bloggs, Fred
    • Gallery: Bond, Geoff
    • Gallery: Burt, Steve
    • Gallery: Carnegie, Ron
    • Gallery: Carole
    • Gallery: Catchpole, Jim
    • Gallery: Clarke, Richard
    • Gallery: Corbett, Wulf
    • Gallery: Danziger, Richard
    • Gallery: De Smedt, Koen
    • Gallery: de Terre Neuve, John
    • Gallery: Deeks, Jon
    • Gallery: Douglas, Mervyn
    • Gallery: Duffell, Andy
    • Gallery: Egg, Free Range
    • Gallery: Erikson, Leif
    • Gallery: Fat Wally (Kev)
    • Gallery: Fiene, Ben
    • Gallery: Gilbride, Chris
    • Gallery: Hodge, Derek
    • Gallery: Humm, Dave
    • Gallery: Llano, Manuel
    • Gallery: Luther, Mark
    • Gallery: Melville, Doug
    • Gallery: Mikkola, Topi
    • Gallery: Miller, Andrew
    • Gallery: munsterfan8
    • Gallery: Murray, Jim
    • Gallery: Nissvik, Thomas
    • Gallery: Owen
    • Gallery: The Mad Padre
    • Gallery: PatG
    • Gallery: Pingu
    • Gallery: Plowman, Ralph
    • Gallery: Pollard, Ashley
    • Gallery: Ralls, Jason
    • Gallery: Slade, Matt
    • Gallery: Stoesen, Chris
    • Gallery: Strom, Joakim
    • Gallery: Stumpy
    • Gallery: Thomas, John
    • Gallery: Treadhead
    • Gallery: Vera, Benito
    • Gallery: Vis Bellica
    • Gallery: Warrior in the Attic
    • Gallery: Weir, Jim
    • Gallery: Whitaker, Mike
    • Gallery: WillieB
    • Gallery: Yuengling, Jon
  • TooFatLardies/
 

This was an I Ain't Been Shot, Mum game played in late Spring 2012 by Dennis, Brian, Martin and myself over a couple of evenings. The scenario was a meeting engagement outside of Vienna, April 3 1945.

It gave me a chance to use some interesting vehicle types on a table that was very flat except for some flood control dykes. Dennis had parts of the 33 Panzer Ersatz & Ausbildungs Abteilung. Brian came in with part of the 2 SS Pz Aufklarungs Abteilung.

Martin entered initially with units of the 11th Separate Guards Motorcycle Battalion and later a forward detachment of the 9th Guards Tank Brigade, which I got to shoot at on the second evening, taking over the remaining Germans. This game was inspired by another of Bob Mackenzie's excellent scenarios:  Vienna 3-4-45.


  German players getting their units assembled   Dennis decides on the deployment of his static troops. He didn't have much to work with but could certainly stymie the Soviet advance through a couple of routes. He started with one platoon of grenadie

German players getting their units assembled

Dennis decides on the deployment of his static troops. He didn't have much to work with but could certainly stymie the Soviet advance through a couple of routes. He started with one platoon of grenadiers, 2 MMGs, 2 PaK 40s (with RSO tractors) and 2 Big Men. Brian meanwhile with the 2 SS recce unit has a light mobile force with some decent firepower. He has 2 sections of 2 Sdkfz 250/9s, 2 Sdkfz 250/3s, 2 Sdkfz 234/1 a/c, 2 Sdkfz 234/4 (Pak 40s!) a/c and a HQ Sdkfz 251/3.

The terrain is flat with two dikes crossing the table cutting off vehicle movement. He entered from the top right edge. There is a deep ditch running next to the hard surface road that goes up the left side of the table, so movement is very much funneled. There is also a RR in the lower right corner.

  Soviet entry corner   Martin had to come in from the lower left edge on the road. He was really hemmed in with a ditch to his left and a dike crossing his front after the small village. And Dennis had placed a couple of road blocks in his way.  Mar

Soviet entry corner

Martin had to come in from the lower left edge on the road. He was really hemmed in with a ditch to his left and a dike crossing his front after the small village. And Dennis had placed a couple of road blocks in his way.

Martin came in first with a weak platoon of motorcyclists who took fire from one of the MMGs on the dike. They took a couple of casualties and scrambled into the houses to return fire.

A random event popped up that caused the white house in the center of the picture to catch on fire: hence the smoke in this photo.

  Positions on the Dyke   The MMG and Pak40 open up on the Soviet m/c units moving into view in the village.

Positions on the Dyke

The MMG and Pak40 open up on the Soviet m/c units moving into view in the village.

  Stalled entry   Dennis opted to place most of his units up front to bottle up the Soviets as much as possible. The 2 blocks on the road will also slow their vehicles down considerably. Another block is on the road directly in front of the guns. He

Stalled entry

Dennis opted to place most of his units up front to bottle up the Soviets as much as possible. The 2 blocks on the road will also slow their vehicles down considerably. Another block is on the road directly in front of the guns. He and Brian couldn't coordinate before the game so Dennis doesn't know when or where the SS recce will appear.

  Motorcyclists moving up   Martin advances a section of m/c troops up to the front.

Motorcyclists moving up

Martin advances a section of m/c troops up to the front.

  Valentines arrive   The troop of Valentine Mk IXs move up and promptly come under fire from the Pak

Valentines arrive

The troop of Valentine Mk IXs move up and promptly come under fire from the Pak

 View to the right  As the Valentines move up to engage the Pak and MMG, Brian's SS recce units are coming into view on the far right.

View to the right

As the Valentines move up to engage the Pak and MMG, Brian's SS recce units are coming into view on the far right.

  The 2 SS recce arrives   Brian dashed his recce units around the side of the dykes as fast as possible. Here he is leading with a couple of Sdkfz 234/1s followed by 2 Sdkfz 250/3 and the 2 Sdkfz 250/9s.

The 2 SS recce arrives

Brian dashed his recce units around the side of the dykes as fast as possible. Here he is leading with a couple of Sdkfz 234/1s followed by 2 Sdkfz 250/3 and the 2 Sdkfz 250/9s.

  Valentine vs SS recce   The 2nd Valentine moves between the buildings to fire at the advancing German recon units. (The Soviet infantry is actually in the building). The smoke is from the building to to right that has caught on fire.

Valentine vs SS recce

The 2nd Valentine moves between the buildings to fire at the advancing German recon units. (The Soviet infantry is actually in the building). The smoke is from the building to to right that has caught on fire.

  Some massive speed bumps there   Probably don't need that block after the big wrinkle in the ground cloth. Looking northeast from the village.

Some massive speed bumps there

Probably don't need that block after the big wrinkle in the ground cloth. Looking northeast from the village.

  Red P39 targeting some Sdkfx 234/1s   The first attack by the VVS. The P39 managed to miss the armored cars. Odds of a Soviet air strike are pretty good. If a card is pulled, the VVS rolls a 6 on a D6. The Luftwaffe also has a chance to show up-the

Red P39 targeting some Sdkfx 234/1s

The first attack by the VVS. The P39 managed to miss the armored cars. Odds of a Soviet air strike are pretty good. If a card is pulled, the VVS rolls a 6 on a D6. The Luftwaffe also has a chance to show up-they need a 10 on a D10 if their card comes up.

  More Red scouts   Another platoon of Soviets arrive in their M3 scout cars, disembark and take cover in the village. Some of the blind cards that are out by the SS recce are dummies.

More Red scouts

Another platoon of Soviets arrive in their M3 scout cars, disembark and take cover in the village. Some of the blind cards that are out by the SS recce are dummies.

  Pressing into contact   2 of the Sdkfz 250/9s move closer to the enemy

Pressing into contact

2 of the Sdkfz 250/9s move closer to the enemy

  Plenty of light targets   Do they not know there is some guns that can take them out?

Plenty of light targets

Do they not know there is some guns that can take them out?

  Yak attack   A Yak 9T also has a chance to nail some Germans who seem to be happily bunching up.

Yak attack

A Yak 9T also has a chance to nail some Germans who seem to be happily bunching up.

  Big explosion for a small vehicle   Some of the M3 scout cars have arrived and more of the SS recce bttn is also engaged. Brian moved up a pair of Sdkfz 250/9s to pin down the Soviet infantry but one explodes after getting hit by a Valentine,

Big explosion for a small vehicle

Some of the M3 scout cars have arrived and more of the SS recce bttn is also engaged. Brian moved up a pair of Sdkfz 250/9s to pin down the Soviet infantry but one explodes after getting hit by a Valentine,

  Enemy definitely spotted   The 2 SS Pz Auf Abt assembles in the open. One of the Sdkfz 234/4 has aleady been disabled by the Valentines. One of the Sdkfz 250/9s sent forwrd has met a fiery end -the other one has gone through the tree line to the ri

Enemy definitely spotted

The 2 SS Pz Auf Abt assembles in the open. One of the Sdkfz 234/4 has aleady been disabled by the Valentines. One of the Sdkfz 250/9s sent forwrd has met a fiery end -the other one has gone through the tree line to the right. There are plenty of targets up ahead but even the 50 cals on the M3 scout cars can knock out any of these vehicles.

  Red recon blunted   The lead Valentine and an M3 are taken out by the Pak 40 and MMG on the dike. Martin ran his Gaz truck with the triple MG AA mount up and pulverized the MMG , but was promptly nailed by the Pak. Its smoking in the center of the

Red recon blunted

The lead Valentine and an M3 are taken out by the Pak 40 and MMG on the dike. Martin ran his Gaz truck with the triple MG AA mount up and pulverized the MMG , but was promptly nailed by the Pak. Its smoking in the center of the mess up towards the block. Return fire from the other Soviet scouts is taking a toll on the weapons crews though.

  Ersatz defenders   Dennis's defenders have done a good job of stopping any Russians from advancing up the road. I think this pic was taken just before they started getting hosed by the M3's fifty cals.

Ersatz defenders

Dennis's defenders have done a good job of stopping any Russians from advancing up the road. I think this pic was taken just before they started getting hosed by the M3's fifty cals.

  Scouts up the road   With the 50 cals blasting the German guns up on the dyke, Martin sends a couple of sections along the road to try to get around the dyke.

Scouts up the road

With the 50 cals blasting the German guns up on the dyke, Martin sends a couple of sections along the road to try to get around the dyke.

  Another hit on the armored cars   After taking out a HT that got too close, Valentines take out a Sdkfz 234/4. The other Pak carrier has been immobilised.

Another hit on the armored cars

After taking out a HT that got too close, Valentines take out a Sdkfz 234/4. The other Pak carrier has been immobilised.

  Defenders making some moves   The surviving Pak crew drags their gun down to the RSO tractor. There is another pak & MMG team under the blind that moved up from the other dike. While the 50 cals took out the Pak crew and most of the MMG team, t

Defenders making some moves

The surviving Pak crew drags their gun down to the RSO tractor. There is another pak & MMG team under the blind that moved up from the other dike. While the 50 cals took out the Pak crew and most of the MMG team, the Russian scouts managed to make it to the side of the dyke. Dennis sends his Big Man and 2 sections on a mission to assault the Russkies before they can get their breathe back.

I need to figure out a way to get the cloth to lay flatter againt abrupt rises like this dyke. A couple of pins just ain't enough to hold down the fabric.

  Changing of the guard   The other Pak and MMG team looks like it got up the first dike just in time-maybe. Dennis really needs to win the Close Combat or the Soviets can prevent the Pak from getting up the dike into position. One infantry section r

Changing of the guard

The other Pak and MMG team looks like it got up the first dike just in time-maybe. Dennis really needs to win the Close Combat or the Soviets can prevent the Pak from getting up the dike into position. One infantry section remains up on the dike to put fire down on the front.

  Grenadiers win the hand to hand   Dennis' 33 Pz Ers troops overwhelm the scouts. Unfortunately their officier is killed in the melee.

Grenadiers win the hand to hand

Dennis' 33 Pz Ers troops overwhelm the scouts. Unfortunately their officier is killed in the melee.

  An advance too far   One of the 2 SS 250/9s burns next to a Valentine and M3 after getting hit by a Red Army wielded panzerfaust. The grenadiers move up to the block just outside of the village and come under lots of small arms fire.

An advance too far

One of the 2 SS 250/9s burns next to a Valentine and M3 after getting hit by a Red Army wielded panzerfaust. The grenadiers move up to the block just outside of the village and come under lots of small arms fire.

  German recon pulls back   Brian pulls back some of the surviviors of his recce unit to the tree lined road. Lesson learned here is recon should be sneaky and use the available cover. Losing the Sdkfz 234/4s really made a difference.

German recon pulls back

Brian pulls back some of the surviviors of his recce unit to the tree lined road. Lesson learned here is recon should be sneaky and use the available cover. Losing the Sdkfz 234/4s really made a difference.

  Grenadiers run back   After using all their panzerfausts (in vain), the surviving grenadiers dash back to the dyke. Meanwhile the second Pak & MMG have moved (slowly) up to positions on the dyke. This was where we stopped the first night. Denni

Grenadiers run back

After using all their panzerfausts (in vain), the surviving grenadiers dash back to the dyke. Meanwhile the second Pak & MMG have moved (slowly) up to positions on the dyke. This was where we stopped the first night. Dennis had done a good job of bottling up the Russkies.

  Recon reconning   2 of the HT edge out to the south to see if there are any nasties on the other side of the railroad. Smoking and abandoned mates in the background.

Recon reconning

2 of the HT edge out to the south to see if there are any nasties on the other side of the railroad. Smoking and abandoned mates in the background.

 Abandoned & smoking Valentine  The Valentine next to the house has been abandoned after getting hit a couple of times by the Pak on the dike. The M3 on the road helped drive off the grenadiers

Abandoned & smoking Valentine

The Valentine next to the house has been abandoned after getting hit a couple of times by the Pak on the dike. The M3 on the road helped drive off the grenadiers

  If the road wasn't blocked before it is now   Wrecked 250/9, Gaz AAA truck, M3 scout car and a crater or two make this spot pretty impassible before even getting to the wooden road blocks.

If the road wasn't blocked before it is now

Wrecked 250/9, Gaz AAA truck, M3 scout car and a crater or two make this spot pretty impassible before even getting to the wooden road blocks.

  Defenders awating the next wave   The 2nd pak and MMG team await the appearance of more Russians. the original MMG is still in place but down to a single action point.

Defenders awating the next wave

The 2nd pak and MMG team await the appearance of more Russians. the original MMG is still in place but down to a single action point.

  After a FW 190 run   The Lufwaffe managed to drop a couple of bombs among the Russian in town. The 3rd abandoned Valentine is next to the burned down house. The 2 M3s pulled back to get out of sight of the Pak but took some fire from the remaing SS

After a FW 190 run

The Lufwaffe managed to drop a couple of bombs among the Russian in town. The 3rd abandoned Valentine is next to the burned down house. The 2 M3s pulled back to get out of sight of the Pak but took some fire from the remaing SS recce and their 20mm guns.

  Scout HQ team   Popular picture on TMP that demonstrates the scale discrepancy between Adler figures and GHQ. I don't really care for discussions that involve my pictures without giving any credit. If it looked like crap, I wouldn't mind, but since

Scout HQ team

Popular picture on TMP that demonstrates the scale discrepancy between Adler figures and GHQ. I don't really care for discussions that involve my pictures without giving any credit. If it looked like crap, I wouldn't mind, but since my games generally show much more style, originality, and just basic effort, I find these web jabberings rather annoying. Which demonstrates the general rudeness of internet commenters. I mean, where's the love, people.

  Guards Shermans   The first detachment of M4A2 with some tank riders arrive on the scene. They saw no point in trying to head up the blocked road so skirted off to the right to make a run around the dike.

Guards Shermans

The first detachment of M4A2 with some tank riders arrive on the scene. They saw no point in trying to head up the blocked road so skirted off to the right to make a run around the dike.

  Luftwaffe sees some Shermans   But the Fw190F drops its bombs short of target.

Luftwaffe sees some Shermans

But the Fw190F drops its bombs short of target.

  The M4 moving across   Shermans and tank riders trying to get across the front before the Pak opens up. I had no M4A2 with 76mm guns, so I stuck a GHQ turret on a CinC hull.

The M4 moving across

Shermans and tank riders trying to get across the front before the Pak opens up. I had no M4A2 with 76mm guns, so I stuck a GHQ turret on a CinC hull.

  The SS recce regroups   The survivors -including the CO- use the tree line to regroup. Not much the 20mm can do against the Shermans.

The SS recce regroups

The survivors -including the CO- use the tree line to regroup. Not much the 20mm can do against the Shermans.

  Hits on the Shermans   The Pak does immobilize the commander vehicle and puts a shock hit on another M4. But once the 76mm start to shell the dike, the Pak will be in trouble.

Hits on the Shermans

The Pak does immobilize the commander vehicle and puts a shock hit on another M4. But once the 76mm start to shell the dike, the Pak will be in trouble.

  HE on the dike   The 76mm in the M4 does not have the same effectiveness as the 75mm would, but 4 guns firing are enough to suppress the Pak.

HE on the dike

The 76mm in the M4 does not have the same effectiveness as the 75mm would, but 4 guns firing are enough to suppress the Pak.

  Tank riders dismount   and use the tanks for to hide behind. Not much the infantry can do out here but take cover.

Tank riders dismount

and use the tanks for to hide behind. Not much the infantry can do out here but take cover.

  Scouts move up   A section of scouts use the HE fire to move up with one of the Big men leading.

Scouts move up

A section of scouts use the HE fire to move up with one of the Big men leading.

  More Soviet recon adn a M17 ht   The Ba64s and the M17 quad AA track move up to add their fire to the M4s. These were some of the units in the forward detachment of the 9th Guards Tank Brigade.

More Soviet recon adn a M17 ht

The Ba64s and the M17 quad AA track move up to add their fire to the M4s. These were some of the units in the forward detachment of the 9th Guards Tank Brigade.

  Last shots from the SS recce   Realizing that their fire would be prety weak against the Shermans, the 20mm guns were turned on the new targets of the Ba64s and M17 HT. They managed to score a couple of hits on them before making their escape aroun

Last shots from the SS recce

Realizing that their fire would be prety weak against the Shermans, the 20mm guns were turned on the new targets of the Ba64s and M17 HT. They managed to score a couple of hits on them before making their escape around the dike edge.

  M4s finishing off the Pak and MMG team   Although presenting their side armor is not a good idea-the 76mm are up to the task of silencing the Pak.

M4s finishing off the Pak and MMG team

Although presenting their side armor is not a good idea-the 76mm are up to the task of silencing the Pak.

  End positions of the Scouts   A pretty bloody fight with some interesting units among an unusual setting.

End positions of the Scouts

A pretty bloody fight with some interesting units among an unusual setting.

1 2 3 4 5 6 7 8 9 10 11 12 13 14 15 16 17 18 19 20 21 22 23 24 25 26 27 28 29 30 31 32 33 34 35 36 37 38 39 40 41 42 43 44 45
Previous Next
  German players getting their units assembled   Dennis decides on the deployment of his static troops. He didn't have much to work with but could certainly stymie the Soviet advance through a couple of routes. He started with one platoon of grenadie
  Soviet entry corner   Martin had to come in from the lower left edge on the road. He was really hemmed in with a ditch to his left and a dike crossing his front after the small village. And Dennis had placed a couple of road blocks in his way.  Mar
  Positions on the Dyke   The MMG and Pak40 open up on the Soviet m/c units moving into view in the village.
  Stalled entry   Dennis opted to place most of his units up front to bottle up the Soviets as much as possible. The 2 blocks on the road will also slow their vehicles down considerably. Another block is on the road directly in front of the guns. He
  Motorcyclists moving up   Martin advances a section of m/c troops up to the front.
  Valentines arrive   The troop of Valentine Mk IXs move up and promptly come under fire from the Pak
 View to the right  As the Valentines move up to engage the Pak and MMG, Brian's SS recce units are coming into view on the far right.
  The 2 SS recce arrives   Brian dashed his recce units around the side of the dykes as fast as possible. Here he is leading with a couple of Sdkfz 234/1s followed by 2 Sdkfz 250/3 and the 2 Sdkfz 250/9s.
  Valentine vs SS recce   The 2nd Valentine moves between the buildings to fire at the advancing German recon units. (The Soviet infantry is actually in the building). The smoke is from the building to to right that has caught on fire.
  Some massive speed bumps there   Probably don't need that block after the big wrinkle in the ground cloth. Looking northeast from the village.
  Red P39 targeting some Sdkfx 234/1s   The first attack by the VVS. The P39 managed to miss the armored cars. Odds of a Soviet air strike are pretty good. If a card is pulled, the VVS rolls a 6 on a D6. The Luftwaffe also has a chance to show up-the
  More Red scouts   Another platoon of Soviets arrive in their M3 scout cars, disembark and take cover in the village. Some of the blind cards that are out by the SS recce are dummies.
  Pressing into contact   2 of the Sdkfz 250/9s move closer to the enemy
  Plenty of light targets   Do they not know there is some guns that can take them out?
  Yak attack   A Yak 9T also has a chance to nail some Germans who seem to be happily bunching up.
  Big explosion for a small vehicle   Some of the M3 scout cars have arrived and more of the SS recce bttn is also engaged. Brian moved up a pair of Sdkfz 250/9s to pin down the Soviet infantry but one explodes after getting hit by a Valentine,
  Enemy definitely spotted   The 2 SS Pz Auf Abt assembles in the open. One of the Sdkfz 234/4 has aleady been disabled by the Valentines. One of the Sdkfz 250/9s sent forwrd has met a fiery end -the other one has gone through the tree line to the ri
  Red recon blunted   The lead Valentine and an M3 are taken out by the Pak 40 and MMG on the dike. Martin ran his Gaz truck with the triple MG AA mount up and pulverized the MMG , but was promptly nailed by the Pak. Its smoking in the center of the
  Ersatz defenders   Dennis's defenders have done a good job of stopping any Russians from advancing up the road. I think this pic was taken just before they started getting hosed by the M3's fifty cals.
  Scouts up the road   With the 50 cals blasting the German guns up on the dyke, Martin sends a couple of sections along the road to try to get around the dyke.
  Another hit on the armored cars   After taking out a HT that got too close, Valentines take out a Sdkfz 234/4. The other Pak carrier has been immobilised.
  Defenders making some moves   The surviving Pak crew drags their gun down to the RSO tractor. There is another pak & MMG team under the blind that moved up from the other dike. While the 50 cals took out the Pak crew and most of the MMG team, t
  Changing of the guard   The other Pak and MMG team looks like it got up the first dike just in time-maybe. Dennis really needs to win the Close Combat or the Soviets can prevent the Pak from getting up the dike into position. One infantry section r
  Grenadiers win the hand to hand   Dennis' 33 Pz Ers troops overwhelm the scouts. Unfortunately their officier is killed in the melee.
  An advance too far   One of the 2 SS 250/9s burns next to a Valentine and M3 after getting hit by a Red Army wielded panzerfaust. The grenadiers move up to the block just outside of the village and come under lots of small arms fire.
  German recon pulls back   Brian pulls back some of the surviviors of his recce unit to the tree lined road. Lesson learned here is recon should be sneaky and use the available cover. Losing the Sdkfz 234/4s really made a difference.
  Grenadiers run back   After using all their panzerfausts (in vain), the surviving grenadiers dash back to the dyke. Meanwhile the second Pak & MMG have moved (slowly) up to positions on the dyke. This was where we stopped the first night. Denni
  Recon reconning   2 of the HT edge out to the south to see if there are any nasties on the other side of the railroad. Smoking and abandoned mates in the background.
 Abandoned & smoking Valentine  The Valentine next to the house has been abandoned after getting hit a couple of times by the Pak on the dike. The M3 on the road helped drive off the grenadiers
  If the road wasn't blocked before it is now   Wrecked 250/9, Gaz AAA truck, M3 scout car and a crater or two make this spot pretty impassible before even getting to the wooden road blocks.
  Defenders awating the next wave   The 2nd pak and MMG team await the appearance of more Russians. the original MMG is still in place but down to a single action point.
  After a FW 190 run   The Lufwaffe managed to drop a couple of bombs among the Russian in town. The 3rd abandoned Valentine is next to the burned down house. The 2 M3s pulled back to get out of sight of the Pak but took some fire from the remaing SS
  Scout HQ team   Popular picture on TMP that demonstrates the scale discrepancy between Adler figures and GHQ. I don't really care for discussions that involve my pictures without giving any credit. If it looked like crap, I wouldn't mind, but since
  Guards Shermans   The first detachment of M4A2 with some tank riders arrive on the scene. They saw no point in trying to head up the blocked road so skirted off to the right to make a run around the dike.
  Luftwaffe sees some Shermans   But the Fw190F drops its bombs short of target.
  The M4 moving across   Shermans and tank riders trying to get across the front before the Pak opens up. I had no M4A2 with 76mm guns, so I stuck a GHQ turret on a CinC hull.
  The SS recce regroups   The survivors -including the CO- use the tree line to regroup. Not much the 20mm can do against the Shermans.
  Hits on the Shermans   The Pak does immobilize the commander vehicle and puts a shock hit on another M4. But once the 76mm start to shell the dike, the Pak will be in trouble.
  HE on the dike   The 76mm in the M4 does not have the same effectiveness as the 75mm would, but 4 guns firing are enough to suppress the Pak.
  Tank riders dismount   and use the tanks for to hide behind. Not much the infantry can do out here but take cover.
  Scouts move up   A section of scouts use the HE fire to move up with one of the Big men leading.
  More Soviet recon adn a M17 ht   The Ba64s and the M17 quad AA track move up to add their fire to the M4s. These were some of the units in the forward detachment of the 9th Guards Tank Brigade.
  Last shots from the SS recce   Realizing that their fire would be prety weak against the Shermans, the 20mm guns were turned on the new targets of the Ba64s and M17 HT. They managed to score a couple of hits on them before making their escape aroun
  M4s finishing off the Pak and MMG team   Although presenting their side armor is not a good idea-the 76mm are up to the task of silencing the Pak.
  End positions of the Scouts   A pretty bloody fight with some interesting units among an unusual setting.


At the end of the battle, the the original defenders (the 33 Panzer Ersatz Ausbildungs Abteilung) was down to one of two MMG sections; its two Pak 40s had been practically de-crewed, and Dennis (and me for the second evening) lost ten of twenty-four of its grenadiers and its commander. It had done a great job of holding the Soviets to the entry point.

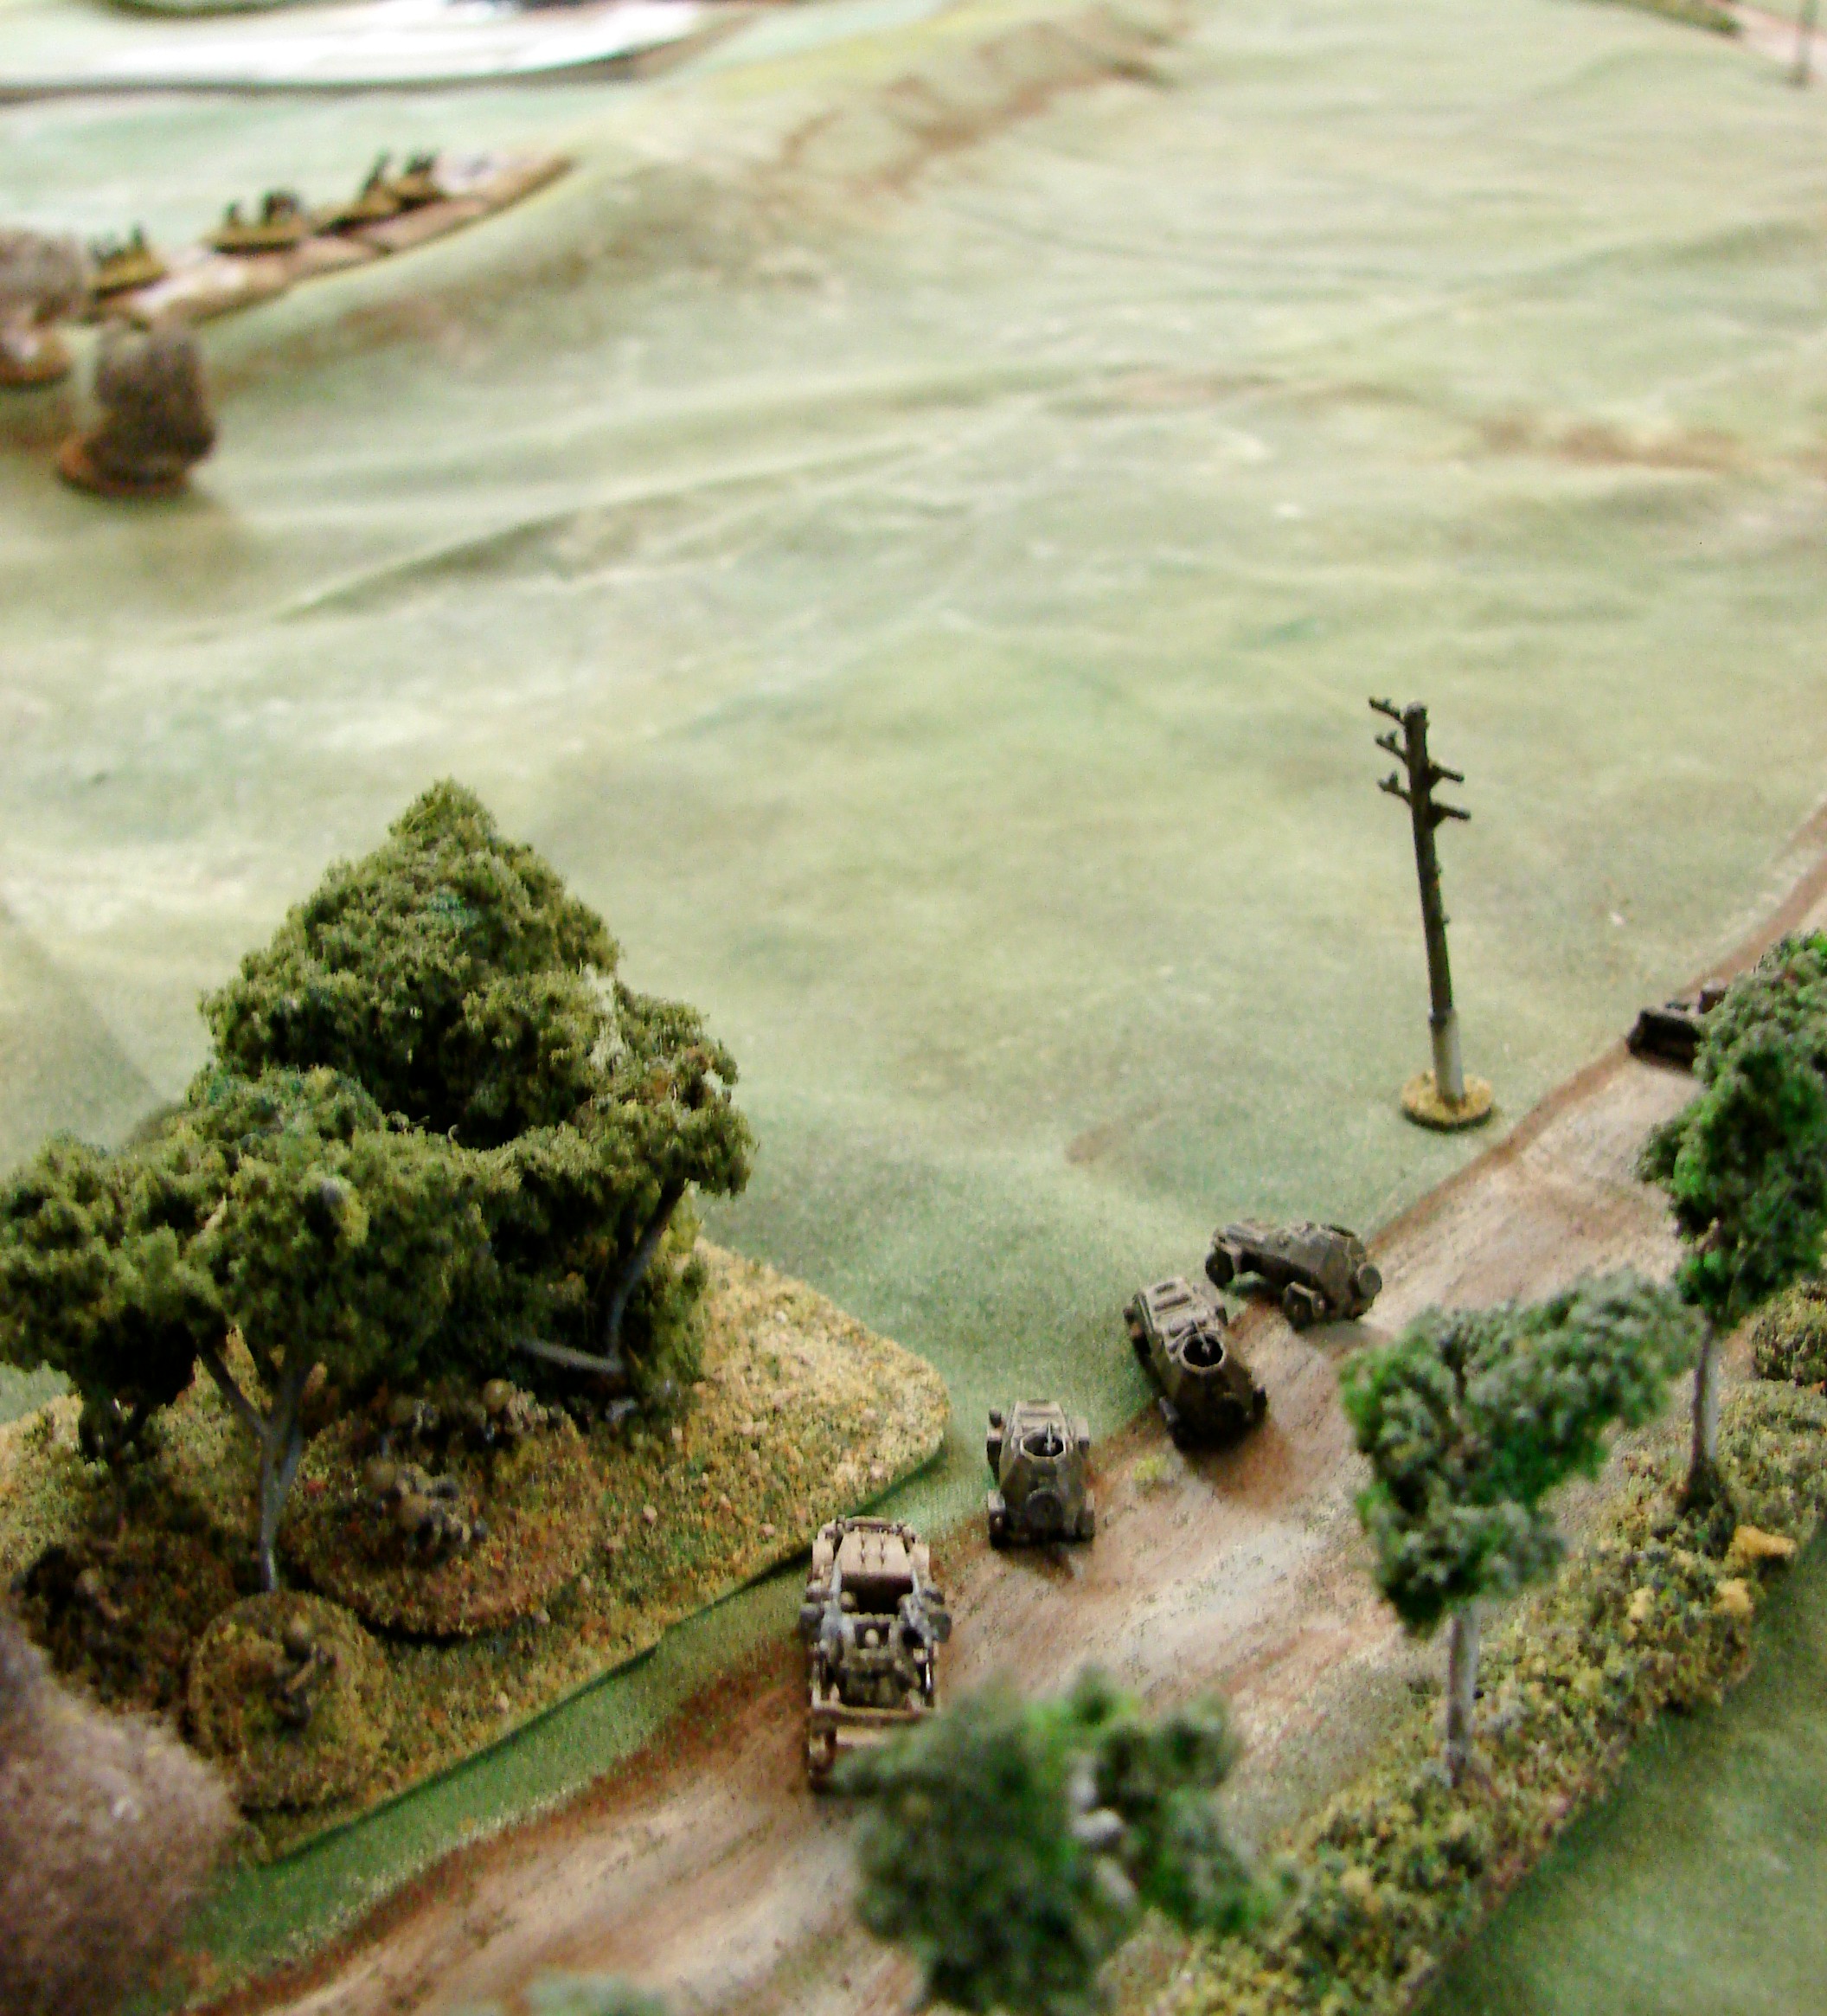
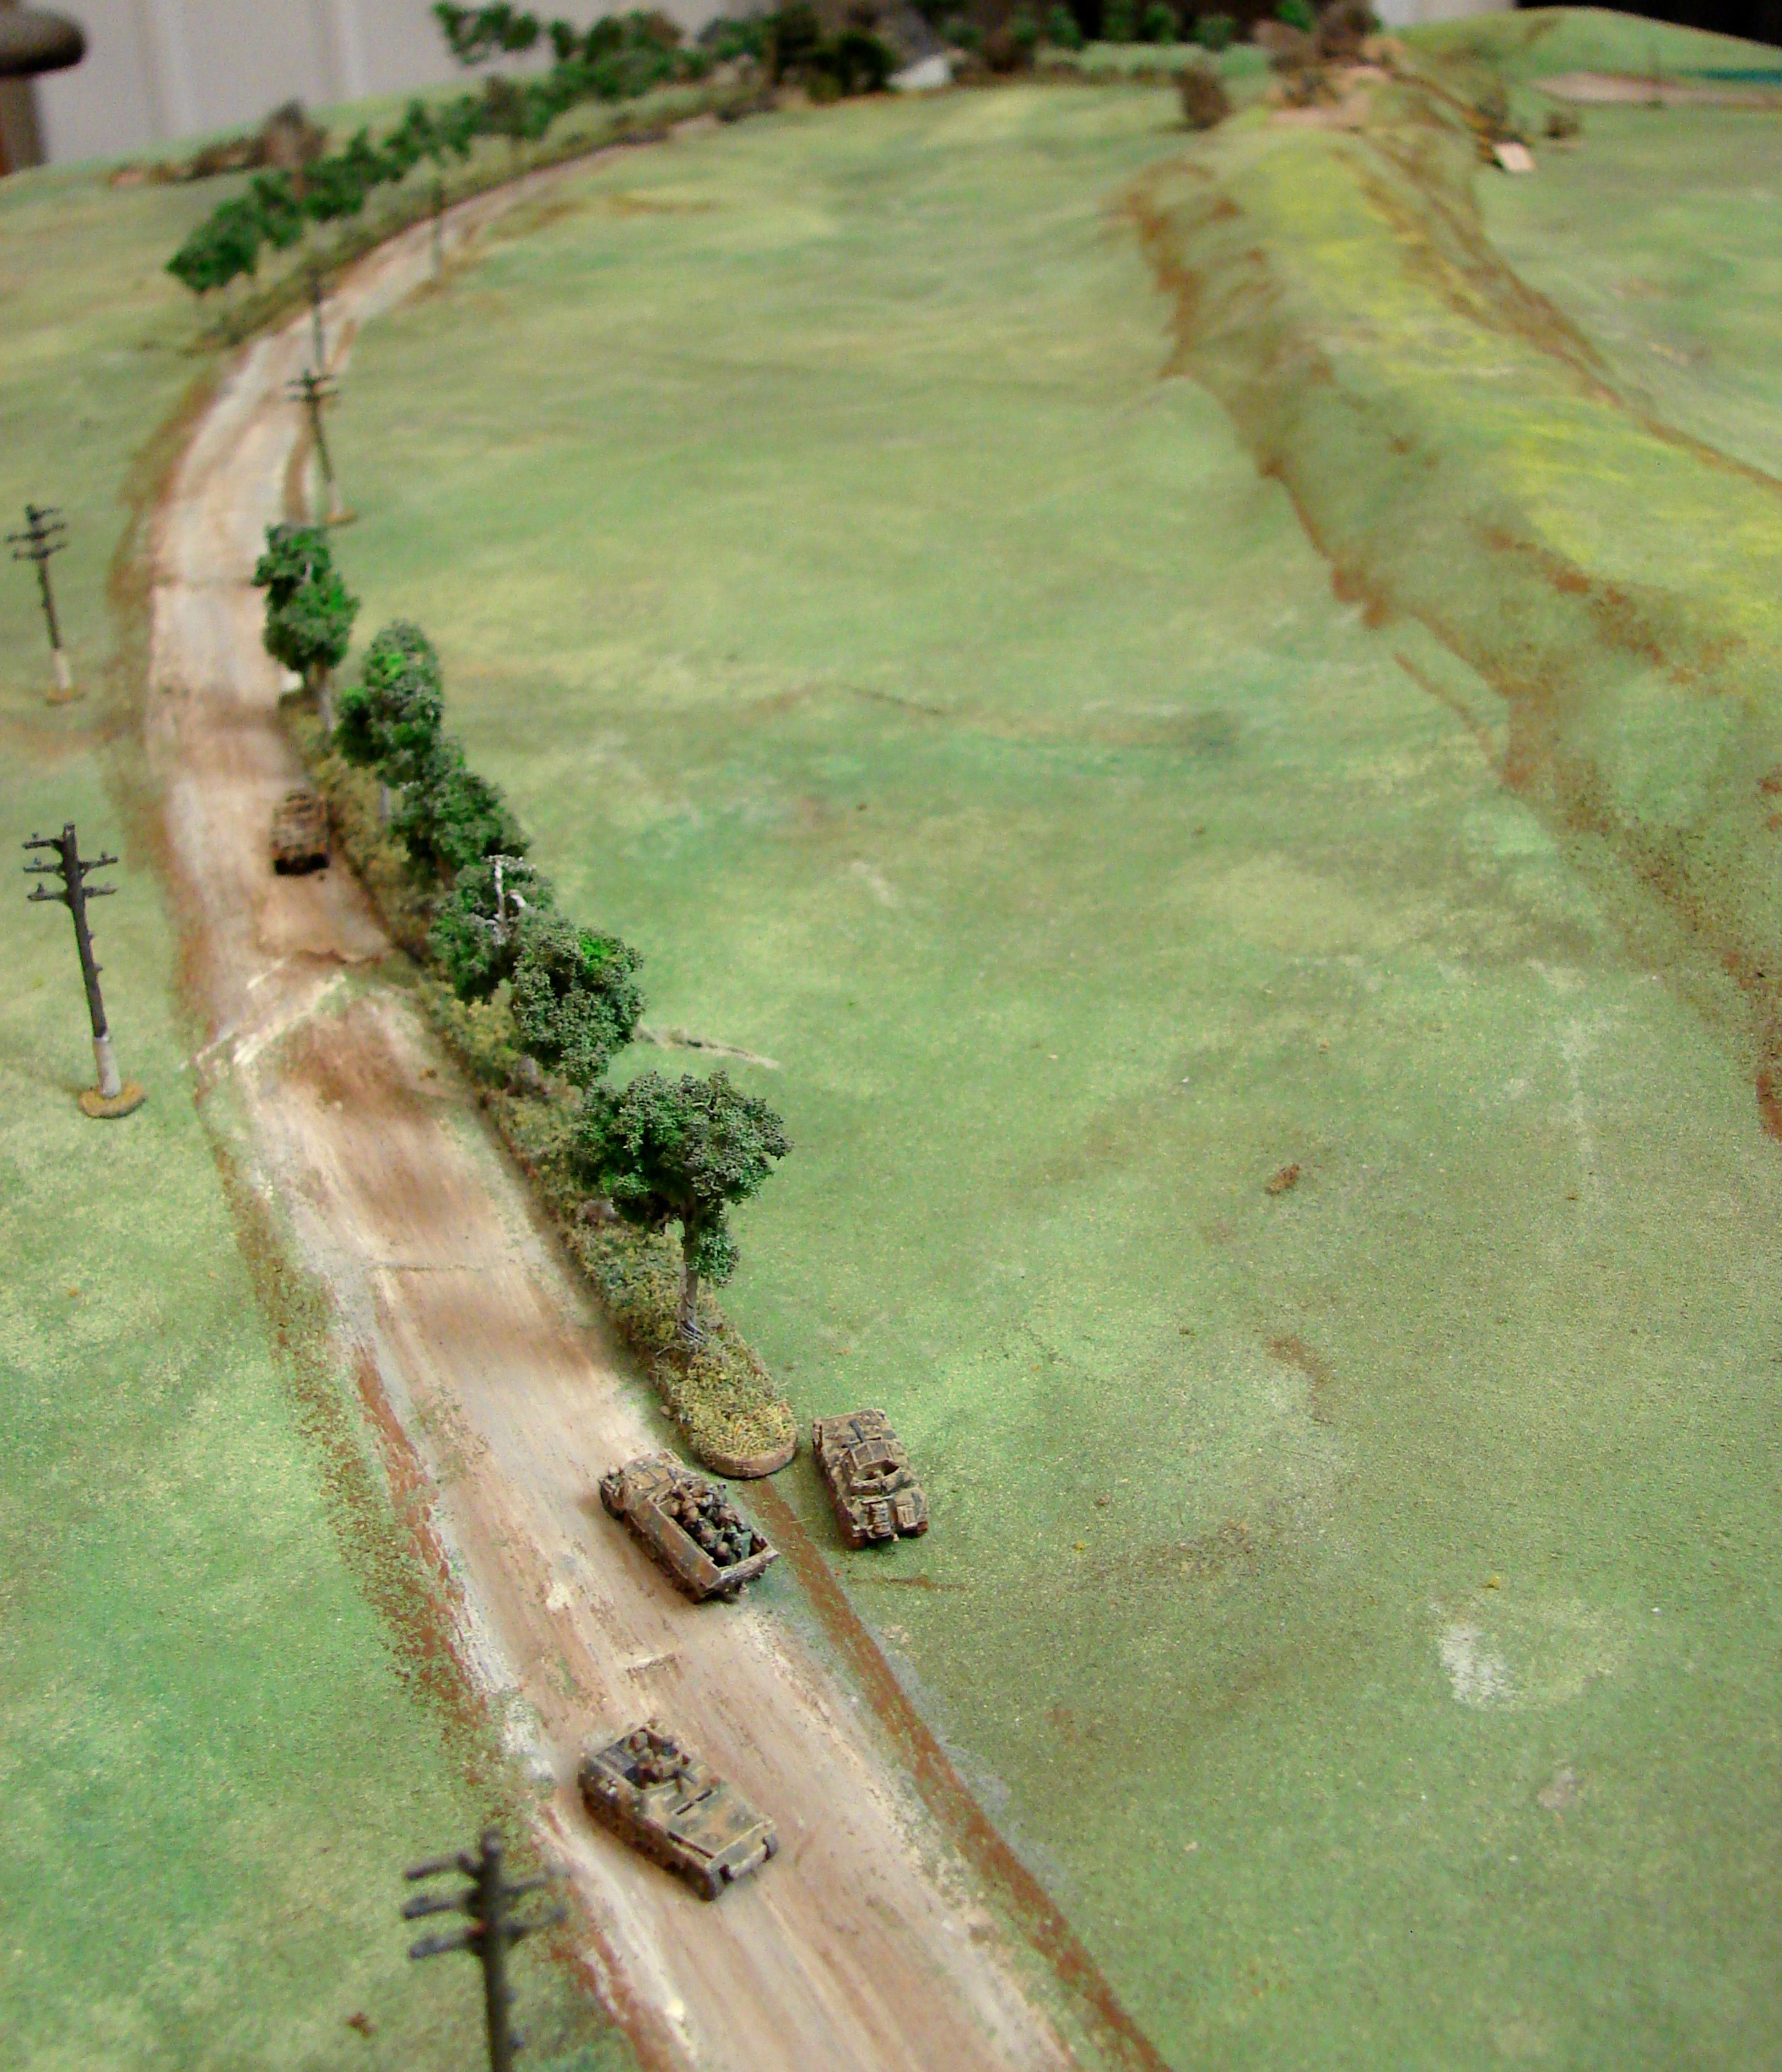
The 2 SS Pz Aufklarungs Abteilung was caught in the open and its light vehicles were chewed up before it could effectively deploy. It lost both of the heavy hitting Sdkfz 234/4s, two of four Sdkfz 250/9s, one Sdkfz 234/1 KO'ed with the other losing its 20mm. I was really looking forward to seeing the 234/4 in action.

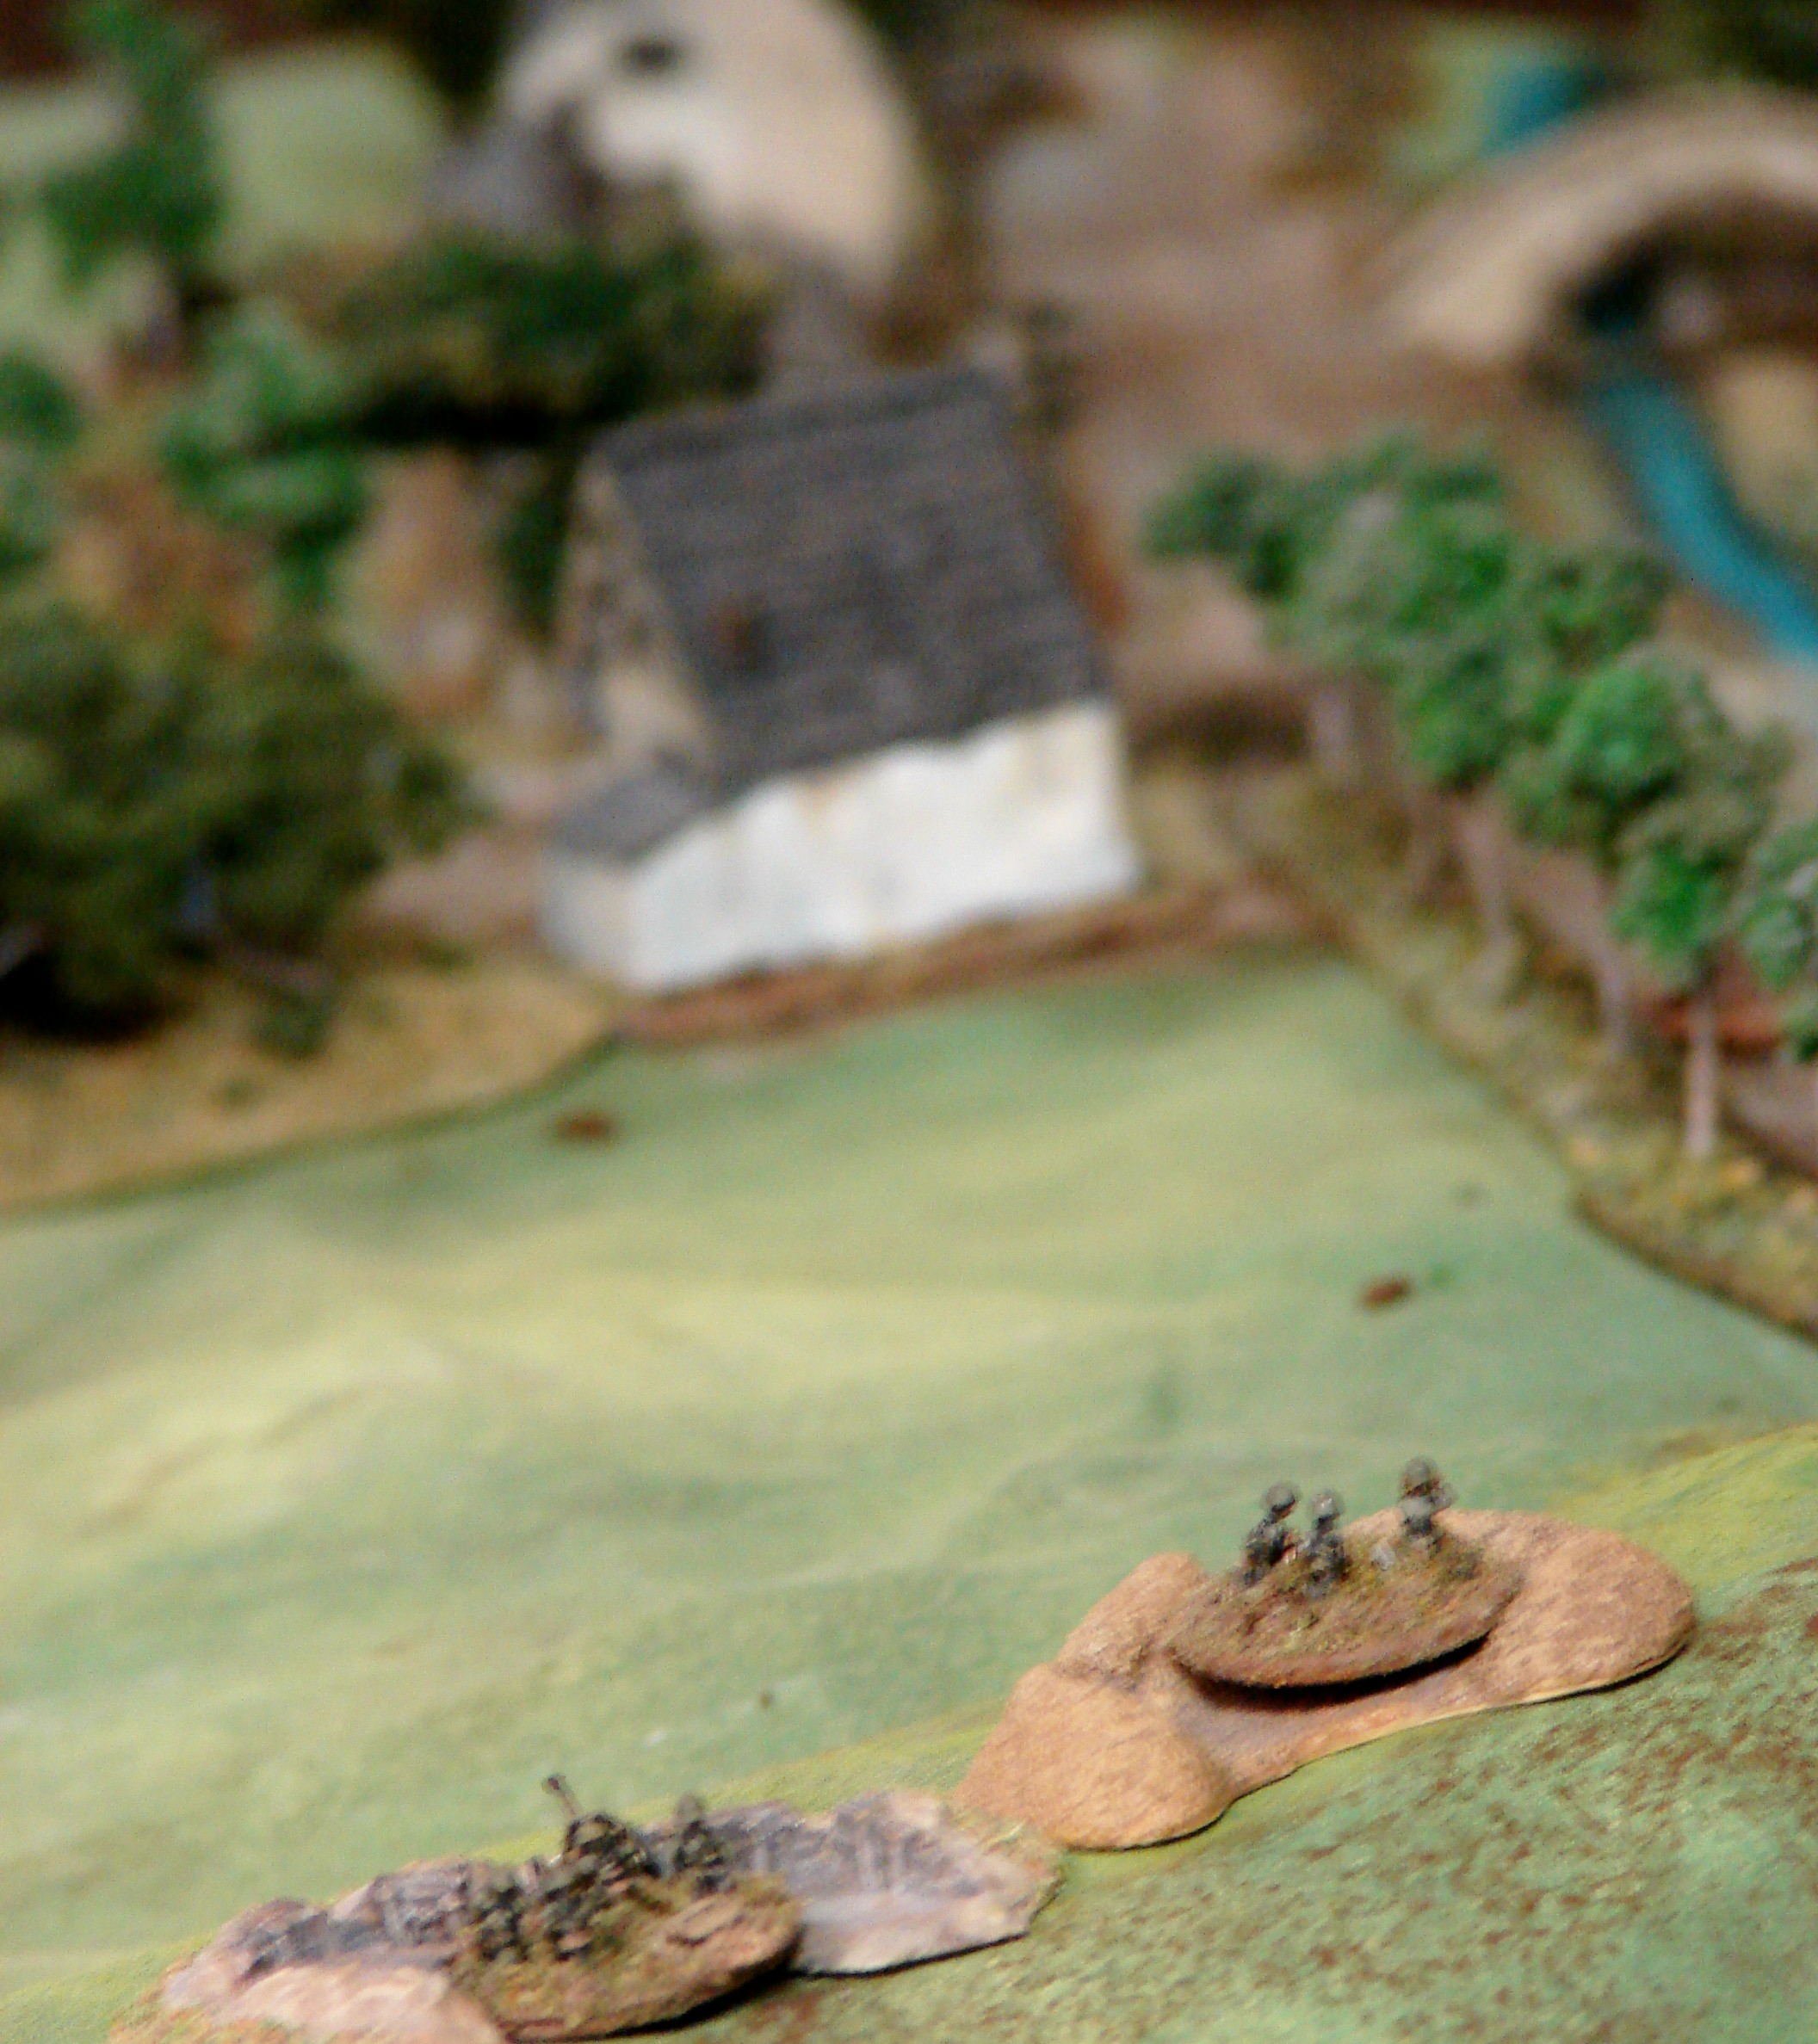
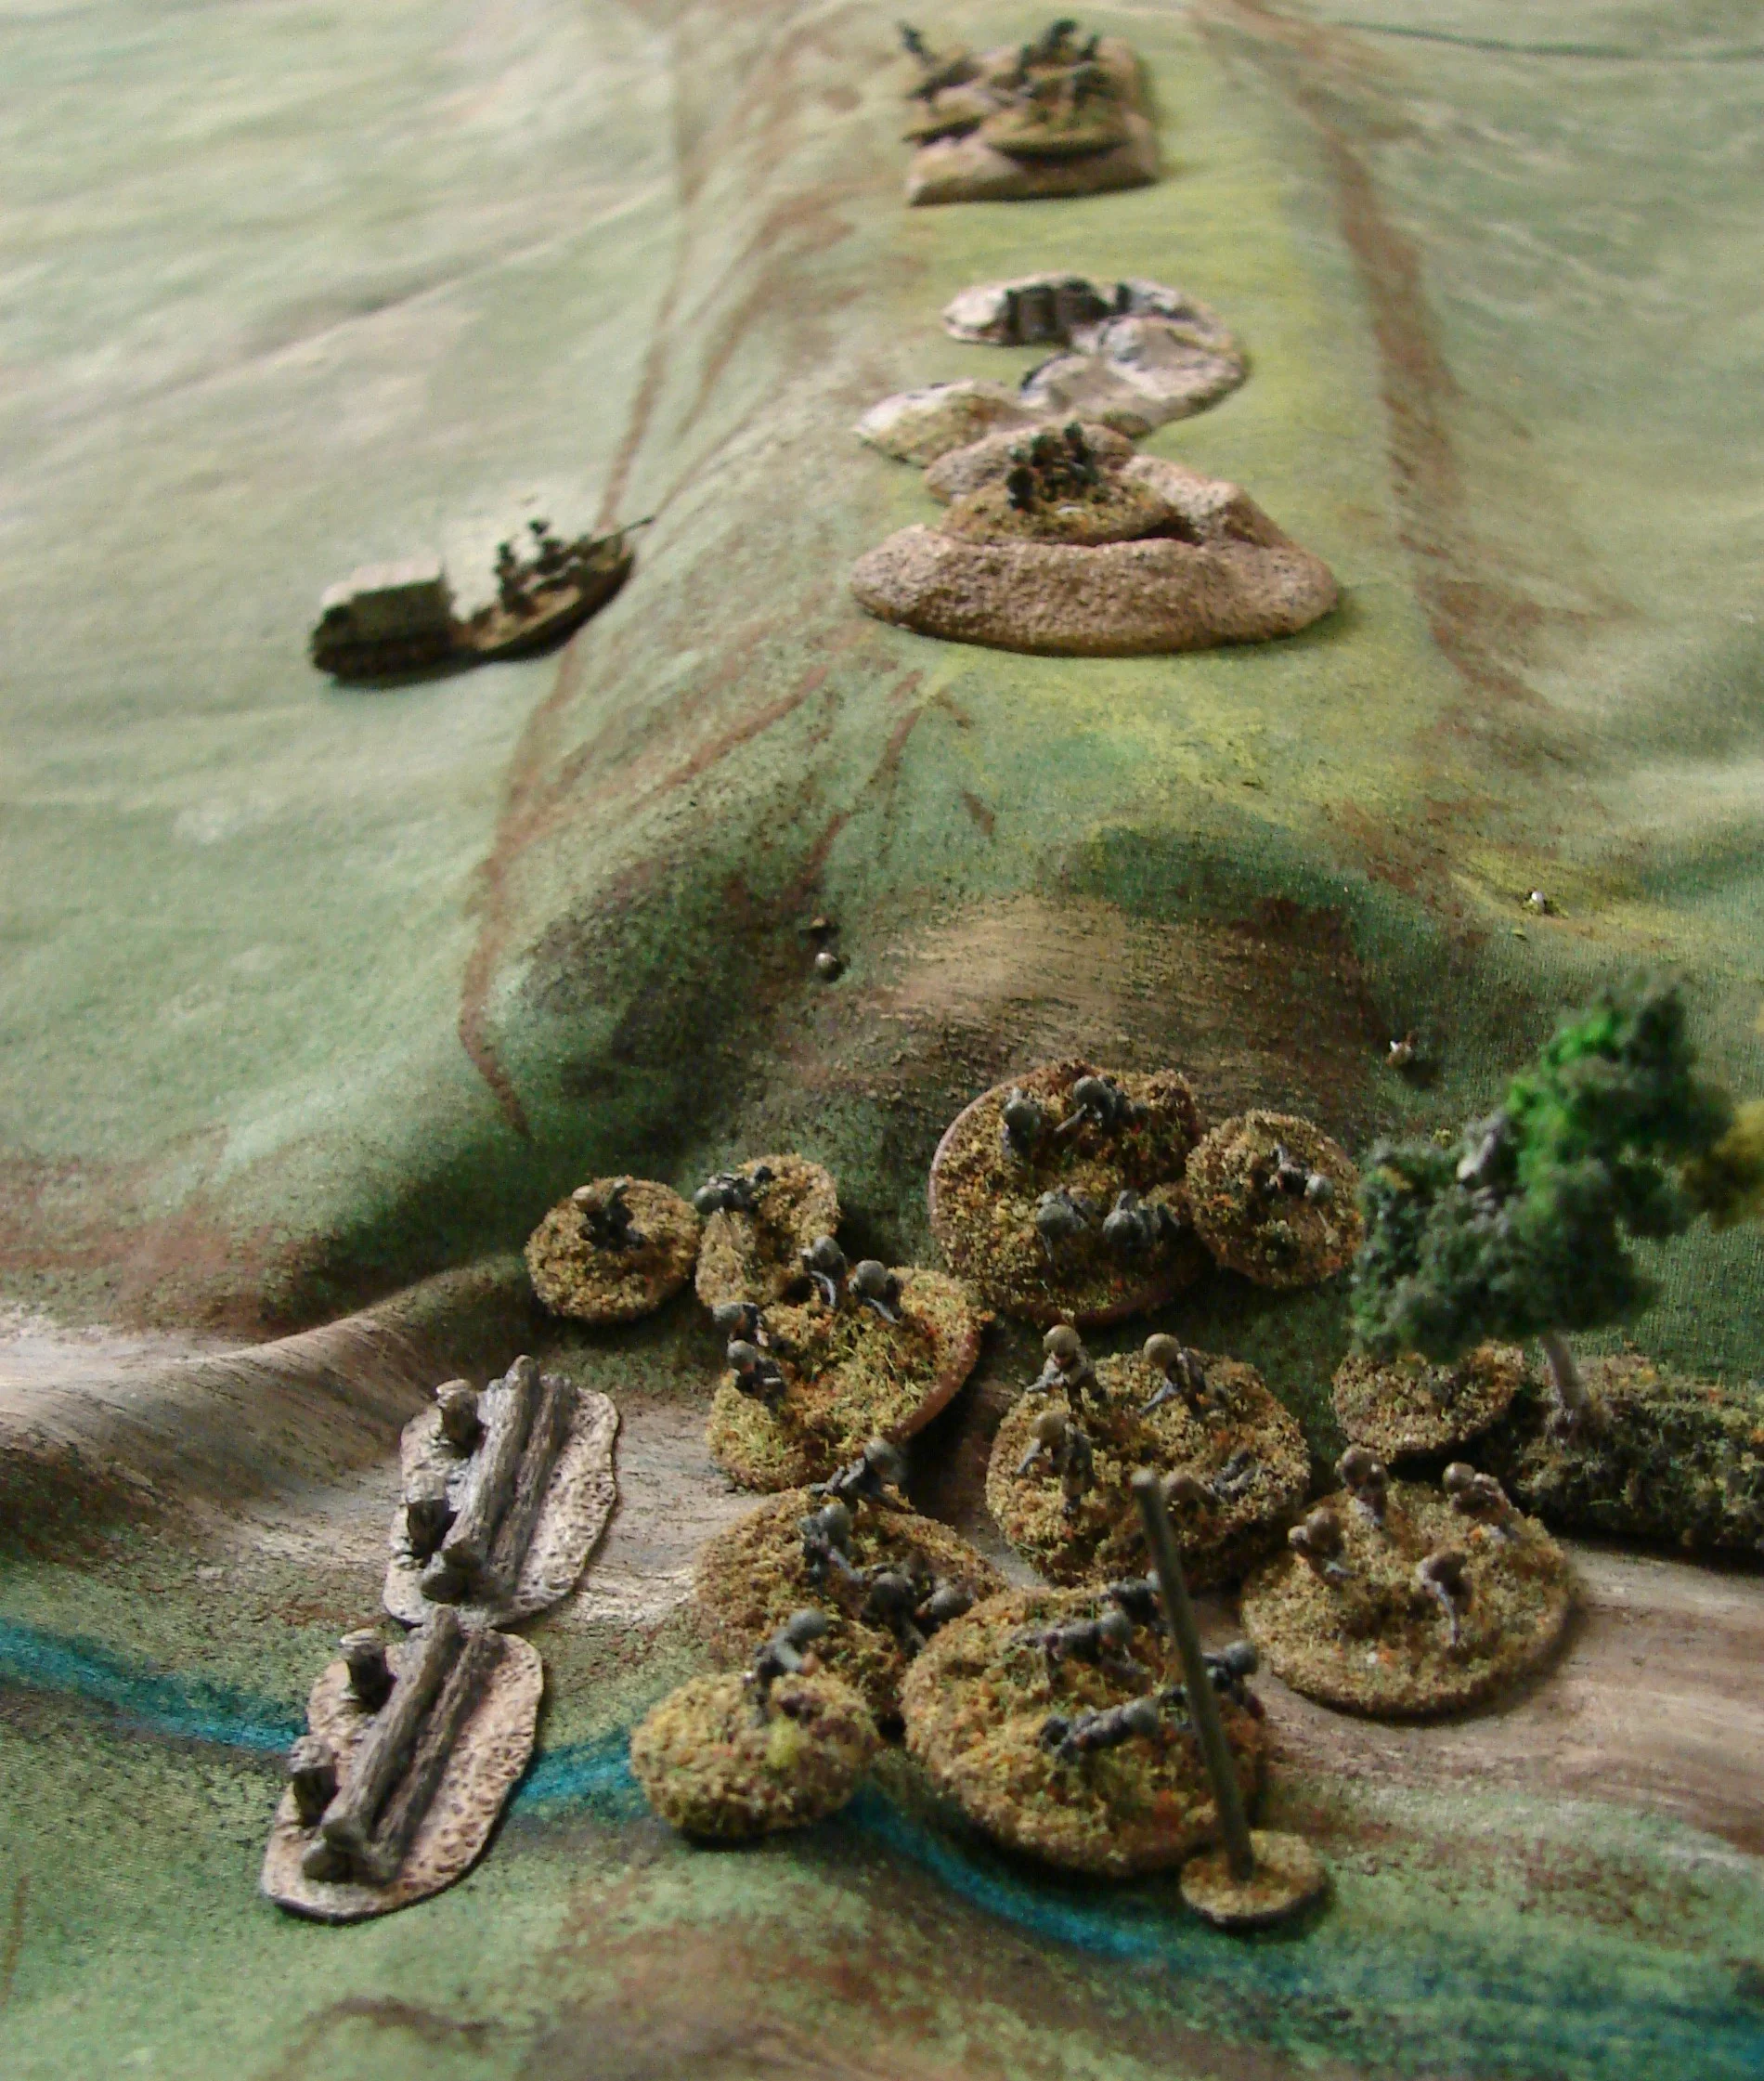
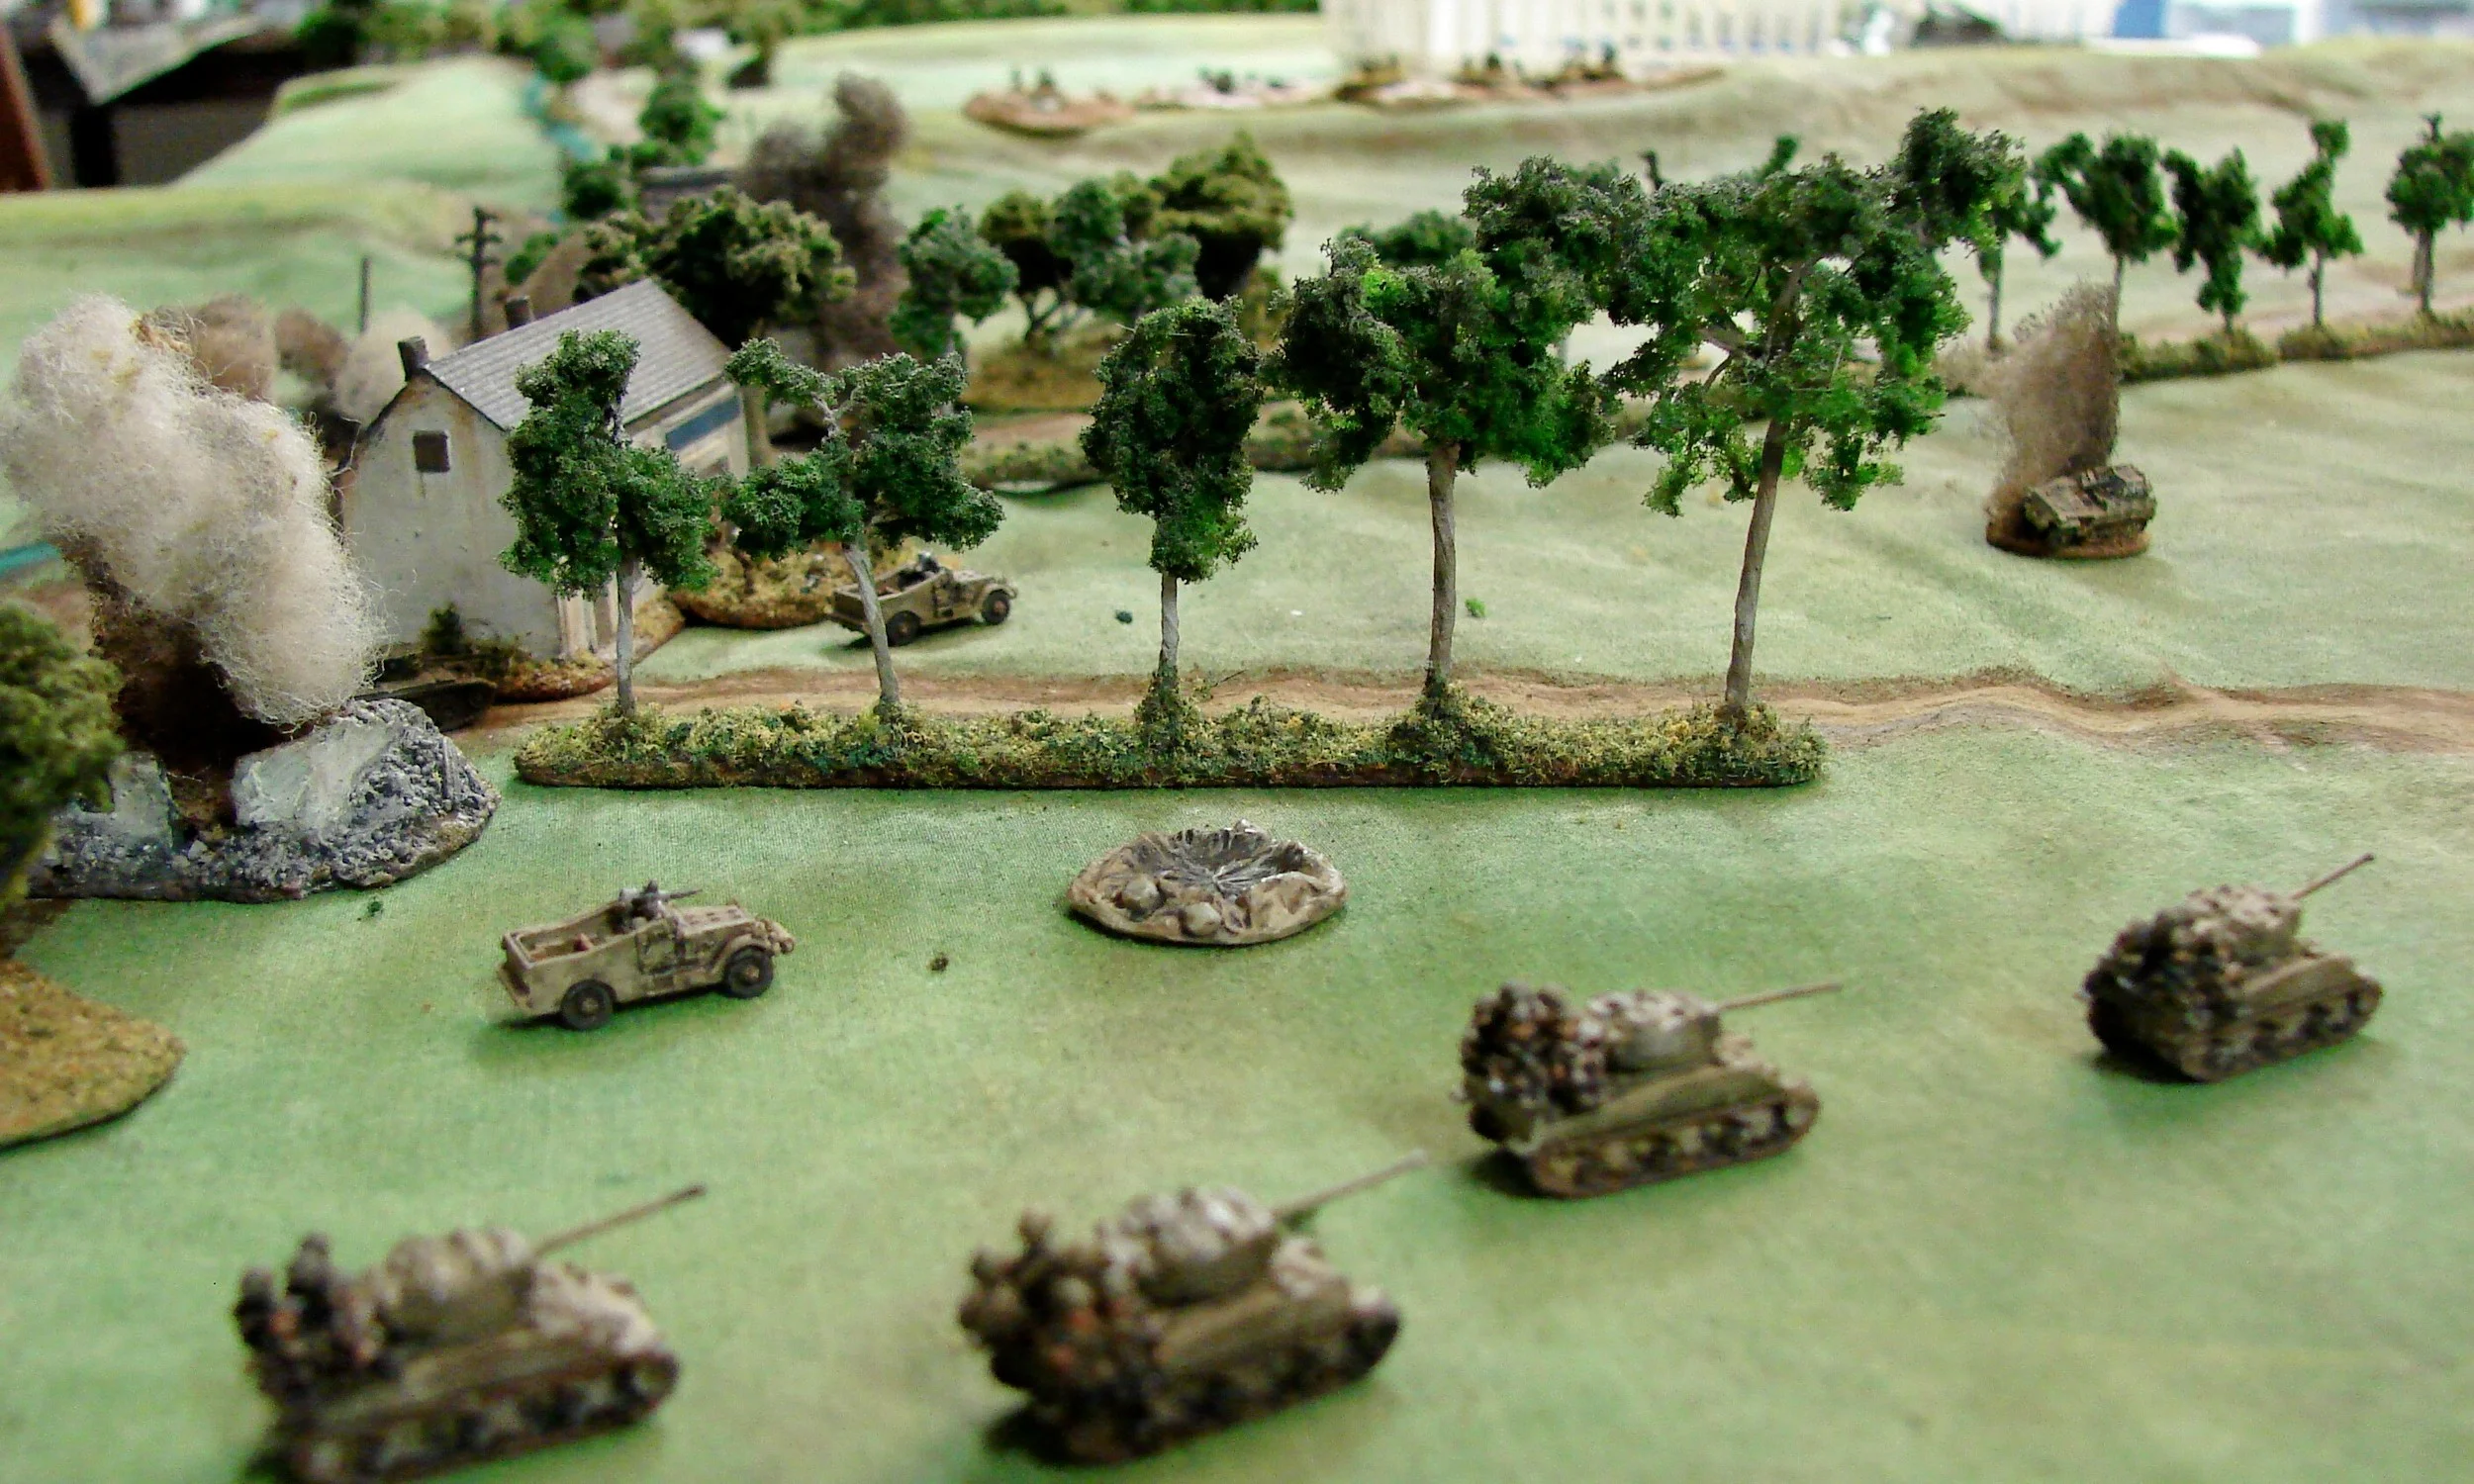
The 11th Separate Guards Motorcycle Battalion had 40 out of 56 of its troopers down along with one officer. The Gaz AAA truck was KO'ed, and all three Valentines were out of action. Their 82mm mortar battery was never able to deploy:  a random event took it out. With only one Pak left by the time the 9th Guards Tank Brigade started to arrive, there wasn't a lot to stop the Shermans and company. They did lose some seven tank riders and had the CO's tank immobilized, but they were easily going to move up to the dyke edge.

This is not quite what I thought would happen with these fast moving light forces. The game took place on about only a quarter of the table. Once one of the few channels for the Soviets was completely plugged up, they had to wait for the M4s to come up to force the issue. Losing the mortars through a random event really limited the Soviet options, and the losing the 234/4s cut the AT ability of the Germans in half.

Mark Luther


BACK