

This afternoon Neil and I fought the second of our paired games from the Operation Compass scenario booklet. This time we would fight BuqBuq twice: once with me as the Italians, then swapping sides so I took the British. The scenario is very similar to the last one we fought, Sidi Barrani, in that it involves a force of British tanks (three platoons, each three tanks: one A9s, one A13s and one Light Tanks MkVI) attempting to suppress a mixed bag of Italian artillery positions supported by some ragtag infantry.
It promised to be a lovely afternoon’s gaming. The table was set up under a canopy on the patio, with Neil’s immaculately tended garden as the backdrop. The sun was shining, but there was a light breeze blowing. The noisy neighbour, who had refused to turn down his music, had gone out. A bar-b-que had been consumed, and there was ice cream for after the battles were done.
The first battle opened with the British bringing their light tanks and A9 Cruisers on to one corner of the table, desperately spotting in all directions as they tried to locate the Italian gun positions amongst the sand dunes west of BuqBuq. A few false Blinds were located and dispersed.
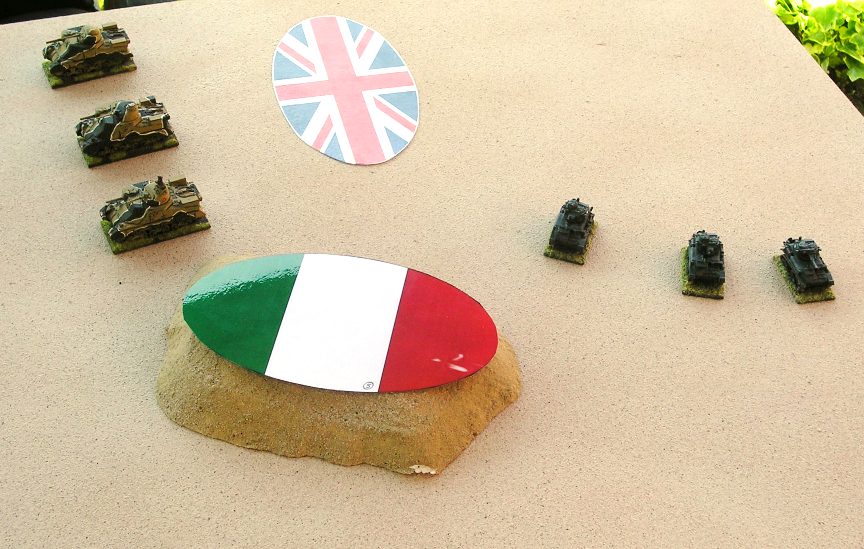
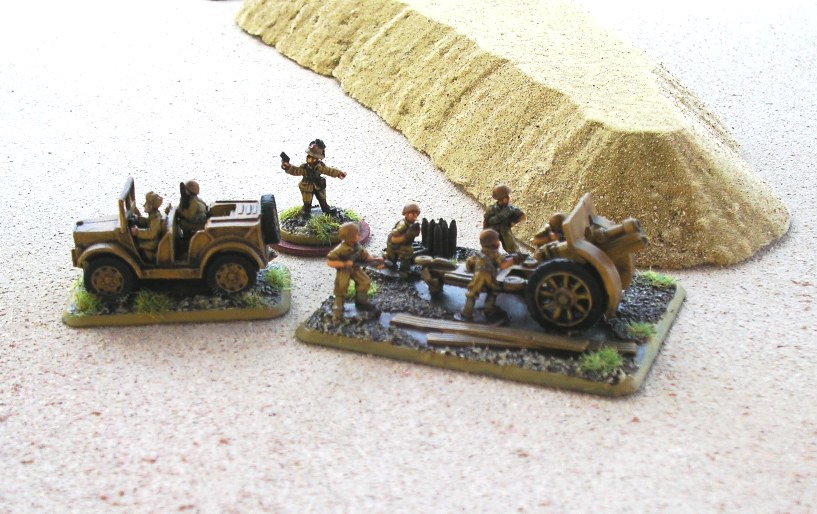
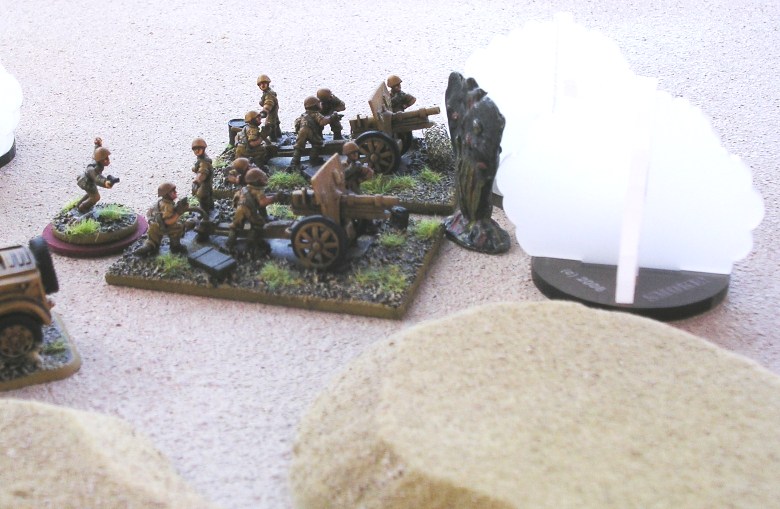
The Italians had spotted as well, opening fire at long range as soon as they saw the British tanks. The Italian force revealed itself as a battery of two 75mm field guns behind one h ill facing the British right; a battery of two 65mm infantry guns on top of hill facing the British left; and in the centre a single 100mm howitzer. The howitzer was supported by two anti-tank guns, but they stayed under Blinds for the moment. There were also four squads of infantry lurking around somewhere, but they, quite sensibly, played no part in the battle.
Italian guns, British tanks
No damage was done by the Italian opening salvo, and the British rushed forward to try and close to effective machine gun range with the Italian guns. On the British right, the A9s (anachronistically represented in the photos by Grants as they’d never been on the tabletop before and I wanted to use them!) fired smoke, partially obscuring the fire of the Italian 75s, with the Squadron Commander also calling in fire support from some off-table 25-pounders. On the British left, the A13s (again anachronistically portrayed by Crusaders as I have them painted up in desert colours) advanced. In the centre, the MkVIs hung back: nervous of the firepower of the Italian howitzer.
The first serious action was on the British left. Here, using their Armour Bonus Move card well, the A9s rapidly closed with the Italian 75s. One A9 was taken out during the advance, but the threat of the other two, and ranging shots from artillery landing on them, was enough to make the Italian gunners limber up and prepare to evacuate. Unfortunately they had left it too late, and moved too slowly. The crews of both guns died under a hail of machine gun fire from the fast-moving cruisers as they drove towards the main Italian position.
However, as the A9s congratulated themselves on their success, a strange whistling noise was heard from above. They had forgotten that they had called in artillery and were currently parked right next to the explosion marker that indicated the centre of the expected barrage. The Off Table Artillery chip had come up and the British tanks rocked and shook as 25-pounder rounds landed on top of them! Neil was most dischuffed, despite the fact that his tanks actually took no damage.
On the British left, however, the Italians had done much better. The howitzer and 65s had managed to knockout two of the A13s and the Squadron commander in his A10 for the loss of only the howitzer. The British light tanks were still lurking at the back of the battlefield, but advanced forward only to be caught in salt flats that immobilised them for the rest of the game (which is what happened historically as well).
Wearing the right shirt: very important when wargaming

The end of game one
The British now brought their three surviving medium tanks together behind a hill and prepared to assume hull down position and machine gun what they thought were the only remaining enemy guns: the two 65s on the far hill. Up the hill they went, straight into the sights of the two Italian ATGs that now came off their Blinds. One A9 went up in smoke, and the other tanks retreated back down the hill.
At this point, Neil decided not to continue with this game: believing that there was no way that his three remaining operational tanks could win, given the large amounts of open ground that they had to traverse. I shall spare you his animadversions on the quality of the scenario; the fact that historical gaming didn’t necessarily equal fun gaming; his preference for equally pointed games with each side having a mix of infantry, artillery and armour; and his general unhappiness with, well, everything really!
After a little persuasion, however, he perked up enough to agree to refight the battle, this time with him playing the Italians. He adopted an almost identical deployment as I had, and sat and waited for me to advance.
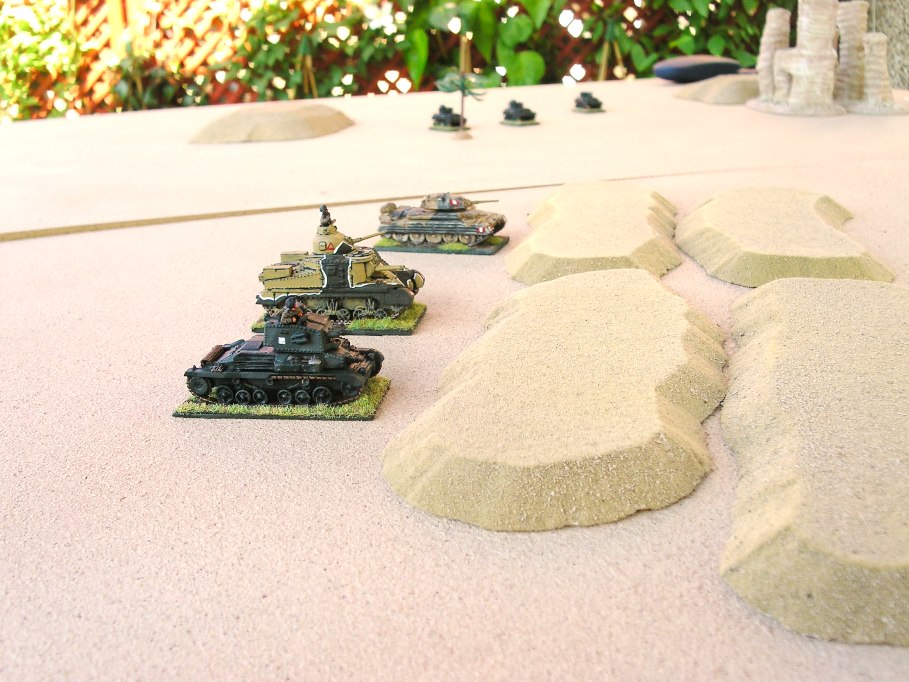
Having seen the consequences of splitting the British force, I had planned to put all my tanks together for one massive thrust up the right hand side of the battlefield. A quick break to get coffee, however, effectively wiped my brain, and I ended up sending the A9s and light tanks up the right hand side of the battlefield; and the A13s and Squadron Commander in his A10 up the left. I mentally kicked myself as I watched all three light tanks and an A9 get KO’d by long range Italian fire.
On the British right, the A9s (this time represented by the correct models) drove up close enough to make the Italian 75s limber up. As the artillery drove away, however, British off-table artillery landed on top of them, pinning them for long enough for the two surviving A9s to catch them and shoot them up.
It was on the British left, however, that the battle was won. A run of movement bonuses got the A13s and A10 into effective range with their machine guns for the loss of just one A13. The Squadron Commander’s card then came up, and he accelerated forward with a stonkingly huge die roll for movement and ended up right on top of one Italian 65mm gun. We rolled to see if his tank was damaged: not even a scratch on the paintwork. That left him in the middle of the Italian gun position: a 65mm gun underneath him, another 65mm gun on one side of him, a 100mm howitzer on the other, two infantry squads looking with astonishment at this metal monster that had appeared in front of them, and two anti-tank guns being pushed round into a position to shoot at him from the next hill along!
Then up came Tea Break. Every Italian gun fired. Both supporting A13s were disabled and would have to roll next time to see if their crews abandoned, but the Squadron Commander’s A10 was untouched.
Next turn began. The British Squadron Commander got to fire first and mullered the 65mm gun next to him. Then came Tea Break. The two disabled British A13s survived the barrage of shells that came their way, bits of their tanks flying off in all directions, frantically shooting their machine guns at any gunners and/or infantry they could see. The Squadron Commander’s tank was, of course, masked by the 100mm howitzer.

Next turn, the Squadron Commander A10’s card again came up first. This time he finished off the Italian howitzer crew on his right. Unfortunately, however, this meant that the Italian anti-tank guns would finally get a clean shot on him when their card came up. Not this turn, however, as the Armour Bonus Move card appeared, and the A10 carefully drove forward deep into the heart of the nearby Italian infantry, effectively screening his tank behind a somewhat surprised human wall.

Tea Break again…and again both immobilised British tanks survived a barrage of shells and wreaked horrible damage with their machine guns. Remember that they hadn’t activated yet, only firing on Tea Break, so hadn’t yet had to roll to abandon!
On the next turn, the Squadron Commander’s card was not the first to appear. It was the A9s, who now appeared behind the Italian ATGs who had slewed round to fire at the A13s and A10. Gunners fell in a hail of machine gun fire and, again, Neil conceded that the battle was lost to the Italians, caught in between the horns of a very British buffalo.

With only the merest hint of gnashing teeth, Neil helped me clear away, ignoring my largely unsuccessful attempts to avoid showing my satisfaction at my two victories. Admittedly our usually convivial post-battle analysis was a little foreshortened, but handshakes were exchanged and, it appeared, good humours restored.
It wasn’t until I was driving home that I realised that I hadn’t been offered my ice cream!
Robert Avery