Vis Lardica
  • New & Updated
  • Introduction & Details Scorecard 2025 Gallery: Burt, Steve Gallery: Cooper, Nick Gallery: Douglas, Mervyn Gallery: Emmett, John Gallery: Flint, Carole Gallery: Helliwell, Andrew Gallery: Luther, Mark Gallery: Plowman, Ralph Gallery: Sapper Gallery: Stumpy Gallery: Vis Bellica
  • Introduction to IABSM Video: How To Play IABSM, Part One Video: How to Play IABSM, Part Two Video: How to Play IABSM, Part Three After Action Reports (IABSM) Army Galleries (IABSM) Buy IABSM Scenario Packs Buy IABSM Theatre Supplements Figure Manufacturers (IABSM) Figure Reviews (IABSM) Game Aids (IABSM) IABSM Facebook Group
  • Introduction to CDS After Action Reports (CDS) Army Galleries (CDS) The Arab-Israeli Six Day War The Arab-Israeli Yom Kippur War After Action Reports (Arab-Israeli Wars) Army Galleries (Arab-Israeli Wars) After Action Reports (Moderns)
  • Introduction to Q13 After Action Reports (Q13) Army Galleries (Q13) Army Lists for Q13 Buy Q13 and/or Five Planets Figure Manufacturers (Q13) Figure Reviews (Q13) Points System Spreadsheets
  • Introduction to 19th Century Army Galleries (19th Century) Army Lists After Action Reports Articles & Essays Quick Guide to the Wars of the 19th Century
  • Introduction and AAR FK&P: The Eastern Front
  • Introduction to Vis Bellica The Rules: Amendments The Rules: Frequently Asked Questions The Rules: Optional Rules After Action Reports (Vis Bellica) Army Lists Articles about Vis Bellica Scenarios for Vis Bellica Other After Action Reports: WRG 6th Other After Action Reports: TTS
  • The Rules: Optional Rules After Action Reports
  • Scorecard 2024 Gallery: Burt, Steve Gallery: Cooper, Nick Gallery: Darkin, Des Gallery: Davenport, Jonathan Gallery: Douglas, Mervyn Gallery: Emmett. John Gallery: Flint, Carole Gallery: Helliwell, Andrew Gallery: Kay, Chris Gallery: Luther, Mark Gallery: Plowman, Ralph Gallery: Sapper Gallery: Scott, David Gallery: Slade, Matt Gallery: Stumpy Gallery: Vis Bellica
  • Scorecard 2023 Gallery: Bowler, Lloyd Gallery: Burt, Steve Gallery: Cooper, Nick Gallery: Douglas, Mervyn Gallery: Emmett, John Gallery: Flint, Carole Gallery: Helliwell, Andrew Gallery: Hodge, Derek Gallery: Kay, Chris Gallery: Luther, Mark Gallery: Plowman, Ralph Gallery: Pollard, Ashley Gallery: Sapper Gallery: Scott, David Gallery: Slade, Matt Gallery: Stumpy Gallery: Vis Bellica
  • Scorecard 2022 Gallery: Bowler, Lloyd Gallery: Burt, Steve Gallery: Cooper, Nick Gallery: Douglas, Mervyn Gallery: Emmett, John Gallery: Flint, Carole Gallery: Goodrick, Pete Gallery: Haines, John Gallery: Helliwell, Andrew Gallery: Hodge, Derek Gallery: Kay, Chris Gallery: Luther, Mark Gallery: Plowman, Ralph Gallery: Pollard, Ashley Gallery: Sapper Gallery: Scott, David Gallery: Slade, Matt Gallery: Stumpy Gallery: Vis Bellica
  • Scorecard 2021 Gallery: Anzani, Joe Gallery: Bowler, Lloyd Gallery: Burt, Steve Gallery: Cooper, Nick Gallery: Douglas, Mervyn Gallery: Duffell, Andy Gallery: Emmett, John Gallery: Flint, Carole Gallery: Haines, John Gallery: Helliwell, Andrew Gallery: Hiett, Travis Gallery: Hodge, Derek Gallery: Kay, Chris Gallery: Luther, Mark Gallery: McGinn, Joe Gallery: Melville, Doug Gallery: Plowman, Ralph Gallery: Pollard, Ashley Gallery: Ralls, Jason Gallery: Sapper Gallery: Scott, David Gallery: Slade, Matt Gallery: Stoesen, Chris Gallery: Stumpy Gallery: Vis Bellica
  • Scorecard 2020 Gallery: Bloggs, Fred Gallery: Bluemoose Ken Gallery: Bowler, Lloyd Gallery: Burt, Steve Gallery: Cornwell, Chris Gallery: Douglas, Mervyn Gallery: Duffell, Andy Gallery: Emmett, John Gallery: Flint, Carole Gallery: Haines, John Gallery: Helliwell, Andrew Gallery: Hiatt, Travis Gallery: Hodge, Derek Gallery: Hooge, Neil Gallery: Kay, Chris Gallery: Luther, Mark Gallery: McGinn, Joe Gallery: Melville, Doug Gallery: Plowman, Ralph Gallery: Pollard, Ashley Gallery: Ralls, Jason Gallery: Sapper Gallery: Scott, David Gallery: Slade, Matt Gallery: Stoesen, Chris Gallery: Stumpy Gallery: Vis Bellica
  • Scorecard 2019 Gallery: Bloggs, Fred Gallery: Blue Moose Ken Gallery: Bowen, Ed Gallery: Bowler, Lloyd Gallery: Burt, Steve Gallery: Clarke, Richard Gallery: Cornwell, Chris Gallery: Davenport, Jon Gallery: Douglas, Mervyn Gallery: Duffell, Andy Gallery: de Terre Neuve, John Gallery: Emmett, John Gallery: Fat Wally Gallery: Flint, Carole Gallery: Haines, John Gallery: Helliwell, Andrew Gallery: Hiett, Travis Gallery: Hodge, Derek Gallery: Hooge, Neil Gallery: Johnston, Owen Gallery: Kay, Chris Gallery: Luther, Mark Gallery: McGinn, Joe Gallery: Melville, Doug Gallery: Plowman, Ralph Gallery: Ralls, Jason Gallery: Sapper Gallery: Scott, David Gallery: Slade, Matt Gallery: Stoesen, Chris Gallery: Stumpy Gallery: Vis Bellica Gallery: Yuengling, Jon
  • Scorecard 2018 Gallery: Bloggs, Fred Gallery: Blue Moose Ken Gallery: Bowen, Ed Gallery: Bowler, Lloyd Gallery: Burt, Steve Gallery: Cornwell, Chris Gallery: Davenport, Jonathan Gallery: de Terre Neuve, John Gallery: Douglas, Mervyn Gallery: Duffell, Andy Gallery: Fat Wally Gallery: Flint, Carole Gallery: Freerange Egg Gallery: Haines, John Gallery: Helliwell, Andrew Gallery: Hiett, Travis Gallery: Hodge, Derek Gallery: Hooge, Neil Gallery: Johnston, Owen Gallery: Kay, Chris Gallery: Lampon, Steven Gallery: Luther, Mark Gallery: McGinn, Joe Gallery: Melville, Doug Gallery: Plowman, Ralph Gallery: Ralls, Jason Gallery: Sapper Gallery: Scott, David Gallery: Slade, Matt Gallery: Stoesen, Chris Gallery: Stumpy Gallery: Treadhead Gallery: Vis Bellica Gallery: Yuengling, Jon
  • Scorecard Gallery: Bond, Geoff Gallery: Bowen, Edward Gallery: Bowler, Lloyd Gallery: Burt, Steve Gallery: Cabey Cabey Gallery: Catchpole, Jim Gallery: Davenport, Jon Gallery: Davies, Keith Gallery: de Smedt, Kohn Gallery: de Terre Neuve, John Gallery: Douglas, Mervyn Gallery: Duffell, Andy Gallery: Fat Wally (Kev) Gallery: Flint, Carole Gallery: Freerange Egg Gallery: Gatzemeyer, Garrett Gallery: Gilbride, Chris Gallery: Haines, John Gallery: Helliwell, Andrew Gallery: Hodge, Derek Gallery: Hooge, Neil Gallery: Humm, Dave Gallery: Kay, Chris Gallery: Lampon, Steven Gallery: Luther, Mark Gallery: MacNeill, Craig Gallery: McCarthy, Andrew Gallery: The Mad Padre Gallery: McGinn, Joe Gallery: Melville, Doug Gallery: Naylor, Richard Gallery: Nissvik, Thomas Gallery: Old Pivot Gallery: Owen Gallery: Pollard, Ashley Gallery: Plowman, Ralph Gallery: Ralls, Jason Gallery: Sapper Gallery: Scott, David Gallery: Slade, Matt Gallery: Stoesen, Chris Gallery: Stumpy Gallery: Treadhead Gallery: Vis Bellica Gallery: Weathersby, Brian Gallery: WillieB Gallery: Yuengling, Jon
  • Scorecard 2016 Gallery: Baldwin, Paul Gallery: Blankenship, Paul Gallery: Bloggs, Fred Gallery: Bond, Geoff Gallery: Bowen, Ed Gallery: Bowler, Lloyd Gallery: Burt, Steve Gallery: Catchpole, Jim Gallery: Clarke, Richard Gallery: Davenport, Jon Gallery: Davies, Keith Gallery: de Smedt, Koen Gallery: Douglas, Mervyn Gallery: Duffell, Andy Gallery: Egg Gallery: Fitch, Doug Gallery: Flint, Carole Gallery: Gatzemeyer, Garrett Gallery: Gilbride, Chris Gallery: Helliwell, Andrew Gallery: Hodge, Derek Gallery: Hooge, Neil Gallery: Humm, Dave Gallery: I Am Bruce Gallery: Lowth, Kev (Fat Wally) Gallery: Luther, Mark Gallery: The Mad Padre Gallery: McCarthy, Andrew Gallery: Melville, Doug Gallery: Naylor, Richard Gallery: Nissvik, Thomas Gallery: Oracle Gallery: Owen Gallery: Plowman, Ralph Gallery: Pollard, Ashley Gallery: Ralls, Jason Gallery: Sapper Gallery: Slade, Matt Gallery: Stoesen, Chris Gallery: Stumpy Gallery: Treadhead Gallery: Vis Bellica Gallery: Willie B Gallery: Yuengling, Jon
  • Scorecard 2015 Gallery: AJH Gallery: Bairos, Vidal Gallery: Baldwin, Paul Gallery: Bax, Dick Gallery: Blankenship, Paul Gallery: Bloggs, Fred Gallery: Bond, Geoff Bond Gallery: Bowler, Hat Gallery: Burt, Steve Gallery: Corbett, Wulf Gallery: Danziger, Richard Gallery: Davies, Keith Gallery: de Smedt, Koen Gallery: de terre neuve, john Gallery: Douglas, Mervyn Gallery: Duffell, Andy Gallery: Egg, Freerange Gallery: Eggman Glass Gallery: Eriksson, Leif Gallery: Fat Wally Gallery: Flint, Carole Gallery: Gilbride, Chris Gallery: Hedglin, Nils Gallery: Helliwell, Andy Gallery: Hodge, Derek Gallery: Hooooge, Neil Gallery: Humm, Dave Gallery: I'm Bruce Gallery: Luther, Mark Gallery: The Mad Padre Gallery: Maerk Gallery: McCarthy, Andrew Gallery: Melville, Doug Gallery: Miller, Andrew Gallery: Miller, Steve Gallery: Milne, Neil Gallery: Mikkola, Topi Gallery: Mr Nouveau Gallery: Naylor, Richard Gallery: Nissvik, Thomas Gallery: Owen Gallery: Pedivere Gallery: Pingu Gallery: Pollard, Ashley Gallery: Plowman, Ralph Gallery: Ralls, Jason Gallery: Sapper Gallery: Skelton, Dom Gallery: Slade, Matt Gallery: Stapells, Tony Gallery: Stoesen, Chris Gallery: Strom, Joakim Gallery: Stumpy Gallery: Topyob Gallery: Treadhead Gallery: Vera, Benito Gallery: Vis Bellica Gallery: Willie B Gallery: Yuengling, Jon Gallery: Catchpole, Jim
  • Scorecard Gallery: Alexandros Gallery: Ambler, Craig Gallery: Armstrong, Keith Gallery: Bailey, Dave Gallery: Bairos, Vidal Gallery: Bax, Dick Gallery: Bloggs, Fred Gallery: Bond, Geoff Gallery: Burt, Steve Gallery: Carnegie, Ron Gallery: Carole Gallery: Catchpole, Jim Gallery: Clarke, Richard Gallery: Corbett, Wulf Gallery: Danziger, Richard Gallery: De Smedt, Koen Gallery: de Terre Neuve, John Gallery: Deeks, Jon Gallery: Douglas, Mervyn Gallery: Duffell, Andy Gallery: Egg, Free Range Gallery: Erikson, Leif Gallery: Fat Wally (Kev) Gallery: Fiene, Ben Gallery: Gilbride, Chris Gallery: Hodge, Derek Gallery: Humm, Dave Gallery: Llano, Manuel Gallery: Luther, Mark Gallery: Melville, Doug Gallery: Mikkola, Topi Gallery: Miller, Andrew Gallery: munsterfan8 Gallery: Murray, Jim Gallery: Nissvik, Thomas Gallery: Owen Gallery: The Mad Padre Gallery: PatG Gallery: Pingu Gallery: Plowman, Ralph Gallery: Pollard, Ashley Gallery: Ralls, Jason Gallery: Slade, Matt Gallery: Stoesen, Chris Gallery: Strom, Joakim Gallery: Stumpy Gallery: Thomas, John Gallery: Treadhead Gallery: Vera, Benito Gallery: Vis Bellica Gallery: Warrior in the Attic Gallery: Weir, Jim Gallery: Whitaker, Mike Gallery: WillieB Gallery: Yuengling, Jon
  • TooFatLardies
Vis Lardica
  • New & Updated/
  • TFL Painting Challenge 2025/
    • Introduction & Details
    • Scorecard 2025
    • Gallery: Burt, Steve
    • Gallery: Cooper, Nick
    • Gallery: Douglas, Mervyn
    • Gallery: Emmett, John
    • Gallery: Flint, Carole
    • Gallery: Helliwell, Andrew
    • Gallery: Luther, Mark
    • Gallery: Plowman, Ralph
    • Gallery: Sapper
    • Gallery: Stumpy
    • Gallery: Vis Bellica
  • I Ain't Been Shot, Mum! (WW2)/
    • Introduction to IABSM
    • Video: How To Play IABSM, Part One
    • Video: How to Play IABSM, Part Two
    • Video: How to Play IABSM, Part Three
    • After Action Reports (IABSM)
    • Army Galleries (IABSM)
    • Buy IABSM Scenario Packs
    • Buy IABSM Theatre Supplements
    • Figure Manufacturers (IABSM)
    • Figure Reviews (IABSM)
    • Game Aids (IABSM)
    • IABSM Facebook Group
  • Charlie Don't Surf! (Vietnam/Arab-Israeli/Moderns)/
    • Introduction to CDS
    • After Action Reports (CDS)
    • Army Galleries (CDS)
    • The Arab-Israeli Six Day War
    • The Arab-Israeli Yom Kippur War
    • After Action Reports (Arab-Israeli Wars)
    • Army Galleries (Arab-Israeli Wars)
    • After Action Reports (Moderns)
  • Quadrant 13 (Sci-Fi)/
    • Introduction to Q13
    • After Action Reports (Q13)
    • Army Galleries (Q13)
    • Army Lists for Q13
    • Buy Q13 and/or Five Planets
    • Figure Manufacturers (Q13)
    • Figure Reviews (Q13)
    • Points System Spreadsheets
  • Vis Imperica (19th Century)/
    • Introduction to 19th Century
    • Army Galleries (19th Century)
    • Army Lists
    • After Action Reports
    • Articles & Essays
    • Quick Guide to the Wars of the 19th Century
  • Vis Lucii (Pike & Shot)/
    • Introduction and AAR
    • FK&P: The Eastern Front
  • Vis Bellica (Ancients)/
    • Introduction to Vis Bellica
    • The Rules: Amendments
    • The Rules: Frequently Asked Questions
    • The Rules: Optional Rules
    • After Action Reports (Vis Bellica)
    • Army Lists
    • Articles about Vis Bellica
    • Scenarios for Vis Bellica
    • Other After Action Reports: WRG 6th
    • Other After Action Reports: TTS
  • Vis Magica (Fantasy)/
    • The Rules: Optional Rules
    • After Action Reports
  • TFL Painting Challenge 2024/
    • Scorecard 2024
    • Gallery: Burt, Steve
    • Gallery: Cooper, Nick
    • Gallery: Darkin, Des
    • Gallery: Davenport, Jonathan
    • Gallery: Douglas, Mervyn
    • Gallery: Emmett. John
    • Gallery: Flint, Carole
    • Gallery: Helliwell, Andrew
    • Gallery: Kay, Chris
    • Gallery: Luther, Mark
    • Gallery: Plowman, Ralph
    • Gallery: Sapper
    • Gallery: Scott, David
    • Gallery: Slade, Matt
    • Gallery: Stumpy
    • Gallery: Vis Bellica
  • TFL Painting Challenge 2023/
    • Scorecard 2023
    • Gallery: Bowler, Lloyd
    • Gallery: Burt, Steve
    • Gallery: Cooper, Nick
    • Gallery: Douglas, Mervyn
    • Gallery: Emmett, John
    • Gallery: Flint, Carole
    • Gallery: Helliwell, Andrew
    • Gallery: Hodge, Derek
    • Gallery: Kay, Chris
    • Gallery: Luther, Mark
    • Gallery: Plowman, Ralph
    • Gallery: Pollard, Ashley
    • Gallery: Sapper
    • Gallery: Scott, David
    • Gallery: Slade, Matt
    • Gallery: Stumpy
    • Gallery: Vis Bellica
  • TFL Painting Challenge 2022/
    • Scorecard 2022
    • Gallery: Bowler, Lloyd
    • Gallery: Burt, Steve
    • Gallery: Cooper, Nick
    • Gallery: Douglas, Mervyn
    • Gallery: Emmett, John
    • Gallery: Flint, Carole
    • Gallery: Goodrick, Pete
    • Gallery: Haines, John
    • Gallery: Helliwell, Andrew
    • Gallery: Hodge, Derek
    • Gallery: Kay, Chris
    • Gallery: Luther, Mark
    • Gallery: Plowman, Ralph
    • Gallery: Pollard, Ashley
    • Gallery: Sapper
    • Gallery: Scott, David
    • Gallery: Slade, Matt
    • Gallery: Stumpy
    • Gallery: Vis Bellica
  • TFL Painting Challenge 2021/
    • Scorecard 2021
    • Gallery: Anzani, Joe
    • Gallery: Bowler, Lloyd
    • Gallery: Burt, Steve
    • Gallery: Cooper, Nick
    • Gallery: Douglas, Mervyn
    • Gallery: Duffell, Andy
    • Gallery: Emmett, John
    • Gallery: Flint, Carole
    • Gallery: Haines, John
    • Gallery: Helliwell, Andrew
    • Gallery: Hiett, Travis
    • Gallery: Hodge, Derek
    • Gallery: Kay, Chris
    • Gallery: Luther, Mark
    • Gallery: McGinn, Joe
    • Gallery: Melville, Doug
    • Gallery: Plowman, Ralph
    • Gallery: Pollard, Ashley
    • Gallery: Ralls, Jason
    • Gallery: Sapper
    • Gallery: Scott, David
    • Gallery: Slade, Matt
    • Gallery: Stoesen, Chris
    • Gallery: Stumpy
    • Gallery: Vis Bellica
  • TFL Painting Challenge 2020/
    • Scorecard 2020
    • Gallery: Bloggs, Fred
    • Gallery: Bluemoose Ken
    • Gallery: Bowler, Lloyd
    • Gallery: Burt, Steve
    • Gallery: Cornwell, Chris
    • Gallery: Douglas, Mervyn
    • Gallery: Duffell, Andy
    • Gallery: Emmett, John
    • Gallery: Flint, Carole
    • Gallery: Haines, John
    • Gallery: Helliwell, Andrew
    • Gallery: Hiatt, Travis
    • Gallery: Hodge, Derek
    • Gallery: Hooge, Neil
    • Gallery: Kay, Chris
    • Gallery: Luther, Mark
    • Gallery: McGinn, Joe
    • Gallery: Melville, Doug
    • Gallery: Plowman, Ralph
    • Gallery: Pollard, Ashley
    • Gallery: Ralls, Jason
    • Gallery: Sapper
    • Gallery: Scott, David
    • Gallery: Slade, Matt
    • Gallery: Stoesen, Chris
    • Gallery: Stumpy
    • Gallery: Vis Bellica
  • TFL Painting Challenge 2019/
    • Scorecard 2019
    • Gallery: Bloggs, Fred
    • Gallery: Blue Moose Ken
    • Gallery: Bowen, Ed
    • Gallery: Bowler, Lloyd
    • Gallery: Burt, Steve
    • Gallery: Clarke, Richard
    • Gallery: Cornwell, Chris
    • Gallery: Davenport, Jon
    • Gallery: Douglas, Mervyn
    • Gallery: Duffell, Andy
    • Gallery: de Terre Neuve, John
    • Gallery: Emmett, John
    • Gallery: Fat Wally
    • Gallery: Flint, Carole
    • Gallery: Haines, John
    • Gallery: Helliwell, Andrew
    • Gallery: Hiett, Travis
    • Gallery: Hodge, Derek
    • Gallery: Hooge, Neil
    • Gallery: Johnston, Owen
    • Gallery: Kay, Chris
    • Gallery: Luther, Mark
    • Gallery: McGinn, Joe
    • Gallery: Melville, Doug
    • Gallery: Plowman, Ralph
    • Gallery: Ralls, Jason
    • Gallery: Sapper
    • Gallery: Scott, David
    • Gallery: Slade, Matt
    • Gallery: Stoesen, Chris
    • Gallery: Stumpy
    • Gallery: Vis Bellica
    • Gallery: Yuengling, Jon
  • TFL Painting Challenge 2018/
    • Scorecard 2018
    • Gallery: Bloggs, Fred
    • Gallery: Blue Moose Ken
    • Gallery: Bowen, Ed
    • Gallery: Bowler, Lloyd
    • Gallery: Burt, Steve
    • Gallery: Cornwell, Chris
    • Gallery: Davenport, Jonathan
    • Gallery: de Terre Neuve, John
    • Gallery: Douglas, Mervyn
    • Gallery: Duffell, Andy
    • Gallery: Fat Wally
    • Gallery: Flint, Carole
    • Gallery: Freerange Egg
    • Gallery: Haines, John
    • Gallery: Helliwell, Andrew
    • Gallery: Hiett, Travis
    • Gallery: Hodge, Derek
    • Gallery: Hooge, Neil
    • Gallery: Johnston, Owen
    • Gallery: Kay, Chris
    • Gallery: Lampon, Steven
    • Gallery: Luther, Mark
    • Gallery: McGinn, Joe
    • Gallery: Melville, Doug
    • Gallery: Plowman, Ralph
    • Gallery: Ralls, Jason
    • Gallery: Sapper
    • Gallery: Scott, David
    • Gallery: Slade, Matt
    • Gallery: Stoesen, Chris
    • Gallery: Stumpy
    • Gallery: Treadhead
    • Gallery: Vis Bellica
    • Gallery: Yuengling, Jon
  • TFL Painting Challenge 2017/
    • Scorecard
    • Gallery: Bond, Geoff
    • Gallery: Bowen, Edward
    • Gallery: Bowler, Lloyd
    • Gallery: Burt, Steve
    • Gallery: Cabey Cabey
    • Gallery: Catchpole, Jim
    • Gallery: Davenport, Jon
    • Gallery: Davies, Keith
    • Gallery: de Smedt, Kohn
    • Gallery: de Terre Neuve, John
    • Gallery: Douglas, Mervyn
    • Gallery: Duffell, Andy
    • Gallery: Fat Wally (Kev)
    • Gallery: Flint, Carole
    • Gallery: Freerange Egg
    • Gallery: Gatzemeyer, Garrett
    • Gallery: Gilbride, Chris
    • Gallery: Haines, John
    • Gallery: Helliwell, Andrew
    • Gallery: Hodge, Derek
    • Gallery: Hooge, Neil
    • Gallery: Humm, Dave
    • Gallery: Kay, Chris
    • Gallery: Lampon, Steven
    • Gallery: Luther, Mark
    • Gallery: MacNeill, Craig
    • Gallery: McCarthy, Andrew
    • Gallery: The Mad Padre
    • Gallery: McGinn, Joe
    • Gallery: Melville, Doug
    • Gallery: Naylor, Richard
    • Gallery: Nissvik, Thomas
    • Gallery: Old Pivot
    • Gallery: Owen
    • Gallery: Pollard, Ashley
    • Gallery: Plowman, Ralph
    • Gallery: Ralls, Jason
    • Gallery: Sapper
    • Gallery: Scott, David
    • Gallery: Slade, Matt
    • Gallery: Stoesen, Chris
    • Gallery: Stumpy
    • Gallery: Treadhead
    • Gallery: Vis Bellica
    • Gallery: Weathersby, Brian
    • Gallery: WillieB
    • Gallery: Yuengling, Jon
  • TFL Painting Challenge 2016/
    • Scorecard 2016
    • Gallery: Baldwin, Paul
    • Gallery: Blankenship, Paul
    • Gallery: Bloggs, Fred
    • Gallery: Bond, Geoff
    • Gallery: Bowen, Ed
    • Gallery: Bowler, Lloyd
    • Gallery: Burt, Steve
    • Gallery: Catchpole, Jim
    • Gallery: Clarke, Richard
    • Gallery: Davenport, Jon
    • Gallery: Davies, Keith
    • Gallery: de Smedt, Koen
    • Gallery: Douglas, Mervyn
    • Gallery: Duffell, Andy
    • Gallery: Egg
    • Gallery: Fitch, Doug
    • Gallery: Flint, Carole
    • Gallery: Gatzemeyer, Garrett
    • Gallery: Gilbride, Chris
    • Gallery: Helliwell, Andrew
    • Gallery: Hodge, Derek
    • Gallery: Hooge, Neil
    • Gallery: Humm, Dave
    • Gallery: I Am Bruce
    • Gallery: Lowth, Kev (Fat Wally)
    • Gallery: Luther, Mark
    • Gallery: The Mad Padre
    • Gallery: McCarthy, Andrew
    • Gallery: Melville, Doug
    • Gallery: Naylor, Richard
    • Gallery: Nissvik, Thomas
    • Gallery: Oracle
    • Gallery: Owen
    • Gallery: Plowman, Ralph
    • Gallery: Pollard, Ashley
    • Gallery: Ralls, Jason
    • Gallery: Sapper
    • Gallery: Slade, Matt
    • Gallery: Stoesen, Chris
    • Gallery: Stumpy
    • Gallery: Treadhead
    • Gallery: Vis Bellica
    • Gallery: Willie B
    • Gallery: Yuengling, Jon
  • TFL Painting Challenge 2015/
    • Scorecard 2015
    • Gallery: AJH
    • Gallery: Bairos, Vidal
    • Gallery: Baldwin, Paul
    • Gallery: Bax, Dick
    • Gallery: Blankenship, Paul
    • Gallery: Bloggs, Fred
    • Gallery: Bond, Geoff Bond
    • Gallery: Bowler, Hat
    • Gallery: Burt, Steve
    • Gallery: Corbett, Wulf
    • Gallery: Danziger, Richard
    • Gallery: Davies, Keith
    • Gallery: de Smedt, Koen
    • Gallery: de terre neuve, john
    • Gallery: Douglas, Mervyn
    • Gallery: Duffell, Andy
    • Gallery: Egg, Freerange
    • Gallery: Eggman Glass
    • Gallery: Eriksson, Leif
    • Gallery: Fat Wally
    • Gallery: Flint, Carole
    • Gallery: Gilbride, Chris
    • Gallery: Hedglin, Nils
    • Gallery: Helliwell, Andy
    • Gallery: Hodge, Derek
    • Gallery: Hooooge, Neil
    • Gallery: Humm, Dave
    • Gallery: I'm Bruce
    • Gallery: Luther, Mark
    • Gallery: The Mad Padre
    • Gallery: Maerk
    • Gallery: McCarthy, Andrew
    • Gallery: Melville, Doug
    • Gallery: Miller, Andrew
    • Gallery: Miller, Steve
    • Gallery: Milne, Neil
    • Gallery: Mikkola, Topi
    • Gallery: Mr Nouveau
    • Gallery: Naylor, Richard
    • Gallery: Nissvik, Thomas
    • Gallery: Owen
    • Gallery: Pedivere
    • Gallery: Pingu
    • Gallery: Pollard, Ashley
    • Gallery: Plowman, Ralph
    • Gallery: Ralls, Jason
    • Gallery: Sapper
    • Gallery: Skelton, Dom
    • Gallery: Slade, Matt
    • Gallery: Stapells, Tony
    • Gallery: Stoesen, Chris
    • Gallery: Strom, Joakim
    • Gallery: Stumpy
    • Gallery: Topyob
    • Gallery: Treadhead
    • Gallery: Vera, Benito
    • Gallery: Vis Bellica
    • Gallery: Willie B
    • Gallery: Yuengling, Jon
    • Gallery: Catchpole, Jim
  • TFL Painting Challenge 2014/
    • Scorecard
    • Gallery: Alexandros
    • Gallery: Ambler, Craig
    • Gallery: Armstrong, Keith
    • Gallery: Bailey, Dave
    • Gallery: Bairos, Vidal
    • Gallery: Bax, Dick
    • Gallery: Bloggs, Fred
    • Gallery: Bond, Geoff
    • Gallery: Burt, Steve
    • Gallery: Carnegie, Ron
    • Gallery: Carole
    • Gallery: Catchpole, Jim
    • Gallery: Clarke, Richard
    • Gallery: Corbett, Wulf
    • Gallery: Danziger, Richard
    • Gallery: De Smedt, Koen
    • Gallery: de Terre Neuve, John
    • Gallery: Deeks, Jon
    • Gallery: Douglas, Mervyn
    • Gallery: Duffell, Andy
    • Gallery: Egg, Free Range
    • Gallery: Erikson, Leif
    • Gallery: Fat Wally (Kev)
    • Gallery: Fiene, Ben
    • Gallery: Gilbride, Chris
    • Gallery: Hodge, Derek
    • Gallery: Humm, Dave
    • Gallery: Llano, Manuel
    • Gallery: Luther, Mark
    • Gallery: Melville, Doug
    • Gallery: Mikkola, Topi
    • Gallery: Miller, Andrew
    • Gallery: munsterfan8
    • Gallery: Murray, Jim
    • Gallery: Nissvik, Thomas
    • Gallery: Owen
    • Gallery: The Mad Padre
    • Gallery: PatG
    • Gallery: Pingu
    • Gallery: Plowman, Ralph
    • Gallery: Pollard, Ashley
    • Gallery: Ralls, Jason
    • Gallery: Slade, Matt
    • Gallery: Stoesen, Chris
    • Gallery: Strom, Joakim
    • Gallery: Stumpy
    • Gallery: Thomas, John
    • Gallery: Treadhead
    • Gallery: Vera, Benito
    • Gallery: Vis Bellica
    • Gallery: Warrior in the Attic
    • Gallery: Weir, Jim
    • Gallery: Whitaker, Mike
    • Gallery: WillieB
    • Gallery: Yuengling, Jon
  • TooFatLardies/
  View from the Commonwealth entry corner   The Brits started out with an HQ troop of one A13, two A10 CS tanks, and one MkVIC; a troop of A13s; a troop of A10s; and two troops of MkVICs of the 3rd RTR; a RHA 25 pdr; and a pl
Vis Lardica

AAR Greece #5: Outflanked /Mavropiye by Mark Luther

A battle report or After Action Report (AAR) for I Ain't Been Shot, Mum (IABSM), the company-sized wargaming rules for WW2 from the TooFatLardies. A game from the Campaign for Greece scenario pack set in 1941.

Vis Lardica
  • New & Updated/
  • TFL Painting Challenge 2025/
    • Introduction & Details
    • Scorecard 2025
    • Gallery: Burt, Steve
    • Gallery: Cooper, Nick
    • Gallery: Douglas, Mervyn
    • Gallery: Emmett, John
    • Gallery: Flint, Carole
    • Gallery: Helliwell, Andrew
    • Gallery: Luther, Mark
    • Gallery: Plowman, Ralph
    • Gallery: Sapper
    • Gallery: Stumpy
    • Gallery: Vis Bellica
  • I Ain't Been Shot, Mum! (WW2)/
    • Introduction to IABSM
    • Video: How To Play IABSM, Part One
    • Video: How to Play IABSM, Part Two
    • Video: How to Play IABSM, Part Three
    • After Action Reports (IABSM)
    • Army Galleries (IABSM)
    • Buy IABSM Scenario Packs
    • Buy IABSM Theatre Supplements
    • Figure Manufacturers (IABSM)
    • Figure Reviews (IABSM)
    • Game Aids (IABSM)
    • IABSM Facebook Group
  • Charlie Don't Surf! (Vietnam/Arab-Israeli/Moderns)/
    • Introduction to CDS
    • After Action Reports (CDS)
    • Army Galleries (CDS)
    • The Arab-Israeli Six Day War
    • The Arab-Israeli Yom Kippur War
    • After Action Reports (Arab-Israeli Wars)
    • Army Galleries (Arab-Israeli Wars)
    • After Action Reports (Moderns)
  • Quadrant 13 (Sci-Fi)/
    • Introduction to Q13
    • After Action Reports (Q13)
    • Army Galleries (Q13)
    • Army Lists for Q13
    • Buy Q13 and/or Five Planets
    • Figure Manufacturers (Q13)
    • Figure Reviews (Q13)
    • Points System Spreadsheets
  • Vis Imperica (19th Century)/
    • Introduction to 19th Century
    • Army Galleries (19th Century)
    • Army Lists
    • After Action Reports
    • Articles & Essays
    • Quick Guide to the Wars of the 19th Century
  • Vis Lucii (Pike & Shot)/
    • Introduction and AAR
    • FK&P: The Eastern Front
  • Vis Bellica (Ancients)/
    • Introduction to Vis Bellica
    • The Rules: Amendments
    • The Rules: Frequently Asked Questions
    • The Rules: Optional Rules
    • After Action Reports (Vis Bellica)
    • Army Lists
    • Articles about Vis Bellica
    • Scenarios for Vis Bellica
    • Other After Action Reports: WRG 6th
    • Other After Action Reports: TTS
  • Vis Magica (Fantasy)/
    • The Rules: Optional Rules
    • After Action Reports
  • TFL Painting Challenge 2024/
    • Scorecard 2024
    • Gallery: Burt, Steve
    • Gallery: Cooper, Nick
    • Gallery: Darkin, Des
    • Gallery: Davenport, Jonathan
    • Gallery: Douglas, Mervyn
    • Gallery: Emmett. John
    • Gallery: Flint, Carole
    • Gallery: Helliwell, Andrew
    • Gallery: Kay, Chris
    • Gallery: Luther, Mark
    • Gallery: Plowman, Ralph
    • Gallery: Sapper
    • Gallery: Scott, David
    • Gallery: Slade, Matt
    • Gallery: Stumpy
    • Gallery: Vis Bellica
  • TFL Painting Challenge 2023/
    • Scorecard 2023
    • Gallery: Bowler, Lloyd
    • Gallery: Burt, Steve
    • Gallery: Cooper, Nick
    • Gallery: Douglas, Mervyn
    • Gallery: Emmett, John
    • Gallery: Flint, Carole
    • Gallery: Helliwell, Andrew
    • Gallery: Hodge, Derek
    • Gallery: Kay, Chris
    • Gallery: Luther, Mark
    • Gallery: Plowman, Ralph
    • Gallery: Pollard, Ashley
    • Gallery: Sapper
    • Gallery: Scott, David
    • Gallery: Slade, Matt
    • Gallery: Stumpy
    • Gallery: Vis Bellica
  • TFL Painting Challenge 2022/
    • Scorecard 2022
    • Gallery: Bowler, Lloyd
    • Gallery: Burt, Steve
    • Gallery: Cooper, Nick
    • Gallery: Douglas, Mervyn
    • Gallery: Emmett, John
    • Gallery: Flint, Carole
    • Gallery: Goodrick, Pete
    • Gallery: Haines, John
    • Gallery: Helliwell, Andrew
    • Gallery: Hodge, Derek
    • Gallery: Kay, Chris
    • Gallery: Luther, Mark
    • Gallery: Plowman, Ralph
    • Gallery: Pollard, Ashley
    • Gallery: Sapper
    • Gallery: Scott, David
    • Gallery: Slade, Matt
    • Gallery: Stumpy
    • Gallery: Vis Bellica
  • TFL Painting Challenge 2021/
    • Scorecard 2021
    • Gallery: Anzani, Joe
    • Gallery: Bowler, Lloyd
    • Gallery: Burt, Steve
    • Gallery: Cooper, Nick
    • Gallery: Douglas, Mervyn
    • Gallery: Duffell, Andy
    • Gallery: Emmett, John
    • Gallery: Flint, Carole
    • Gallery: Haines, John
    • Gallery: Helliwell, Andrew
    • Gallery: Hiett, Travis
    • Gallery: Hodge, Derek
    • Gallery: Kay, Chris
    • Gallery: Luther, Mark
    • Gallery: McGinn, Joe
    • Gallery: Melville, Doug
    • Gallery: Plowman, Ralph
    • Gallery: Pollard, Ashley
    • Gallery: Ralls, Jason
    • Gallery: Sapper
    • Gallery: Scott, David
    • Gallery: Slade, Matt
    • Gallery: Stoesen, Chris
    • Gallery: Stumpy
    • Gallery: Vis Bellica
  • TFL Painting Challenge 2020/
    • Scorecard 2020
    • Gallery: Bloggs, Fred
    • Gallery: Bluemoose Ken
    • Gallery: Bowler, Lloyd
    • Gallery: Burt, Steve
    • Gallery: Cornwell, Chris
    • Gallery: Douglas, Mervyn
    • Gallery: Duffell, Andy
    • Gallery: Emmett, John
    • Gallery: Flint, Carole
    • Gallery: Haines, John
    • Gallery: Helliwell, Andrew
    • Gallery: Hiatt, Travis
    • Gallery: Hodge, Derek
    • Gallery: Hooge, Neil
    • Gallery: Kay, Chris
    • Gallery: Luther, Mark
    • Gallery: McGinn, Joe
    • Gallery: Melville, Doug
    • Gallery: Plowman, Ralph
    • Gallery: Pollard, Ashley
    • Gallery: Ralls, Jason
    • Gallery: Sapper
    • Gallery: Scott, David
    • Gallery: Slade, Matt
    • Gallery: Stoesen, Chris
    • Gallery: Stumpy
    • Gallery: Vis Bellica
  • TFL Painting Challenge 2019/
    • Scorecard 2019
    • Gallery: Bloggs, Fred
    • Gallery: Blue Moose Ken
    • Gallery: Bowen, Ed
    • Gallery: Bowler, Lloyd
    • Gallery: Burt, Steve
    • Gallery: Clarke, Richard
    • Gallery: Cornwell, Chris
    • Gallery: Davenport, Jon
    • Gallery: Douglas, Mervyn
    • Gallery: Duffell, Andy
    • Gallery: de Terre Neuve, John
    • Gallery: Emmett, John
    • Gallery: Fat Wally
    • Gallery: Flint, Carole
    • Gallery: Haines, John
    • Gallery: Helliwell, Andrew
    • Gallery: Hiett, Travis
    • Gallery: Hodge, Derek
    • Gallery: Hooge, Neil
    • Gallery: Johnston, Owen
    • Gallery: Kay, Chris
    • Gallery: Luther, Mark
    • Gallery: McGinn, Joe
    • Gallery: Melville, Doug
    • Gallery: Plowman, Ralph
    • Gallery: Ralls, Jason
    • Gallery: Sapper
    • Gallery: Scott, David
    • Gallery: Slade, Matt
    • Gallery: Stoesen, Chris
    • Gallery: Stumpy
    • Gallery: Vis Bellica
    • Gallery: Yuengling, Jon
  • TFL Painting Challenge 2018/
    • Scorecard 2018
    • Gallery: Bloggs, Fred
    • Gallery: Blue Moose Ken
    • Gallery: Bowen, Ed
    • Gallery: Bowler, Lloyd
    • Gallery: Burt, Steve
    • Gallery: Cornwell, Chris
    • Gallery: Davenport, Jonathan
    • Gallery: de Terre Neuve, John
    • Gallery: Douglas, Mervyn
    • Gallery: Duffell, Andy
    • Gallery: Fat Wally
    • Gallery: Flint, Carole
    • Gallery: Freerange Egg
    • Gallery: Haines, John
    • Gallery: Helliwell, Andrew
    • Gallery: Hiett, Travis
    • Gallery: Hodge, Derek
    • Gallery: Hooge, Neil
    • Gallery: Johnston, Owen
    • Gallery: Kay, Chris
    • Gallery: Lampon, Steven
    • Gallery: Luther, Mark
    • Gallery: McGinn, Joe
    • Gallery: Melville, Doug
    • Gallery: Plowman, Ralph
    • Gallery: Ralls, Jason
    • Gallery: Sapper
    • Gallery: Scott, David
    • Gallery: Slade, Matt
    • Gallery: Stoesen, Chris
    • Gallery: Stumpy
    • Gallery: Treadhead
    • Gallery: Vis Bellica
    • Gallery: Yuengling, Jon
  • TFL Painting Challenge 2017/
    • Scorecard
    • Gallery: Bond, Geoff
    • Gallery: Bowen, Edward
    • Gallery: Bowler, Lloyd
    • Gallery: Burt, Steve
    • Gallery: Cabey Cabey
    • Gallery: Catchpole, Jim
    • Gallery: Davenport, Jon
    • Gallery: Davies, Keith
    • Gallery: de Smedt, Kohn
    • Gallery: de Terre Neuve, John
    • Gallery: Douglas, Mervyn
    • Gallery: Duffell, Andy
    • Gallery: Fat Wally (Kev)
    • Gallery: Flint, Carole
    • Gallery: Freerange Egg
    • Gallery: Gatzemeyer, Garrett
    • Gallery: Gilbride, Chris
    • Gallery: Haines, John
    • Gallery: Helliwell, Andrew
    • Gallery: Hodge, Derek
    • Gallery: Hooge, Neil
    • Gallery: Humm, Dave
    • Gallery: Kay, Chris
    • Gallery: Lampon, Steven
    • Gallery: Luther, Mark
    • Gallery: MacNeill, Craig
    • Gallery: McCarthy, Andrew
    • Gallery: The Mad Padre
    • Gallery: McGinn, Joe
    • Gallery: Melville, Doug
    • Gallery: Naylor, Richard
    • Gallery: Nissvik, Thomas
    • Gallery: Old Pivot
    • Gallery: Owen
    • Gallery: Pollard, Ashley
    • Gallery: Plowman, Ralph
    • Gallery: Ralls, Jason
    • Gallery: Sapper
    • Gallery: Scott, David
    • Gallery: Slade, Matt
    • Gallery: Stoesen, Chris
    • Gallery: Stumpy
    • Gallery: Treadhead
    • Gallery: Vis Bellica
    • Gallery: Weathersby, Brian
    • Gallery: WillieB
    • Gallery: Yuengling, Jon
  • TFL Painting Challenge 2016/
    • Scorecard 2016
    • Gallery: Baldwin, Paul
    • Gallery: Blankenship, Paul
    • Gallery: Bloggs, Fred
    • Gallery: Bond, Geoff
    • Gallery: Bowen, Ed
    • Gallery: Bowler, Lloyd
    • Gallery: Burt, Steve
    • Gallery: Catchpole, Jim
    • Gallery: Clarke, Richard
    • Gallery: Davenport, Jon
    • Gallery: Davies, Keith
    • Gallery: de Smedt, Koen
    • Gallery: Douglas, Mervyn
    • Gallery: Duffell, Andy
    • Gallery: Egg
    • Gallery: Fitch, Doug
    • Gallery: Flint, Carole
    • Gallery: Gatzemeyer, Garrett
    • Gallery: Gilbride, Chris
    • Gallery: Helliwell, Andrew
    • Gallery: Hodge, Derek
    • Gallery: Hooge, Neil
    • Gallery: Humm, Dave
    • Gallery: I Am Bruce
    • Gallery: Lowth, Kev (Fat Wally)
    • Gallery: Luther, Mark
    • Gallery: The Mad Padre
    • Gallery: McCarthy, Andrew
    • Gallery: Melville, Doug
    • Gallery: Naylor, Richard
    • Gallery: Nissvik, Thomas
    • Gallery: Oracle
    • Gallery: Owen
    • Gallery: Plowman, Ralph
    • Gallery: Pollard, Ashley
    • Gallery: Ralls, Jason
    • Gallery: Sapper
    • Gallery: Slade, Matt
    • Gallery: Stoesen, Chris
    • Gallery: Stumpy
    • Gallery: Treadhead
    • Gallery: Vis Bellica
    • Gallery: Willie B
    • Gallery: Yuengling, Jon
  • TFL Painting Challenge 2015/
    • Scorecard 2015
    • Gallery: AJH
    • Gallery: Bairos, Vidal
    • Gallery: Baldwin, Paul
    • Gallery: Bax, Dick
    • Gallery: Blankenship, Paul
    • Gallery: Bloggs, Fred
    • Gallery: Bond, Geoff Bond
    • Gallery: Bowler, Hat
    • Gallery: Burt, Steve
    • Gallery: Corbett, Wulf
    • Gallery: Danziger, Richard
    • Gallery: Davies, Keith
    • Gallery: de Smedt, Koen
    • Gallery: de terre neuve, john
    • Gallery: Douglas, Mervyn
    • Gallery: Duffell, Andy
    • Gallery: Egg, Freerange
    • Gallery: Eggman Glass
    • Gallery: Eriksson, Leif
    • Gallery: Fat Wally
    • Gallery: Flint, Carole
    • Gallery: Gilbride, Chris
    • Gallery: Hedglin, Nils
    • Gallery: Helliwell, Andy
    • Gallery: Hodge, Derek
    • Gallery: Hooooge, Neil
    • Gallery: Humm, Dave
    • Gallery: I'm Bruce
    • Gallery: Luther, Mark
    • Gallery: The Mad Padre
    • Gallery: Maerk
    • Gallery: McCarthy, Andrew
    • Gallery: Melville, Doug
    • Gallery: Miller, Andrew
    • Gallery: Miller, Steve
    • Gallery: Milne, Neil
    • Gallery: Mikkola, Topi
    • Gallery: Mr Nouveau
    • Gallery: Naylor, Richard
    • Gallery: Nissvik, Thomas
    • Gallery: Owen
    • Gallery: Pedivere
    • Gallery: Pingu
    • Gallery: Pollard, Ashley
    • Gallery: Plowman, Ralph
    • Gallery: Ralls, Jason
    • Gallery: Sapper
    • Gallery: Skelton, Dom
    • Gallery: Slade, Matt
    • Gallery: Stapells, Tony
    • Gallery: Stoesen, Chris
    • Gallery: Strom, Joakim
    • Gallery: Stumpy
    • Gallery: Topyob
    • Gallery: Treadhead
    • Gallery: Vera, Benito
    • Gallery: Vis Bellica
    • Gallery: Willie B
    • Gallery: Yuengling, Jon
    • Gallery: Catchpole, Jim
  • TFL Painting Challenge 2014/
    • Scorecard
    • Gallery: Alexandros
    • Gallery: Ambler, Craig
    • Gallery: Armstrong, Keith
    • Gallery: Bailey, Dave
    • Gallery: Bairos, Vidal
    • Gallery: Bax, Dick
    • Gallery: Bloggs, Fred
    • Gallery: Bond, Geoff
    • Gallery: Burt, Steve
    • Gallery: Carnegie, Ron
    • Gallery: Carole
    • Gallery: Catchpole, Jim
    • Gallery: Clarke, Richard
    • Gallery: Corbett, Wulf
    • Gallery: Danziger, Richard
    • Gallery: De Smedt, Koen
    • Gallery: de Terre Neuve, John
    • Gallery: Deeks, Jon
    • Gallery: Douglas, Mervyn
    • Gallery: Duffell, Andy
    • Gallery: Egg, Free Range
    • Gallery: Erikson, Leif
    • Gallery: Fat Wally (Kev)
    • Gallery: Fiene, Ben
    • Gallery: Gilbride, Chris
    • Gallery: Hodge, Derek
    • Gallery: Humm, Dave
    • Gallery: Llano, Manuel
    • Gallery: Luther, Mark
    • Gallery: Melville, Doug
    • Gallery: Mikkola, Topi
    • Gallery: Miller, Andrew
    • Gallery: munsterfan8
    • Gallery: Murray, Jim
    • Gallery: Nissvik, Thomas
    • Gallery: Owen
    • Gallery: The Mad Padre
    • Gallery: PatG
    • Gallery: Pingu
    • Gallery: Plowman, Ralph
    • Gallery: Pollard, Ashley
    • Gallery: Ralls, Jason
    • Gallery: Slade, Matt
    • Gallery: Stoesen, Chris
    • Gallery: Strom, Joakim
    • Gallery: Stumpy
    • Gallery: Thomas, John
    • Gallery: Treadhead
    • Gallery: Vera, Benito
    • Gallery: Vis Bellica
    • Gallery: Warrior in the Attic
    • Gallery: Weir, Jim
    • Gallery: Whitaker, Mike
    • Gallery: WillieB
    • Gallery: Yuengling, Jon
  • TooFatLardies/


This was an IABSM game played at Gigabites Cafe in Marietta in Feb, 2012. The game was based on the Outflanked scenario from Chris Stosen's Campaign for Greece scenario pack.

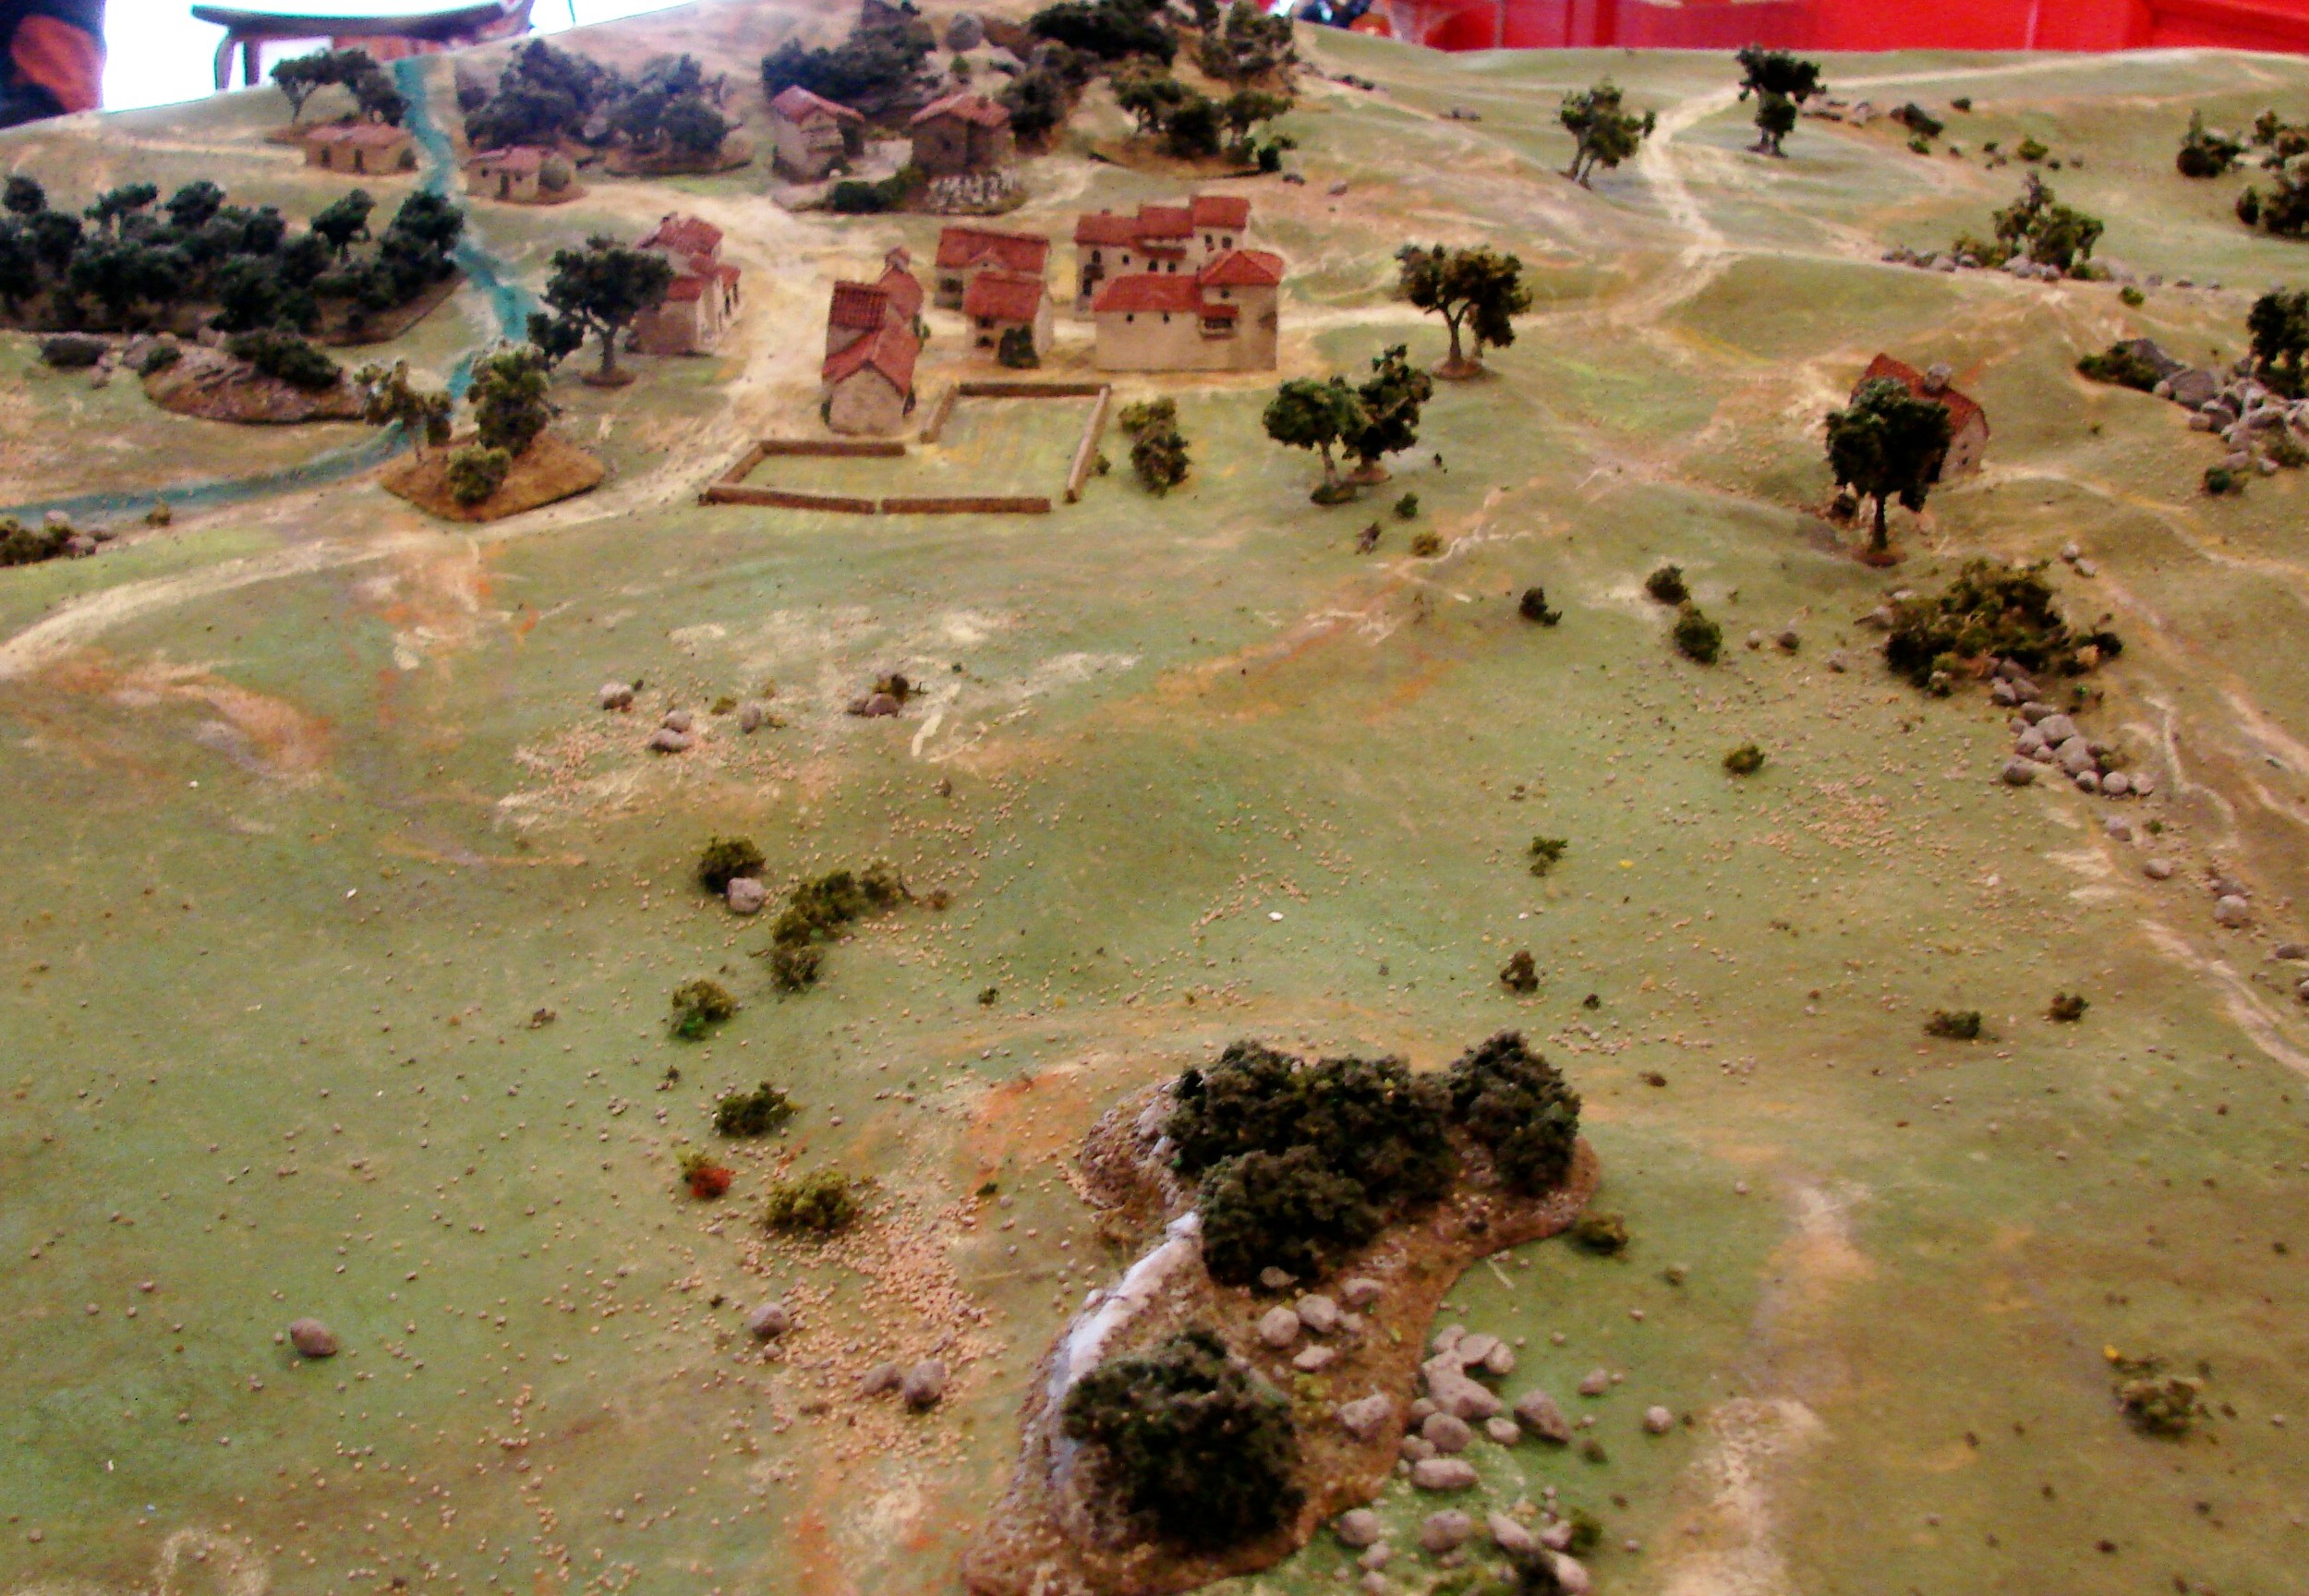
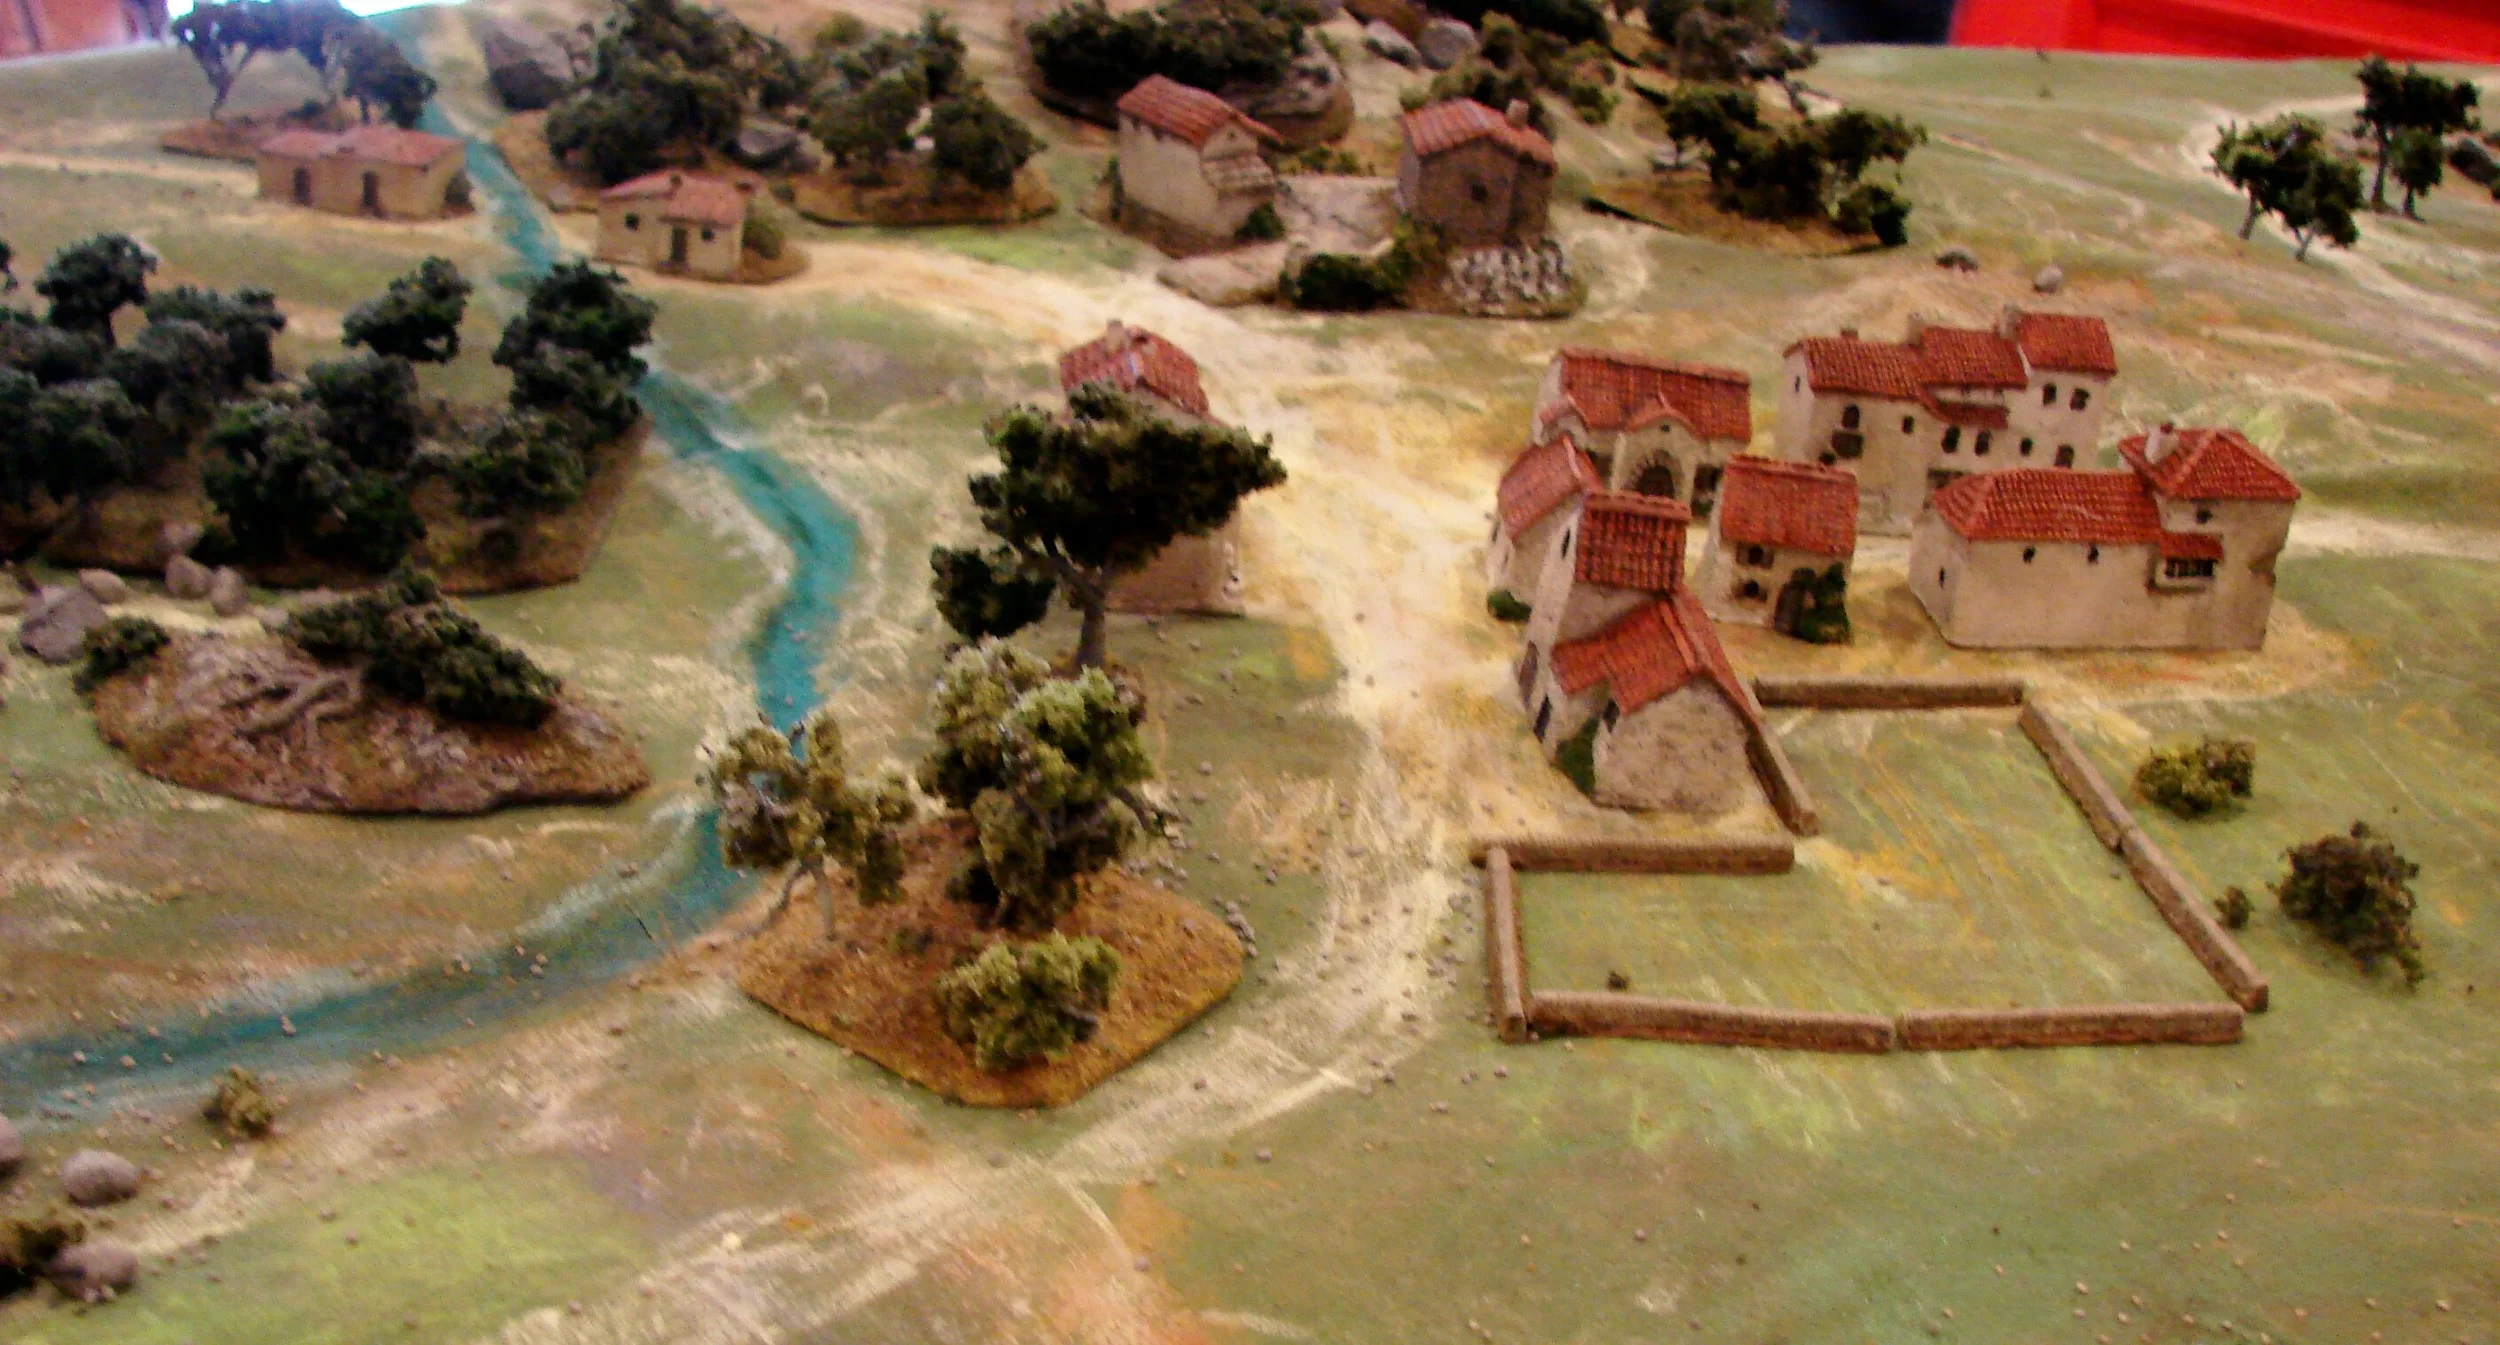
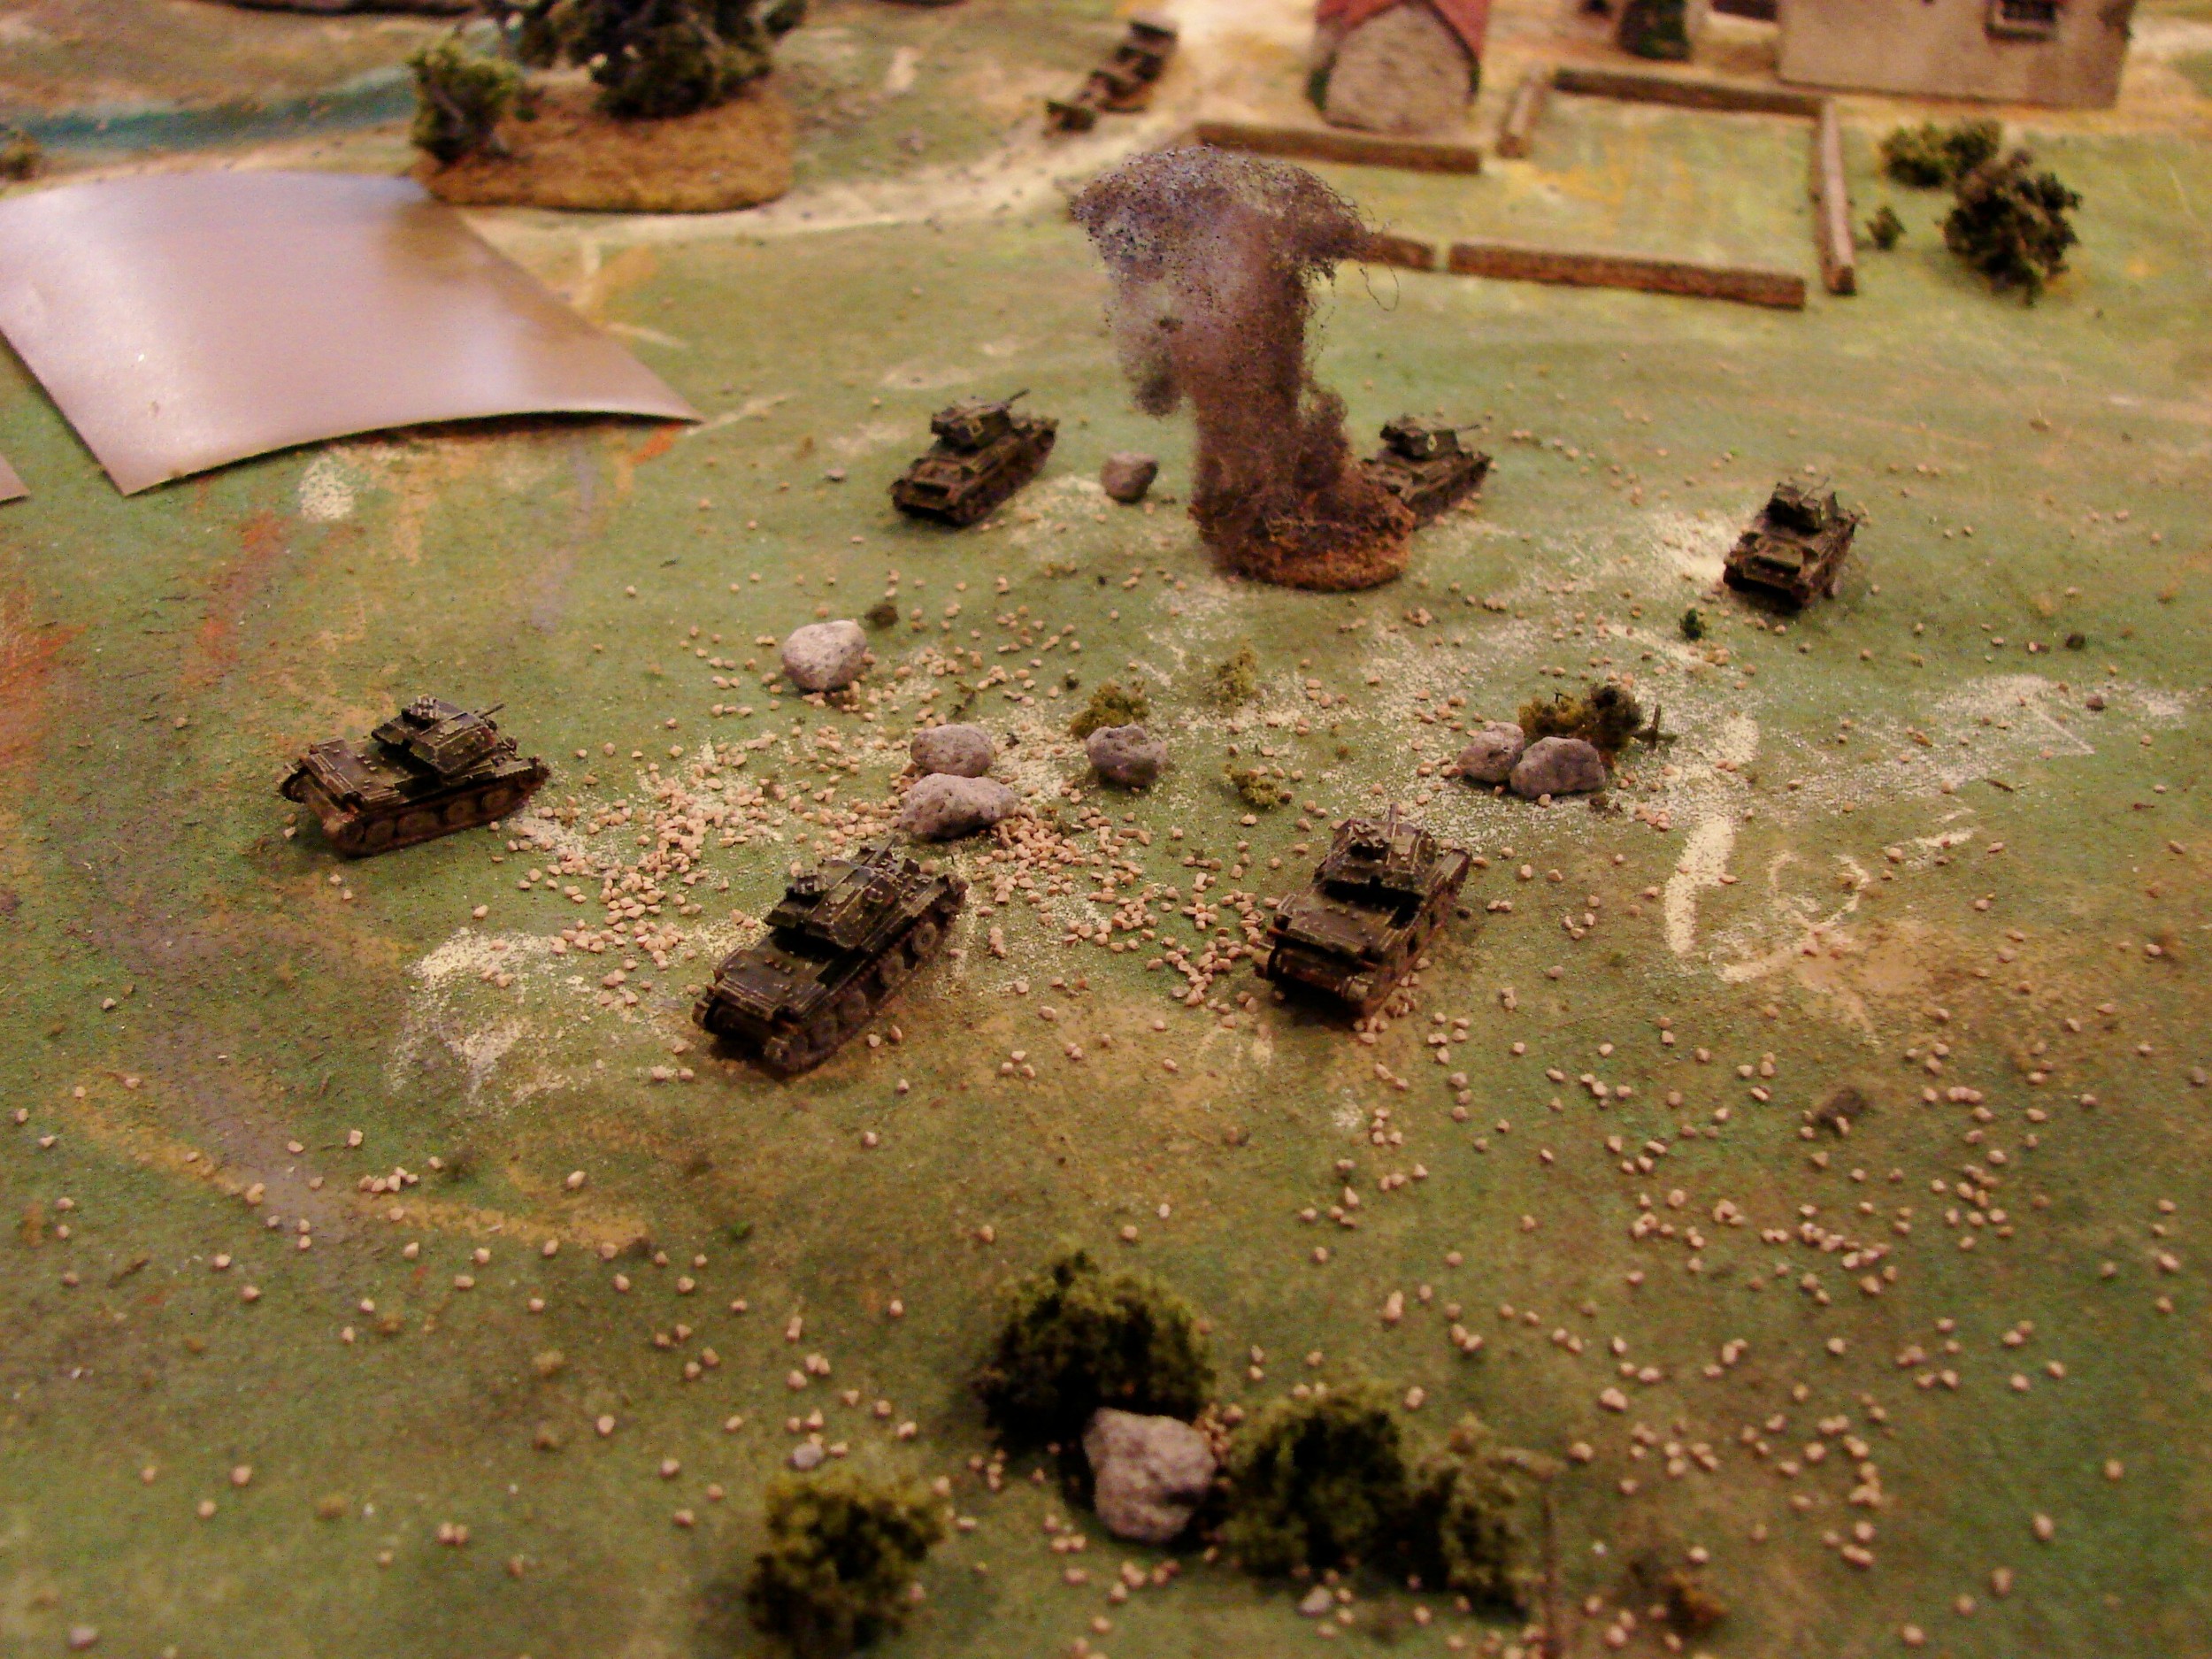
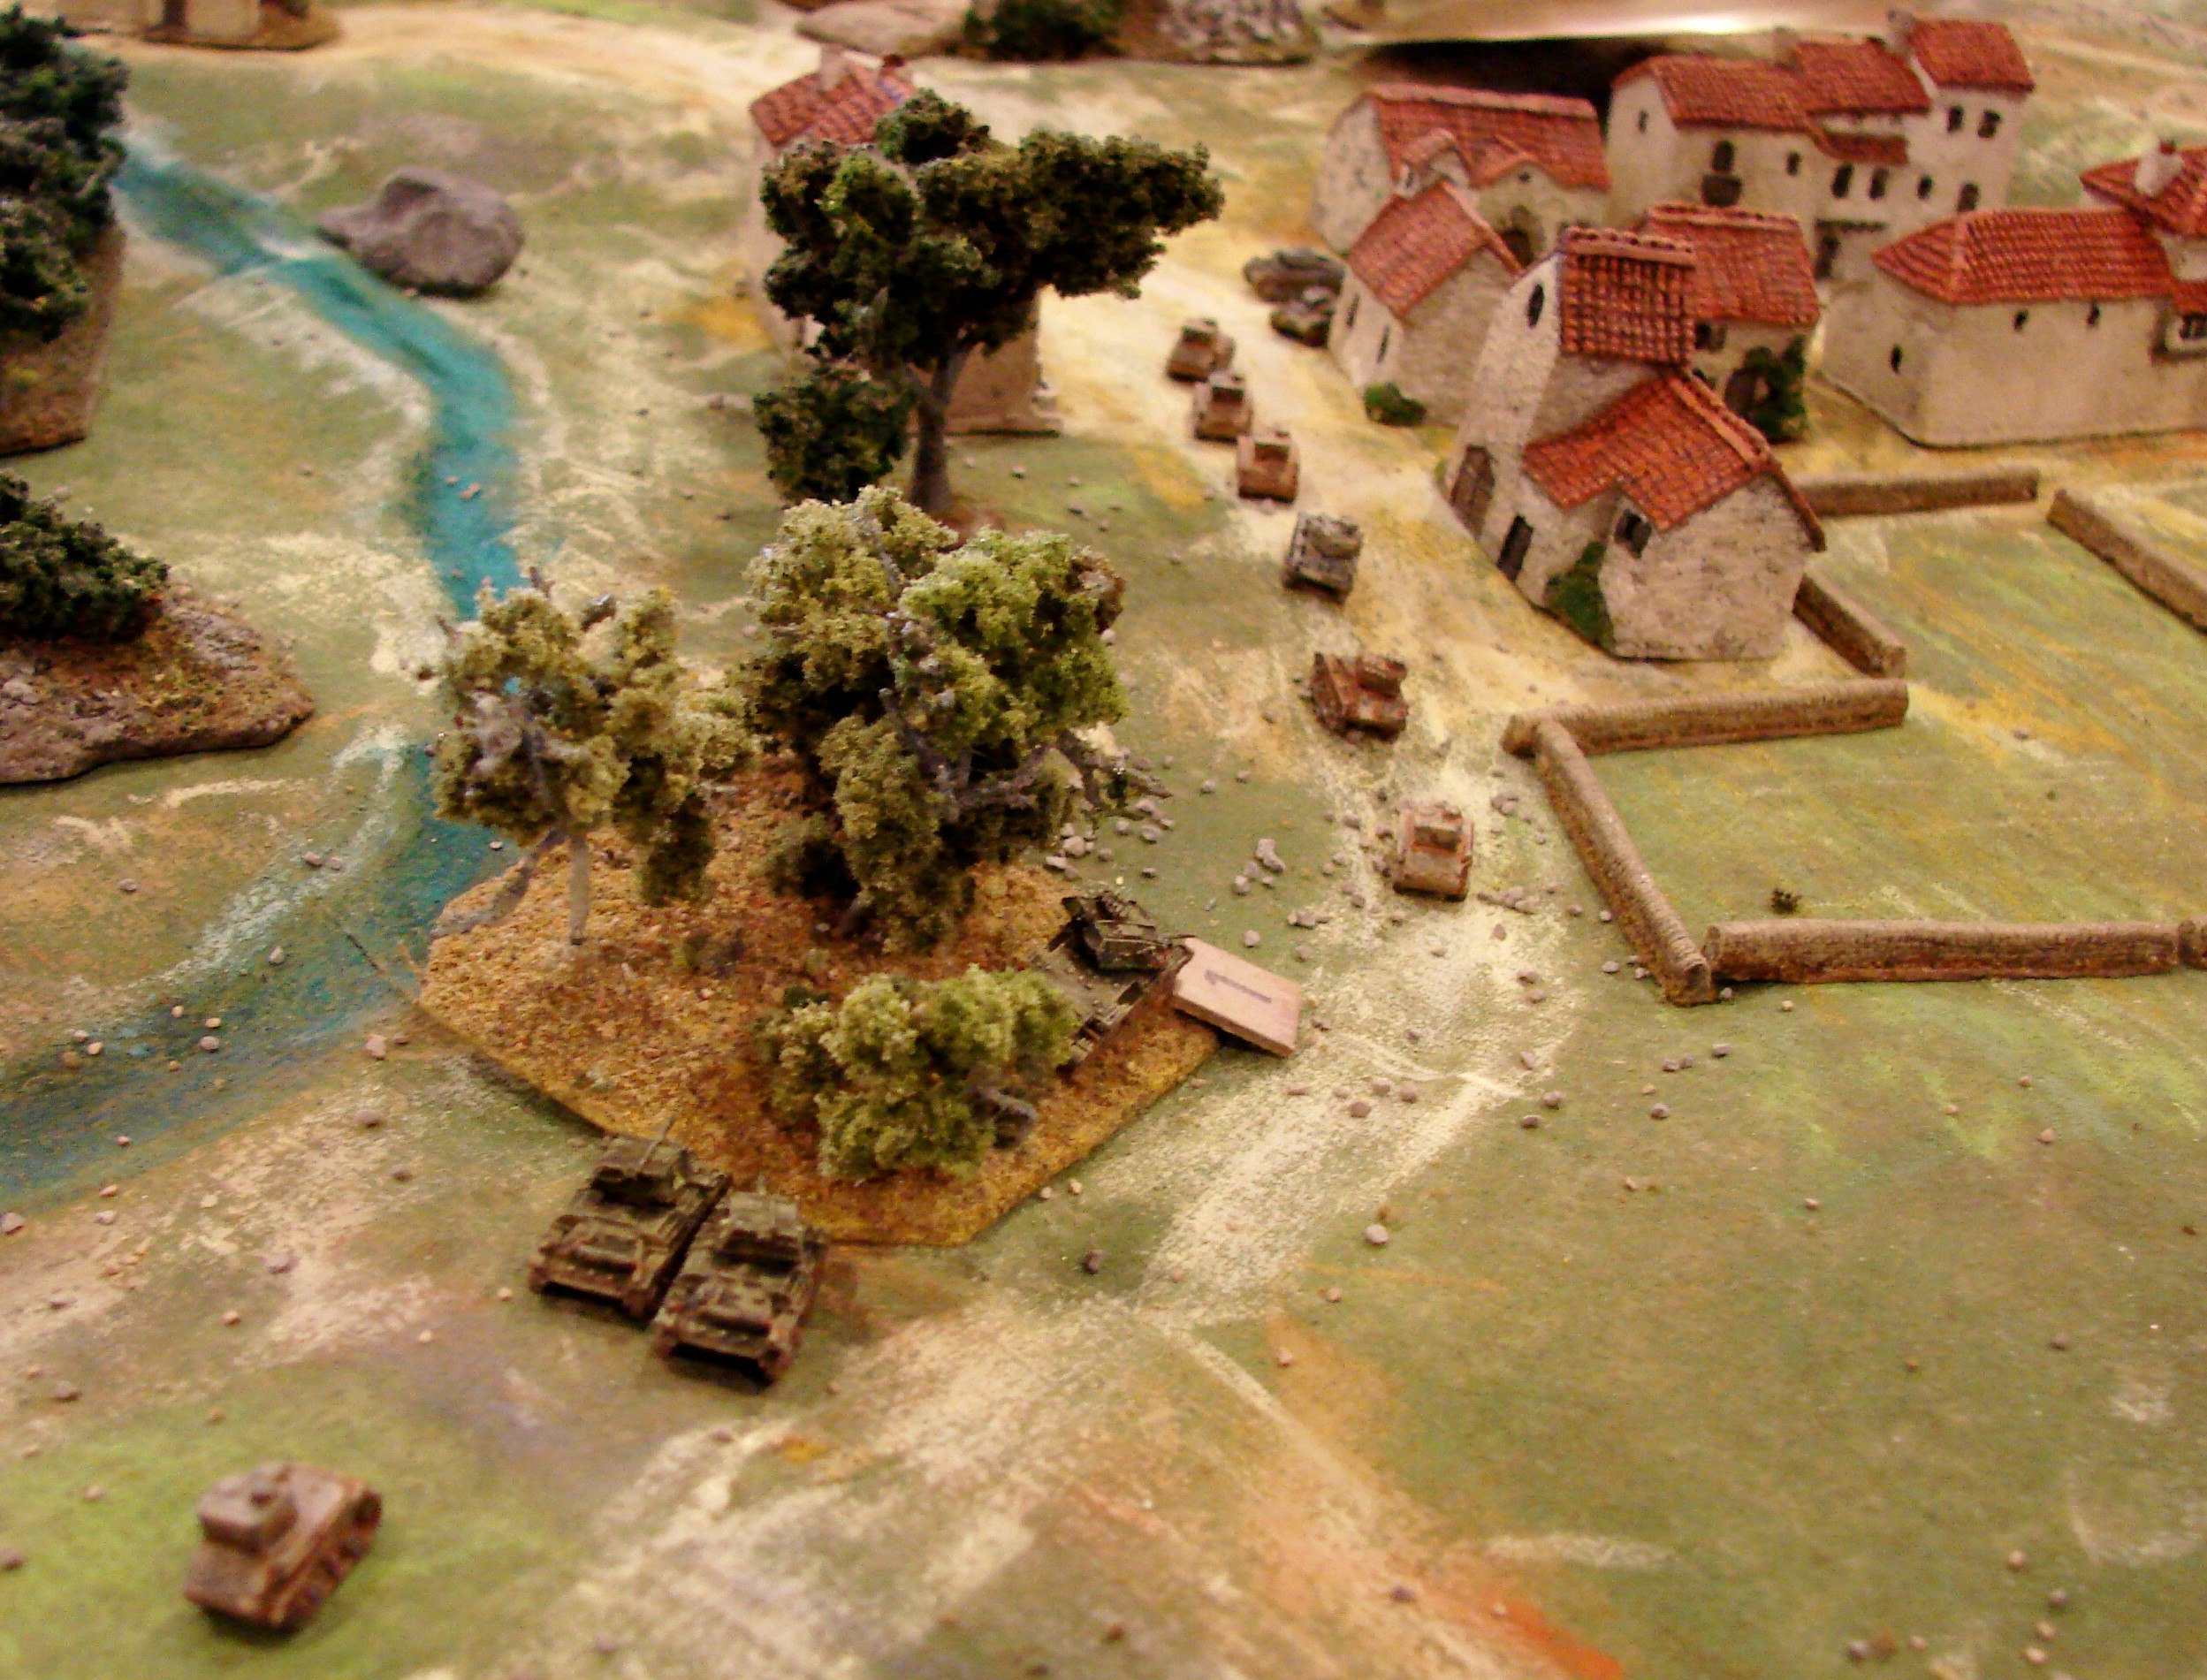
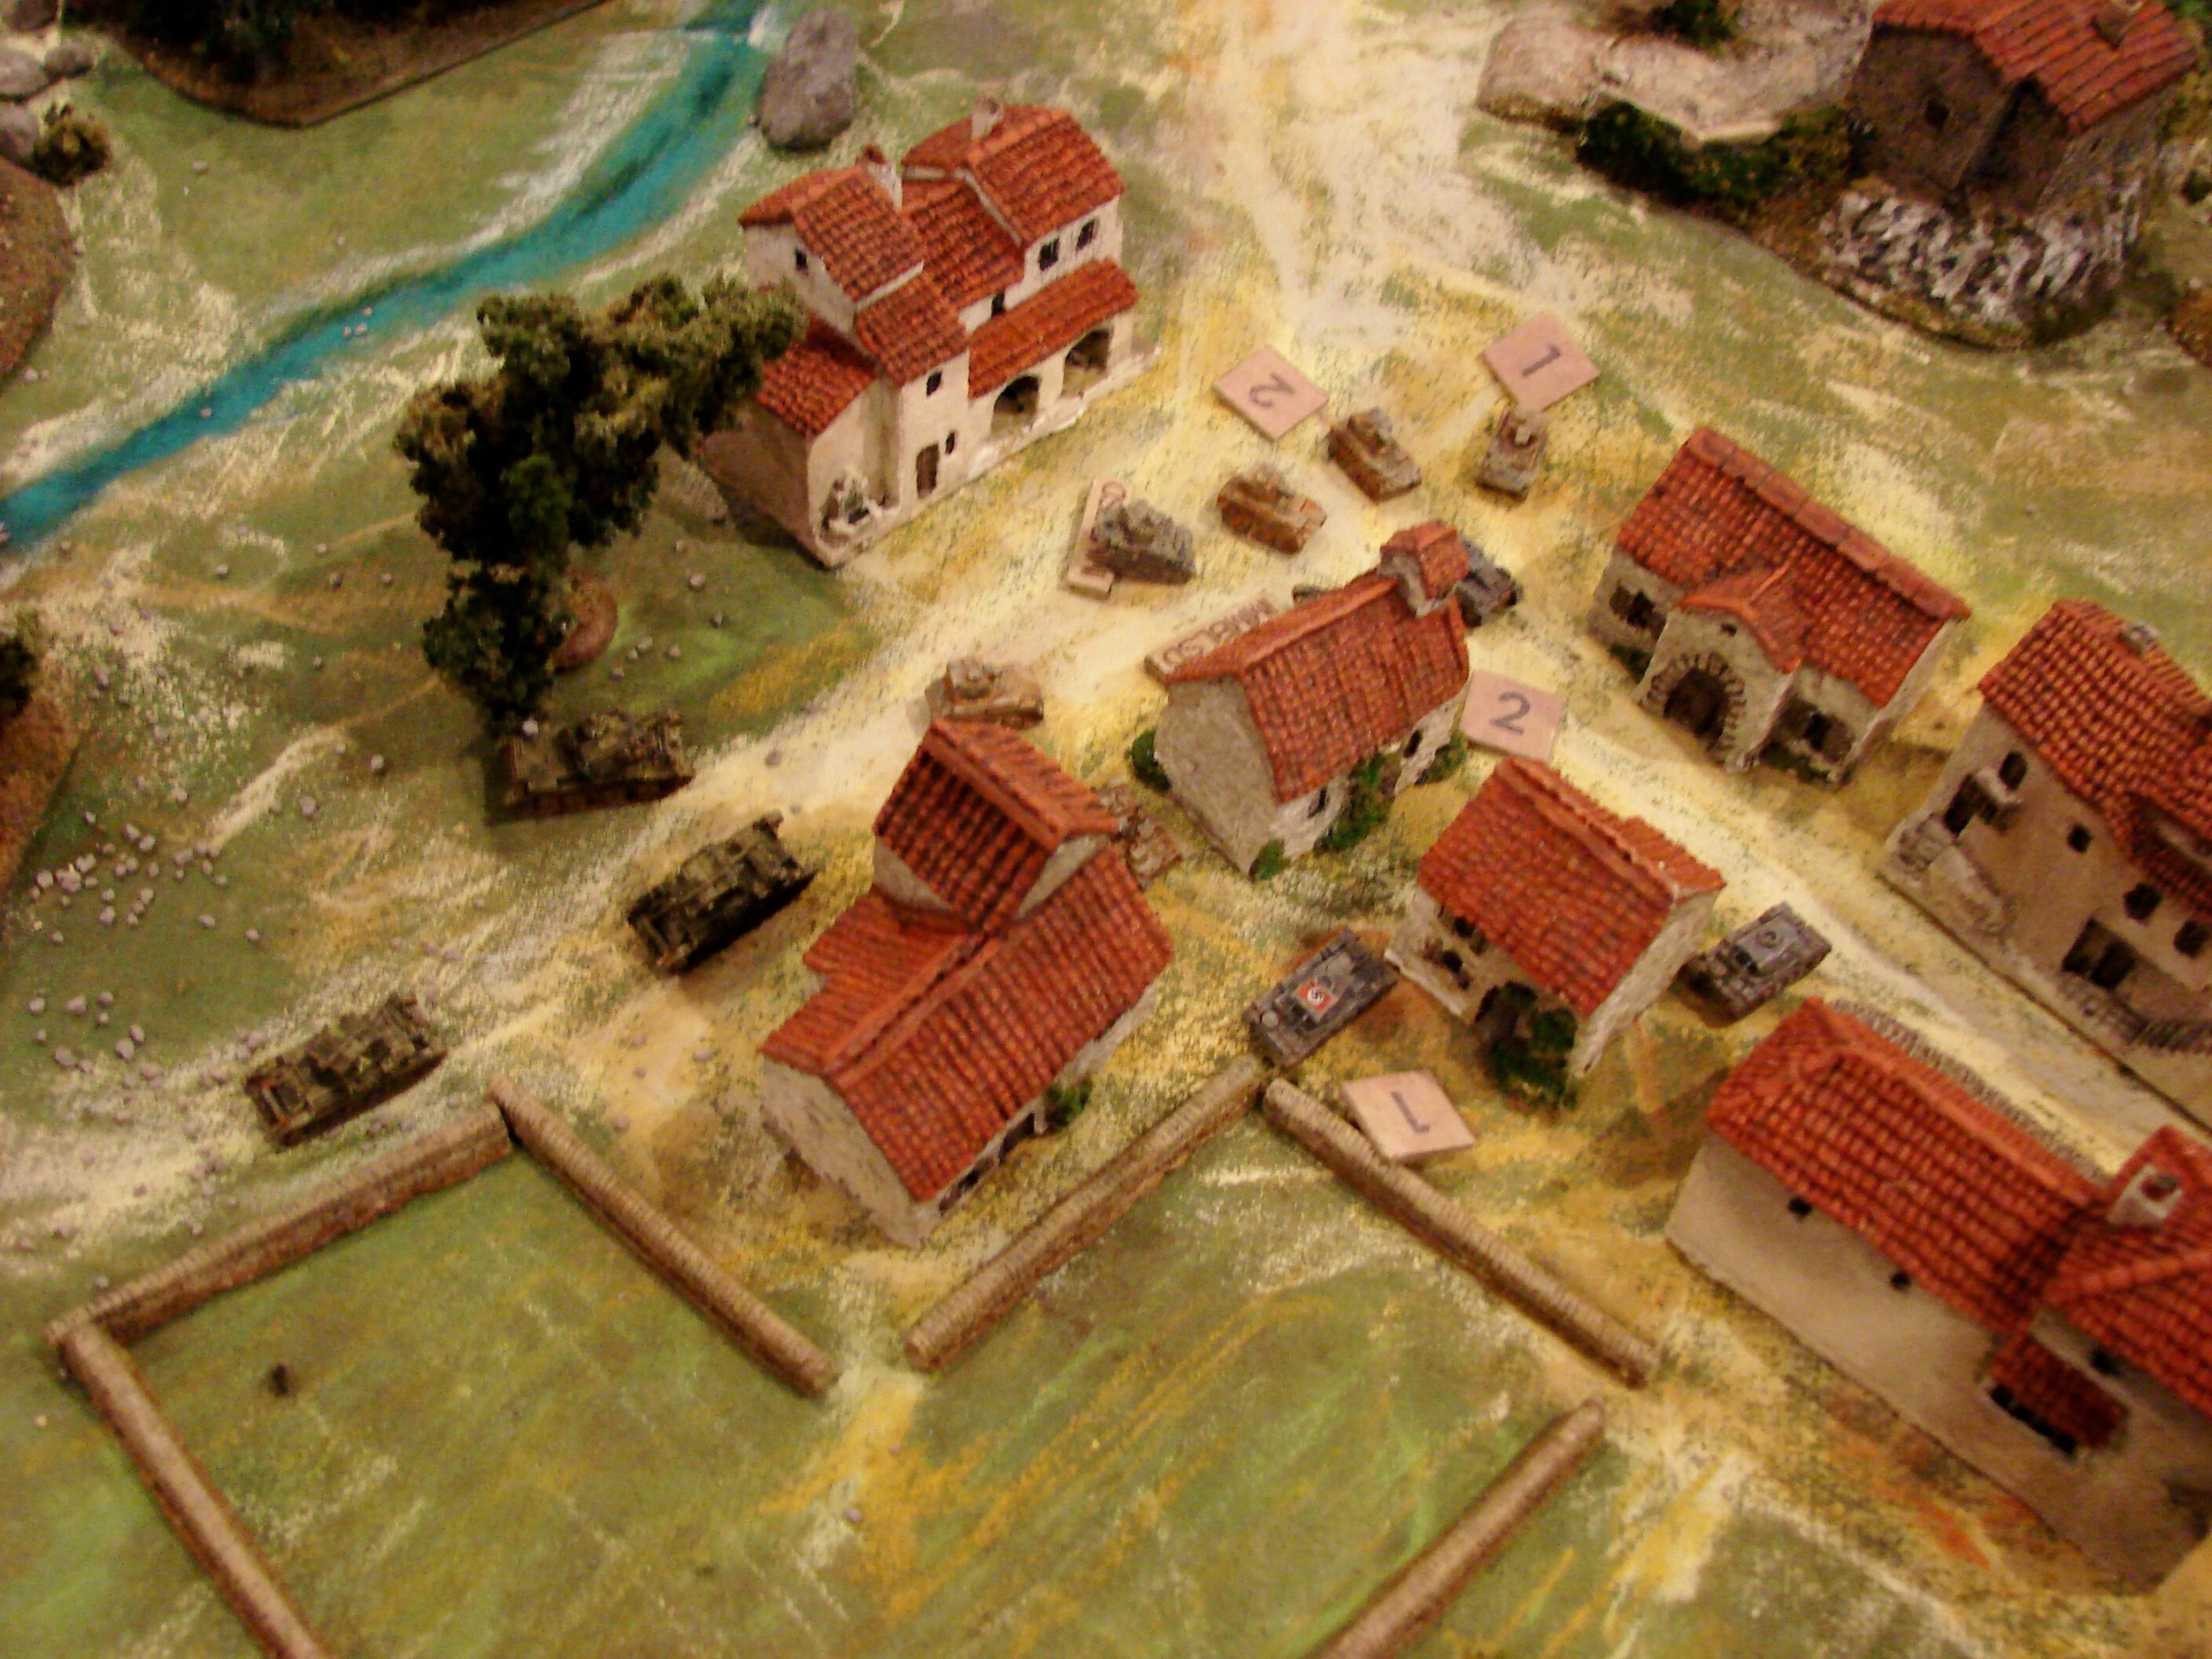
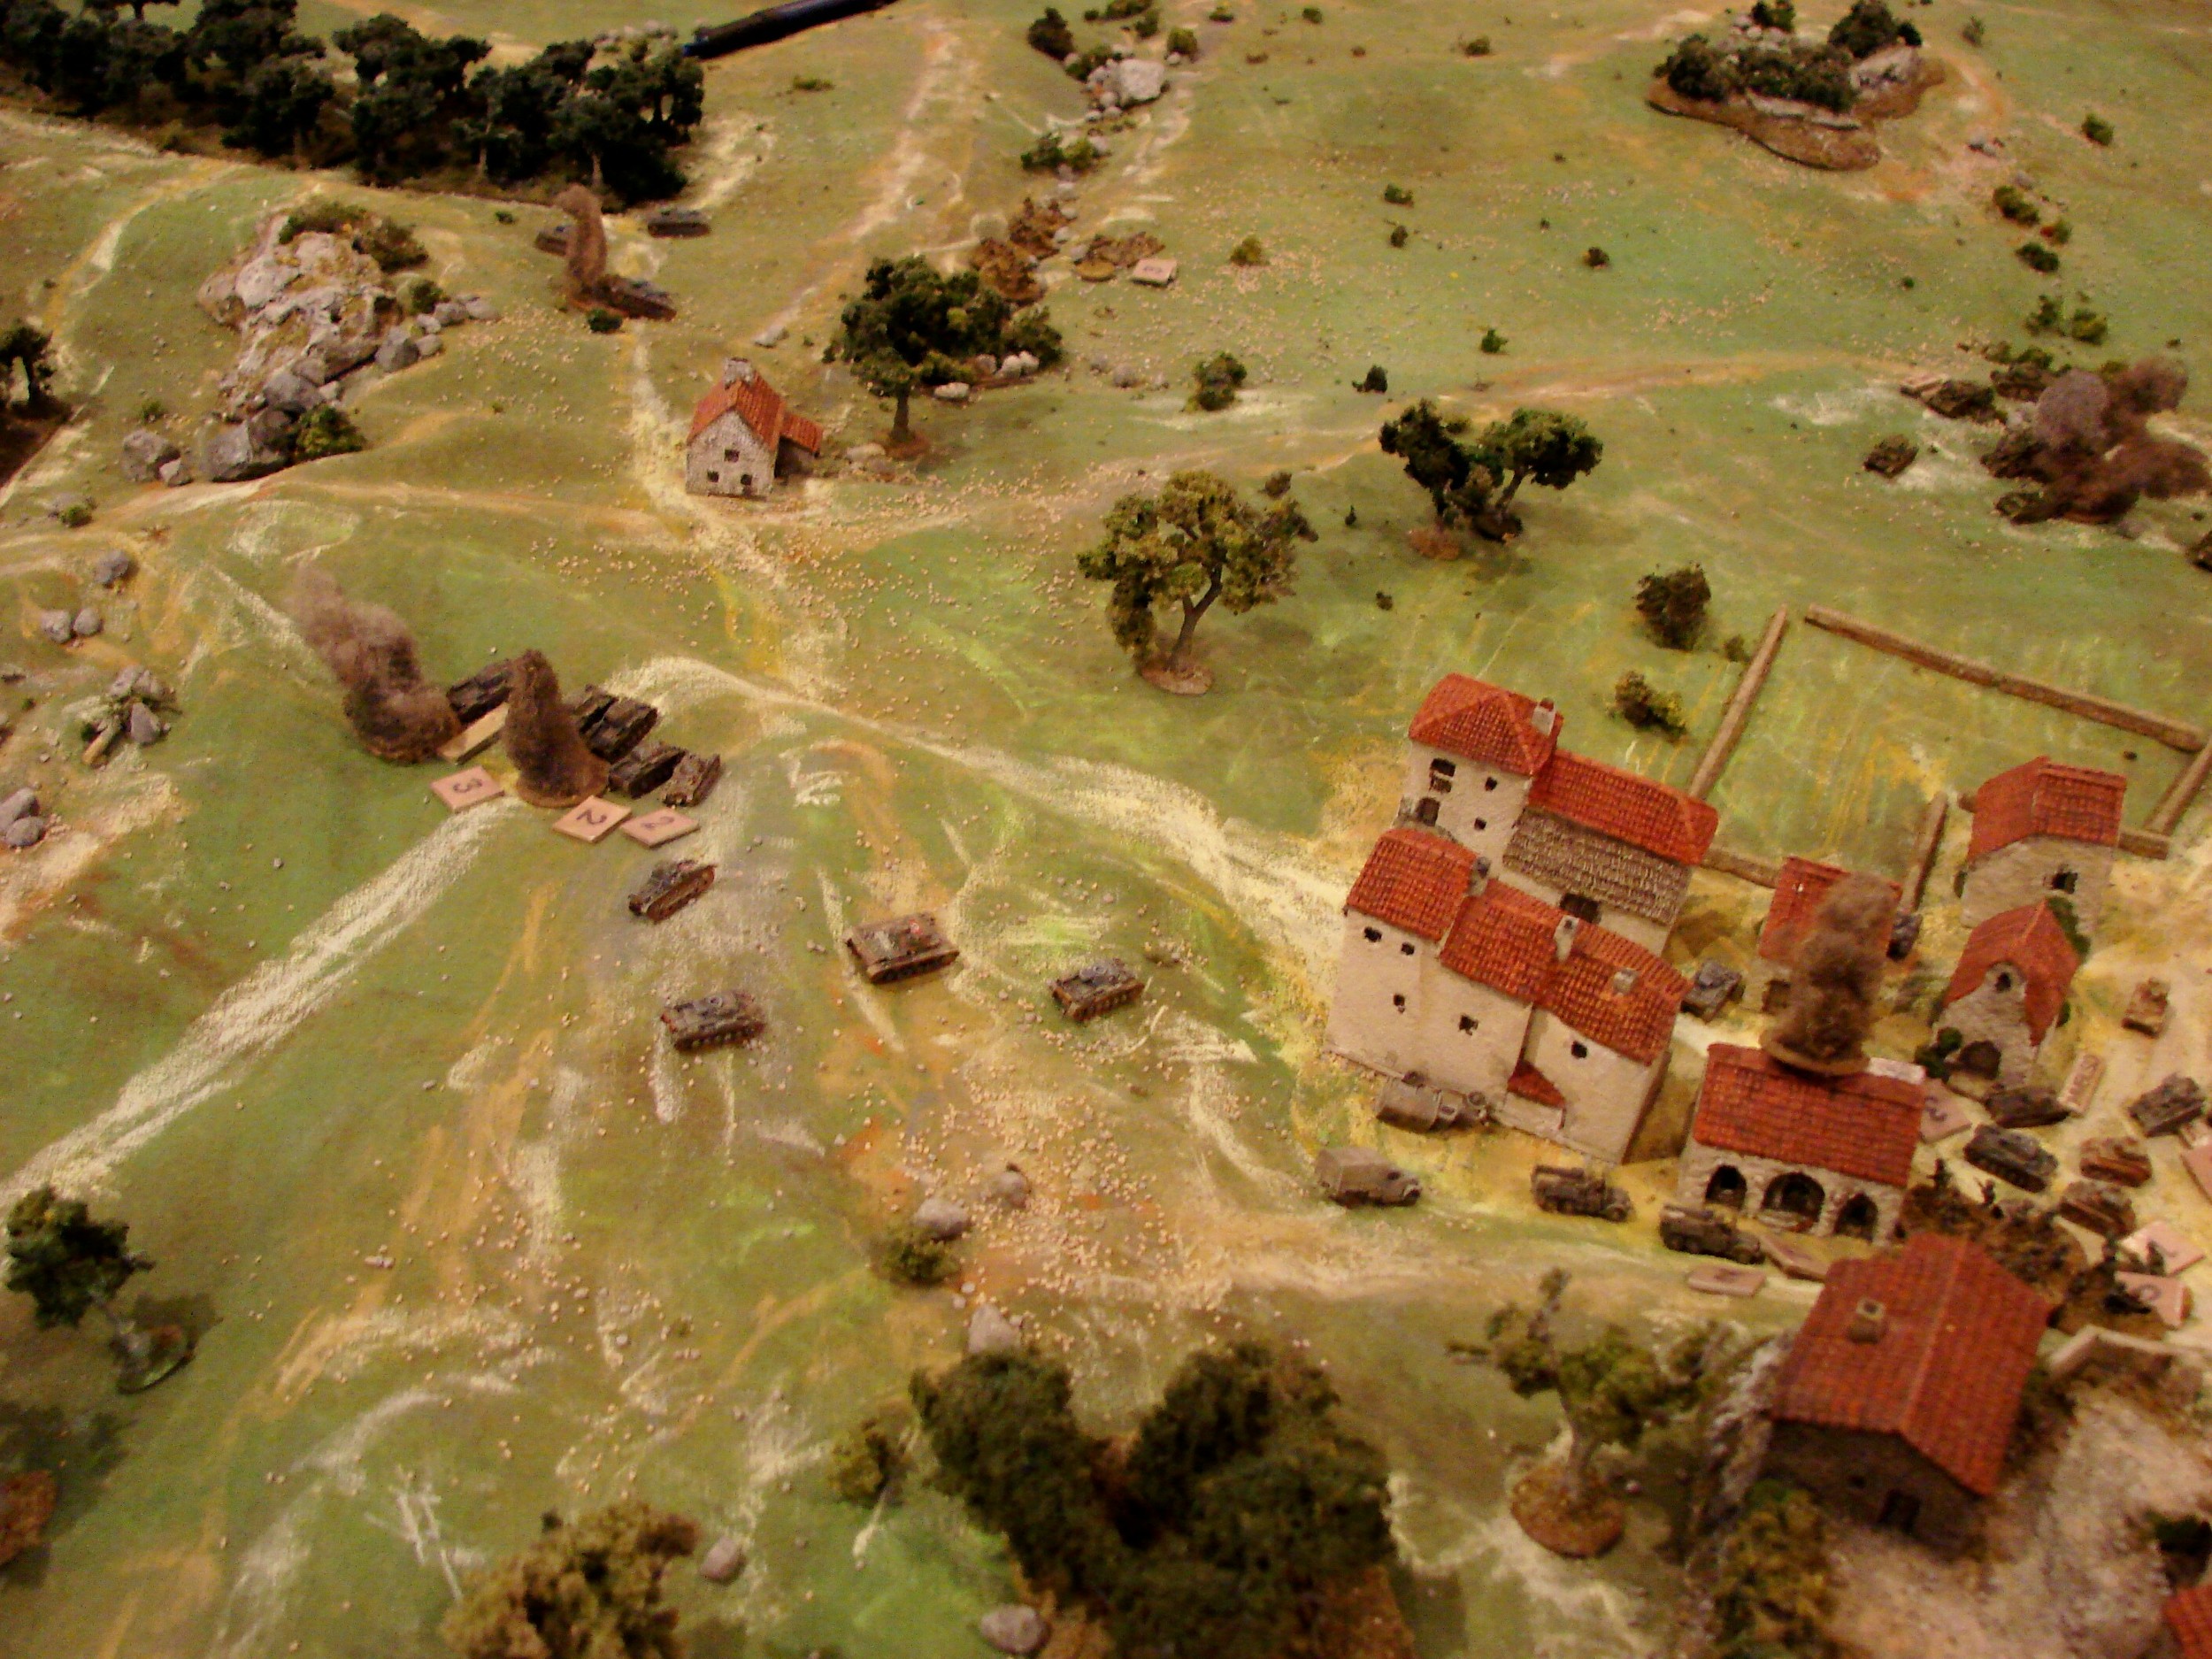
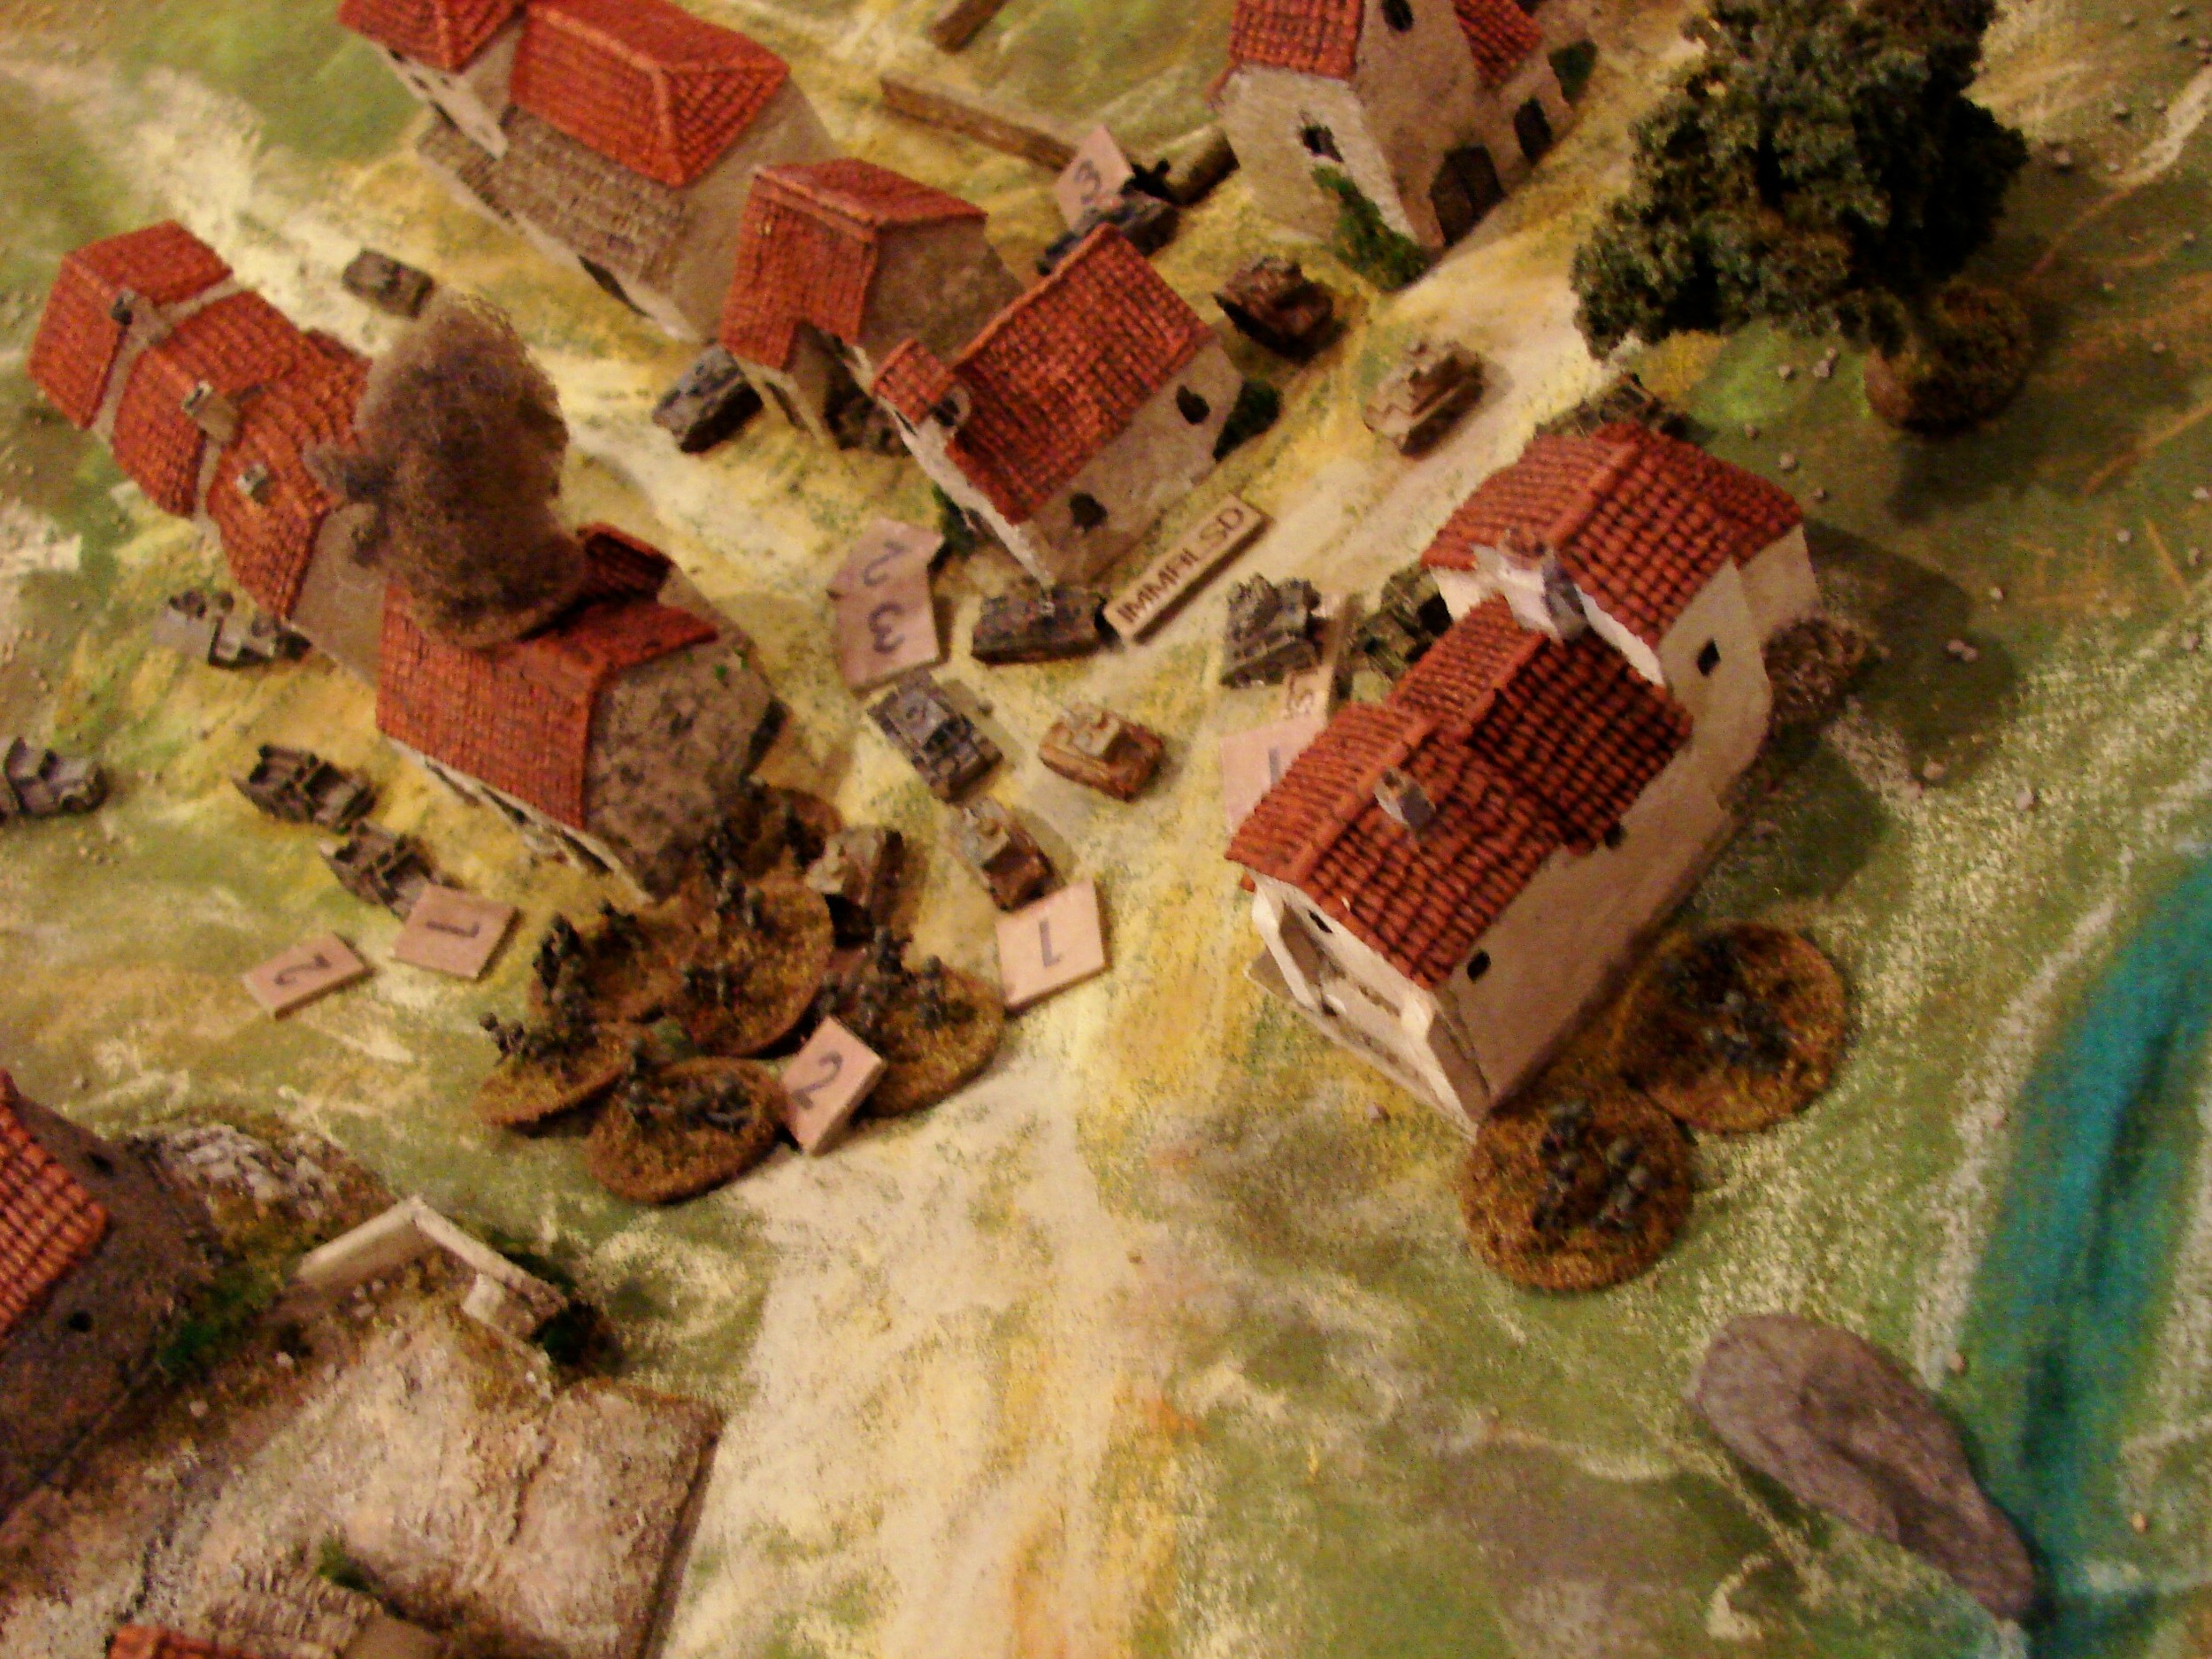
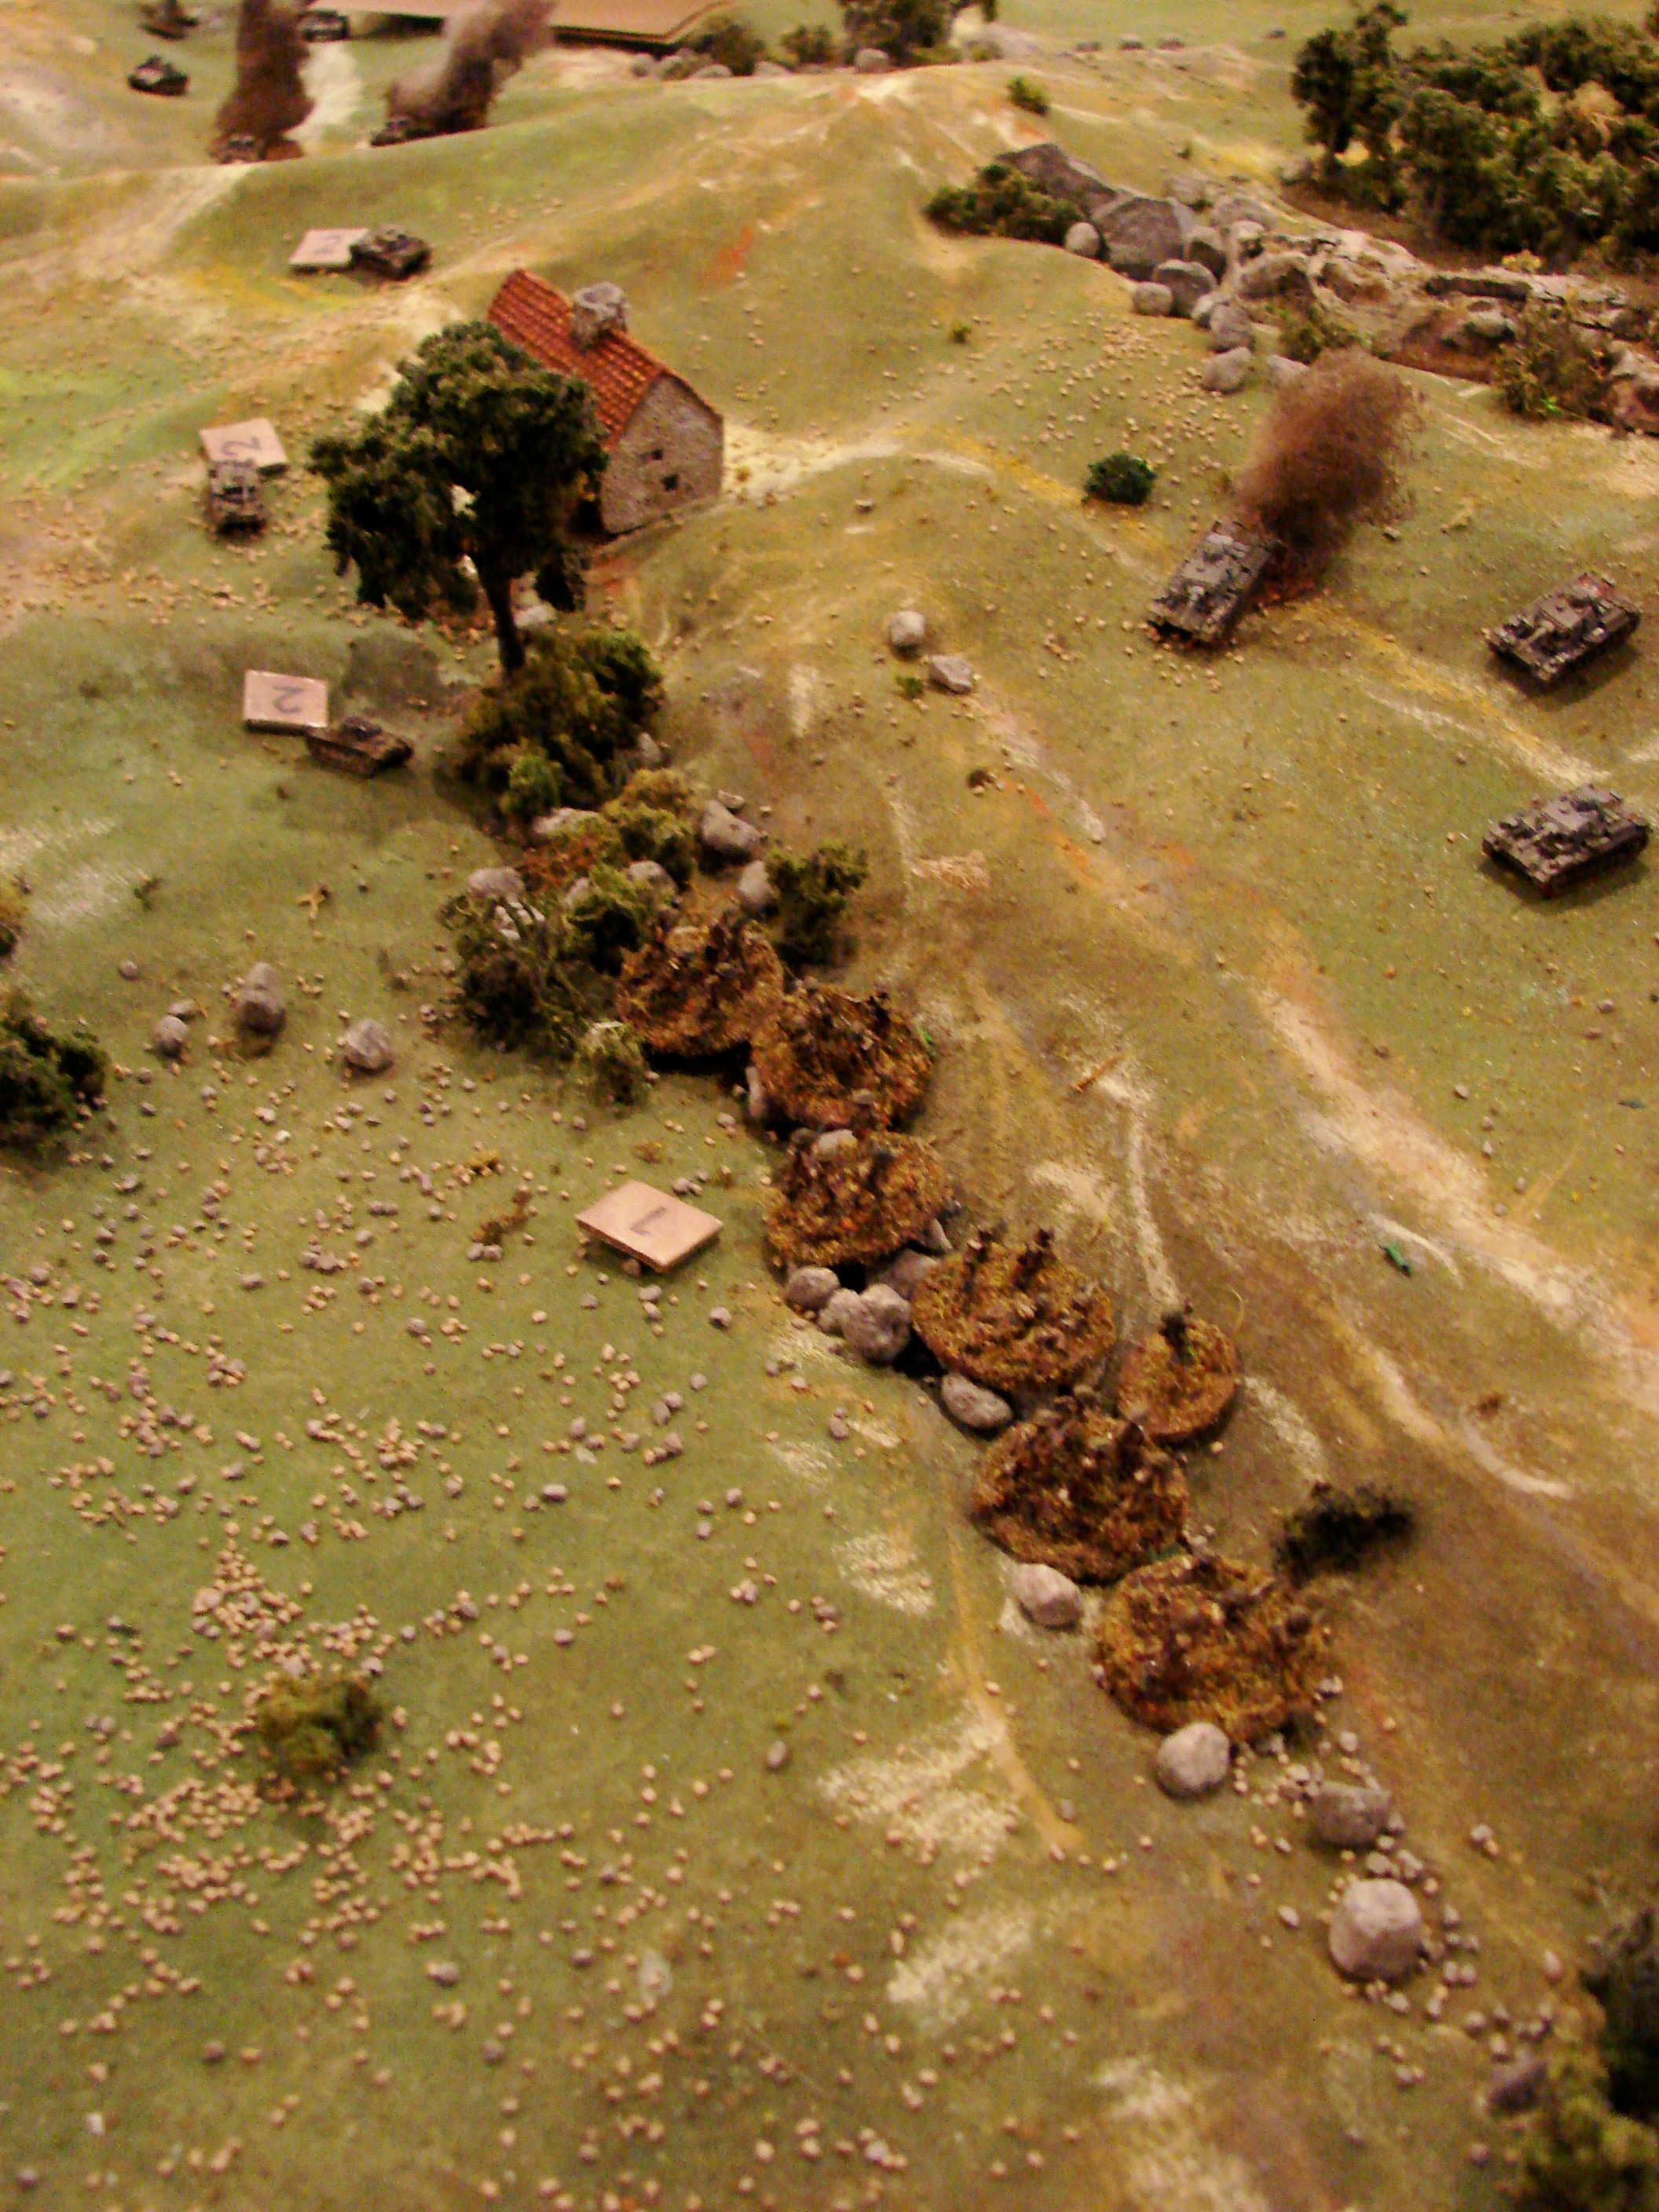
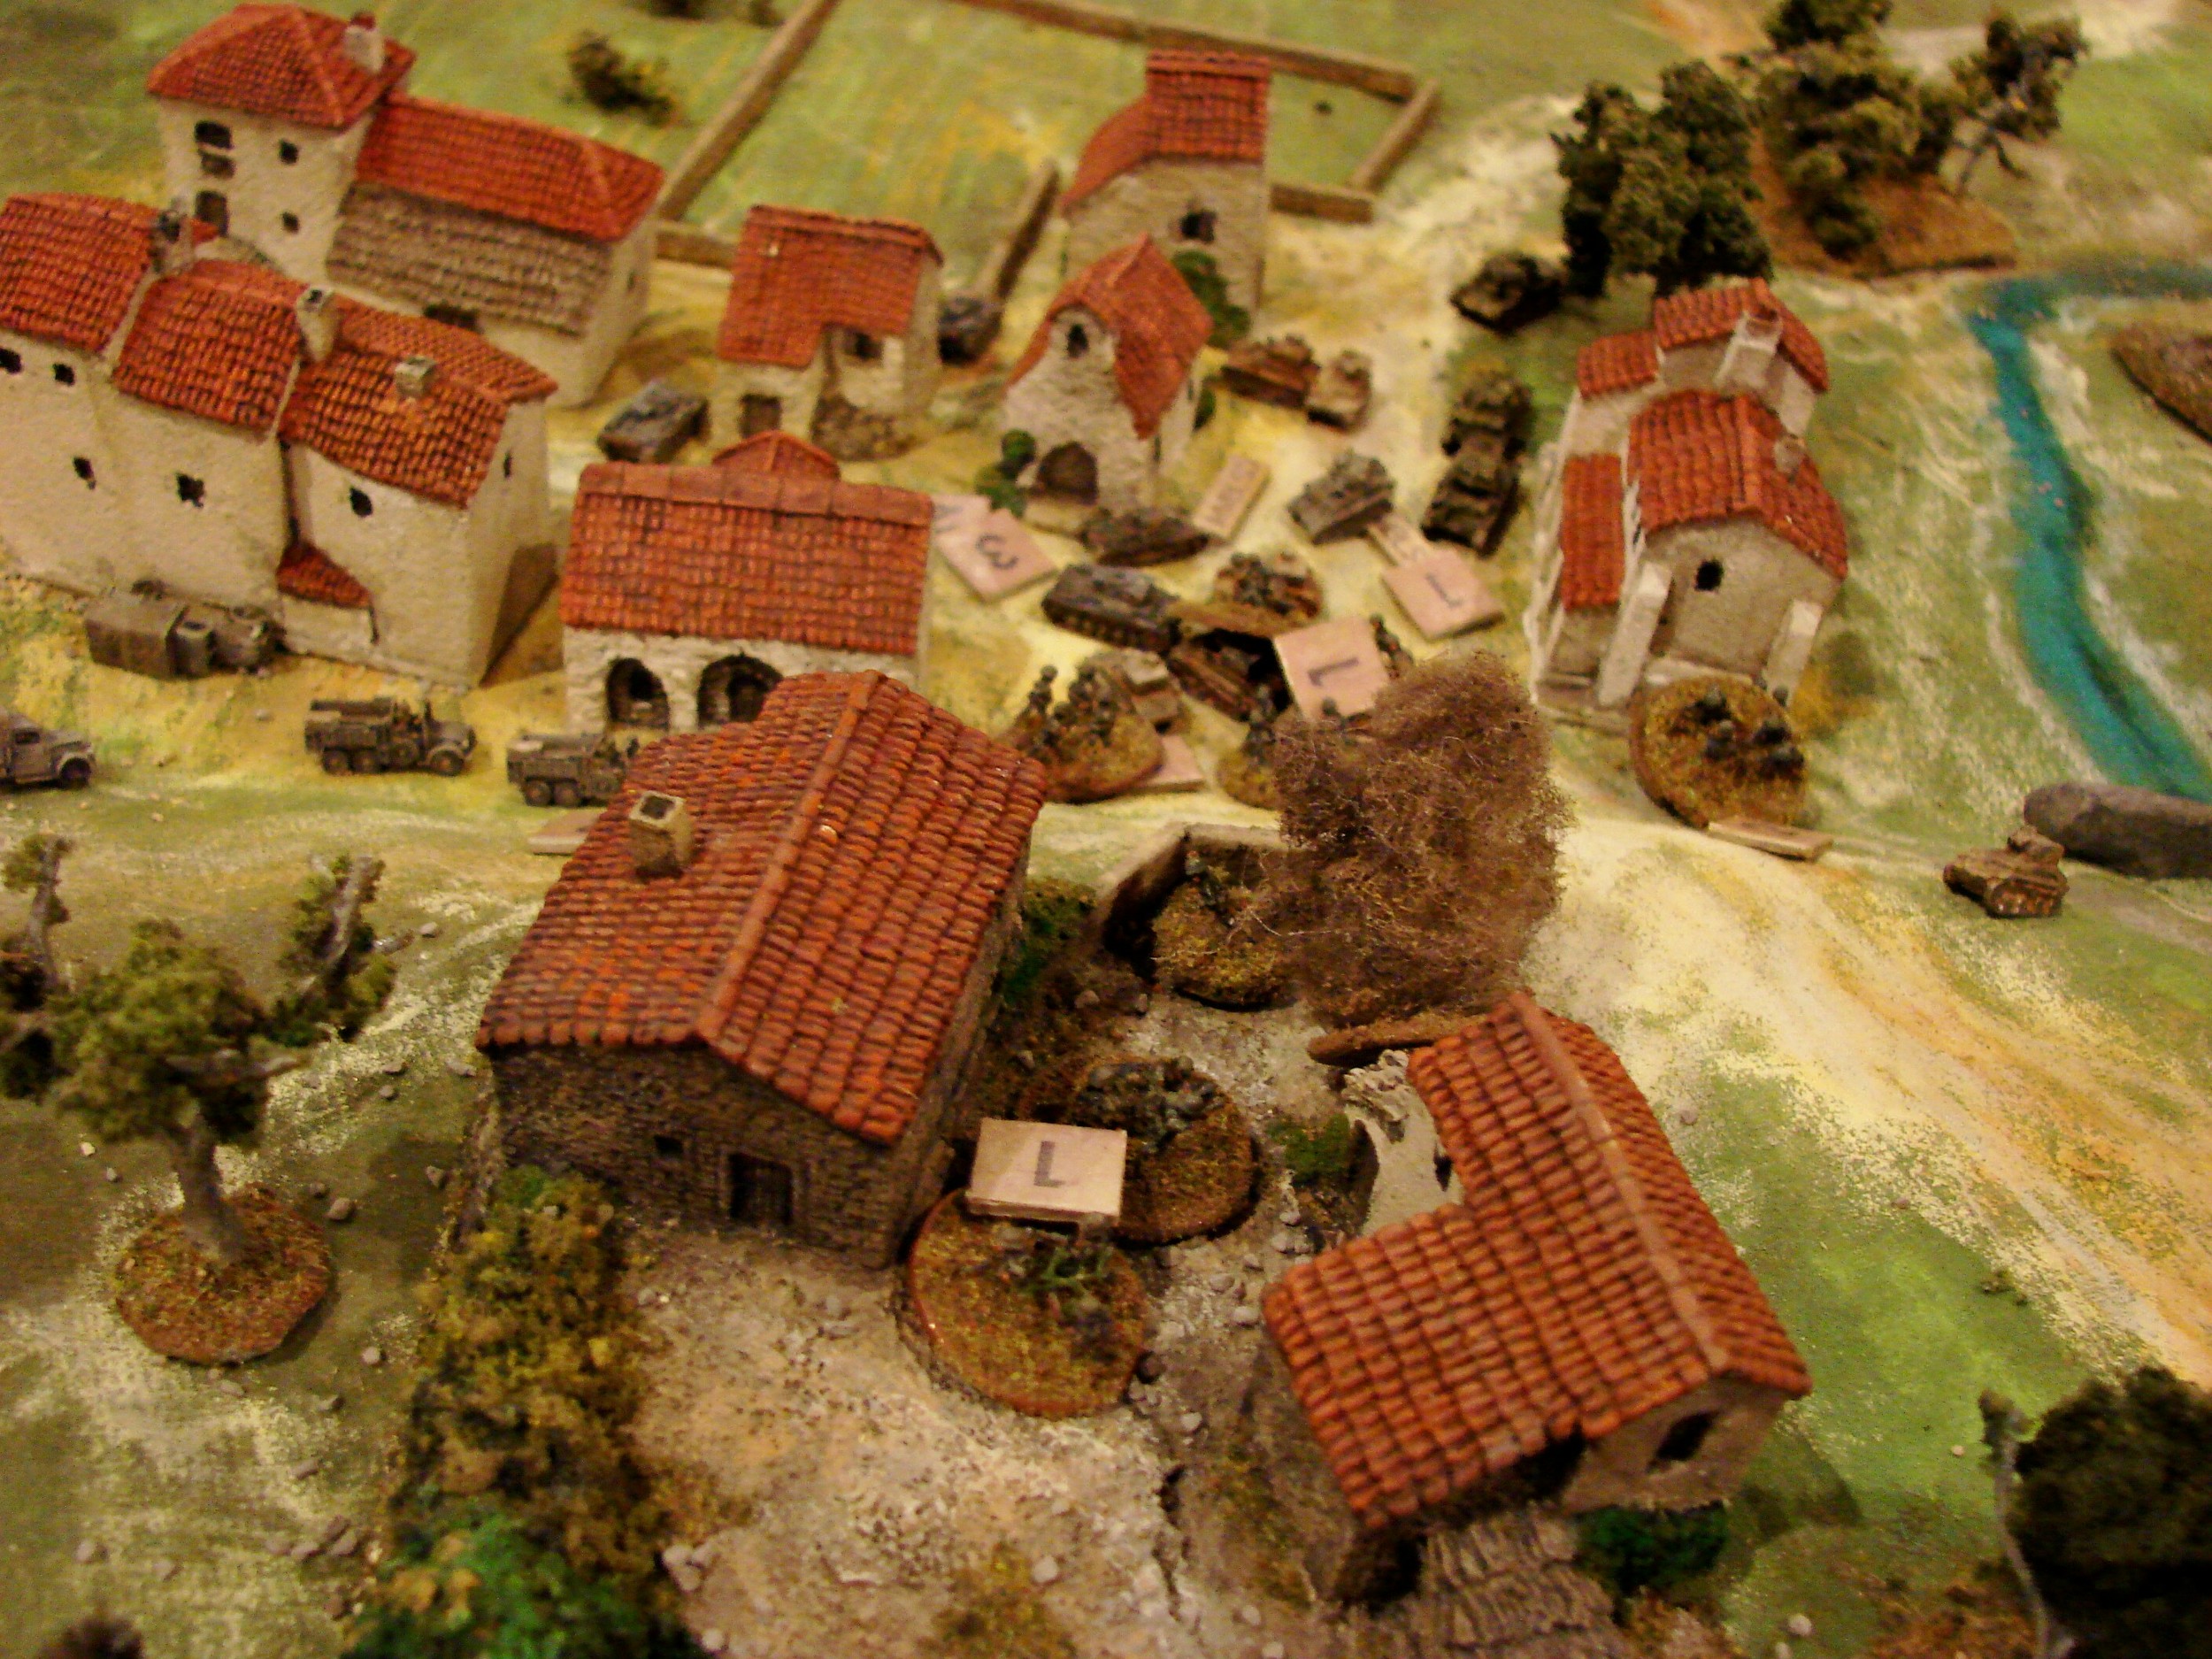
This game has the 9th Panzer attempting to run around the flank of the Commonwealth positions near Ptolemais and the defenders hurried efforts to stop them near the village of Mavropiye.

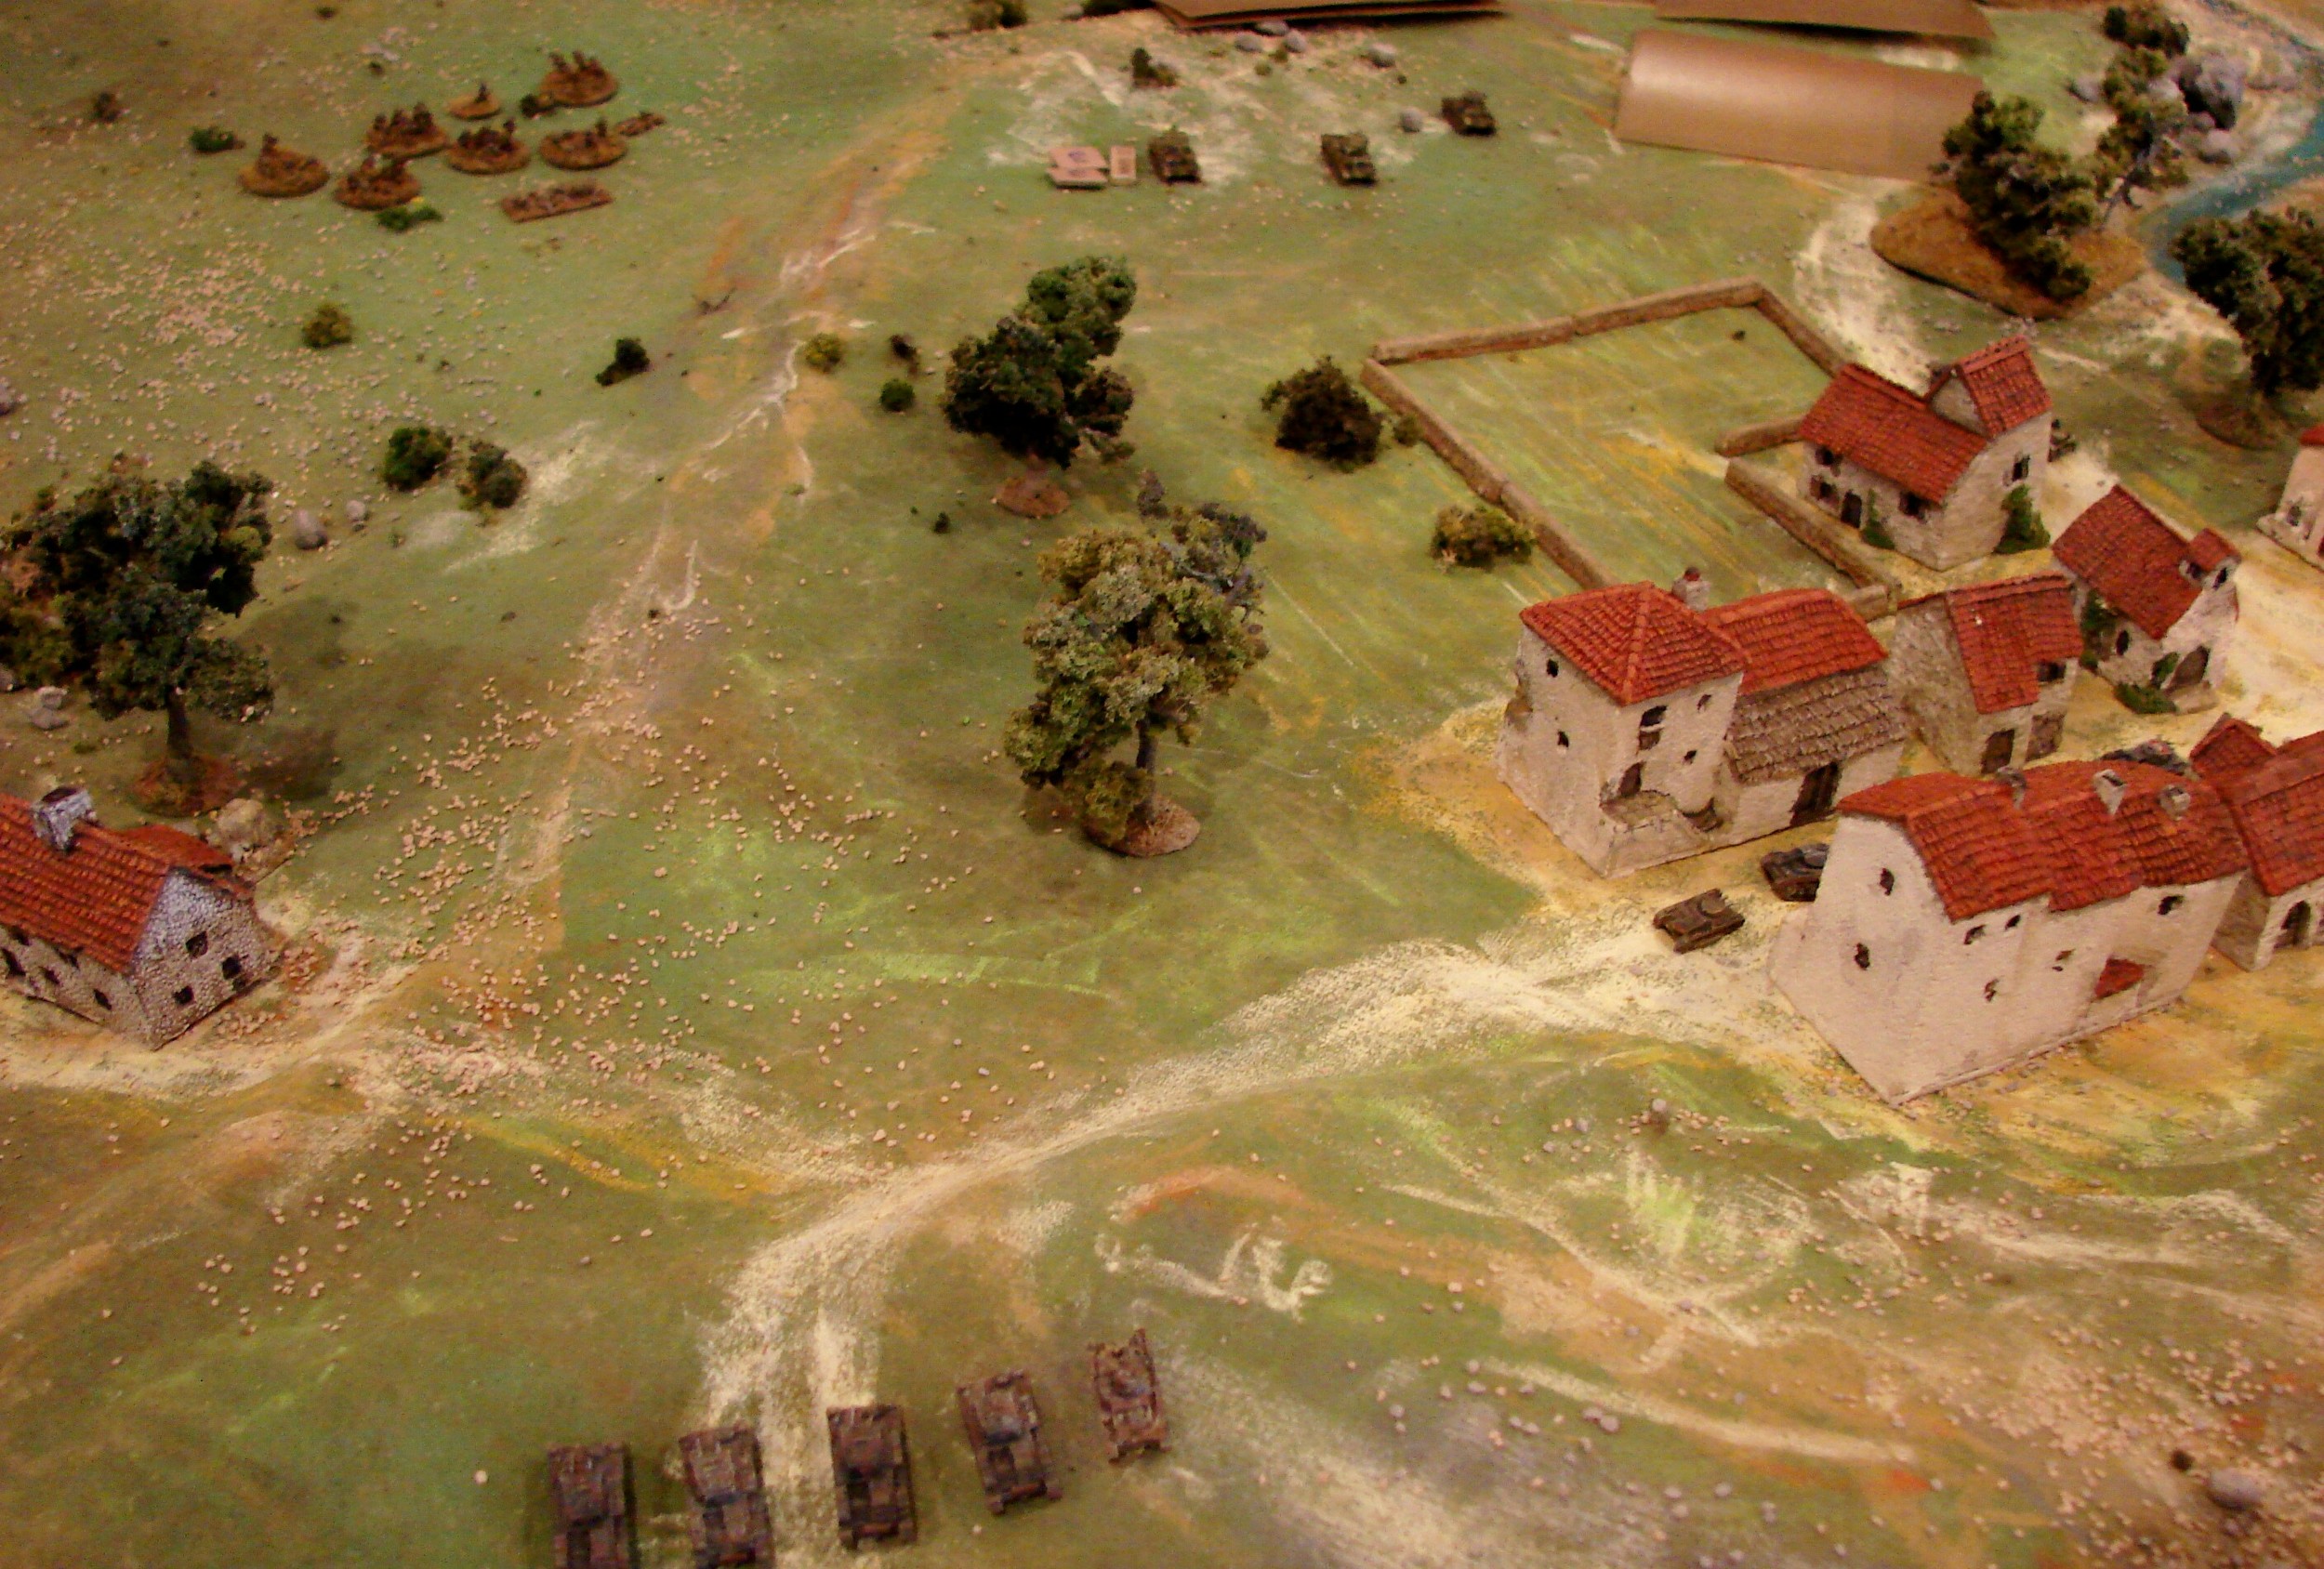
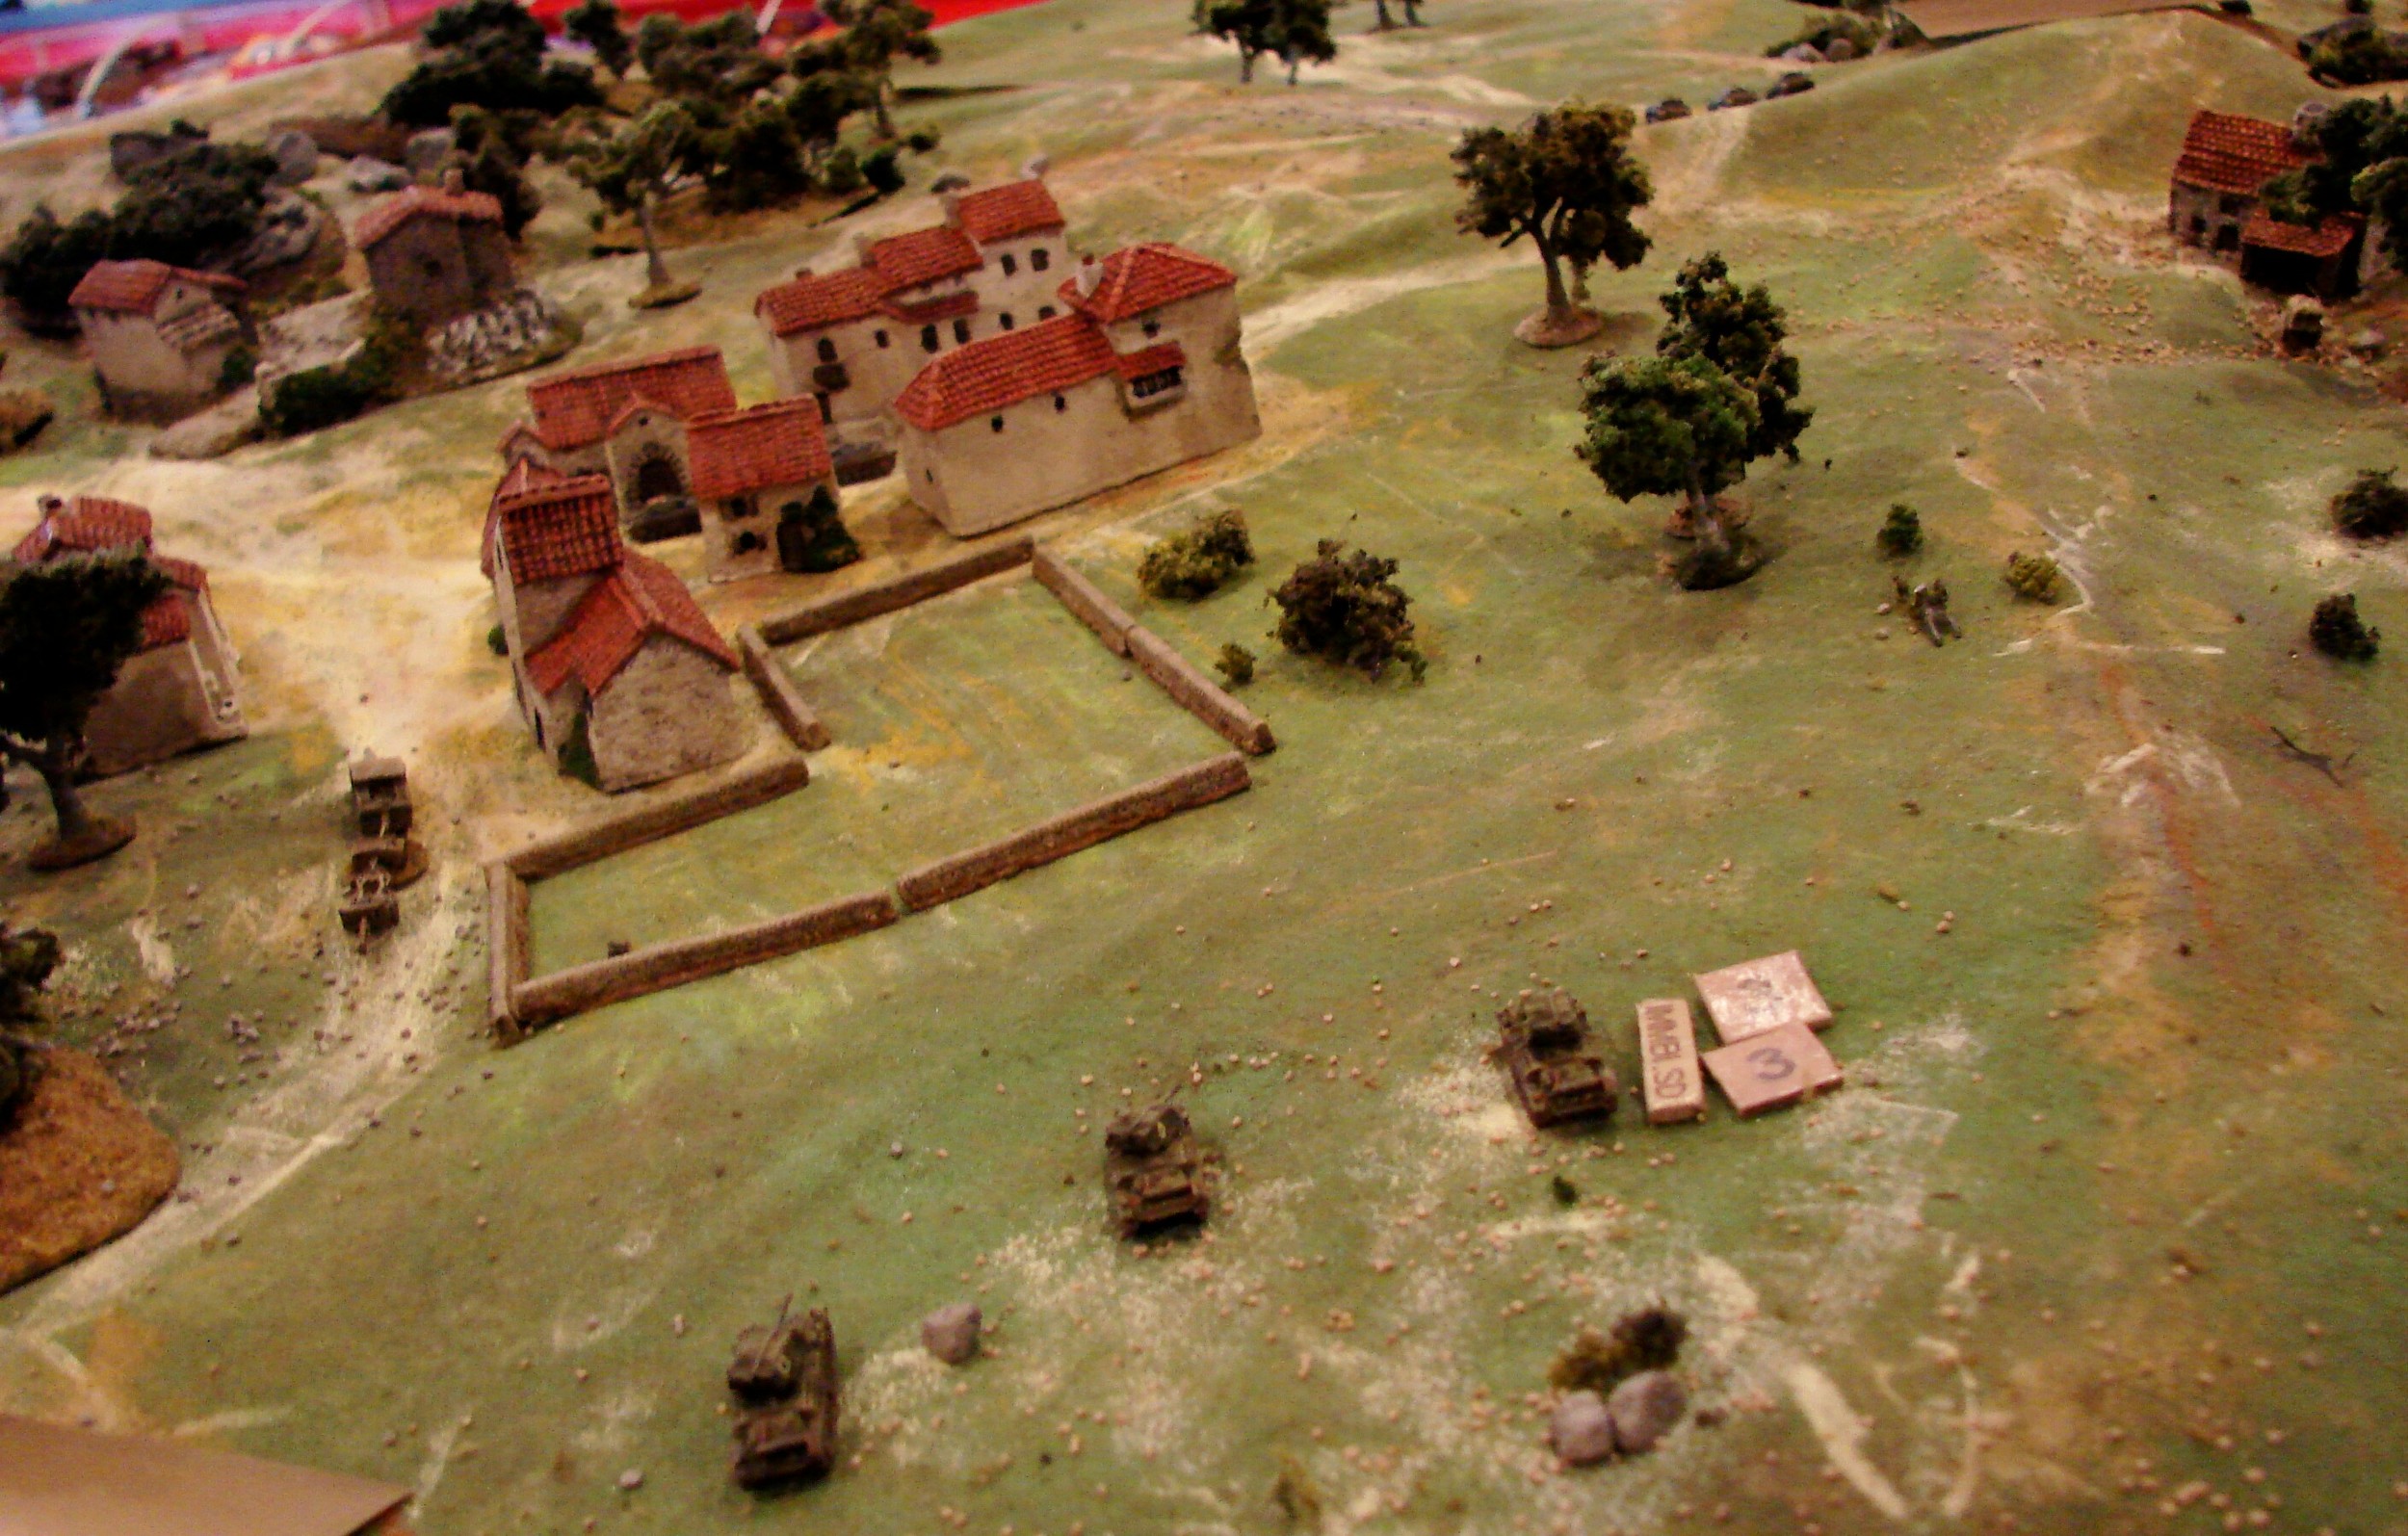
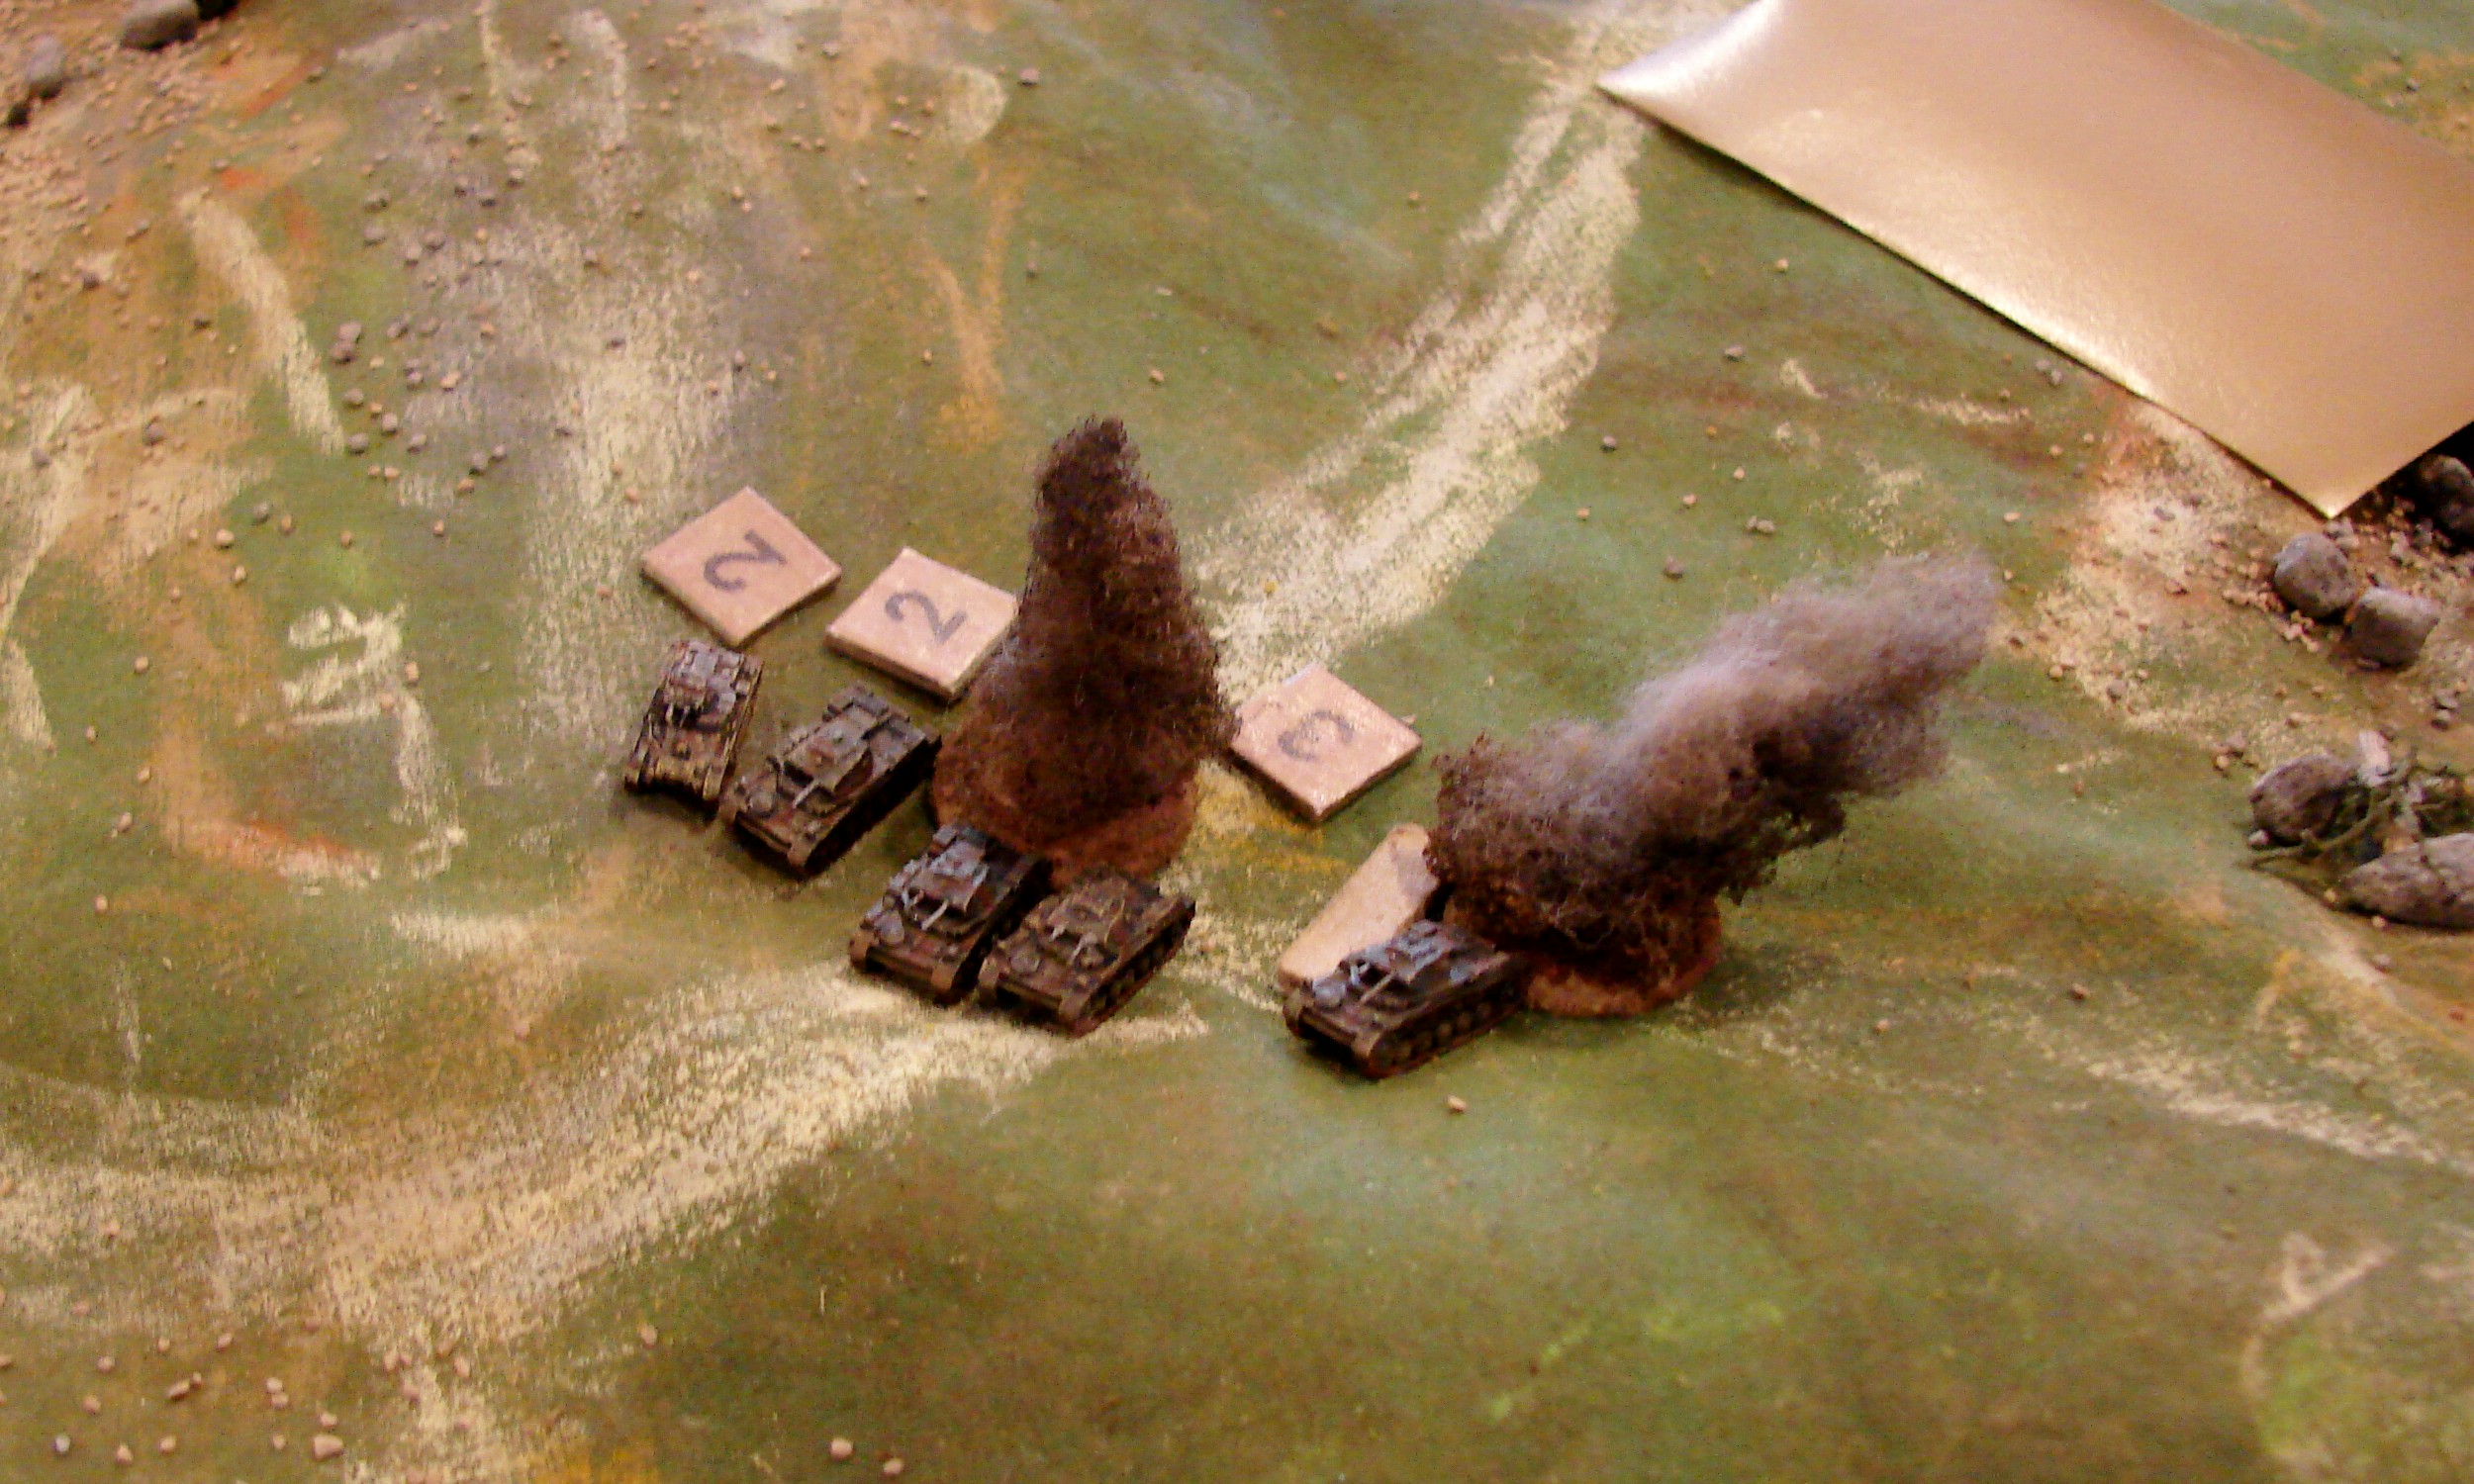
Chris played the German forces and Brian had the task of stopping their breakthrough. Both sides were to receive reinforcements throughout the game, but the numbers were definitely in the Germans' favor.

I had to borrow some of Chris MkVI to go with my BEF armor. The British vehicles were supposedly repainted green for this operation, so that scheme will do. I had to use some Pz I and IIs in the early war camouflage of brown on grey also, so that does look kinda hokey.

Mark Luther

 
  View from the Commonwealth entry corner   The Brits started out with an HQ troop of one A13, two A10 CS tanks, and one MkVIC; a troop of A13s; a troop of A10s; and two troops of MkVICs of the 3rd RTR; a RHA 25 pdr; and a pl

View from the Commonwealth entry corner

The Brits started out with an HQ troop of one A13, two A10 CS tanks, and one MkVIC; a troop of A13s; a troop of A10s; and two troops of MkVICs of the 3rd RTR; a RHA 25 pdr; and a platoon from the Rangers.

Brian brought the armour and 25 pdr in on the road and the infantry came in cross country along the rocky slope in the center of the picture.

  View from the German entry area   Chris came in on the road towards the village. His initial units were; a Pz company HQ unit of one Pz I command tank, one Pz III, and two Pz IIs; and two platoons of Pz IIs and Pz Is; and two platoons of

View from the German entry area

Chris came in on the road towards the village. His initial units were; a Pz company HQ unit of one Pz I command tank, one Pz III, and two Pz IIs; and two platoons of Pz IIs and Pz Is; and two platoons of Pz IIIs. There was also a four-section platoon of infantry and the HQ section in trucks following the panzers.

  Mavropiye   Small village at the foot of the mountains. This would turn out to be heavily fought over as the two sides met there.

Mavropiye

Small village at the foot of the mountains. This would turn out to be heavily fought over as the two sides met there.

  Mavropiye again   The village was on a couple of levels, surrounded by olive groves, mountains and a small stream.

Mavropiye again

The village was on a couple of levels, surrounded by olive groves, mountains and a small stream.

  Another pic of the village   Most of the buildings came from Angel Barracks. Really nice models with some cool details.

Another pic of the village

Most of the buildings came from Angel Barracks. Really nice models with some cool details.

  Players sorting their units out   Chris arranges his blinds in order on the entry road while Brian deciphers his unit list. You can see how the terrain slopes down to the far corner. There are a couple of olive groves and some rocky outcrops scatte

Players sorting their units out

Chris arranges his blinds in order on the entry road while Brian deciphers his unit list. You can see how the terrain slopes down to the far corner. There are a couple of olive groves and some rocky outcrops scattered about. Not the best tank country.

  First sightings   One of the light panzer platoons spots the Rangers moving towards the village and is spotted in return. Chris has some more panzers moving around to his left and Brian has his A10s and A13s moving cross country under blinds. We ha

First sightings

One of the light panzer platoons spots the Rangers moving towards the village and is spotted in return. Chris has some more panzers moving around to his left and Brian has his A10s and A13s moving cross country under blinds. We had one Stuka strike up to this point that missed the blinds on the road by a wide margin.

The German commander:  note to self, do not bunch up tanks. Never, ever, ever again.

The British commander:  British infantry along with some Anzac MG platoon and a sniper moving to occupy the town when the tanks crested the hill. Whoops!

  Panzers in the village   Chris had a good run of cards and with the additional bonus movement cards he easily made it to the village before Brian. This is his lead light panzer platoon poking around the corner.  The British commander was mentally t

Panzers in the village

Chris had a good run of cards and with the additional bonus movement cards he easily made it to the village before Brian. This is his lead light panzer platoon poking around the corner.

The British commander was mentally tendering his commission at this point, though the prospect of settling up his tab at the regimental mess all in one go was far more unnerving than the possibility of a tarnished reputation. But this situation would evolve in his favor ...

  A10s and Light panzers trading shots   The first fire was between the A10 troop and Chris' Light tanks arrayed along a slight ridge. The panzers scored first and took one A10 out.  The British commander:  A10s proved to be more fragile than I'

A10s and Light panzers trading shots

The first fire was between the A10 troop and Chris' Light tanks arrayed along a slight ridge. The panzers scored first and took one A10 out.

The British commander:  A10s proved to be more fragile than I'd hoped. Really got bogged down once they were off the road and the bloody huns managed some damnably good shooting. I say that grudgingly, of course.

  Stray 25 pdr   As the A10s and panzers shoot it out, the 25 pdr headed into town. Fortunately the panzers in the village were spotted so Brian could reverse the gun and get out of trouble. Unfortunately, it was never to get deployed for the rest of

Stray 25 pdr

As the A10s and panzers shoot it out, the 25 pdr headed into town. Fortunately the panzers in the village were spotted so Brian could reverse the gun and get out of trouble. Unfortunately, it was never to get deployed for the rest of the game.

The British commander:  The British concept had been to race the 25 pdr to the far edge of the village to control the road. Since the foothills to the north of the town weren't armor friendly, it was hoped that this move would force the Bosche off the road and onto the broken ground where my A10s and A13s would be waiting. Since the briefing stated that I was not to allow the Germans to cross to the far edge of the table, I thought this would slow them down.

The loss of the 25 pdr pretty much doomed the chance of any significant victory. Best I could hope for would be to stall the German advance long enough for the game to just end.

  A13s and A10s   Two of the A10s are out of action at this point. The A13s begin to engage the panzers on the ridge and a few of the panzers in the village that they can see. The HQ troop is on the road outside of the village.  GHQ models in BEF cam

A13s and A10s

Two of the A10s are out of action at this point. The A13s begin to engage the panzers on the ridge and a few of the panzers in the village that they can see. The HQ troop is on the road outside of the village.

GHQ models in BEF camo. They did repaint the tanks green that went to Greece...so close enough.

The British commander:  Paint job or not, these were "tanks" only because they had treads...the paper-thin armor didn't help them much.

  Sympathetic Damage   The Brits managed to KO two of the Pz IIs and when the middle one exploded, it caused shock to the other panzers. Lesson here is to keep some space between your tanks.  The German commander:  And here is why you never ever

Sympathetic Damage

The Brits managed to KO two of the Pz IIs and when the middle one exploded, it caused shock to the other panzers. Lesson here is to keep some space between your tanks.

The German commander:  And here is why you never ever bunch up your tanks.

The British commander:  Luckiest shot of the game ... or so I thought.

  Sending in the little guys   The HQ troop pulls to the side and lets the two troops of MkVICs charge into Mavropiye to challenge the light panzers. A platoon of grenadiers has also moved into the village and is occupying the row of houses along the

Sending in the little guys

The HQ troop pulls to the side and lets the two troops of MkVICs charge into Mavropiye to challenge the light panzers. A platoon of grenadiers has also moved into the village and is occupying the row of houses along the back of the street.

  Tank battle in a narrow place   Good thing that these are small vehicles that can find parking places. Pretty bold move by Brian but he thought he could swamp the panzers and at that range even the HMG could penetrate,  The German commander:  

Tank battle in a narrow place

Good thing that these are small vehicles that can find parking places. Pretty bold move by Brian but he thought he could swamp the panzers and at that range even the HMG could penetrate,

The German commander:  I figured out why this happened. Brian and I both drive I-285. We just assumed traffic like that is normal.

The British commander:  I think my total disregard for the lives of my men was also a factor.

  Clash of the Titans on a low budget   The MkVIs do a fair job of chewing up the Pz Is and IIs:  especially if they can hit the side armor, but they also receive damage. The HQ troop moves up also.

Clash of the Titans on a low budget

The MkVIs do a fair job of chewing up the Pz Is and IIs:  especially if they can hit the side armor, but they also receive damage. The HQ troop moves up also.

  More Germans   More grenadiers arrive on the table. The Grenadier HQ section is in the lead followed by two Pz IIIs. Another platoon of Pz IIIs has moved well off to the left in the center of the table.  The British commander:  Seeing these gu

More Germans

More grenadiers arrive on the table. The Grenadier HQ section is in the lead followed by two Pz IIIs. Another platoon of Pz IIIs has moved well off to the left in the center of the table.

The British commander:  Seeing these guys come off their blinds, I knew defeat was just a matter of time.

  Action across the table   On the left the platoon of Pz IIIs has come under fire from the A10/13s and lost one tank. The Ranger platoon has tried to make the cover of the gully but the HQ section was caught in the open and lost just about everyone

Action across the table

On the left the platoon of Pz IIIs has come under fire from the A10/13s and lost one tank. The Ranger platoon has tried to make the cover of the gully but the HQ section was caught in the open and lost just about everyone but their CO.

The Panzer HQ platoon has also joined in and is firing at the cruiser tanks. The vehicles that brought up the grenadiers to Mavropiye are also shown on the back of the village. Looks like one has taken a tumble.

  Picking off the Cruisers   The commander of the panzers tries his luck at hitting badly obscured targets and does incredibly well. The two cruiser troops are just about finished now after taking fire from four different units.  The British commande

Picking off the Cruisers

The commander of the panzers tries his luck at hitting badly obscured targets and does incredibly well. The two cruiser troops are just about finished now after taking fire from four different units.

The British commander:  THAT was the luckiest shot of the game. The ref got an earful from the British commander for allowing this. All of it G-rated, of course.

  High traffic area   We really needed a traffic cop here. The grenadiers rush some of the MkVIs and put a couple out of action. The CS tanks put the buildings that the grenadiers were in under fire. The light tanks trade shots. One of the grenadier

High traffic area

We really needed a traffic cop here. The grenadiers rush some of the MkVIs and put a couple out of action. The CS tanks put the buildings that the grenadiers were in under fire. The light tanks trade shots. One of the grenadier sections is trying to work around the village to get at the CS tanks.

  Cruiser junkyard   Two abandoned tanks, two burning tanks, and the remaining two are firing at panzers to the right and center.  Despite having 'broken down' cards in the deck for both sides we had no vehicles immobilised by the rocky Greek terrain

Cruiser junkyard

Two abandoned tanks, two burning tanks, and the remaining two are firing at panzers to the right and center.

Despite having 'broken down' cards in the deck for both sides we had no vehicles immobilised by the rocky Greek terrain.

The British commander:  I blame the commander!

  Rangers in trouble   The main body of the infantry made it to cover in the gully. The HQ section with the light mortar and ATR was caught just outside of cover and was taken out.  The Big Man using the 'heroic commander' card was able to retrieve t

Rangers in trouble

The main body of the infantry made it to cover in the gully. The HQ section with the light mortar and ATR was caught just outside of cover and was taken out.

The Big Man using the 'heroic commander' card was able to retrieve the ATR and took several shot at the Pz IIIs to no avail.

The remaining light panzers from the first group on the ridge line have moved down to spray the men scrambling for cover.

It will take some 'heroic' action to keep this unit from getting destroyed.

The British commander:  Poor movement role put the most valuable unit of this group pretty much out of action. Caught in the open and cut to ribbons. Only the Big Man and a few men would make it to safety with the gun.

  The MKVIs prevail   The MGs on the light tanks cut down enough German infantry to force them back up the hill to where their command element has arrived. And the CS tanks shift their fire up there. The light panzers also have suffered a lot of dama

The MKVIs prevail

The MGs on the light tanks cut down enough German infantry to force them back up the hill to where their command element has arrived. And the CS tanks shift their fire up there. The light panzers also have suffered a lot of damage. Lots of shock among the armor in town.

The British commander:  The fight for the town has turned into a quagmire for the Germans. I was surprised that Chris didn't make a made dash for the edge of the board -- less than 18" from the center of the town. But after those first two Pzs got knocked out, they bottle necked the road. Pretty soon, the only way to go was around the town.

  Last turn   The light panzers make their way down to strafe the Brits in the gully. They still have some shock points from their exploding comrades.  This proved to be too big a game to get all the units on the table in a few hours. There was still

Last turn

The light panzers make their way down to strafe the Brits in the gully. They still have some shock points from their exploding comrades.

This proved to be too big a game to get all the units on the table in a few hours. There was still a couple of panzer platoons coming on--total of five Pz IIIs and three Pz IVs. The RTR still had six more MkVIs, and another 25 pdr section and a New Zealand MG team along with another Ranger platoon was also awaiting their turn.

Overall casualties were one Pz III, two Pz 1, four Pz IIs and twelve grenadiers. The Commonwealth lost two A10s, two A13s and two MKVIs and six Rangers.

Point-wise according to the scenario that works out to 100 points to the Germans and 135 to the Commonwealth when the game was called. However, the Rangers in the gully were about to receive a hurtin'. The best panzers had not yet appeared and would have little trouble with light Brit armour. If the 25 pdrs could get set up they might help to even the odds but then the Luftwaffe had also been markedly absent, so if they started to make an appearance their best target would be the guns.

I would say that this is a tough one for the Commonwealth player to pull off if we were to continue.

The British commander:  Great game, and one more hour of play would've seen the British forces effectively swept aside. There was a massive wave of German armour that was just about to get into the fray when the game ended, and I don't think the Brits had enough reserves coming. The would've been no better than a speed bump. Or should I say "sleeping policeman?"

Note to self: when the author of a wargaming scenario quickly says, "I'll take the Germans" you're likely in for a tough day at the game table!

1 2 3 4 5 6 7 8 9 10 11 12 13 14 15 16 17 18 19 20 21 22 23
Previous Next
  View from the Commonwealth entry corner   The Brits started out with an HQ troop of one A13, two A10 CS tanks, and one MkVIC; a troop of A13s; a troop of A10s; and two troops of MkVICs of the 3rd RTR; a RHA 25 pdr; and a pl
  View from the German entry area   Chris came in on the road towards the village. His initial units were; a Pz company HQ unit of one Pz I command tank, one Pz III, and two Pz IIs; and two platoons of Pz IIs and Pz Is; and two platoons of
  Mavropiye   Small village at the foot of the mountains. This would turn out to be heavily fought over as the two sides met there.
  Mavropiye again   The village was on a couple of levels, surrounded by olive groves, mountains and a small stream.
  Another pic of the village   Most of the buildings came from Angel Barracks. Really nice models with some cool details.
  Players sorting their units out   Chris arranges his blinds in order on the entry road while Brian deciphers his unit list. You can see how the terrain slopes down to the far corner. There are a couple of olive groves and some rocky outcrops scatte
  First sightings   One of the light panzer platoons spots the Rangers moving towards the village and is spotted in return. Chris has some more panzers moving around to his left and Brian has his A10s and A13s moving cross country under blinds. We ha
  Panzers in the village   Chris had a good run of cards and with the additional bonus movement cards he easily made it to the village before Brian. This is his lead light panzer platoon poking around the corner.  The British commander was mentally t
  A10s and Light panzers trading shots   The first fire was between the A10 troop and Chris' Light tanks arrayed along a slight ridge. The panzers scored first and took one A10 out.  The British commander:  A10s proved to be more fragile than I'
  Stray 25 pdr   As the A10s and panzers shoot it out, the 25 pdr headed into town. Fortunately the panzers in the village were spotted so Brian could reverse the gun and get out of trouble. Unfortunately, it was never to get deployed for the rest of
  A13s and A10s   Two of the A10s are out of action at this point. The A13s begin to engage the panzers on the ridge and a few of the panzers in the village that they can see. The HQ troop is on the road outside of the village.  GHQ models in BEF cam
  Sympathetic Damage   The Brits managed to KO two of the Pz IIs and when the middle one exploded, it caused shock to the other panzers. Lesson here is to keep some space between your tanks.  The German commander:  And here is why you never ever
  Sending in the little guys   The HQ troop pulls to the side and lets the two troops of MkVICs charge into Mavropiye to challenge the light panzers. A platoon of grenadiers has also moved into the village and is occupying the row of houses along the
  Tank battle in a narrow place   Good thing that these are small vehicles that can find parking places. Pretty bold move by Brian but he thought he could swamp the panzers and at that range even the HMG could penetrate,  The German commander:  
  Clash of the Titans on a low budget   The MkVIs do a fair job of chewing up the Pz Is and IIs:  especially if they can hit the side armor, but they also receive damage. The HQ troop moves up also.
  More Germans   More grenadiers arrive on the table. The Grenadier HQ section is in the lead followed by two Pz IIIs. Another platoon of Pz IIIs has moved well off to the left in the center of the table.  The British commander:  Seeing these gu
  Action across the table   On the left the platoon of Pz IIIs has come under fire from the A10/13s and lost one tank. The Ranger platoon has tried to make the cover of the gully but the HQ section was caught in the open and lost just about everyone
  Picking off the Cruisers   The commander of the panzers tries his luck at hitting badly obscured targets and does incredibly well. The two cruiser troops are just about finished now after taking fire from four different units.  The British commande
  High traffic area   We really needed a traffic cop here. The grenadiers rush some of the MkVIs and put a couple out of action. The CS tanks put the buildings that the grenadiers were in under fire. The light tanks trade shots. One of the grenadier
  Cruiser junkyard   Two abandoned tanks, two burning tanks, and the remaining two are firing at panzers to the right and center.  Despite having 'broken down' cards in the deck for both sides we had no vehicles immobilised by the rocky Greek terrain
  Rangers in trouble   The main body of the infantry made it to cover in the gully. The HQ section with the light mortar and ATR was caught just outside of cover and was taken out.  The Big Man using the 'heroic commander' card was able to retrieve t
  The MKVIs prevail   The MGs on the light tanks cut down enough German infantry to force them back up the hill to where their command element has arrived. And the CS tanks shift their fire up there. The light panzers also have suffered a lot of dama
  Last turn   The light panzers make their way down to strafe the Brits in the gully. They still have some shock points from their exploding comrades.  This proved to be too big a game to get all the units on the table in a few hours. There was still
BACK