

The action for this week's game in our Eastern Front campaign takes place in central Yelna, November 1941.
Our campaign is taken from Rob Avery's excellent "Vyazma or Bust" campaign supplement, and available from Too Fat Lardies for their WW2 rules, "I Ain't Been Shot Mum". I cannot recommend this too highly even if IABSM is not for you the scenarios are easily convertible for most WW2 rules.
The German commander Jez Davies, had orders to drive into the centre of Yelna and capture the square, which will enable the Germans to control the main access points and bring up reinforcements at will.
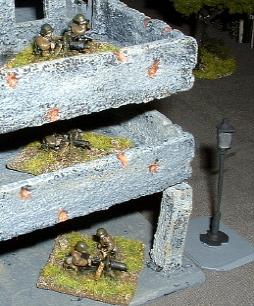
The entire table (below) is full of buildings with towards the centre a square, in which incidentally I decided to put JR Miniatures Stalingrad range fountain.

To defend the centre of Yelna against the forces of Kampfgruppe Davies I had four Big Men with two reduced Companies of Soviet Infantry; four Platoons of three ten-man squads in total, with one AT rifle attached to each Platoon. In support were two MG Platoons each of three Maxim MMG's, two snipers, two 45mm AT guns and the surprise package even a T-35! I also had limited off-table artillery support from a four-gun 122mm battery. A formidable force on paper. However, the infantry were rated as 'Poor' troops (so far in the campaign my troops were all rated 'Good') and I make all Soviet armour and guns 'Green/Raw' for 1941 anyhow to reflect the lack of training and inexperience of the crews. T-35's are big and look impressive, but in fact are quite crap, being slow and poorly armoured and are bloody big to hit. In practice then my force was numerous but poorly trained and equipped. This was going to be another close one!
I had strewn various rubble, clutter and large craters across the table to provide aesthetics, period feel and obstacles for the Germans to hide behind, as well as a large number of ruined buildings. There were plenty of roads both, wide and small, to allow movement for vehicles but a number of roads were barricaded as per Rob's scenario notes.
I was tasked with holding the town and in particular the square. In the scenario the Soviets are permitted to deploy anywhere east of the most westerly road. In practice this was within 6-9" of the western table edge. I decided that my best deployment involved me protecting the eastern half of the town initially with the majority of my troops whilst occupying forward positions in the north with an infantry Platoon and south with a Maxim Platoon. Hopefully this would encourage the enemy to advance into the centre towards the Square, passing a large warehouse where my artillery was zeroed in. Pinned by the artillery and adjacent snipers, who would be tasked with potting off Big Men in an attempt to rob Jez of his superior command and control, German movement would bog down before the enemy could occupy the square.
Kampfgruppe Davies consisted of a six Big Men with a HQ SdKfz 251/10 halftrack and AT rifle, two Platoons each of four eight-man infantry sections, a Support Platoon of three MG34's and two 81mm Mortars. Three ten-man engineer sections mounted in three SdKfz 251/7 halftracks, two StuG IIID and two Sturmpanzer I 'Bison', 15cm sIG33B self-propelled guns completed this powerful force. His infantry were Line Troops and generally good but the Pioneers in particular were hard bastards who would prove very troublesome.

First a question...
Ever had one of those IABSM games where you can't really blame the dice, nor the order of the cards drawn for your defeat?
Pure and simple you just screwed it up! This was one of those games for me.
Fighting in an urban setting is a nightmare. The scenery seems to suck up troops like a sponge and its easy to lose all momentum. IABSM handles streetfighting superbly in a way which other WW2 rules I've used don't. IABSM captures all the 'feel', uncertainty and savagery of close fighting making games in an urban setting my personal favourite.
Initially, the German blinds advanced quite cautiously onto the table across the entire length of the western table edge. Units on blinds have four initiative dice in IABSM and as they tentatively edged forward they spied the buildings expecting an ambush at any point. I had 'refused' all along the front to allow them to be sucked in. However, the Germans spotted my northern most infantry Platoon and moved into occupy the warehouse in the centre of the table. Rolling a 12 they also managed to spot one of my snipers across the square. This is one of the only times either of us could recall a sniper had ever been spotted in IABSM!
In the south of the table I managed to spot the halftrack mounted HQ and Engineers moving along the road eastwards. They de-bussed and moved into buildings adjacent to the warehouse complex. With their last initiative dice they also spotted three of my Maxims in a adjacent three storey building.
As my 'Blinds Move' chip came up next I could activate the Maxims as at the beginning of the turn they had been on a blind. All three opened up a hail of withering fire upon the Engineers who picked up a couple of kills and several wounds. 'Wounds' (- negative cohesion points) are as important as kills in IABSM as they reduce all movement by -1" per wound and -1 on the total when firing. Without removing wounds by using Big Men and 'Rally' chips things can grind to a halt very quickly. The effect of wounds upon troops firing in an urban setting is exacerbated. Rob's scenario called for a die to be used to enter and leave a building. I decided that moving in rubble would also result in a -2 for movement.

My own troops were hidden amongst the ruins. Their main disadvantage was that being rated as 'Poor' they only possessed two initiative dice at full strength dropping to only one after losing only two men. It was important for me to move whilst unspotted on 'Blinds Move' as it allowed a maximum of four initiative dice to be spent on movement. I hoped that I would be able to coordinate and move my reserves quickly to where they were needed most whilst spotting the Germans and forcing them to move in an uncoordinated manner. However, once a unit, which is hidden in cover, moves a blind is placed on the table to indicate its presence. If I moved my reserves too soon the Germans would know what was happening.
Across the street from the Engineers another Soviet Infantry Platoon opened up causing more wounds upon them but also upon the enemy occupying the warehouse complex. Things were grinding to a halt as per my plan.
Whilst on 'Blinds Move' I decided that my CO should call in artillery upon the warehouse complex and its Platoon of enemy infantry. Soviet artillery arrives after its chip is drawn three times so it was important to call early for it. Unfortunately, it has 3D6 deviation and can be wildly inaccurate and a double edged sword. Nevertheless the call was made.
I also managed to spot the German support Platoon of mortars and machine guns occupying a house and its garden on Jez's baseline and more importantly another German Platoon which had seized buildings adjacent to the north of the warehouse. Jez had managed successfully to take and hold the centre despite my best efforts, a mere stone's throw from his objective; the square.
Things didn't seem to be improving when I spotted Jez's Bison self-propelled 15cm howitzers. These are really nasty pieces of equipment, and damned useful for prising infantry out of buildings.
A 45mm AT gun dug into a factory, on the eastern side of the square, issued a sharp retort as its shell sped westwards and straight into a Bison. Suffering potential engine damage the Bison replied the very next turn however. The 15cm shell slammed into the factory as the Bison kicked more like a mule! The walls shook dangerously as they registered a critical hit. In IABSM, when firing at buildings if more ones are rolled than sixes for fire effect the building is deemed 'unstable'. Three ones and the building collapses, killing all its occupants. In addition we like to count unstable hits accumulatively, progressively weakening buildings to the point where it is near suicidal to enter them. Being in an unstable building forces the occupants to leave the building temporarily next time their respective chip is drawn.
The game progressed with the 'Tea Break' chip being drawn quickly resulting in lots of sporadic, short range firefights of which my infantry Platoon and the German Engineers had the worst of. Most IABSM games I've played seem to enter this phase. It represents the kind of lull in fighting which reading of historical testimonies will support. All close range units whose card has not been drawn may engage in short range fire. Where opposing troops have moved into cover and are in close vicinity this can be disastrous as successive firefights can strip units of men and the will to manoeuvre as they accumulate wounds quickly. It is then that Big Men must step into the limelight and motivate their men into activity which can often swing a game.
Anyhow, the German support Platoon was soon doing its stuff. 81mm mortar bombs rained down upon my infantry Platoon south of the warehouse. One MG34 targeted my luckless AT gun killing one crew member and inflicting two wounds, another fired at my poor sniper despatching him to the great Gorky Park in the sky. Luckily I had two snipers and the second was to have a great effect, more of which soon. The third German MG, with Big Man attached, moved up to support the much depleted Engineers.
Jez also spotted another unit of three Maxims in another factory adjacent to the north-east corner of the square. These had reserved dice and opened up on the German Infantry Platoon opposite which had manoeuvred to take the buildings north of the warehouse complex, causing a string of casualties.
Jez then revealed two StuGs which journeyed northwards to support his left flank and began to fire (and albeit miss) at the Maxims and attached CO.
I decided that I had better start to move up my reserves and so, upon my next blinds chip, moved two infantry Platoons towards the centre, their blinds being placed upon the table. I also decided to unleash my T-35. Moving towards the square, no German unit was in a position to spot it so after all my blinds had moved I announced to Jez that he could hear tank engines and tracks grinding.
The rare T-35 had five turrets and numerous MG's but was poorly armoured (at only effect 3 in IABSM) and ponderously slow. It was also liable to breakdown. Mine is an old Battlefront one and this is the first game I've ever used it in!
Suddenly 122mm shells started to fall upon the warehouse complex, my artillery support had arrived. Rolling a hit dice initially the shells missed their target and had fallen short, but how short? Rolling three D6 I rolled a four in total, whew! Having a 7" blast radius the shells hit three Infantry sections, a StuG and a Bison...good shooting comrades! The StuG suffered minor damage but the Bison was permanently immobilised but the real damage was done of Jez's infantry. Being pinned and accumulating further wounds they were robbed of being able to move into the square, which they had been poised to do. Jez's luck ran out too for an Infantry Platoon's Big man who, doubtless raised his head to gaze at his unfortunate Kameraden in the warehouse, was felled by a deft shot from my remaining sniper.
So, the meat grinder of a game rolled on still further. By now my Soviets were in a dire situation. Wounds had been accumulated everywhere but things were about to get much worse.
Rolling a lucky seventeen Jez ensured one of my Maxims was destroyed in the factory.
As his MGs continued to fire across the square the Engineer halftracks continued to fire upon my Maxims killing one causing further wounds. An Engineer section, lead bravely by its Big Man assaulted a Soviet held building, keen to break the deadlock. Outnumbered, and rated green, my men fought tooth and nail against the highly motivated and Elite rated engineers. The Soviets stoic defence could not be maintained though and predictably the building fell into the hands of the enemy at its defenders demise.
The air was filled with tremendous explosions as yet again my Artillery arrived. Missing but only just the shells fell onto the warehouse yet again, pinning the infantry and further damaging the Bison.
Jez's StuGs by now were targeting the factories effectively and had killed yet another Maxim MG.
The Red Airforce suddenly appeared and strafed the victorious Engineers to little effect.
Basically to the north of the warehouse the German Infantry had suffered 40% casualties and had only one effective section remaining. The others clung desperately to the buildings. However, they had successfully tied down a Soviet Platoon and three Maxims and had essentially won through the attrition they had caused. I had actually suffered less casualties but as most of my units were down to only one initiative dice there was very little I could do.
When blinds move next came up I moved my remaining infantry platoons to the factories east of the square in preparation for their assault upon it. At 'Tea Break' I announced that the next move would be the last move as we had been at it for the usual three hours. I also placed my reserve infantry on the table and placed my respective relevant chips in the hat. Jez's German troops in the warehouse complex, at last unpinned, with their chip coming up first decided to make a bold move on the square. Assaulting a shellhole occupied by an AT rifle, a section of German Infantry quickly despatched him and hugged the ground which was their objective. My T-35 fired a MG at them without much effect and then Jez drew the "Tea break' chip from the hat. Game over! Short range fire from units which had not been motivated caused a couple of casualties but Jez's troops had made it!
Game over. Jez had won in the last gasp. I had badly mistimed it. I had hoped, and could reasonably have expected, that at least one of my units adjacent to the square would have seen its chip drawn and have been able to move in to occupy it.
Jez had got the jump on me though and to be fair had planned and timed it well. He had taken his time throughout the game, supported each move as well as possible, used his weapons capabilities to the best effect and had ground me down.
I had caused many casualties and held him up effectively throughout the game but I had been sadly lacking in tactical acumen and had left it too late to be able to win the game. I had relied too much on my artillery to pin him down and should have moved my forces up earlier.

So game lost I had lost the campaign too. Yelna had fallen and the action would move to the outskirts of Vyazma and the Germans ultimate objective. The next game would result in either a Total, or Major, German victory and the extent of which would depend on how well I fought it.
So next time scenario 5D, the last battle - The Outskirts of Vyazma
Kev