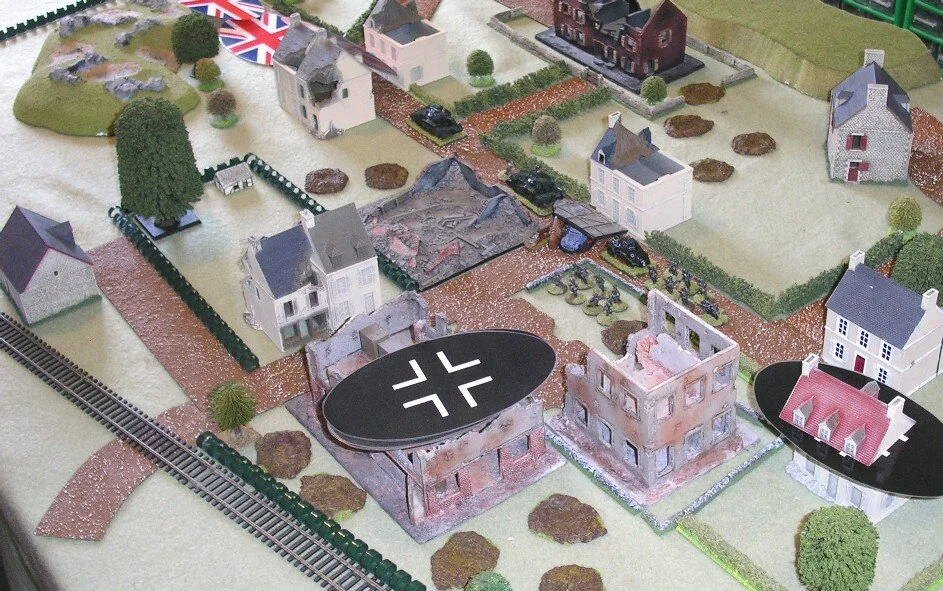
On The Road To Gravelines is the fourth scenario from the Defence of Calais scenario booklet. It covers the British attempt to get a convoy of trucks from Calais through to Dunkirk out along the road leading north-east from the town to Gravelines. You can read an extract from the scenario on the "Buy Stuff" pages.
The game began with the British convoy, headed by a couple of A13 Cruisers and a platoon of Rifles hitting a German barricade guarded by a couple of squads of infantry and an armoured car. I was playing the British. The lead A13, with Big Man Major Foyle on board, and the enemy armoured car immediately opened fire on one another at just about point blank range. The armoured car suffered an immediate engine fire, but managed to knock a track off the A13, immobilising it! A serious loss for the Brits. Meanwhile, the two German squads scattered into nearby buildings, desperately calling for reinforcements.
One squad managed to get close enough to the immobilised A13 to chuck grenades at it, all of which proved too much for the crew, who promptly bailed out and ran back down the road to Calais! By this time, however, the 1st Platoon of Rifles had managed to get a couple of sections into houses looking down onto the barricade, and did some serious casualties to the tank-busting Germans. The other A13, "Ram", had moved off the road to the left, looking for some way of getting past the barricade, now effectively doubled in size because of an abandoned British tank! Major Foyle took advantage of a Dynamic Move card to jump on board Ram.
Both sides spent the next turn or two bringing up their other forces. The British trucks scattered off the road into cover, still under Blinds, making way for the small 2nd Platoon of Rifles to come through from behind. The Germans revealed two full Platoons of infantry, supported by a couple of MMG's and loads of Big Men.
On the right of the main road, the Brits prevented the Germans moving up the flank by placing a section of infantry and the main force commander behind a house that dominated that sector. Unfortunately, although it covered the flank, this force was effectively pinned in its position as the Germans moved forward their two MMG's and a couple of squads of infantry: if they moved out from behind the house they sheltered behind, they would be riddled with bullets! This meant that they played no further part in the battle!
The Germans had also moved two squads of infantry way to the left of the road, either trying to outflank on this side or concerned about what the British Blinds might be (a convoy of trucks makes a significantly large collection of Blinds!). Unfortunately, they ran straight into A13 "Ram", and one squad was brutally Besa'd down. I should perhaps mention at this point that the British tanks had no HE on board, so the British commander was beginning to wonder just how he was going to shift the German platoons from their buildings!
At this point the German armoured car raised its ugly head again. If you remember, it had suffered an engine fire at the hands of the first A13. That fire had flukily been extinguished and, eager to KO another British tank, the SdKfz222 rushed forward and placed itself right next to "Ram"'s flank! Whose card would come up first? Well, it was "Ram"'s and with a ponderous creaking noise, its turret turned slowly to the side and blew the armoured car into its component parts!
Meanwhile, the British 2nd Platoon had moved up, two sections strong and led by a Big Man. They occupied a school near where "Ram" was disposing of the armoured car, and had badly shot up a German section in a nearby house with a devastating accurate barrage of rifle and LMG fire which also killed the Big Man with them. This was too good an opportunity to miss, so out of the school thundered the platoon, across the gardens, and engaged the pinned down Jerries in a bit of close combat: winning the ferocious hand-to-hand fight and turfing them out of their abode. Well done the Rifles!
This proved, however, to be the high watermark of British success. Although 1st Platoon (3 sections strong, but with one section pinned in position to the right) had successfully been engaging the other German platoon, there were just too many damn Krauts to make a breakthrough: especially when the first of the German reinforcements arrived: three PzIII's! "Ram" managed to take out one of them (six consecutive hits!) but was then crippled by an infantry attack from the flank. One MMG was reduced to a single crew member, the German sniper and another Big Man killed, but it just seemed that whenever one German was killed, another two popped up in his place. Reluctantly Major Hamilton ordered the convoy to retreat back to Calais, covered by the remaining Rifles, and then broke contact himself.
This was, despite the vast disparity in forces, a really, really good game: proving that you don't need some points-system-fair-fight to enjoy yourselves! The action was firmly based on historical fact (if you knew the time it took me to find a contemporary map of the Calais/Gravelines road!) and followed history fairly accurately: the Brits unable to break through due to sheer weight of German numbers, but surprising their enemy with the ferocity of their fighting. A great game, even if I lost!
More pictures are in the gallery, below:
Robert Avery


