

Although the initial Allied landings at Anzio in early 1944 took the Germans completely by surprise, they reacted quickly and had soon managed to find enough troops to form a ring of steel around the Allied beachhead. Once the invasion had thus been contained, the Germans gradually began pushing the Allies back towards the sea.

The remains of Aprilia or the Factory. Note the open terrain on all sides.
A significant part of this stage of the fighting took place around Aprilia, known to the Allied troops as the Factory. This was in effect a "new town" plonked down in the middle of the Anzio plain as part of the Mussolini regime's pre-war plans to increase Italy's industrial base.
The Germans began their main counter-attack towards the Factory on the night of 8th/9th February with a devastating thrust towards Aprilia by the Gräser and Schönfeld Battle Groups. This attack fell on the London Irish, holding the town; and the 10th Royal Berkshires, holding the ground to the east; and followed the usual pattern of an outflanking manoeuvre followed by an attempt to roll up the British line.
The London Irish were forced back to the walls of the Factory but counterattacked and regained some of the lost ground. The Royal Berkshires, fighting fiercely but outnumbered about eight to one, were gradually forced backwards and by daylight, according to the battalion’s war diary, consisted only of “Battalion HQ, two sections of C Company, and a few carrier and mortar personnel, totalling forty men in all”.
By 9am, 725th Grenadier Regiment had worked its way down the western side of Aprilia, with 29th Panzer Grenadier Regiment driving down the eastern side. With the Berkshires now effectively hors de combat, and 735th Grenadier Regiment posed to smash into the northern side of the Factory, London Irish had no choice but to withdraw as well.

The British line, bloody but unbroken, reformed along the southern outskirts of Aprilia: with London Irish (about two companies-worth were left) on the left, London Scottish brought forward on the right, and what was left of the Berkshires behind them. Again the Germans could have continued to drive forward and perhaps wiped out the troops in front of them, but the fierceness of the British defence meant that they were content to have taken Aprilia.
That's part of the background to scenario #13: Aprilia from my Anzio: Wildcat to Whale scenario pack for I Ain't Been Shot, Mum, the subject of last night's game.
The Game
The battle would represent the advance of the 725th Grenadier Regiment down the western side of Aprilia/the Factory in the face of determined opposition from the London Irish. Although a part of the table will represent the battered buildings of Aprilia itself, occupying or moving through these ruins would be very dangerous, as both sides have artillery that has zeroed in on the individual structures and can be called in with little delay.
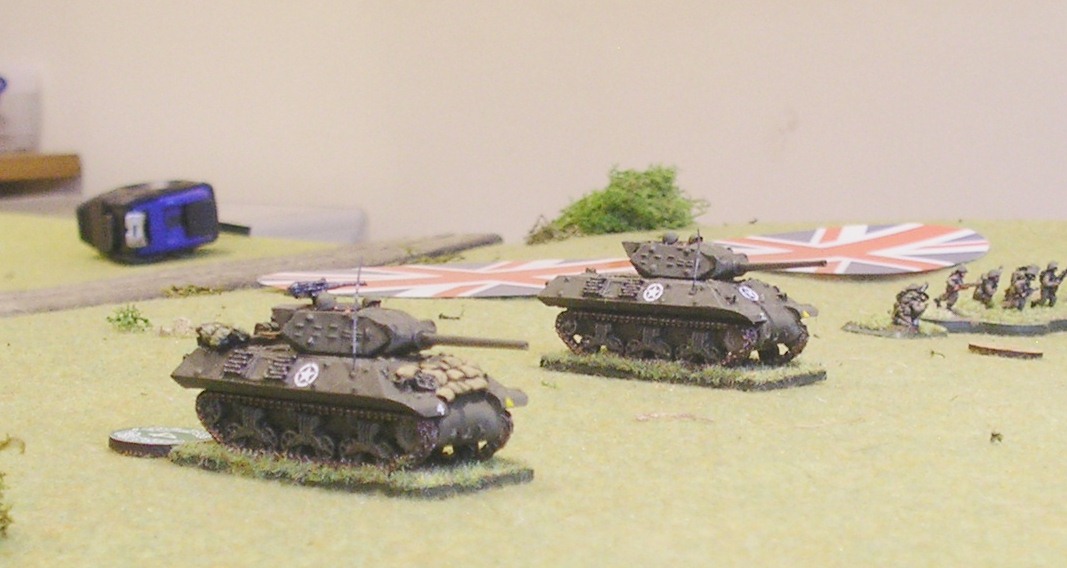
I would play the London Irish, and start the game on table under Blinds about half way up the table. My force consisted of two full platoons of regular infantry (each with a PIAT team), a small one-squad Company HQ, and two American M10 Wolverines from 894th Tank Destroyer Battalion.
Advancing onto the table would be Bevan's German force: four veteran infantry platoons supported by a couple of medium machine guns, two Panthers and two StuGs.
The table itself was largely flat, but with one side taken up by the outskirts of the Factory. This tested my terrain cupboard to the limit, but I eventually managed to create an 8 foot by 18 inch strip of industrial looking buildings along what was the British right flank. Each building was numbered, with the most senior Big Man able to call in off-table artillery with little deviation onto a specific building. Troops thus had the choice of either moving over open ground or risking 'death from above' in the Factory itself.
The ground was very open but, significantly, there was a gentle hill towards the British end of the table. It had a slight ridge on it, possession of which would become the focal point of all the fighting.
The picture, above, shows the initial British deployment. The closest two Blinds are my infantry platoons. The line of four behind them are Dummy Blinds designed to keep the Germans from just smashing forwards over the ridge. The two Blinds at the back are my tank destroyers and Company HQ.
Each sides' objective was simple: mine was to stay on the table, Bevan's was to push me off.
The Action Begins
My plan was to hold a position along the very slight ridge line and shoot the Germans as they came forward. The infantry would be 'two up, one back', prone and ready to shoot; the tank destroyers would 'shoot 'n' scoot' backwards and forwards over the ridge; and my Company HQ would wait in reserve to see where it was needed. I ignored the Factory as I couldn't really afford to lose any troops to artillery there.
The German plan was to launch a combined arms attack down the centre of the battlefield with his armour and three platoons of infantry whilst his fourth platoon made its way through the Factory itself in an attempt to outflank the British line. The toughest German troops were the two Panthers, so they were 'front and centre' as the main assault force.
The Panthers and StuGs, out front, were very quickly spotted, along with one infantry platoon and one British platoon. This meant that the chip bag (I was using poker chips rather than cards for unit activation) very quickly became flooded with chips, allowing the German Blinds chip to very successfully hide in the recesses of the bag for most of the rest of the game. Bevan couldn't complain, however, as he was pulling the chips!
What this meant in game terms was that the next, major phase of the battle involved two Panthers, two StuGs and an infantry platoon trying to get over a ridge held by a platoon of infantry and two tank destroyers.
I immediately made things a bit easier for Bevan by failing dismally in a "shoot 'n' scoot" attempt with one of my tank destroyers. Yes, it shot forward and acquired a target, but it missed its shot (or the shell merely scratched the Panther's paintwork, I forget which) but then the driver must have mashed the gears because it failed to pull back far enough to be in cover. One Panther fired and, against the much thinner tank destroyer armour, did enough damage to force the M10's crew to bail out.
On a positive note, however, my infantry were keeping his single platoon's heads down, meaning their advance was very slow and quite painful, and the threat of the other tank destroyer was making his armour think twice about just rolling forward over the ridge. They did, however, gradually move up until only a matter of some 100 yards separated the two sides, which was close enough for me to risk my PIAT team (the chaps with the 'ring of death' in the picture below) in an attempt to take out one of the Panthers by crawling forward over the ridge: in the picture, below, the German infantry squad is about to be driven backwards by the combined fire of my two squads, and the Panther is about to advance level with the PIAT team.
It was a beautiful shot: right into the Panther's side armour, but you'll see from the inset, above, that the Panther was obviously one of the well made ones, and the spigot-fired shell just bounced right off it! This left the position as shown, below: with the German armour moving in on my one remaining tank destroyer and ignoring my other Blind.
Now, if you look carefully at the picture to the right, you can see a German Blind with a little "boom" marker on it in the factory building top/centre. This was a German infantry platoon that had gradually been making its way up the table through the Factory, chased by my off-table artillery who, up to now, had always managed to land on the building they had just vacated.
Unfortunately, their luck had eventually run out: the "boom" marker represents the fact that they had taken a round of artillery fire, the effect of which would be worked out when they deployed.
Well that was now, as Bevan, unwilling for them just to sit and suffer more artillery fire, charged them out of the Factory straight at my Blind. This initiated a massive Close Combat with me rolling something like thirty dice and the Germans, despite the damage from the artillery, rolling something like twelve dice. That's the sort of ratio you get when you charge an un-Pinned or -Suppressed unit across open ground! The situation was made worse when Bevan rolled not a single kill on his twelve dice, meaning that as I had rolled quite well, the German infantry platoon just evaporated!
Meanwhile, towards the centre of the field, my PIAT had finally managed to do some damage to the nearest Panther: blowing a track off it so permanently immobilising the beast. I just needed one more point of Shock to force the crew to bail, so decided to risk an infantry squad in a desperate charge onto the behemoth's flank. Did I say desperate? I meant stupid! Normal infantry, not tank killers, even with a Big Man, barely scratched the Panther's paint work, and its machine gun then played havoc: killing my Big Man and halving the squad!
That left the battlefield looking as shown in the two pictures, below:
View from the Factory
View from the German Company HQ
Apart from losing a tank destroyer and a squad of infantry with Big Man, I wasn't feeling too bad at this point. I could see the game was still on a knife edge, but if I could kill his armour, or at least immobilise the other three AFVs, then I could hopefully deal with his infantry piecemeal. Unfortunately, at that point the German Blinds chip returned from its holiday, and Bevan immediately smashed forward another two platoons of infantry and the two MMGs of his Company HQ. Worse, his remaining Panther, doing what he should have done some time ago, crashed over the ridge andtook out my last remaining tank destroyer.
This changed matters considerably, but the PIAT team from my other infantry platoon, having survived the earlier melee, went into overdrive: blowing one StuG up and permanently immobilised the other. By now, I'd had to commit my reserve to shoring up my left flank, so this left me with two platoons of infantry (one slightly battered, one at about two-thirds strength) and a couple of PIATS versus two and a bit platoons of infantry, two MMGs and a Panther.

Unfortunately, my men on the left were still manning the ridgeline, and an unfortunate run of chips meant that they suffered badly from the two Panthers' machine guns (I still had't managed to kill or bail the immobilised one) and the combined fire of a platoon of infantry. Even under cover, this point blank barrage was enough to severely reduce the platoon.
With three of his four vehicles immobilised, I decided that now was the time to retreat back from the ridge, and hope that I could hold the ground further back. The remaining Panther was a problem, and the fact that I now only really had one functioning squad on the left was a problem, but I still had one and a half PIAT teams and a pretty unscathed platoon of infantry.
Aftermath
At this point, having been playing for about three hours, we called the game. Although at this point it was technically a British victory, I couldn't actually see that I would have eventually won. Had I been Bevan, I would have let me do what I like on the other side of the ridge whilst I brought all my men and machine guns up, plus the Panther, then taken up my own position on the ridge and blasted down at the Brits until nothing moved. That would, however, have been quite a long and boring process, so we agreed to call it a draw, although I think I was lucky to get away with that...my conscience dictates that I confess that it was at best probably a losing draw for me!
Here's what happened historically (again from the Anzio scenario pack):
By 9am, 725th Grenadier Regiment had worked its way down the western side of Aprilia, with 29th Panzer Grenadier Regiment driving down the eastern side. With the Berkshires now effectively hors de combat, and 735th Grenadier Regiment posed to smash into the northern side of the Factory, London Irish had no choice but to withdraw as well. The British line, bloody but unbroken, reformed along the southern outskirts of Aprilia: with London Irish (about two companies-worth were left) on the left, London Scottish brought forward on the right, and what was left of the Berkshires behind them. Again the Germans could have continued to drive forward and perhaps wiped out the troops in front of them, but the fierceness of the British defence meant that they were content to have taken Aprilia.
All in all a cracking and hard-fought game that both sides were convinced they were losing right up to the final moments!
Robert Avery