

As part of a counter-attack that had already thrown the Germans back some twenty kilometres, the Polish 16th and 26th Infantry Divisions crossed the Bzura river near Lowicz on the morning of 14th September 1939, and the Polish 4th Infantry Division reached the road linking Lowicz and Glowno. At this point, however, the retreating Germans were re-inforced by the 4th Panzer Division, which had been withdrawn from the fighting in the outskirts of Warsaw, and launched a counter-attack of their own against the advancing Poles. This battle would recreate the encounter battle that followed.
The Game
Each side would begin the game with half their available platoons on table under Blinds within their deployment area. Once initial moves were out of the way, each time a side’s Blinds card appeared, they could roll a D6 to see if one of their remaining units arrived: with a roll of 1-3 meaning that one off-table platoon arrived on the road at the back of the appropriate deployment area.
It was player’s choice which platoons started on table: the first important decision of the game.
The red circles on the photo above show where the objectives were. After the eighth appearance of the Turn Card, the game would end if one side held both objectives on any appearance of the Tea Break card. If the game went on past eleven appearances of the Turn Card, then a draw would be declared.
As you can see, each side had one objective within relatively easy striking distance of their deployment area, and one objective nearer to their enemy’s deployment area.
The Germans
The Germans, played by Bevan, had the following force at their disposal:
A Company HQ
A company of Schutzen infantry: three platoons of three squads each, with each squad having two light support weapons, so firing with an extra D6 effect
A platoon of four MMG teams
A platoon of two 7.5cm infantry guns
A Panzer HQ tank and a platoon of four tanks: five Panzer 38(t) tanks in total
The Germans also had air support available.
Bevan chose to begin the game with his Company HQ (for calling in air support), two platoons of infantry and the MMG teams. His plan was to take the objective nearest to him, and then to wait for reinforcements before advancing towards the other objective.
The Poles
I played the Poles. The sensible thing to do would be to mirror what Bevan had planned: take and hold the nearest objective, then build up and go for the other.
Looking at my available troops, however, I realised that a lot of them were pretty quick. I had a platoon of cavalry, some taczankas and some scout TKS tankettes, all of which could whizz around the table rolling lots of extra dice for movement. My available troops were:
A Company HQ
Three line infantry platoons, one of three large squads, one of two large squads
A platoon of cavalry with two squads
A support platoon of two light mortars and three taczankas
A platoon of two anti-tank guns
A reconnaissance platoon of five tankettes
I therefore decided to be incredibly bold and initially deploy all the really quick troops, and then try for a coup de main involving an attempt to snatch the FAR objective from under the Germans’ noses, and then hold on until relieved.
Risky…but would make for a more fun game!
I therefore began the game with my cavalry platoon, my support platoon, the tankettes, and the weakest infantry platoon on table. The infantry would head for the nearest objective, my fast-movers would try and take the far objective before the Germans arrived.
Obviously, all sorts of things could go wrong with my plan. I could fail to reach the far objective in time; I could get there, take the objective, then get overwhelmed by heavier German opposition; or, worse, I could end up strung out in super-fast march order and be picked off bit by bit by more solidly deployed German troops. In essence, the game could be over really quickly!
The Battle Begins
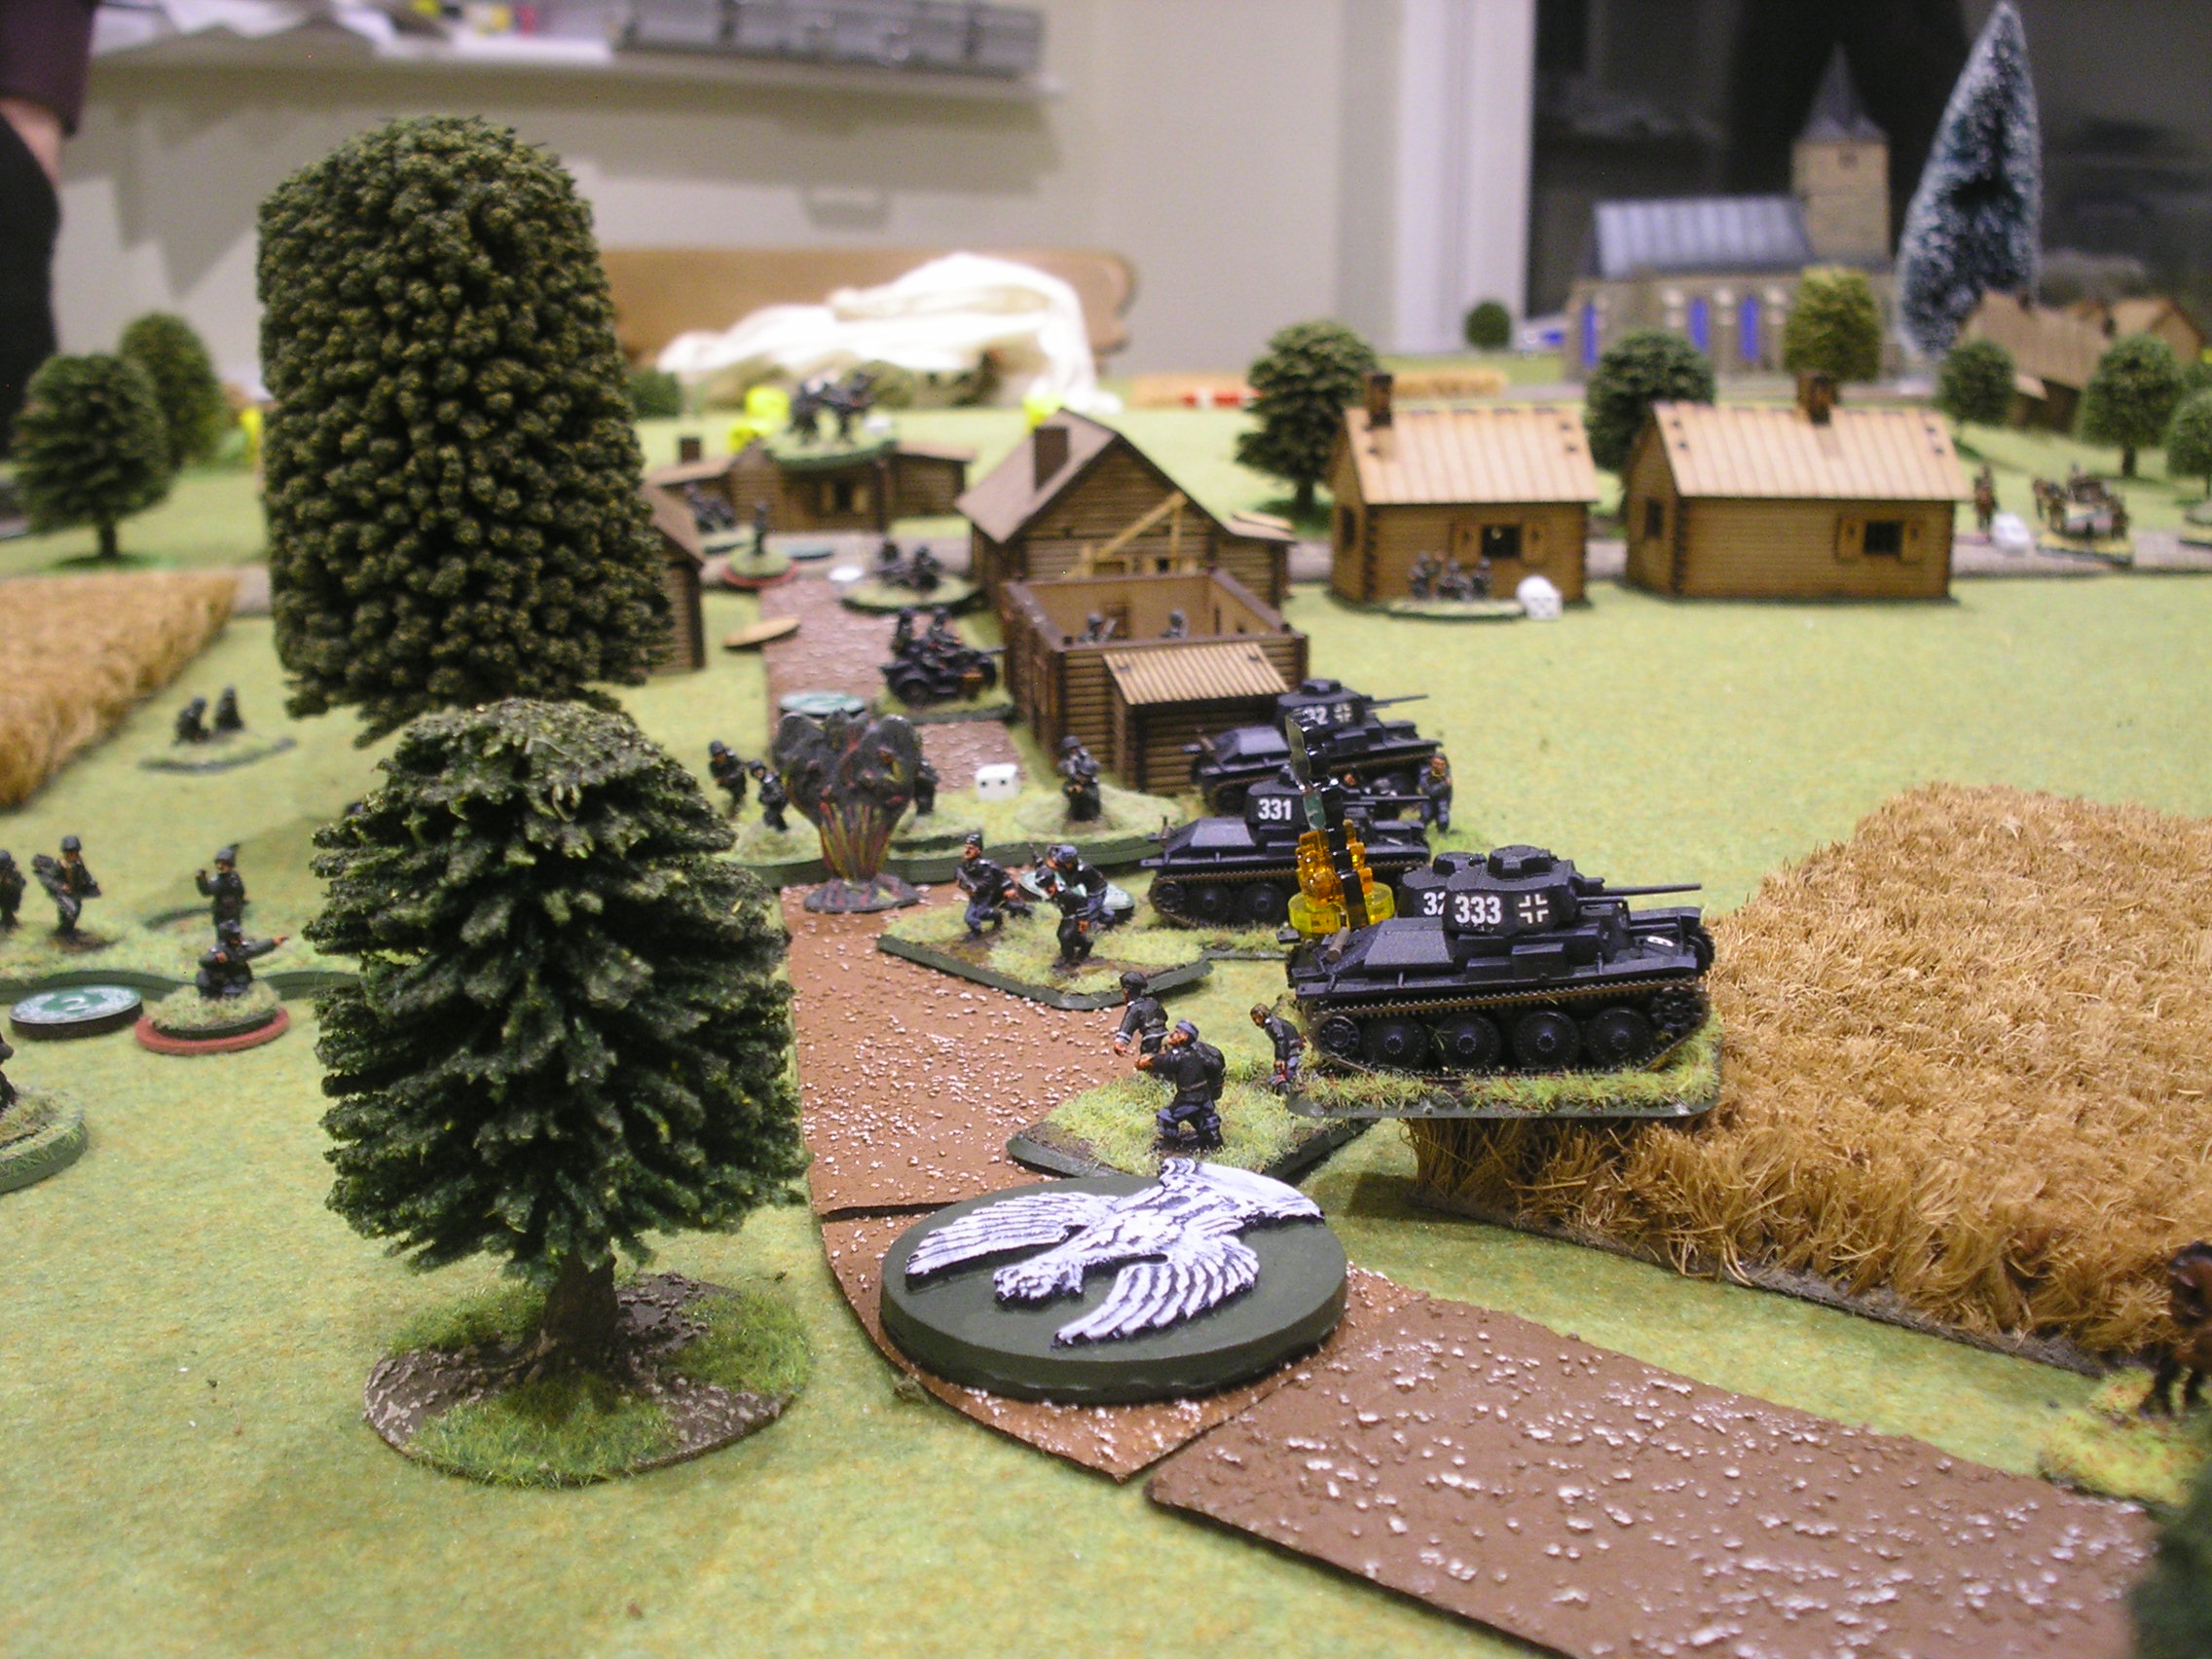
As the battle began, I sent my fast-movers (the cavalry, tankettes and taczankas) towards the far objective as fast as they could move.
The Poles advance pdq
Well that turned out to be pretty damn fast! A run of good cards had me well on the way before the Germans had worked out what I was doing. In the picture above, the taczankas have already deployed, Blind 7 is the cavalry, Blind 8 are the tankettes, Blind 4 is the infantry, and Blinds 9 and 12 are Dummy. The taczankas are deployed early so that the mortars could get into action asap…and to stack the deck for morale purposes.
“Now what do we do, Porucznik?”
As can be seen, the Germans were moving quite sluggishly, and had split their movement between moving towards ‘their’ objective and moving towarsd the church in preparation for a push towards ‘my’ objective. This allowed my cavalry to shoot forward and, much to my surprise, effectively take the far objective without opposition. This was a good thing, especially when they dismounted and took as much cover as they could on the edge of the field.
The beginnings of a ring of death!
The Germans had, however, managed to get one of their Blinds into the village. This deployed as their MMG platoon, which opened fire on the cavalry (desperately keeping their heads down) and killed Porucznik (Lieutenant) Pierogi with their opening burst!
Fortunately, my mortars then got a turn, and managed to drop their bombs right on top of the German positions amongst the wooden shacks of the village. All four MMG teams were affected: suffering casualties from the splinters of shell and wood flying everywhere, and Pinned by the blast.
This allowed my cavalry to survive long enough for my tankettes to arrive. On paper, these are rubbish: light armour and armed only with a single MMG. There are five of them, however, and surrounding an already Pinned unit of MMGs at Close range, made the Germans suffer for the death of Pawl Pierogi. Fire from a couple of taczankas also added to their misery.
The Germans had another Blind in the village: a platoon of infantry. These deployed in order to add their fire at the cavalry but, of course, immediately came under fire themselves from the now-headless horsemen, five tankettes and two taczankas. Another German infantry platoon also deployed and headed for the objective.
All I see is more targets!
By the sort of coincidence that no-one ever believes, both sides then received reinforcements. The Germans chose (surprise, surprise) to bring on their Panzer platoon; I chose to bring on (surprise, surprise) my anti-tank guns.
The Action Hots Up
The German MMG teams had, by now, all run for the hills, but the four Panzer 38(t)s, a very good tank at this stage of the war, advanced forward, infantry following on behind.
German infantry demonstrating their dressage skills…
This changed the balance of power considerably, and for a couple of turns it was the Poles who were on the receiving end. Two tankettes were lost to enemy fire, and the cavalry were starting to look a bit thin on the ground.
I said the plan was “hold until relieved”, and it now looked somewhat unlikely that I could actually last that long. Neither of my two strong infantry platoons were even on the table yet, although the weak platoon and taczanka deployed towards the church was combining holding ‘my’ objective with some quite effective long range fire down into the German troops holding the village.
Fortunately, however, help was at hand. My anti-tank gun platoon, commanded as always by Porucznik Bert Bigos, had had further to go than the German panzers, but now arrived and set up shop.
The Luftwaffe intervene
The German panzers, in their eagerness to close with the Poles, had moved forward just far enough to present their flanks to the anti-tank guns. Although it took a couple of turns, and the process was briefly interrupted by the German Luftwaffe, soon all four were either burning merrily or abandoned.
At this point, we both realised that my light troops, helped by the mortars, had effectively destroyed the German panzer platoon, their MMG platoon and one of their platoons of infantry, with the other looking quite sick as well (especially as I could now concentrate my fire on it as the Germans had nothing else left until more reinforcements arrived).
At the same time, I held both objectives, and had strong reinforcements still to arrive…and the Turn Card count was at six: only two more appearances before the “hold both objectives and win” conditions came into play. Bevan thought a moment, and then conceded. My coup de main had won the day!


Aftermath
Well that had been a cracking game, proving my two favourite IABSM maxims:
mortars are deadly
boldness and aggression are the key to winning
Although I had enjoyed the early period of the game, when my superior numbers had just kept blasting the German 1st Platoon and MMG teams to pieces, the arrival of the Panzers had definitely swung things the other way, and I could easily have found myself with only a single infantry platoon left to play with.
The arrival of the anti-tank guns couldn’t have been better timed, but it does go to show how important it is to keep your enemy reacting to what you do rather than the other way around. I believe “get inside the enemy’s decision making loop” is the modern way of saying it.
Robert Avery