OK Rich I will give it a shot then; however as I design and umpire most of our IABSM games I usually find it difficult to actually remember much of the detail!
The 82nd Airborne folder actually contains photos from 2 games. The first set, posted by captainquincy (my mate Neil), is indeed the terrain around Cauquigny; for a report of that game click here. Incidentally, both these games are from the bunch of Airborne scenarios I sent you late last year; we're about two thirds of the way through play-testing them and I'm pleased with the results so far.
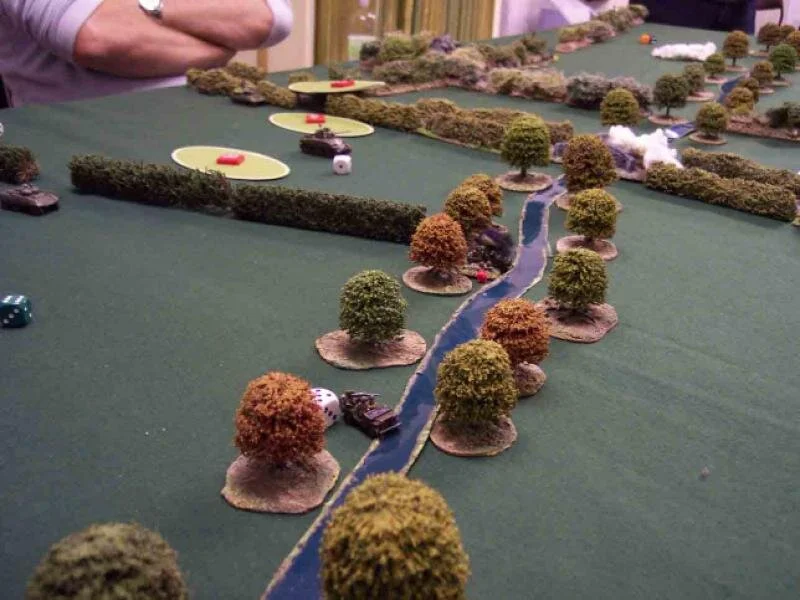
The second set of photos posted by The Gnostic (that'll be me) show last week's glider game. This is the terrain just south of Fauville. We've played a version of this game twice now. The first game was only very loosely based on the real action but Neil provided an absolutely hilarious AAR. . The latest game was the more historical version and gave the better game, although I'm not even going to try to match Neil's fantastic action report. So here goes:
The game represented the actions of Howell force.
At 2.00 p.m. on 6th June, the seaborne elements of the 82nd AB division (Force C or `Howell Force') landed on Utah beach. Howell Force included an armoured task force, consisting of Company C, 746th Tank Battalion; Troop B, 4th Cavalry Squadron and Company F, 2/401st Glider Infantry Regiment. The mission of the task force was to link up with the airborne forces to provide a more powerful anti-tank capability. Howell Force reached Les Forges by early evening but found that the Germans occupied a wooded hill to the north (Hill 20) and an enemy salient extended north-east to the Ecoquenneauville – Turqueville ridge. This not only separated the 82nd AB, fighting at Ste Mere Eglise, from the 4th Infantry Division but also dominated the valley below, which at 9.00 p.m. was destined to become glider landing zone W. It was vital that the valley be cleared for the incoming gliders; consequently, Howell Force attacked northwards along the road with the reconnaissance elements in the lead.
For the game the Germans had a single infantry company , from the 795th Georgian battalion, supported by two MMGs, three PAK 40s and a couple of panzerschreck teams. These were deployed on a map so that the allies were faced with an empty battlefield. Obviously they were also unaware that they were on a landing zone.
The American main force consisted of a platoon of Shermans and a company of glider infantry. These were preceded by a troop of US cavalry (jeeps and armoured cars) for recce purposes. The recon troop entered the table, on blinds, on move one. I then left it up to the Americans to decide when they had enough information, from the recon troop, to bring on their main force. The players actually decided upon a pretty thorough recon phase and planned to deploy their main force on turn four (turns were determined by a blank card). The recon did quite well, ferreting out a couple of AT guns, a panzerchreck team, a MMG and a platoon of infantry. The latter was found the hard way, on move one, when they drove straight into the German position; losing an armoured car and a jeep to panzerfausts.


Unfortunately, the gliders were due to land on move 6 (the players were unaware of the exact timing); so the main force had barely entered the table when the gliders arrived. One Waco landed amongst a platoon of Jerries and were promptly wiped out. Another landed in 'no mans land' but the occupants managed to make their way back to safety; despite being machine gunned along the way. The third glider, a Horsa, landed amongst the Yanks; taking out a couple of their own MG teams in the process! The Yanks were expecting reinforcements in the form of Airborne artillery; so weren't too chuffed when I informed them that these were mainly Headquarters troops and were under my (umpire) control. I ruled that, upon landing on a hot LZ, they would simply head for the nearest cover; whereas the players naturally wanted them to join a co- ordinated assault with their own forces - tough!
The biggest problem for the Yanks was actually the stream across the width of the table. Despite being informed that it ran into a flooded river, they attempted to cross with a couple of tanks - oh dear bogged. By the end of the game the Germans held one side of the stream and the Americans the other. The Americans had managed to get some tanks across the bridge but the lead tank was lost to panzerschreck fire and the survivors were too afraid to advance because of the presence of infantry in the hedgerows. I also allowed the Germans to bring on a couple of Marders as reinforcements. This was not strictly historical but the Germans had used SP guns in their earlier attack on Fauville, a couple of hundred yards off their table edge. This was also the only armour left from our previous game (the attack on Fauville) so I wanted the Germans to see the consequences of having lost their armour support in the previous game.
At one point it did look like the Yanks had managed to get a platoon of glider infantry around the German flank but a bad run of cards saw the attack stalled by off table mortar fire and direct fire from the Marders - nasty! In the end the result was pretty historical with the tanks failing to cross the stream and the landing zone remaining in German hands. So all in all a good game and it's on to Ste Mere Eglise next.
The Gnostic