

It's 1800 on 9 July 1943 in western Russia, where the German 507th Infantry Regiment of the 292nd Infanterie Division is scraping out hasty defensive positions in preparation for a counterattack by the Soviet 1061st Rifle Regiment and armoured elements of the 1442nd Heavy Breakthrough Artillery Regiment. Cut-off, alone, outnumbered, and low on ammunition, this should prove to be tough sledding for the German infantrymen.
I am playing this game because I have the good fortune of being buddies with Steve of the "Sound Officer's Call" blog, and he is running a "Firestorm Ponyri" campaign. He is playing some games with his local buddies, but was unable to play all of the games himself; rather than simply 'dice off' for results of campaign fights they were unable to play on the table top, Steve asked if anyone in the blogosphere wanted to help, so here I am.
It's been a little bit of an issue that I literally just sold off a bunch of German late war gear, so I'm a bit understrength, but Steve is working with me to make sure the fights I get match up with the forces I have. This is the first fight I've played, and I hope it wasn't too much a pain for him, I certainly want to keep going! First, I love to play games; second, it's been way too long since I've played any Eastern Front games (maybe eight years or so?); and lastly, I'm a solo gamer that still craves some comradery, so whenever I can help another wargamer out, I'm always quick to jump at it.
The Field of Battle
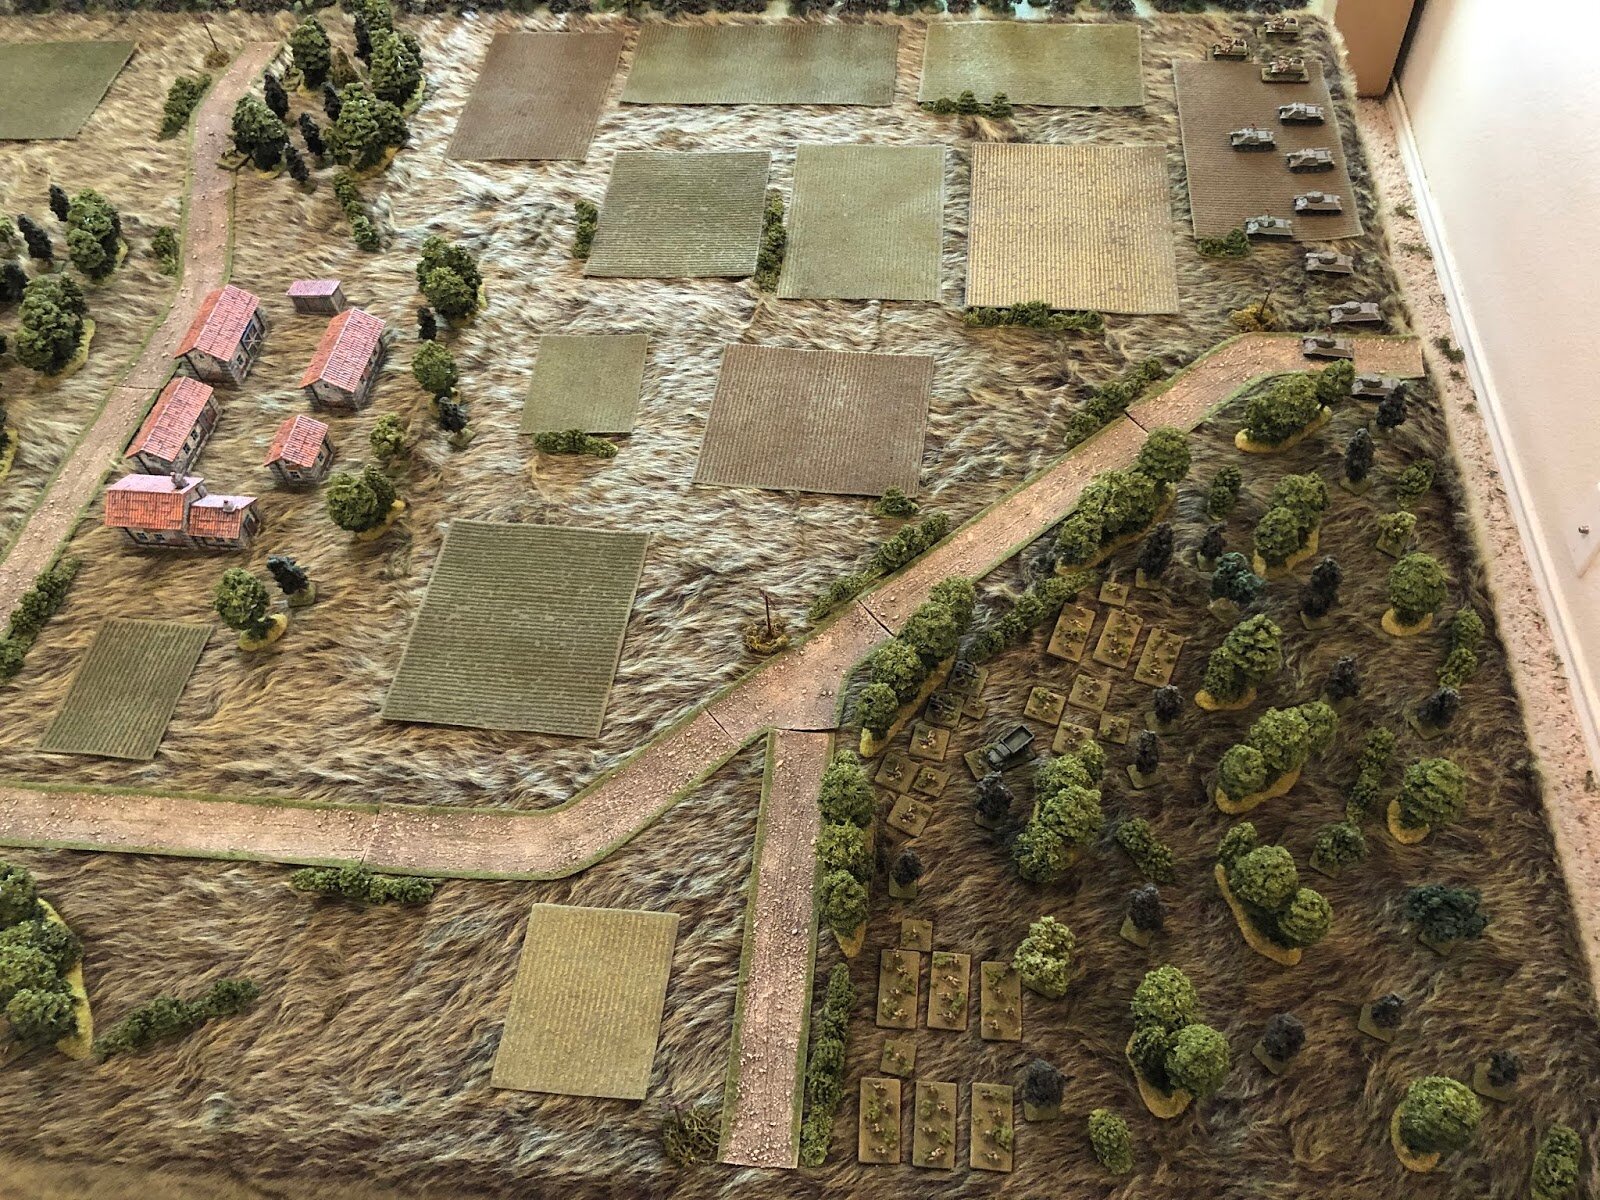
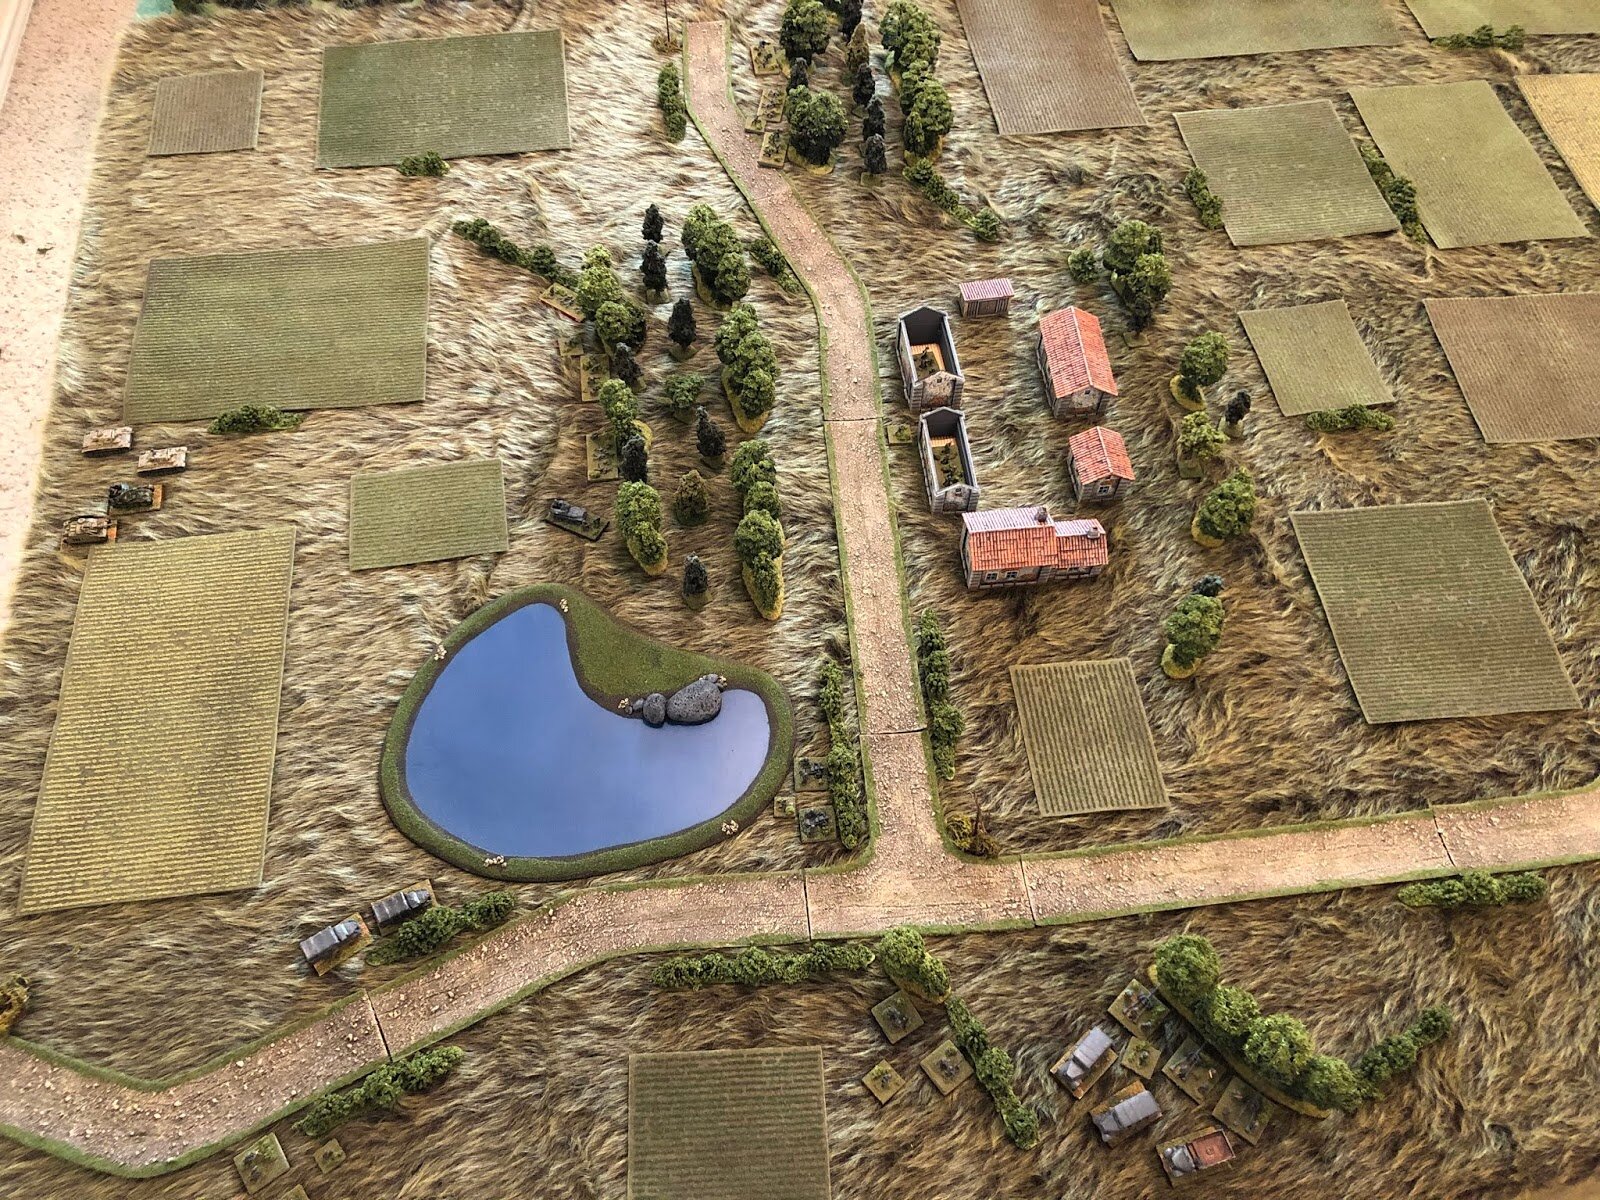
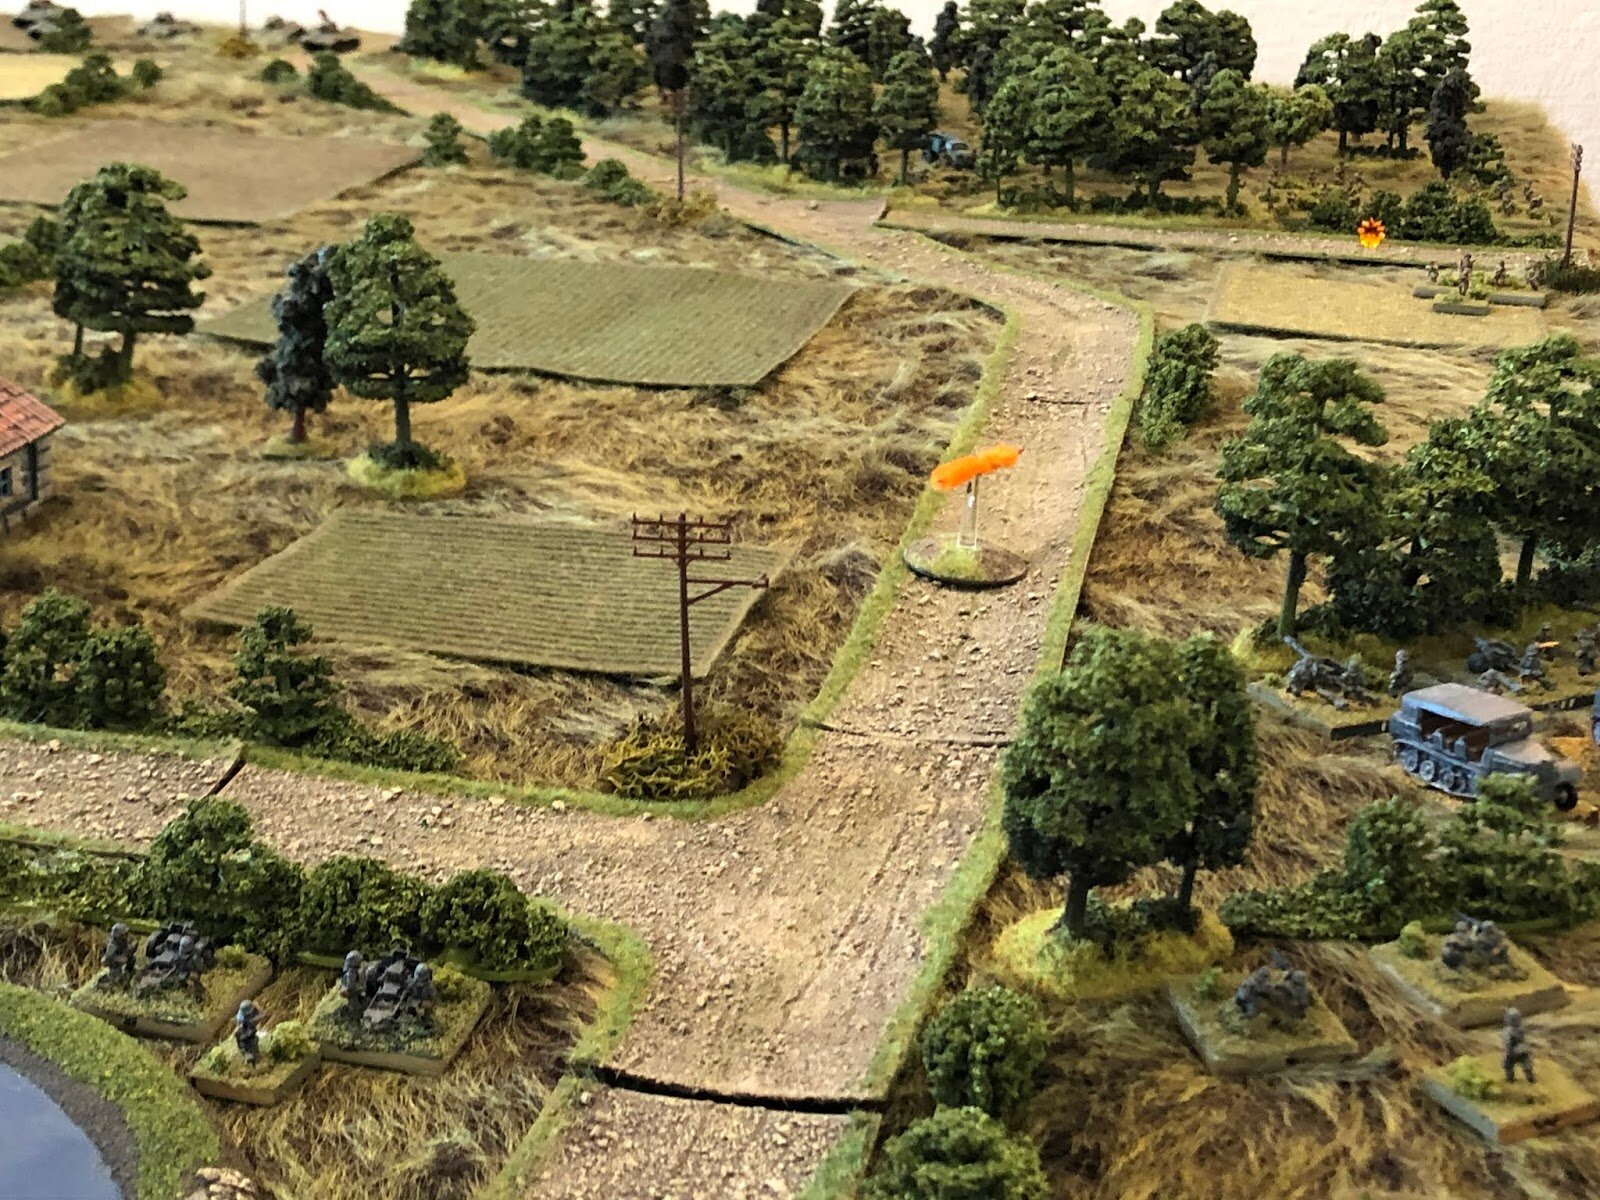
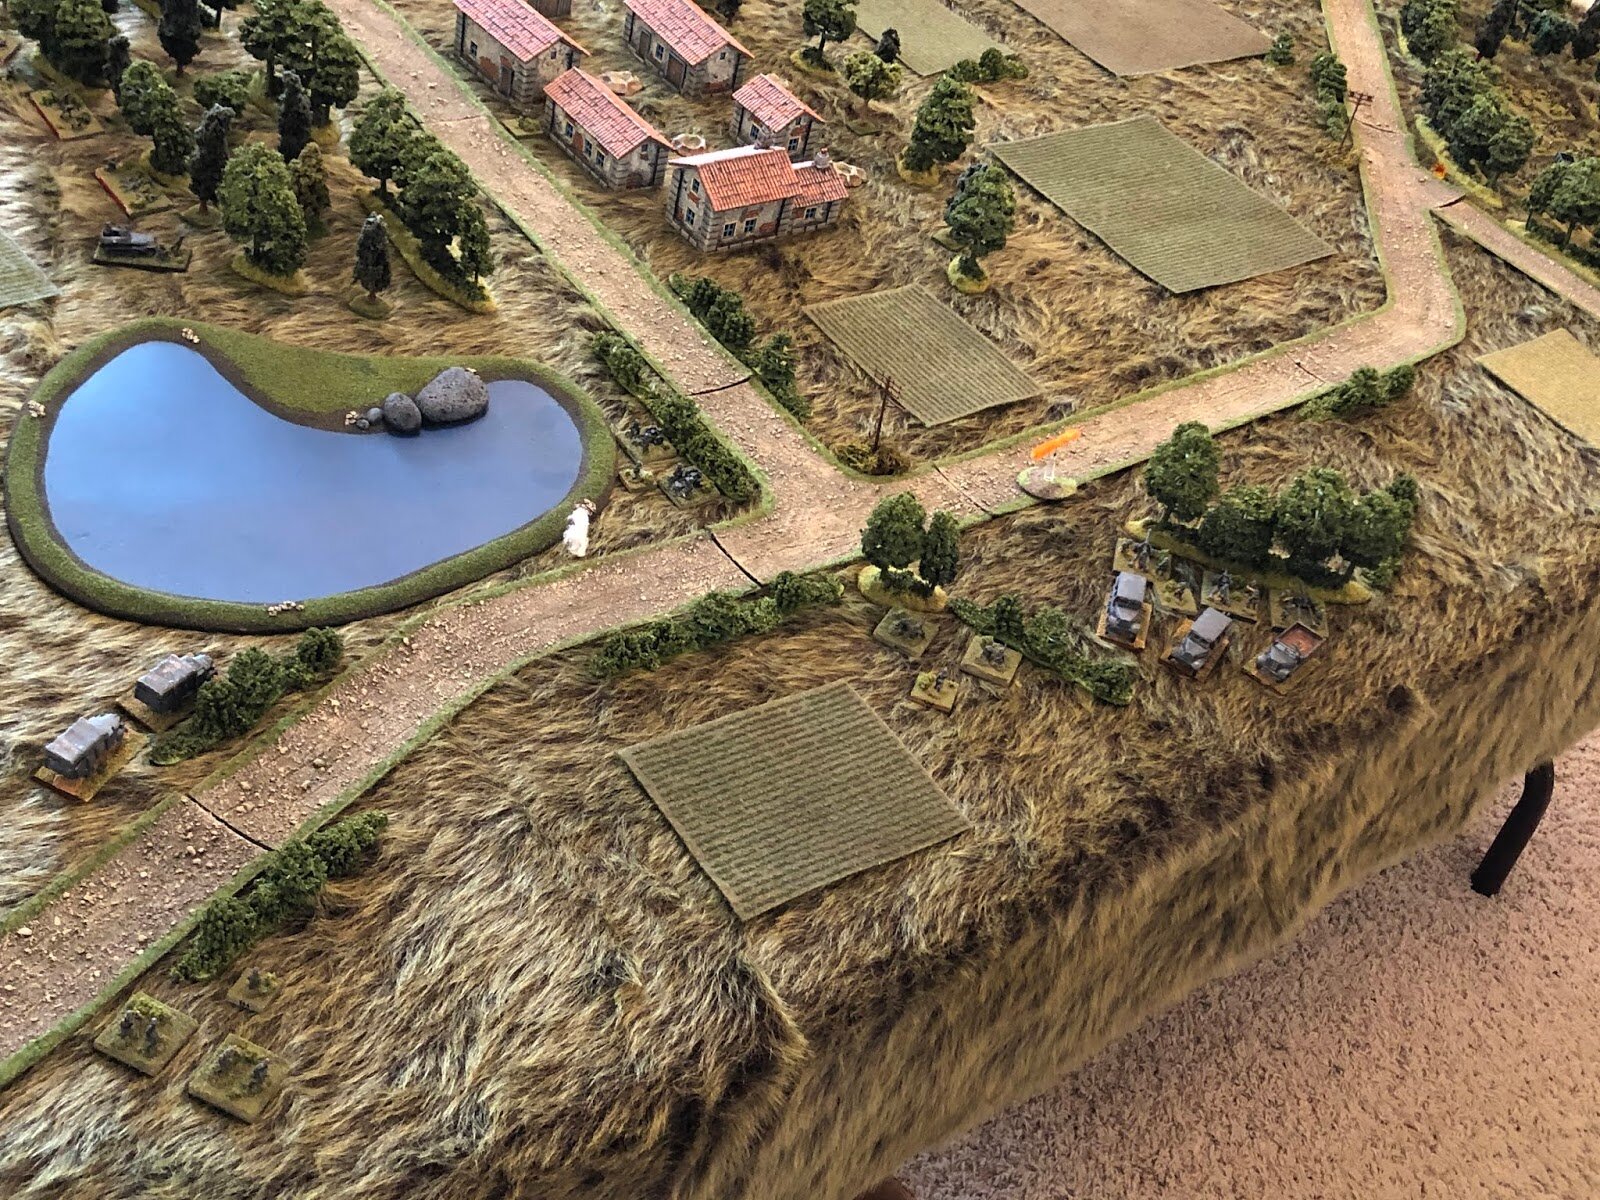
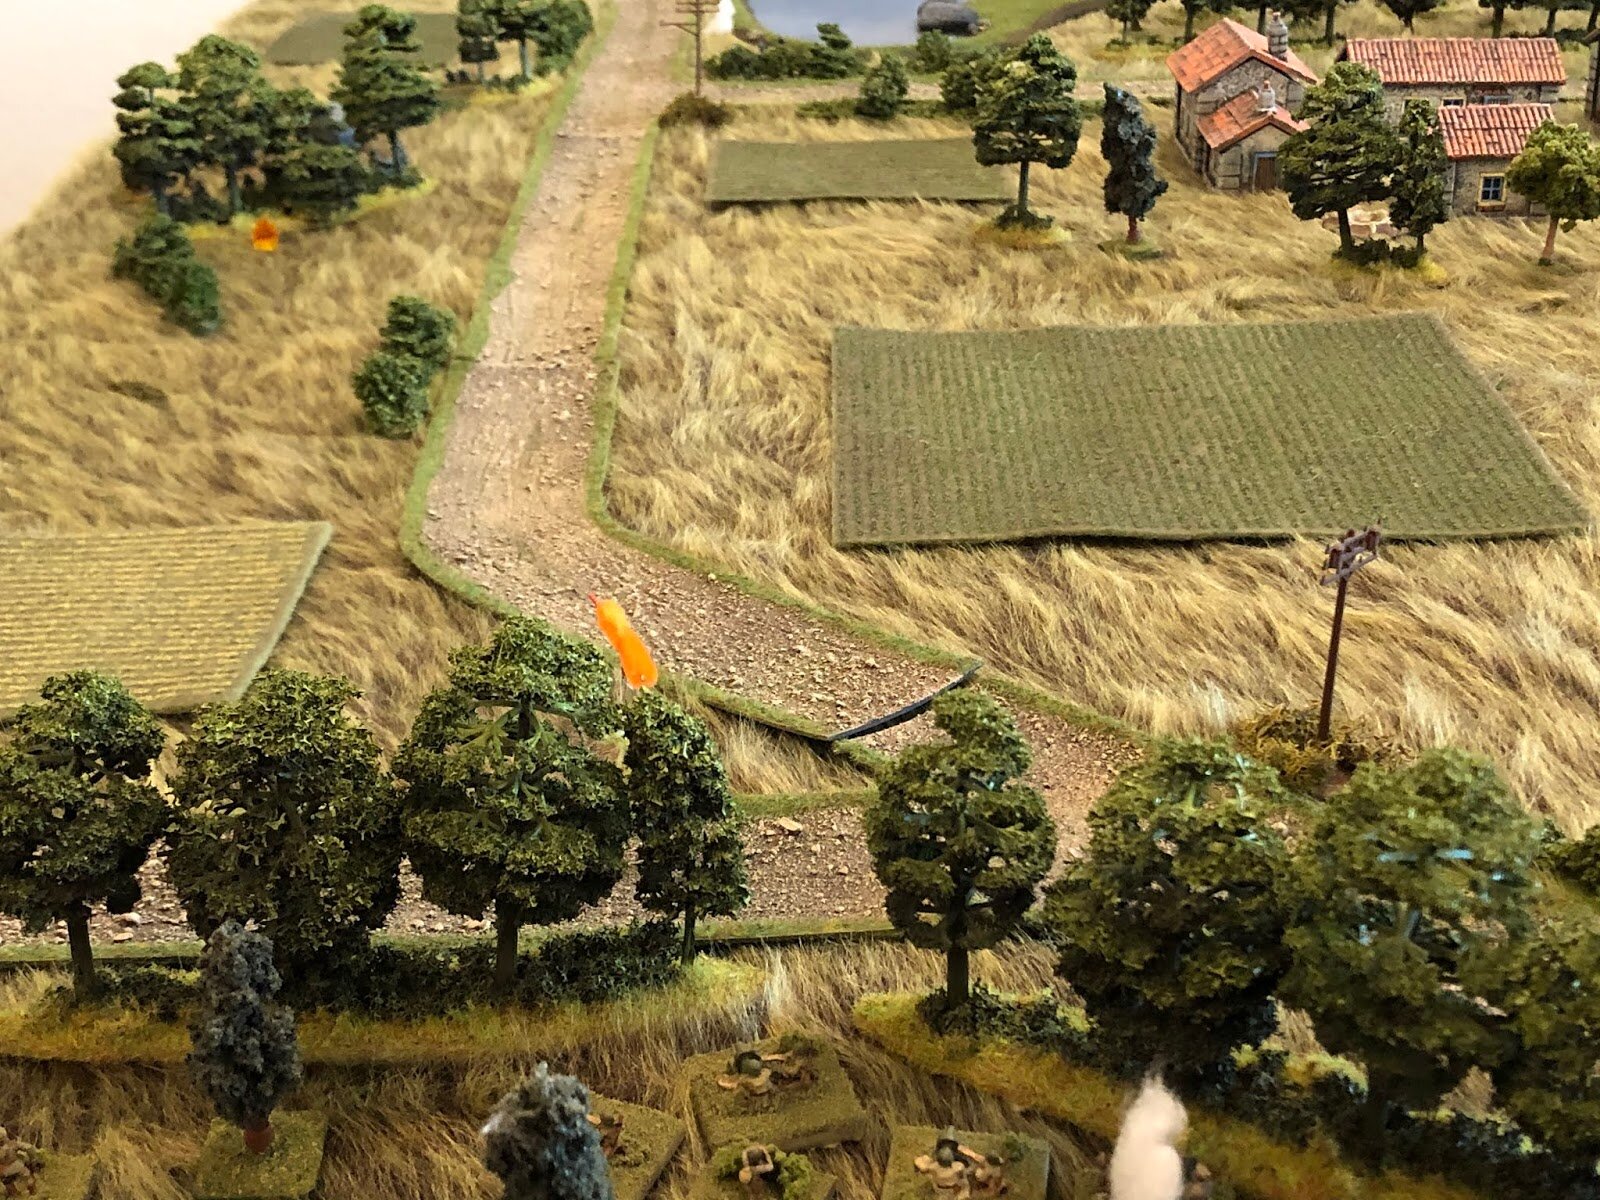
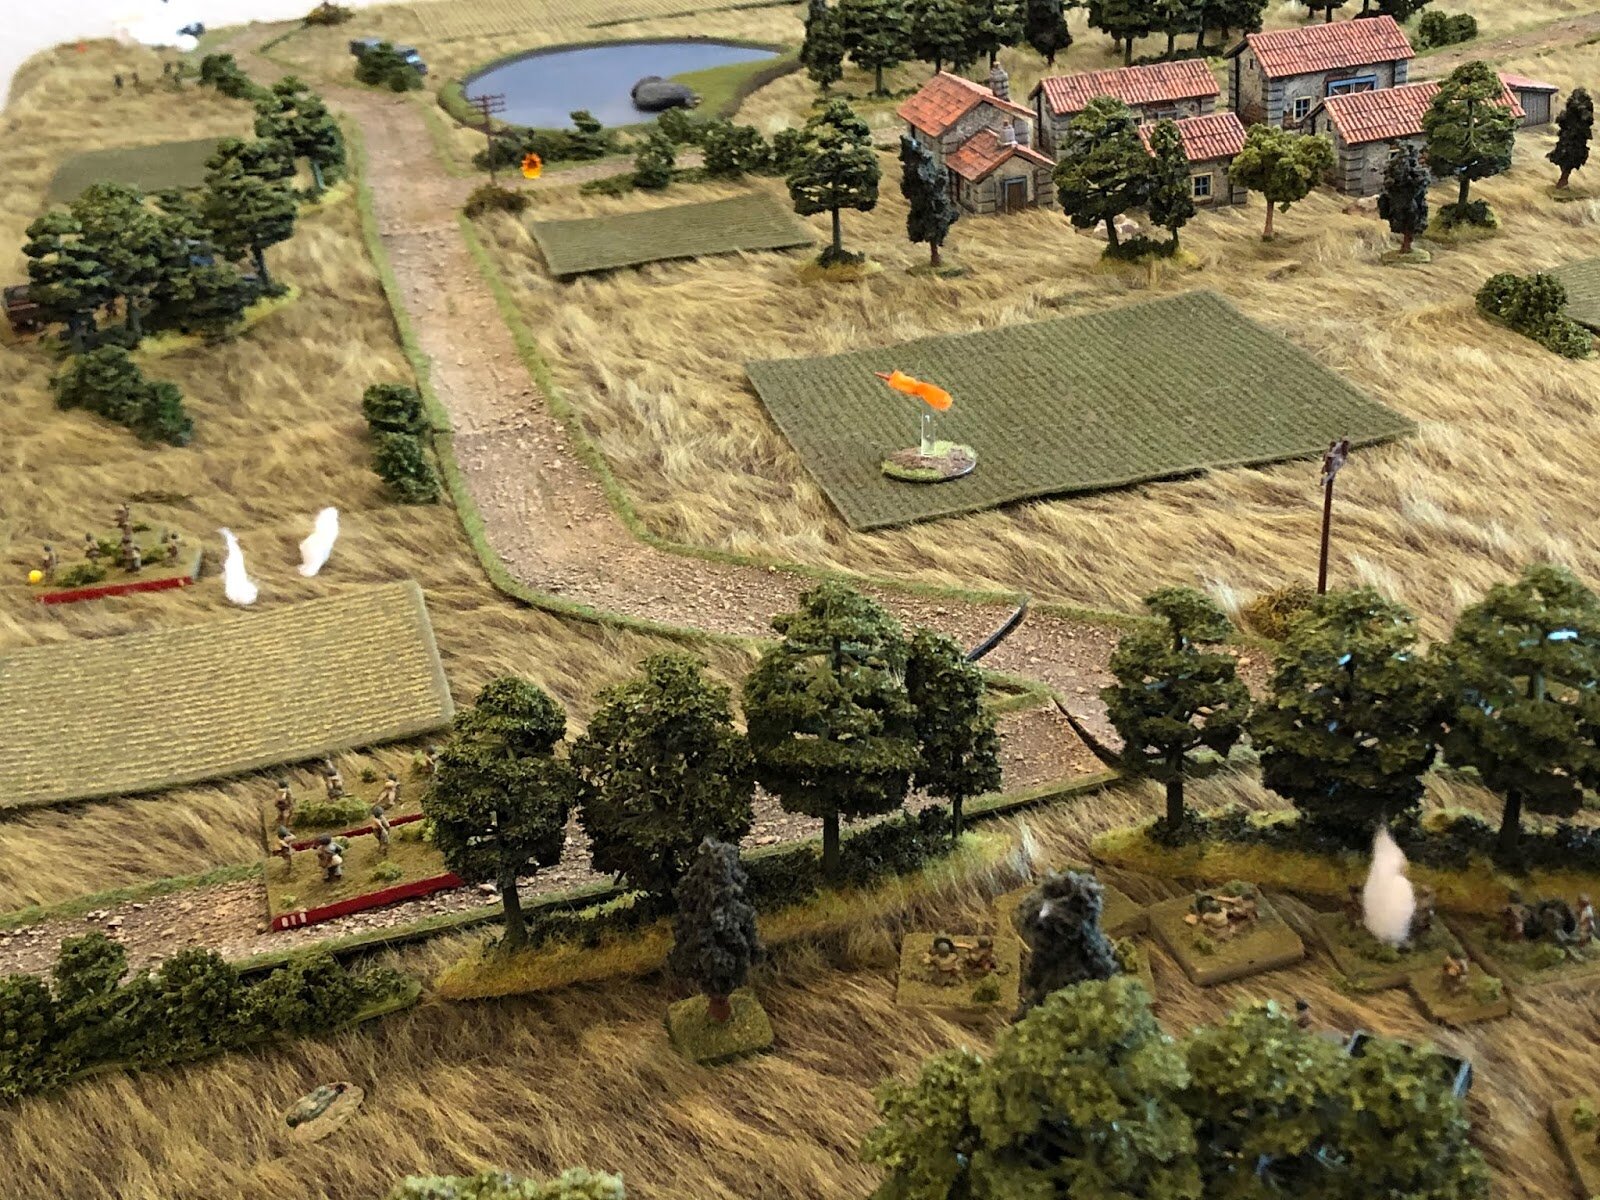
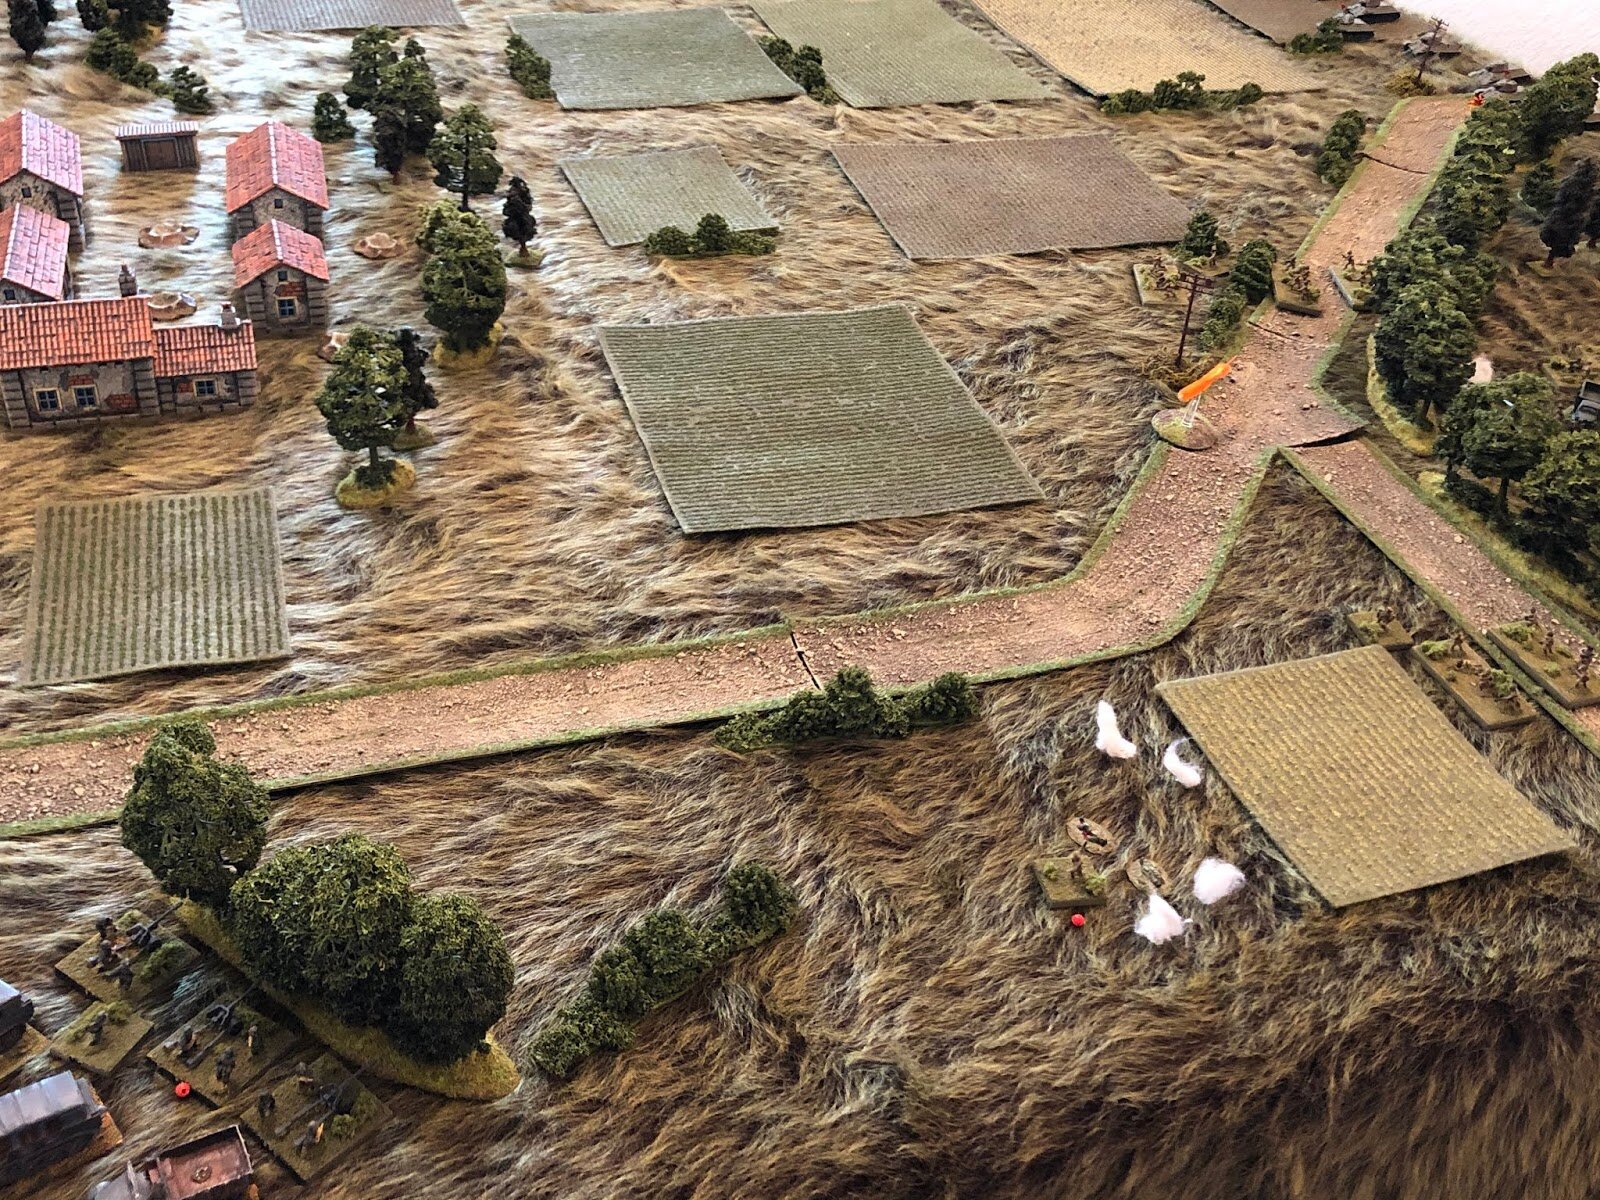
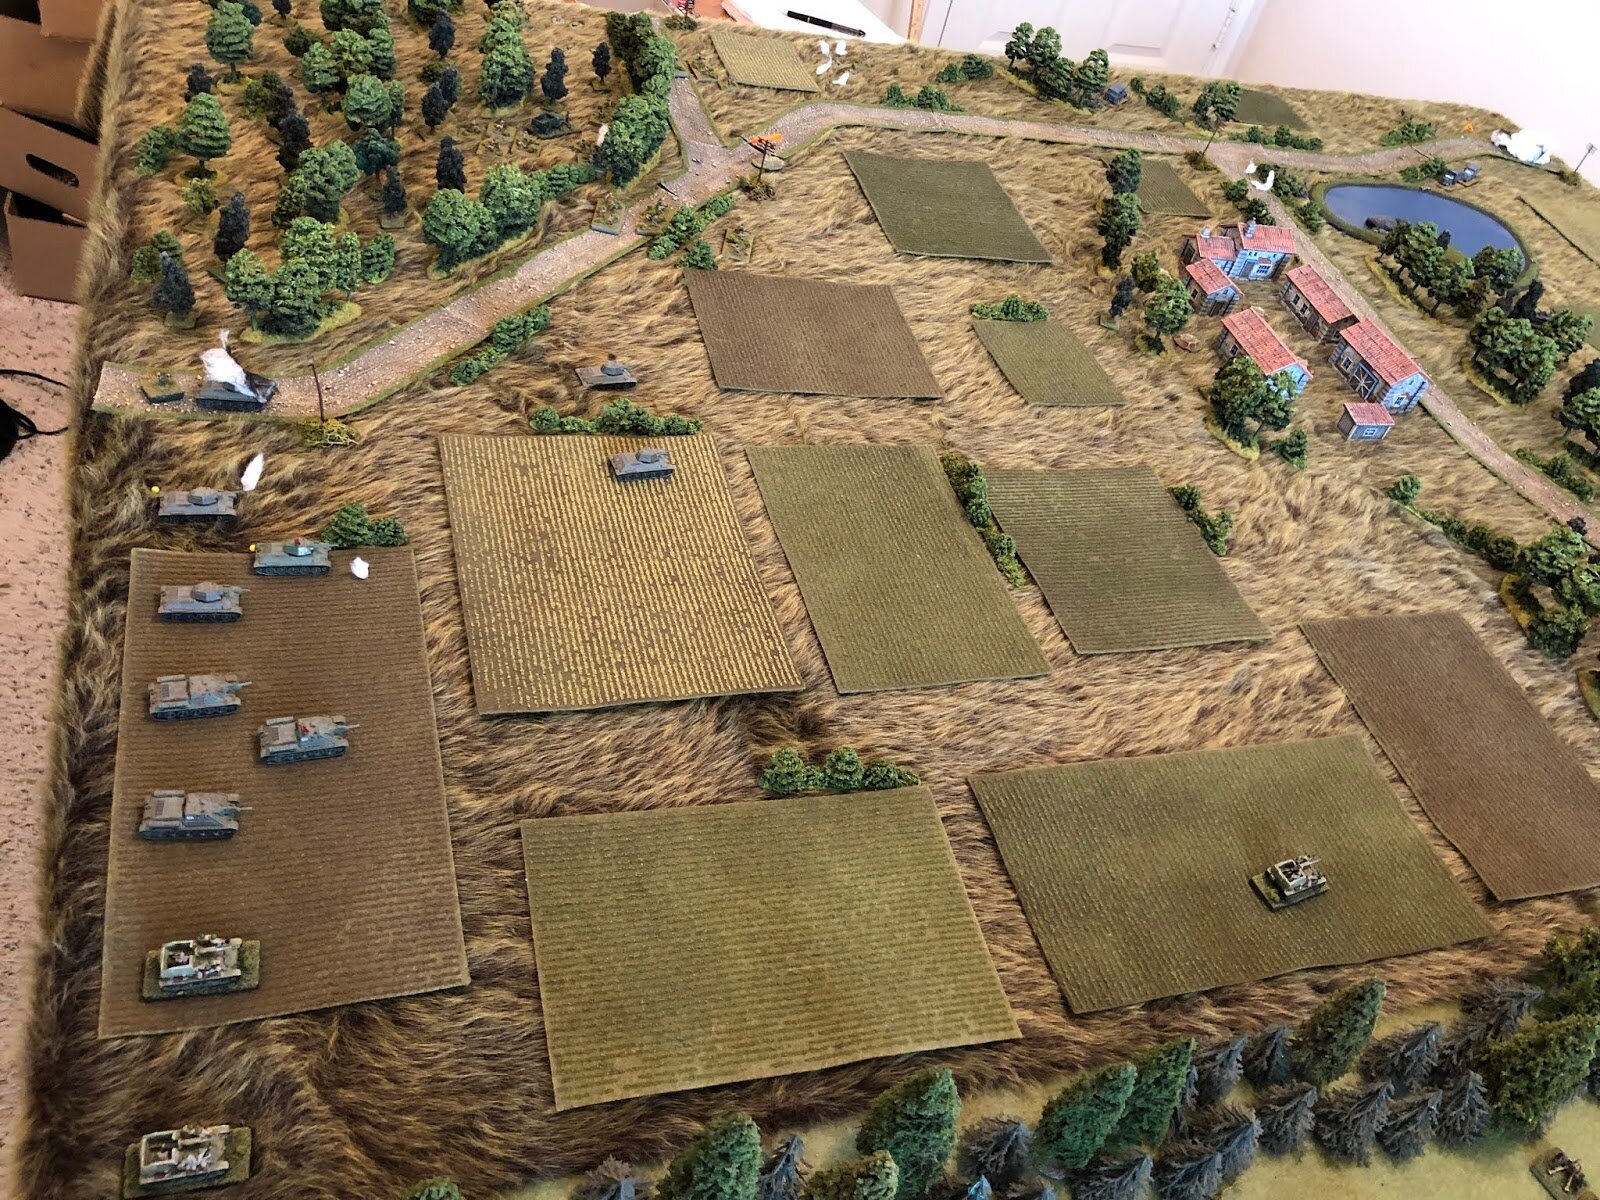
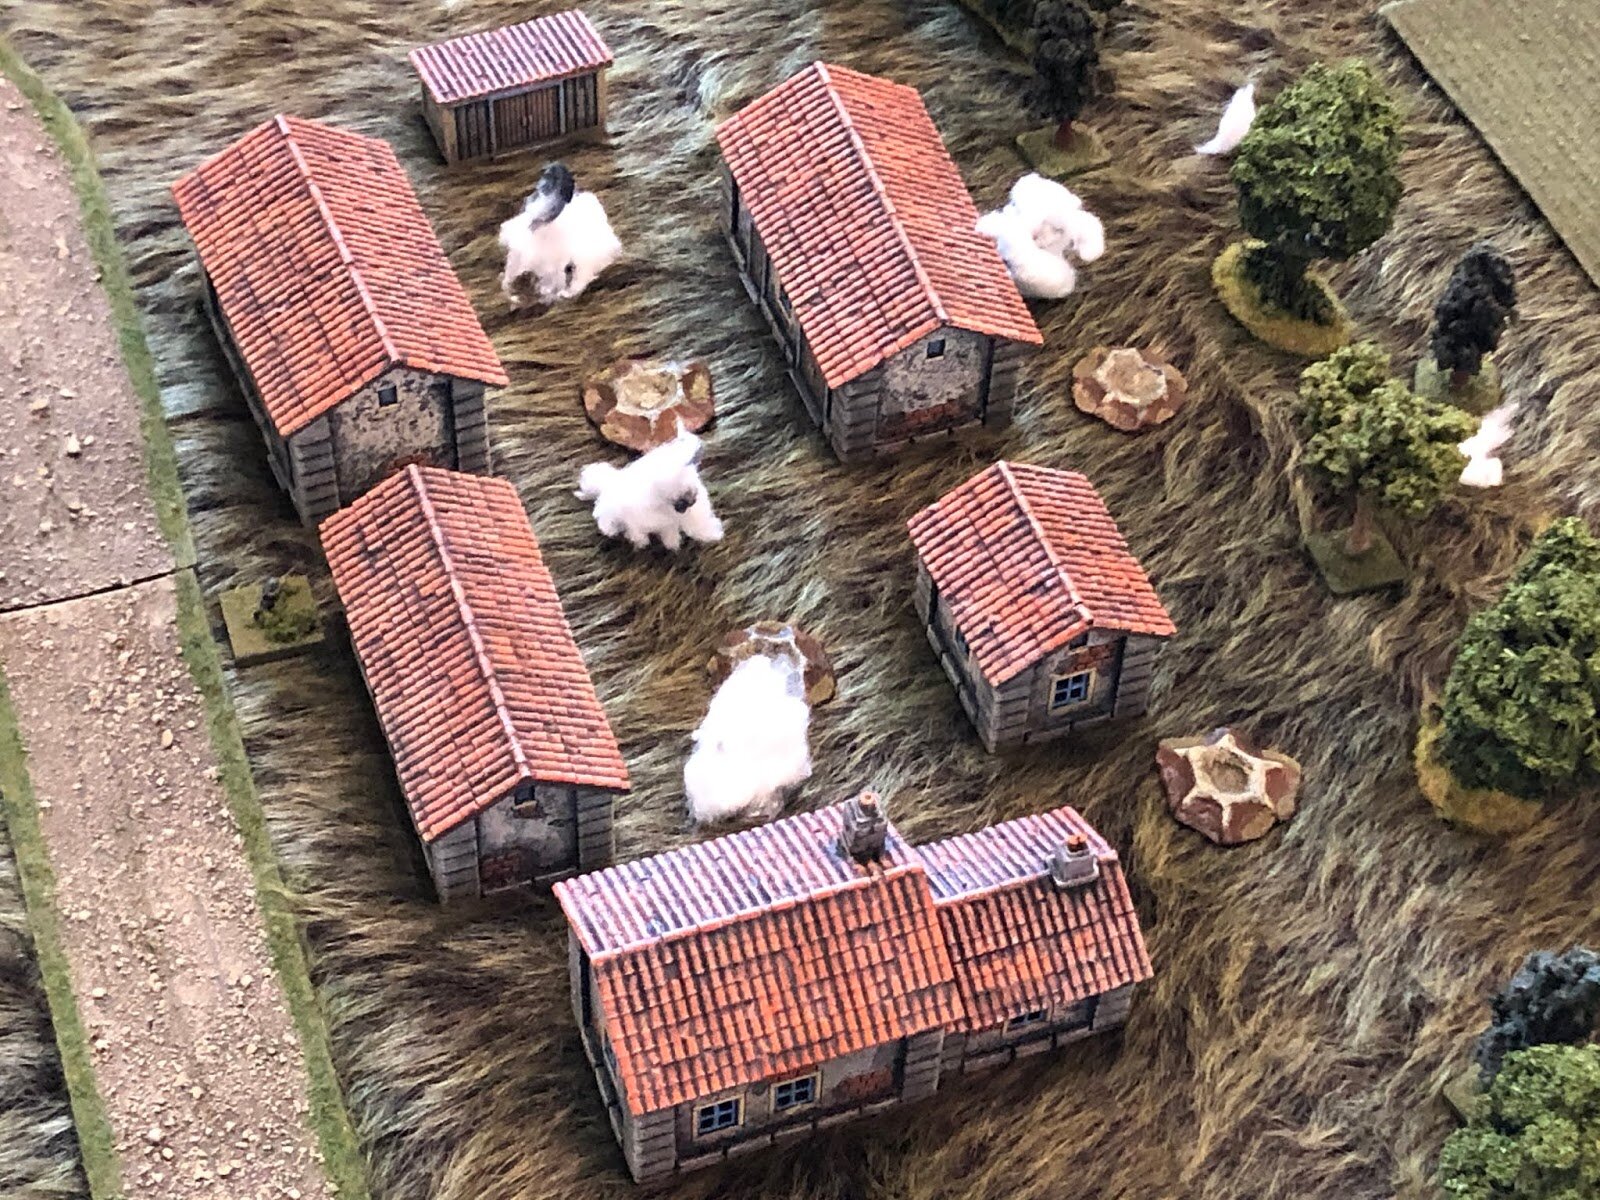
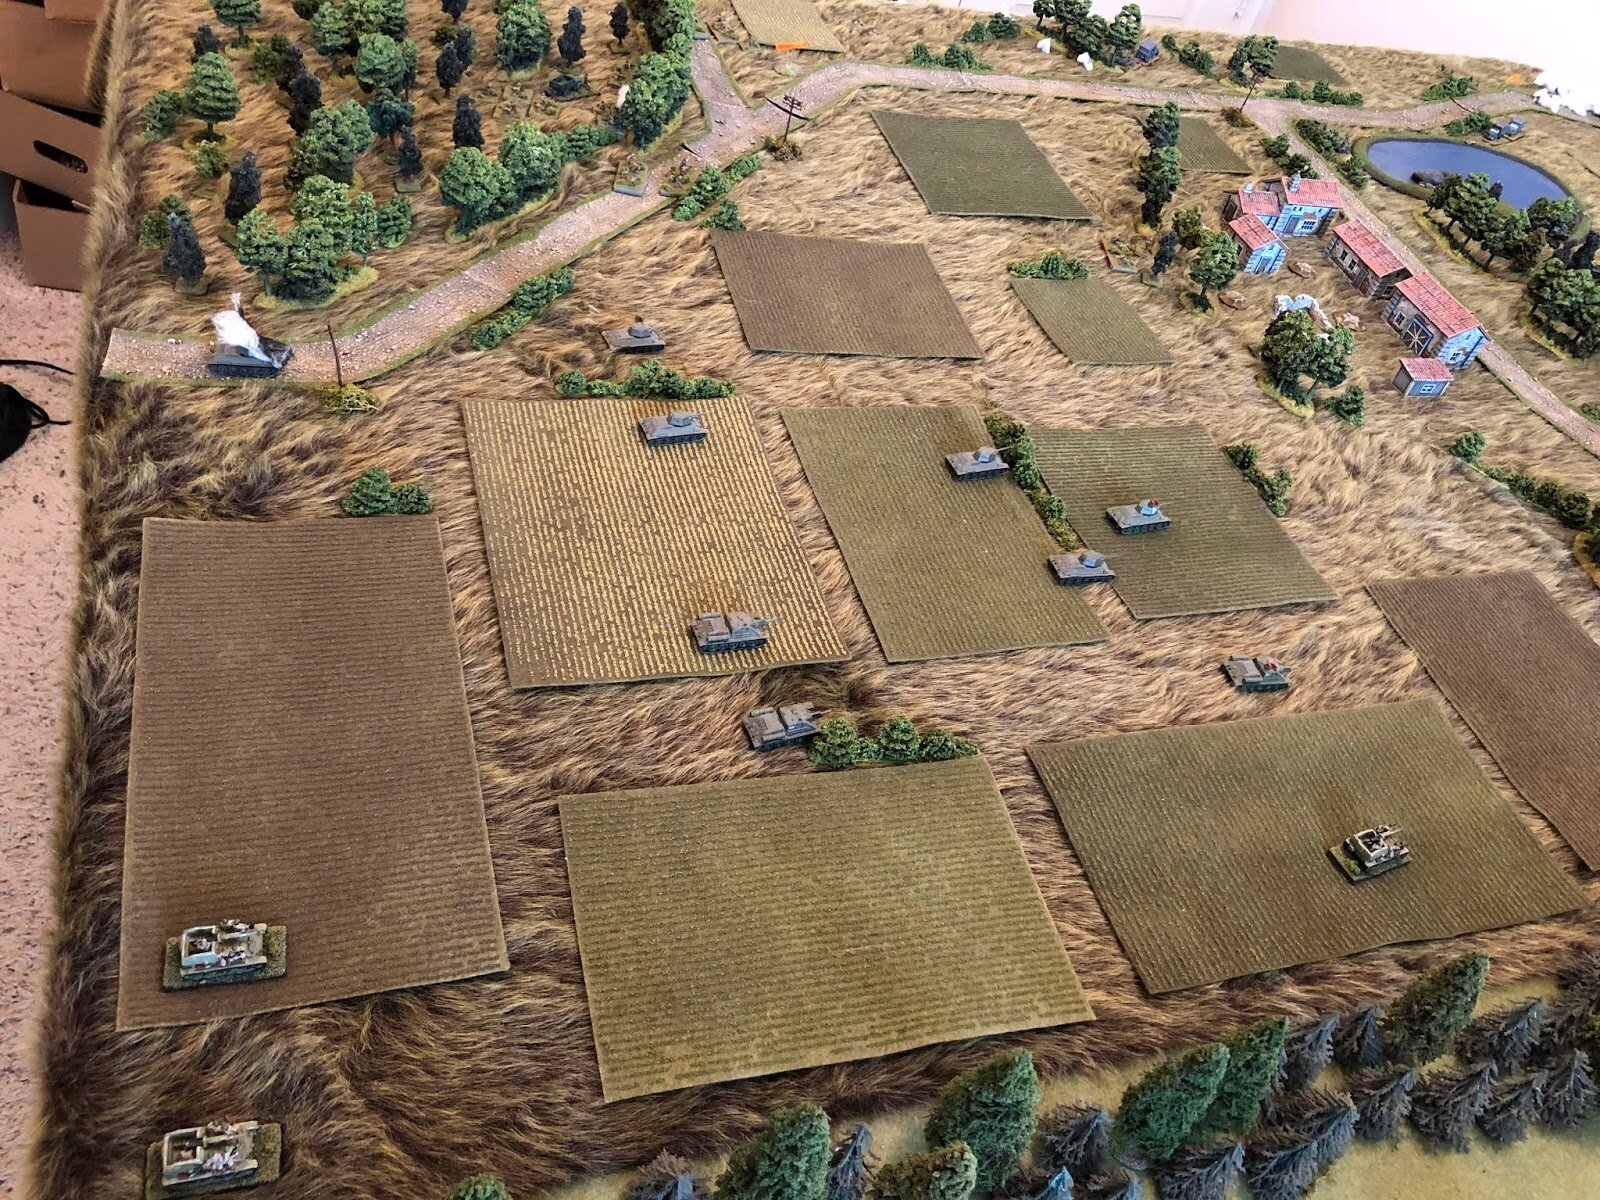
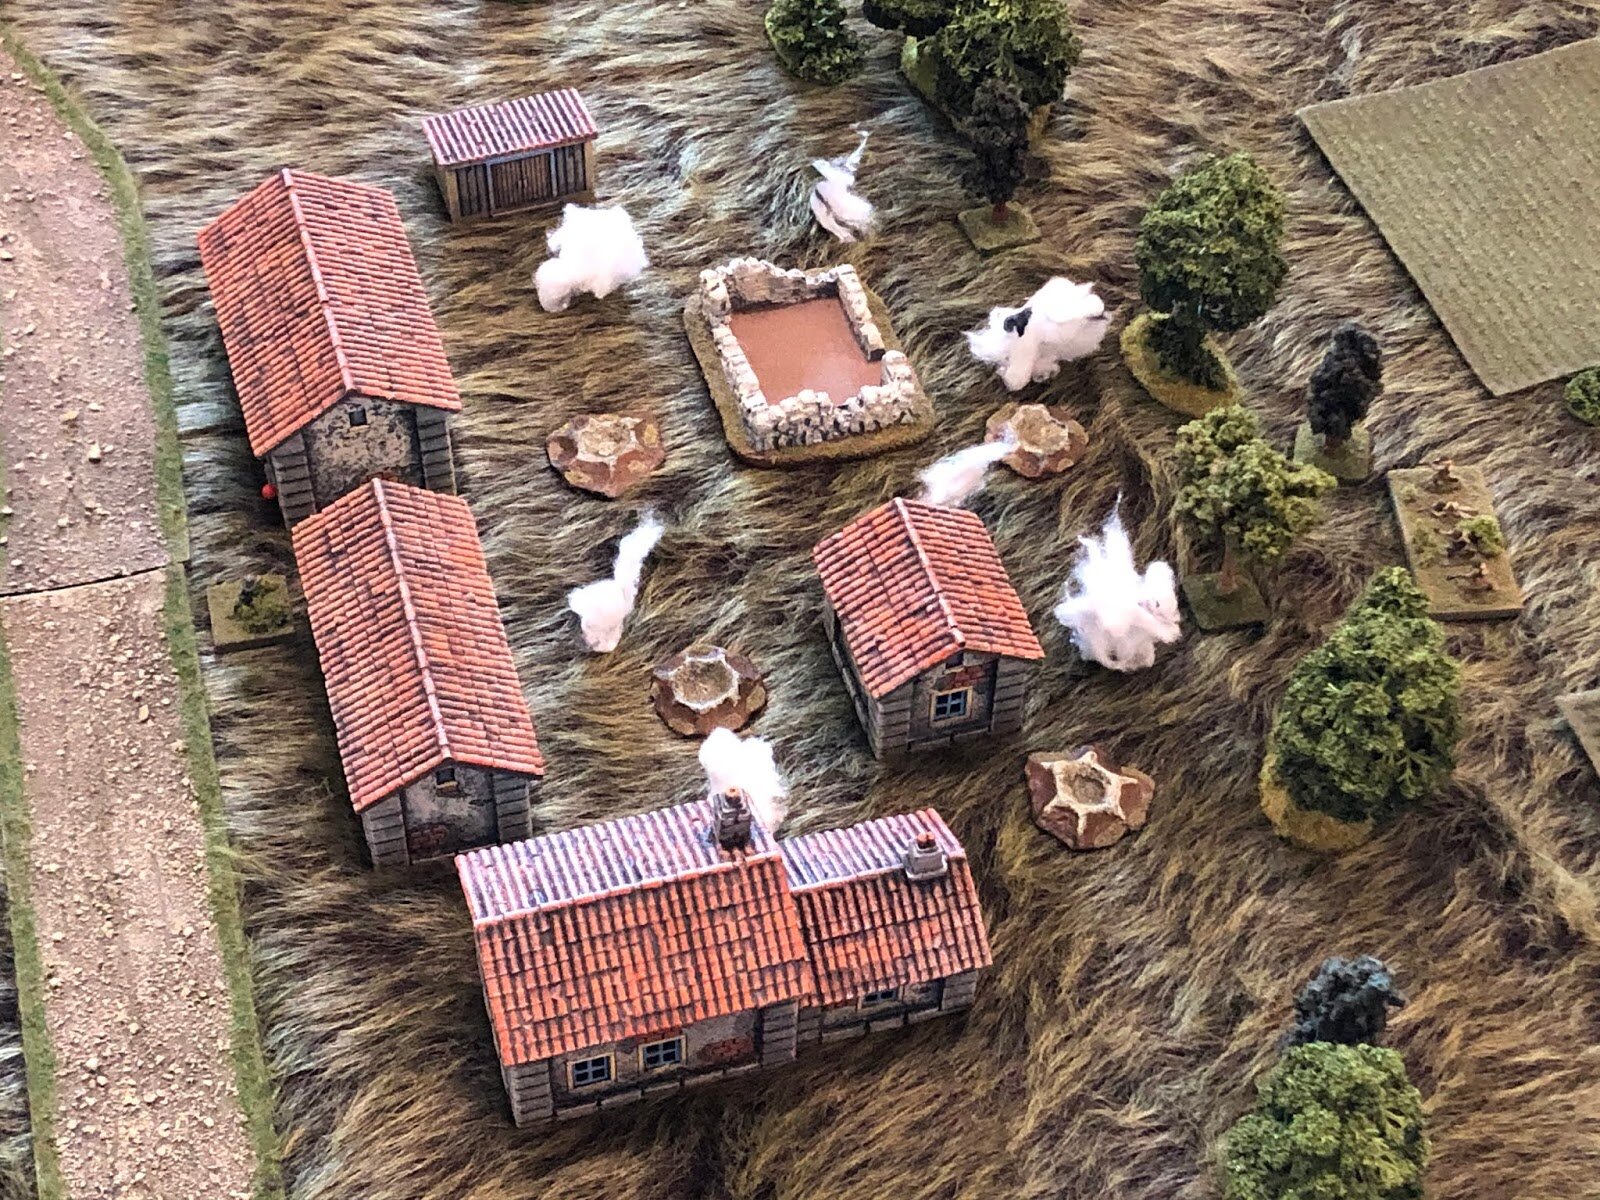
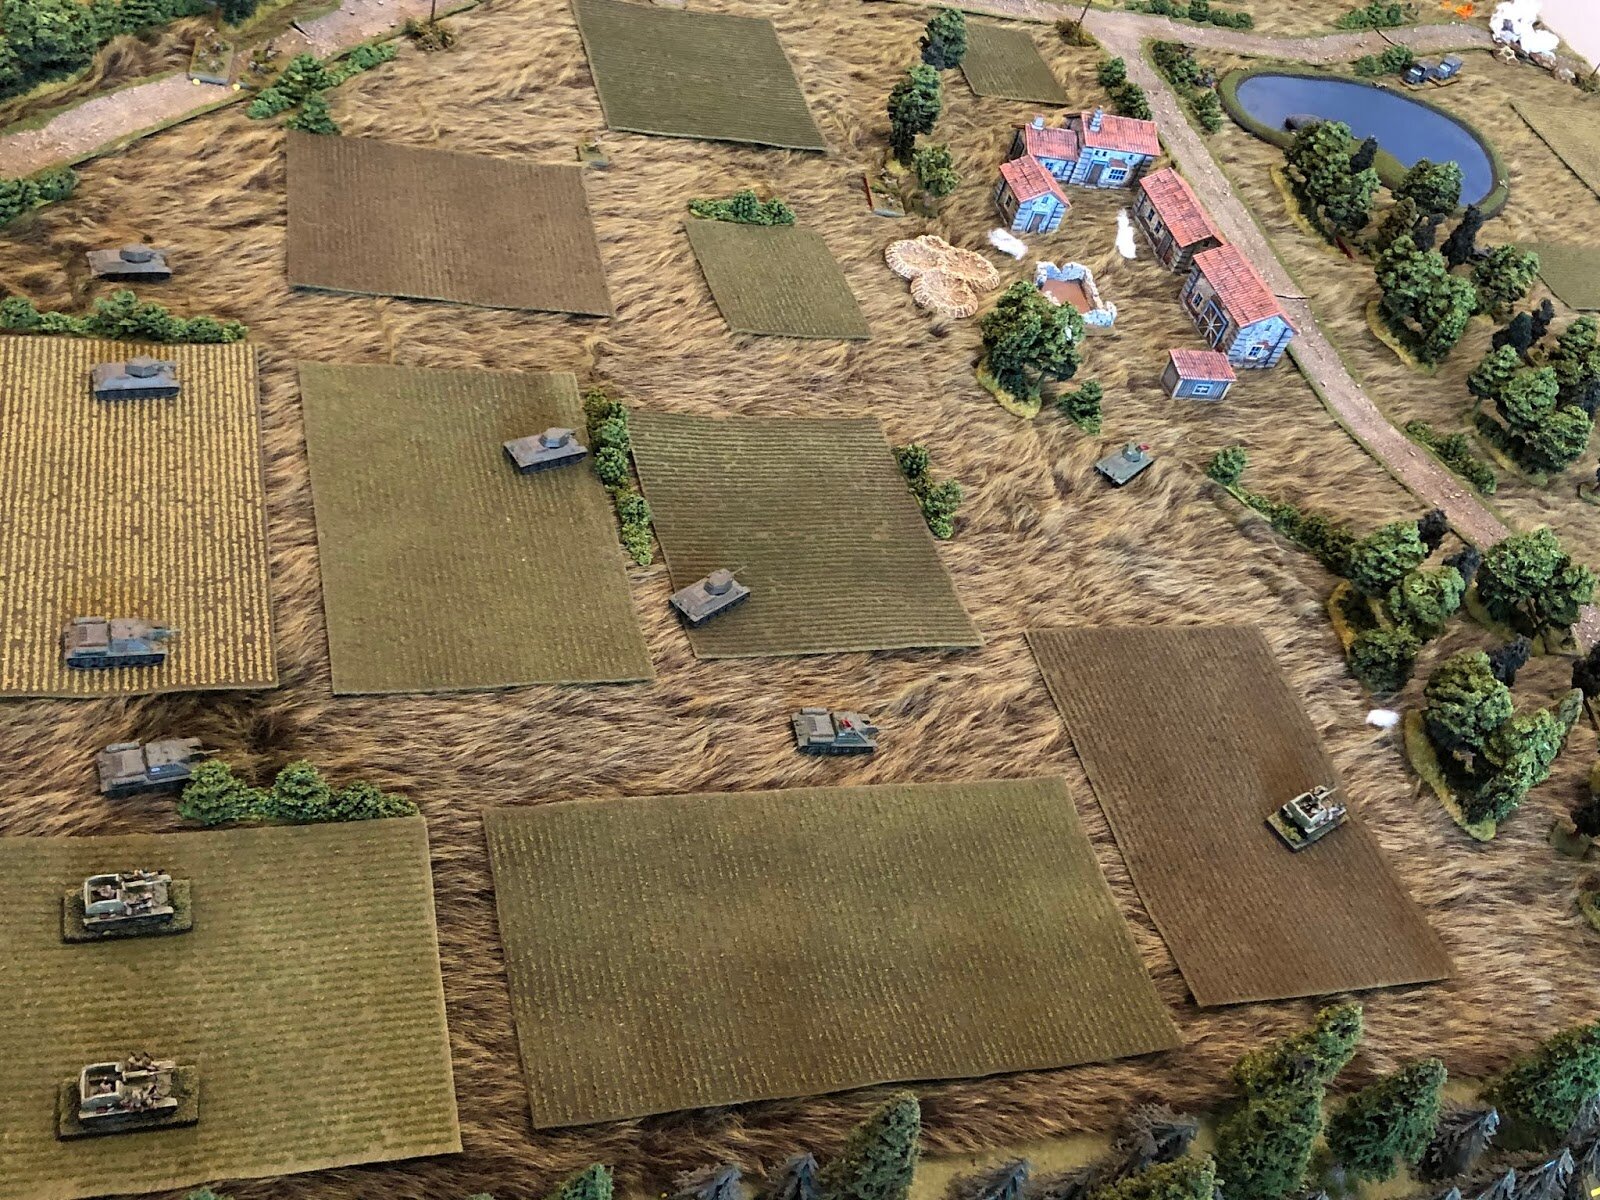
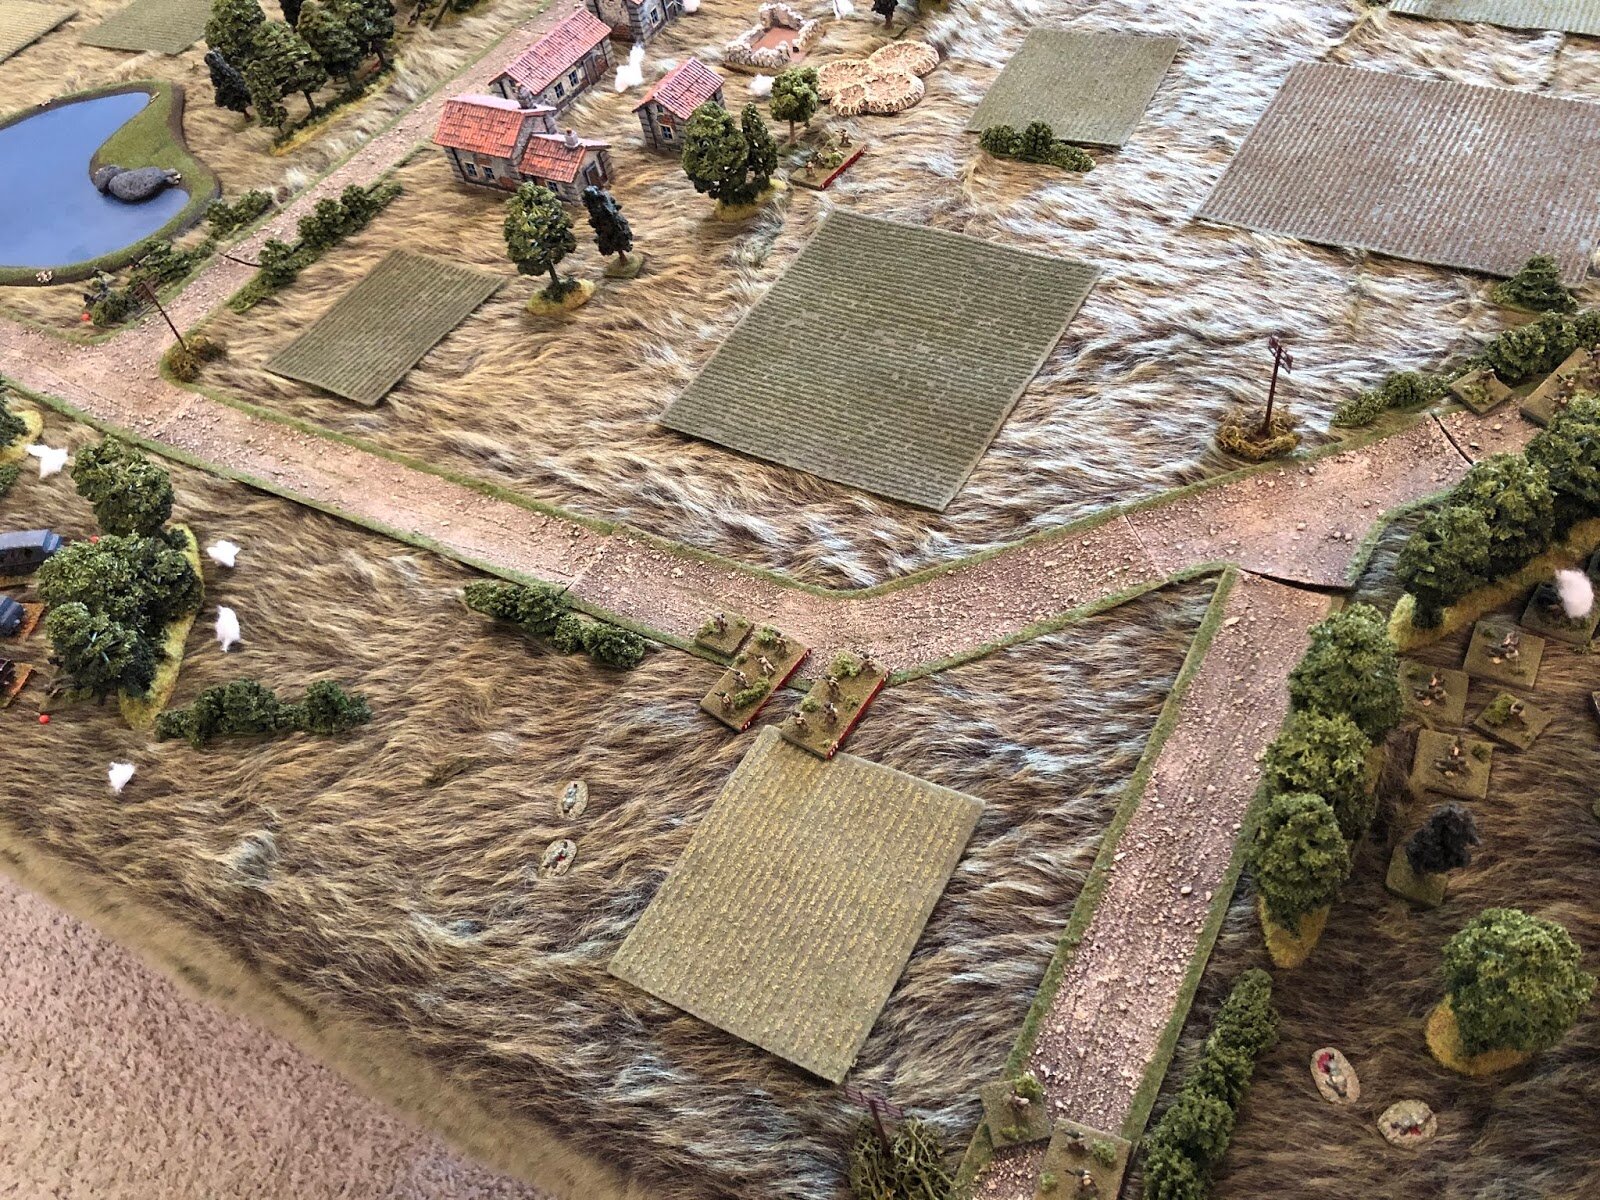
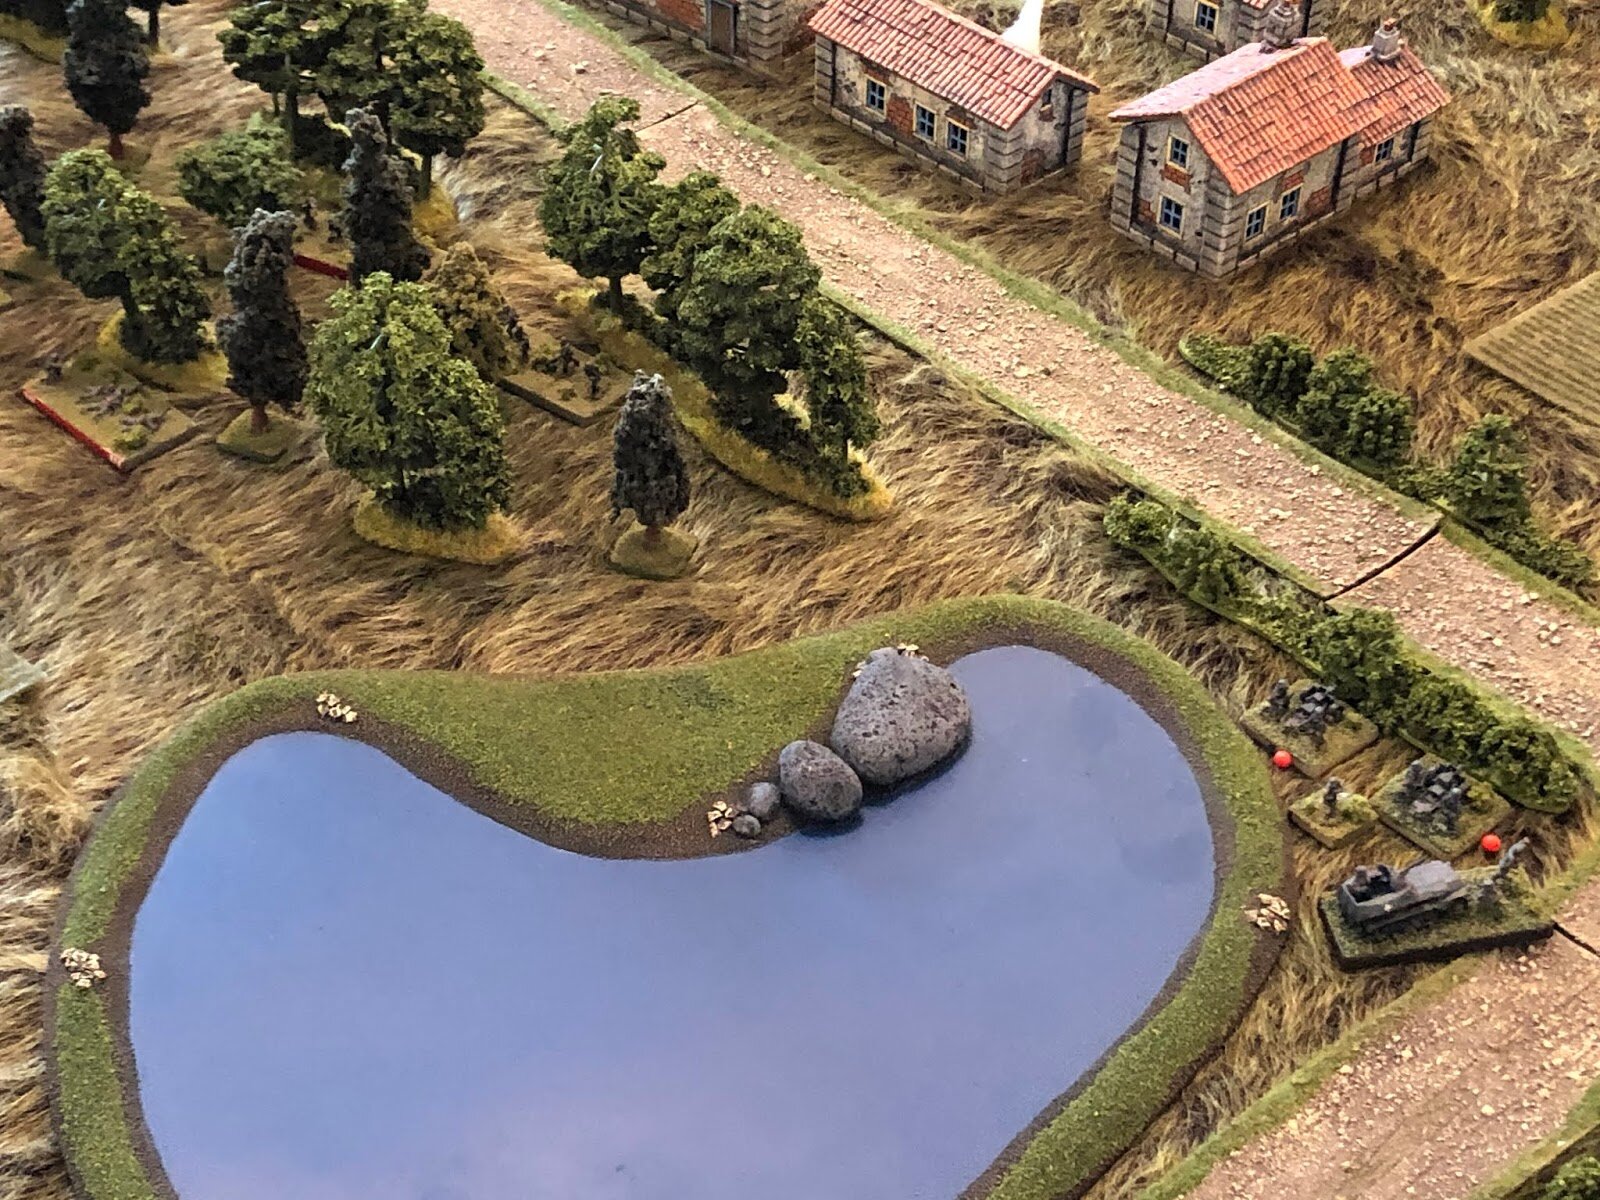
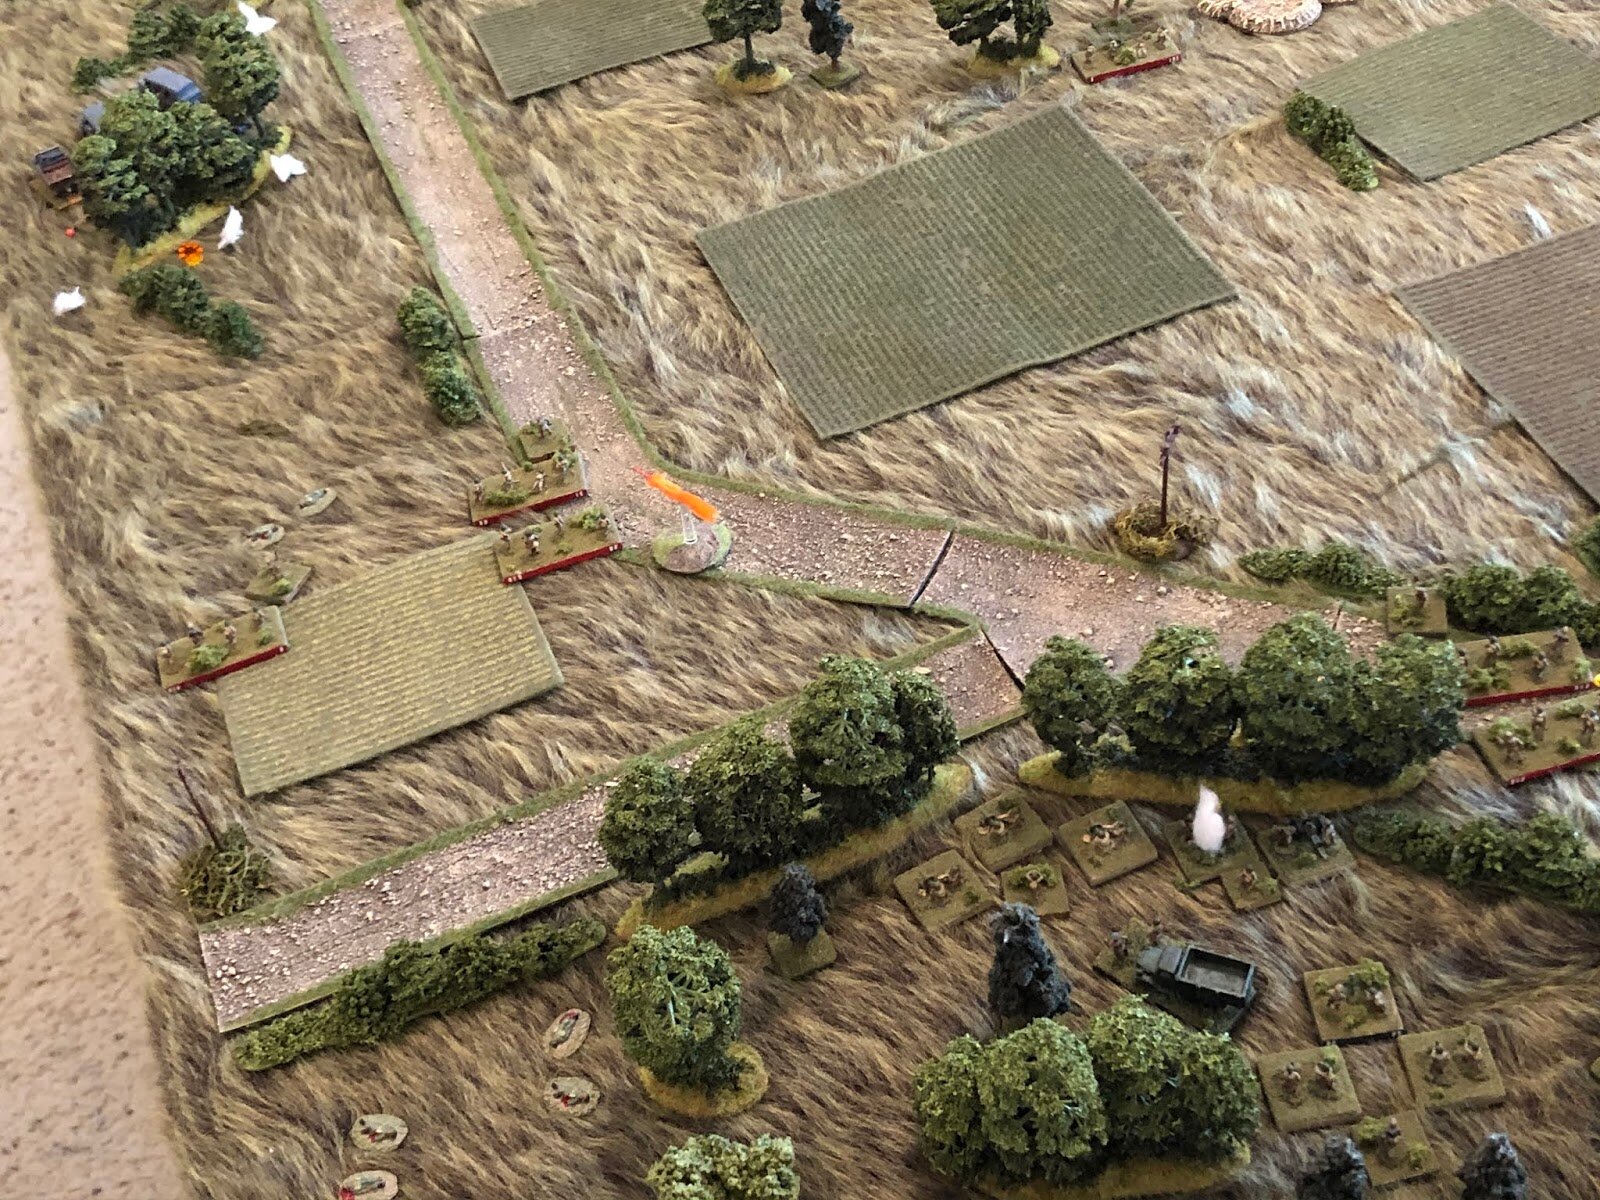
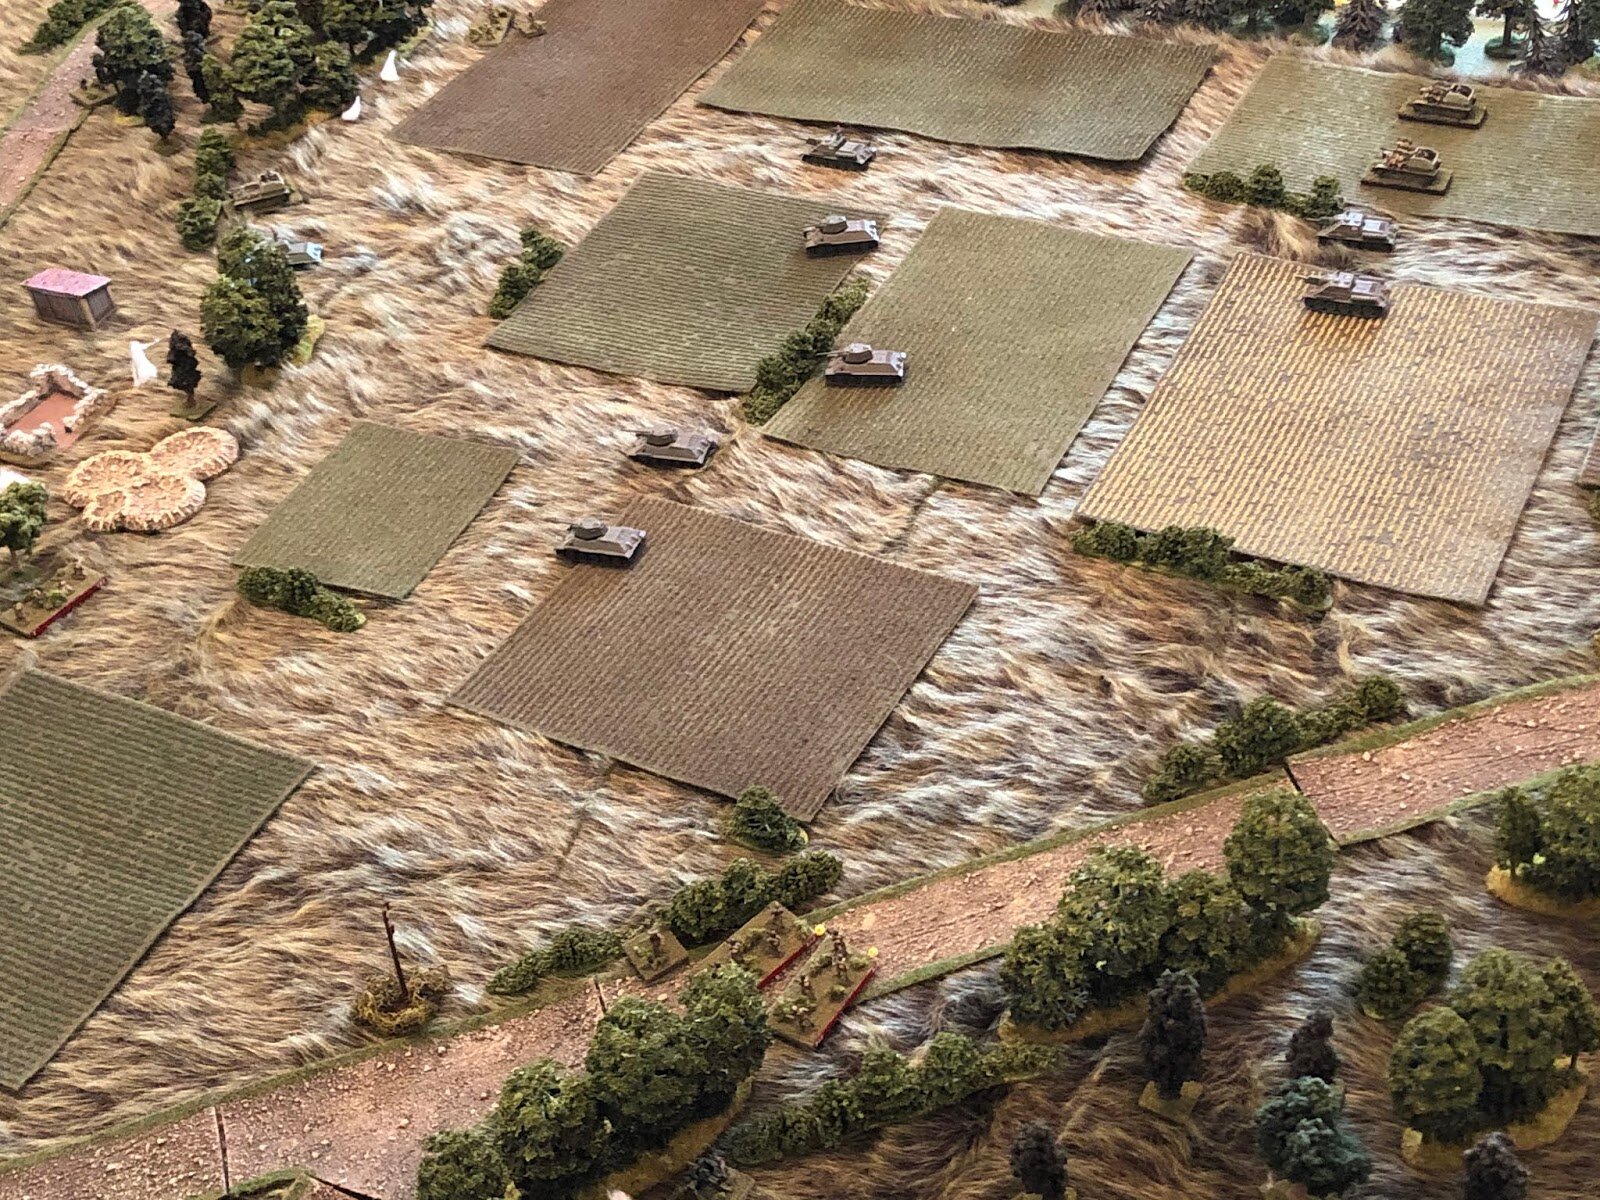
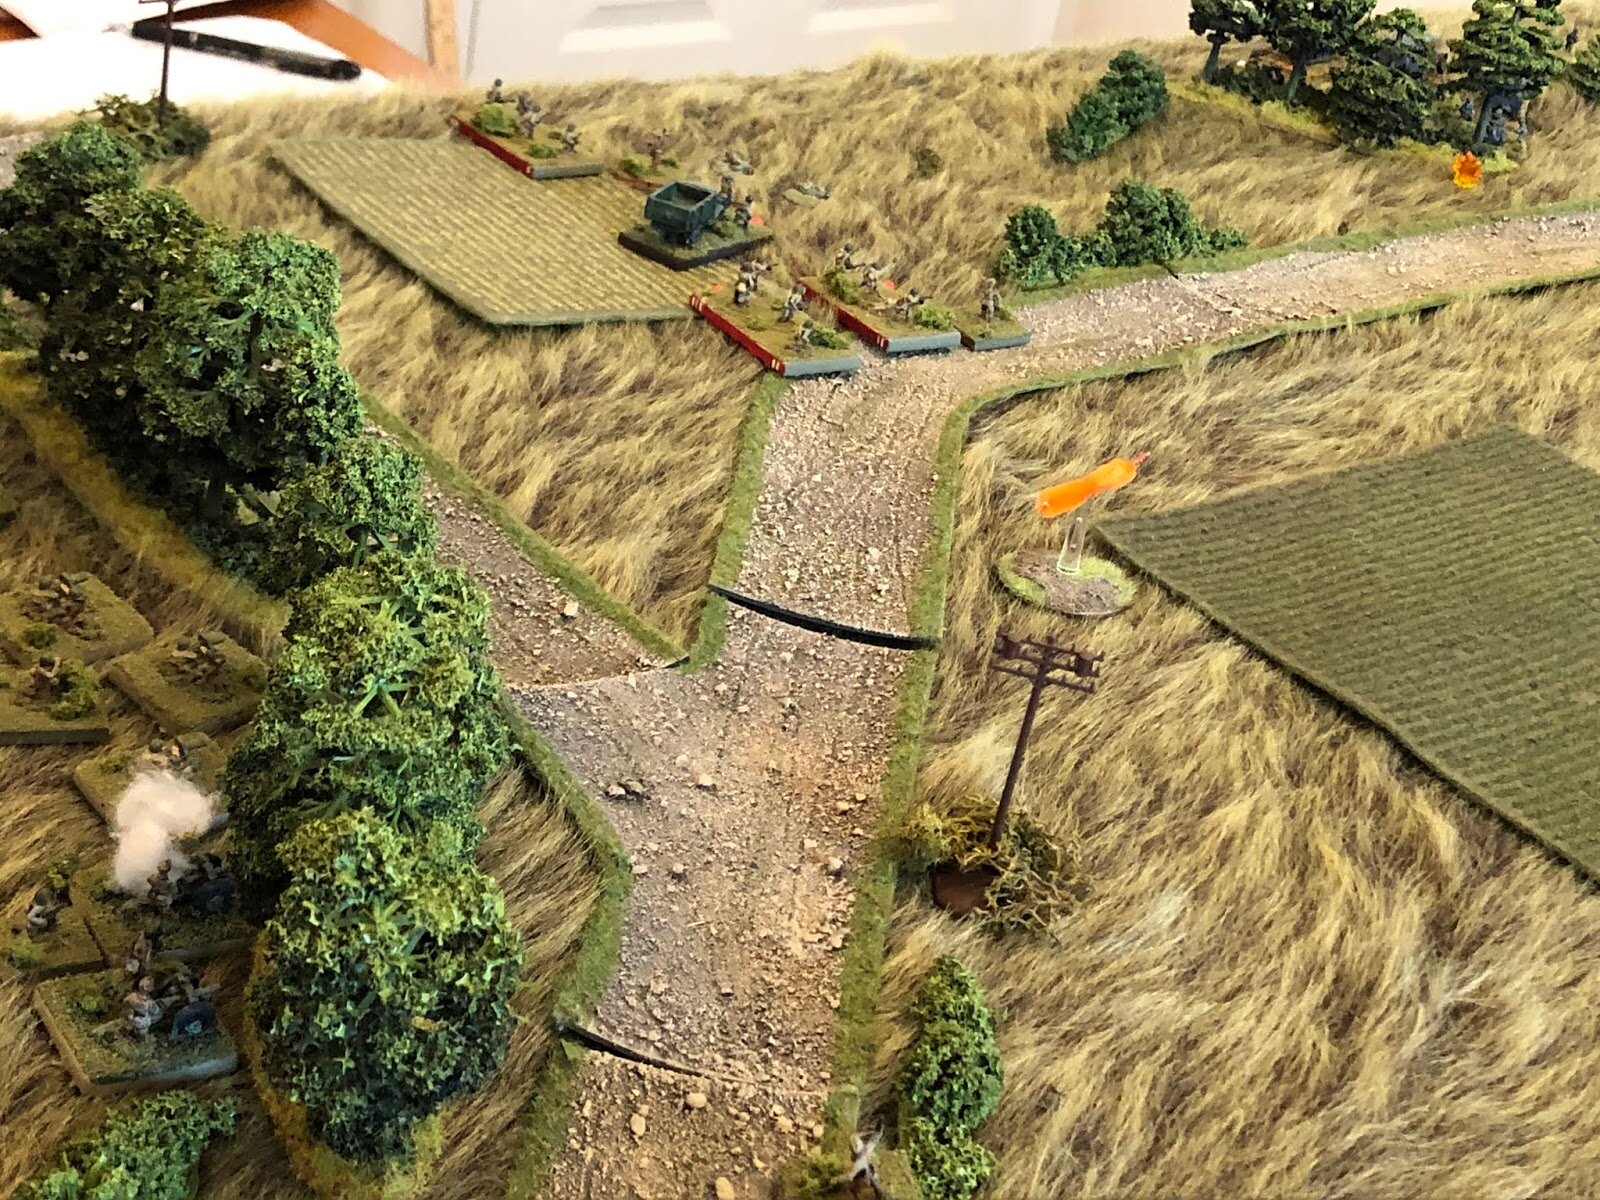
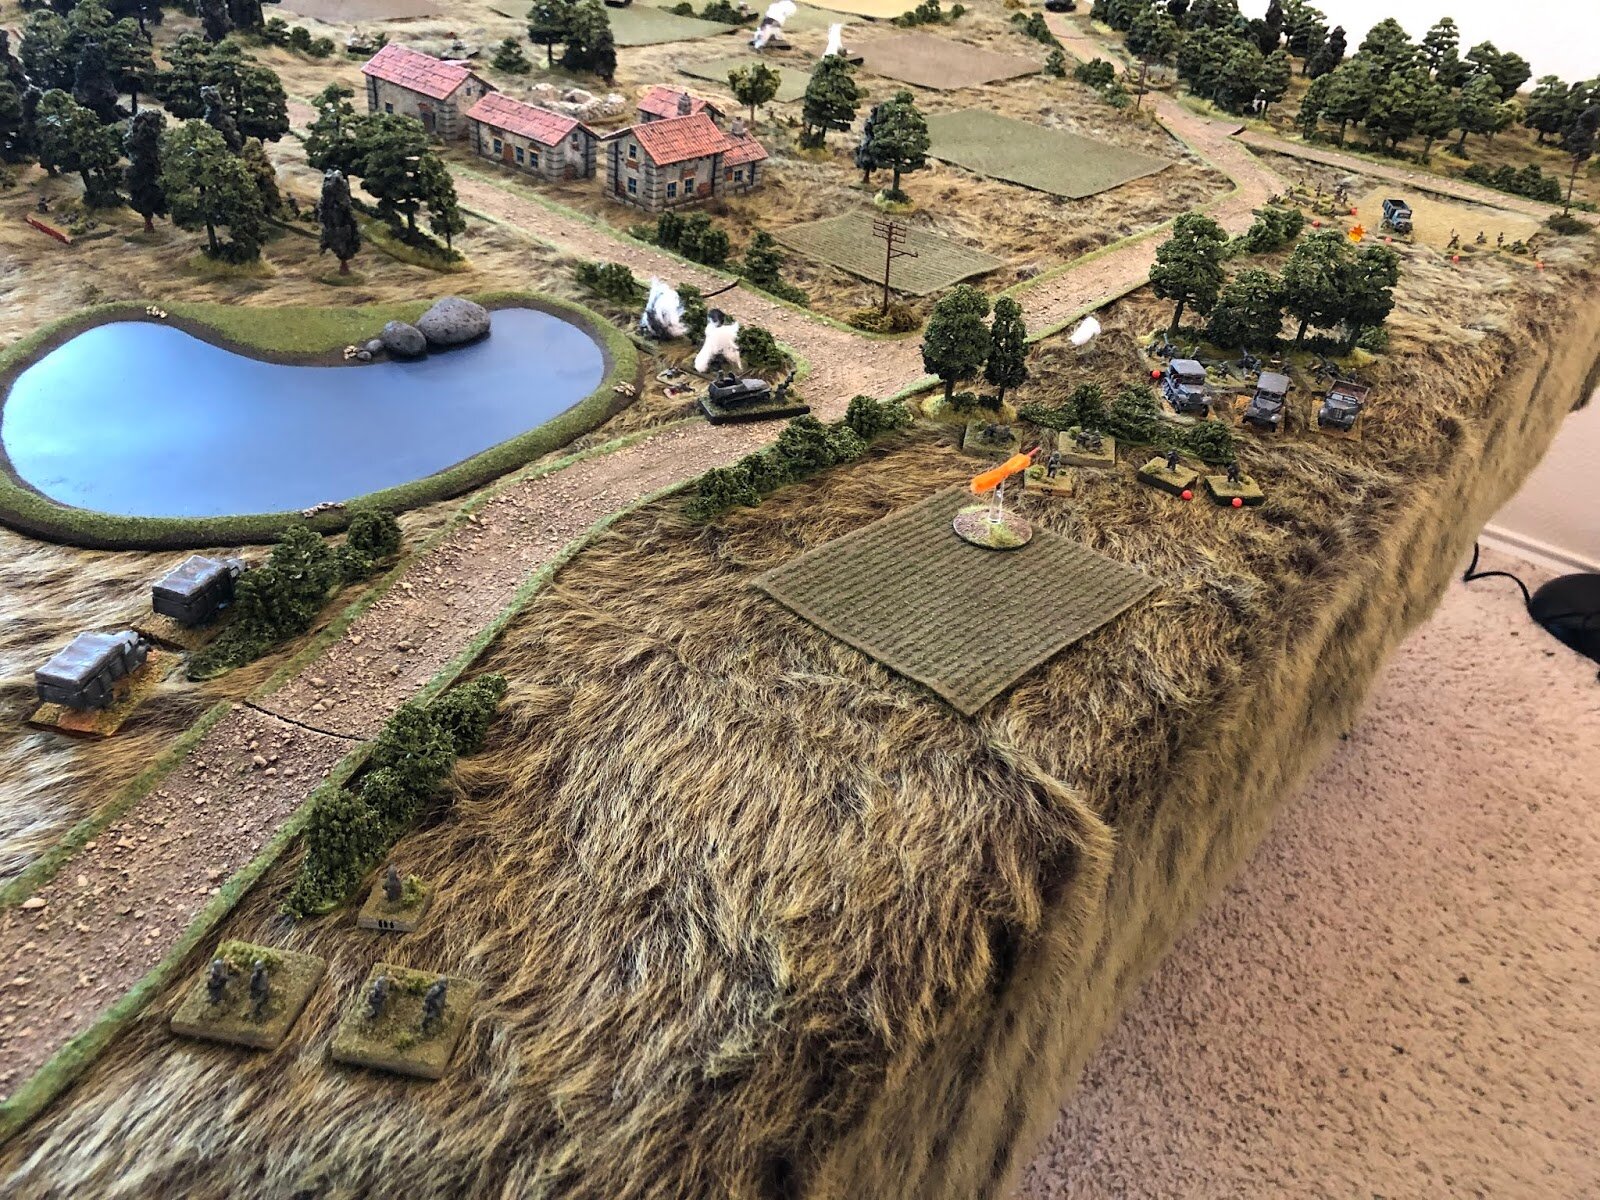
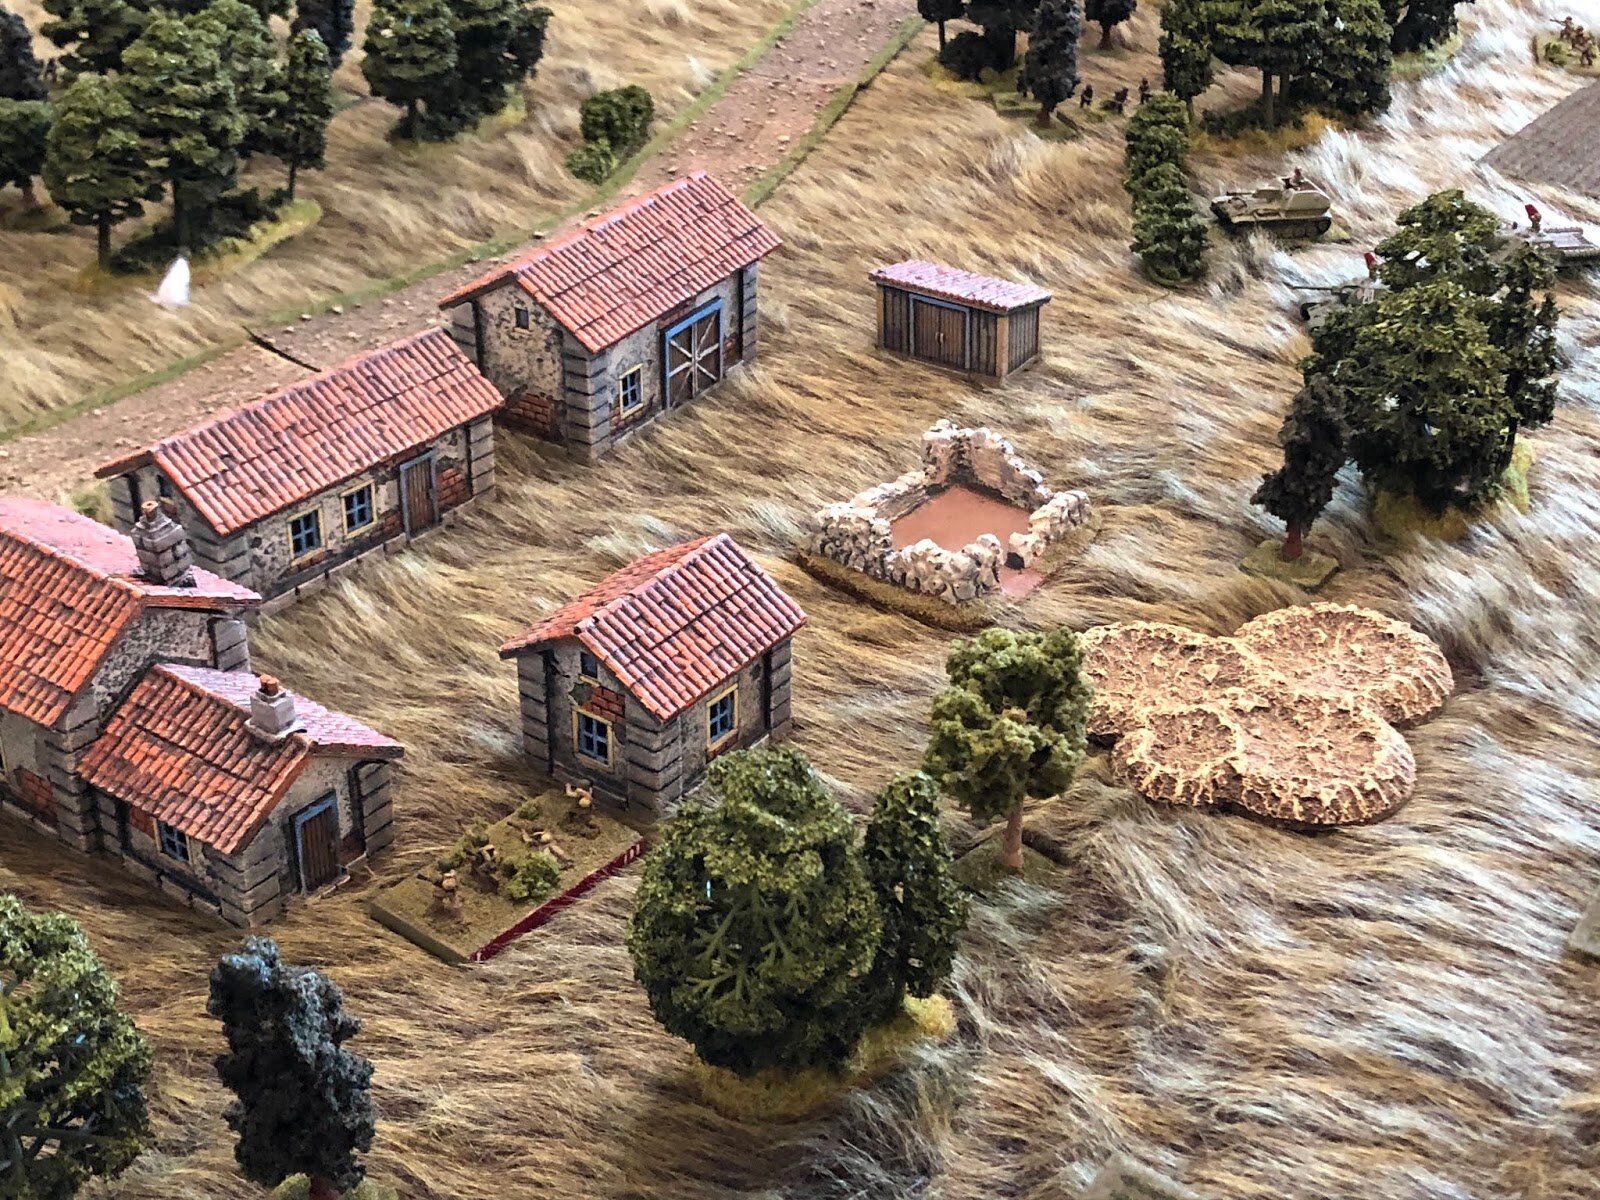
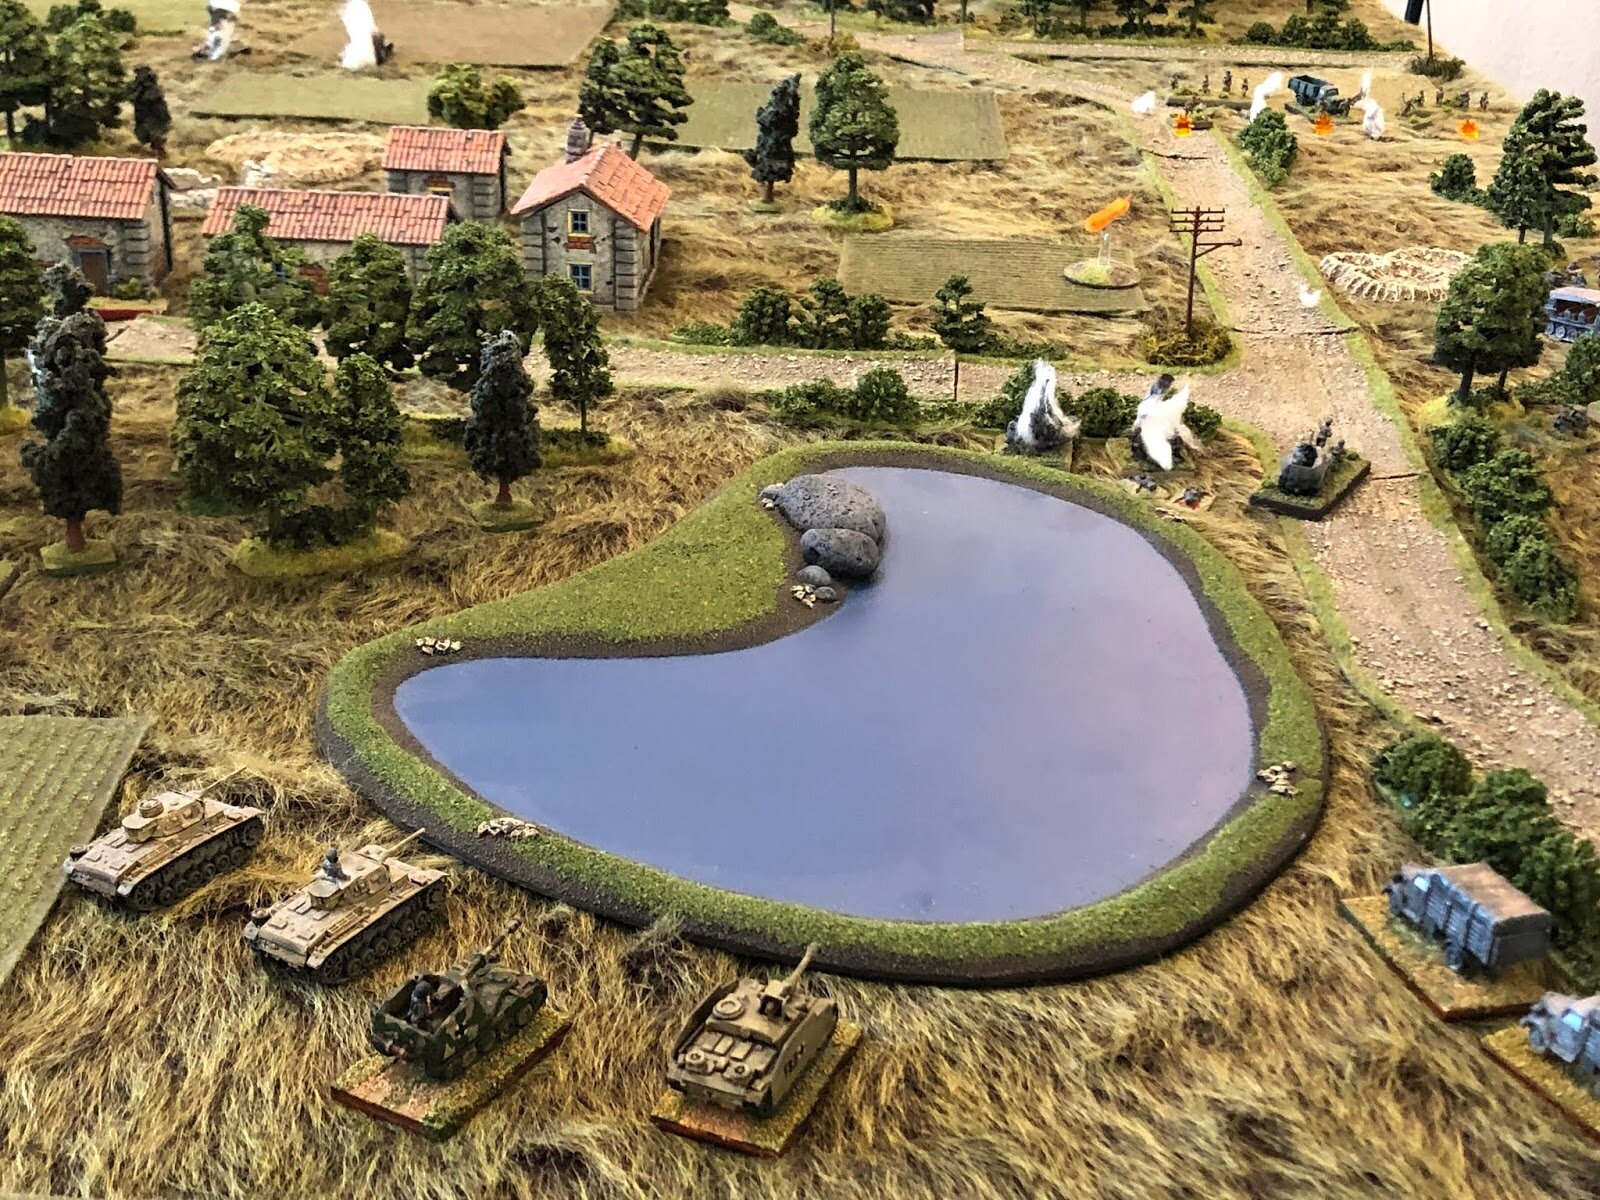
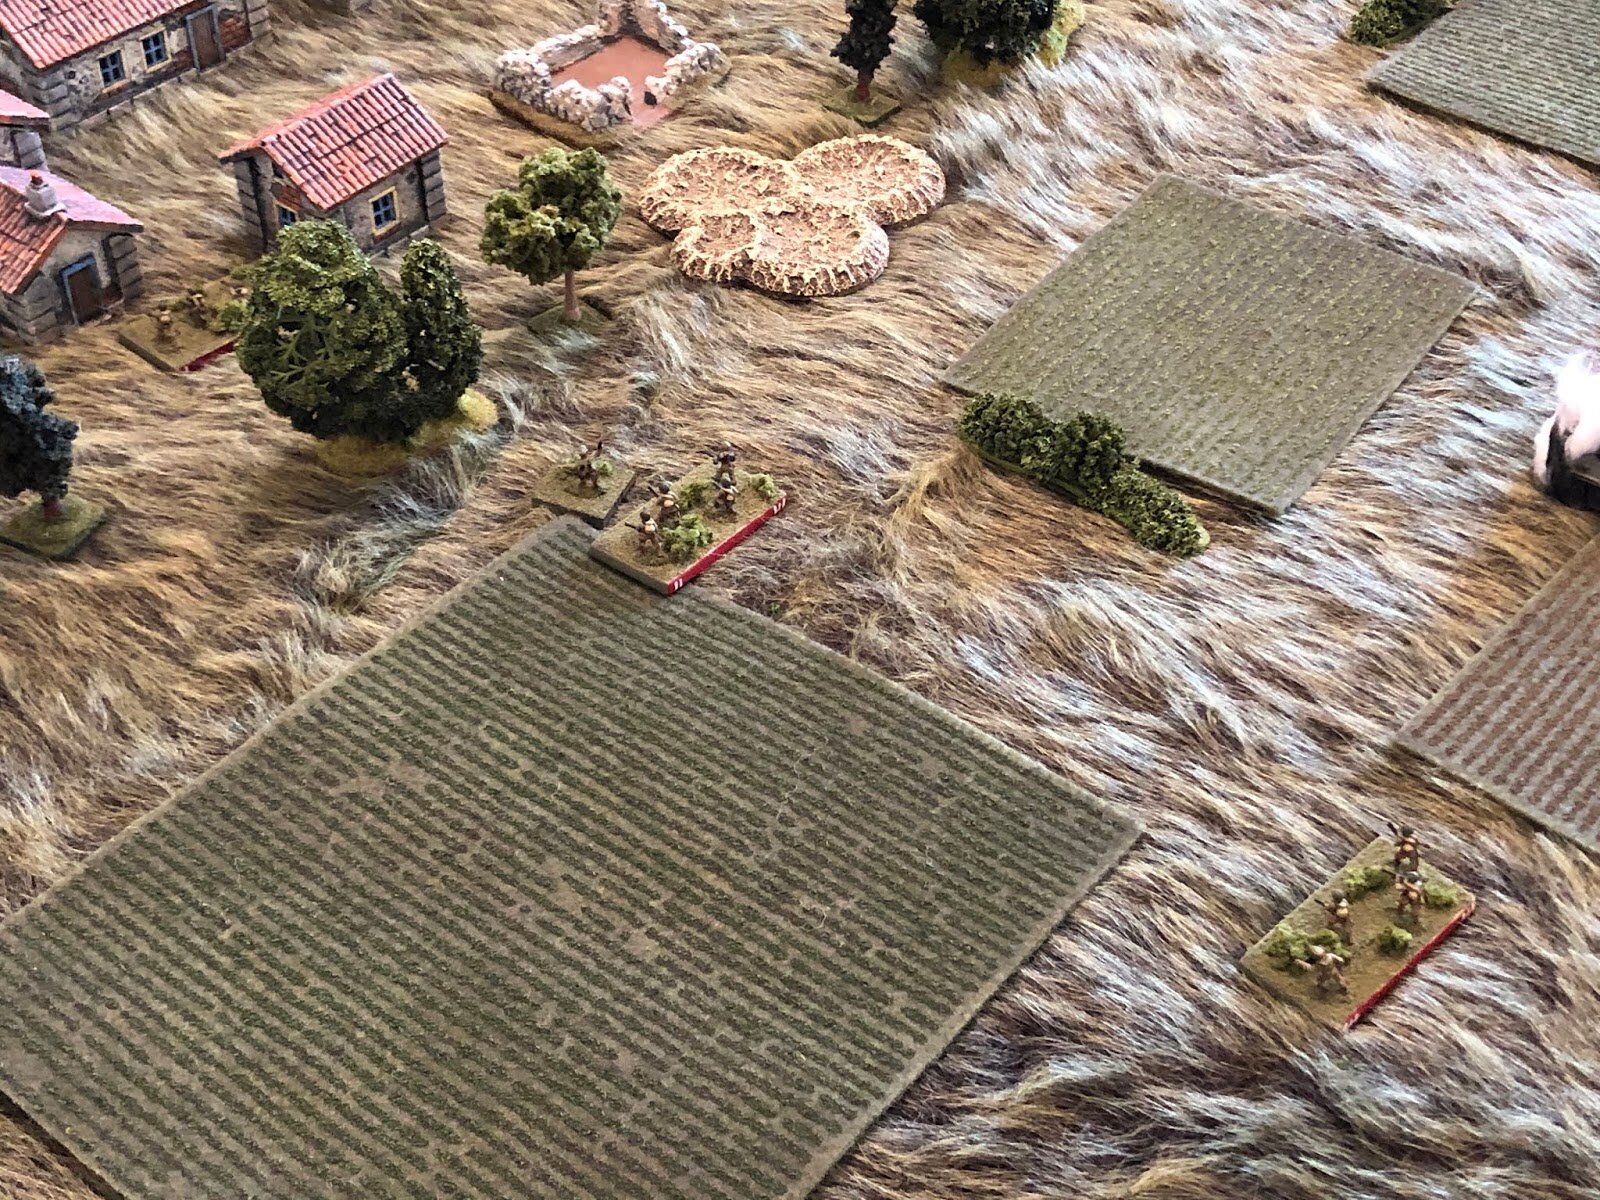
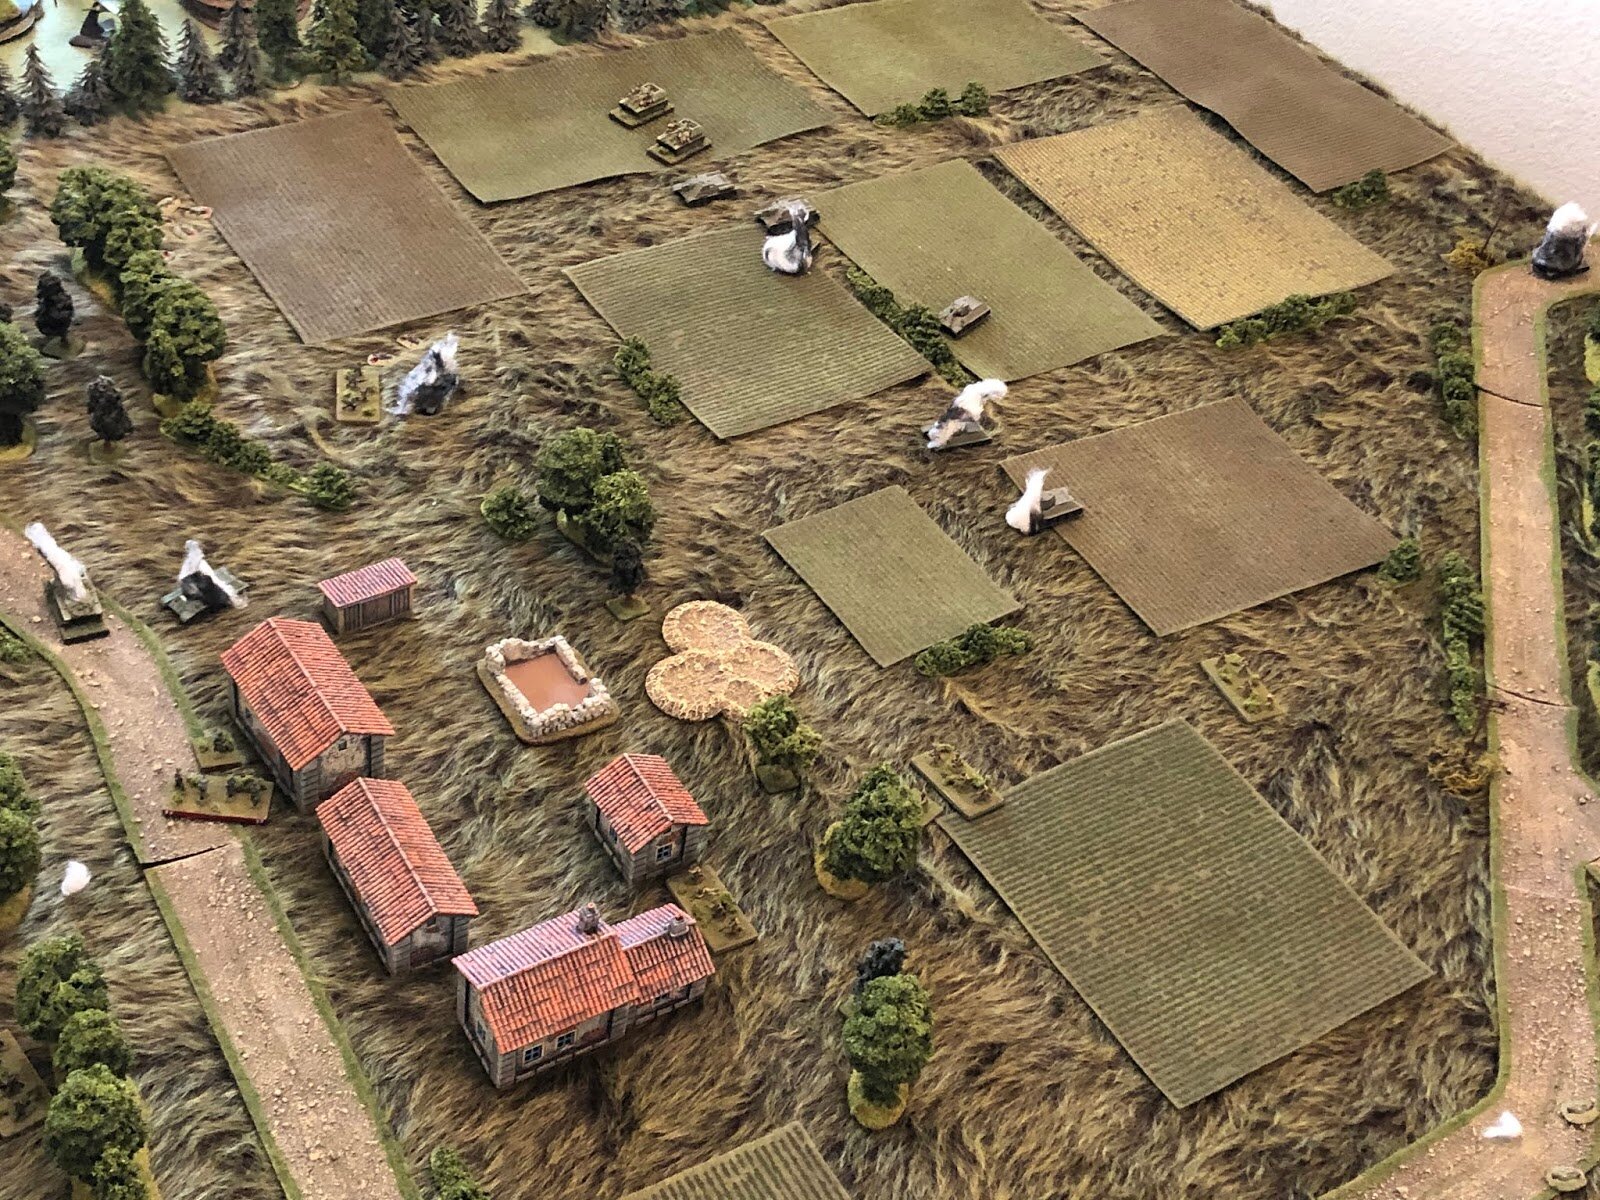
Overview, north is up. The objective is the village of Snava, a Soviet supply depot, at center left. You can see hardball roads running all over the place, and a water treatment pond at left. The forest called "Birnenwald" is at right/bottom right, and other than that it's a couple patches of wood (top center left, left, with a stand at bottom center and a strip just east of Snava) with cultivated fields throughout. This is the third fight at Karpunevka; the first saw a desperate Soviet defense throw back the German attackers, before the Germans were able to rebound and throw the Soviets out on the second try.
The Soviets have attacked north, past Karpunevka (would be off camera to top), cutting the German forces here off from supply, and are now coming back to eliminate the pocket. Technically speaking, all Soviet forces should enter the map from the northwest (top right), which is where the counterattack is coming from on the campaign map, but I'm allowing Soviet infantry to attack from right/bottom right as well, figuring they infiltrated via the Birnenwald which, off camera to right, actually extends further to the north/northwest.
This is a Soviet hasty assault vs a German hasty defense. Here are the orders of battle:
The Germans
3 x rifle platoon
each has a platoon commander Big Man (PC), two have three rifle squads, one has two rifle squads
1 x machine gun platoon
Big Man, only two MG-42s
1 x mortar platoon
Big Man, only two 8.0cm mortar tubes
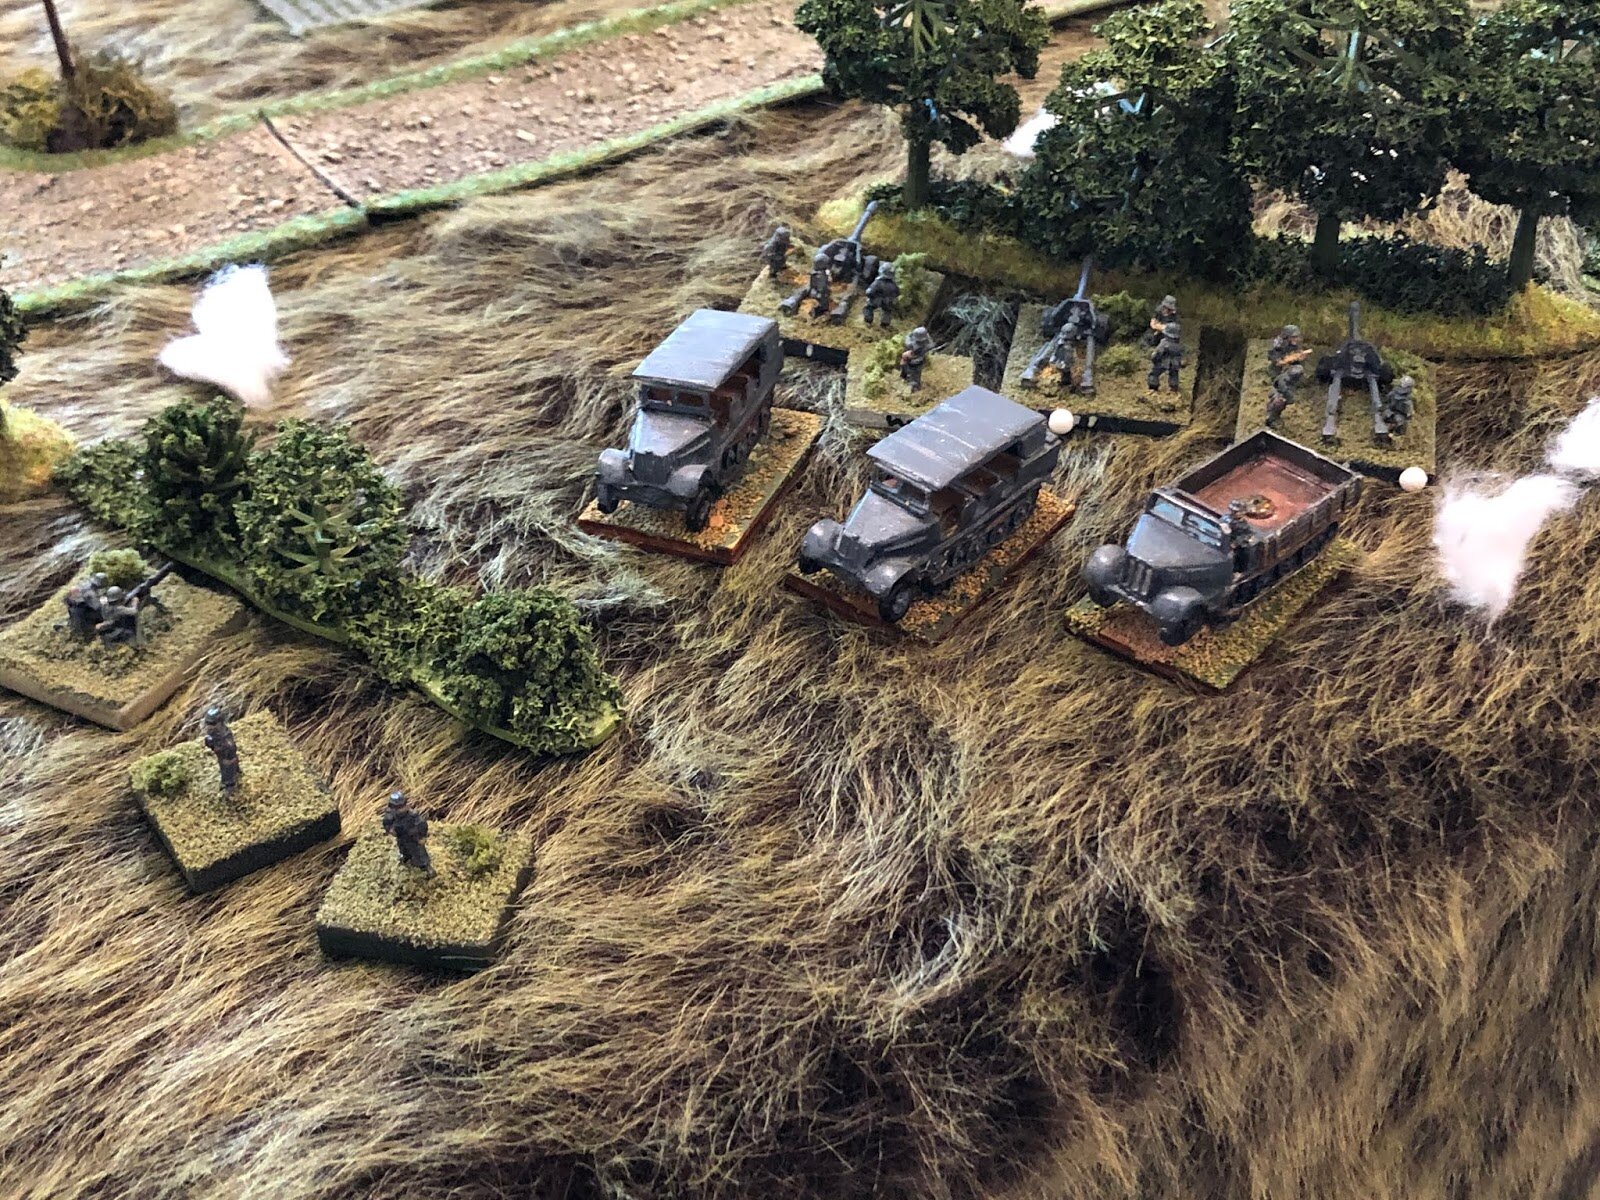
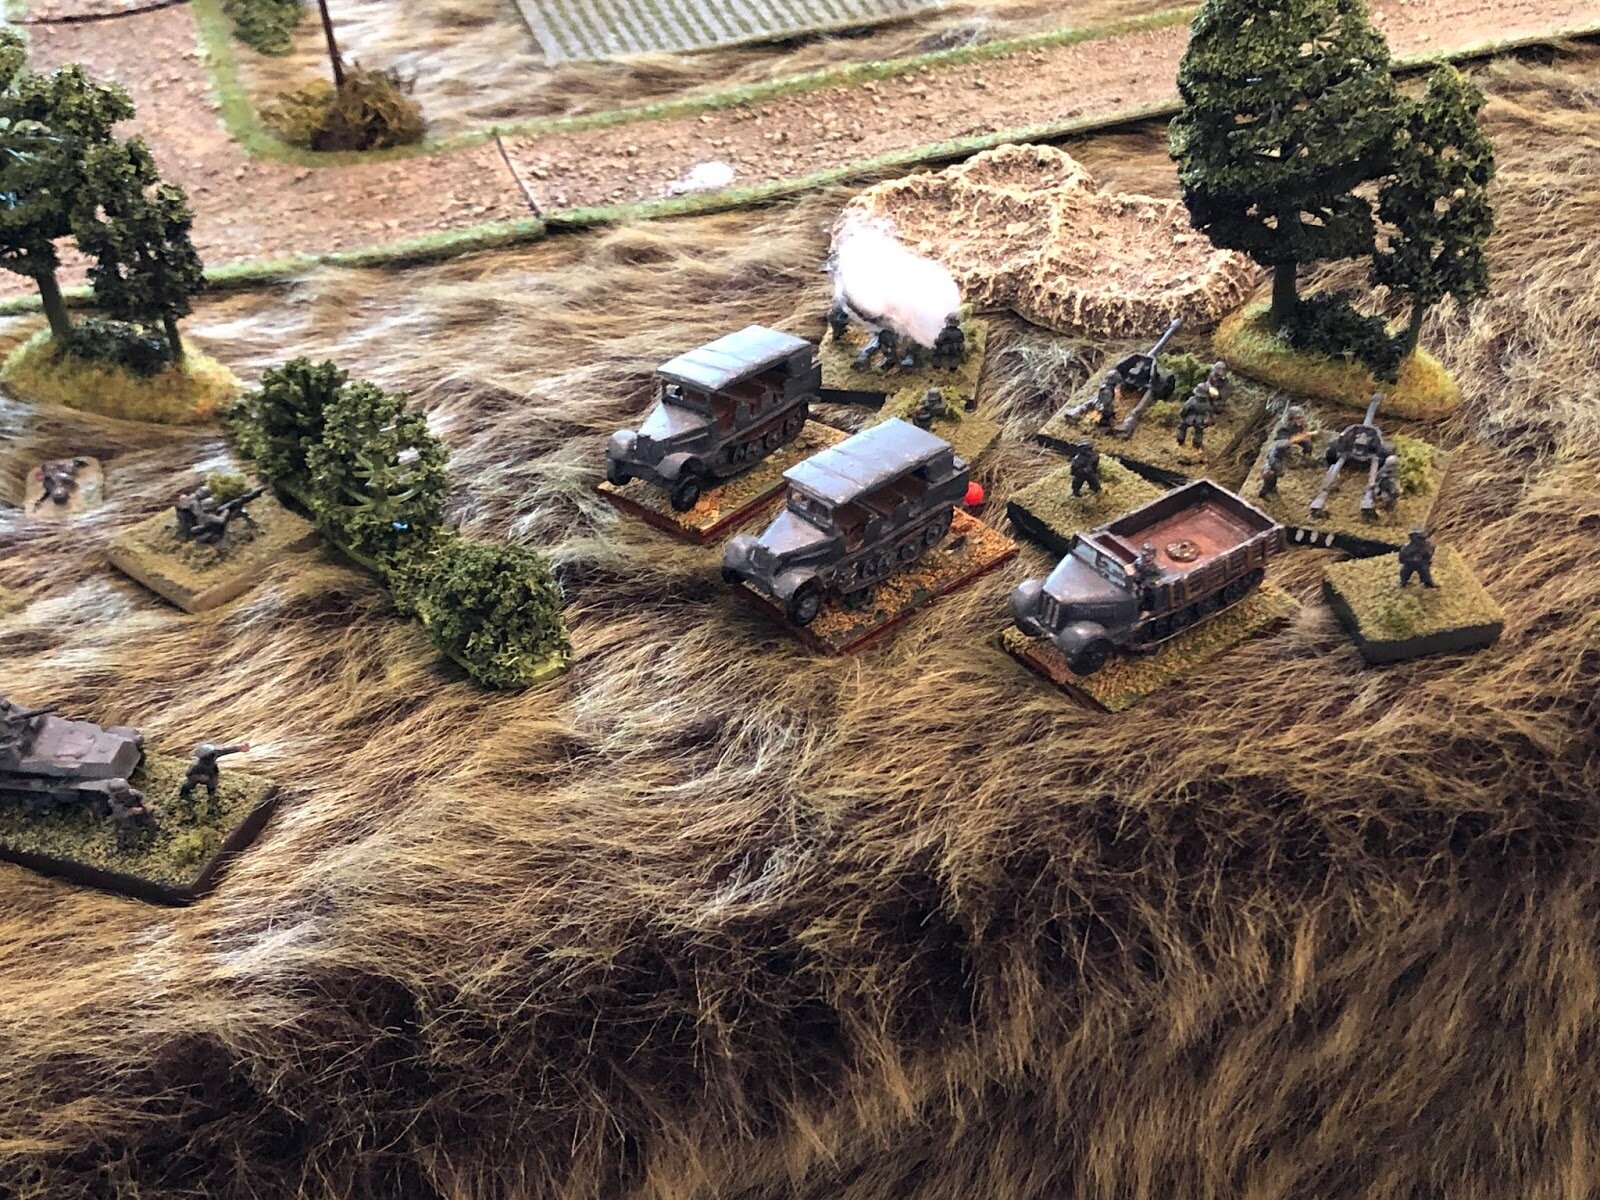
1 x infantry gun platoon
Big Man, only two 7.5cm howitzers and two prime movers
1 x anti-tank gun platoon
Big Man, three PaK-38 5.0cm guns and three prime movers
1 x 'ersatz panzer' platoon
Two Panzer Mk III, one StuG III, and one Marder III
*Being out of supply, the German OOB was knocked down by 20%, which is why they are missing one rifle squad, one MG team, one mortar team, and one Panzer Mk III.
The Soviets
1 x rifle company
Three platoons of PC and three rifle squads
1 x machine gun platoon
PC, three Maxim .30-cal MGs
1 x mortar platoon
PC, three 82mm mortar tubes
1 x infantry gun section
PC, two 76mm howitzers
2 x T-34 platoons
Three T-34/76 each
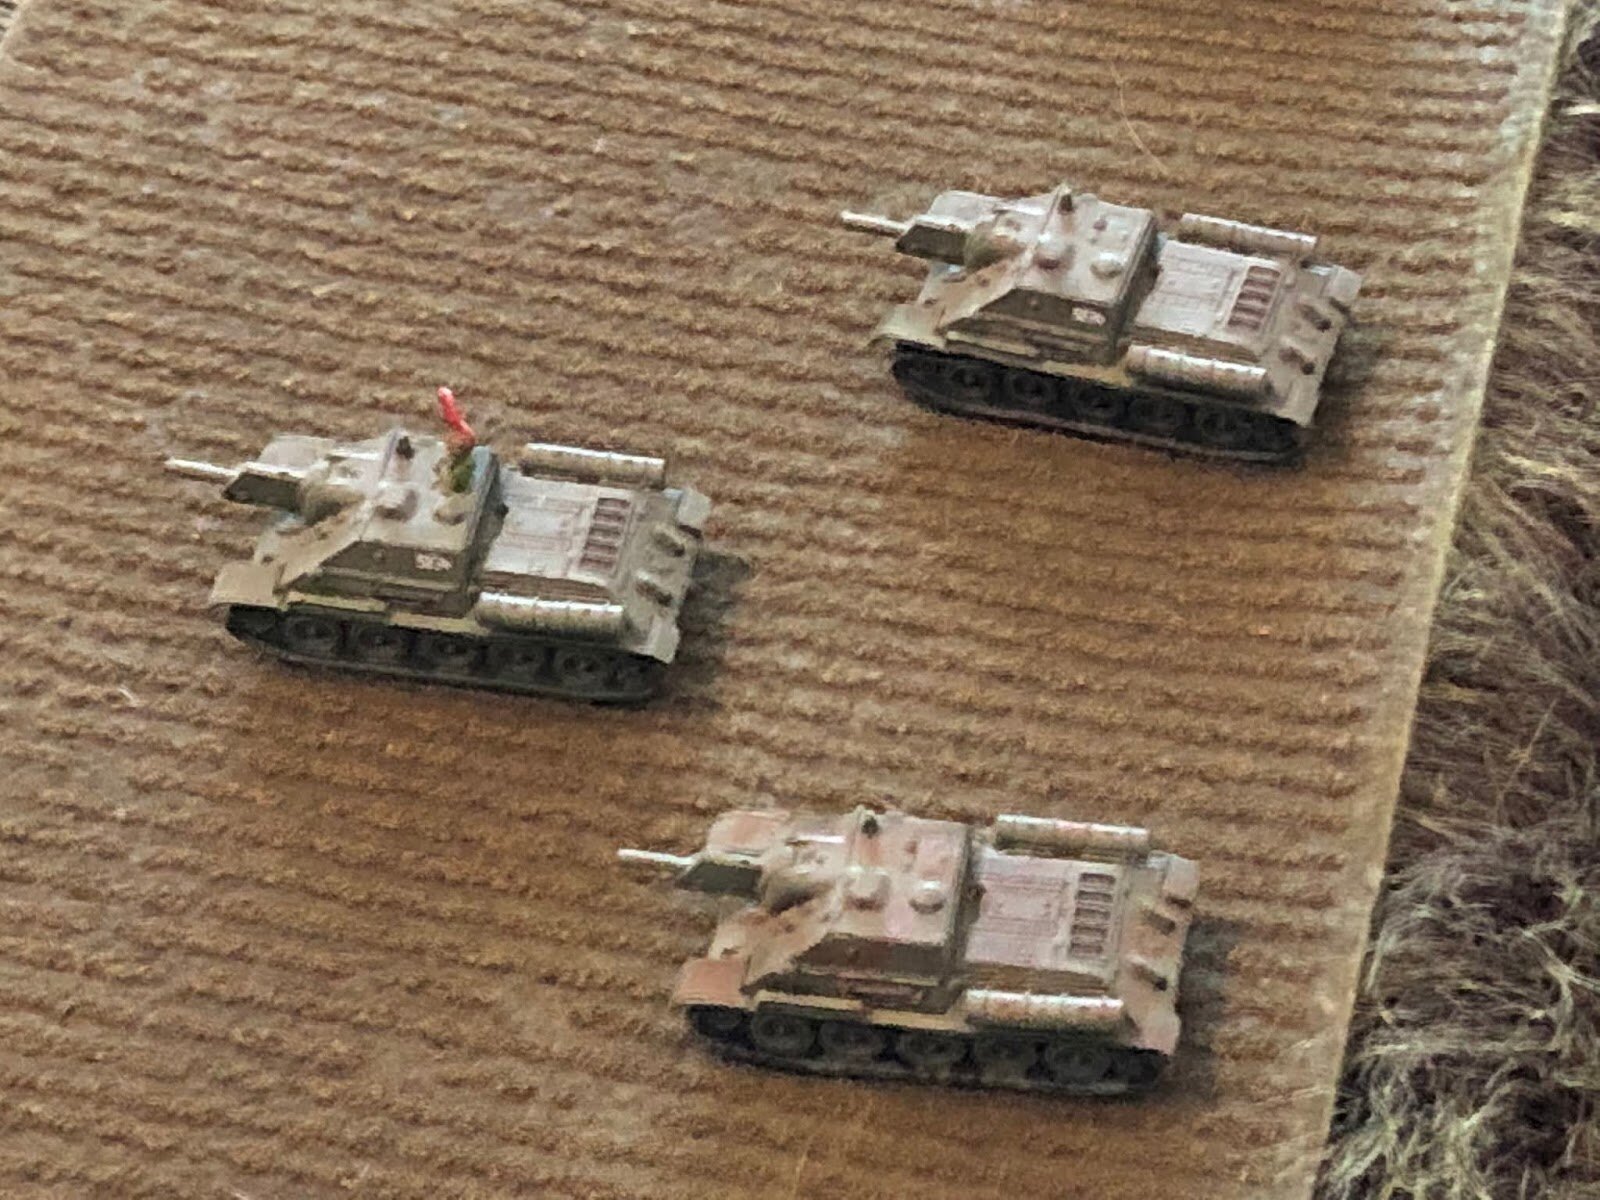
1 x Su-122 platoon
Three Su-122s*.
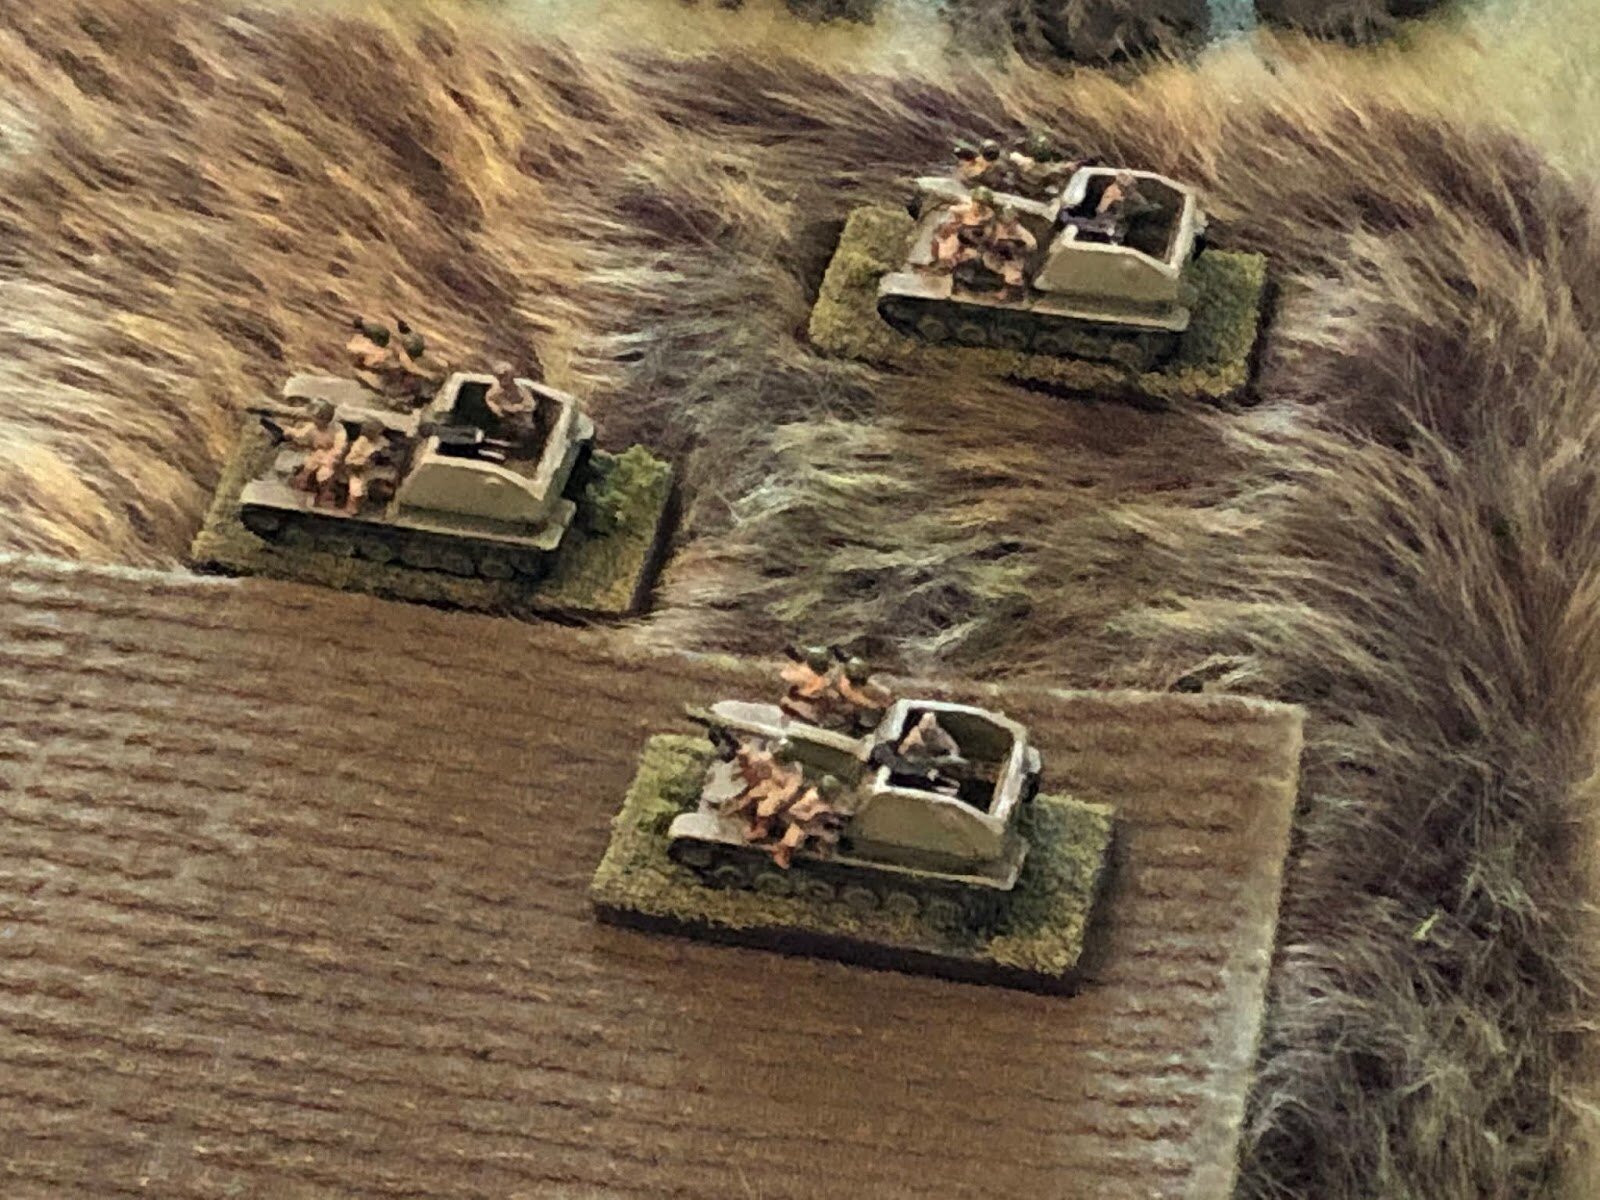
1 x Su-76 platoon
Three Su-76s
1 x 'Tank Rider' platoon
PC and three rifle squads riding the S-76s
Off table support
One battery of four 120mm heavy mortars
*I used Su-122s because I don't have enough T-34s, but the vehicles were treated as T-34s on the tabletop
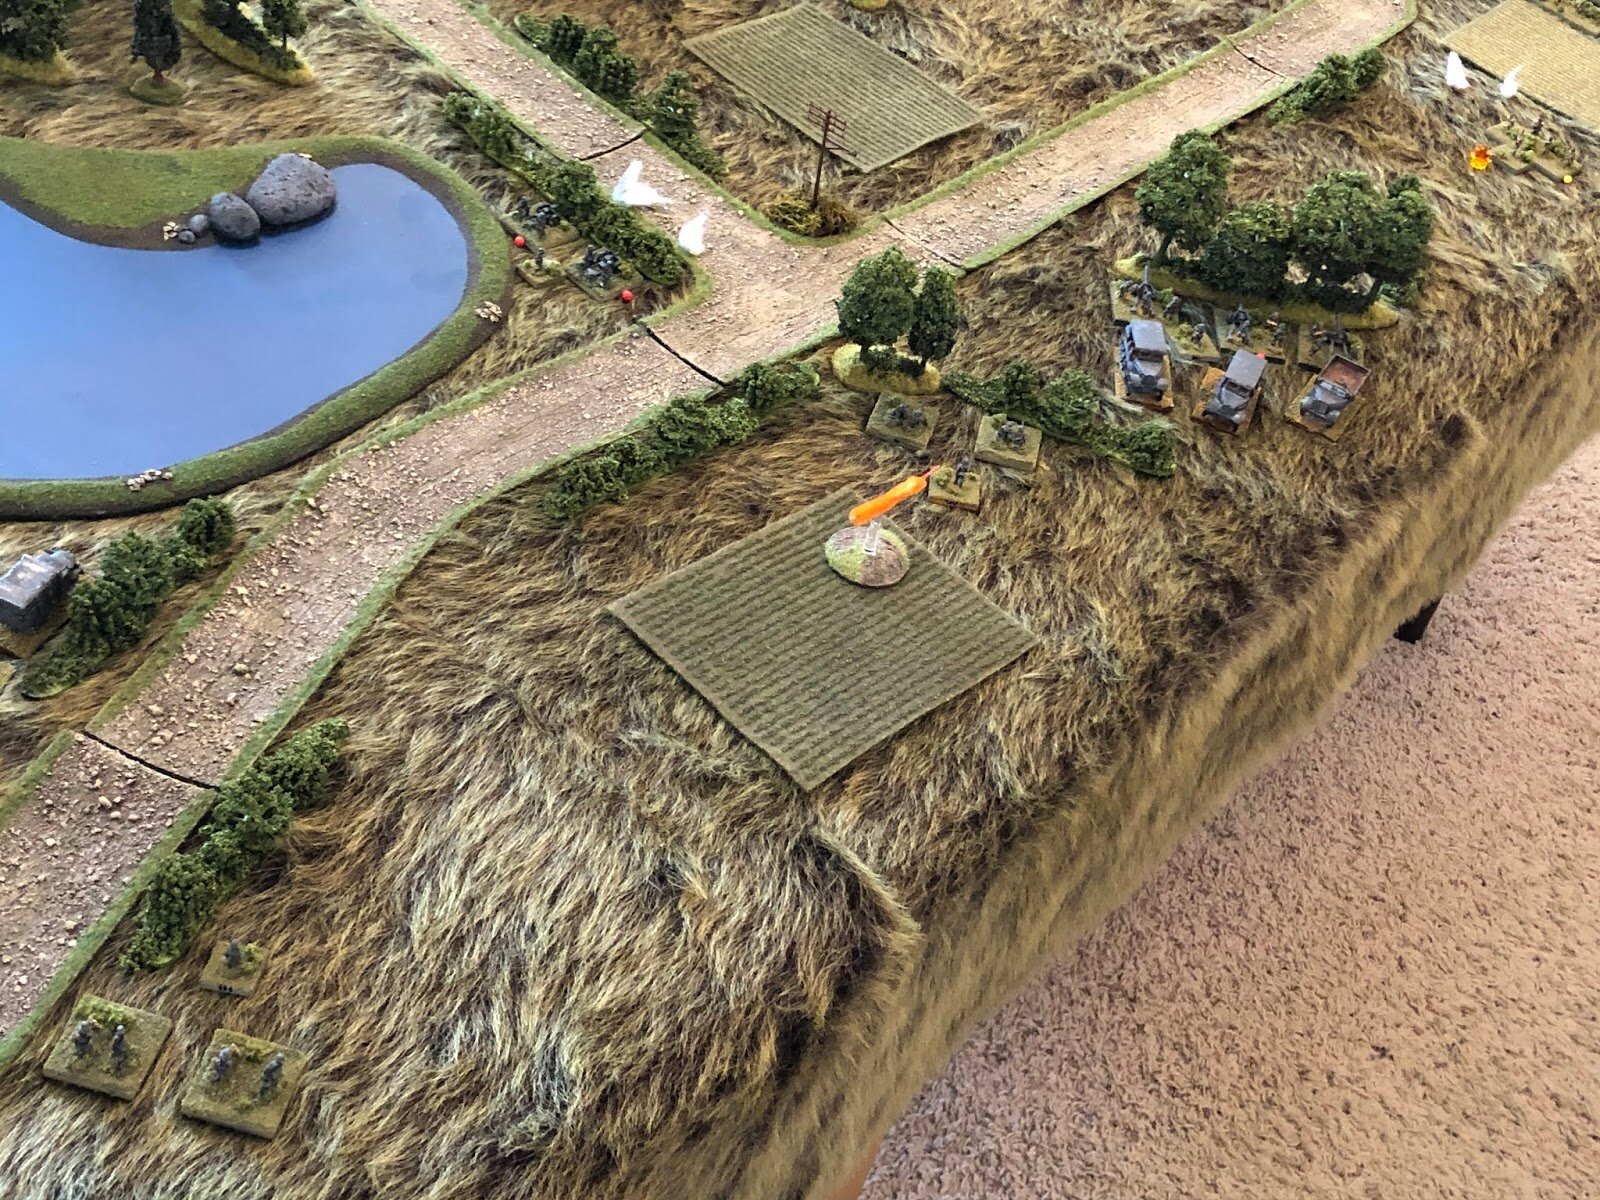
Overview
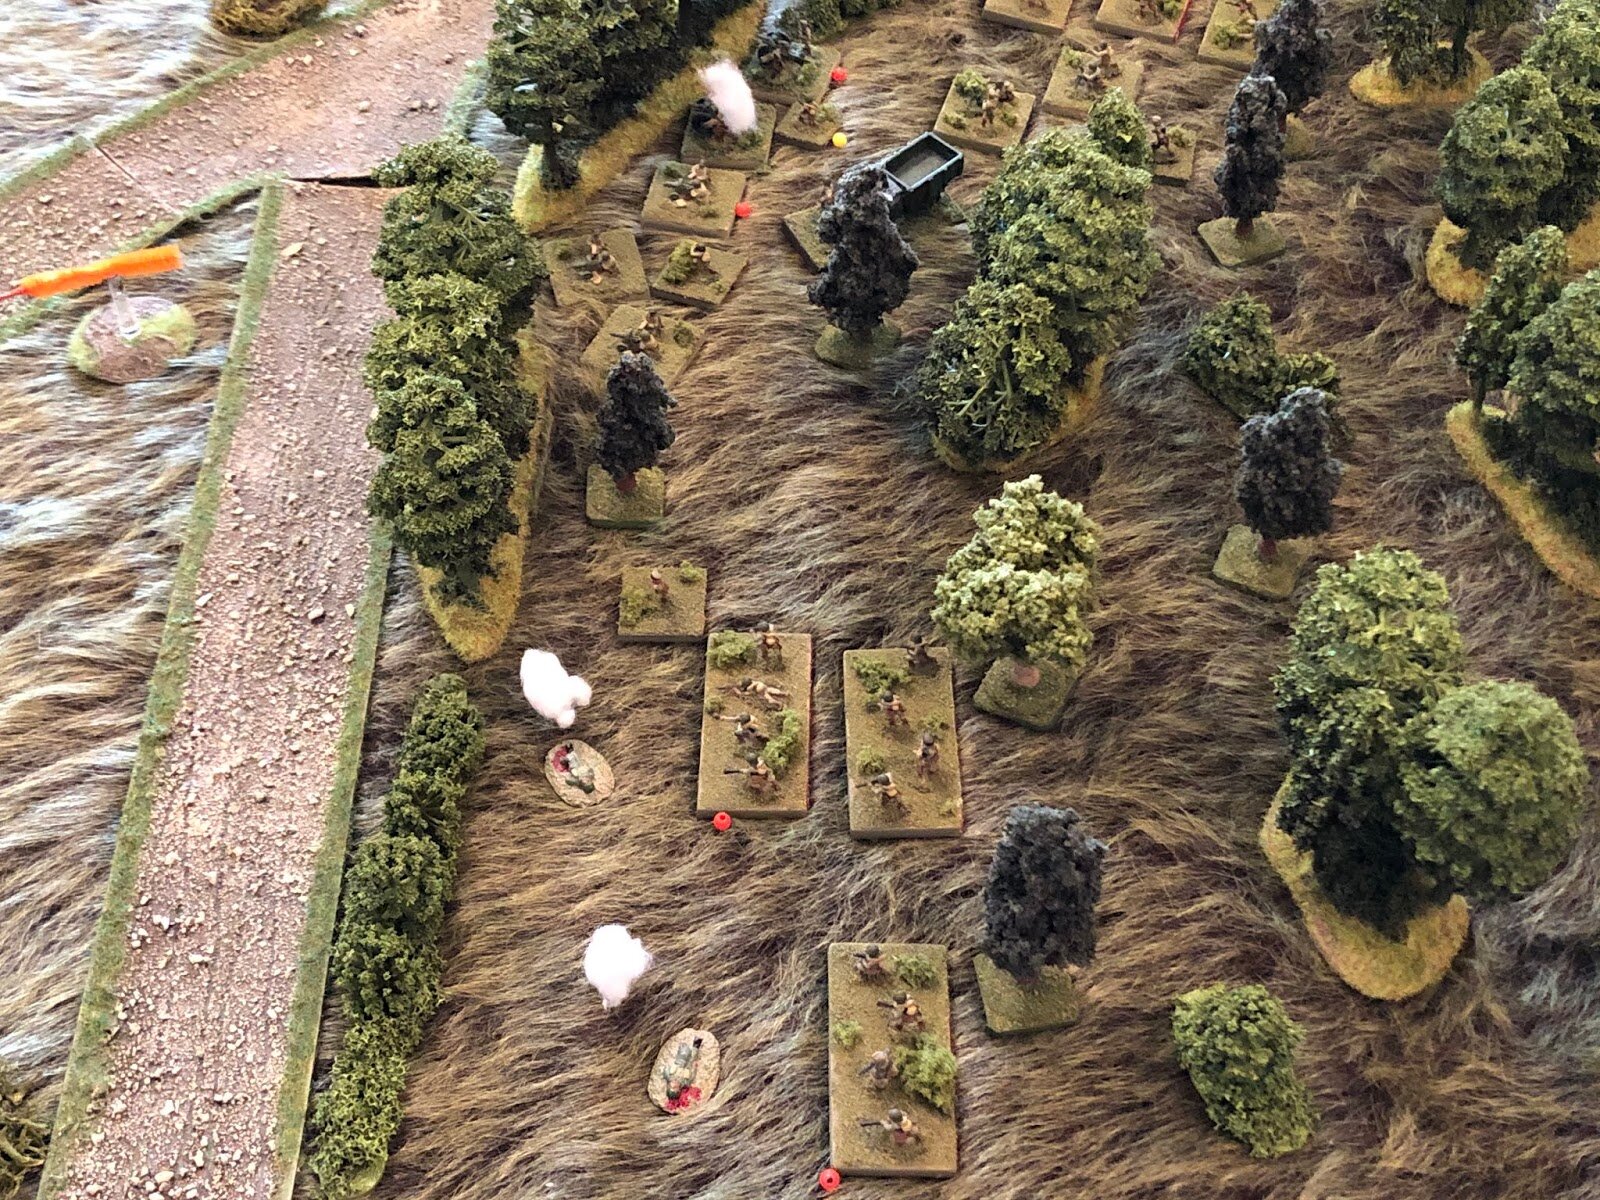
This time with troops
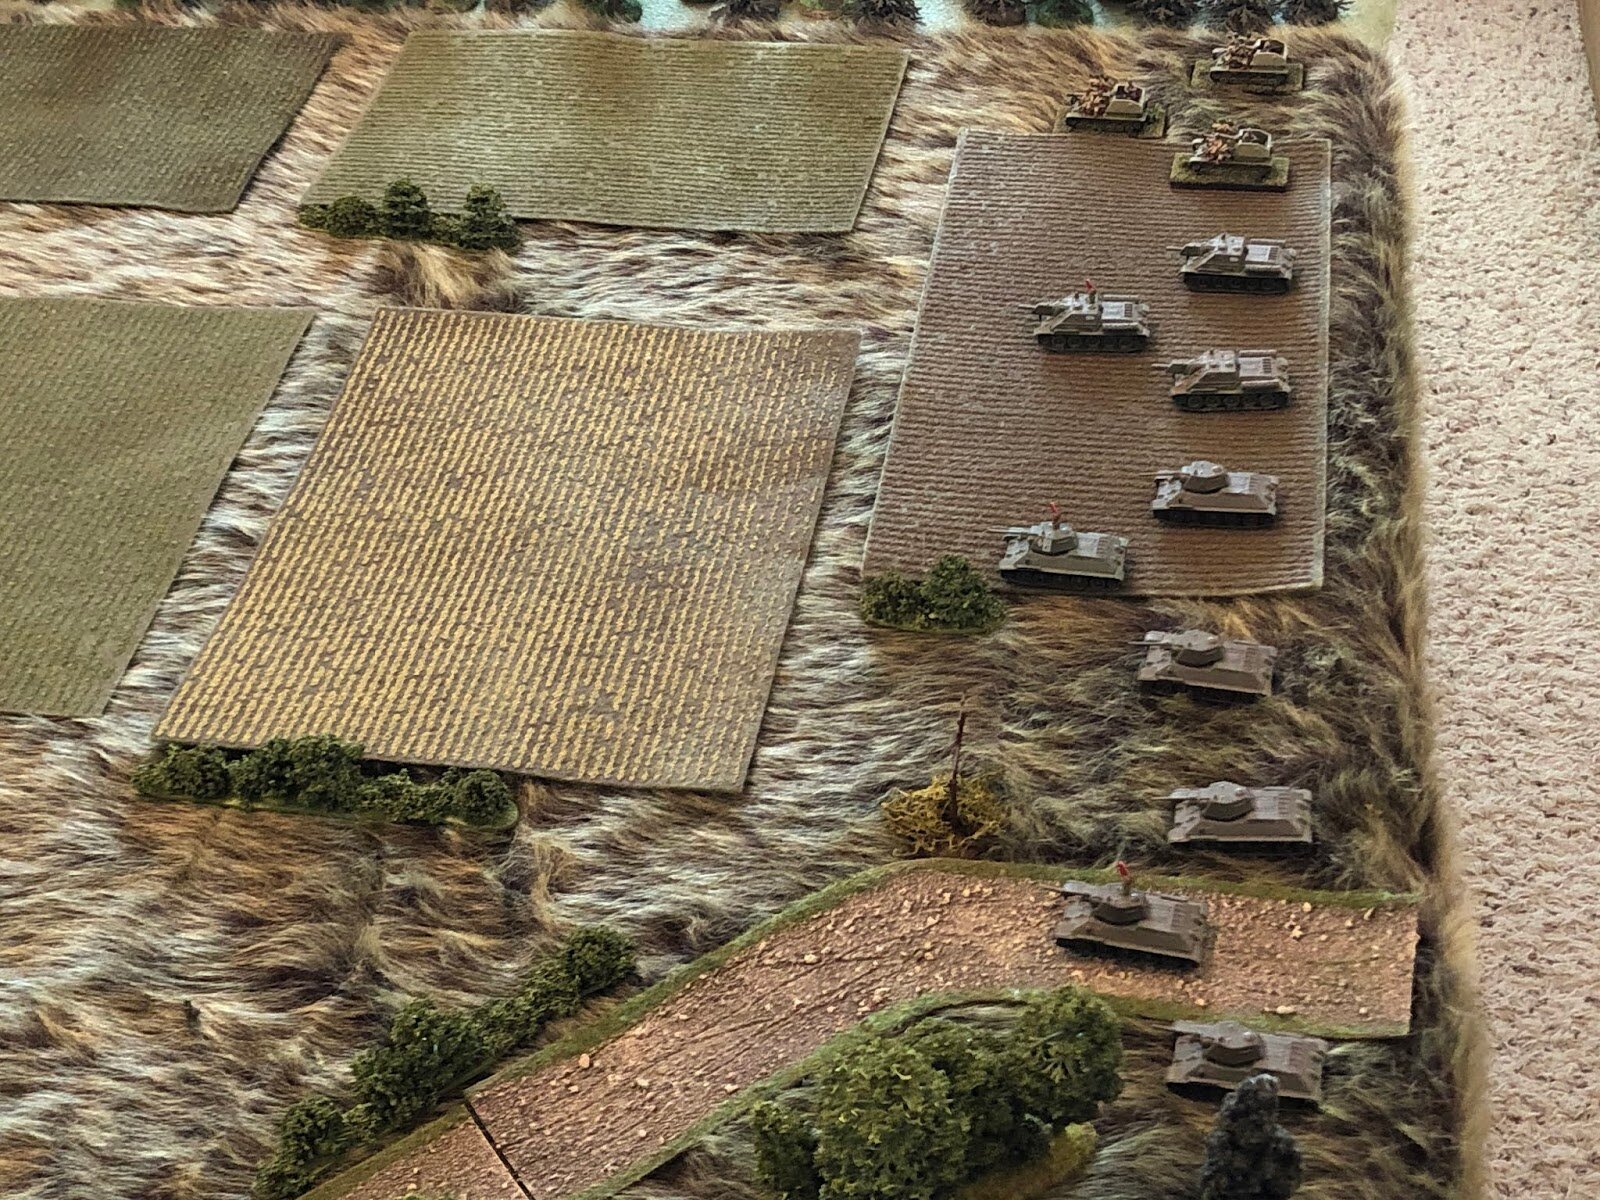
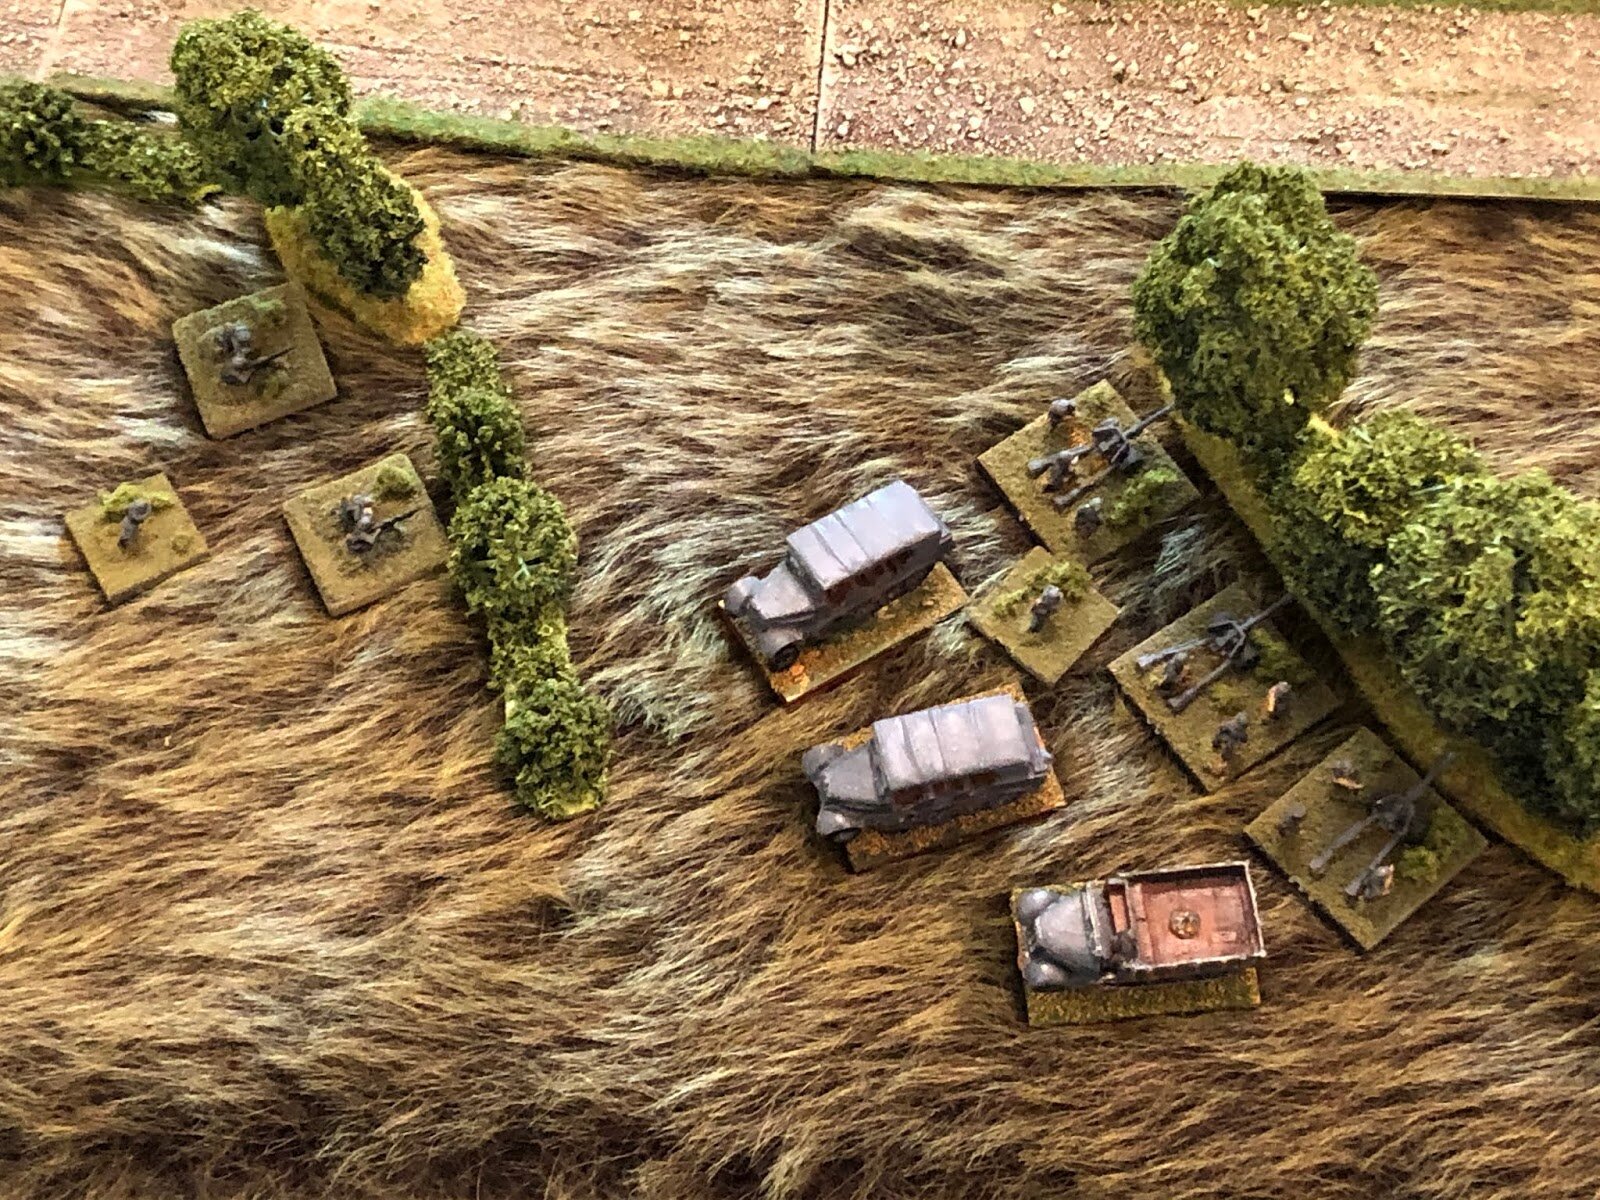
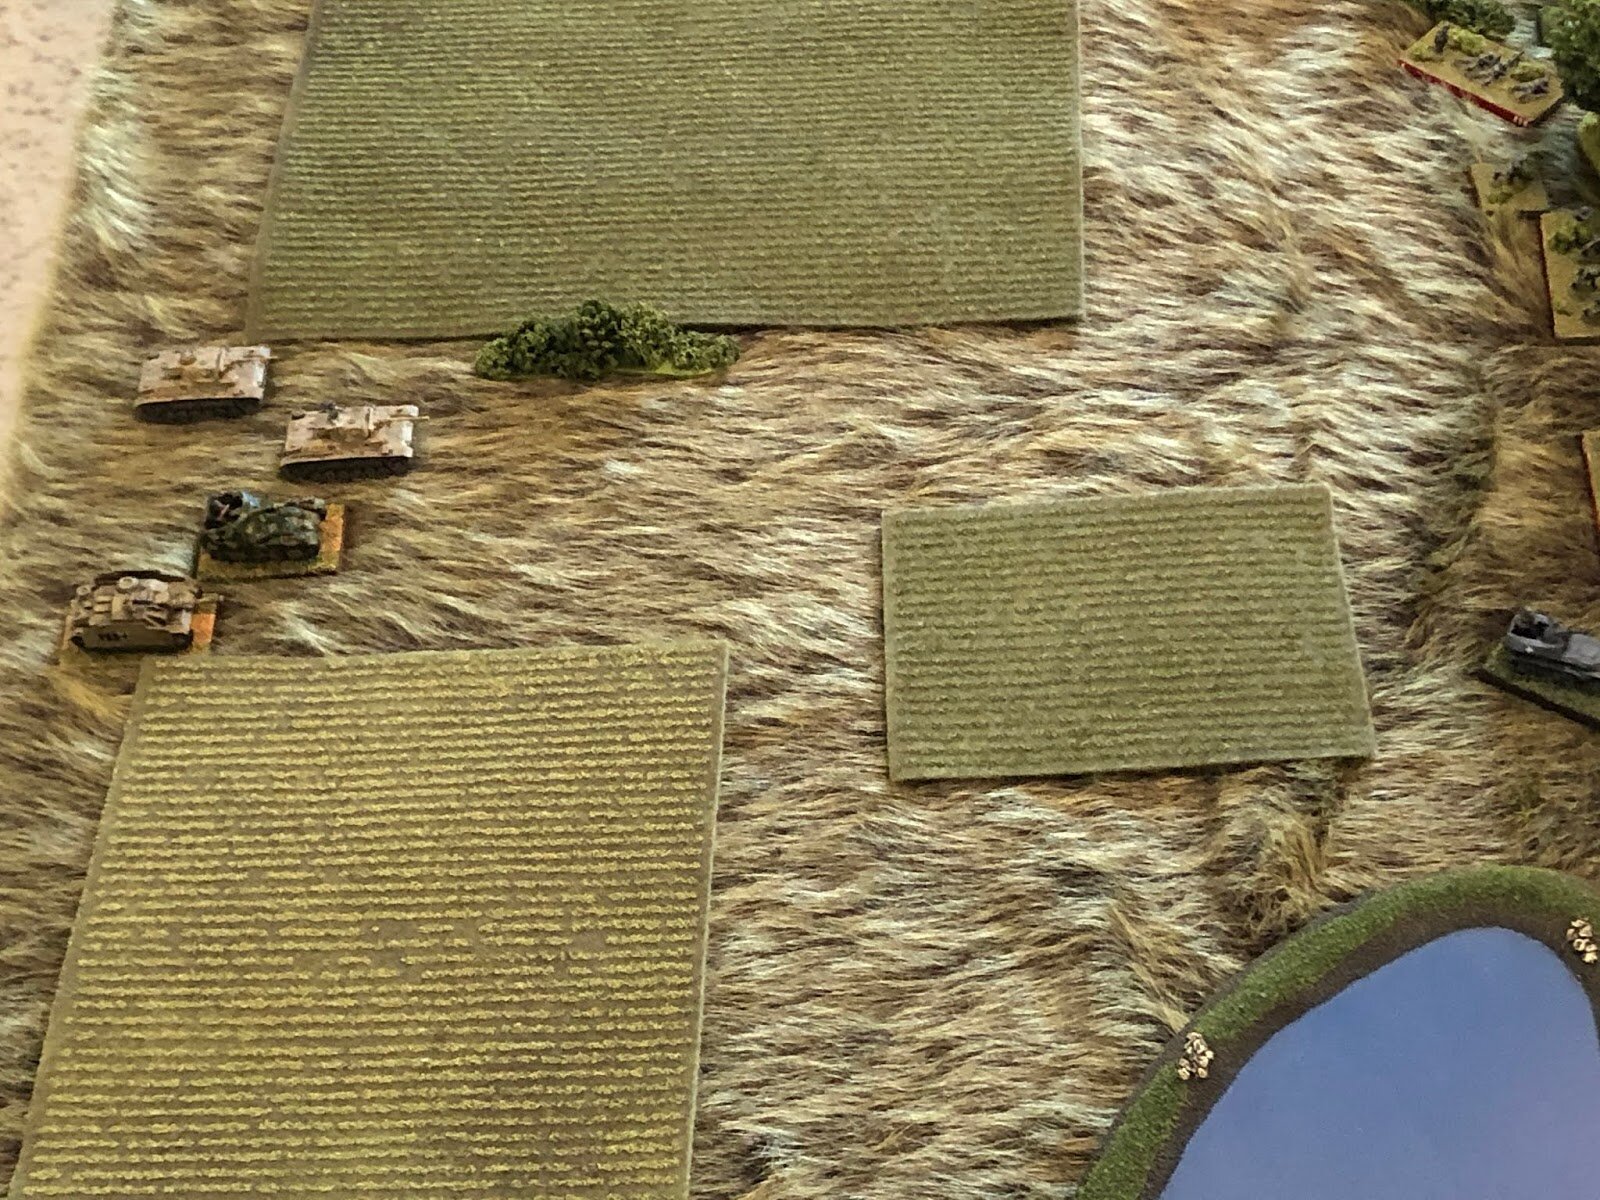
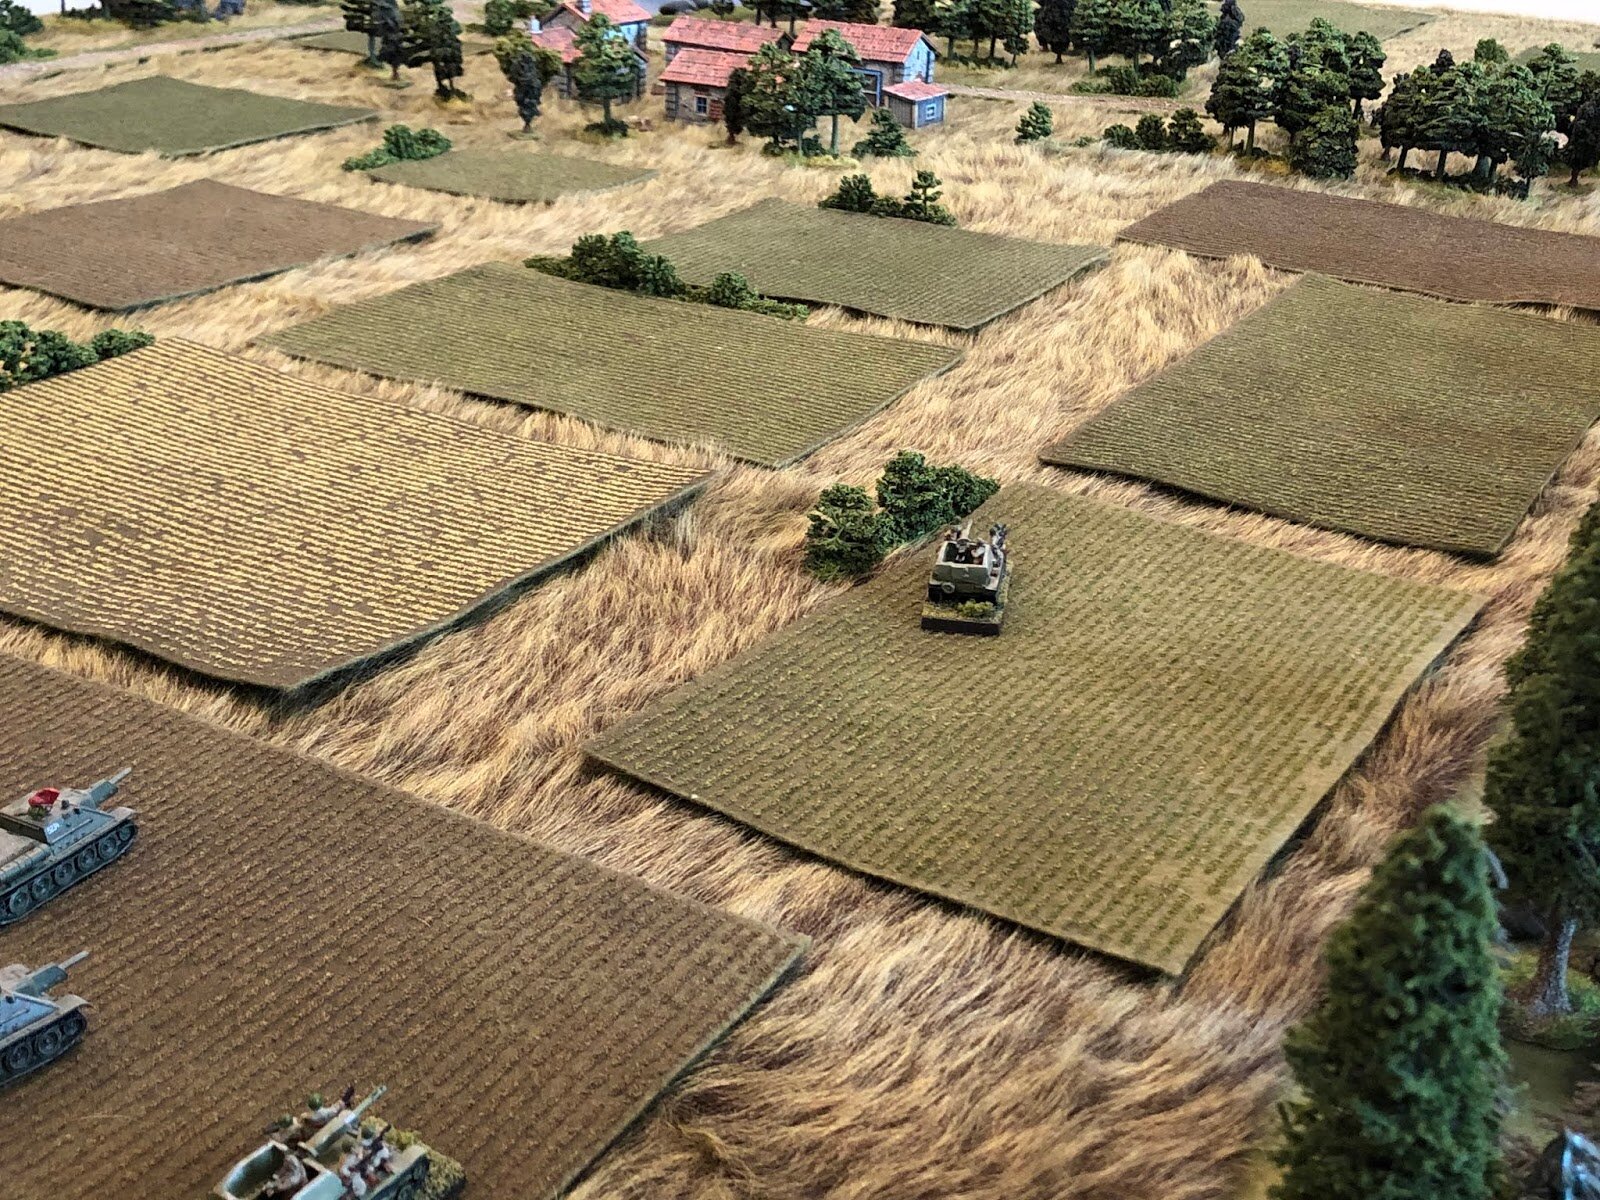
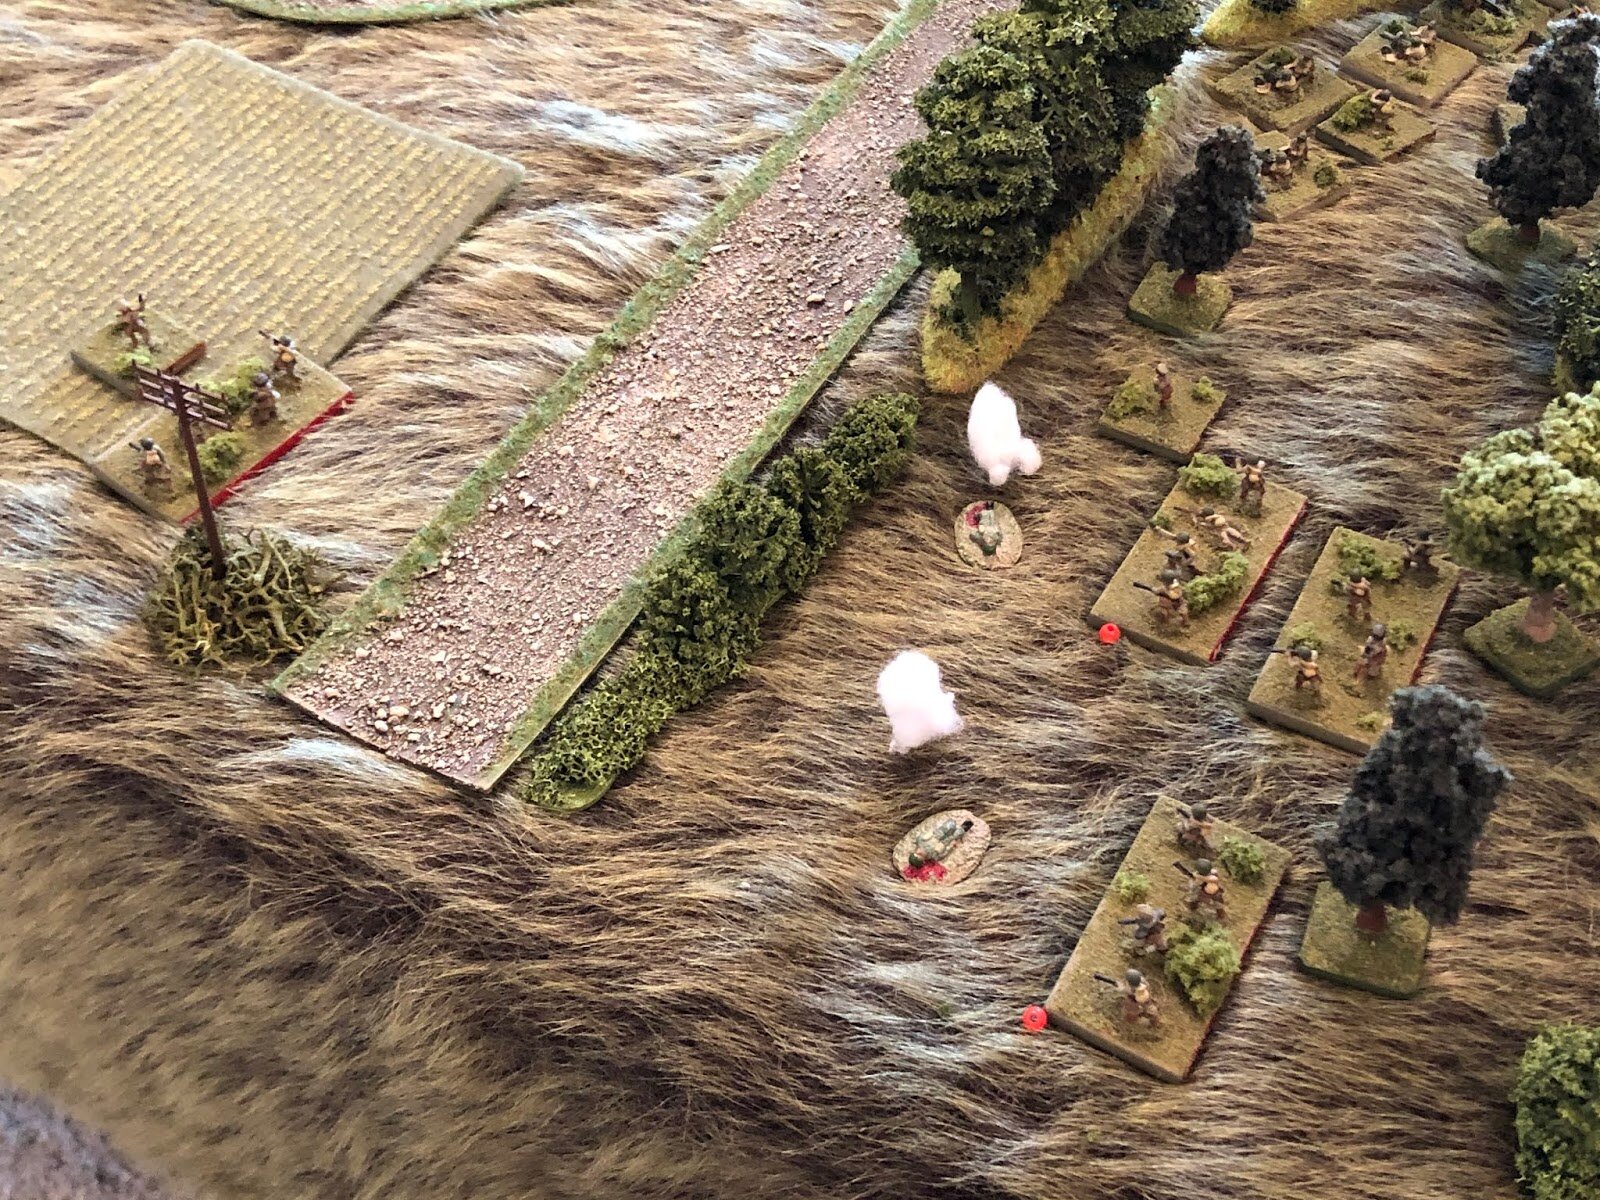
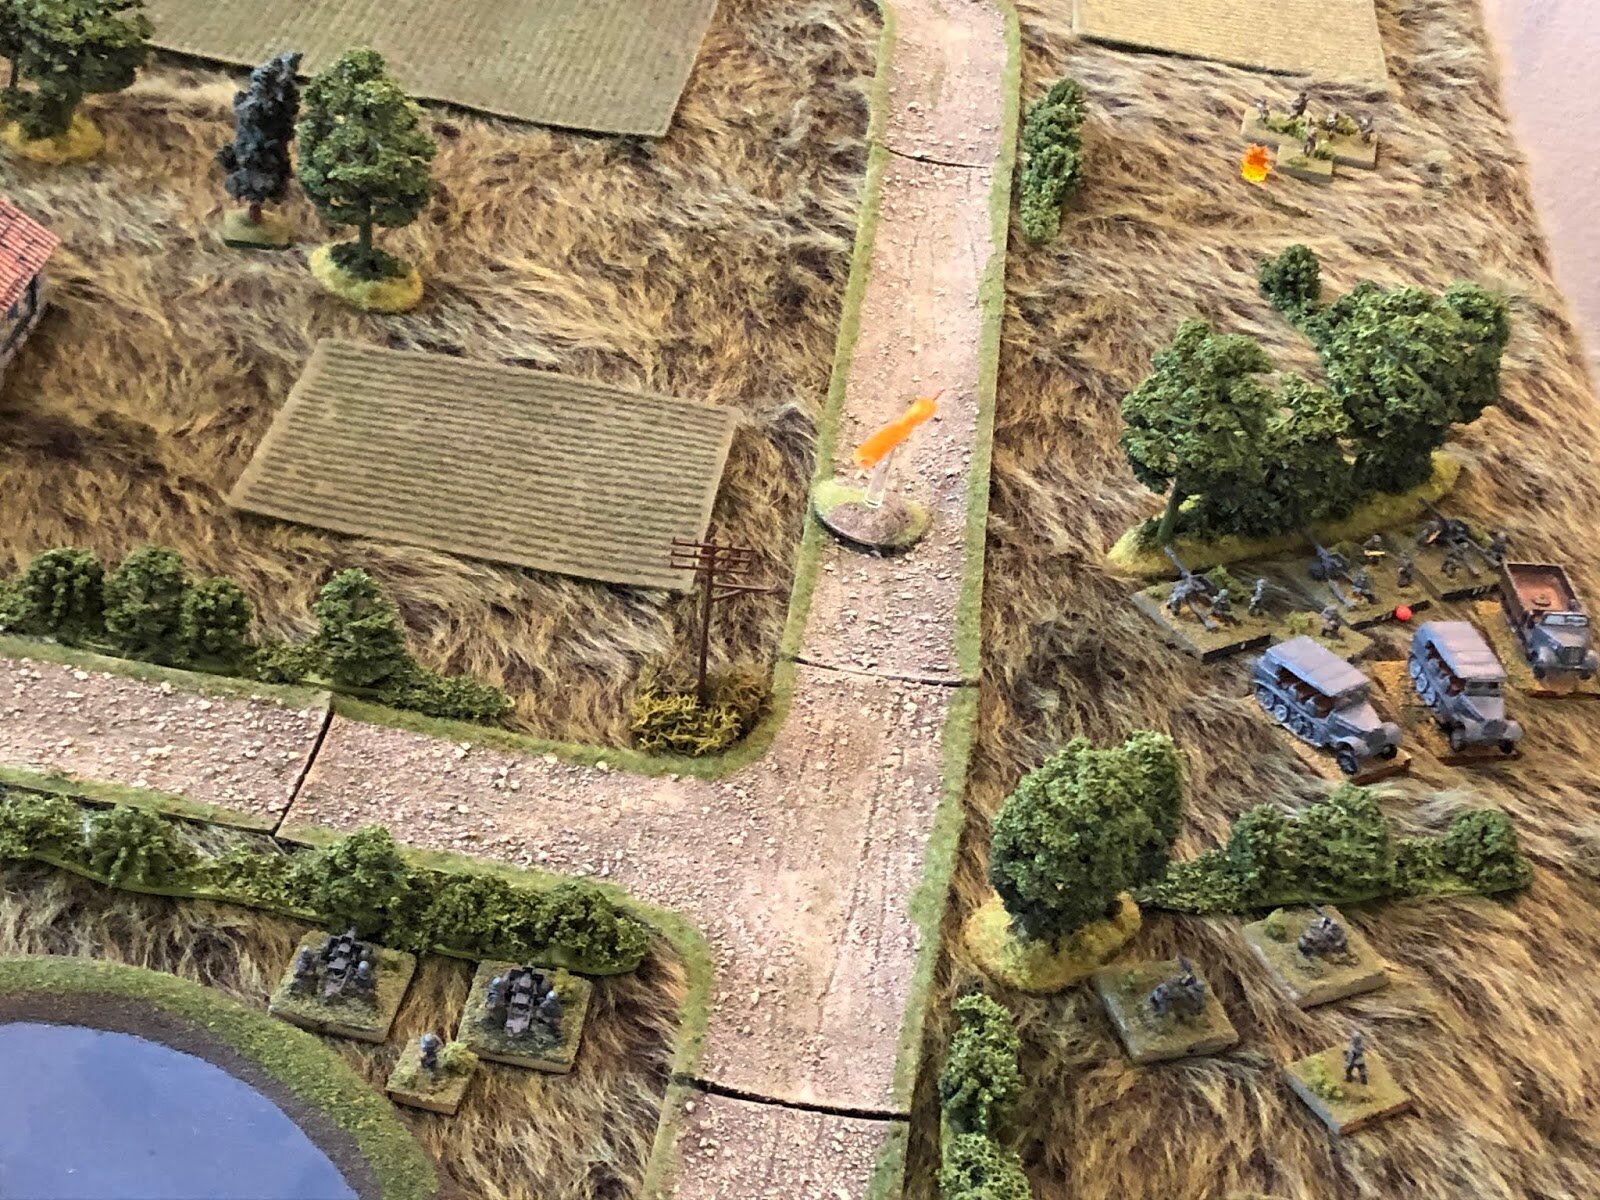
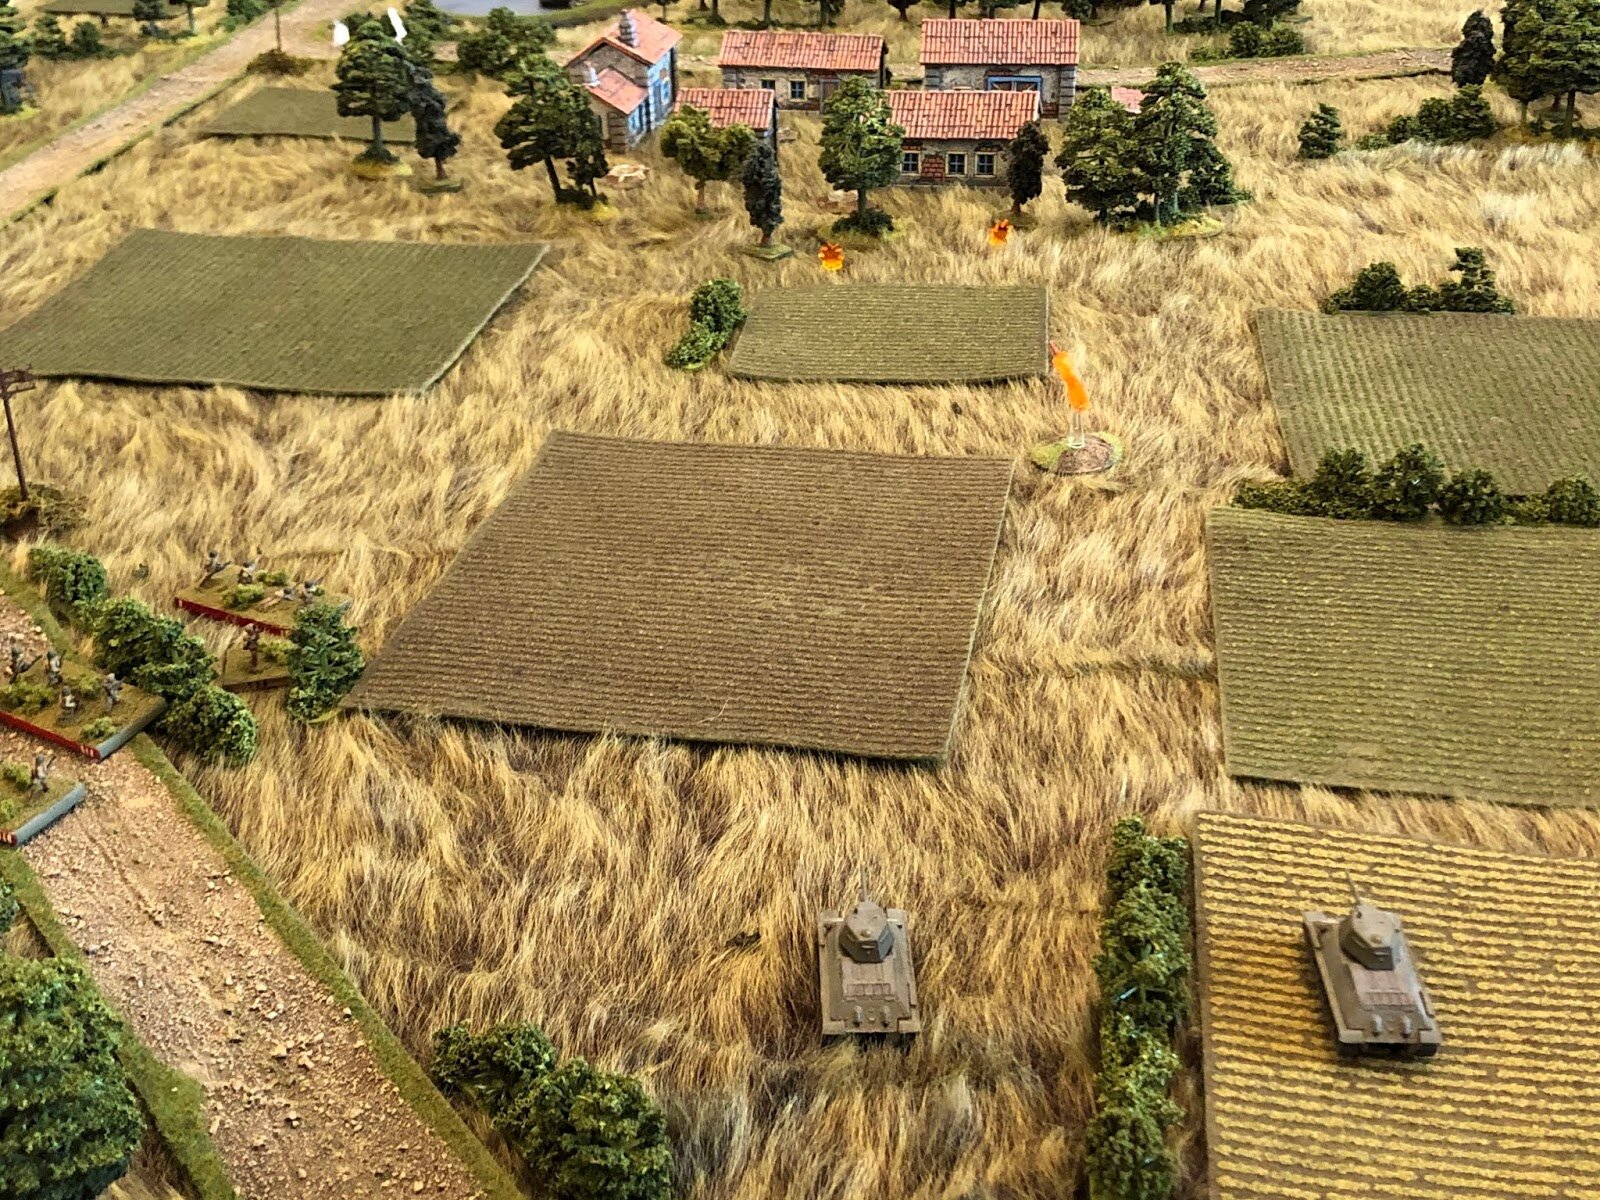
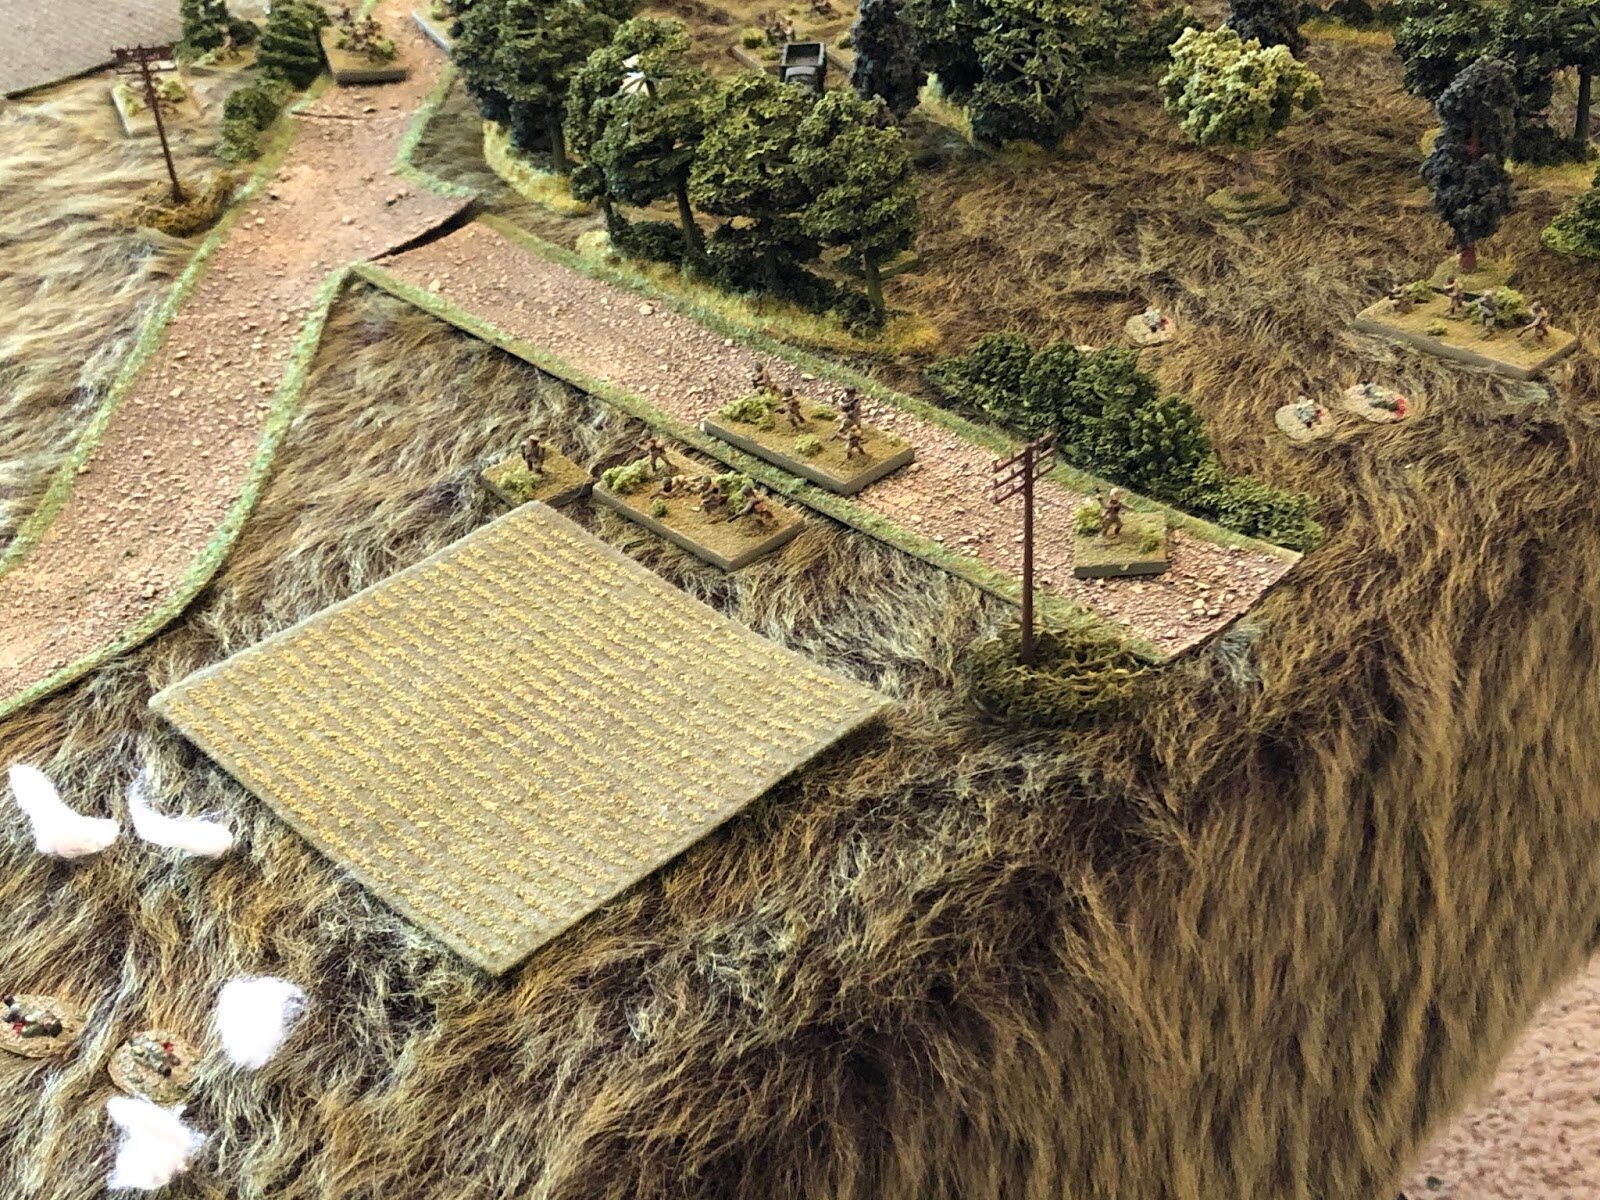
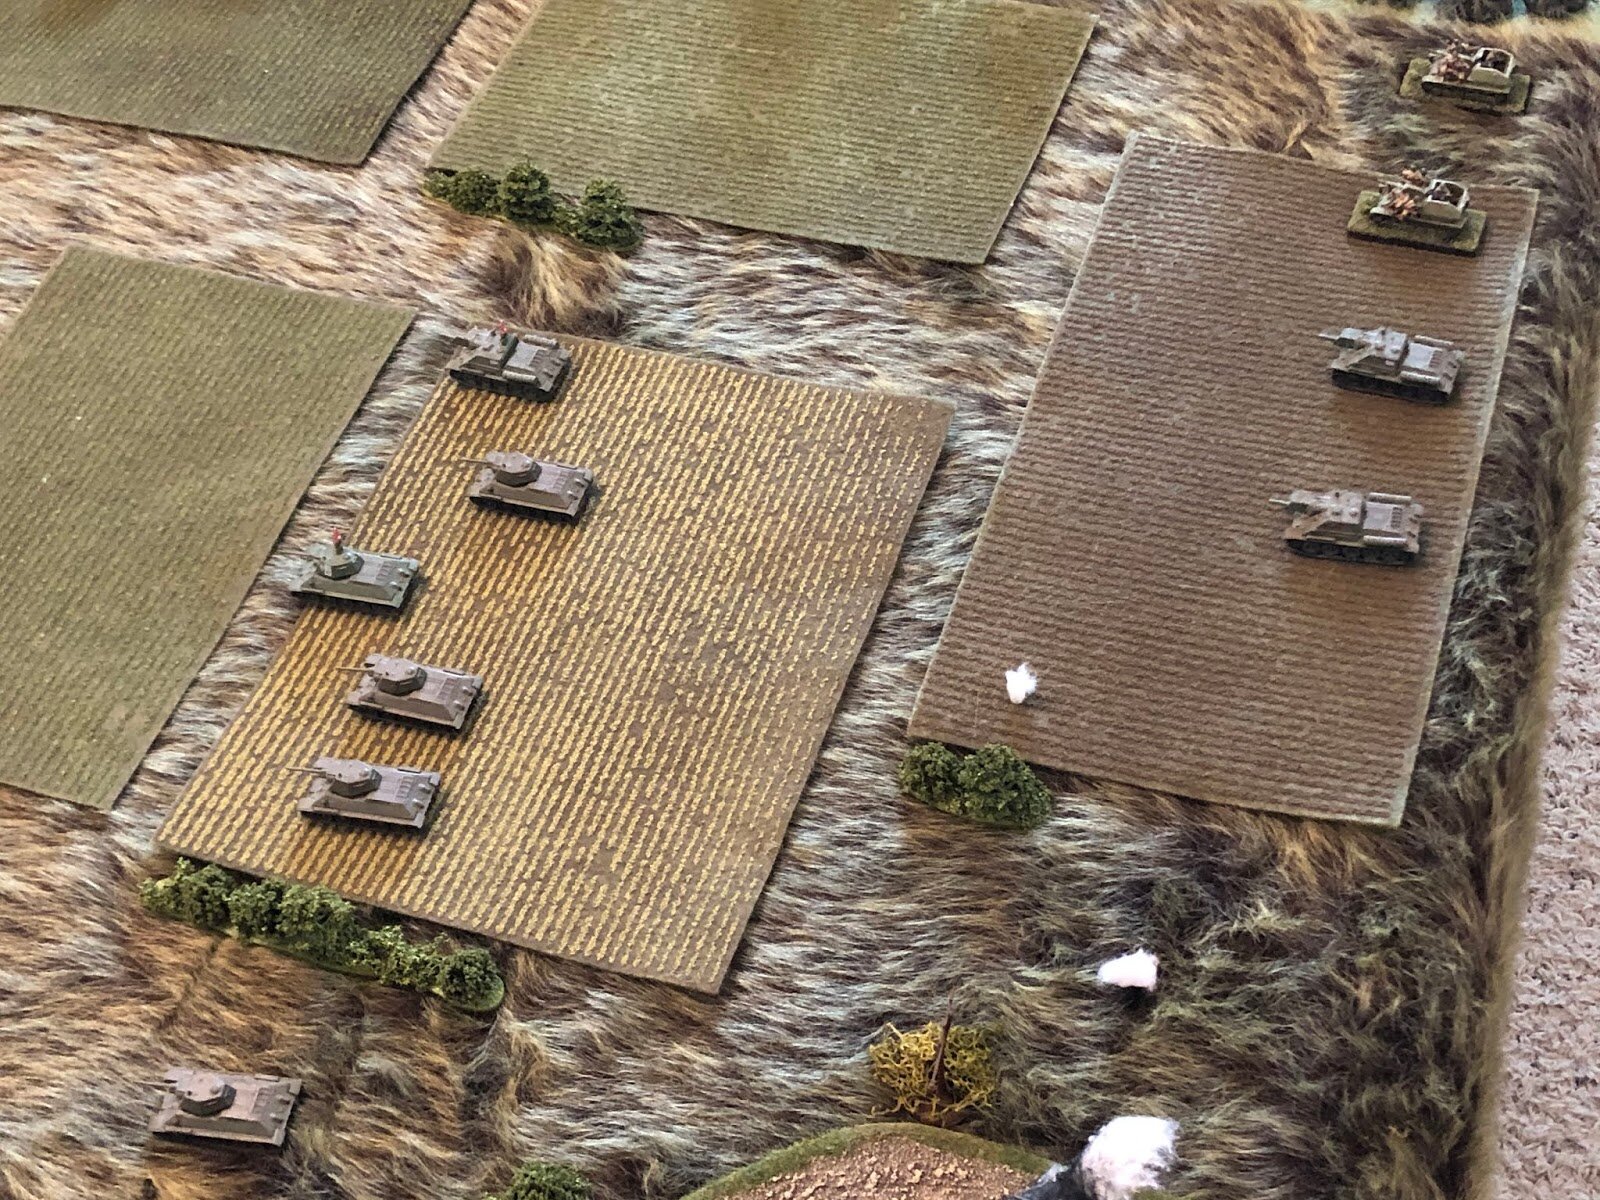
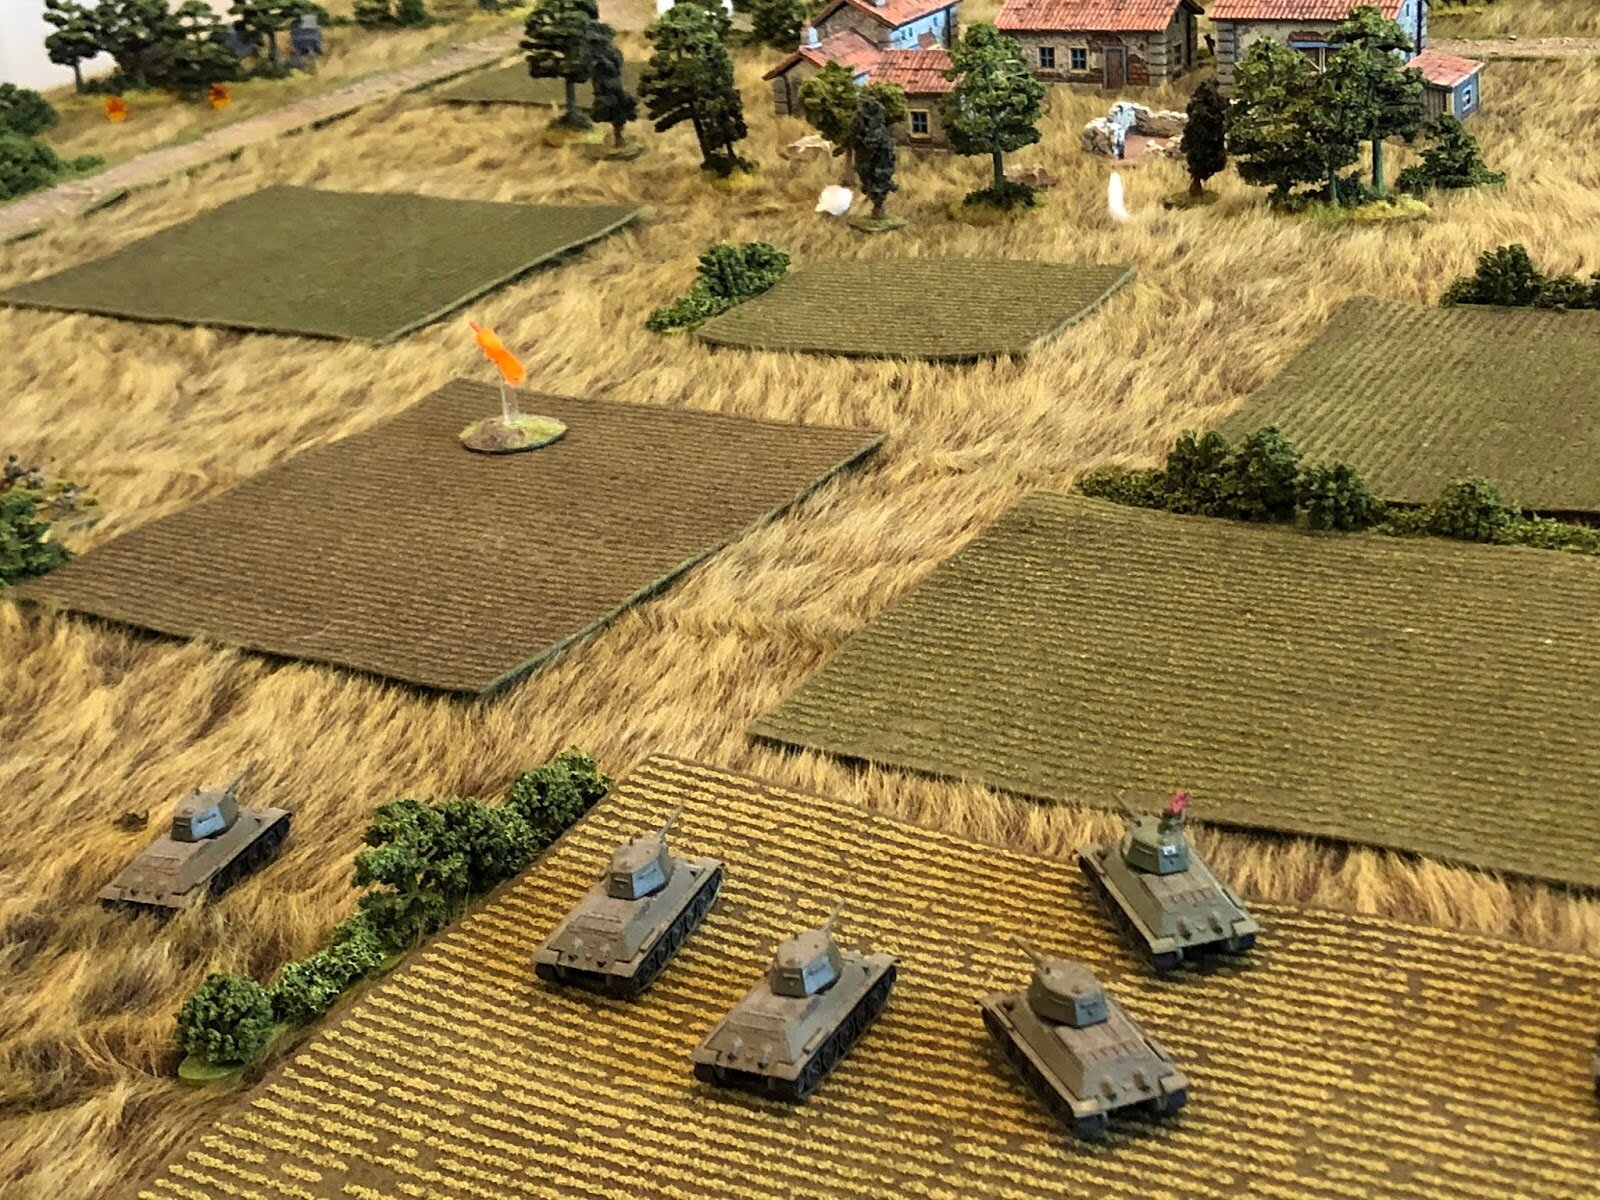
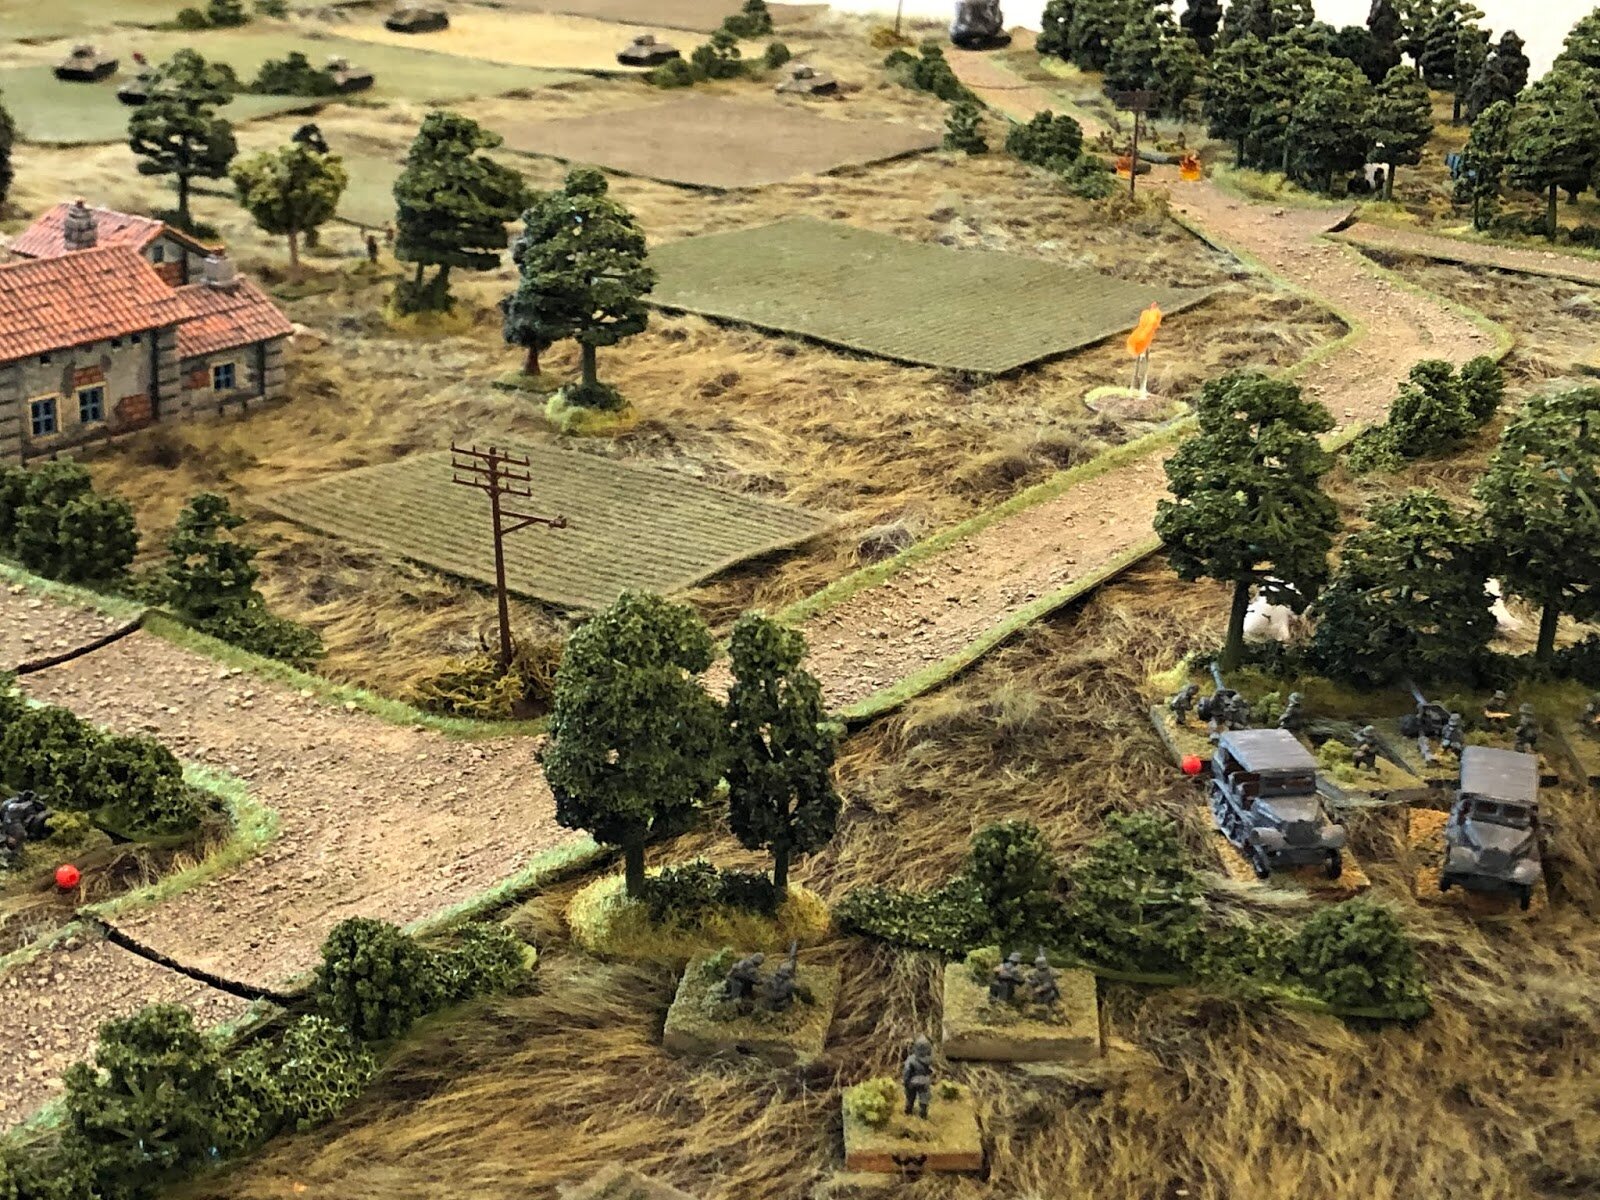
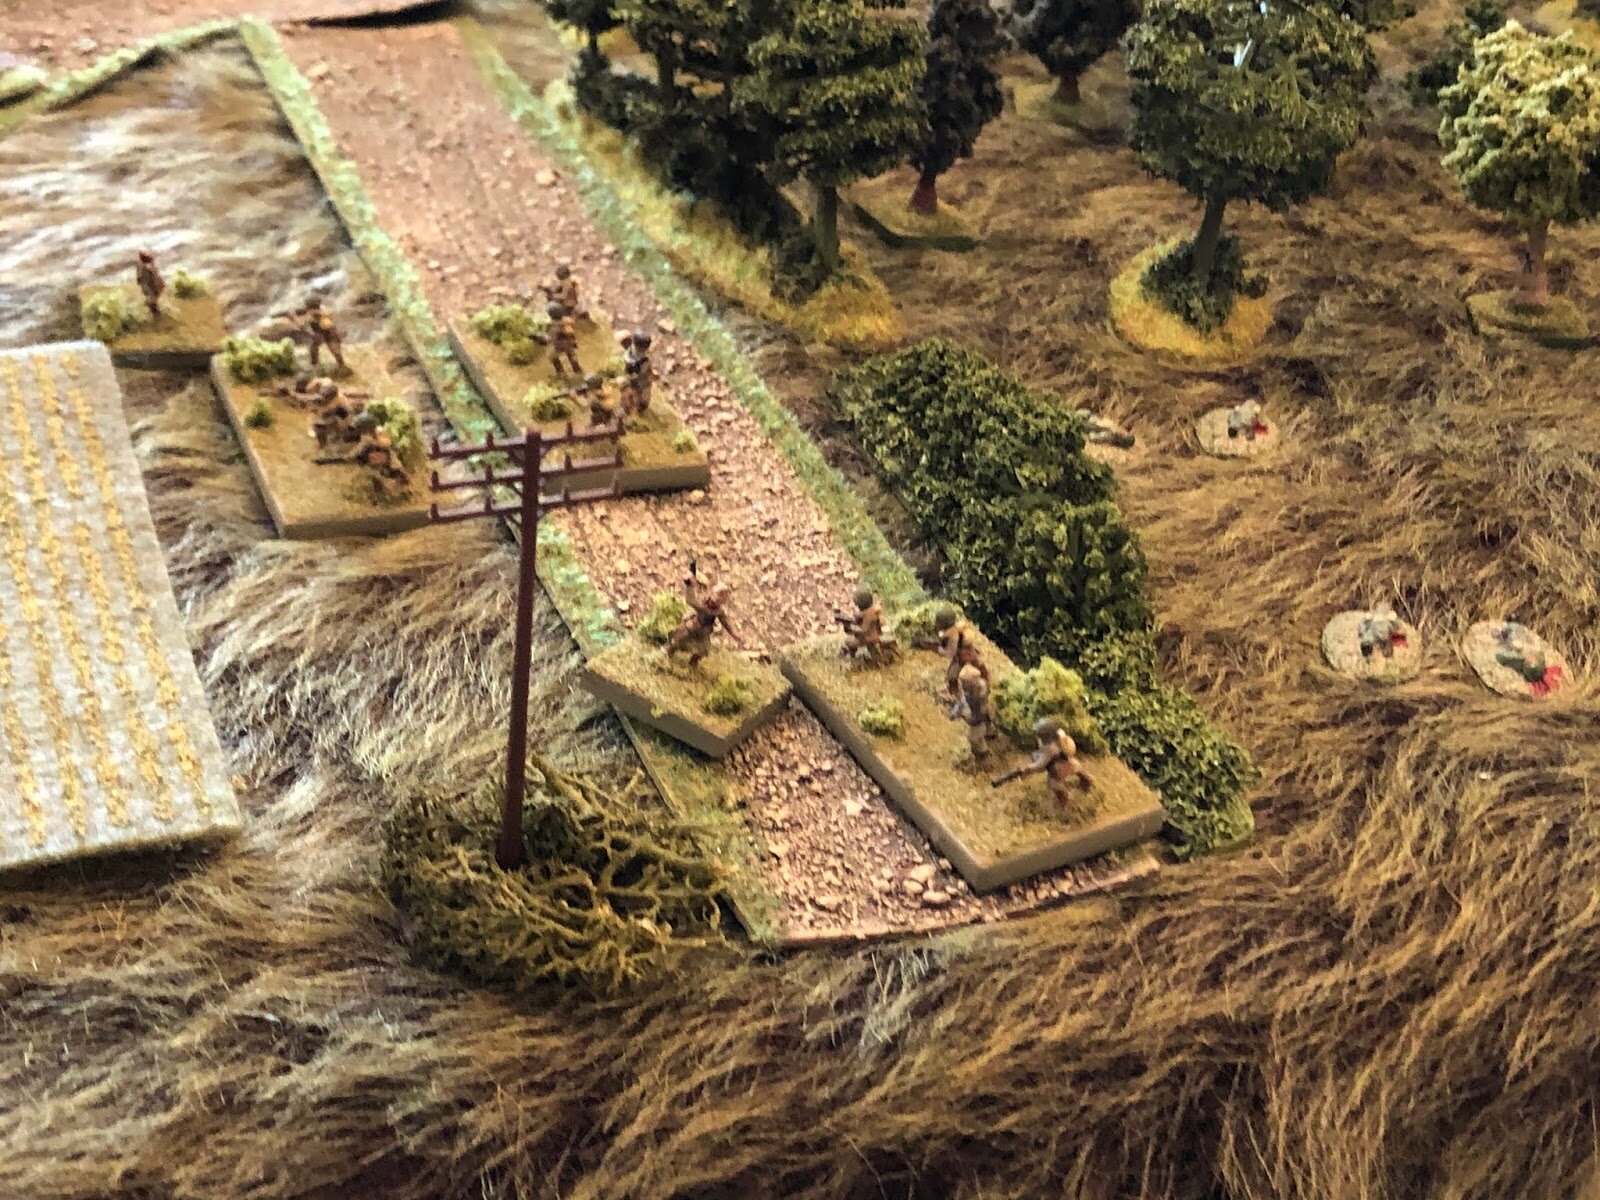
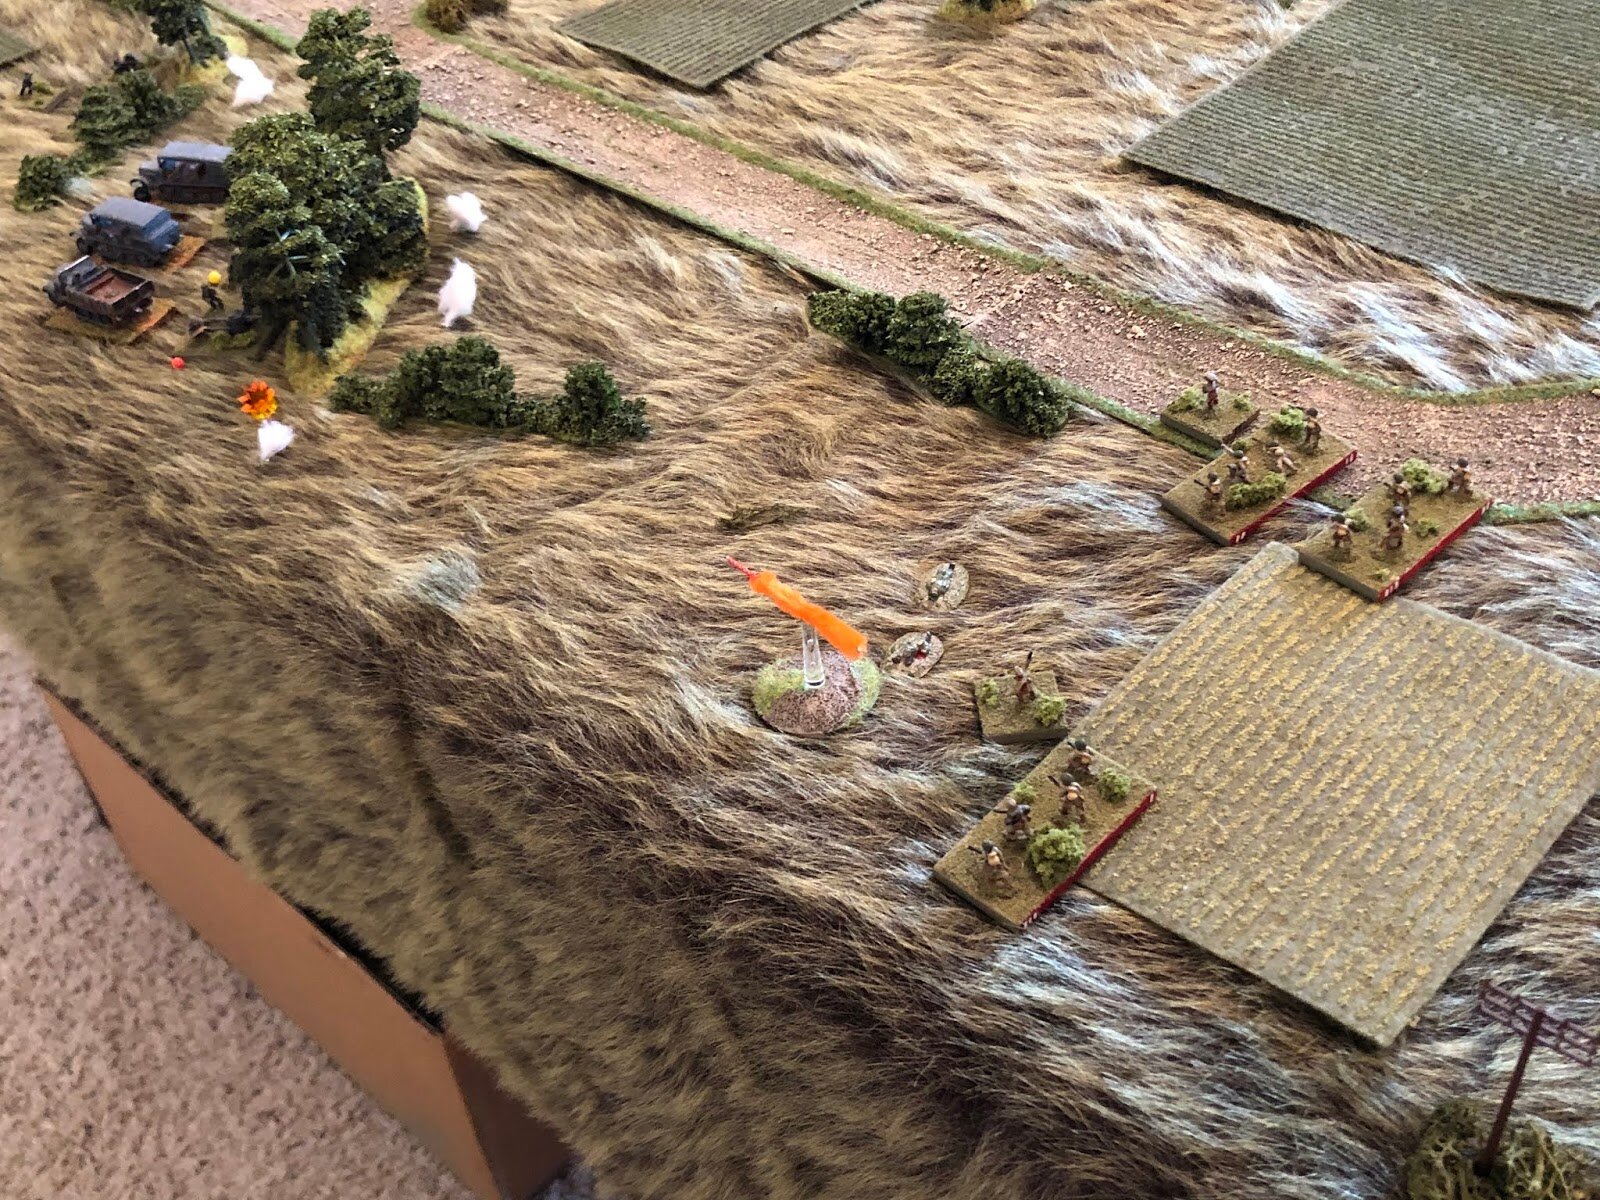
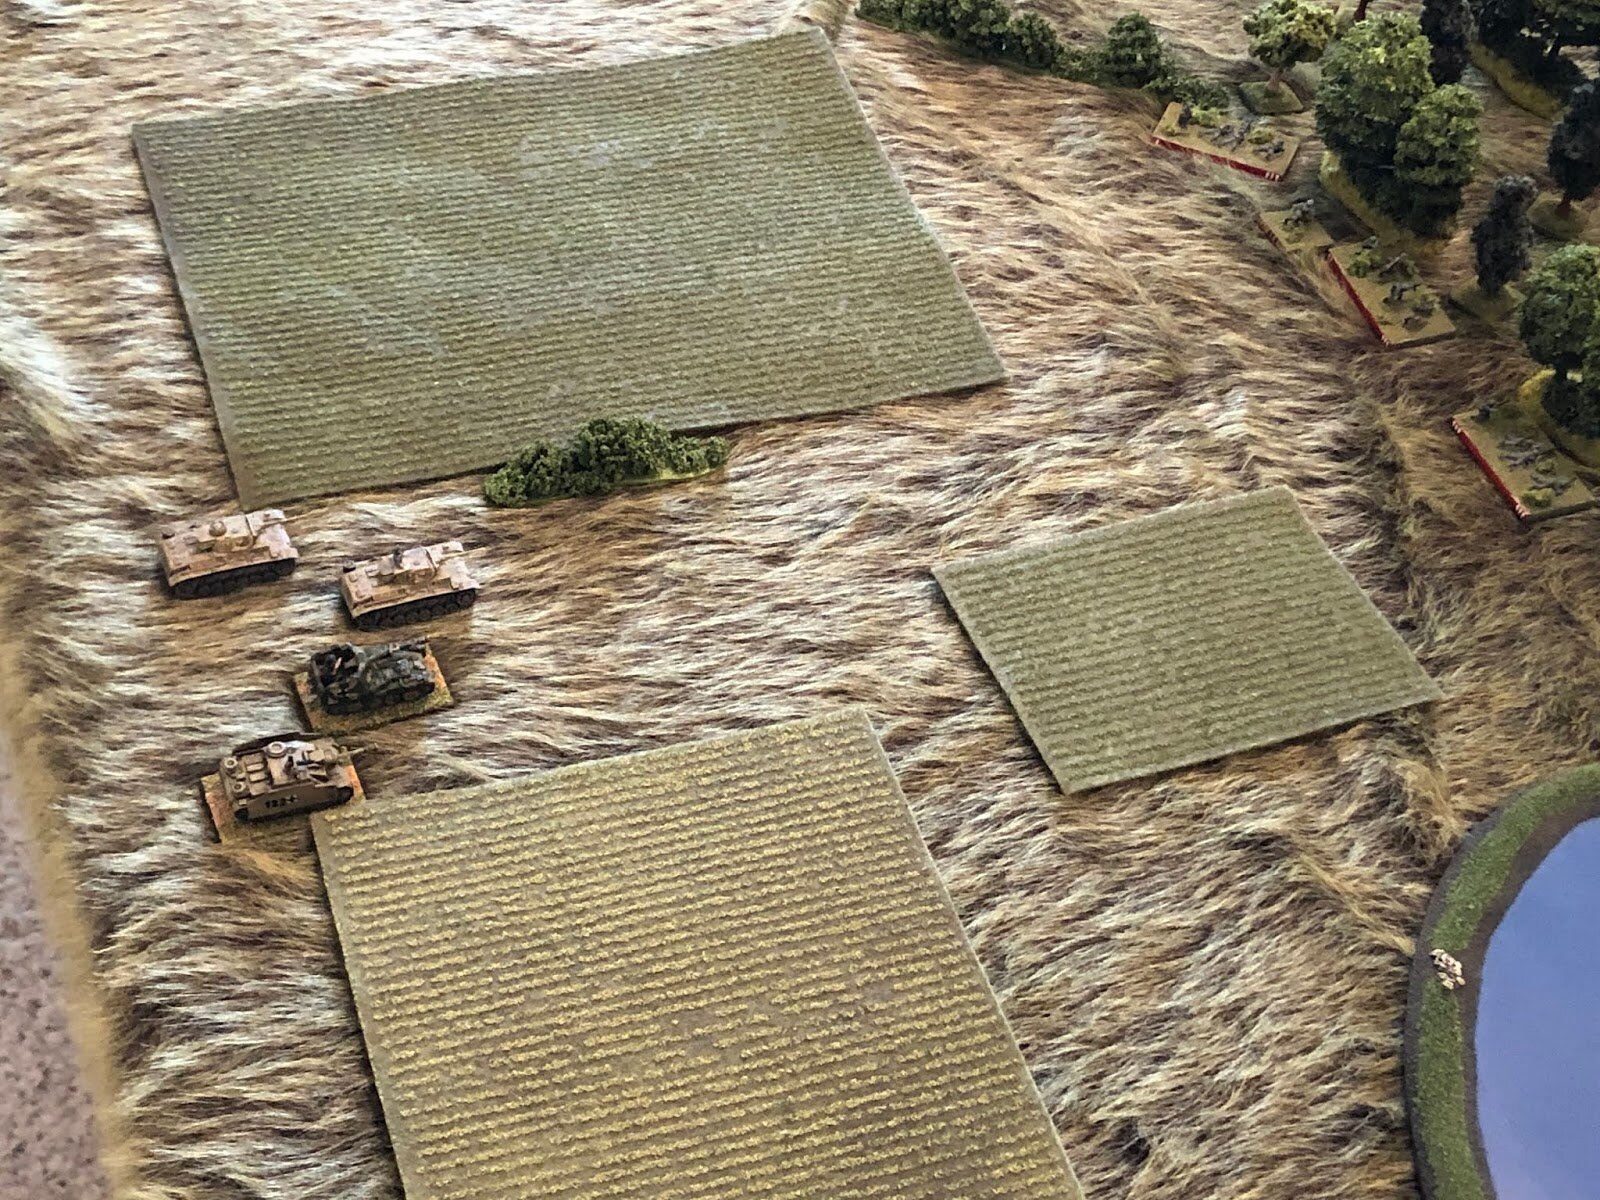
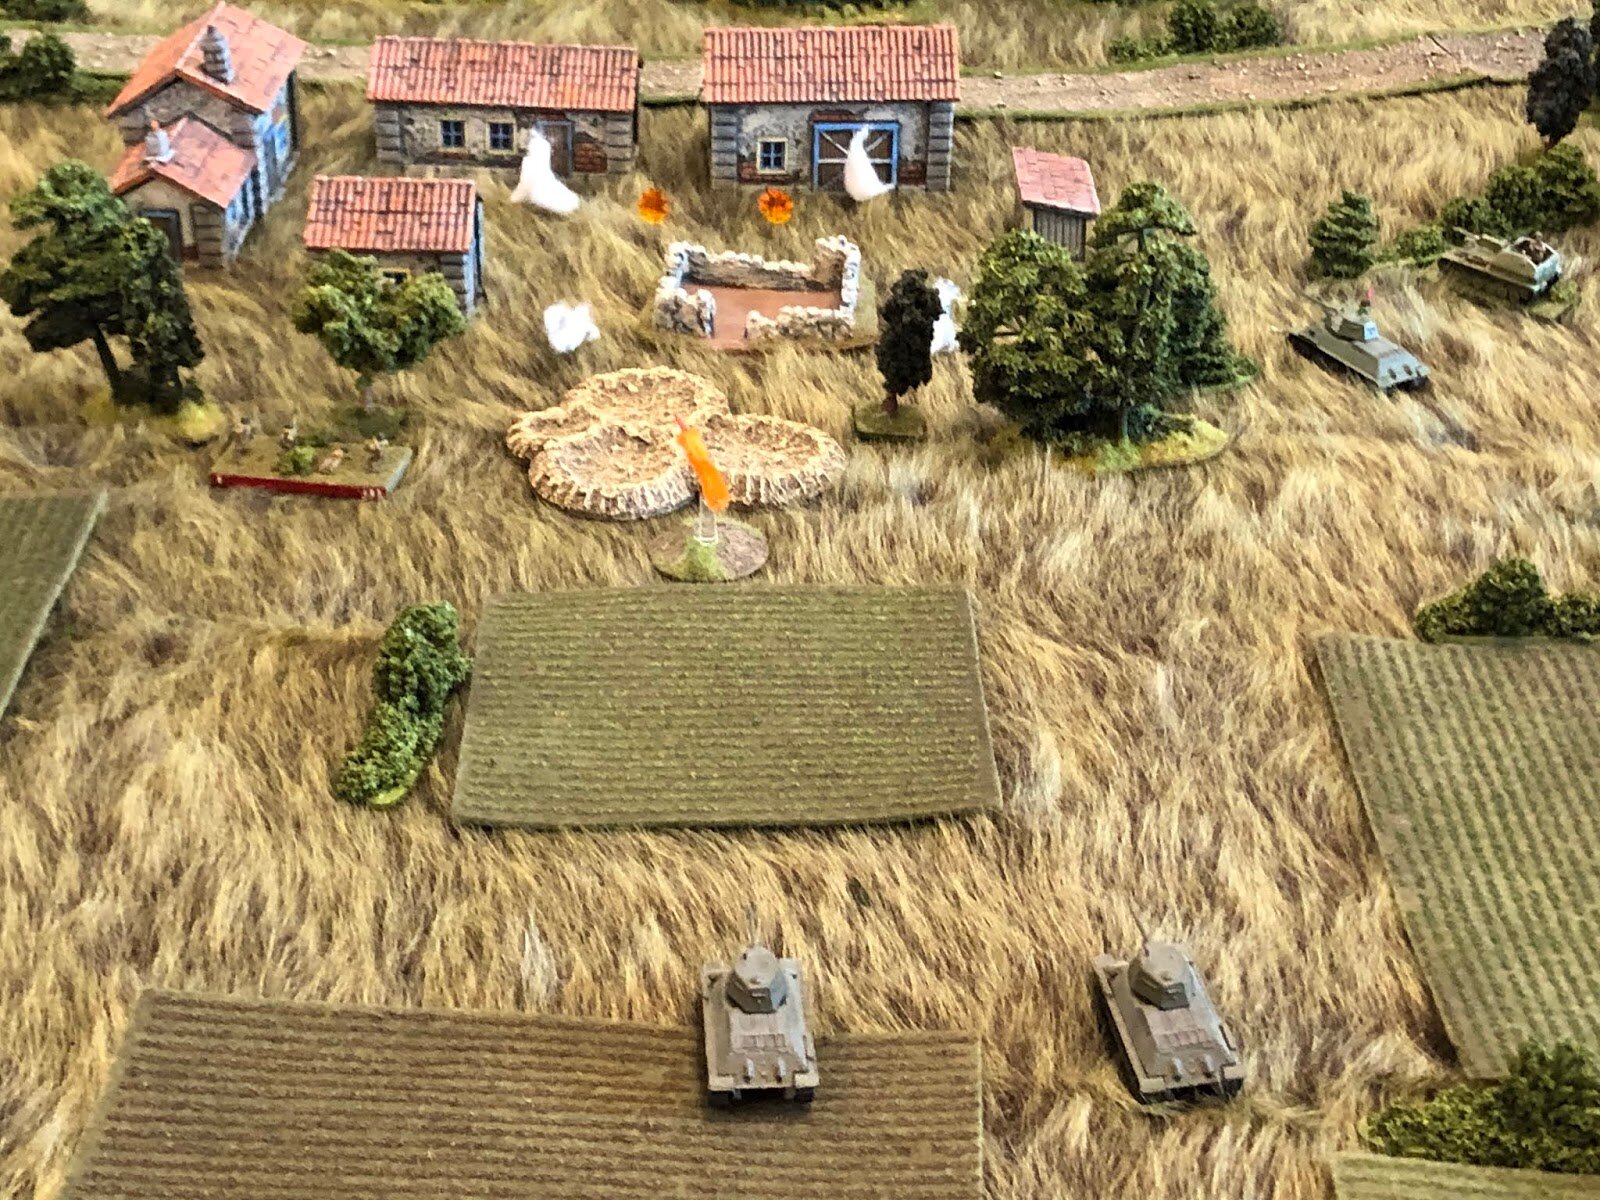
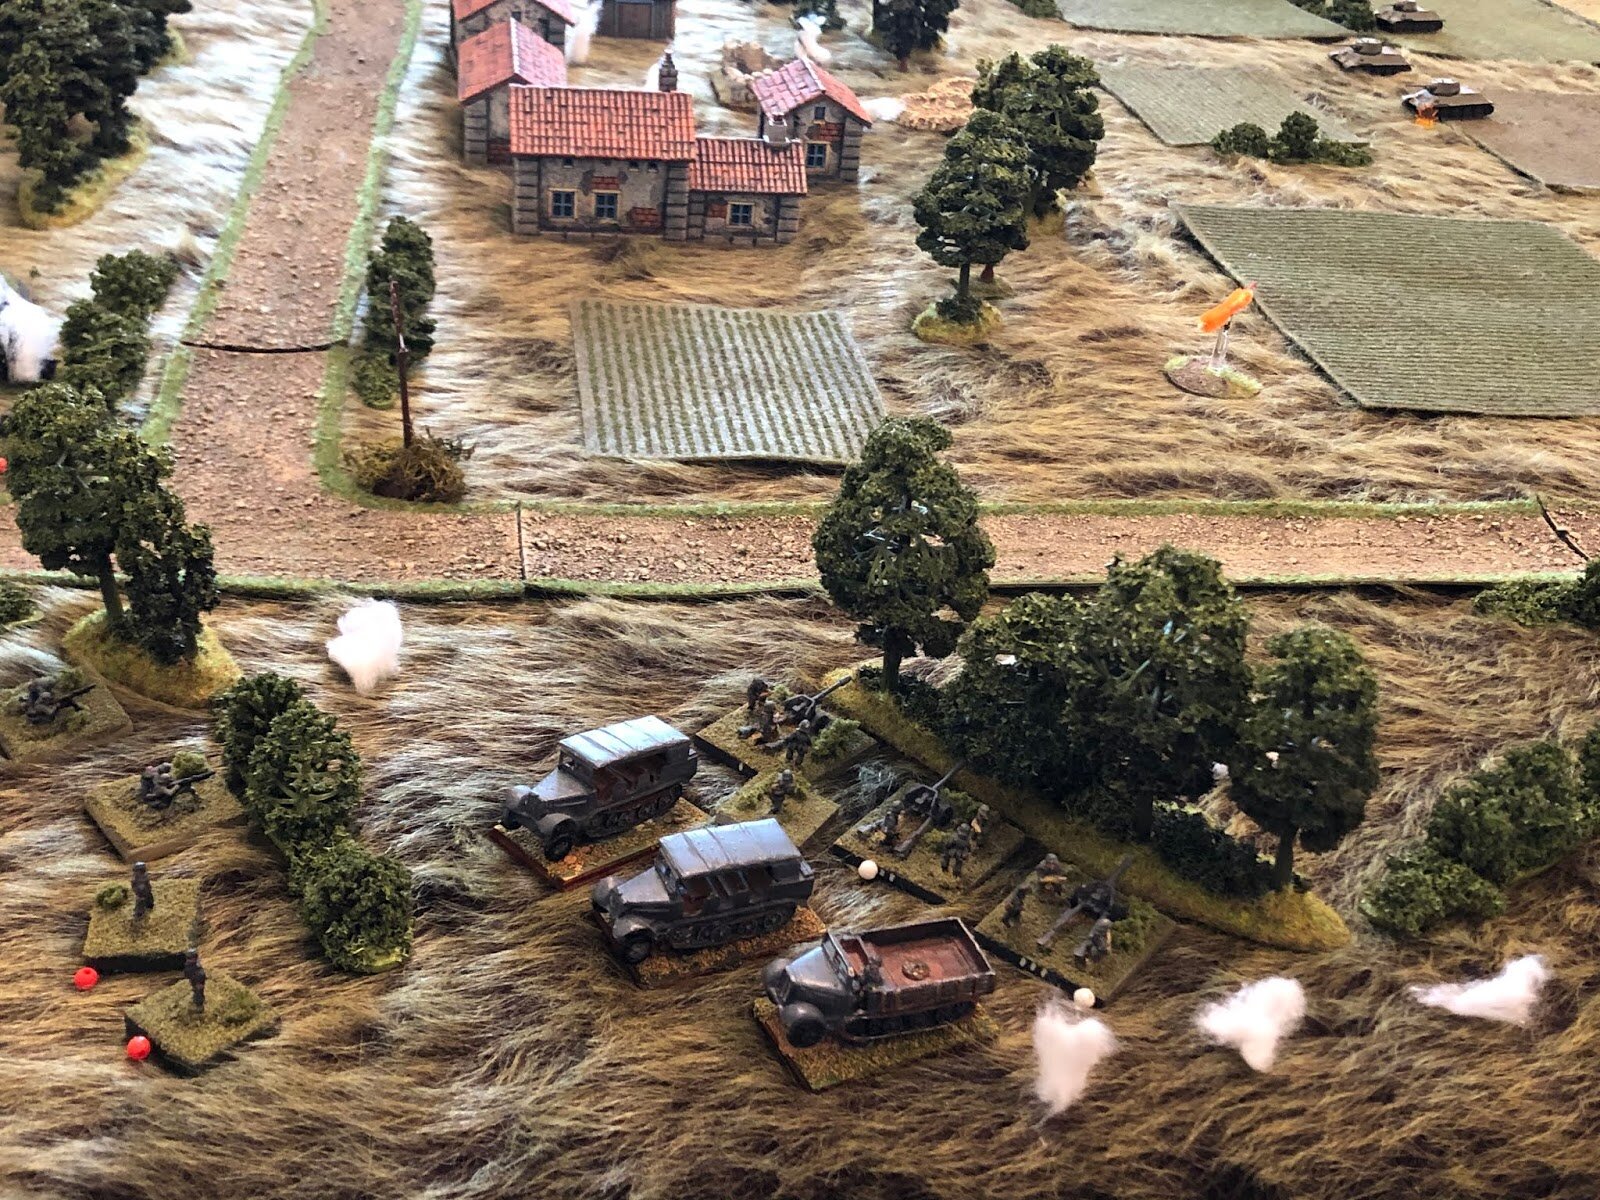
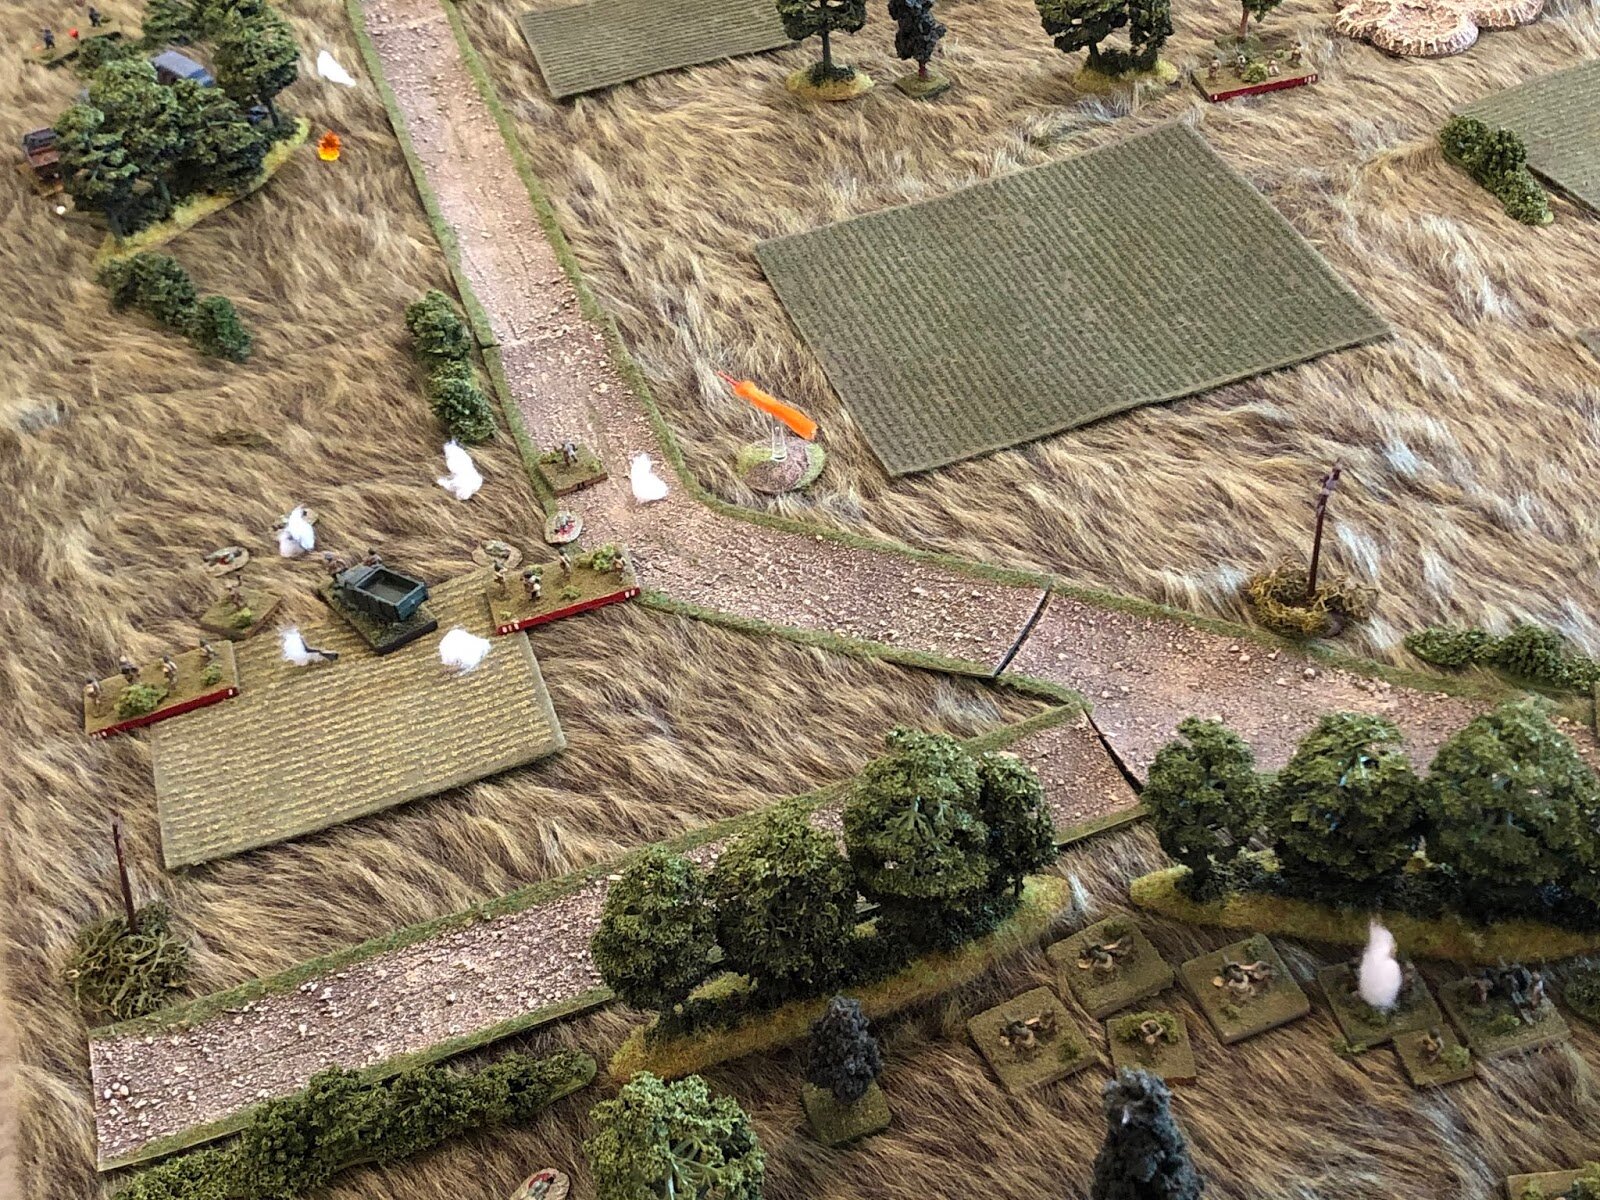
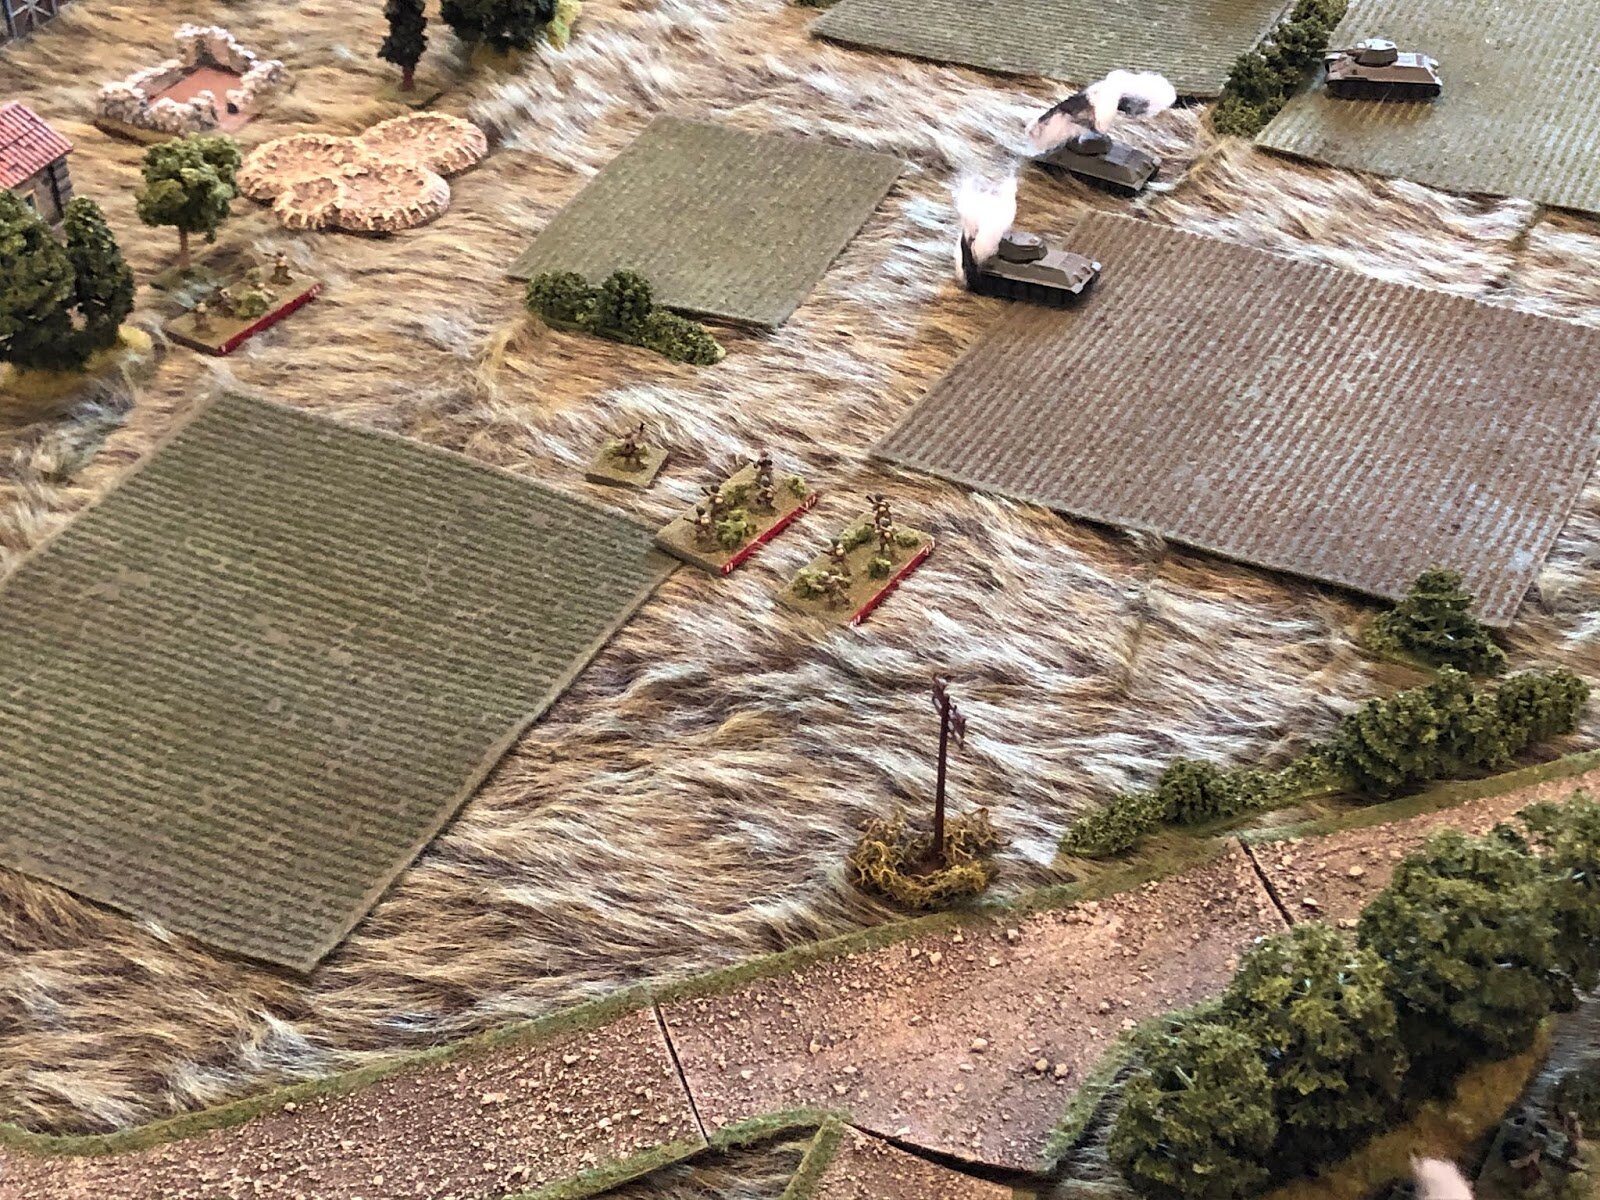
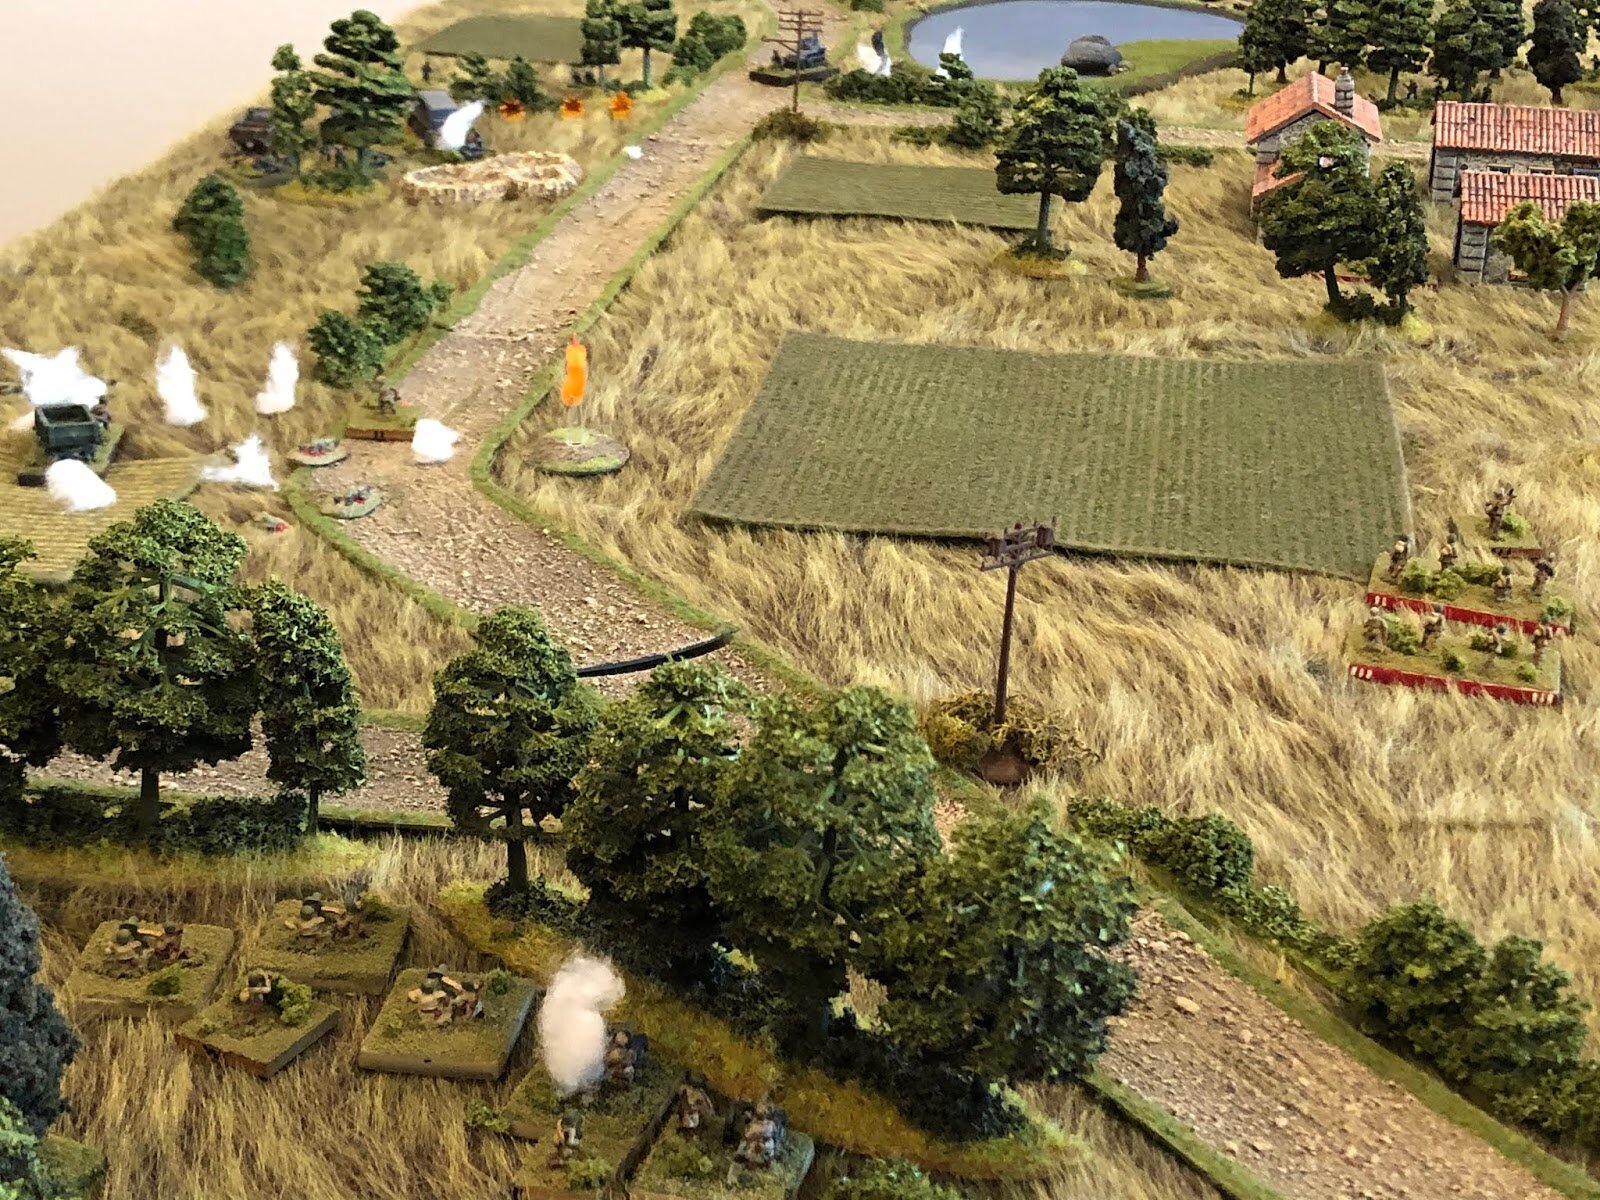
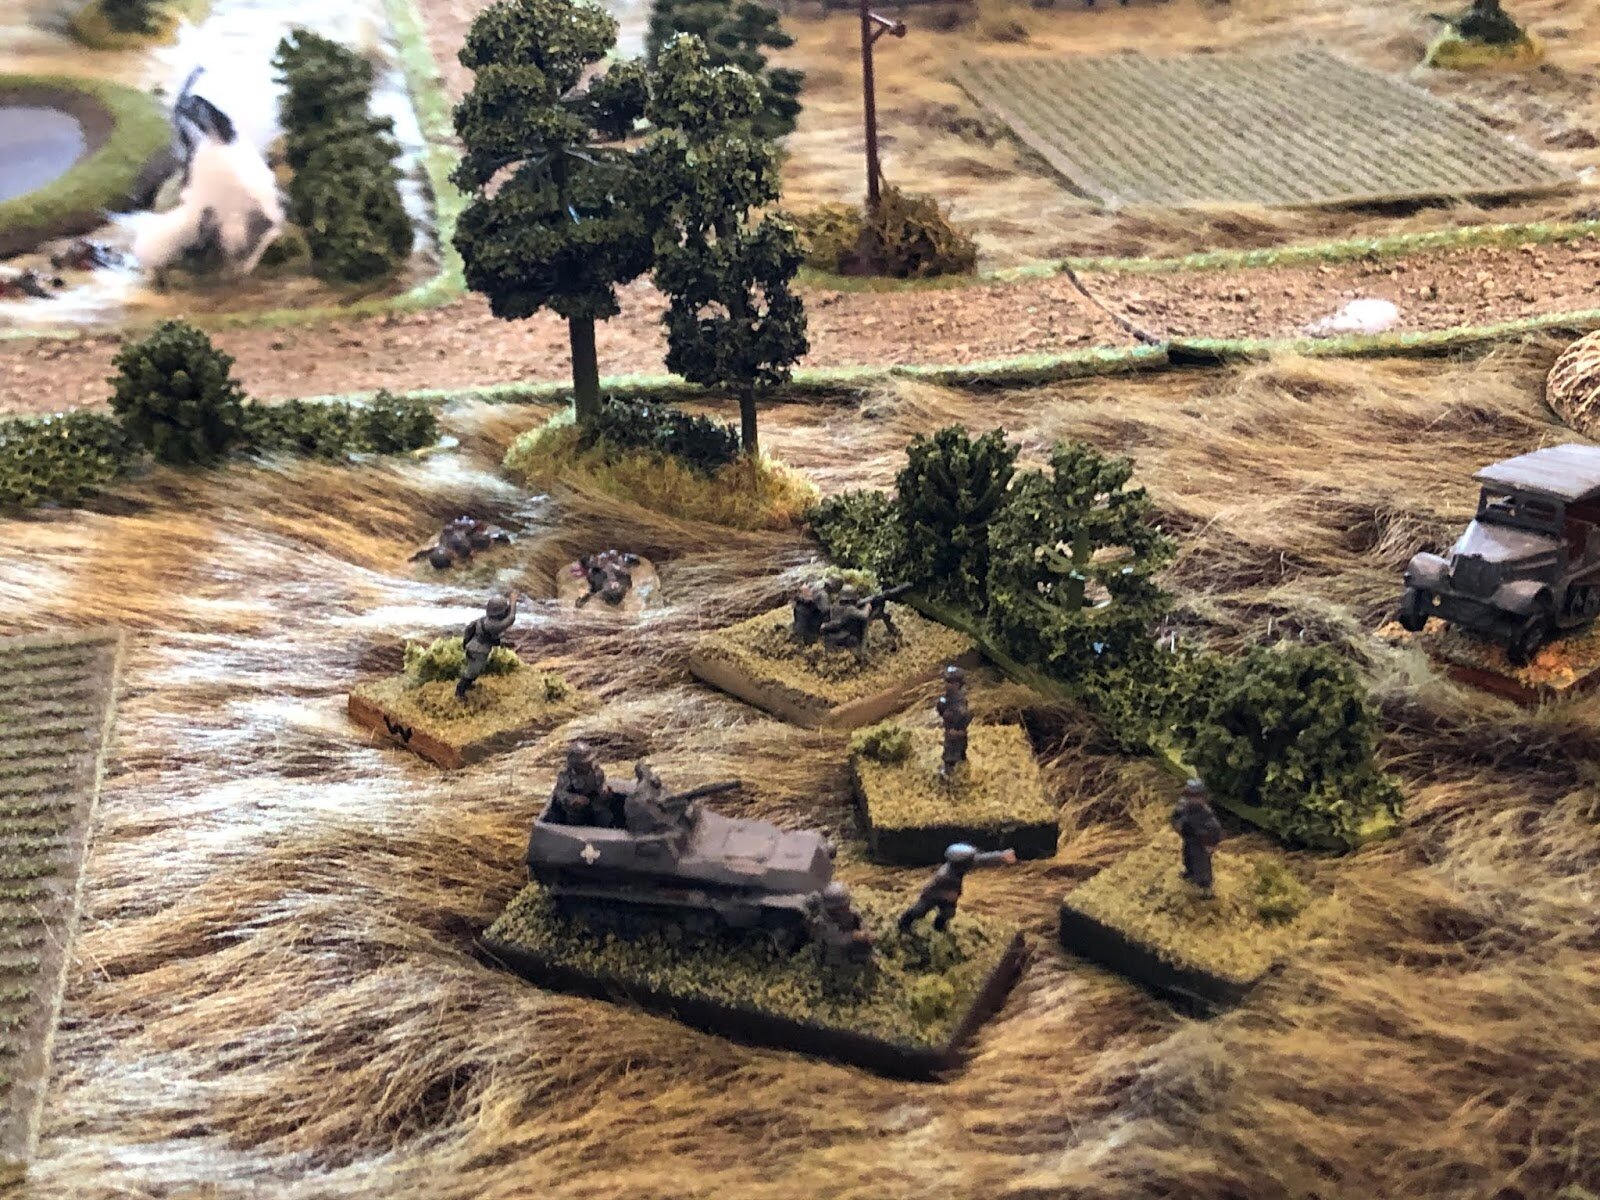
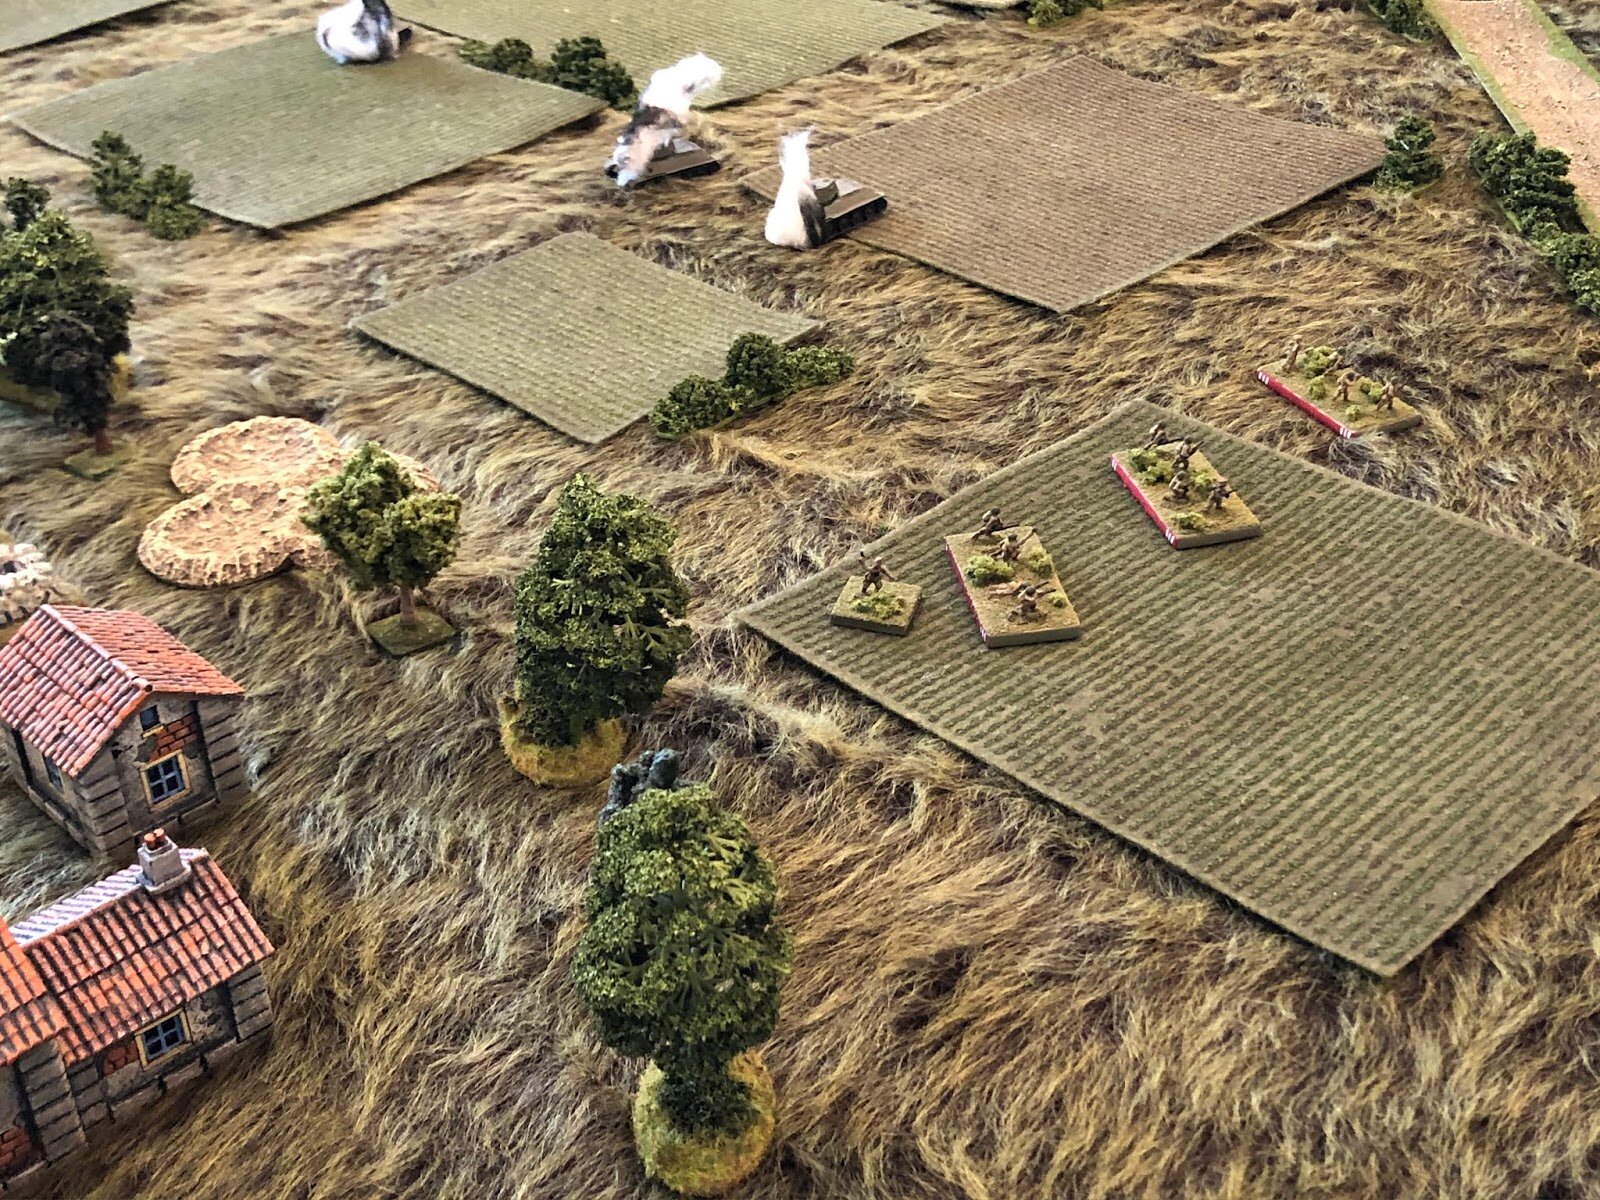
The Soviets are at right, the Germans at left. At top right is the Soviet mechanized force, from top to bottom: Su-76s with tank riders, Su-122s, 2nd T-34 Platoon, 1st T-34 Platoon. At bottom right is the Soviet infantry force, from bottom to top: 1st Platoon, 2nd Platoon, MG Platoon, Mortar Platoon, Infantry Gun Platoon, 3rd Platoon. And, or course, the Soviets have the heavy mortars off table.
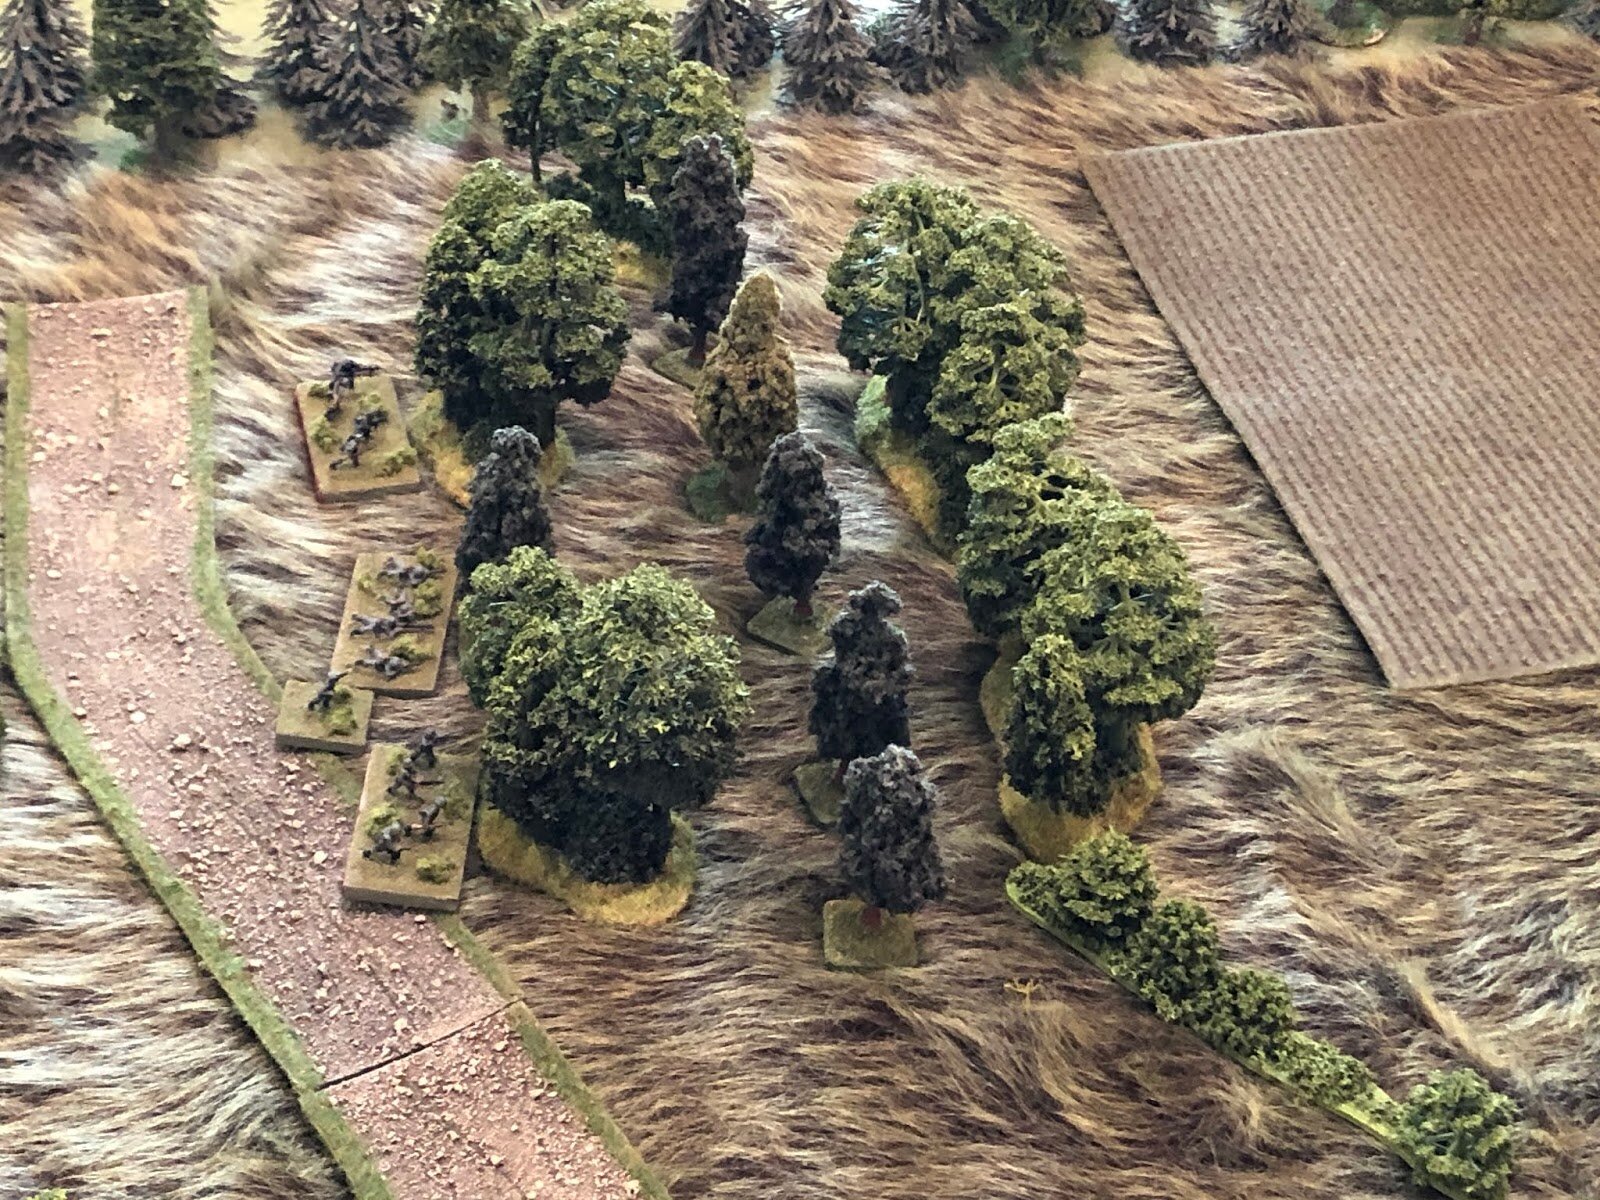
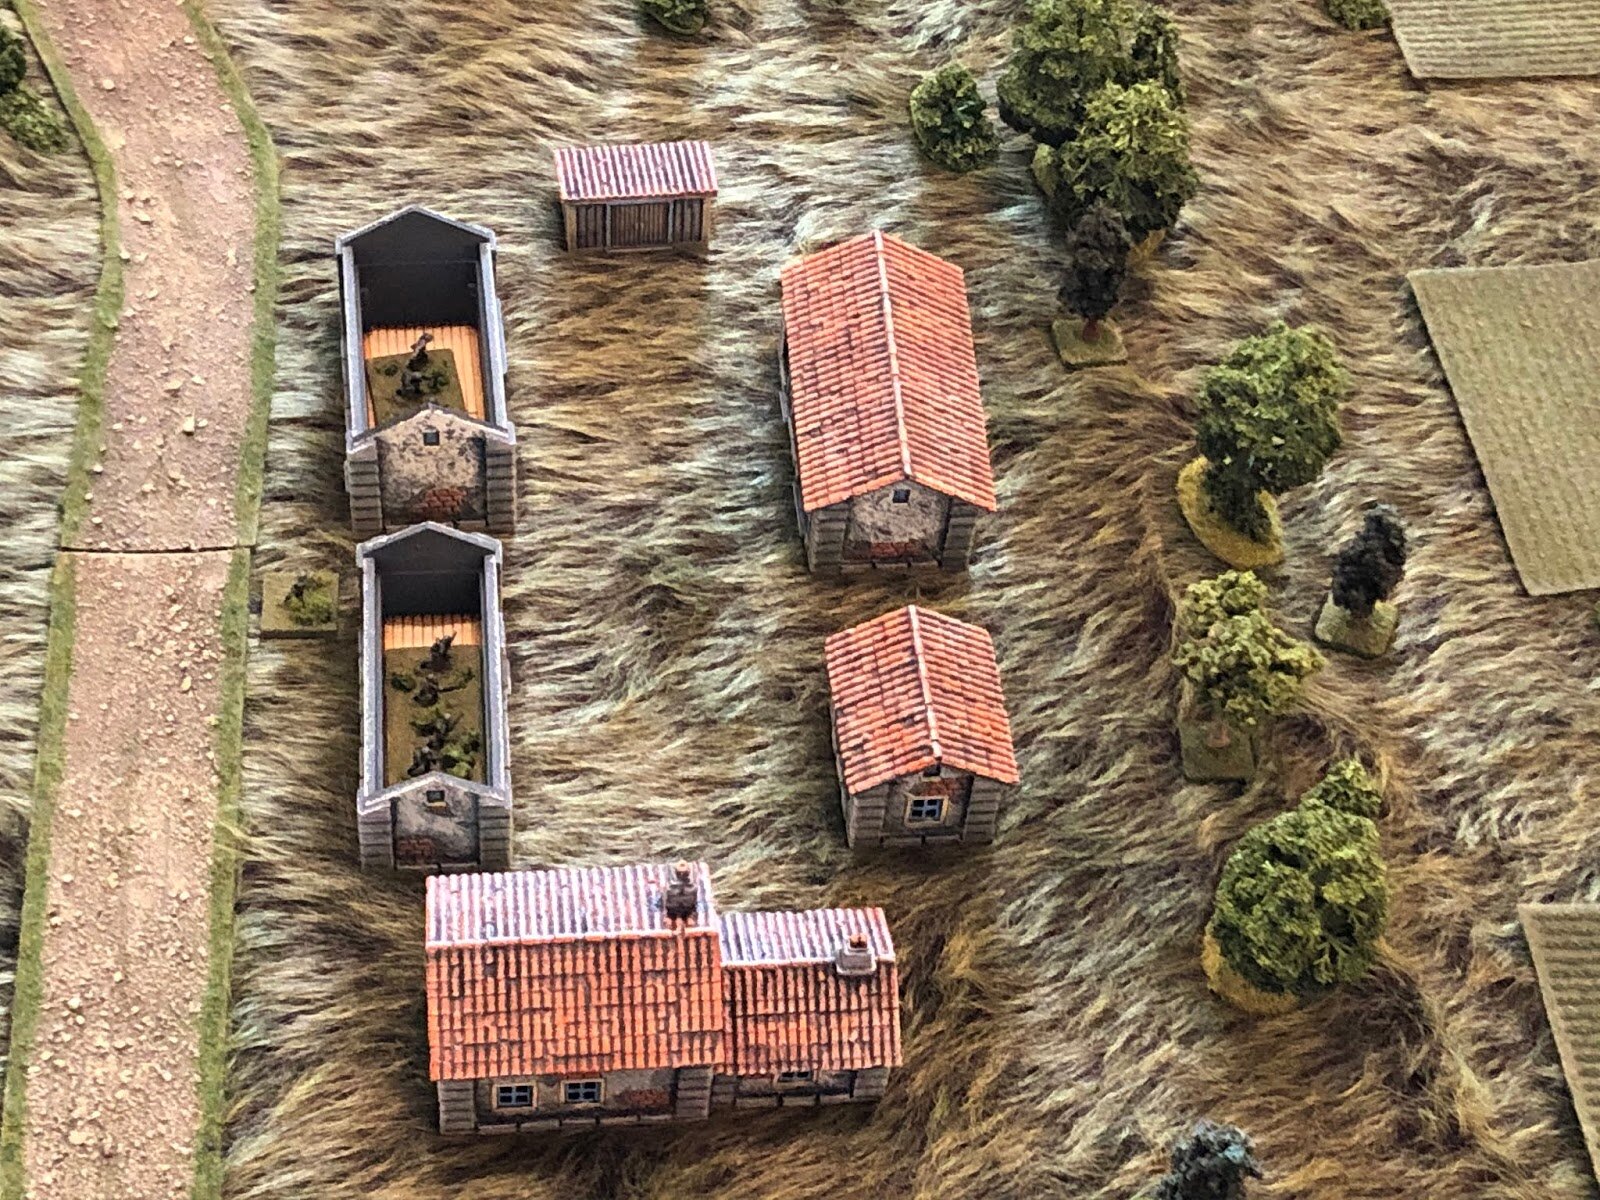
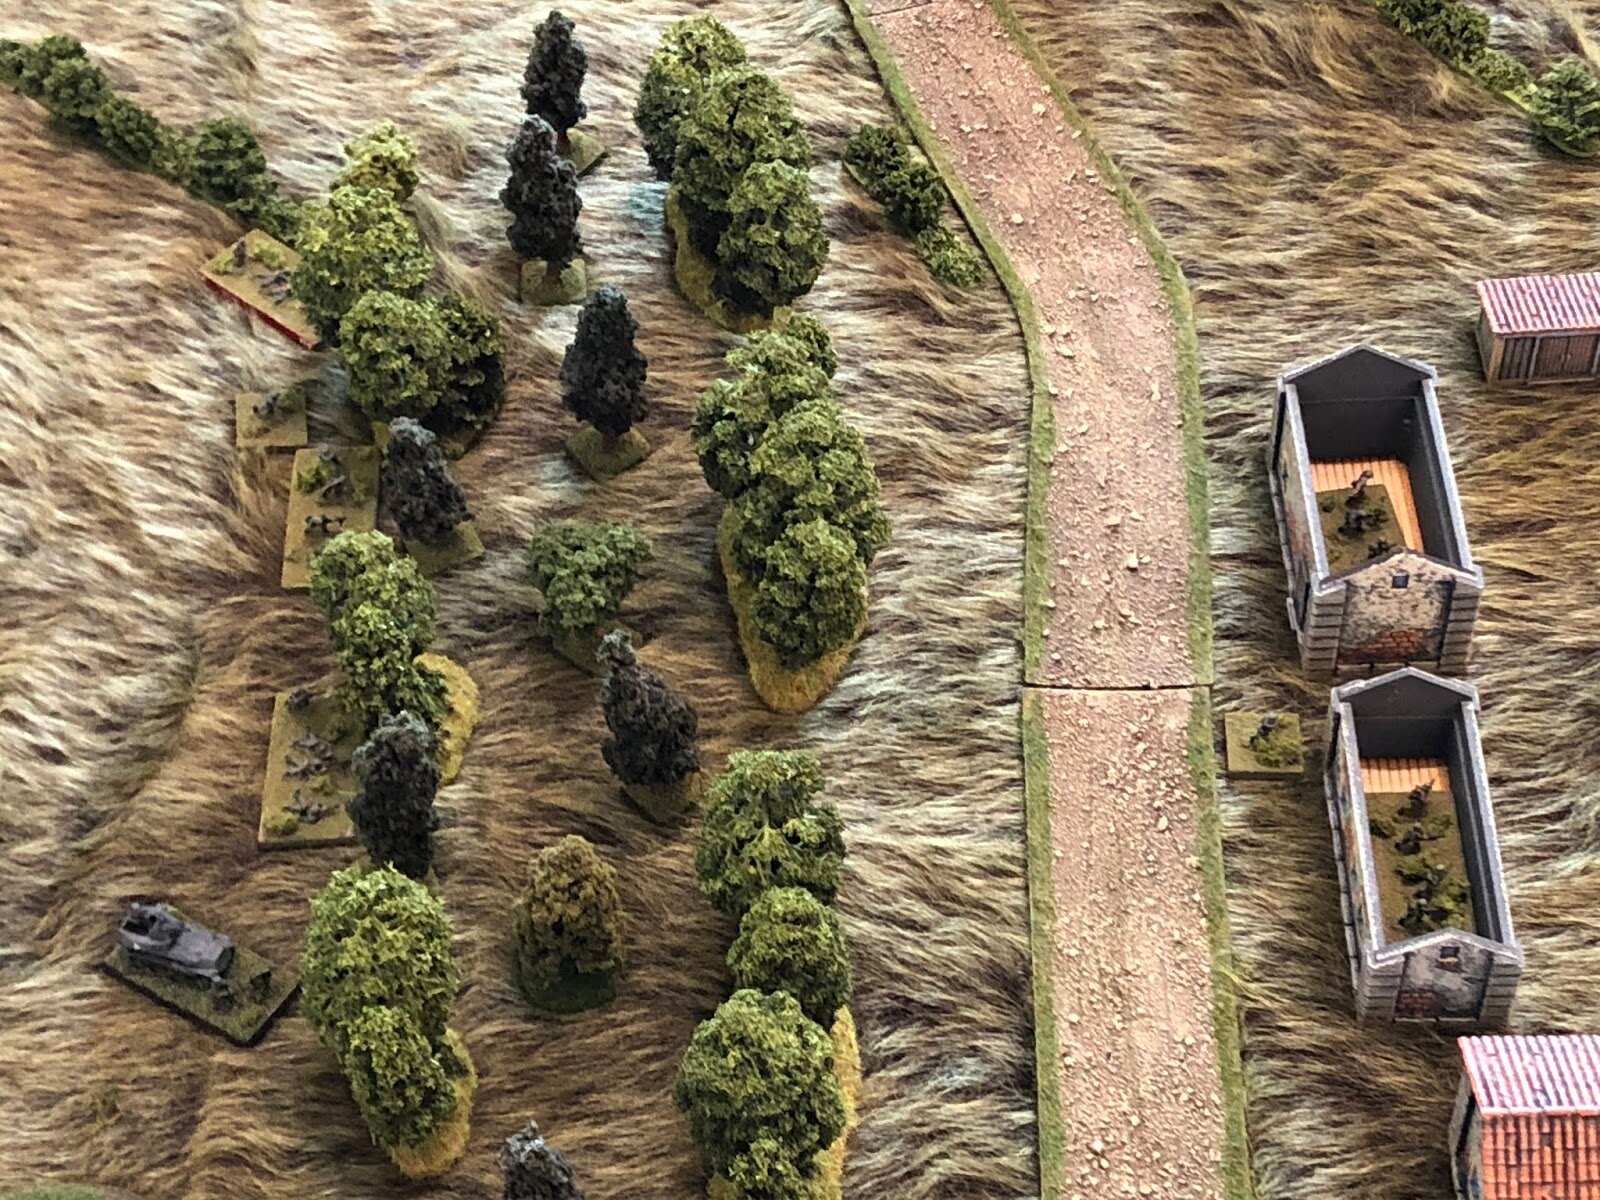
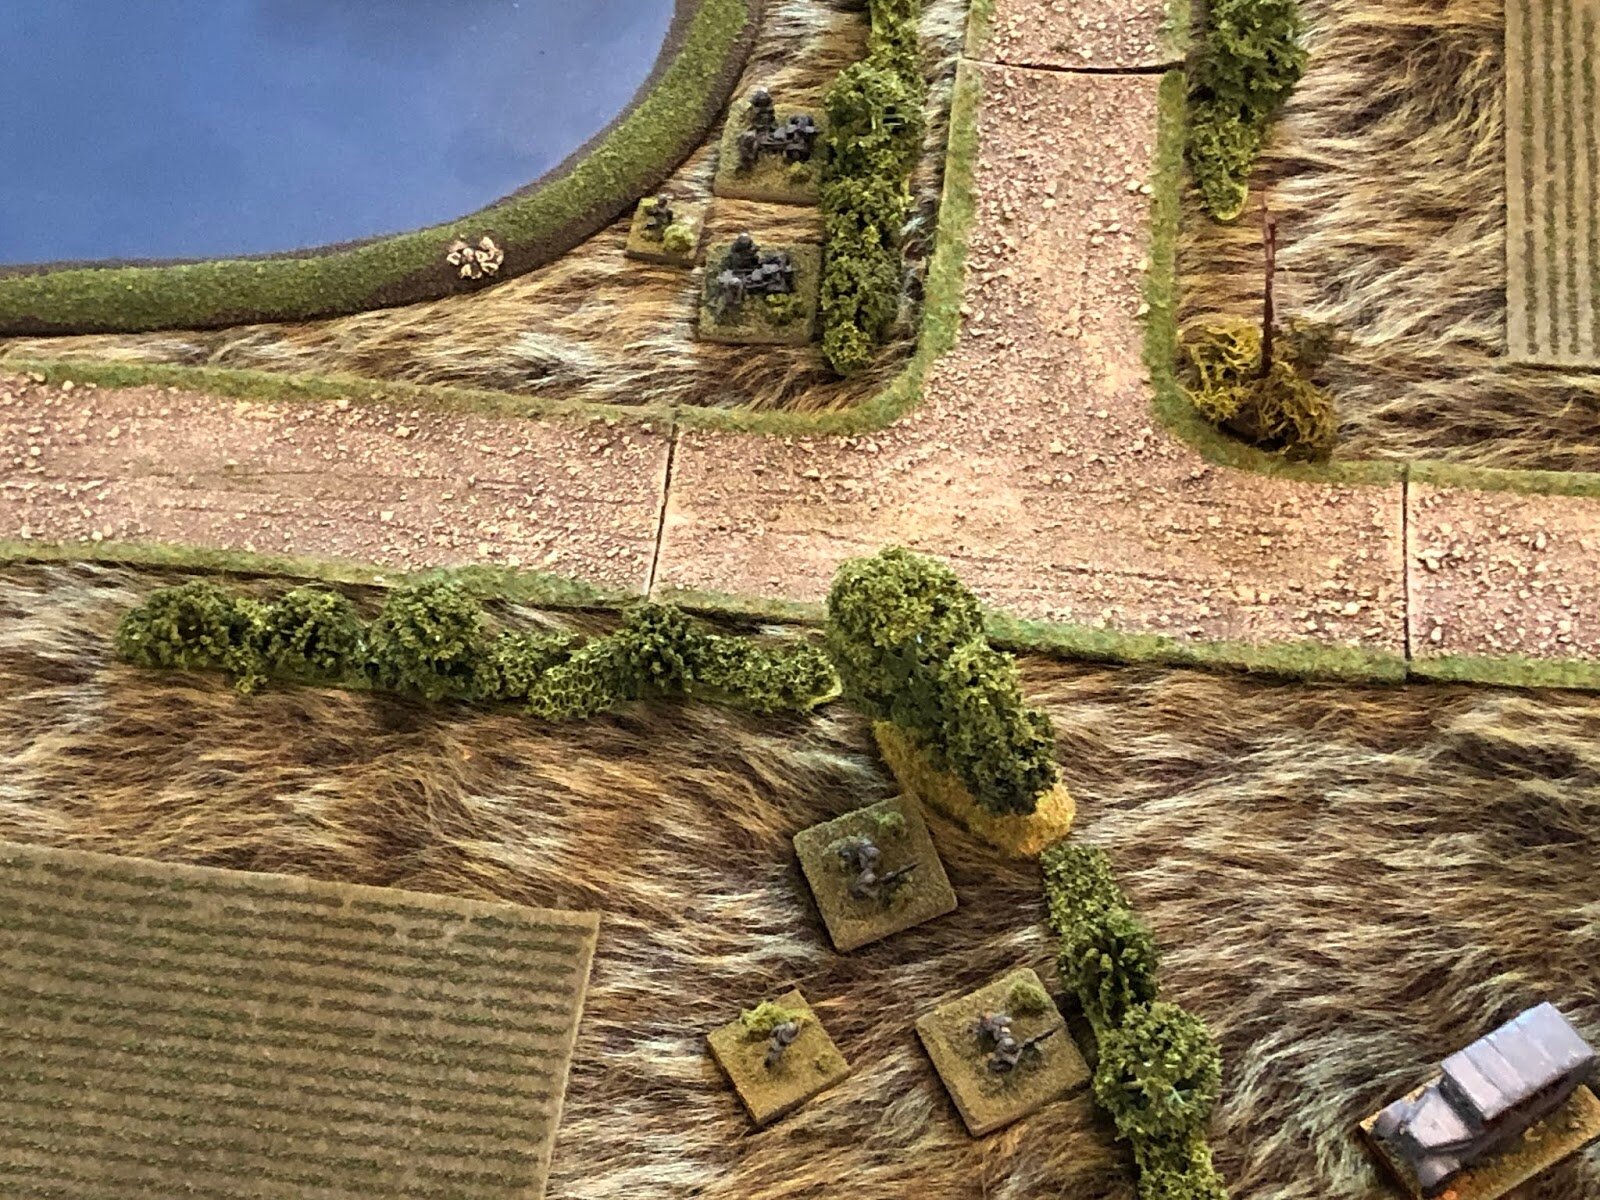
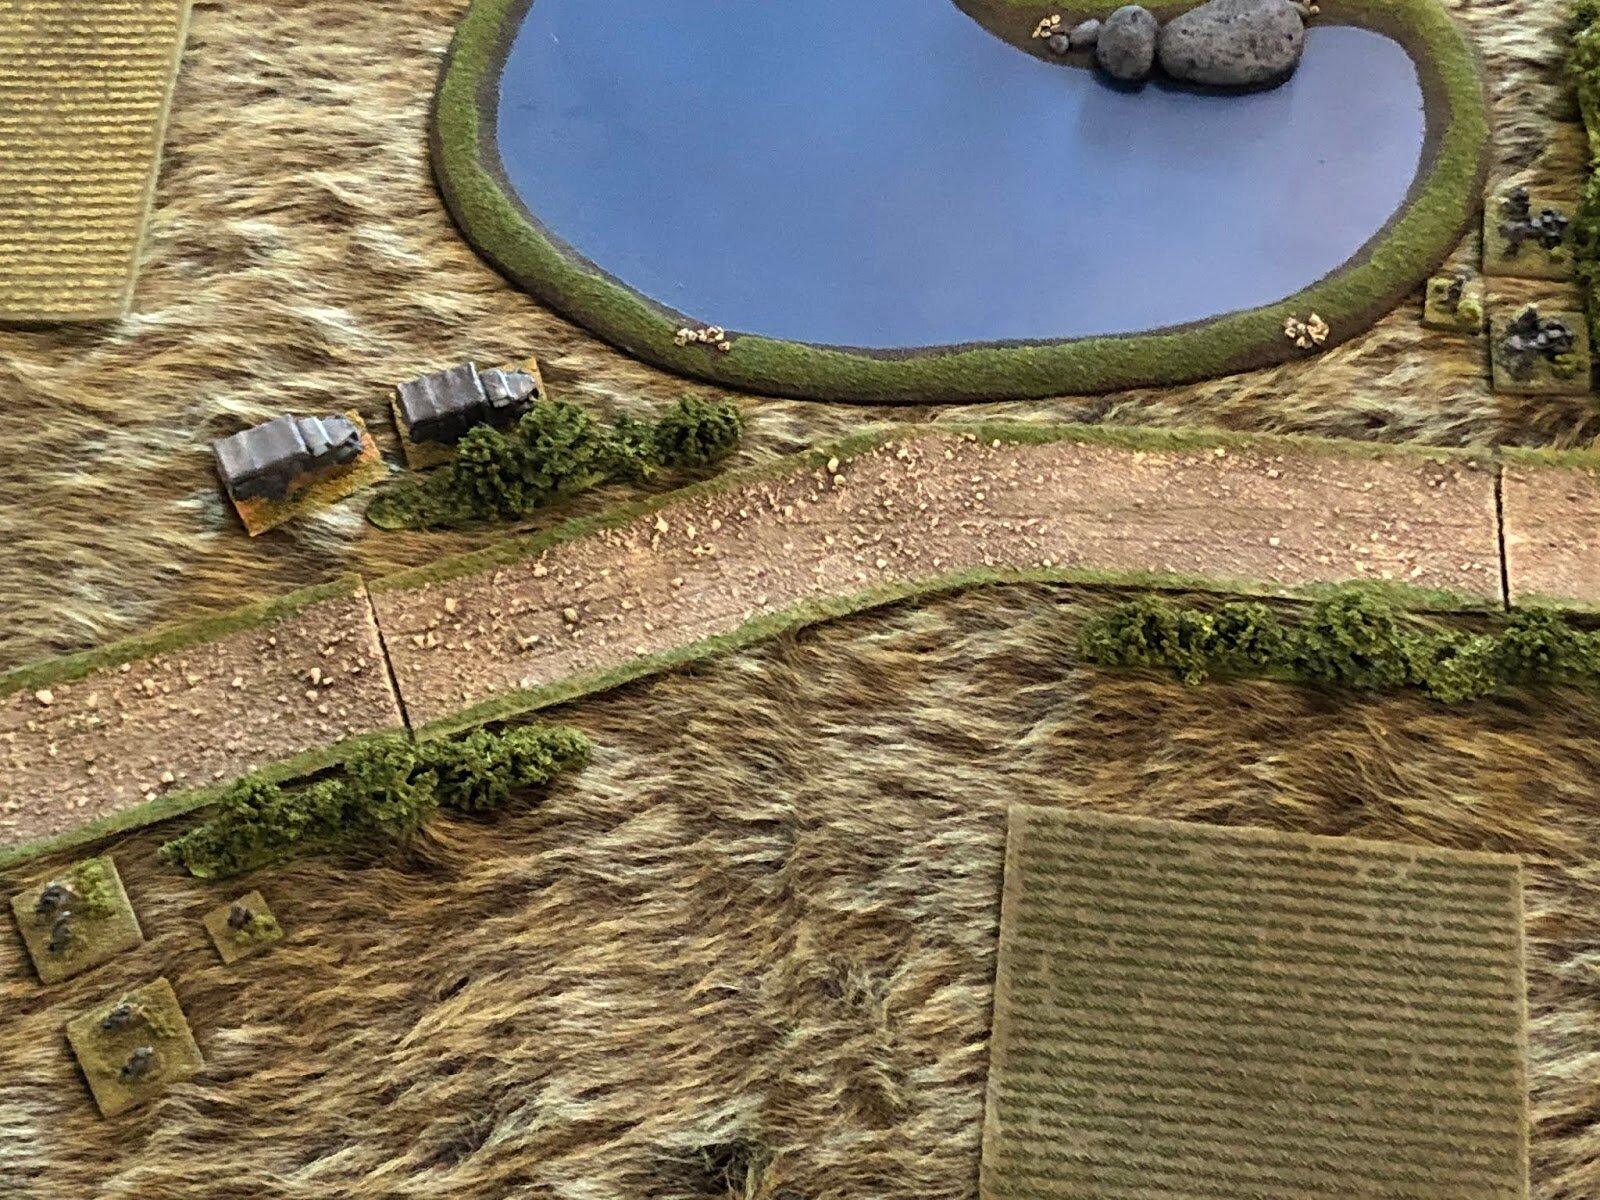
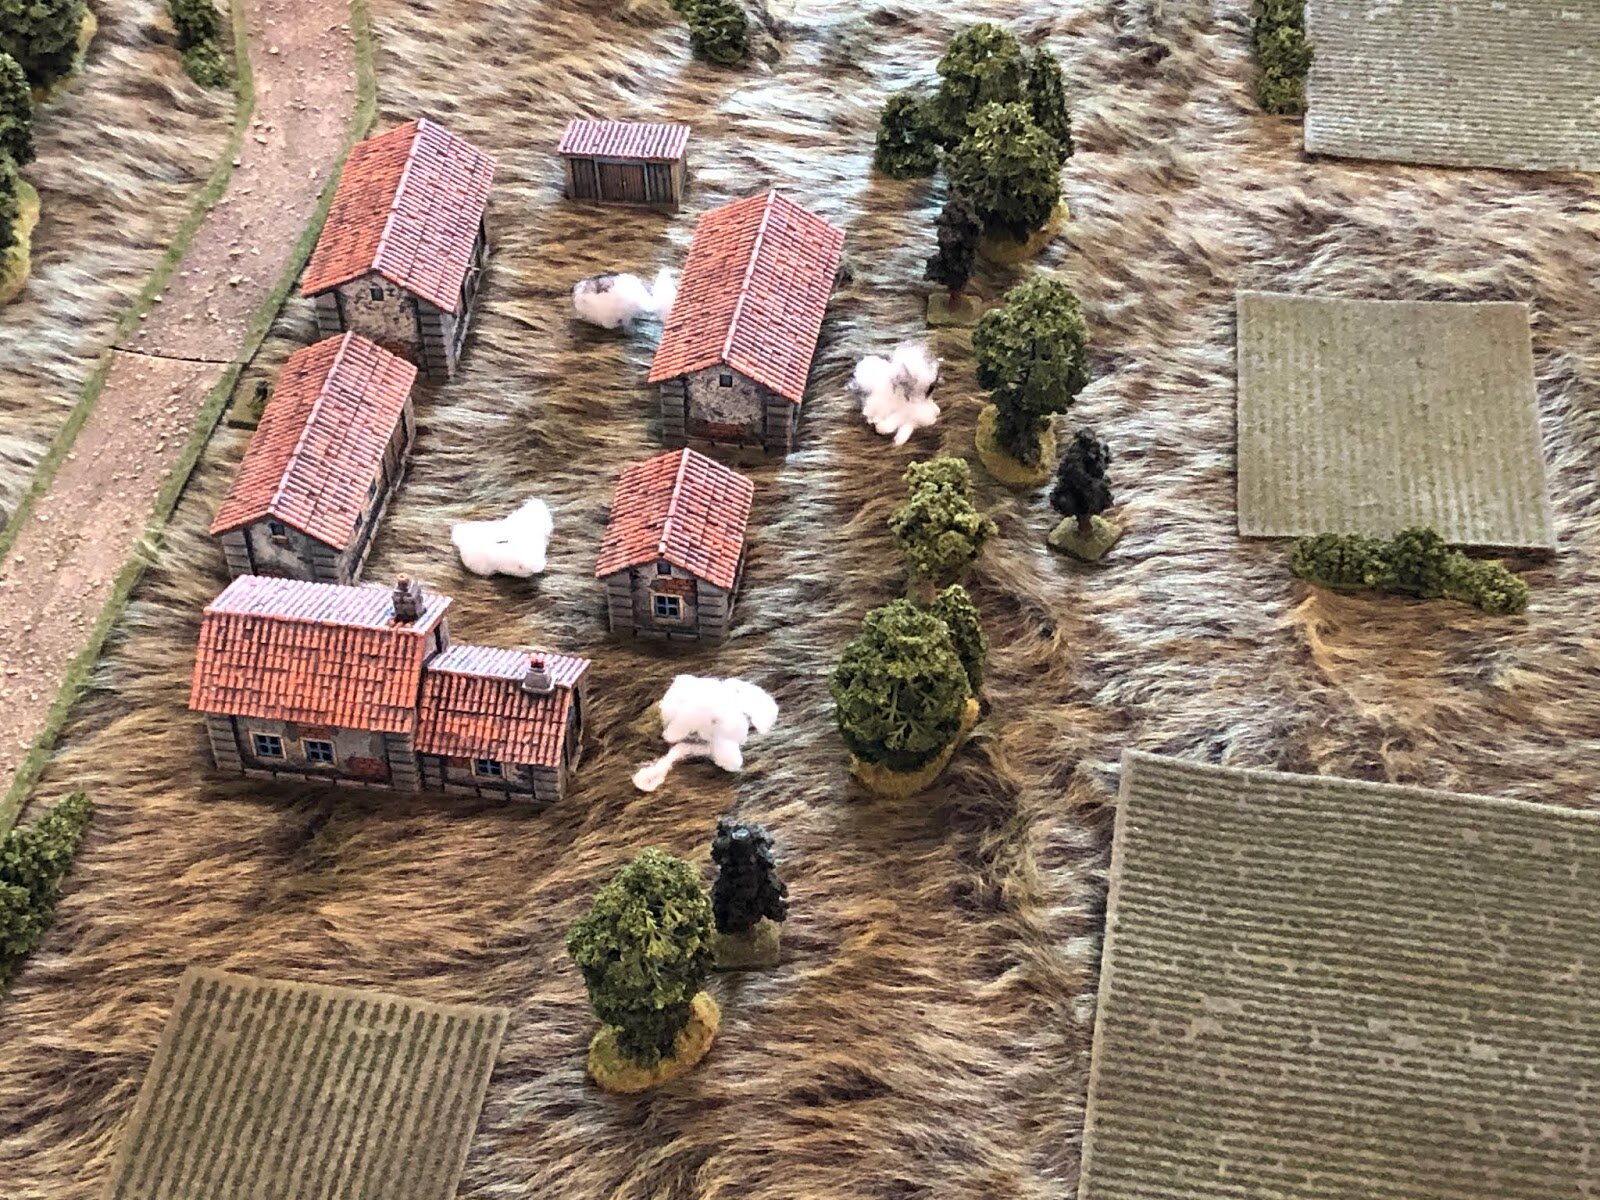
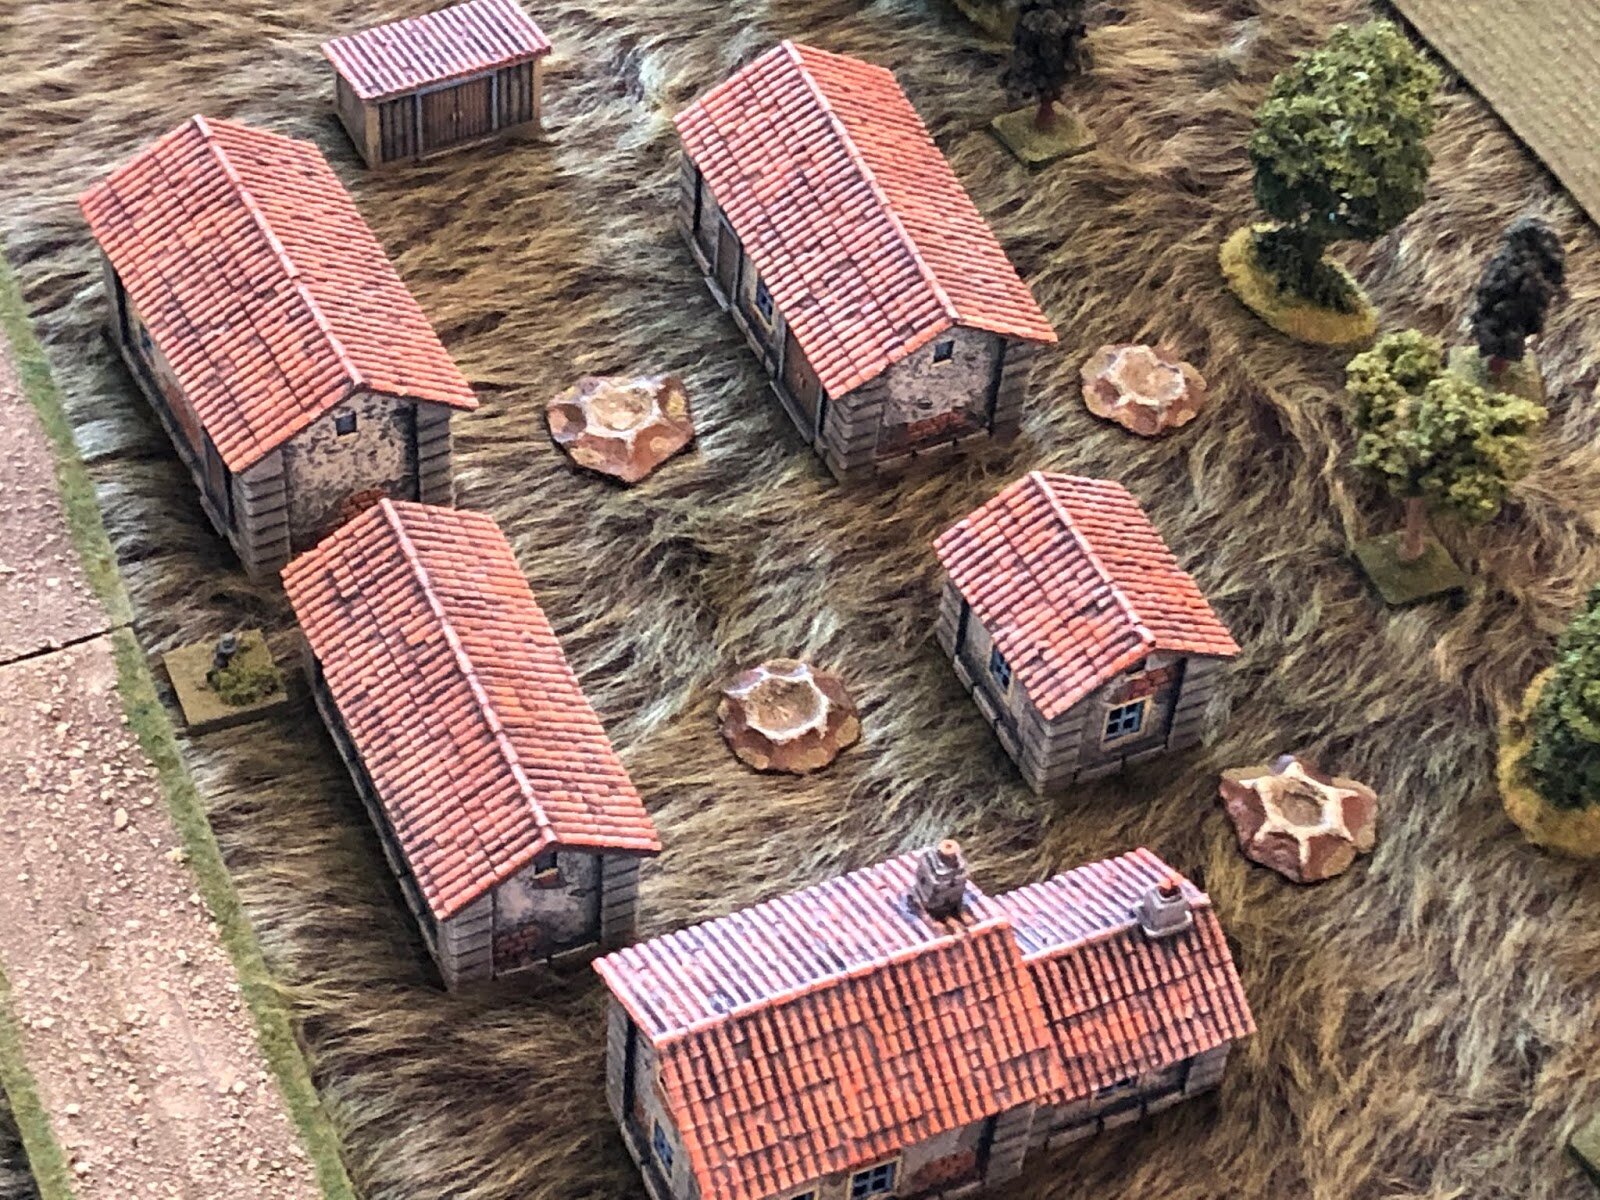
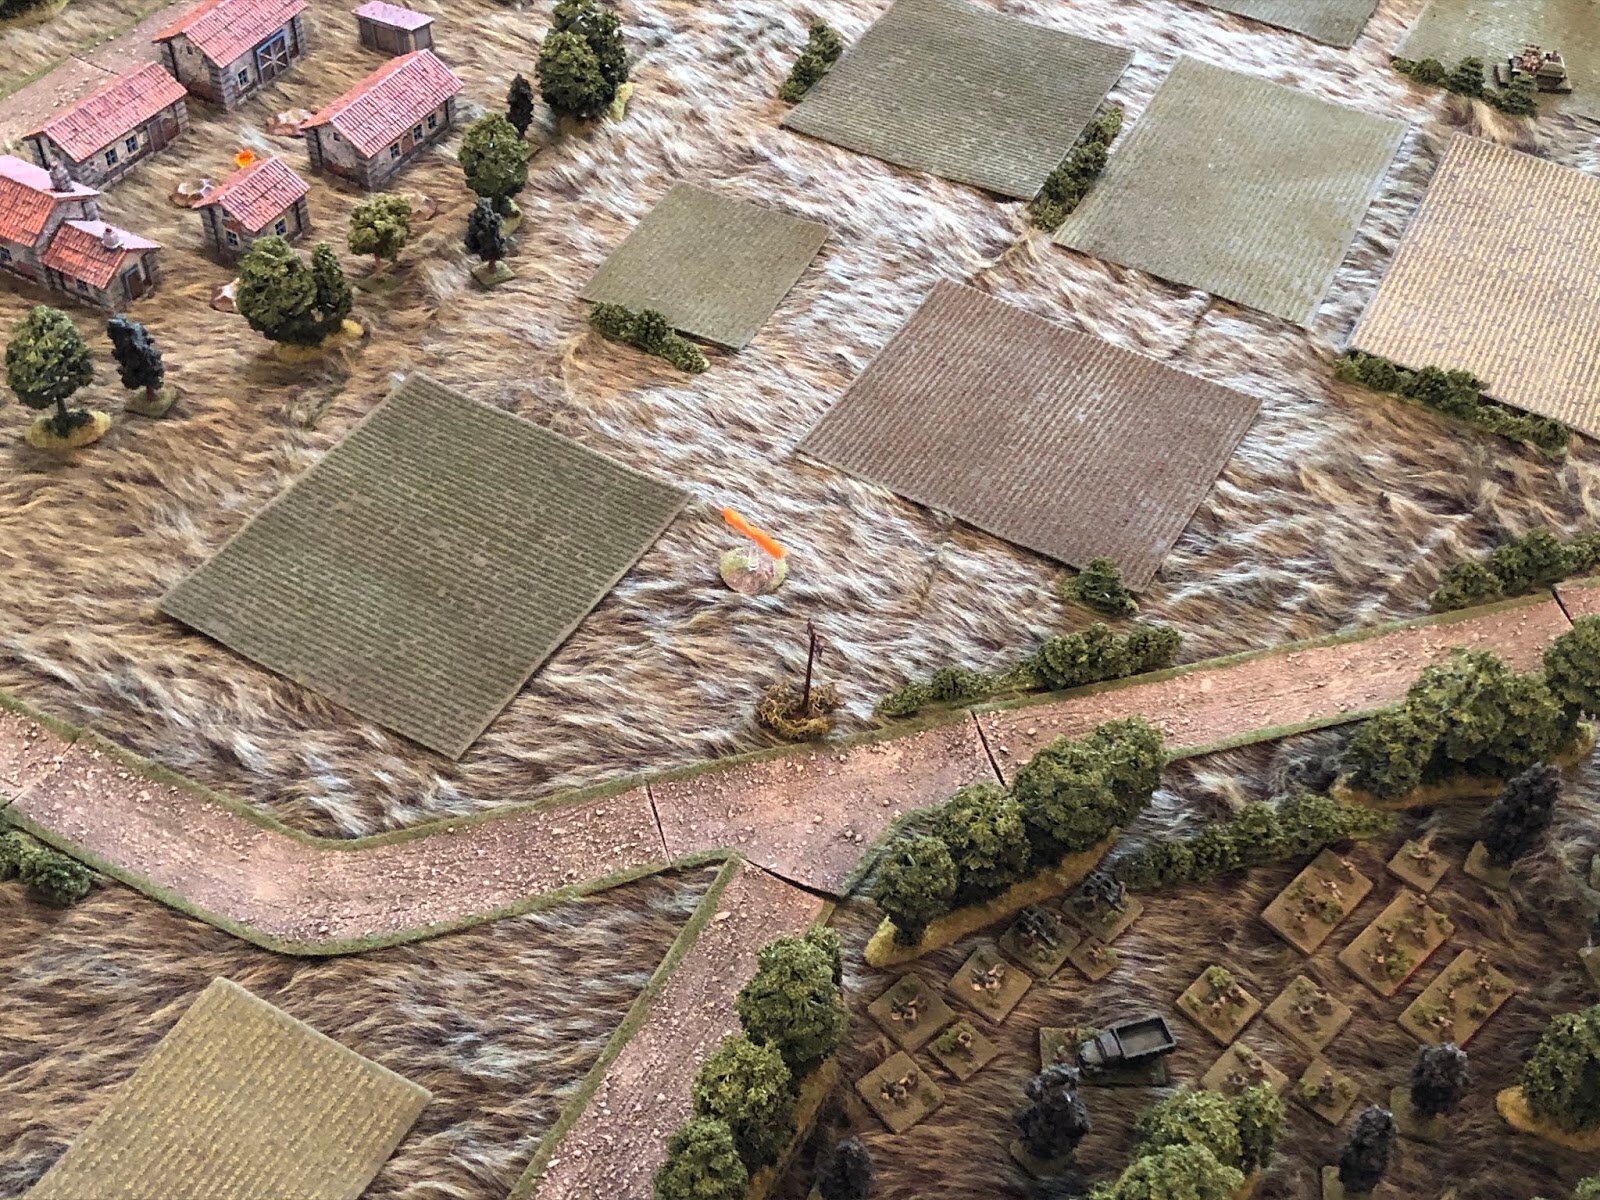
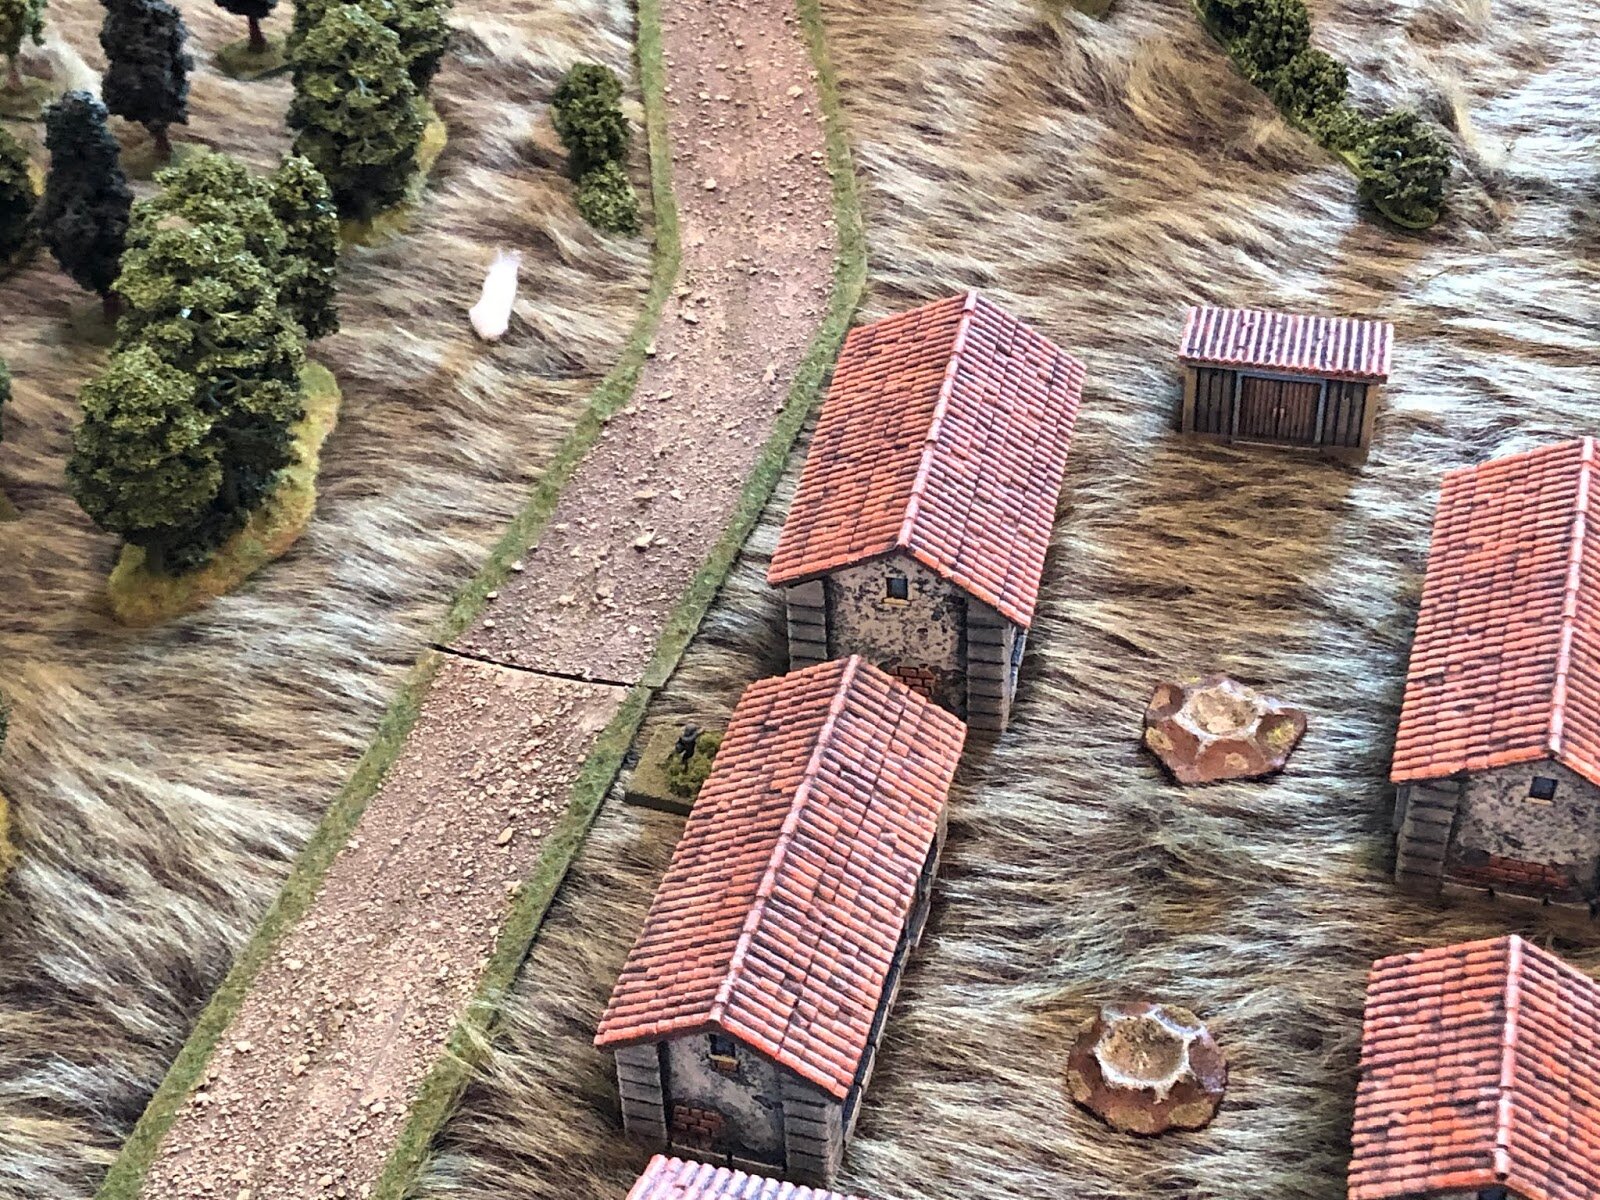
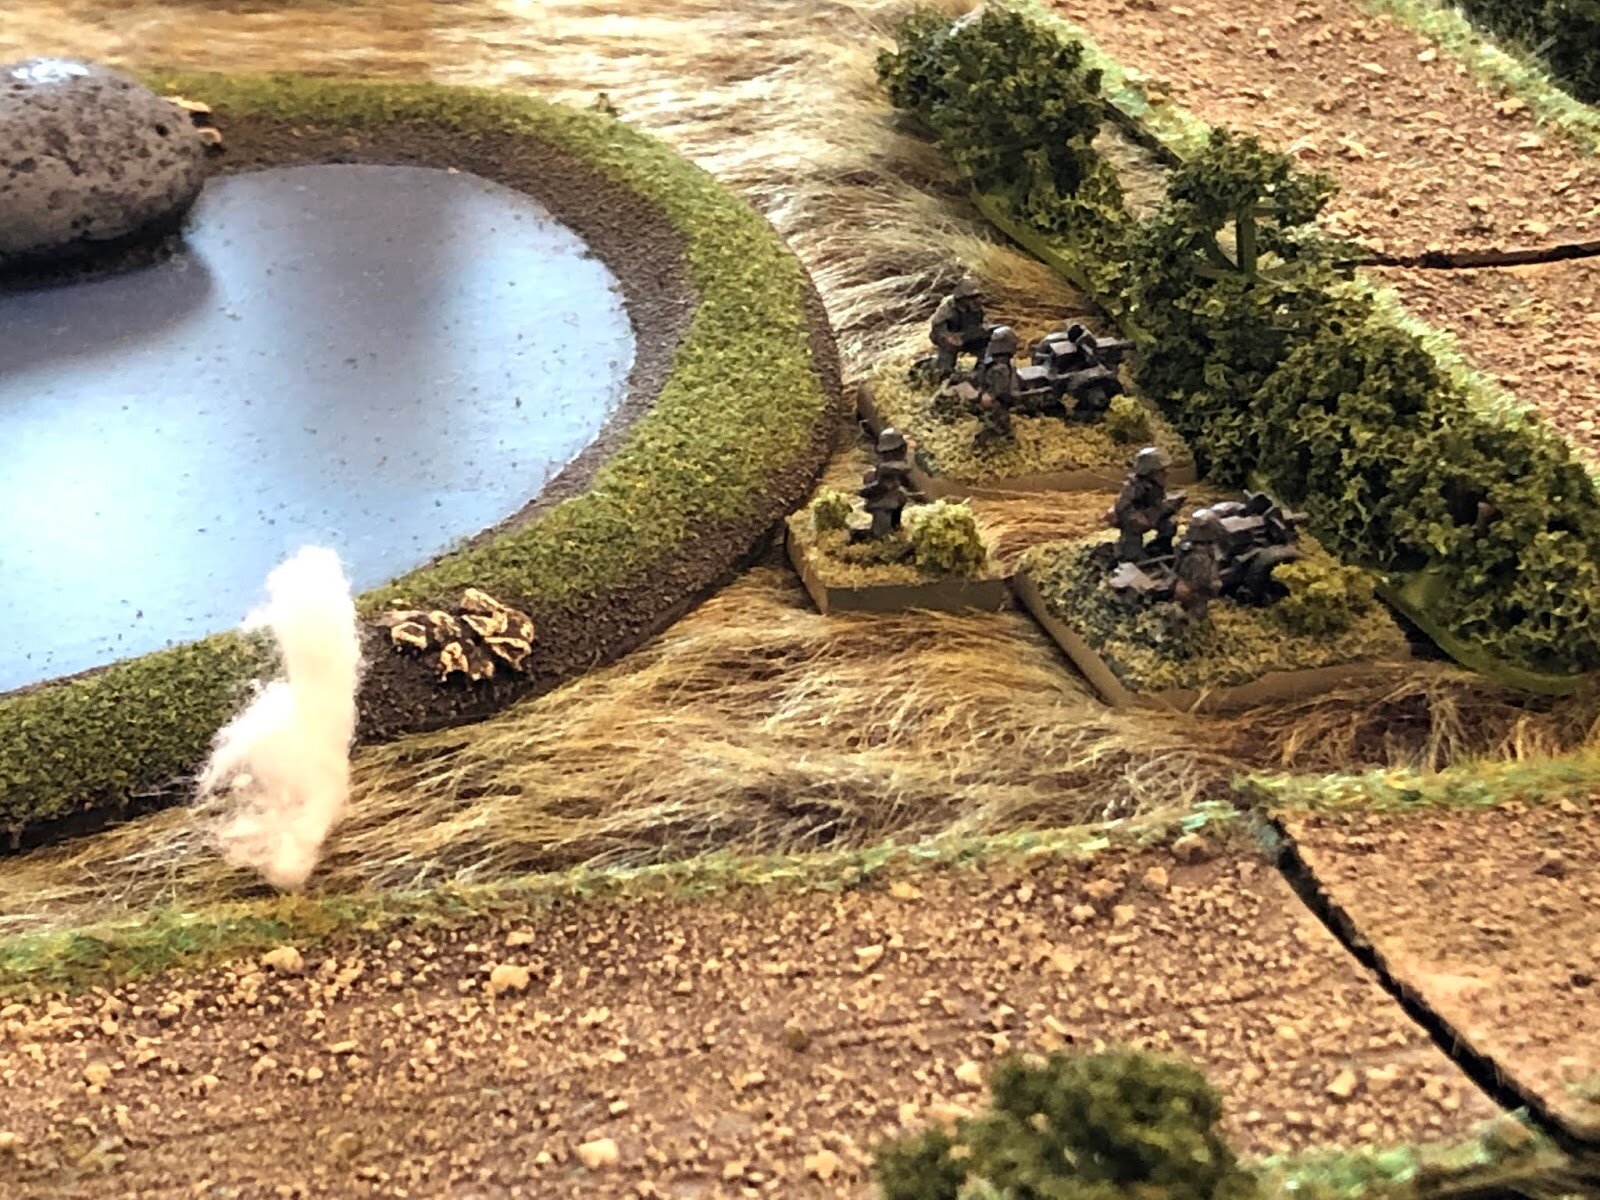
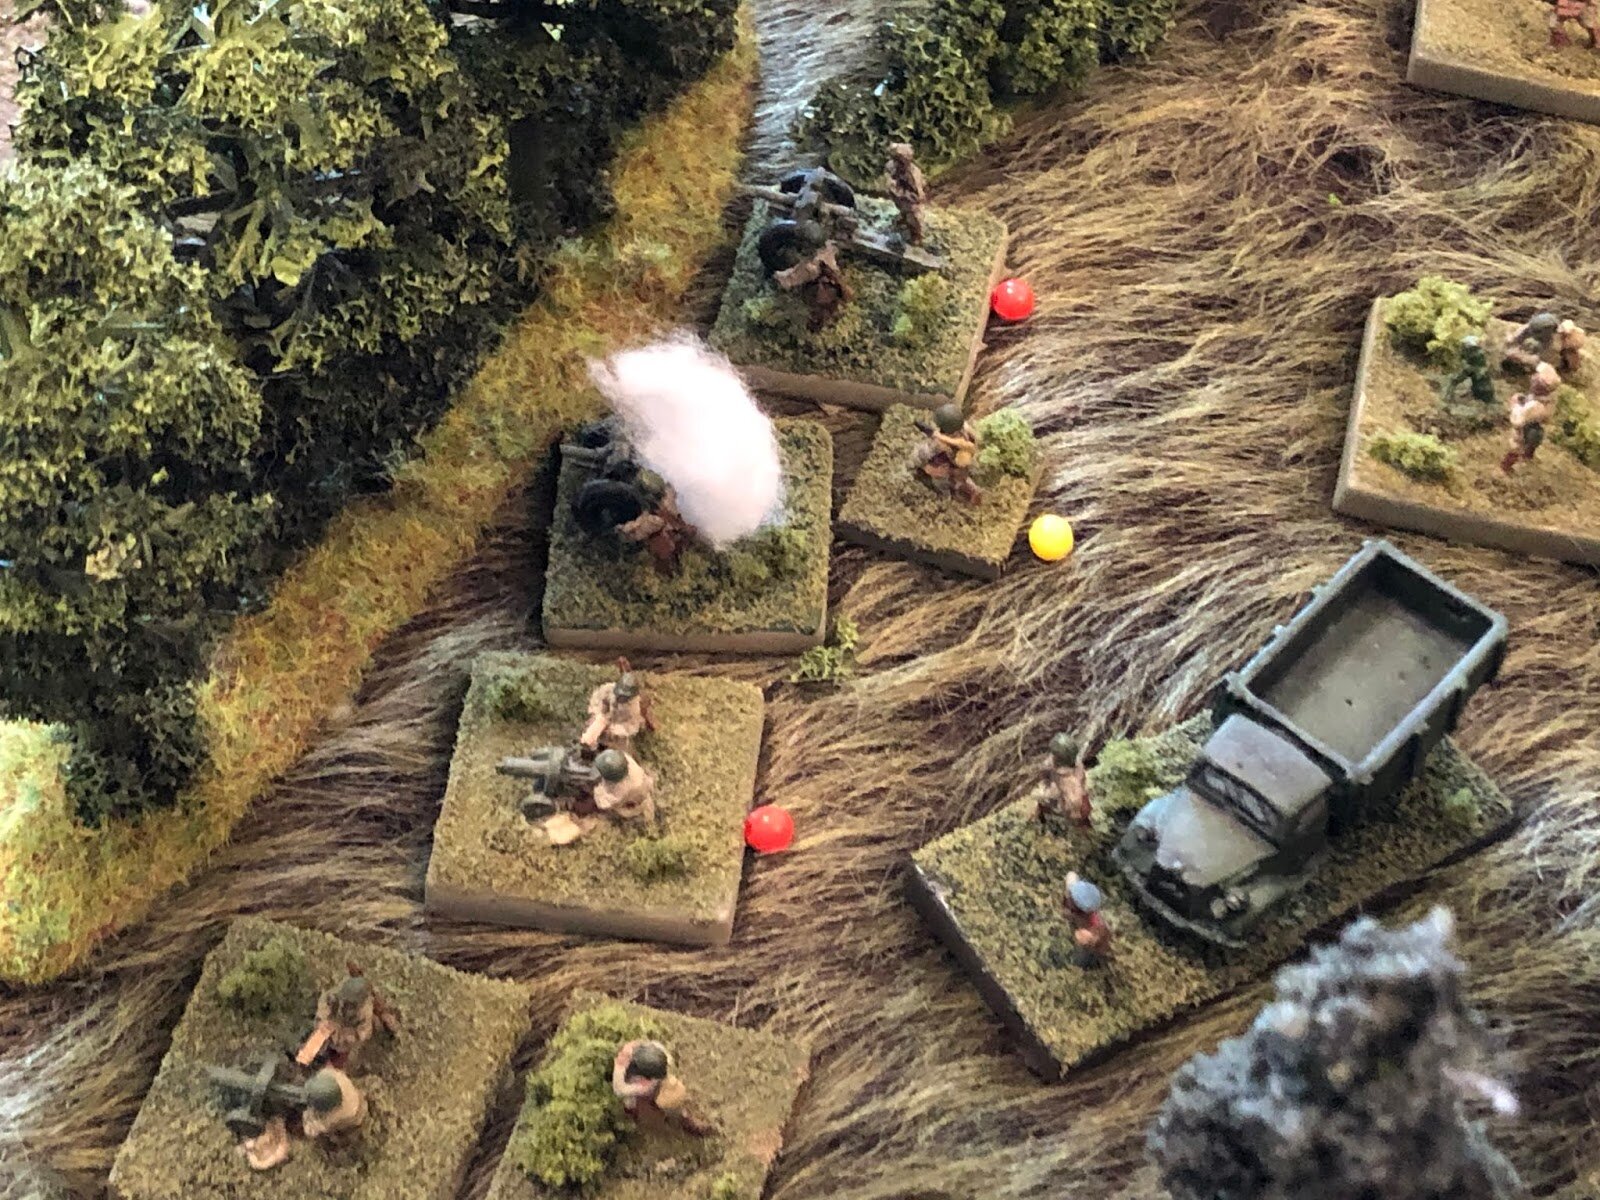
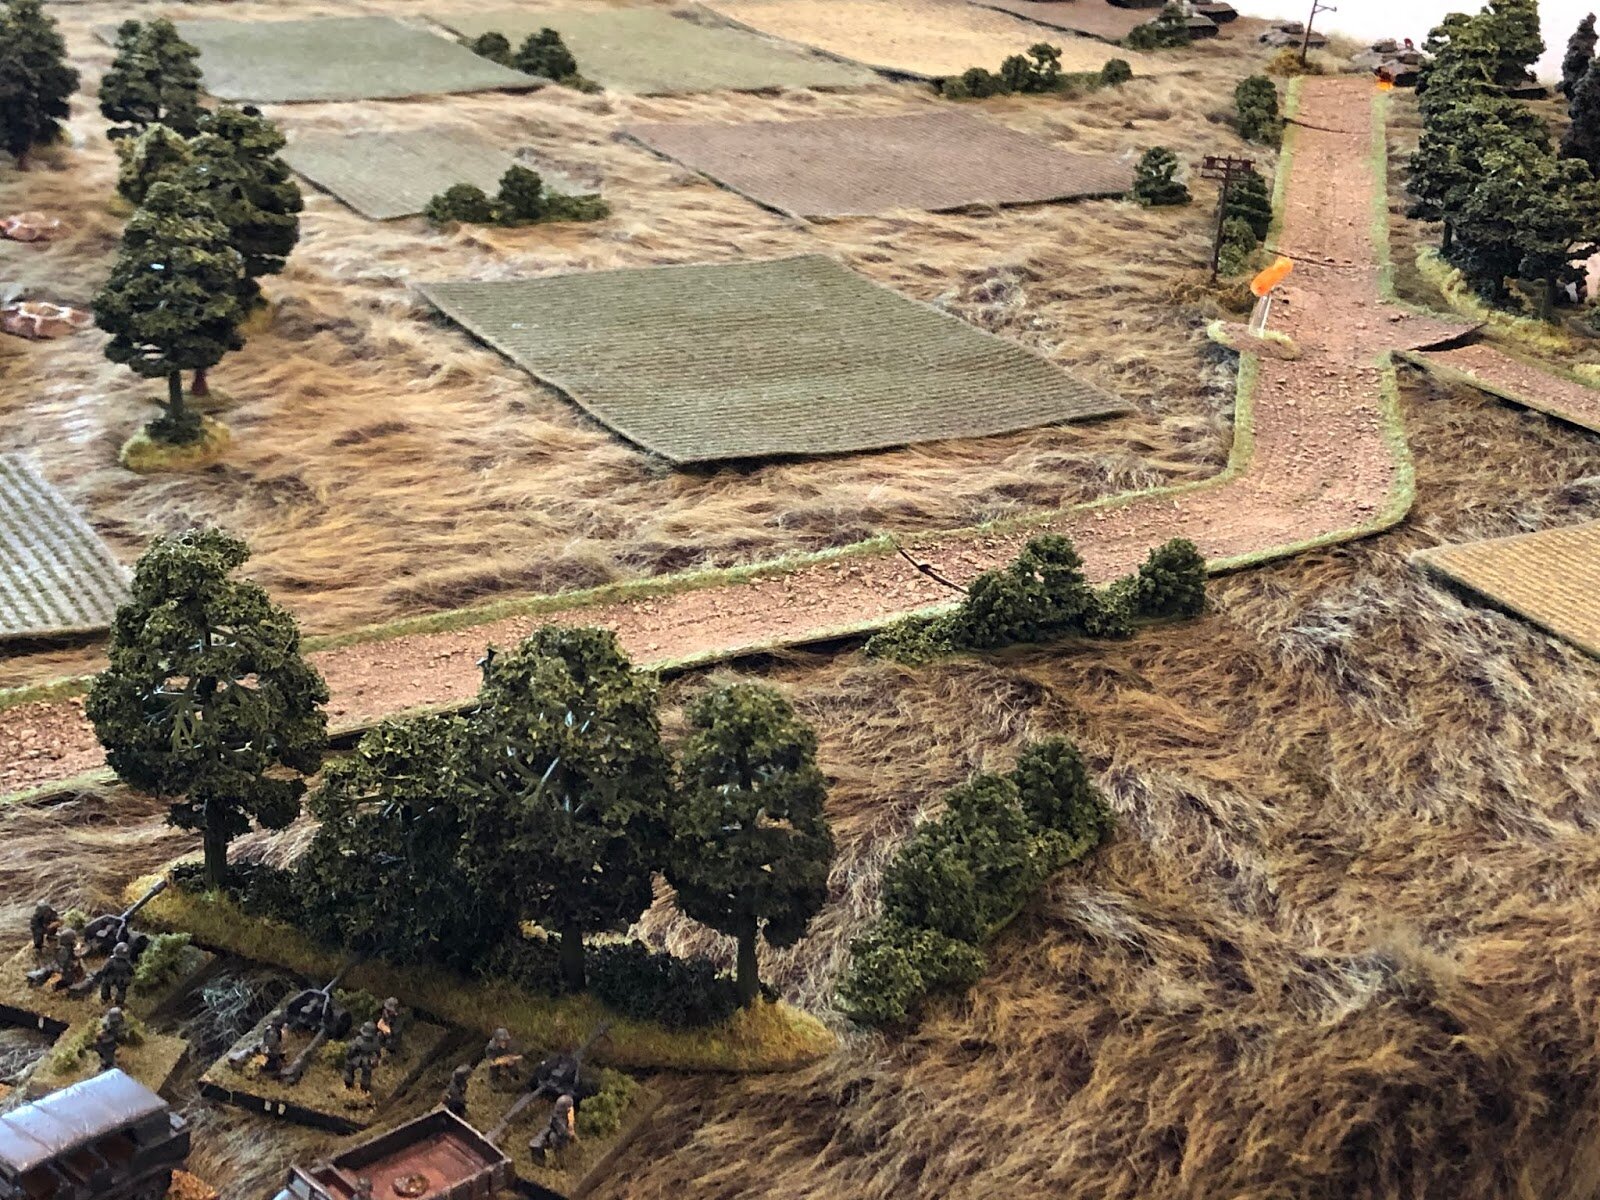
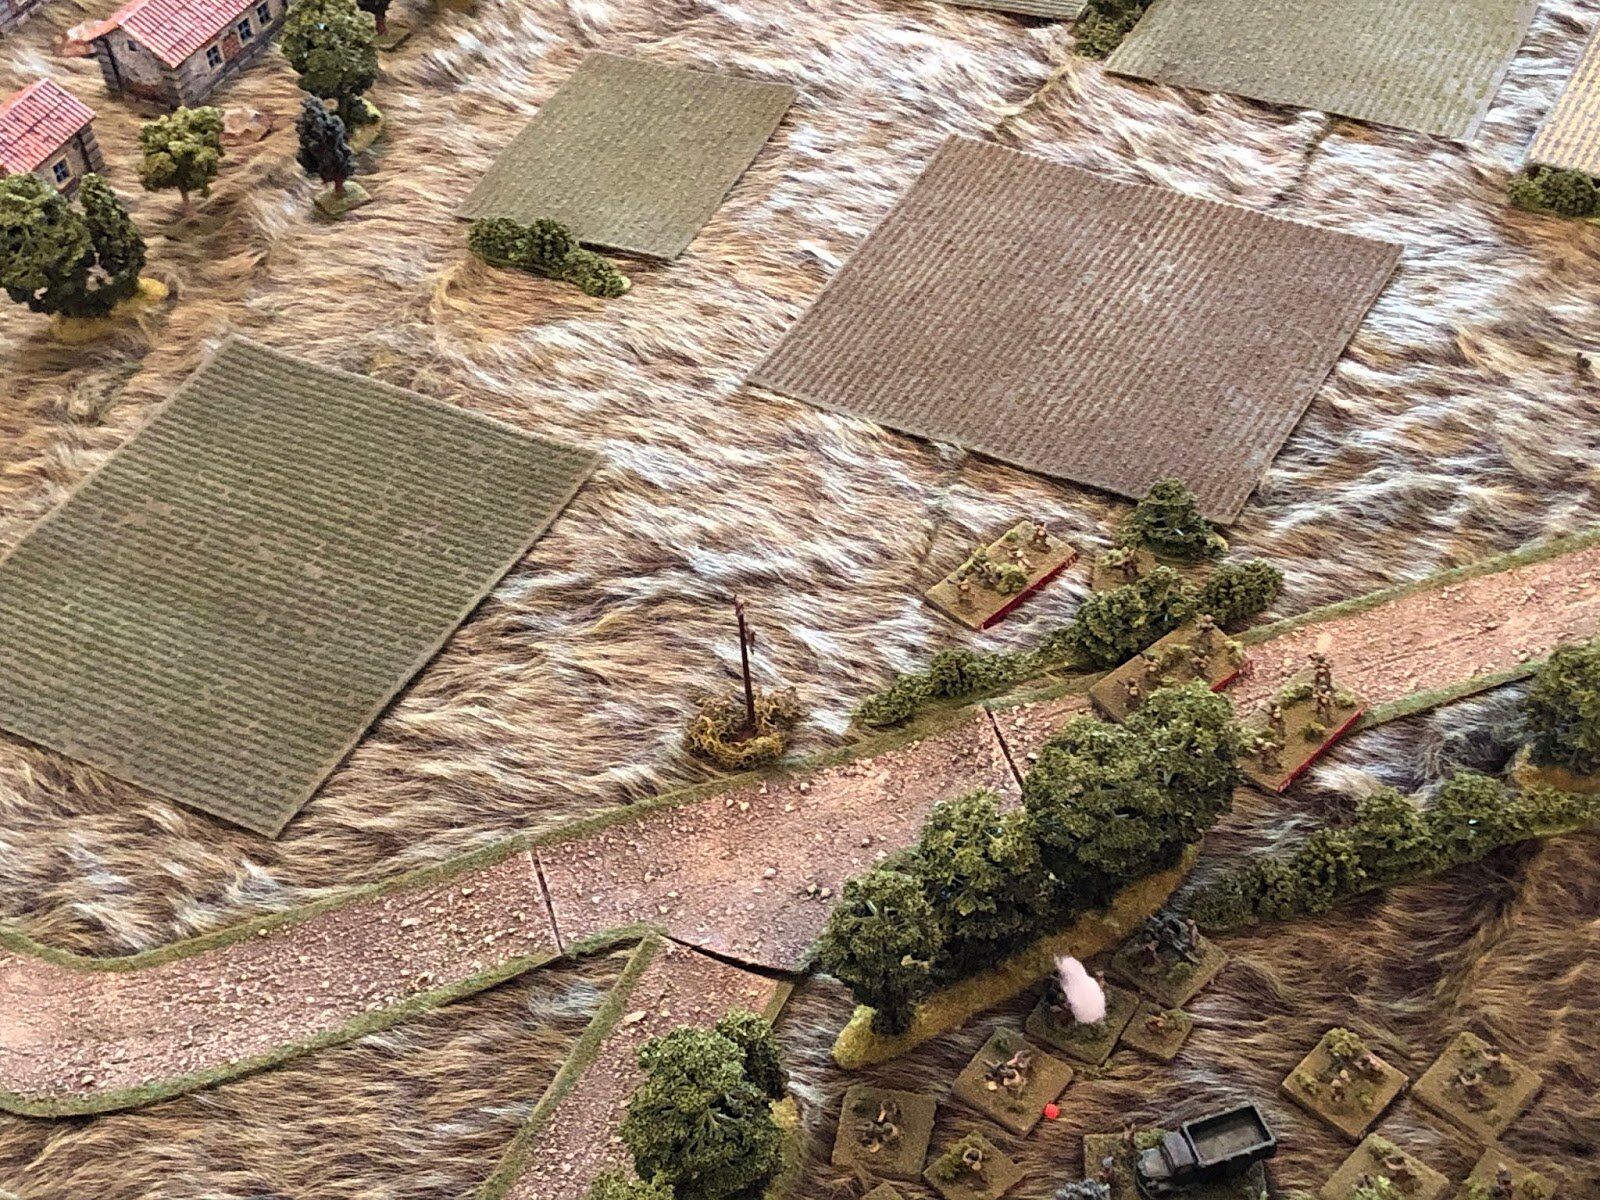
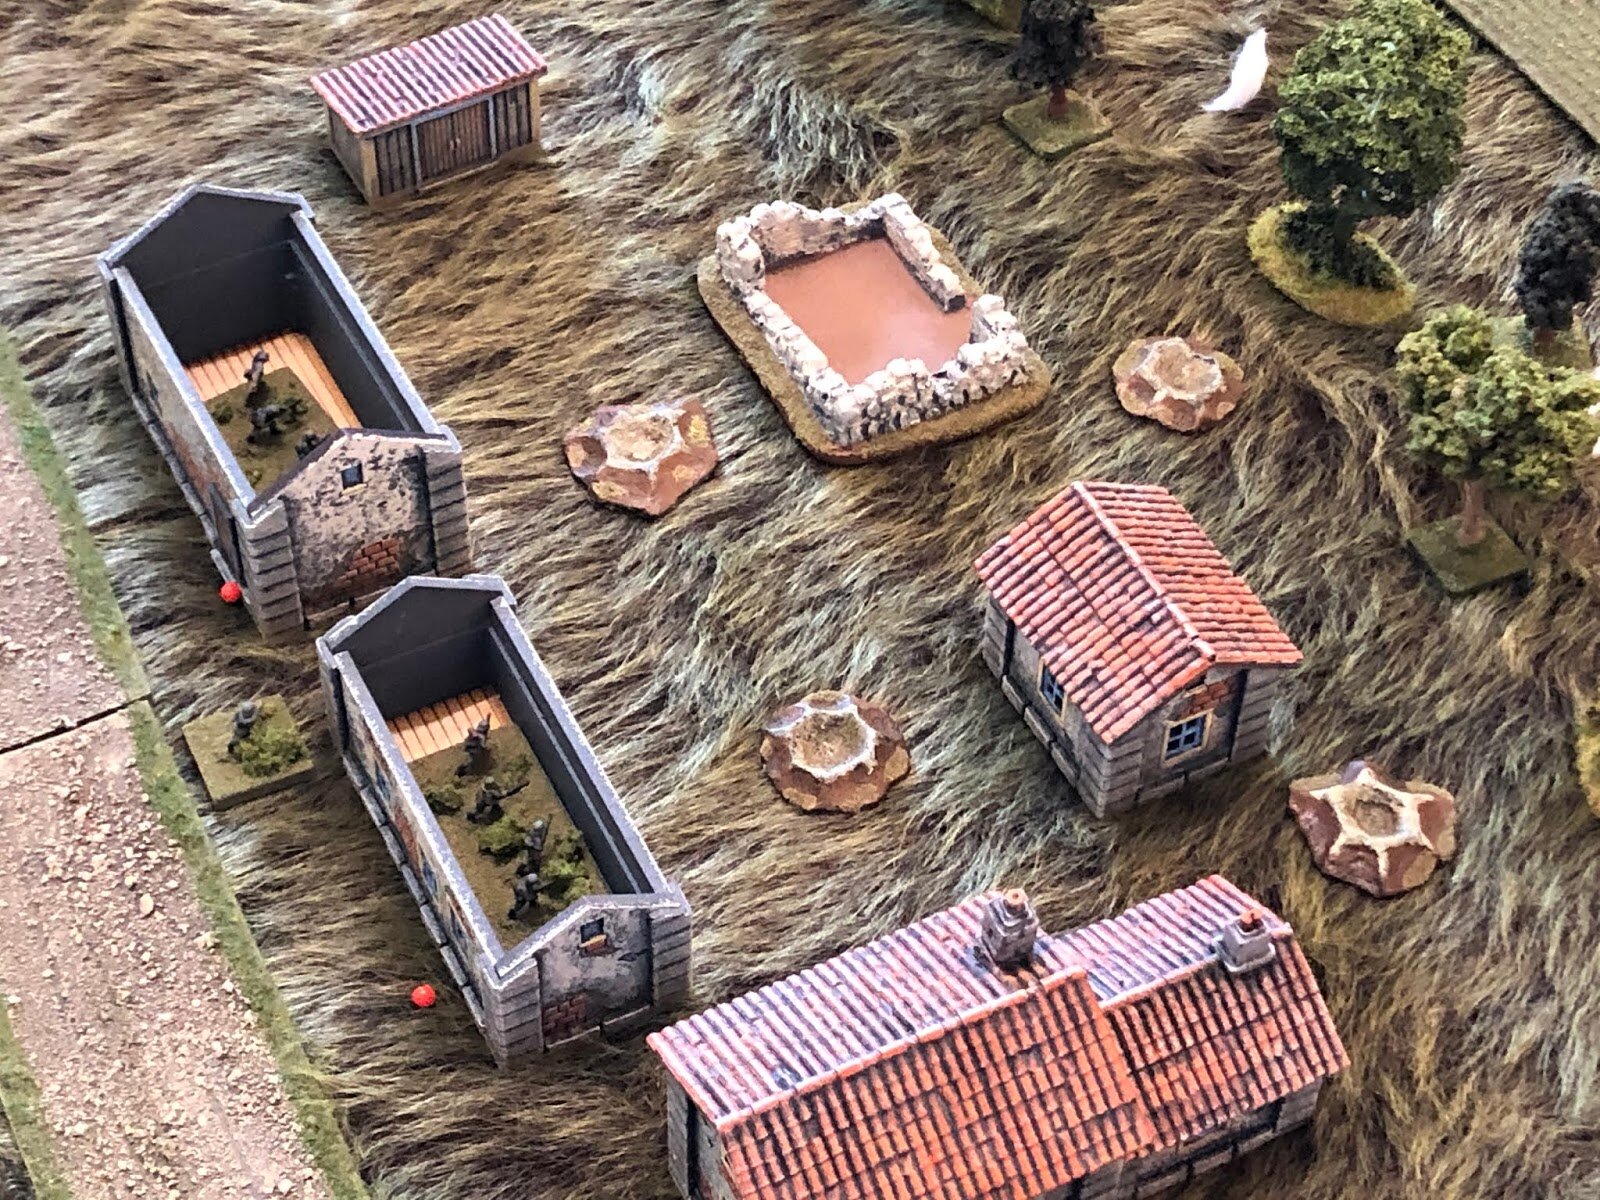
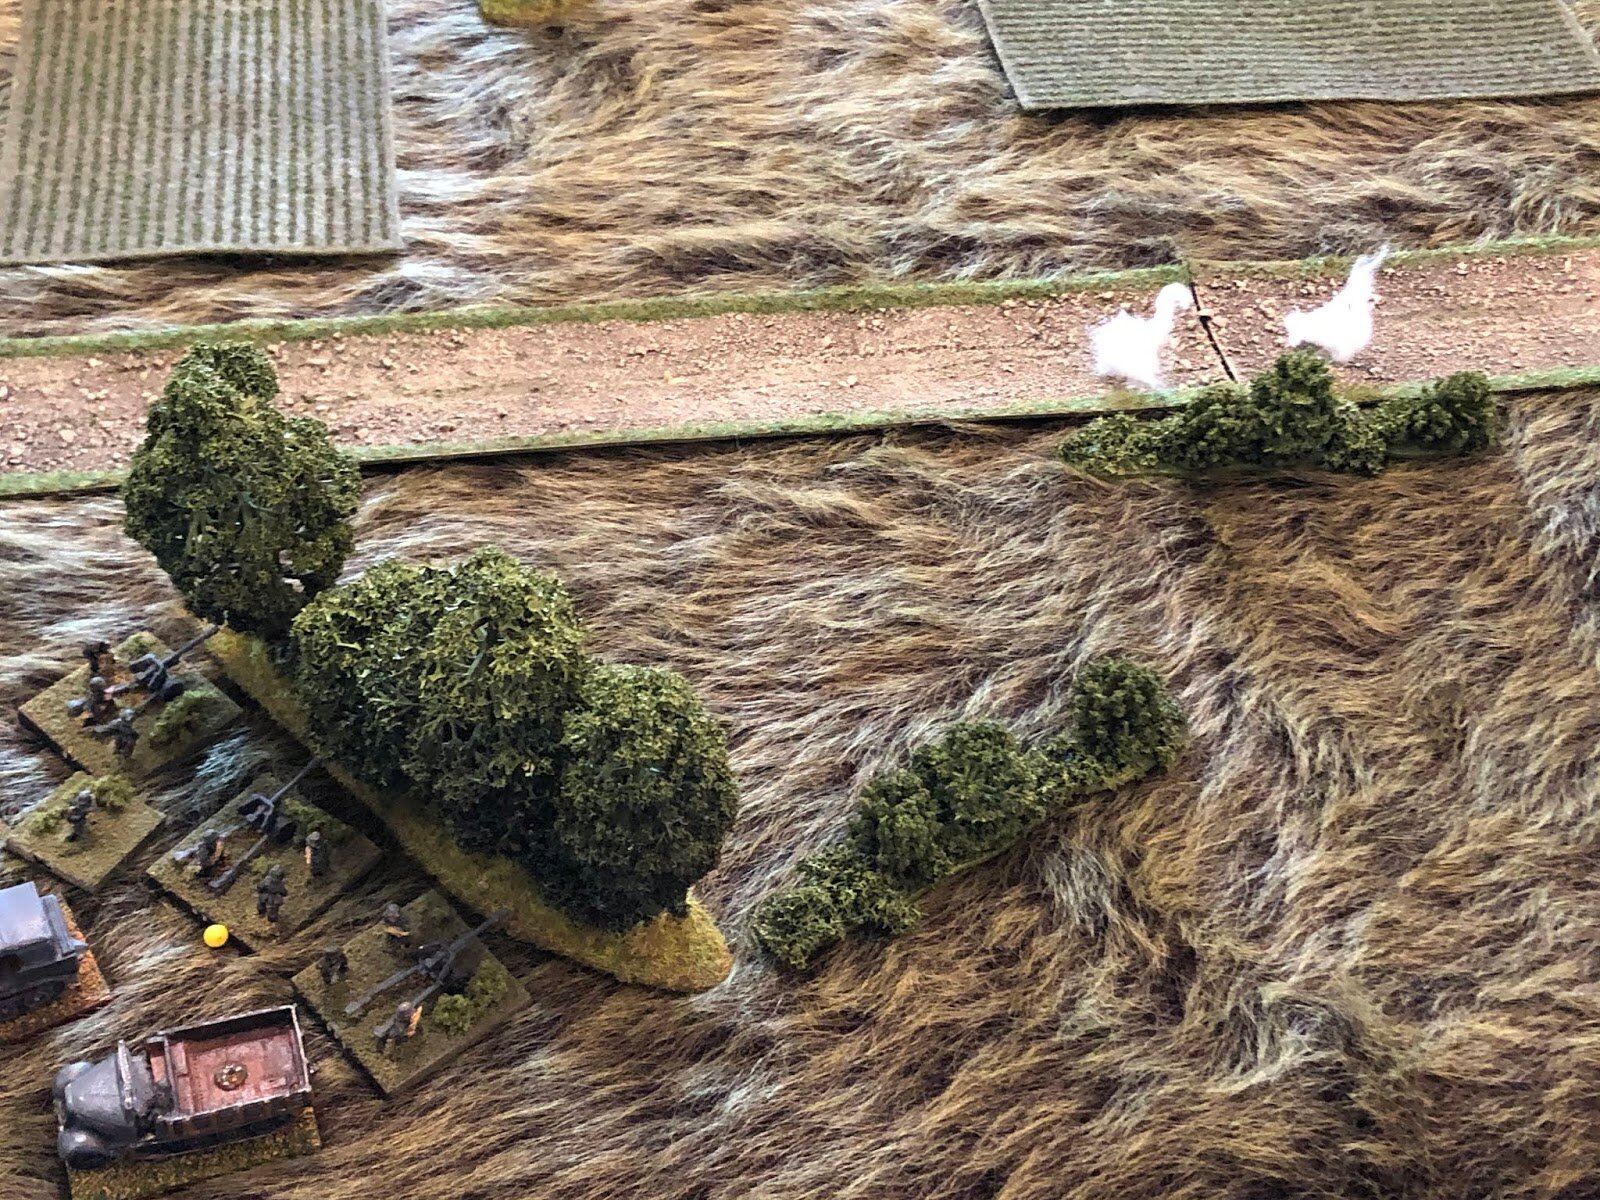
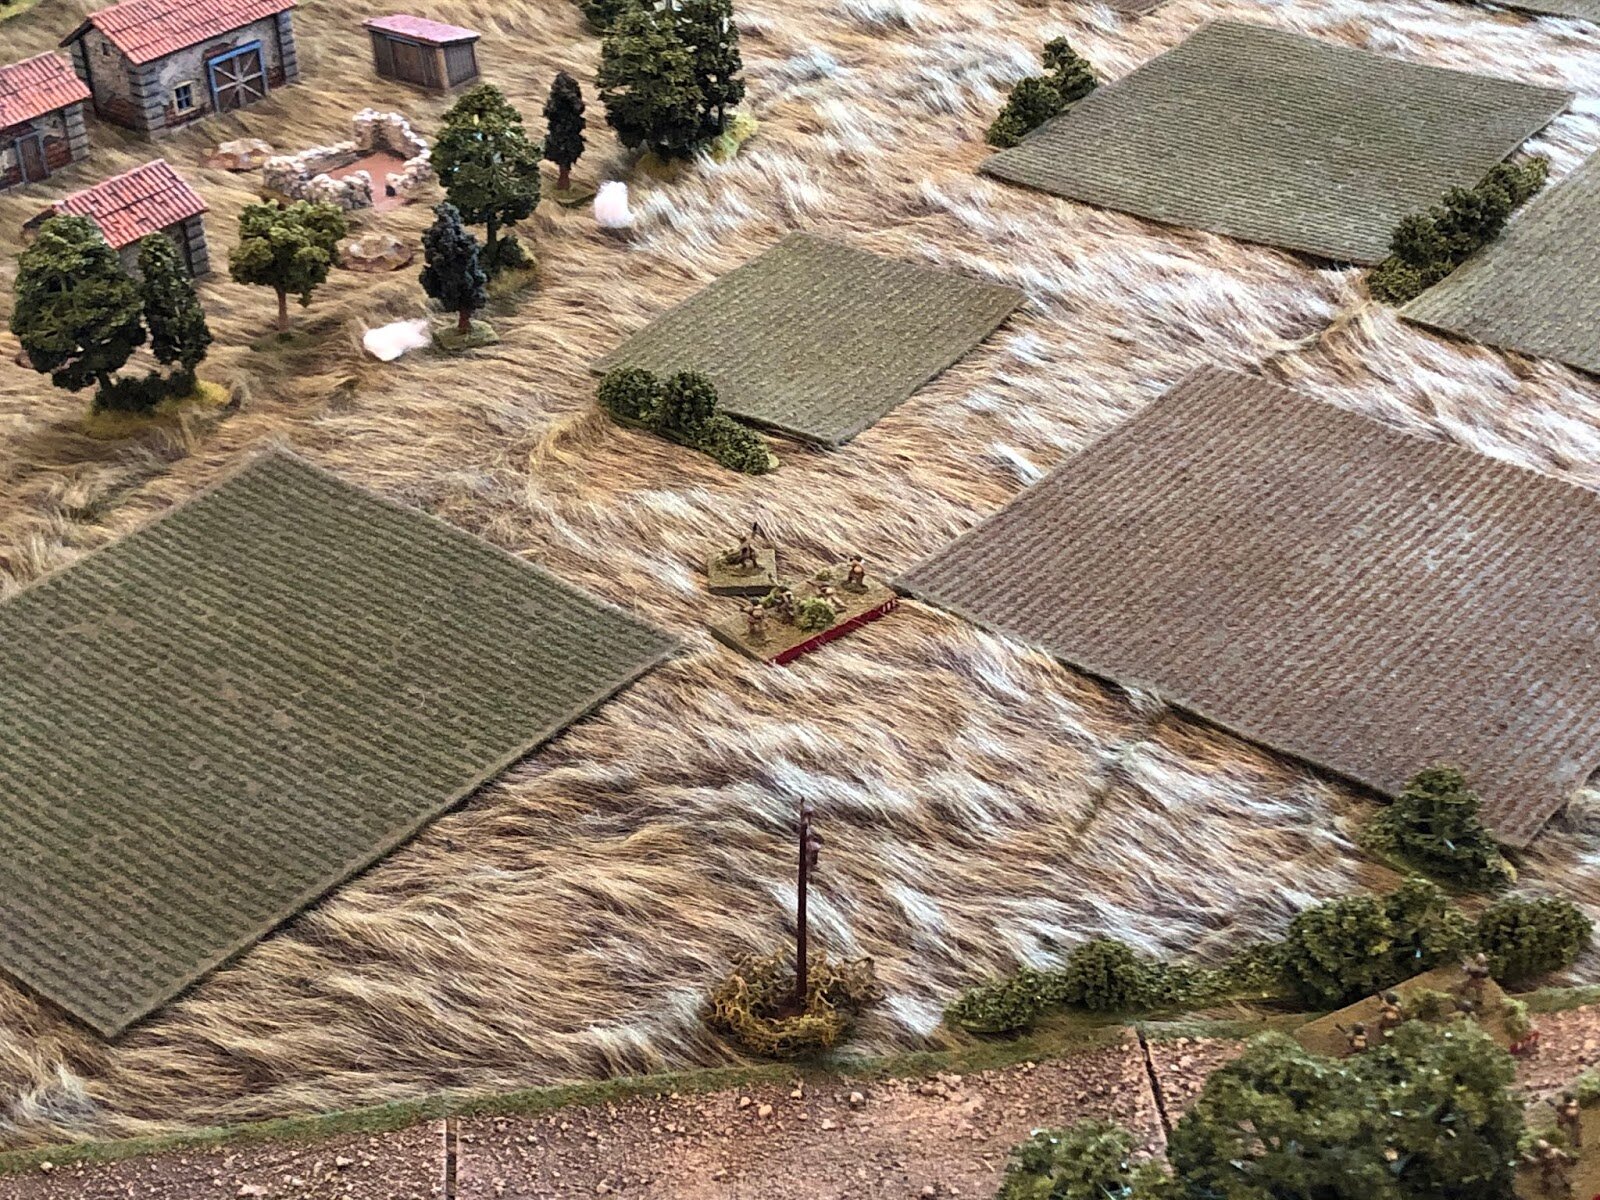
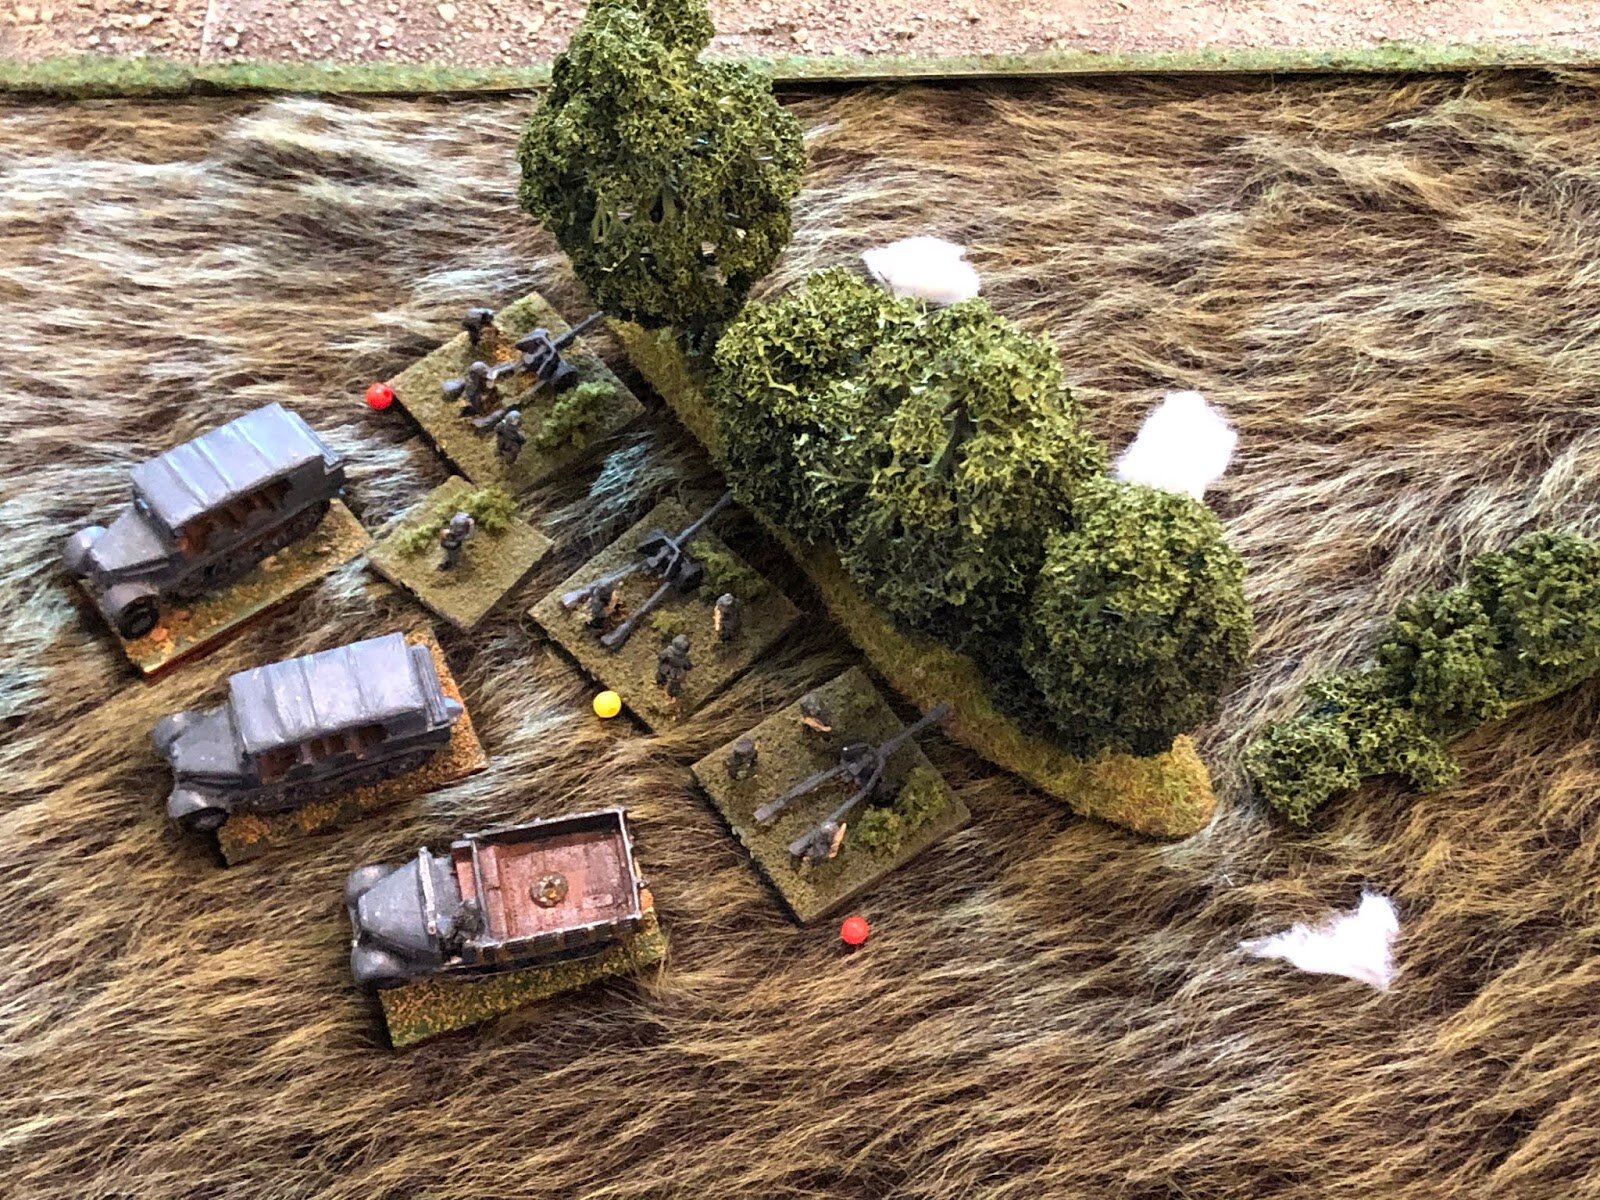
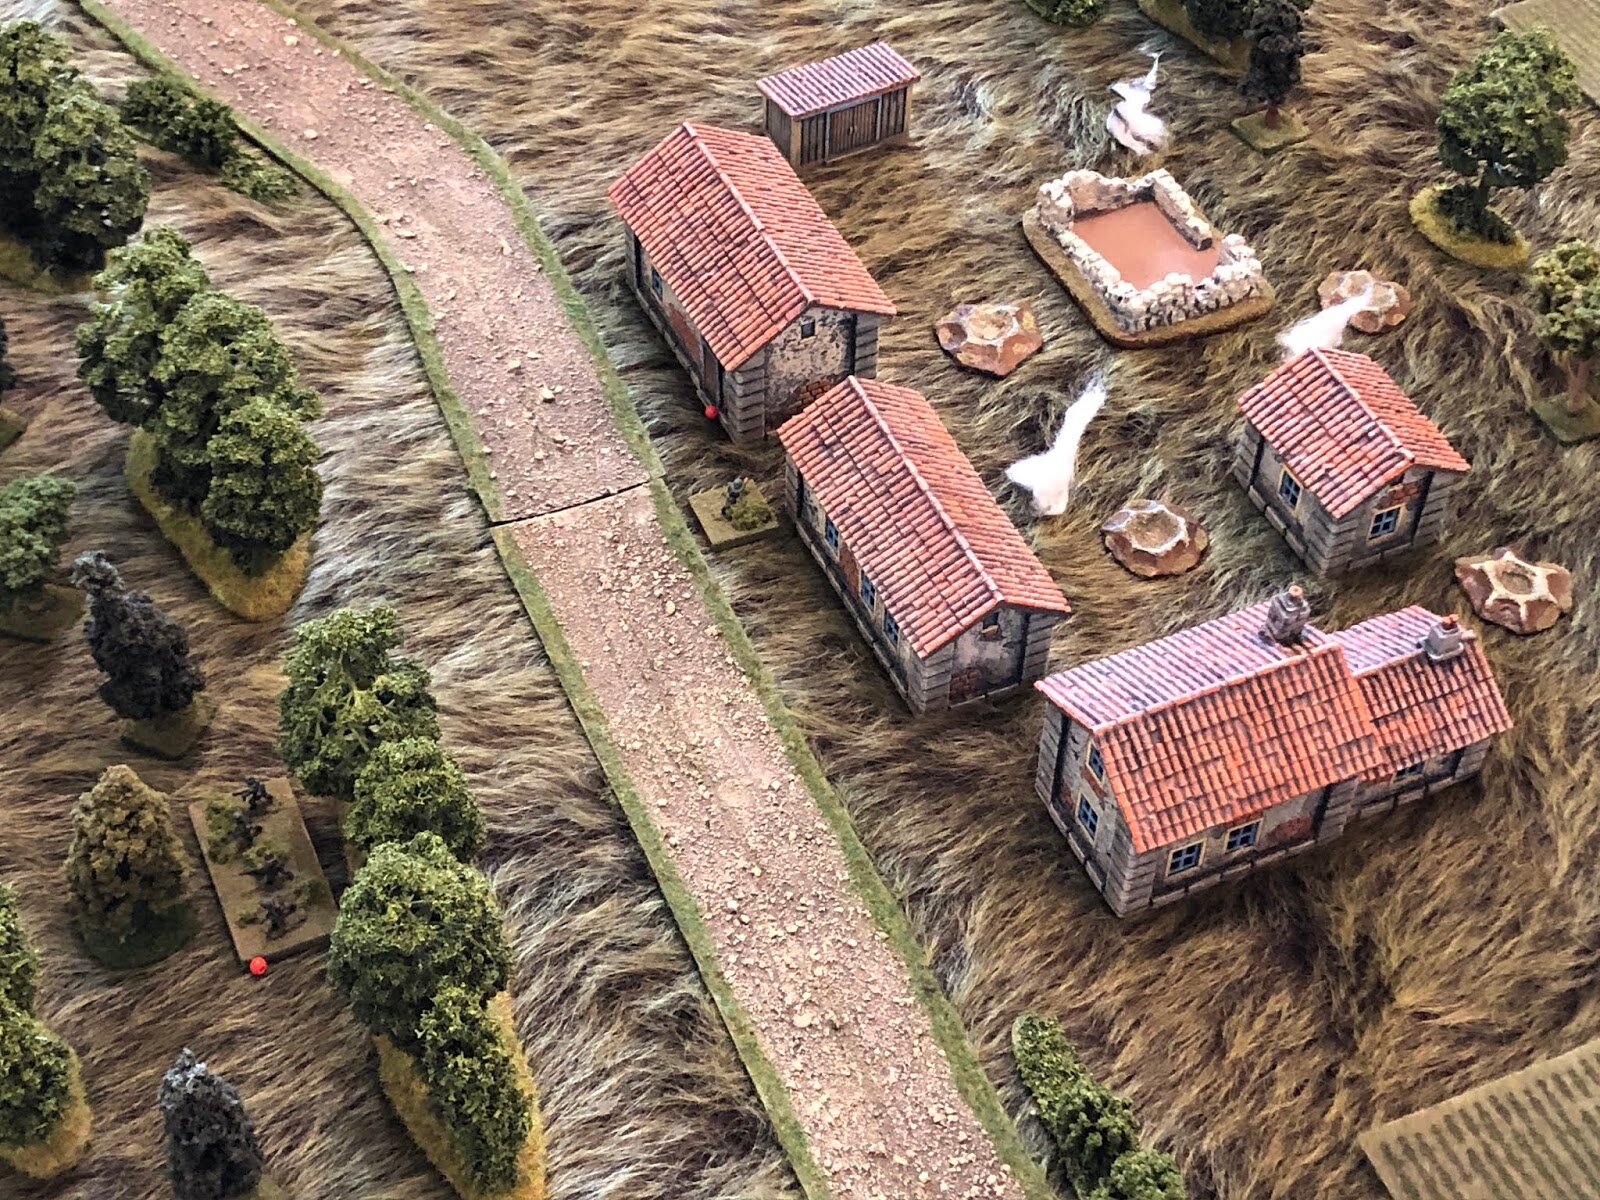
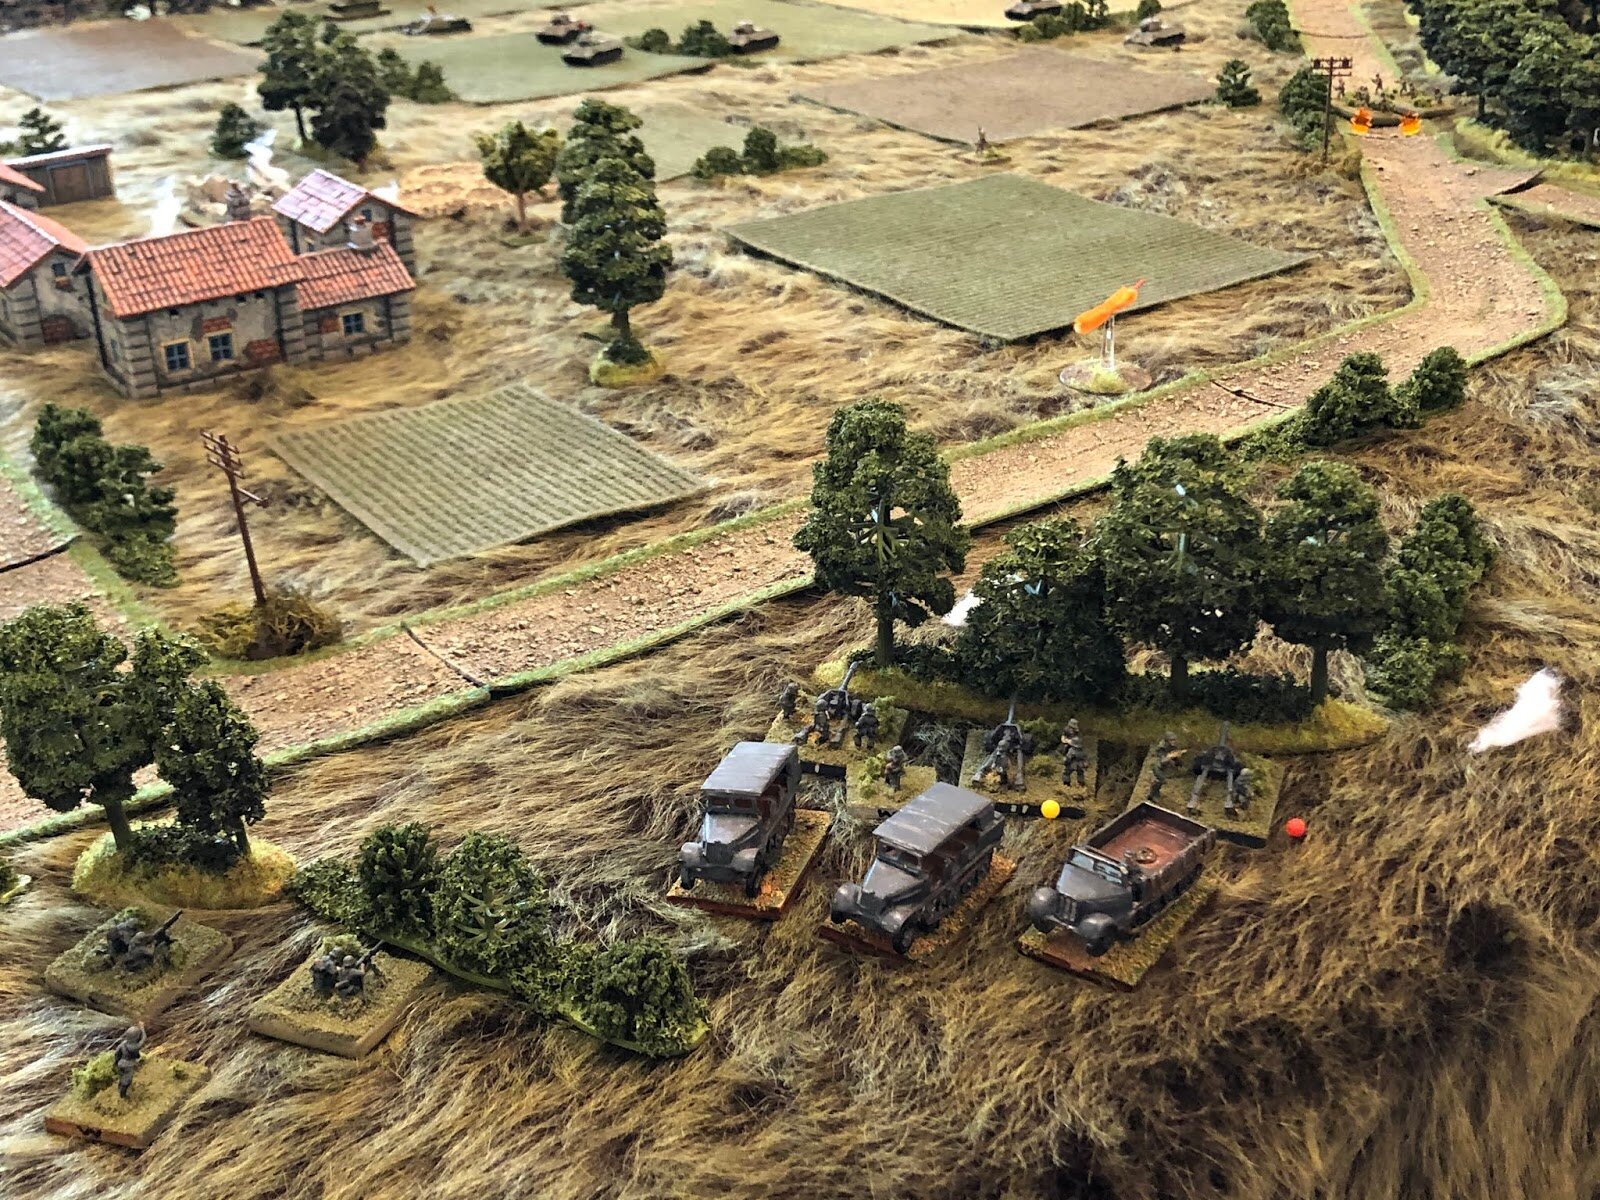
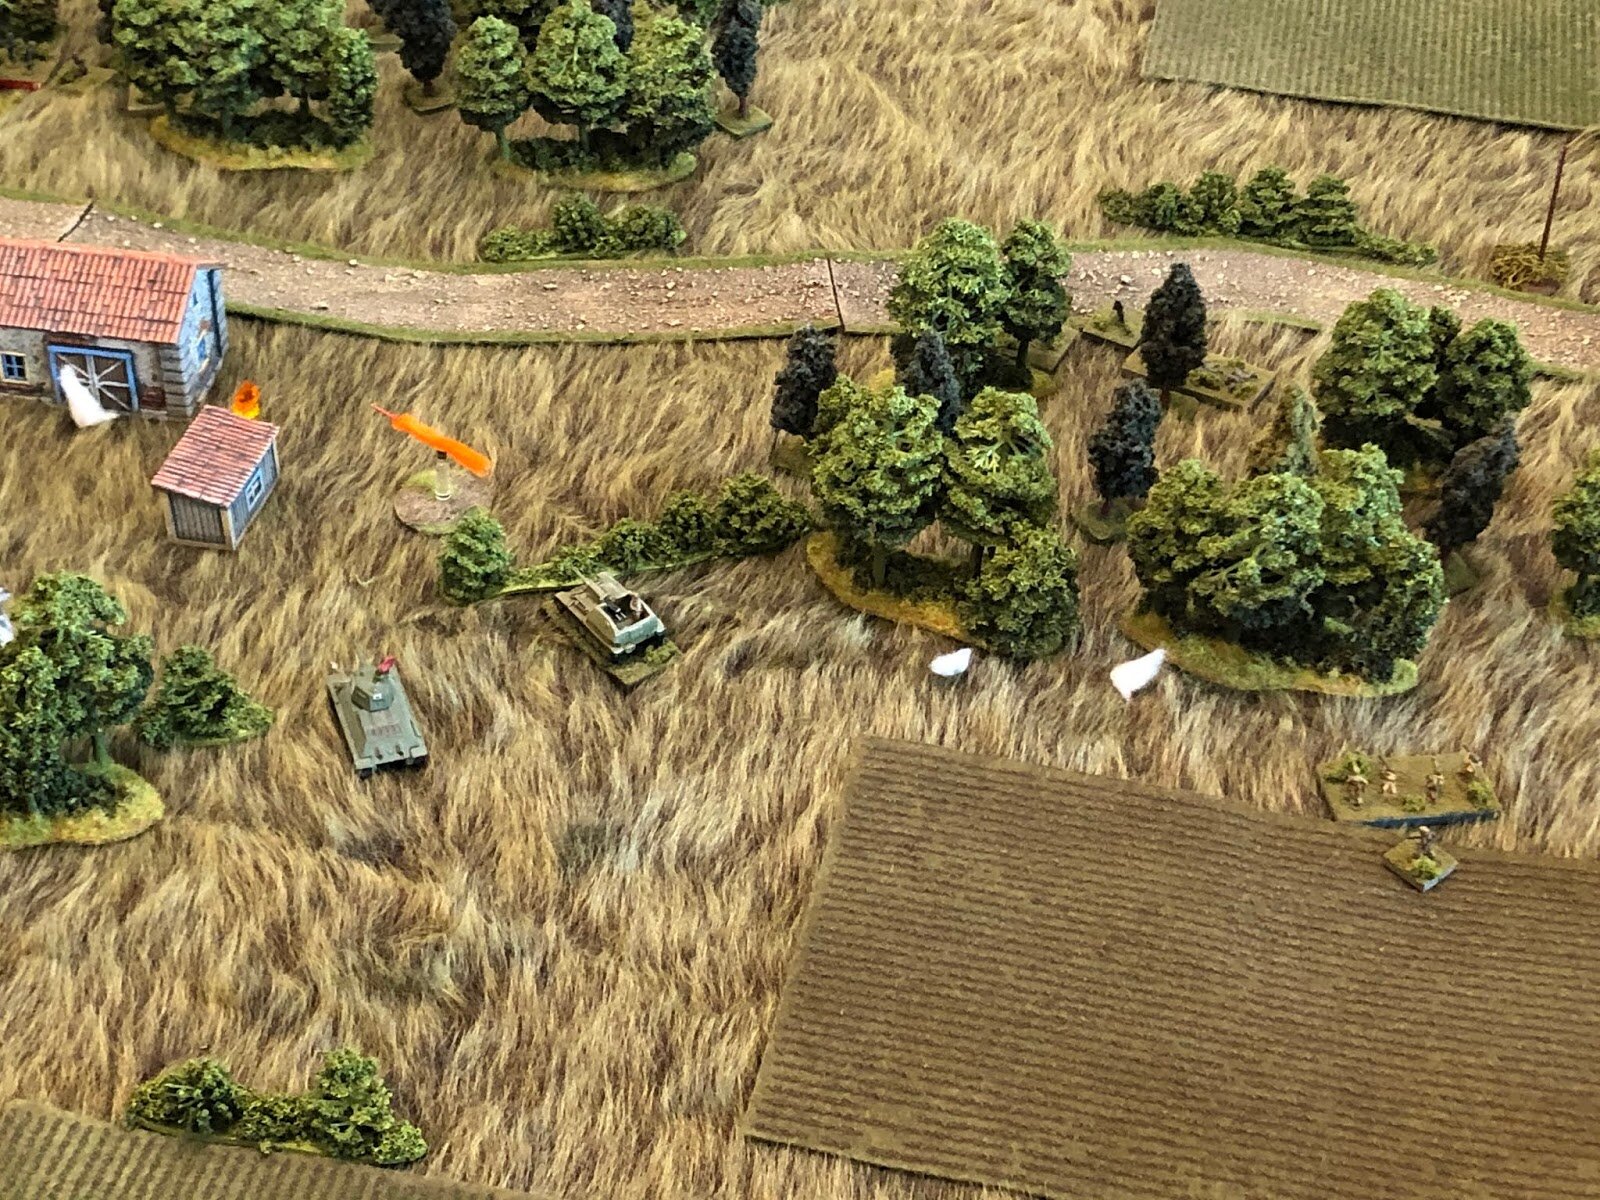
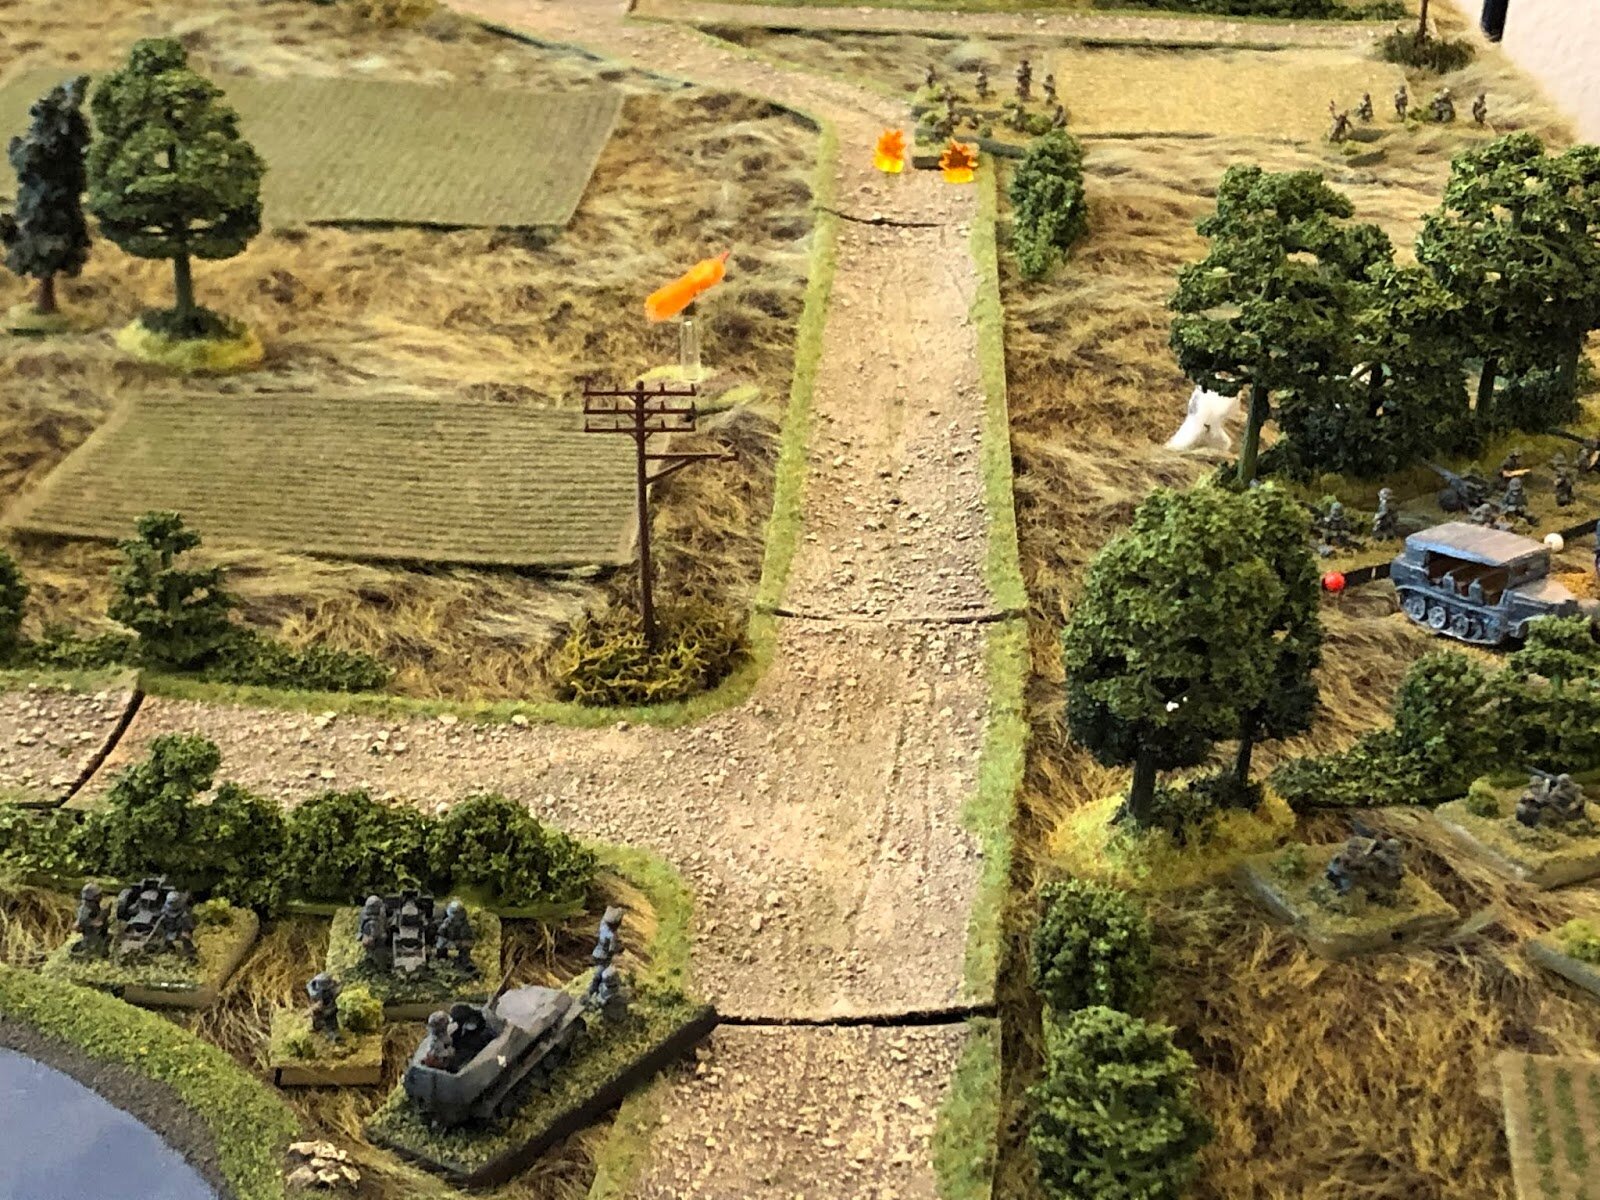
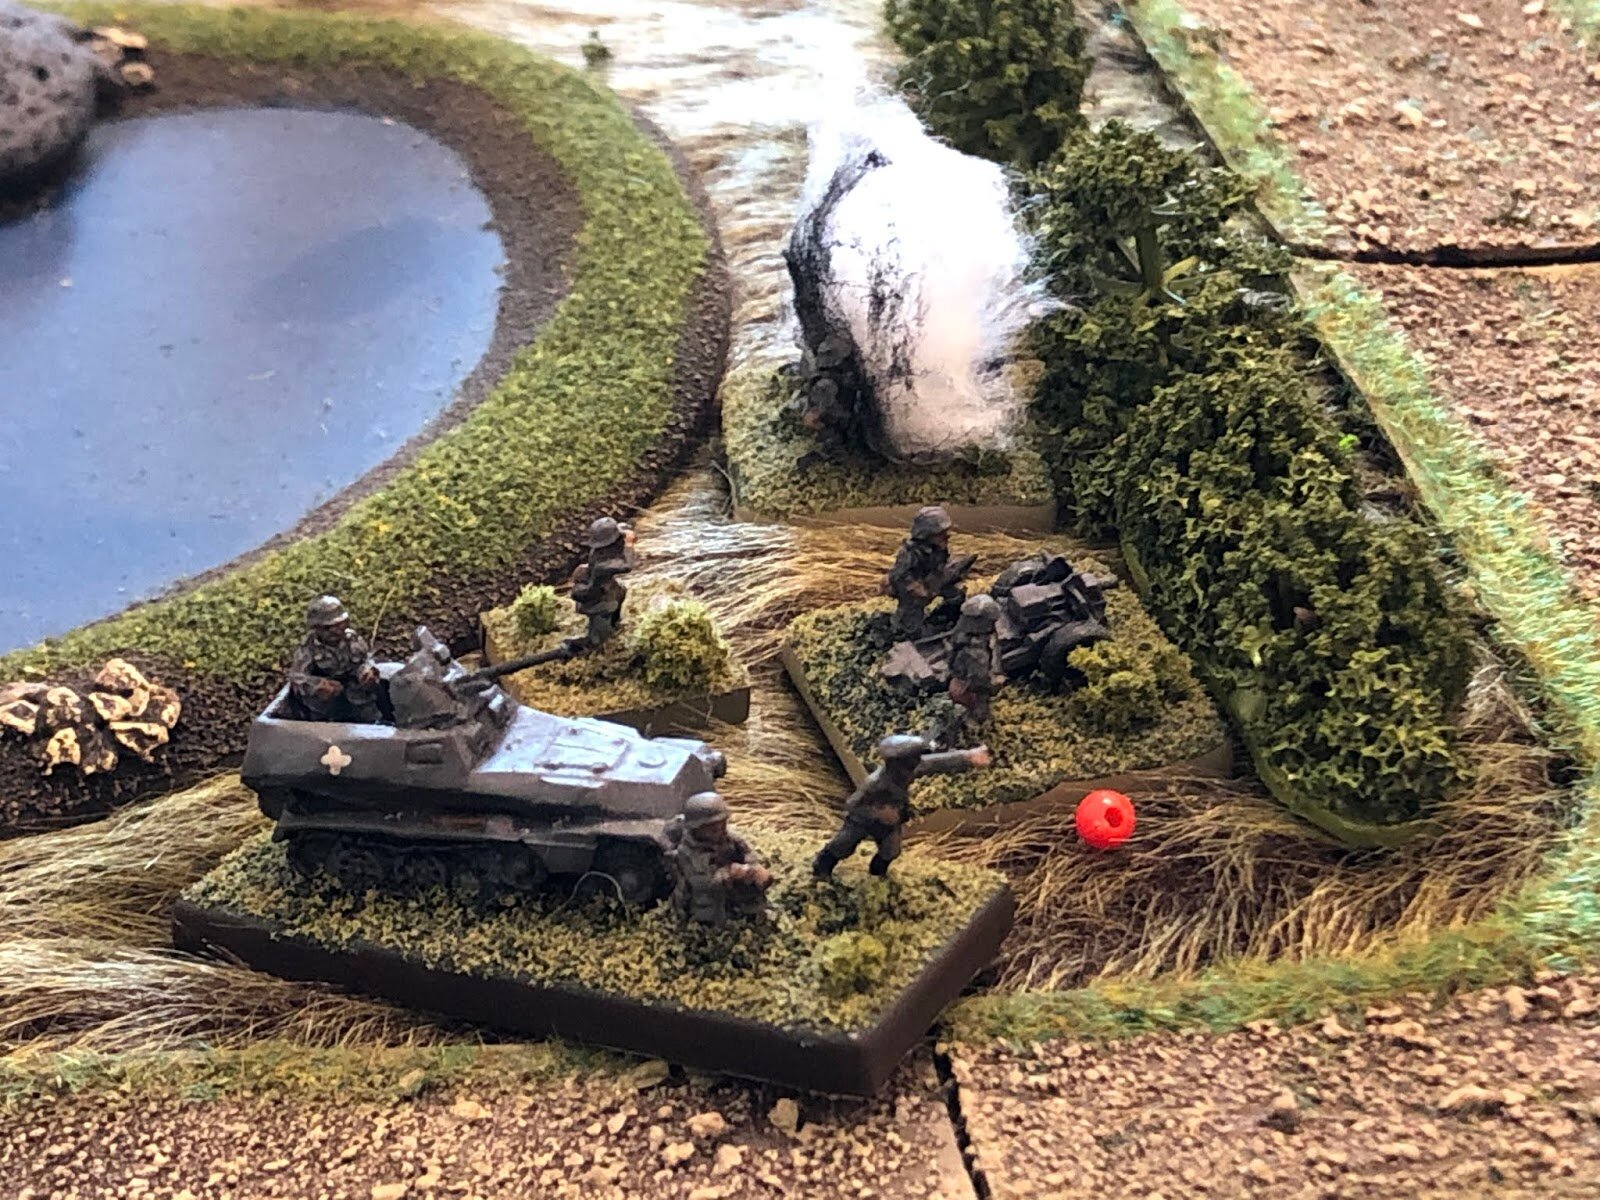
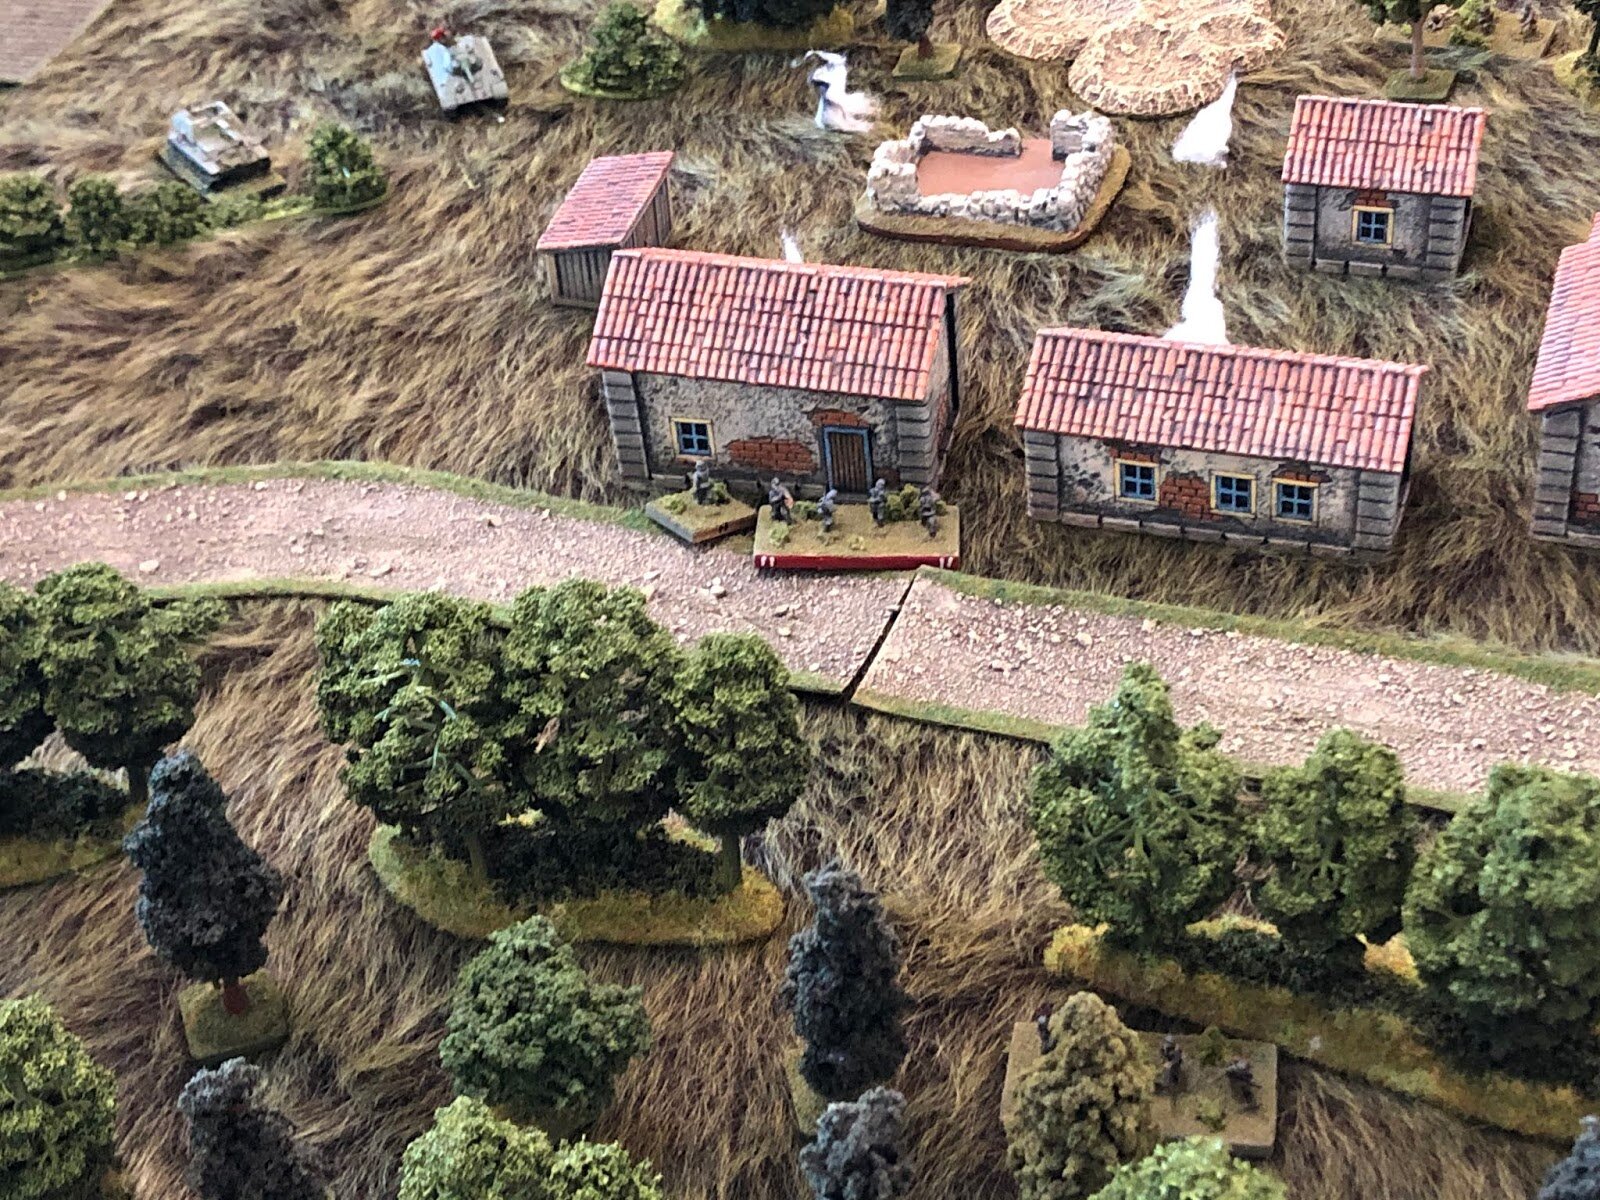
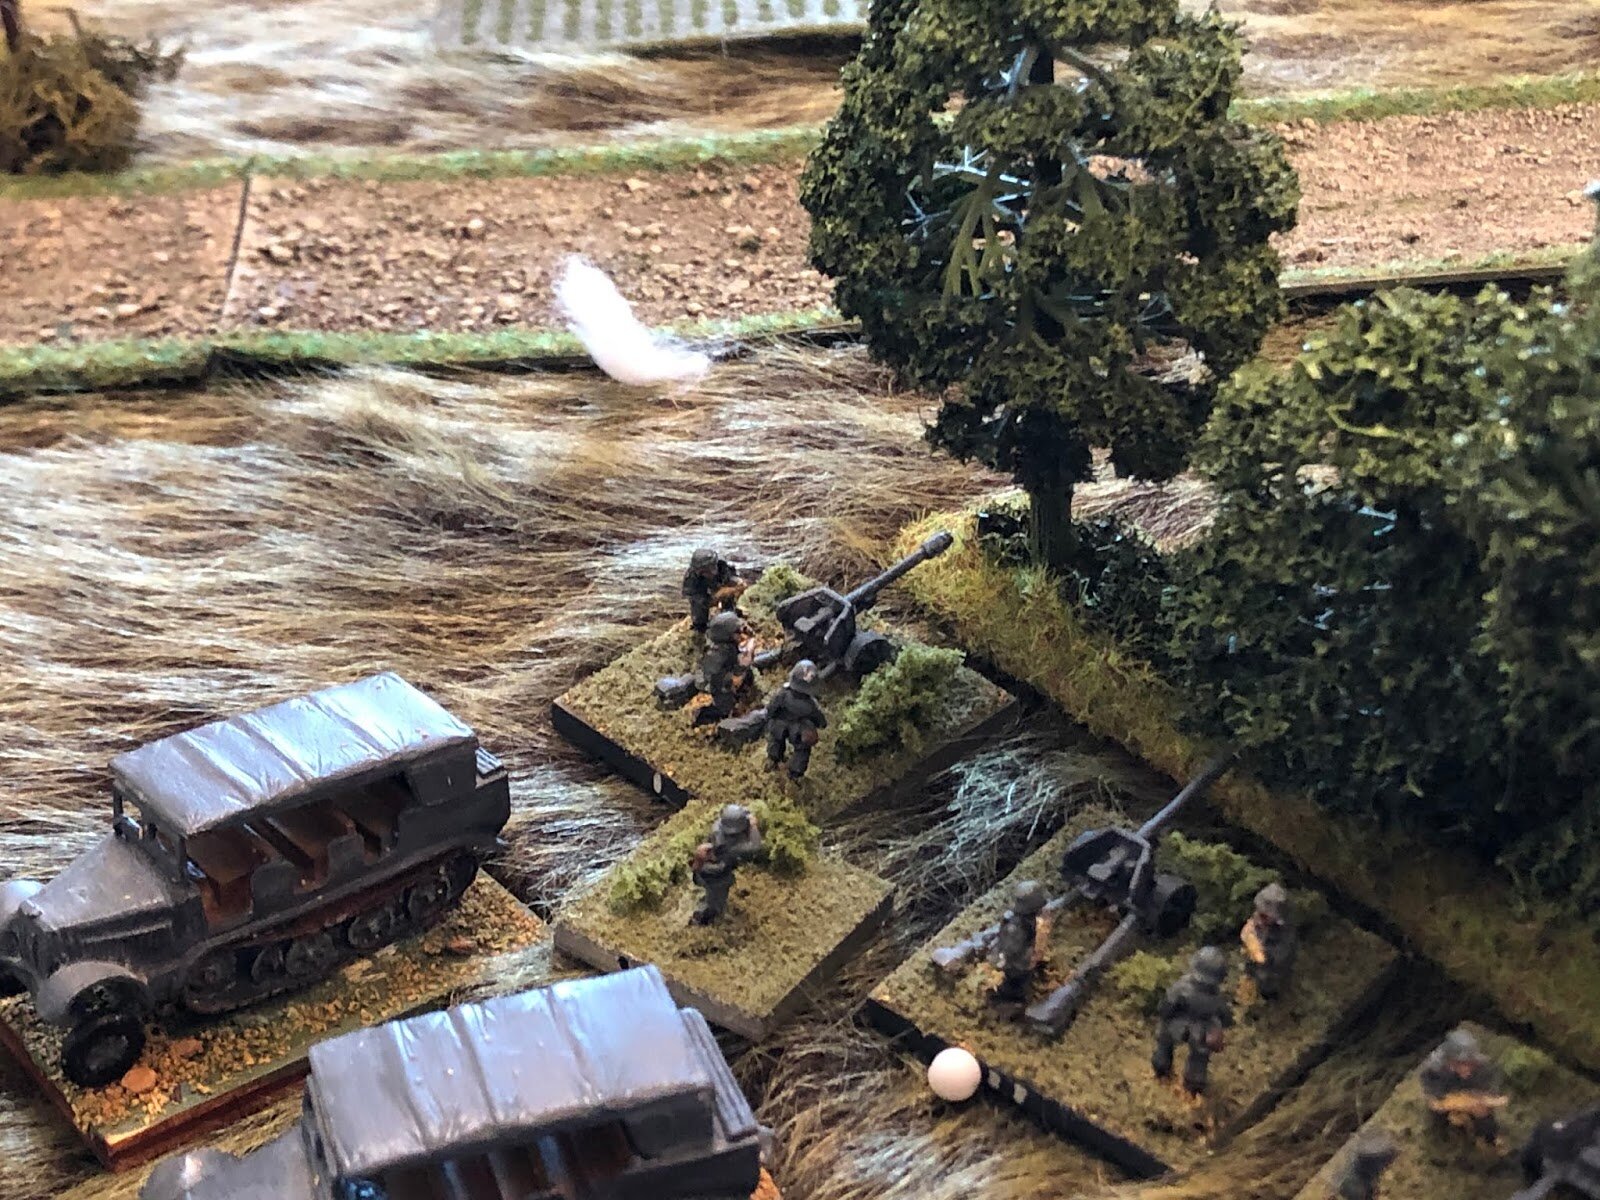
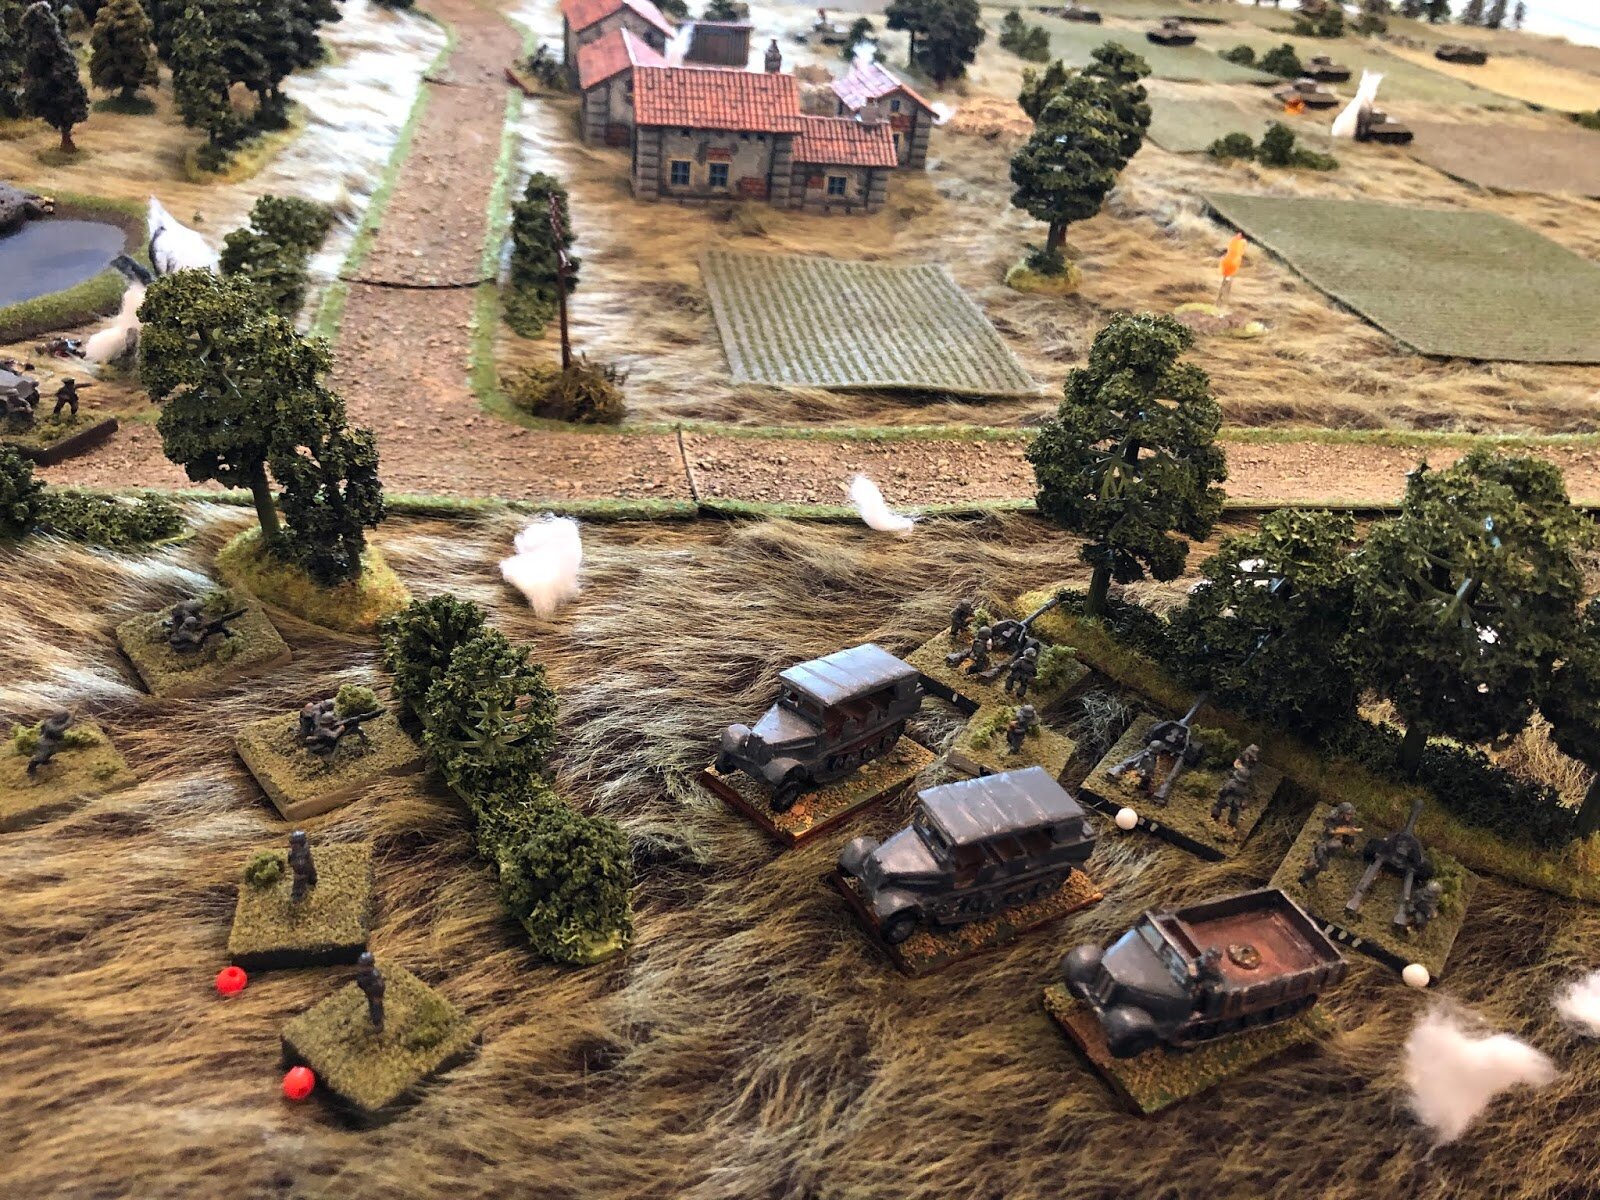
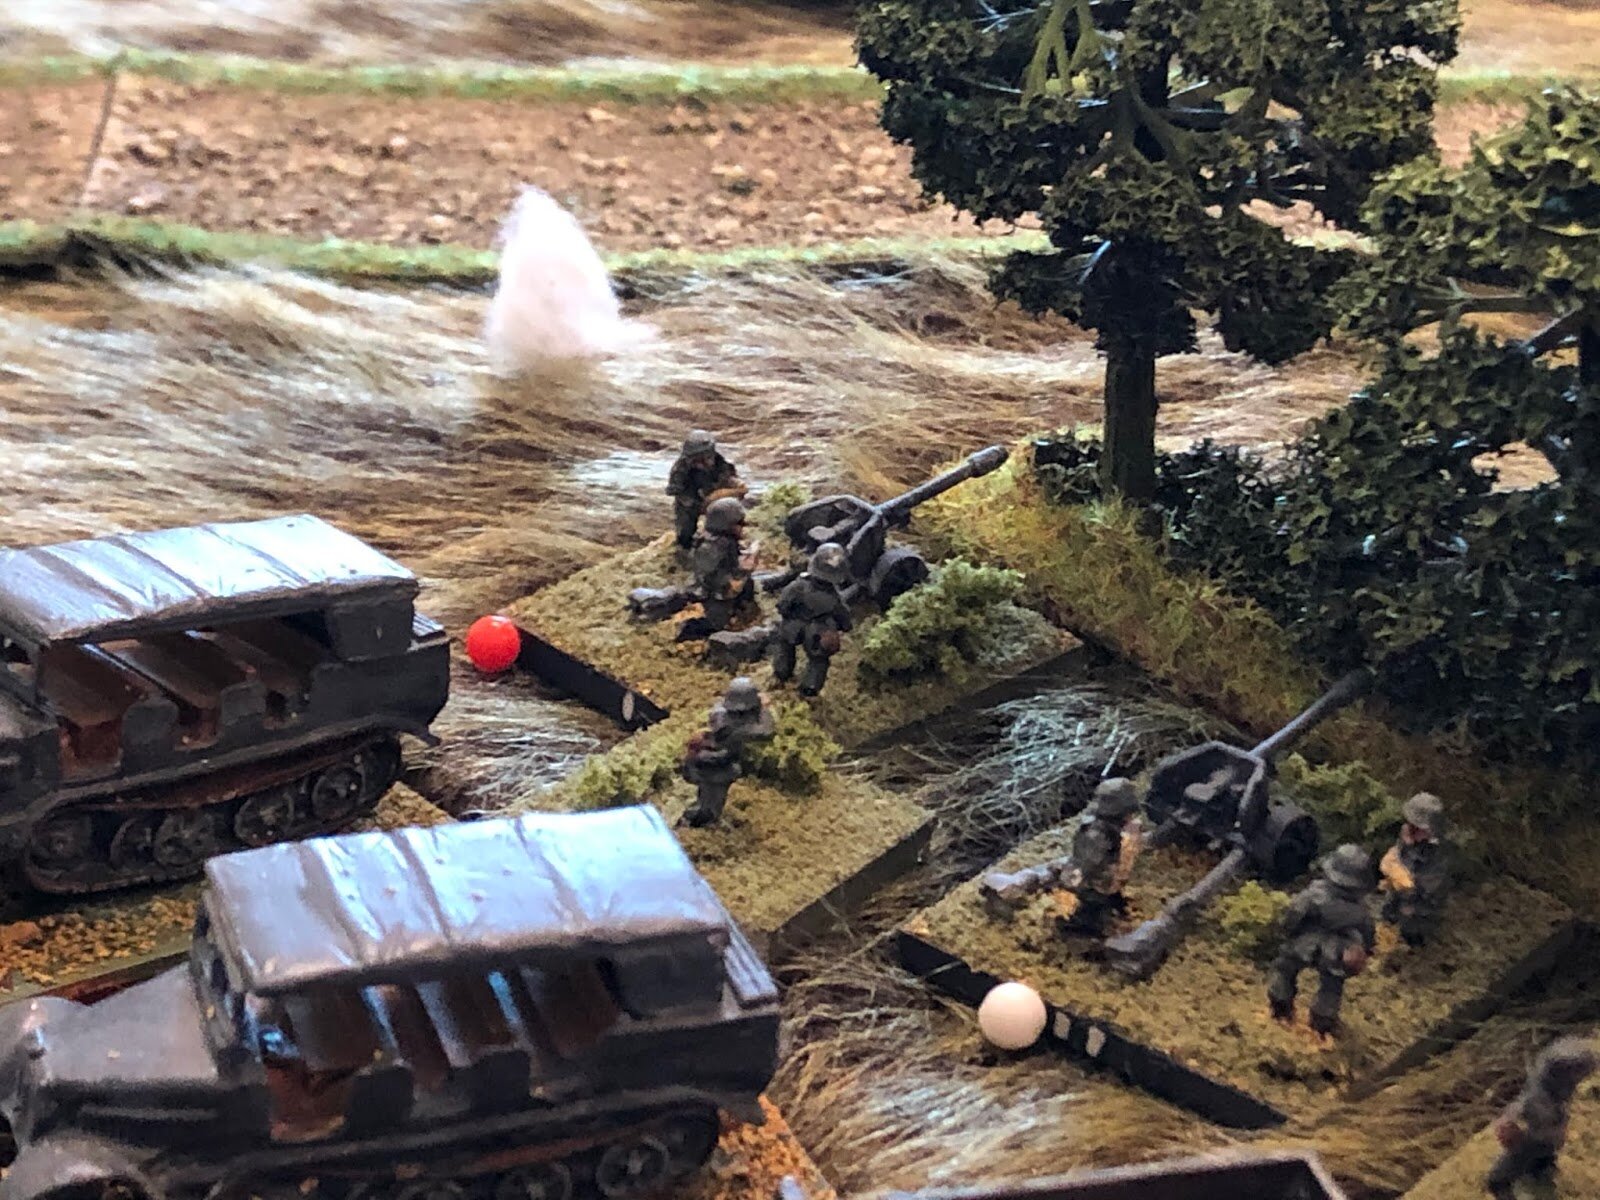
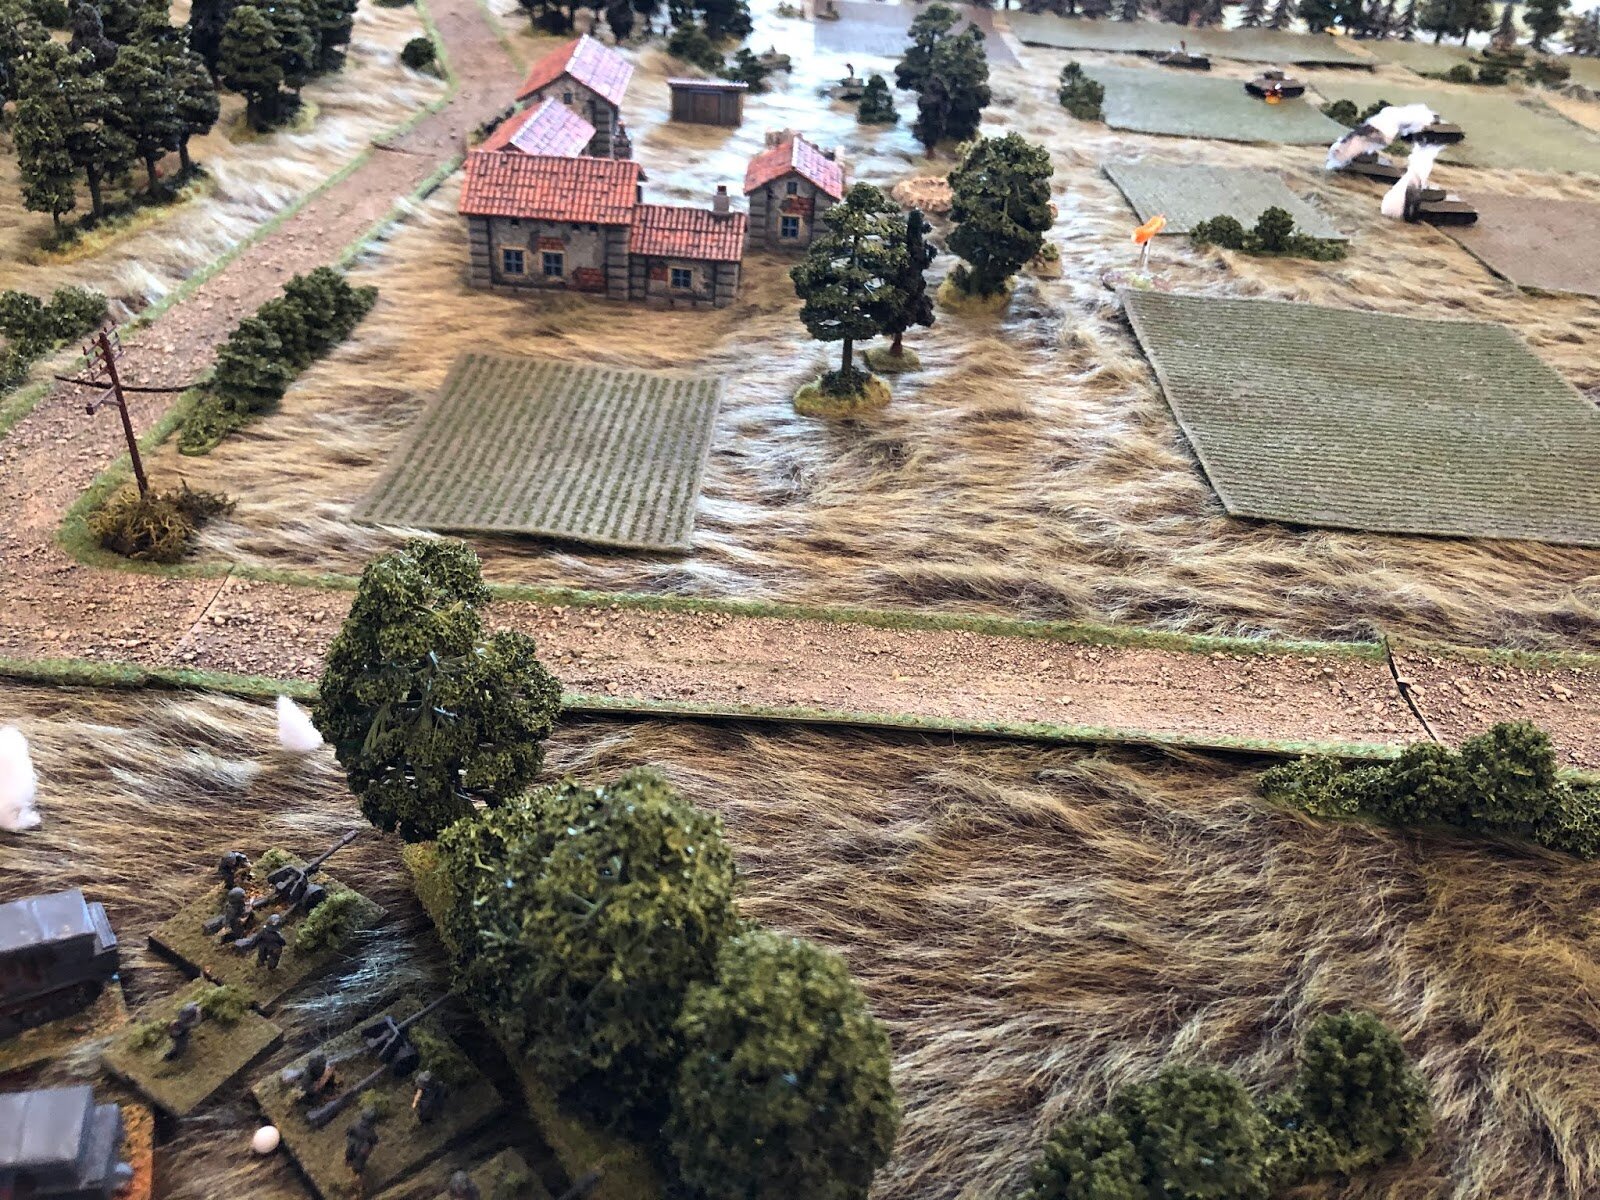
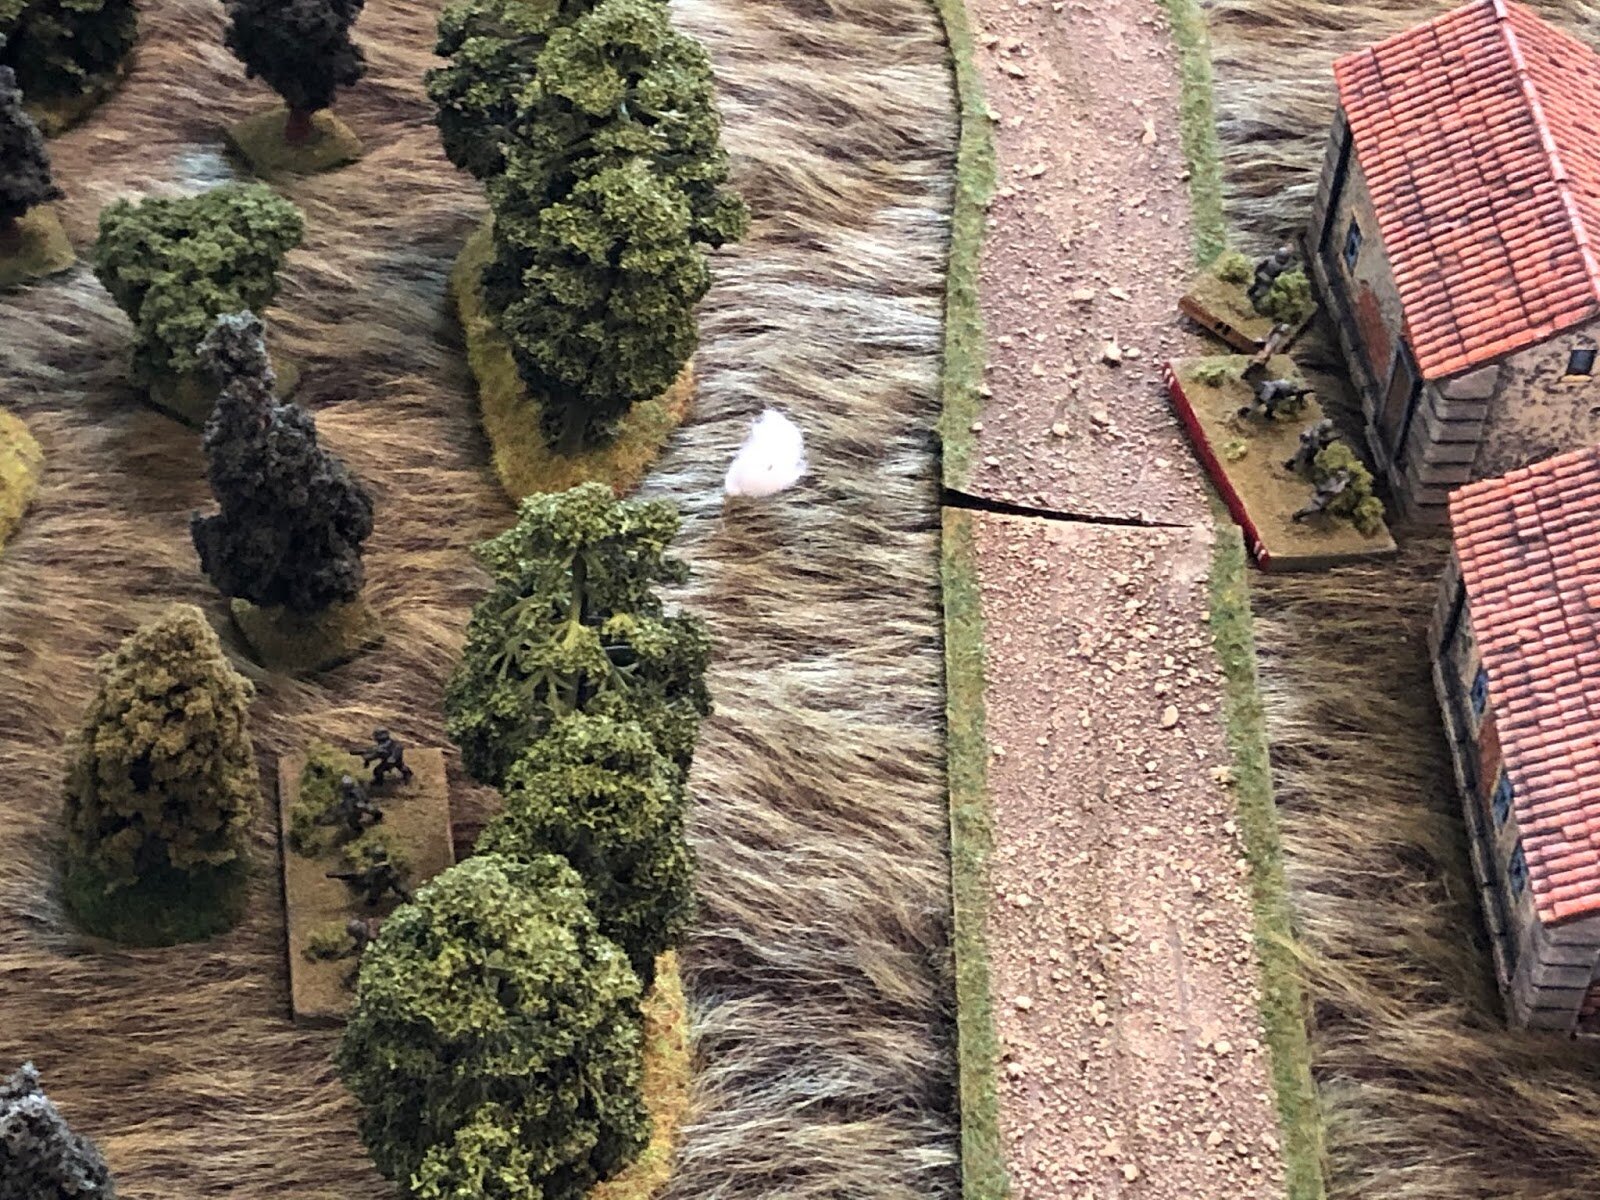
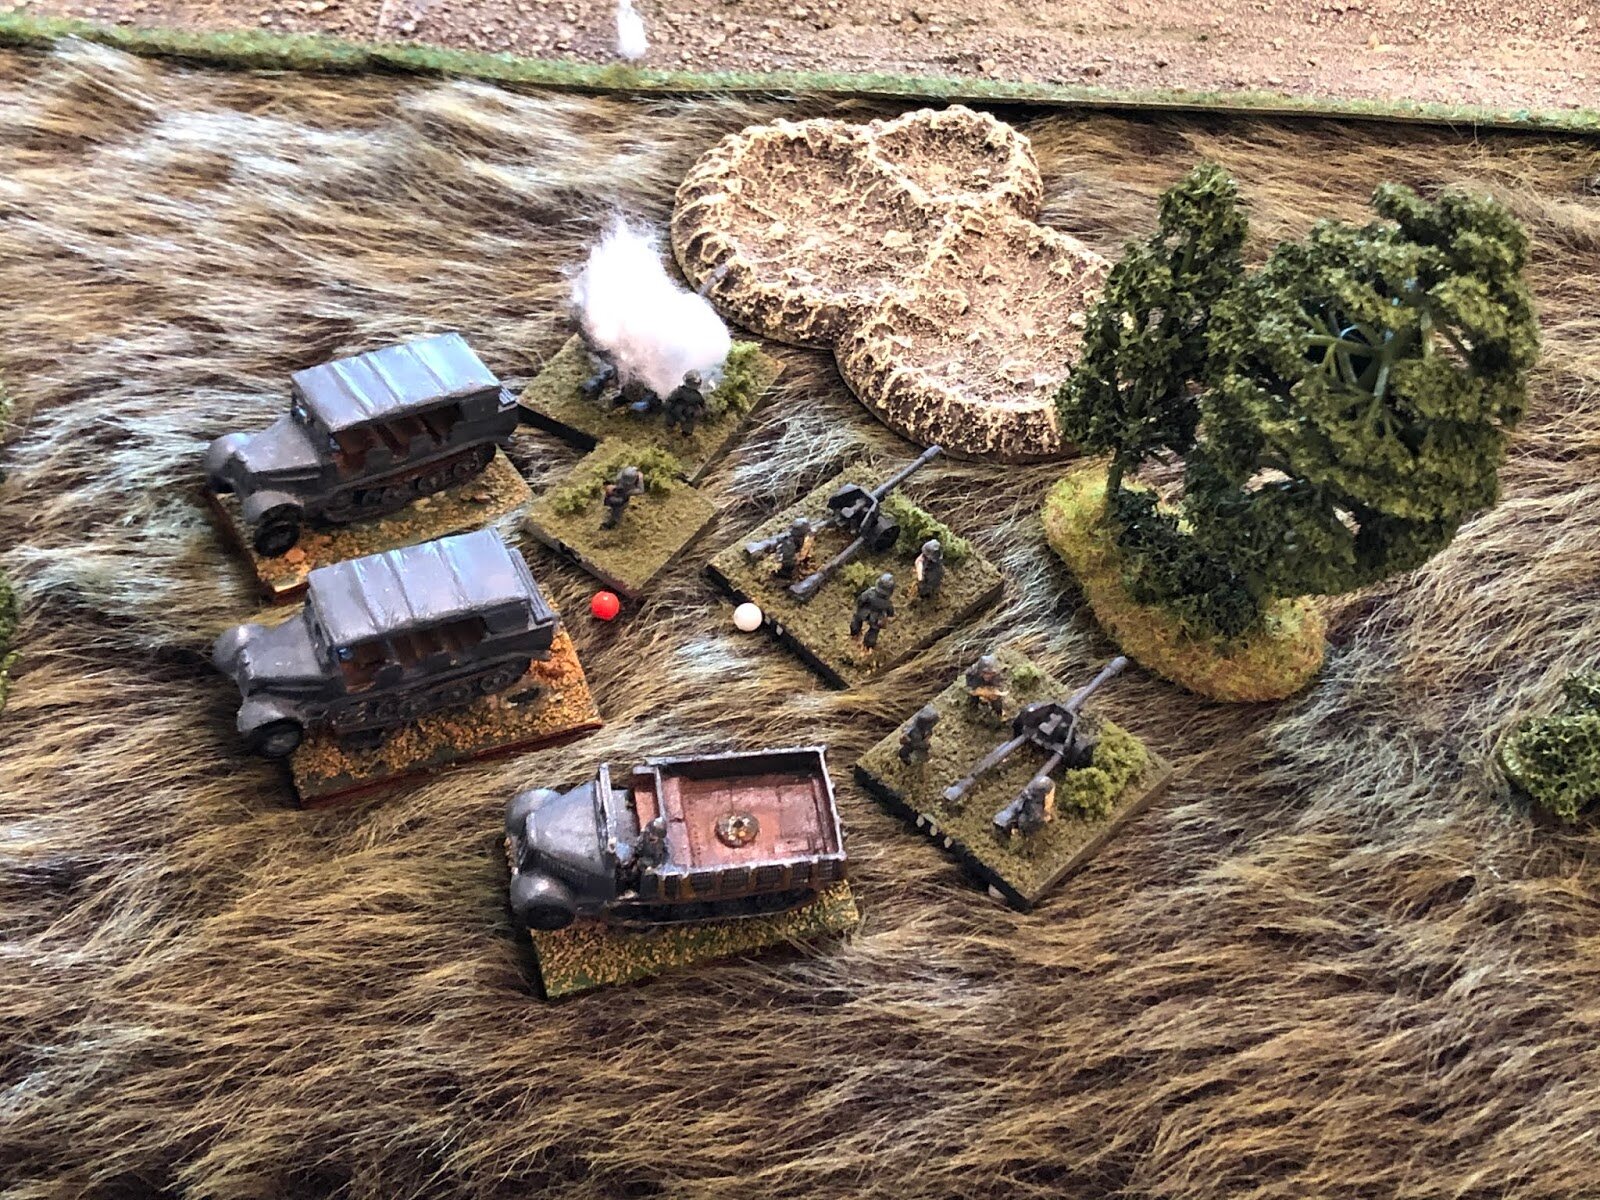
The Germans have their 1st Platoon in the woods at top center left, which we'll call 'the north wood.' 2nd Platoon is in the woods at left, which we'll call 'the west wood.' The understrength 3rd Platoon is in the village of Nava, center. At the 'T-intersection' at center bottom left we have the German Infantry Gun Platoon (just right of the pond), the MG Platoon (just below the bottom of the 'T'), and the Anti-Tank Gun Platoon (just right of the MG Platoon). The Mortar Platoon is at bottom left, and the German armor is chilling at far left.
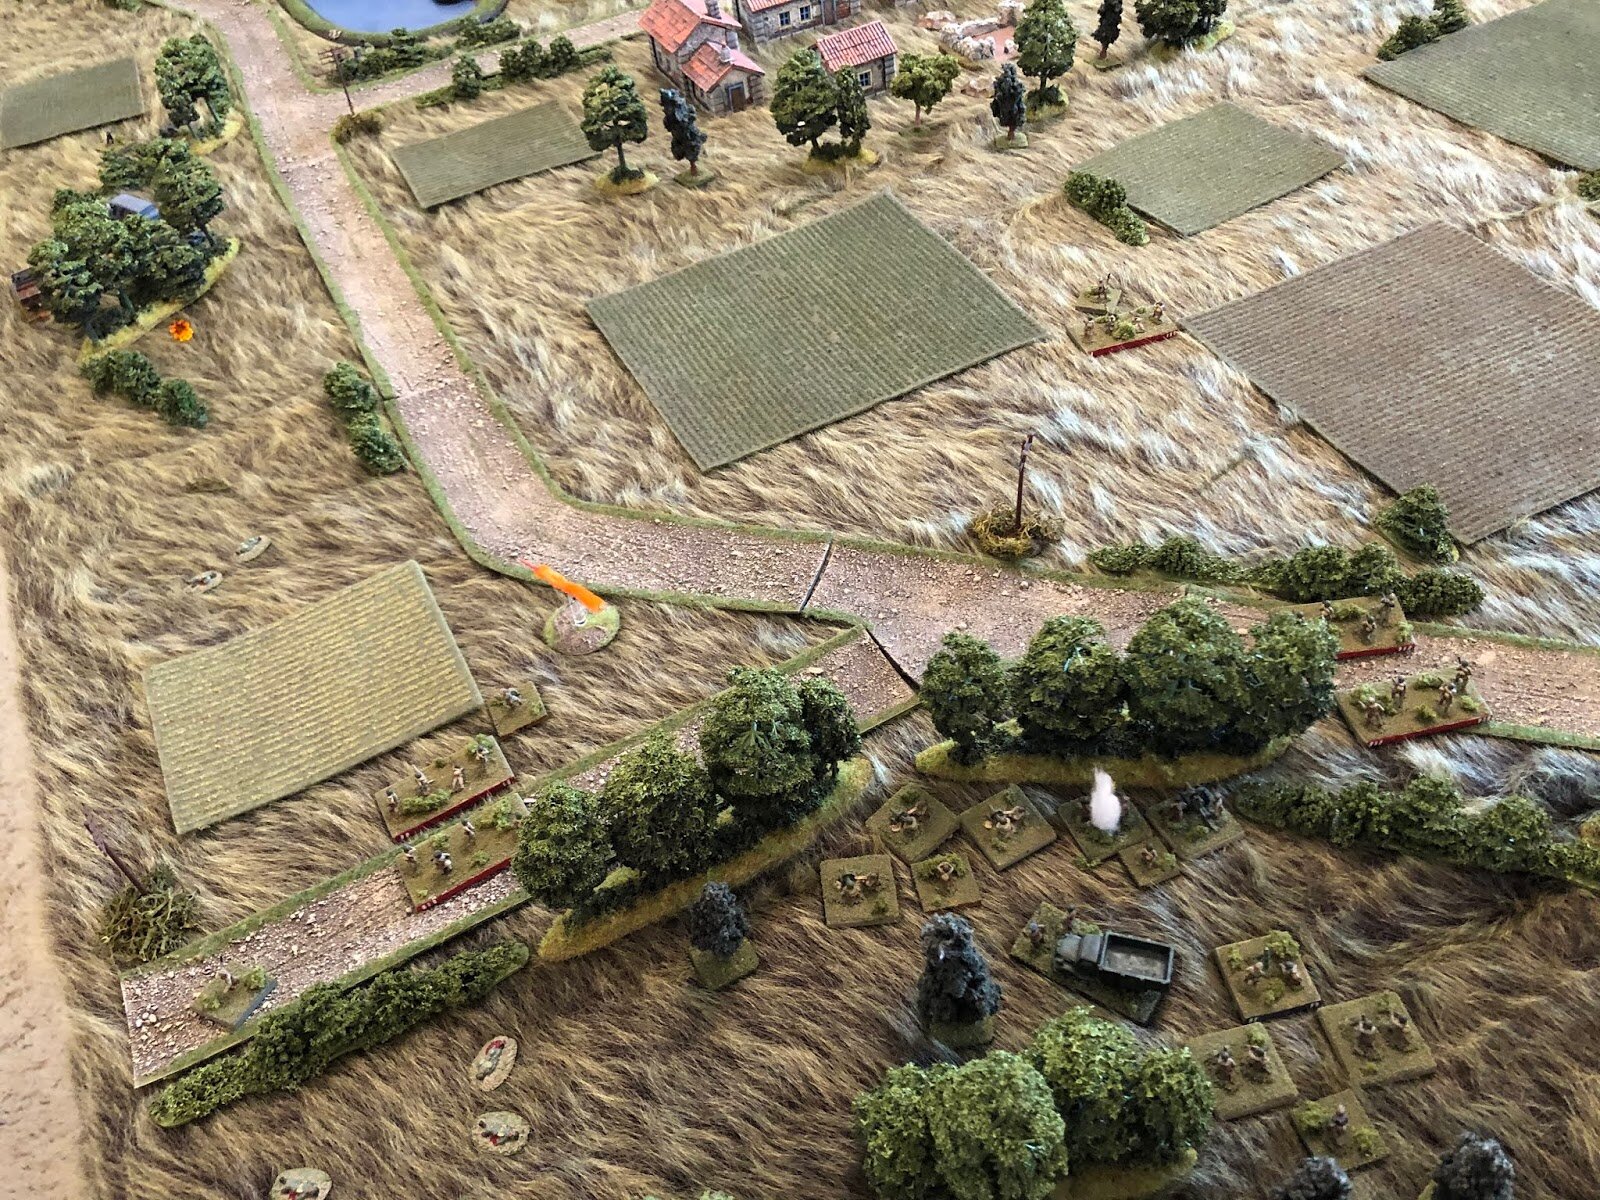
Here's my scheme of maneuver overlay, showing the plan for both the Soviets and the Germans.
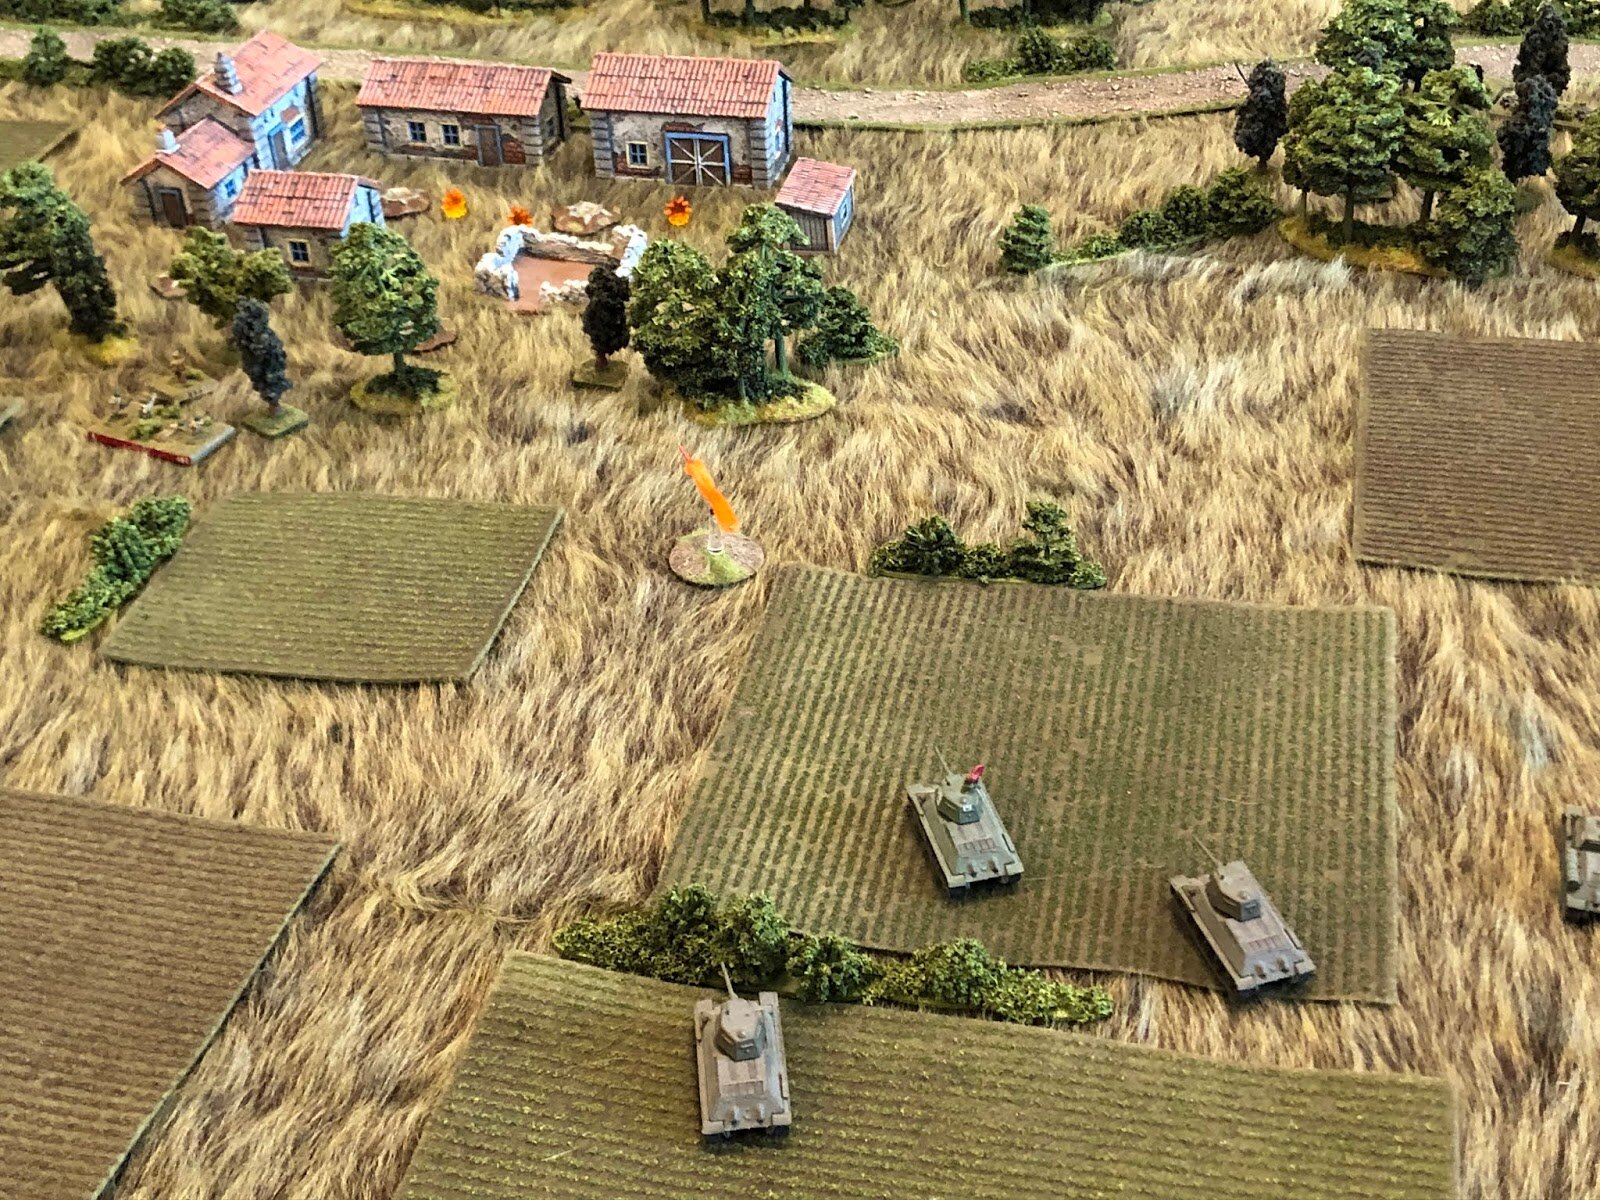
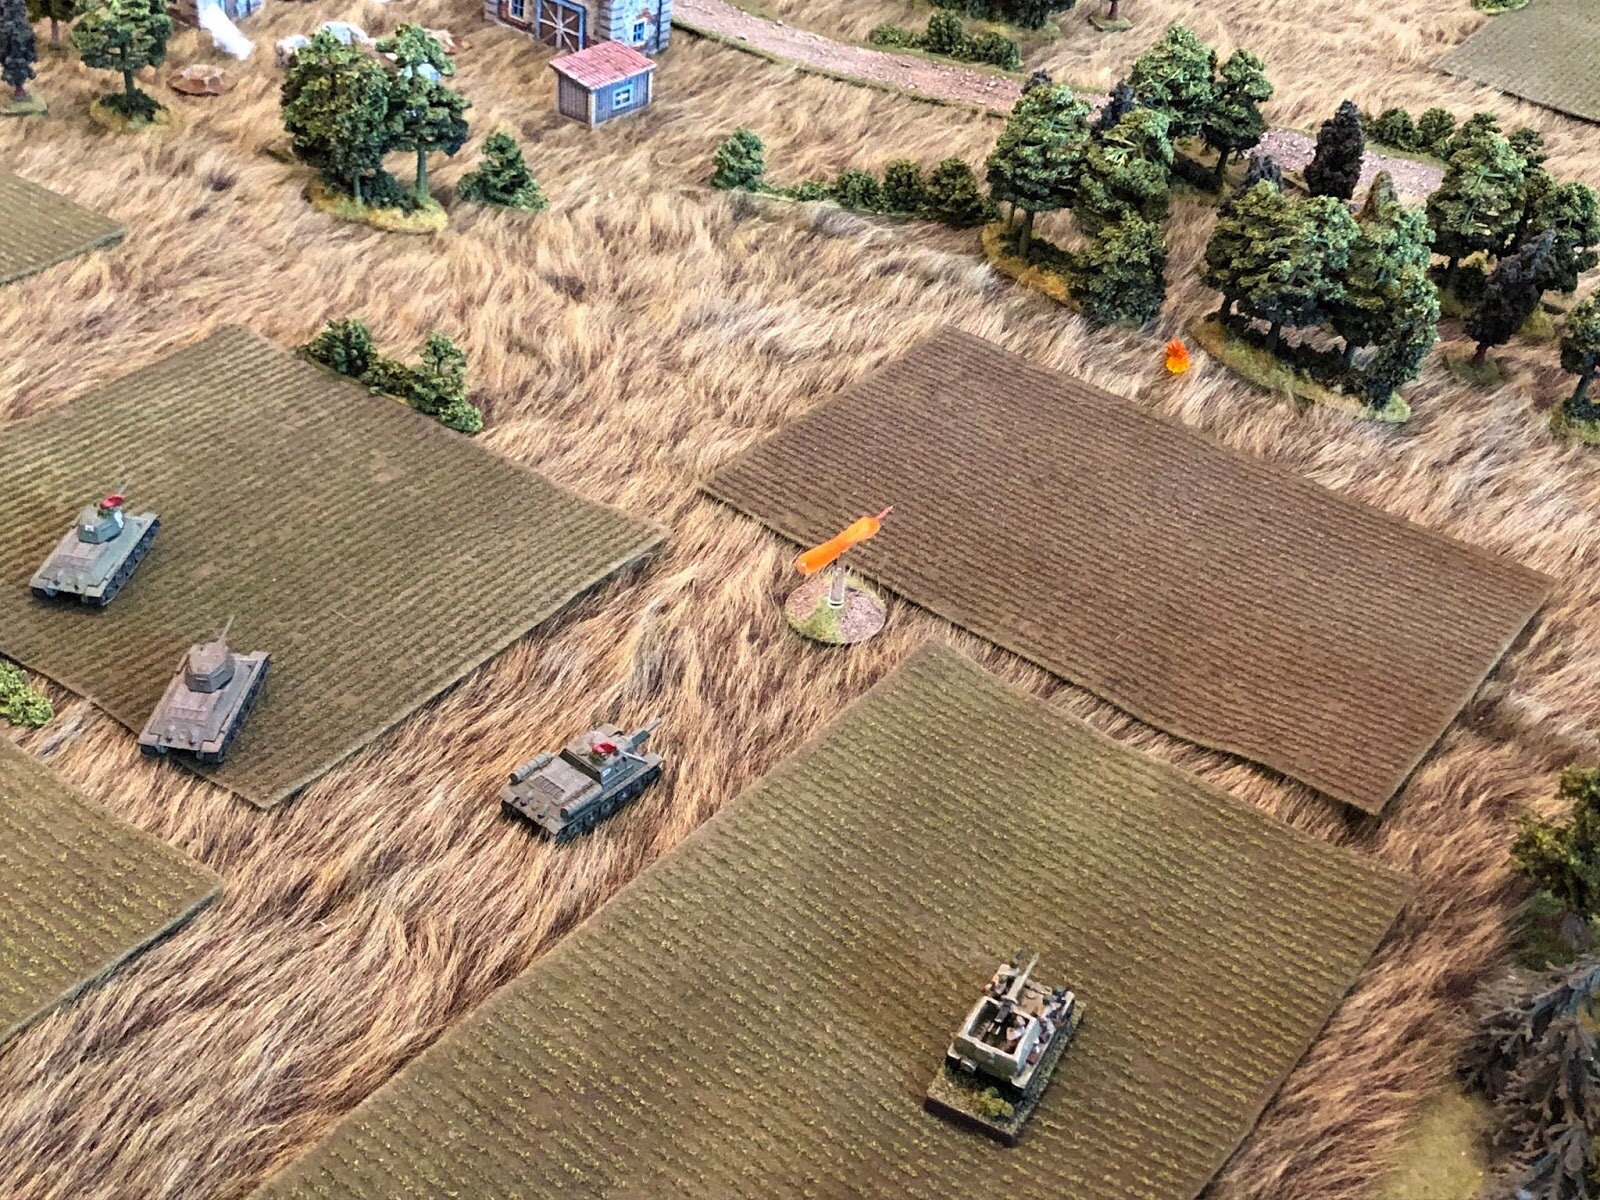
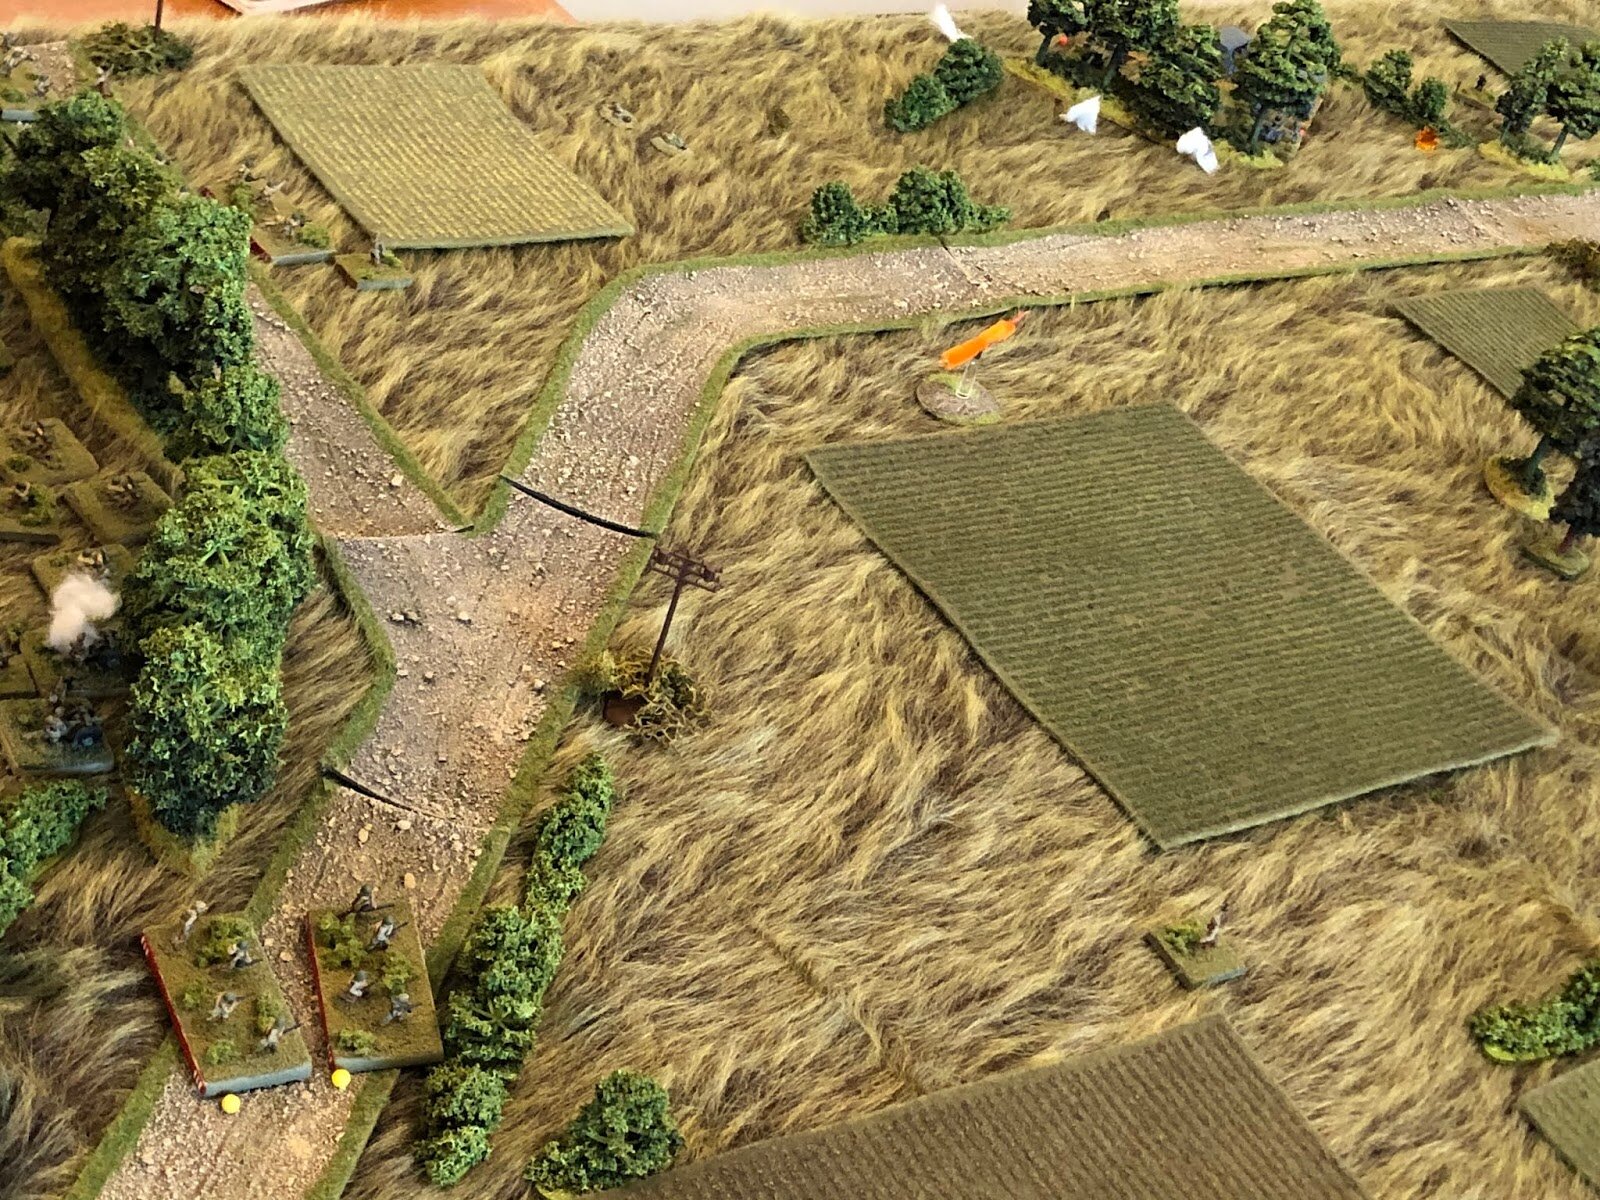
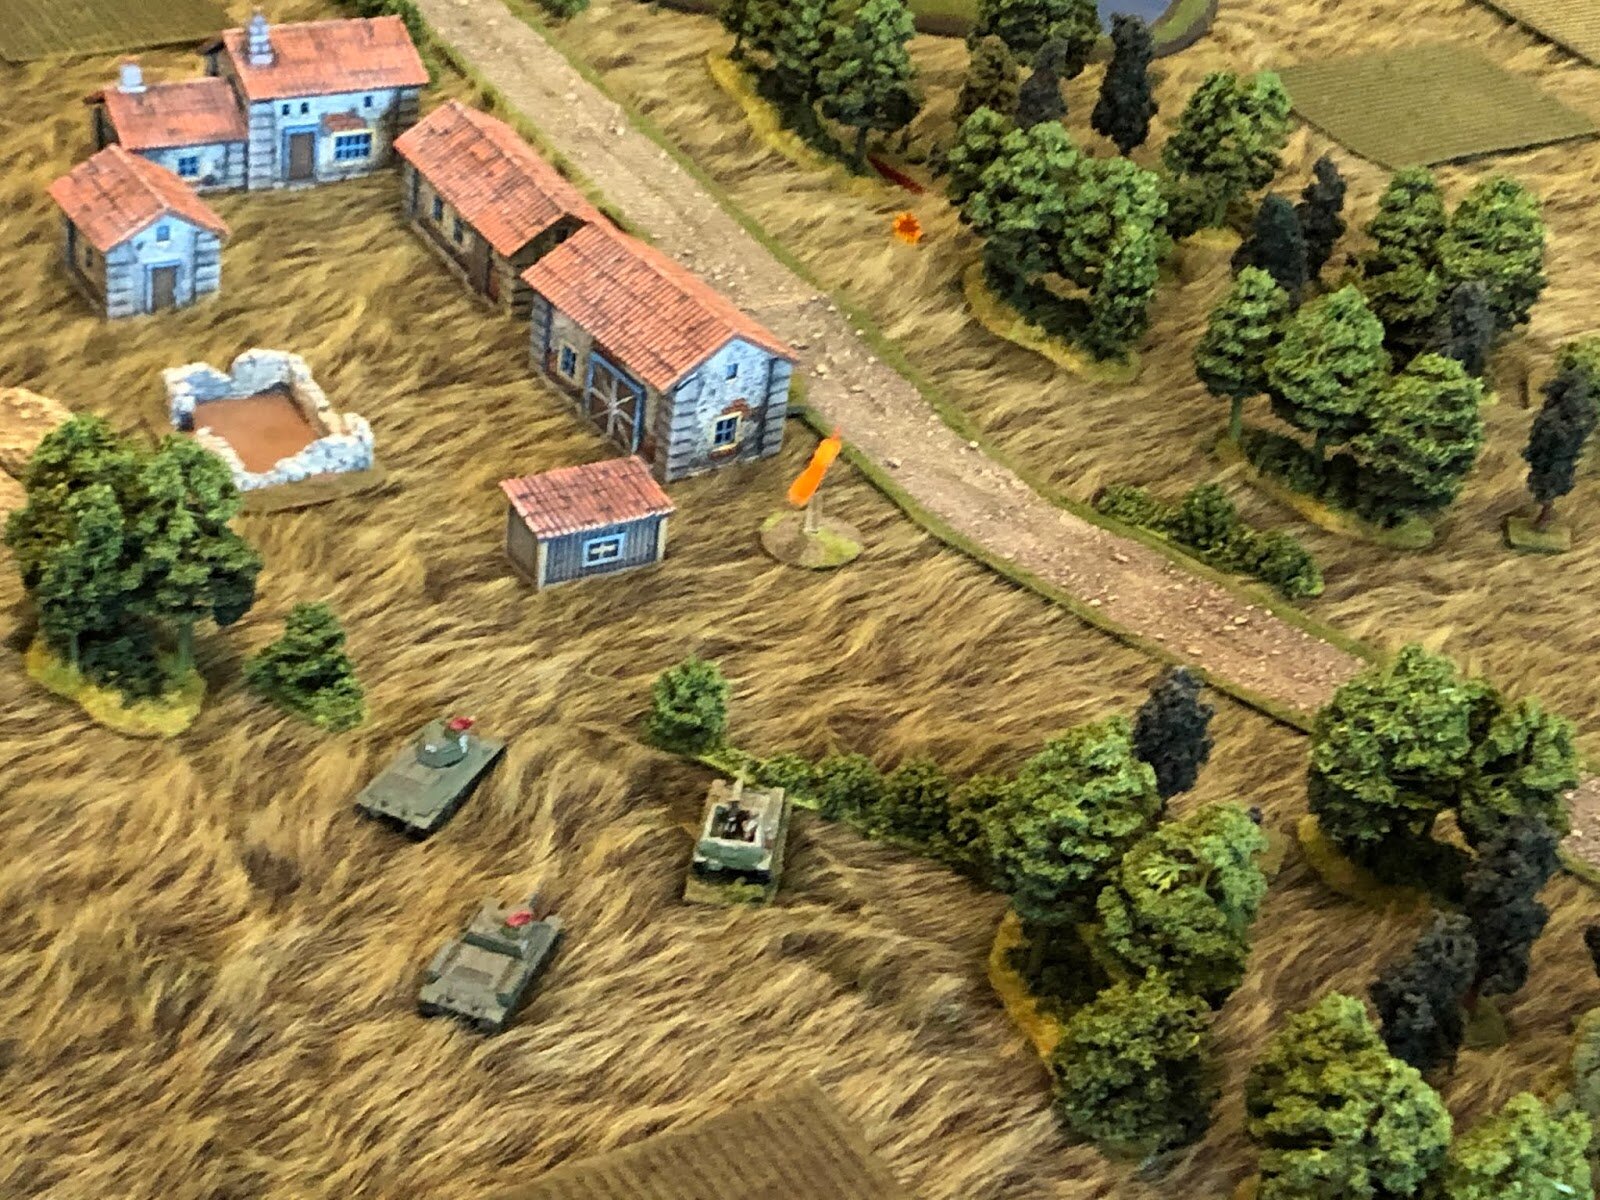
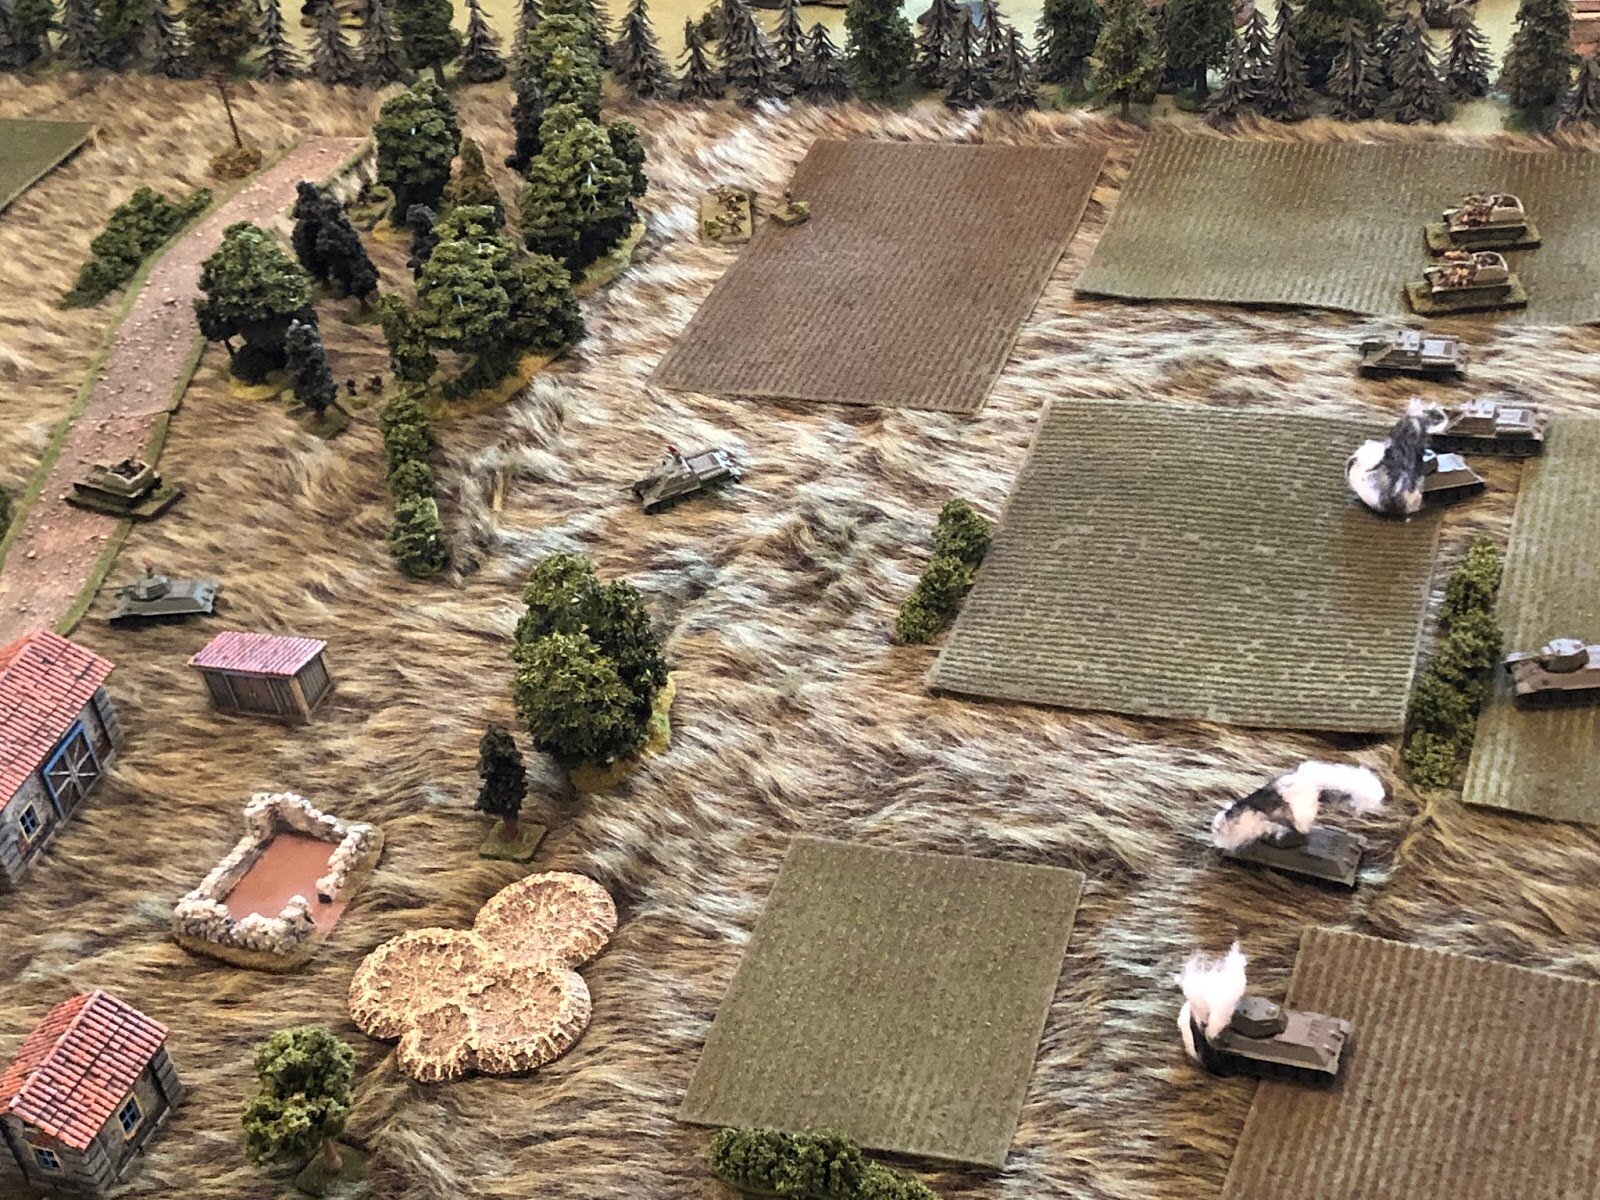
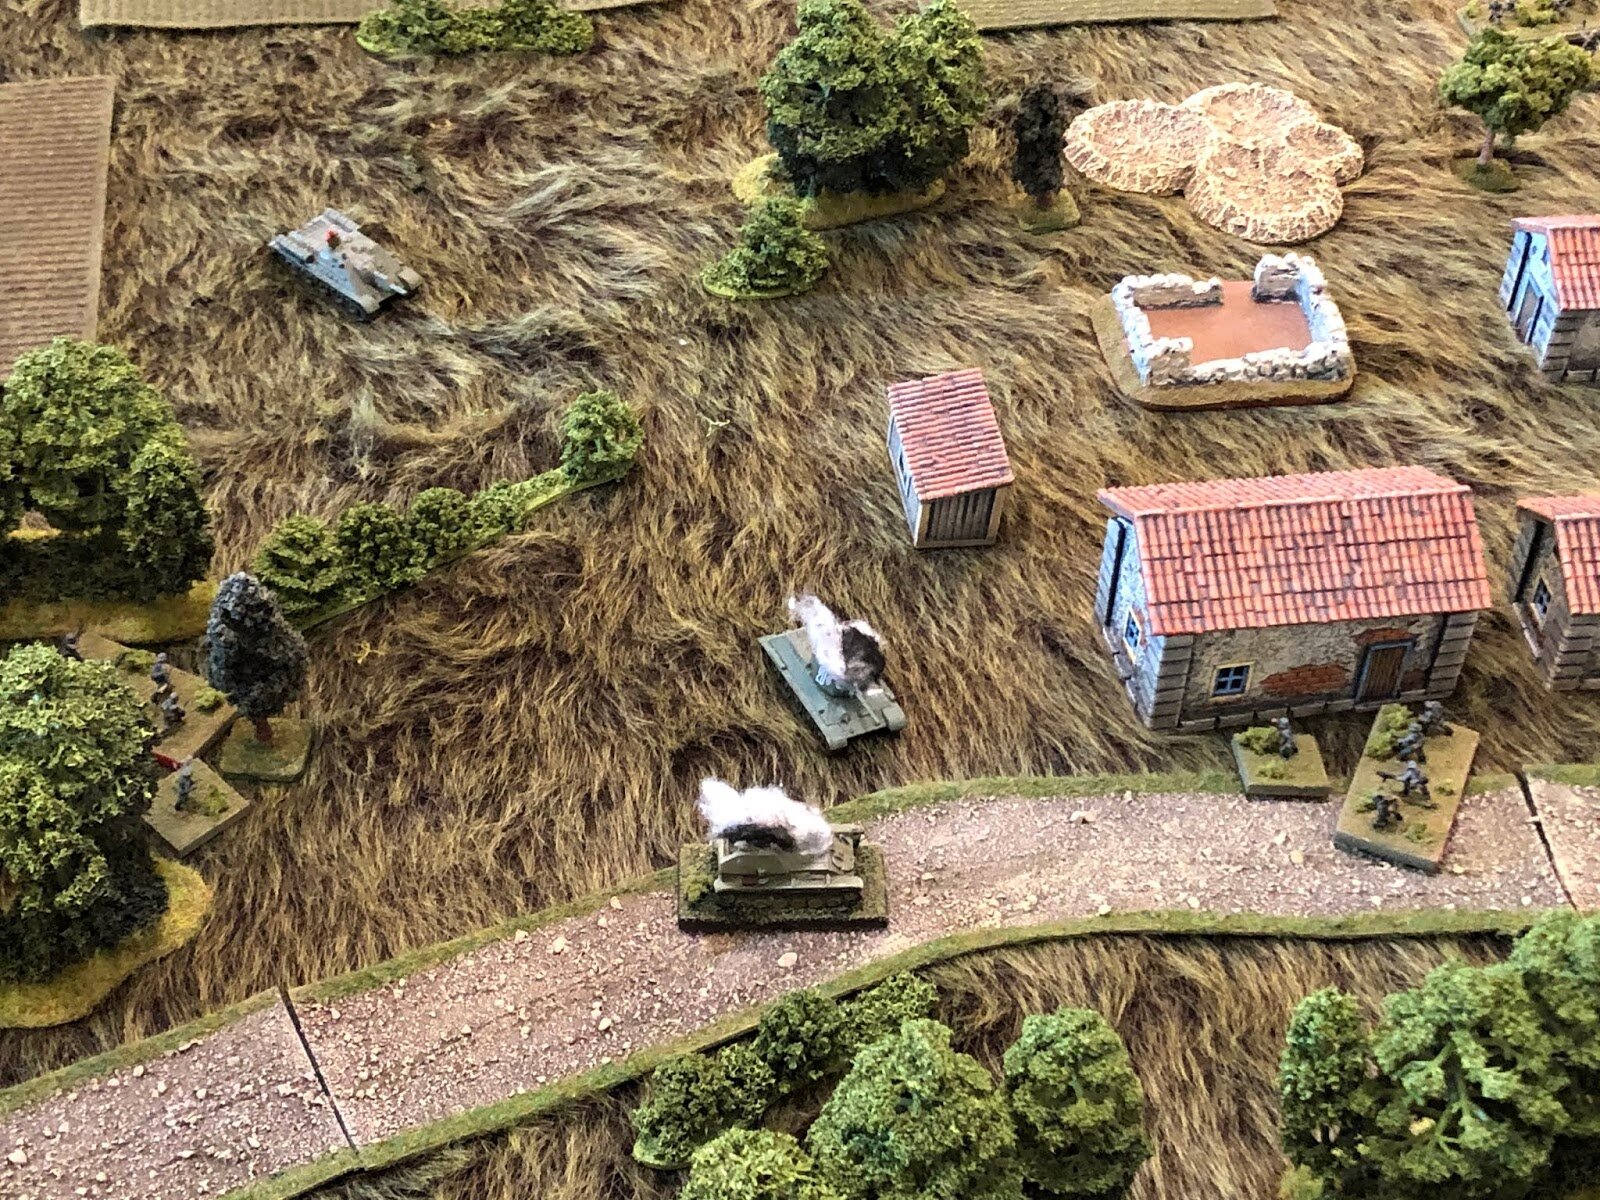
The Soviet plan is pretty simple, though they're splitting forces a bit more than is probably normal. The plan is for the Soviet armor to jailbreak through the gap between Snava and the North Wood, while 3rd Rifle Platoon takes Snava and the other two rifle platoons flank Snava to the south, both pincers supported by their heavy weapons stationed in Birnenwald.
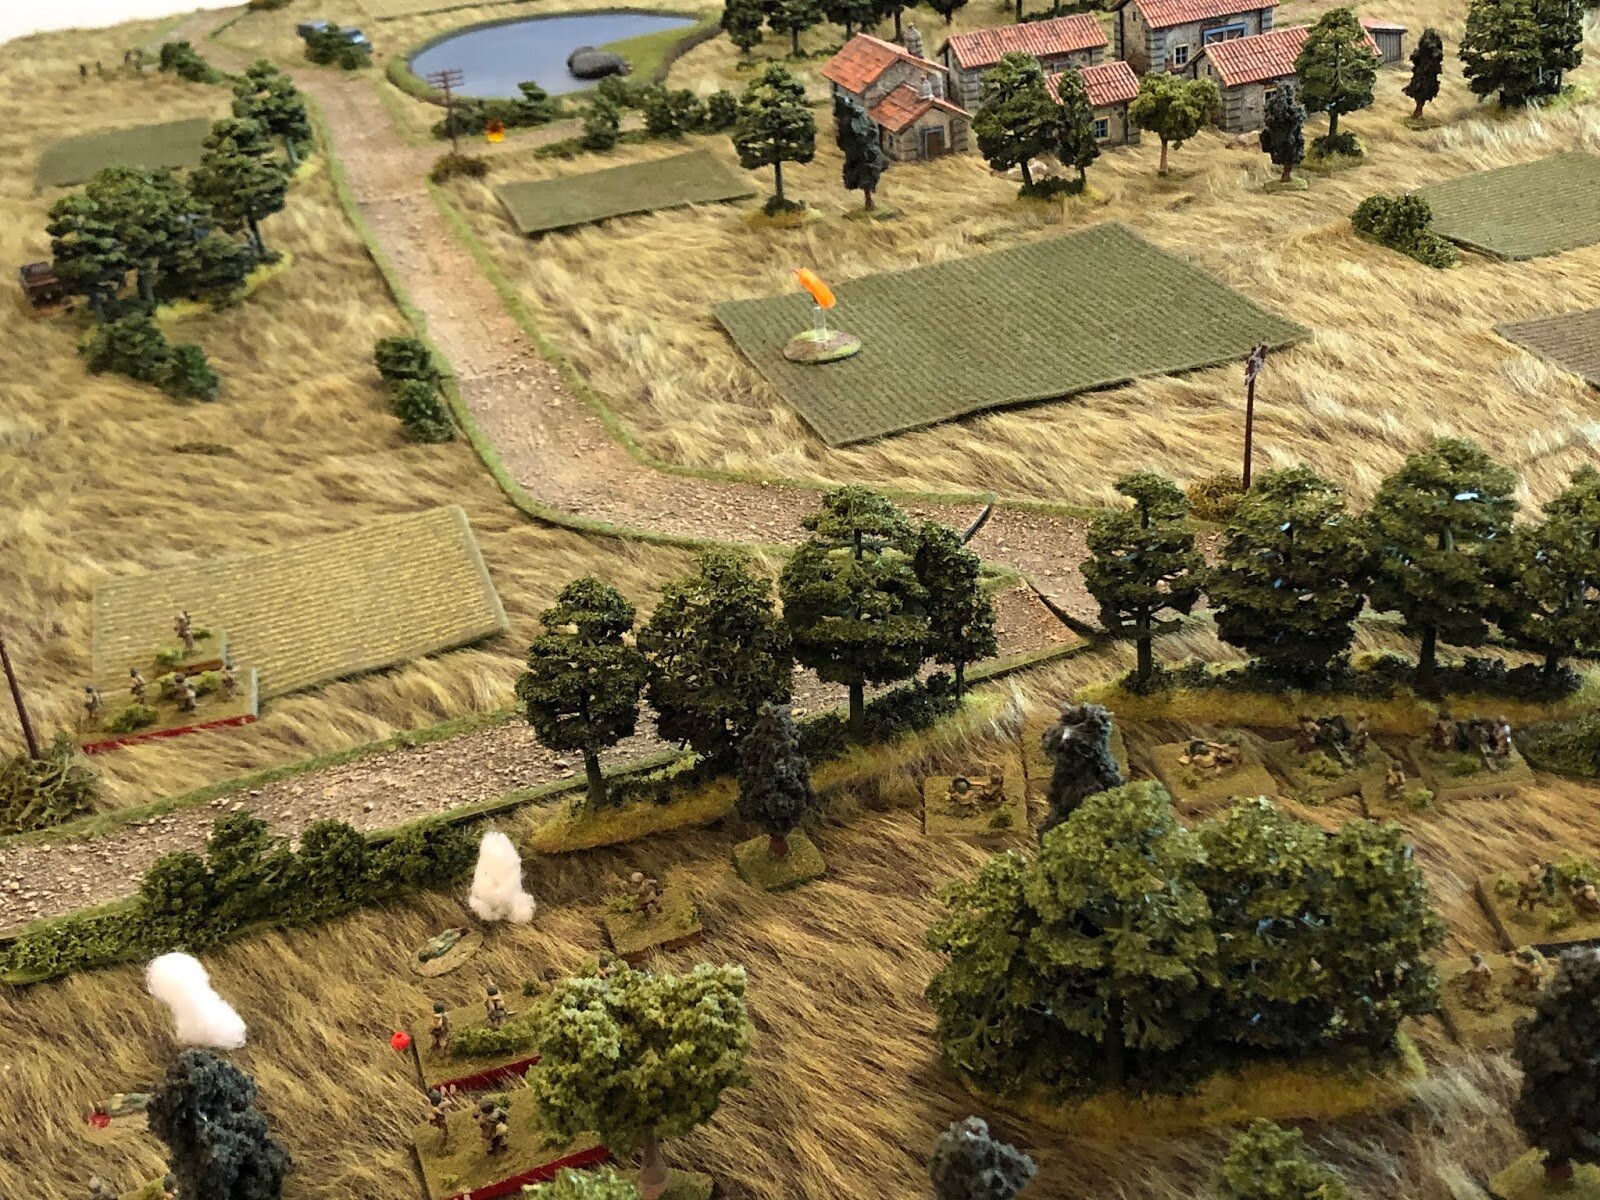
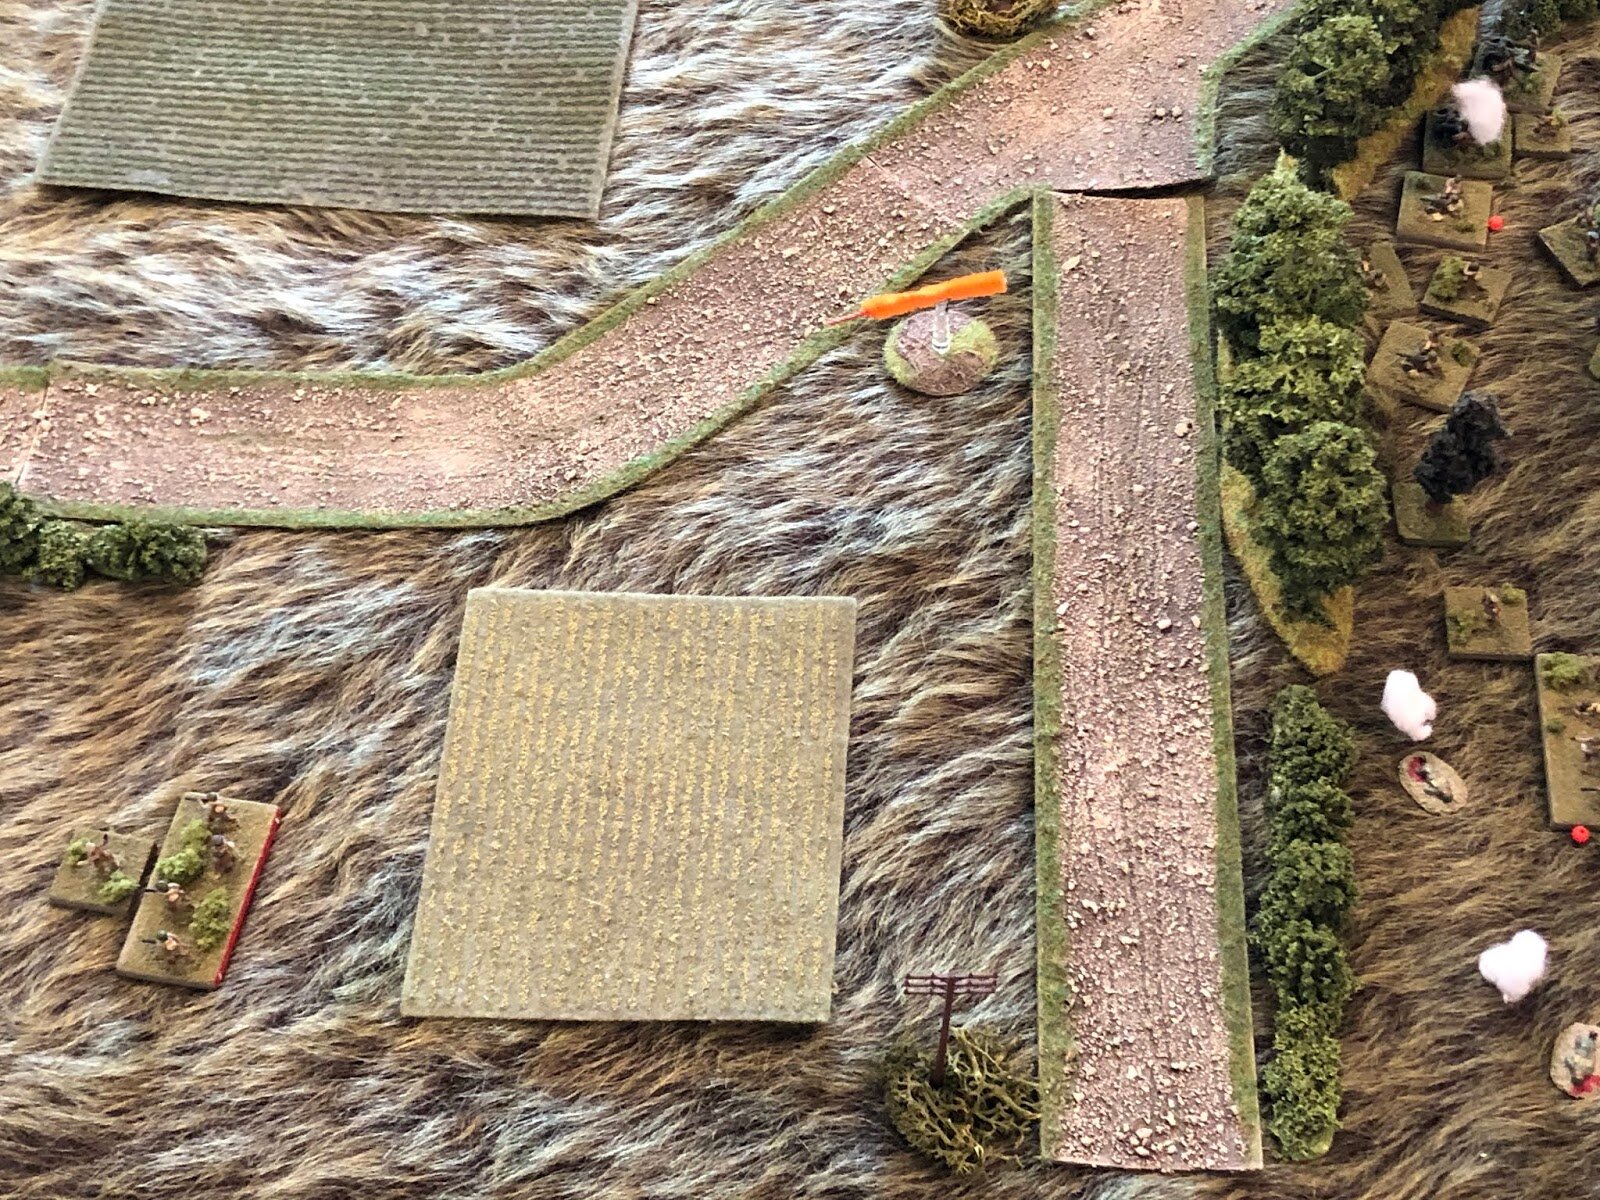
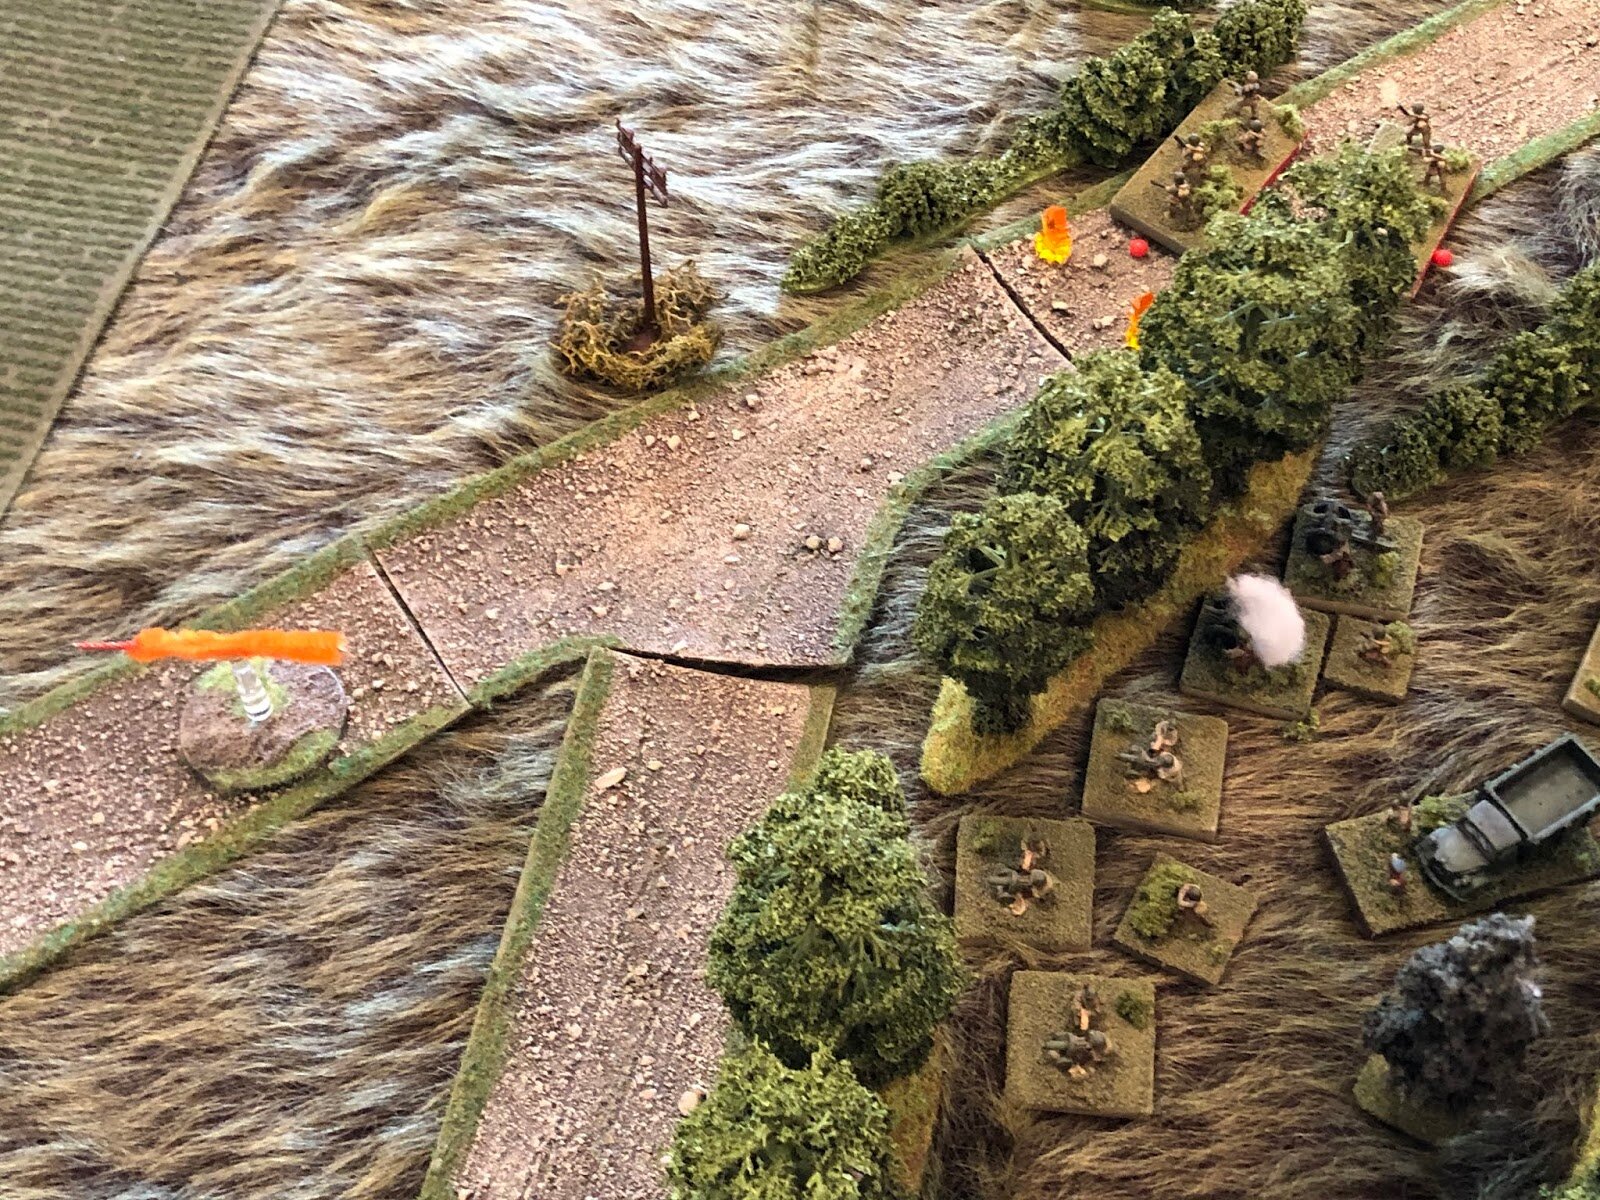
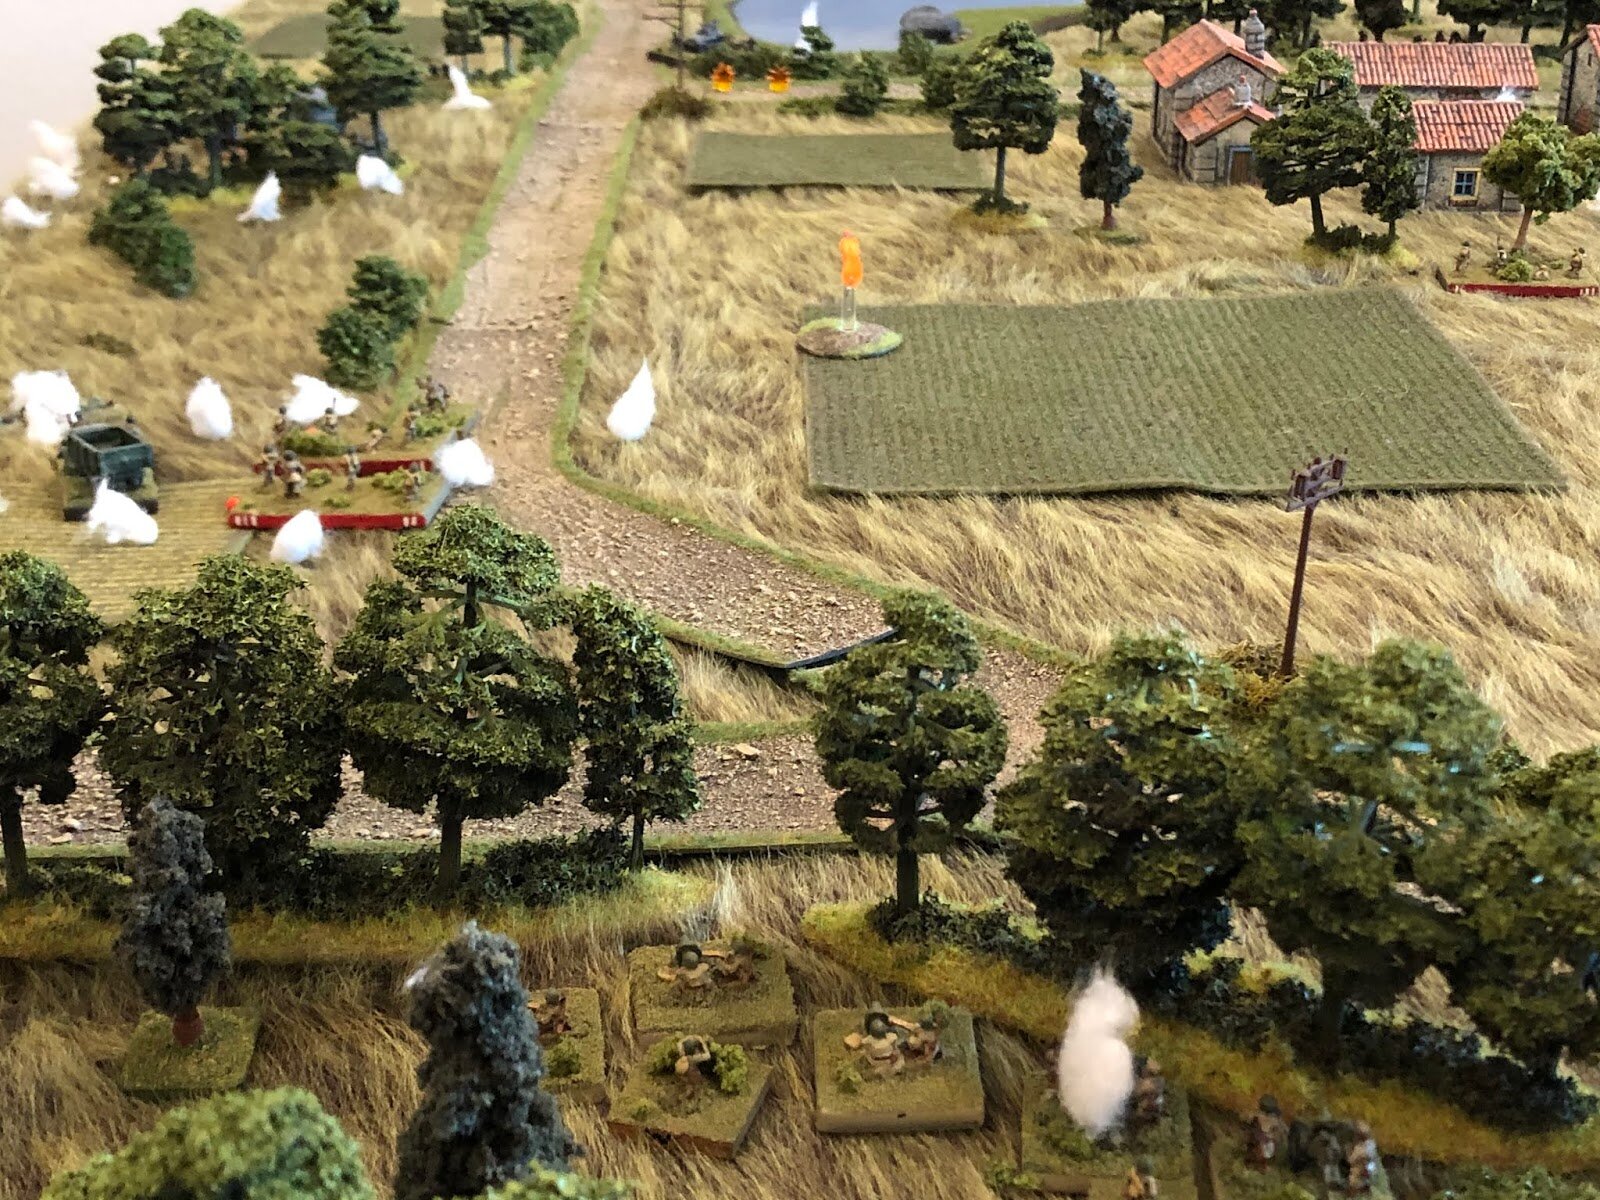
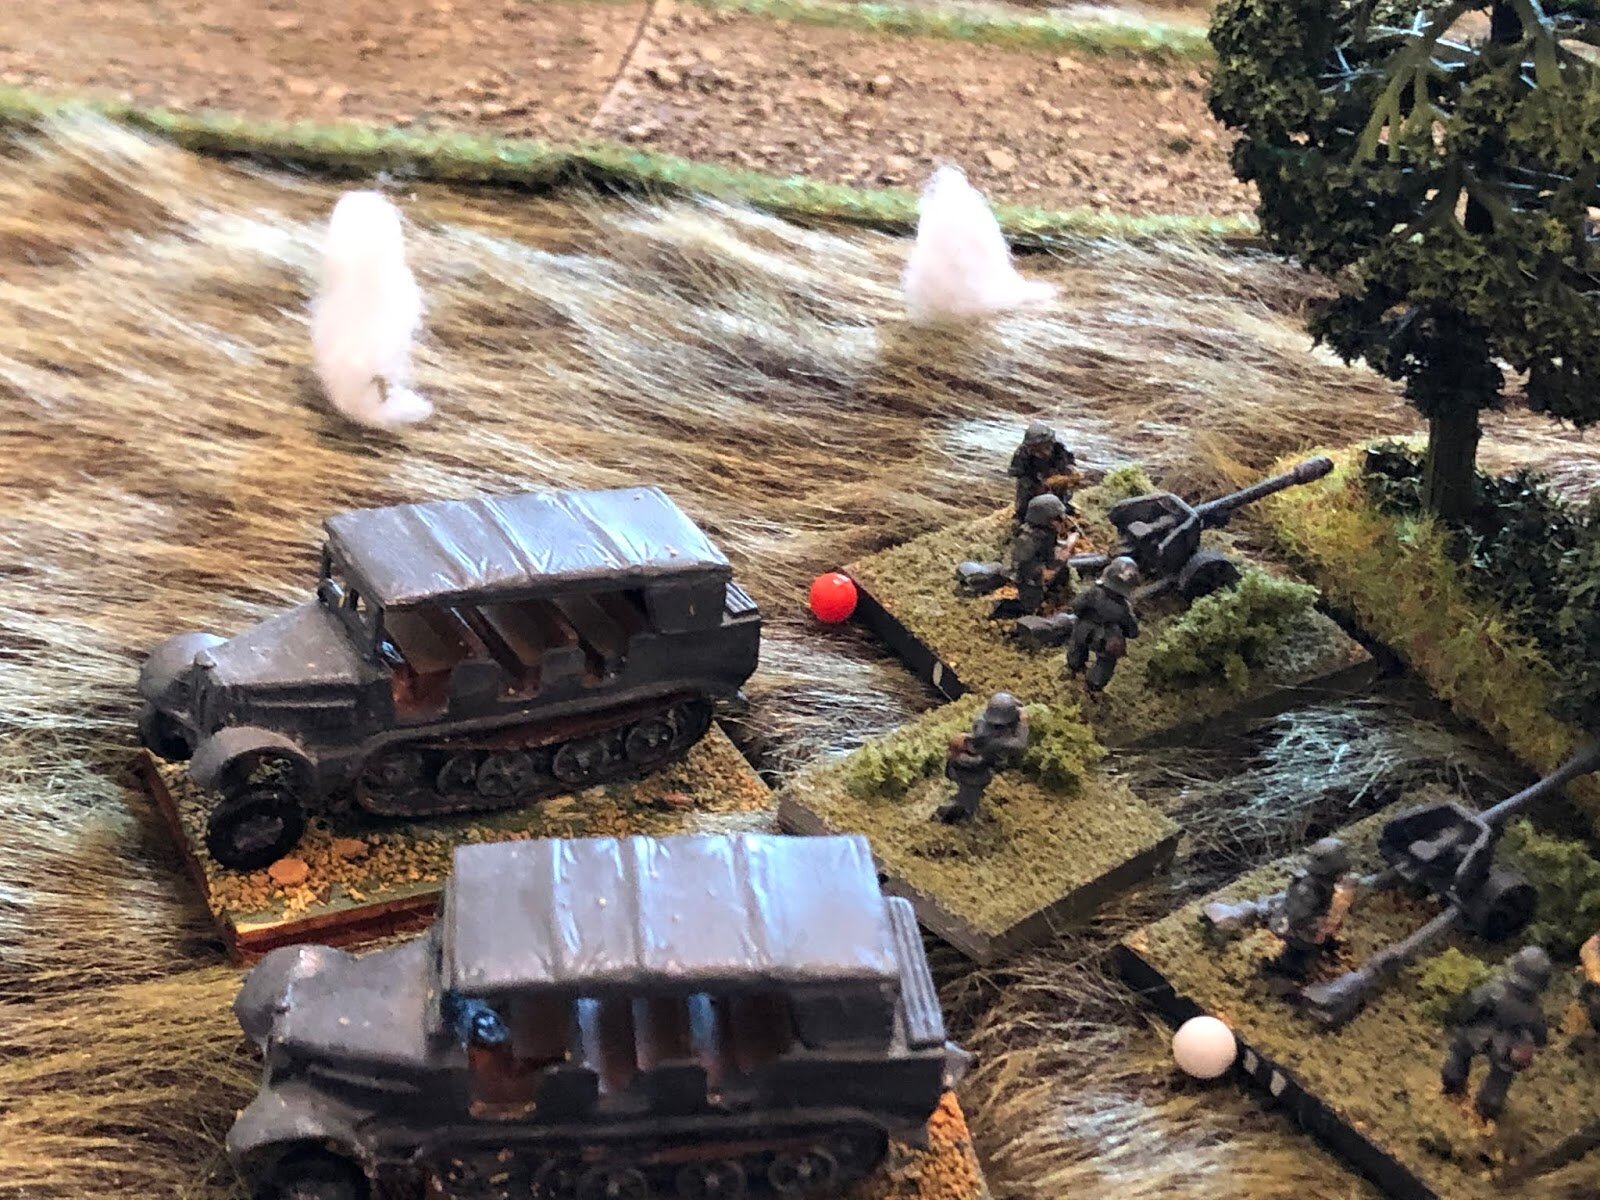
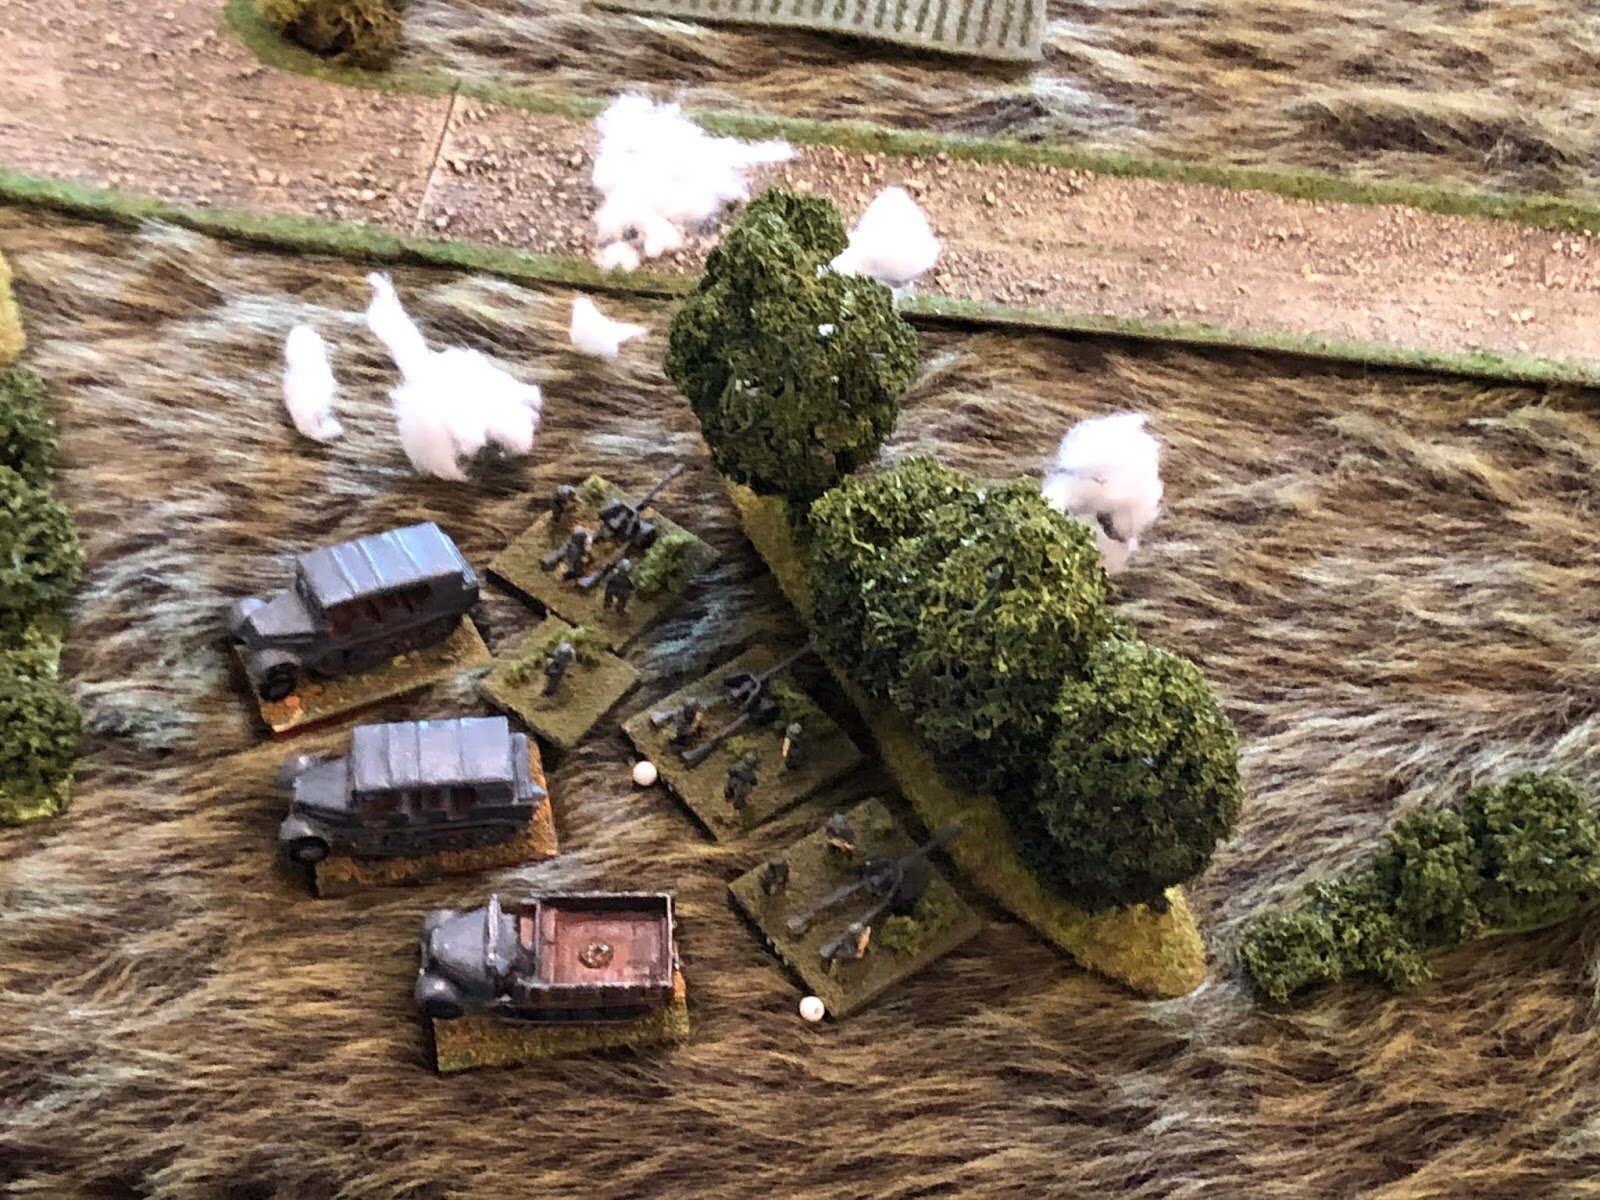
The Germans have a bit of an interesting concept going on: first, they're short on fuel and ammo. Second, they're facing a serious disparity in firepower. Third, they're facing a serious disparity in mobility. So, they decide to emplace their direct-fire heavy hitters (the IGs, MGs, and ATGs) to interdict the Soviets most likely avenues of approach (the ATGs at bottom center to cover the entire arc between Snava and the Birnenwald, the MGs and IGs looking straight into the dark forest of the Birnenwald, where everyone is sure the Soviet infantry must emerge.
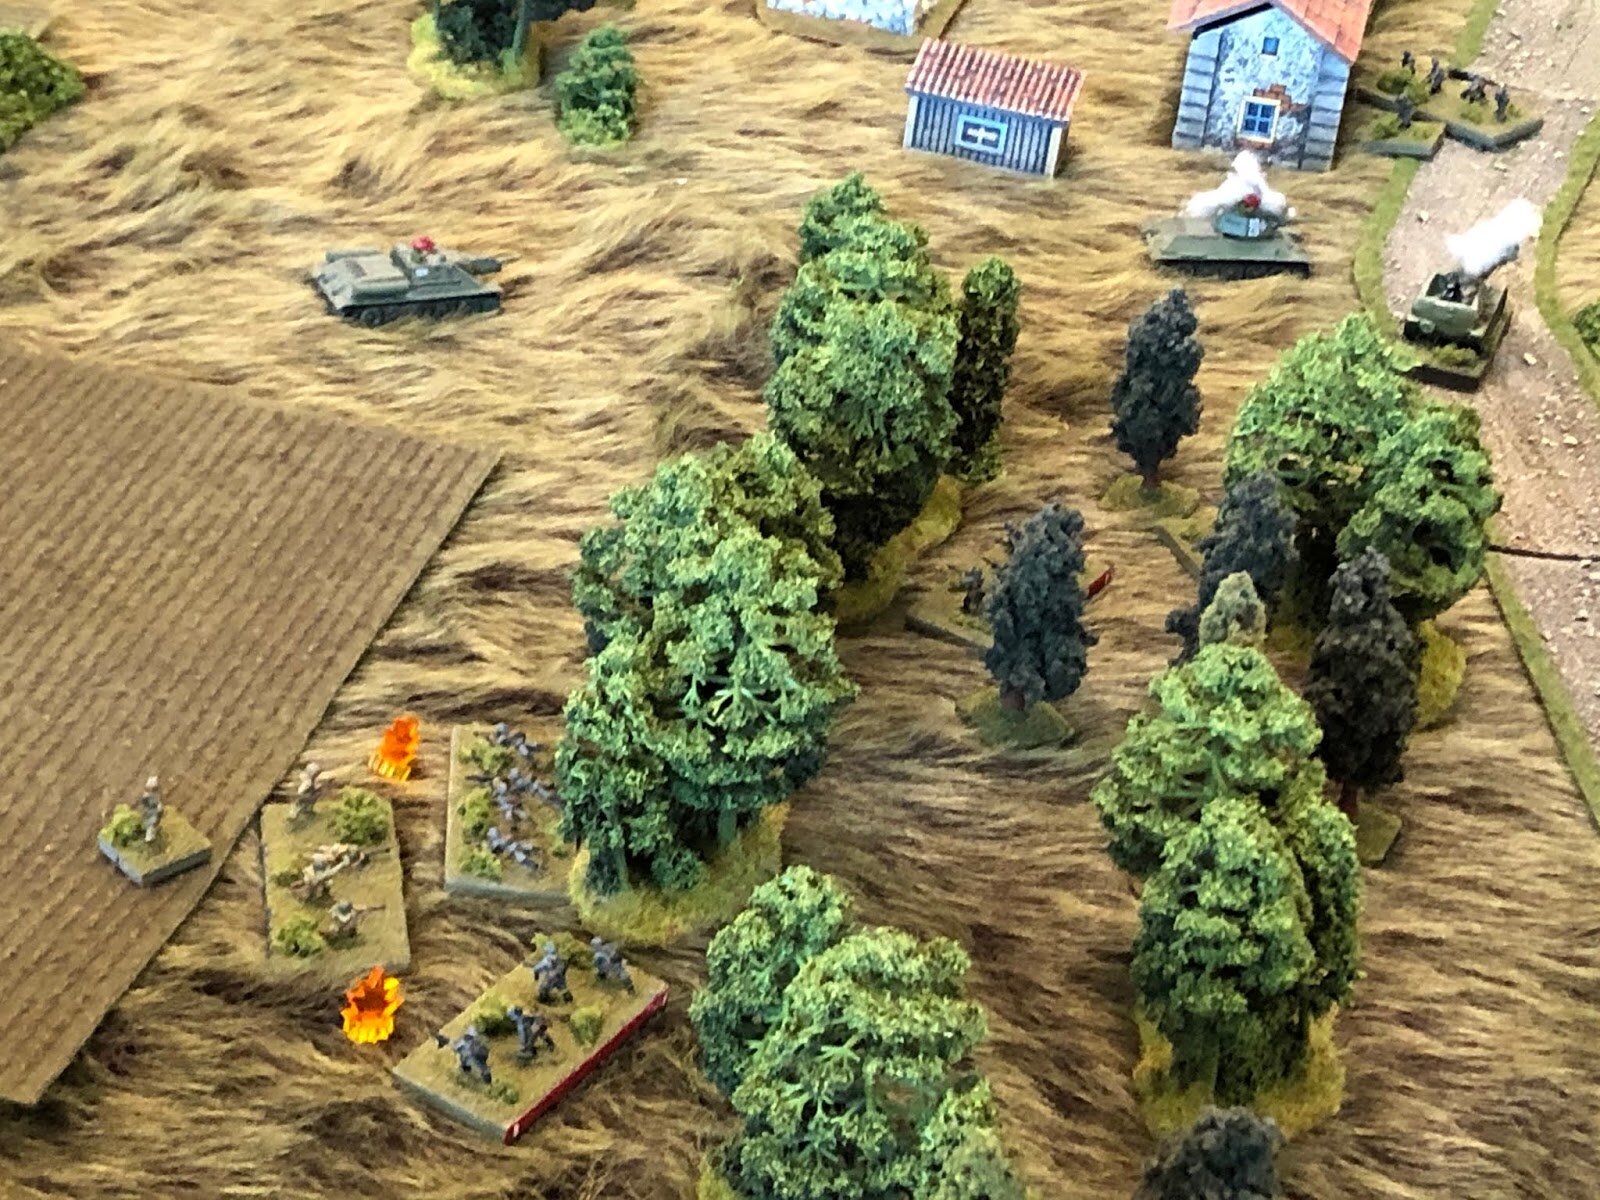
The German armor is in reserve, waiting to stem any Soviet breakthrough. But the different piece is the three German rifle platoons: outnumbered and outmatched (very little organic anti-personnel capability beyond point-blank range, and no anti-tank capability beyond point-blank range), they are essentially conducing a 'reverse-slope' defense.
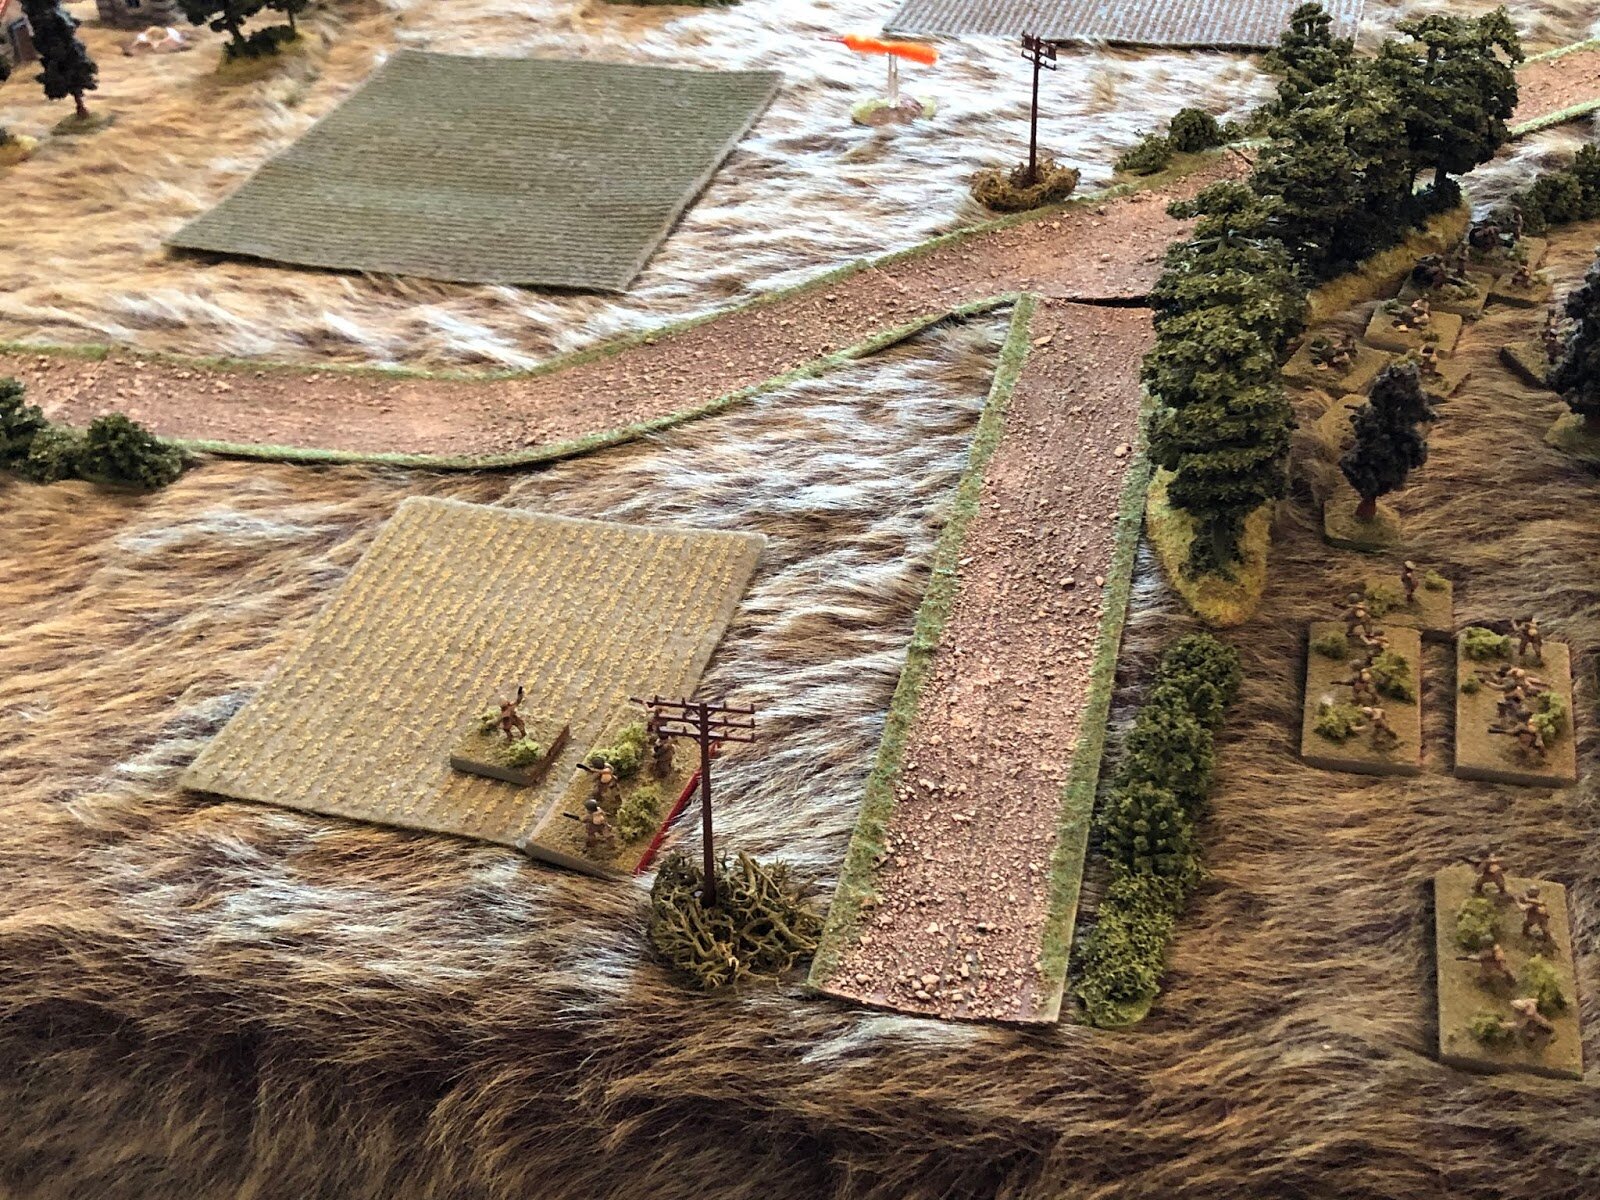
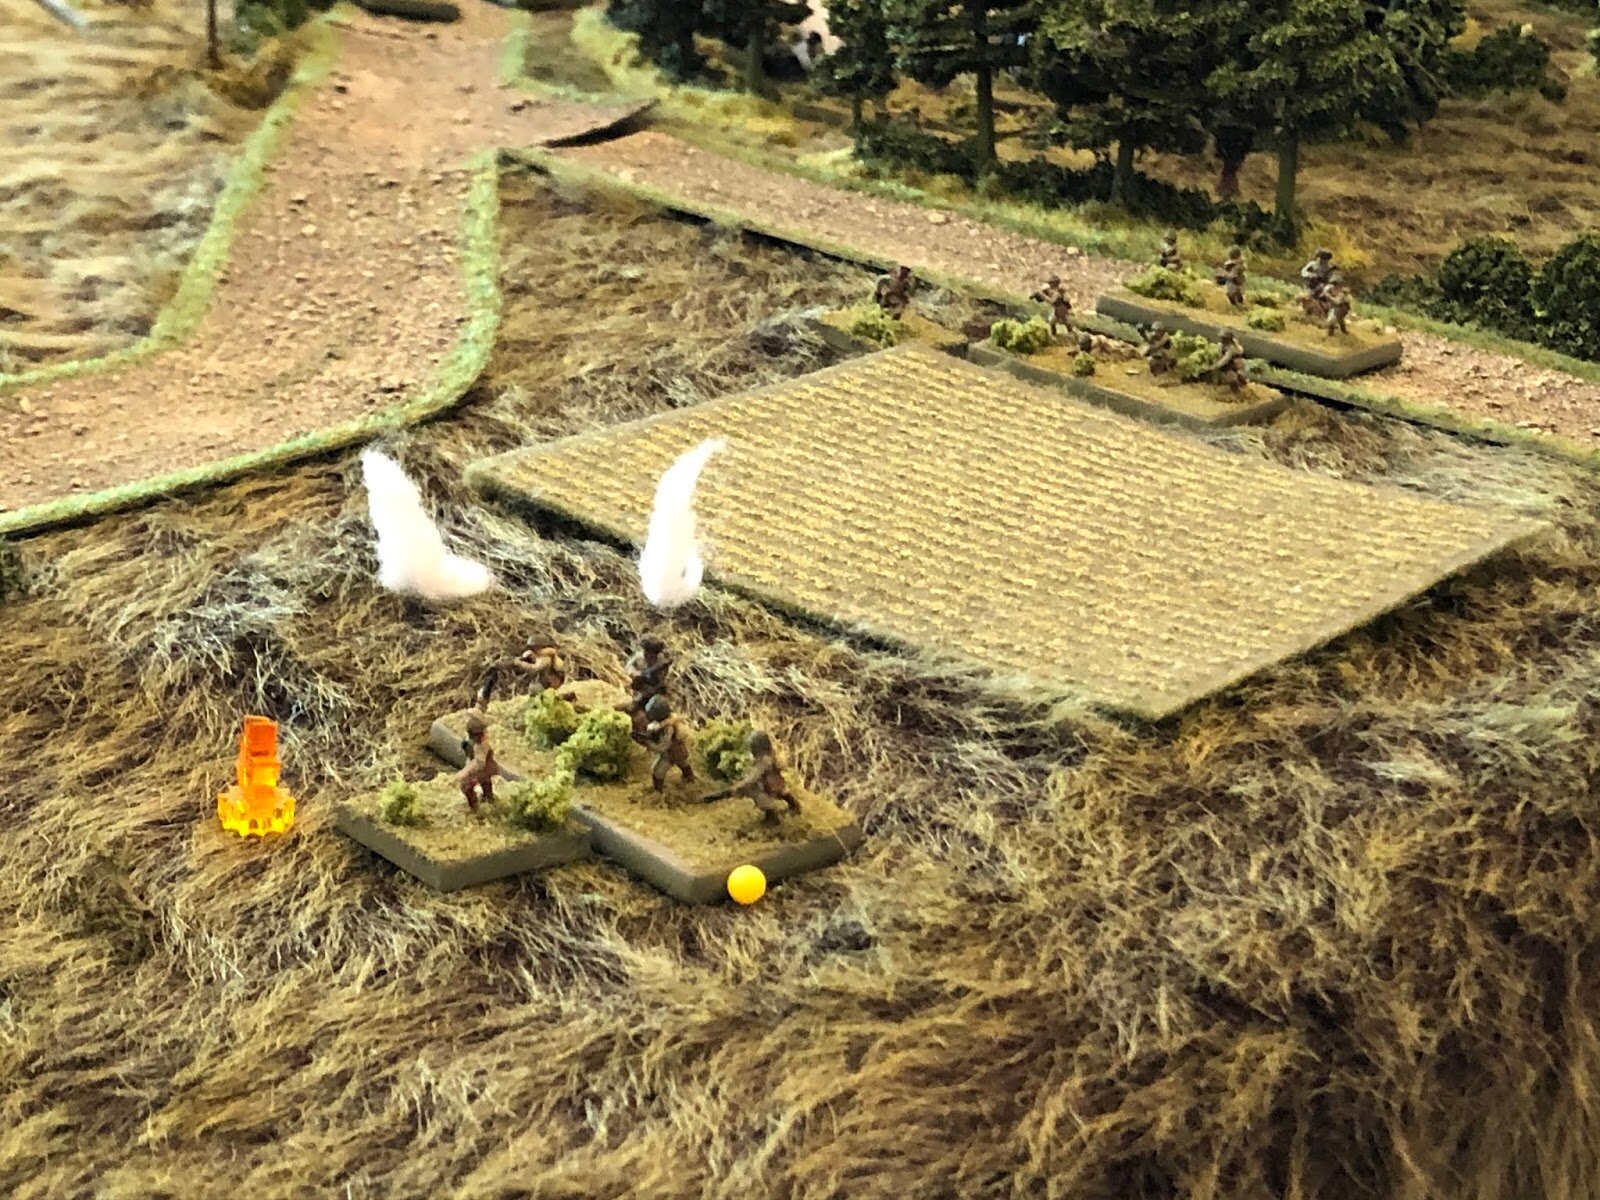
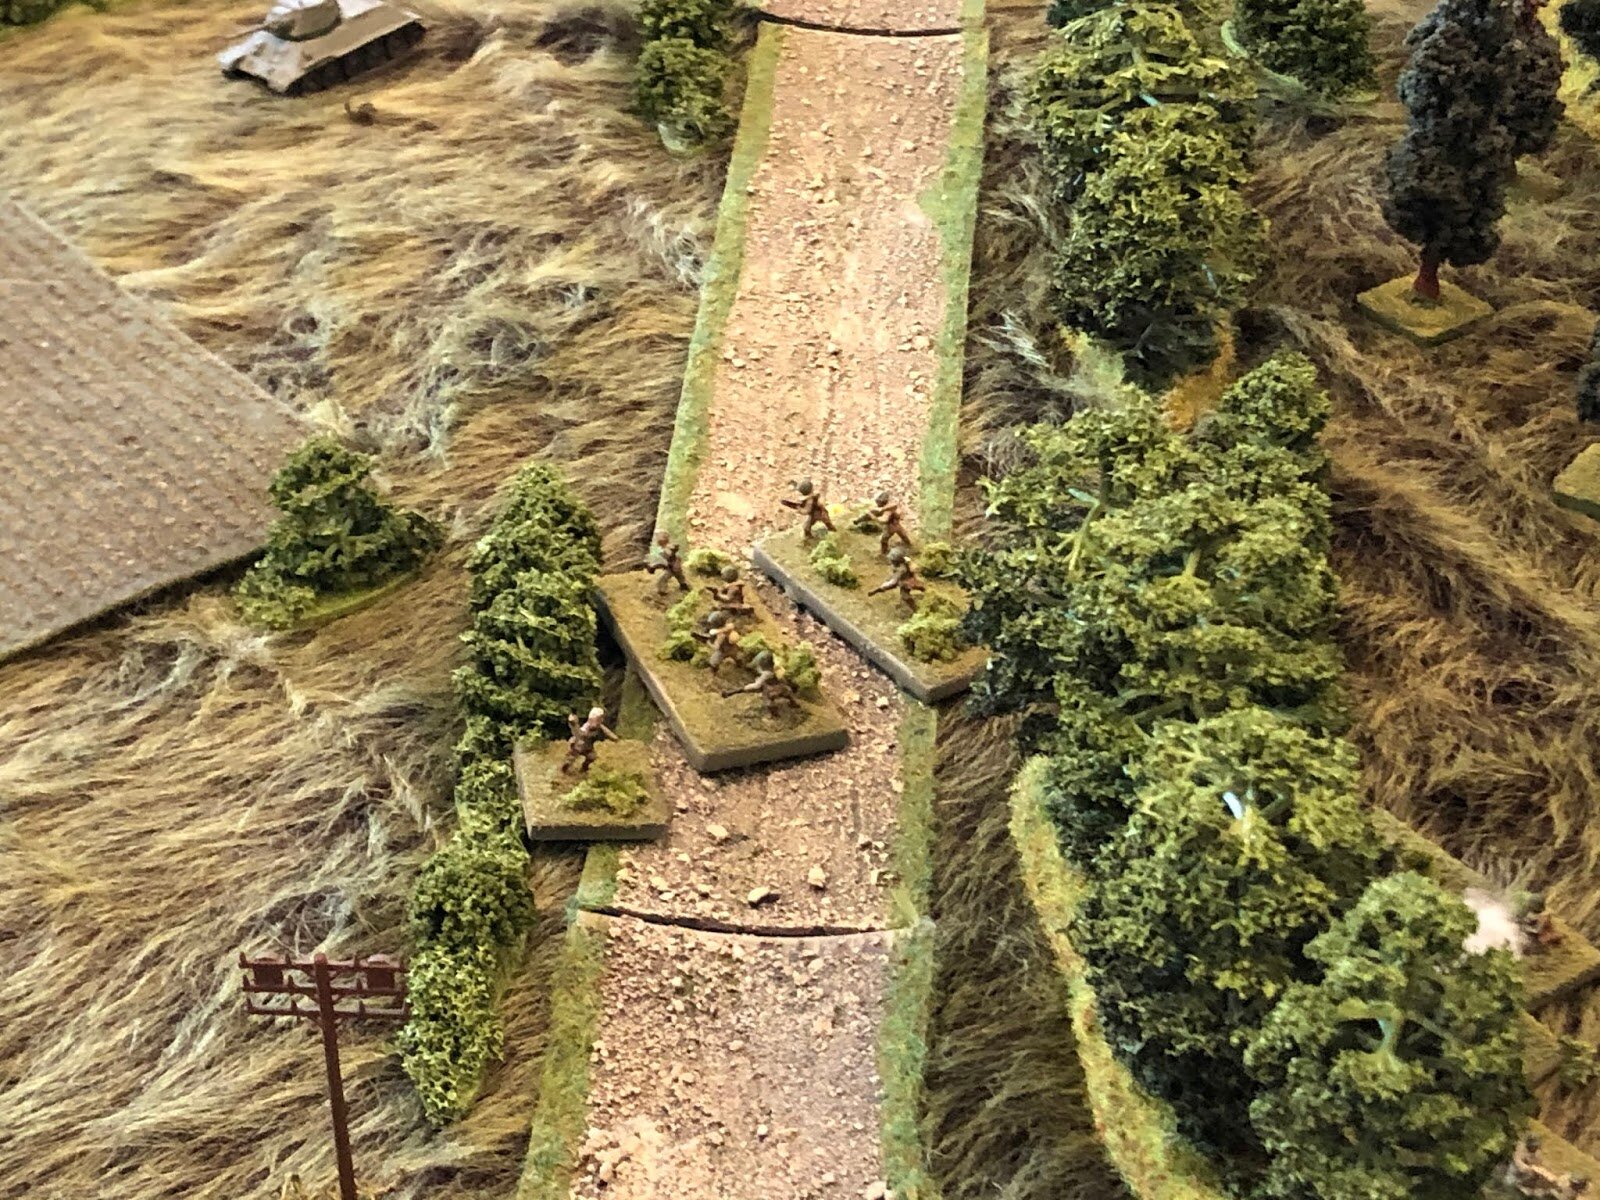
Yes, I know there is no slope, but what I mean is that they are looking to take advantage of restrictive terrain in order to maximize their capability against enemy armor and infantry by forcing engagements at point-blank range only. They are doing this by occupying the North Wood, the West Wood, and the village of Snava, but by occupying only the west, i.e., trailing, edge of those terrain features. So, by occupying the west edge, the Soviets will have to push into the east edge in order come to grips with the Germans, negating the Soviet firepower advantage. Or at least that is the theory. So spotting and 'recon by fire' will be a big part of this game because the Soviets are carrying out a hasty attack, so they didn't have time to conduct a thorough reconnaissance and thus they have to identify where the German defenders are emplaced.
I am playing this game in 10mm on a 6' x 4' table. The toys are a mix of Pendraken, Minifigs UK, and Takara. The matt is from The Wargames Company, with trees, hedges, and buildings from Crescent Root, the pond from Battlefront, and the fields from Hotz Mats. I am using the Too Fat Lardies' I Ain't Been Shot Mum rules, modified a bit for simplicity. I already mentioned spotting and recon by fire being a big part of this game; IABSM usually uses 'blinds' to depict hidden forces, but I am not going to do this as I'm playing solo and don't want to confuse myself any more than normal ;) It's actually quite simple, no confusion involved, I just don't want to do it as I'm not going to be able to surprise myself anyway, so I'm putting the toys on the table and rolling to spot.
The Game Is Afoot: Time To Fight!

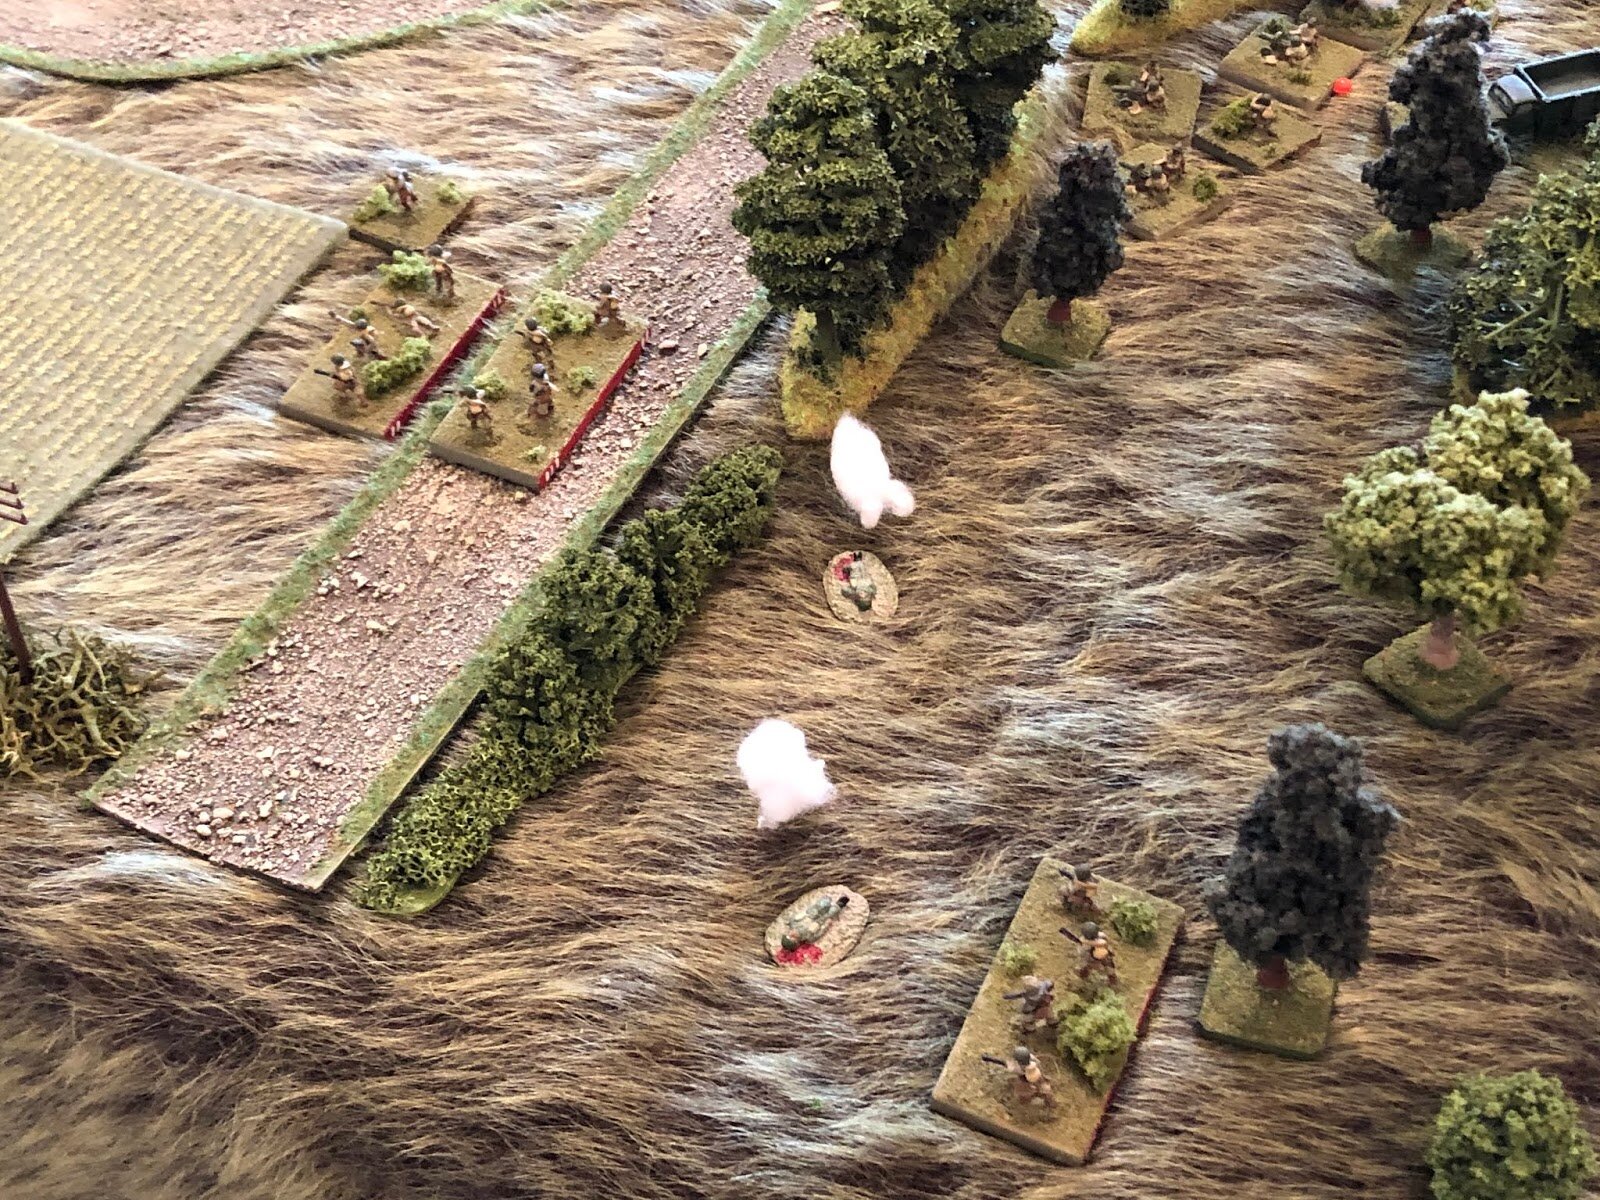
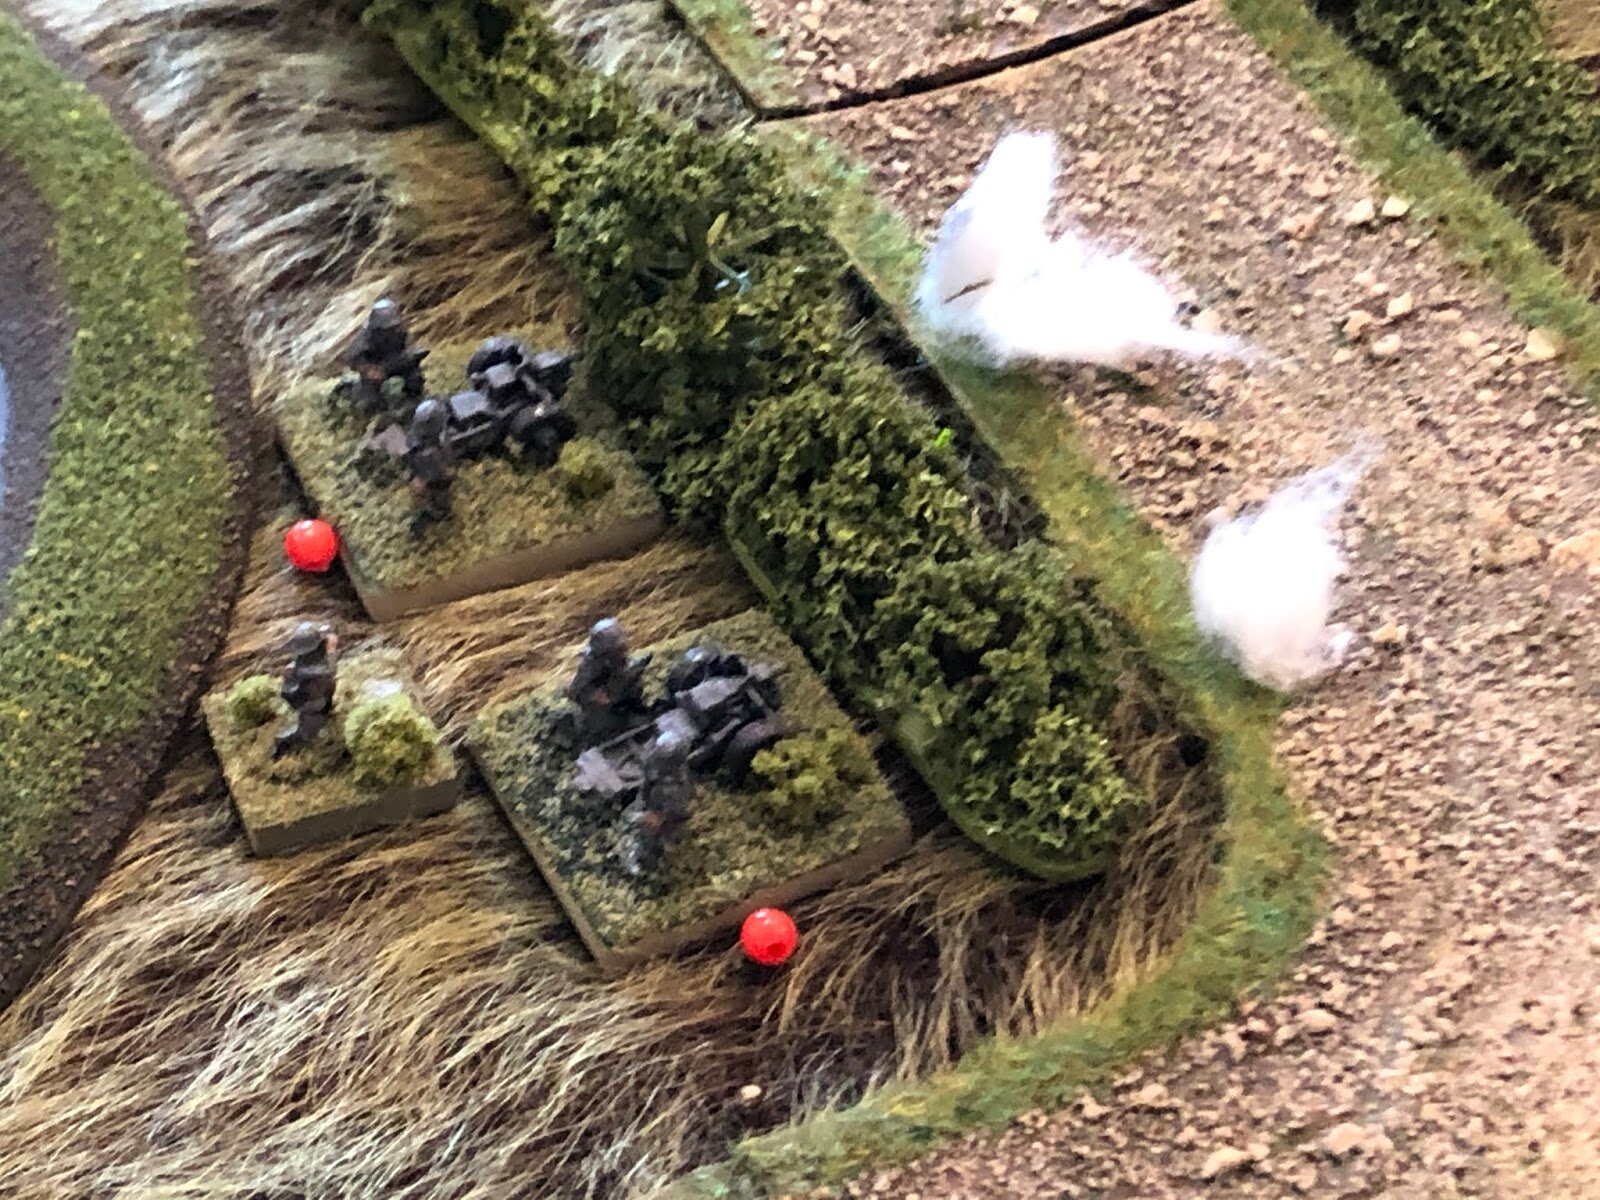
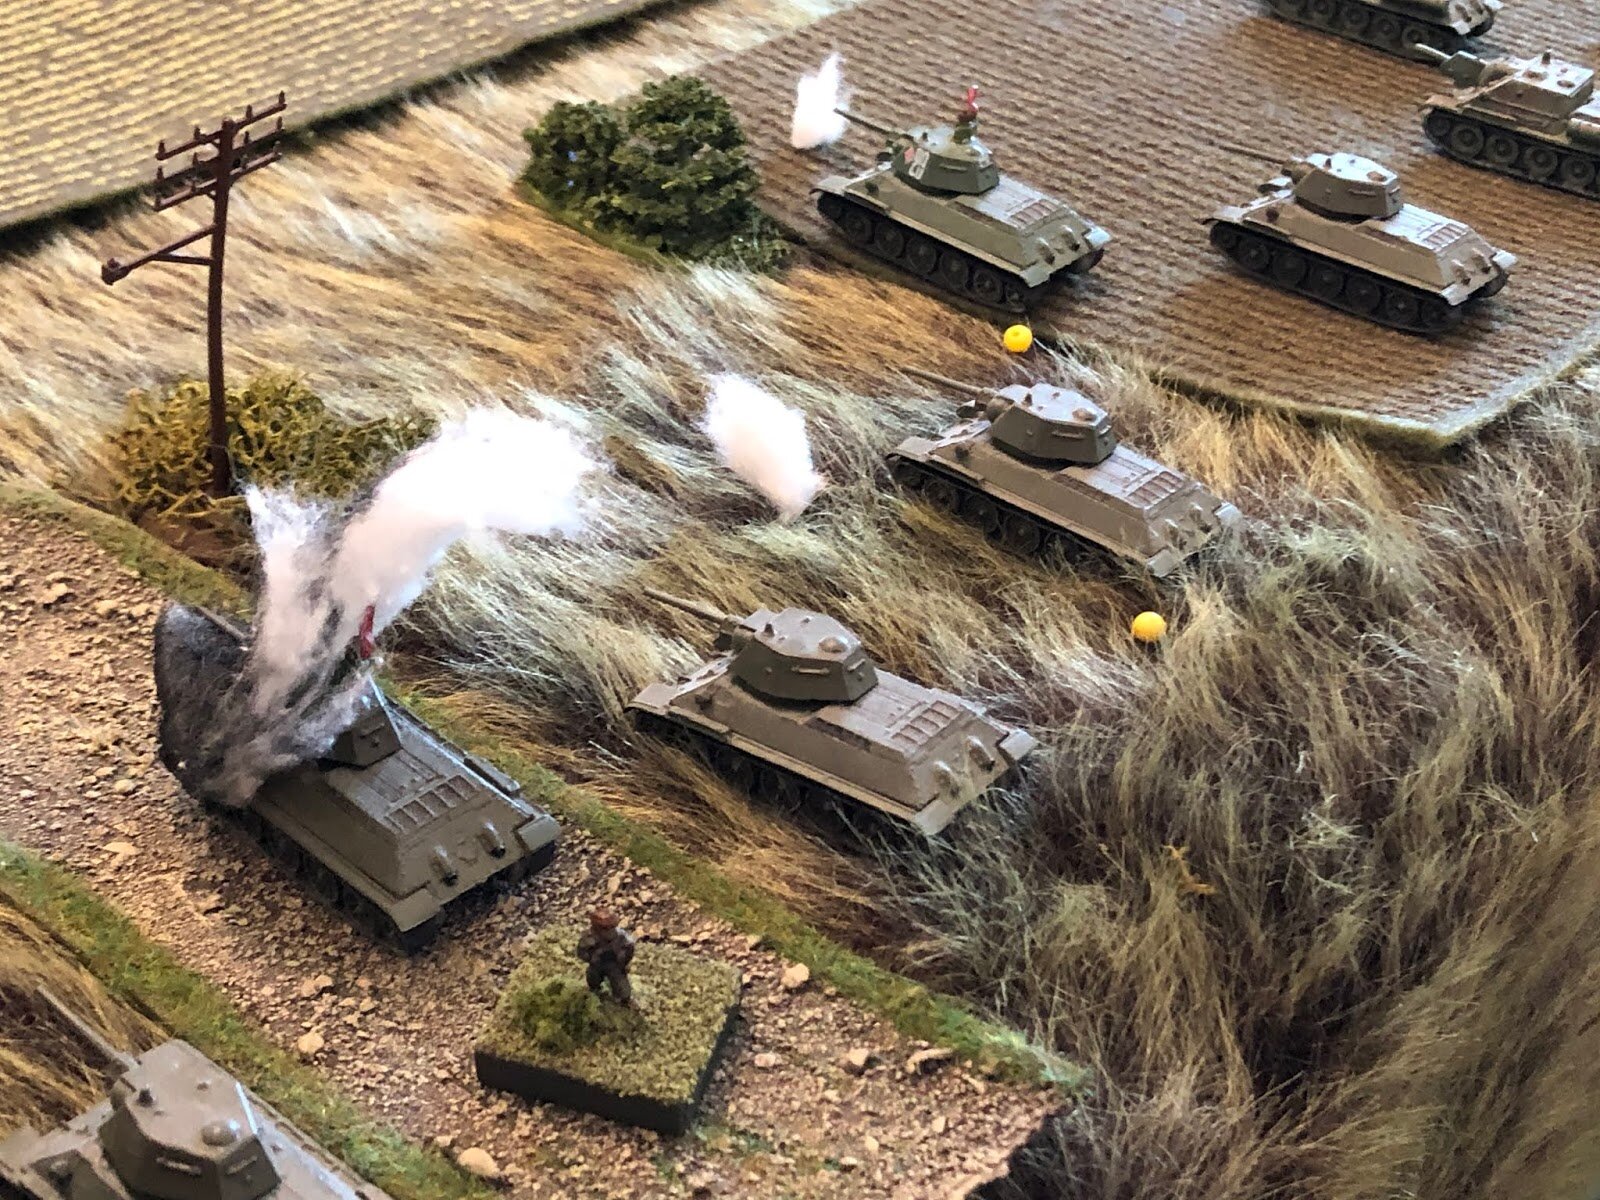


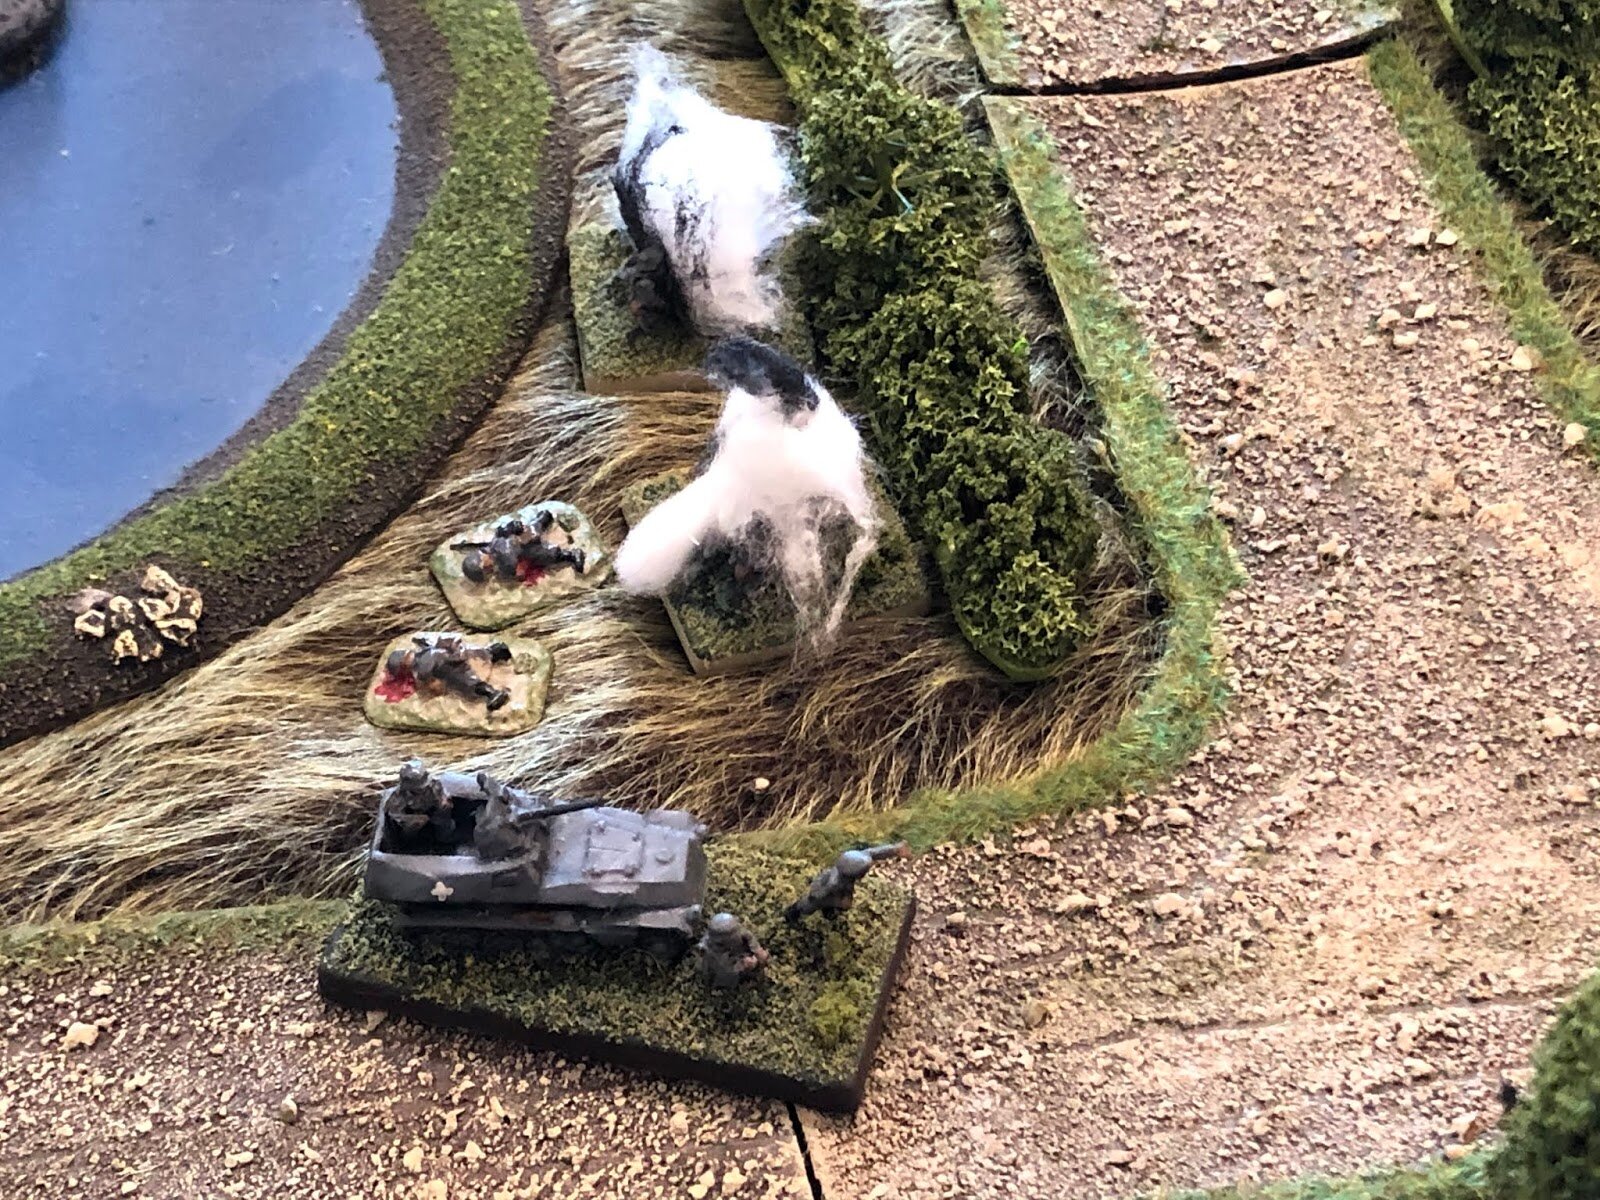

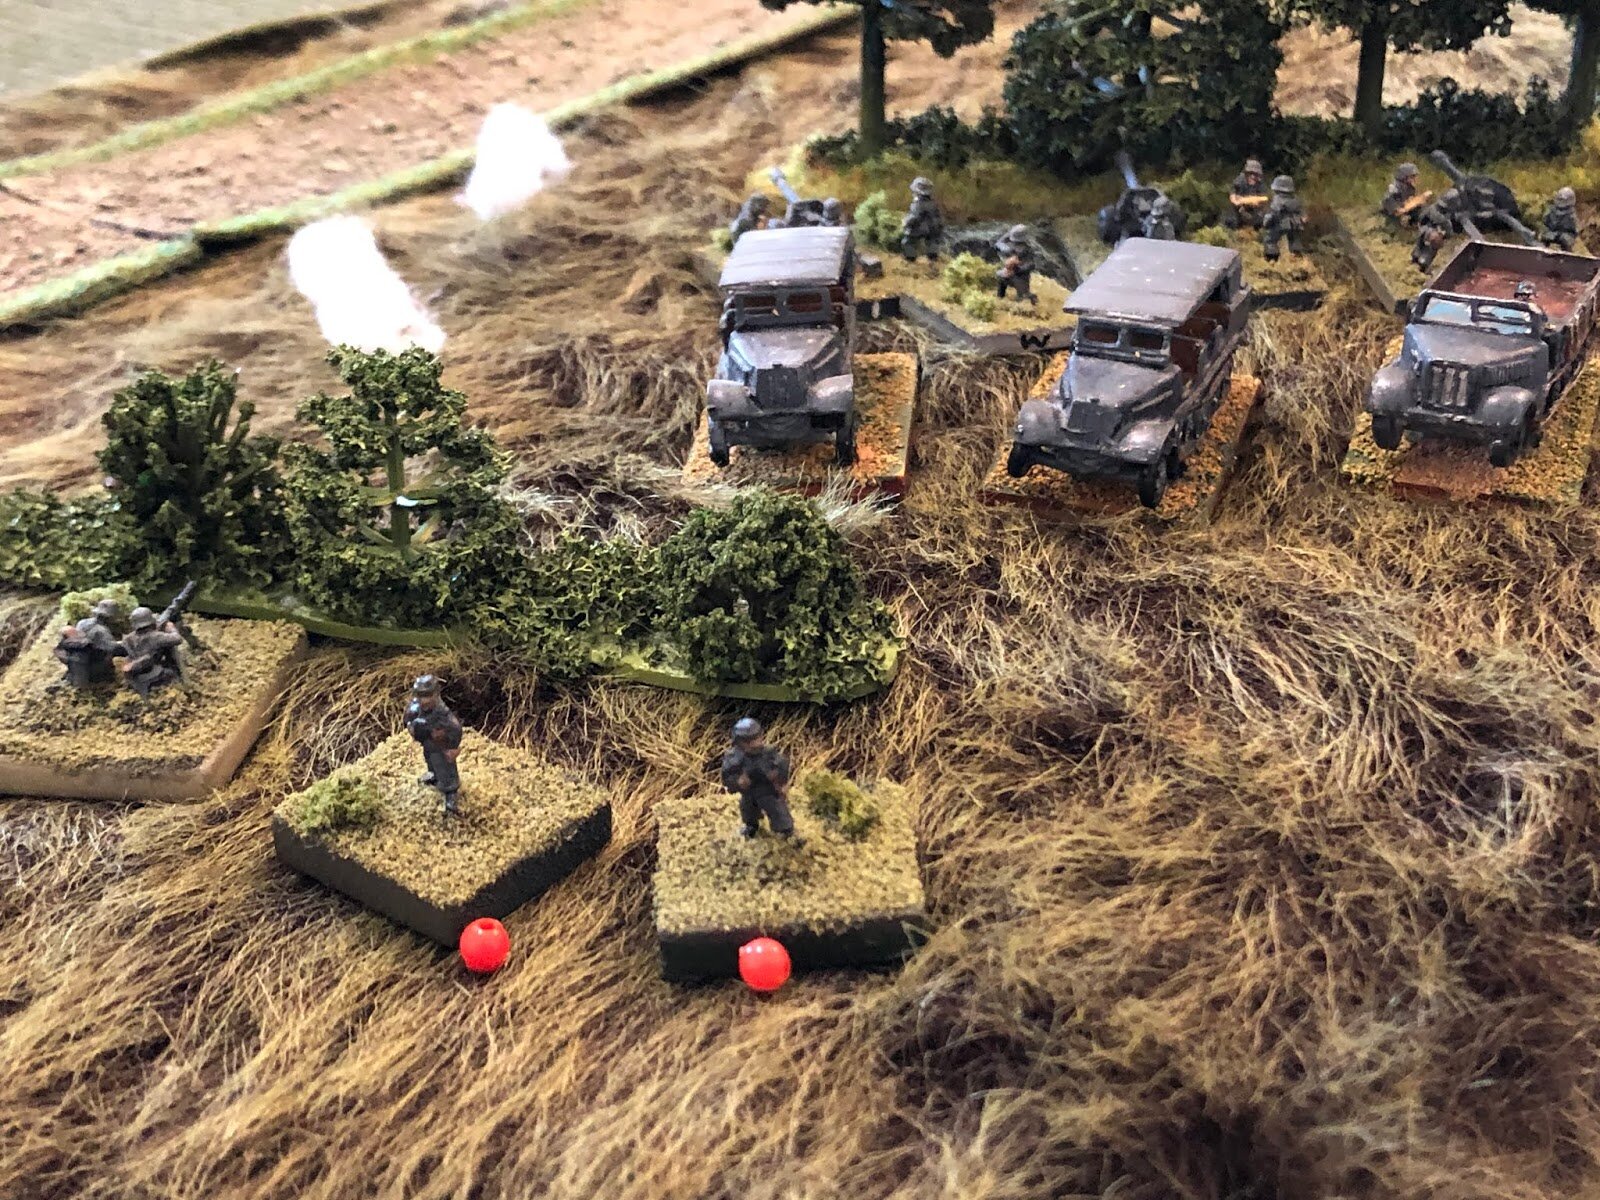


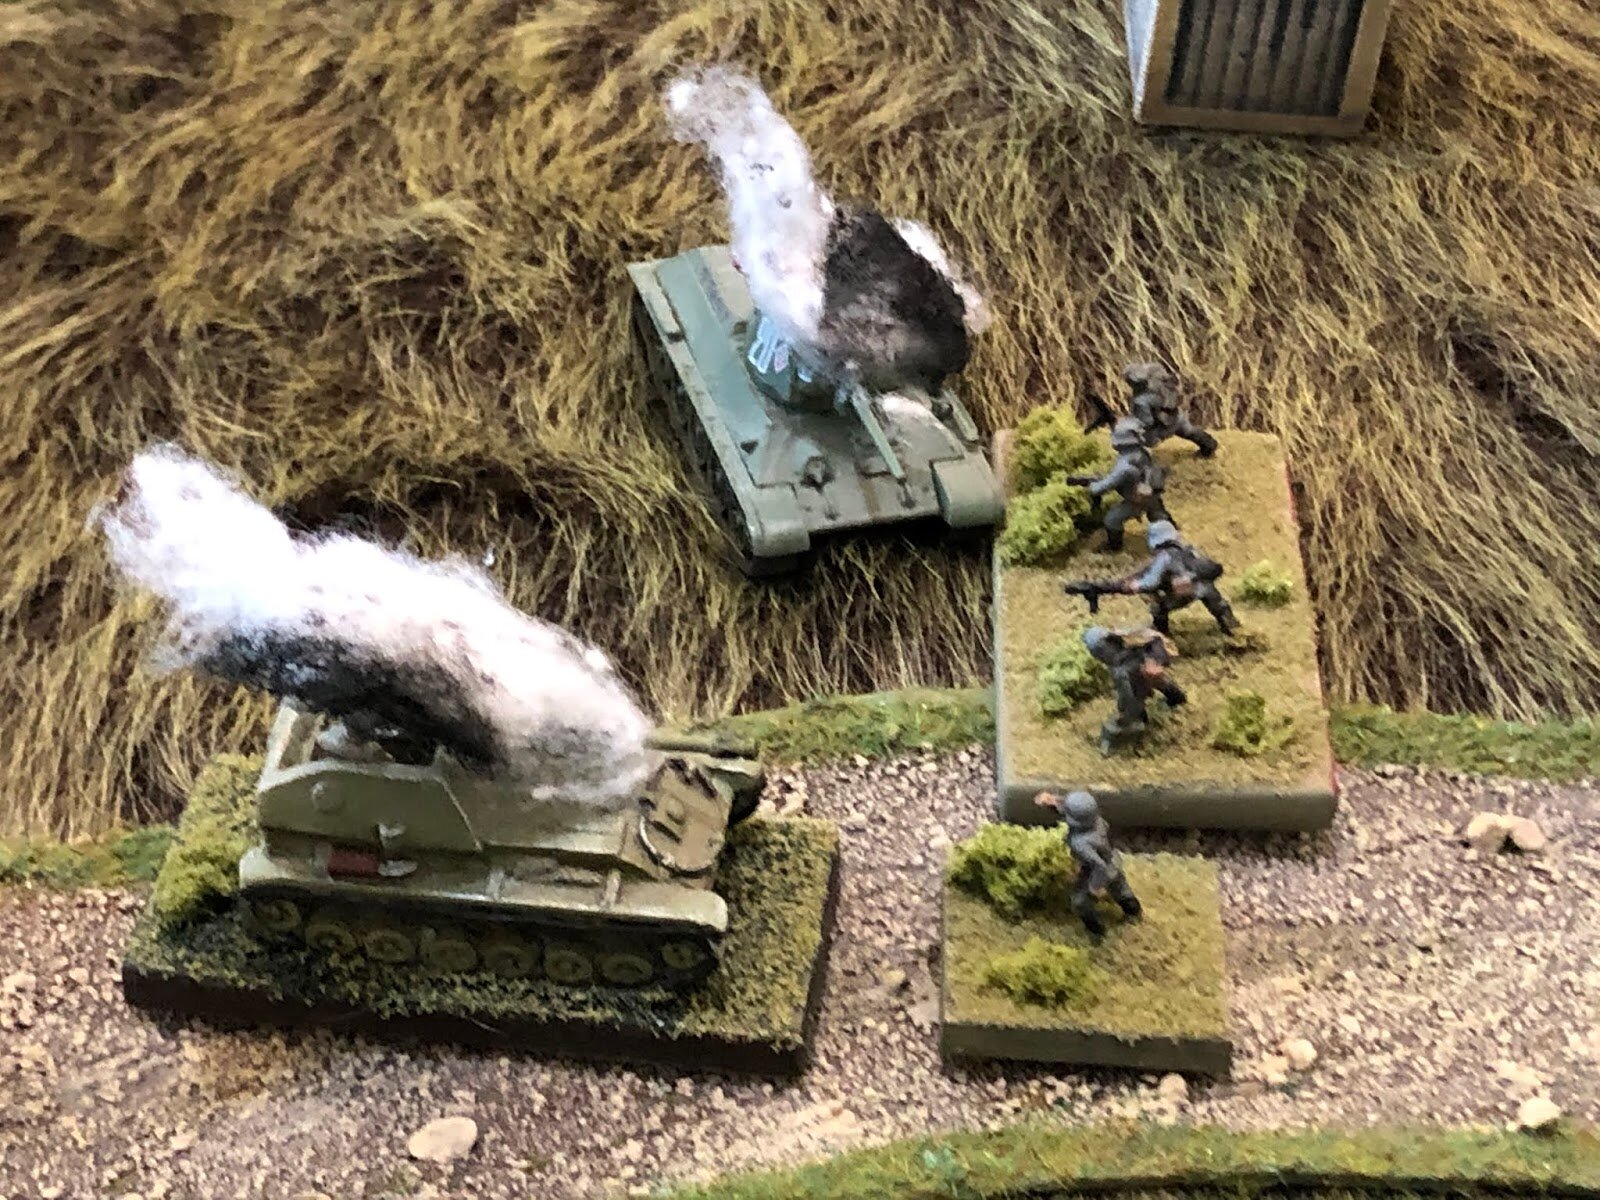

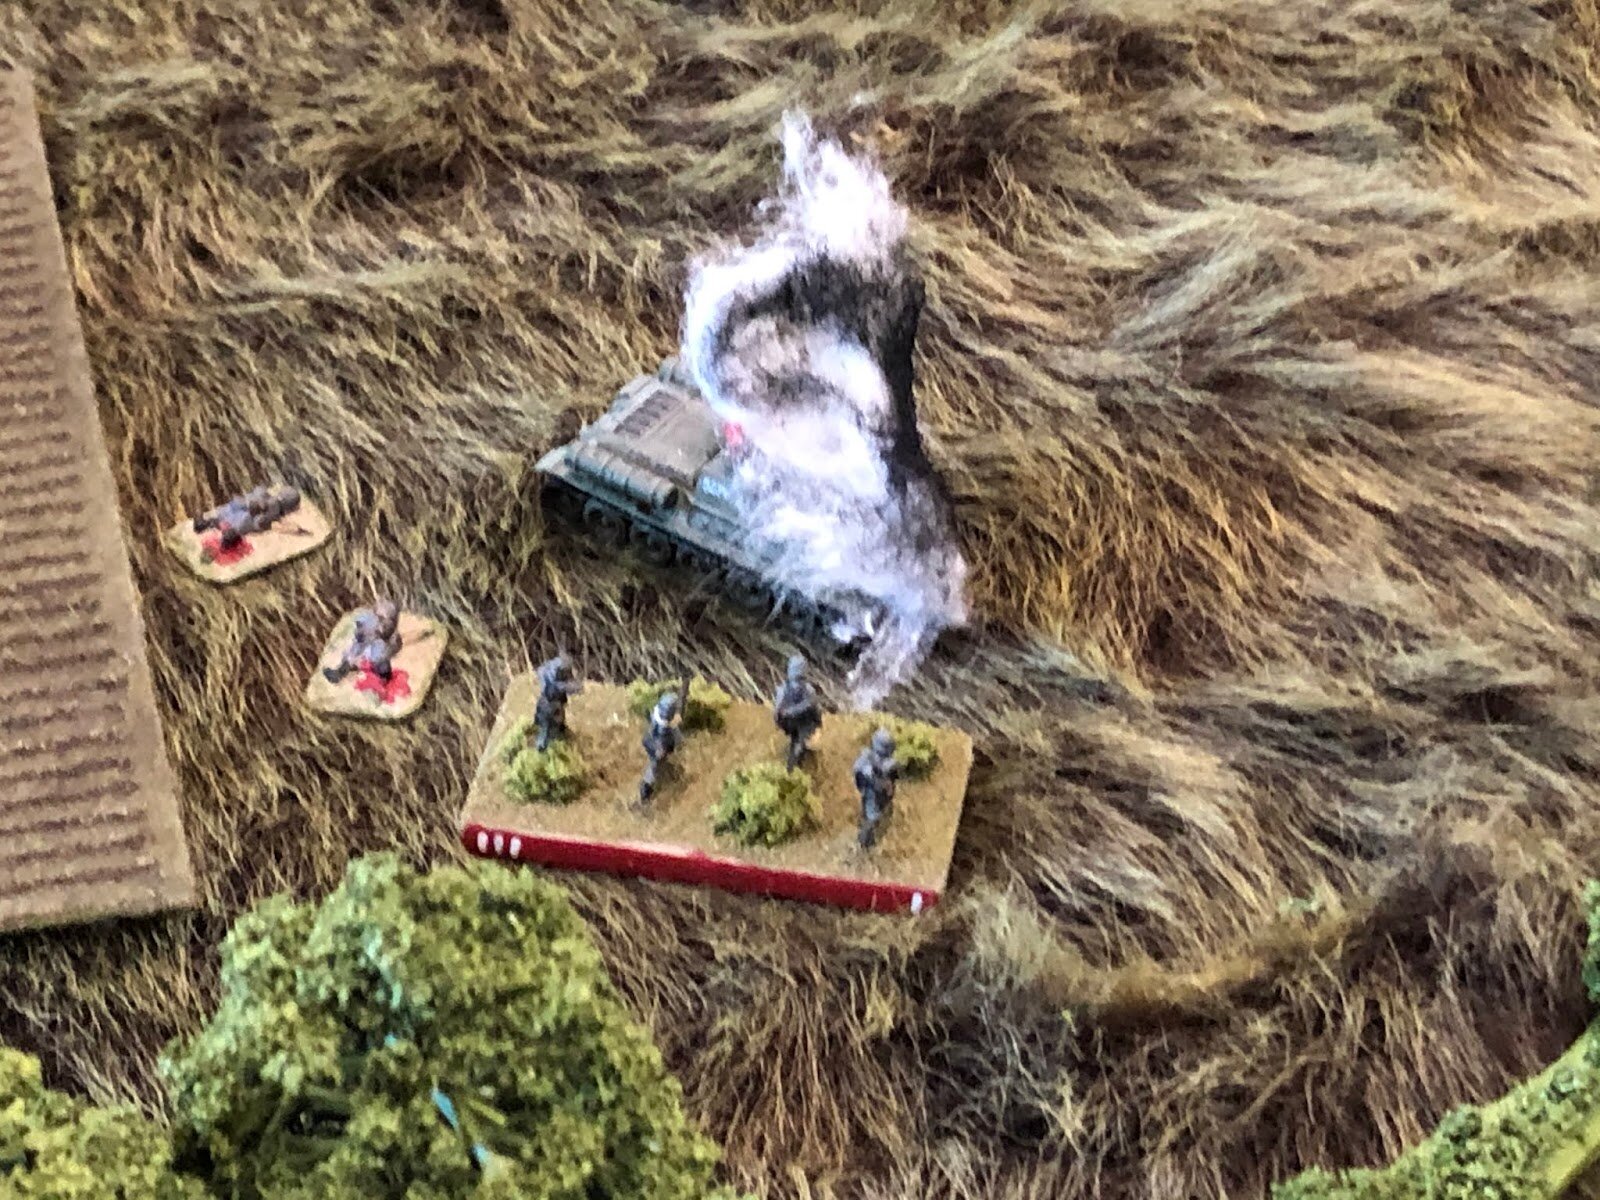

The German Kampfgruppe Commander consoles his ATG Platoon Commander; "they were true heroes, and they, especially in these difficult times, will be missed. I will ensure they receive their Iron Crosses, and I will do everything I can to ensure their families are looked after."
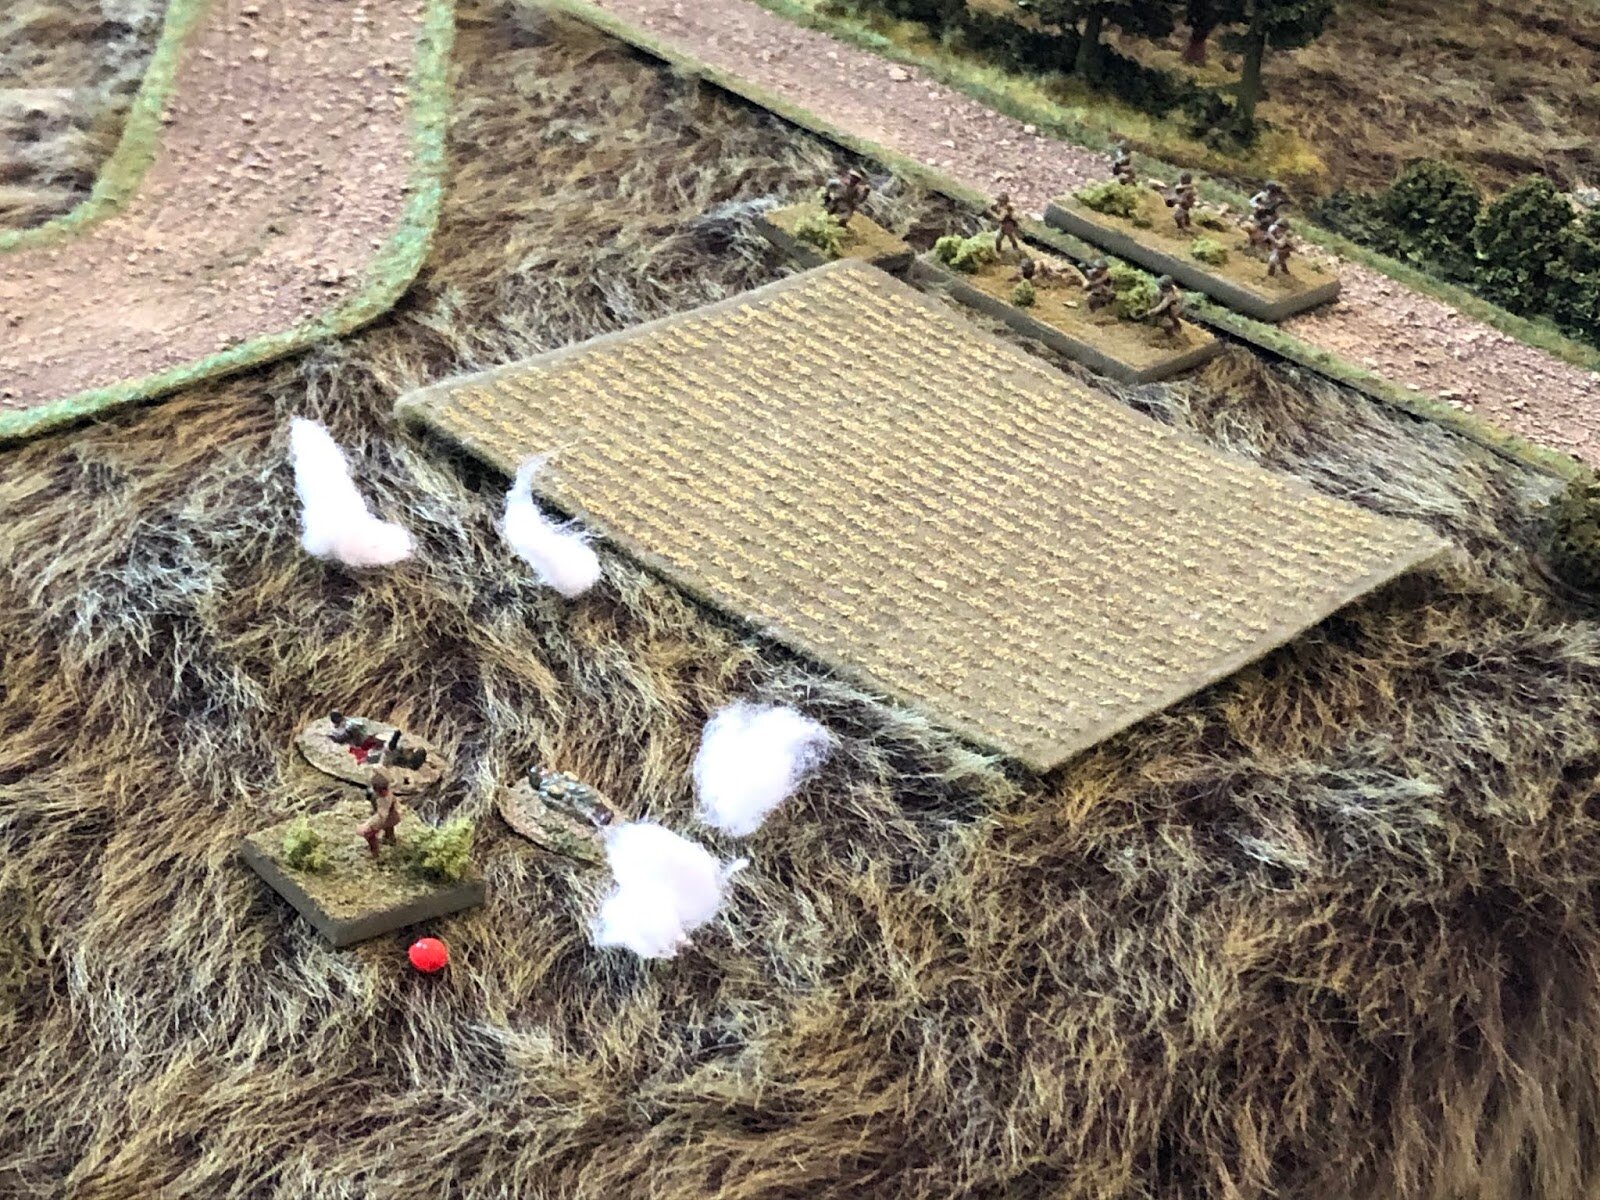
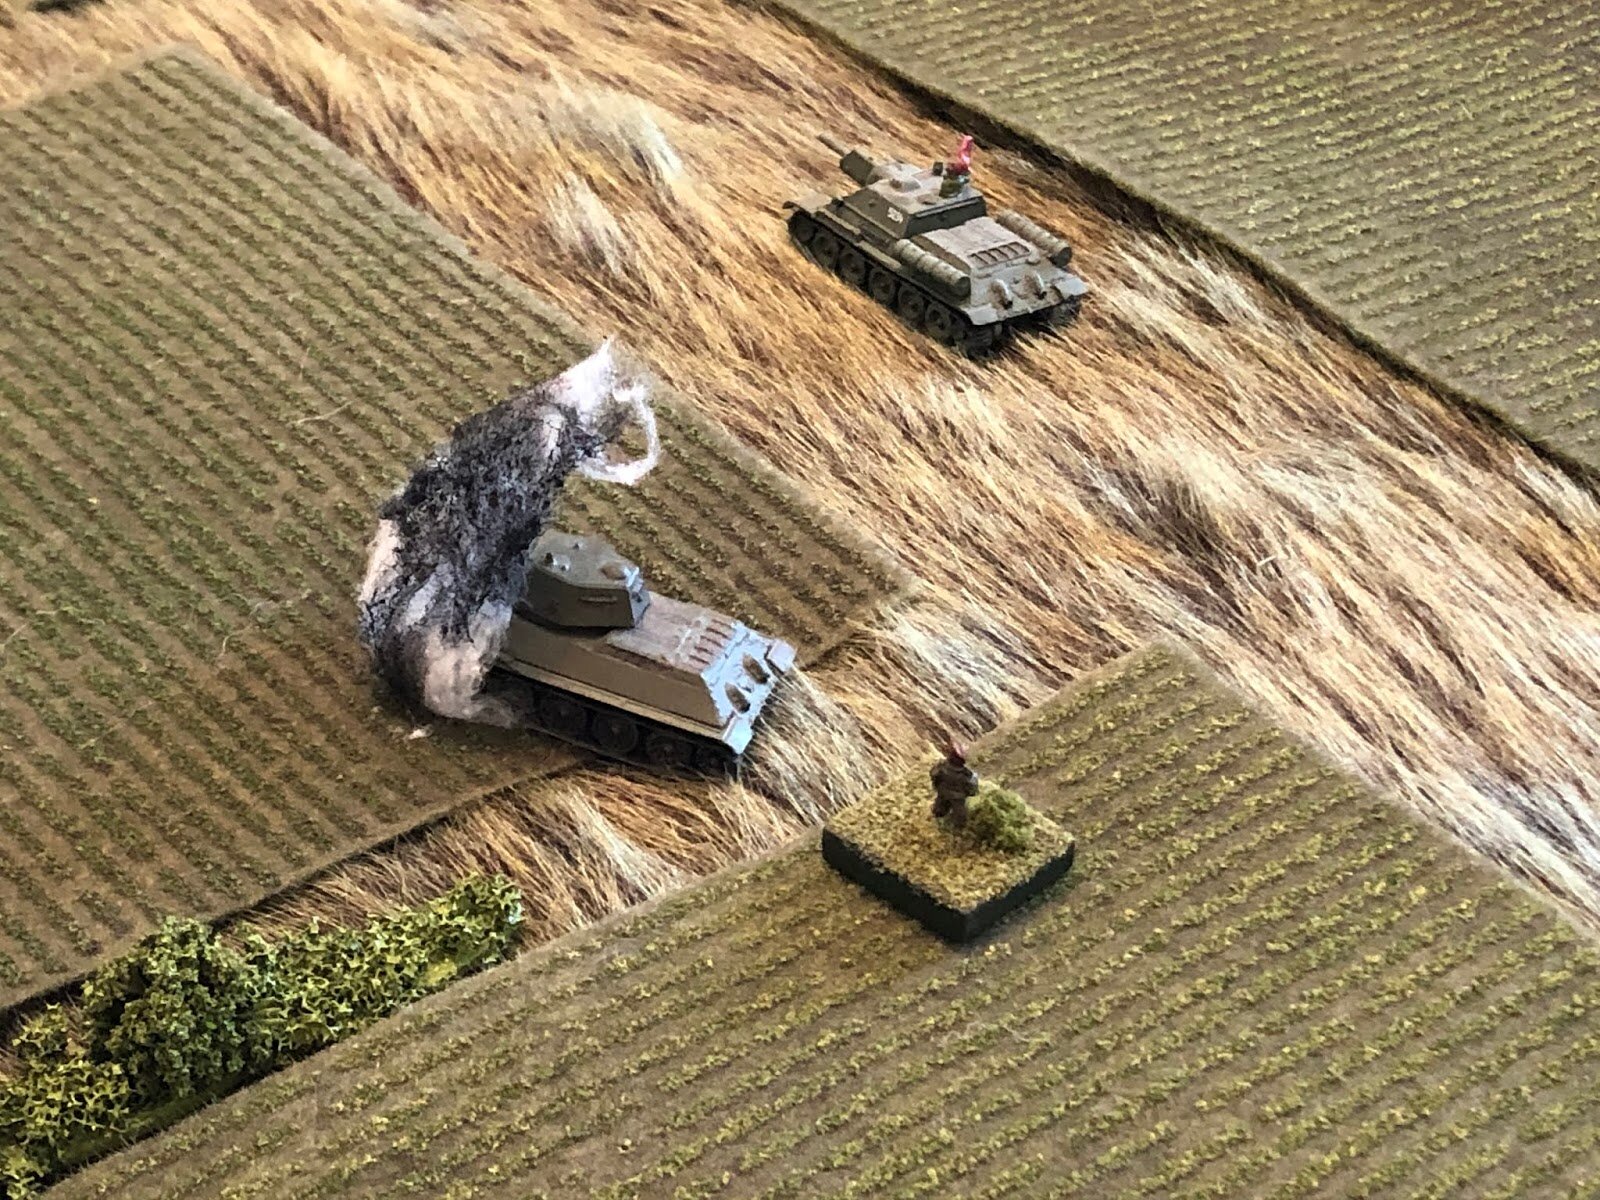
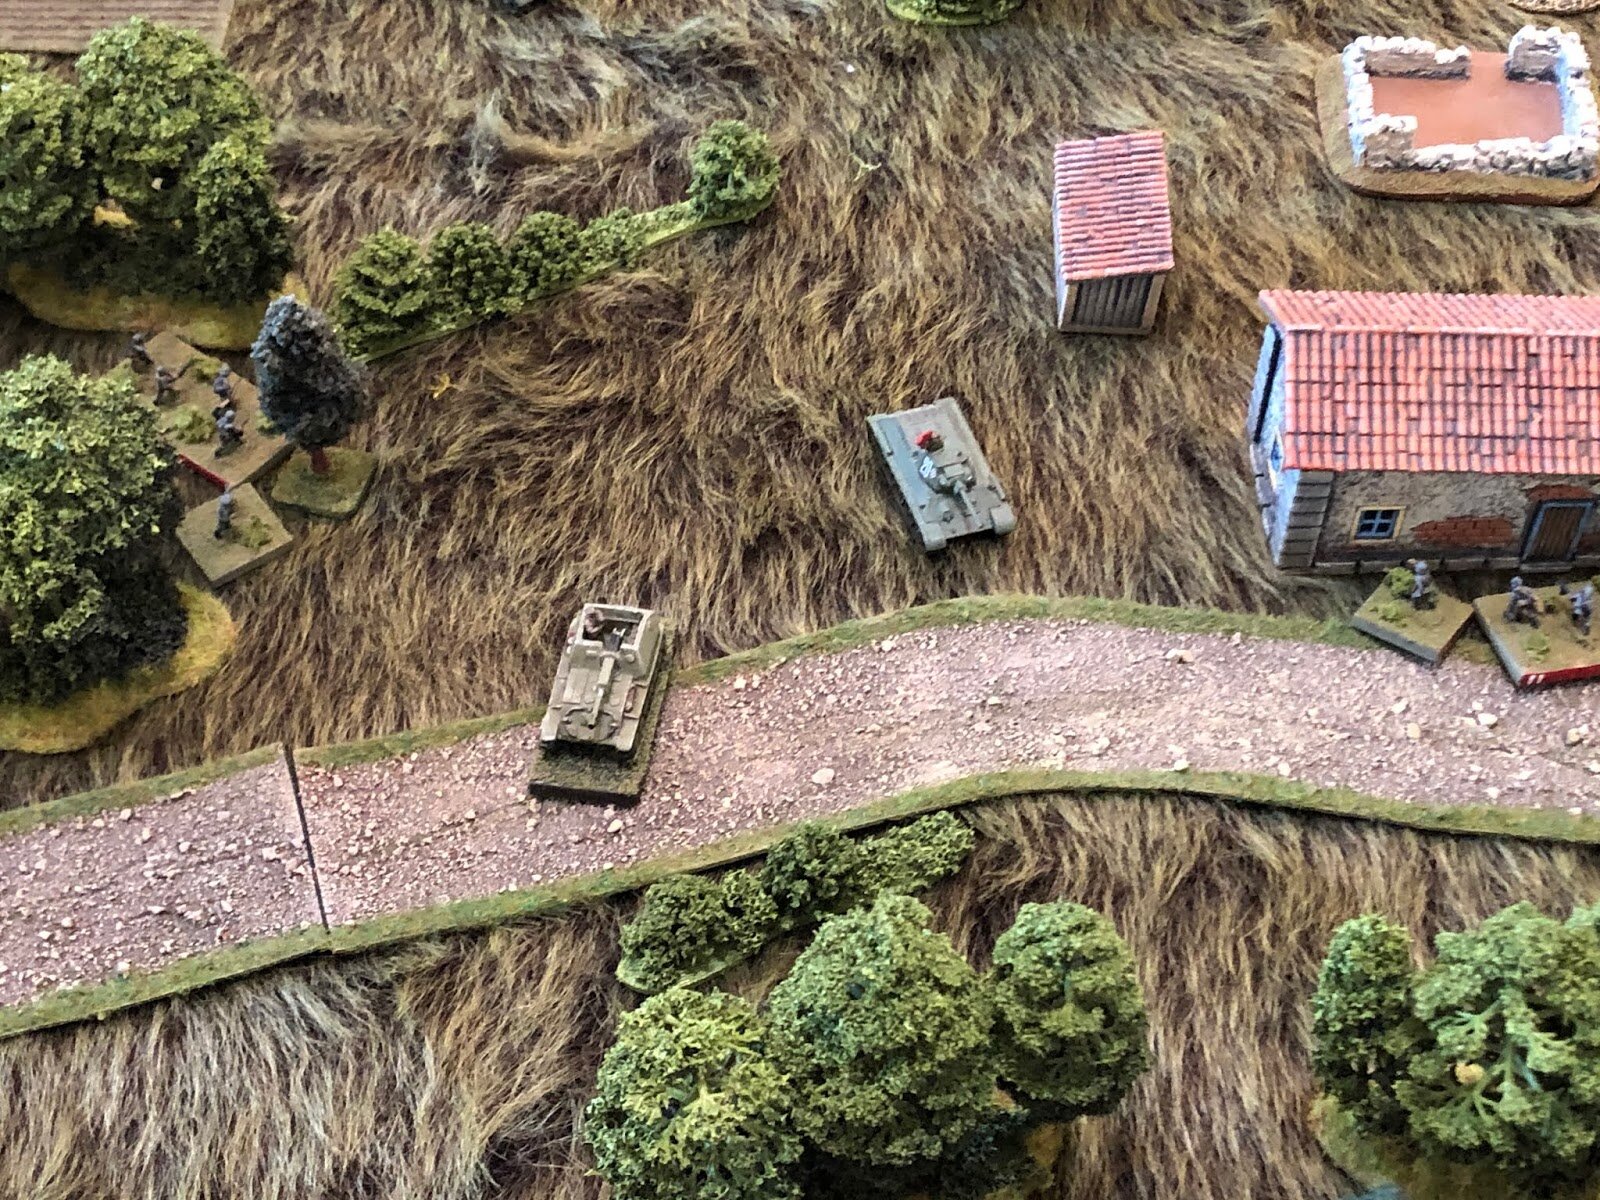
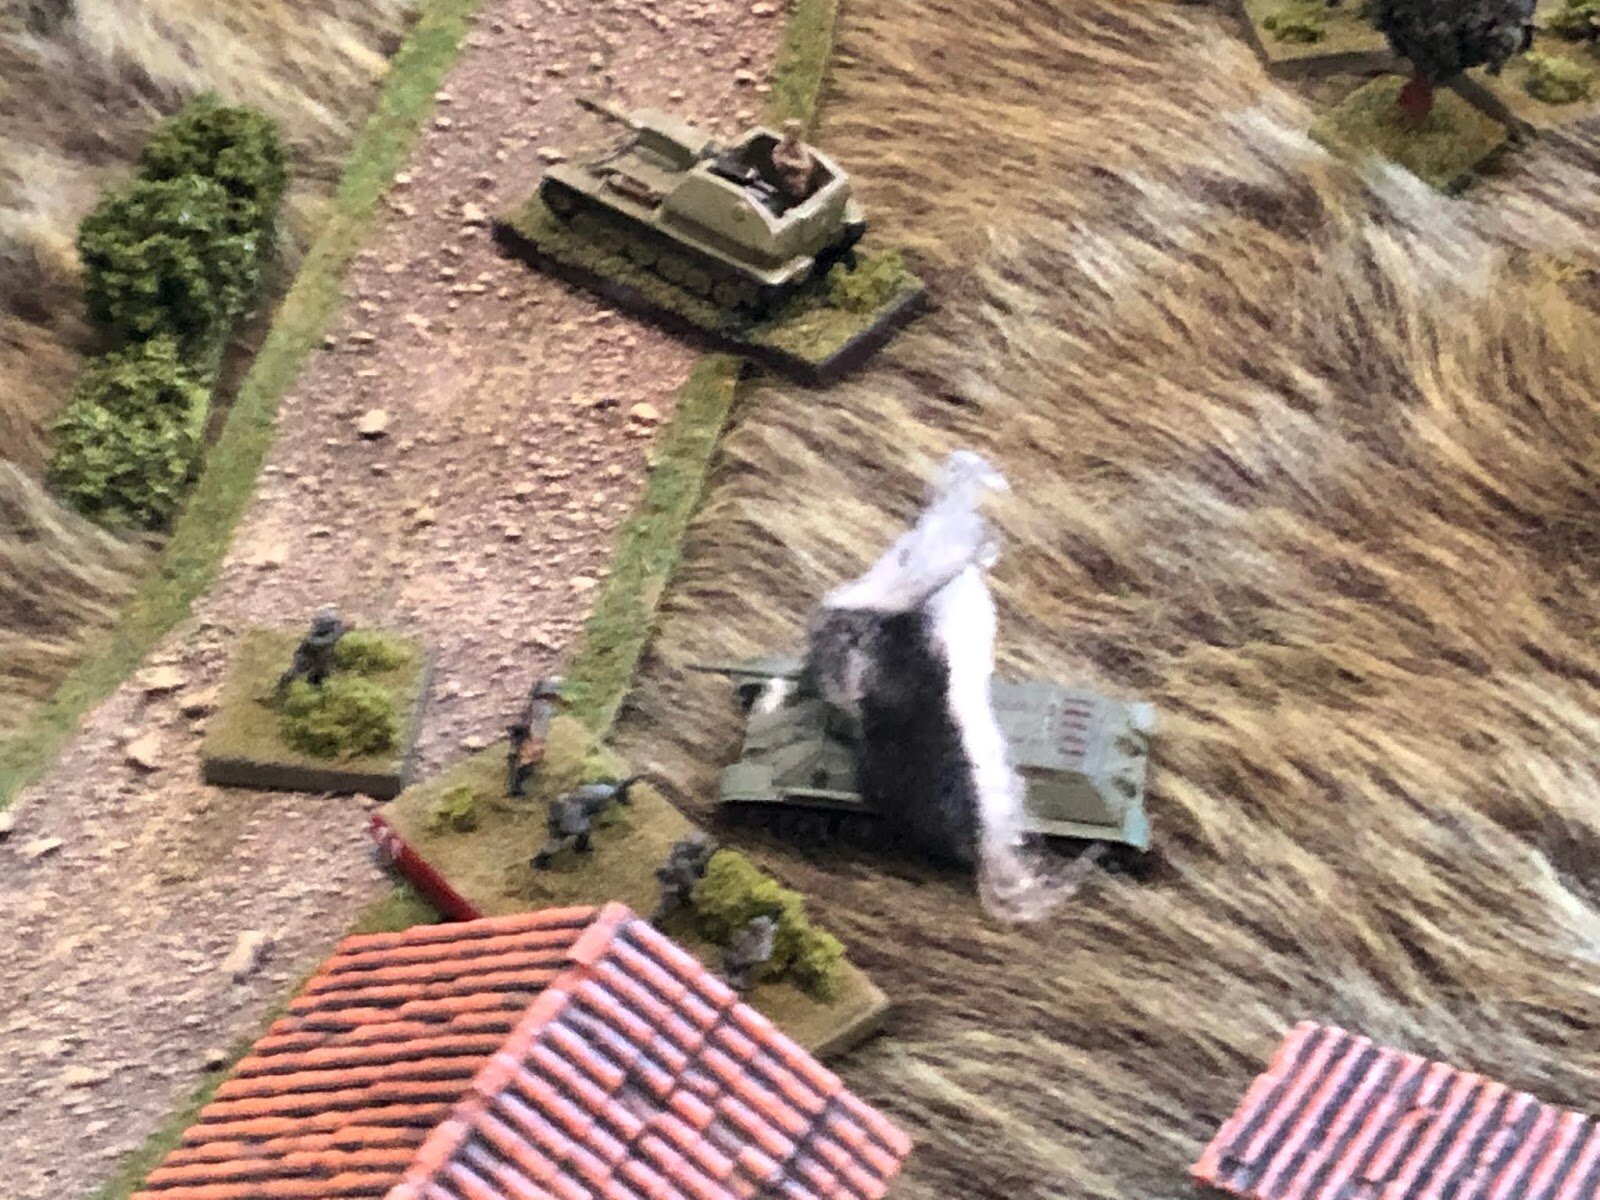
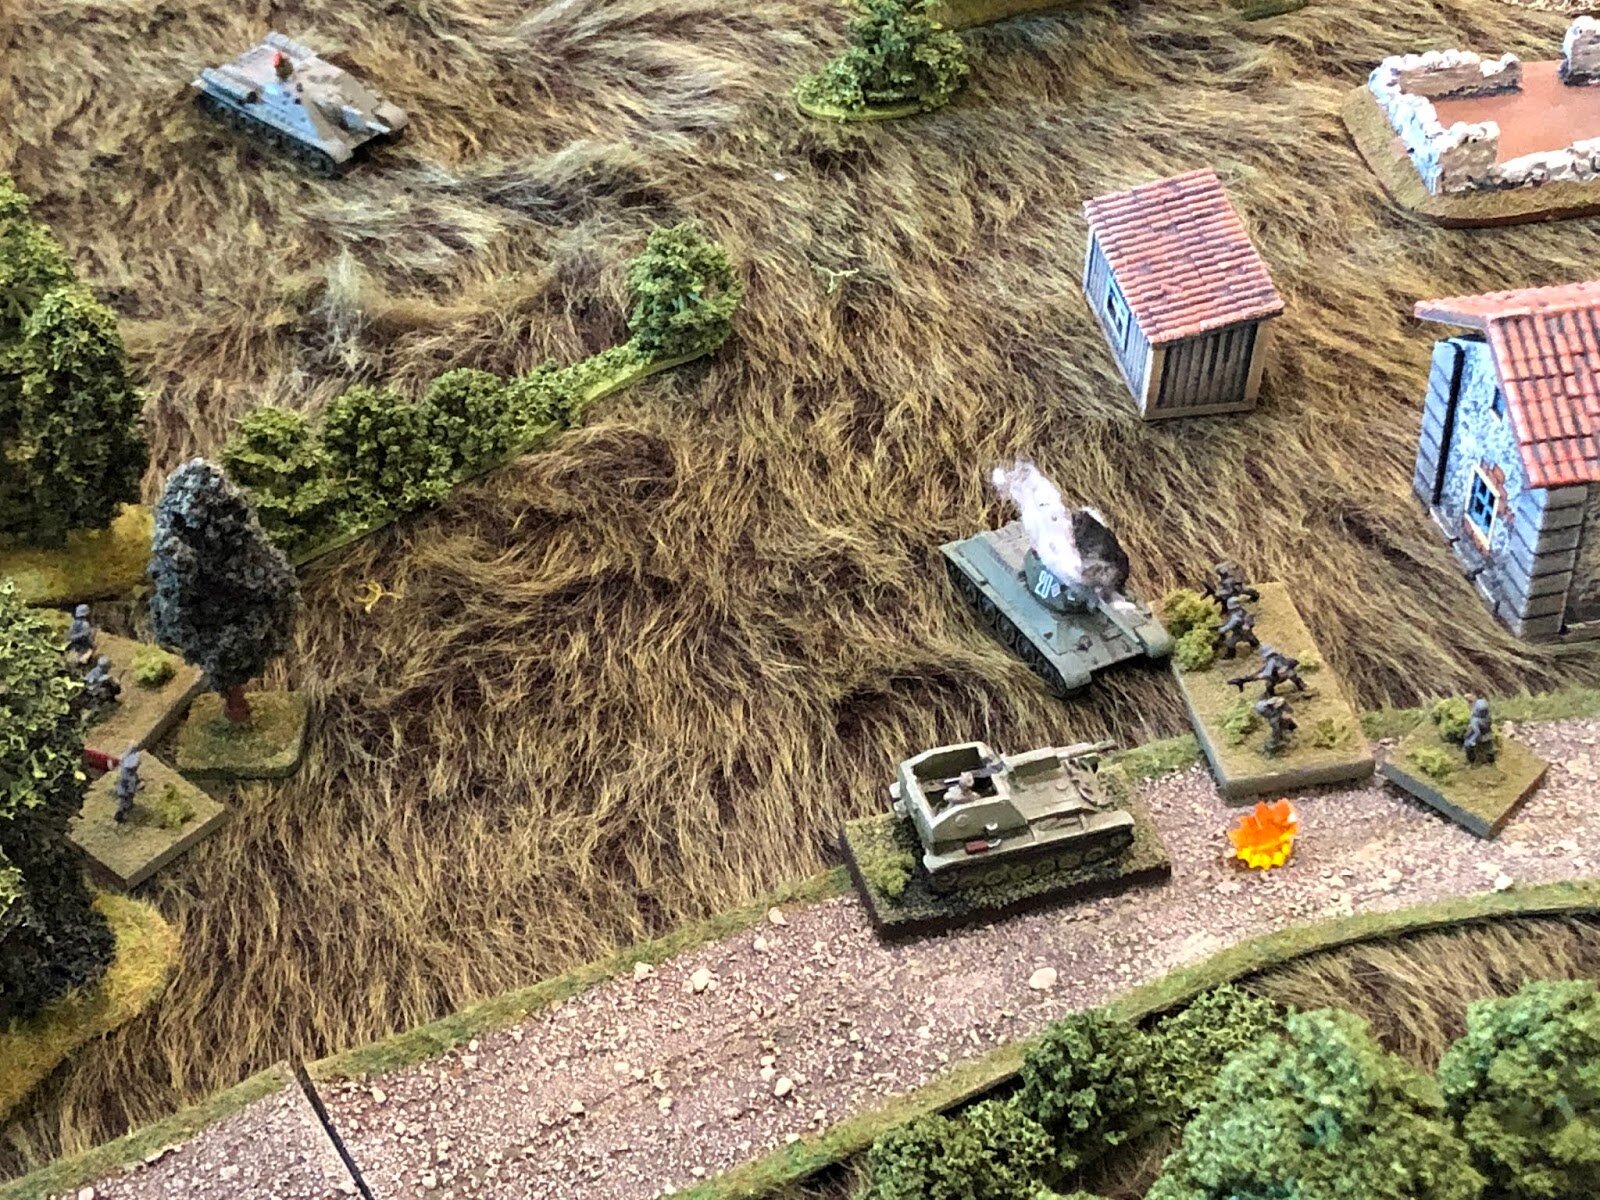
Not long after, he was made aware of the exploits of his 1st and 3rd Platoon Commanders on the left flank, which cost the 1st Platoon Commander his life. But the 3rd Platoon Commander's feat of knocking out one Soviet armored beast, then standing his ground and knocking out a second when it charged him, is also the stuff of legends.
Analysis
I've already outlined the Soviet casualties (though I forgot to mention, the Soviet heavy weapons units actually suffered a tiny bit of casualties, a single infantry gun was knocked out), guess I should do so for the Germans as well:
2 Platoon Commanders (1st Rifle Platoon and Infantry Gun Platoon)
1 Anti-Tank Gun
2 Infantry Guns
1 Machine Gun Team
1 Rifle Squad
Pretty lopsided in terms of casualties, but it had to be, I suppose, as the Soviets had a much larger force.
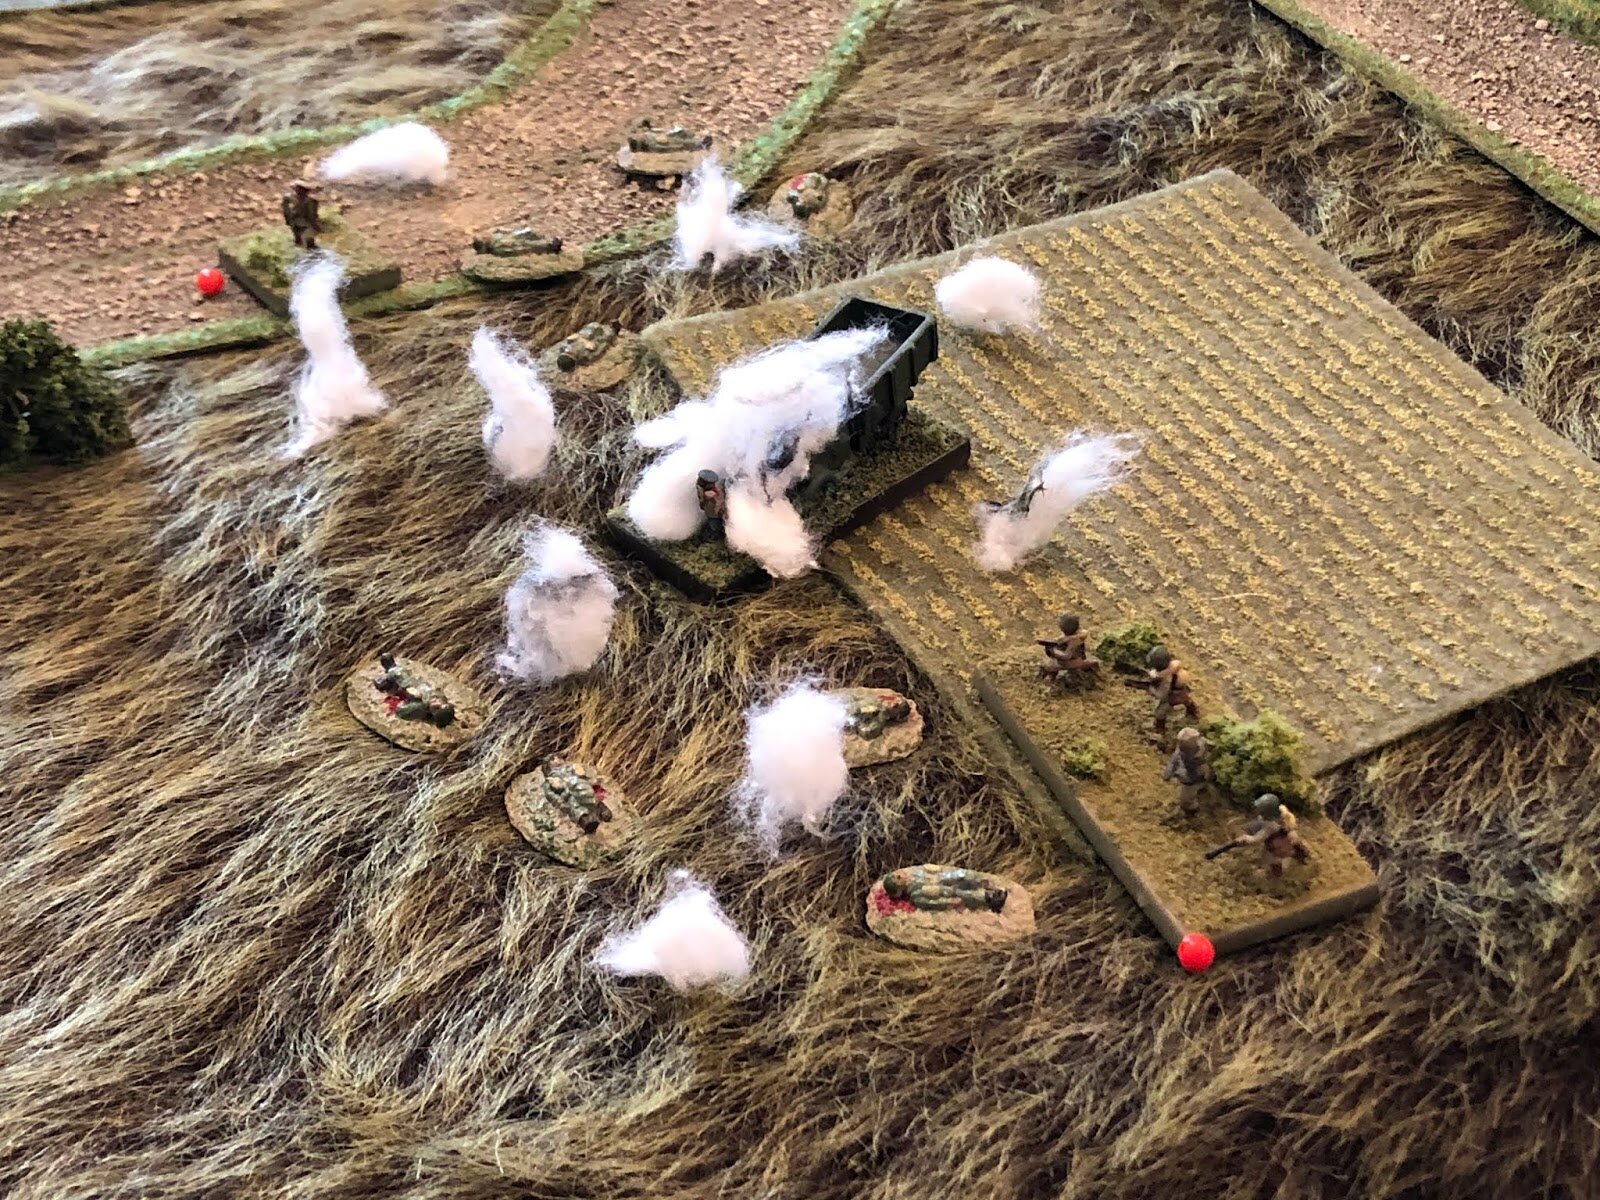
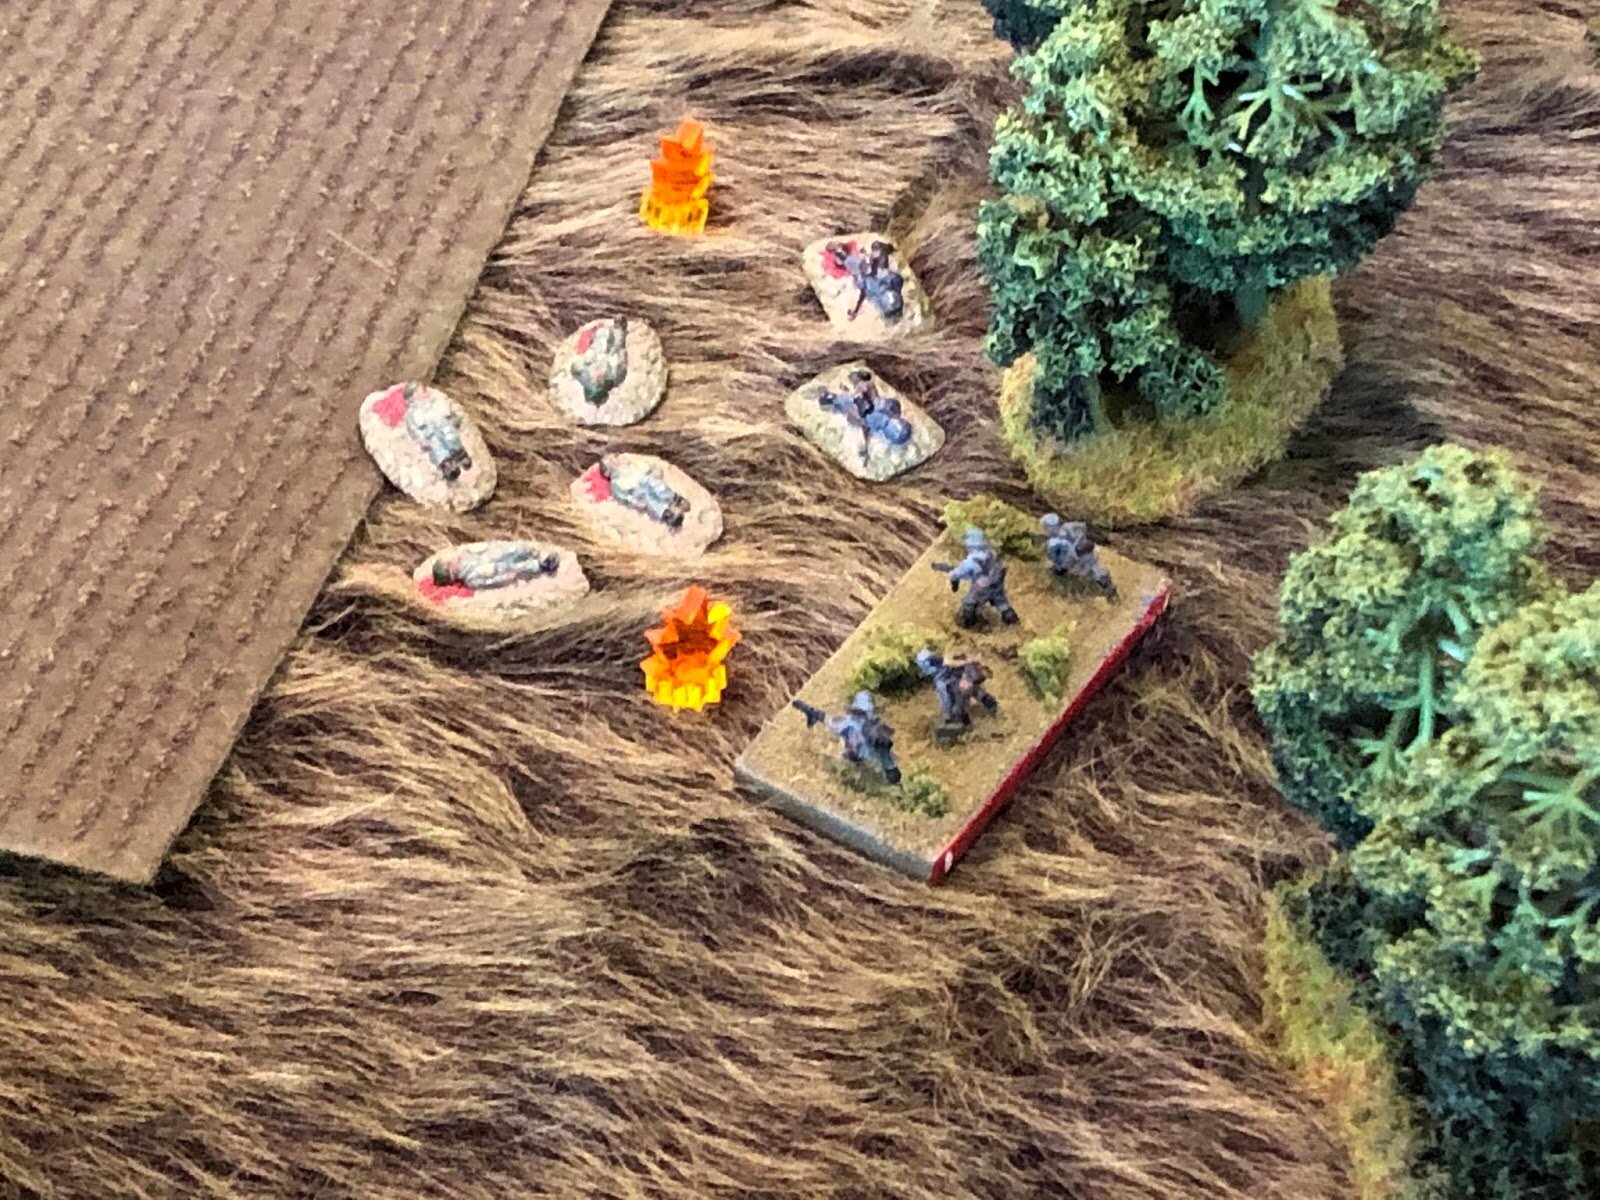
So, what happened? Well, I'd sum it up by saying the Soviets experienced an inordinately large amount of battlefield friction. Or plain bad luck, whichever you prefer ;)
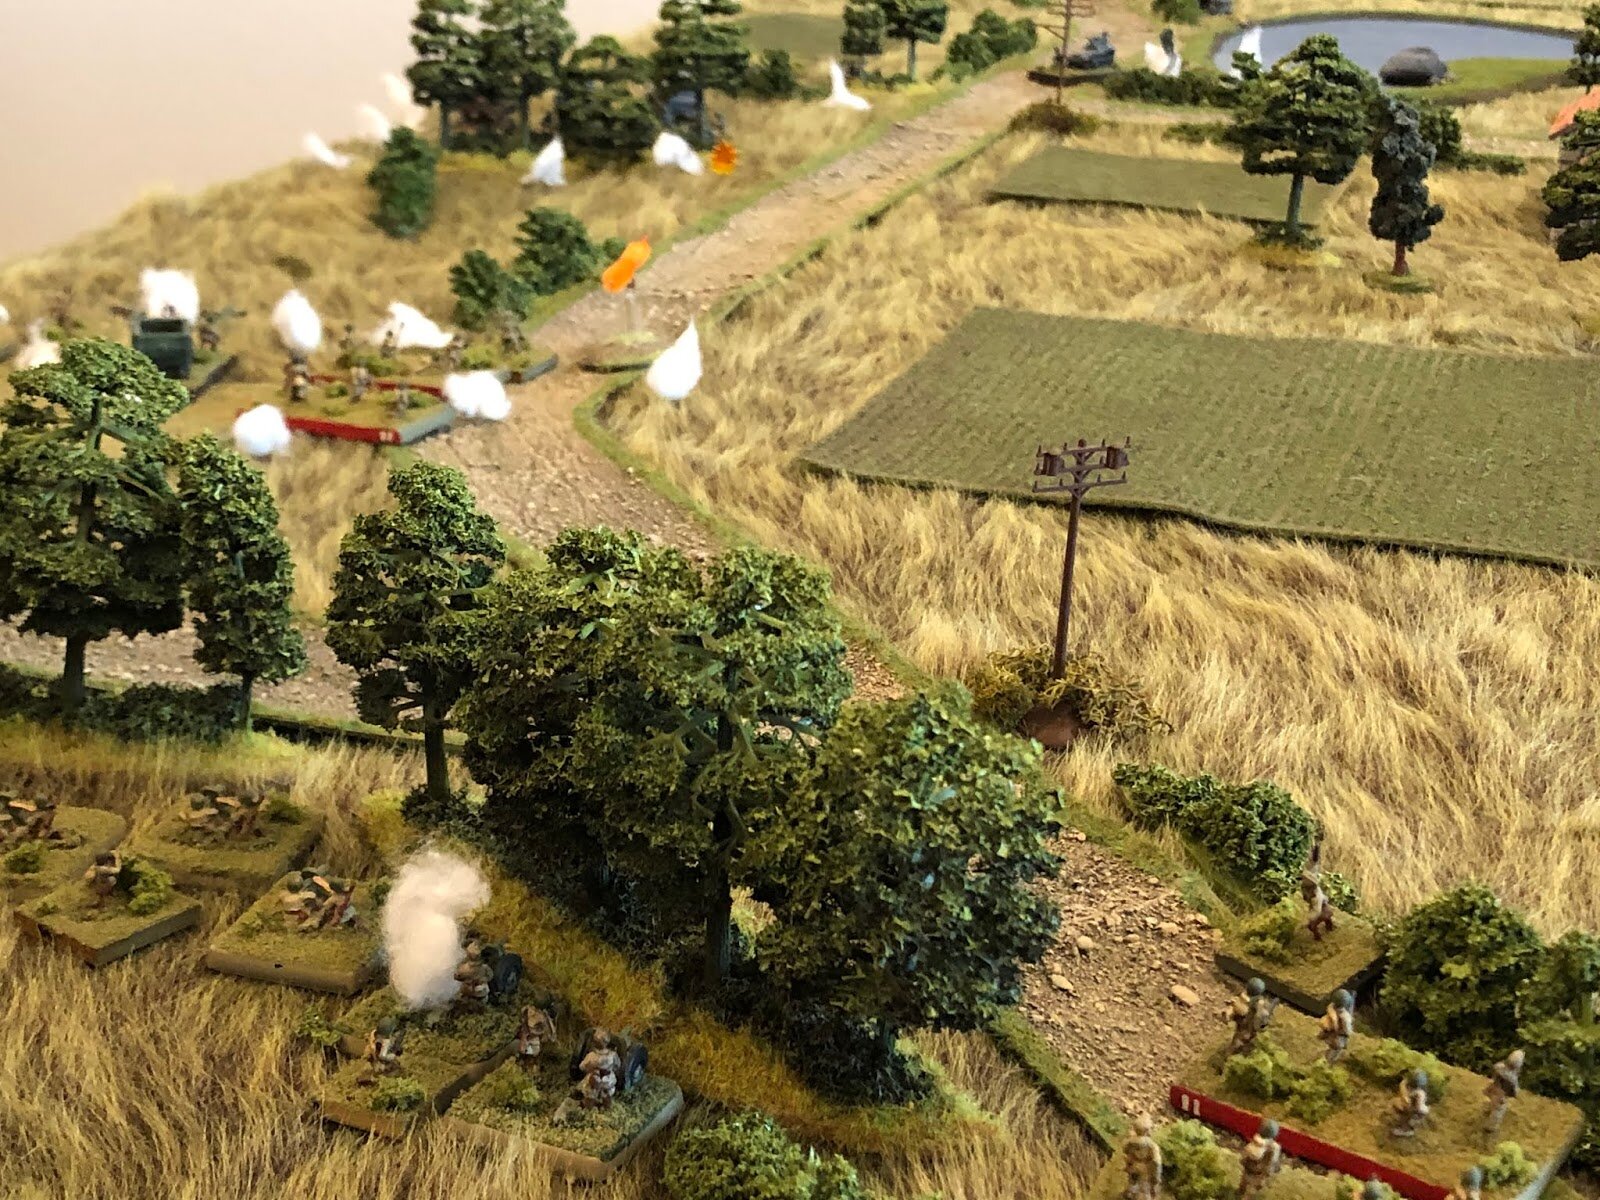
The German anti-tank guns had a wonderful field of fire; it would have been unreasonable (in my estimation) for the Soviet off-table heavy mortars to have been zoned in on them from the get go. Without reconnaissance, there's no way the Reds are putting supporting fires on that location, they're putting it on the objective at least 99 times out of a hundred. Yes, the ATG position is a clear point of interest (that amazing field of fire is why they were emplaced there, after all), which is why I did allow the Soviets to commit two rifle platoons to its seizure (and only one to the objective itself), as well as allowing they and their heavy weapons to 'infiltrate' the Birnenwald in order to emplace right across the way.
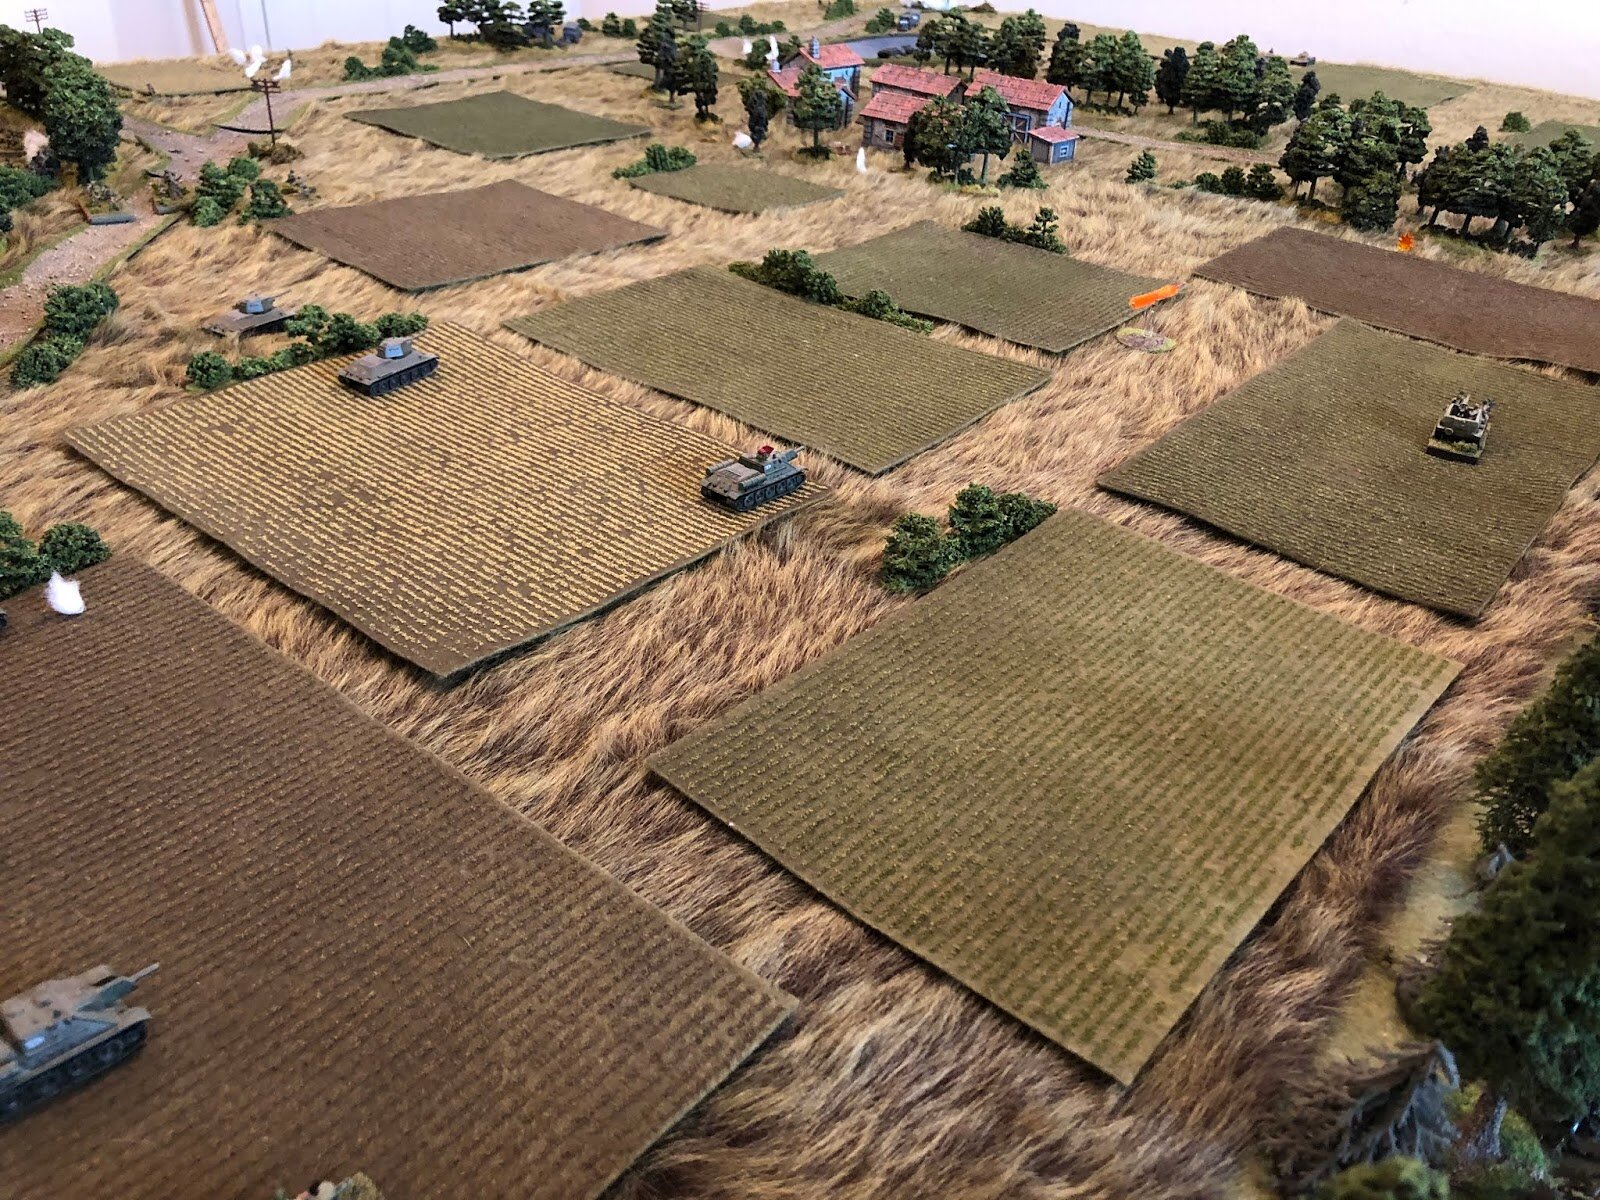
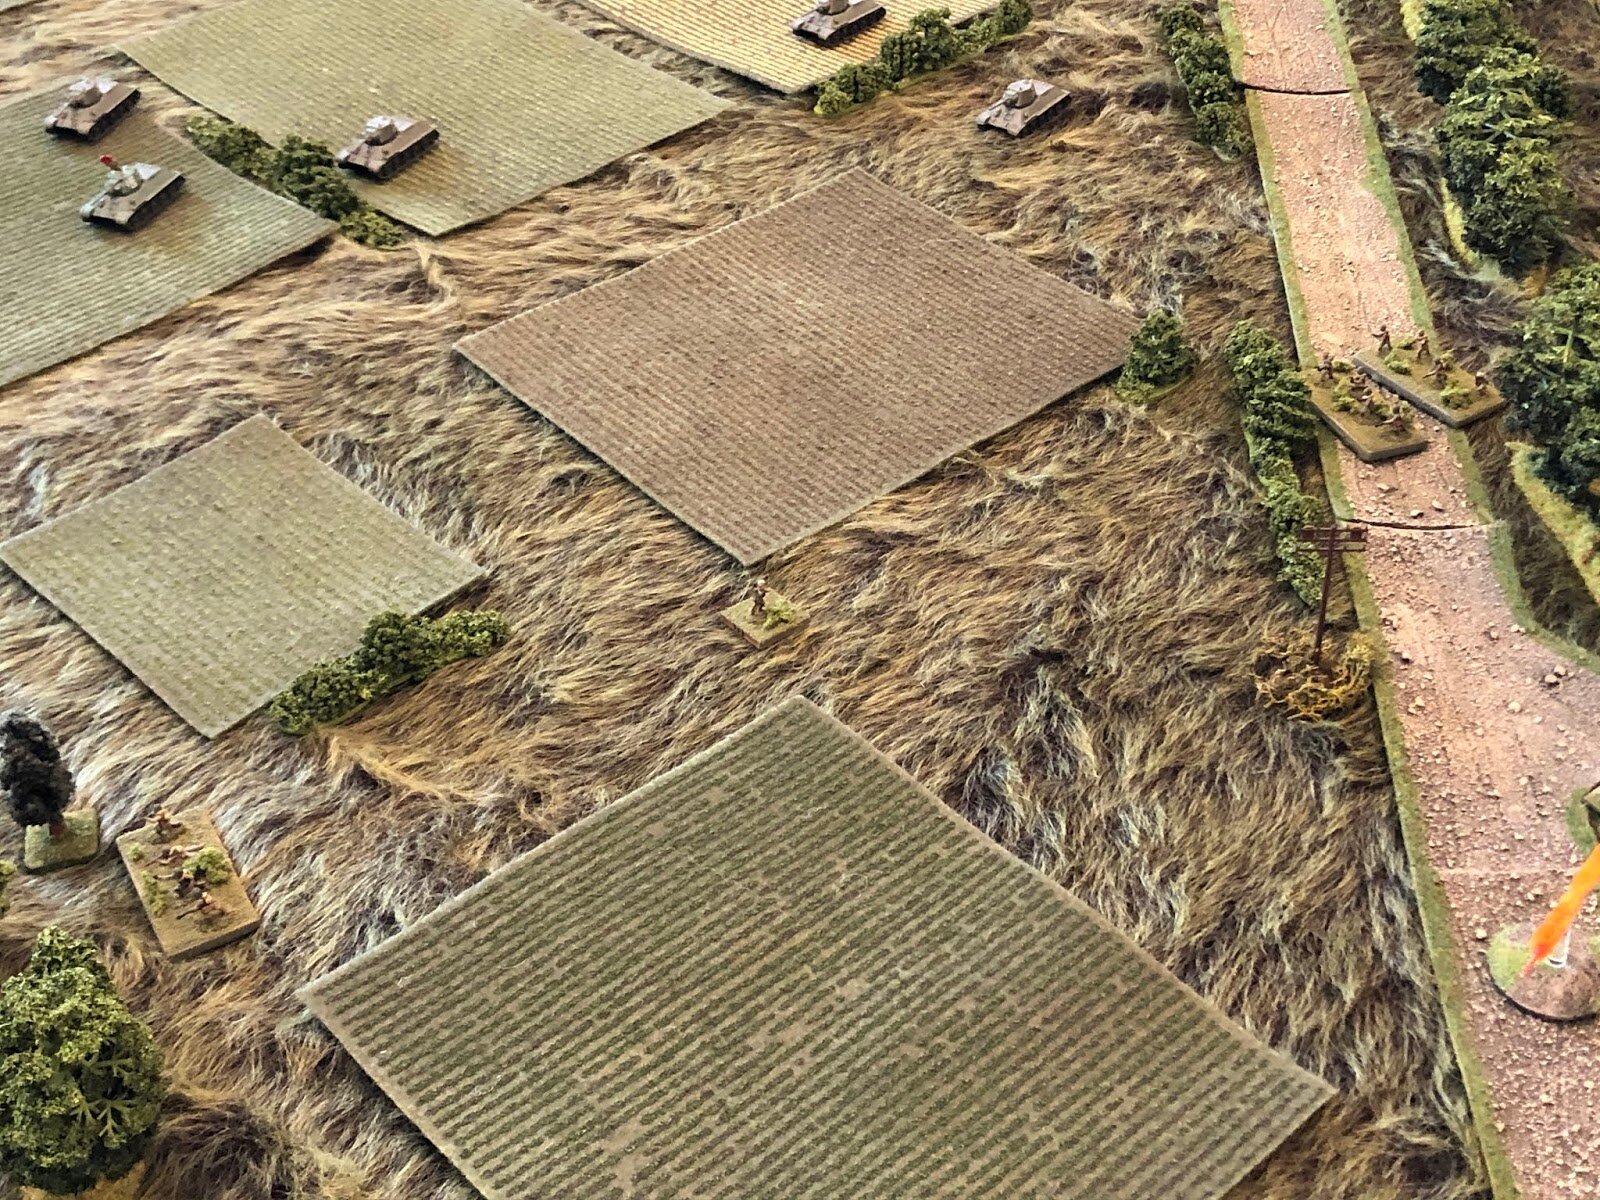
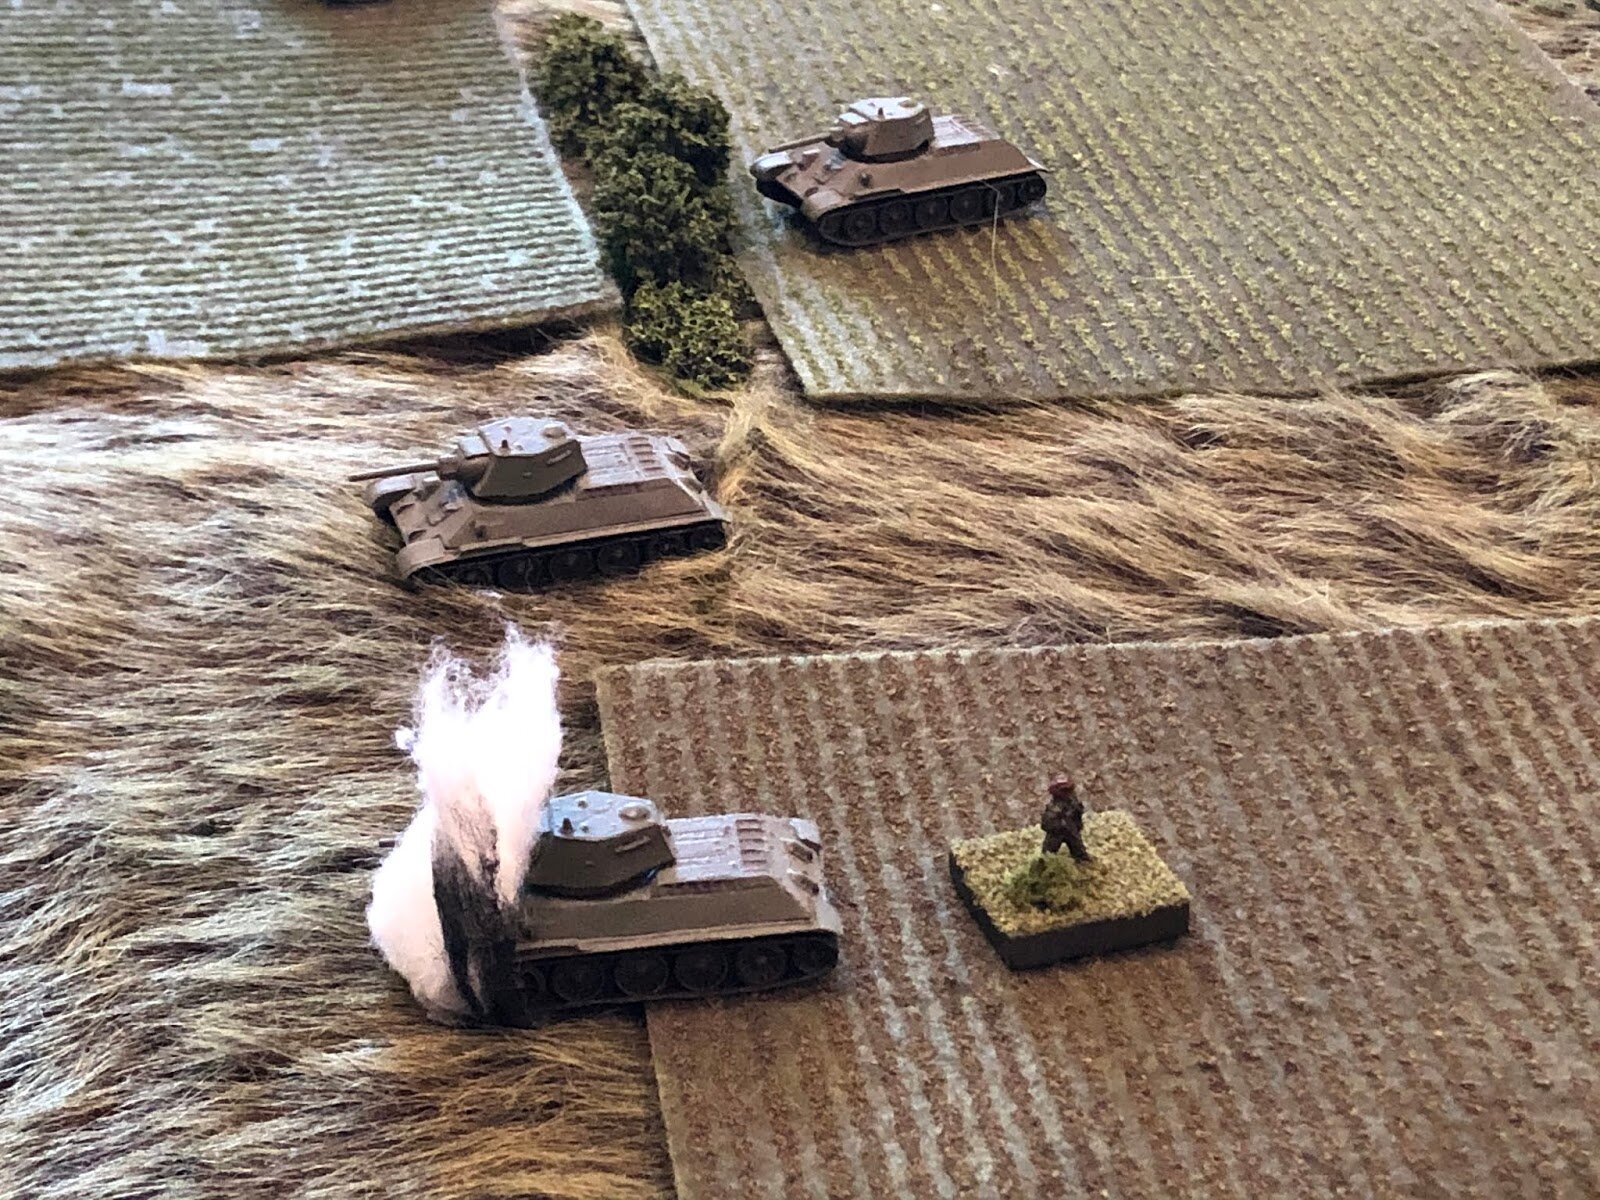
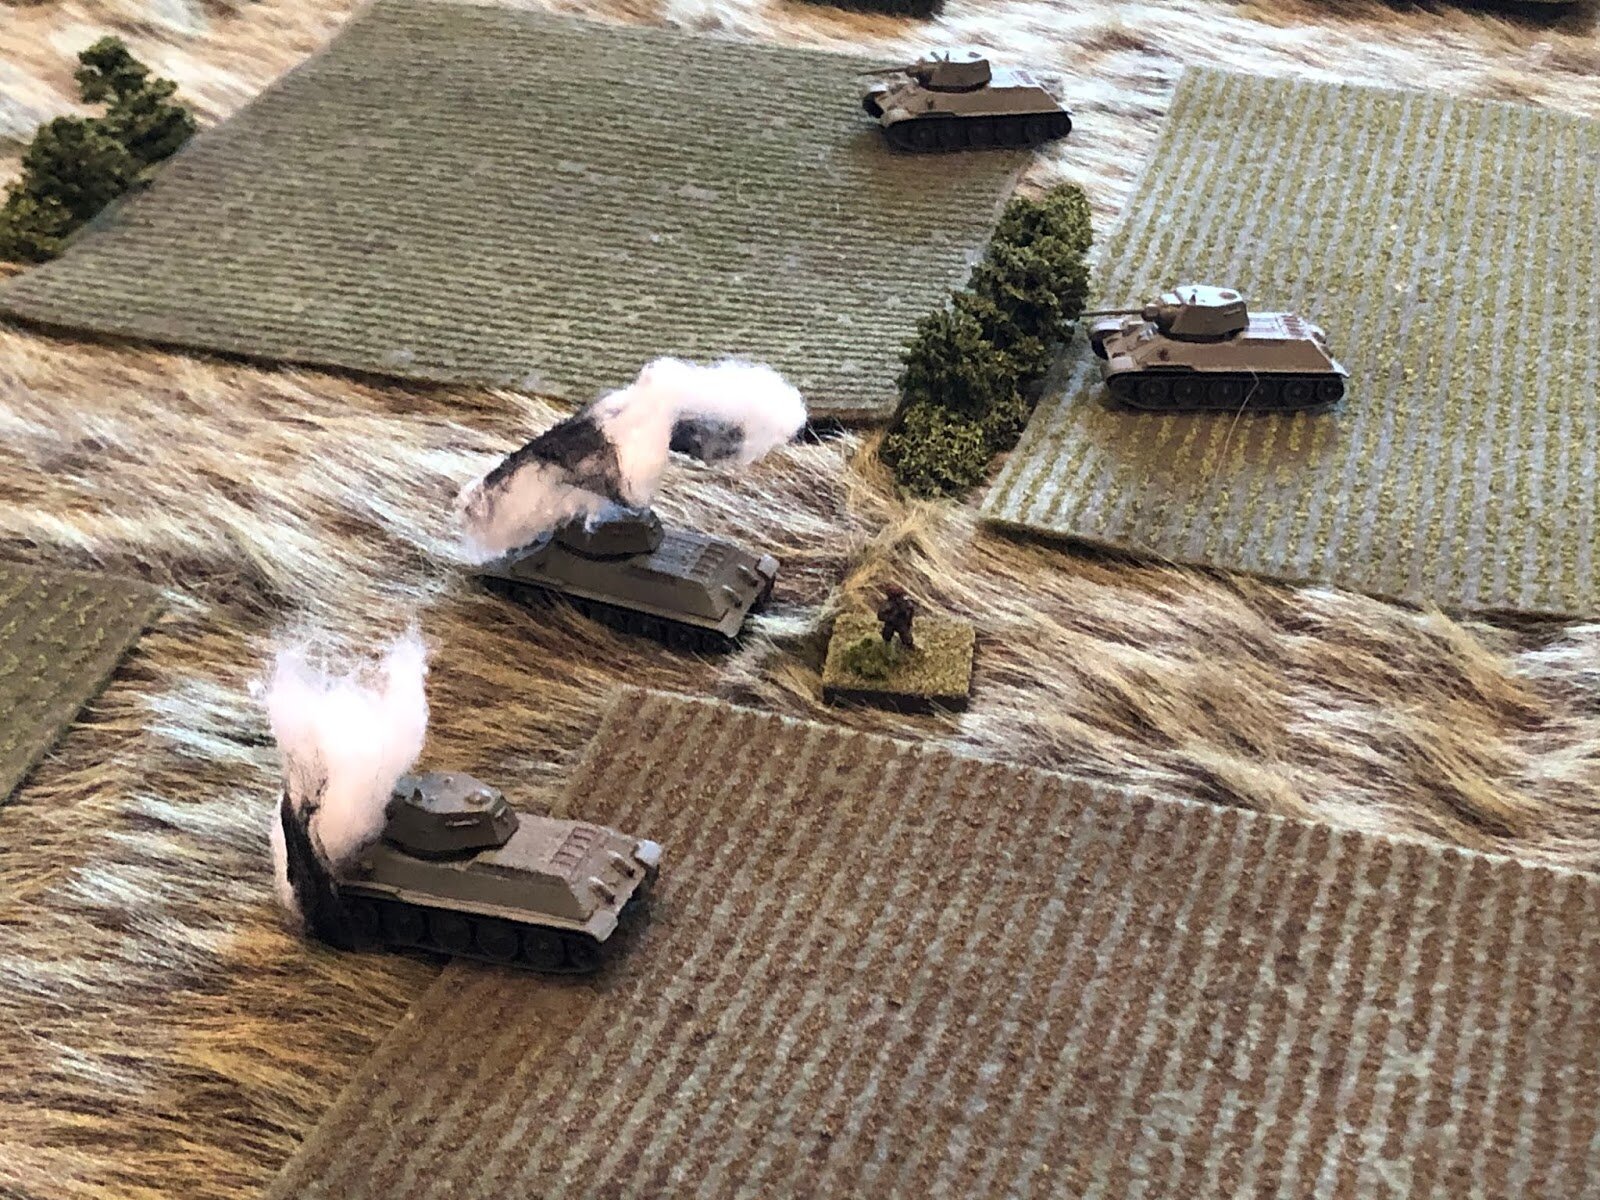
The Soviet armor knew it had an issue right from the jump, in that it was going to have to cross a great, wide open expanse (what many folks would call 'good tank country,' so don't beat me up too bad), but that's kinda what you expect tanks to do.
Similarly, the German ATG's got off to a very weak start, not getting many shots in and then missing most of them when they did. But the issue for the Soviets was just that the Soviets couldn't get to where they needed to be; I really thought the Soviet armor would have a good chance of punching through the Snava-North Wood gap in a relative hurry (at least fast enough to avoid getting shot to pieces by the German ATGs). With that, I figured the Tank Riders would be in the North Wood in a hurry, tying down the German 1st Platoon, maybe even beating them with close support from their Su-76s and Su-122s. I figured by that time the ATGs wouldn't be an issue, so the off-table mortars and on-table heavy weapons could shift fire to Snava and the West Wood, keeping the Germans there (3rd and 2nd Platoons, respectively) pinned down, and the deciding fight being the German armor being committed to stem the breakthrough by Soviet armor, which, by that point, should have enjoyed something like a 7 or 8-4 advantage.
And if their infantry on the left could flip a trick and somehow get into the German ATG position, thus forcing the German MGs and IGs to fall back, maybe they could have even tied up the German armor reserve some, too, maybe force it to be split to deal with two separate calamities.
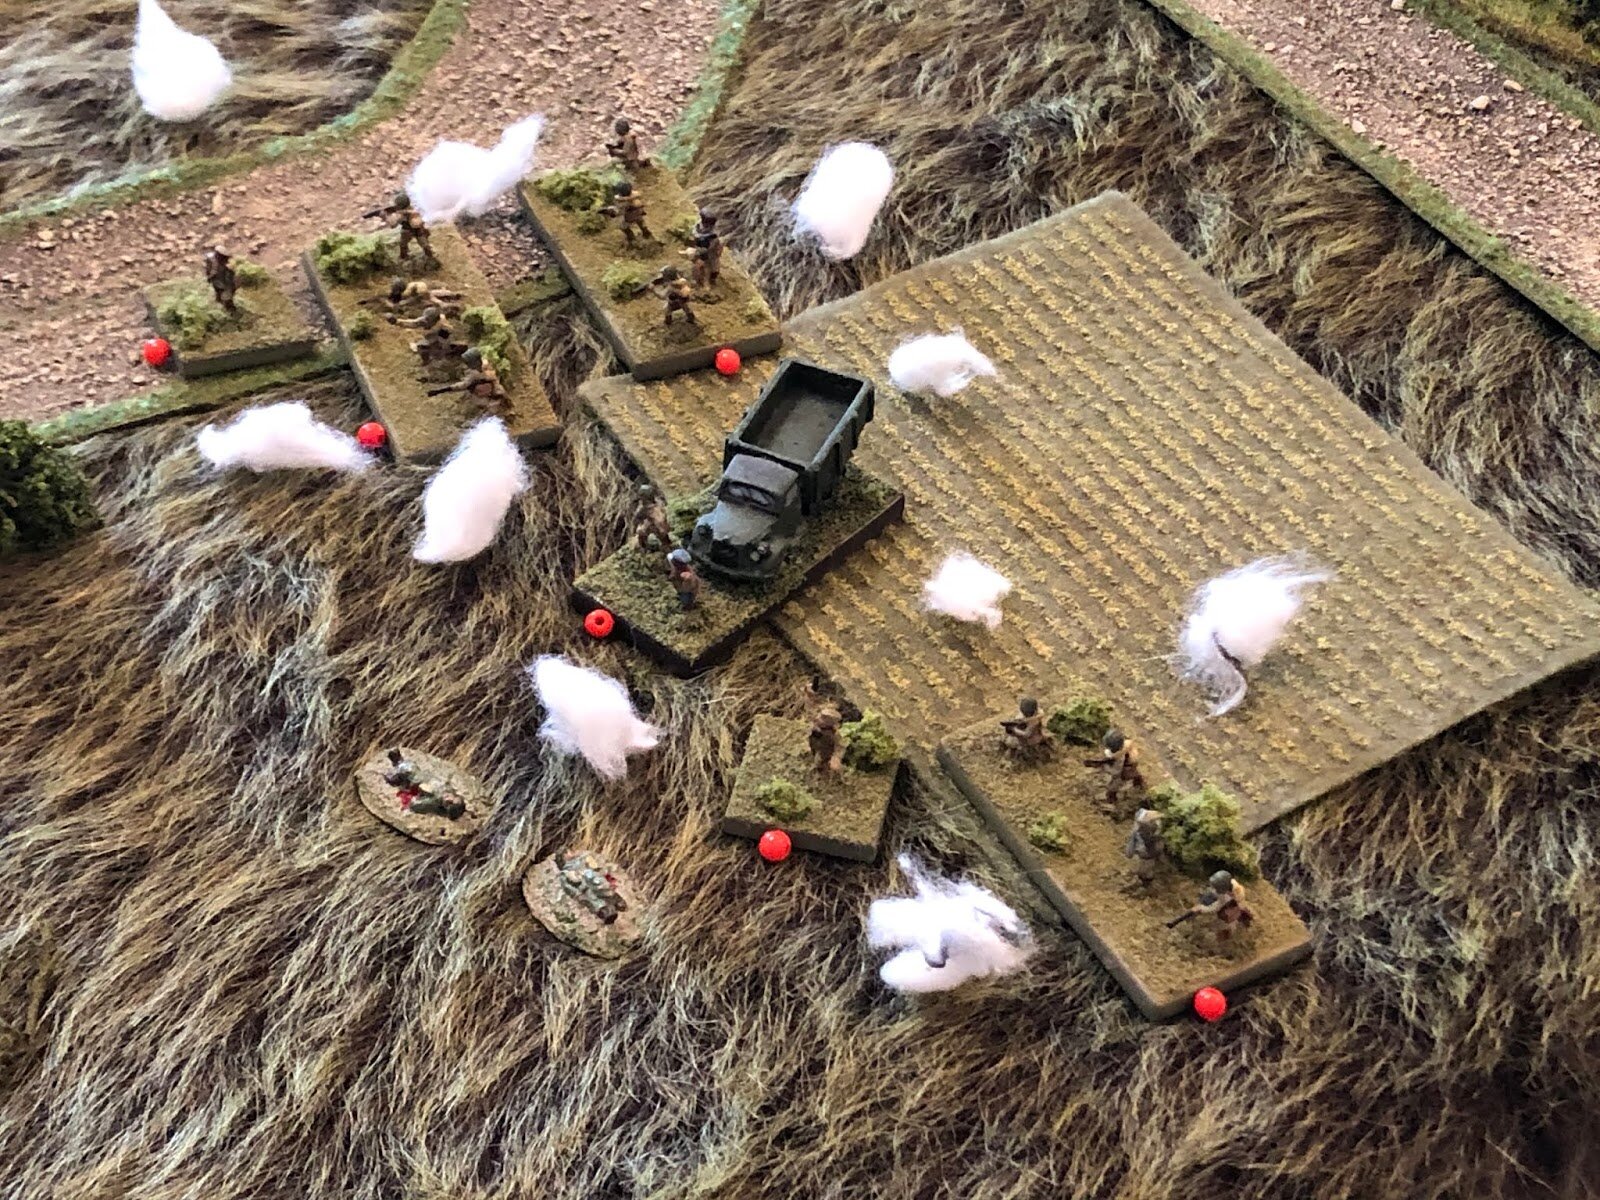
Overall, the Soviets had a huge problem with Platoon Commander cards coming out, but Platoon cards not, which meant that Platoon Commanders were able to push forward very far, very fast, but with very limited capability as the rest of their units were still stuck back at the start line.
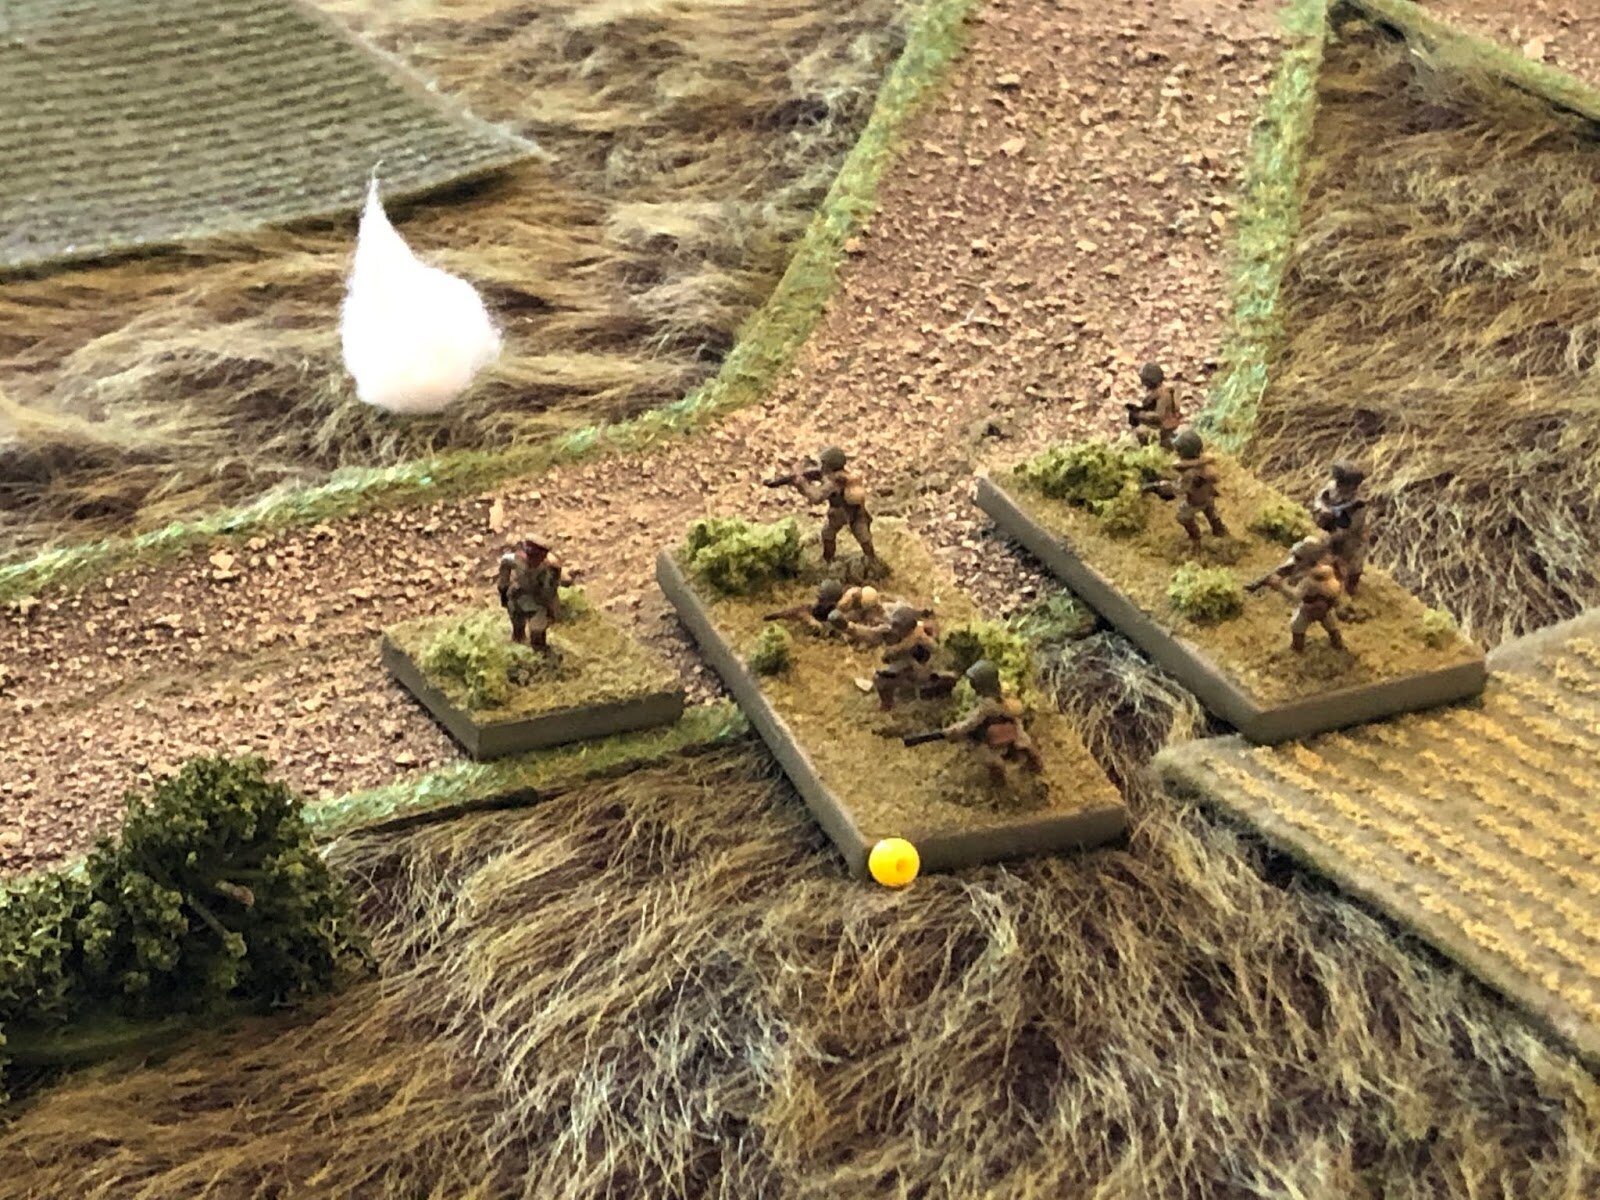
I'm sure some will say that my big mistake (as the Soviet commander) was not concentrating the Soviet force; personally, I'm always very aware of unit spacing, not wanting to get bunched up and pounded by supporting fires. So that one doesn't bother me; what bothers me, what I worry my big mistake was, is when the Soviet 3rd Platoon got their Platoon Commander and one rifle squad into the eastern edge of Snava, I halted the rifle squad there and sent the PC back to get the rest of his platoon. That worked, I suppose, but not until both flanks had collapsed. I will always wonder what would have happened if I would have kept the 3rd Platoon Commander there in Snava, with his 1st Squad, and every time his card came out, led them further into Snava, moving forward cautiously, spotting the German forces there, then coordinating with armor for fire support in order to blast the Germans out systematically. I could have done that, but it just didn't seem to feel like a very 'Soviet' way of doing things, so I did what I thought they would do, which was try to get the rest of the platoon forward.
And that shines a spotlight on the other big problem for the Soviets: they couldn't spot anything! Their armor had countless chances to spot German positions. Not good chances, but my goodness, lots of them! You would figure they'd have accidentally spotted some of the German units they missed, but no, they didn't even when they were on top of them, and they had like a 90% chance of successfully doing it.
The last issue, or possible failure on my part, was not concentrating organic supporting fires on the German ATG position. To a human player playing another human player, I have no doubt that I, or anyone else, would have said "ta hell wit da German MGs and Infantry Guns, I'm taking out dose Anti-Tank Guns!" But, again, I try to play from the perspective of the force's commander, knowing only what he knows, and doing what I think he would have done given 1) his knowledge of the tactical situation and 2) his role on the tabletop. The issue, then, was 1) the organic heavy weapons (machine guns, infantry guns, and 82mm mortars) belonged to the infantry company, not the tank company, and not, really, even the Task Force Commander. So, 2) the job of the organic heavy weapons was to do whatever they could to keep their infantry comrades from getting shot to pieces, not to keep their tanker comrades from getting shot to pieces. So they ended up splitting the baby and not doing either very well...
From the German perspective, really it came down to 1) having (I think) a solid plan, with the long reach weapon having long fields of fire and the rifle platoons playing reverse-slope defense to maximize their firepower, then 2) pure luck. Like I said, the German ATGs got plenty of shots in on the Soviet tanks because they just took so damn long to get through the kill zone, the Soviets just couldn't get their Tank Riders into the fight, and they just couldn't spot a damn thing, with both of those factors allowing the German 1st and 3rd Platoons to creep riflemen into position to close assault their tanks.
So, a helluva fight that was a helluva lot of fun! I hope you enjoyed it as much as I did.
Just Jack