The inaugural TFL Games Day at the Devon Wargames Club took place on Saturday 8th September 2018. One of the games on display was a Charlie Don't Surf! extravaganza put on in 10mm by guest attendee Dave J. Here are some words and pictures about the game by Clotted Lardee Carojon:

CDS at Clotted Lard 2018

I was really interested to see how this game would play as I have never seen or played a game of Charlie Don't Surf! although I am very familiar with it's close cousin I Ain't Been Shot, Mum for WWII.

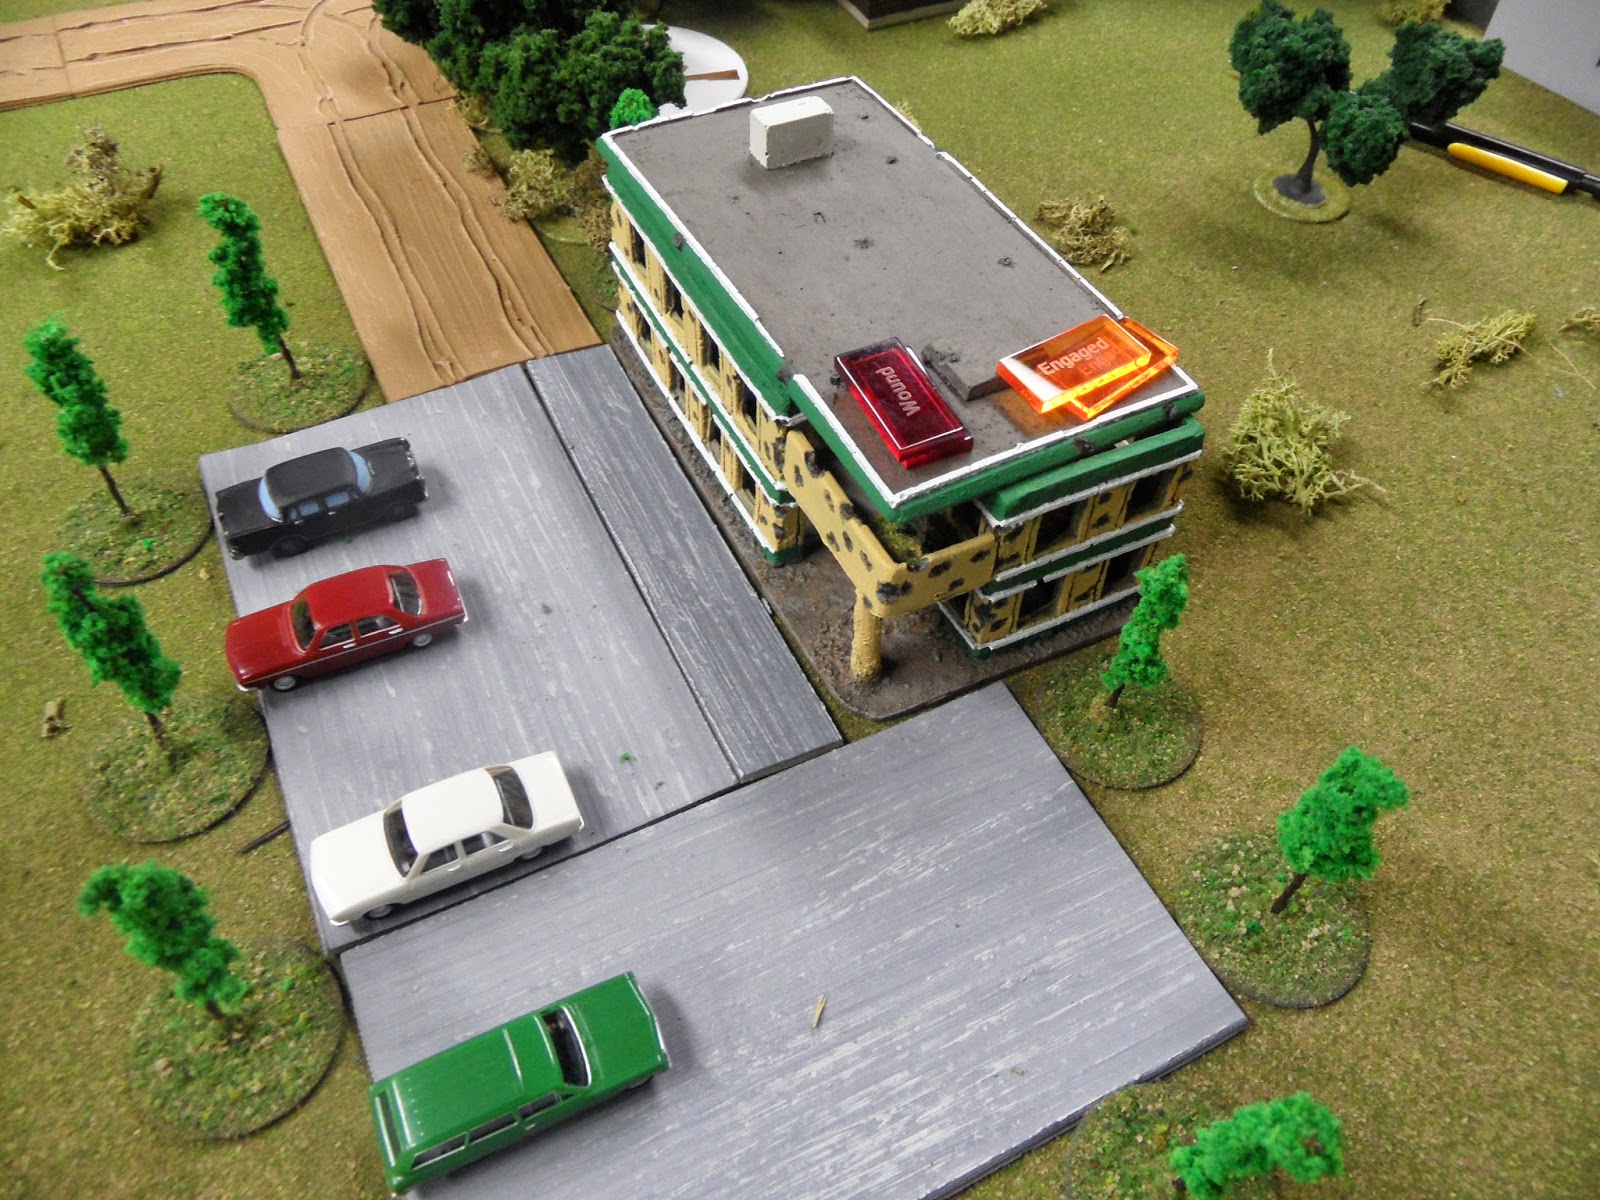
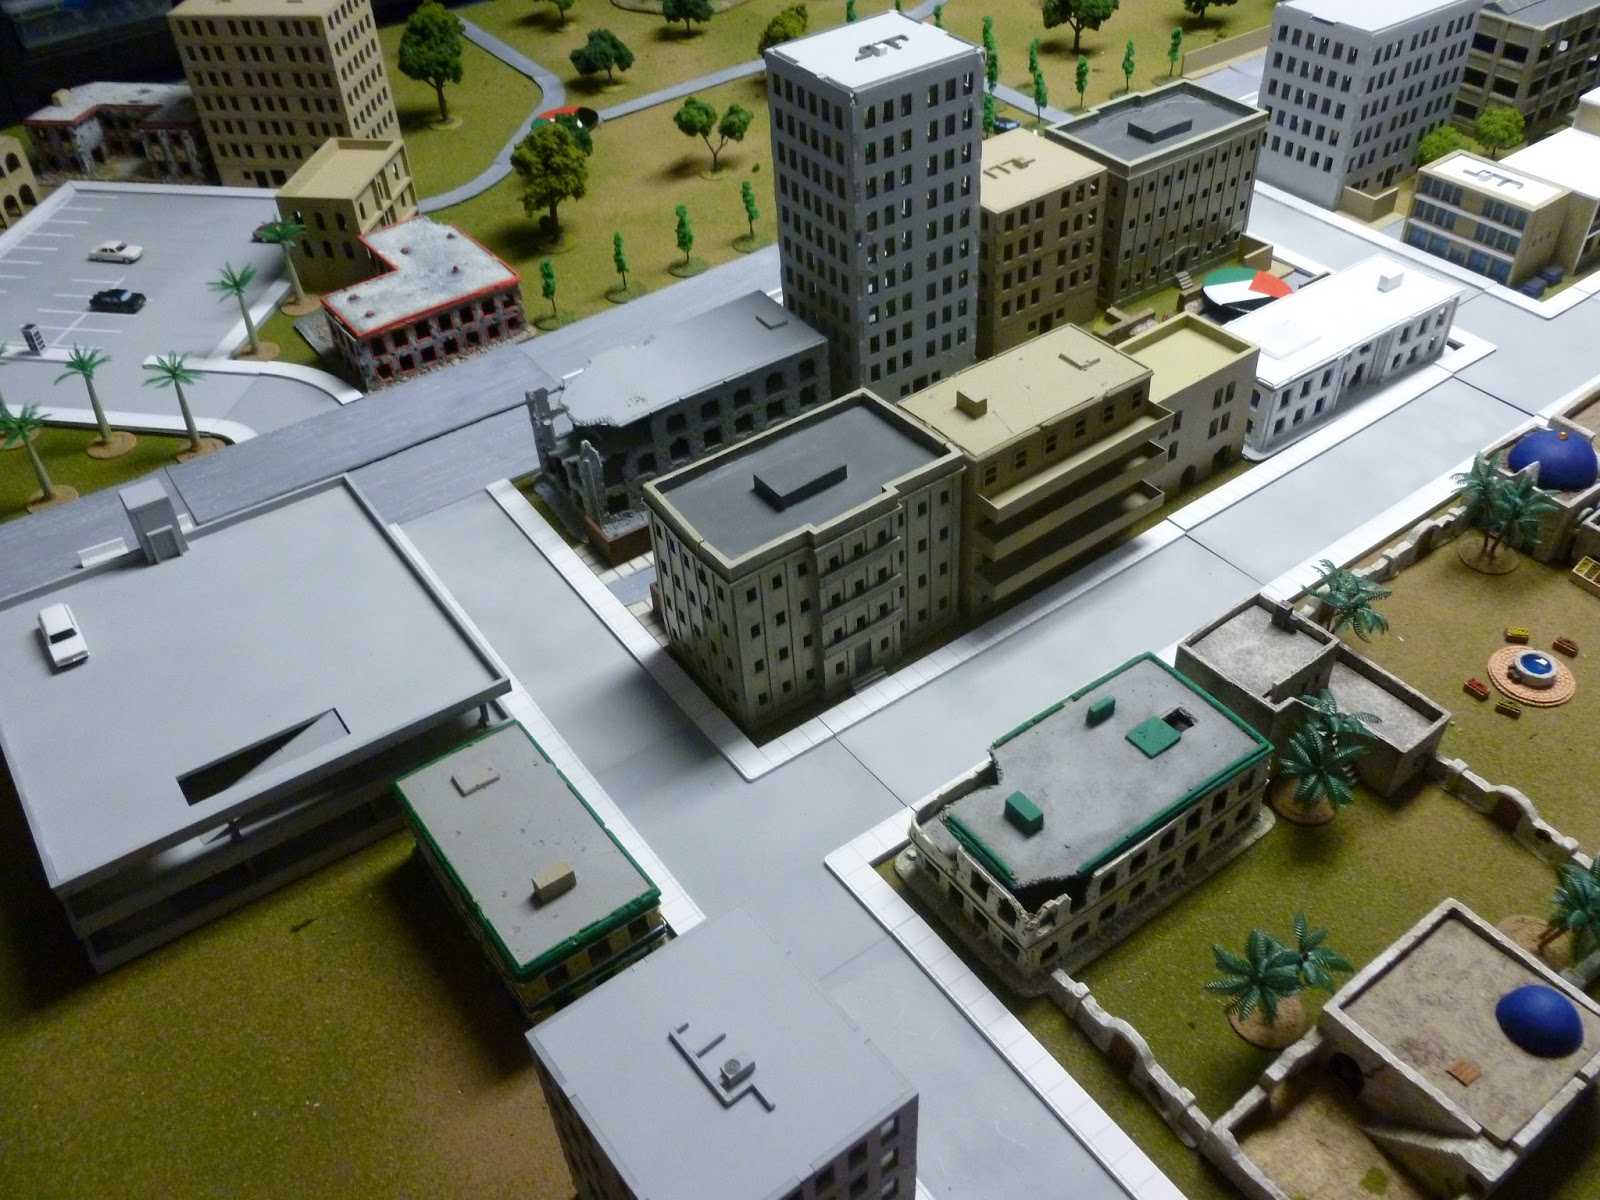
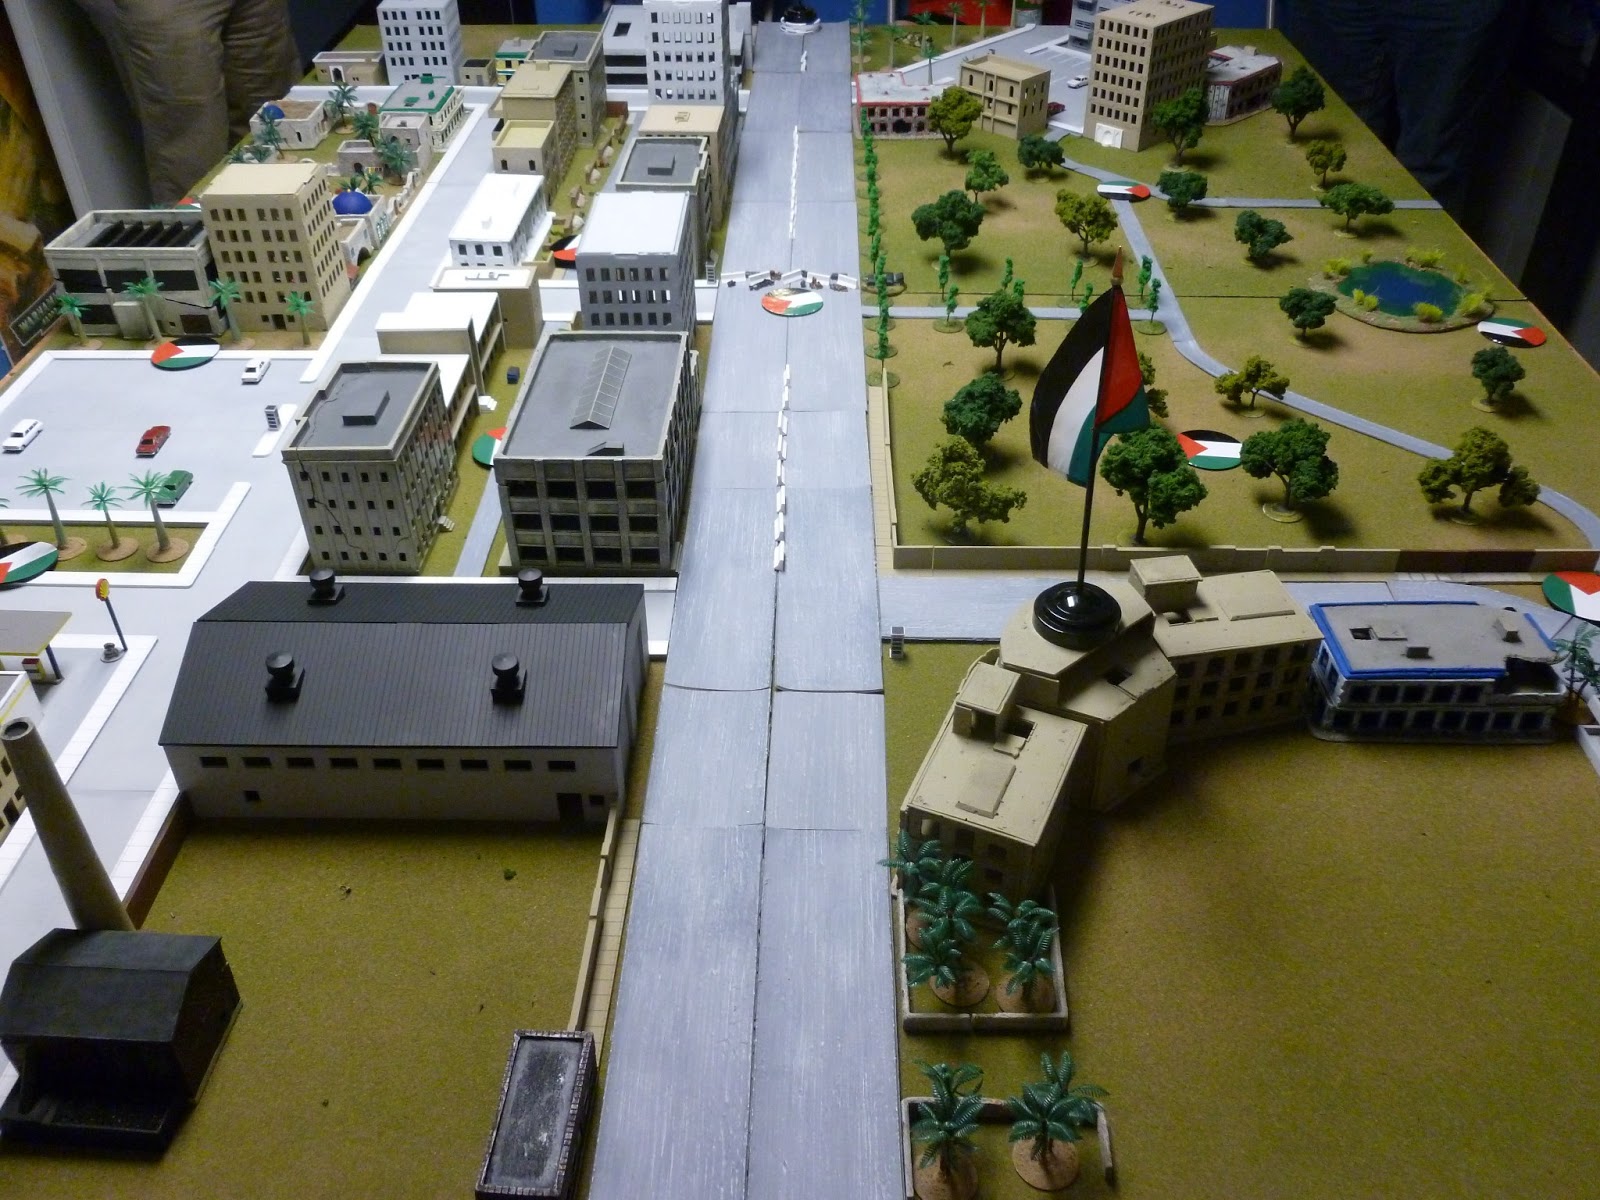
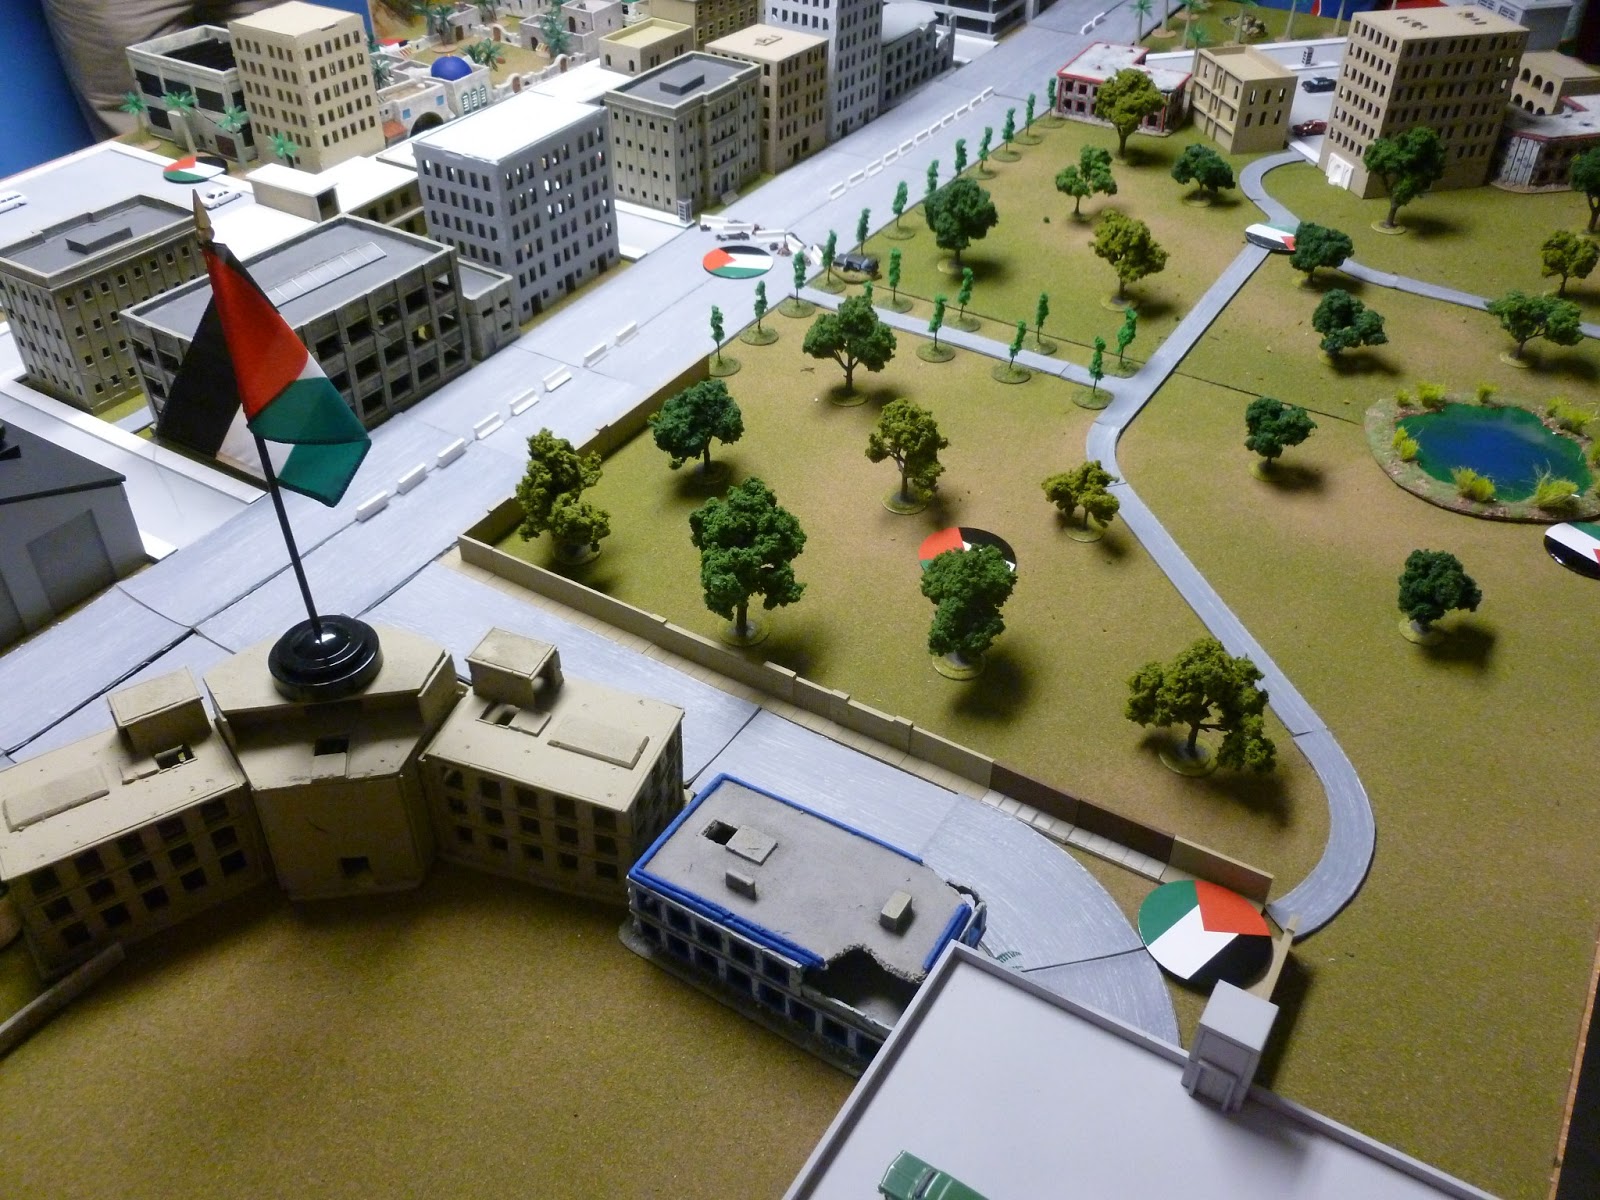
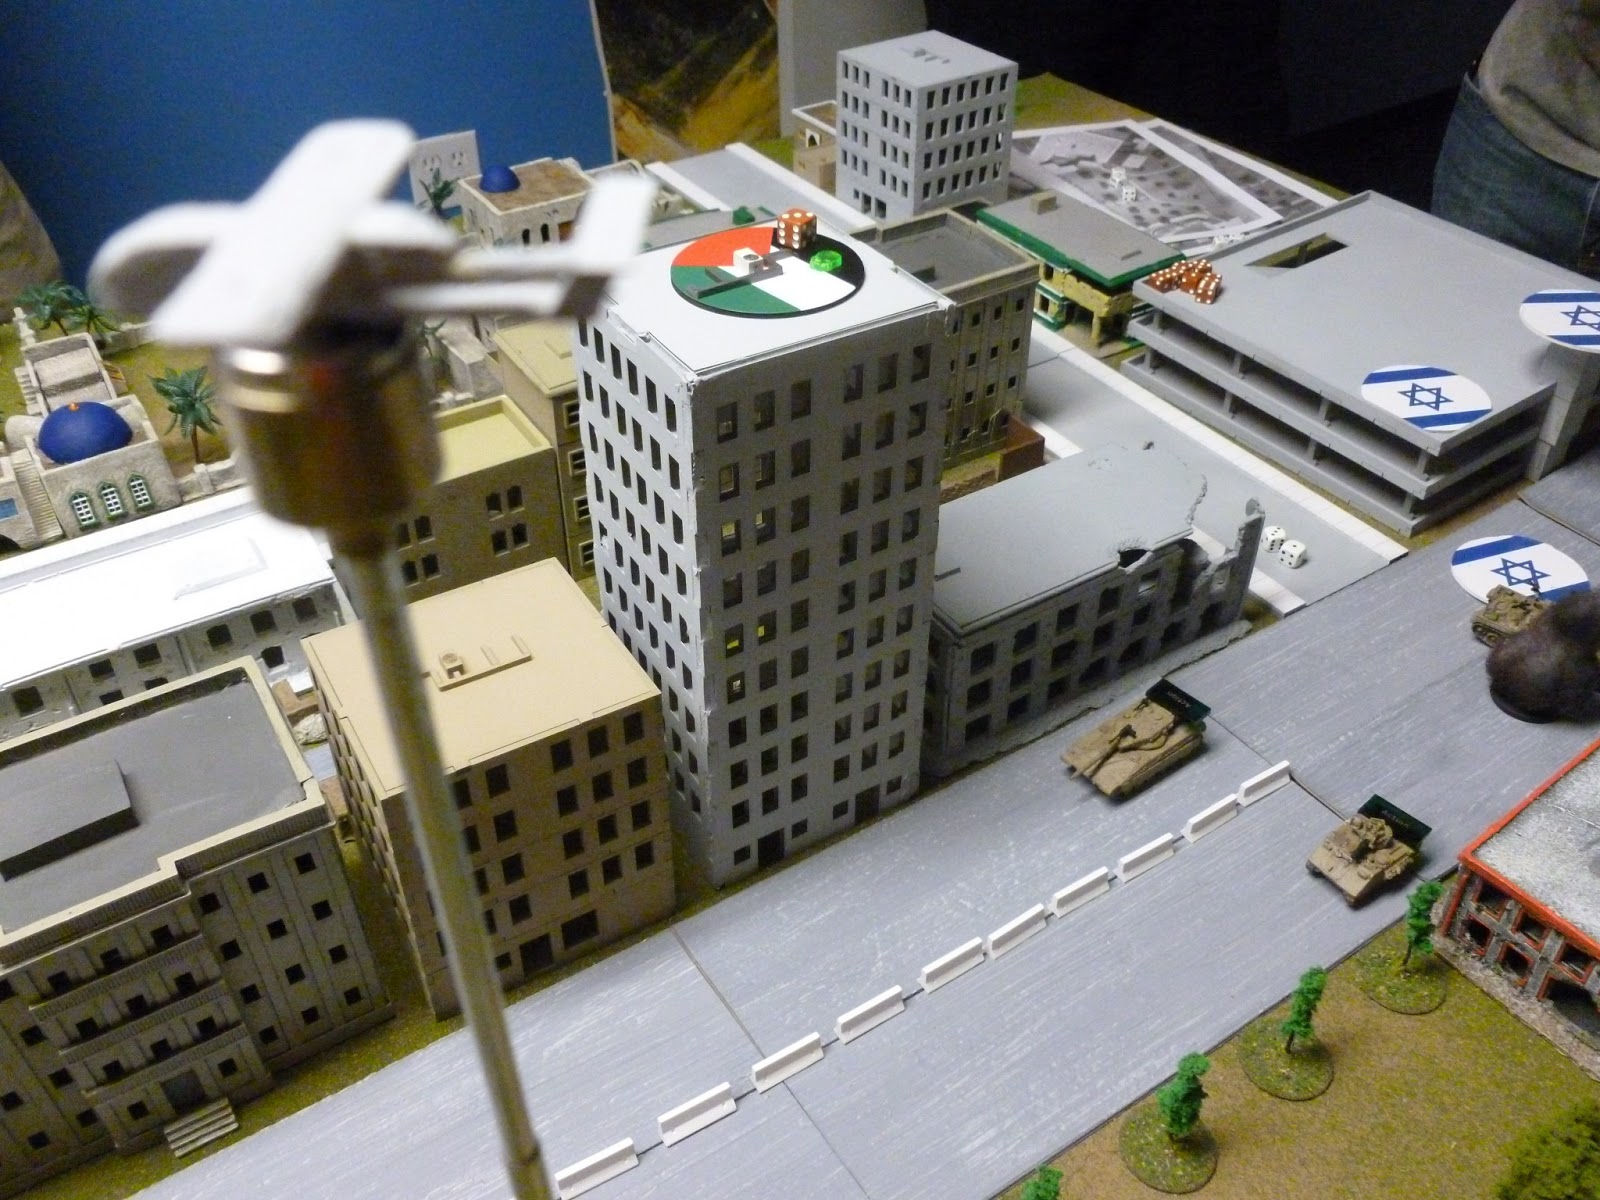
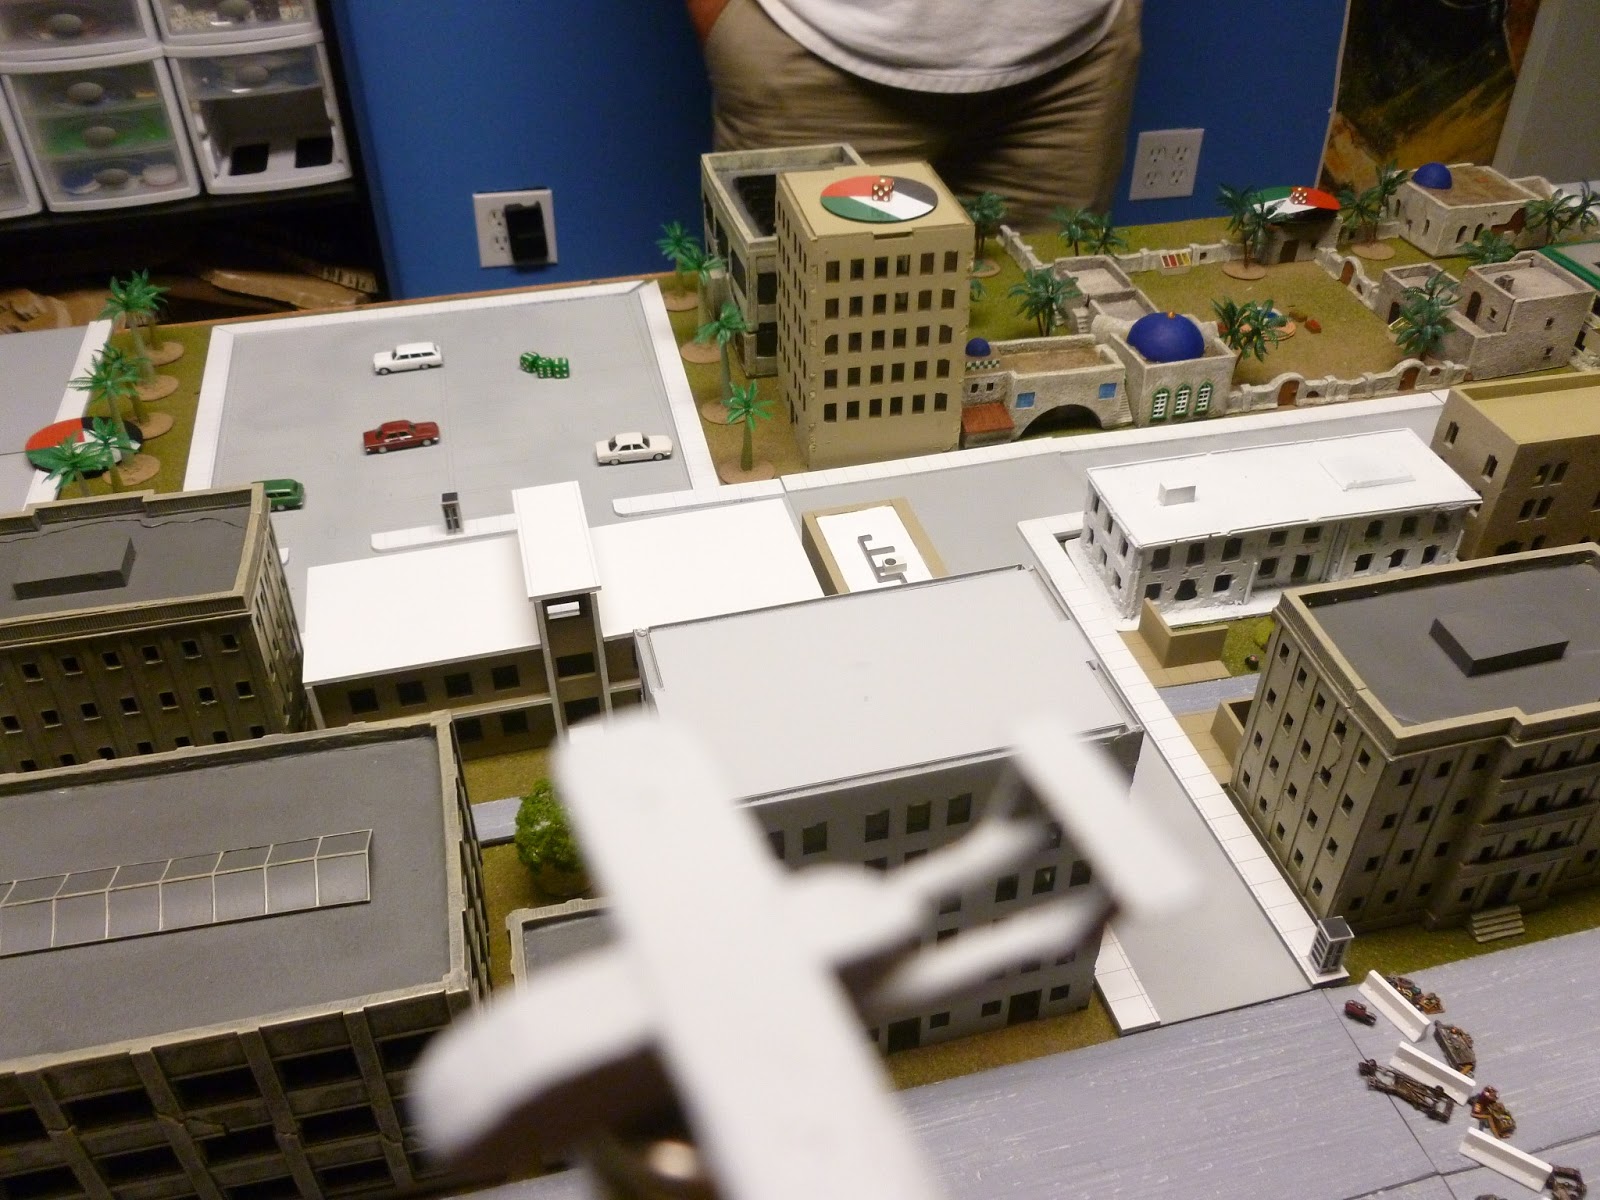
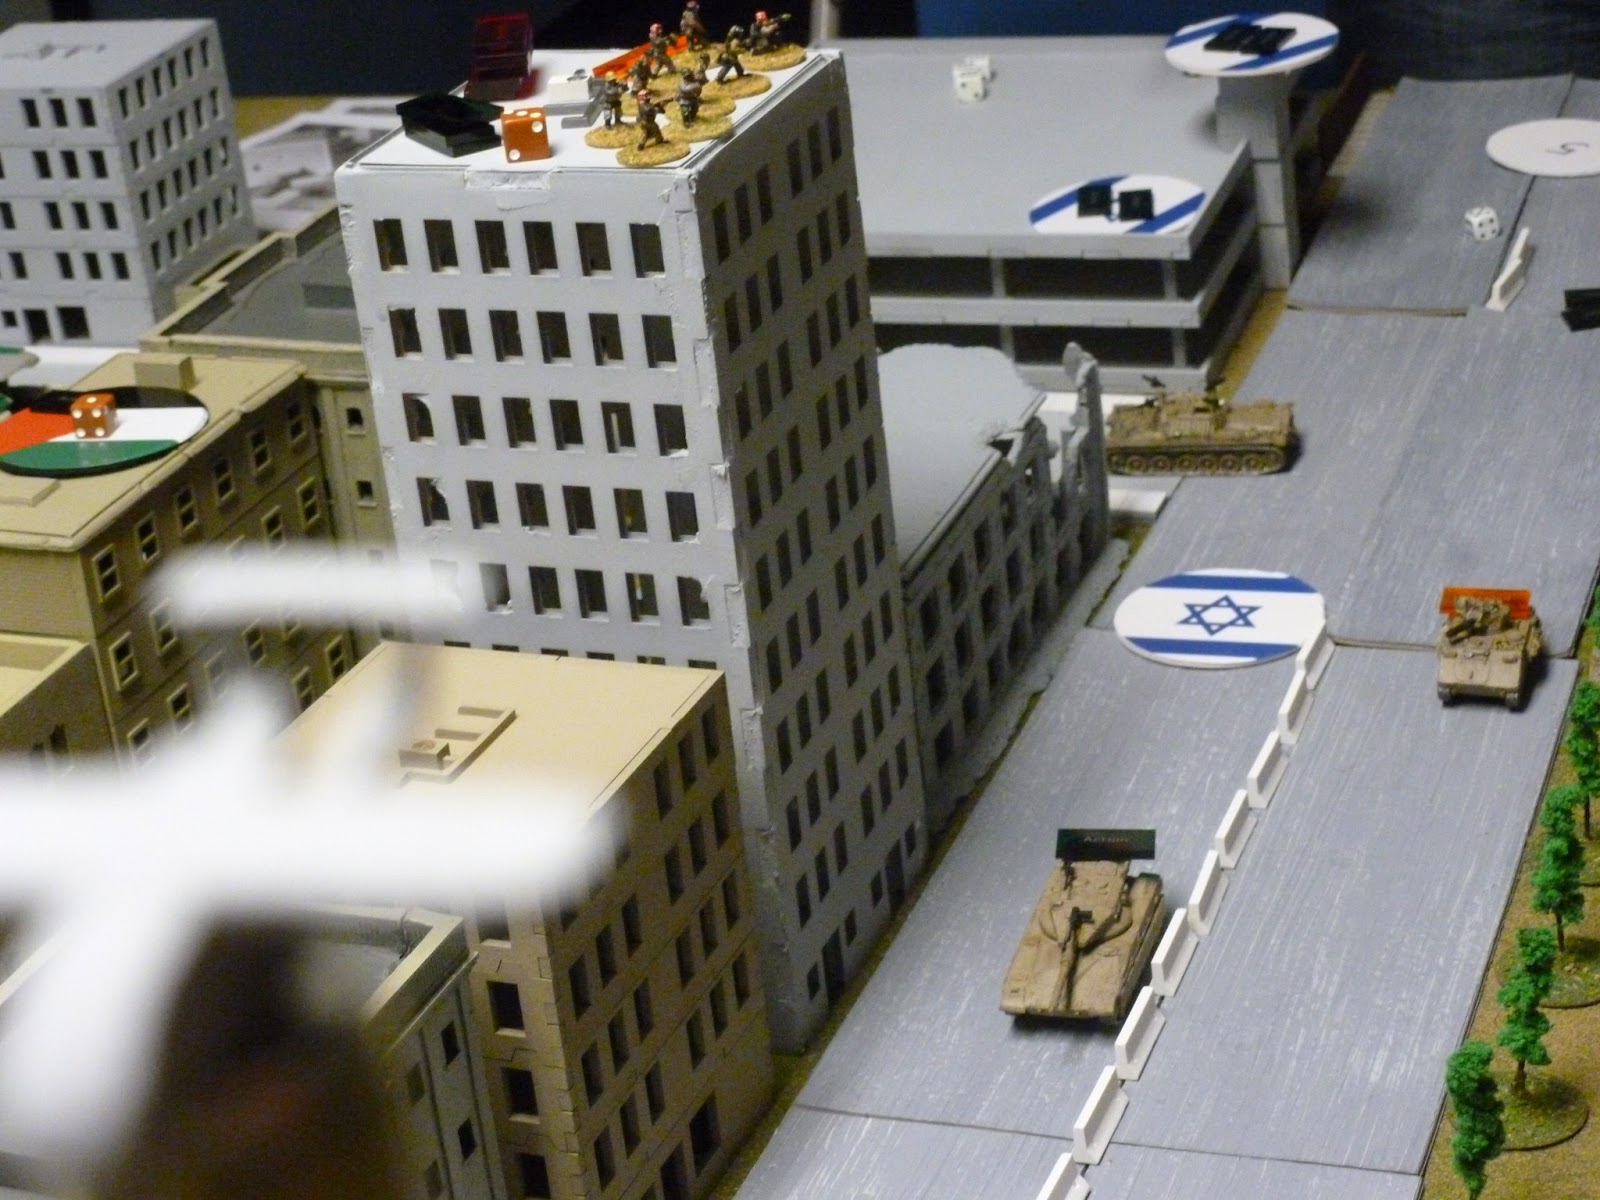
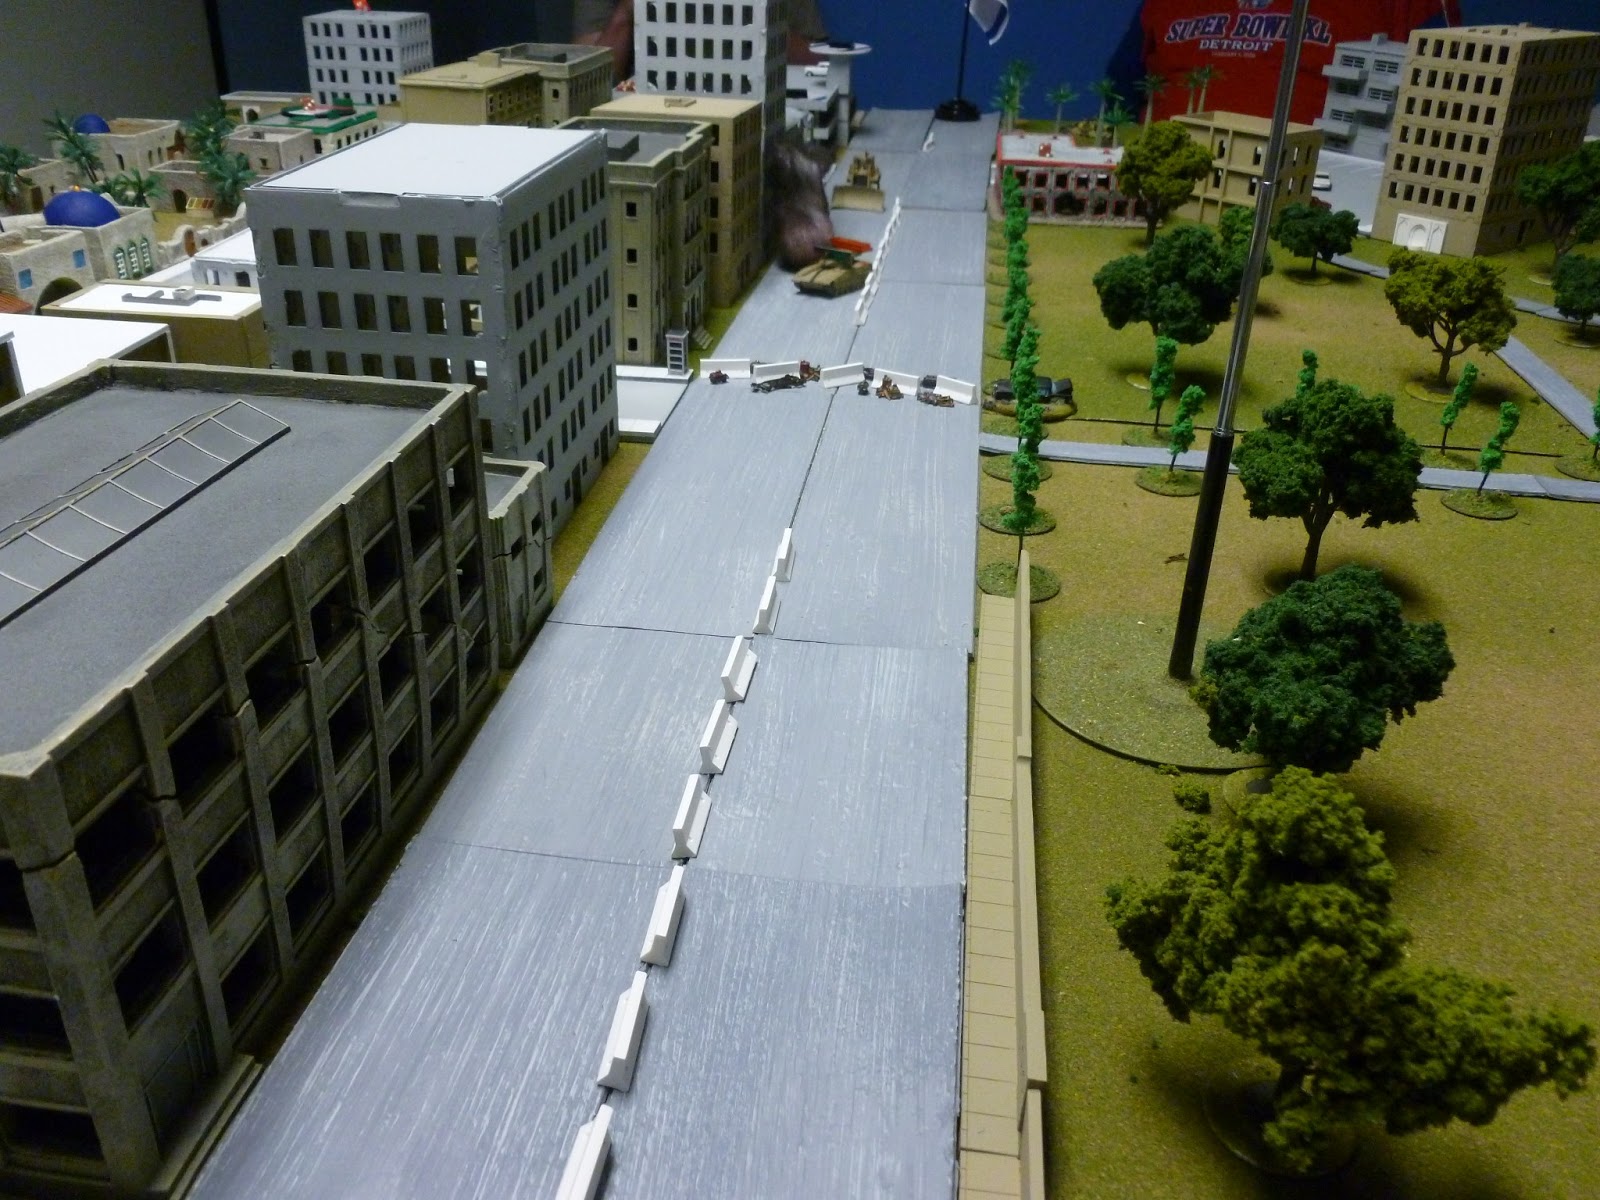
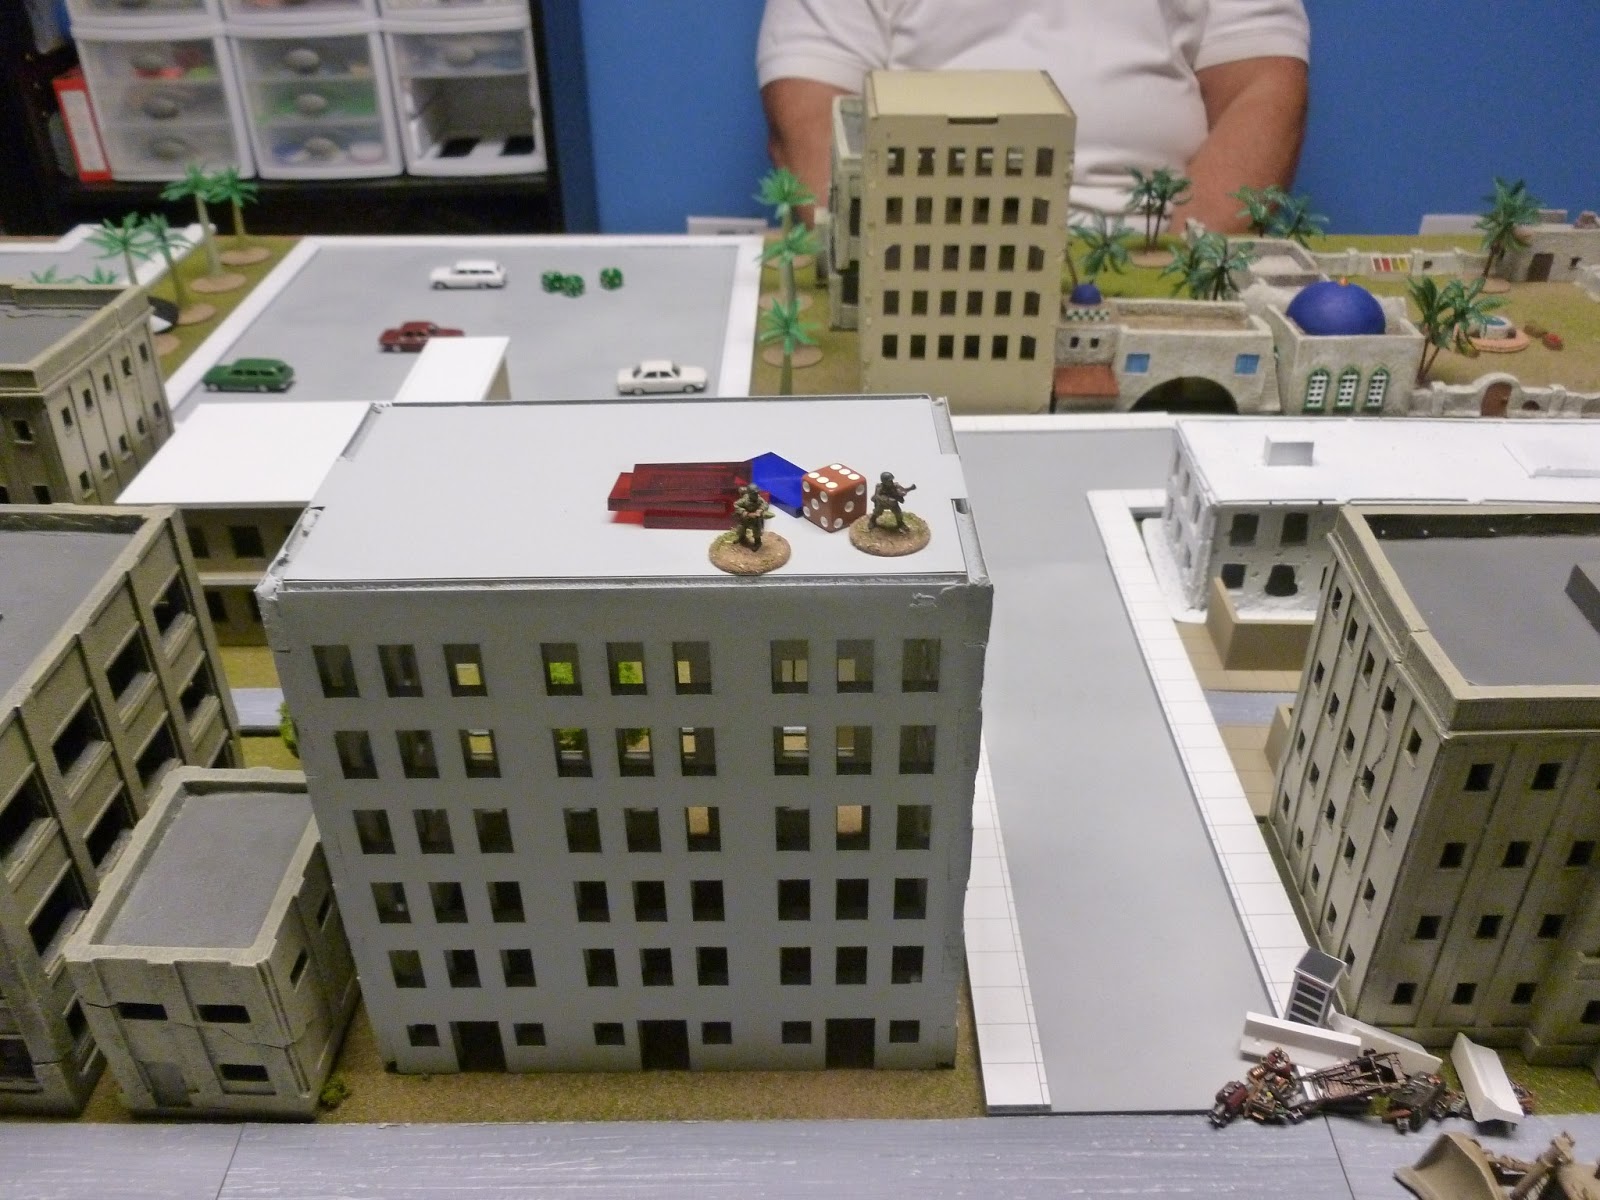
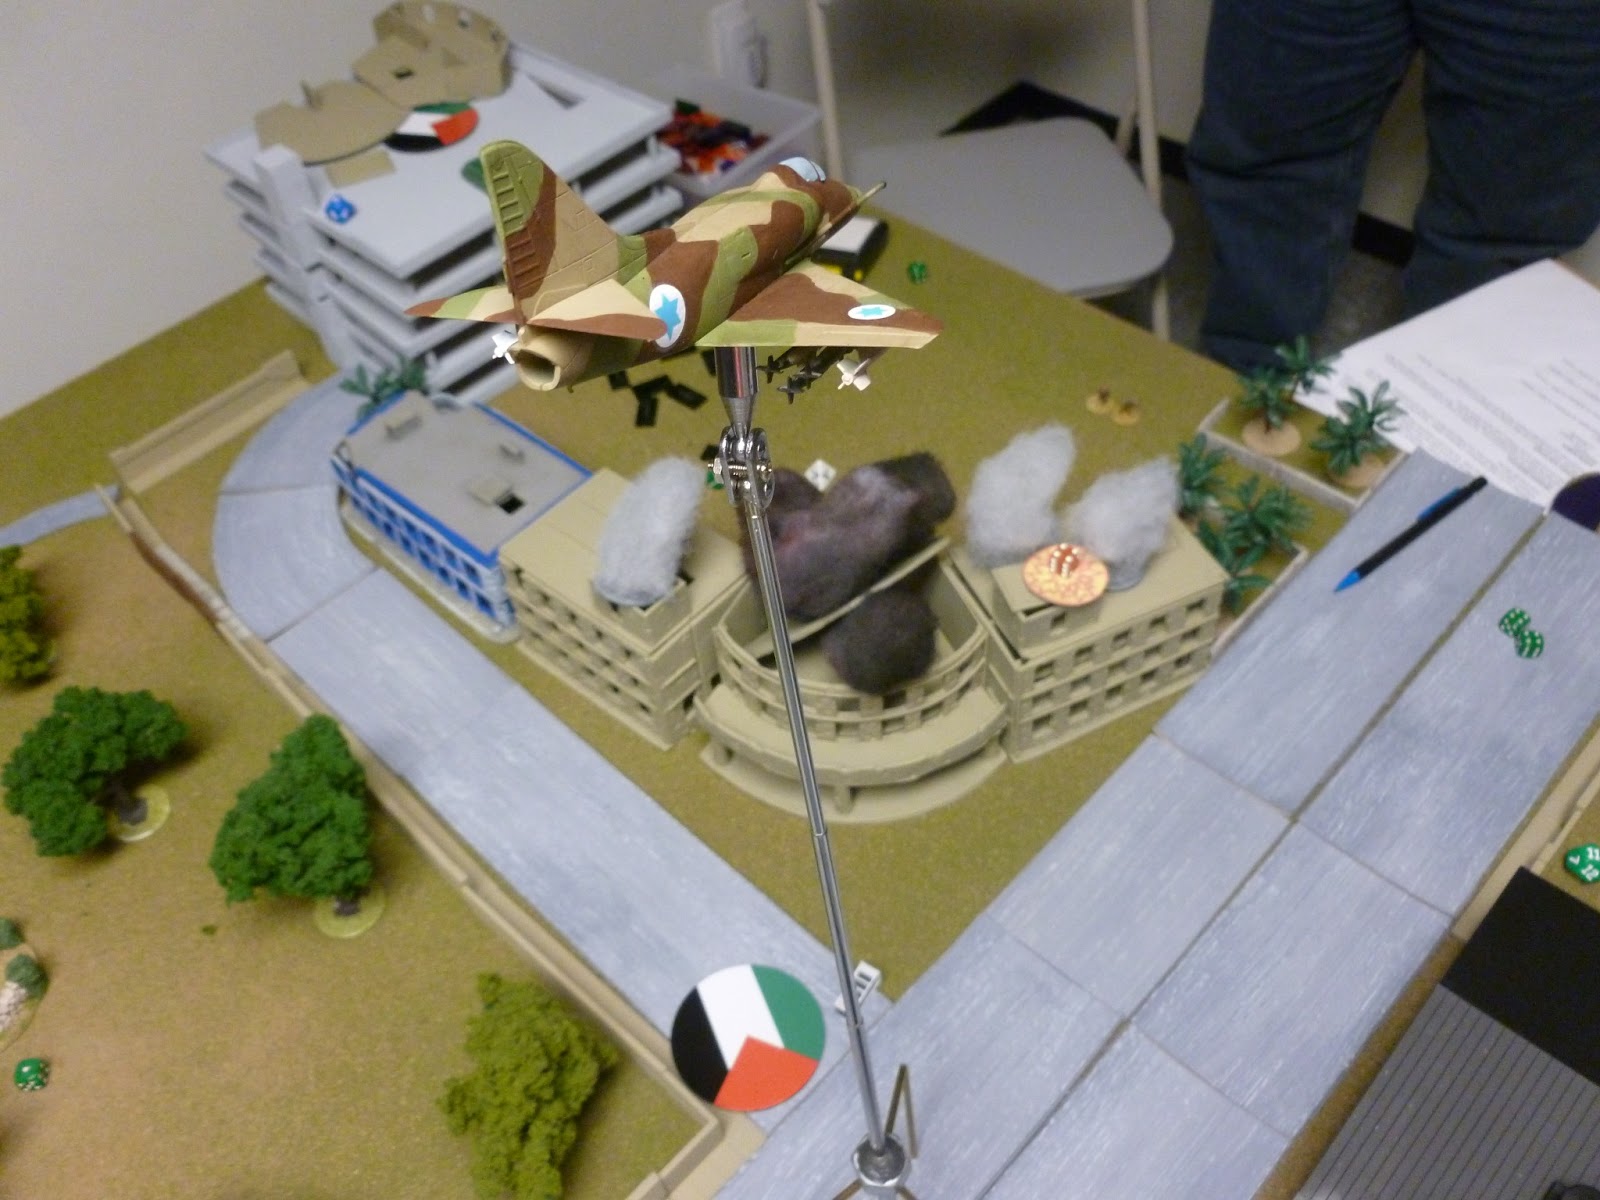
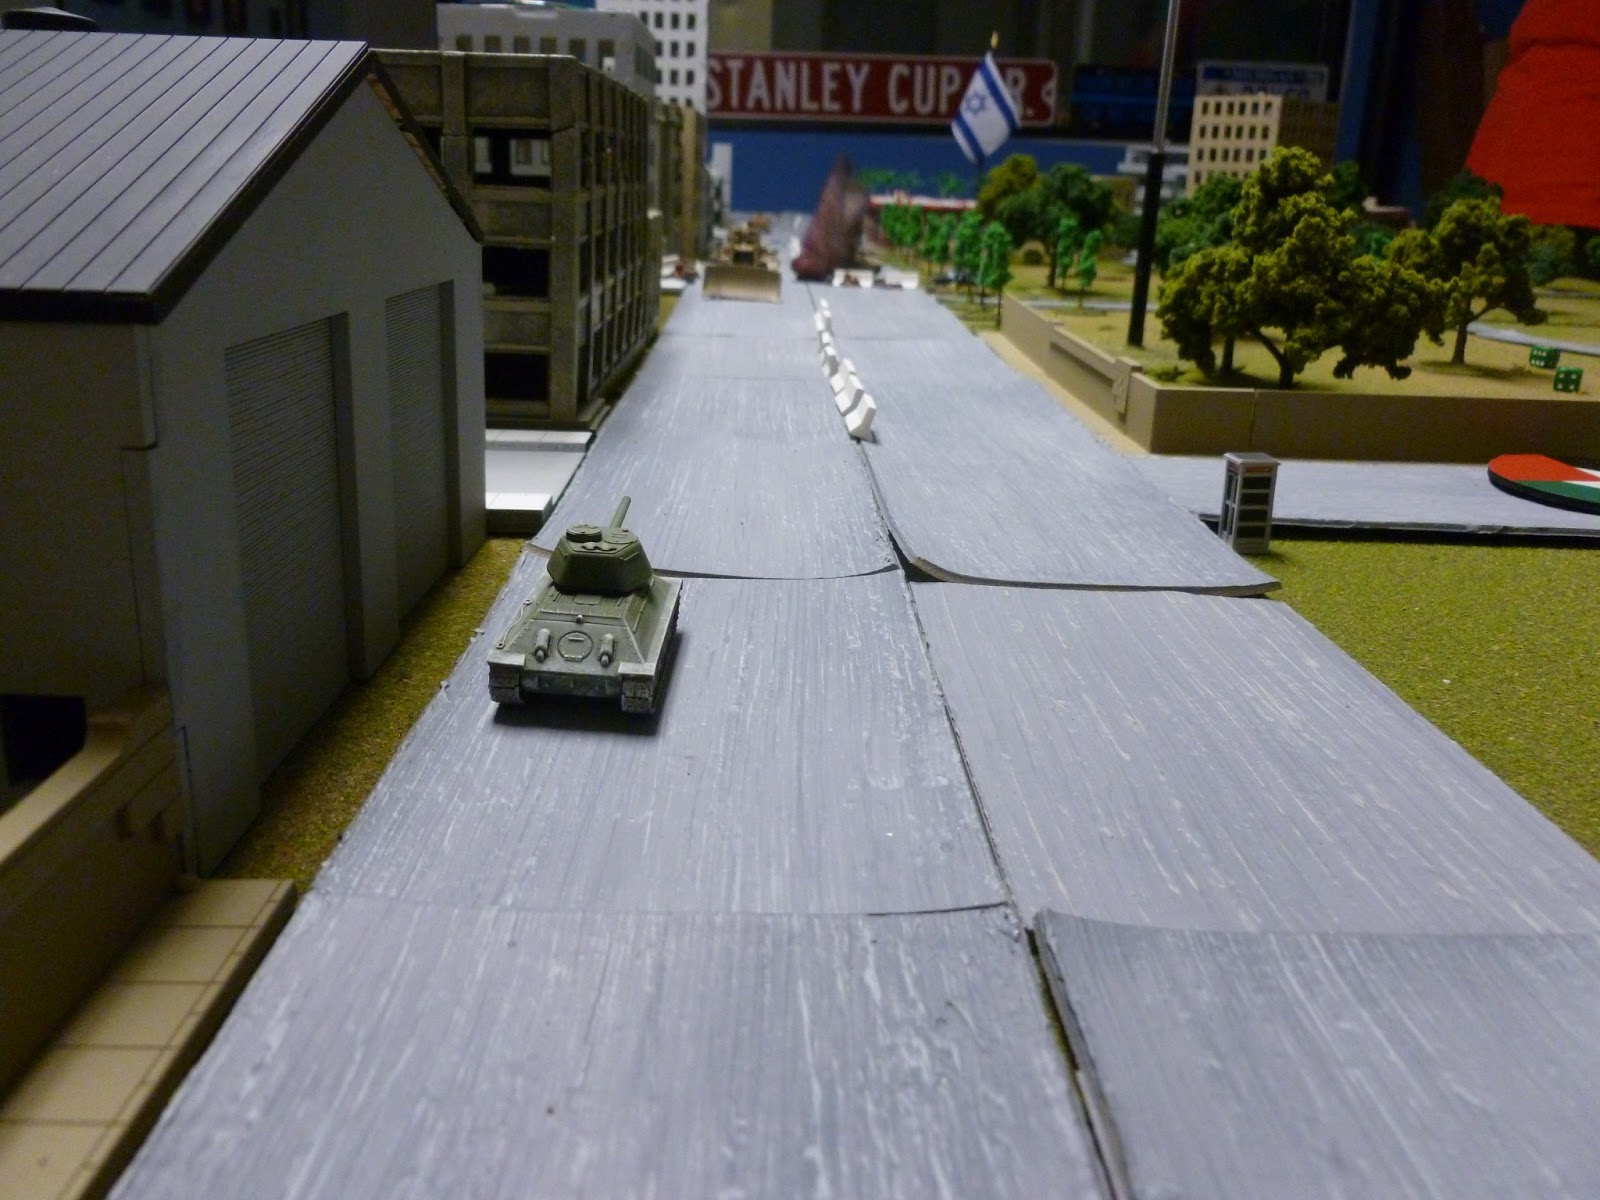
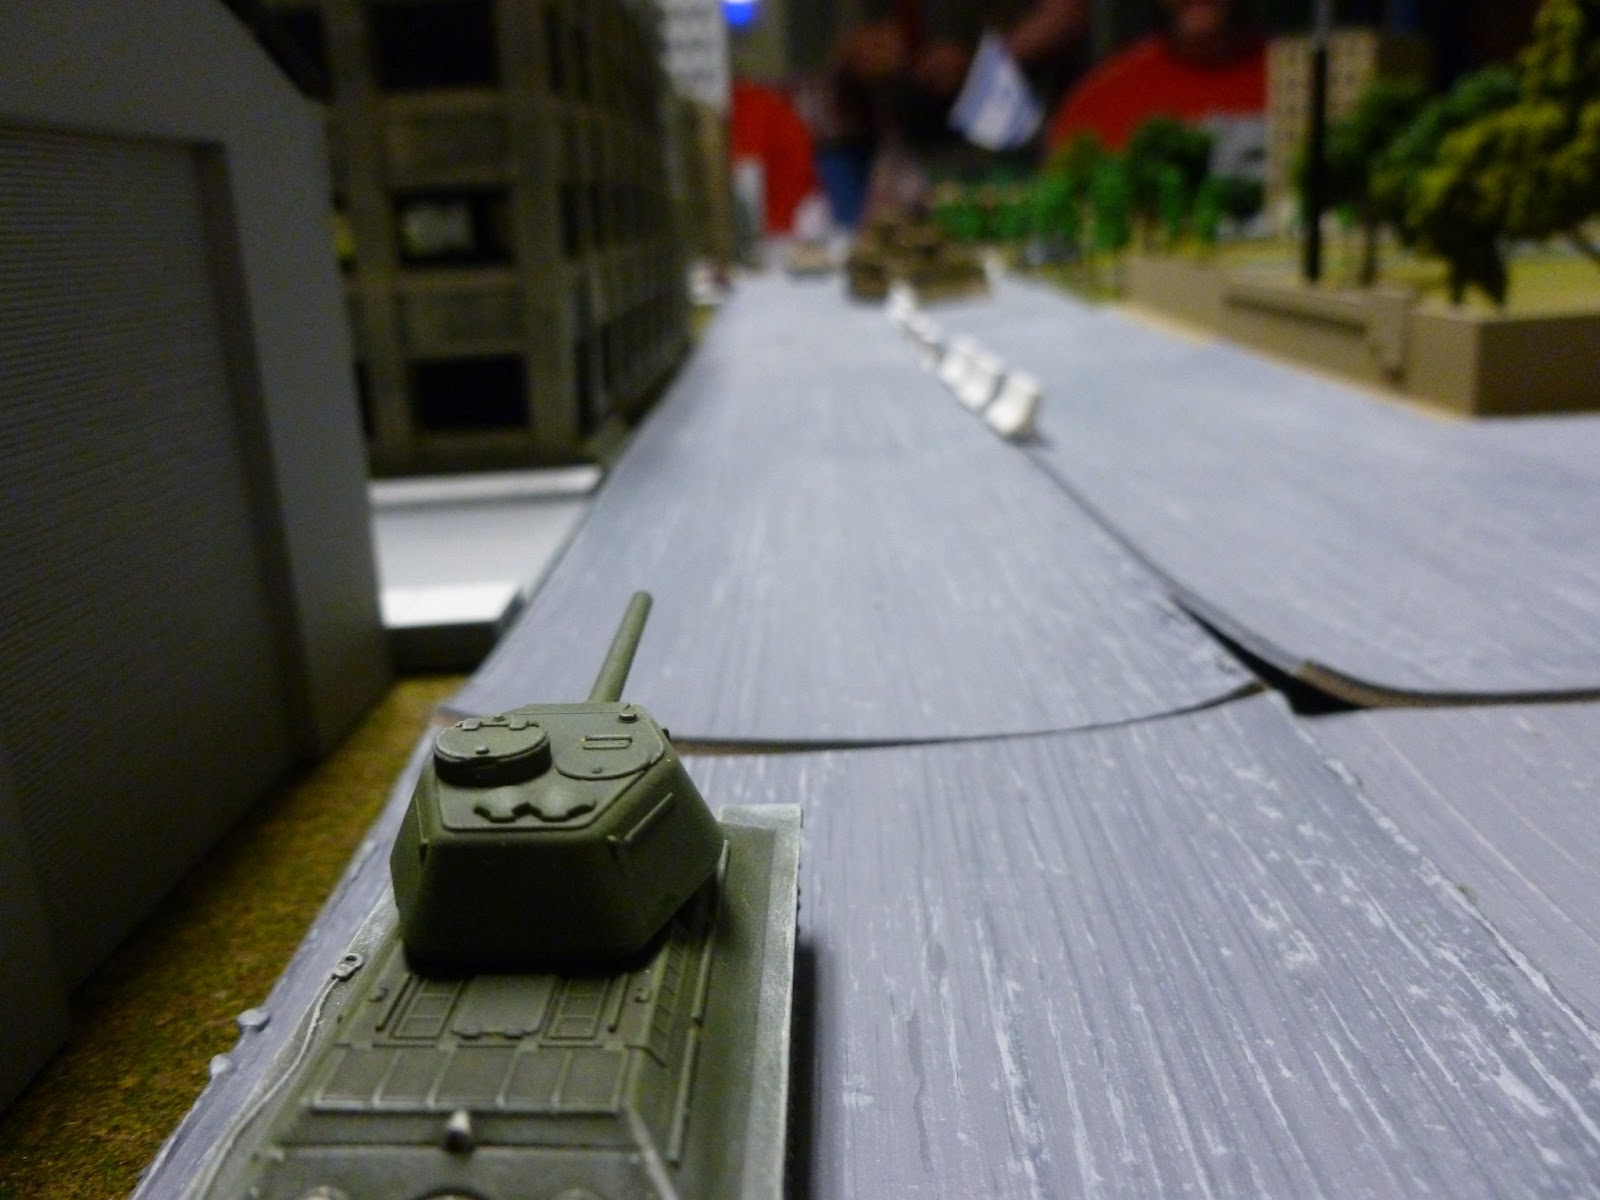
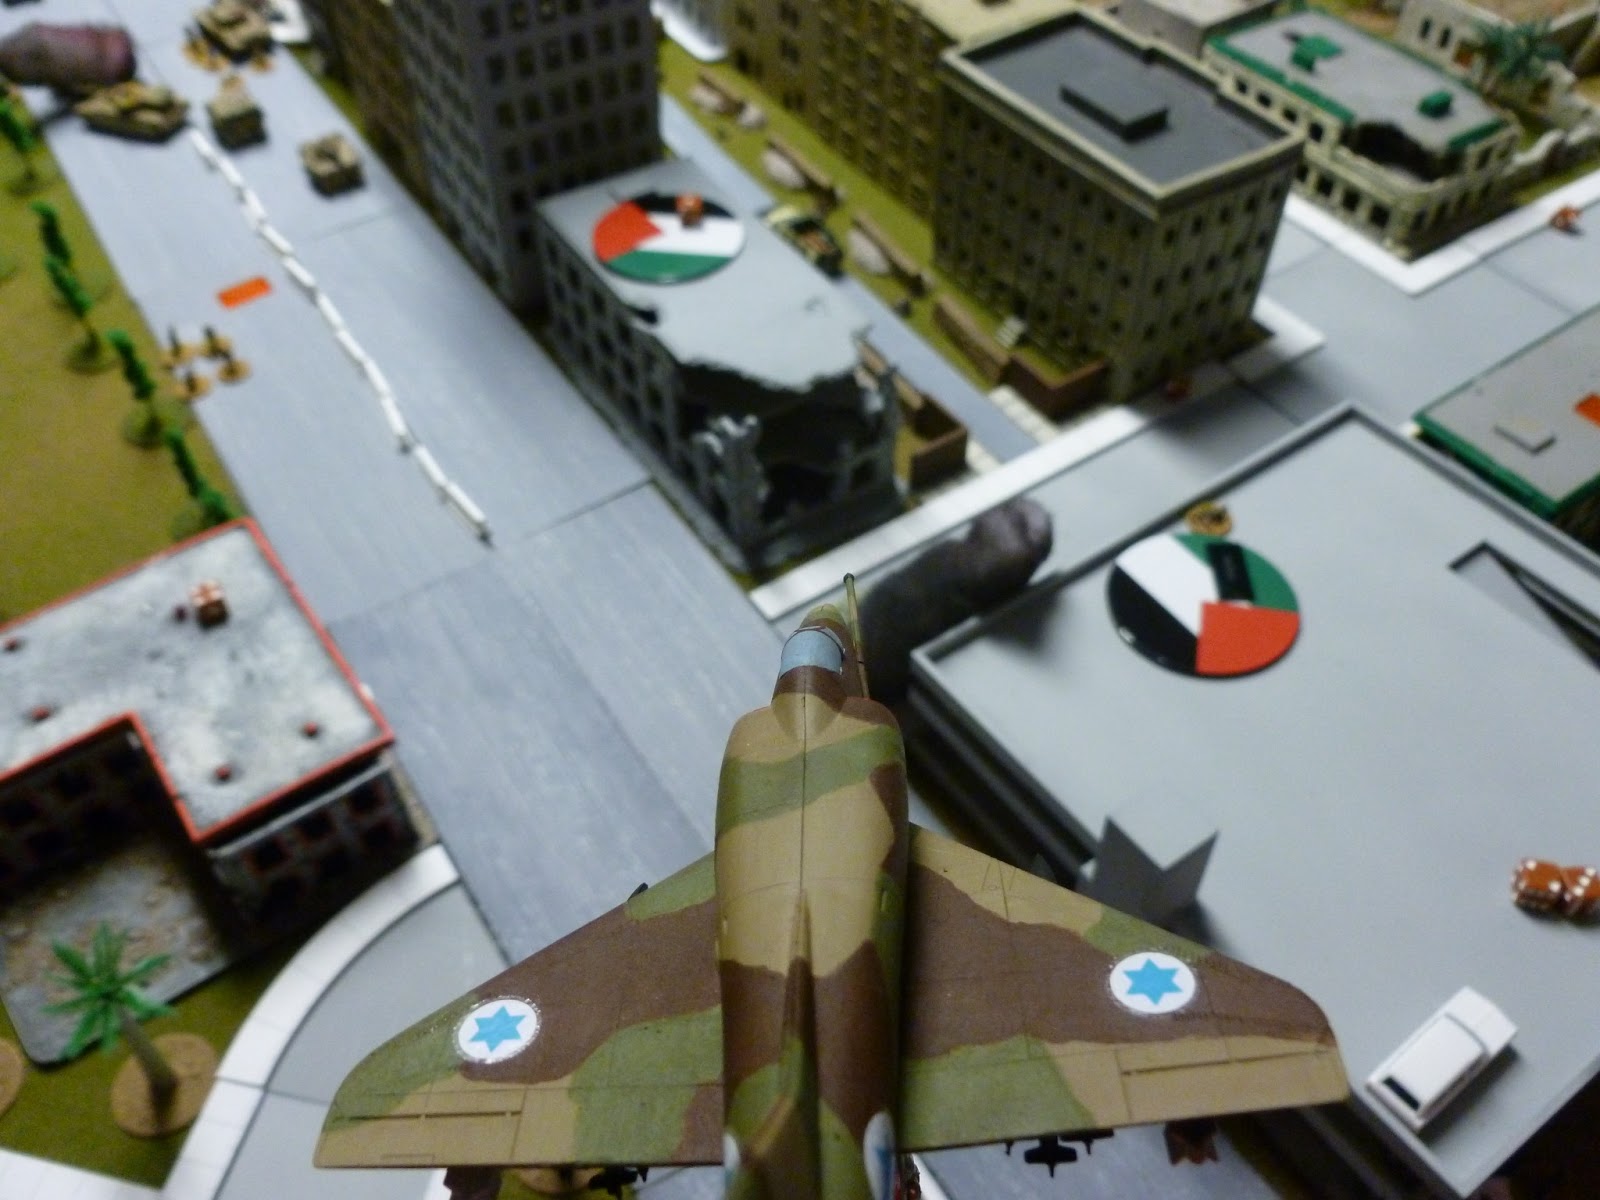
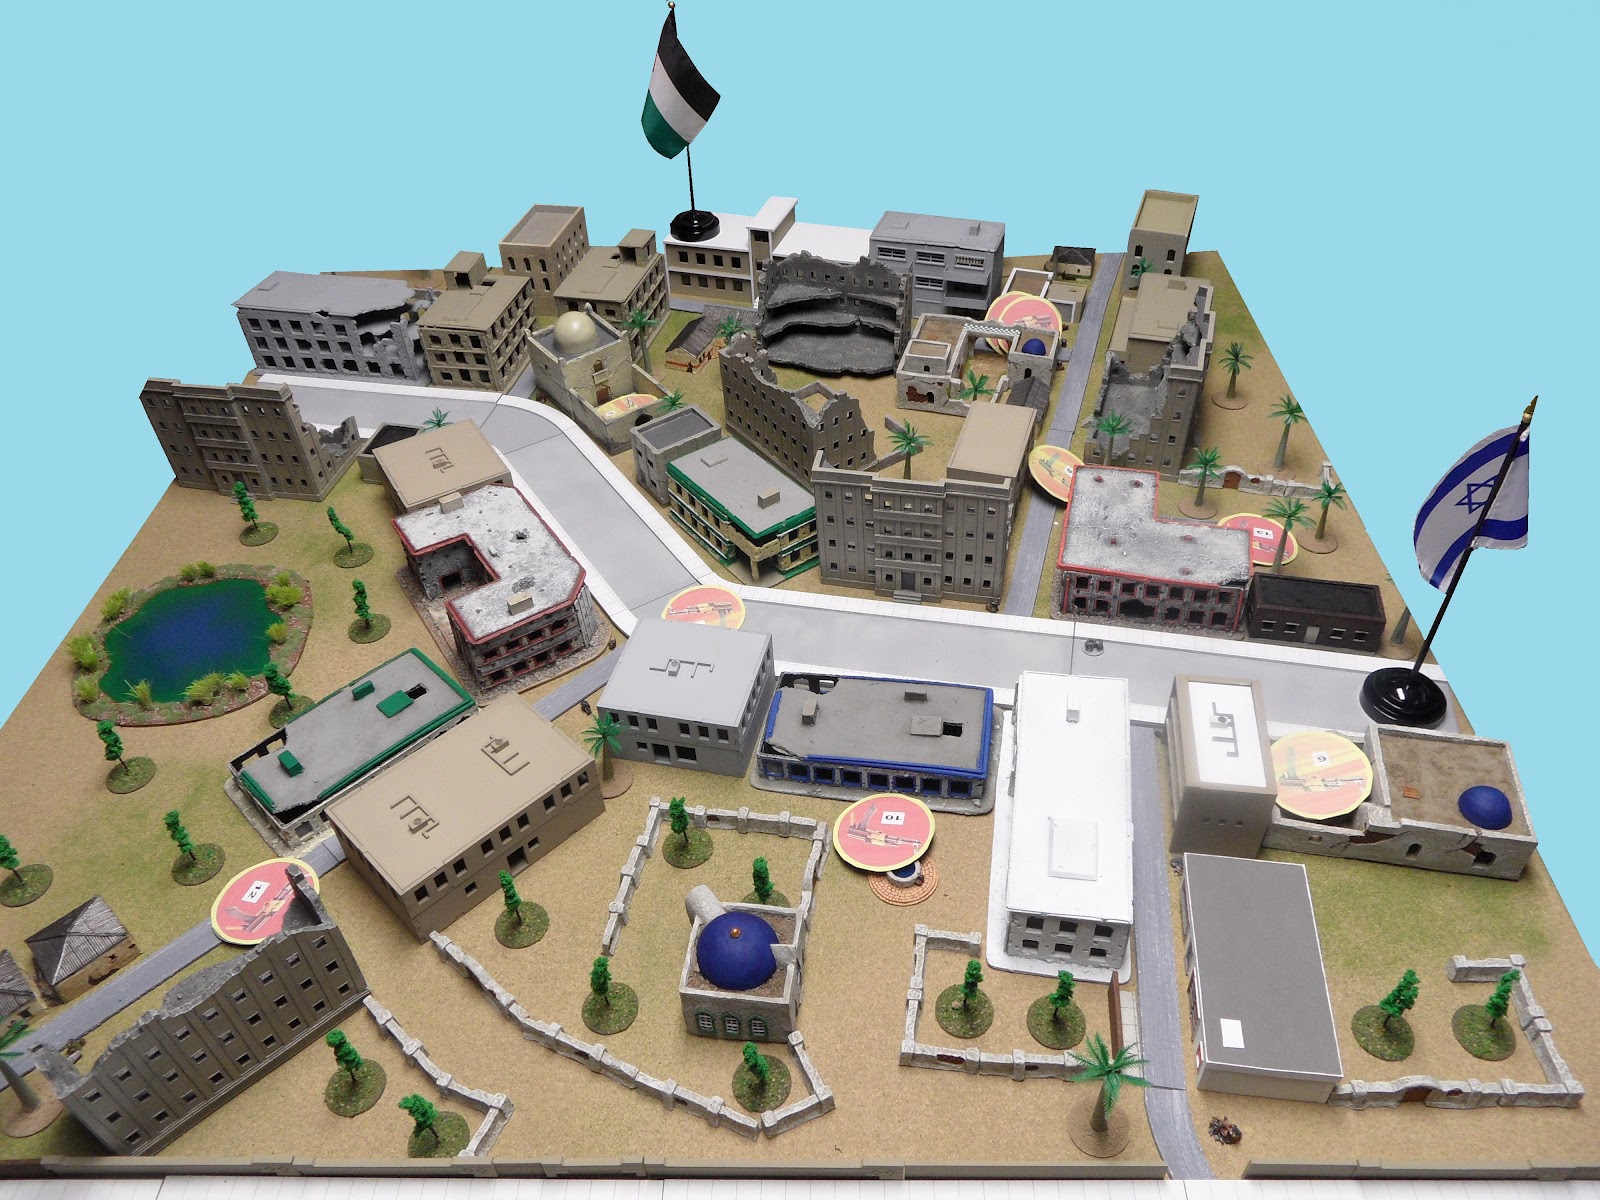
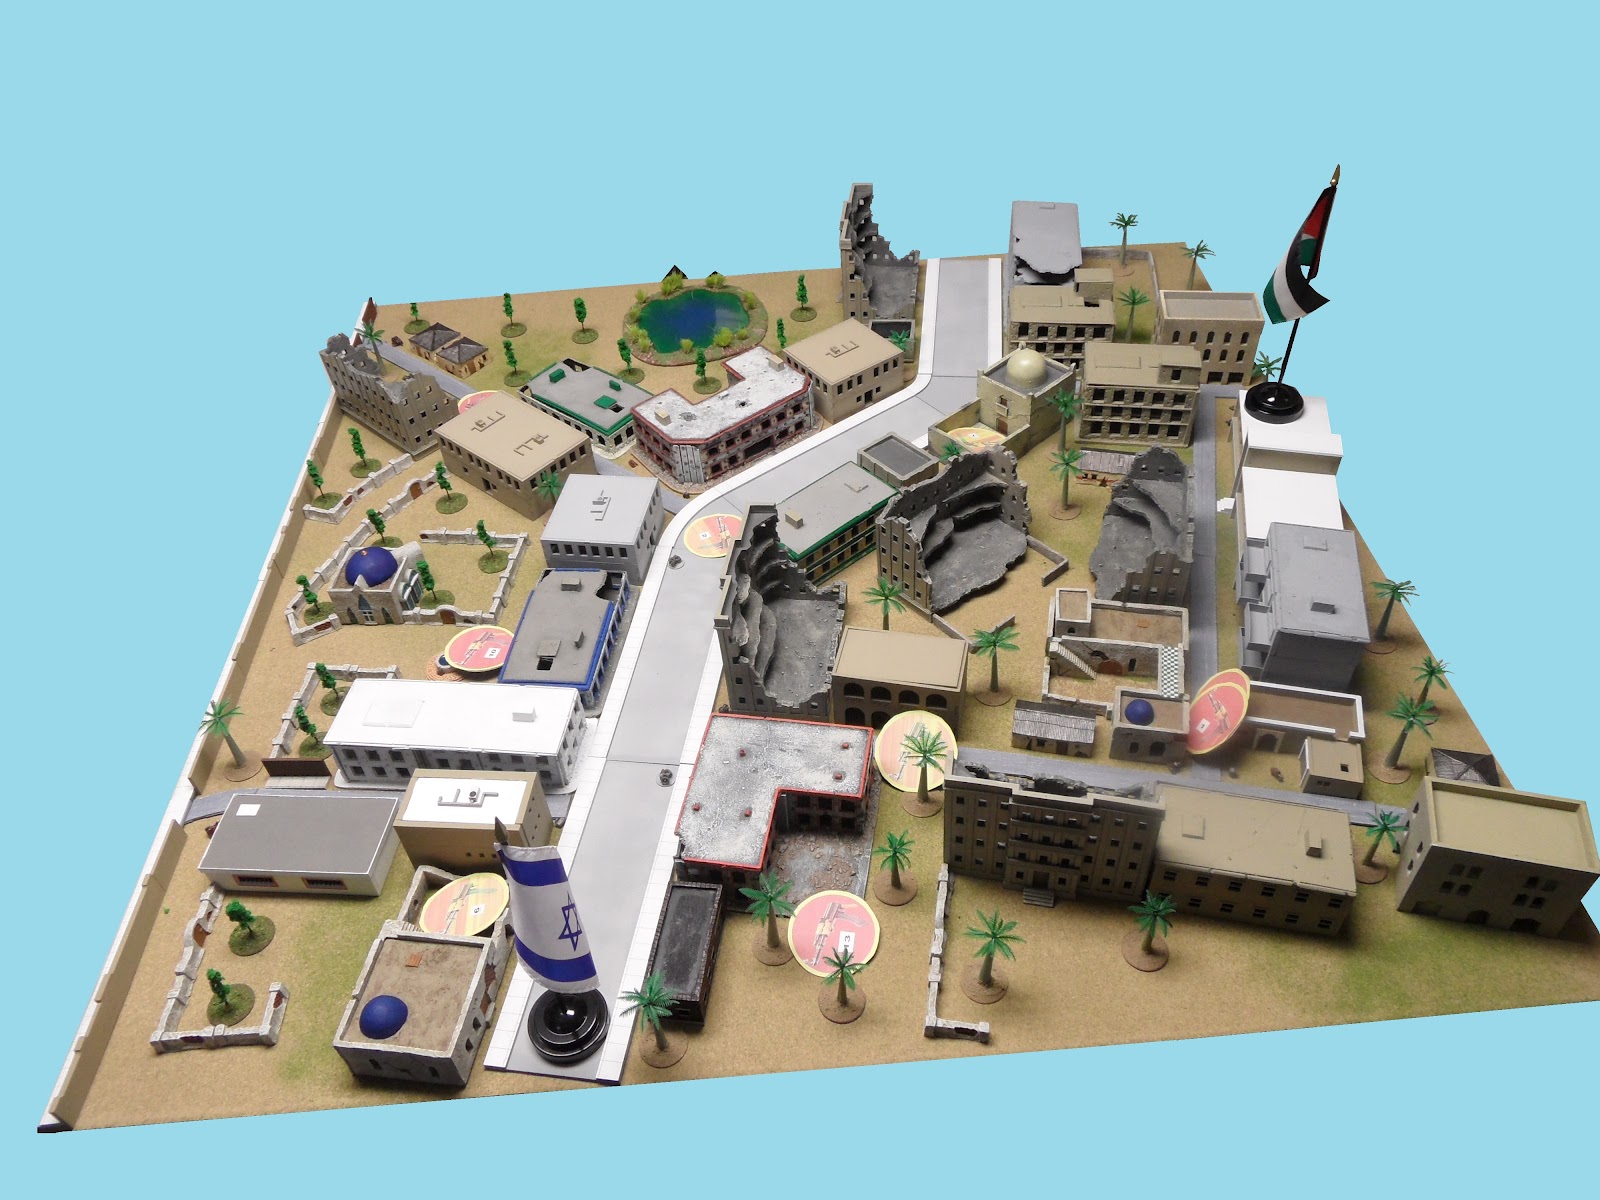
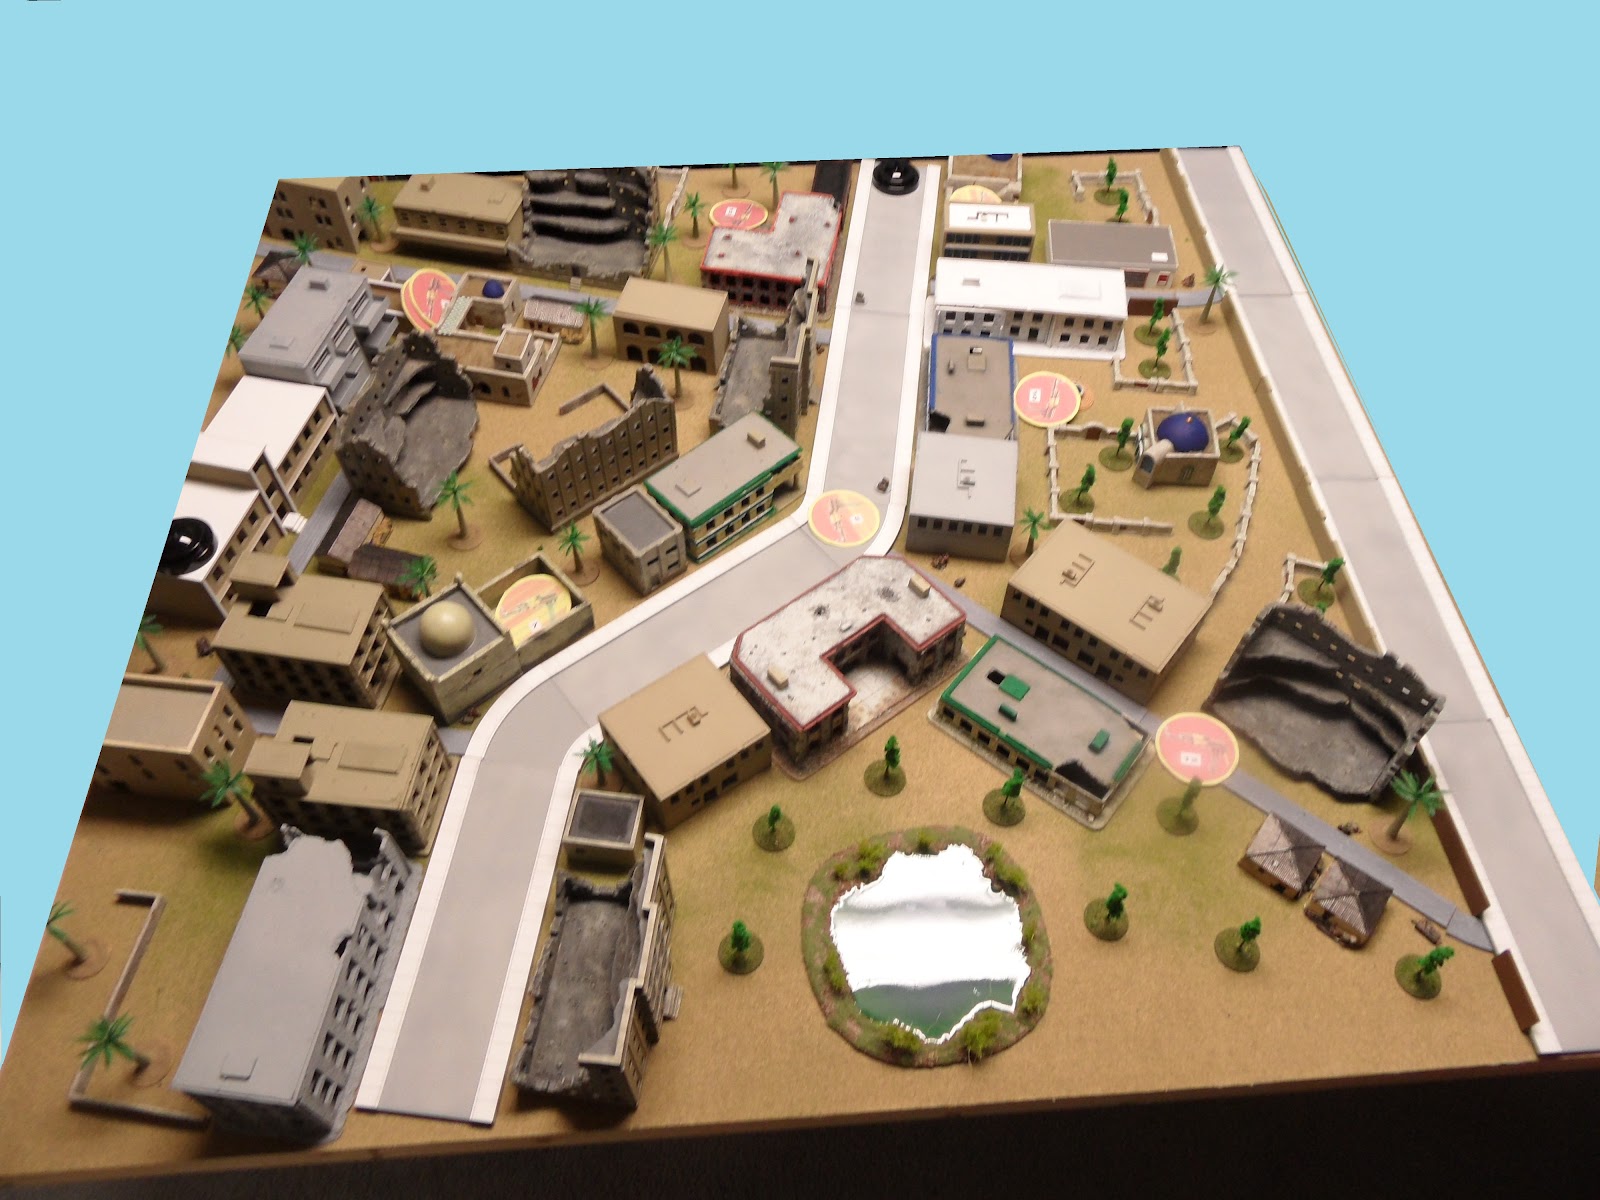
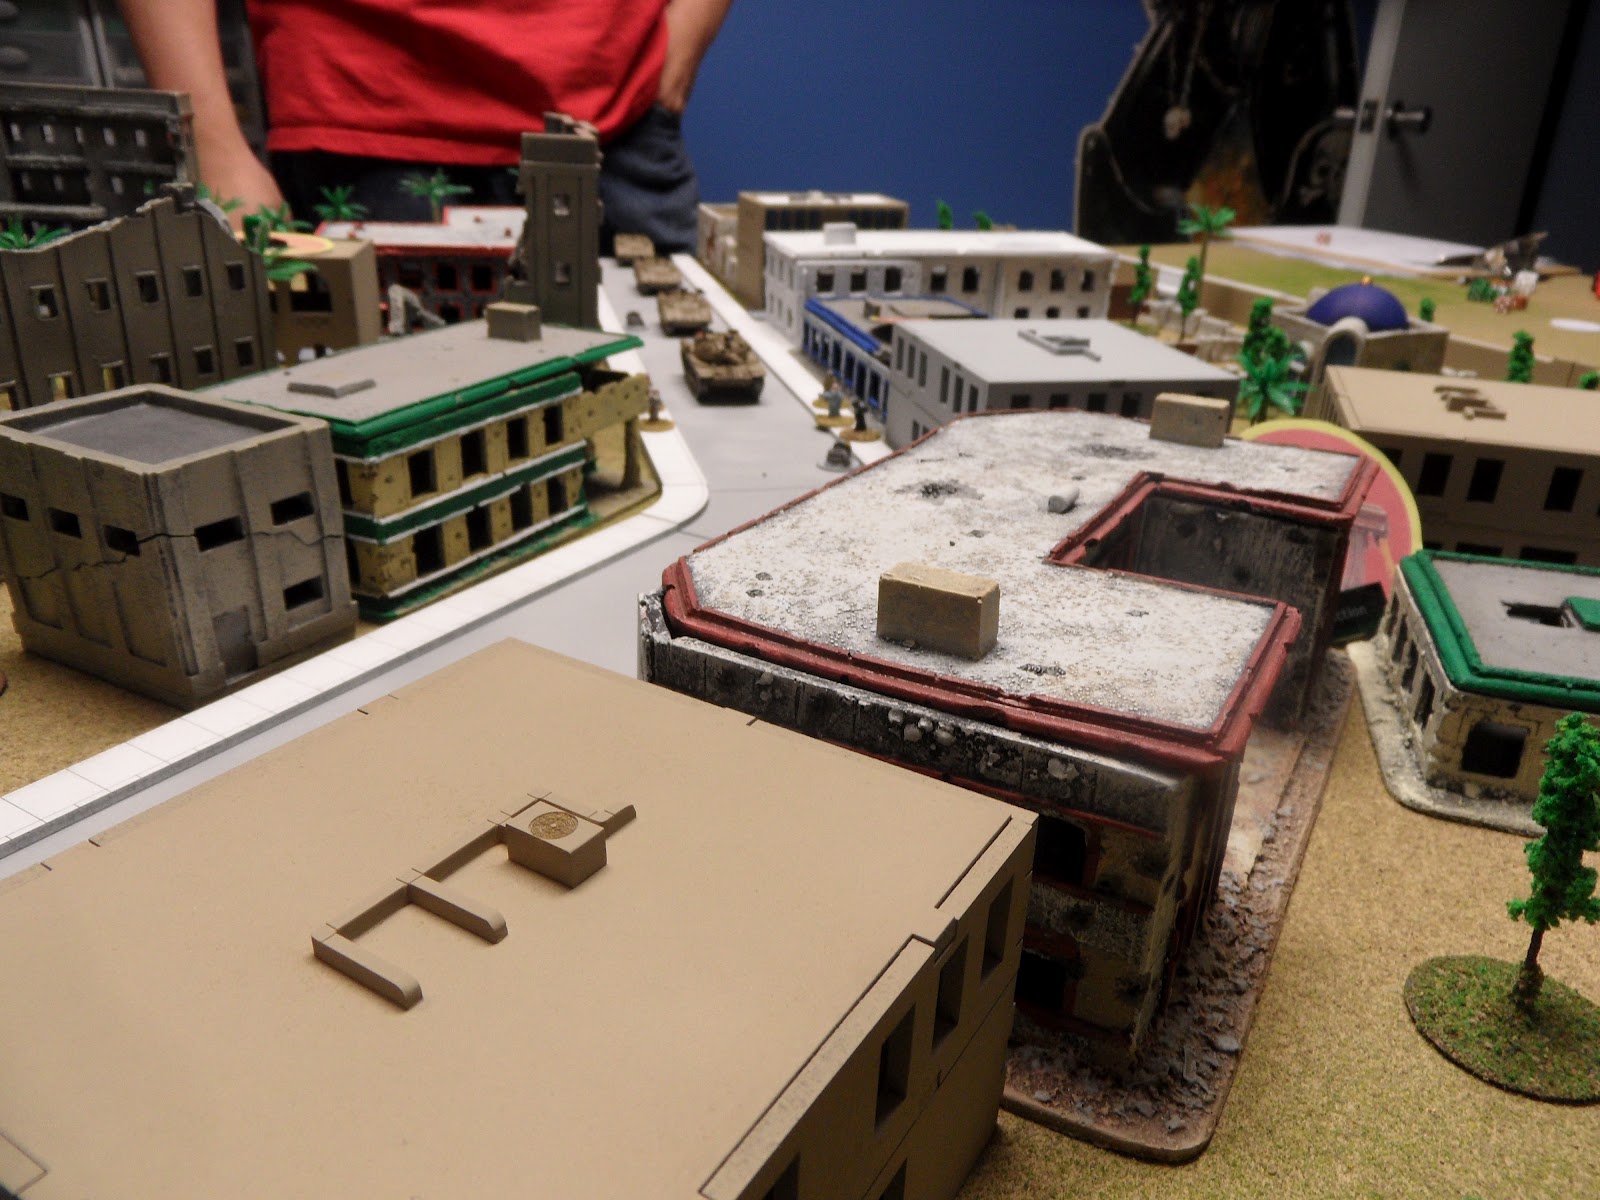
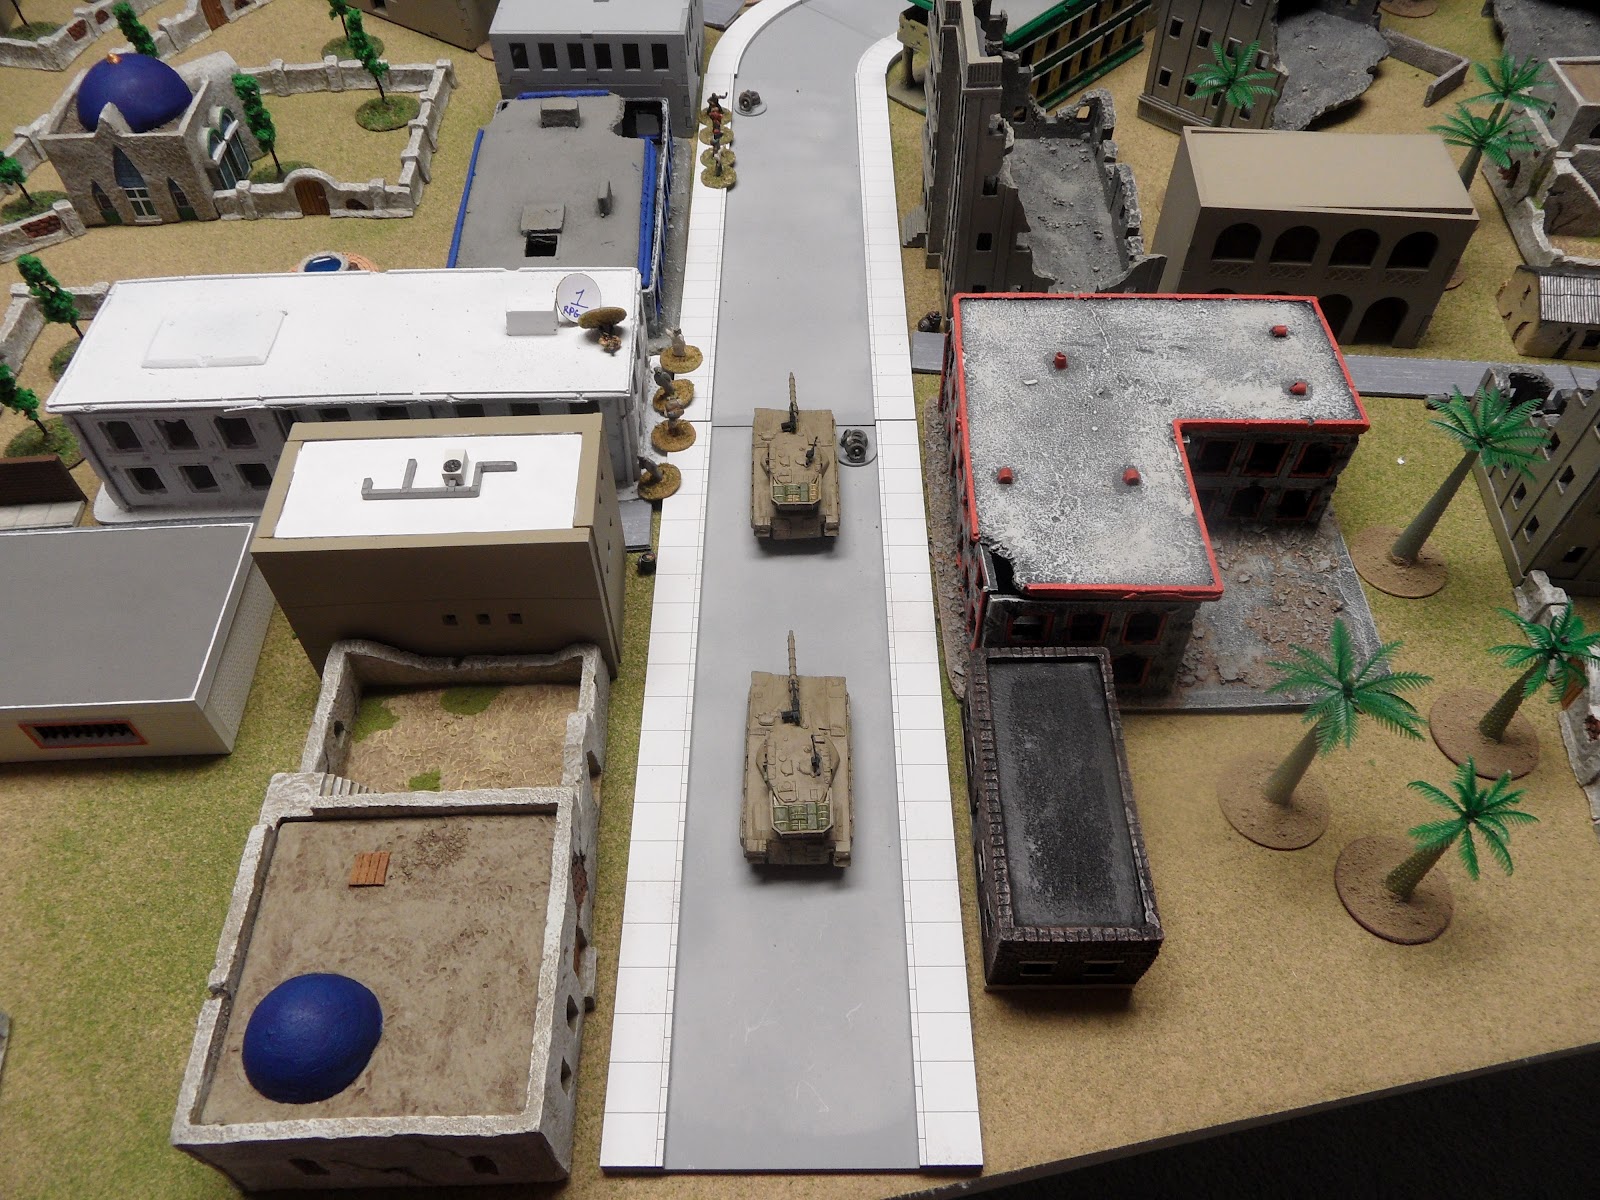
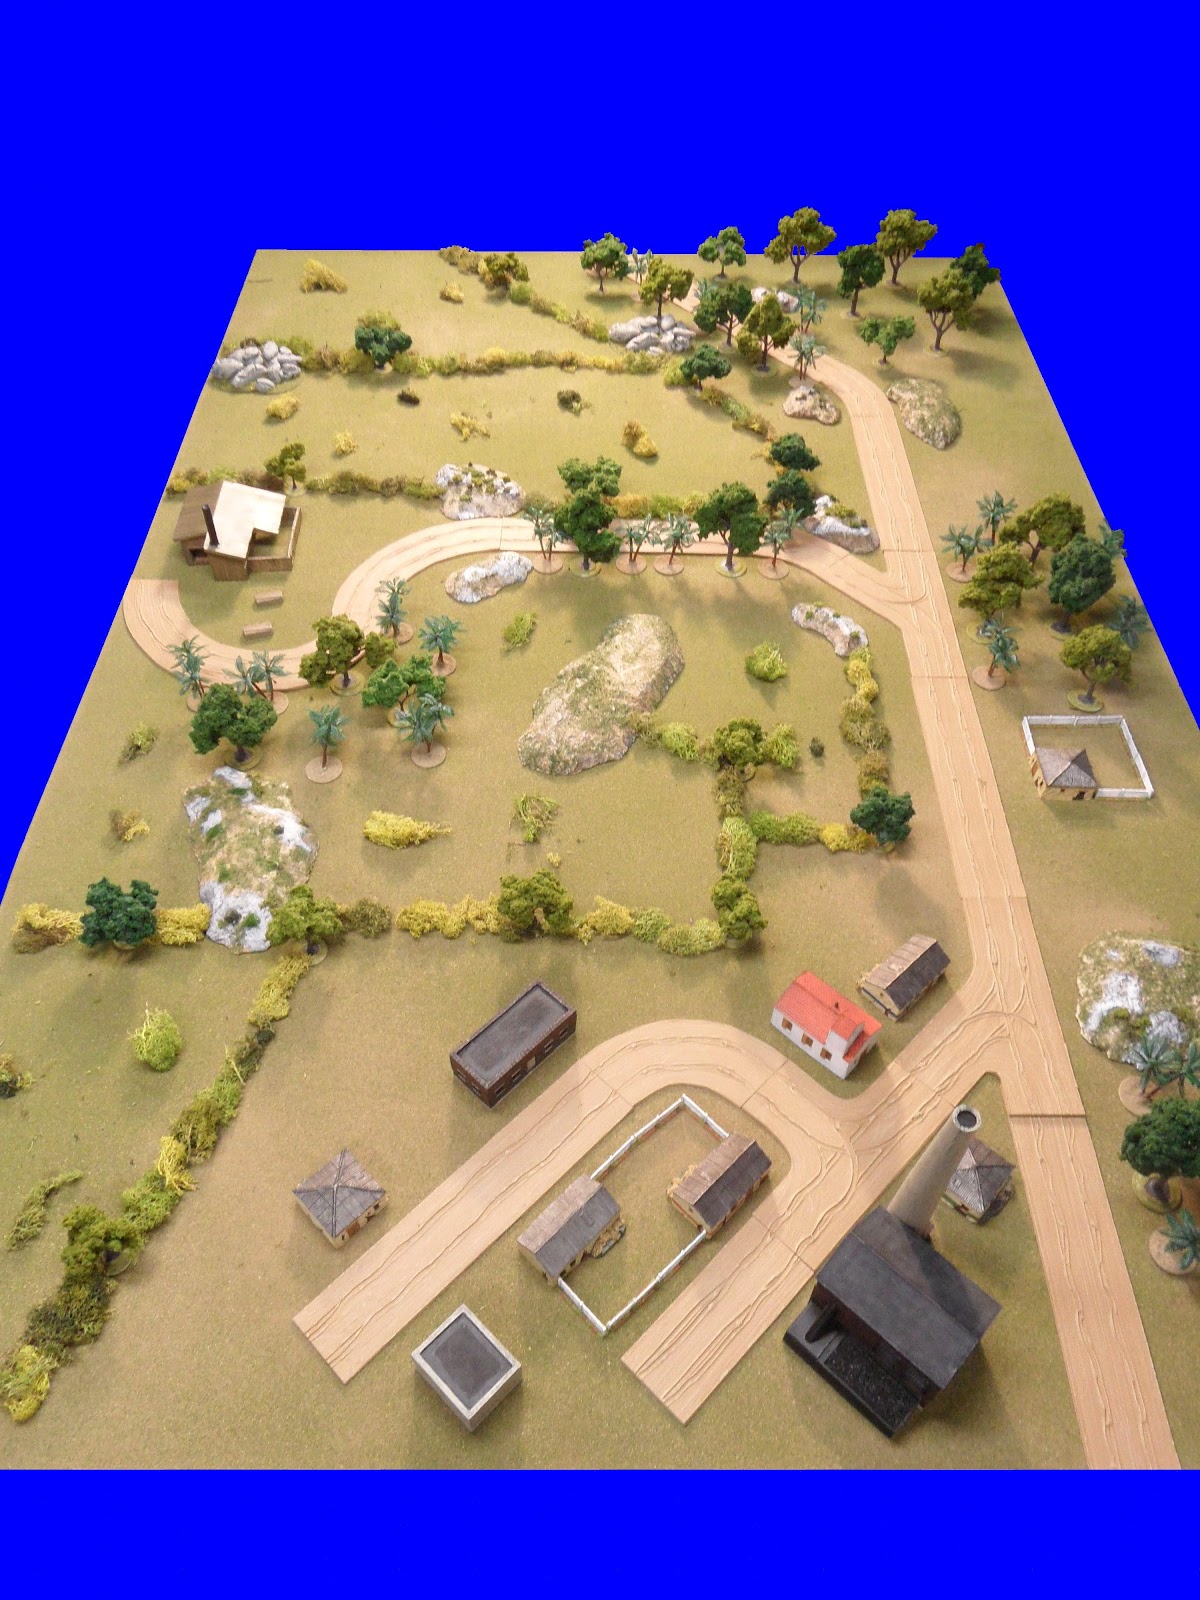
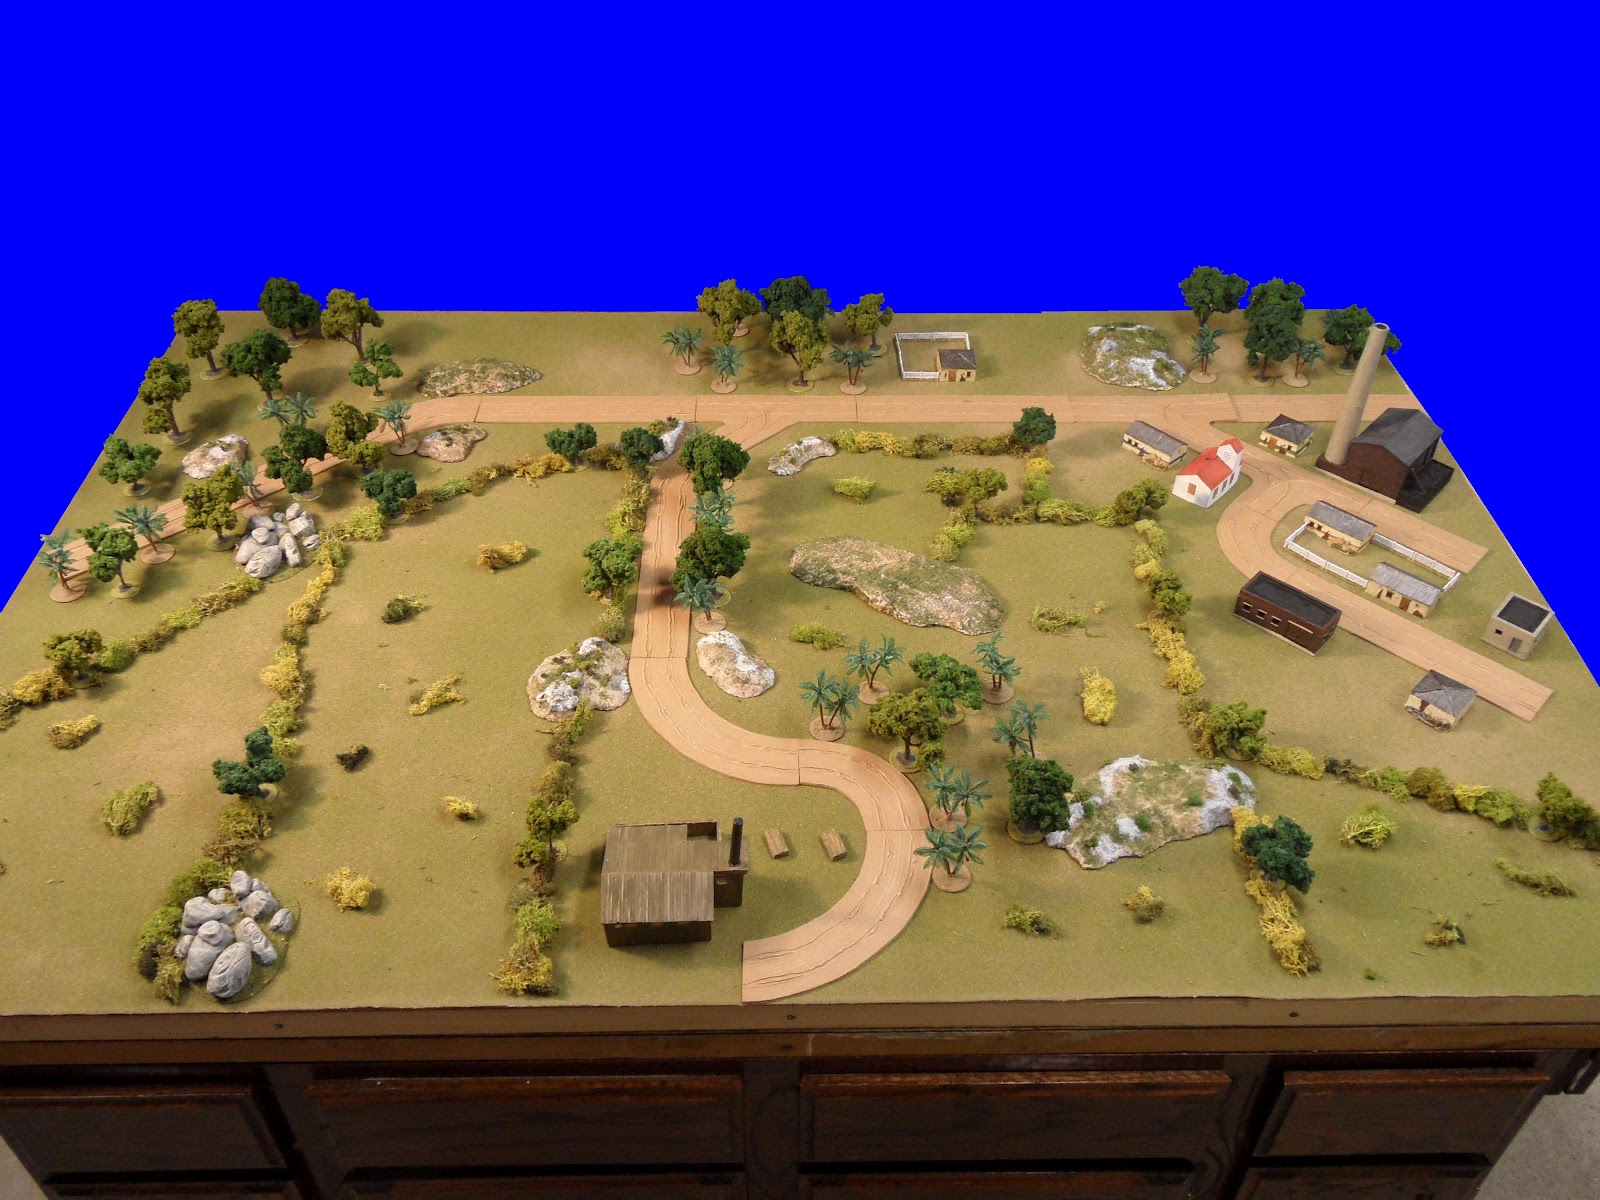
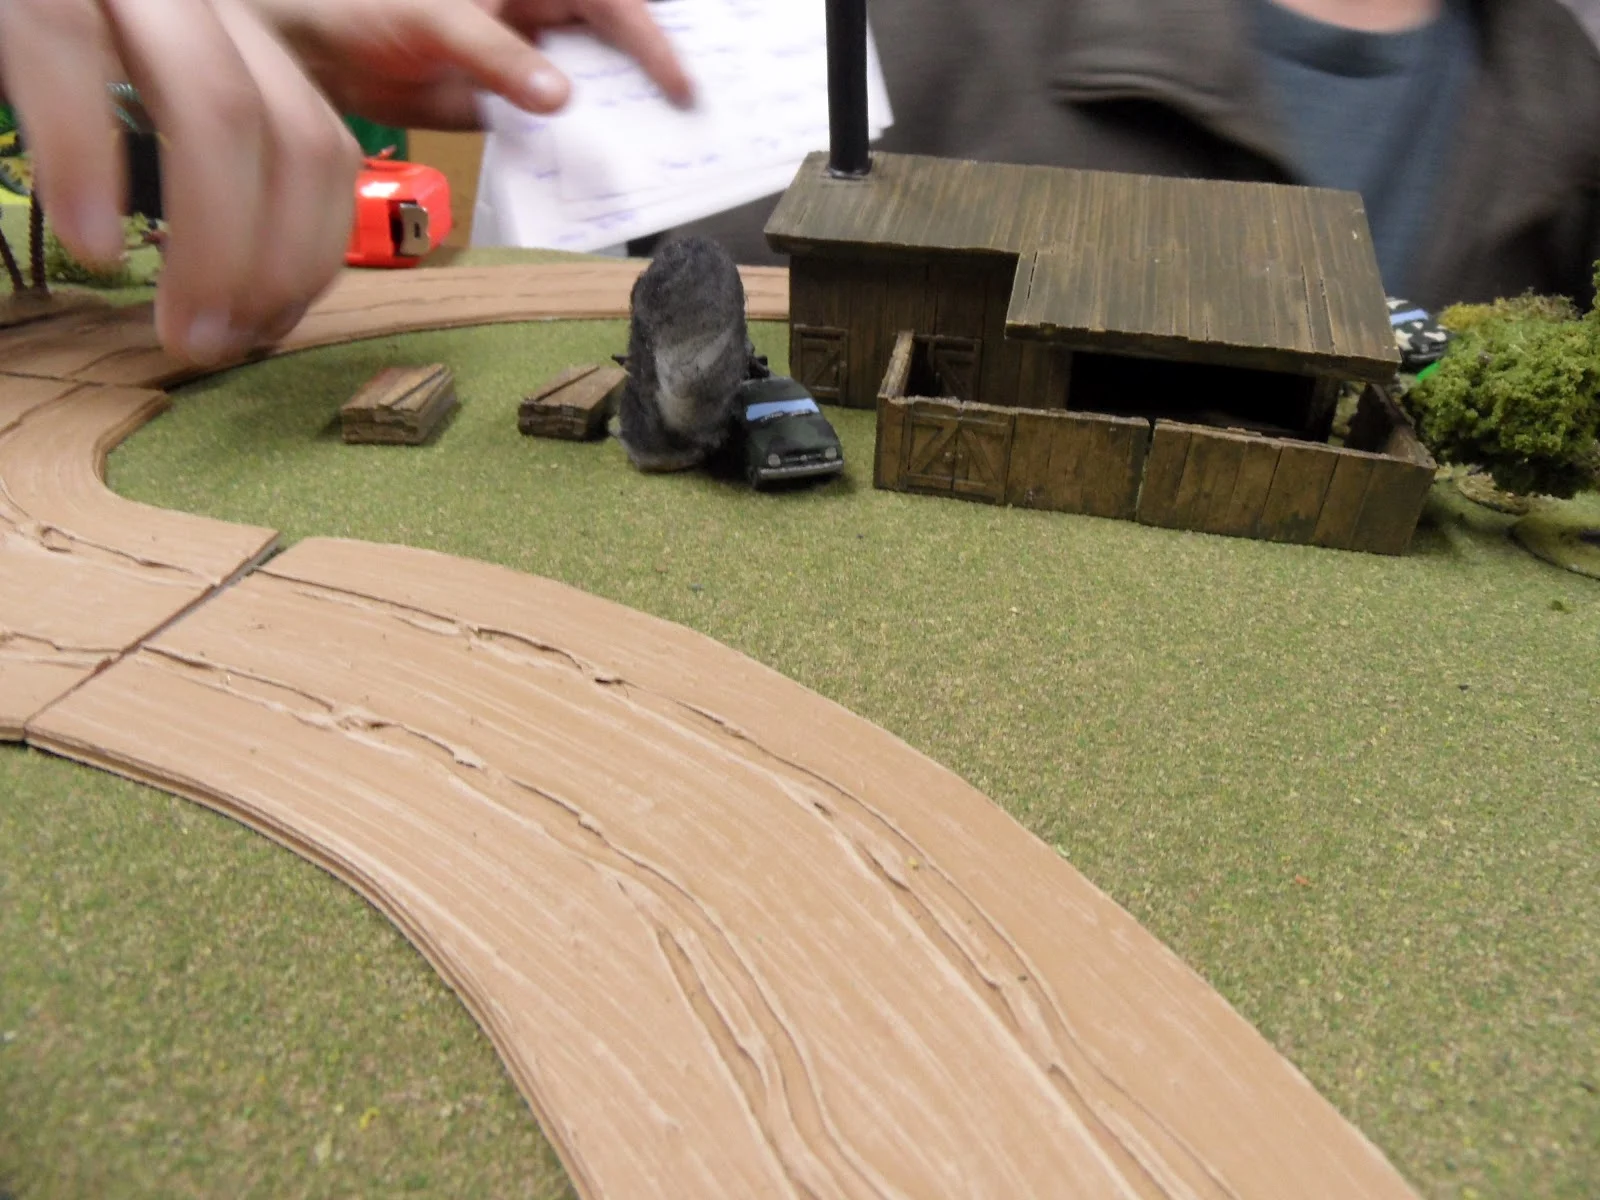
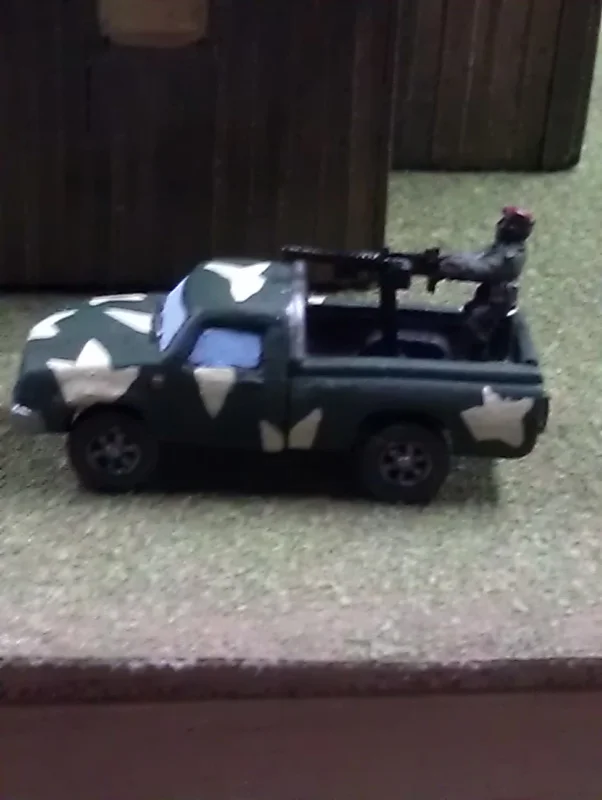
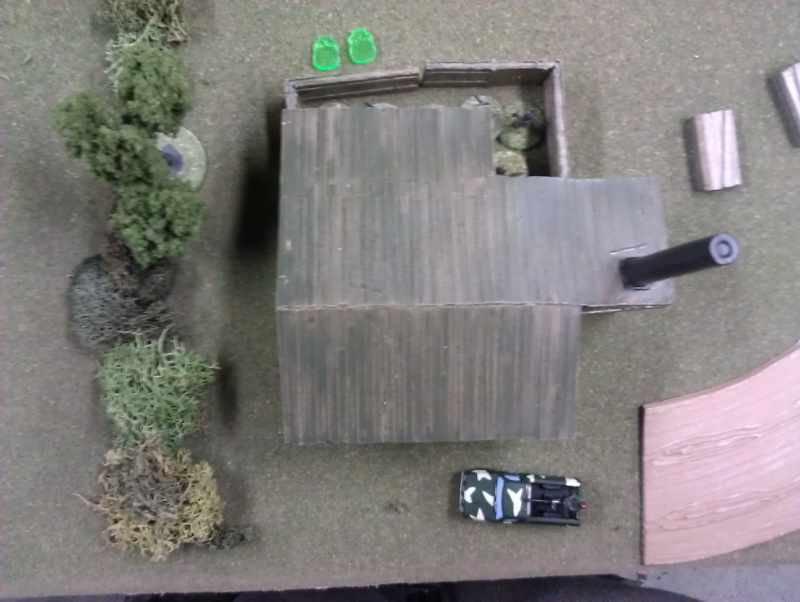
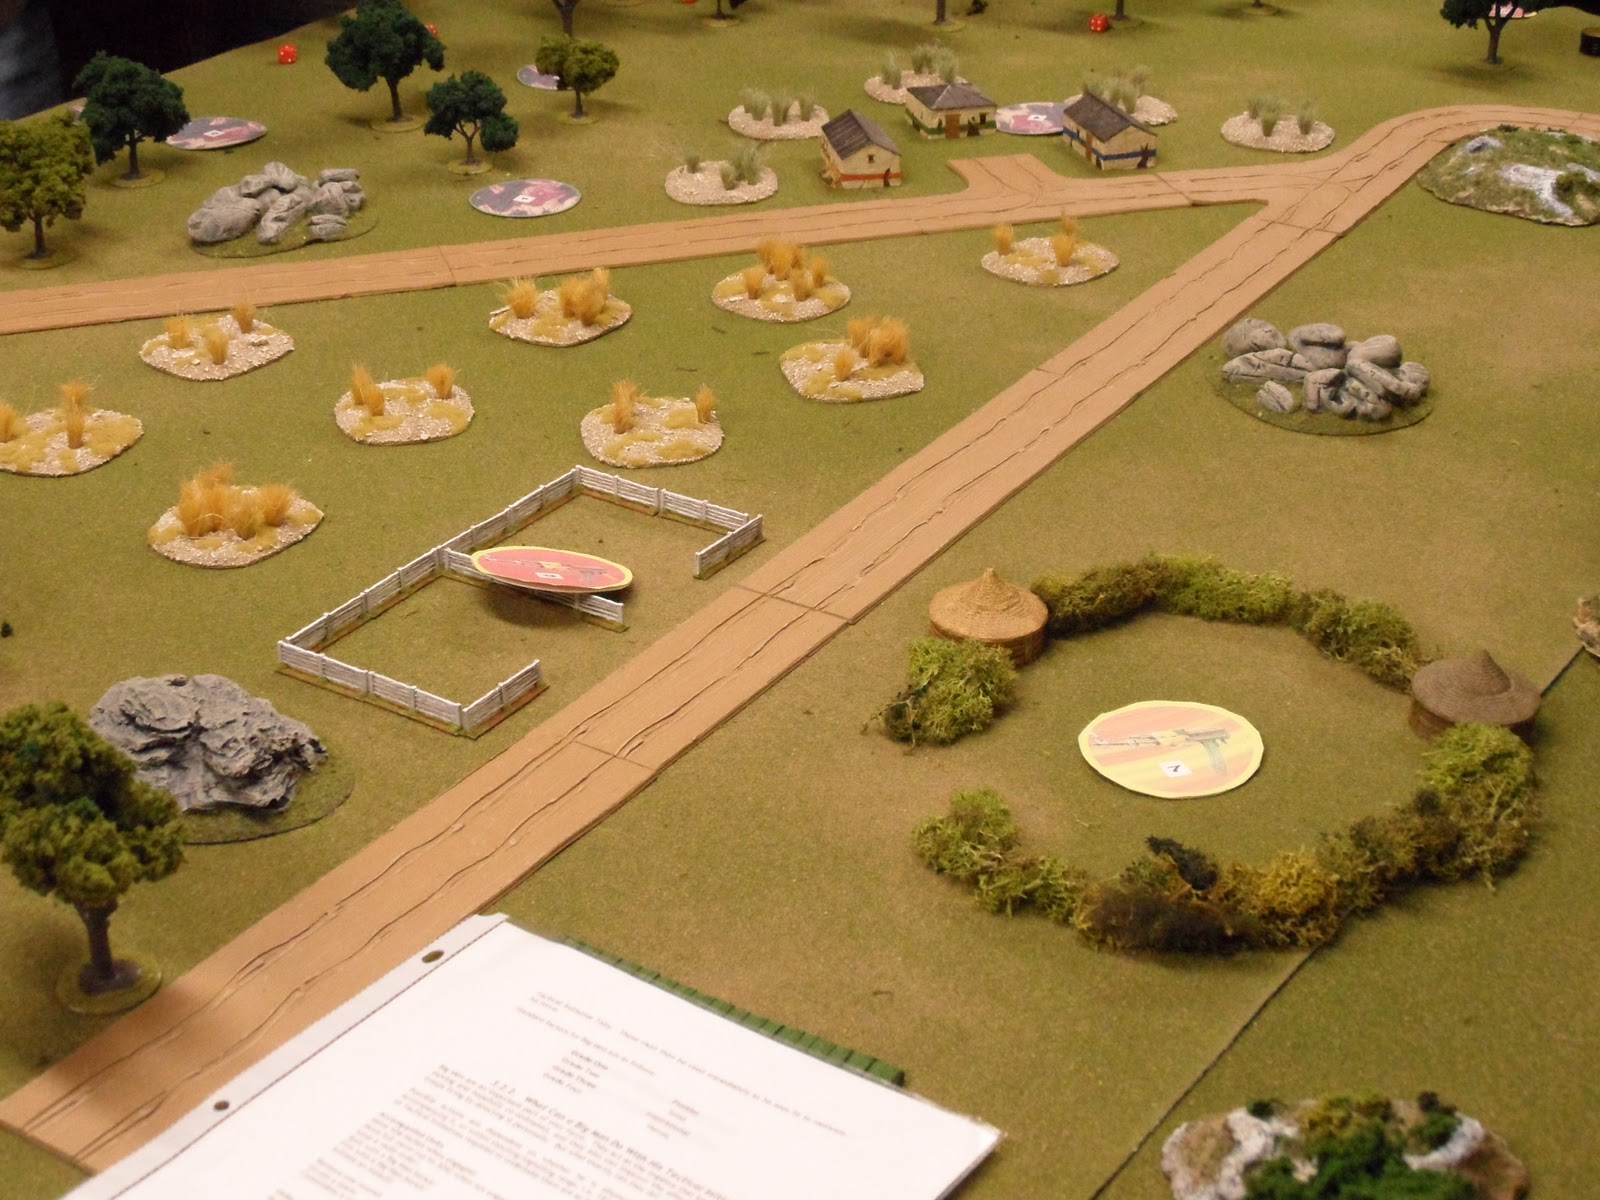
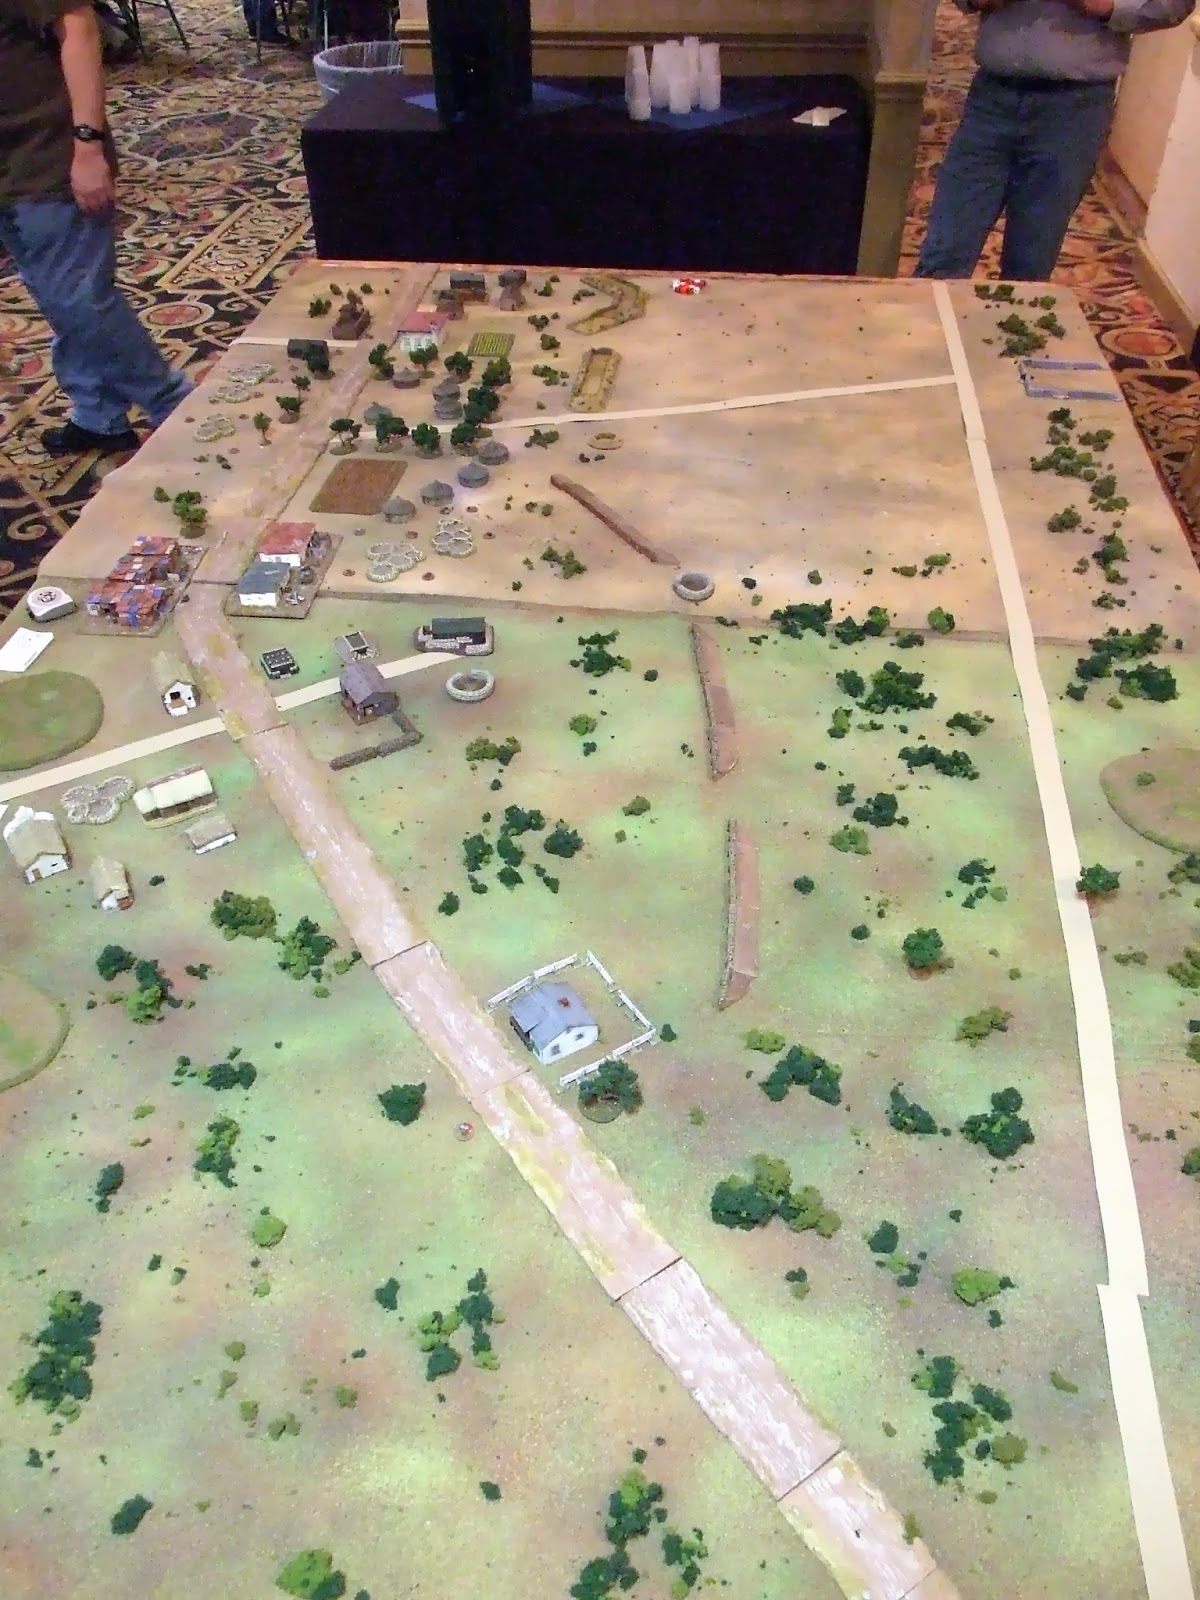
The other really interesting aspect was that it was played using 10mm Pendraken figures, a scale I would not have thought of using for a Vietnam game, but I think you will agree that Dave J from Plymouth, one of our two visitor organised games, carried it off really well with an exquisite table to match the figures.

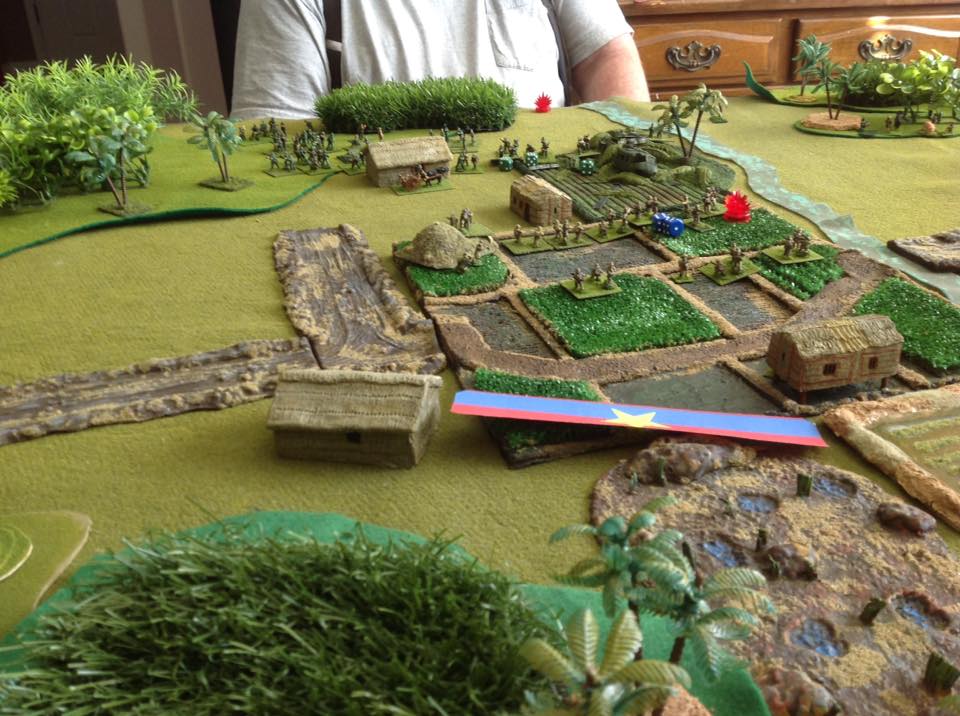
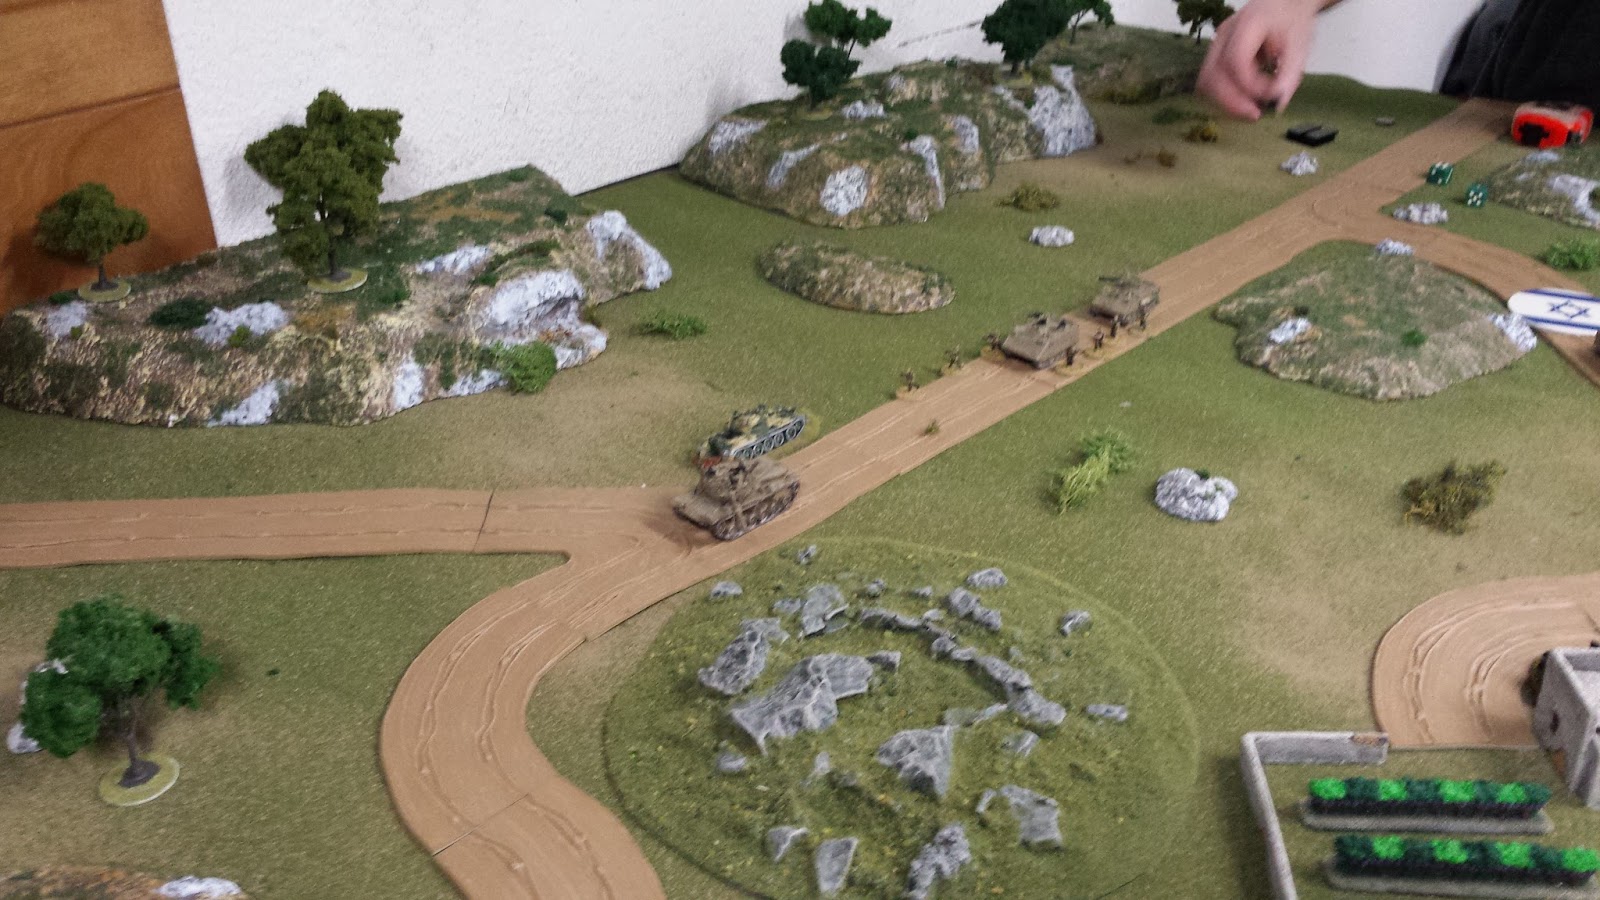
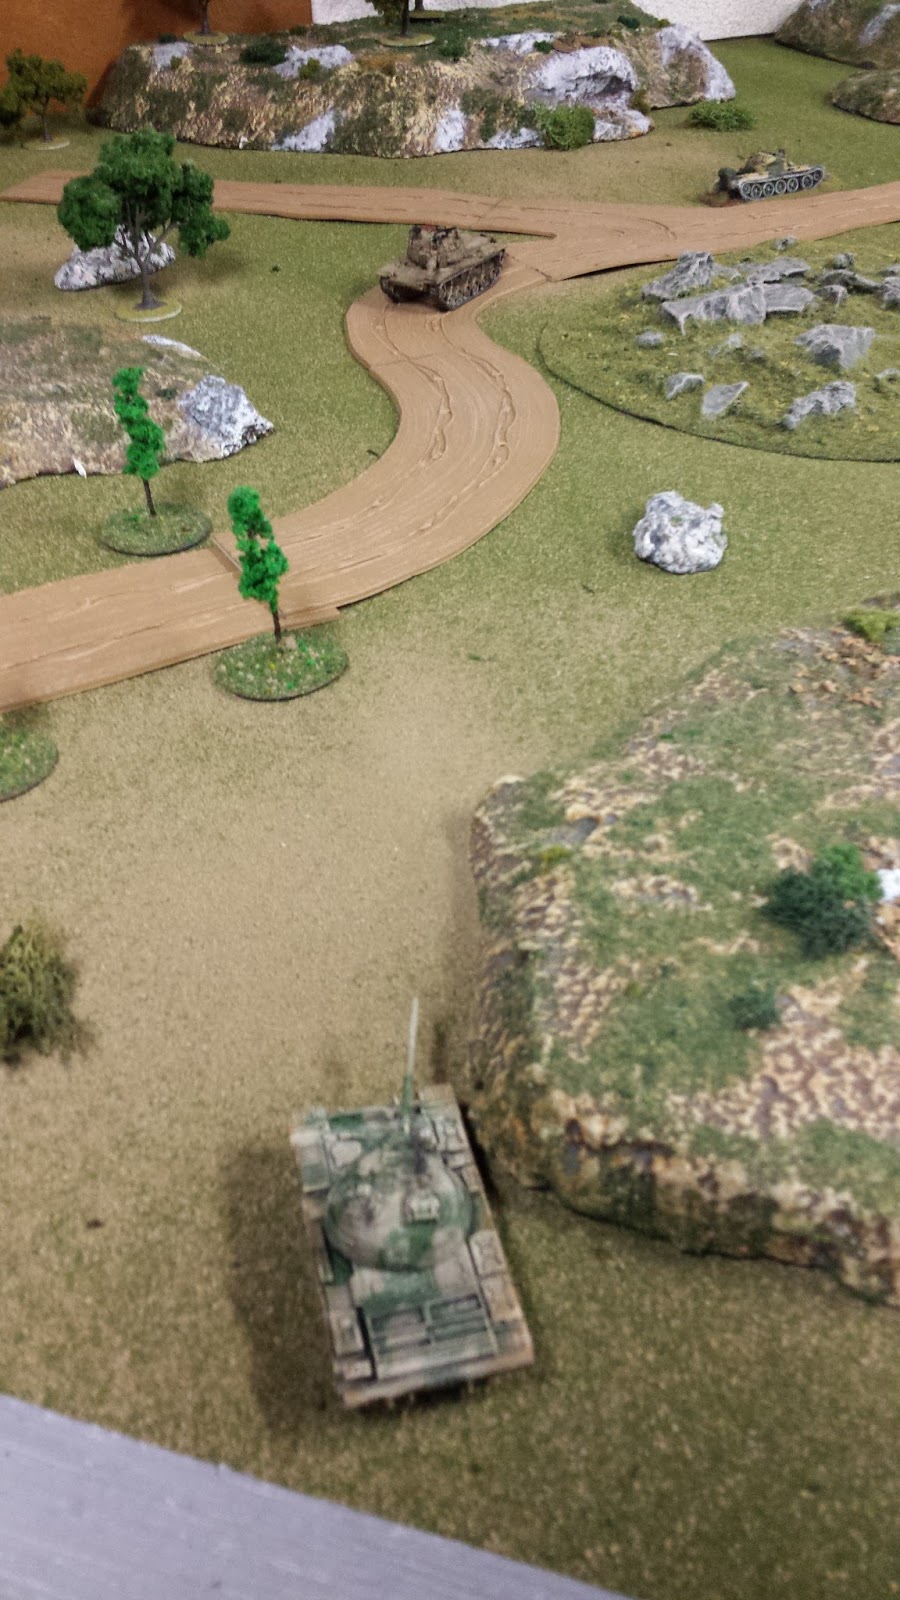
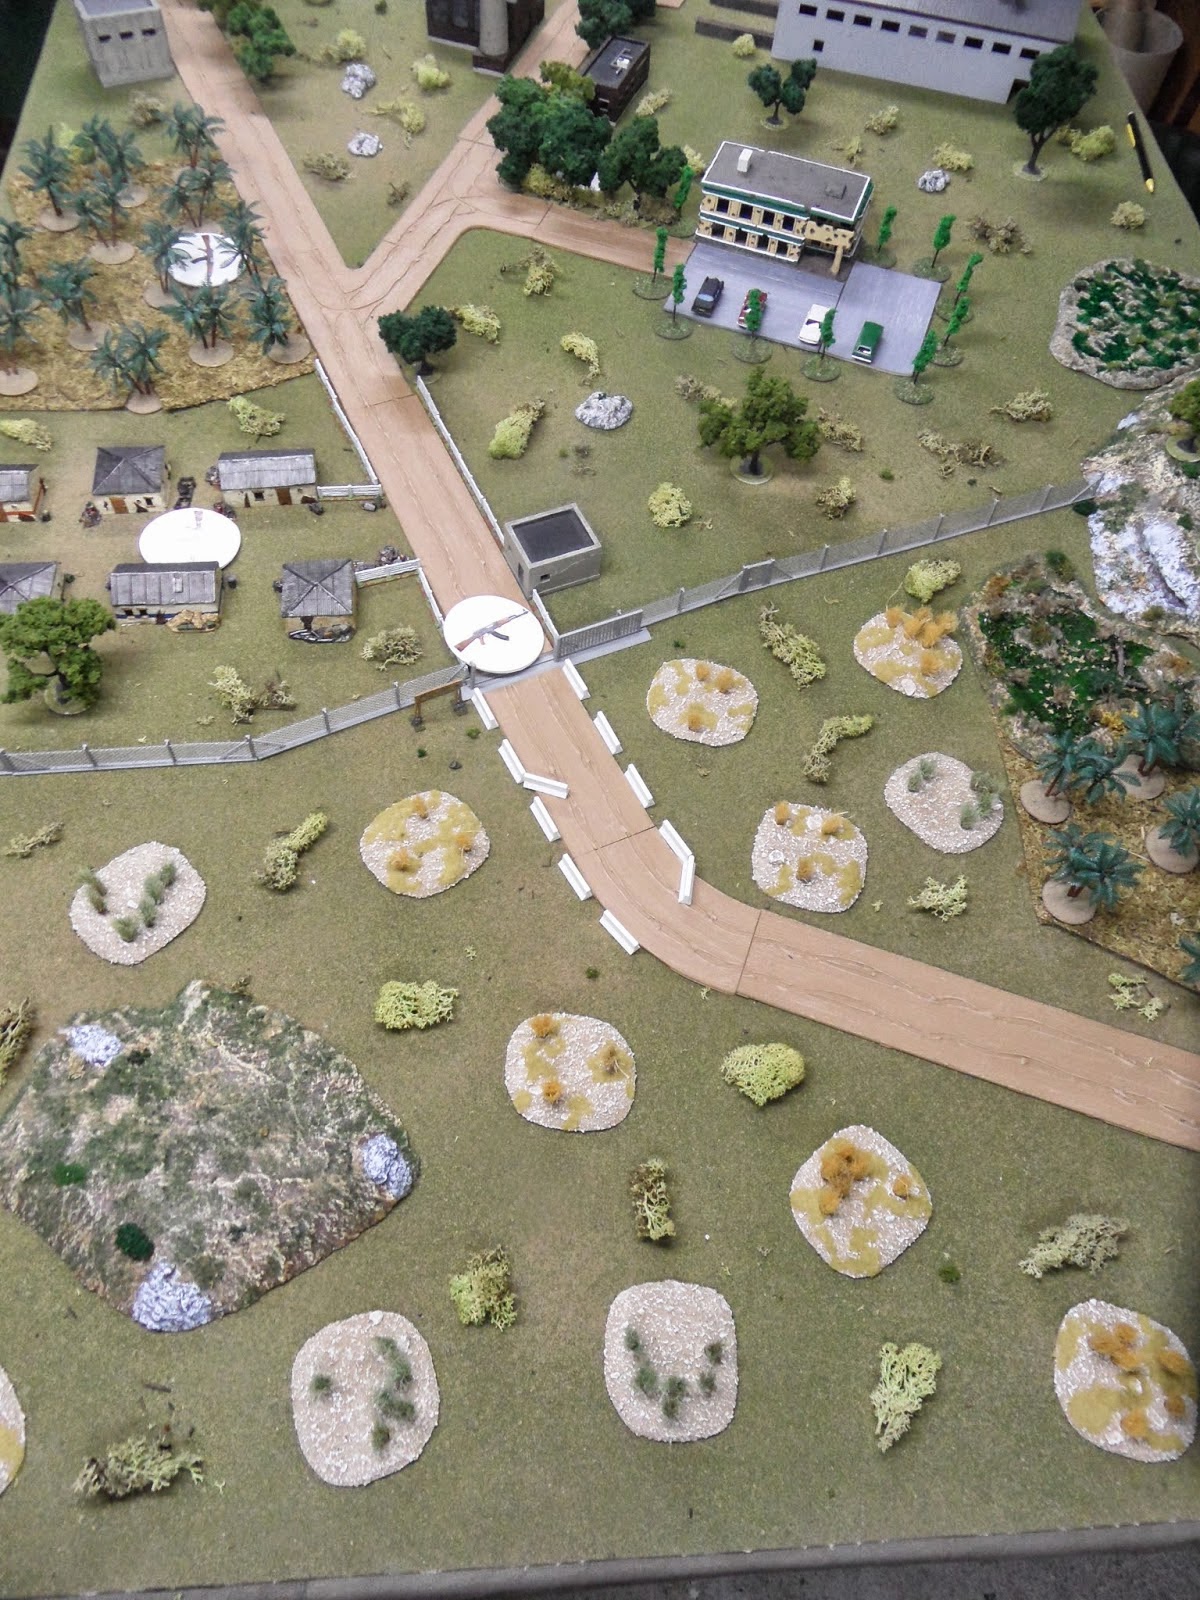
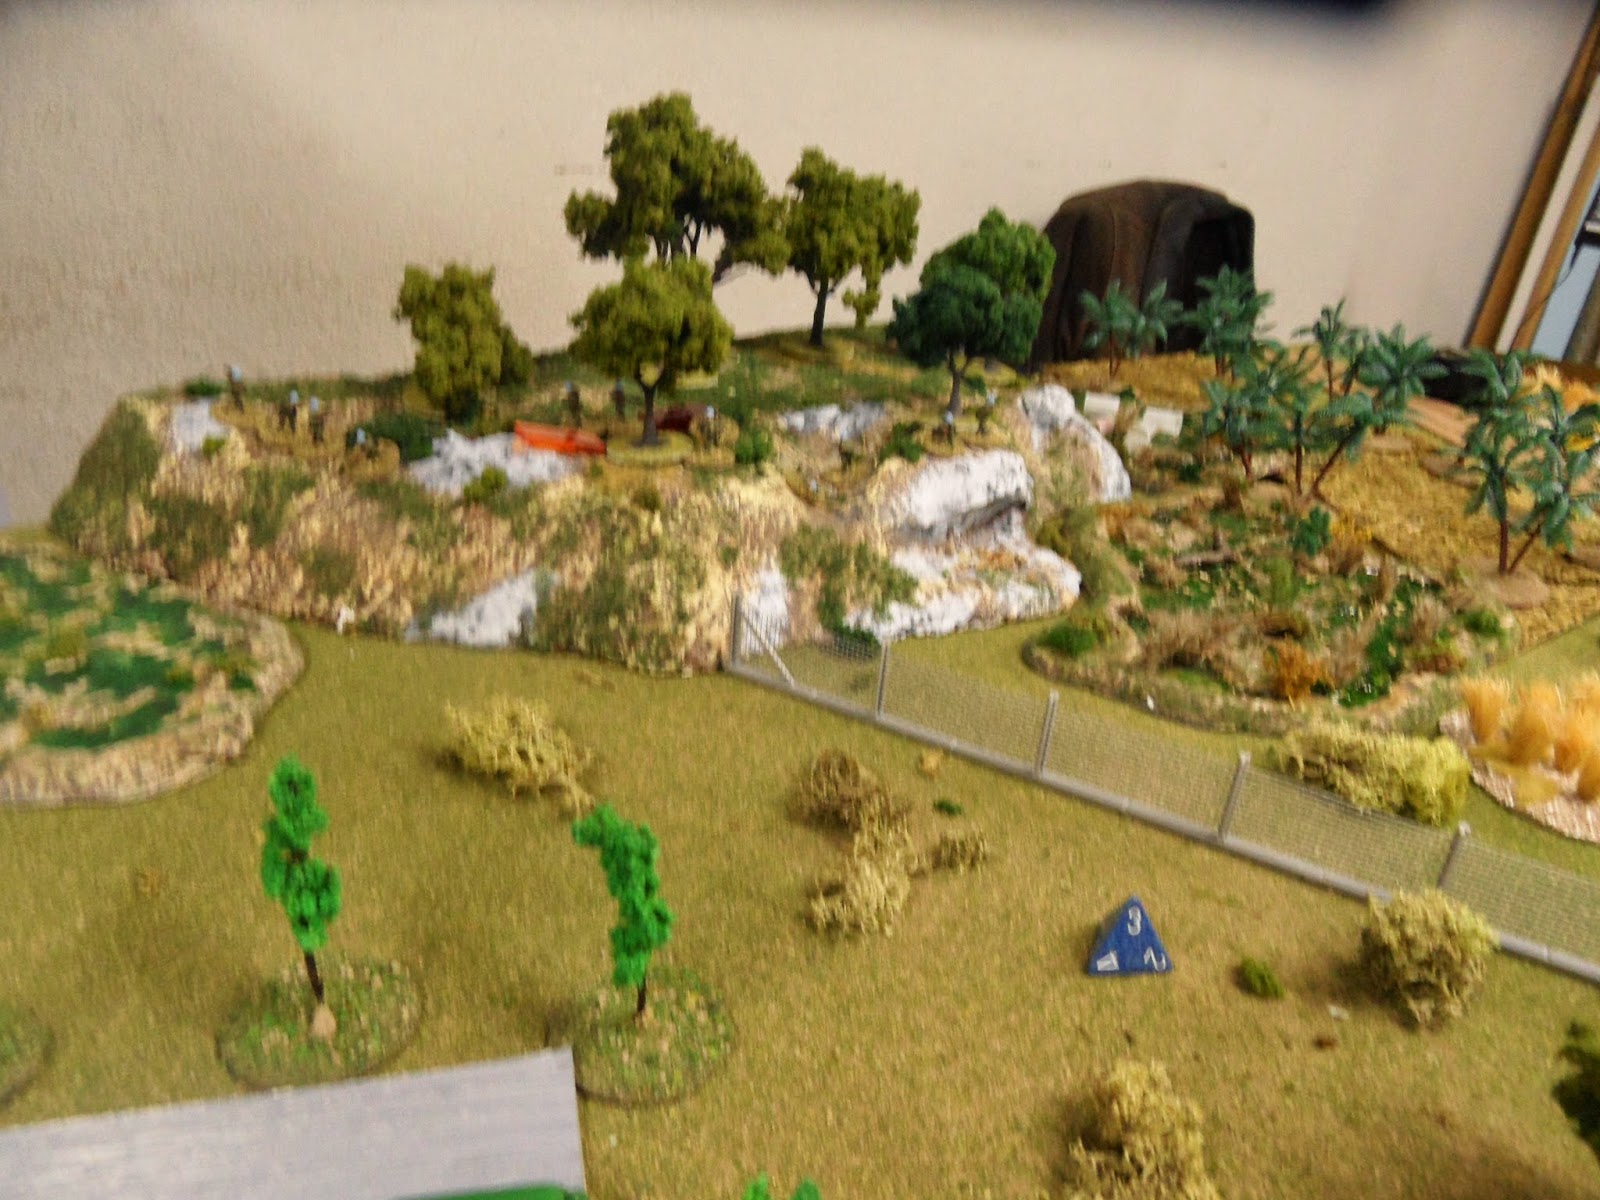
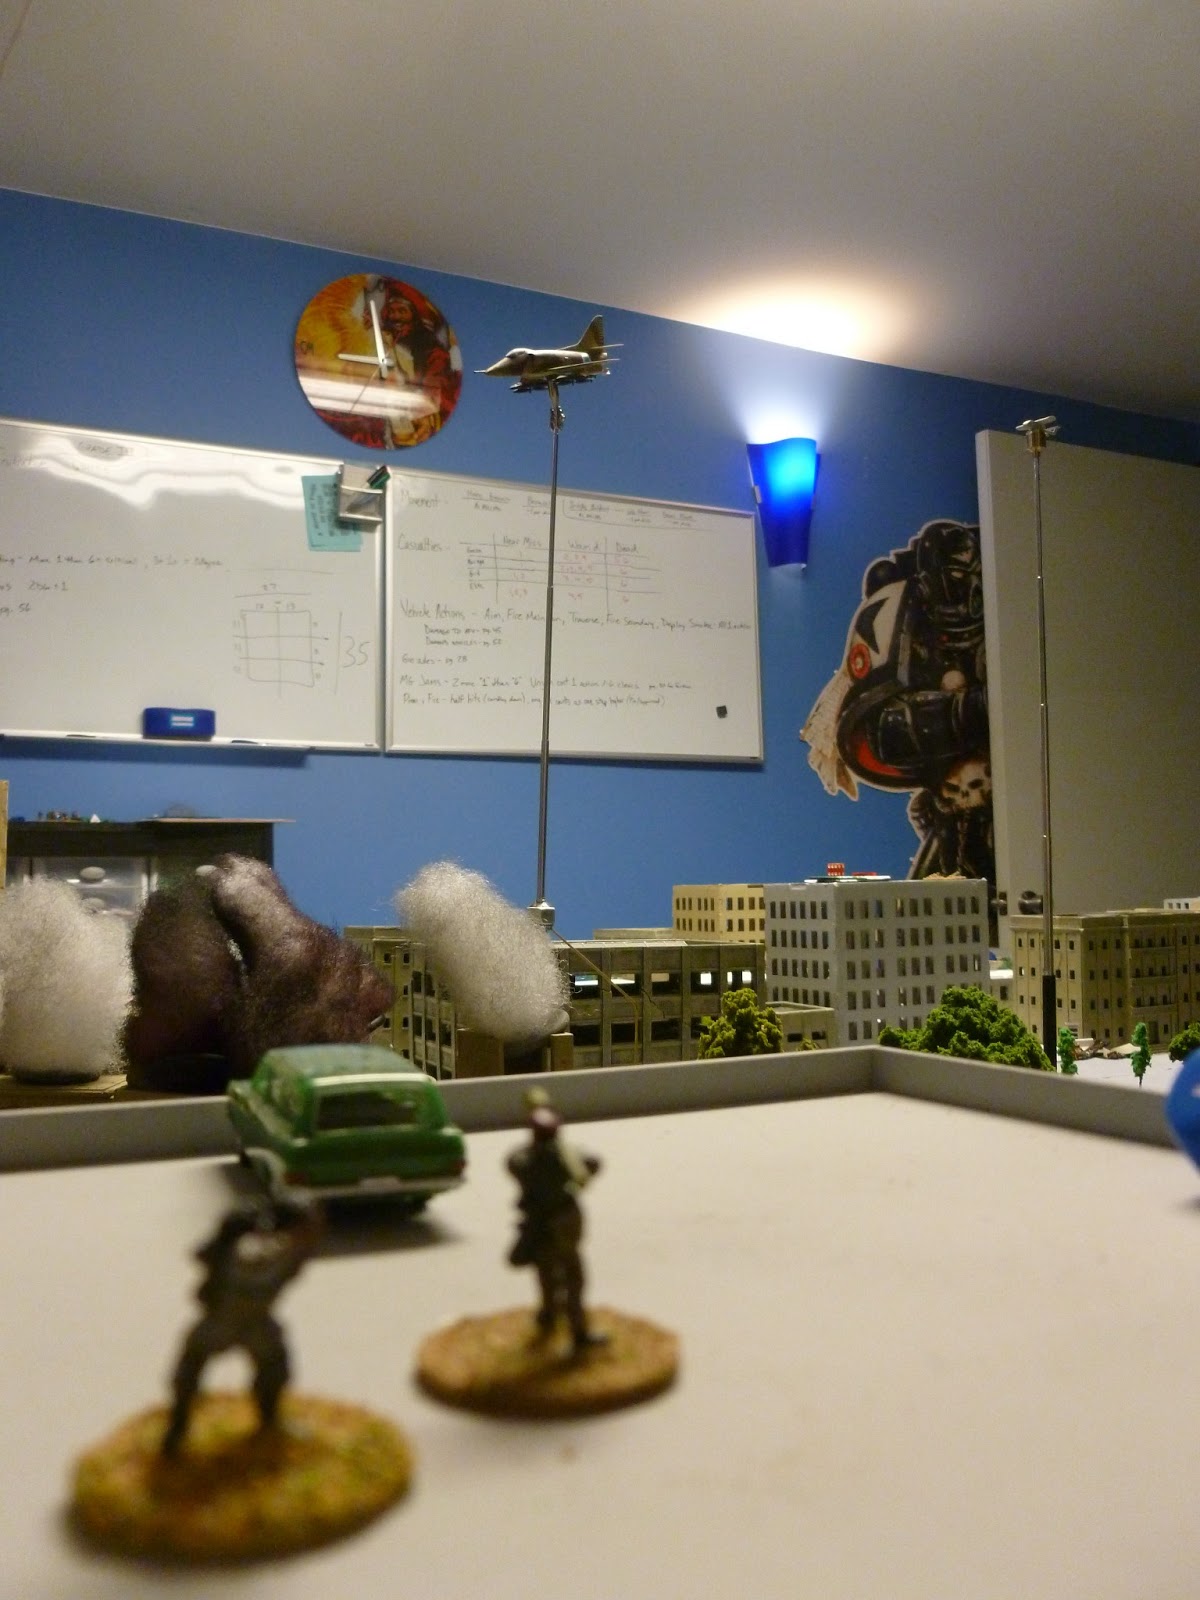
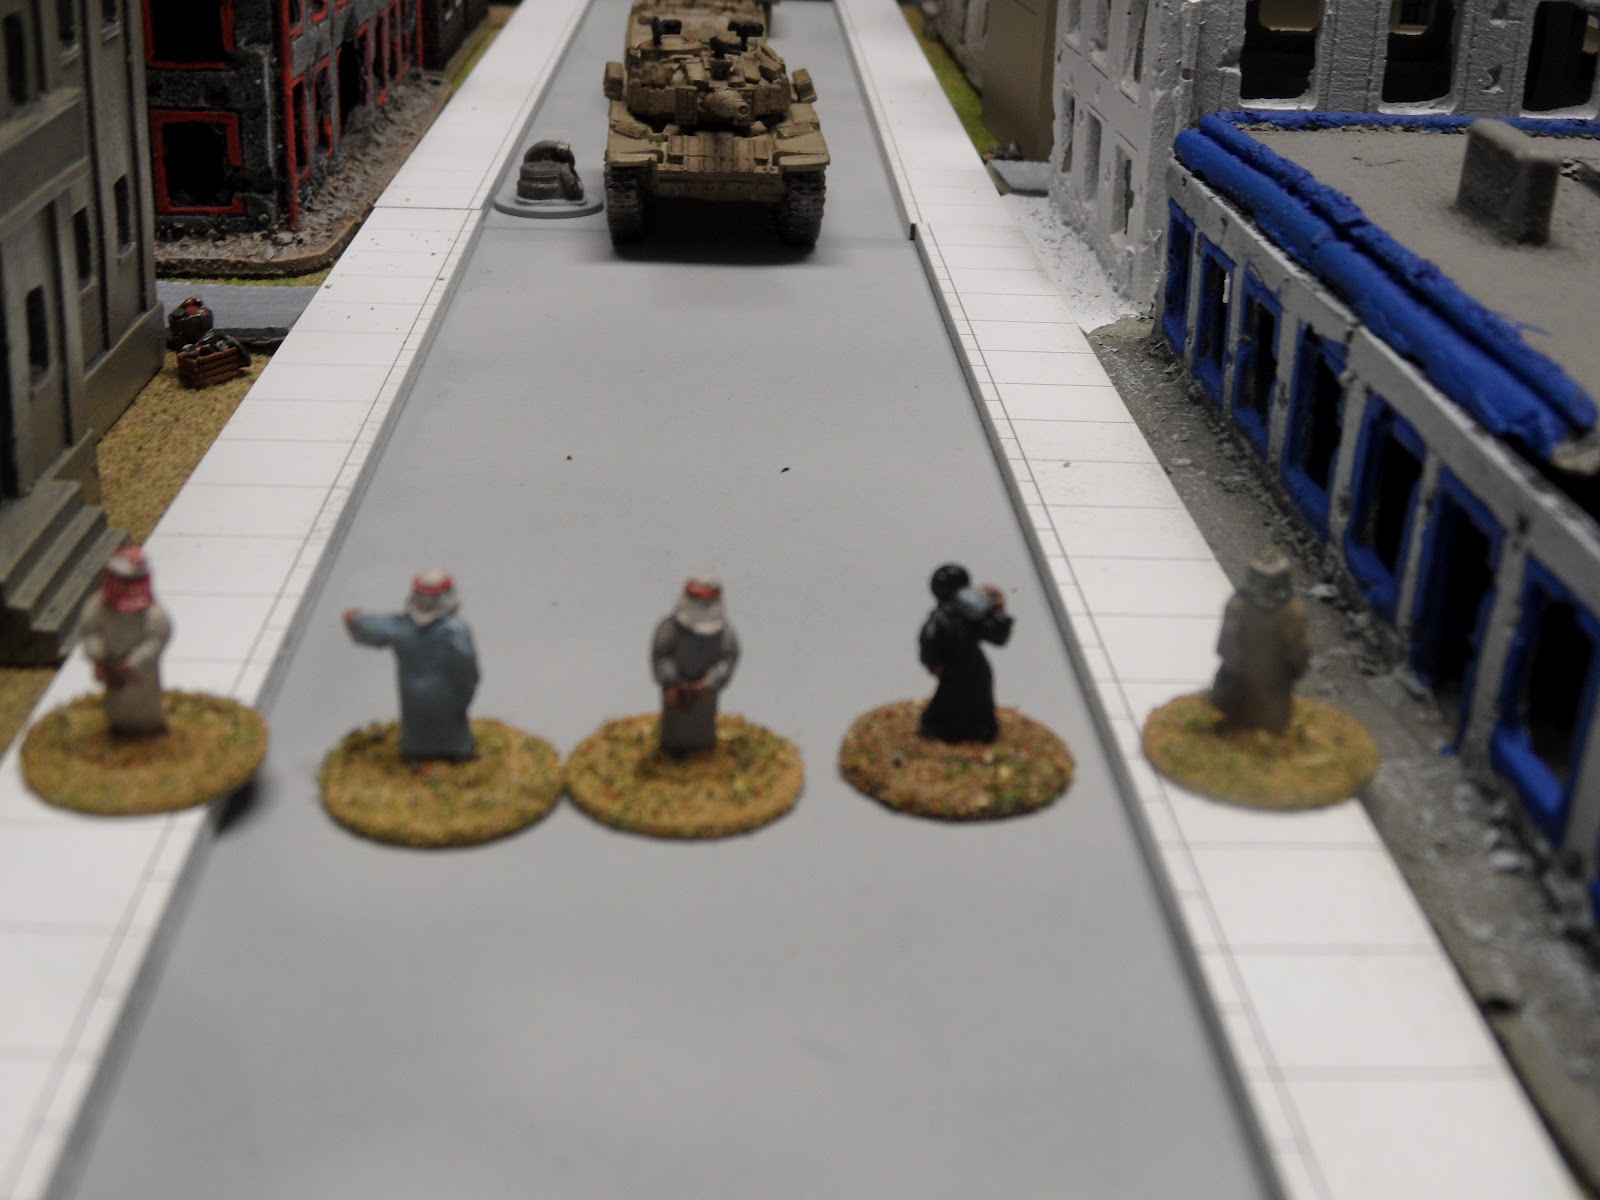
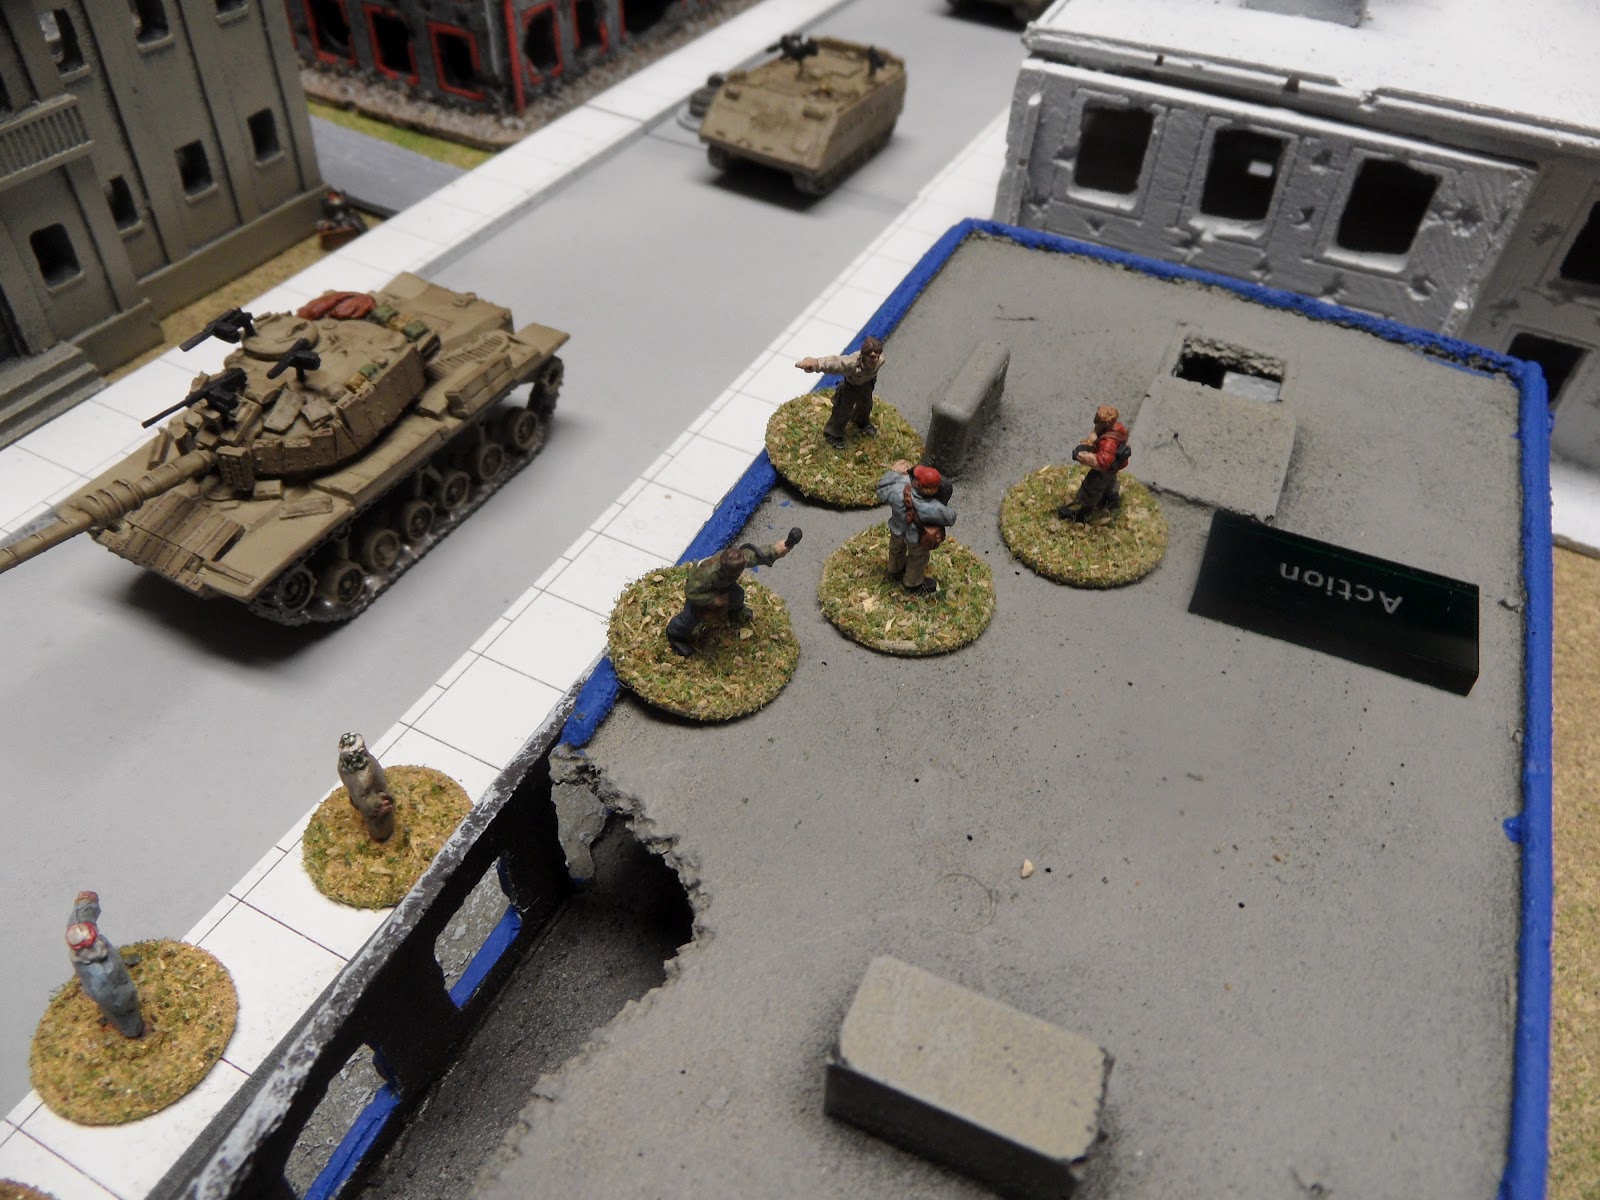
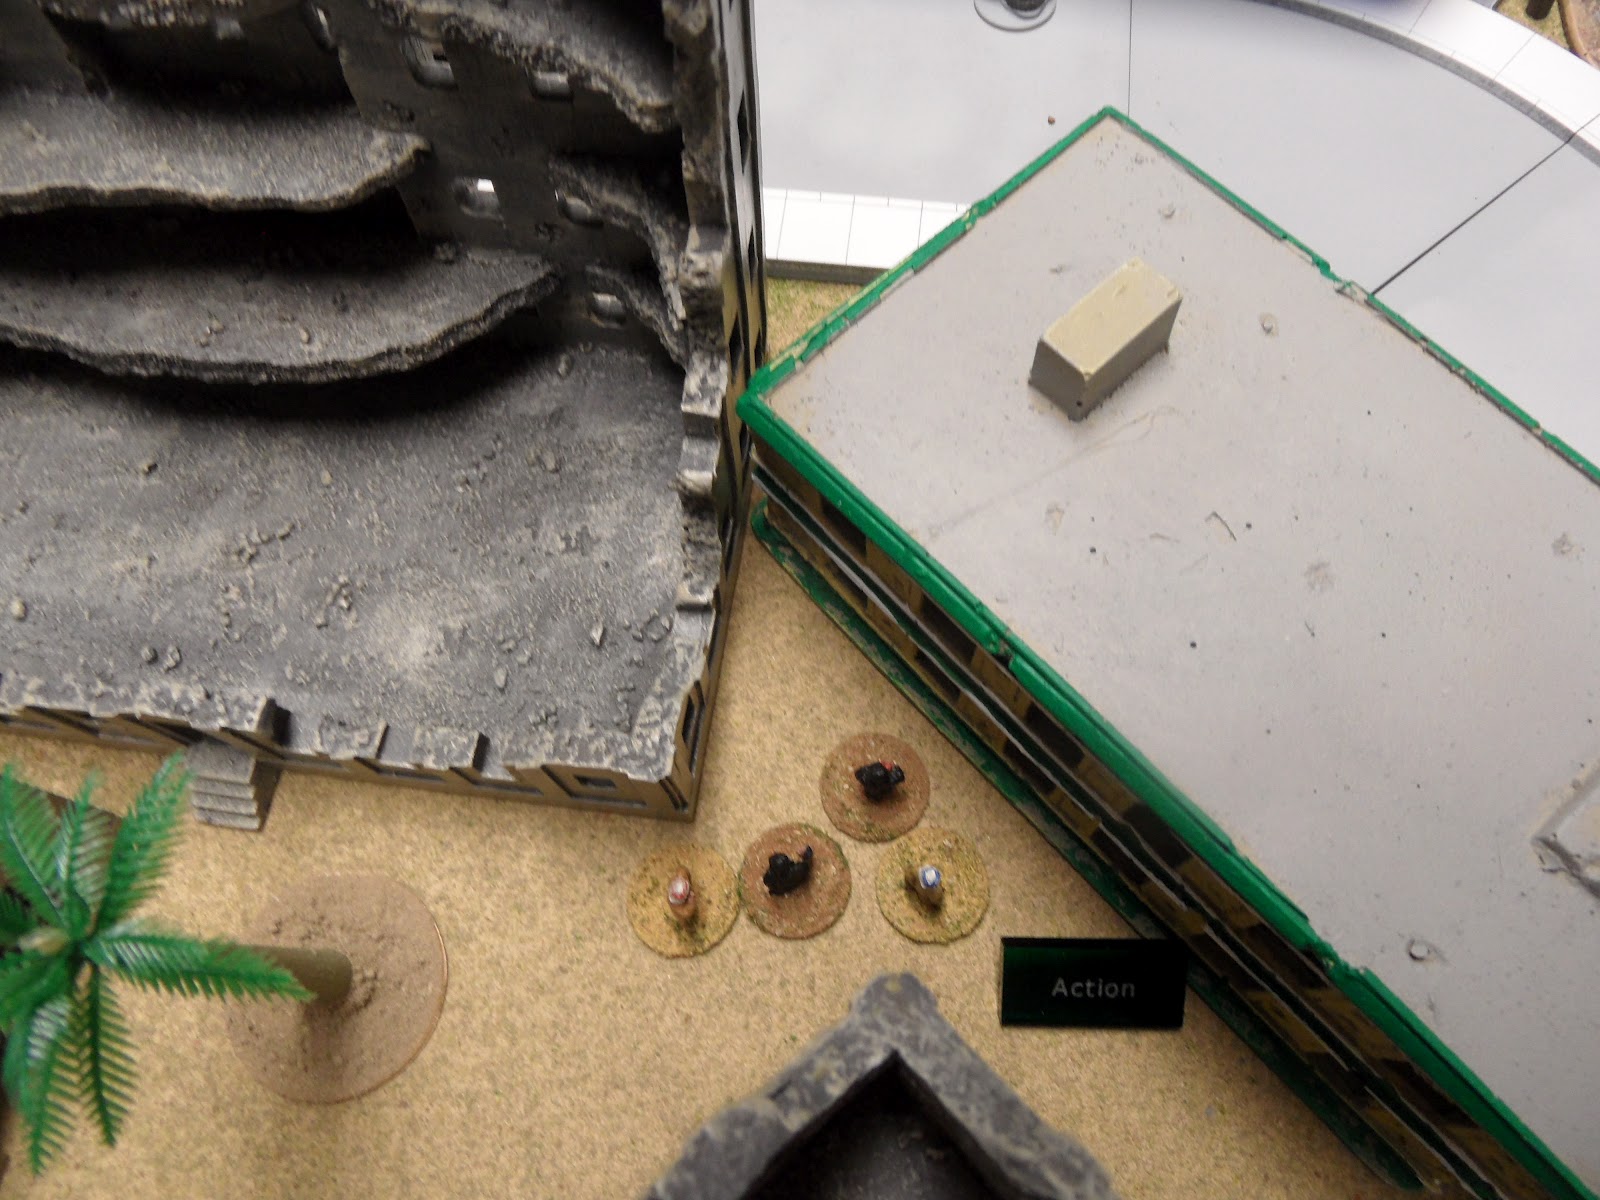
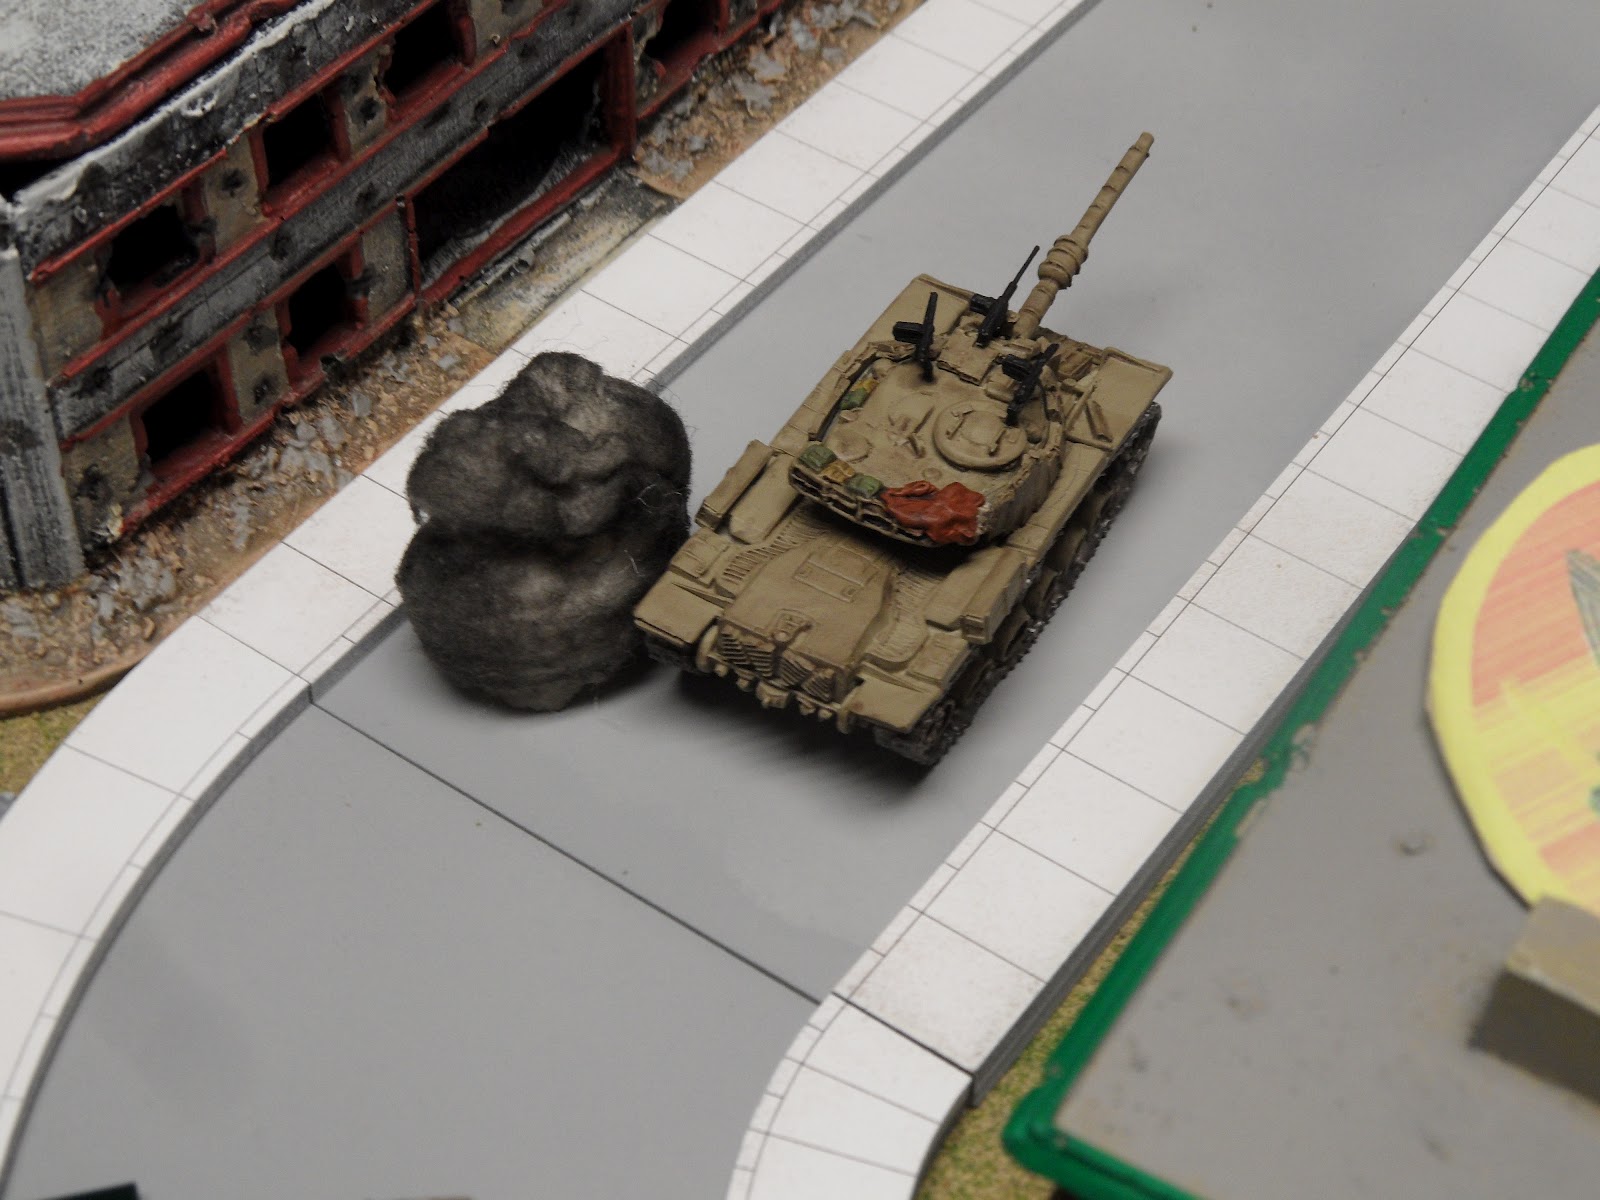
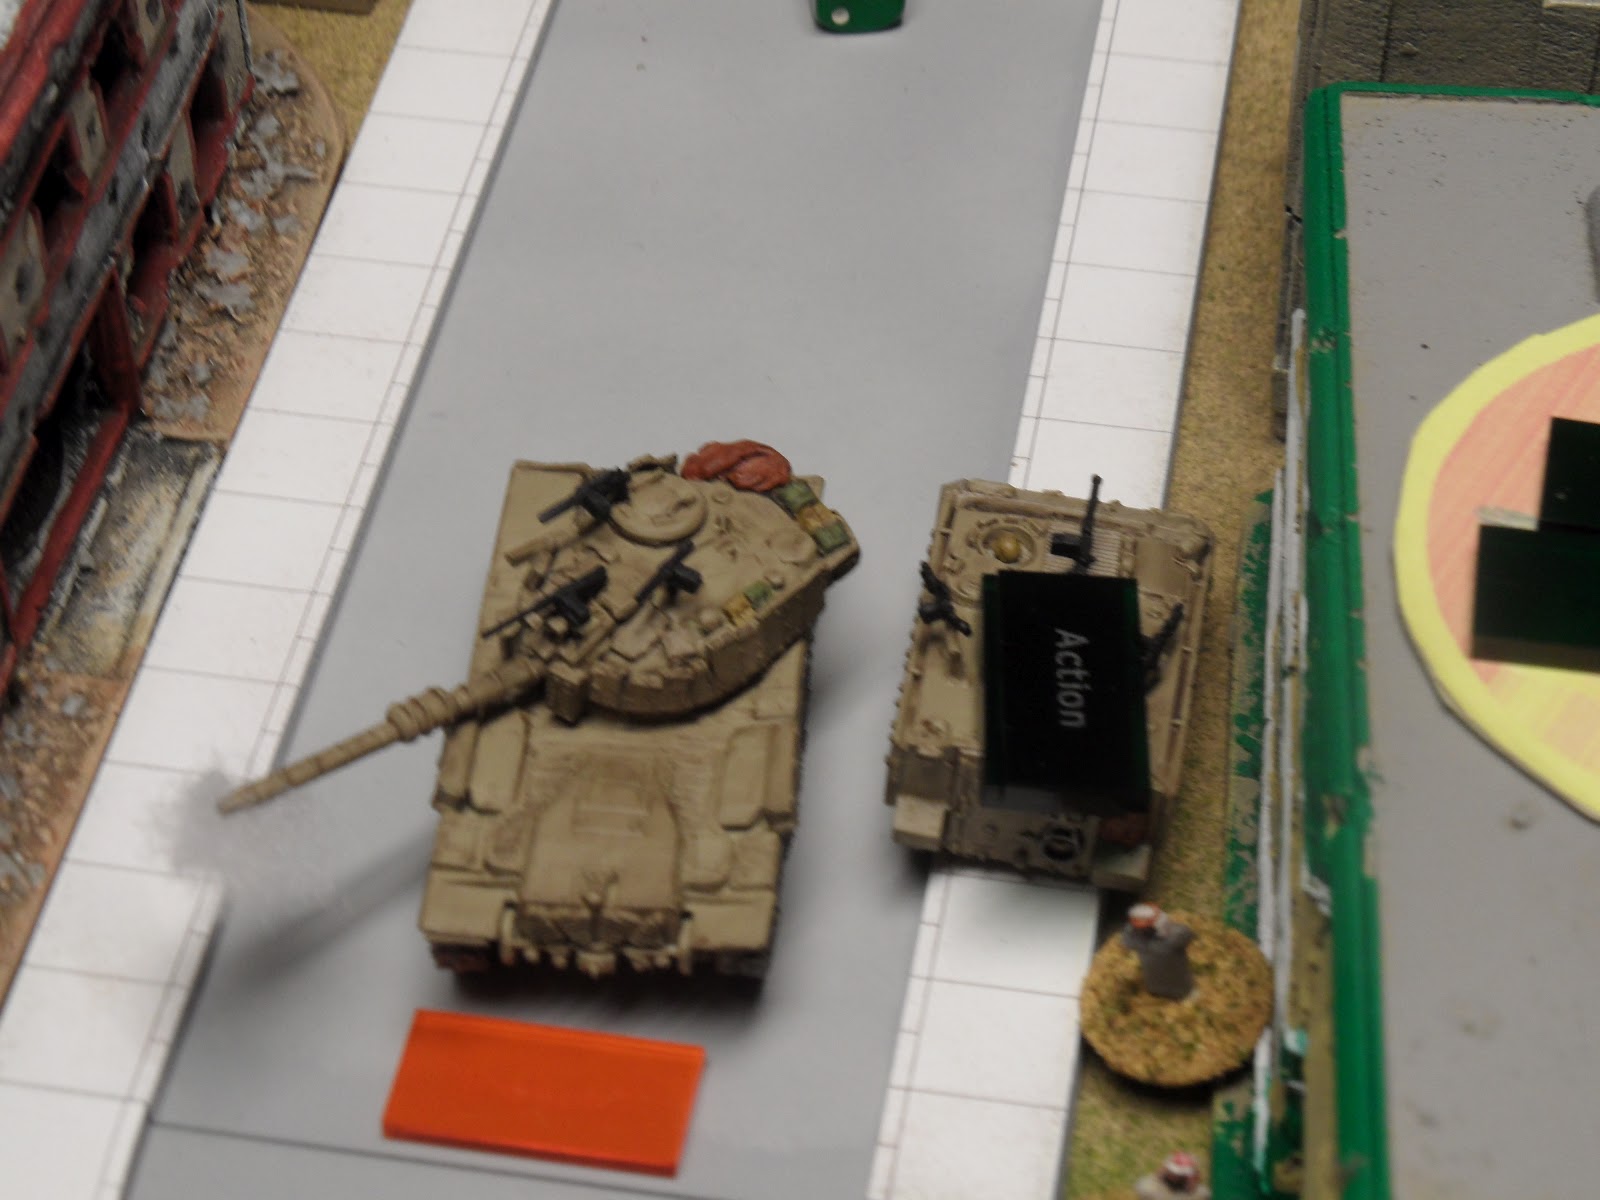
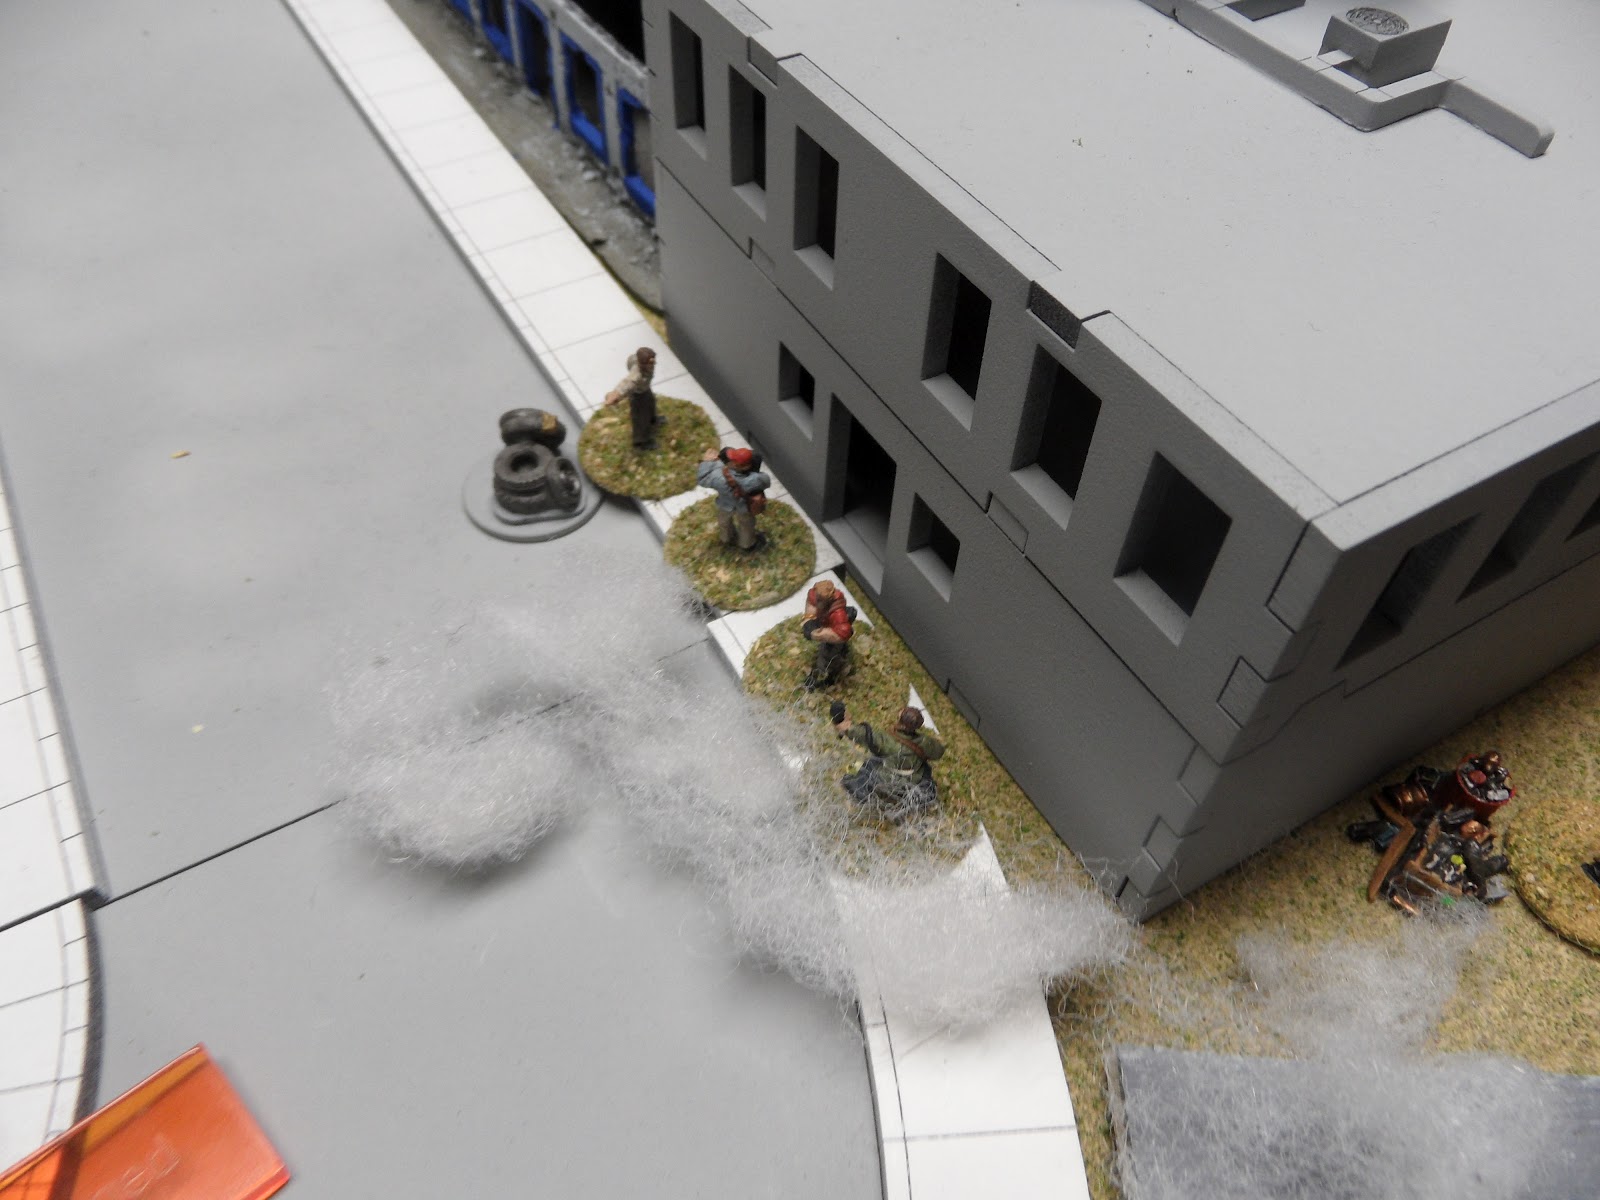
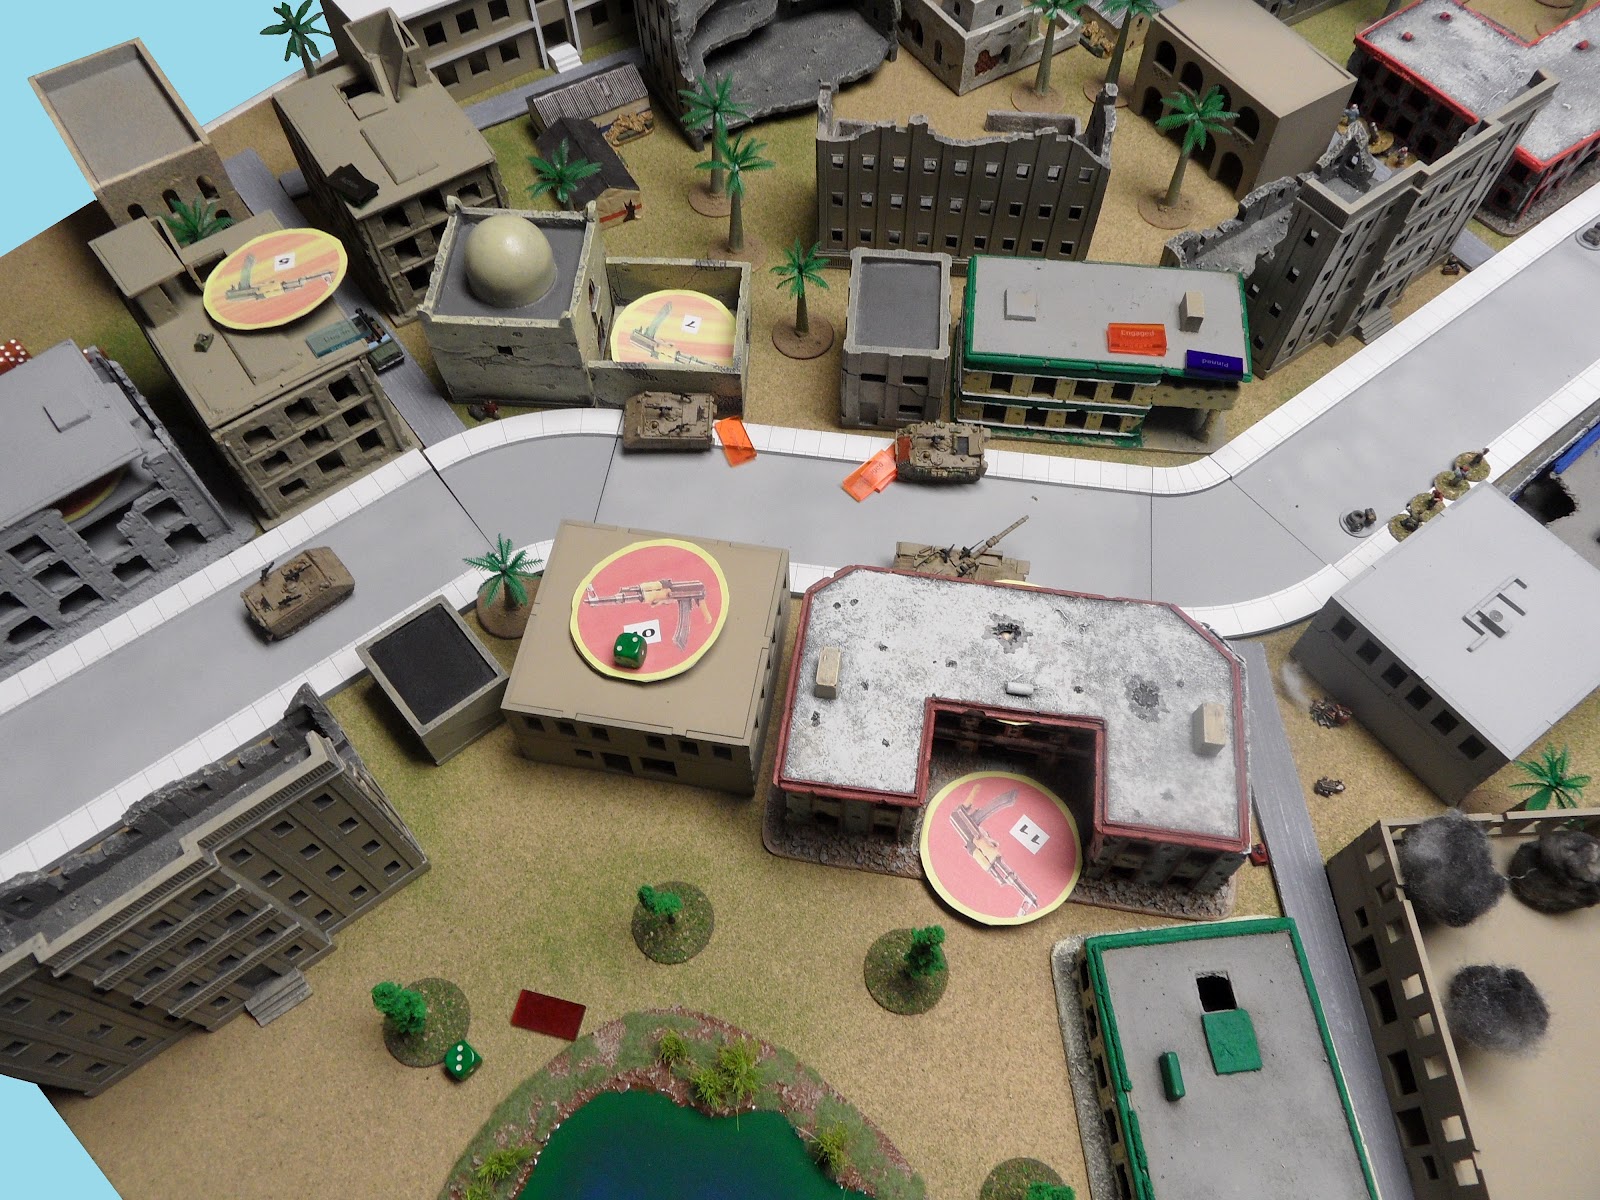
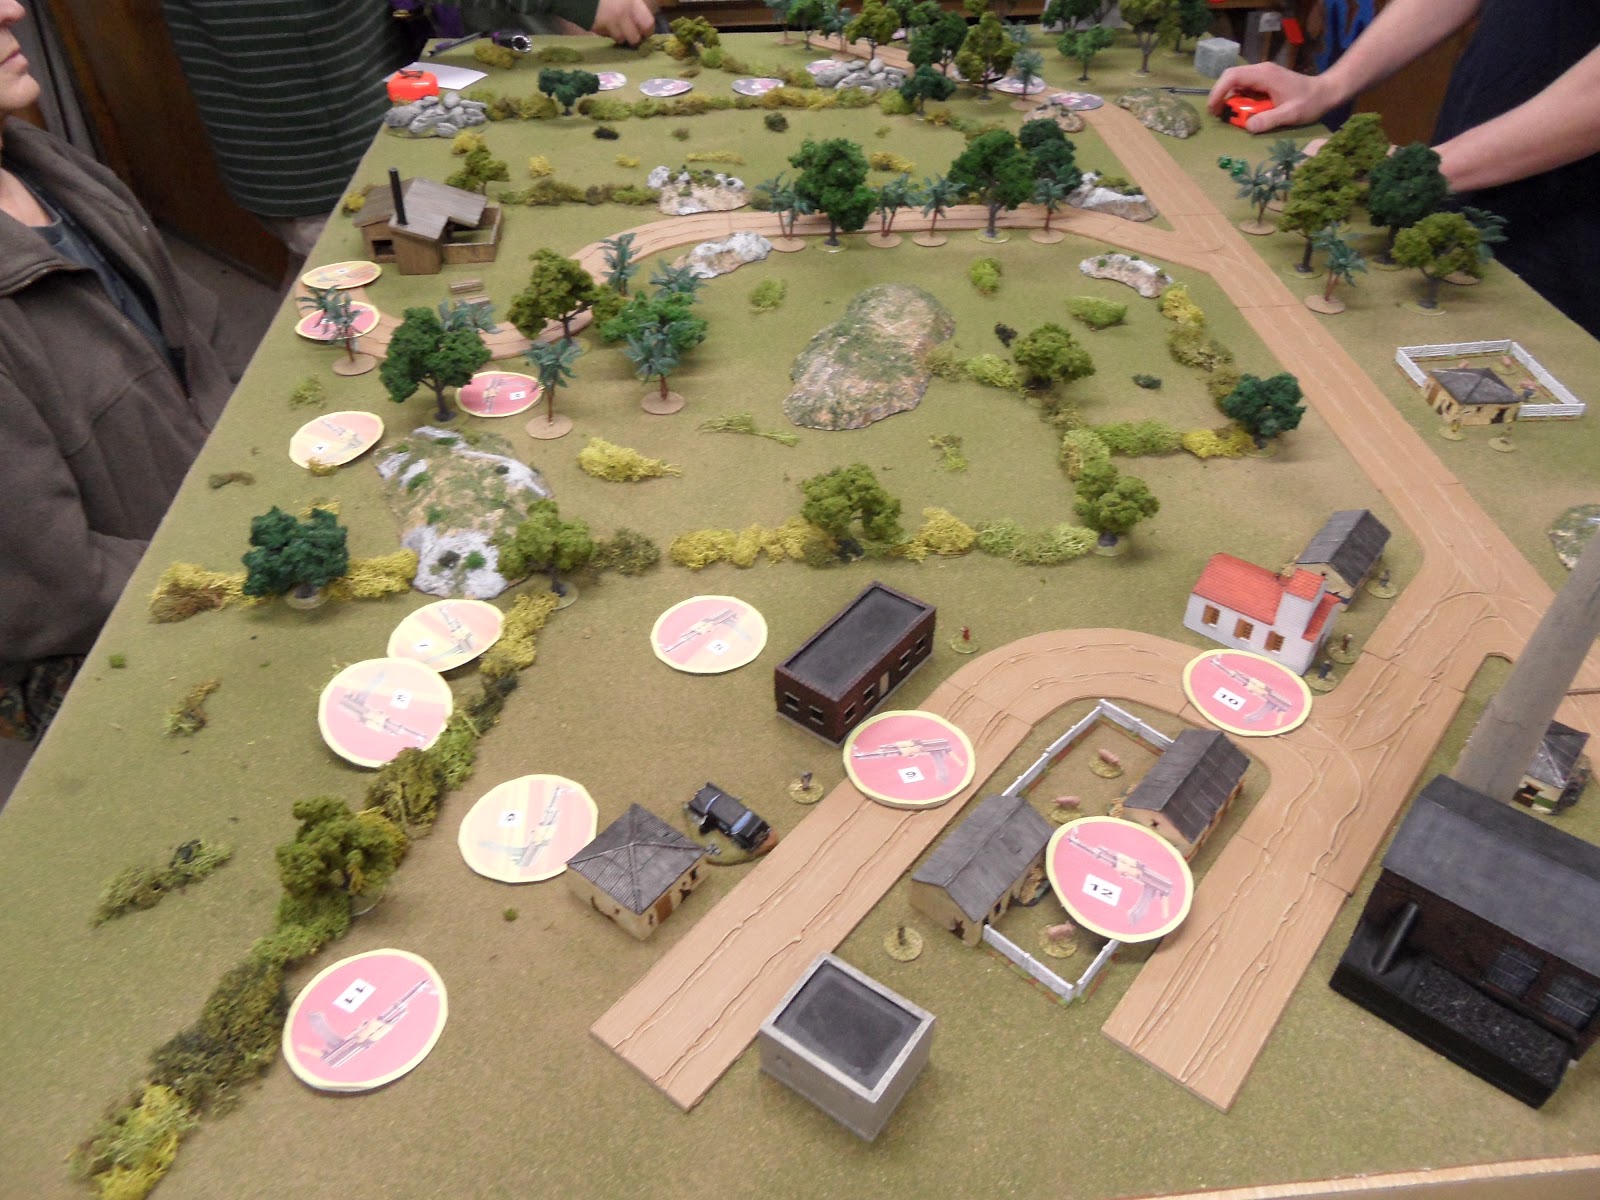
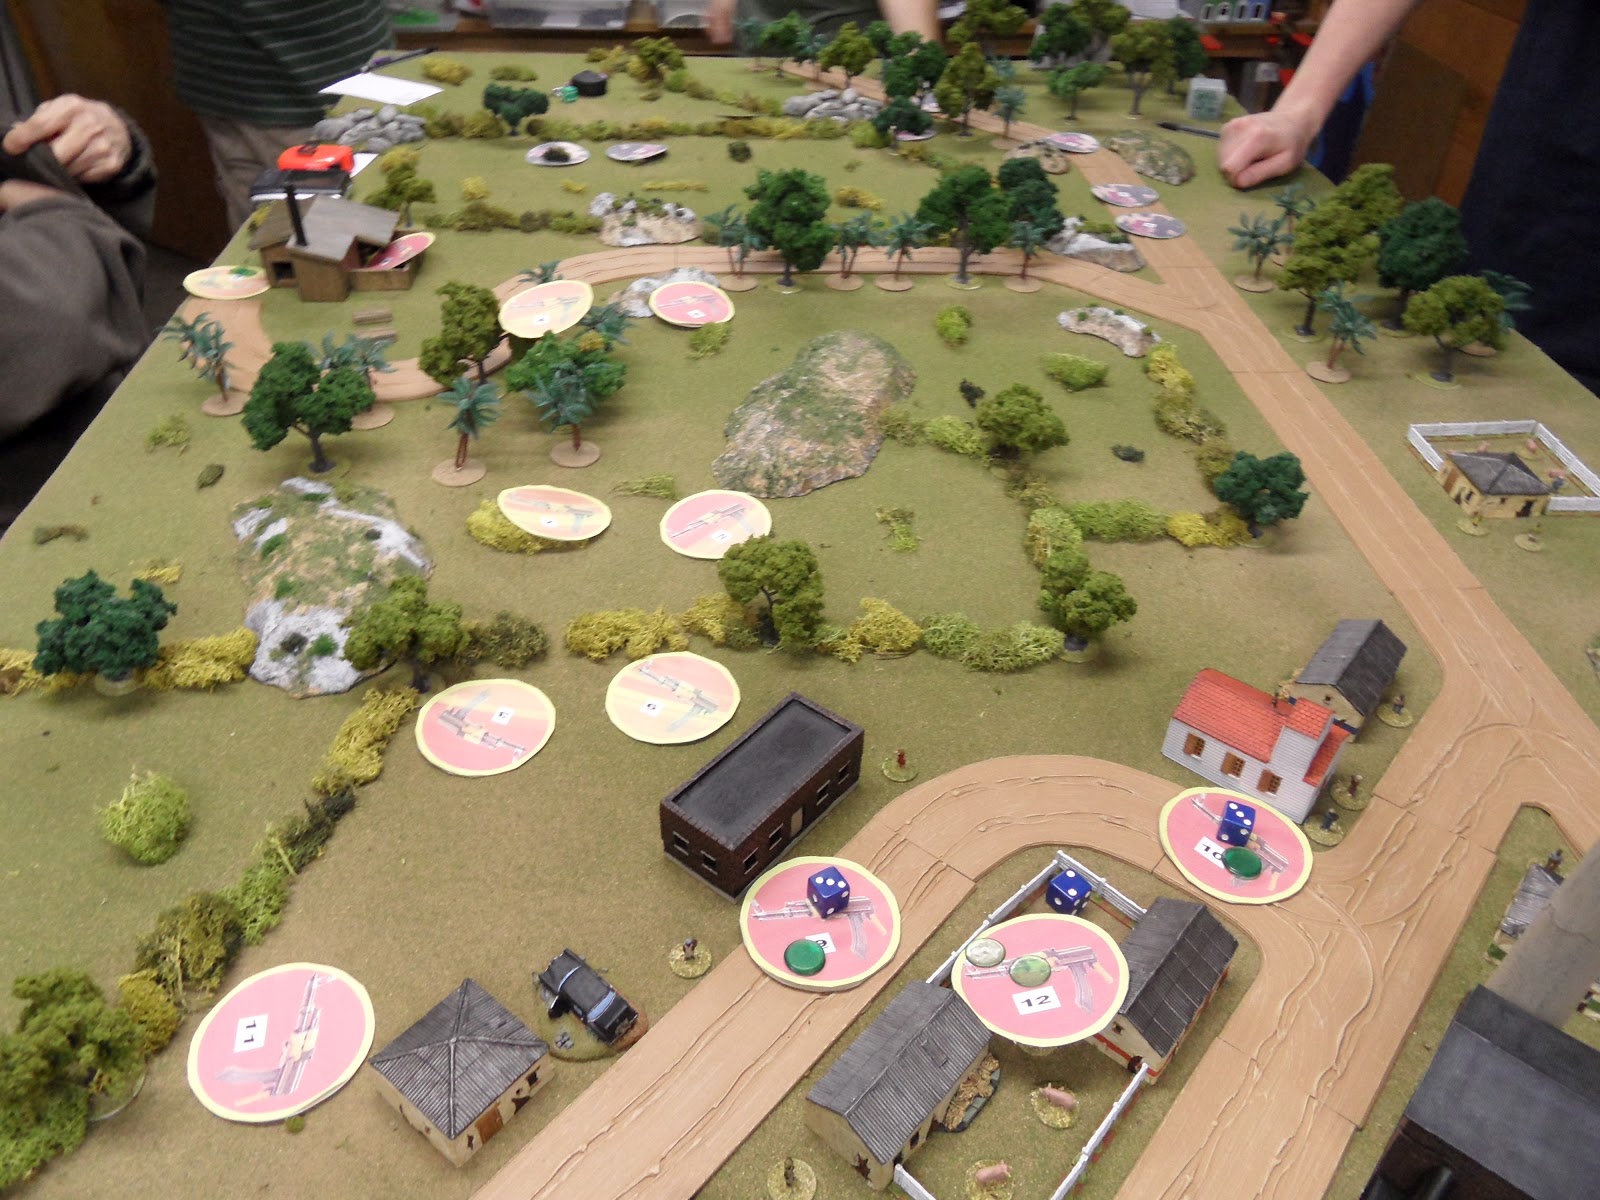
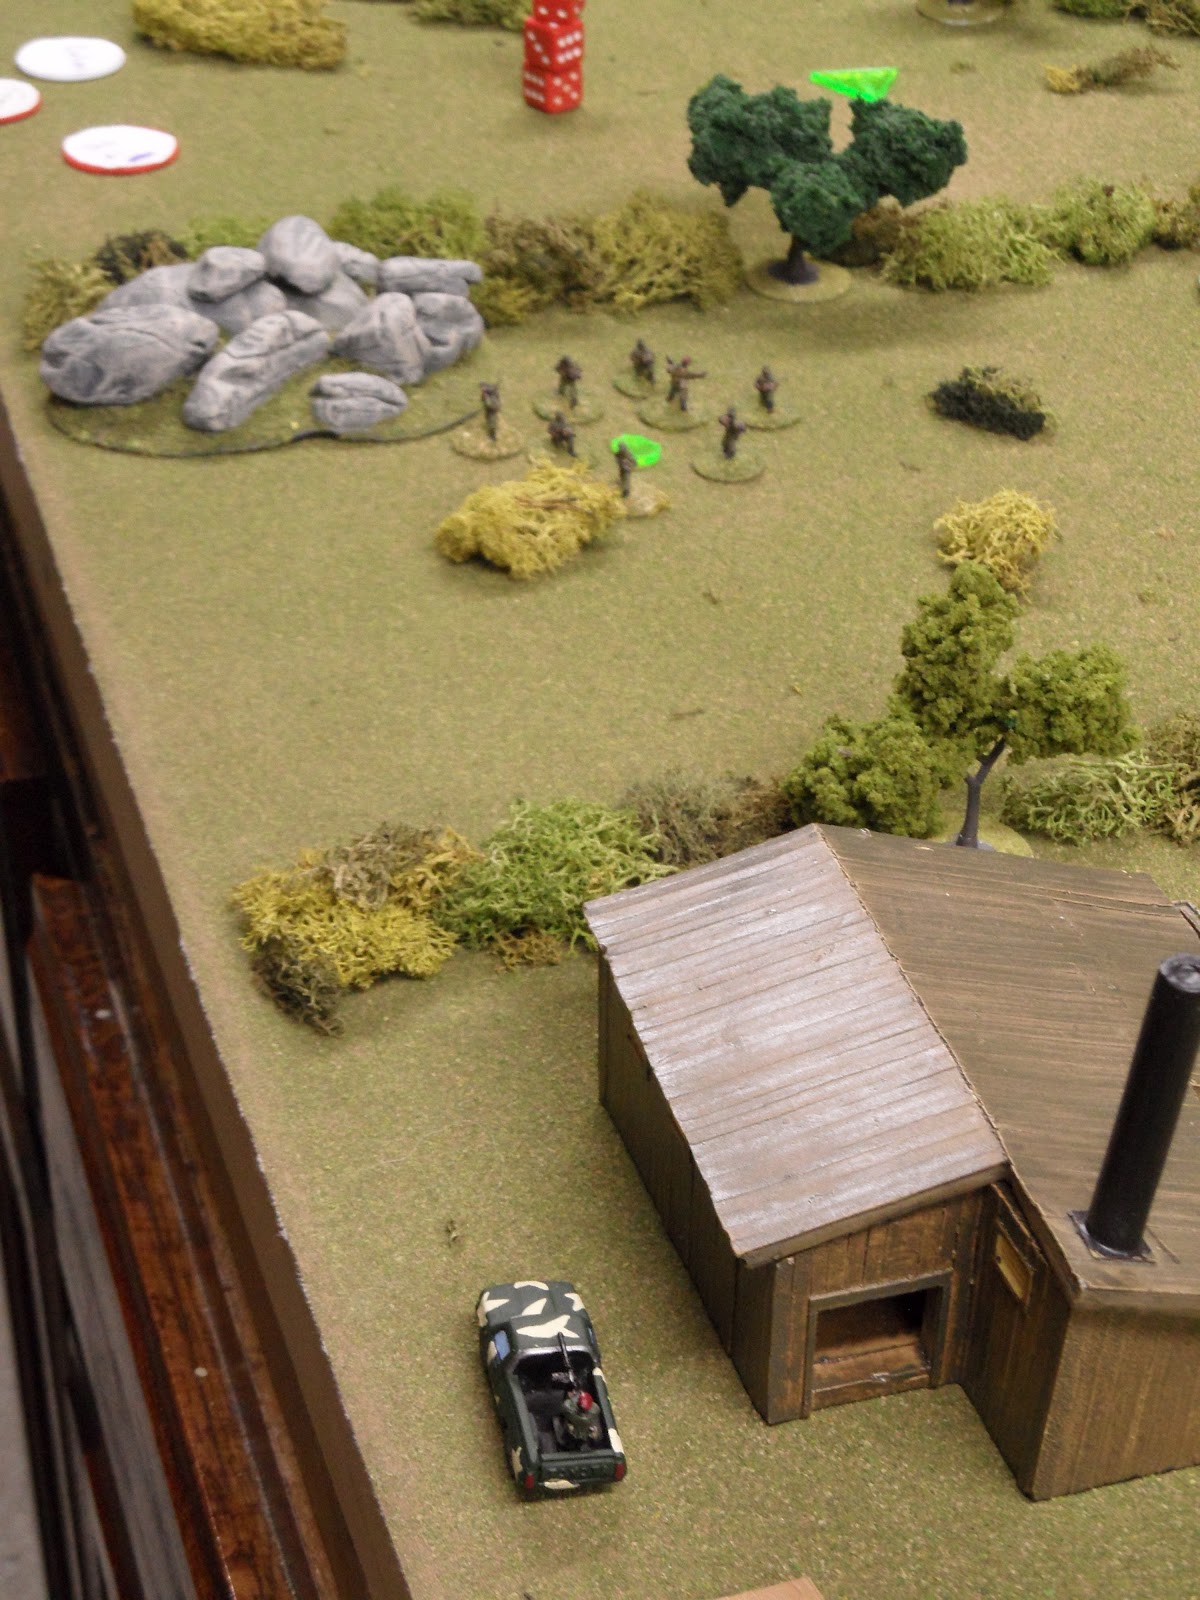
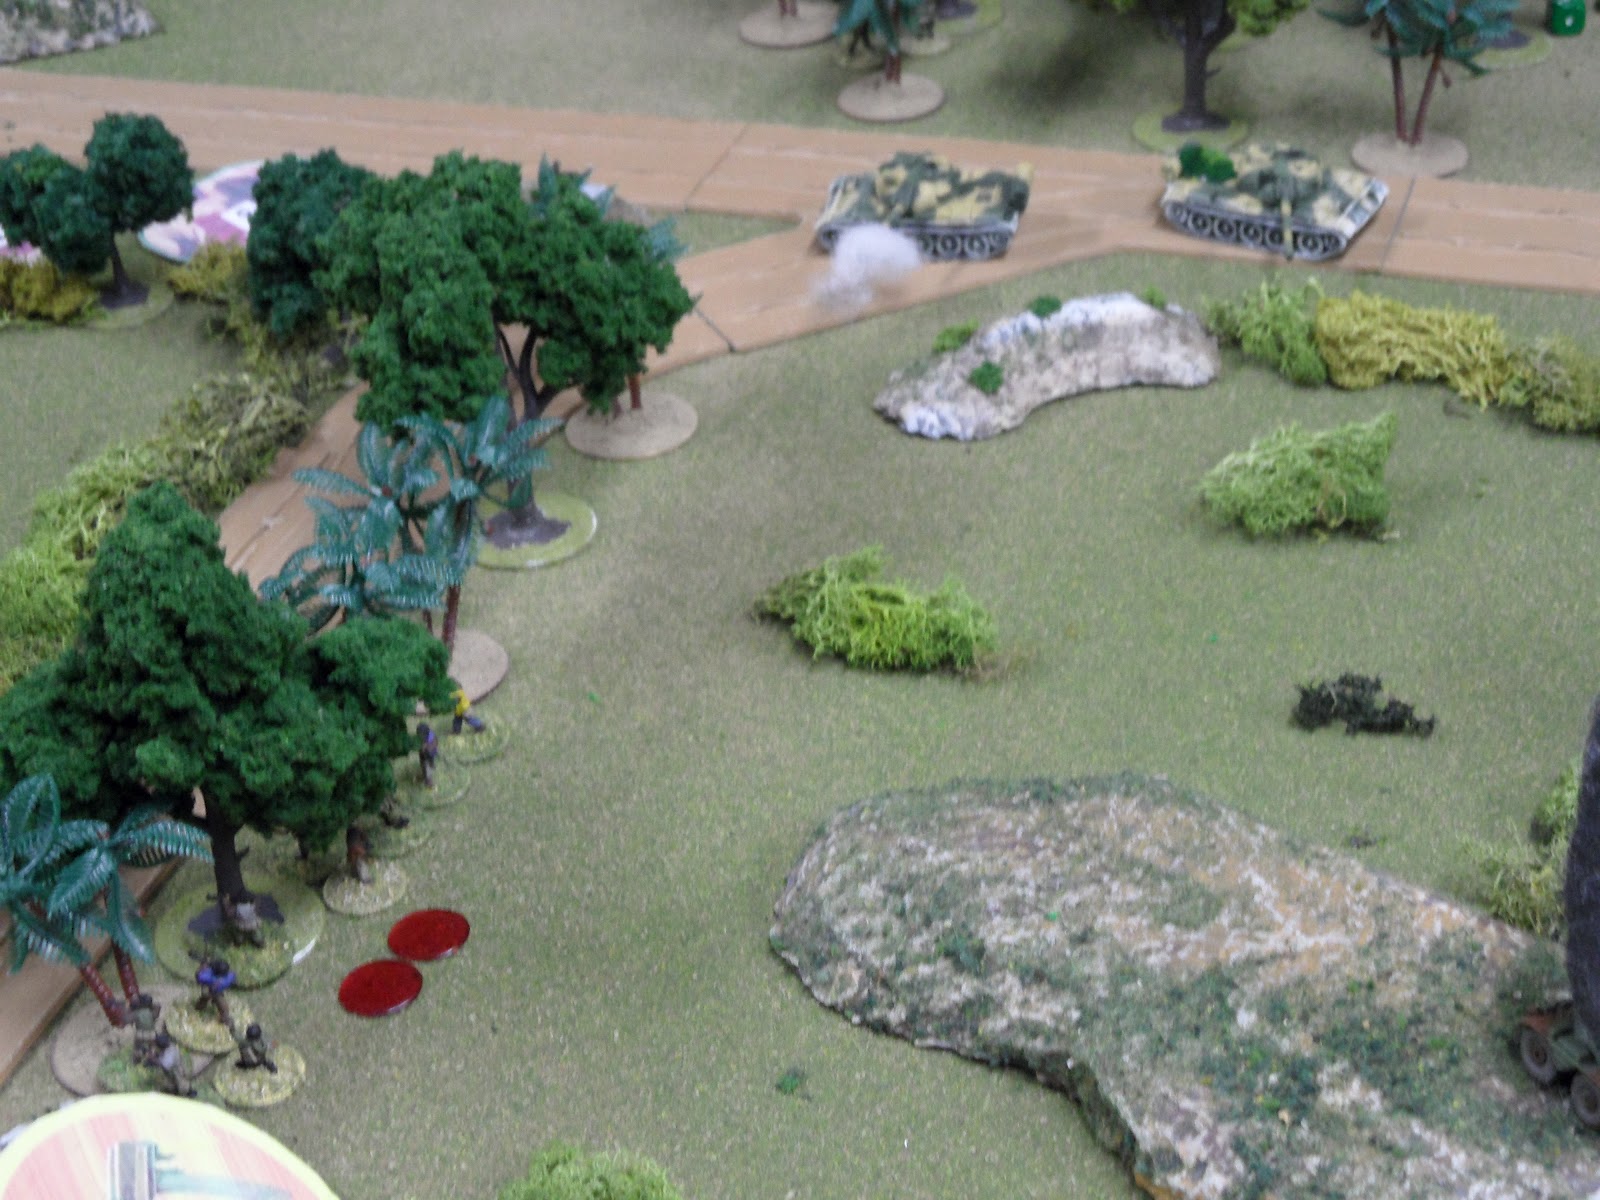
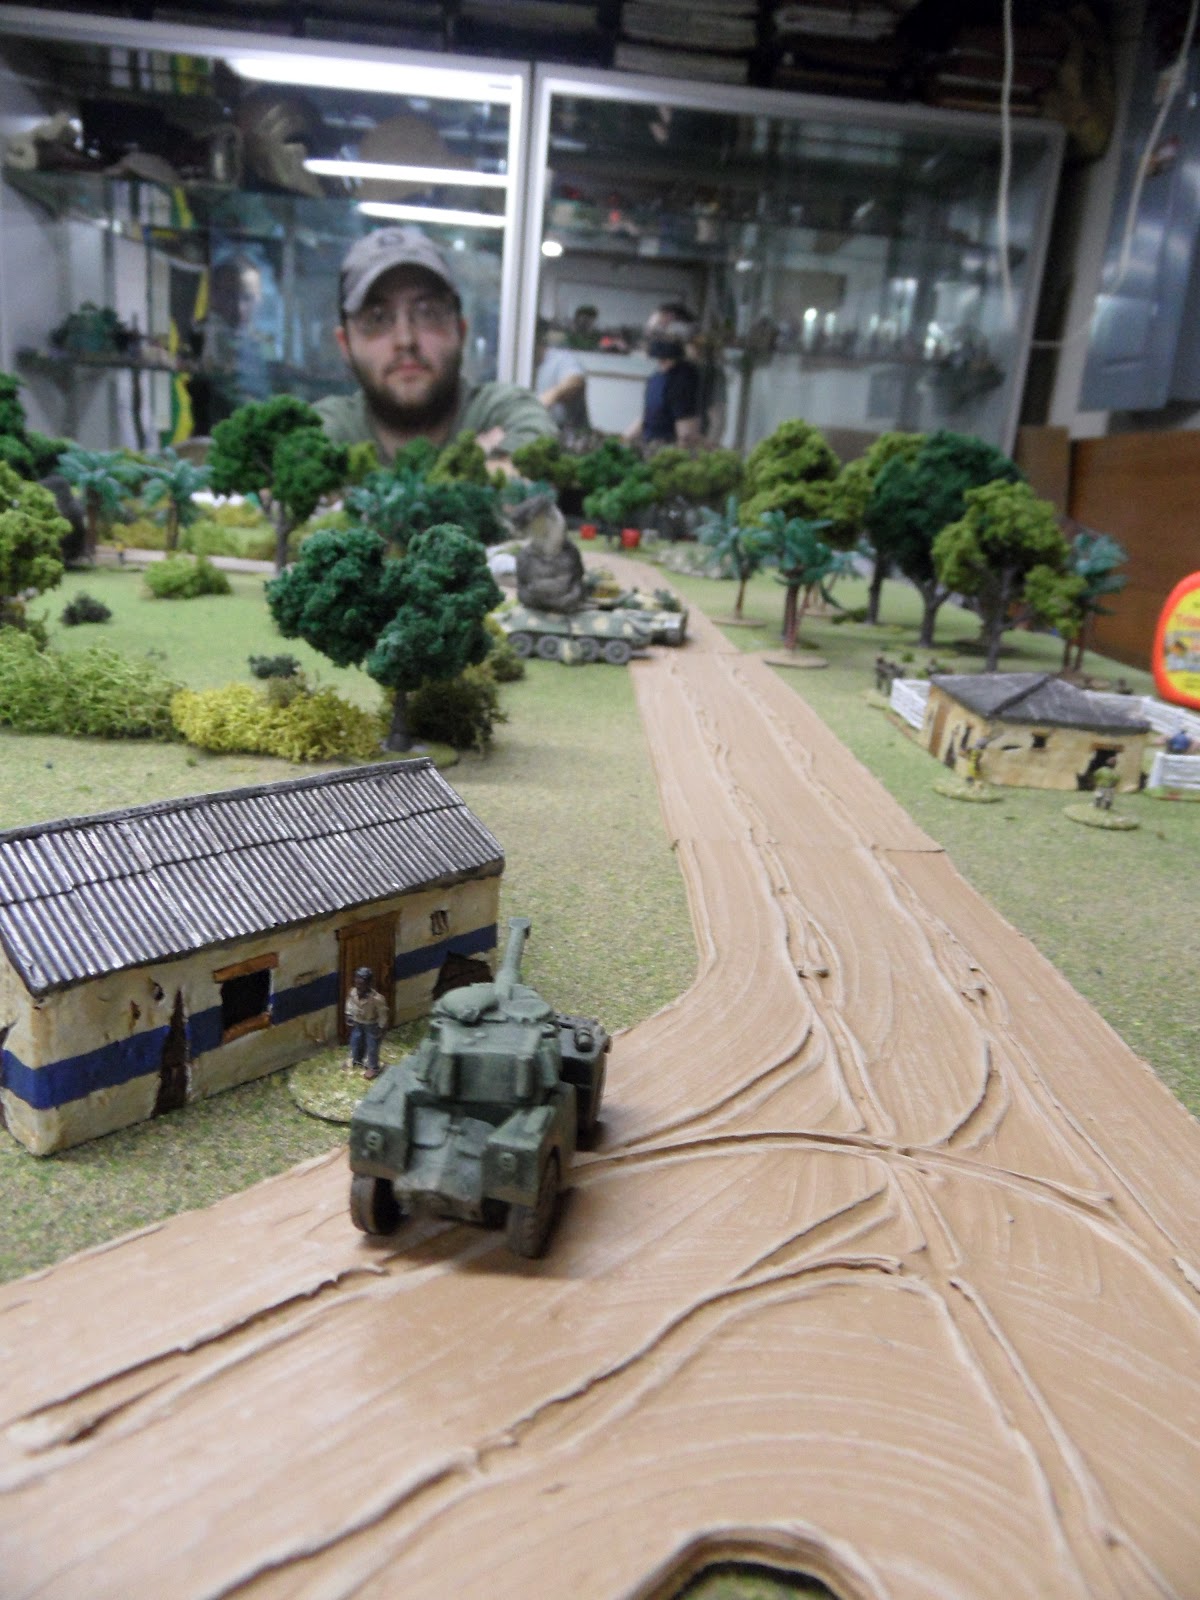
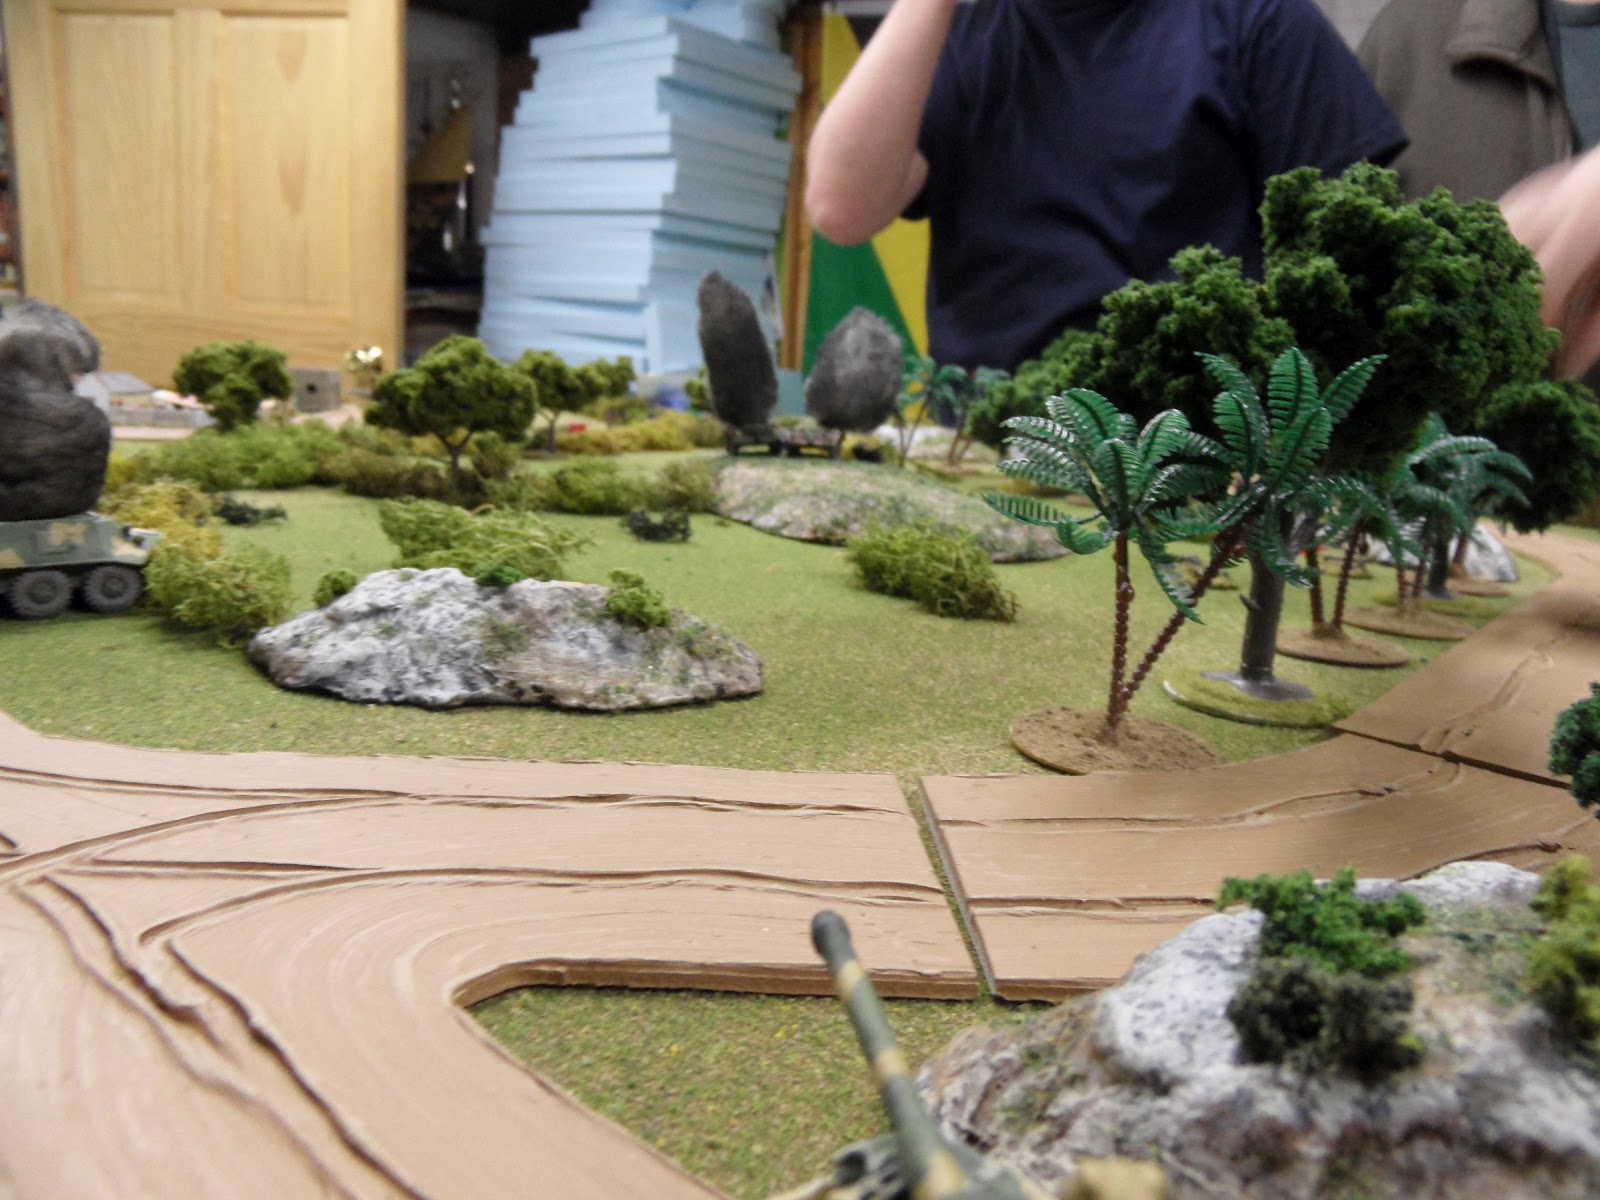
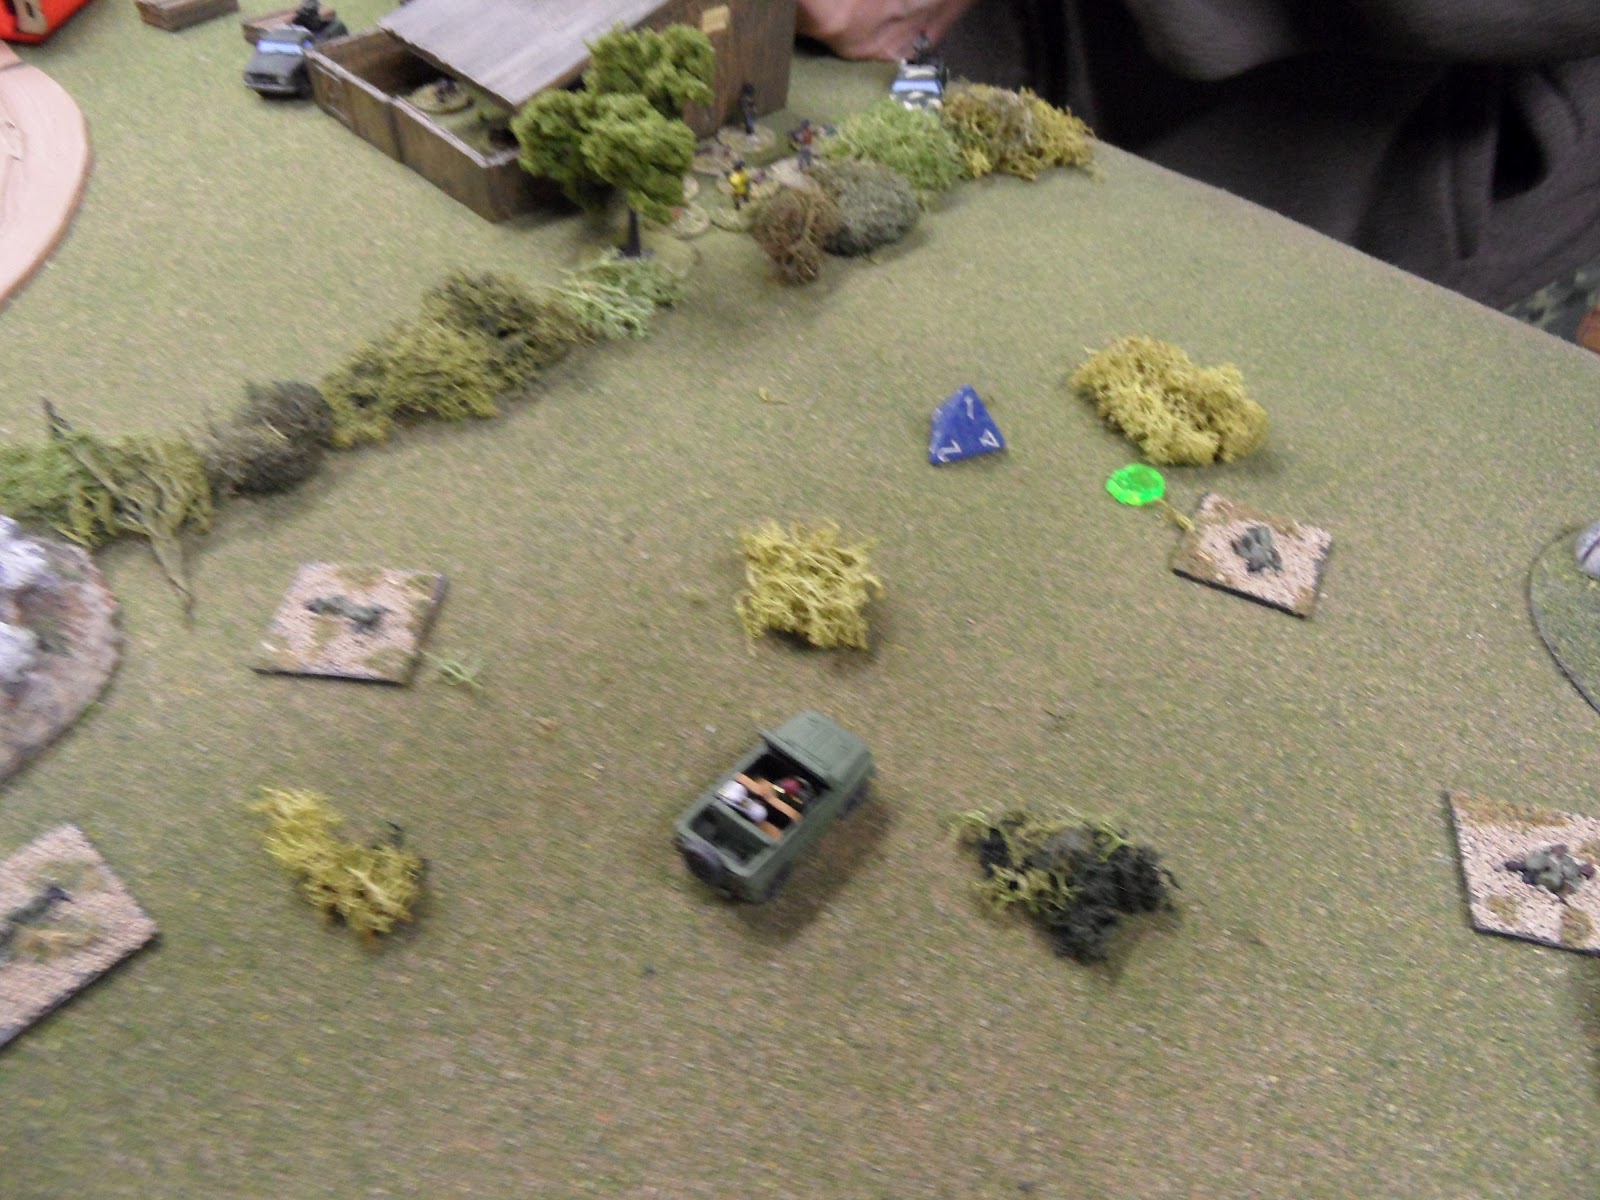
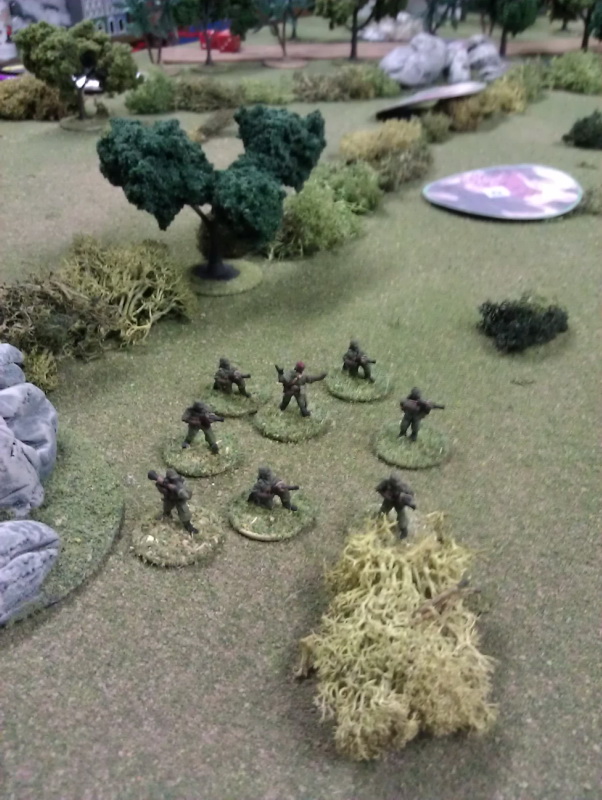
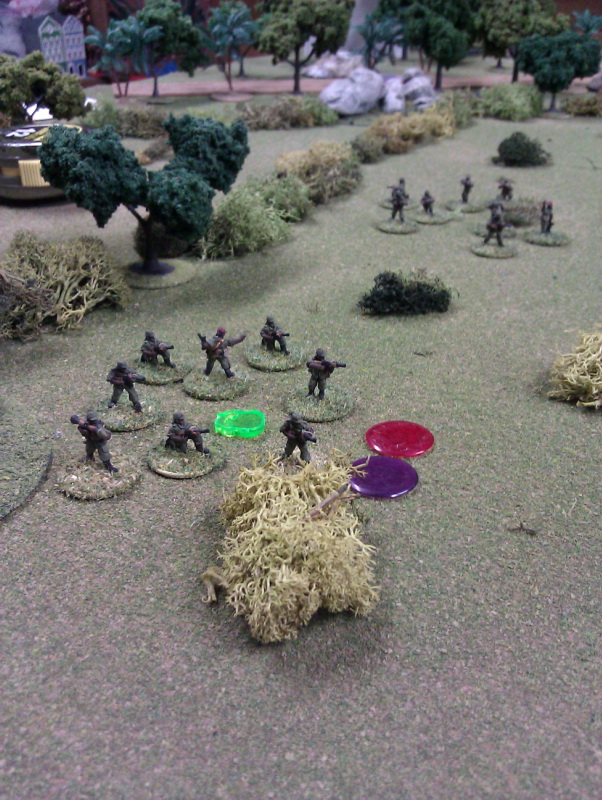
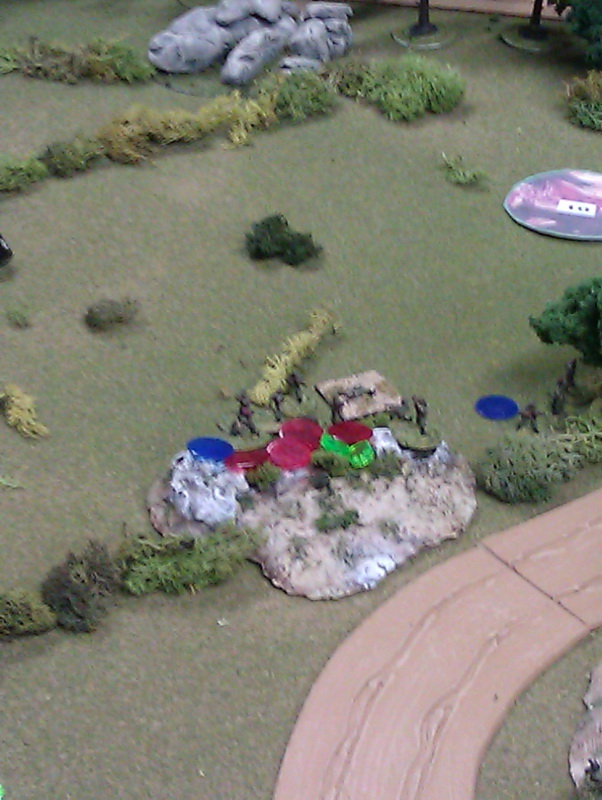
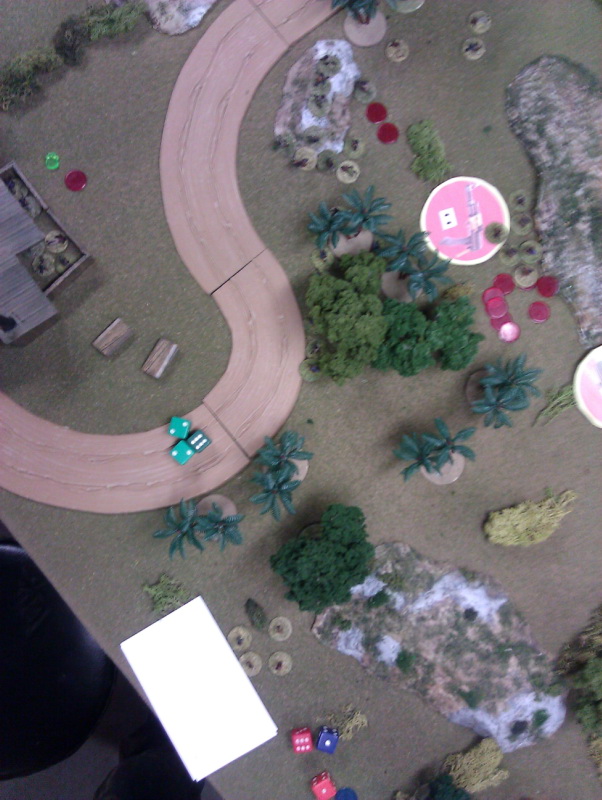
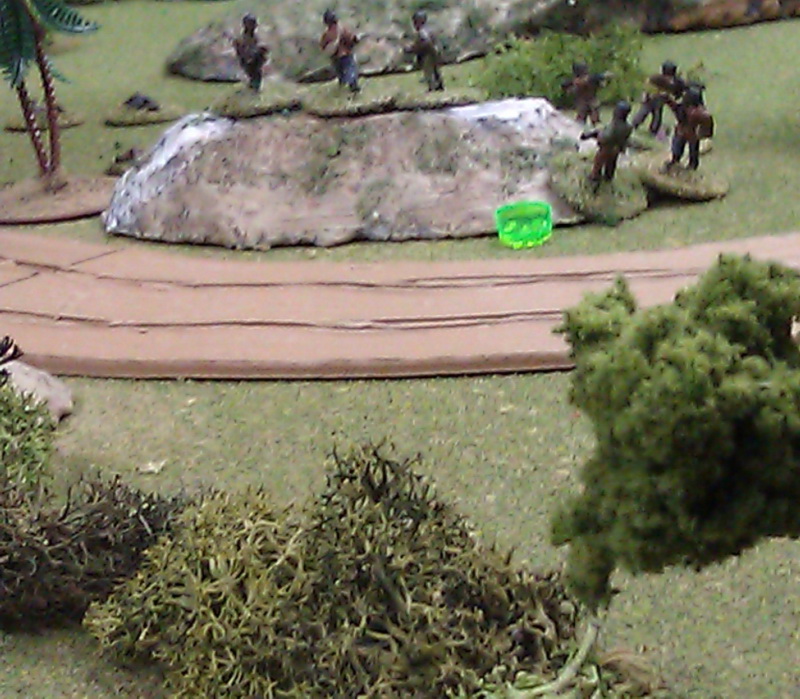
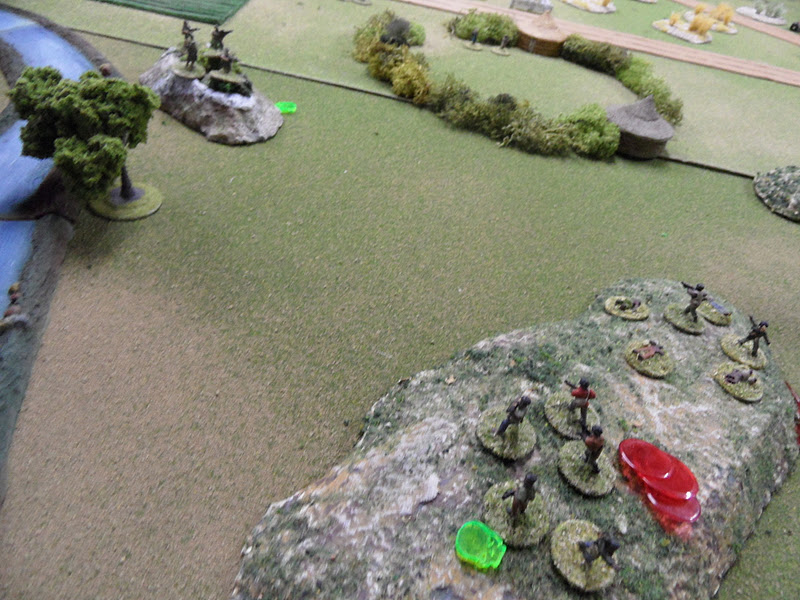
'Blinds' are placed as the opposing sides start to feel out each others position

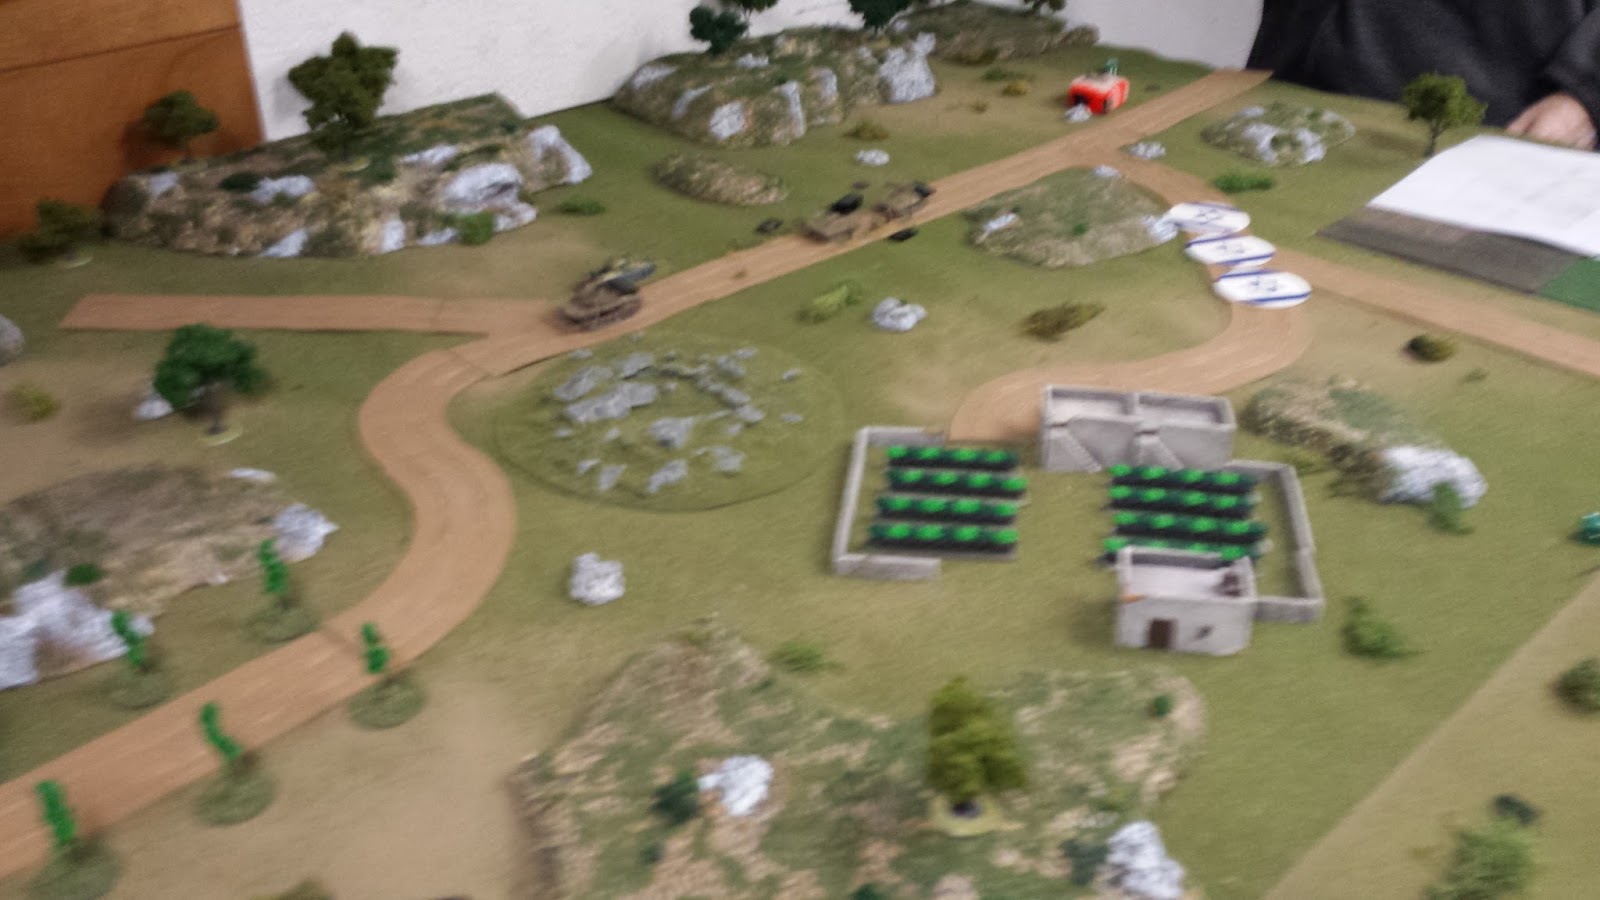
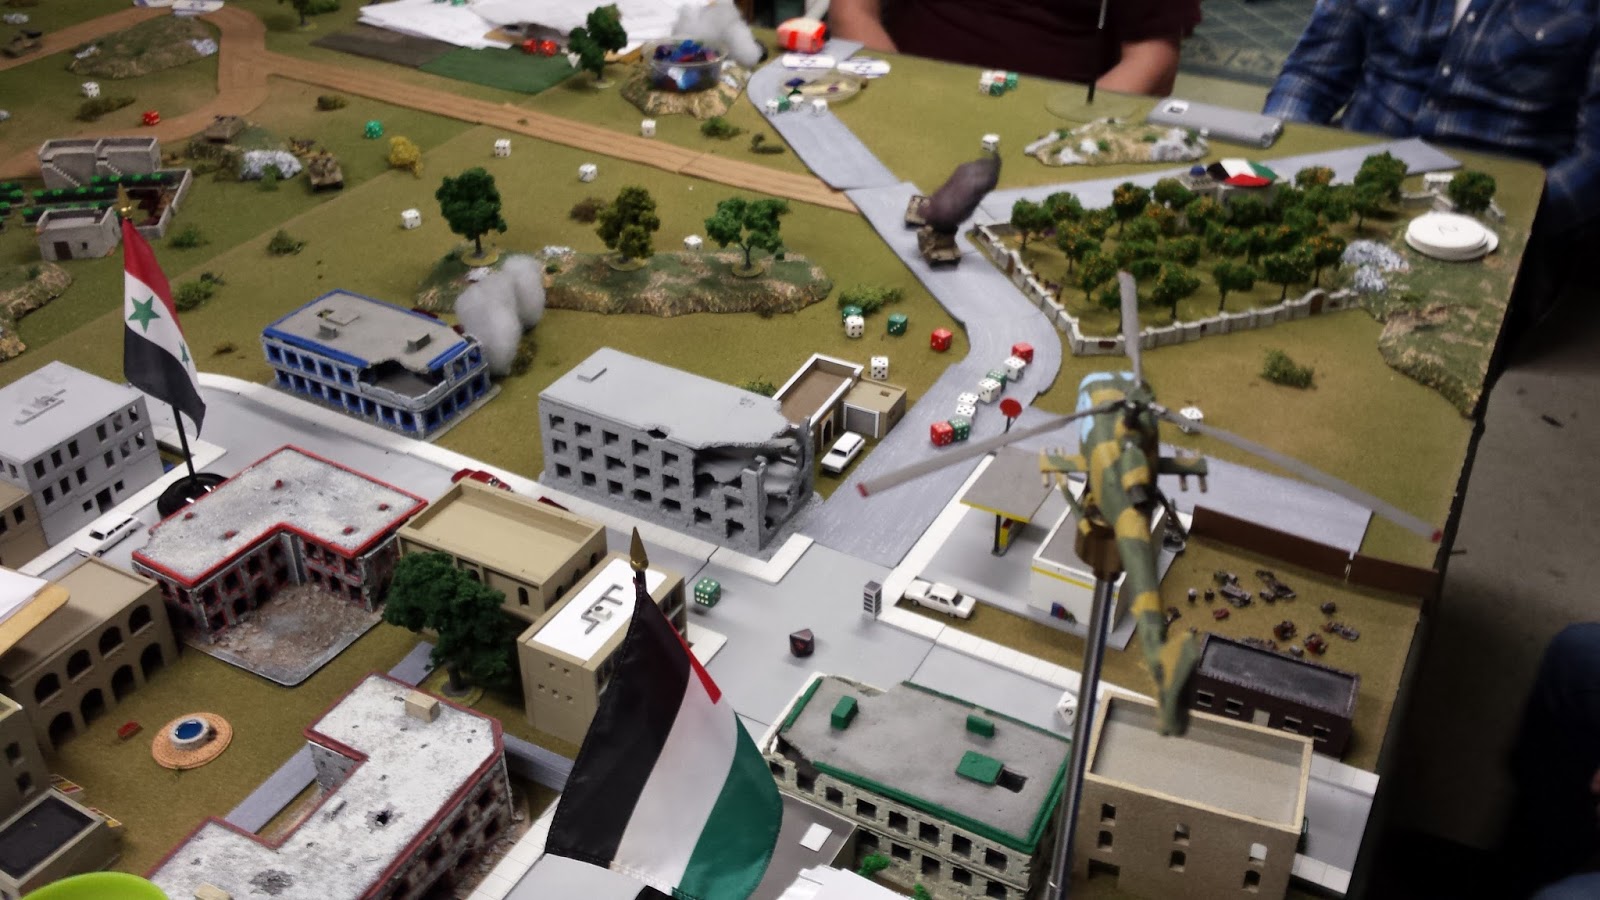
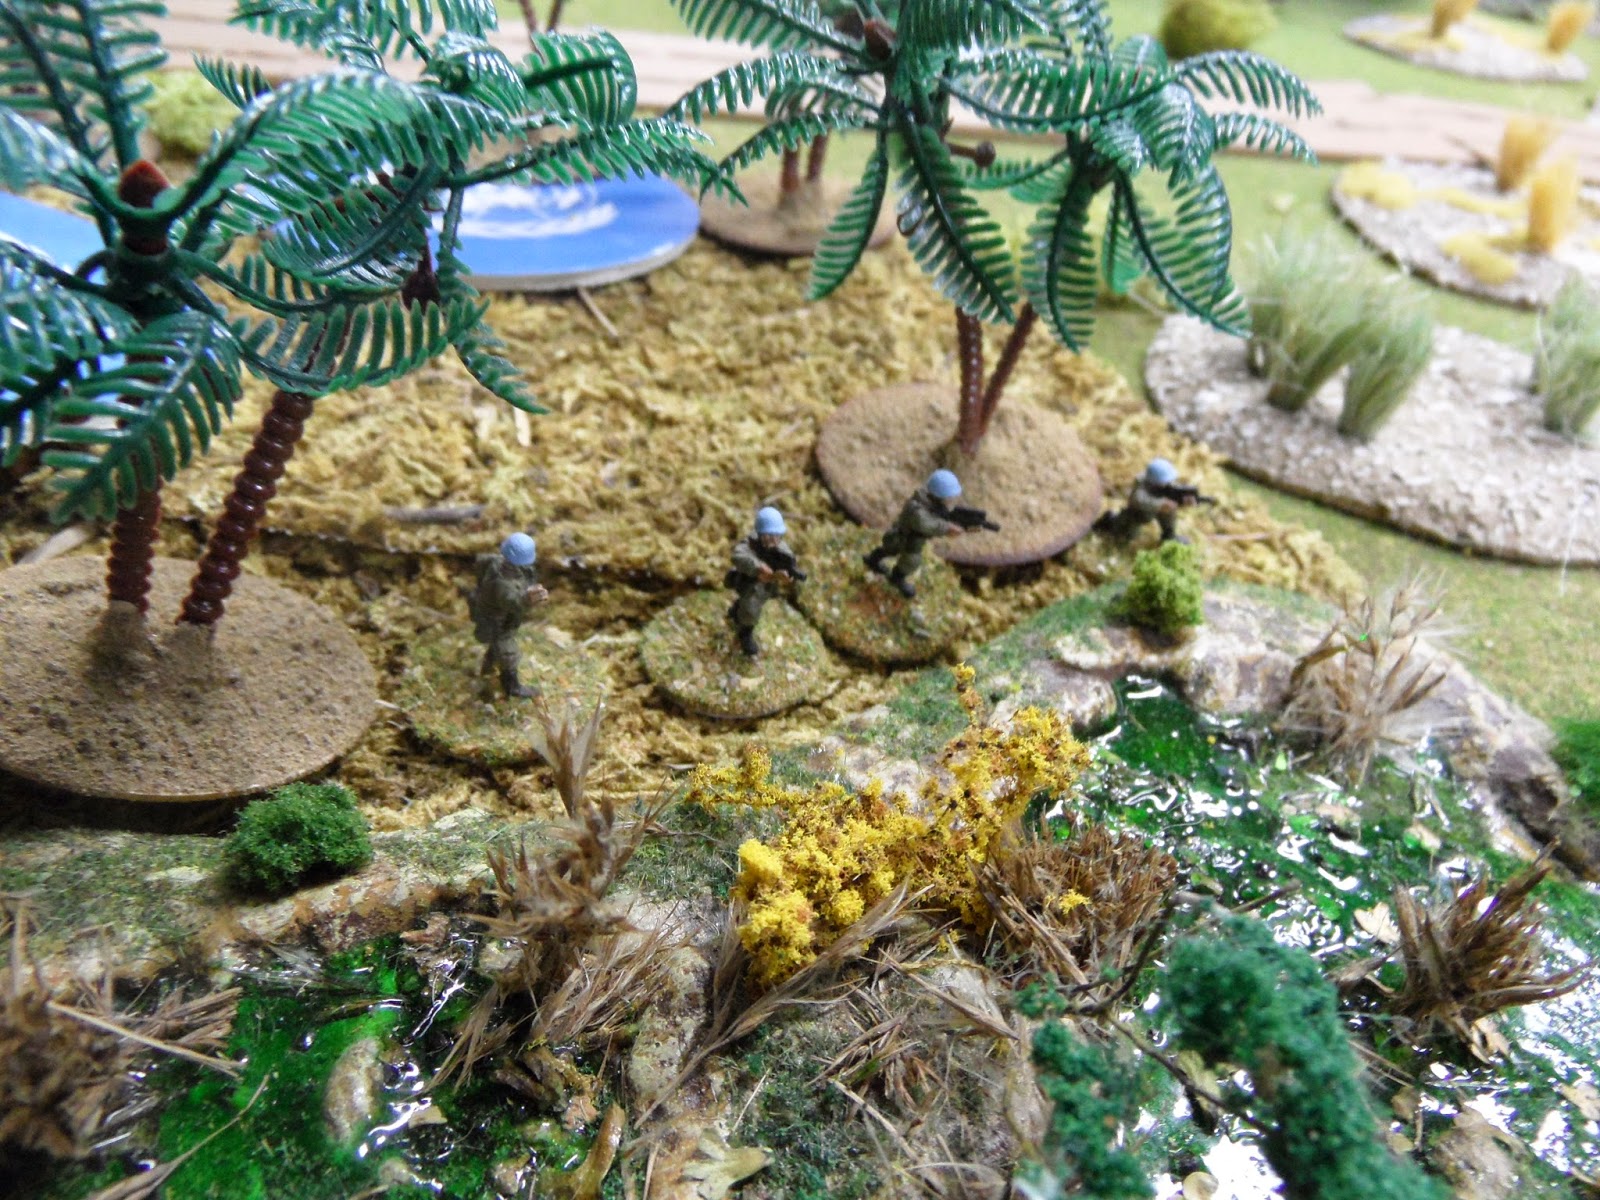
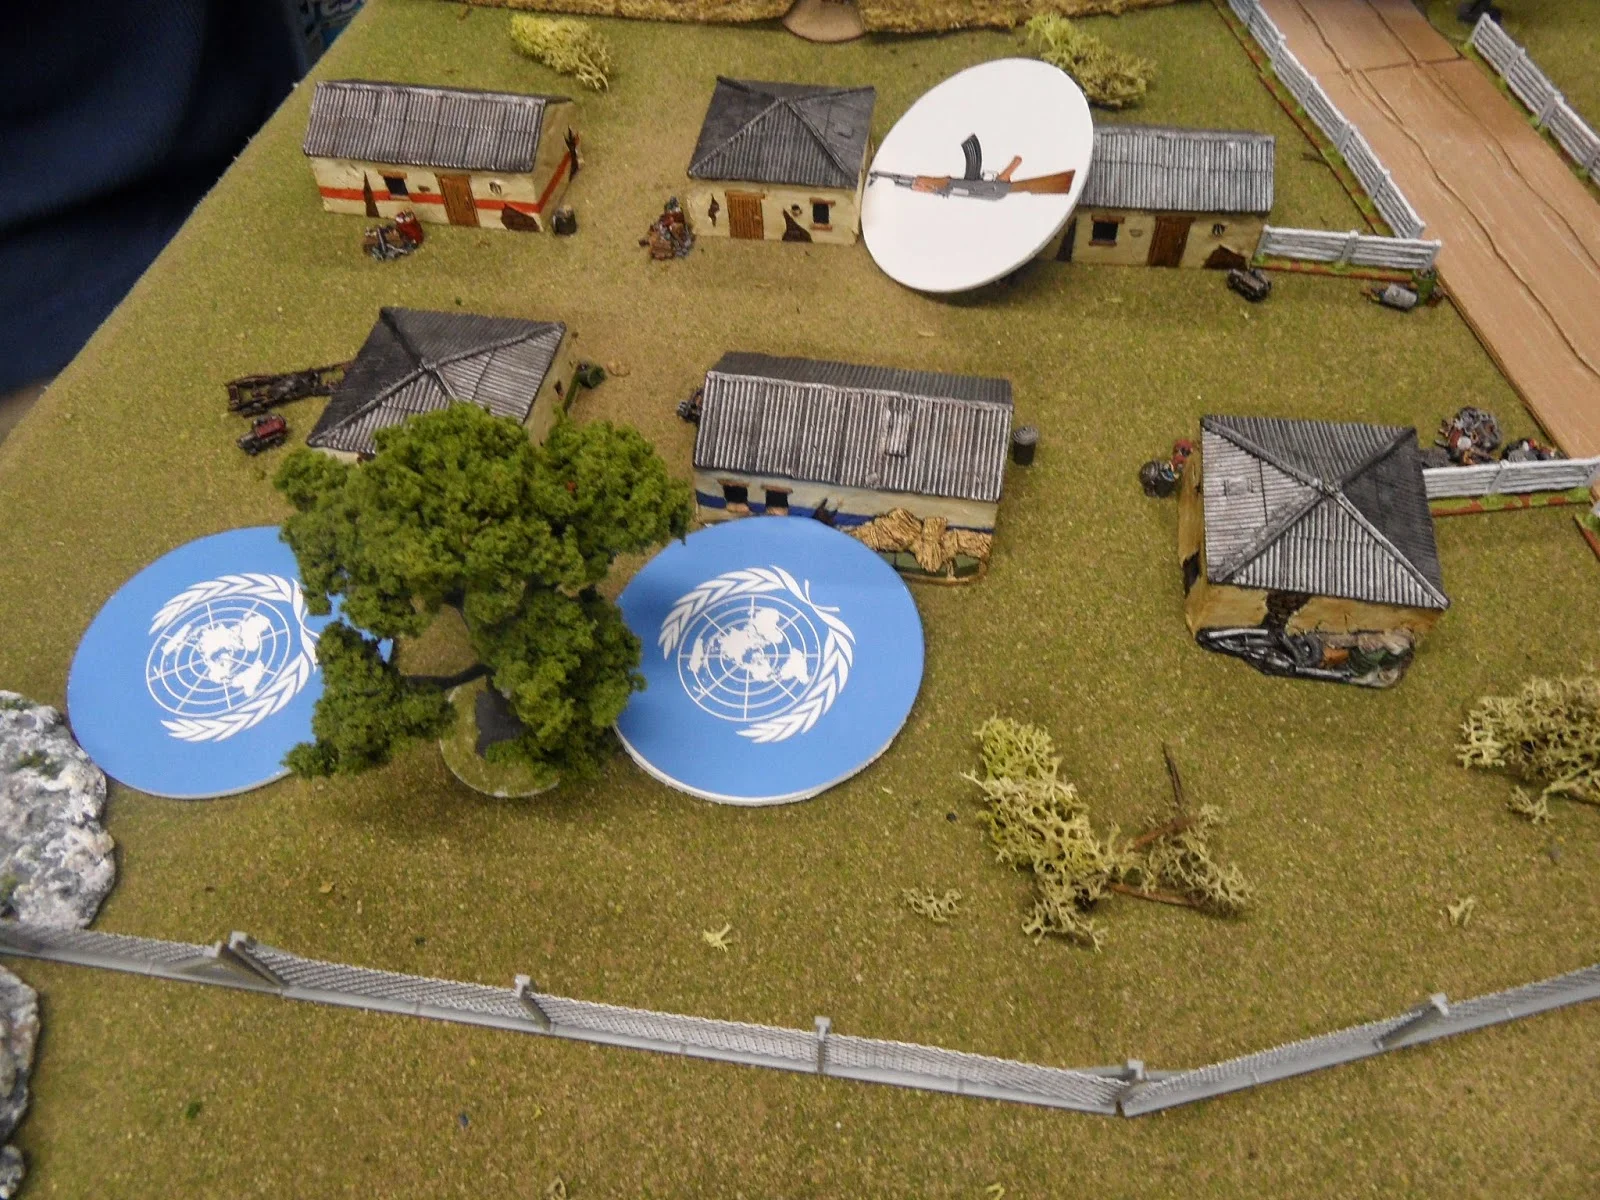
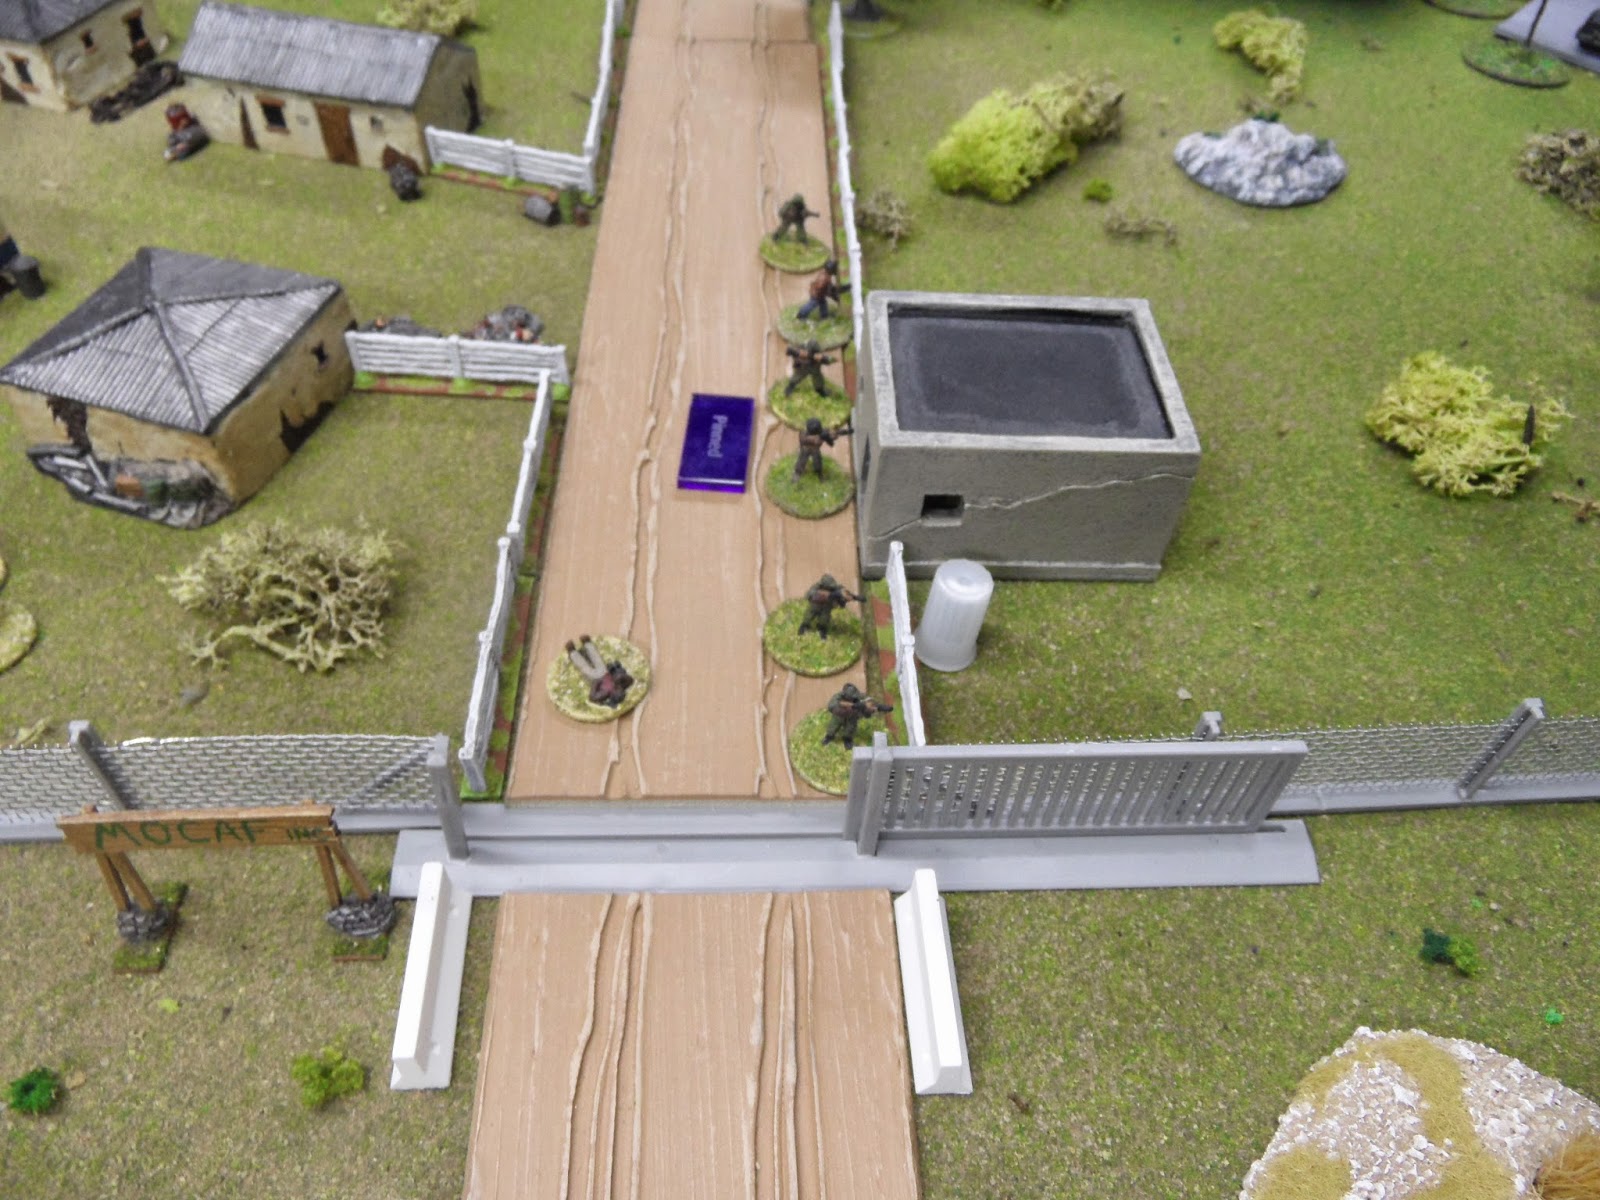
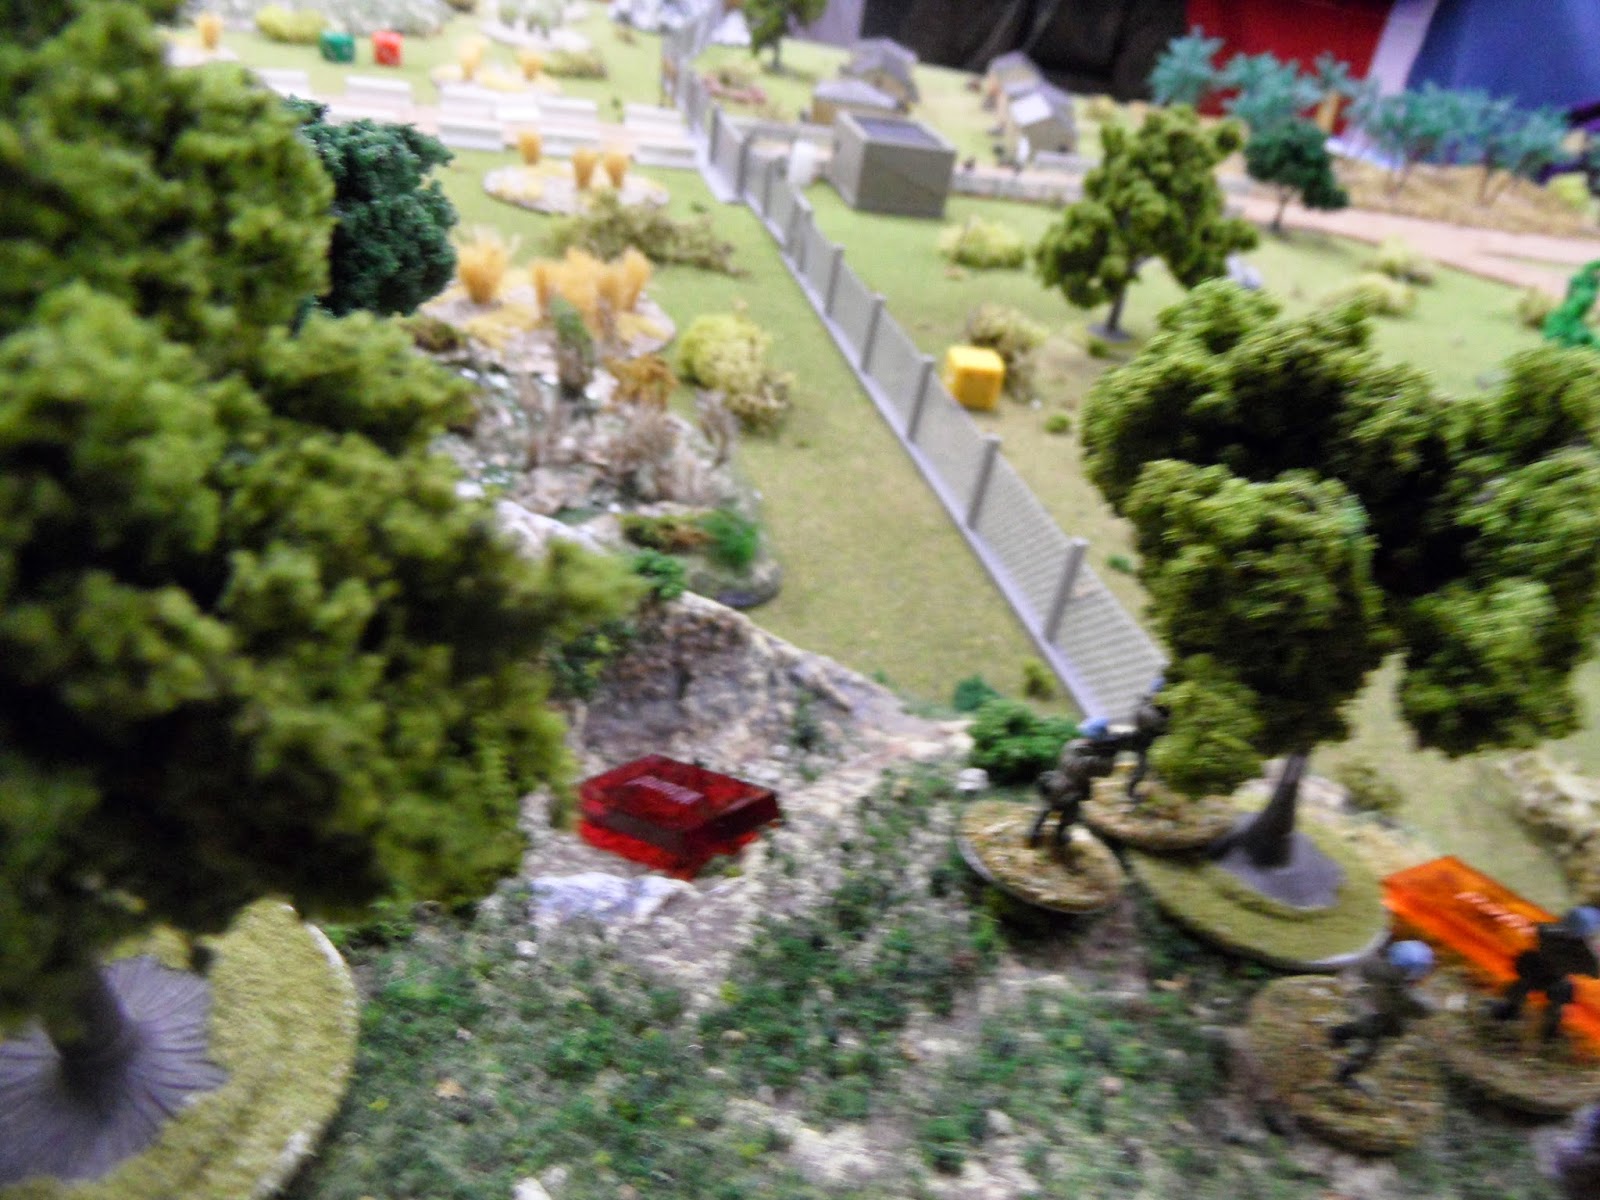
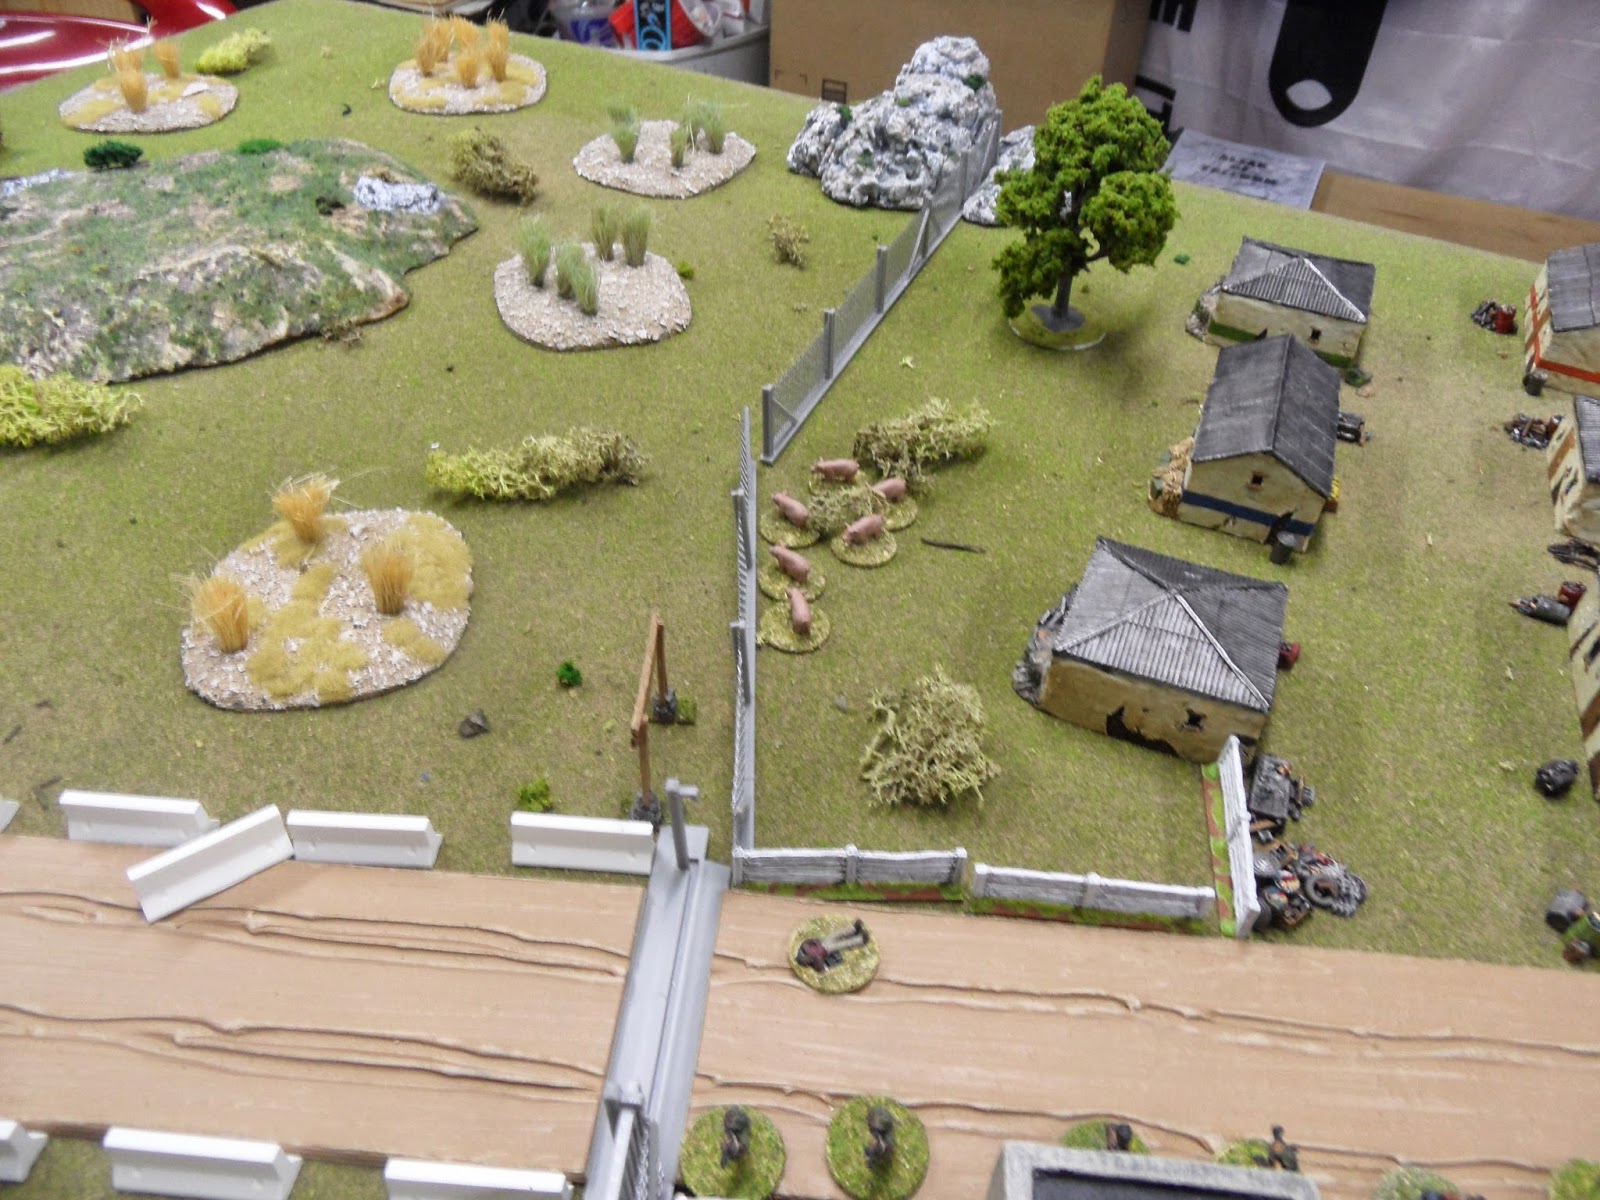
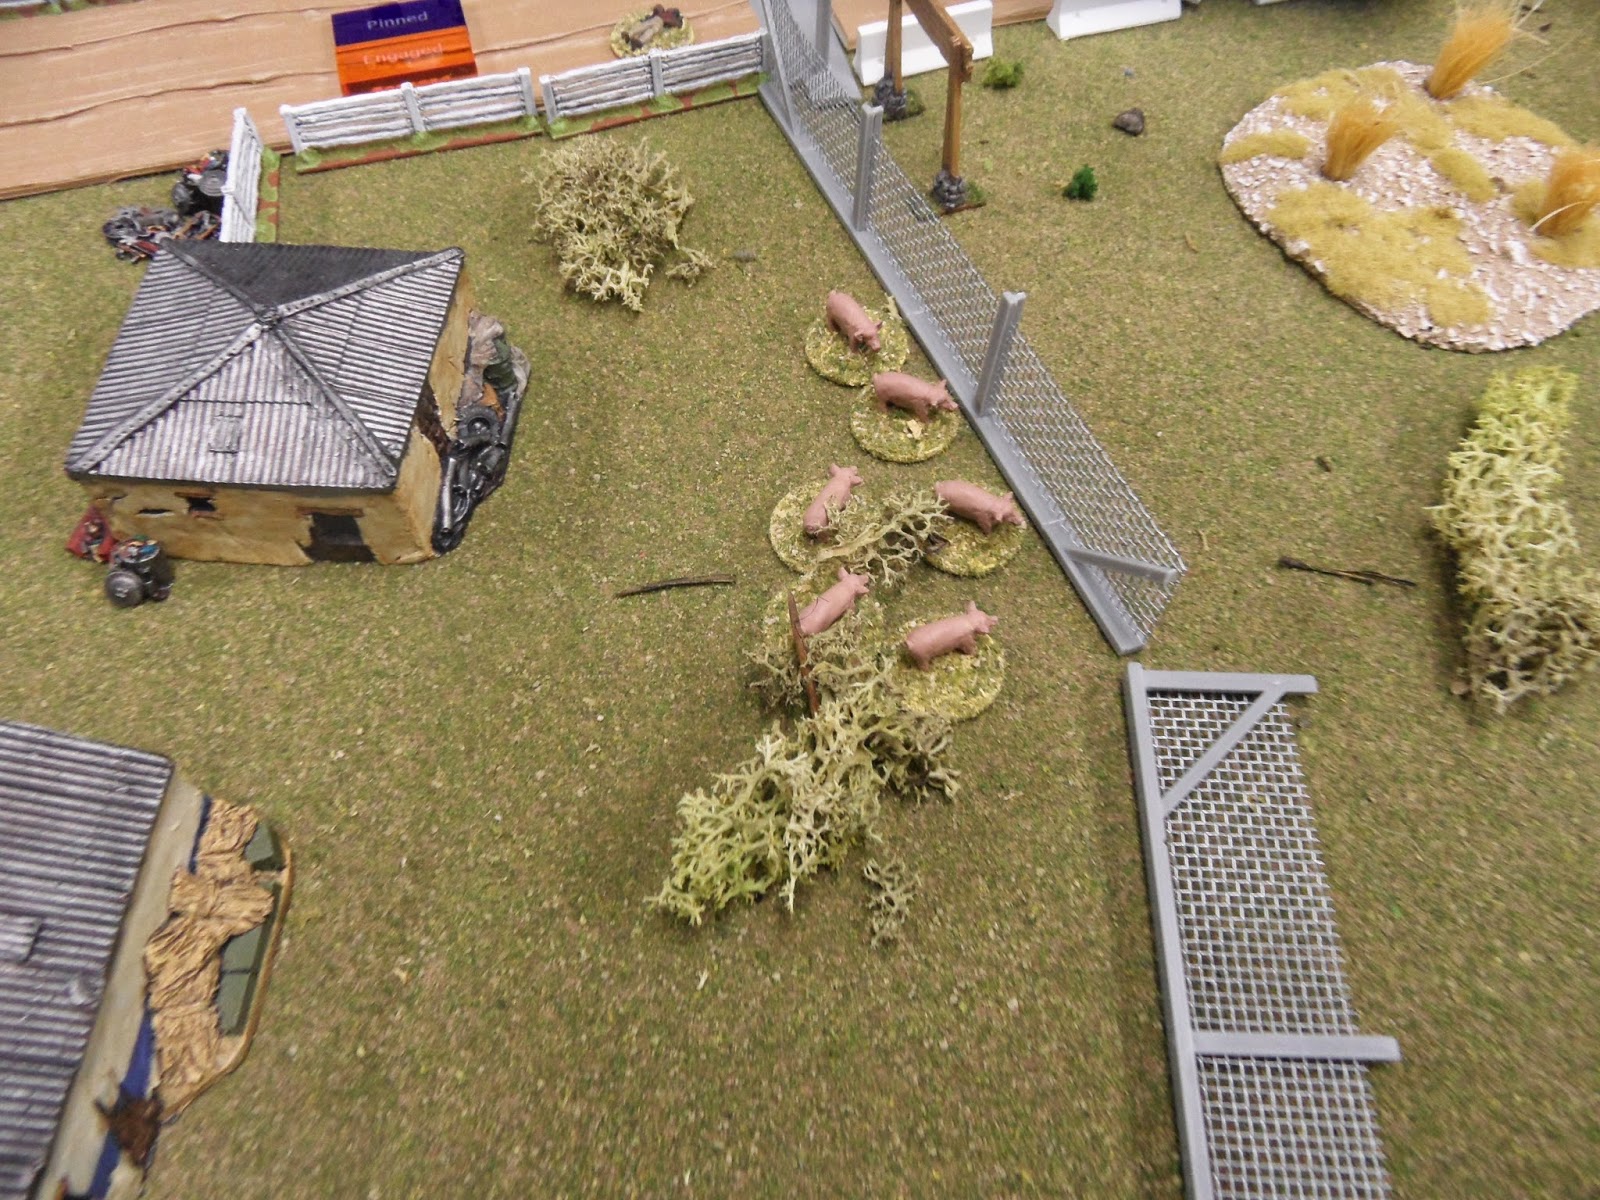
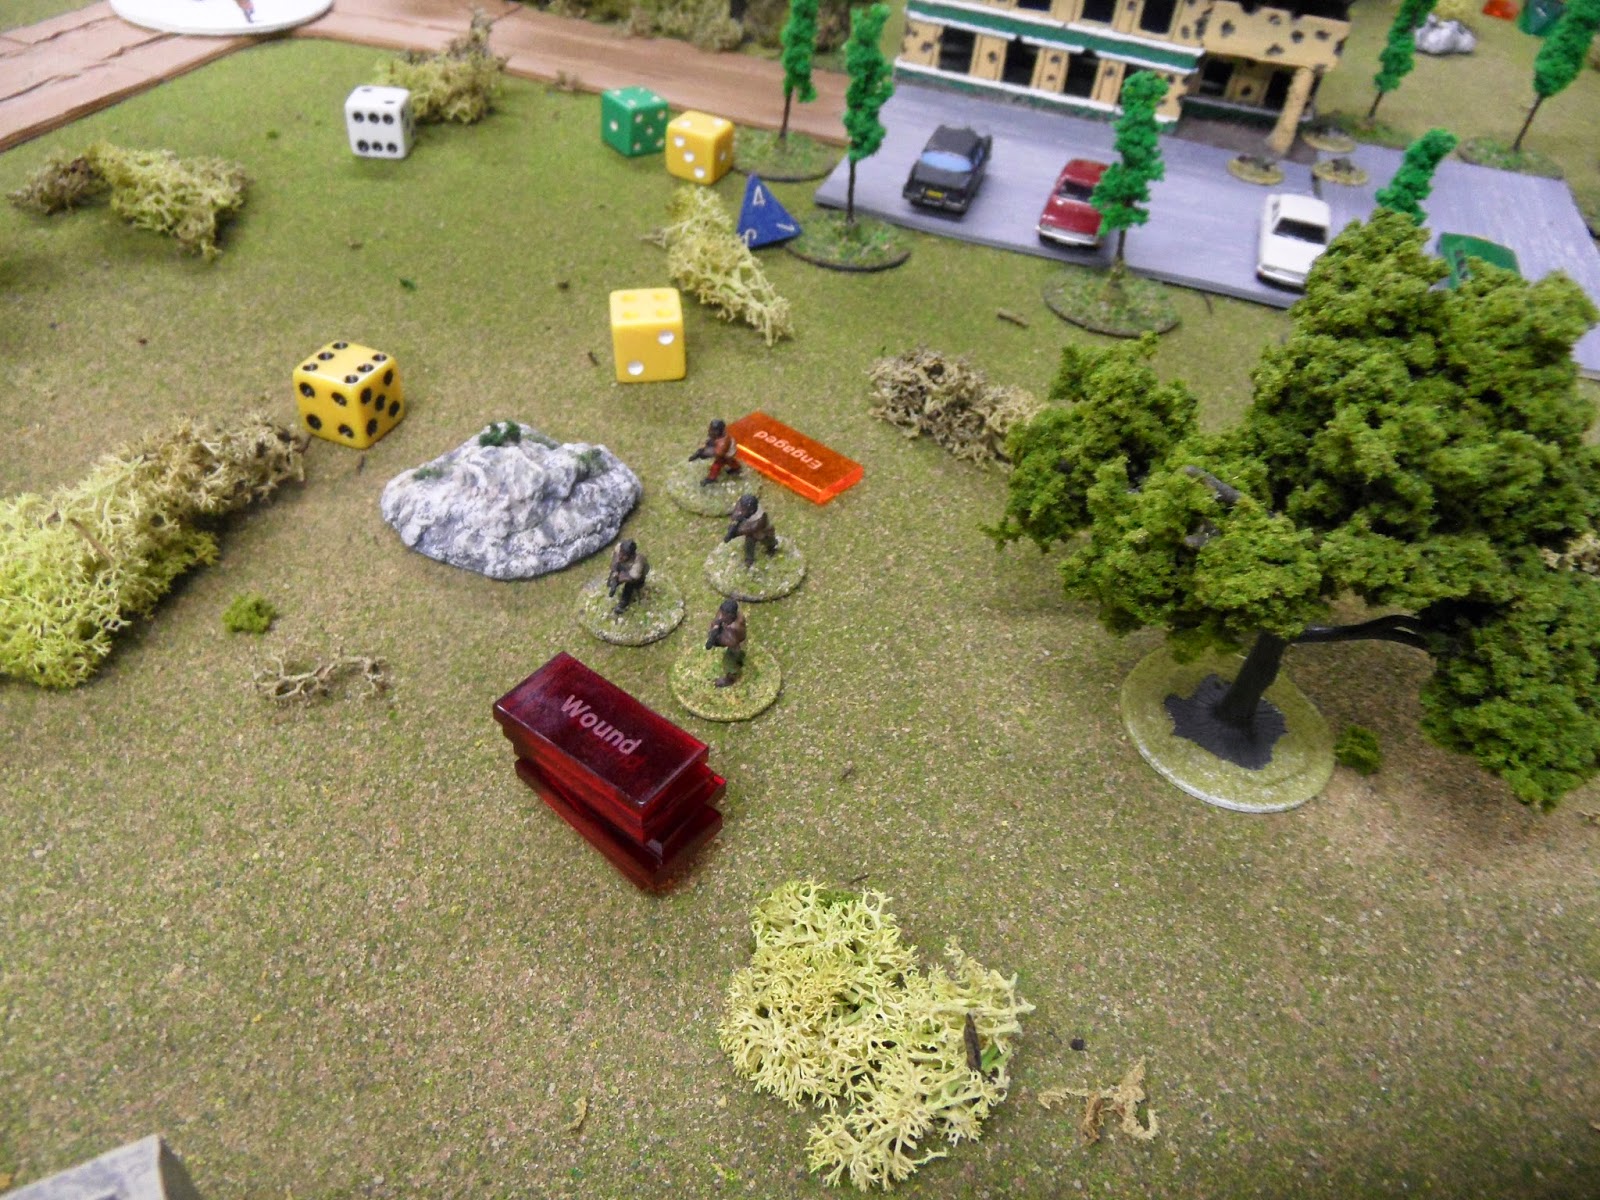
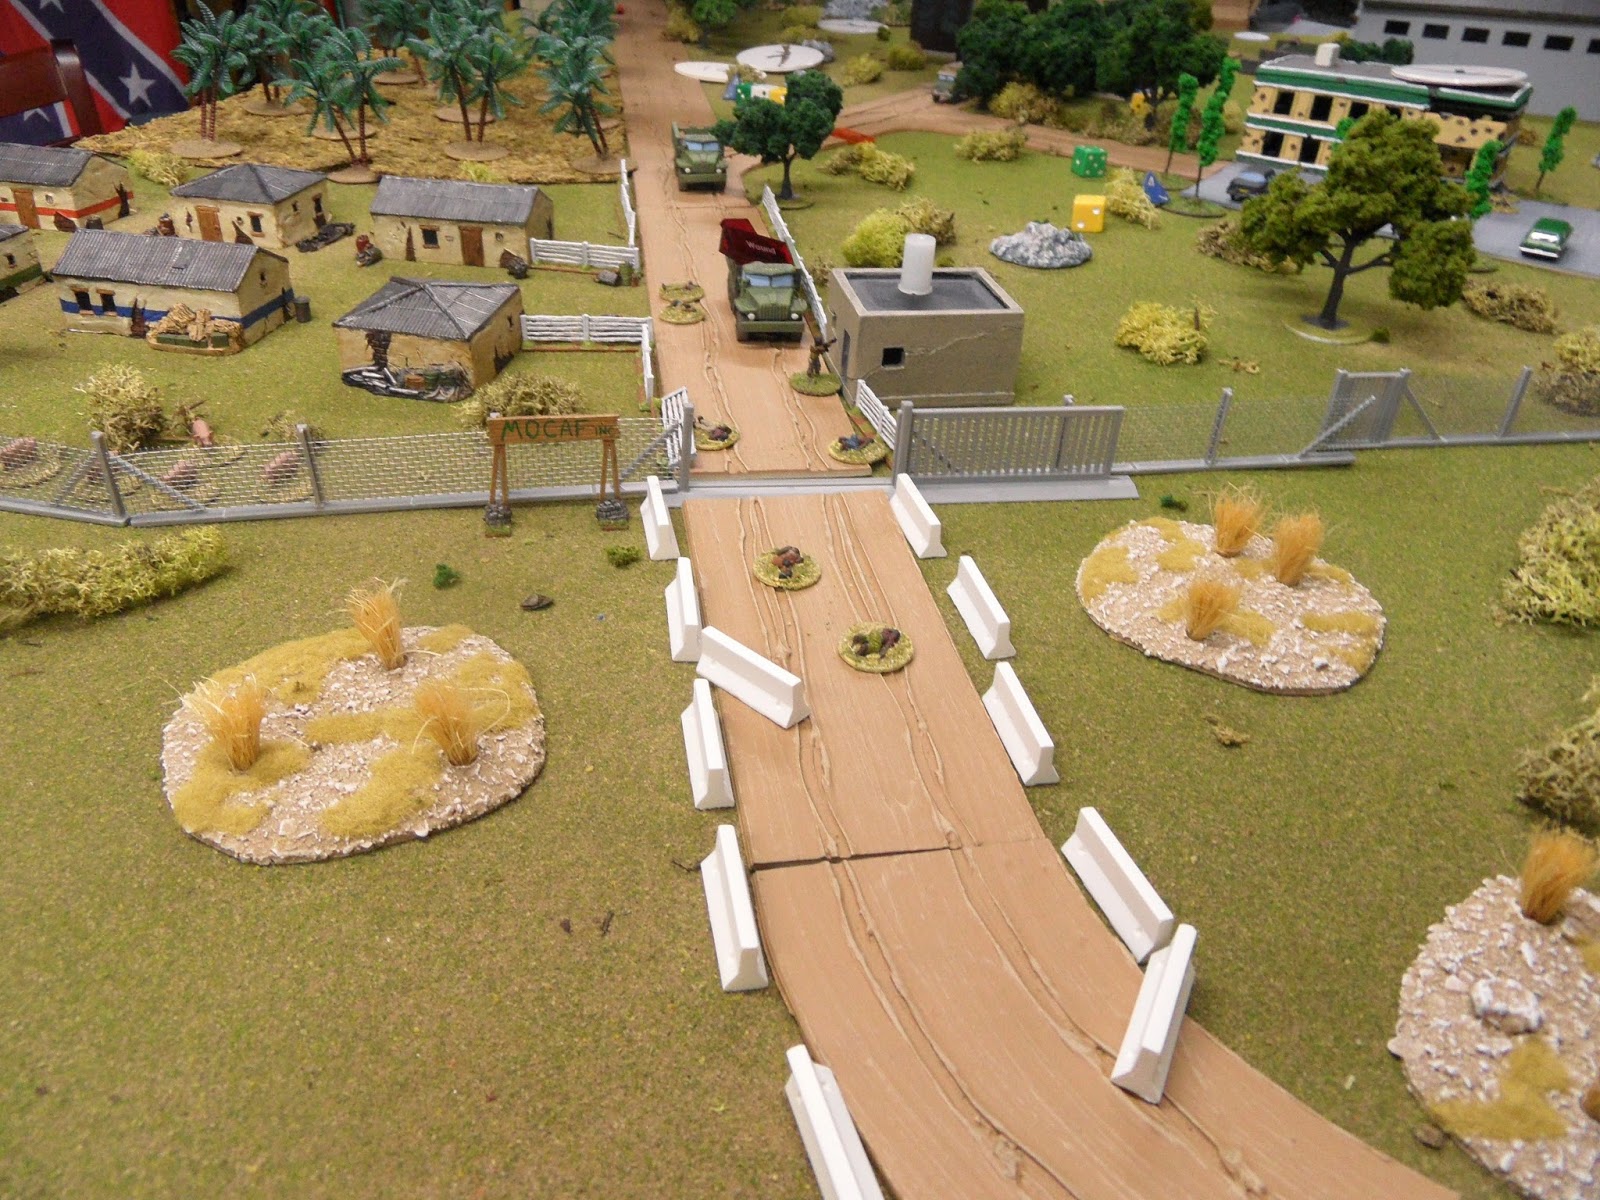
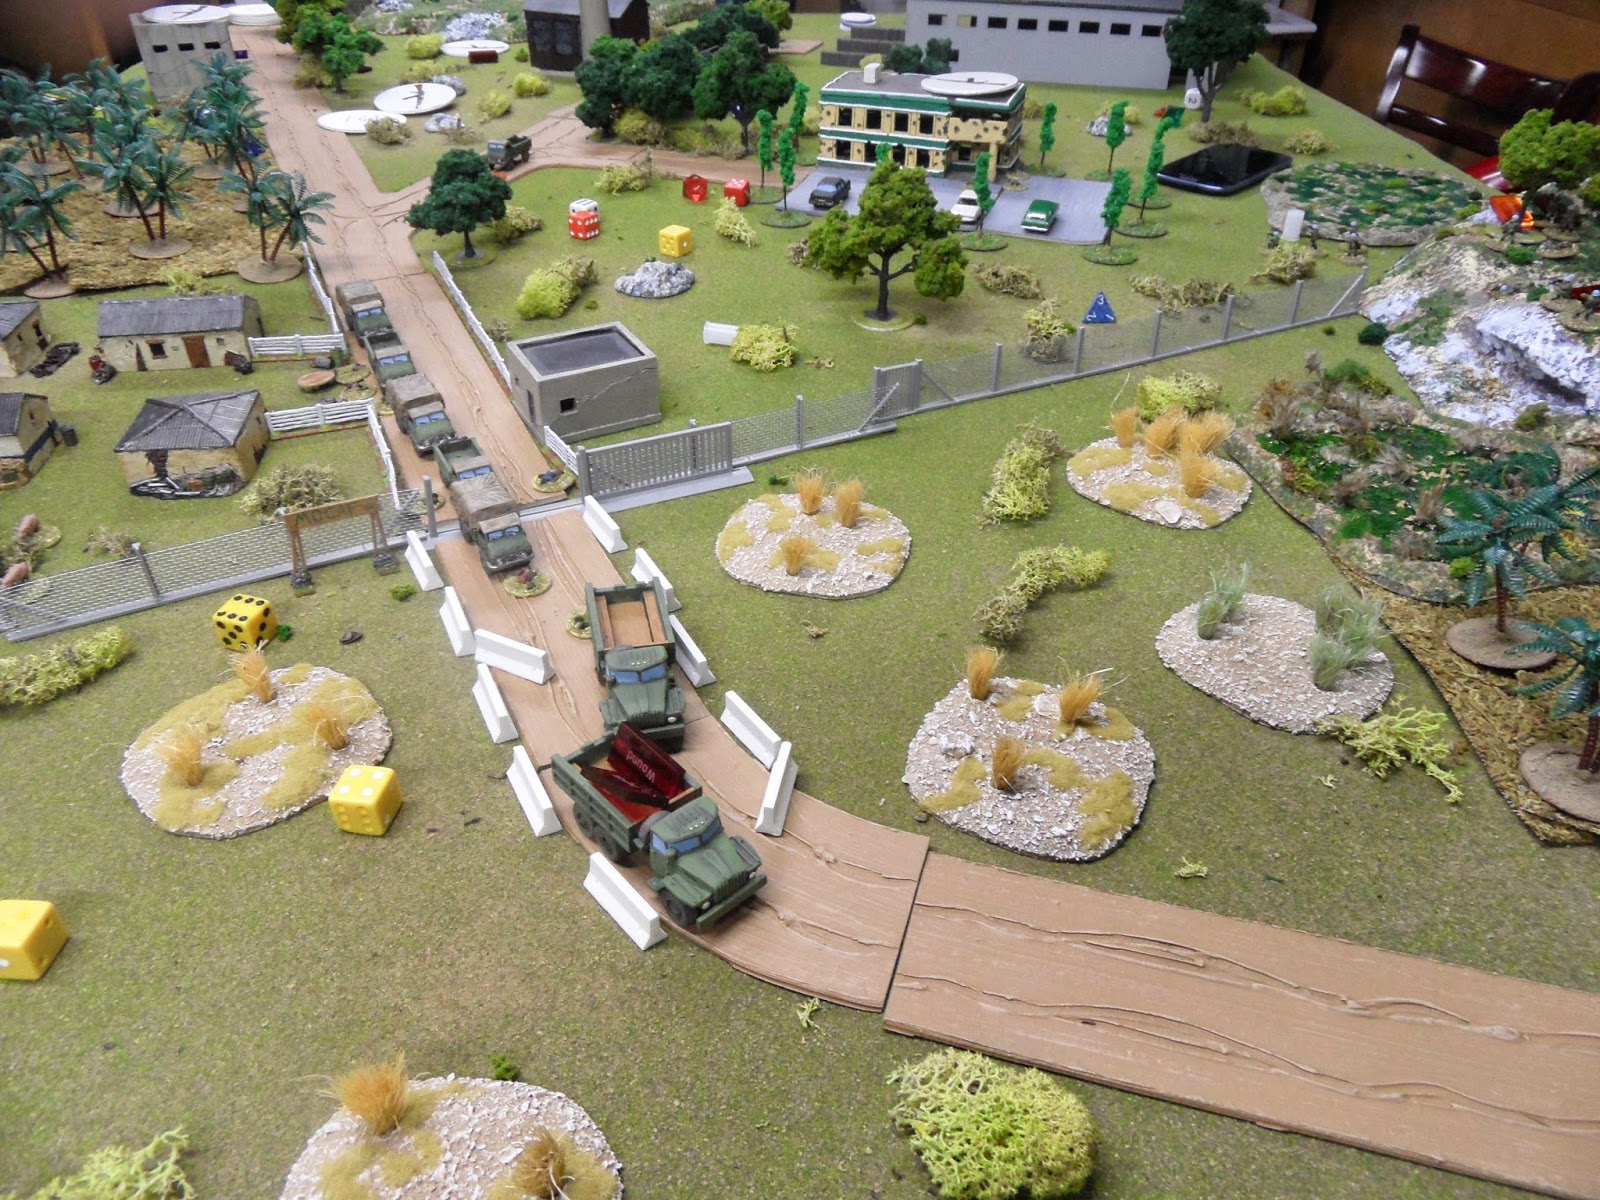
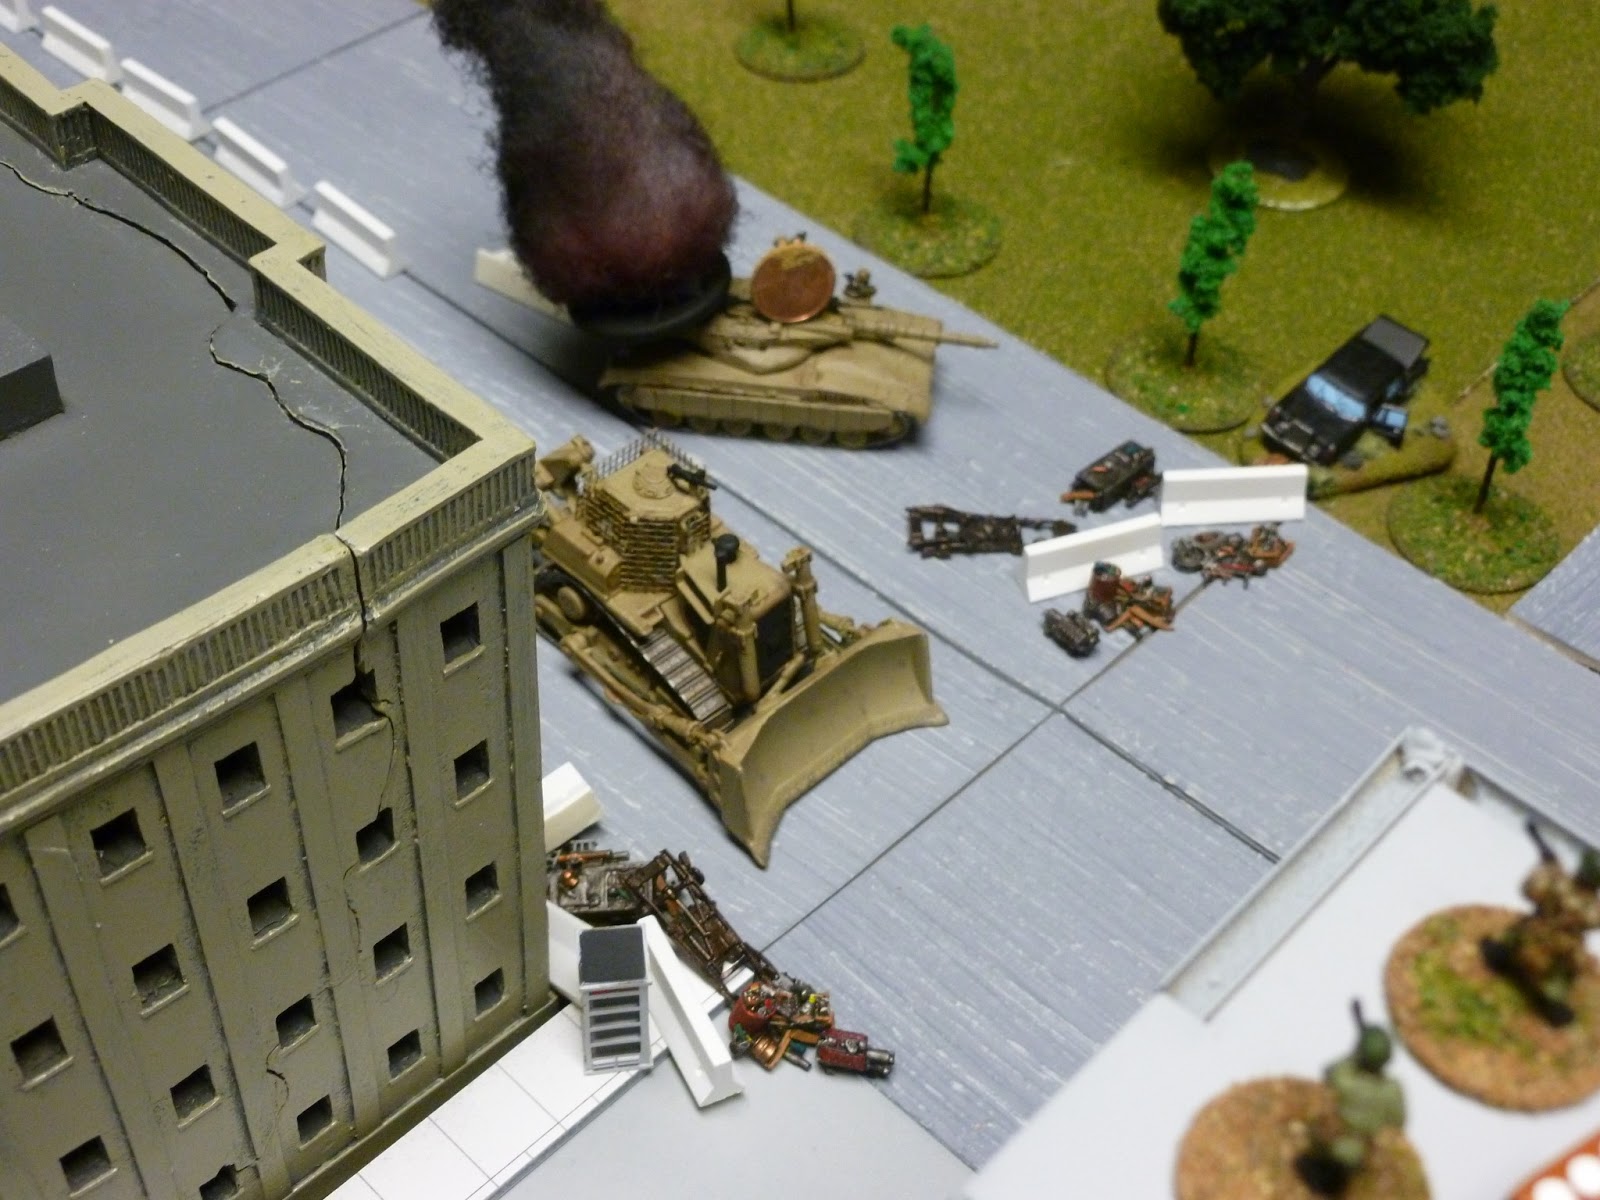
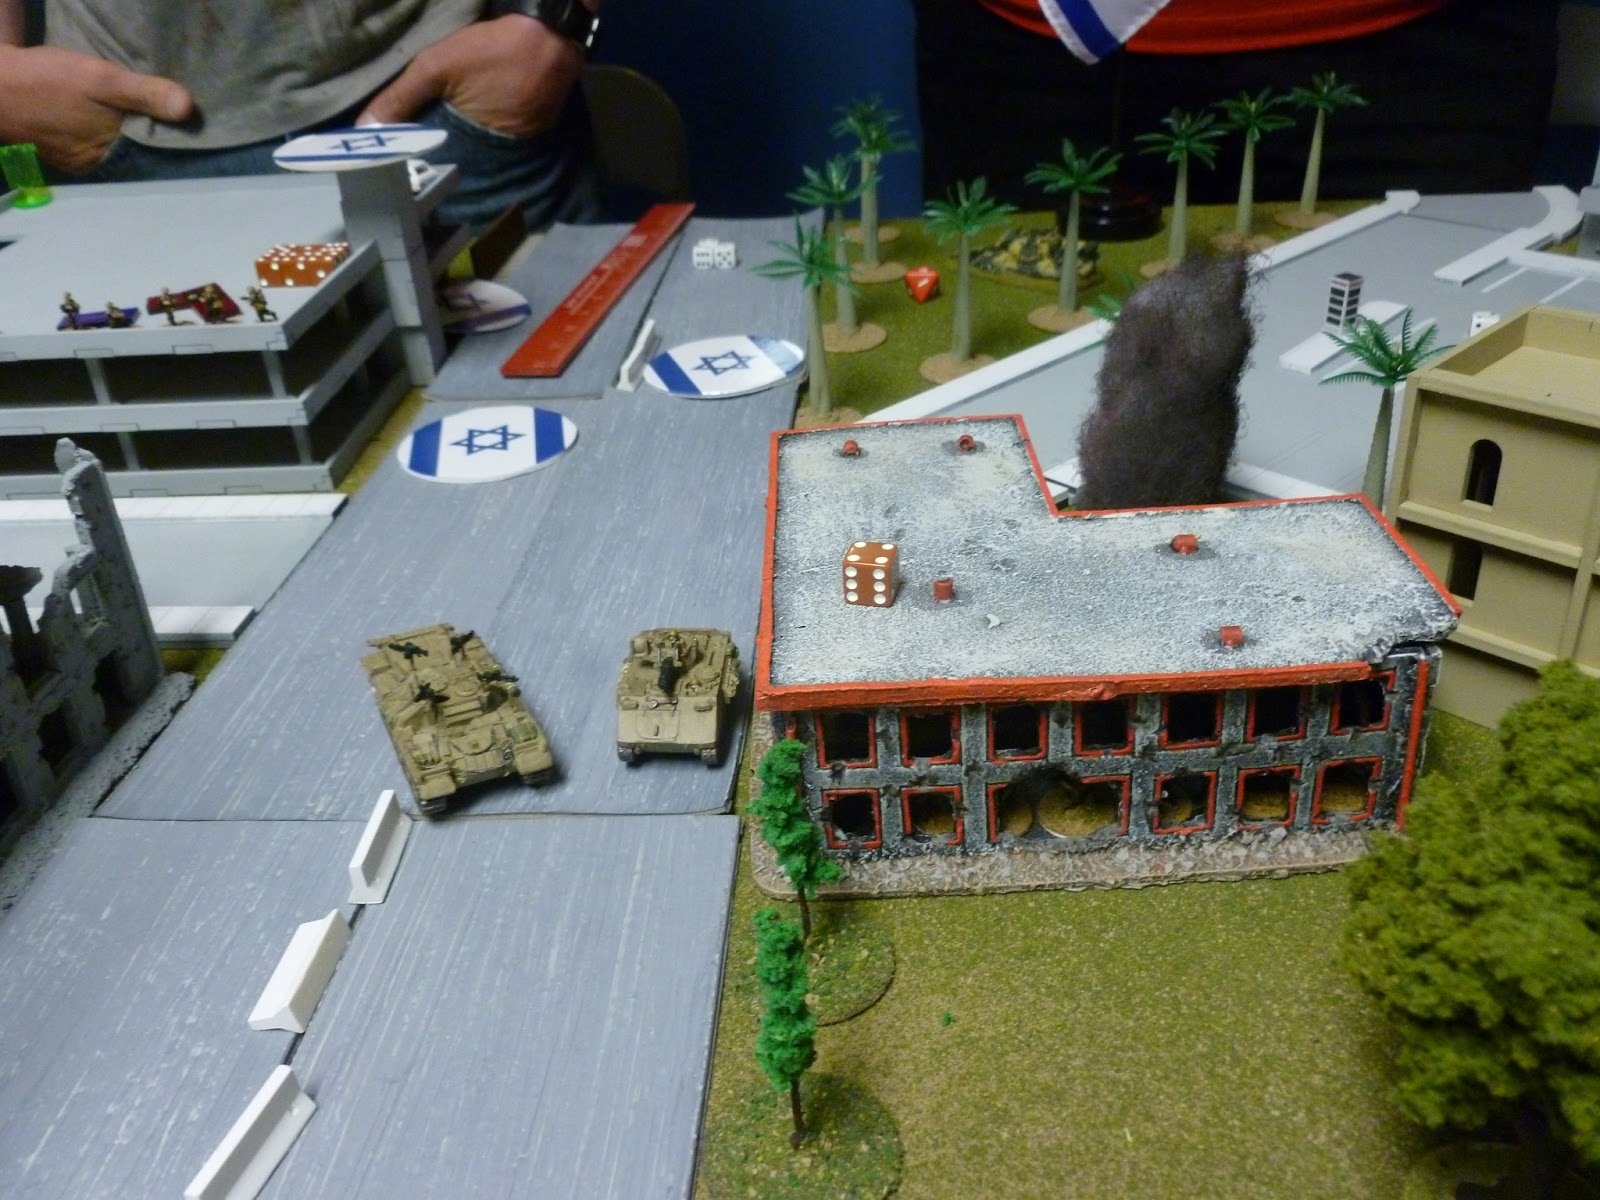
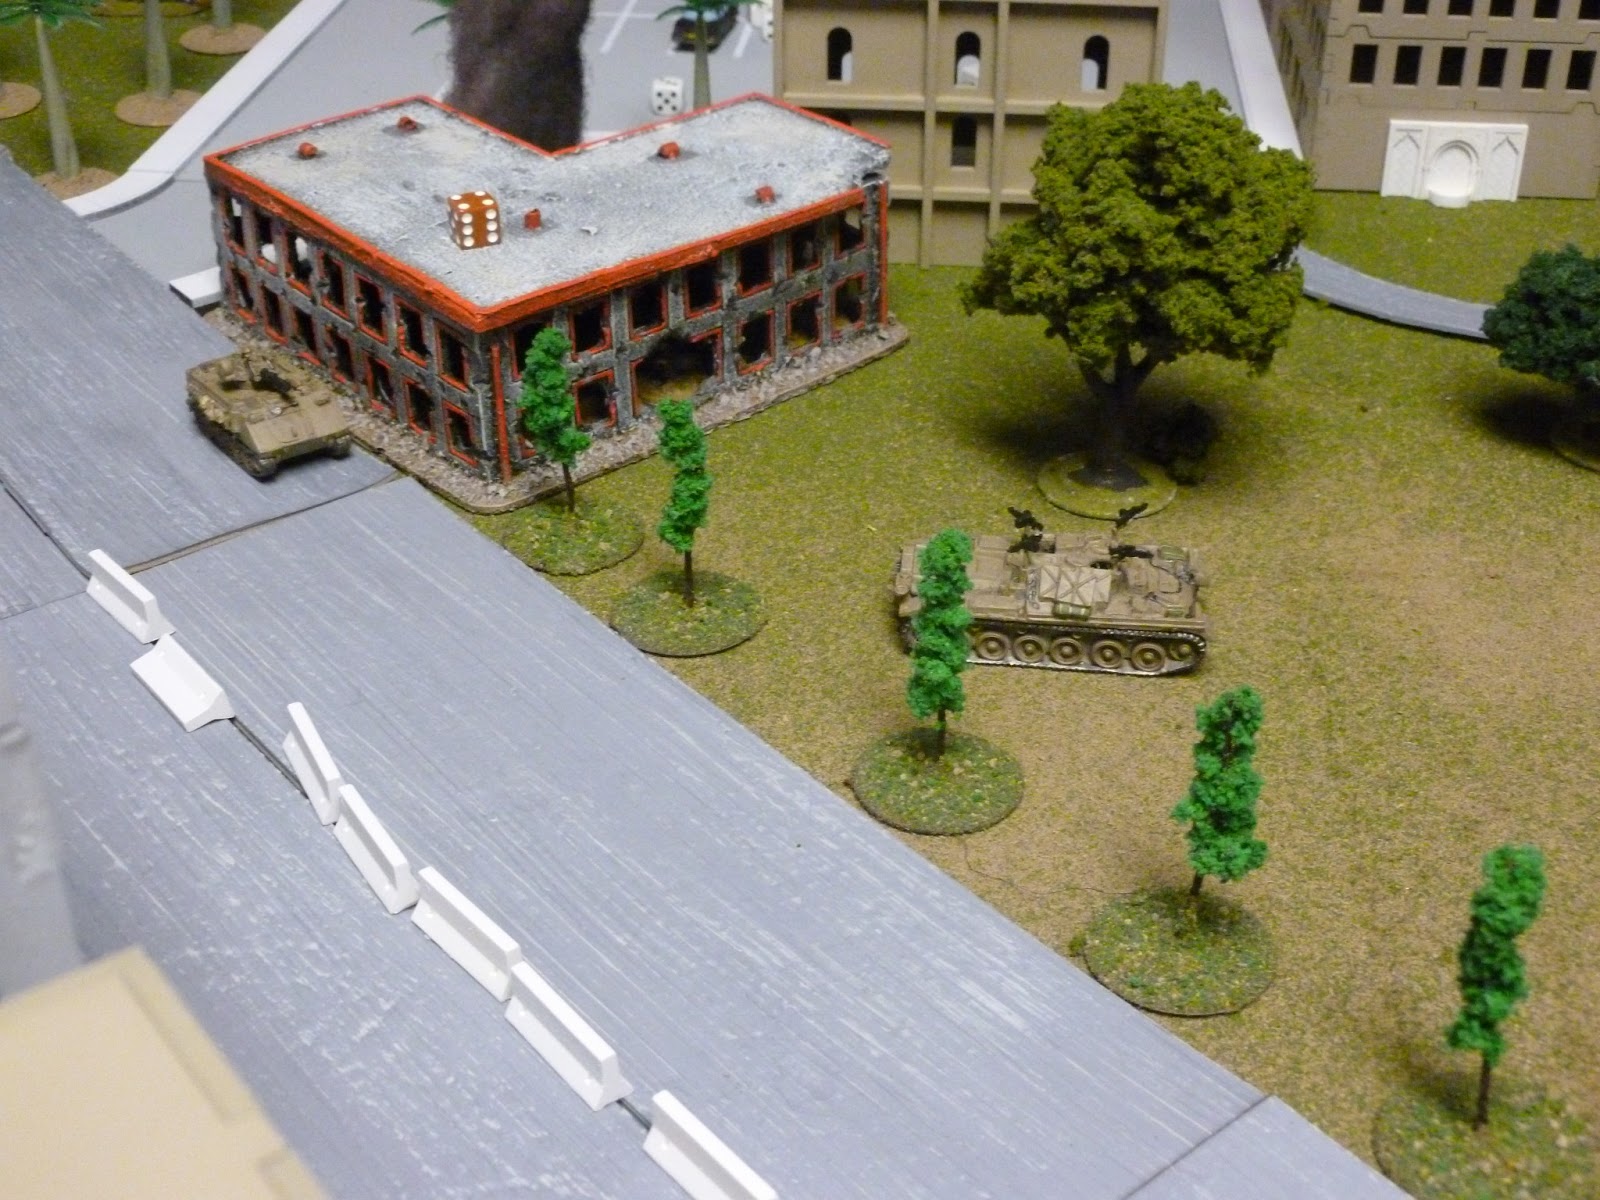
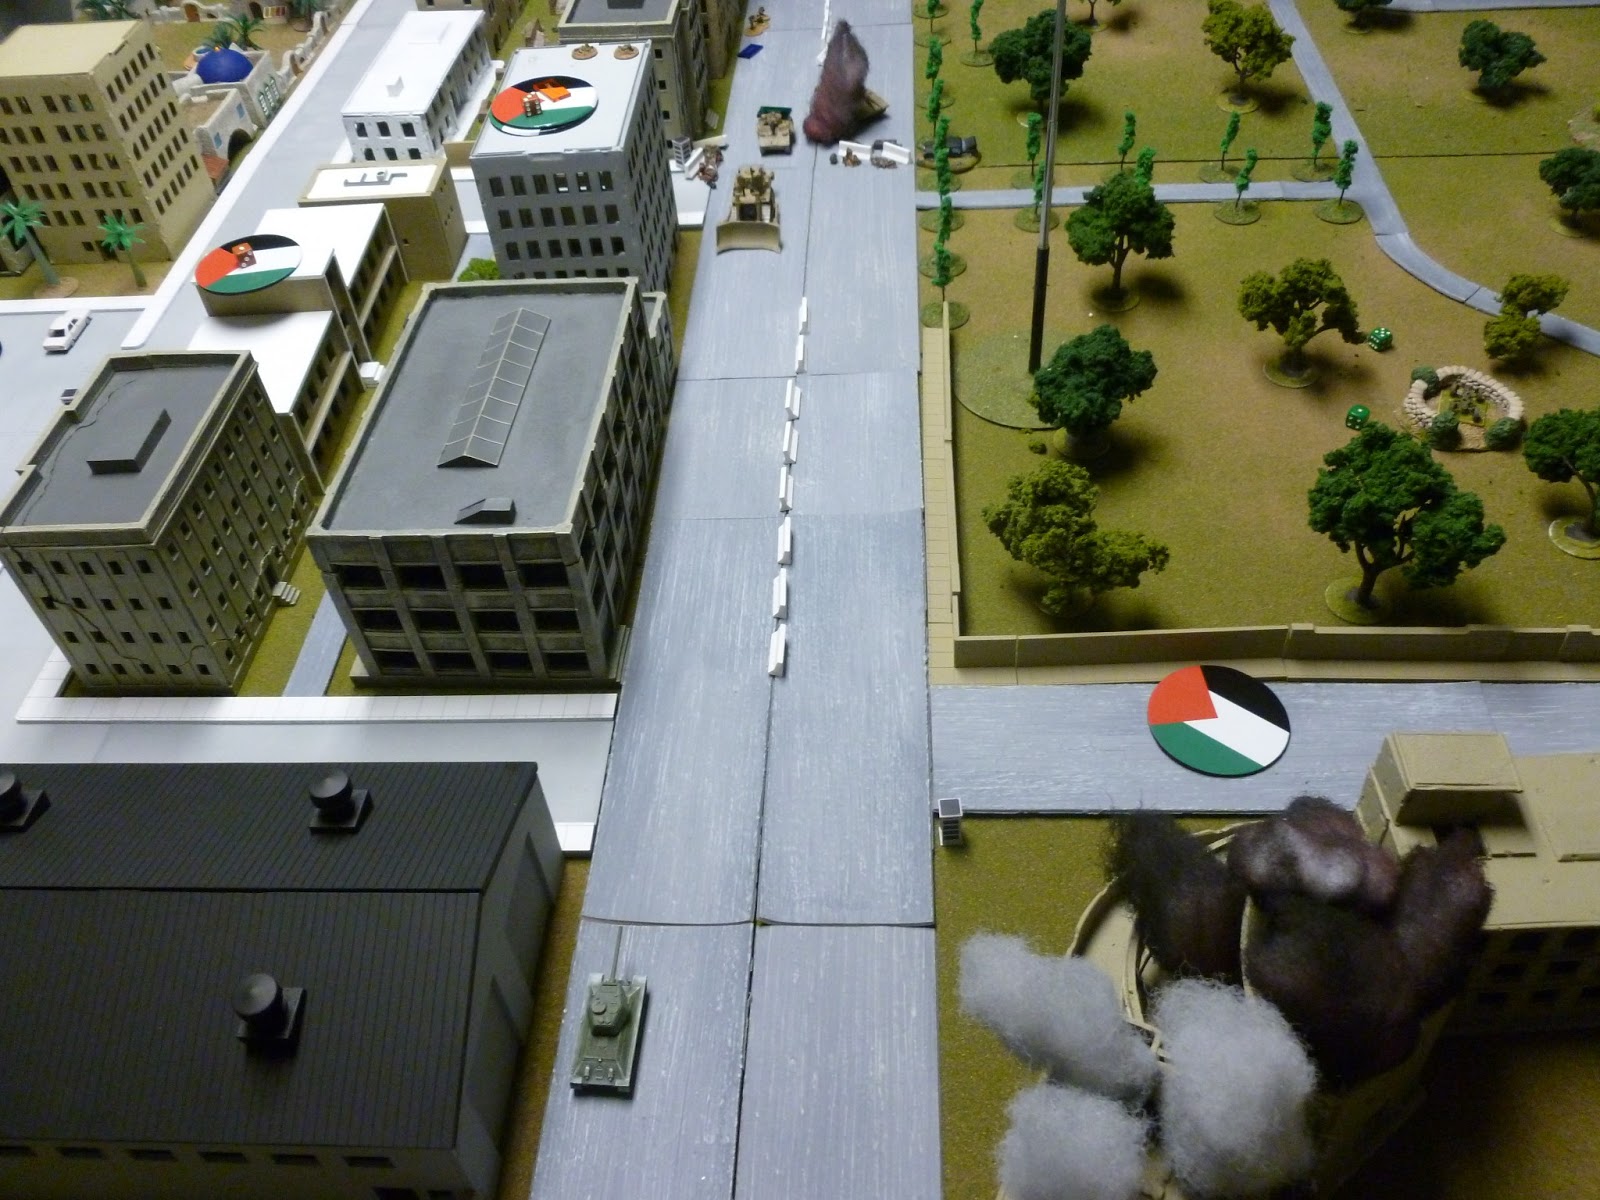
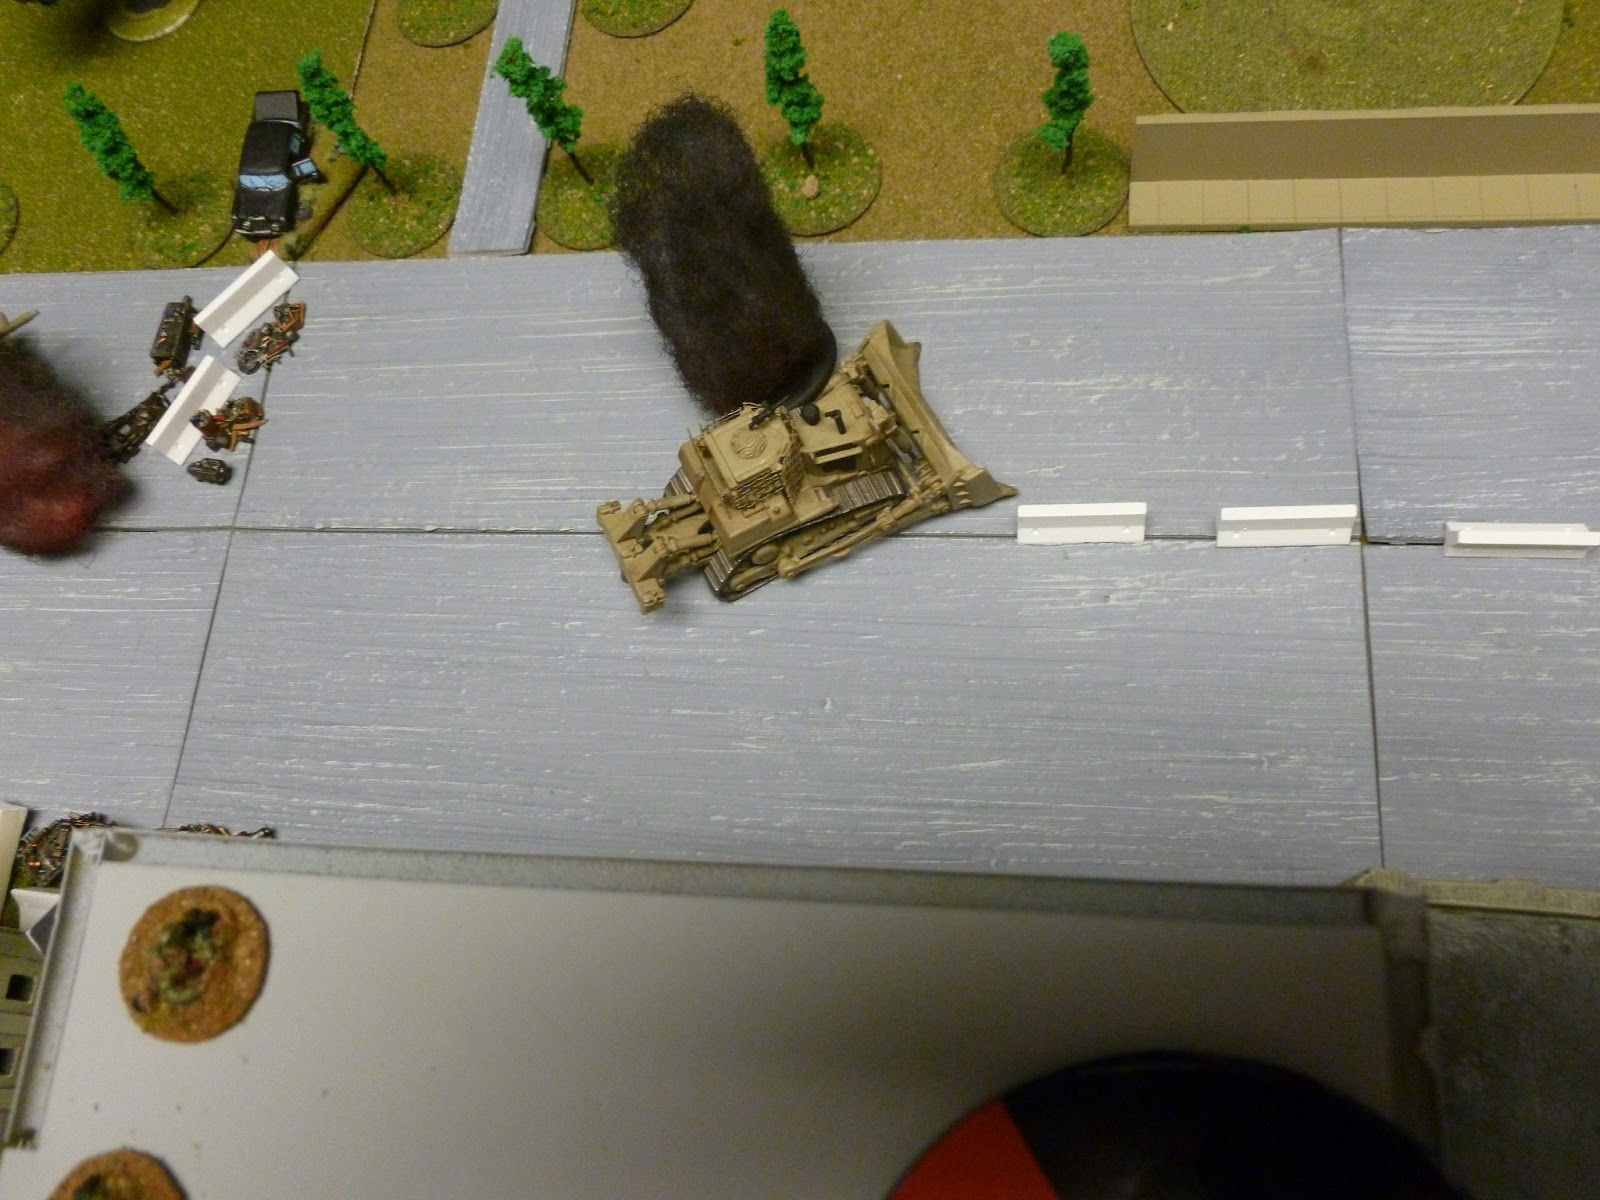
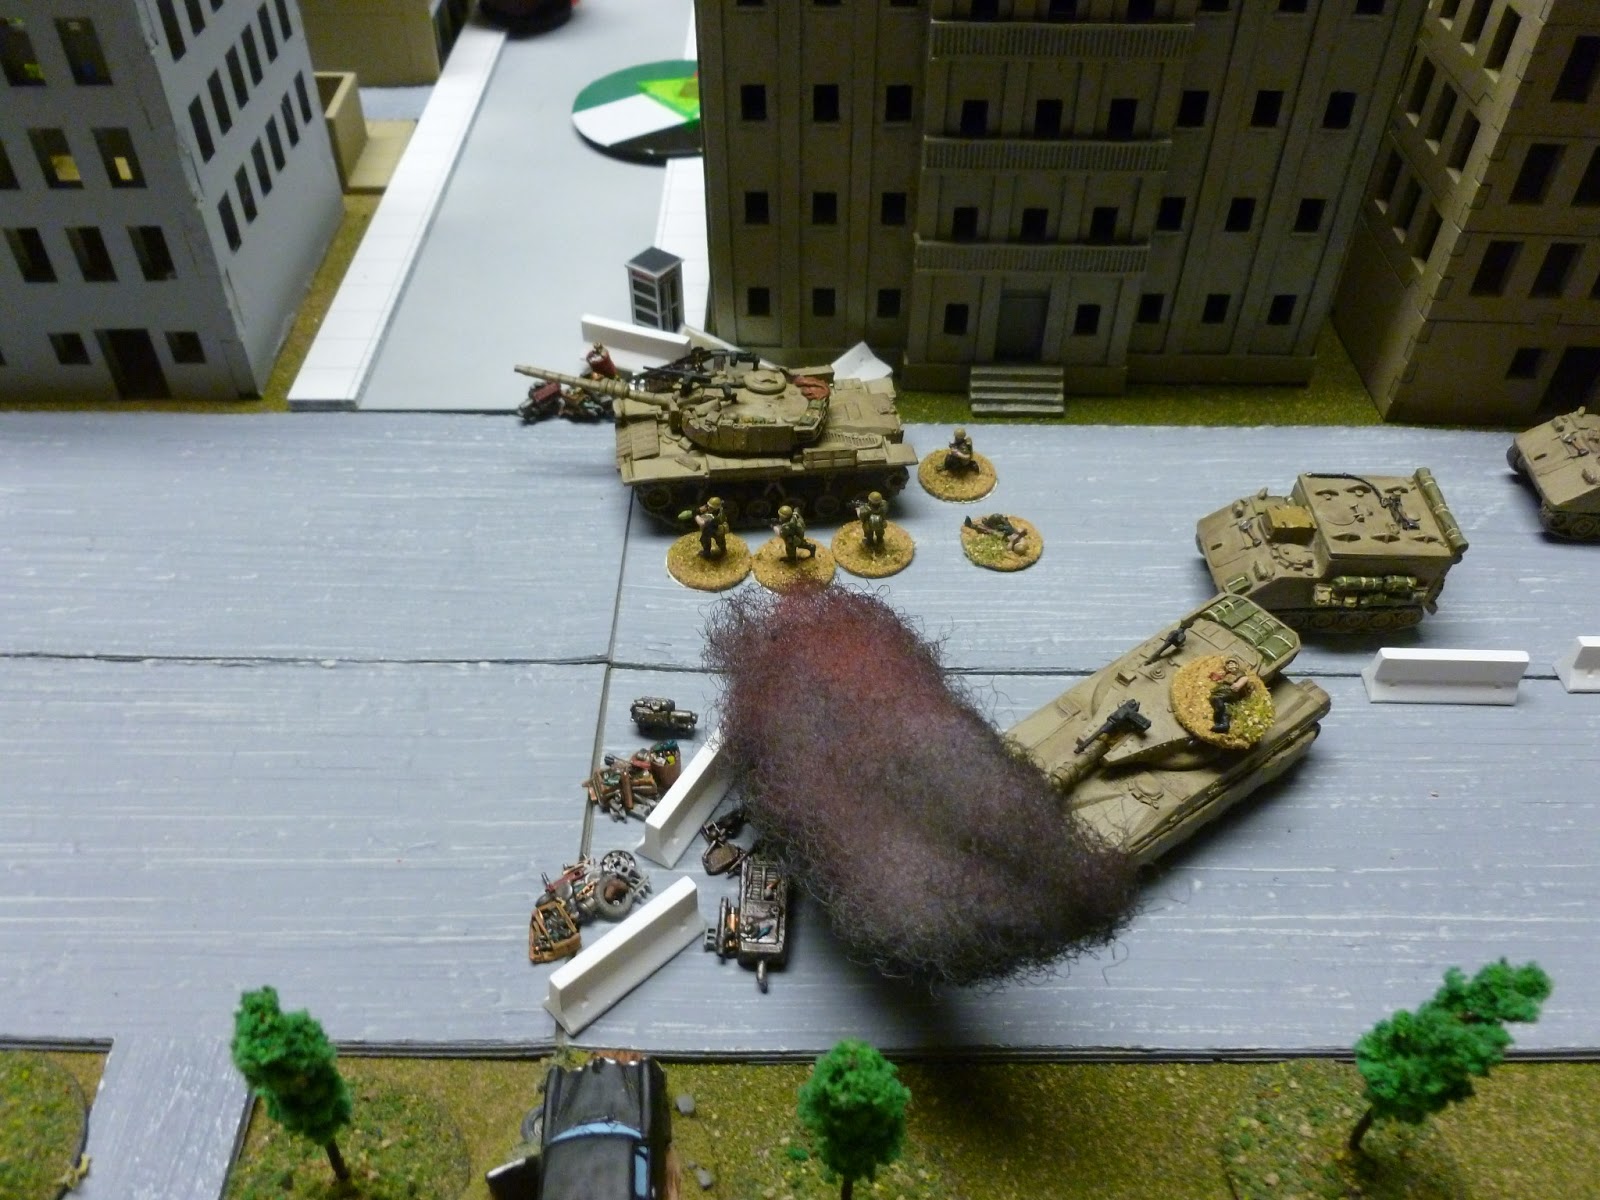
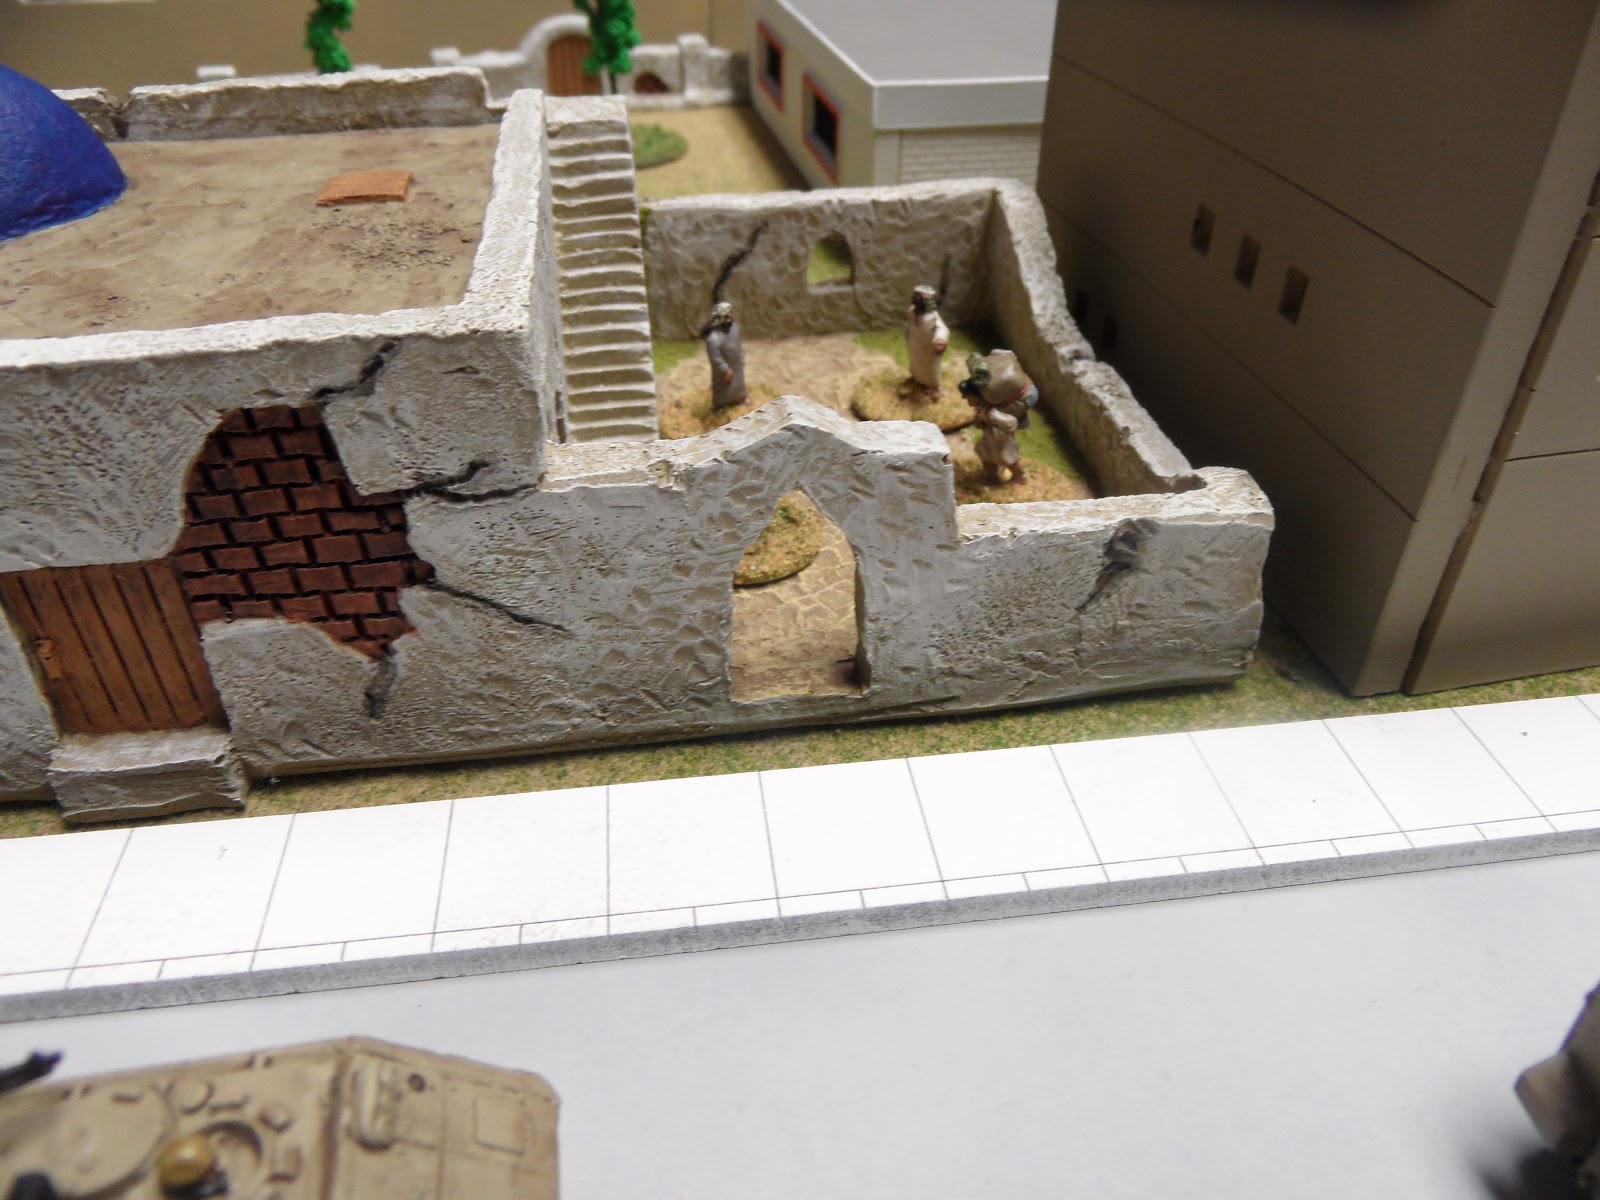
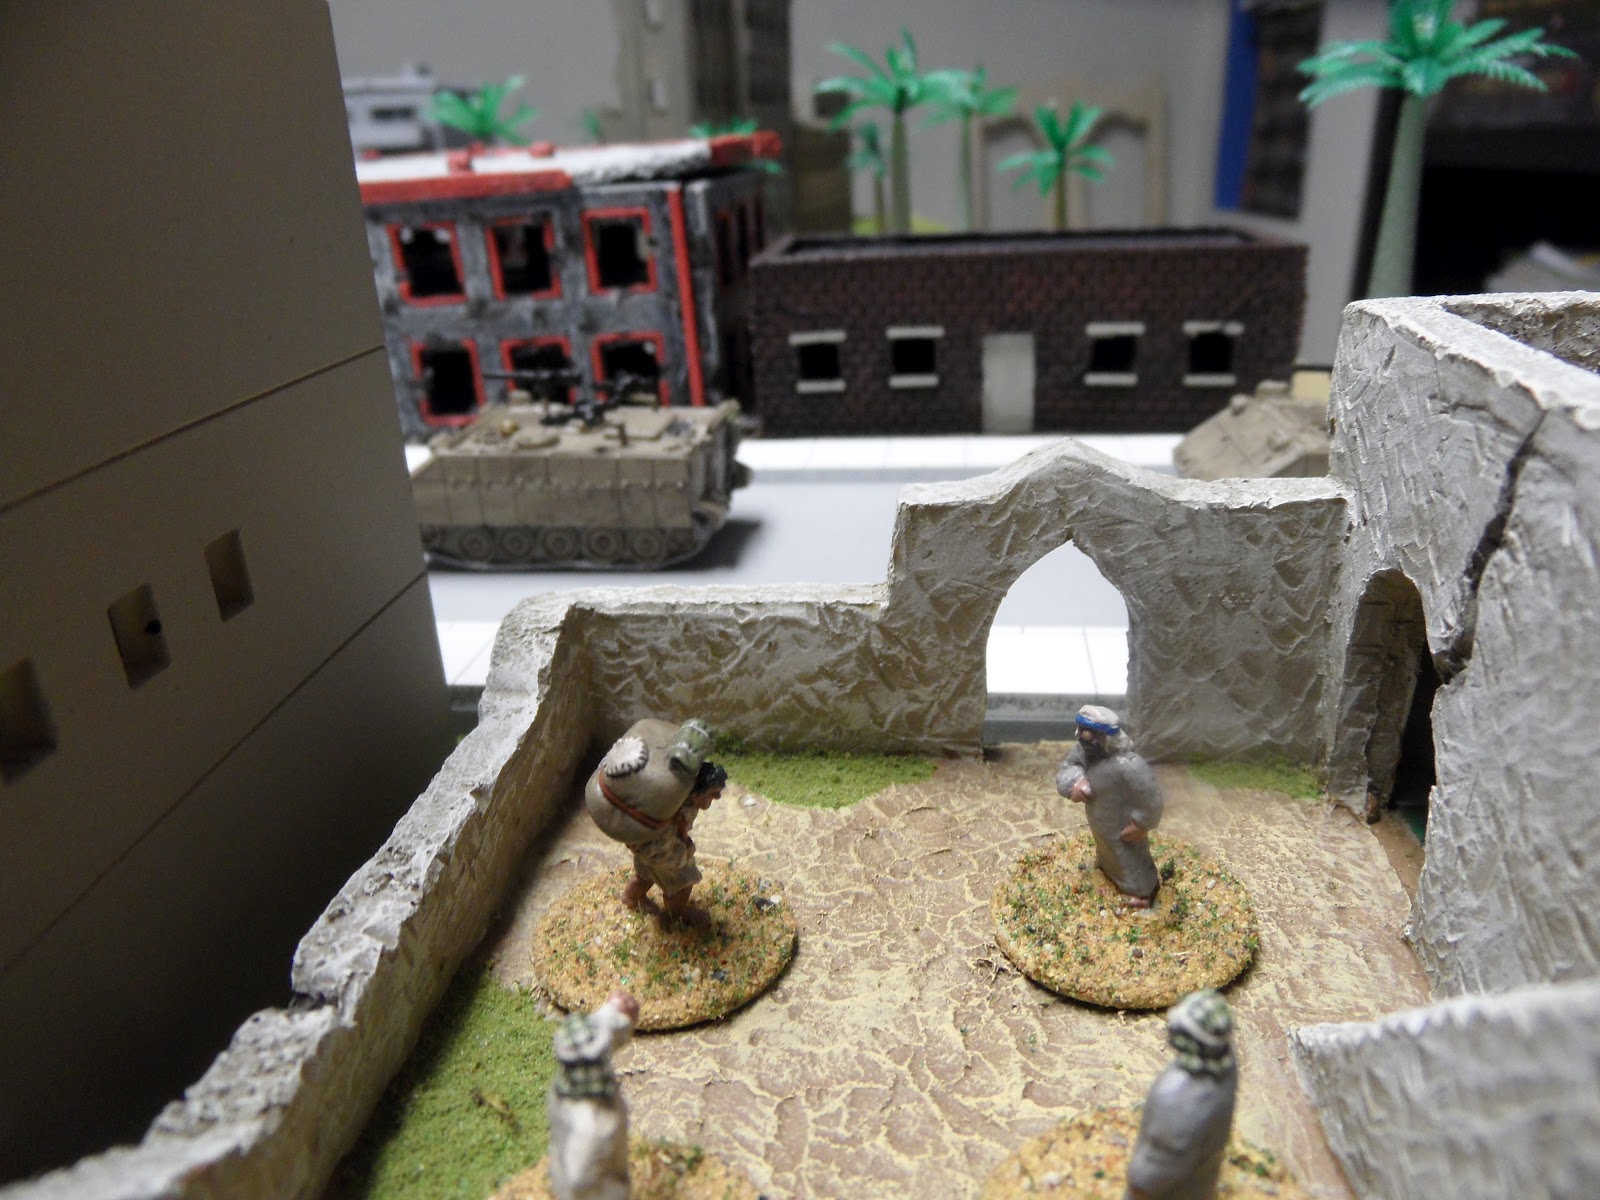
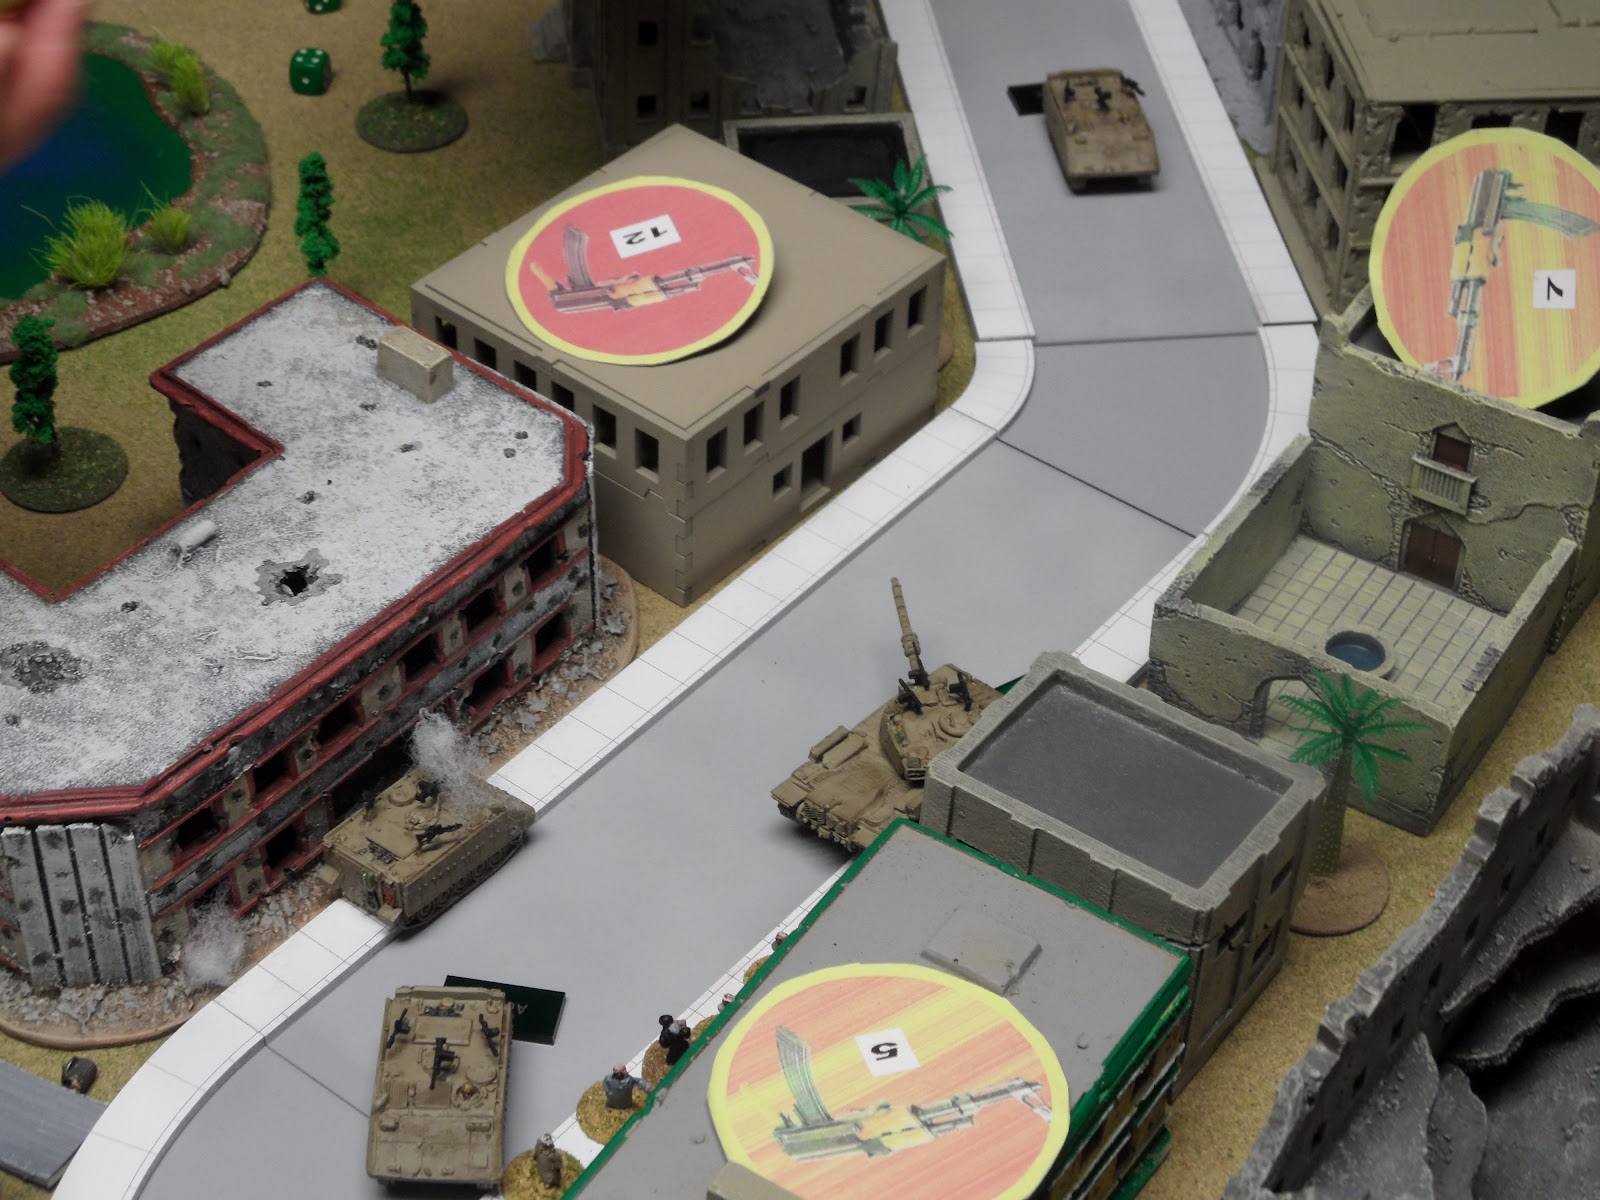
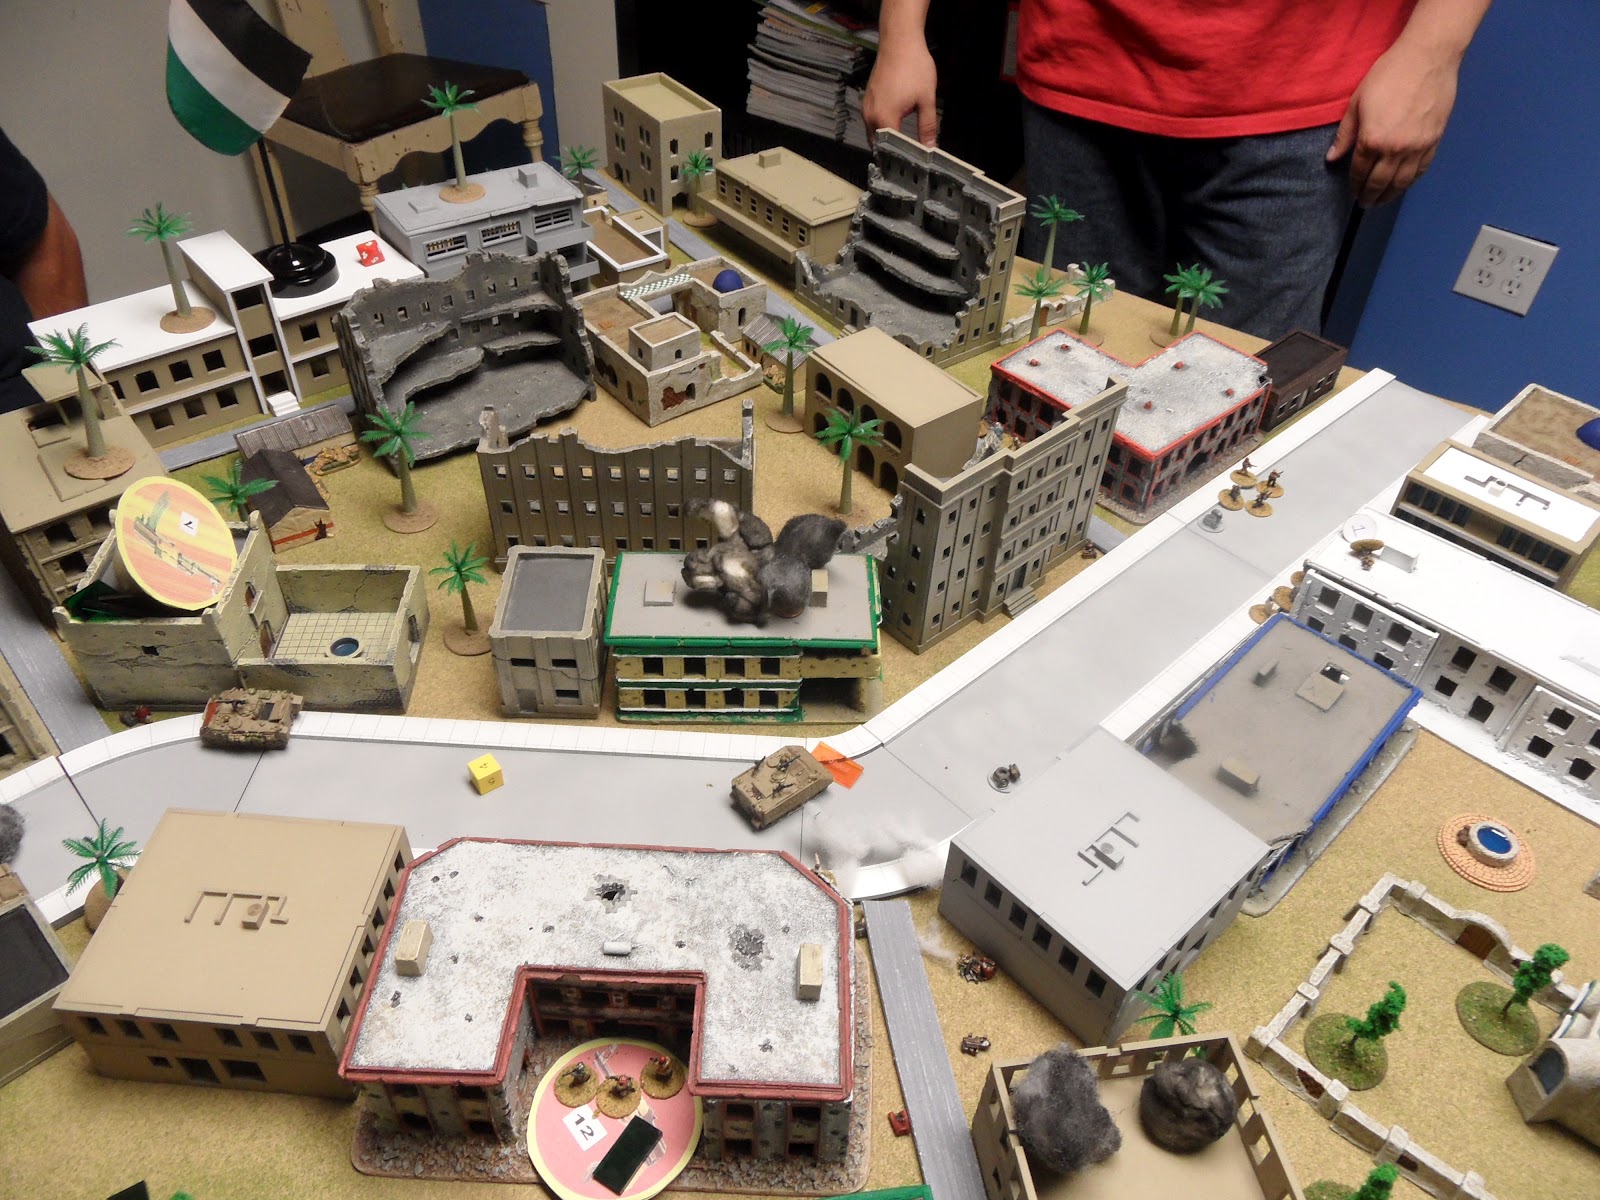
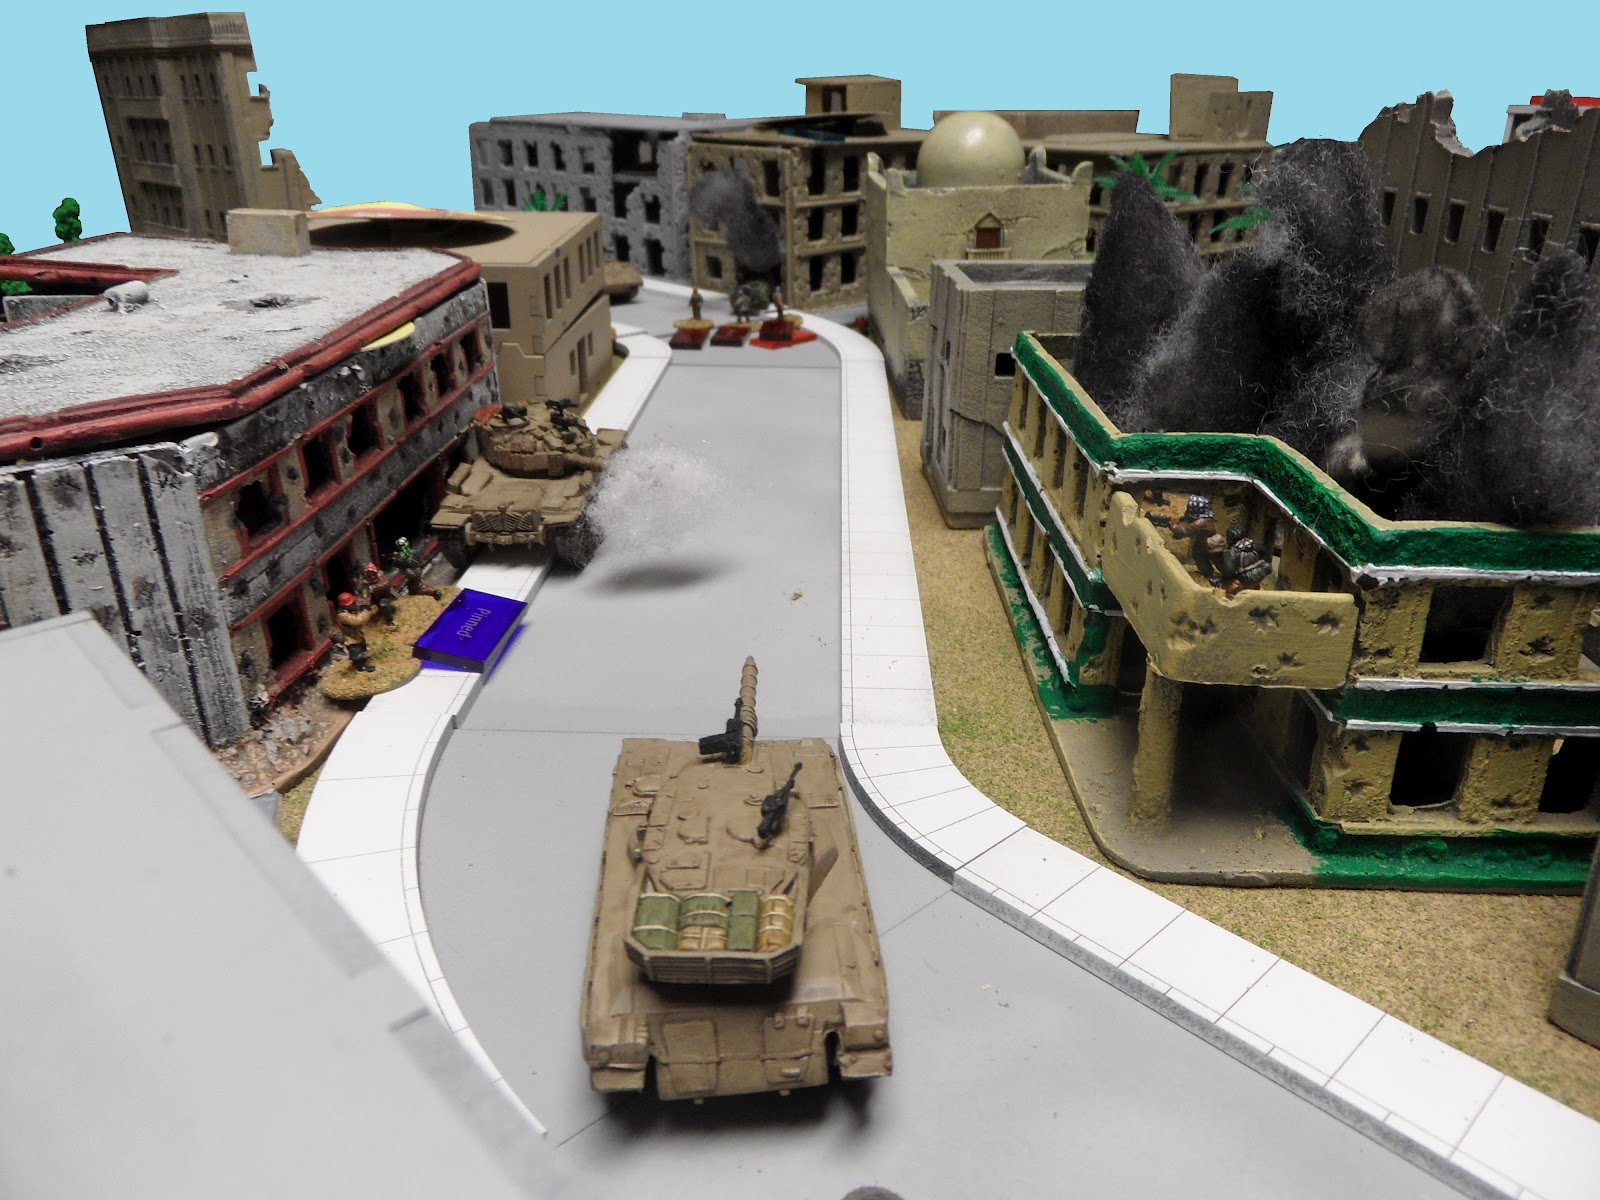
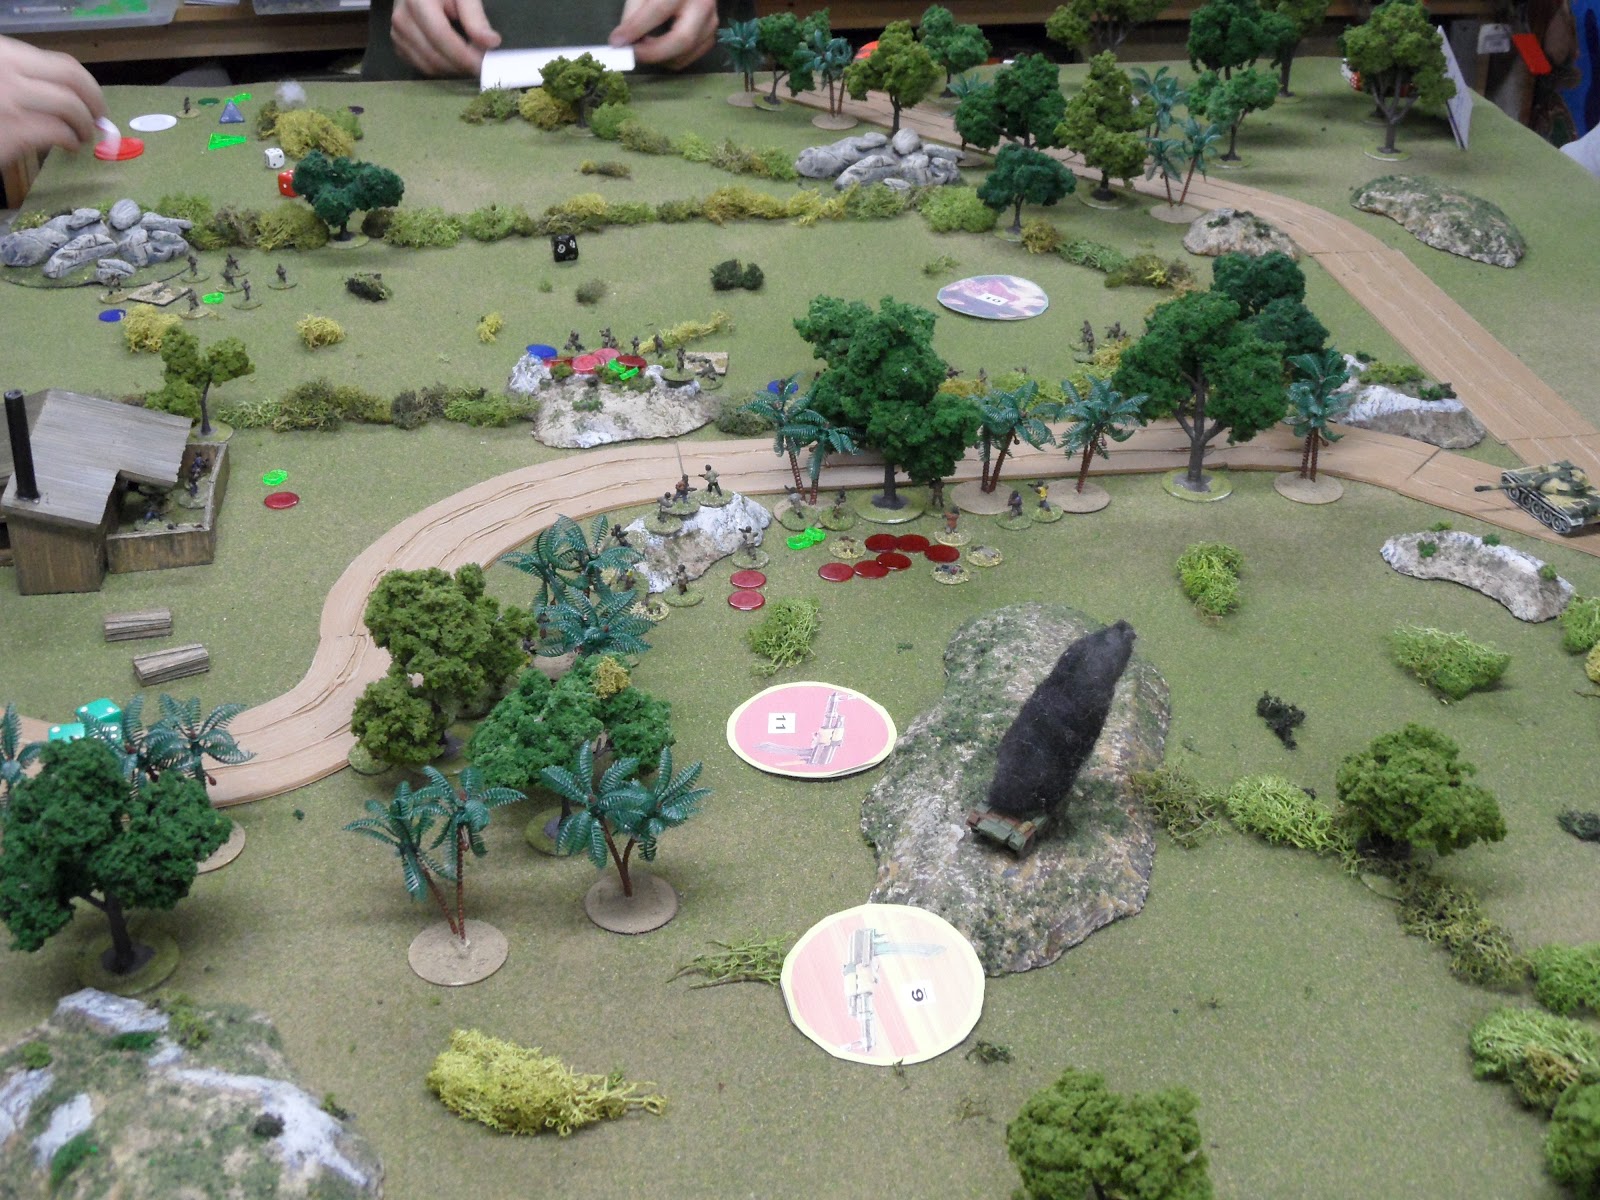
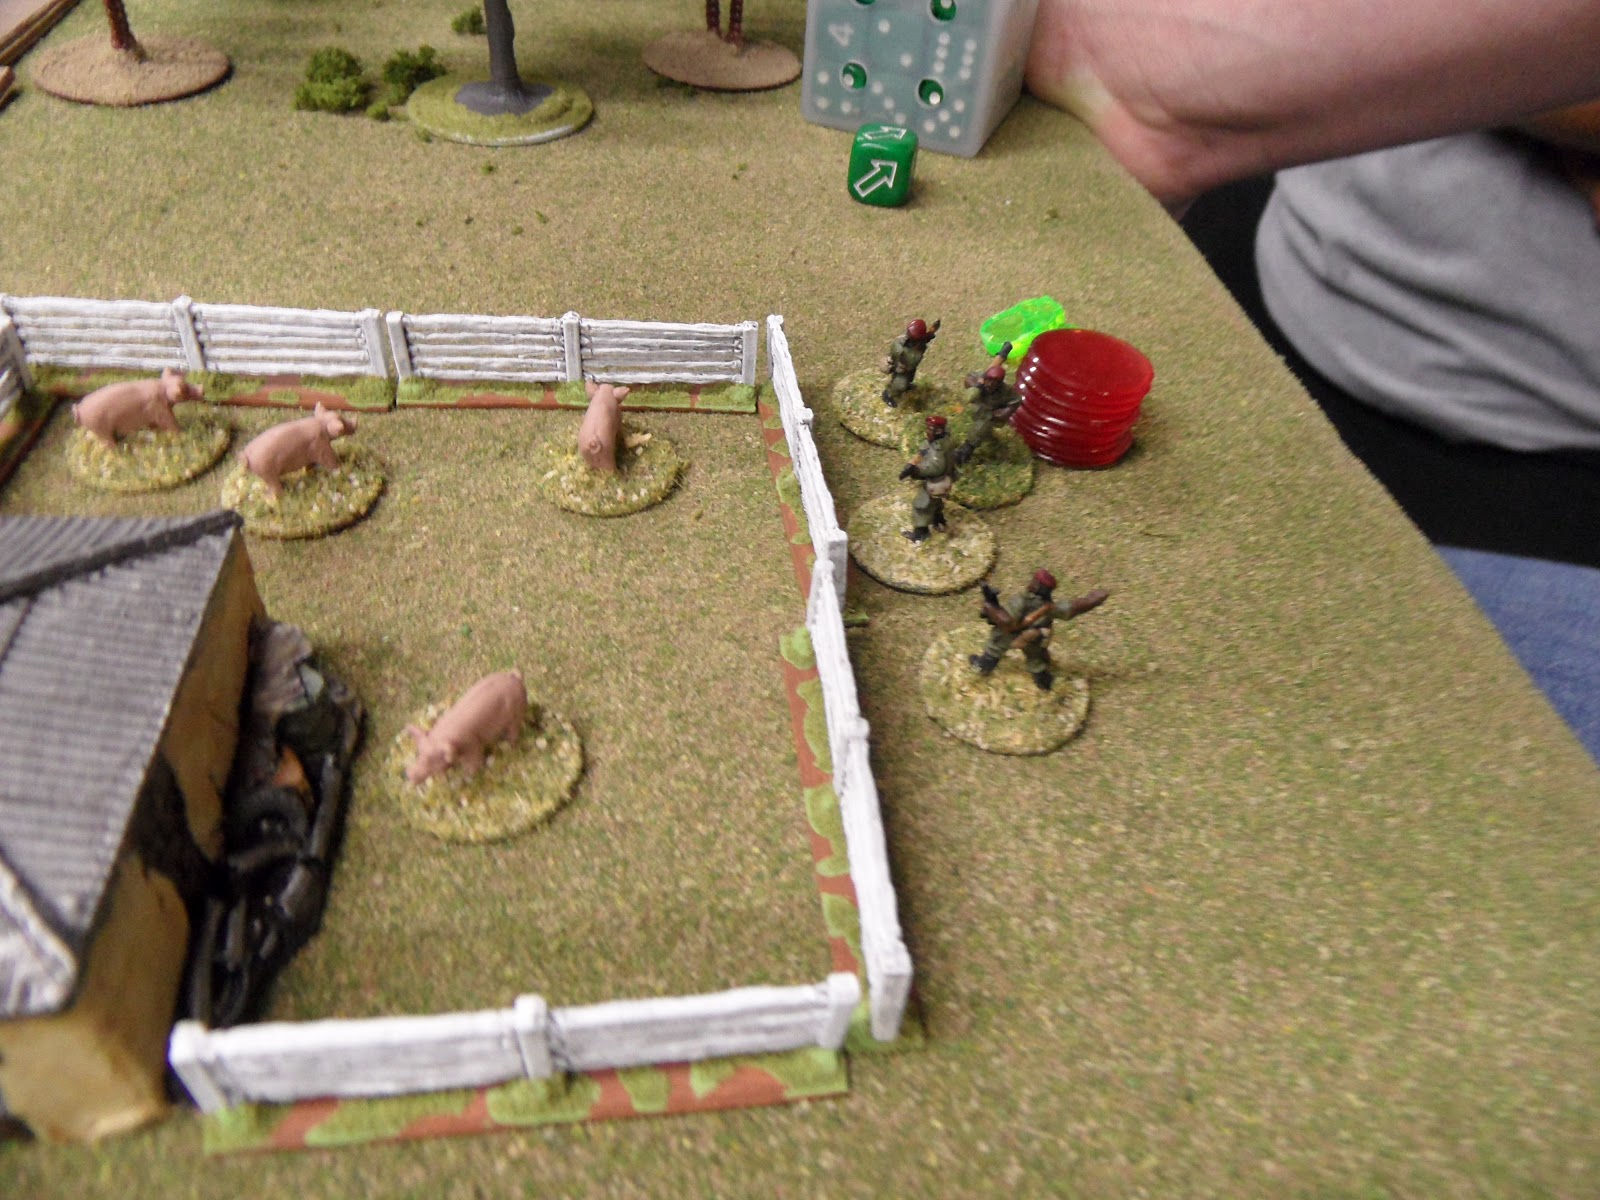
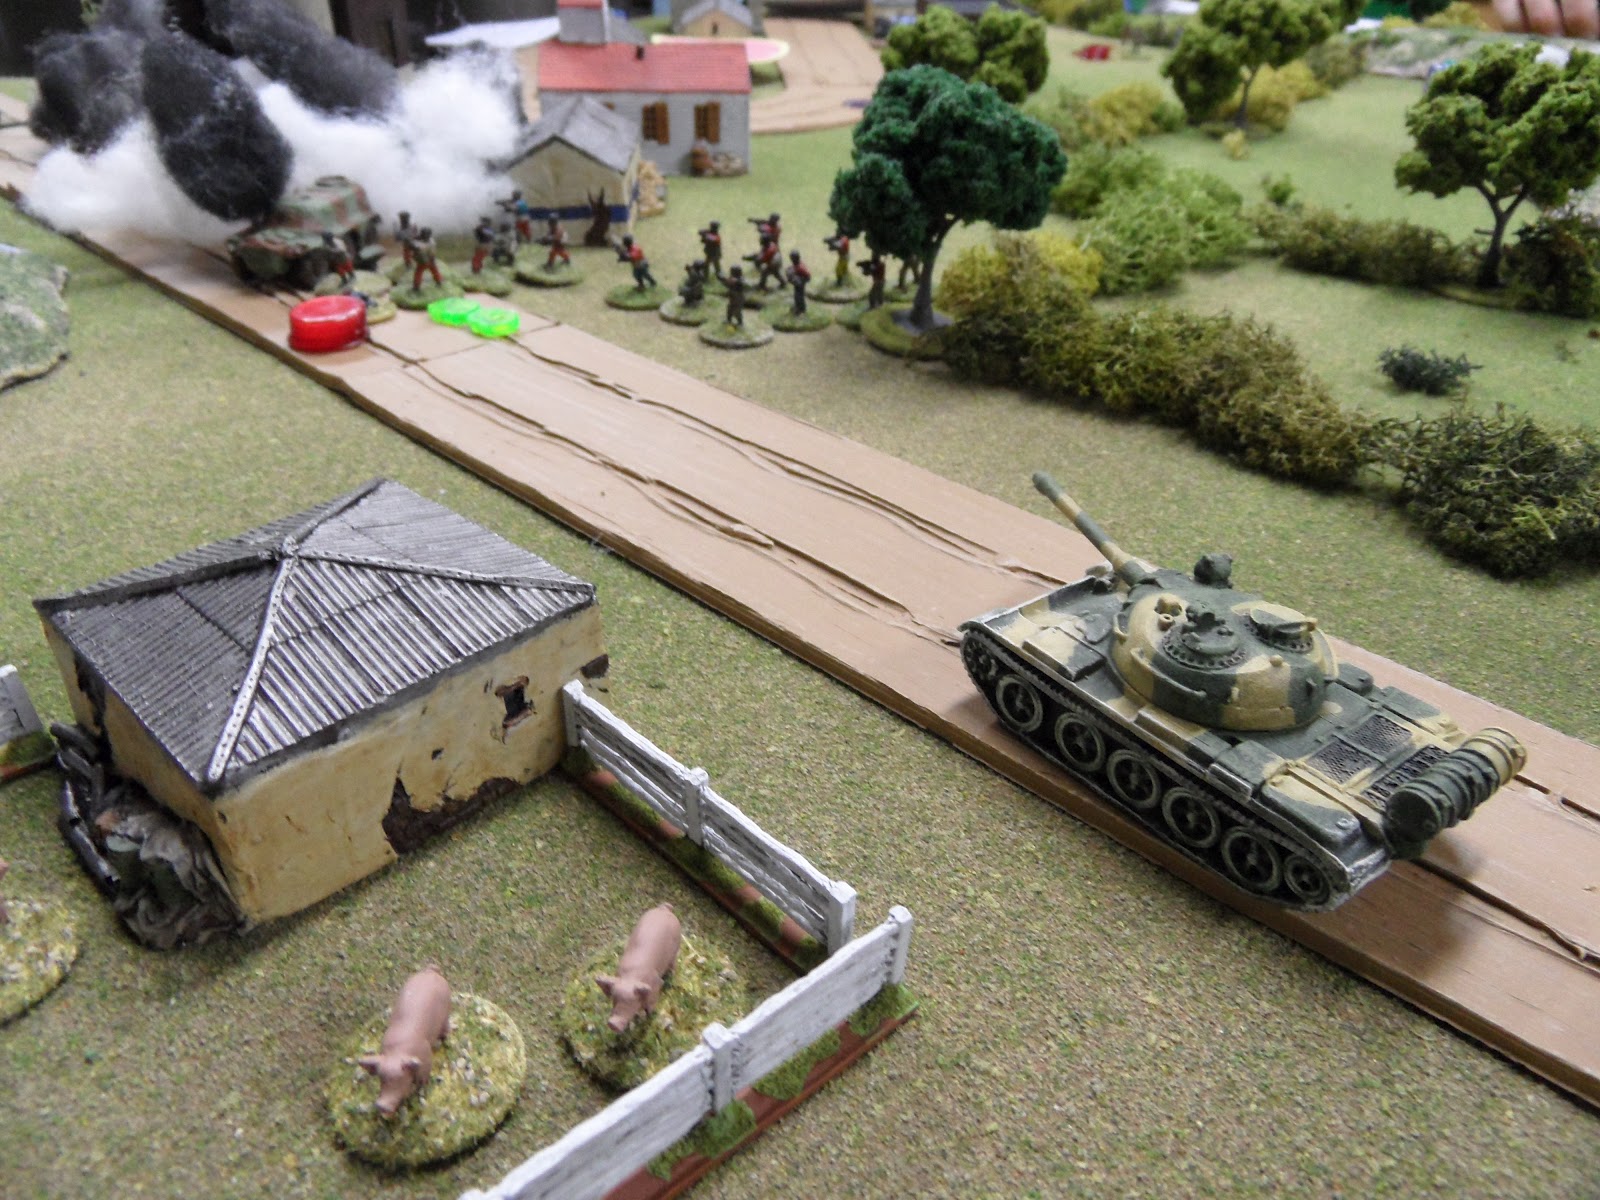
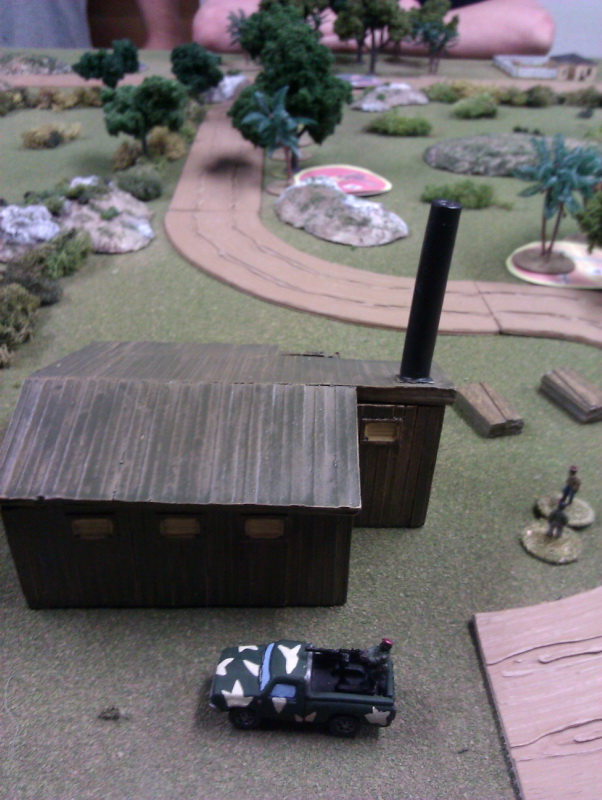
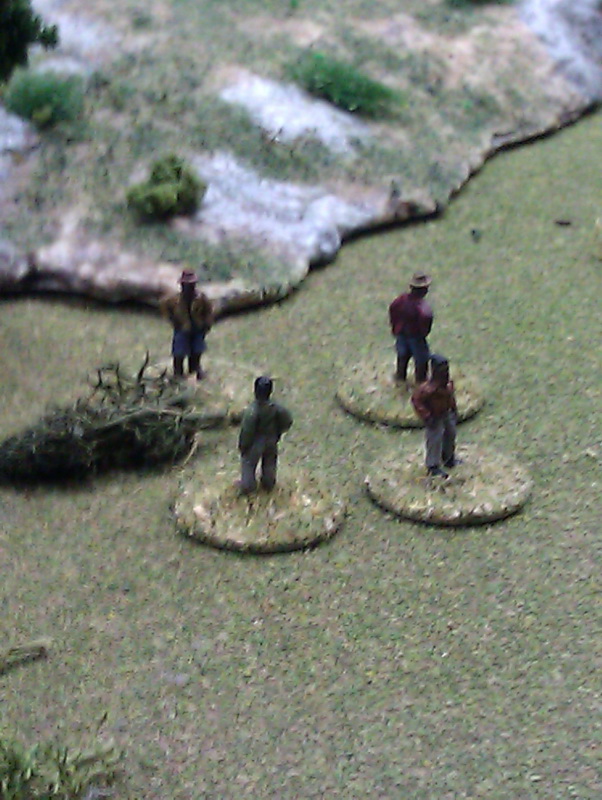
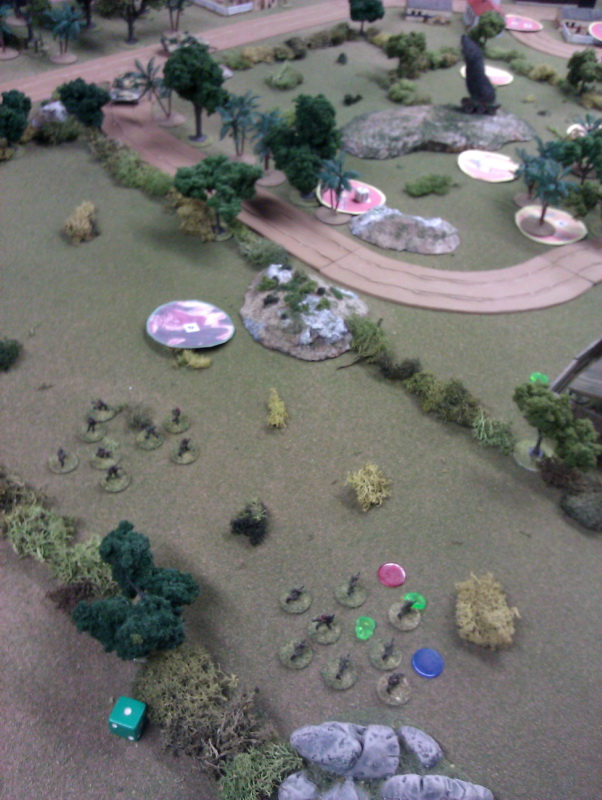
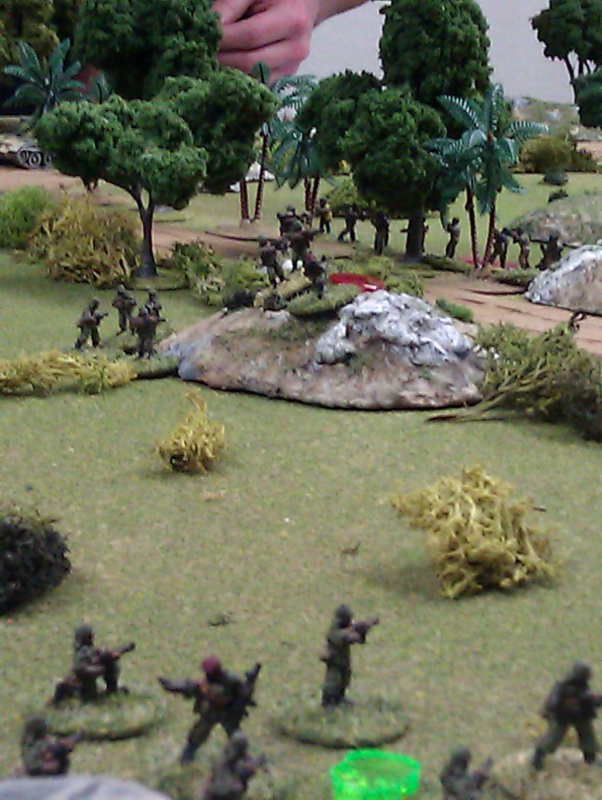
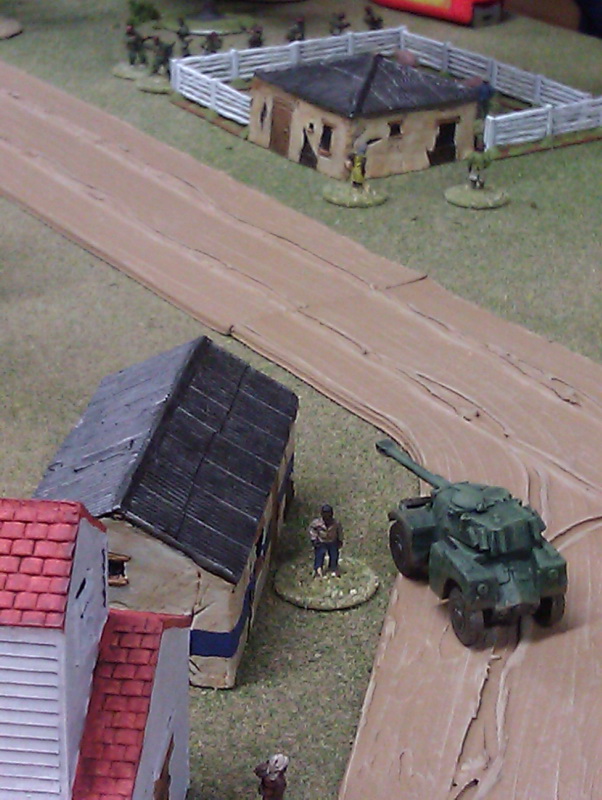
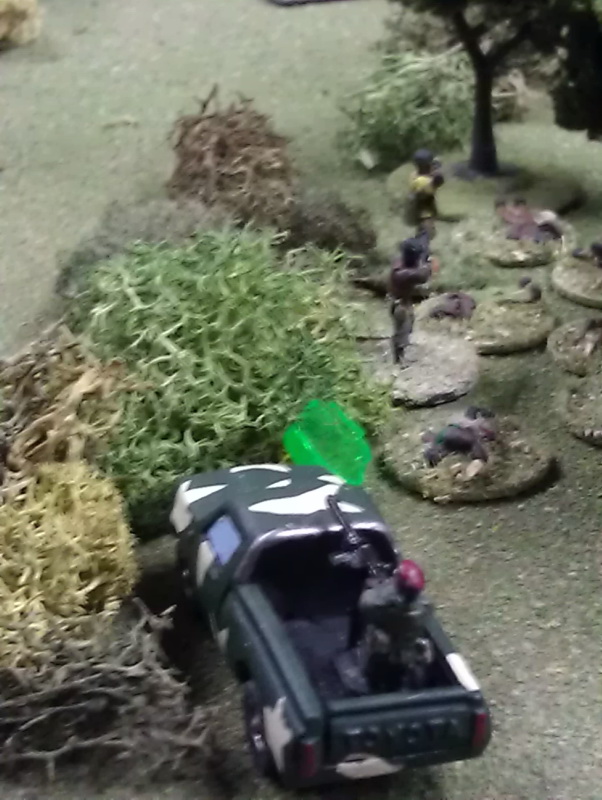
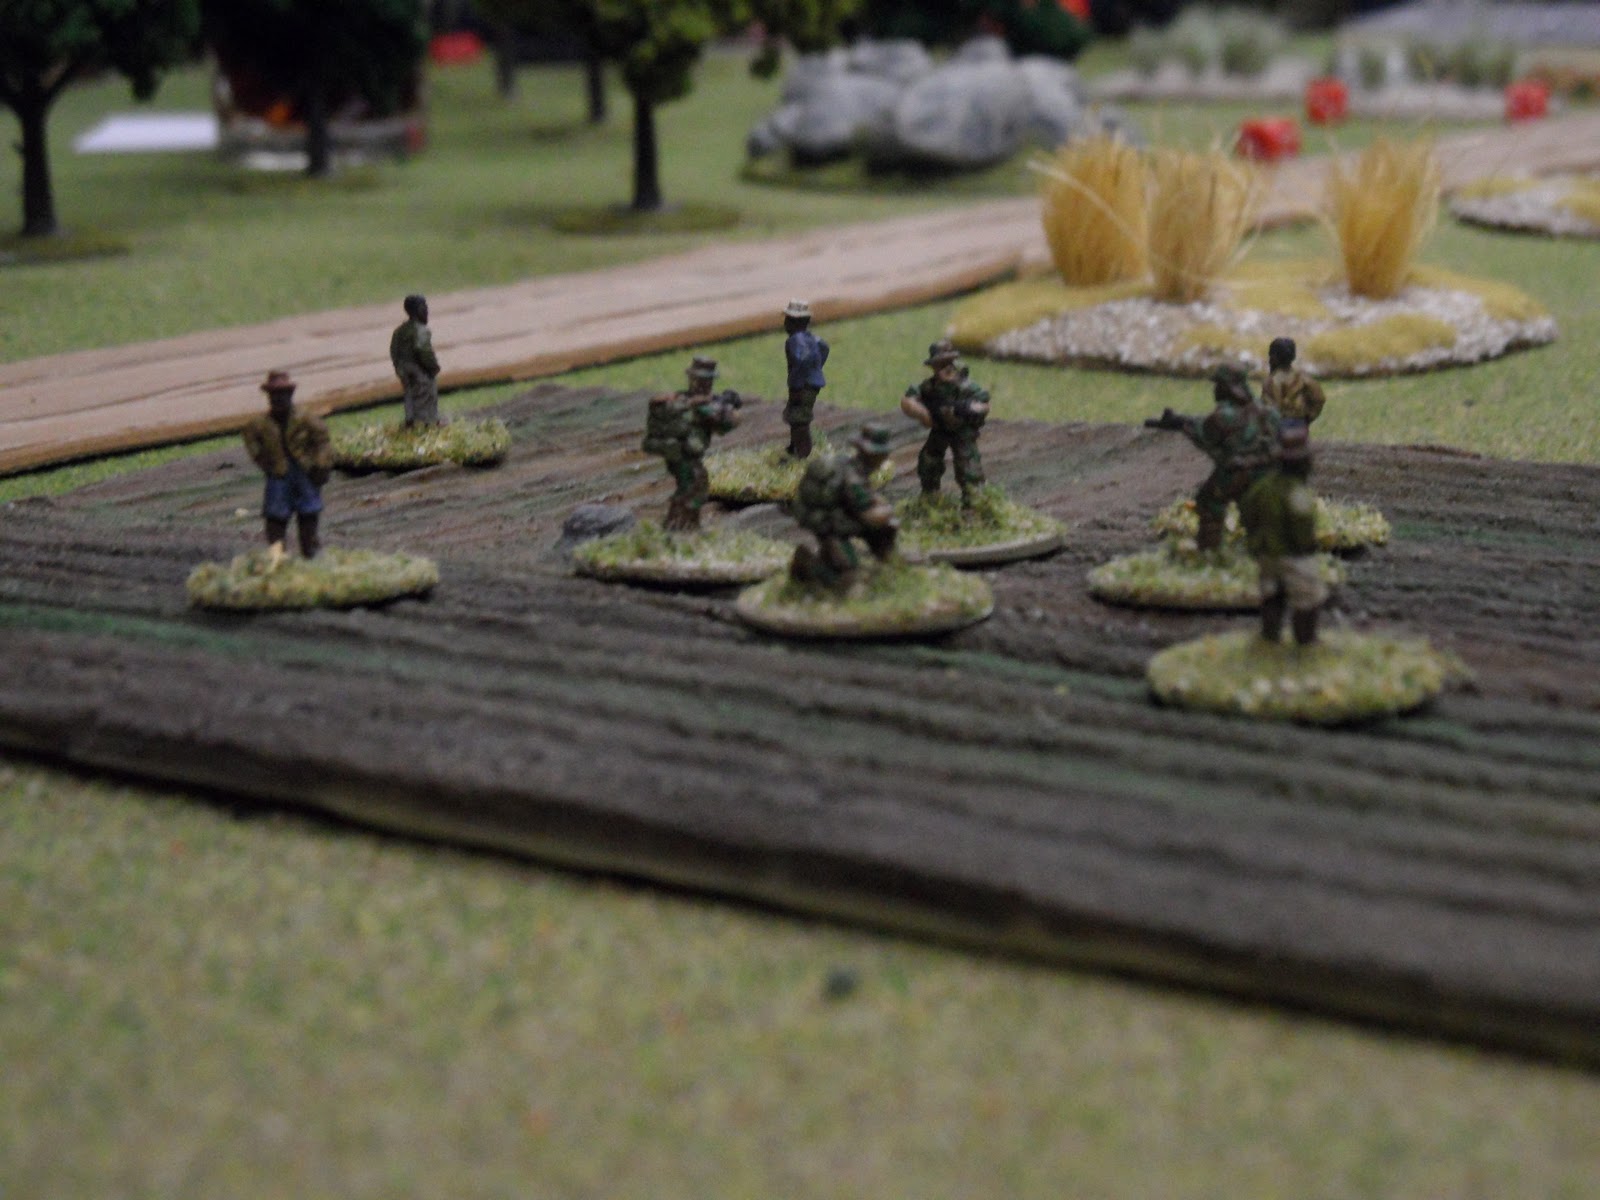
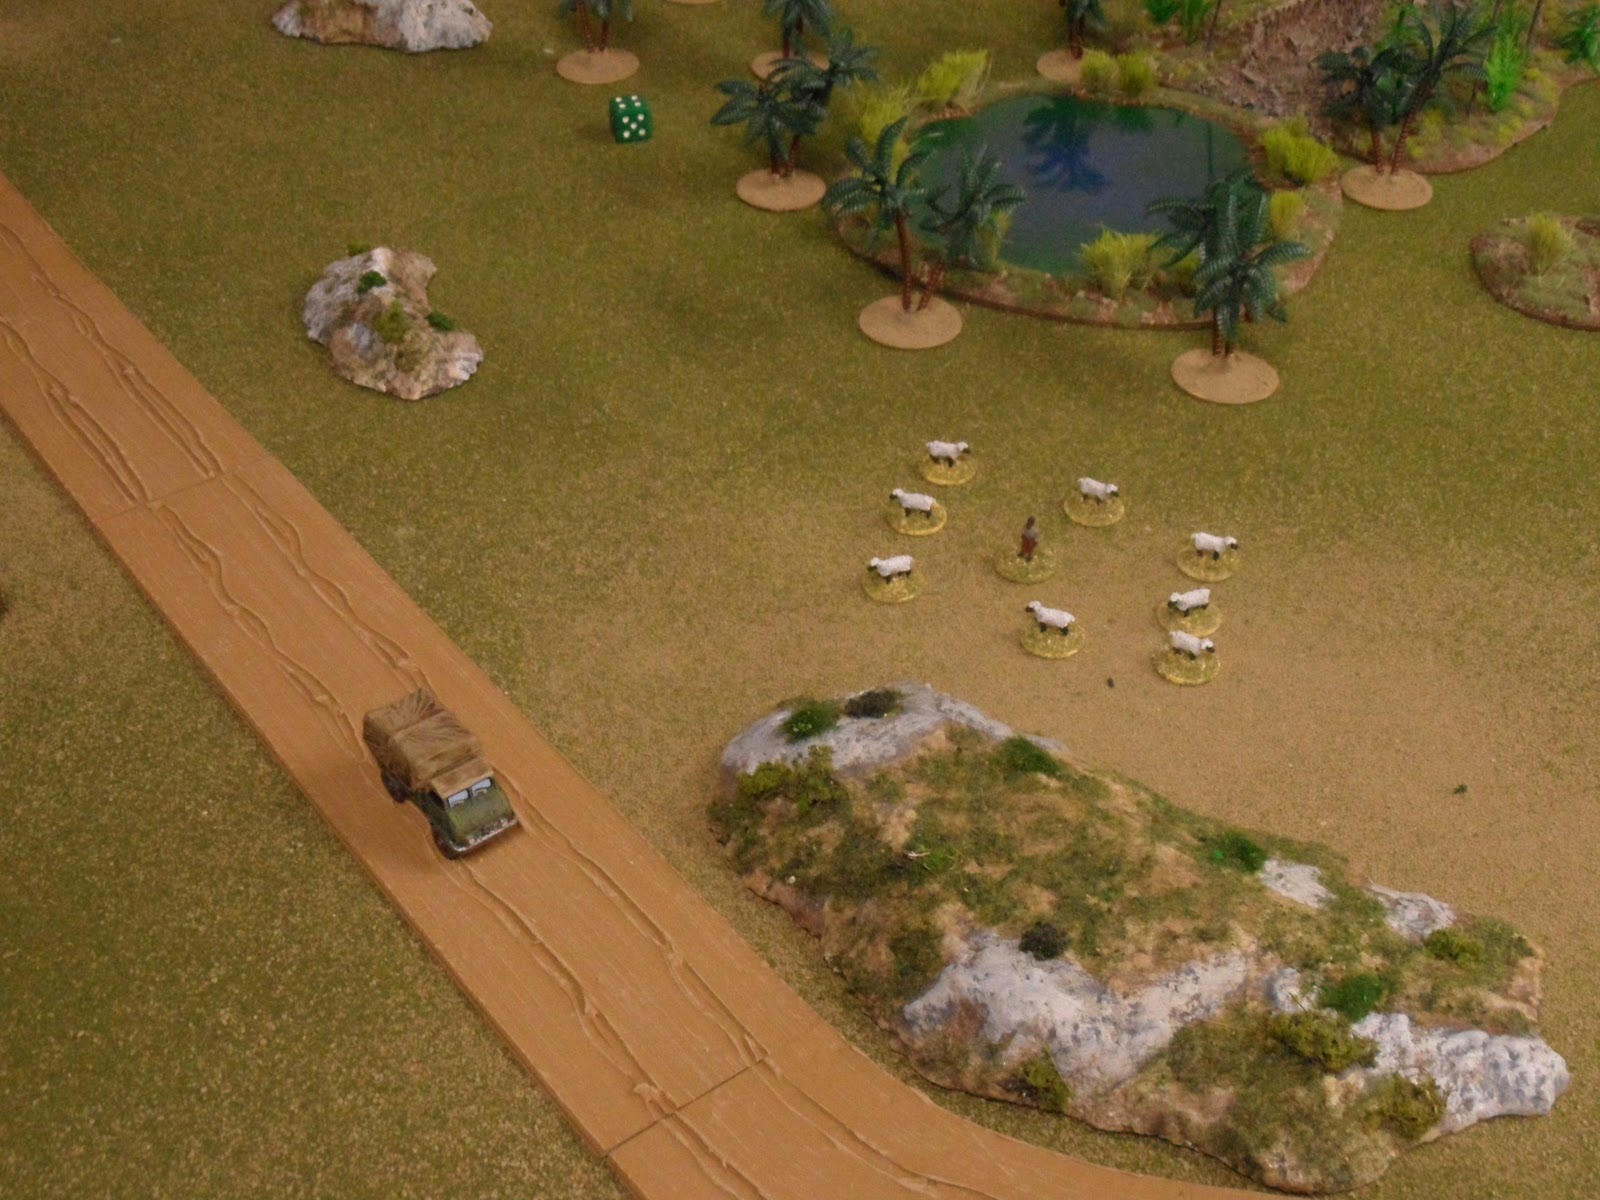
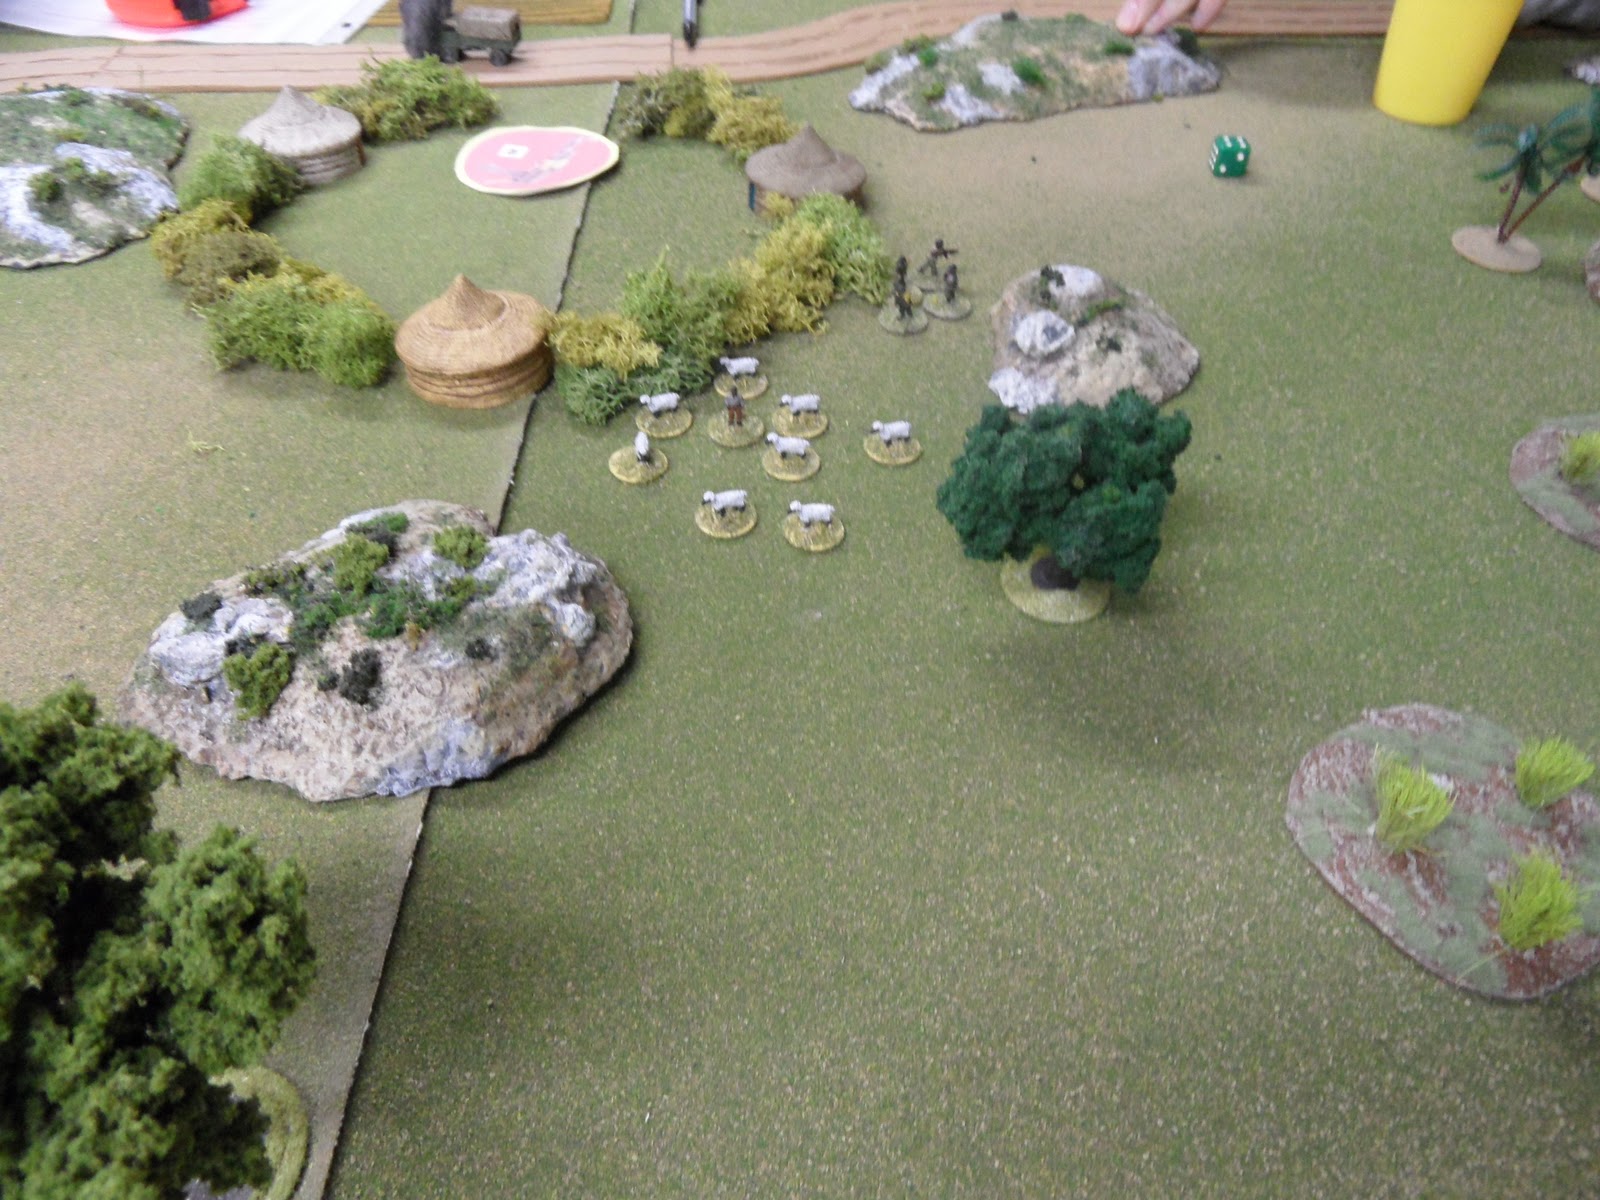
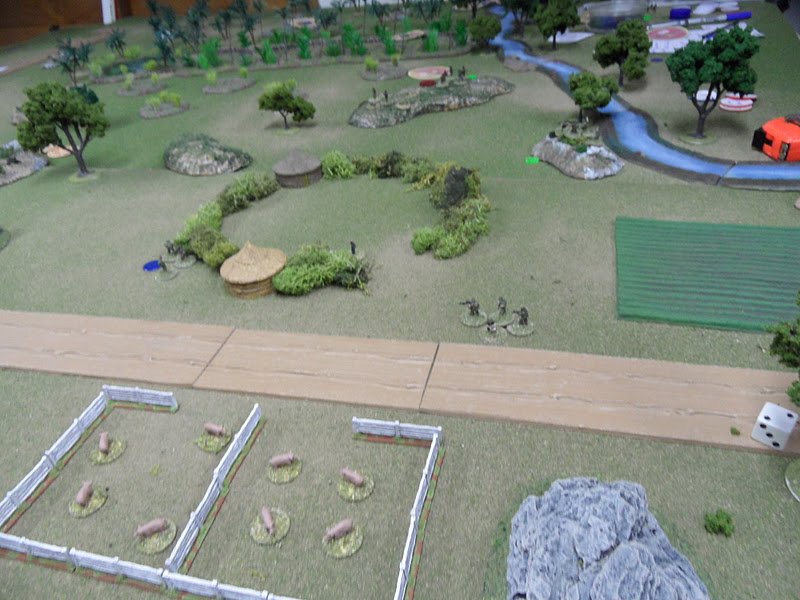
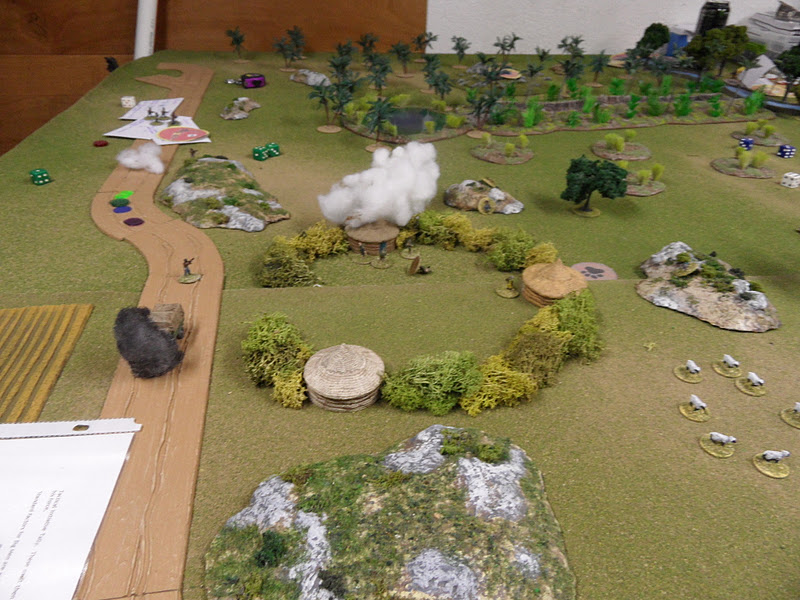
The game saw the usual movement to contact using Blinds, such an important aspect in sight limiting terrain, as US forward operating teams attempted to shepherd some pigs rounded up in a hostile village patrol towards the defence perimeter of a railway marshaling yard.

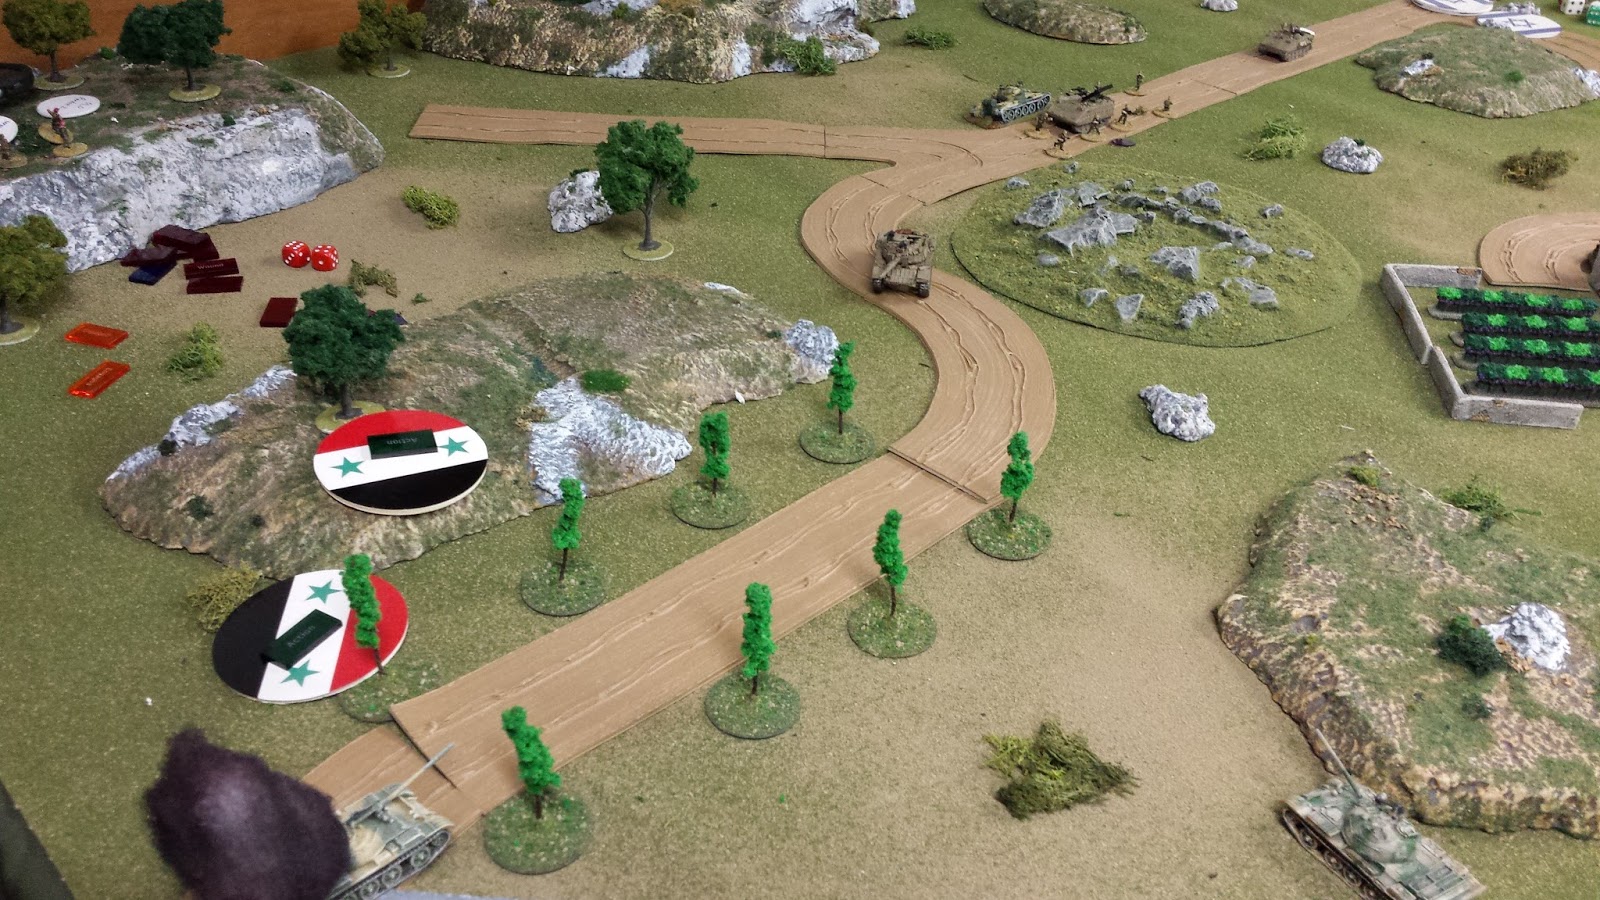
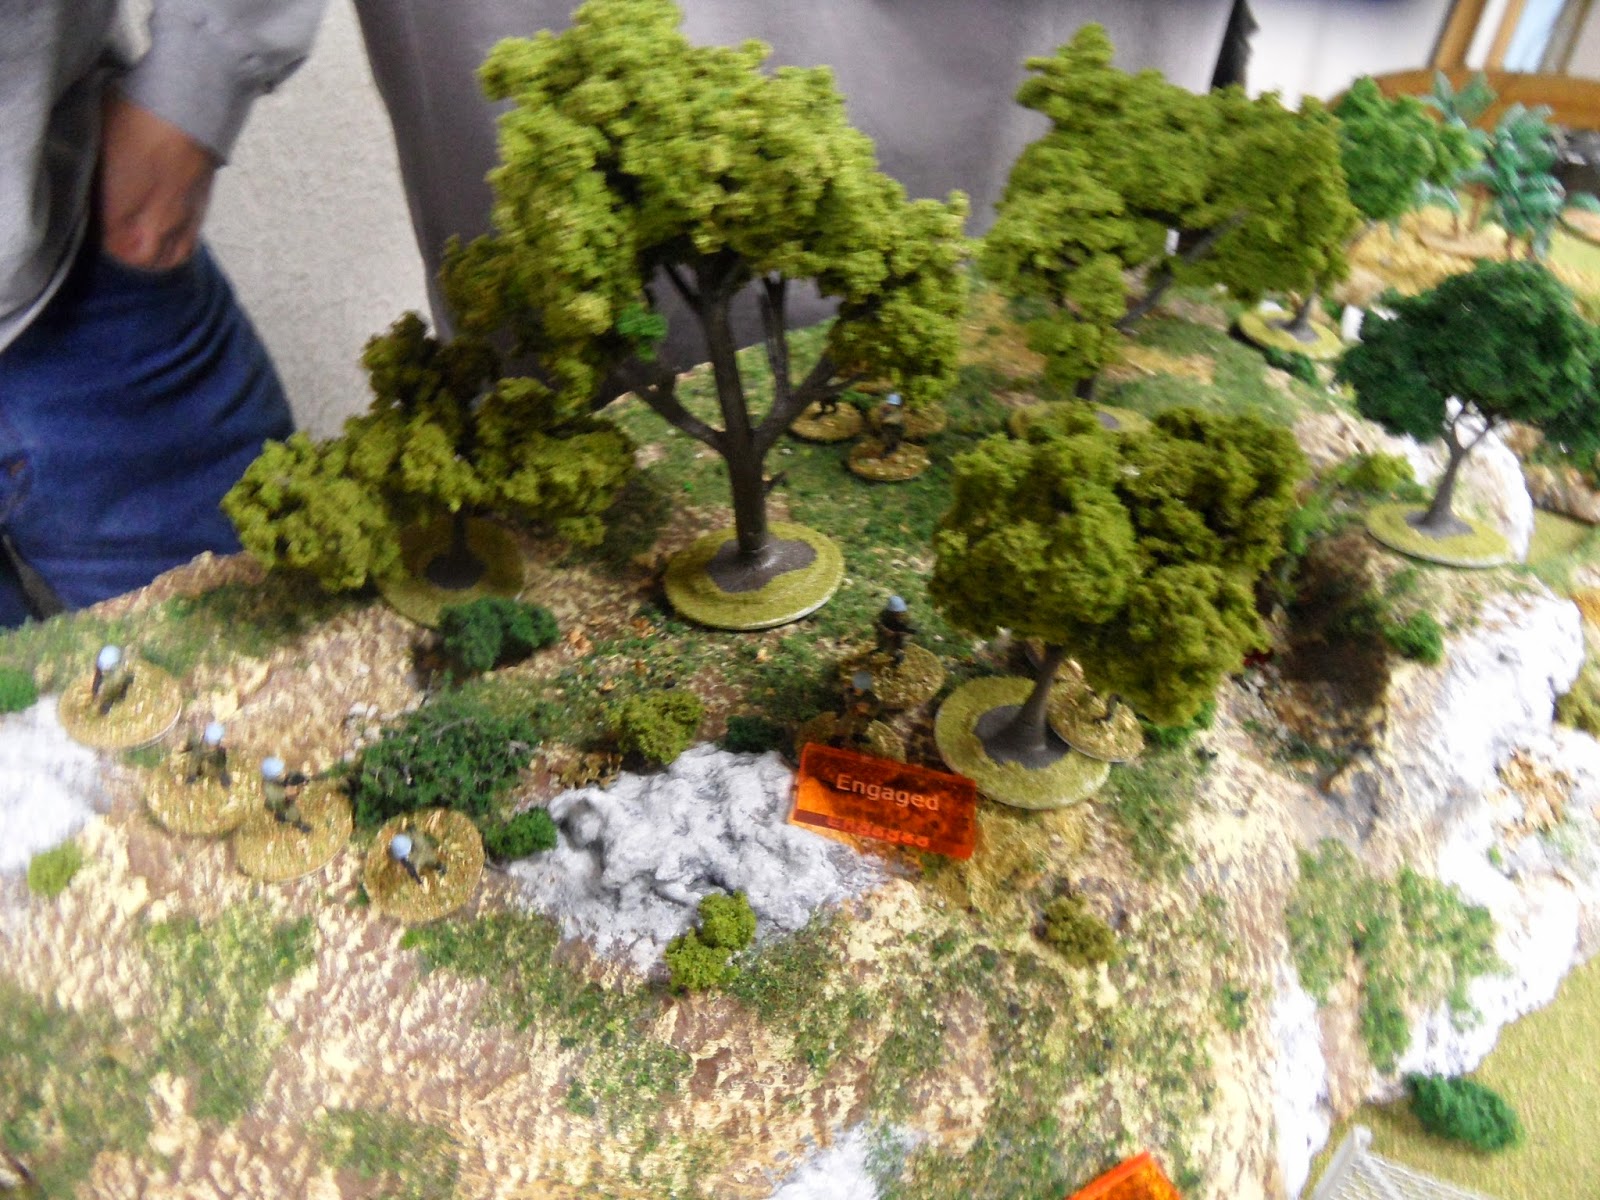
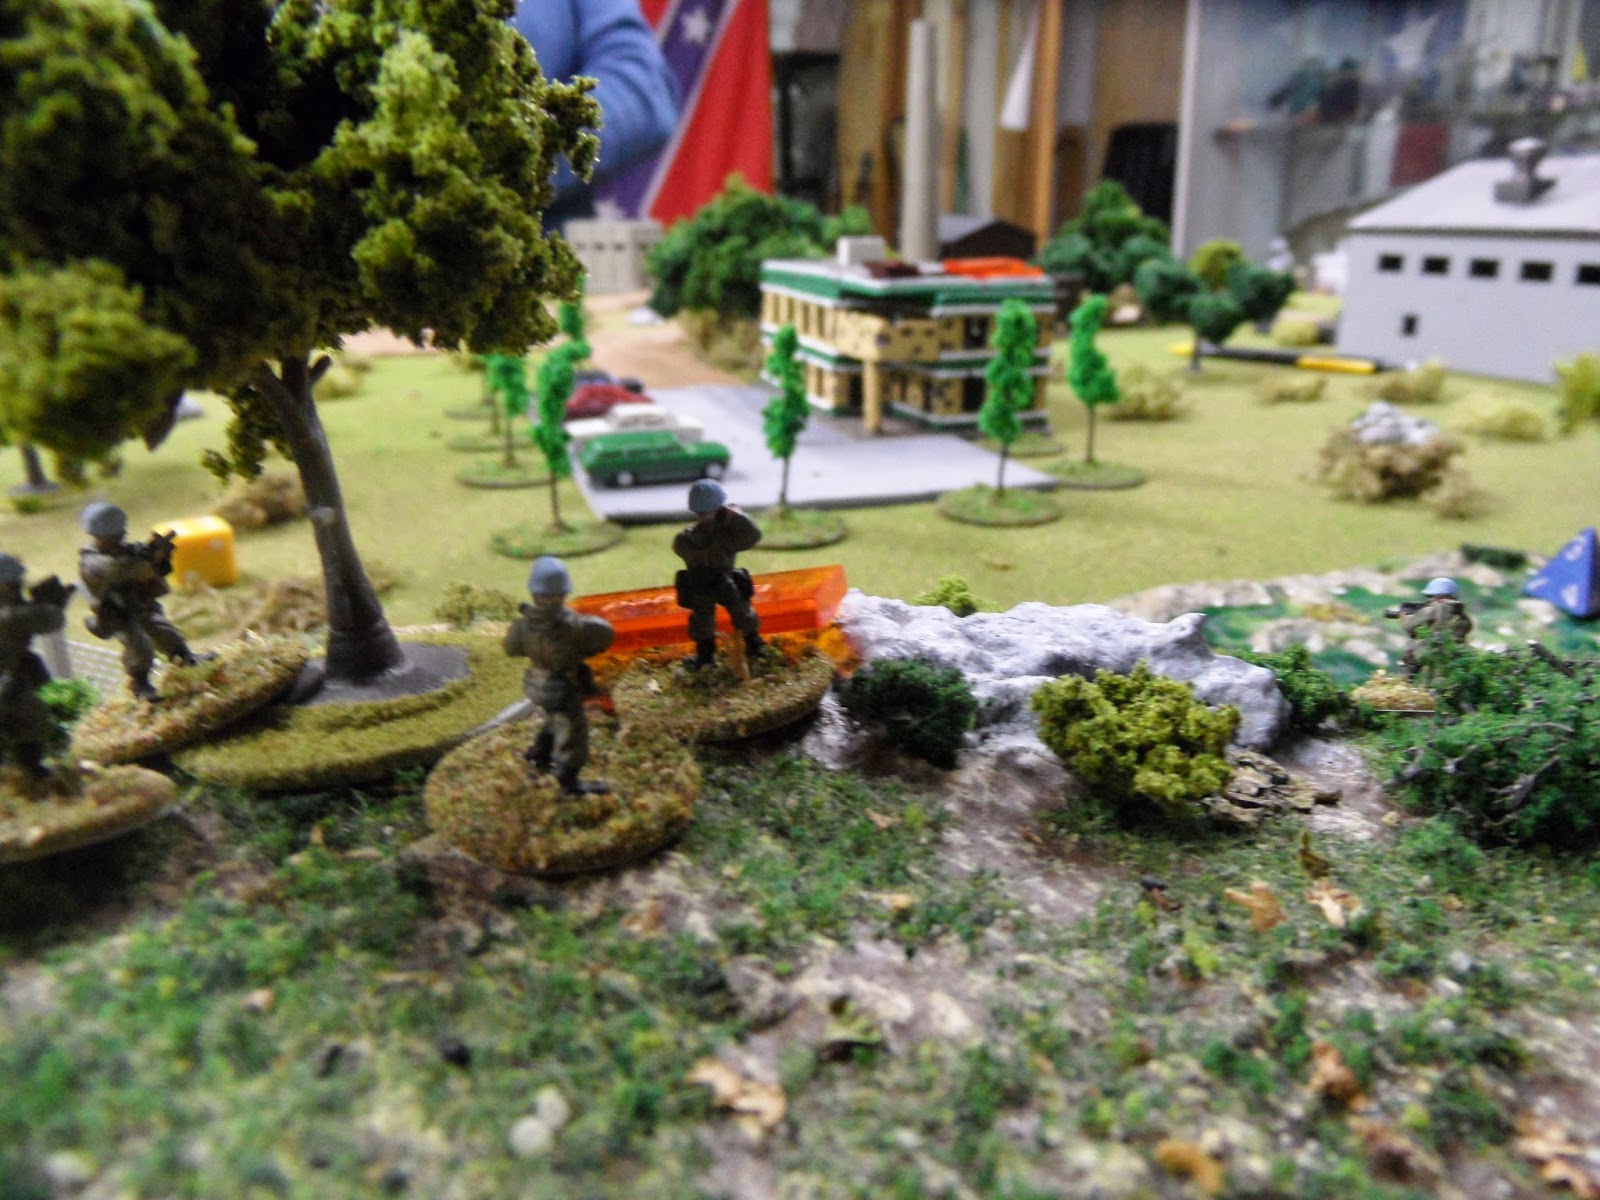
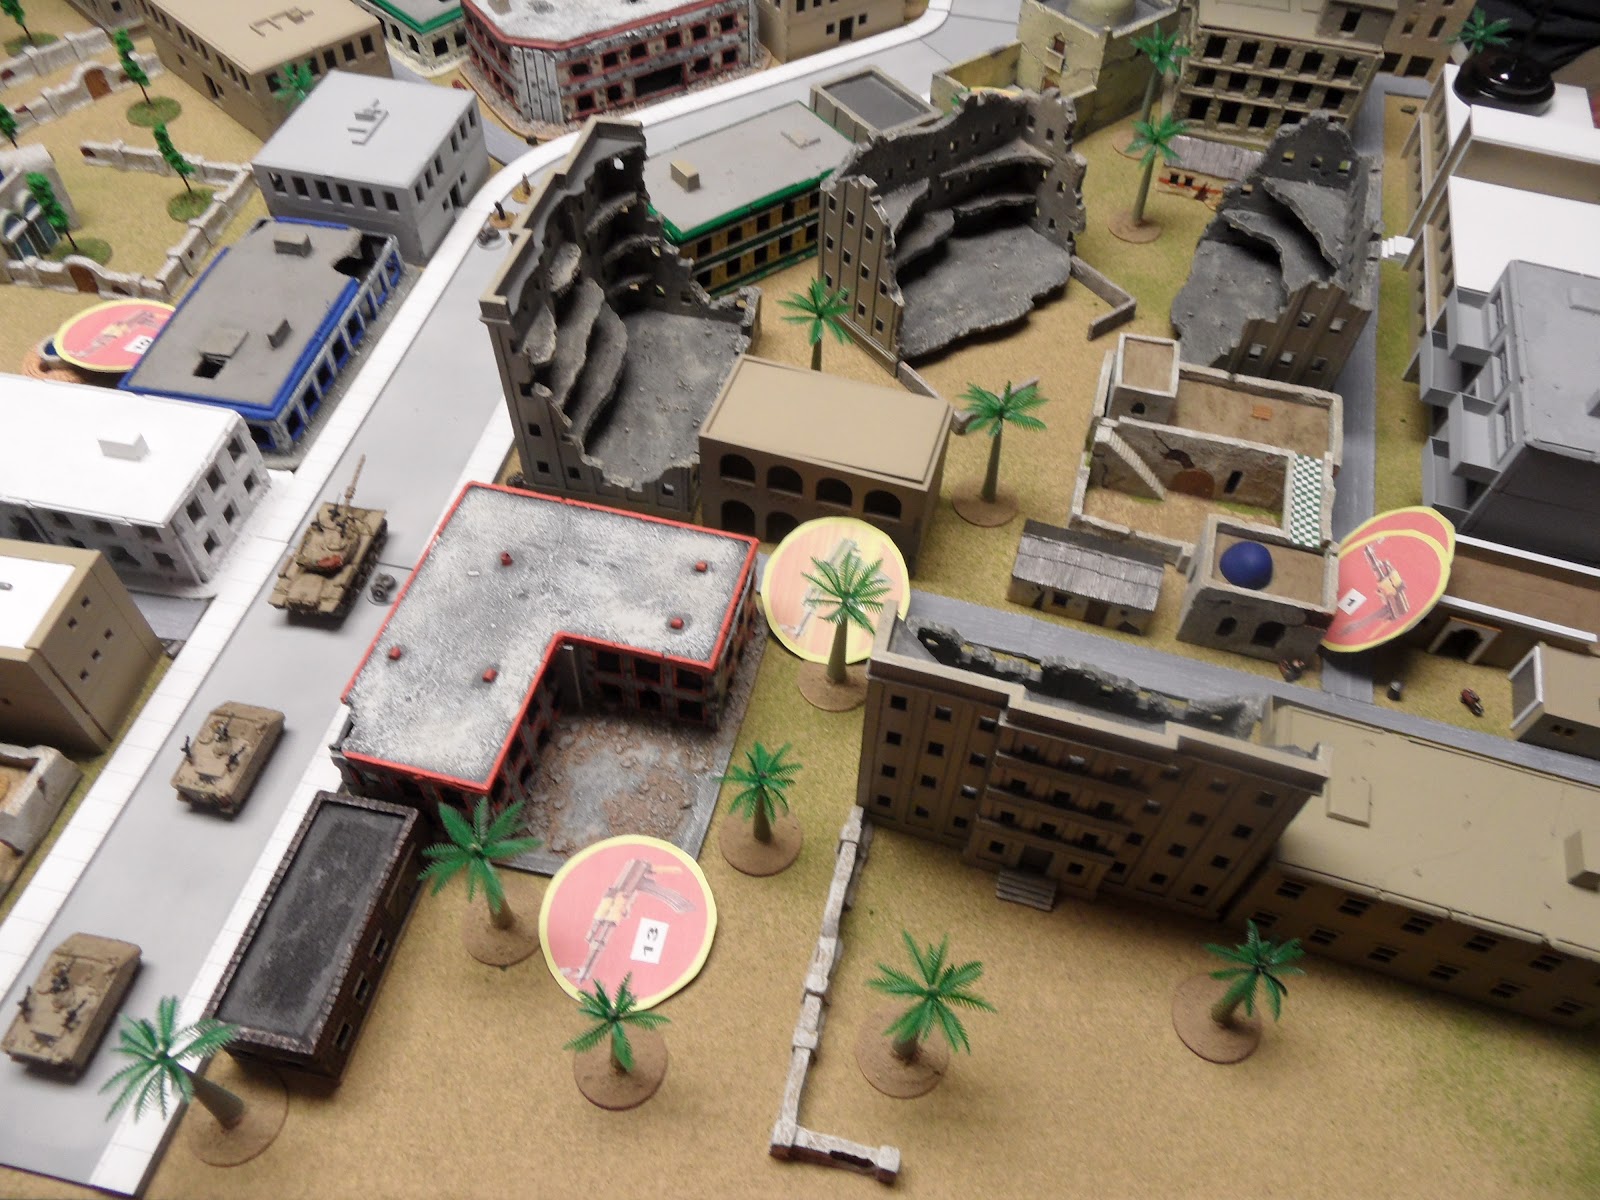
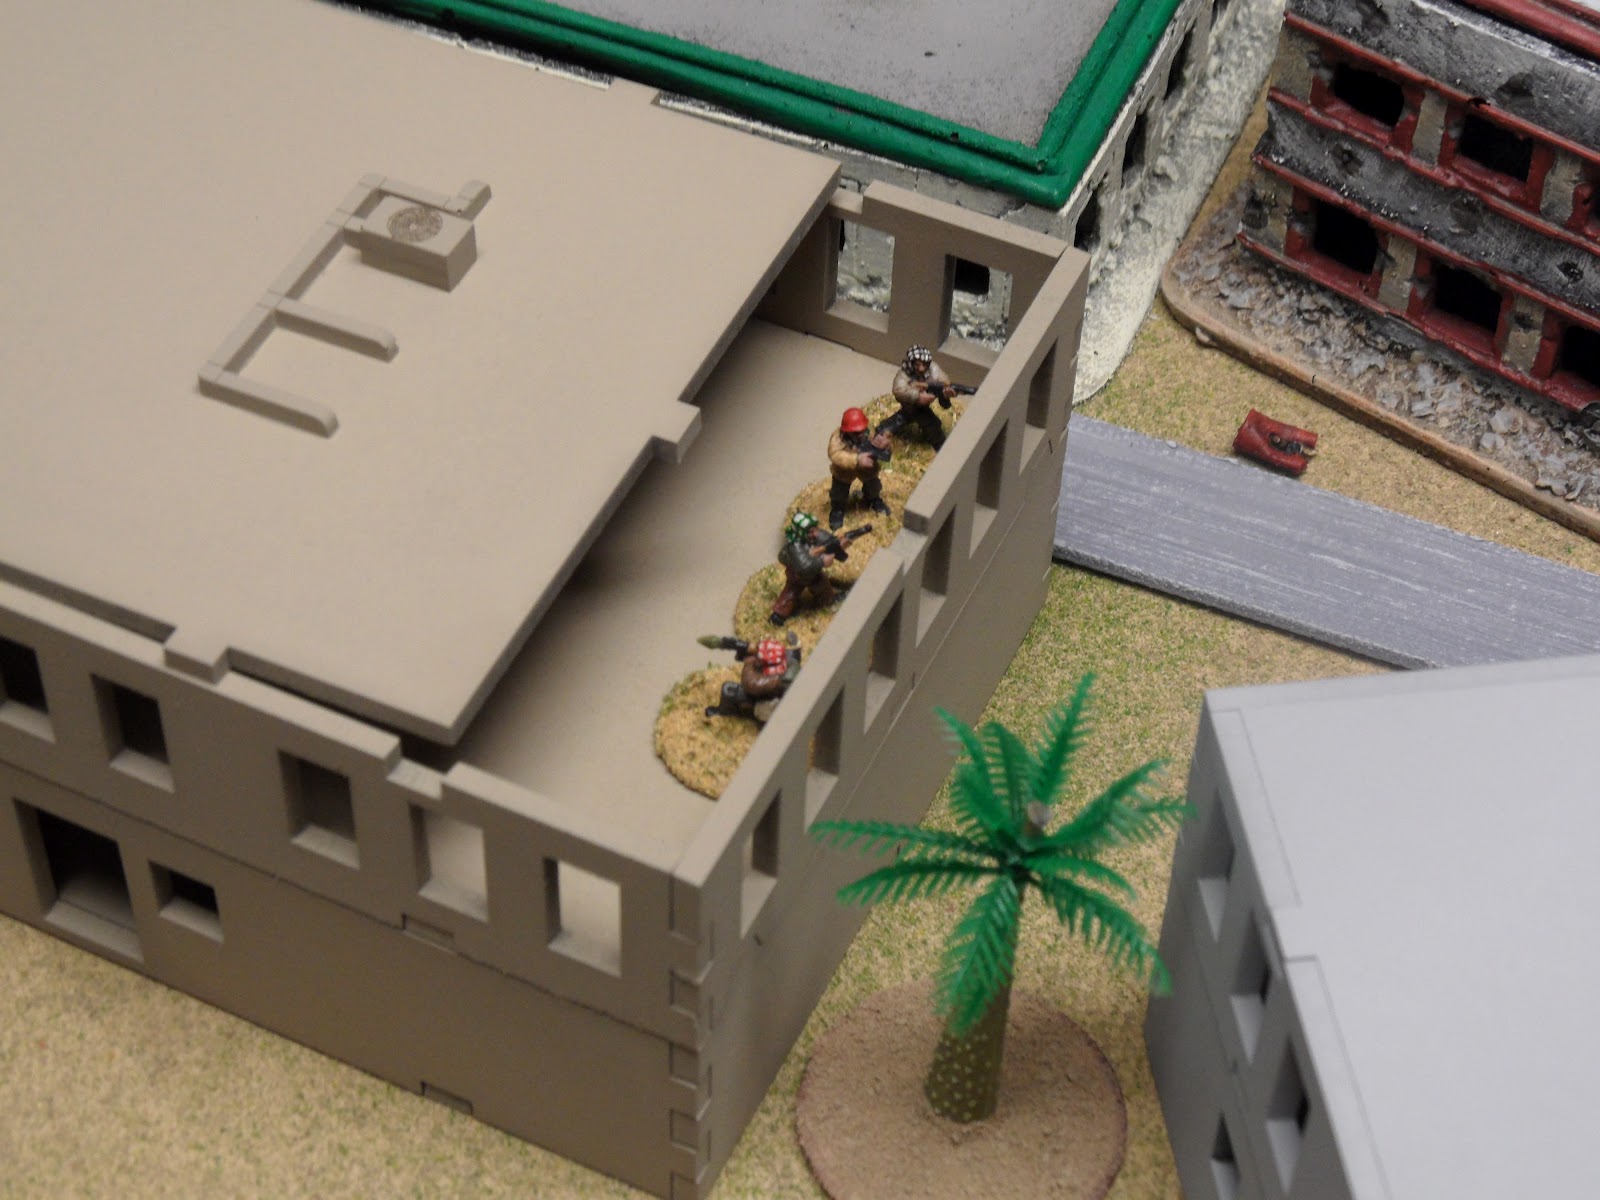
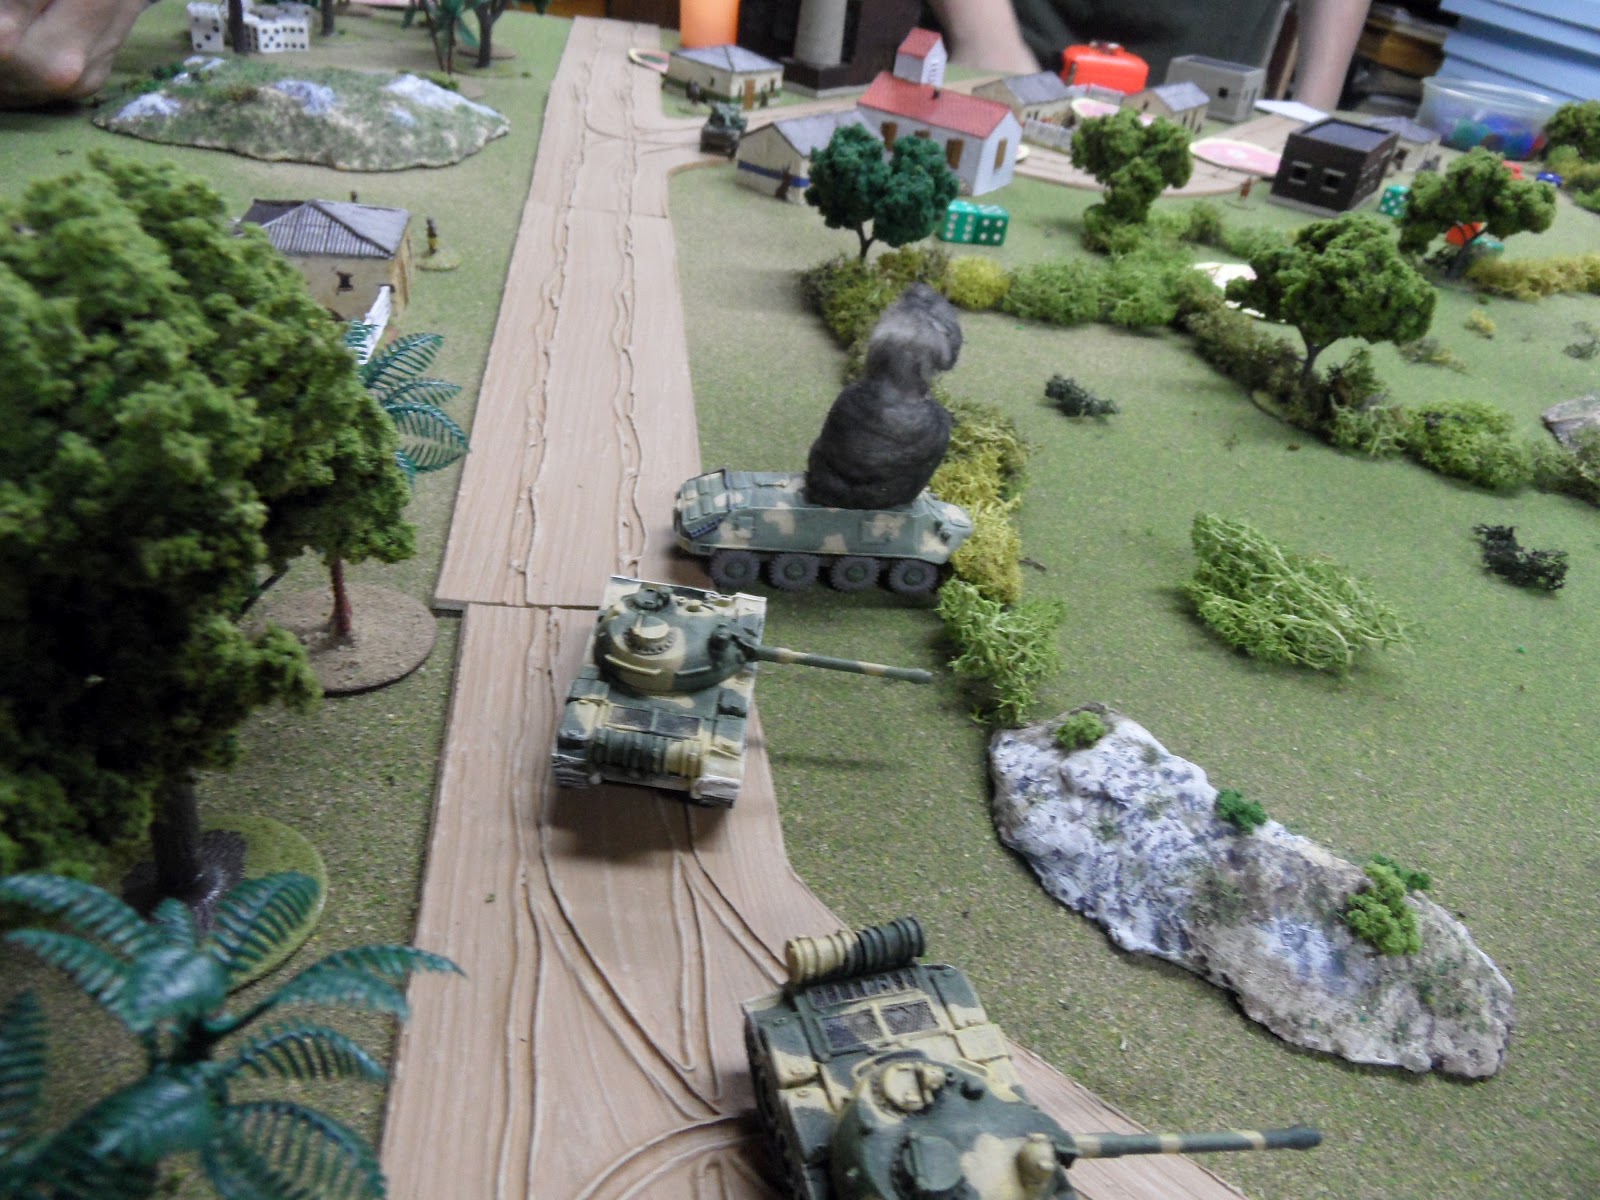
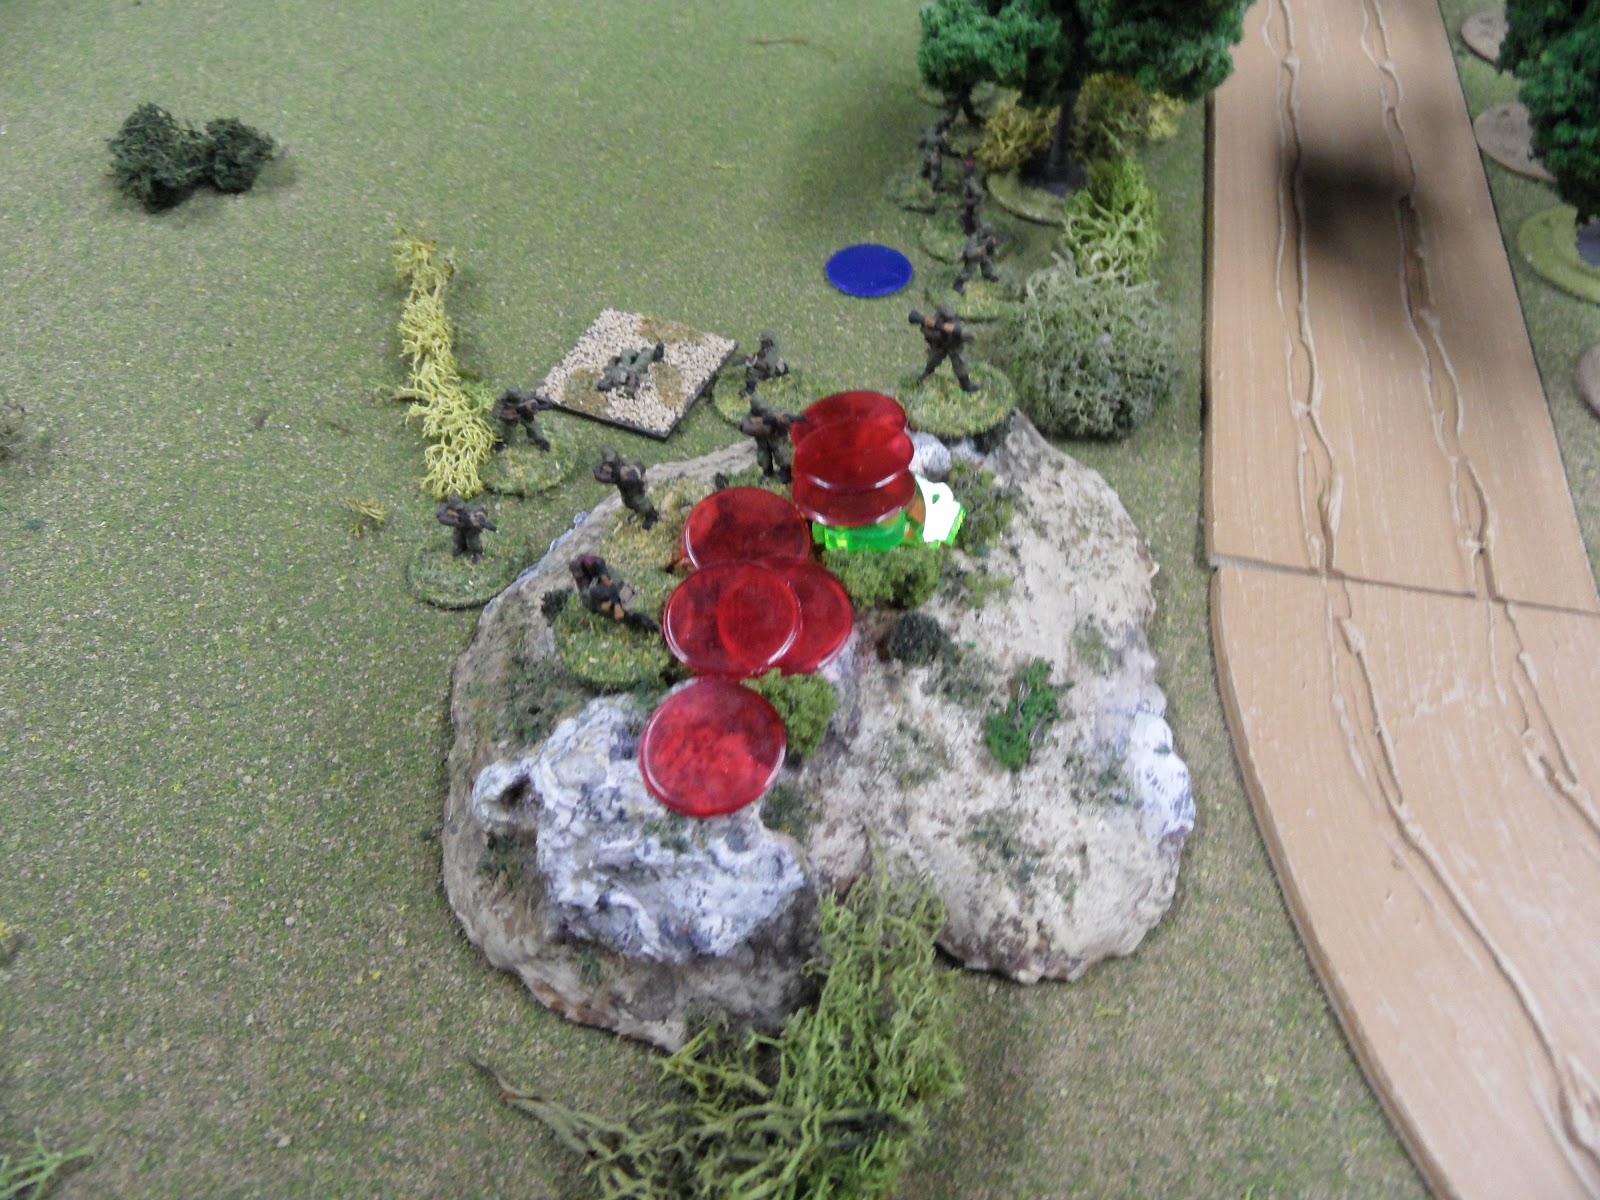
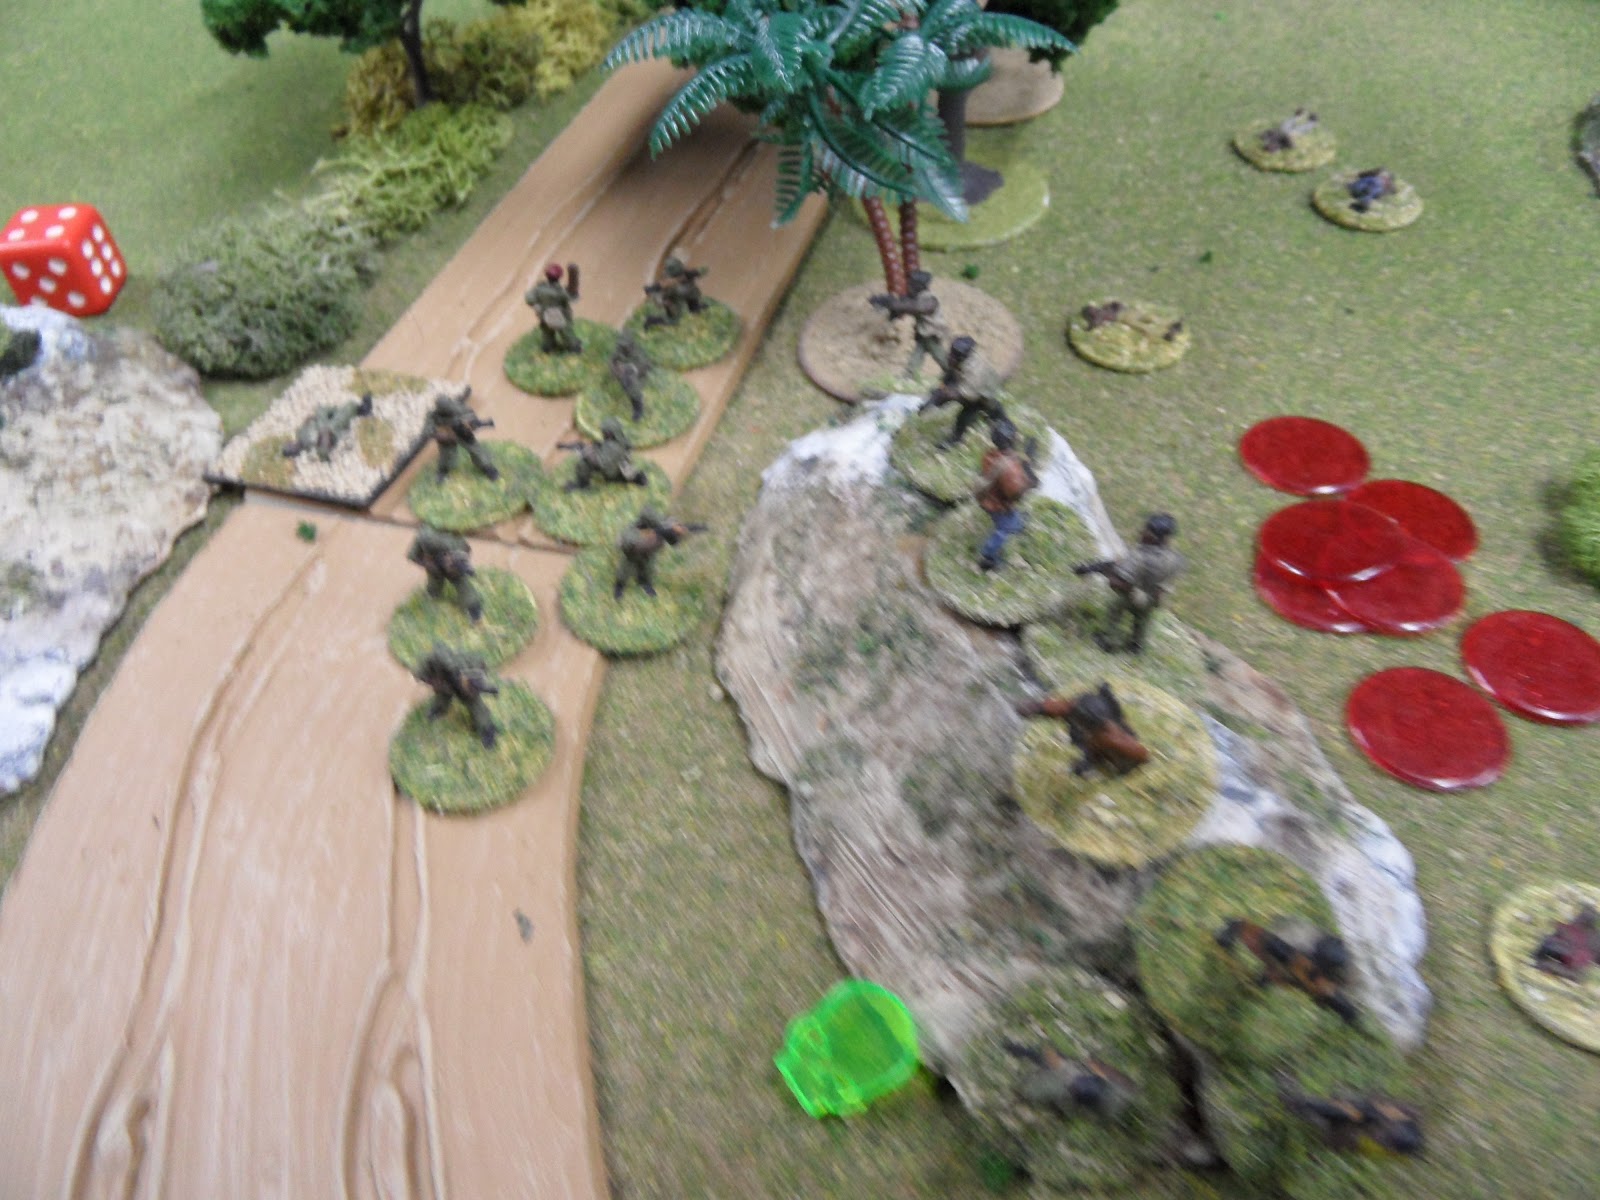
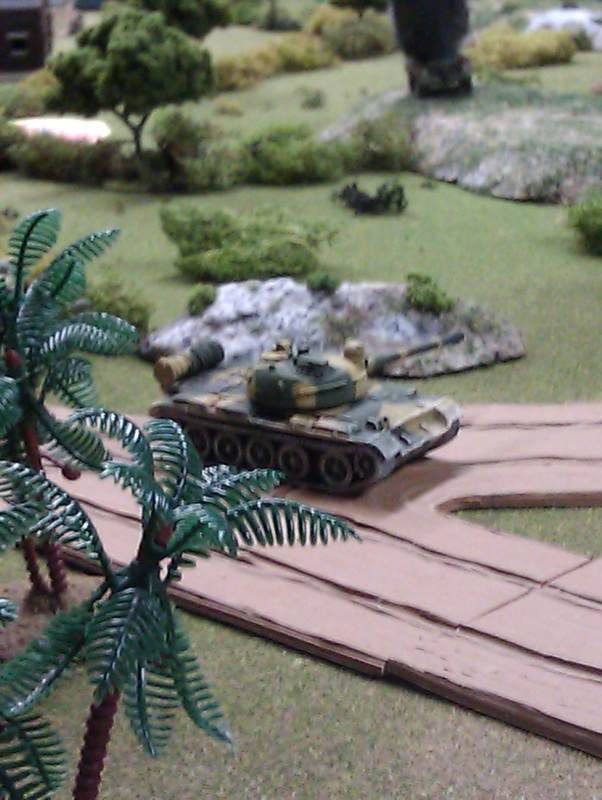
All this as a North Vietnamese company attack assembled on the overlooking high-ground.
 

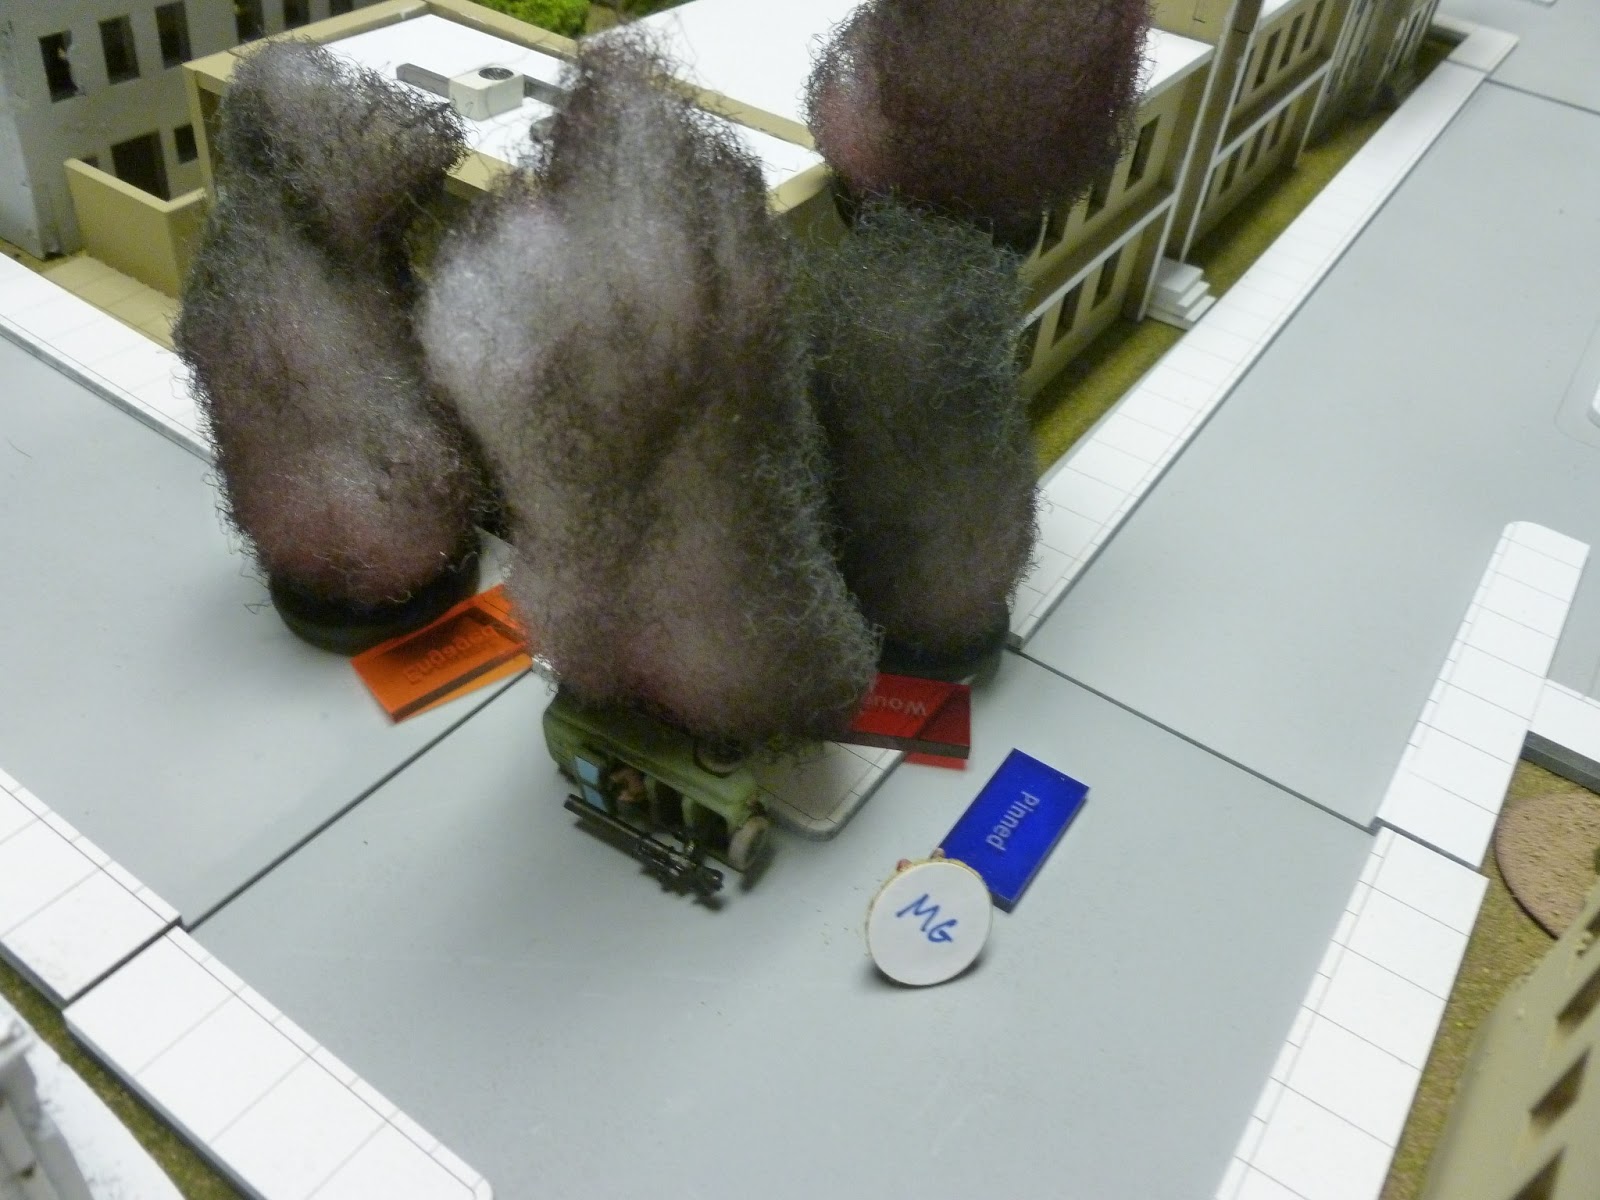
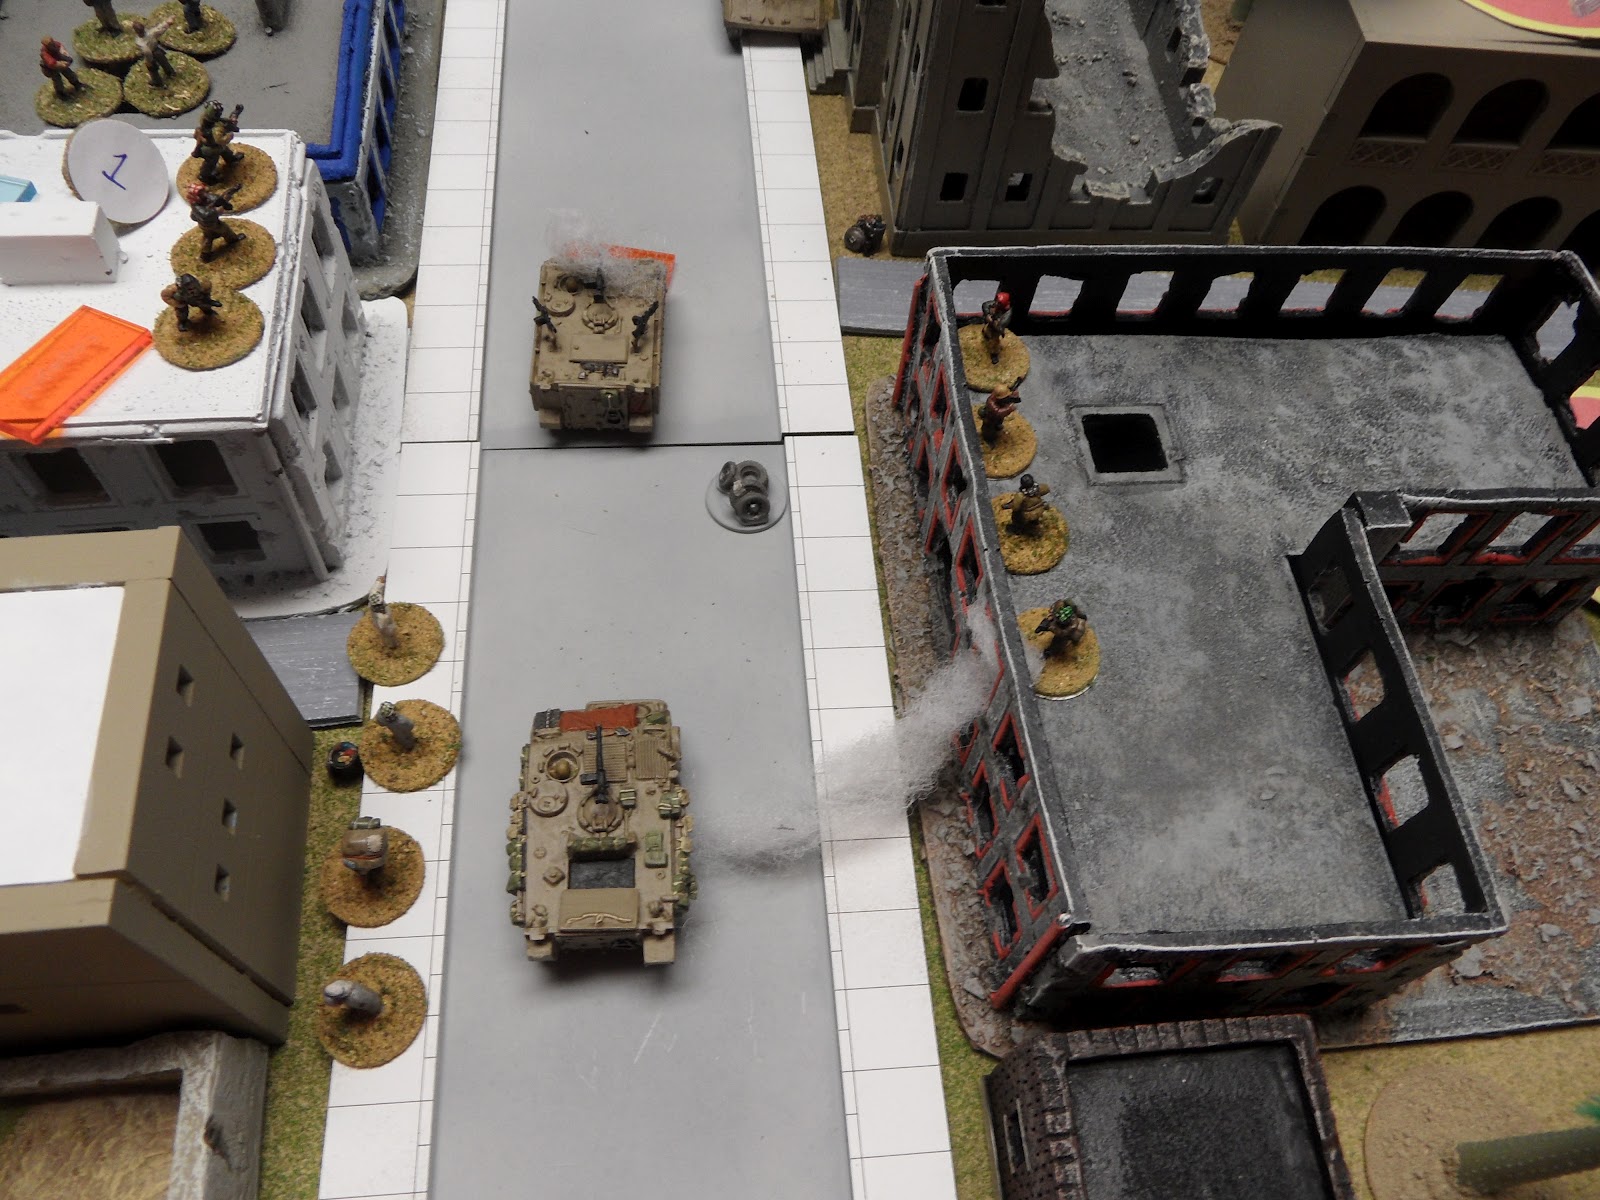
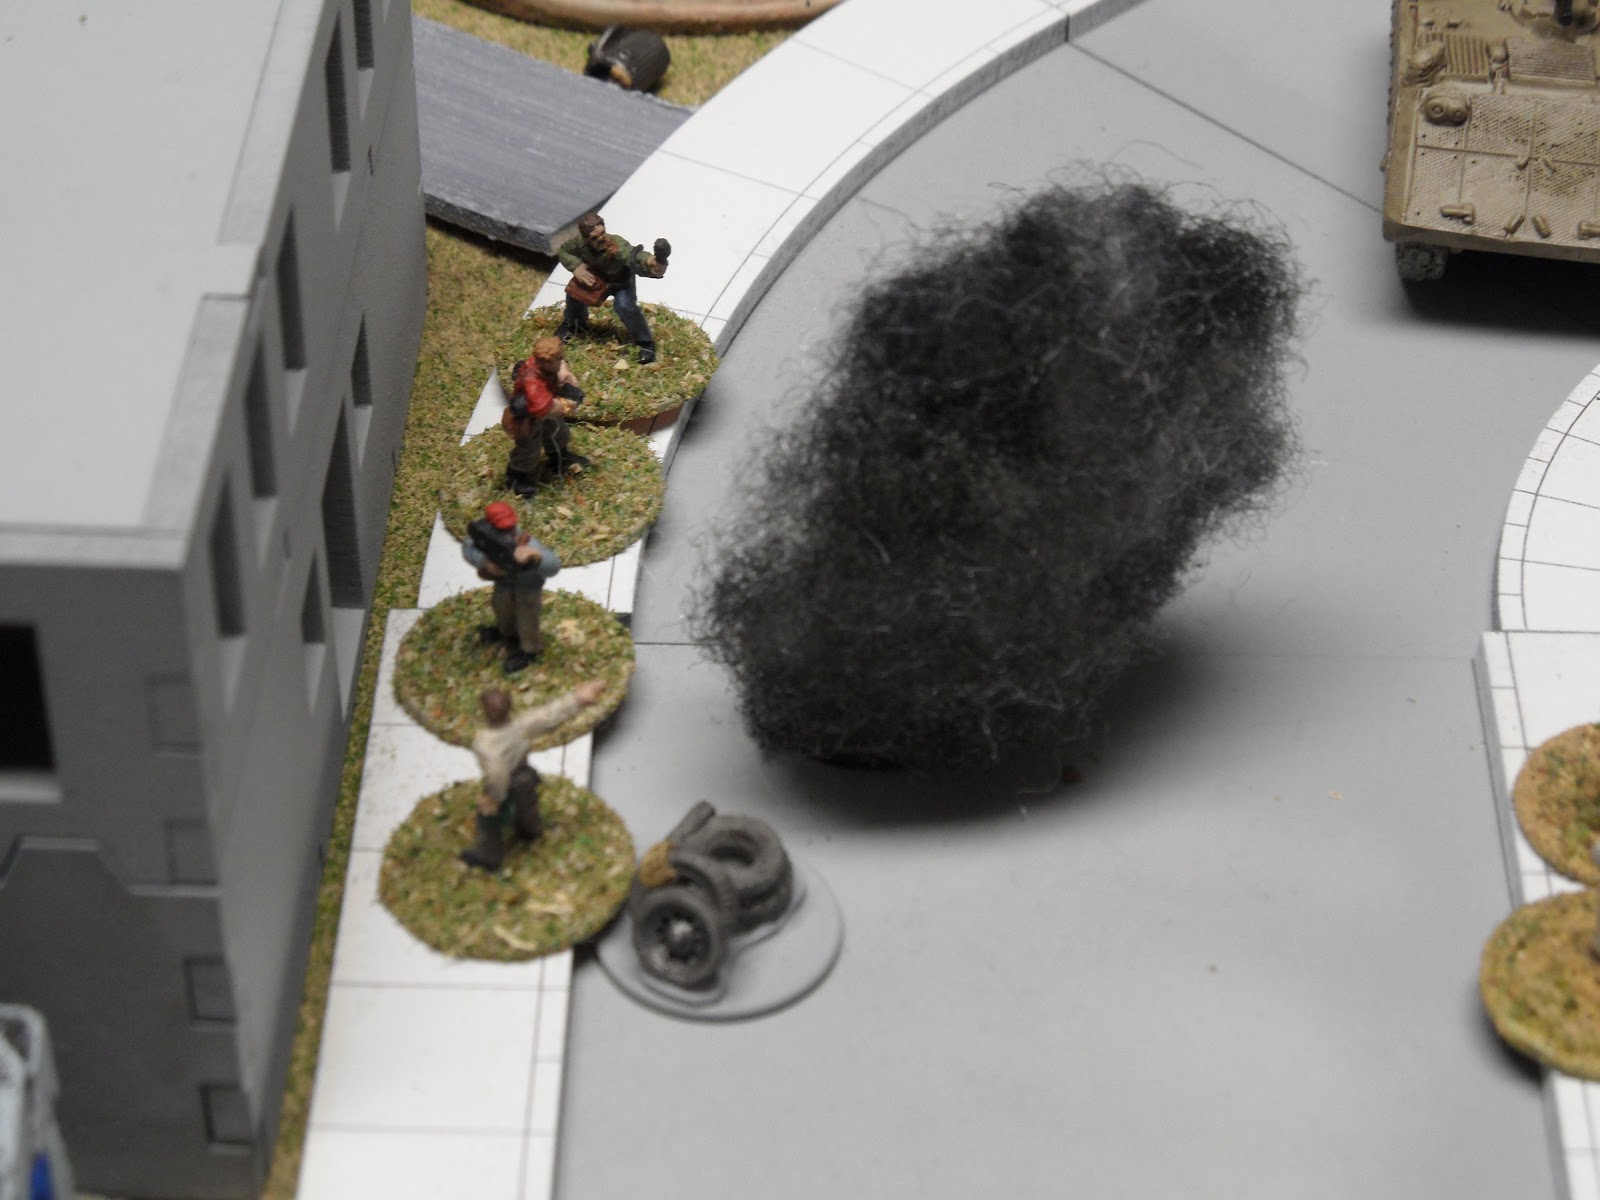
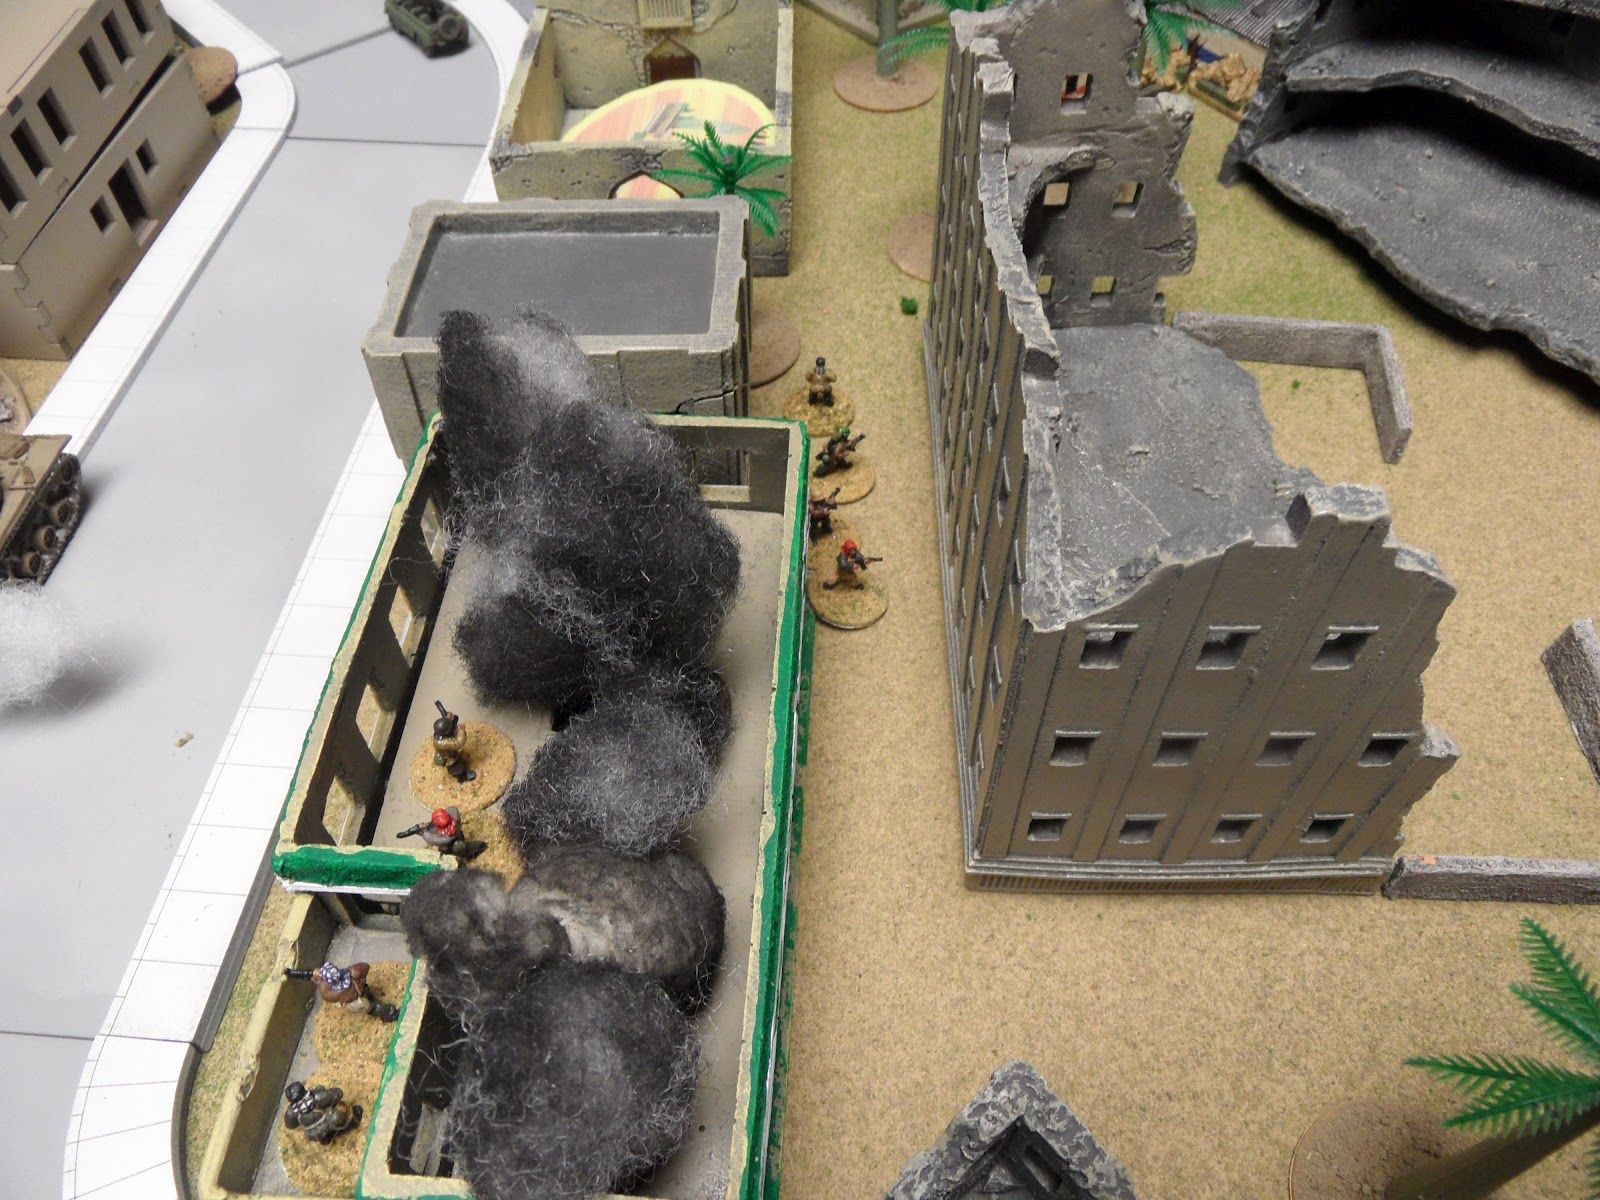
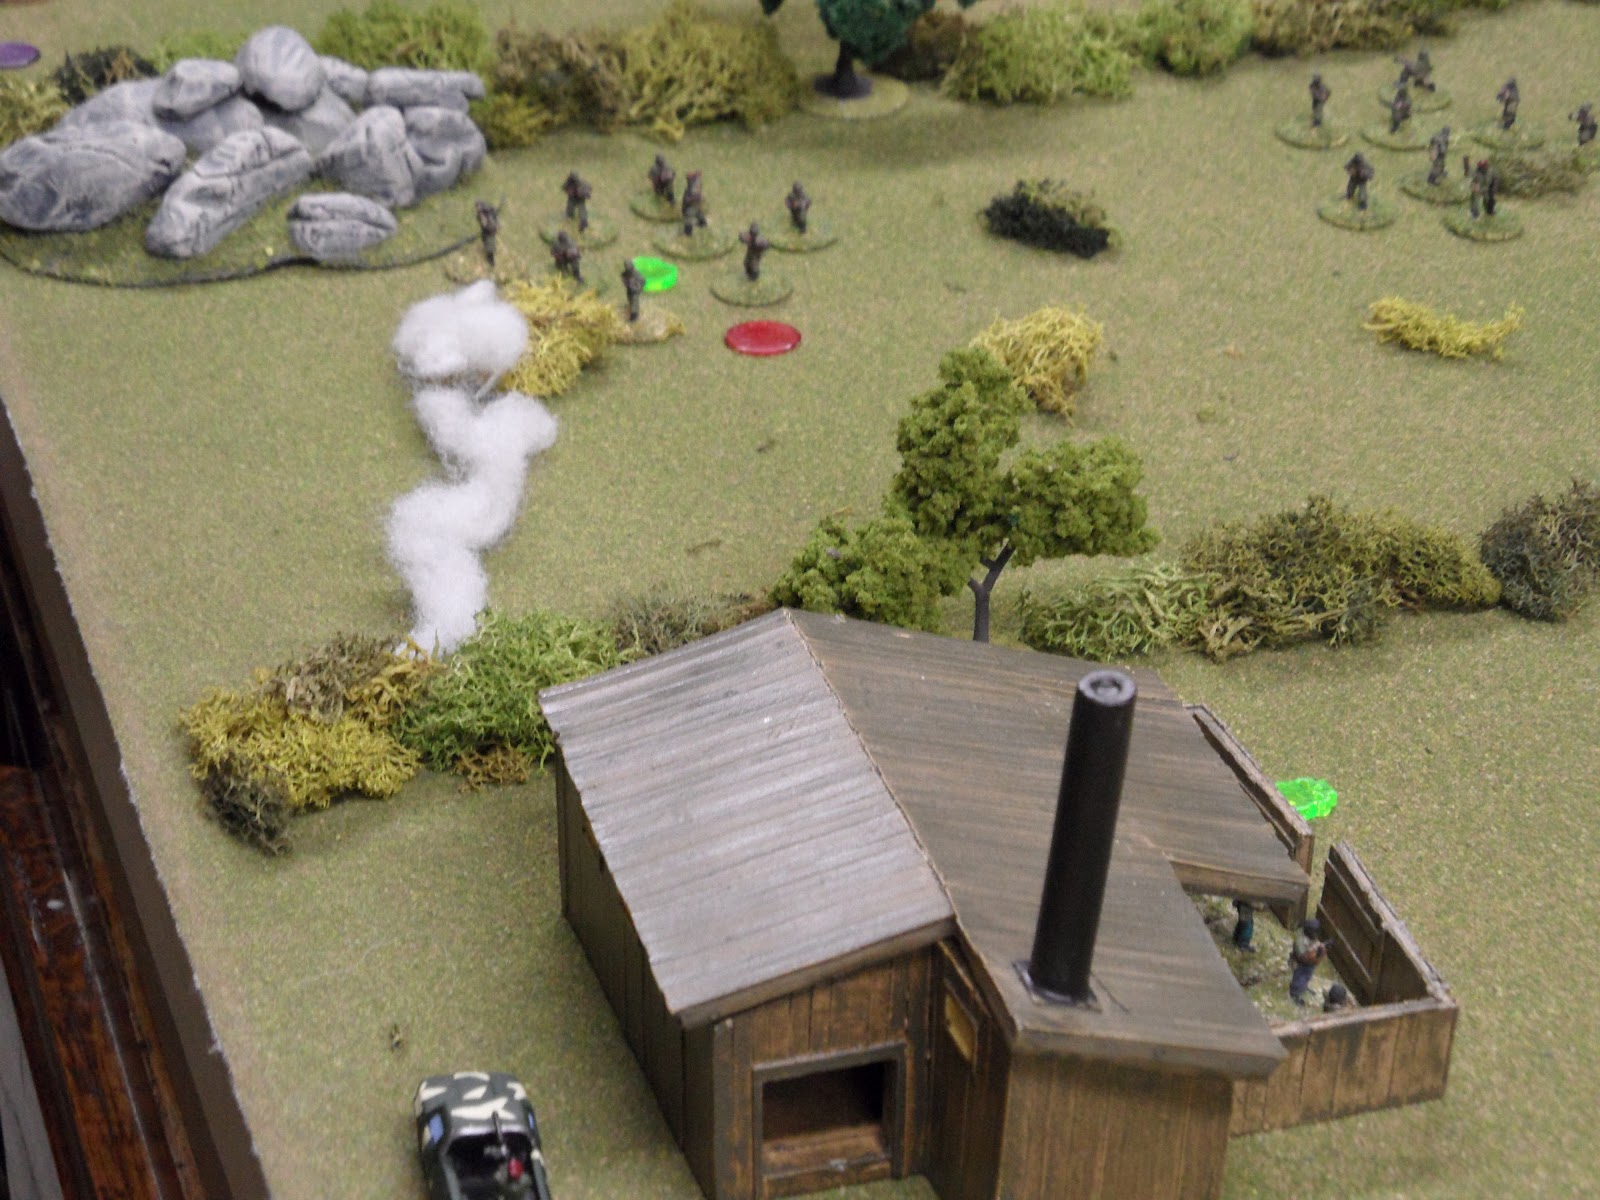
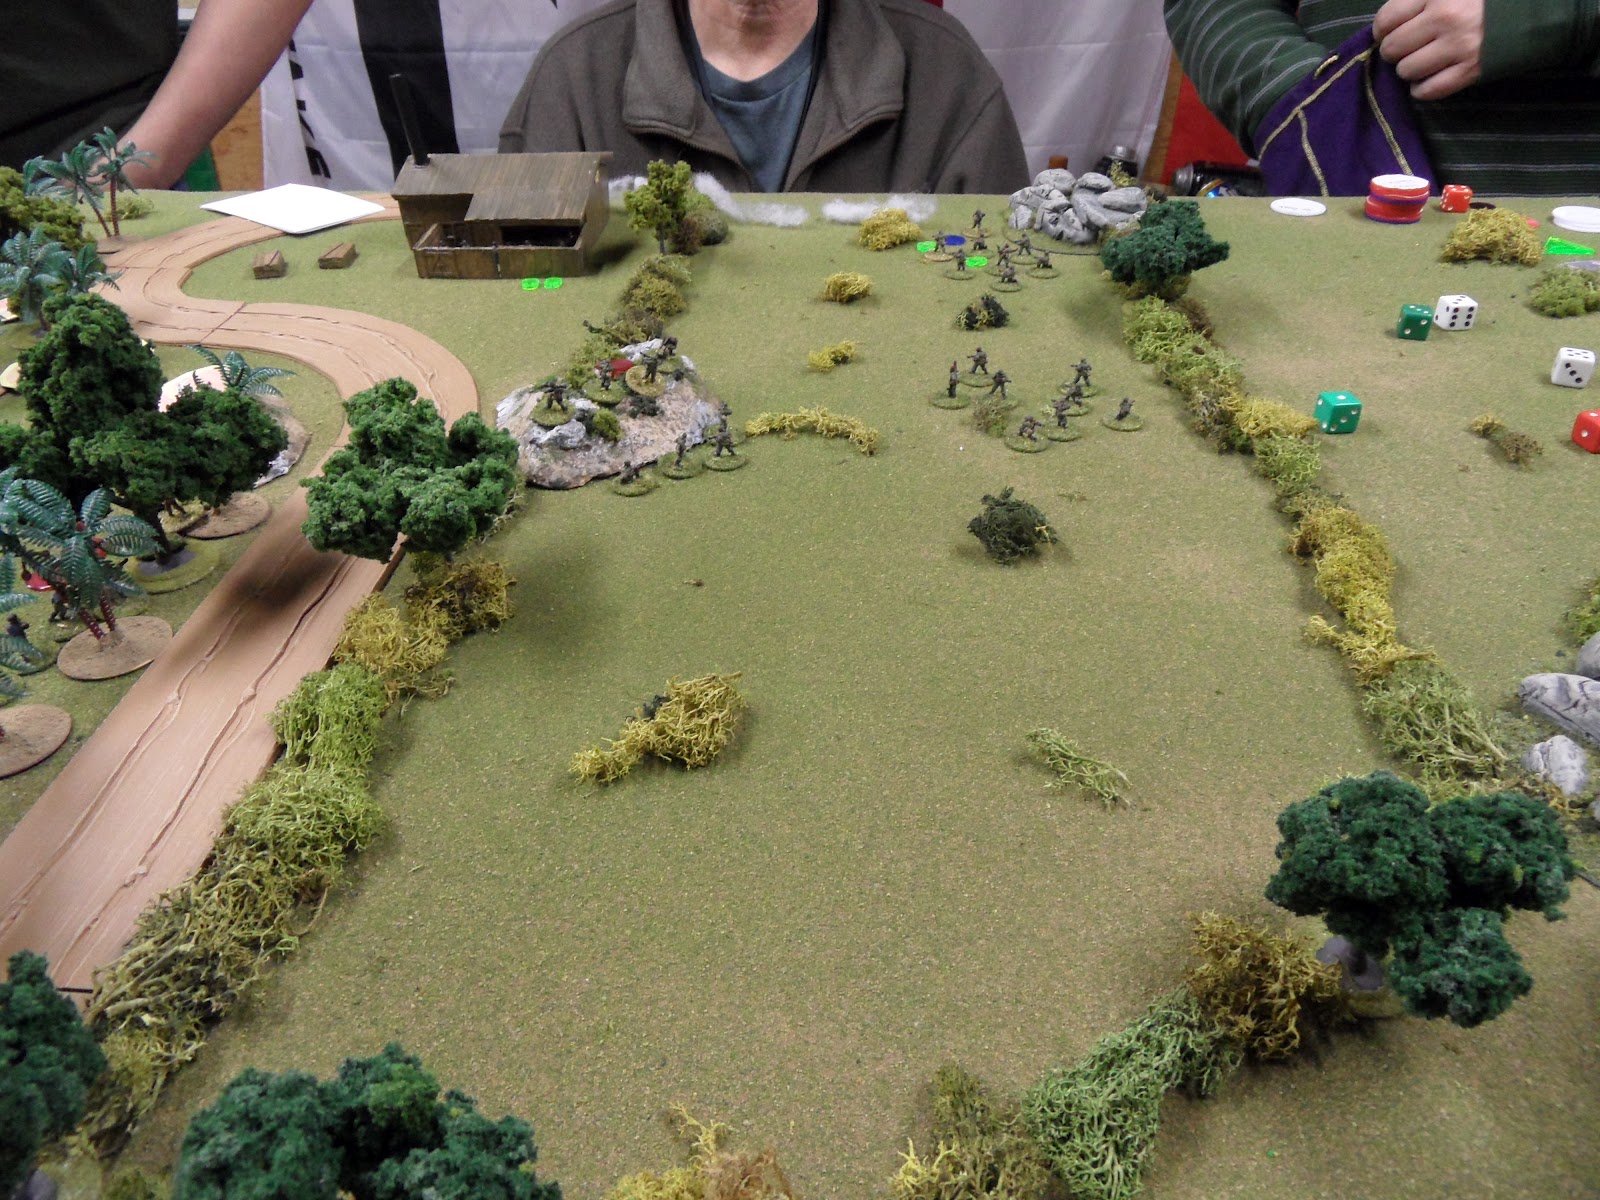
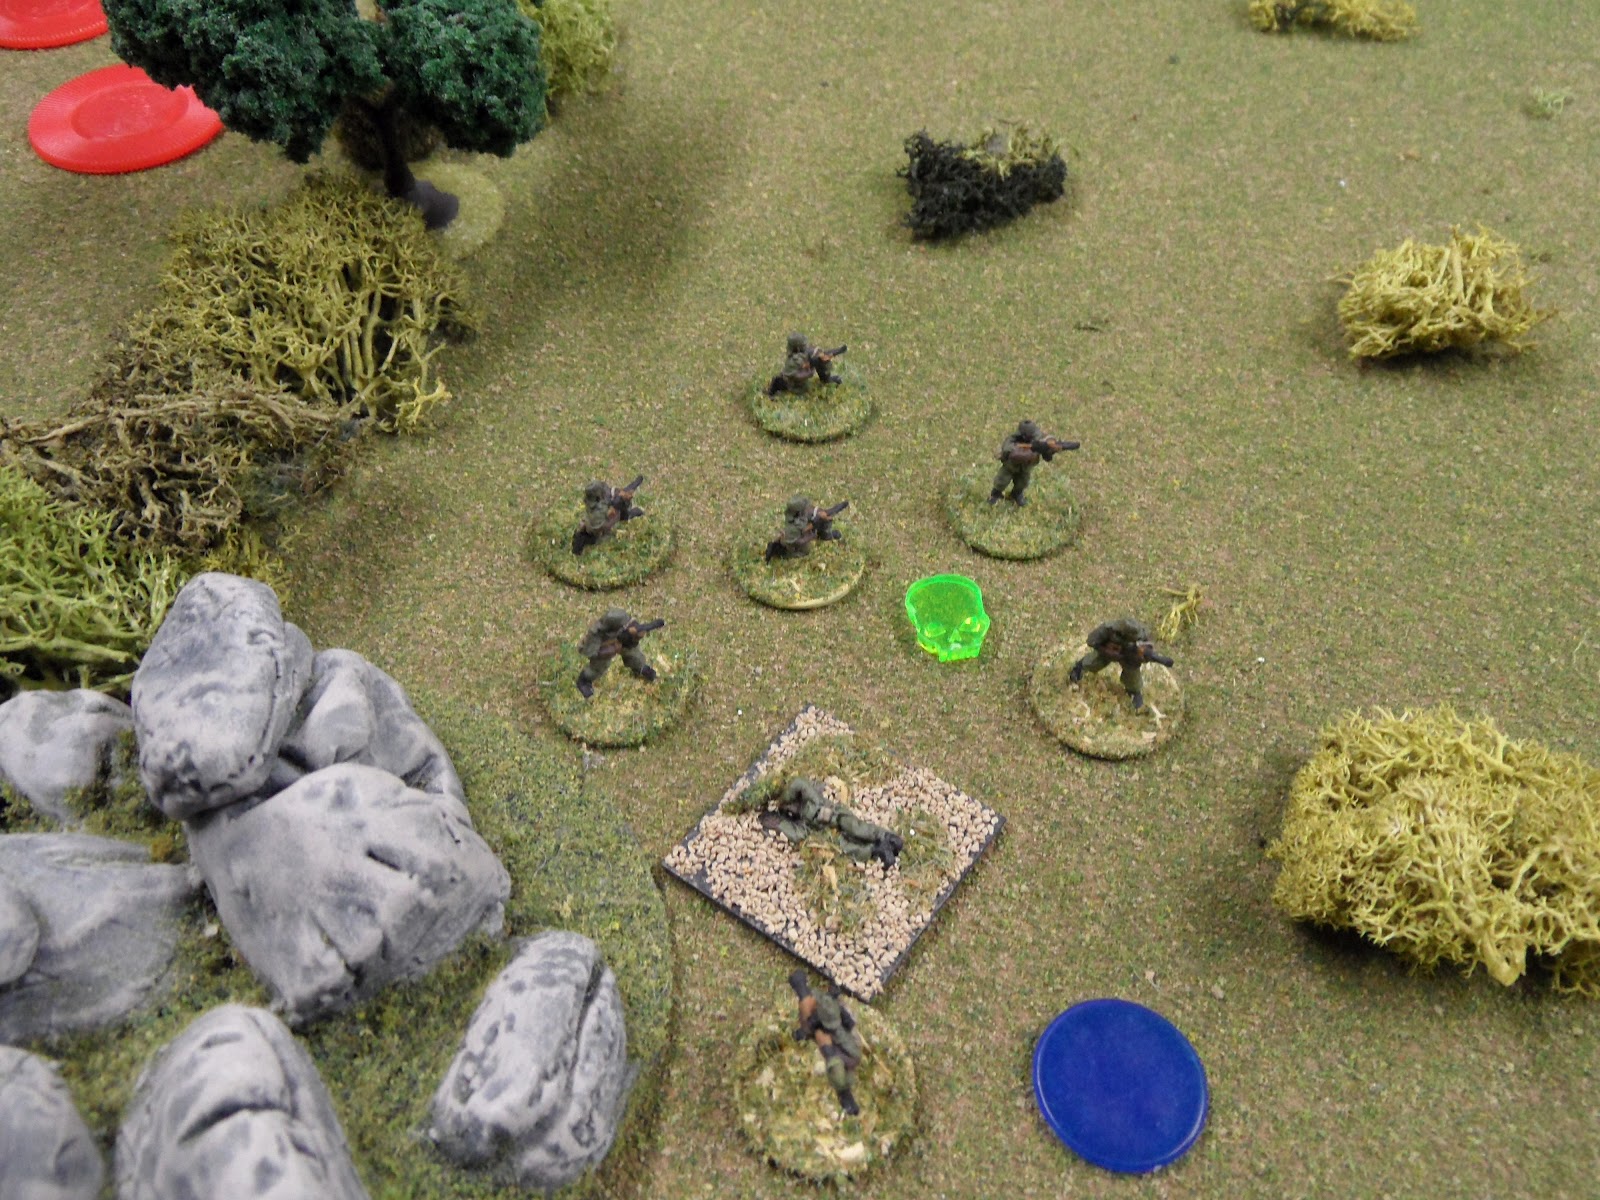
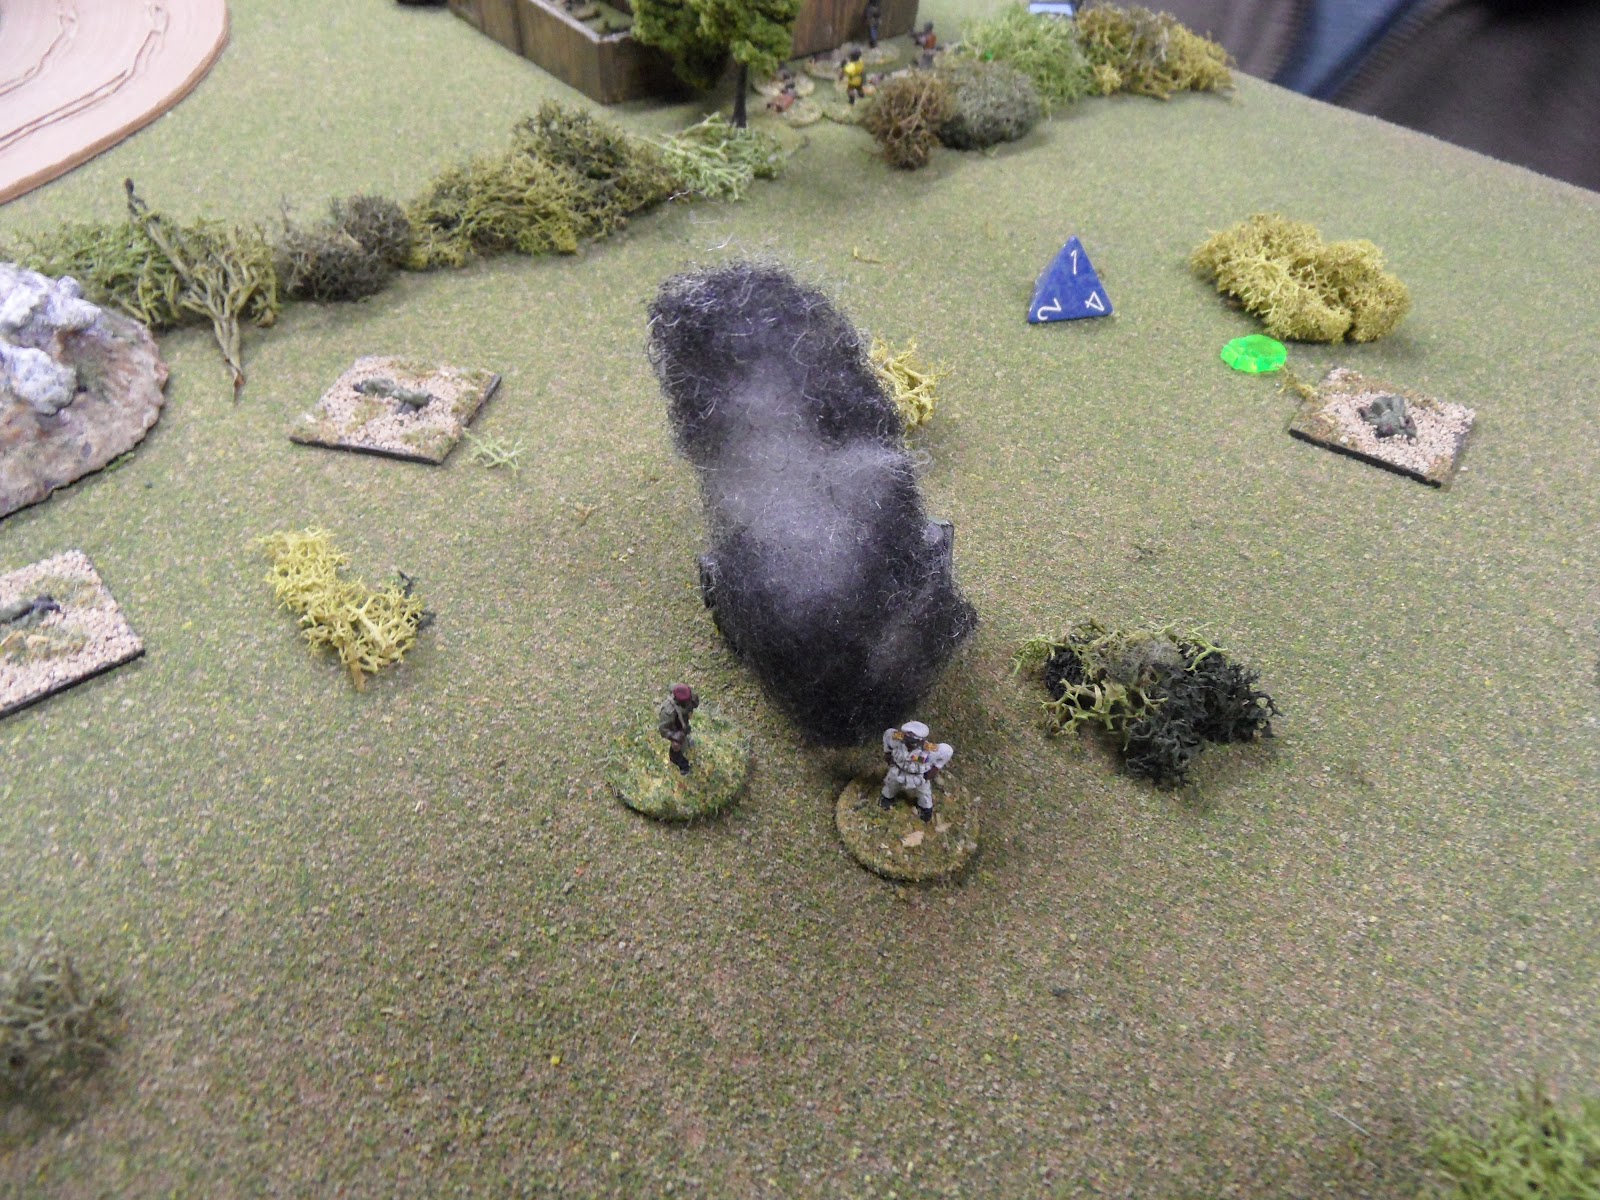
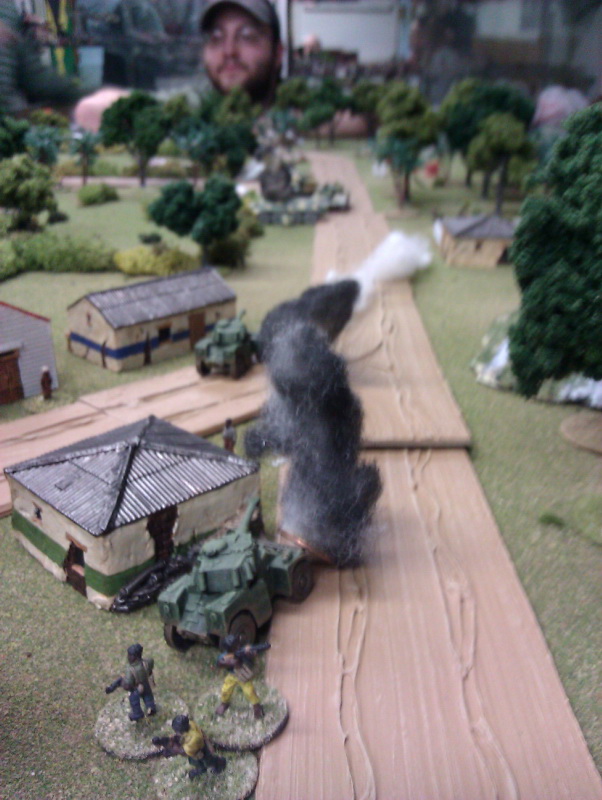
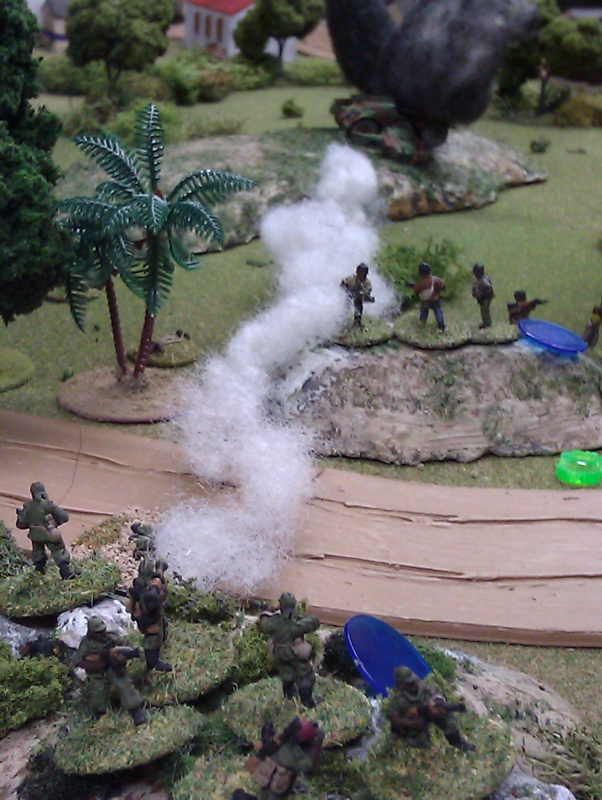
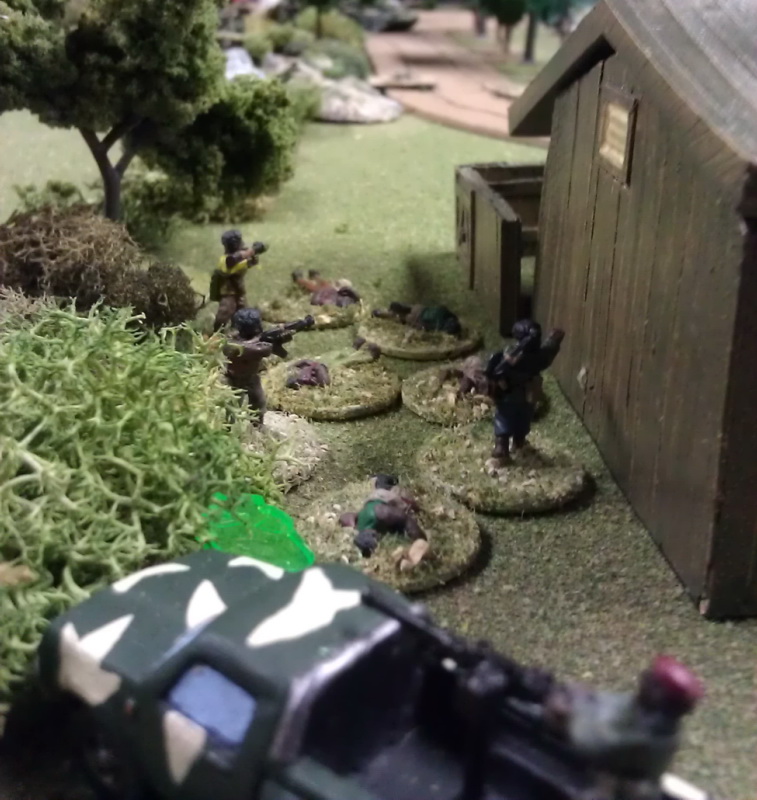
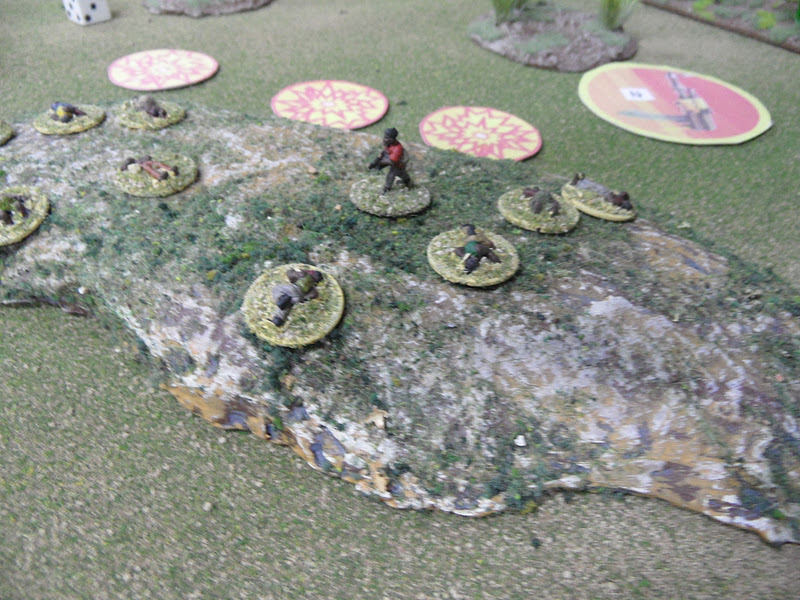
Pig herding whilst under mortar fire - not recommended!

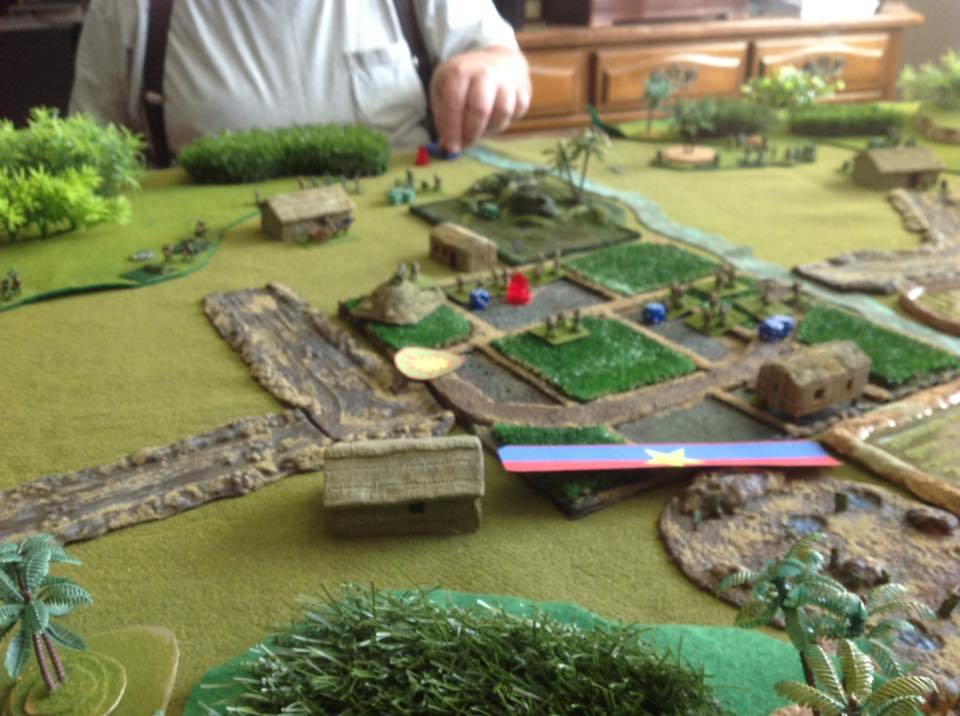
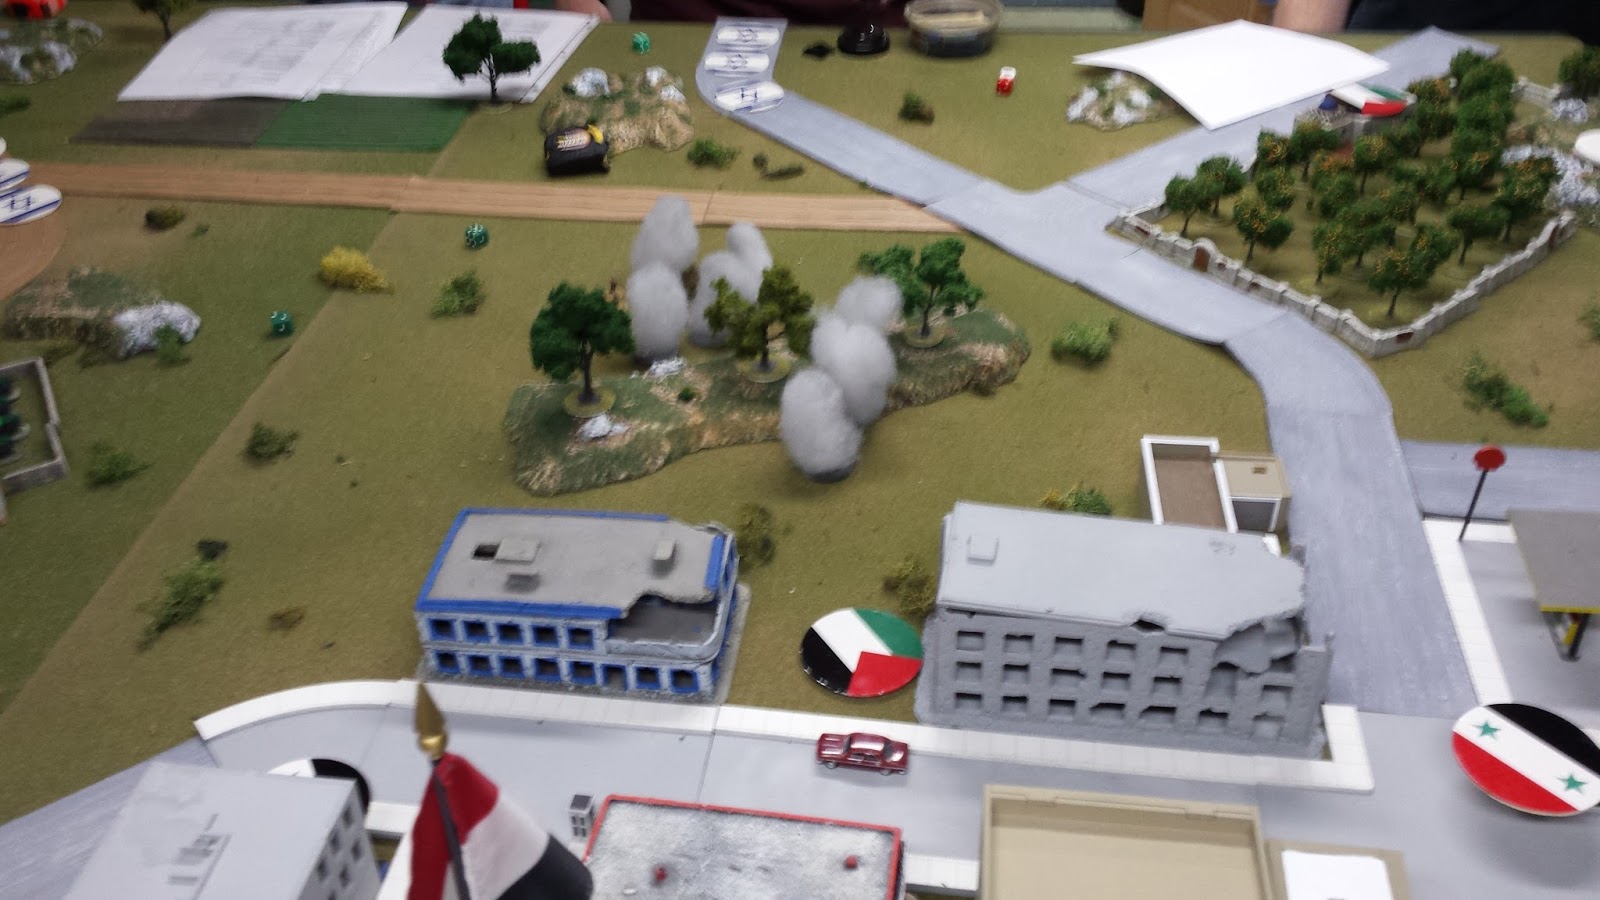
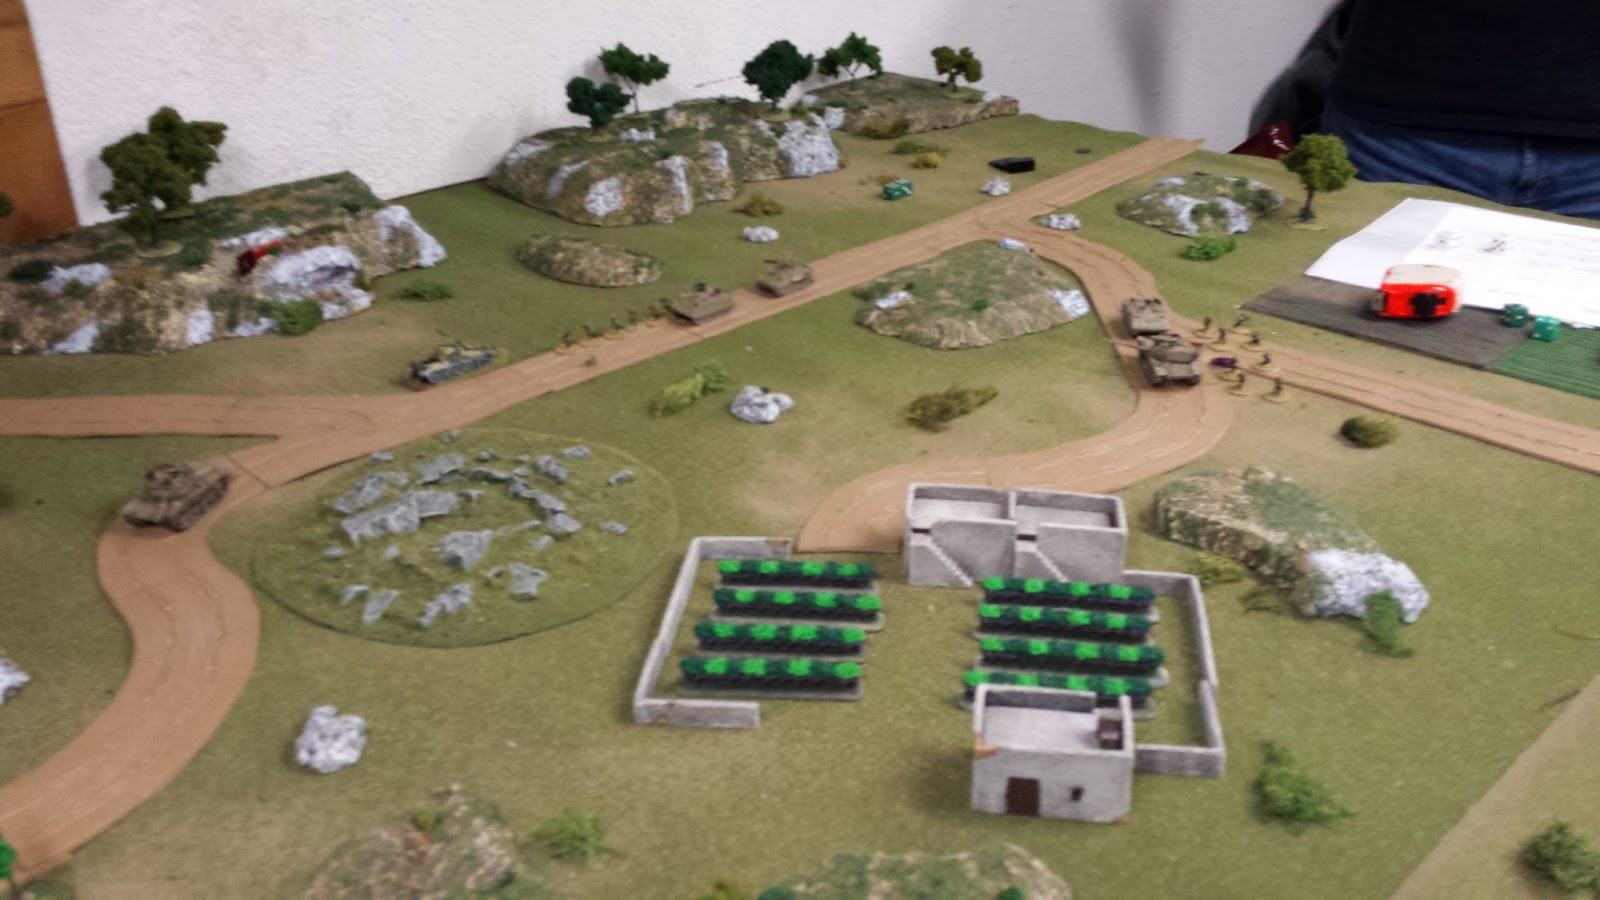
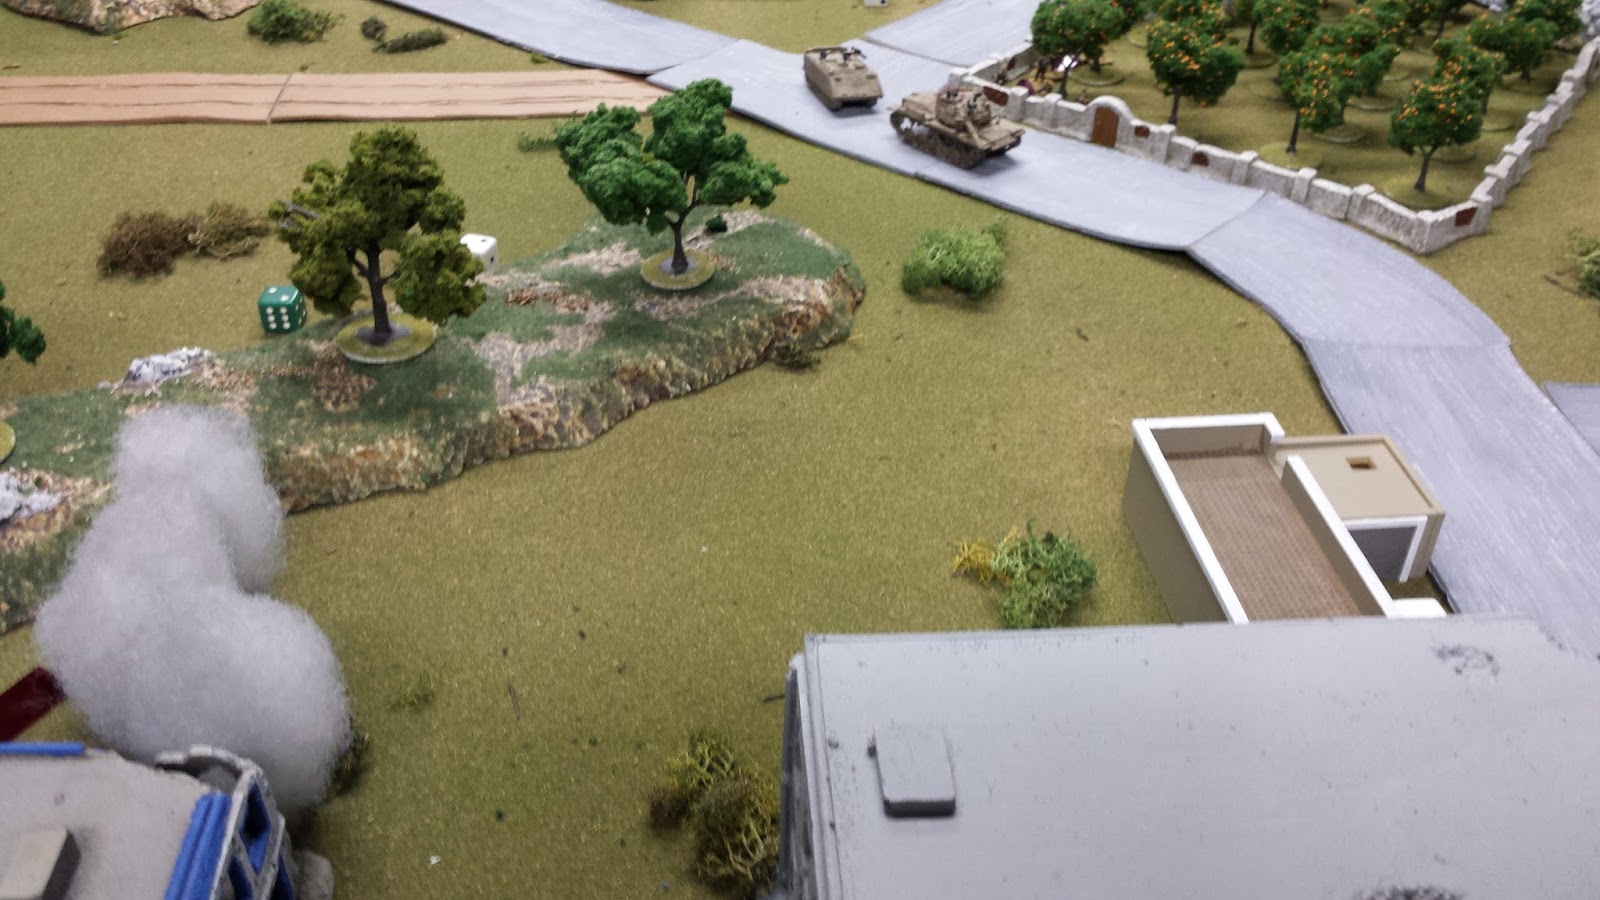
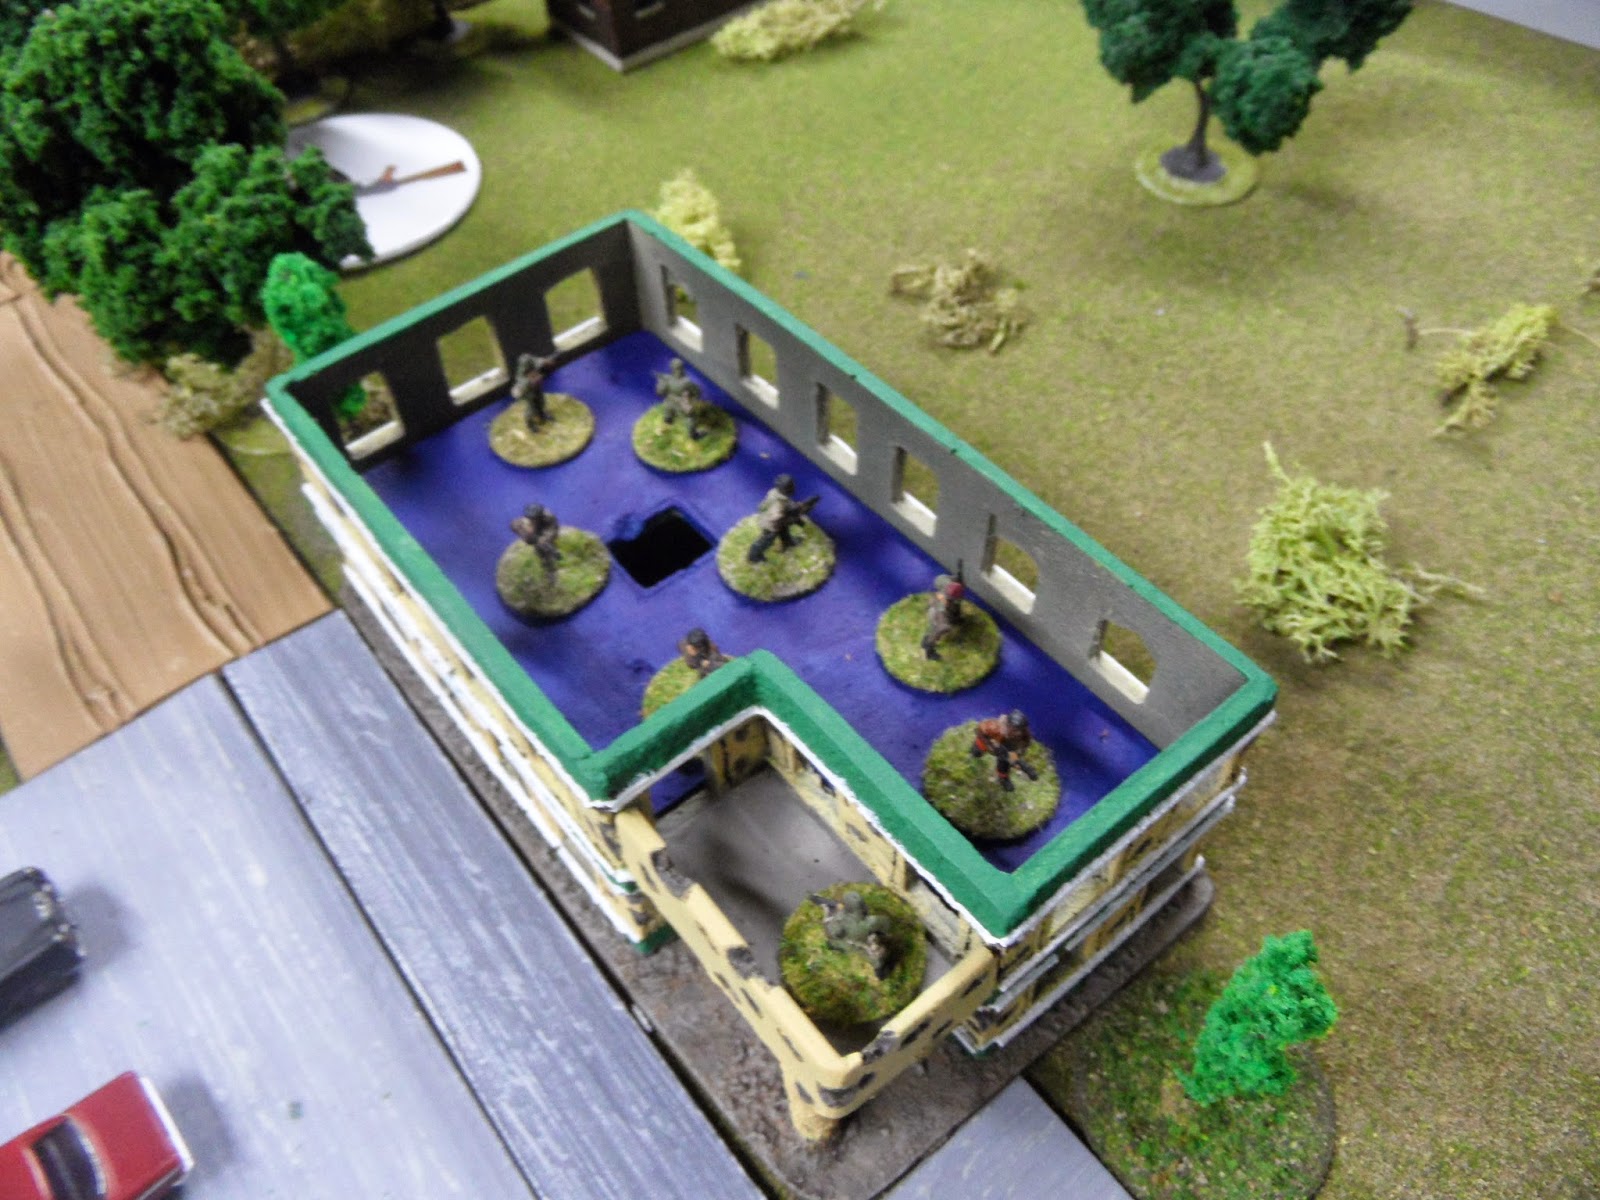
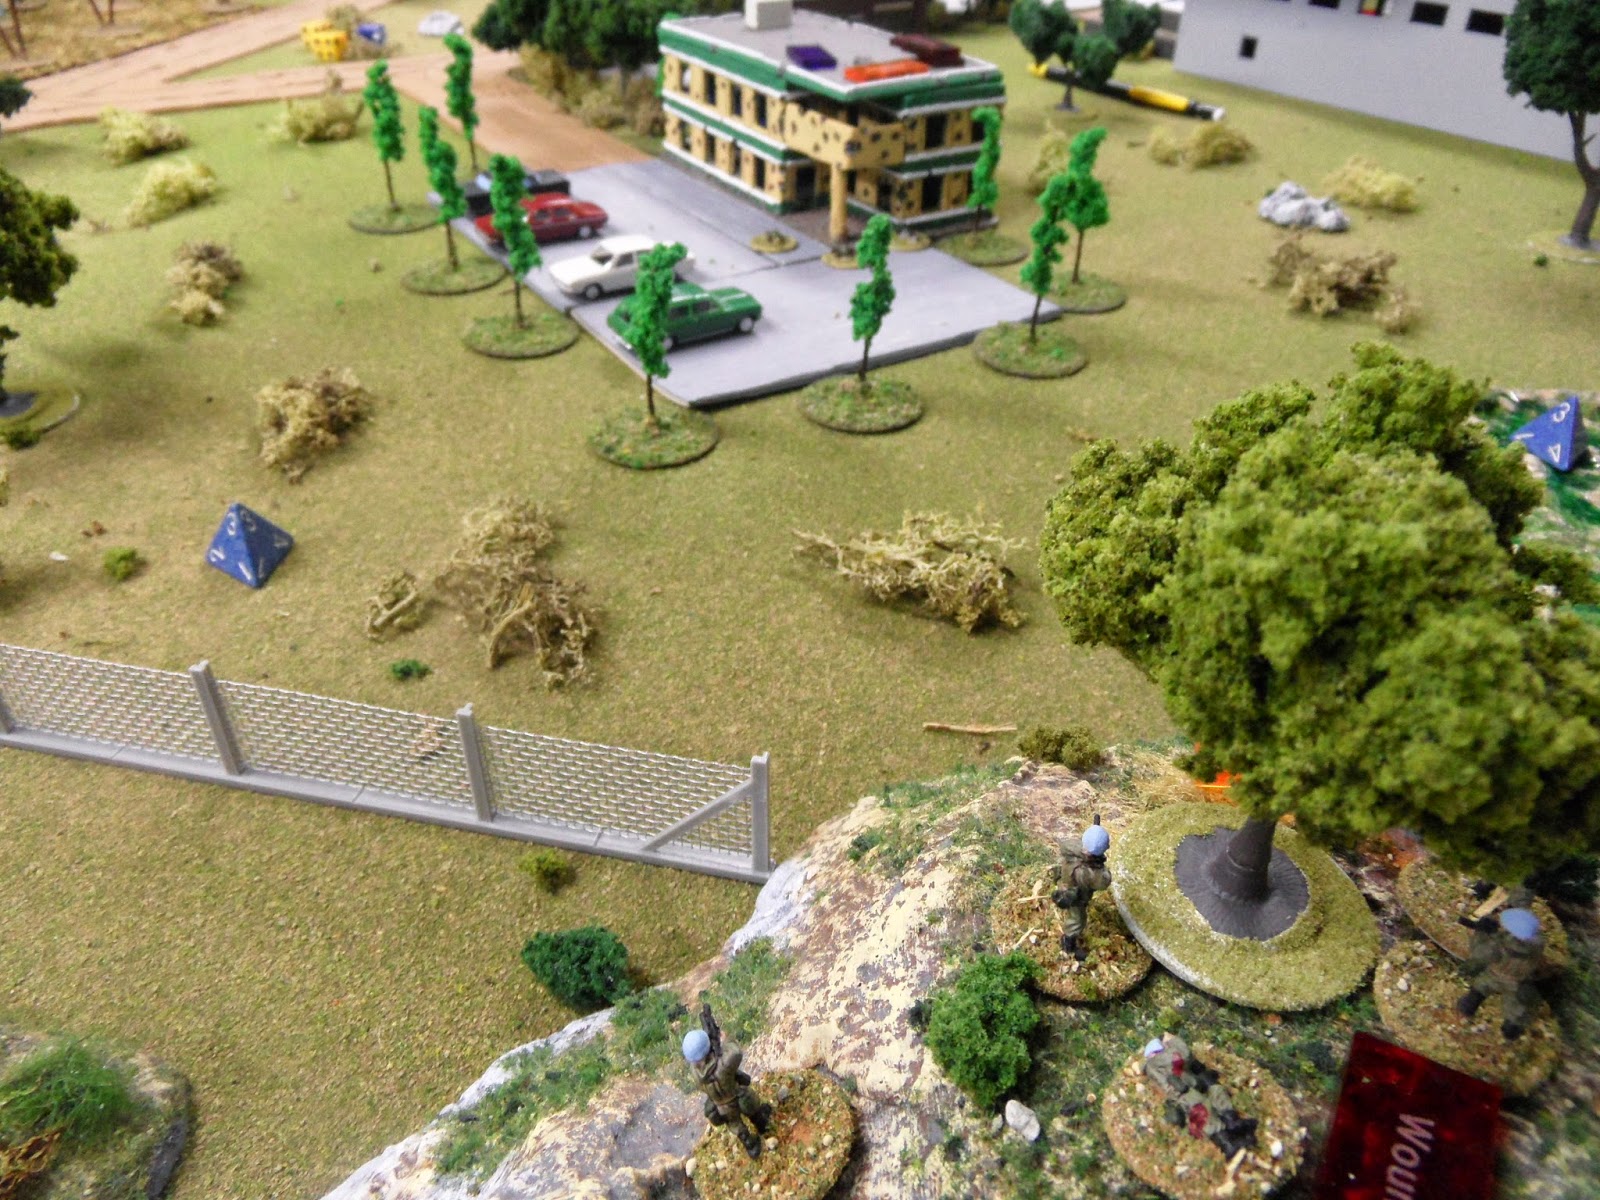
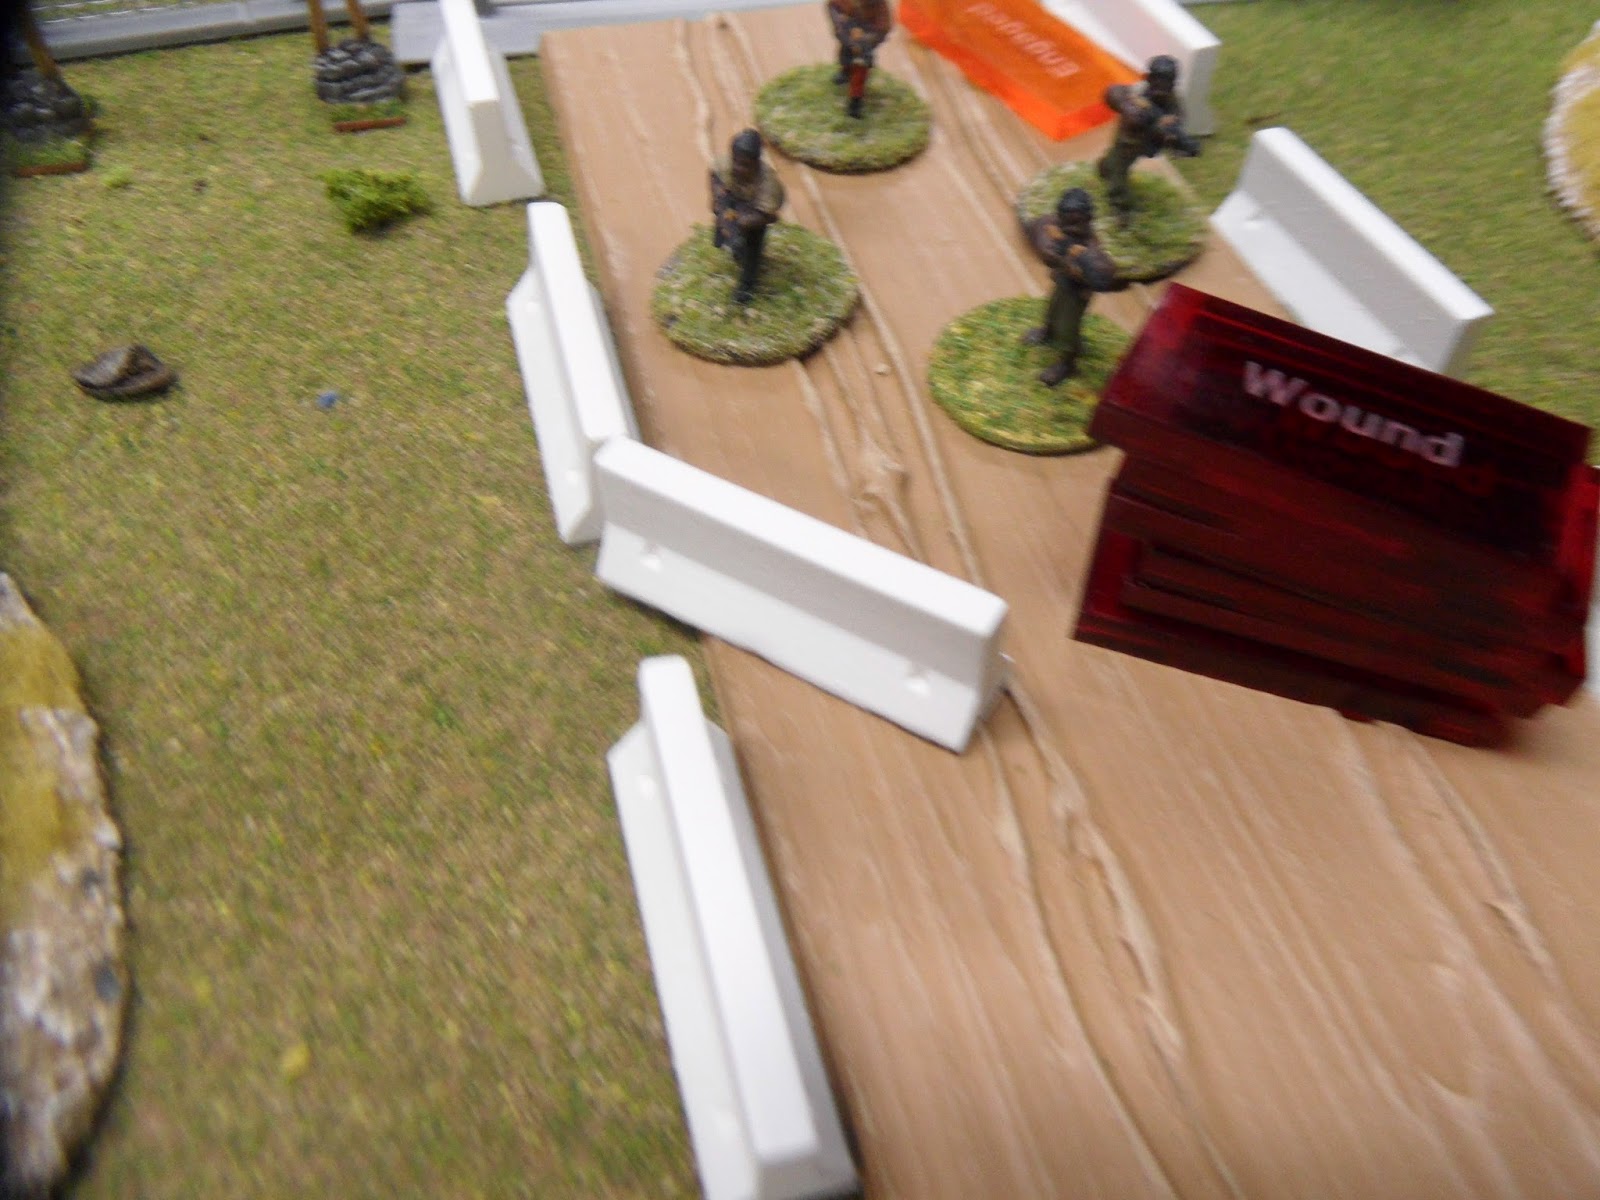
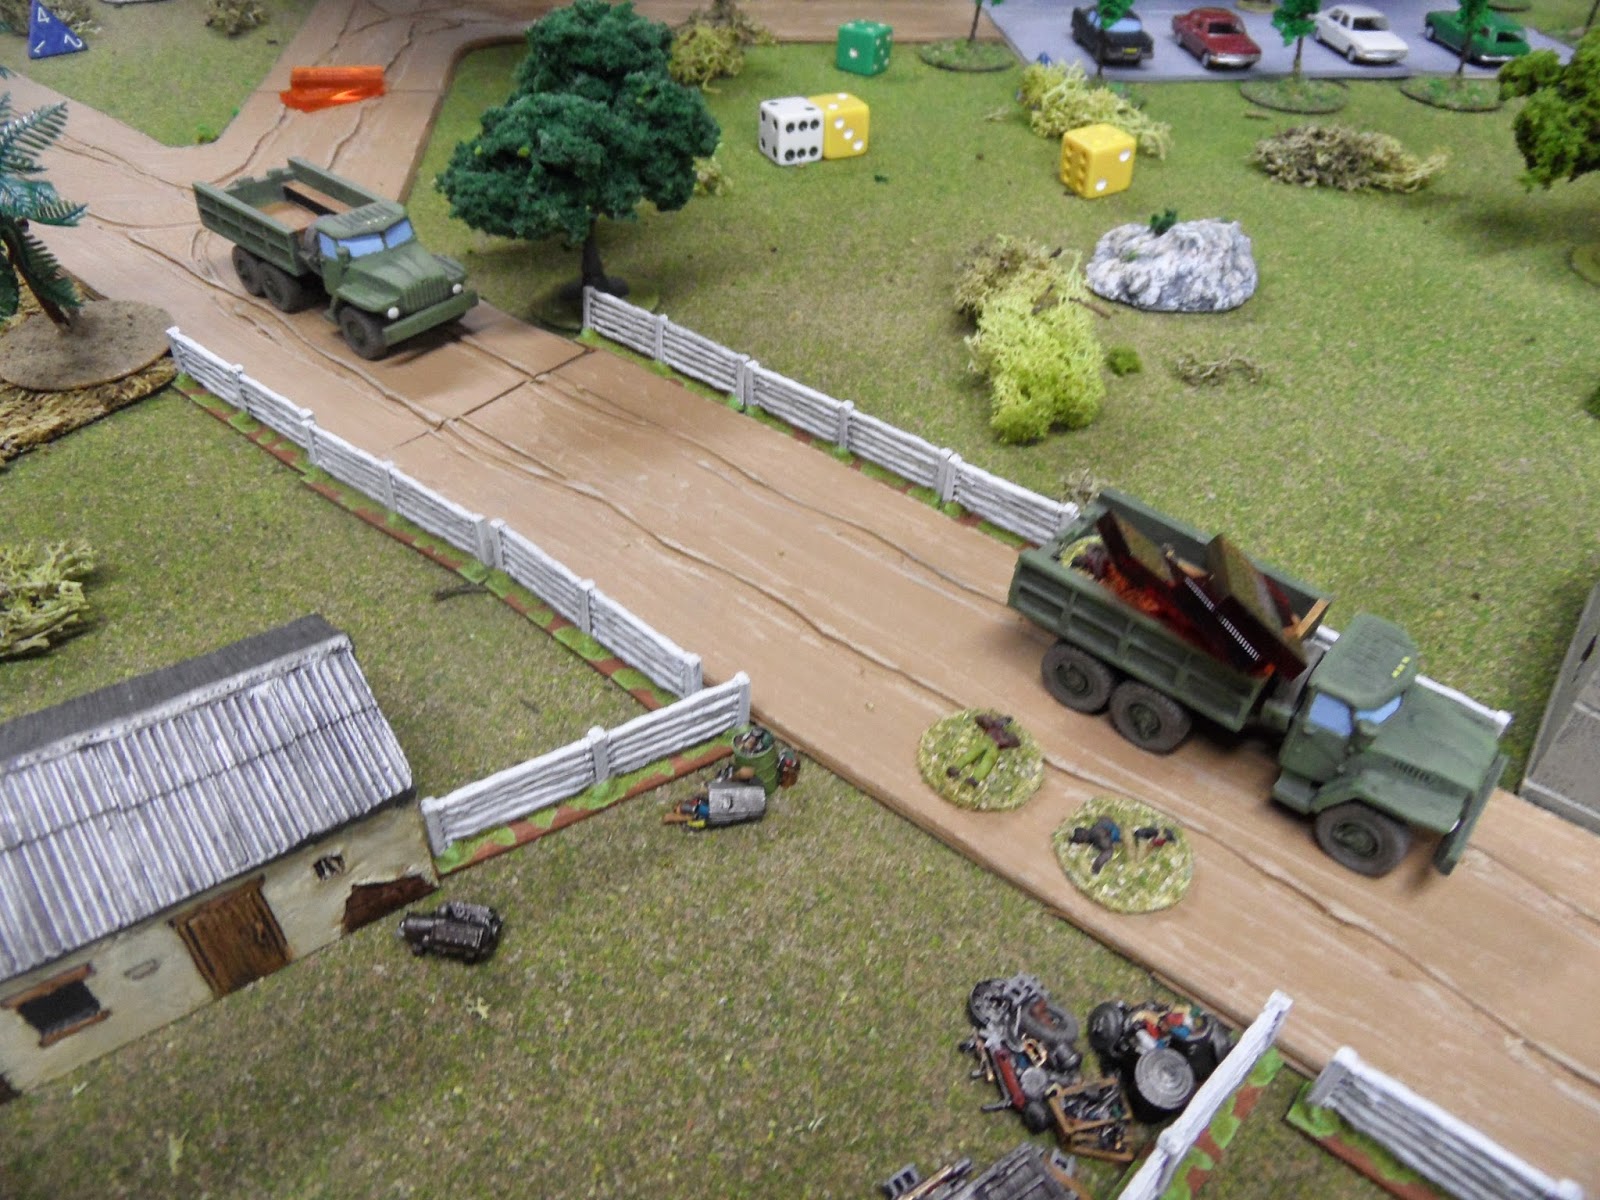
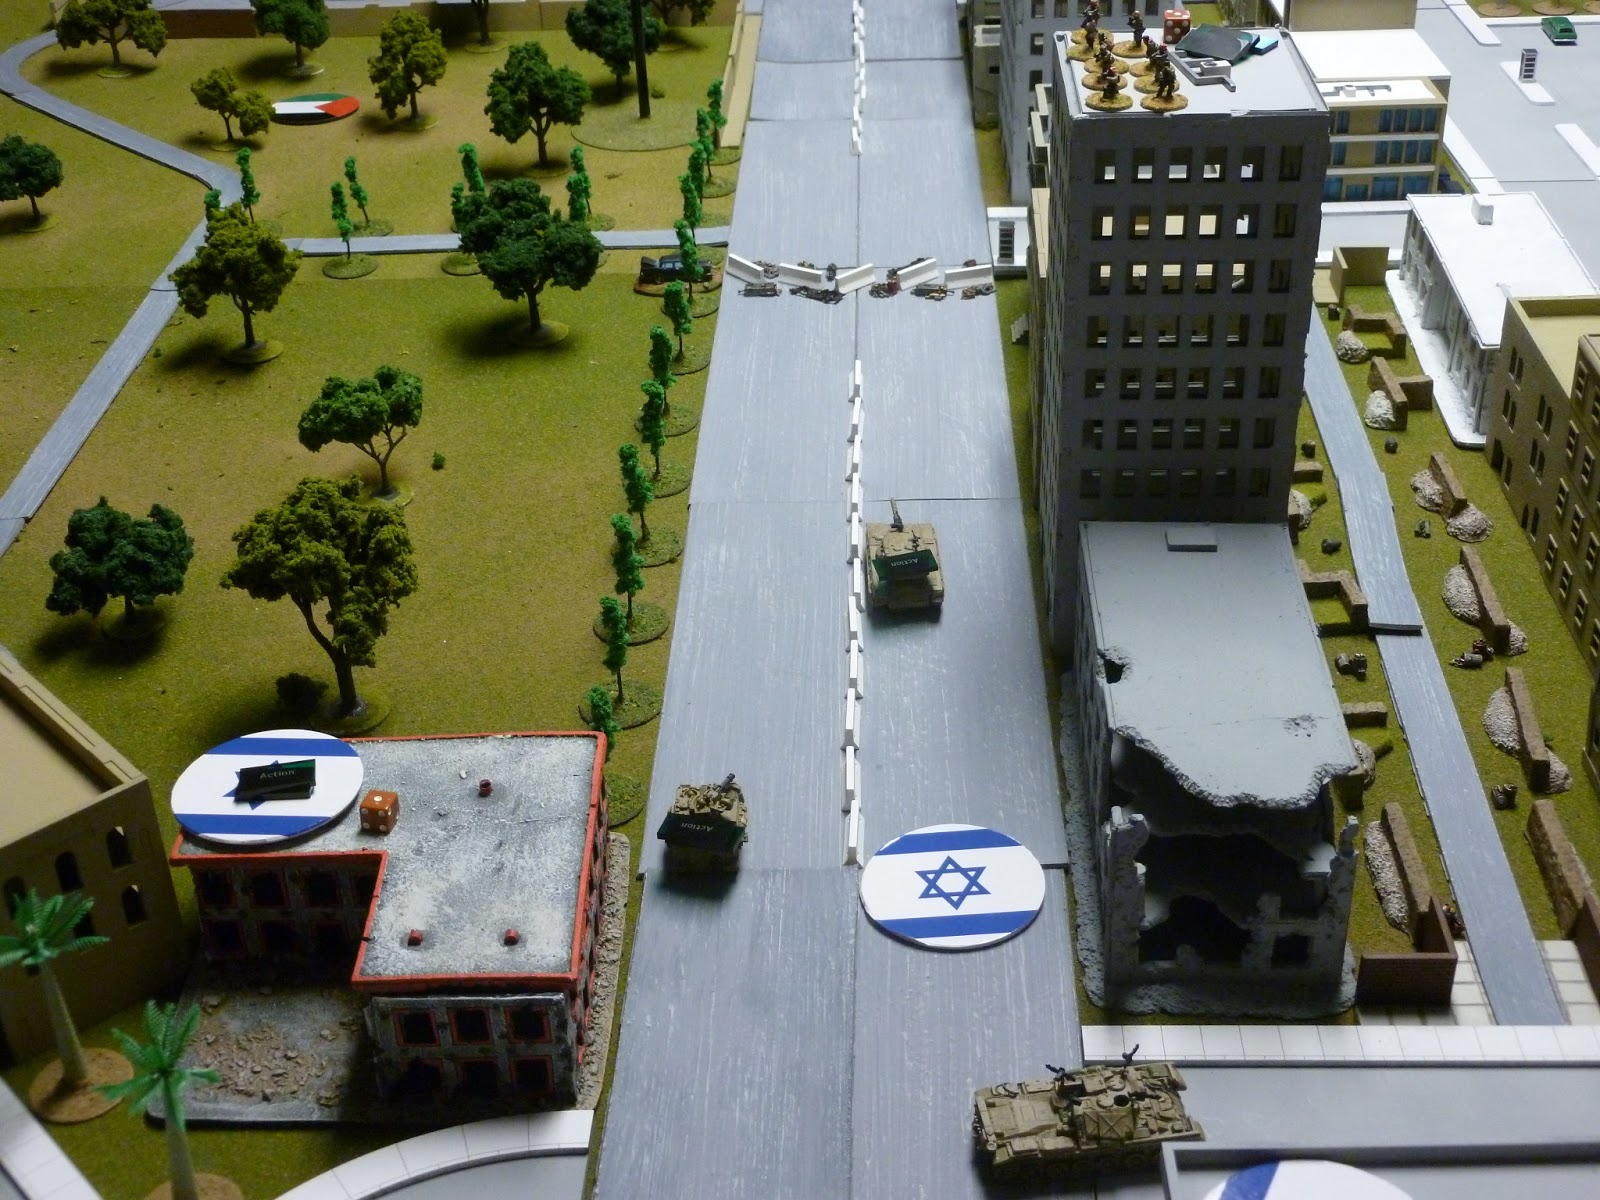
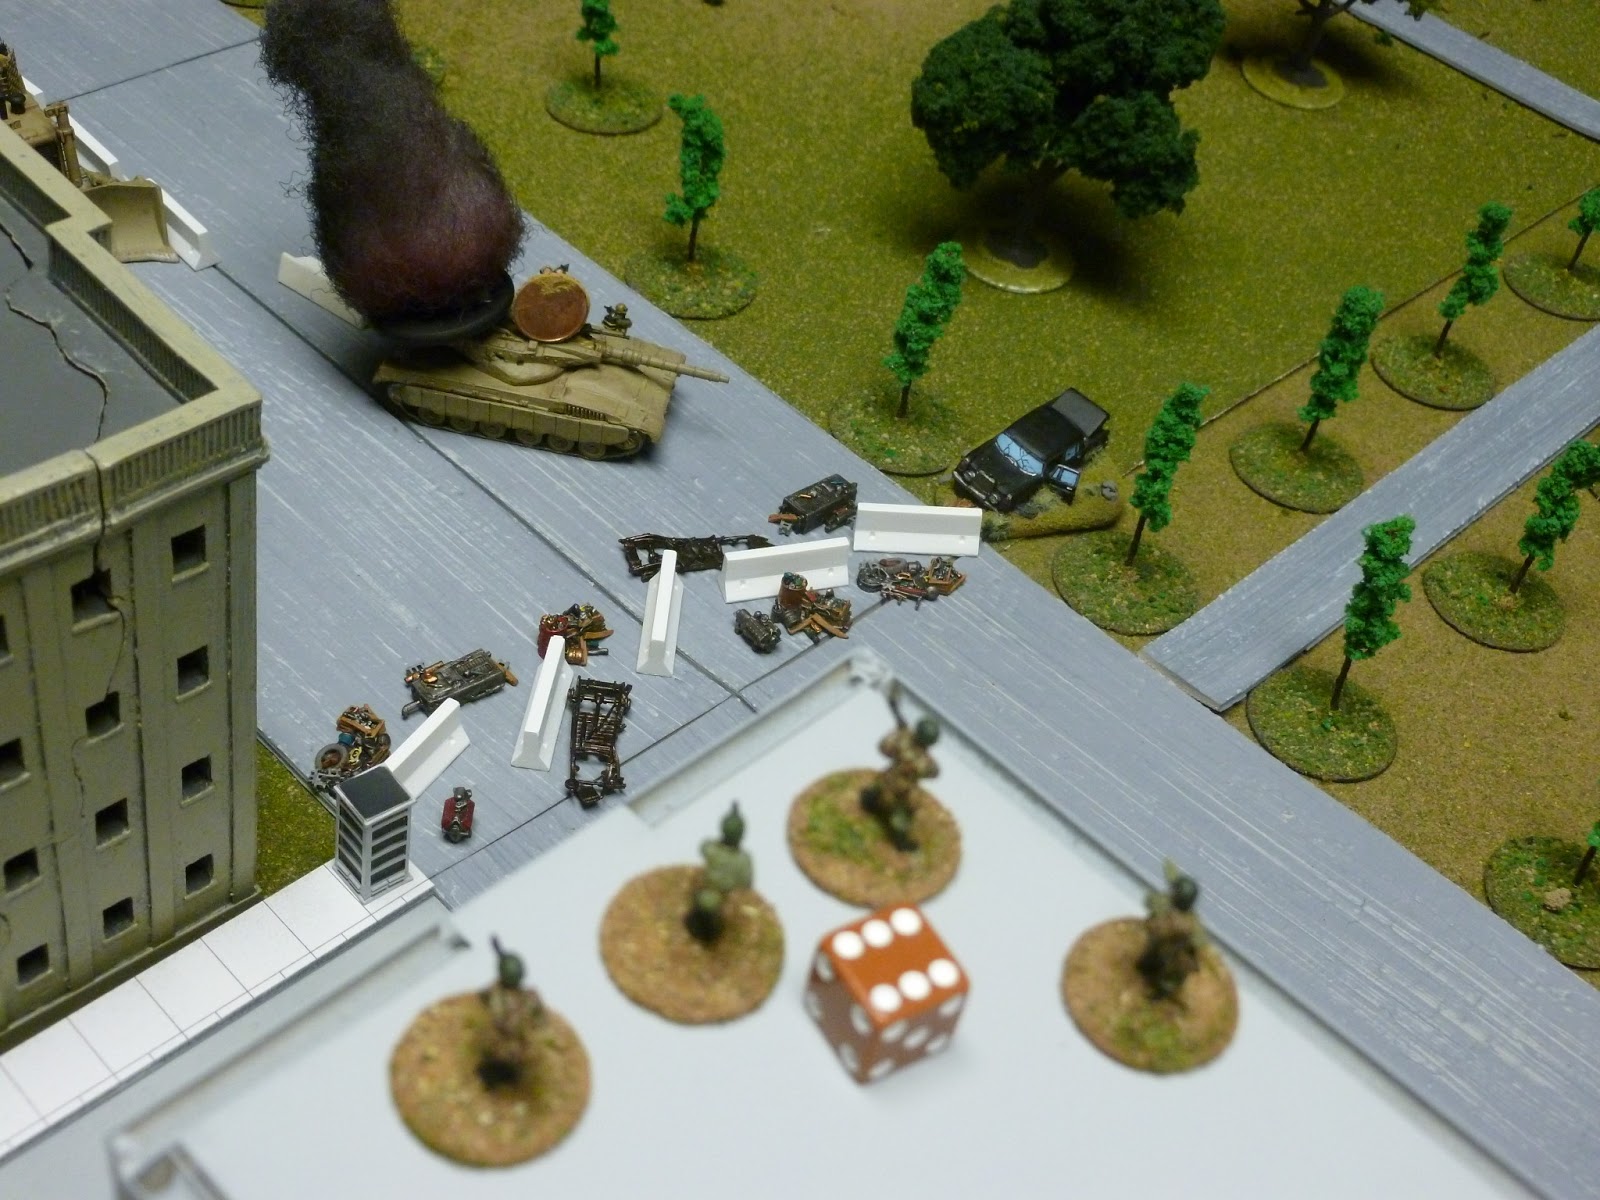
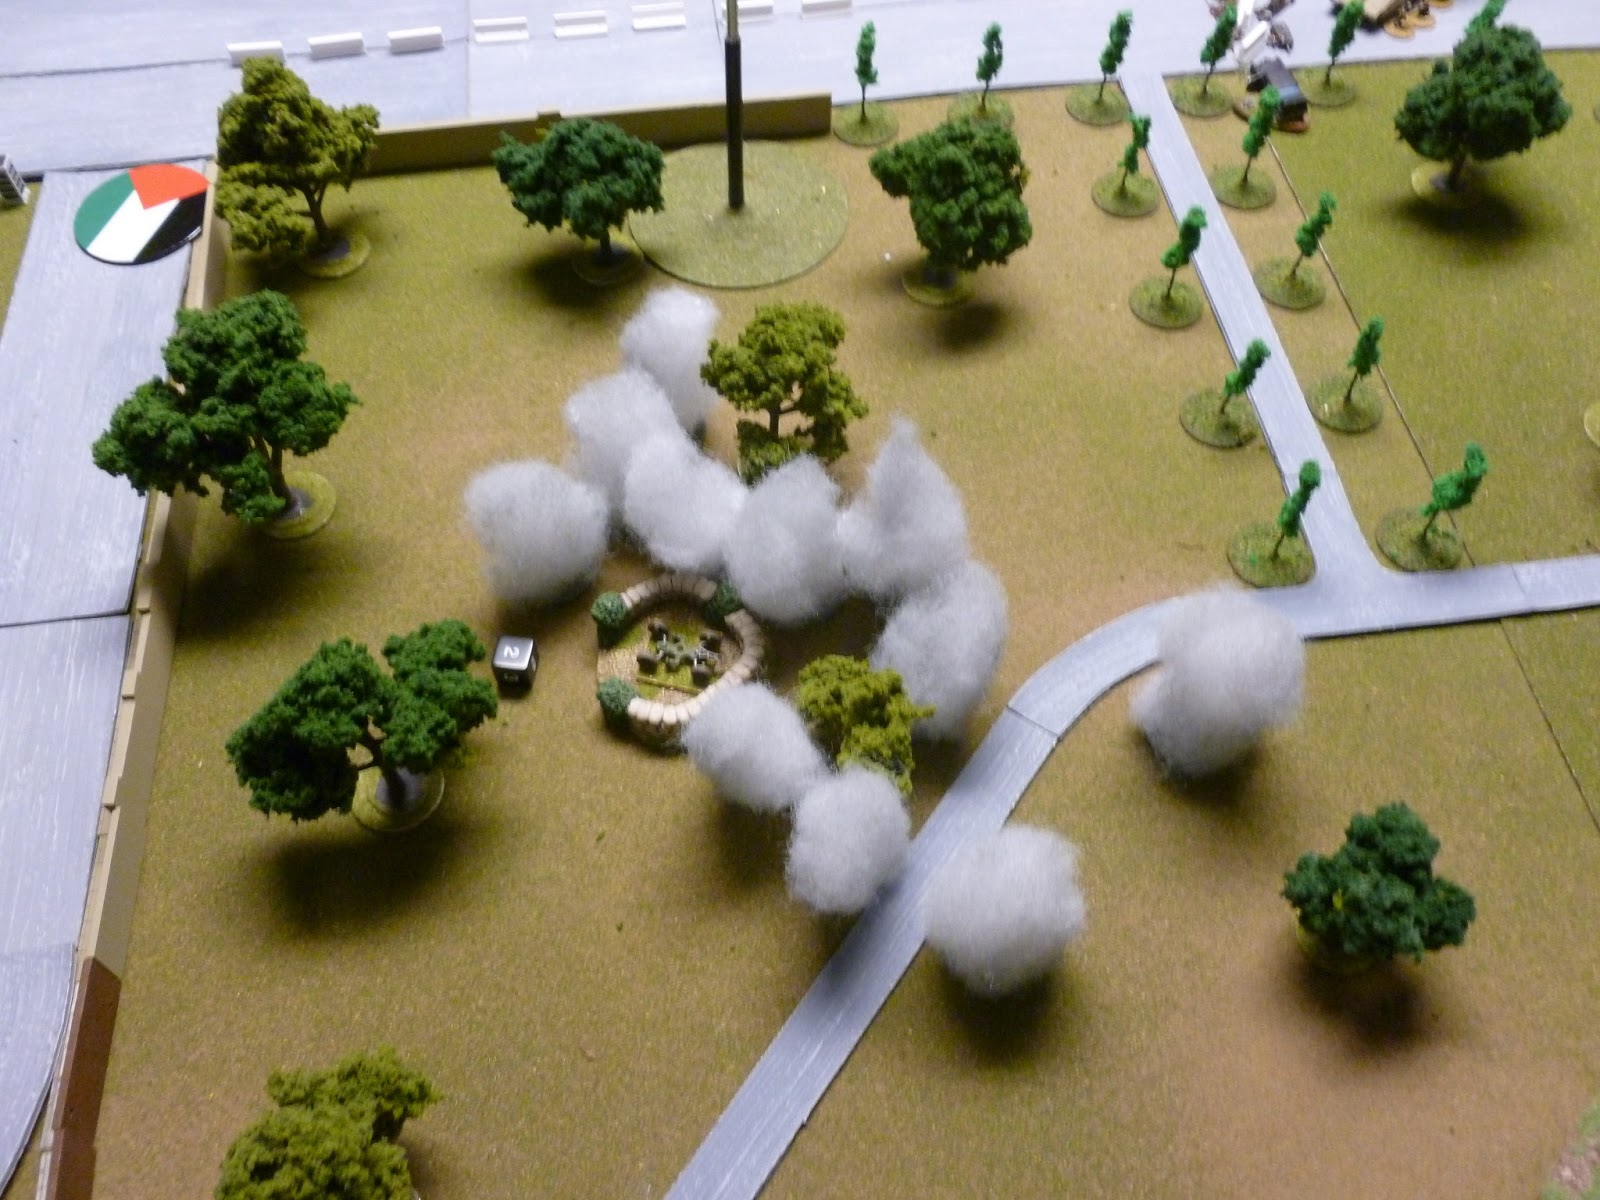
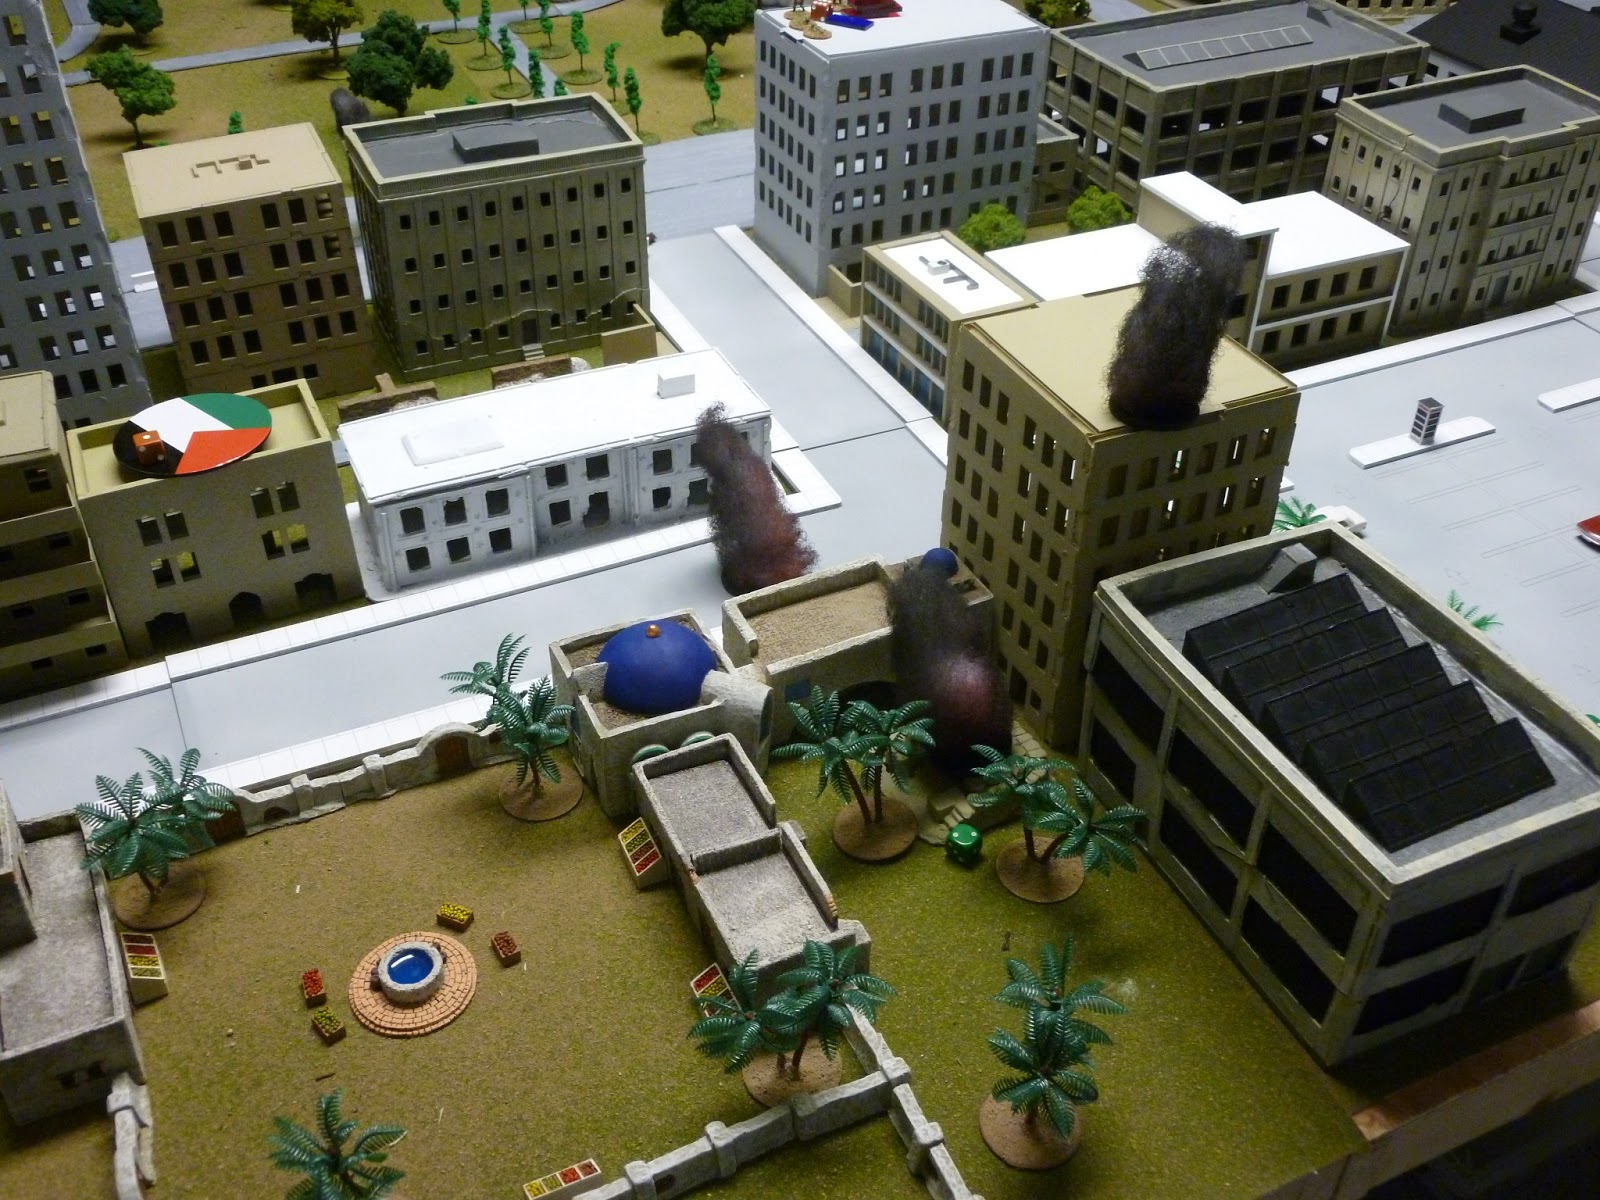
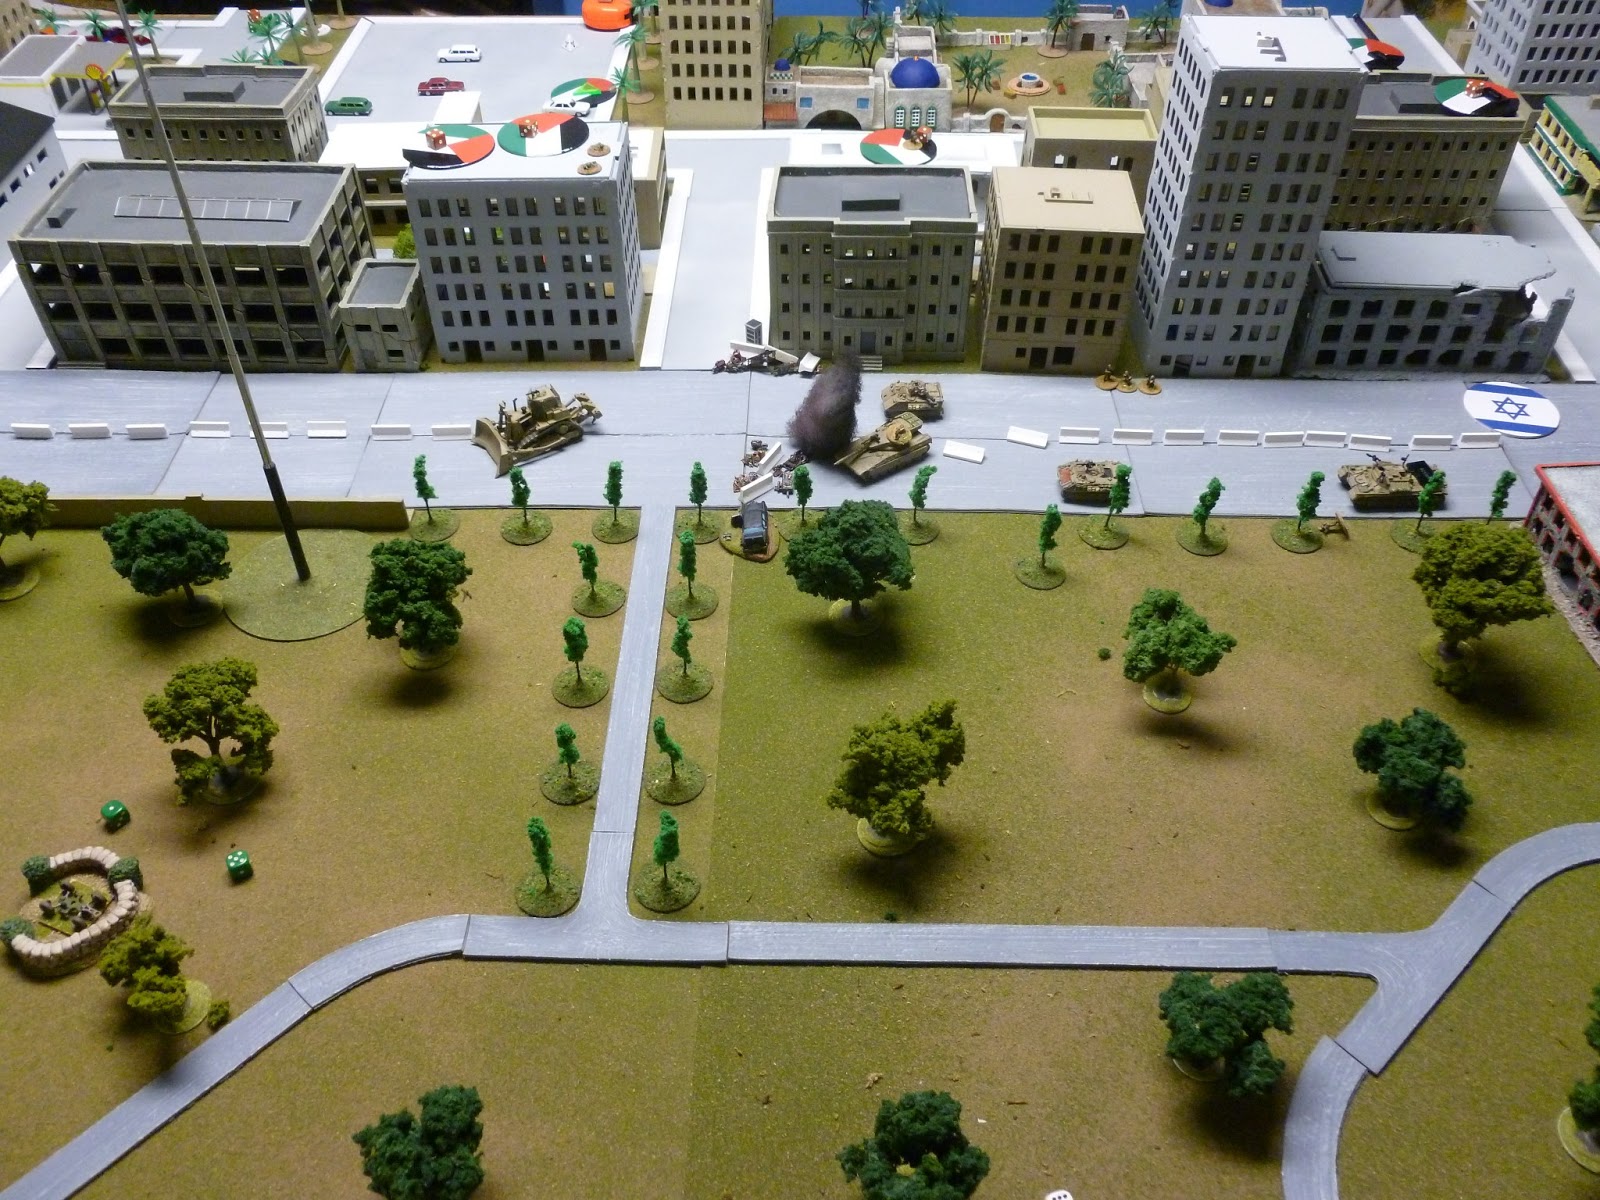
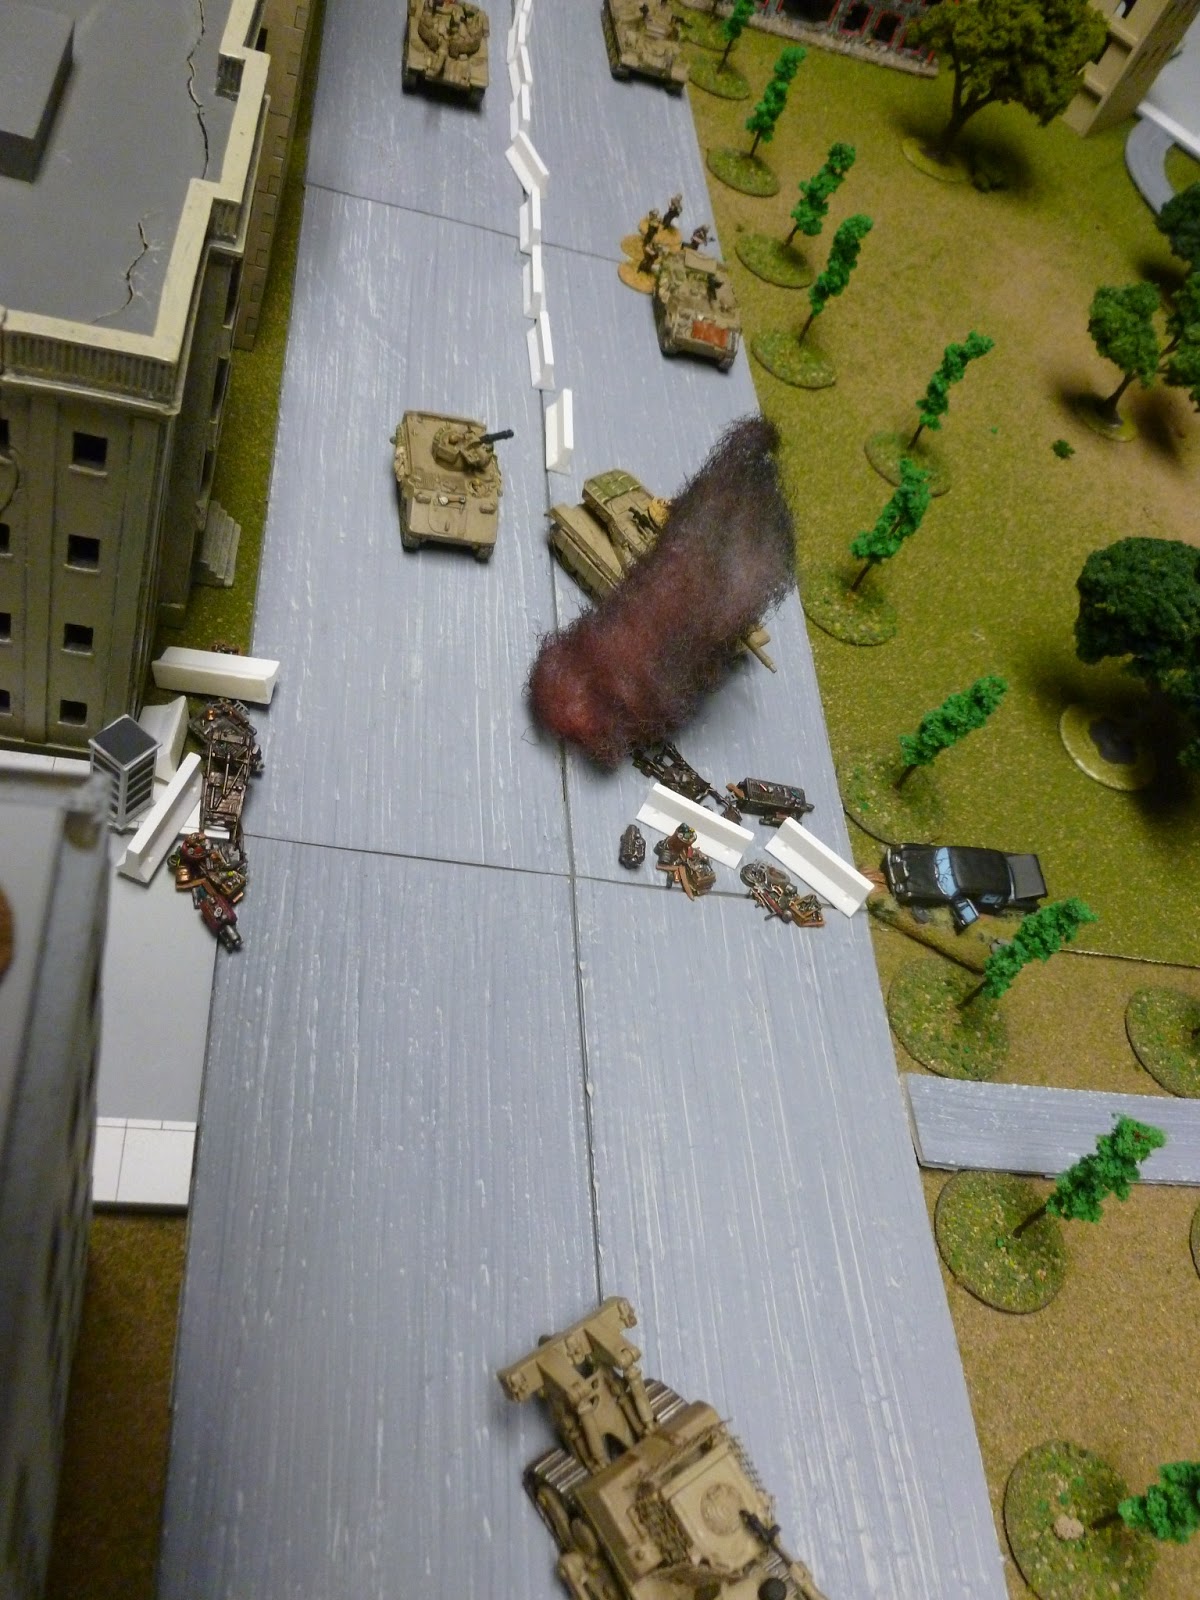
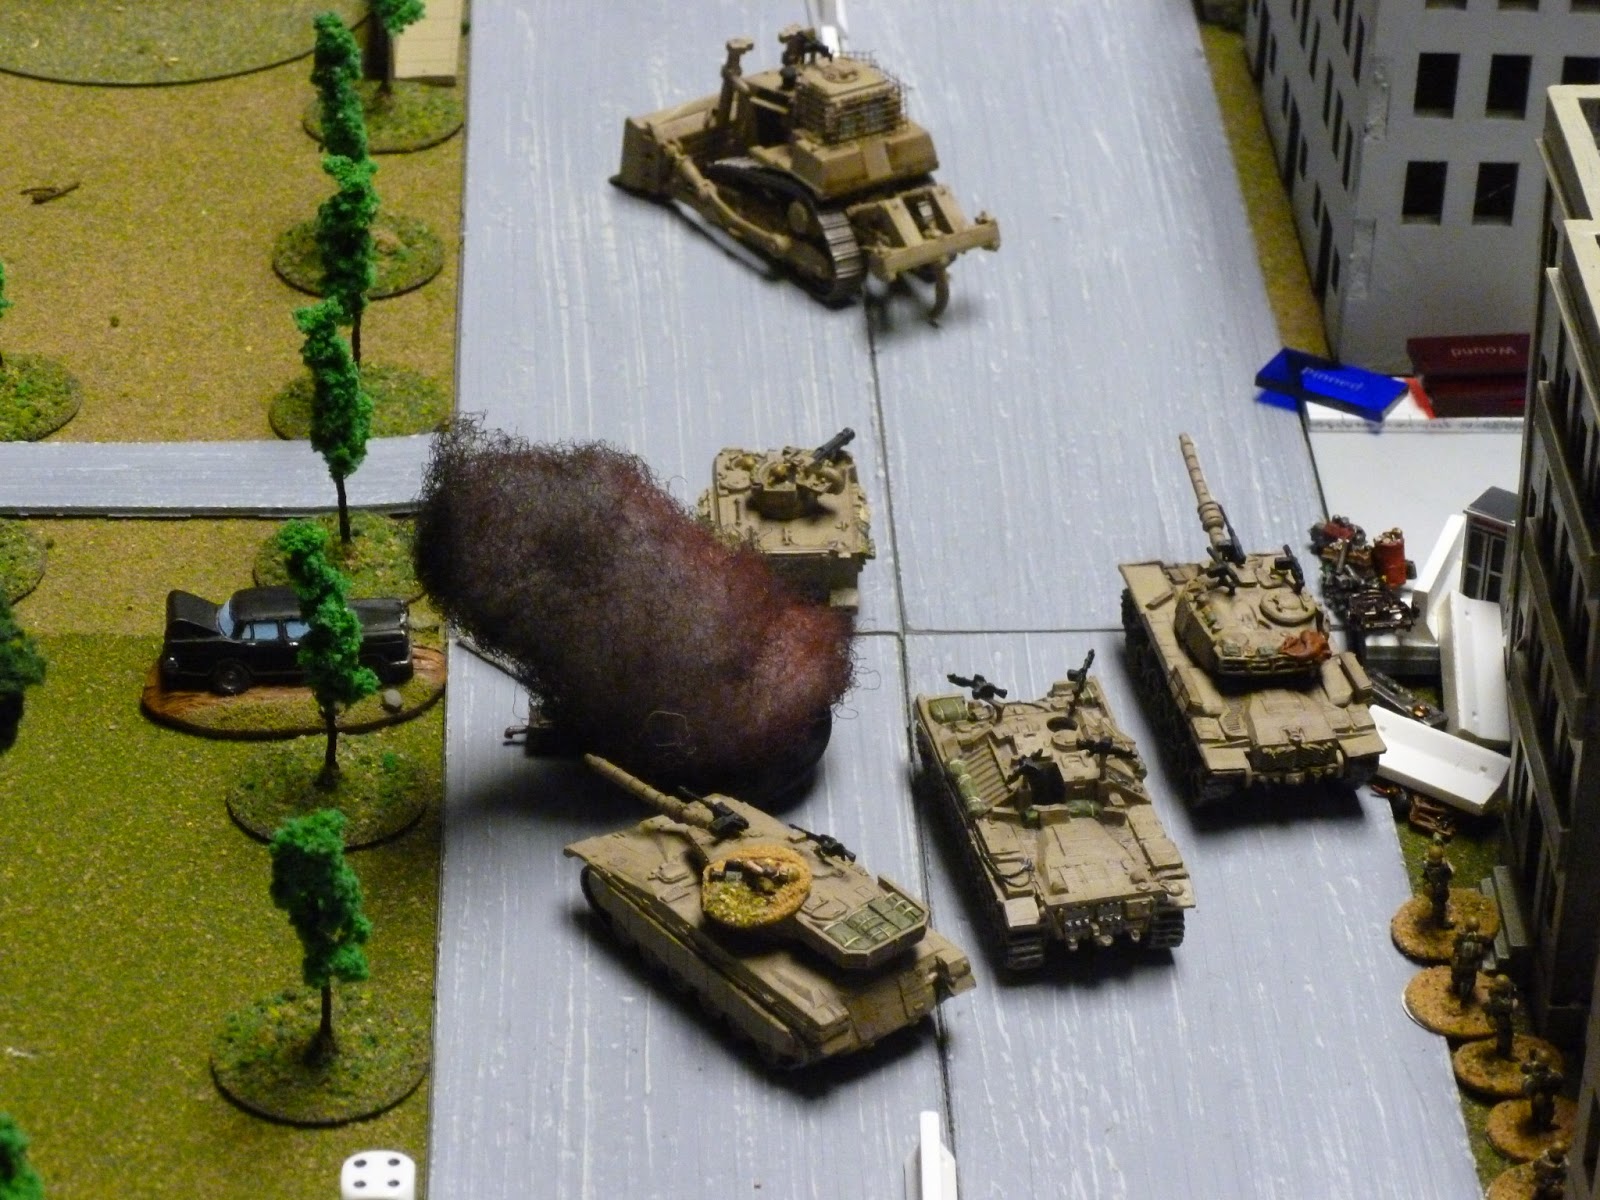
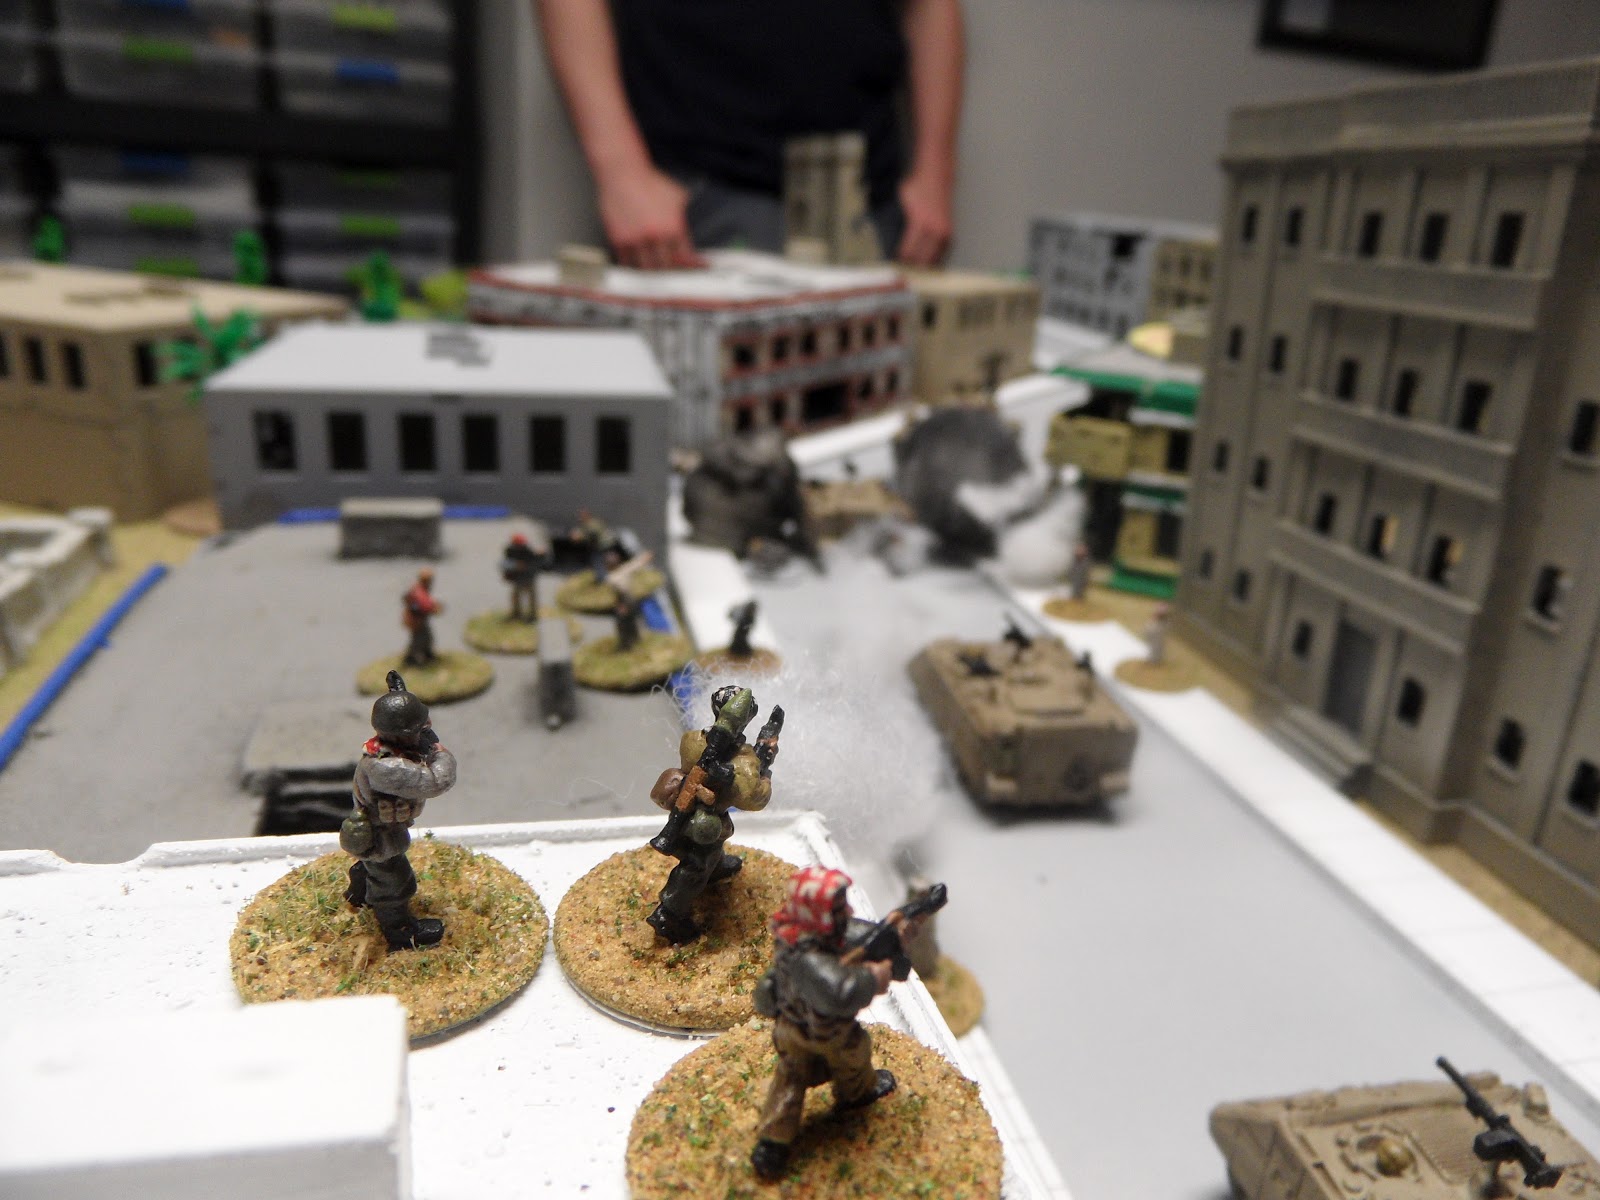
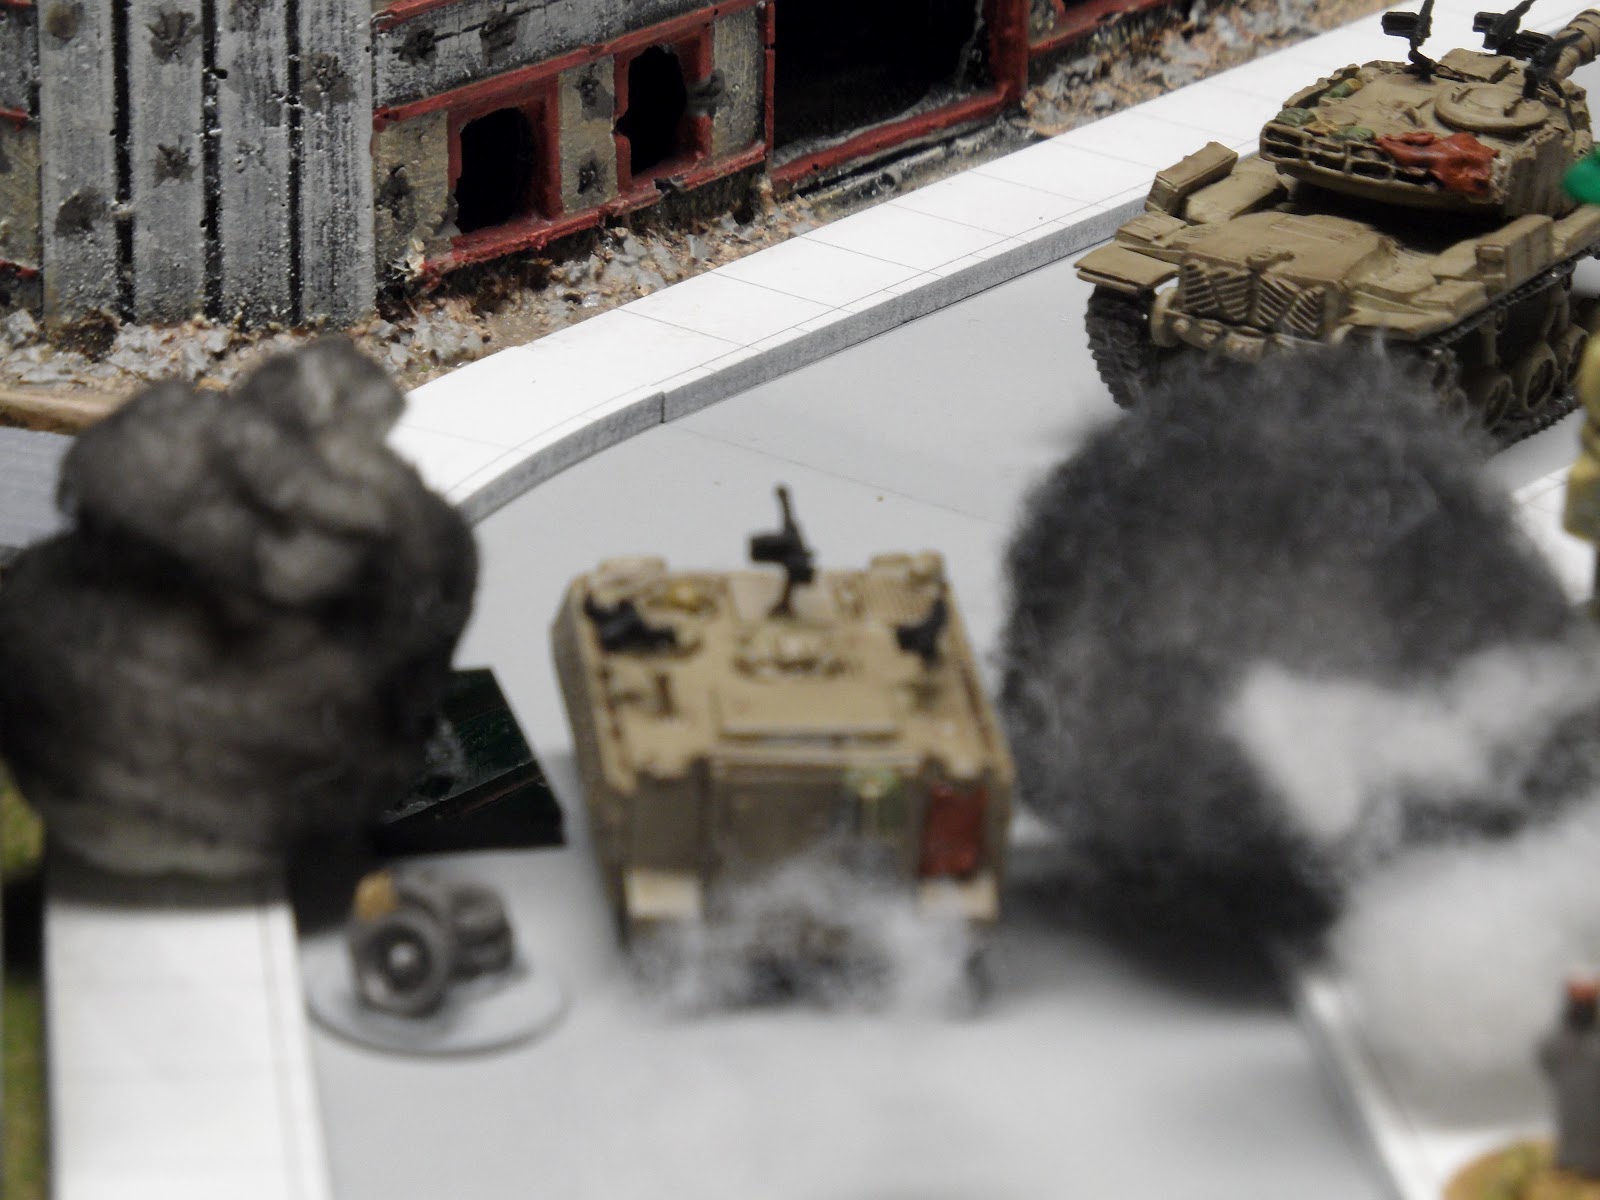
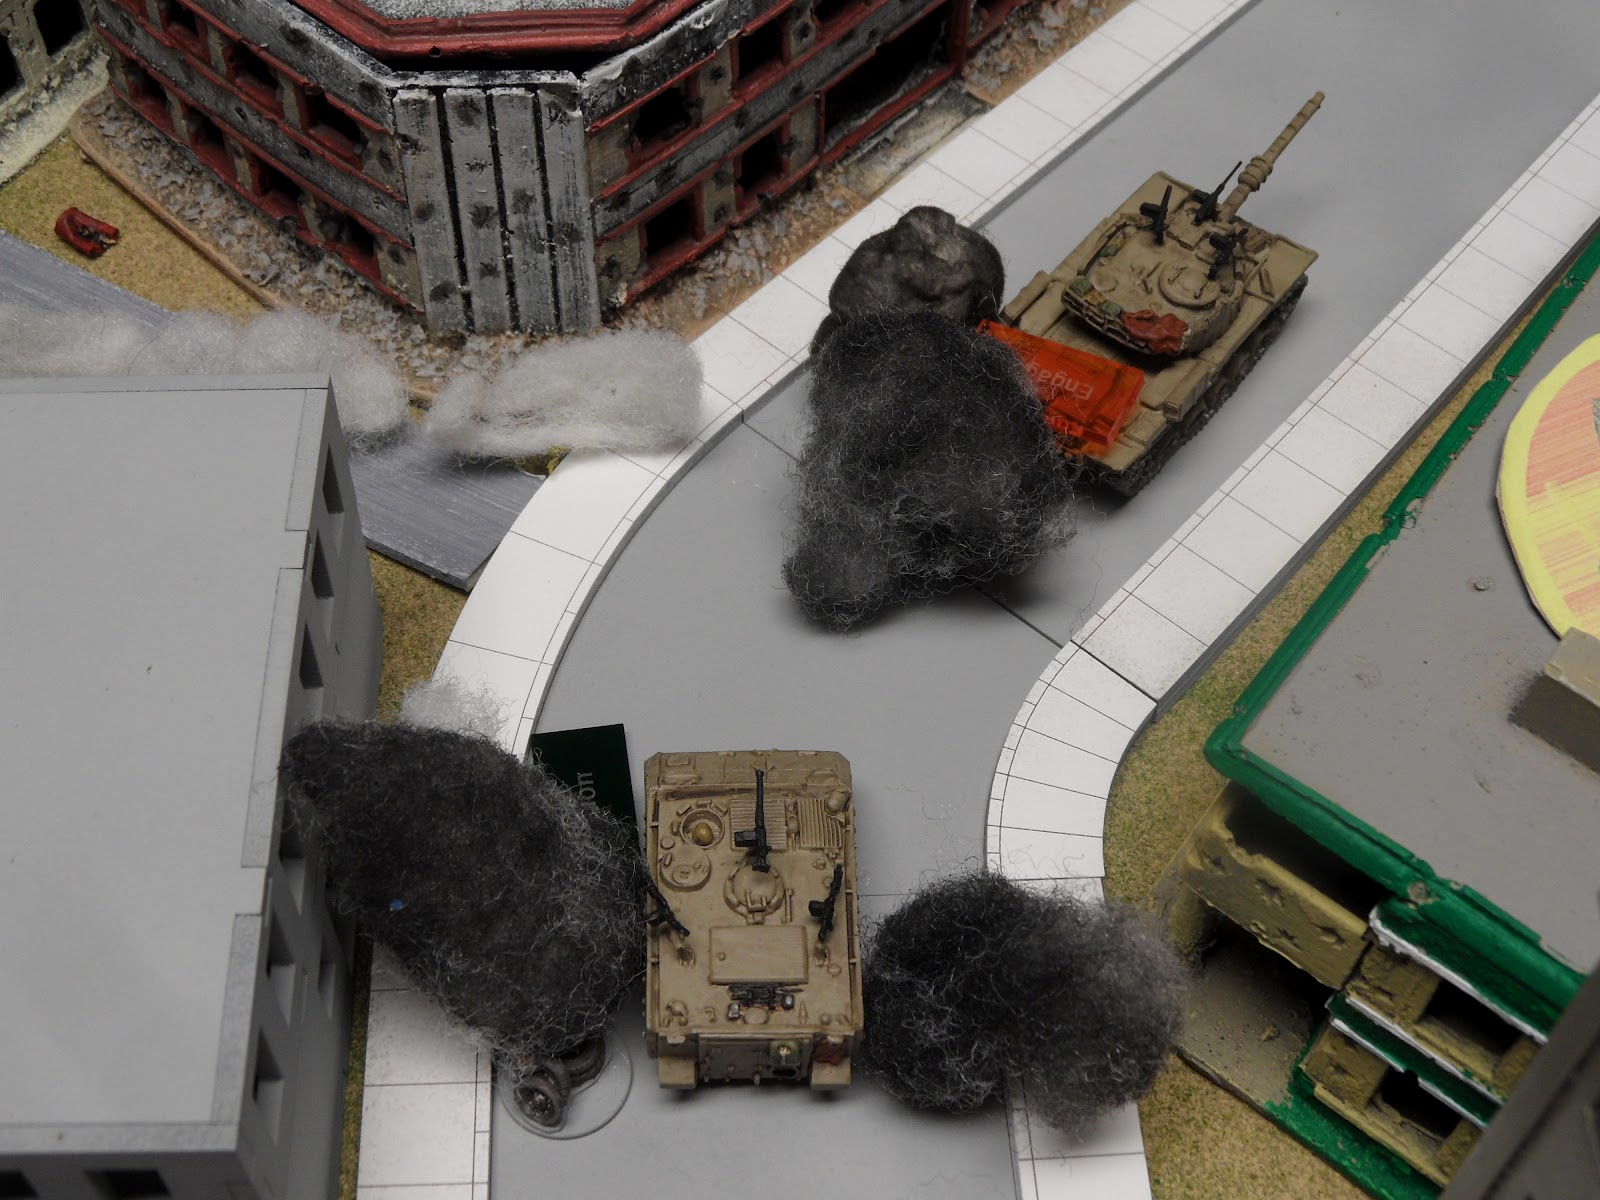
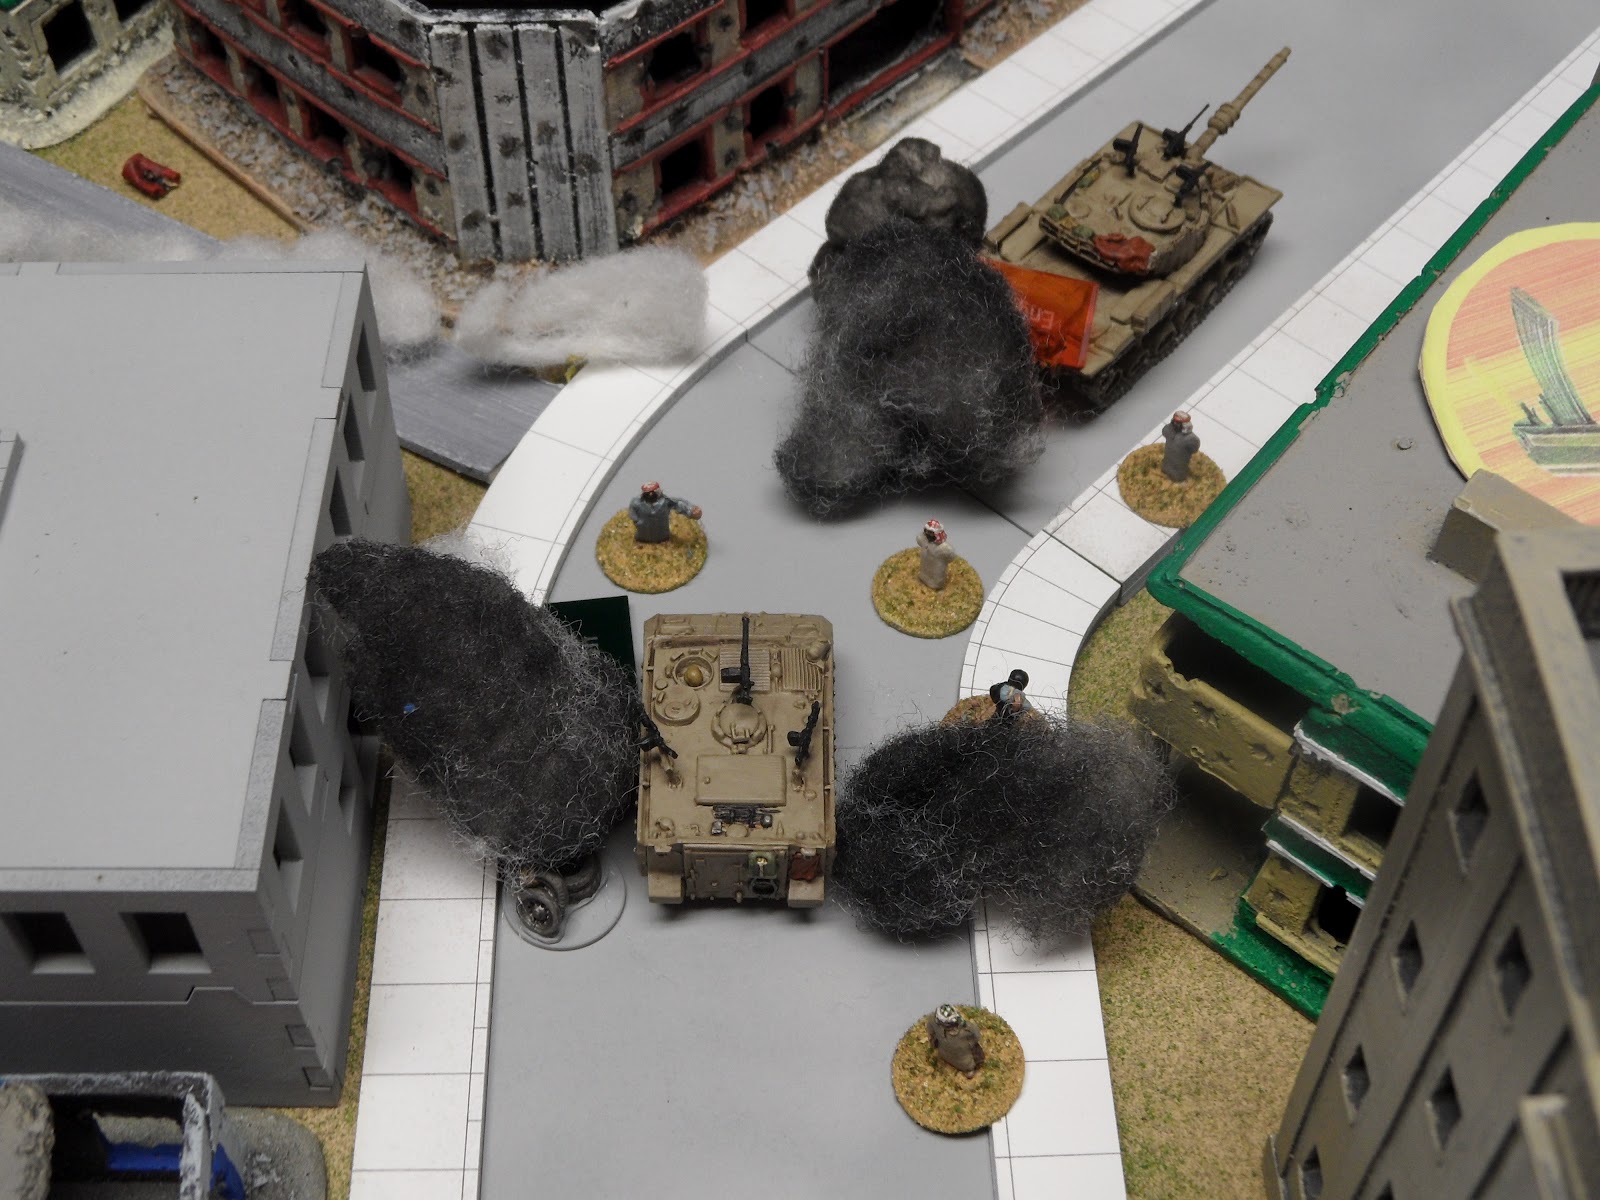
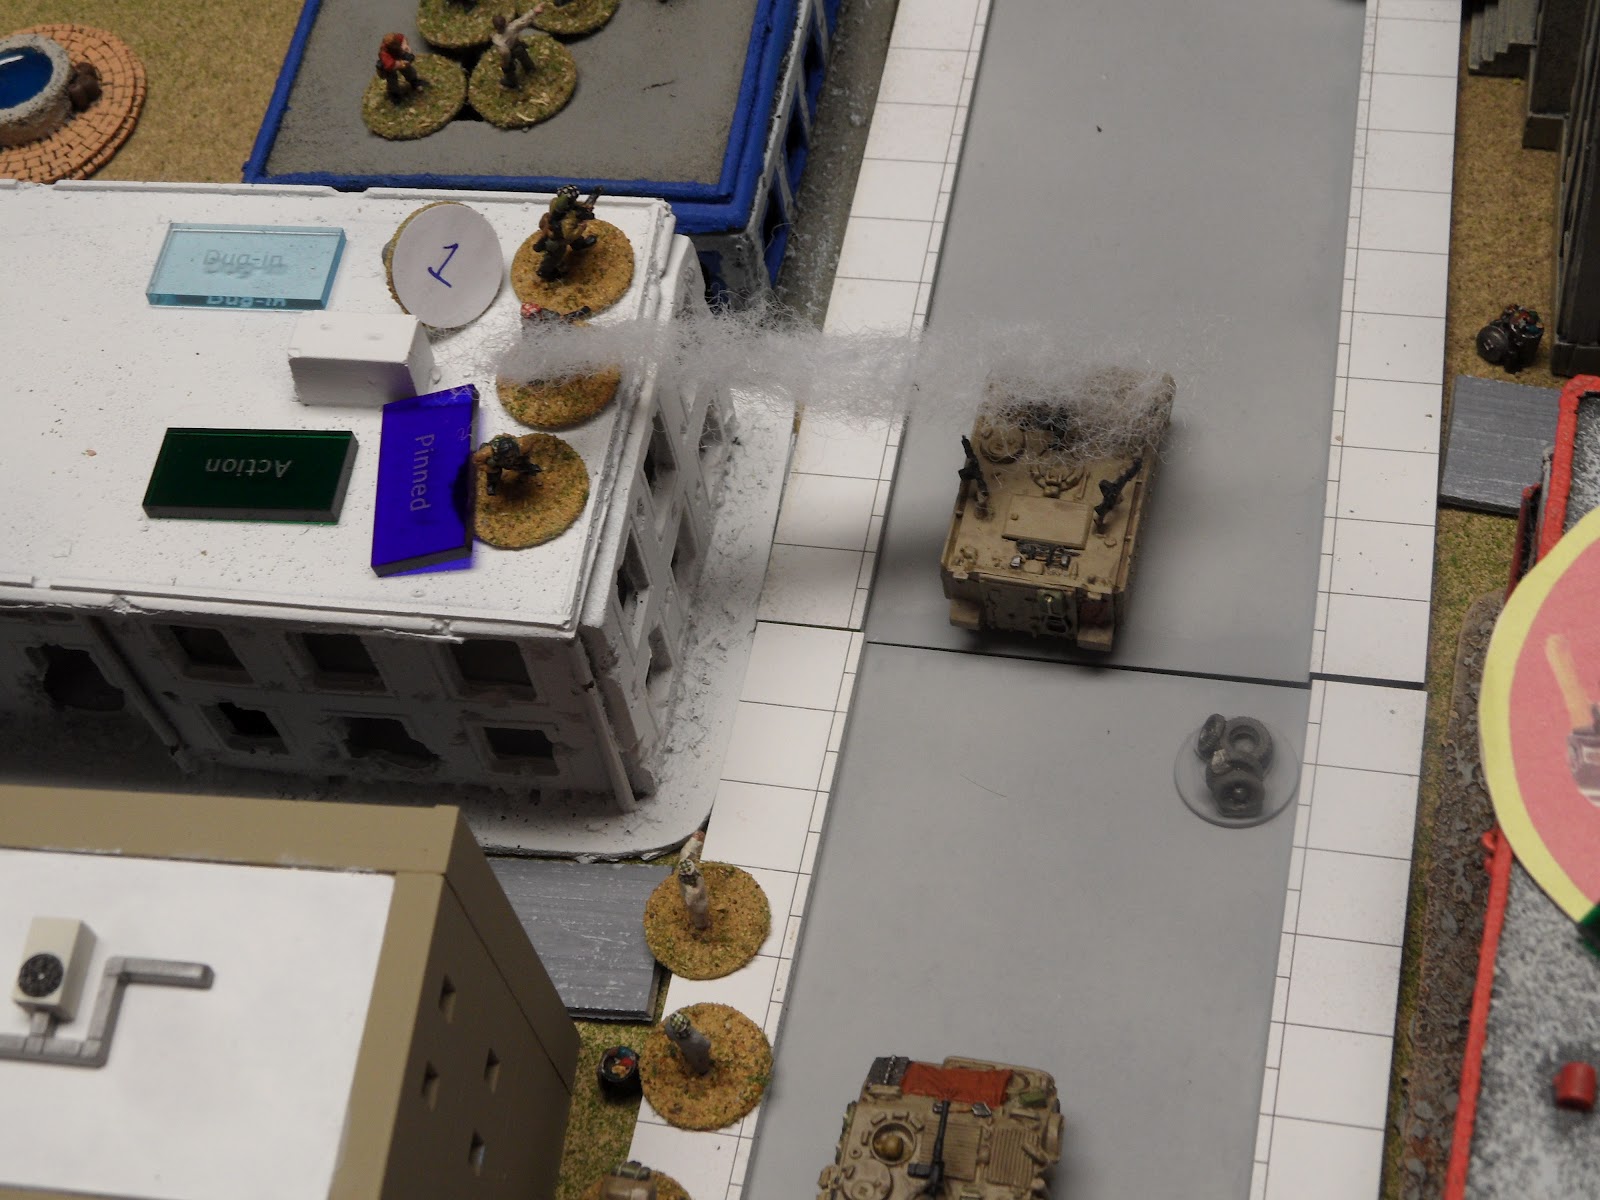
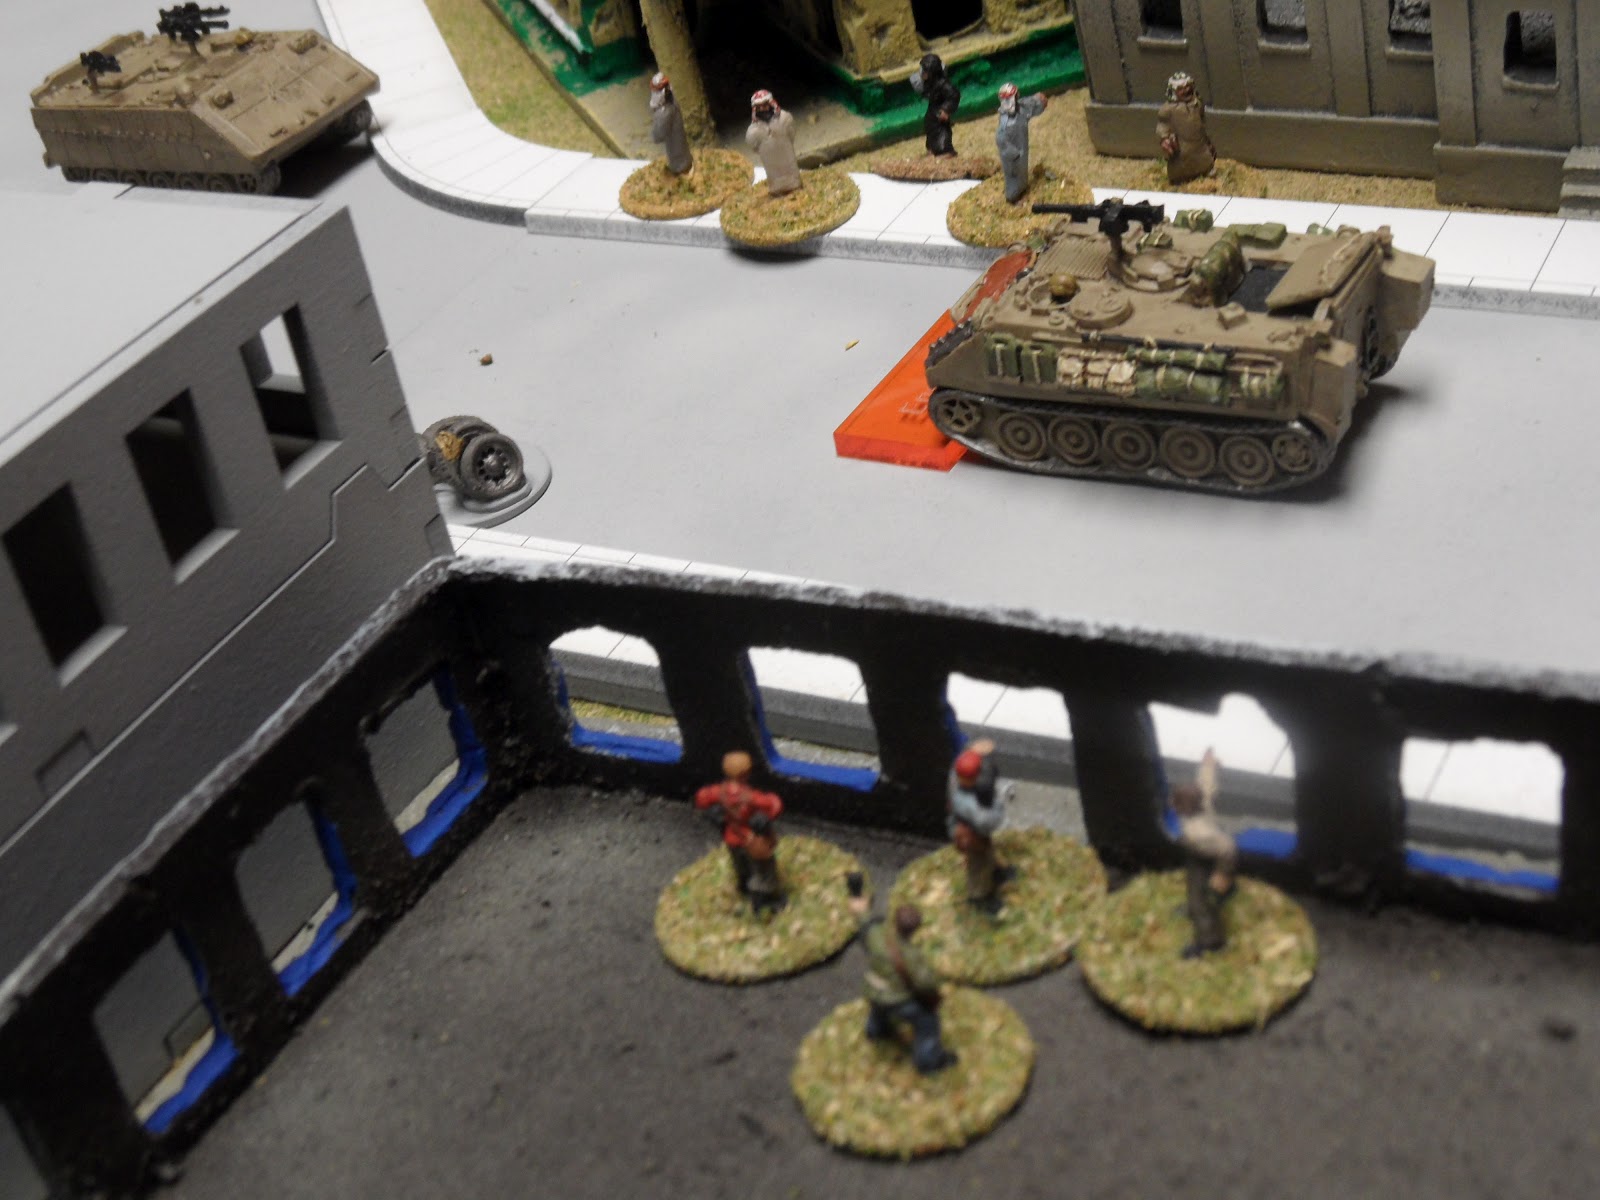
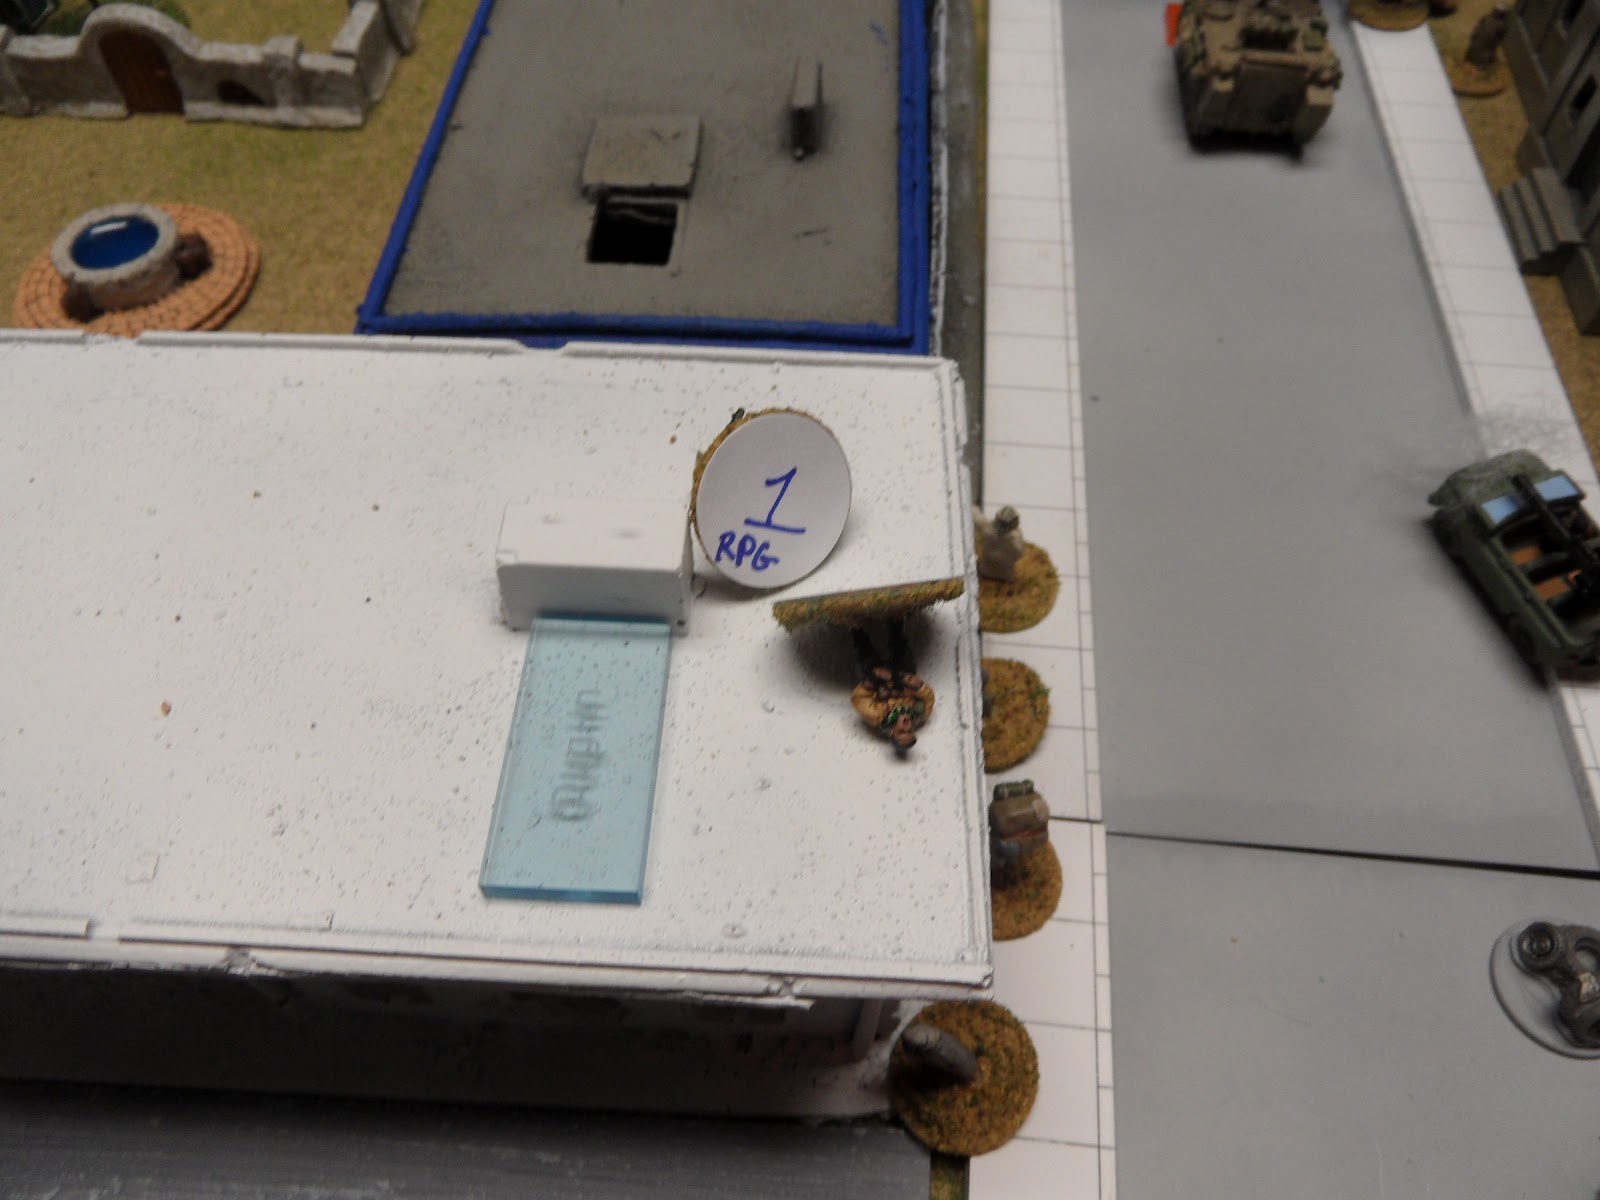
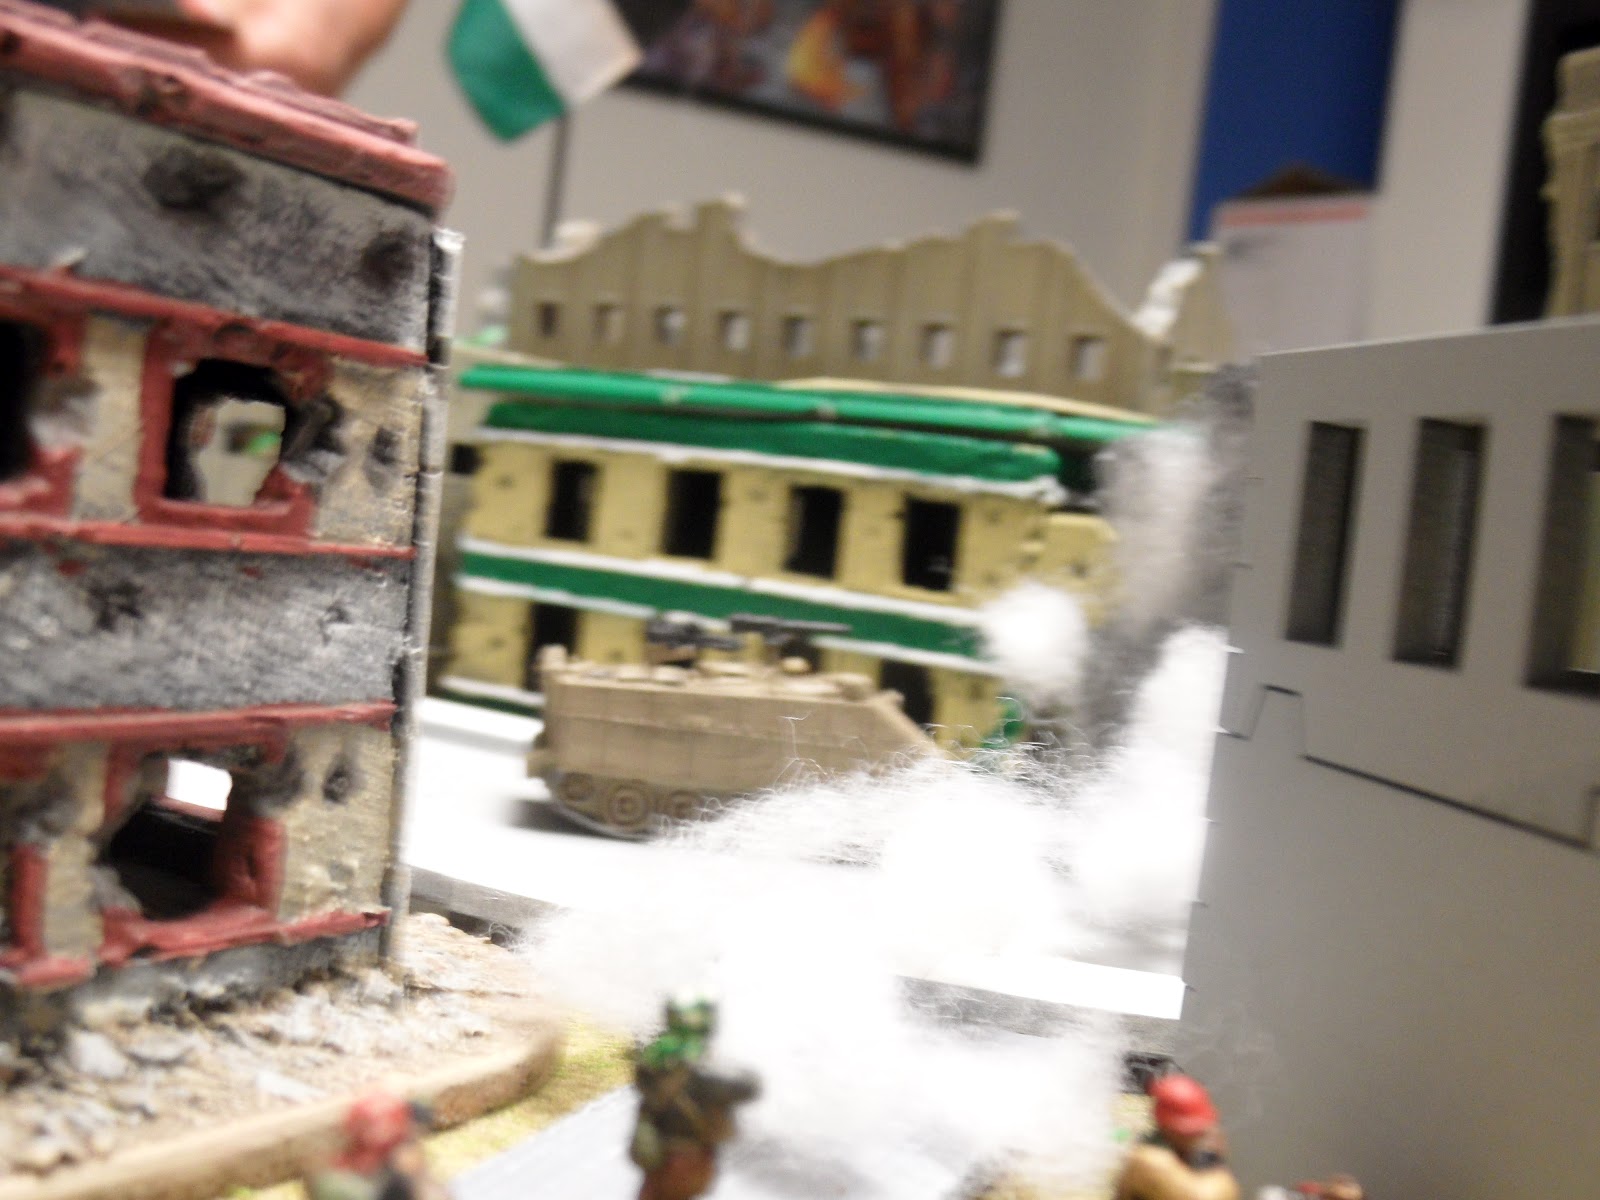
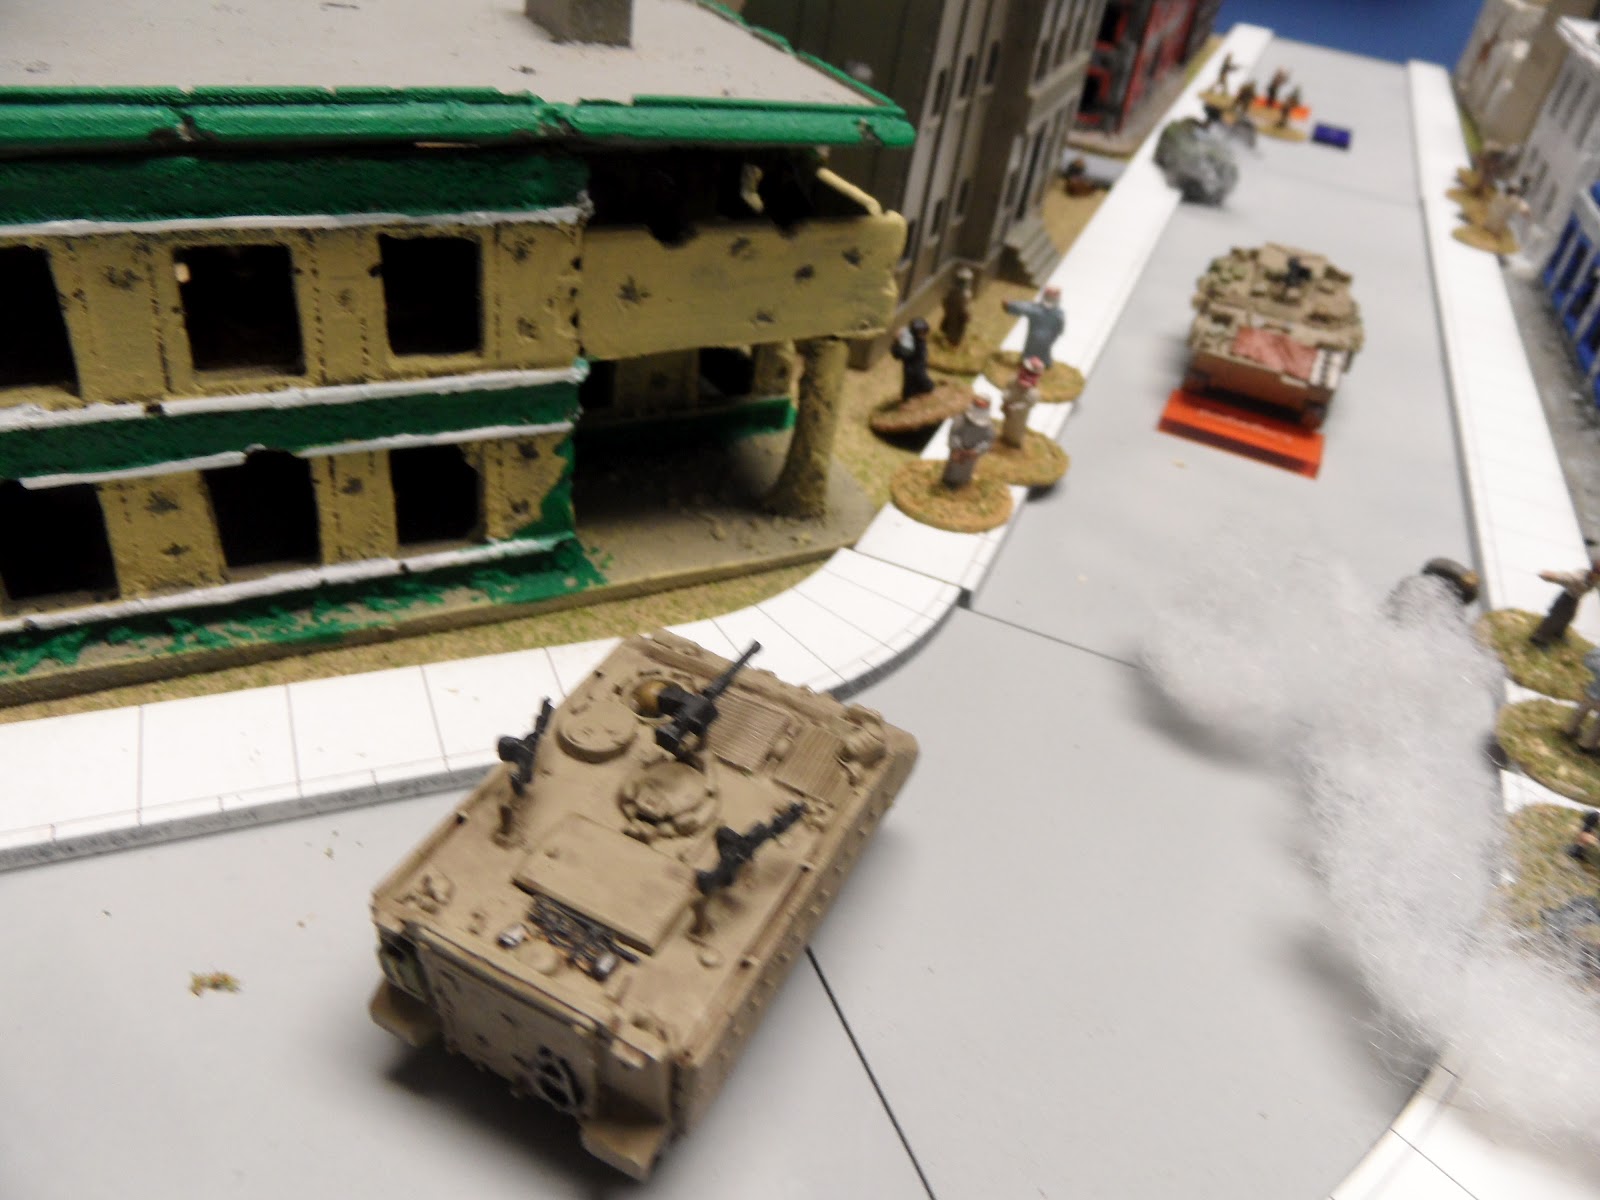
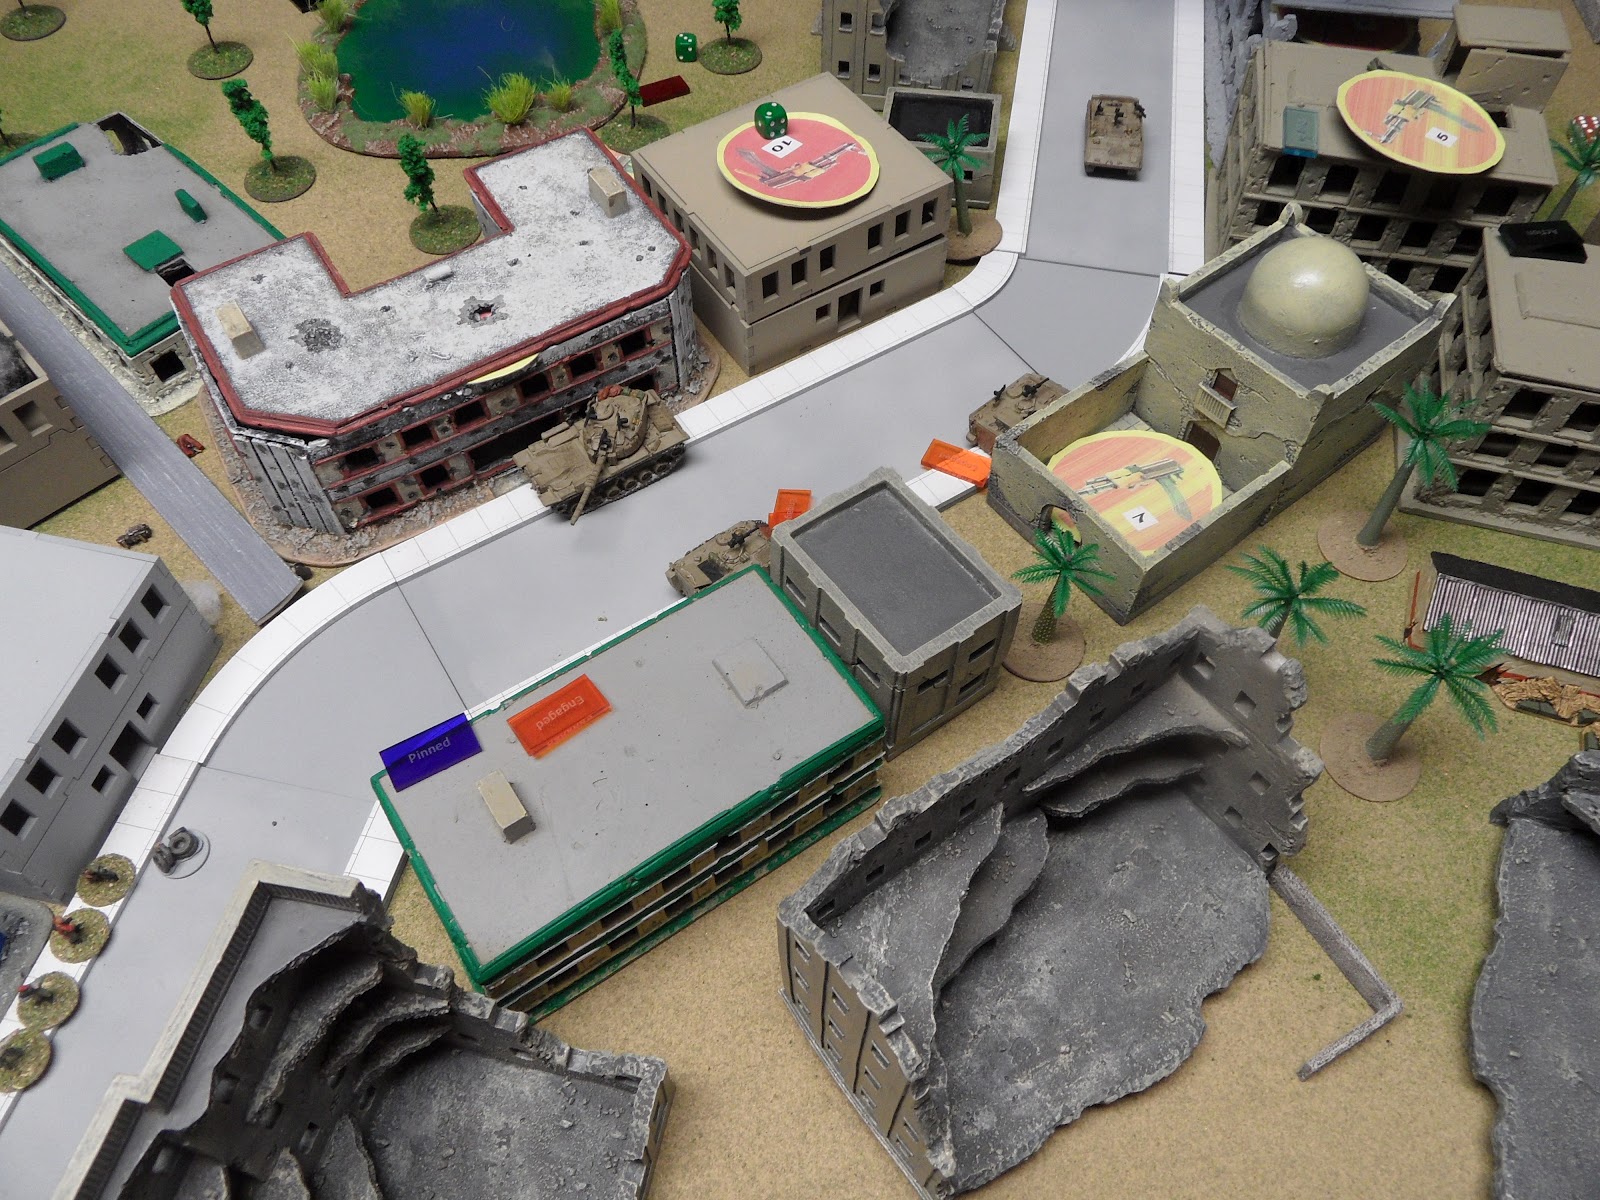
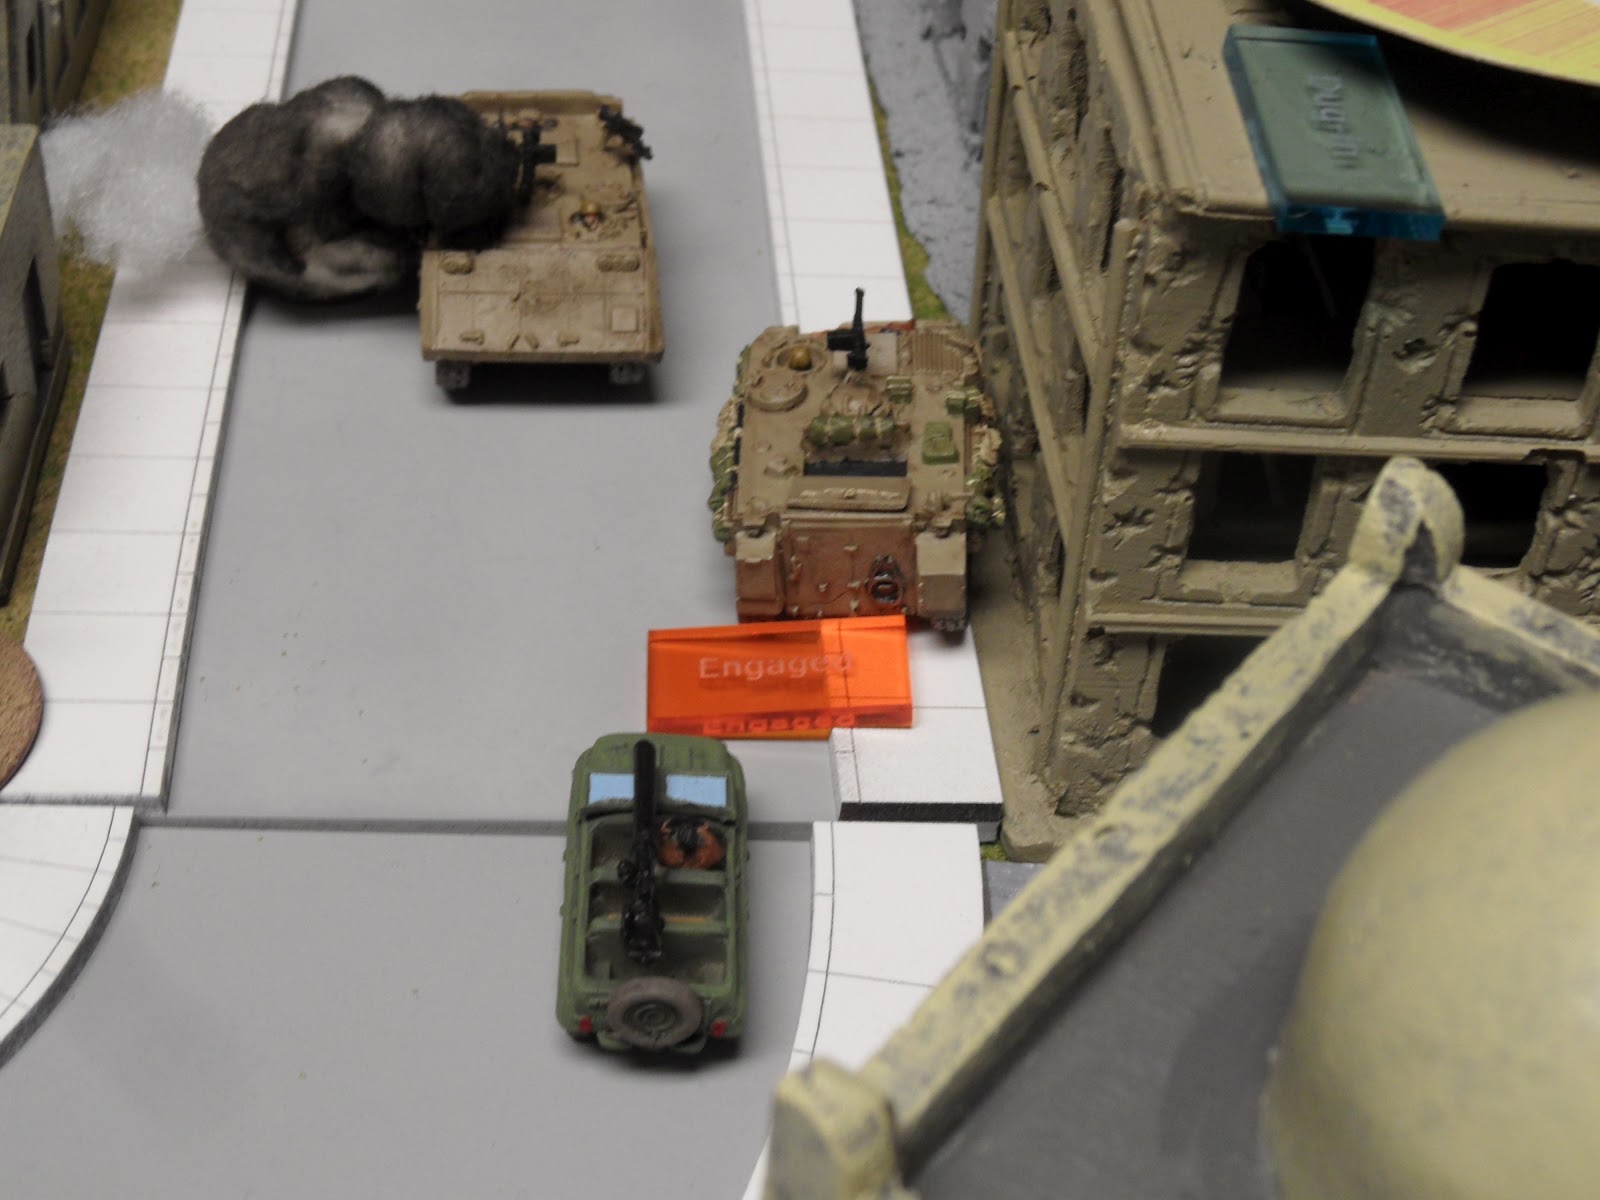
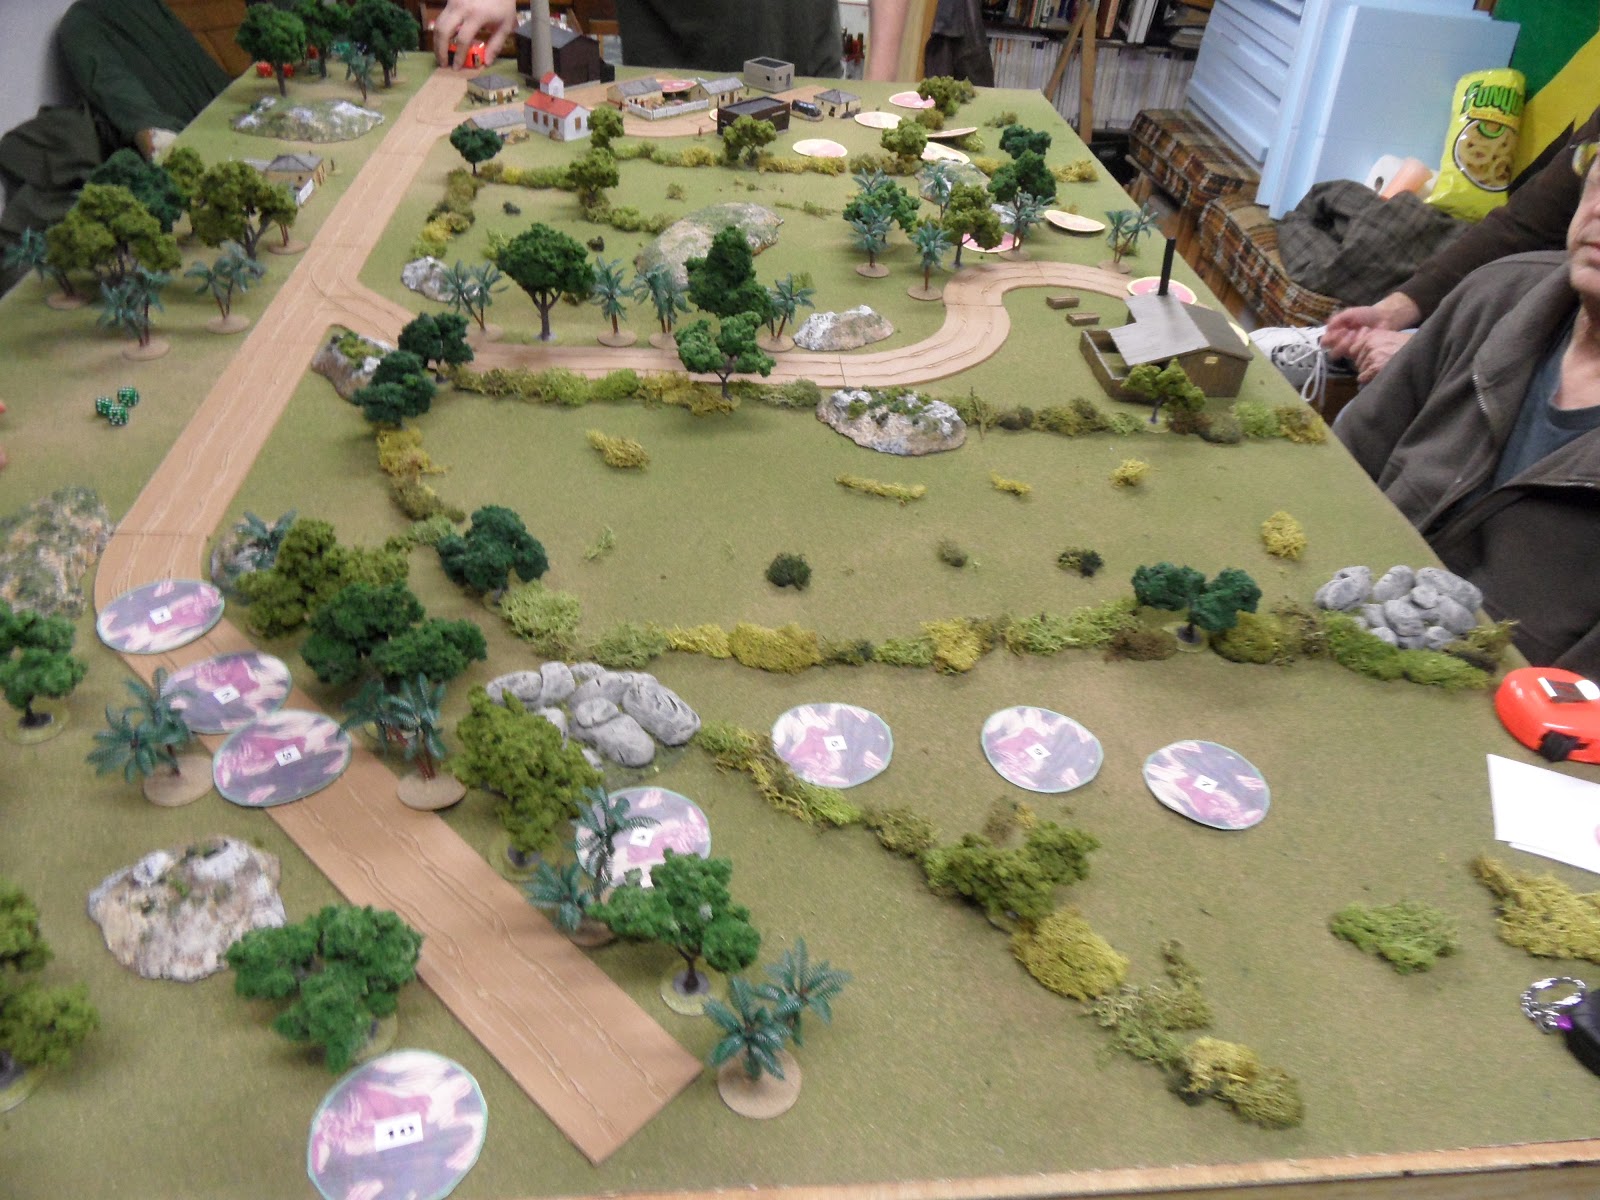
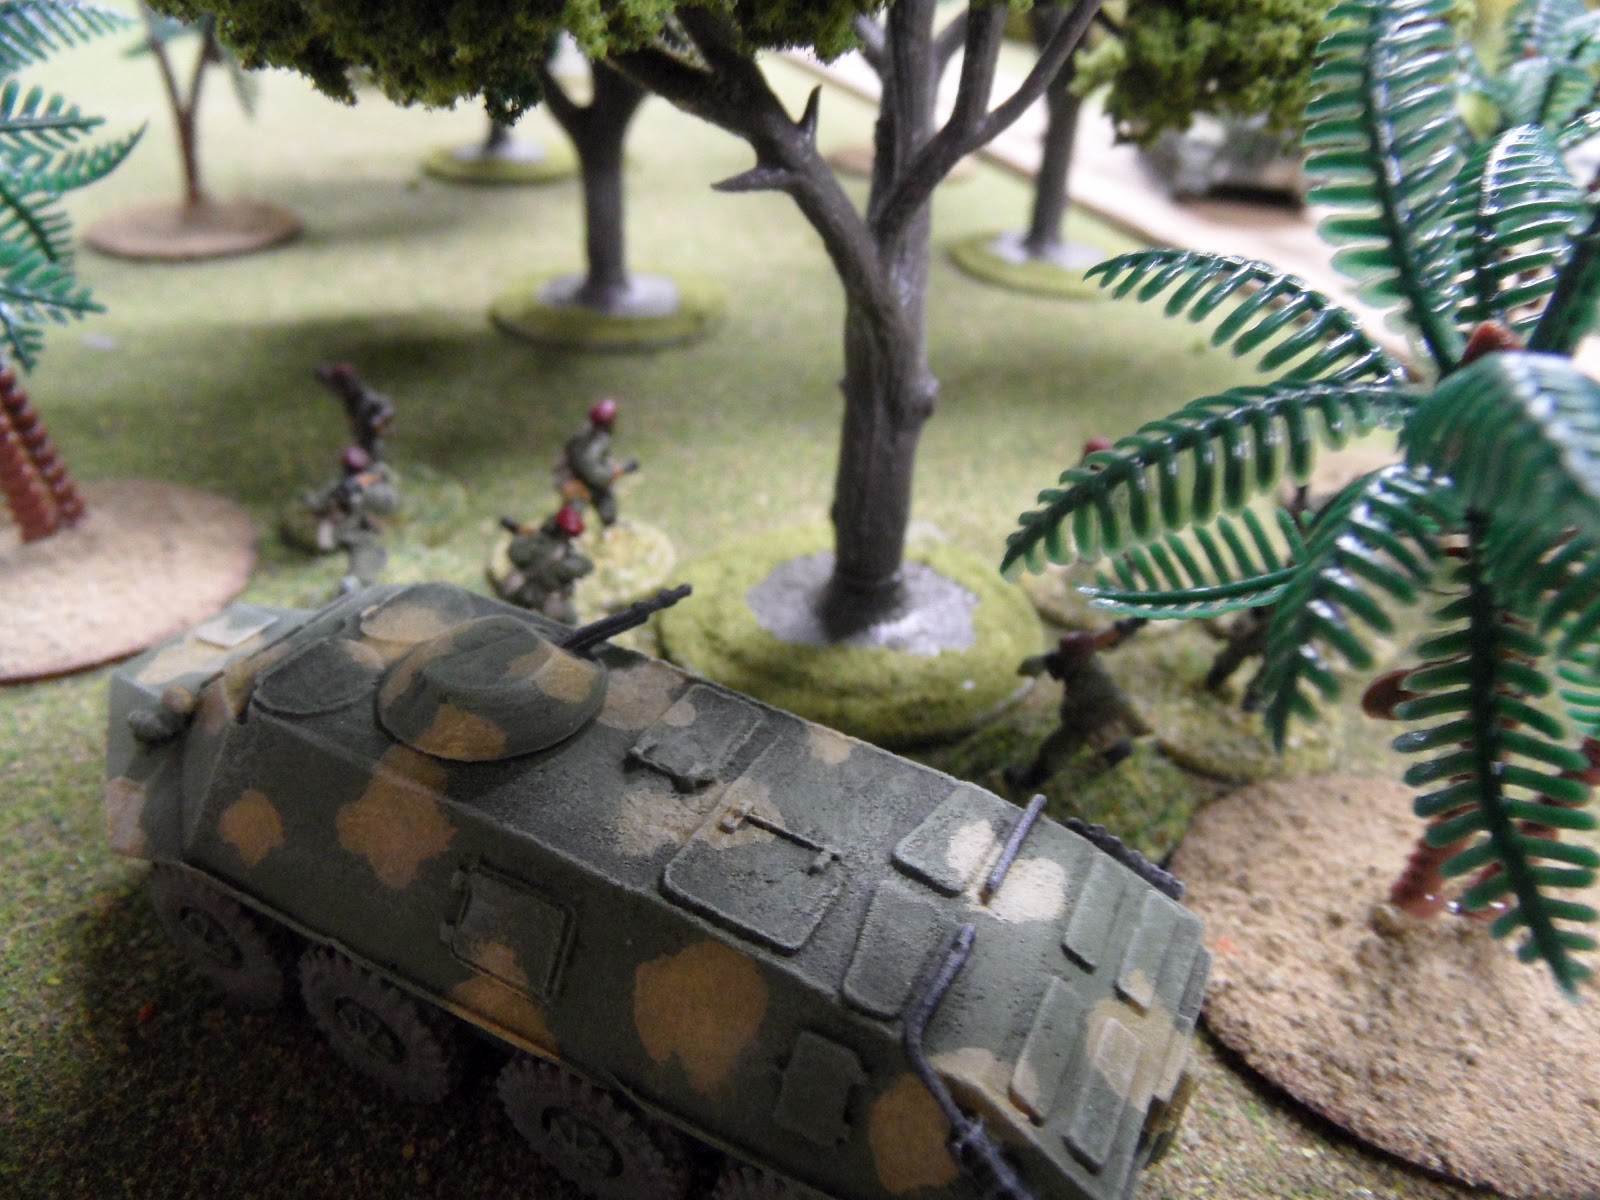
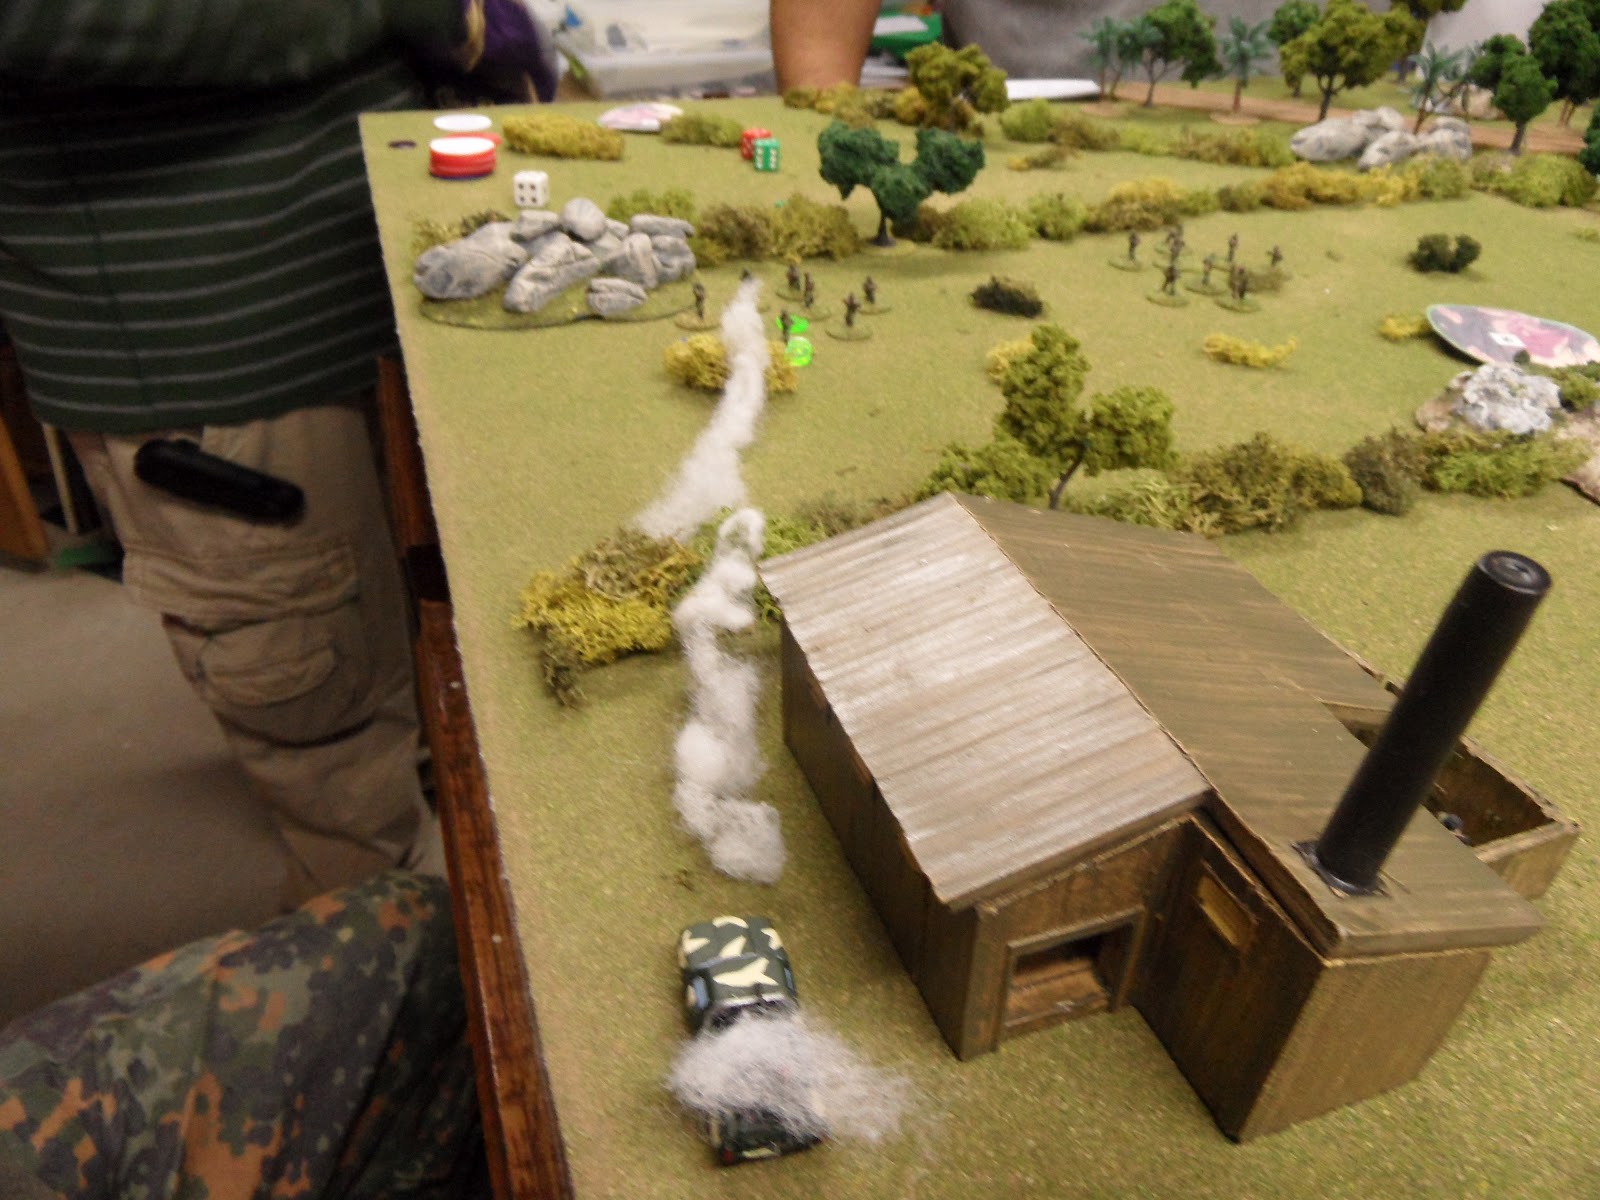
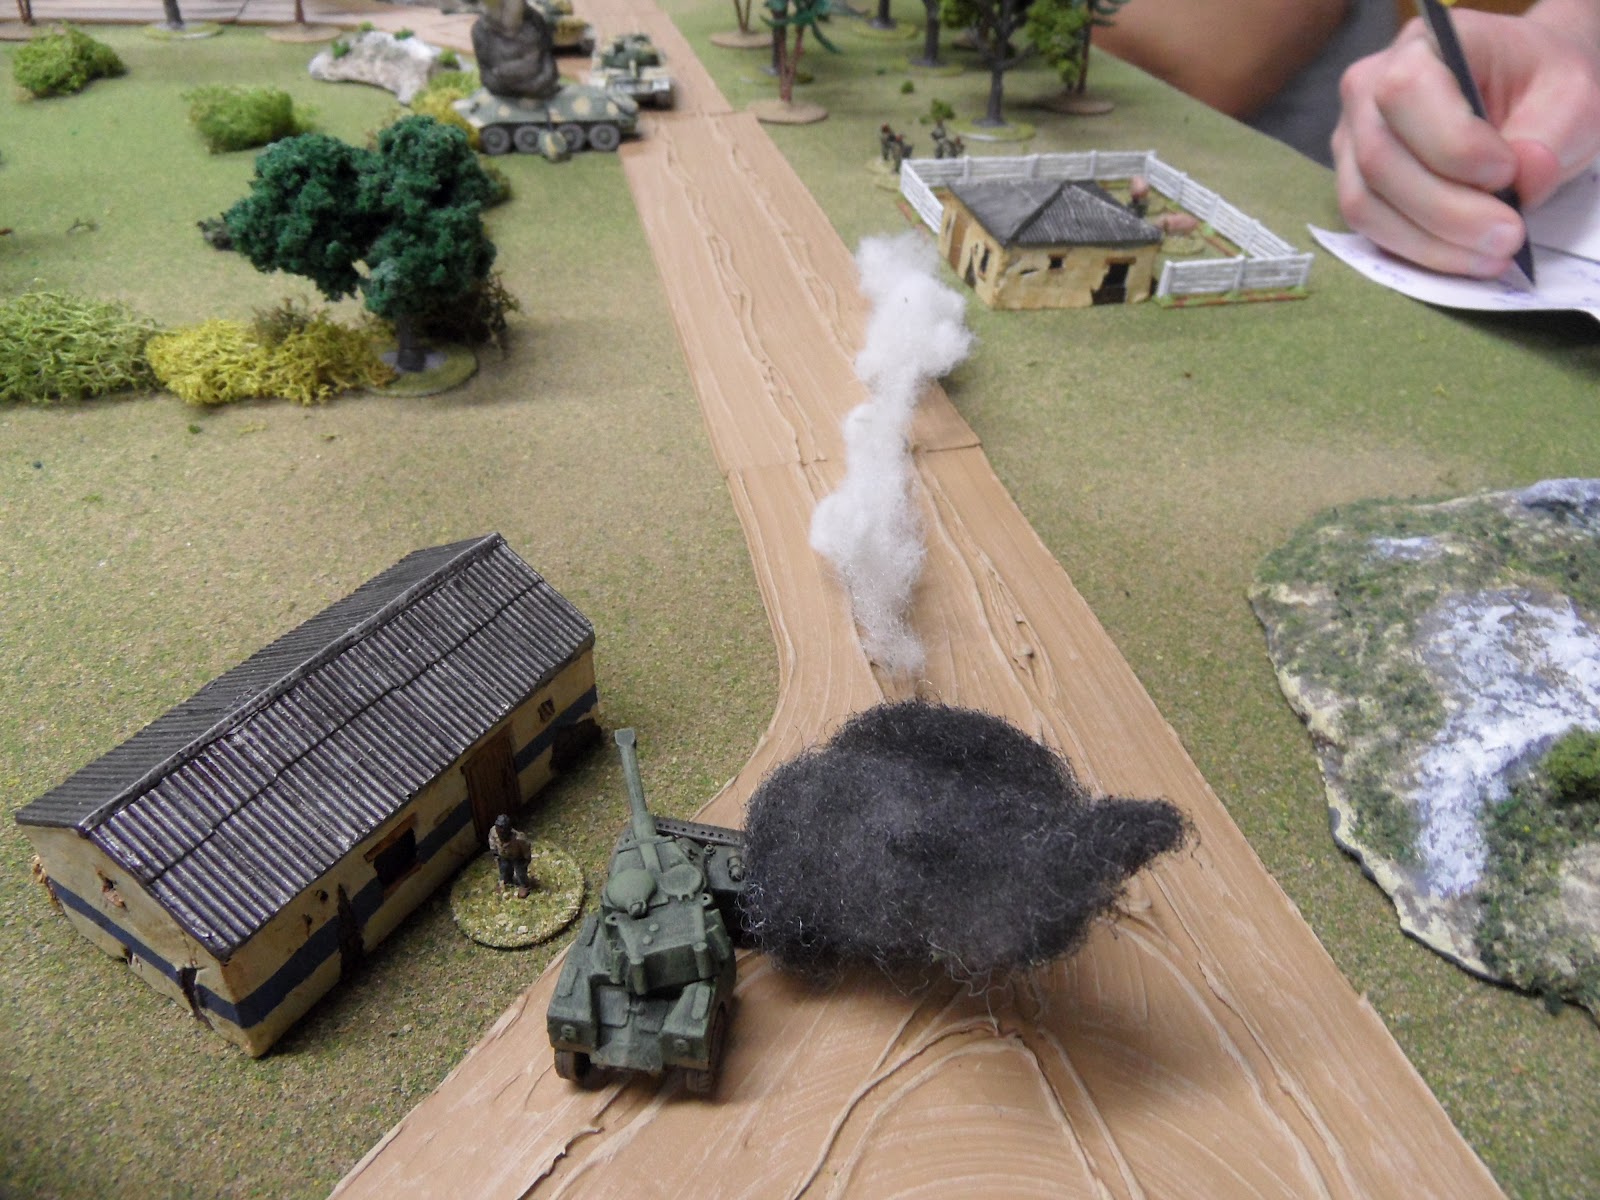
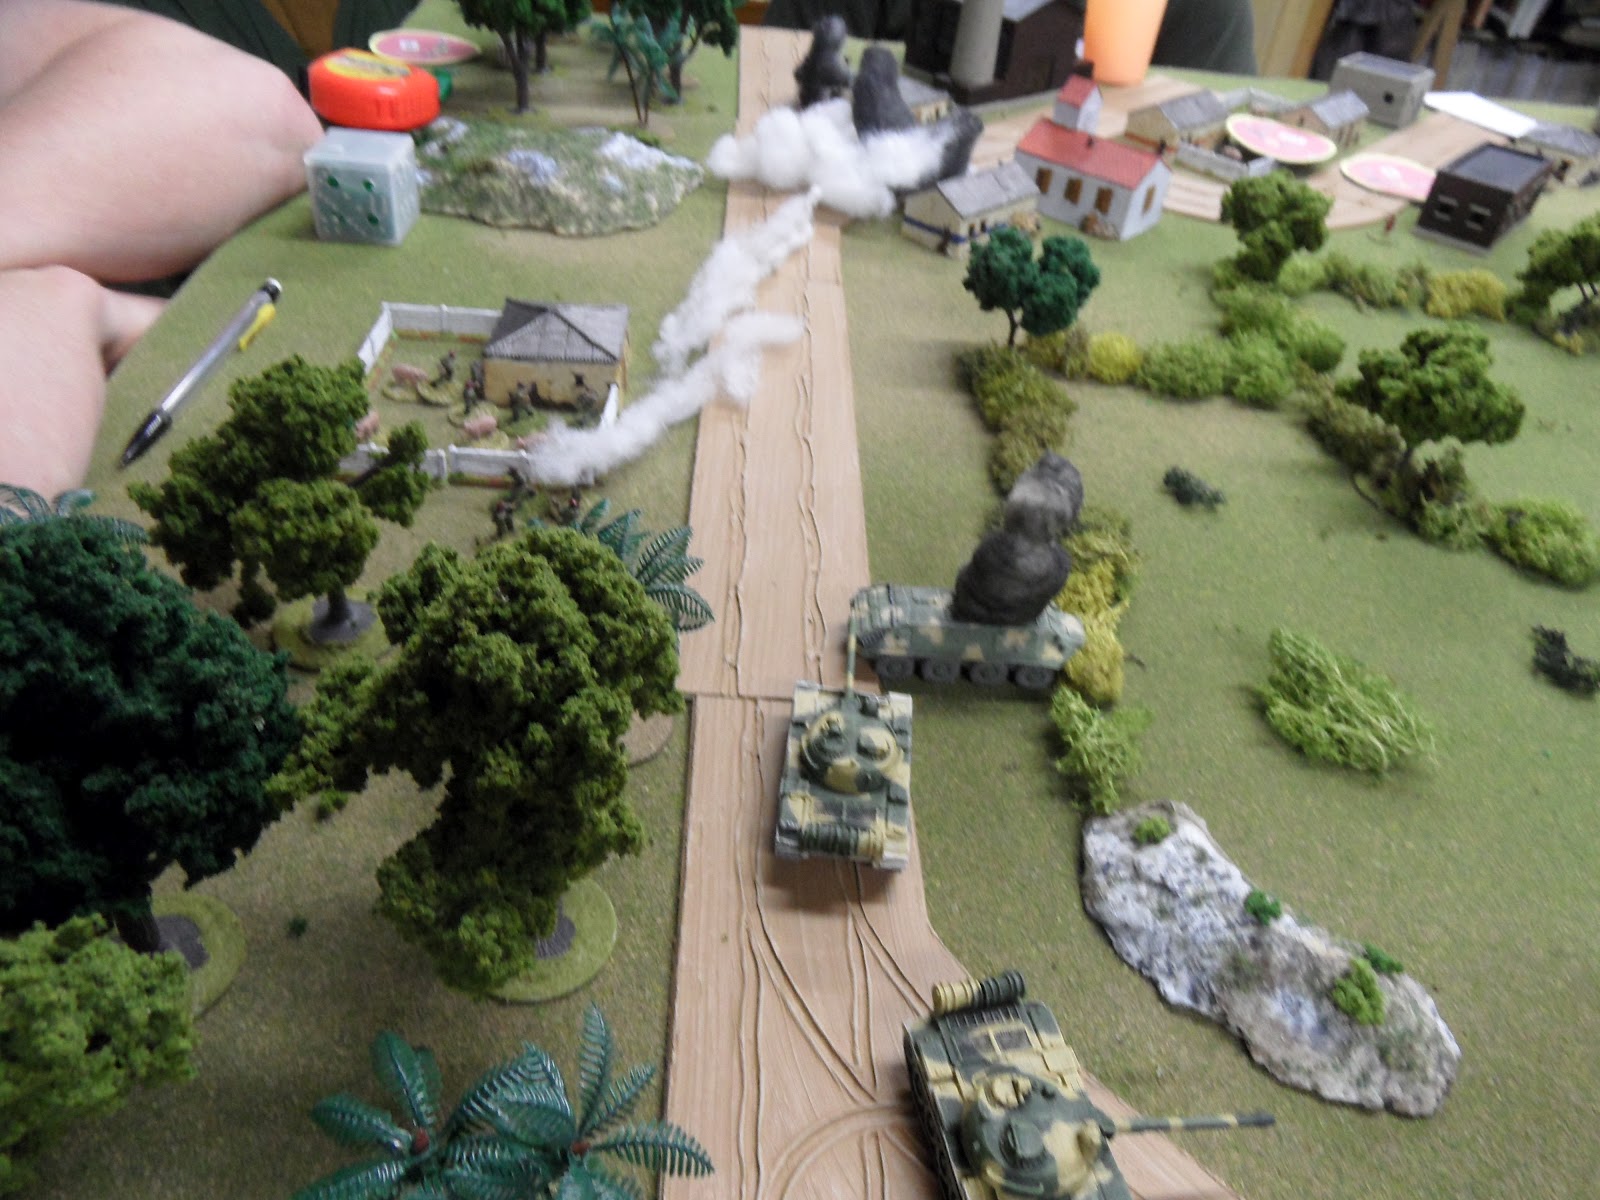
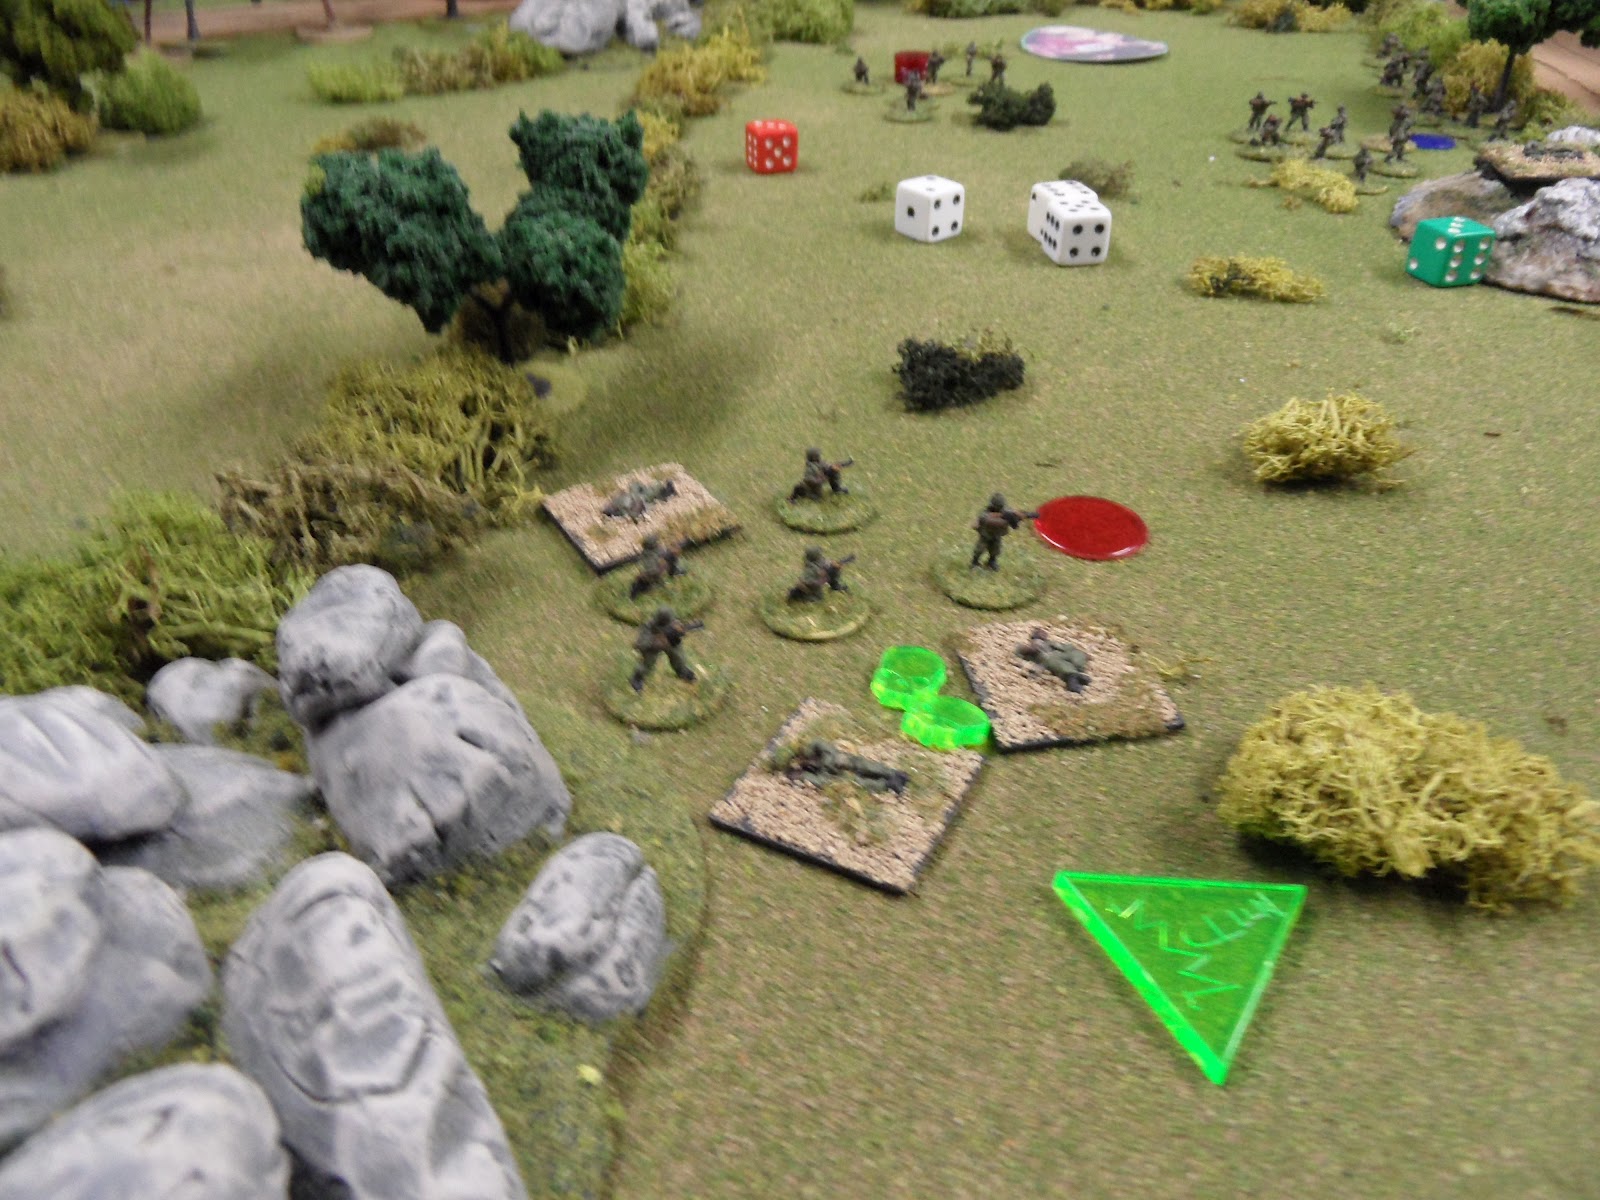
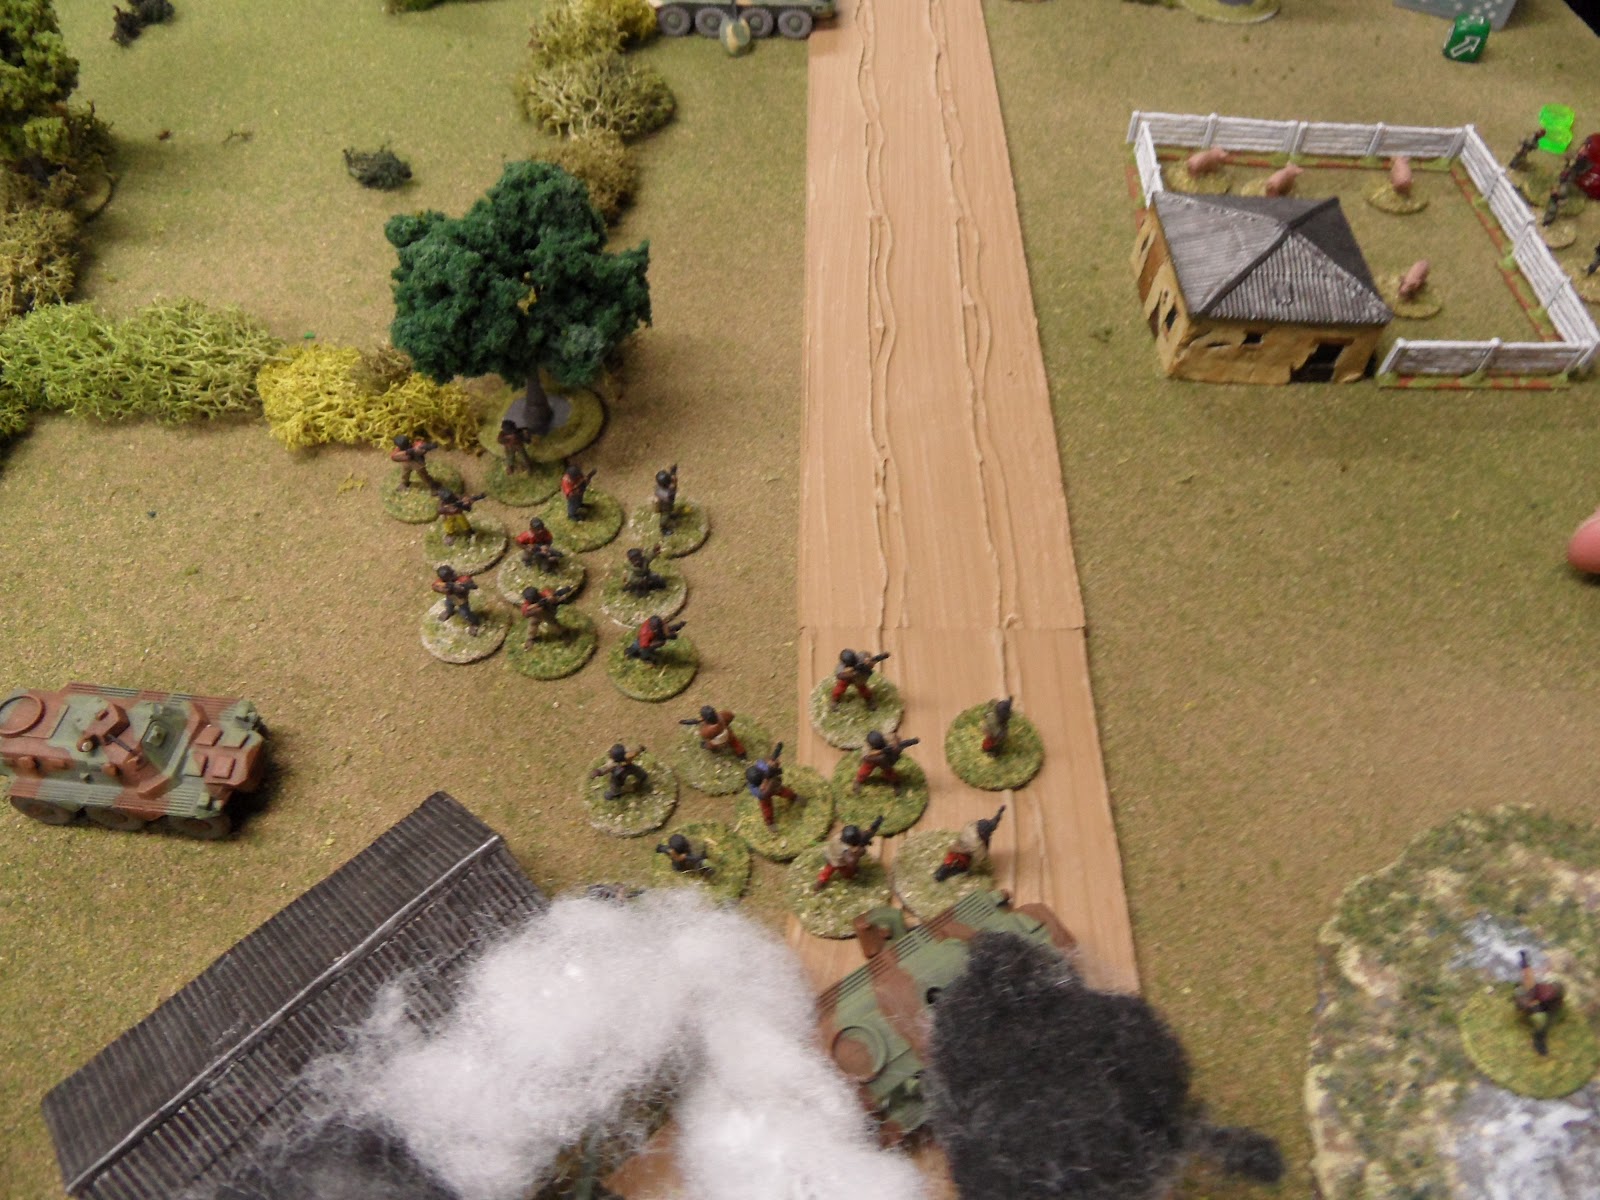
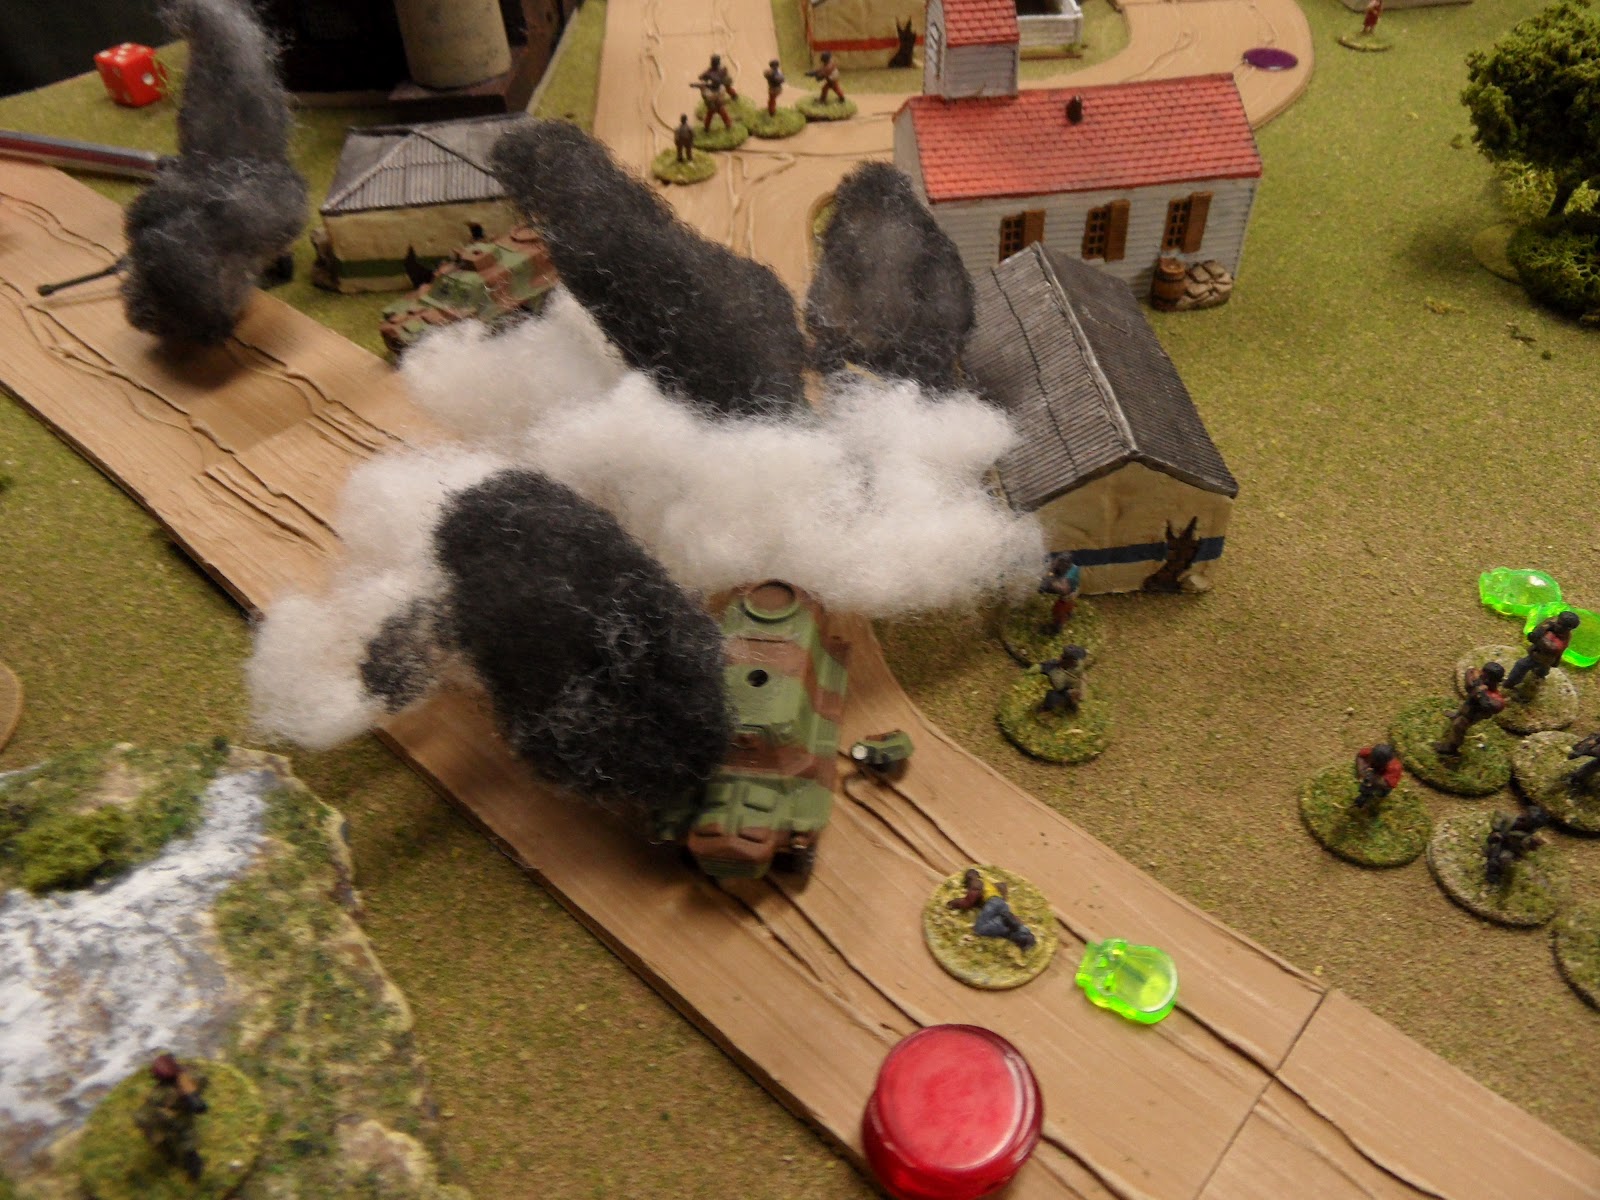
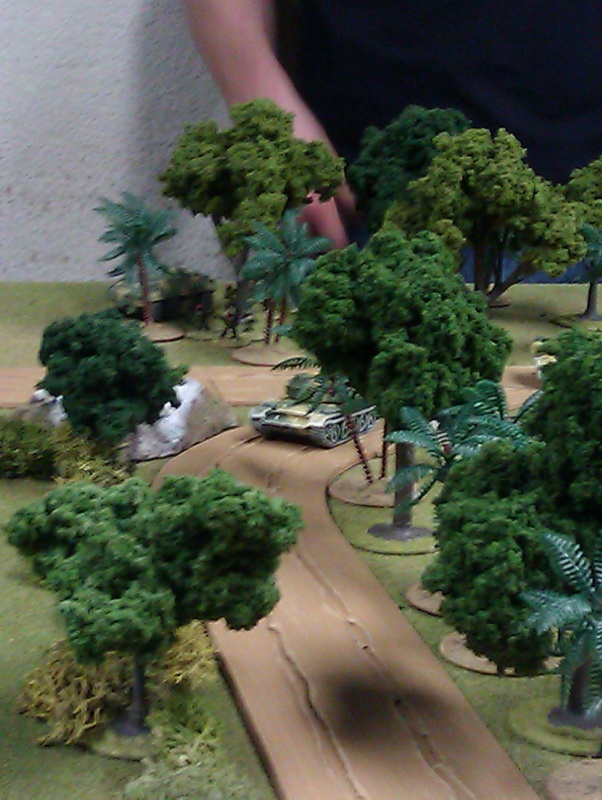
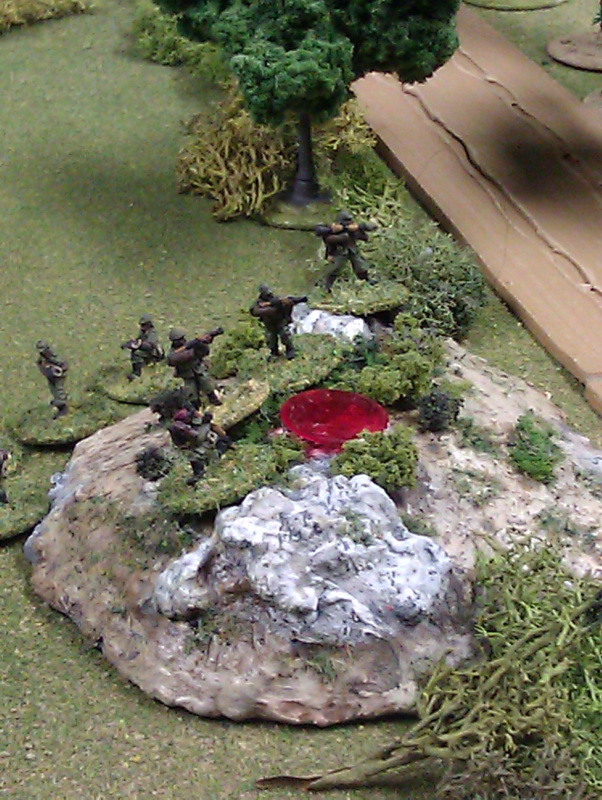
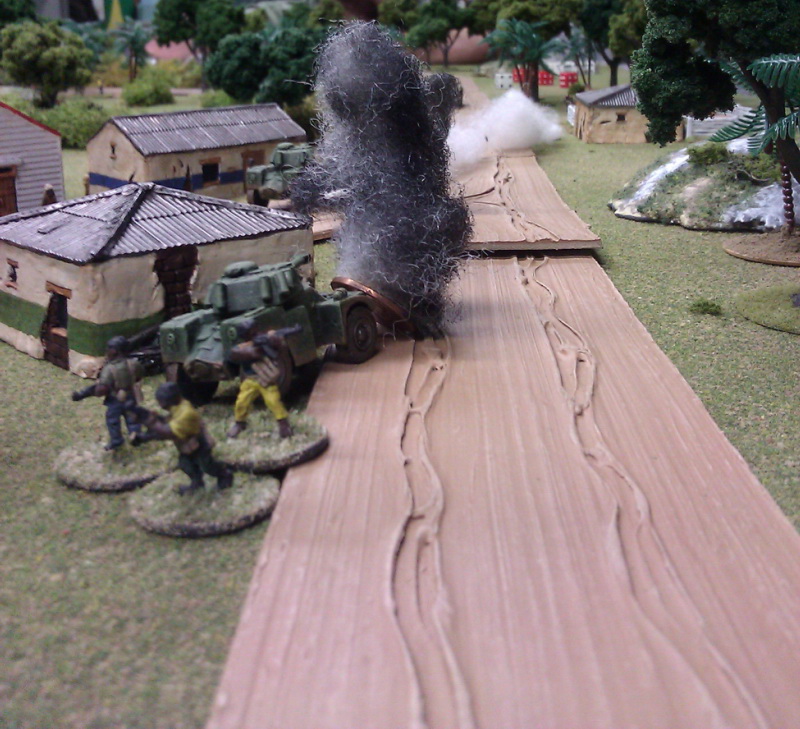
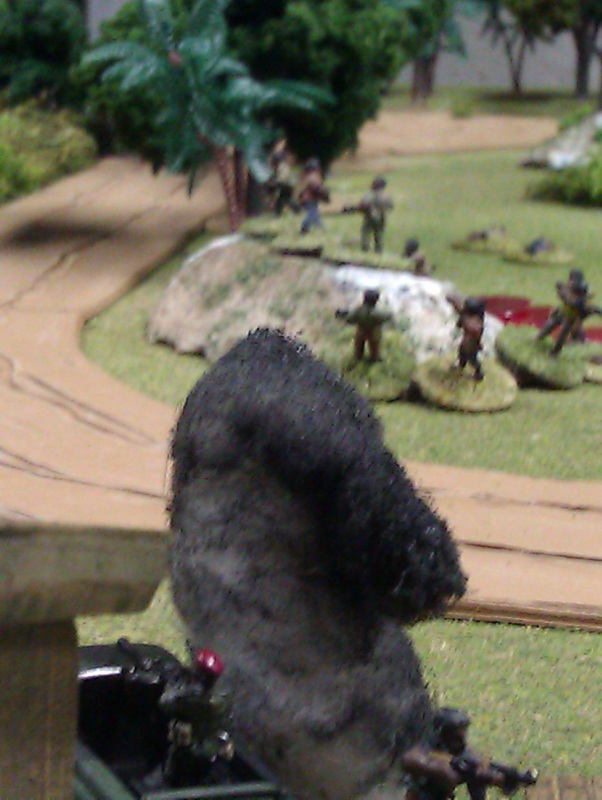
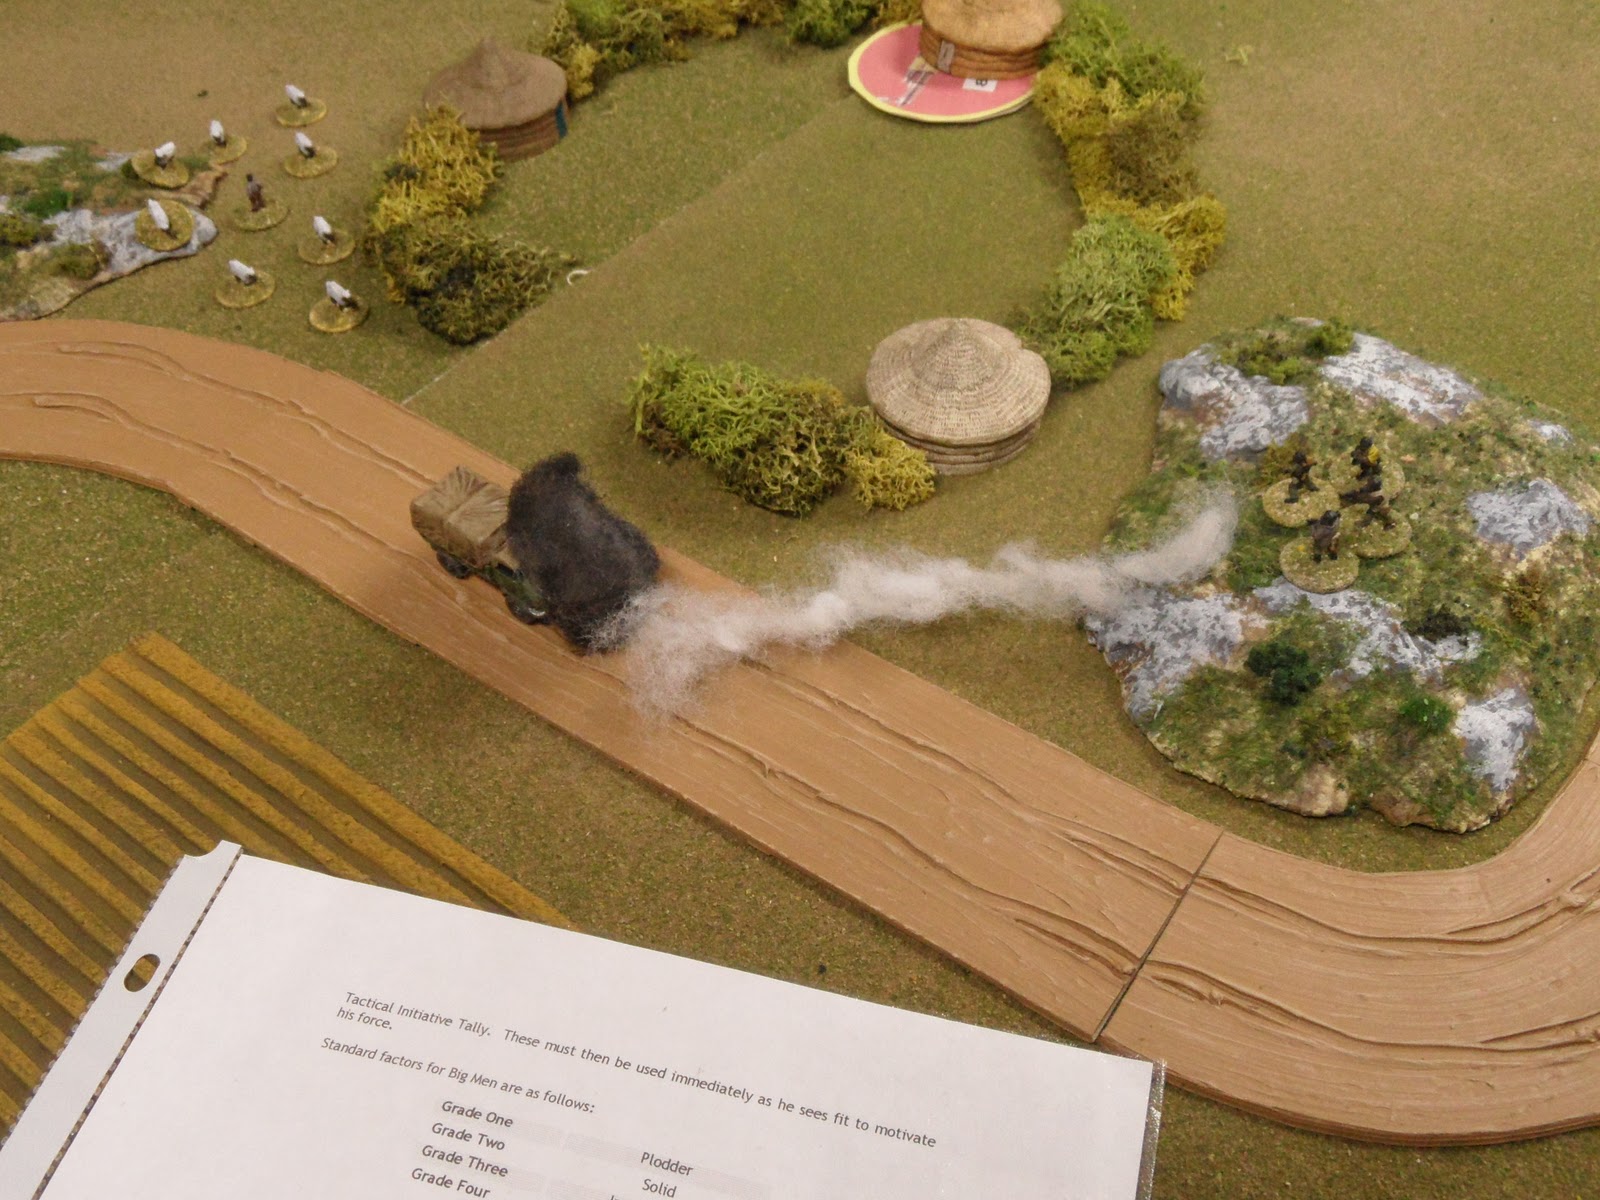
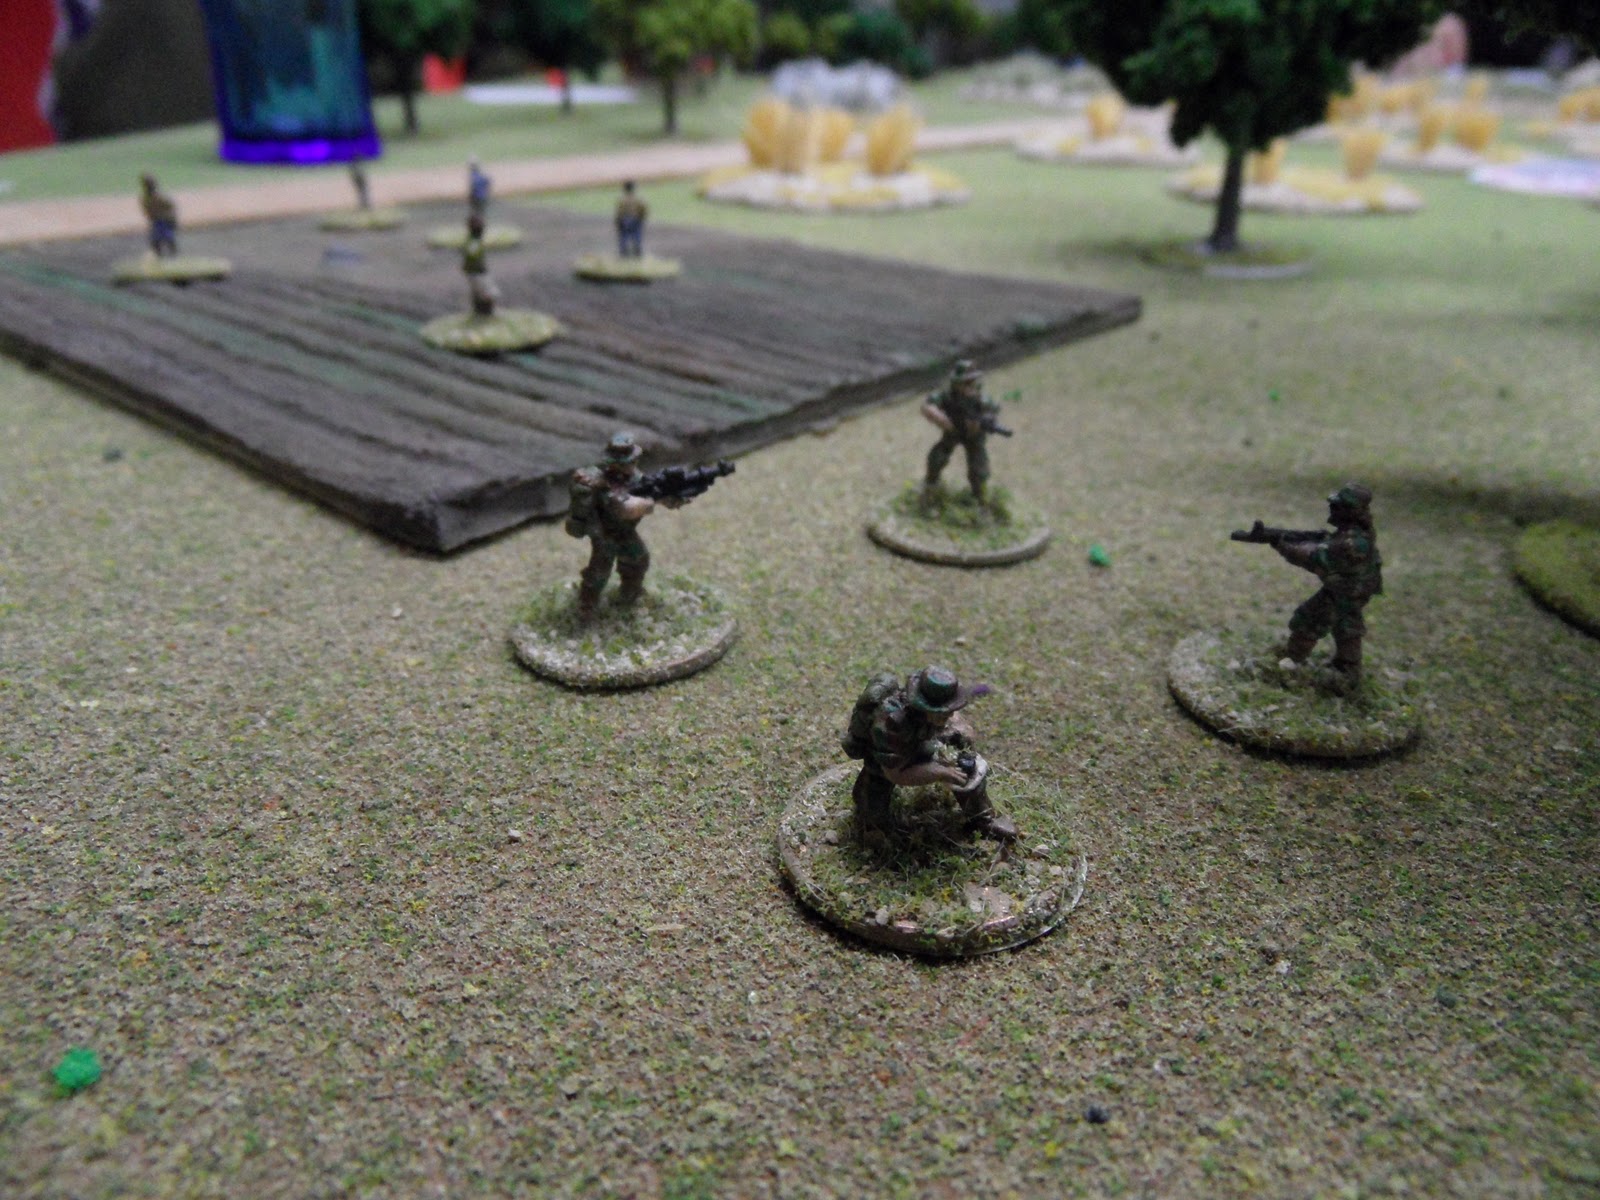
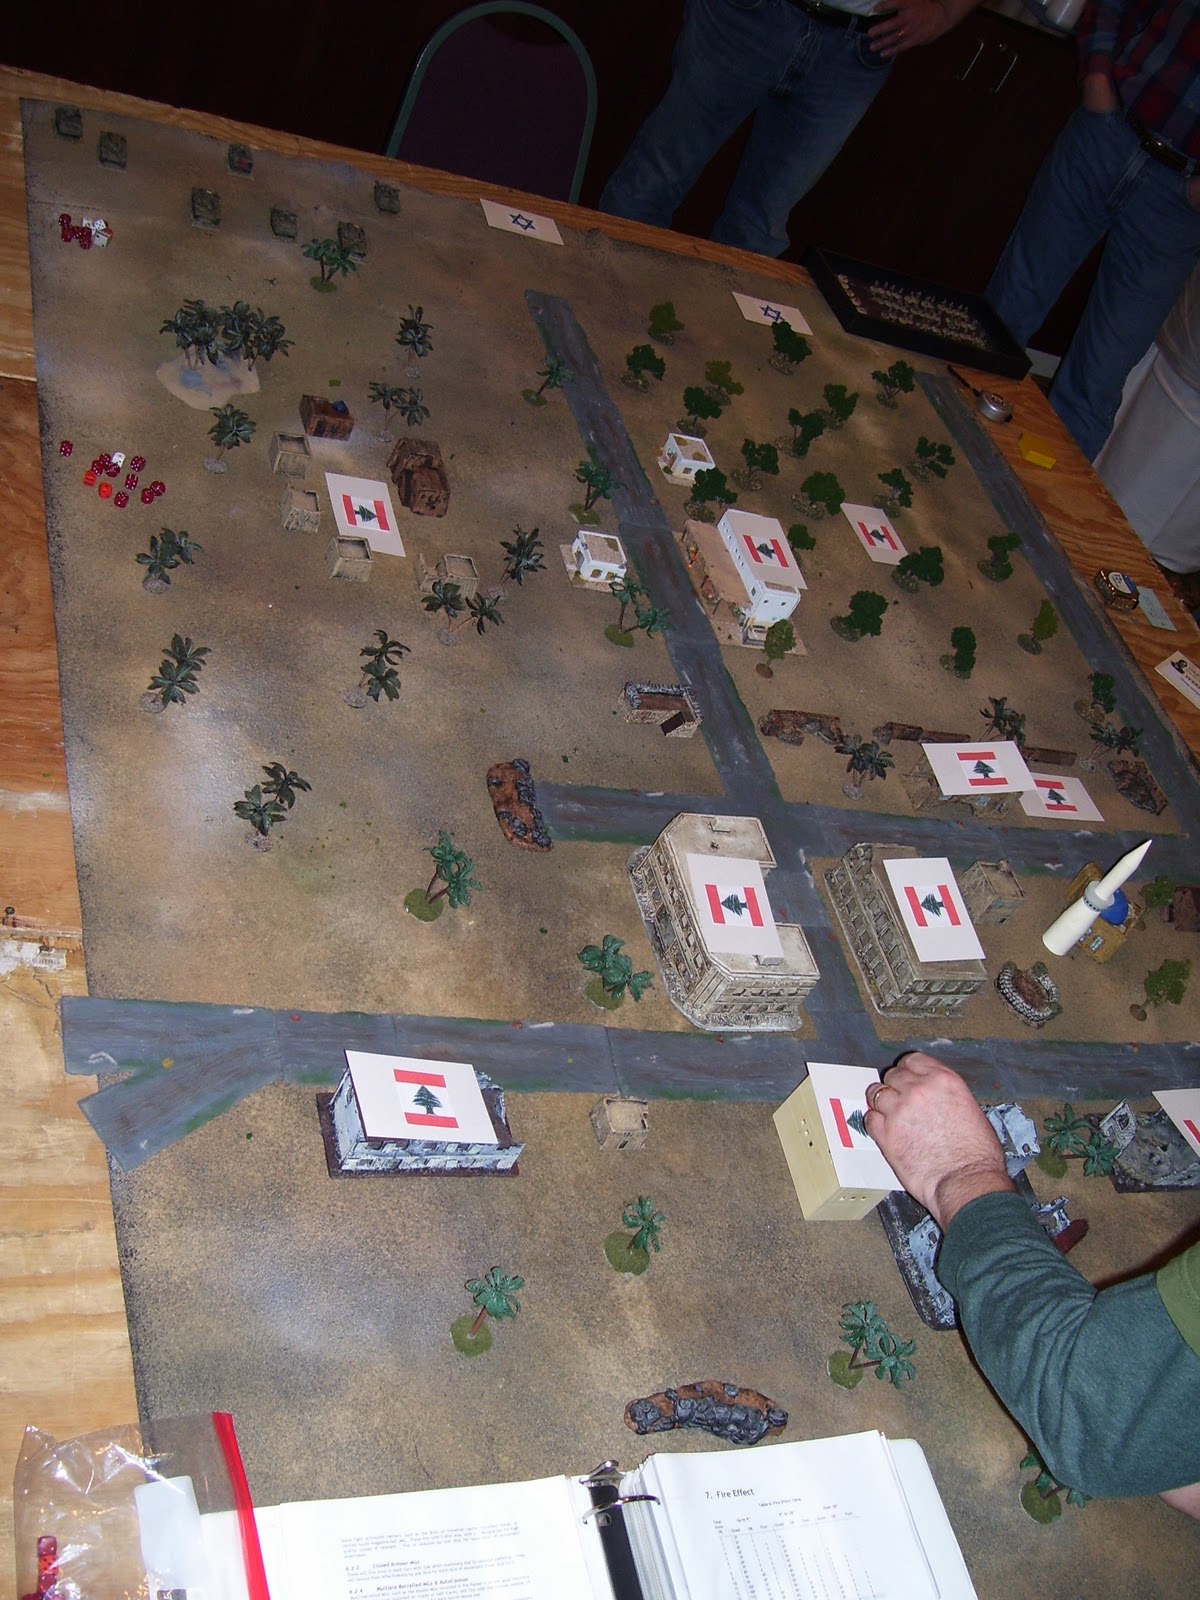
As the Vietnamese infantry moved in through the close country supported by occasional mortar fire and smoke, US forces rushed forward to support their forward teams guarding the perimeter wire and the scene soon erupted to the sound of rapid machine-gun fire, interlaced with criss-crossing tracer and RPG rounds, as both sides let rip.

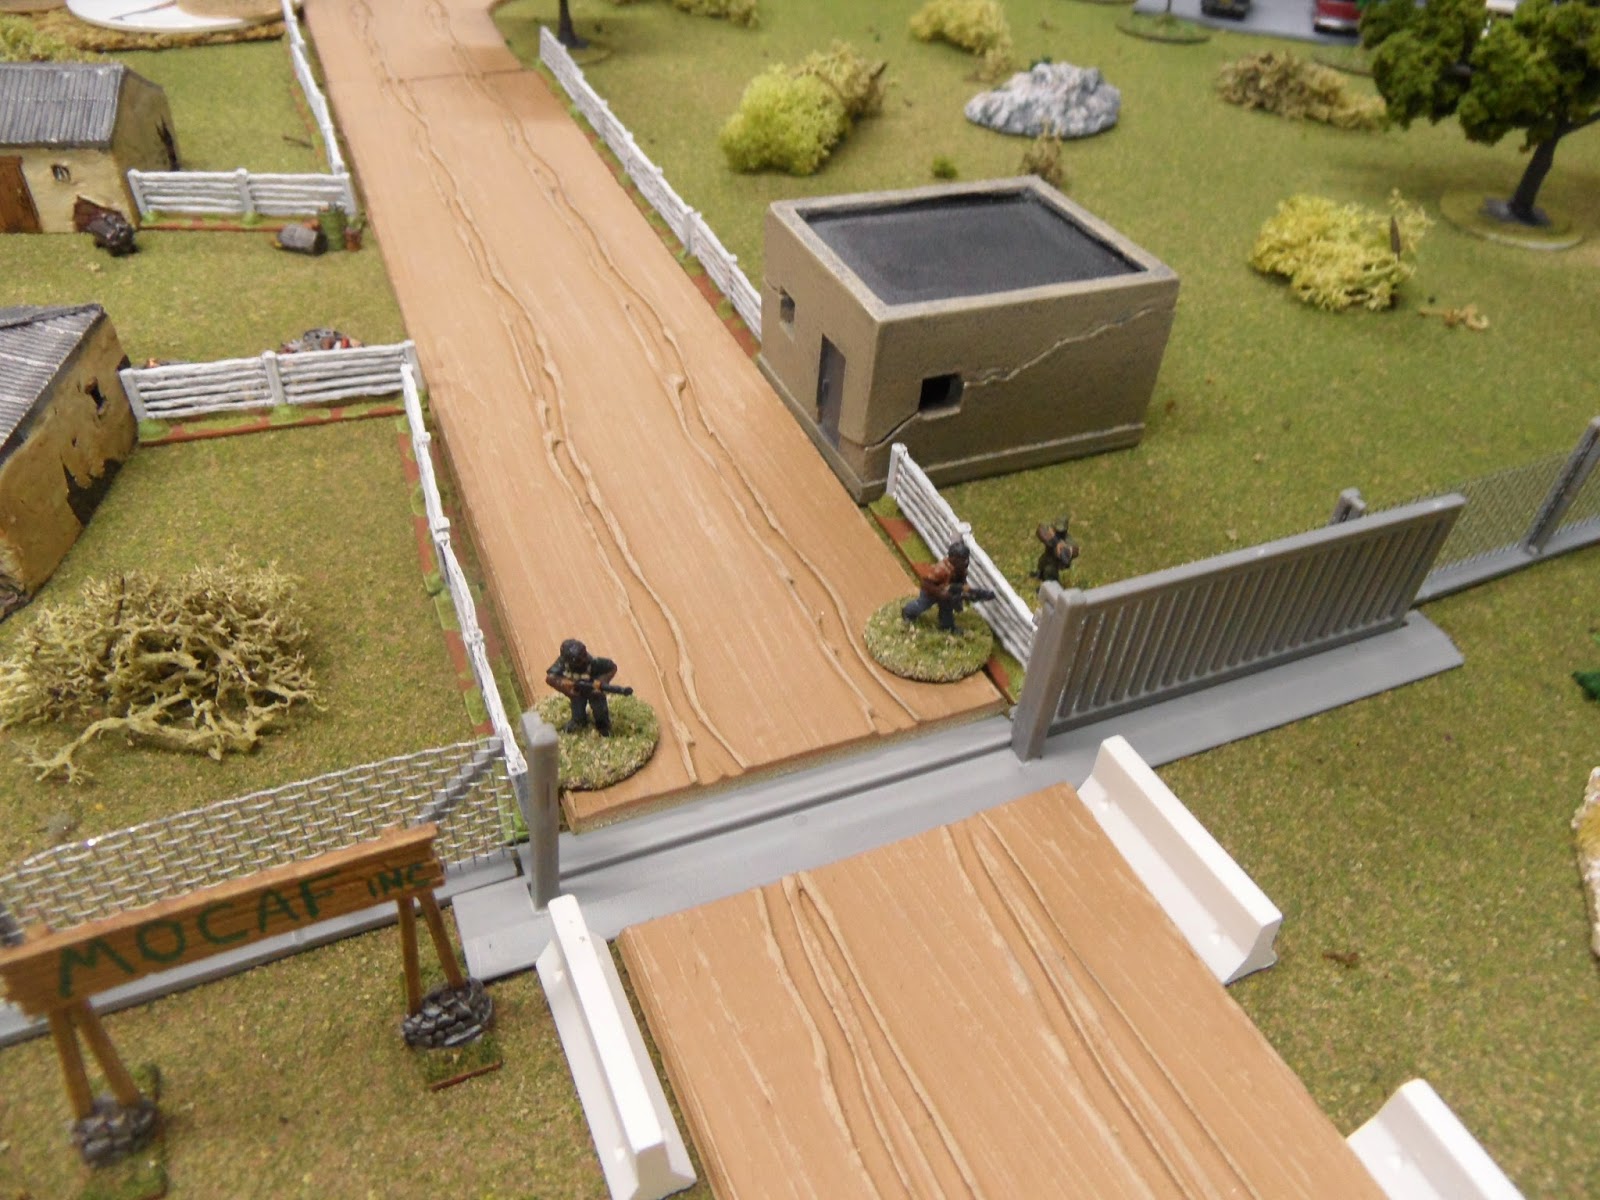
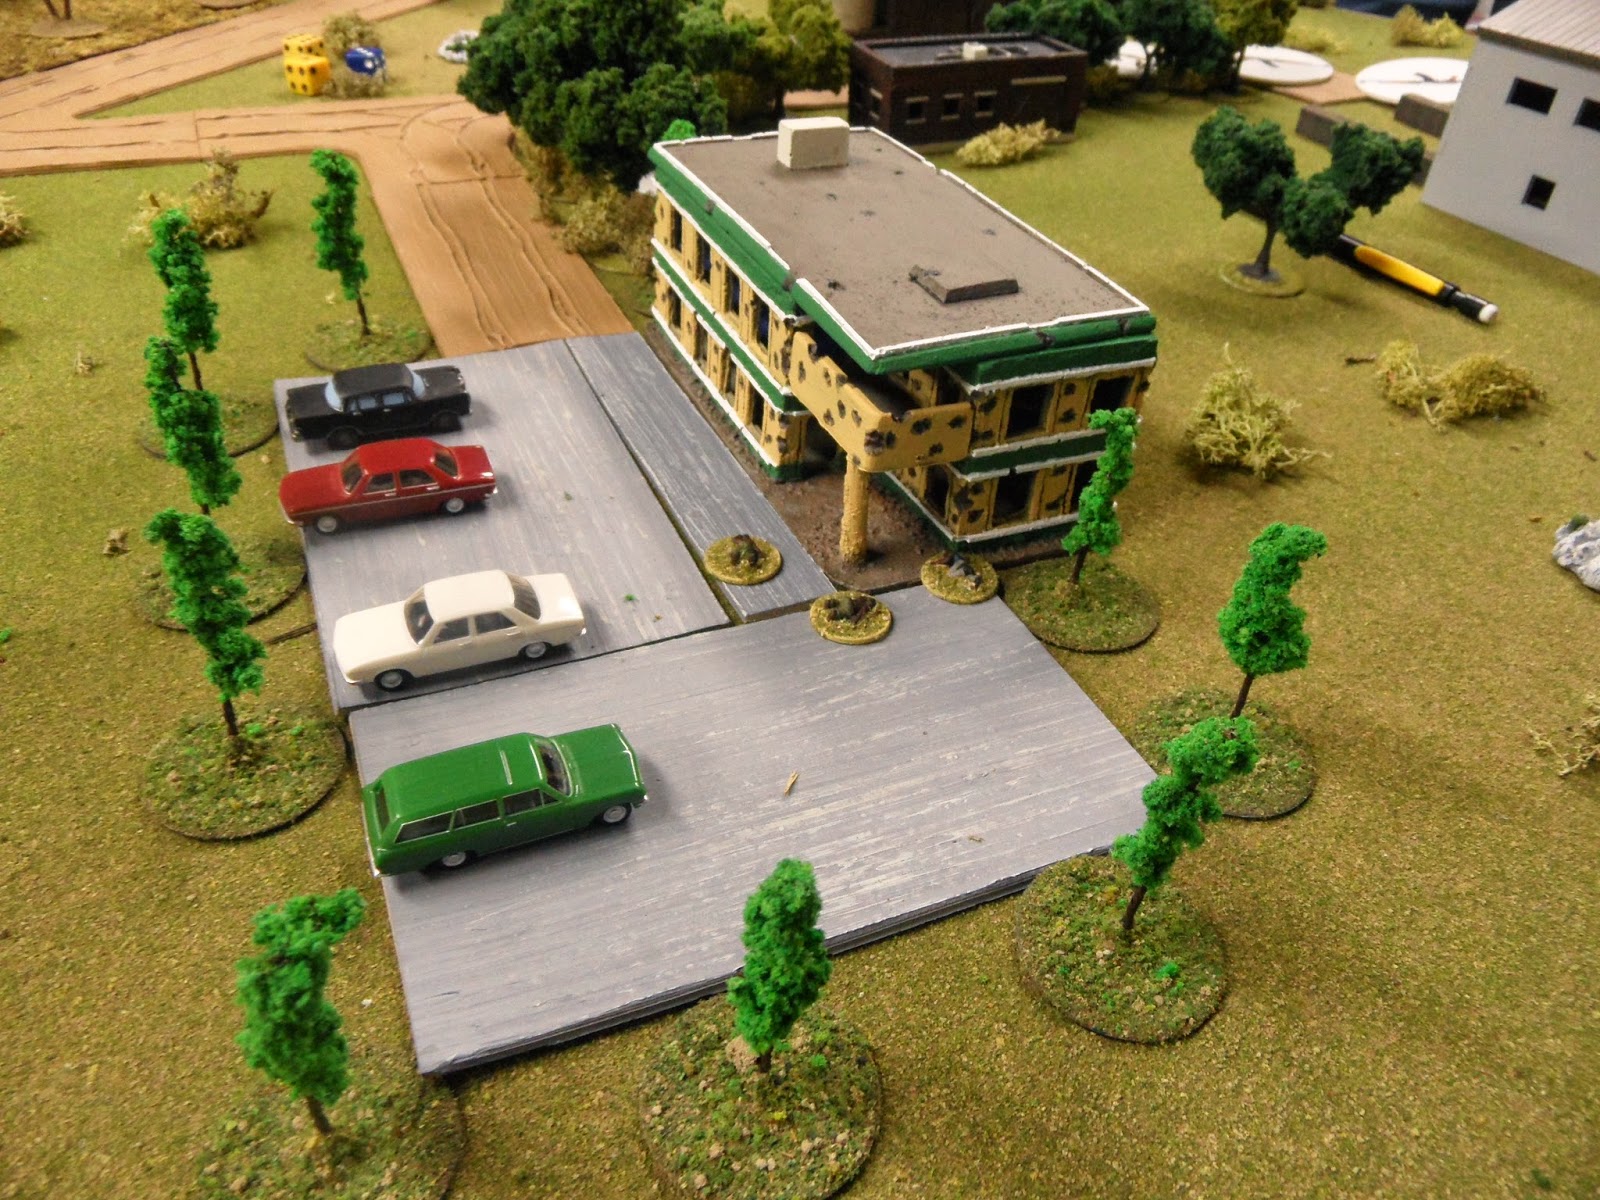
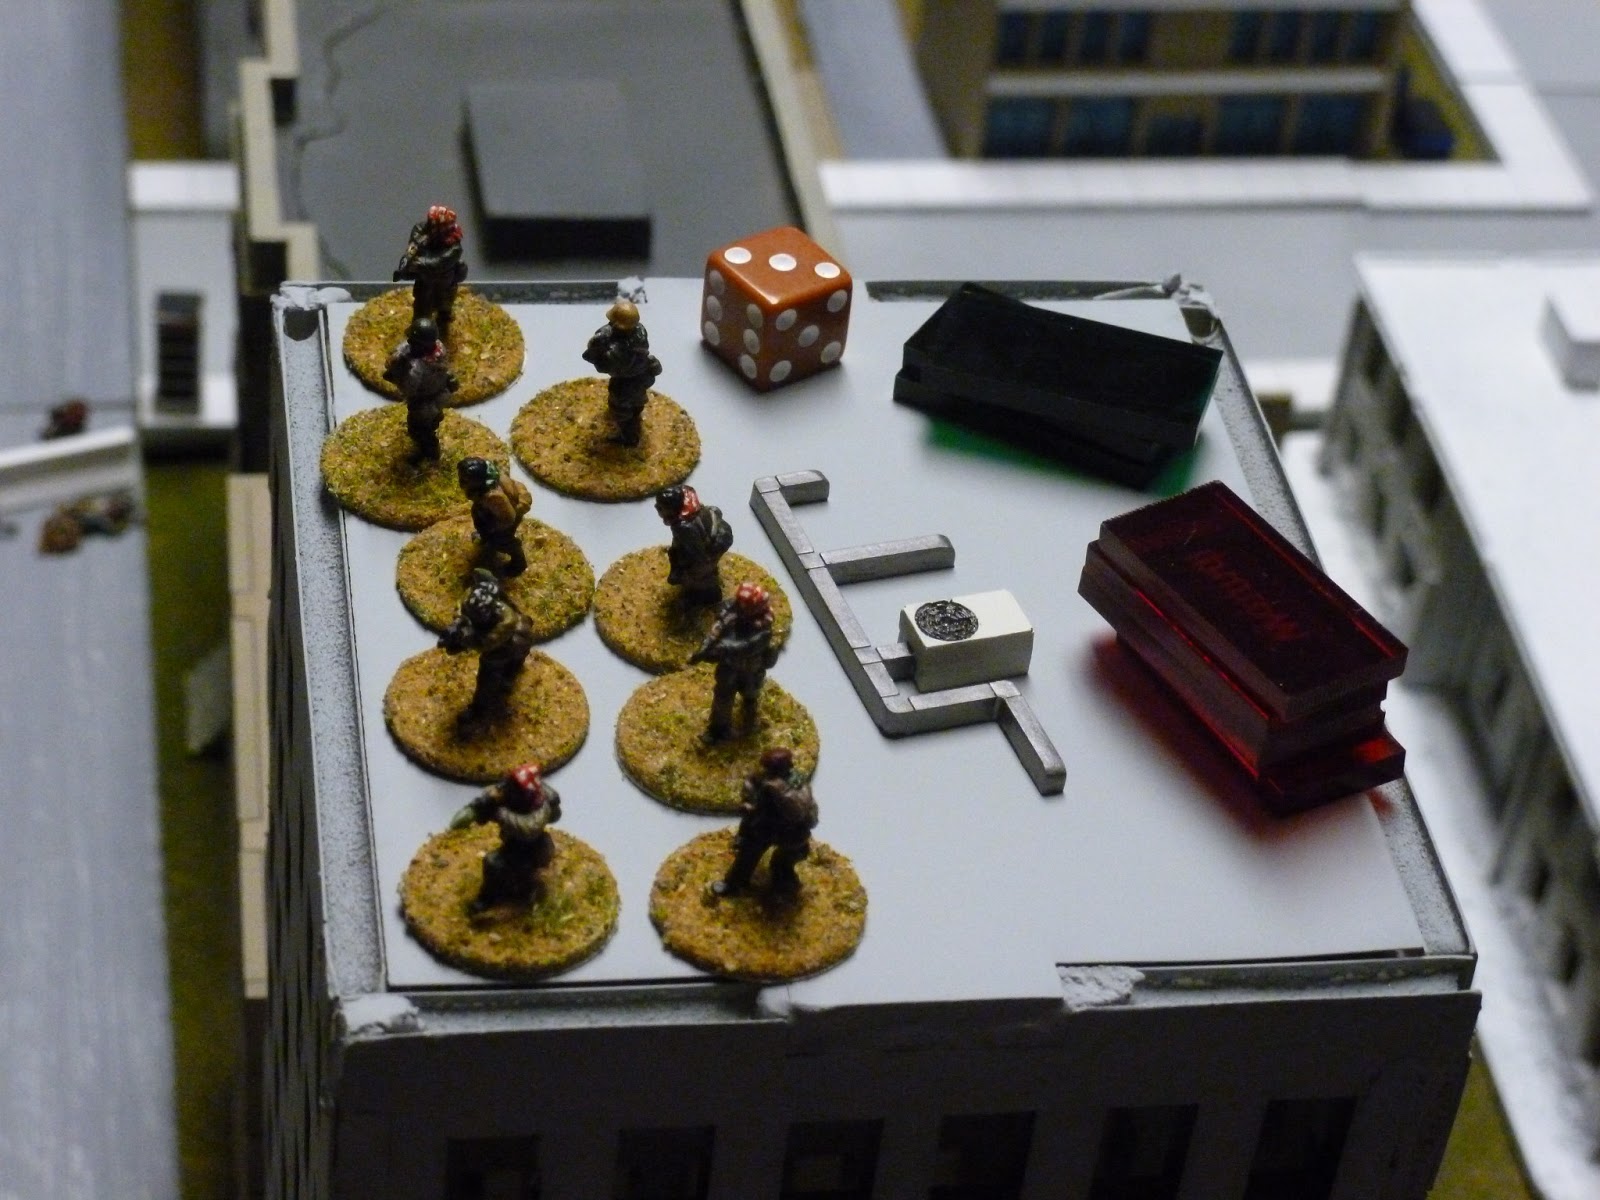
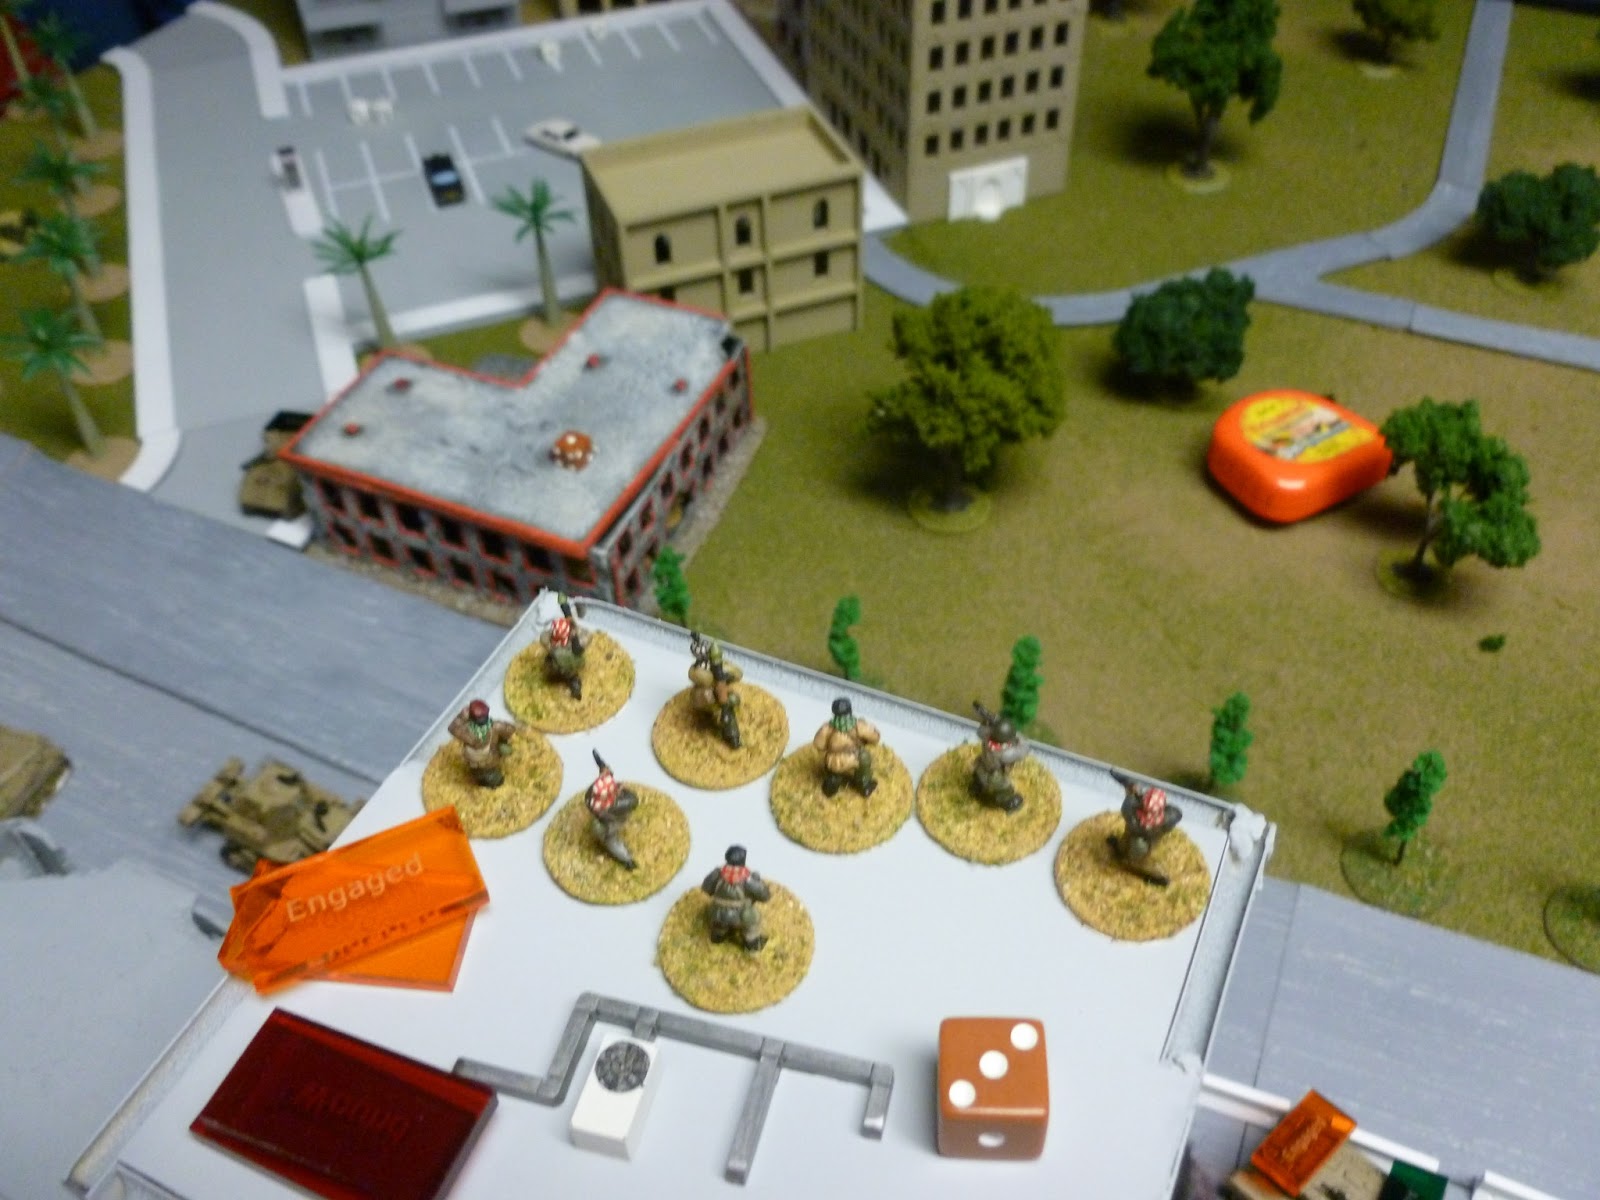
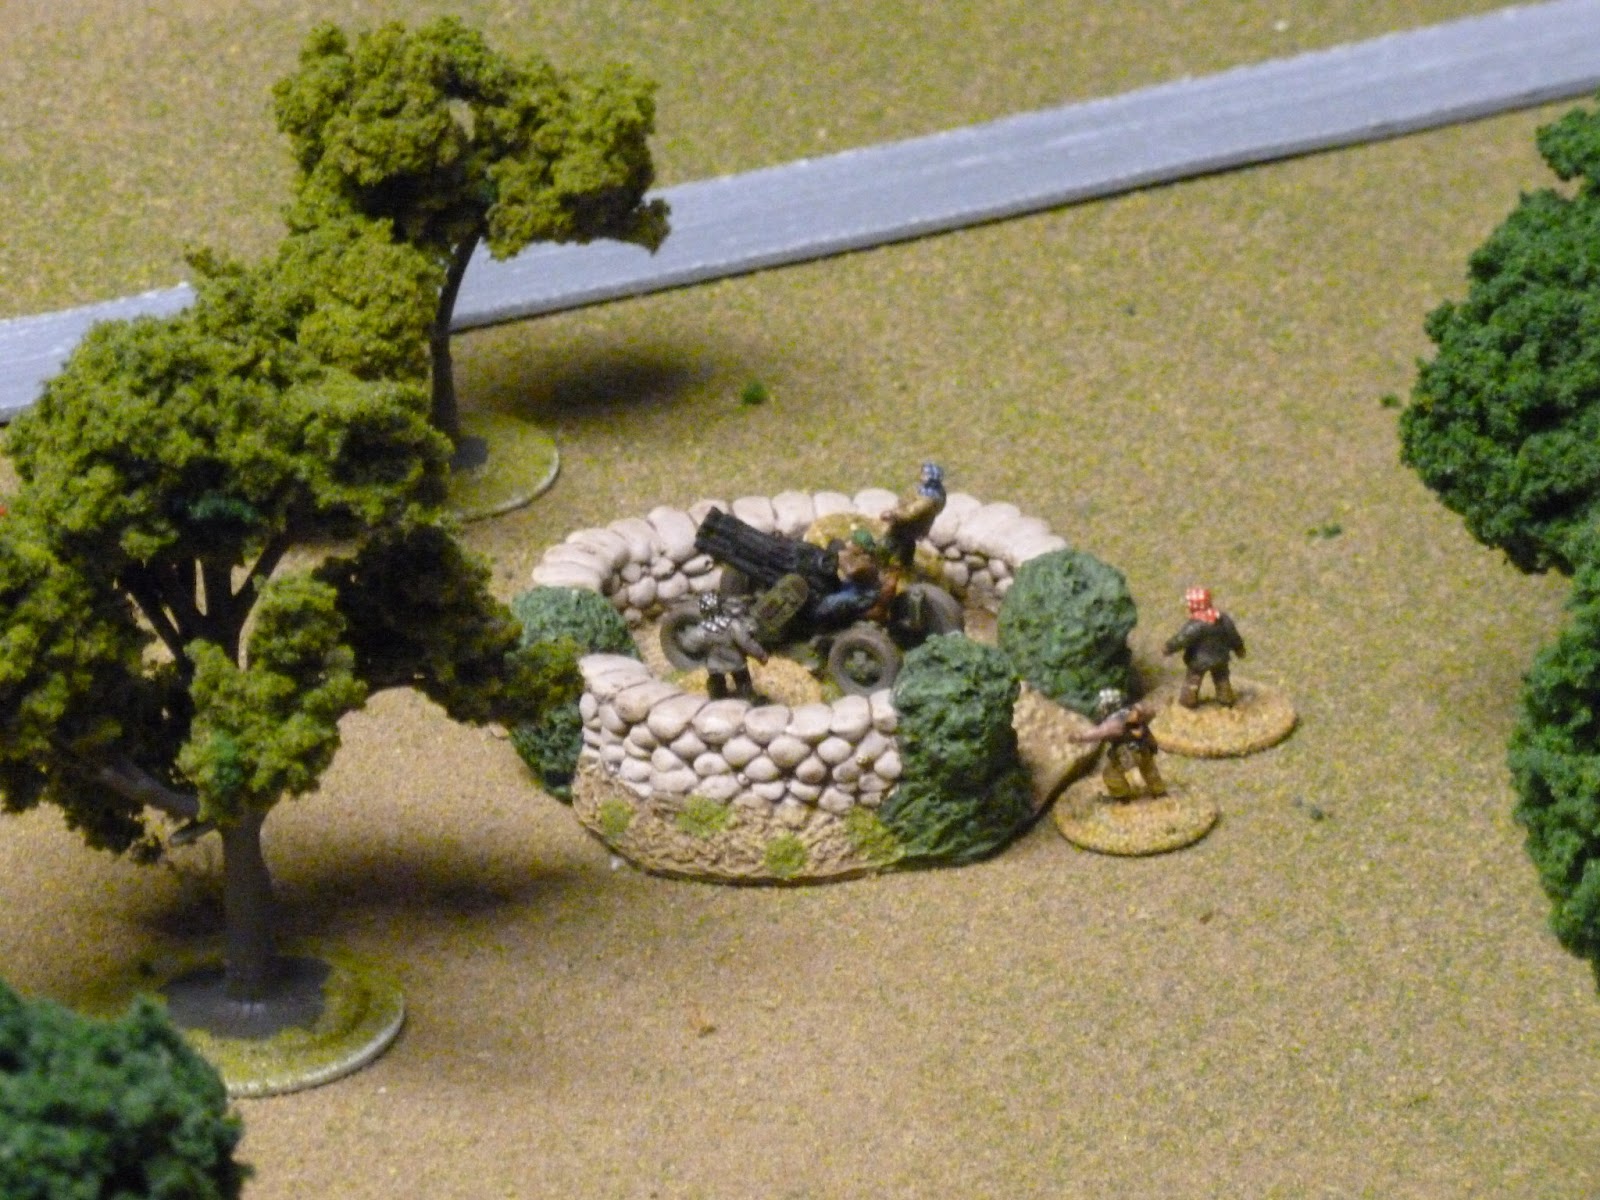
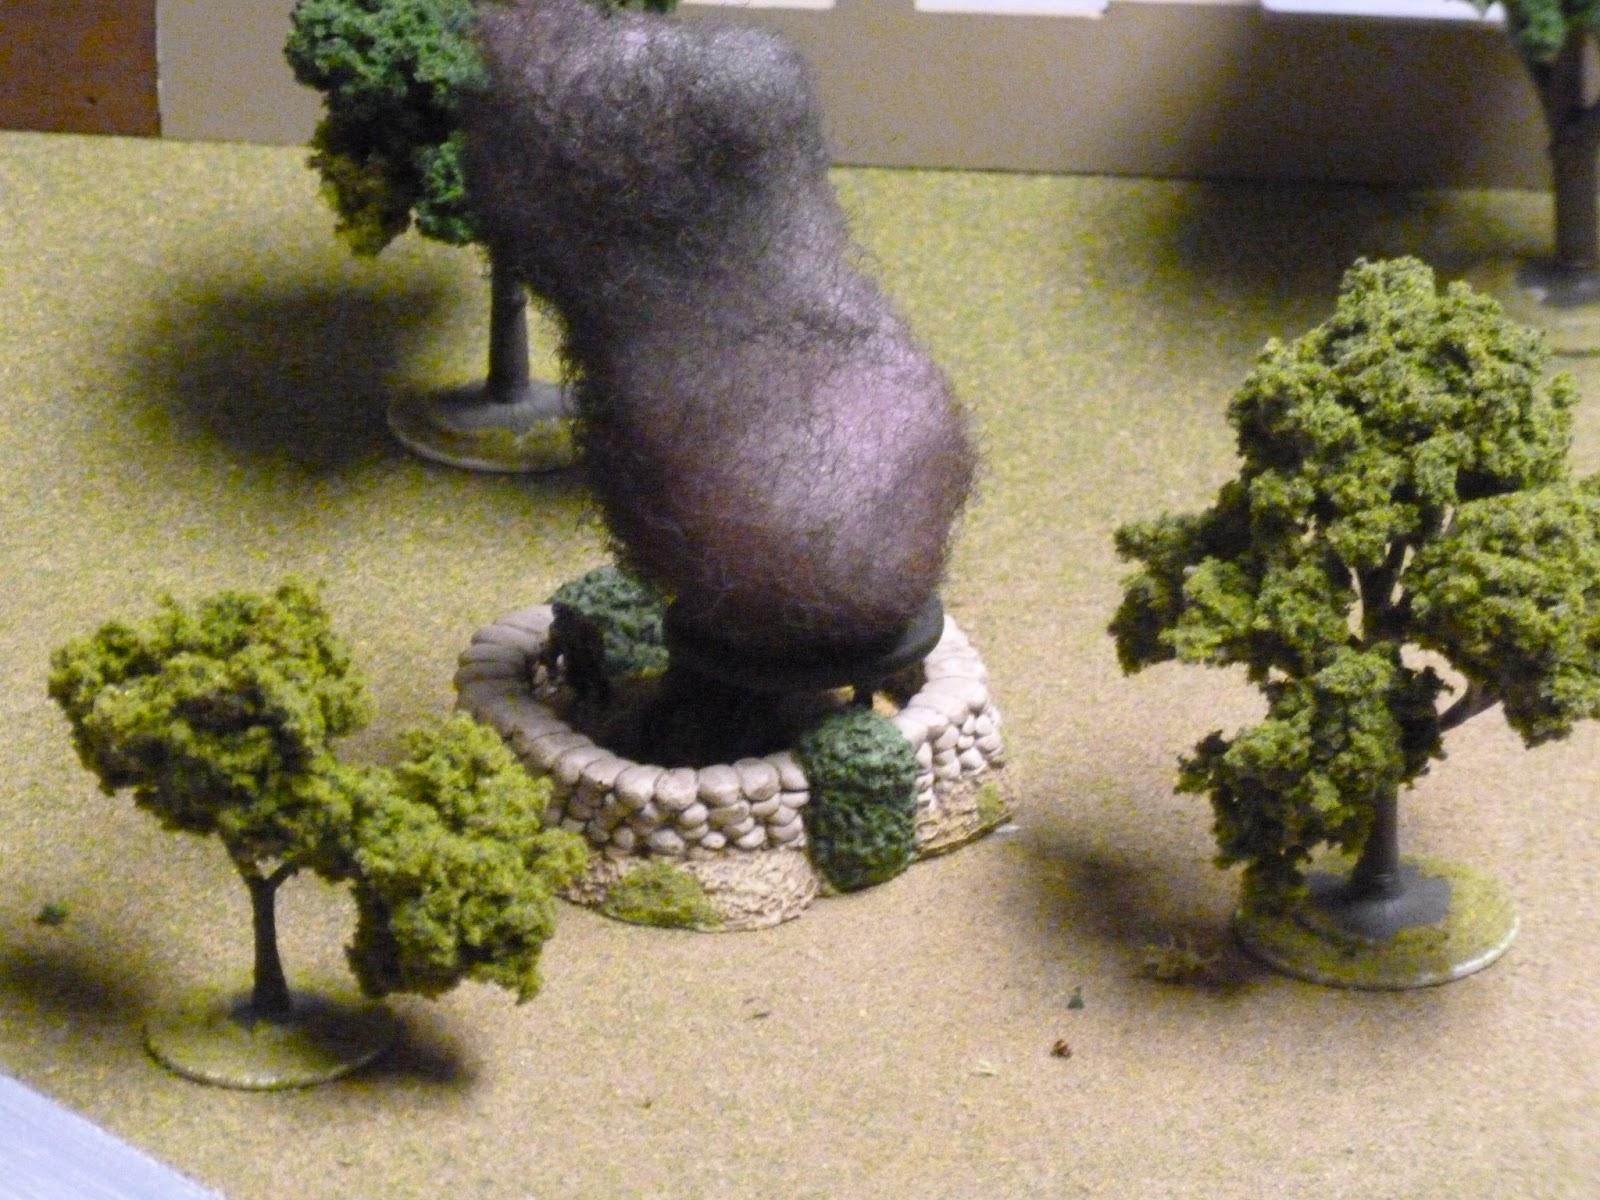
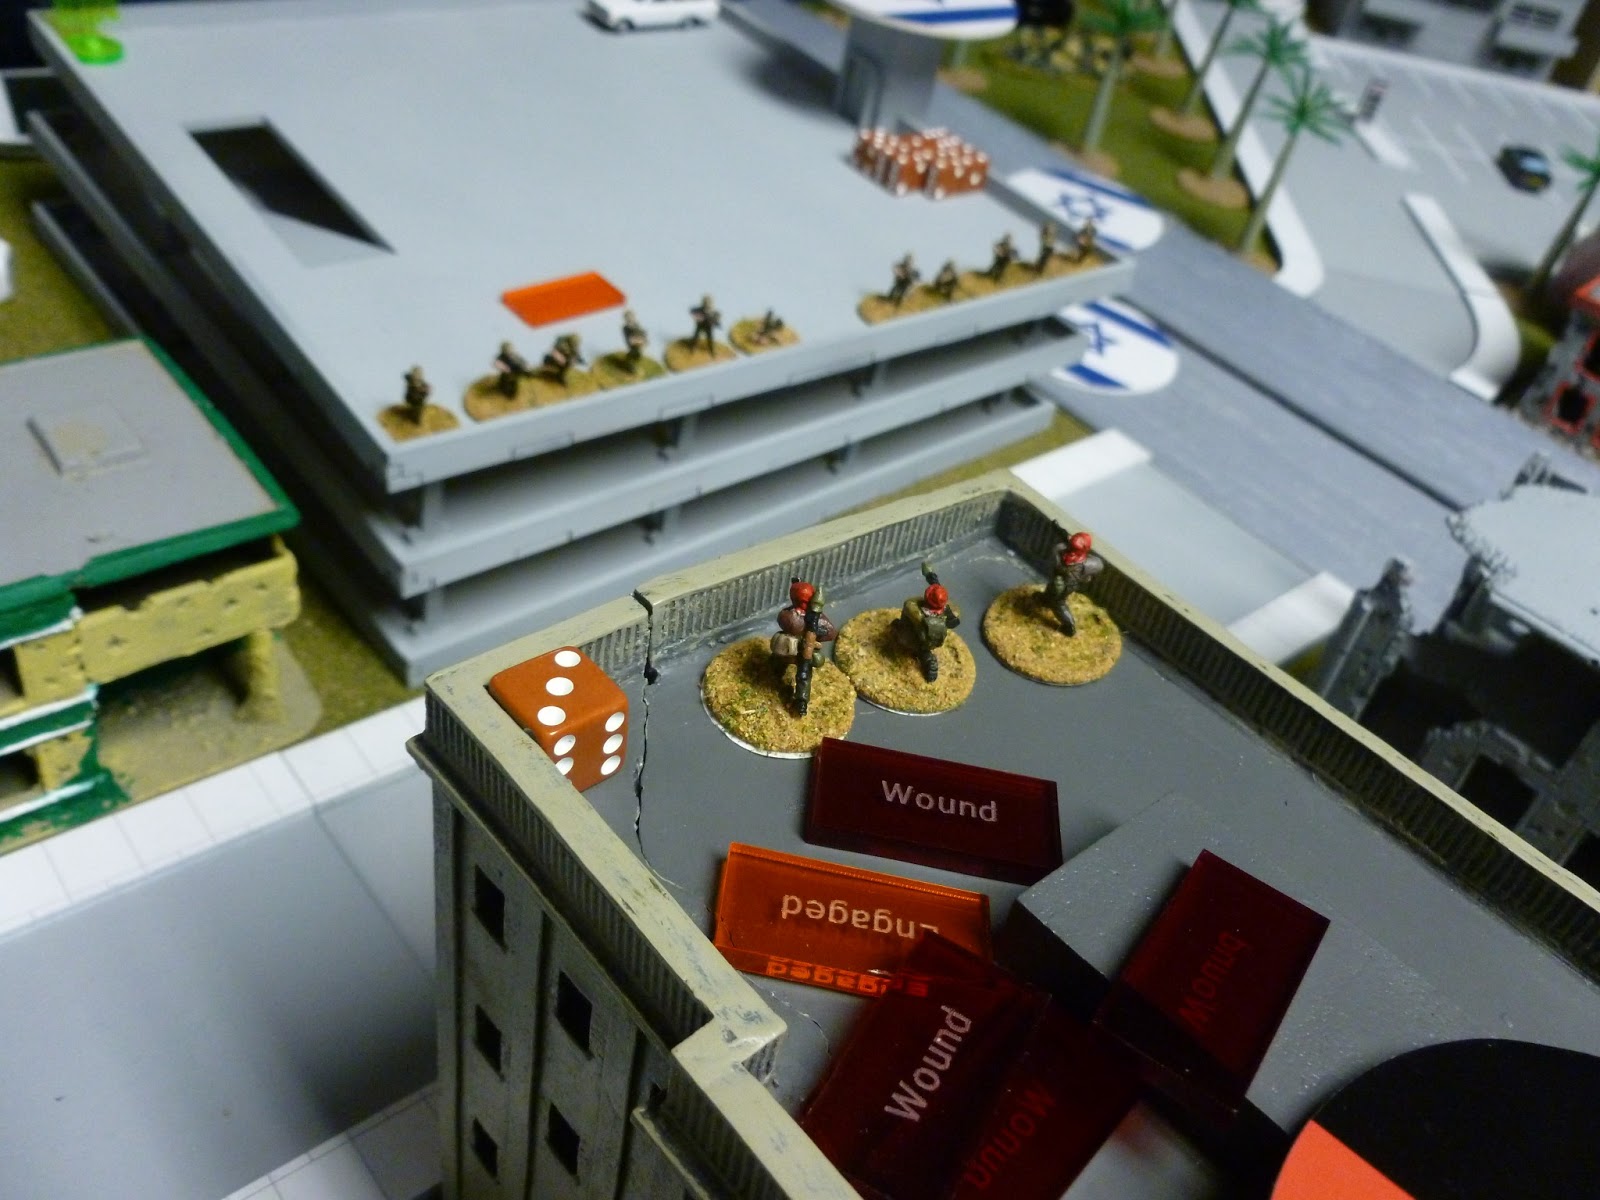
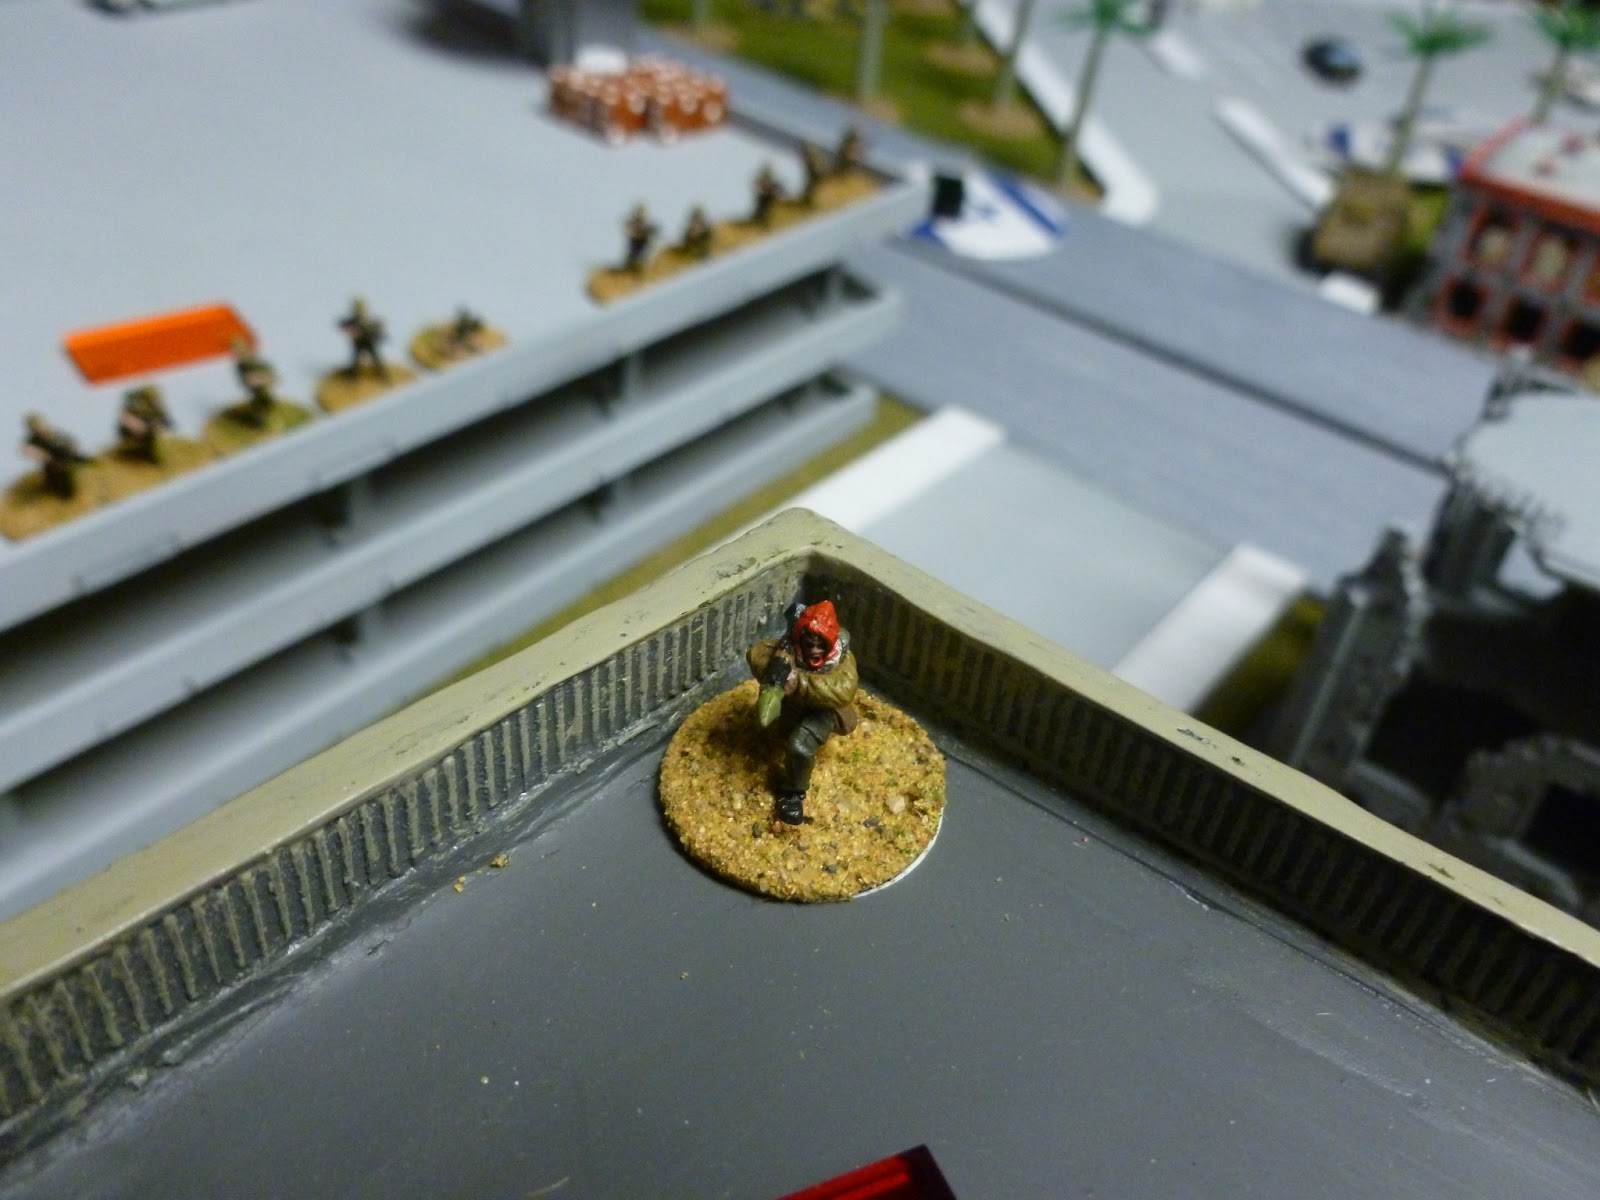
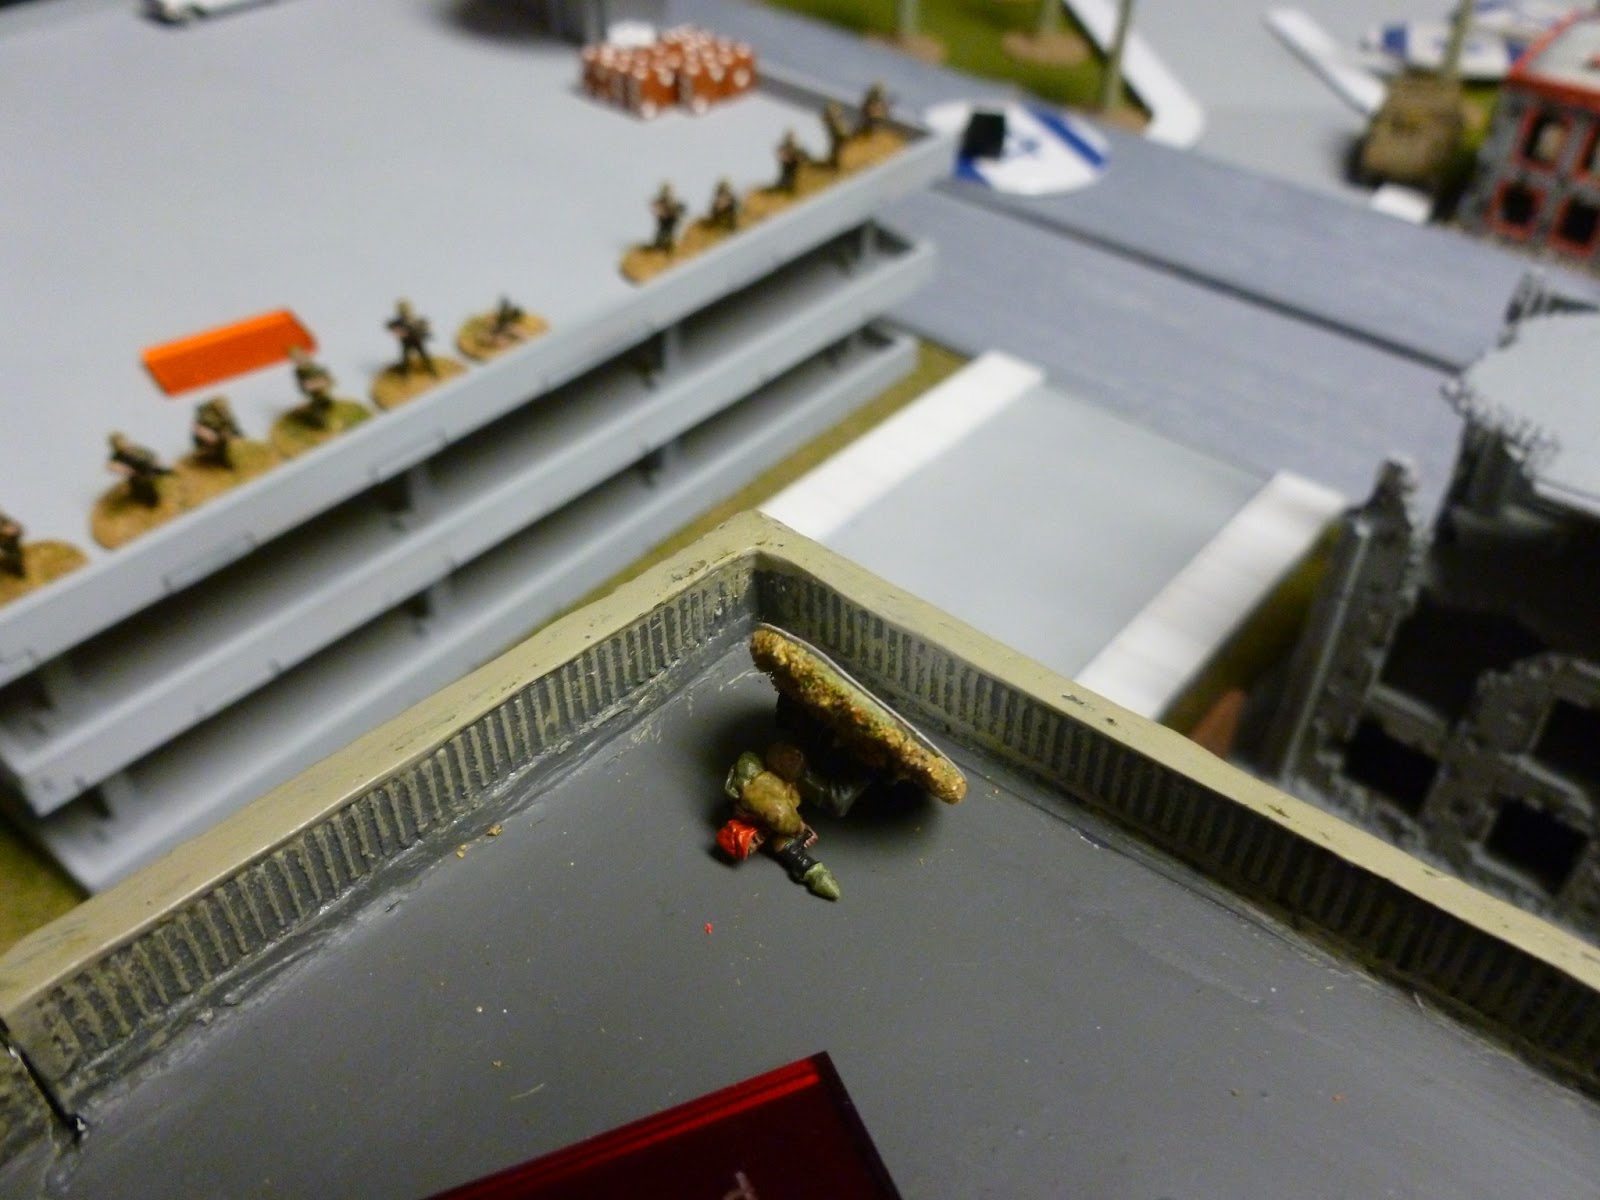
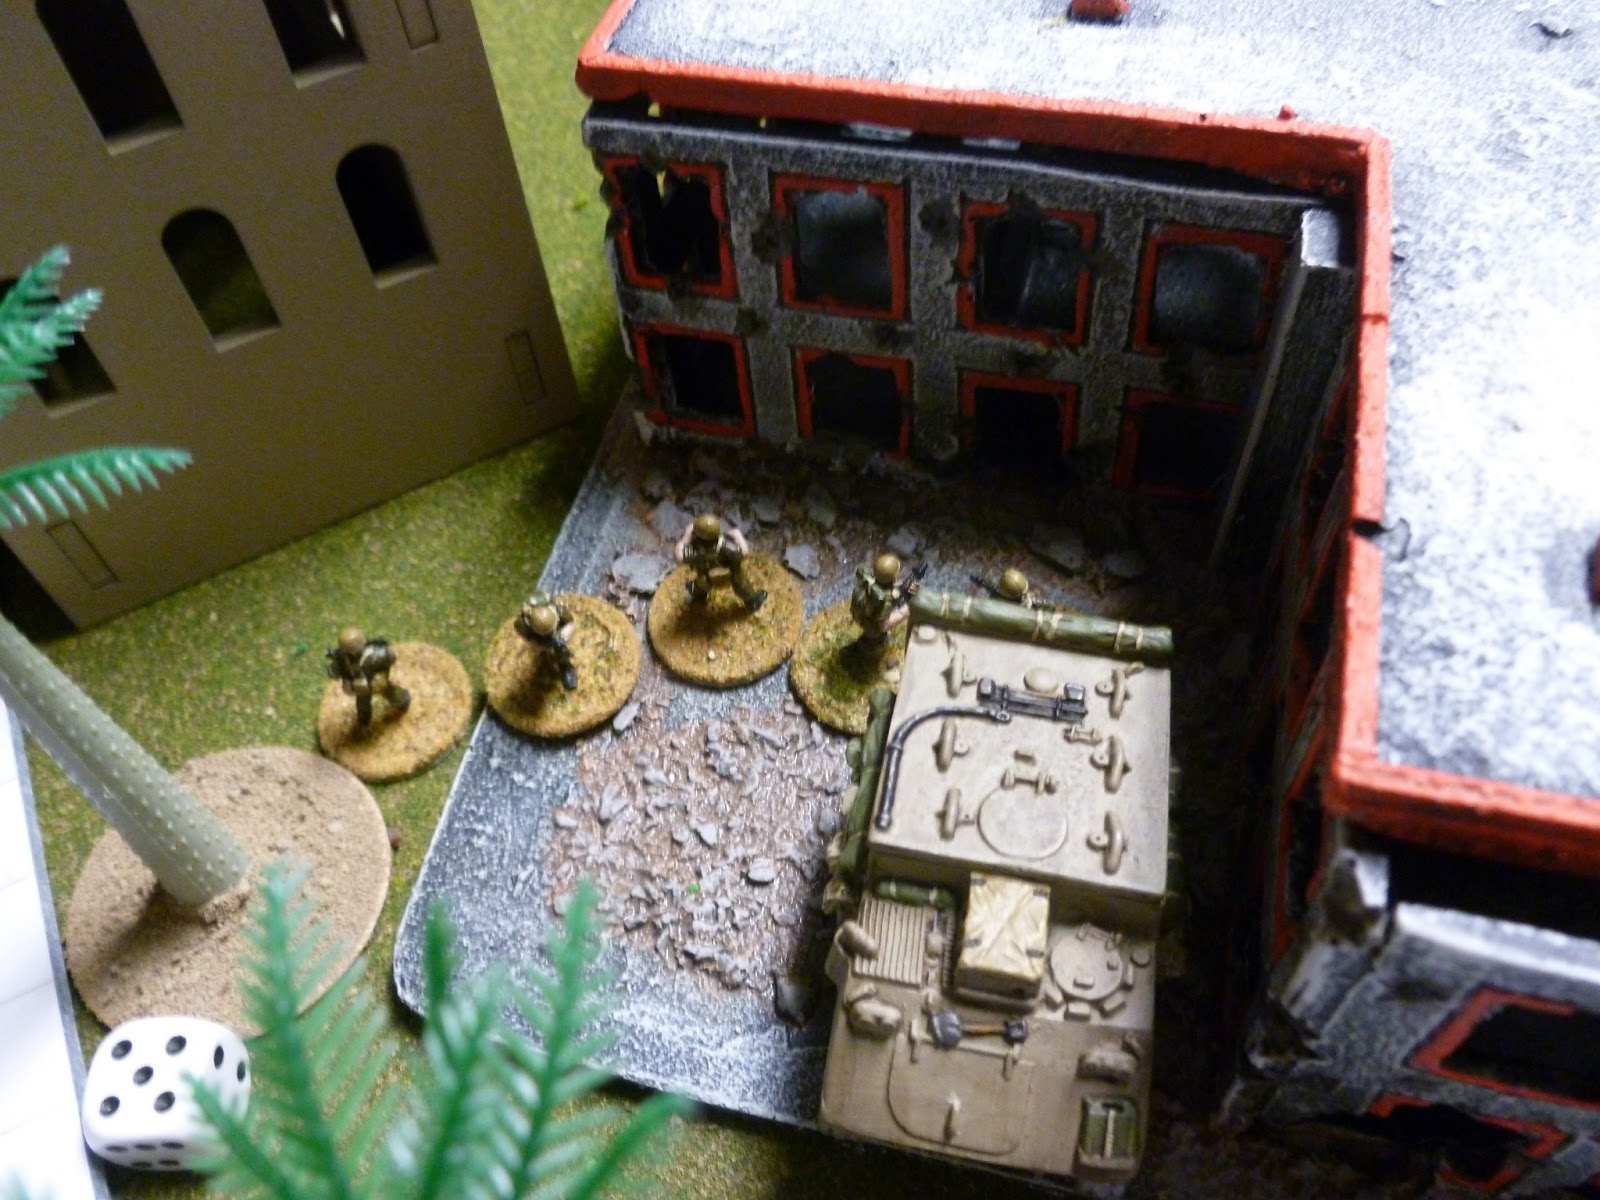
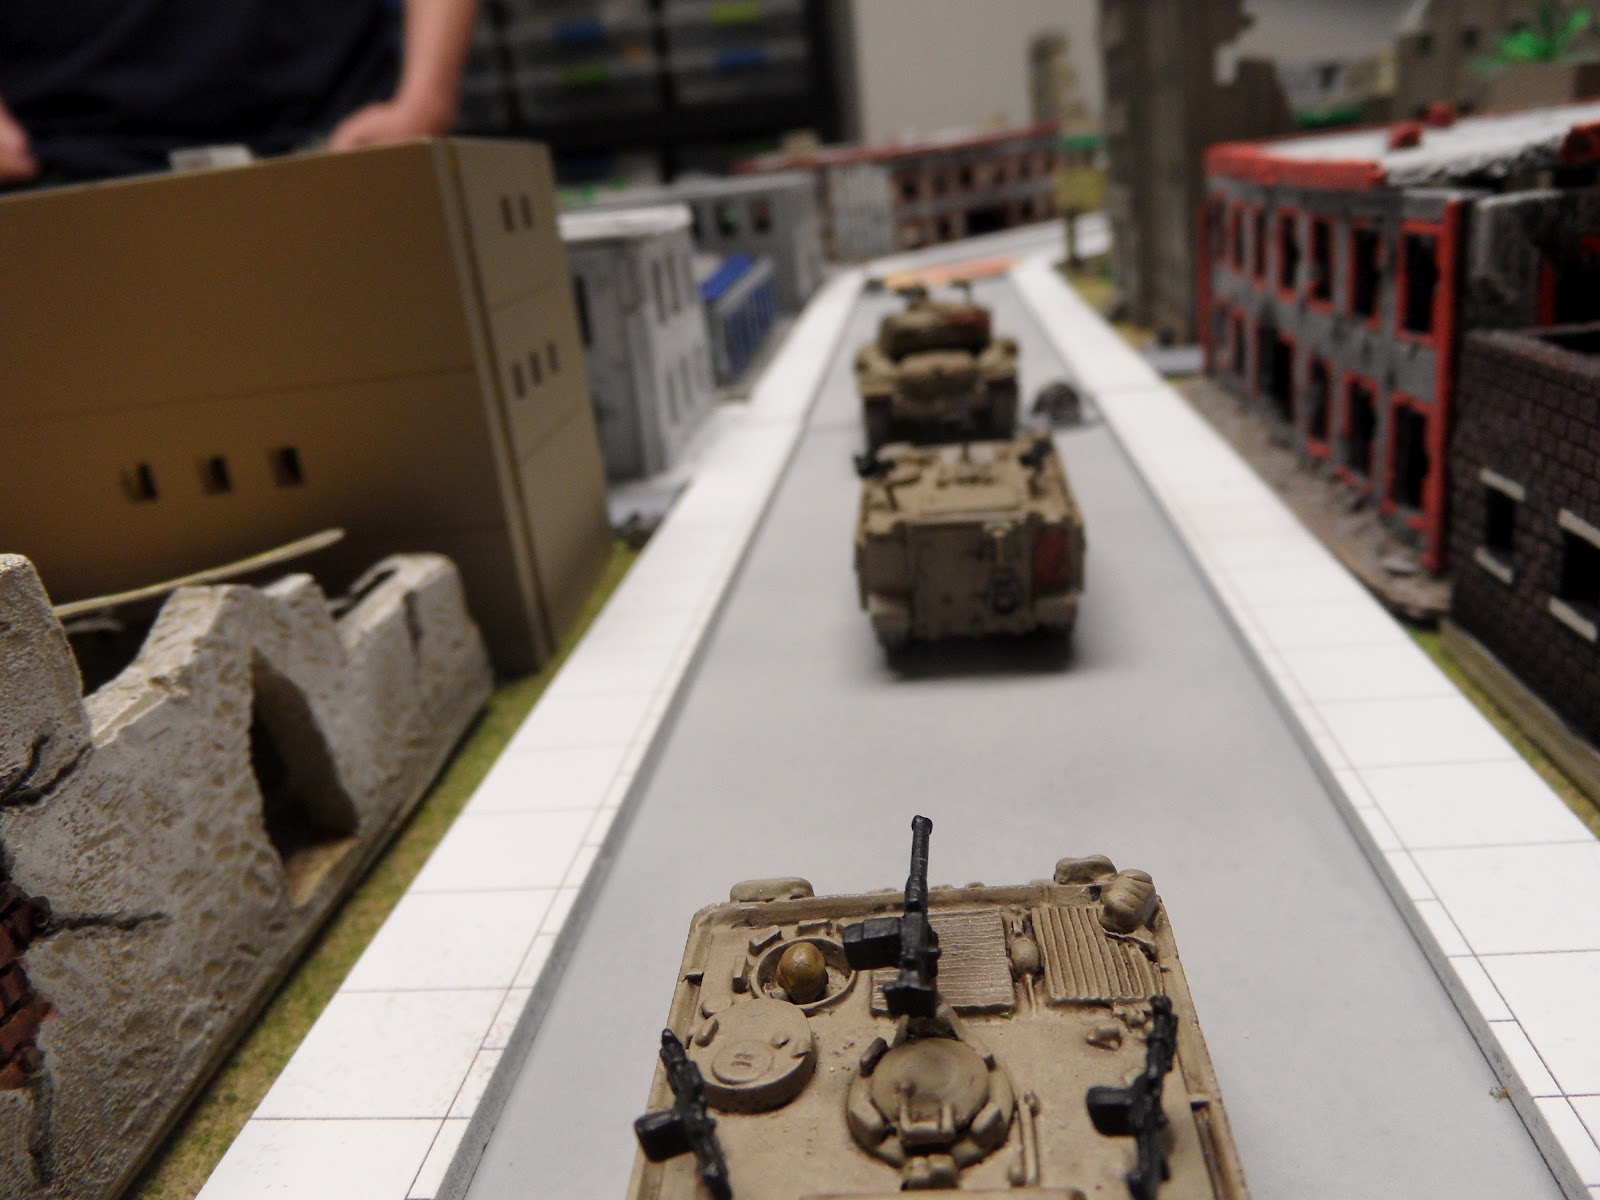
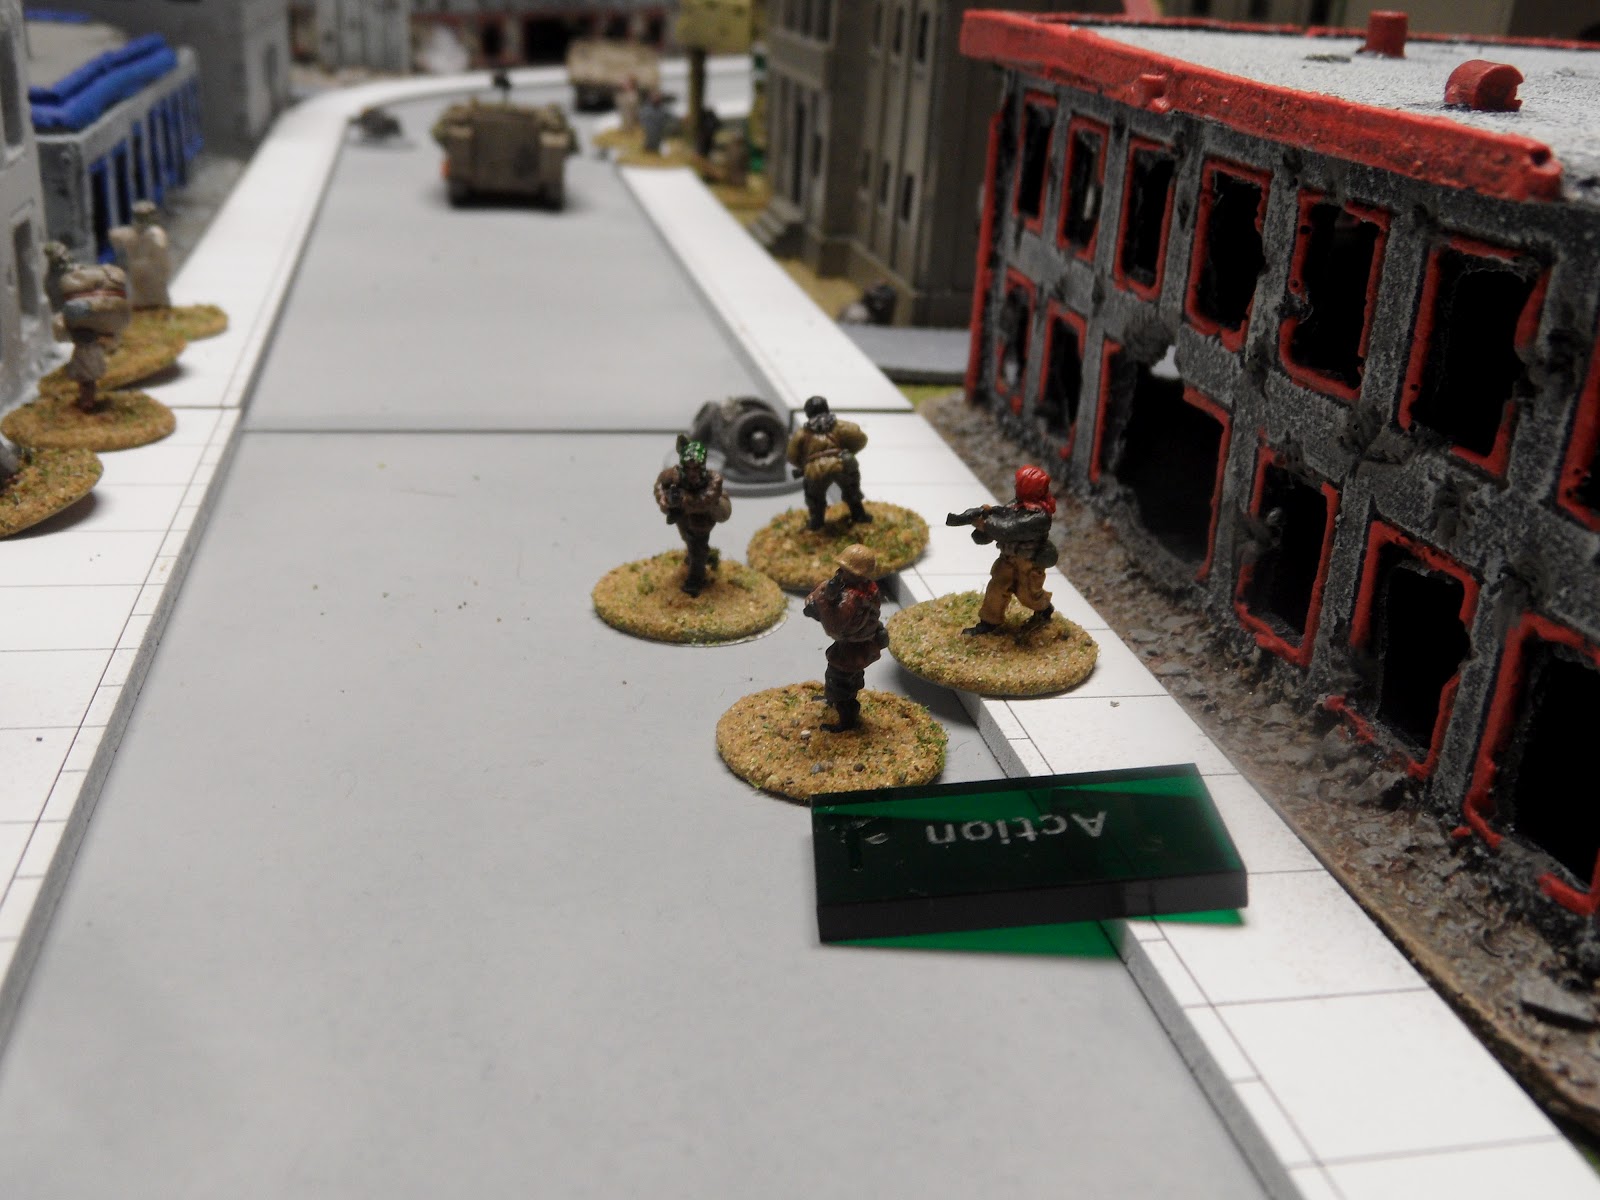
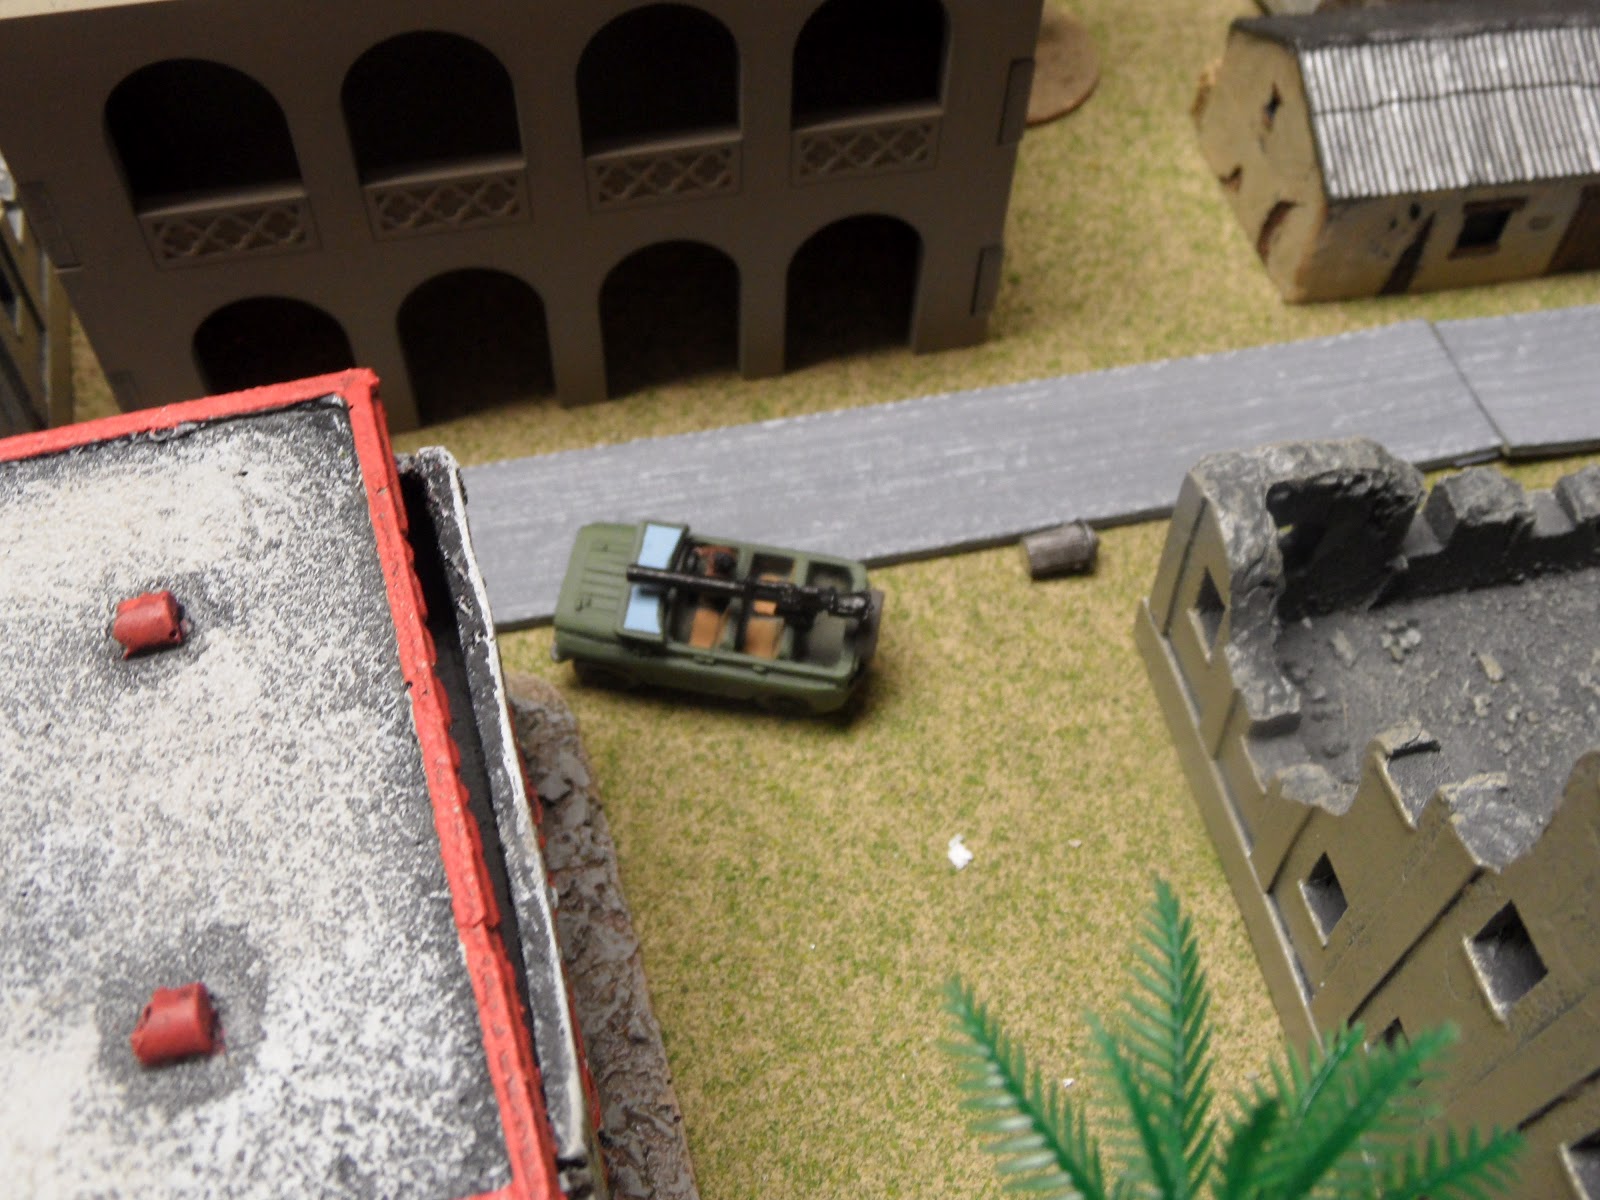
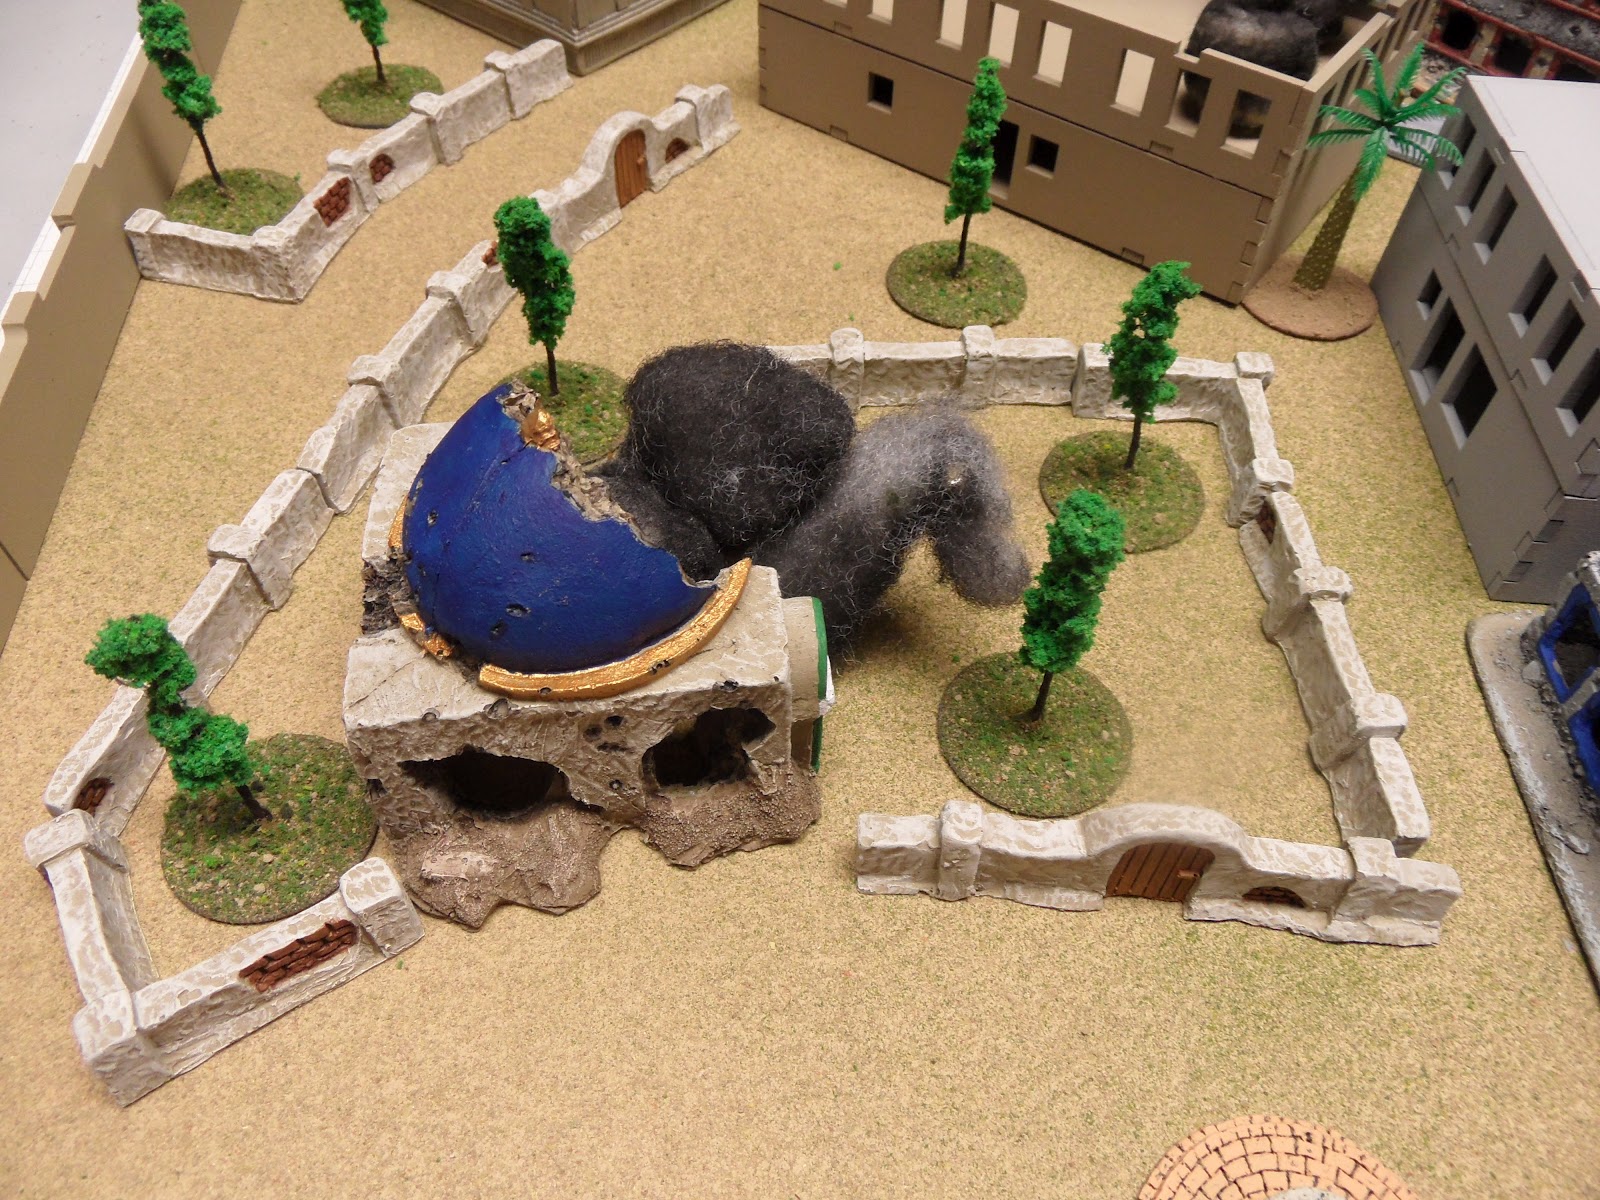
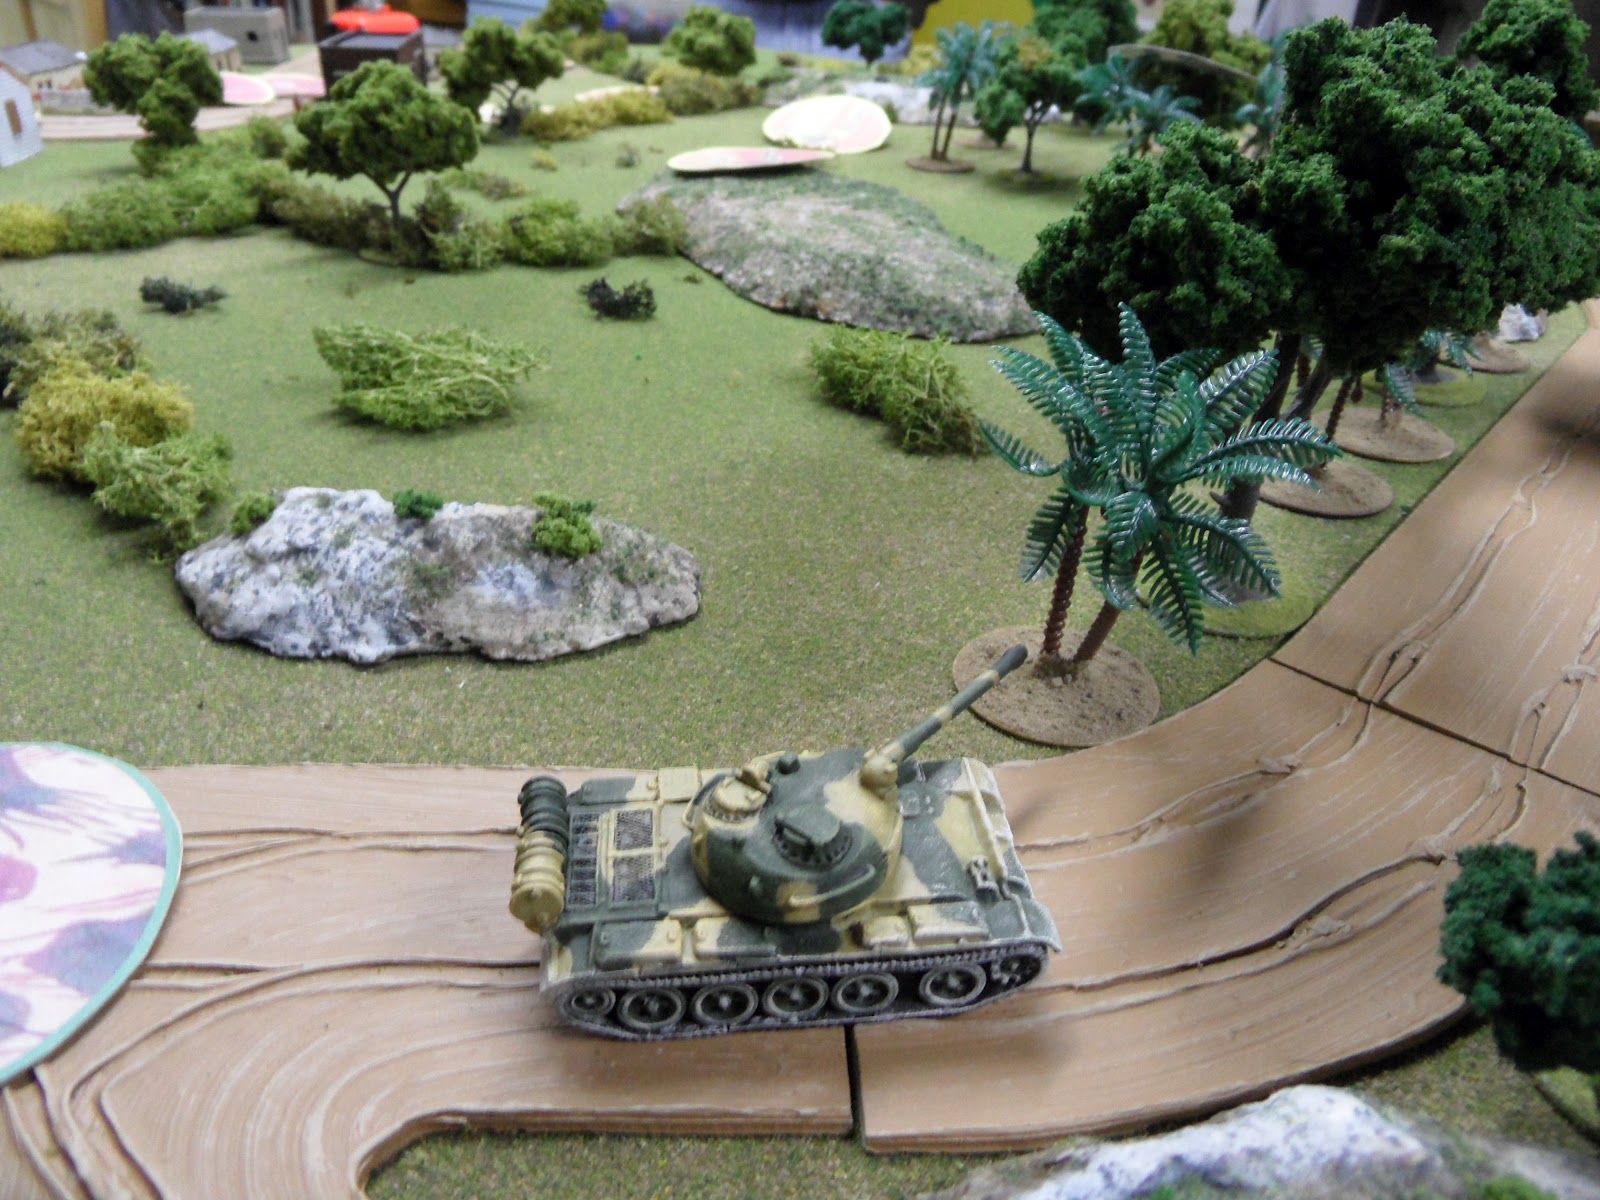
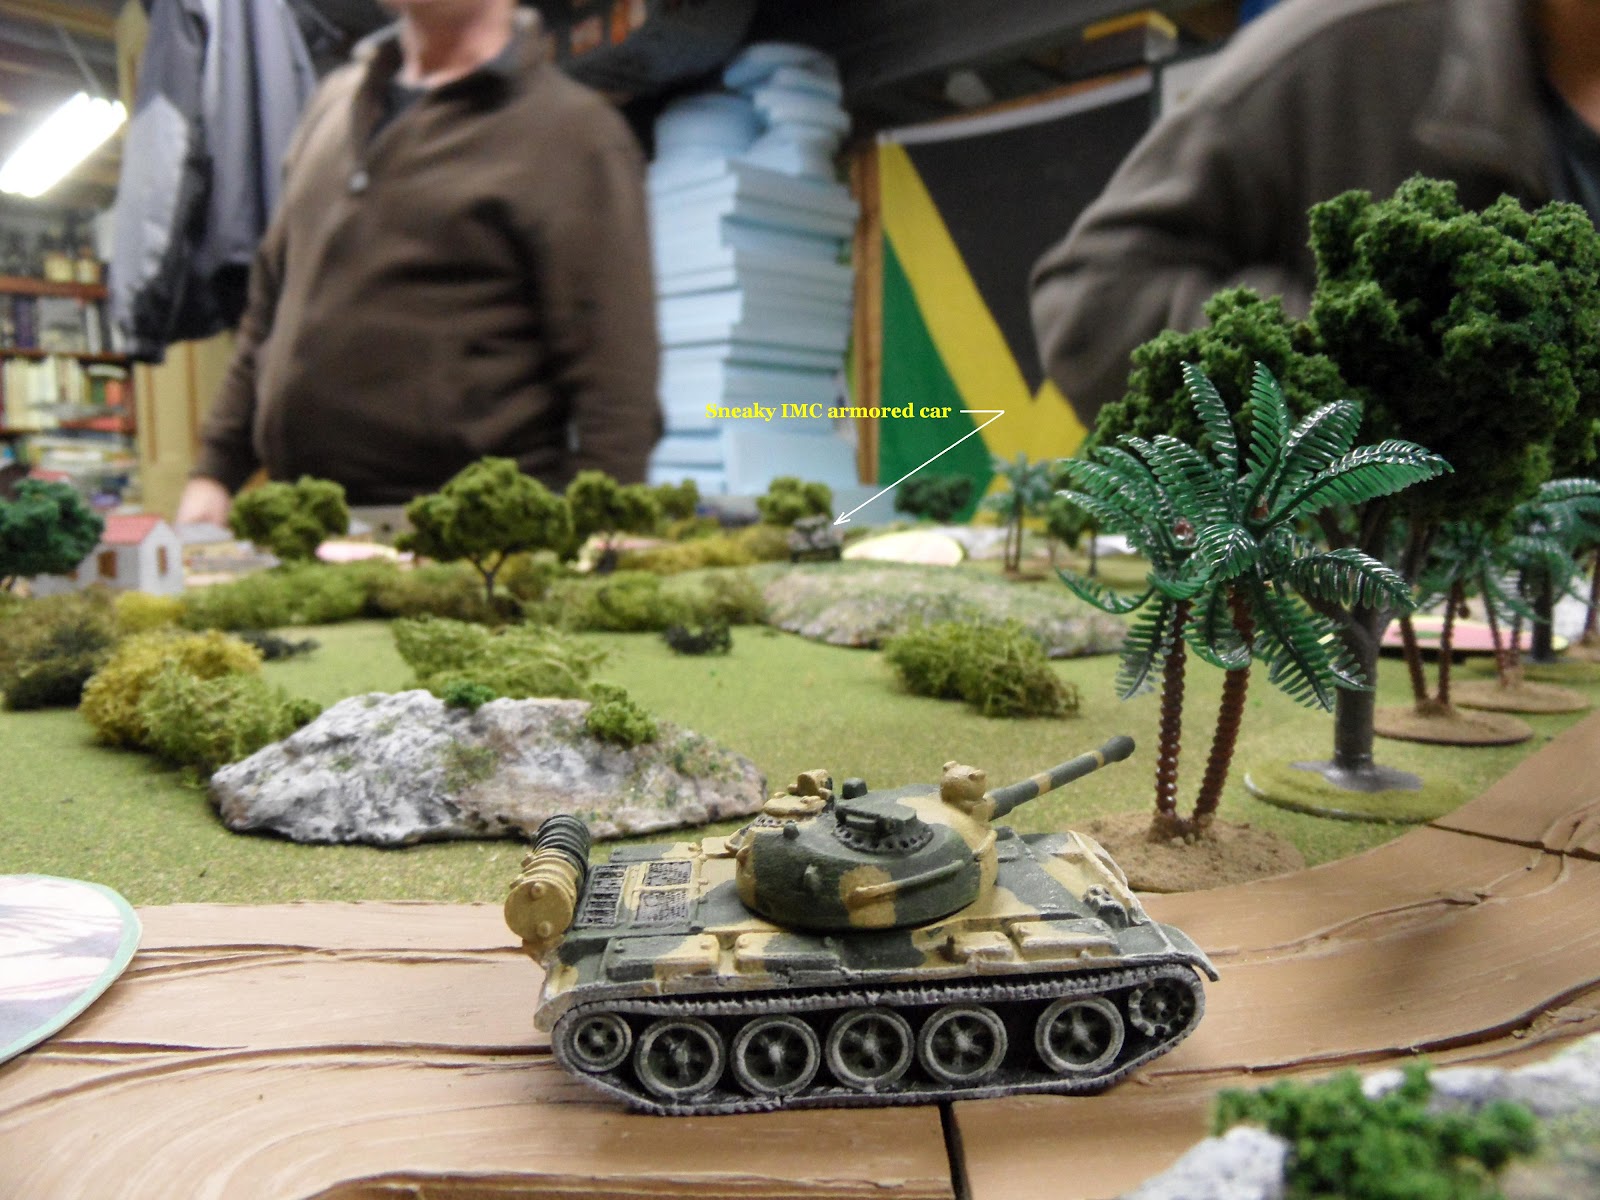
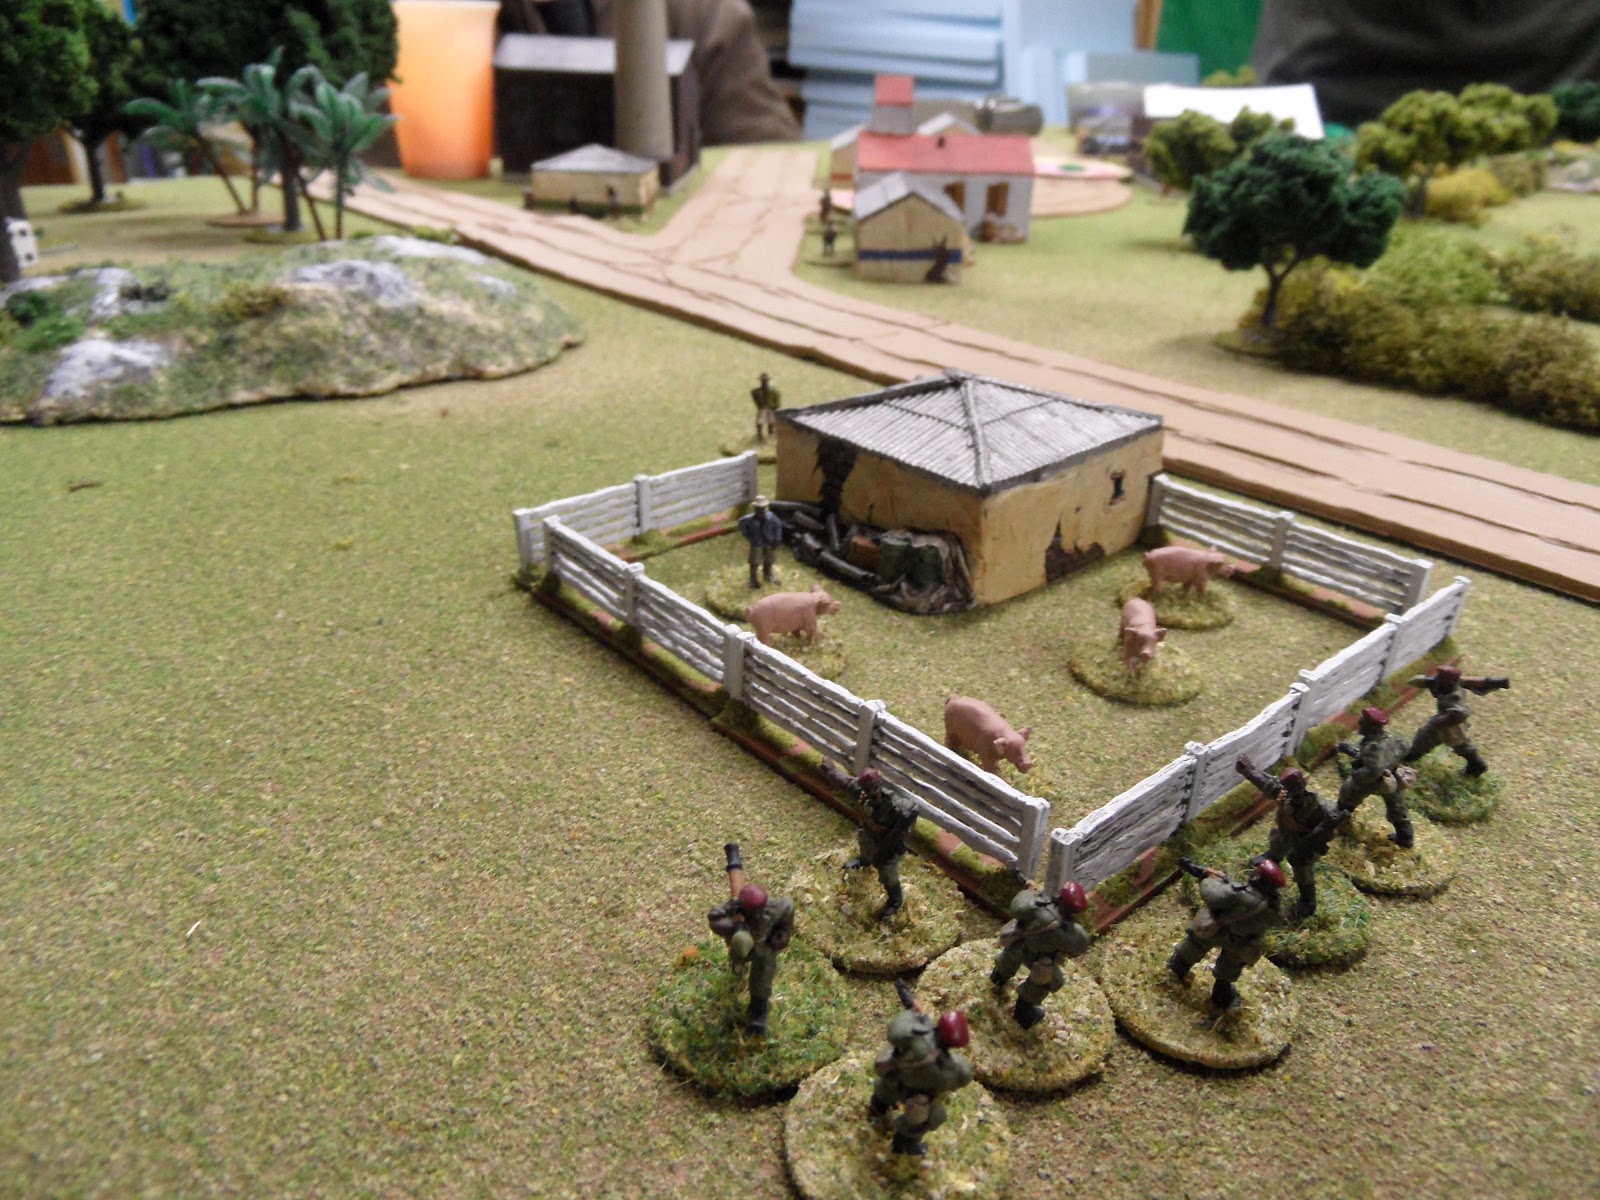
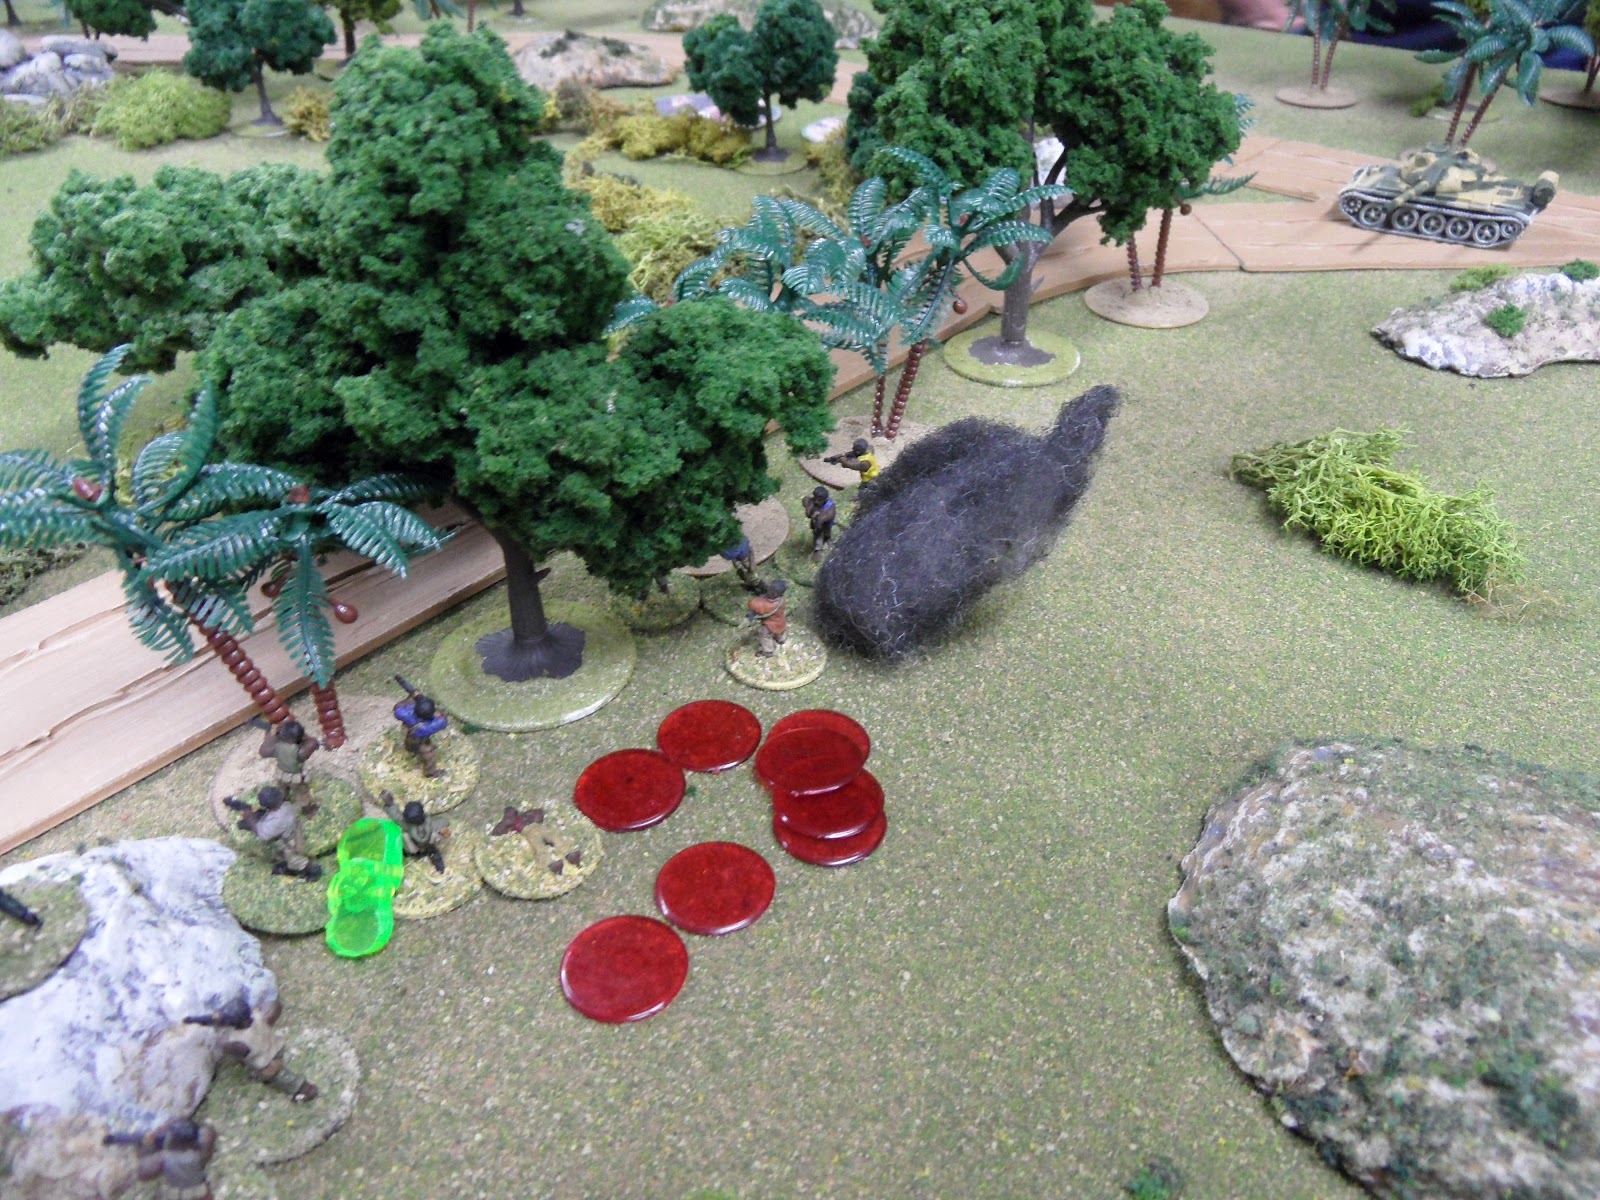
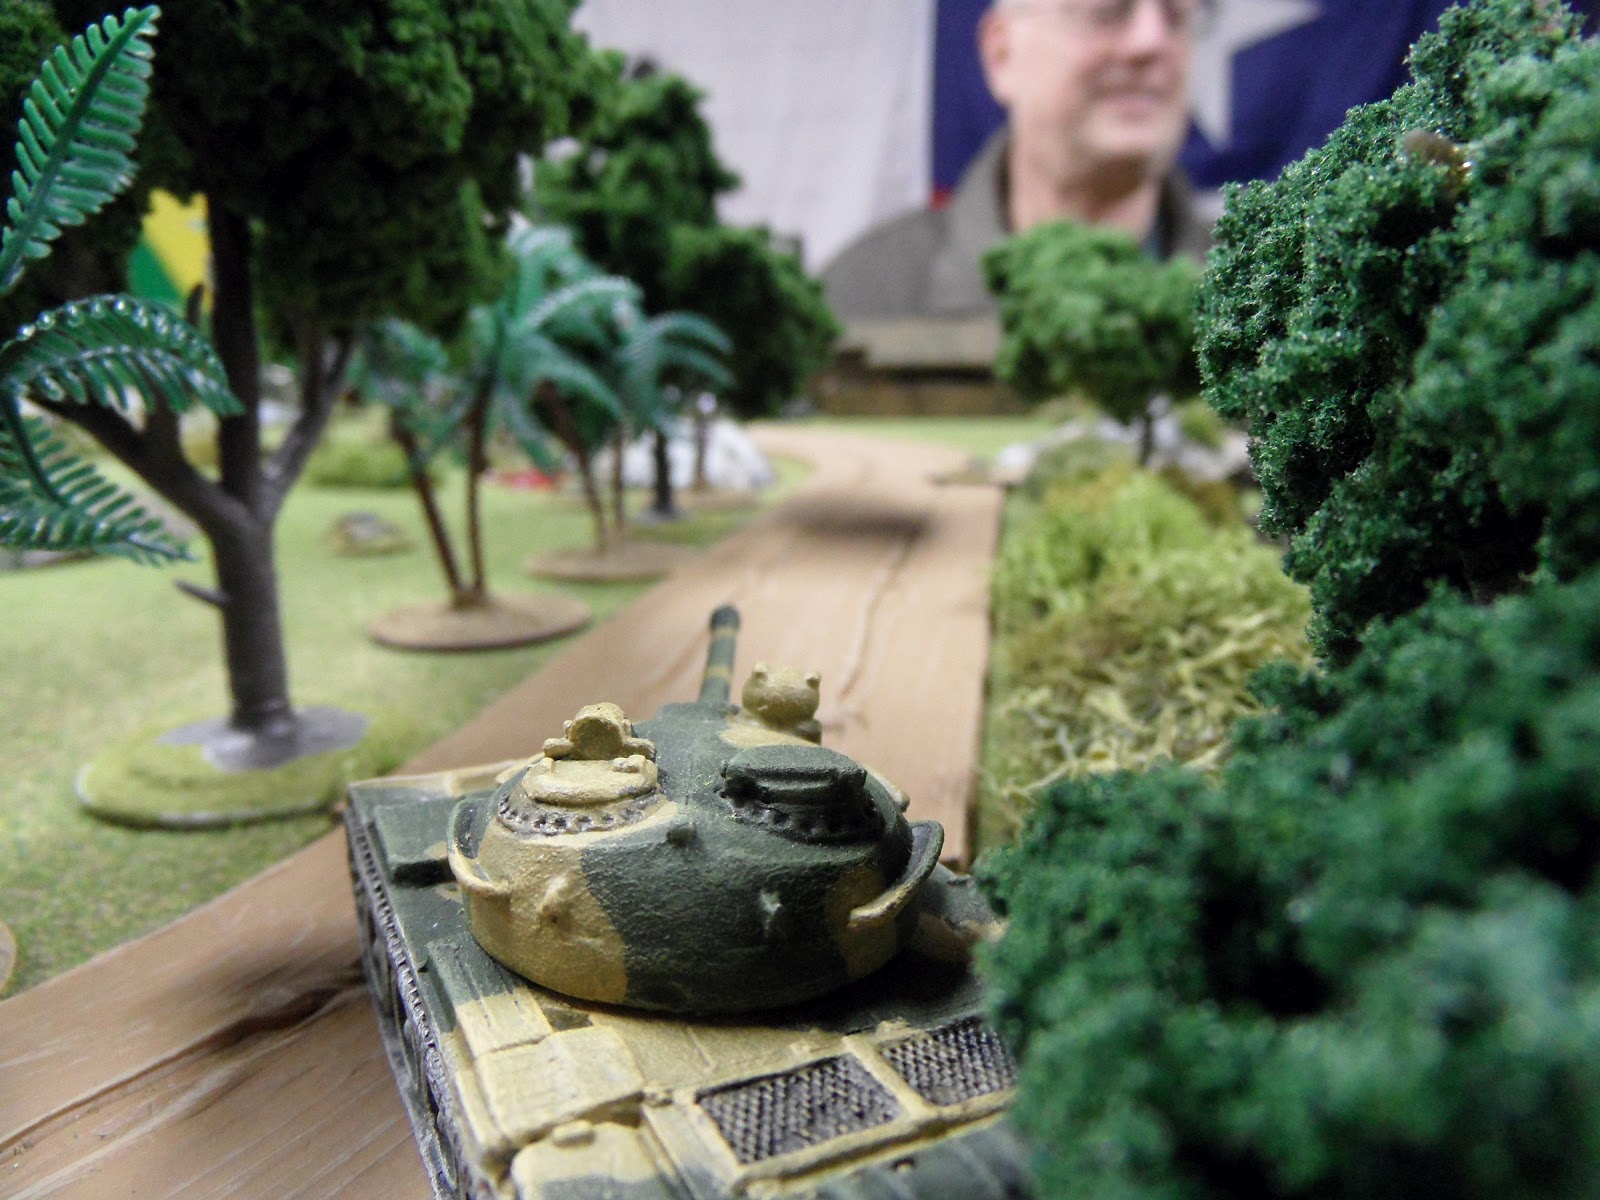
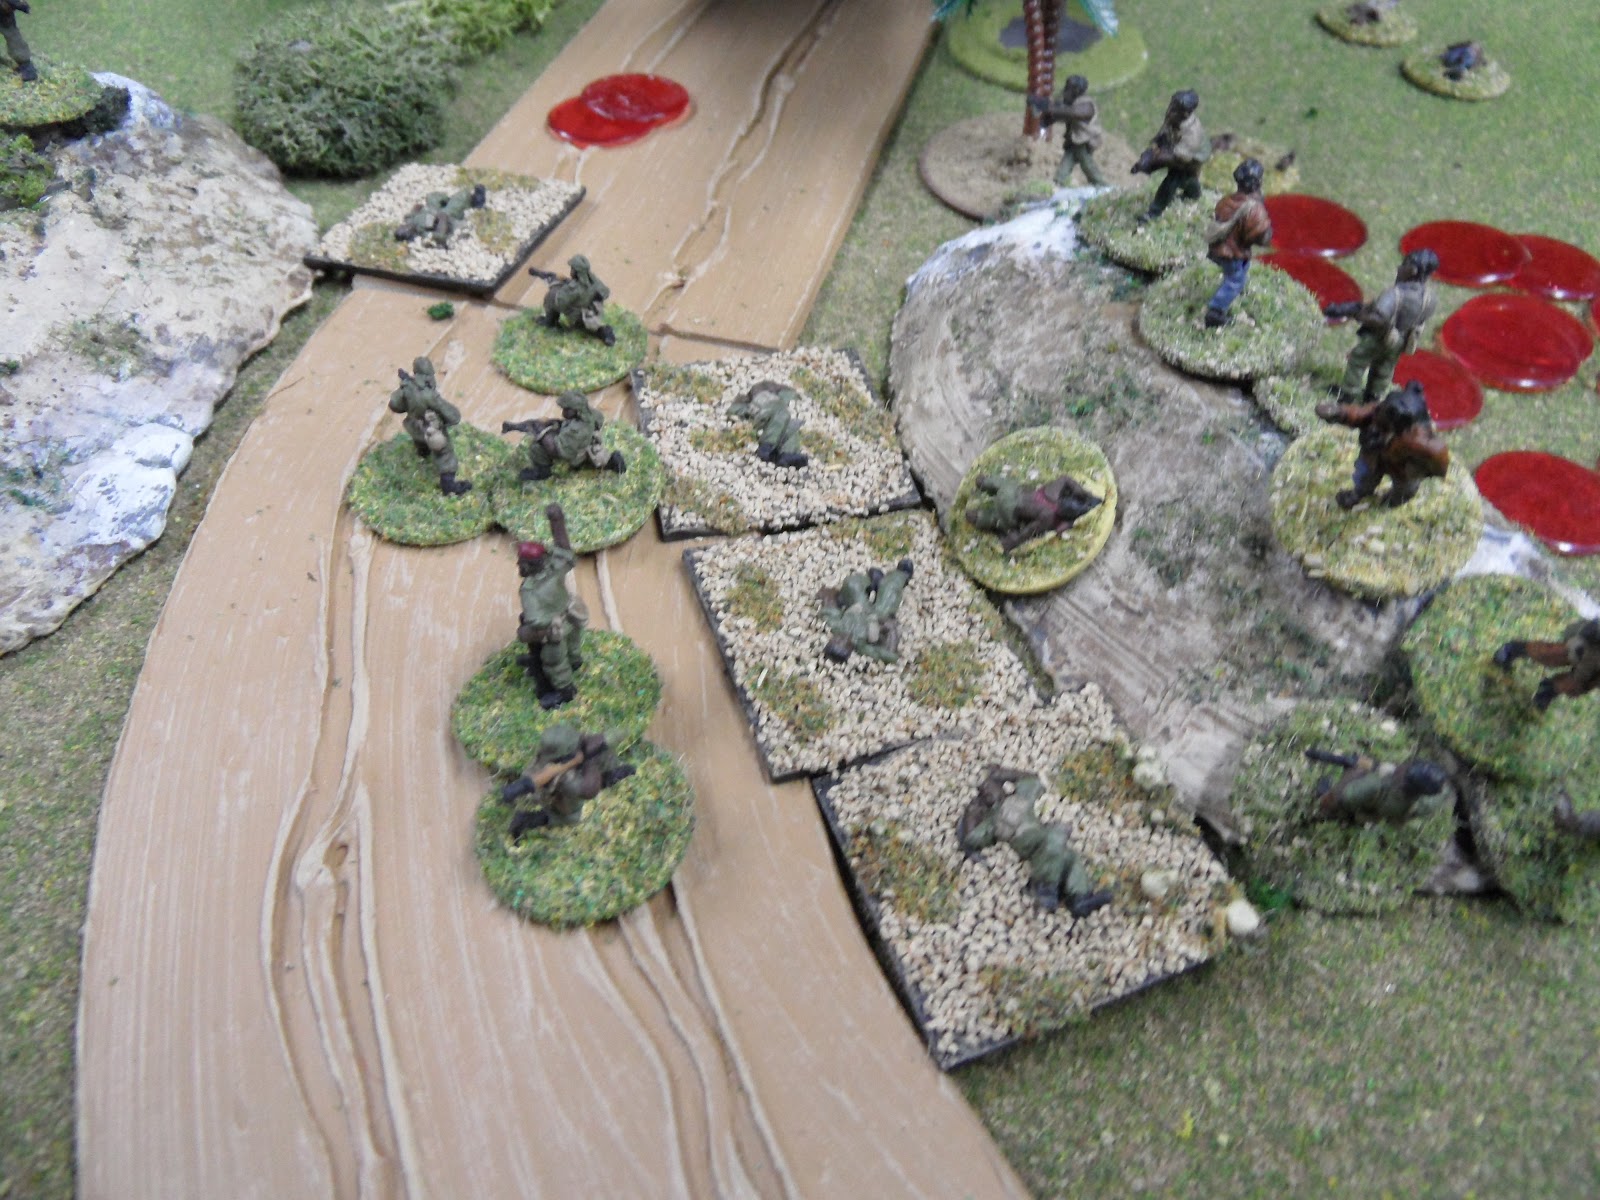
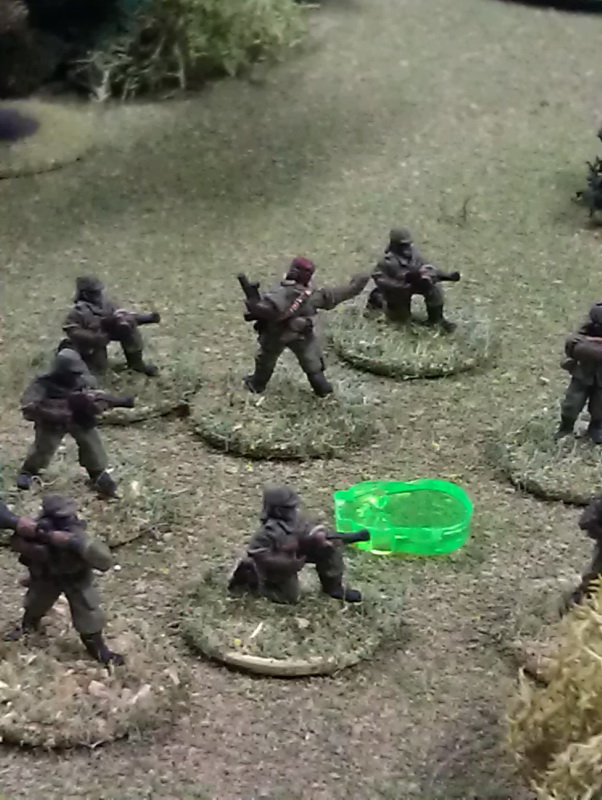
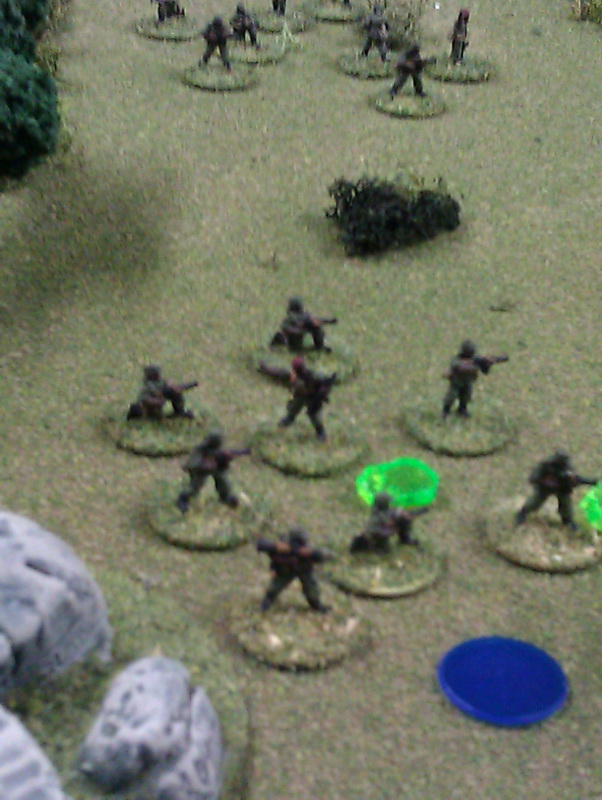
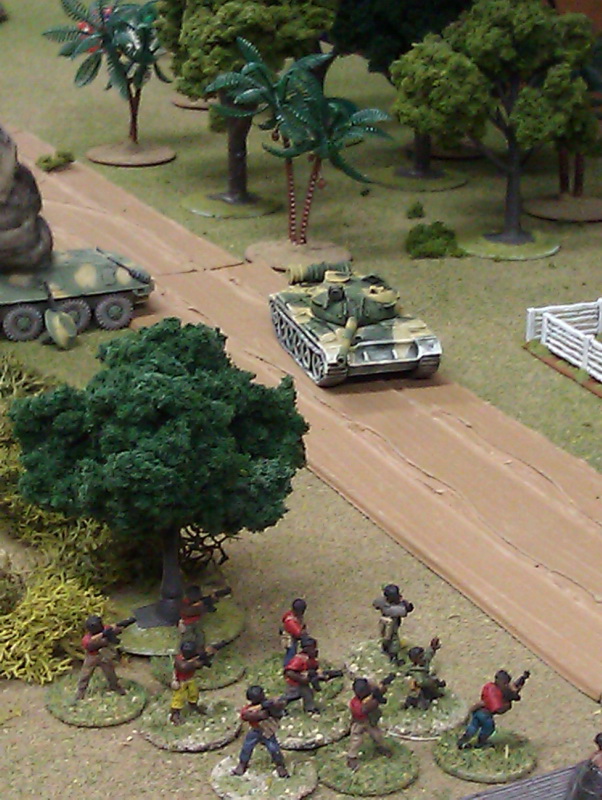
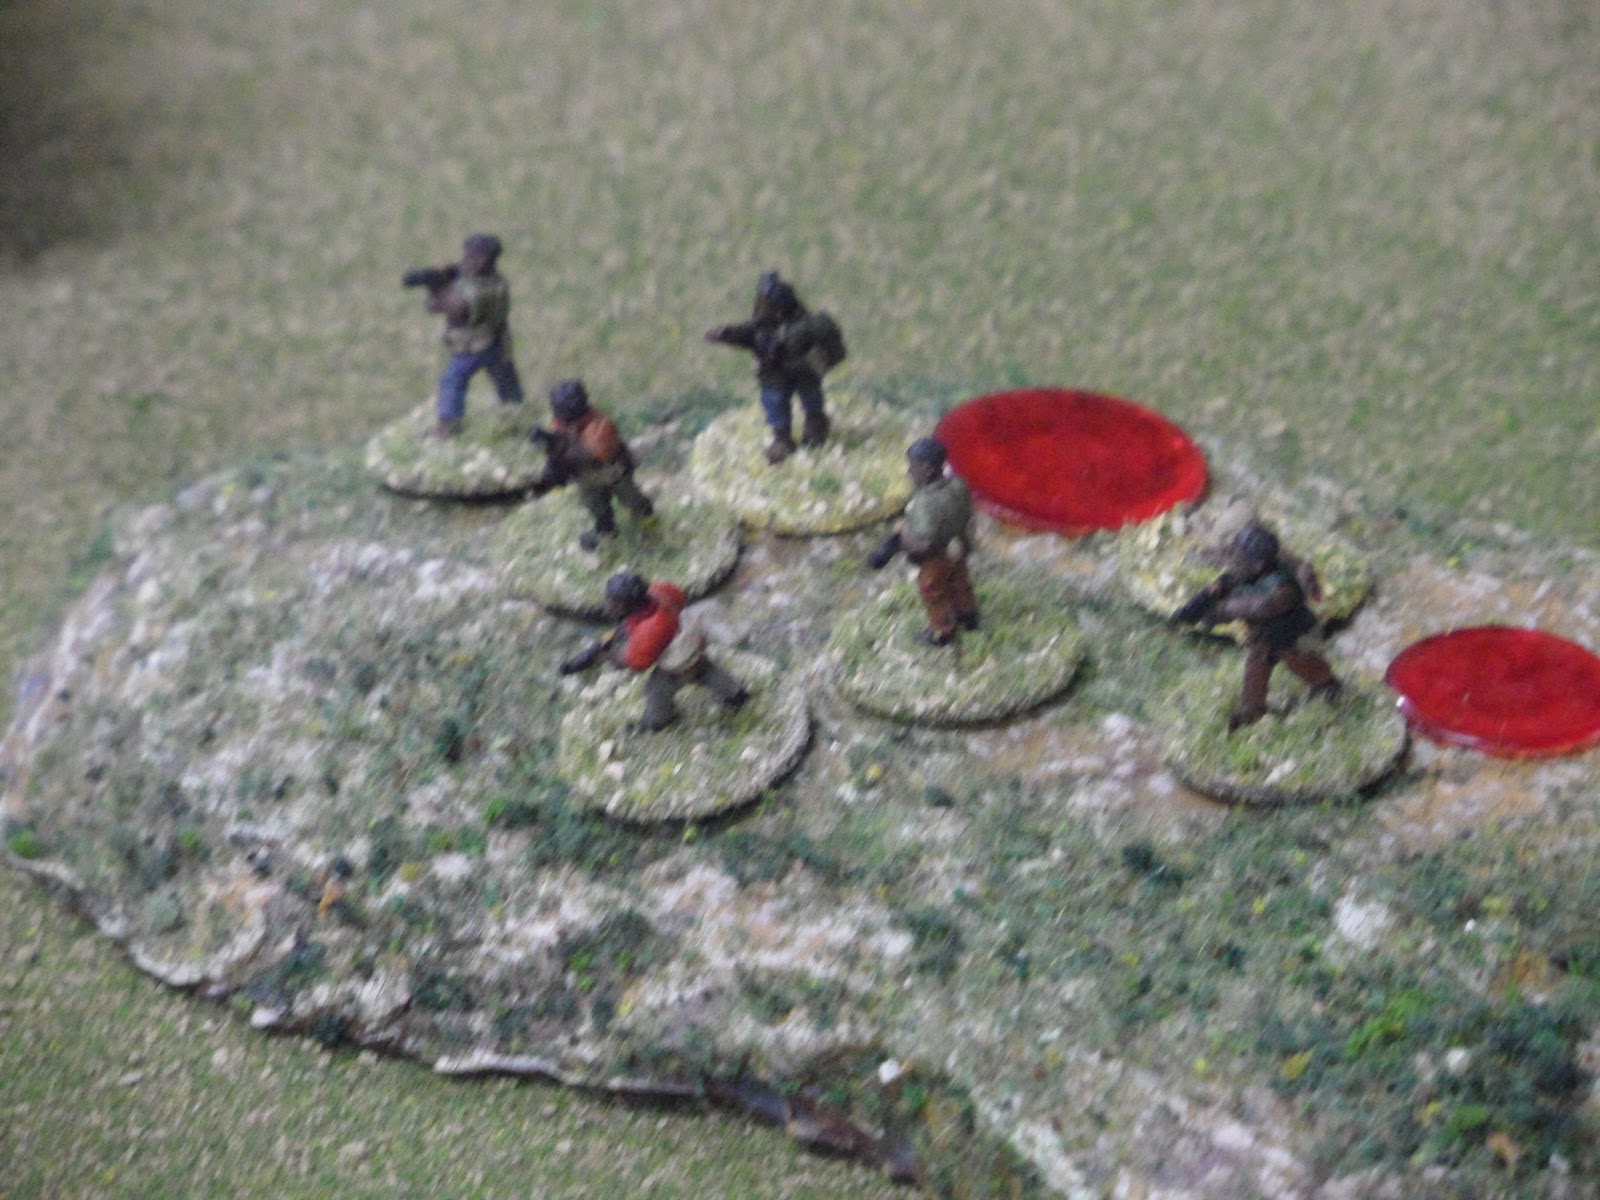
The detail on these little 10mm chaps is amazing and together with the terrain really created a great effect

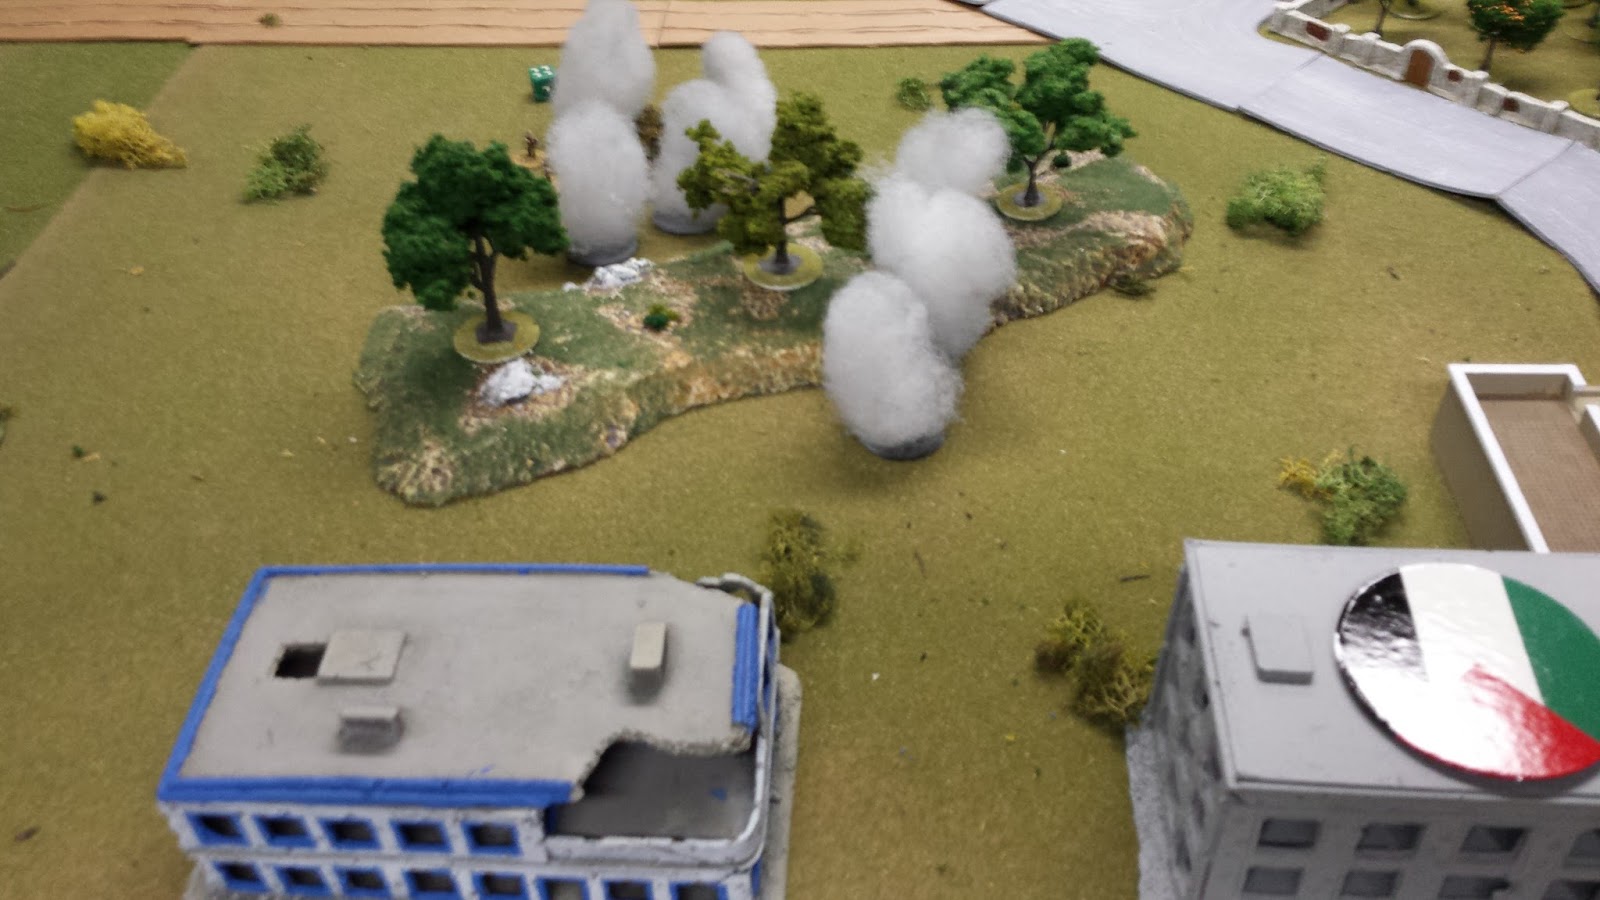
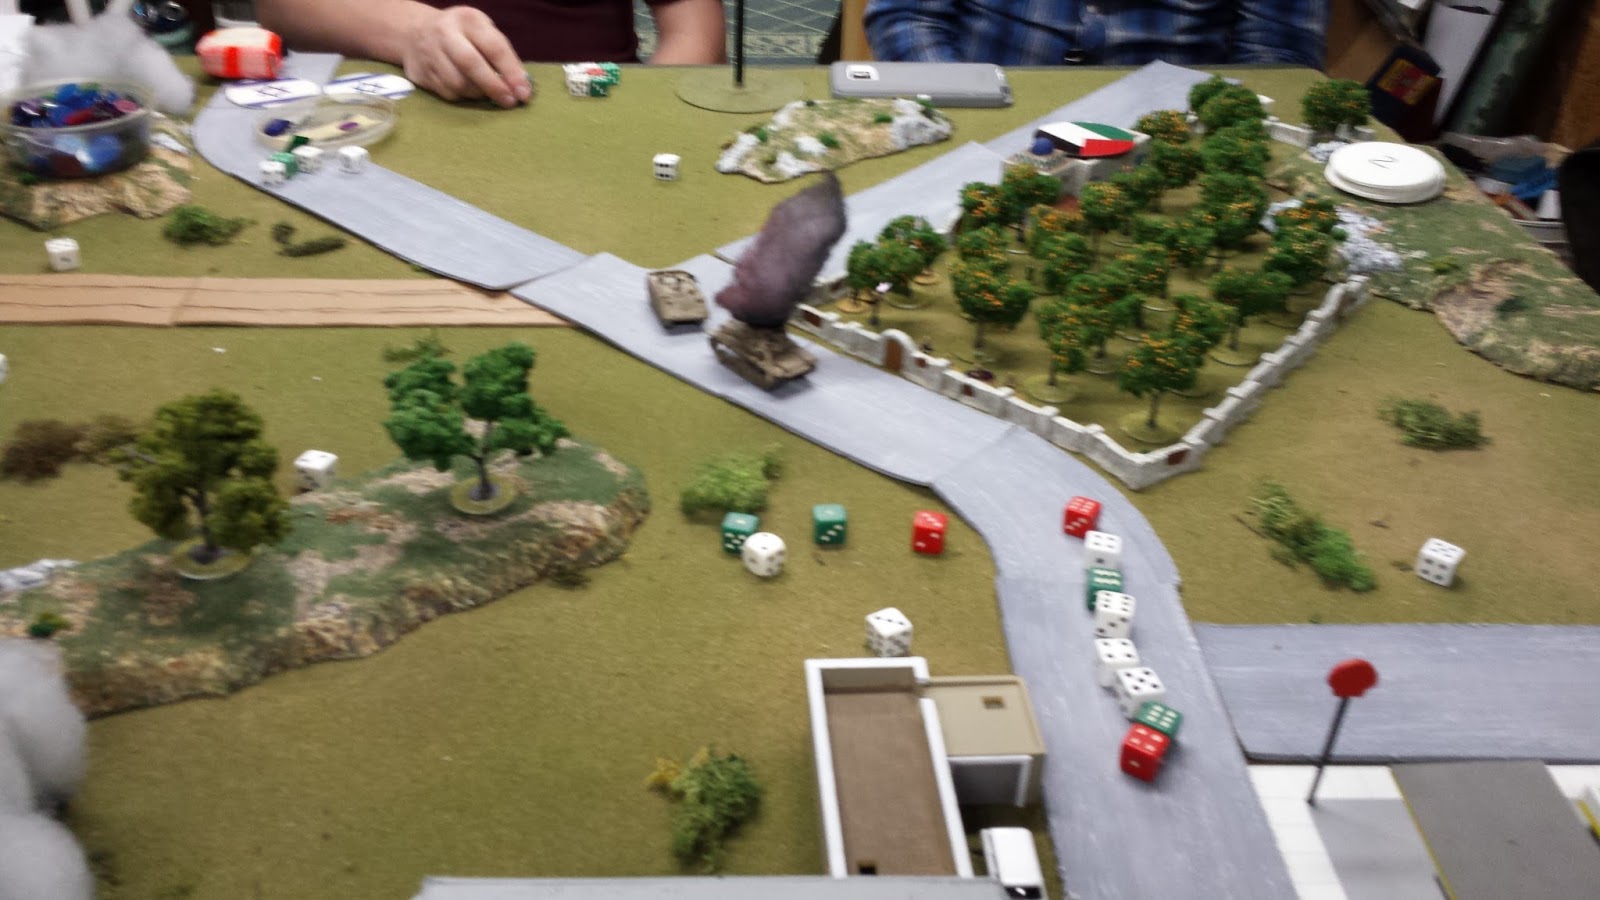
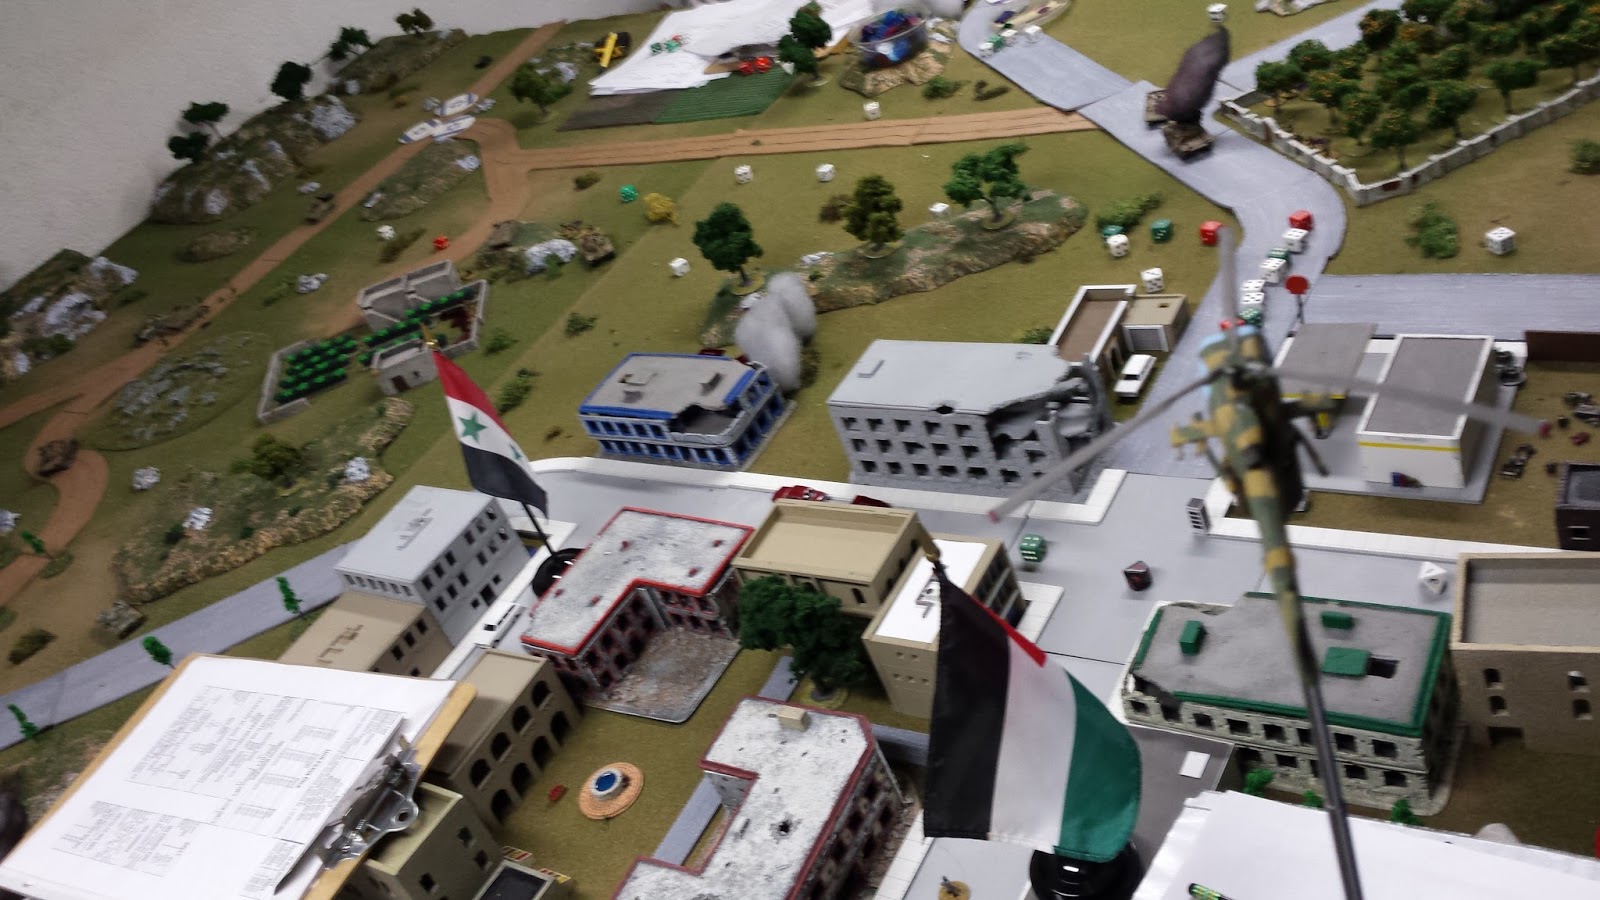
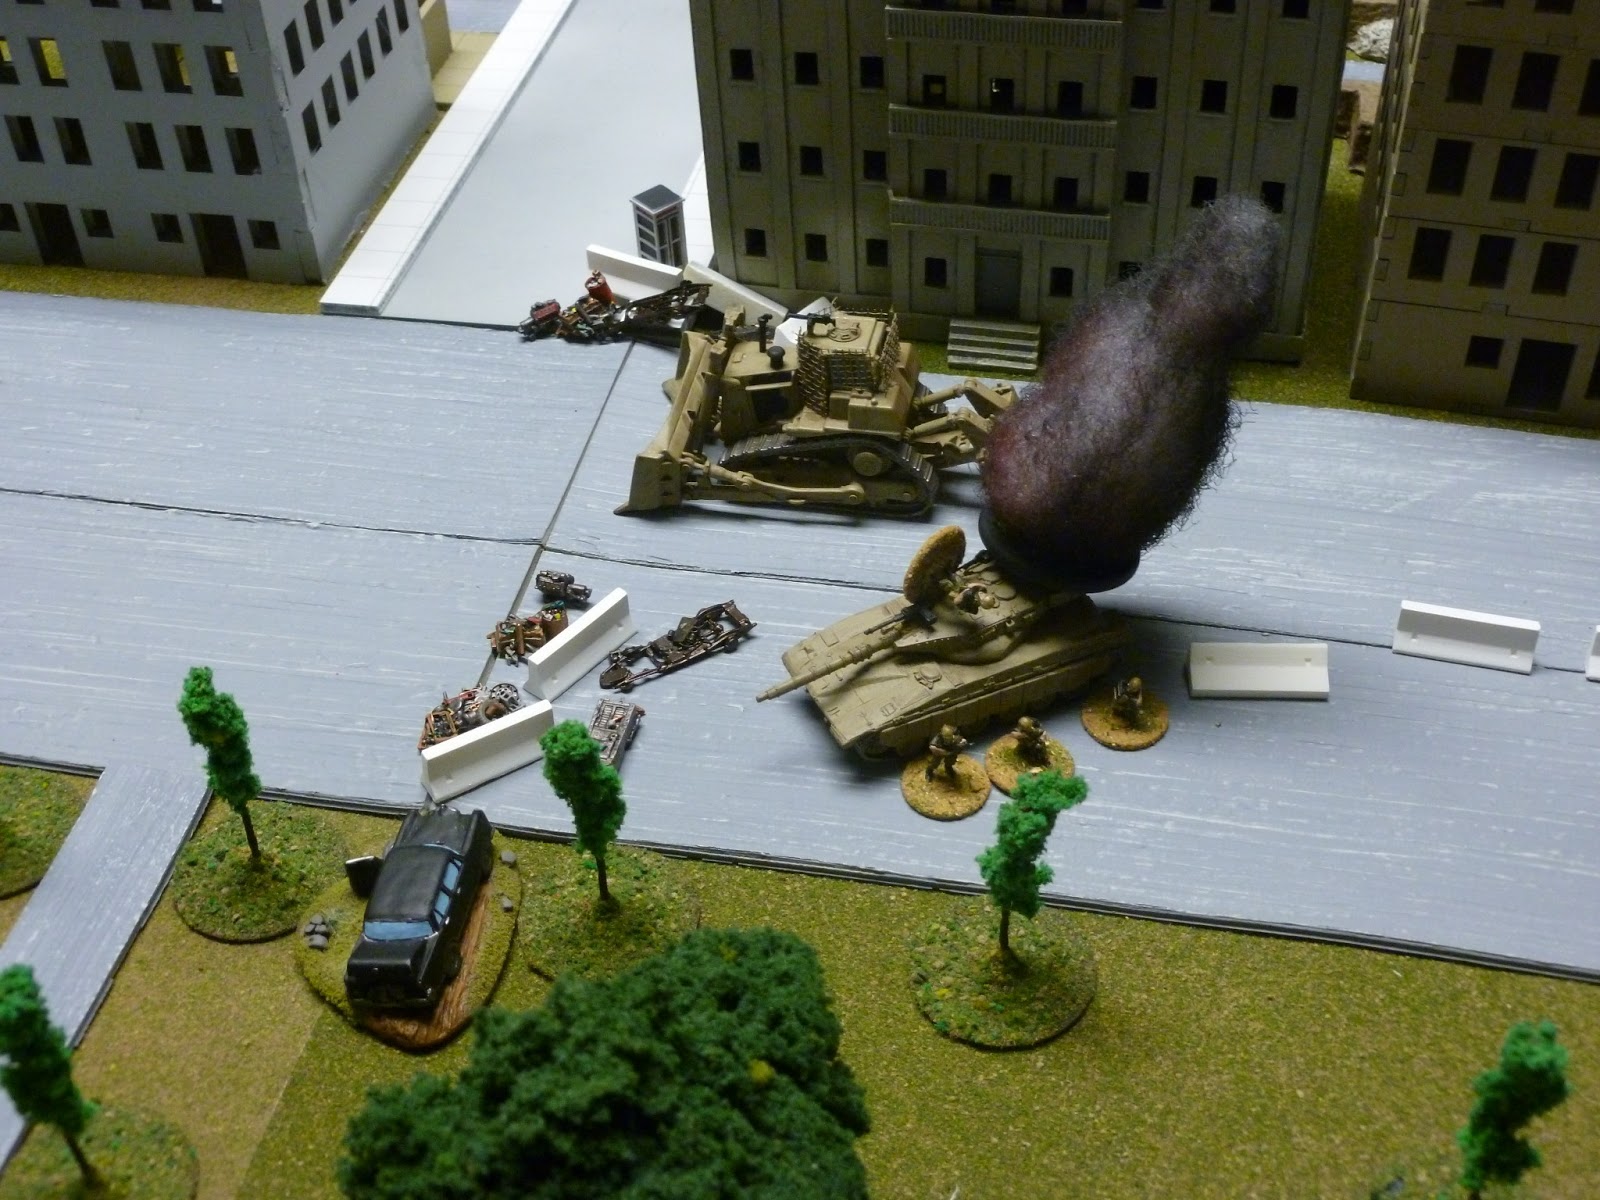
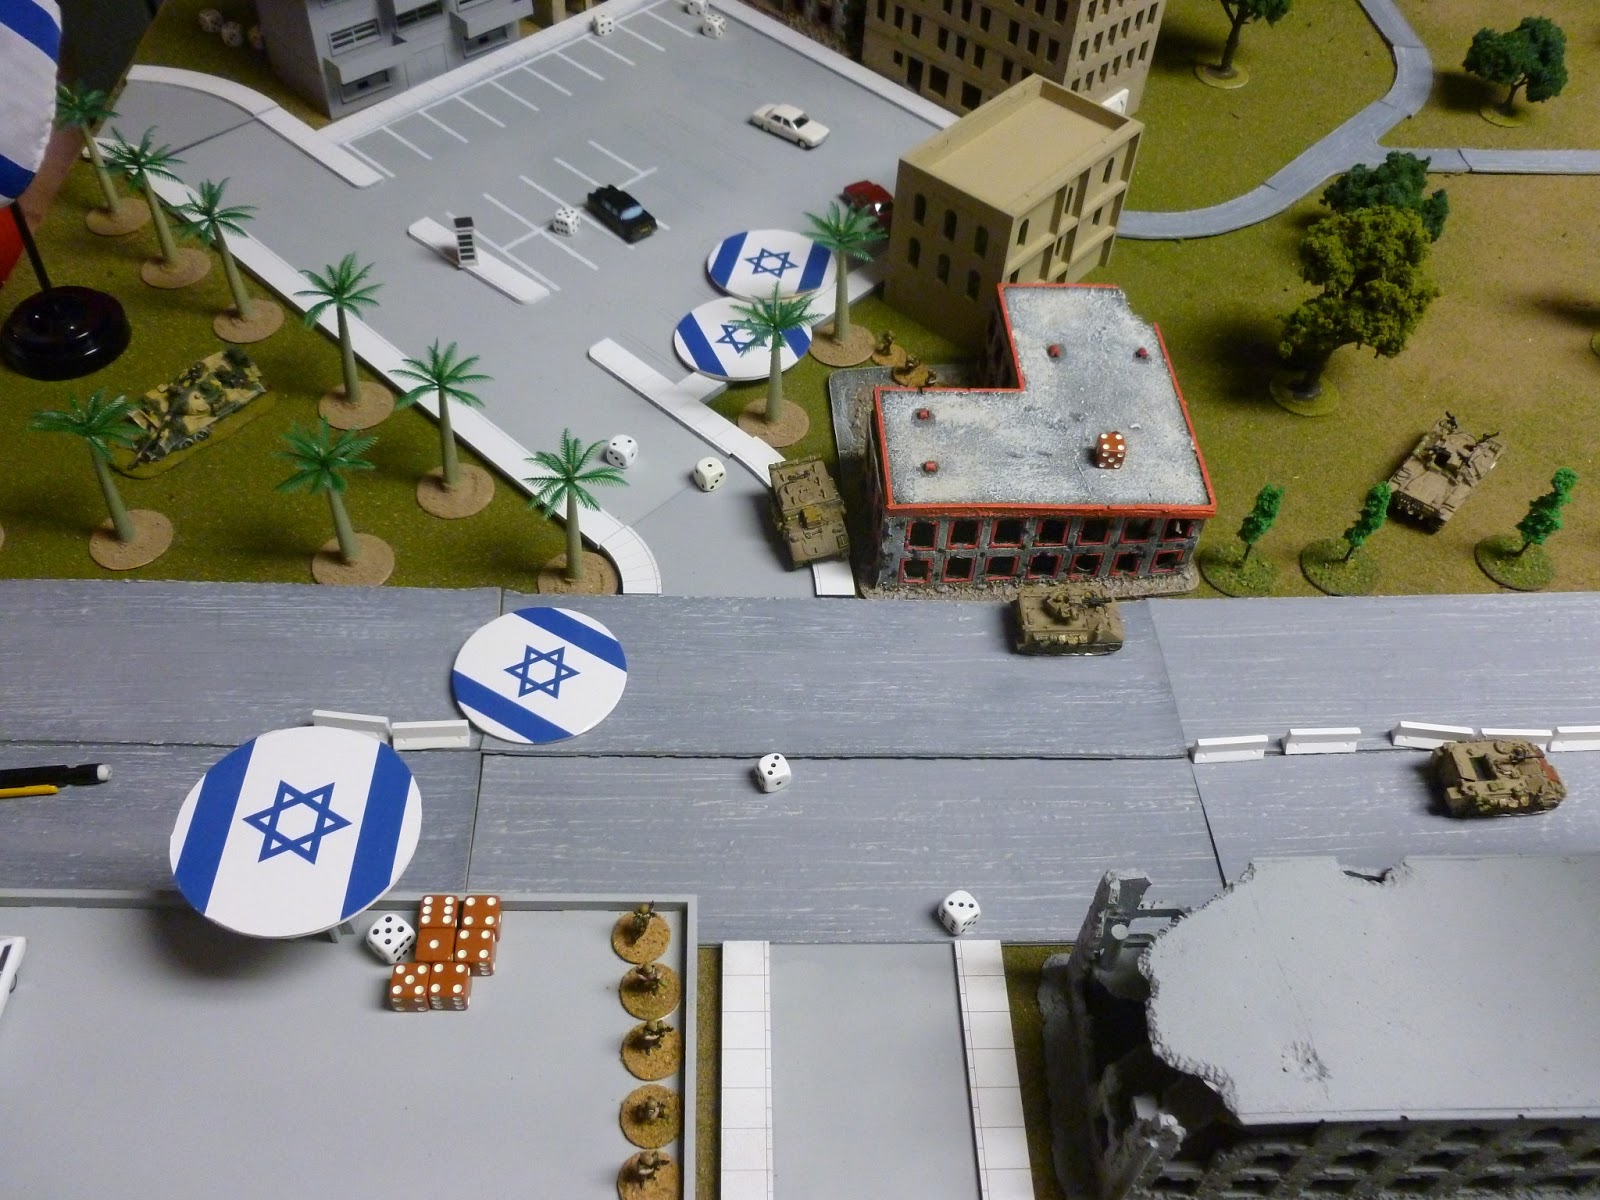
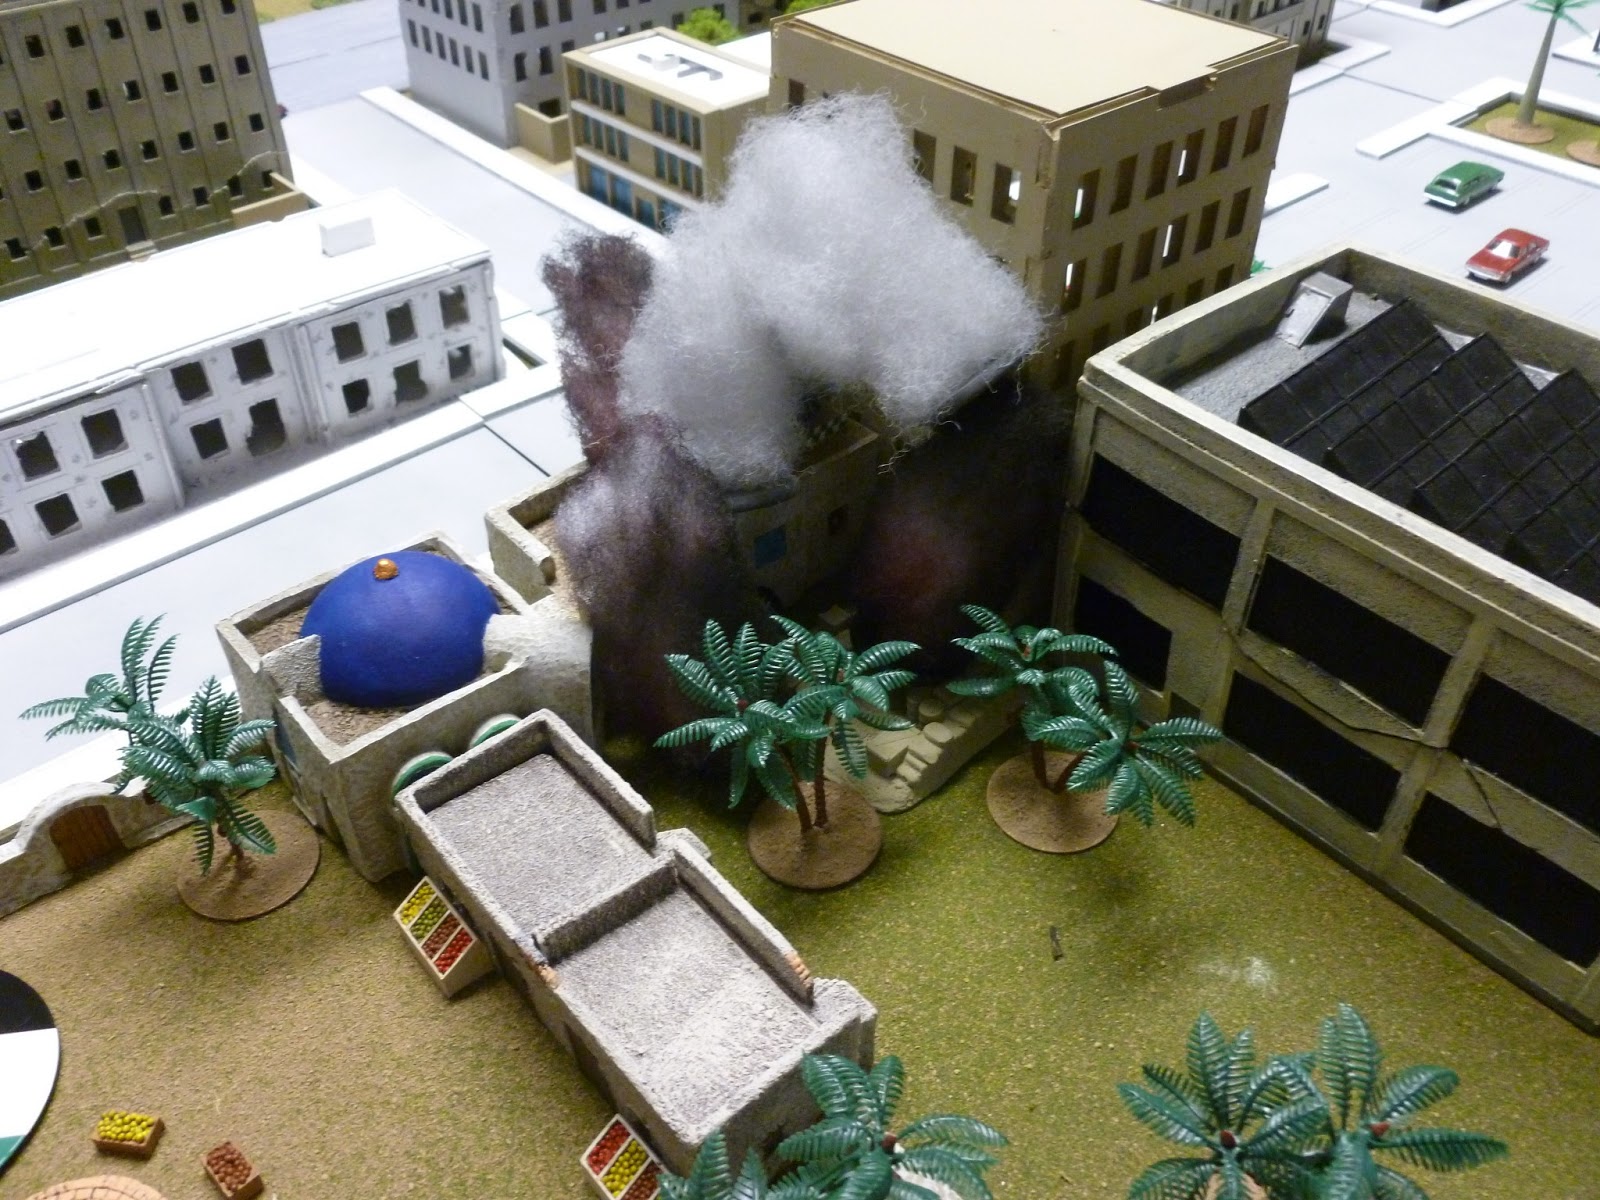
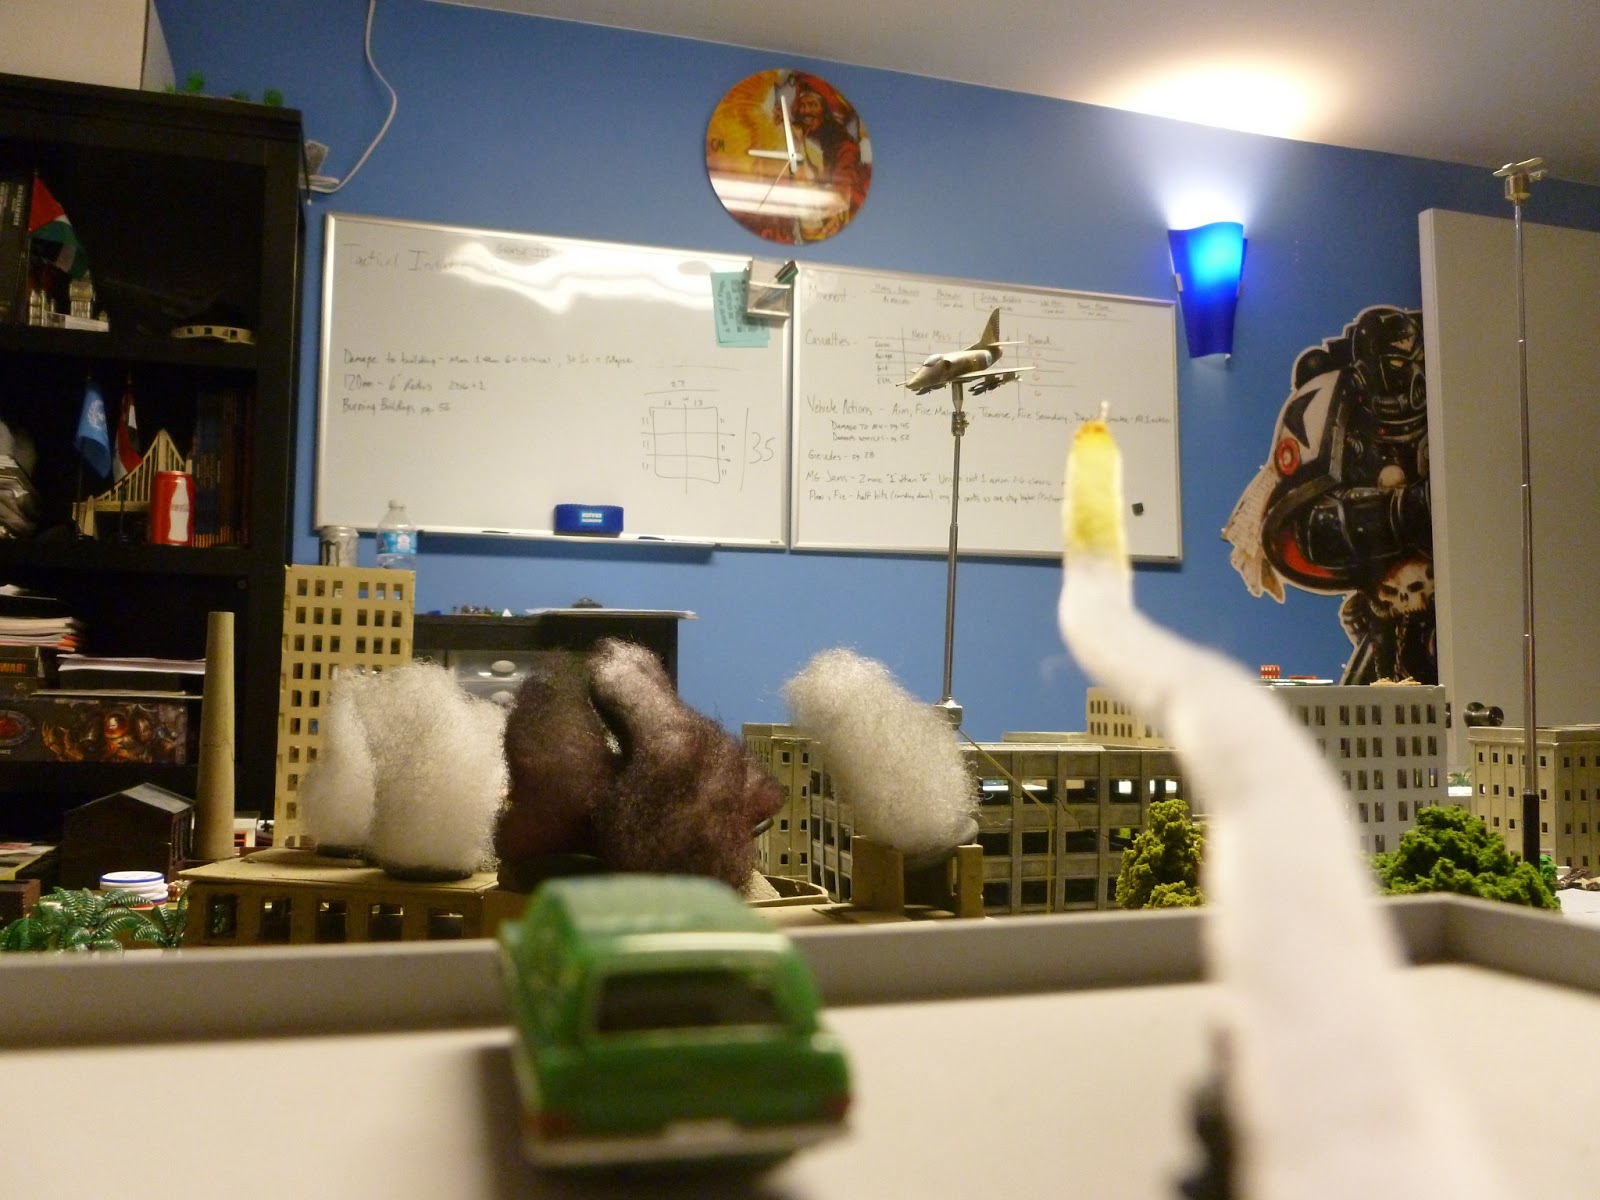
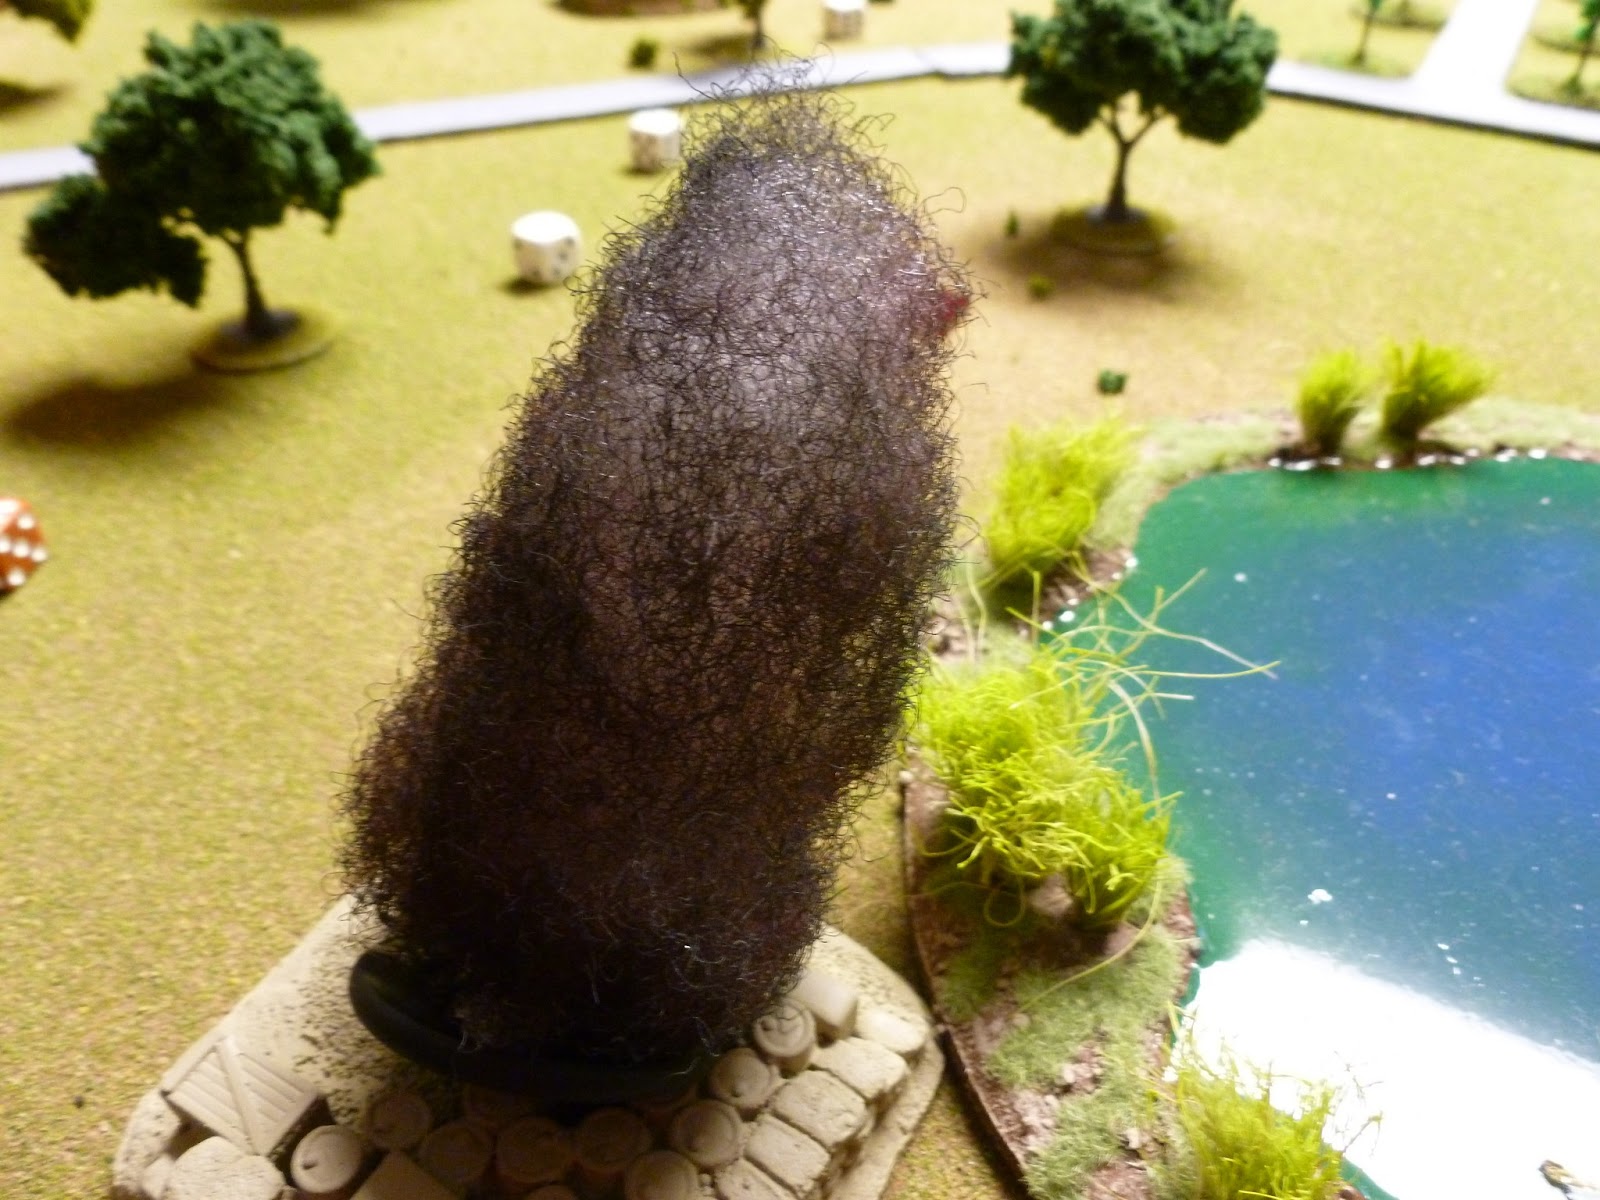
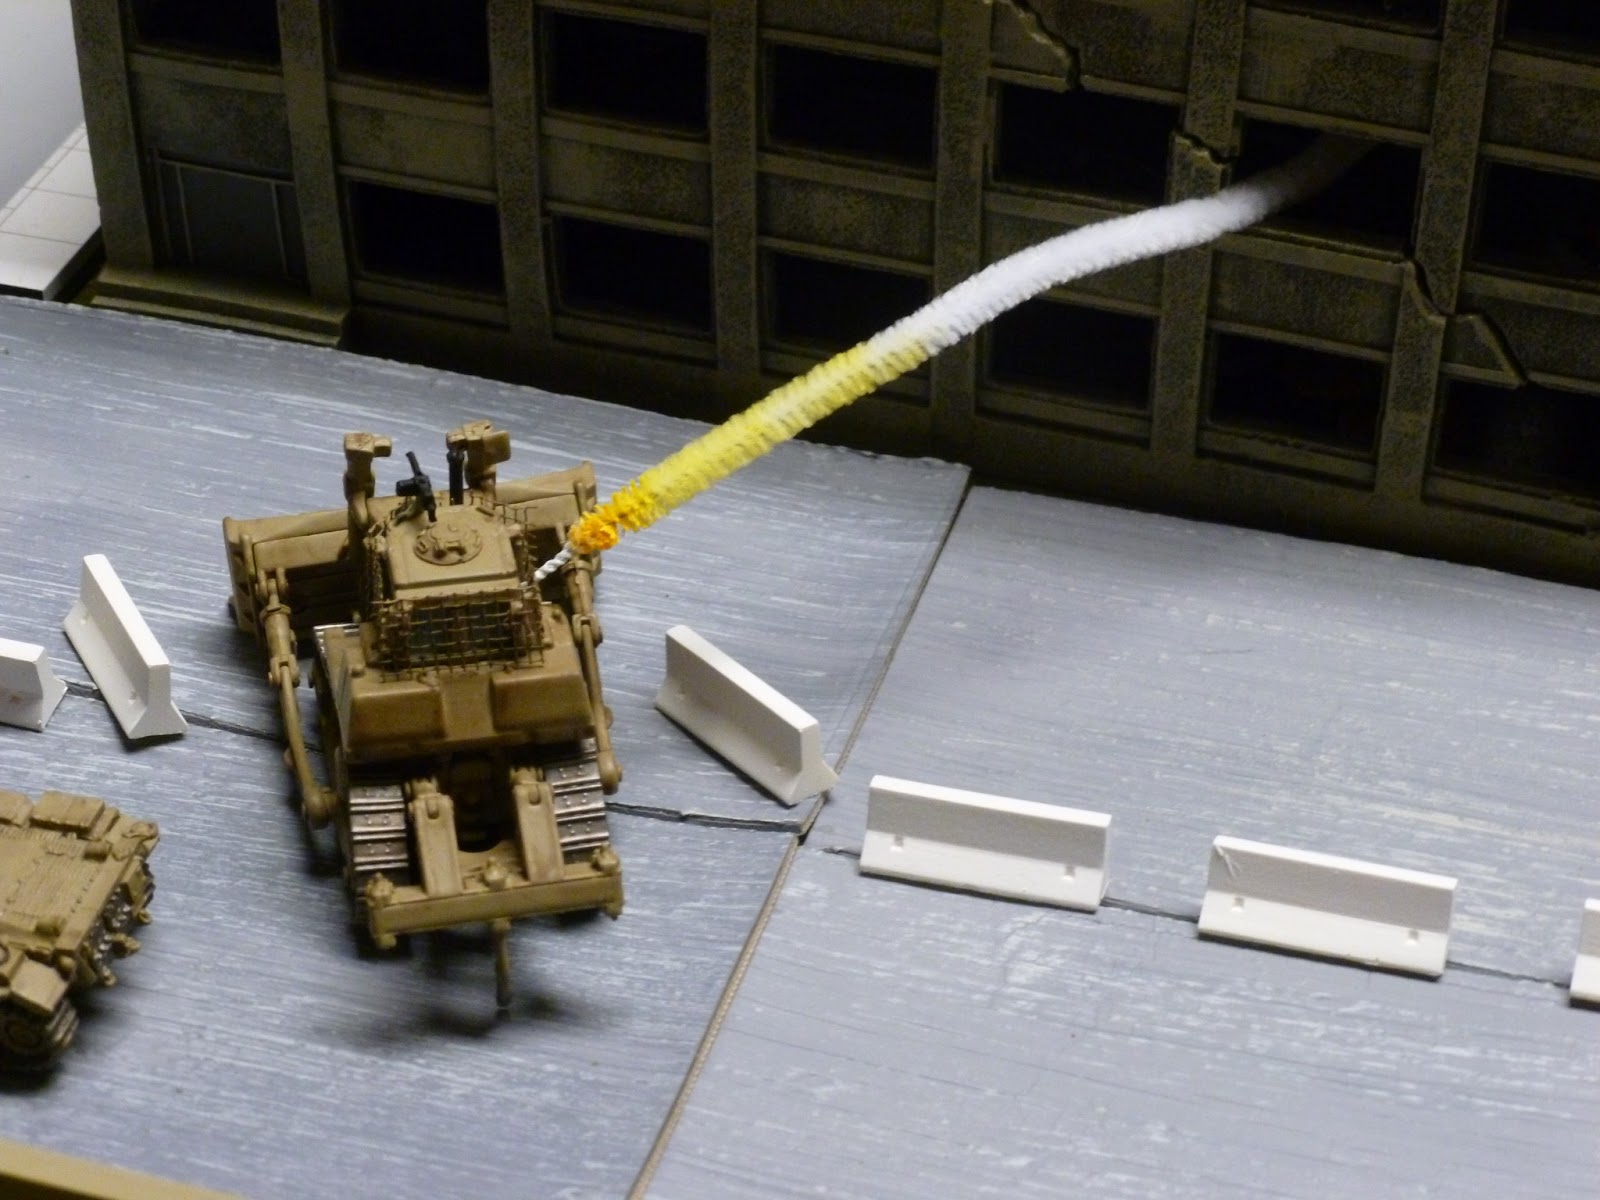
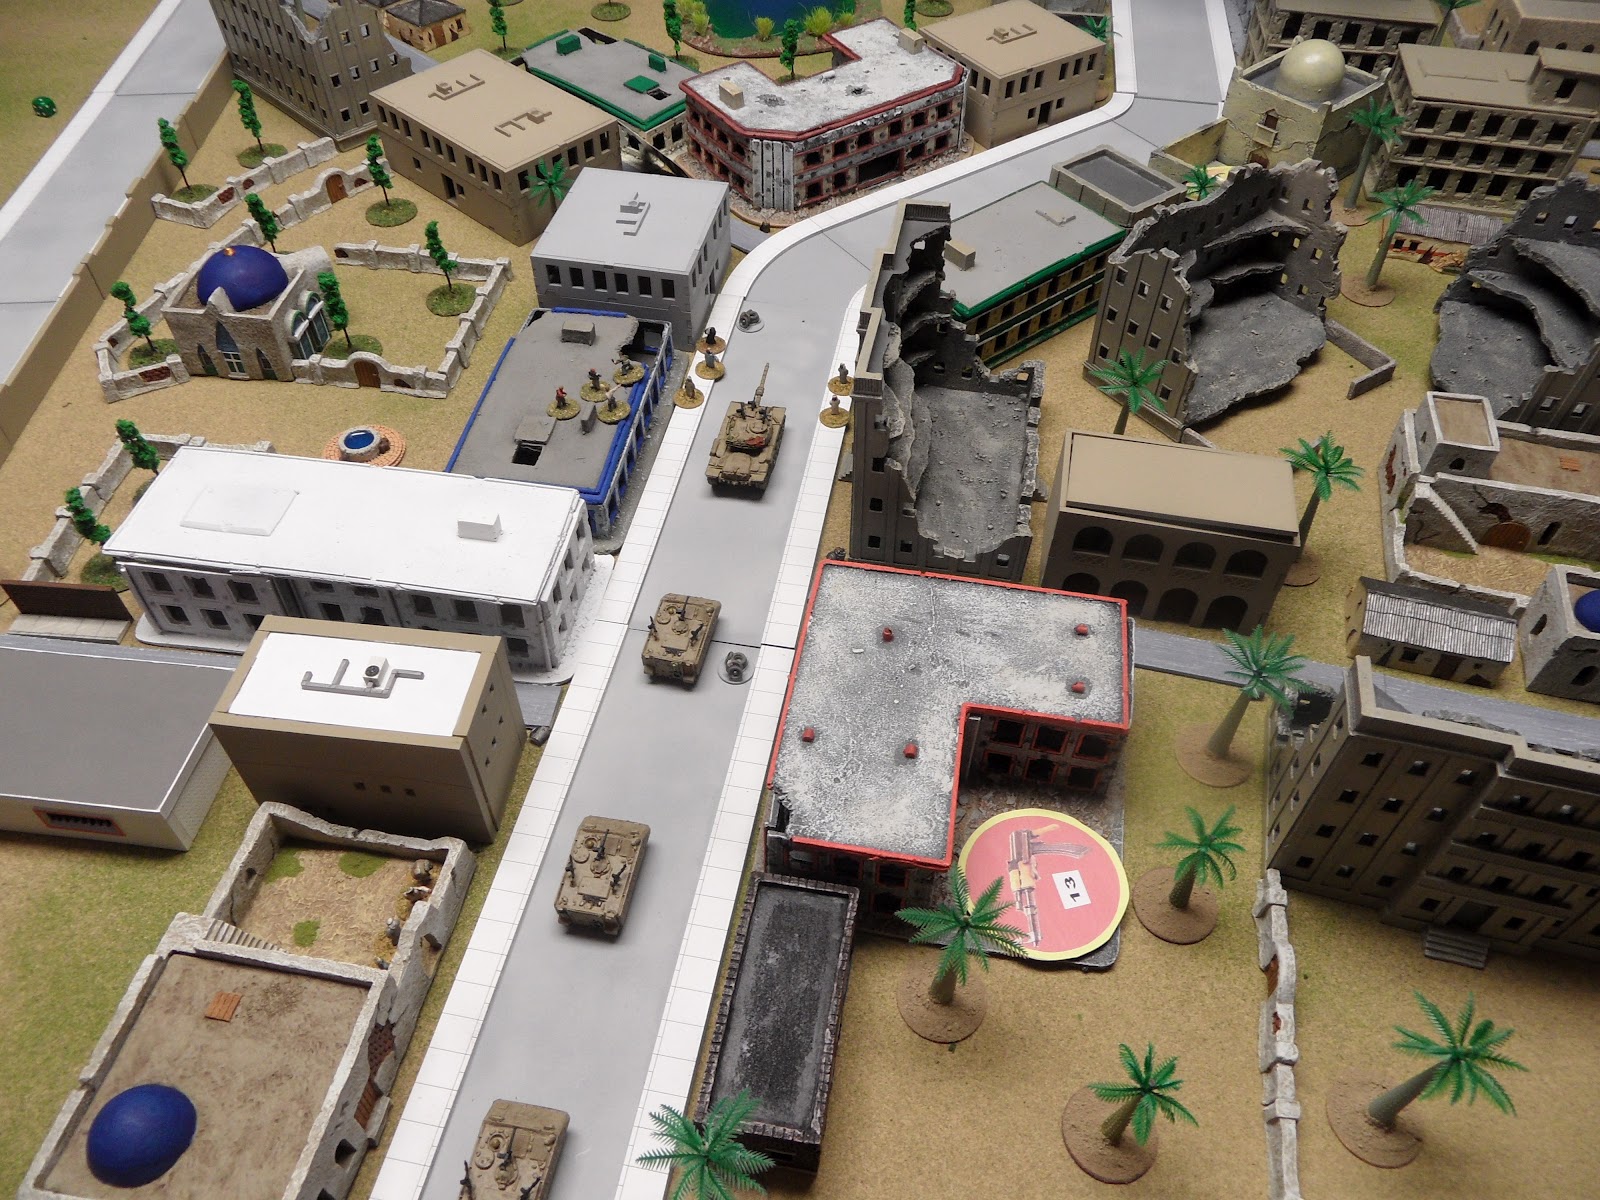
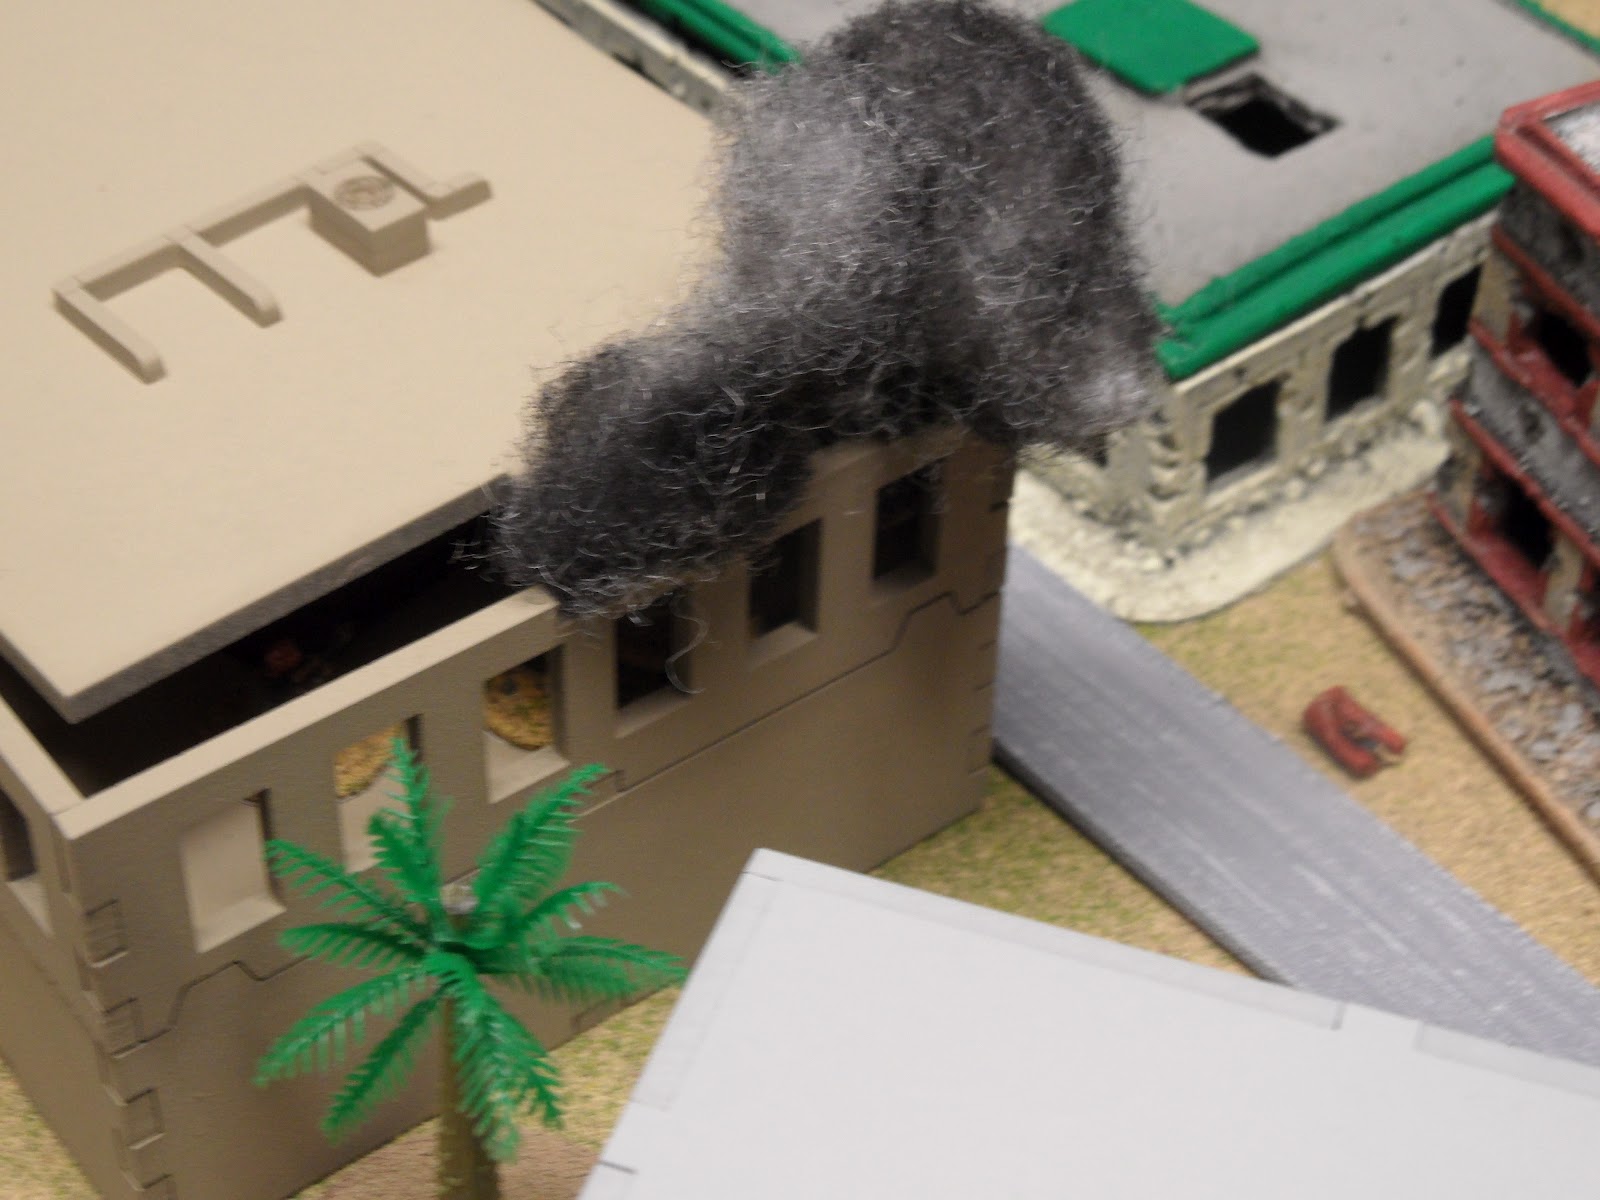
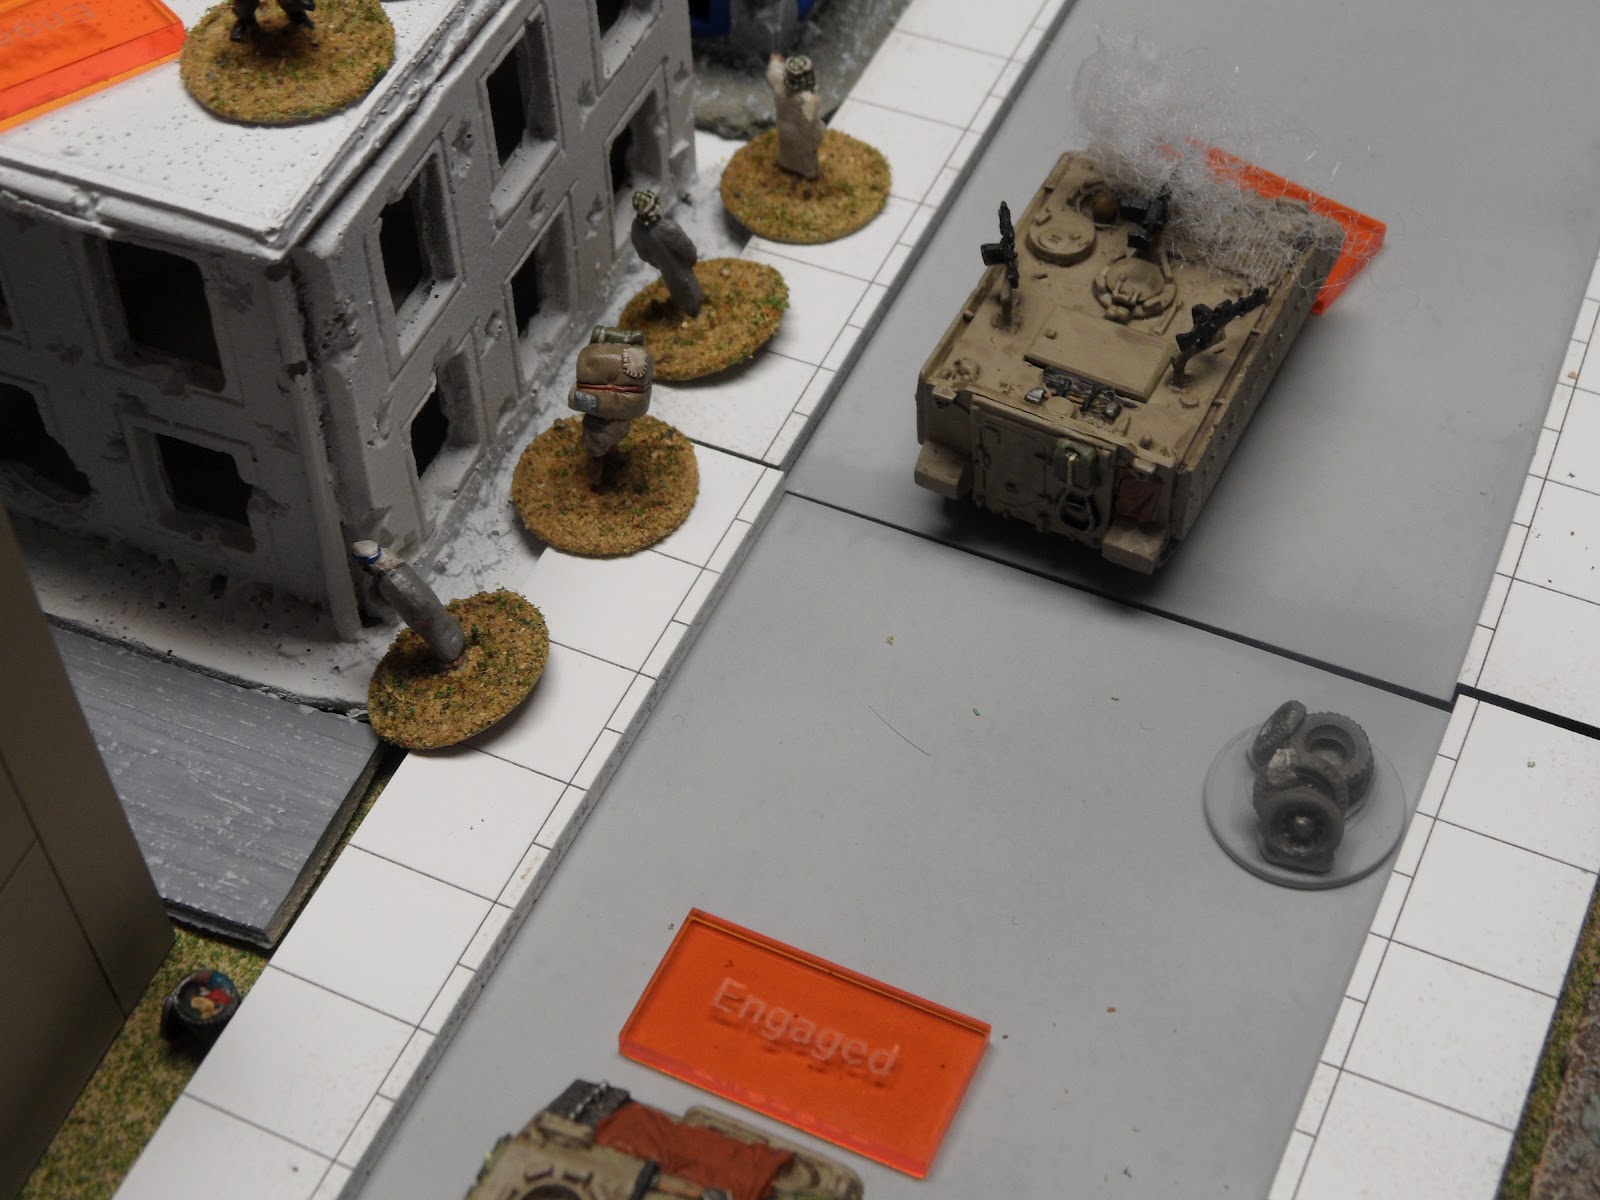
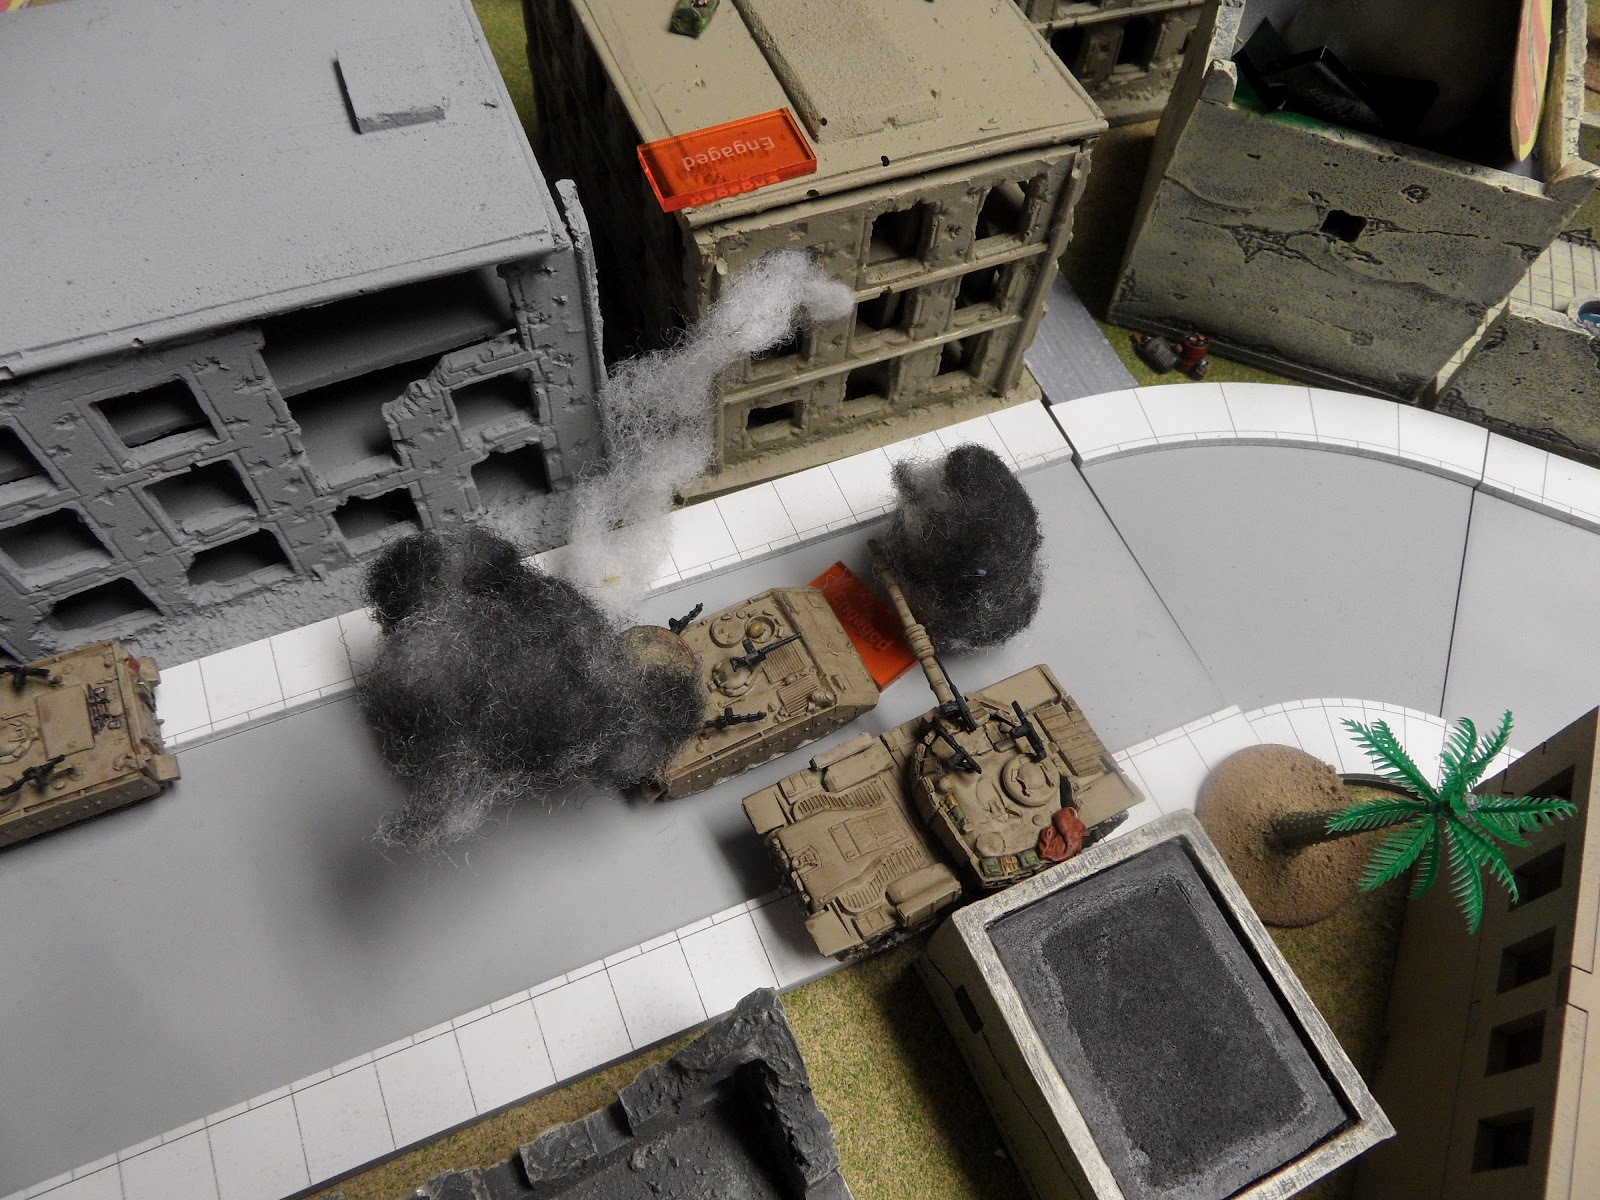
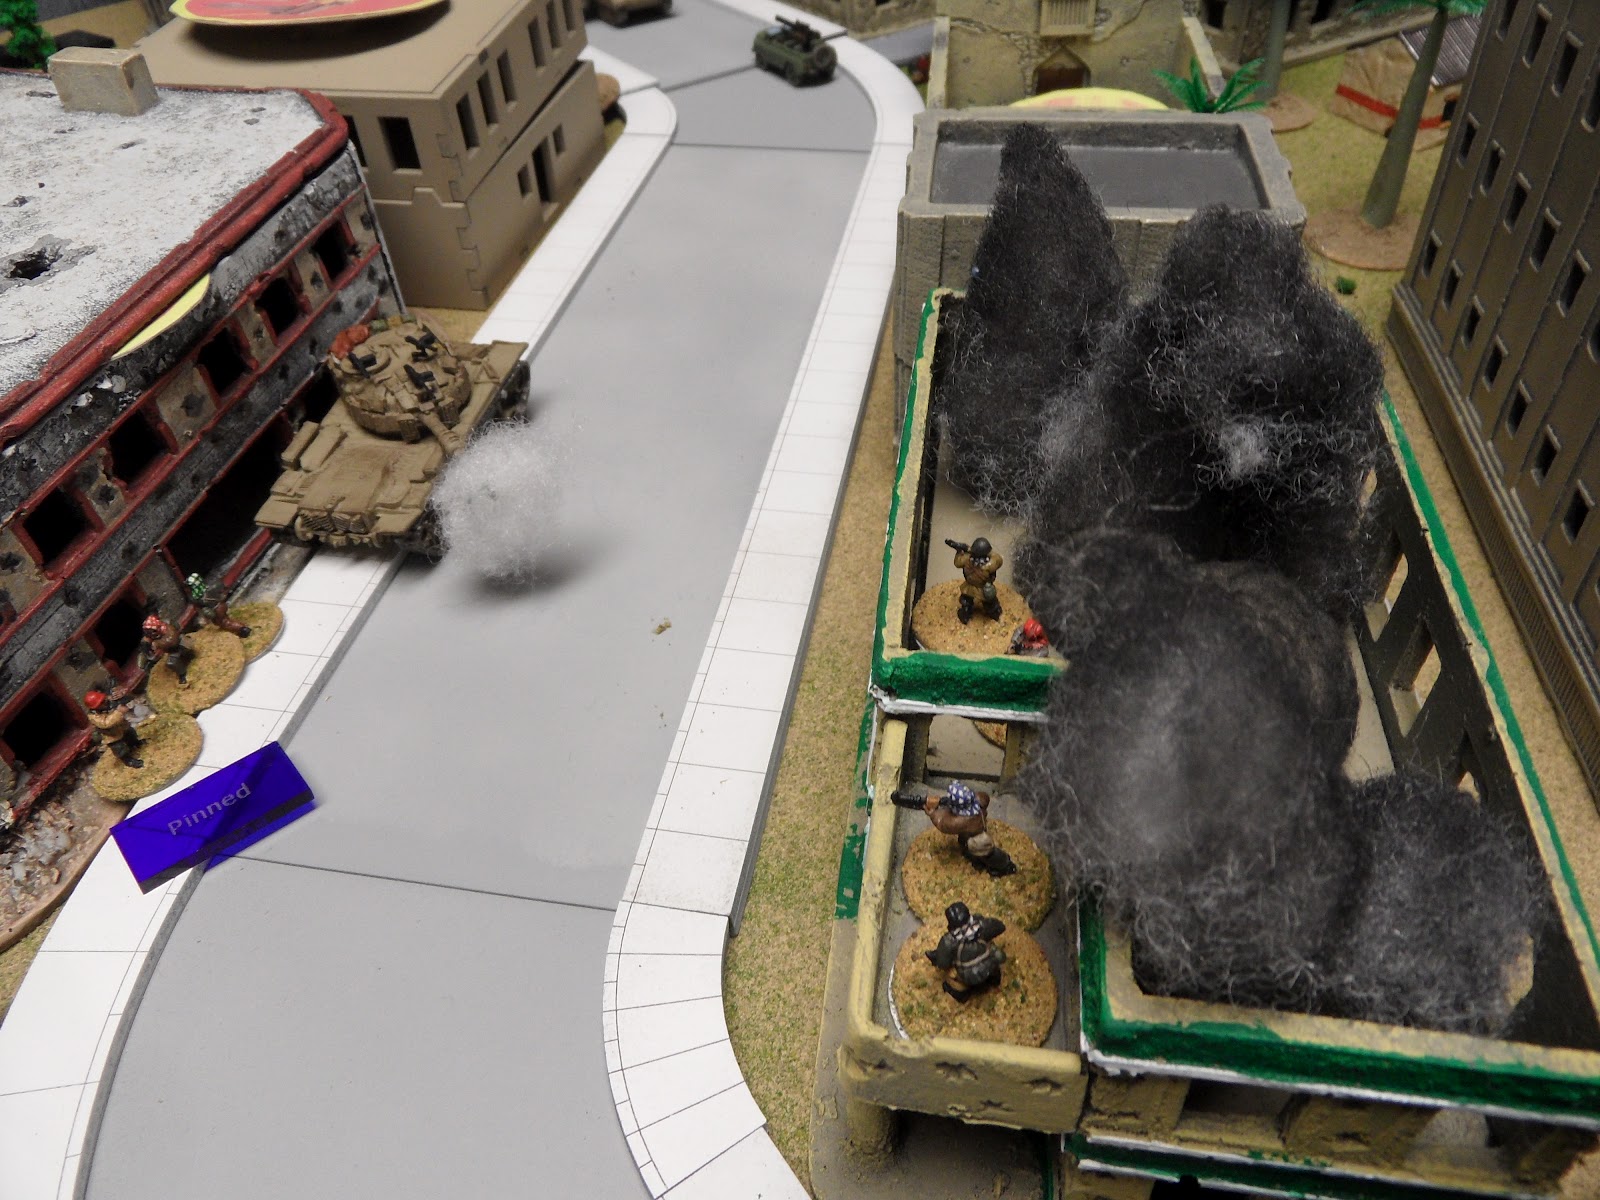
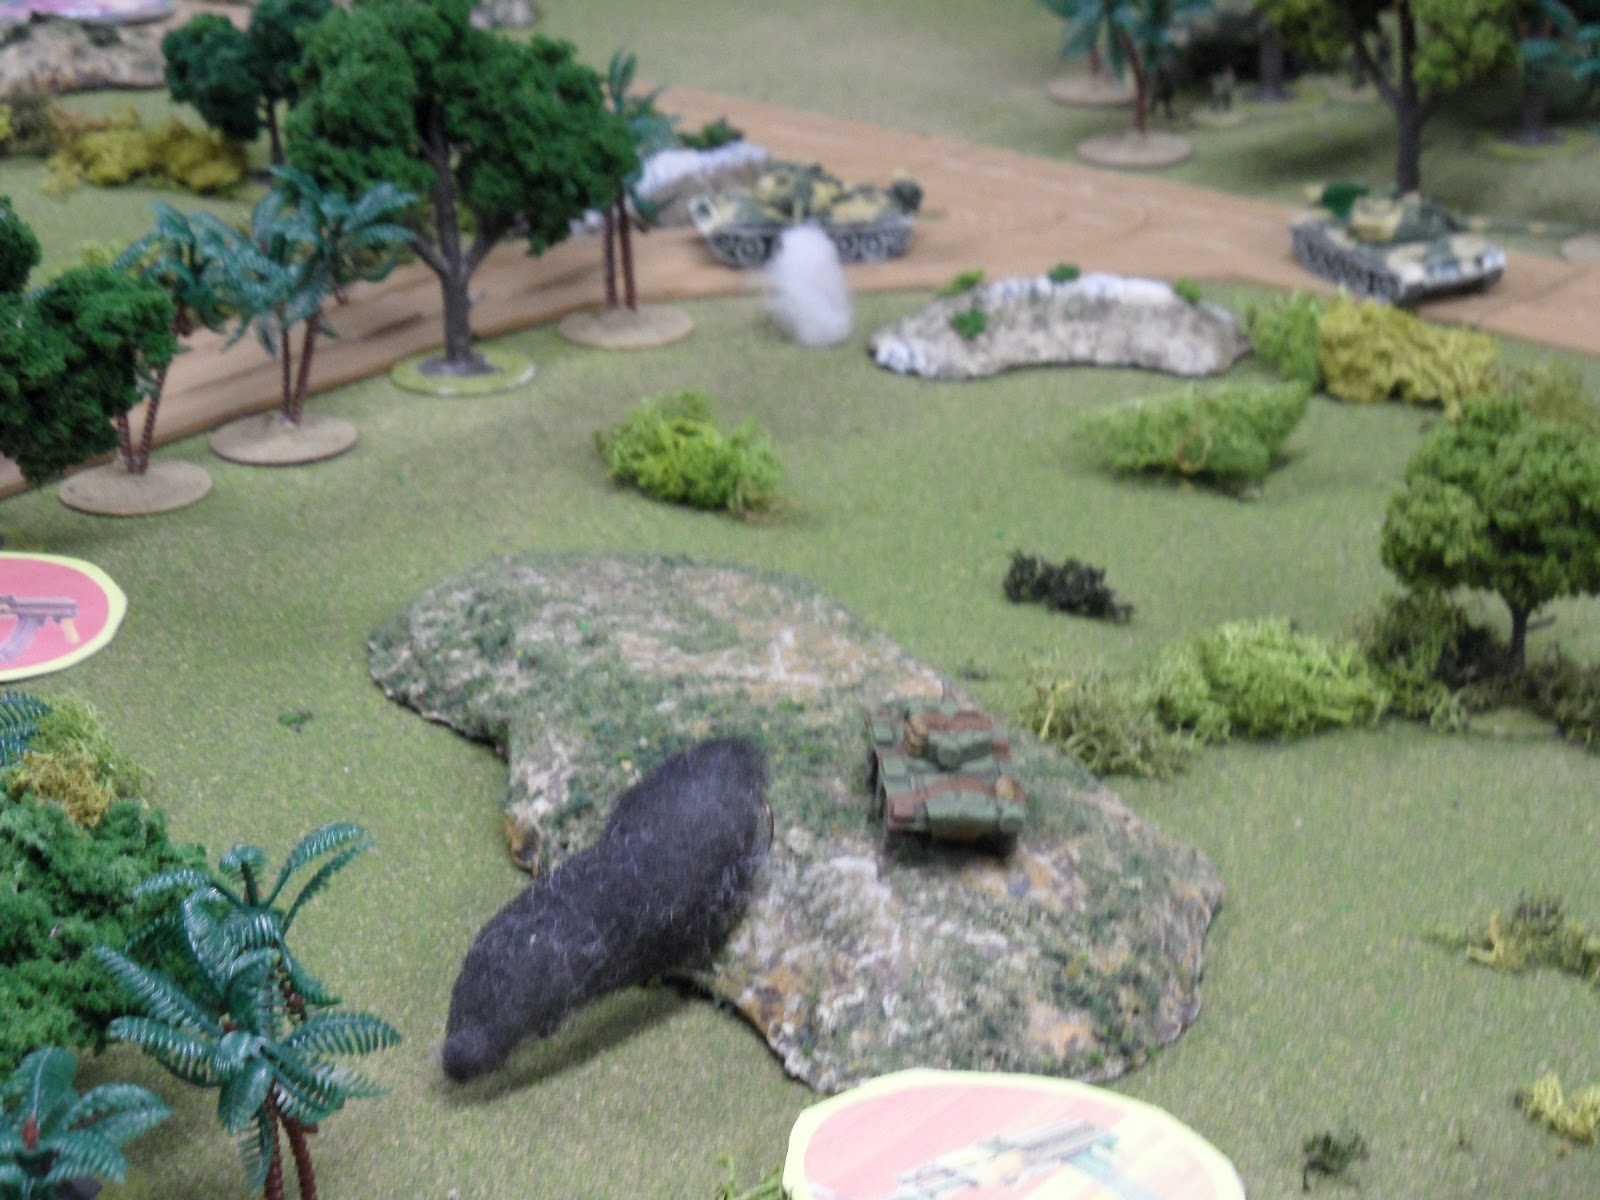
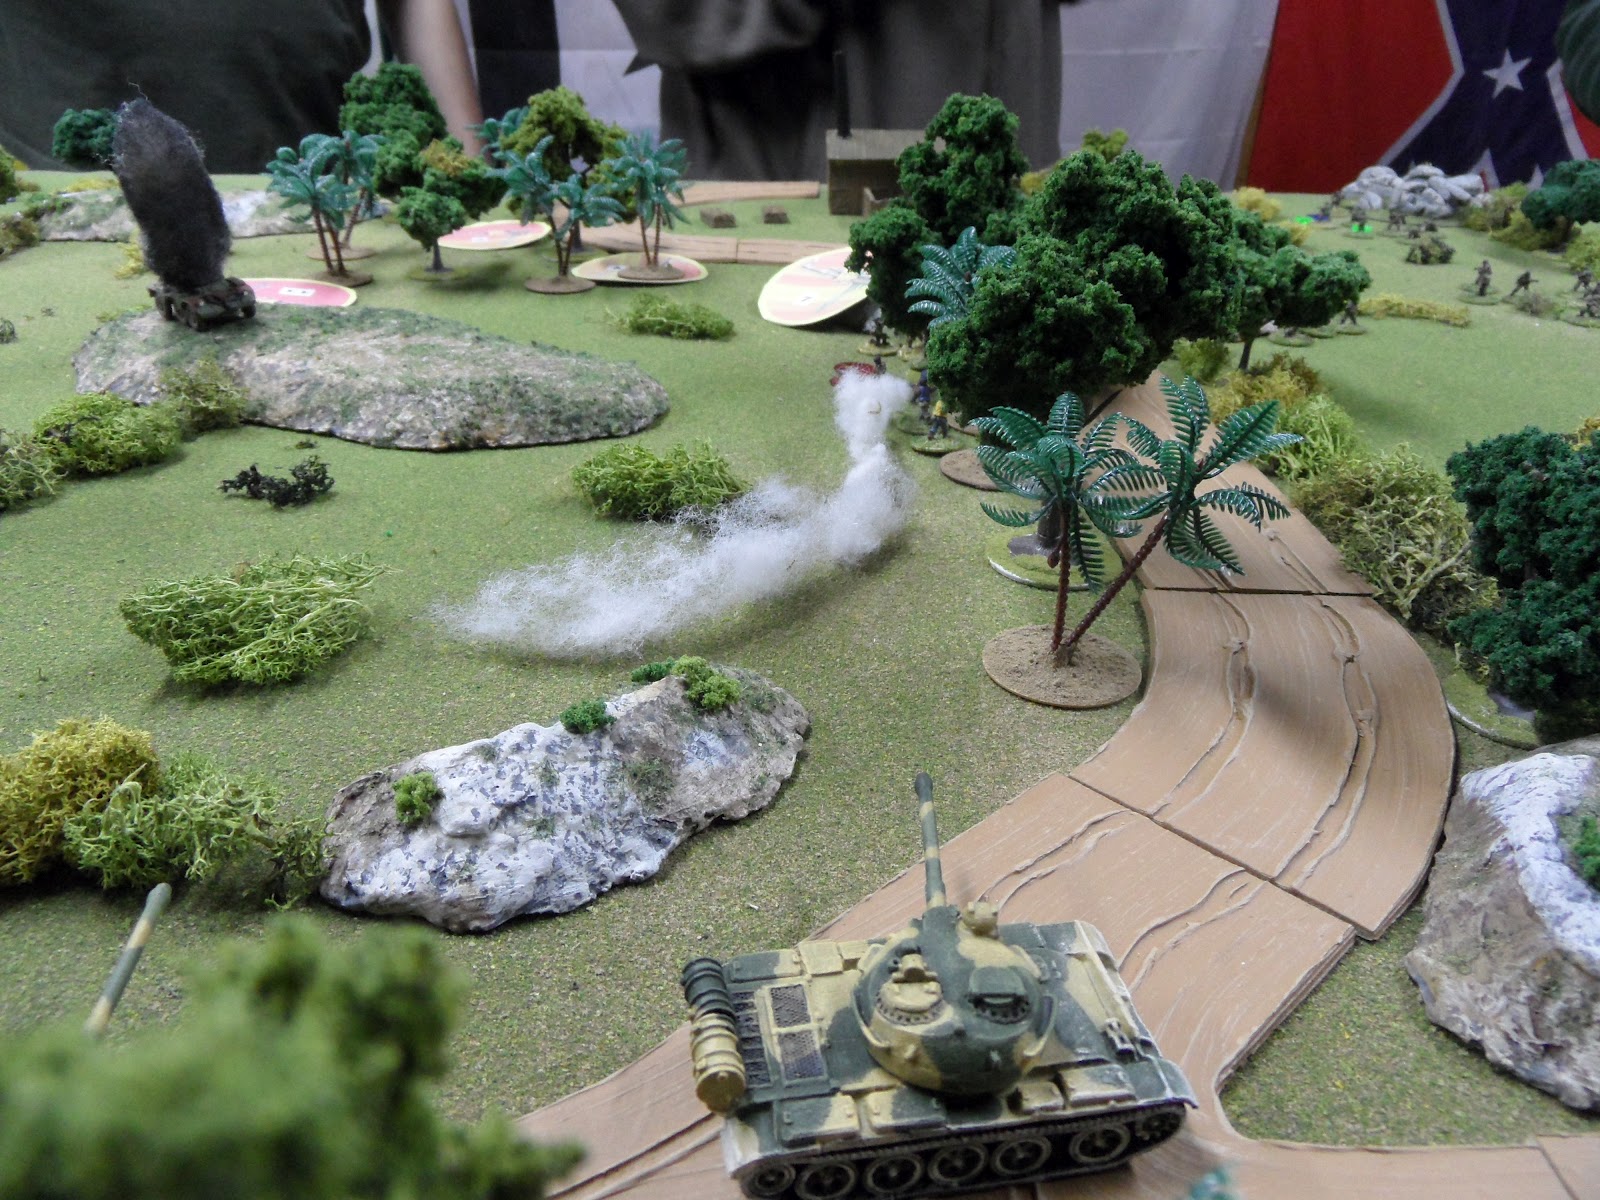
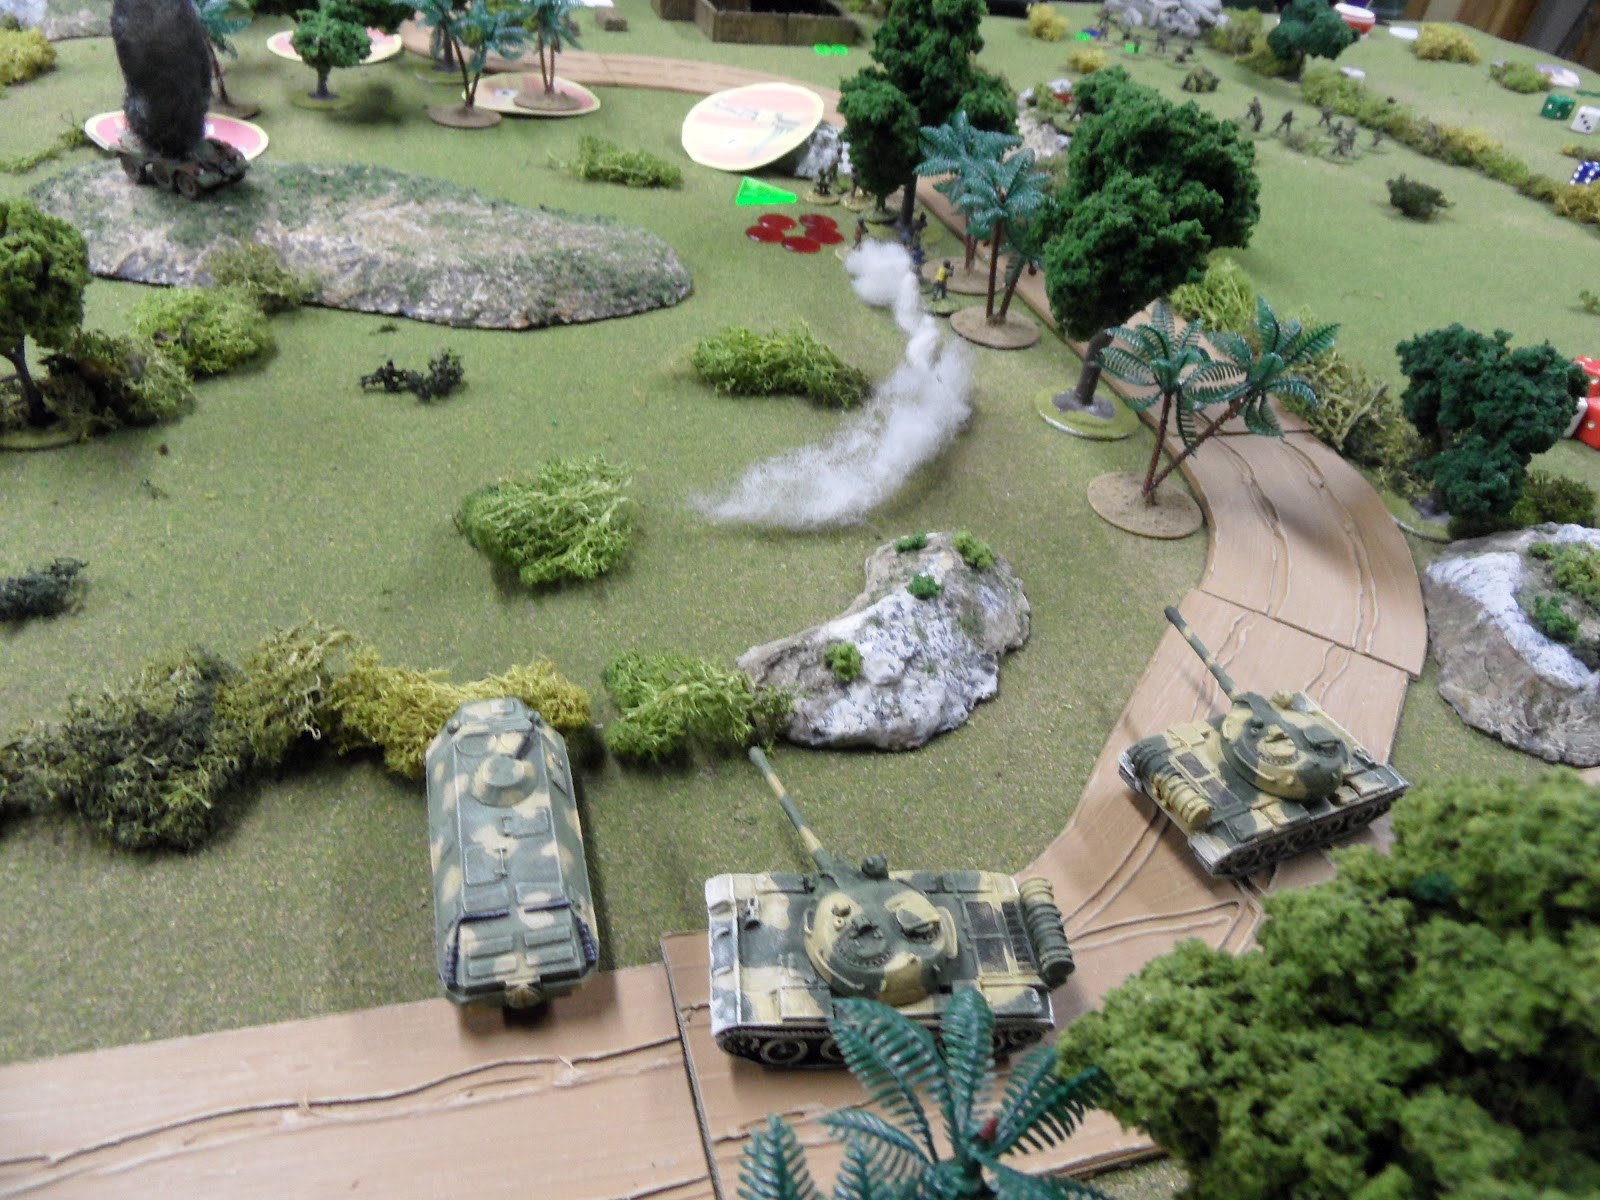
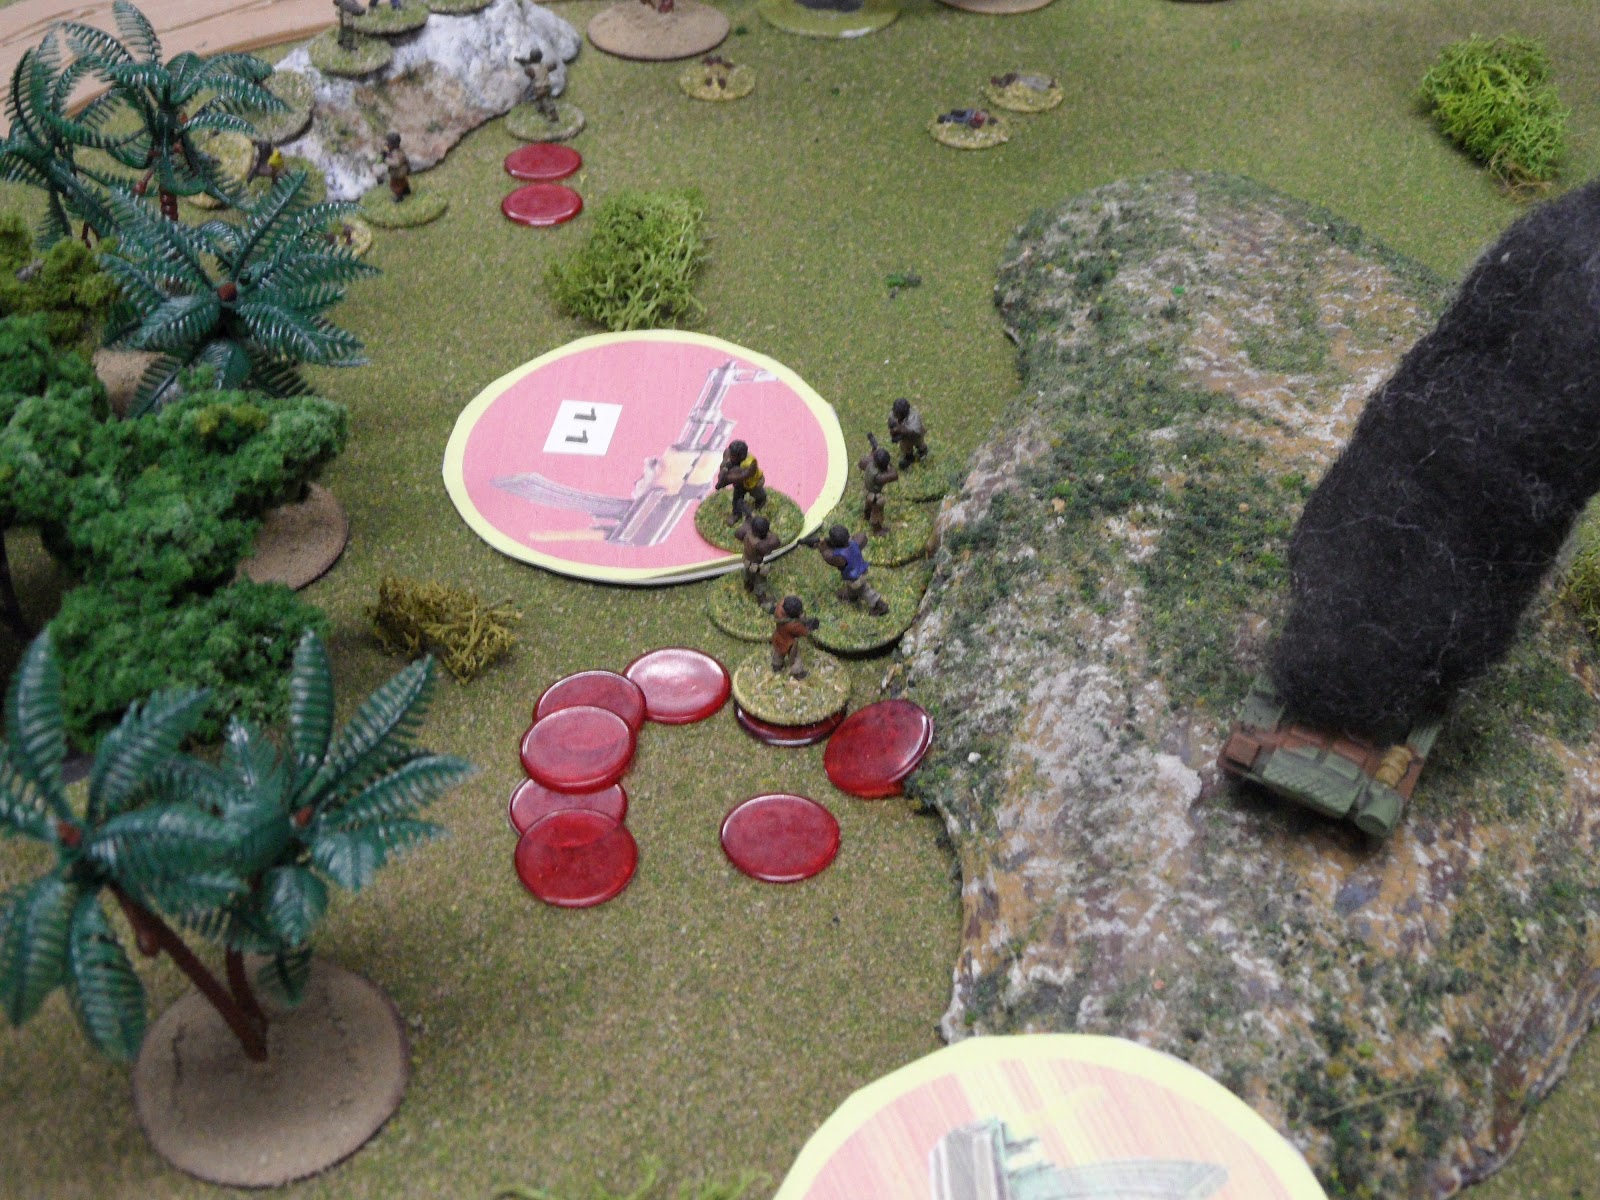
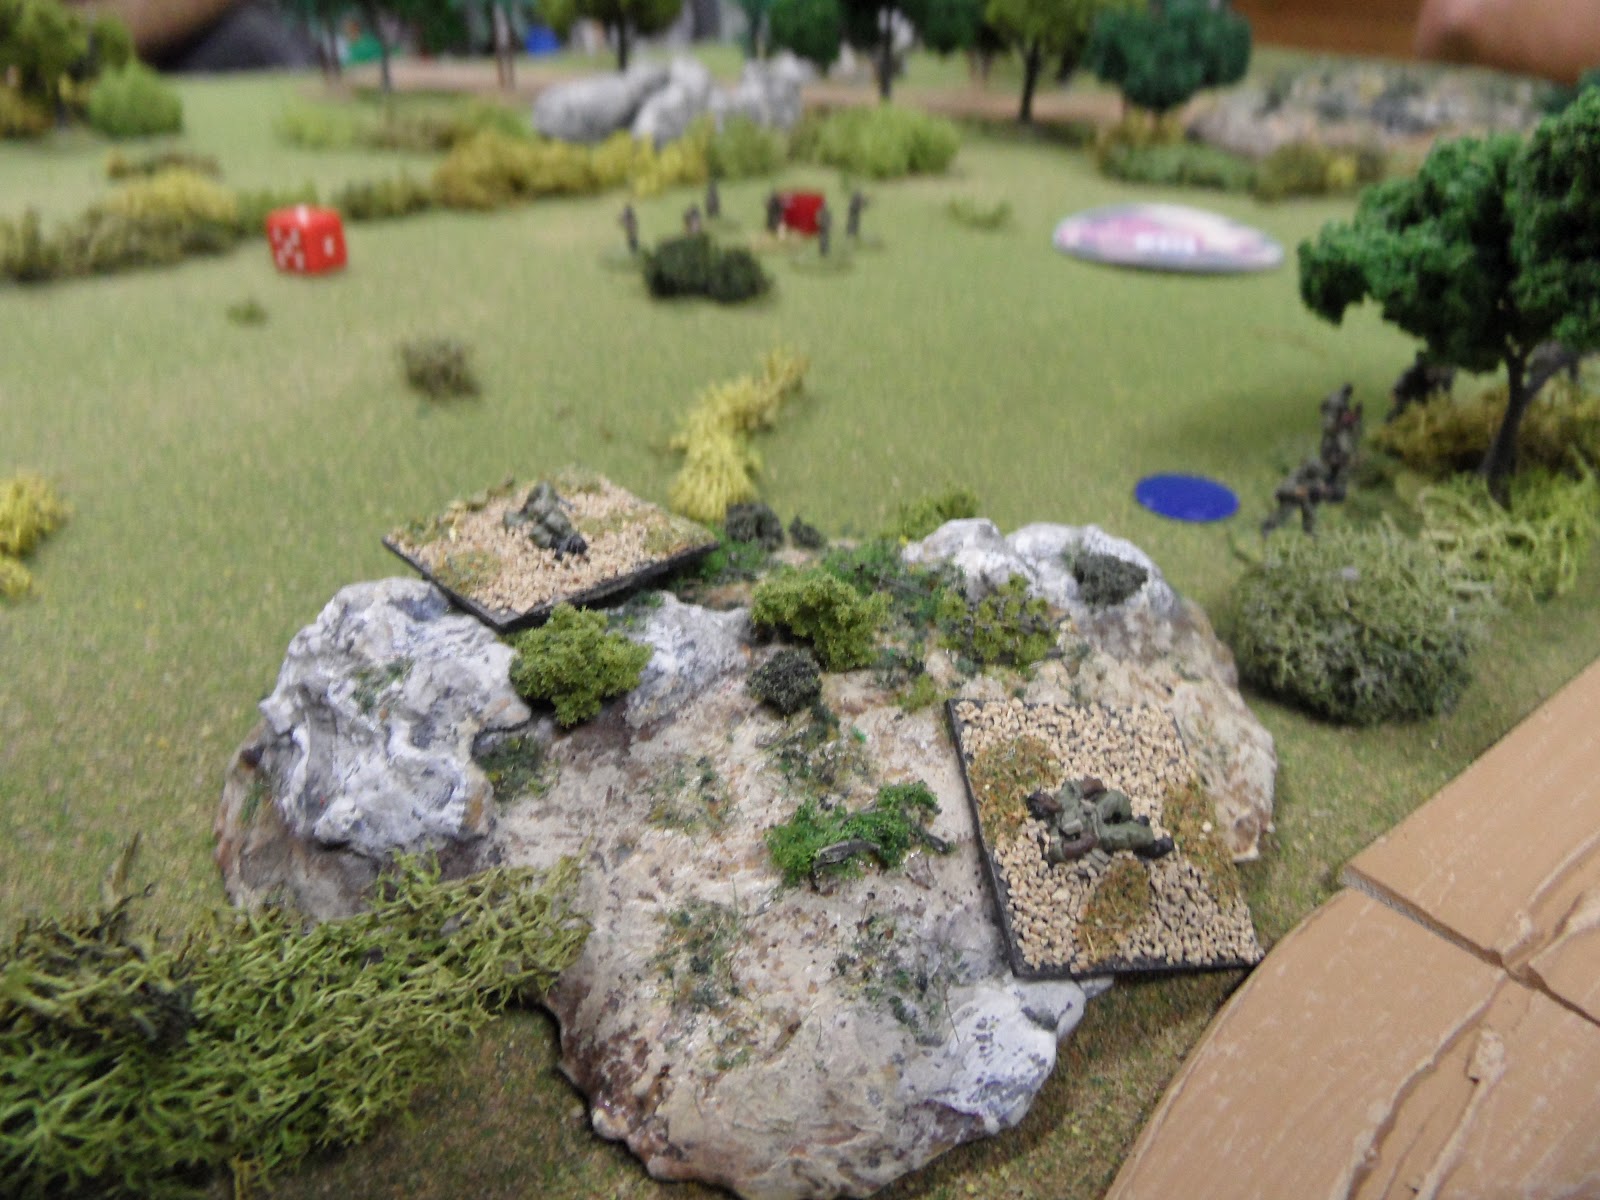
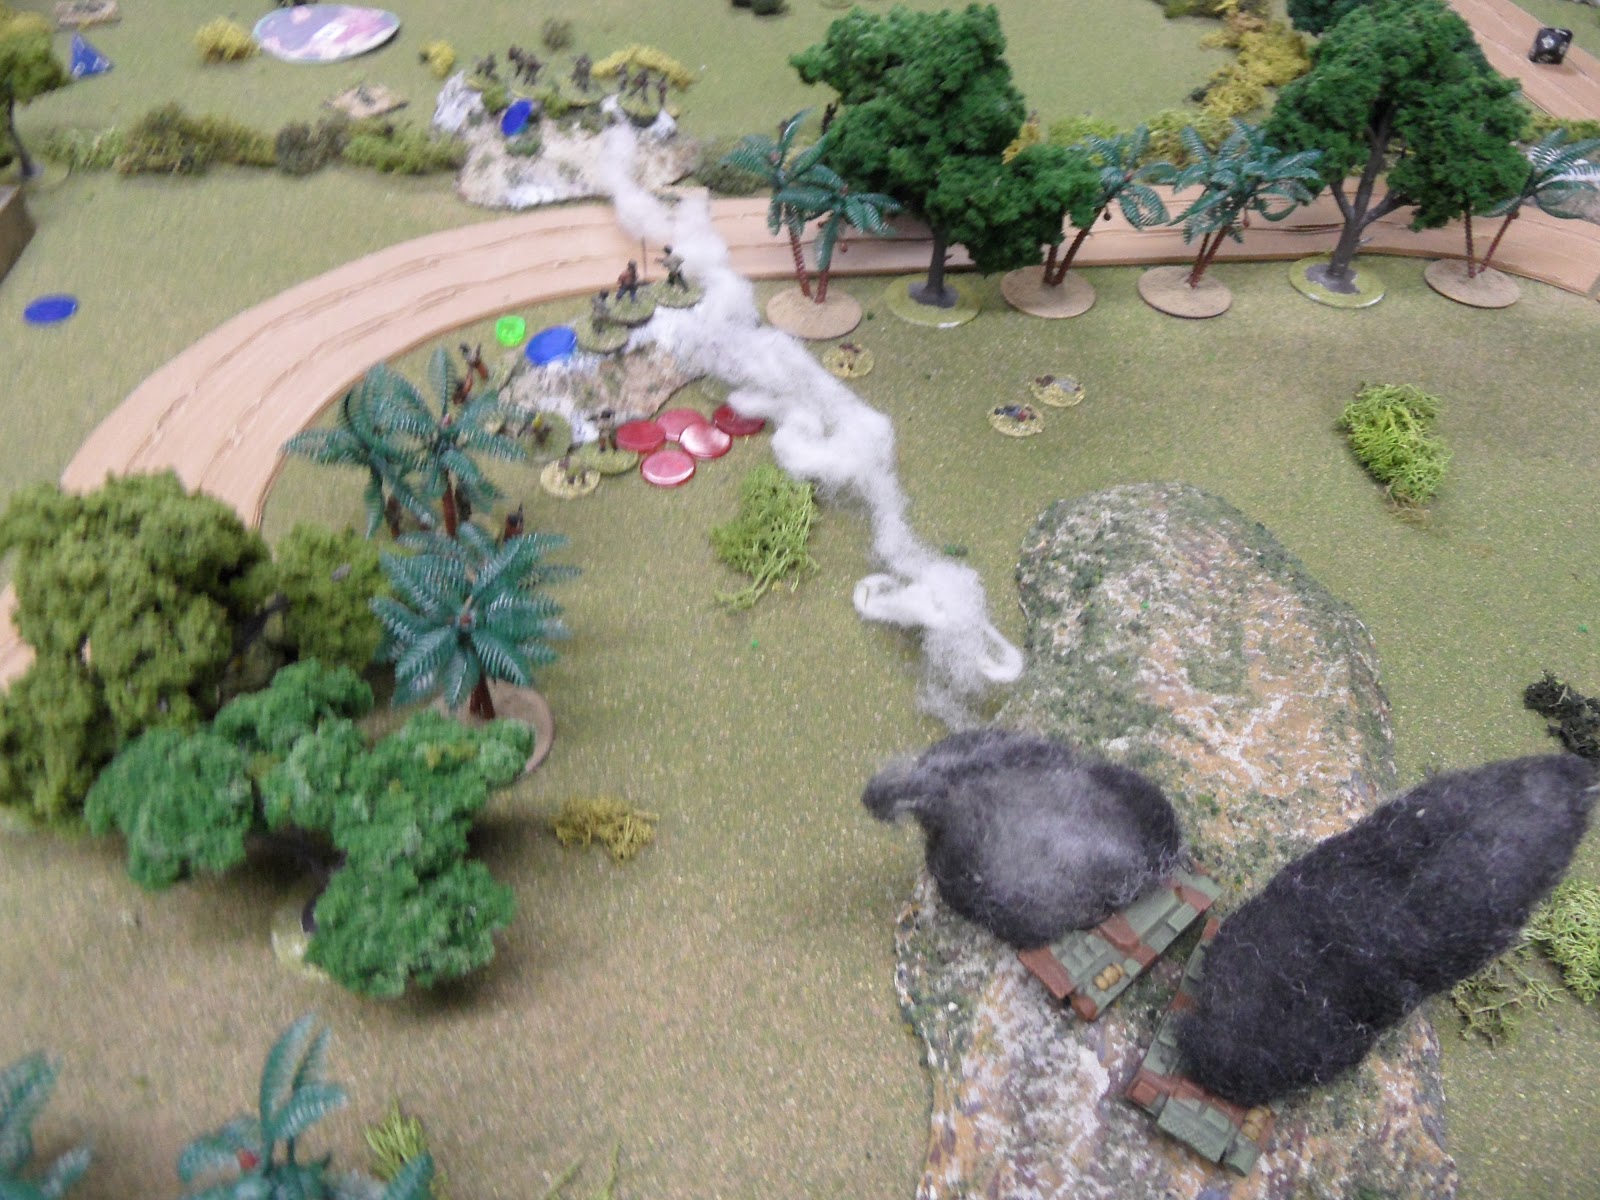
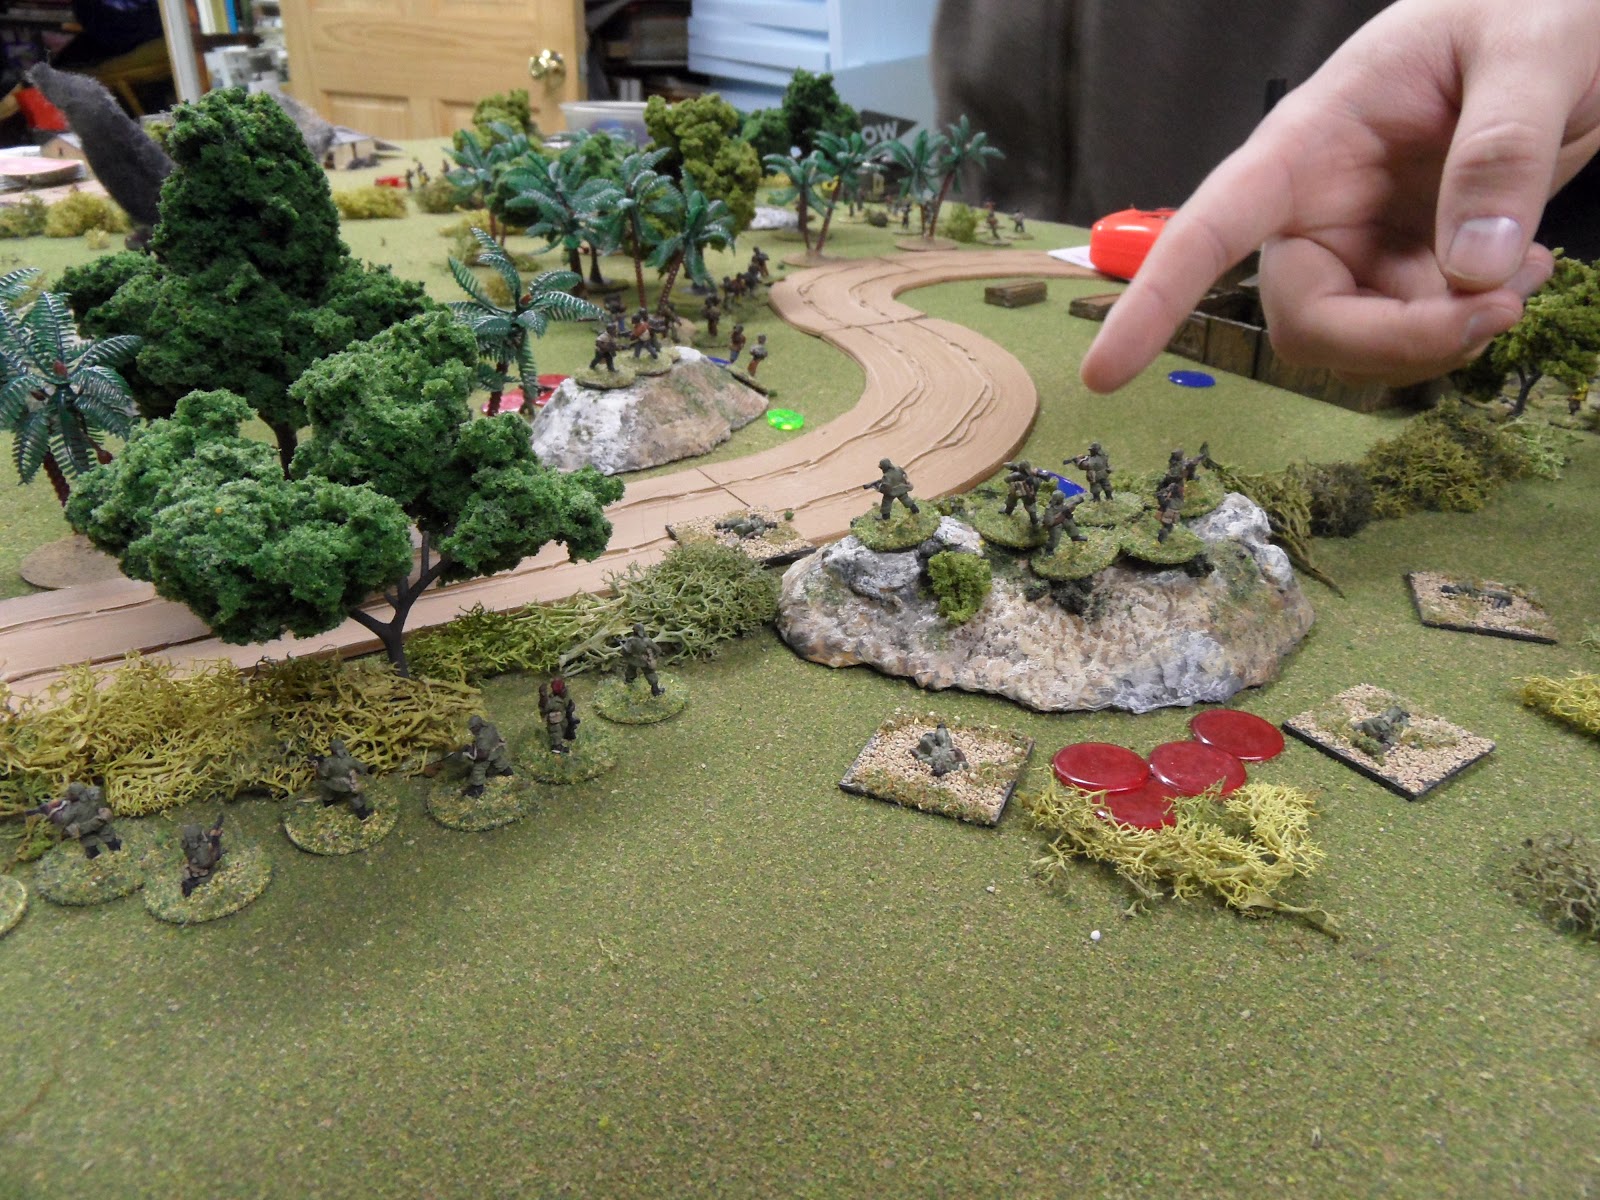
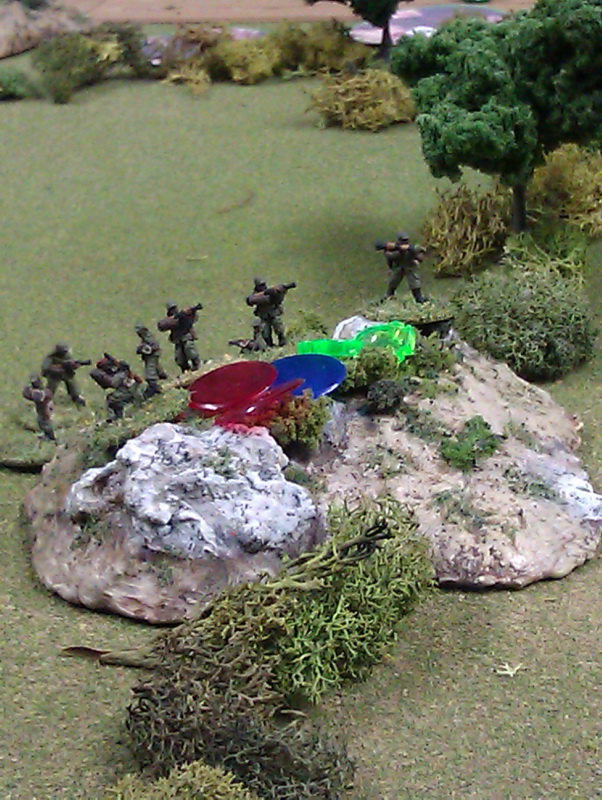
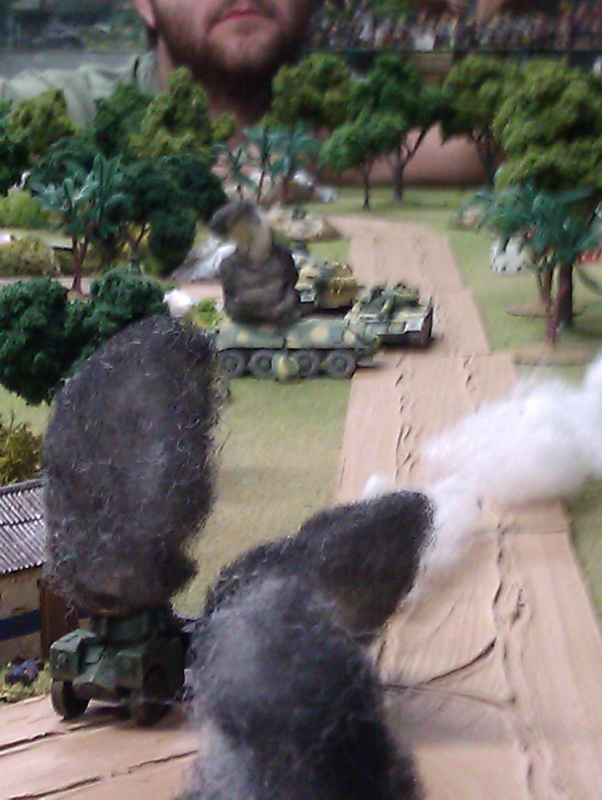
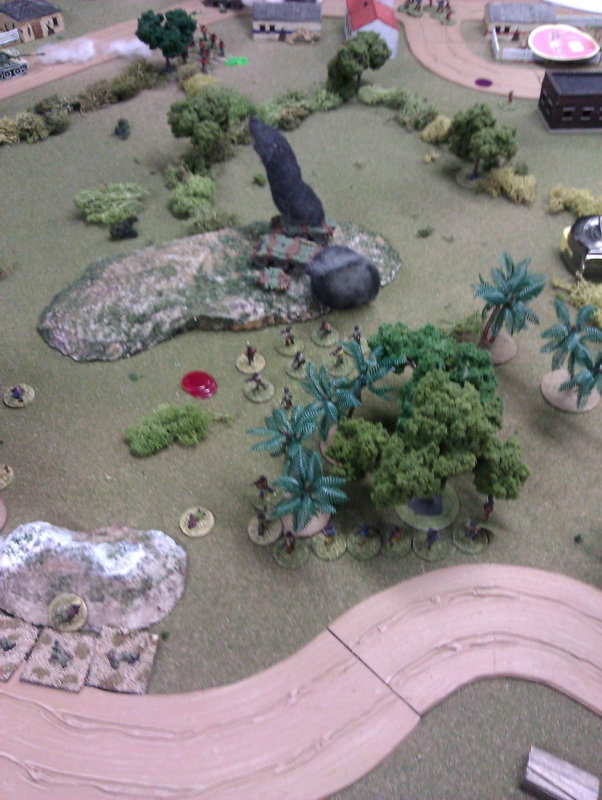
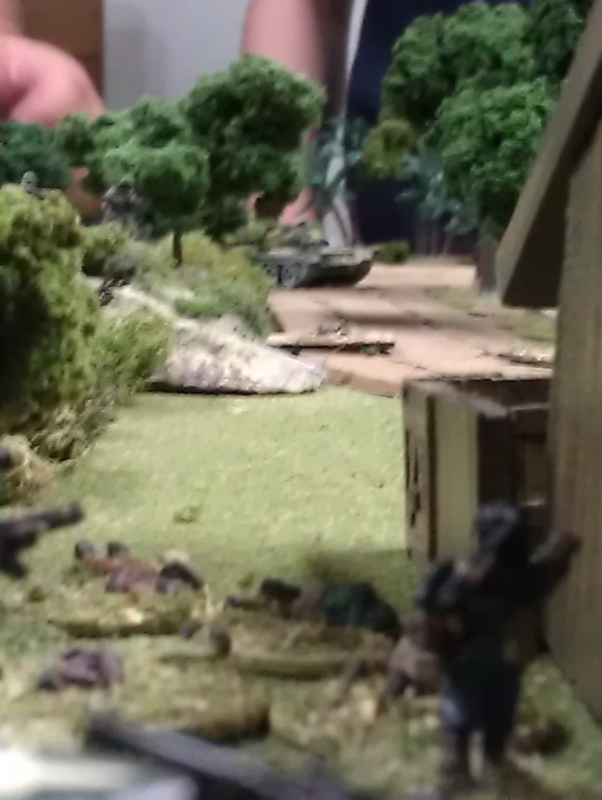
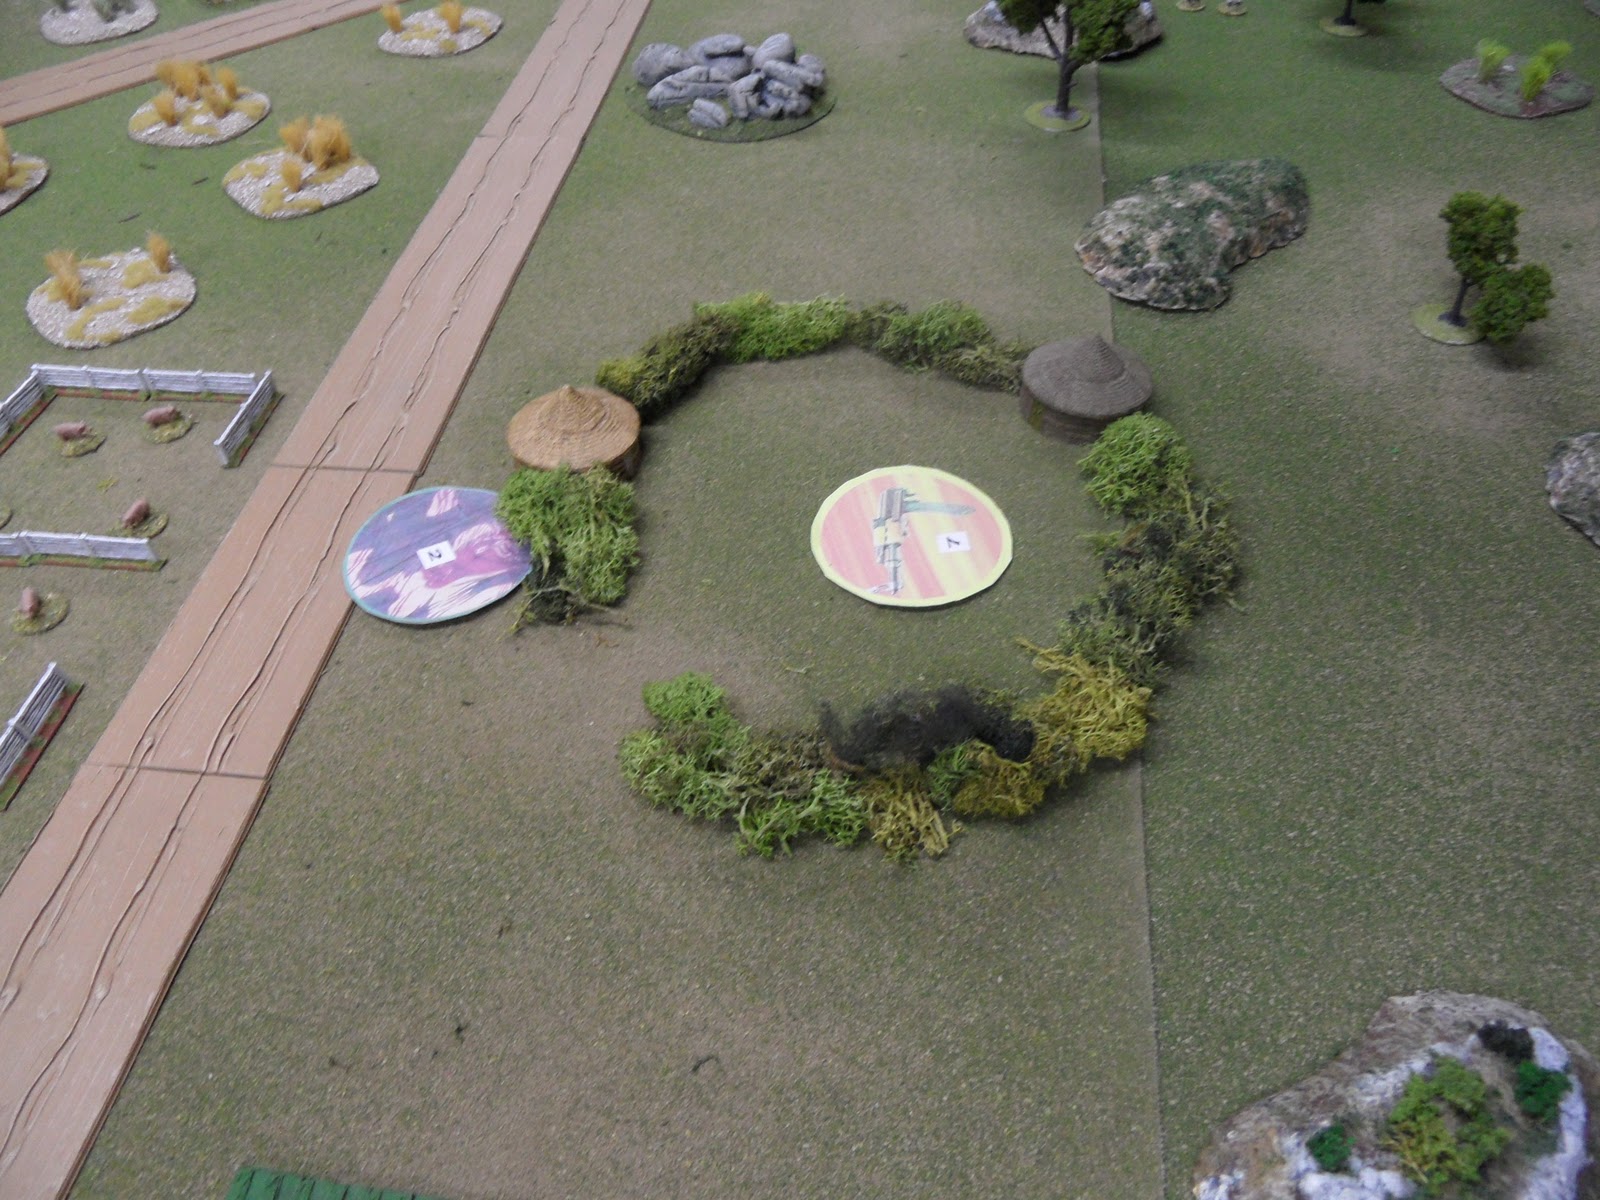
The Vietnamese mortars drop smoke rounds to cover a hard pressed platoon on the edge of the US perimeter

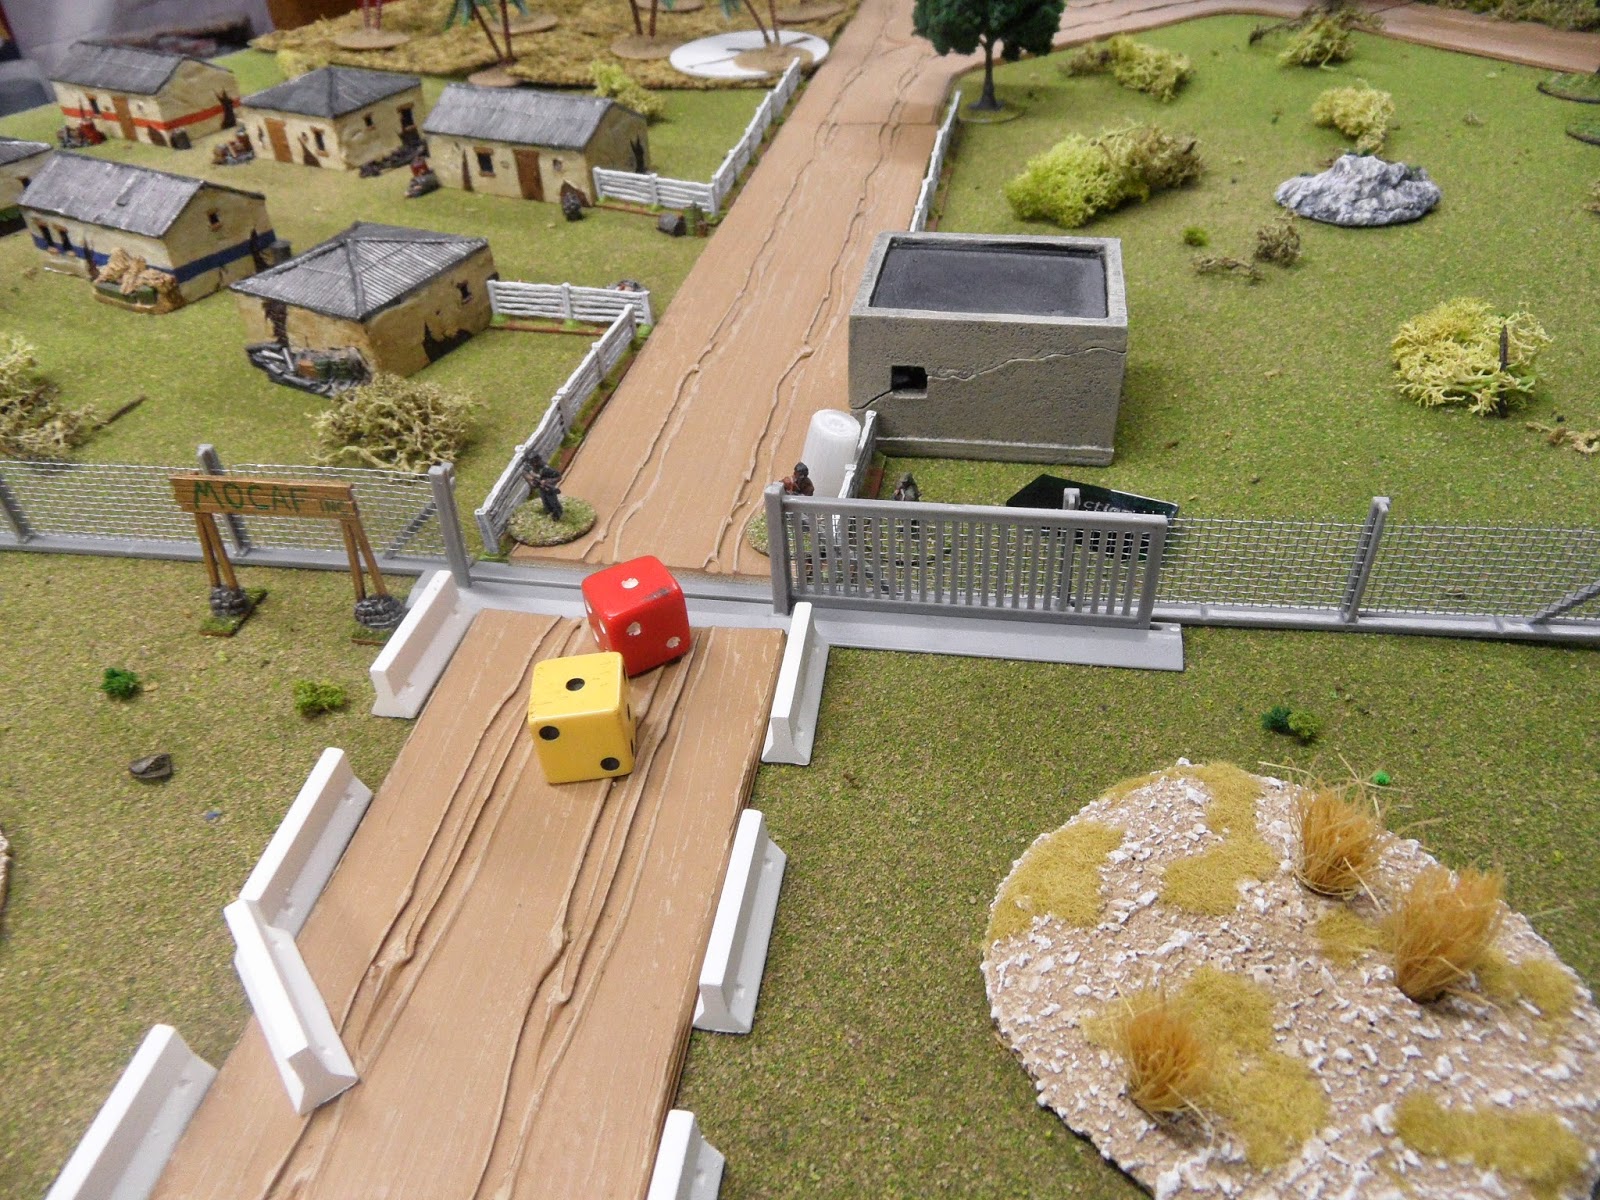
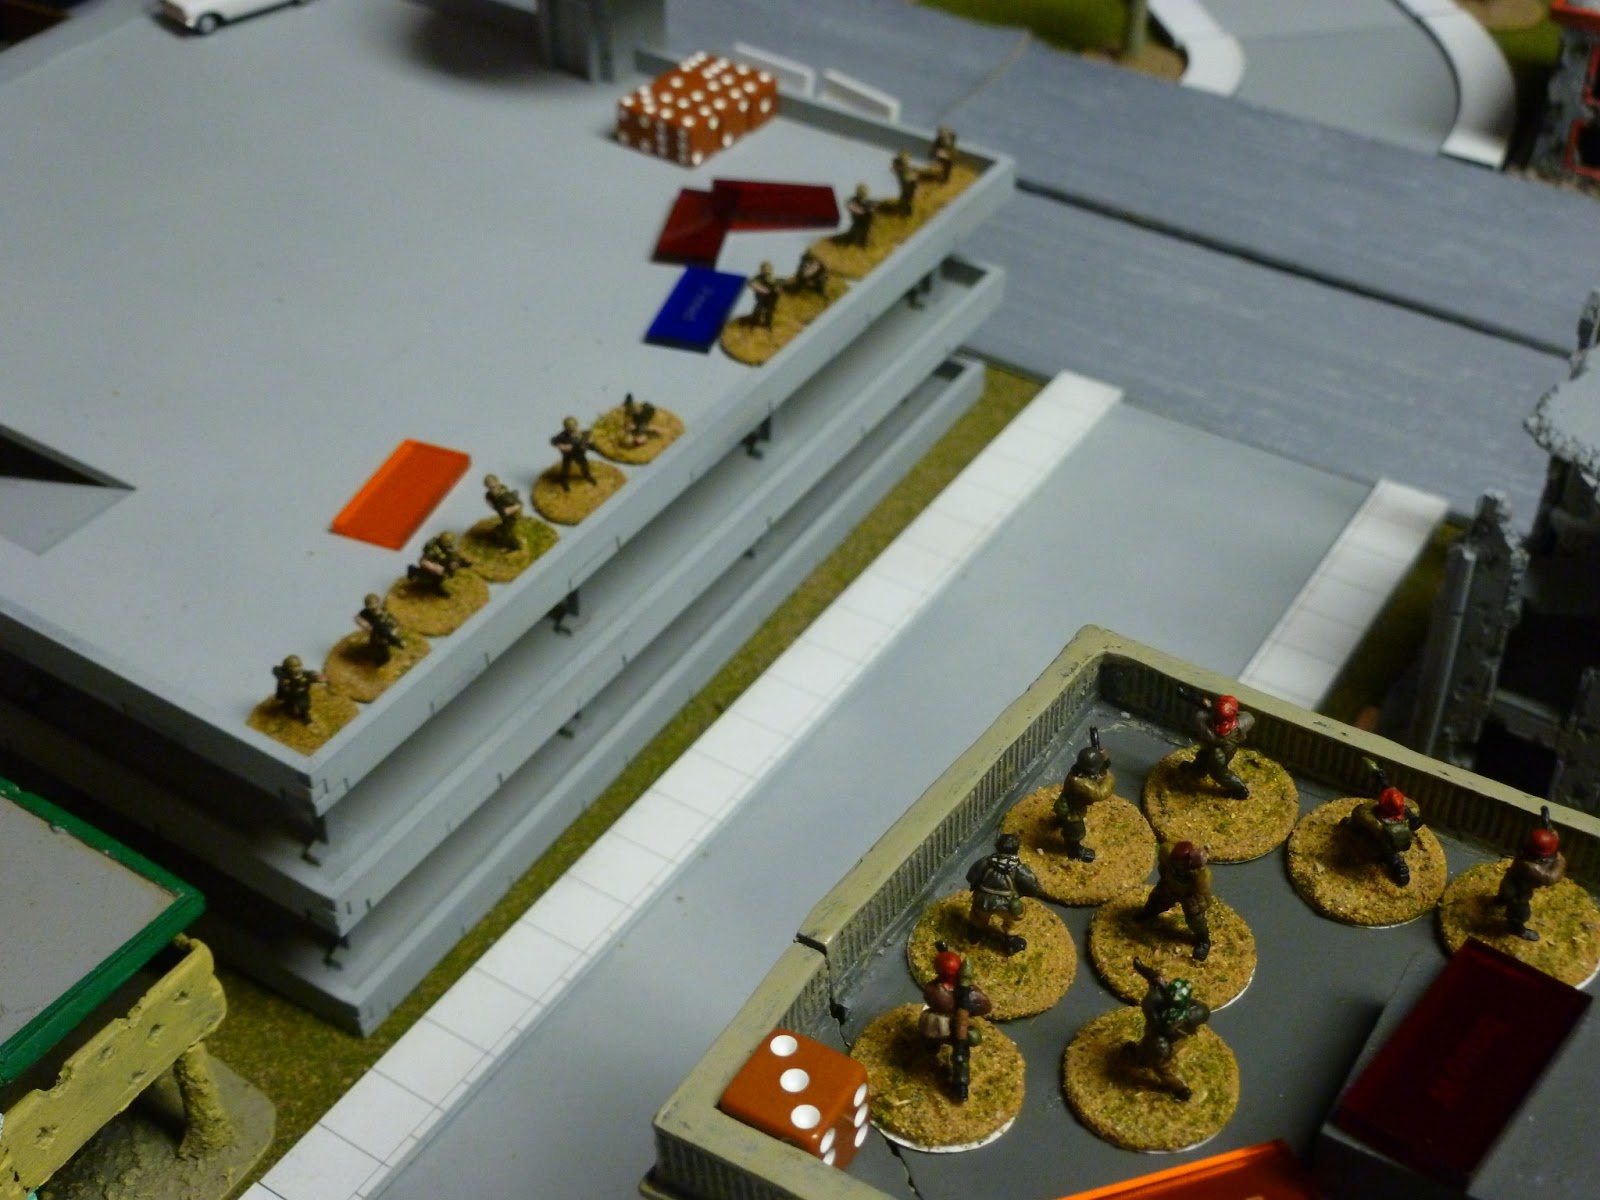
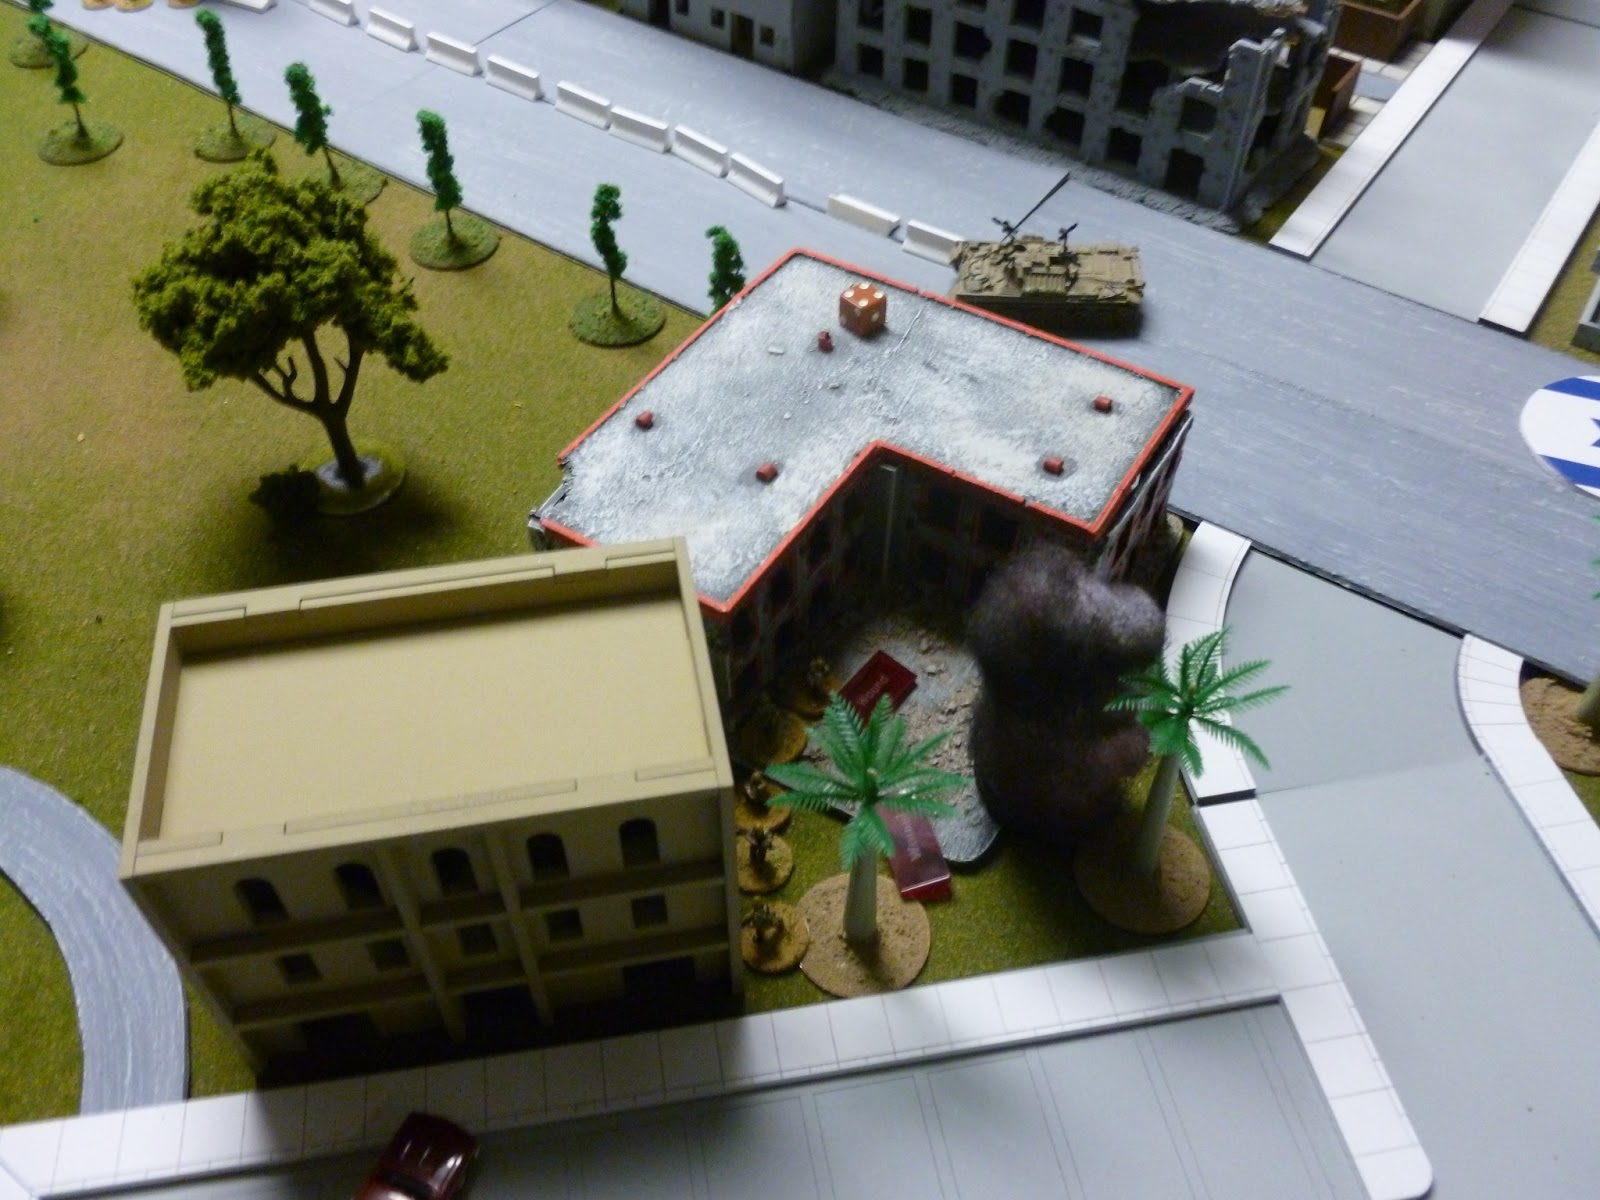
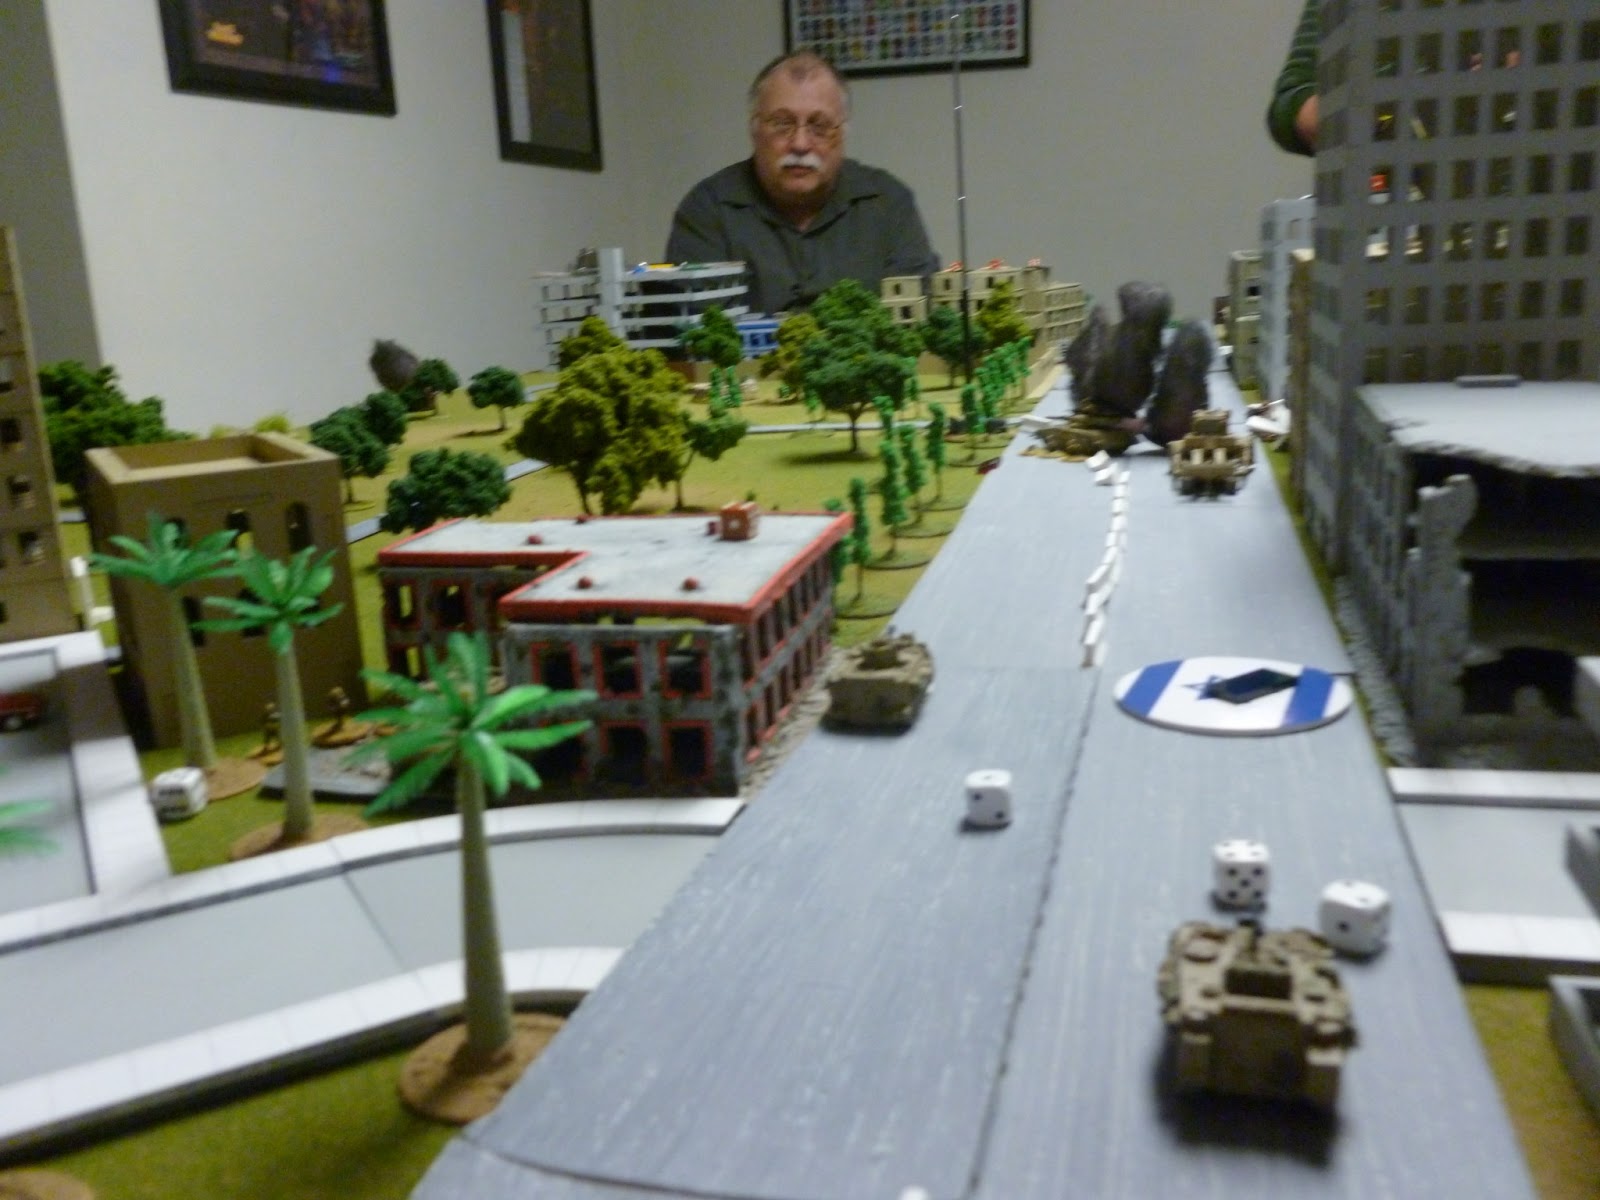
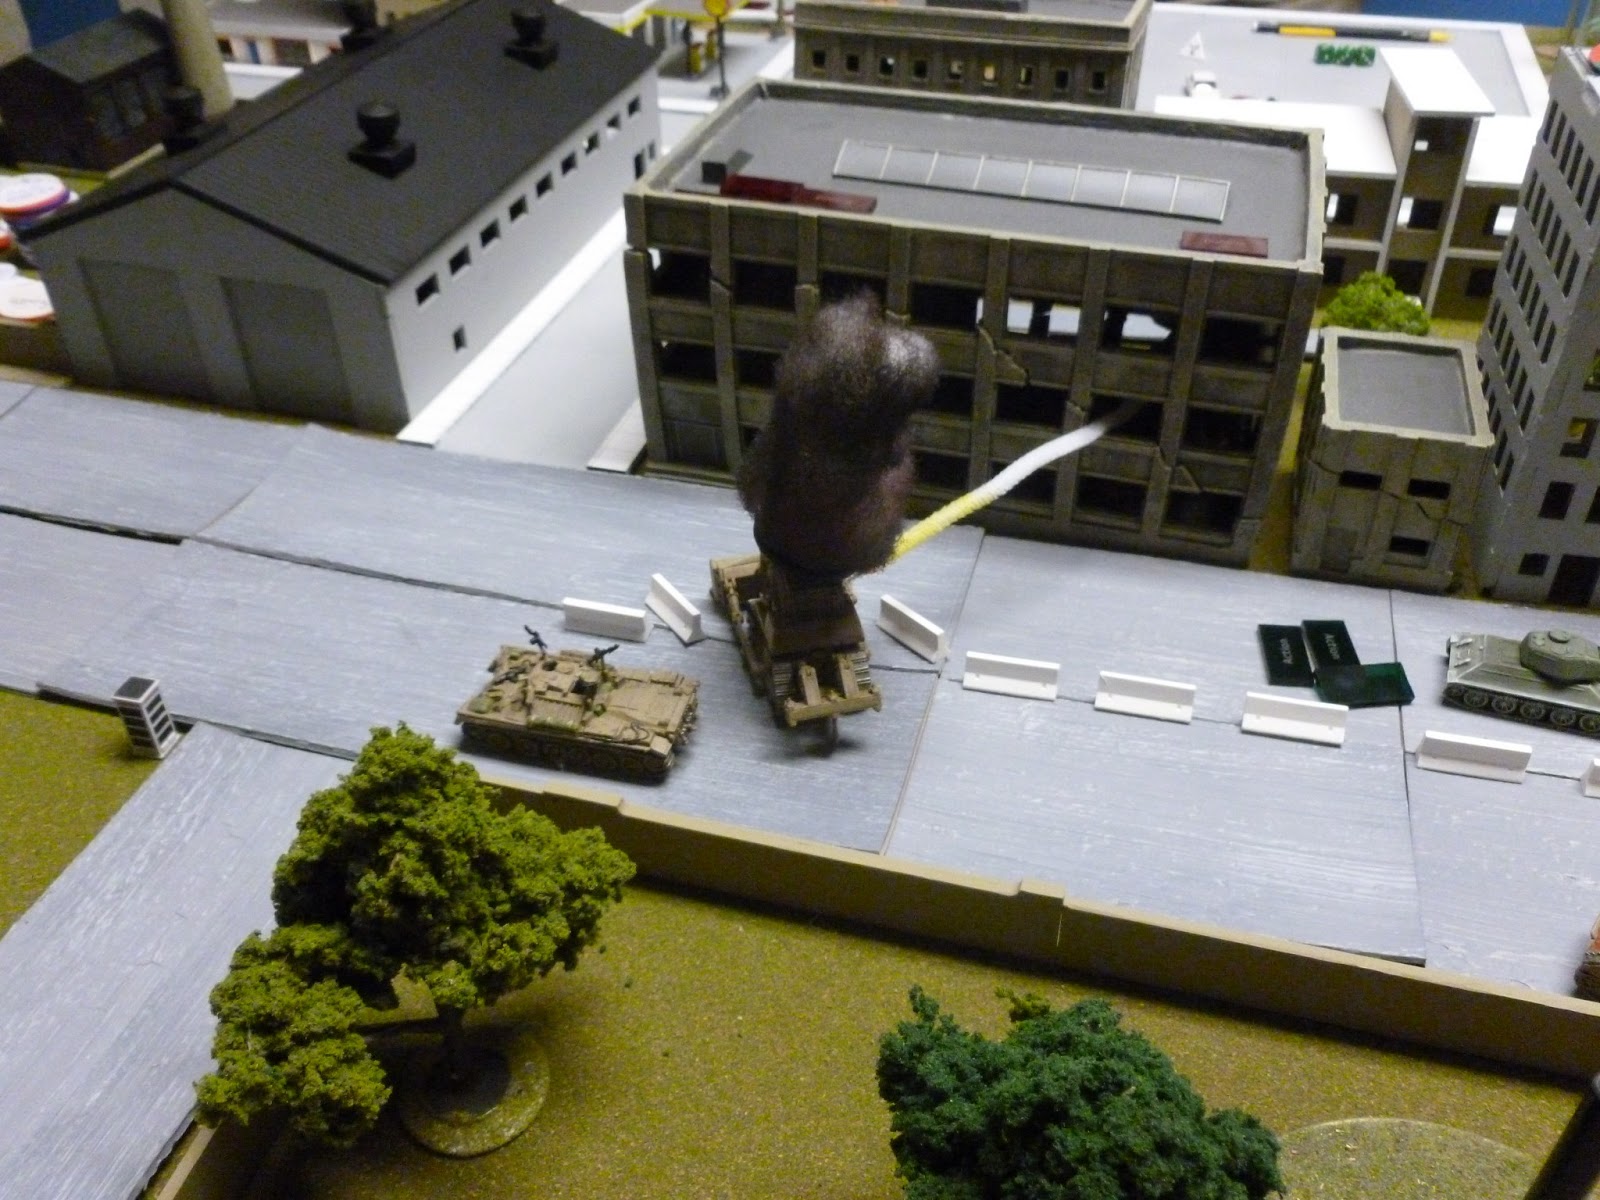
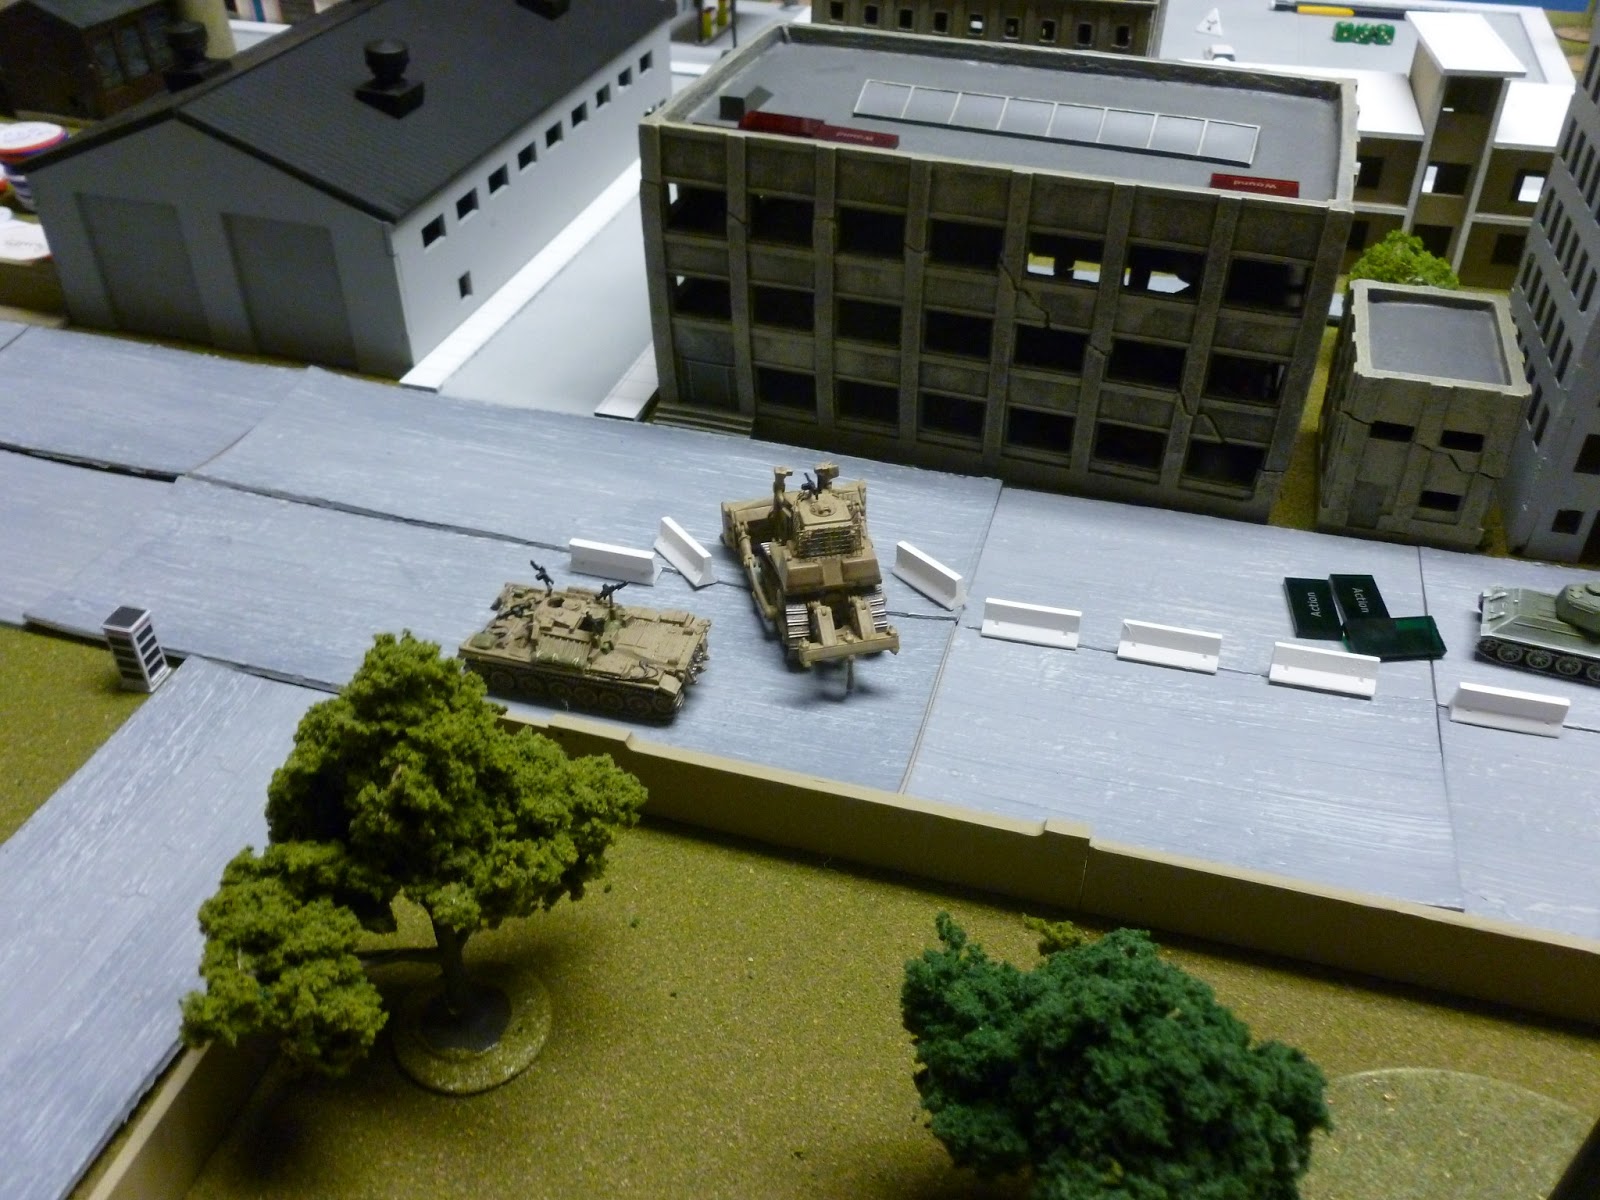
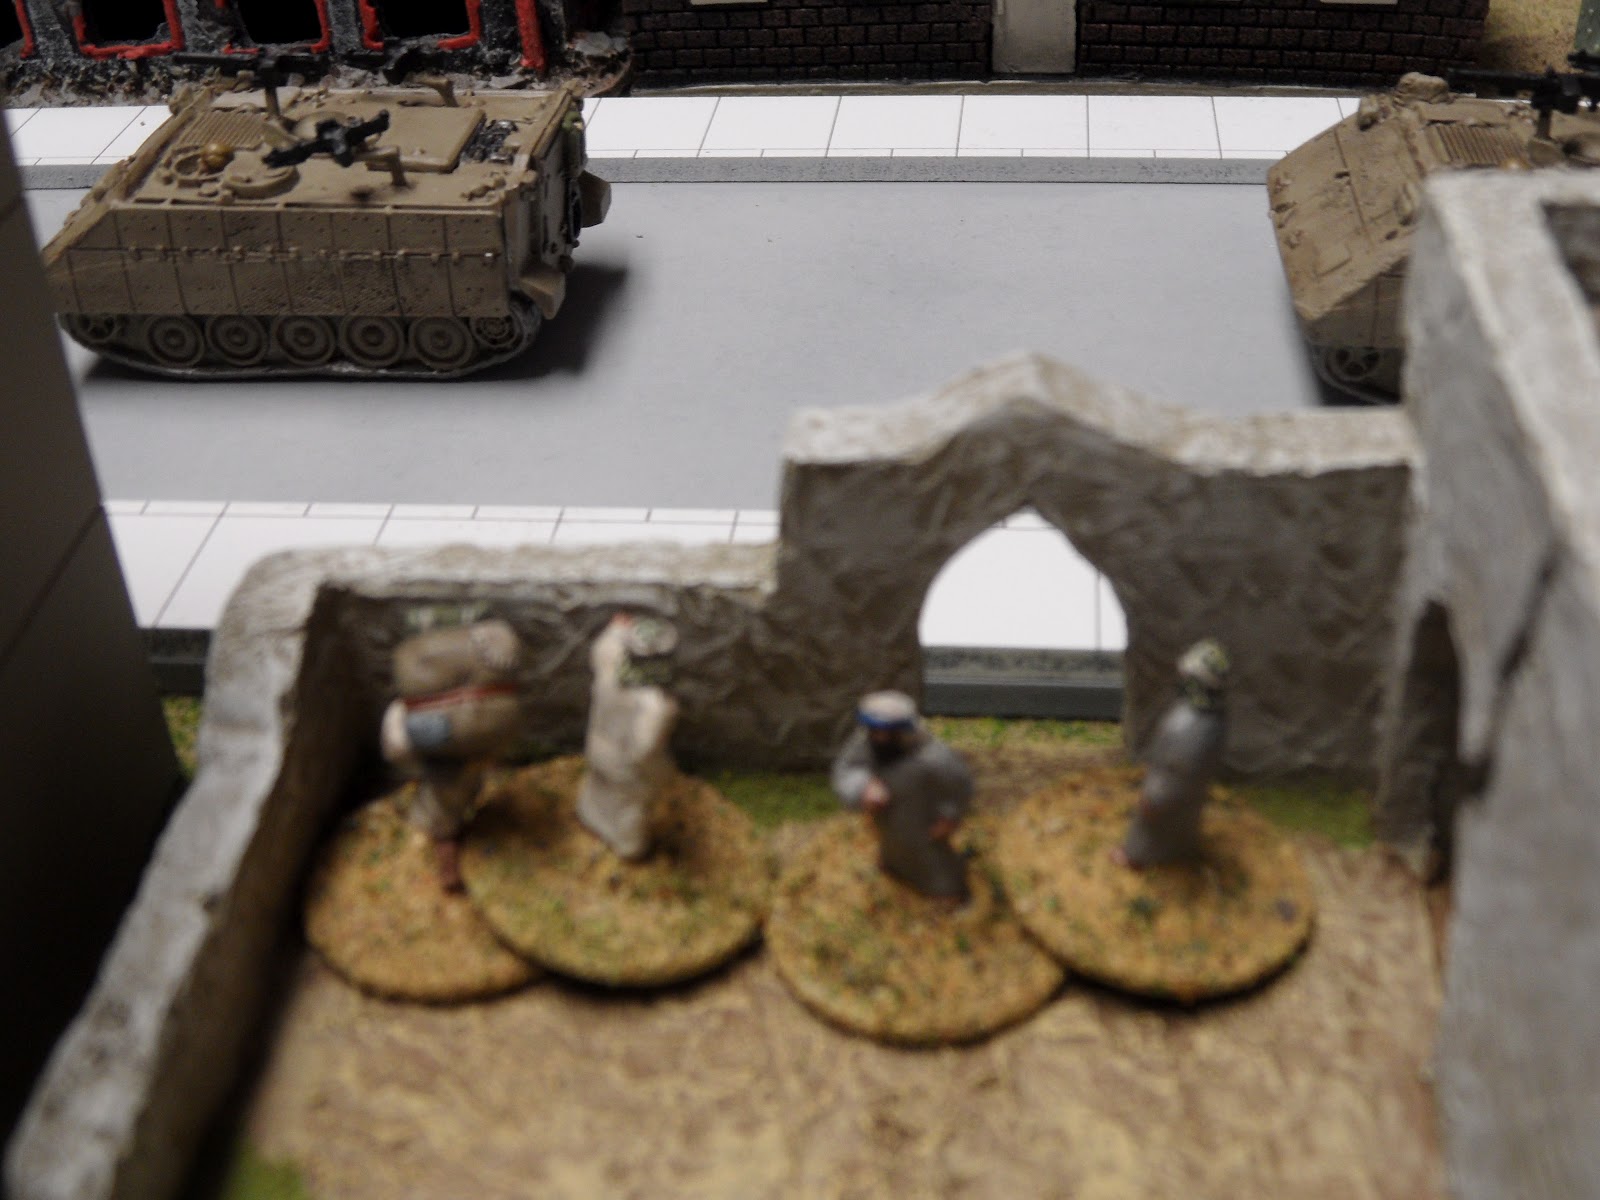
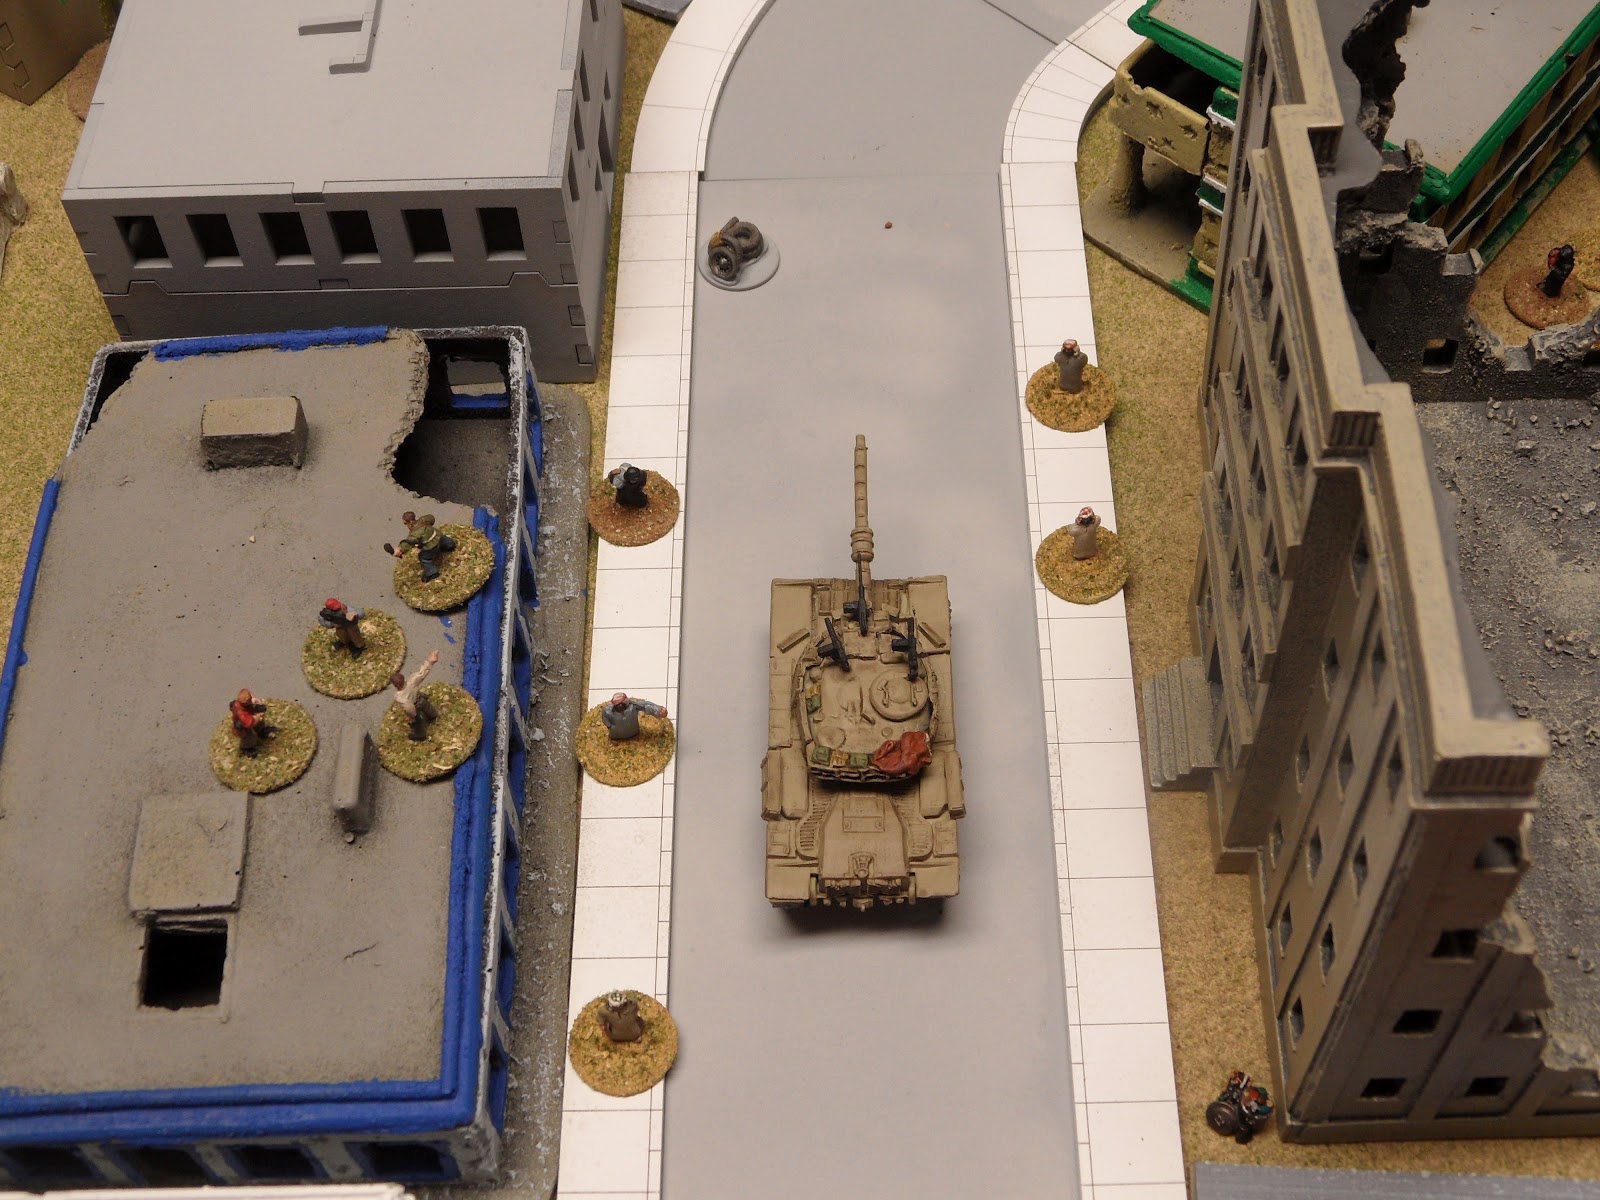
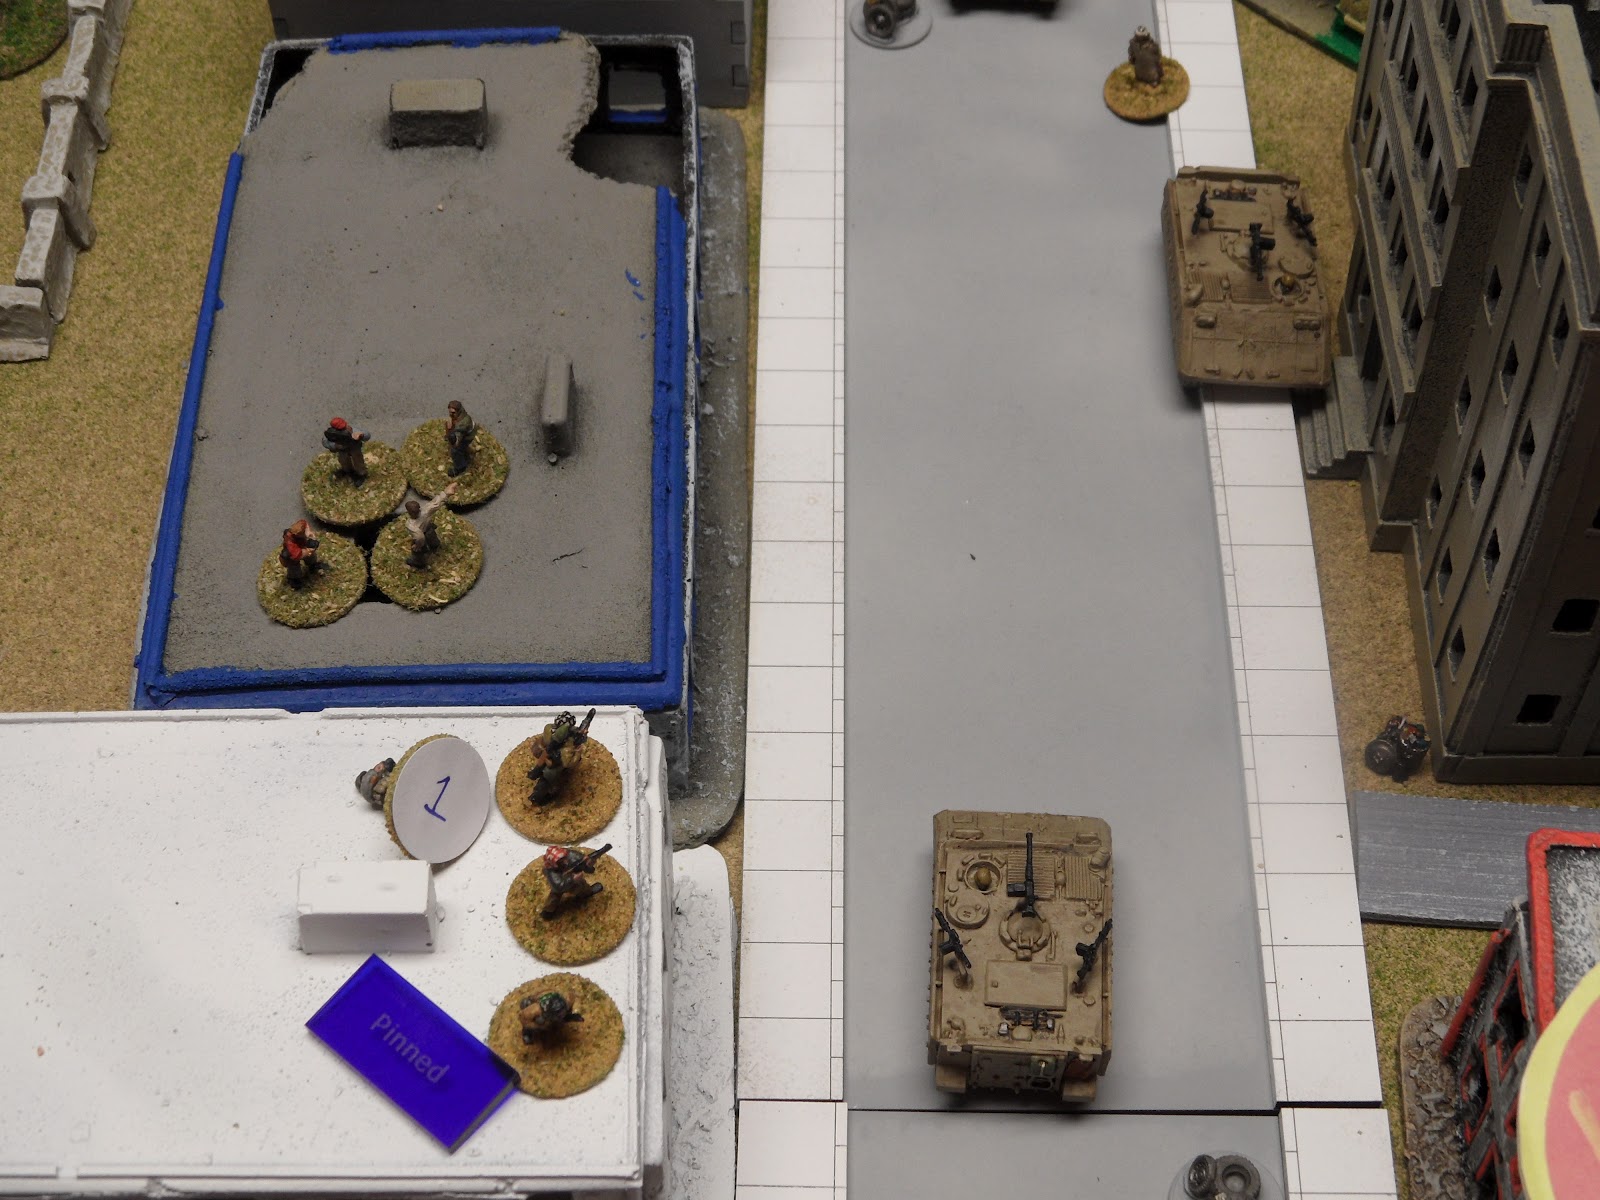
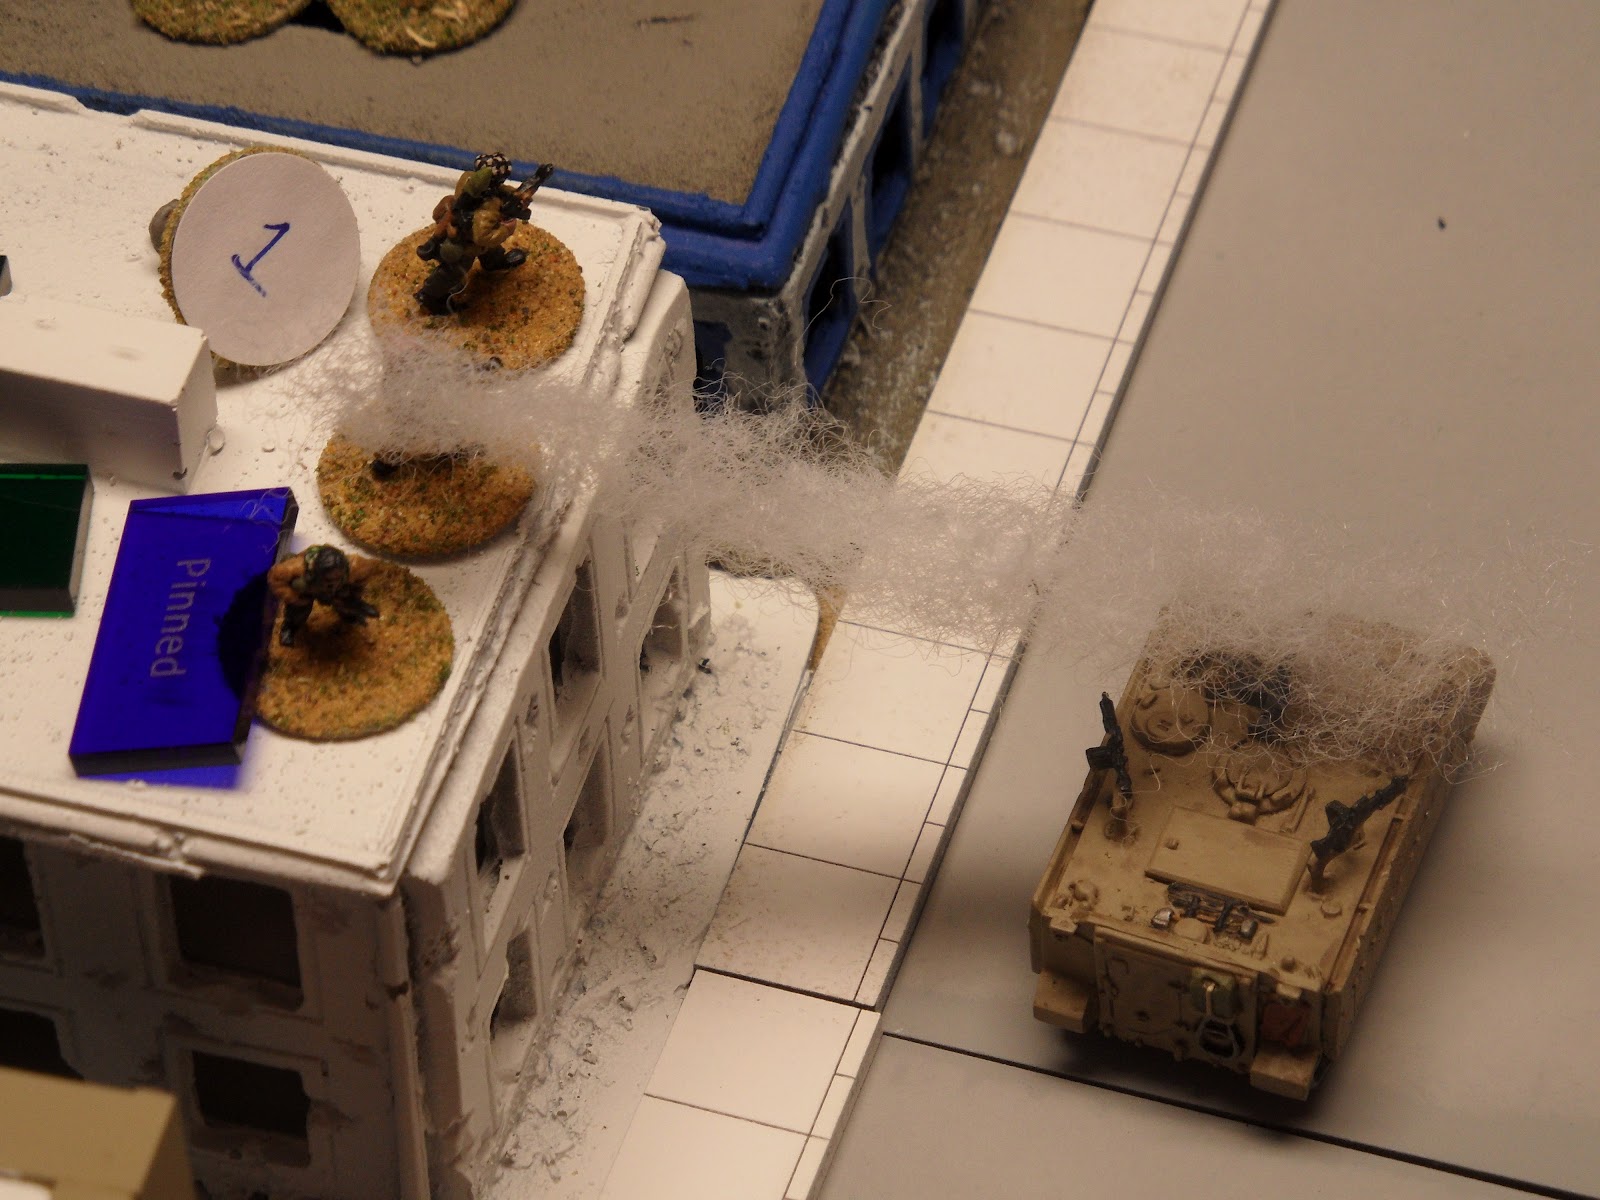
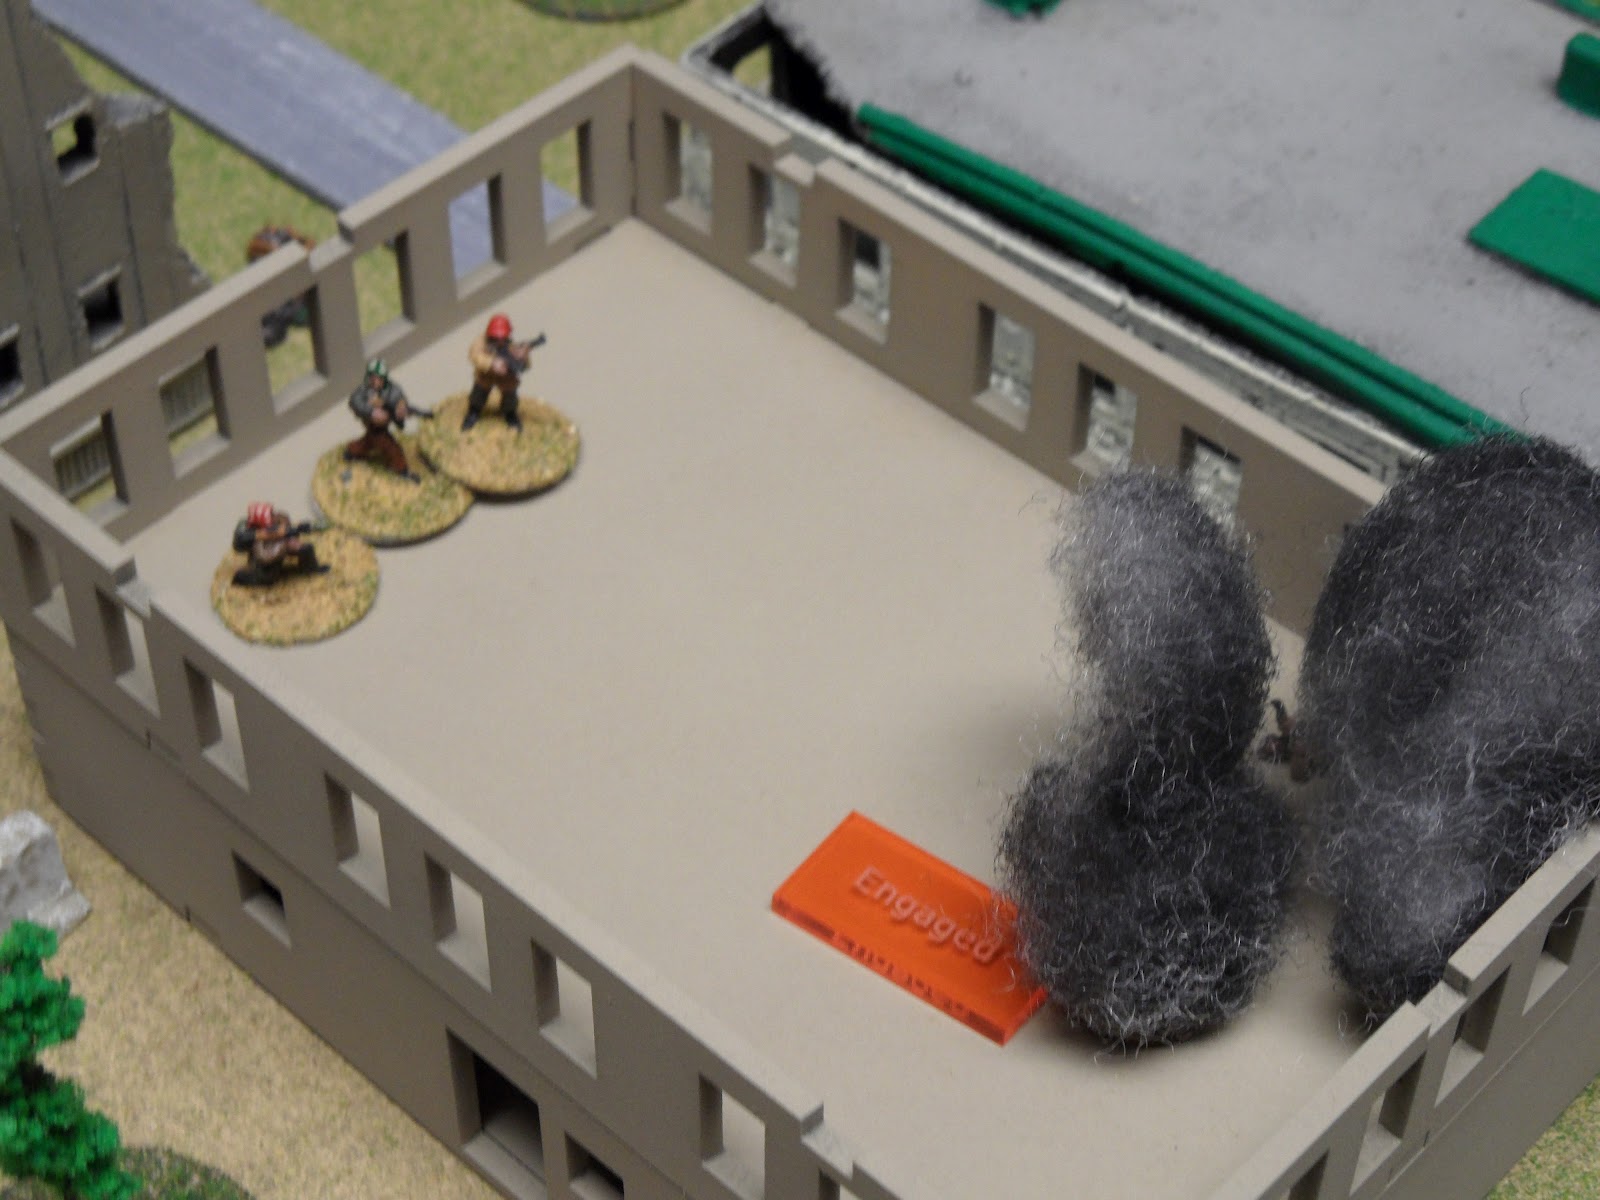
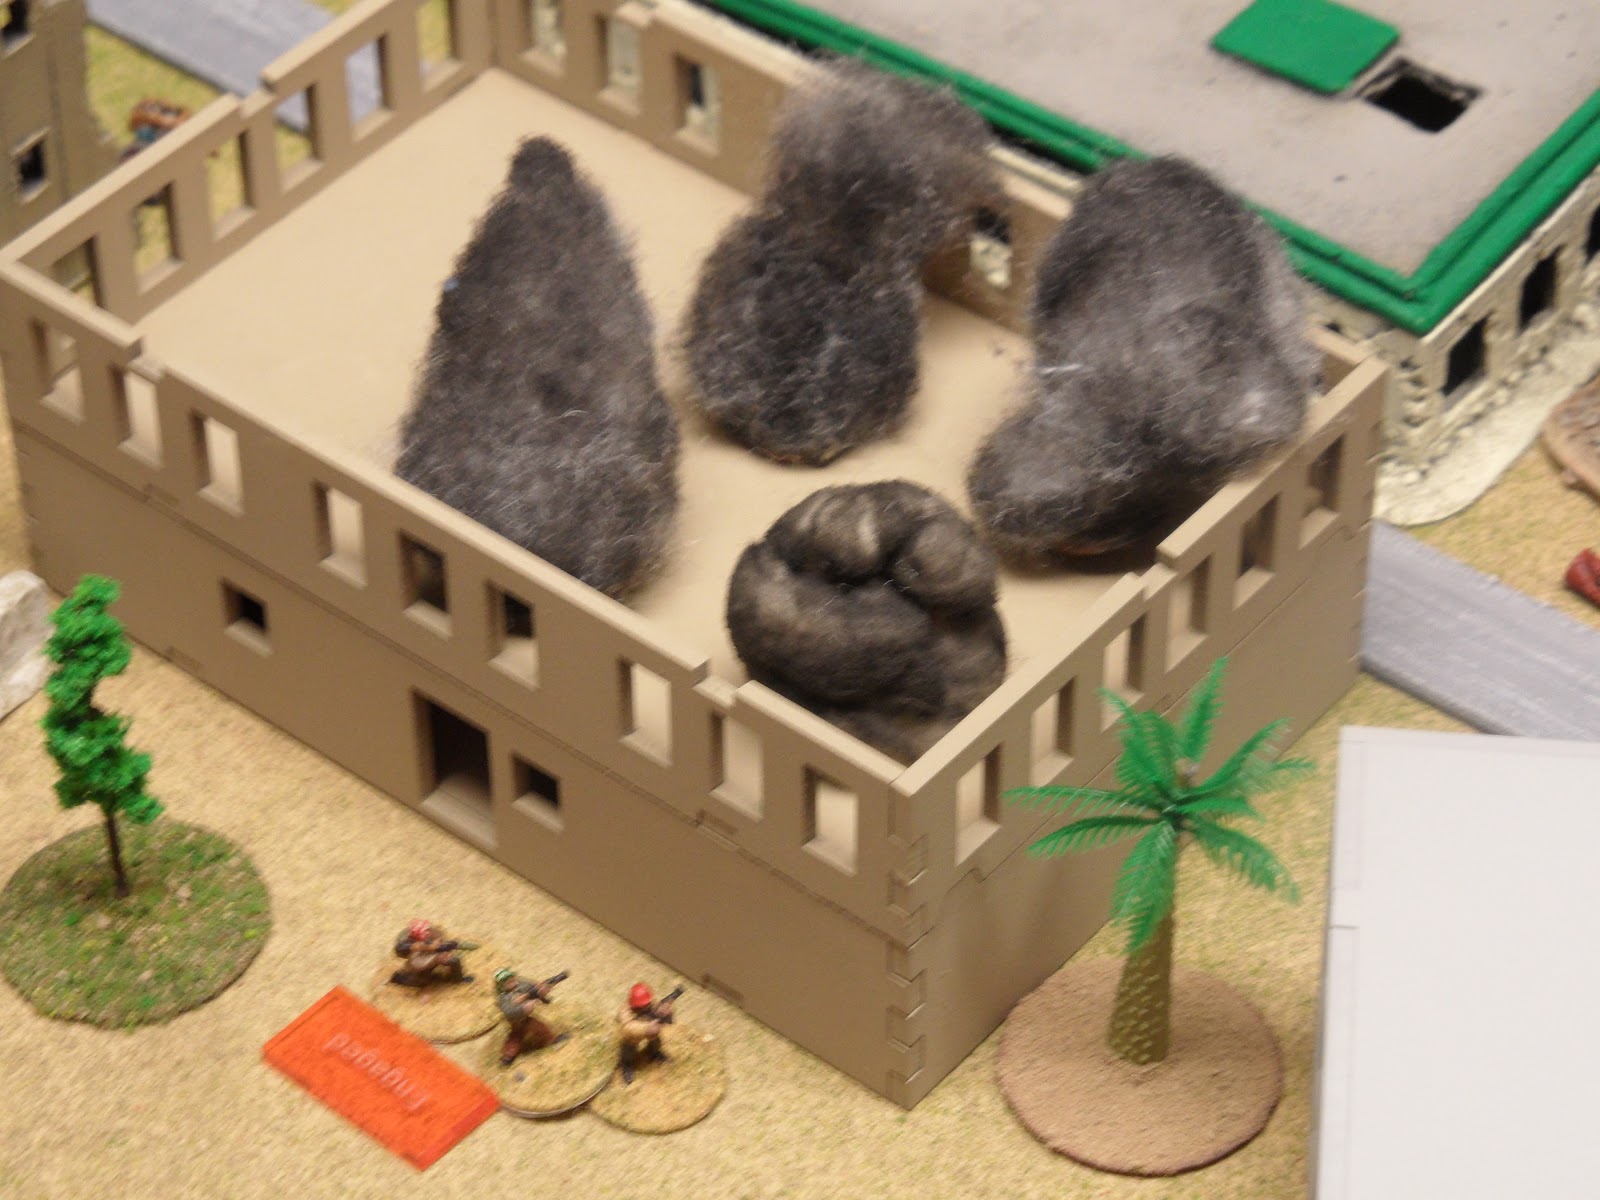
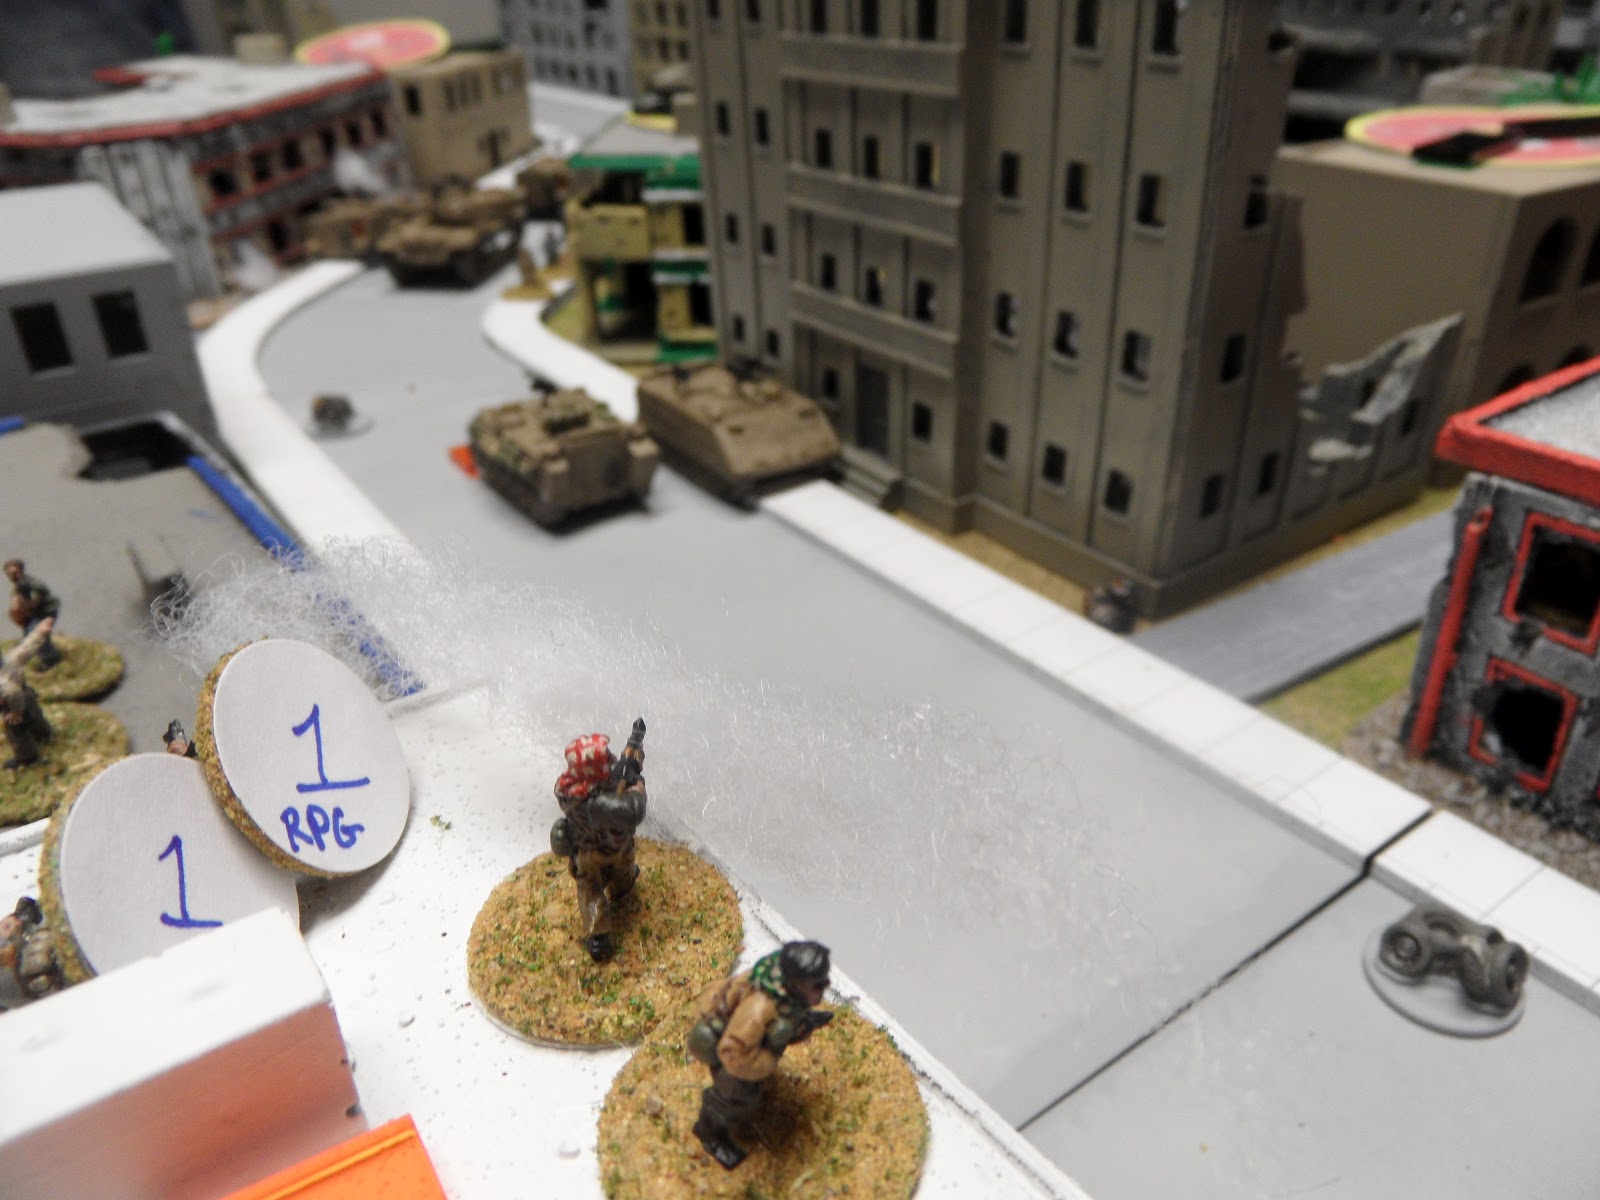
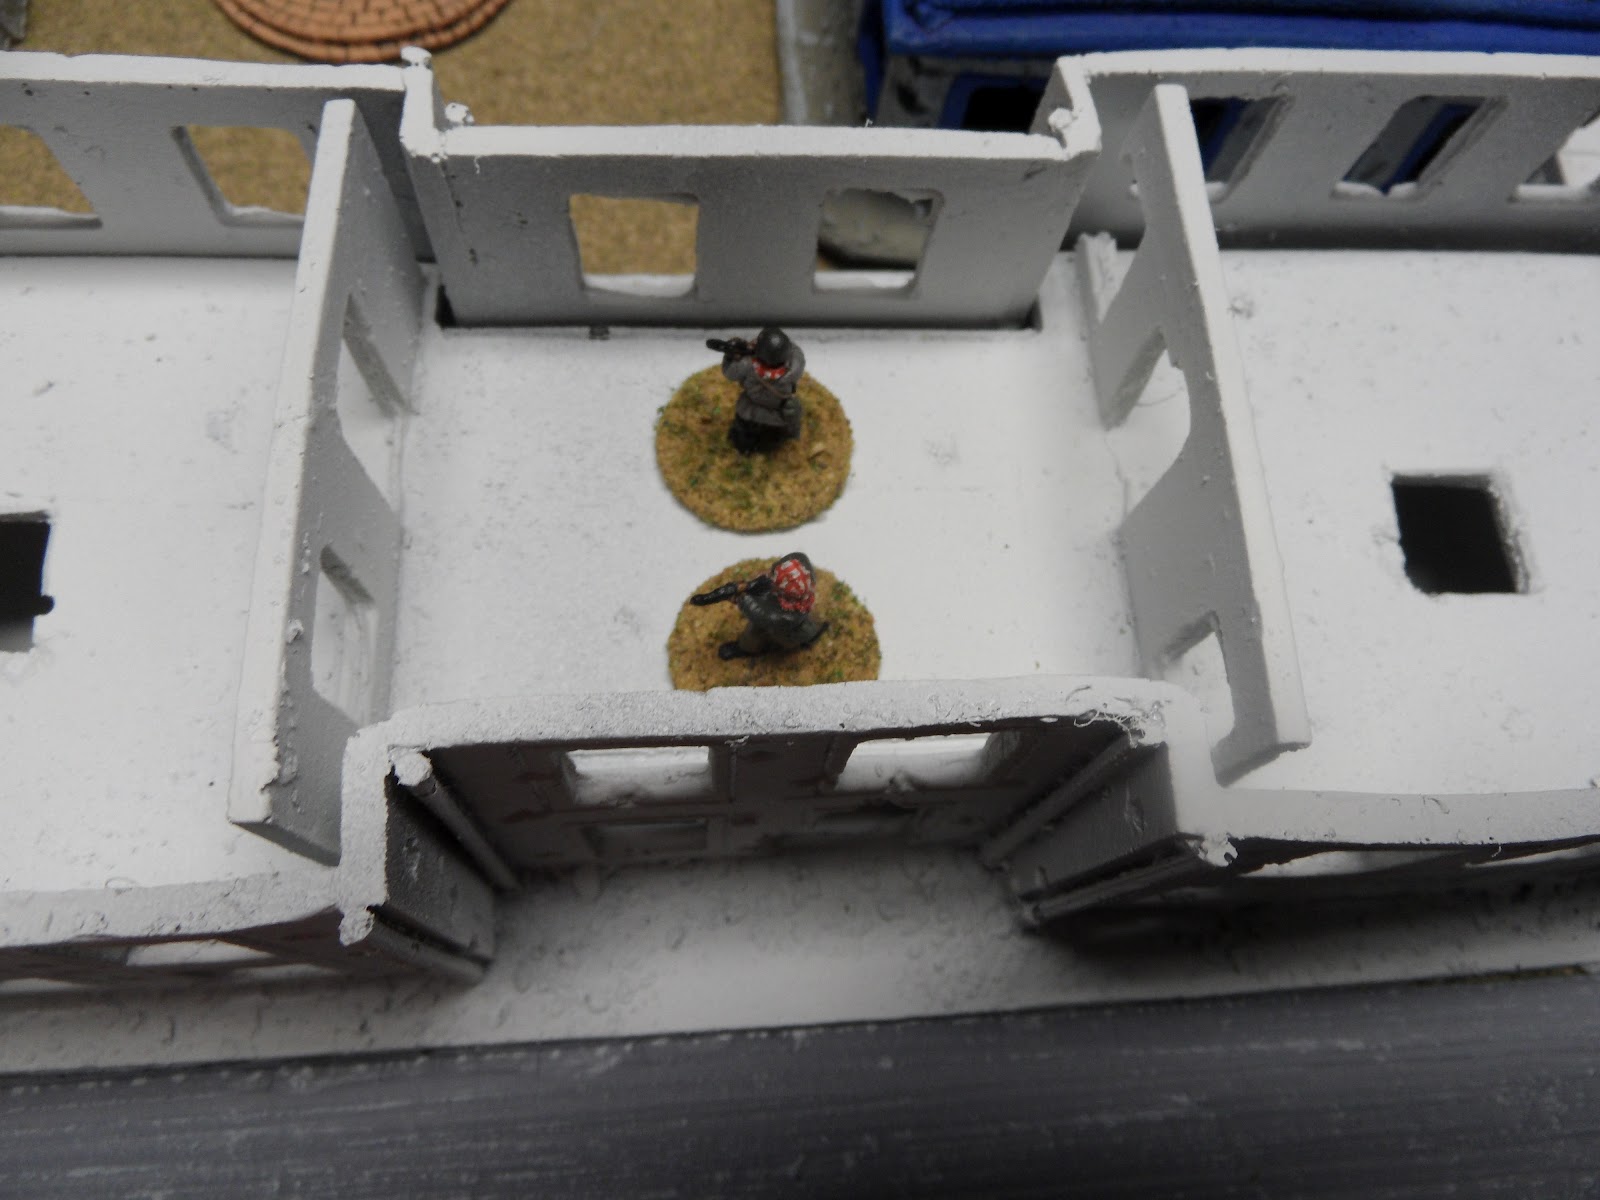
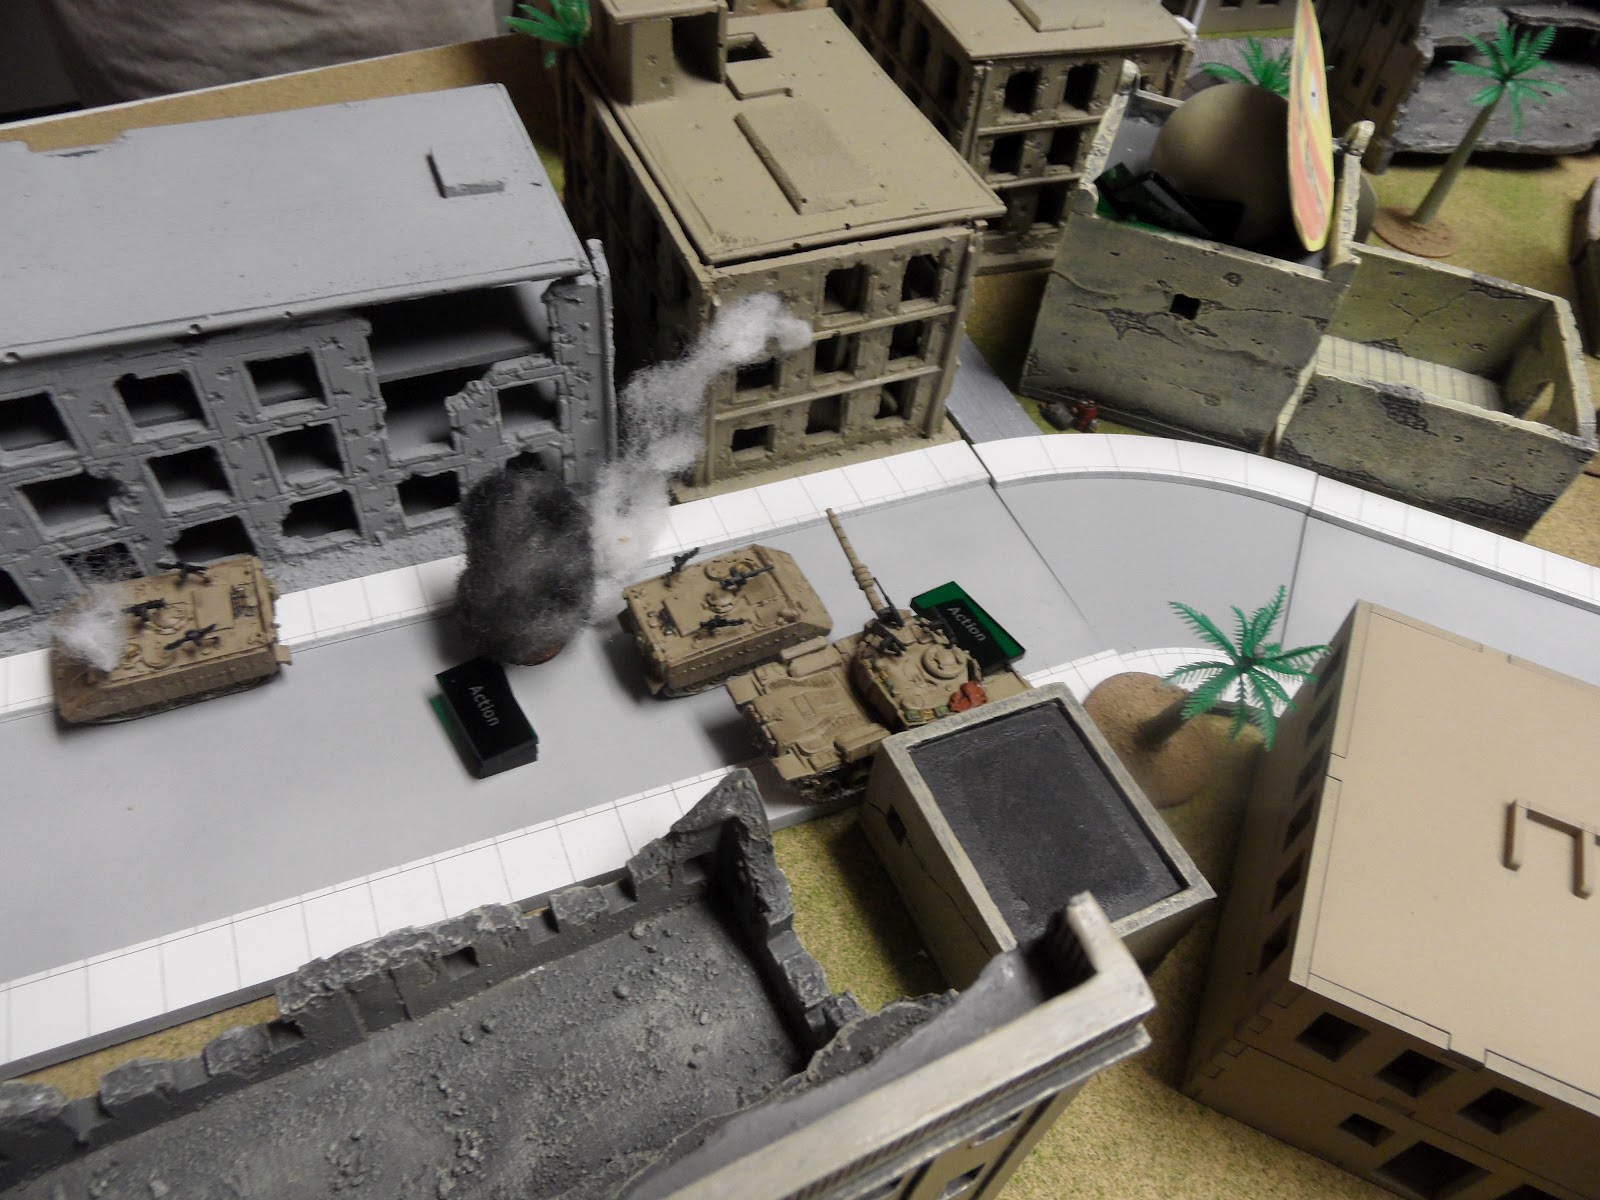
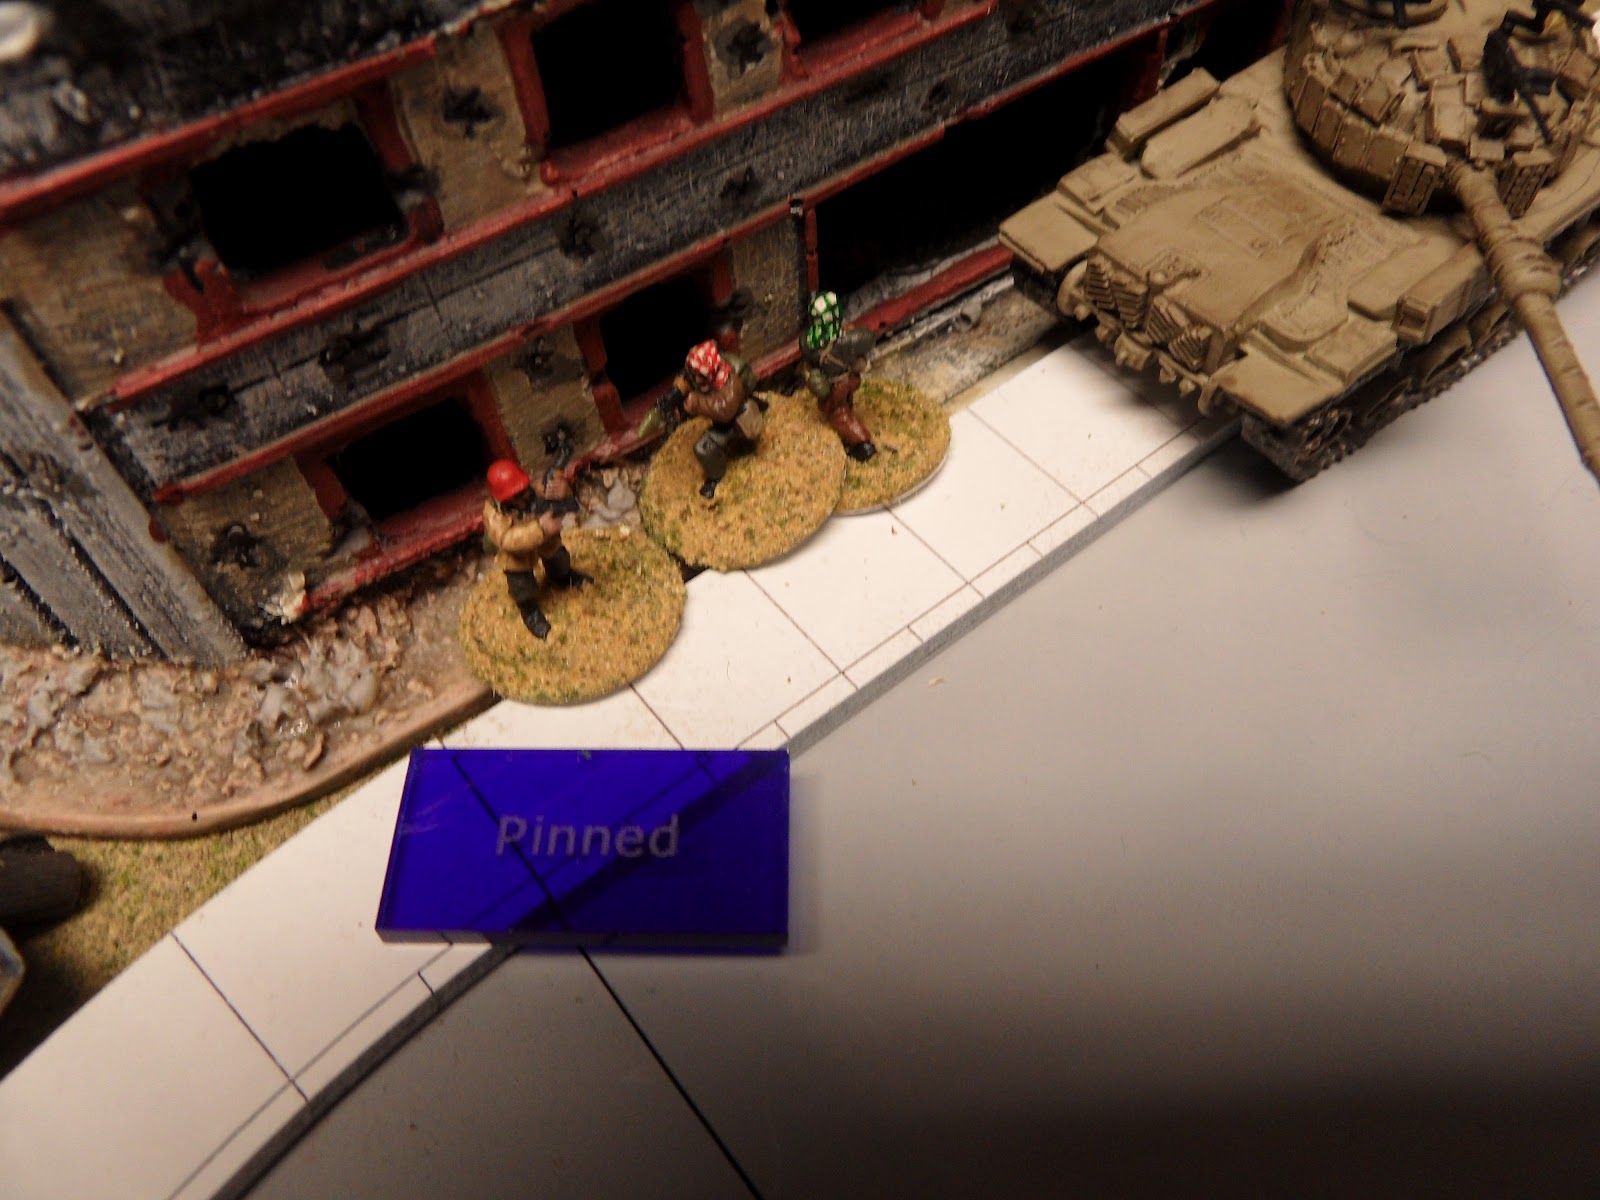
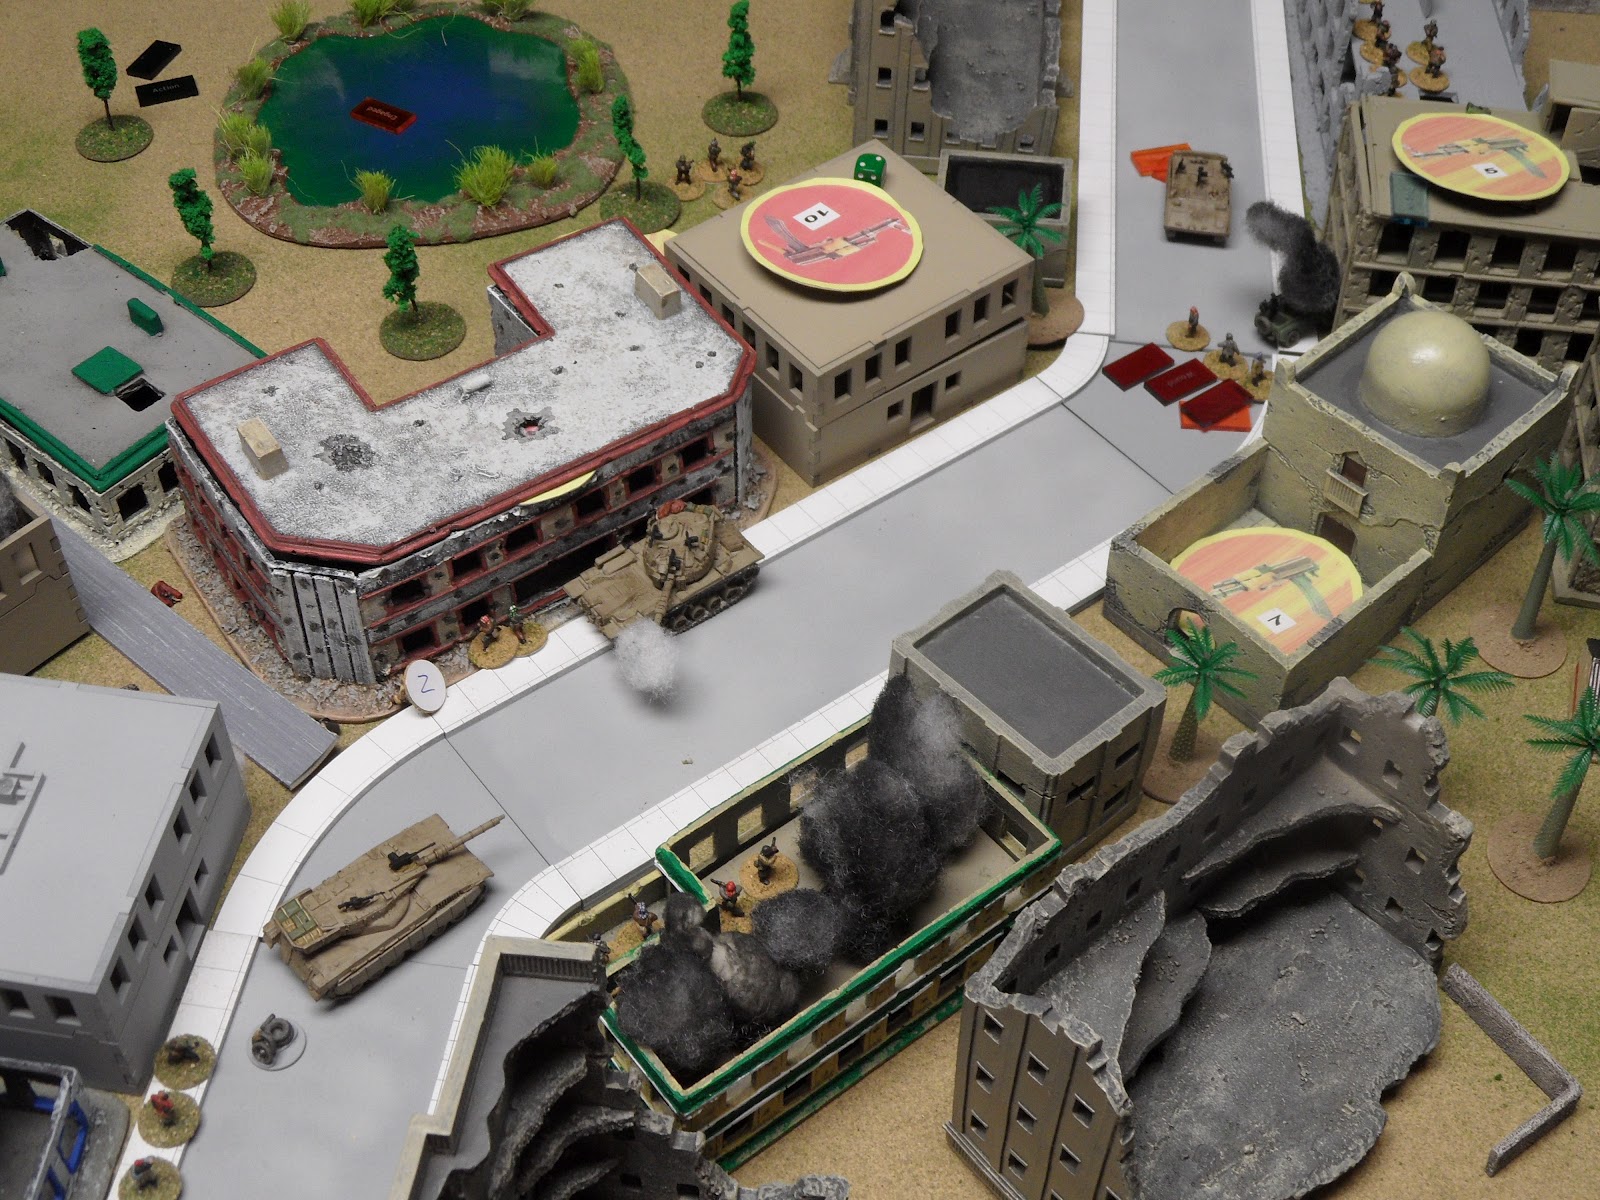
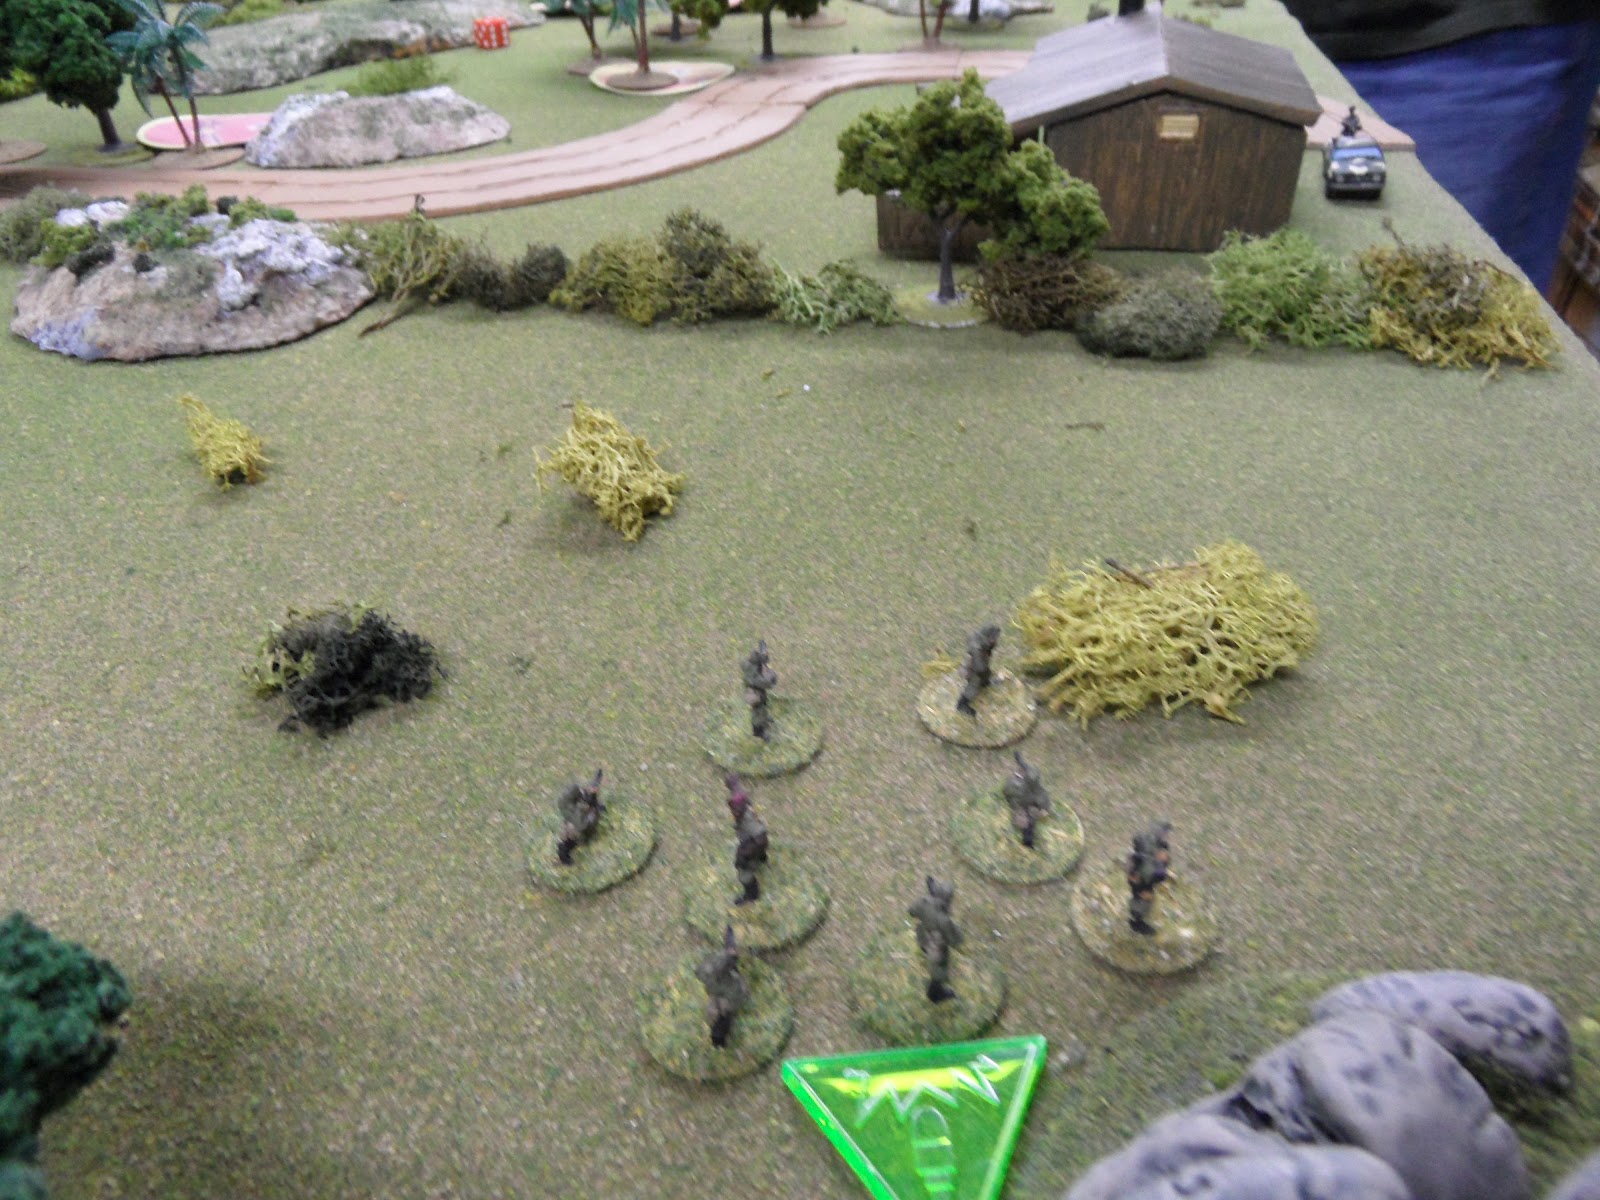
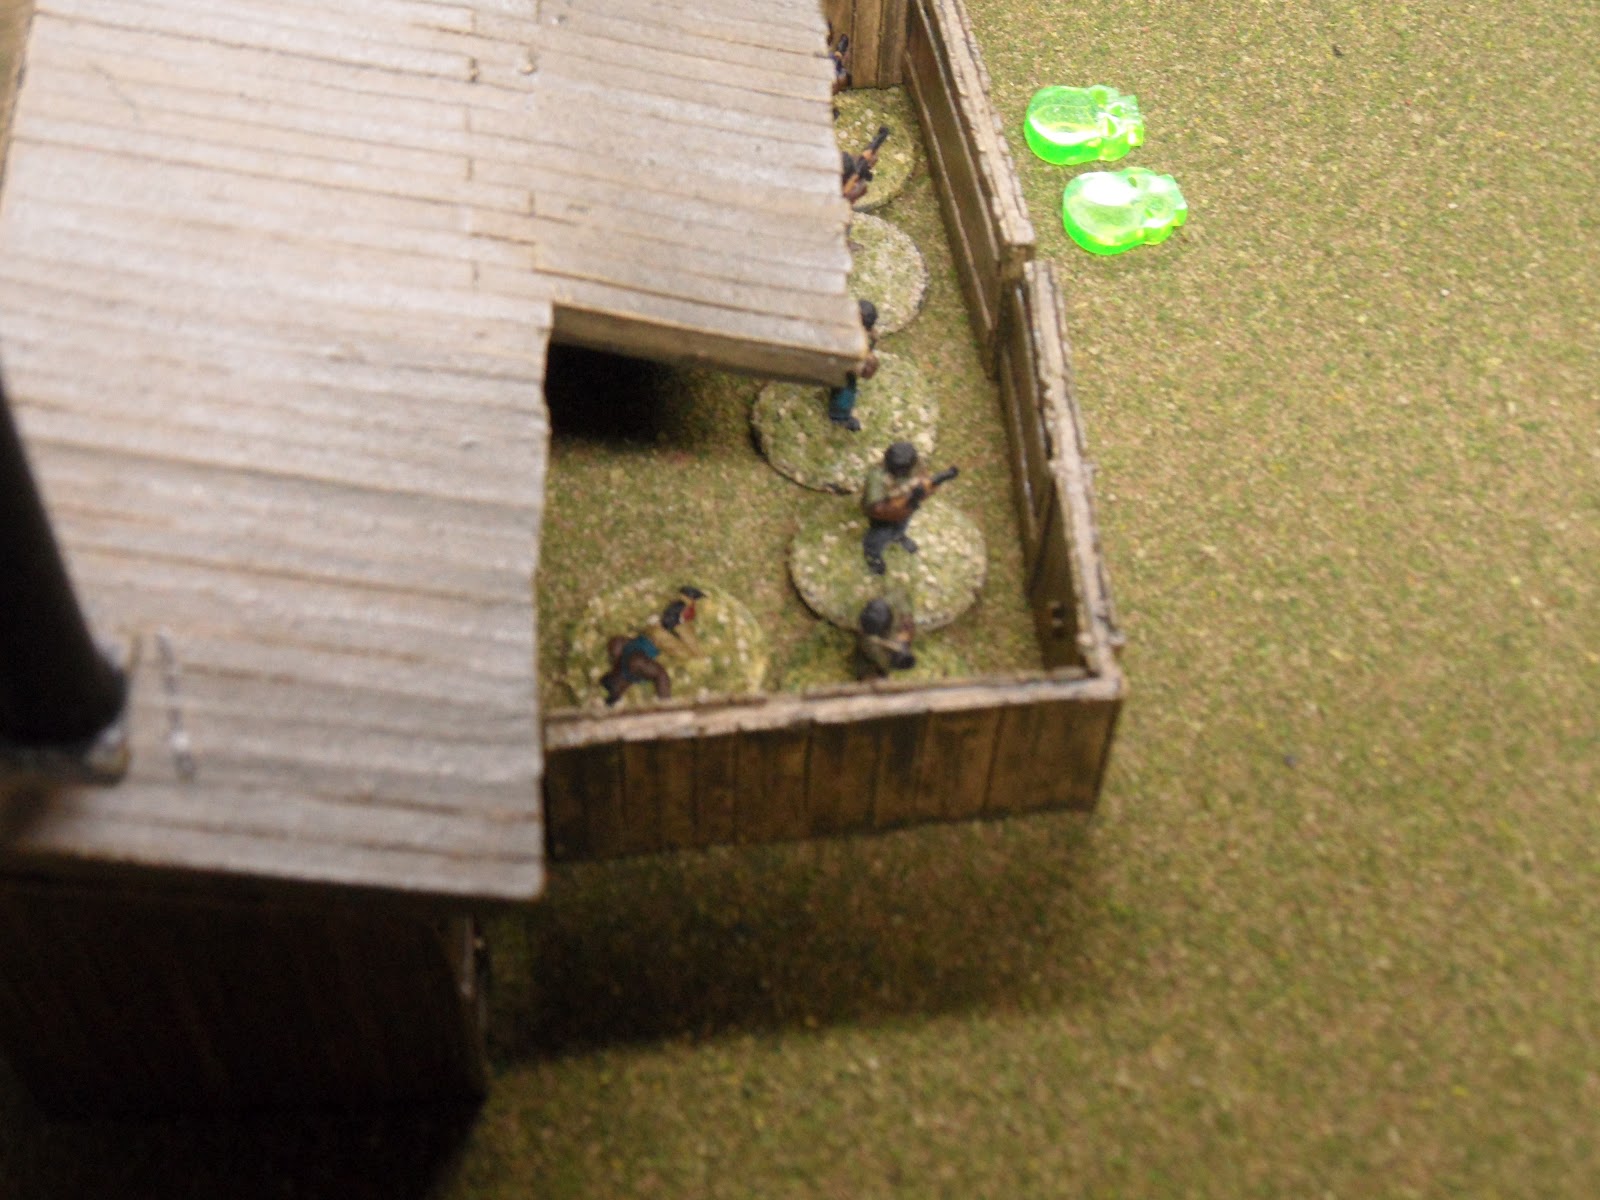
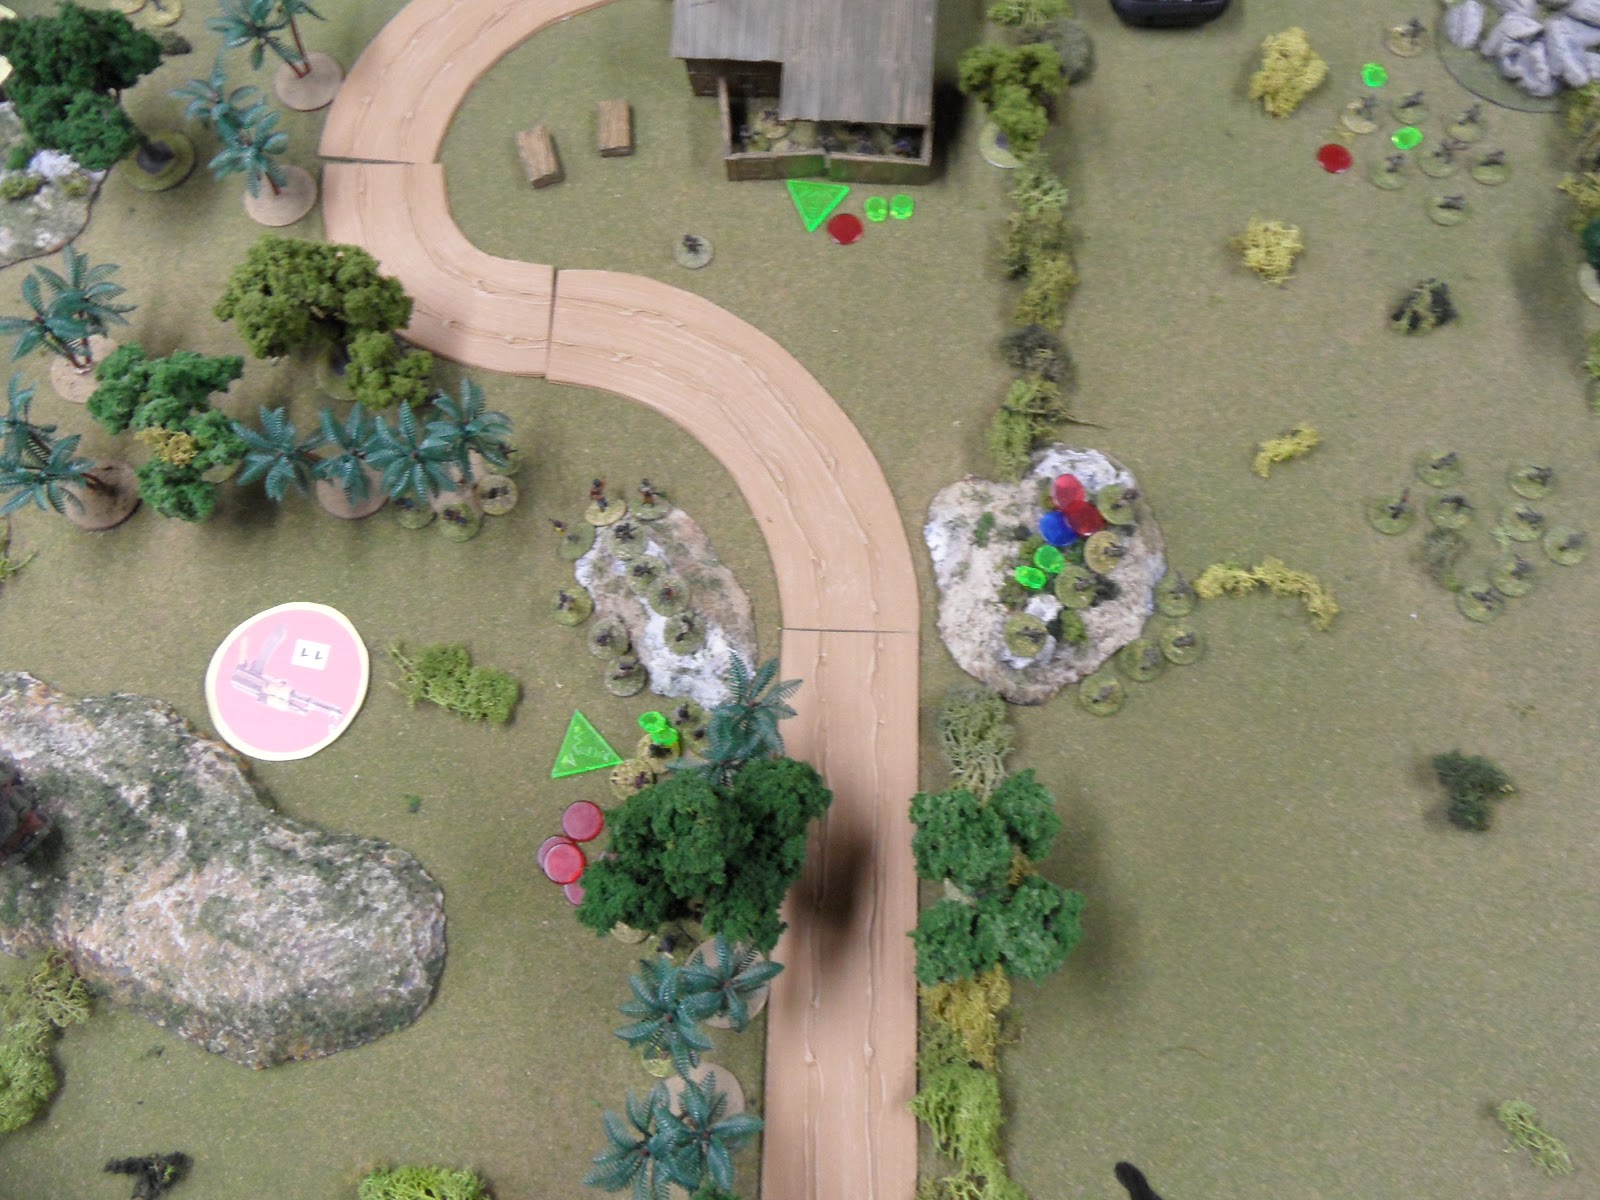
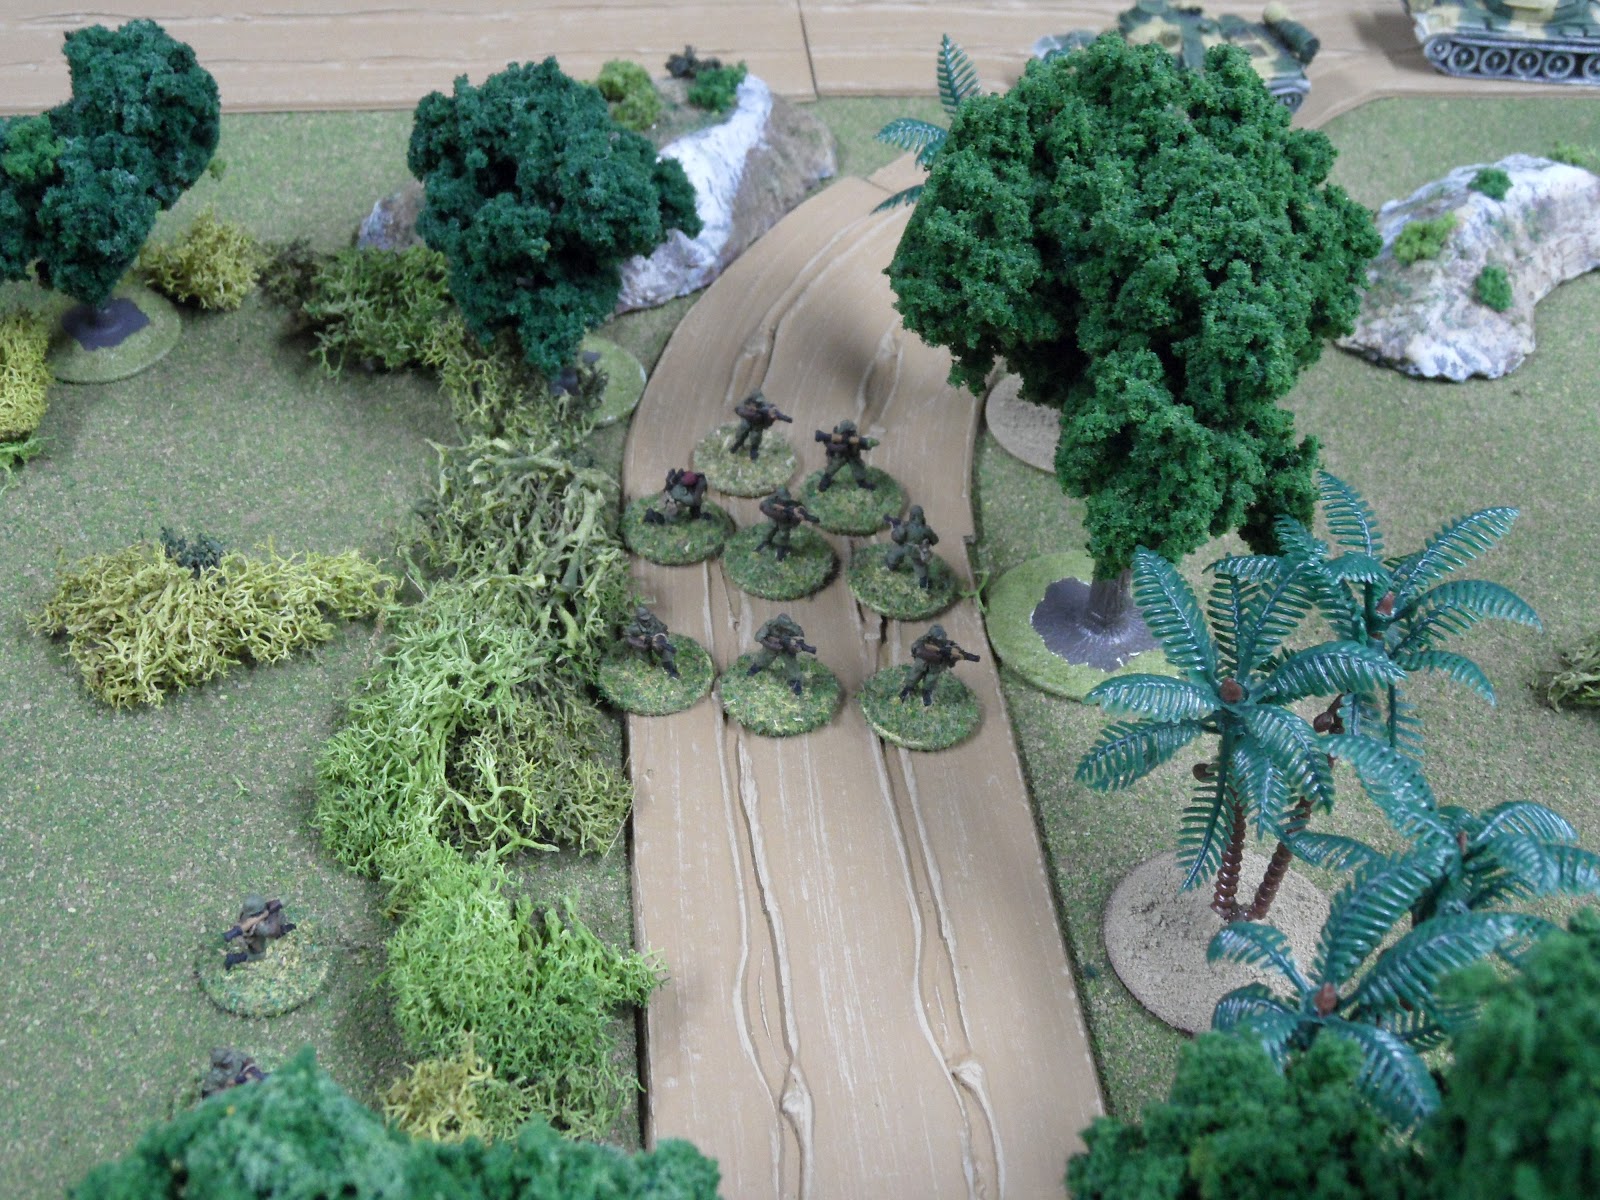
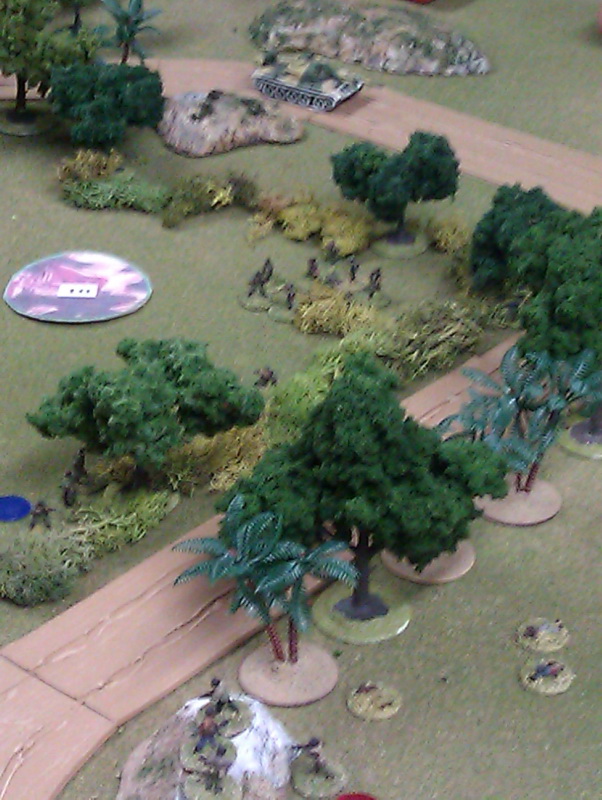
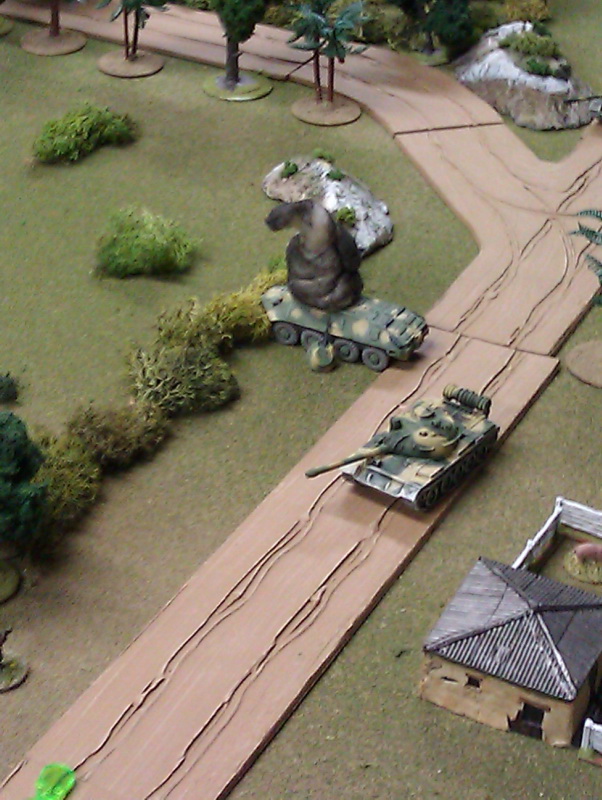
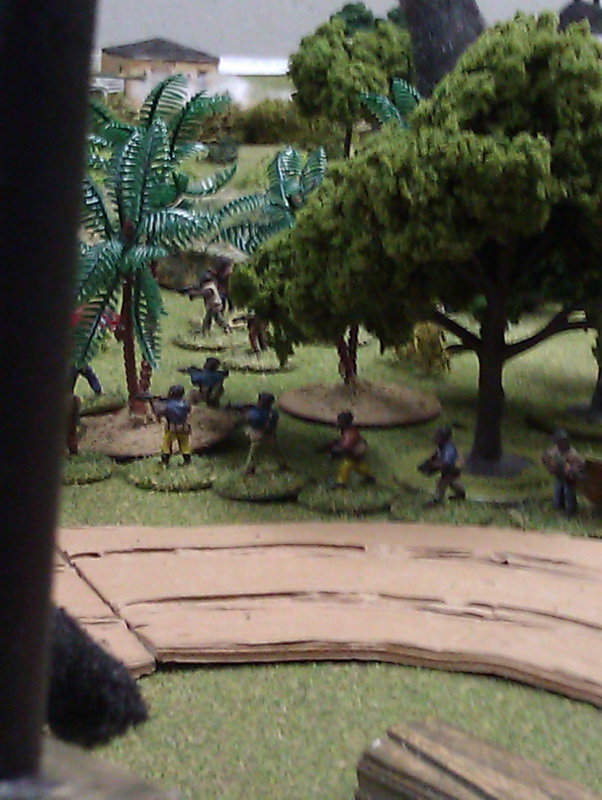
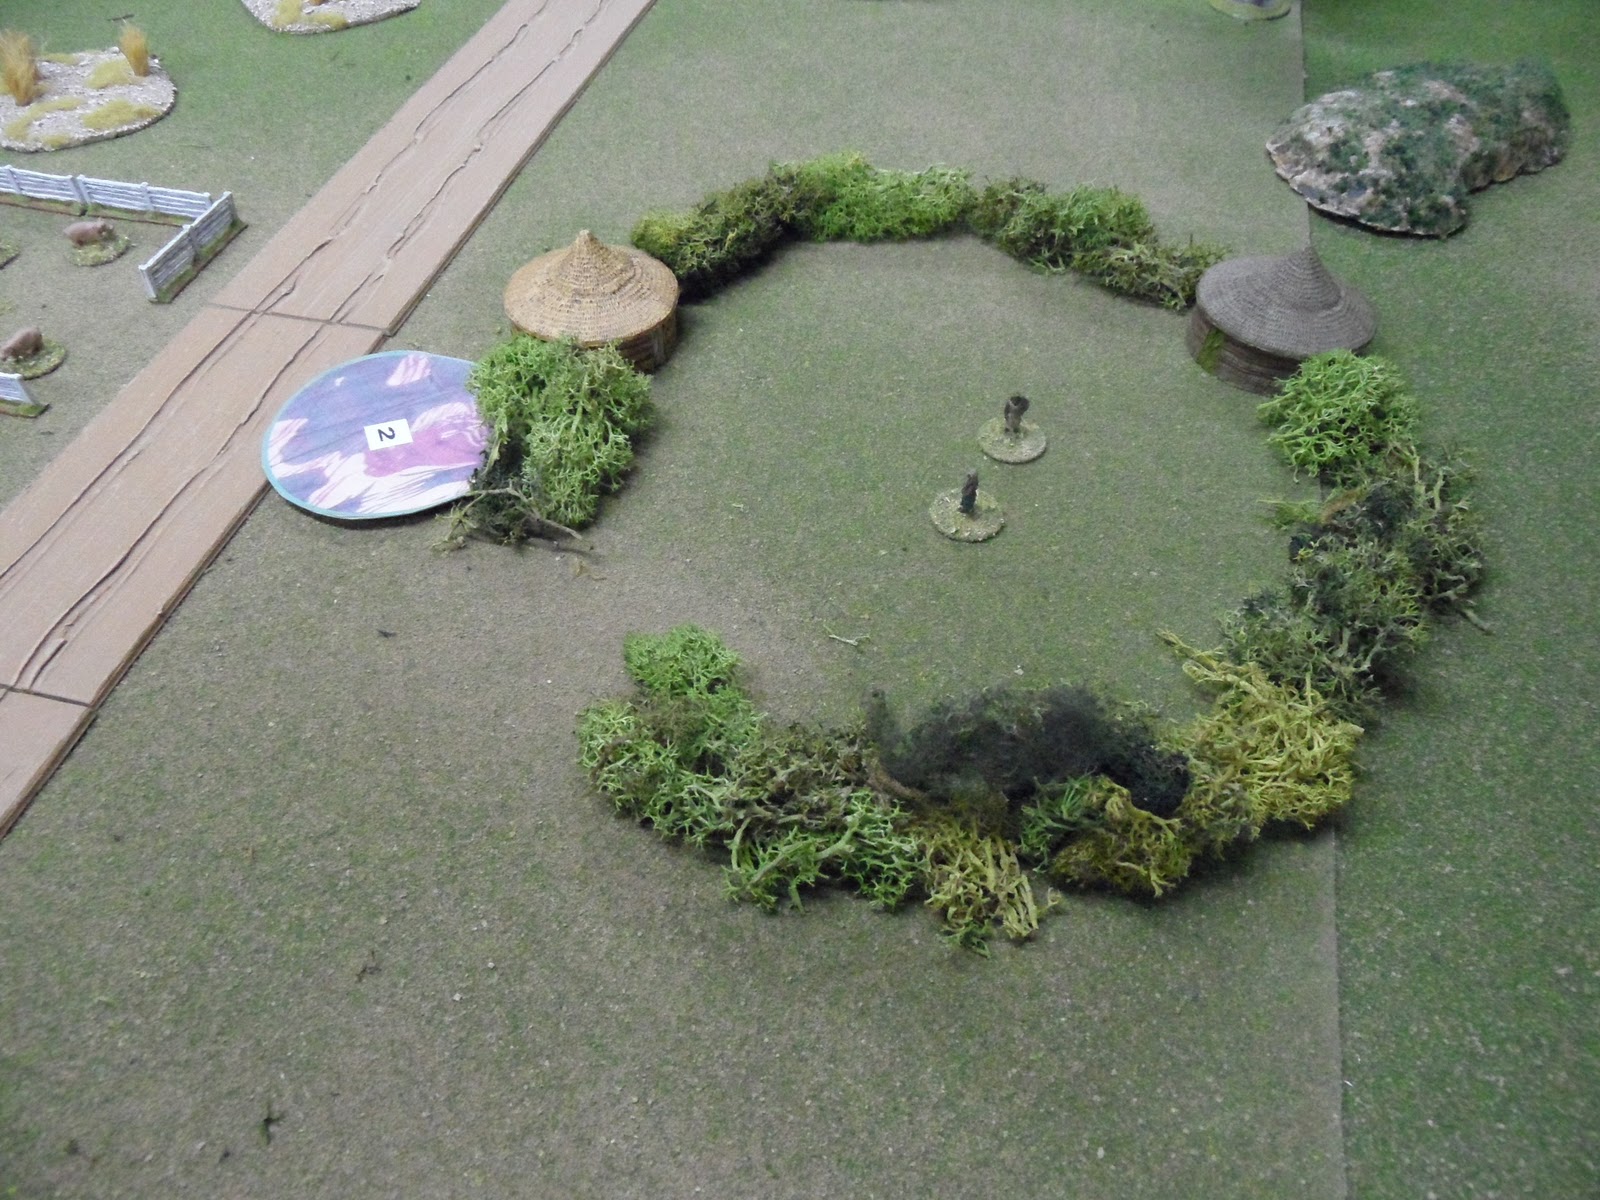
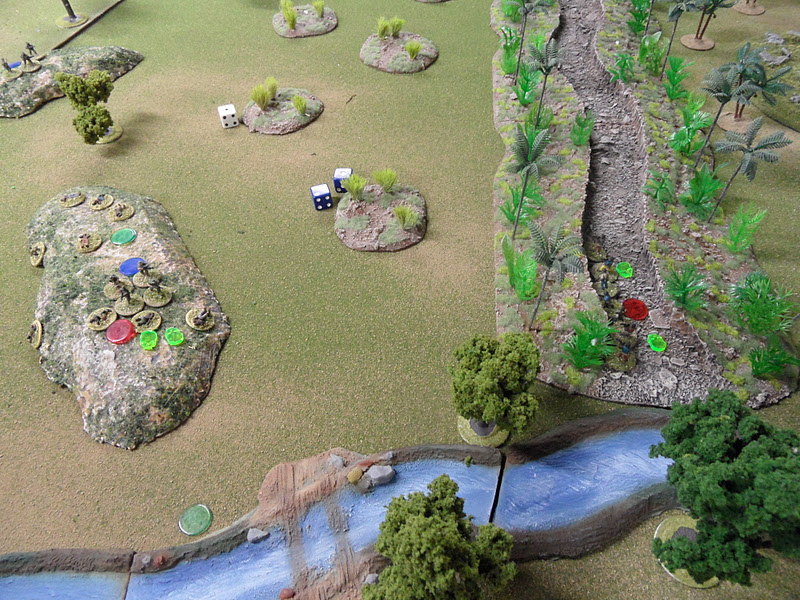
The NVA are moved up to the perimeter

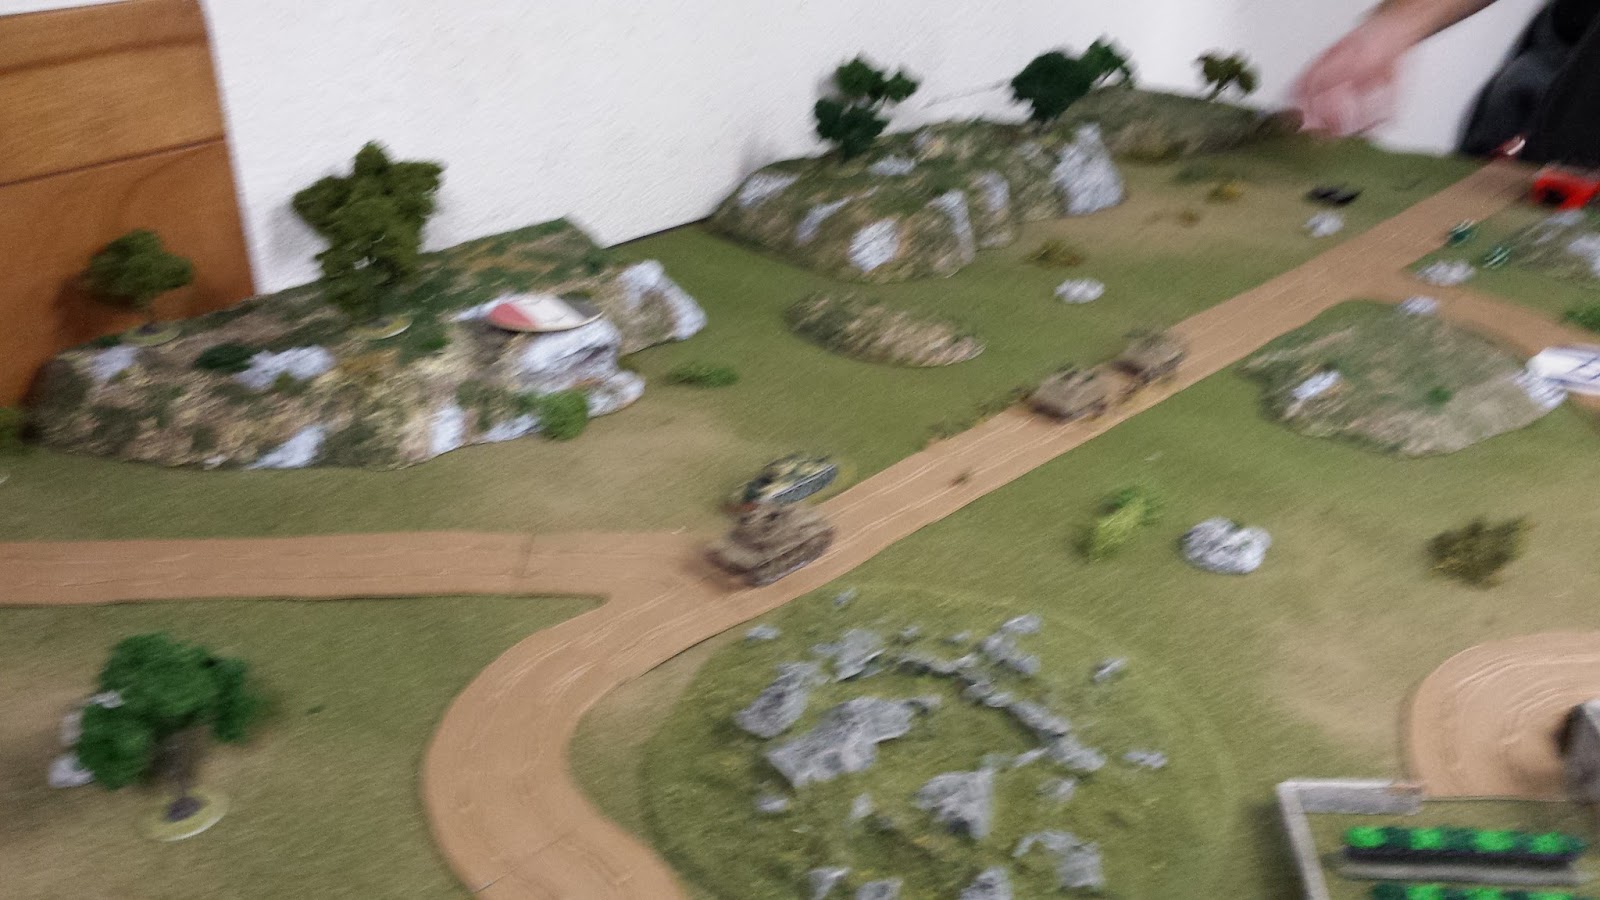
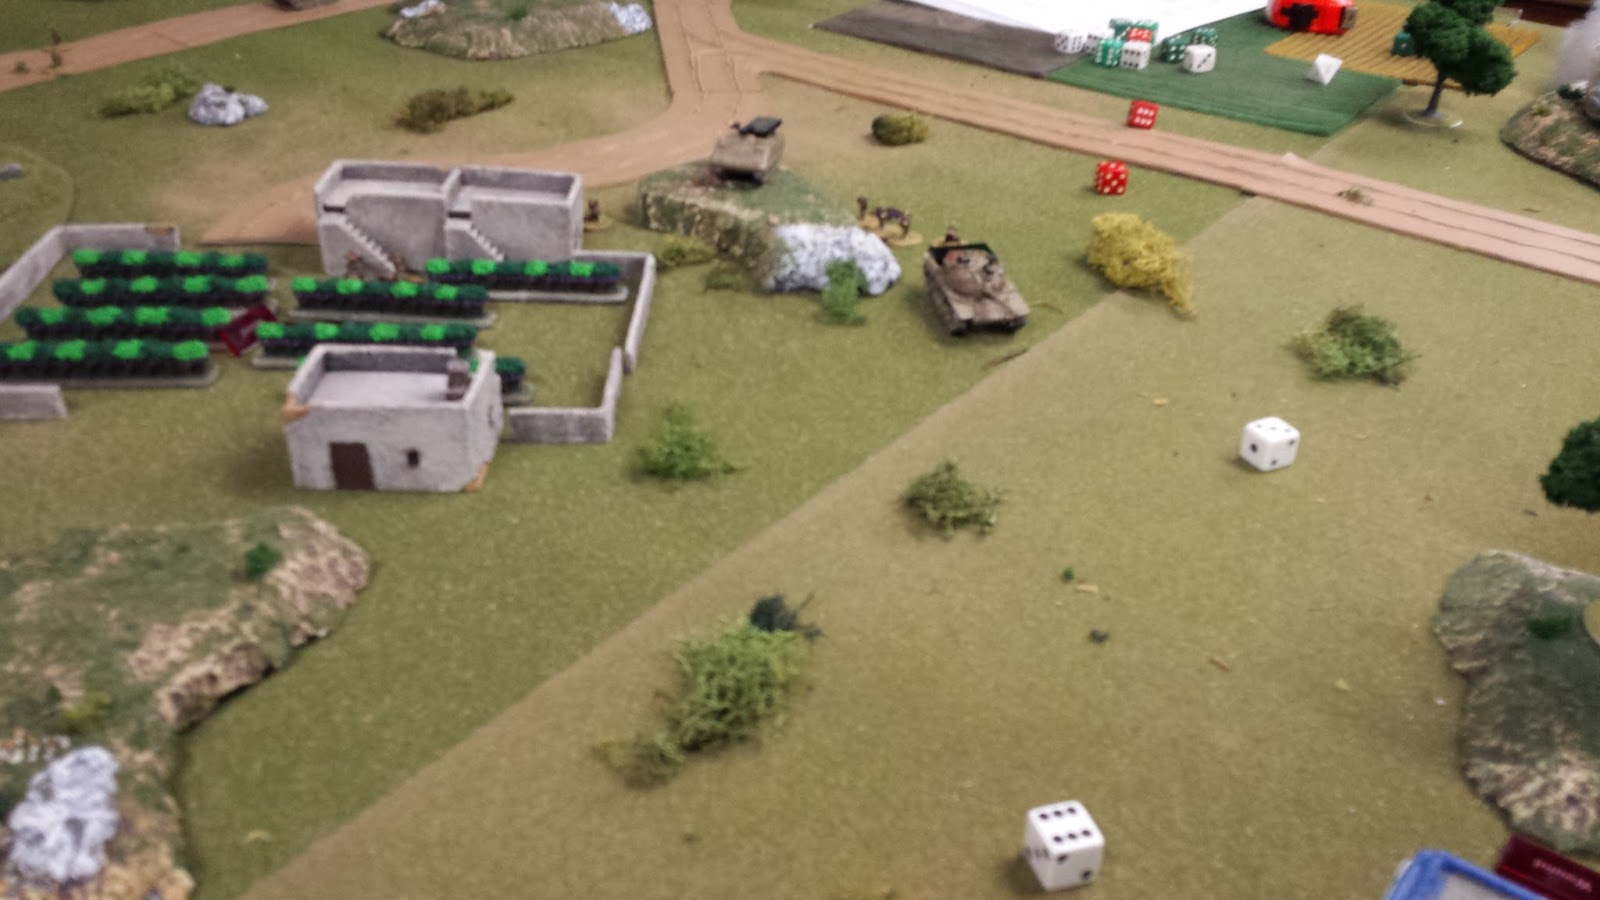
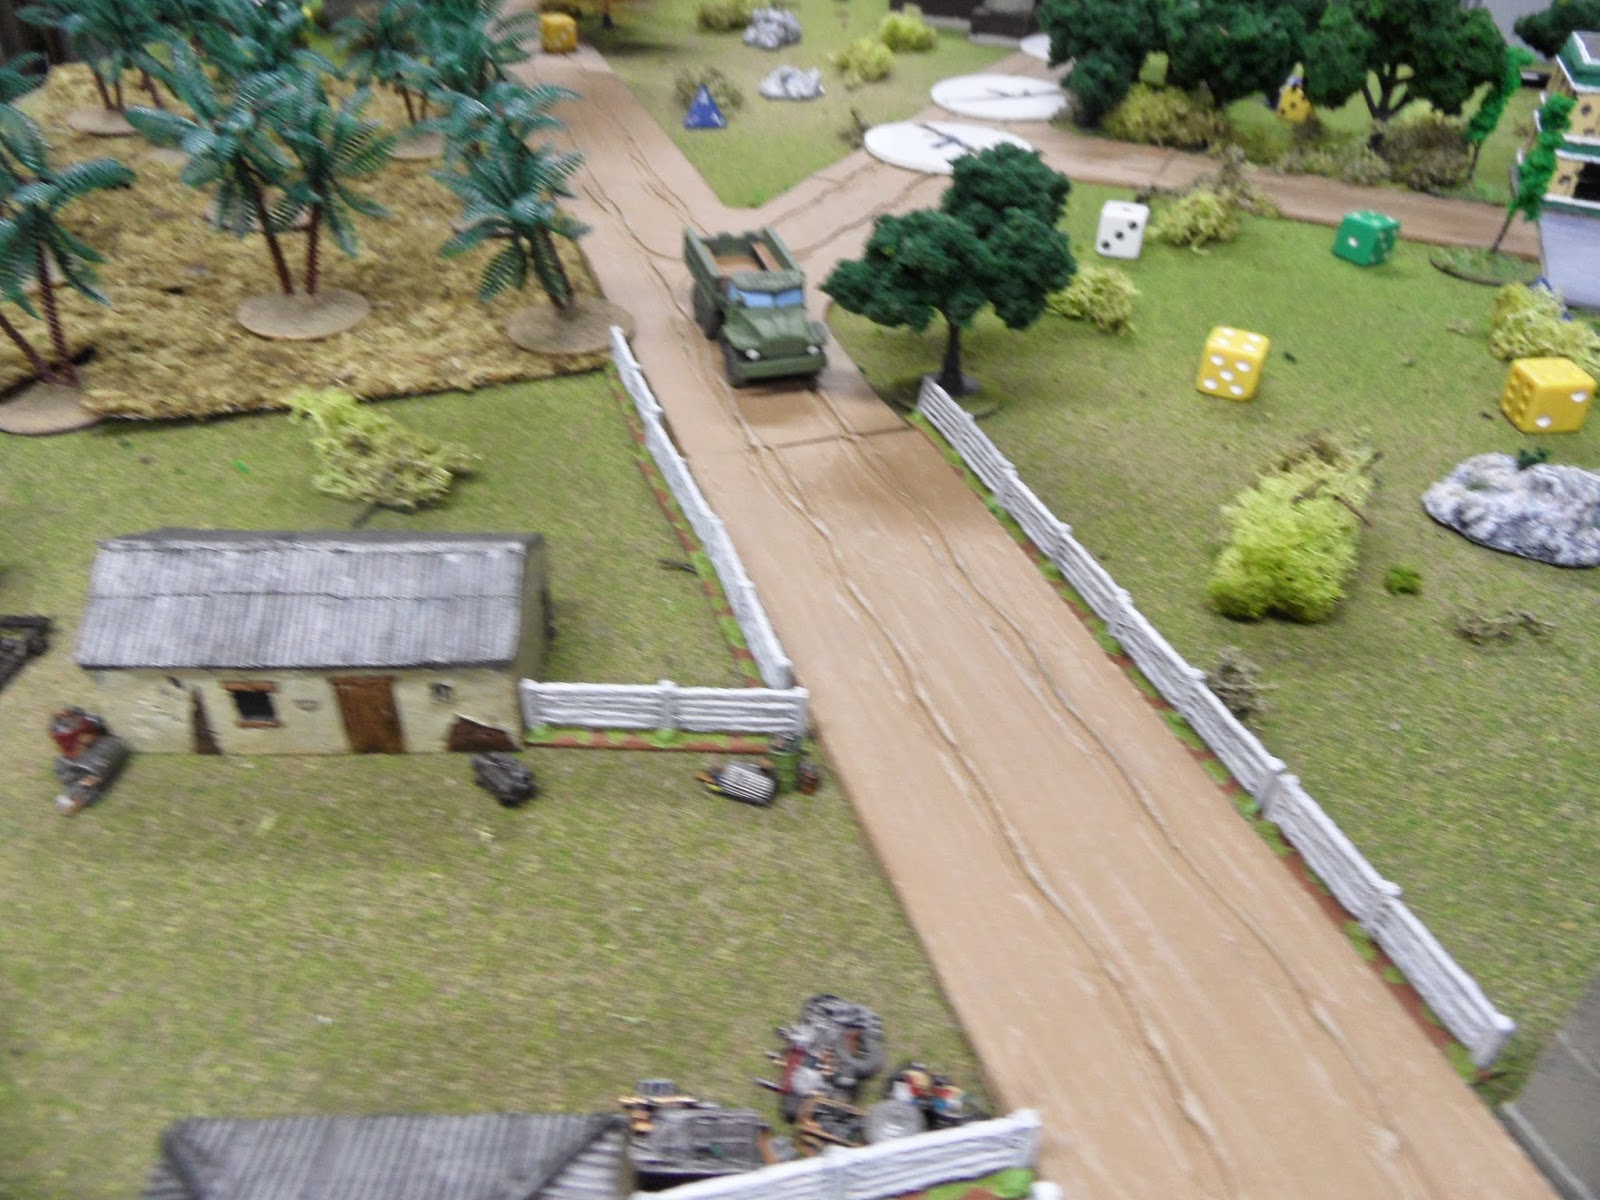
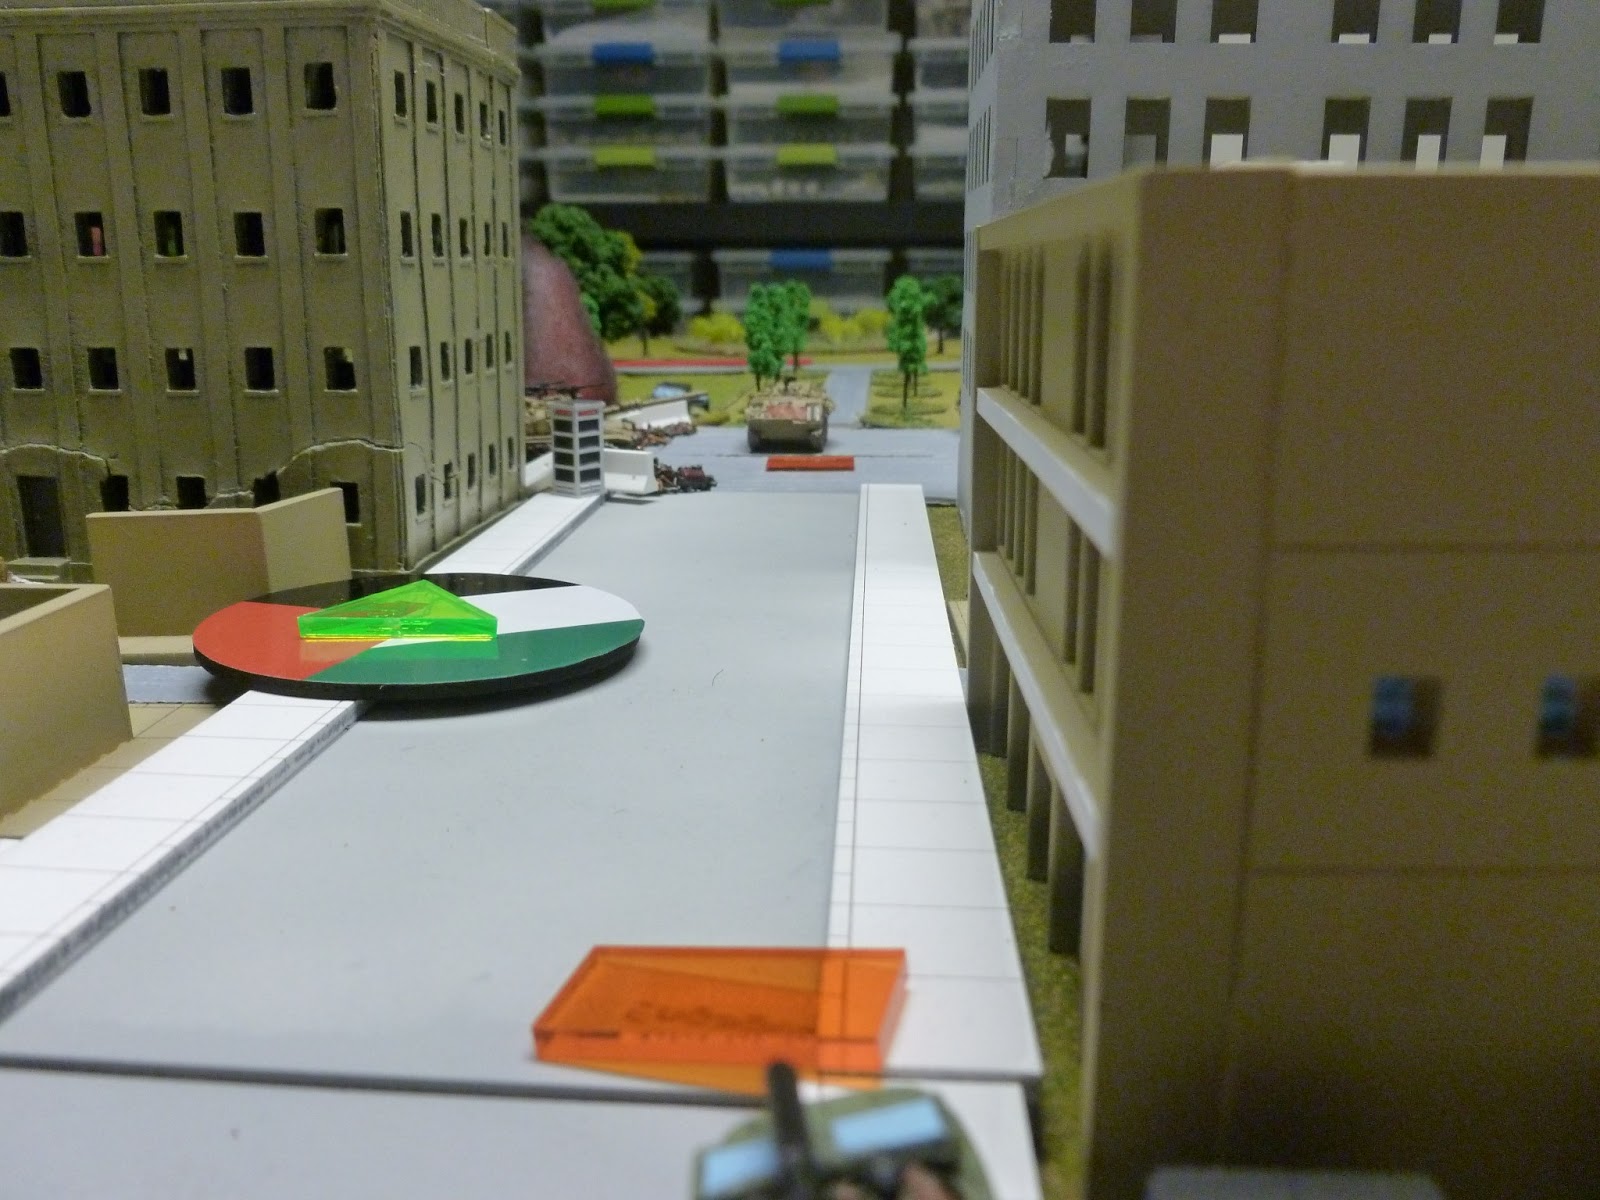
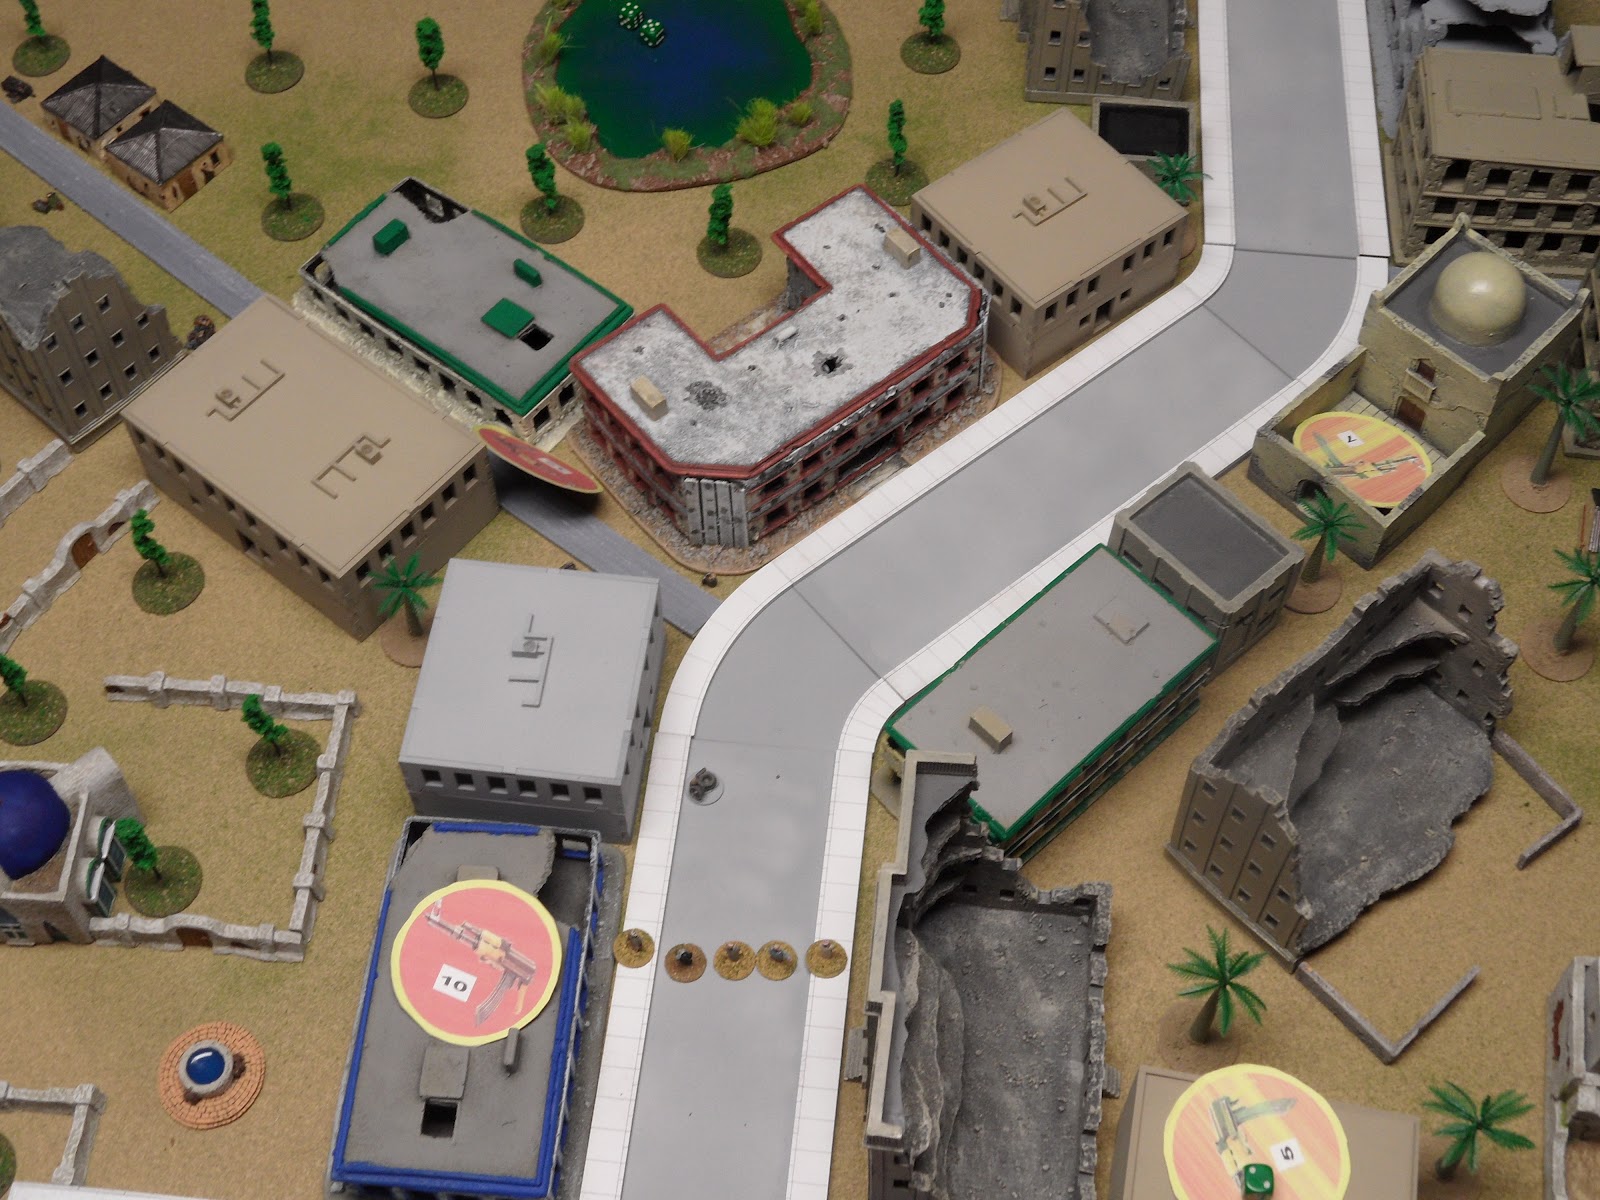
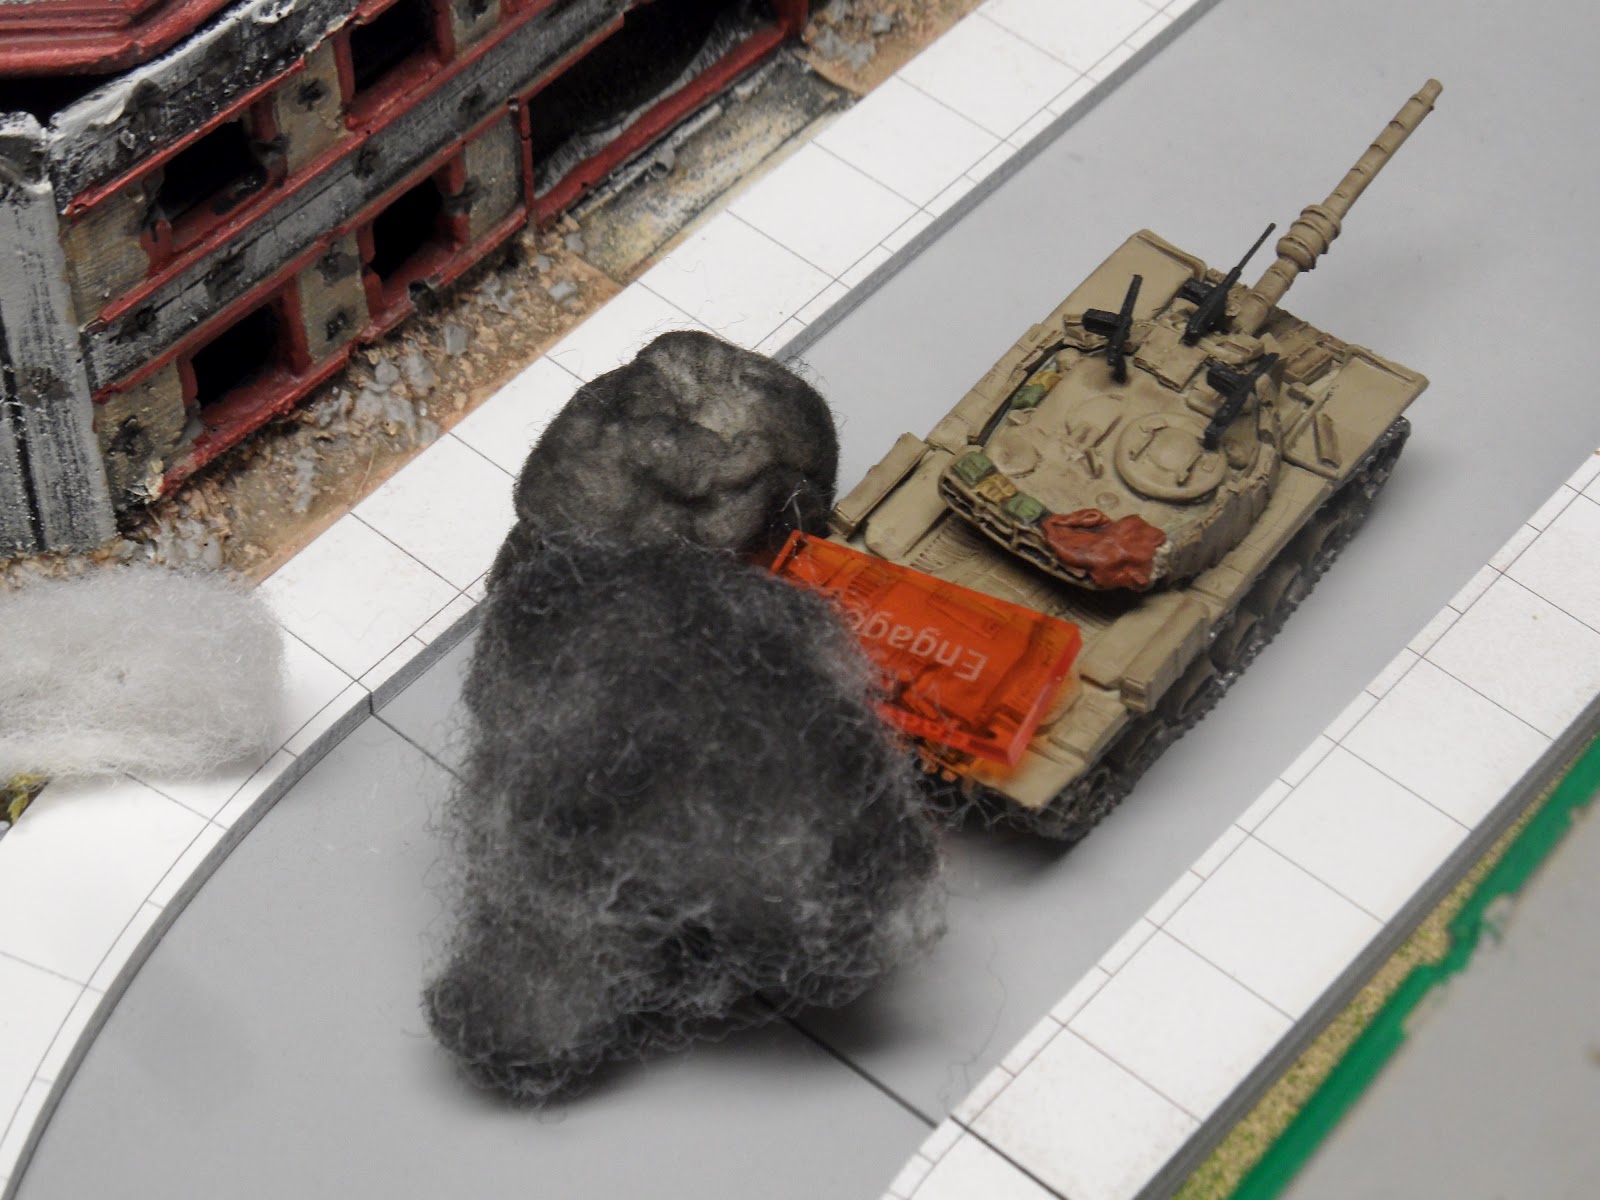
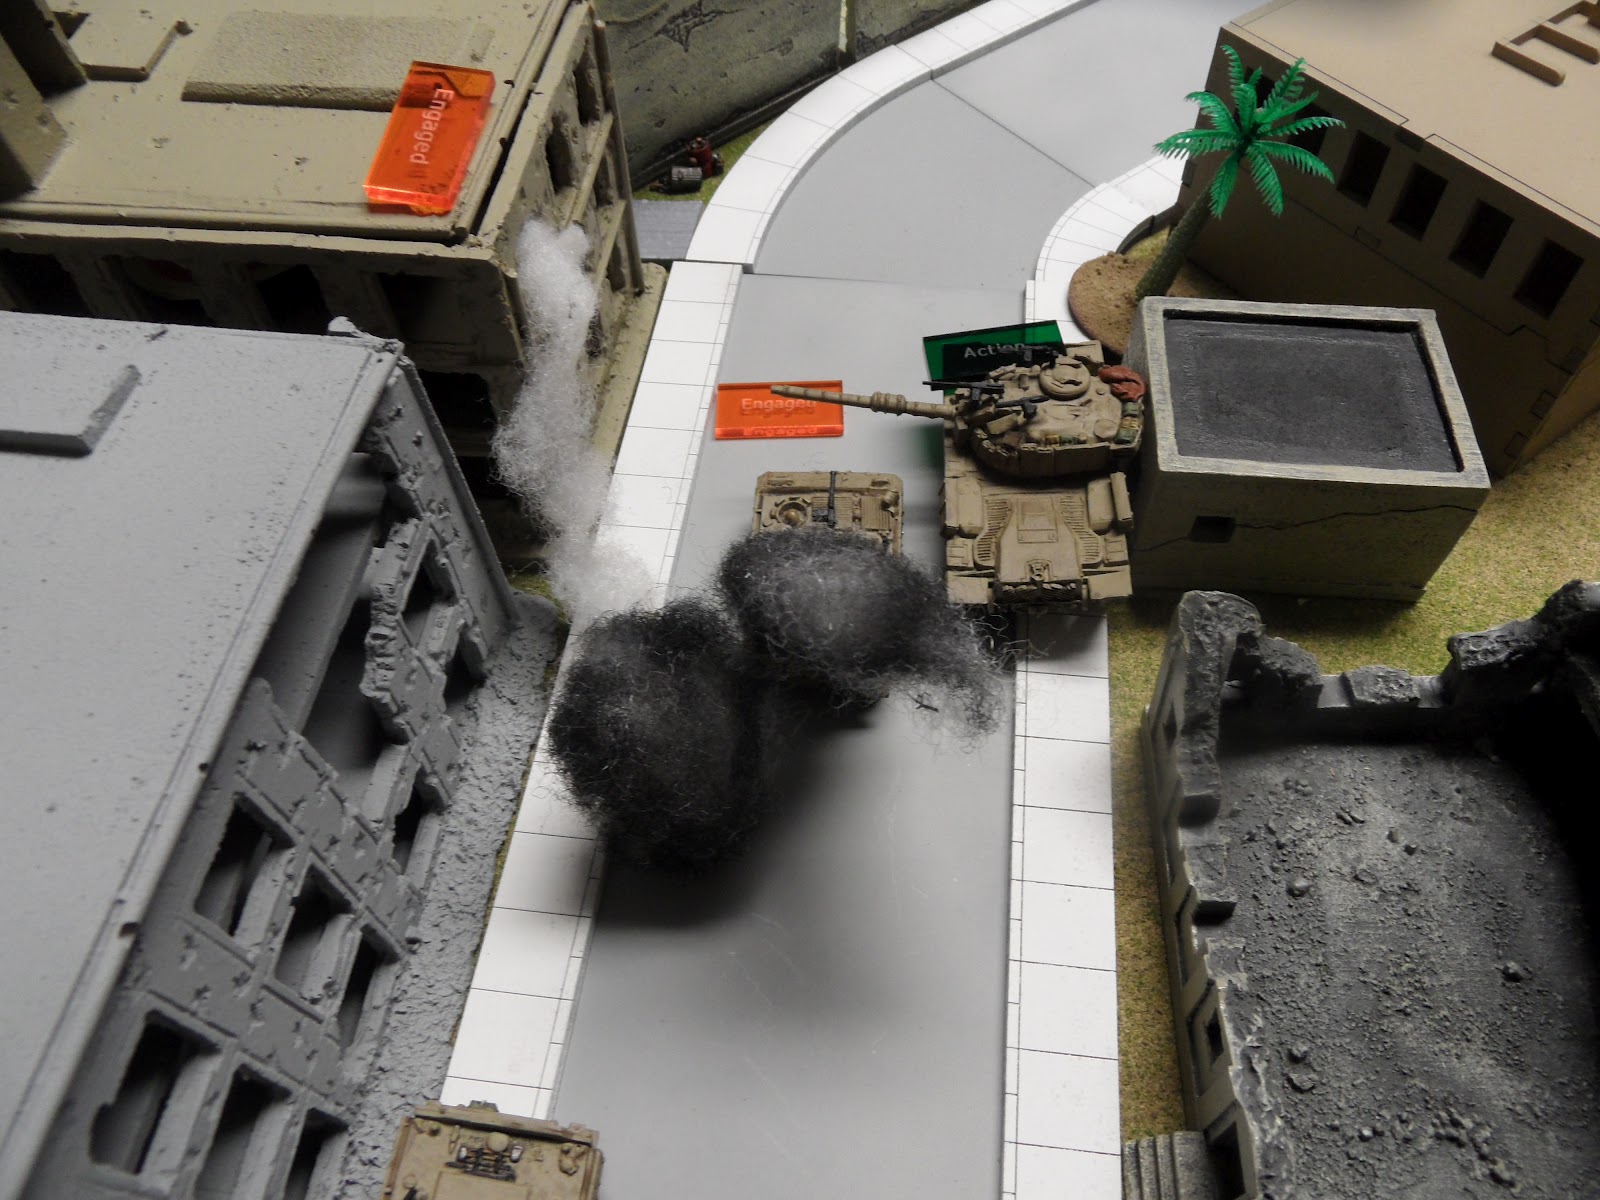
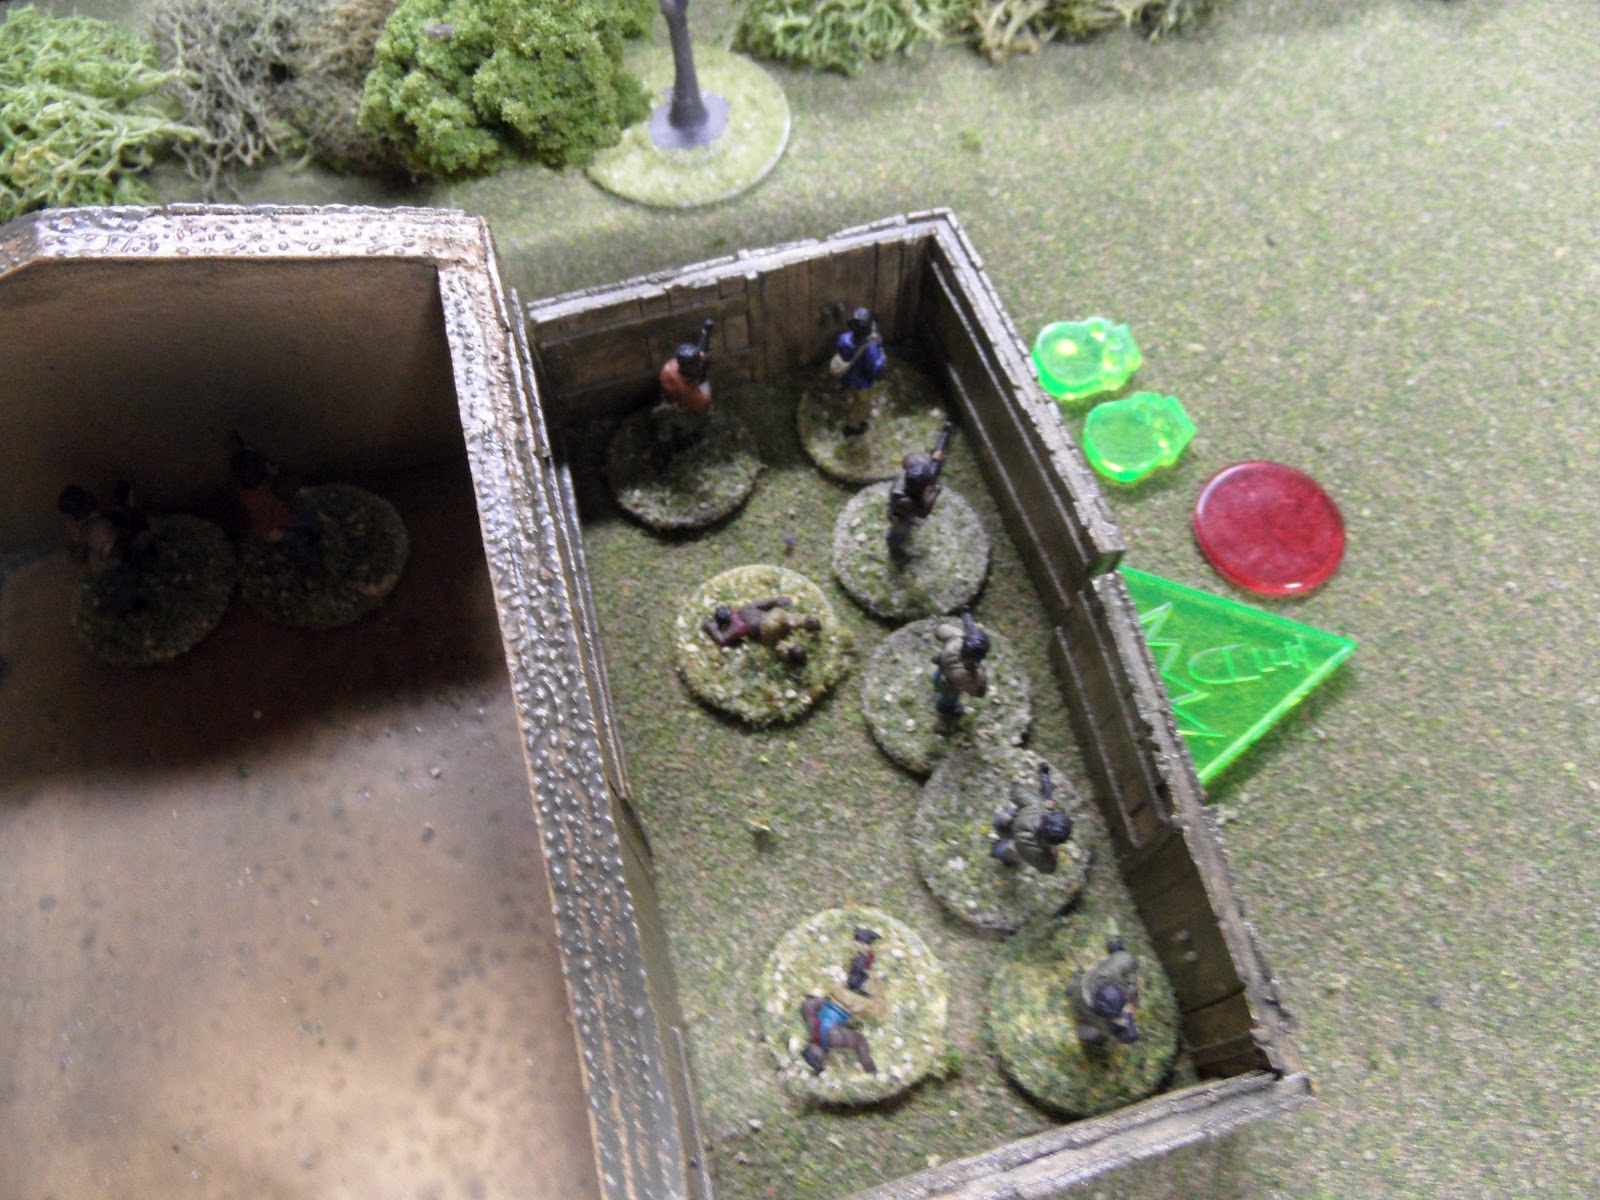
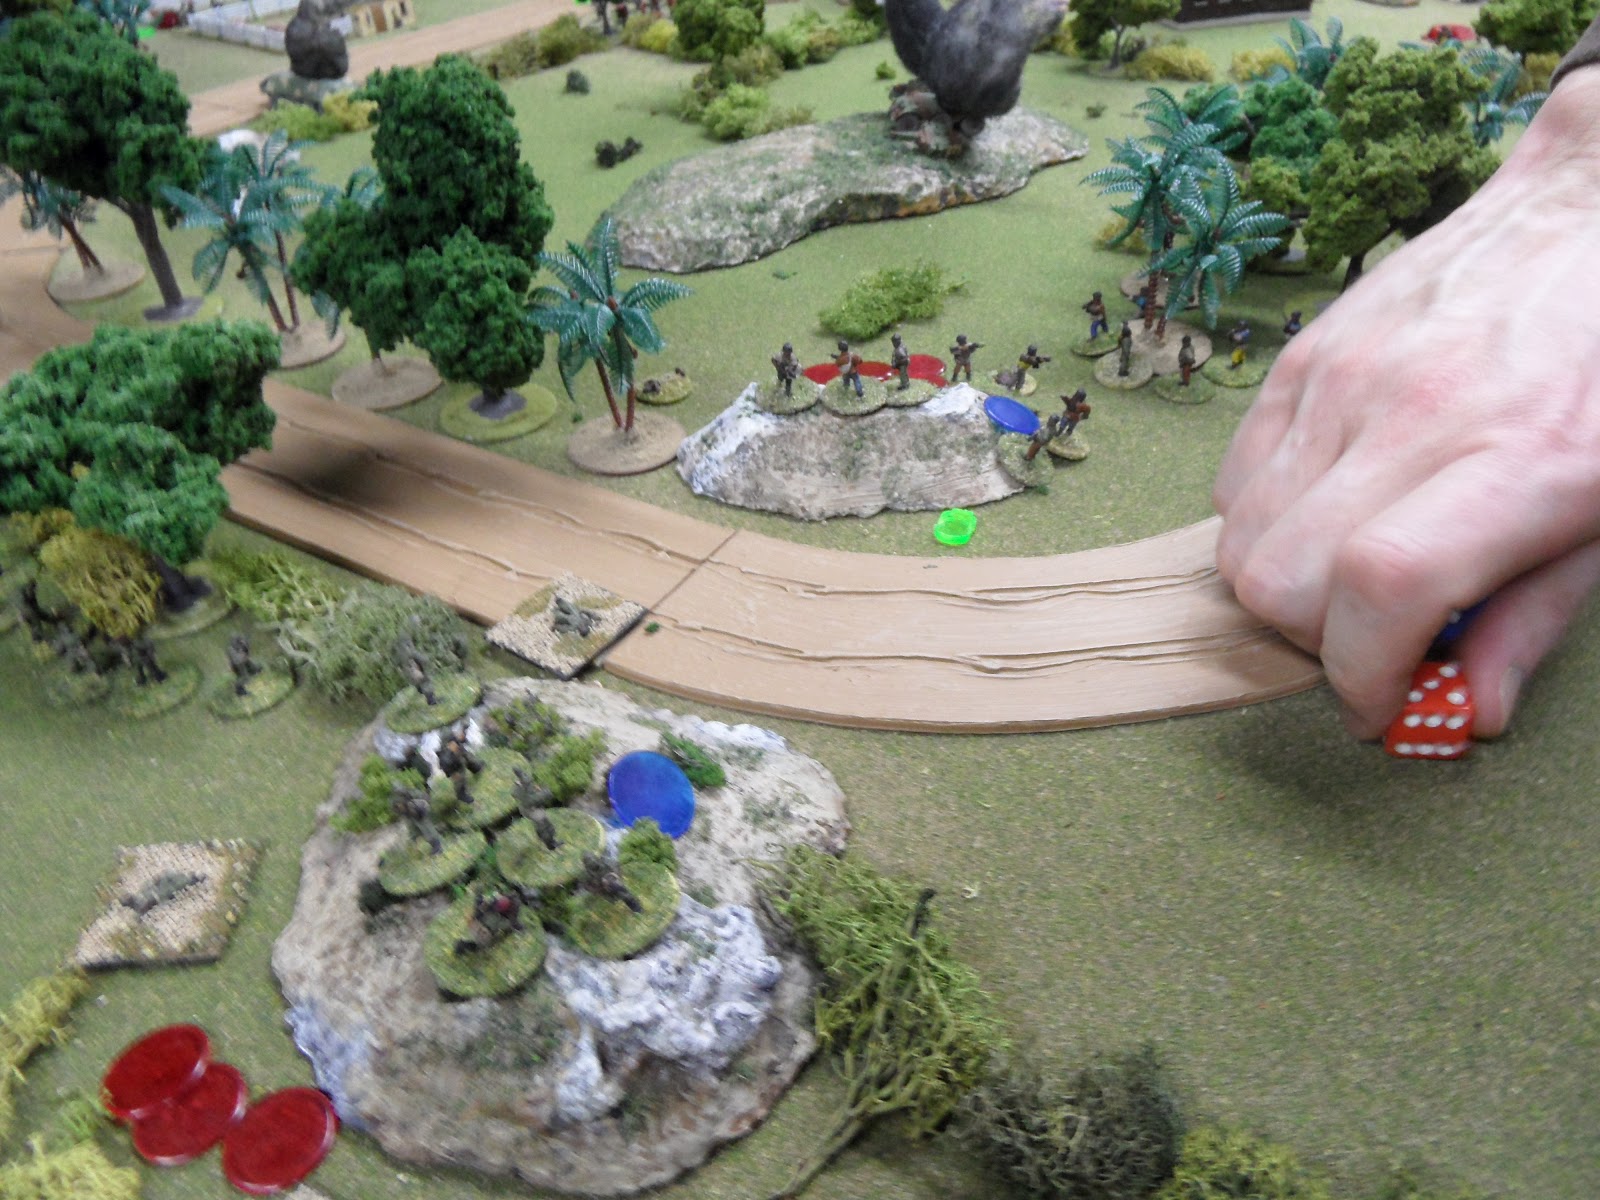
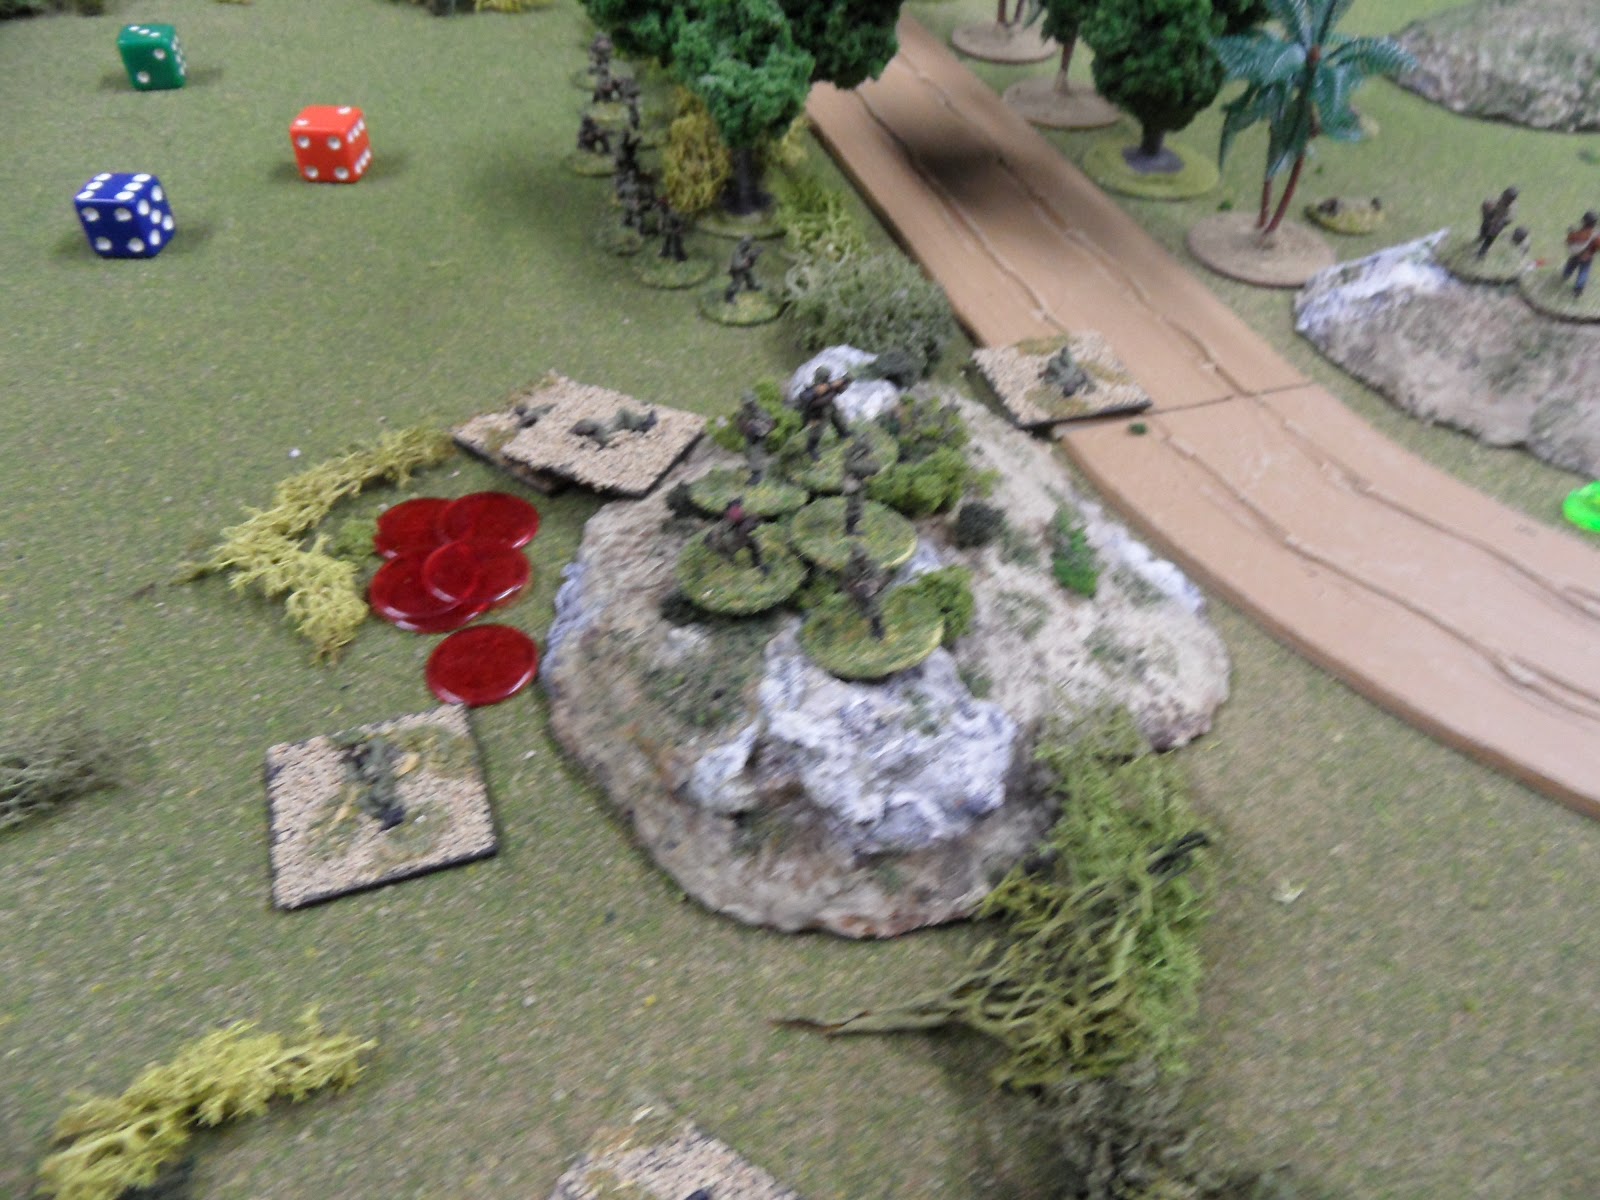
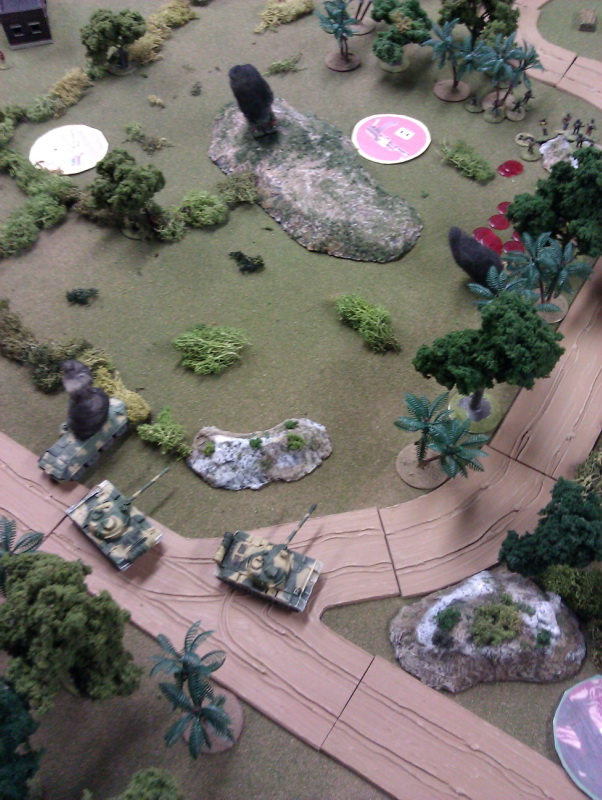
Yellow dice in among the jungle indicate accruing NVA shock

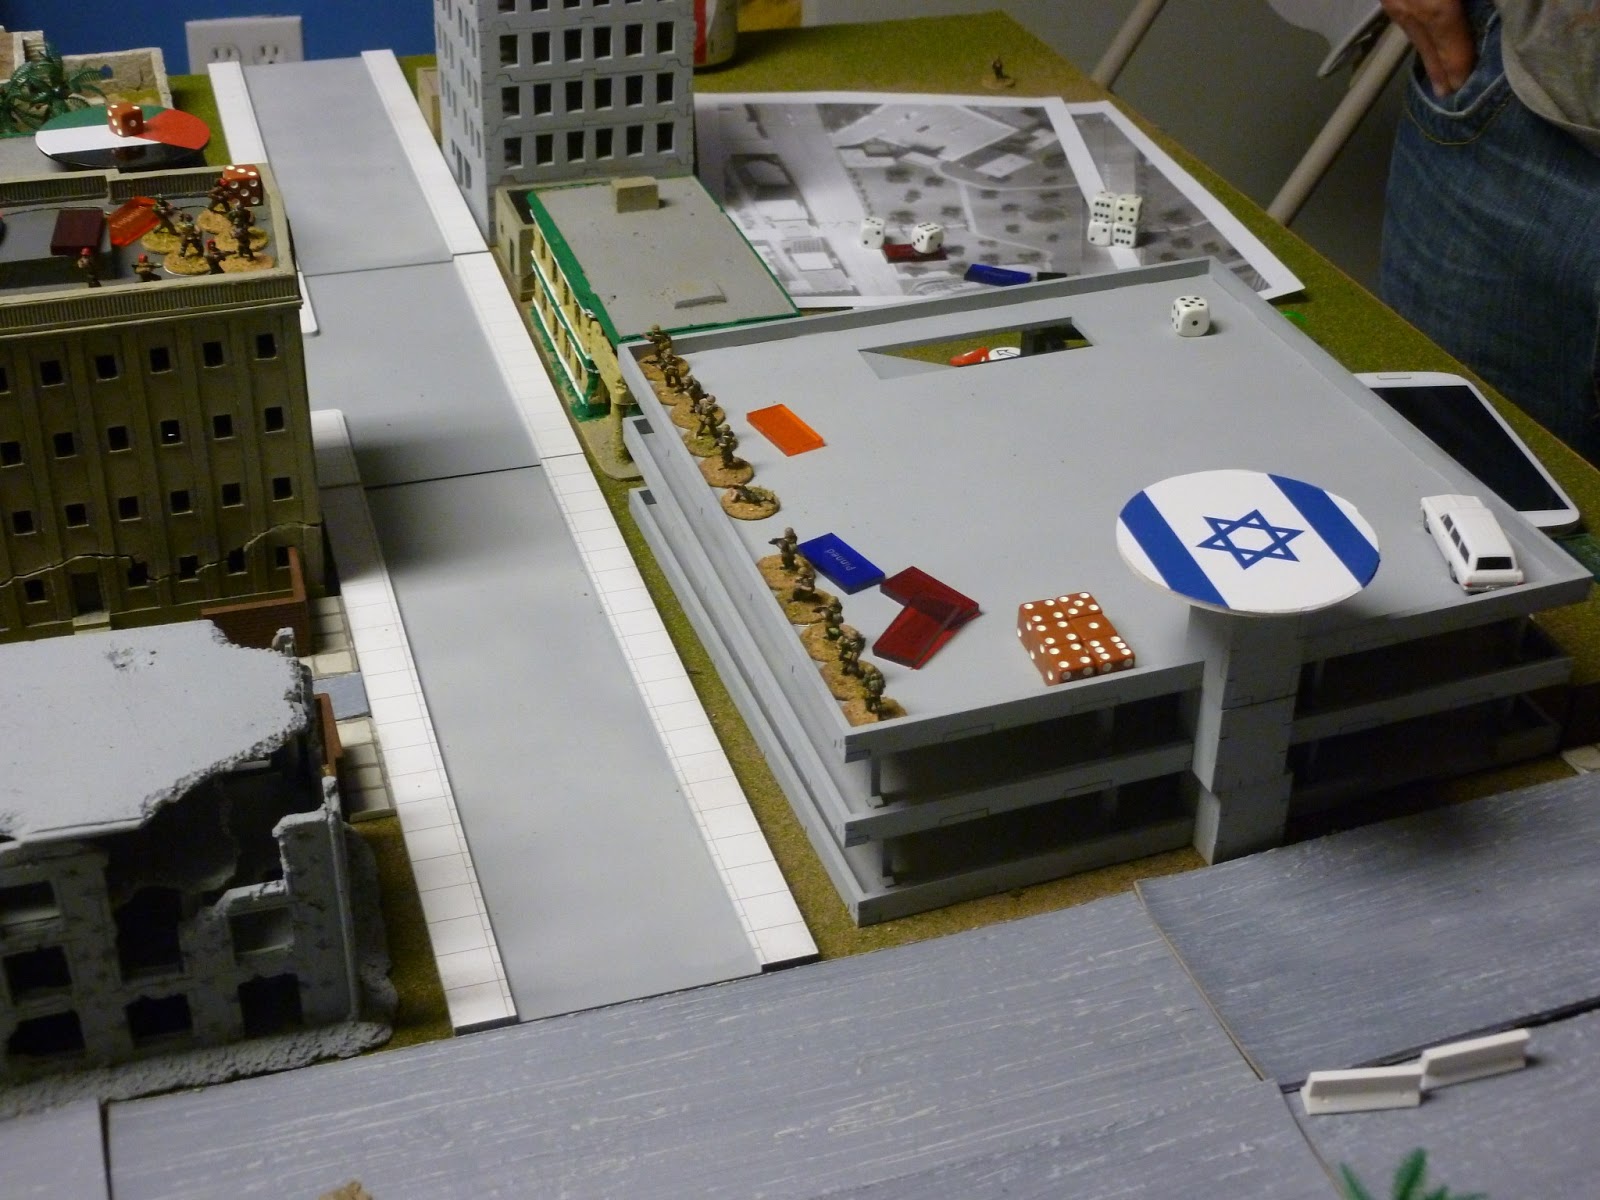
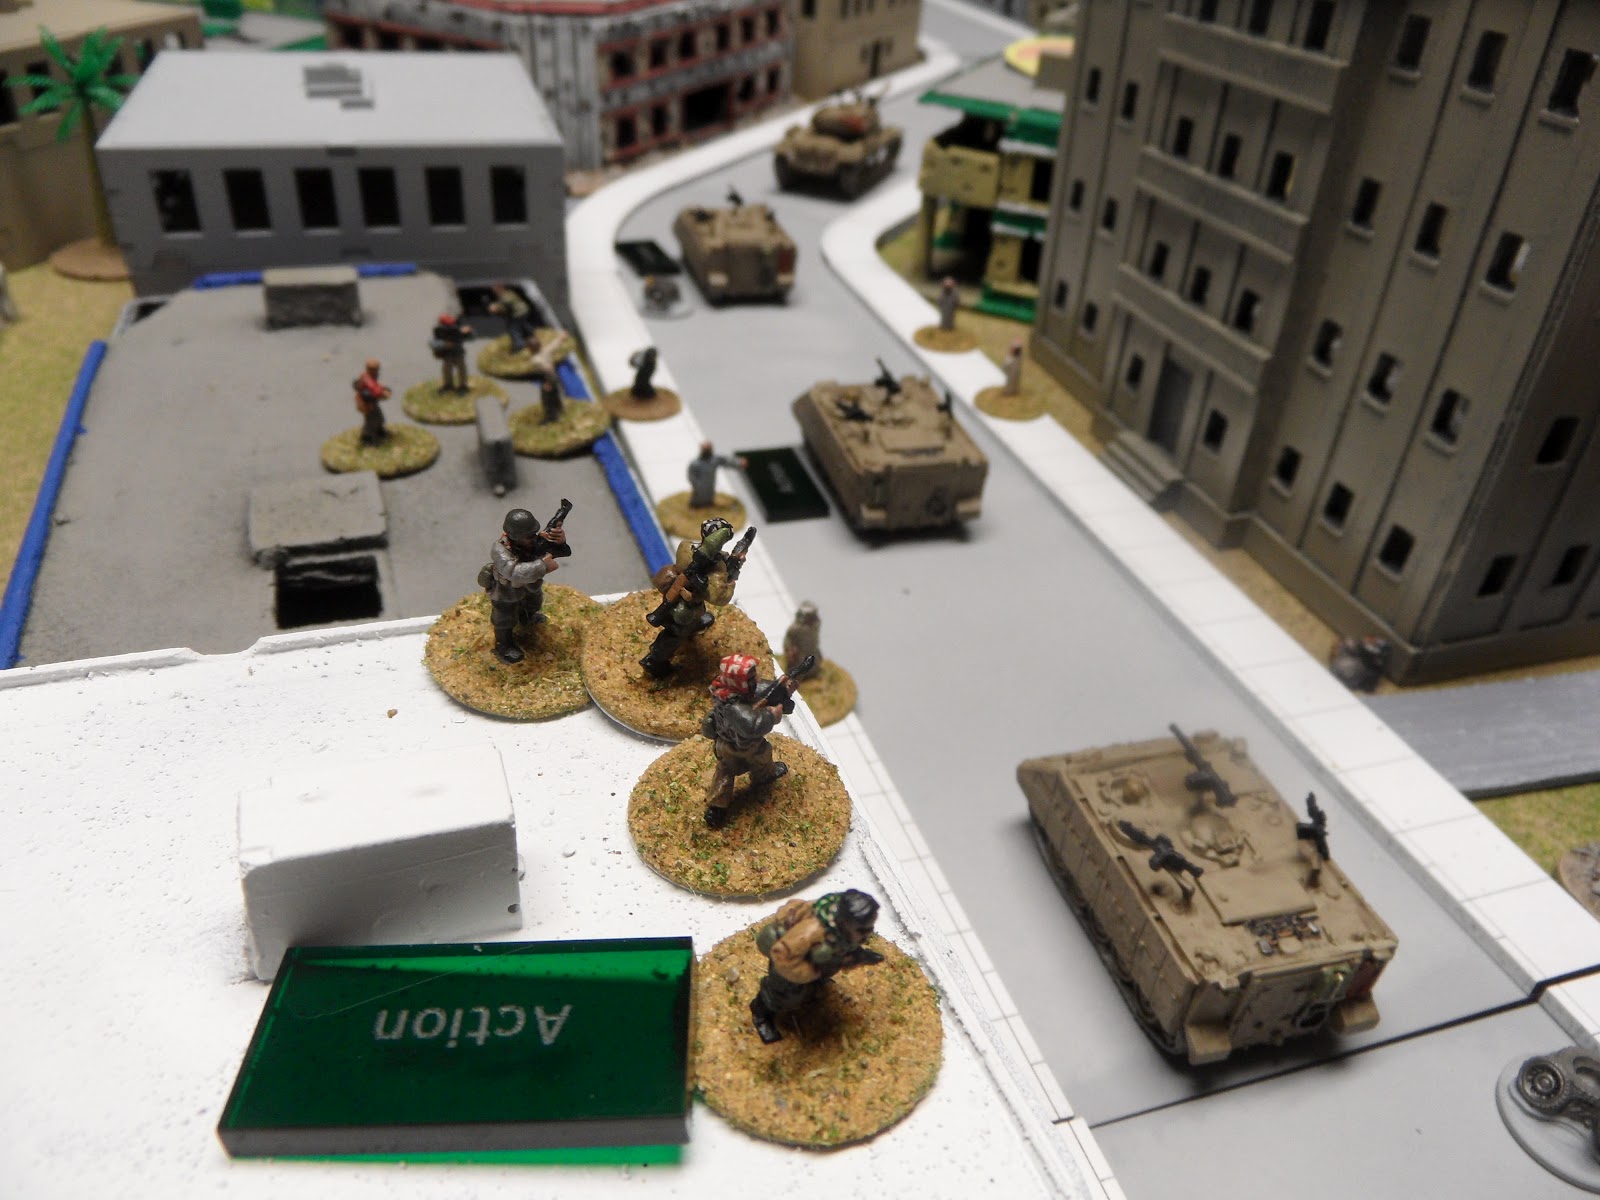
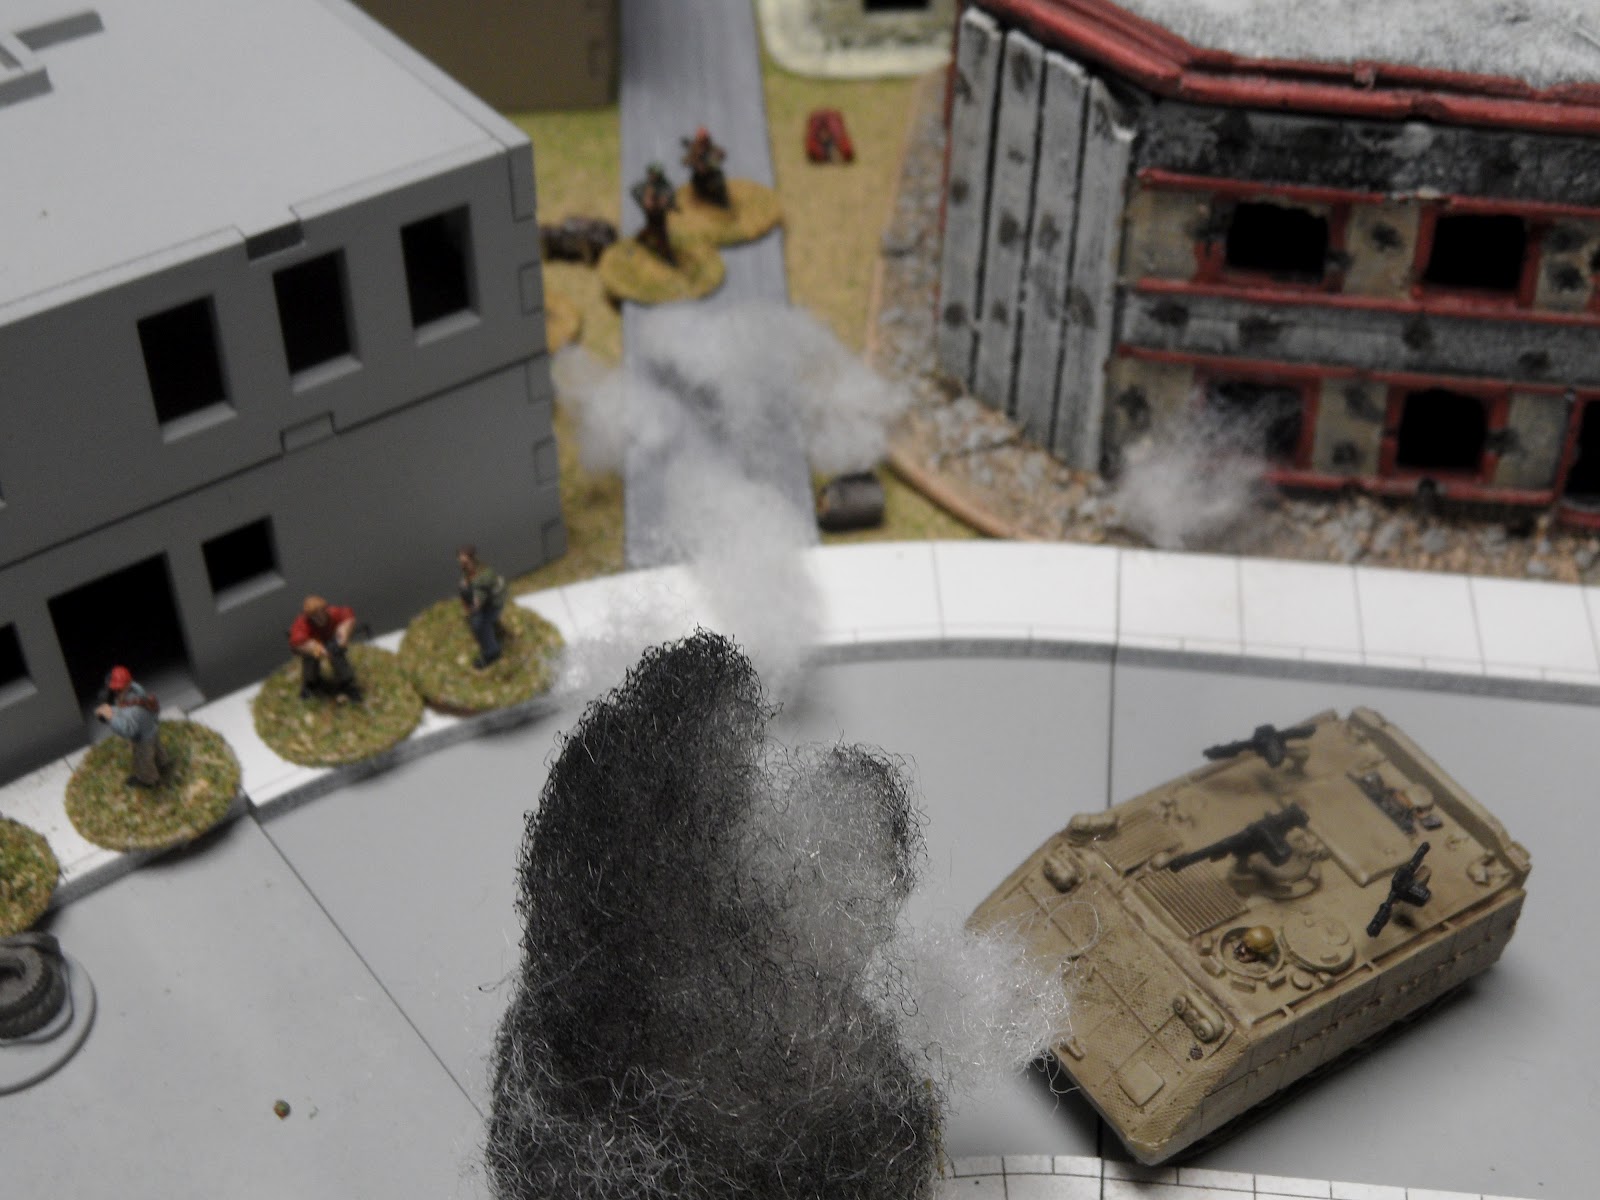
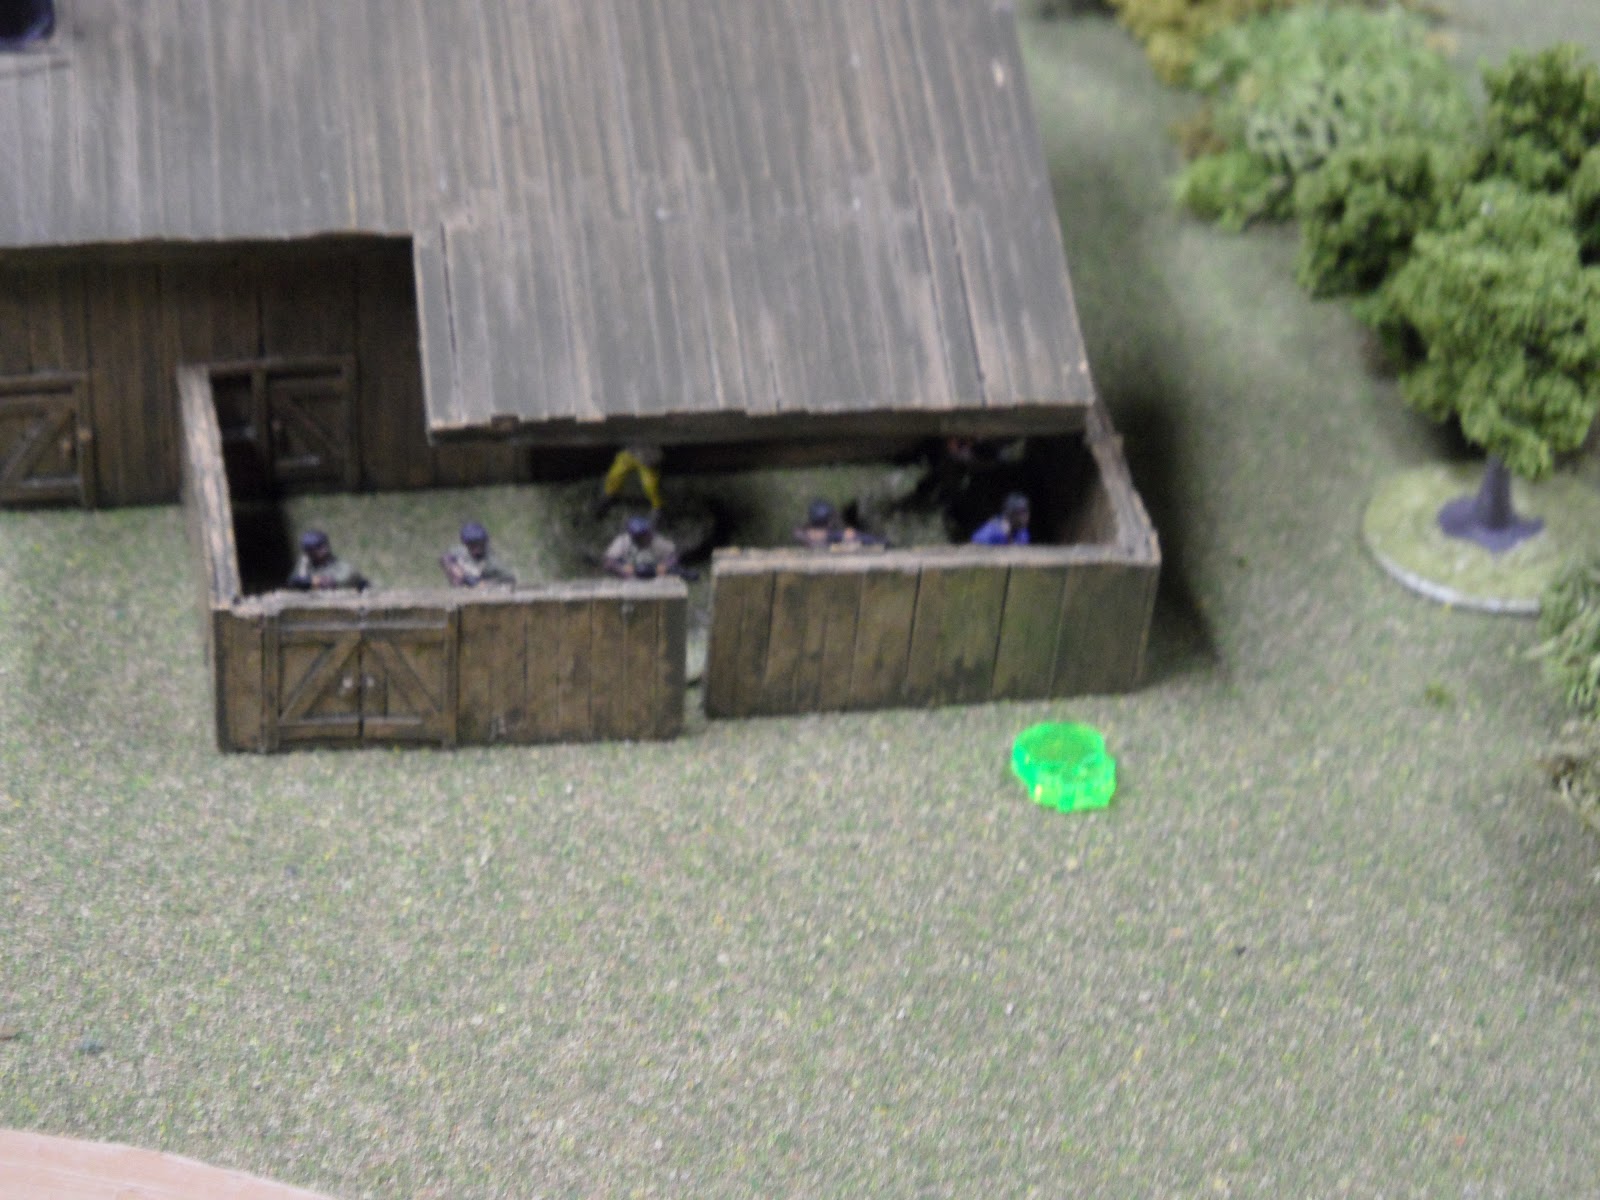
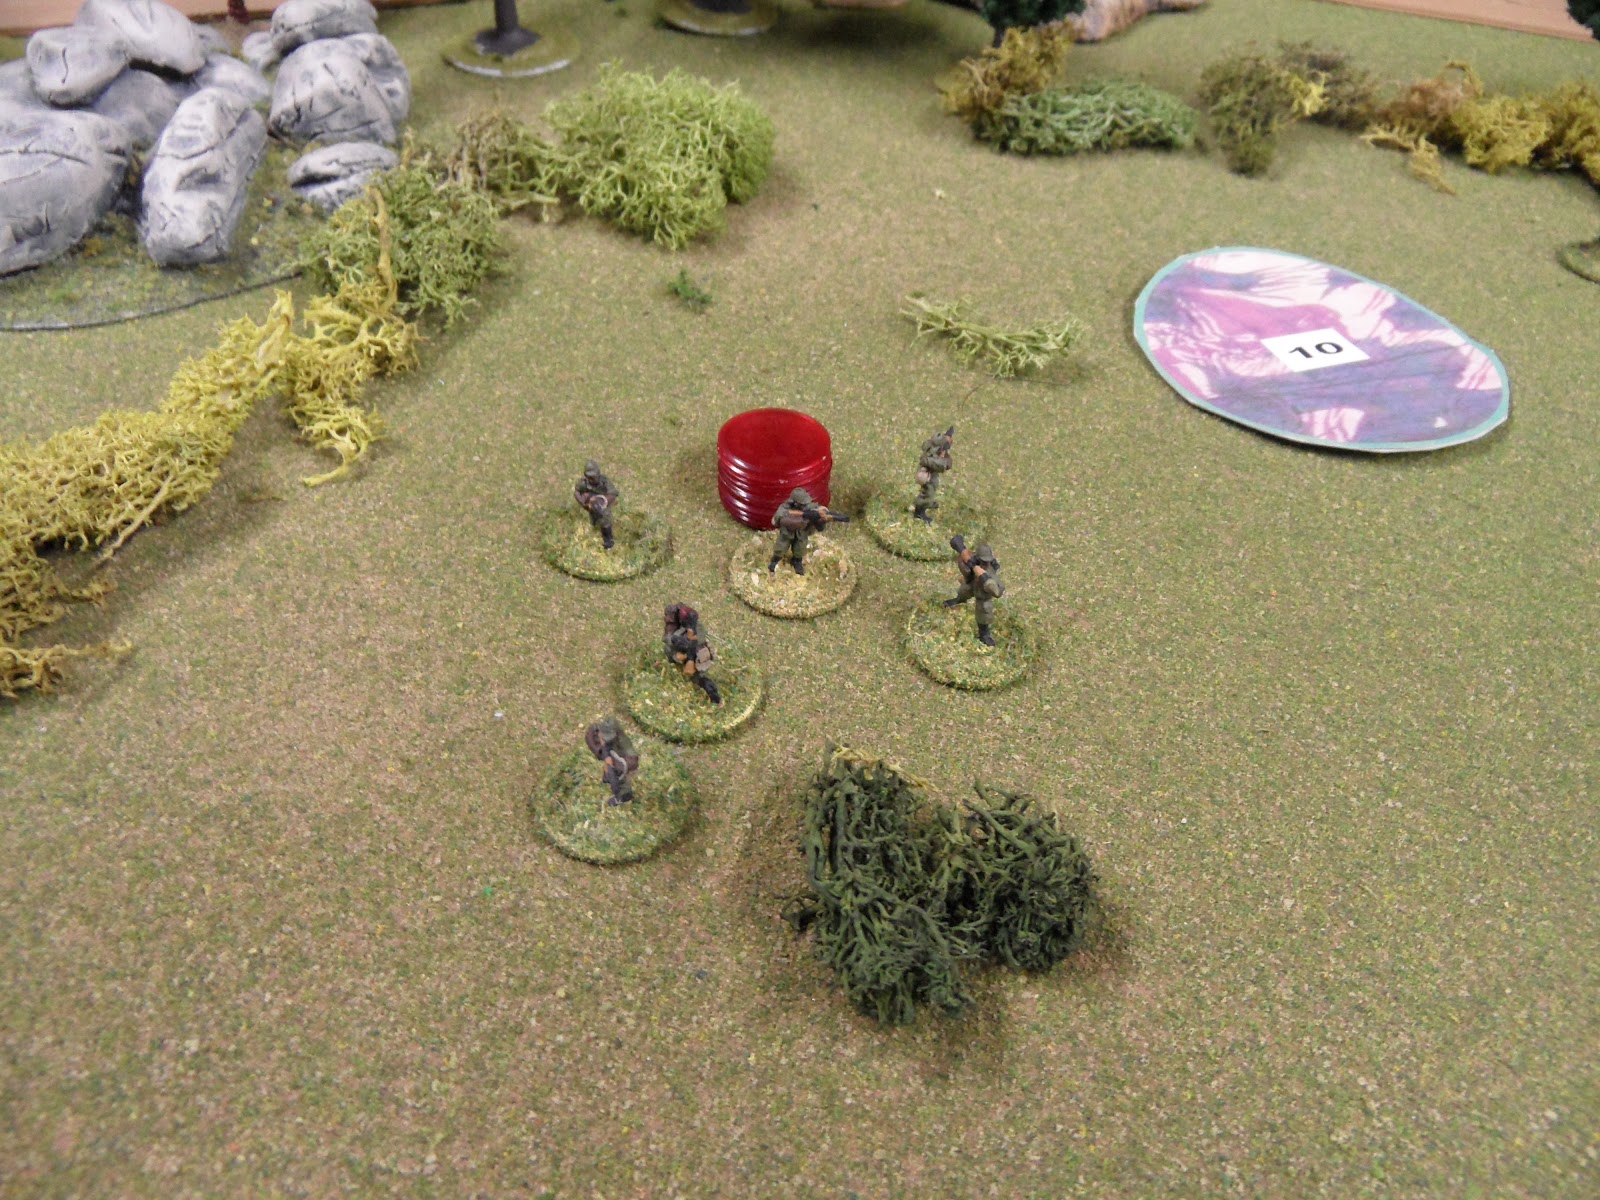
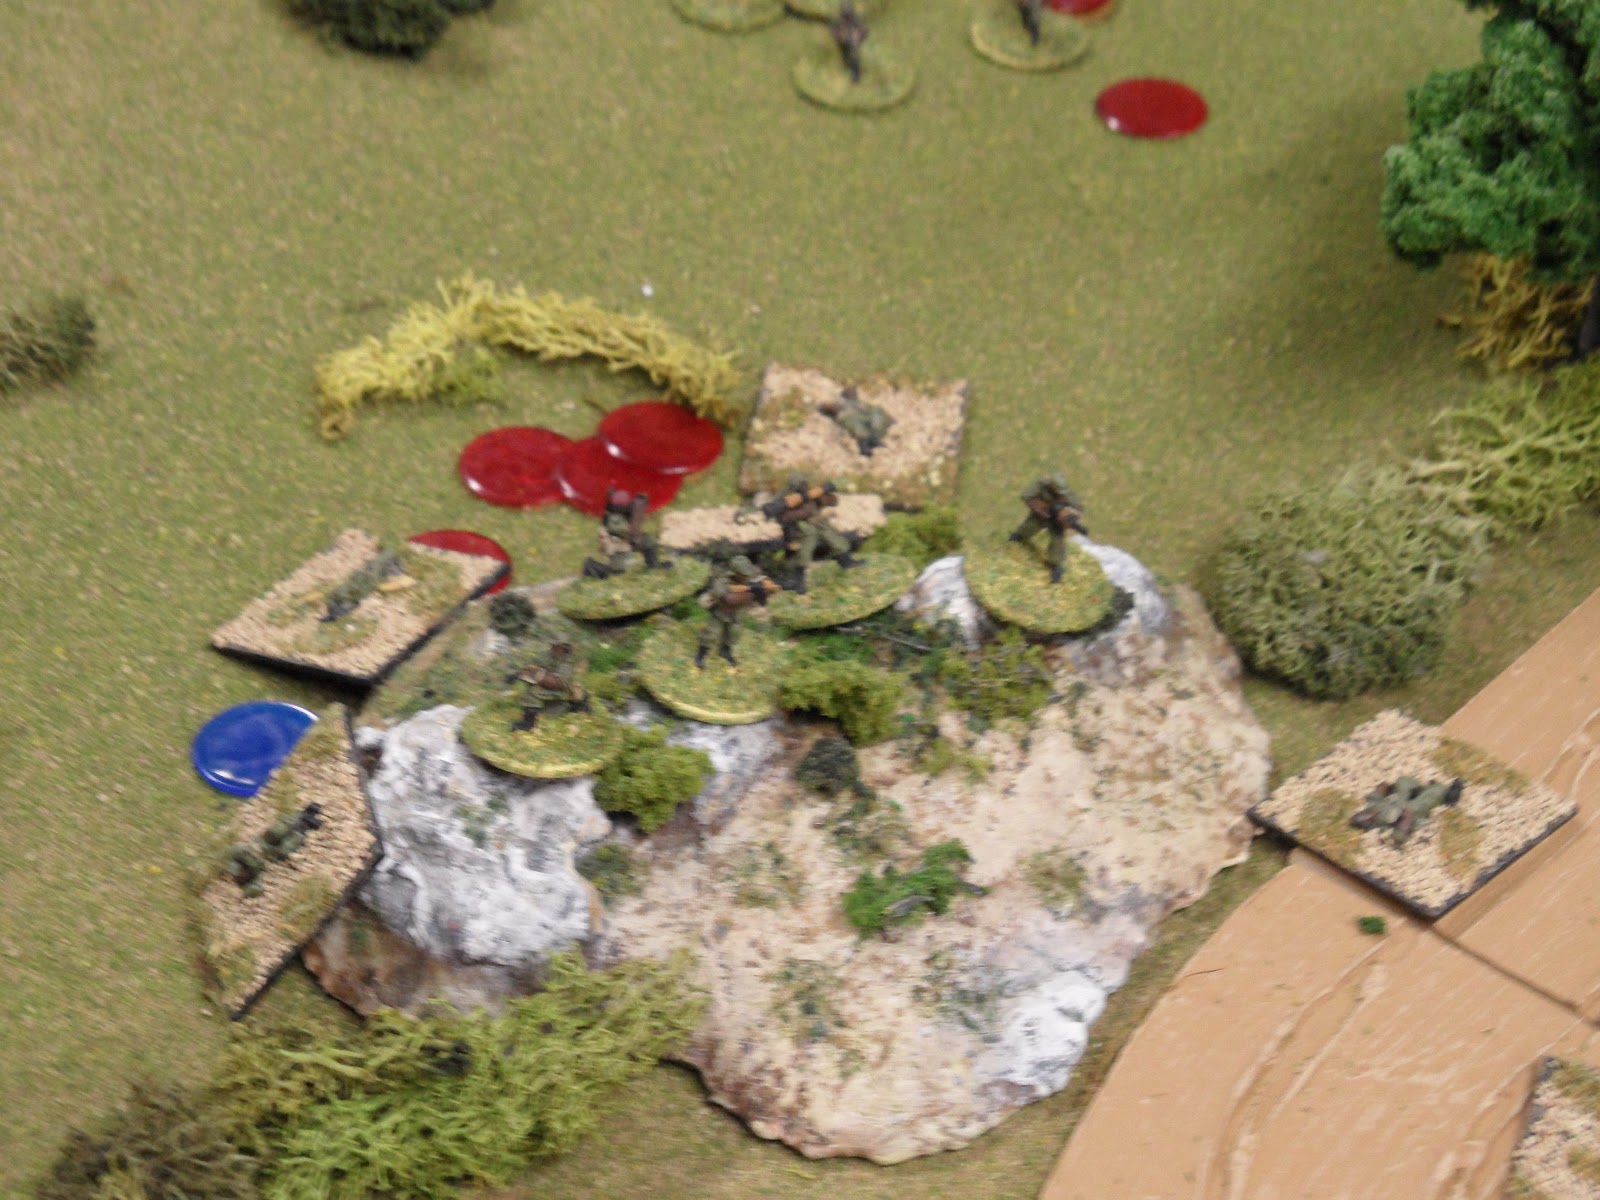
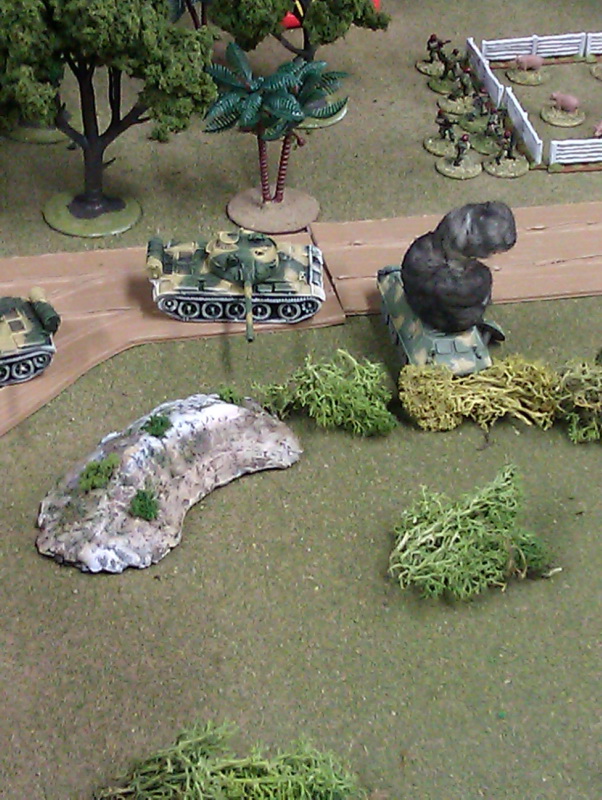
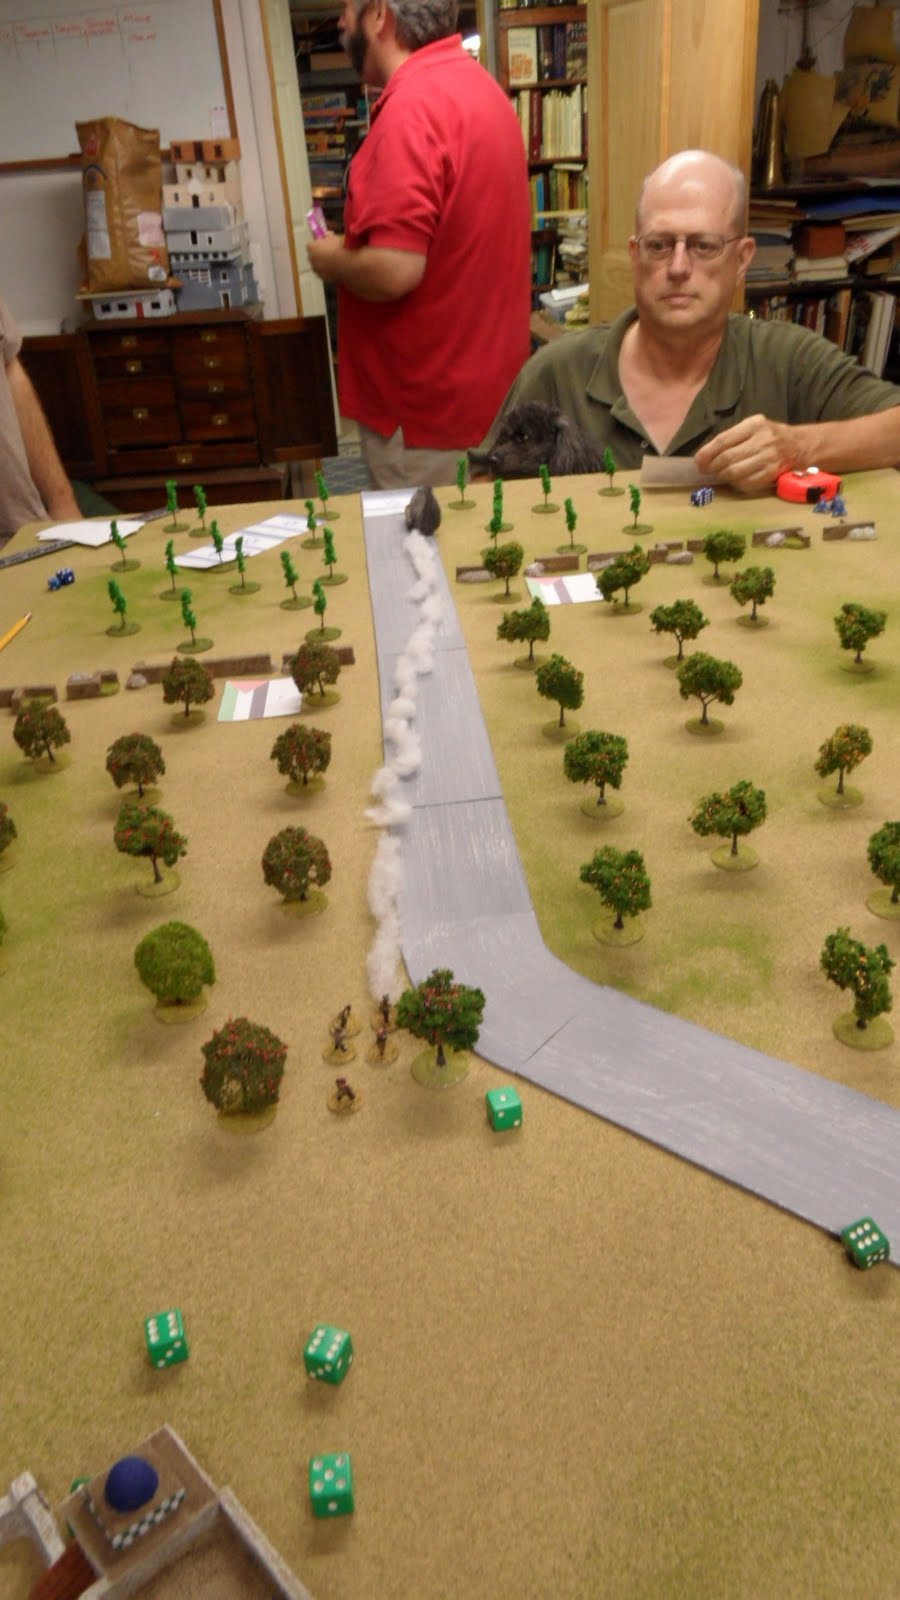
US troops man positions on a quiet sector of the perimeter as the battle erupts to their right.

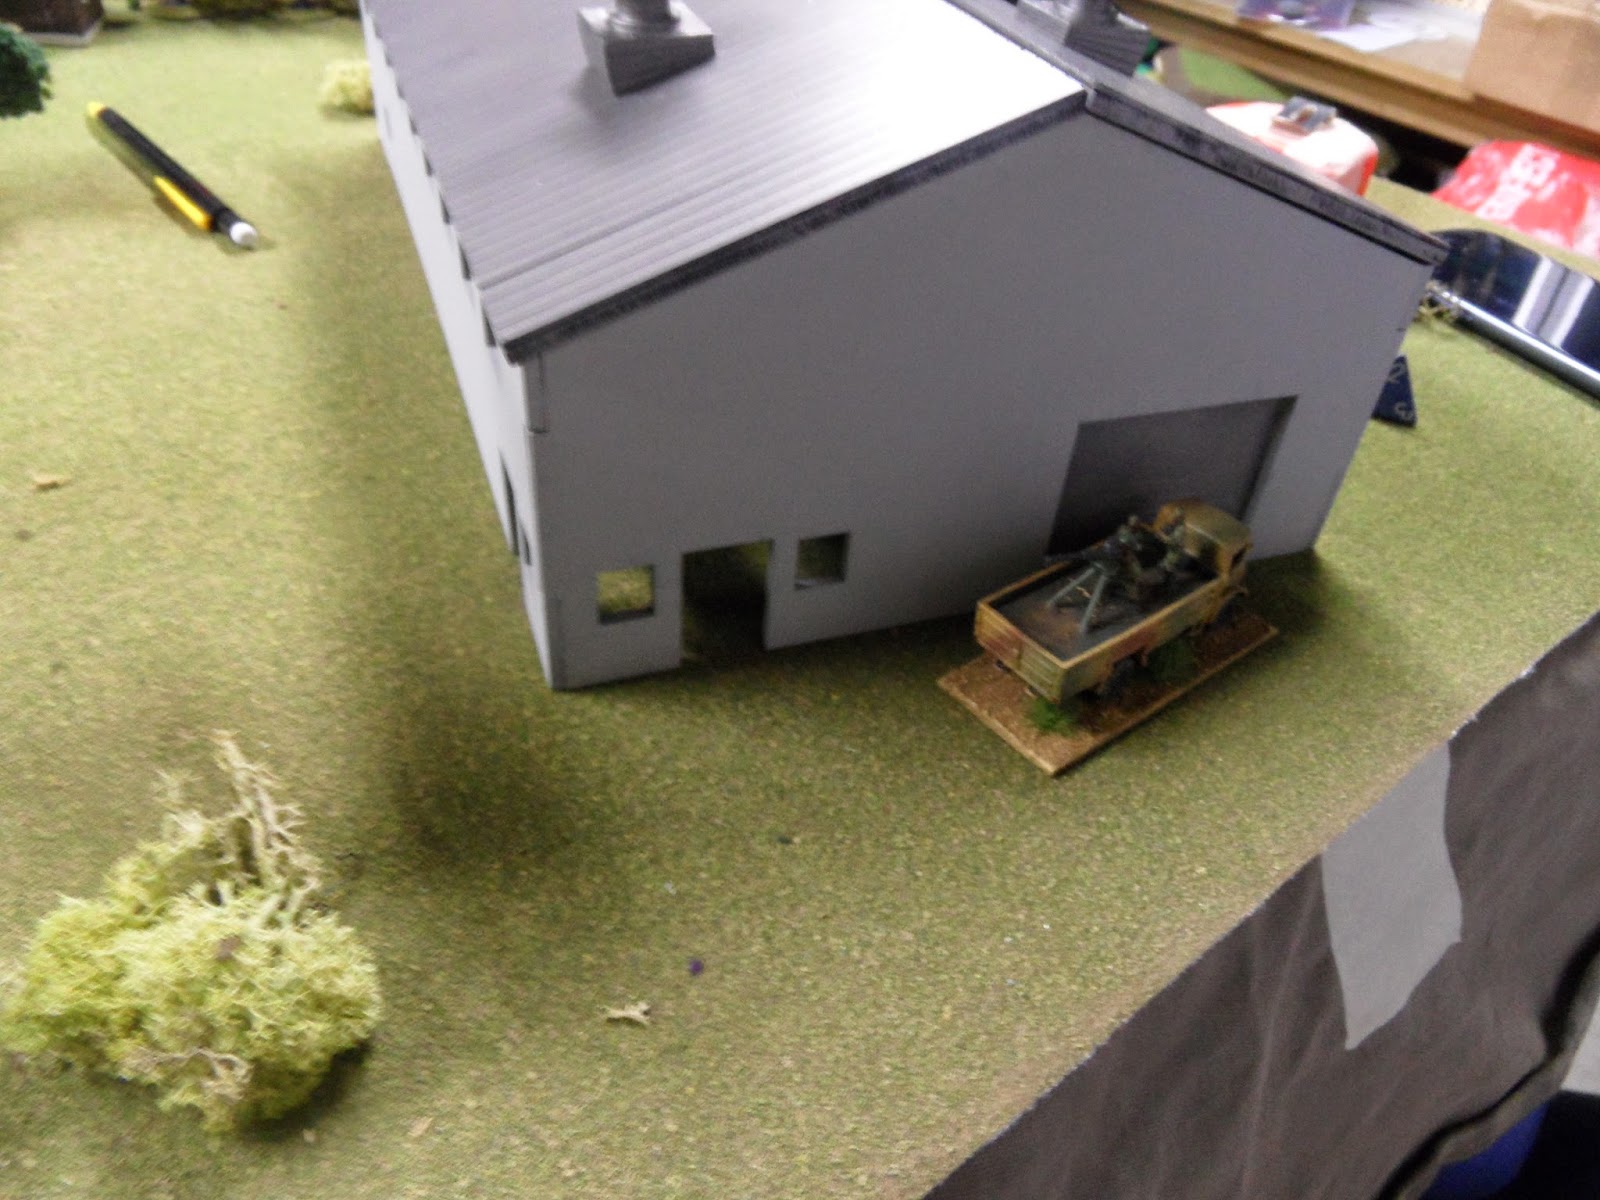
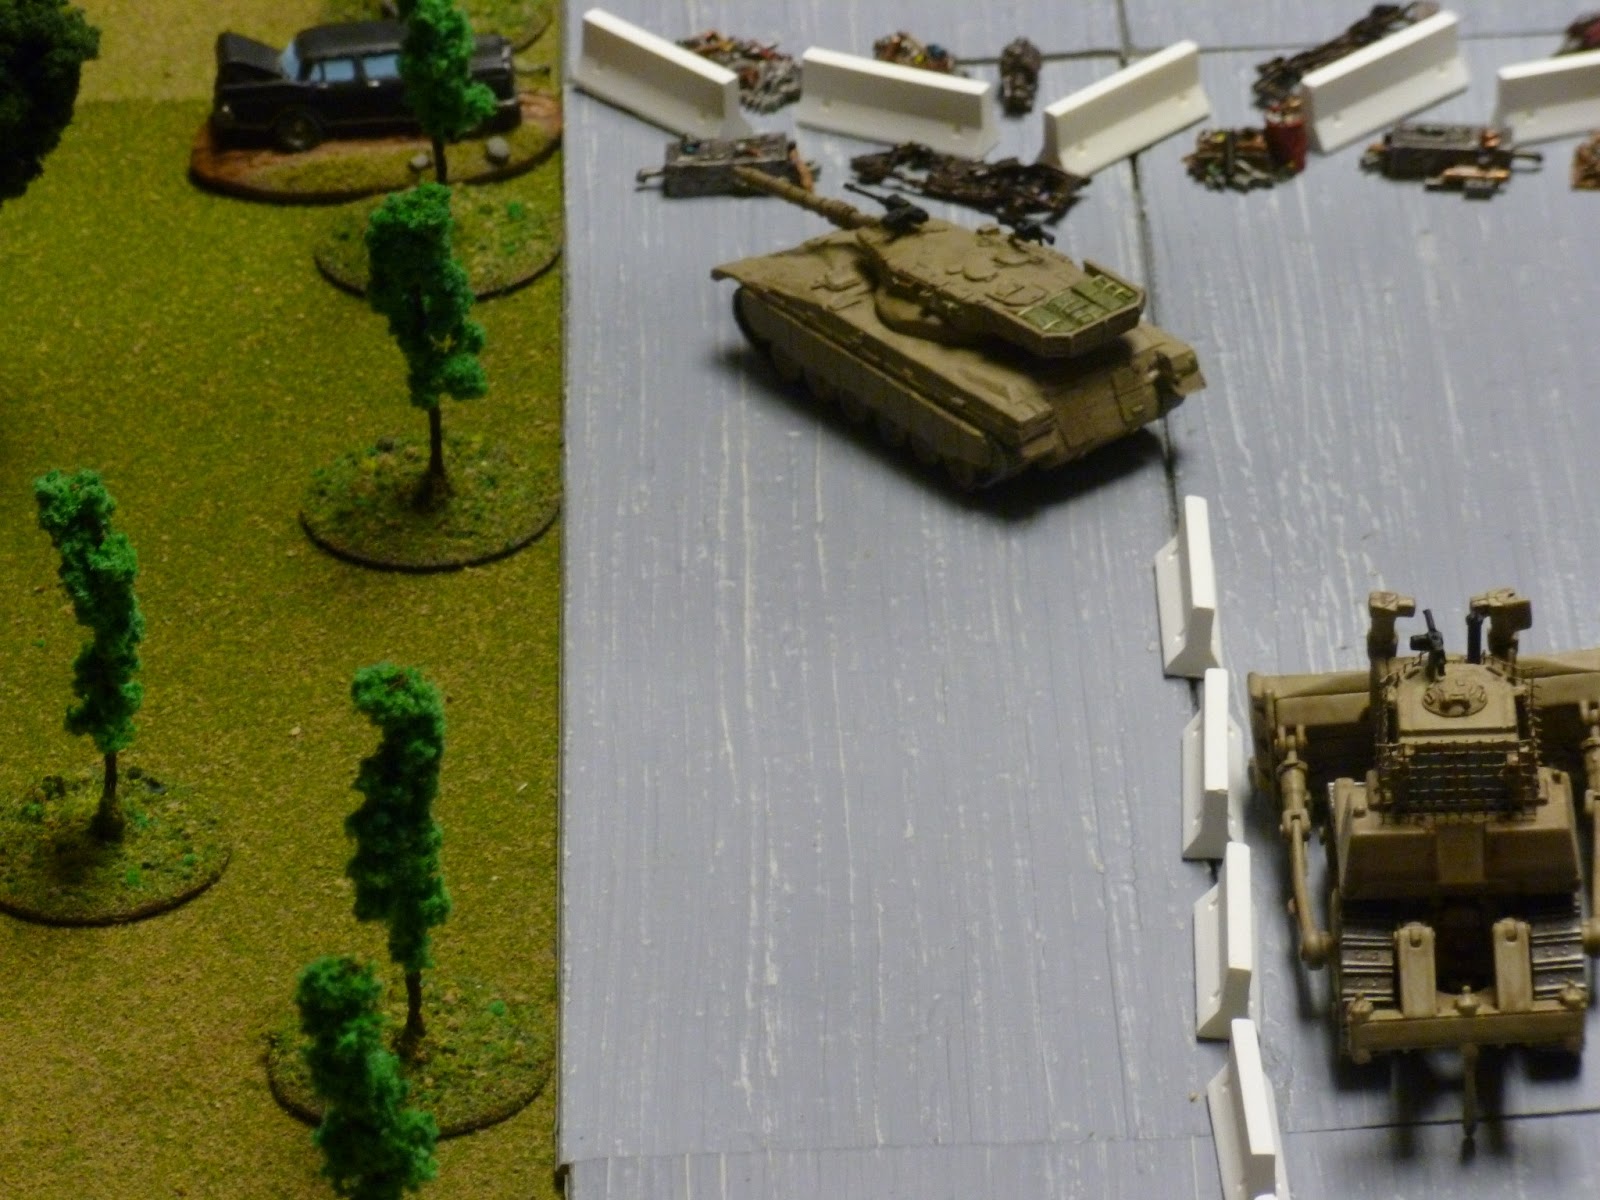
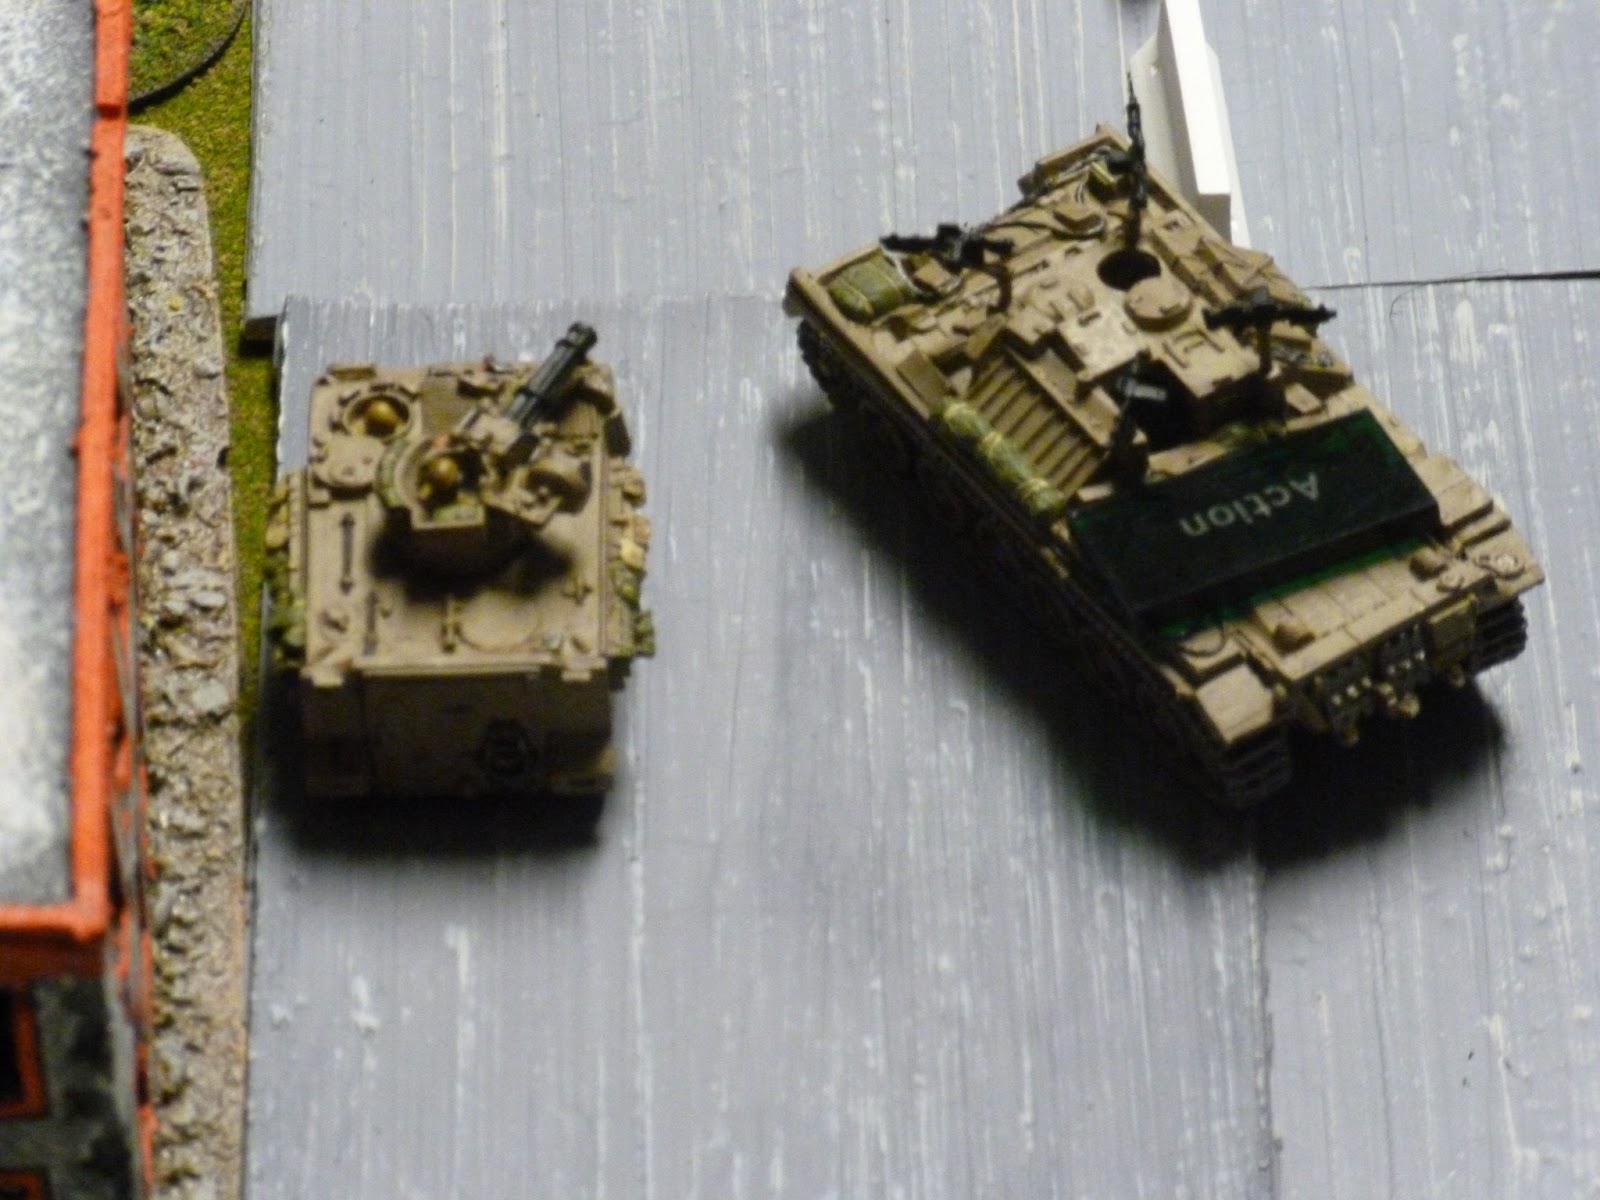
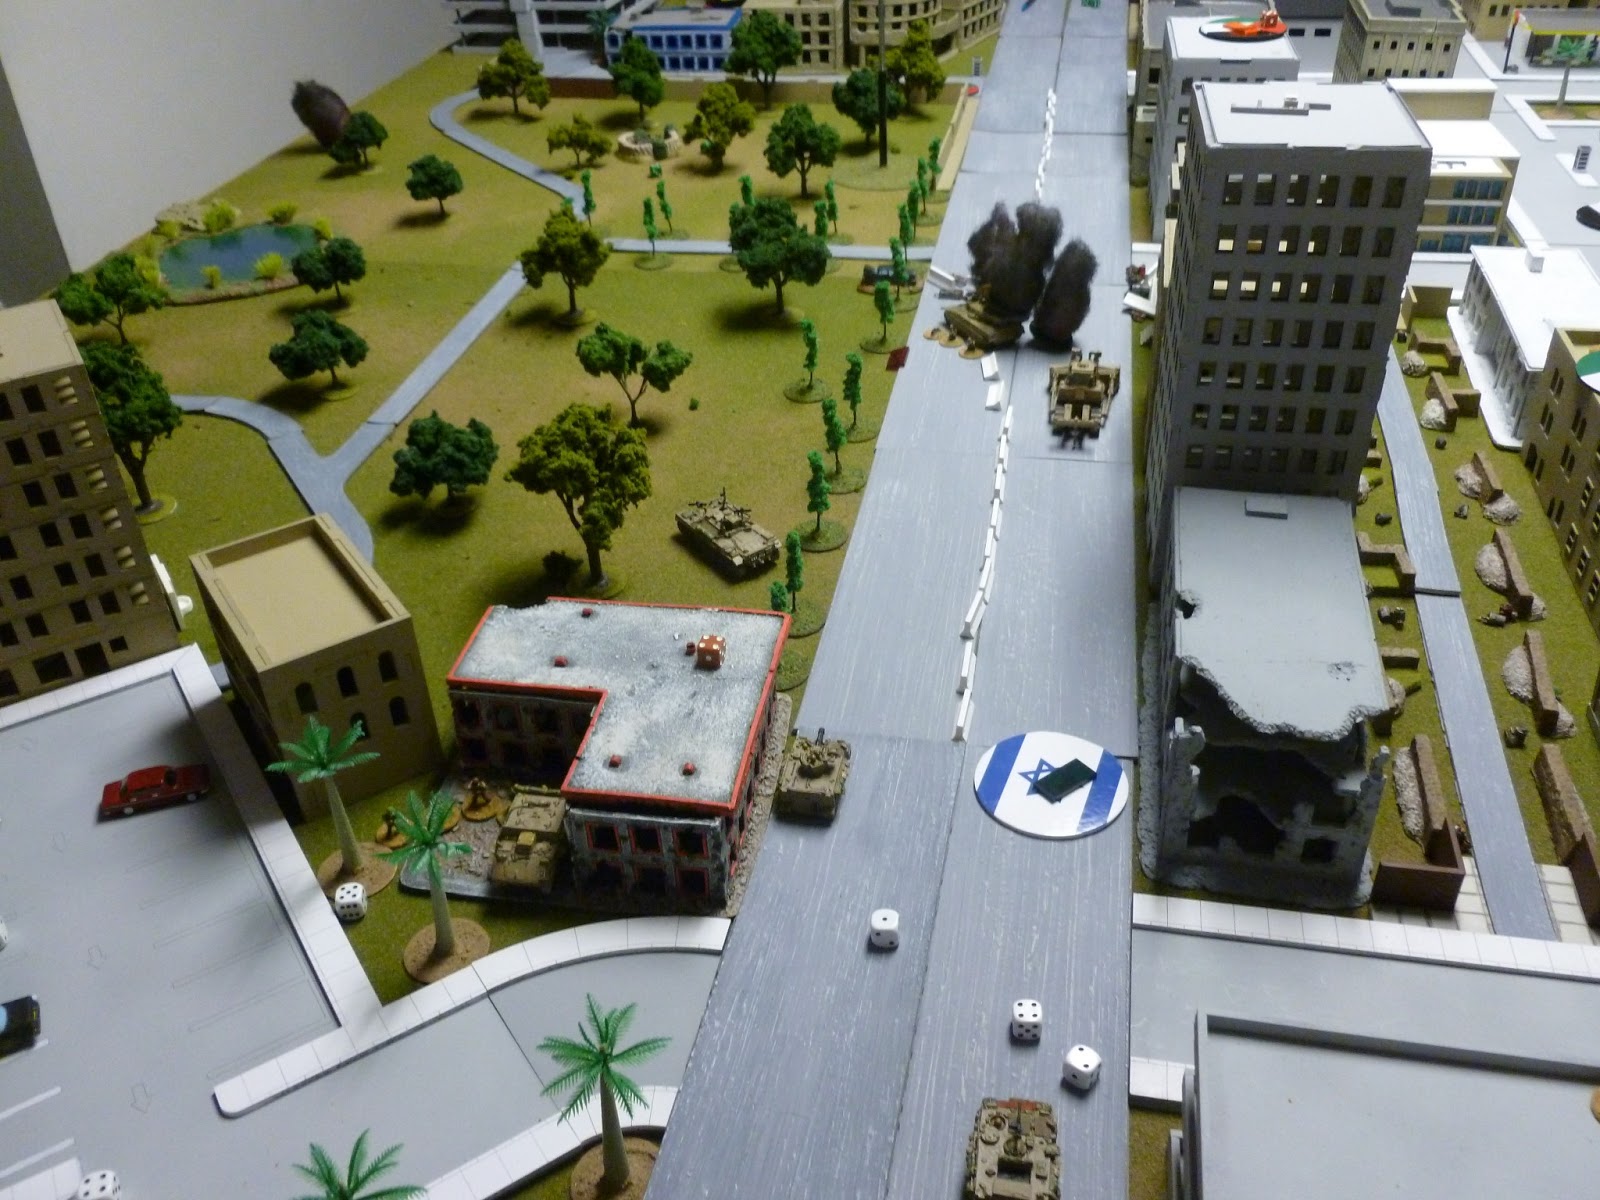
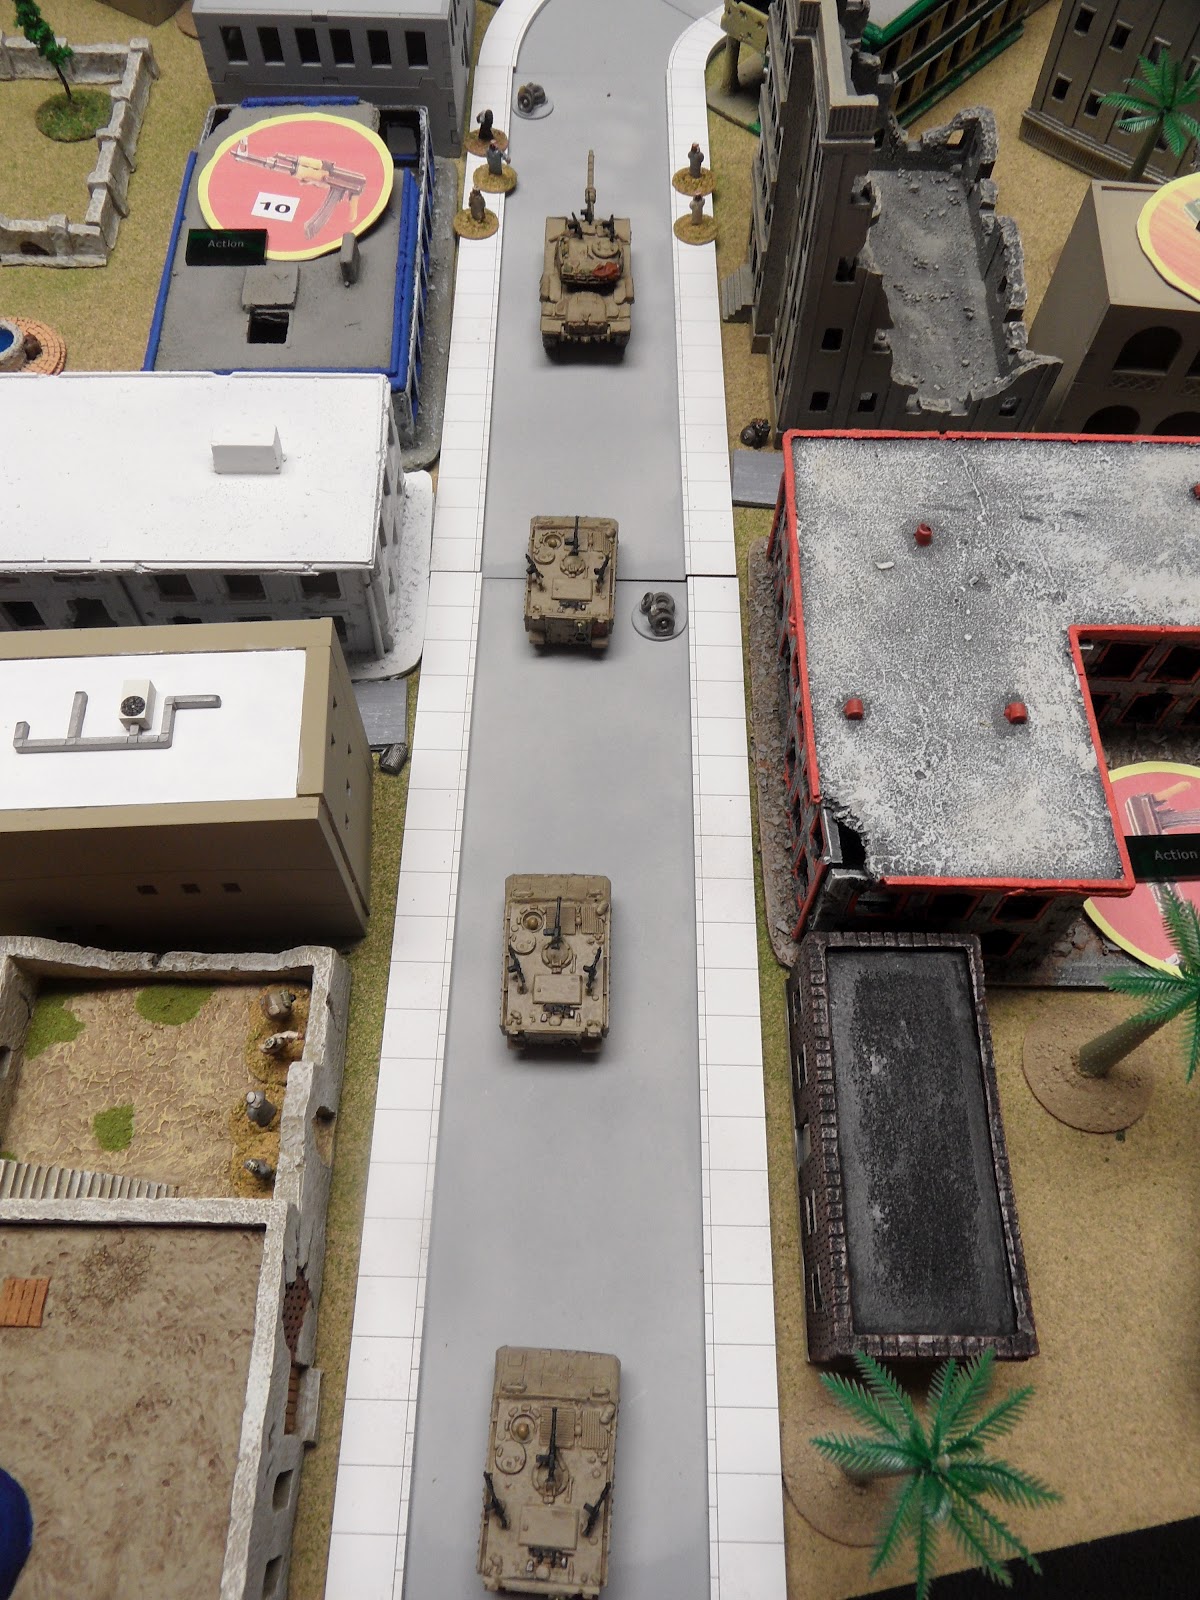
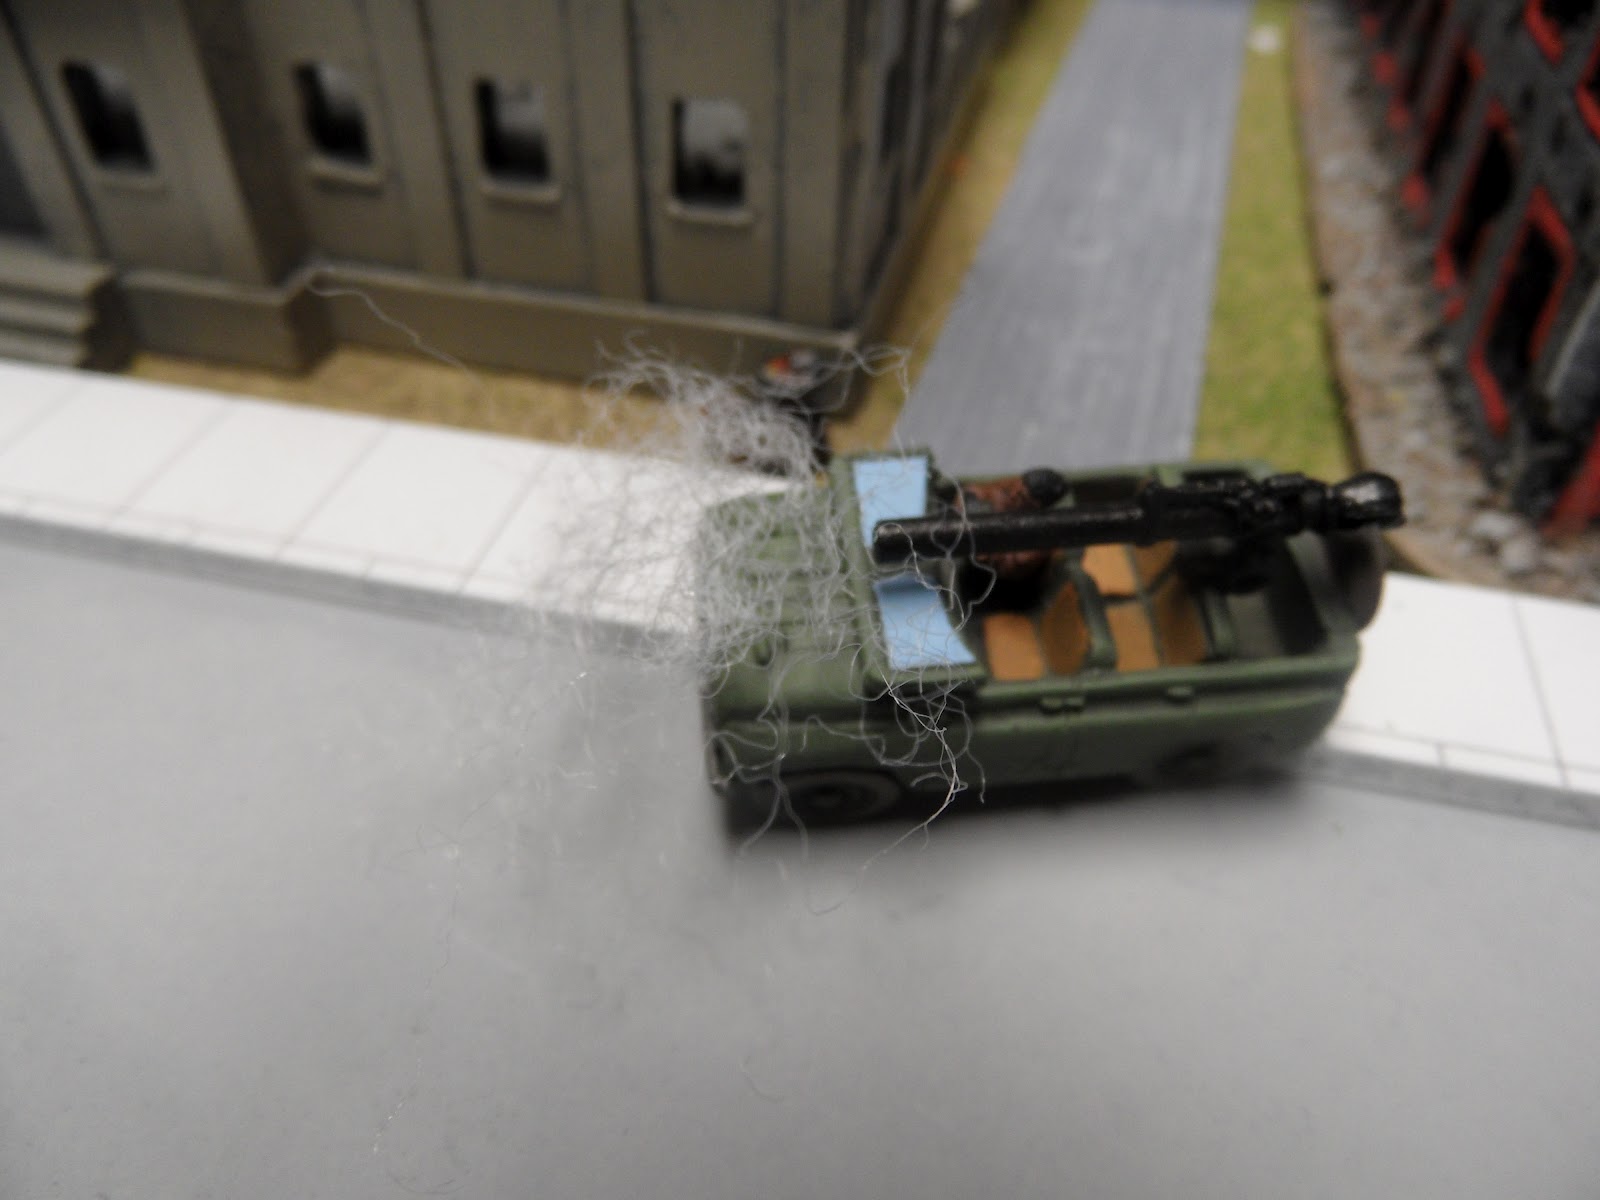
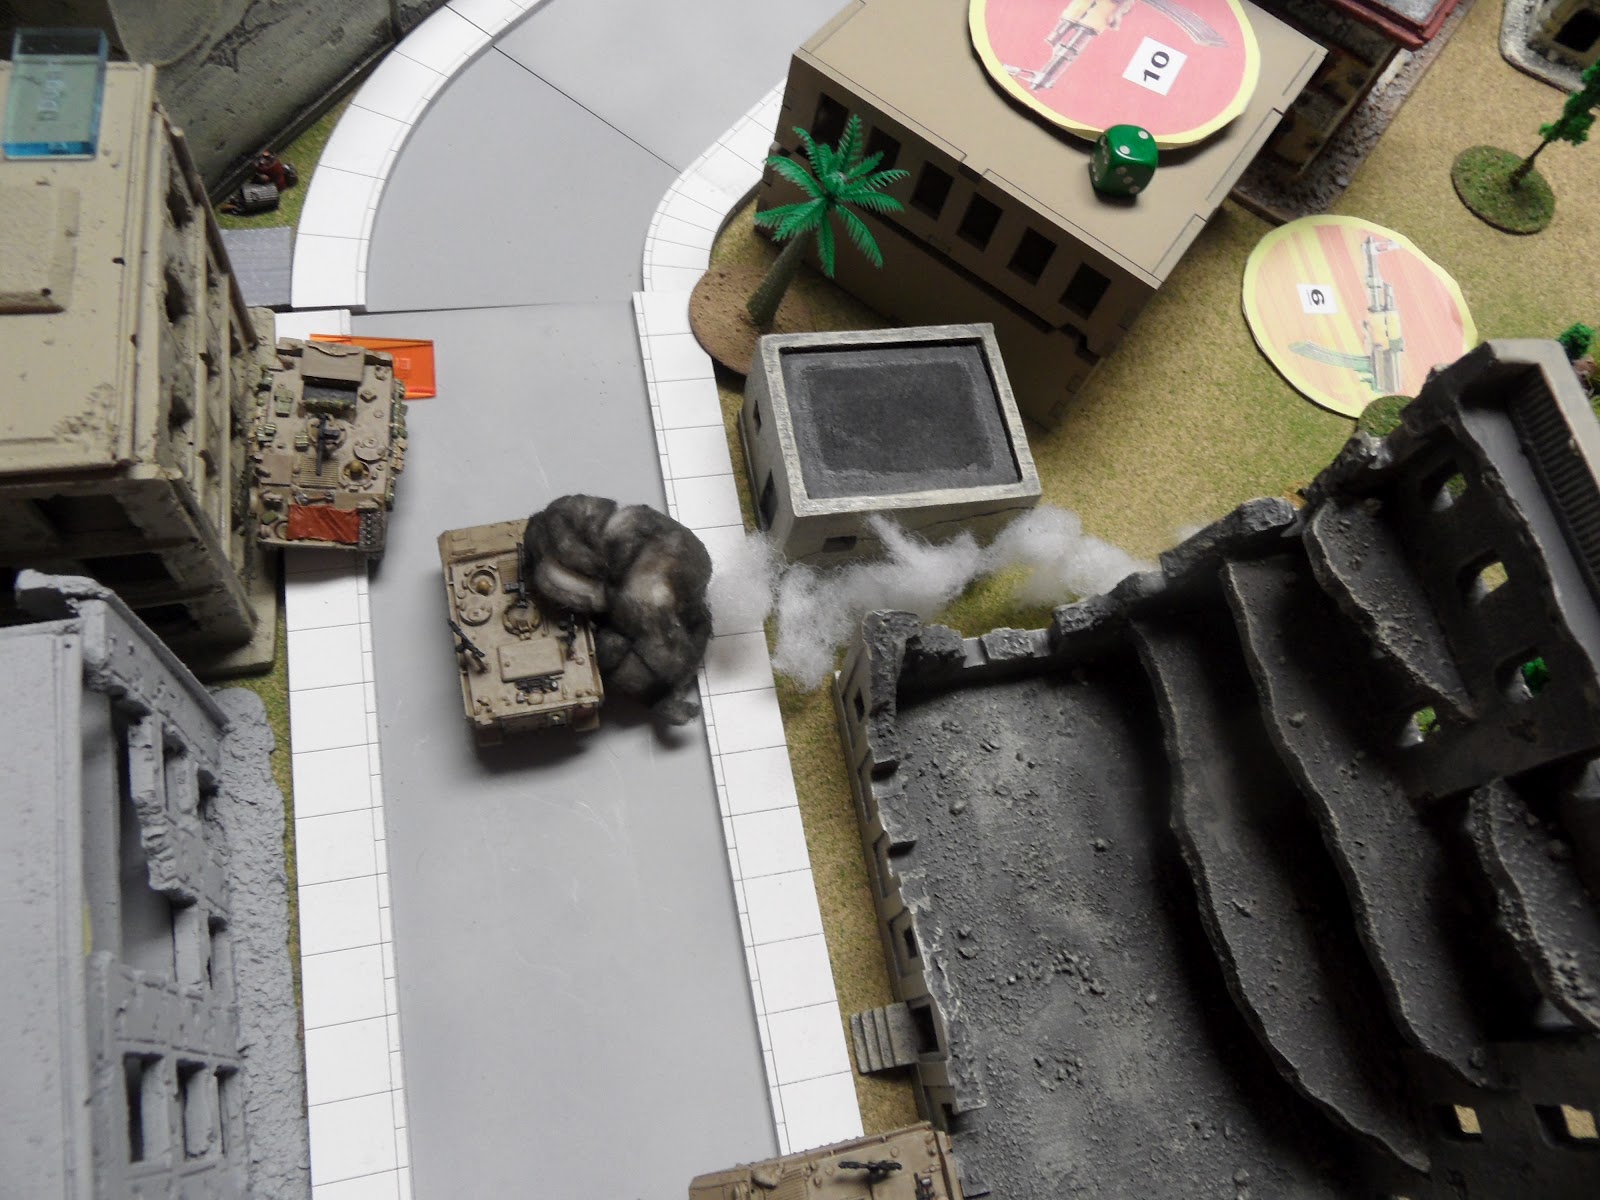
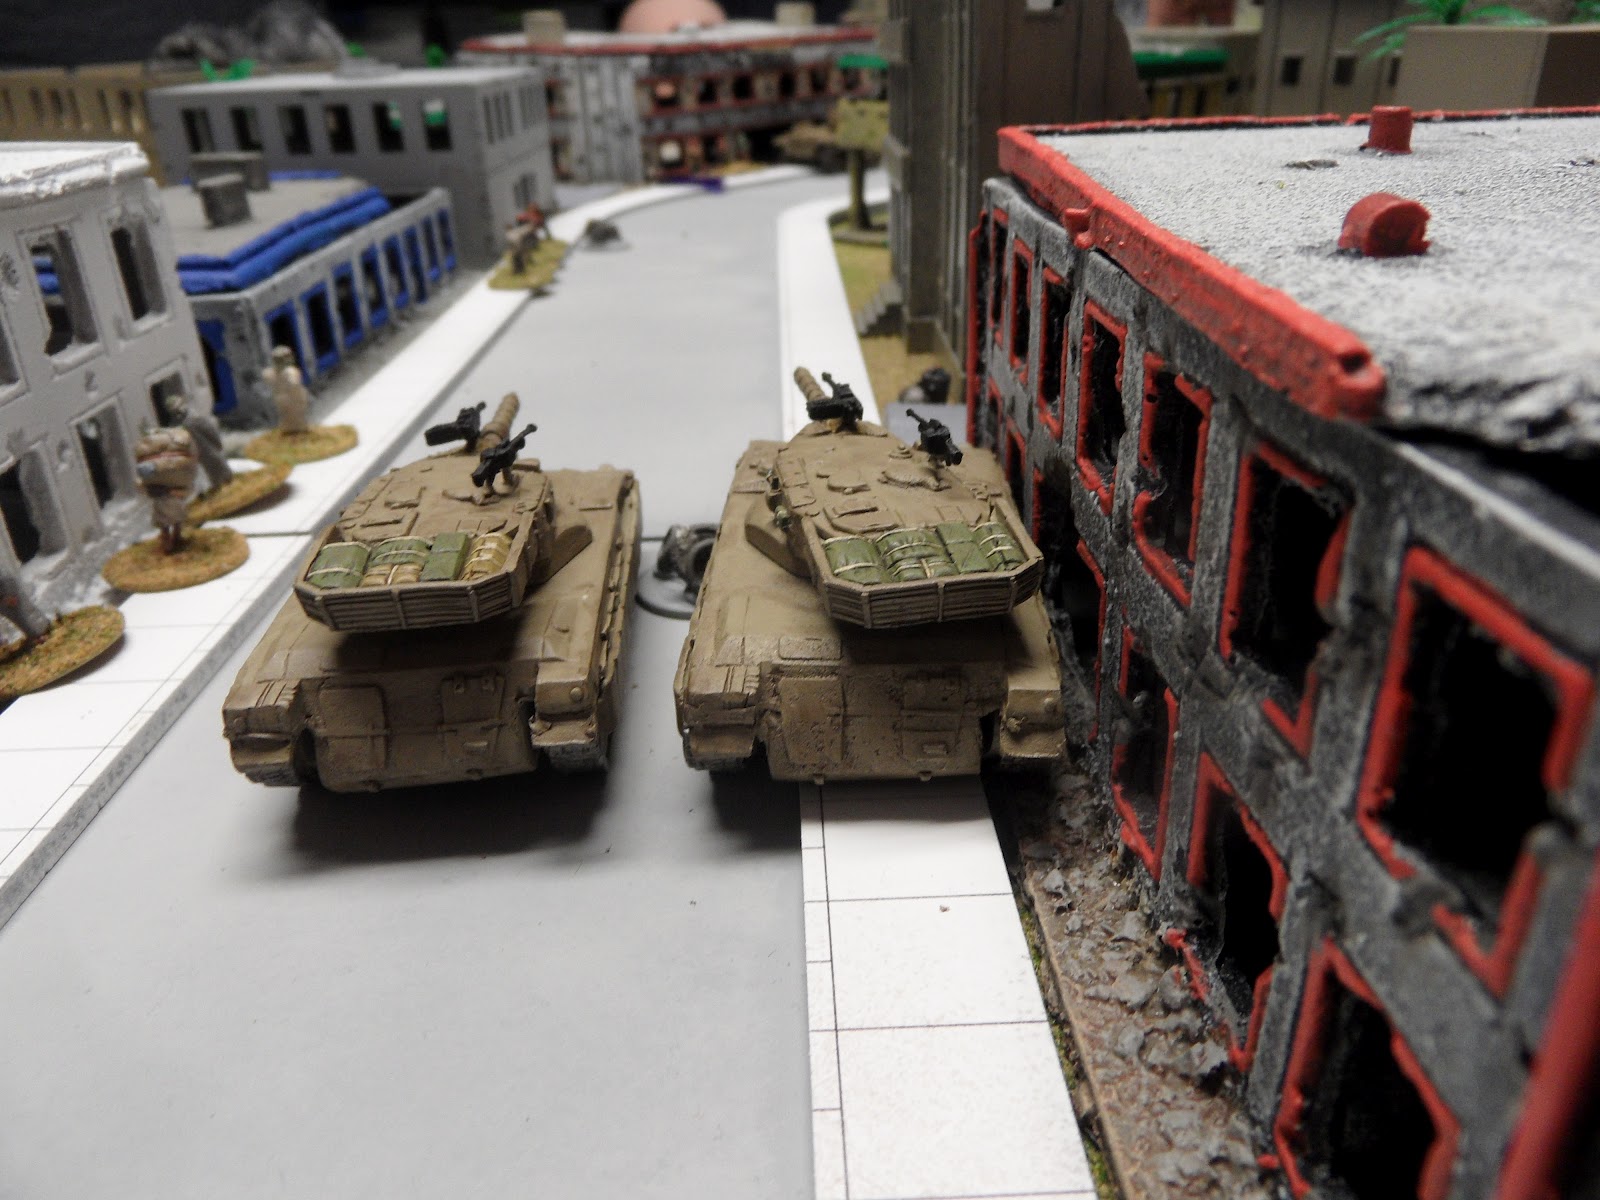
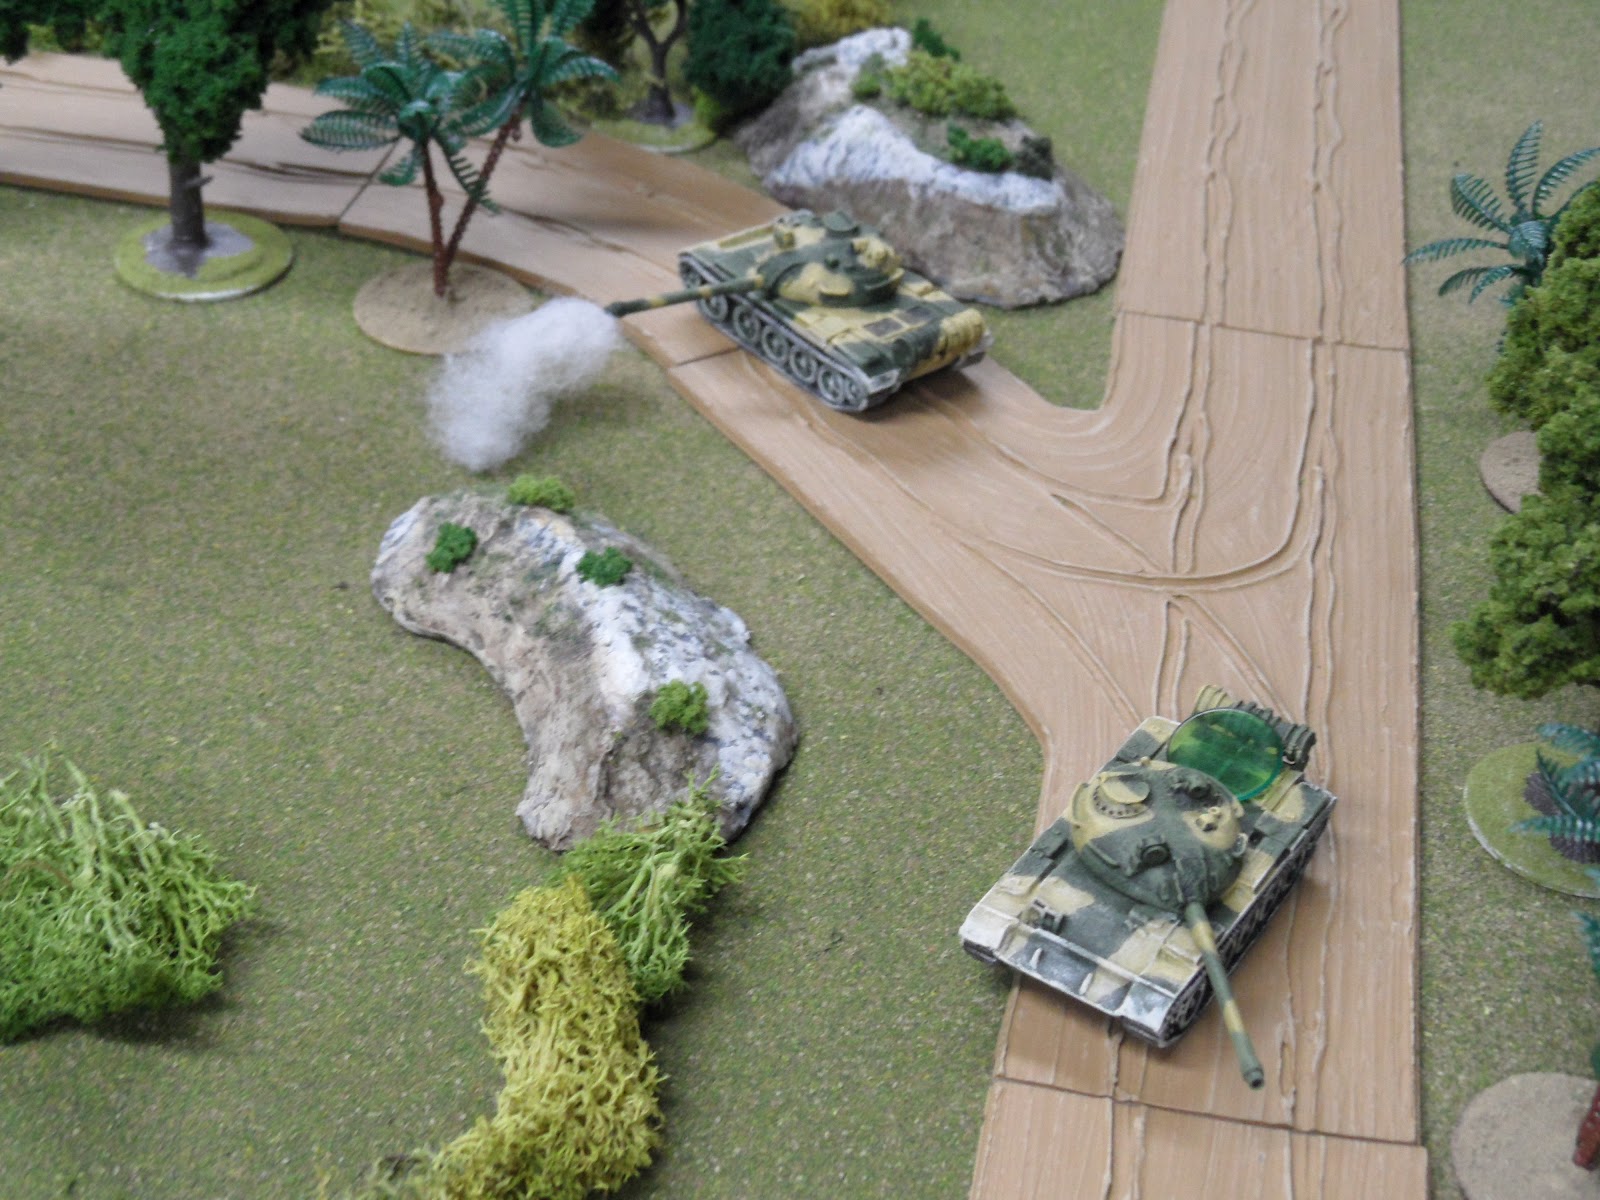
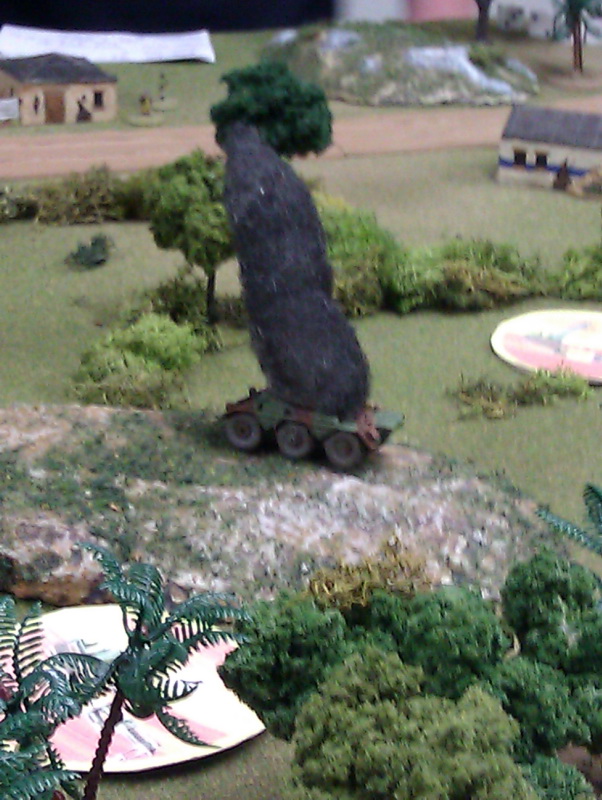
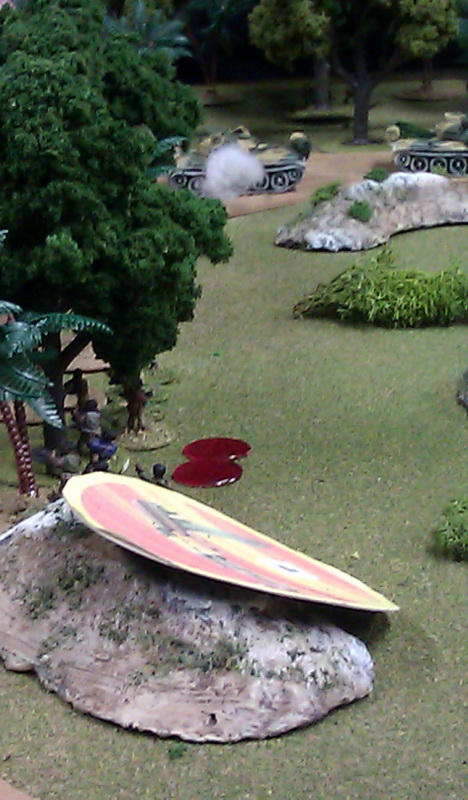
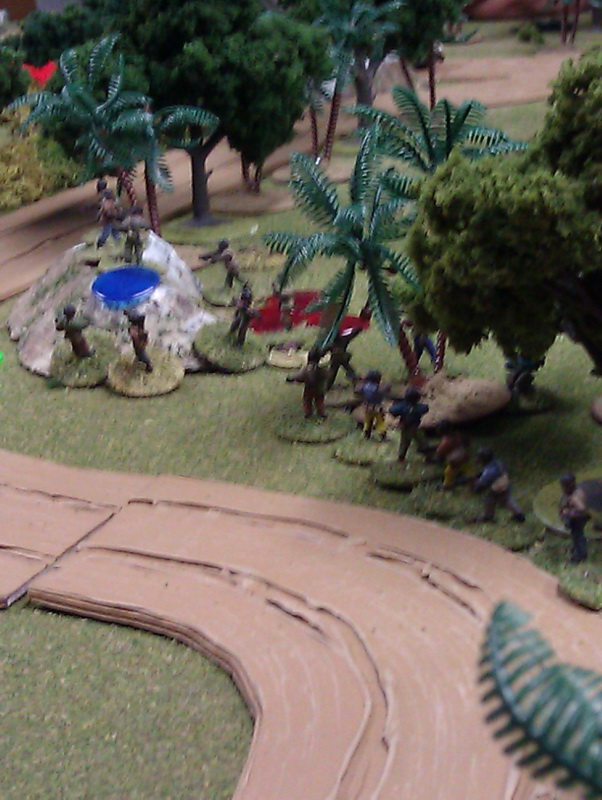
US carriers help to add yet more hurt with their support weapons

I really enjoyed watching this game evolve and recognised a great system suitably adapted for this period of military history.

Carojon


Lieutenant Randy Buckmeir crouched down on the edge of the rubber plantation and scanned the village ahead. The path through the paddy fields was straight and true, and at a run he reckoned his platoon could be across the open ground in a matter of twenty seconds. But fresh to `Nam as he was, Randy knew that a lot could happen in that twenty seconds.

Across to his right he could see Merv Schultz's platoon sweeping through Gok Wan 1 and setting up their M60s to dominate the open ground between the ridge and the riverside hamlet of Gok Wan 2. Behind him he knew that the battalion's mortars were set up ready to provide support if things got tough. Twenty seconds.

The radio crackled into life.

"This is the Green Man; what the Hell is holding you boys up down there. I have Yellow Dragon on my back, he is in position and waiting for you to push Charlie on to his stop line. Now haul ass, you no good sons of bitches!"

Sergeant Biff Stone looked nervously at the young Lieutenant. Quietly he signalled his weapons squad to shake out on the edge of the paddy field and make ready to put fire into the village.

"Let's go!" Lieutenant Buckmeir leapt to his feet and began the run down the path towards Gok Wan 2. Ten seconds. Fifteen. My God, he was going to make it.

The crackle of several AK47 assault rifles was sufficient to confirm that Buckmeir was not going to make it after all. As the lead infantry squad was within yards of the entrance to the hamlet a hail of bullets came from the hooches. One man went down dead, but fortunately the raised berm that edges the paddy field gave them cover.

Instantly two M60s opened up in reply, their fire stitching erratic patterns in the leaf thatch and corrugated iron that made up the structure of the hooches. In seconds the firefight was over. Nine VC were dead or dying, and Randolph Buckmeir the Third counted his lucky stars that he was still alive and un-perforated. He could see his Corpsman moving among the men checking for wounds and the big Sergeant moving slowly forward to re-organise his unit.

"Move yo ass you muttahs"!". On the ridge Sergeant Leroy Burlesque spat out his instructions to keep his men moving through the dense undergrowth. He was sure that he had detected movement on the ridge and taking a chance and running forward on the edge of the open ground would allow him to outflank his foe. This was a sweep operation, and Leroy had every intention of sticking to the plan. If Charlie was here then Leroy would find him.

By the little yellow idol to the south of Gok Wan 2, near the little marble cross below the town, Charlie had placed an anti-aircraft MG (ZPU), on a rise from which he was now gazing down. Deployed against the US infantry moving in the open the heavy calibre rounds were devastating. Sergeant Burlesque would never play new New Orleans again, and two more of his men were literally torn apart in the first moments. The rest of the platoon tumbled into the tree-line and sought what cover it could.

In the observation position on top of the Gok Wan ridge the VC Company Comander, Pak Choi, watched the American infantry sweeping up towards him. Another minute and the way would be clear. He dropped down the access tunnel into the main complex. Forty men were assembled ready to move out. Pak Choi knew he had but one chance. He had seen the South Vietnamese Paras drop to take up their positions, he had watched as they set up their weapons and beat down the vegetation to create a field of fire before their positions. Then he knew that a sweep force would be coming to drive him on to this position.

Pak Choi's Company of VC mainforce had been operating from around Gok Wan for over a month now. A small barrack complex had been dug out of the deep red soil that made up the ridge. His plan had been simple. Deploy one of his platoons away from the barracks and attempt to draw in the US force. Once they were past him his remaining two platoons would attempt to break out and head for the rubber plantation. The chances were slim, but the alternative was to be trapped between the two forces.

On his command the first platoon rushed from the concealed entrance and ran towards Gok Wan 1. A lone US weapons squad was between them and safety and surprise was on their side. The fight was short and violent. The US firepower told as the first rank of VC was literally cut down, however had to hand fighting threw the US section out of the hamlet and saw then dropping back, badly shocked, to the edge of the rubber plantation. The tattered remains of the VC platoon dropped back to the concealed bunker, the body of Pak Choi dragged behind them. Meanwhile the more circumspect second VC platoon were making their way through the tall elephant grass, heading for freedom.

At this point we called it a day. One VC platoon had escaped intact. One other squad was attempting to lurk in the undergrowth near the yellow idol. The crew of the ZPU AAMG was dead around its weapon, largely put out of action by Biff Stone's M60s. The Americans had lost five men dead, which in reality equates to two dead and three badly wounded, whereas the VC had lost about thirty men. From the pure bodycount perspective this was a US victory, however the sweep had failed to catch all the VC, so the Communist players were claiming a victory too. A good fun game of Charlie Don't Surf, and more to come next week.

Richard Clark


This was a Charlie Don't Surf village sweep.

The Free World forces' objectives were to capture the rice caches and to kill Commies; the Communist objectives were to kill 30% of the Capitalist dogs and protect the rice.

The US troops consisted of three platoons of infantry backed by some on-call artillery. The PAVN forces comprised two NVA platoons, one VC platoon, and three bunkers with two light and one medium machine gun.

The US forces advanced in and got ambushed. The PAVN managed to hold out for a few turns until the superior firepower of the US forces started to have an effect on the PAVN morale.

It was a close run thing, with the PAVN inflicting 22 casualties on the Americans...but the 33 PAVN casualties and destroyed rice caches brought a win for the Americans.

Mike O'Brien


This is a "Rock the Casbah" after action report. The Israelis were meant to clear a town that a small group of Syrians had forgotten to actually pull back from. The Israeli spearhead was to take the town while the Syrians and PLO were there to take what they could and hold until relieved...or at least that's what I think they were to do. As someone who played the Israelis, I found their actions and methods inscrutable, and thus do not deign to try and explain them!

It has been quite a while since we actually played this game, but it was (as per usual) a pretty great one from R.U.P.

As I've already mentioned in the captions, Israeli hesitance to move forward at speed ended up being one of the great deciders, as the Syrians ended up getting reinforcements well before the Israelis even got close to their target. The furthest advance was the recon group, which you can see in the final photo in the blue/grey building with smoke nearby it.

Credit to Anton, Housemartin and his devilish daughter for standing up and costing so many brave Hebrew lives. That day, the man in the tank was not victorious.

Anton Ryzbak


This was another one of R.U.P.'s lushly pretty B'Maso games that involved a multi-layered scenario with multiple twists in the plot. I led the FFL force in an attempt to free hostages from the brewery office  (the yellow building with a parking lot in the upper right of the picture below). Of course things turned pout differently.

The upshot of the game was that the FFL was there to rescue hostages that didn't exist. The revolutionaries were there to steal the beer from the brewery and had detained the workers solely to prevent them telling the authorities what was going on. It was a fun game and presented a series of command decision to both leaders who were working to different objectives and unaware of what their opponent was up to.

Anton Ryzbak


To mark Dan A's return from the Army, Rich Uncle Pat ran a Rock the Casbah game at his place. The scenario was an Israeli penetration into a PLO controlled area in Lebanon. Each side had specific, and potentially asymmetric, objectives as well as very different forces and capabilities. This promised to be an interesting game.

The Scenario

A couple of notes on the next section:  at times you will see troops (or a Blind) standing on top of a building with a small brown die next to them. This is because some of the buildings do not have internal floors (yet) and the die indicates which floor the troops occupy. Having tried off-table book-keeping of hidden troop locations I can tell you this is a much quicker and more elegant, method. Also some of the PLO assets were in buildings and on Blinds, this creates a "double-Blind" situation where even the Blind is removed, effectively making the troops invisible.

Opening Moves

We join the game as the IDF Blinds come onto the table. For those not familiar with Two Fat Lardies rules, units are represented on the game table by "blinds" - a sort of generic marker - until an enemy unit identifies them by use of the spotting rules. This helps avoid the "thousand-meter tall general" situation that plagues many rules.

For the PLO players this is often the worst part, not knowing if it is a Jeep or a Merkava until you force the Blind to reveal, often with disastrous results for the unit forcing the reveal . For the IDF it is worse, you know you are a sitting duck but can doing nothing about it but move forward, scanning every window, hoping to spot enemy activity...

Things were getting serious now. The PLO had managed to reveal most of the IDF Blinds at small cost to themselves. The problem was this: what did they have that could slow down the IDF advance?

From the Israeli point of view, their advance had been slowed and they had not yet located the main body of the enemy forces.

The Denouement

The Killdozer Rules All!

The situation thus far. 

The IDF is making a major road-clearing incursion into a PLO held area, the PLO has been tasked with delaying the intruders long enough for reinforcements to arrive and counterattack. Both sides are sure that they don't have enough combat capability for the job, this means the GM had designed a near-perfect scenario.

At this point we called the game:  there simply was nothing left in the PLO arsenal to stop the IDF, and the PLO reinforcements were too weak and far away to make any difference.

By all accounts everyone enjoyed themselves greatly:  credit again to R.U.P. for setting up the scenario and providing all the toys. The Killdozer, through a streak of luck unparalleled in the forty years that I have been gaming, tipped the balance with its indestructibility. Hit after hit generated only the most minor of damage, it was amazing.

Anton Ryzbak


IDF vs. PLA, Refugee Camps near Tyre, July 1982

In our continuing Lebanese Civil War “campaign”, Rich Uncle Pat decided to put the Israelis through a wringer, giving them the densest urban terrain they had seen yet. Previously, the campaign had them in the wonderful orchards of rural Lebanon trying to push a column through, getting delayed and leading to a strategic SNAFU. This strategic SNAFU required Israeli forces to push into the nice suburbs of Tyre to secure a crossroads, allowing a Merkava I Platoon to successfully get to where they needed to be because they got "lost" trying to keep on schedule.

Well, did you wonder where they actually needed to get to? The real reason?

Due to the delay in the column, the mechanized platoon nearby had moved off-course in an attempt to support it. They never arrived, but their detour had thrown them into unfamiliar territory. By the time they realized they were in the wrong area, they were deep into the city and the only way to get back would be to cut through a nearby refugee camp. They were to get through the camp without leaving anyone behind, but especially getting the Battalion CO (LTC Geiger) out.  One of the few PLA units in the area would be ambushing them and trying to cause as much damage for an in-area local news crew to catch.

So the Merkavas weren't lost, the Battalion CO was. Apparently someone at HQ was covering his ass and sullying the good name of the Merkava commander. Damn politics...

For those of you who are following at home with your personal copies of Rock the Casbah, he was playing  “Peace for Galilee Scenario 2: The Al Bass Crossroads”.

We were also trying out a rules change regarding Big Men and Tactical Initiative. In previous games, the drawing of a great deal of Tactical Initiative had generally bogged down the game and was probably the most confusing part for most of the people who were unfamiliar with the rules. To make the game run quicker, RUP eliminated Tactical Initiative chits and instead gave Big Men a number of Big Men Actions equal to their number. Rallying was now replaced by a stat similar to a “Big Man Bonus”, where they would roll to see how many wounds they would take off.

A few other minor clarifications/modifications:

-  The Armored Bonus Move was taken out, and replaced by the Israelis moving on a single “Convoy” chit until engaged. They’d have to remain 4” from each other until all hell broke loose.

-   Only one MG per turn could fire from the Zeldas. If the HMG fired and shared an arc with an LMG, they got a +3 to the HMG’s total roll.

-    The Palestinians were rated as “Average” for being PLA units rather than just militia, while the Israelis were rated as “Good”.

-     The Magach’s ERA used a similar mechanic to Israeli Grenades (ENDA), where they’d have to roll under a certain number not to decrease it. Once it went below one, it was no longer effective. This was done to show ERA deterioration over time.

-    The road was a bit wider, so we could cram three vehicles at once if we took the sidewalk on either side.

If there are any others or mistakes in there, Rich Uncle Pat can correct me/insult me/assault me as he feels is necessary. I also won't be showing the deployment zones because 1) I was Israeli and 2) This is a good time to show you the hell that we had to go through. Try and figure out where the PLA was hidden yourselves!

One thing that we didn't capture in the pictures is that the rearmost Zelda stopped at the bend got hit by an RPG and had its engine shut off. We didn't know if we could get it back on (I think the roll to restart it was something like an 11 or 12), so we emptied one of the Zeldas at the edge of the board and drove it back to ferry some of the fireteams back. In the end, though, it restarted (Honest Dan came through with a roll after about three turns, at which point we had at least two fire teams out of it) and we ended up driving it off.

That situation really goes to show how close this battle was: Up until the end, it was very tense because the PLA kept rolling up new RPG teams on the reinforcements. Of course, Anton's dice were incredibly cold (apparently he saves all his good rolls for Check Your Six!, where he's an Arab Chuck Yeager), which ended up saving us from a perfectly set-up ambush at the center of the table. Given the spotting rules, it's basically impossible to see anything, even blinds, so you have to be completely reactive in everything you do. It's absolutely horrible.

As for the rules changes, the removal of the command chits made things move far faster than before. More units moved because there weren't extra chits between, and frankly the commanders were much simpler to use than previous. It's a really nice streamlining of things that, in my opinion, improved the quality of the game.

Justice & Rule on Anton Ryzbak's Blog


B'Maso Goes Blood Diamond in Central Africa

Many years ago the Government sold the Imperial Mining Company mineral rights to the Omovodo Range, a series of small mountains in the far north. At that time there was nothing to be found there but some poor-quality iron deposits, recently extensive research by IMC has found that the area contains vast, rich fields of diamonds. 

The IMC has quietly been developing the infrastructure to begin exploiting the resource but word has gotten out (it always does) and the Government has demanded a re-negotiation of the terms of the mining rights contract and has threatened nationalization. Needless to say the IMC is not happy about this development and has "taken measures" to ensure the security of their investment. 

The government, always looking for a foreign "boogey-man" to rabble-rouse against, has mobilized the army nearby citing "rising unrest" in the area and the need to "secure the national endowment". Rumors abound of mercenaries and military equipment moving into the area from surrounding nations, the powder keg has been opened and only awaits a spark.

As usual, kudos to Pat for a well thought-out game with lovely terrain and all of those good-looking minis. 

For folks not familiar with the game system; the green chits you see in the photos are representative of held actions; the red ones are "wounds" which represent a combination of actual injuries as well as disorganization and loss of morale; blue chits show that the unit is suppressed (with much reduced fire and movement options); the green skulls show that the unit is taking fire (troops that are not being shot at are more effective than those that need to duck). 

Vehicle damage is detailed:  you can be driven off by fire, have key personnel stunned/wounded/killed, parts of the vehicle can be damaged either temporarily of permanently. This sort of thing happened several times in this game: one of the T-55s spent a fair part of the game either retreating or moving back into position as the result of otherwise ineffective RPG and armoured car fire. 

Movement is random, each unit is assigned a card which are then shuffled and drawn, there are also two "sundowner" cards in the deck which when the second one is drawn show that the turn has ended. It is possible to go several turns without your card getting drawn, it is also possible for the last unit to move in one turn and be the first unit moving in the next turn. Some people do not care for this but I think it nicely creates the random chaos of modern small-unit combat. Certain powerful leaders get a card of their own and they can activate nearby units to advance the plan.

Anton Ryzbak

More Pictures from the Game


The day after the Great Hospital Raid the Rhodesians decided that the ZANLA guerrillas had gotten completely out of hand and, rather than relying on the local Constabulary, they called in the big guns: The Rhodesdian Light Infantry. This crack force of highly-trained, ultra motivated and very well equipped troops were deployed to reduce the level of rebel activity in the area. The mission was to recover the hostages (the ZANLAs had been collecting them over the past week or so), discover and destroy the rebel supply base, detach the rebels from sympathetic villagers, and kill or capture as many guerrillas as possible. The R.L.I. took that lengthy list in stride and mover swiftly into action.

Below we find the area of operations, this zone is known to be thick with ZANLA troops and there is evidence that the villagers are actively supporting the rebels.

North is at the bottom of this view

North is to the left of this view

The ZANLA players were tasked with defending their center of operations, which was hidden in the dried up river bed and the rocky ground near the southern edge of the table, they were told that there had been a fair amount of Rhodesian activity in response to the raid the day before and were expecting a counter-attack. The problem being that they had little idea where it might come from. Thus they deployed in an all-around defence, the level of success that this strategy met with will be shortly seen. Several local boys were recruited to act as look-outs, appearing to be innocent shepherds or farmers. The ZANLAs were allowed two ambushes and could place most of their units as "hidden" rather than as on Blinds (this being their home-turf and all). After much hand wringing and discussion the troops were deployed.

The R.L.I. swept in from the north, taking advantage of their superb training and drill they moved swiftly to their assigned positions and fanned out across the battlefield. 

A desperate last stand by the remaining ZANLA squad tried to cover the withdrawal of the supplies and prisoners but largely resulted in additional casualties as the R.L.I. squads moved in for the kill.

At the risk of sounding lie a broken record (dating myself, I am there) I really like the way these rules play. The random movement sequence and distance keeps thing "up in the air" and adds to the sense of chaos. The use of extra "dummy' blinds (one of the ZANLA blinds was a herd of pigs) keeps players from using the helicopter vision that so many games fall victim to. 

A fun and very good-looking game, thanks Pat!

Anton Ryzbak


We decided to step into Lebanon again with our second session of “Rock the Casbah”. This time we traded in the scenic fruit orchards of the countryside for the concrete jungle of Lebanon’s urban areas. Dan and John would be running the Zionist pigs, while Brad and I would be running the plucky freedom fighters.

With long delays on the main roads due to ambush, a platoon of Merkava tanks had attempted to reach their forward position by taking a slight off-road shortcut. Unfortunately, the unit ended up completely out of position on the wrong flank, leaving a noticeable hole in the Israeli advance. To rectify this command sent out a mechanized platoon who, despite multiple ambushes, had arrived near their objective: A crossroad which would allow fast transit for the Merkava unit to speed through. The PLO, as per usual, knew only that the Israelis were advancing on their positions and that they must hold against the Israeli assault no matter the cost.

Due to the nature of urban settings, the PLO would be particularly difficult to spot: as long as they were in a building, hidden units would not be placed as a blind on a table. This meant that the Israelis could not simply advance forwards and ferret out PLO cells by proximity: instead, methodical spotting and clearing of areas would be necessary. There were also rumors of a media crew in the area, and that they should watch their actions lest they get caught on tape.

Setup, as viewed from the front of the table.

Setup, focusing on the back end of the table.

The PLO, on the other hand, had set forward units damage and slow the Israelis advance. However, none of these units contained leaders and would be difficult to pull away; their job was to cause casualties and die where they stood. The heavier units with leaders set-up along the corners of the crossroads, unknowingly guarding the Israeli objective. The Recoilless Rifle and T-34 were set-up at opposite ends of the table, each guarding over one of the long inroads to destroy any fast armored advances along the roads. Finally, a single cell was attached to a civilian group; depending on how well the Israelis rolled on their spotting roll, they may see both the civilians and the terrorists or only the civilians.

Moving through the orchard

The initial Israeli advanced showed that this unit was obviously more experienced than the ones which had been halted by the ambushes earlier in the day: Instead of standing in the road they immediately moved their transports into the orchard, attempting to avoid any long-range shots. Meanwhile, their supporting Magach 6 sat in the road, confident that its Blazer ERA would protect it.

More trouble for the PLO

As the Israelis moved forward their second wave swept through the orchard behind them, concealed by blinds and looking to take the right flank. The first Israeli fire team pulled up to the wall and looked over, revealing the first blind: A bunch of men auctioning off a camel. 

One Fine Pi...I mean, Camel.

The IDF shows proper caution by stopping to look both ways...

While this was a relief, the cell overlooking the Magach 6 had gotten antsy. The Magach had refused to advance further, and the RPG man decided to take his shot. The first RPG round hit, covering the tank in smoke, while the second RPG round went off to the side. When the smoke cleared, though, the tank was still standing… and would remain there, being de-tracked by the rocket attack.

Continuing the streak of RPG effectiveness... but not as effective as the PLO would have liked.

The tank commander, panicking under the sudden rocket assault, decided that his tank crew was more important than adhering to the “rules of war”. He ordered his loader to put in a white phosphorus and fire it into the building. The cannon fired, and the ringing in the ears of the nearby troops thankfully drowned out the screams of the PLO nearby.

It burns us! BURNS US!

A costly trade-off

With the sudden burst of fighting, Israeli units began advancing into better cover. With the assistance of a giant hand, the Israelis managed to clear out the nearby civilians as they advanced towards the nearby houses.

Go here, my sons.

Once there, they began looking to see if anything was across the street. While the troops saw nothing, the corporal wasn’t convinced and continued to spot out the windows. Lucky for him, he was able to notice the RPG setting up at the last second, allowing his troops to take cover and minimize the casualties to a single soldier. Their own RPG fired back as both sides opened up with small arms fire, civilians hitting the deck in the middle of the street

Yeah, just stand in the middle of the street, guys. I'm sure that'll work out for you.

In all the chaos and confusion, yet another explosion occurred. IED? Stray artillery round? Inopportune gas leak? Either way, it caught both a PLO and an IDF blind, causing a wound to the latter and obscuring the street. This allowed the Israelis on the right flank to move up, searching houses before retreating as they came under fire from the T-34/85 down the street. The crew would attempt to advance, but the machine would not as it refused to shift into gear. It would remain on the corner, hull down for the rest of the battle.

This is what happens when you pay for substandard gas lines in your Mosque!

"Well, this went to hell quickly."

With all this going on, the crew of the recoilless rifle spat out a dozen different curses; a civilian group had walked out into the middle of the street, obscuring their shot of the immobilized Magach. The civilians would eventually flee towards the Mosque, like the rest of the civilians would seem to do.

Damn pedestrians think they can walk anywhere.

The Israelis, knowing that they had little time to sit around, took on the offensive. One of the Zeldas moved forwards on the left flank, zipping around before the recoilless rifle team could get off a proper shot. The Zelda would provide a base of fire for the other Israeli units moving up, while the recoilless rifle would get into an extended duel with the Magach. Neither side, however, would do much to damage the other.

Advancing on the right flank: Slow but sure.

Near the Mosque, however, the smoke had cleared and given the IDF team across the street a clear view of the people in the Mosque. At first, it seemed as though it was just a mass of civilians… but the appearance of an RPG quickly changed their mind. Ducking for cover, they managed to avoid the worst of the fire, shrugging off most of the damage. The right flank, though, was looking rather clear as they moved through the scattered buildings.

The left flank was more difficult. The Zelda, along with a second Magach, had advanced up the street, falling into MG and RPG fire. Sadly, this only managed to track the Zelda, whose occupants decided to turn it into a firebase, blazing away with its machine guns. The sudden ambush melted away as PLO casualties mounted quickly. This, along with the advance through the recently cleared green building had just about secured the left flank.

"Shouldn't we do something?" "Nah, they've got it handled."

On the right flank, though, the PLO leader had been more wily. Rather than revealing themselves too early, he had waited calmly as the cautious Israelis began to get frustrated with their inability to find new enemies. Realizing that the Merkava unit could arrive at any second, the commander ordered one of his fire teams advance across the street… and the results were disastrous, with almost the entire fireteam being lost. However, the second Magach, having view of these new enemies and hearing about the situation over the radio, decided to fatefully to fire a white phosphorus round at the building, killing most of the cell inside.

A Technical tries to finish off the remaining Big Man, but gets lit up in the process.

At this point, the last group, waiting on the roof, decided to reveal itself and fire down. But it was too late; the battle was won and the PLO was falling back. They had managed to cause 5 casualties as well as immobilizing 2 vehicles at the cost of over 30 men and a technical. The tipping point, though? The building across the street contained the media crew, which had full view of the illegal use of force. The Israelis may have plugged the hole in their line, but they likely lost an officer and gained a media firestorm.

The Merkava Platoon makes its way past the torn-up intersection, looking for the RR...

... But its crew were smart enough to get out of there.

"Gee, Hamid, what are we going to do tomorrow night?" "Same thing we do every night: Try and stop the IDF's advance!"

After Action Report: PLO

A few things I learned from this:

1) Don't be afraid to use your Big Men more actively. We were told this after the game that we could have probably saved a few units by revealing our Big Men individually and having them run around. I thought they would be more vulnerable, but since they have an 18" range, they can stay out of view while doing these things. This hasn't been an issue in most games, but this one it probably hurt my own stuff a bit.

2) The Israelis, when played properly, are hard are hell. John and Dan used their support a lot better than the IDF did in the previous game, even with the watering down of the Zelda. When used in concert, Israeli squads and their Zeldas can quickly take care of anything, as my MMG found out.

3) Since the Israelis are hard as hell, you have to let them make the mistakes. At times I did reveal a bit earlier than I probably should have. The PLO is very hard to spot in buildings, so letting the Israelis get frustrated with poor spotting rolls (like John did at the end, which cost him a fireteam) and try to rush forwards is paramount. My MMG and Terrorist cell on the left side of the Crossroads could have benefited from a bit more patience.

Overall a great (if rough) game made even better by a smashing Palestinian victory!

Anton Ryzbak


Pat hosted a game last weekend of PLO vs IDF using Two Fat Lardies "Rock the Casbah" rules; these are clones of the TWaT and B'Maso rules tailored for use in games reflecting the conflict in the Holy Land.  
     
The scenario was straightforward; the IDF needed to get off the other end of the table as fast as was feasible whilst suffering as little casualties as possible. The IDF troops are part of a deep penetration force trying to cut off retreating PLO forces. The PLO force is a scratch force thrown together to delay the IDF as long as they can to allow their compatriots to escape the pincer movement. The PLO have no heavy weapons and only intermittent mortar support, the IDF is an entirely motorised and armored force with helicopter gunship support. 

Here we see the table as veiwed by the IDF players, the narrow road runs between the citrus orchards that are such a common feature of the south of Lebanon, the orchards are divided by high stone walls that are too tall for a man to see over and even pose a significant obstacle to tracked vehicles. Click on the photos for a larger view.

This is the scene from the PLO perspective, a couple of good choke-points but the lack of heavy weapons means the fight will be up-close and bloody, not a PLO speciality. The IDF has good troops that are well-led and mounted in armored vehicles, they are armed to the teeth with automatic weapons. The PLO has five units, four of them assault rifle and RPG armed the last is an LMG. The real crippling factor is the shortage of leaders on the PLO side.

The PLO placed their dummy blinds so as to make the IDF players expect an immediate ambush from both sides of the road, hoping to make them deploy and move with caution. The real units were marked as hidden and placed further from the road so as to be able to react the the IDF deployment. The two pre-registered aiming points for the mortars were placed on the road to create a "box" with dreams of trapping the IDF between them, little did they know just how sporadic the mortar support would be. As usual, Pat put together a fine looking table. I particularly like the walled compound at the northern end of the table.

To the surprise and consternation of the PLO team the IDF players promptly spread out from their entry point and deployed using blinds of their own (spotting is difficult for crappy troops like PLO so they faced a situation of being on the defensive but operating blind at the same time).Fortunately for the PLO they rolled well and spotted a Zelda on the road from the RPG team at the far end of the table. Using the tried and true WTF method of reasoning they decided to open fire at extreme range in the hope of hitting the Zelda before it had a chance to open fire. To everyone's shock the round struck home and damaged the Zelda and wounded some of the crew (wounds in Rock the Casbah act as supression or disorder points, they reduce the effectiveness of the unit until they are removed). 


Looking south at the target of the RPG shot.

Note the IDF blinds moving east through the orchards...

...and the PLO blinds hunkered down on the near side of the walls

The random unit movement that is the core of the game now granted the PLO all the dreams they ever wanted and allowed them to fire again at the newly spotted M-60 tank; an even more difficult roll was quickly passed and the tank took minor damage. Much cheering was heard from the PLO camp.

you just know it is going to be "one of those days"

This to be quickly followed by even more rejoicing as the hidden unit nearest the south end of the table was nearly run over by a Zelda moving as a blind (this vehicle was unable to react as it had used all of it "activation points" rushing to its location) they spotted the moving vehicle at point-blank range easily enough and fired an RPG at it.  As luck would have it the projectile struck the Zelda damaging the top-deck LMGs, stripping the vehicle of its on-board firepower. Happily for the IDF the troops inside escaped unscathed, they promptly dismounted and hammered the PLO squad with small-arms fire.

what price glory?

that price glory:  all but one PLO has fallen!

As the IDF continued moving down the road the stunningly lucky RPG team at the north end of the table decided to stretch the credibility of random probability and take yet another shot at the IDF armor.

A new Zelda had taken over the point position and was thus selected as the target.

The Zelda crew had saved an activation point to employ their smoke cannisters just in case they were fired upon, this allowed them to "pop smoke" when they saw the RPG team lining up their shot (the rules allow troops to "save" any or all of their activation points to use to interrupt later enemy actions - a sort of overwatch stance). 

It did them little good as the RPG team rolled a pair of sixes and another shell slammed home against the luckless IDF armor force.

This caused but nominal damage.

The thoroughly angered IDF forces finally had an opportunity to open fire on the pesky RPG firing squad which was quickly reduced to a lone figure.

Not to be put off by some rag-tag troops firing missiles at them the IDF doggedly mopped up the hidden unit in the orchard and then proceeded down the road. Along the way they revealed the blinds as dummies and thus were freed from the threat of more RPG attacks, or so they thought. As they pressed northward they encountered the two hidden units west of the road, these disclosed their positions by firing the ever-present RPG at the two lead Zeldas, destroying one and damaging another. This caused the crews to dismount and open fire on the PLO squads. The tank joined in and the losses mounted against the PLO. The PLO had finally gotten mortars and had used them to drop smoke at the northern aming point to cover the retreat of the remains of the improbable RPG team and to allow the LMG team to move to the walled compound.

even the tank joined in the hammering of the no-longer hidden PLO

another RPG damages the tank

 the IDF infantry swiftly took revenge

The PLO ambush teams survived long enough to get a second chance at firing their RPG and this time damaged the tanks main gun. In retribution the IDF infantry team demolished the remaining PLO troops. The PLO mortars ranged in with HE only to find that it had no effect on the tracks, it did manage to hit a few of the IDF grunts to no great effect. One Zelda swept through the now vacant eastern orchard while the others on the road recuperated and rearranged troops into the remaining runners.

the LMG team impotently watches the Zelda sweep the eastern orchard

With their troop-loads now sorted out the IDF again moved forward only to find that the PLO had brought on new squads, one had snuck into the walled compound (just in time to see the eastern orchard Zelda scoot past and off toward the north) and another hot-footing it in from the south. Pressed from both the north and south and being pounded by mortar rounds the IDF remembered their mission and again began moving northward. The platoon commander leading from atop his APC (there was not enough room to load everyone inside the two remaining APCs so he chose to do the heroic thing and take the position of greatest risk). Fire was exchanged between the PLO in the compound and the passing IDF armor, but the gods of random chance decided to even the odds and the PLO scored no more hits. As the IDF raced northward the helicopter support showed up and took the compound under fire.

Zeldas racing northward to close the pincer

A Cobra gunship takes the compound under fire

This was another fun game that explored another dimension of the Two Fat Lardies game system. I am interested in playing a WWII skirmish game involving US Marines vs Japanese troops in the island-hopping campaign of the Pacific war. The blinds, hidden movement and random order of movement seem to create the uncontrolled nature of skirmish conflict.

Thanks again Pat!

Anton Ryzbak


This is one of the scenarios that we played when my buddy Tom was in town. It was a battle to rescue the legendary rebel leader, Garfield Shavanje, from the hands of the Rhodesian Police. He had been wounded and captured in an earlier battle after a heroic resistance along with a few other rebels. Rumor was that they were being held in the local Police Station.

a view of the table from the western end

The Rebels had been strengthened by the addition of two squads of ZIPRA "regulars" and they had acquired a delivery van from a local businessman. Fortified in this way they planned their attack. The irregulars would attack from the east (entry point A) in an effort to drawn the Rhodesians to them while the regulars hung back, waiting to attack from the south once the police had responded to the distraction.

A big feature of the rebel plan was to have the delivery van "casually" drive into town with a load of irregulars in the back to launch a surprise attack. In the careful, detailed, planning stage the ZIPRA commanders failed to agree on the entry road, each left thinking that the road they had chosen was going to be used. Needless to say this had an impact on how things worked out.

the view from the eastern end of the battlefield

In the opening moves the rebels quickly advanced their Blinds from the east closing with the hospital in a few short turns.

rebel activity elicits little police response

Having closed too quickly with the enemy position the rebel troops on the road had to deploy off their Blind. Once the figures were on the table they rapidly moved into the hedges on the side of the roadway for cover. The other Blinds continued to press forward, sweeping through the patches of scrub and rocky ground on the left and the orchard on the right they encountered no police.

the command section occupies the hedge near the hospital in the distance while in the foreground two Blinds stumble into each other in the scrub

Things seemed to be going nicely for the rebels, the contact in the woods was between two "dummy" Blinds and so came to nothing (with both being removed) and the other troops moving with surprising speed. In a moment things went entirely awry for the ZIPRAs. The delivery van entered at entry point C rather than B as the rebel leader thought they would, distracting but not fatal, but it did place the squad contained therein far too close to the Police Station and left the rebel left flank hanging "in the air" as it consisted almost entirely of dummy Blinds.

At the same time the rebels crossed into the hospital to find an entire squad of Rhodesian Police had already taken up residence in the building. During the Rhodesian move they advanced down the road with a Blind toward the hospital causing even greater consternation. The police had been plagued with several turns which they had few, if any, units activated an experience they found most frustrating.

hey, that's not the new interns! those are ZIPRAs! Look at the AK-47s!

The Rhodesians were once again ill-served by the random activation schedule and the ZIPRAs got off the first shot, it mattered little as it caused only nominal damage (I guess the ZIPRAs were caught a little off guard). The return fire was punishing and scattered the rebels, sending them fleeing from the building.

Meanwhile to the north of the hospital a firefight broke out between a police patrol and the ZIPRAs holding the hedge line, this went badly for the police (moving in the open is never good) but the rebels did not escape unscathed. While this was going on the Blind west of the hospital was revealed a an armored Crocodile APC.

Determined to attract as many as possible police away from the recently discovered rebels in the delivery van the ZIPRA commander opened fire with as many units as he could push up into line as well as pushing another unit into the hospital. This torrent of fire crippled the police squads between the buildings and succeeded in driving the police out of the hospital and into the APC.

heavy casualties reduce the police squads to one and two figures each

Apparently the rebels in the delivery van were not driving casually enough (that and the fact that the van had been reported stolen only an hour earlier) during the approach run and they were met with a hail of fire from the Police Station. This fire destroyed the van and pounded the squad inside with casualties, they beat a hasty retreat into the school building nearby where they nursed their wounds. Meanwhile the tardy regulars had finally arrived from the south only to be pinned down by a lone sniper on the balcony of the Police Station who hounded them into the brush with painfully accurate fire.

the rebels losing the firefight across the street. note the dreaded sniper on the police station balcony

The police patrol fleeing the hospital piled into the APC while the remnants of the other two patrols retreated to the hotel between the Police Station and the hospital to reorganize. The regulars moved east through the woods behind the school to avoid the fire from the sniper. The delivery van squad gathered its wits and engaged the police squad across the street, but this was a fight they could not sustain for long.

At this time the rebels in the hospital found out that the police had been guarding wounded prisoners and that they had loaded them into the APC. A reversal of rebel luck allowed the police to move first on the next turn and the APC driver made a superb attempt at escape, showing a titanic bit of driving skill he managed to make it almost all the way to entry point B in one move.

But fate was just toying with the police as they then suffered two turns of not being drawn to move, this allowed the rebel leader to shift his command squad (which contained the RPG man) into a position to fire. The results have been seen before but they bear repeating here;

truly the shot of the day

This shot destroyed the APC but most of the persons inside survived with little further damage. A rebel regular unit gamely tried to redeem themselves by assaulting the three unwounded police but were thrown back three times with ever-mounting casualties. Finally a returning patrol of Selous Scouts appeared near the village and swept up the prisoners and the policemen and carried them away into the brush southbound. Garfield was last seen shouting, "Be brave my brothers".

I again must say how much I like the B'Maso rules, the chaotic nature of small unit actions is dealt with very well by the random activation system. Thanks again to Pat for a beautiful game and a well-thought out scenario that was a blast to play.

Anton Ryzbak


Last Saturday we played a game of "B'Maso", a set of rules for the period of decolonialisation 1950-1990 by Too Fat Lardies. This set of rules is closely similar to "I A'int Been Shot Mum" by the same authors. The mechanics are simple but the play is very interesting with the native troops moving as blinds that mark their location but conceal their composition from the Europeans. Additionally there is usually one dummy blind for every real one, just to keep the enemy guessing. Pat kindly provided the figures (largely Peter Pig figures) and ran the scenario and rules for us.

The scenario was a Rhodesian Police Patrol responding to reports of "trouble" near Mr. Patel's General Store, see the map below;

Scratch one APC

Blinds were scattered across the table with one positioned near the store, the Rhodesian Police came on searching the surrounding terrain for terrorist activity (aside from the burning warehouses in the distance they could see nothing) only to have one of their "mineproof" vehicles stumble onto one of the two mines that the ZIPRA forces had laid in the road. The vehicle was disabled but none of the troops killed. The other two spread out off-road, one heading for Patel's store, the other toward a nearby hill that looked suspicious.

At this point the ZIPRA HQ popped the ambush and fired an RPG at the damaged APC, hoping to take it (and the two squads inside) out of the fight. Against the odds, the RPG struck the APC and detonated, utterly destroying the vehicle but only wounding some of the passengers,  The rattled, but largely unharmed, policemen rapidly de-bussed while the other vehicles spotted the HQ and the ZIPRA squad #1 and engaged them with fire.

the ZIPRA commander celebrates the success with the RPG

The APC approaching the hill was engaged with rifle fire by squad #1 to no effect (so they are mine-resistant but seem to be bullet-proof). The constables dismounted in the face of ineffective fire and, seeing only a few terrorists on the hill attempted to engage them in close combat to take custody of them. This did not pan out too well as there were a great many terrorists on the backside of the hill. The section was wiped out except for their leader.

the constables charge to their doom

The ZIPRA forces followed the "shoot and scoot" policy and also broke away from the fight in an effort to disengage from the Rhodesians, This is where one of the aspects of the rules came into play in the favor of ZIPRA, in an effort to mimic the chaotic nature of small-unit combat the rules assign a card to each unit, there is also a card marked "Sundowner" which ends the turn of play. A unit can find it self unable to move if the Sundowner card is played before it has its card drawn. This happened to the other police squad and they found themselves unable to take advantage of the retreat of the ZIPRAs.  Meanwhile ZIPRA squad #2 had moved stealthily into an area of heavy scrub to cover the retreat of squad #1. They awaited the advance of the Rhodesians.

squad #2 lurks in the shrubbery

the constables nervously scan the terrain for signs of ZIPRA activity

Fortunately for the Rhodesians they spotted squad #2 in the brush and went to cover before they took any damage. A desultory fire-fight began. Behind them the squads from the burning APC began slowly moving forward to assist. As they did so they spotted squad #3 in the front edge of a spot of woods and engaged them with fire as well.

squad #3 feels the weight of enemy fire

At this point the ZIPRA HQ foolishly decided to try to again engage the remaining APCs with RPG fire. Every free rifle on the Rhodesian side turned on the HQ and it was crushed by fire, the OIC killed, and the rest scattering to avoid death.

While this was going on the third APC scurried along paralleling the road and approached the Patel store. De-bussing just a short distance away they crept up on the blind located just past the store only to find that the "suspicious activity" was Mr. Patel's cow. A quick search of the store revealed Mr. Patel's lifeless body and a ransacked building. The APC driver attempted to re-position the vehicle and managed to drive over the one remaining mine that the ZIPRAs had laid.

not the proper way to deactivate a mine lad, I guess we will walk

Freed of the distraction of getting in and out of their APC the two police squads turned their full attention to ZIPRA squad #3 which quickly buckled under the pounding and fled. Away on the Rhodesian right the constables had put ZIPRA #2 to flight and then calmly mounted up and pursued the fleeing remnants in an attempt to capture them.

the constables give chase

Cornered!   the ZIPRA troops surrender

They rapidly overtook the fleeing remnants of squad #3 and took them into custody as the other police squads (resourceful lads that they were) decided to use Mr. Patel's truck to replace their damaged APC. Sadly they found it had very poor cross-country performance and decided to de-buss (once again) and pursue on foot.

constables on the move

All in all I enjoyed the rules, they play quickly and give a good feeling of the disorganized nature of small-unit combat. They are different from most rules and you will need to set aside your preconceptions to grasp them (at least I did).

Anton Ryzbak


Mark Kinsey ran a gigantic Beirut 1982 game at the Cold Wars convention in 2012. Here's an account of the set up and game itself.

The Set Up

[At Cold Wars] I'm going to run a huge urban Beirut '82 scenario with the men of the Israeli Handasah Kravit (engineers) attempting to clear a road block using their huge D9 dozer. I might possibly do a second scenario on the same table with a follow up attack using a platoon of Merkavas. If I'm going to transport this much terrain, I might as well make a day of it!

The assault is down a major 4 lane artery into West Beirut across the "Green Line" separating the city into Muslim and Christian quarters. The approach is dominated by the tallest buildings I could muster, both commercial and scratch built. There is a major roadblock and a few concrete barriers and trash in the road. I do have a few more bits of trash I need to paint up.

On the right near the parking lot there is two new buildings I've just built using bits from the old Child Guidance toys from the 1950's. I have added styrene stucco flat sides and balconies. The largest of the two buildings is L-shaped and 7 stories tall.

There is a slum area and some hidden weapon caches. Across the street is a large park which is impassible to vehicles.

The scenario comes from the "Rock the Casbah" Too Fat Lardies supplement. I couldn't duplicate all of the enormous buildings listed, but I've come close enough. Israeli forces include three squads, an M163 (M113 w/vulcan), Nagma Sho't, a Merkava 1, a Dozer, three 82mm Mortars, and a Drone Aircraft. PLO forces are a secret, but they are quite significant and they do have quite a few surprises.

Scenario One

At Cold Wars itself, Mark would play two inter-connected scenarios with the Israeli Engineers and some reservists crossing the green line into Beirut in July of 1982.

Looking north you see a roadblock on the west side of a four lane road. The Merkava has been held up by a PLO T-34 just off camera to the south. The IDF Reservists in the beige building to the southeast have a bit of bad luck and very little support. This squad will end the game with 7 out of 8 men in the squad dead.

Here the Nagma Sh'ot with the Engineer squad has nearly made it to the roadblock. The D9 Dozer is still under blind and is hiding behind some smoke. I'd say one mistake the Israeli players made was ignoring the PLO squad in the center of the park too long.

The PLO manage to take out the dozer with an RPG round. The engineers blow the roadblock with satchel charges. A car bomb goes off but manages not to damage the two vehicles in range (the Nagma Sh'ot and M113 carrying a hesitant commander with new orders). Then the M163 is lost to more RPG fire. The scenario ends with the IDF pulling back after achieving their objective and before they can be given a new one by the hesitant commander. The PLO are awarded a minor victory due to the large number of casualties inflicted on the IDF. 

Scenario Two

In the second scenario the Israelis are tasked with breaking through with a platoon of three Merkava tanks. They also have to clear a weapons cache from a local Police Station and a mortar pit on the SW corner of the park. They received reinforcements to bring the number of squads back up to three and they received an additional Nagma Sh'ot. The PLO had 7 squads, a WWII Russian 76mm anti tank gun and a Charioteer tank.

With a new set of players, a bad day goes to worse for the Israelis. A B11 Recoiless blasts a track off the Nagma. It sits blocking traffic for the rest of the game. Worse still, we have our first Merkava kill from an RPG in all our time playing this period with IABSM. Incidentally we were playing IABSMv3 with the Charlie Don't Surf weapons charts.

The other Nagma headed all the way to the south and ran smack dab into the Charioteer blind. On the turn end the Charioteer KO's the Nagma and the survivors of the squad bail out. The following turn the Charioteer goes first and sprays the squad with machinegun fire.

To the north the engineer squad from the other Nagma that was disabled on turn one heads into the PLO populated shantytown unsupported and pays a heavy price as well.

Merkava #2 has its main gun disabled. The end of the table near the exit is now a deadly canyon.

Merkava #2 makes a run for it along with Merkava #3. The command M113, the one with the hesitant commander from the first scenario bumps into the 76mm Anti tank gun and also tries to make a hasty retreat. I give the Israelis an M109 as reinforcements but while it destabilizes a building and forces one of the PLO teams to retreat it doesn't help all that much. The two Merkavas escape, but the remaining infantry team in the center comes under fire from the Charioteer and takes several casualties. The M113 takes several mobility hits and limps towards the board edge only to be immobilized inches from safety. The crew is taken prisoner. A major victory for the PLO.

Conclusions

Now these are games that are meant to be fun, so they are tilted towards force parity more than they would be in reality, but these were both larger victories for the PLO than we've ever had.

The Israeli players in both scenarios seemed to both be fooled by their firepower advantage into thinking they didn't need to be careful and use good doctrine. They also need to move fast. To be fair it's a tough balance and the players in the second game were not accustomed to modern warfare. As one PLO player (Charles) pointed out Modern combat is a game of sudden death hide and go seek. The Israelis need to use combined arms, they can't have teams running around unsupported. Once a PLO blind has been spotted and revealed the Israelis need to concentrate their firepower on it and neutralize it immediately.

In the first game a PLO team was allowed to sit unmolested in the park firing RPG's on the Israelis for 5 turns. This is the team that eventually took out both the Dozer and M163. In reality they should be limited to 3 or 4 shots, but it's never come up before. The Israelis were also spread very thin.

In the second game many of these same mistakes were taken to an extreme. The Nagma that bumped into the Charioteer had no reason to be where it was on the extreme southern edge of the playing area. To the north, a squad ran into the shanty town alone with no way for any of the armored vehicles to assist it.

That said, everyone told me they had a good time. I would love to see all of the players back for another go of modern combat in the future.

Mark Kinsey


Operation Reindeer, which began on 4 May 1978, was South Africa's second major military operation in Angola, carried out under the Apartheid regime, the first being Operation Savannah.

The South African operation consisted of an assault by 2 South African Infantry Battalion on two South West Africa People's Organisation (SWAPO) base complexes, Chetequera and Dombondola, near to the then-South West Africa/Angola border; an assault by the elite 32 Battalion on SWAPO's Omepepa-Namuidi-Henhombe base complex around 20 km east of Chetequera.

This AAR is a Chetequera playtest and refight put on ay Historicon 2010 by Mark Kinsey and friends.

The Playtest

In preparation for Hisoricon, Jon and I played through enough of the scenario to find a few things that need to be fixed. But then that's the point of playtesting. We used M'Baso/IABSM for the rules. Here's some eye candy from the game.

The latest iteration of the terrain setup.

This area represents just a small corner of a SWAPO base containing several hundred defenders with recoilless rifles, 14.5mm AA, and 60mm mortars. It was assaulted by by a combat Team with fourteen Ratel-20's and four Eland-90's. A second Combat team with four additional Eland-90's and three Support Troops in Buffels held stopping positions at a nearby crossroads and set up an 81mm mortar in a nearby Kraal. Many of the Ratels were held up in the thick brush and only six made the final assault. Of the four Eland-90's, two were knocked out by recoilless rifle positions.

The Canberra preps the base with bombs

Buccaneer does the same with rocket fire

Air support prior to the assault consisted of four Canberras, and two Buccaneers. Additionally, two K-Cars with 20mm guns were on hand for close air support during the assault, mostly to fire on SWAPO attempting to flee the assault. Since this is just a small portion of the base, an attack by a single Canberra and one Buccaneer should be adequate. Historically the communication between the SAAF and SADF was poor, and as a result there was 30 minutes between the air assault and ground assault. More than enough time to remove any pin or suppression effects.

The K-car is shot down by a ZPU-2 as the Eland-90's trade shots with the SWAPO recoilless rifle teams

What I'm going to attempt is to have the scenario give a "feel" for the period and the assault. So while being inspired by the events at Chetequera, it is not a strict simulation of the events. A simulation of the actual events would be boring and frustrating for any SWAPO player, and perhaps a bit dull for any SADF player. 

The Ratel-20's storm the trenches. It gets ugly fast. Lesson learned, don't close assault unpinned troops in trenches.

The Ratel on the left was disabled (engine damage) by a recoilless rifle team. I like the balance between the recoilless rifle team and Ratel armor. No huge brew ups, just vehicles disabled through various means. SWAPO teams armed with just AK's can't do much except force morale checks, but often that's enough.

Chetequera at Historicon 2010

Below is a view of the Northern edge of the camp seen from West (North is to the left in the photo). The South Africans start the game a bombardment from a Canberra and Buccaneer and then assault down the road with two Eland-90's a K-Car helicopter gunship. On turn 3 they receive four Ratel-20's evenly spaced 9" from the trench line.

The aerial bombardment is mostly ineffective (need to change that up a bit next time), and then as predicted the Eland armoured cars are hung up by the Recoiless Rifle team in the bunker. When the Ratel's show up the fight is still going on with no knock out blows by either side.

The armoured car commander musters his courage, charges to the edge of the barbed wire and rolls a 17! In the IABSM system this magic number destroys any crewed weapon. The damage also killed the Big Man crewing the gun.

Rest in Peace Big Man. Long live Little Big Man!

The Ratel commander realizes time is against him and rushes the trenches after two turns of little movement. It comes as a cost though. The SWAPO second in command, nicknamed "Little Big Man" mans a recoiless rifle, turns it and attacks a Ratel in the rear as it rushes by rolling an 11 on 2D6.

Things are fast and furious near the end with a second Ratel being knocked out by more great shooting. The South African player pushes forward to the board edge as Ratel's are recycled for a second wave of attack. Several gun crews are killed and infantry rush forward along the trench line to take their place (this is something that happened in the actual attack). I give them an 8+ on 2D6 to man the gun and then it can be used on the following turn. One Ratel gets stuck on the trench line (1 on a D6), but manages to free itself on the following turn (50% chance). With this and some great movement die rolls the South African player manages to get six Ratels off the board by the end of the game, narrowly eking out a win.

I messed up the rules a bit and things were chaotic at times, but everyone had a really great time. 

Mark Kinsey


The Battle of Cassinga took place on 4th May 1978 during the South African Border War. The battle involved South African forces raiding a suspected SWAPO base at Cassinga, Angola, and, covered in the game below, the intervention of a Cuban armoured force operating out of the nearby Techamutete village.

Mark Kinsey and Jon Yuengling re-fought the battle at Fall-In, 2013, using a combination of I Ain't Been Shot, Mum! and B'Masao.

The Play Test

Jon and I gathered at Dragonhead Distributors in Allentown, PA today to knock the dust off our Too Fat Lardy knowledge and playtest the Cassinga game before next weekend at Fall In.

I like to head to a convention with a setup photo in hand and have the terrain packed away from the playtest (or at least from a setup in my basement). Really cuts down on the guessing.

In the end it didn't look as awesome as the image in my head, but I think it can be improved upon with a little more effort. I'd like to add in the dirt trails and a few other things, but we were pressed for time and took far too long to set this up. We used a 6' x 10' setup and the buildings, trees and trenches I have got were a little swallowed up by the massiveness of the board..

Here the anti-tank platoon is arrayed in a stop line to slow down the advancing Cubans coming from the near board edge.

We recruited a passerby named Michael and inducted him into Lardy gaming. The Cubans lead with their recon element, followed by their tank platoon of T-34's.

After several turns of fighting and shots from the anti-tank platoon RPG's and Mirage III's and a Buccaneer firing AP rockets the anti-tank platoon is completely immobilized on the road. Two T-34's have been KOd' and others damaged. This has created a traffic jam that has slowed the advance of the other Cuban platoons.

The anti-tank platoon receives orders to withdraw to LZ Rennex as the Buccaneer attacks the column again.

When we ended the game two of the three platoons from Company C had managed to depart from LZ Rennex, but the anti-tank platoon was being very hotly pursued by a Cuban Mechanized Platoon in BTR-152's. 

So what did we learn? We overused the hesitant commander card for the Cubans and they did not get their entire force on the table. Also the air support while effective did not KO as many vehicles as I would expect. I think both of these should be easy tweaks and then the battle will rage farther across the table and create even more tension for both sides.


This is the south end of the battlefield looking up towards the center of the town and LZ Rennex at the top right.

Fall In 2013

The airborne landing and assault on the SWAPO camp at Cassinga, Angola by South African Paras has been a success, but now it must be saved from disaster! A Cuban Armoured column of T-34/85's and BTR-152's is grinding up the road from Techamutete. Can the South African Anti-Tank Platoon hold them off long enough for their unit to exfiltrate by helicopter from LZ Rennex?

This year I only went to Fall In for one day and really only to run my one big game and socialize. It was scheduled for 1 - 5 pm on Saturday and we used all of our time and a little bit more. We set up at 11:30am and were done by 12:30pm, so I had some time to get a breather before the game. Parking was at capacity when I arrived at 9:30am, so the day involved a bit of walking back and forth to the car in the far parking lot.

Below is a view with the walled Cemetery on the bottom left, and LZ Rennex at the dice pile. The Cubans enter from the top left. The South Africans have a small Anti-tank platoon and support from 2 Mirage III CZ's and a Blackburn Buccaneer. They must leave the battlefield by Helicopter from LZ Rennex with C Company (3 platoons) and the AT platoon intact. Rules were "I Ain't Been Shot Mum" (version 3) with modifications from the B'Maso ruleset from Too Fat Lardies.

The Game

Both the Buccaneer and Mirages get involved early, taking out the Cuban Recon Platoon. Here the Buccaneer misses the Cuban BTR-152 column.

An AT team has been discovered in the building just up the road. The Cuban player is on the left and South African on the far right with Jon in the middle. What is that set of Blinds moving up the trail to the left?

One of the C Company platoons of the South African paras has deployed off blind and is trying to set up a defensive line against any Cuban infantry on the south end of the clearing.

The Cuban Tank platoon of T-34-85's has finally been spotted on the eastern trail. There is no movement bonus on the trail, but the Cubans are using it anyway. A lucky RPG shot from an AT team in the trench line takes out the lead tank.

The Buccaneer is back to finish the job on the BTR-152 Platoon. Elsewhere, two of the three Paratroop platoons have left by helicopter on the north end of the battlefield. A SWAPO sniper in the walled cemetery is killed after firing several rounds at the South African Forward Observer. The third platoon is trying to make it's way back to the Landing Zone but is impeded by Cuban Mortar fire.

The remaining four tanks of the tank platoon move up the trail to the clearing. Through a combination of RPG fire and Air Support one has its main gun taken out, another immobilized, one has a -4 to move, and the other is KO'd. But before this happens they manage to get several shots on the helicopters which have landed nearby (without driving them off). Over on the main road a platoon of Trucks towing the Anti-Aircraft guns is badly mauled by the last run of the Mirages before they have to go back to base. The Cuban Big Man in his GAZ69 jeep is narrowly missed. The AT teams have almost run out of RPG ammo and are in full retreat.

They turn their attention on the fleeing platoon instead, pinning it in the open. Another BTR-152 platoon reaches the clearing and adds their fire to the mix. Back over on the main road, a different BTR-152 platoon has bumbled into the minefield the South Africans have placed on the road just north of the first house.

The LZ is in chaos now, with what few teams that are not pinned or under shock attempting to board helicopters.

In the confusion the embarkation officer boards the helicopters early! Each of my three Puma helicopters represents a group of helicopters that can carry a platoon of men. Van Zyl the embarkation officer has to get off the helicopter to encourage a group of 14 men aboard (it is his special skill in the scenario).

Air support has not come in for two turns and the Para platoons casualties continue to increase. The Cuban MG platoon sets up in the adjacent tree line near the "camp followers" area of Cassinga and opens fire, again crippling the platoon. They are rewarded for their effort with a round of better late than never rockets from the Buccaneer which takes out two of the trucks and injures one of the MG teams.

The South African Level III Big Man Colonel Jan Breytenbach removes two shock from a South African Para Section and then boards a helicopter. 

As the helicopters lift off, they leave behind 12 dead and 25 men who are forced to surrender to the Cubans. As a result the Cubans are awarded a Major political victory. A minor strategic victory goes to the South Africans from the excessive amount of damage that they inflicted on the Cubans. In the end there wasn't a single Cuban platoon that hadn't taken extensive losses. But this is a hollow achievement. The South Africans were not here to fight the Cubans, only SWAPO, and that goal had been accomplished before this scenario even began. Their only goal here was to leave with as few casualties as possible.

Jon declared it the best game we've ever run. We had a lot of people stopping by to watch the game and three people watched the entire dramatic final hour of the game. My only minor disappointment is that I had my camera on the wrong settings so they turned out a bit grainy. Still it was a very exciting fast moving game that came to a dramatic conclusion at the end, everything I was hoping for.

Mark Kinsey


Right column bring the warehouse under fire with the M-113.

The South Lebanese Army while investigating the report of an arms cache in one of the neighboring villages came under fire prior to withdrawing, Associated Press has reported today from Beirut.

While it has not been confirmed, unidentified members on staff say it was a poor showing for the SLA. No additional comments have been received from official sources.

Now for the PLO view…

It was a great day for the PLO. Two columns of the SLA attempted to enter the village looking for arms and supplies. One column was to approach the village, clear a roadblock and support the second column approaching the village’s stores and warehouses.

Left column under fire while approaching the roadblock.

Trouble started early as the right column moved faster than expected and their M-113 was quickly engaged in a firefight from one of the warehouse buildings. After taking three hits by RPGs the M113 retired to check on the damage to the APC.

This left the four squads to secure the warehouse complex. One squad unfortunately had trouble crossing the road and was brought under fire by a PLO LMG team firing from the roof. A squad was able to take one building but was forced to pull back after the M113 and a third squad pulled back. A fourth squad did reach their objective, but was unable to contact the left column. They also pulled back with the other three squads.

The left column was unable to remove the roadblock as they were under fire. Once they secured the PLO position they received orders to pull back to the start line.

(The PLO leader at this position has a different stand on this as he was holding off a superior force and he only left once his position was untenable. He escaped with his own life and his RPG team and the truck. It was our only truck.)

While causalities were similar, 7 PLO for 8 SLA, the fact that the PLO held the field allowed them to recover arms from the causalities and check on their wounded.

Jon Yuengling

SLA pulling from one of the warehouse buildings.

 LMG team bring the SLA squad under fire.

 The PLO commander at the roadblock returning the truck.


Cold Wars convention 2011:  Mark Kinsey and myself ran two games dealing with Lebanon 1982 and Dr Mercury had two 28mm games covering the conflict as well. All in all the Vista Room in Lancaster was a little bit of Lebanon (in the Middle East that is).

The second fight was “Lebanon 1982 - Clearing the Orange Grove”:  an infantry fight based on a scene in Waltz with Bashir. This was to have the IDF moving through an agricultural area on the coast road. 

This operation was smaller with only a platoon of infantry. Each player had control of a M-113 with three fire teams. 

This operation followed doctrine with the infantry working with the APC. This time the PLO came off for the worse. Their teams put up a good fight, but the combined firepower of the IDF contained any PLO threat. 

Jon Yuengling


Cold Wars convention 2011:  Mark Kinsey and myself ran two games dealing with Lebanon 1982 and Dr Mercury had two 28mm games covering the conflict as well. All in all the Vista Room in Lancaster was a little bit of Lebanon (in the Middle East that is).

The first fight was “Lebanon 1982 - Fight at Ishiya”. This is a village in the Bekaa where the IDF is looking to move north as fast as possible while destroying as my of the PLO infrastructure as possible.

The Battlefield - Image from Doctor Merkury

Unfortunately it didn’t work out that way. The IDF had a platoon of infantry with Magach support.  While they had two perfectly good roads to use, they set up on the table edge and started to move through the rough terrain. Now as a game master I should have place the figures on the road and said you start here. My fault.

The IDF started by approaching a cluster of houses and found a PLO arms cache, but also civilians, militia and a news crew. Now after failing to spot the news crew (even though I had figures on the table) they proceeded to use the machine guns and Magach tanks on the people and buildings getting a clean kill on the entire news crew. 

Things could not get worse for the IDF, well they could and did. For over three turns they continued to pummel the buildings. It took an order from over the radio to get them moving, ever so slowly. In desperation (on the game master’s part) I said something like, “I paid a lot for that latex road and you guys need to use it. 

Once they got on the road they moved towards a market building and encountered a second PLO team with a machine gun. This slowed up the column again and the reinforcements. The IDF received a jeep platoon. 

At this time the Syrians appeared on blinds (we were using a Lardies rules). It was funny that the IDF was not concerned about the new column approaching the village center. The Syrians had two platoons of T55s and a platoon of BTR60s. 

It was only when the command tank was hit by an RPG and received engine damage that the IDF realize they were in trouble. The command tank earlier lost their commander. The Syrian Infantry and lead platoon of T55s fired on the tank and the crew bailed to a building. More on that latter.

The rest of the IDF column made a run for the edge and it looked like they were going to make it, until the PLO moved their one heavy asset, a Charioteer, to stop them. There is something humorous in having a 1950s tank (or tank destroyer) frightening off the IDF. Only by luck was the PLO tank unable to get the last M113 in the column. (In the future I need to write up some PLO specific tank rules. Should make for interesting and comical battles.)

Back to the tank crew. They were holding up in a building being shot at by a platoon on Syrian and a defiant group of PLO. There situation did not look good, so the jeep platoon went in to recover them. Luck was still with the Syrians as they were able to get into a firing position and disabled the jeeps and captured their crews and the crew of the tank. 

This game was a PLO and Syrian victory. I think the IDF commander was lucky to have been an early causality, if not Ariel Sharon would not have been happy with the results. 

Jon Yuengling


7 June 1982, South of Sidon

by Macaulay Connor

Today this reporter came upon the results of a recent and bloody Israeli sweep south on Sidon. At least three IDF soldiers were killed in an ambush.

On this the second day of the Israeli Operation Peace for Galilee Israeli infantry were sweeping north through an orange grove near this unnamed market town. While there were reports of Fatah militia in the area, numbers were unknown.

Two roads bordered the grove and heads north towards the market. The IDF appears to have been following these parallel roads when an ambush occurred causing the loss of three soldiers who were on an M113.

While we cannot approach the village at this time I can say we can hear heavy weapons coming from the village itself.

While the IDF is limiting their comments on this engagement, this reported was able to find out from resident that Fatah did take some losses.

After Action Report

It has been to long since Mark and I play IABSM and it showed. We missed adding in a few of the IDF cards and took a couple of actions before we got back our sea legs.

Unfortunately this effected Mark’s IDF more than me. He ended up get a M113 to far in front of the column and was hit by RPG7s. Between this and AK47 fire the M113 came out the worse for ware.

Once Mark was able to get his two infantry sections on the table he was able to clean out the militias with limited loses. His superior Big Men allowed the IDF to move faster than my running Fatah troops.

The game came to an end when the IDF was able to get to the village and than faced a HMG. Over all I (as the PLO player) feel that the PLO won as we destroyed (ok immobilized) an M113 and killed 4 IDF soldiers, three of which were in the M113. The PLO lost only 12 men (out of 18 active men).

Jon Yuengling