

This scenario is in the Welsh Guards supplement pack and represents their action defending the slopes of Mont Lambert between the village of the same name and St Martin Boulogne following their rapid deployment in under 24 hours from the south-east of England by troopship to the strickened port, where they intended to offer a rearguard action to French and British troops who were retreating back to the coastal ports of Boulogne and Dunkirk.
Upon arrival the Welsh Guards deployed with their colleagues the Irish Guards and some troops from the ACPE units in a semicircle around the port of Boulogne. The Welsh Guards took up the eastern part of the perimeter with the 3rd Coy taking up positions on the St. Martin road.
Extract from 2 Bttn Welsh Guards diary
Date: 0730hrs 23 May 1940
Whilst the Commanding Officer was making a detailed tour of the line enemy tanks attacked No. 3 Coy at MONT LAMBERT, setting fire to the rd block which was being inspected by a patrol under 2/Lieut. A. MacN. PERRINS, most of which suffered casualties. The tanks fired at the A/T guns sited near 3 Coy HQ. These guns either put the tanks out of action or at any rate made them withdraw after heavy fighting. Lateral enemy Arty bombardment began and lasted without pause until midday, registering at first on the quay and the town of BOULOGNE and later lifting backwards (SOUTH) until it registered accurately on the railway running through the Bn position, the SAMER road, and particularly on 2 Coy.
At about 0900hrs under cover of this close Arty bombardment and Mortar fire, a strong enemy attack with Tanks and A.F.V.s was launched against our right (2 Coy) and centre (3 Coy). The front was held intact until 11a.m., a slight readjustment to 2 Coy’s position having been made, one Pl and Coy HQ being withdrawn slightly to the left and rear. The Arty registration on the railway had made it untenable and one Pl suffered heavy casualties from shell fire. Meanwhile 3 Coy was heavily engaged and suffered casualties. Capt. W.H. CARTER being mortally wounded at about 1030hrs.


The Scenario
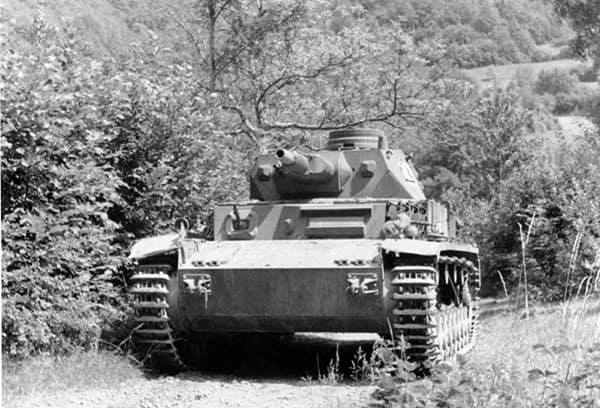
The scenario sees the Welsh Guards having arrived at their positions and attempted to dig in to the hard ground. They succeeded only in digging scrapes for cover but were supported by brigade anti-tank units armed with Hotchkiss 25 mm anti-tank guns known as 'one pounders'. In the scenario the guards have 3 of these for their assistance. They are under attack from advance elements of the 1st Panzer Division in the form of platoons of Mark II and Mark III panzers.

These are French Hotchkiss 25mm Anti tank guns. Bought by the British army and affectionately known as ‘One pounders’ these little guns packed a punch against Blitzkreig German Tanks.
These are 1/72 scale metal castings from Keiven at Lancer Miniatures. Painted in Tamiya and Vallejo paints, flock based on MDF and festooned in tufts from The Warpainter.

These 1/72 scale kits by S Models, Pz Kpfw II Ausf B, are excellent wargaming models. Painted in Tamiya and Vallejo paints, on a Warbases MDF base and textured using Jarvis cork pieces and sand, dry brushed and decorated with tufts from The Warpainter (via EBay)
The Game
We initially played this game on the Friday night but experienced a series of very strange extremes with both the order the cards were dealt and the dice scores being rolled by players. This resulted in a magnanimous British victory with all of the German tanks being destroyed by the 25 mm anti-tank guns. In addition the Germans lost all of their support medium machine gun teams, including actual MMGs being destroyed by roles of '17' from small arms fire from the British infantry platoon in the sand quarry.


Three of us decided to play this game again a couple of days afterwards having had time for us to do some further research and swot up on as many AARs and accounts of the actual battle as possible.
In this game Ralph play the Germans and Martin played the British, whilst Yours Truly was umpire and tea masher.
In the second game the cards were a little more generous in the order in which they were drawn but again the opportunity for the German player to identify Welsh Guards positions as a result of their previous evening's poor fire discipline provided Ralph with significant intelligence about the Guard's deployment and Martin had to uncover half the Blinds he had placed on the table.
This can be a particularly difficult scenario ruling if an extreme is obtained, however on both games we managed to get about 50% of the Blinds exposed and in fairness that was reasonable.
The disclosure showed an anti-tank gun outside the crossroads and a British platoon, 9 platoon, 'C' Coy, Welsh Guards taking up additional cover behind the low cliff of the sand quarry close to the crossroads. That platoon was accompanied by a Boys anti-tank rifle, but not the usual 2 inch mortar.
The crossroads showing the first anti-tank gun to be exposed and the platoon in the sand quarry adjacent to the monument
Ralph proceeded to bring on his Germans on Blinds and was initially a little reluctant to engage the targets already exposed, choosing instead to rush for the Boulogne end of the table. His objective was to secure the crossroads and get 5 tanks of far edge.
His machine gun company was quickly observed, along with another Panzer II platoon and the former quickly became the target of concentrated small arms fire from the British infantry platoon within the quarry. The Panzers were immediately also under fire from the one pounder anti-tank gun at the crossroads along with another one nearby, which exposed itself coming off its Blind. The Panzer platoon suffered several hits and a series of minor damages in the form of engine mobility problems and losses of actions for the following activation but importantly only one tank was knocked out.
The Germans are allowed a forward observation officer for their offboard mortars in the form of a Storsch light aircraft and Ralph was quick to have it over the table and searching for targets. That it did in finding the anti-tank gun at the side of the crossroads, whereupon it called in support from the offboard mortar battery.
Ralph brought on more reserves in the form of a second Panzer II platoon and it soon started to make headway down the slopes of Mont Lambert, veering somewhat northwards away from the activity in the sand quarry and the crossroads but very quickly came under fire from a third anti-tank gun back in the isolated farmhouses on the St Martin Road.
The third anti-tank gun along with its accompanying Big Man attempting to create havoc to the advancing panzers
More minor hits were achieved but nothing dramatic and the Panzers continue to roll on. The mortars now zeroed in on the anti-tank gun and casualties were suffered. Martin continued to pour fire into the advancing Panzers as a third platoon, this time of Mark III tanks entered the fray.
More mortar fire ensued with the motorman reducing their distance from the target each turn. A rifleman in the quarry notched up successes against the German machine-gun positions on the hill and drove one off quickly. The Germans were in danger of losing whatever support they had for the tanks and it looked like another British victory may be on the cards. However they look changed dramatically and the German Panzers started to take advantage of the pinning potential of the autocannons on their Mk II tanks, quickly switching targets and eventually pinning all three of their tormentors.
The airborne spotter turned to richer targets and assisted the mortars in zeroing in on the Welsh Guards in the sand quarry where casualties quickly started to build.
The German advance continued with more and more firepower quickly pinning the anti-tank guns early on after each tea break card respite. The anti-tank gun close to the crossroads despite being aided by a Big Man removing Shock regularly eventually succumbed and German concentration of fire move to the one next to the quarry and that was quickly dealt with. The gunners abandoned the gun despite the efforts of another Big Man and were mown down as they ran away towards farm buildings. That left just the third remaining 25 mm gun sat back in the farm buildings on the St Martin Road as a single main deterrent to the German advance.
The guards start to withdraw from sand quarry area as all appears to be lost
The second Guards platoon was activated but only offered elements of firepower in the final destruction of the remaining German machine guns. But by then it was getting too late with the Panzers rapidly advancing down upon the crossroads.
The Welsh Guards in the sand quarry succeeded in shooting down the airborne observer but found it necessary to withdraw from the quarry as mortar fire continue to zero in on them. They also desperately tried to get their anti-tank rifle across to the road and hiding the hedge is close to the crossroads, but as they did so they too were mown down by successive rounds of auto cannon fire and high explosive shells from the Panzer Mark III tanks.
The Germans were now effectively free to bypass the crossroads, with the British defence all but eliminated. The remaining Welsh Guards electing to withdraw back to Boulogne and make a stand in a similar manner to that of their historic predecessors.
Panzers on the advance
All in all it was a better game than on the Friday evening and went very much the way of the real thing. We now need to move on to play part two of the game which is the defence of the station on the dockside in Boulogne itself.
Tim Whitworth
Pictures of Key Terrain Features

The Crossroads


