

Another lockdown game of I Ain’t Been Shot, Mum against Daughter #1’s boyfriend, K, trapped with us for the duration.
This time we would be returning to Poland in 1939, using scenario #37 from the second September War scenario pack: Minsk-Mazowiecki. The action takes place on 13th September as Polish cavalry under General Wladyslaw Anders attempt to break through elements of the German 3rd Army as they march on Modlin.
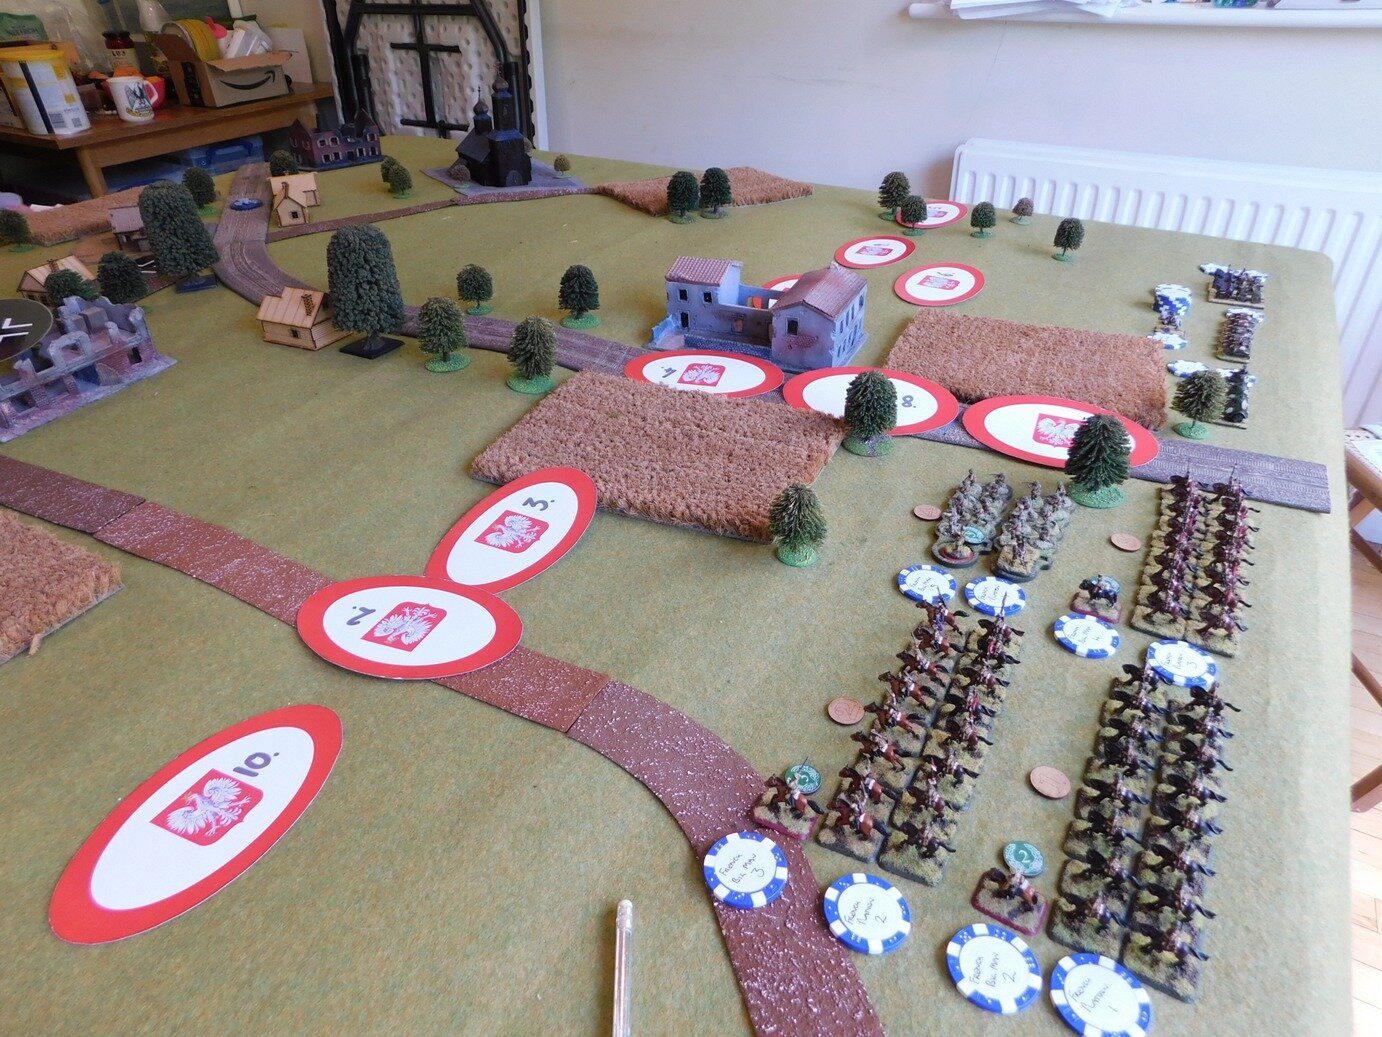
The Set Up
K volunteered to play the defending Germans, which I appreciated as I had no wish to field a force of SS Verfungstruppe.
Two interesting thoughts crossed my mind at this point: firstly, am I a hypocrite as I’ll quite happily play Assyrians or Romans, but don’t like playing SS; and, secondly, interesting how the fact his troops were SS had literally no effect on K at all: he had no comprehension of what that represented. I can feel the words “generation gap” marching towards this conversation faster than the Rifles towards Corunna!
Musings on the quality of modern education aside, the Germans would field a couple of small infantry platoons defending a village, and be waiting for a platoon of Panzers to appear as reinforcements.

View from the Polish entry point. Figures are not technically on table yet, just set up ready to go.
The Poles would field three mounted and one dismounted two-squad platoons of cavalry backed up by two taczankas, a platoon of armoured cars, and a platoon of tankettes.
They needed to have taken and held either on of two objective points in the village by a certain number of appearances of the Turn Card.
An impressive sight…but a pitfall for the unwary!
Now I have played Polish cavalry before, and although they look magnificent (and take up an awful lot of room on the table) the one thing to remember is not to charge anyone under any circumstances. No ifs, no buts: just don’t do it, it always goes badly.
With that settled in my mind, I prepared to do battle and deployed.
Lots of Polish Blinds!
The Game
I knew that time was of the essence, so deployed as far forward as I could, and then advanced my Blinds forward quickly as well.
One of my mounted platoons was quickly spotted, and came under fire from a German platoon ocated in a large building on the left hand side of the field. Their first volley emptied four saddles: an inauspicious beginning.
Painful first encounter with the German defenders
I obviously needed to get some firepower down onto them as quickly as possible, so my armoured car platoon deployed and sped down the road, backed up by the tankettes. By using the central road, I could bring them to bear on either side of the battlefield as necessary.
Forward the armoured cars!
At the same time, I’d also spotted some Germans just in front of the church, so sent the taczankas and dismounted cavalry forward to deal with them: the plan being to then infiltrate the village from the rear right flank. A bit of pin and assault!
Dismounted cavalry under Blind, top right
Taczankas behind the trees
At that point, the German Panzers appeared at the back of the table. As I had no proper anti-tank capacity, this was about to get interesting!
At this stage of the war, Panzer IIs are pretty useful tanks!
Back on the left, my attempts to dislodge the German infantry in the building were proving not very successful and pretty painful in terms of cavalrymen lost. Oh for some mortars!
Go on: poke your lance through the window at them!
I Thought You Said…
Things were, however, about to get very interesting on the other side of the battlefield.
My dismounted platoon had crawled forward to the edge of the corn, and Pinned the nearest German squad in front of the church whilst they were distracted by the large numbers of mounted cavalry heading towards them.
Why is he on his ‘phone in all the pictures? Generation gap again!"
The chip out of the bag was the Polish bonus chip “Charge!”. Now I had promised myself that none of my cavalry would be doing any charging…but these chaps were dismounted, so that didn’t really count.
Out of the cornfield they poured, and the cowardly SS troops in front of them just fled.
Unimpressed!
The chips were really with me, and next turn my chaps got to move before the Germans. One squad chased the fleeing SS squad off the table, the other blew the other German squad away with a bit of close range fire.
One position was now cleared of enemy, although taking out his FOO, in the church tower, did cost me a bit of time and a couple of cavalrymen.
Meanwhile, on the road, the German Panzers had split their efforts. Two went to help the other German position, two engaged my armoured cars. As I said earlier, the Panzer II’s 20mm cannon is a powerful tool at this stage of the war, and the crew of one of my WZ34s was soon forced to bail: their vehicle having been turned into a colander!
Run away!
At the same time as this was happening, the German infantry in the building on the left had started to waver. One squad moved out of the back of the building onto the road where the Panzer I was trundling forward.
I wandered around the table to have a look at this…
Horse, check. Lance, check. Enemy in sight, check.
I knew I shouldn’t charge the Germans on the road,…but there were the same number of them as I had but they had seven points of Shock. And these are Polish cavalry for God’s sake!
Glorious!
It was glorious!
The enemy were mown down and evaporated from the table. Okay, so I lost a few men, including the cavalry platoon commander, but I had now wiped out all the enemy infantry.
Meanwhile, all the troops I’d had near the church on the other side of the battlefield, including an anti-tank rifle team, had been creeping round towards the flank and rear of the German tanks.
The German Company Commander was also in the area: he’d been with the FOO in the church tower but had avoided death or capture and was busy laying low, effectively surrounded by Polish troops.
At that moment, the German off-table artillery (a couple of 105mm guns) declared themselves ready for action and, without a moment’s hesitation, SS-Hauptsturmfuhrer Eins called their fire down onto just about his own position.
The deviation dice were called for and rolled: direct hit:
German Big Man is in front of the taczanka
Superb shelling!
This was a real pain, and did me lots of Great Shot damage. My troops were forced to abandon their advance, and flee from under the barrage.
Endgame
This was, however, merely a hiccup on the footpath to victory!
Although I had to be careful of his artillery, I had loads of tankettes and armoured cars and taczankas that I could deploy against his Panzers.
One by one they succumbed, and my men were eventually able to saunter over and capture the objectives.
Victory to the Poles!
Gone to Ground meaning Bailed: I couldn’t find my tank crew stands!
Riddled with bullets!
Aftermath
So that had been another cracking game of I Ain’t Been Shot, Mum.
Although the day was mine, I had lost about a platoon’s worth of cavalry or 25% of my force. I’d been a bit lucky, as well: the Germans in front of the church never really got a clean shot off at my advancing troops…and that could have been quite nasty.
More proof of the pudding that IABSM rewards aggression, certainly when attacking. I’d kept the pressure on throughout, and never really given any of the enemy time to get settled.
Postscript
I wasn’t going to mention it, but I did end up charging a German tank with the remains of the cavalry that cleared the German infantry off the road.
No damage to the tank, five dead cavalrymen.
Don’t charge with your cavalry!