

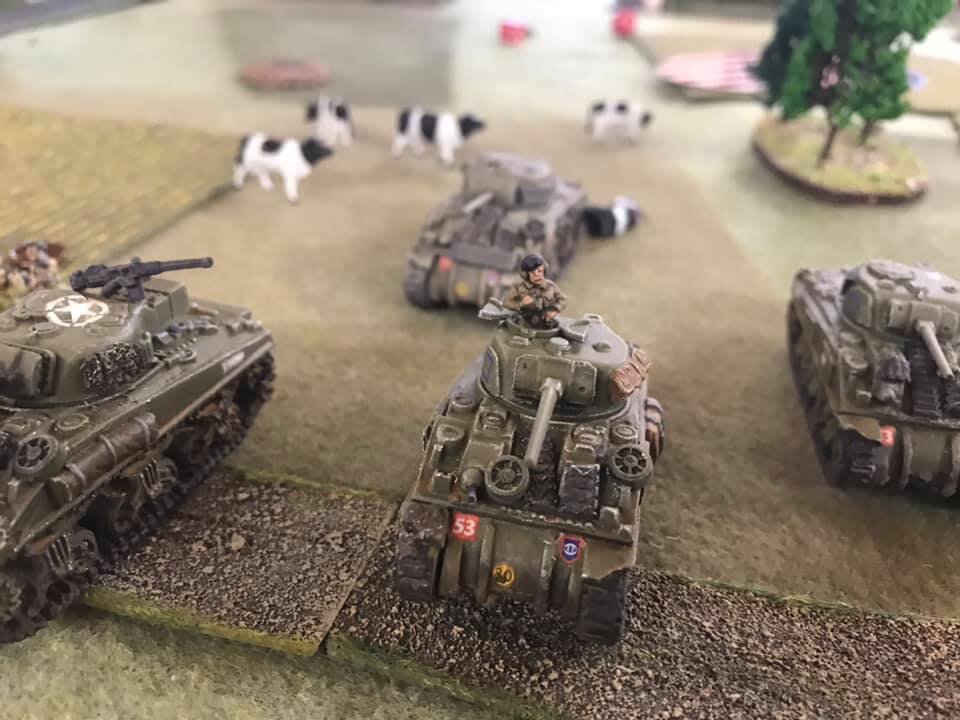
Some pictures from a recent game of I Ain’t Been Shot, Mum by Joe McGinn and Tim Howard.


Friend Dave and company have been playing a mini I Ain;t Been Shot, Mum campaign, Chasseur, and invited me to take part in game three. The campaign is set during the invasion of France in May/June 1940, and I would play a column of German Panzers as it motors towards the Seine. Here are the game briefings:
The Allies (British & French)
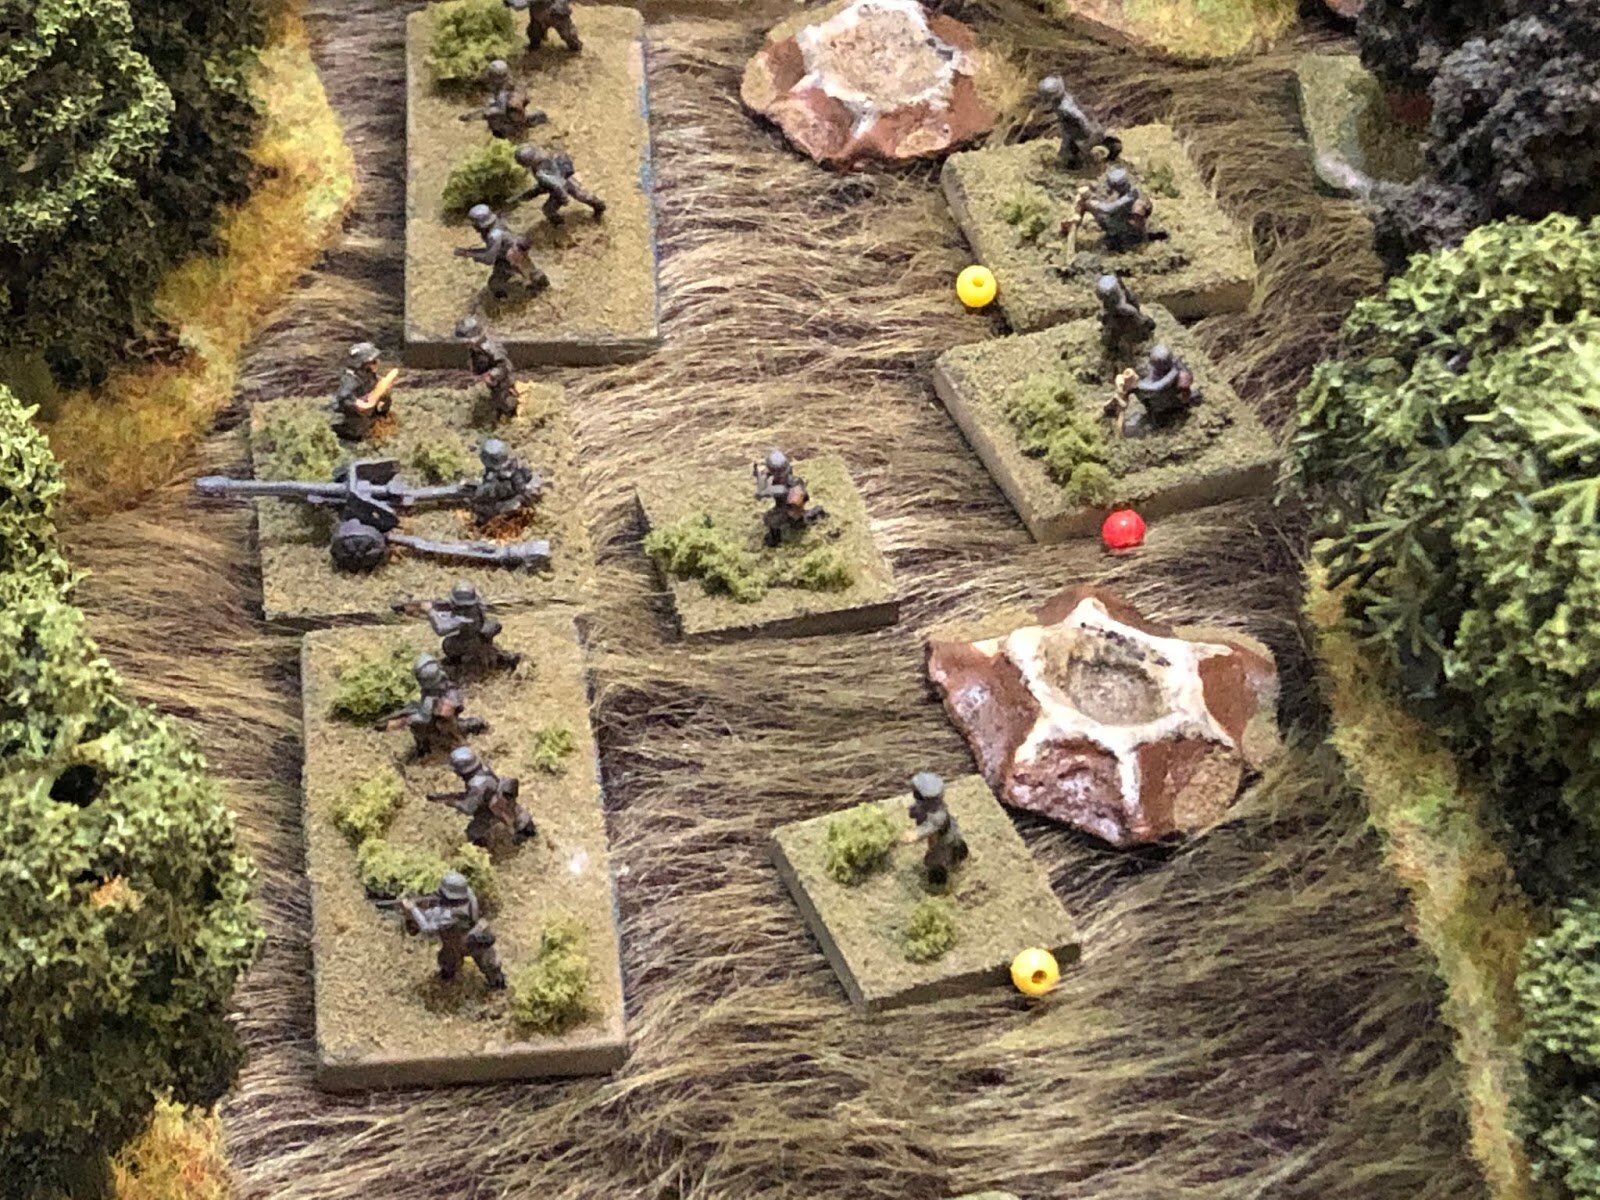
Following the splendid showing yesterday (didn’t those Panzers burn well!) your boys are now in the tow of Hallencourt together with a small force of Frenchies who also encountered the Hun two days ago. A shame the rest of the 7th Argylls haven’t turned up…in fact none of the 51st have now that you think about it. Hmm…
Your job today is to stop the enemy here and to prevent him from reaching the Seine bridges just to the south of the town - or at least to delay him whilst a covering force is put in place. The men are in good spirits, the French tanks are supporting you and you have defensive options. Rather than four weak sections, you have reorganised the platoon into three full-strength sections.
Your first task, though, is to agree dispositions with the French so as to cover all possible routes through or round the town. The only problem being that apart from the tans, all the French seem to have disappeared just at the moment. Ah well, better just deploy the chaps and get on with it.
Company HQ
Big Man A: Captain Brember (Level III)
Big Man B: Sergeant Gray (Level II)
Two Vickers MMG teams (5 men each)
One Boys Anti-Tank Rifle Team (2 men)
One Light Mortar team (2 men)
Two trucks
1st Platoon
Big Man 1: Lieutenant Baxter (Level III)
Big Man 2: Sergeant Mackay (Level II)
Three sections of 8 men each
One Boys Anti-Tank Rifle Team (2 men)
One Light Mortar team (2 men)
Three trucks
Support Platoon
Big Man 3: Sergeant Dalgleish (Level II)
Two 2-pdr Anti-Tank Guns (5 crew each), two carriers as tows
Carrier Platoon
Big Man 4: Sergeant Law (Level II)
Three Carriers: two with Bren LMG, one with Anti-Tank Rifle, 12 men in total
French Support
Big Man 5: Lieutenant Blanc
One Somua S-35
Three Renault R-35/40
Off-Table Support from a battery of three 25 pdr guns with pre-registered targets
Bonus Cards: Rally, AT Bonus, MMG Bonus, Dynamic Commander
Although the British troops had three Actions, the French tanks had only two Actions (and therefore two morale) and could not move and fire in the same activation.
The Germans
What a glorious morning! It's just after dawn on 7th June 1940, and at last your Panzers are on the move again. After the easy successes in the north, with the British running for their lives at Dunkirk, the final attack on the remains of the French army is about to begin.
You (Major Beckenbauer) are the tip of the advance (the schwerpunkt!) as 7th Panzer Division rolls forward again. You have elements of the 25th Panzer Regiment, a detachment of engineers, and are ordered to head for the river Seine with all haste, and if possible to seize a bridge there. Once taken, your orders are to make the bridge safe and hold until the rest of the Division catches up or until Rommel thinks of the next lightening move.
After crossing the Somme easily on the 5th June, you have bypassed the major French strongpoints by going cross country, and have been joined by your lorried infantry of the 7th Rifle Brigade. Now the little town of Hallencourt can be taken or bypassed and after that you'll be in open country towards Rouen and the Seine.
So, here you are on the outskirts of Hallencourt, a town you need to pass through – or go round – to reach the Seine bridges which are your objectives. Your recon platoon has drawn you the attached map, a bit on the thin side but adequate! It would seem you have a choice of a run down the main road through the town, or going round it. The report tells you that enemy troops have been seen moving within the town. You have met both French & British in the last few days, so this could be either. They also report the ground towards the river looked very green (soft?), but could not get close enough to check.
Your Panzers are a little battered after yesterday's encounter with the British, although one of the Panzer II's has been repaired and is back with you. The recon platoon is now nearly back to full strength, but you are especially pleased that Regiment has sent up a support platoon of StuG with a Panzerjaeger attached. This should give you the artillery support you desperately needed yesterday. However, you should not attempt to subdue or take the whole town – the mission is to capture that bridge. The Luftwaffe have promised support as usual.........
Vorwaerts!
HQ Platoon
Big Man A: Major Beckenbauer (Level IV) in Kfz 13
Big Man B: Leutnant Heller (Level II)
Two MMG teams (5 men each), each in a Kfz 70
One squad of 8 pioneers in SdKfz 251
One FOO in Kfz 14
1st (Panzer) Platoon
Big Man 1: Hauptmann Heldt (Level III)
Three Panzer IIC
One Panzer 38(t)
2nd (Panzer) Platoon
Big Man 2: Leutnant Seeler (Level III)
Two Panzer IIIE
One Panzer IVD
Two Panzer 38(t)
3rd (Grenadier) Platoon
Big Man 3: Hauptmann Weber (Level III)
Big Man 4: Ofw Schnellinger (Level I)
Four infantry squads (8 men each)
One Anti-Tank Rifle Team (2 men)
One Light Mortar team (2 men)
Two LMG teams (2 men each)
Four Opel Blitz trucks
4th (Artillery) Platoon
Big Man 5: Leutnant Grabowski (Level II)
Two StuG IIIA
One Panzerjaeger I
5th (Recon) Platoon
Big Man 6: Leutnant Haller (Level II)
One Panzer IB
Two SdKfz 222:
Limited Off-Table Support from a battery of two 81mm mortars
Bonus Cards: Rally, Rapid Deployment, Blitzkrieg, Tank Killer (Panzerjaeger only)
German infantry had three Actions; German AFVs had three Actions and a morale of three.
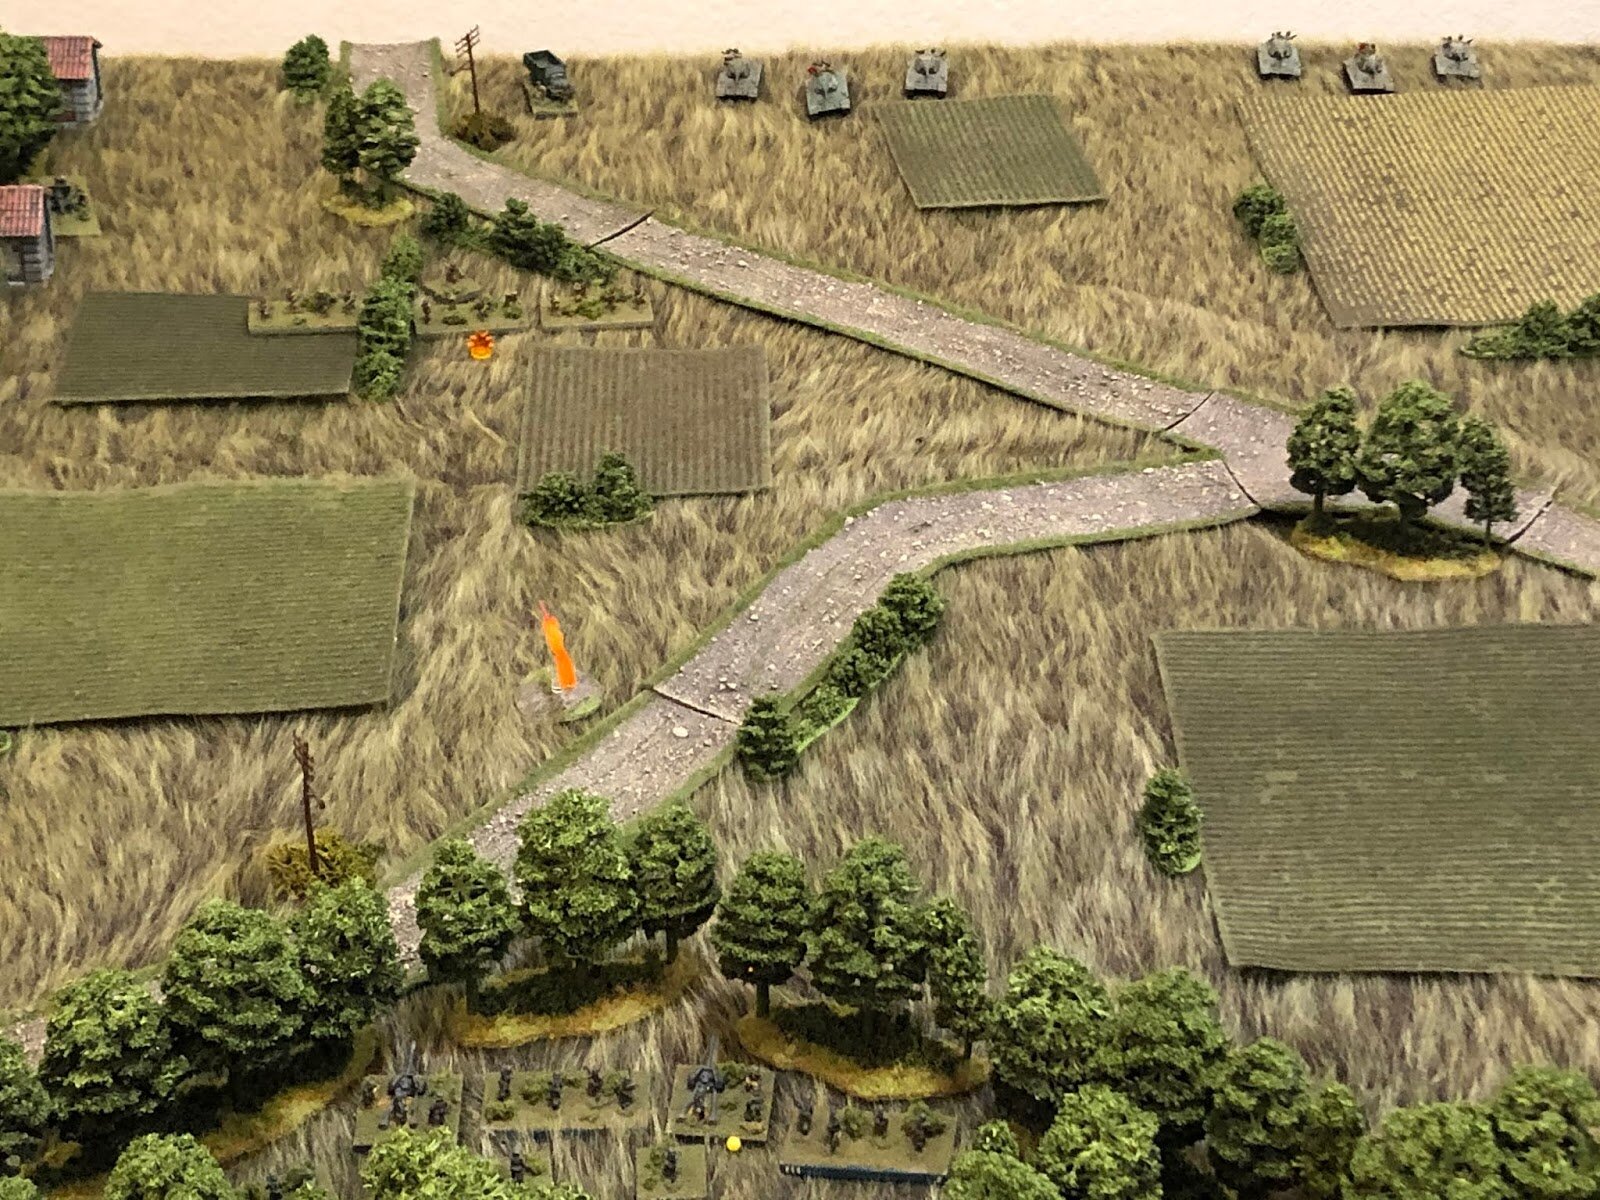
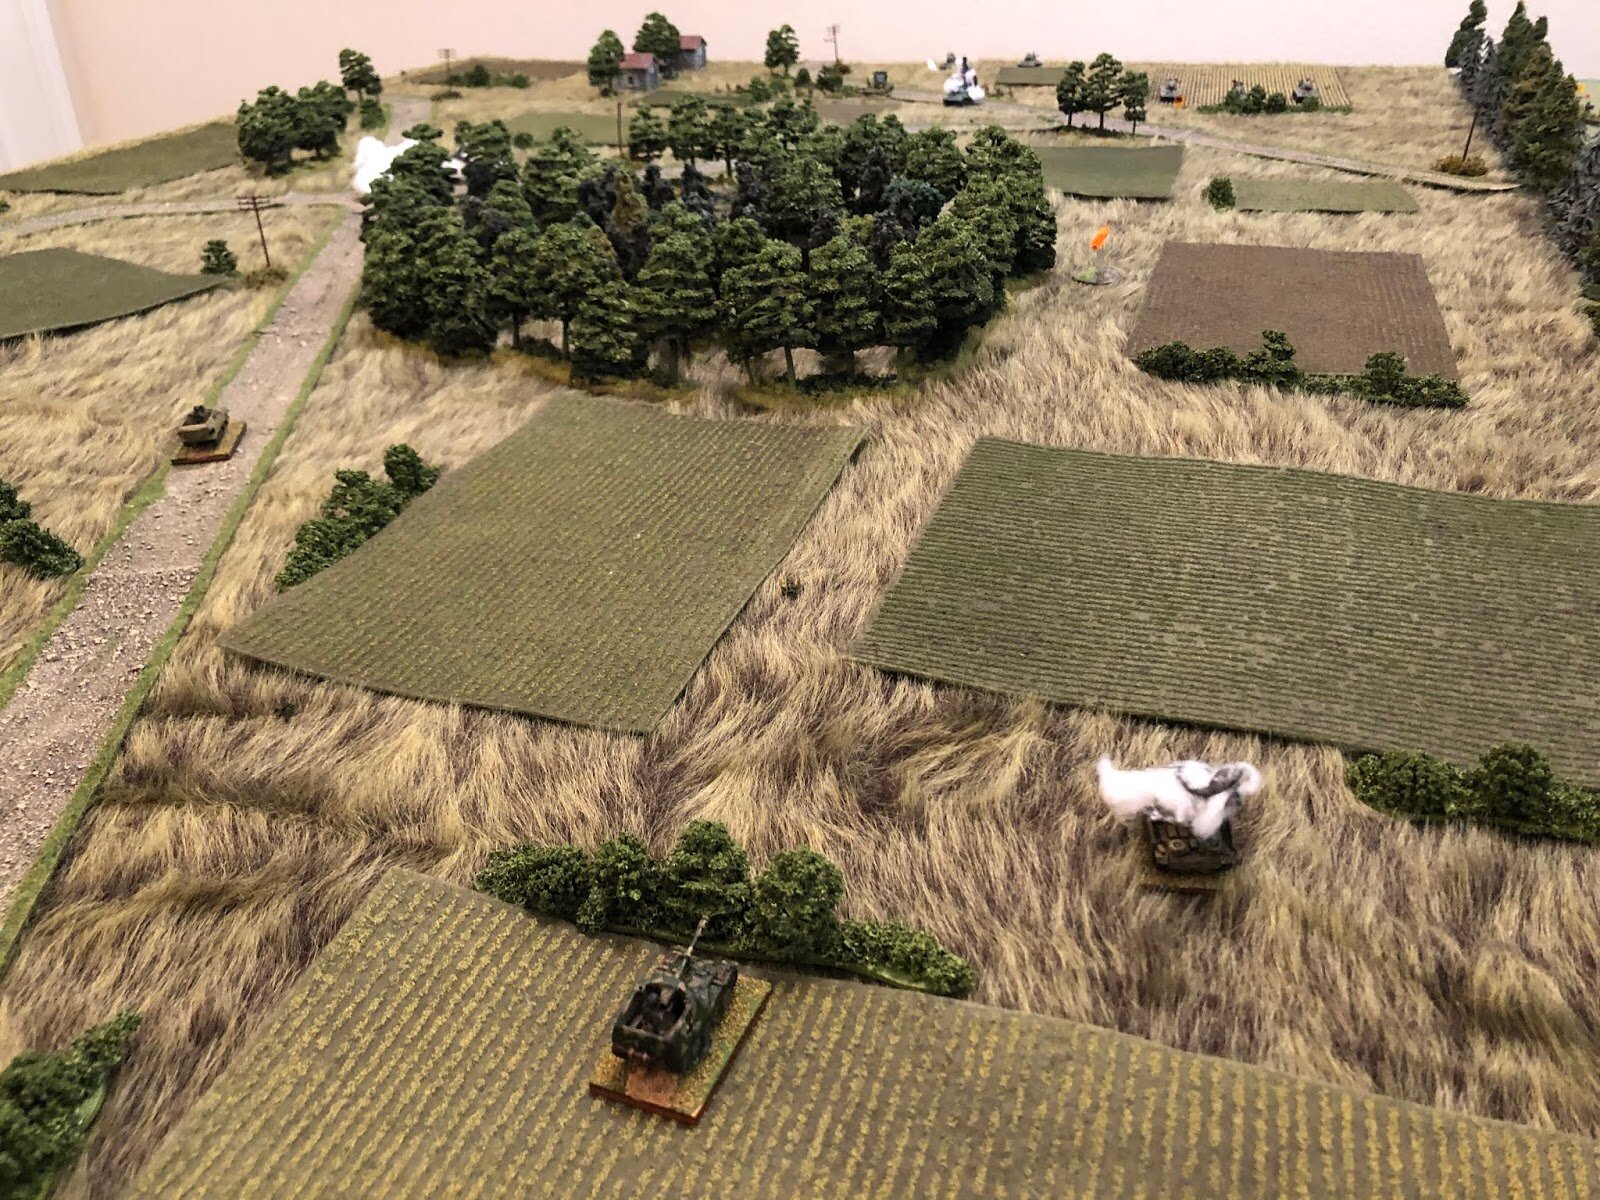
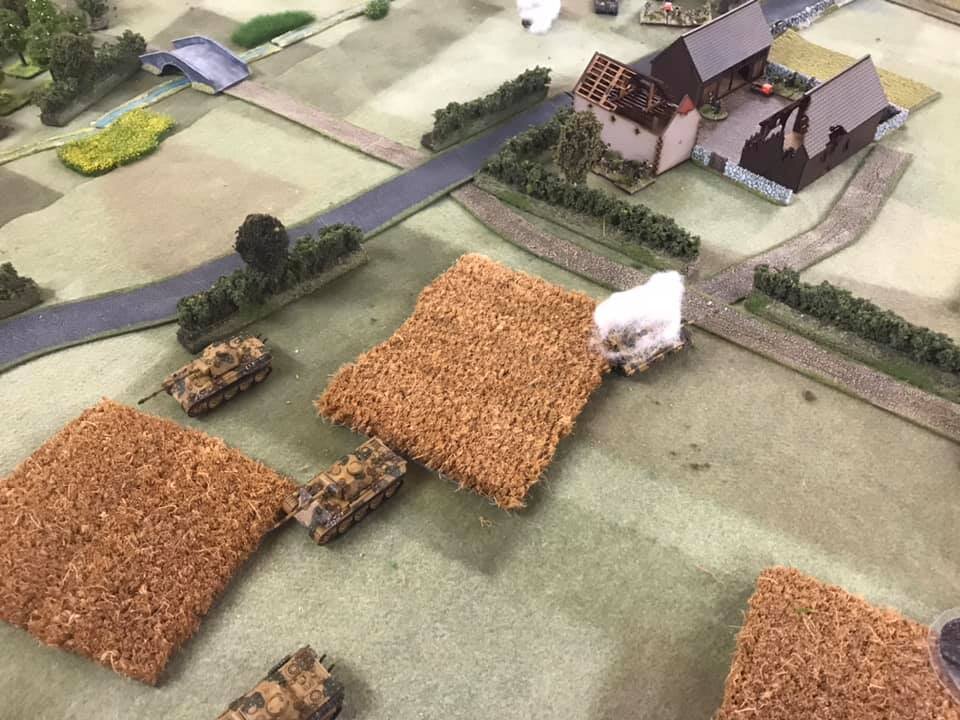
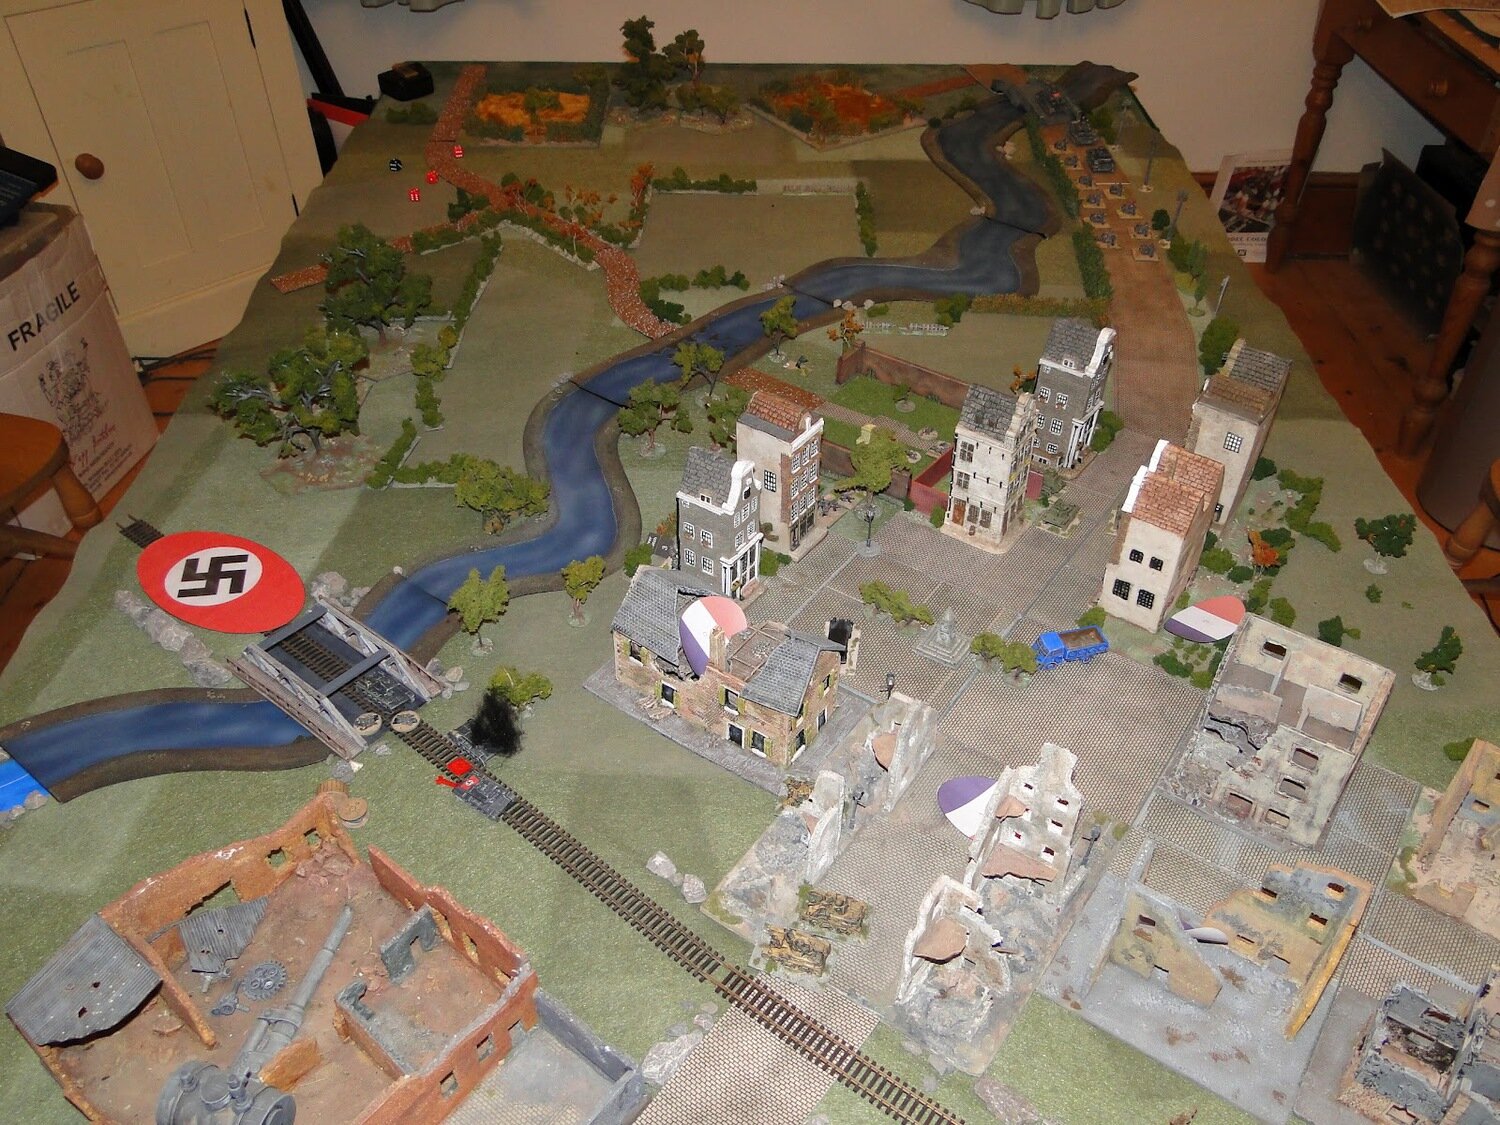
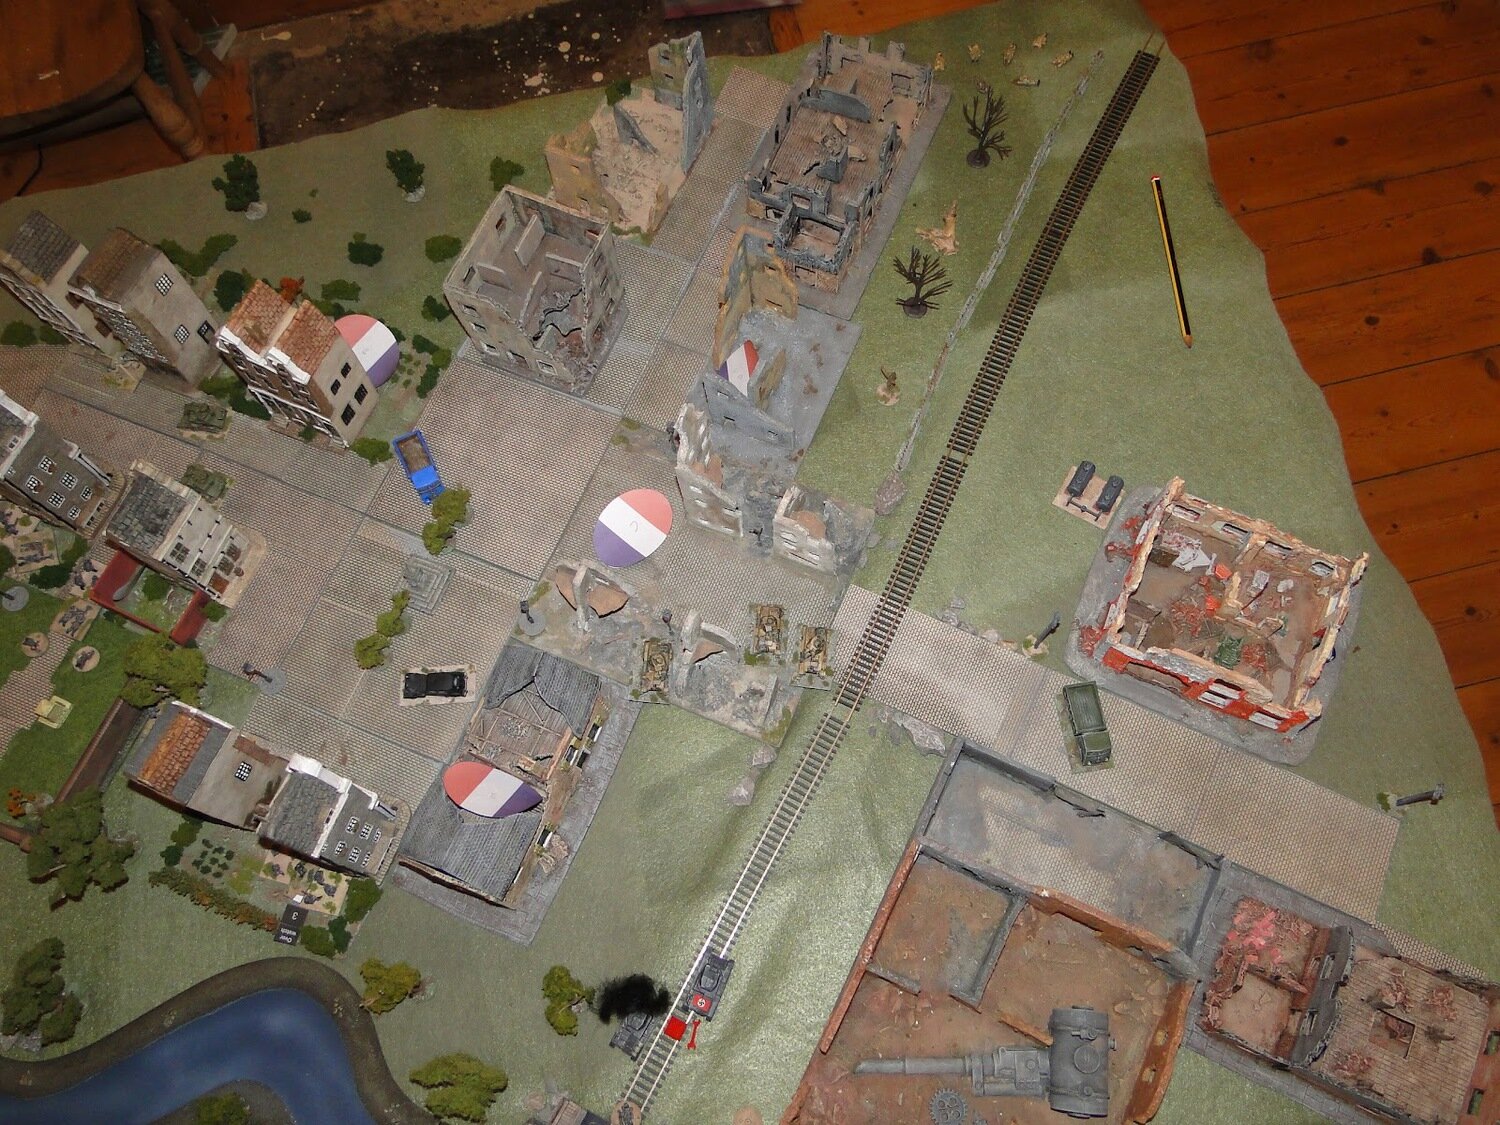
The Battlefield
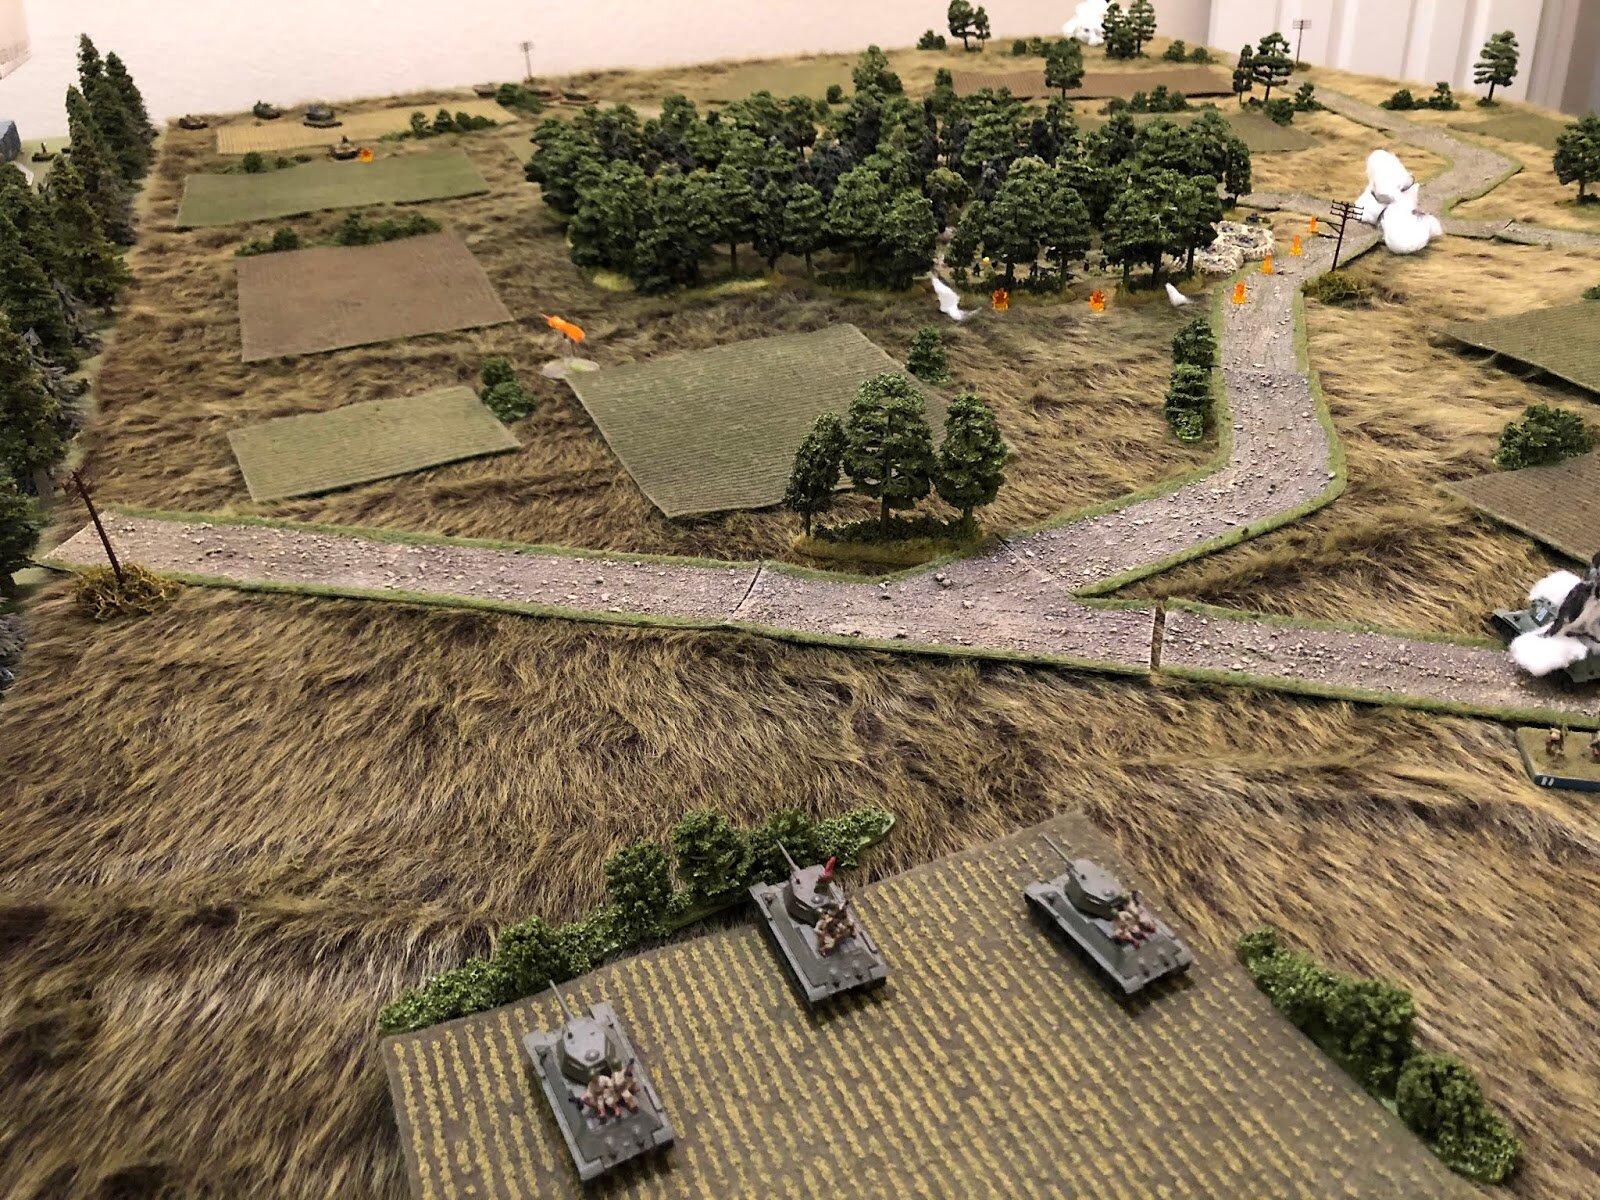
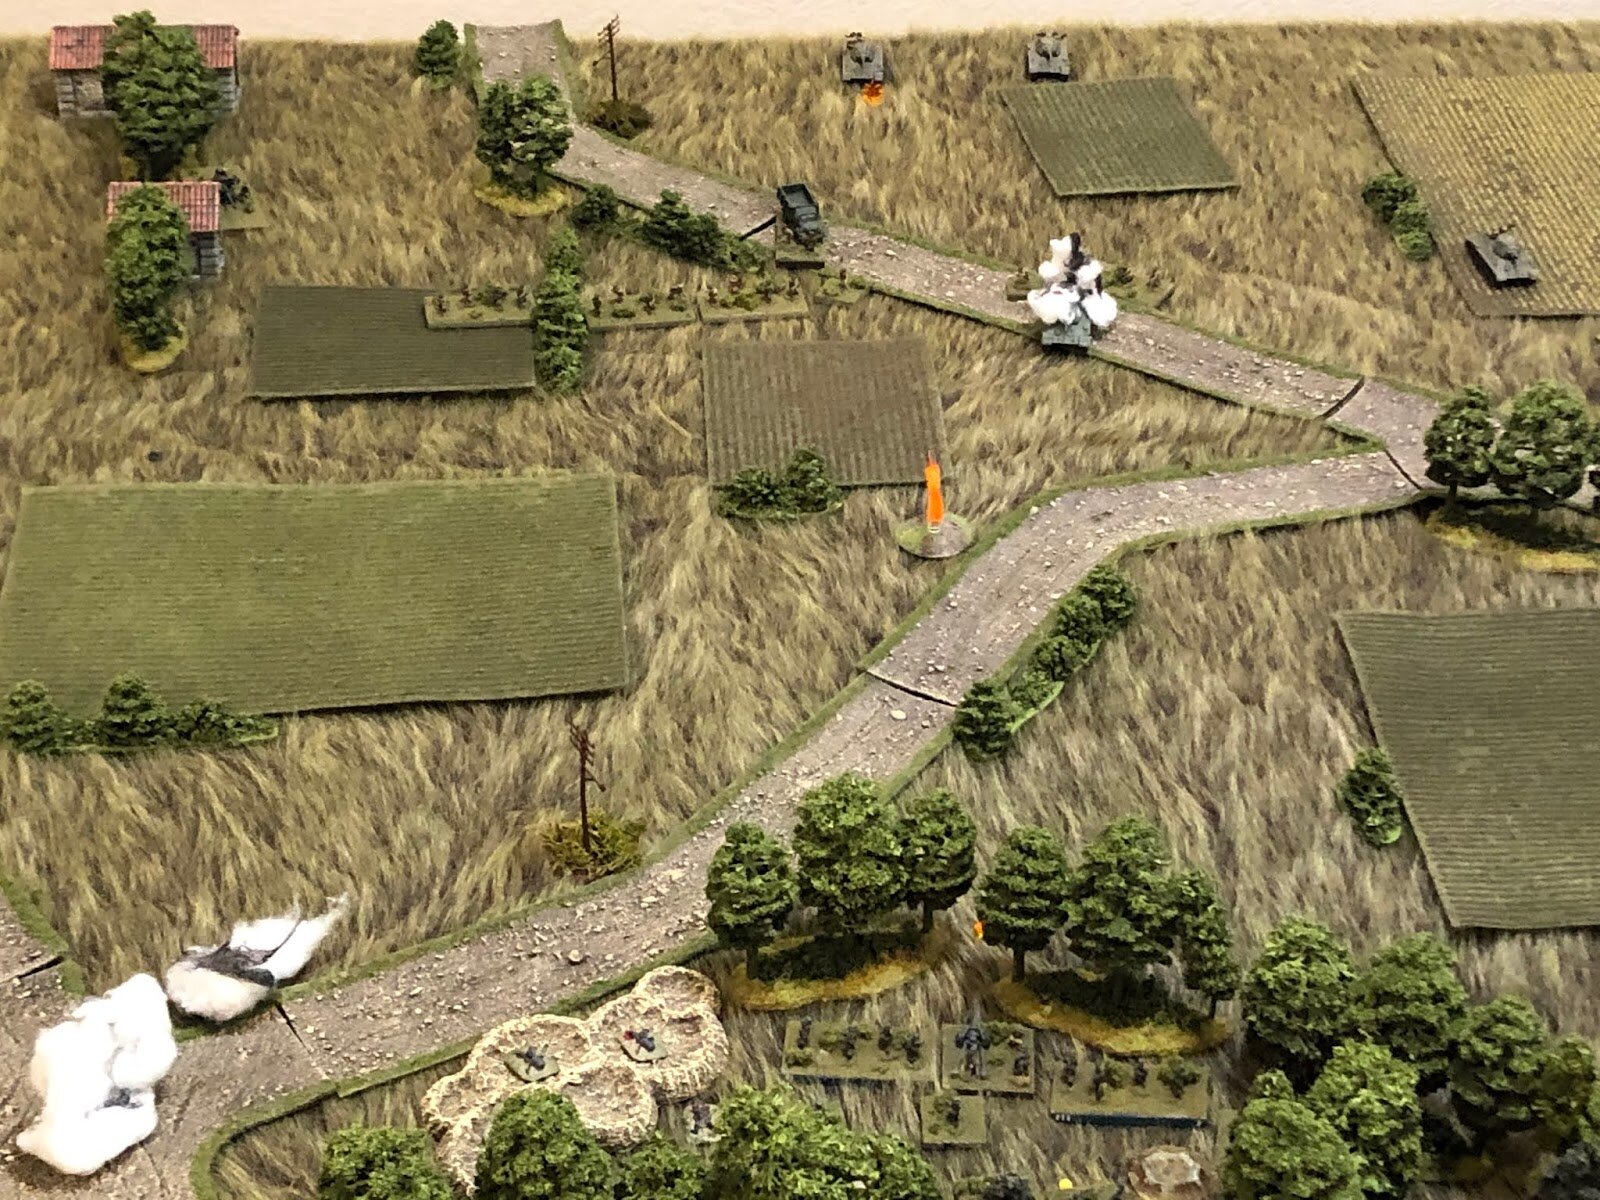
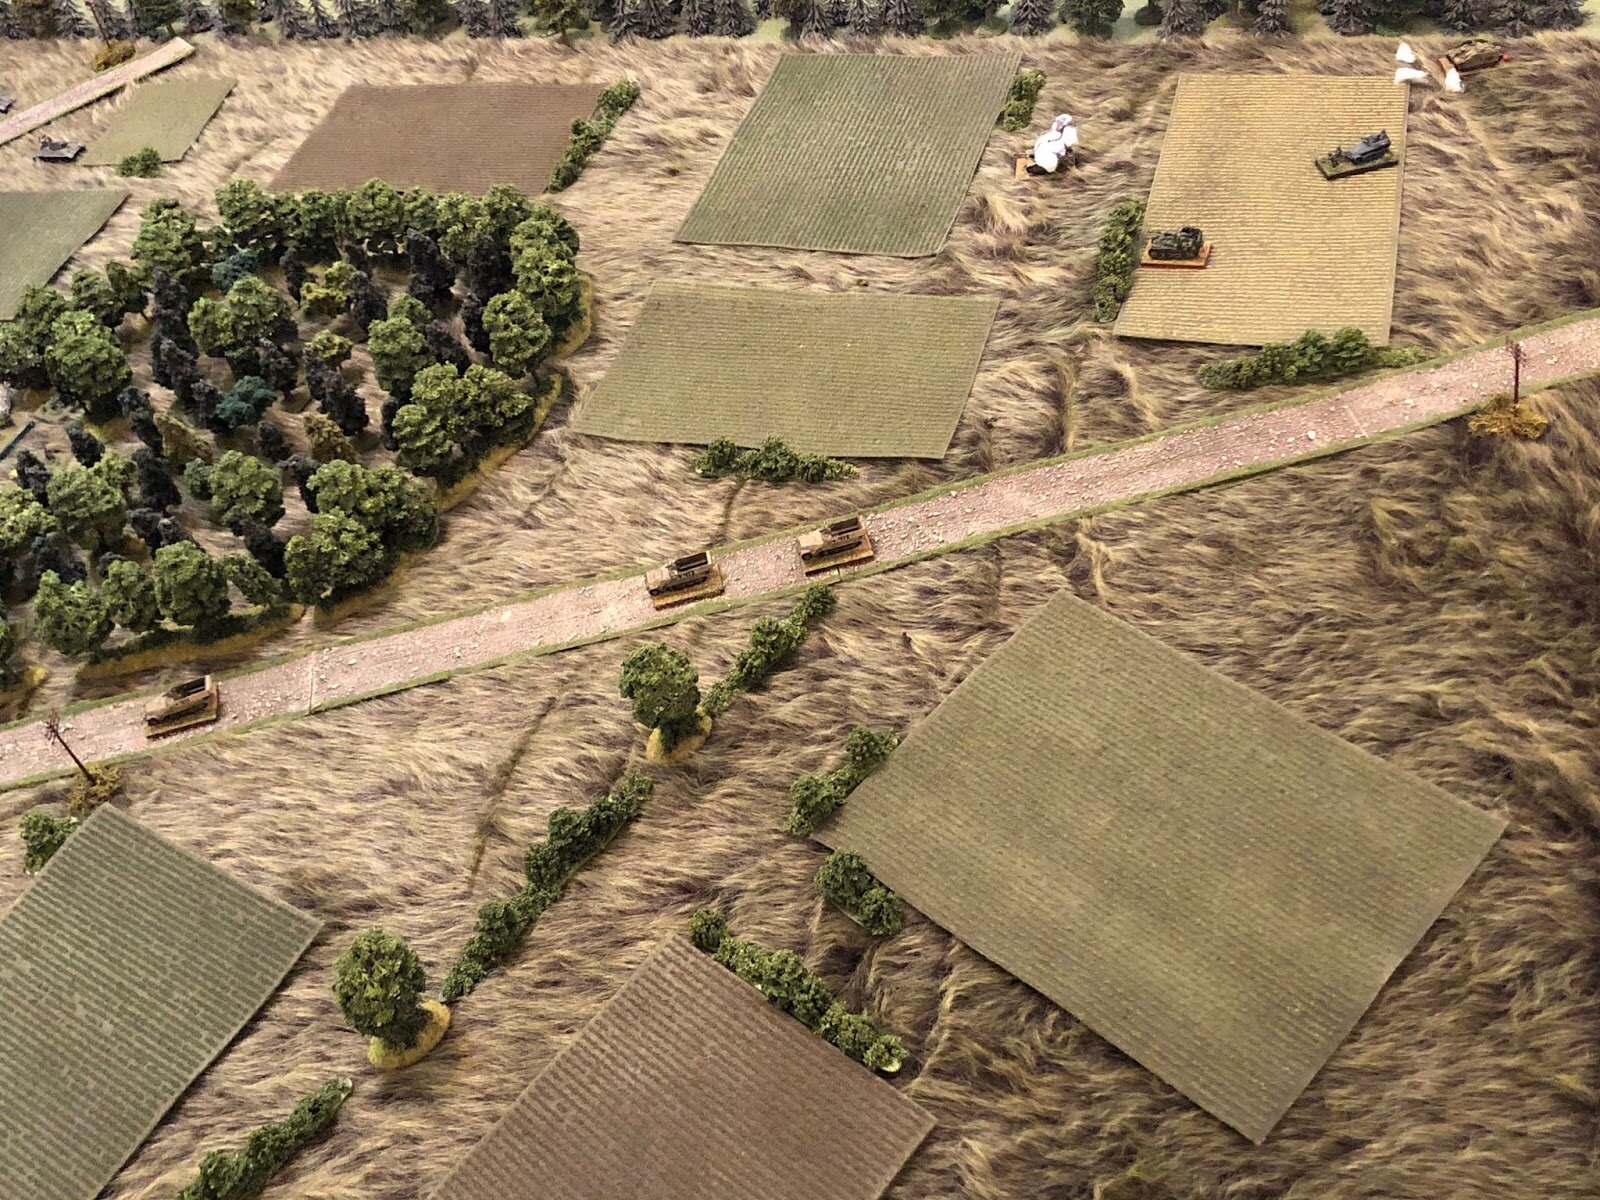
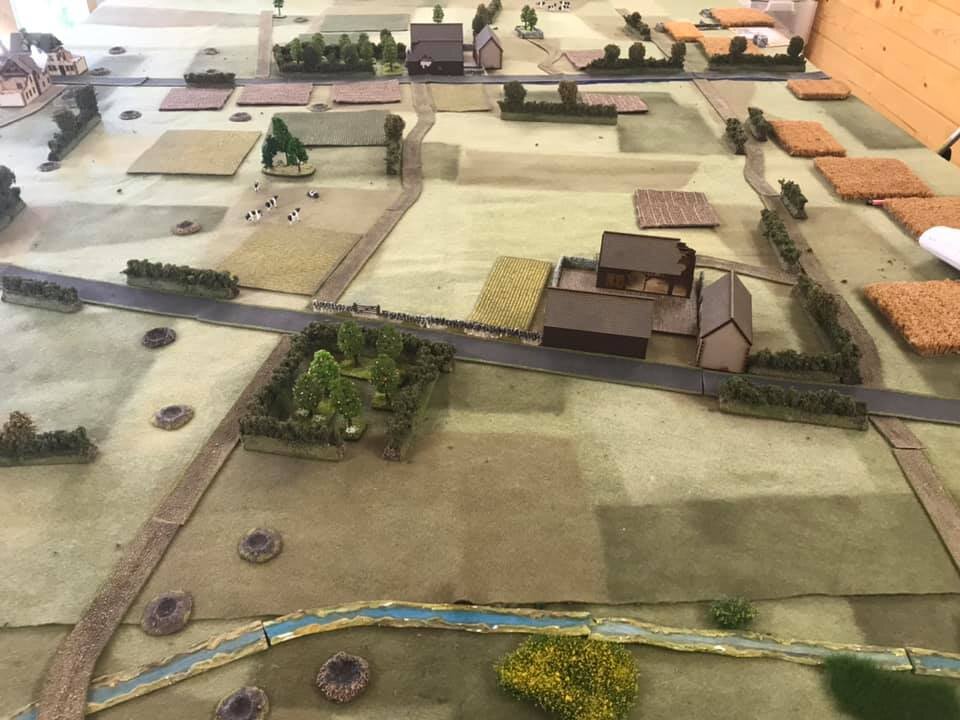
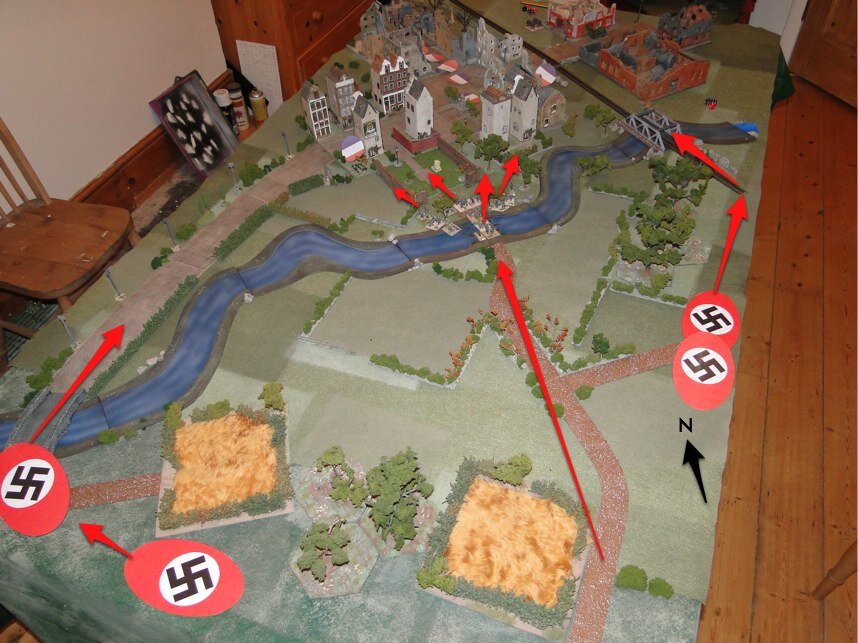
The Germans would enter the table from the road at the bottom of the picture, and needed to exit on the same road at the other end of the battlefield. They thus had a choice whether to go straight down the road through the town; take the long way round by the road heading right; or go across the field down towards the river on the left (although they had been warned about soft ground near the river).
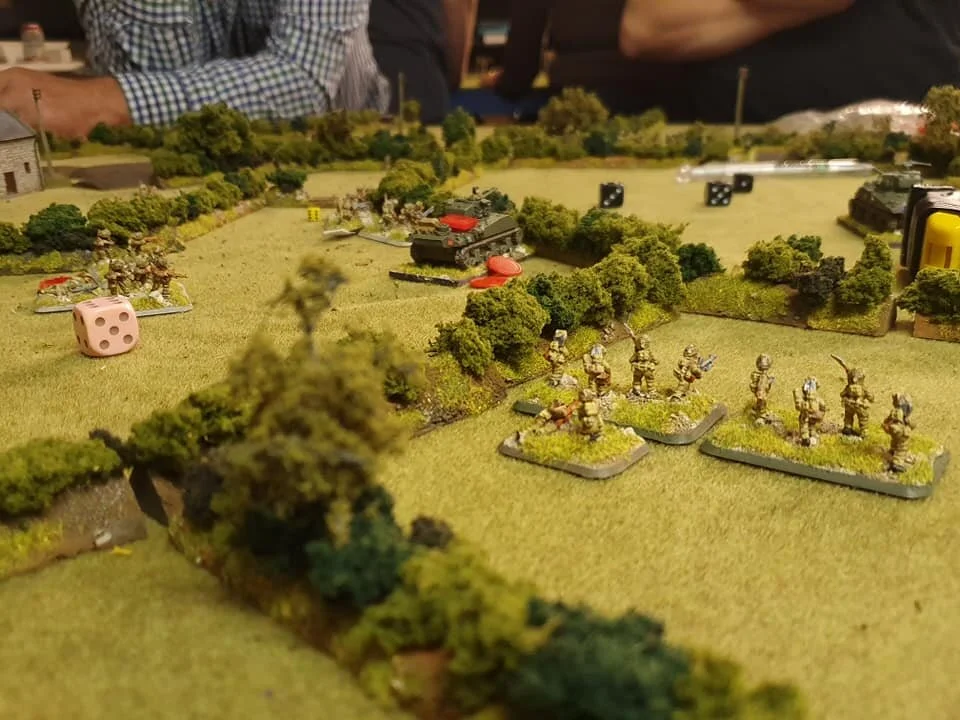
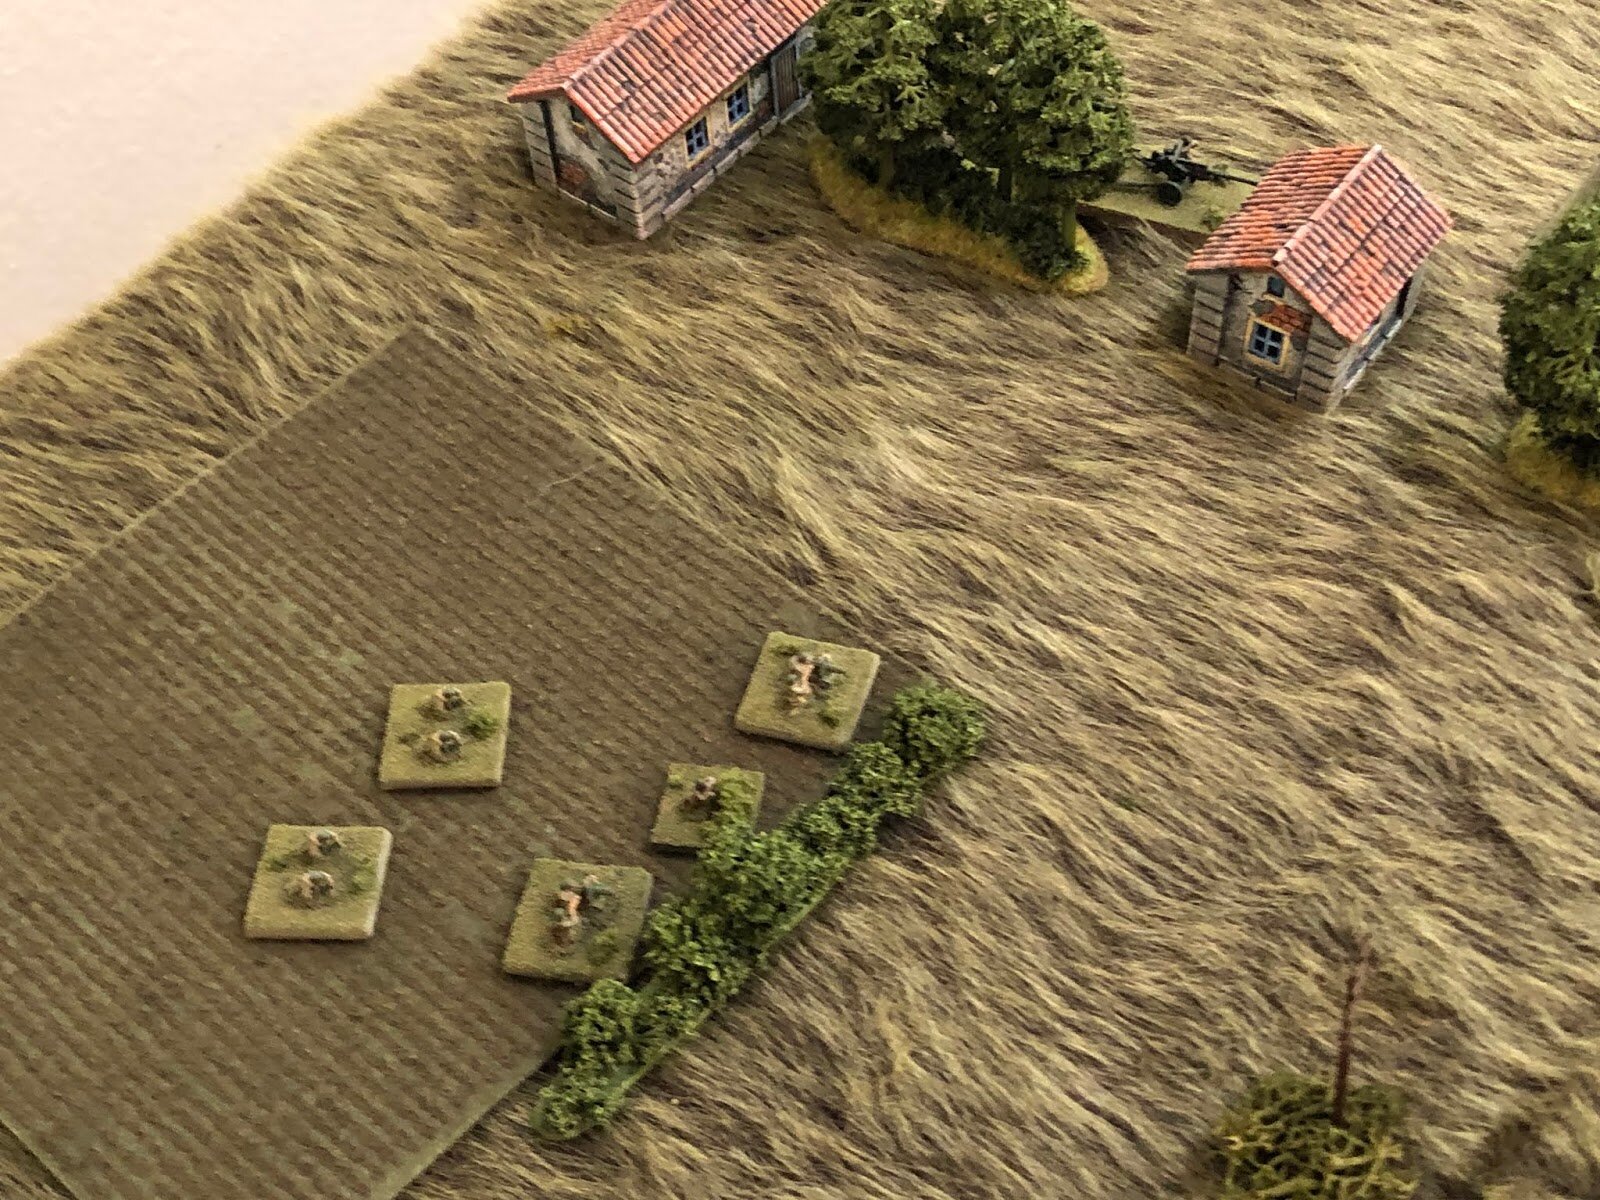
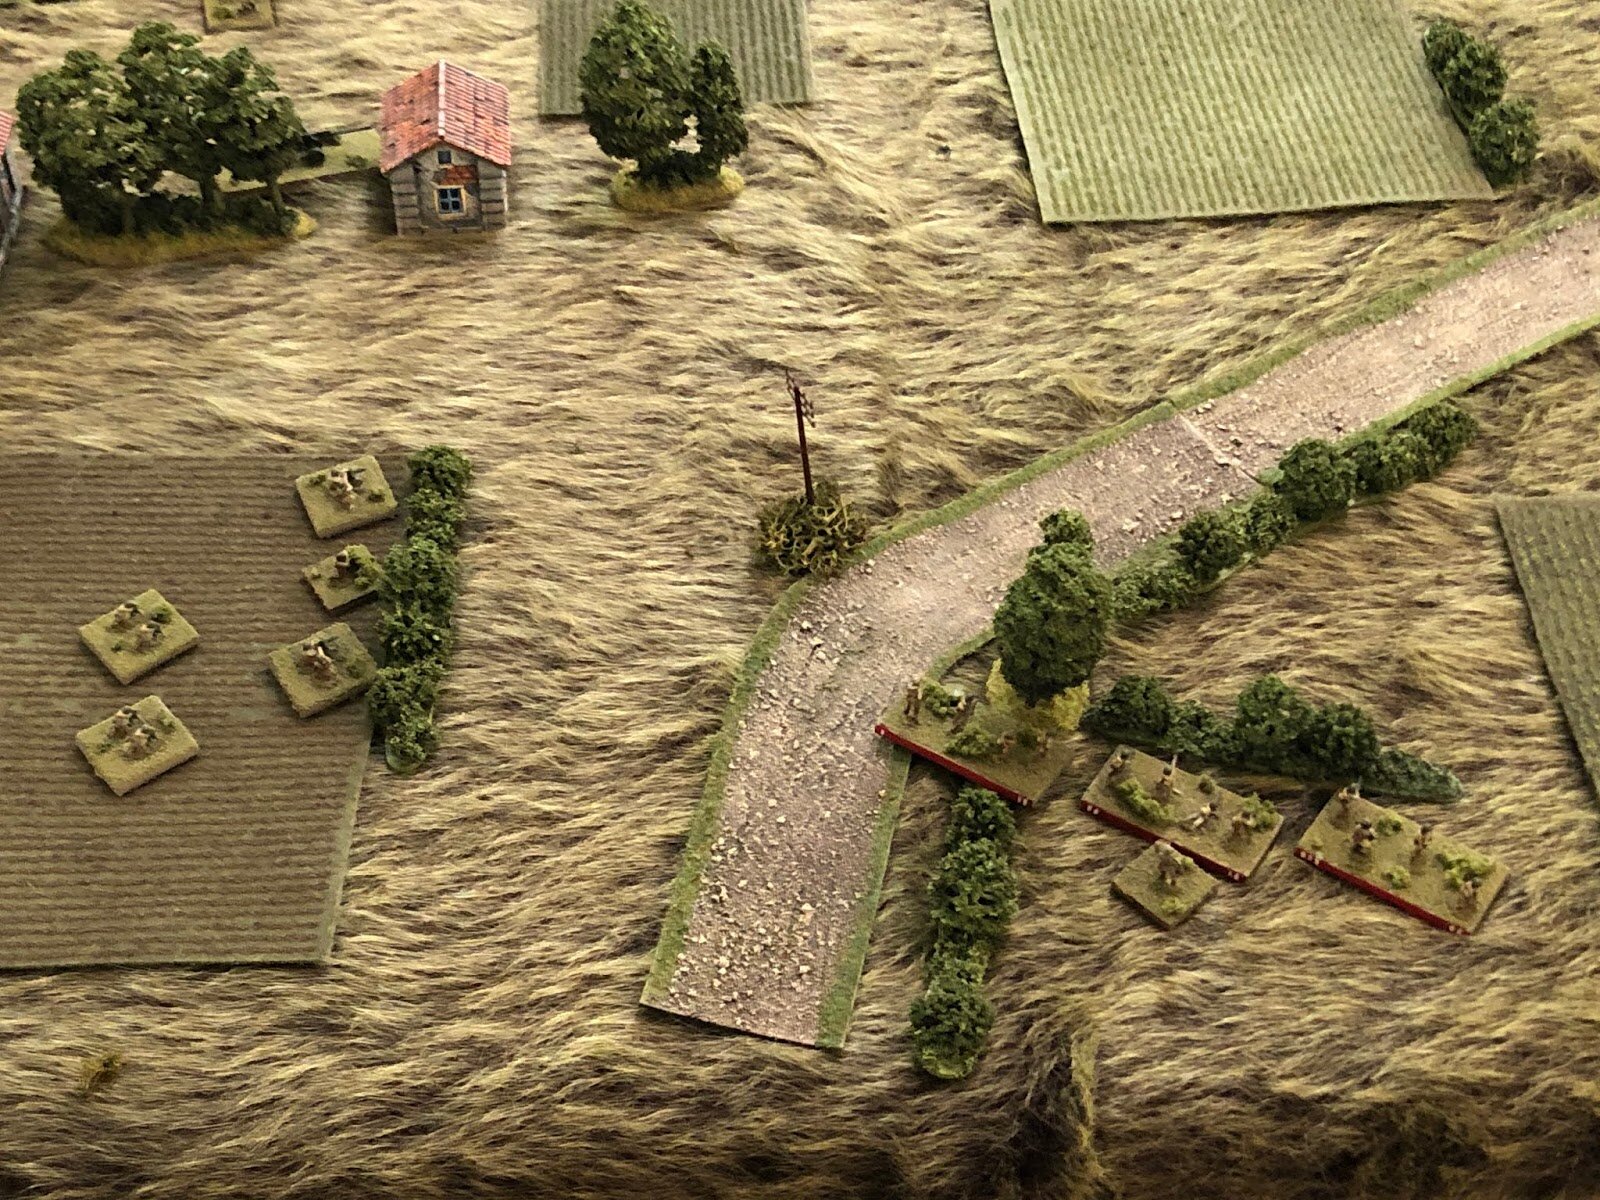
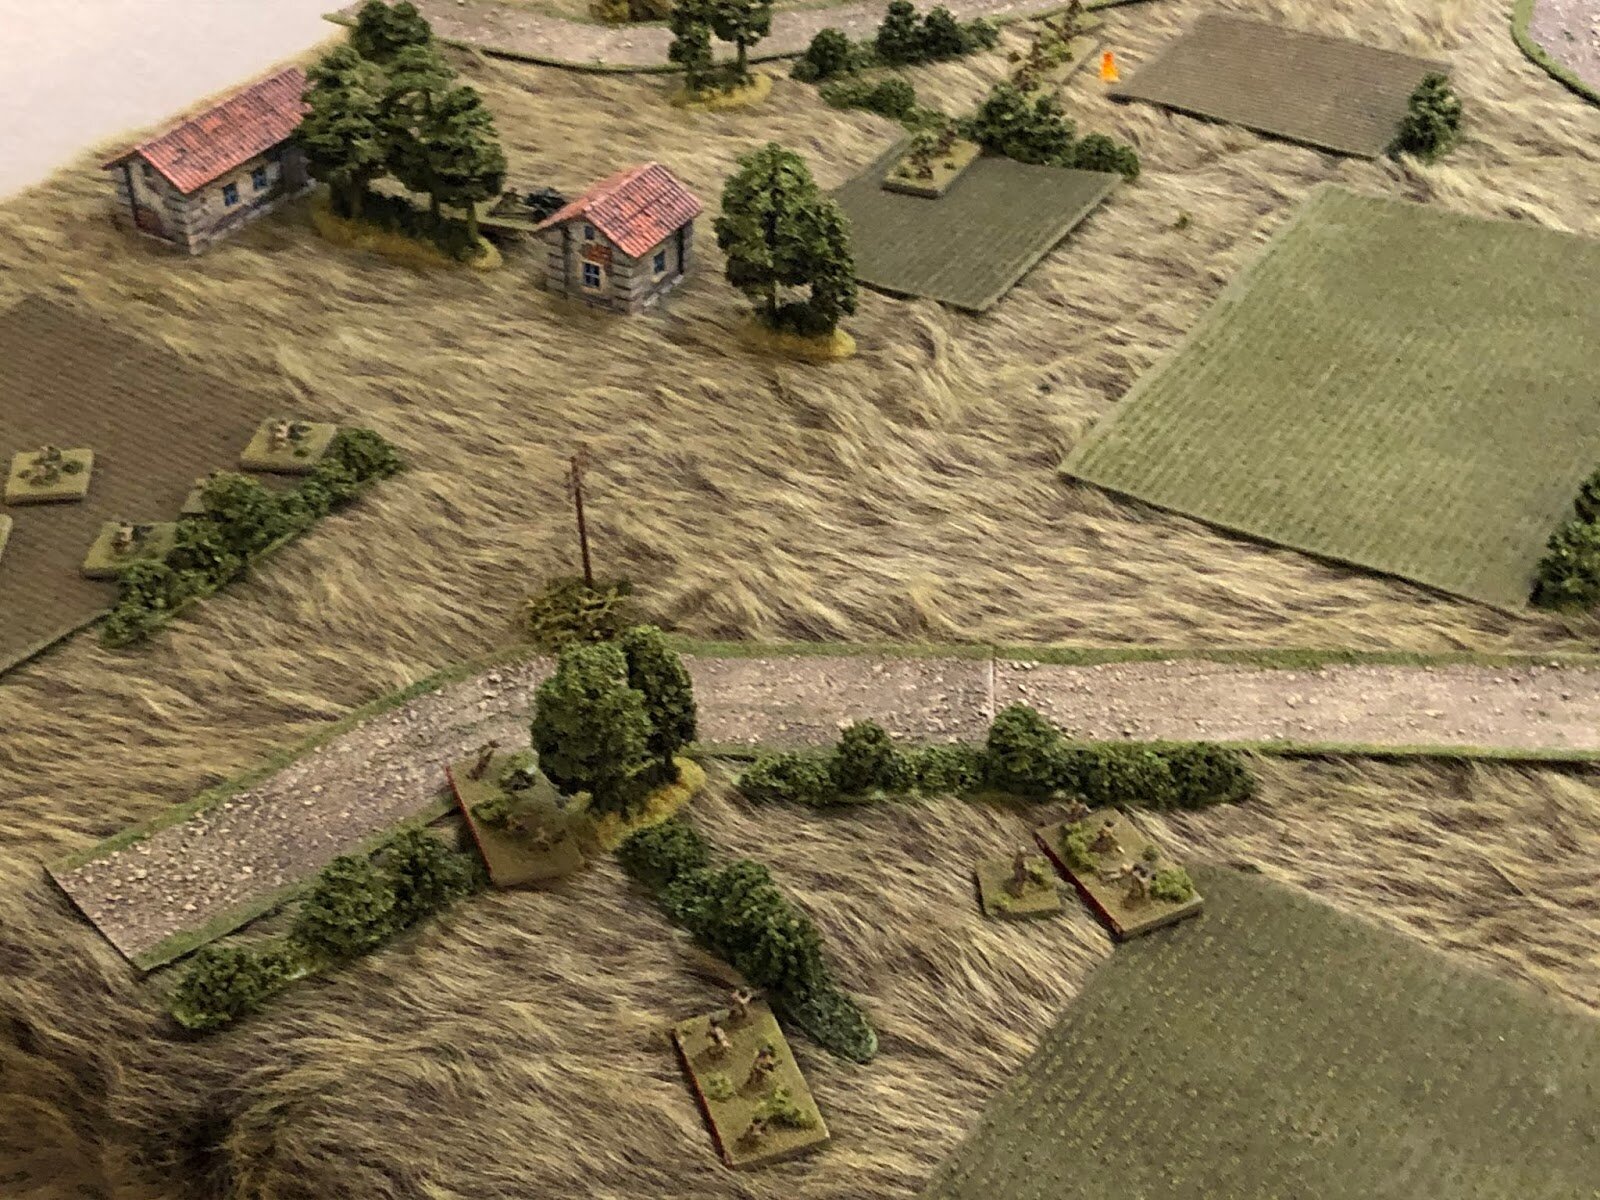
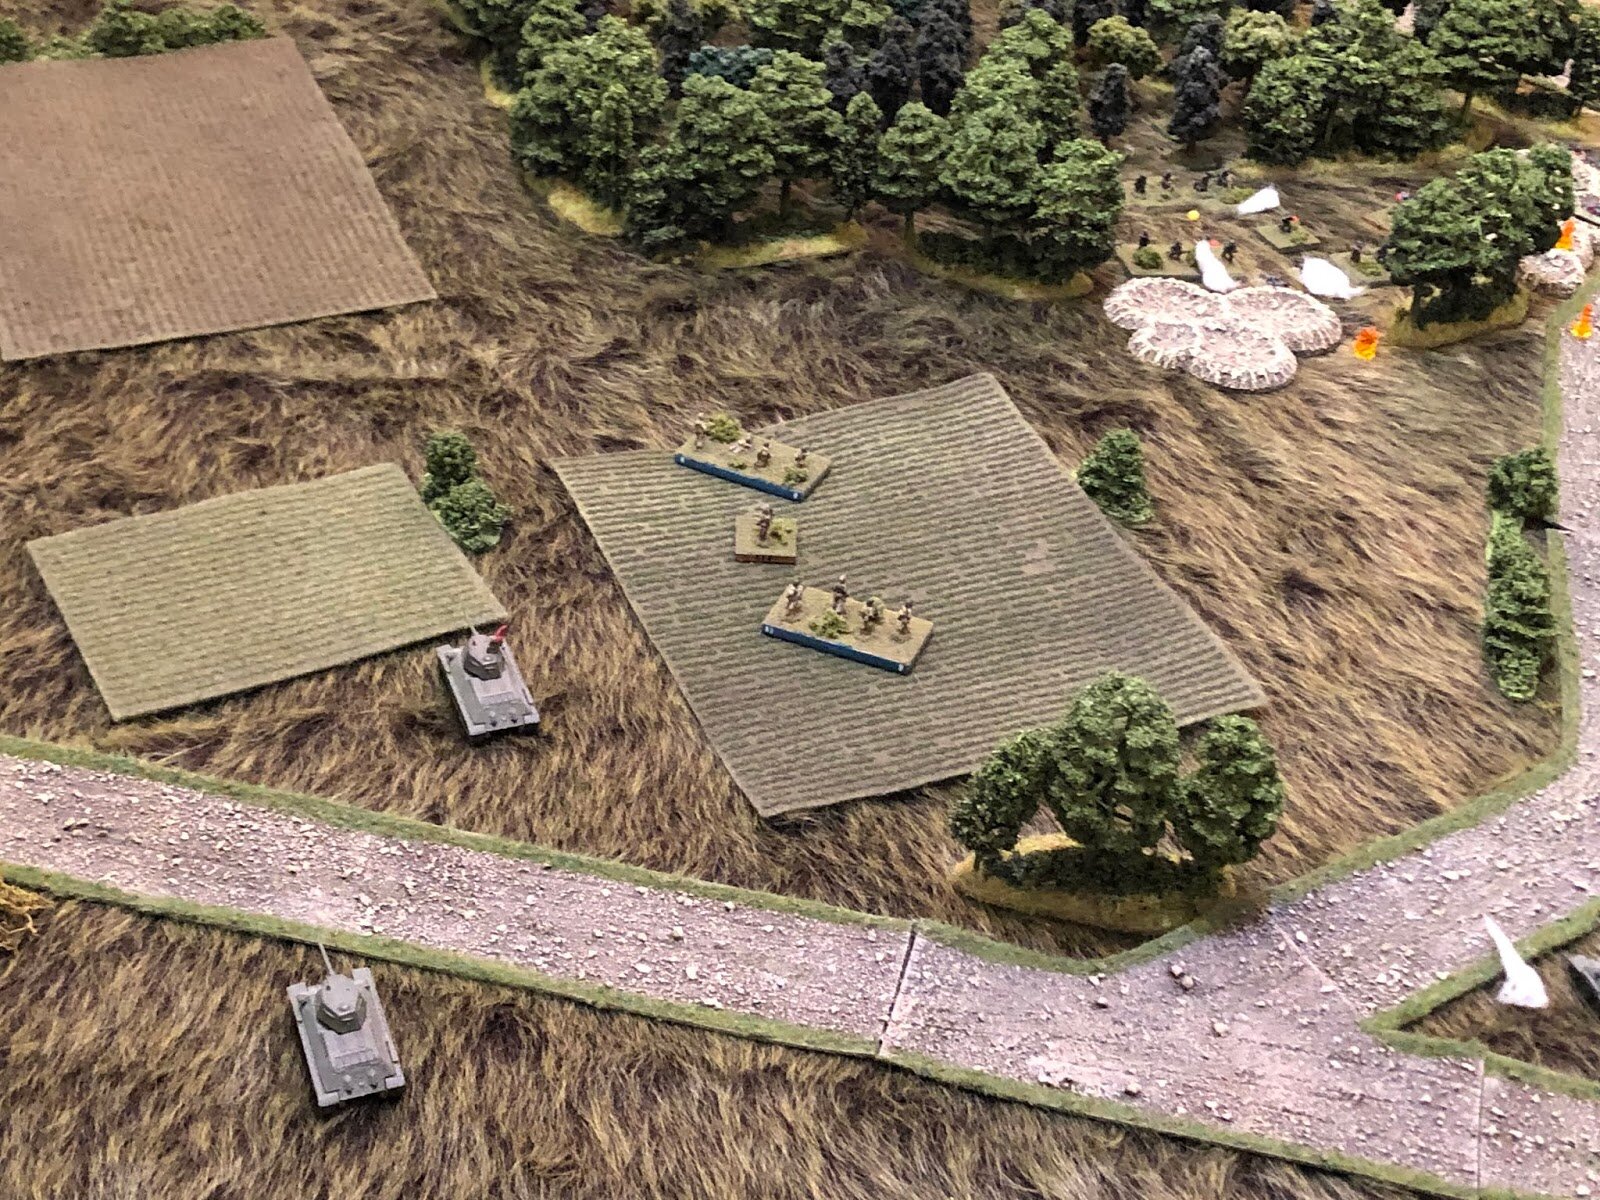
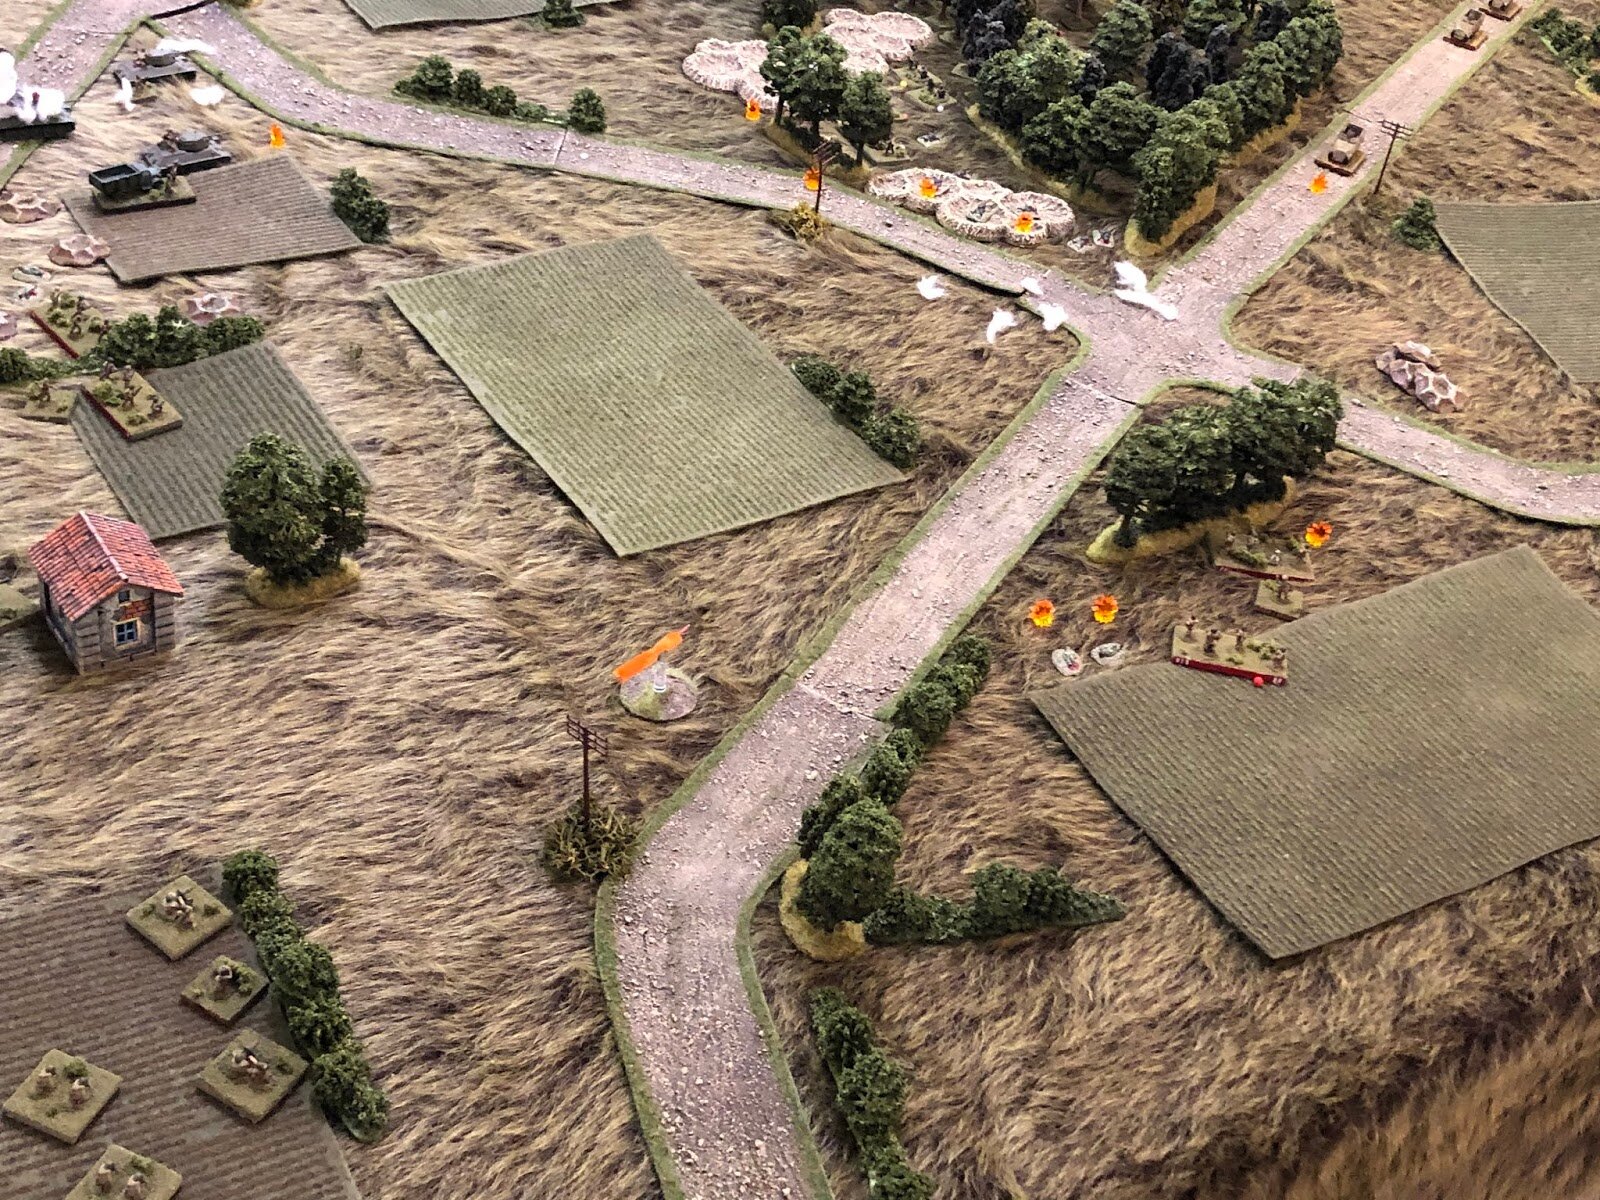
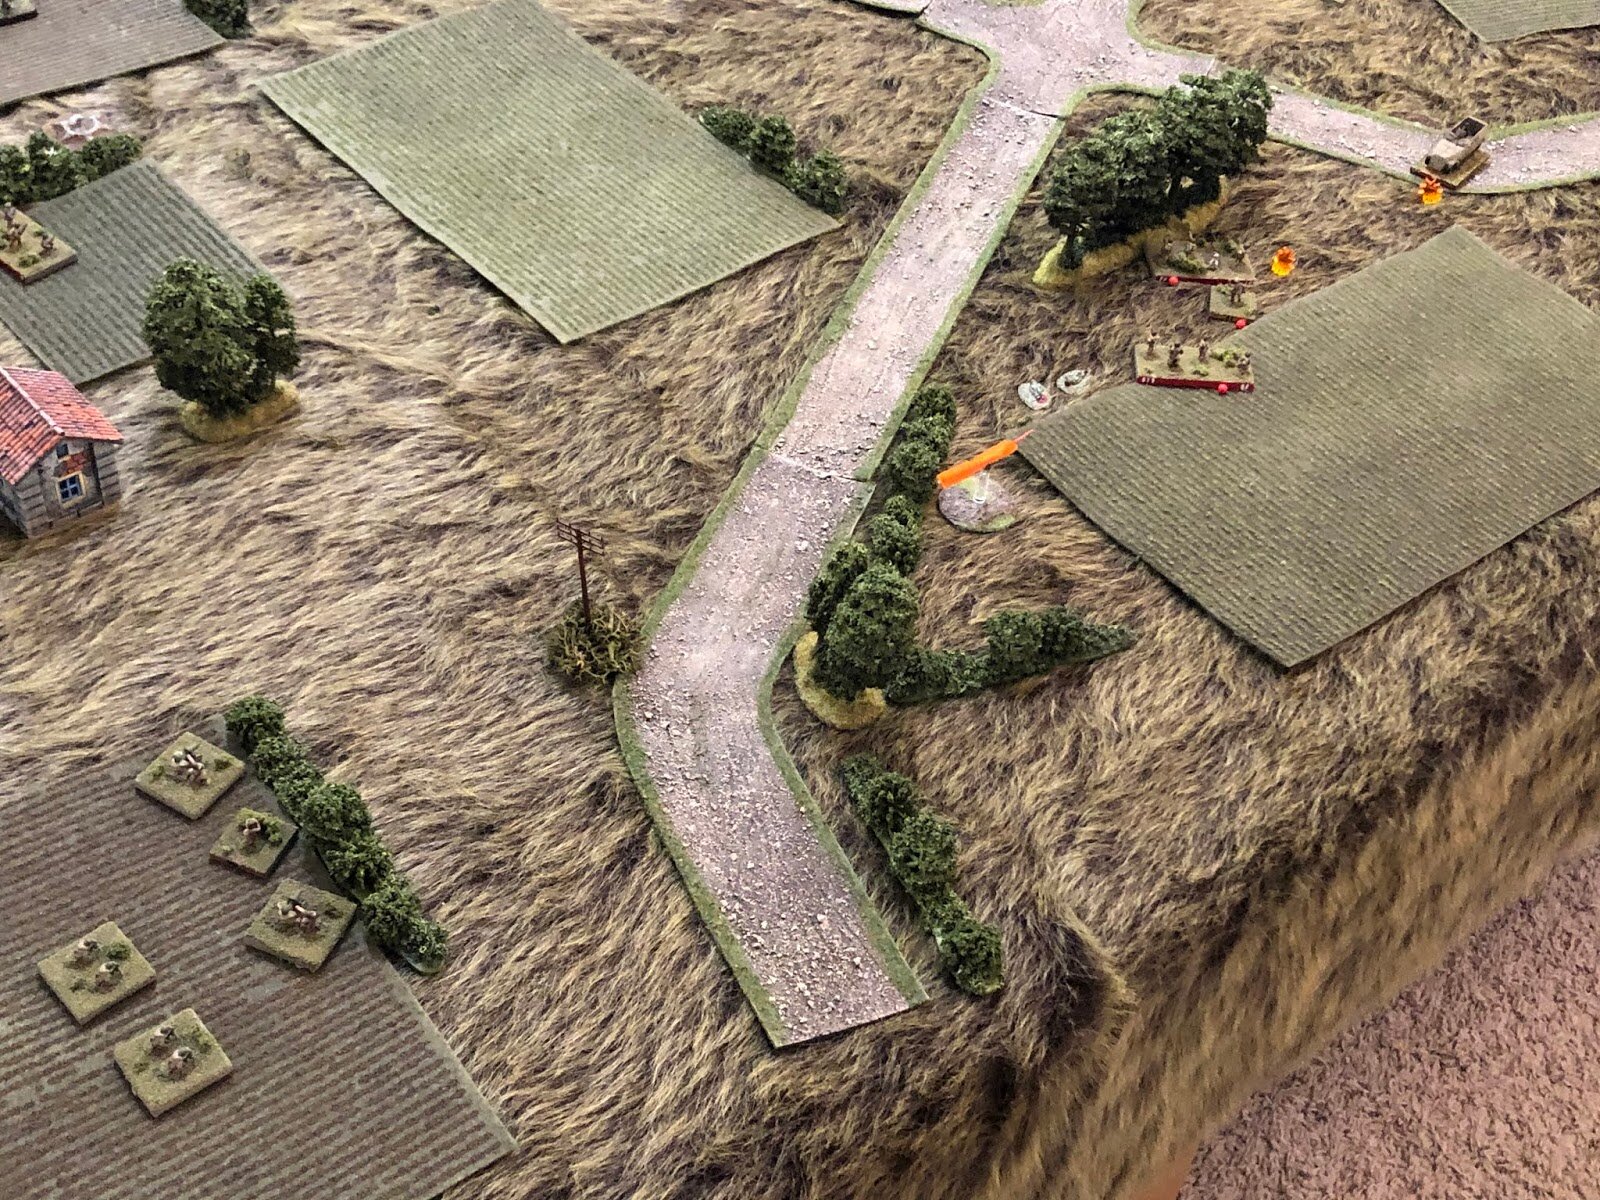
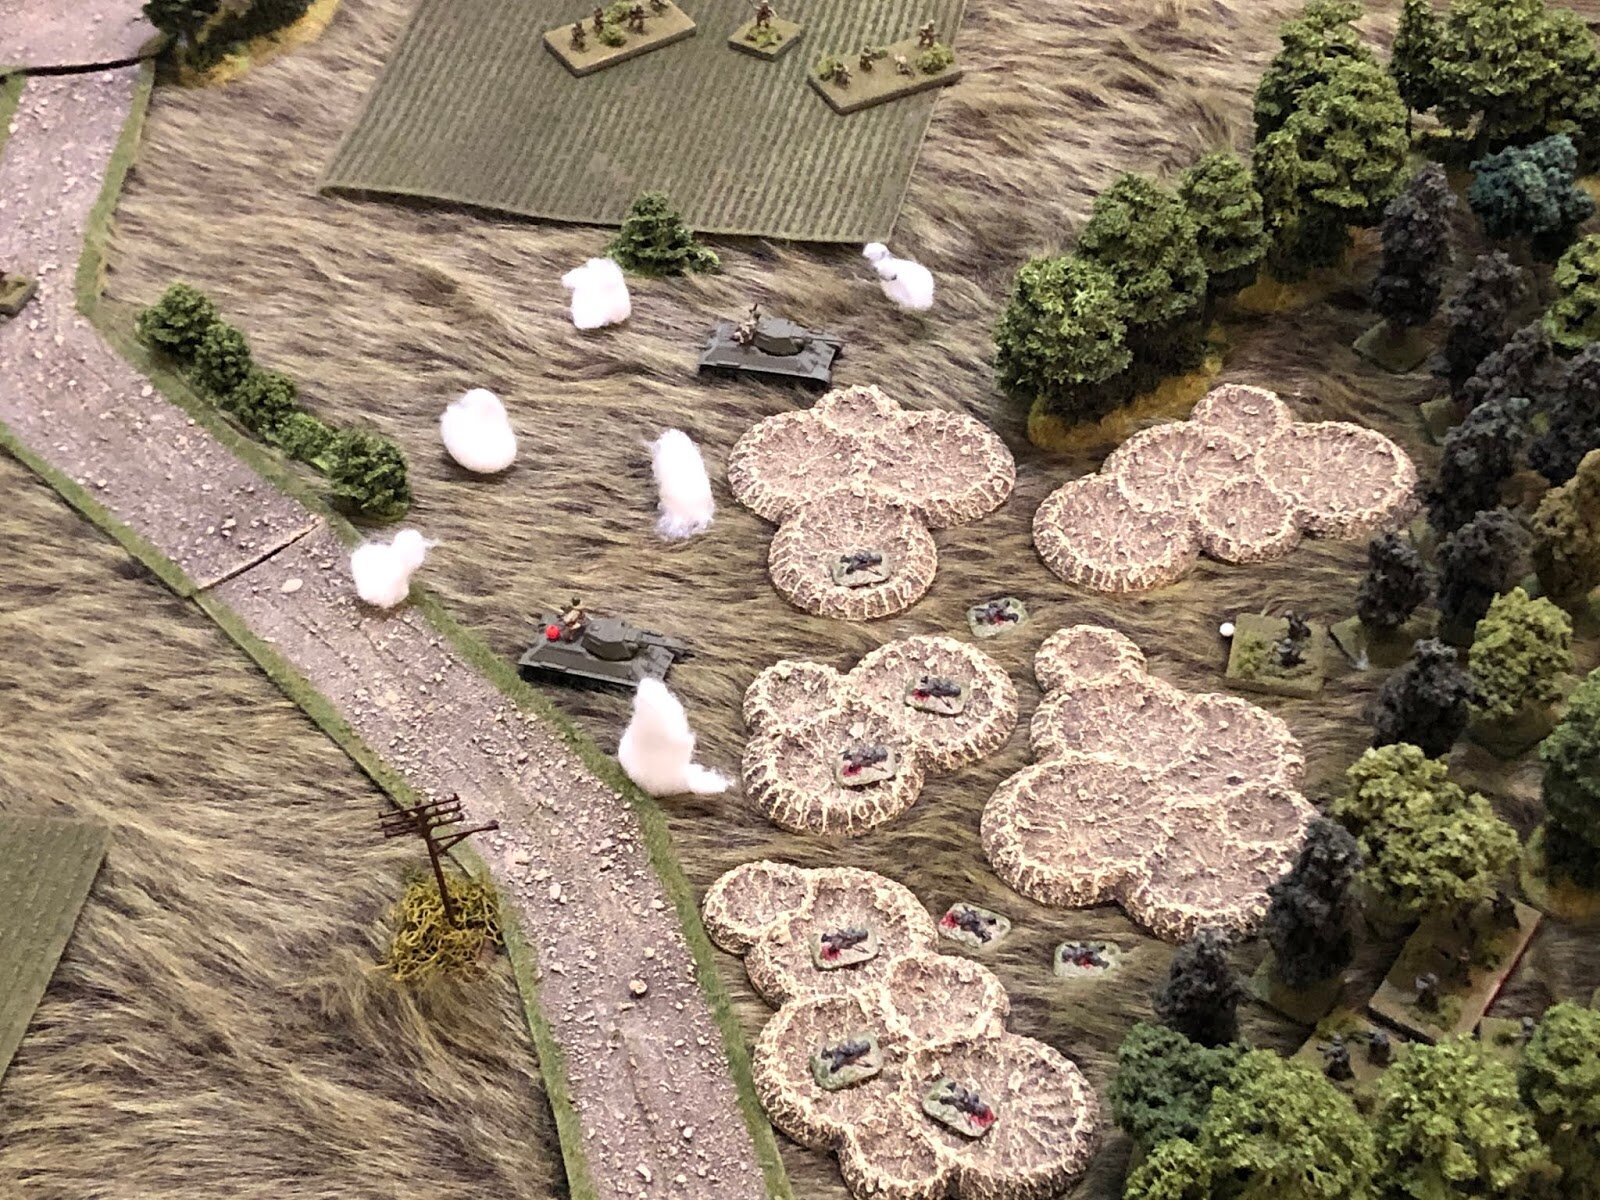
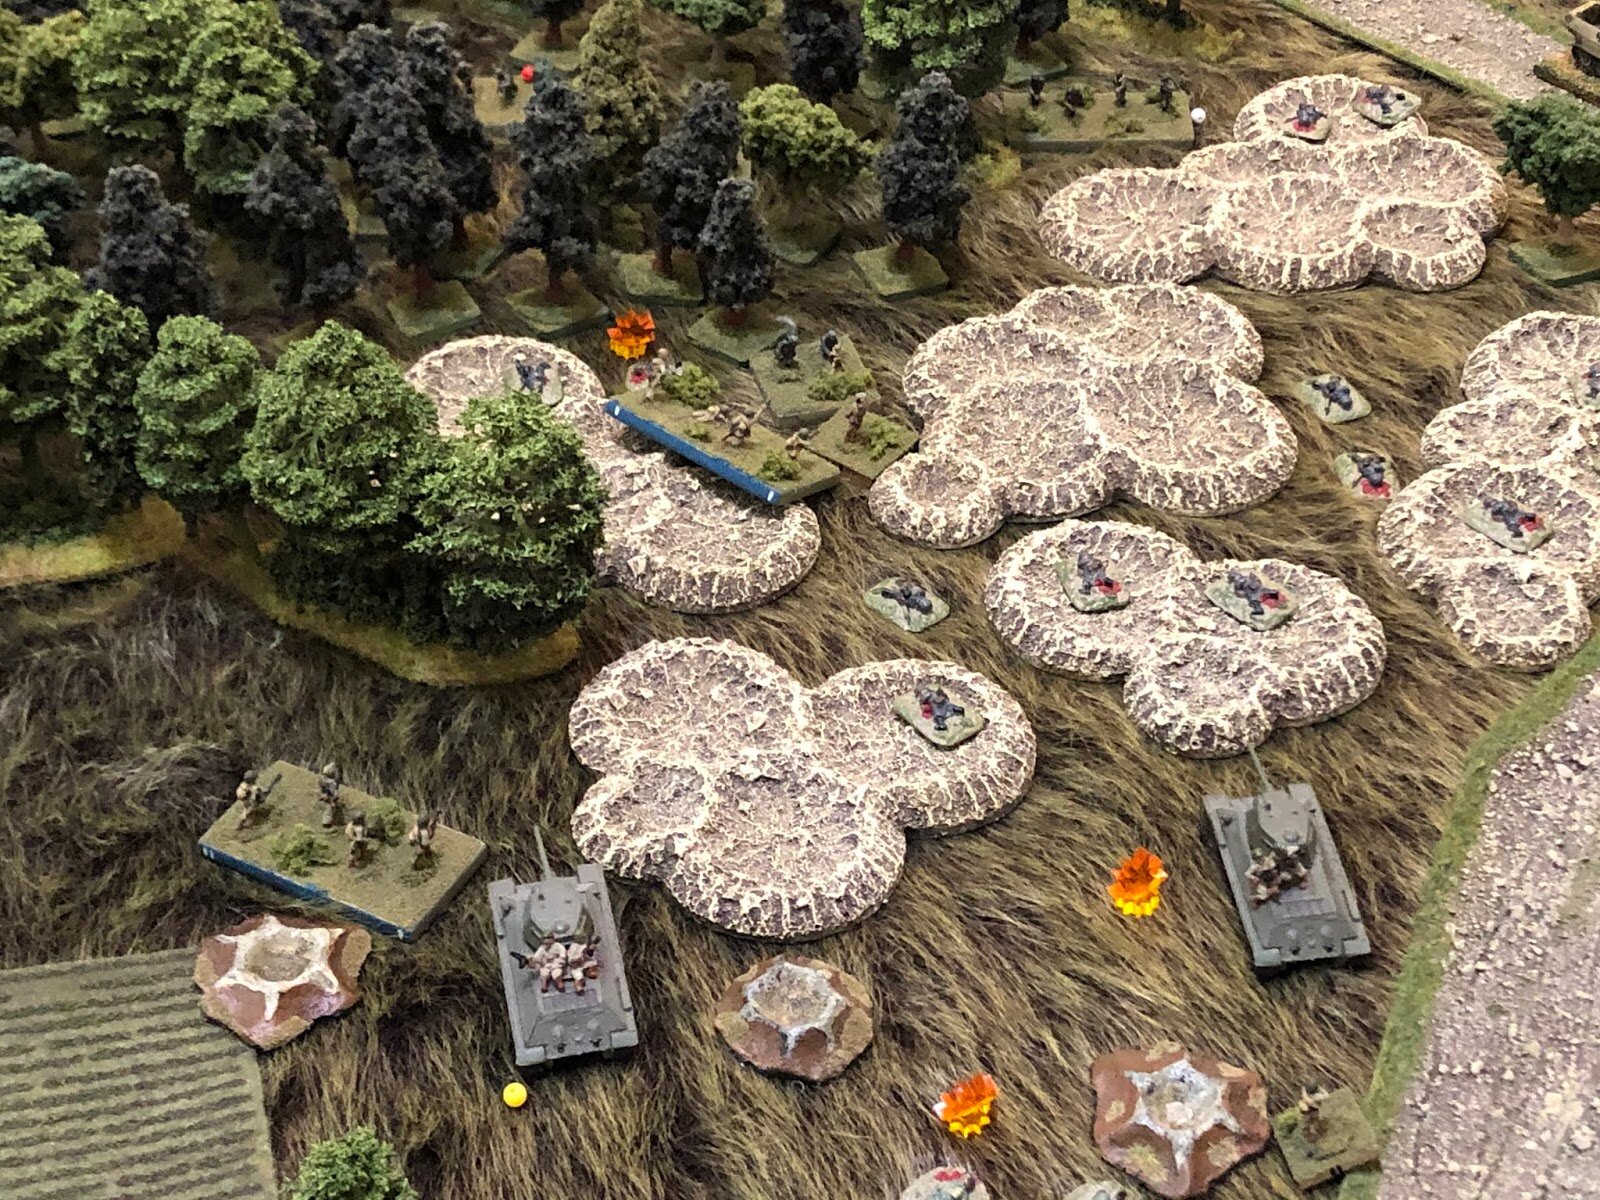
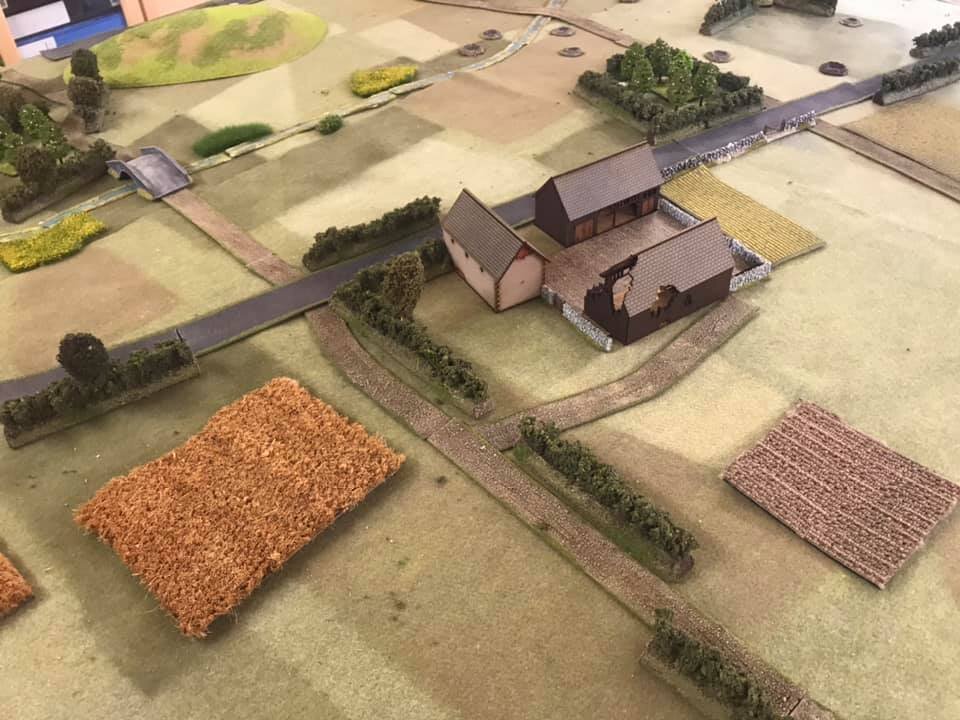
The pictures below show the views from the opposite end of the table, and where the Allies deployed their troops. As you can see, their infantry was concentrated in houses and church within the town itself, with the French tanks lurking behind; the anti-tank guns were dug-in behind the hedges surrounding the cow barn; with the Carrier Platoon hidden in the pig sty to the left.
The Game Begins
As I (as German commander) had no idea where the enemy was, I couldn’t commit my schwerpunkt until I had identified the enemy’s positions. I therefore decided to probe all three of the routes discussed above: left of the town, through the town, and round the roads to the right of the town.
Through the town would be quickest, but to take vehicles into a town is always risky, and if my enemy had assets that could block the far end of the High Street, I would be trapped like rats in a barrel.
To the left looked a strong proposition, but I was a little worried about this “soft ground”, especially for my wheeled vehicles, and again I could be blocked from my exit point by forces currently out of sight behind the town.
Right looked a long way round, but my wheeled vehicles (all the trucks and armoured cars) move double on a road, so could speed round and be off table before the enemy could react.
My only consolation was that the British and French had no idea which way I would go, so would have to make sure they could cover all angles. That meant, to me, that the infantry would be in the town, with any armour or anti-tank guns as wild cards that could be anywhere so would need to be spotted and neutralised before a general advance could occur.
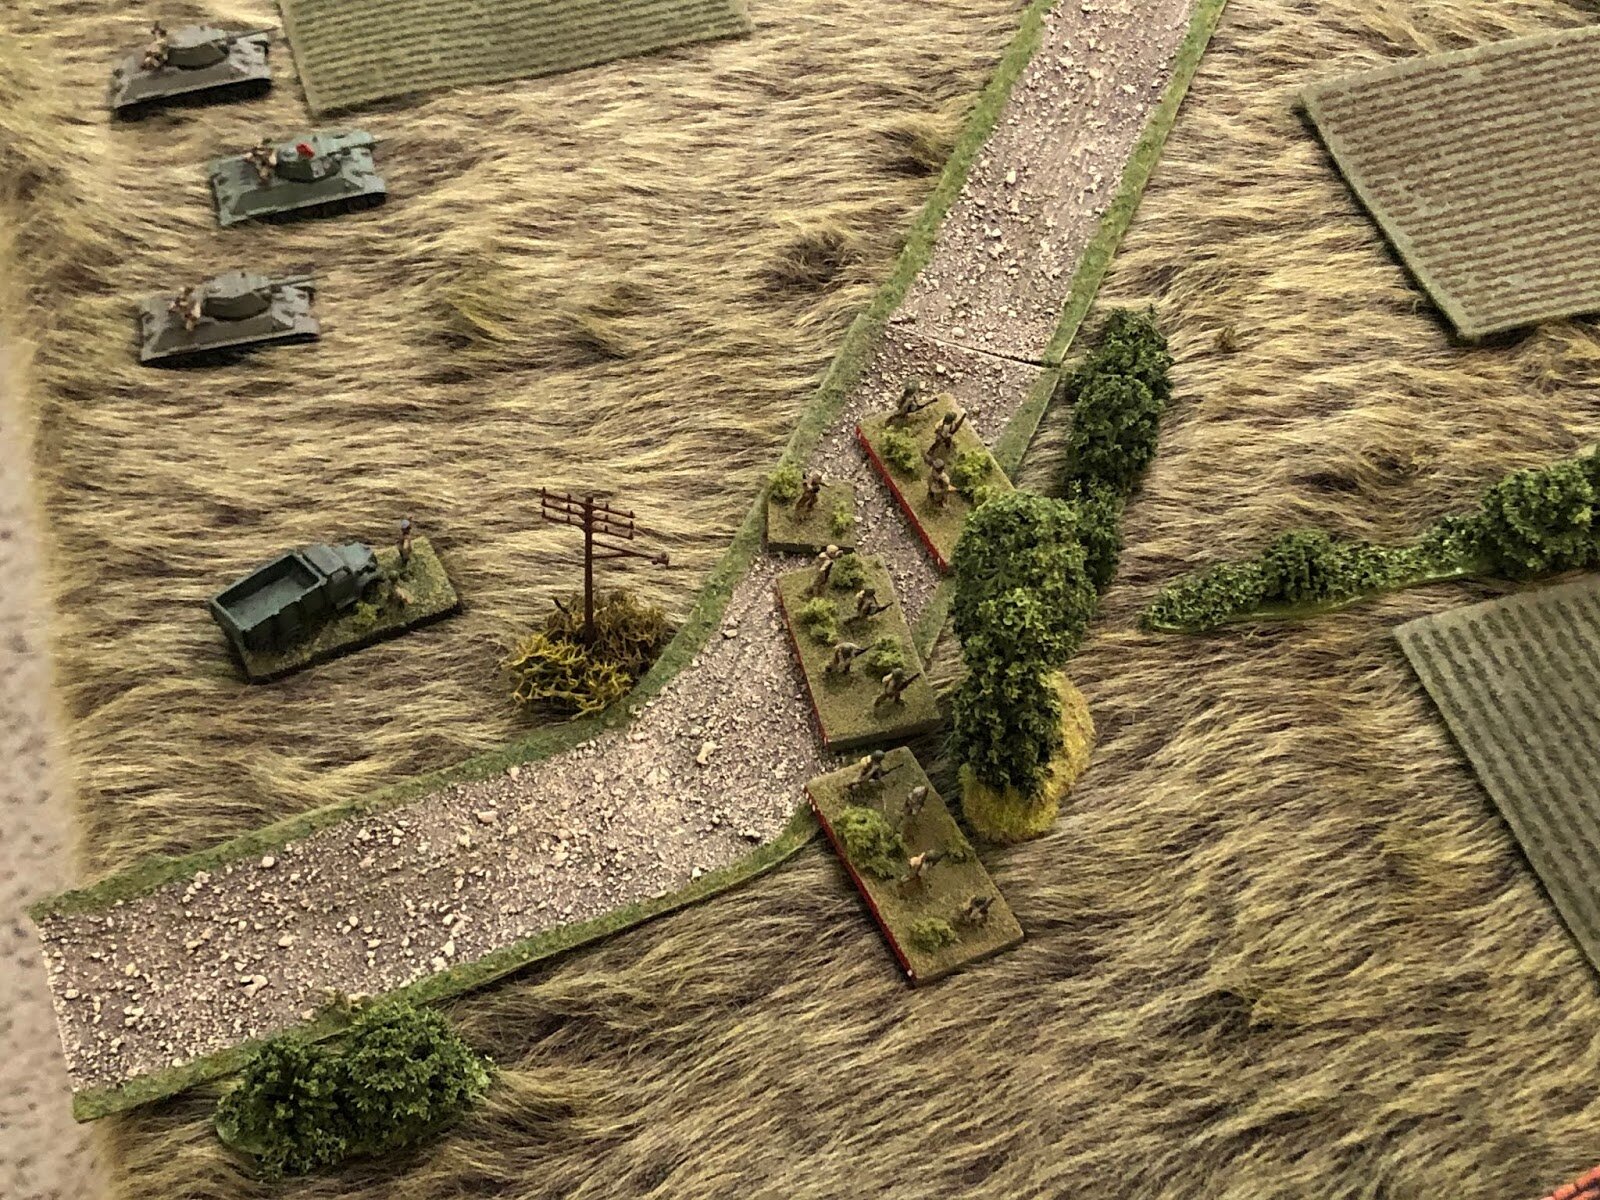
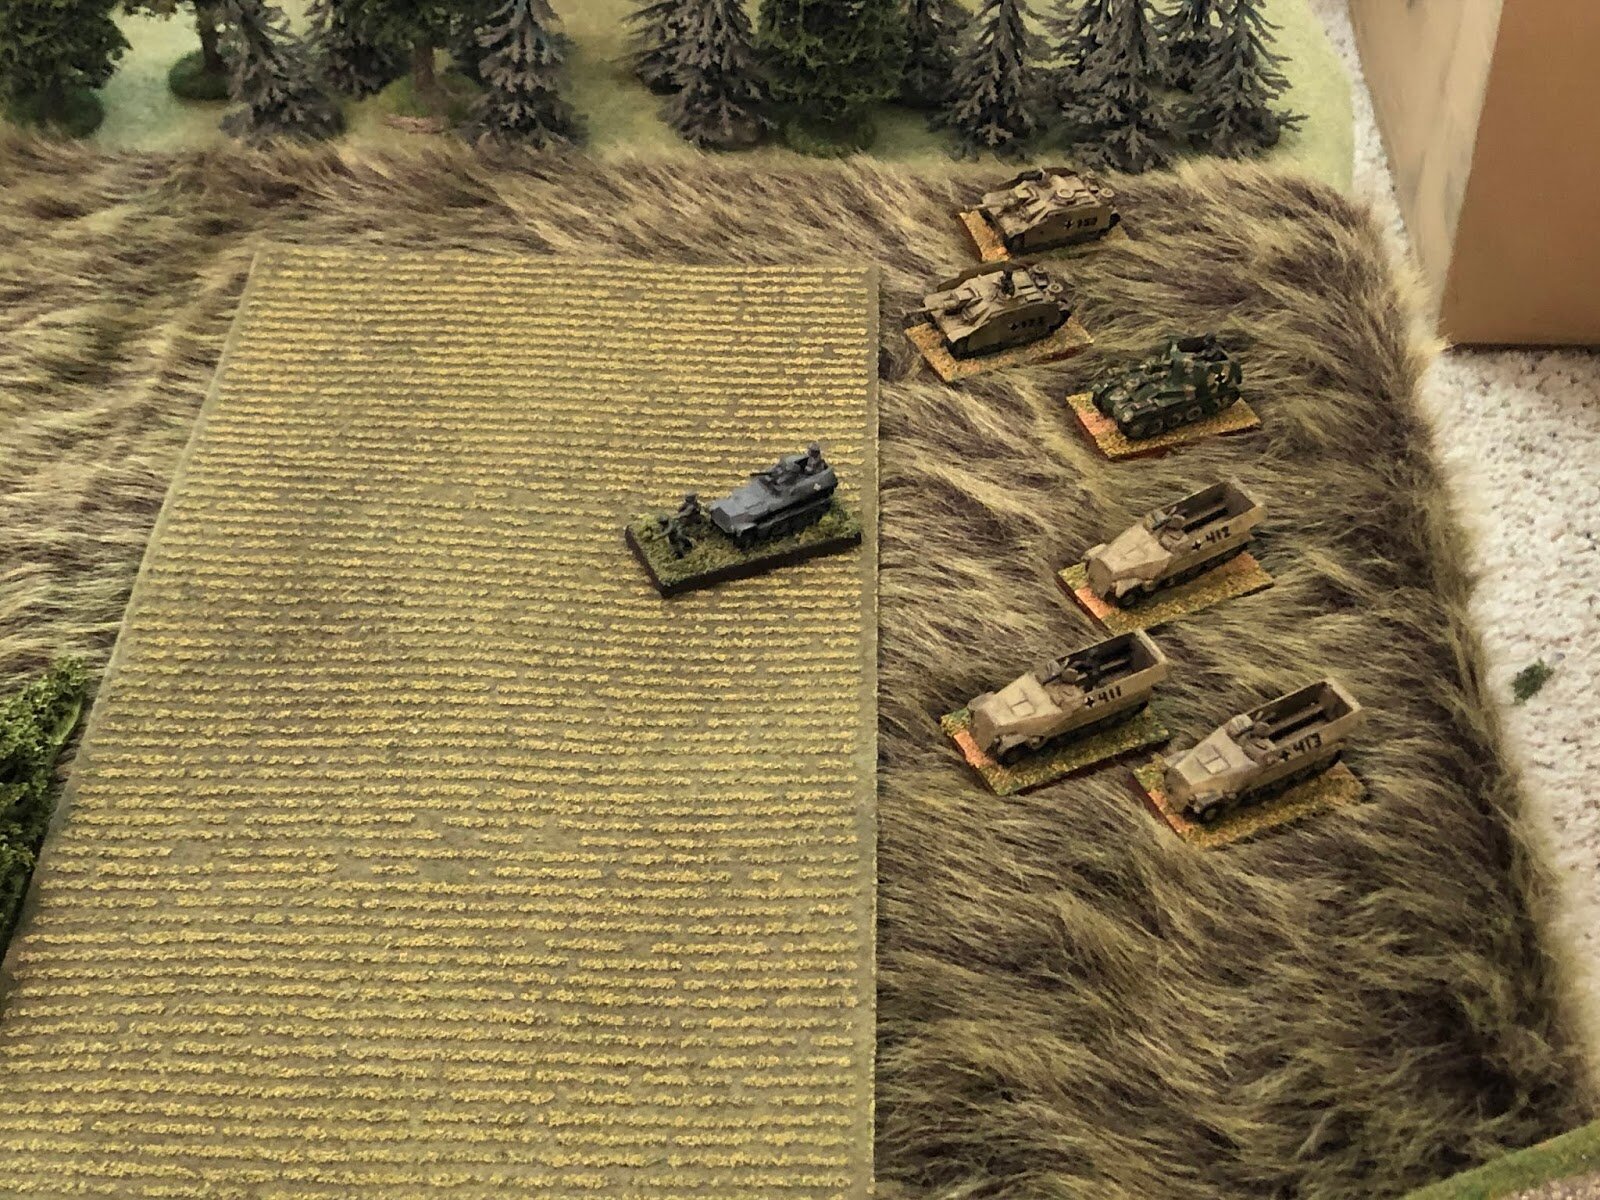
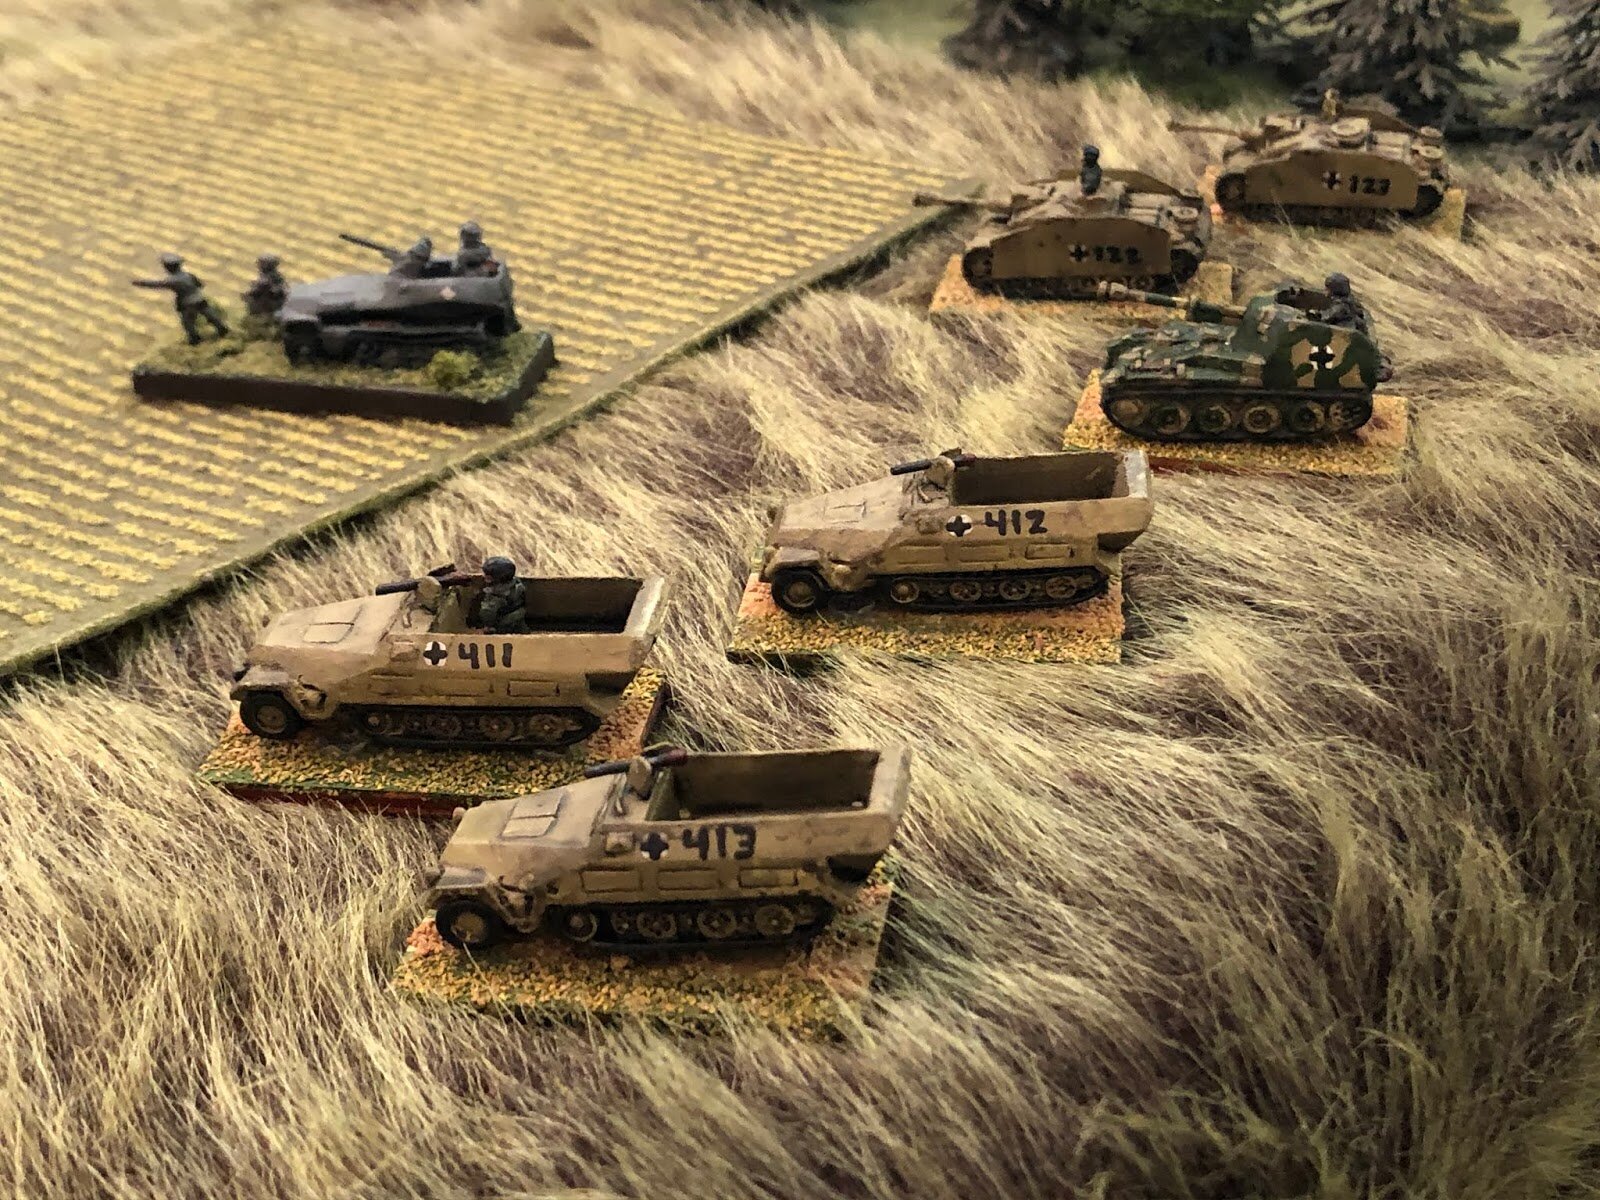
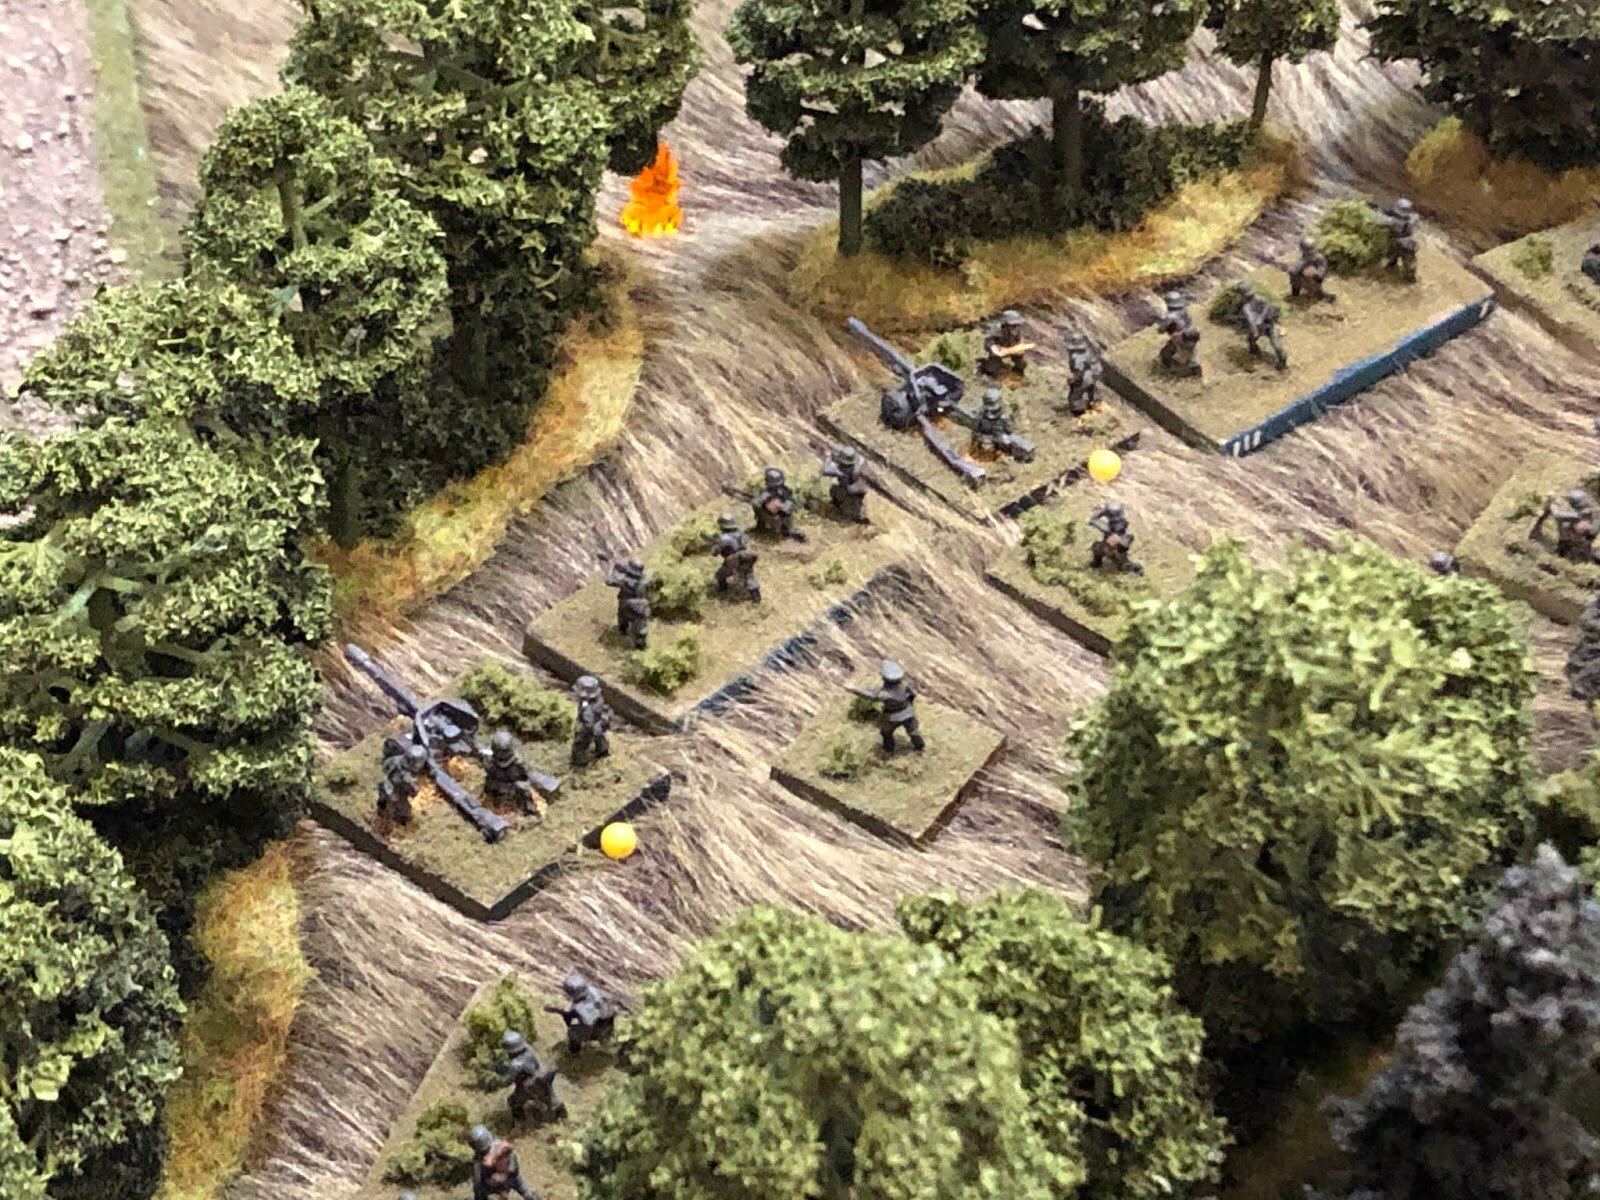
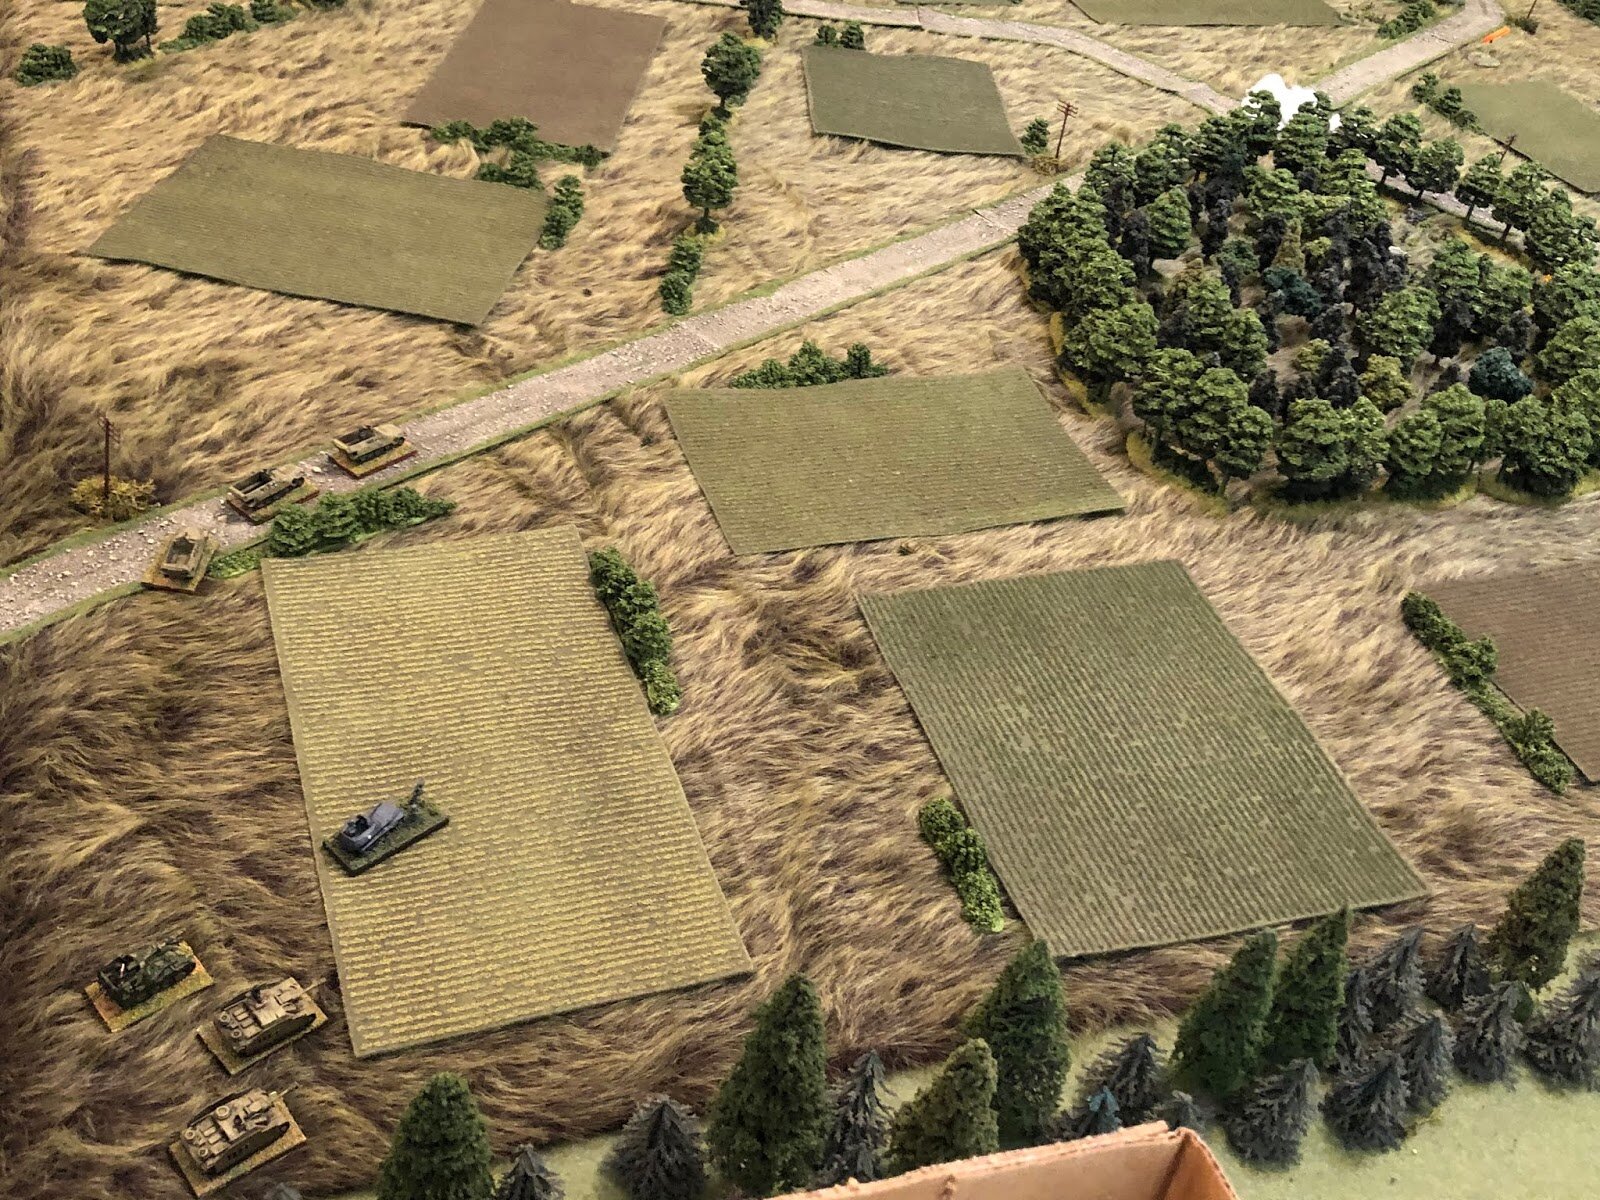
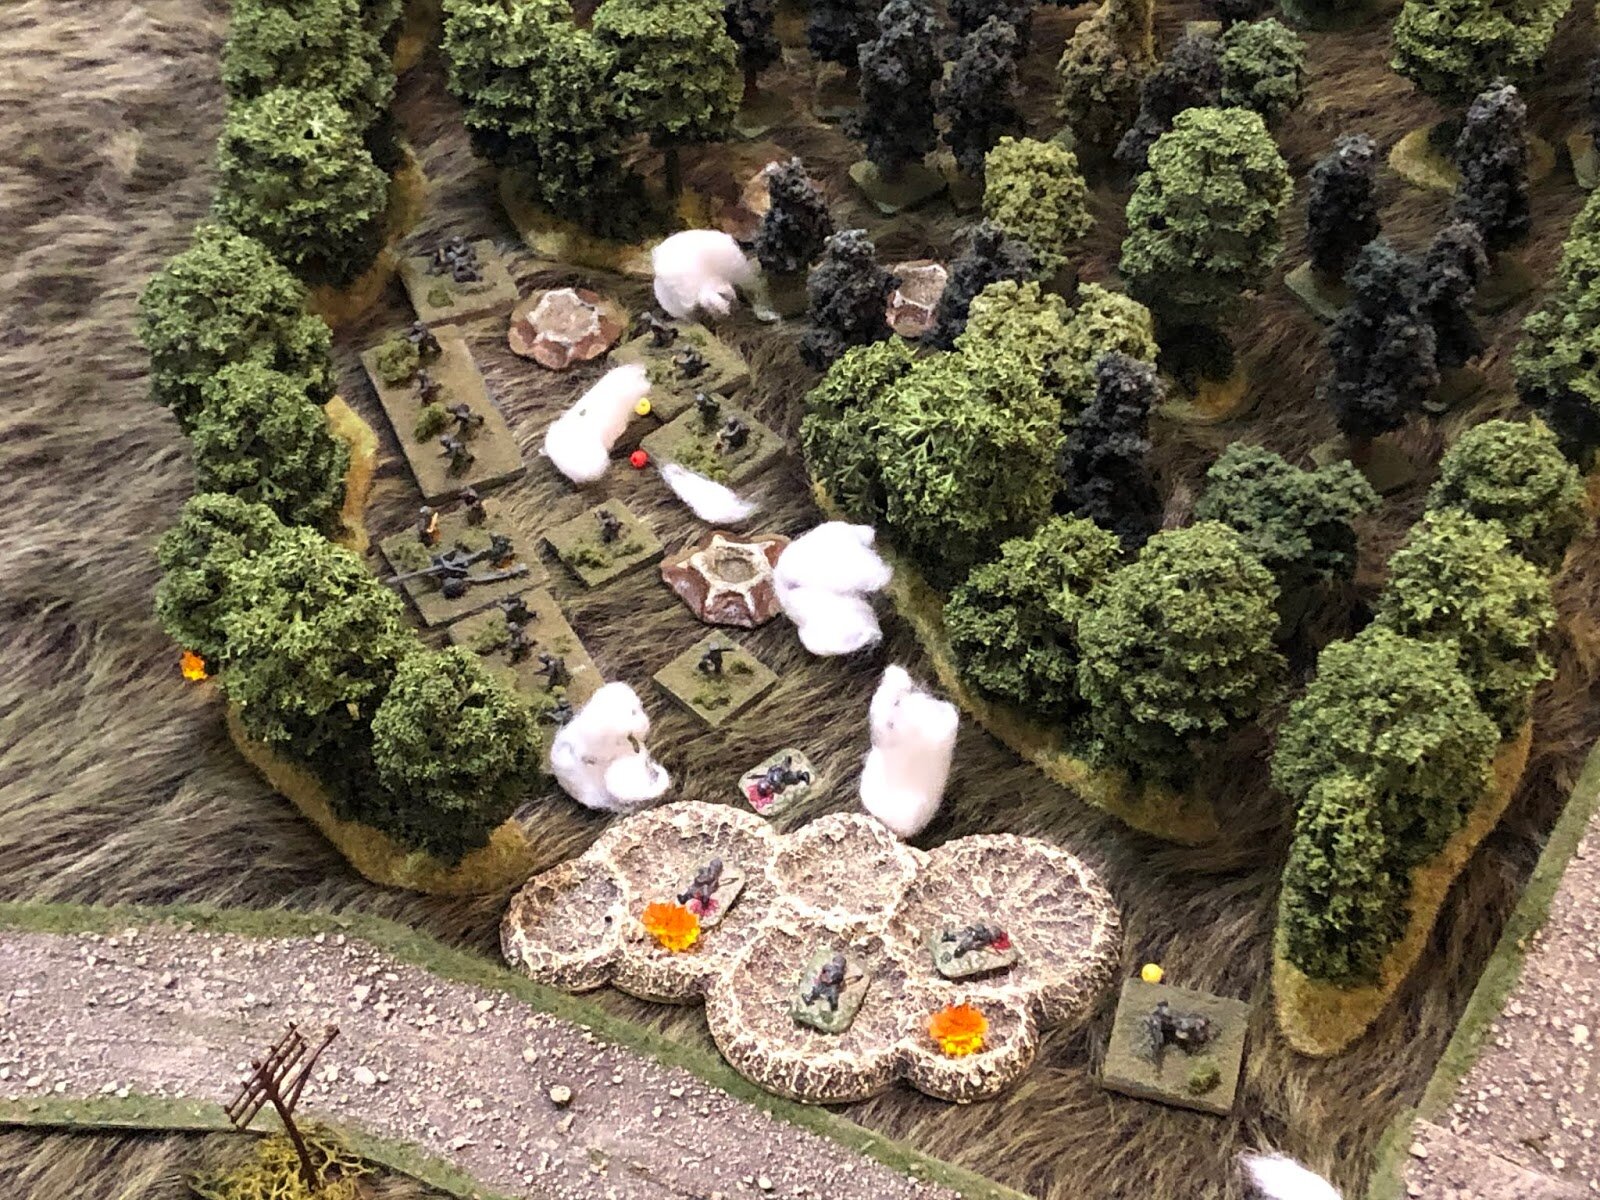
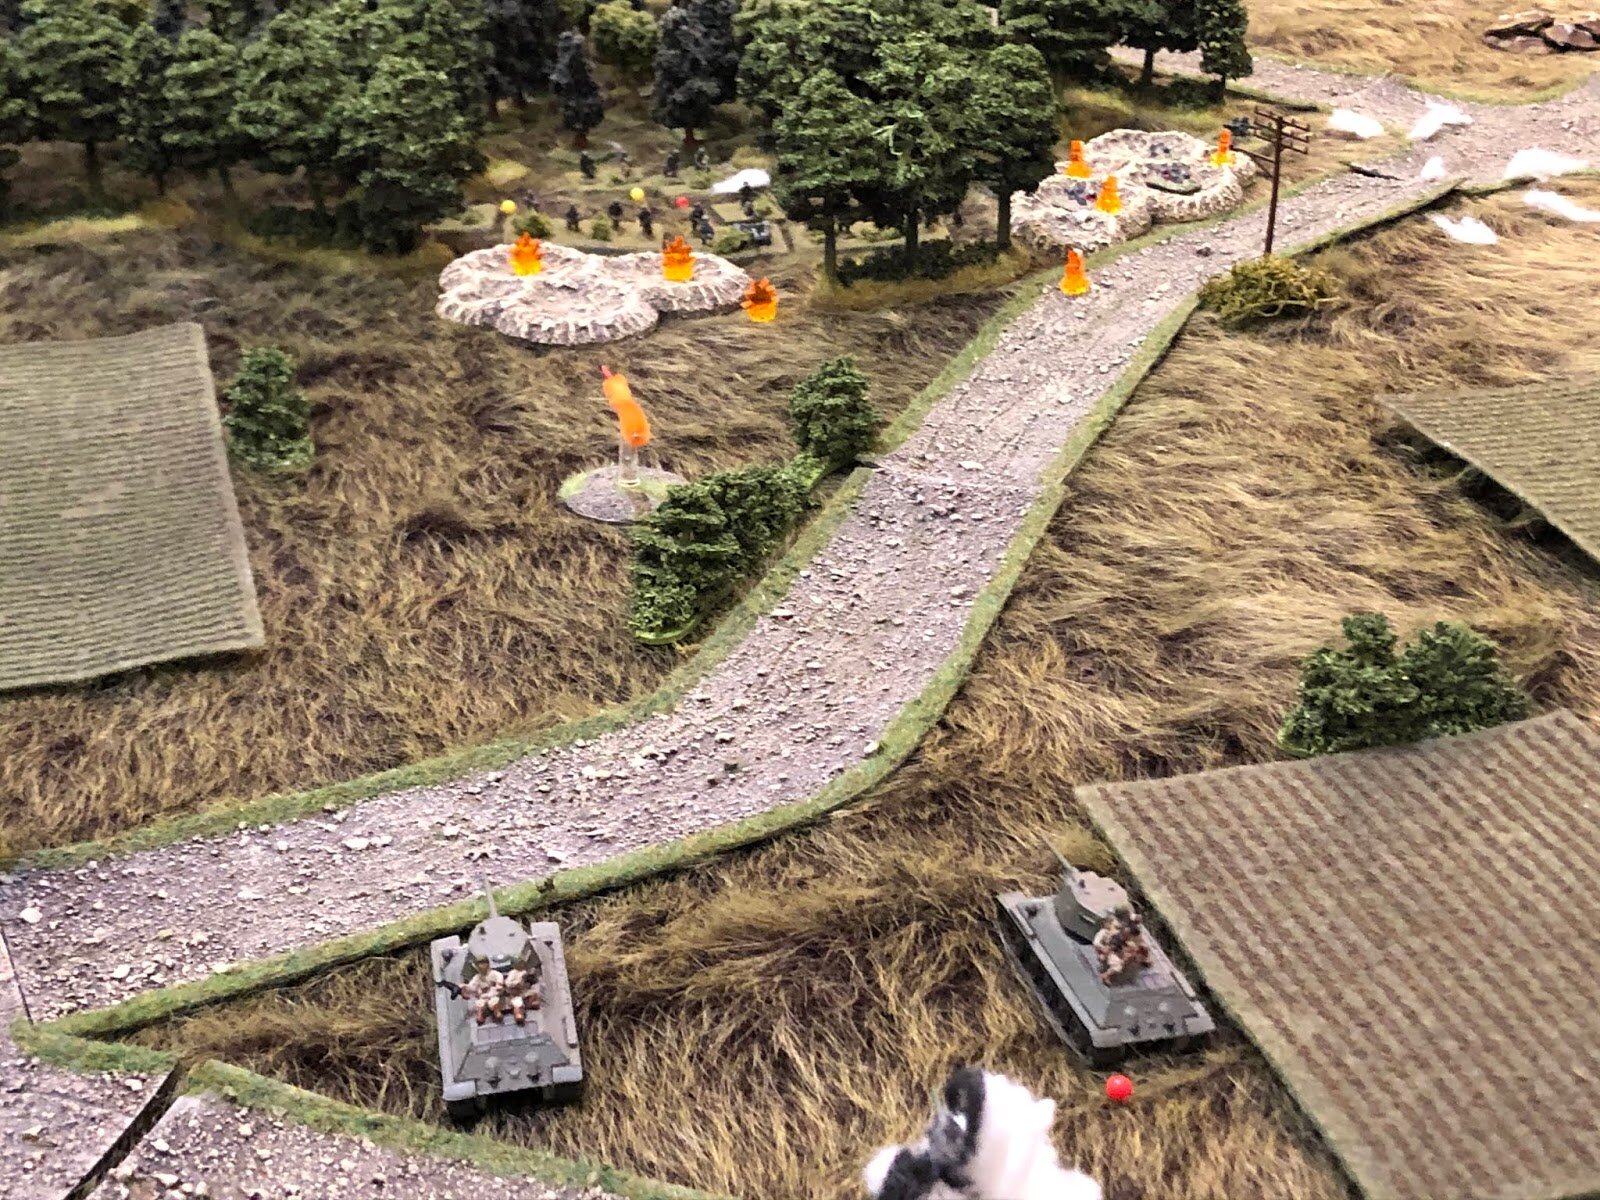
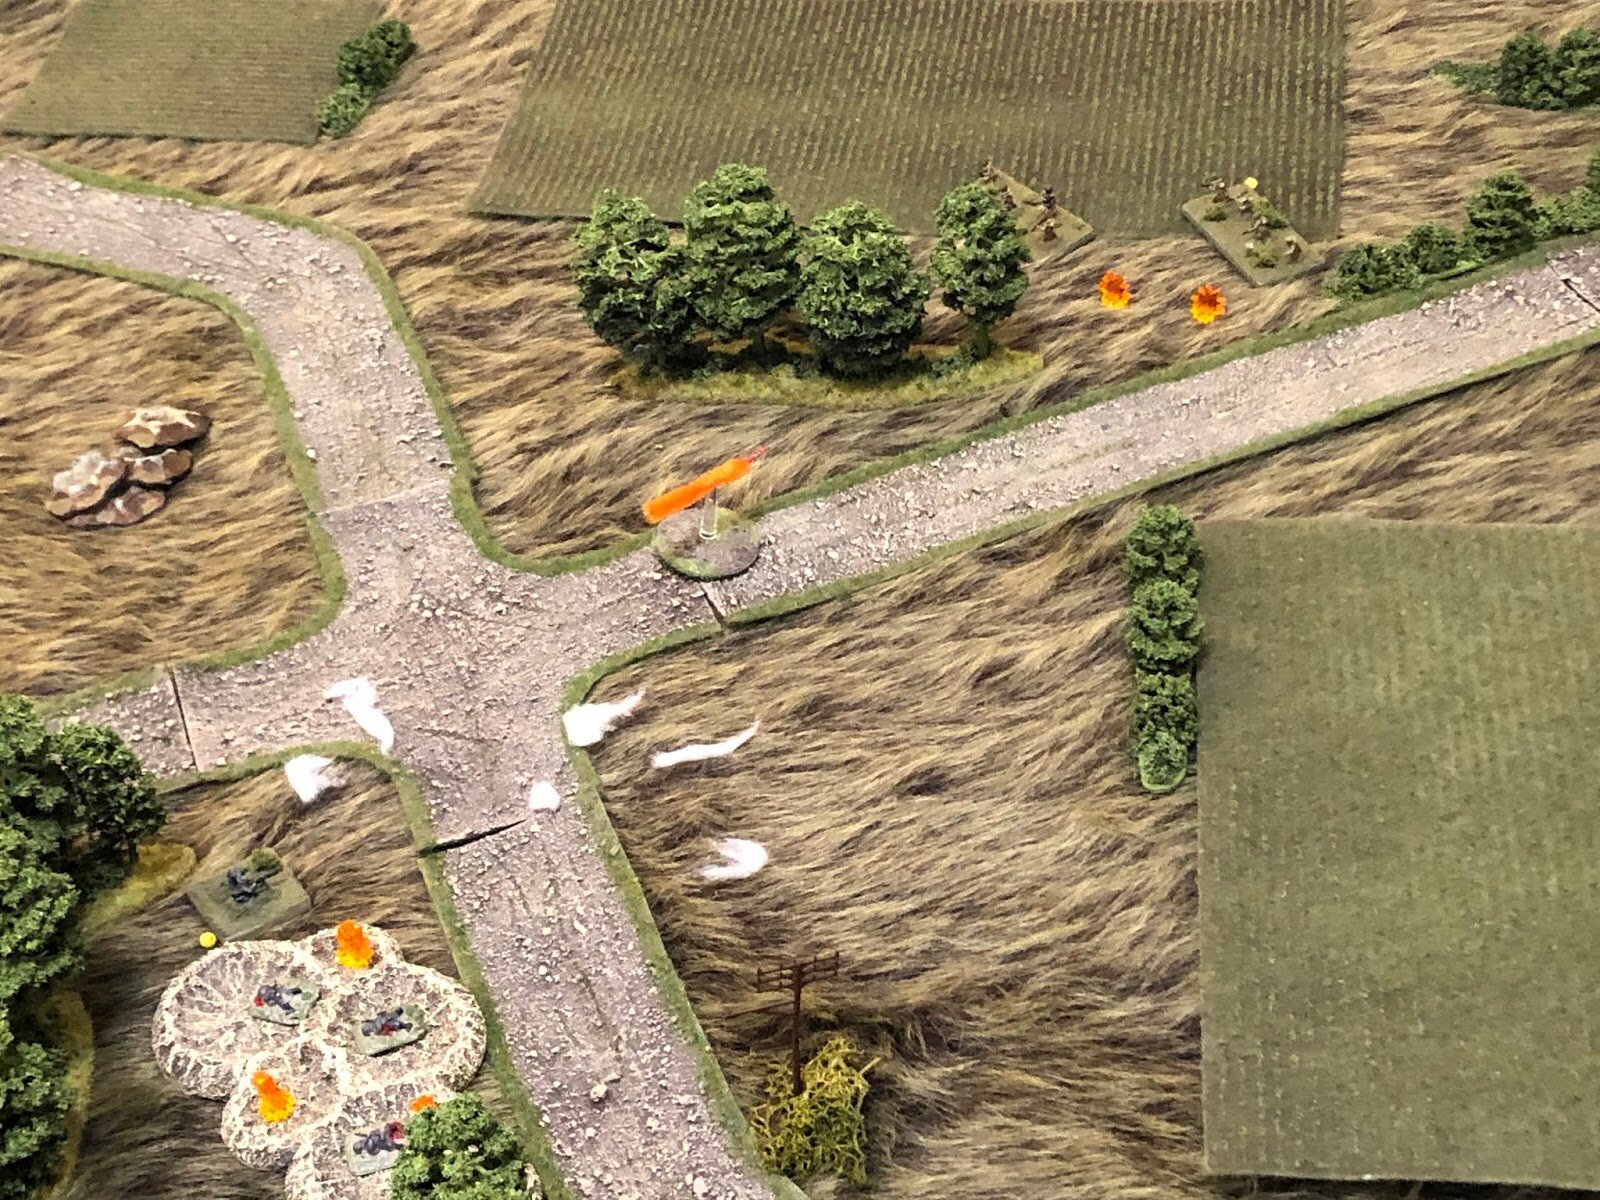
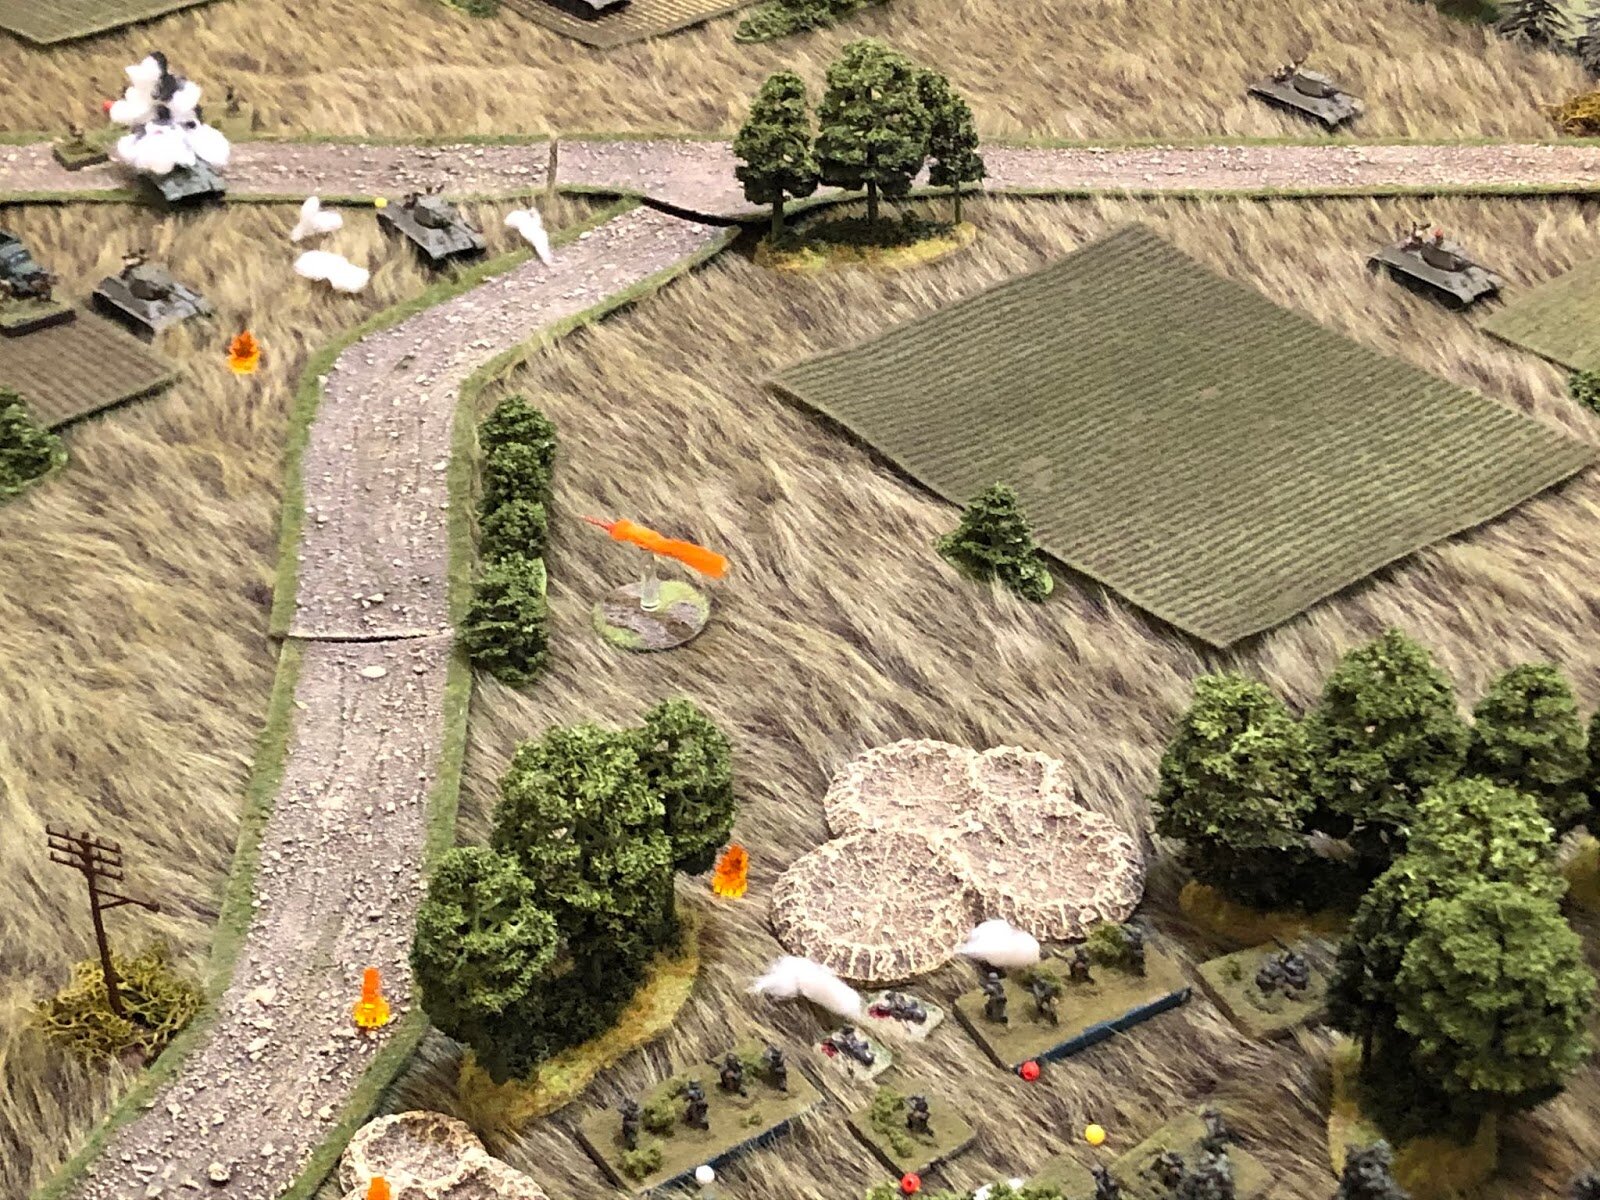
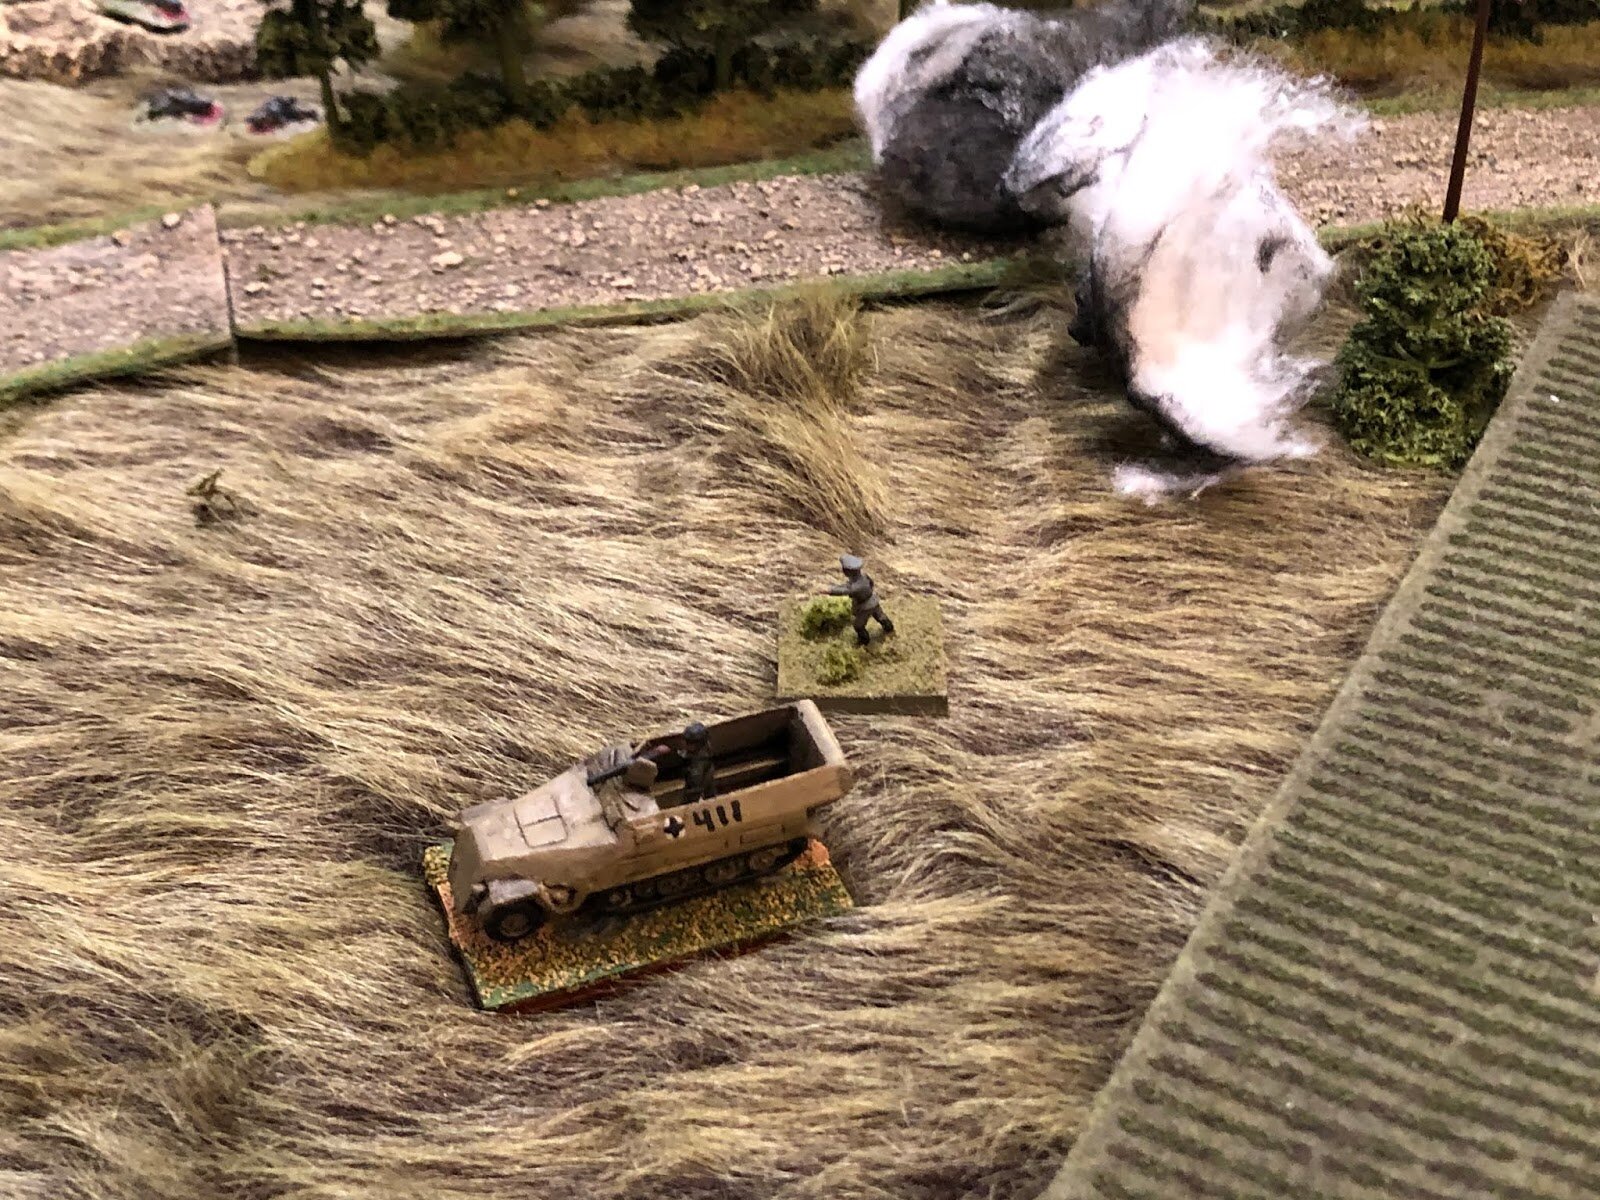
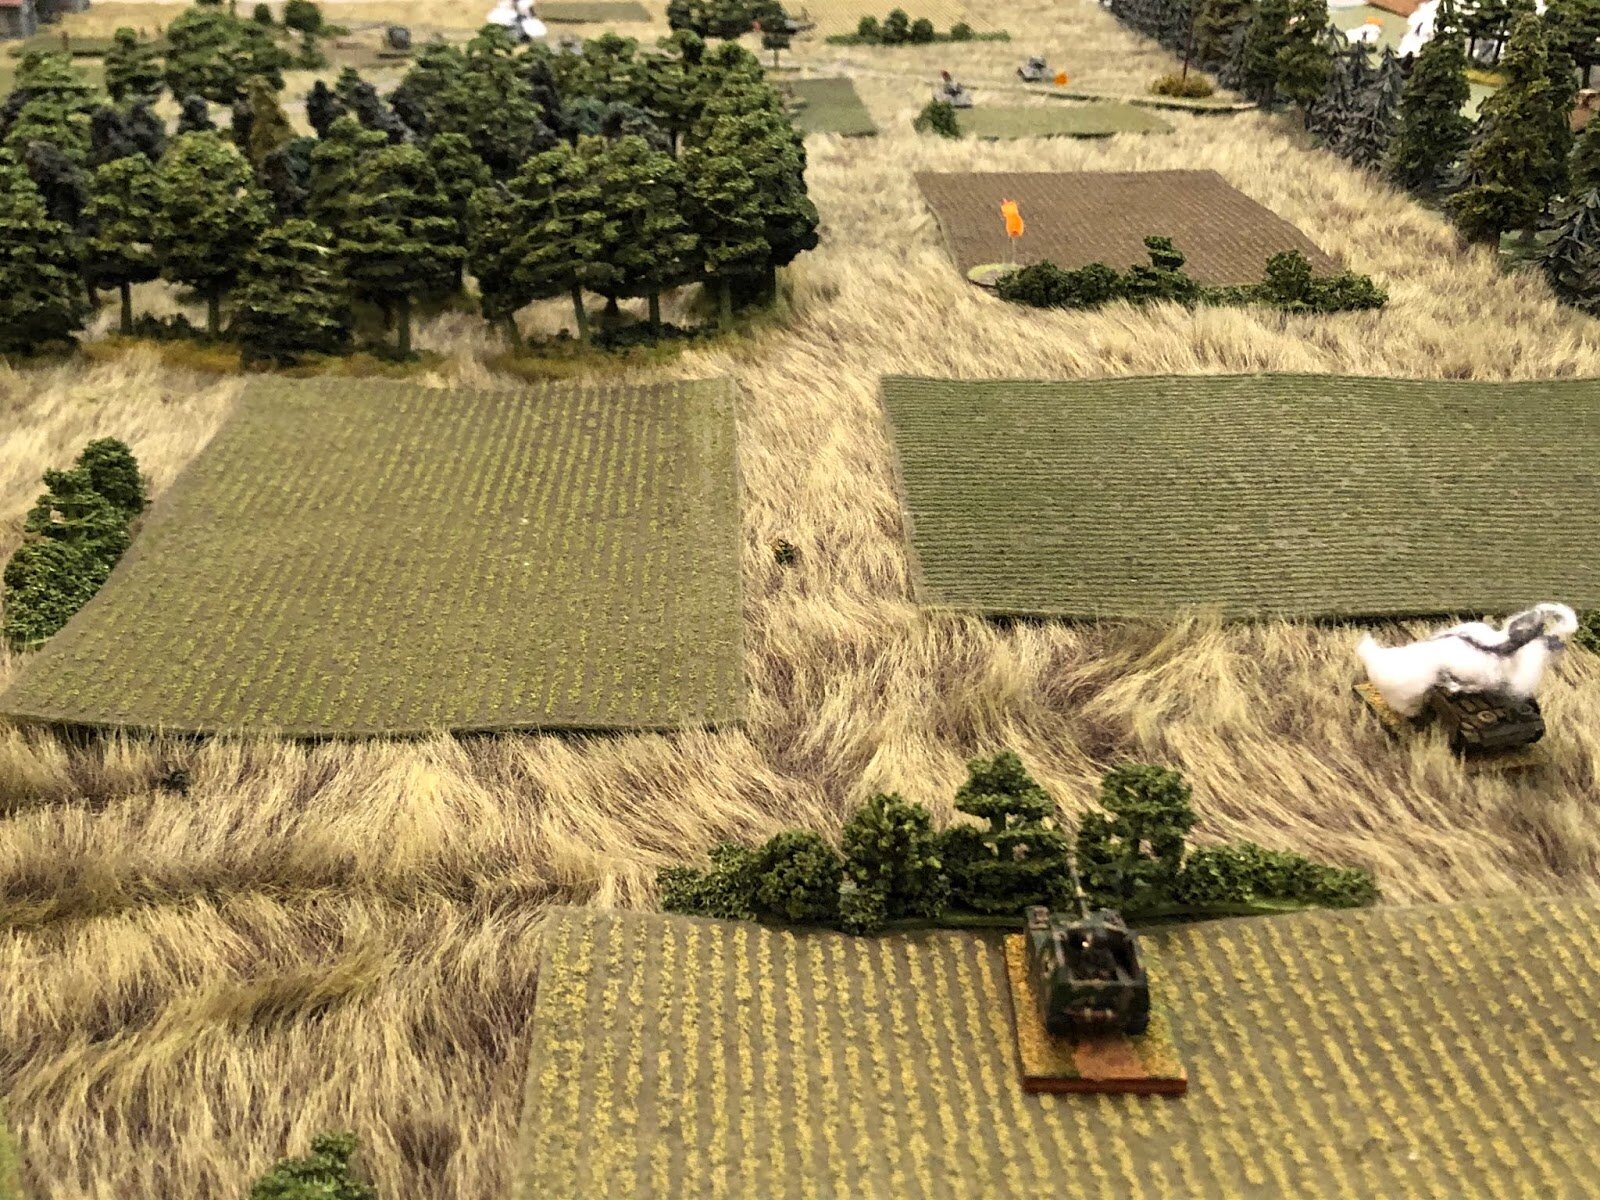
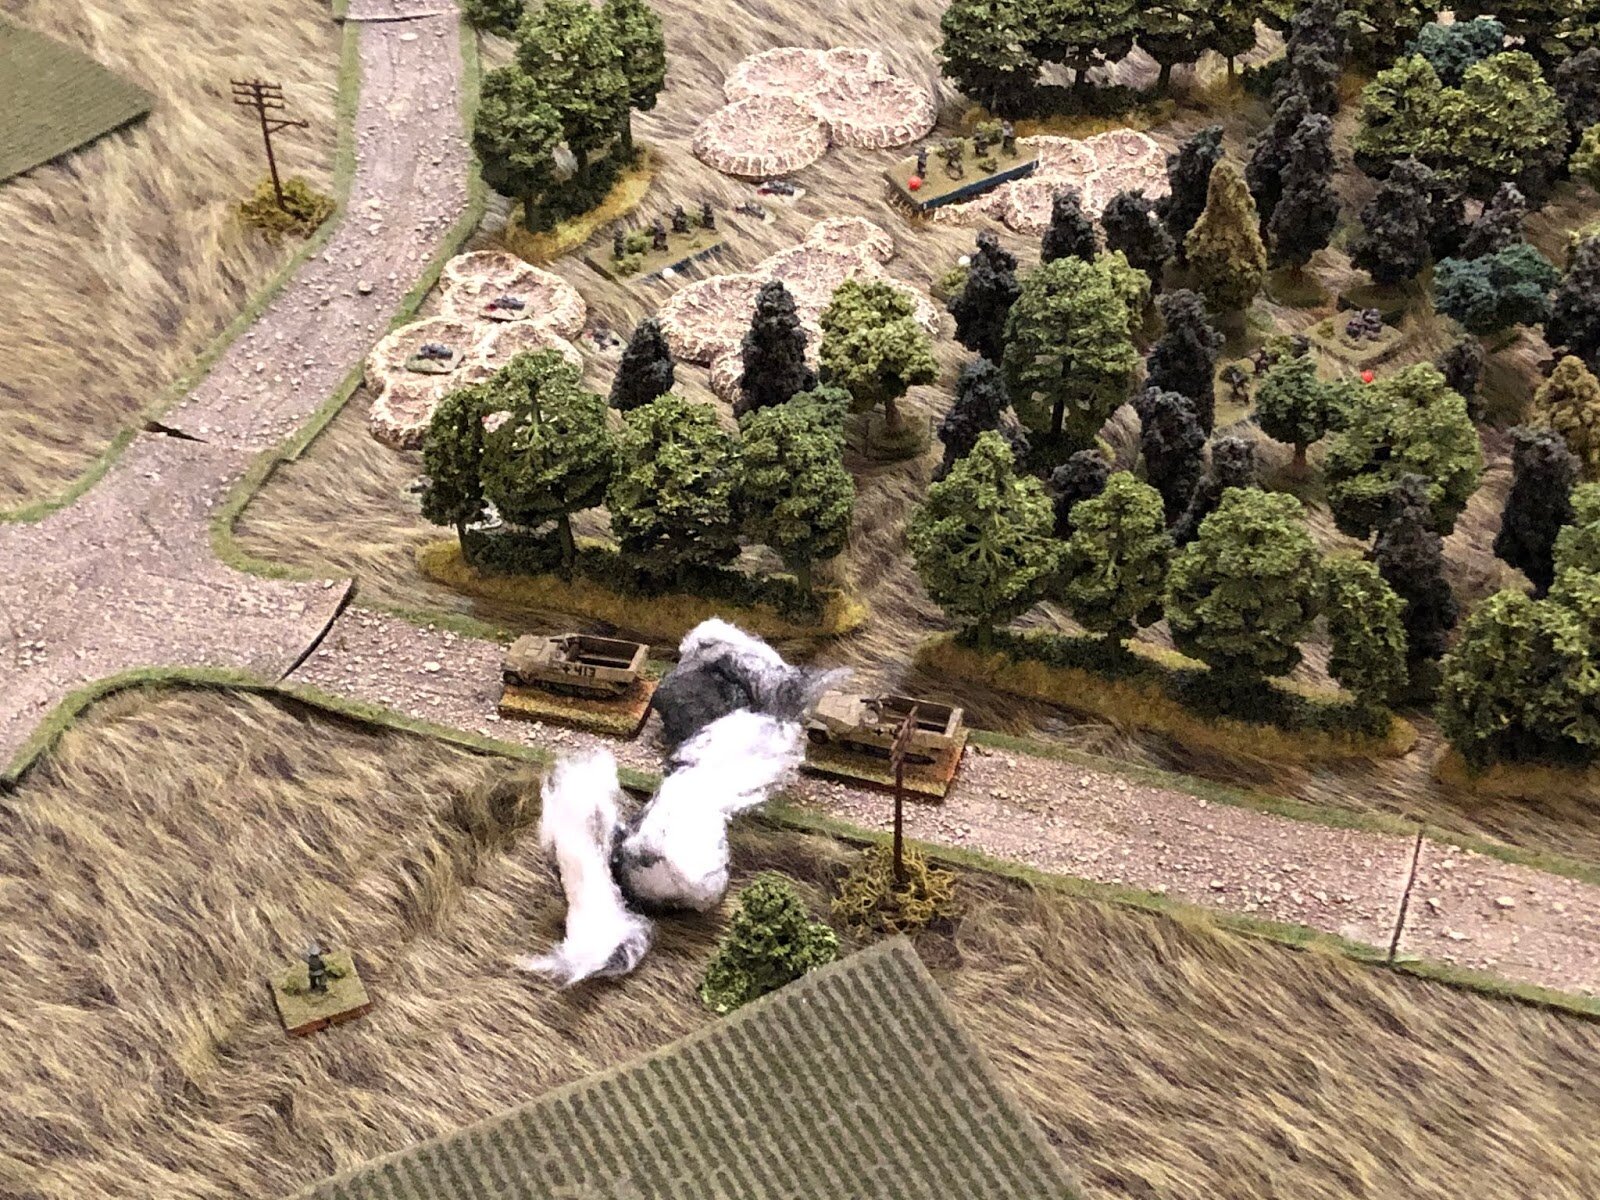
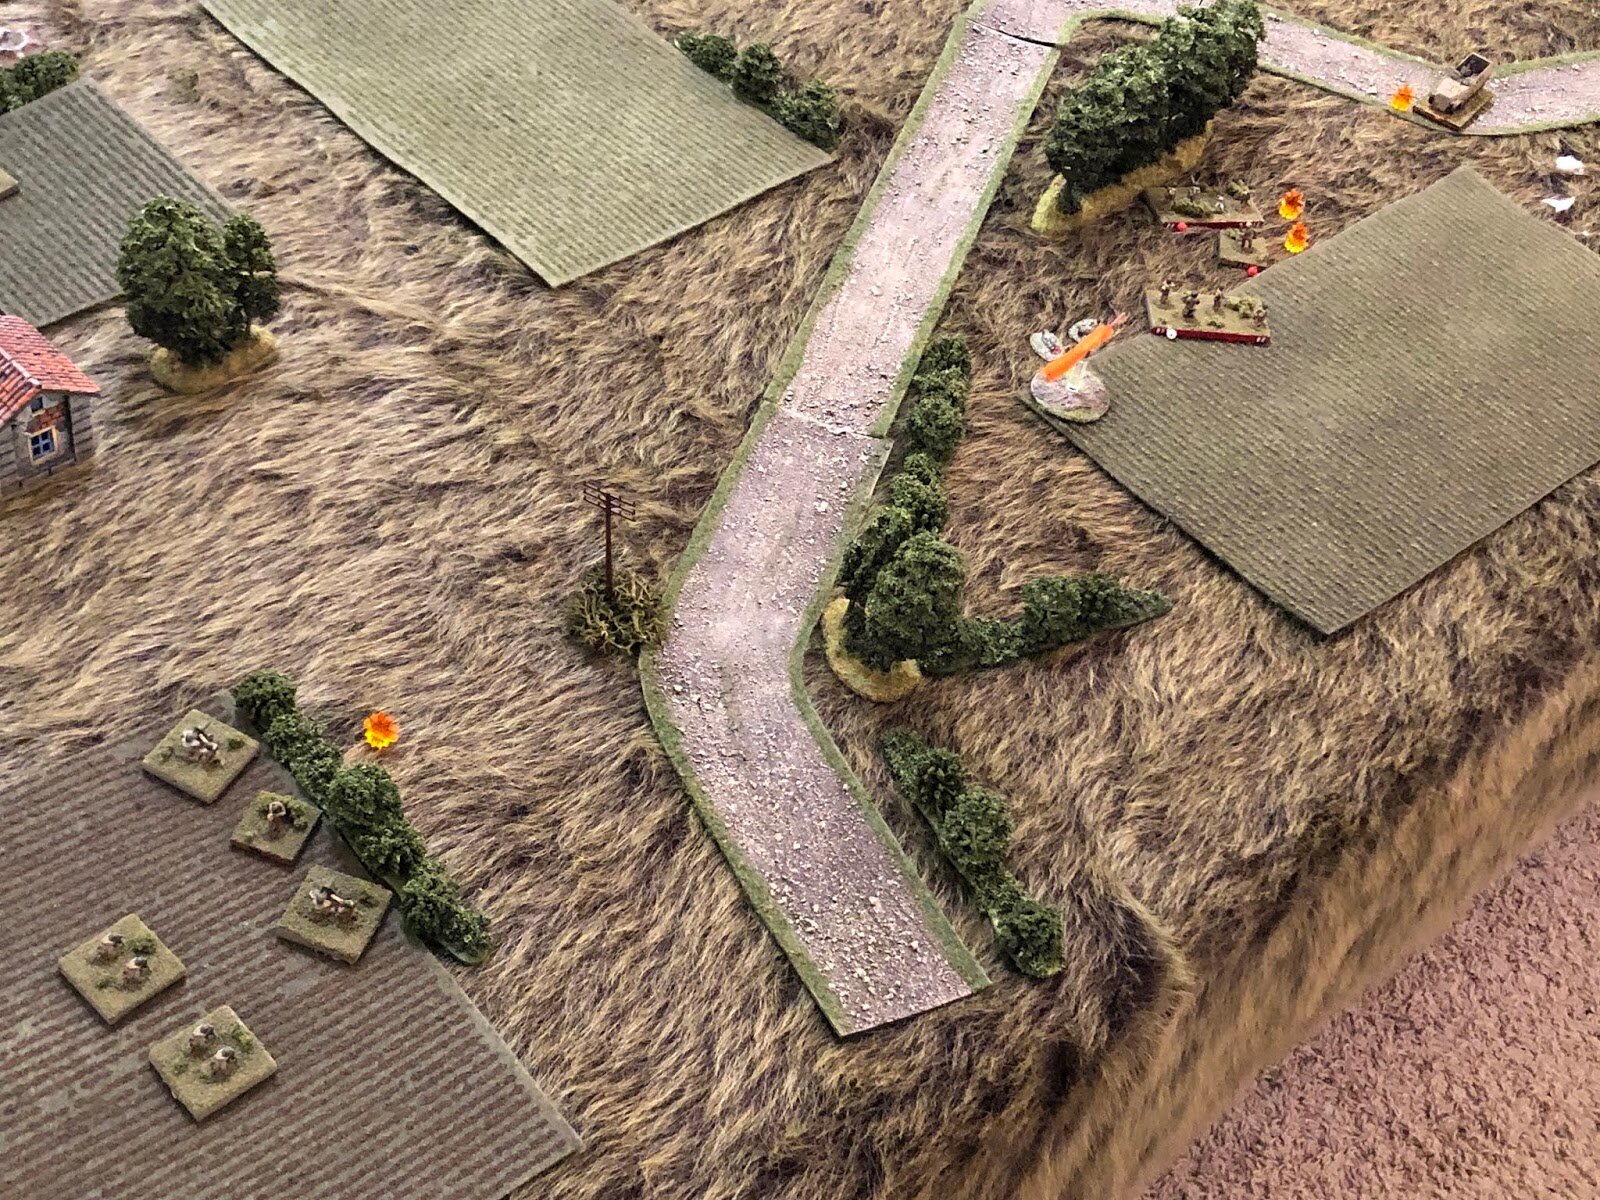
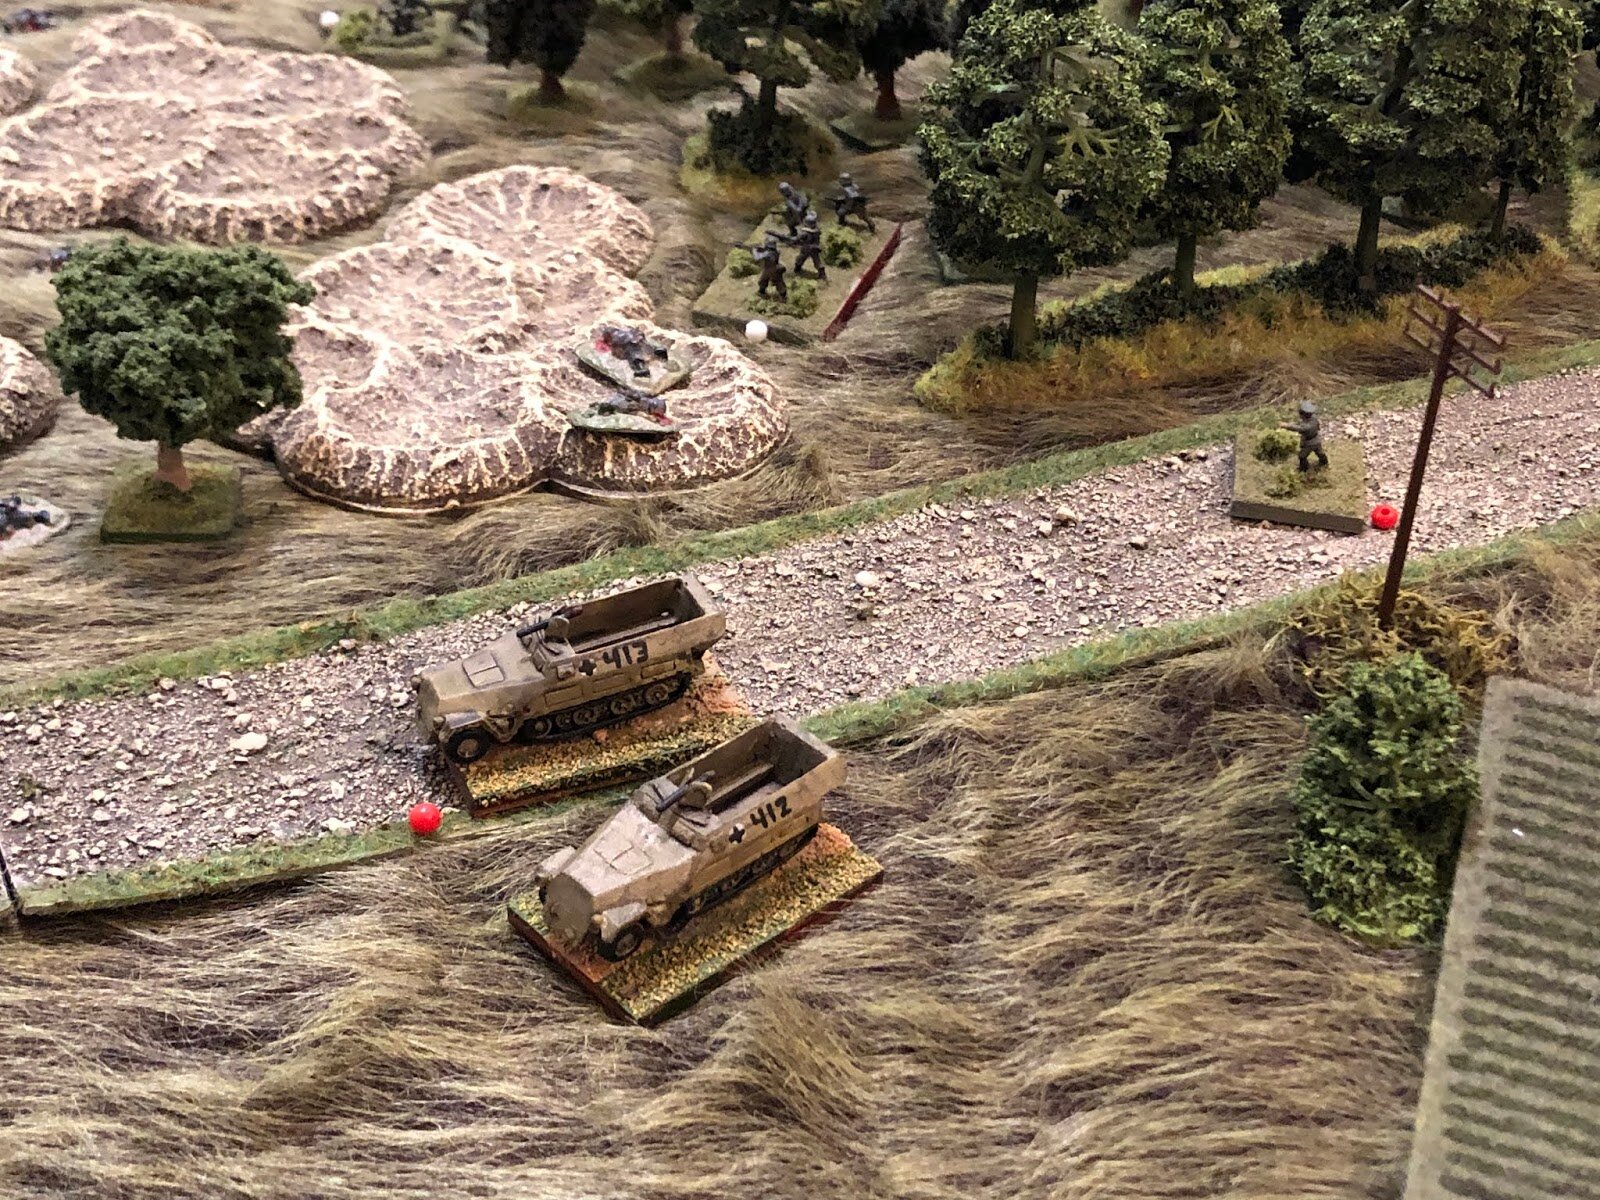
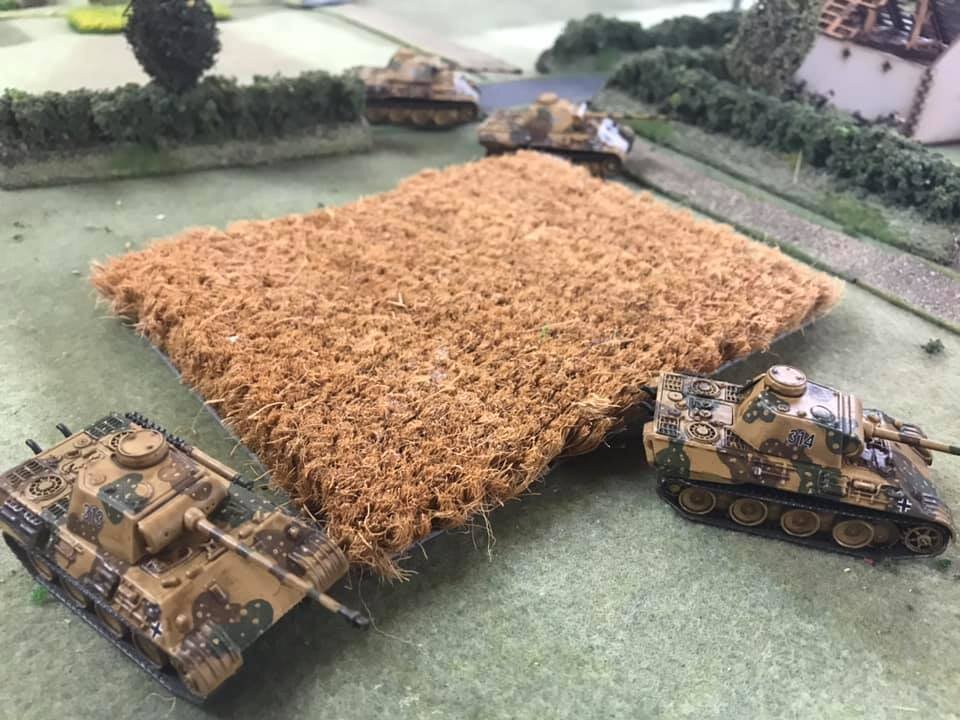
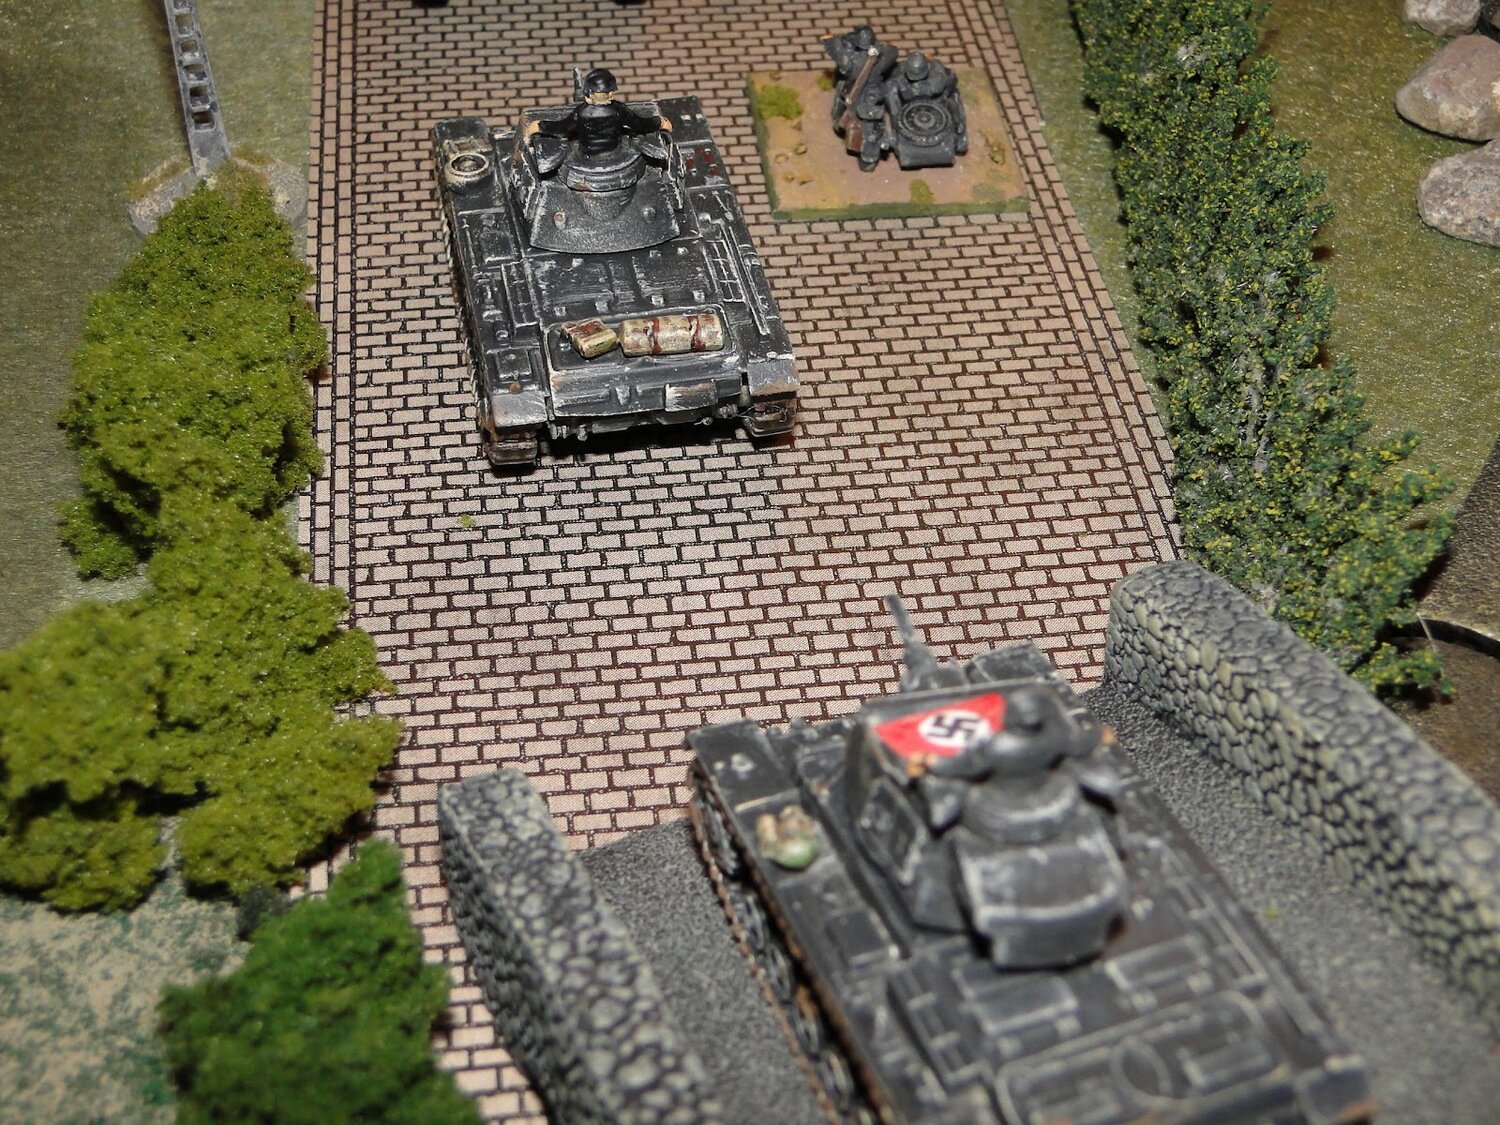
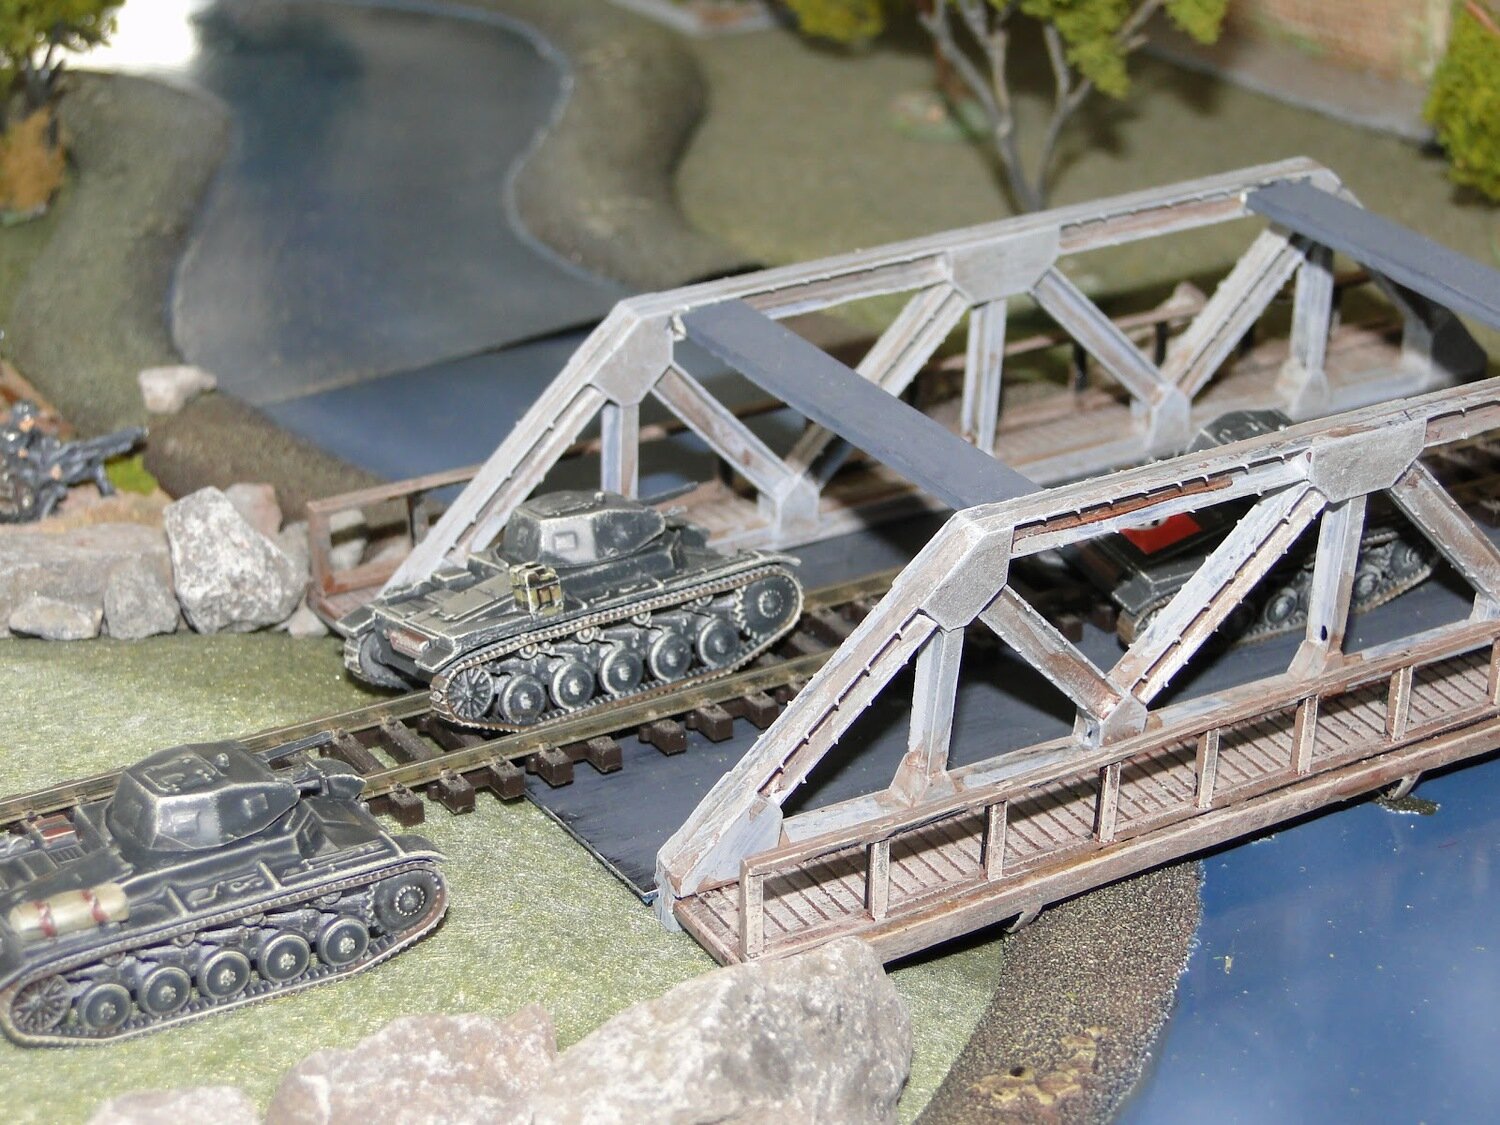
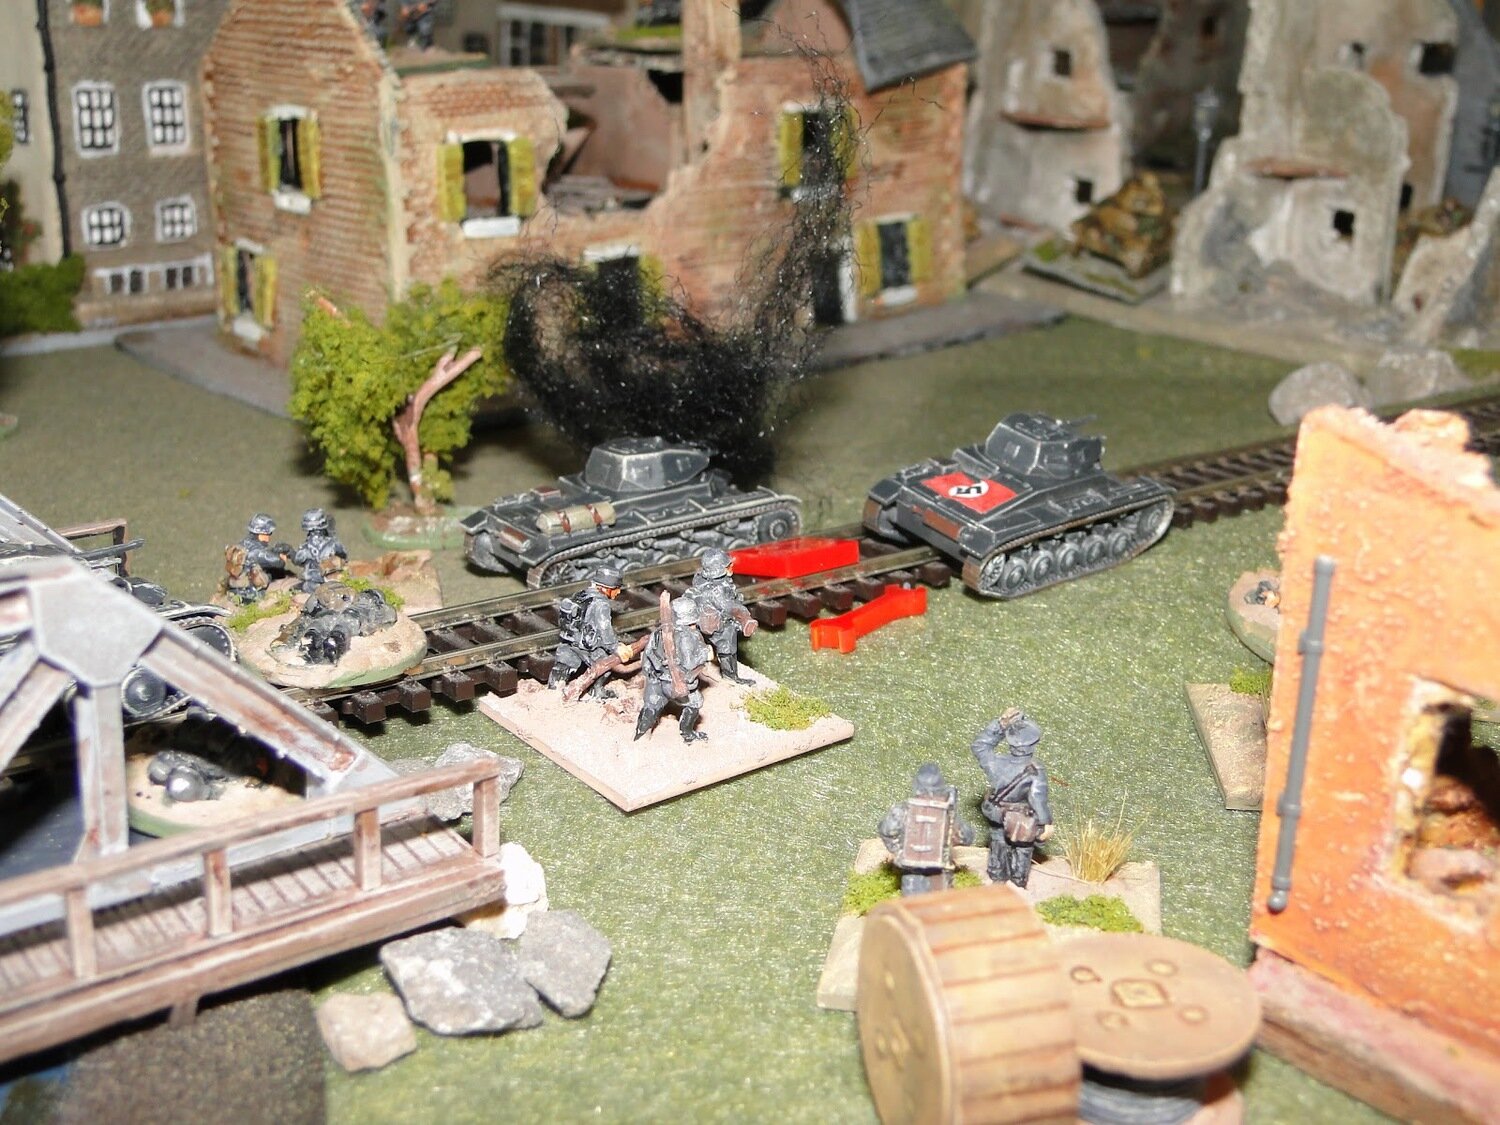
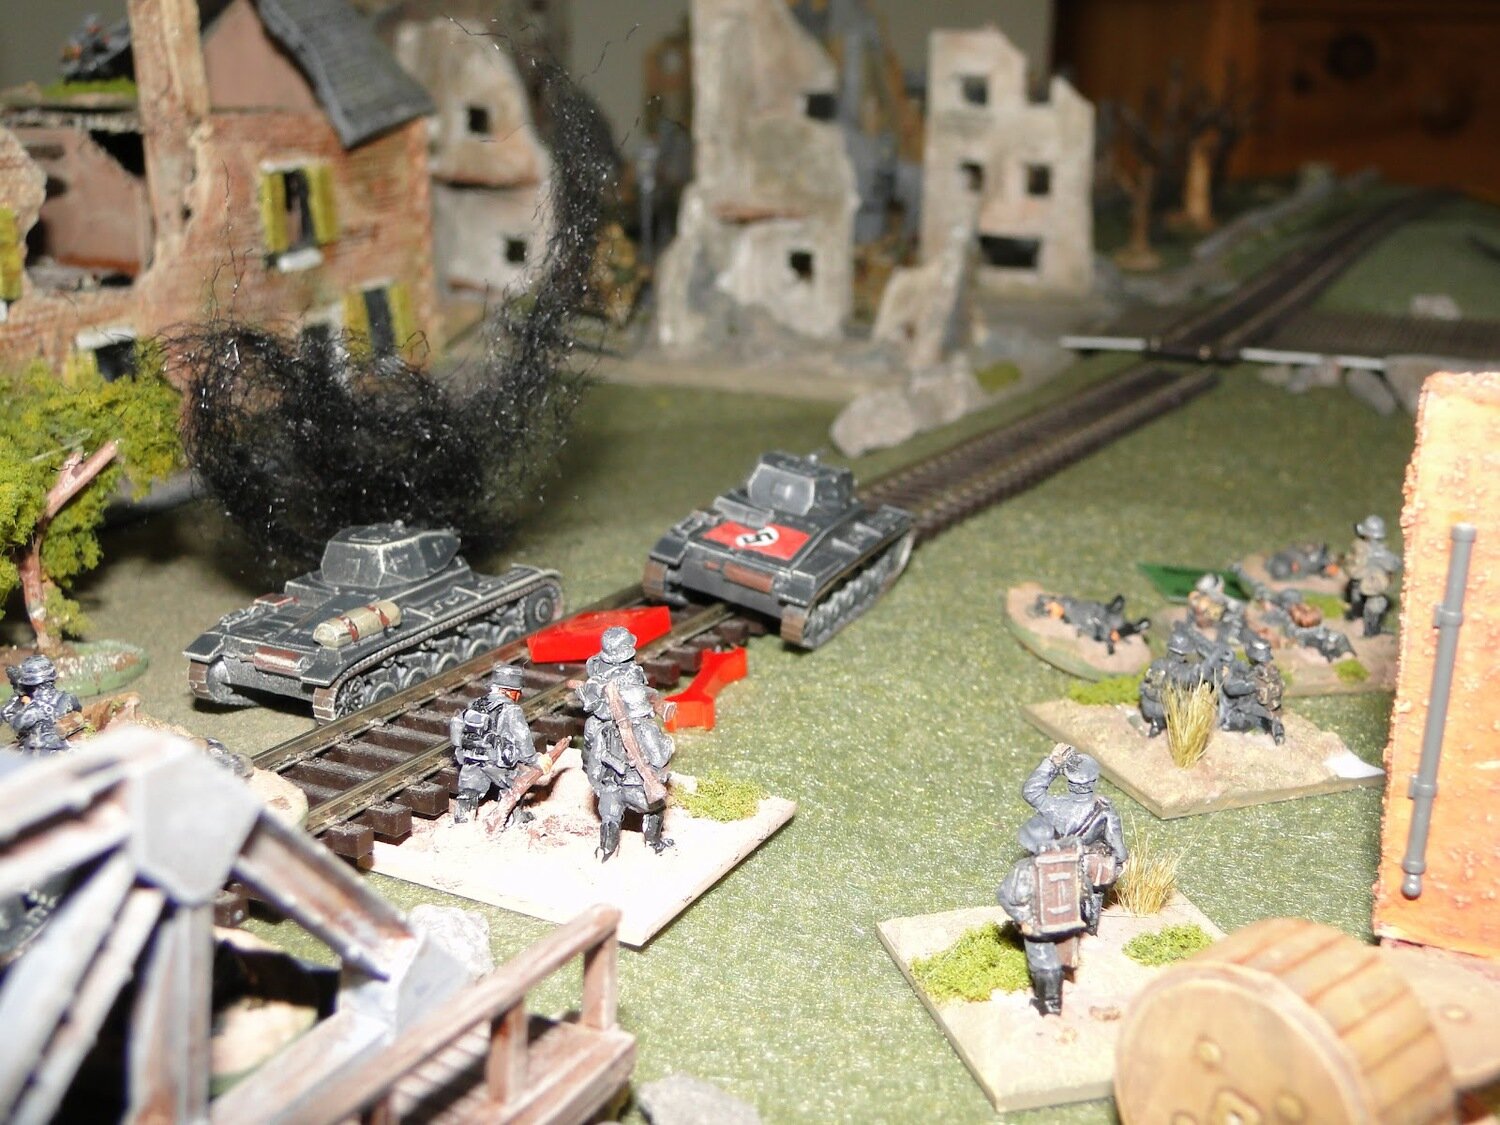
First on to the table, therefore, was a probe to the left with 1st Panzer platoon: the Panzer IIs along with one Panzer 38(t). They, under a Blind and accompanied by a Dummy Blind, can be seen forward and to the left in the trees in the picture below.
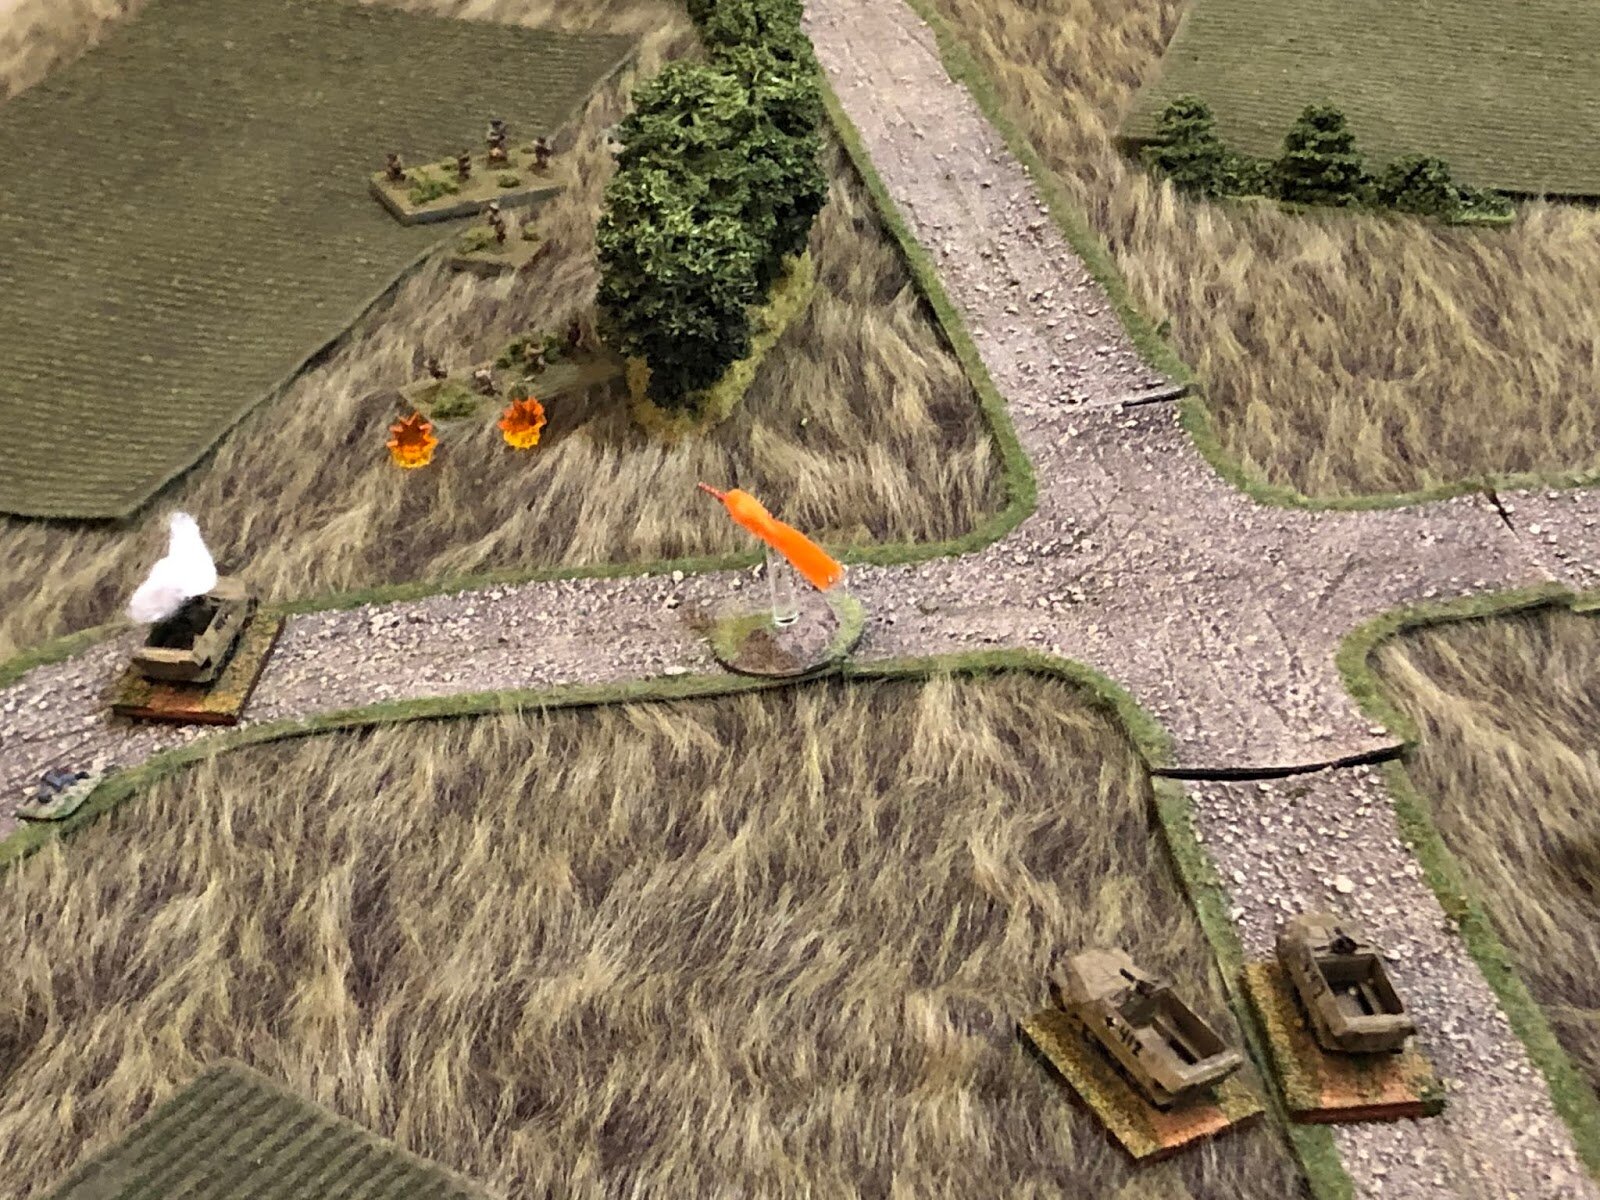
I then deployed my artillery platoon. Unusual to lead with the guns, but I knew from previous recon that there were no enemy immediately on me, and their job was to try and identify threats within the town, and then neutralise them with long range 75mm fire. As luck would have it, my first spotting roll was “double 6” and I managed to see a glint from the British FOOs binoculars coming from one of the windows in the white house in the distance at the end of the High Street.
StuGs Deploy
This was all the excuse I needed, and both StuGs opened fire. Again, luck was with me, and although the shells did no more than add a bit of Shock to what turned out to be the British HQ platoon and leading Big Men, the house was set alight by my bombardment, meaning that all inside would have to vacate as soon as possible. Talk about keeping the enemy off balance!
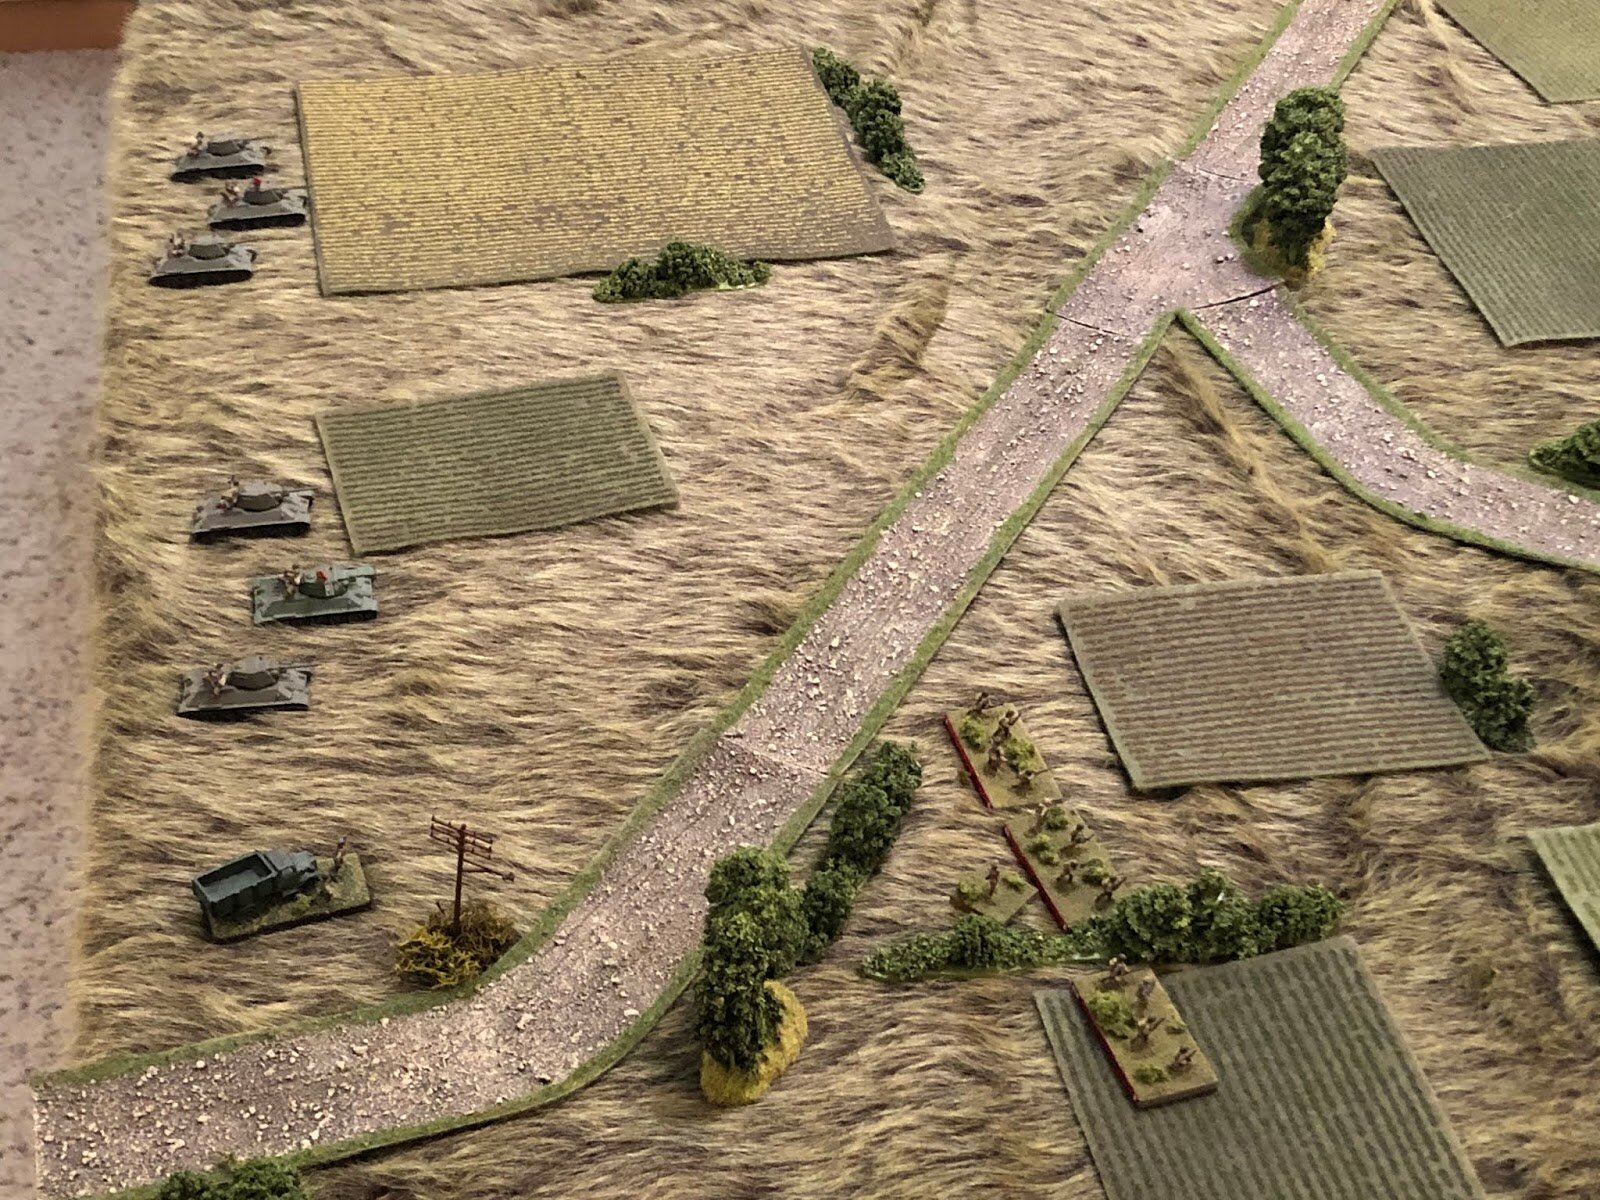
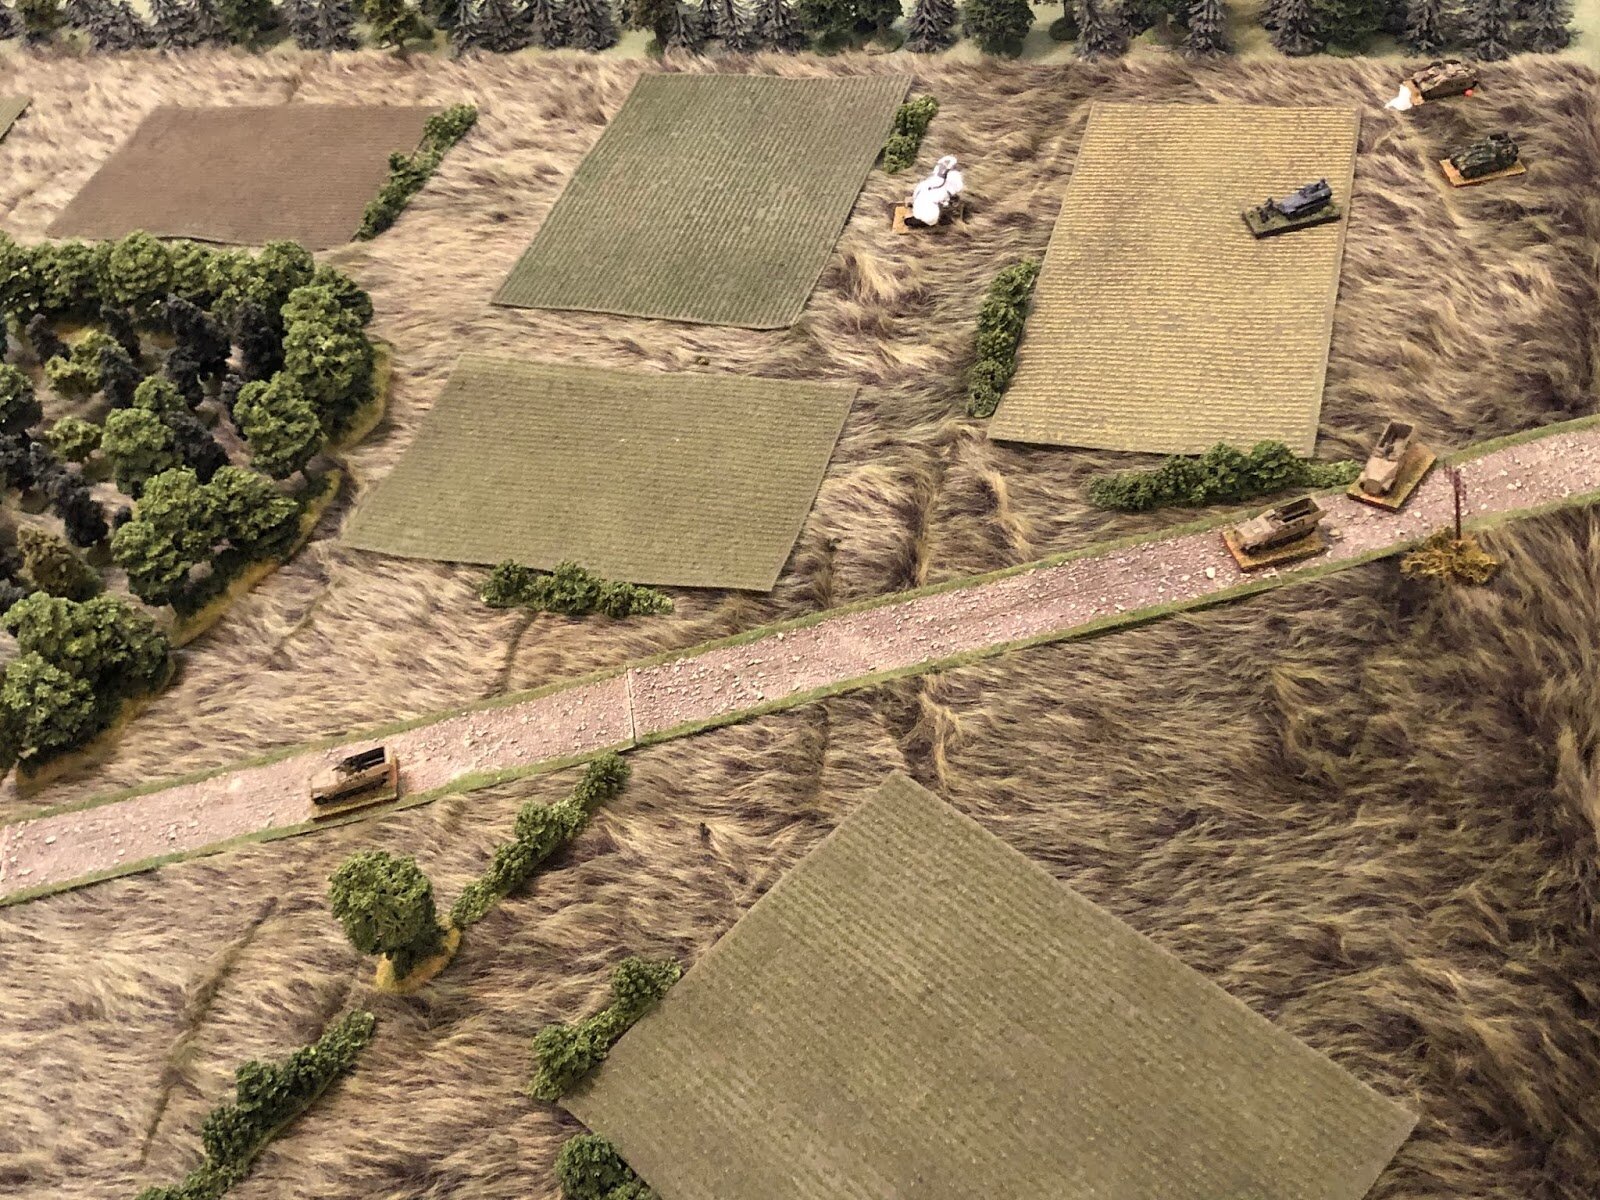
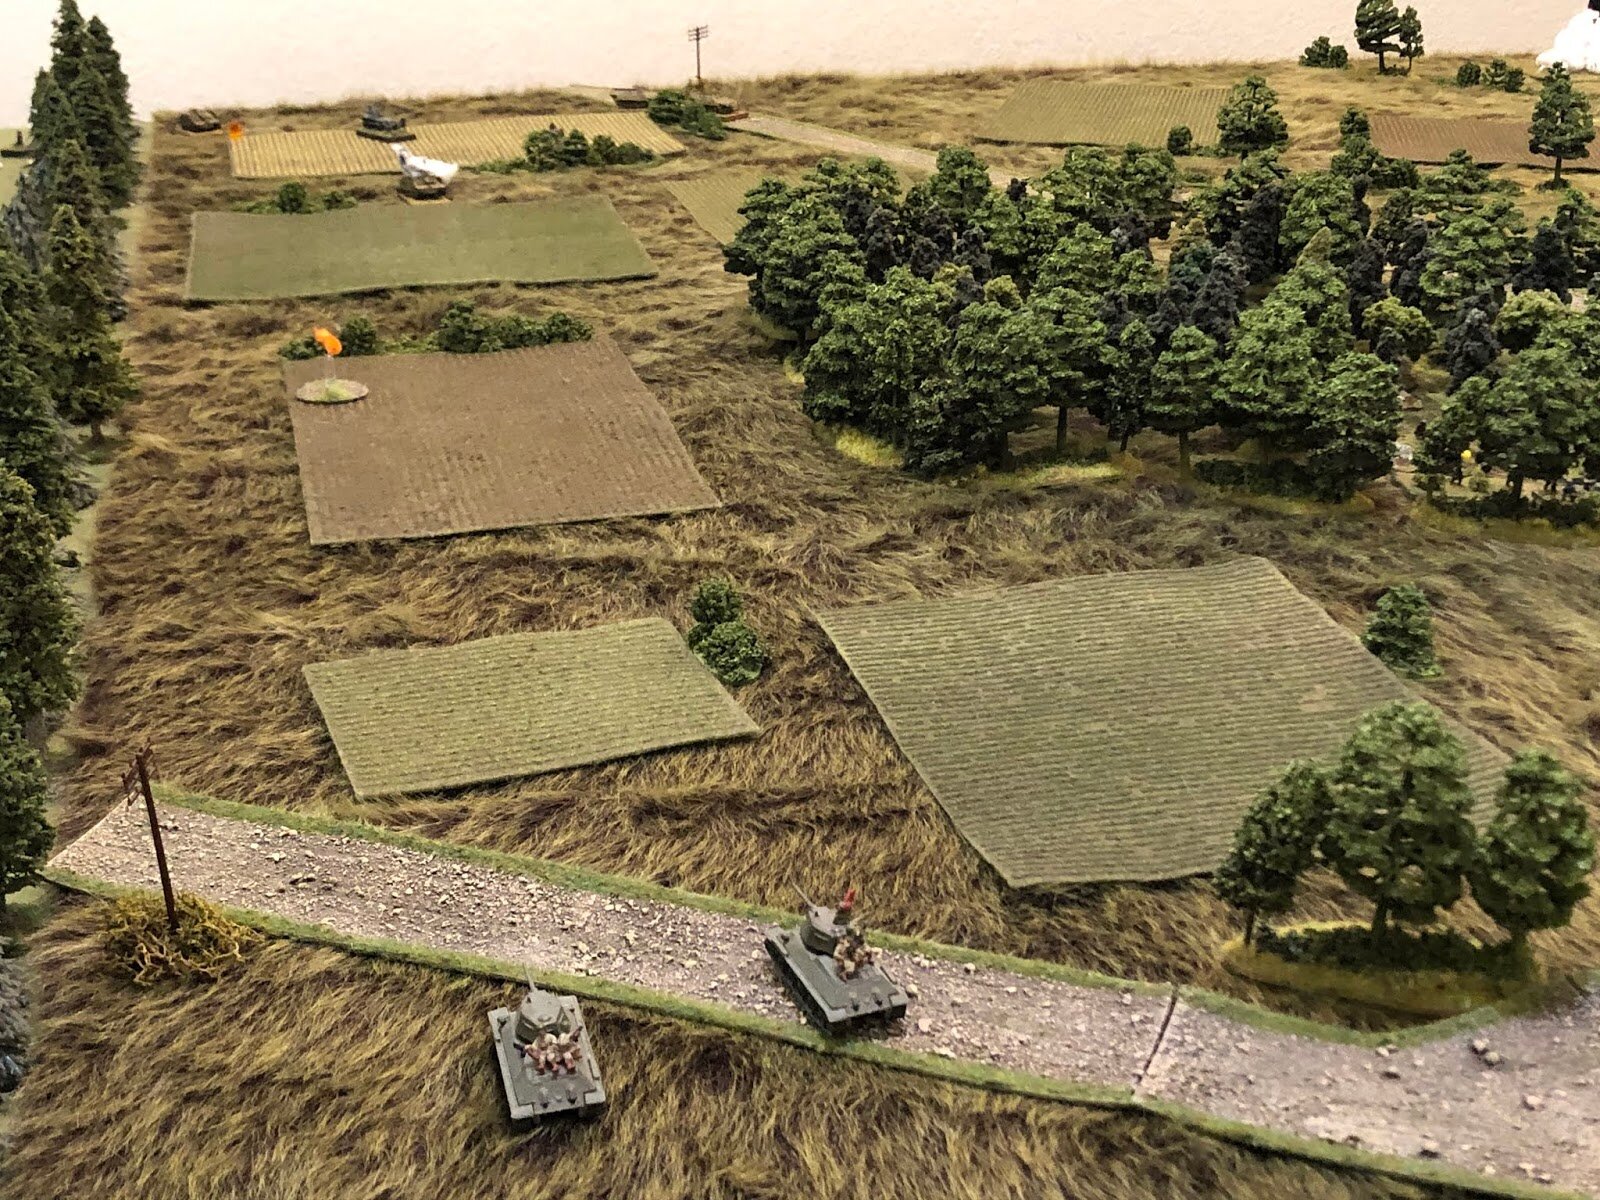
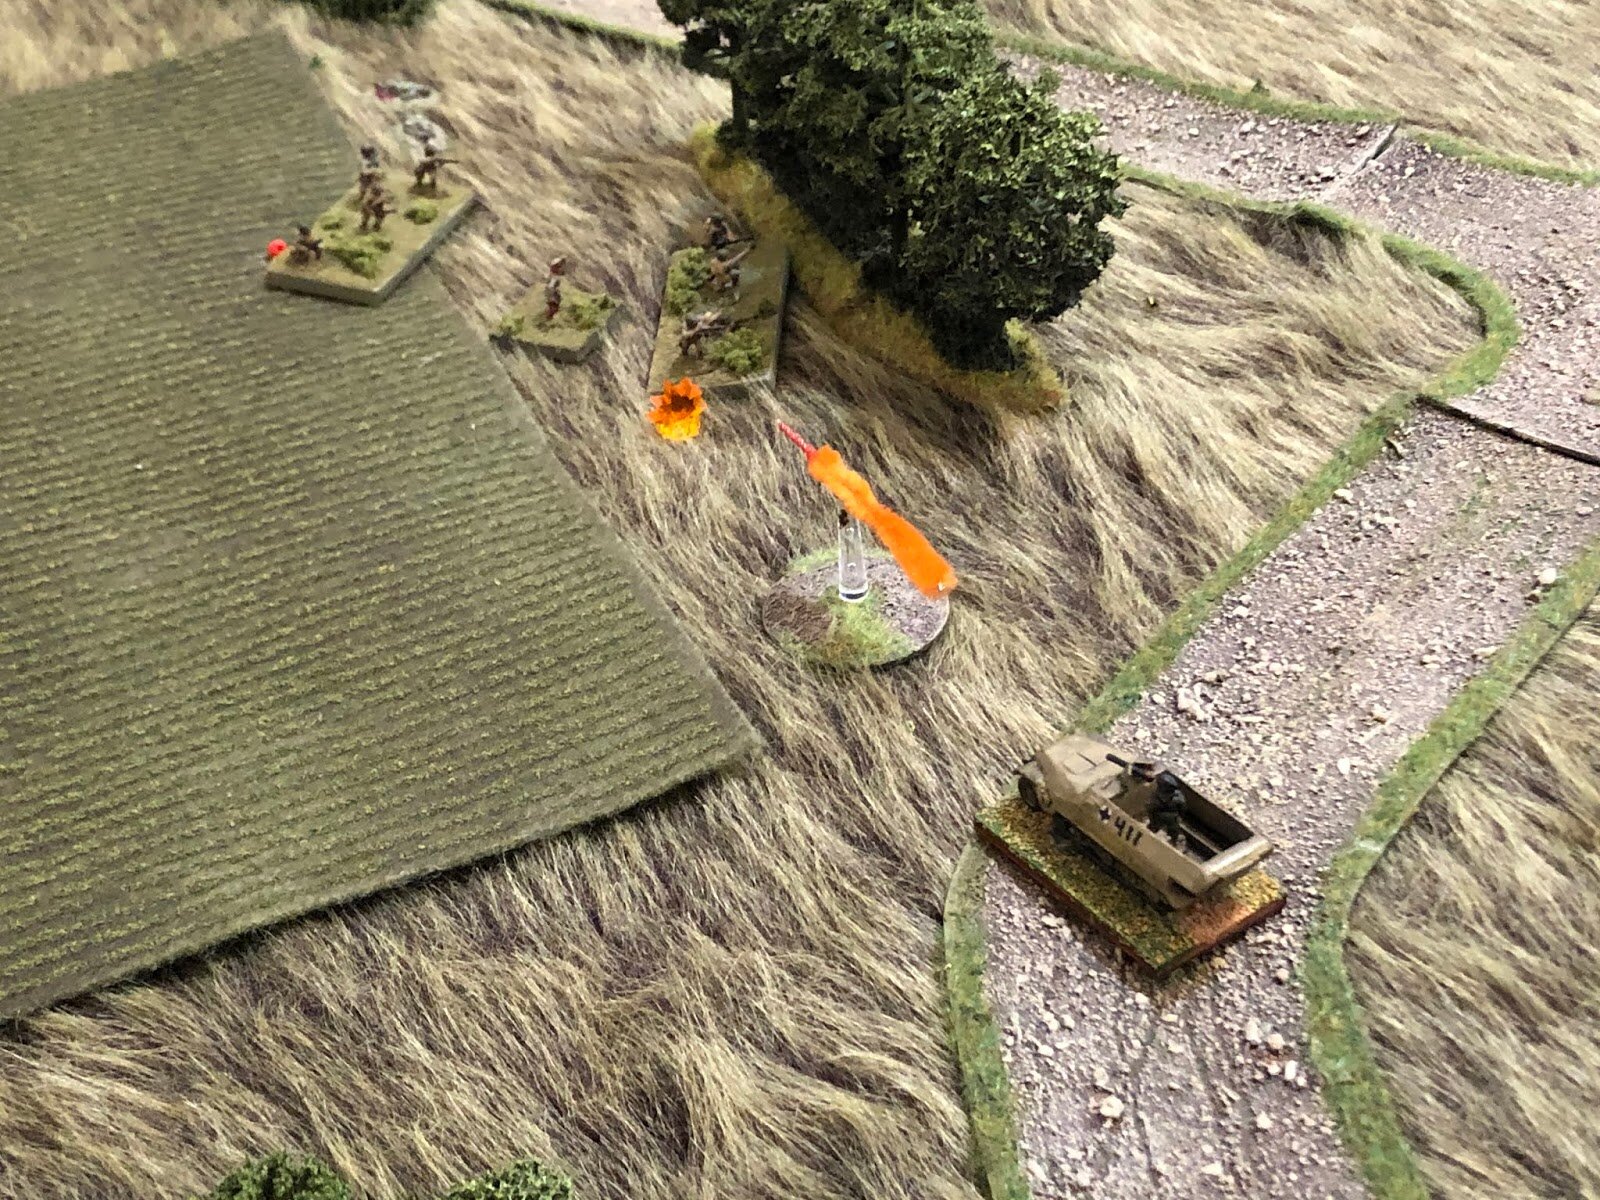
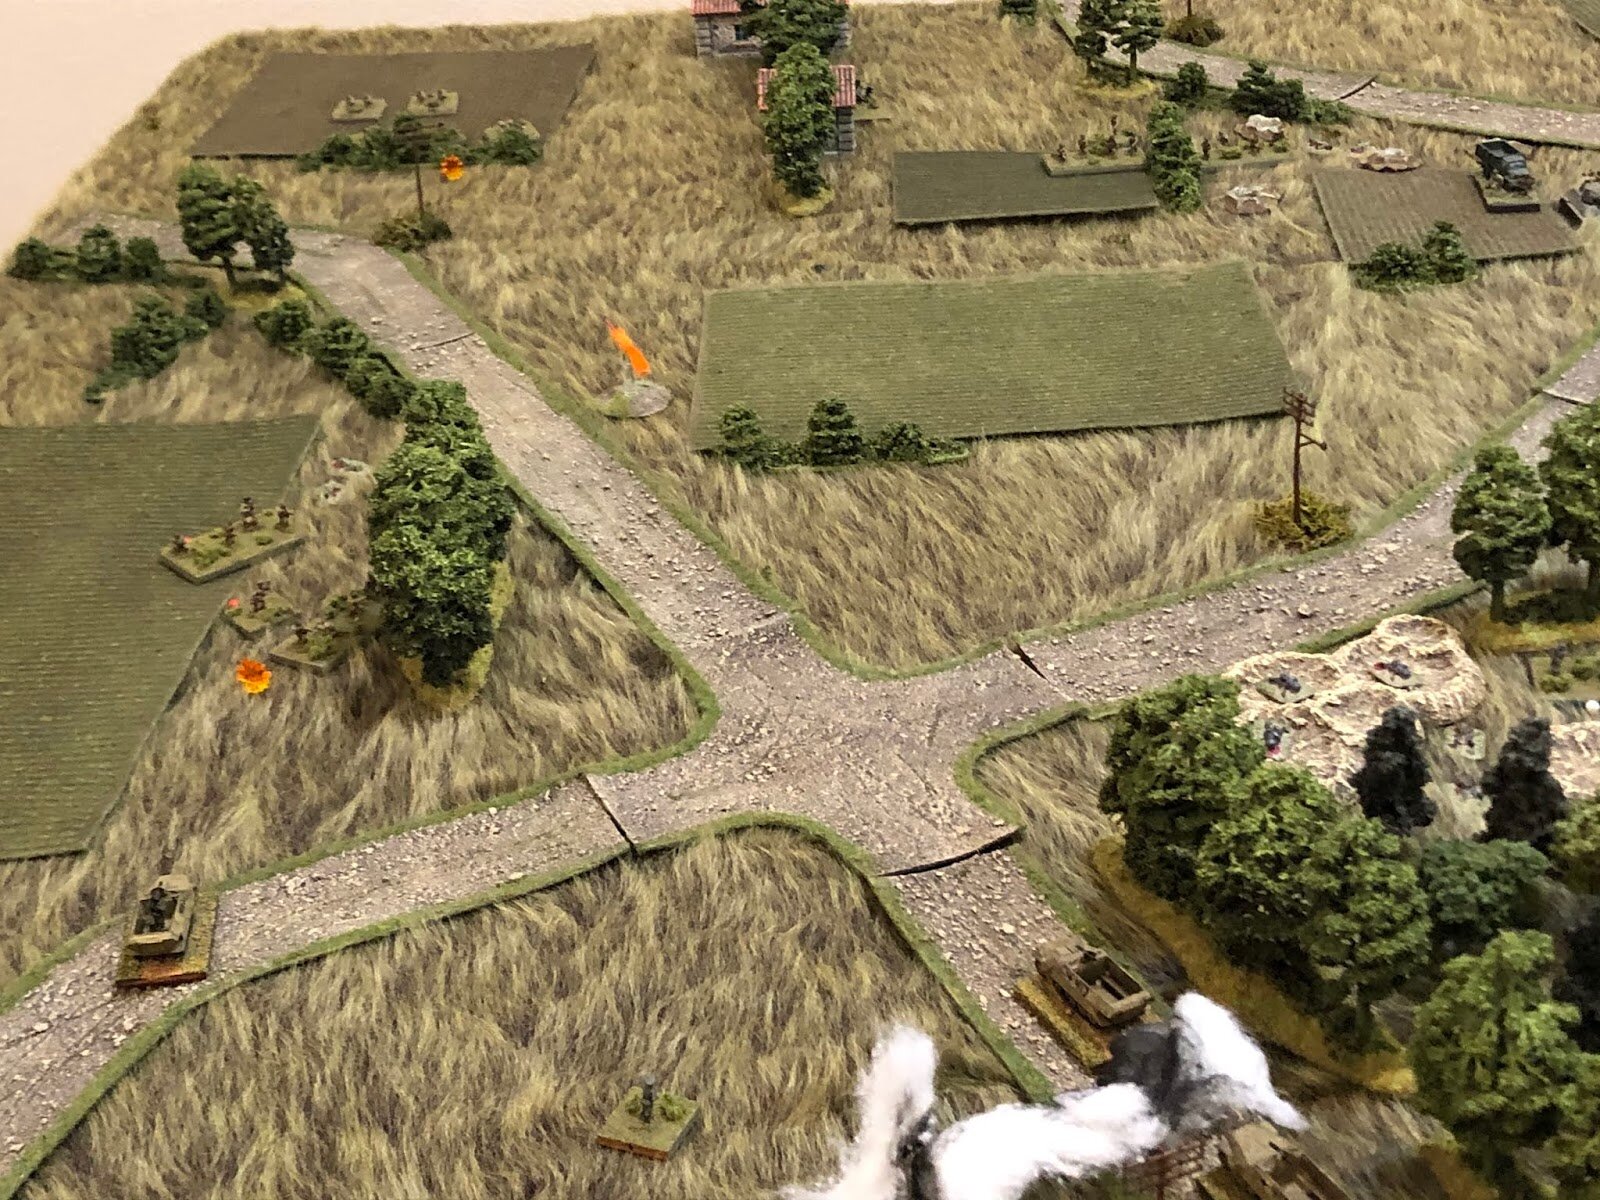
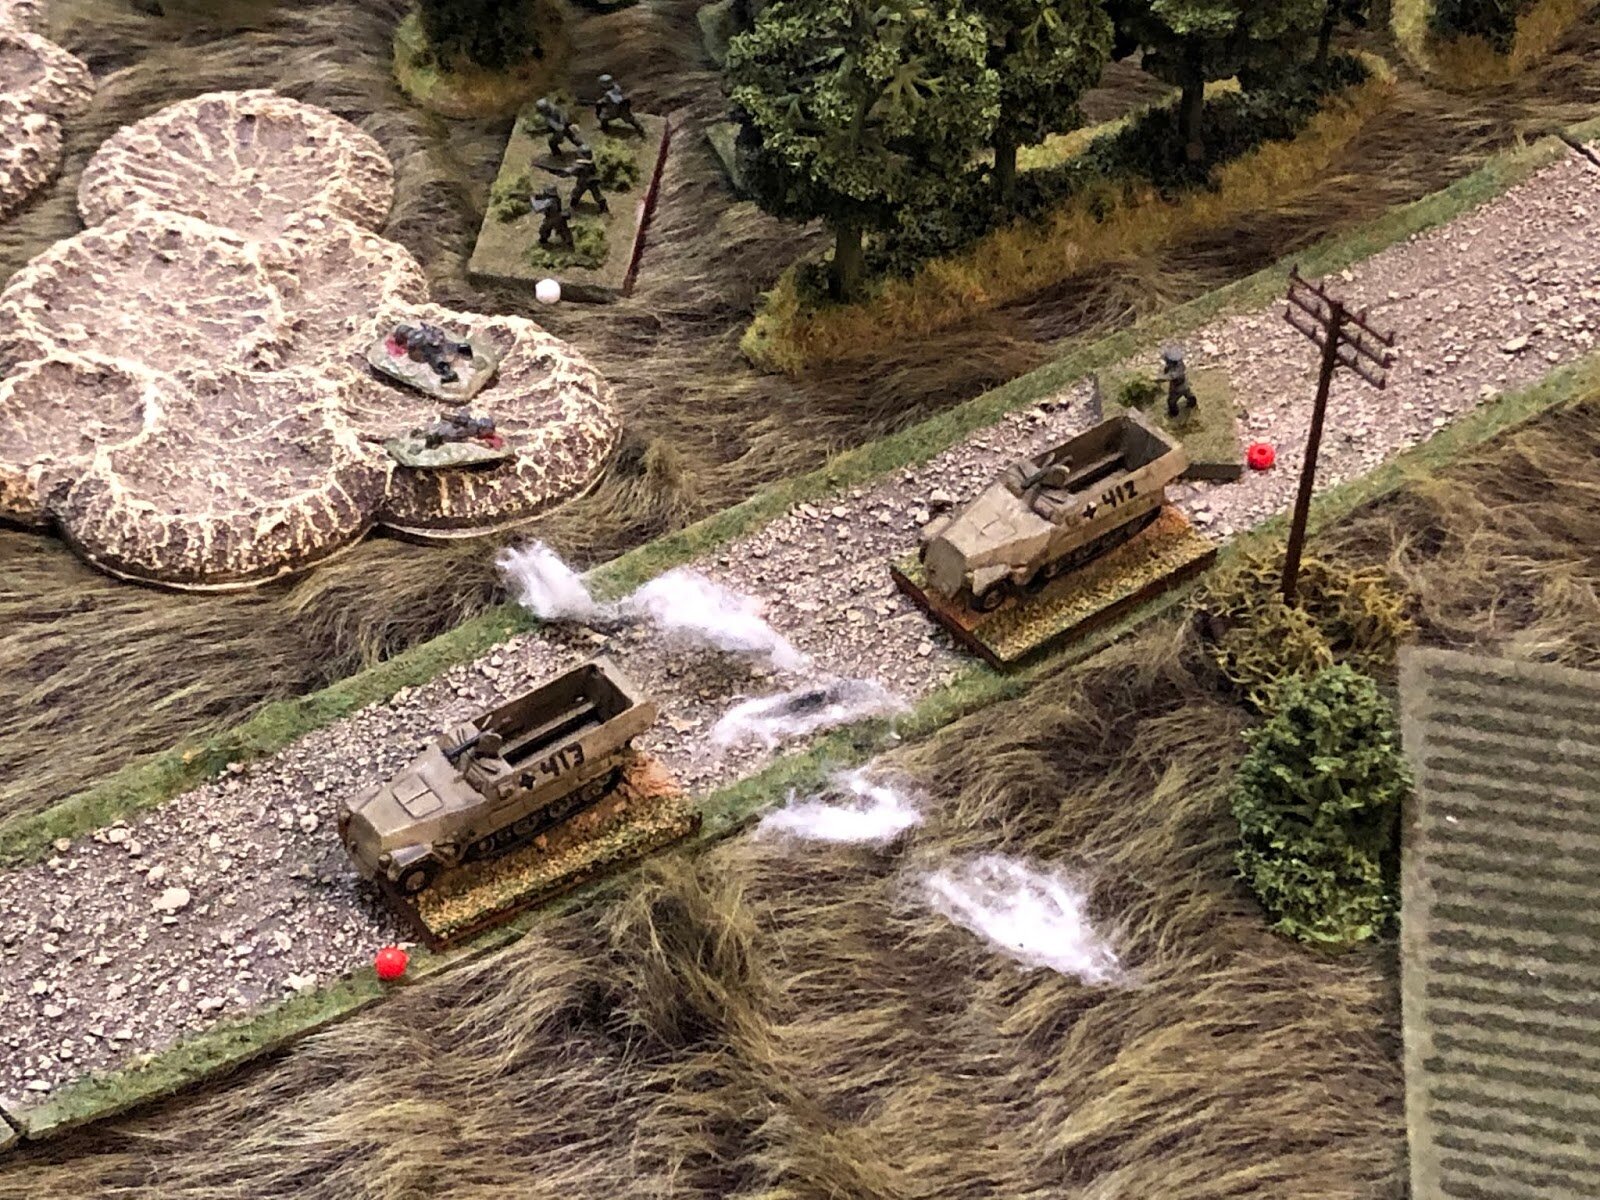
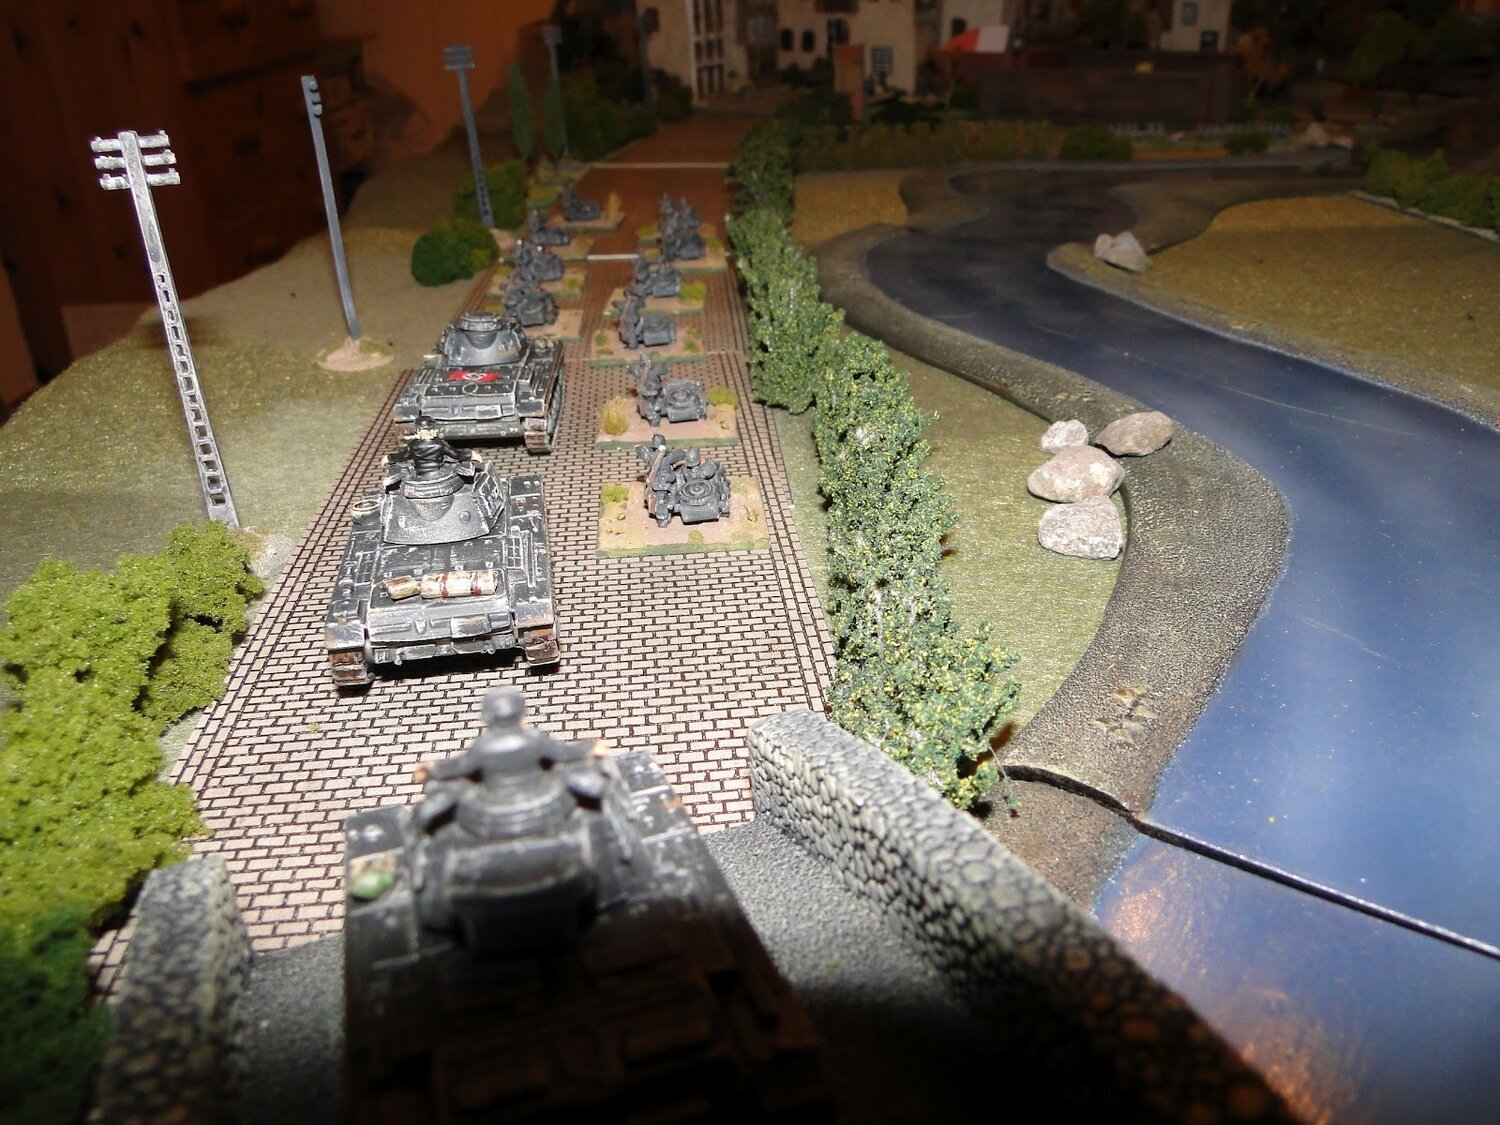
Meanwhile my Recon Platoon headed out along the roads to the right, followed by Blinds representing my HQ and truck-based infantry platoon.
Recon Platoon scooting to the right
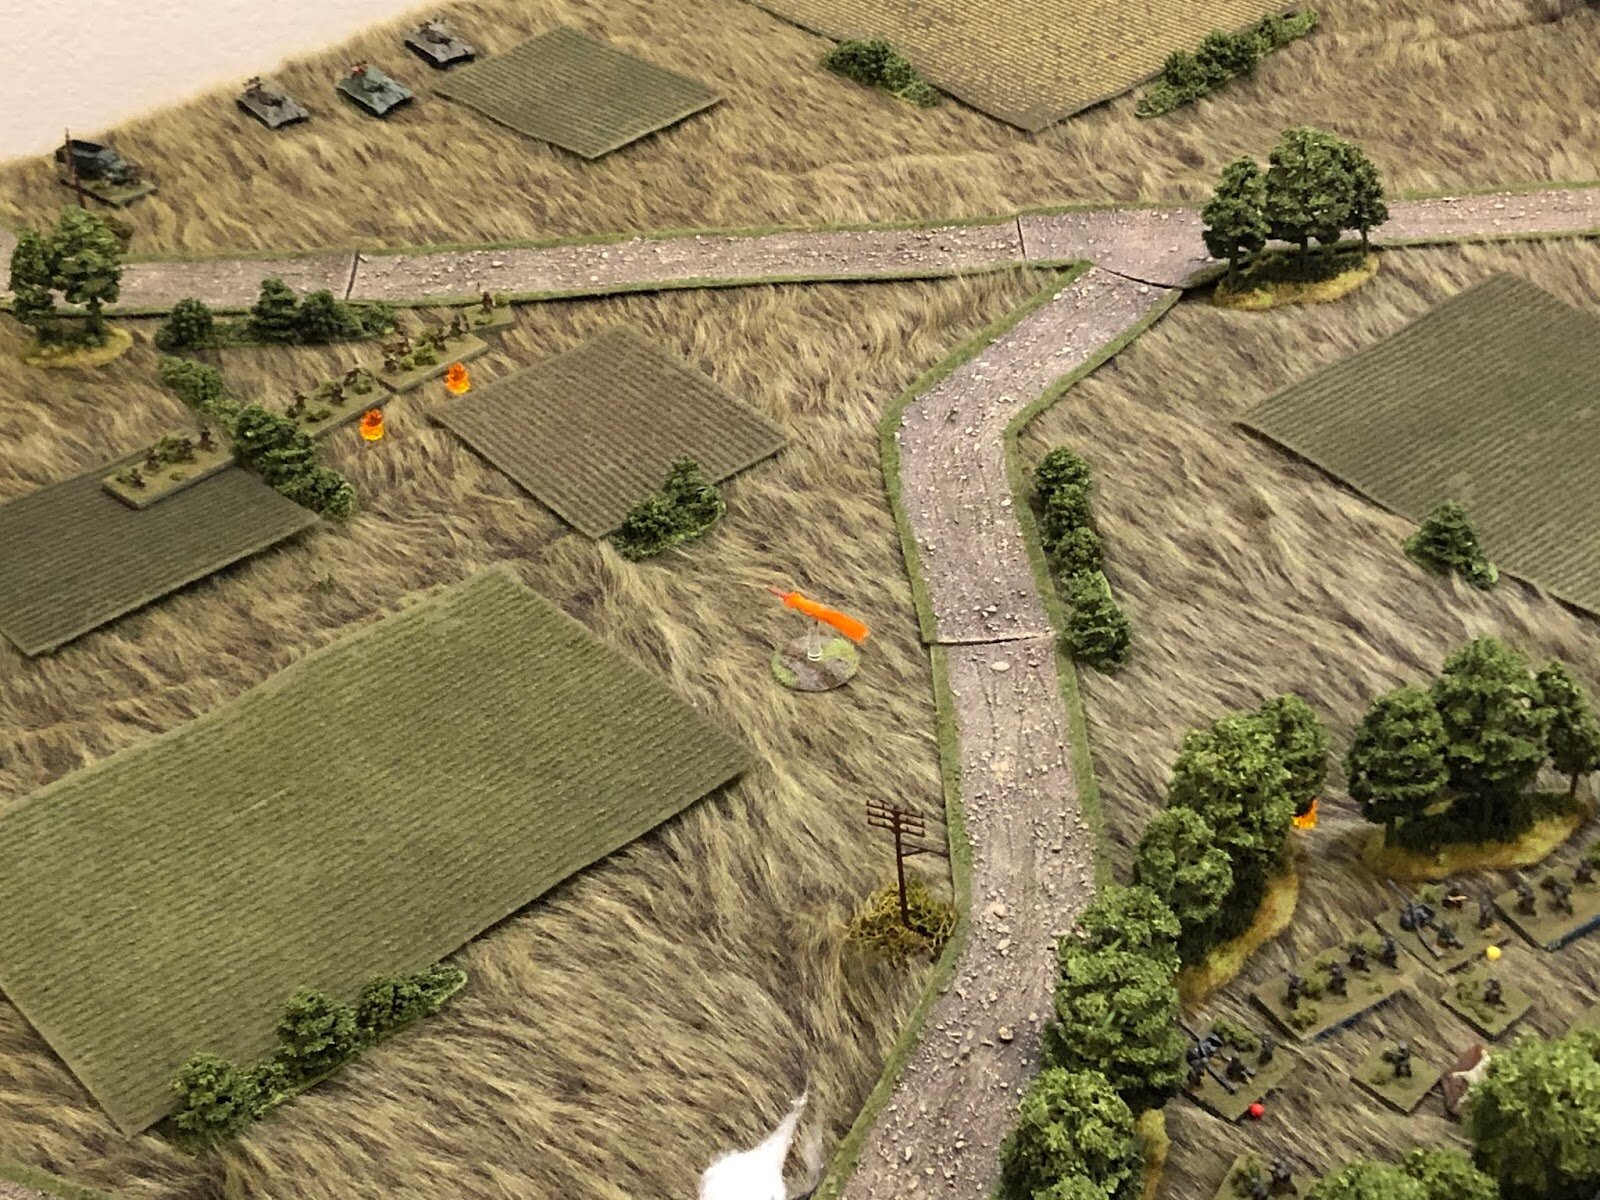
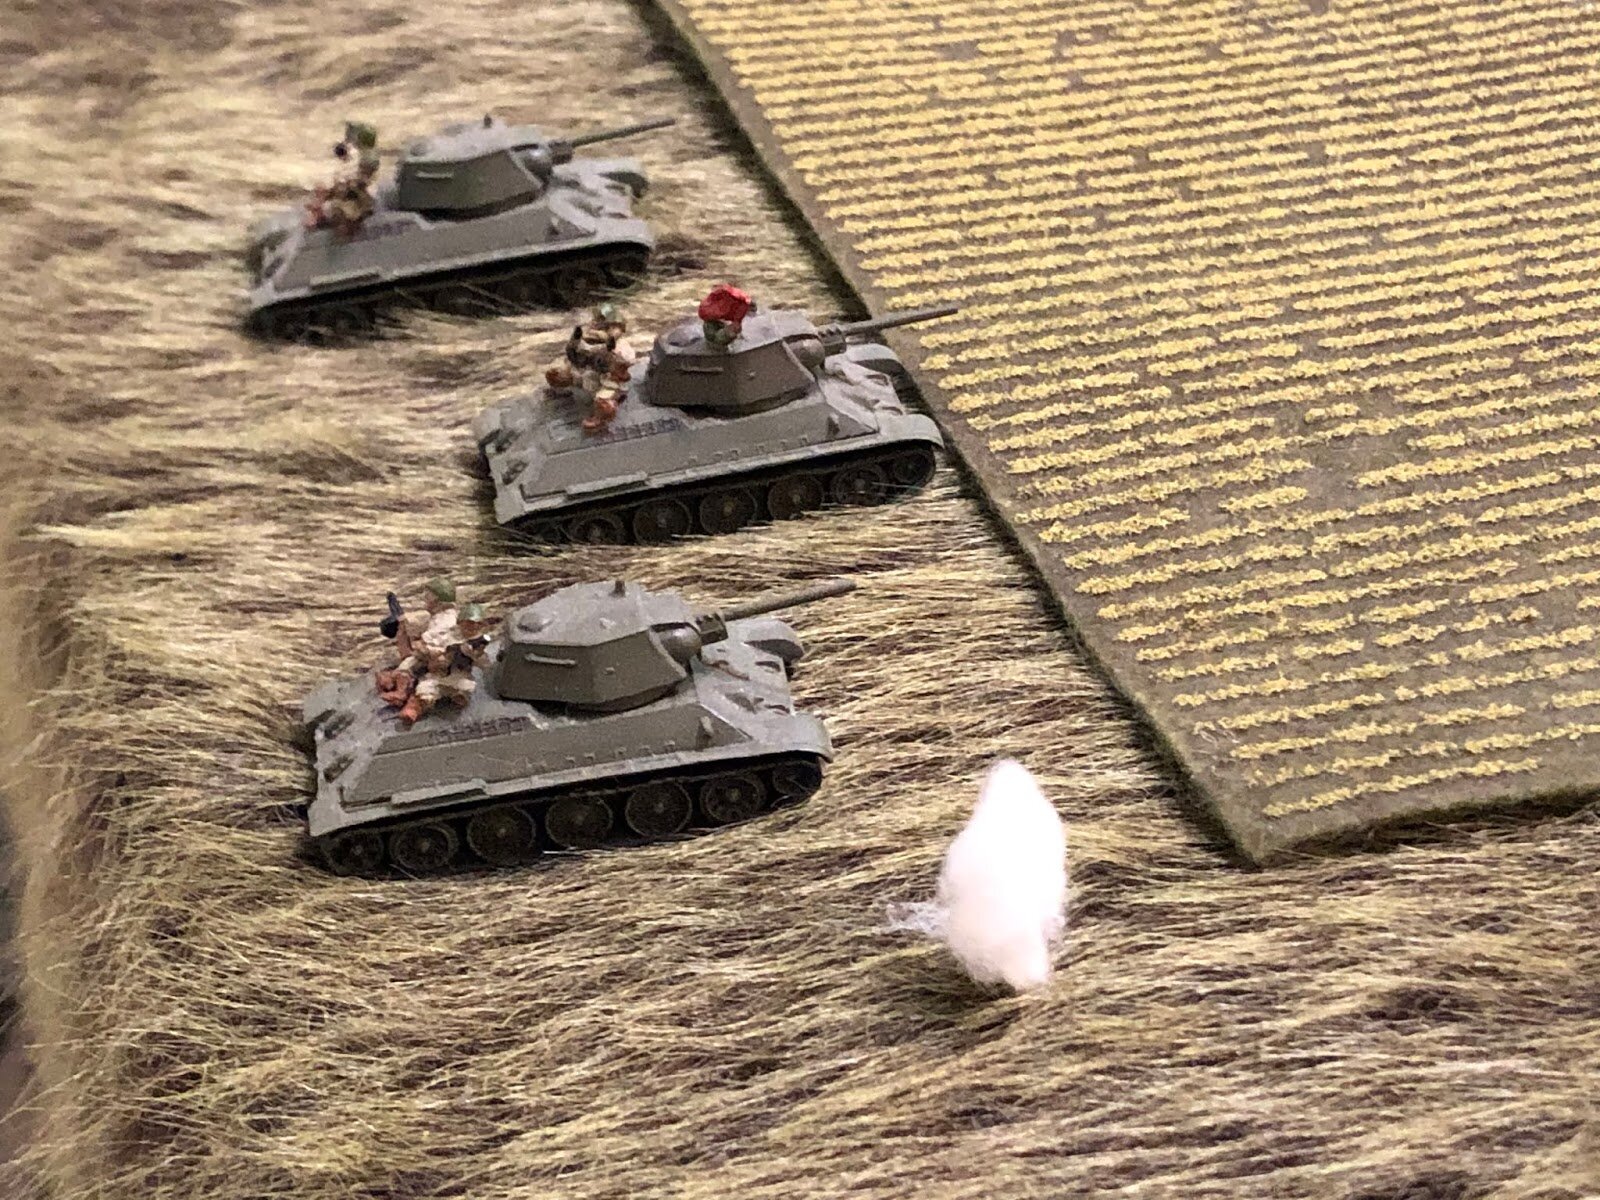
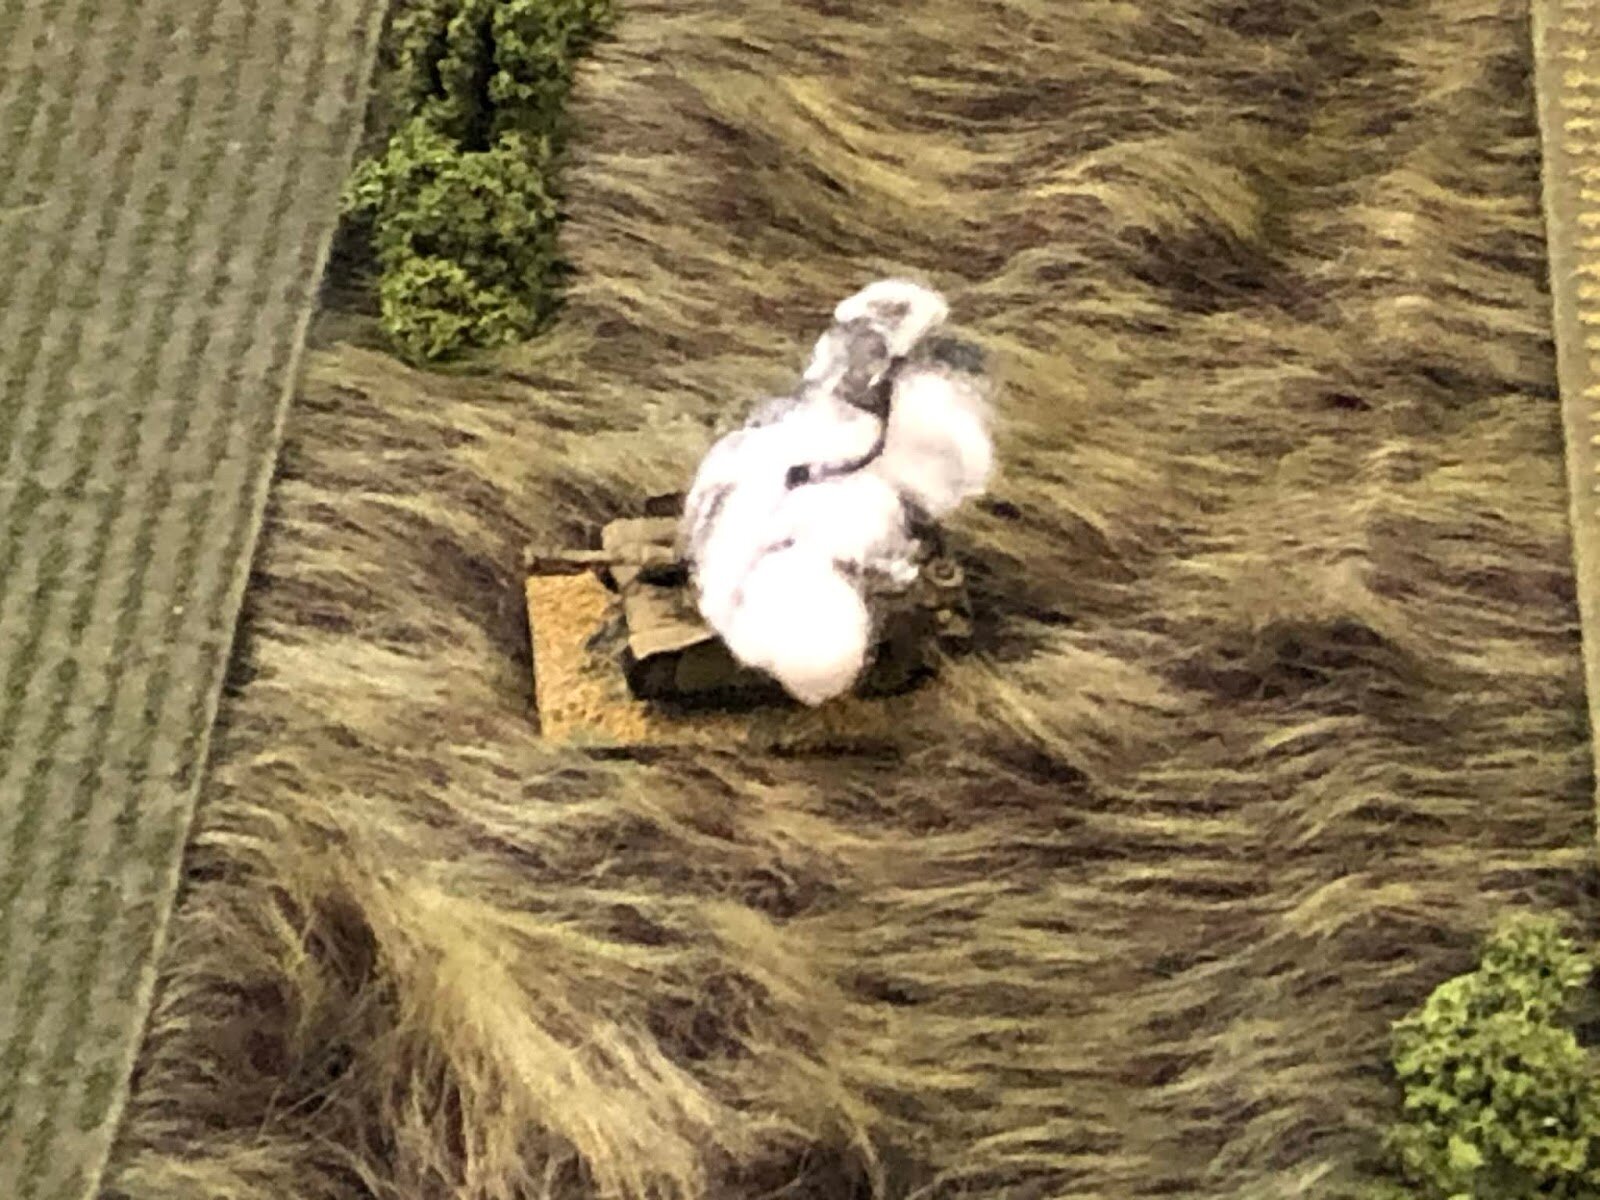
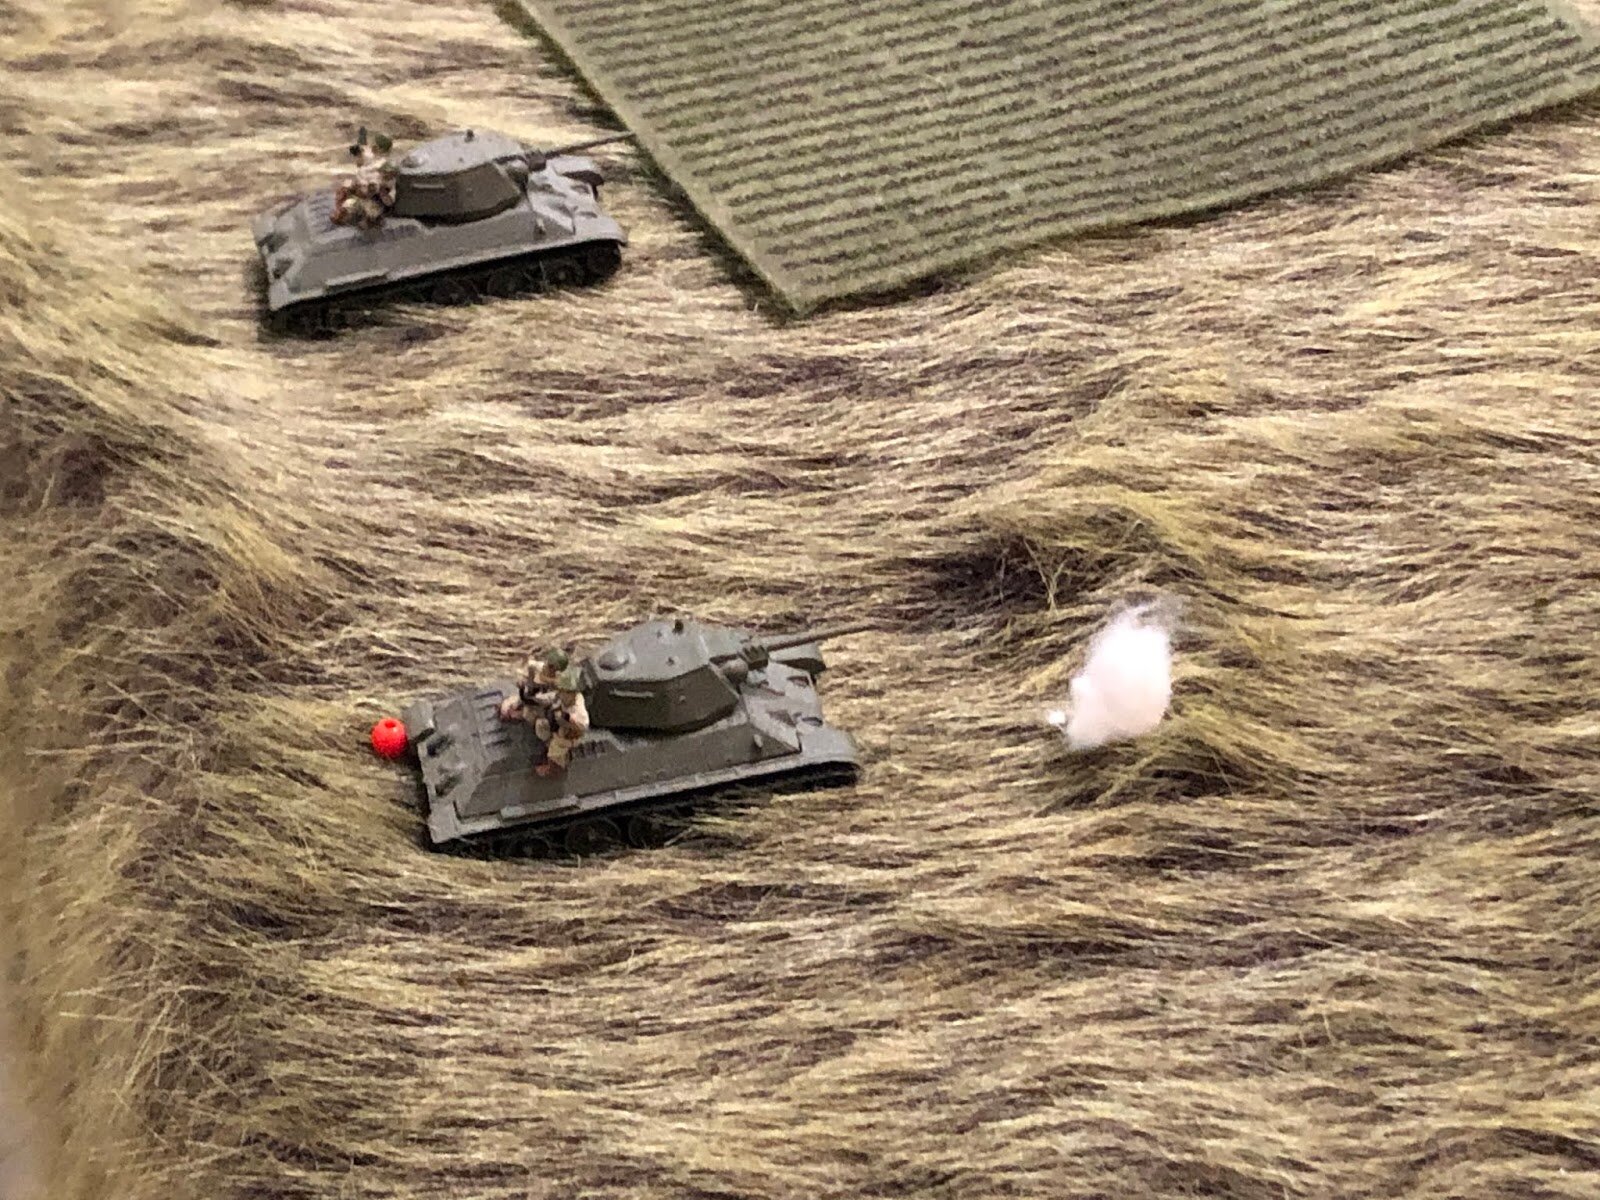
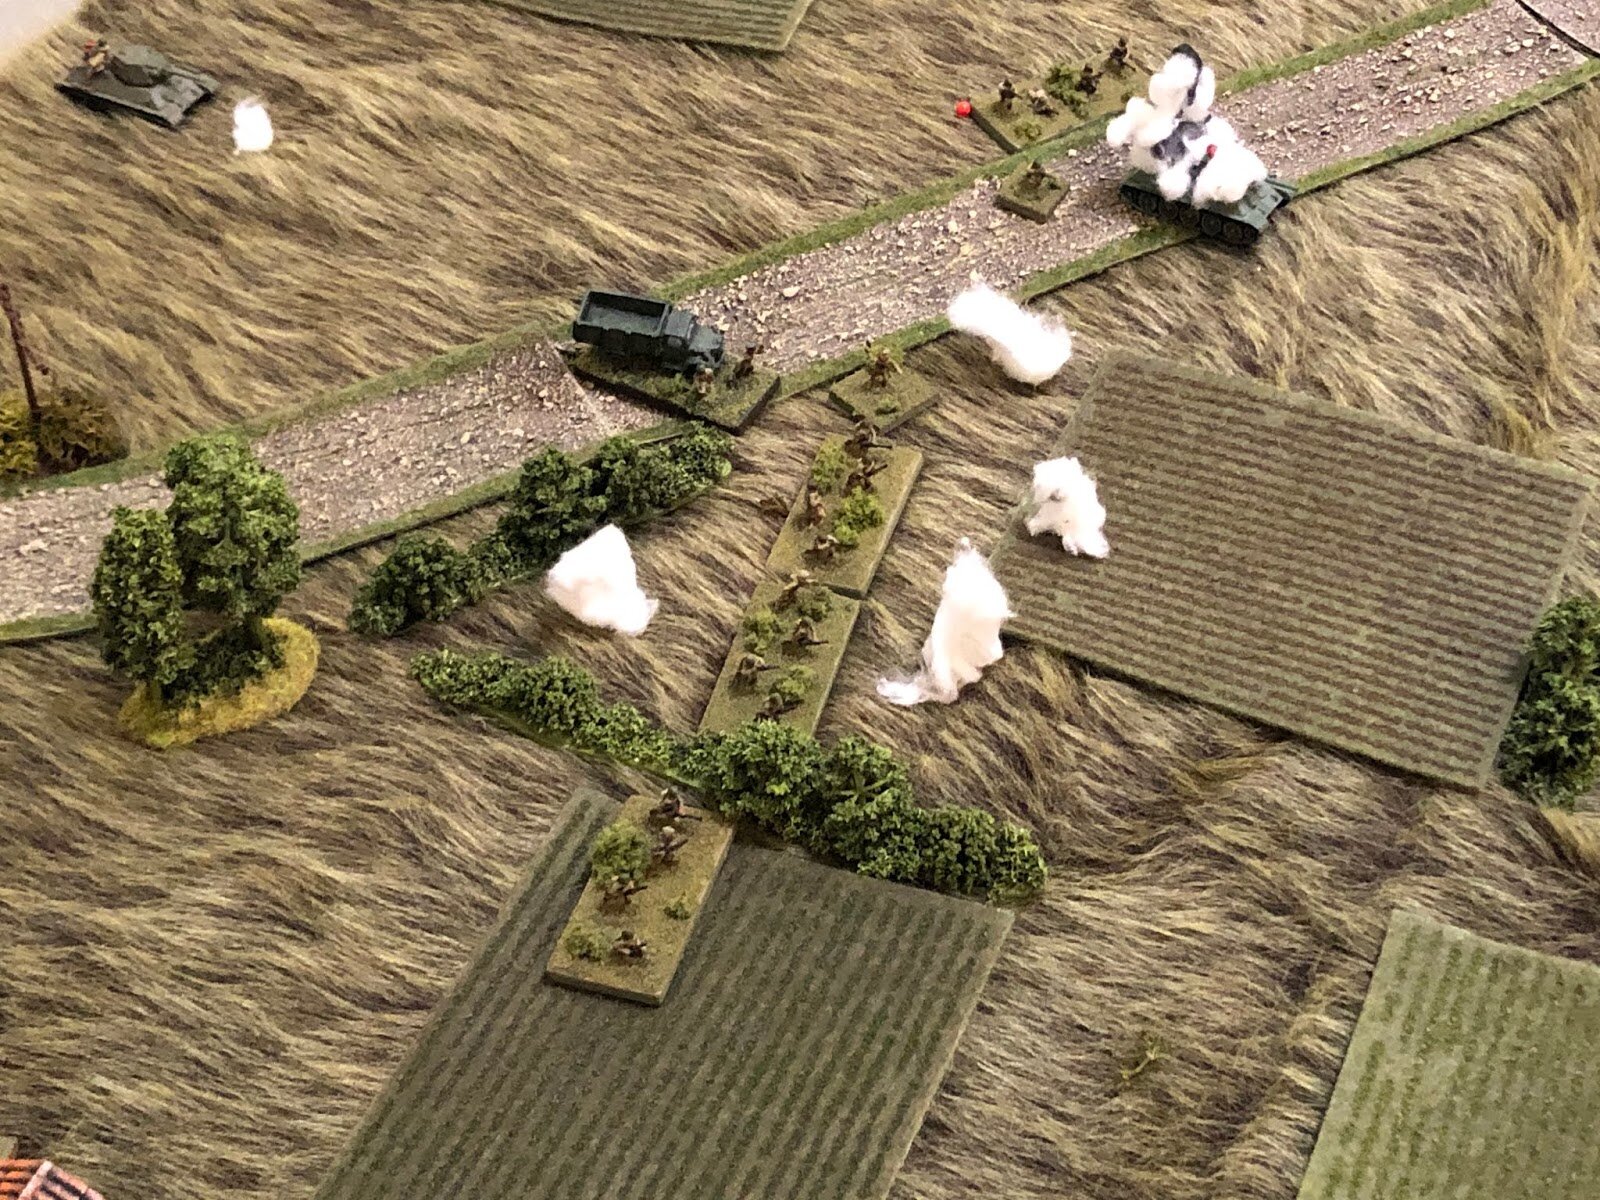
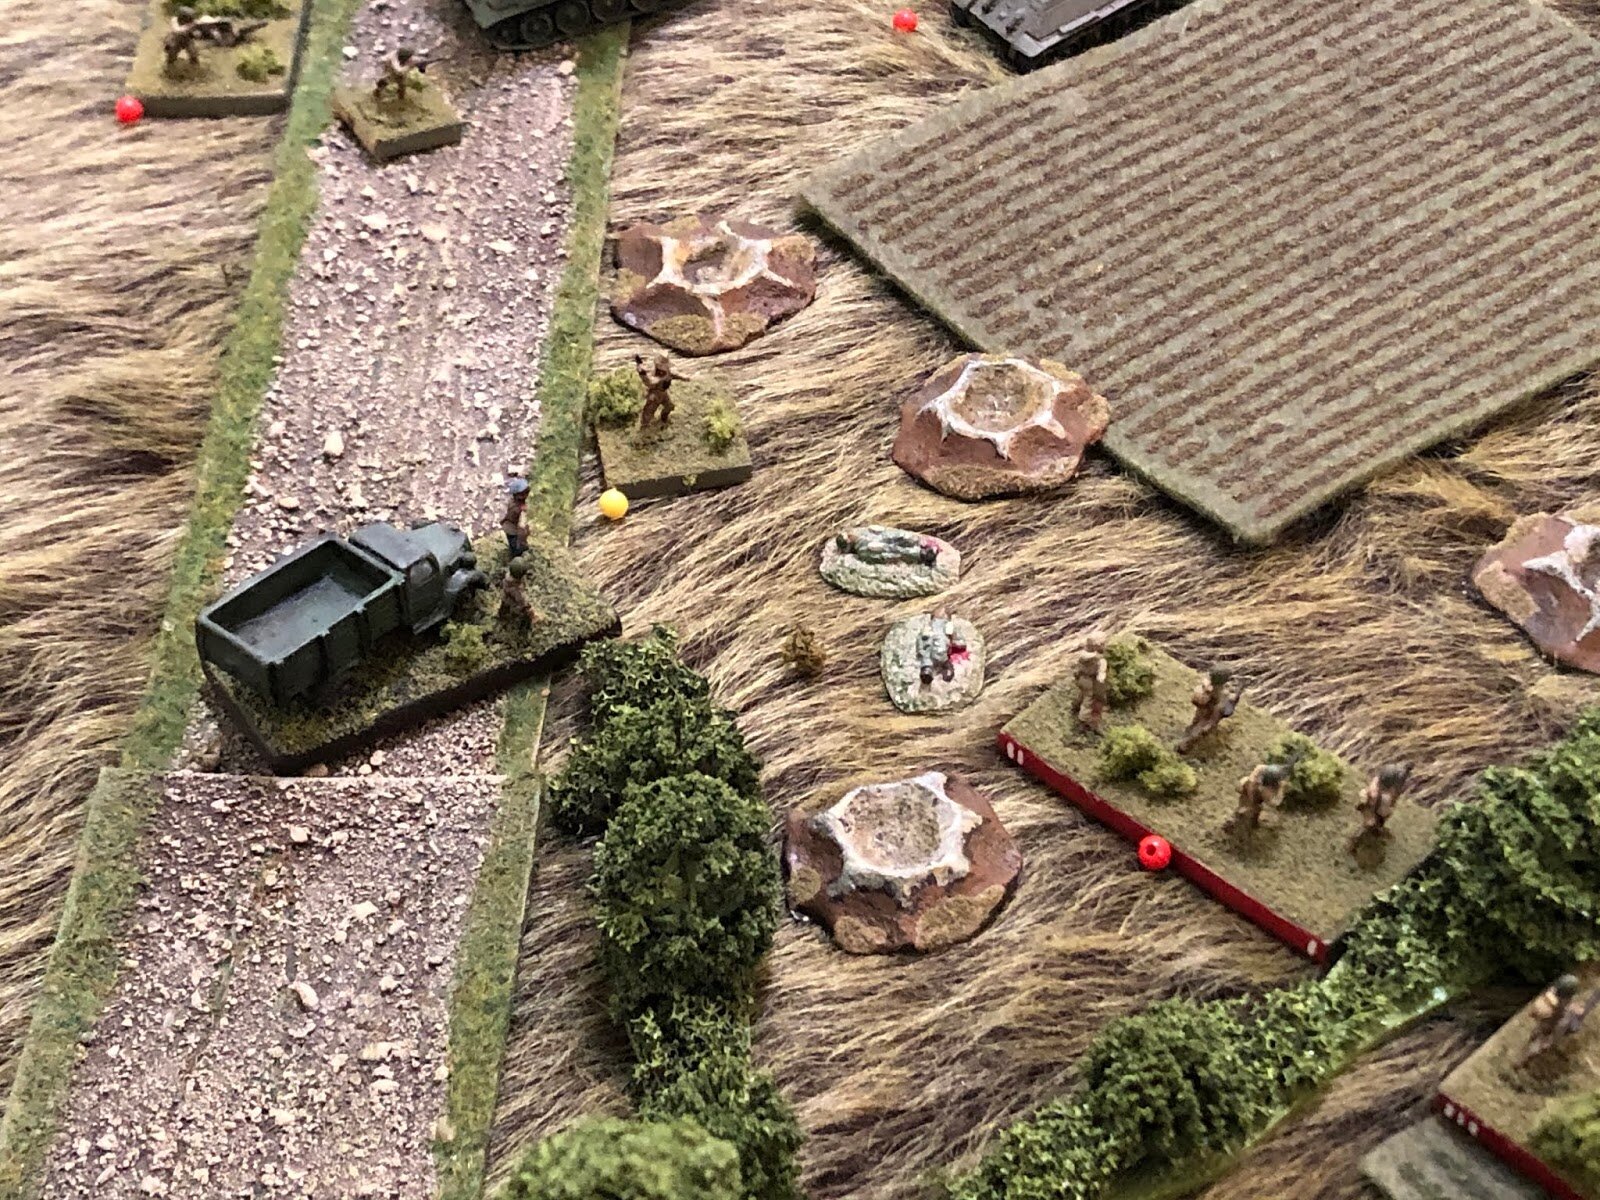
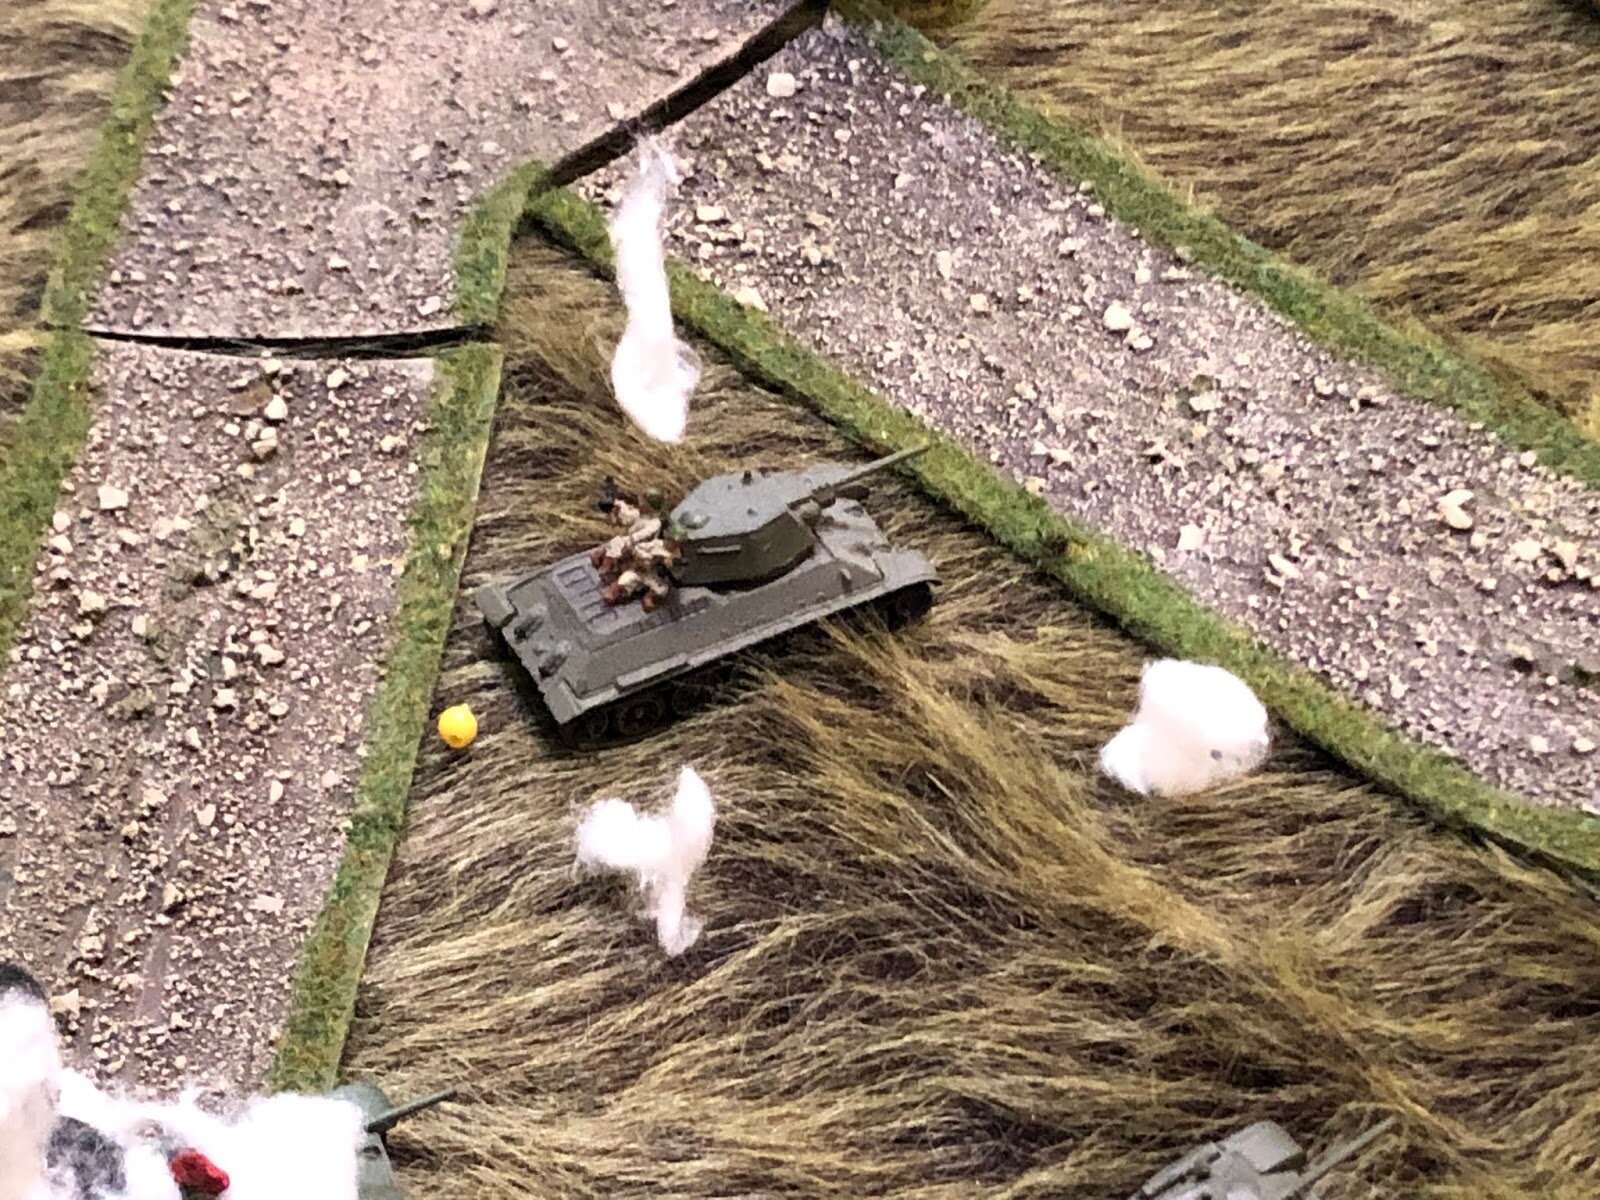
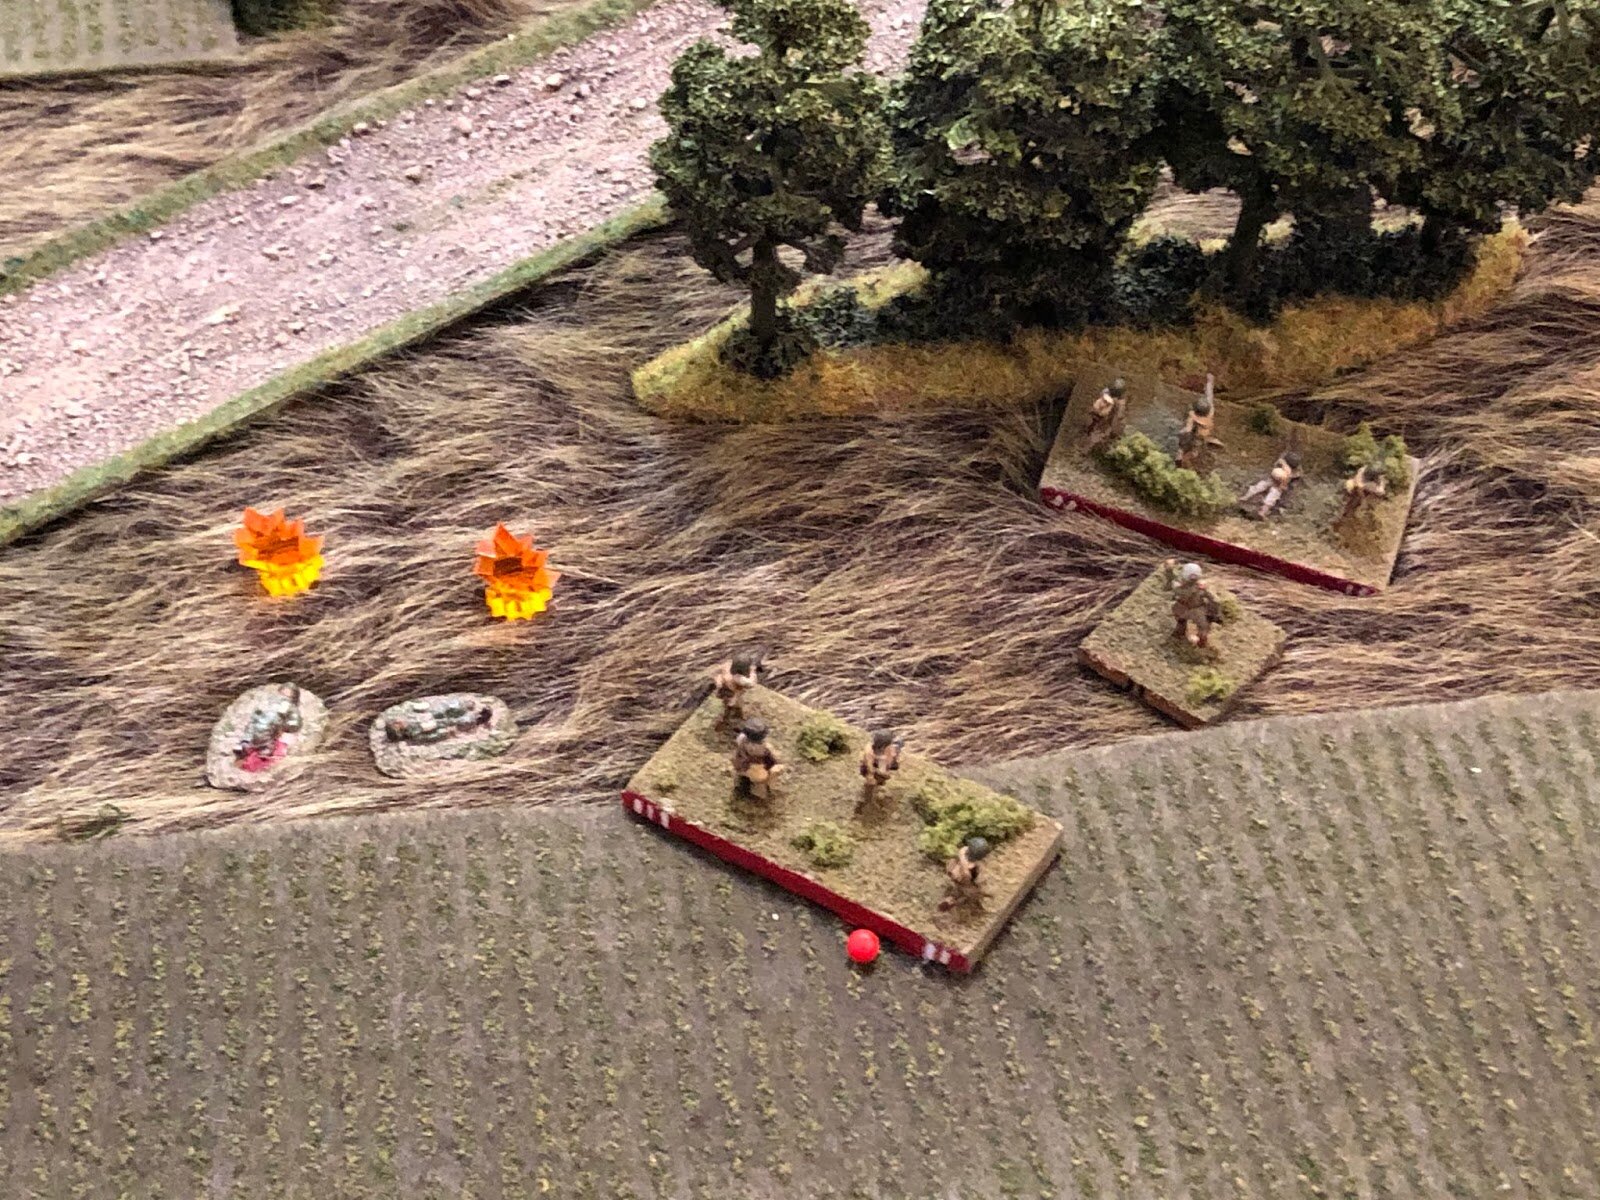
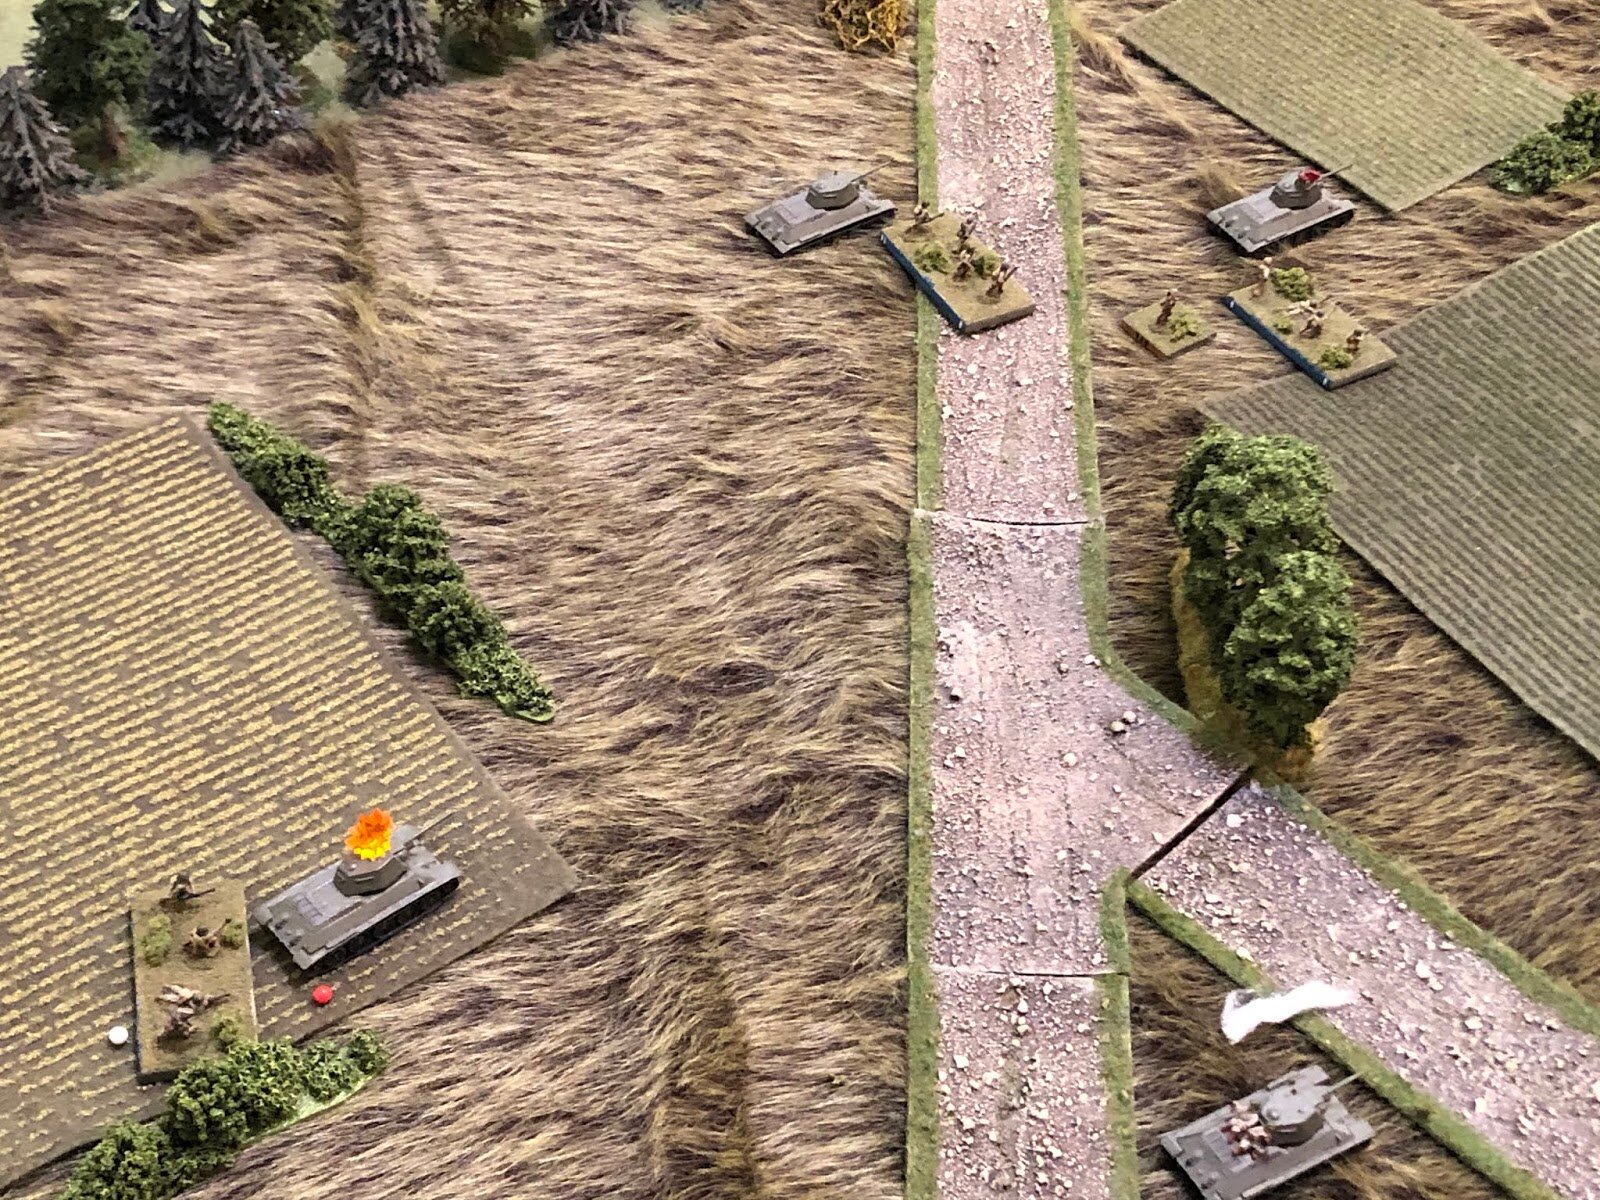
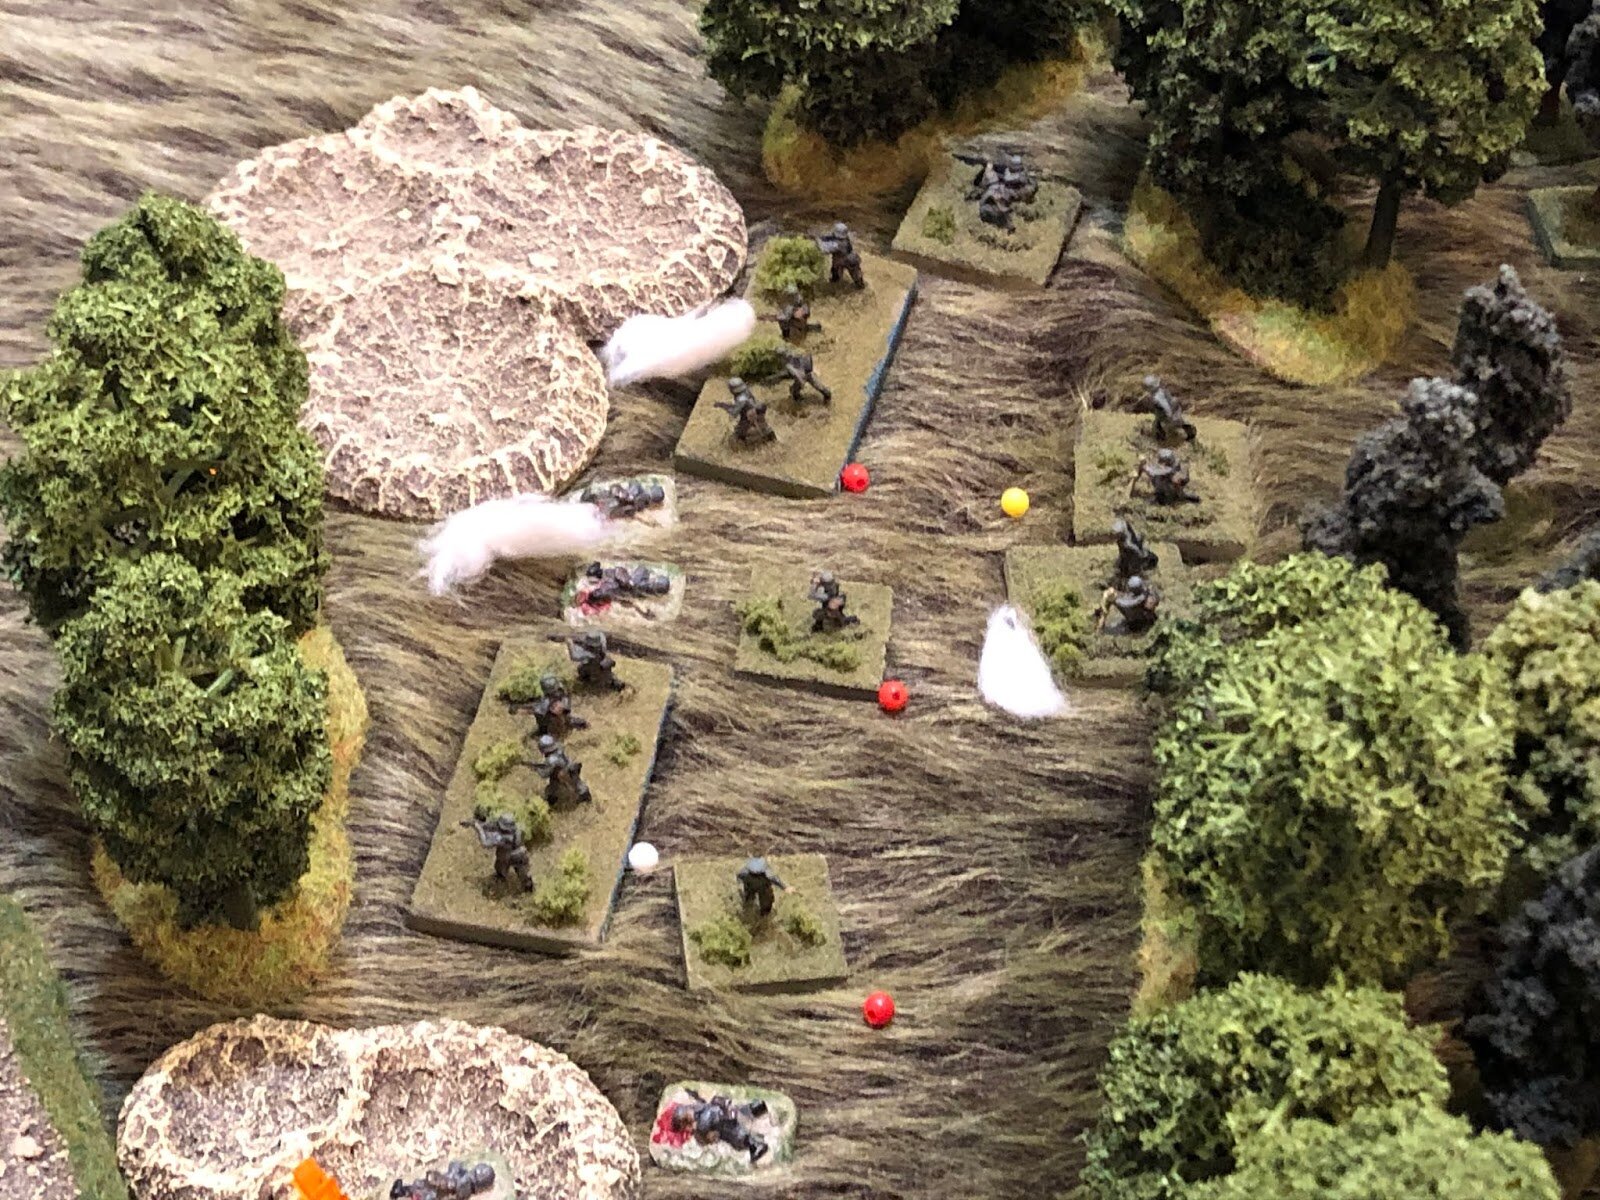
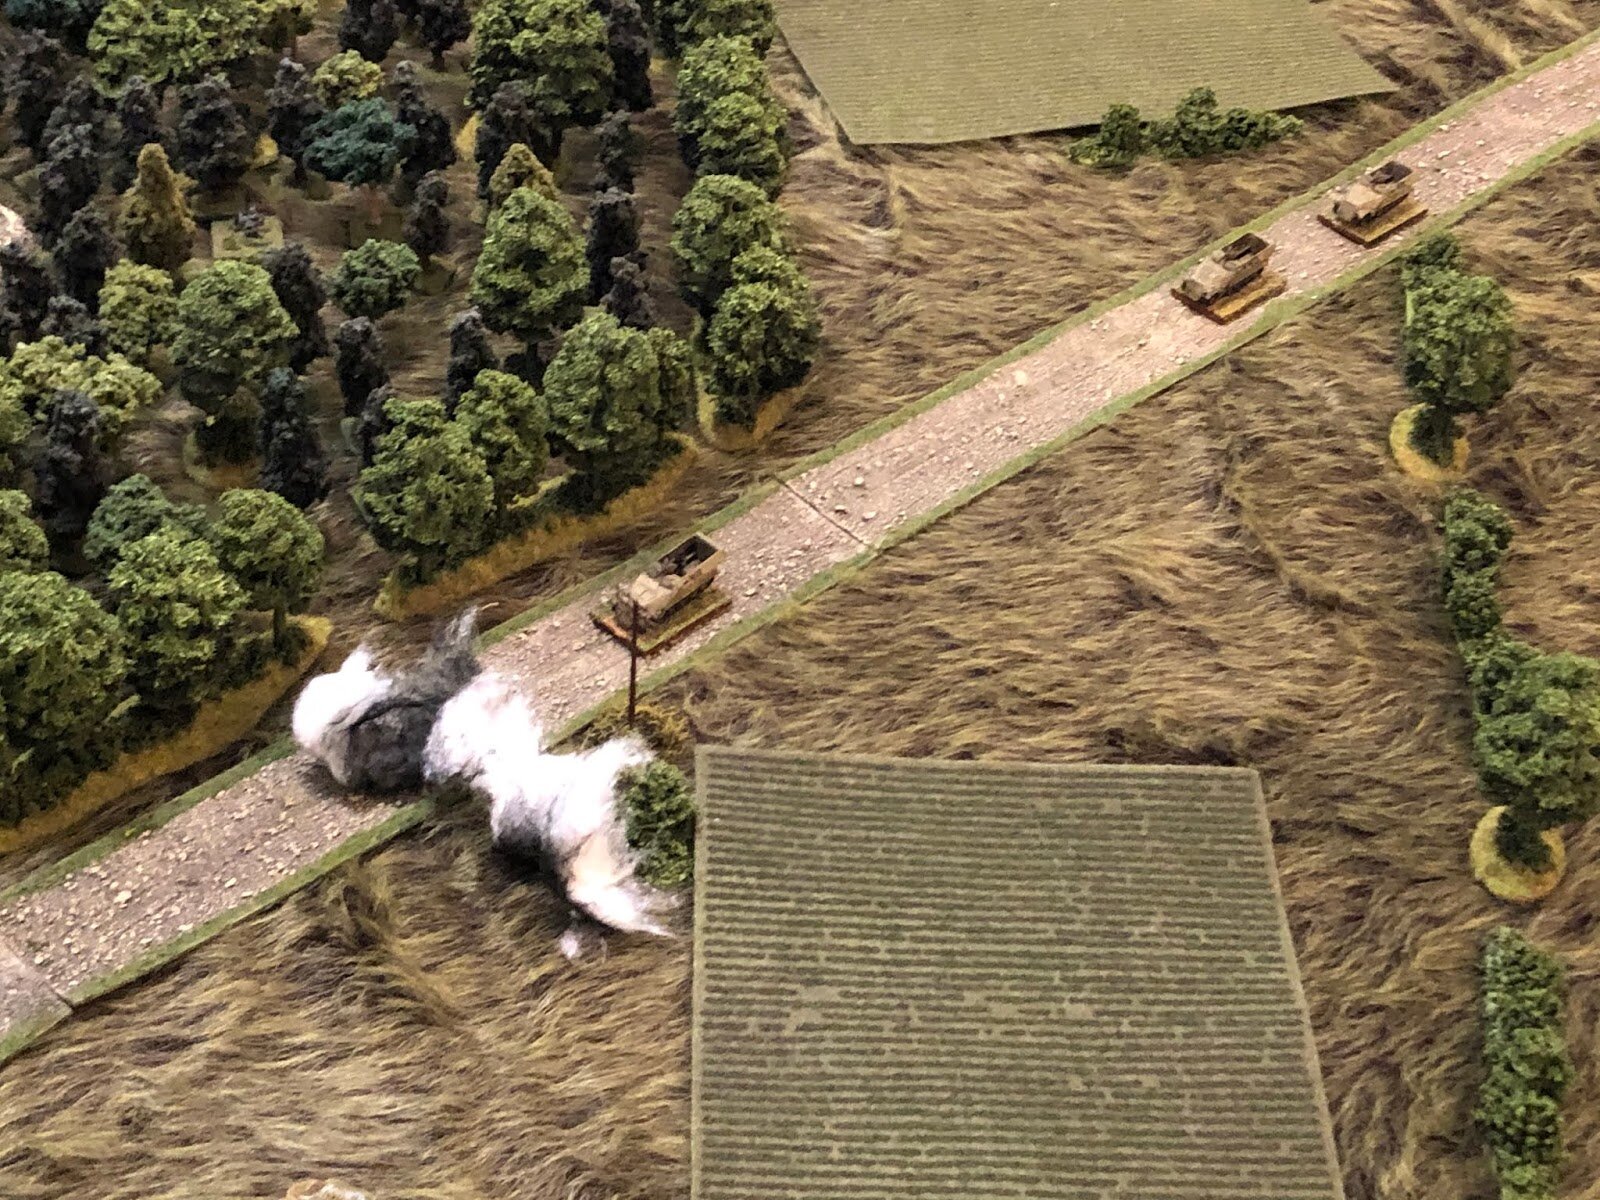
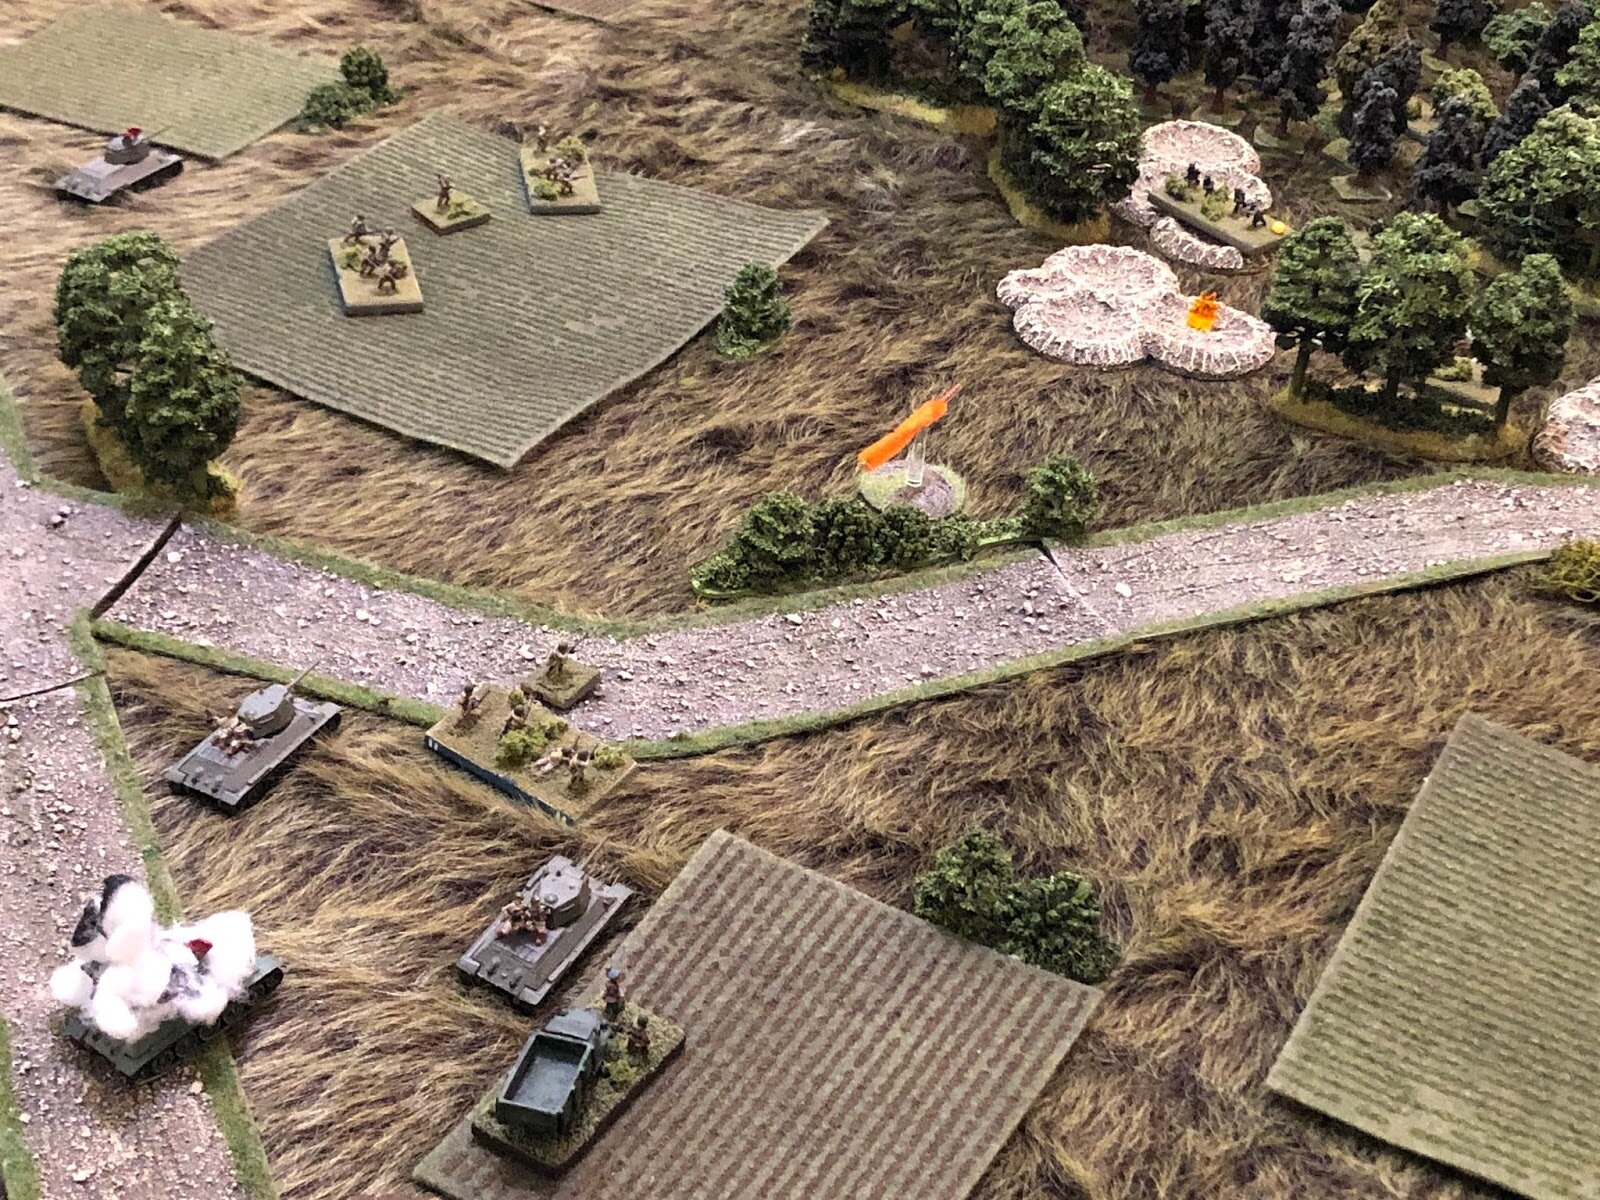
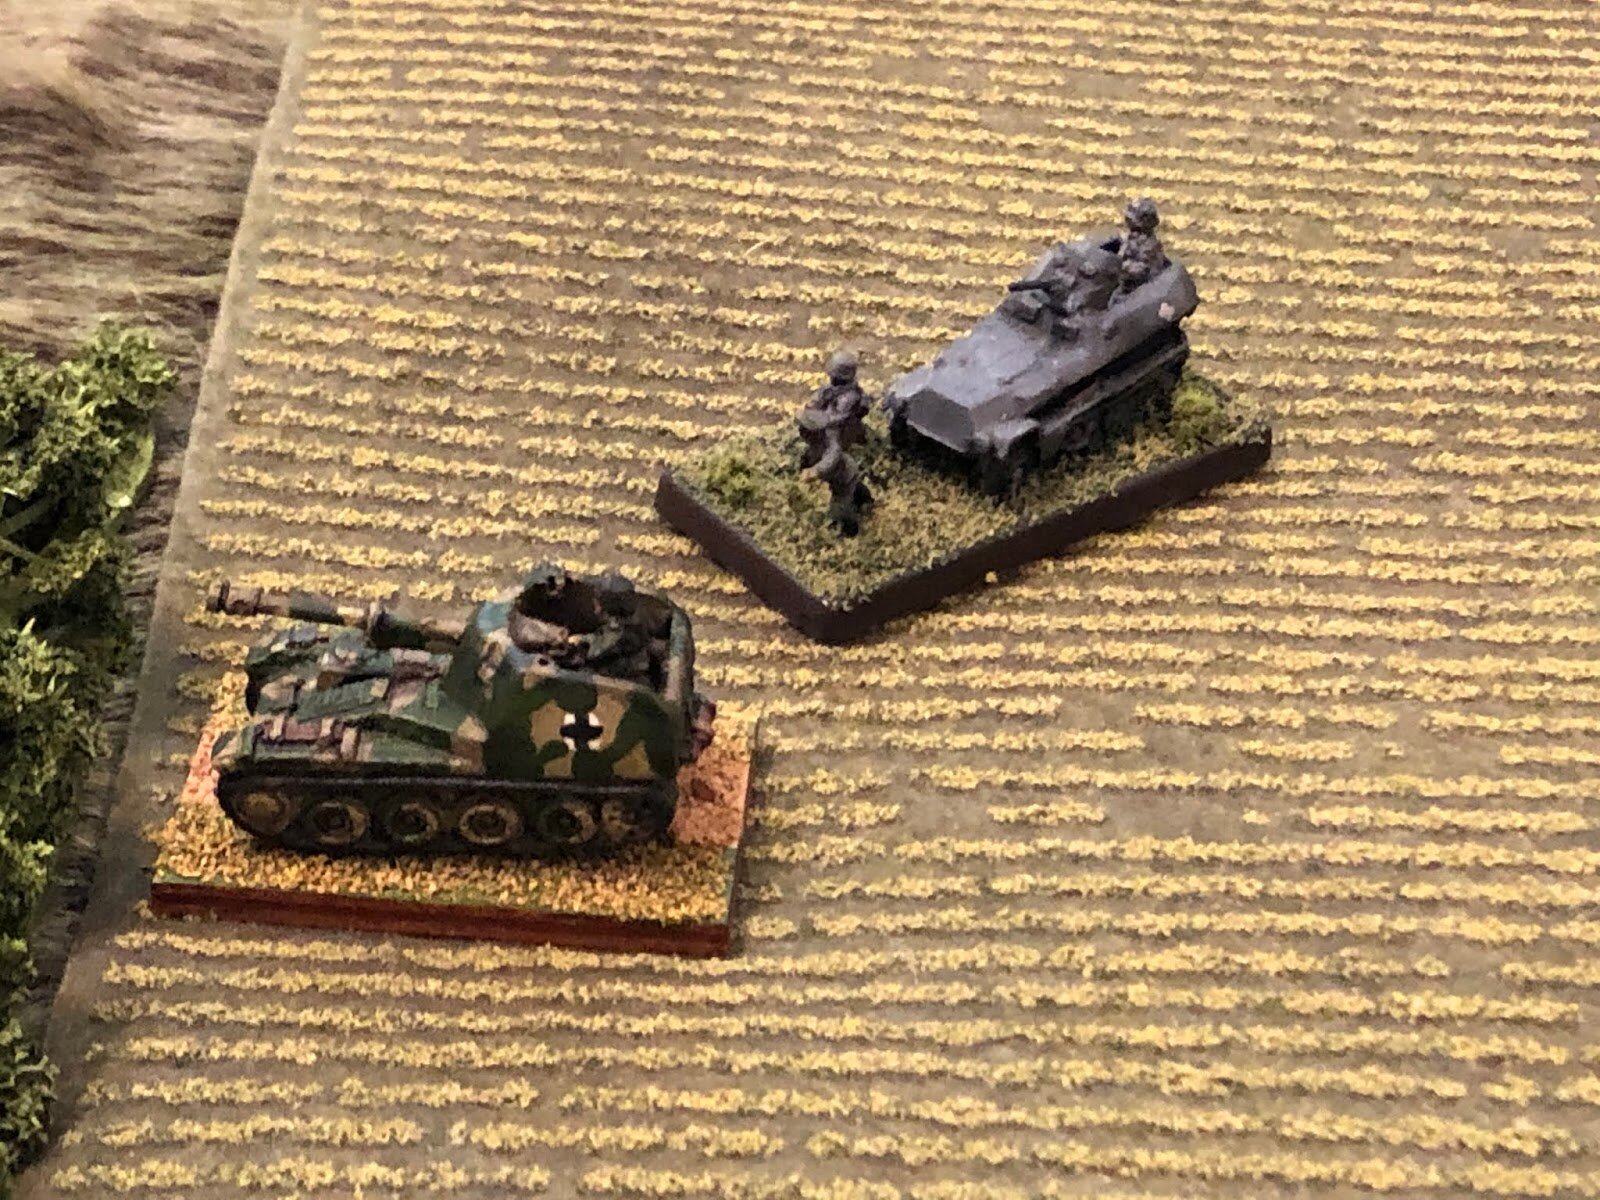
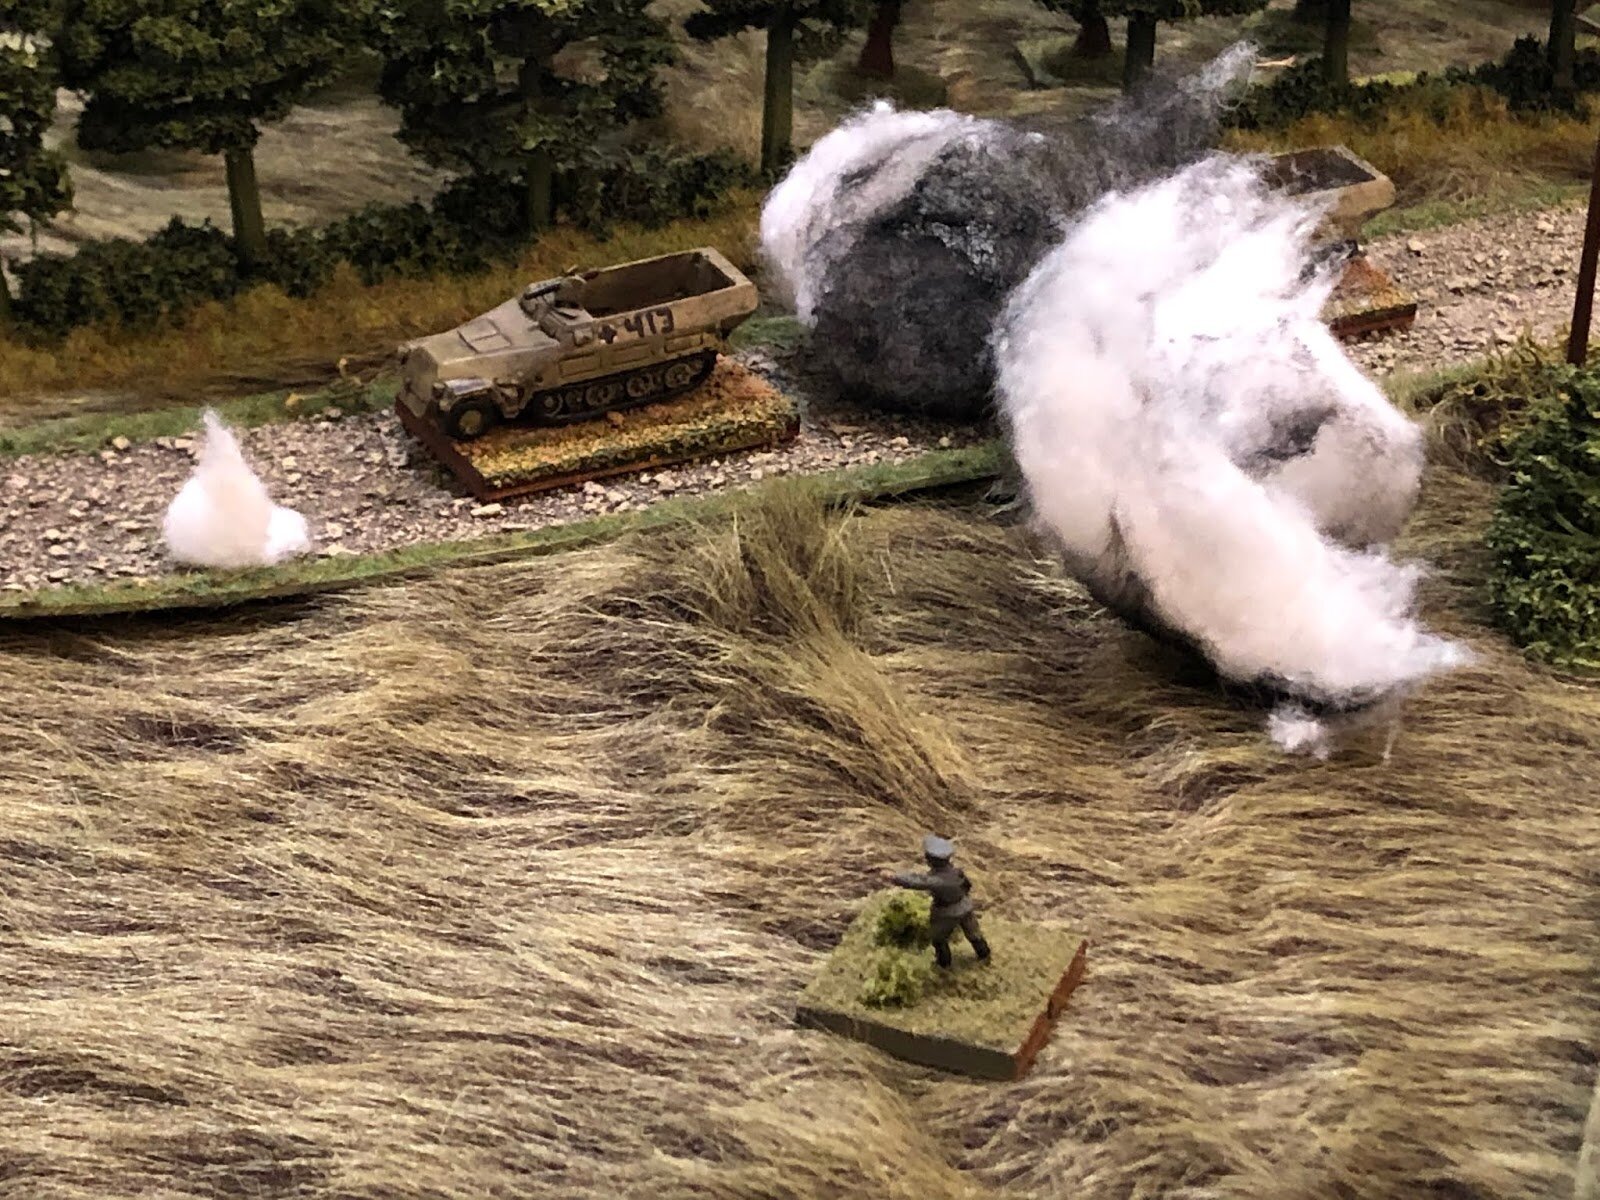
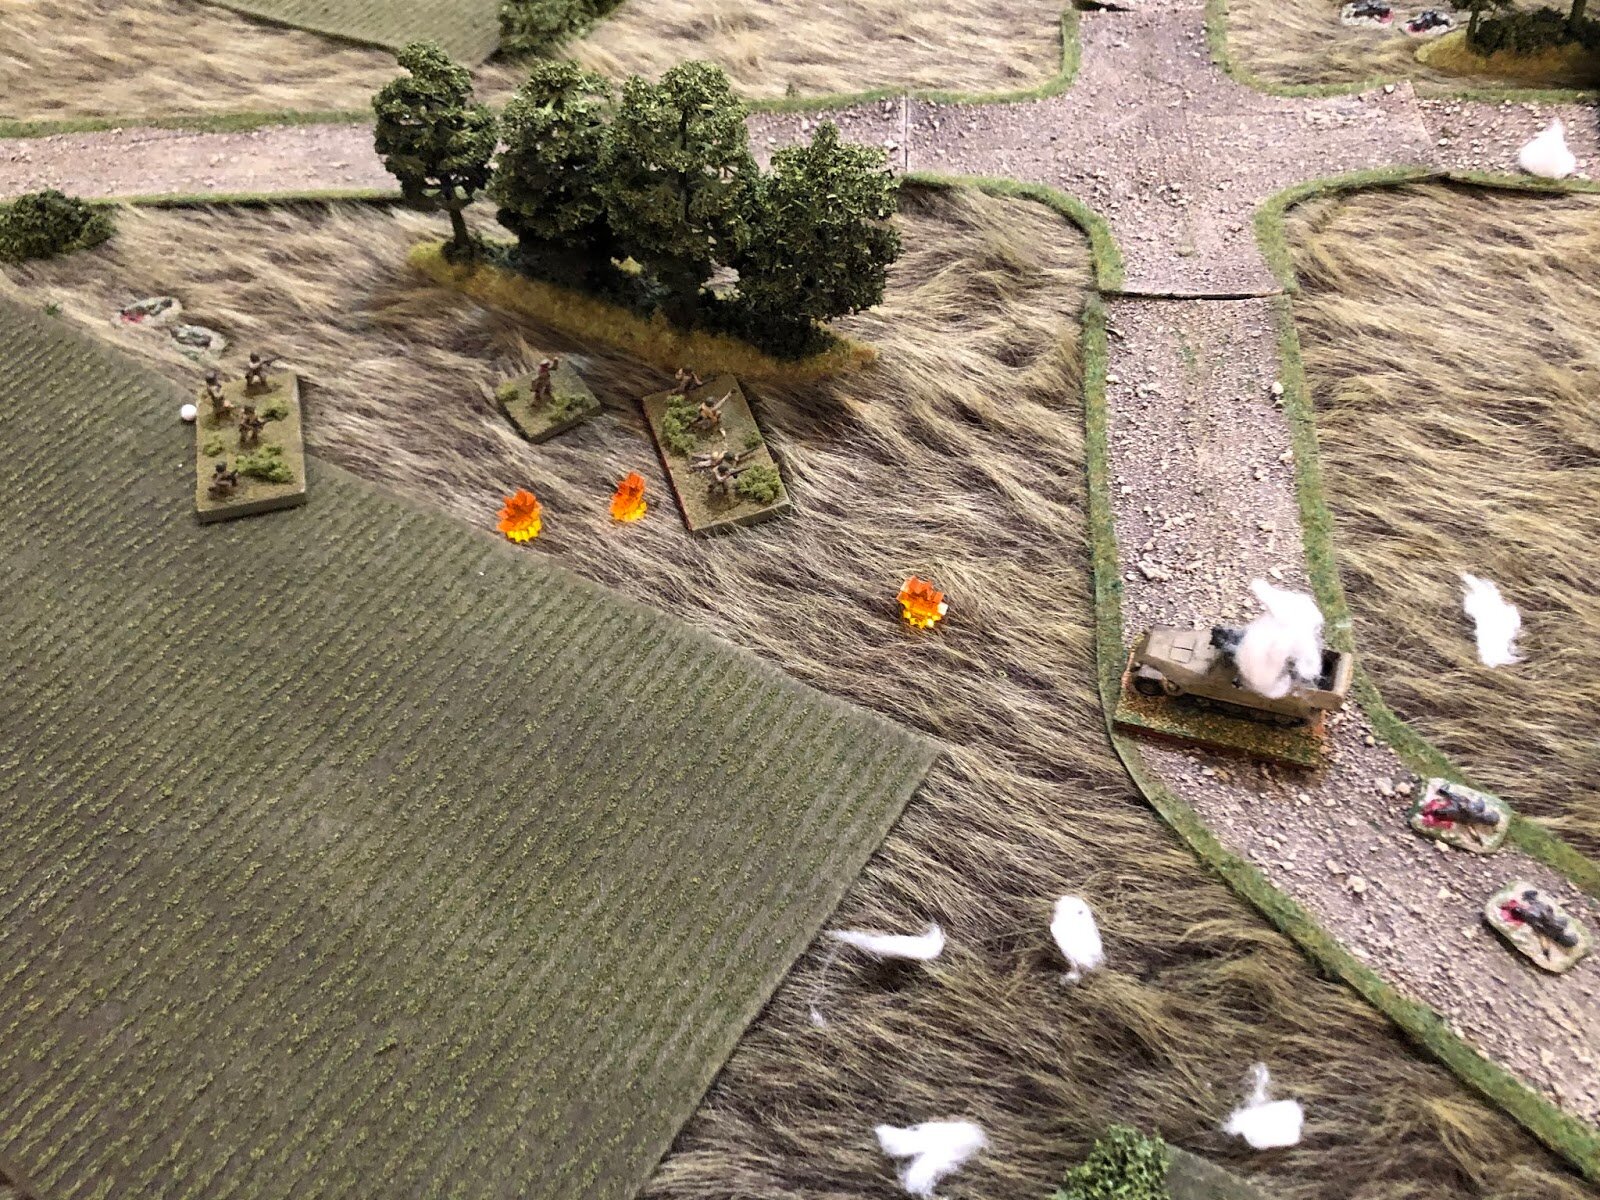
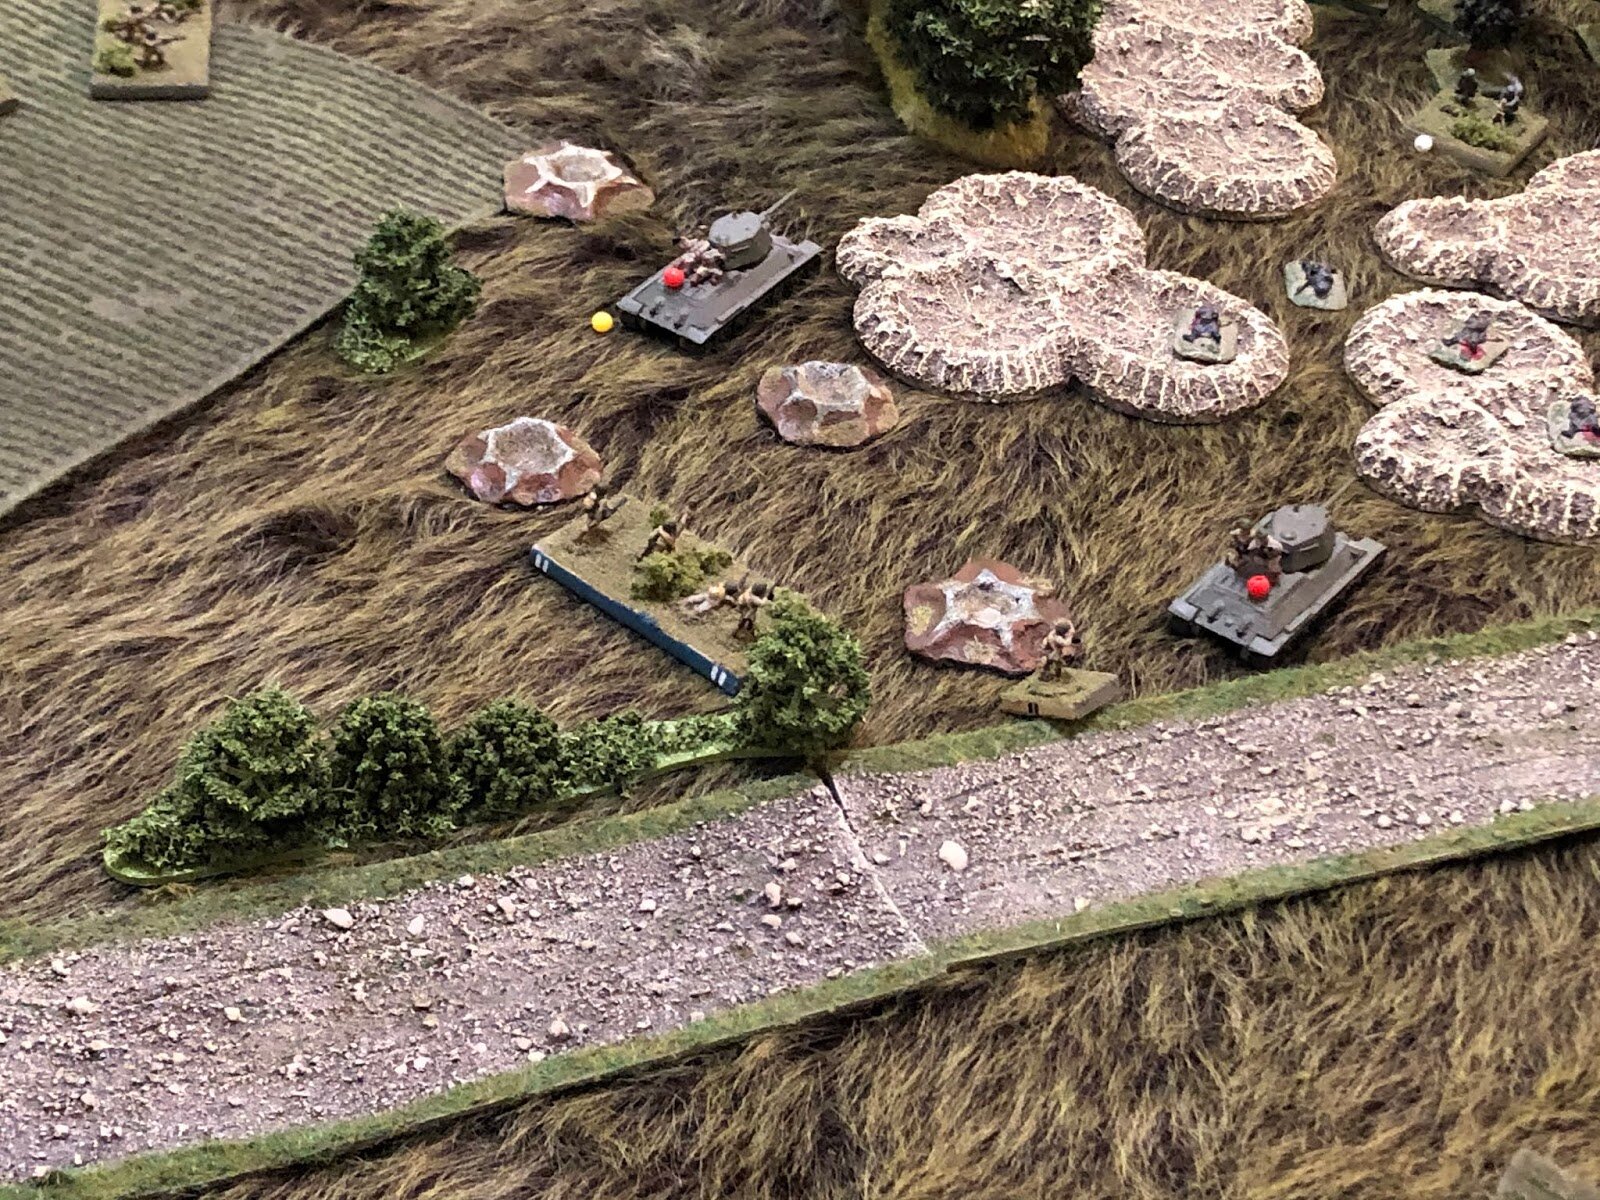
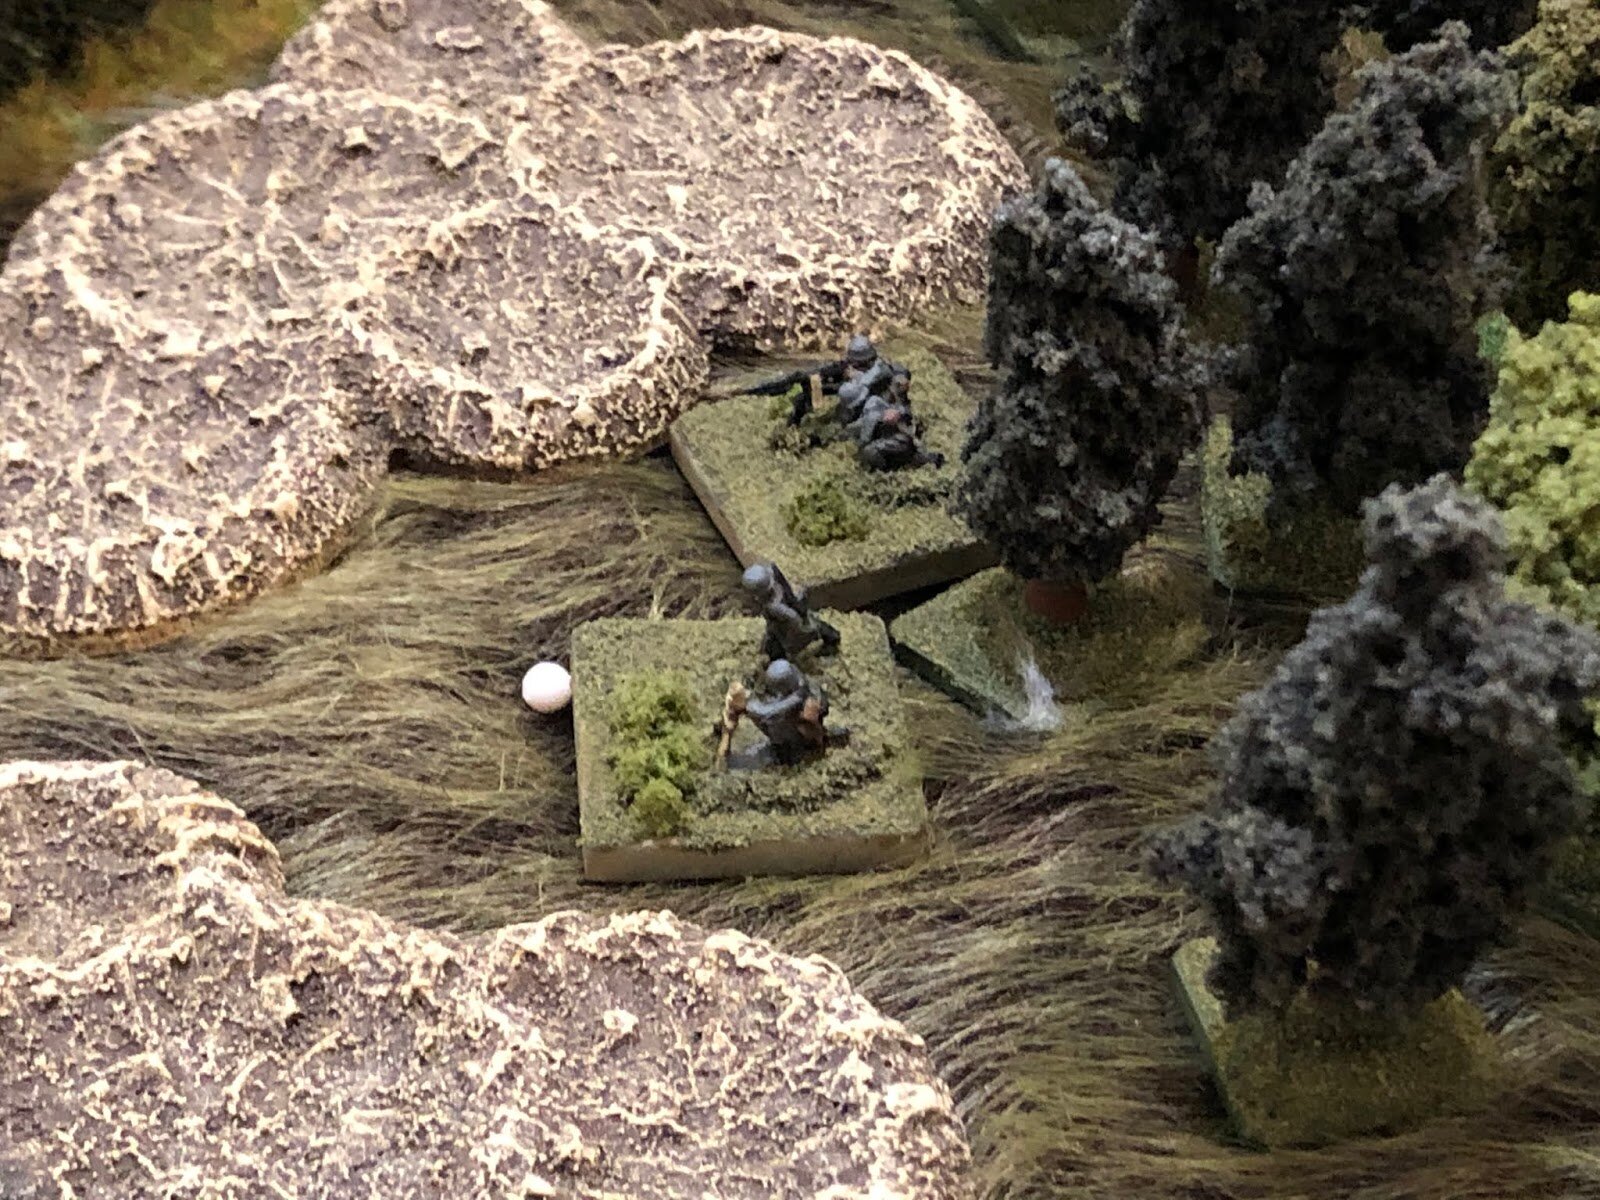
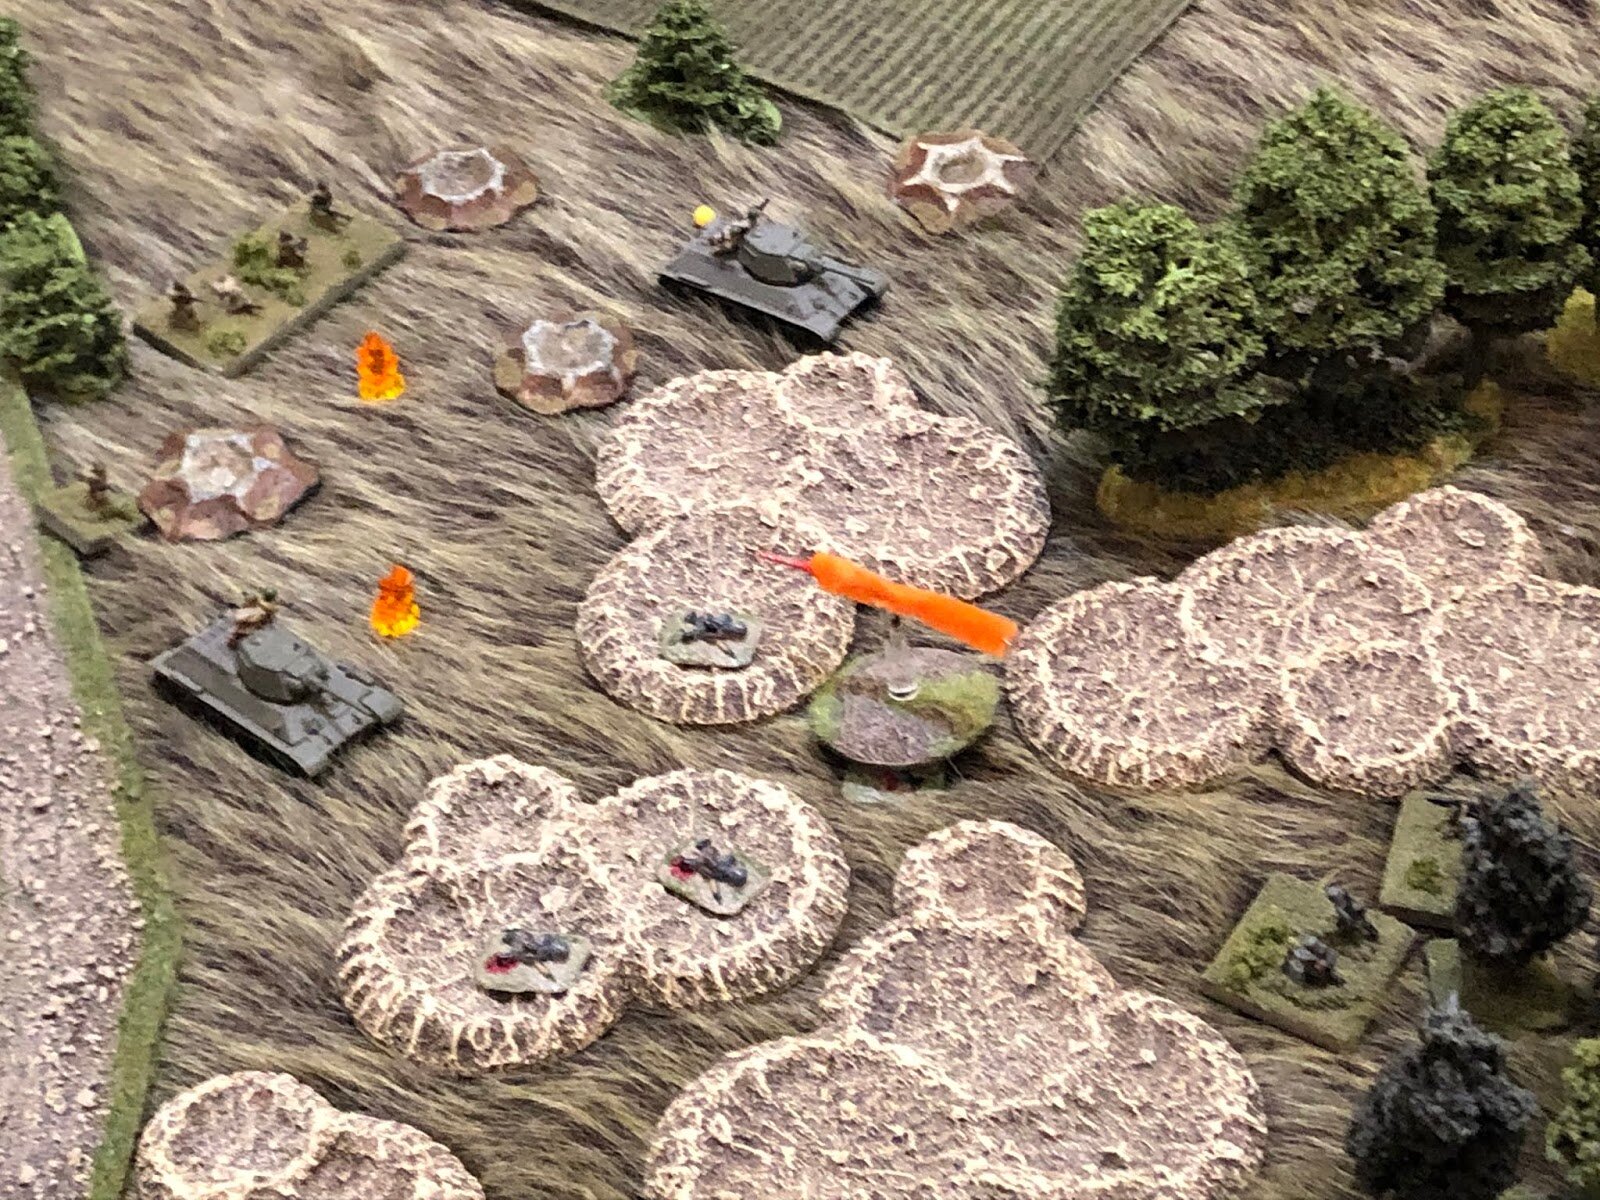
Things then started happening quickly on my left. The Blind concealing 1st Tank Platoon had reached just past the woods and turned towards the town when it was spotted and forced to deploy. Then, out from behind the town came two French tanks: the Somua and one of the R-35s. They opened fire and manged to immobilise one Panzer II and knock out the 20mm cannon on another!
This was not good (an imagine what it would have been like if the French tanks had had more than the rather rubbish two Actions) but I soon got to return fire and, much to my surprise, the ‘broadside’ from the entire platoon managed to knock out both enemy tanks. This was a major achievement, in my opinion, and well worth the damage they had done to me.
The British Commander, in the background: decidedly unimpressed by the performance of his French allies!
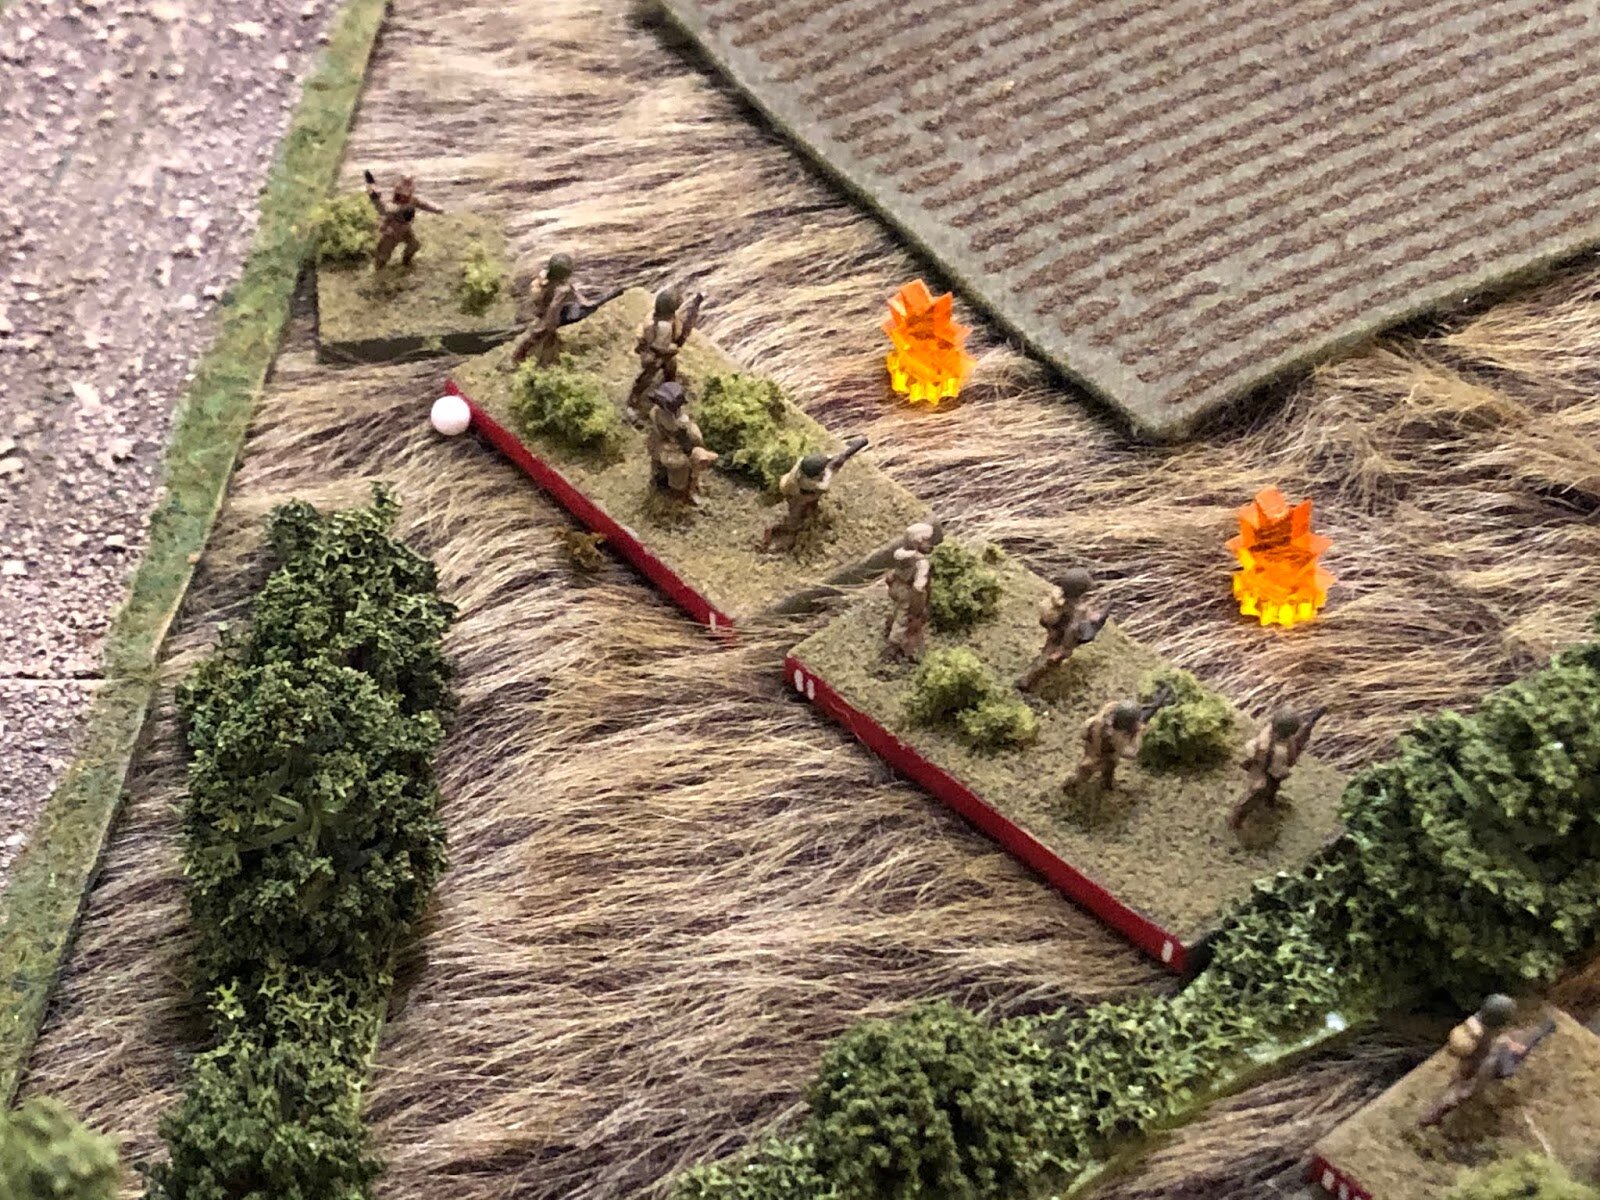
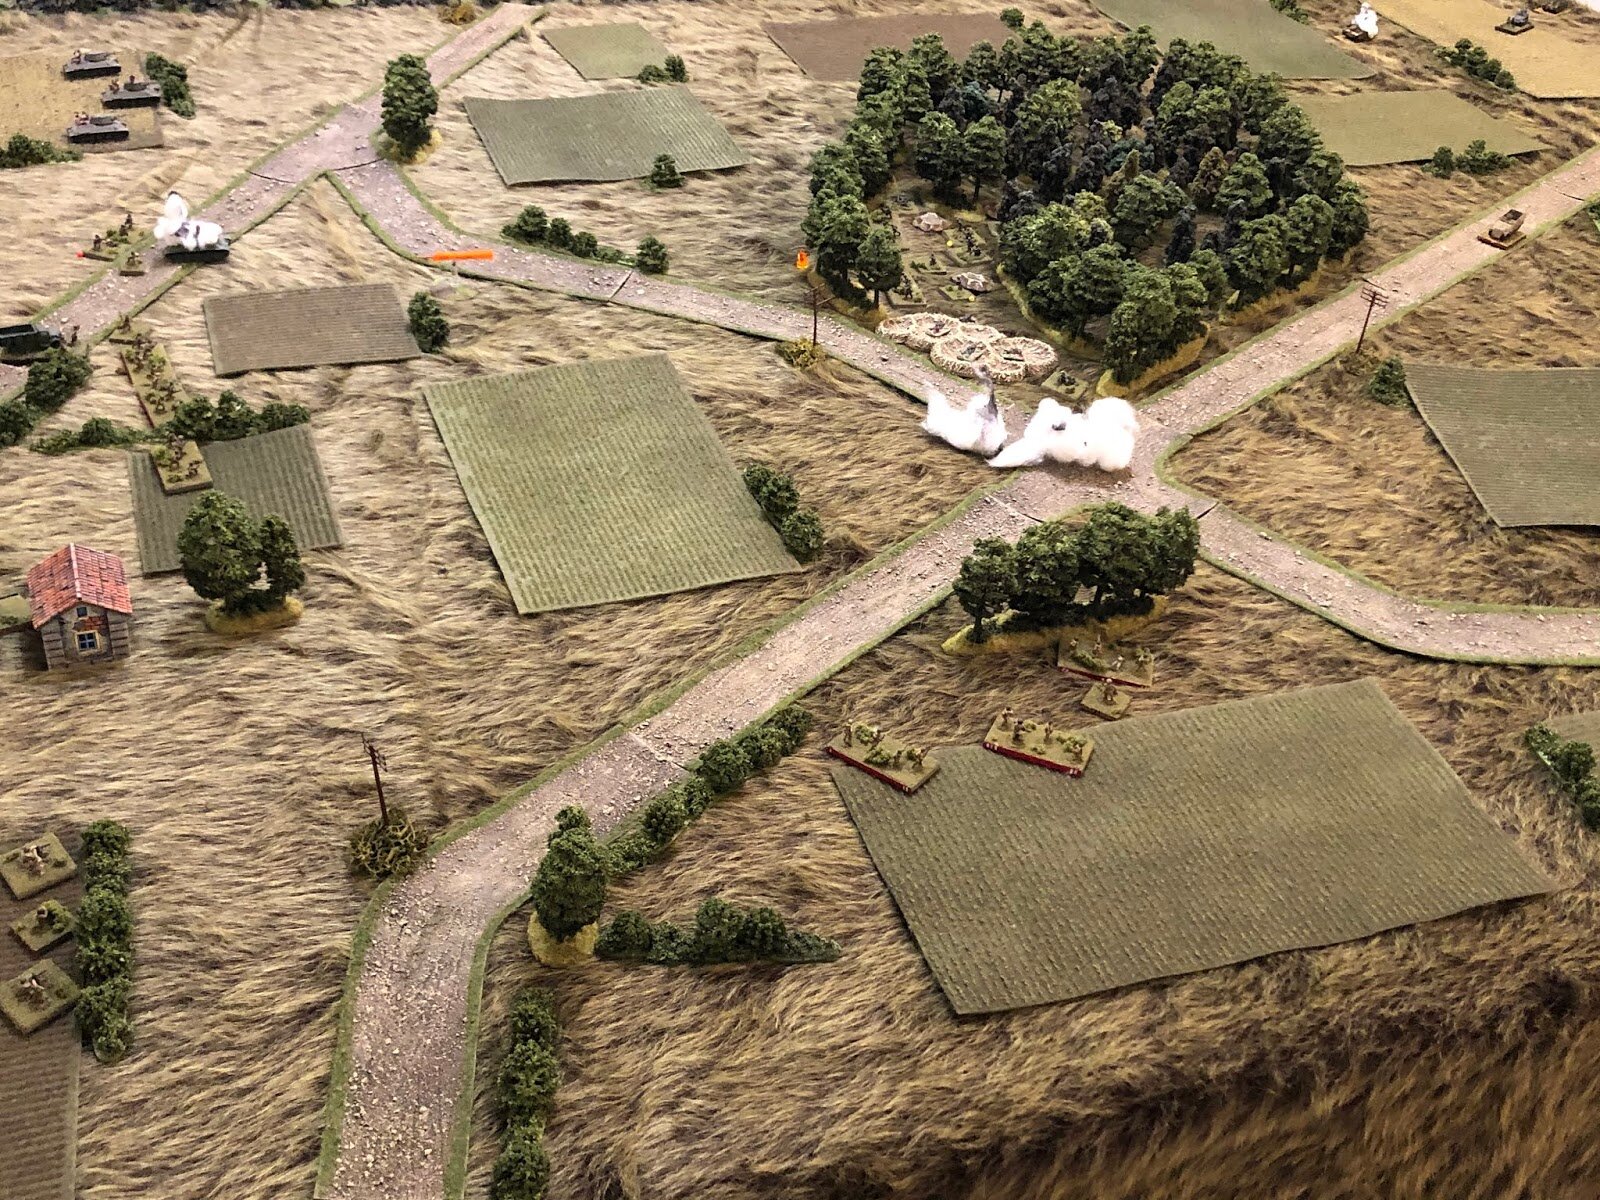
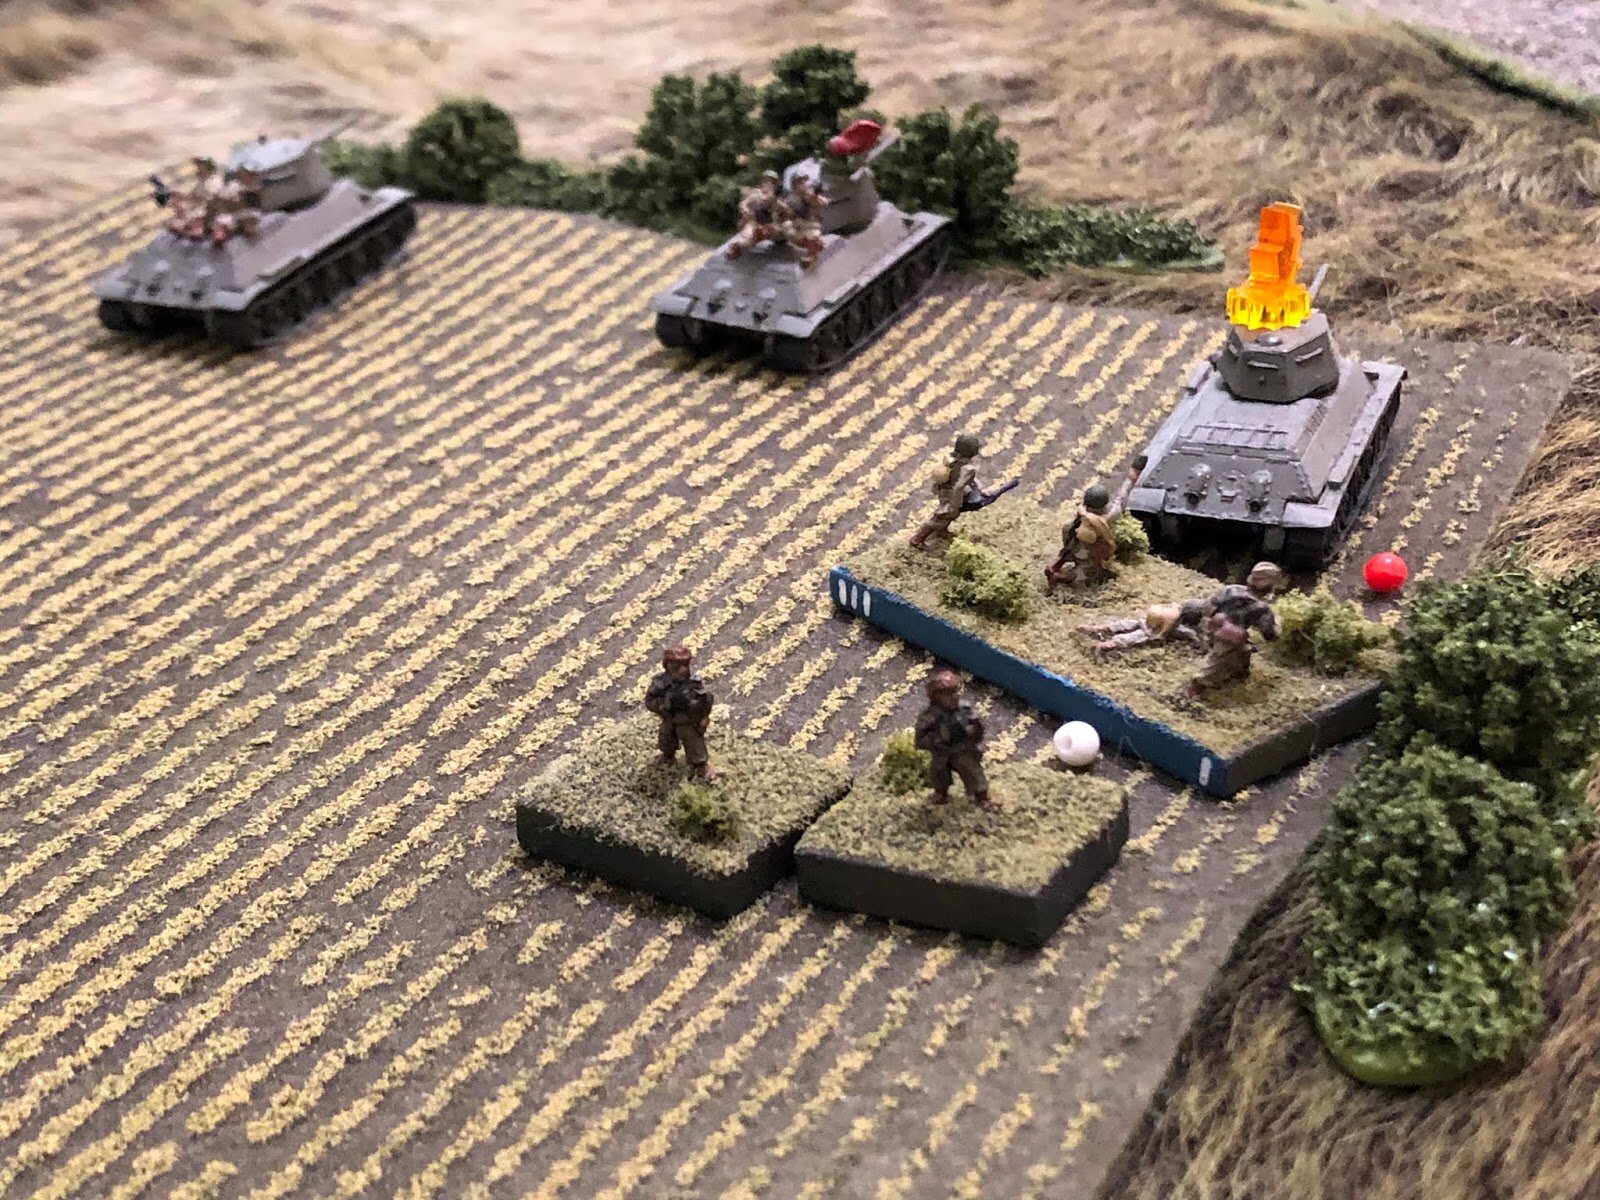
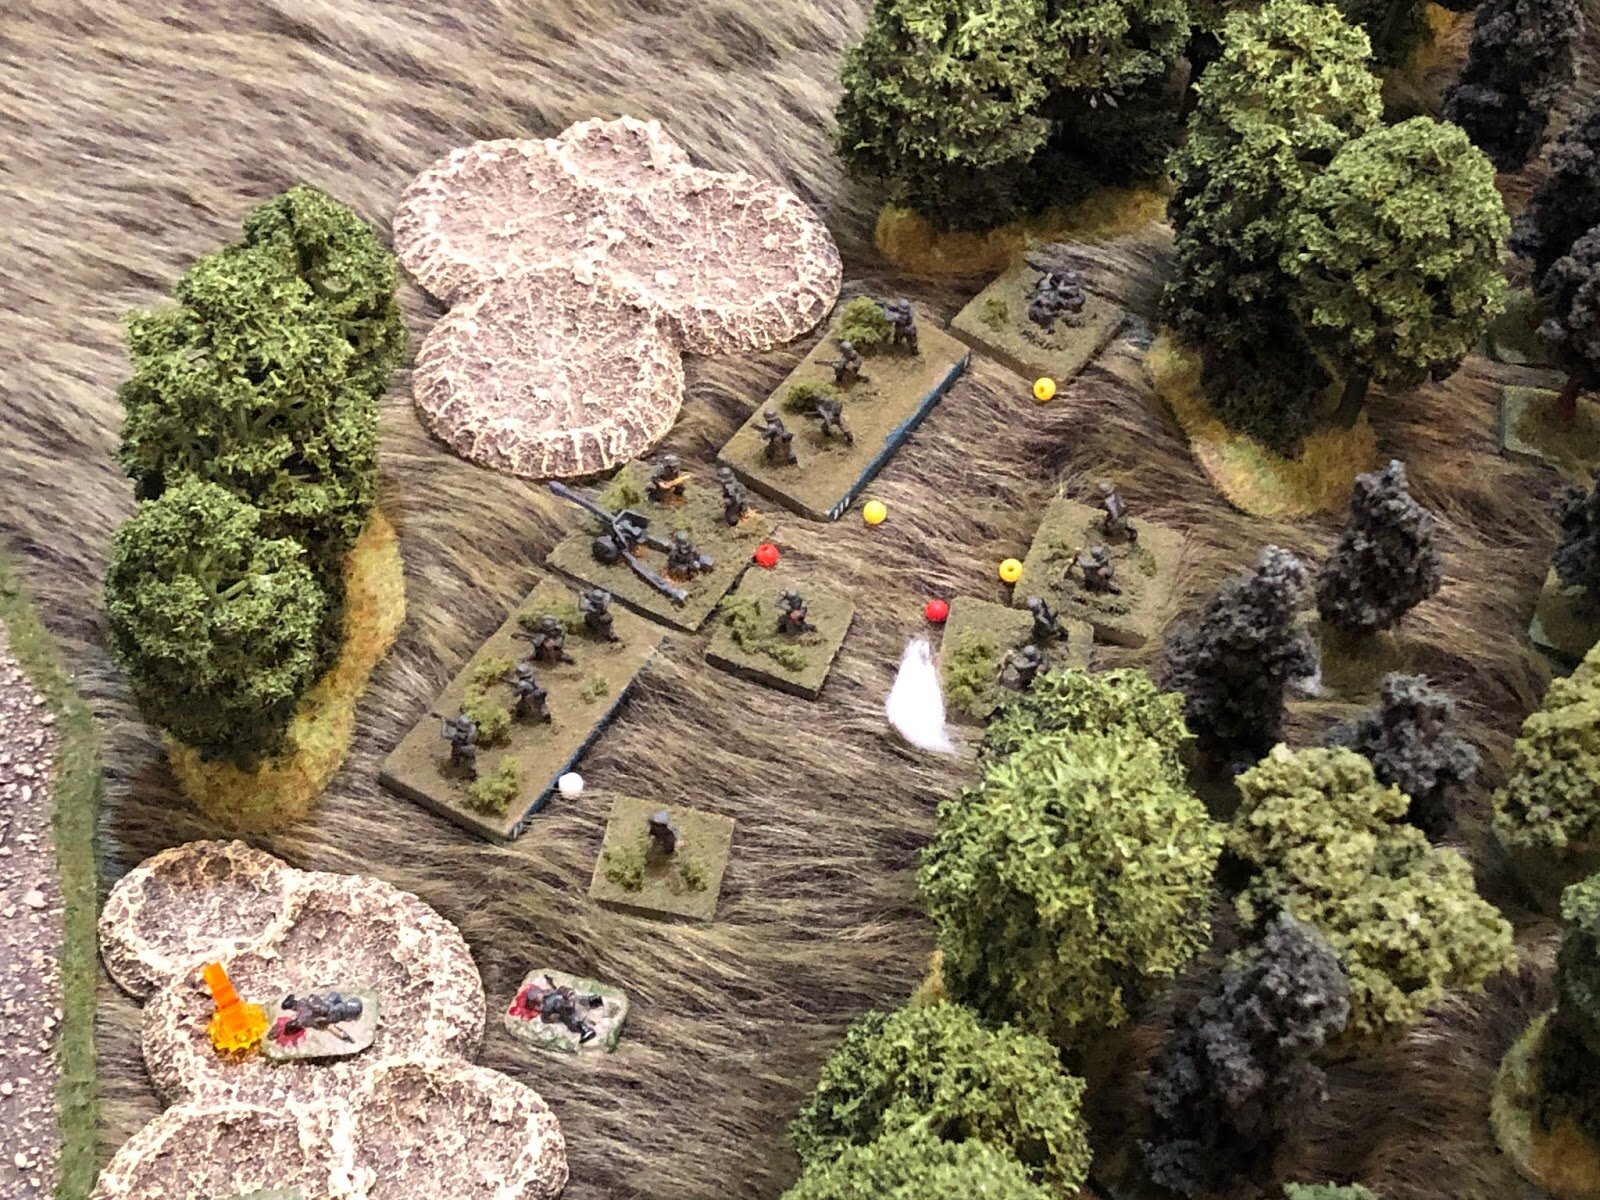
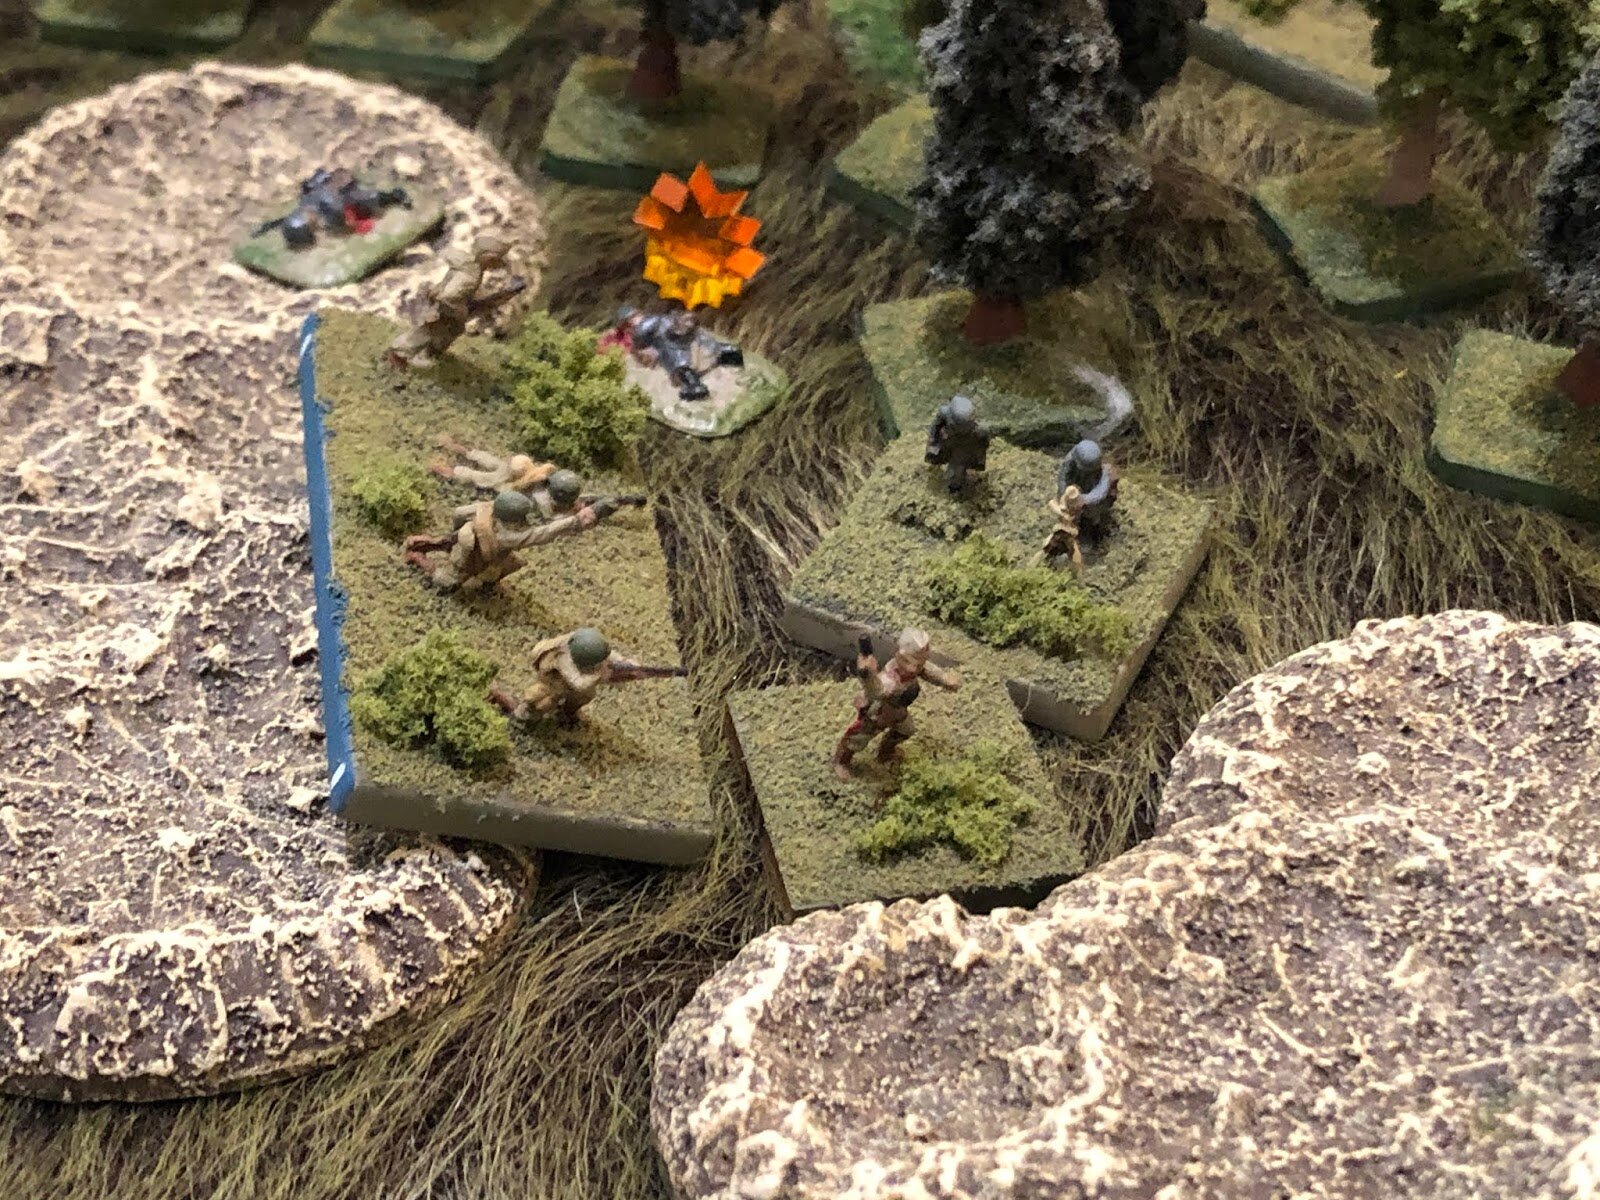
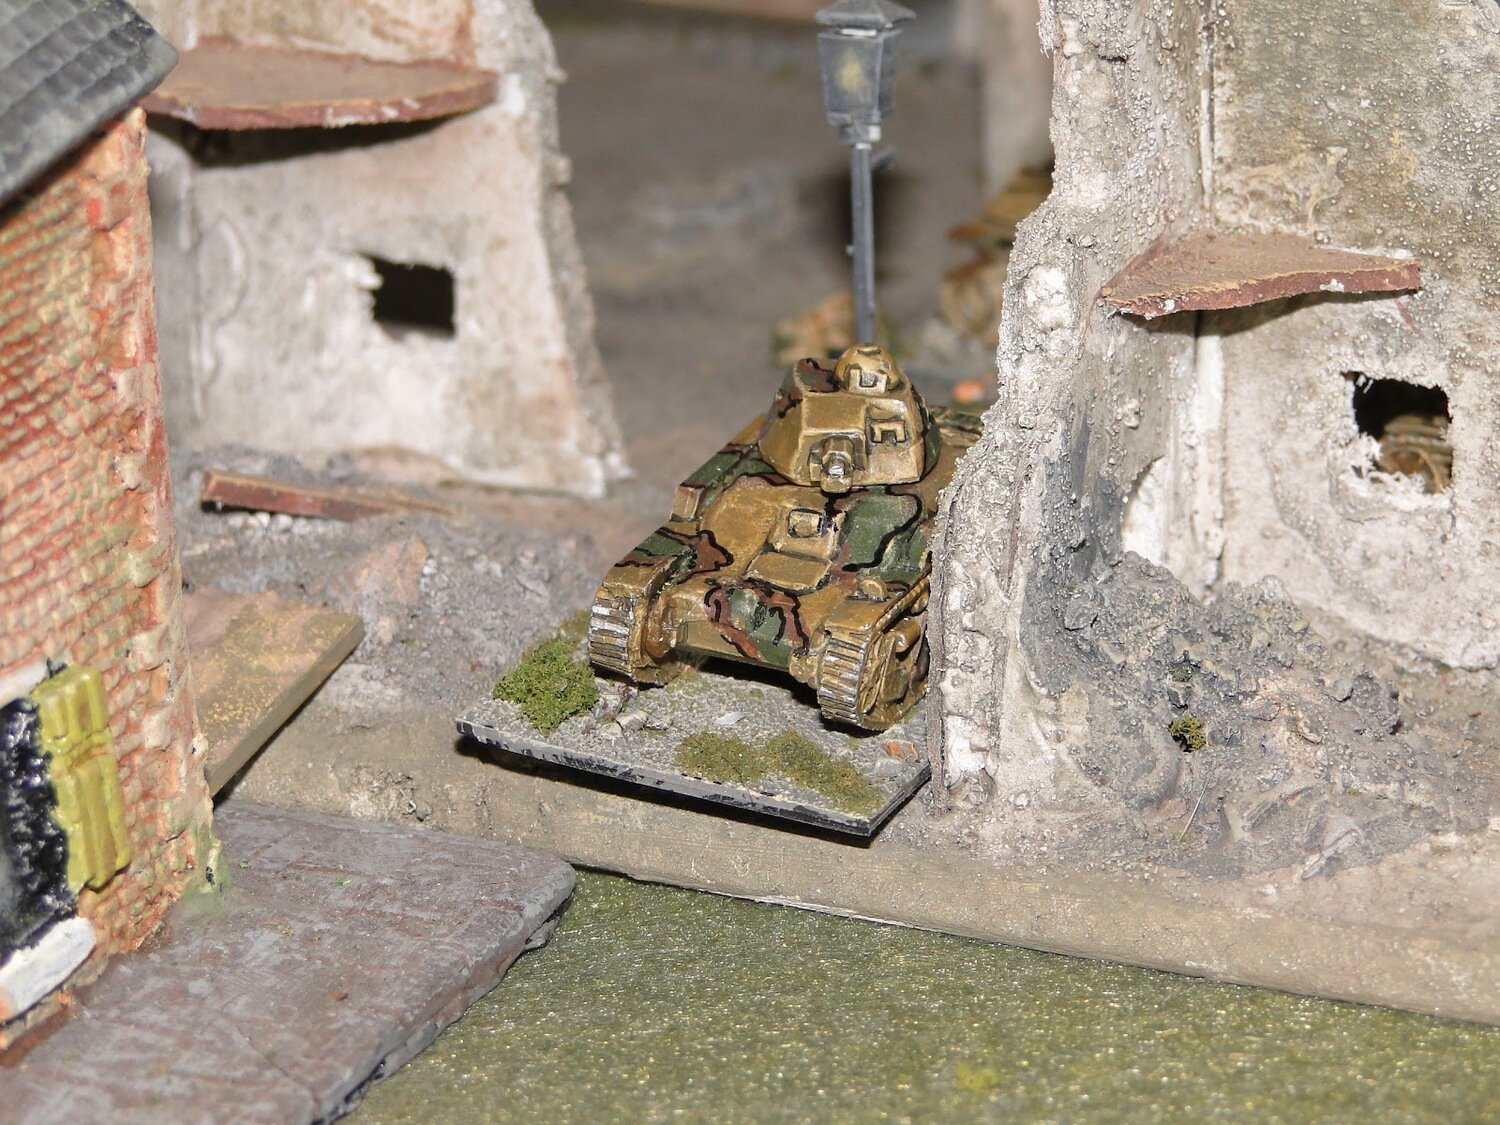
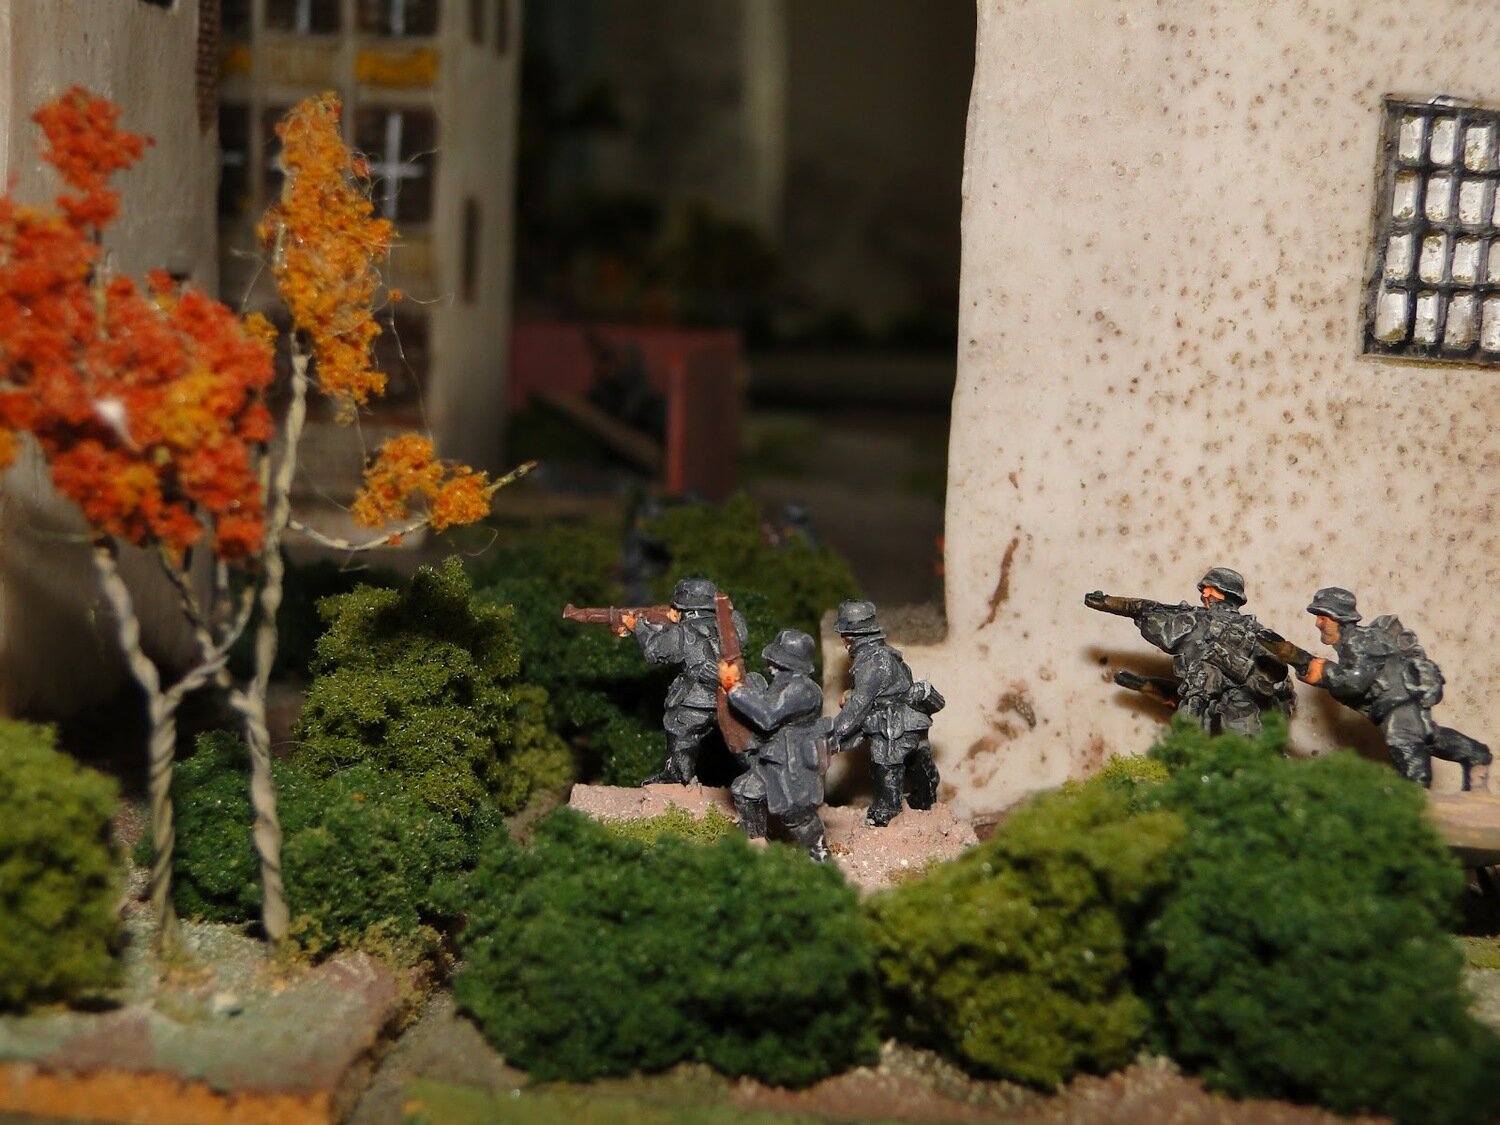
My tanks then turned towards the town, discovering and engaging a section of British infantry in the big house in the foreground of the picture below. As you can see, the Panzer II with its 20mm autocannon knocked out was doing a bit of reconnaissance by proximity: no way could the Brits remian hidden with a Panzer in their back garden!
Knock, knock!
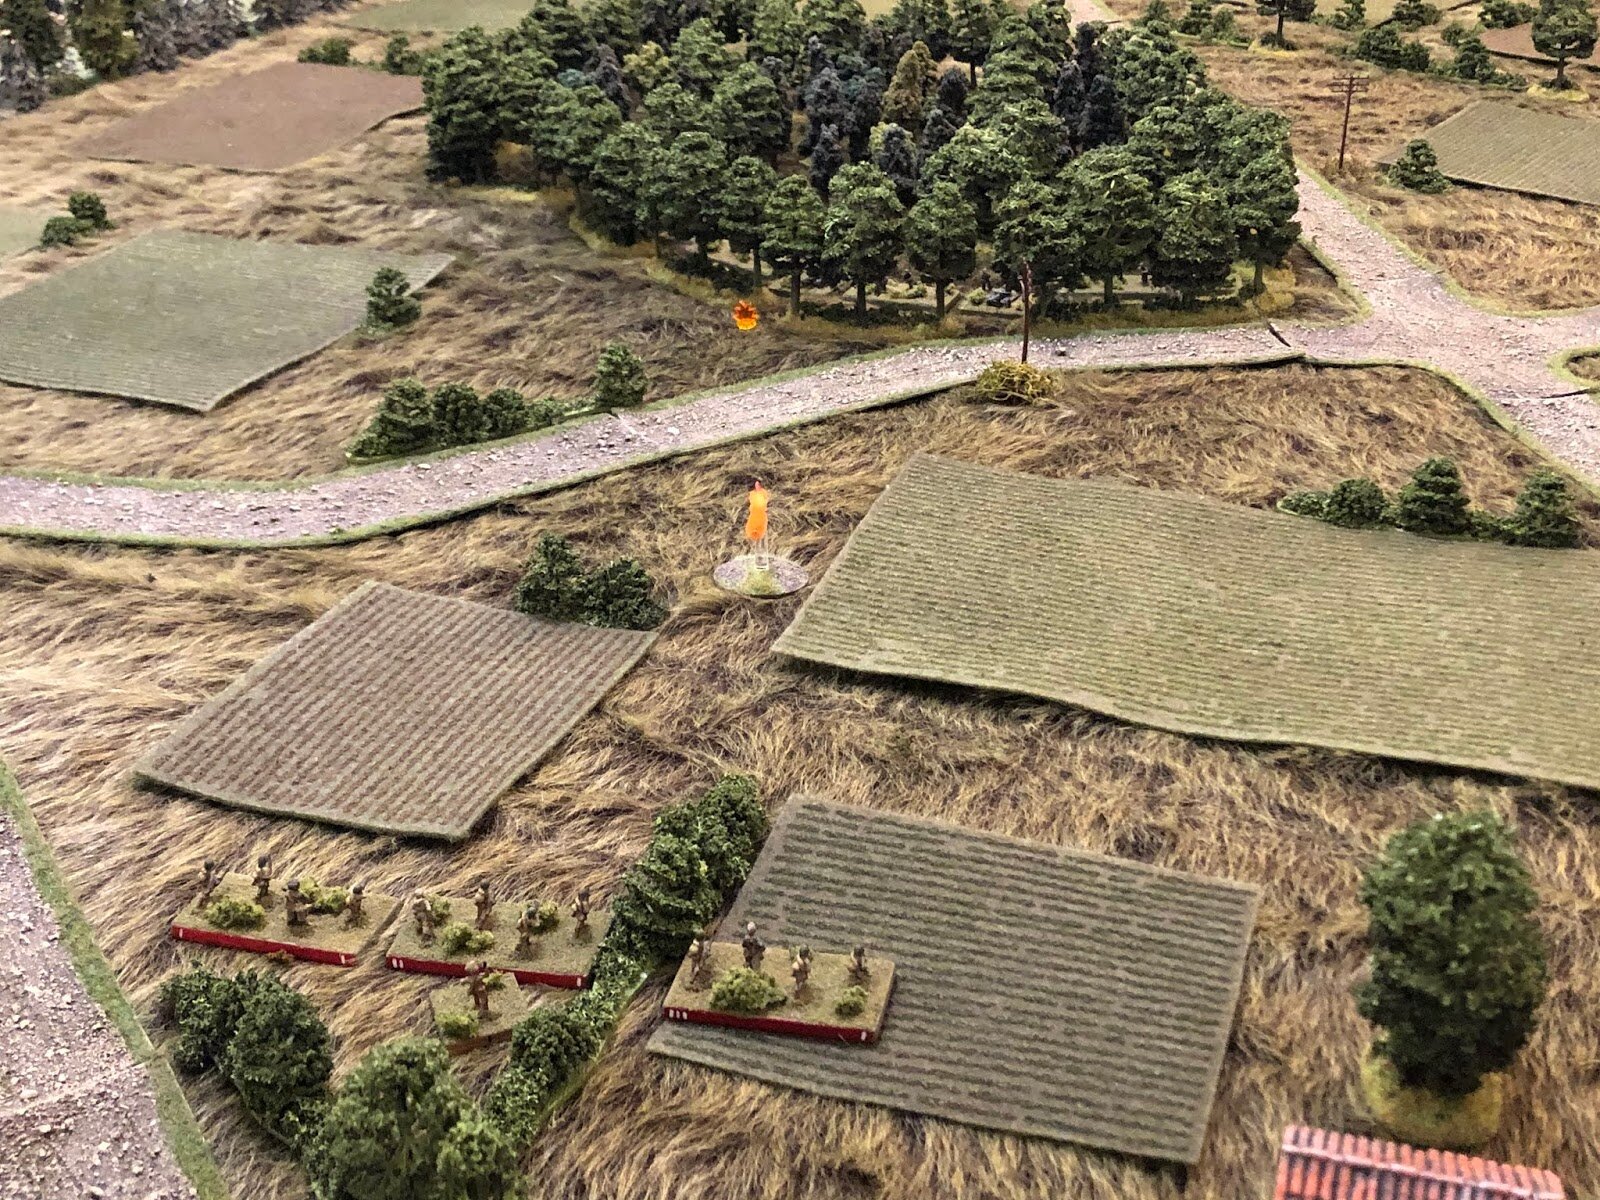
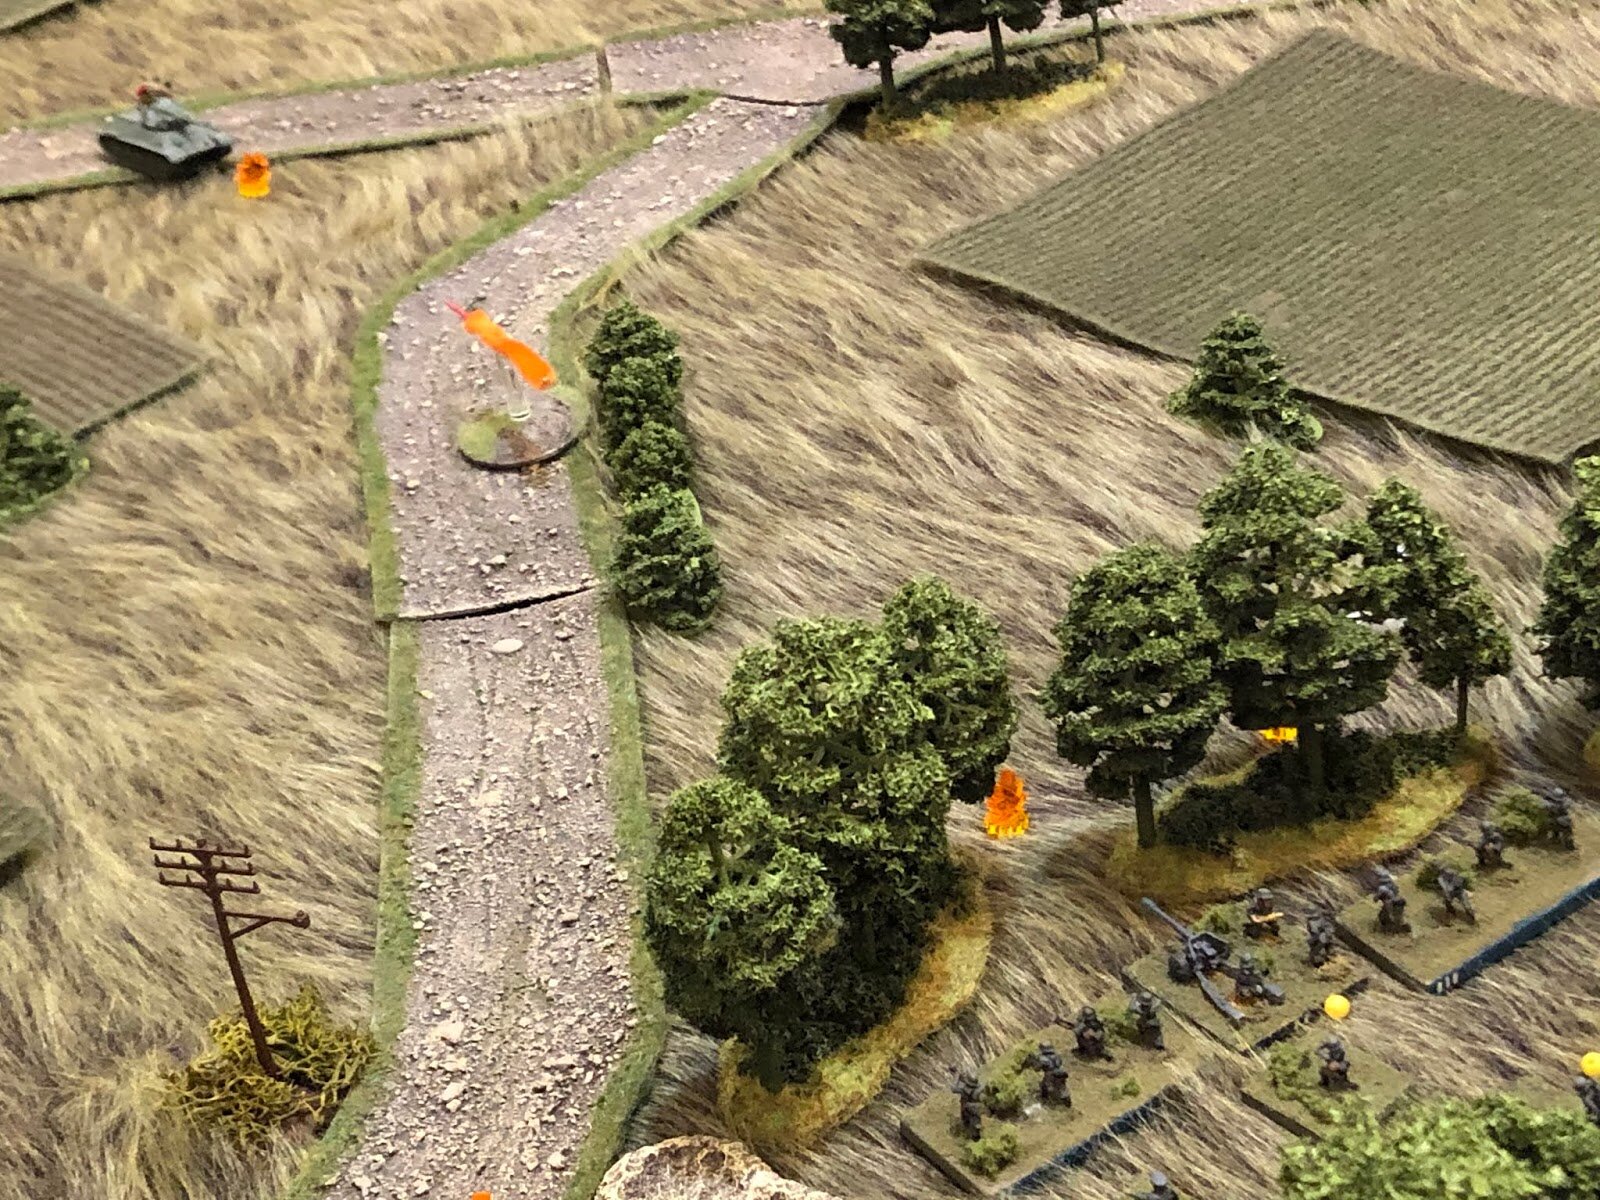
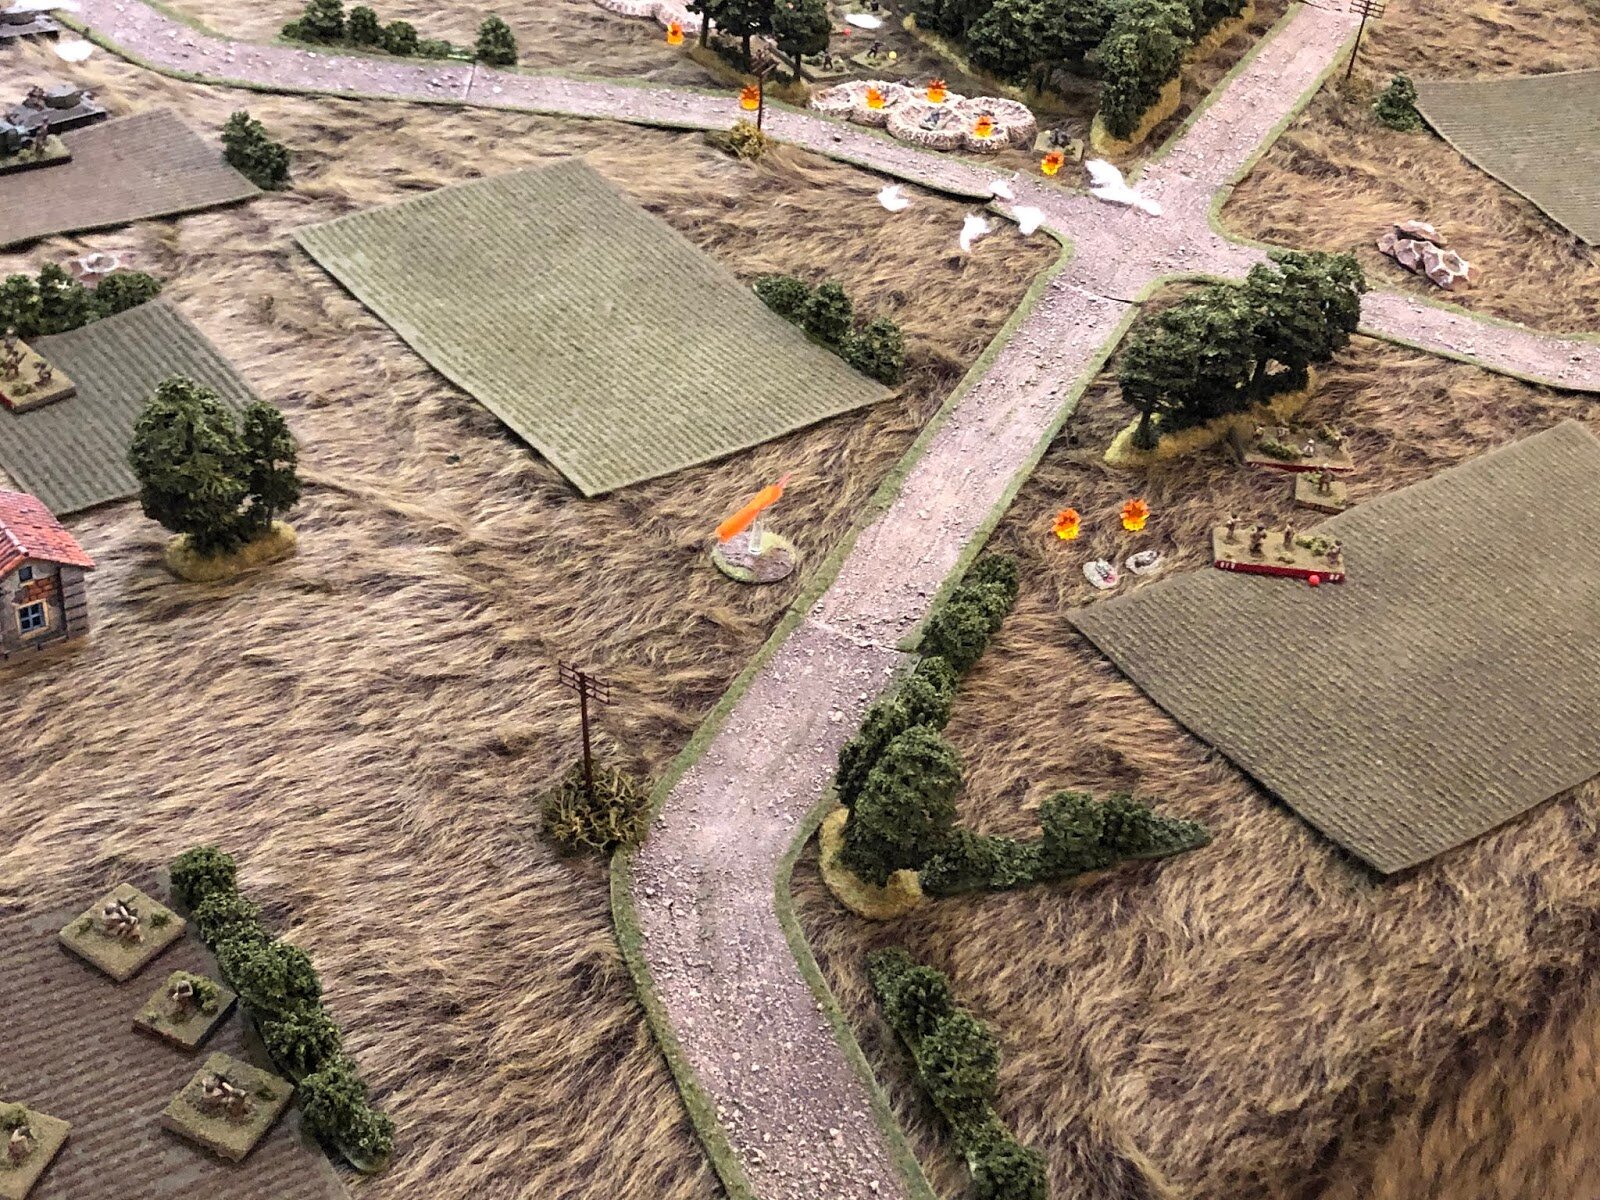
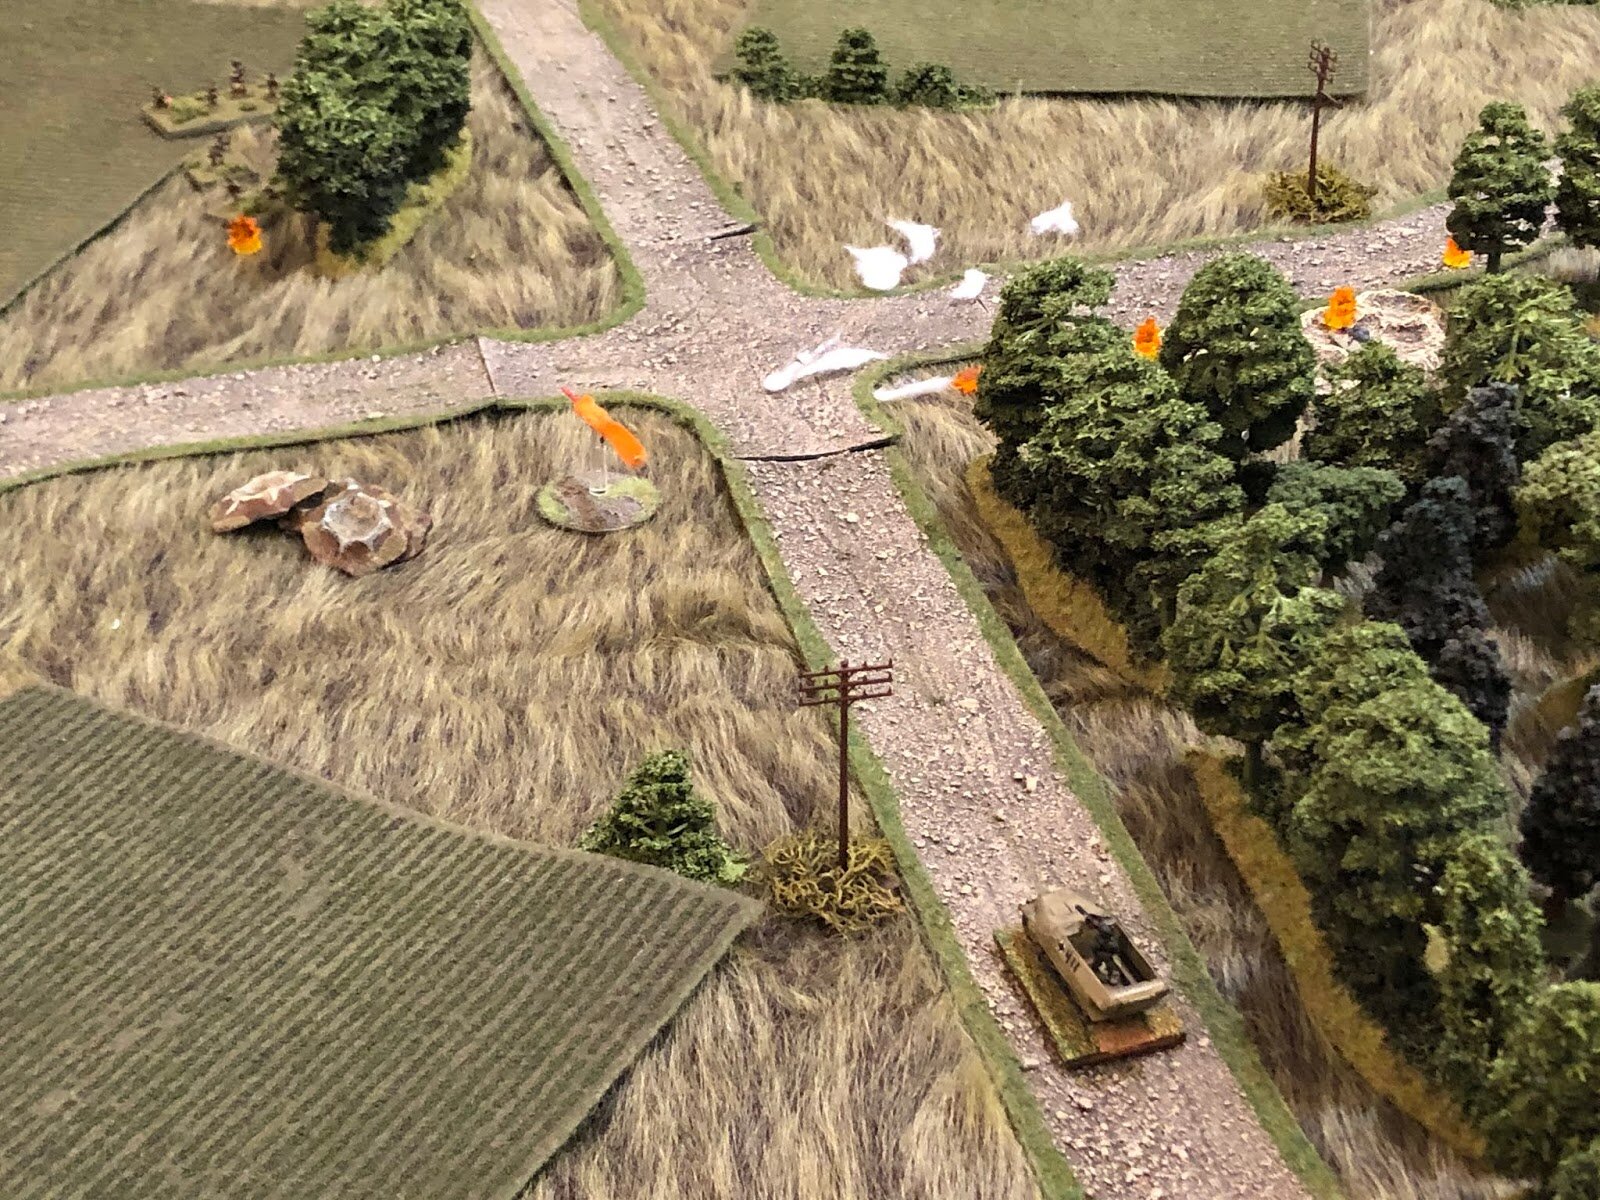
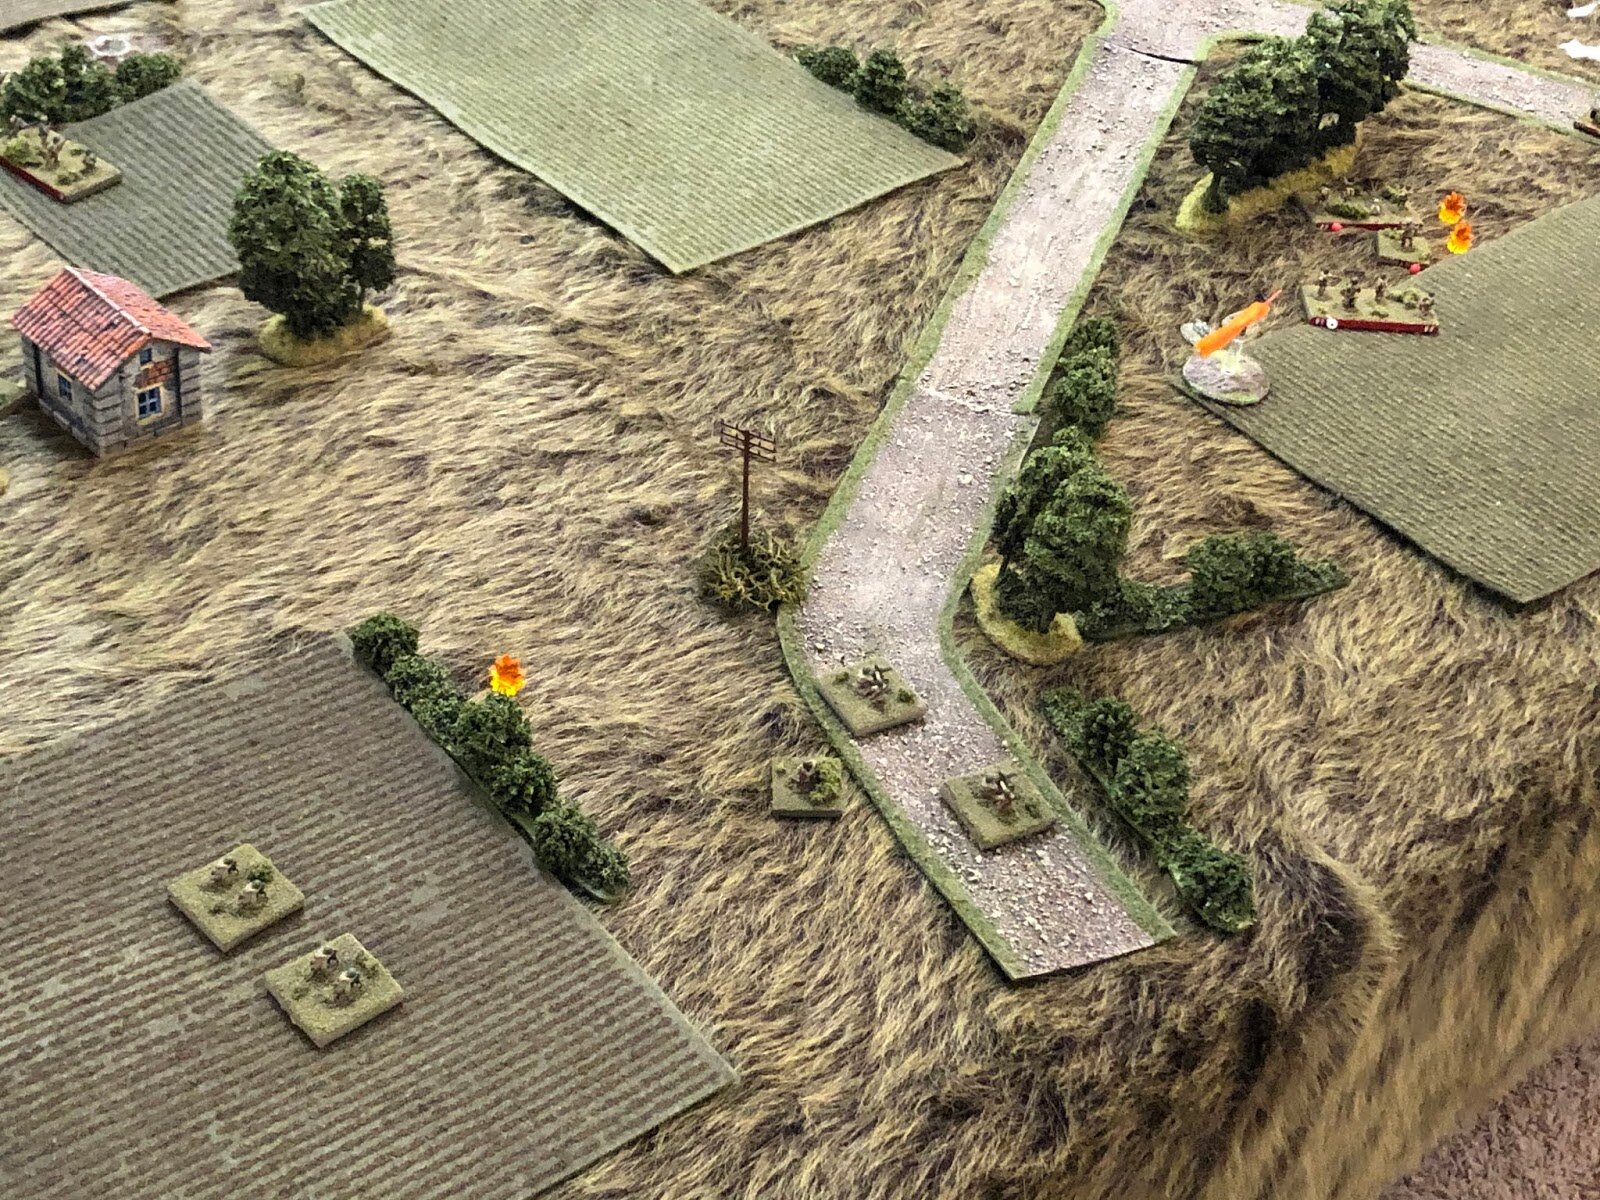
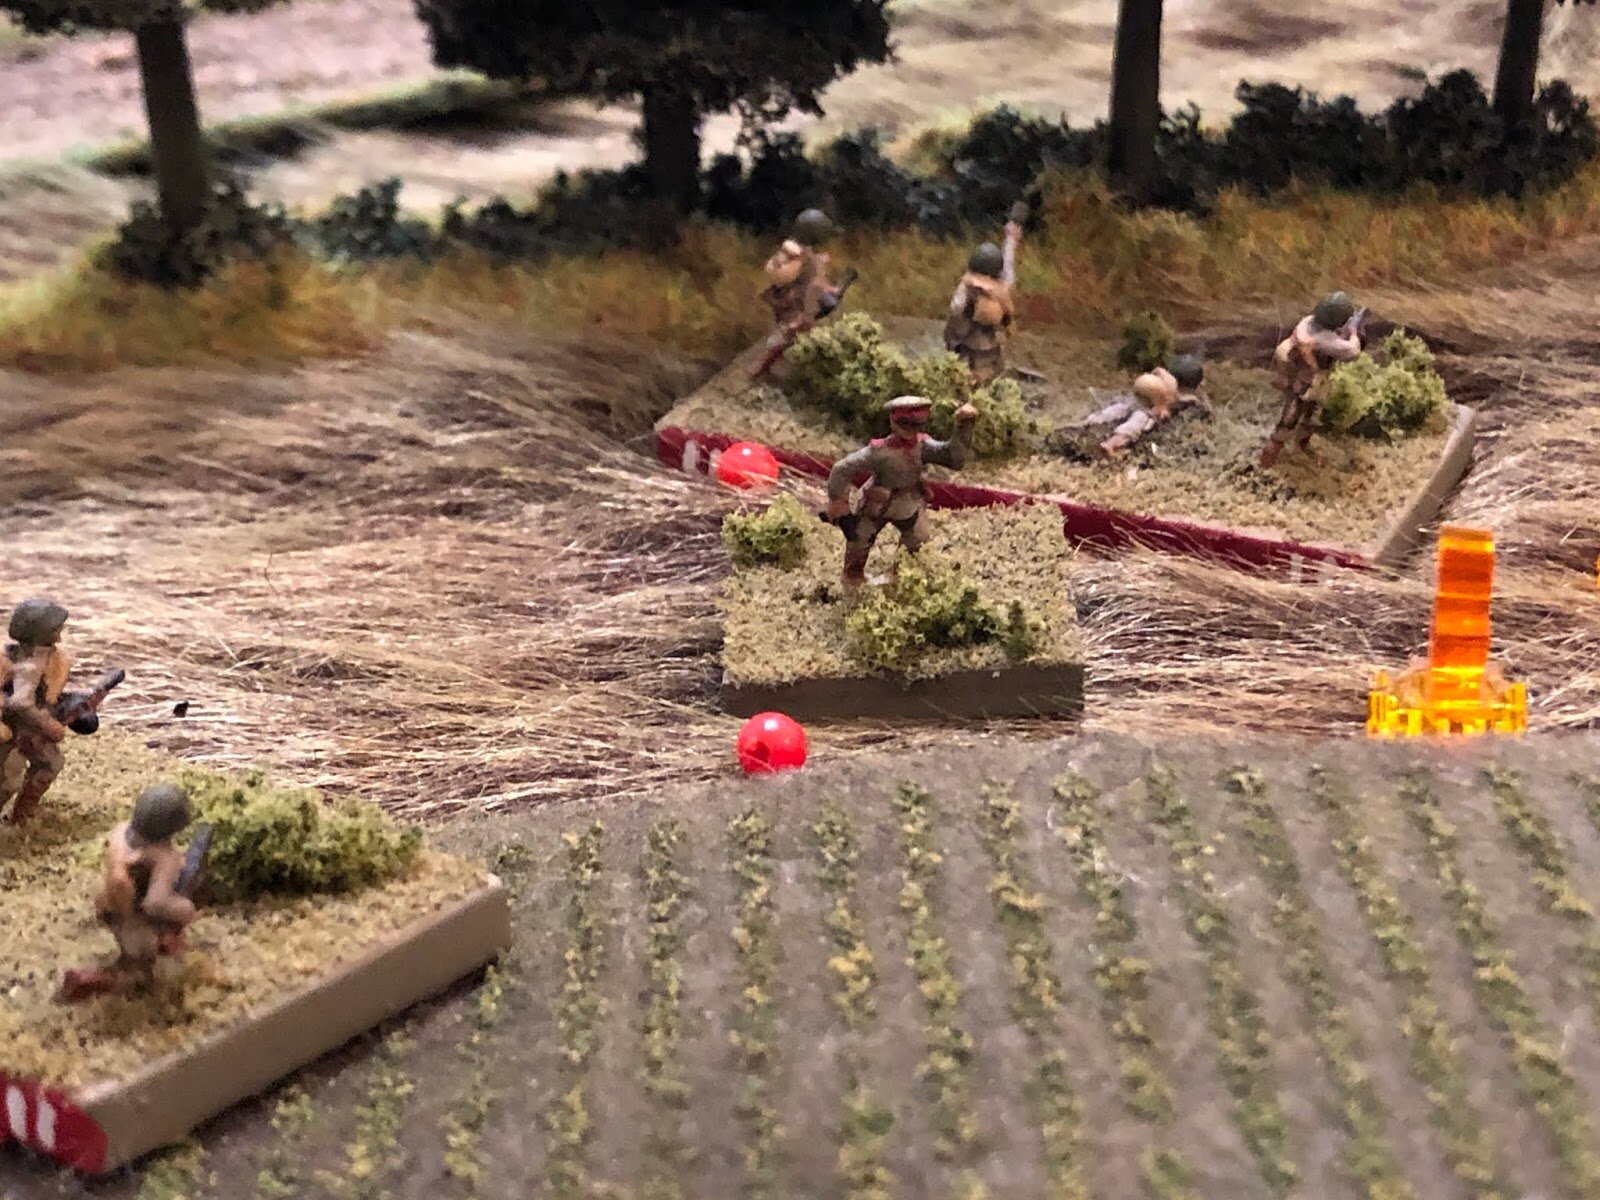
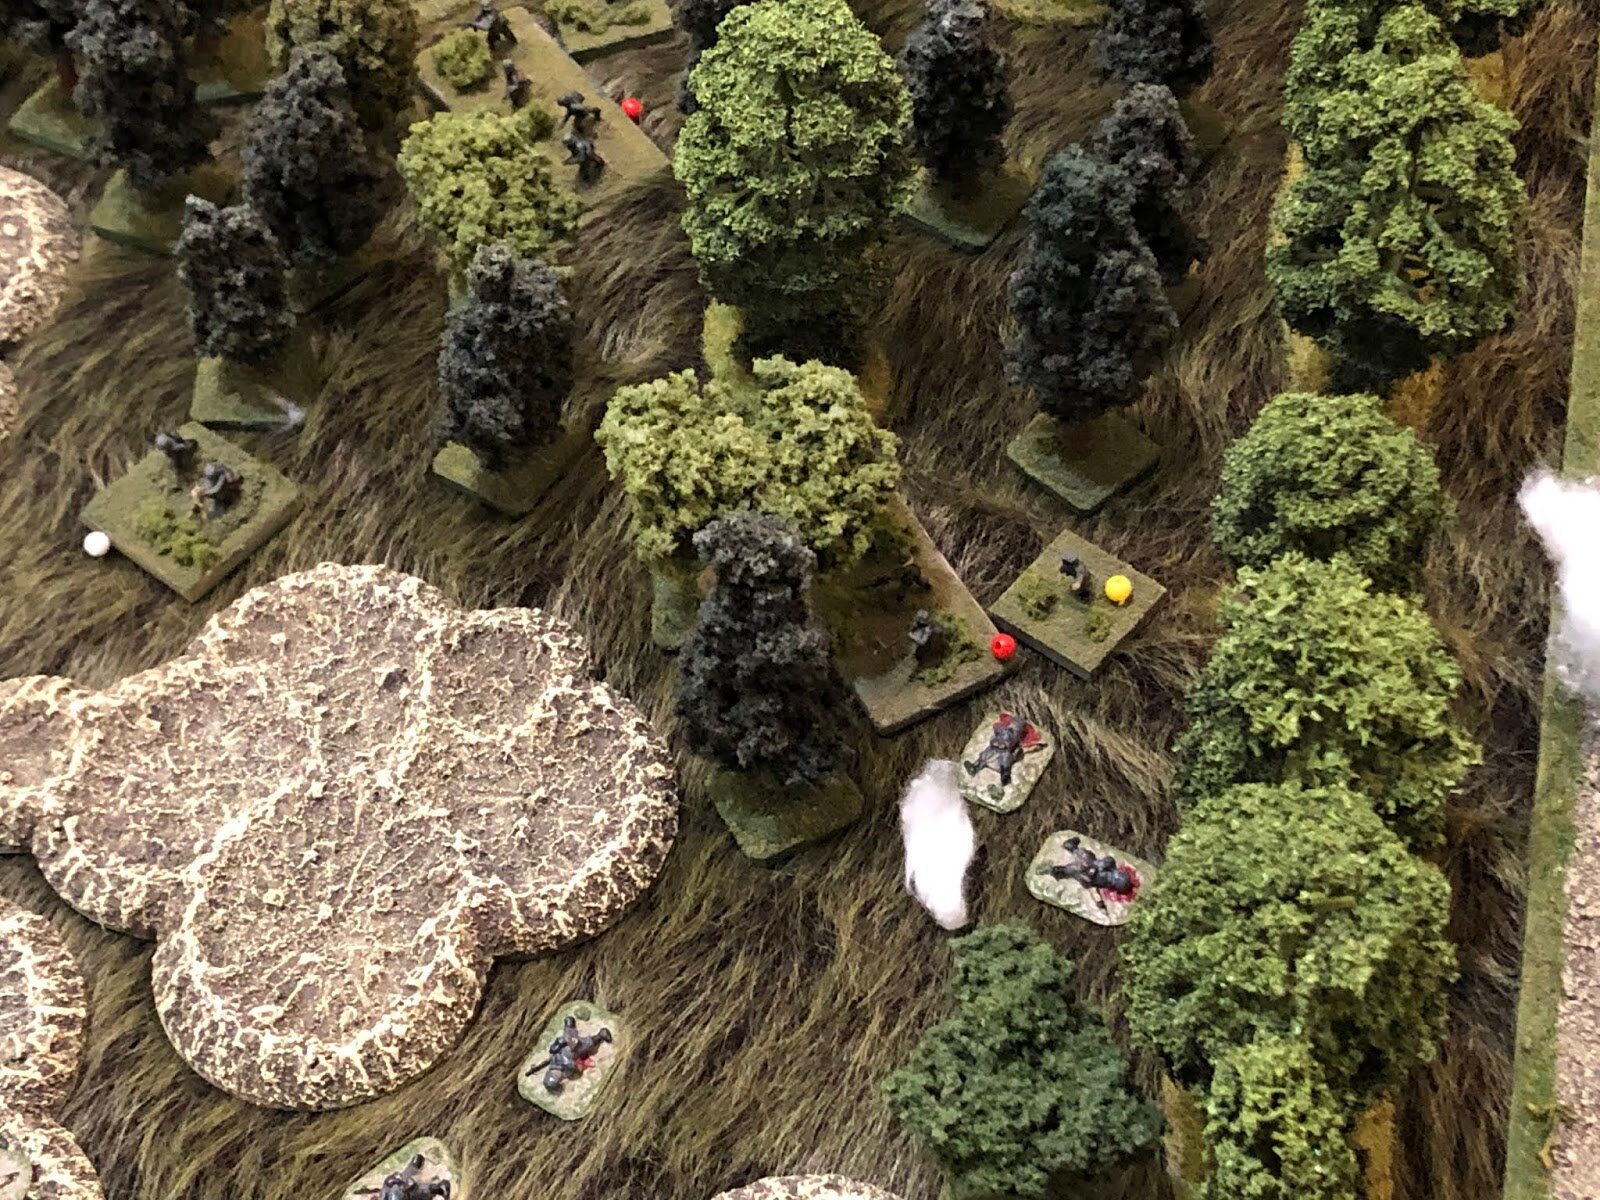
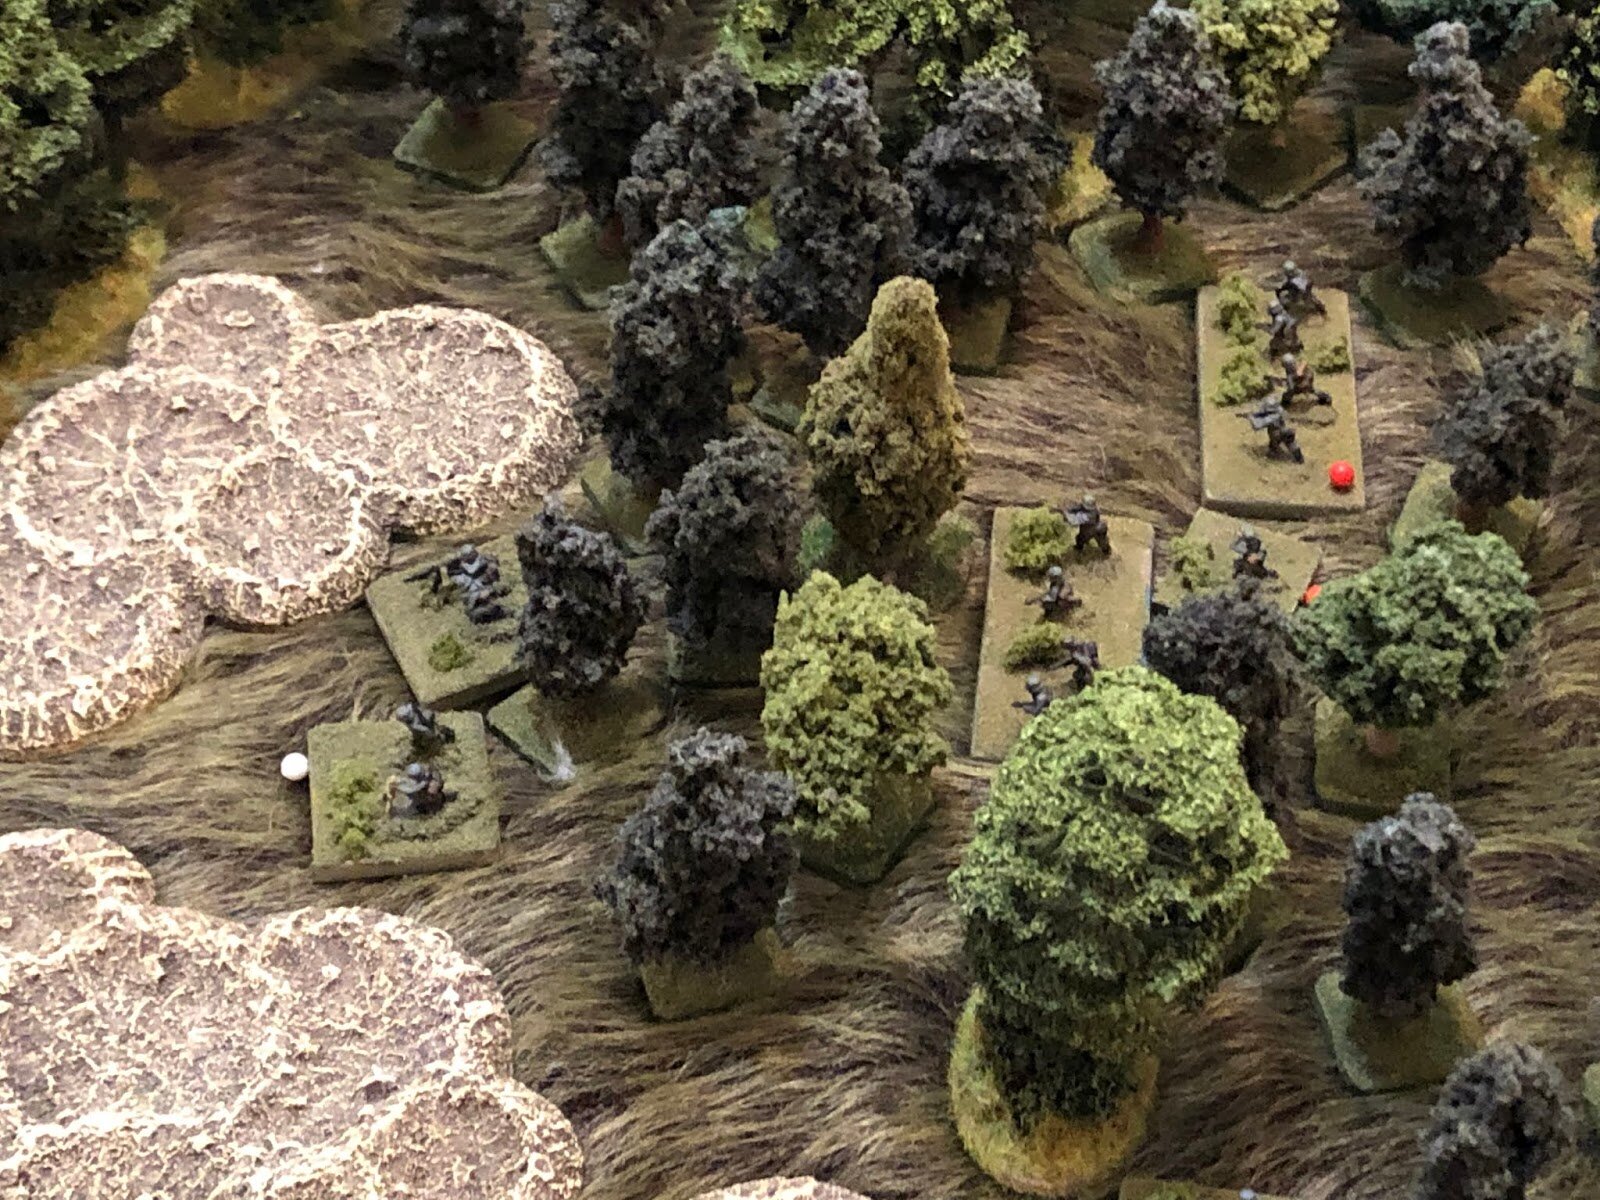
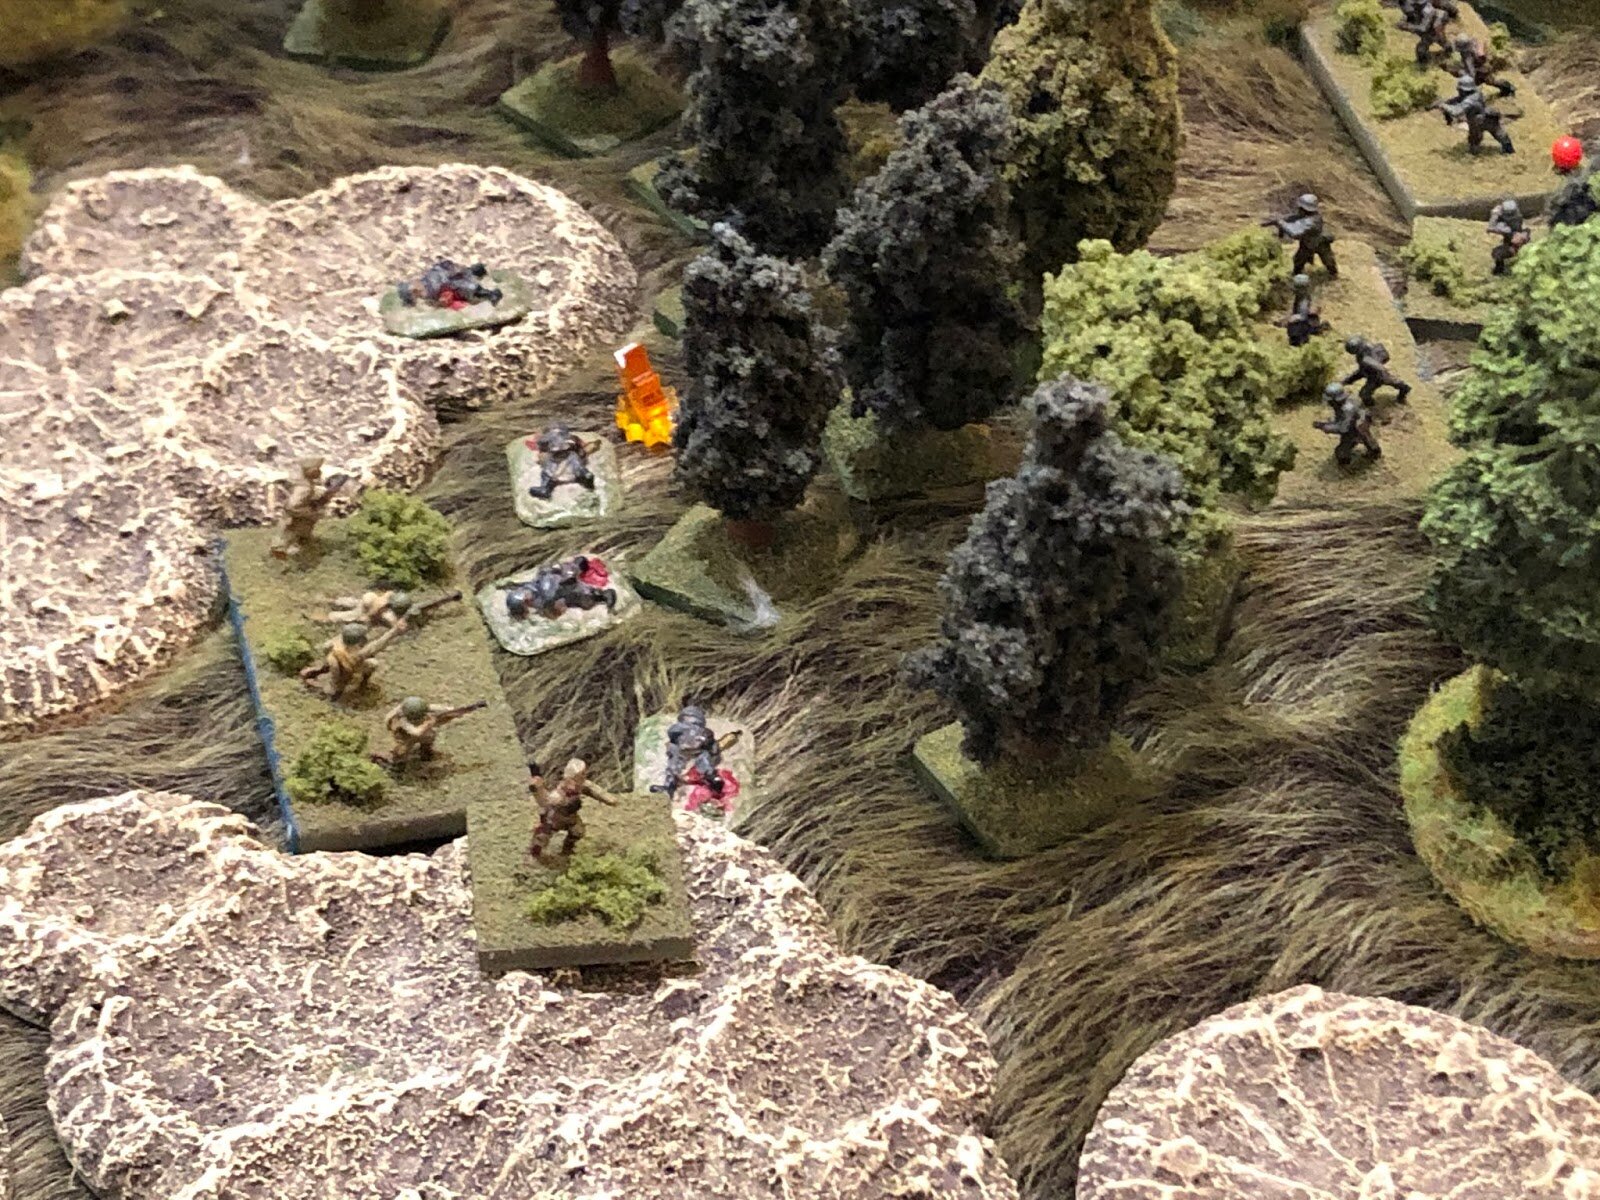
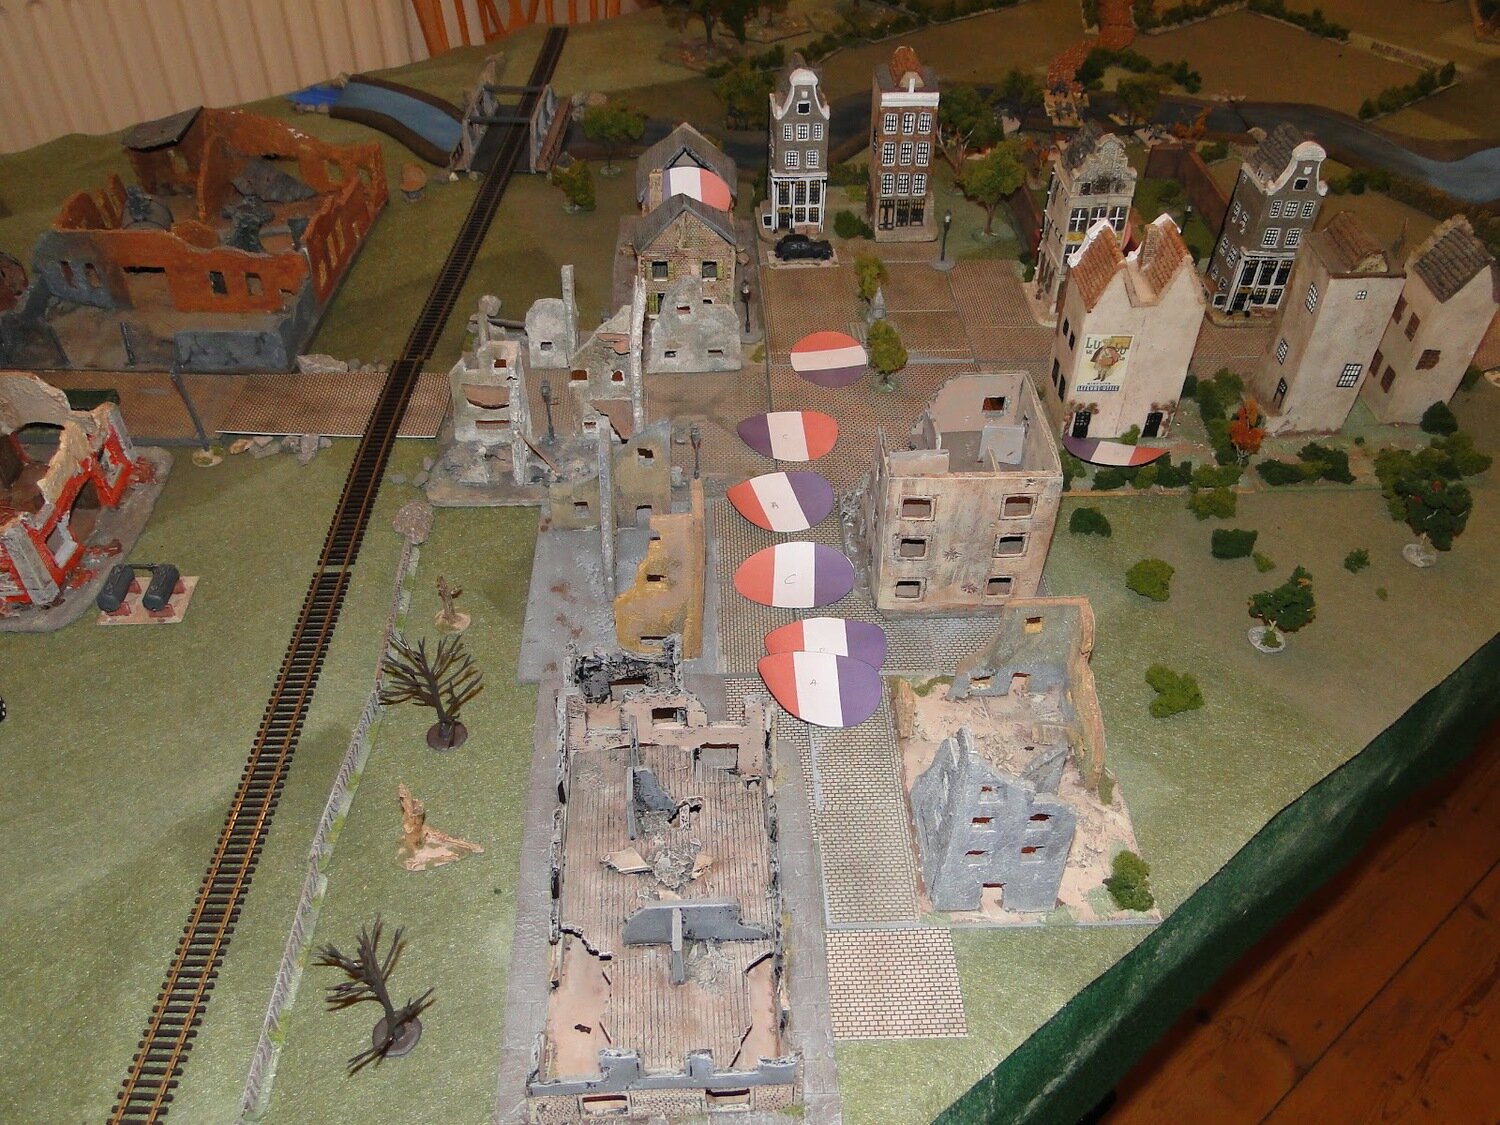
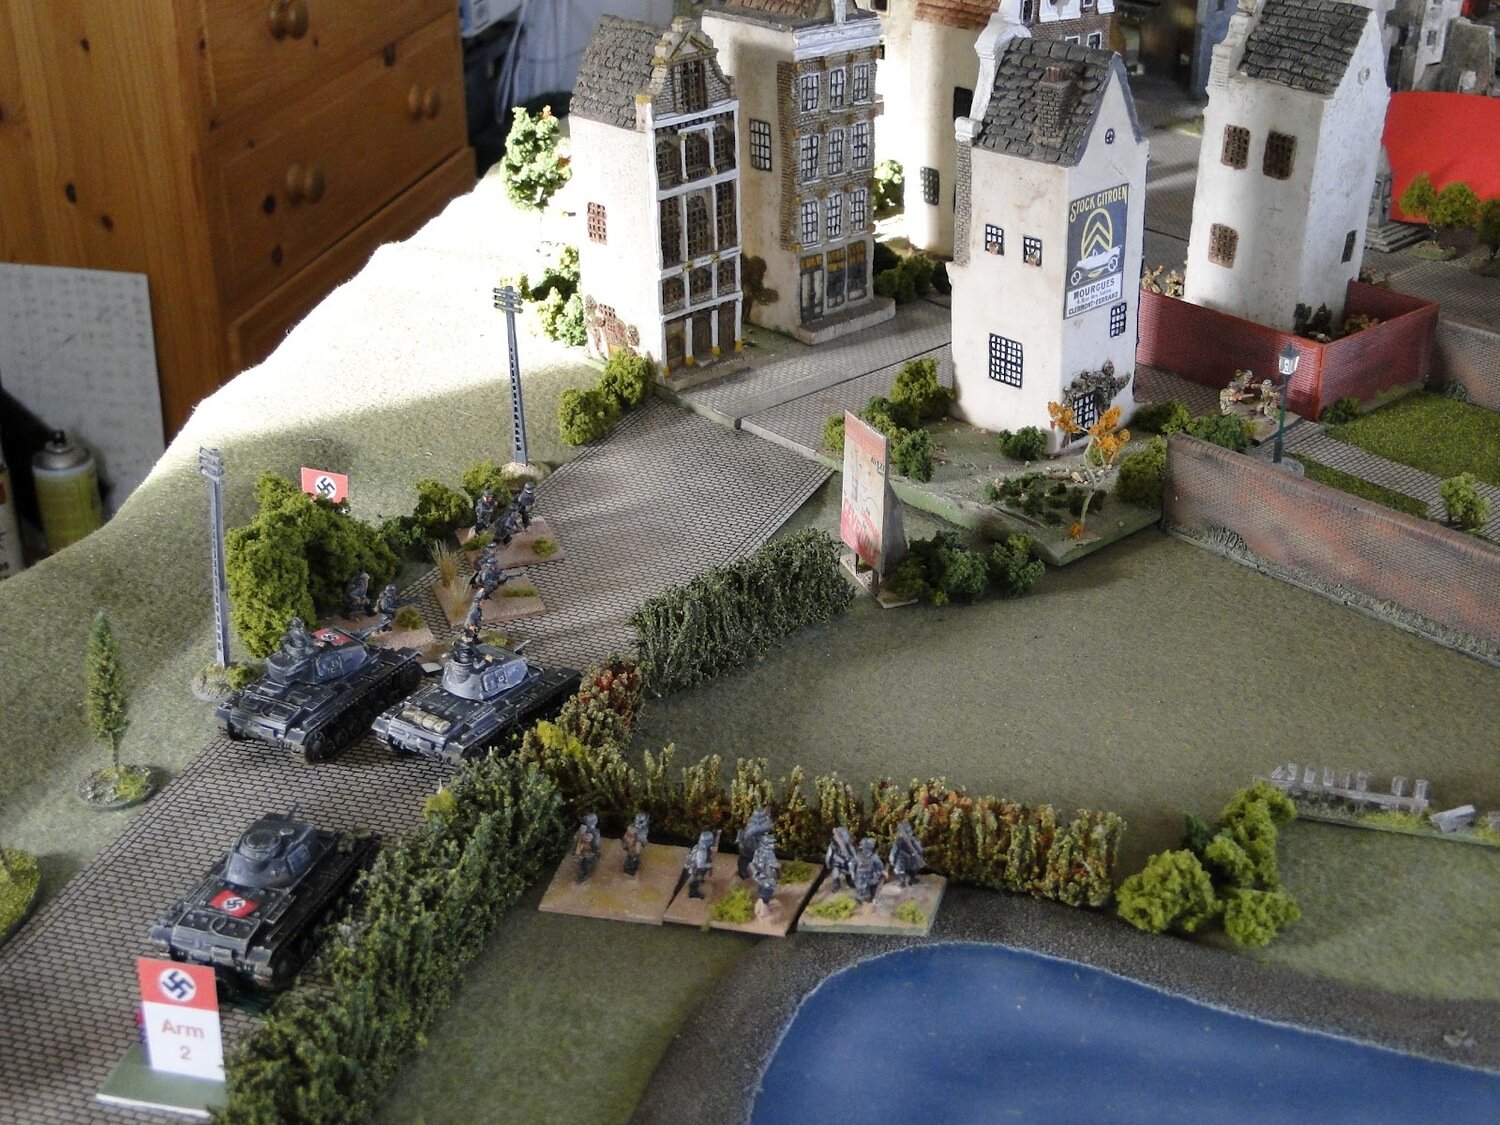
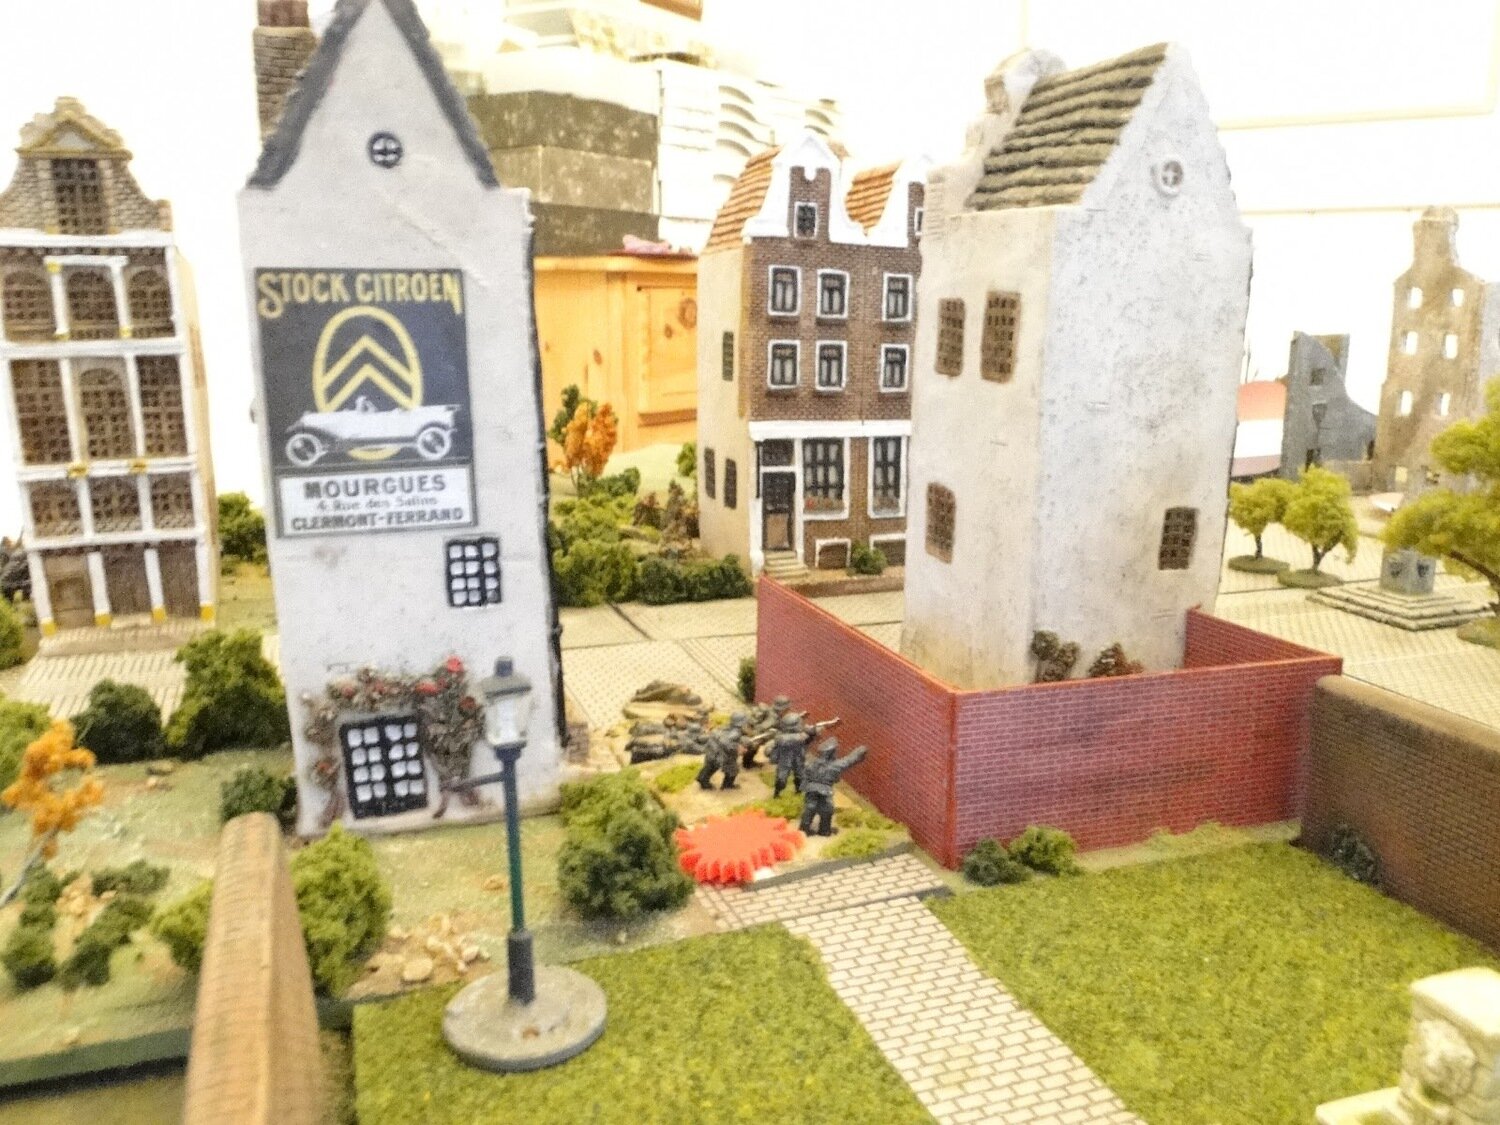
In a few moments, I would do the same sort of thing with the Dummy Blind: sending it right into the High Street just to the right of the big house, forcing the British infantry in two other locations within the town to deploy as well. Now I knew where they were!
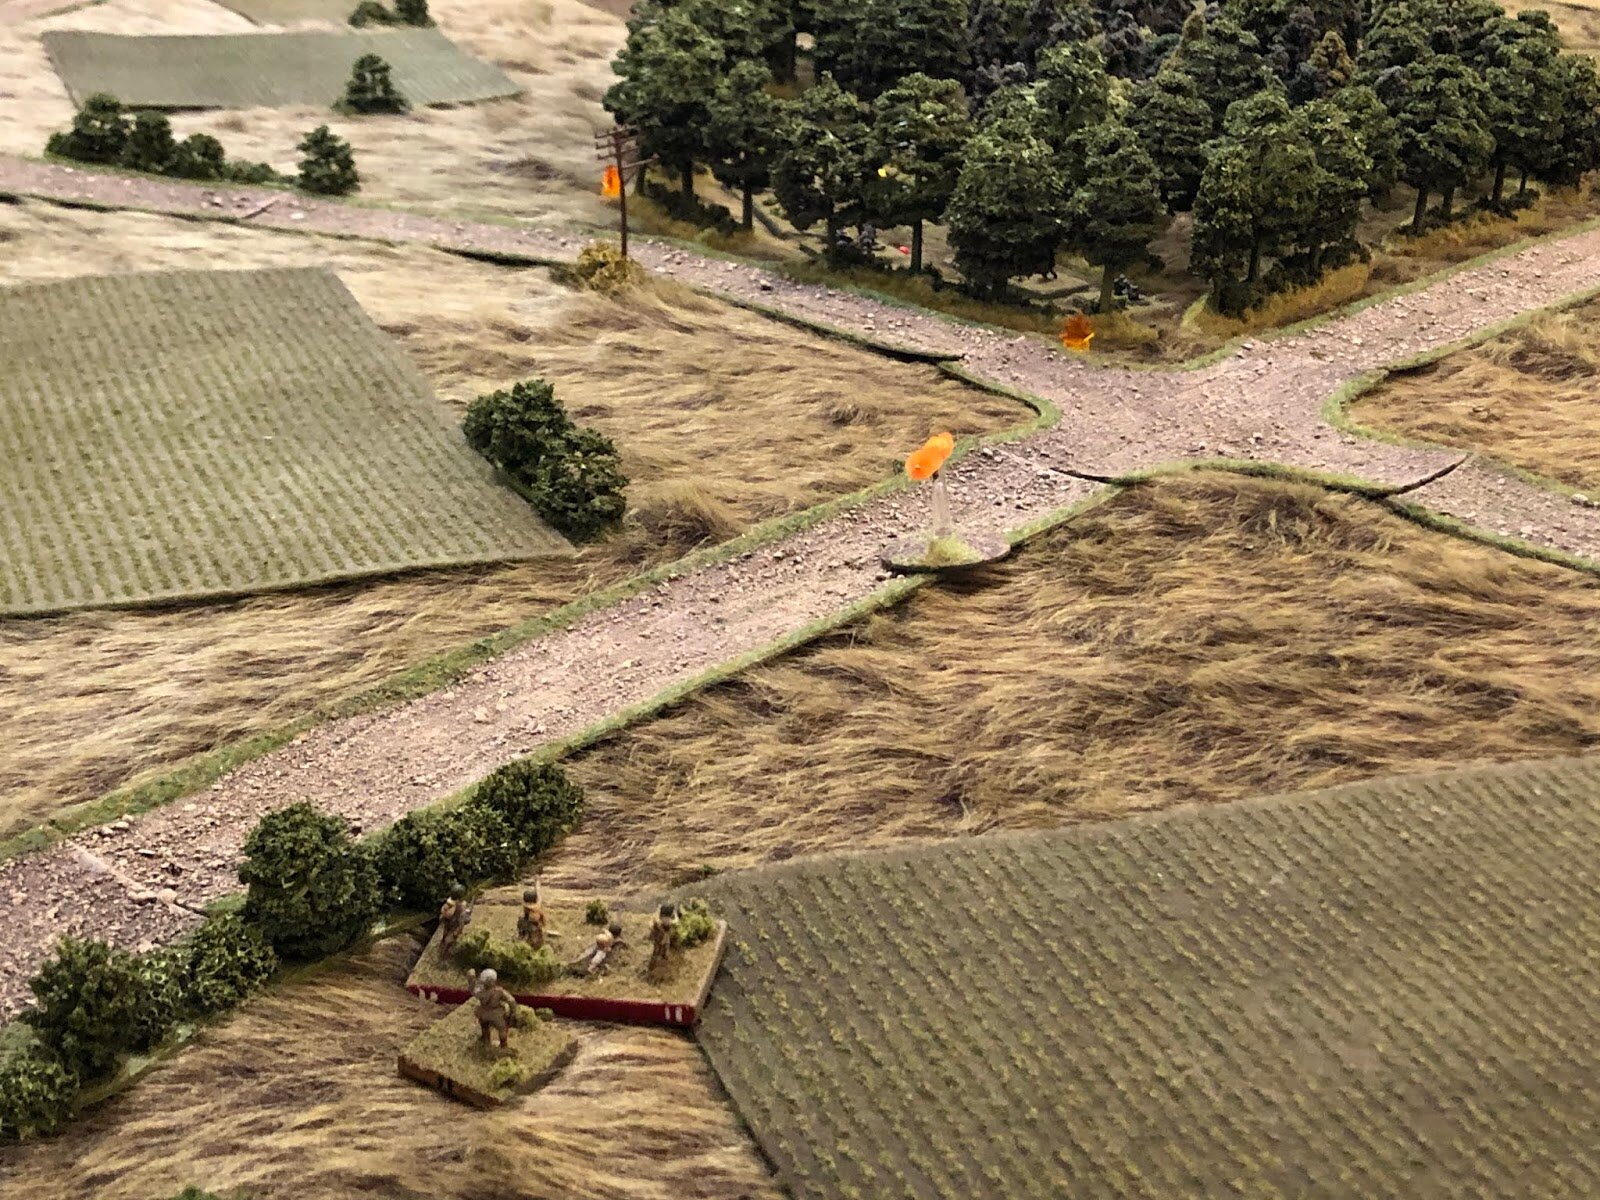
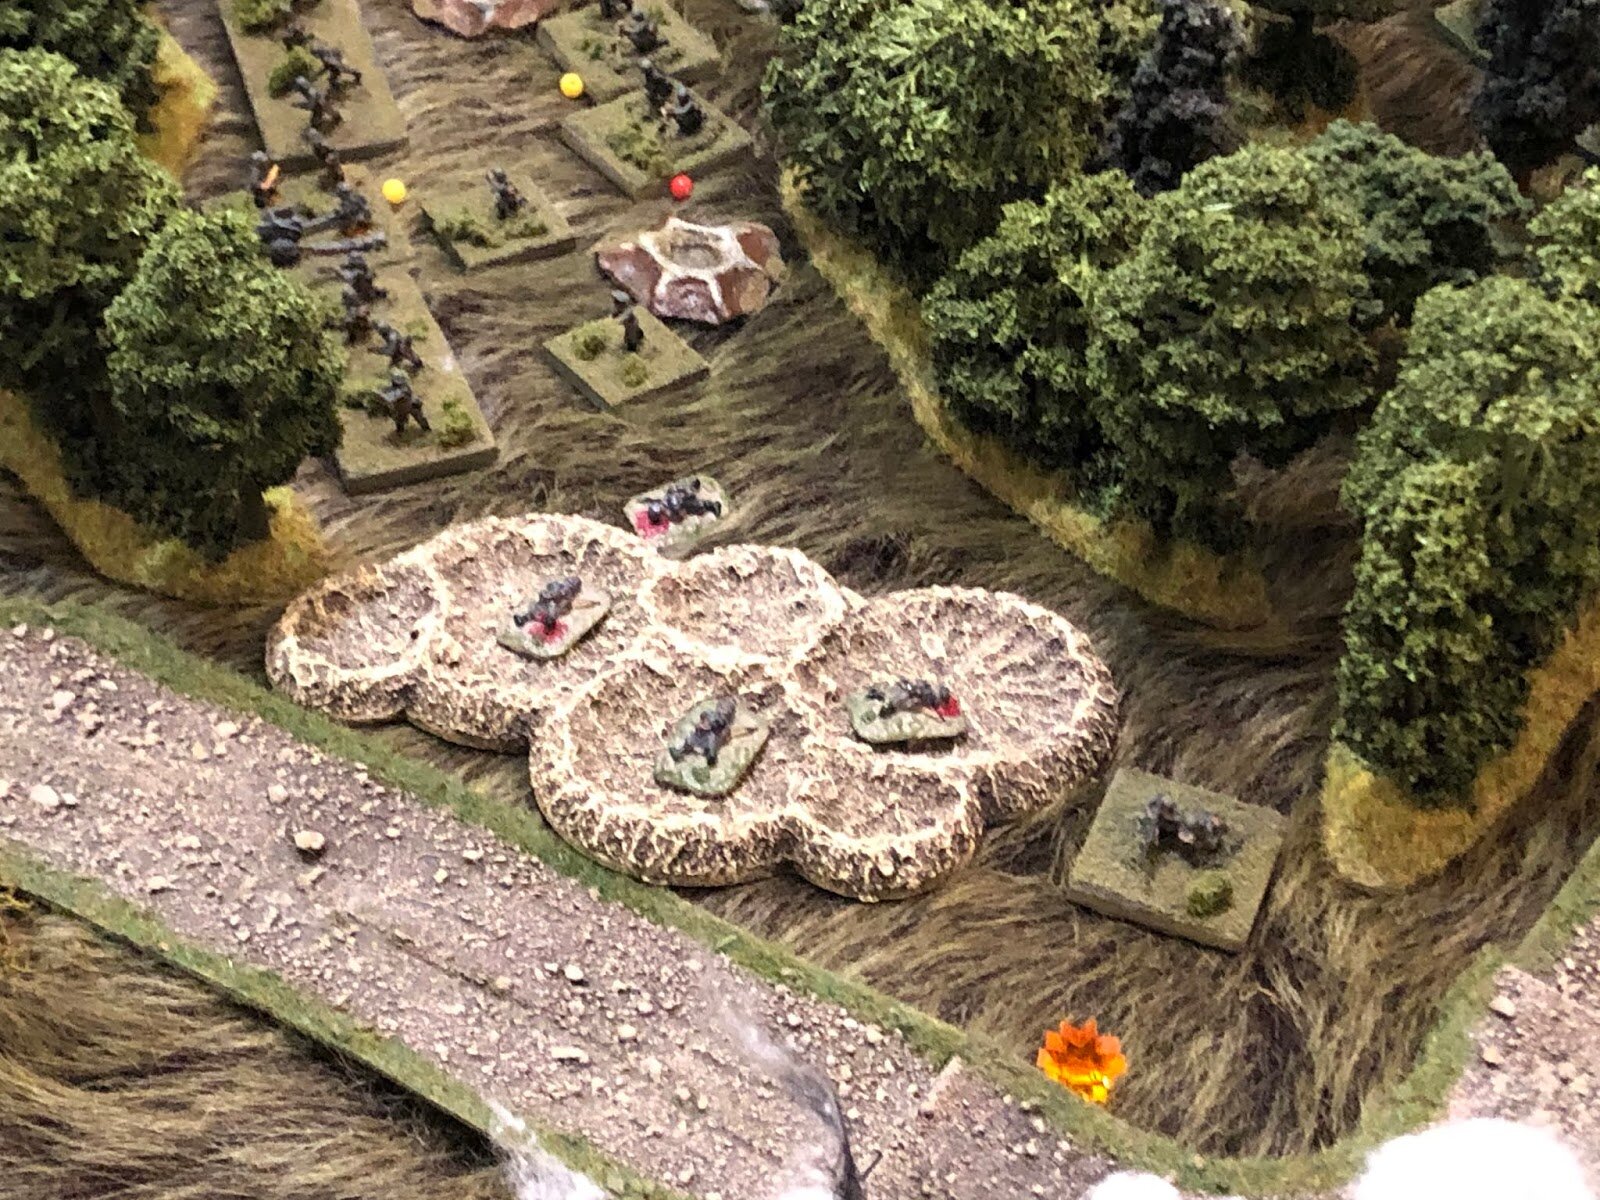
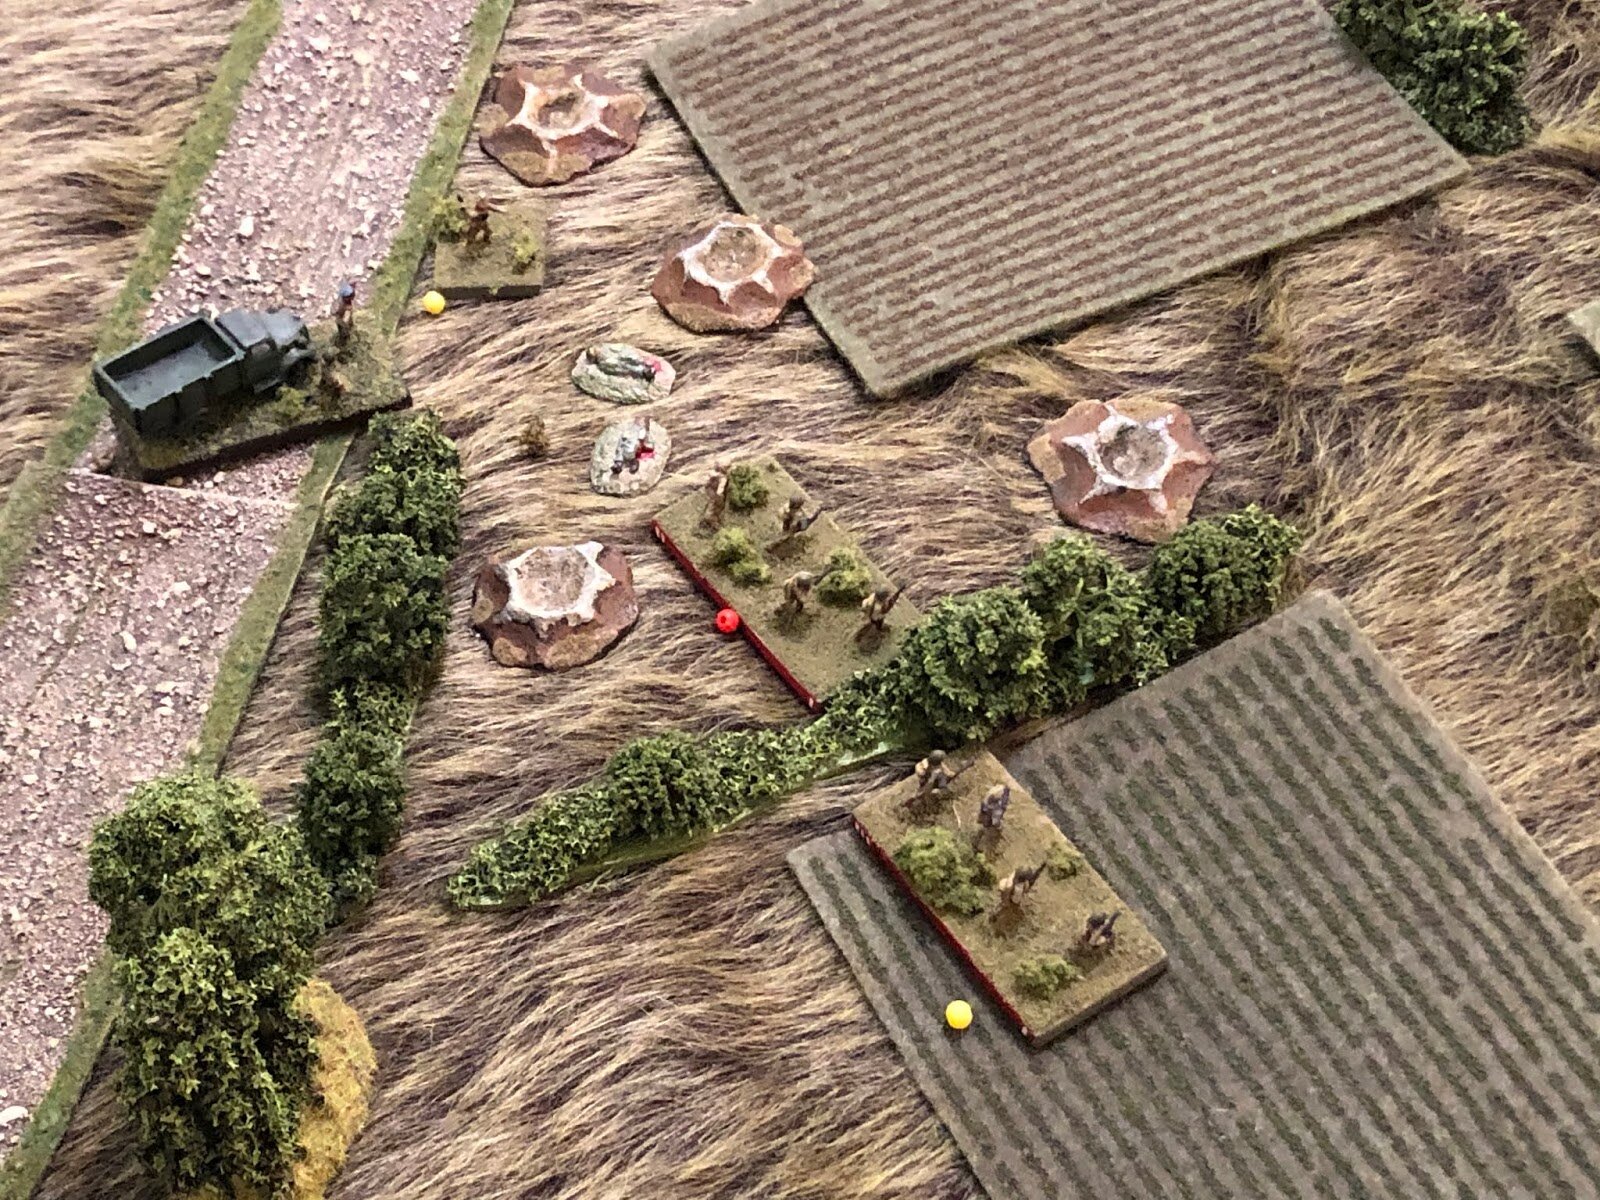
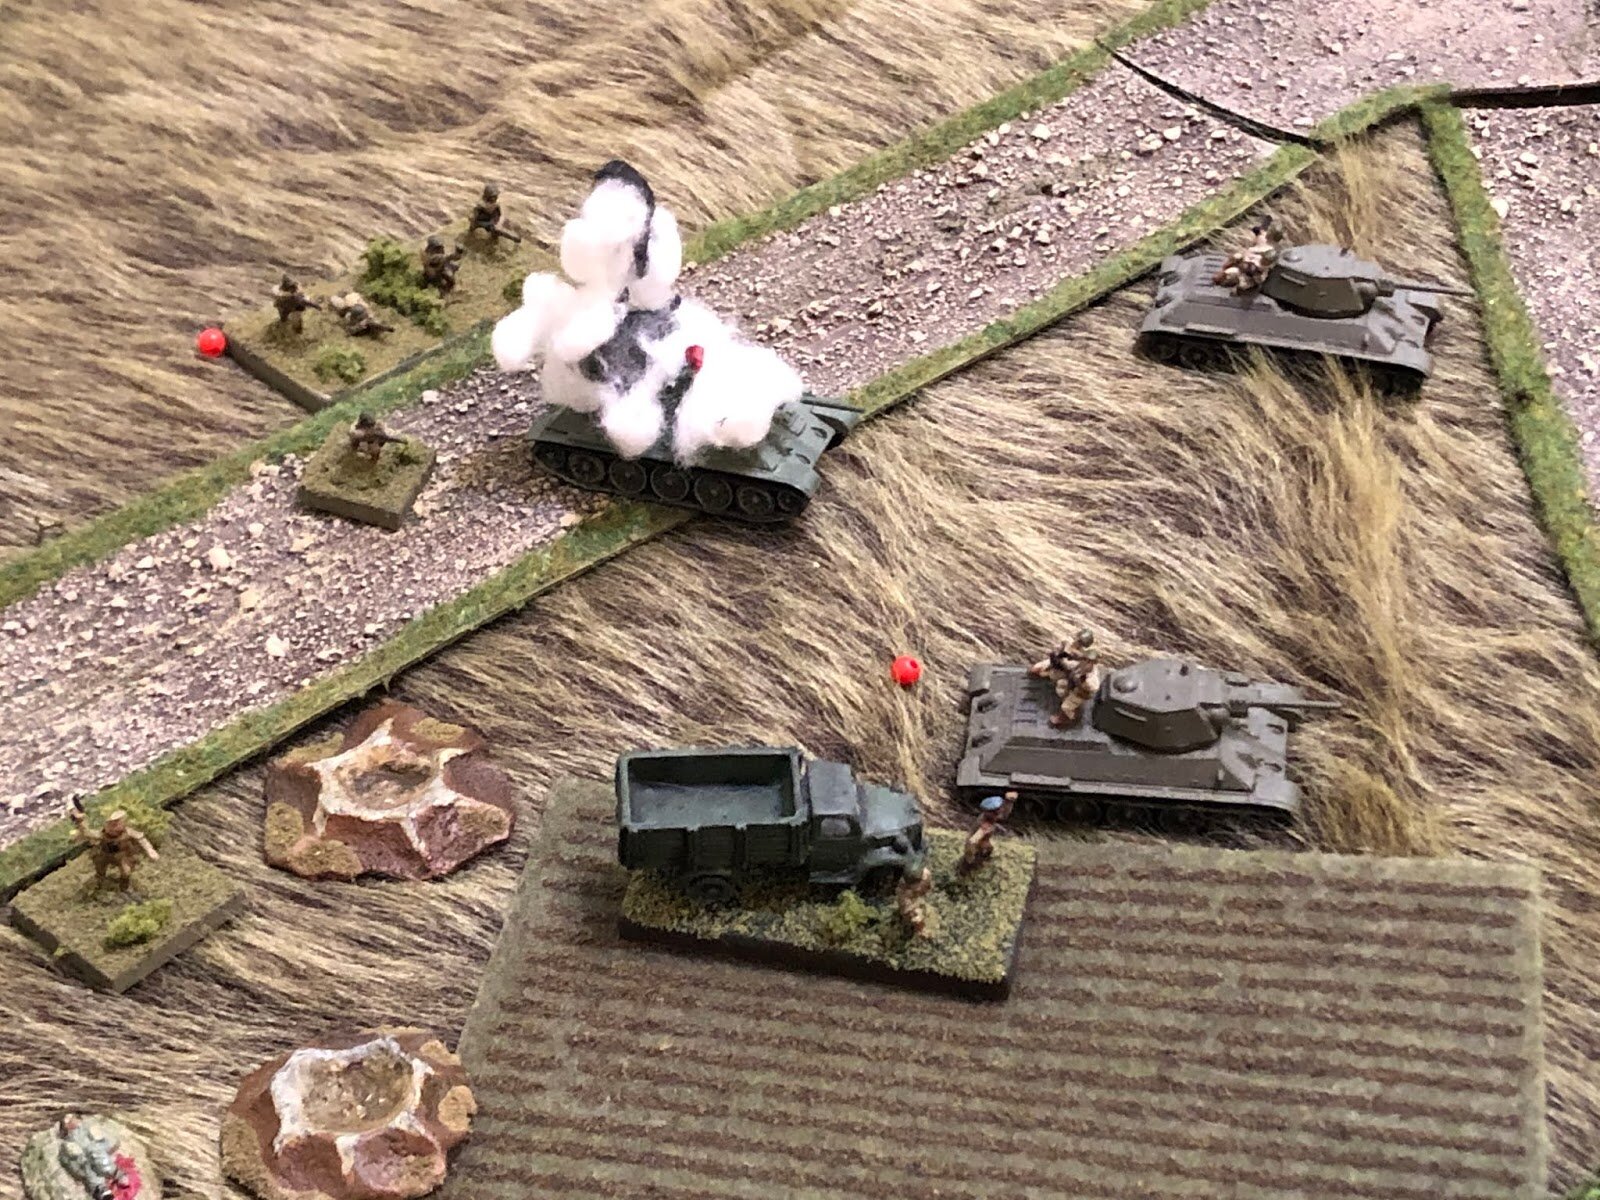
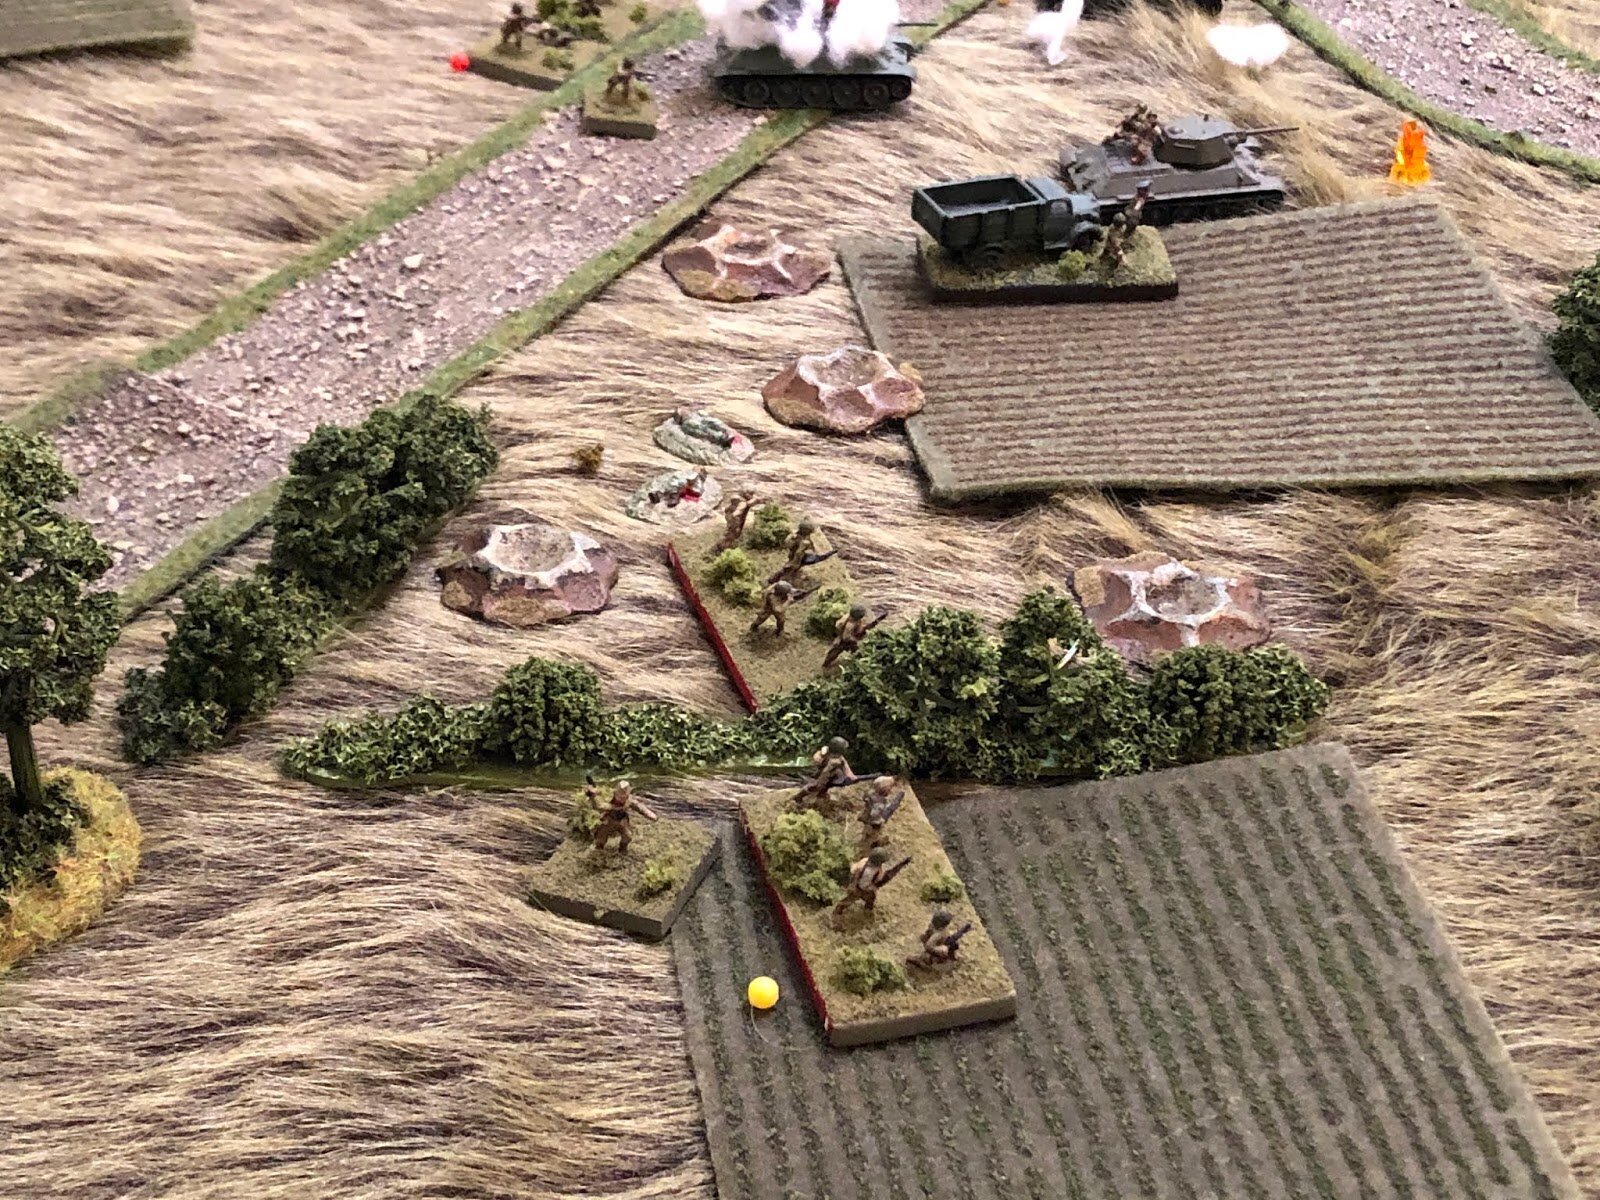
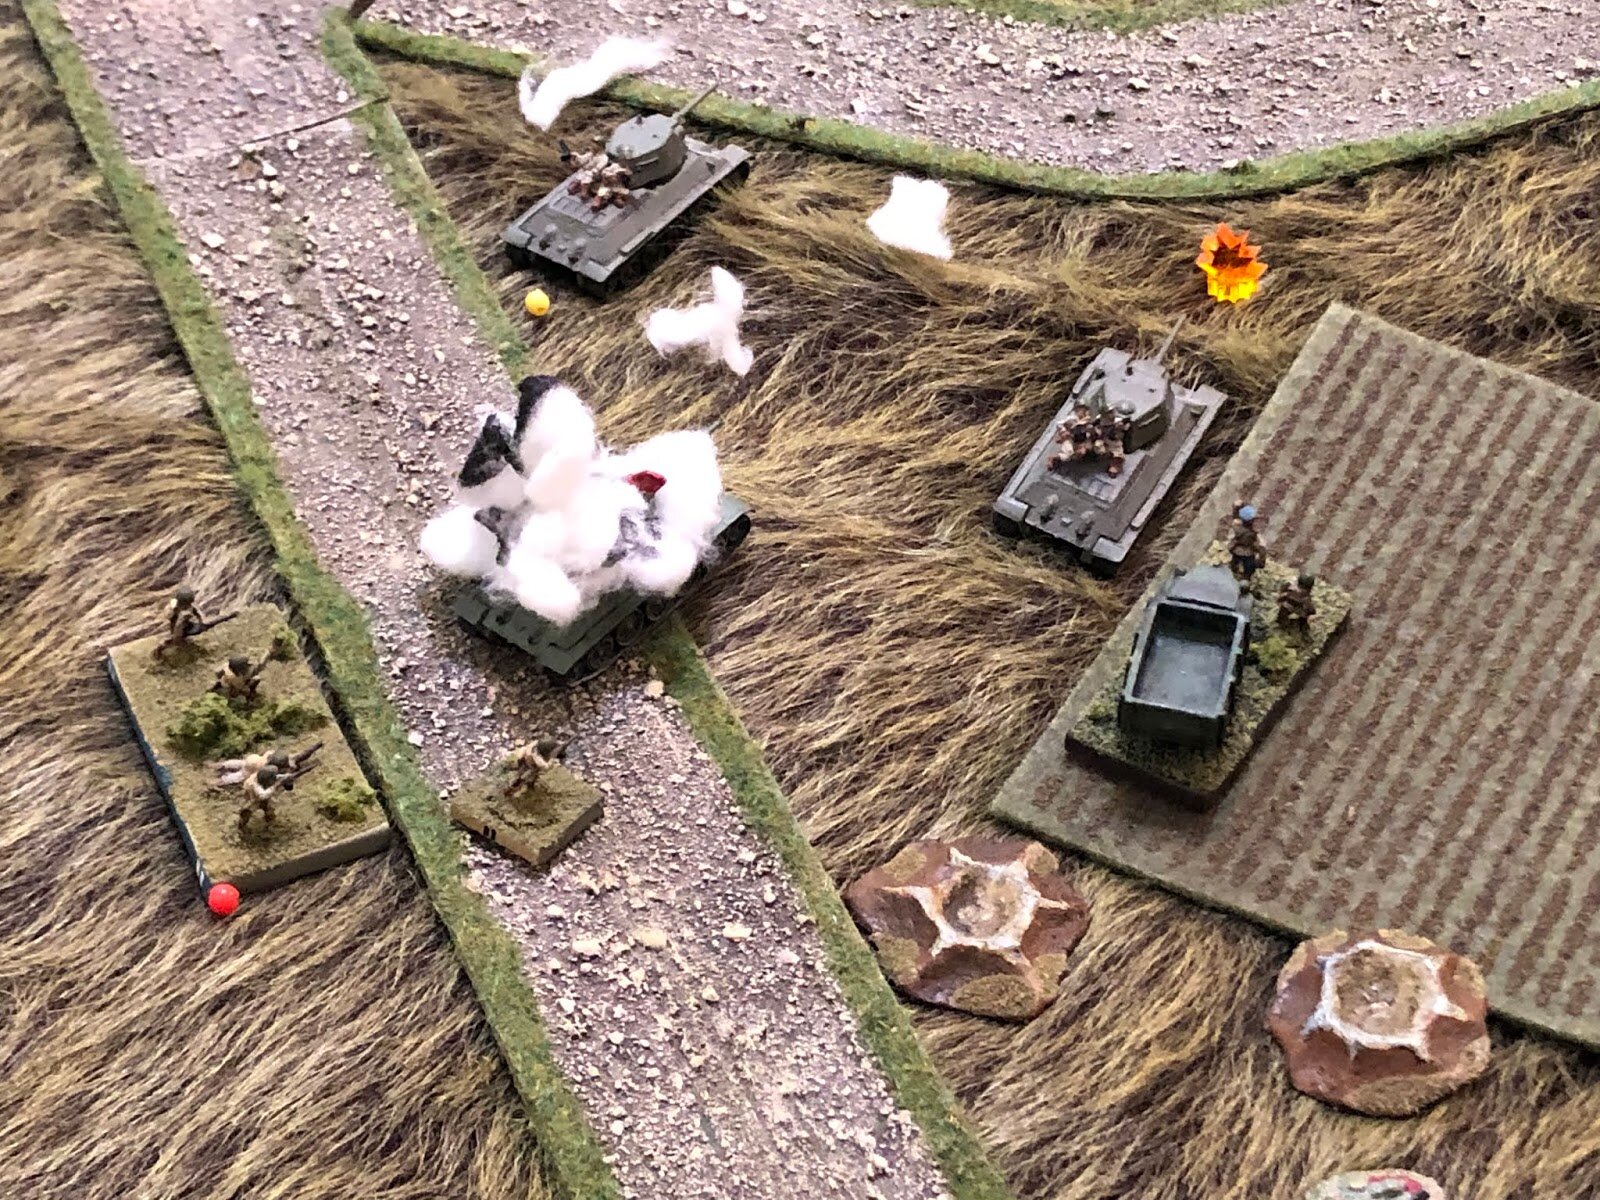
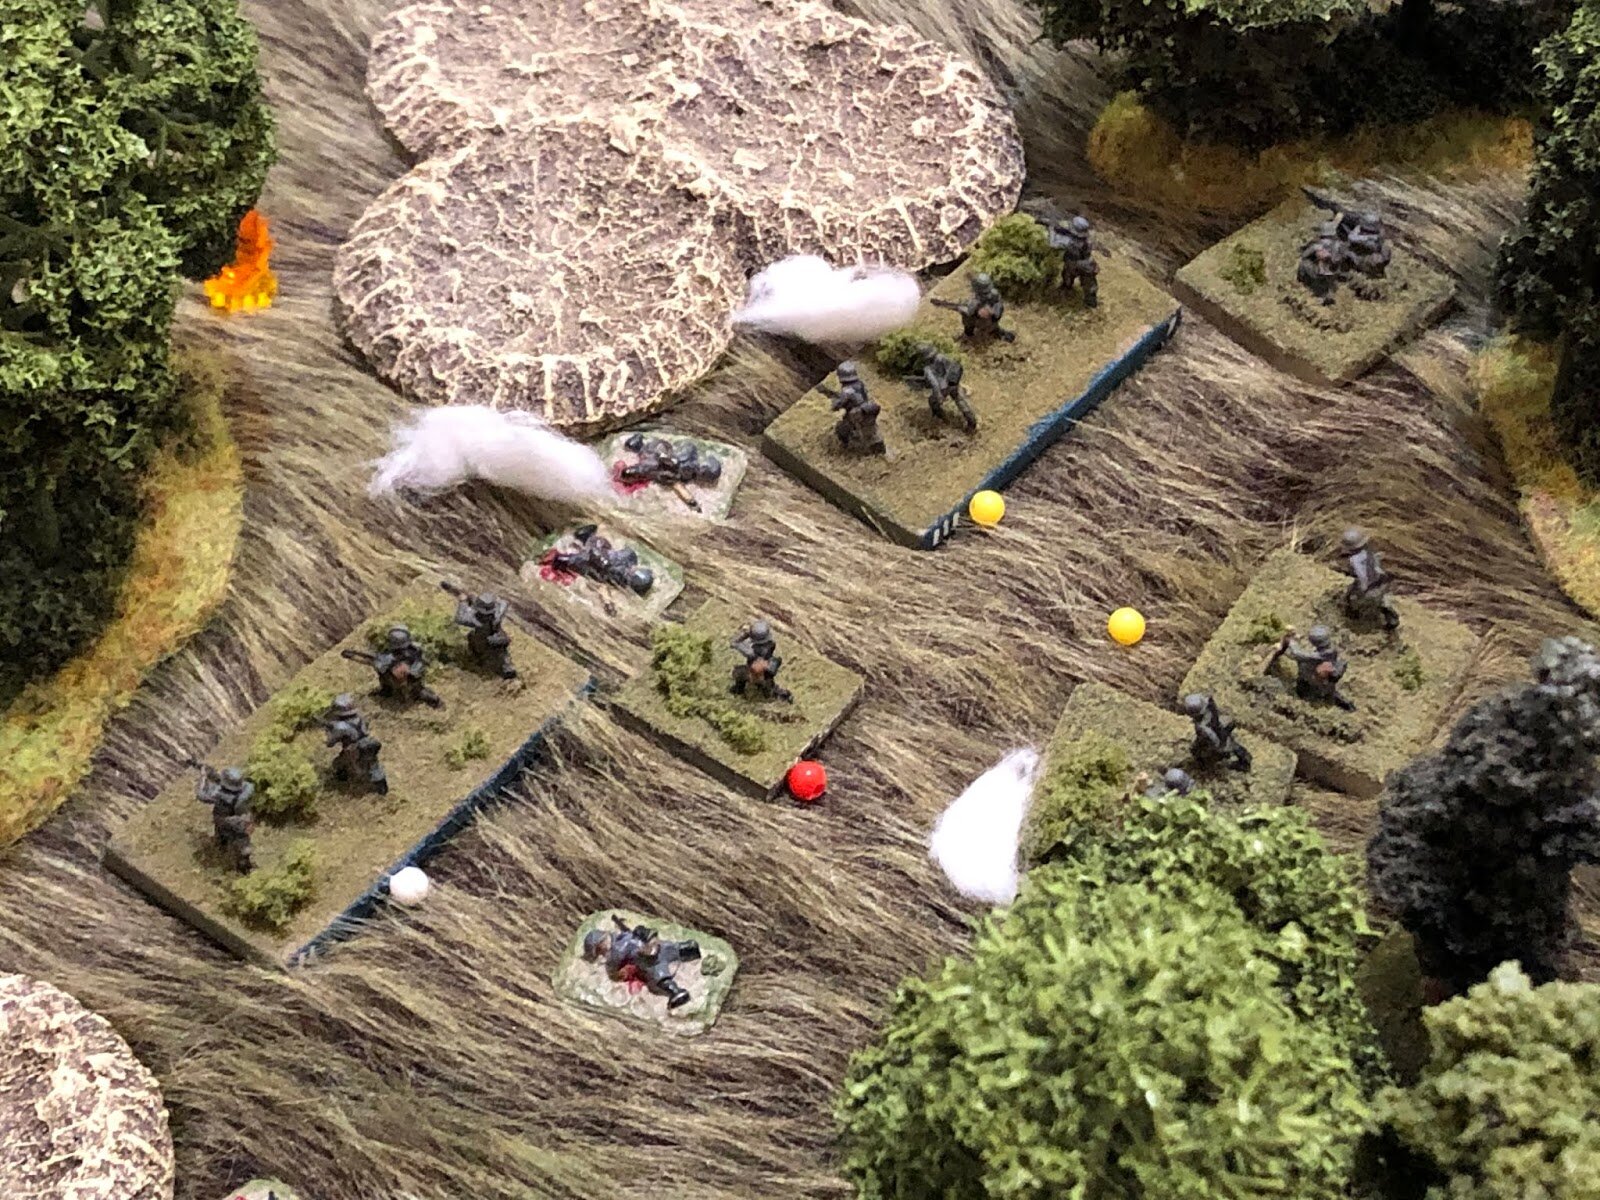
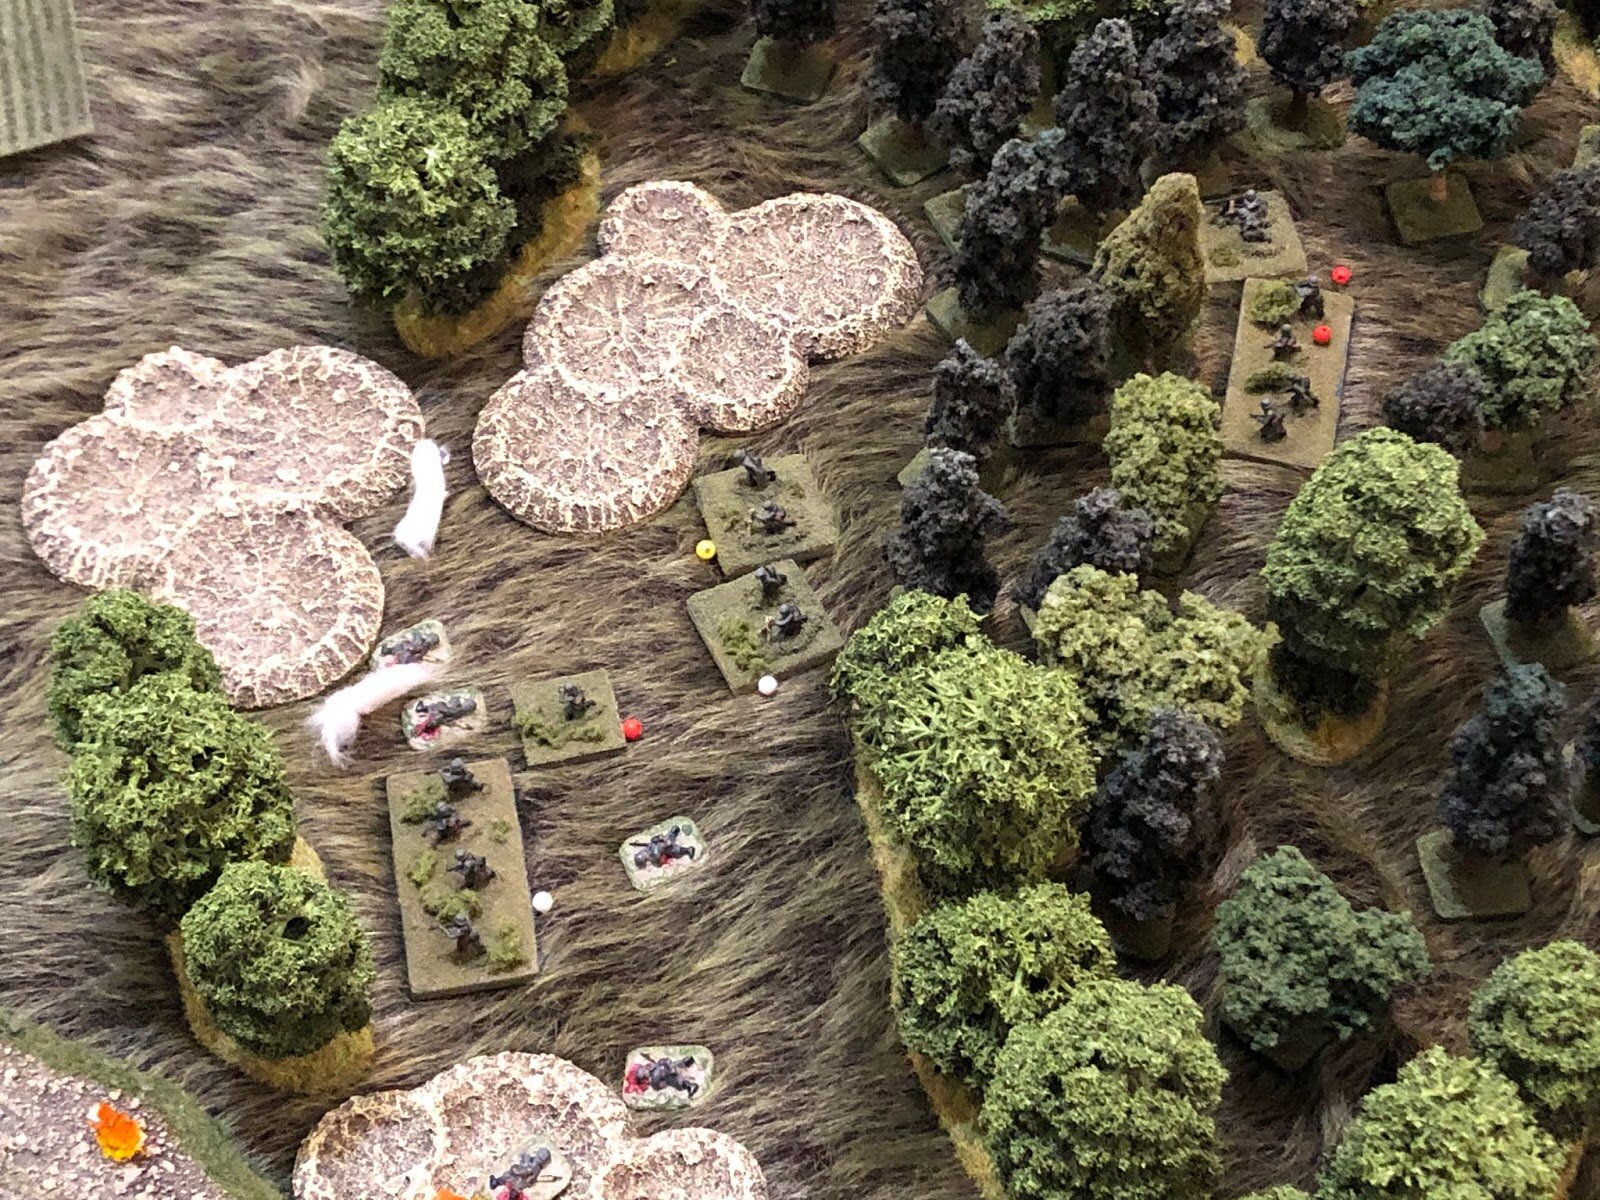
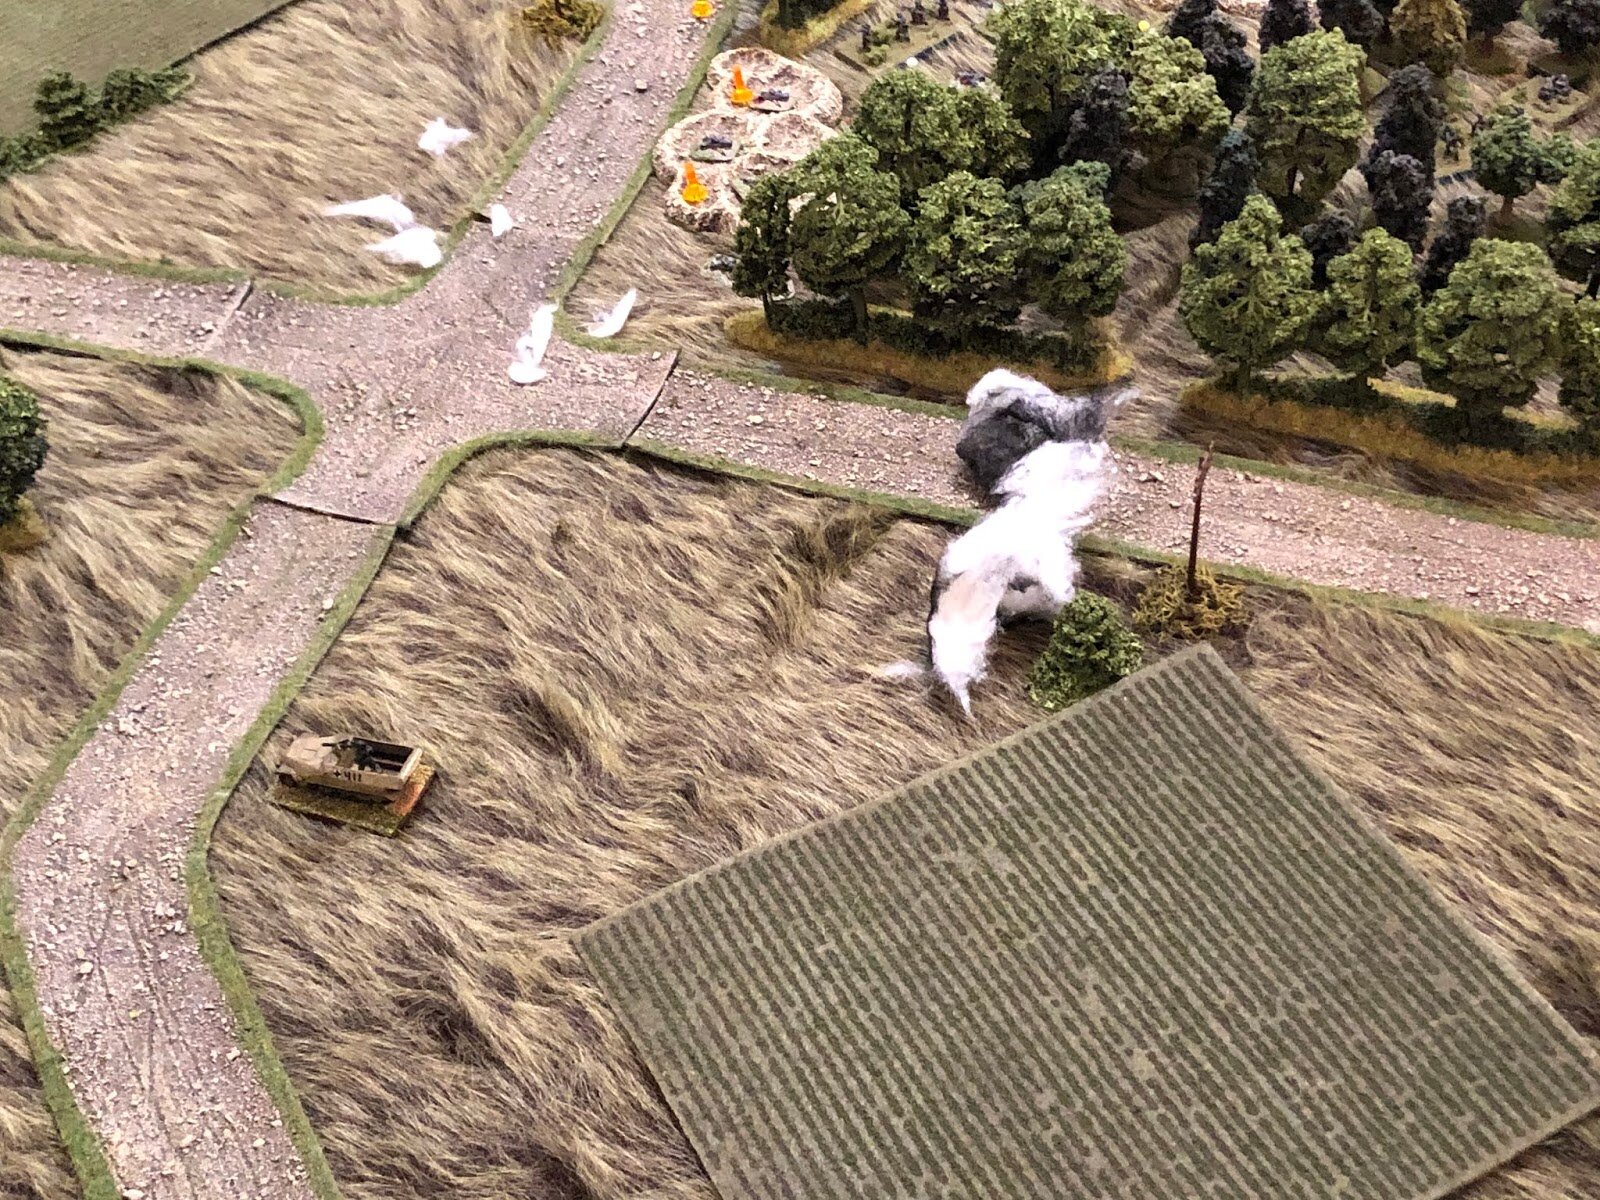
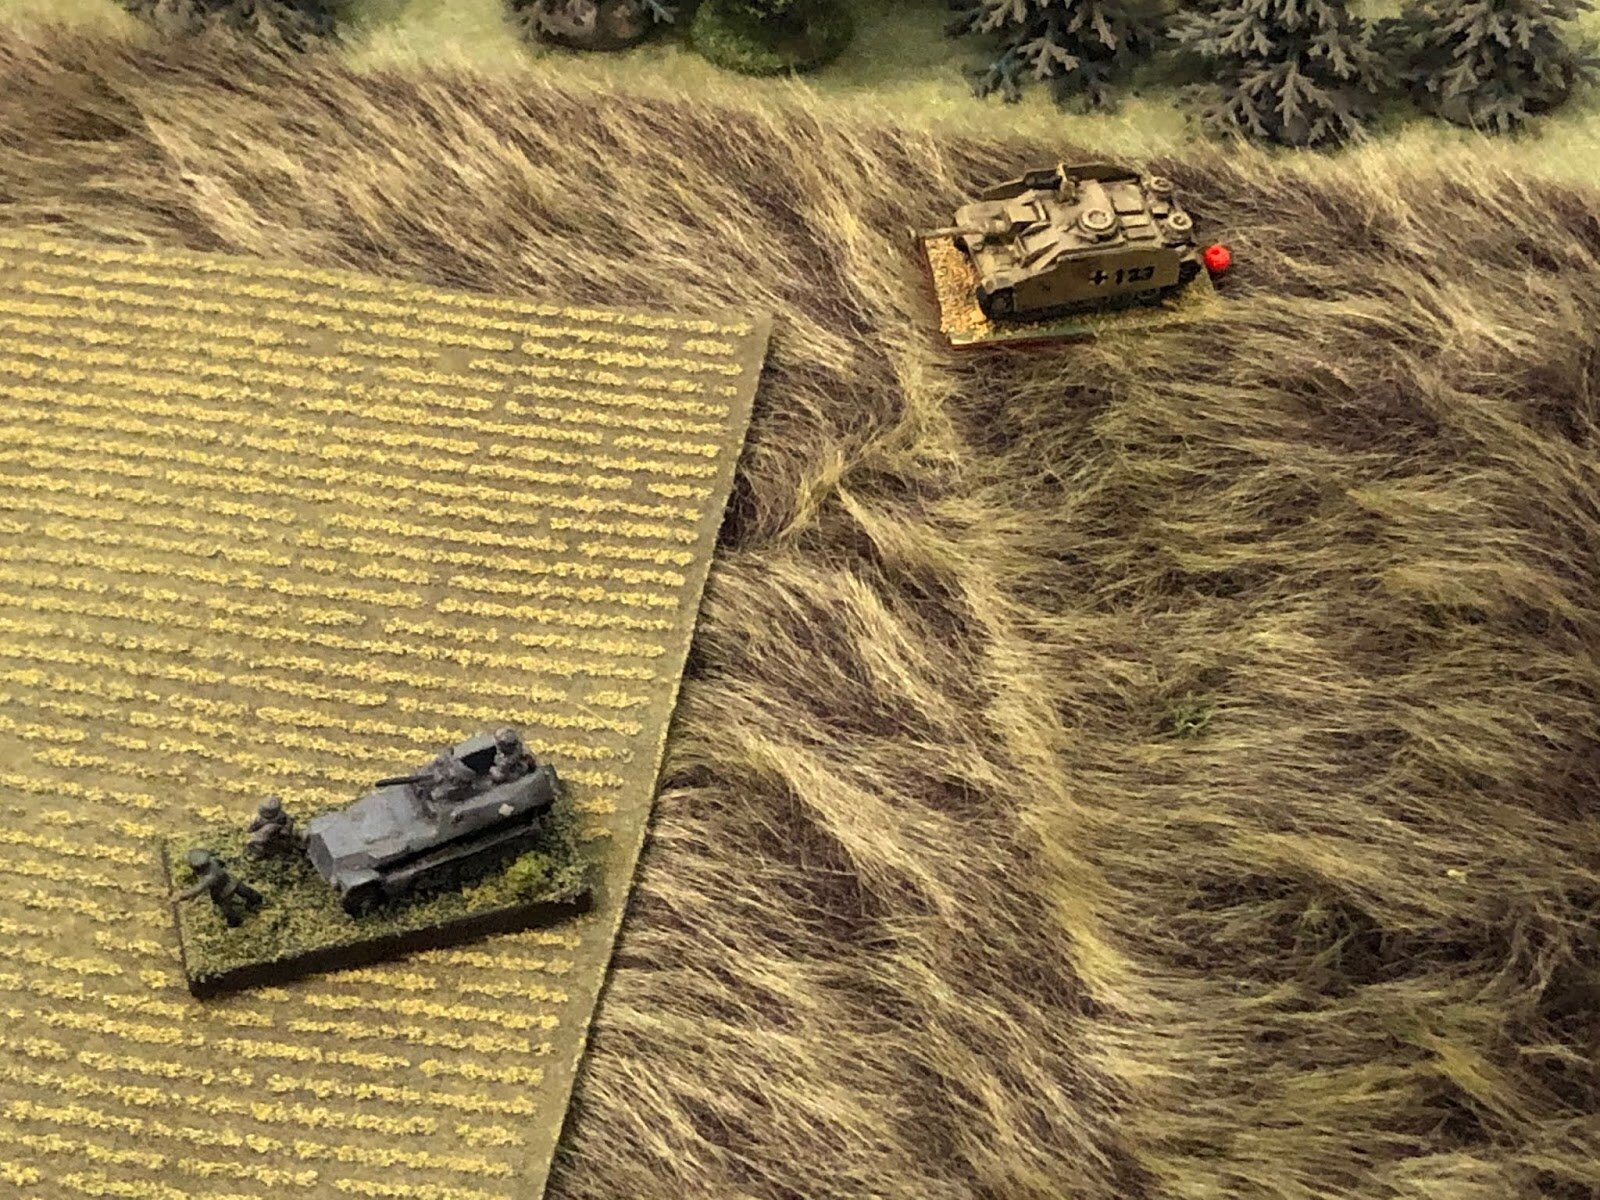
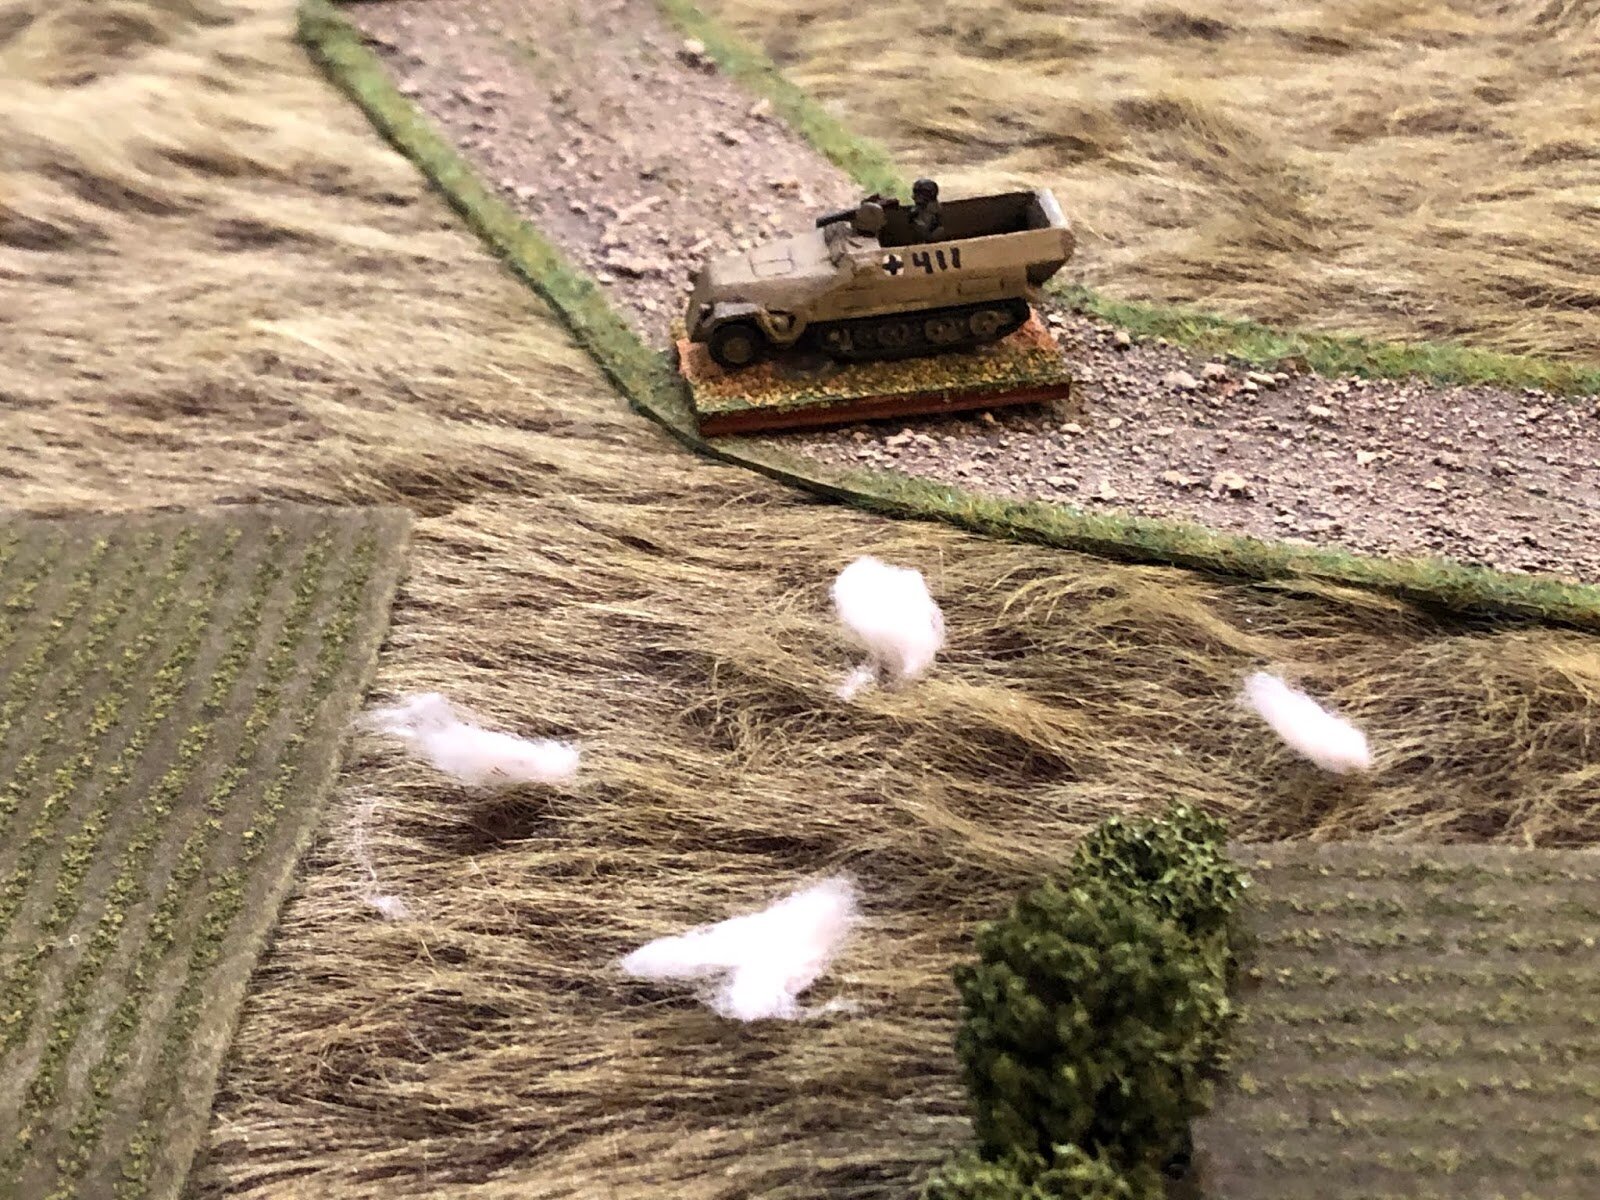
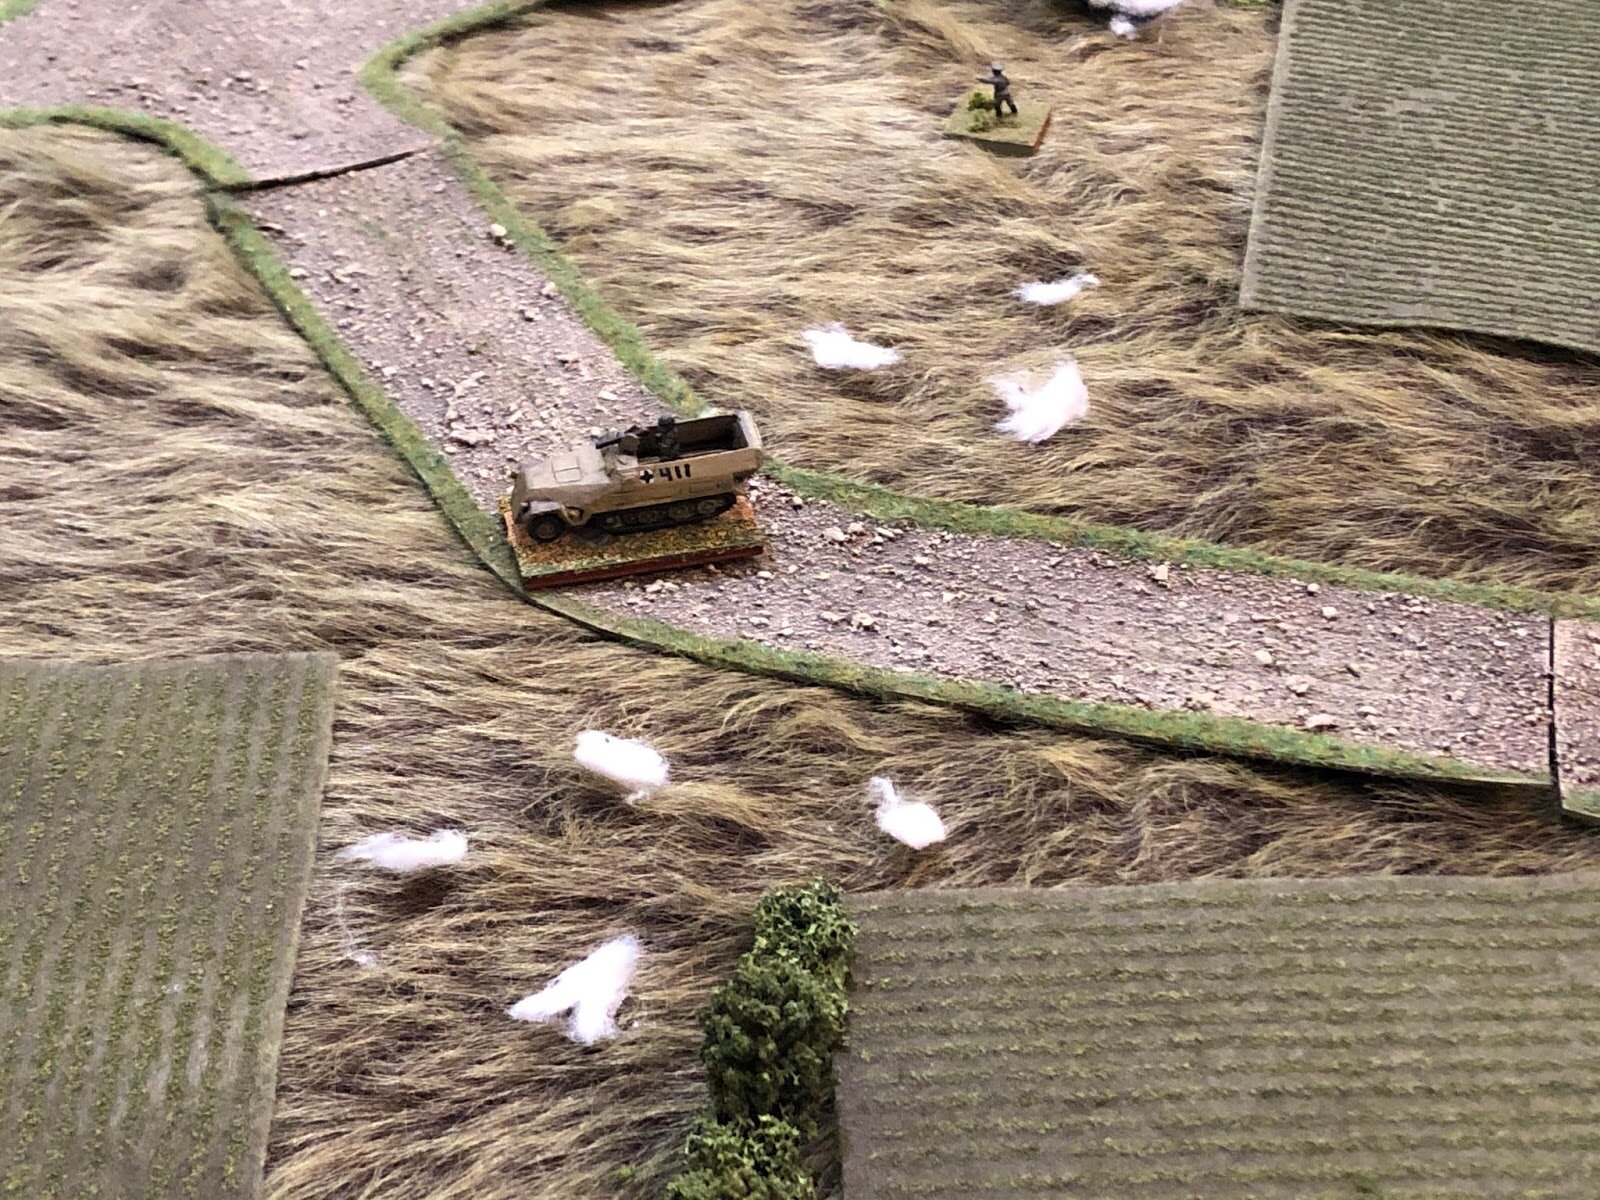
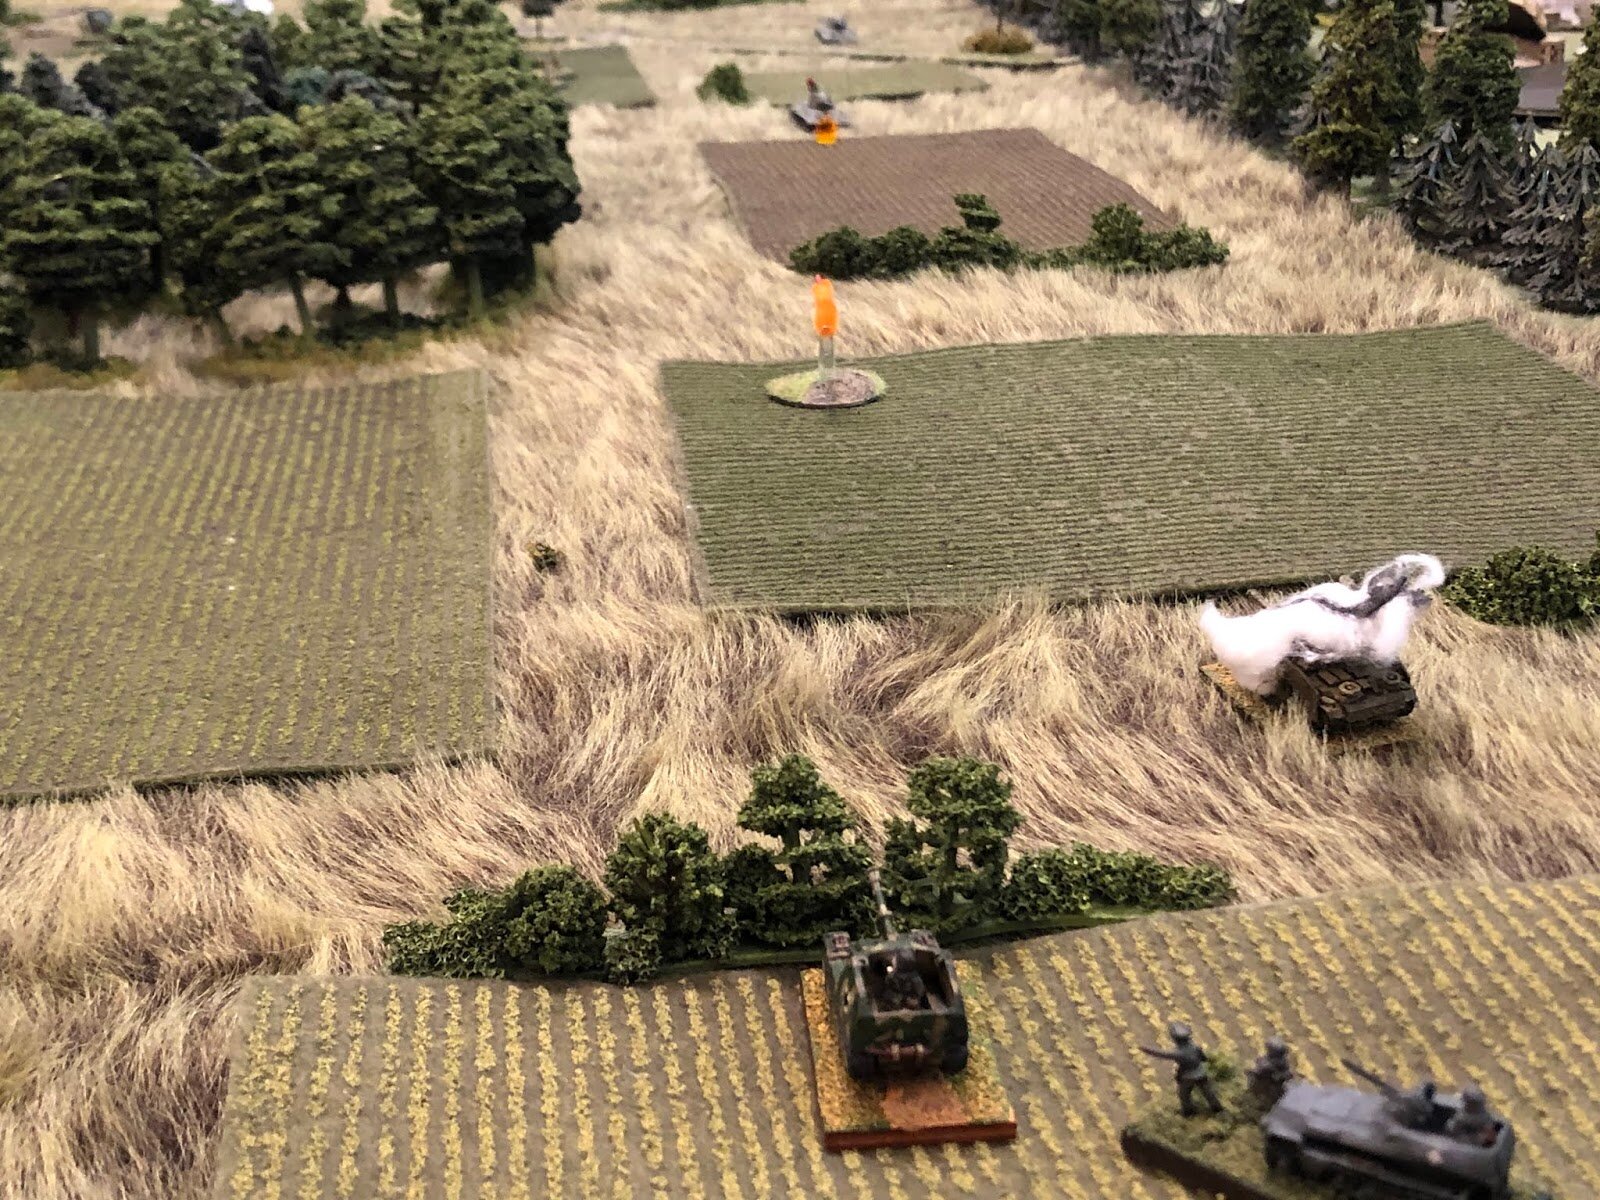
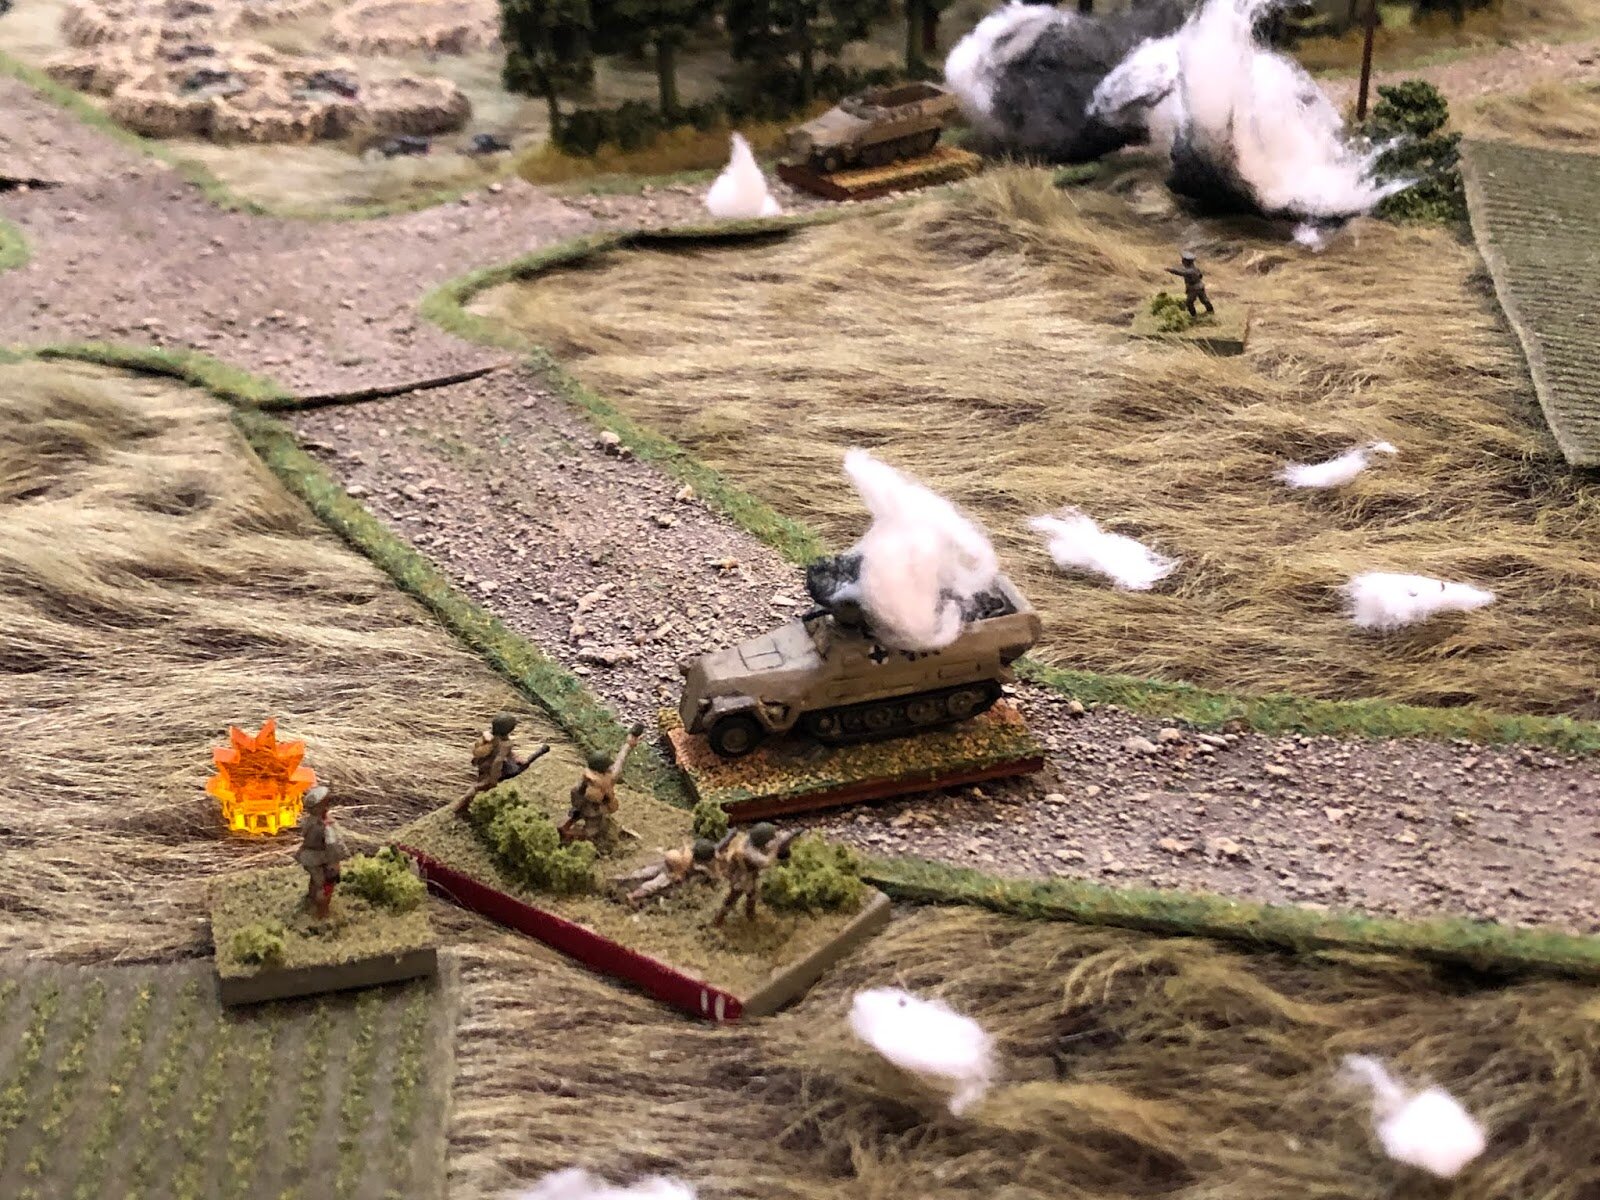
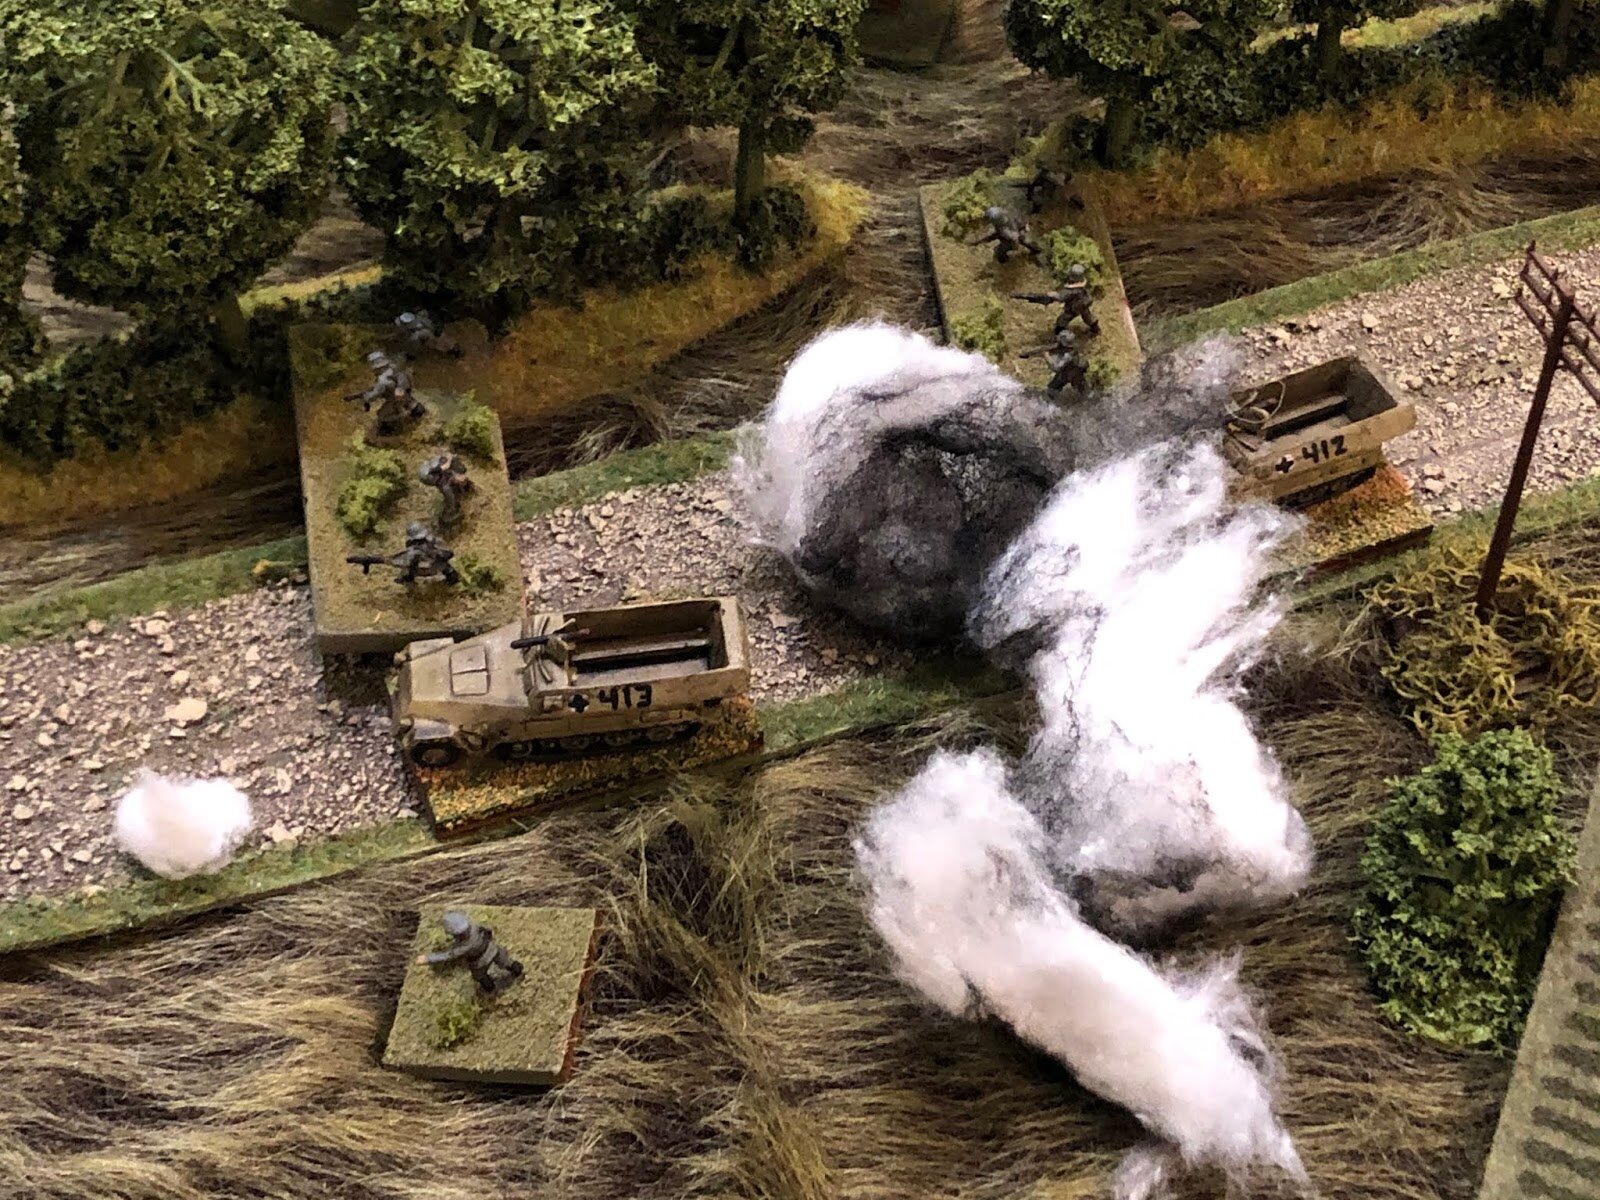
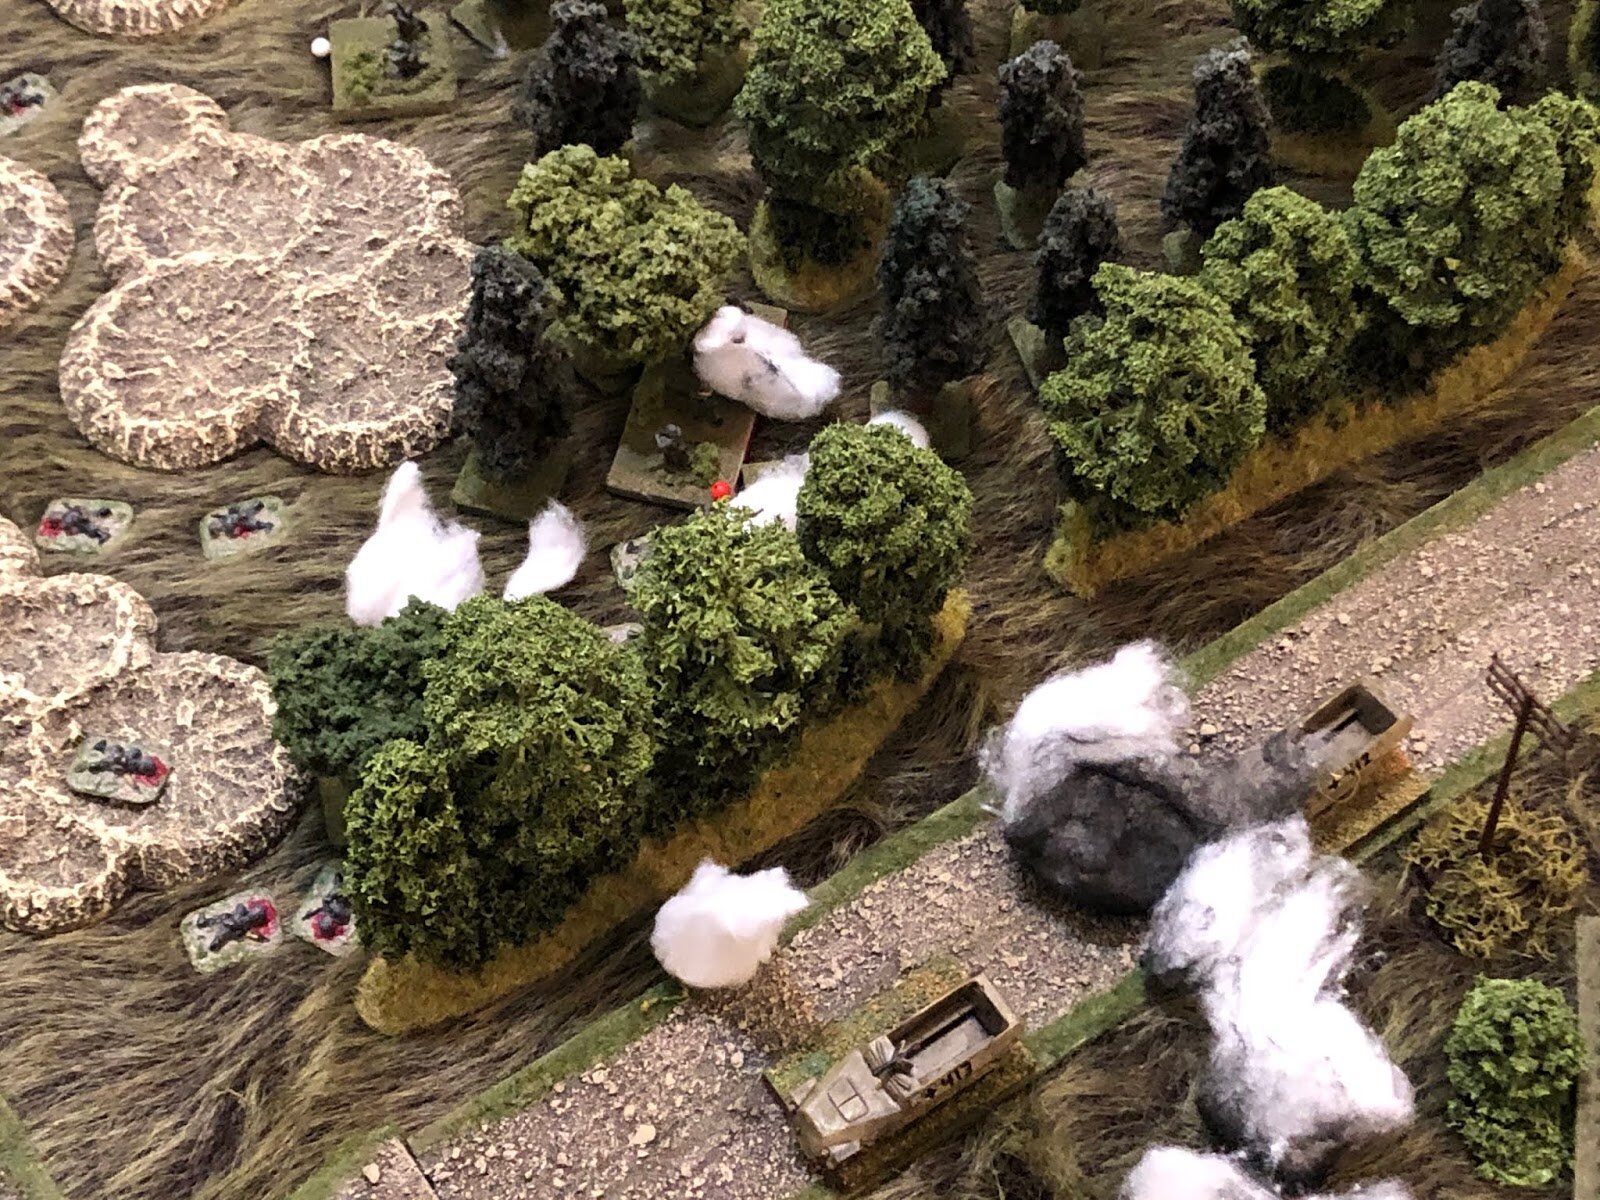
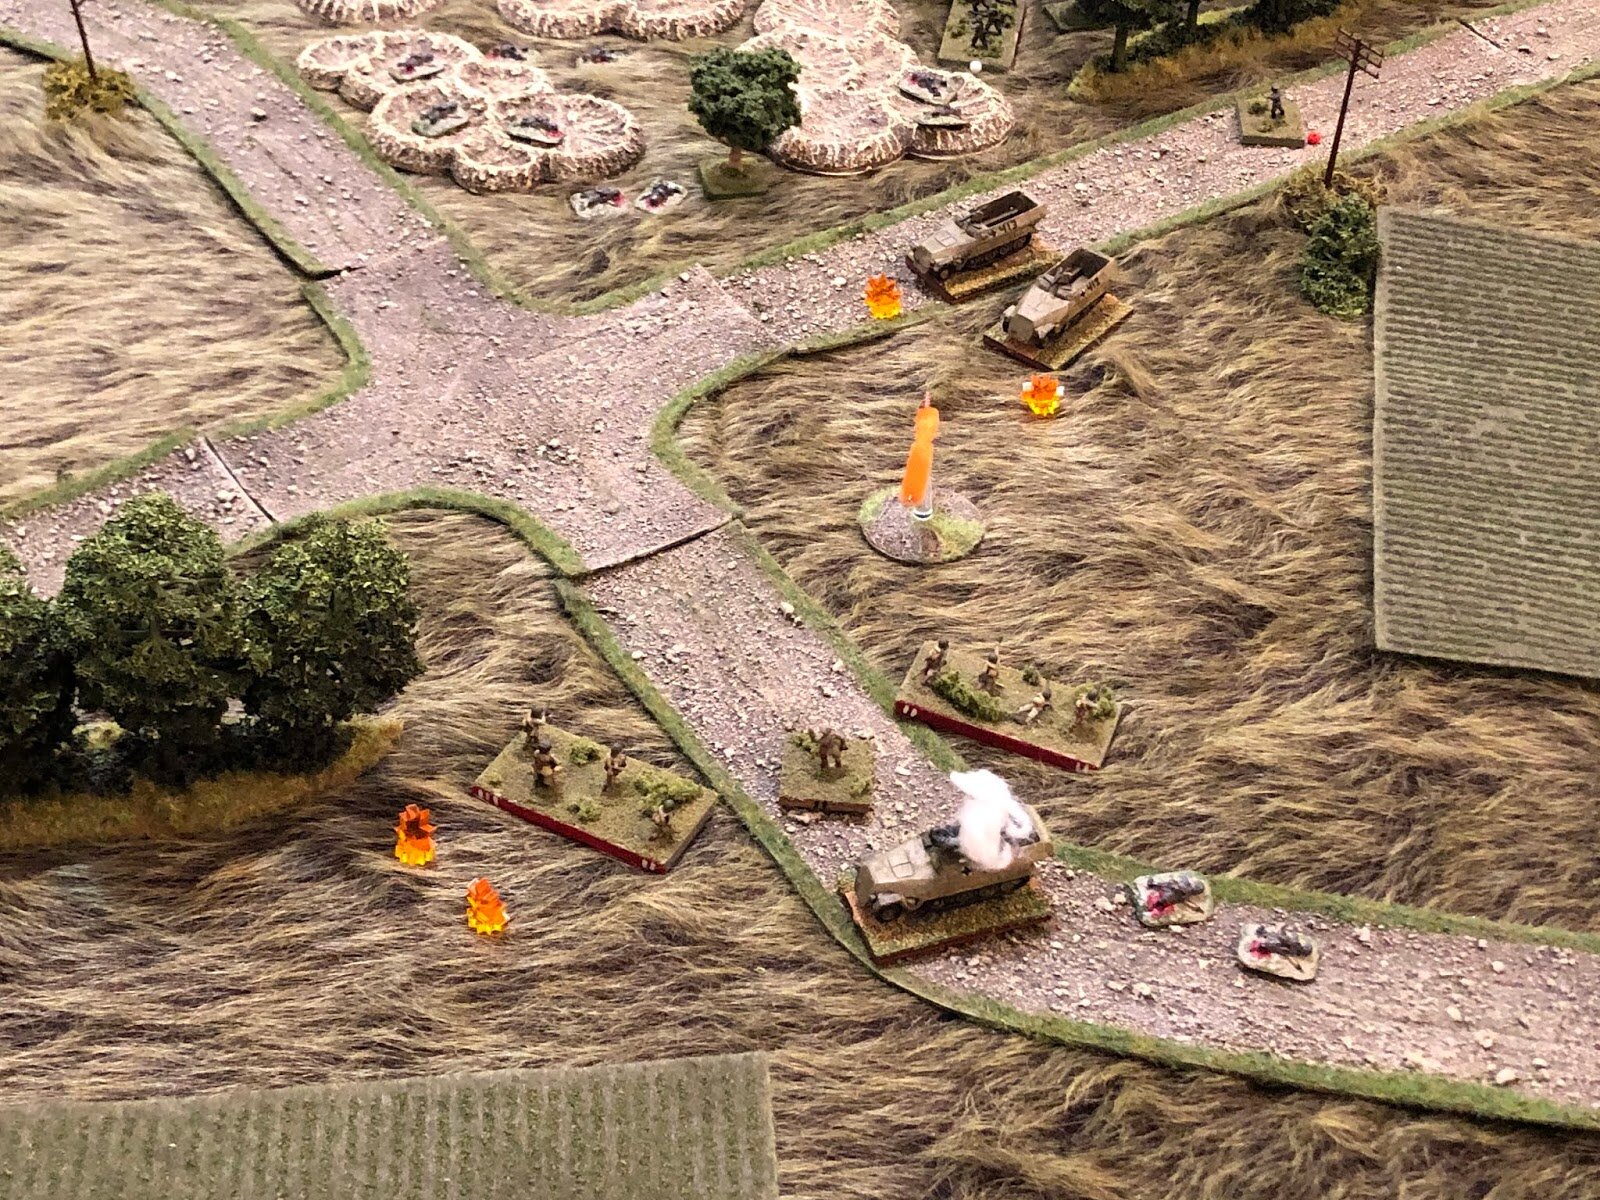
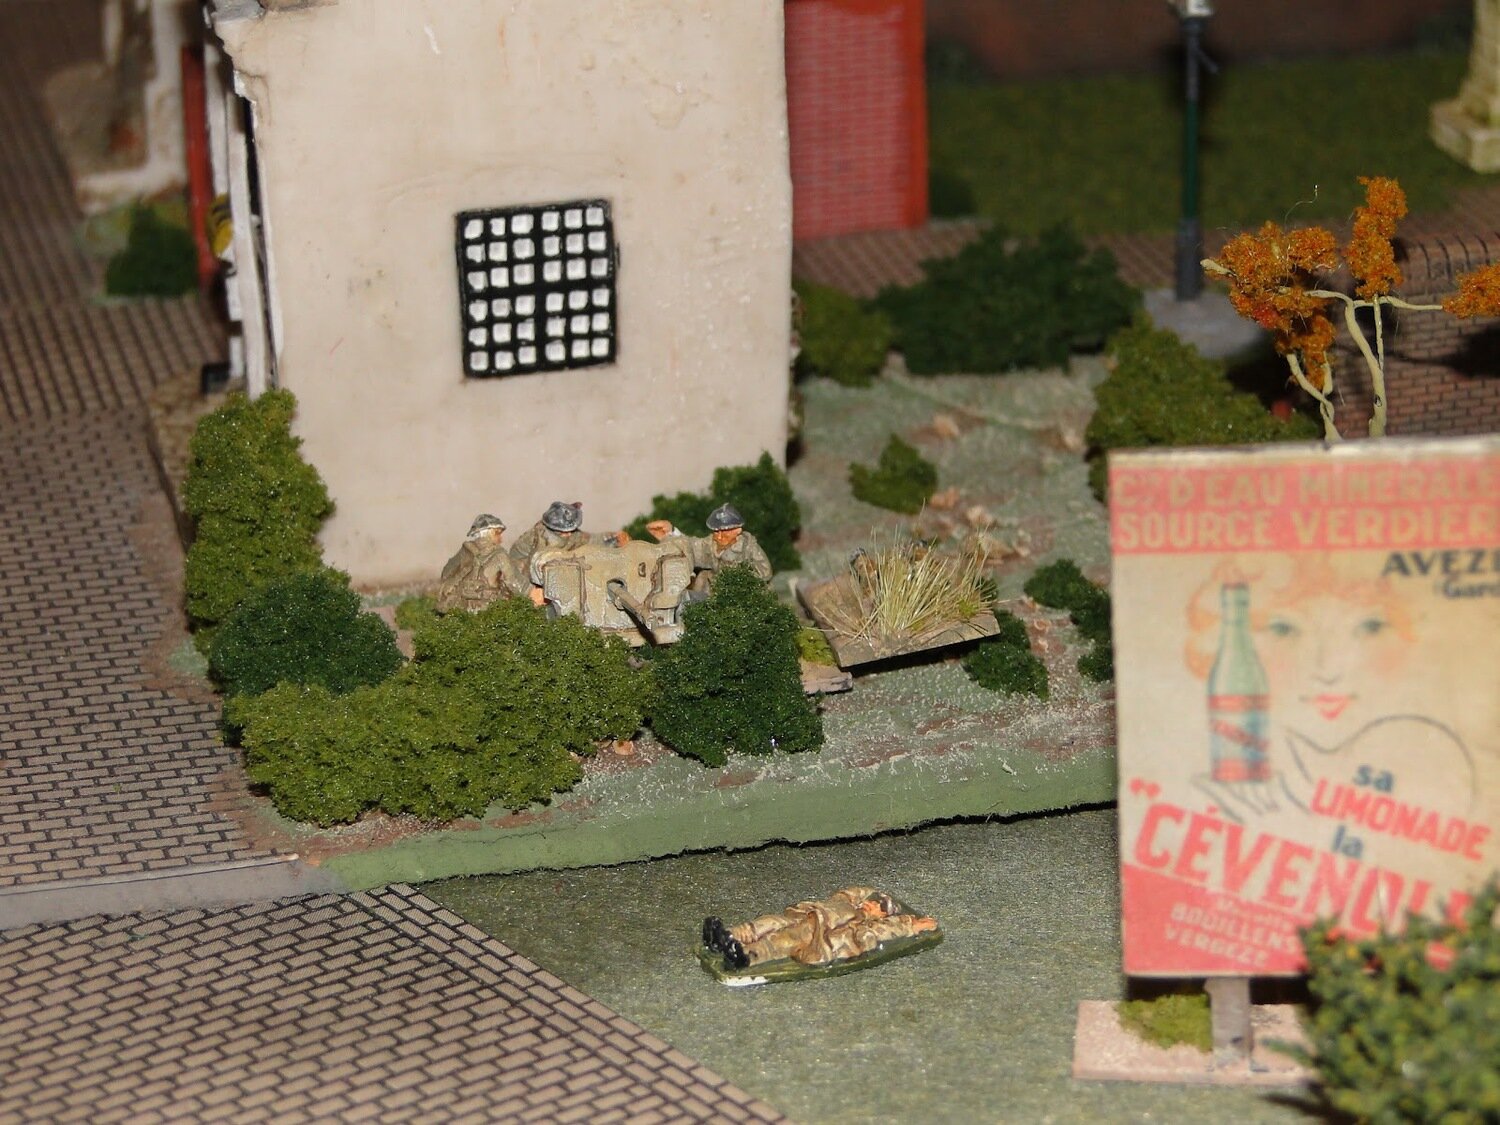
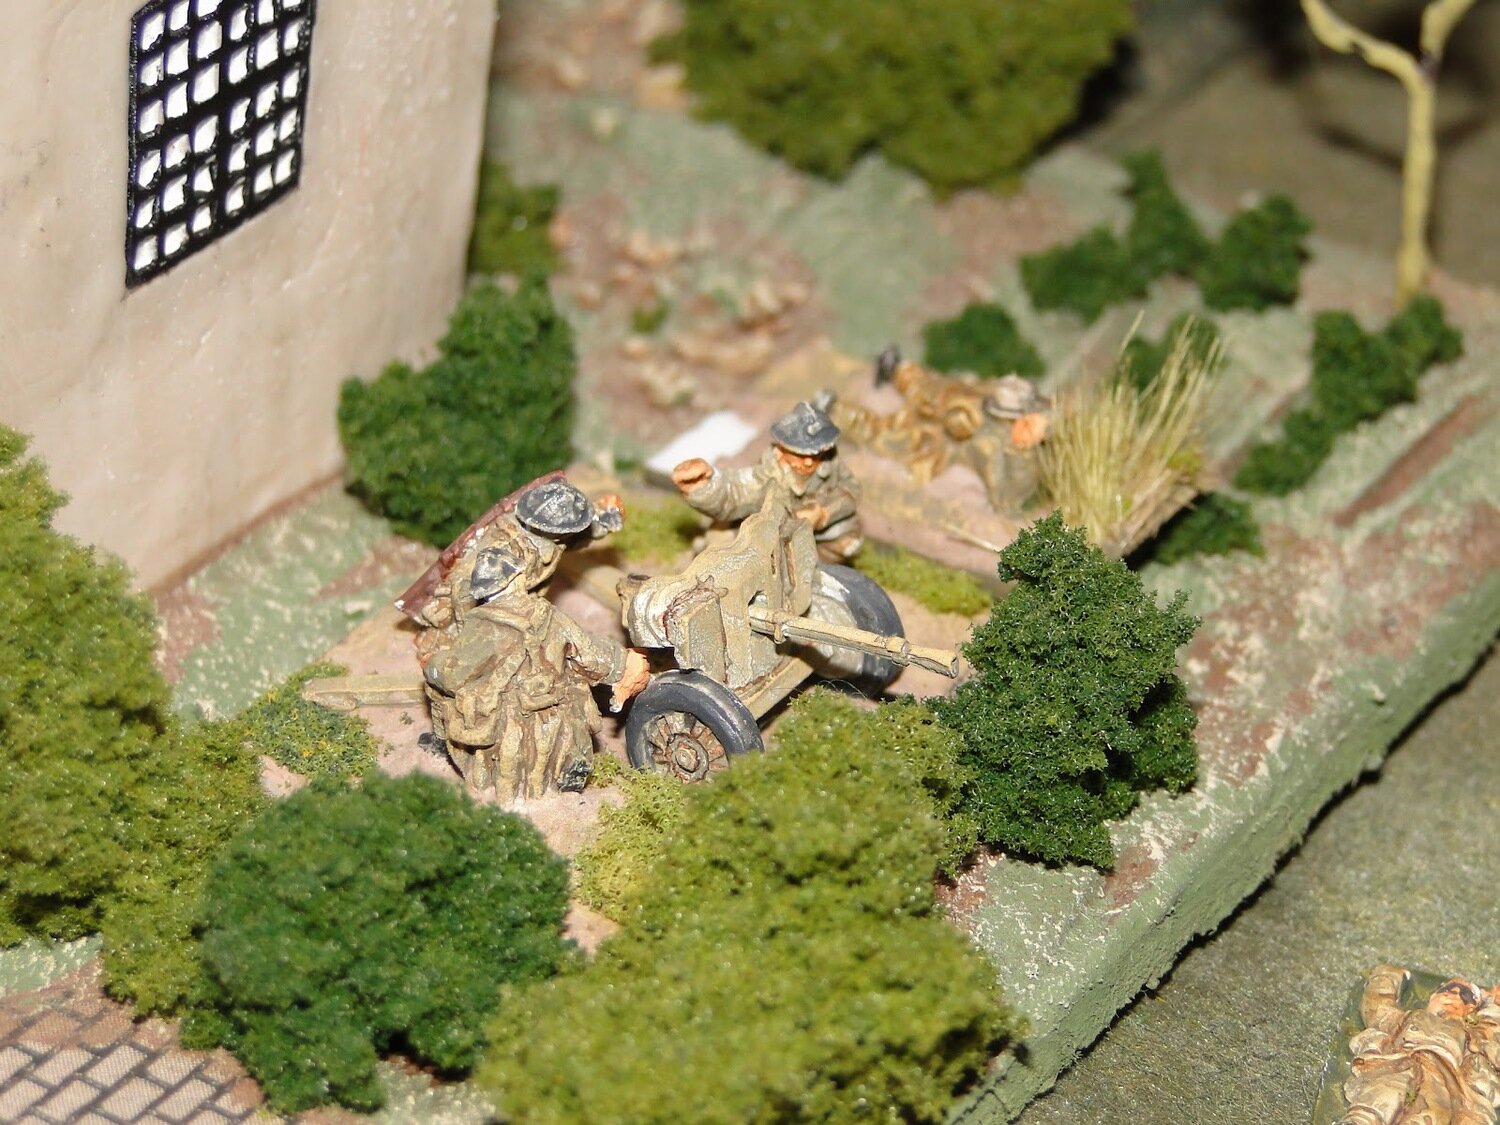
The German Recon Platoon had also been discovering things: the British anti-tank gun platoon to be exact, hiding behind the hedges surrounding the cow shed. The guns opened fire, and although they didn’t take out the lead SdKfz 222, it’s crew decided that being a sitting duck was no fun at all and decided to abandon ship and bailed out!
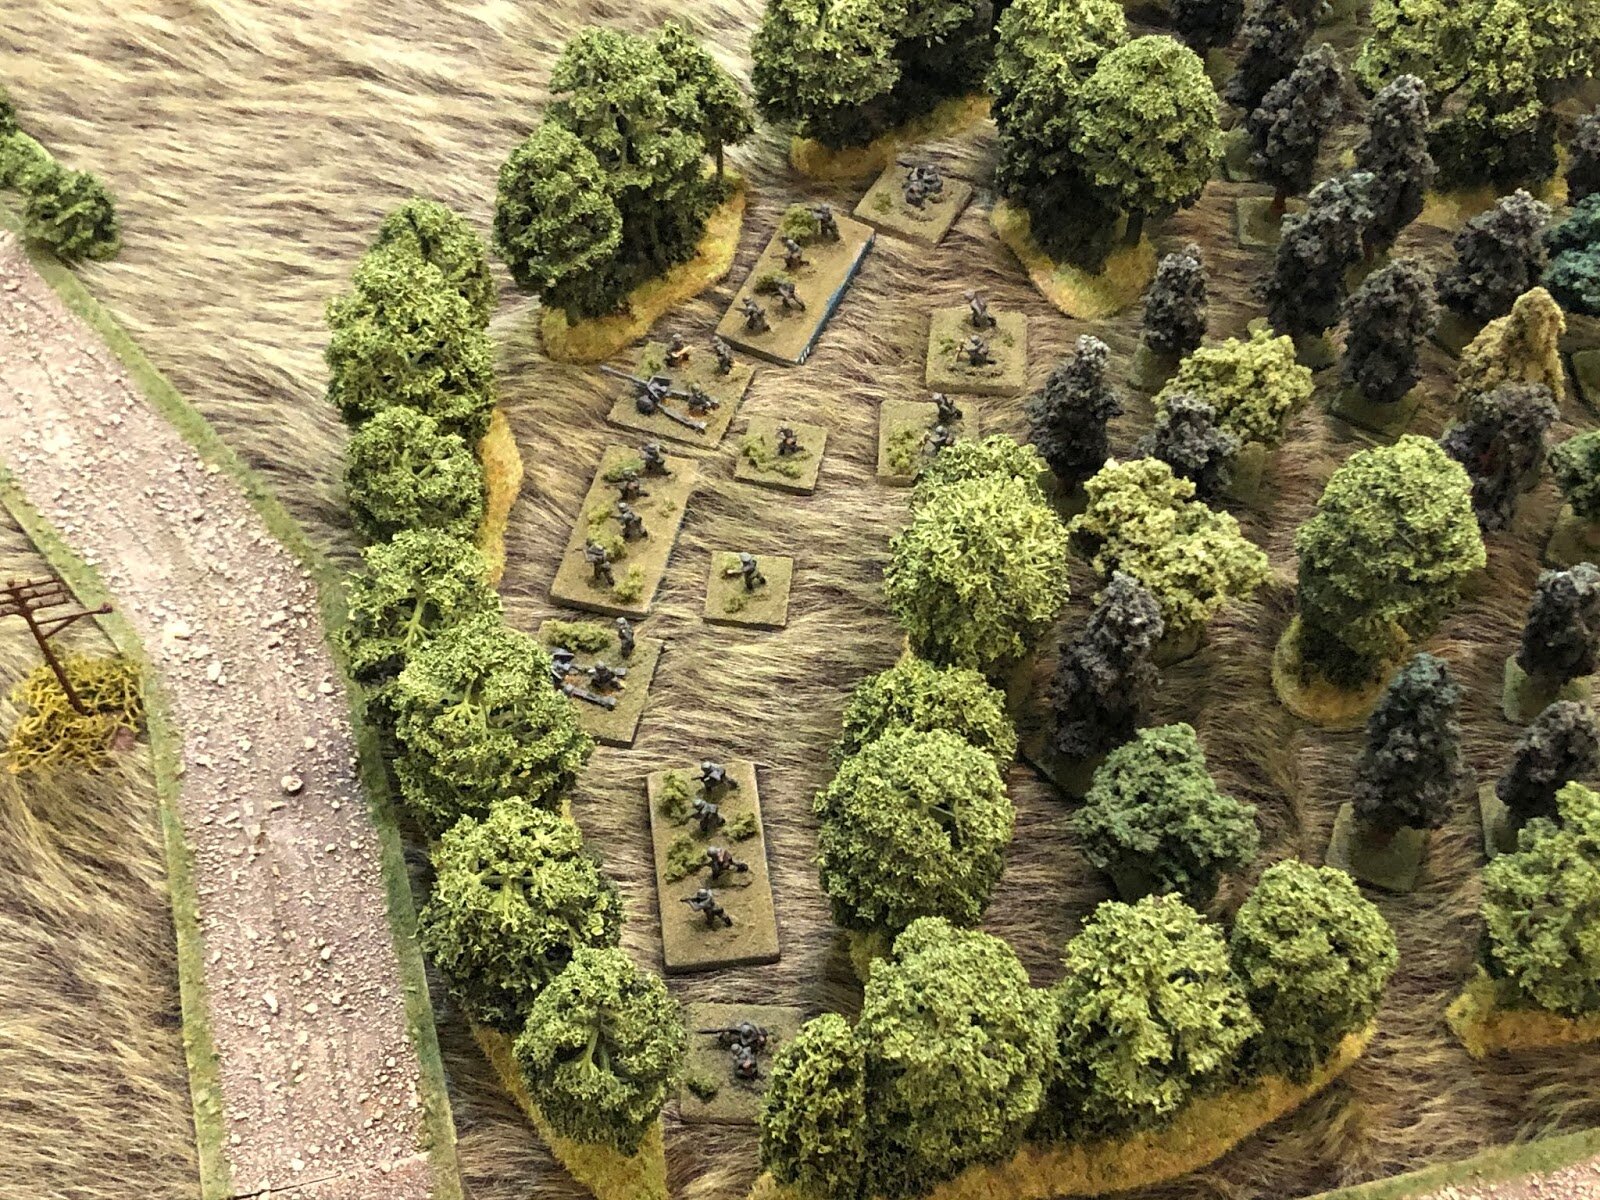
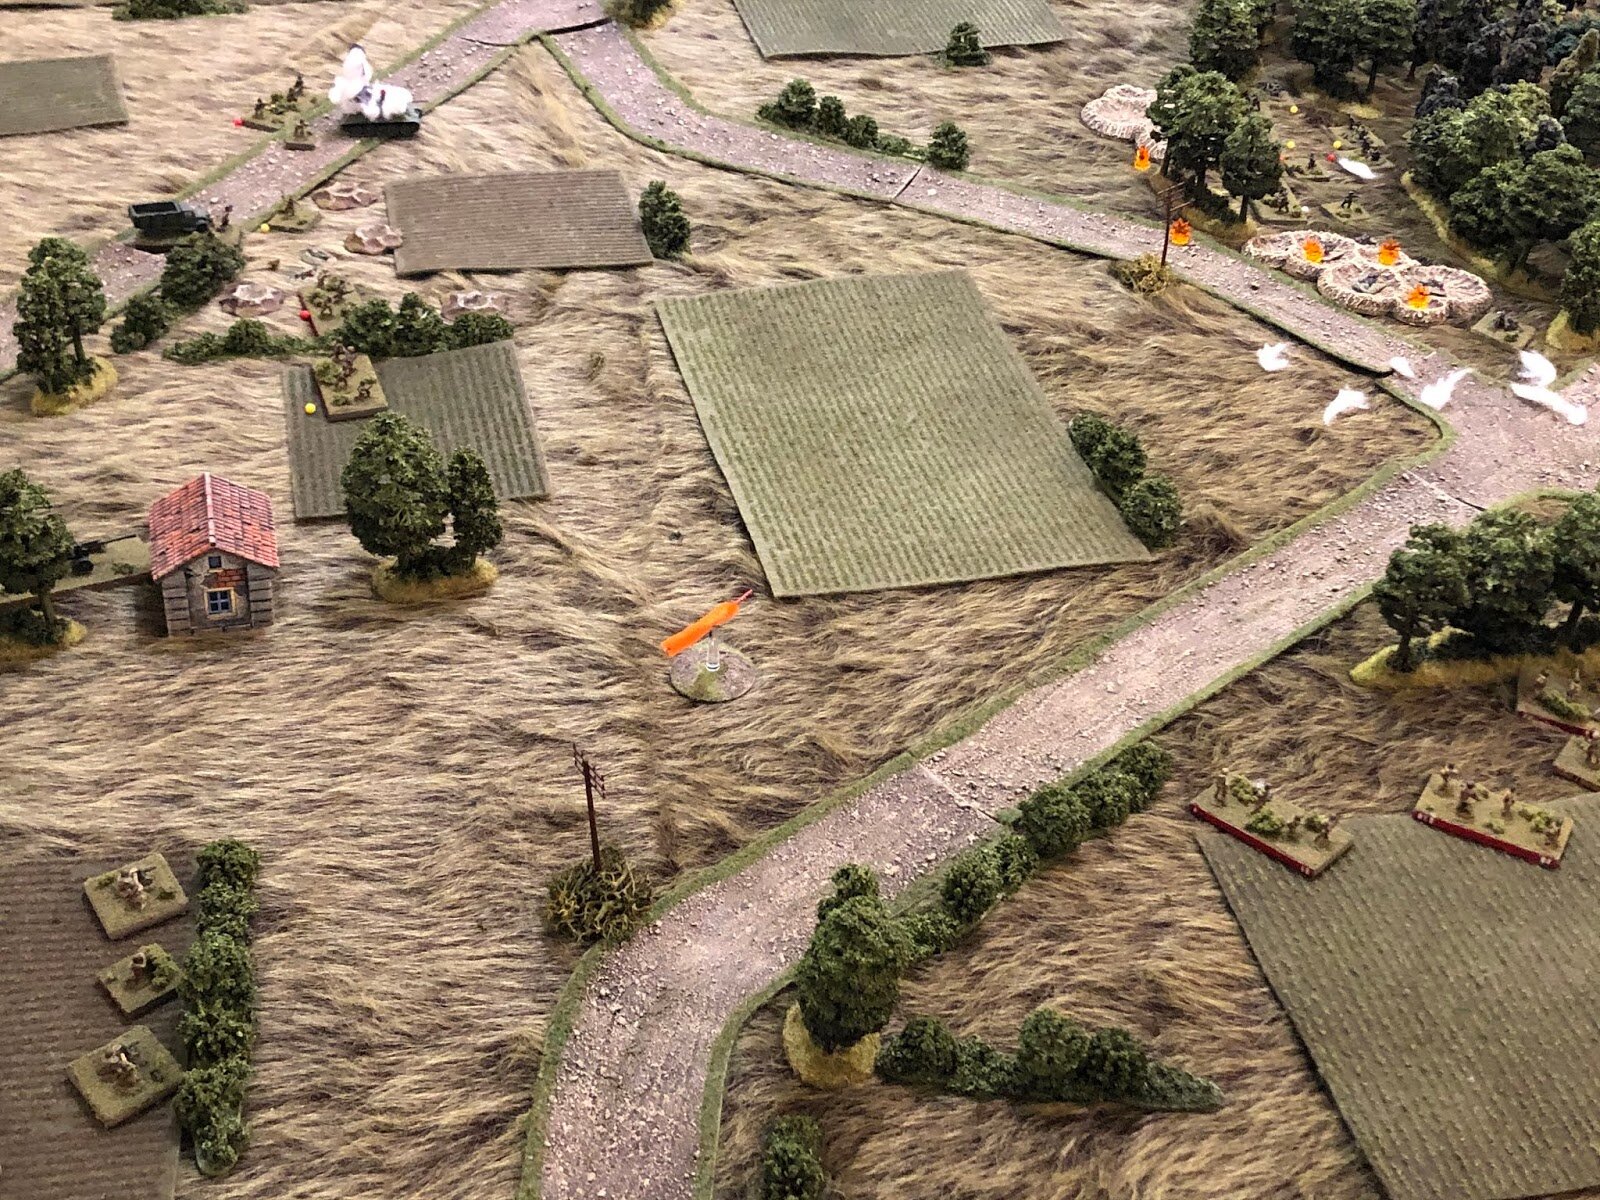
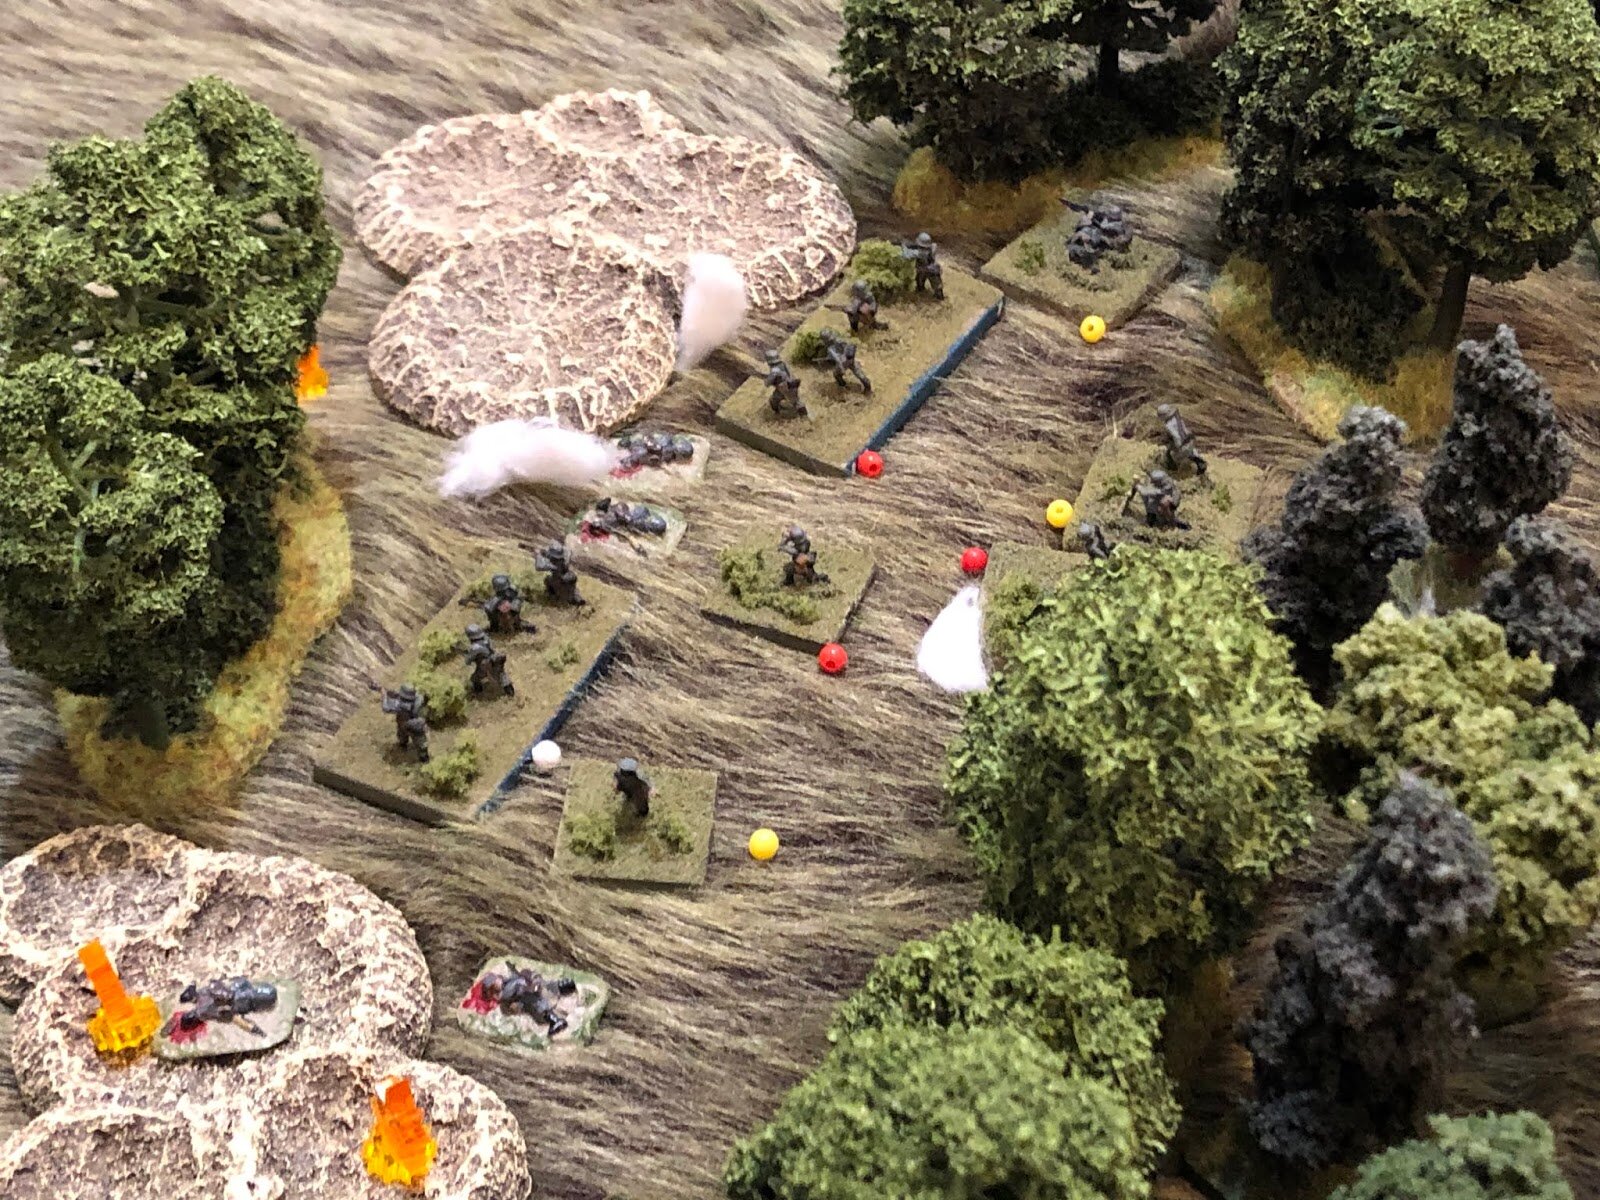
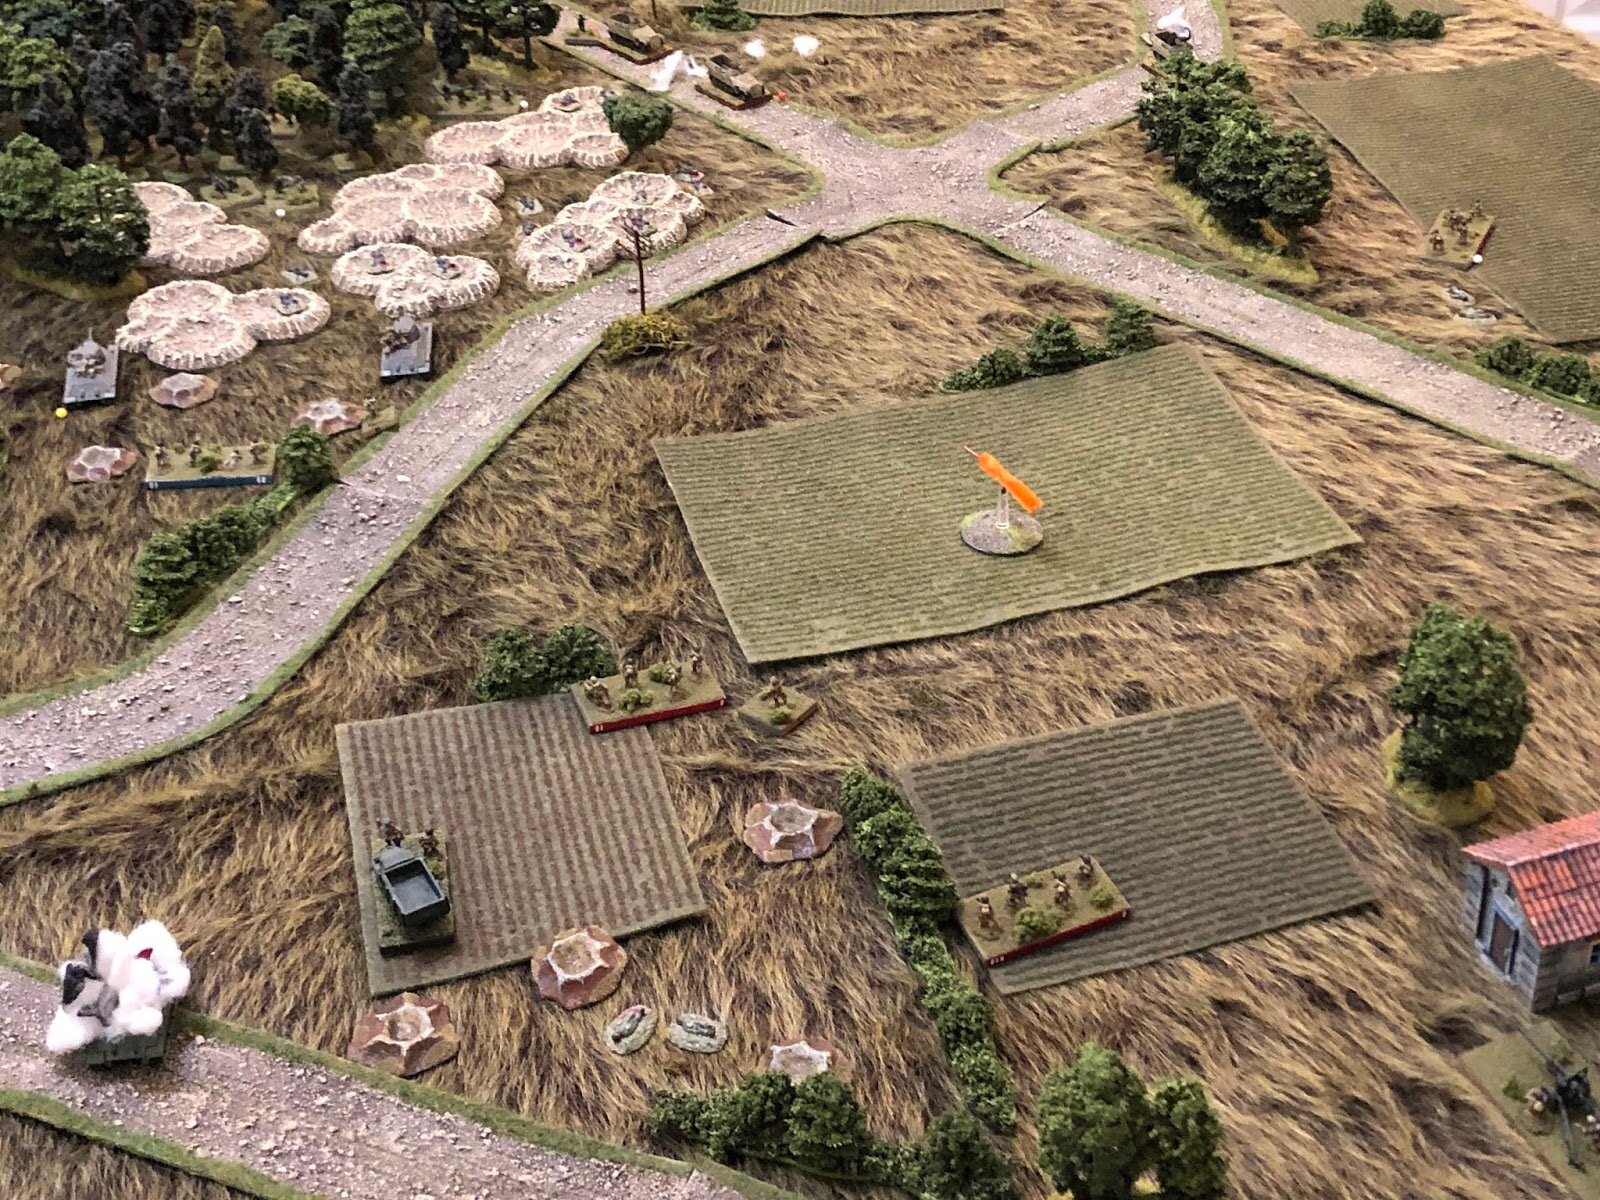
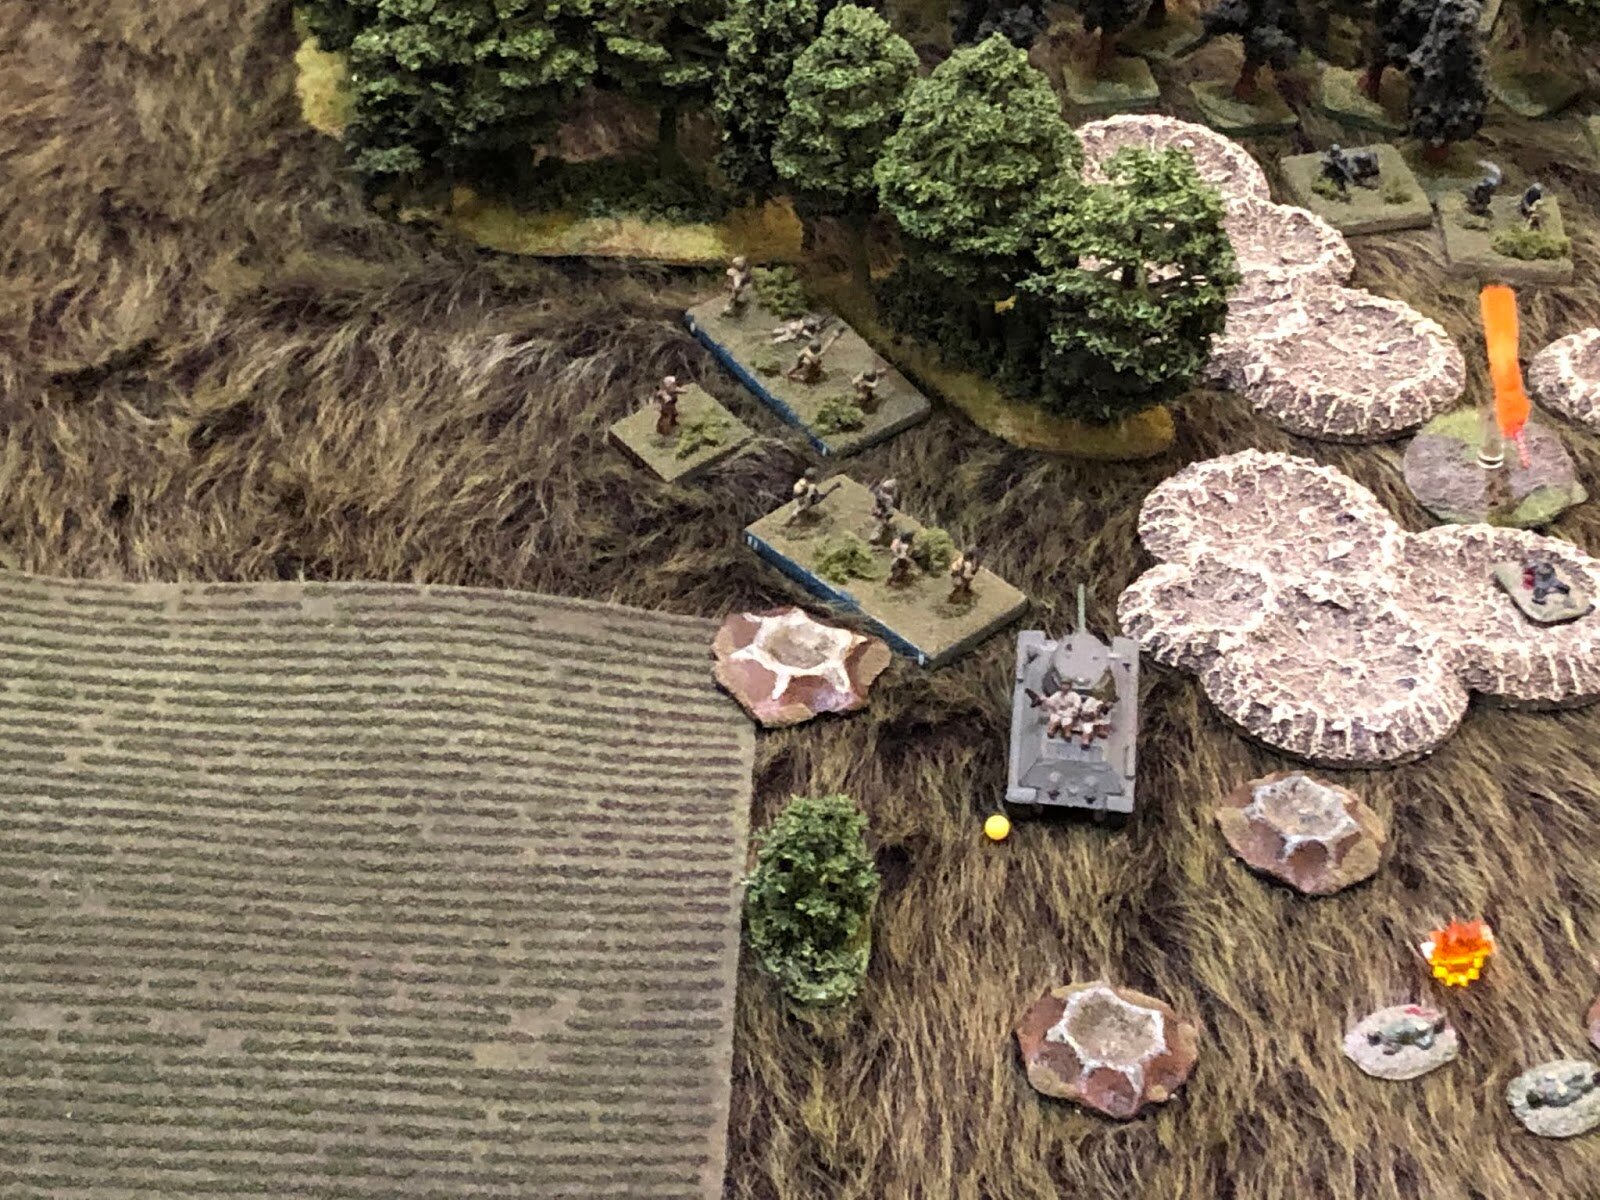
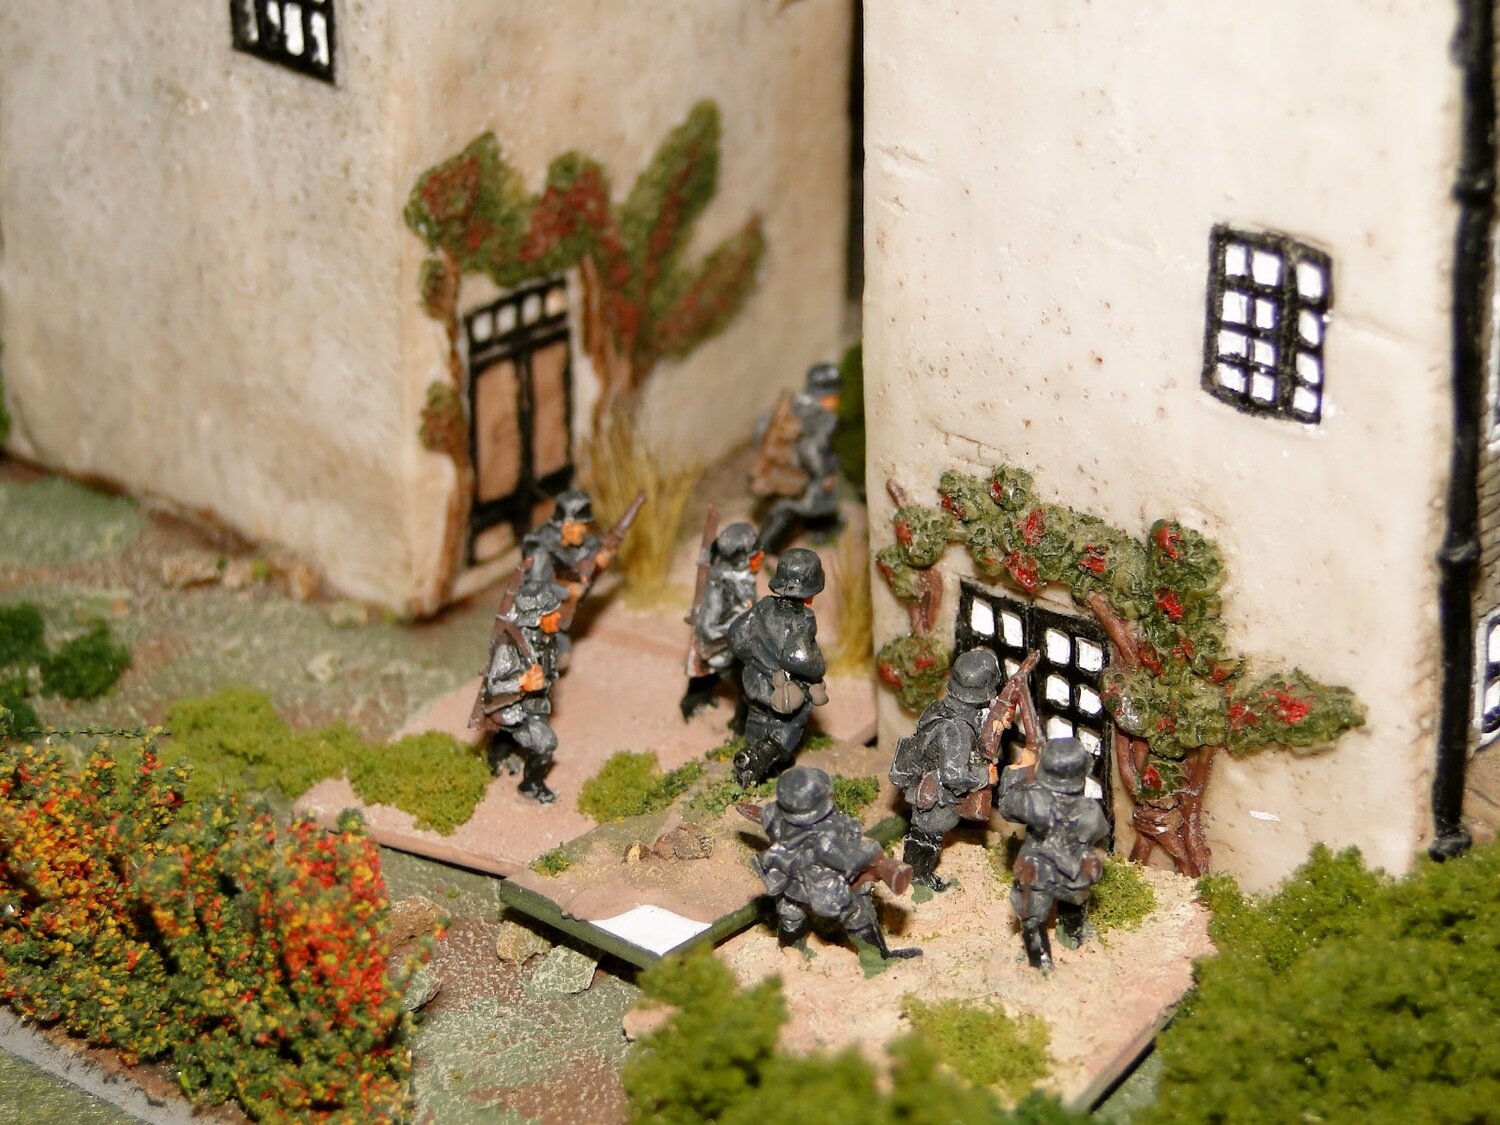
Now that I knew where the anti-tank guns were, I could kill them, even if they currently blocked my route round to the right. The FOO called in my off-table mortars but, as it would take a bit of time for that to arrive (presumably lots of paperwork to fill in) I moved my infantry forward forward to take them out.
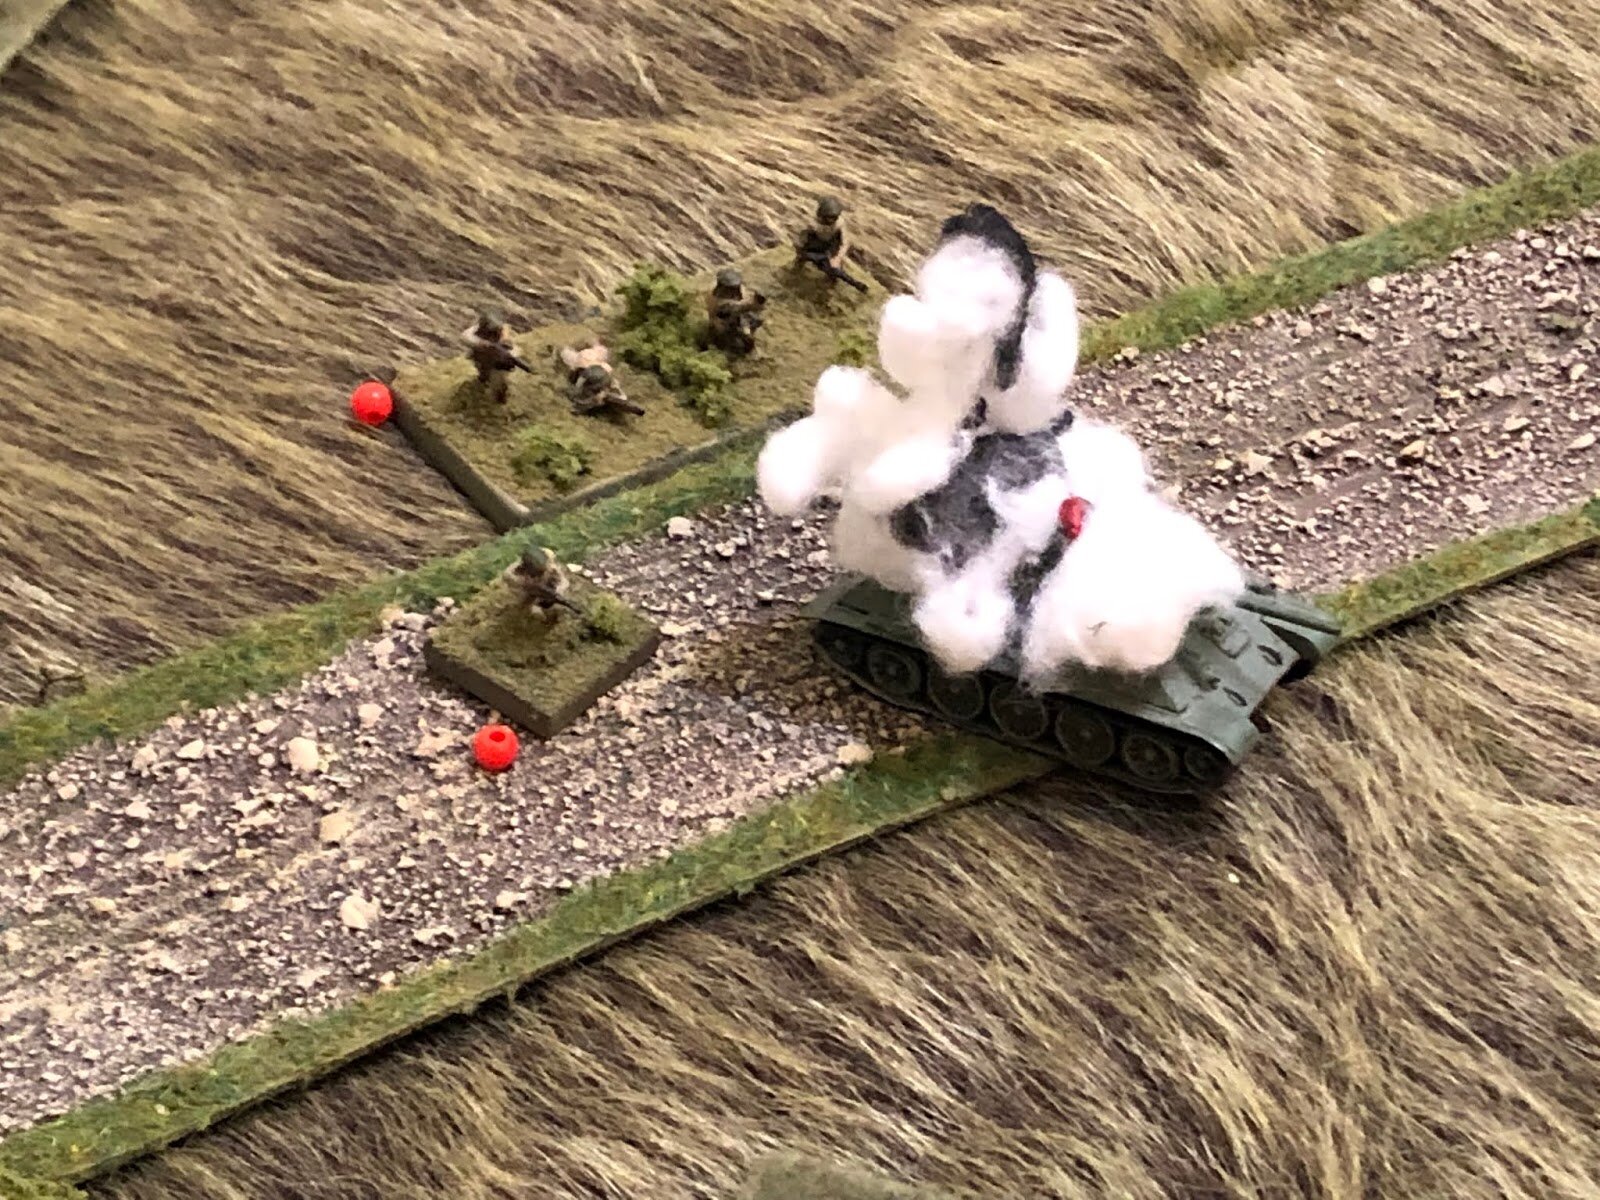
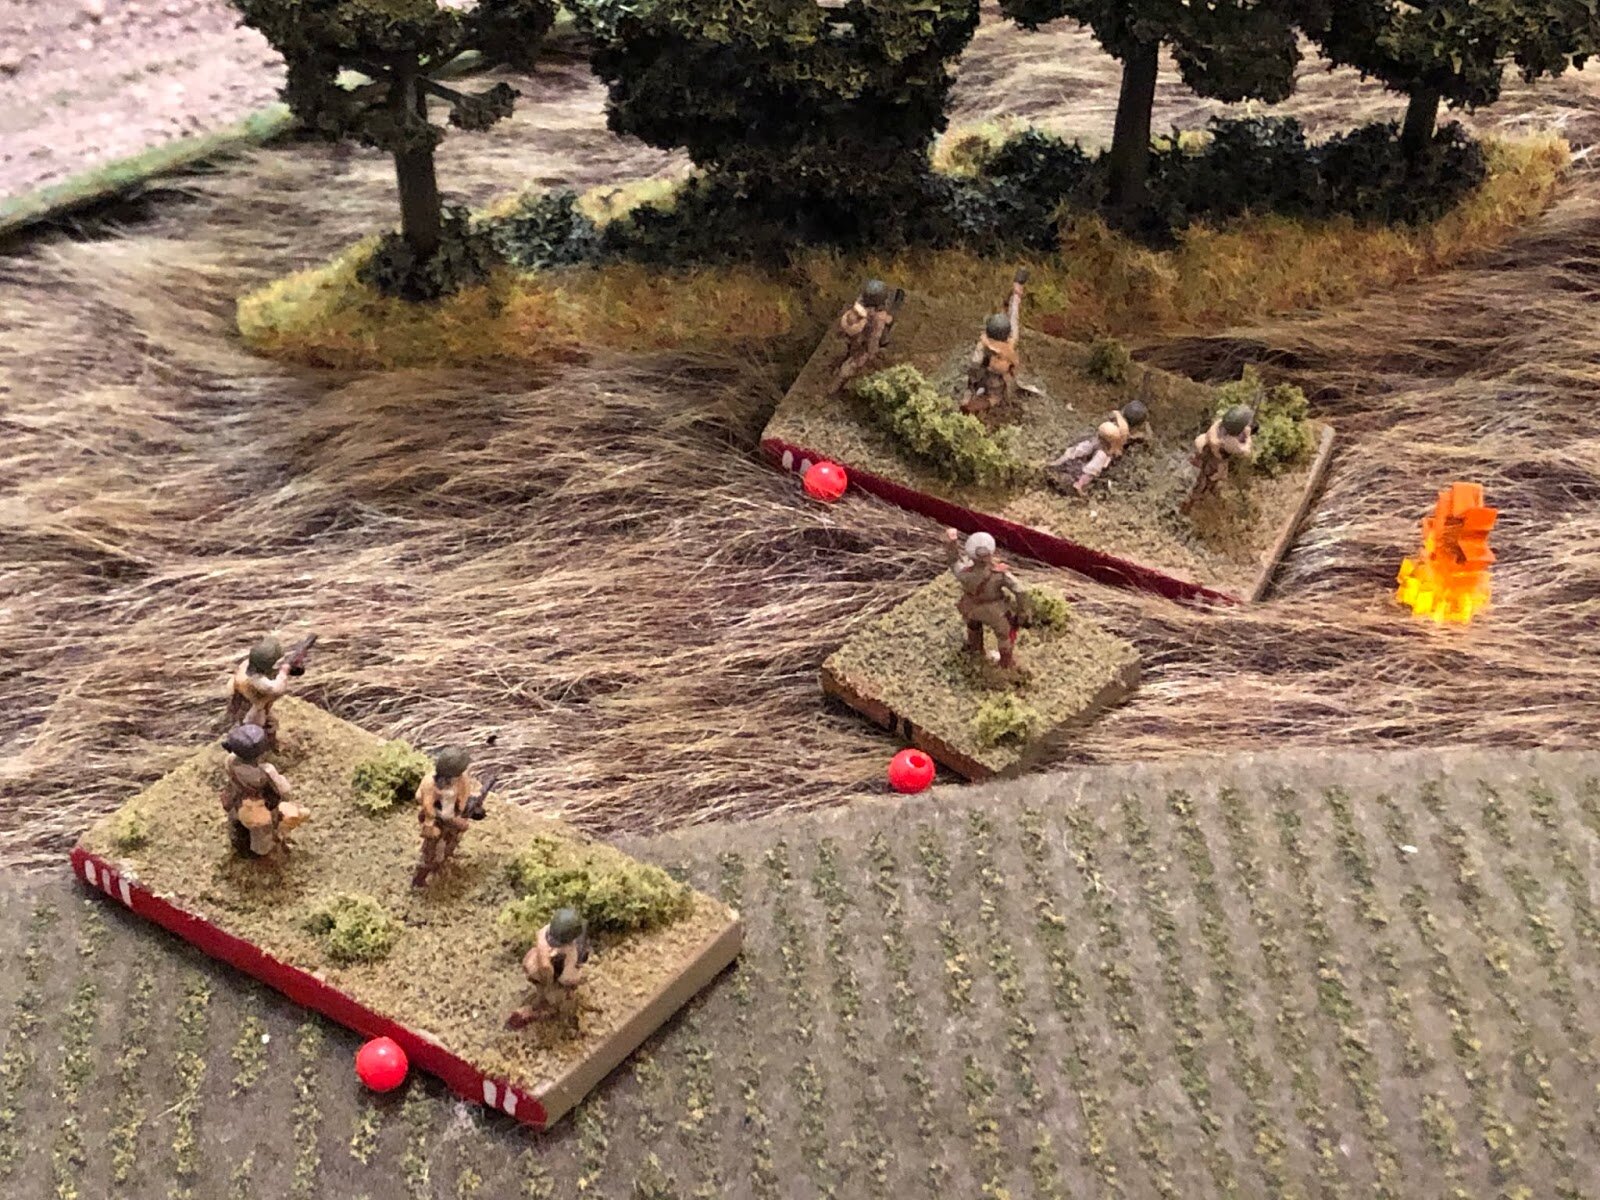
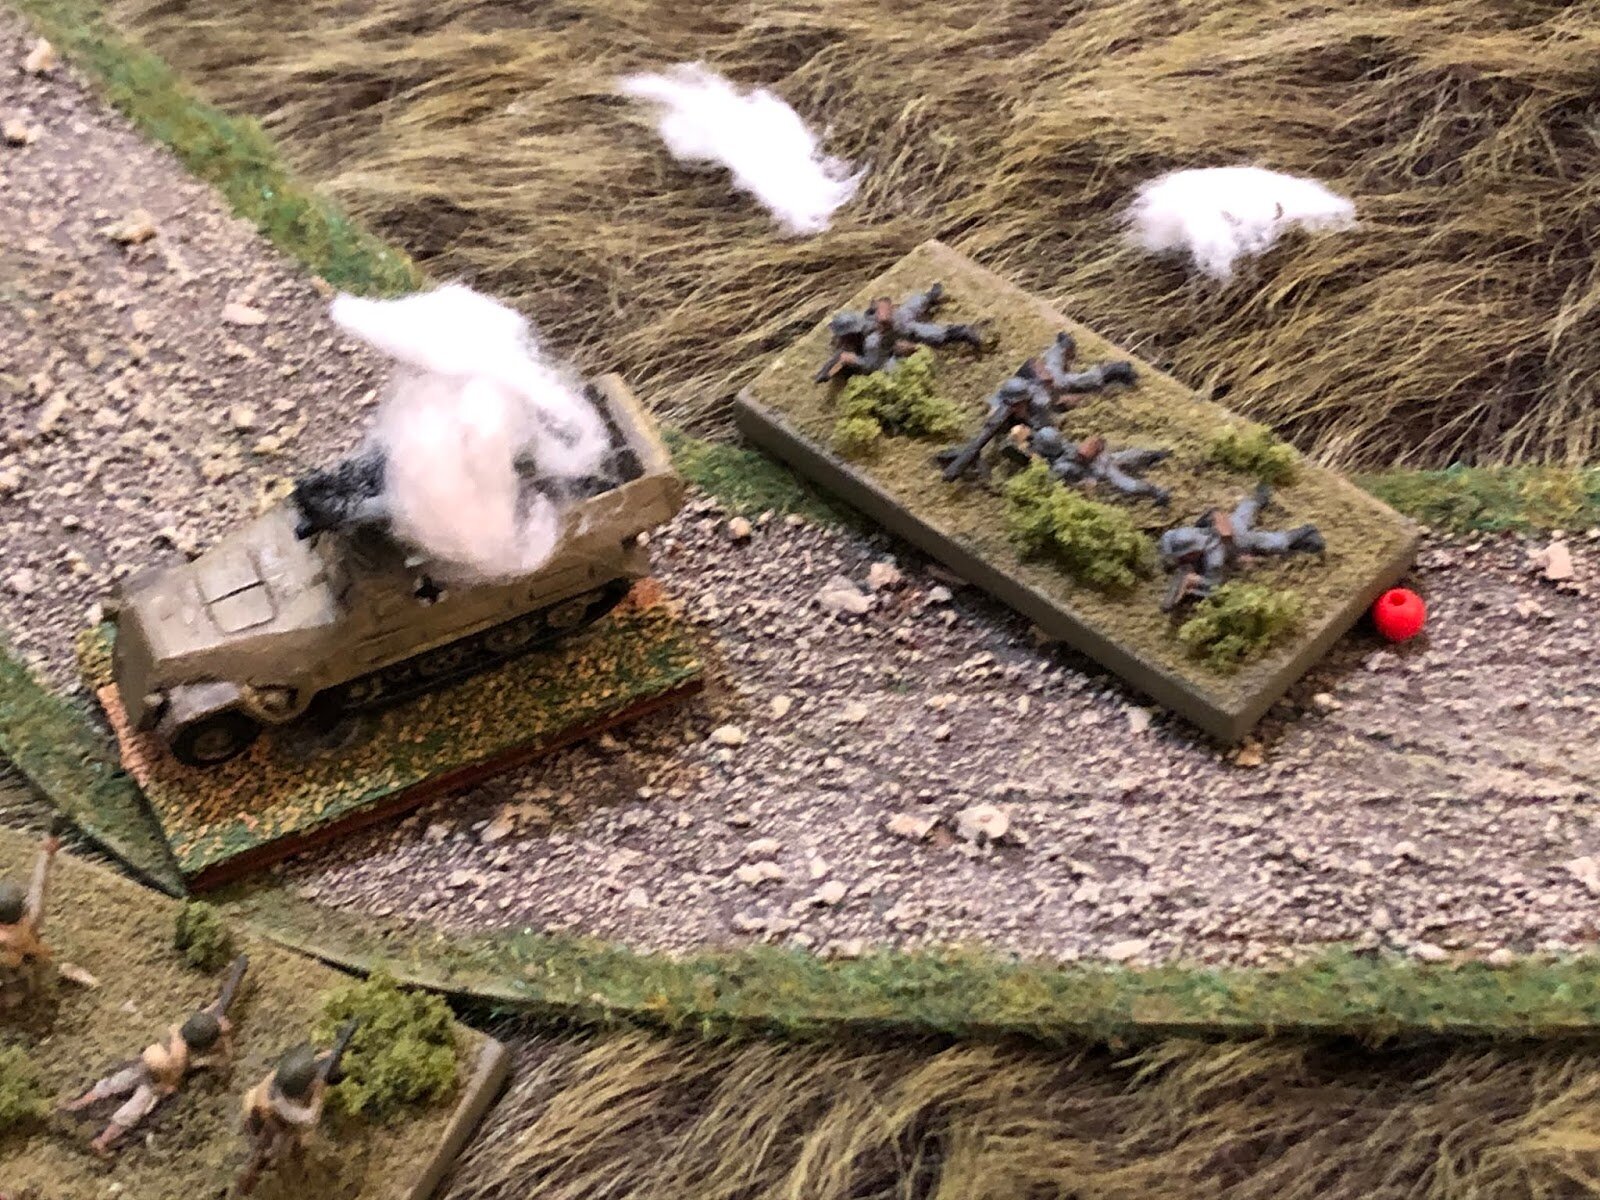
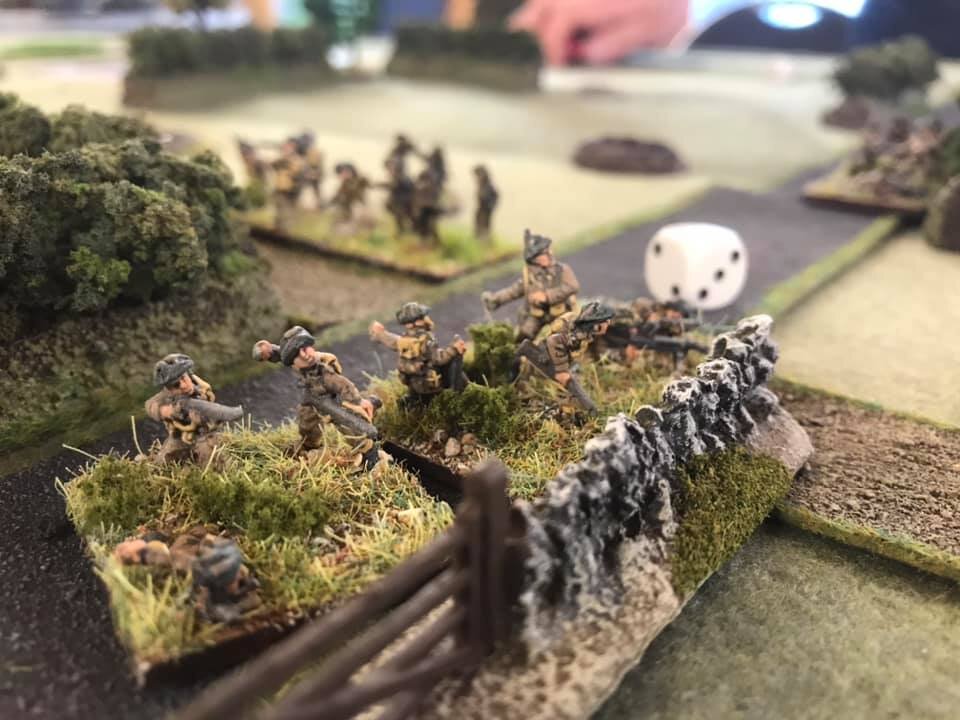
Unfortunately, the Recon Platoon had managed to drive straight past the British Carrier platoon hiding in the pig sty and, as my trucks drove past, these opened fire at point blank range!
The lead two trucks were hammered: one squad losing five of its eight men, the other losing two but racking up the Shock.
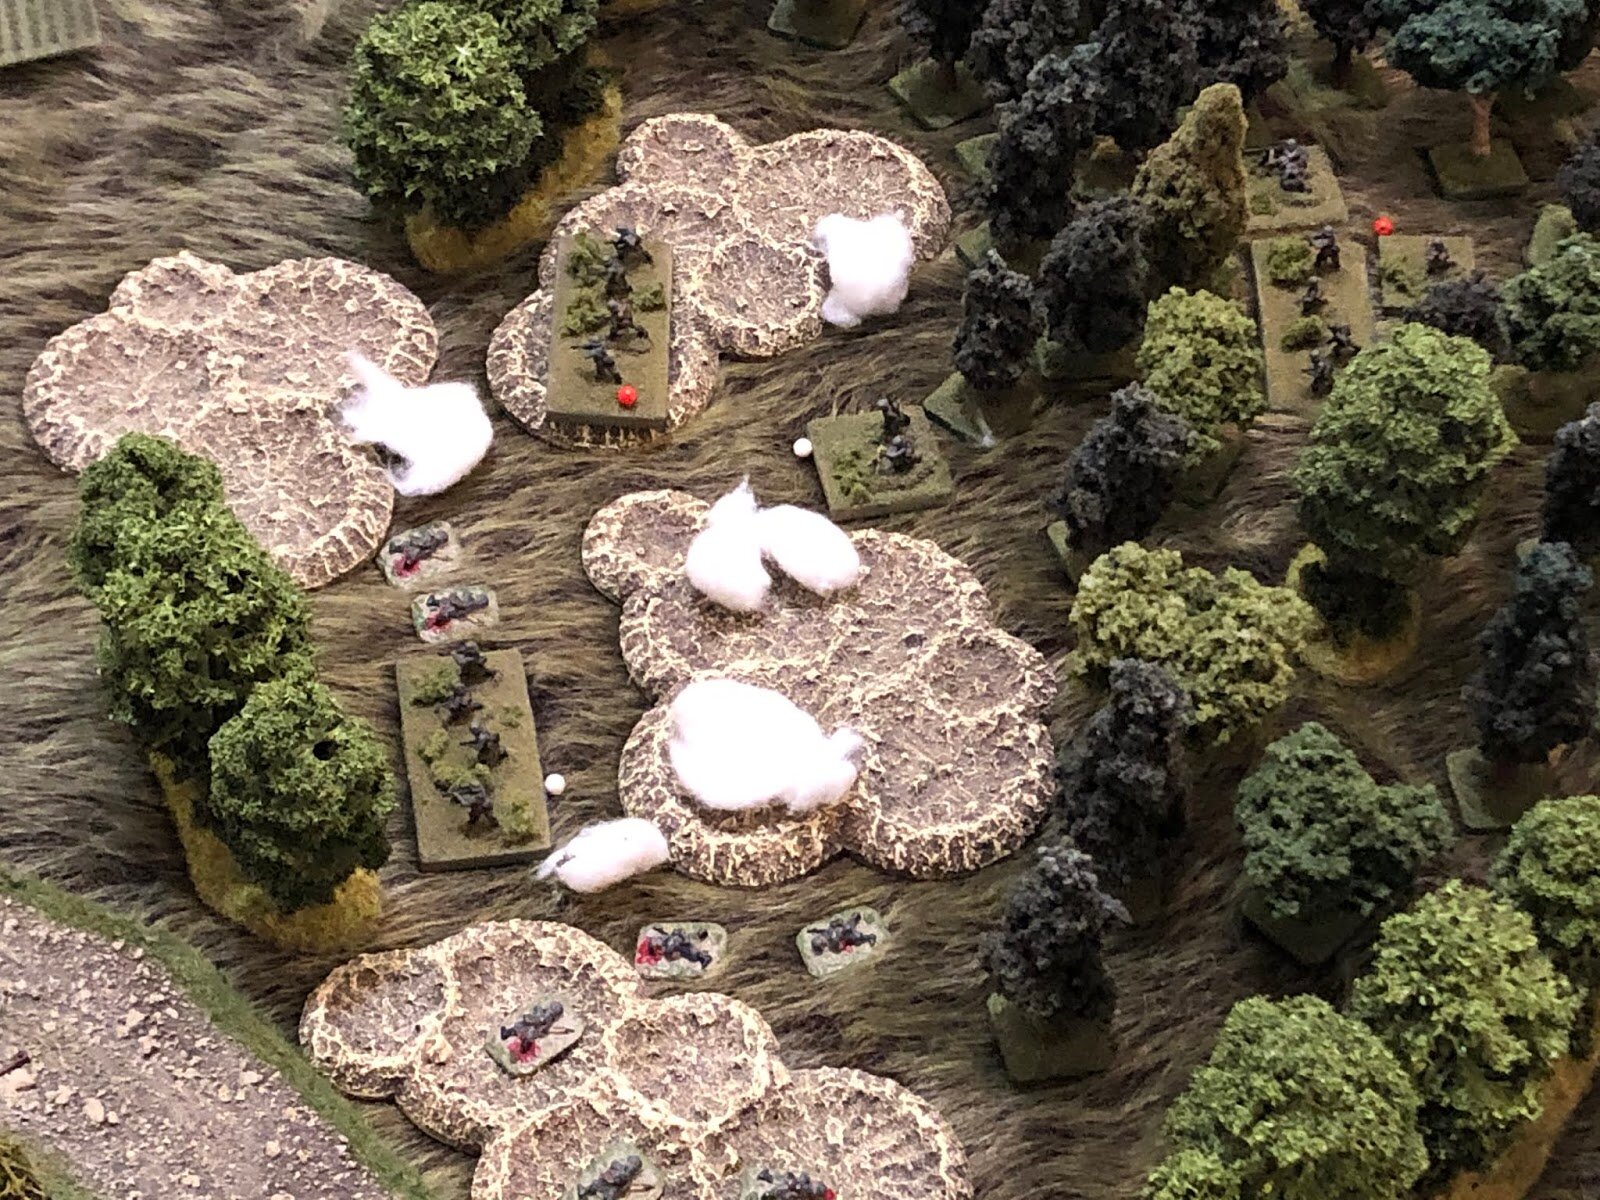
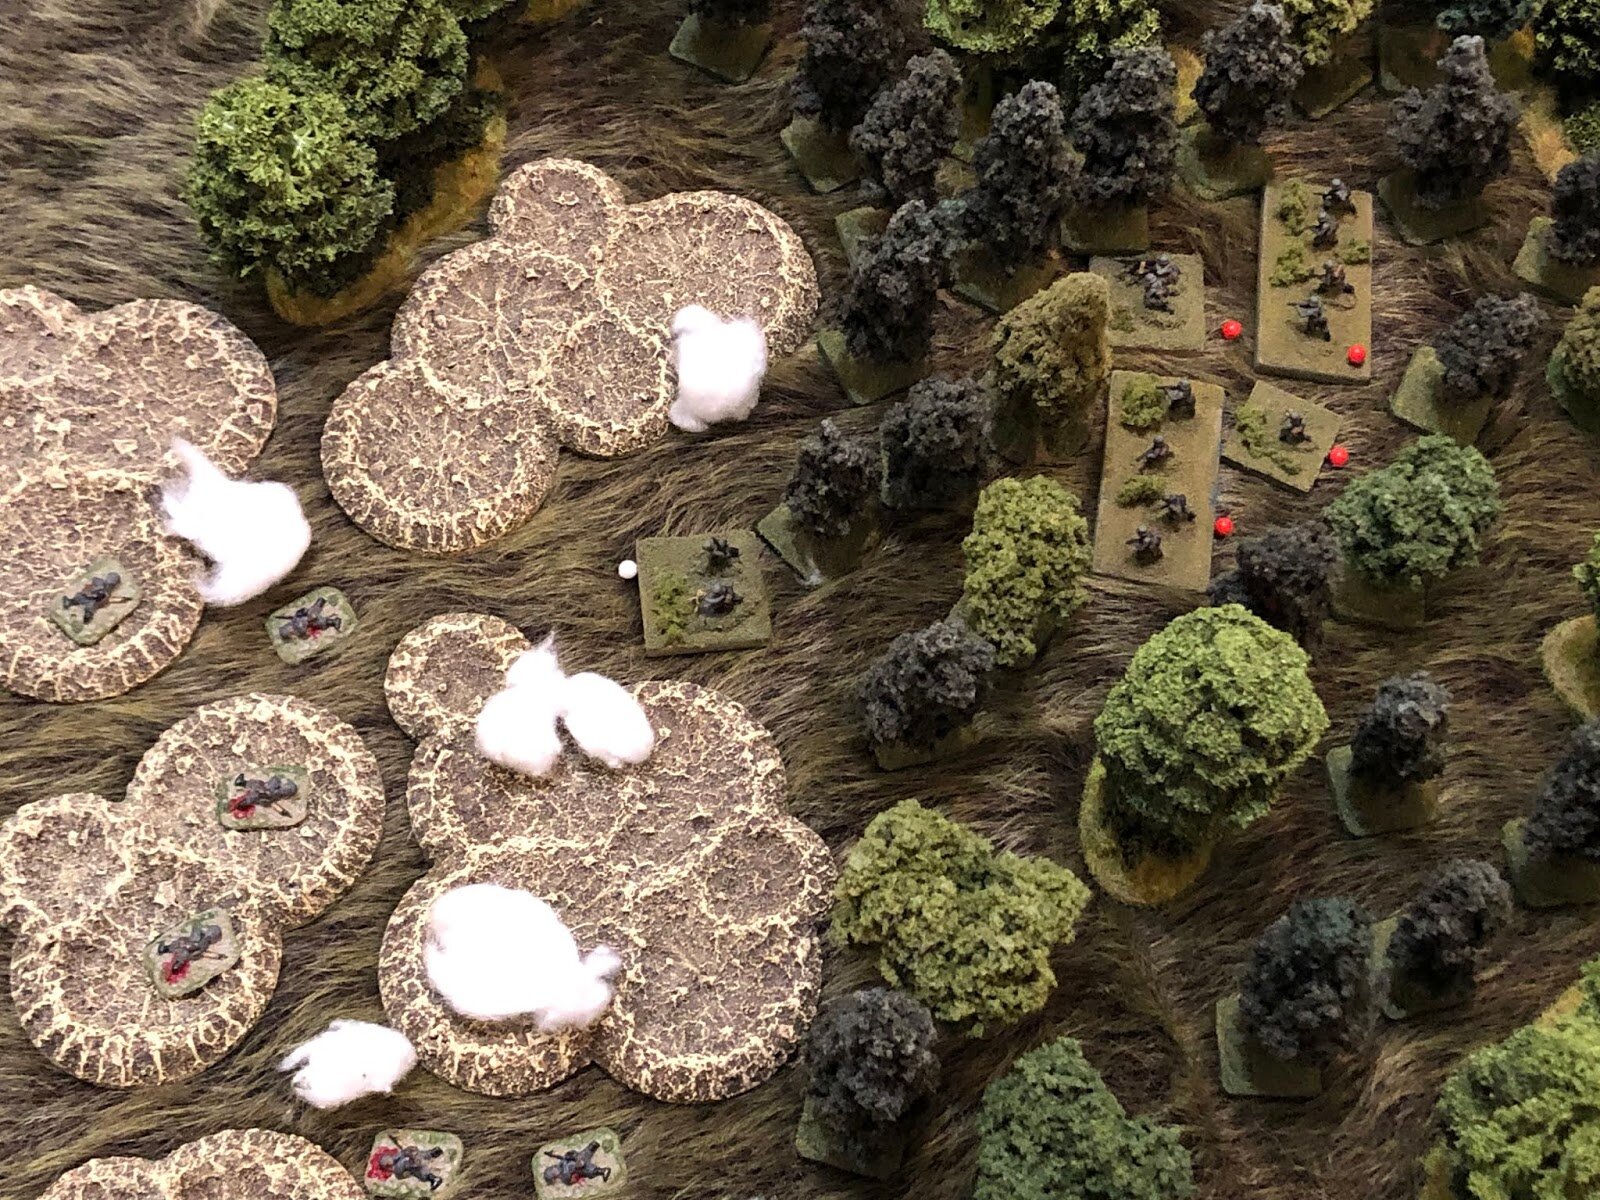
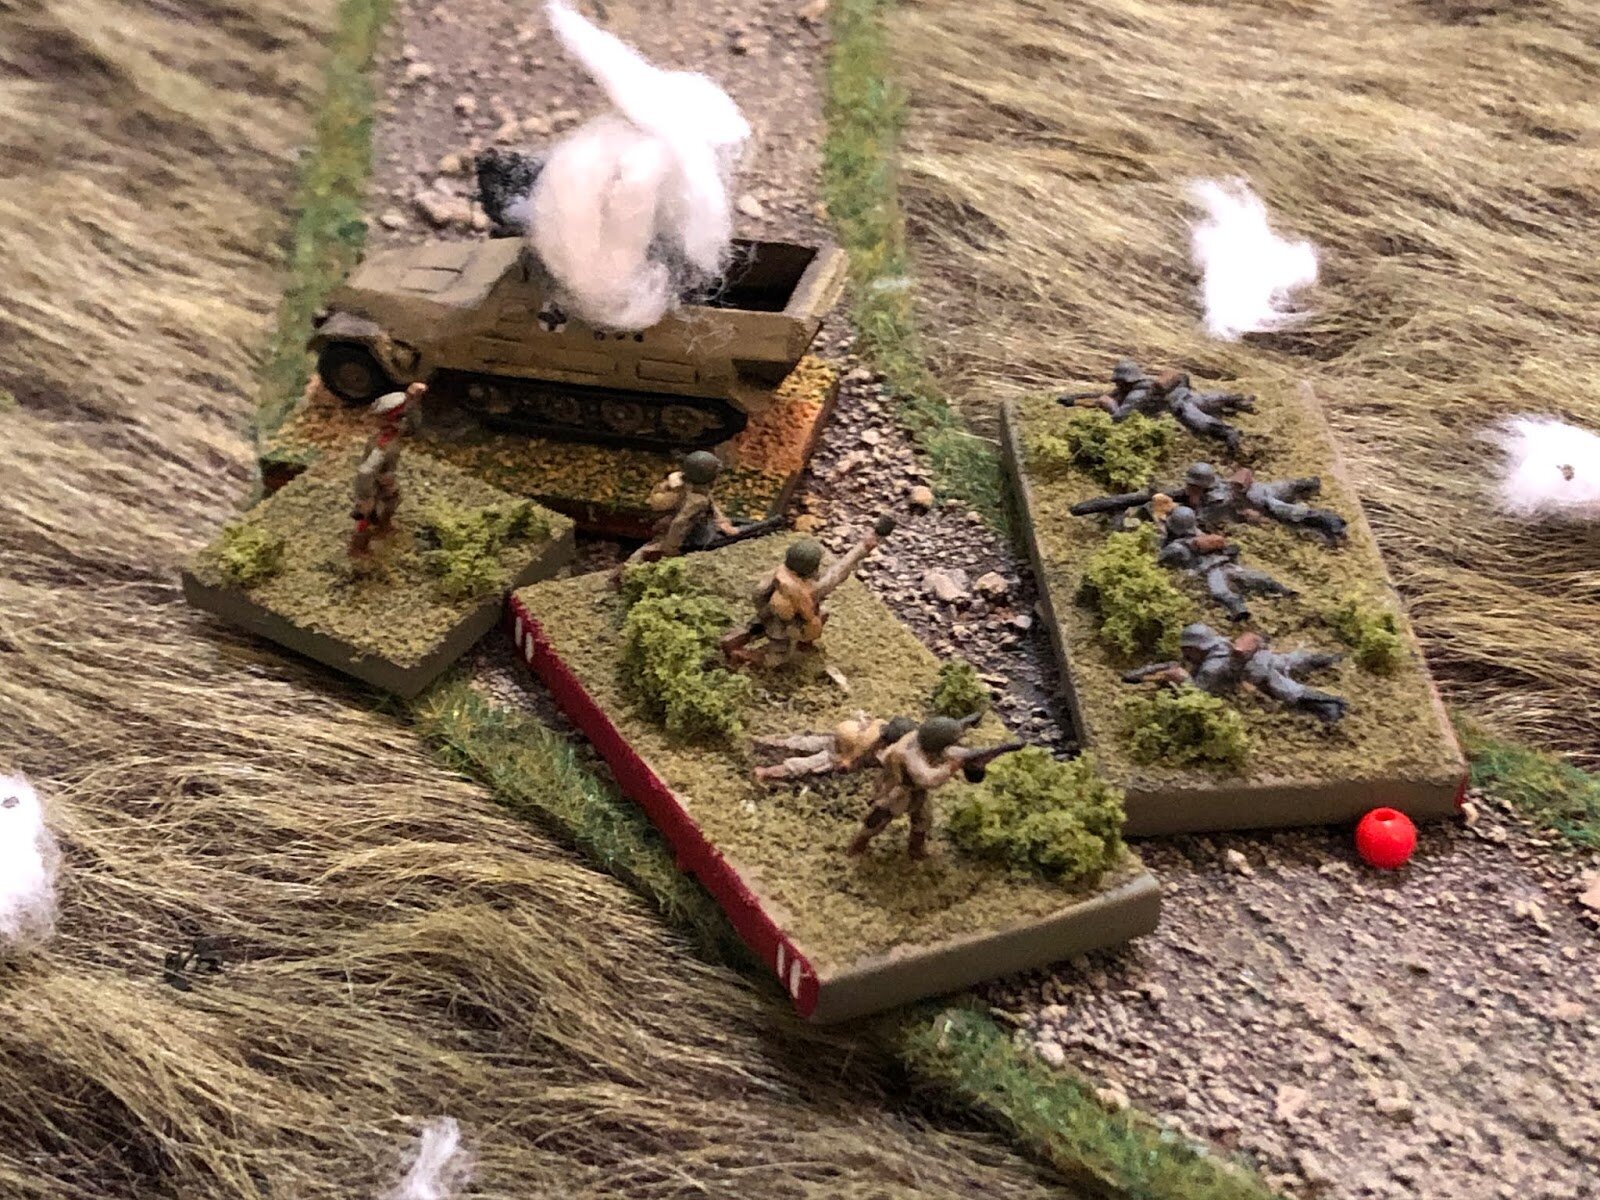
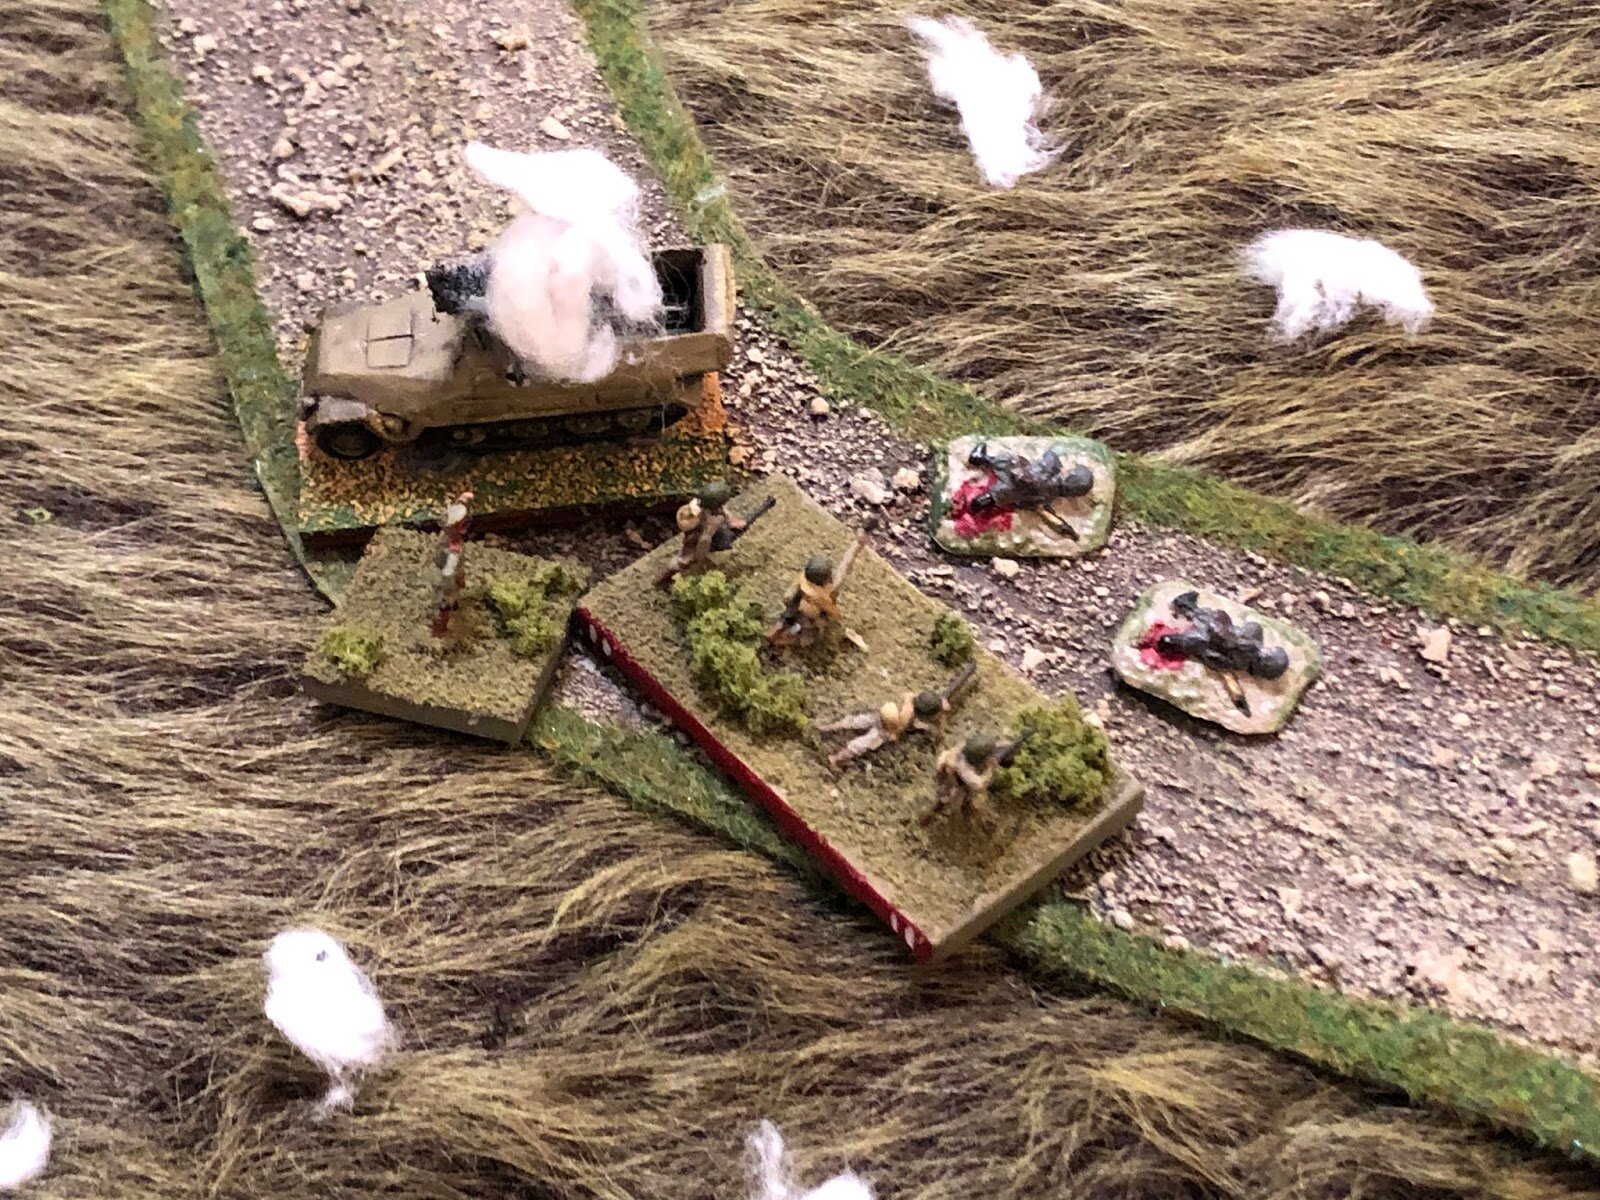
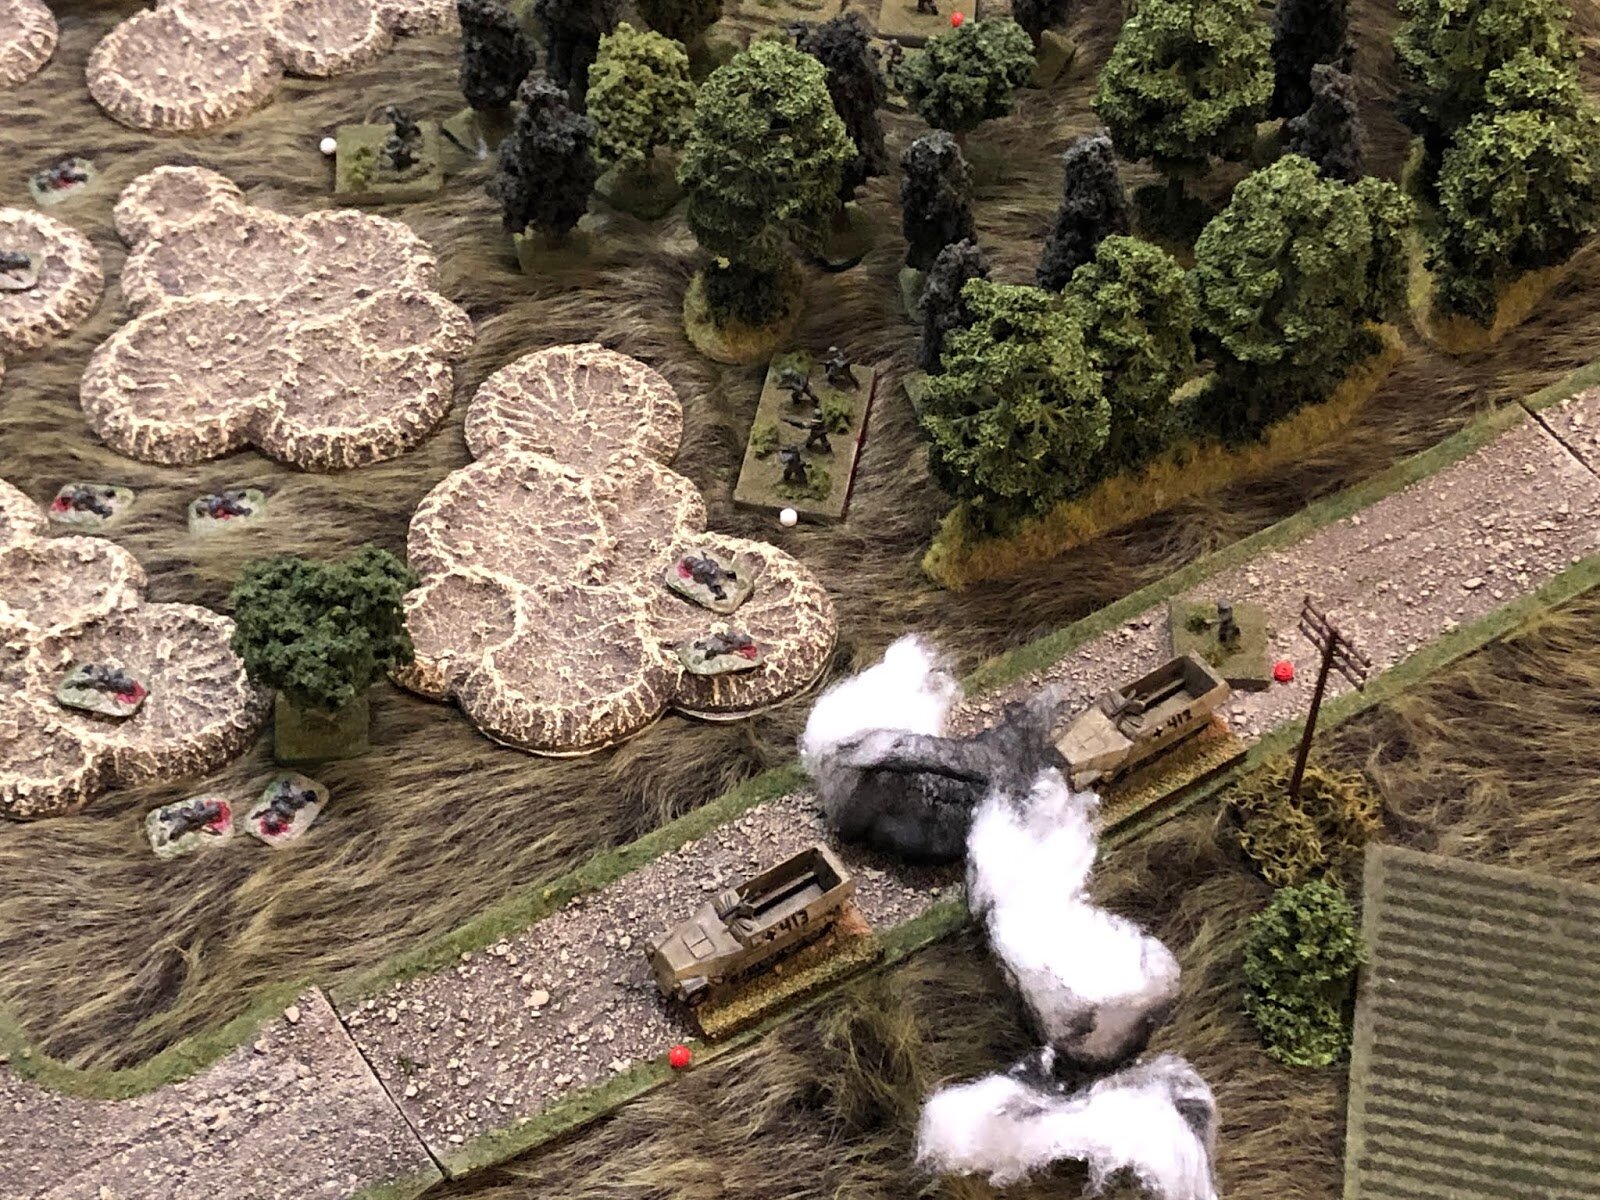
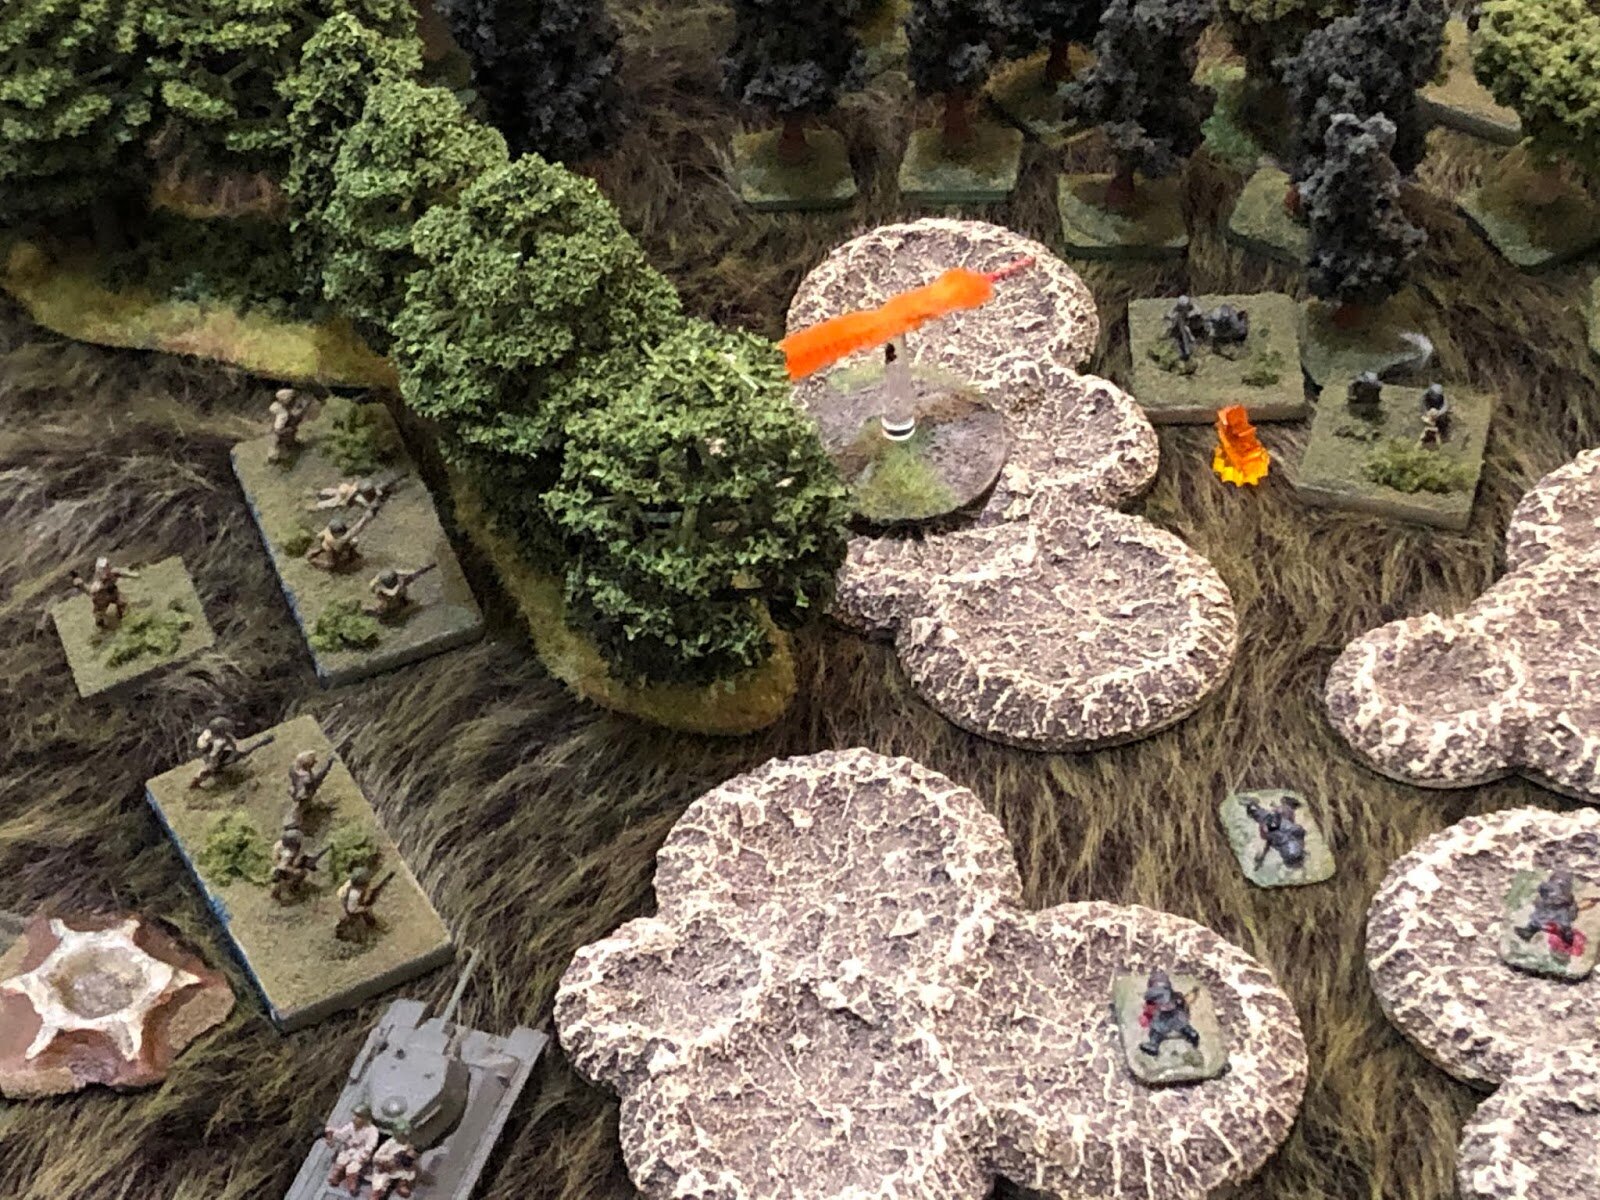
Leaving aside what I was going to do to Leutnant Haller after the battle, quick action was needed. Fortunately I had another squad ready to jump in so, on their next activation, they jumped down from their trucks and the whole lot charged into the pig sty, overwhelming the two closest carriers for the loss of one more man. The surviving carrier bugged out.
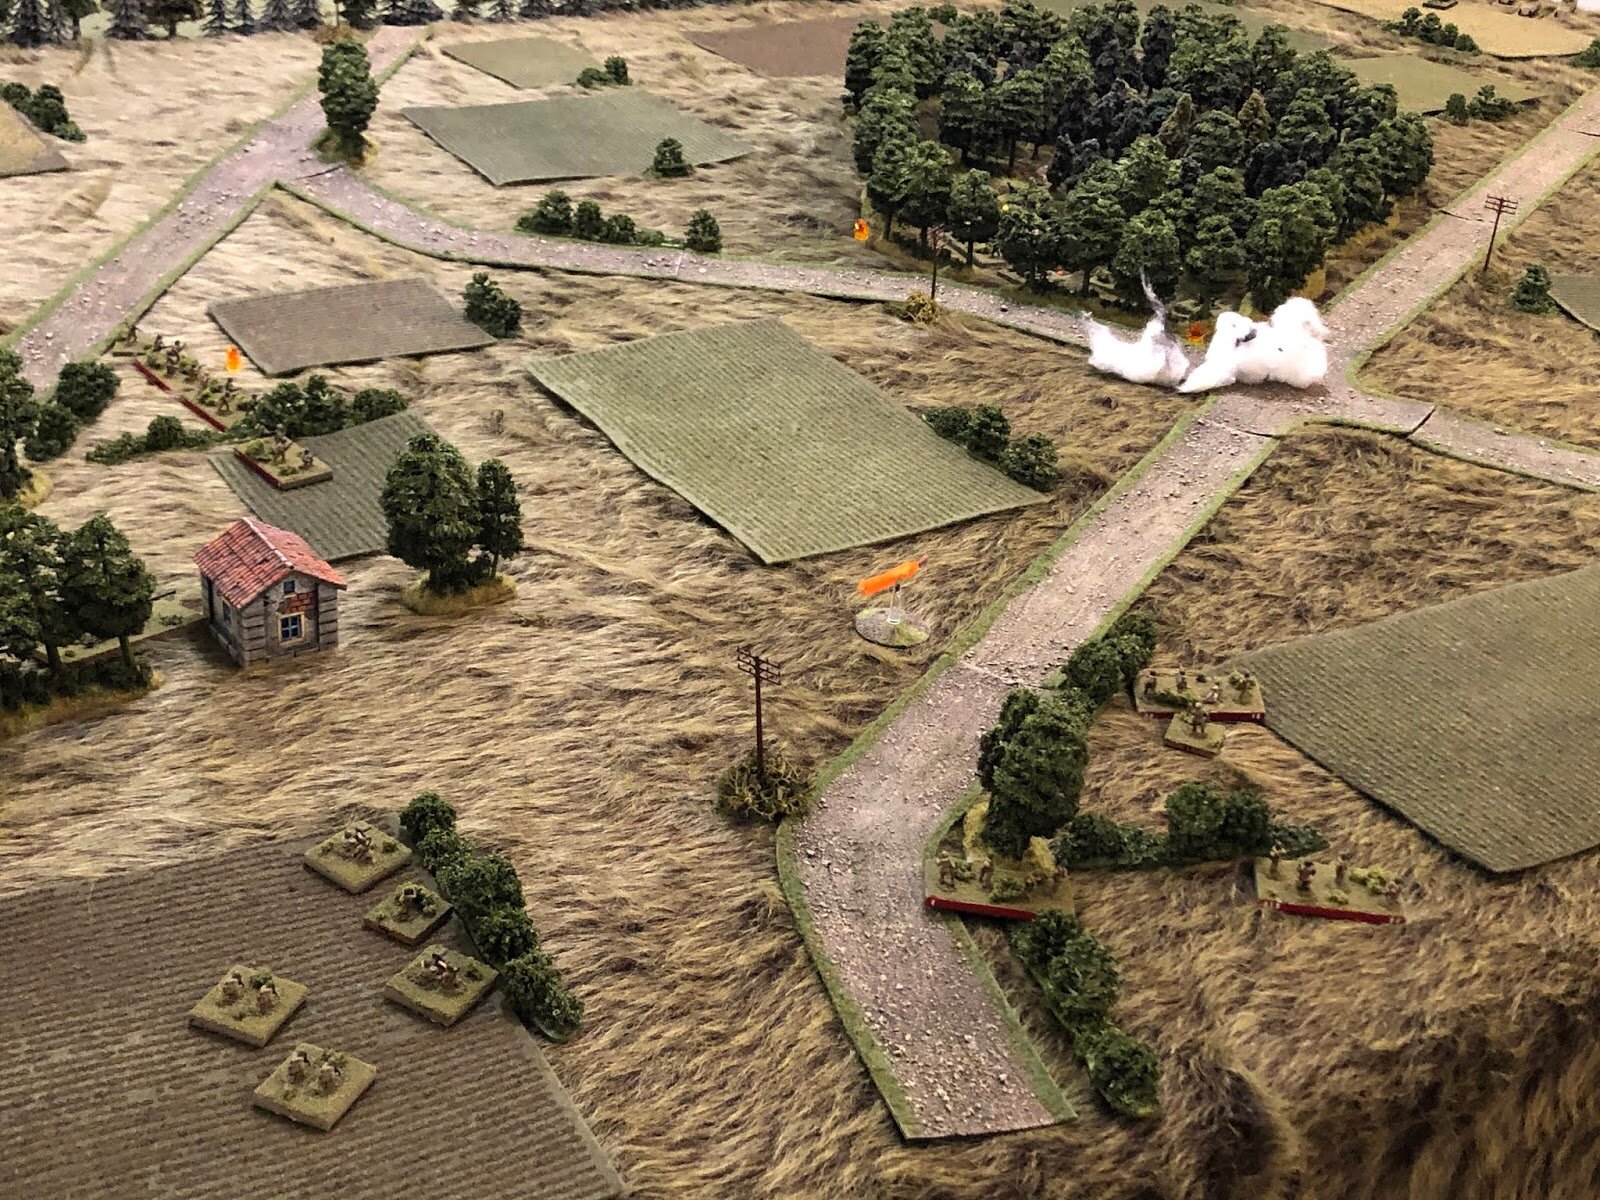
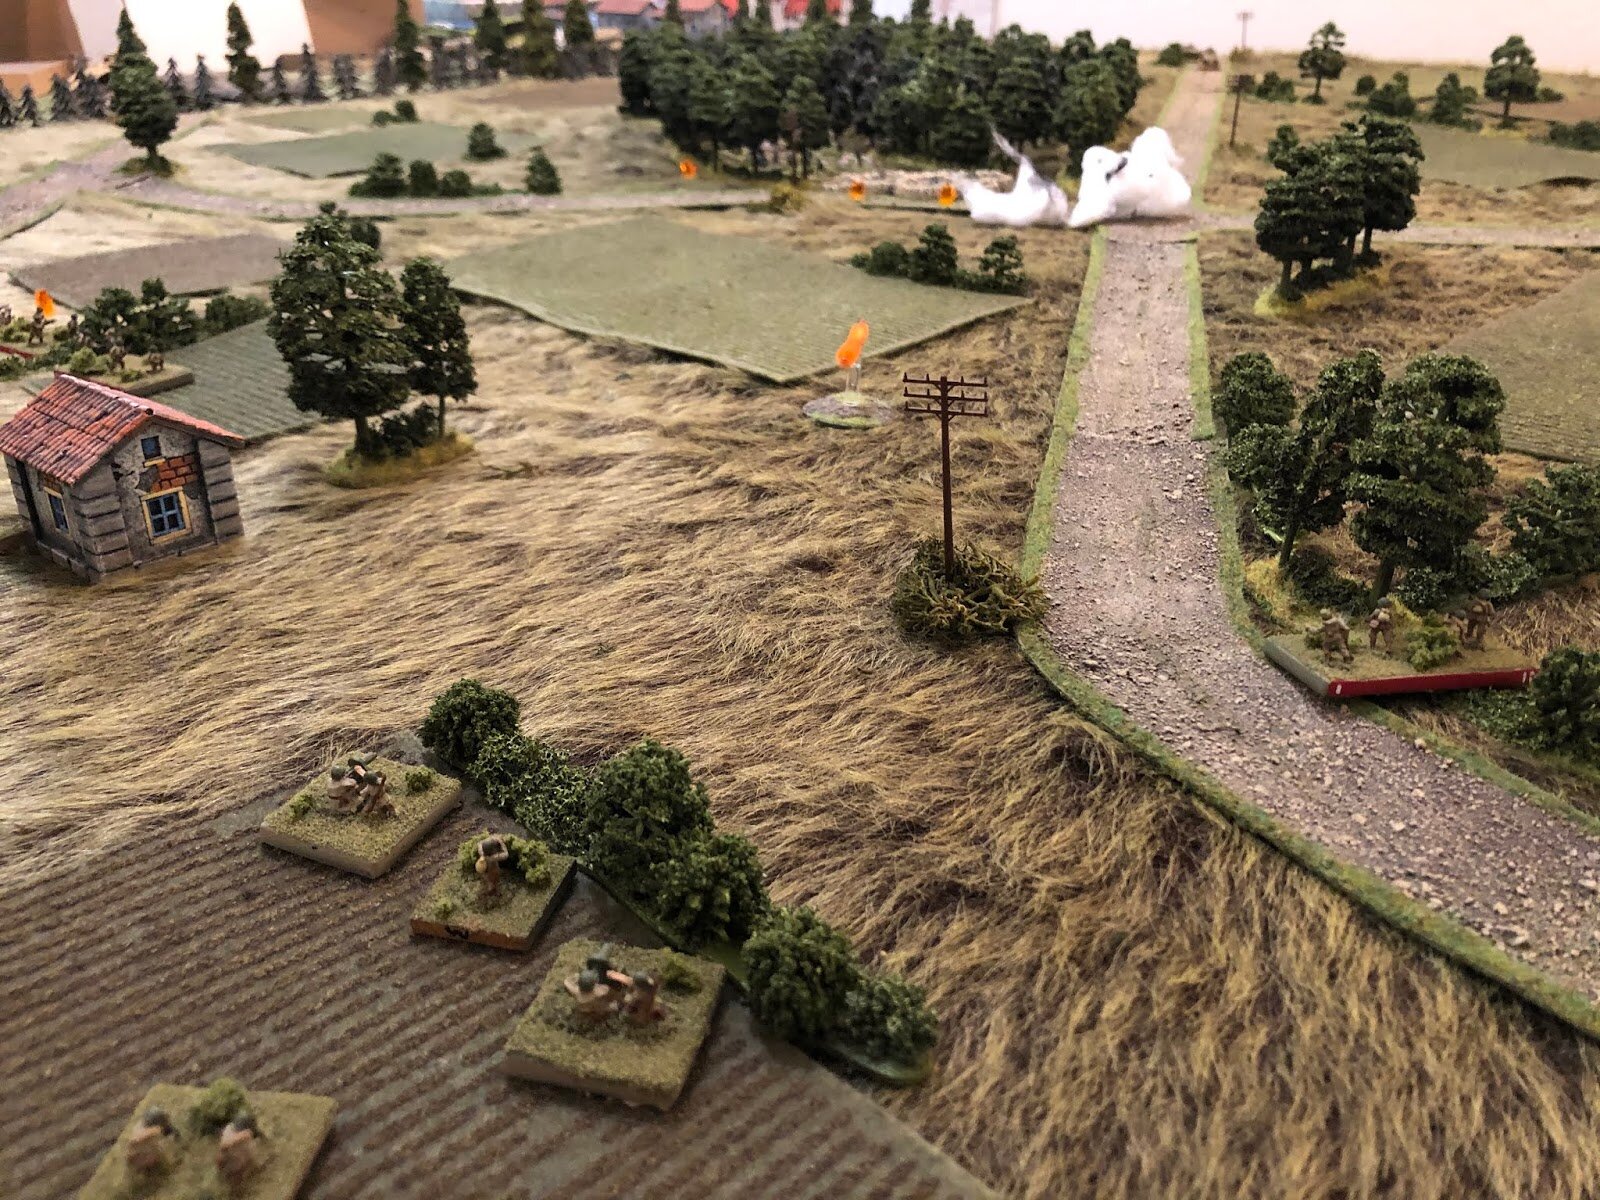
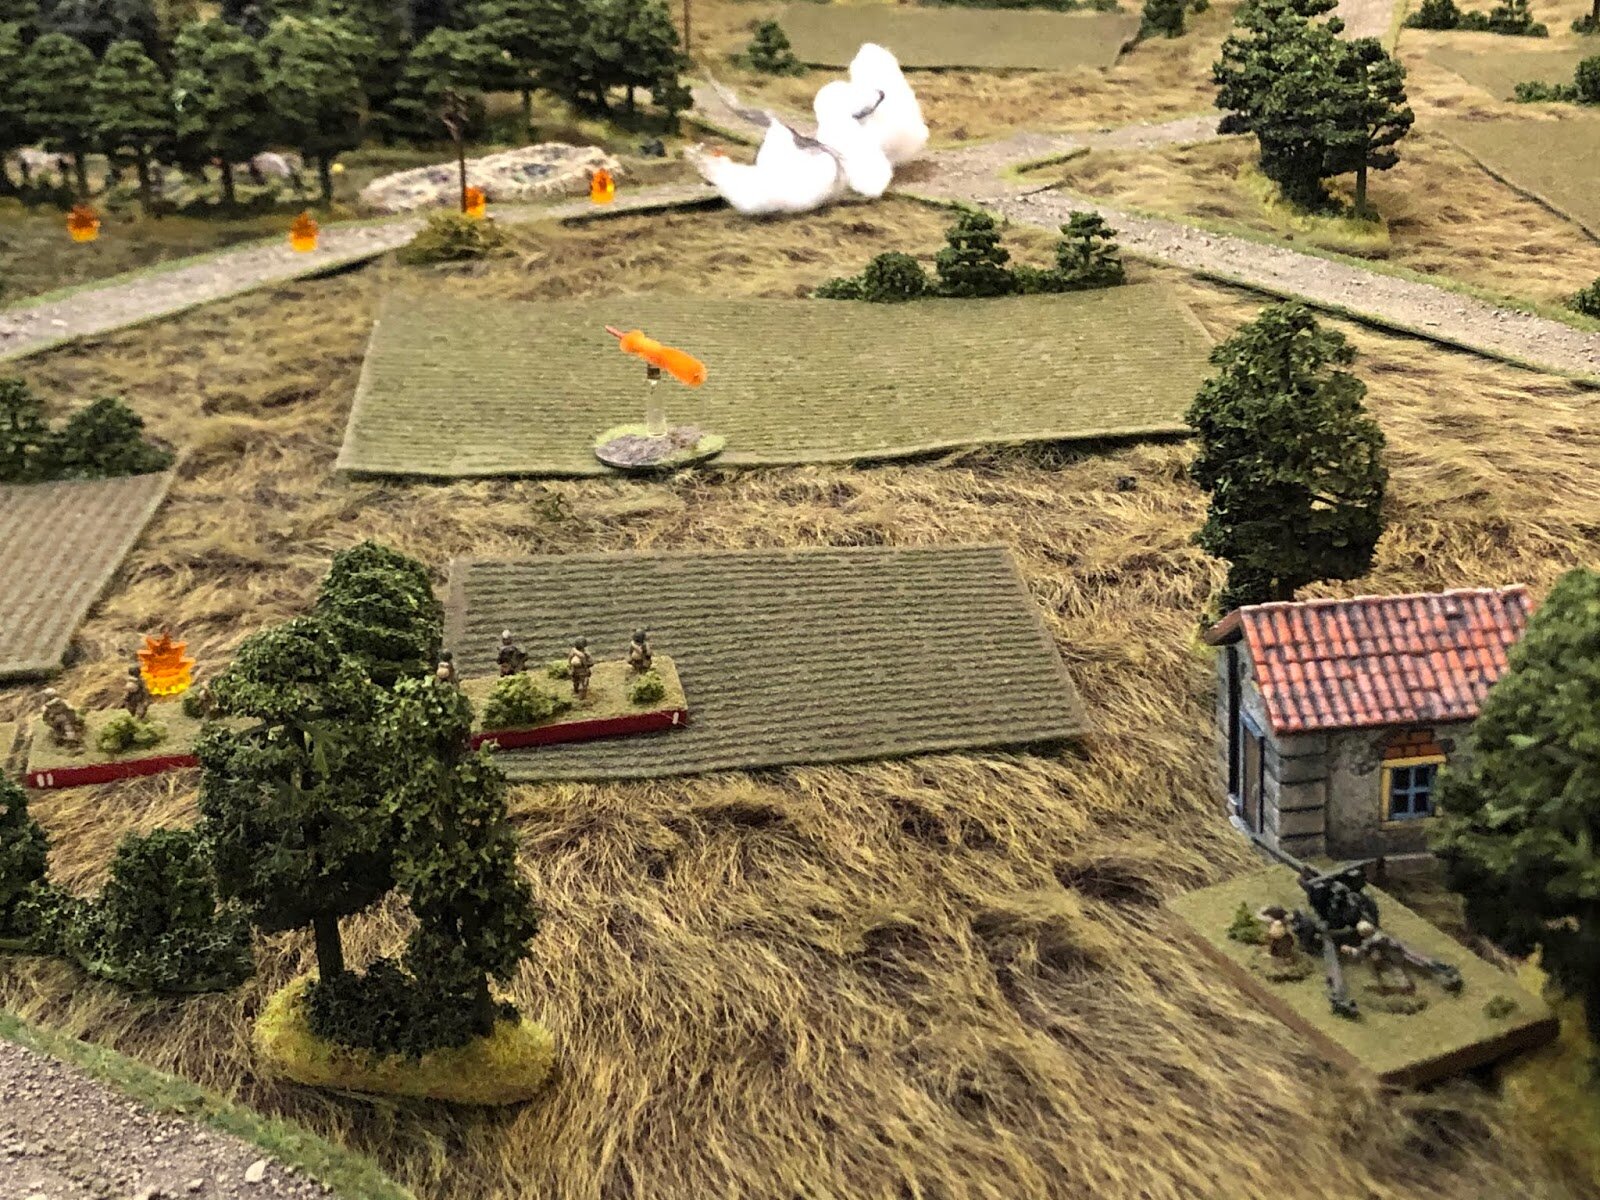
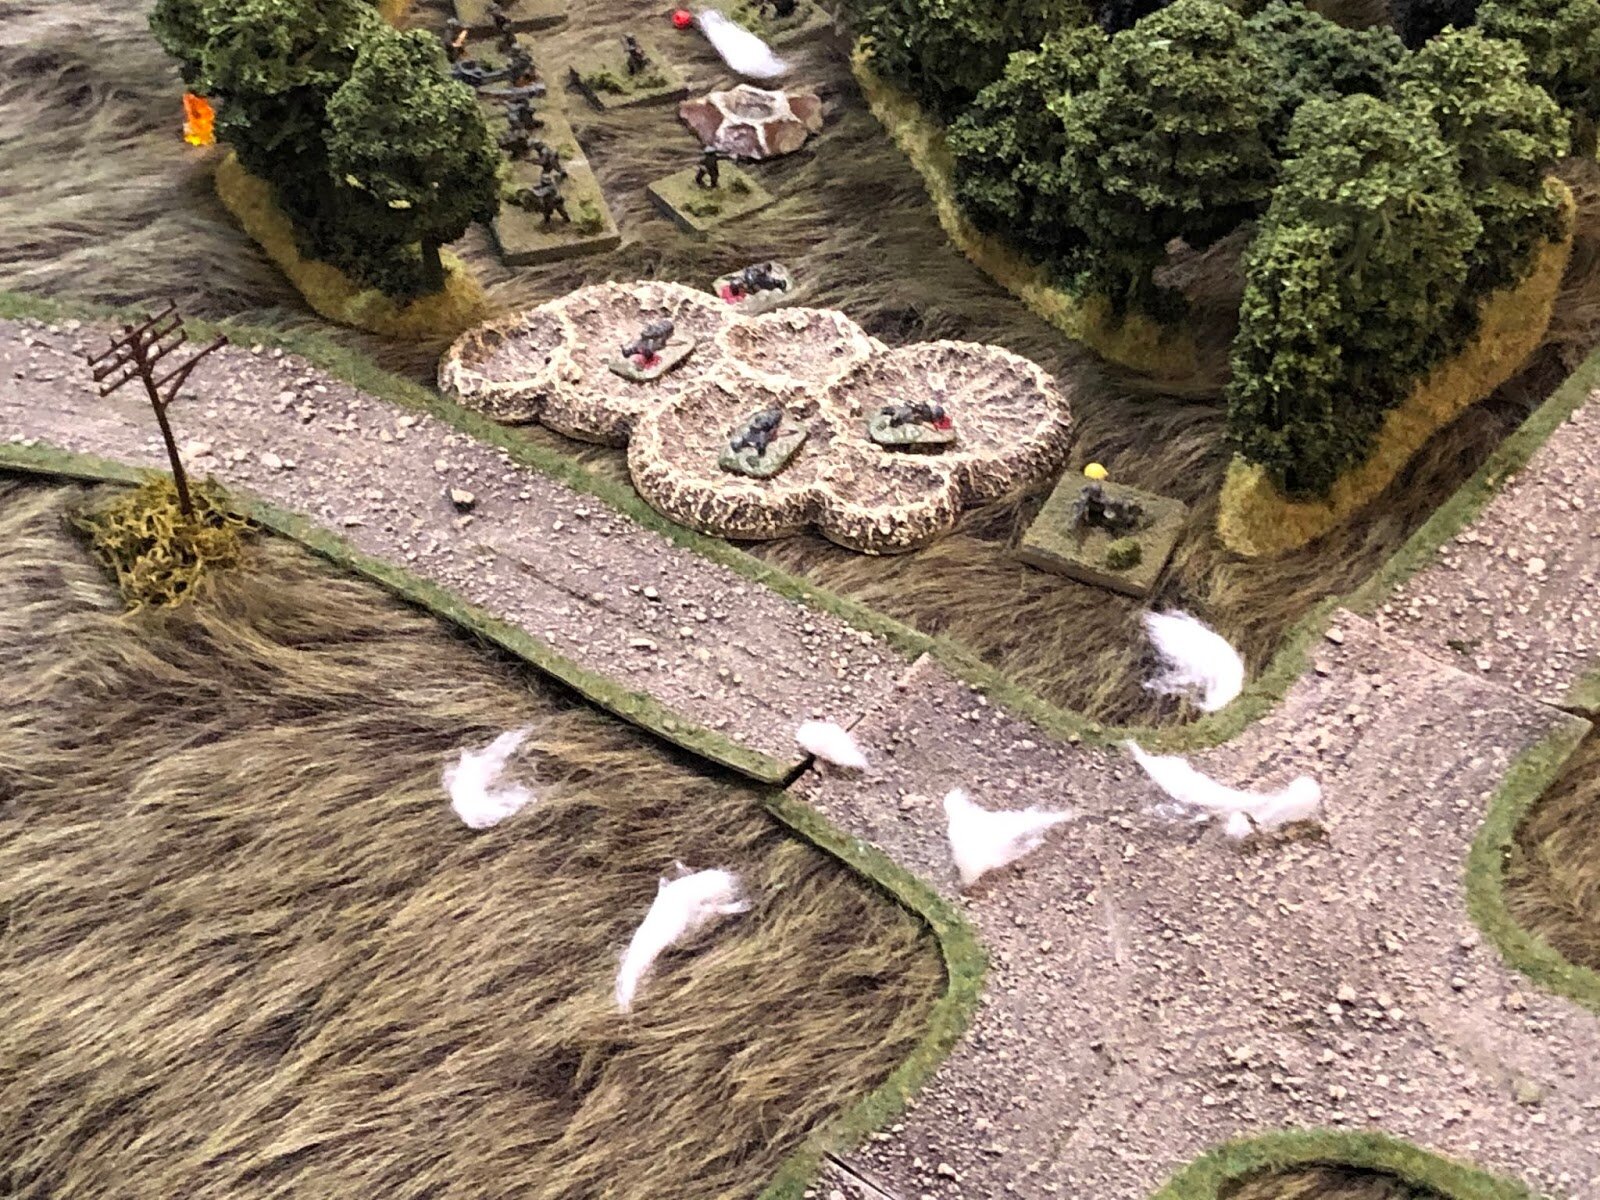
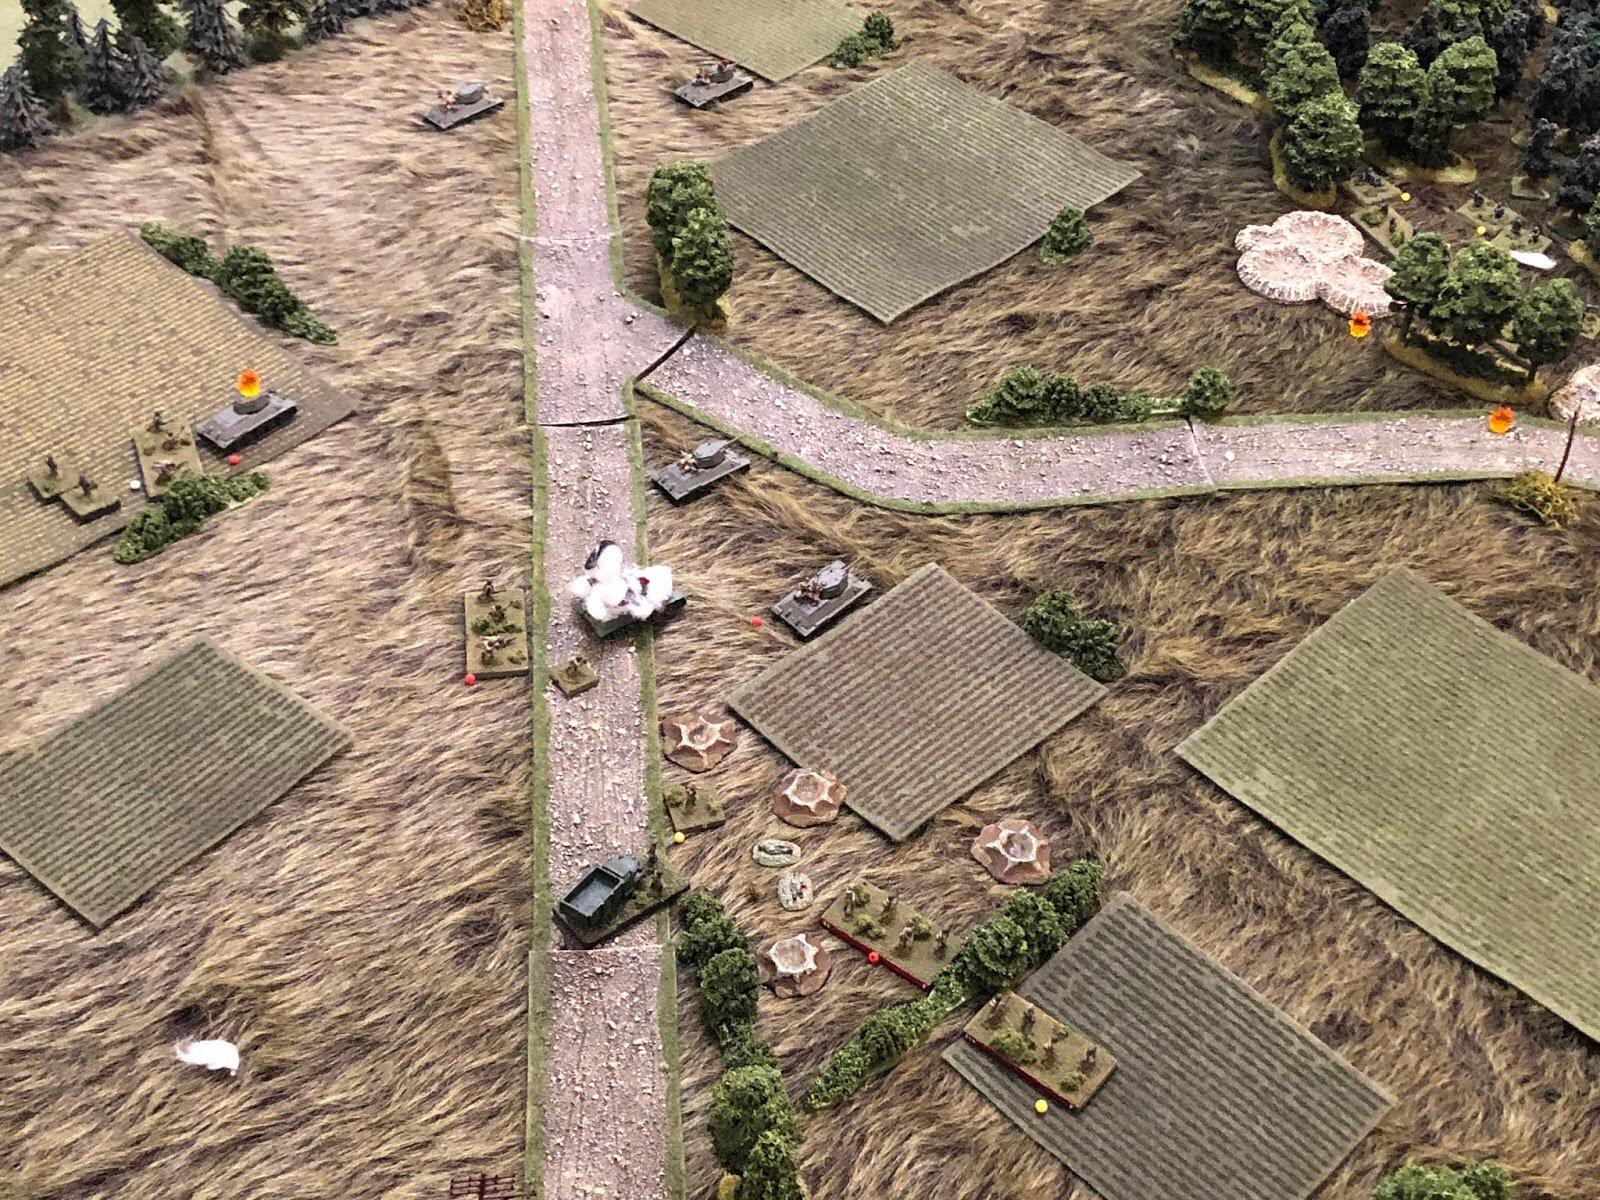
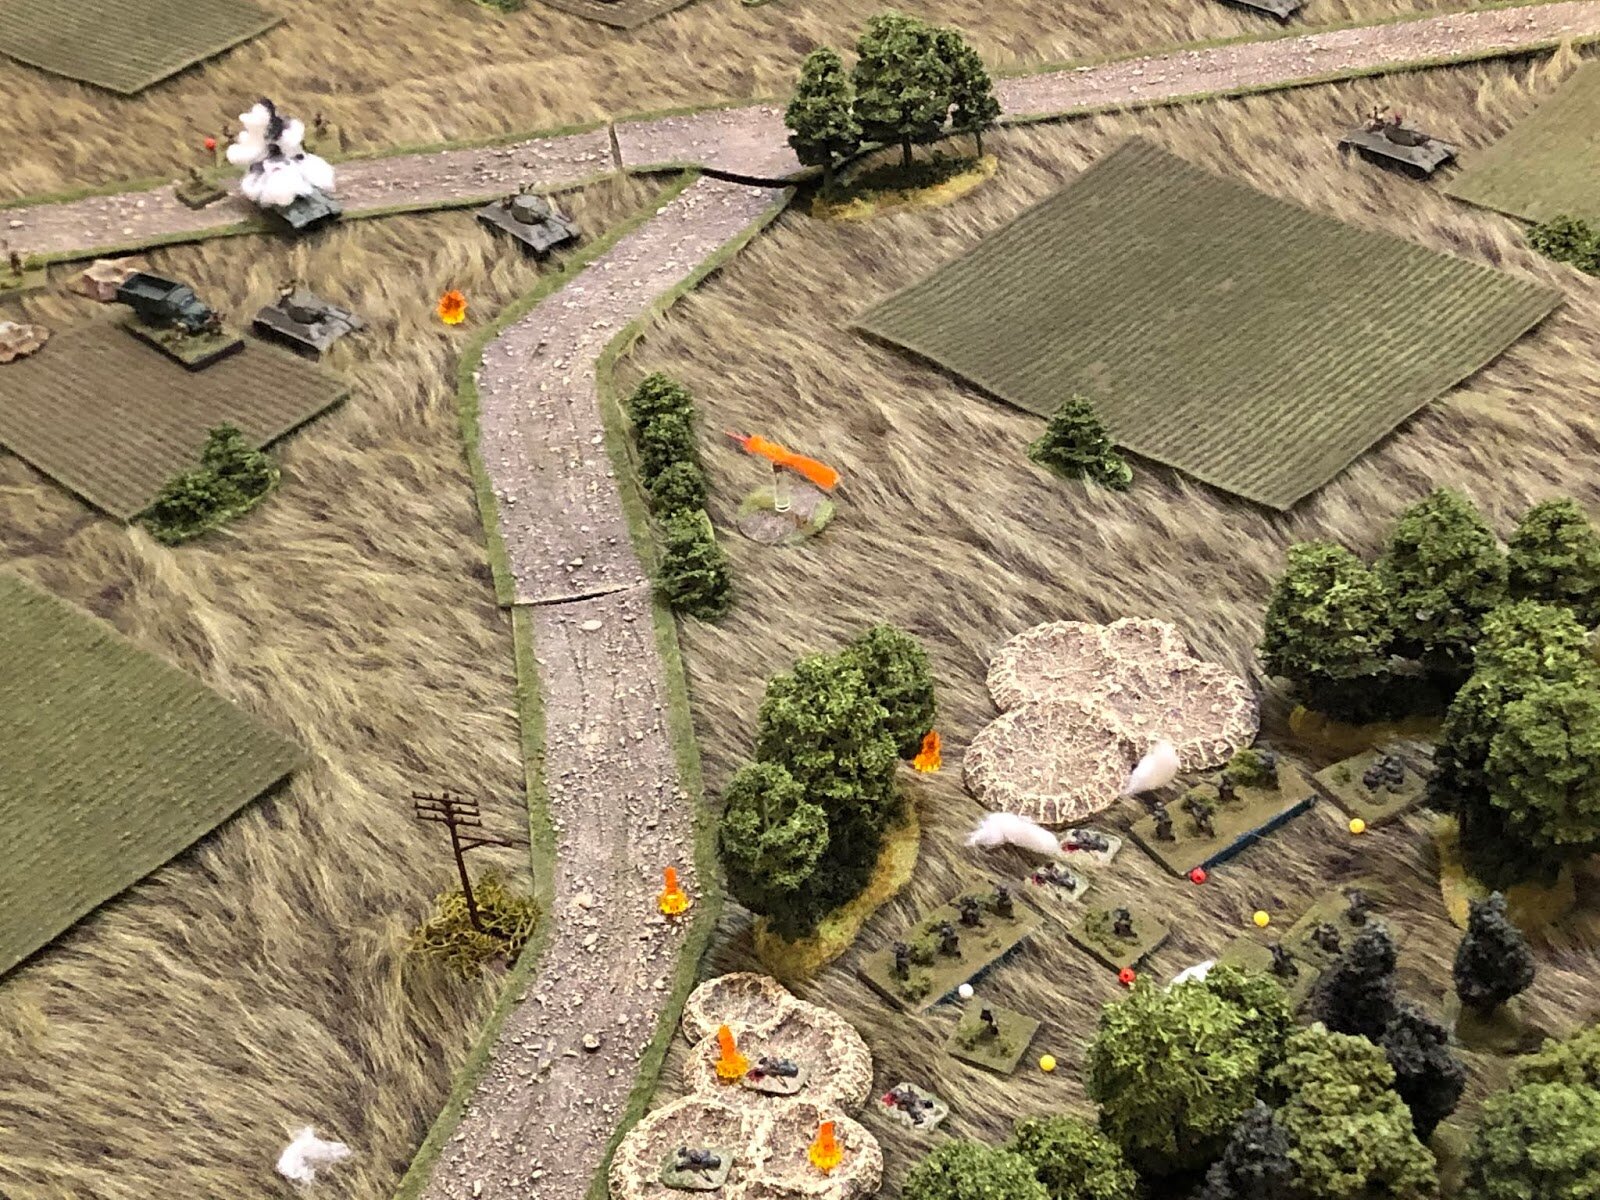
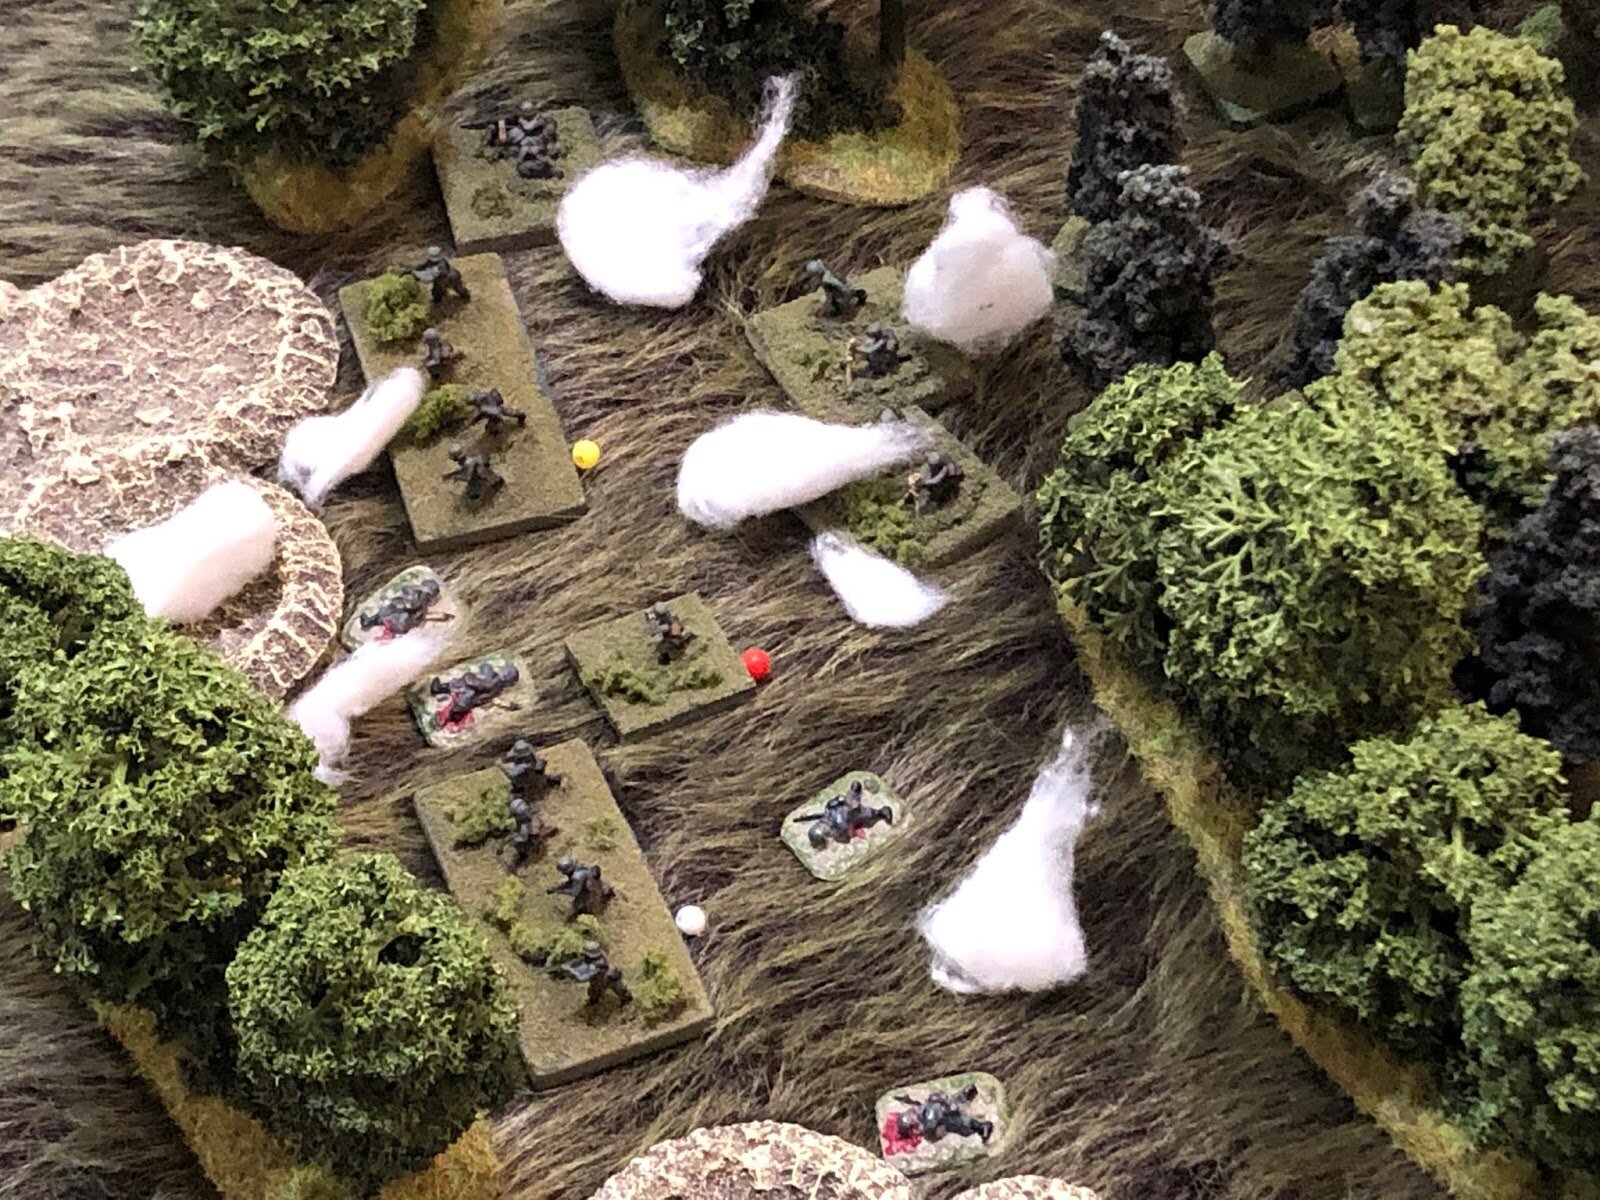
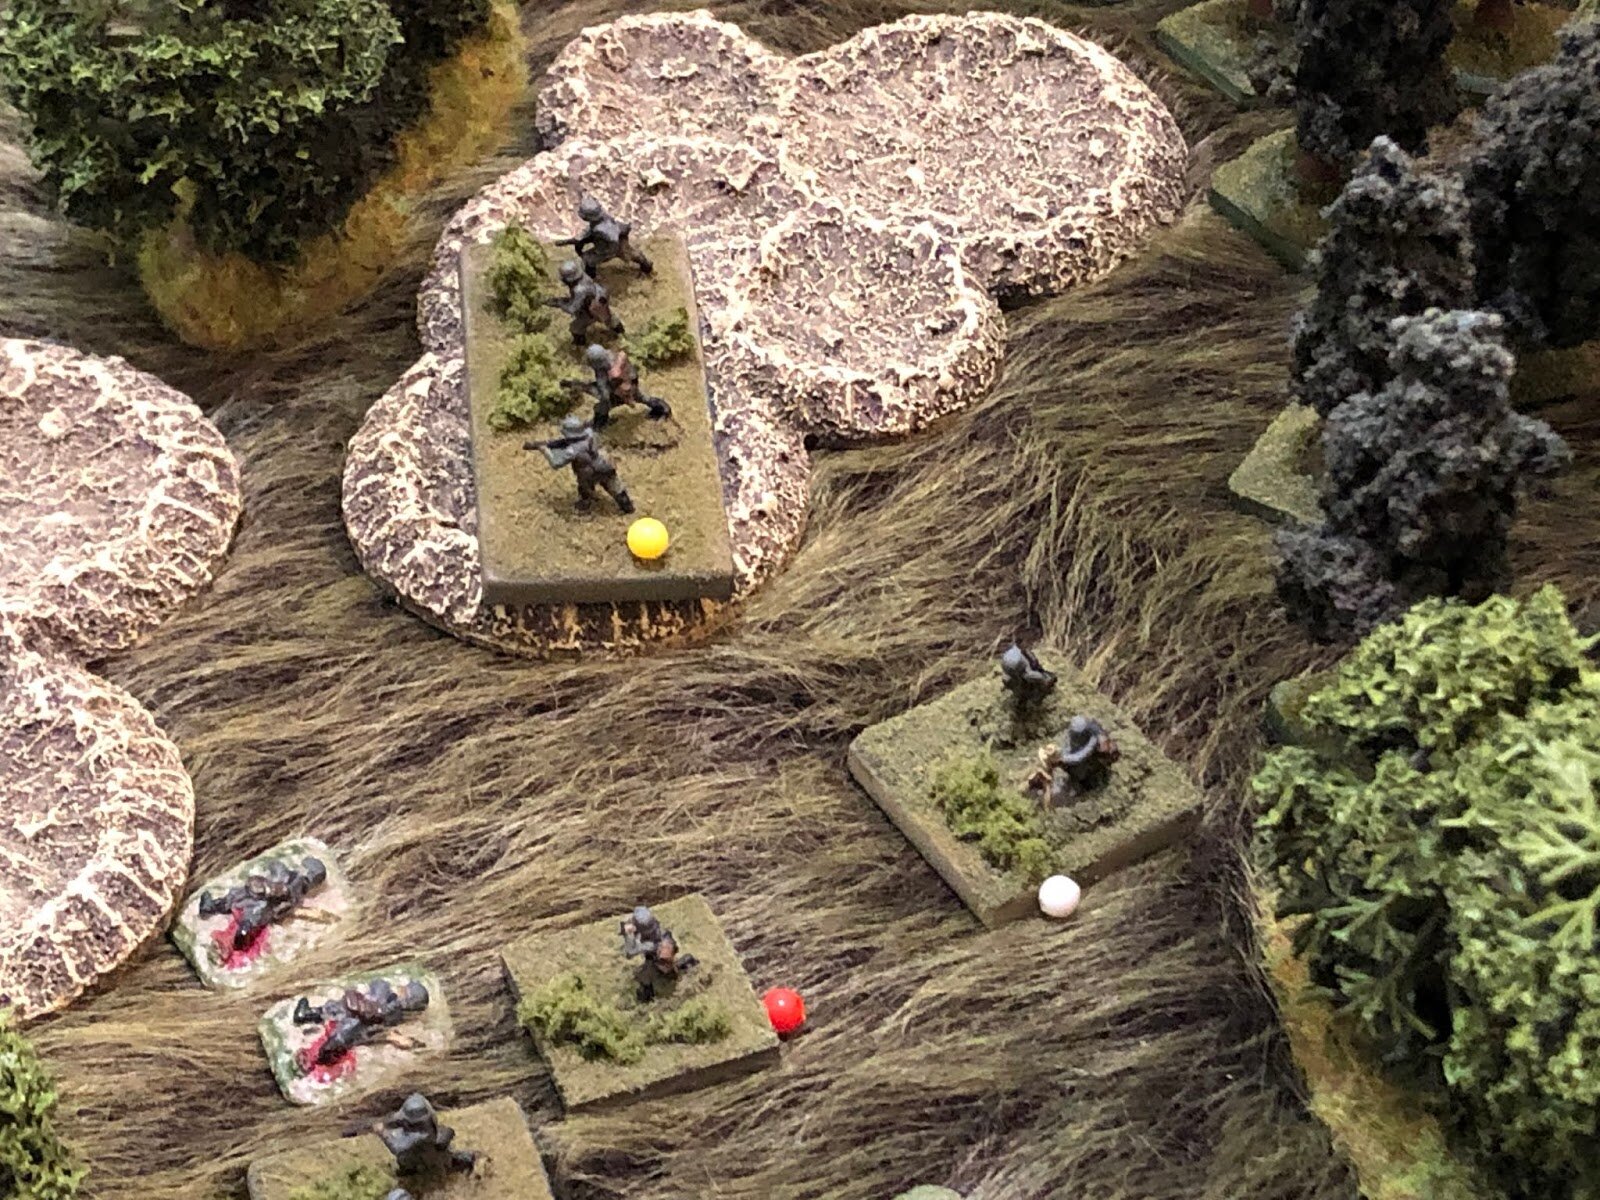
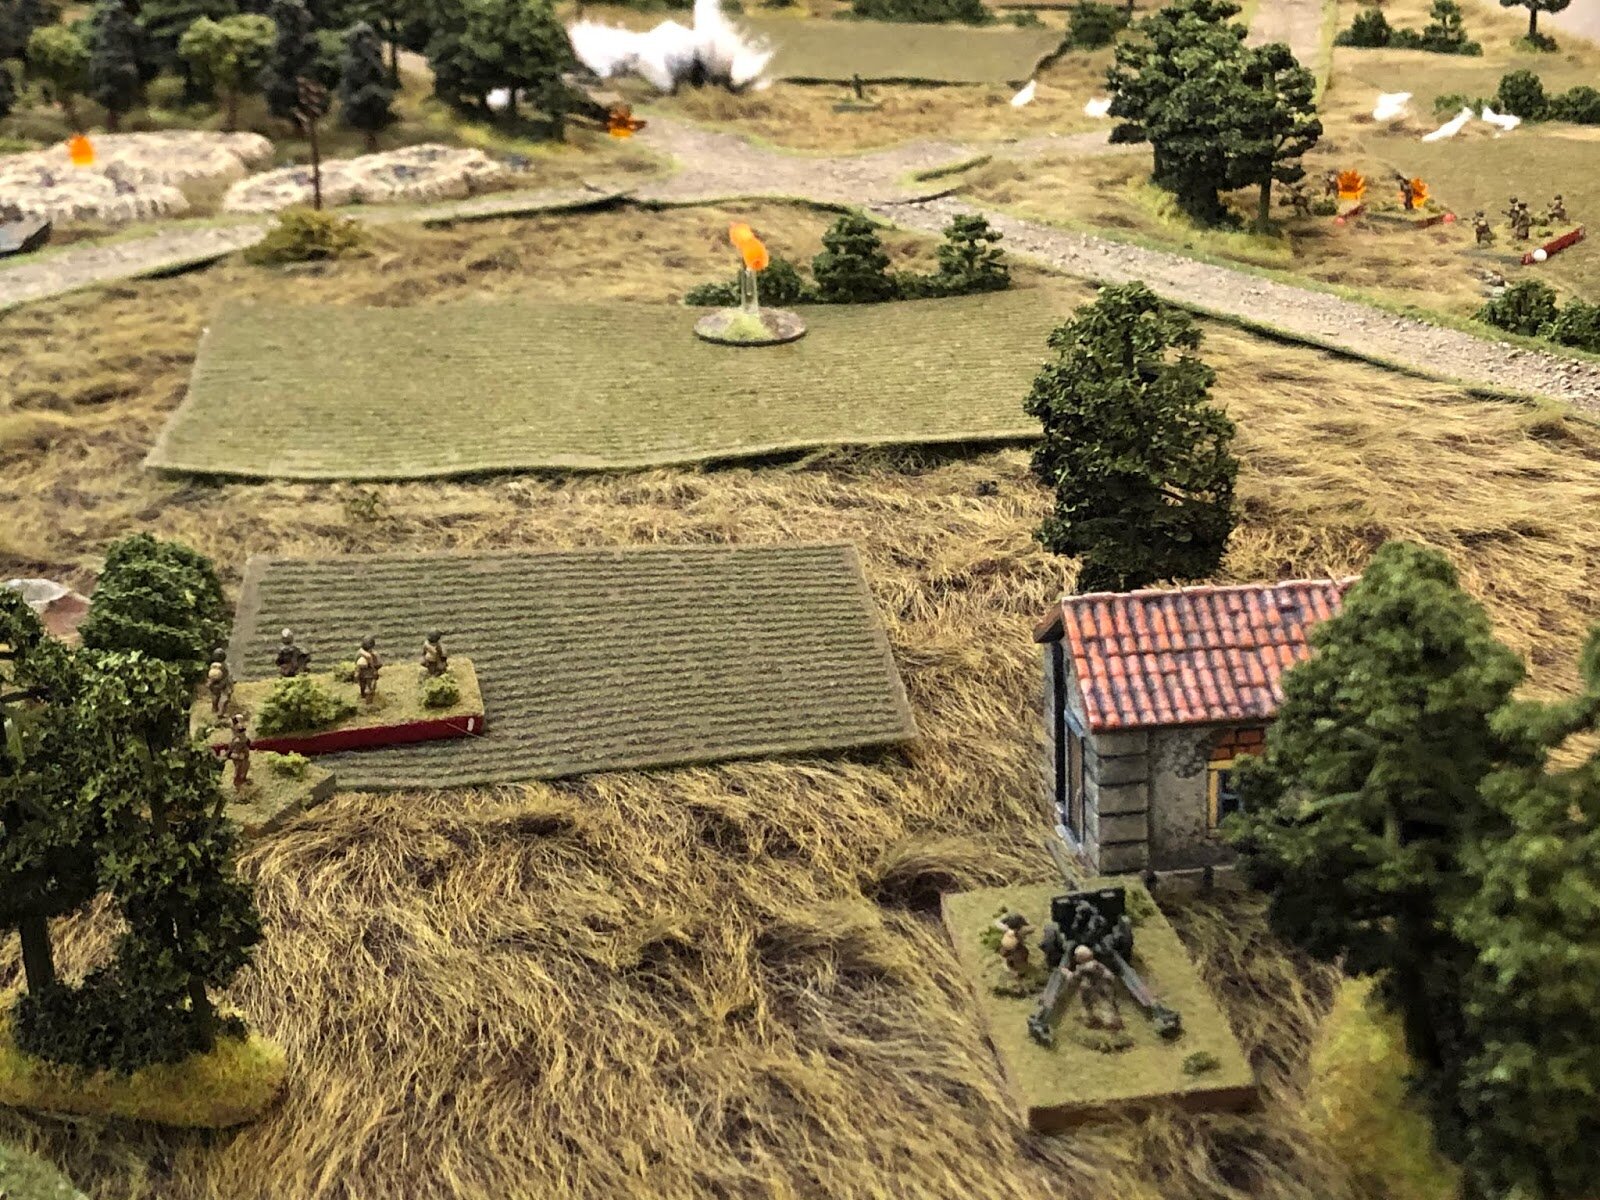
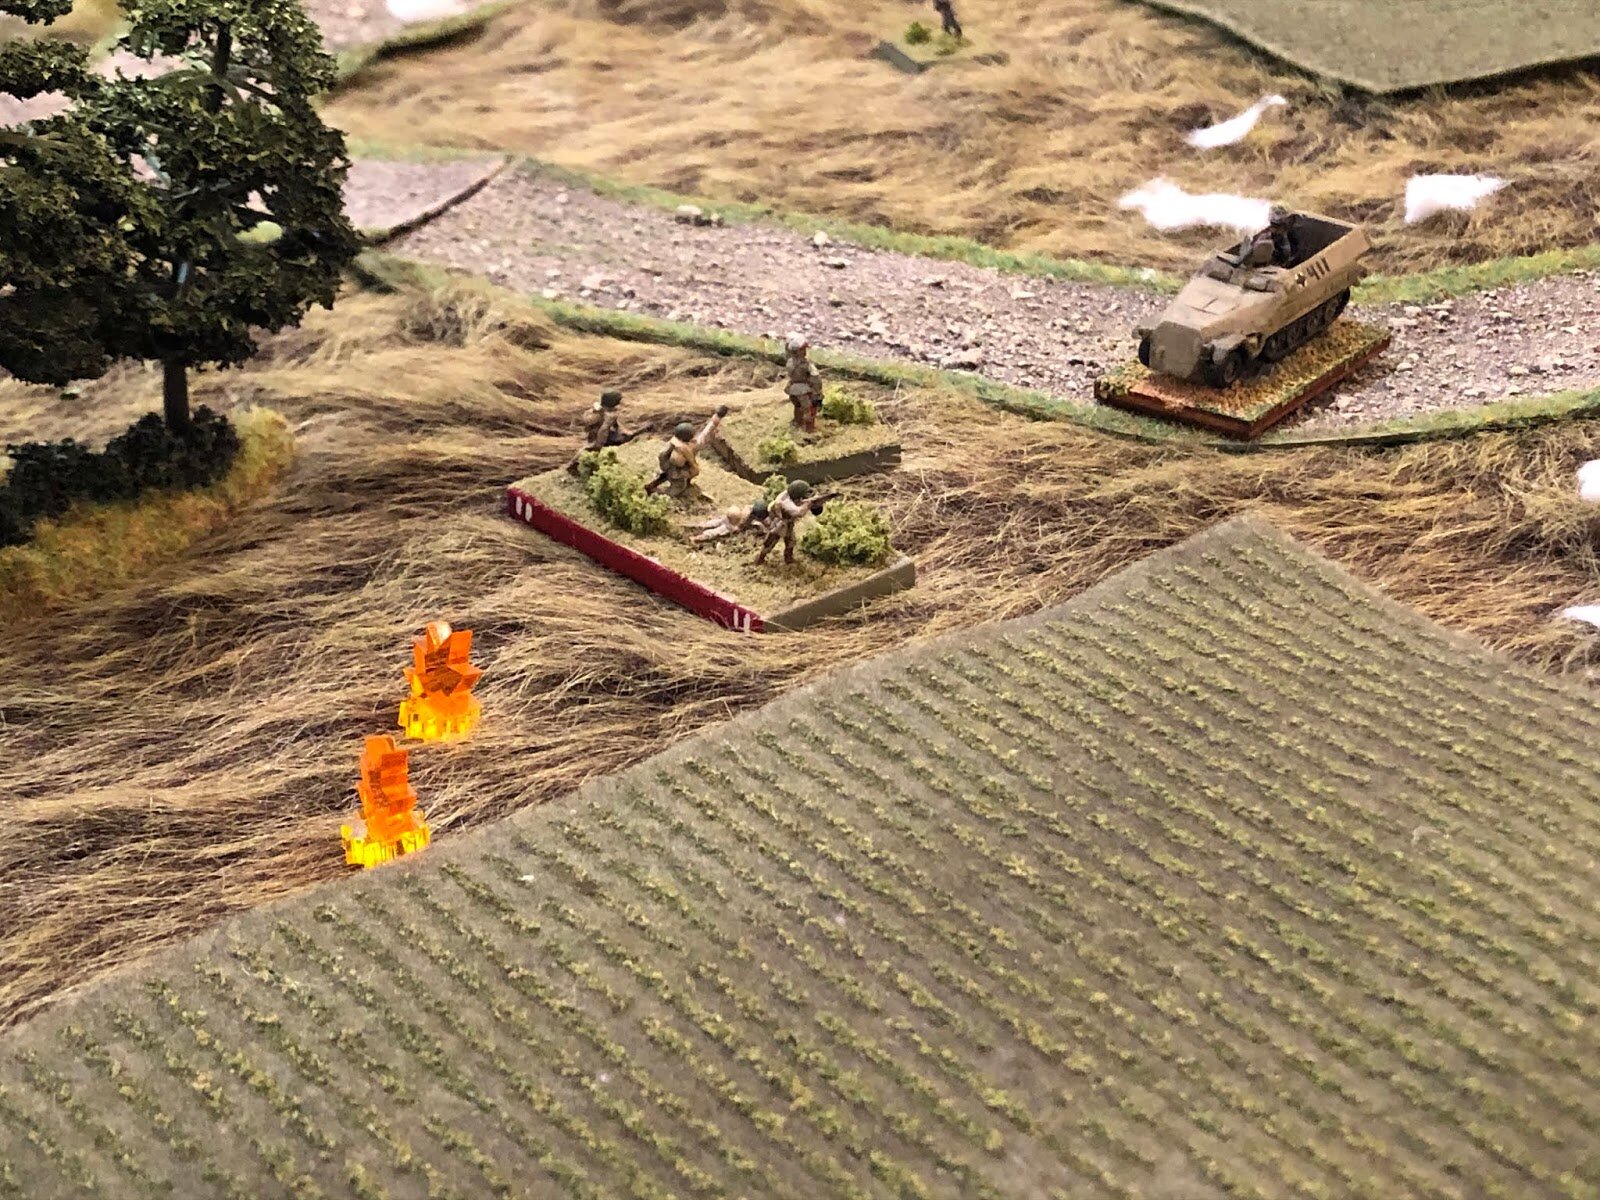
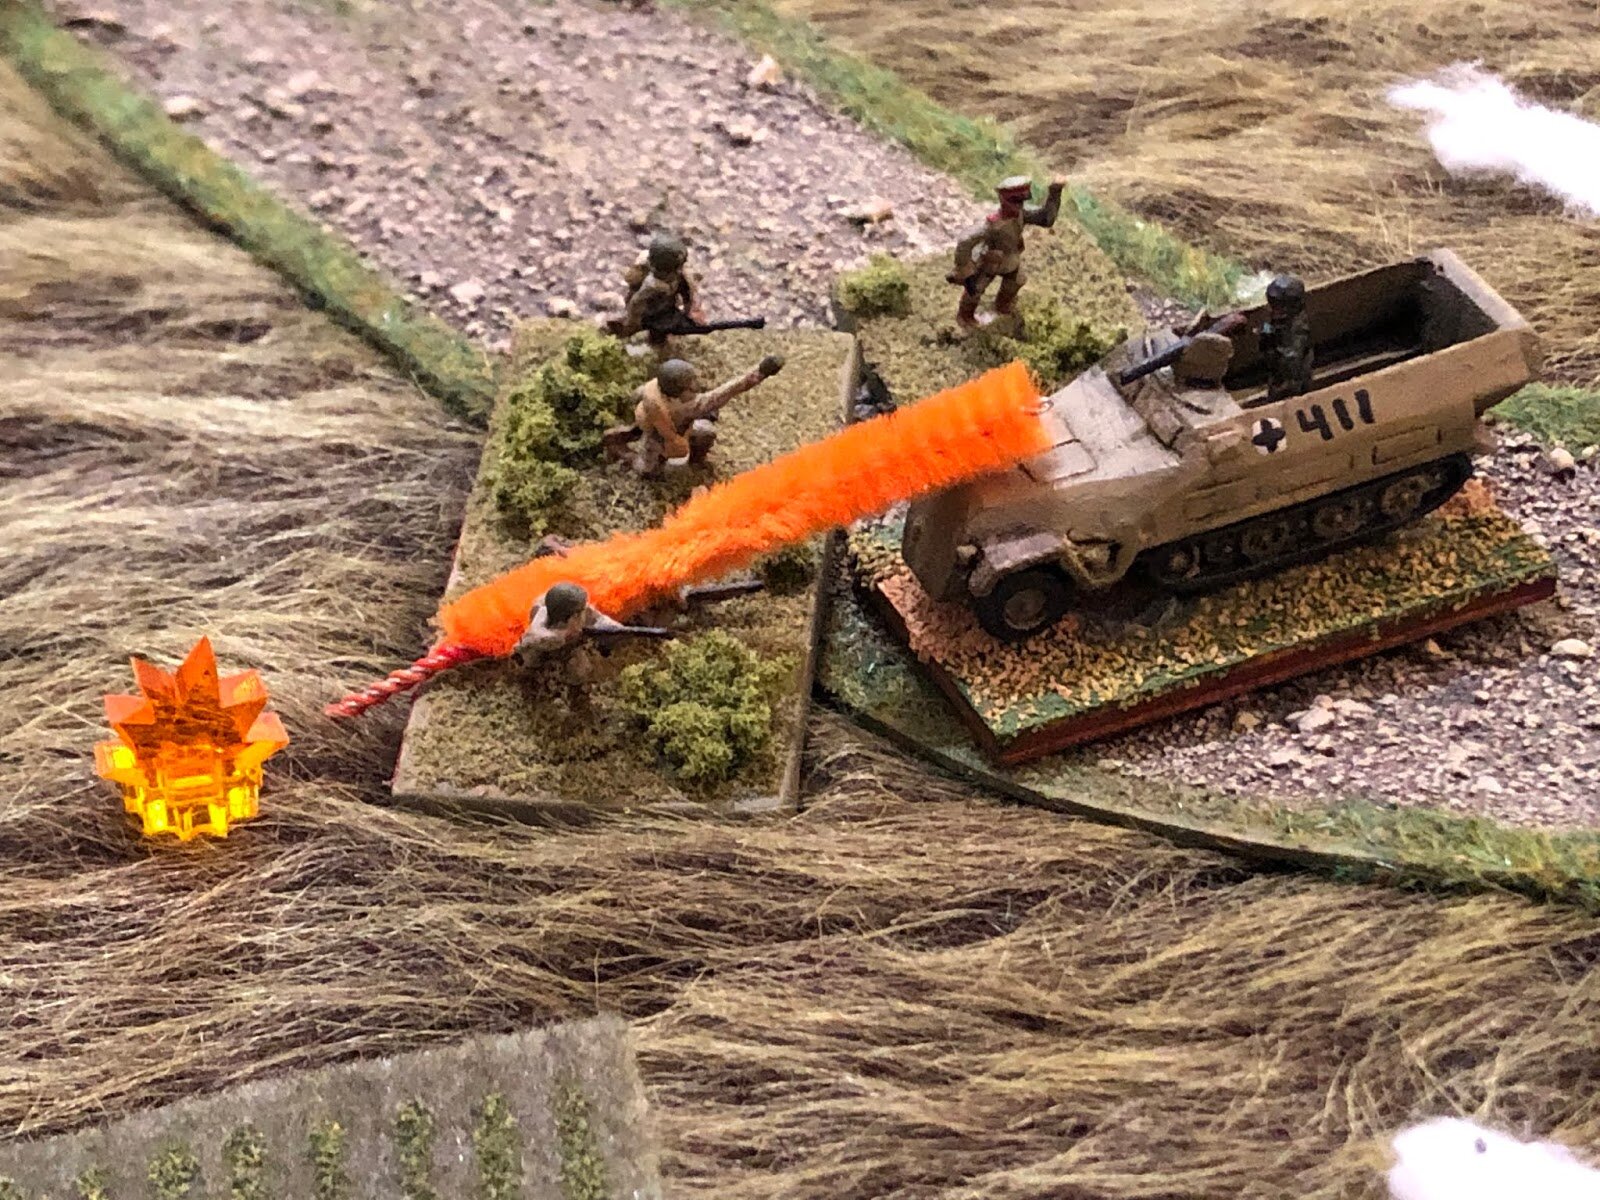
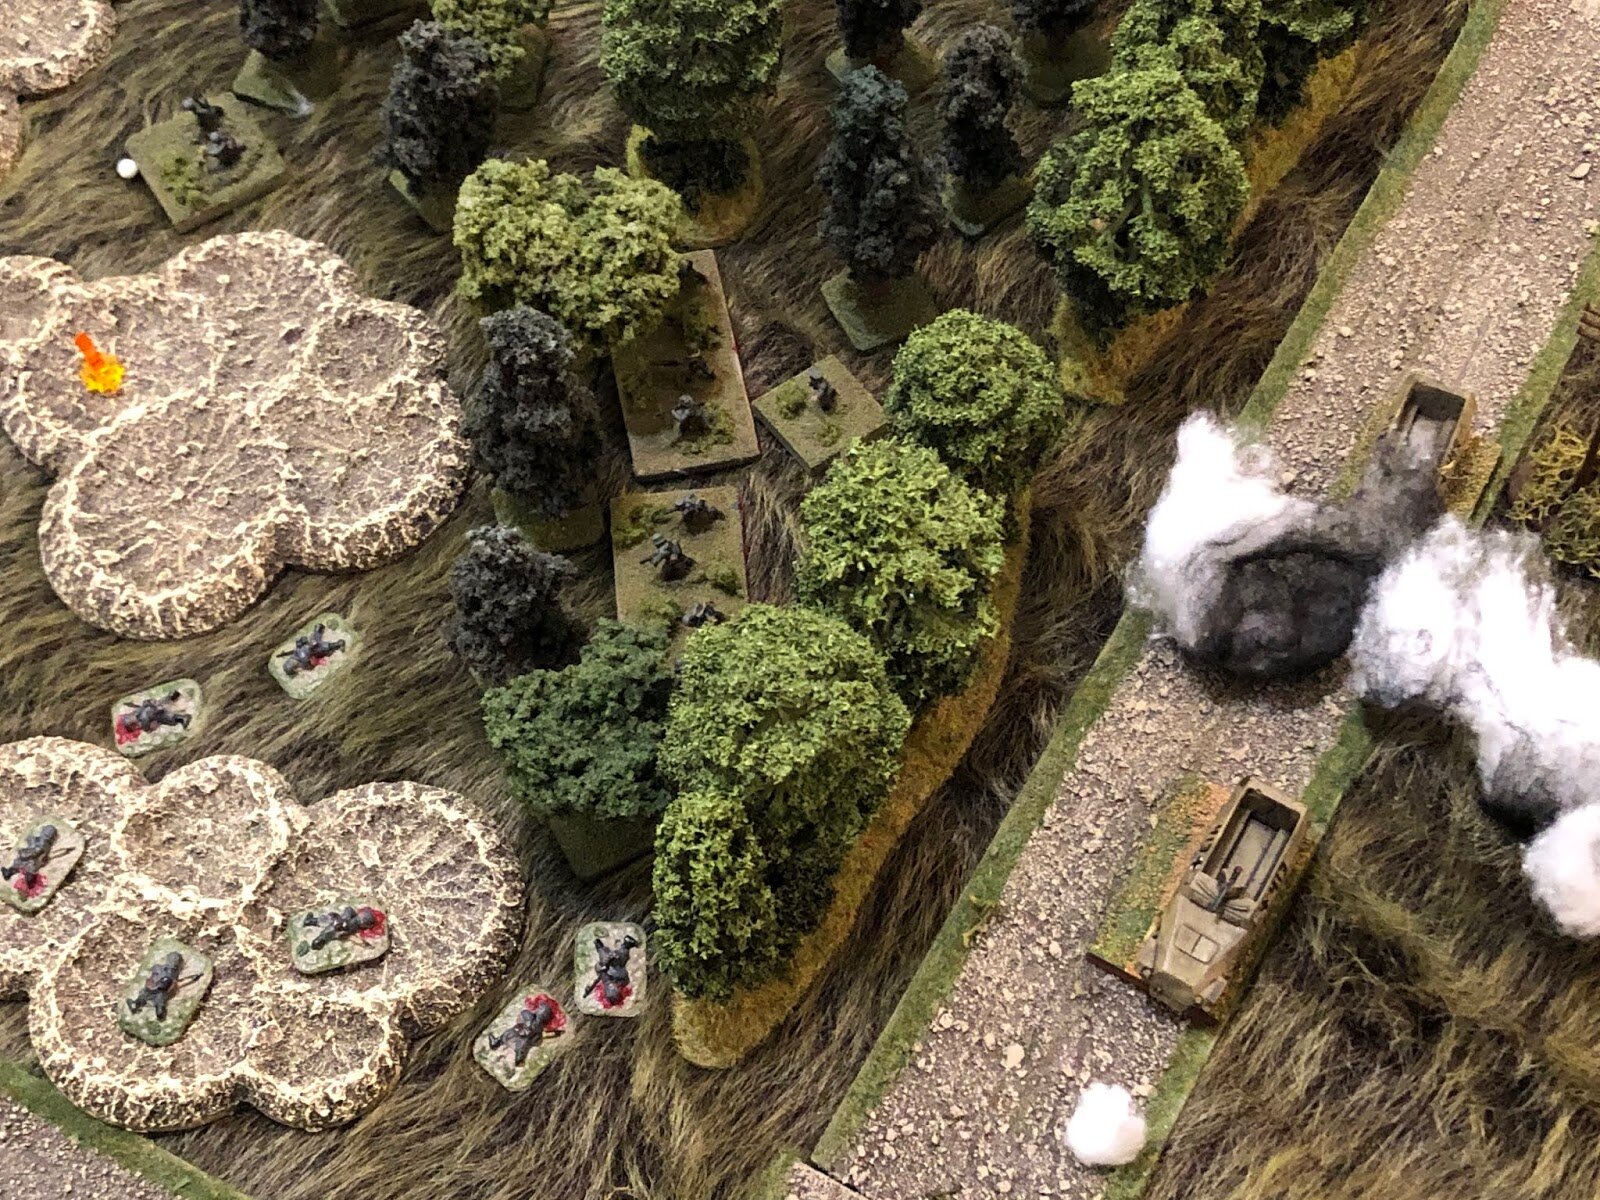
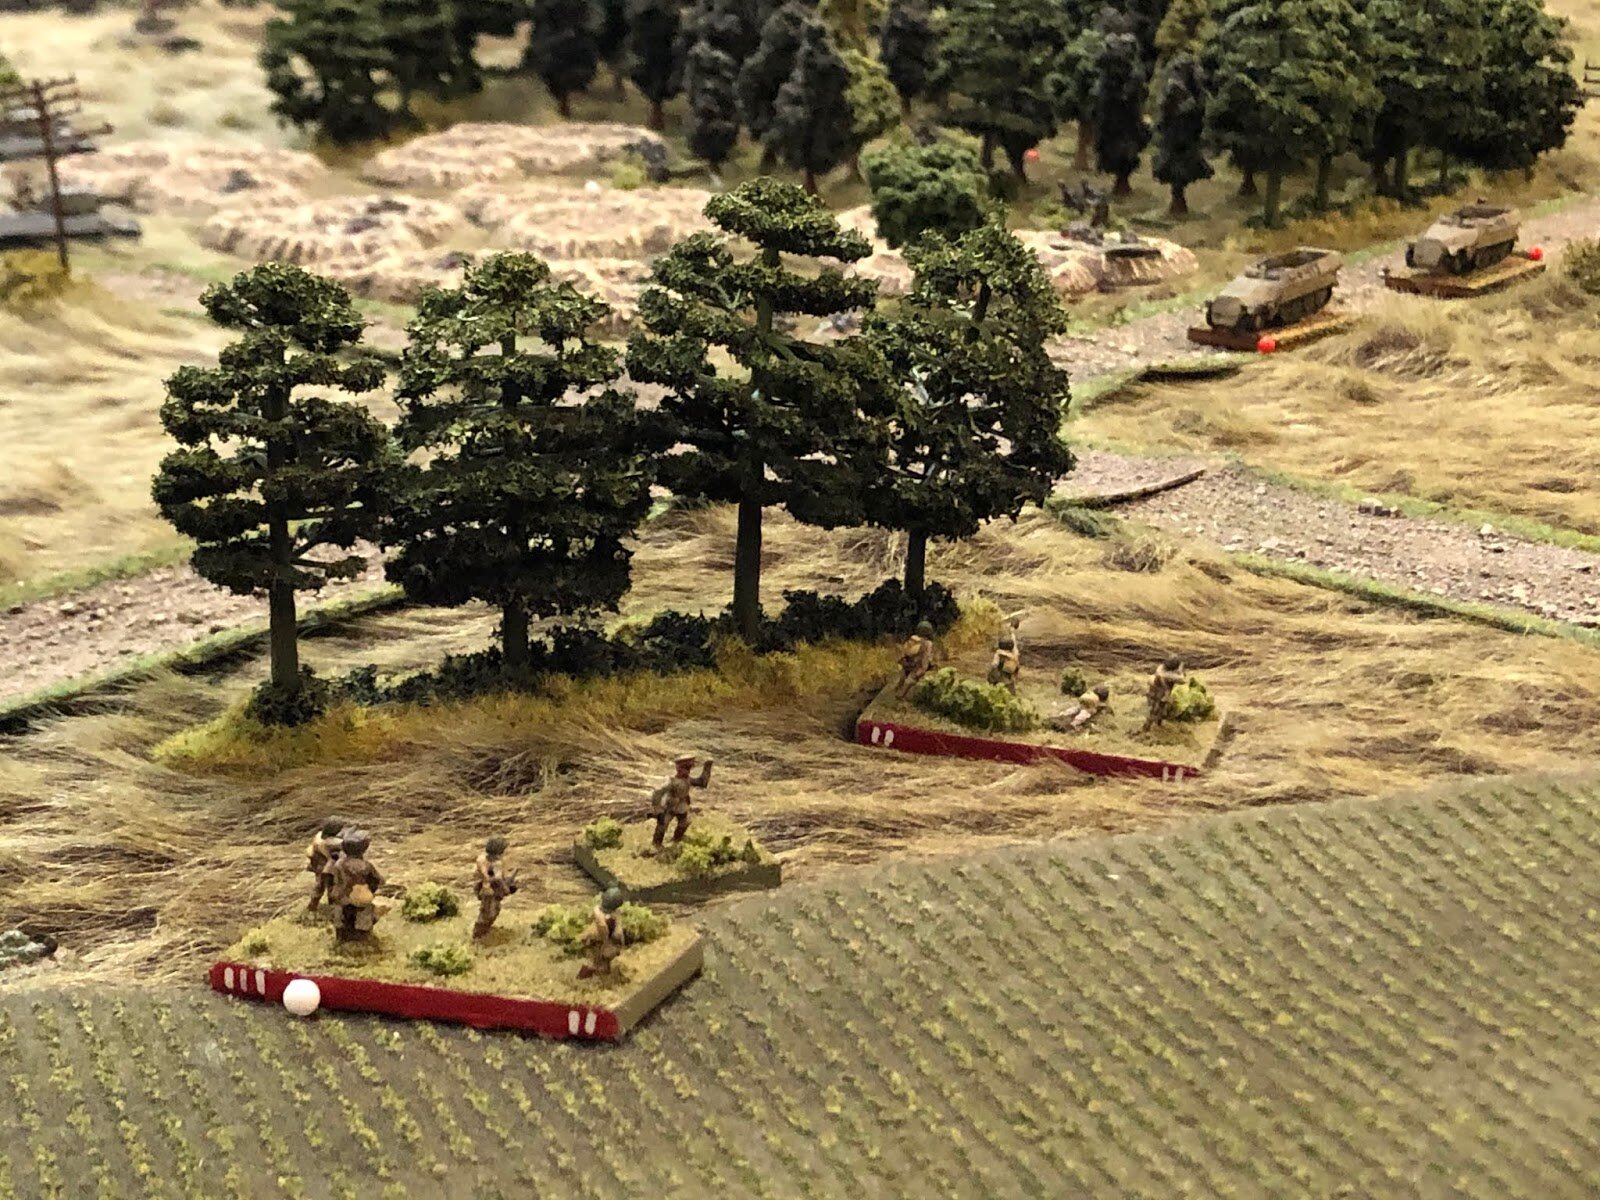
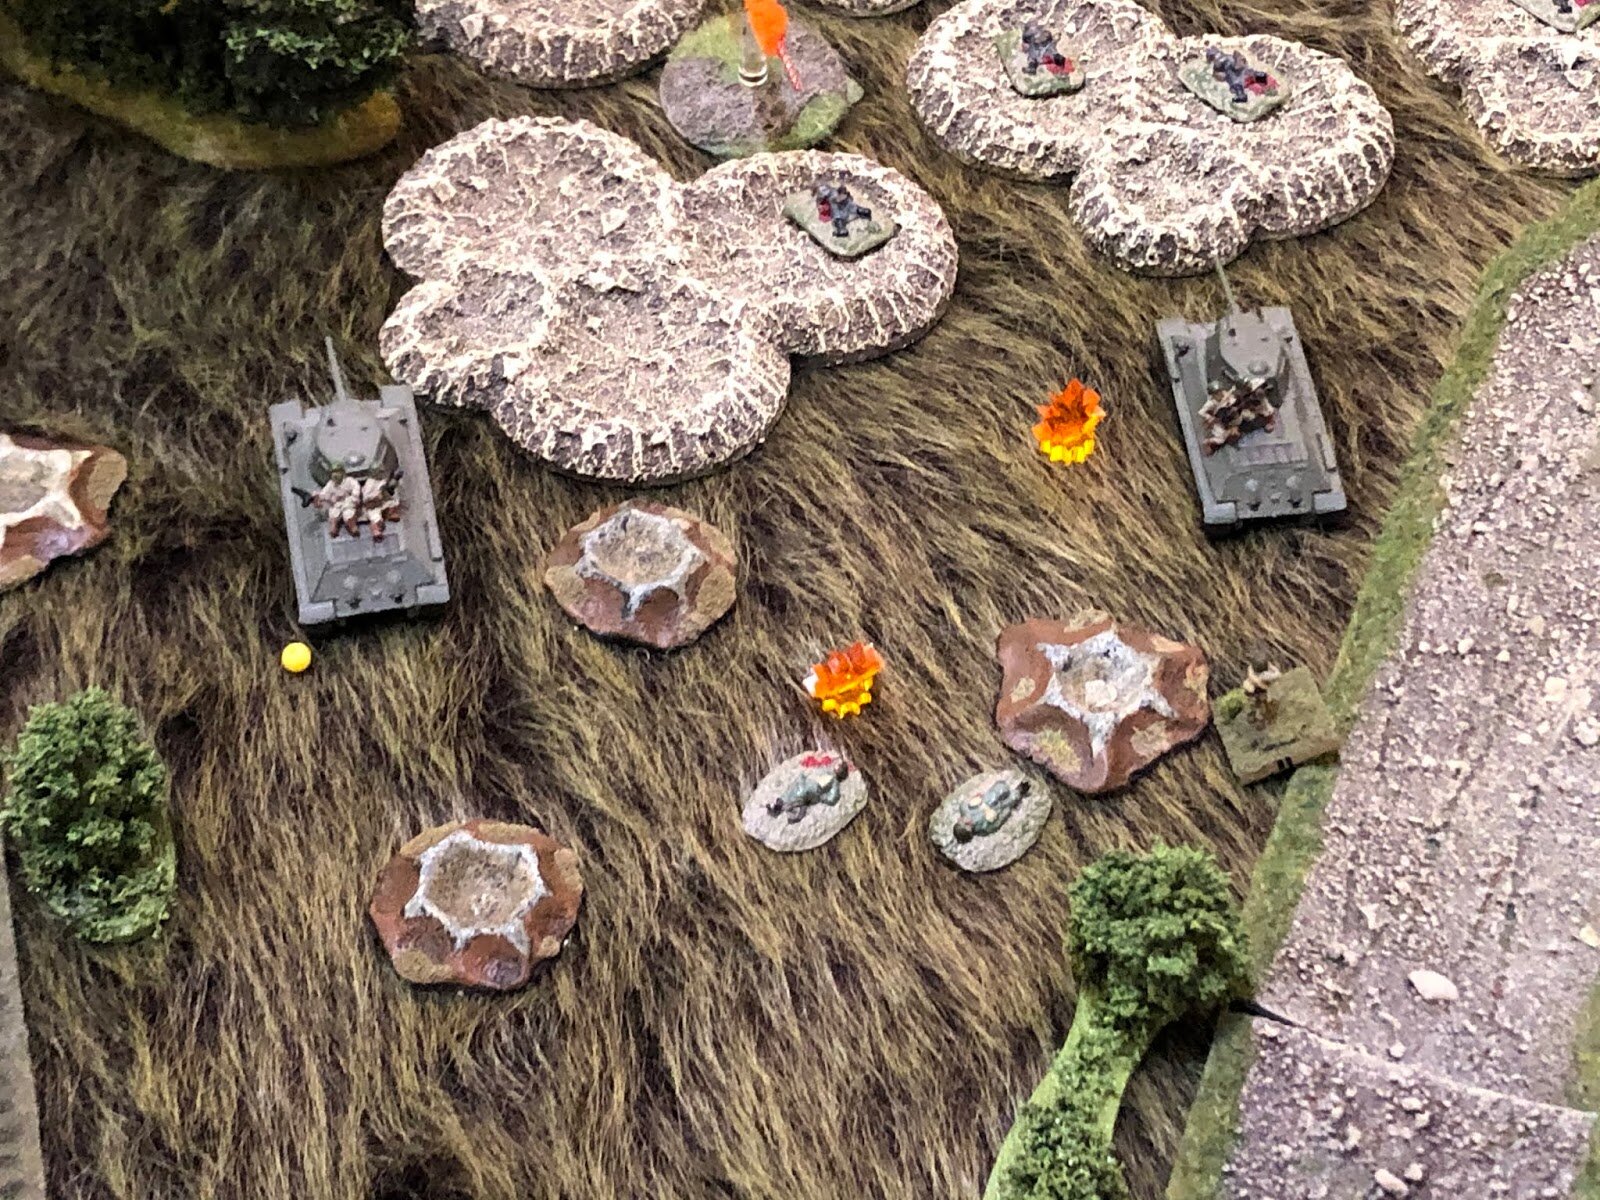
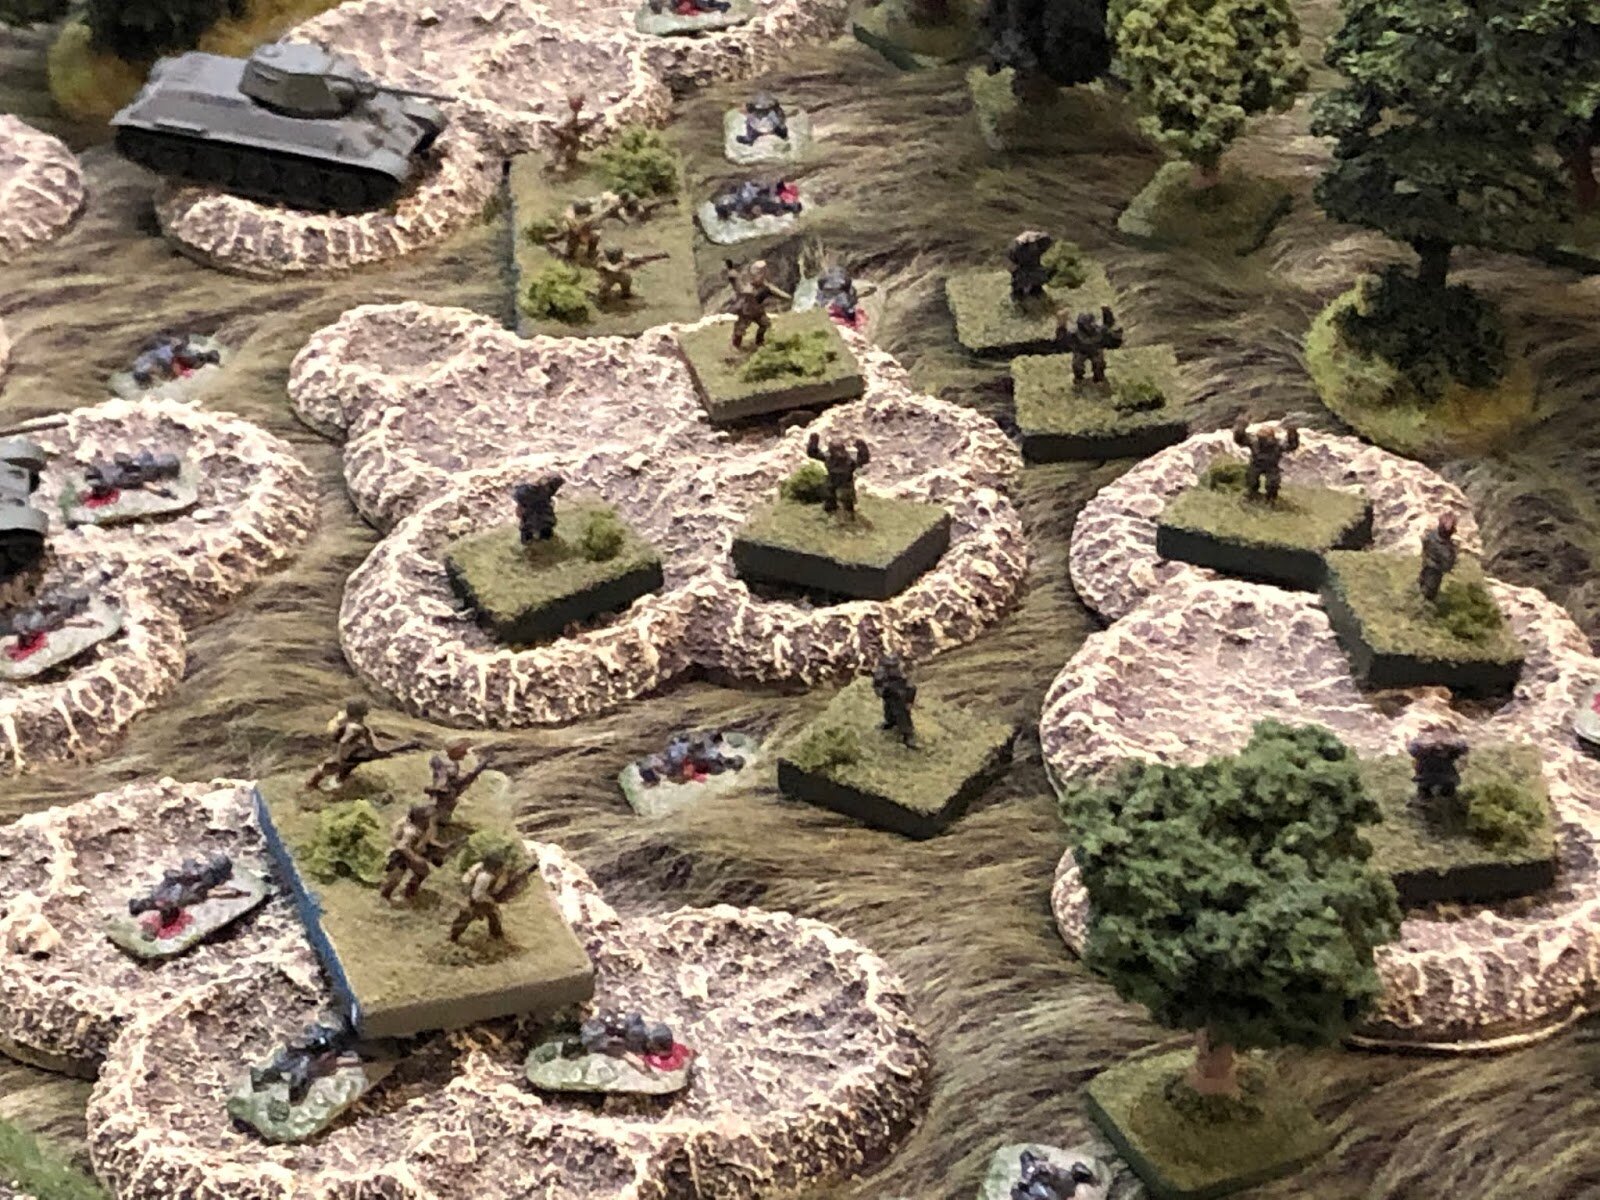
The surviving German infantry from the first three squads then headed forward for the wood, intending to take up a position where they could start to lay down fire on the anti-tank guns. Again unfortunately, they then came under fire from the British section in the church, losing a few men and getting pinned down. This was another awkward situation, only solved when I brought the two Company HQ MMG teams up and into the white house bottom left. Once set up, they would have a clear, point blank range shot into the British lining the windows of the church.
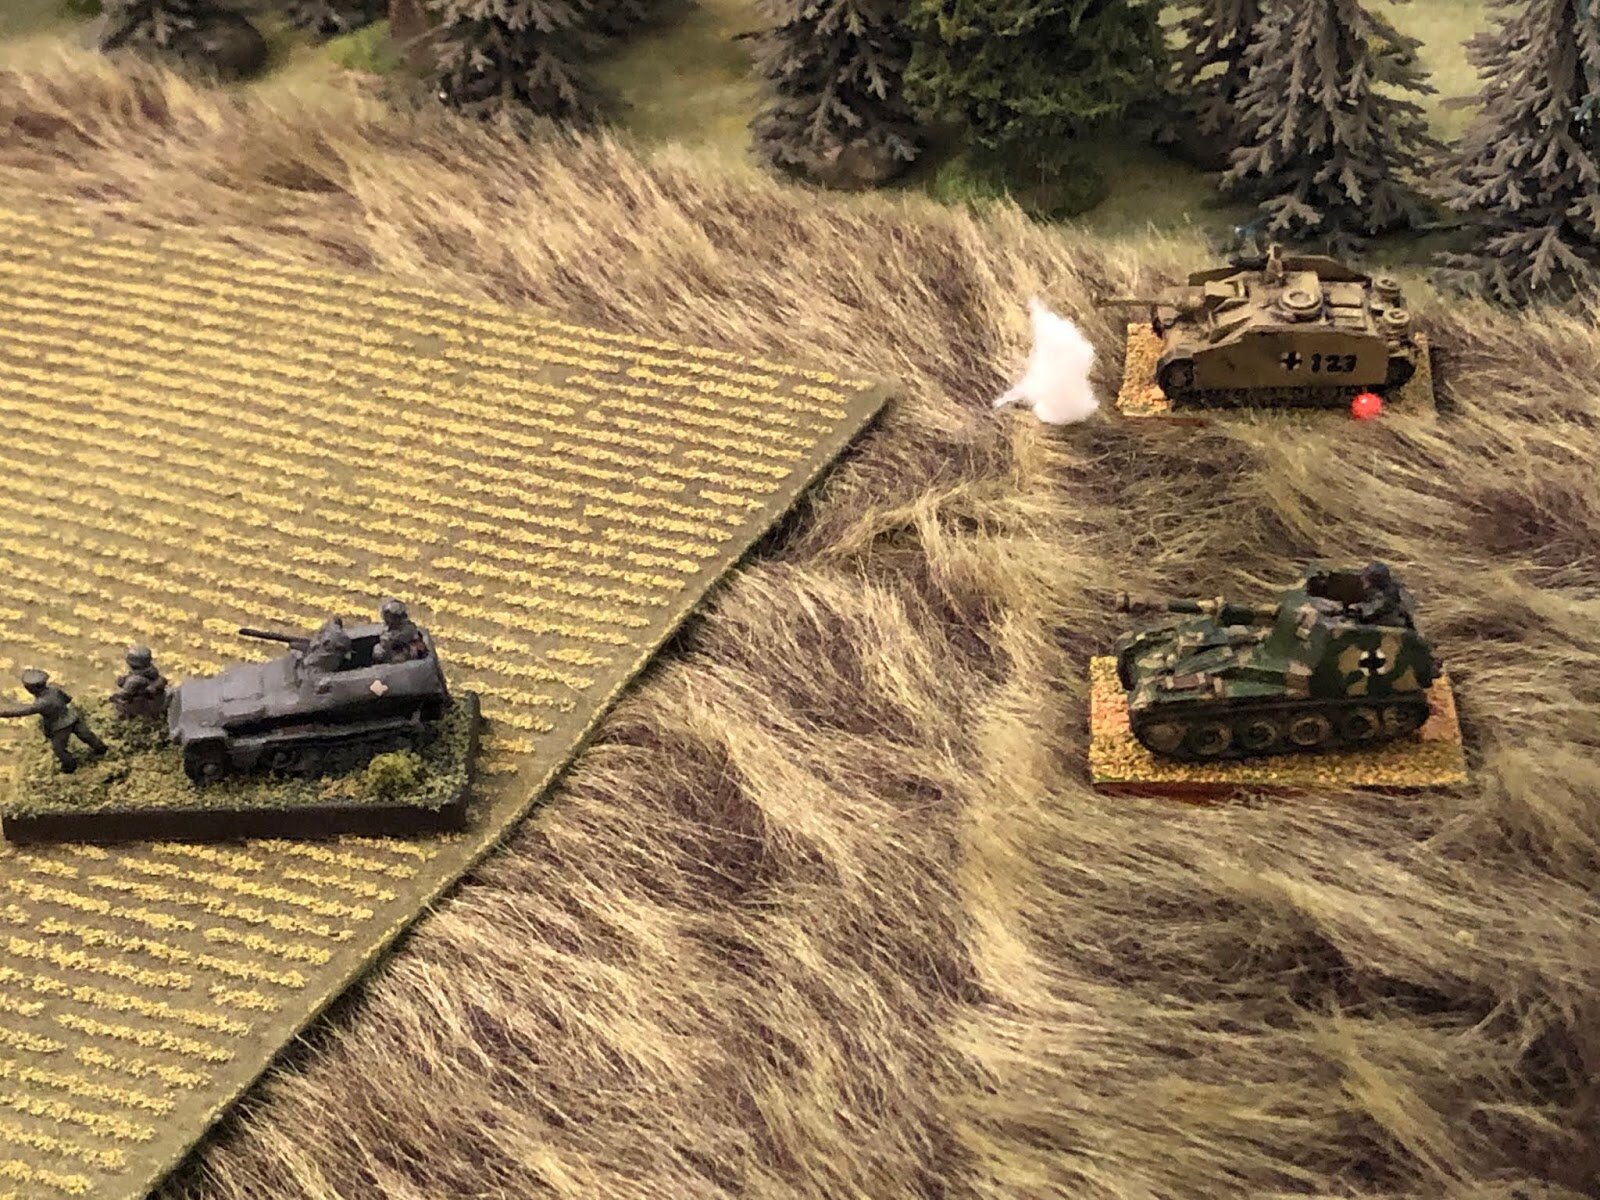
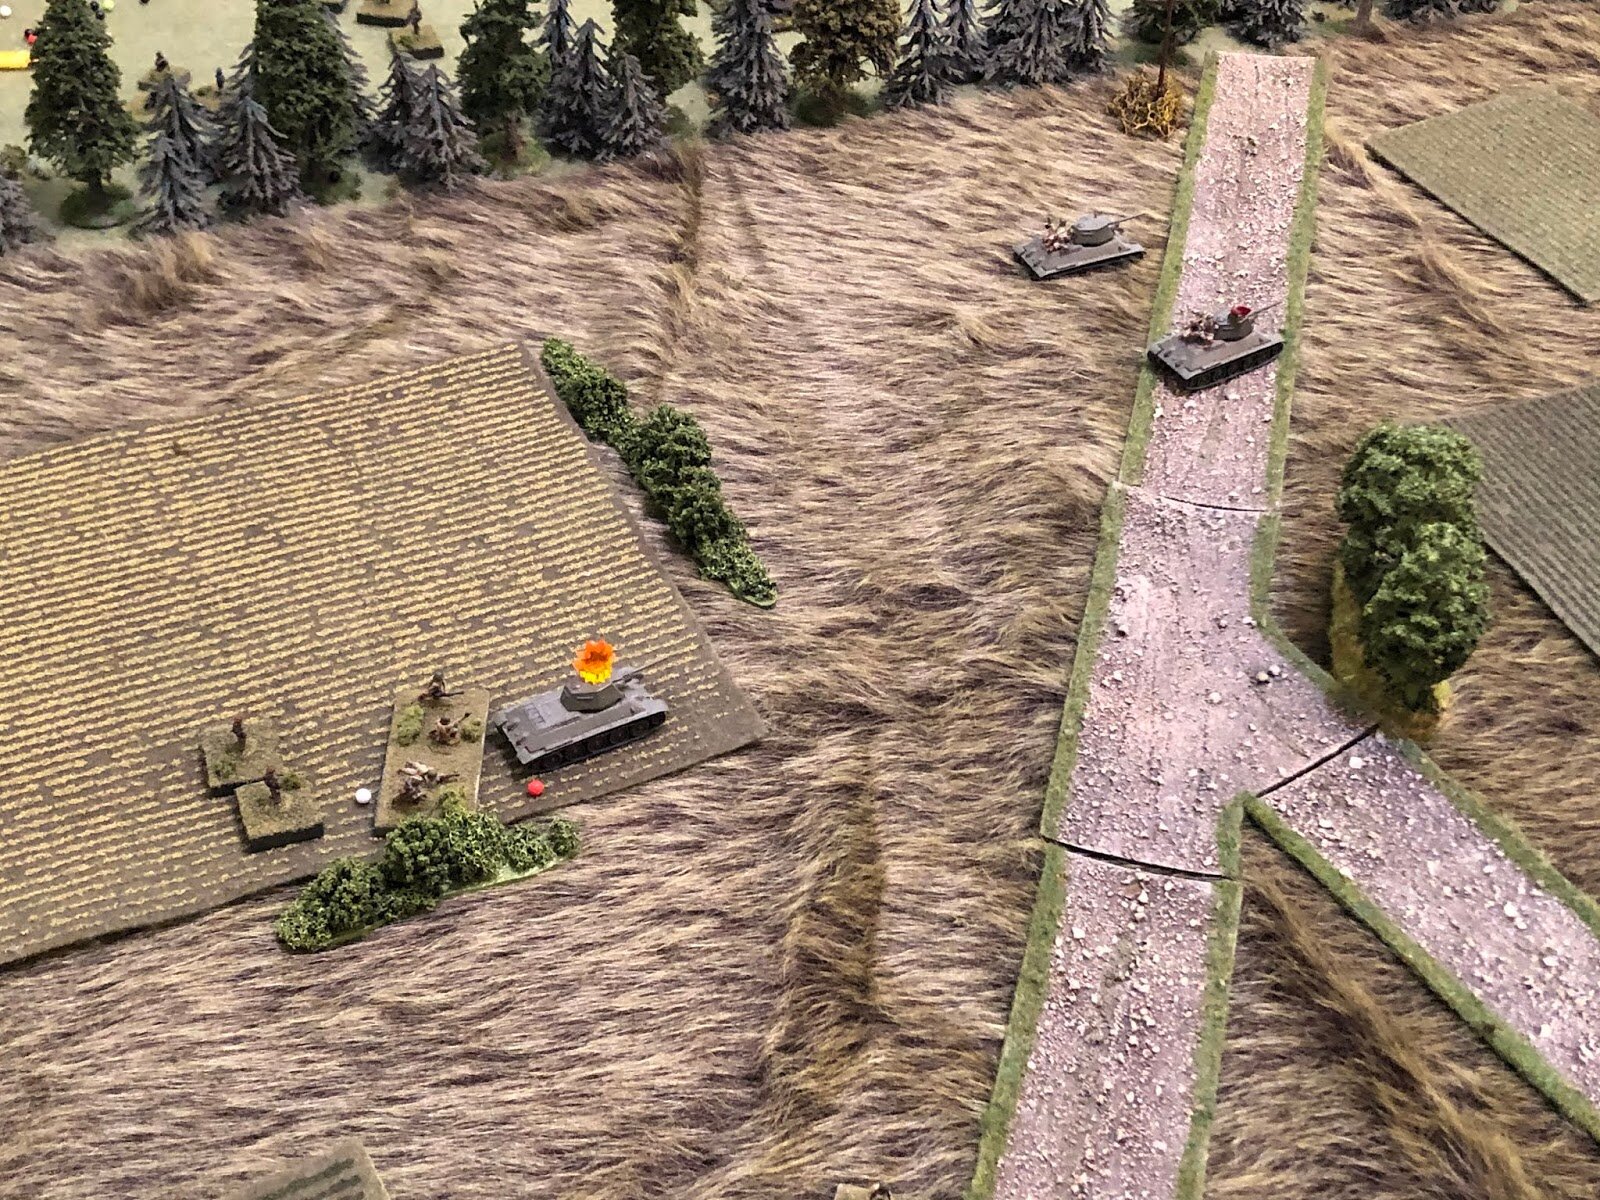
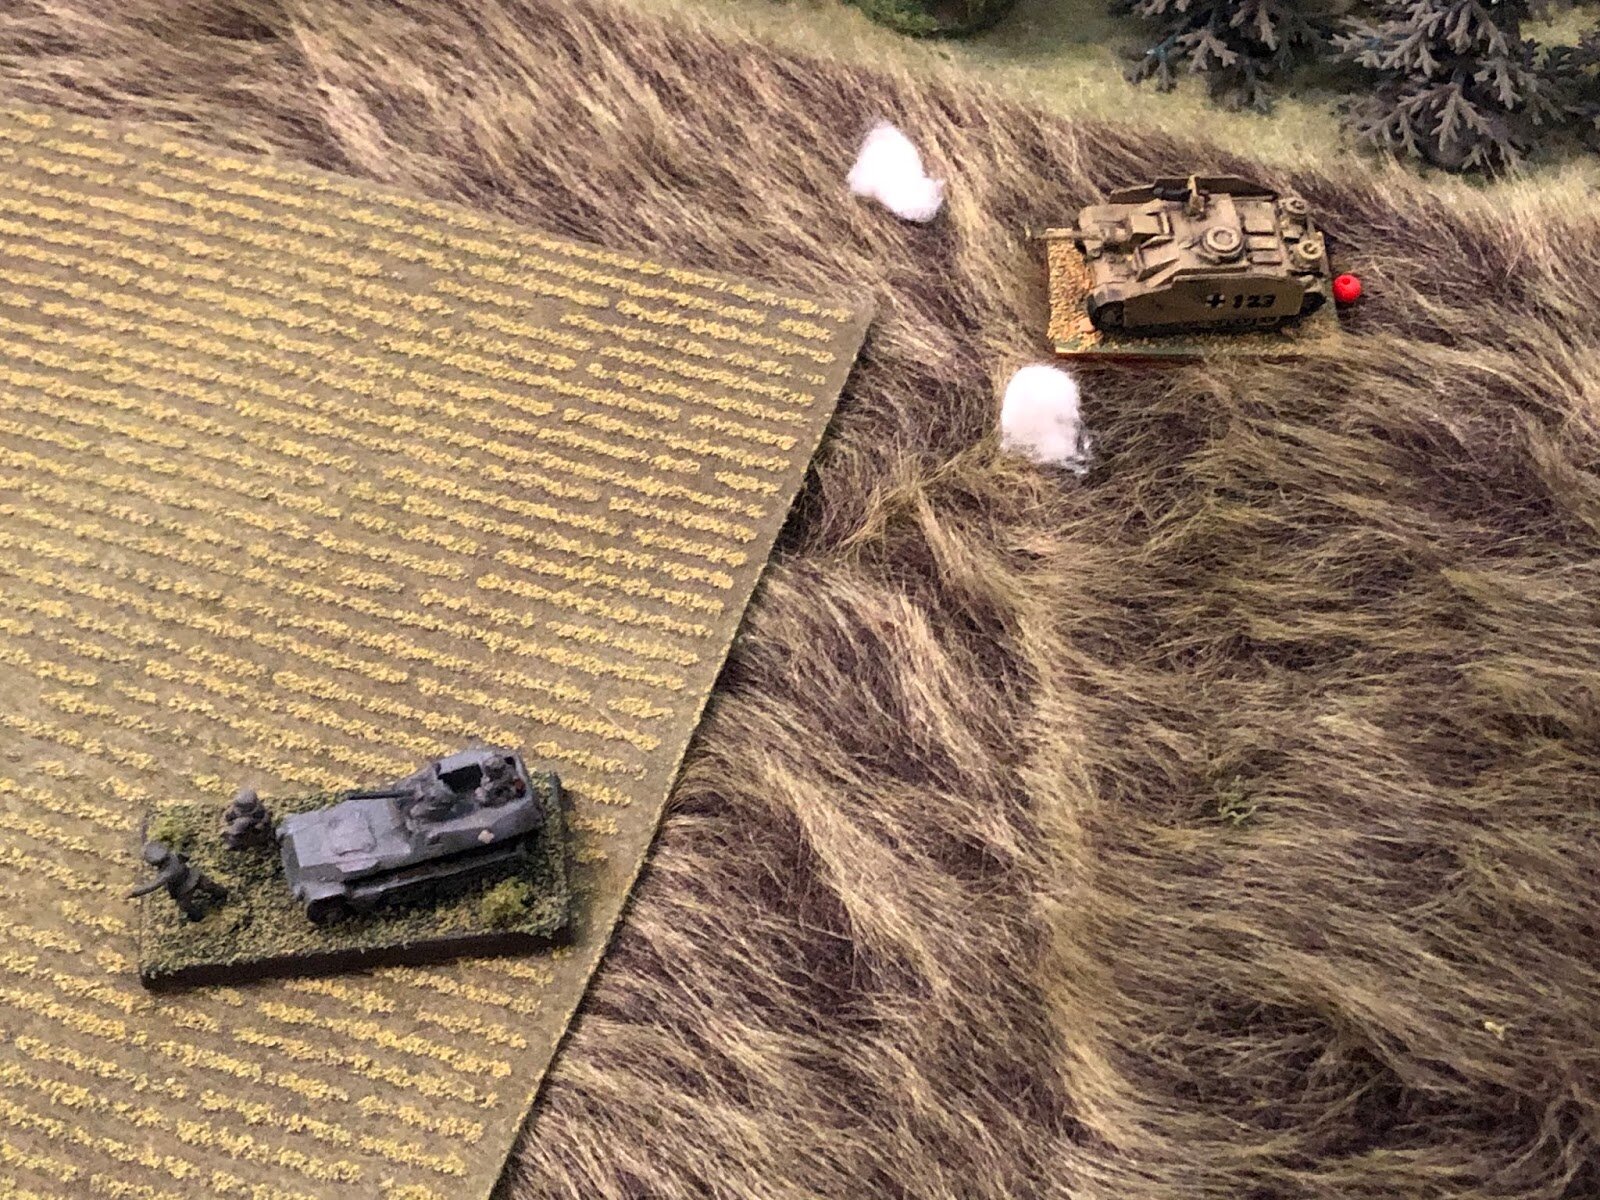
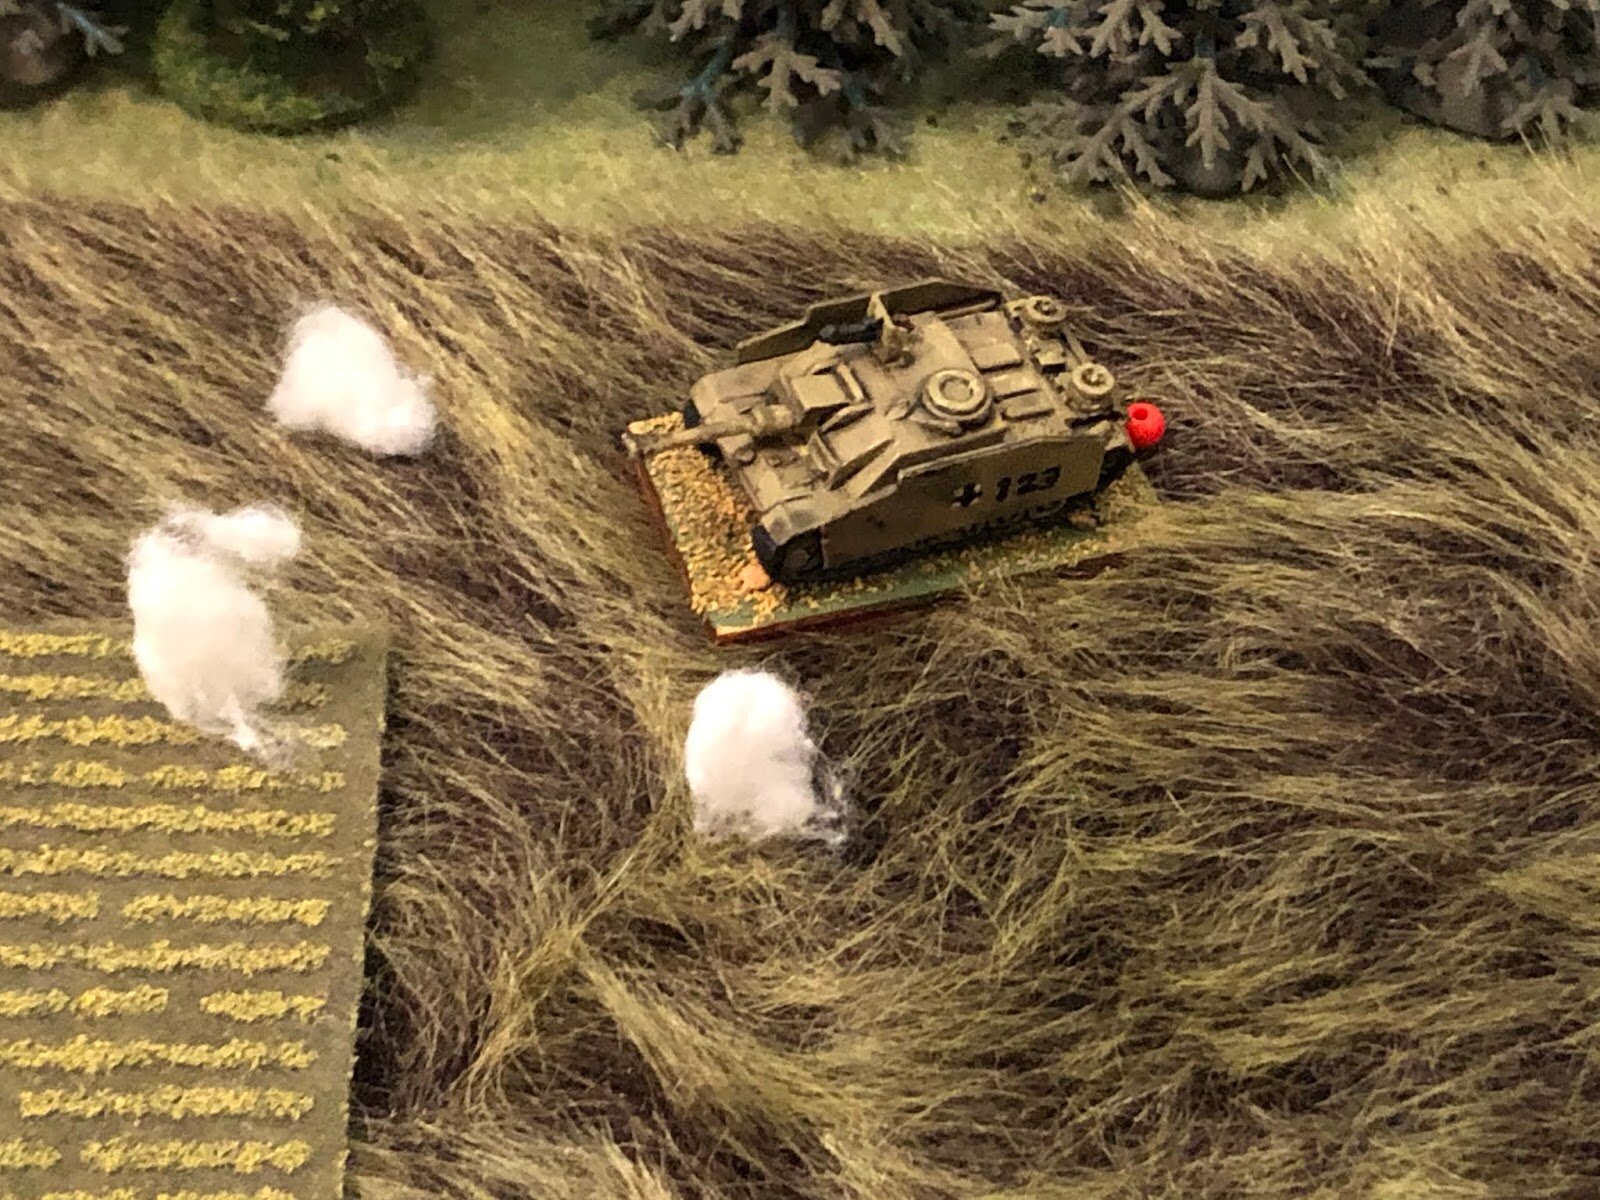
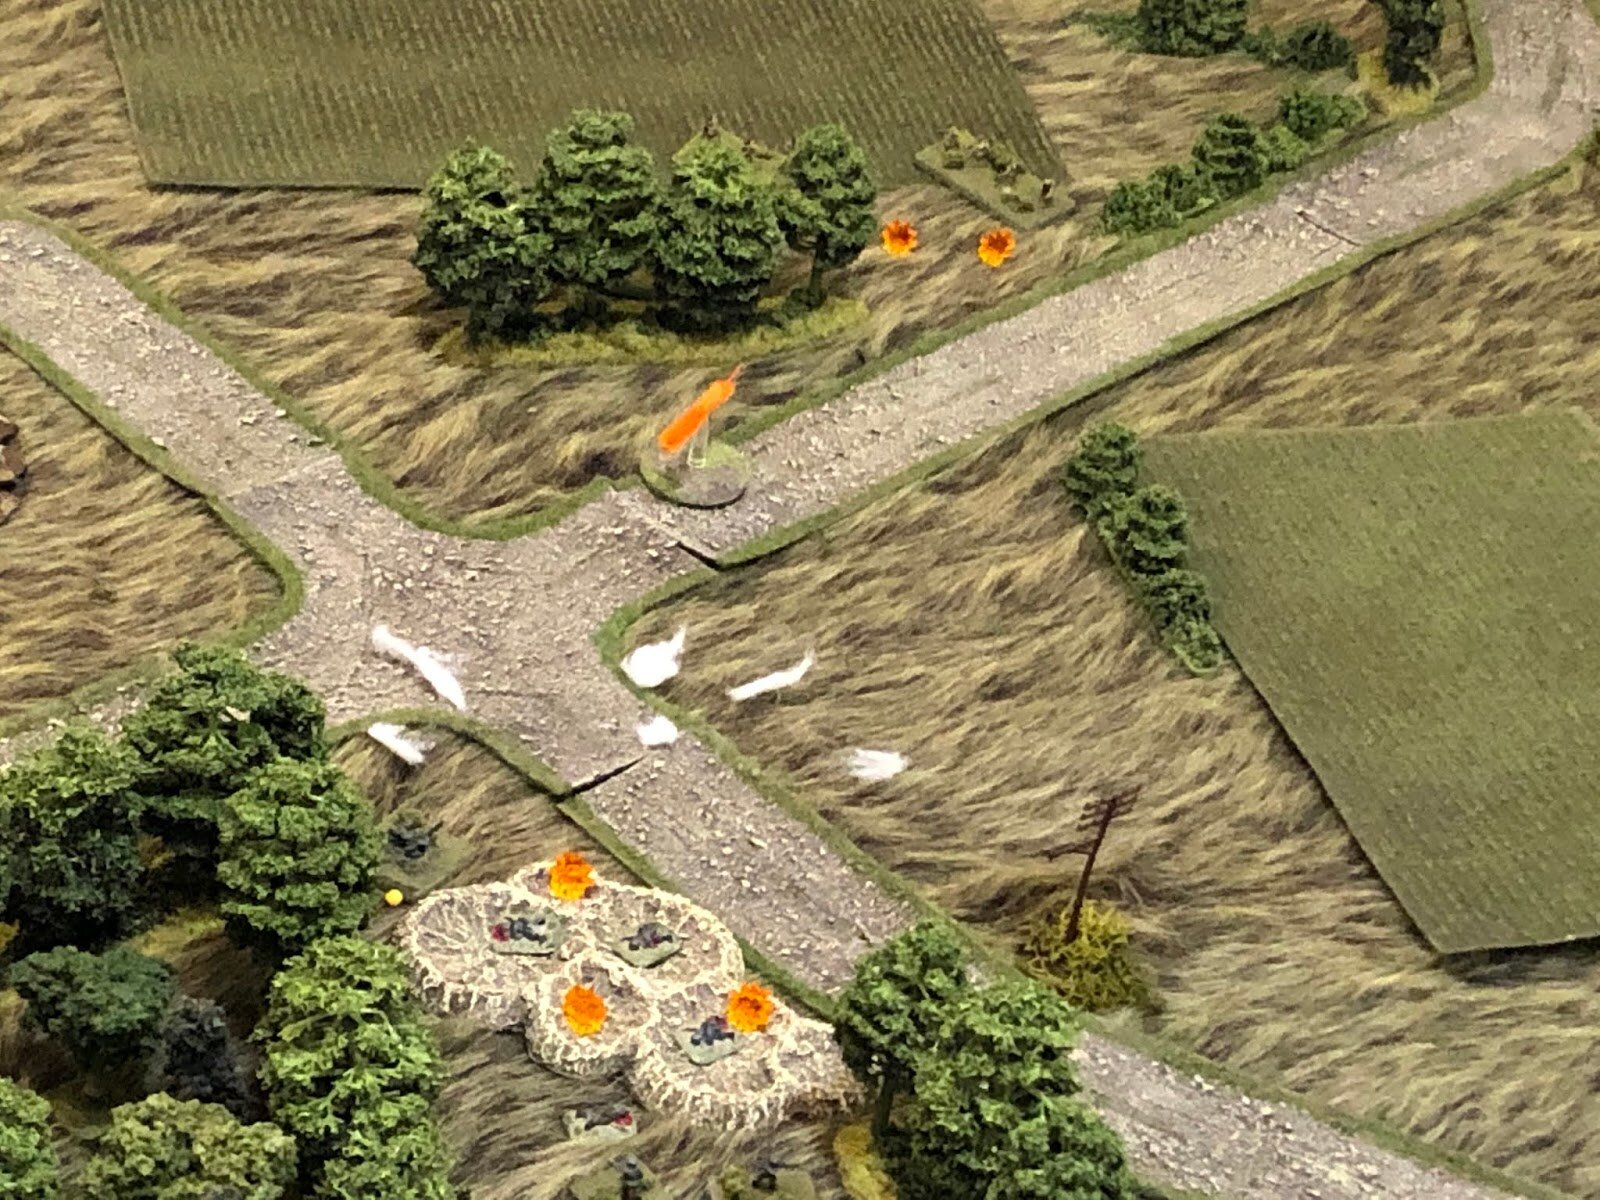
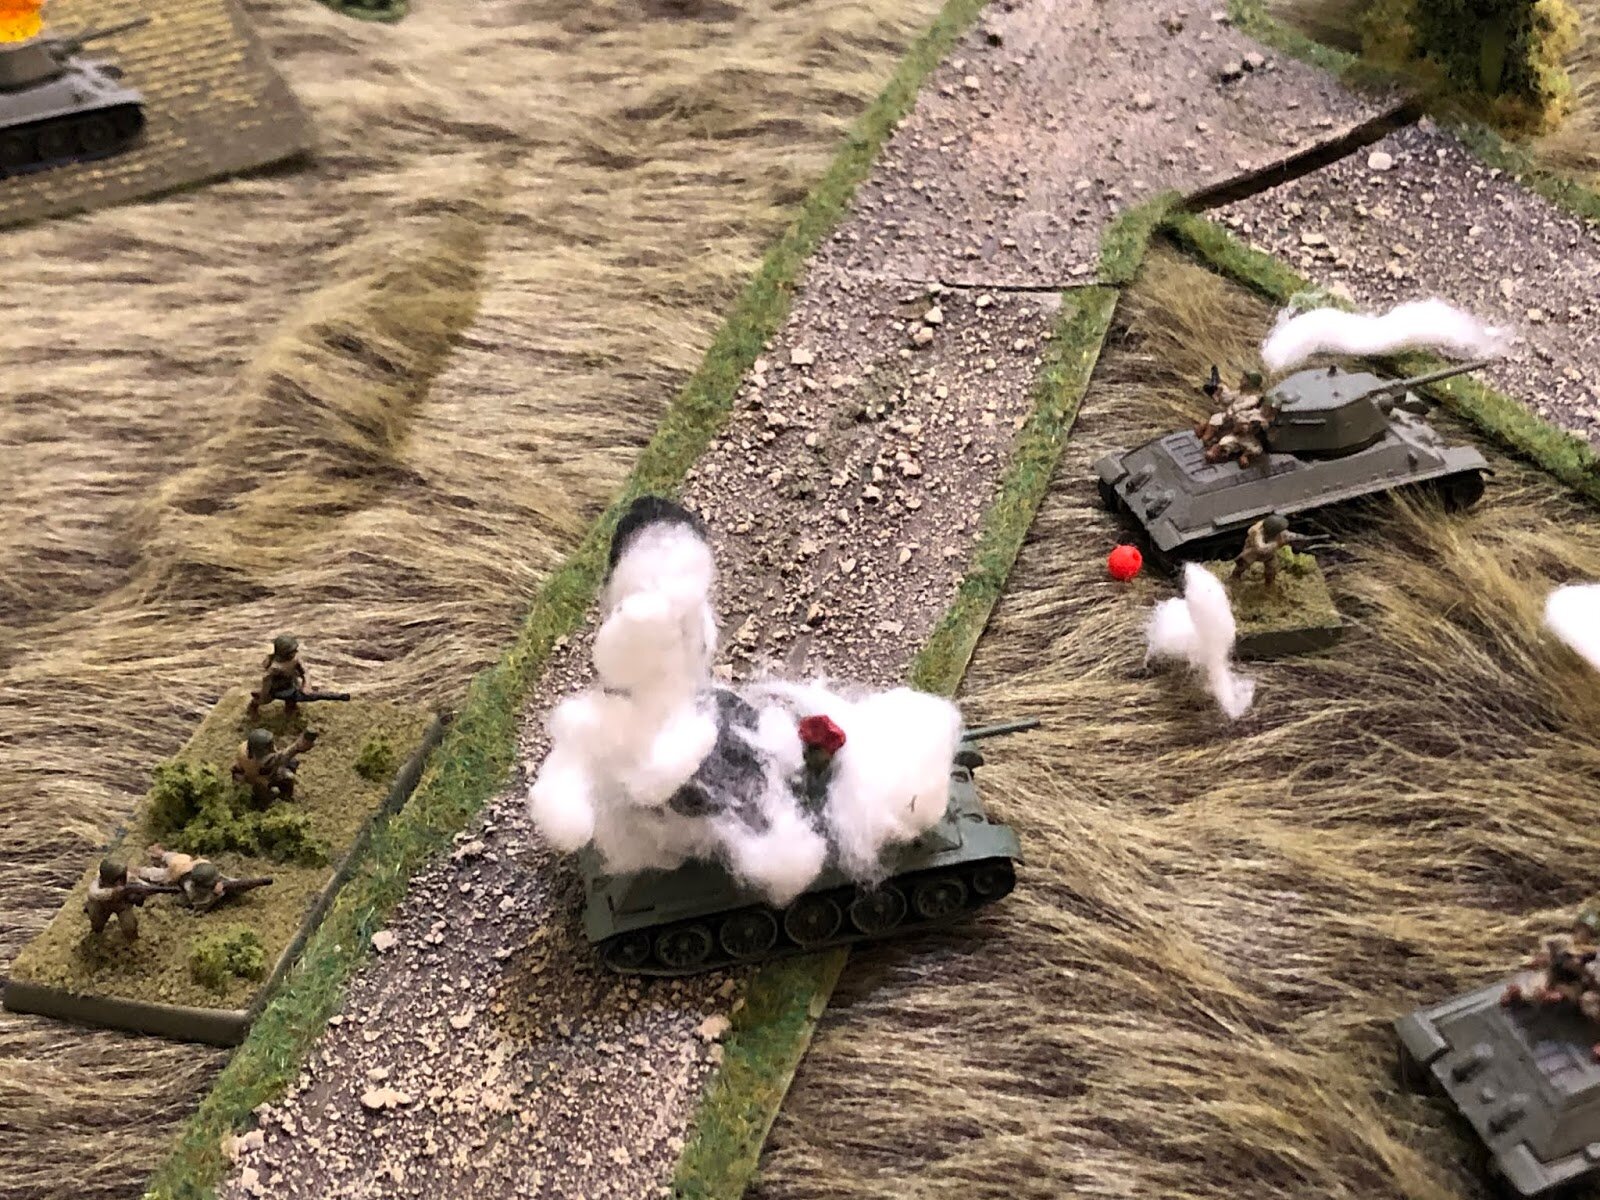
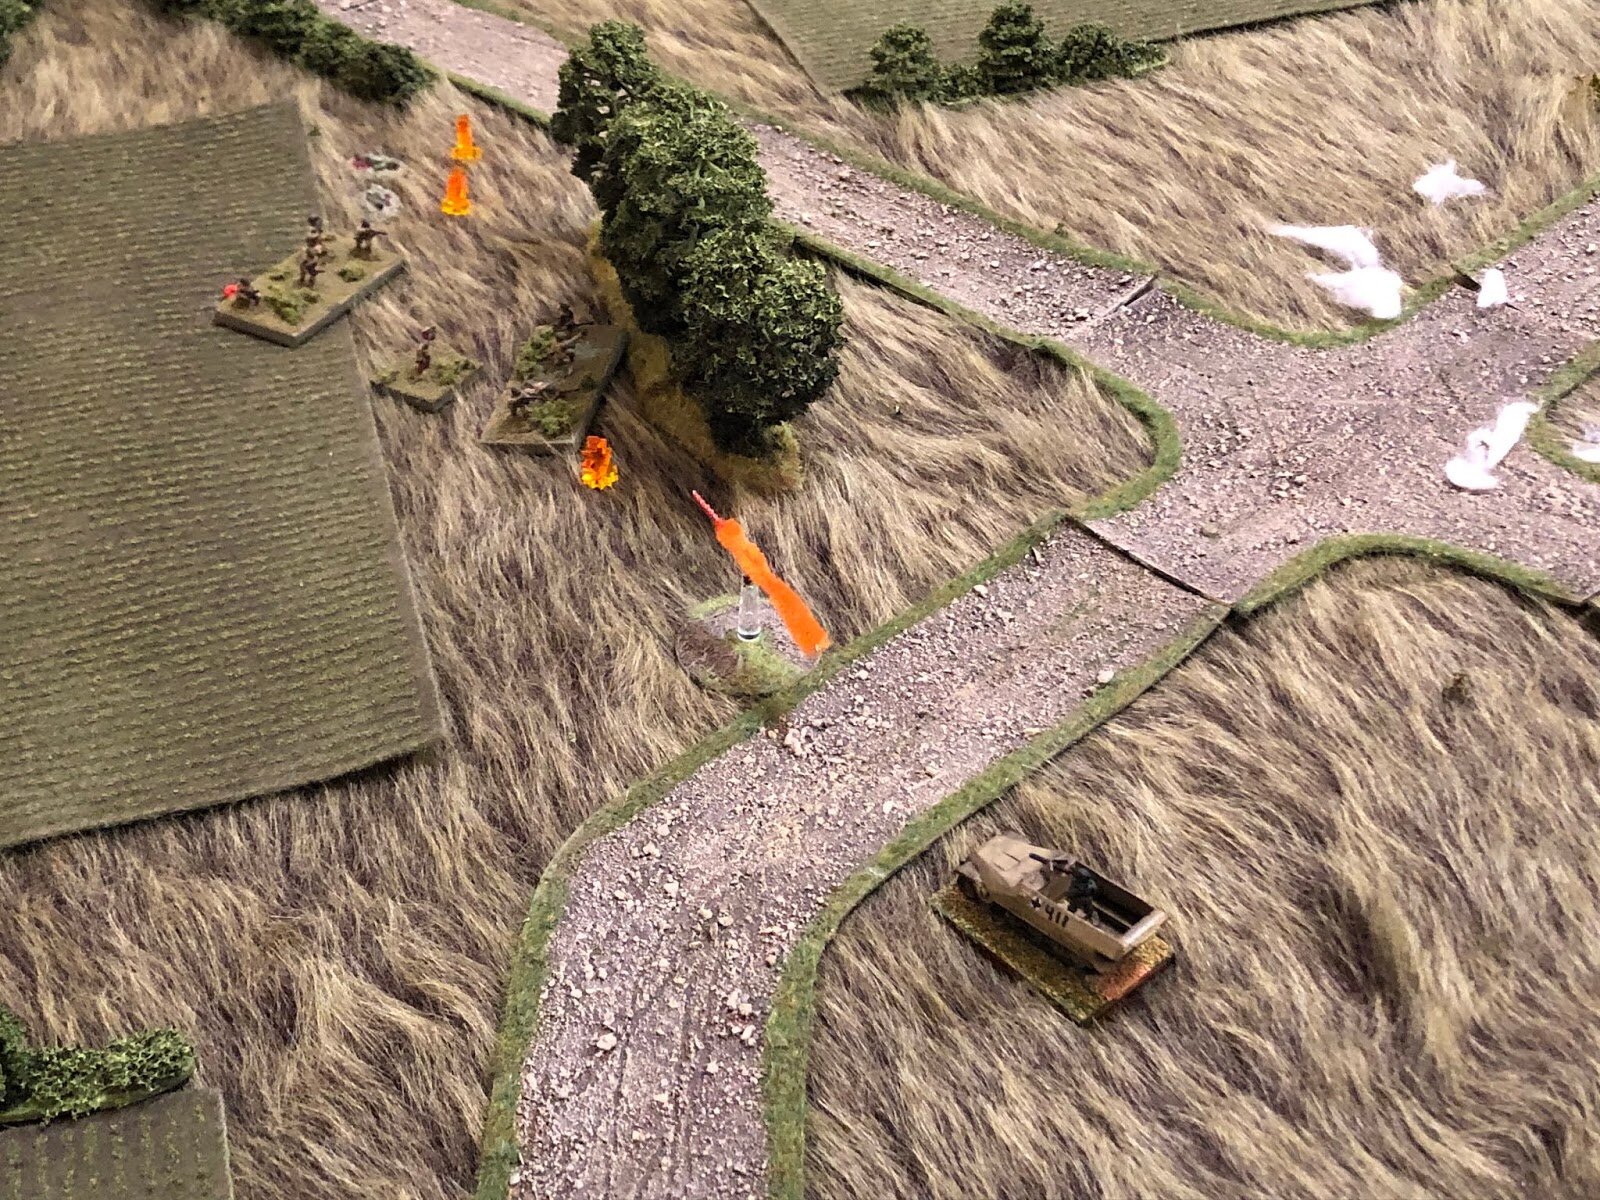
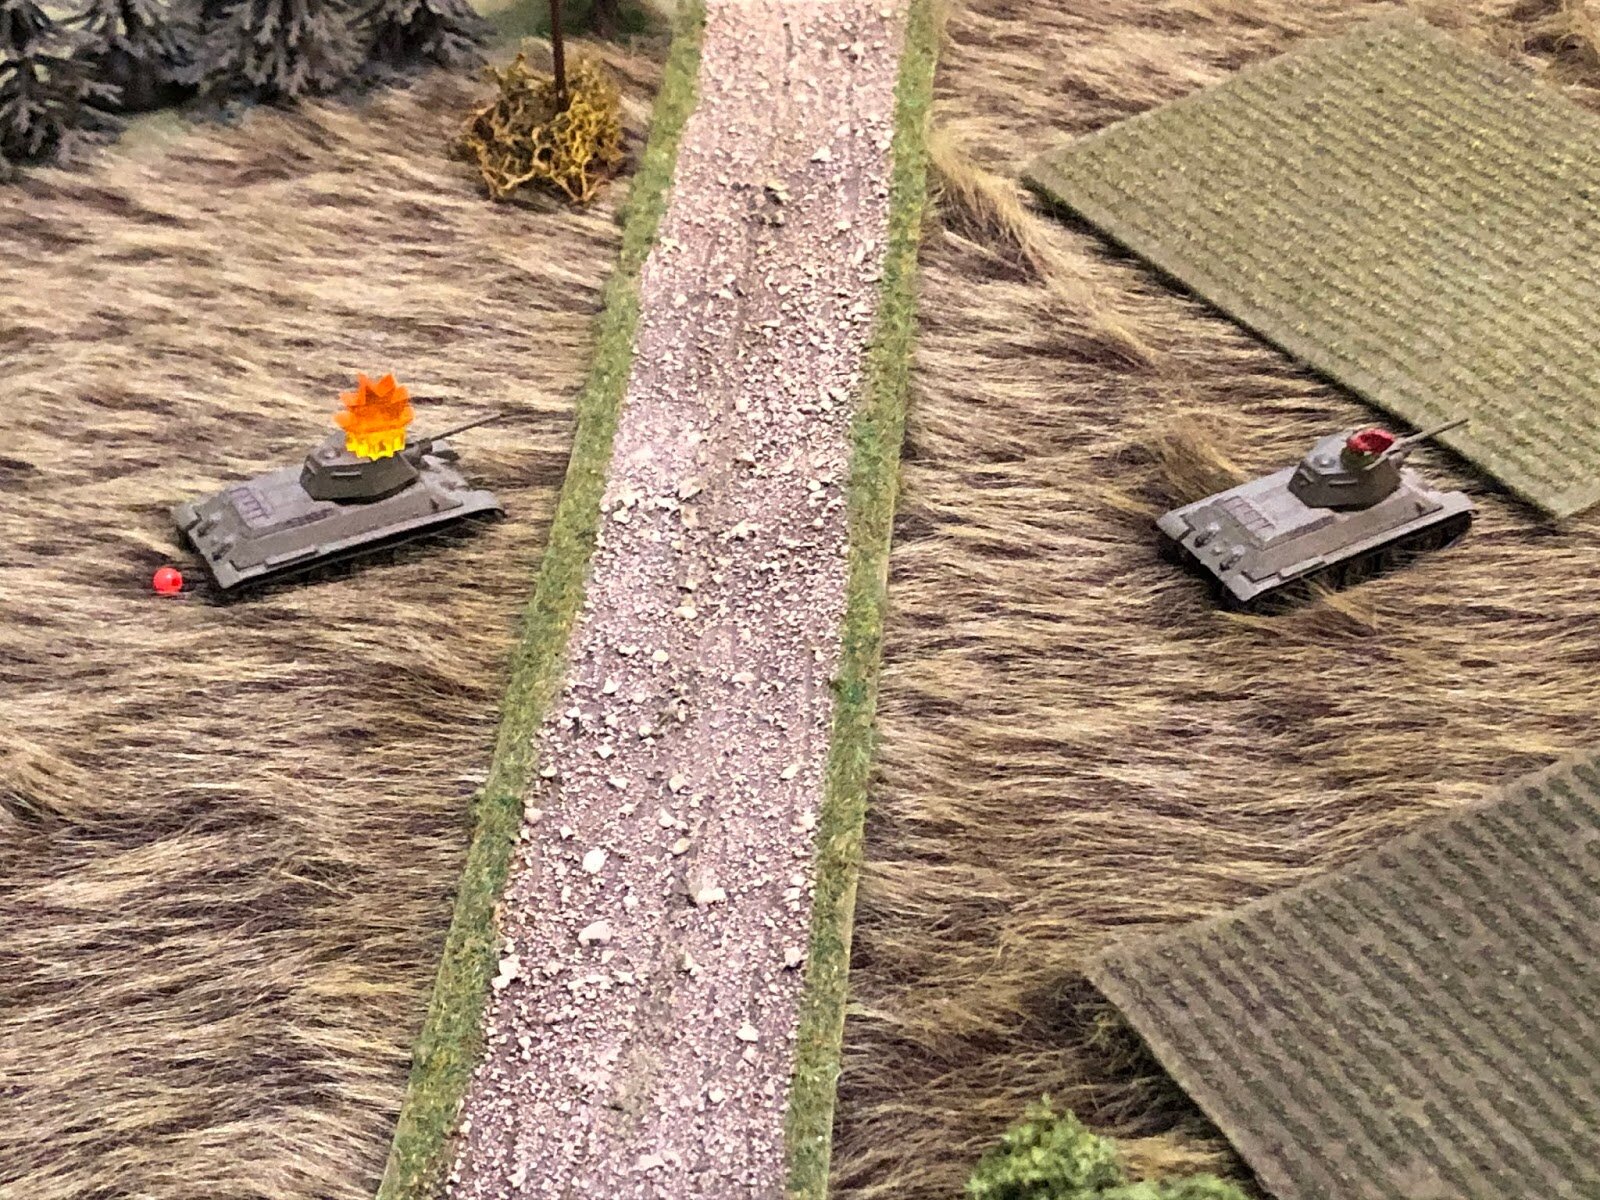
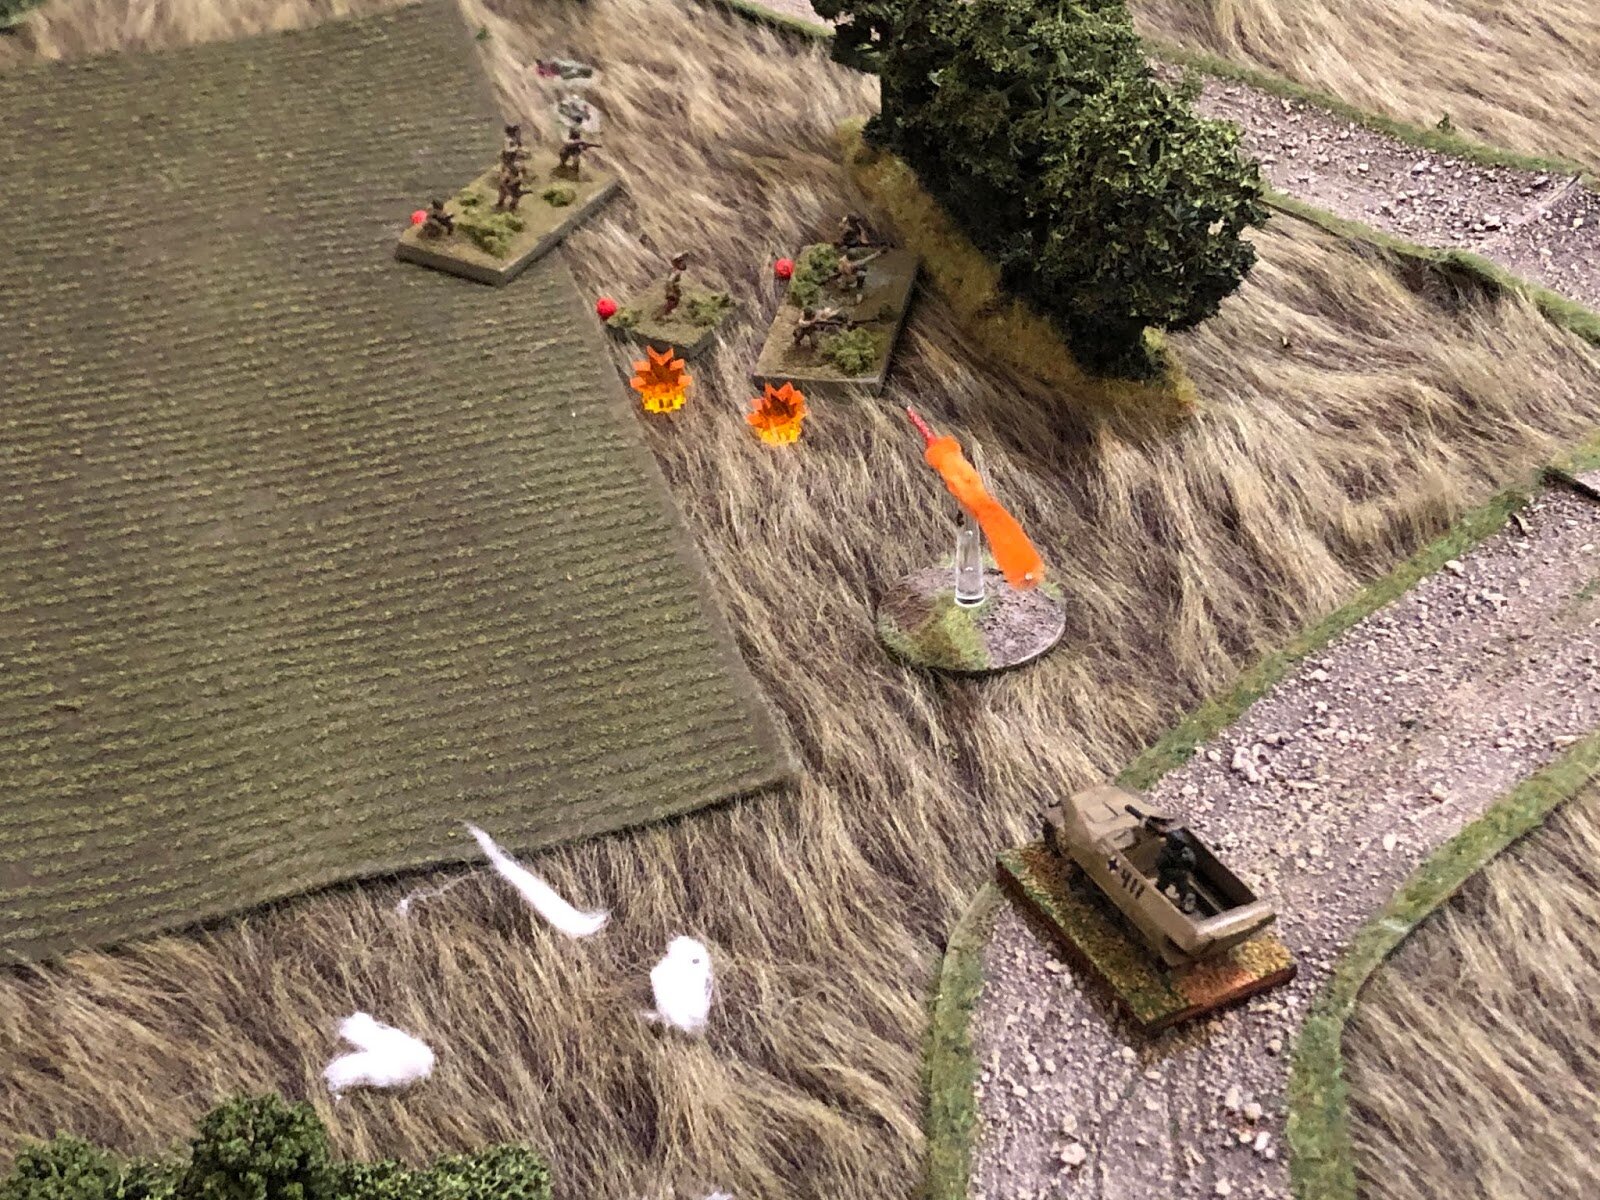
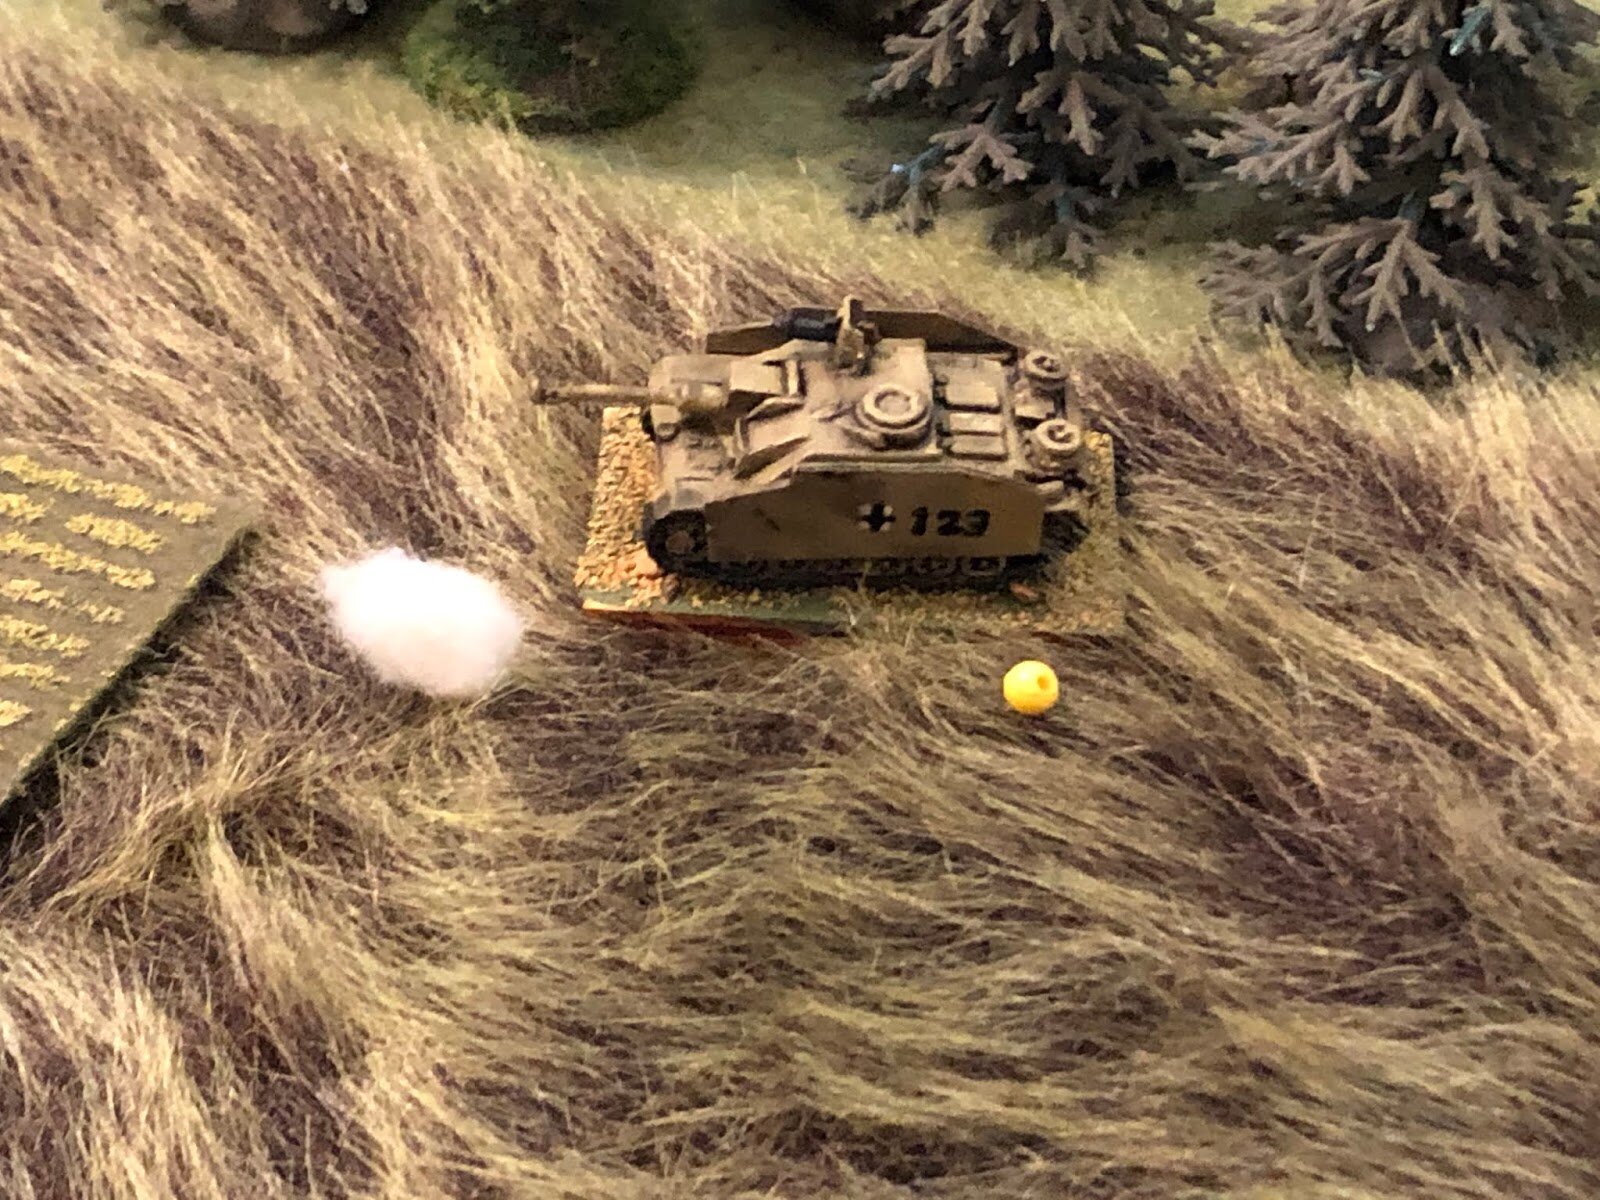
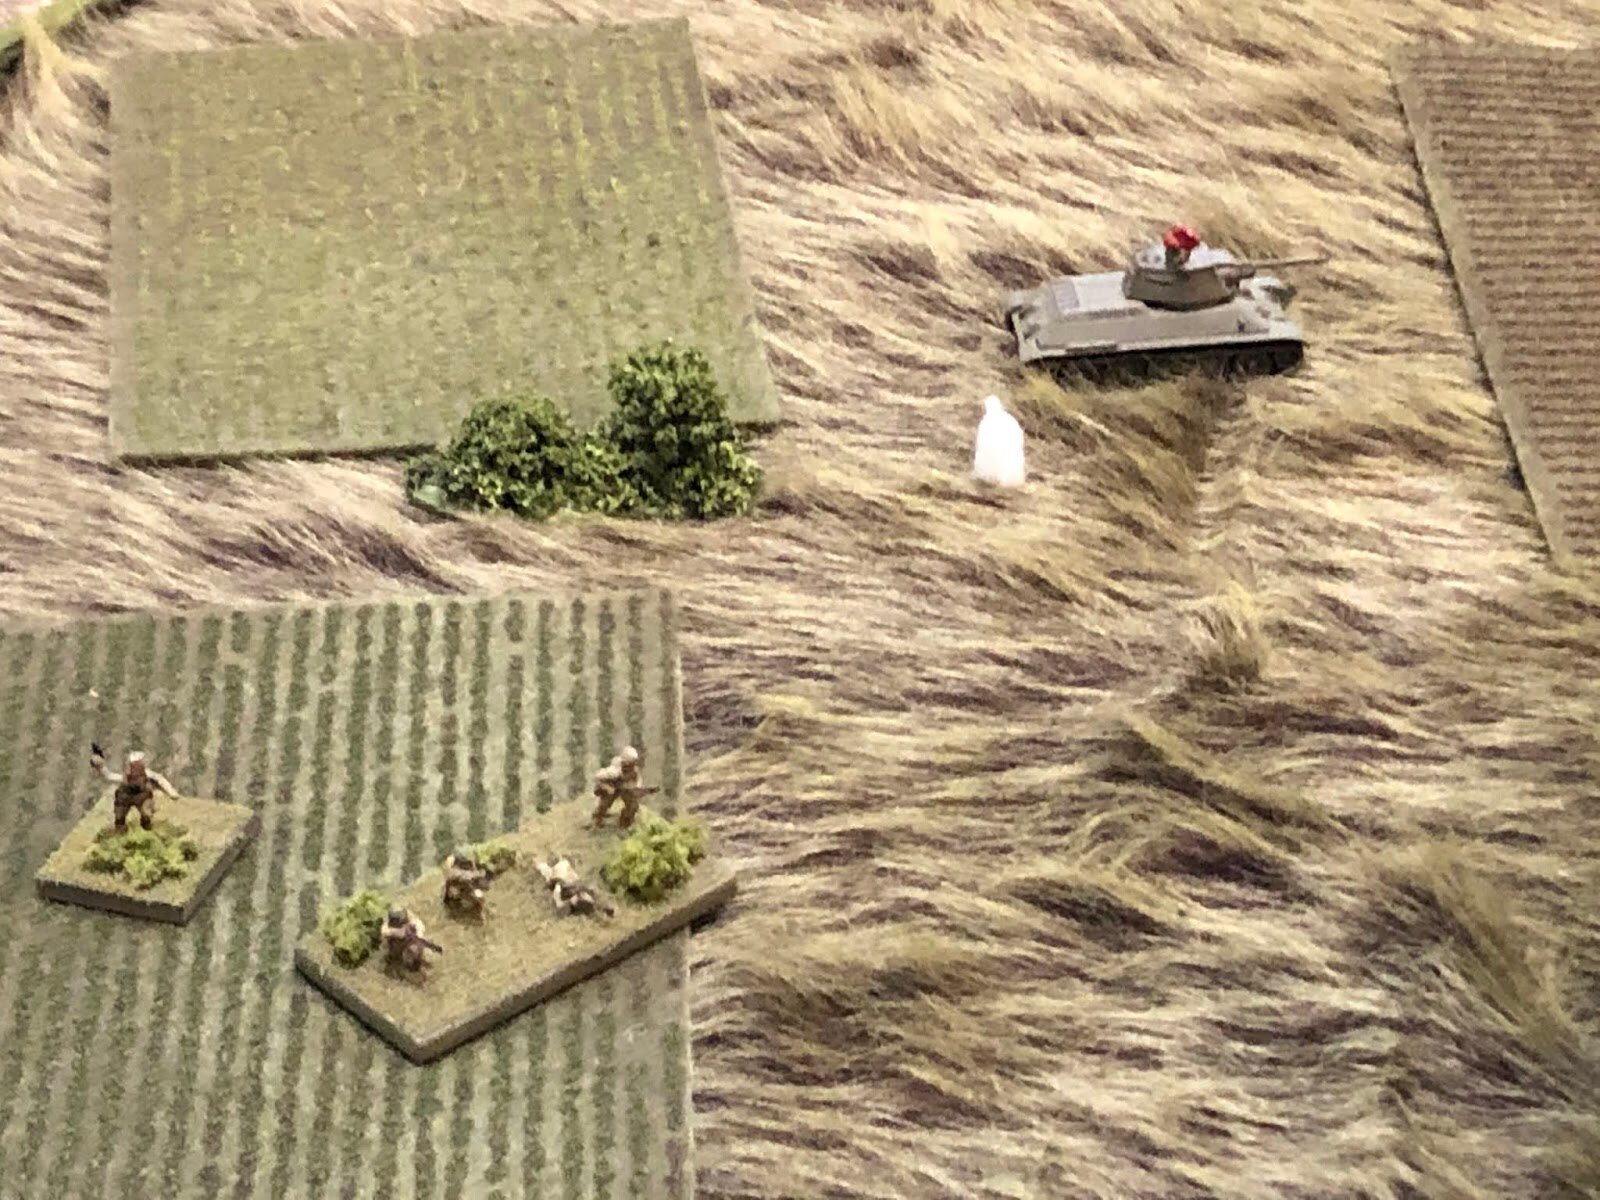
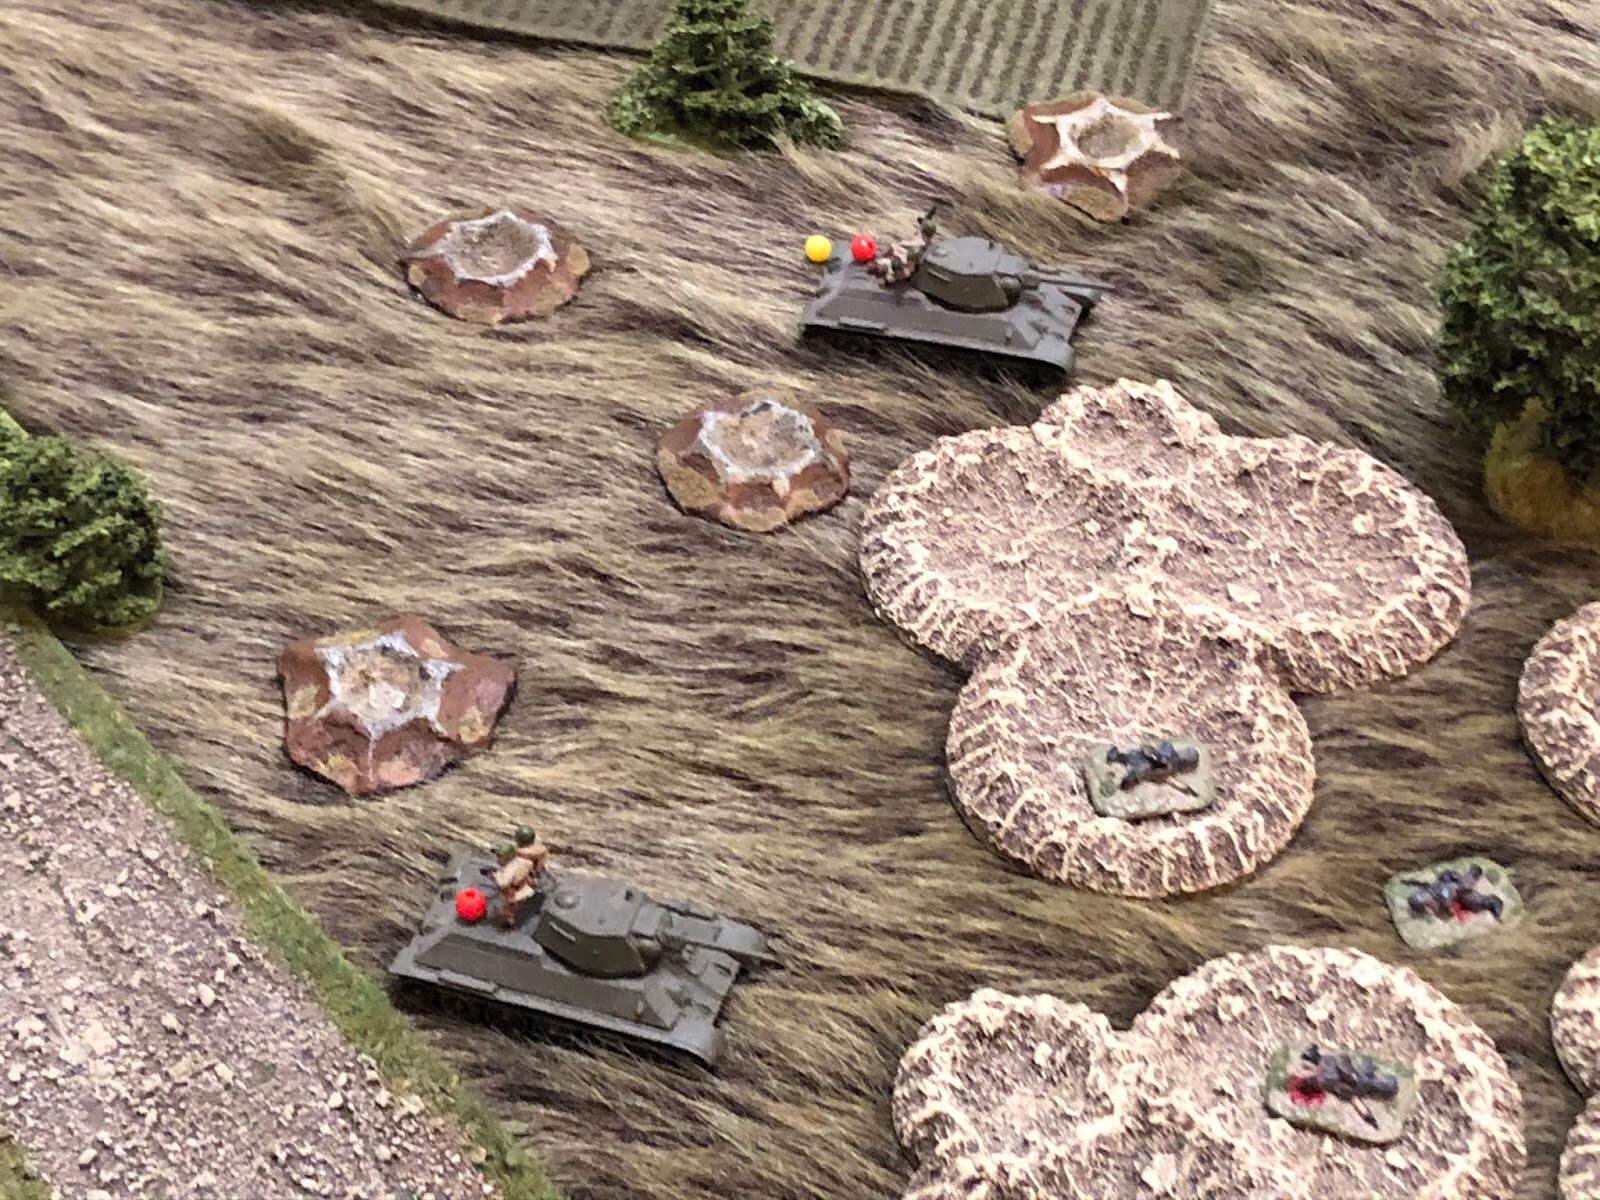
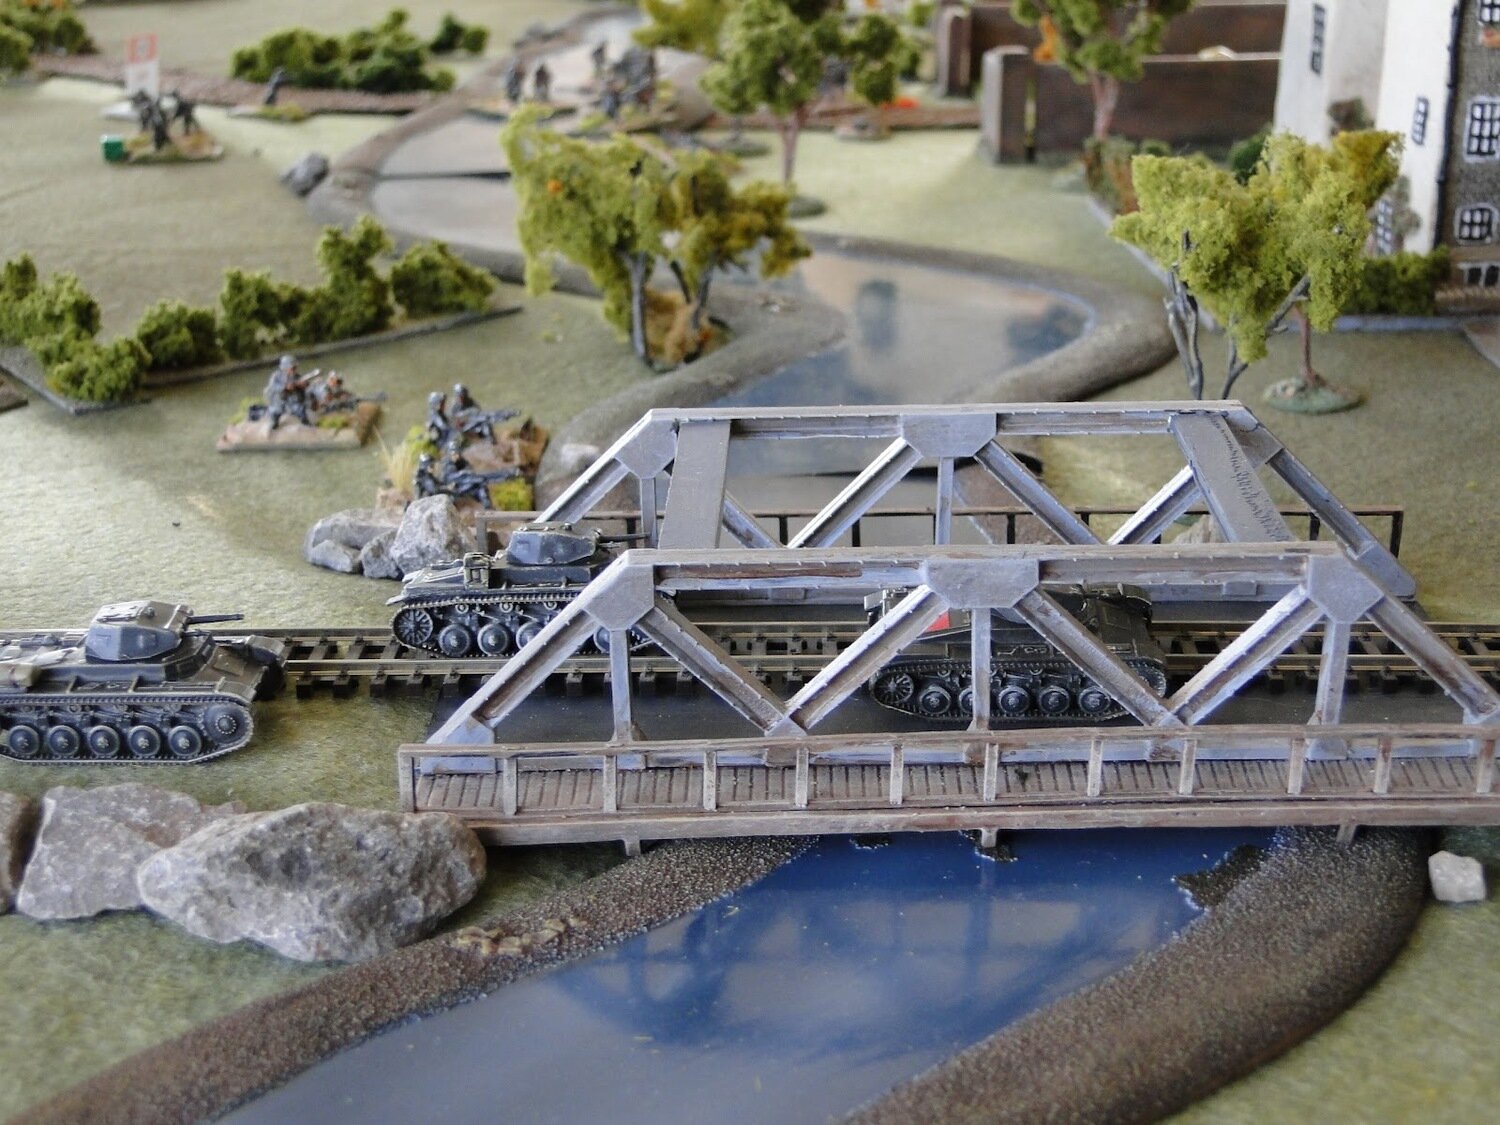
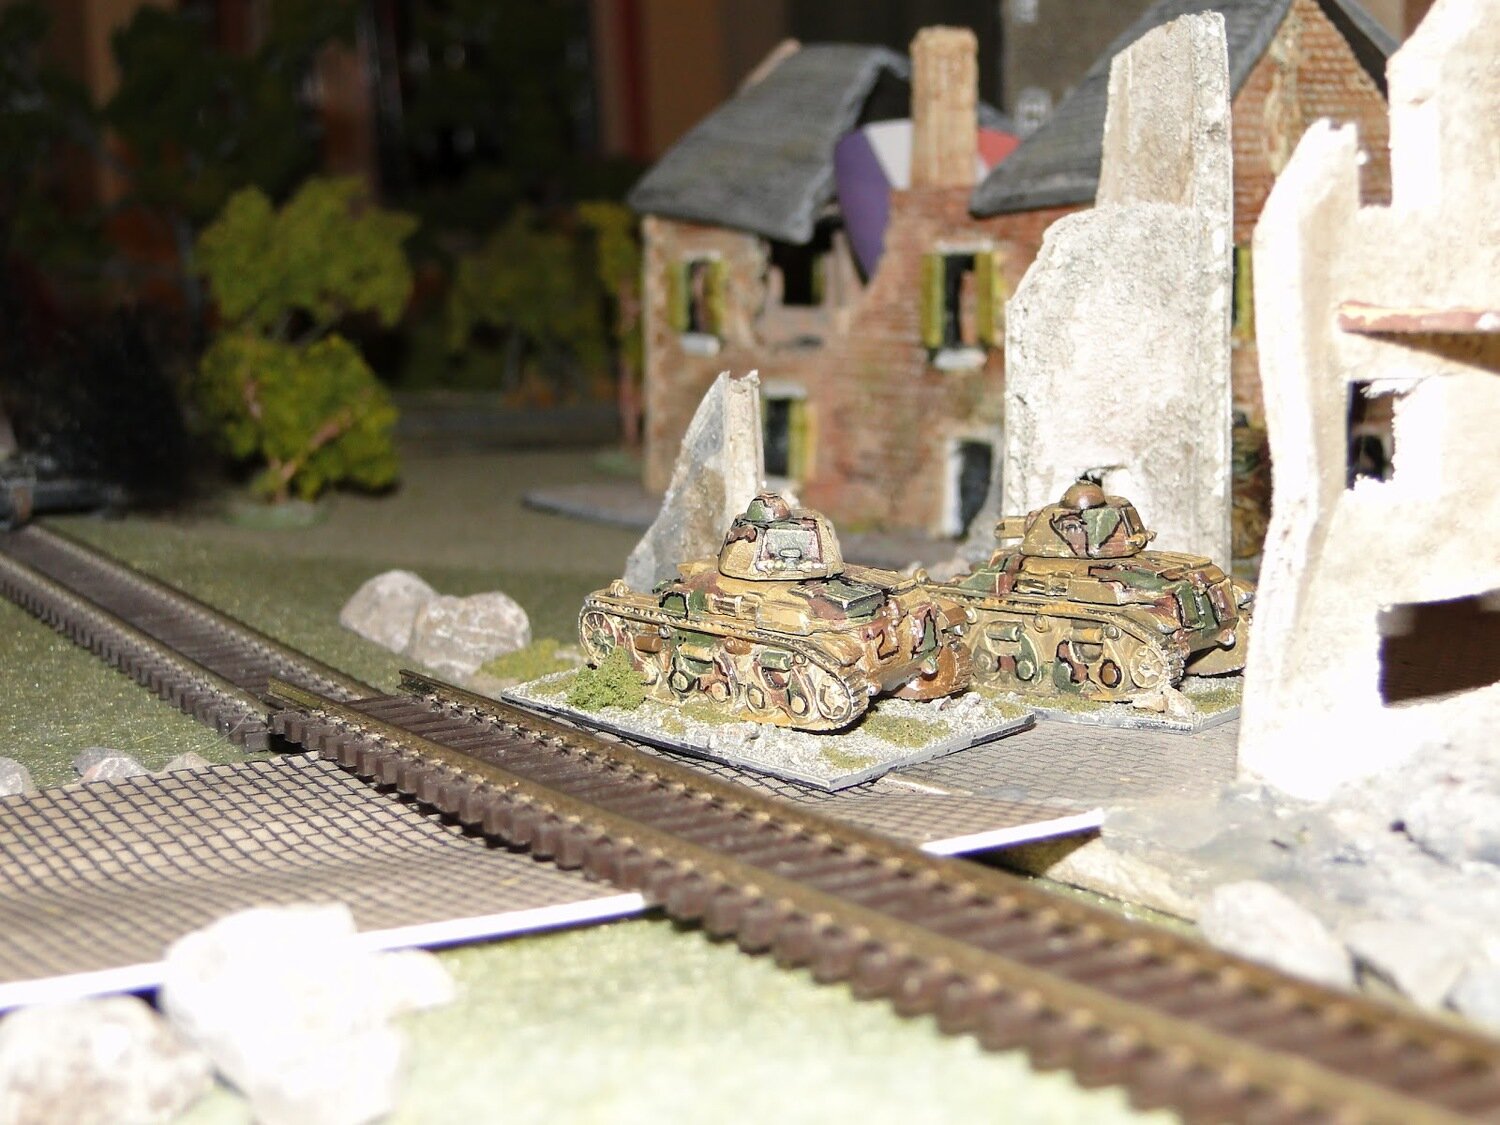
Meanwhile, back at the town, one of the remaining Renault R-35 tanks had turned back towards my advancing Panzer II platoon. Whilst getting into position under cover behind his burning comrades, however, the tank commander left his rear end sticking out into the main road. Up came my Panzerjaeger on a Tank Killer bonus card, and put two rounds through his side armour: end of R-35.
Worse for the French, my Panzer 38(t) had managed to get a shot in at the last French tank: sending several rounds of AP right up its, er, backside as it tried to manoeuvre towards my infantry. The Allies now had no armour left…well, they had one battered carrier, but that wasn’t much interested in doing anything but leaving rapidly!
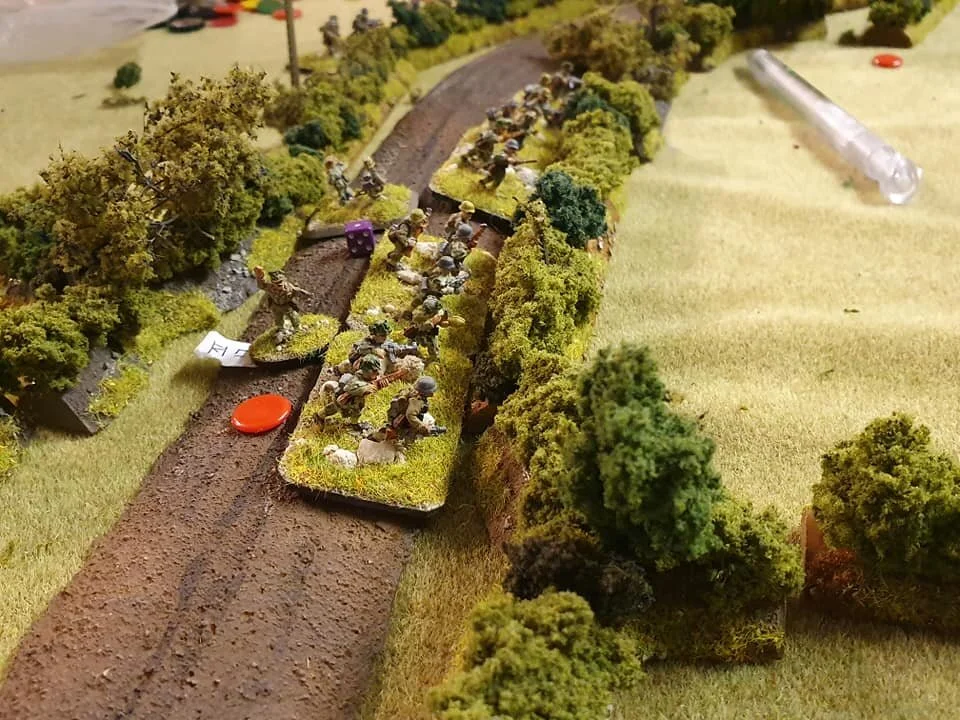
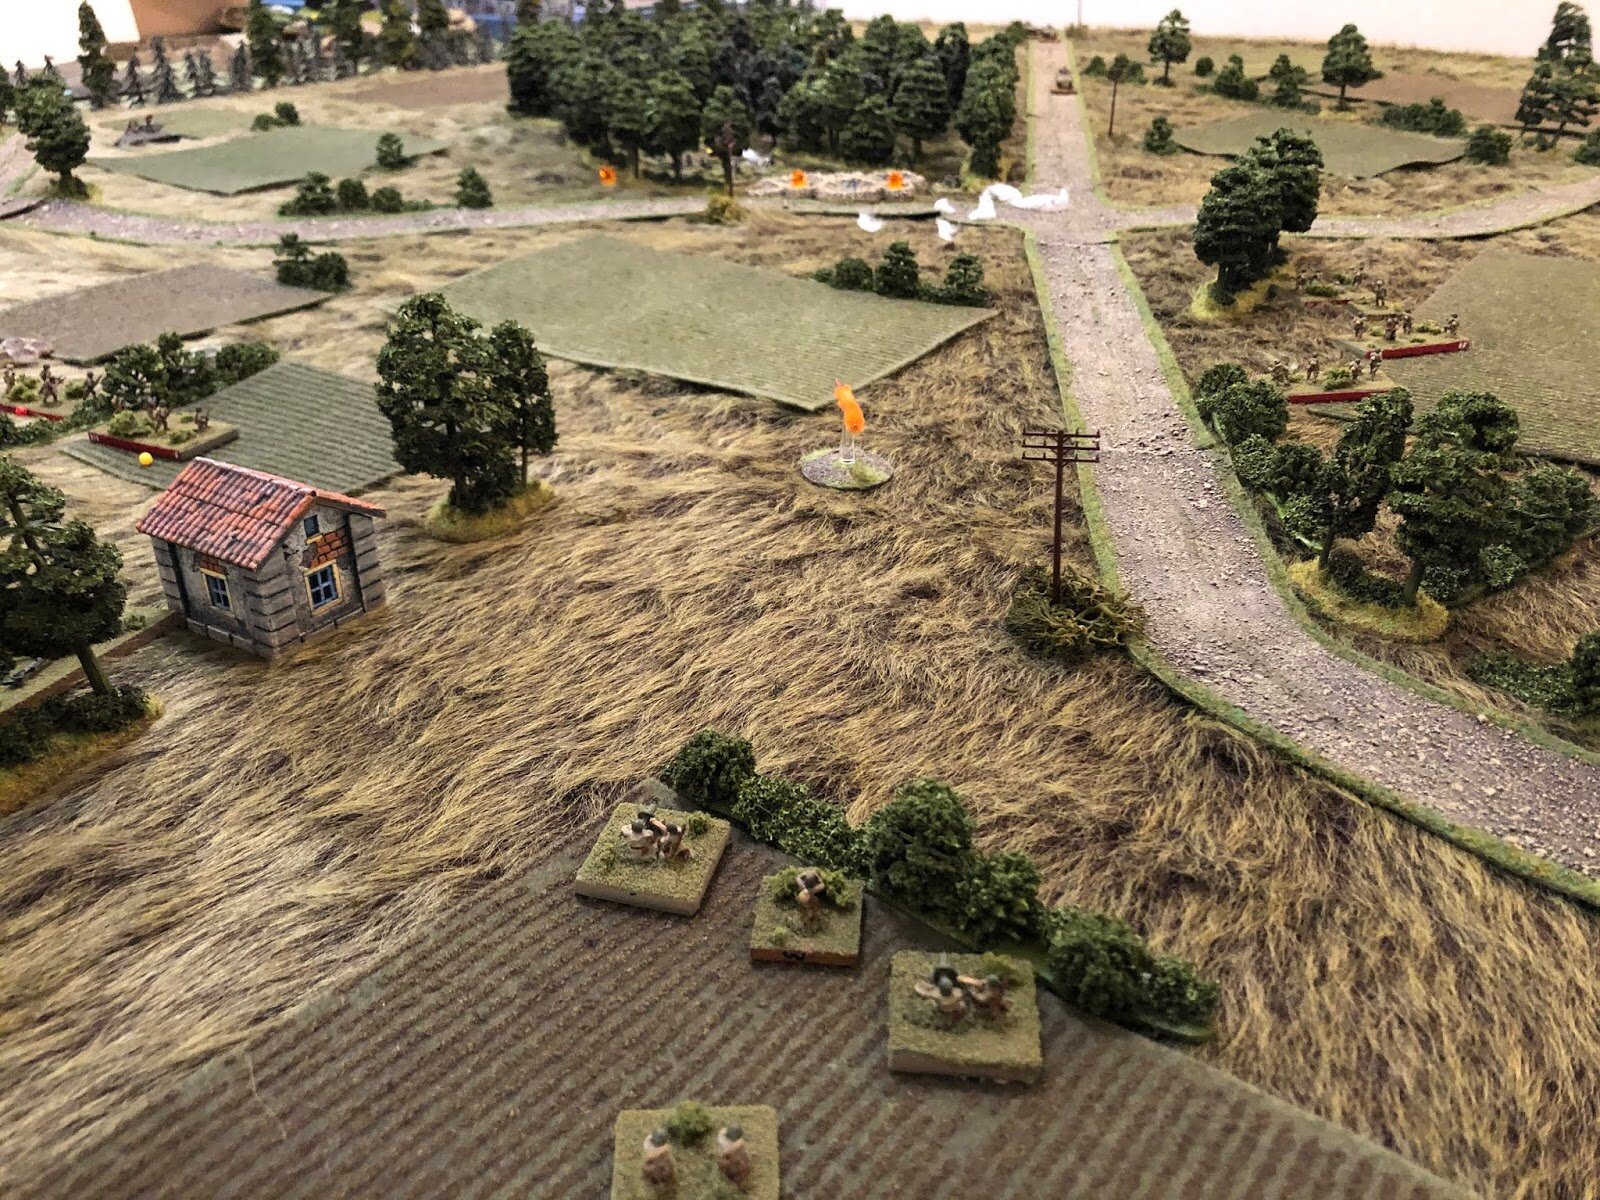
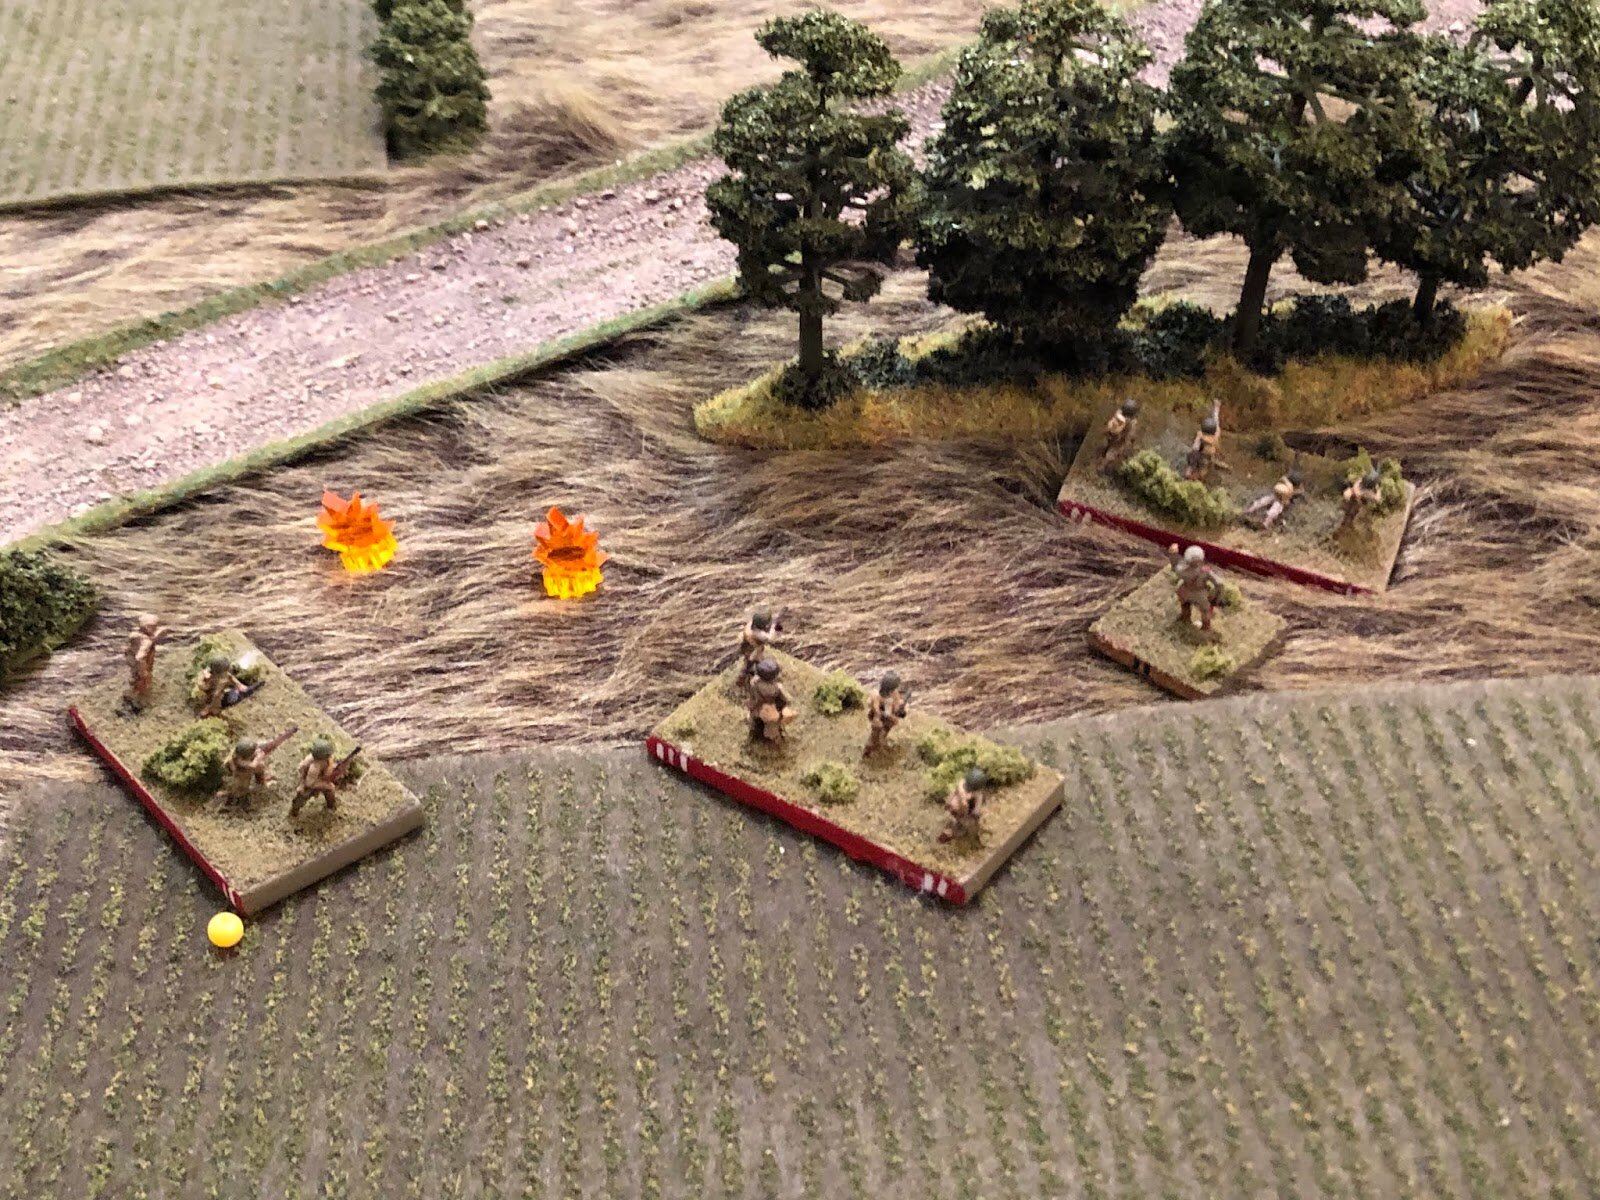
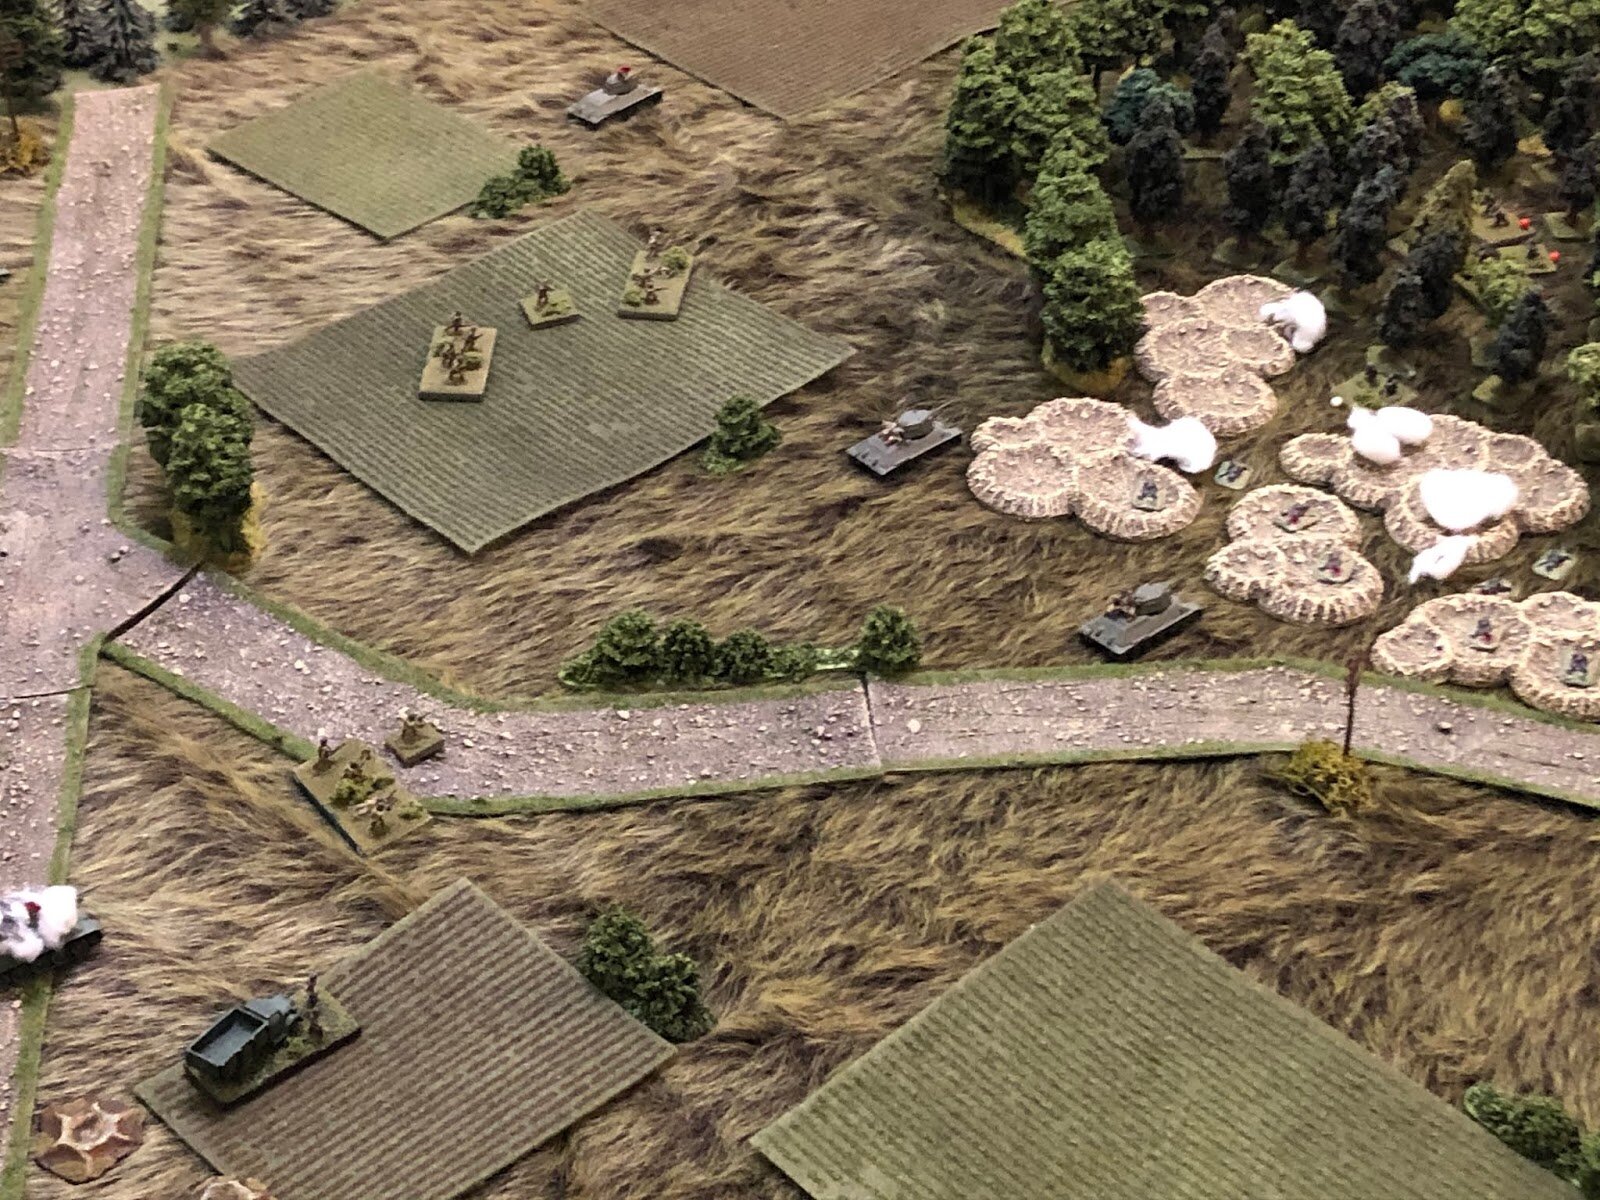
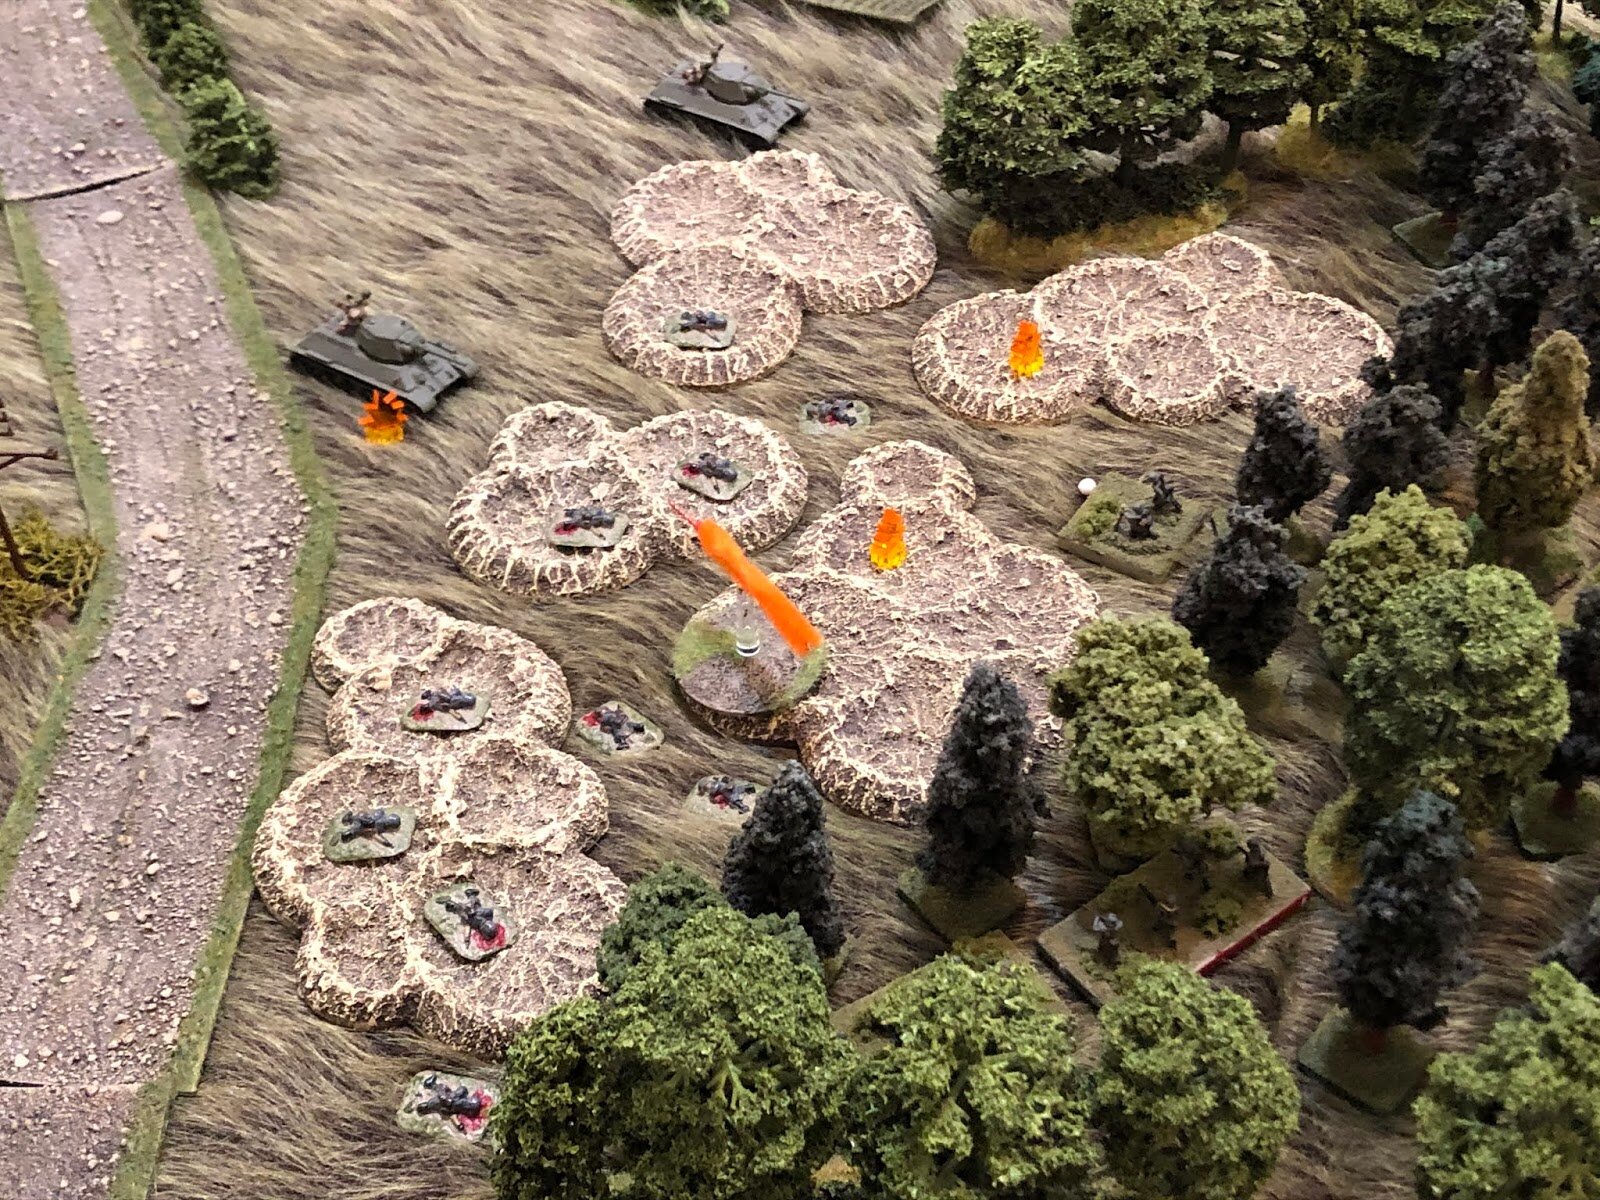
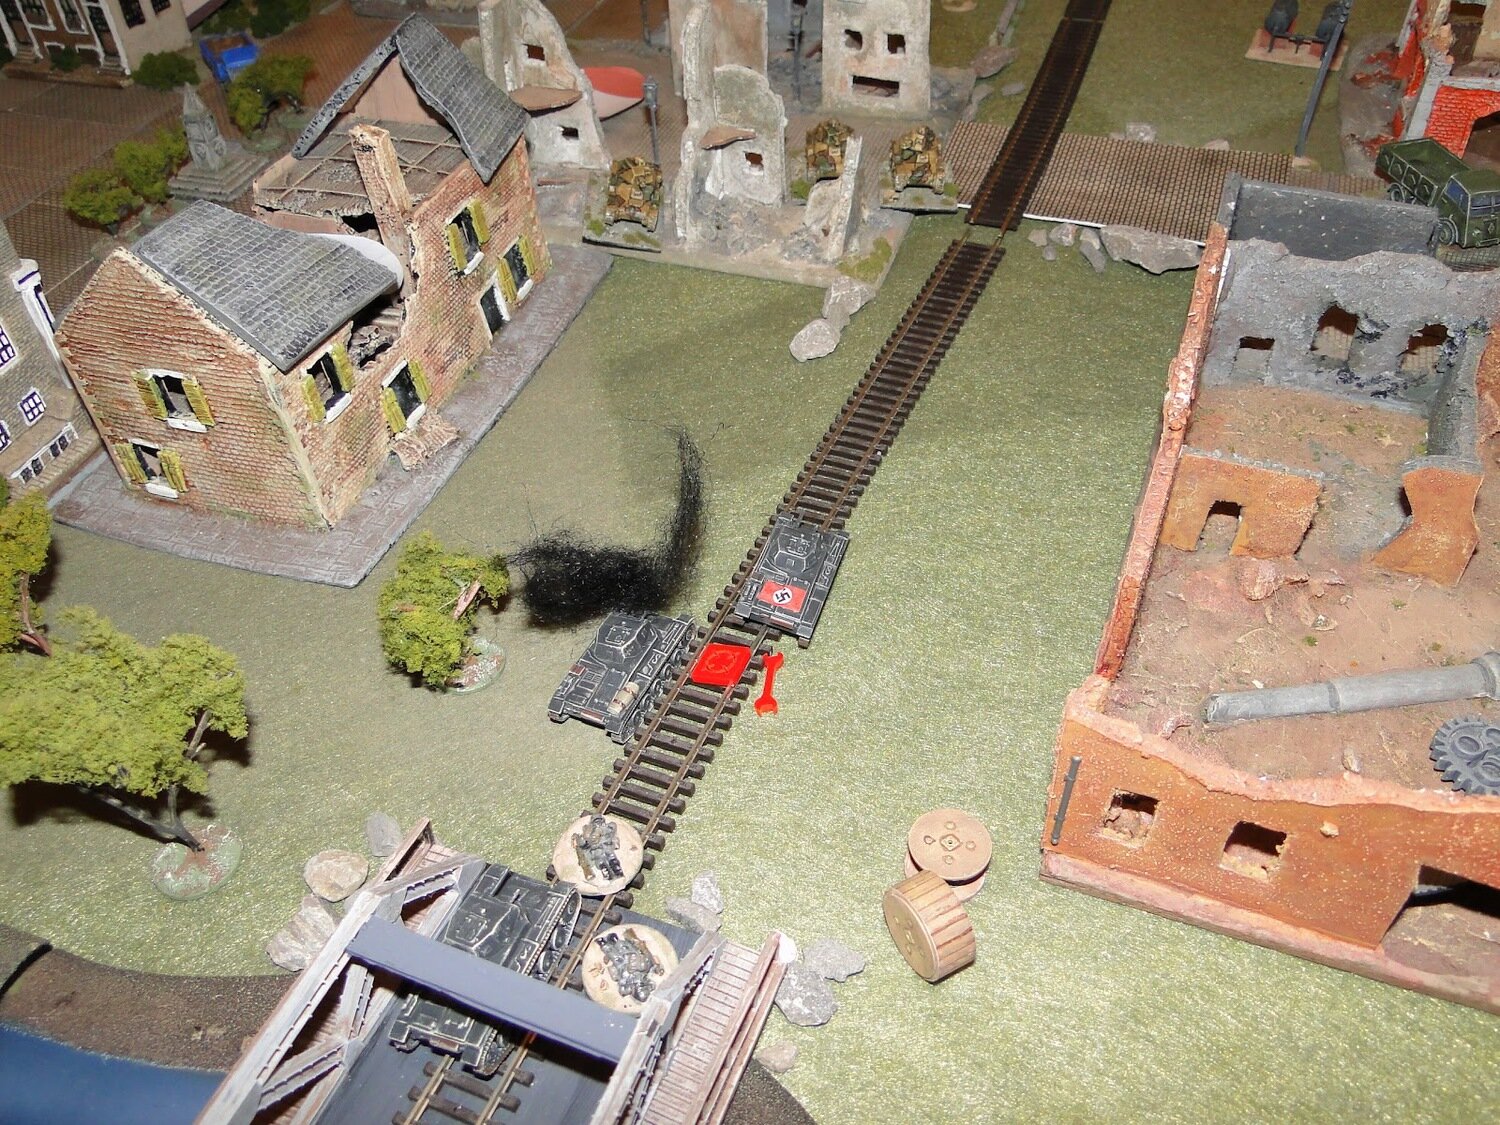
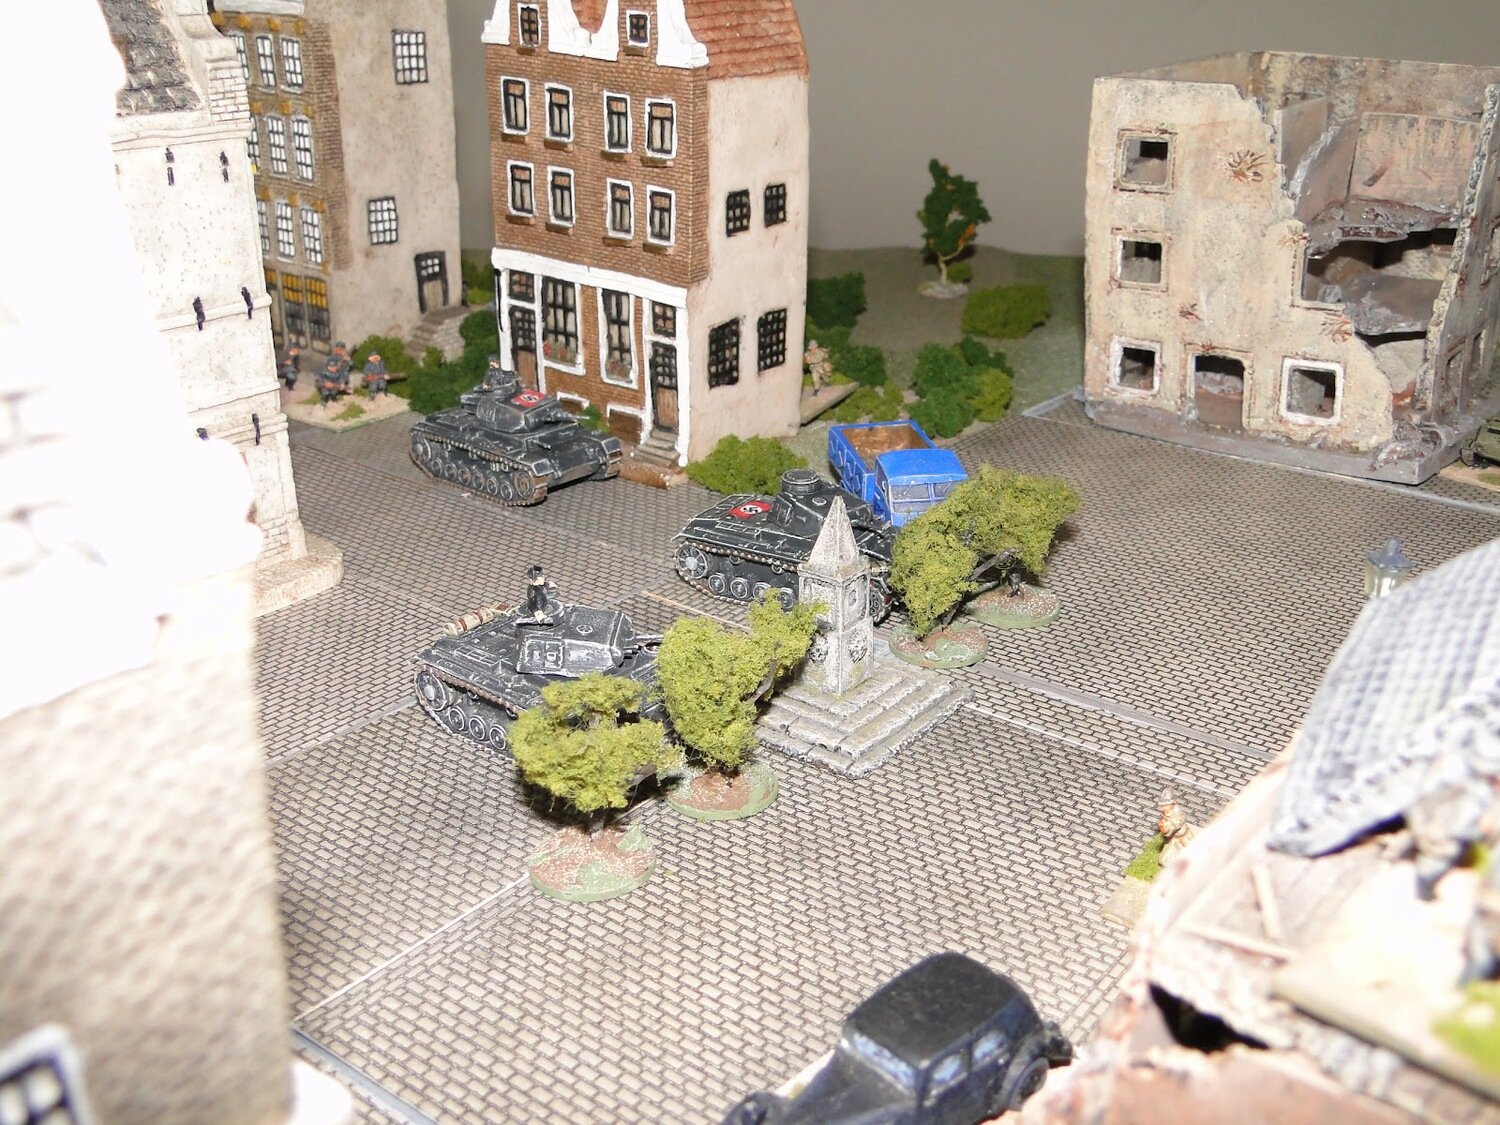
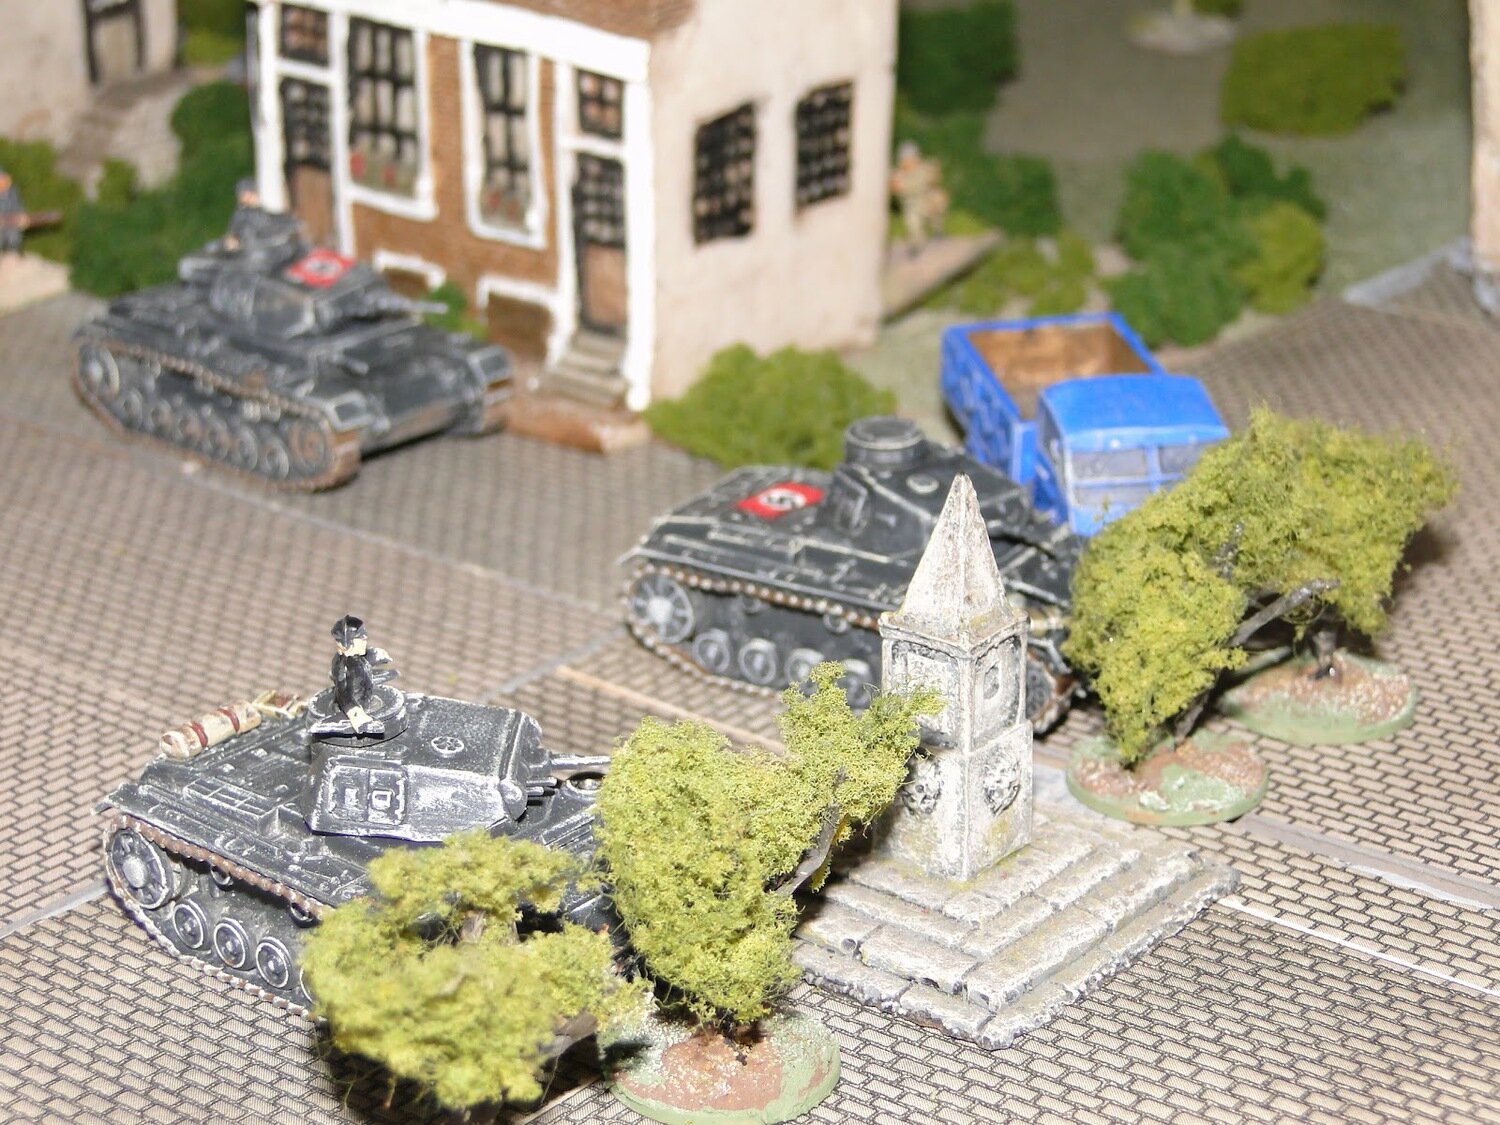
Unfortunately I was almost out of time. Not game time (we’d actually only had a handful of Turns) but real time, as I had another event to go to. That meant that rather than reducing the now-all-British force from a distance, I had to get stuck in and do the job quickly. Much against my better judgement, therefore, I sent my medium Panzer platoon straight down the High Street, as shown in the pic below (the Panzer IV is in the lee behind the right hand house).
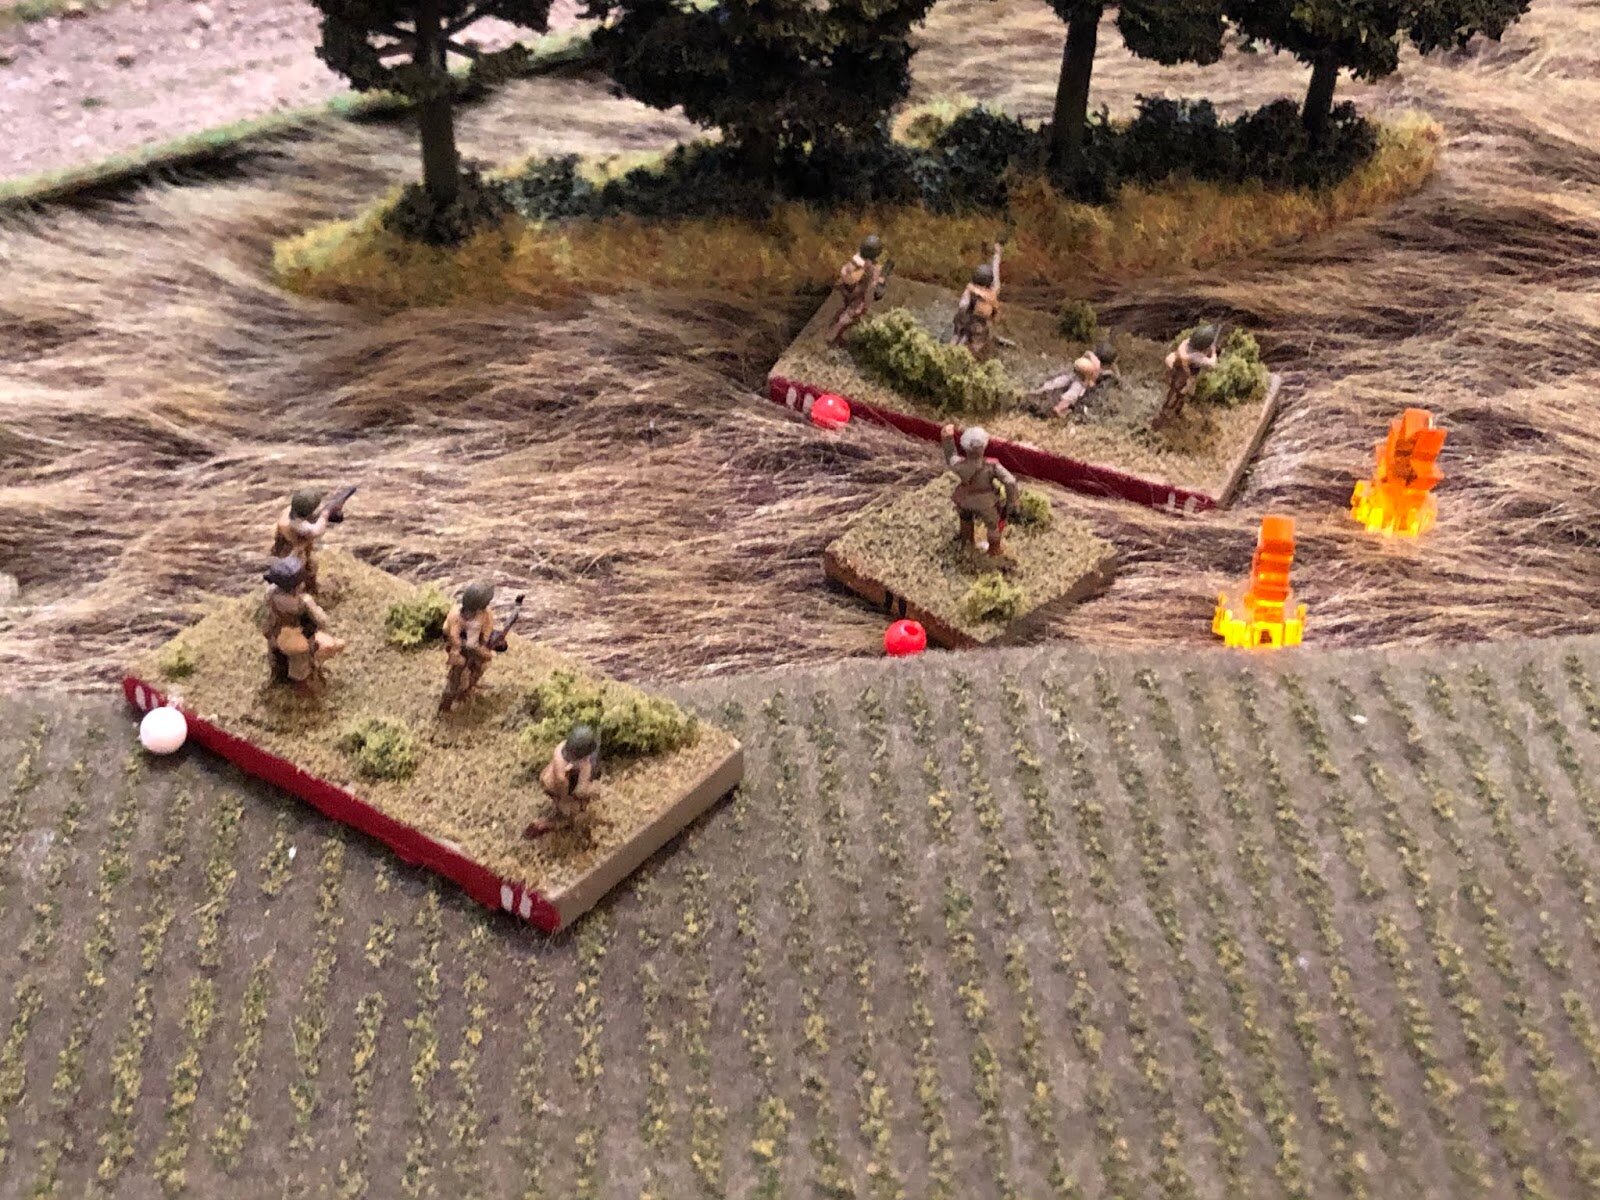
A fierce fight broke out between the British infantry contingent (two MMGs and two sections of infantry) and my tanks: the PBI dropping grenades from the houses, my tanks raking them with machine gun fire. You can also see the survivors of the light tank platoon joining in. As the battle ended, the German tanks had picked up a bit of Shock but had just about halved the numbers of infantry.
It was a stupid thing to do, however. I would have been much better hanging back and letting the 75mm guns on the StuGs and Panzer IV blow the houses down around the enemy foot, and then machine gunning any survivors in the rubble. I wanted to try and finish the game with a decisive win, however, so took the risk…
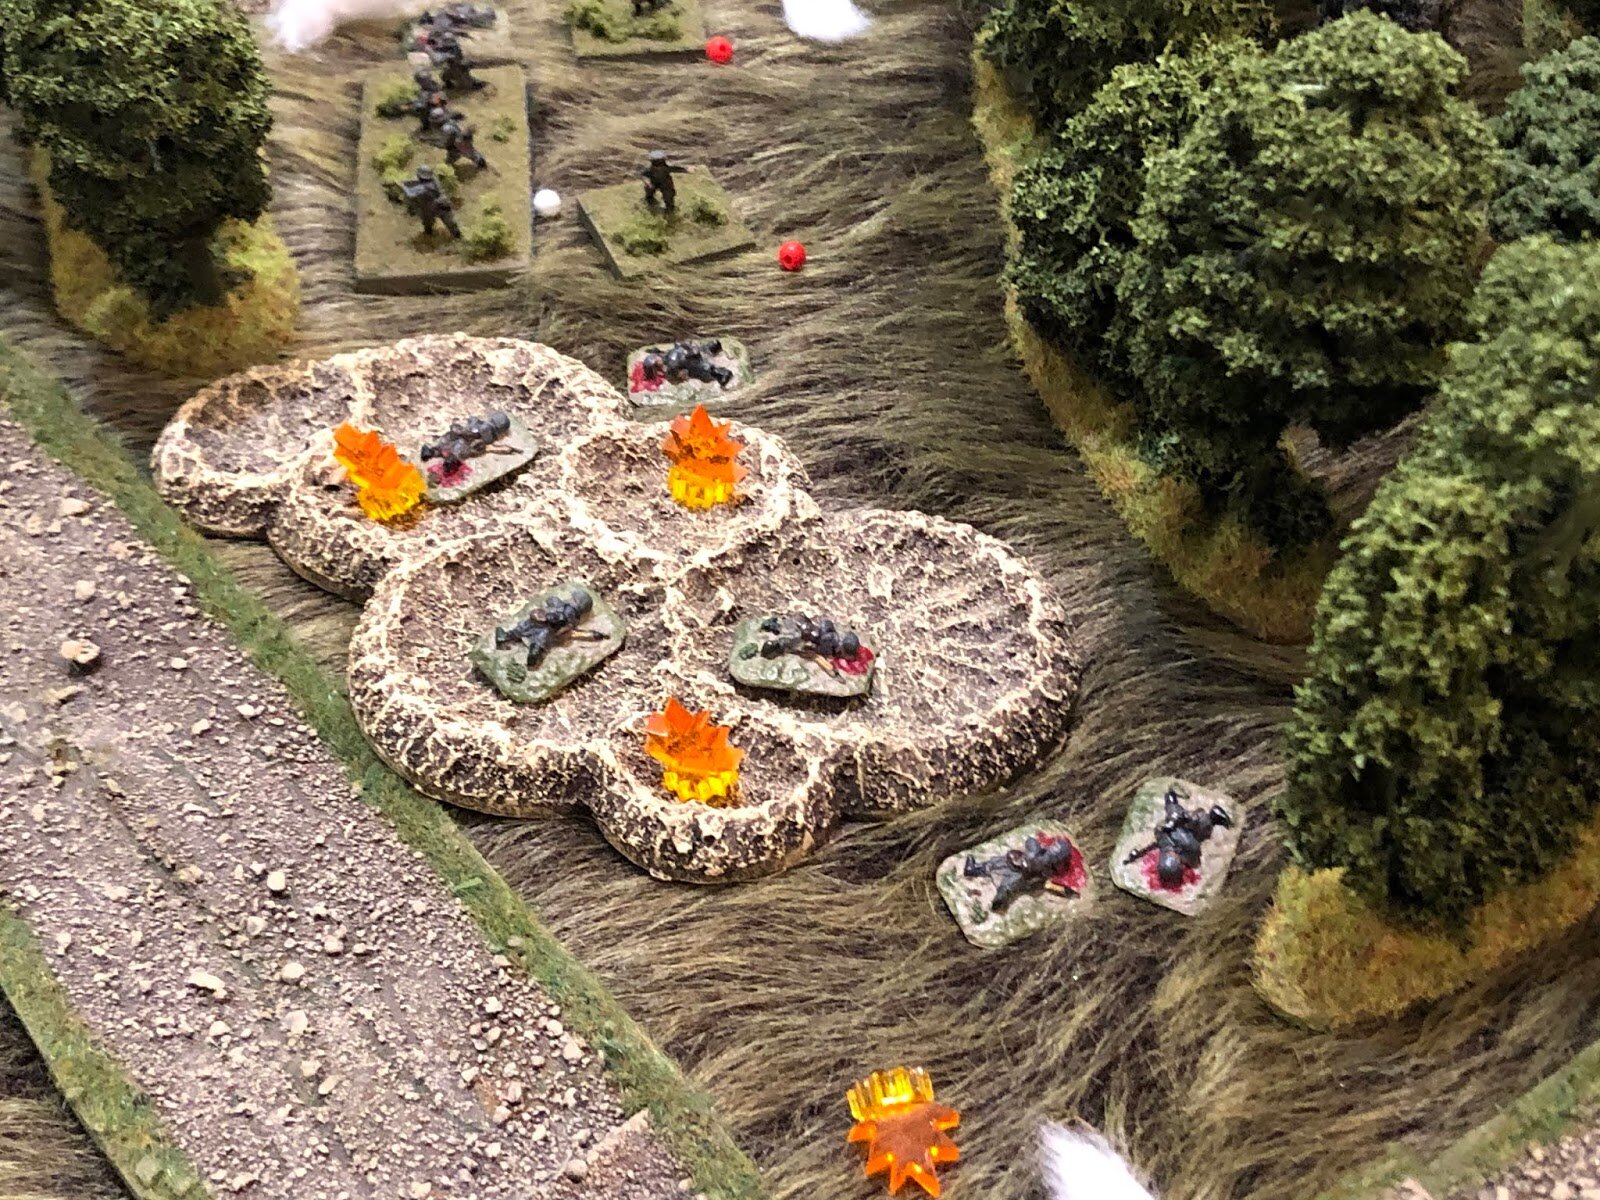
This is especially true as (and you can just see it in the picture, above) my off-table mortars had finally ticked all the boxes on their various forms for unscheduled fire, and landed the first of many bombs onto the anti-tank guns, one of which had moved round to cover the flank. It was a good shoot: knocking half the gunners out. A couple more of those and the way through would be clear
Aftermath
But the game had to end before all that because, as I said, I had to go.
The Allies had lost all four French tanks, two of three carriers, and had their infantry contingent reduced by about half. The Germans had lost half a platoon of infantry, but no tanks: those that were out of action had not been destroyed, their crews had bailed, meaning that “in real life” they could be recovered later.
My mission, however, had been to get troops off the table, which I hadn’t actually done yet. The Umpire therefore awarded the Germans a Moderate Victory, as all could see that the end was in sight for the Allied force.
A great game from a great scenario: my only regret is not having the time to finish things off properly!
Robert Avery

It's 1430 on 7 July 1943 in western Russia, where the German 292nd Infanterie Division has been caught off guard by forward elements of the Soviet 57th Tank Brigade. The Germans rear echelon troops (supply, maintenance, training company, administrative, military police, walking wounded, etc...) stage into the nearby treeline to mount a hasty defense and their commanders flee in search of reinforcements, which had better hurry as everyone can hear the roar of T-34 engines!
I am playing this game because I have the good fortune of being buddies with Steve of the "Sound Officer's Call" blog, and he is running a "Firestorm Ponyri" campaign. He is playing some games with his local buddies, but was unable to play all of the games himself; rather than simply 'dice off' for results of campaign fights they were unable to play on the table top, Steve asked if anyone in the blogosphere wanted to help, so here I am.
It's been a little bit of an issue that I literally just sold off a bunch of German late war gear, so I'm a bit understrength, but Steve is working with me to make sure the fights I get match up with the forces I have. This is the first fight I've played, and I hope it wasn't too much a pain for him, I certainly want to keep going! First, I love to play games; second, it's been way too long since I've played any Eastern Front games (maybe eight years or so?); and lastly, I'm a solo gamer that still craves some comradery, so whenever I can help another wargamer out, I'm always quick to jump at it.
Overview, north is up. The objective is the wood at center; there is a healthy hardball unimproved road network running throughout the area, with a small village present in the southwest (bottom left). Other than that it's manmade crop fields interspersed with a few stands of trees and untamed grassland.
This game is a bit smaller than the previous two; the first two were a reinforced German battalion vs a reinforced Soviet company or two. This one is a Soviet reinforced Company vs a German reinforced platoon, which is actually what the rules are designed for, so went a lot quicker. Also, there were no off-table reserves in this game, everything started on the table so I could get right at it.
Orders of Battle
German
Ersatz Infantry Platoon (PC and three rifle squads)
Ersatz Weapons Platoon (PC, two MG-42s, two 8.0cm mortars, and two PaK-38 5.0cm anti-tank guns)
Commanding Officer
Ersatz Mechanized Platoon (PC and three rifle squads in 3 Sdkfz 251 halftracks)
Ersatz Panzer Platoon (two Stug IIIG and one Marder PzJgr)
Off Table 120mm Mortar Platoon
Soviet
Rifle Company (-) two platoons of a PC and three rifle squads)
Weapons Platoon (PC and two Maxim .30-cal MGs, two 50mm mortars, and one 76.2mm 'crash boom' field gun)
Tank Company (-) (two platoons of three T-34s)
Tank Rider Company (-) (two platoons of a PC and three rifle squads)
Off Table 122mm Field Artillery Battery
Off Table 120mm Mortar Battery
I'm playing in 10mm (figures, vehicles, and gear a mix of Pendraken and Minifigs UK) based at one stand=one squad, weapon, or vehicle. I'm playing this game using Too Fat Lardies' "I Ain't Been Shot Mum" rules, simplified a bit in terms of combat, morale, and movement.
Overview, this time with troops.
The German defenders consist of their rifle platoon and weapons platoon dug-in on the west (left) side of Kastenwald (center), while their mobile force is coming from the northeast (top right). The concept with the mobile force is that the local HQ Battalion Commander ran off to scrape together whatever reinforcements he could find, and this is what he's back with: a 'panzer' platoon of two Stugs and a Marder, and he flagged down three halftracks to carry all the rest of the clerks, bakers, and candlestick makers he could find, which amounts to another platoon of 'infantry.'
The Soviets have their infantry company manoeuvring in from the southwest (bottom left), supported by their weapons platoon, while their tank company (with tank riders) are coming in from the northwest (top left). The goal is to take/hold the wood.
The Soviets southwest, where they have their 1st Rifle Platoon at left (in trees just above the right-hand building), their Weapons Platoon (the 76.2mm gun is next to the right-hand building, the rest of the Wpns Plt is in the field below it), and their 2nd Rifle Platoon is at bottom center. You can see the understrength Tank Company at top left.
The Game Begins


Wow, that was a tough one for the Germans, though Soviet sluggishness probably made it a bit closer than it should have been.
Not that the Germans didn't have a chance to pull it out, they just didn't seem interested! The Marder had enough shots to knock out everyone of the T-34s, he just didn't manage to hit a damn thing! And I don't think he was ever even actually shot at! And then the German halftracks and their inability to overcome the Soviet 2nd Rifle Platoon, which their PC had caught out in the open! Unable to finish them off, they ultimately succumbed to those very same Soviet infantrymen! I suppose the German Landser on the objective never really had a chance; they just took body blow after body blow from the Soviet off table artillery and 120mm mortars. Having said that, they were the only ones to knock out a Soviet tank!
But if the German armor and halftrack shooting could have been a little better, they may have just fought the Soviets to a standstill and force them to fall back.
Well, let's see what big Steve has got next for us. Awaiting my orders ;)
Just Jack

Operation Martlet, 25th June. Set up the table to play Day Two of the British attack on the German line at St Nicholas Farm and the Grand Farm. Figures were 15mm.
We used the Oh What a Total Bummer, dice driven version of IABSM. Iain Fuller gamely agreed to be the British and I take the German defenders.
Grand Farm to the right, St Nicholas on the left. View is from the British side.
The final game will be the whole attack, but today we just played a company attack on the Grand Farm, carried out by the Tynesdale Scots supported by the 24th Lancers. The initial assault wave was one full strength company and two troops of tanks. An AT troop was available, as was an AVRE. A pre game stonk also gave the British a flying start.
The Germans had one company to cover the whole table ( not just The Grand Farm!) two dug in Panzer IVs at St Nicolas Farm and a mobile reserve of HQ halftracks. There was also an off table force of four Panther tanks, but they would have limited table time (these were historically withdrawn in the late morning of the 25th to support the line as Operation Epsom started).
The game tested just one part of the attack and it worked really well. The full game will be run in November/December.
Next time we will have FOO per side and battalion mortar support.
Desmondo Darkin

Just played the In By The Back Door scenario: the seventh scenario from the excellent Sea Lion scenario pack, and not a reference to my sexual habits. Play was enhanced by being set against an audio backdrop of the fireworks being set off in the vicinity!
It's Folkestone, two days after the German invasion began, and a platoon of Kiwis are holding the station and vital Dover Road. From the wrong end of town, an entire company of FJ's descend on them. On the sixth turn, two Maori re-inforcement platoons are expected to arrive.
The battle opened with the FJ's moving smartly though the town. The Kiwis were a bit spread out, and the Germans managed to pin two sections of infantry and a Vickers (isolated by the heavy "town" terrain) with 2 platoon, and then close assault them one by one with 3 platoon from the flank.
The close assaulting FJ's of 3 platoon realised they were on a roll, and immediately followed up with another assault on the single Kiwi section guarding the station itself. This was forced out of the station buildings straight into the field of fire of the other FJ platoon, and regrettably ceased to exist. Lt Oskar Felther was awarded an Iron Cross for three consecutive successful close assaults, and settled down with his men to barricade themselves into the station.
The final section of Kiwis currently on the table (the re-inforcements had obviously got lost, not being from round 'ere, and were nowhere to be seen) was skulking in a small cottage at the edge of the table, exchanging long range fire with a couple of FJ MMG's, but was soon rendered ineffective by the combined fire of everything the Germans had available!
At this moment the Maori's arrived.
Faced with fighting their way onto the table, one platoon entered the terraced housing at the bottom left of the table, opposite the station, with the other outside in the gardens exclaiming at the sophistication of the loos.
Lt Felther's 3 platoon, in the station, suddenly found themselves under heavy fire: with Felther himself being killed by a sniper almost immediately. Casualties mounted rapidly, and the station buildings were soon empty of effective FJ's.
Meanwhile the so far untouched FJ 2 platoon and the second Maori platoon had both moved forward so that only a thin partition wall separated them. The Maori card came up first, and they decided to shoot house-to-house through loop holes etc.
Little damage was done to the FJ's, however, so when their card came up next, two sections offered the Maori's a taste of their own medicine but, being German, didn't play fair and blasted them with "a plethora of automatic weapons". With china ducks literally flying everywhere, the Maori's were supressed: a tad unfortunate as the other two FJ sections now close assaulted them.
The FJ's, being used to fighting Kiwis, expected another easy victory, and were somewhat surprised to come up against tattooed tribal warriors screaming haka at them and counting as elite troops in hand to hand! A brutal combat erupted, with good dice from the Maori's meaning they lost by only one '6'. Being elite's, the combat continued immediately for another round. The Maori's lost again, but again only by one dice, so the combat continued for a THIRD round. This time the Maori's were properly duffed up (there were only a few of them left!) and were ejected from the house not to advance again until a Big Man inspired them.
The FJ's were so battered, however, that they couldn't hold what was left of the house. With what remained of one section sacrificed to cover their retreat, the others blitzkrieged in reverse back to their start point.
This left one Maori platoon holed up in the bottom corner of the table, with the Germans in a loose ring around them. Big Men had been dying all over the place as well, so neither side felt like doing much: with the Germans currently in victory position as they held the station (1 platoon had advanced, delayed by the death of the CinC Major Stenzler, up the blind side and occupied the station, but, in a fairly obvious bit of gamesmanship, refused to show their faces and be shot at, content to be "in control" of the station building whilst hiding out of sight behind a wall of British Rail sandwiches.
Deadlock was broken by the arrival in spotting position (finally) of the FJ Forward Observer. He got into a position where he could see the houses the Maori's were in, but couldn't really be shot at, and then directed the loving attentions of the 4 81mm FJ mortars.
This was too much for the Maori's. Their final Big Man was killed (as I said, they were dropping like flies: the Empire troops lost all four of theirs, the Germans 4 out of 6!) and the battle conceded.
This took, believe it or not, only 2¾ hours of gameplay! I played the FJ's, with the Kiwis and Maori's commanded by my friend Dave: suffering from having had "the snip" four days before but ably supported (figuratively I hasten to add) by his 12 year old son.
The boy had only ever played Evil Empire games before...but I'm pleased to say that he declared that IABSM was far superior in every respect. I shall be bringing him to the next TFL Games Day, I hasten to add, as his ability to roll good dice was supernatural enough for me to check his hairline for the sixes he kept rolling!
Robert Avery

Having enjoyed our first IABSM game, Michael and I agreed to try the first scenario again, to see how the game flowed when we had some grasp of the rules. This time, I’d printed the scenario map out, made a new quick reference sheet including the Fire table and the Unit Actions table, and put stickers on the Big Man cards with each one’s name, rank, Command Initiative, and what they command. Last Friday at the NWA was very busy indeed – when we went to grab a table, we found there was only one trestle left. Luckily an old hand pointed us to some others. After a period of dithering, we decided to just play the sides we’d played last time.
After we’d set up the table, Michael spent a while writing his hidden deployment on the printed map. Having read the scenario a bit more closely I found that I had three pre game ‘stonks’, so I chose to spread them along the hedgerows and orchards bordering the wheat field I was to advance through. Michael then spent a bit more time rolling dice and writing notes while he resolved all that. I then placed my three platoons, with my dummy blind on the far left.
THE EMPTY BATTLEFIELD
We decided that we should make spotting easier than we did last time, so we decided that spotting would be only partially obstructed in the wheat field. The consequence of that was that my 3rd platoon was spotted in the very first action of the first turn. Michael had deployed his two tripod mounted MG42s in the centre orchard. They were only a little worse for wear after the stonk that had hit them, and they and my 3rd platoon exchanged shots for a few turns. That was not the best thing I could have done – I should have closed the range, but I kept just shooting back and forgetting to take cover. Another mistake I made was to move my dummy blind right up to a range where it was auto-spotted, but the Germans, who were in better cover, were not. That felt like a bit of a waste, but I didn’t have anything over on that side of the table anyway, so it wasn’t as if I could have done anything to the unit the blind was trying to spot. My other blinds made good progress down the table. My 1st platoon, on my right, was spotted and engaged by Michael’s 1 zug.
1ST PLATOON FACES OFF AGAINST 1. ZUG (BEHIND THE HEDGE)
Luckily the stonk that had hit that platoon gave them quite a beating, which meant that my platoon was able to do some good advancing by bounds. The Germans didn’t manage to kill many of them, but the platoon commander, Lt Watson, was kept pretty busy keeping his men moving. As an aside, it really made a difference having the Big Mens’ names on their cards (‘Come on Sgt MacAlpine’ is rather more catchy than ‘Come on Allied Big Man 4′). My 2nd platoon, still on its blind, managed to get in close to the orchard before it was spotted, and with some good shooting it was able to cause one of the German HMG teams to lose their bottle.
ALL MY FORCE IS NOW DEPLOYED (REMNANTS OF 3 PLT ARE OUT OF SHOT)
They then advanced right up to the hedge surrounding the centre orchard. Michael’s 2 zug deployed (it was them on my right, after all) and moved to the orchard as well.
Sadly we had to call it a night at that point. It would have been fun to see how the shootout in the centre orchard played out. The game flowed quickly enough, but I suspect that IABSM in Northwest Europe might need just a fraction more than a club night to finish a game. Playing at a club you have to do all the terrain setup and packing up on the night, and there’s a fair bit of terrain in a Northwest Europe game. To save time the stonk and hidden setup could be done before the game. Also I hope to have some Soviets painted in a few months, so there should be a bit less terrain to set up too. If I can get enough done I could host the odd game at my place, so that I could set up the night before and pack up the following day, so the whole evening could be used playing the game. The kids would just have to eat their dinner off the floor or something…
Small Sagas

Michael at the NWA and I have been attempting to have a game of IABSM for ages, and at last on Friday there was room on our dance cards.
We played the first scenario in the rulebook: North of Caen. Michael has a number of Crossfire armies, so it wasn’t much of an effort to glean the figures we needed for the two forces. Michael had the Germans, with two rifle platoons and a section of tripod mounted MG 42 medium machine guns. Facing him I had a British rifle company, with three platoons (let's say that I had A Company in a Regiment, so 7, 8, and 9 Platoons).
THE TABLE WHILE WE WERE SETTING UP. MICHAEL'S 2 ZUG WAS IN THE ENCLOSED ORCHARD IN THE CENTRE
We started off by misreading the ‘pre-game stonk’ rule, but I found out later that the area I chose to use the stonk on turned out to just have a dummy blind on it anyway.
I put Capt Jones, the company commander, with 8 Platoon, in the centre of my line, and my dummy blind on the right flank.
Michael spotted 8 Platoon fairly quickly, with his 2 Zug, which were deployed in an enclosed orchard. They came off their blinds, and the two platoons exchanged fire at fairly long range without much harm being done to either side.
My other blinds proved very difficult to spot, and I got a fair way down the table with them.
I moved my dummy right up to the blind that was on my right, and it proved to be the German machine gun section. Not wanting to get in a firefight with them I charged 9 Platoon, still on their blind, right up to close combat. At this point we realised that that was going to be costly for me. Each of Michael’s MMG crews ended up with nineteen dice (dug in, MMG attacked from the front, etc), against the nine dice that my assaulting sections could muster. The two MMGs held, just, and put one of my sections to rout. I did manage to cause one of the German MMGs to fall back, and the other was down to two men.
Meanwhile Lt Watson had led 7 Platoon into a good position to enfilade the Germans in the orchard, and with the combined firing of two platoons the Germans started to become weakened.
On the right flank I finally put paid to one of the Spandaus, but 9 Platoon was down to one section.
At this point Michael and I called it an evening. We had spent a long time discussing a few rules that we either couldn’t decipher or couldn’t find on the night, so the game went a little slowly. We plan to play the same scenario again to see just how fast we can play the game. I feel that we should be able to play the game pretty quickly the second time around. I’d definitely like to play some of the more advanced scenarios to see how tanks and artillery support feel because I enjoyed that little session.
Small Sagas

I Ain't Been Shot, Mum! game this evening at Hailsham Wargames Club. This was a refresher for myself, as it's been at least a year since we last played a game, and a first game for one of our newest members. Tim Howard very kindly played the Germans and hand held us through it.
A British infantry company supported by a machine gun section in carriers and a platoon of Shermans were clearing the hedgerows just off the beaches in Normandy. The Germans had a couple of platoons, attached MGs and a couple of PaK 40s deployed on hidden (map) Blinds. The British were coming on from table edge in full view of the Germans.
Fierce fighting ensued around the farm building, with both sides taking significant chunks out of each other.
The game concluded with a very narrow British victory. They wiped out a German platoon and two anti tank guns. In return, two of the British platoon were completely mauled.
It's easy to forget how great a set of rules IABSM is. It is however a bit like Marmite: you either love or hate it! I for one am a big fan of this game, and would play it more often if only the others at the clubs I attend would too. I think more persuading is required!
Joe McGinn


France 24 June 1940
The view along the Gravelines to Calais road
We played a game last night using TFL IABSM rules.
Robert Avery’s Defence of Calais booklet: ‘ Scenario 4: On the Road to Gravelines’.
I had completed some background reading on this battle. The unenviable task facing the British was to get a massive truck borne supply consignment of ratios from Calais to Dunkirk along the road via Gravelines.
Early in morning the convoy left the Calais Gate and travelled the route until it reached the village of Le Beau Marais where 1 Panzer Division forward elements had set up a substantial roadblock on the village crossroads and billeted up for the night.
In the early hours prior to the convoy journey two other British probes had received differing results. One force of carriers had turned back reporting German tanks in the area, whilst a second force of three light tanks and a A13 Cruiser tank of 3RTR had somehow passed through the roadblock unrecognised by the Germans manning the obstacle.
The game started with the British truck convoy reaching the roadblock and the Germans being alerted to their presence.
In short the battle went much according to the historical outcome. The lead tanks of the column quickly succeeded in dozering the obstacle to the roadside and causing sufficient casualties to its defenders to chase them off. However the Germans soon got their infantry up and awake and brought numerous support weapons to bear on their attackers.
Two 3RTR A13 tanks burst through the roadblock pushing it aside having immobilised a Sdkfz 221 and sent the defending infantry packing.
The road was soon blocked with abandoned armour leaving the British commander no alternative but to turn back and return to Calais. The rations not being delivered to the beleaguered garrison of Dunkirk.
Bruce and Dale played the Brits (I pushed the ration lorries along slowly) whilst Barry and Ralph defended. The NAaFI being provided by Archie ably assisted again by Steve.
Good points: The scenario was another to have players think about achieving their objectives quickly and efficiently; German difficulties exist because their Officership are all eating breakfast sausages in their separate billet and take time to conclude before rousing their hungry minions into action.
Bad points: I had a thick head and let a few rule errors in.
Plus points: I managed to complete all of the new industrial buildings and get them on the tabletop but alas I was unable to complete the school house build in time through illness. Bruce brilliantly put his Eaton playing fields fair attitude into the game and accepted full and absolute responsibility for the whole debacle. He has his firing squad in the morning.
Tim Whitworth


Colonnello Carlo Pellion di Persano's ride to glory, or some background for the story
This is a history-inspired campaign about the Italian invasion of British Somaliland in autumn 1940. In reality, three columns attacked from south and west and overpowered the defenders in short order. The British reinforcements allowed them to pull off a brilliant fighting withdrawal that saved most of their troops. Some Italian troops were sighted by the eastern coast, but a light cruiser firing a shore bombardment drove them off. This is an alternative story about the fourth column from the east, tasked with cutting off the British withdrawal routes. Timing is critical and the avenue of attack is non-optimal with lots of small passes, so a secret task has been given to a mechanized bersaglieri task-force (a reinforced battalion) with veteran autosahariana troops from Libya providing the recon force (its composition is not historical, you may commence breathing).
In the grand Italian tradition of making sure that at least titles are magnificent, this group is called Grande gruppo speciale di Africa Orientale Italiana (The grand special group of Italian East Africa), headed by capo di tutti, Colonnello Carlo Pellion di Persano. Facing him is an old British officer with a ragtag group of Indian troops, high on morale and determination, very low on everything else.
It is a story told with none too serious tone (think of Tintin and WW2 comics), so reader might be advised not to take it too seriously, either.
Both commanders have period maps of the area, with varying amount of help from GM.
Some of the persons of note we will later meet:
"Colonnello Carlo Pellion di Persano", capo di tutti
A rising star in the magnificent Italian army, one of the great leaders for the east African empire. Man of small stature but big ambitions, he was given this command as his forefathers were condottieri and leading armies is in his blood. He is the villain of our story.
Capitano Rafaello Peppone, commander of the autosahariana company
Operated previously in northern Africa, shipped here to spearhead the assault. He is a veteran of many years, hard but fair, loved by his men, distrusted by his superiors. What else could a recon company commander be?
Major Jacob "Indian-Jack" Montjoie
Old man carrying white man's heavy burden. Most of the relieving units are still lost at the sea, so he ended up commanding a battalion from 15th Punjab Regiment, tasked with flank security for the main force in Berbera.
A Missionary Man
"Don't mess with a missionary man. He's got God on his side. He's got the saints and apostles backin' up from behind."
August 9th, 1940 Ceelayo missionary station in eastern British Somaliland
Lieutenant Bruce of 1st Ceelayo militia (or Little-Bruce, bastard son of reverend Jeff Huntington, head of the Ceelayo missionary station, as he was usually called) was a man with a mission. Italians were coming, everybody knew that, but no-one wanted to fight them. King's African Rifles and other regular troops had been withdrawn from the eastern border to defend Berbera. It made perfect strategic sense - in case you were planning a fighting withdrawal like the cowardly high command was. So Bruce had raised his own militia from the able bodied men of the area and had received some second-rate weapons from regular and colonial troops before they had withdrawn: a dozen rifles, an old Lewis-gun and prized Vickers machinegun on an AA mount. Just enough for his band of brave men to give the spaghetti-eaters a bloody nose!
The previous days had seen the village prepared: the generator was ready for firing up the radio to signal to HQ that Italians were coming; AA was covering the village; the Lewis-gun was in a well-camouflaged and fortified forward position and a decoy artillery pit was there to draw enemy attention away from real defensive line. All was set for the self-titled Lieutenant's day of glory.
Early morning, sentries from both direction came running. From the east arrived an armoured car (home made from a truck) from Laasgoray garrison with two trucks carrying normal supplies. And from the east came a column of armed trucks, sporting Italian flags. And an ominous sound of bomber could be heard from the distance.

A SLEEPY MISSIONARY STATION
Initially everything went like a clockwork, decoy artillery soaked enemy fire while Bruce woke up his garrison, saw that they manned the firing line and then he ran to operate the radio.

LEWIS-GUN IN FORWARD POSITION OPENS FIRE. NO-ONE IS HIT BUT EVERYONE WITHIN HALF A MILE TAKES COVER
The Lewis gun had a brilliant opportunity as none of the Italian saharianas spotted it, but in their great excitement the militiamen shot wide and the Italian trucks passed the position with just a scare. The Italians came forward with wild abandon, all guns blazing. The lone goat attached to the wooden mannequins by the artillery pit finally escaped (six casualties and eight shock were absorbed by the decoy, so it worked well) and the saharianas concentrated their fire on poor militia. Several men were immediately gunned down and the rest never had an opportunity to return fire.

A moment later, most of the defenders were down
But Bruce got the radio running and the armoured car came forward to cover the retreat of trucks. It hunted forward carefully and engaged the forward-most sahariana platoon with its machine gun. Four gun-trucks against a lone MG was never going to be a fair game, but its crew fought valiantly. Two saharianas were shocked enough to retreat and one sustained serious engine damage before the 47mm gun found its mark and the last ace for defenders was abandoned.

AVANTI! AVANTI!
The "ghibli" bomber assisting the attack made a few passes, but as soon as it came closer, the tracers from the Vickers convinced it to take distance again. During the whole battle, AA Vickers kept up steady stream of fire, not causing much damage but frustrating attackers several times.
After his armoured reserve was lost and the trucks had disappeared over the horizon, Lieutenant Bruce decided that his duty to the King and Country was done, at least for a moment. So after several SOS messages, he destroyed the radio, ate the papers containing codes, and came out with a white flag, cheerfully congratulating the slightly befuddled Capitano Peppone on his lightning victory.
The Italians quickly rounded up rest of the militia survivors and placed them under arrest, while the area was secured. Tenente Visili led his reserve platoon in a chase for the escaped trucks and a while later came back saying that the trucks and supplies have been captured, mostly intact. Victory was reported to the commander of theGrande gruppo speciale di Africa Orientale Italiana. After an hour, while vehicles were being repaired, one of the guards came back to report that the leader of the prisoners along with a camel was missing, having overpowered the guards with a pistol hidden inside a bible. Fortunately everyone was sure that the lunatic would not get far in the scorching African heat, so incident was not reported upwards.
Topi

It's 0630 on 7 July 1943 in western Russia, where the I Battalion, Panzer Grenadier Regiment 101, 18th Panzer Division is carrying out an assault on Soviet defensive positions in and around the village of Snava (which is also a Soviet supply depot) held by elements of the 2nd Battalion, 676th Rifle Regiment, 15th Rifle Division. This is part of the German offensive to eliminate the Kursk salient, specifically on the northern shoulder of the bulge, as German forces push towards Ponyri.
I am playing this game because I have the good fortune of being buddies with Steve of the "Sound Officer's Call" blog , and he is running a "Firestorm Ponyri" campaign. He is playing some games with his local buddies, but was unable to play all of the games himself; rather than simply 'dice off' for results of campaign fights they were unable to play on the table top, Steve asked if anyone in the blogosphere wanted to help, so here I am.
It's been a little bit of an issue that I literally just sold off a bunch of German late war gear, so I'm a bit understrength, but Steve is working with me to make sure the fights I get match up with the forces I have. This is the first fight I've played, and I hope it wasn't too much a pain for him, I certainly want to keep going! First, I love to play games; second, it's been way too long since I've played any Eastern Front games (maybe eight years or so?); and lastly, I'm a solo gamer that still craves some comradery, so whenever I can help another wargamer out, I'm always quick to jump at it.
Overview, north is up. There are a couple primitive roads, mostly running north-south, with a couple patches of heavy wood in the west (left), a large, man-made pond in the south (center bottom right), and the village of Snava in the east (right). Other than that it's flat terrain covered in crop fields broken up by a few stands of trees, with over grown brush flanking them. The brush provides limited concealment, but no cover, and does not block line of sight. The buildings of Snava are stout stone structures, offering good cover.
The orders of battle:
Germans
Battalion Commander
1st Company (three rifle platoons of three rifle squads)
2nd Company (three rifle platoons of three rifle squads)
3rd Company (three rifle platoons of three rifle squads)
Schwere Company (MG platoon of four MG-42s, mortar platoon of four 8.0cm tubes, infantry gun platoon of two 7.5cm guns, and an anti-tank platoon of two PaK-38 5.0cm guns)
Panzer Platoon (five Pz IIIJ with long 50mm)
Battery of 10.5cm Artillery (off table)
Flight of Ju-87 Stuka dive bombers (off table)
Soviet
Battalion Commander
1st Company (three rifle platoons of three rifle squads)
2nd Rifle Company (three platoons of three rifle squads)
Anti-Tank Rifle Platoon (3 x PTRS-41s)
Anti-Tank Platoon (4 x 45mm ATGs)
Field Gun Platoon (3 x 76.2mm "crash-boom" guns)
MG Platoon (4 x Maxim .30-cal MGs)
Mortar Platoon (3 x 82mm mortars)
Tank Platoon (three T-34/76s)
I'm playing in 10mm (figures, vehicles, and gear a mix of Pendraken and Minifigs UK) based at one stand=one squad, weapon, or vehicle. I'm playing this game using Too Fat Lardies' "I Ain't Been Shot Mum" rules, simplified a bit in terms of combat, morale, and movement.
And again, this time with troops present. The Germans are attacking from the north (top); at top left is their 2nd Company, and at top center right is 1st Company, with their Schwere Company spread between them.
The Soviets are dug-in to four strongpoints:
Strongpoint Marta (in woods at left center), where they have 1st Platoon, 1st Company (platoon commander, three rifle squads, a Maxim .30-cal MG, and a 45mm anti-tank gun)
Strongpoint Katarina (in stand of woods at bottom center), where they have 2nd Platoon (1st Company, same as 1st Plt)
Strongpoint Masha (top right), where they have 3rd Platoon, 1st Company (same as 1st Plt)
the village of Nava (right), where they have 1st Platoon, 2nd Company (same as 1st Plt, 1st Co), a platoon of three 76.2mm 'crash booms,' and just in front of them, a platoon of anti-tank rifles dug-in in an ambush position
The Soviets have a platoon of 82mm mortar platoon of a PC and three tubes.
The German Panzer Platoon will start off table but come on as soon as possible following the initial strikes by supporting fires. The Germans are holding their 3rd Company and AT Platoon off table, in reserve. The Soviets are holding 2nd Platoon, 2nd Company, and their T-34 platoon carrying 3rd Platoon, 2nd Company, off table in reserve.
On the Soviet left flank is 1st Platoon, 1st Company, manning Strongpoint Marta.
In the Soviet center is 2nd Platoon, 1st Company, manning Strongpoint Katarina.
On the Soviet center-right, occupying the village of Snava, is 1st Platoon, 2nd Company, the Field Gun Platoon (3 x 76.2mm guns), and the Soviet ATR Platoon (bottom left).
And on the Soviet right flank (with Snava just visible at far left) is 3rd Platoon, 1st Company, manning Strongpoint Masha. This would be the scene of some incredibly intense close combat that would ultimately decide the fight here at Karpunevka.
And the Soviet 82mm Mortar Platoon in the southeast (bottom right, looking northwest).
The German far right flank, where 2nd Company has crept up to the line of departure, with half of the Schwere Company in direct support (far left, two MG-42s, two 80mm mortars, and a 7.5cm Infantry Gun).
In the German center, the German CO and the other half of the Schwere Company, supporting 1st Company's (just visible at top left) attack.
And the German far left, where 1st Company is prepared to cross the LOD, looking straight into the teeth of Strongpoint Masha (top center, with Snava at top right).
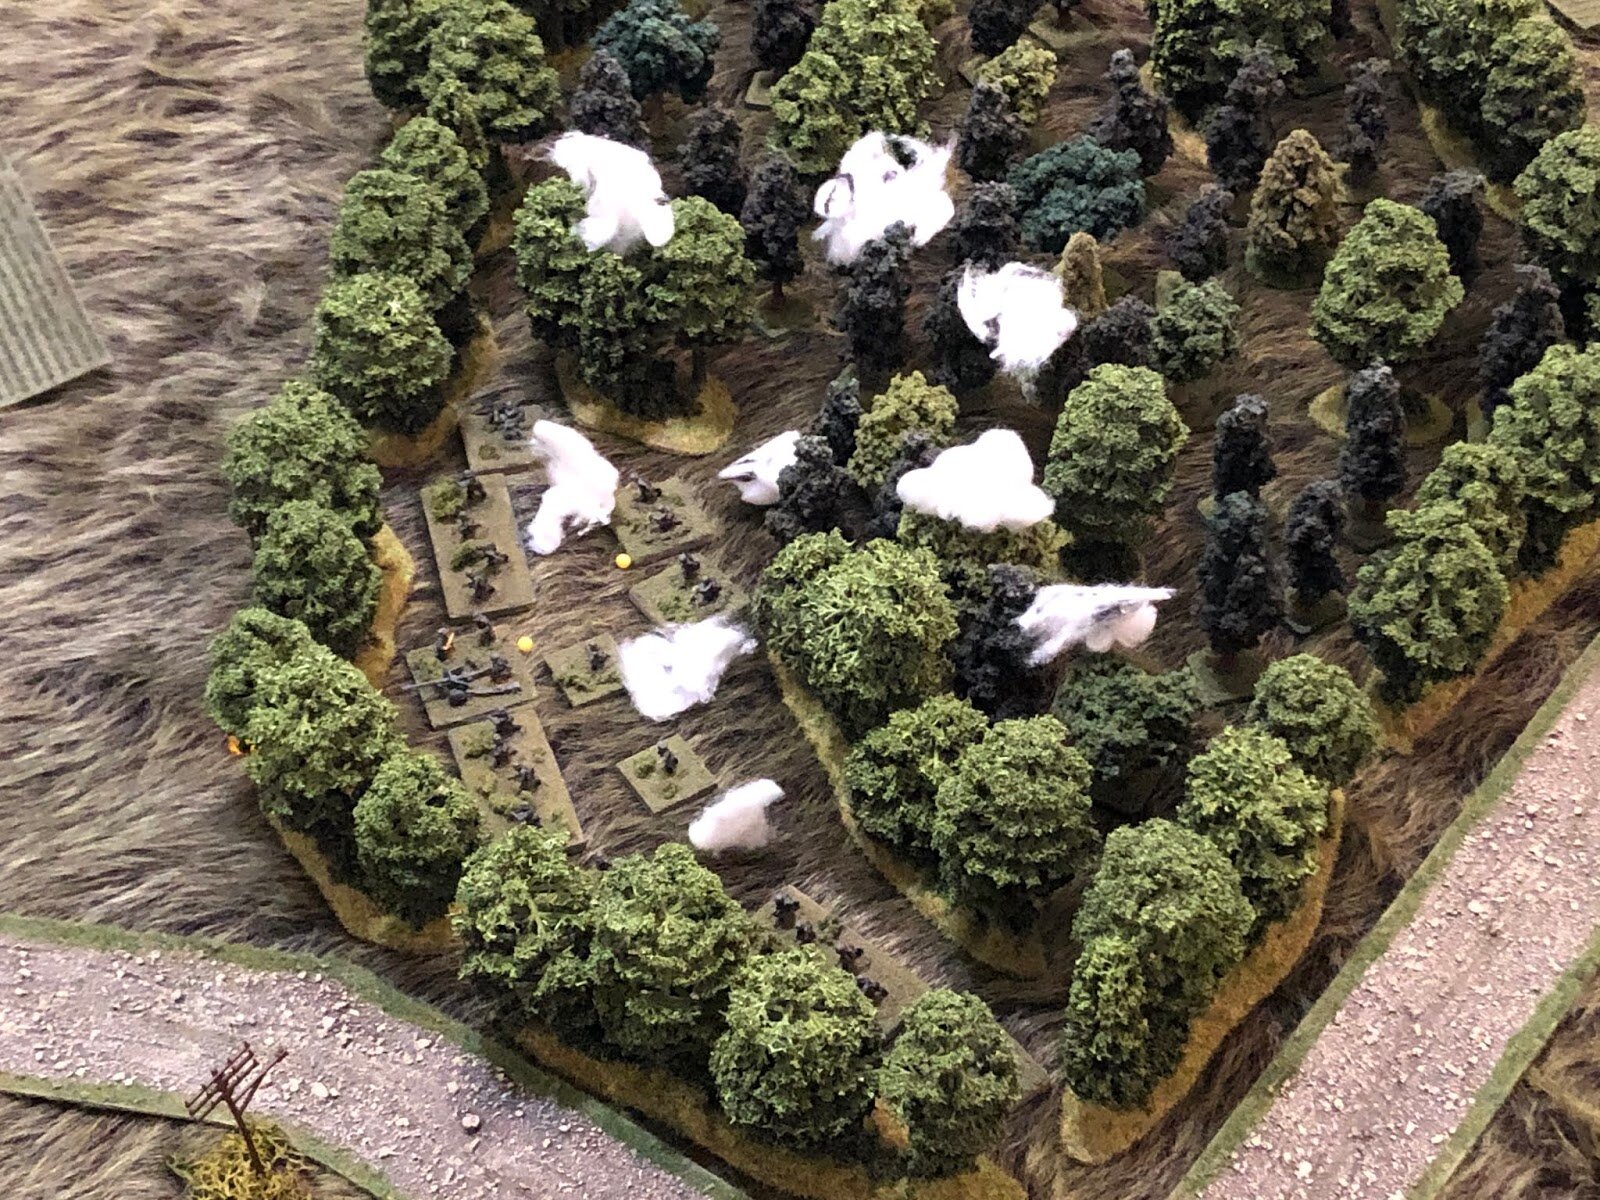
A buzz is heard in the distance, and all eyes turn skyward as a flight of Ju-87s streaks in...
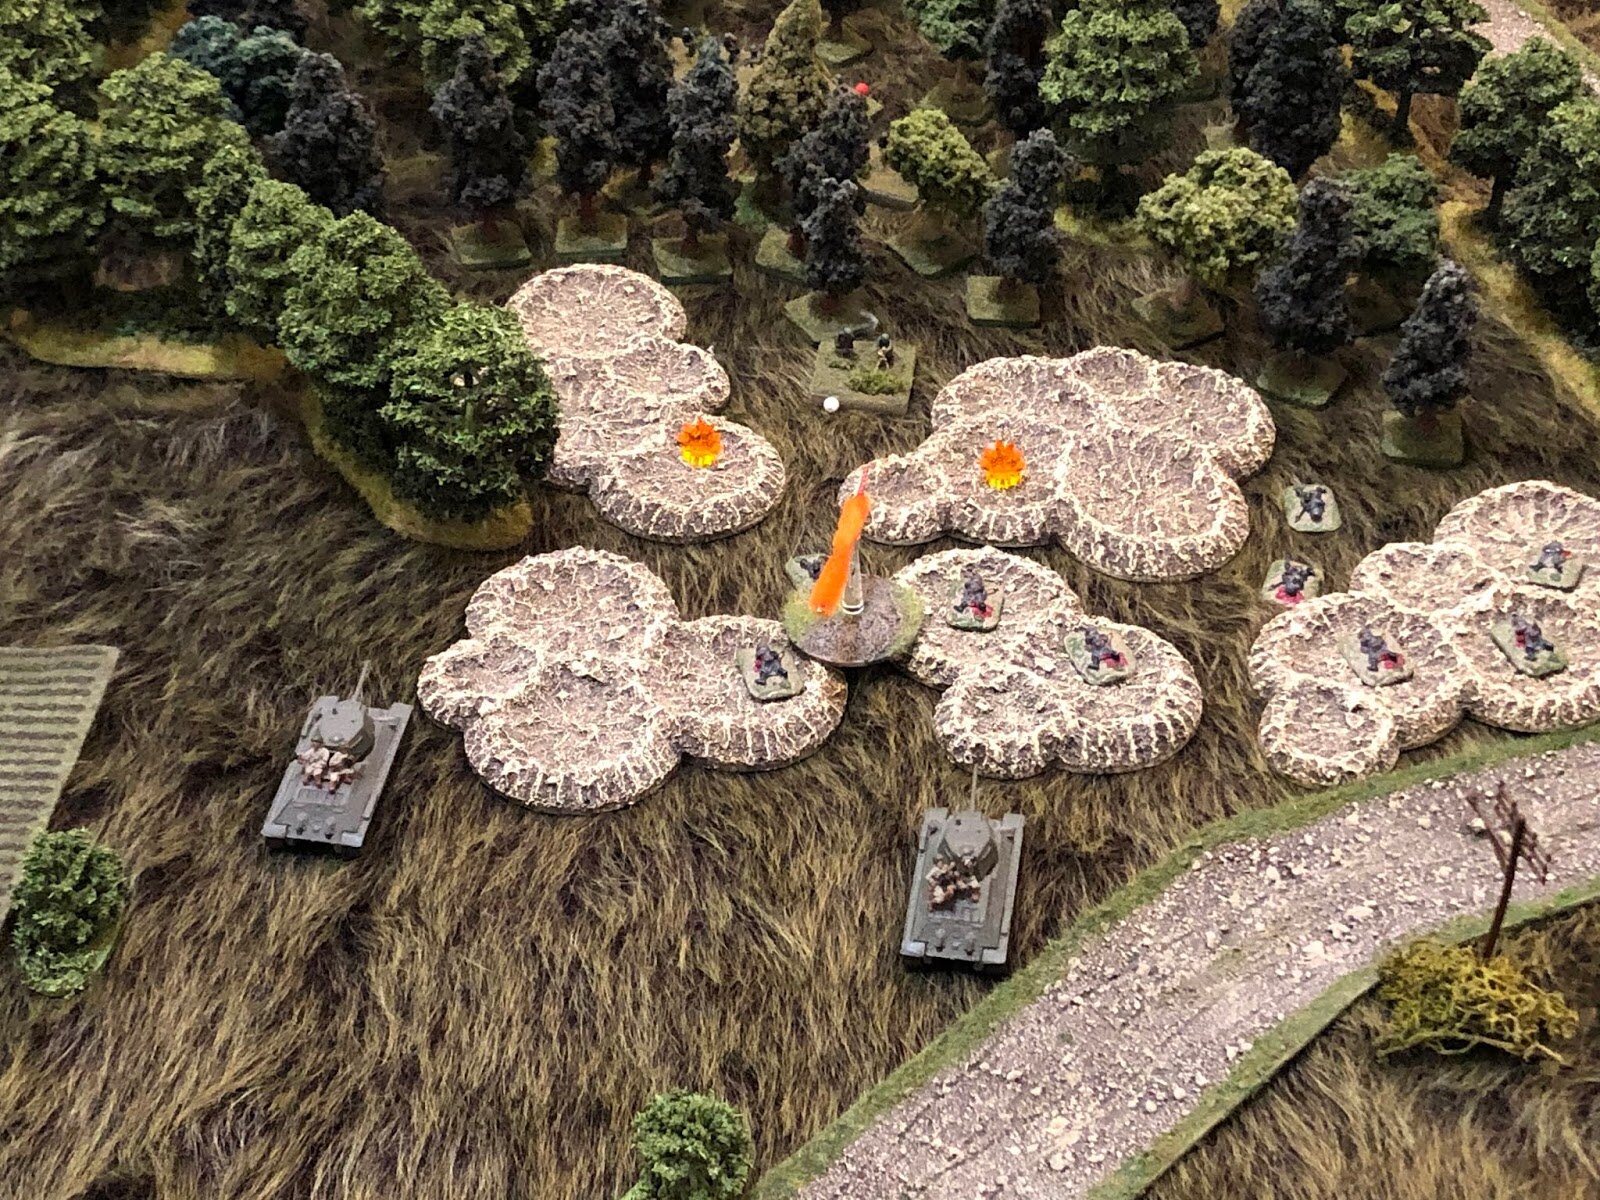
And drops its bombs on Strongpoint Marta, knocking out the Soviet machine gun team, putting casualties on two rifle squads and the 45mm ATG crew, and suppressing the PC and last rifle squad!
And then sky is filled with the sound of runaway locomotives...
Followed by German 150mm HE shells slamming into Strongpoint Masha, knocking outa rifle squad, putting casualties on two others, then suppressing the PC, the 45mm ATG, the MG team, and an adjacent 76.2mm Field Gun!
Attack!!!
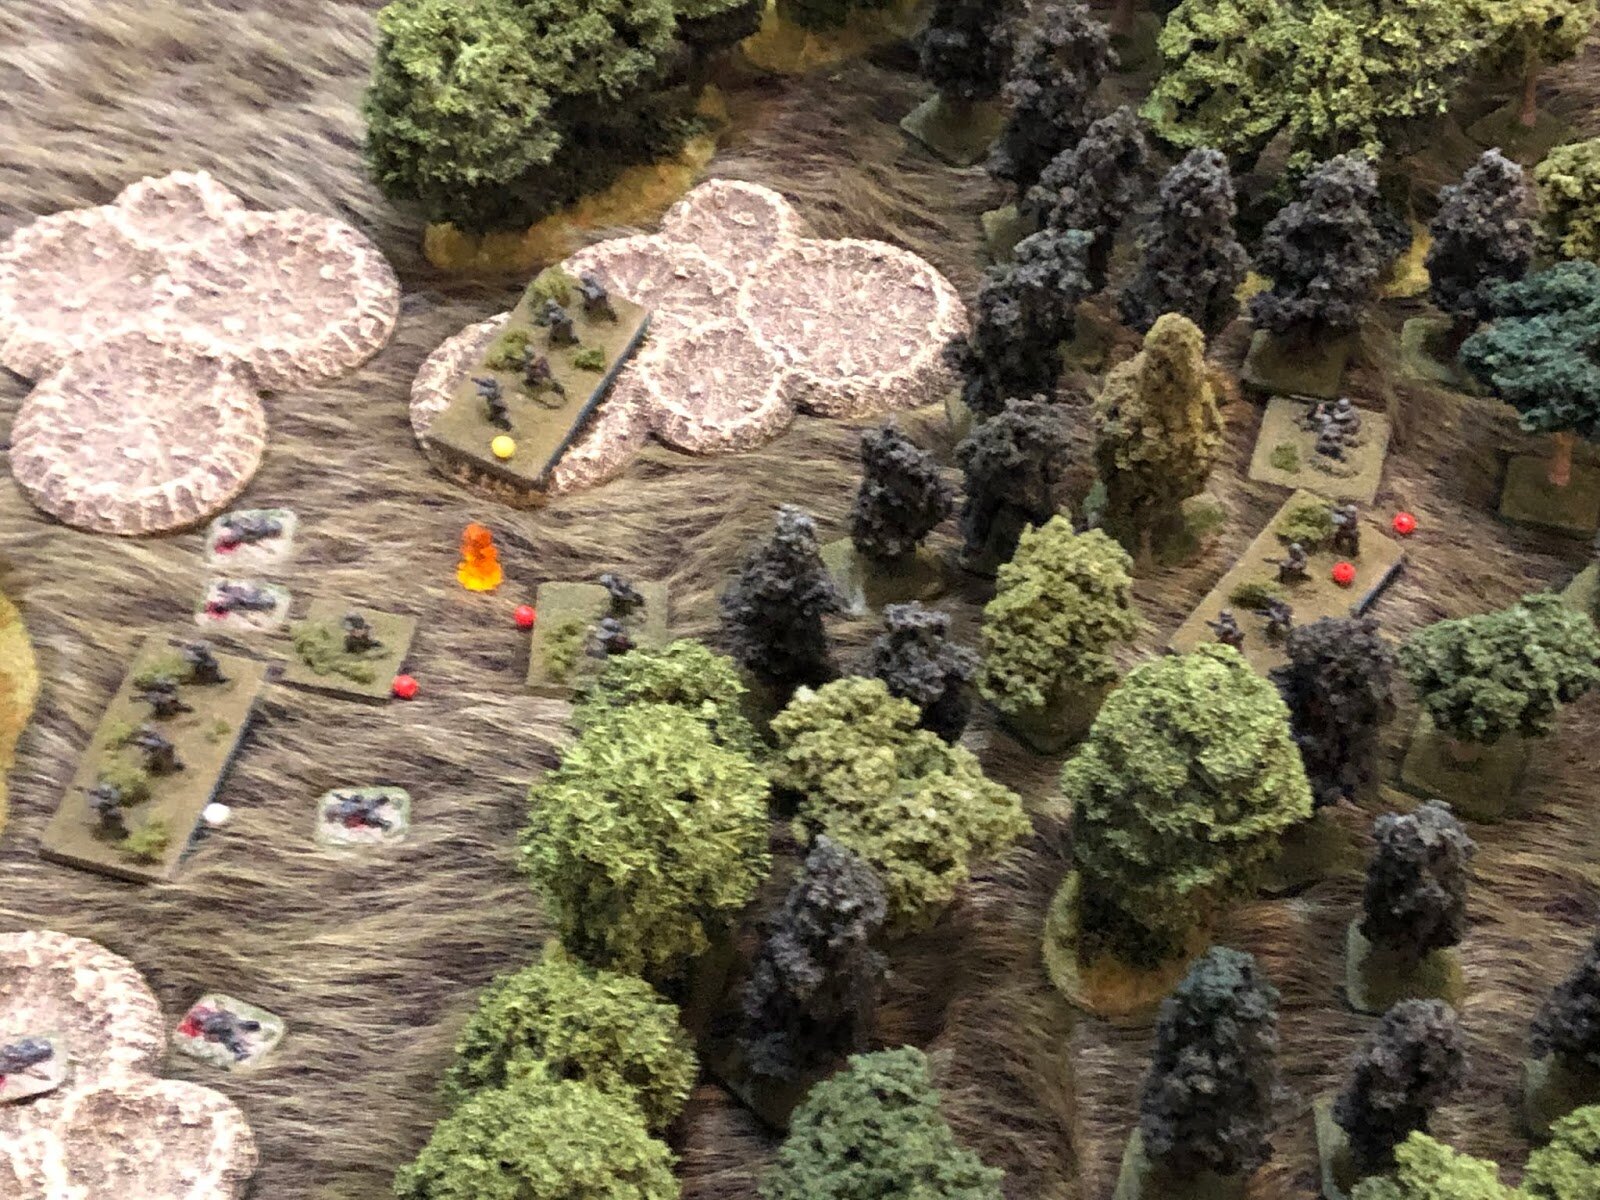
On the German left, the 1st Company (far left) looks on as they're Schwere Company attachments (mortars, MGs, and infantry gun, bottom left) open fire on Strongpoint Masha (top center)...
And the 1st Platoon and 2nd Platoons jump off into the attack, firing as they go.
The combined fire keeps Masha's defenders suppressed, even forcing the ATG crew and MG team to fall back out of the bunker!
On the German right, 2nd Company's Schwere attachments (far left) open fire on Strongpoint Marta (top right) as the 2nd Company attack jumps off (2nd Platoon moved up, center bottom, from bottom left).
But Masha's defenders (top center right) call in mortars (bottom right) on the German 1st Company (top left), knocking out a Nazi squad!
And that fire is joined from the south, where Strongpoint Katarina's machine gun team (in bunker at bottom left, firing past the ATR Platoon at center top, with Snava at top right) lays into the German 1st Company's flank (top center, approaching Strongpoint Masha, top right), knocking out another German squad while pinning a third!
On the Soviet left, Strongpoint Marta continues rallying back into fighting shape, though a rifle squad loses its bottle and fall back (bottom left, from trench)! Other riflemen open fire on the German 2nd Company (top right), to no effect.
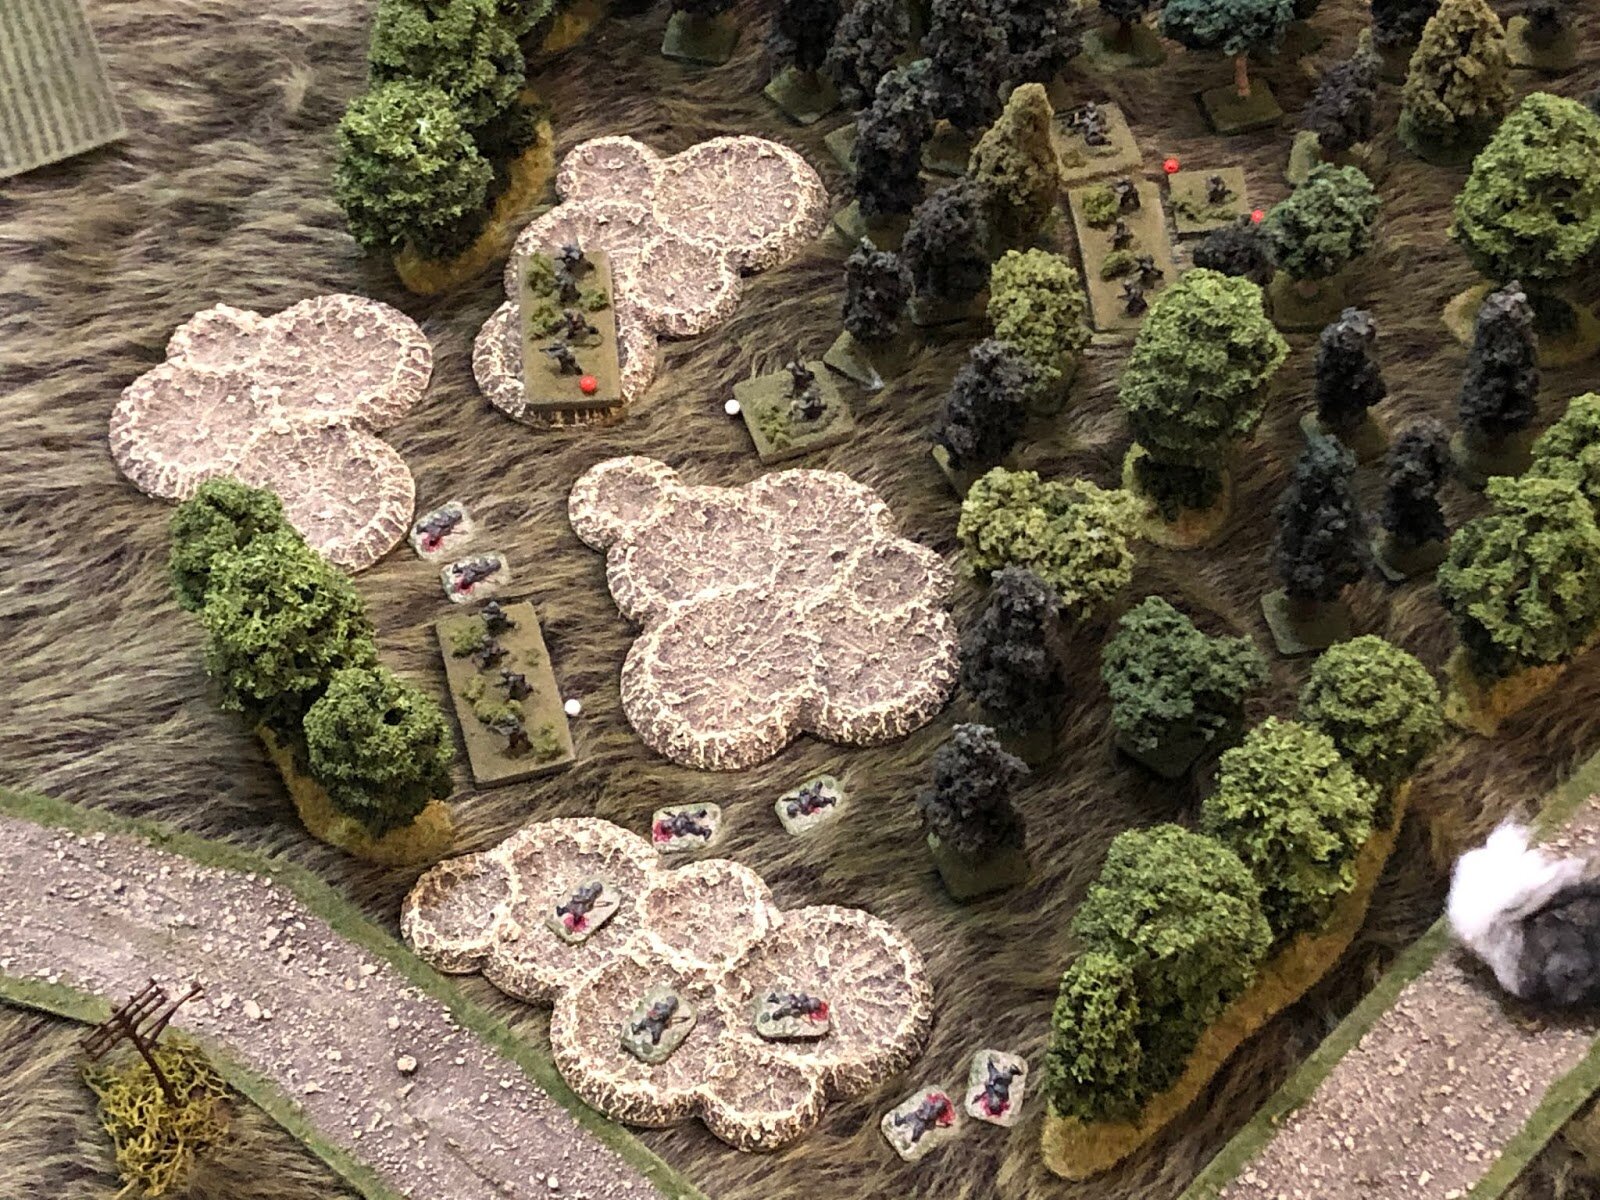
Back on the German left, the German Commander (bottom left) pushes 3rd Platoon up to maintain the momentum of 1st Company's faltering attack (top left, where 1st and 2nd Platoons are taking fire and pinned down), as their Schwere Company attachments (bottom center left) continue pounding Masha (top center).
The German 3rd Platoon leader pushes his lead squad up to the road (bottom center left, from bottom right), looking to get into Masha's abandoned bunker (you can see the Soviet ATG crew and MG team suppressed behind it at top left).
In Snava, the valiant platoon commander of the 'Crash-Boom' platoon sprints right to rally his suppressed #3 gun (far right, from left)...
But he takes a stray round (casualty figure at far left) and goes down, which is enough to convince the gun crew to haul ass (bottom right, with red bead) !
But the Soviets are able to rally a tremendous amount of firepower to counter the Germans 1st Company's assault, as the remainder of the Soviet Field Gun Platoon (the two gun emplacements at bottom right) open fire on the German 1st Company's Schwere Company attachments (top left), suppressing an MG team.
Strongpoint Katarina's bunker (bottom left) continues pounding German 1st Company's (top right) flank.
And the Soviet 1st Platoon, 2nd Company (in Snava, bottom left), opens fire on the poor German infantry caught in the open (top right).
All told at this point, the German 1st Company has two squads out of action, one 'men down,' one suppressed, and one PC and one squad pinned!
And then, as the German 1st Company's 2nd Platoon Commander stands up to rally his men, he is hit in the chest and goes down (casualty figure above the squad with white bead). So 2nd Plt, 1st Co is now leaderless and down to two beat up squads!
On the German right, 2nd Company continues its rather cautious advance on Strongpoint Marta (top right).
In Snava, the Soviet CO moves up and rallies the 'crash-boom' crew that had abandoned its gun (right, gun at center left), then signals for part of his reserve, the foot-mobile 2nd Platoon, 2nd Company, to move up and reinforce Masha (top center), which, despite the withering crossfire from the mutually supporting Soviet defensive positions, is still under tremendous pressure.
With the defenders of Strongpoint Masha (bottom right) suppressed, the Soviet riflemen and machine gunners in Snava (bottom left/center left) continue to pour fire into the German 1st Company (top center/right)...
Which forces the German 2nd Platoon to break and run (top right, from far left)! The supporting fire allows the Soviet Platoon Commander in Masha to work on rallying his men...
But the remaining German platoon commanders of 1st Company are aggressive combat veterans, and so they keep pushing: the 1st Platoon Commander leads one of his rifle squads forward (center left), so near Masha's bunker they can smell the borscht cooking!
The Soviet Platoon Commander (far left) has got his MG team (center right bottom) rallied, and now it's literally a race to see who gets into the bunker first! The Soviet Lieutenant begins to rush to the MG team to usher them back into the bunker...
But the German infantry gun attached to 1st Company (bottom left) keeps banging away at Masha (top right, with 1st Company at top left)...
Pinning him down (top left)!
Soviet mortars continue to fall on 1st Company (top left), but mostly the German assault troops have moved out of the kill zone, so only one squad is suppressed (red bead), as Soviet reserves begin to arrive at Masha.
Well, not exactly; concerned about German infantry (top right) nearing Masha's bunker, the Soviet Commander is forced to commit his 2nd Plt, 2nd Co, into the fight piecemeal, as they arrive. The 2nd Platoon's commander and 1st Squad arrive and move up (behind trees, at left bottom, coming from off table to bottom center left).
On the German right, the German Commander has ordered his Anti-Tank Platoon up, so they arrive in the northwest (far left), behind 2nd Company.
Which is only receiving sporadic fire from Strongpoint Marta (top right) causing it to advance ever so slowly, in fits and starts...
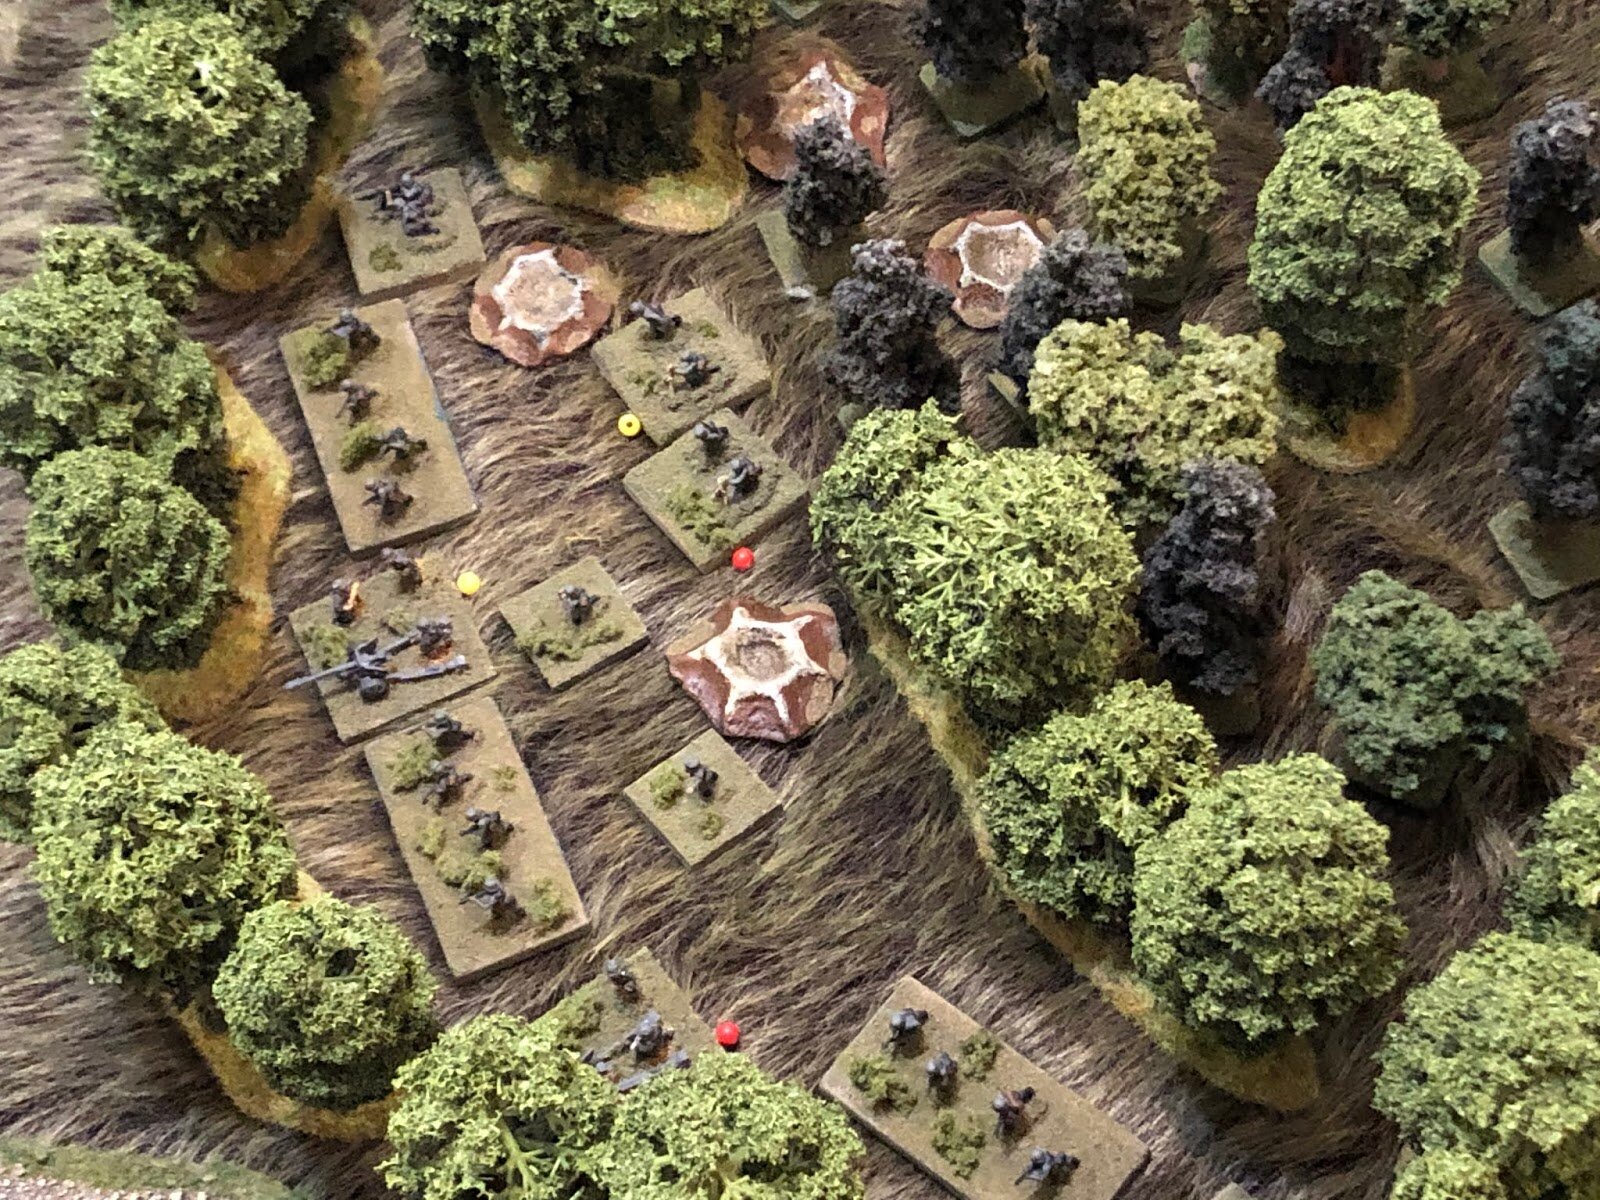
German Schwere Company (bottom left) continues pounding Strongpoint Masha (top center), knocking out a Soviet rifle squad...
As the 1st Company's 3rd Platoon Commander grabs a squad and charges up to the bunker, into close combat with the Soviet MG team (bottom center, from top right, with 1st Platoon's PC and a squad at top center)!
They quickly overrun the Soviet machine gunners and move on the pinned anti-tank gun crew, which is joined by their Lieutenant!
And the Soviets stand their ground (bottom left), throwing the Germans back in disarray (far right, suppressed)!
German mortars (bottom left) in support of 1st Company (fighting for their lives at top left) turn their tubes on Snava and begin raining 80mm HE rounds on it, knocking out 76mm gun #2, suppressing #1 and a rifle squad, and pinning the 45mm ATG crew!
While German mortars in support of 2nd Company (mortars at bottom left, 2nd Company at bottom center, moving slowly towards Strongpoint Marta (far right), seek to relieve some of the pressure being placed on 1st Company (top left), so they fire on Strongpoint Katarina (top right), whose machine gun has been punishing them...
Placing smoke directly on target!
The Soviet mortars (bottom right) adjust fire and continue dropping rounds on the German 1st Company (top center left), danger close...
The rounds knock out the recently thrown back squad from the German 3rd Platoon (center) and force their PC to fall back to the road (top right, with 1st Platoon PC and one squad at top center). The Soviet PC at Masha (far left) exhorts the ATG crew to get back in the bunker and re-man their gun...
But he mysteriously takes a round and goes down (bottom right), which is enough to convince the ATG crew (far right) and the least remaining rifle squad (top left)...
To get outta Dodge (right top, from left, with PC and 1st Squad from 2nd Plt, 2nd Co below them)
But now the fire on Snava (top right) from the German Schwere Company...
Is beginning to tell, as Snava's MG team (center, in house) is knocked out! Snava now has all three 76mm guns out of action (one KO, one suppressed, and one had its crew run off, and though they were rallied, they still haven't been able to return to their gun), its 45mm ATG suppressed, and its MG team knocked out.
And on the German right, despite the incredibly slow advance of 2nd Company (bottom right), the Schwere Company's (bottom left) fire on Strongpoint Marta (top right)...
Is having a deleterious effect, with every unit still in action looking a bit roughed up.
With more units beginning to fall back.
The German 2nd Company is making slight progress towards Marta (top right) as their 3rd Platoon moves through the woods and begins popping out the other side (top right end of woods at bottom center).
On the Soviet right, the 2nd Plt, 2nd Co, PC grabs his lead squad and rushes towards the abandoned bunker (center top, from bottom center).
Right back where we started.
While further left, in Snava, the Soviet CO finally coaxes the crew of 76mm gun #3 back up to their weapon.
Schwere Company fire (bottom left) in support of 2nd Company (right) on Strongpoint Marta (top right)...
Has become overwhelming, and empties it of Soviet troops! "Comrade, I hope the Lieutenant doesn't realize we all ran away from our position!" Soviet Lieutenant: "Shut up, Ivanenko, you're so stupid!" "Stupid, eh? What are you doing back here, Lieutenant?"
The Germans begin committing their infantry reserves: 1st Platoon, 3rd Company, arrives (center top, the three stands in a row facing towards bottom) in support of the beleaguered 1st Company. The 1st Company's 3rd Platoon leader, suppressed on the road (red bead at center top right, with 1st Platoon's PC and a squad below him) stands up to rally the troops!

And is promptly laid back down, permanently (center top right)!
Things are looking up for the Germans as their platoon of Panzer Mk IIIs arrive in the center!
They immediately push south (Strongpoint Marta is at top right)...

While on the German right, riflemen are finally almost into Marta (top right).
But the defenders are all hanging out, out back! The Soviets are all suppressed at bottom center, the Marta trench is in the trees at center/center right, German 2nd Company is at center/top left, German tanks at top right).
German 150mm artillery shells crash down on Snava, further roughing up the defenders.
Over at Strongpoint Masha, the remaining two squads of the Soviet 2nd Plt, 2nd Co, arrive (left, with their PC and 1st Squad near the bunker, top right)...
The remains of 1st Company creeps right, towards Masha's bunker...
The last remaining officer, 1st Platoon's commander, and one squad get into the bunker and open fire on the Soviet reserve platoon trying to get into the bunker!
As the rest of 1st Company (center) attempts to isolate the objective (the bunker, far left) by fire.
But the German 1st Plt PC and squad getting into the bunker (top left) is enough to convince the Soviet PC and squad to fall back and regroup with the rest of their platoon (bottom right)!
German Schwere Company (bottom left) continues to pound Snava (top right), wracking up more casualties and keeping the 76mm Field Guns out of the fight.
As the smoke on Strongpoint Katarina lifts...
The German tanks push east...
And two of them (bottom left) begin pounding on Katarina (top right), knocking out a rifle squad and suppressing another, as well as the Soviet MG team.
The remaining German tanks turn their guns on Snava...
Knocking out 76mm Gun #3 (center, Gun #2 knocked out at bottom left) and suppressing the Soviet CO (just right of Gun #3)!
Gun #1 fires on Panzer #4...
A near miss shakes up the crew (yellow bead).
The German CO immediately moves over (far right, from bottom left) and rallies the crew.
As the German ATG Platoon moves up (still limbered, center left, from bottom left). The German 2nd Company continues advancing at its glacial pace (bottom)...
And the Germans finally have infantry in Strongpoint Marta!
And over on the left, German infantry (in bunker, center, and at their top right) are keeping Soviet infantry reserves (top left) at bay in Strongpoint Masha.
So far the Soviet Anti-Tank Rifle Platoon (bottom center) hasn't had much to do; despite the arrival (finally) of German tanks (top center), they're still not close enough for the ATRs to do harm, so the Soviet gunners lie there patiently, baking, waiting for the German steel beasts to come a bit closer.
On the Soviet right, German small arms fire has driven off one of the Soviet reserve squads!
Their Lieutenant curses his cowardly comrades, but orders his 2nd Squad (bottom right) to lay down a base of fire as his 3rd Squad moves to envelop (far left).
But the Germans continue to attempt to reinforce, moving troops towards the all important bunker (just visible at far right). The Soviet Platoon Commander knows he must do something before the Germans are able to marshal their strength on the objective...
So he lets out a 'Hurrah!' and charges, leading his 3rd Squad into close combat with a German squad on the other side of the trench!
The marauding Soviets quickly knock out the squad, then turn and advance down the trench, into the bunker, where grenades, spades, and trench knives are wielded...
But the Germans mow them down in the trench!!
Seeing their Lieutenant and comrades mowed down at the bunker (top right), the last remaining squad of 2nd Platoon, 2nd Company, flees the battlefield (bottom left)!
But, just in time, just like the cavalry in the old-timey Westerns, the last of the Soviet reserves arrive: 3rd Platoon, 2nd Company, riding on T-34s!!!
The Soviet reserve has come on directly behind Snava (far right), with Strongpoint Masha at top right and Strongpoint Katarina at bottom left).
The three T-34s immediately push on Masha, closing directly on the bunker...
And begin blasting it with their 76mm guns at point blank range...
Killing the German Platoon Commander and his squad!
And with that, the last two remaining squads of 1st Company head for the hills (top right, bunker at bottom left), three squads of 1st Platoon, 3rd Company between them)!
One of the Soviet tanks spots a Panzer III (top right) and fires...
Immobilizing the German tank!
Over at Strongpoint Marta, on the Soviet left, the leader of 1st Platoon, 1st Company, manages to rally all three of his rifle squads, though it's cost him precious time, time that probably will allow the Germans to get enough troops into the trench (top, where the Germans already have one rifle squad, top left), which will make it very, very difficult to dislodge them.
On the German left, 1st Platoon, 3rd Company gets ever so near to the bunker at Strongpoint Masha, though they've got to be careful, what with three T-34s and a platoon of Soviet infantry on the other side....
German artillery continues to pound Snava, but there's not much left. Hell, the Soviets don't have much left on the table worthy of a fire mission, but for the T-34 platoon, though it's recent arrival meant it couldn't yet be targeted. A rifle squad is knocked out, the last remaining 76mm gun (#1) is 'men down,' the PC is pinned, and the 45mm ATG crew falls back, abandoning the gun.
The German 2nd Company keeps pushing towards Strongpoint Marta (top right), but they're so slow, and still only have one squad in the trench.
Back on the Soviet right at Strongpoint Masha, T-34s continue firing on German tanks, ineffectively.
The German Schwere Company (bottom left and top left) packs up its MG and infantry guns on their trucks, preparing to displace forward.
The German 3rd Company's 2nd Platoon comes on (top left) behind their 1st Platoon, pushing hard on Strongpoint Masha's bunker (right, with two T-34s below it).
And the Soviet tank riders dismount on Masha...
Just as the German Stukas arrive for a second pass!
The birds of prey dive on Strongpoint Masha...
The Soviet PC's T-34 is knocked out (far right) and the other two tanks are suppressed, as are two of three Soviet rifle squads!
The big question is, can the German 3rd Company take advantage of this?
Aware of the threat to Strongpoint Marta (top left), the Soviet Mortar Platoon (bottom right) cranks their tubes over and begin dropping rounds in that direction...
Putting the squad in the trench 'men down,' suppressing their Platoon Commander, then pinning two nearby squads and another PC!
Down at Strongpoint Katarina, where the Soviet MG team in the bunker has a great enfilade shot on the German 3rd Company trying to get into Strongpoint Masha's bunker (and contributed significantly to the German 1st Company's route while trying to do so), but they're suppressed. The Soviet PC moves over and rallies them successfully!
But the German mortars immediately rain down and suppress them again!
With Soviet tanks spotted in vicinty of Strongpoint Masha (off camera to top right), the German ATG Plt PC moves one of his guns up (center right top, from bottom left), looking to get them into the fight.
While the German Panzer Platoon Commander pushes his tank forward (center top, from center)...
Before lurching to a halt and firing on a Soviet T-34 at Masha...
The 50mm armor piercing round skips harmlessly off the T-34's mantlet (top center), as the Soviet 3rd Platoon, 2nd Company, PC begins getting his men back into fighting shape after the Stuka attack.
On the German right there is some success as they finally get more men into the trench at Strongpoint Marta!
The Soviet 1st Platoon, 1st Company commander decides he cannot wait any longer, so he grabs a squad and leads them through the dense forest, into close combat in the trench!
But the veteran Landser are hardly surprised by marauding Russians appearing suddenly out of the forest, and the Communists are mowed down in their tracks!
The German PC an a squad dash ahead, looking to catch the Soviets off guard, and they pop through the other side (center, from the trench at top center), running square into the remaining two squads of the Soviet 1st Platoon, 1st Company...
Who promptly drop their weapons and surrender to the Germans!
Strongpoint Katarina's MG team finally gets back into action and lays into 3rd Company, suppressing several squads, which is furthered when the Soviet Mortar Platoon gets in on the action as well, pounding the hapless German infantrymen and suppressing some more of them!
German mortars (bottom left) begin pounding Strongpoint Masha (top center)...
And it's deadly, knocking out a Soviet rifle squad and suppressing the other two, freshly rallied, squads! The Soviet Platoon Commander can only manage to rally one of his squads, but it's all come down to this...
He (far right) grabs 2nd Squad and leads them around the bunker, into close combat against a German 1st Platoon, 3rd Company, that has been beat up by Strongpoint Katarina's MG team and the Mortar Platoon (all the red beads are suppressions)! The enraged Soviets easily knock the German squad and PC out, then turn on the next squad (top right), and knock them out too, completing the destruction of the German 1st Platoon, 3rd Company!
They rush into the street, braving fire from their own machine guns and mortars...
Where they crash into the lead squad of the German 2nd Platoon, 3rd Company!
The Soviets knock out the lead squad (far right) in brutal, hand to hand combat, sending the remaining two squads fleeing for the hills (top left)!
The spent Soviet heroes then fall back to the relative safety of the bunker at Strongpoint Masha, having saved their comrades, saved the defensive position, and saved Snava!
The German Panzers continue to advance and fire, knocking out a second T-34...
They push south and fire on Strongpoint Katarina...
They even push east and fire on Strongpoint Masha, but their 50mm guns aren't much use against fortified defenses, and the bigger issue is, with two of their three rifle companies seen off by Soviet tenacity, the Germans don't really have the infantry support left to continue and seize Snava. The German CO yells at the 2nd Company's commander to get his ass in gear; they've only now taken Strongpoint Marta, who knows how long it will take them to move on Katarina, then Snava. But it must be done...
But as 2nd Company is re-forming on Strongpoint Marta (top left), the Soviet Mortar Platoon again goes into action..
And the results are devastating, knocking out one squad, putting two more 'men down,' suppressing two PCs and a rifle squad, and pinning two rifle squads.
The boys just don't have it in them, so the CO orders a withdrawal.
But they were already leaving (top left, from bottom right).
On the south side of the Marta wood, the 2nd Platoon, 2nd Company PC and his lead squad are flabbergasted. They shoot the Soviet prisoners...
Then fall back to collect the casualties left by their comrades fleeing...
Well, that was a helluva fight! I really thought the Germans were going to pull it off after the Stuka strike on the Soviet tank platoon at Masha, but that damn MG team at Katarina and those damned mortars compromised 3rd Company's strength so bad that they were turned into a virtual house of cards, just waiting for a PC and squad from 3rd Platoon, 2nd Soviet Rifle Company to come up and blow them over. I'm really loving how "I Ain't Been Shot Mum" is working out for these games, it's been a lot of fun. I'd complain about how long they're taking, but, then again, it's kinda my fault: IABSM is designed to play reinforced company-sized games, but I'm playing battalion-sized games, so I really can't blame the rules.
I actually played two fights in Kursk this weekend, so stay tuned for the Soviet counterattack at Kastenwald!
Just Jack

A fictional scenario set in late May 1940. Using IABSM 3 & Platoon Forward (tweaked for company level ).
Ed's Note: i.e. Tony would play the Germans with the Allied force generated randomly
The German forces are heading for the English channel, Luftwaffe reconnaissance have spotted several undefended river crossings in a small market town some miles north. Division have sent you ahead to secure the crossings and town before a coherent defence can be organised.
German Force
Company HQ
Big Man Level 3
2 x MMG
1 x ATR
1 x Mortar 50mm
Kradshutzen Platoon
Big Man Level 3
Big Man Level 1
3 x Panzer II
3 x Squads of 8 on Motorcycles
Platoon Two
Big Man Level 3
Big Man level 1
3 x Panzer III
4 x Squads of 8
Air Support
1 x Stuka
The Allied force Blinds were totalled, then one third were placed on board representing remnants of French units and two thirds would represent a BEF force sent to bolster the defence.
These would arrive on turn one to four diced for at the beginning of the game. It turned out to be move one! In Platoon Forward the blinds are classed A,B or C so that you can deploy them with some degree of knowledge of what type of troops they represent but they are diced for only when they are spotted or deployed. In this game, the dice threw up a few surprises!
Platoon One with the Panzer IIIs take the left flank bridge; Platoon Two cross the centre ford; and Company HQ and the Panzer IIs head for the rail bridge.


During the game the first few Allied blinds revealed two armoured platoons and an anti tank gun, subsequent blinds melted away revealing little else, just one HMG and an infantry section. Without the poor bloody infantryman the town could not be held, the Germans had won.
Until the last two blinds melted away the game could have gone either way. It was also unusual to have so many tanks come up on blinds ( in my experience anyway ), but it was an enjoyable solo game playing against the unknown.
Tony Hobbz

Just back from holiday in Scotland via Birmingham. When we stopped over in Brum (well, near Solihull actually) I managed to get in a game of IABSM using our friend's 10mm 1940. He has only painted a limited amount so I had to fit the scenario around what he had.
Andy has read but had never played IABSM (I haven't played a lot either mind you) and I conscripted my 14 year old to play the British. We did not formalise commander's names but we did use a few which I will refer to.
German forces are racing for the Channel, Maj. Bob 'Boozy' Smythe of the Loamshires has been ordered to delay the enemy at the bridge at Limmette on the River Lys with his C Company (less a platoon held as battalion reserve), a carrier section, the battalion's one remaining 3in mortar and a borrowed MMG of the Cheshires. A section of engineers in labouring to blow the bridge before the Germans arrive. Recently arrived under Lt Trotter are a troop of MkVIB and a solitary A13, separated from 3 RTR. Two 2pdr AT guns of the RA were also provided without tows.
By contrast Hauptmann Anders Robschaft had under command two mixed panzer platoons (totalling 2 Pz II, 3 Pz III and 2 PzIV), led by Lt Gruber and two tired schutzen platoons with an MMG, mortar and an FOO with 2 105mm howitzers on call.
Neither side had light mortars (because there weren't any models) though the BEF did have Boys ATRs.
As we were using 10mm on a small 3' x 4' table we used 1.5cm = 1" which worked pretty well. The terrain was professional KJ Warren stuff which looked really good.

The Germans arrived from the NW edge by road - which ran off the the east next to a large wood and were faced by mainly open farmland with hedges and walls down to the river with its conspicuous stone bridge (left centre of the table as the Germans looked at it) and hedgerows and copses beyond. There was one large immature orchard on the German side but this did not reach the river bank. The German entry road had a junction at mid table where the road led over the bridge.
On the British side there was a stone house next to the bridge and some hedges etc between the river and a road running more or less parallel with the river.
Major Smyth quickly identified the existence of a ford on the left of his position and positioned one platoon on his left with an A13 and one of the 2 pdrs (which could also train on the bend in the road in front of the bridge). The other platoon was deployed in depth to the right of the house with the building having only the MMG, and AT rifle and the platoon leader. A 2pdr on the road to the rear provided protection.
The MkVIBs were left in reserve parked behind cover and the carriers parked on the road as emergency transport (not being armed). The sappers were under the bridge. As all troops were in cover no blinds were used. The sappers had an Event chip - on the third they would test as to how well they had blown the bridge.
The Germans steamed forward when they came on, although good British spotting from the top floors of the house detected a panzer platoon and infantry platoon early. In the event one German panzer platoon elected to go down the road to the bridge, the other to try the right flank with an infantry platoon and the other infantry platoon to advance through the orchard between the two tank units. The German left (British right) was not threatened.

It was noticeable that the Germans were disinclined to spot and the British left quite a lot 'on blinds'. The German onrush was spectacular and bloody - the RA served 2 pdrs plus the A13 (deployed on a tea break because the Germans had not spotted it) hammered the German armour with pretty ineffective replies (read poor saving rolls). By the end of the action two panzers had withdrawn for repairs, two were immobilised with other damage and the other three were burning hulks. Total BEF losses in the AT exchange was an A13 immobilised and one lost artillery crewman.
Insult was added to injury by the initial 3in mortar shot landing plumb in the middle of the orchard hitting two sections. Not to be outdone the left flank British platoon deployed to hammer the enemy infantry and soon Germans - even in OK cover at medium and long range - were dropping like flies. The German right hand platoon leader and the FOO were killed.
The Germans managed to kill a single BEF infantryman before deciding to fall back with 11-12 dead.
Entertaining moments:
- the panzer crewman from a Pz III with damaged main gun sent to check the damage on the bridge: BEF response was a full burst from the previously unspotted (but deployed) Vickers doing 4P to a single crewman ...
- the 2pdr shot against Lt Grubers Pz III which scored 5 hits on 6 strike dice and which resulted in one save - BOOM
- the Boys ATR which actually caused Lt Gruber to retire at extreme range
- the fact that the BEF rifle platoon commander seemed to activate virtually every turn
- the fact that the second BEF rifle platoon and the MkVIB troop did not fire a round
It should not have been that one sided but that's the way it ended up.
Edward Sturges


Time for another blast from the past: here’s an After Action Report from a game played five years ago. It was the first game played with what is currently my American army.
The table was very random, since it was pulled together from the collections of several people who were not actually going to play the game.
The American deployment was in hidden: with lots of widely scattered units spread amongst what little cover was available.
The German deployment, also in hidden, was less dispersed.
In this game I learned that you need to spread your troops out far enough apart so that they can move forward in a coordinated way without tripping over each other’s feet and blocking each other’s line of sight.


The Germans, although concentrated in one place, knew what they had come to do.

To win!
And therefore caught the Americans in total disorder.

American units were being destroyed one by one like clockwork!

As already mentioned, this game taught me not to deploy so many units so close together, as initially they hinder each other’s movement, especially if those initially deployed furthest forward are the slowest, and, if destroyed, then get in the way of the advance and the line of sight of those following.
Burt Minorrot


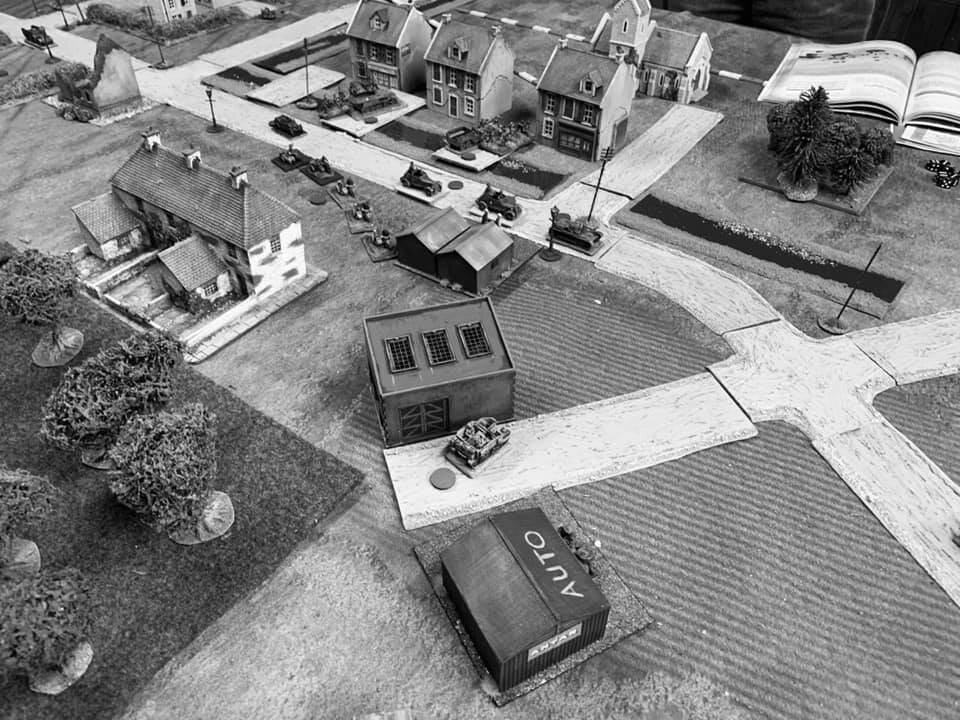


It's 1630 on 5 July 1943 in western Russia, where the I Battalion, Panzer Grenadier Regiment 101, 292nd Infanterie Division is carrying out an assault on Soviet defensive positions in the "Bunkerwald," held by elements of the 1st Battalion, 676th Rifle Regiment, 15th Rifle Division. This is part of the German offensive to eliminate the Kursk salient, specifically on the northern shoulder of the bulge, as German forces push towards Ponyri.
I am playing this game because I have the good fortune of being buddies with Steve of the "Sound Officer's Call" blog , and he is running a "Firestorm Ponyri" campaign. He is playing some games with his local buddies, but was unable to play all of the games himself; rather than simply 'dice off' for results of campaign fights they were unable to play on the table top, Steve asked if anyone in the blogosphere wanted to help, so here I am.
It's been a little bit of an issue that I literally just sold off a bunch of German late war gear, so I'm a bit understrength, but Steve is working with me to make sure the fights I get match up with the forces I have. This is the first fight I've played, and I hope it wasn't too much a pain for him, I certainly want to keep going! First, I love to play games; second, it's been way too long since I've played any Eastern Front games (maybe eight years or so?); and lastly, I'm a solo gamer that still craves some camaraderie, so whenever I can help another wargamer out, I'm always quick to jump at it.
A rather unassuming swath of land in western Russia, part of the Kursk salient. At top center is a forest known by the Germans as "Schwarzwald," while at center is "Bunkerwald," and there is an unnamed patch of wood at far left. There are three dirt tracks in a generally north-south direction, mostly towards the three human structures: the State Farm (bottom left), the District Seat (bottom center), and Alexei's House (center right). The rest is untended grassland pocked with cultivated fields; there are some wooden fences on the southern half of the table, as well as scrub around a lot of the fields, that neither blocks LOS or provides cover (just for looks), while there are some hedges strewn throughout the table that don't provide cover or block LOS, but do serve to 'disrupt' LOS a bit (making shots through a bit more difficult).
The Orders of Battle
Germans
Battalion Commander
1st Company (three rifle platoons of three rifle squads)
2nd Company (three rifle platoons of three rifle squads)
3rd Company (three rifle platoons of three rifle squads)
Schwere Company (MG platoon of four MG-42s, mortar platoon of four 8.0cm tubes, infantry gun platoon of two 7.5cm guns, and an anti-tank platoon of two PaK-38 5.0cm guns)
Assault Gun Platoon (reduced, only two vehicles)
Battery of 10.5cm Artillery (off table)
Battery of Nebelwerfers (off table)
Soviet
Company Commander
Rifle Company (three rifle platoons of three rifle squads)
Anti-Tank Rifle Platoon (3 x PTRS-41s)
Anti-Tank Platoon (3 x 45mm ATGs)
Infantry Gun Platoon (2 x 76mm guns)
MG Platoon (3 x Maxim .30-cal MGs)
Mortar Platoon (3 x 82mm mortars)
Combat Engineer Platoon (three flamethrower squads)
Assault Gun Platoon (3 x Su-76s)
I'm playing in 10mm (figures, vehicles, and gear a mix of Pendraken and Minifigs UK) based at one stand=one squad, weapon, or vehicle. I'm playing this game using Too Fat Lardies' "I Ain't Been Shot Mum" rules, simplified a bit in terms of combat, morale, and movement.
And here we go, with troops added. The objective for the game is possession of "Bunkerwald" (the path of forest at center bottom); the Germans want it and the Soviets currently have it. The fight will go until one side breaks, winner determined by ownership of the objective. The German baseline is in the north (top) and the Soviets at bottom (south).
Scheme of Manoeuvre
German
The Germans have infiltrated the bulk of their Schwere Company into the Schwartzwald (patch of woods at top center), where they have emplaced their machine gun, mortar, and Infantry Gun (IG) Platoons. Because of the pace of operations they have not had the opportunity to conduct a thorough reconnaissance, so they are proceeding with a generic 'double envelopment' assault. To that end, 1st Company is crossing the line of departure in the northeast (top right), with a lot of open ground to cover, while 2nd Company is using a shallow gully in the north-northwest (top center left) that runs north to south to infiltrate as close to the objective as possible.
The Germans are aware of enemy forces in Bunkerwald and in a stand of trees in the southeast (bottom right), so supporting fires will be used to reduce/suppress those positions. The Germans are holding 3rd Company and their ATG Platoon in reserve (off table).
Soviet
The Soviets are manning static defenses with a mobile reserve to counterattack any German breakthroughs. To that end, the Soviets are manning three fortified and (semi-) mutually supporting positions: Strongpoint Irina (in woods at far left), Strongpoint Anna (Bunkerwald), and Strongpoint Ilsa (in the southeast/bottom right). To that end, the Soviet commander has task organized his rifle company, MG platoon, ATR platoon, and ATG platoon into combined arms forces at each defensive 'hedgehog.' So each strongpoint consists of three rifle squads, one .30-cal MG, one ATR, and one 45mm ATG.
The infantry gun platoon is emplaced in the southwest (bottom left), while the mortar platoon is emplaced behind the State Farm, with its platoon commander acting as forward observer on the second floor of the State Farm building. The Soviets have their assault gun and combat engineer platoons in reserve (off table, with the engineers planning to ride into battle on the Su-76s).
German Initial Deployment


I suppose here I will make a comment on the rules and my setup: I'm not sure why, but I really sold the Germans short during this fight by only giving them Platoon Commanders (PCs), but not Company Commanders (of which they could have had three for the rifle companies). When I was setting up I just kinda blew it off as, 'well, they've got plenty of troops, plenty of supporting weapons, plenty of leaders, they don't need'em.' Well, in the attack, across open ground in particular, you can never have enough leaders...
Soviet Initial Deployment


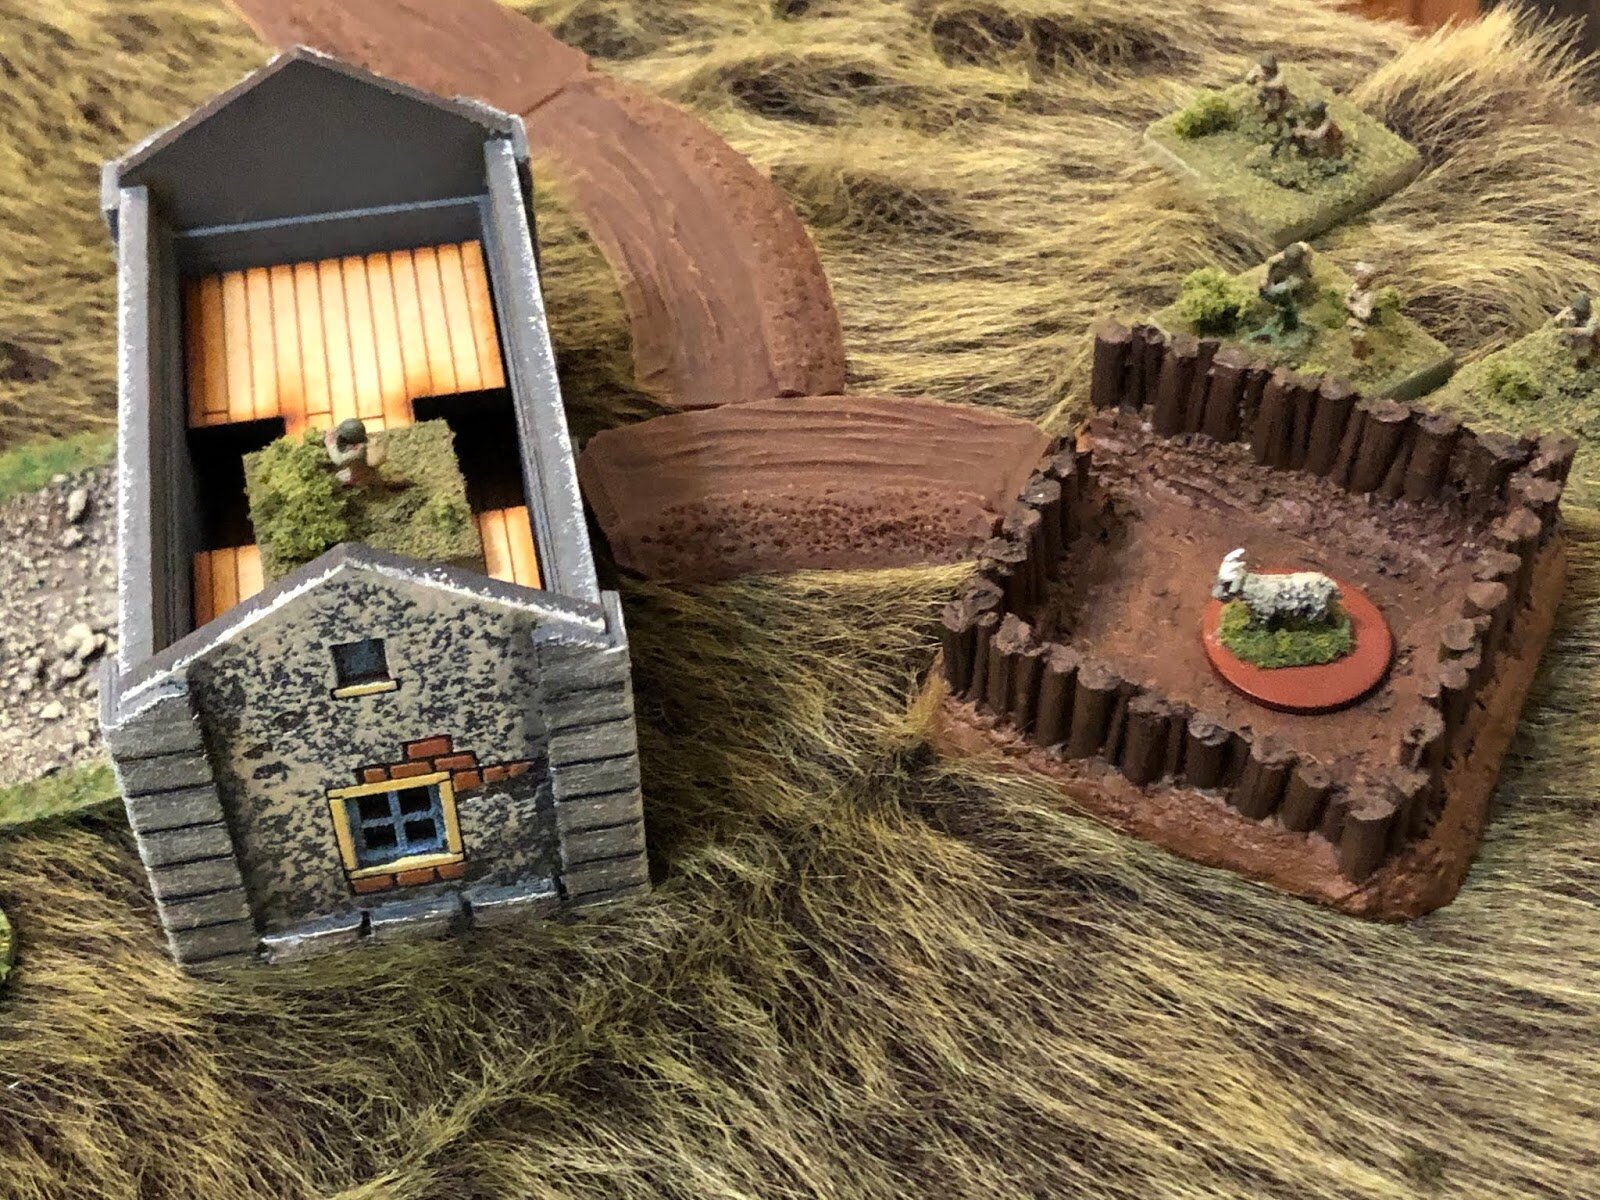


Off-Table Assets and Reinforcements


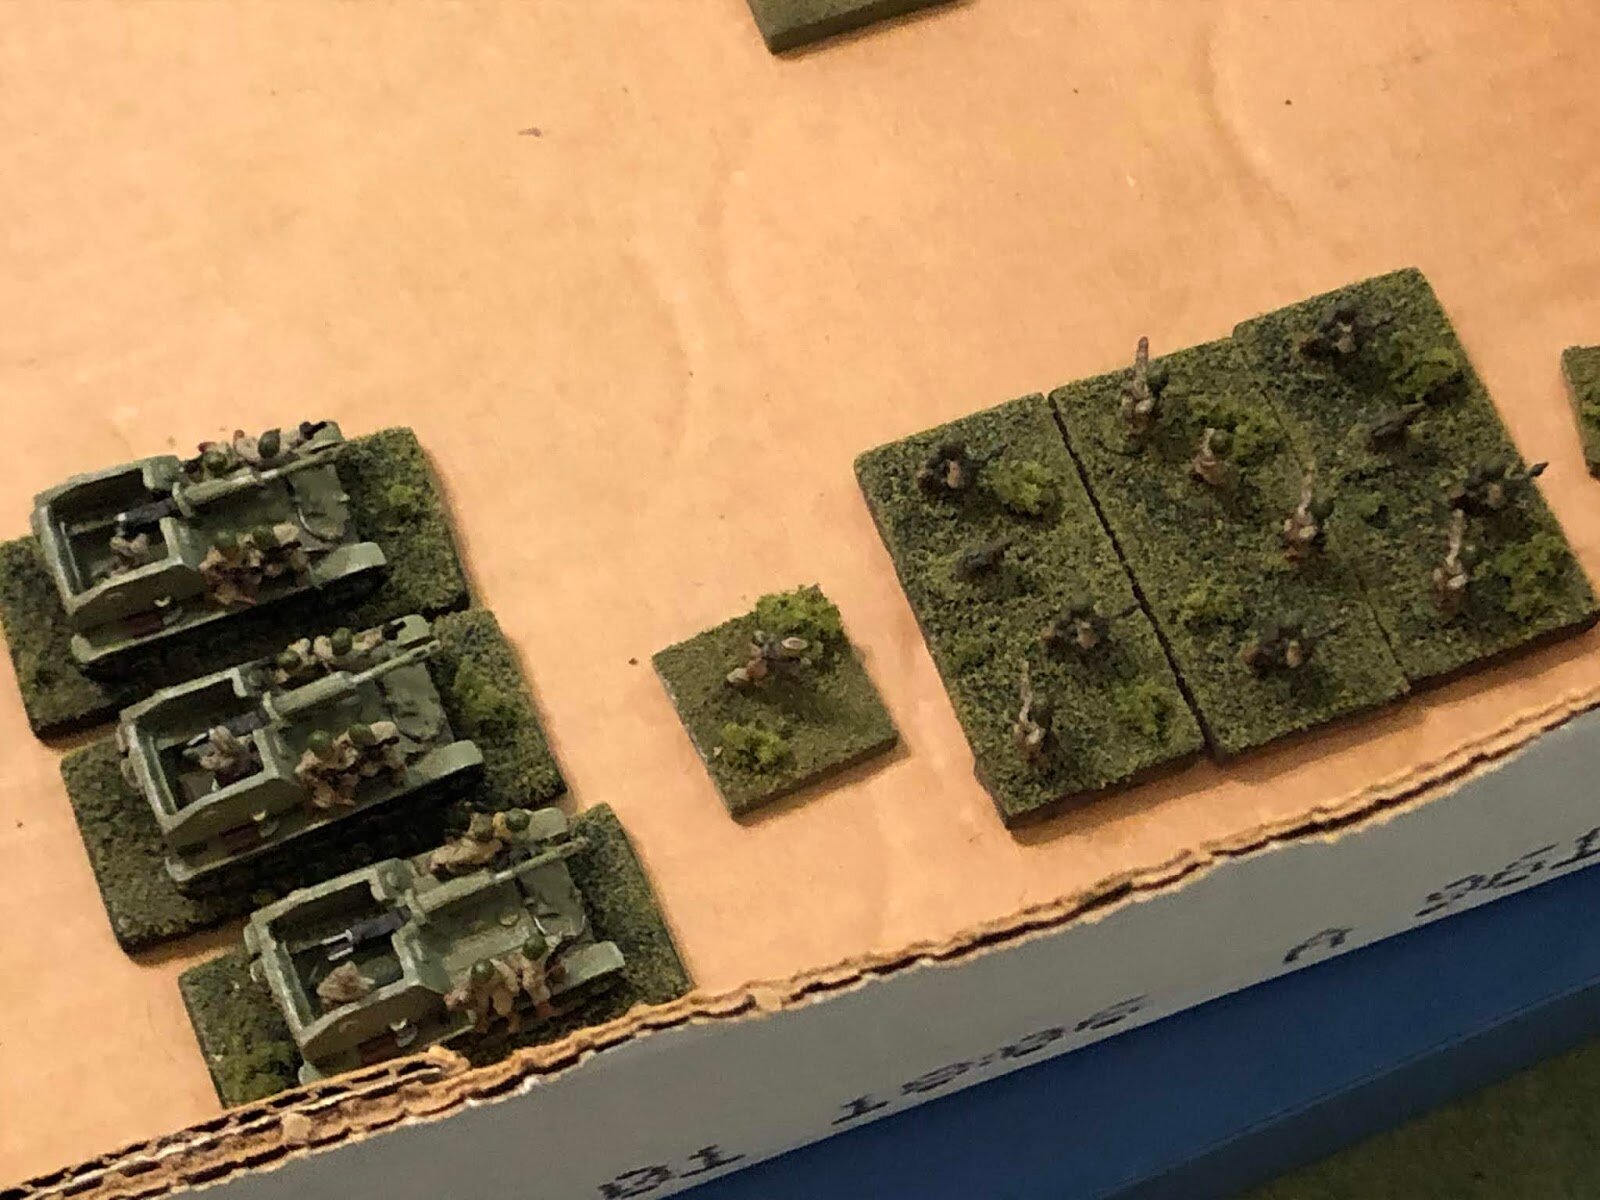
It’s Time to Fight
The battle begins with German artillery pounding the objective, Strongpoint Anna! 150mm HE shells, some quick fuse, some airburst, and some delayed fuse (to take care of bunkers) detonate, causing all sorts of headaches for the Russkies, but no real casualties, just pinning the PC and his MG team (below, left). While in the southeast, the Nebelwerfers slam into the earth occupied by Strongpoint Ilsa. This barrage causes significantly more damage, owing to the open topped positions: the ATR team suffers casualties and is 'men down,' two rifle squads are suppressed, and the PC and MG team are pinned (below, right).


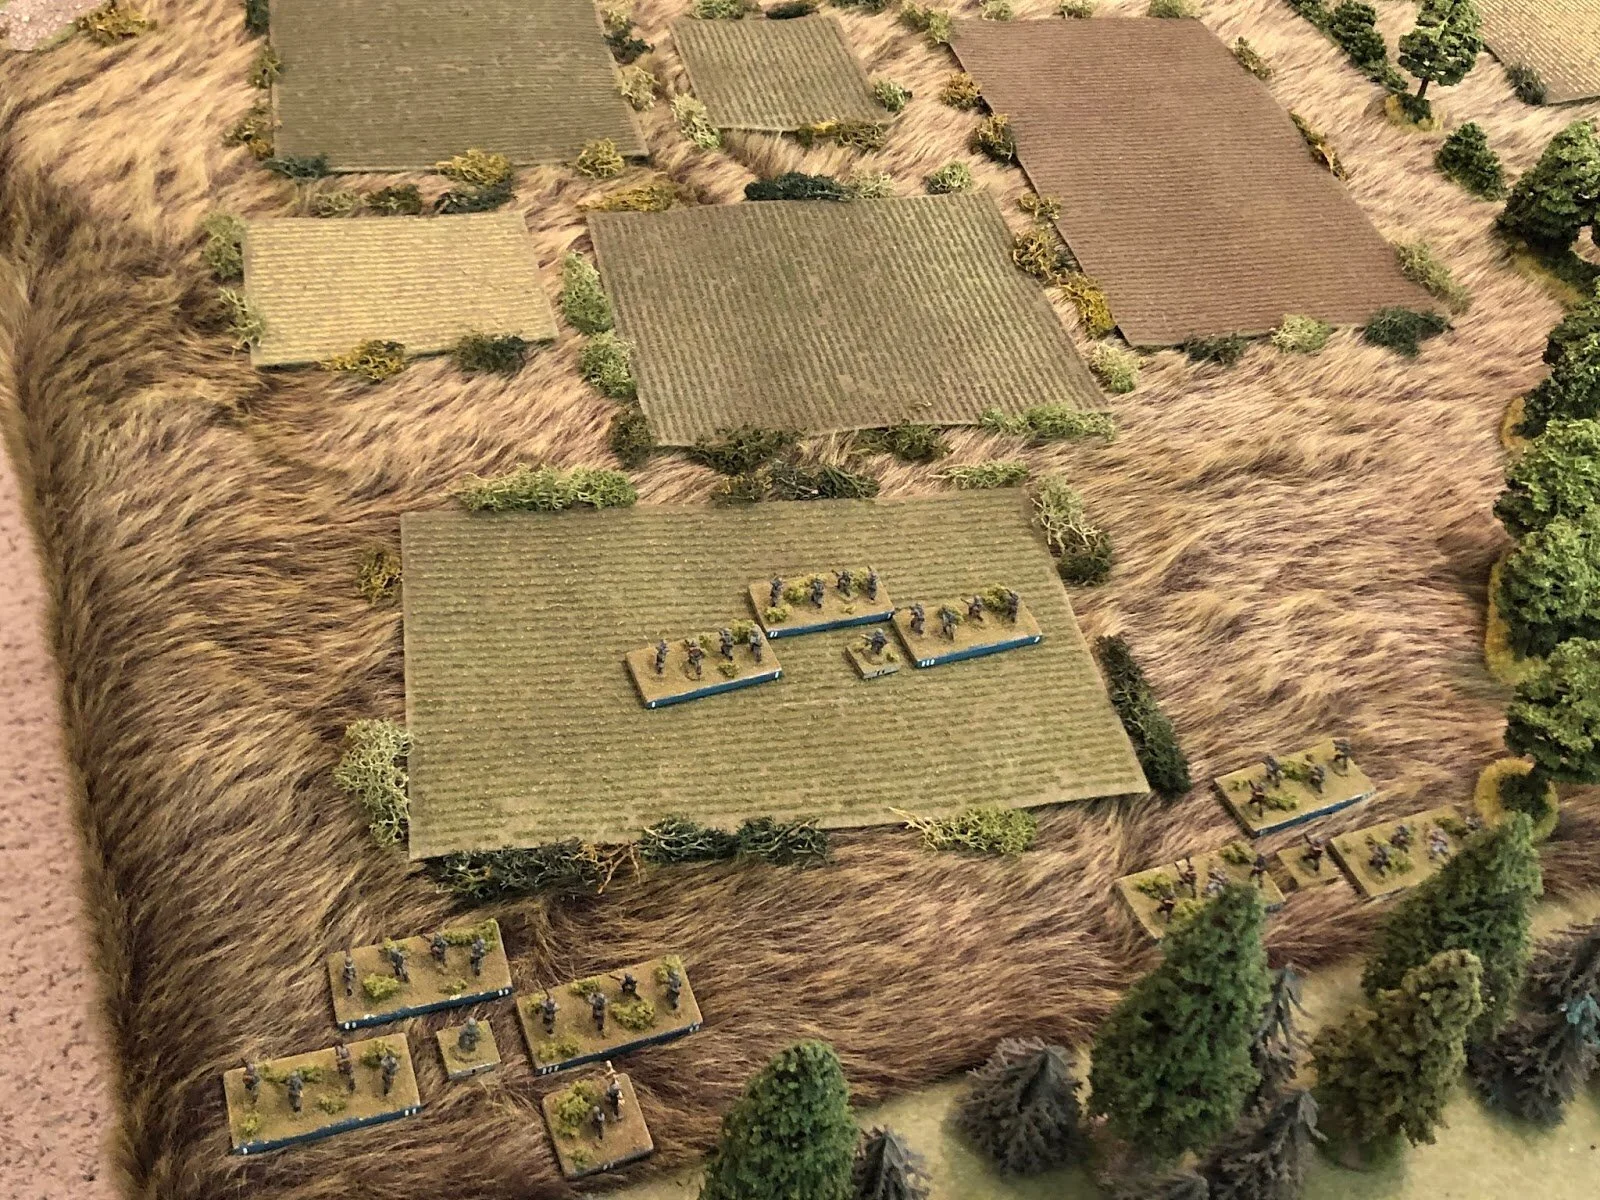

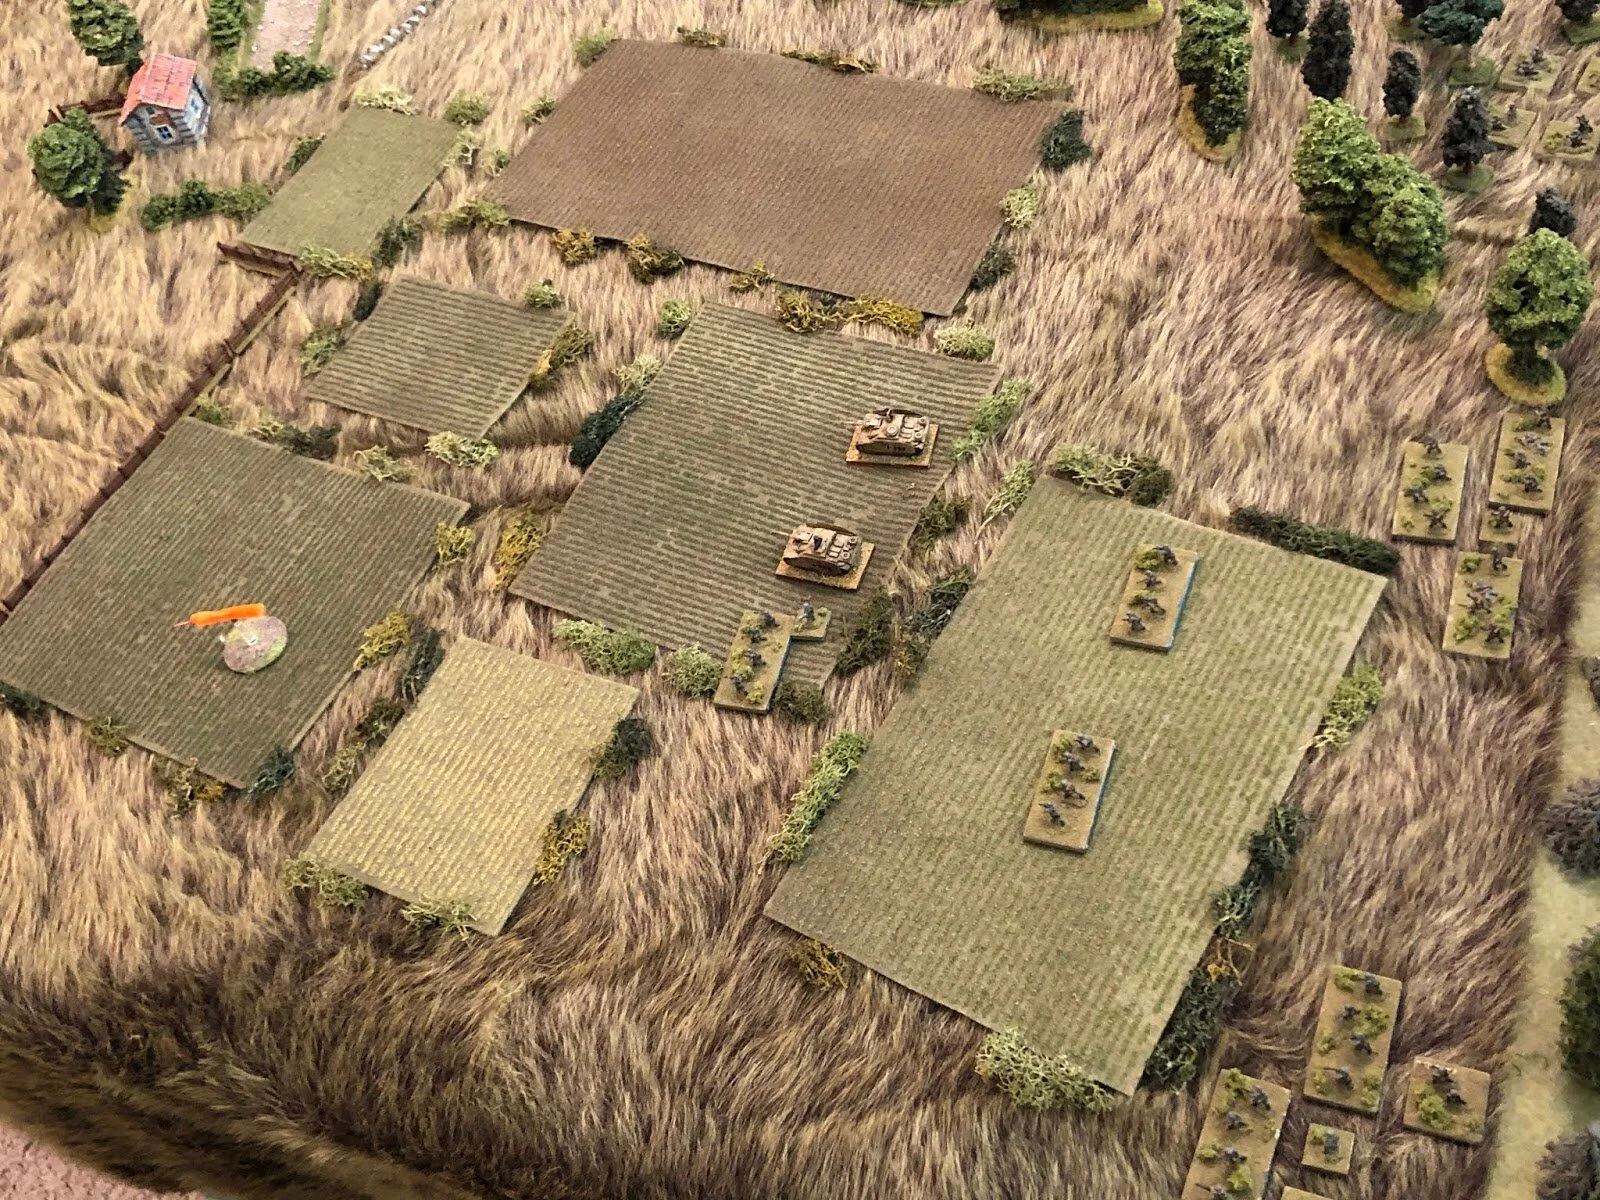


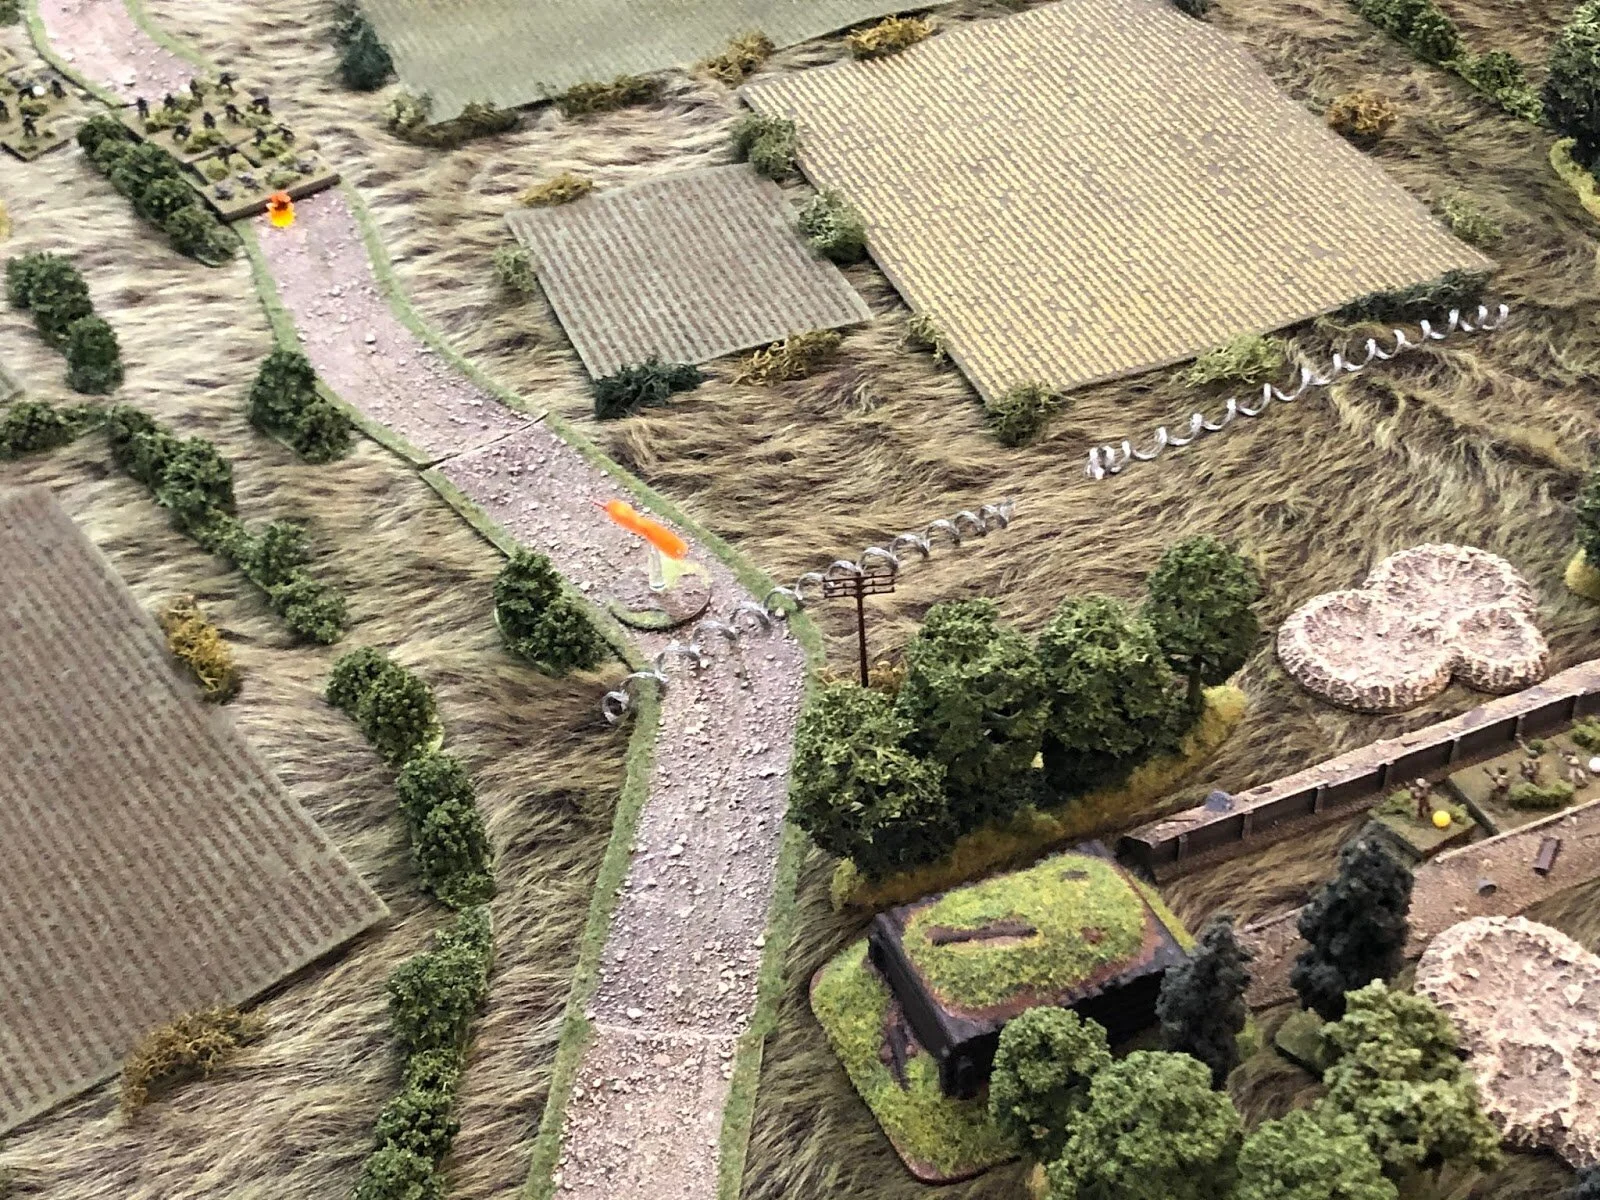

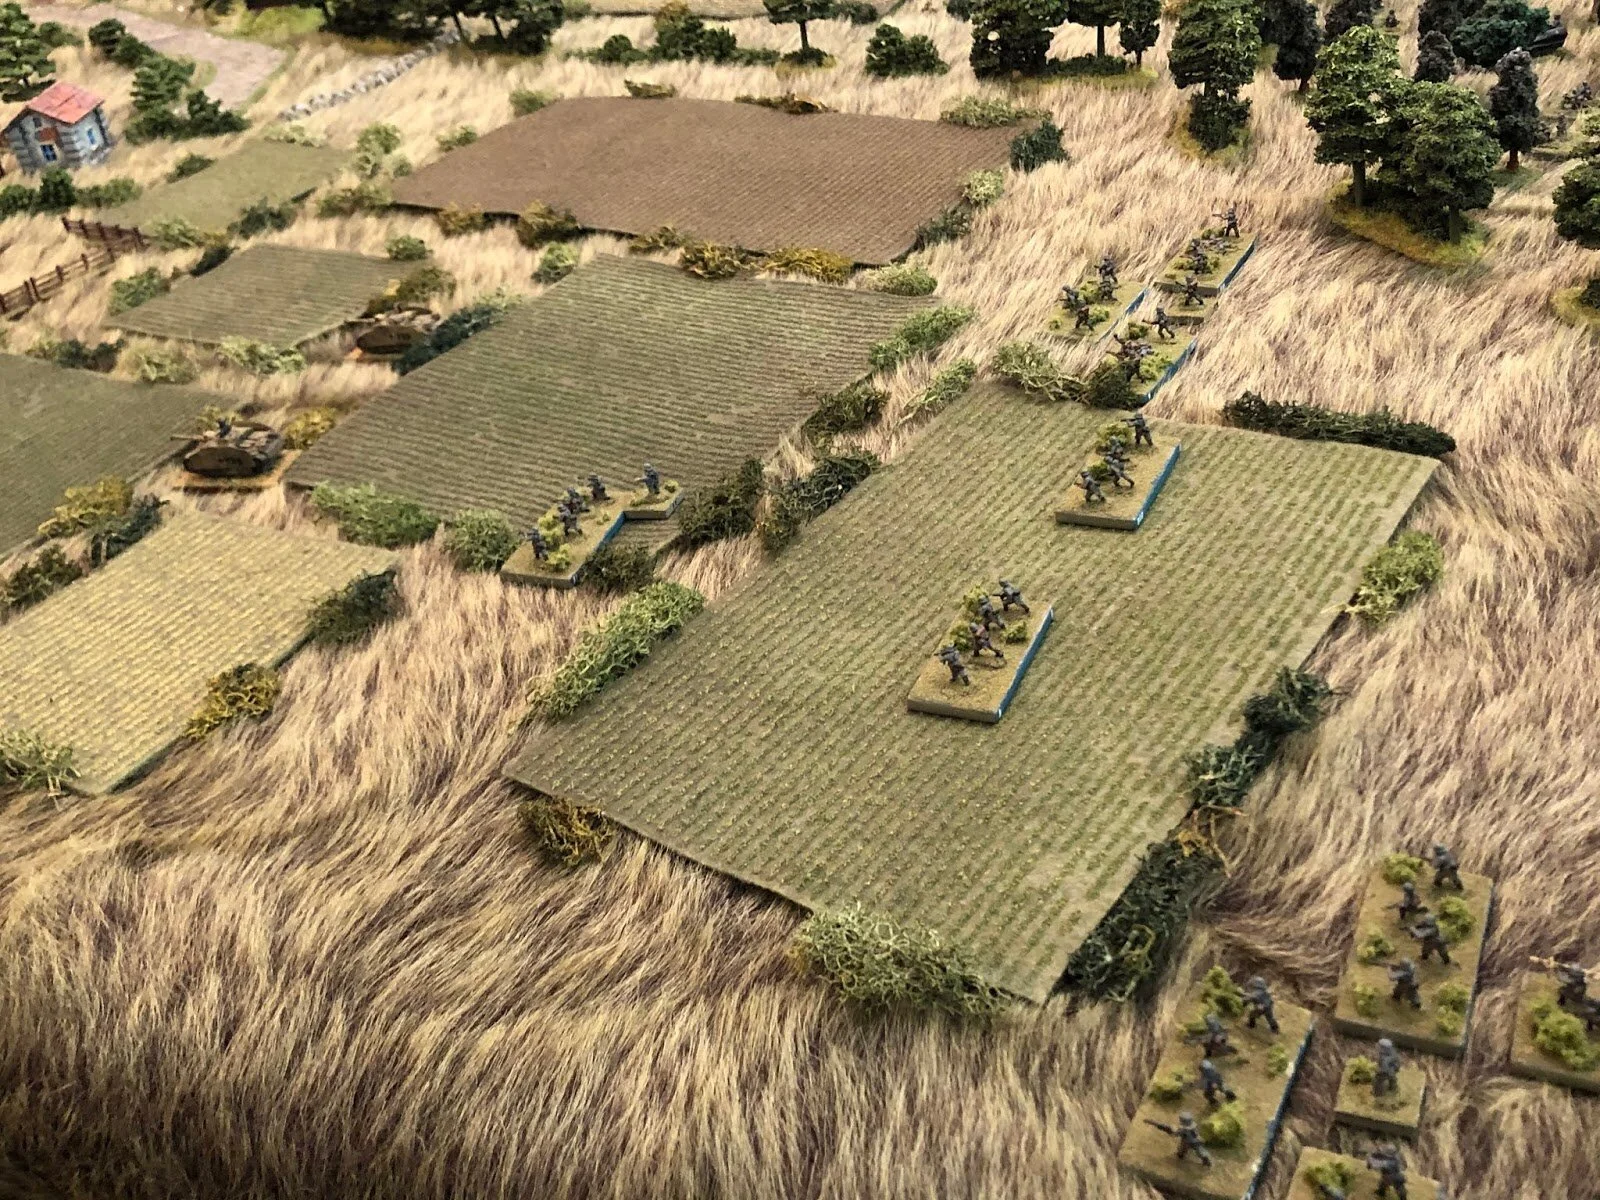
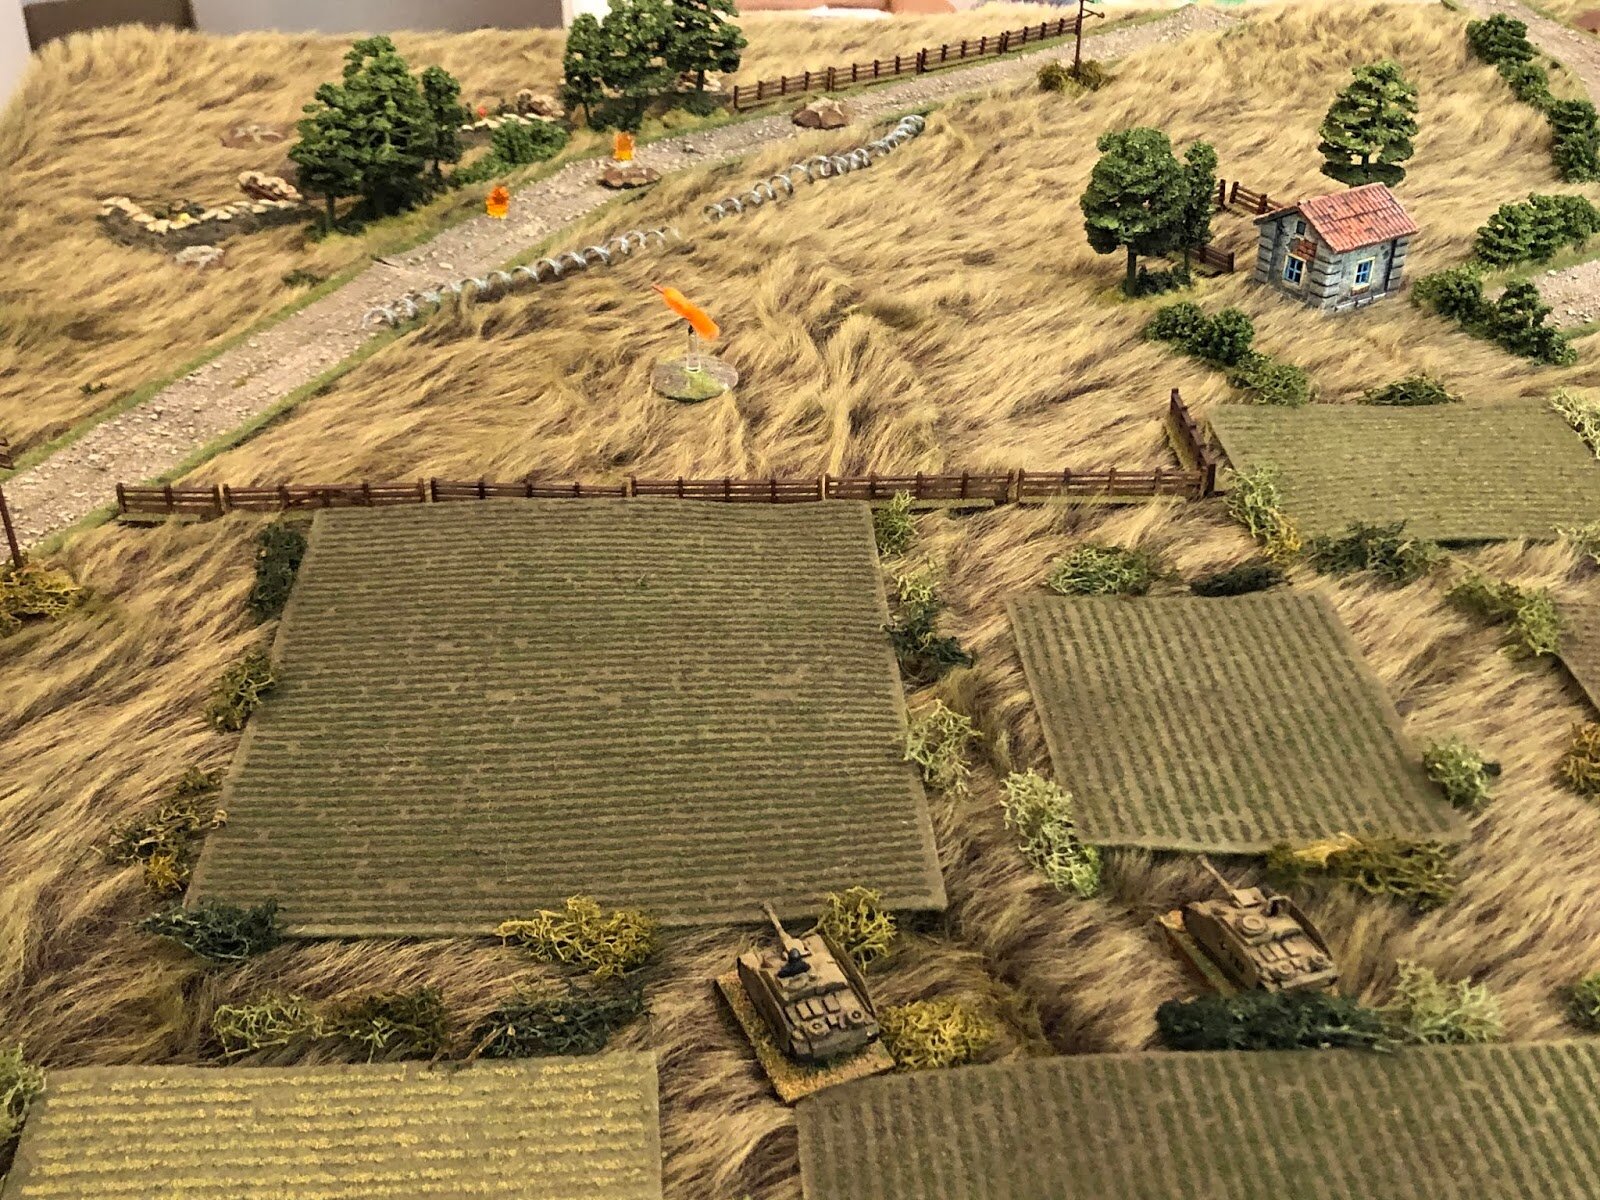


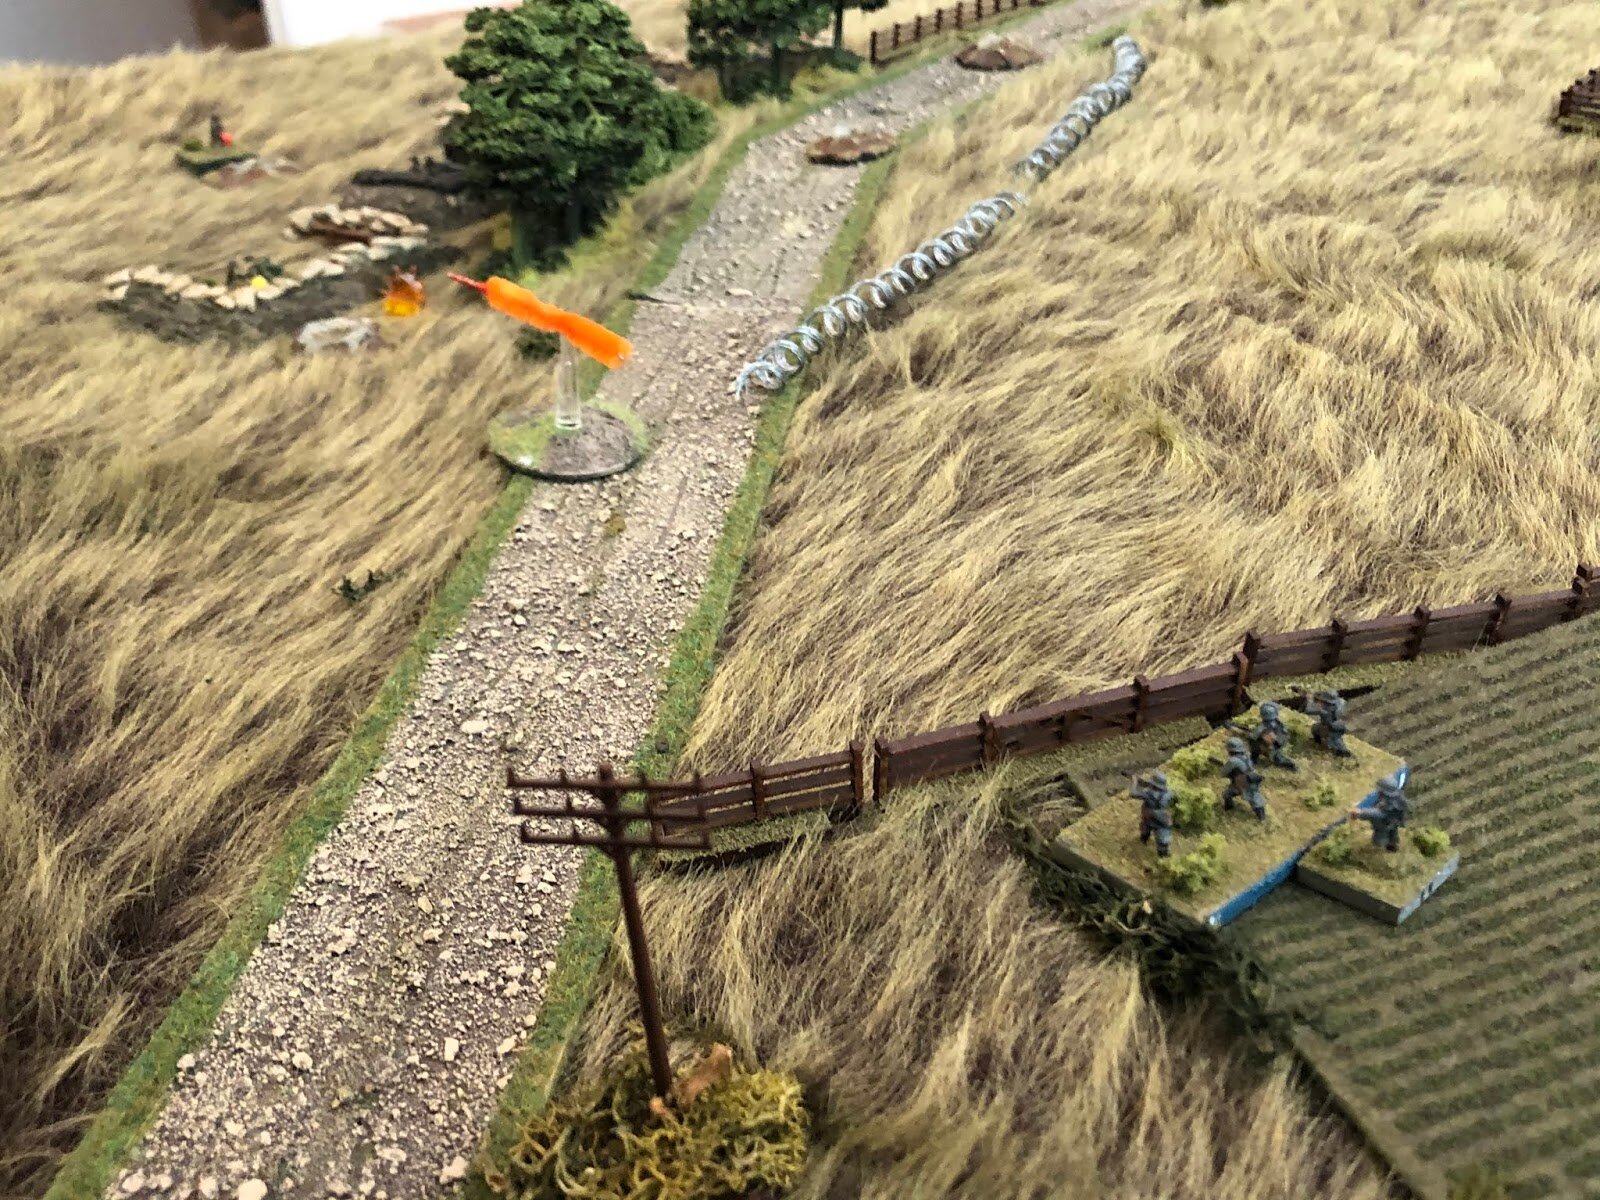


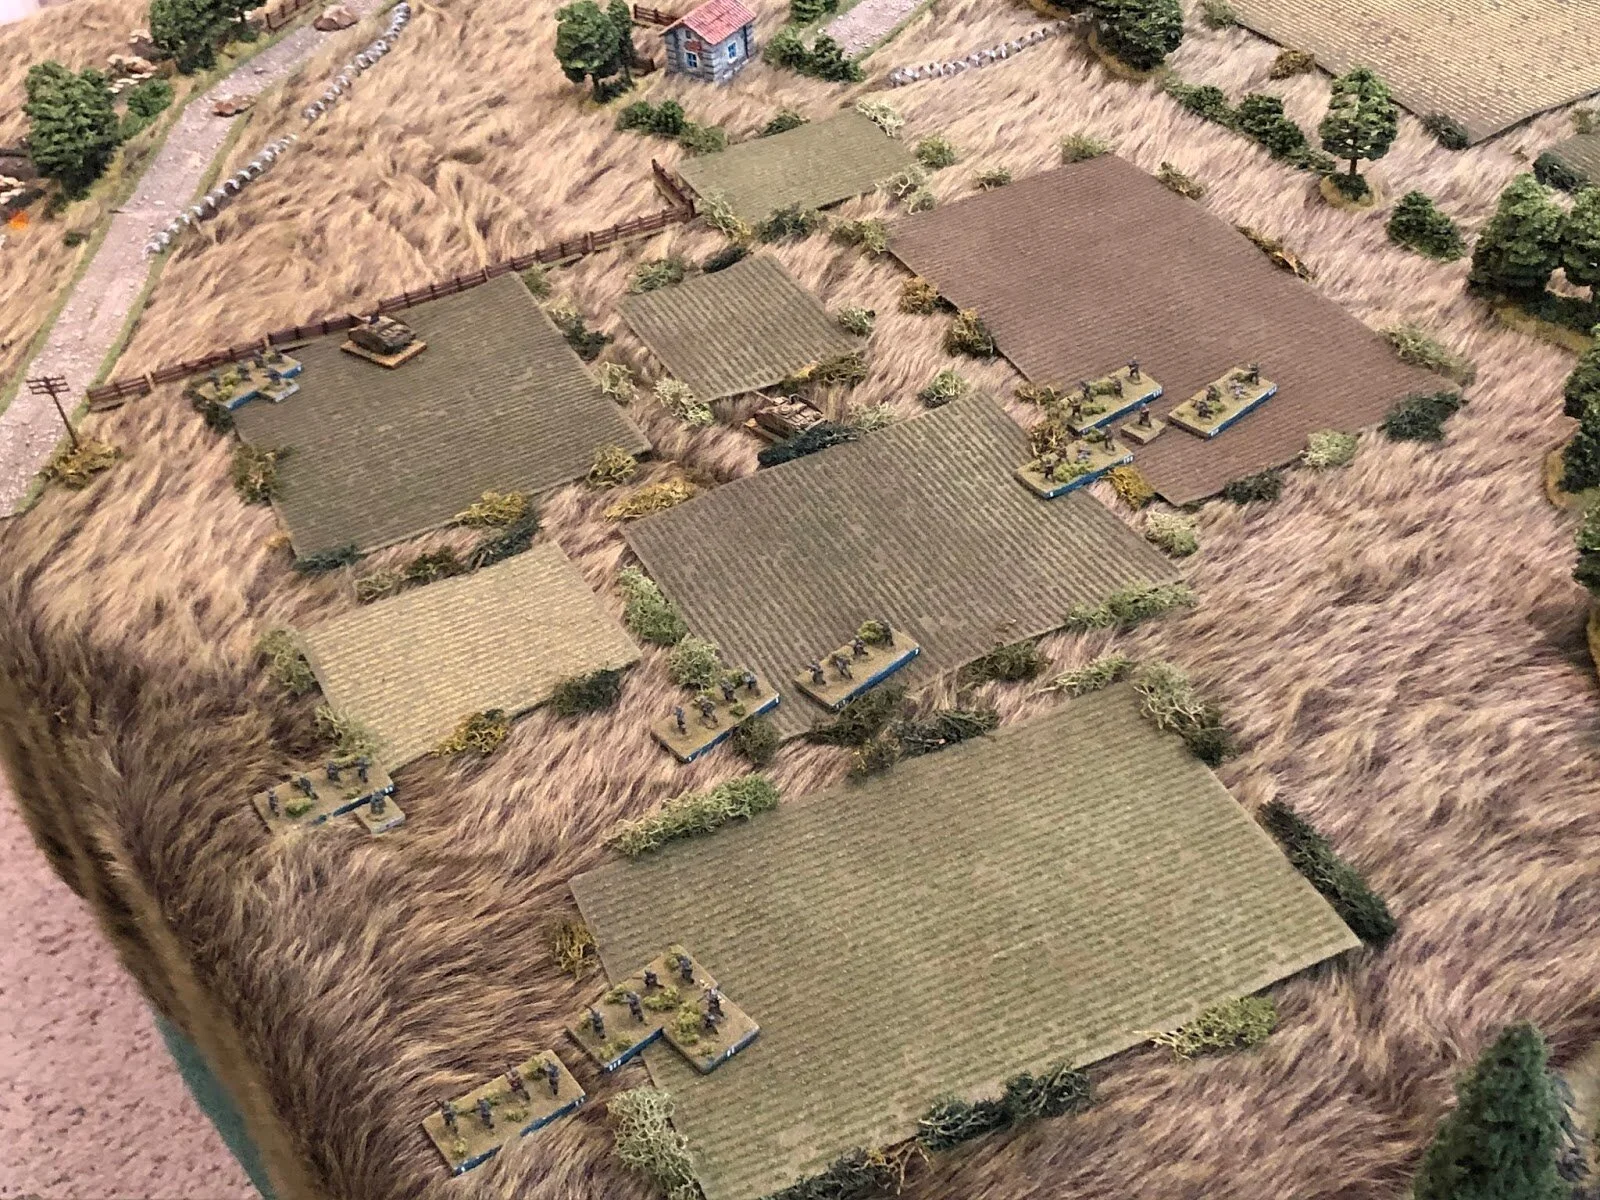
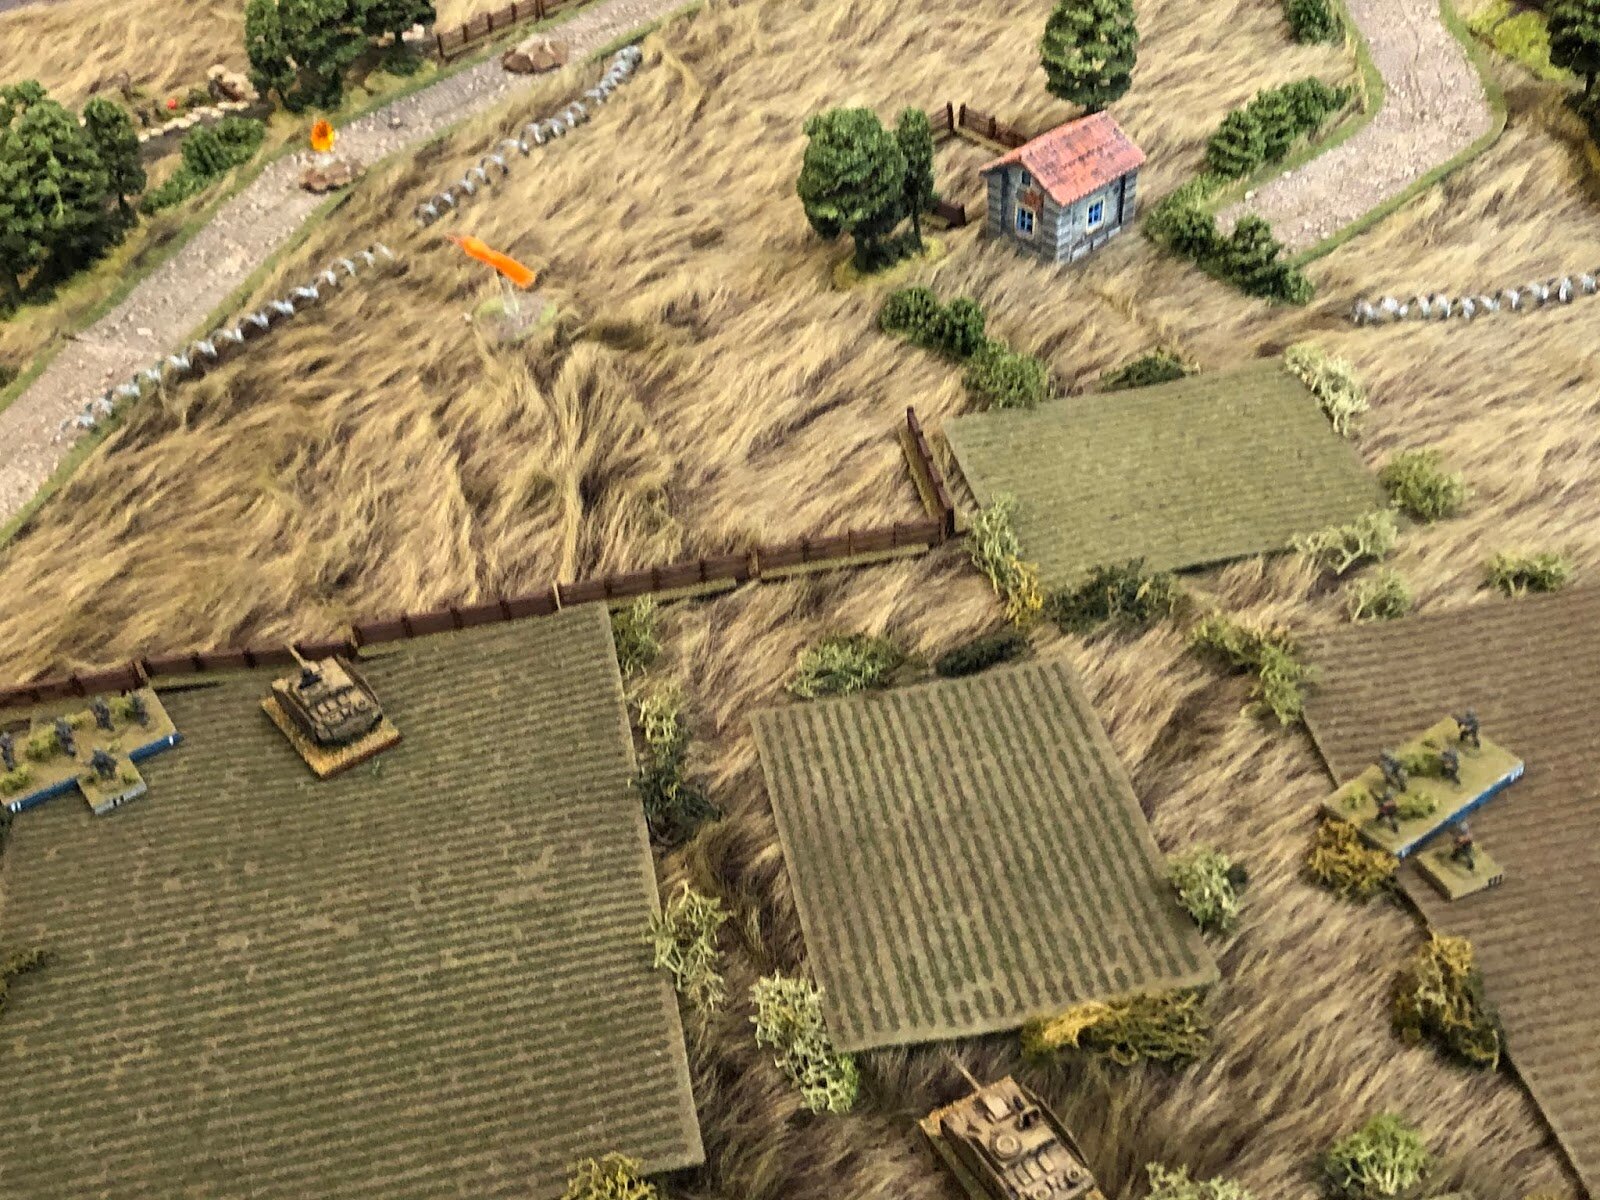


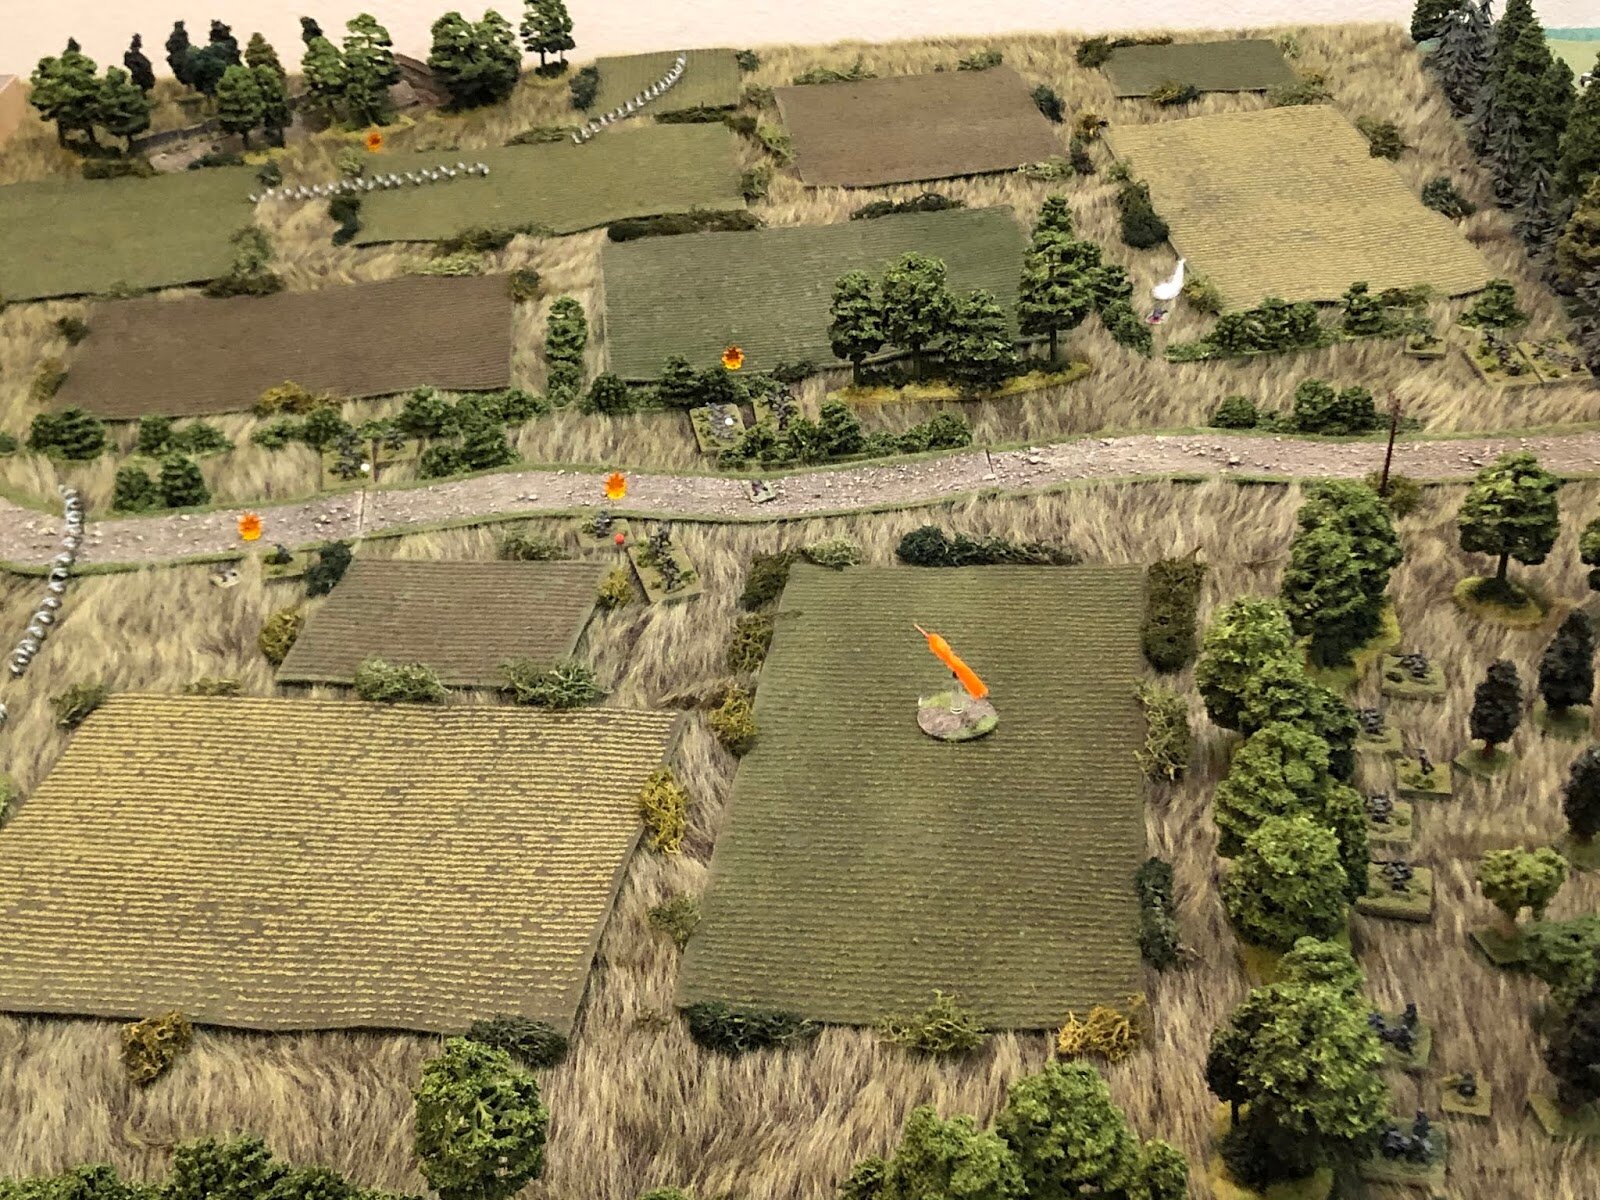
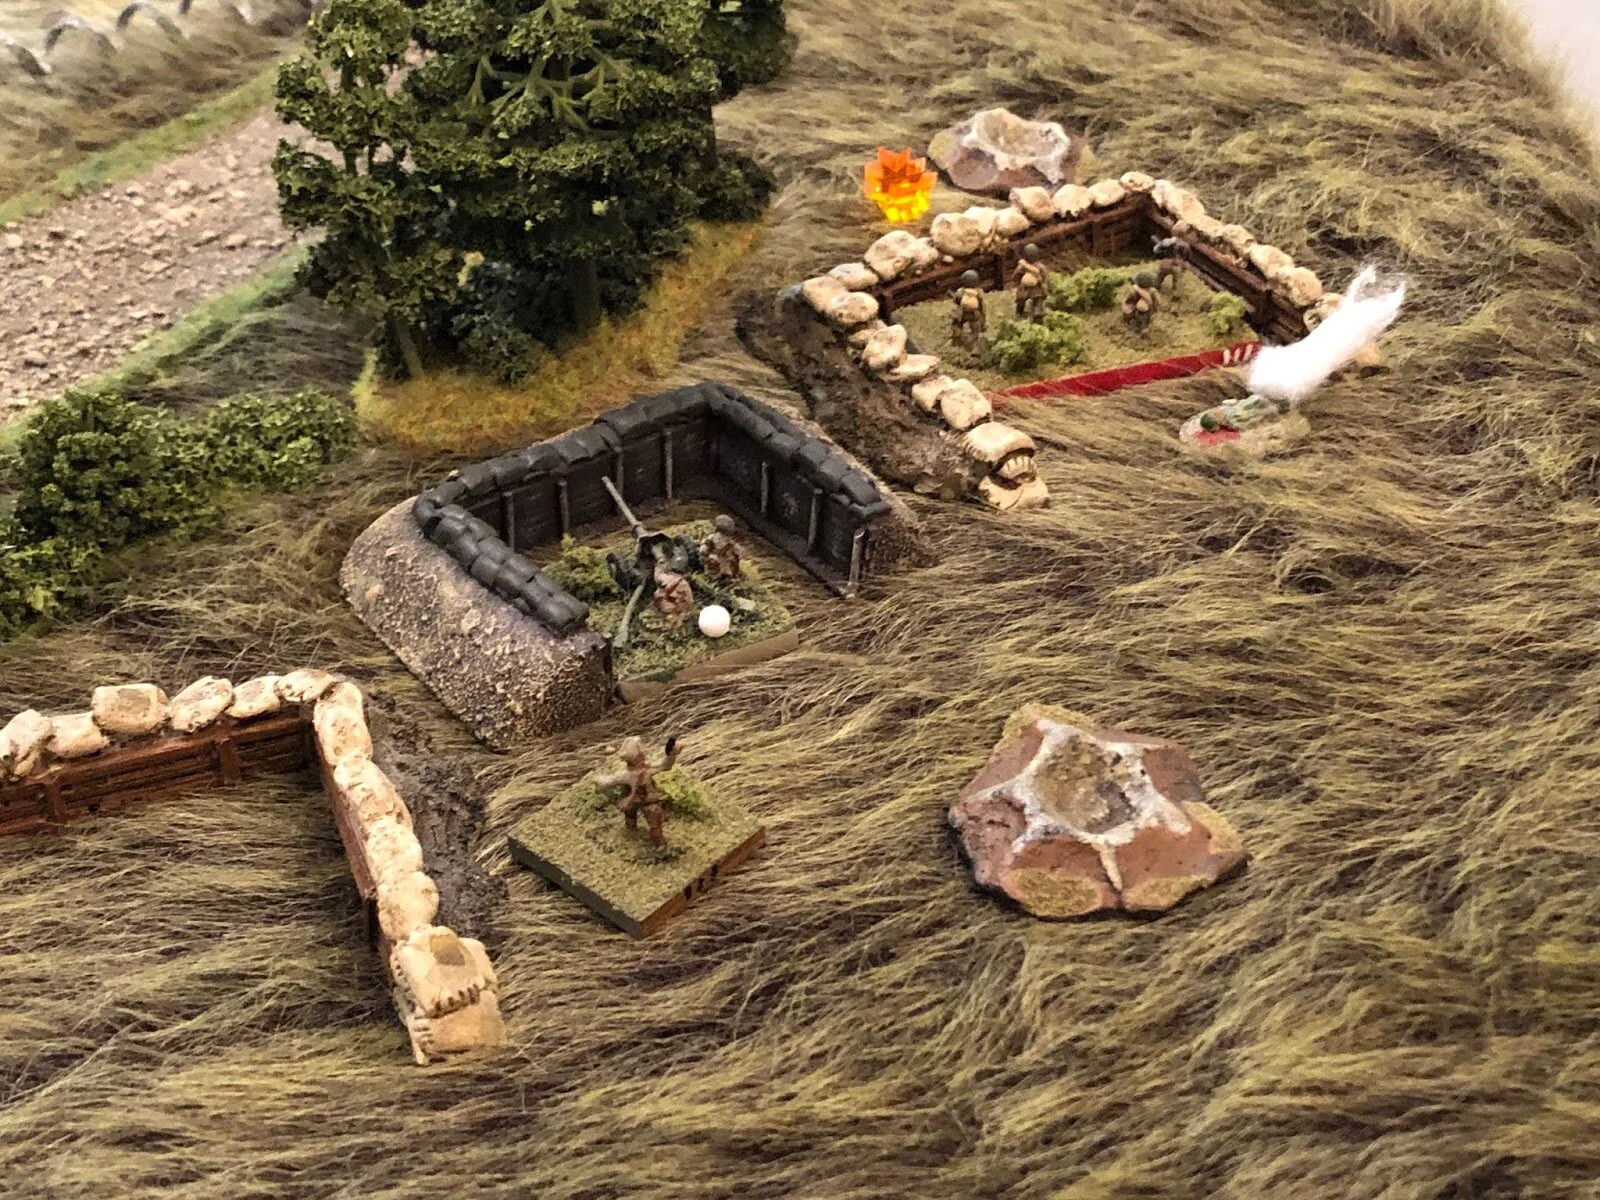
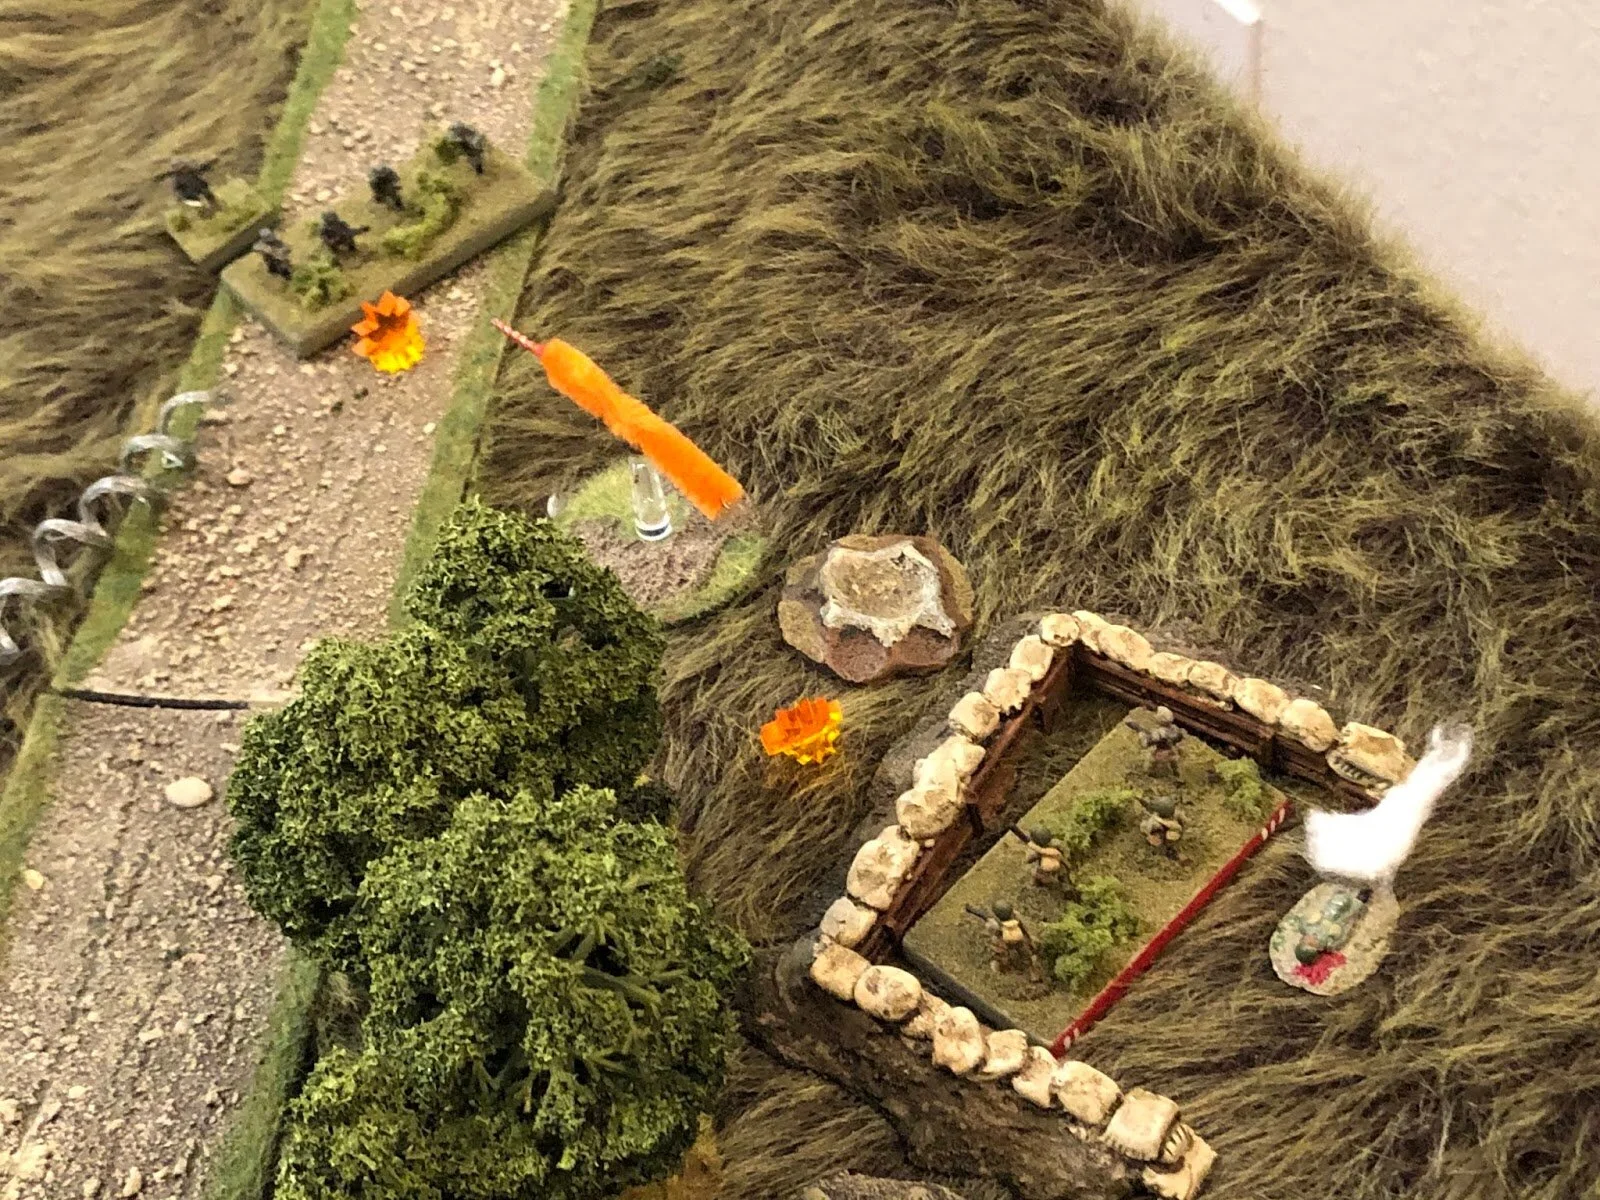


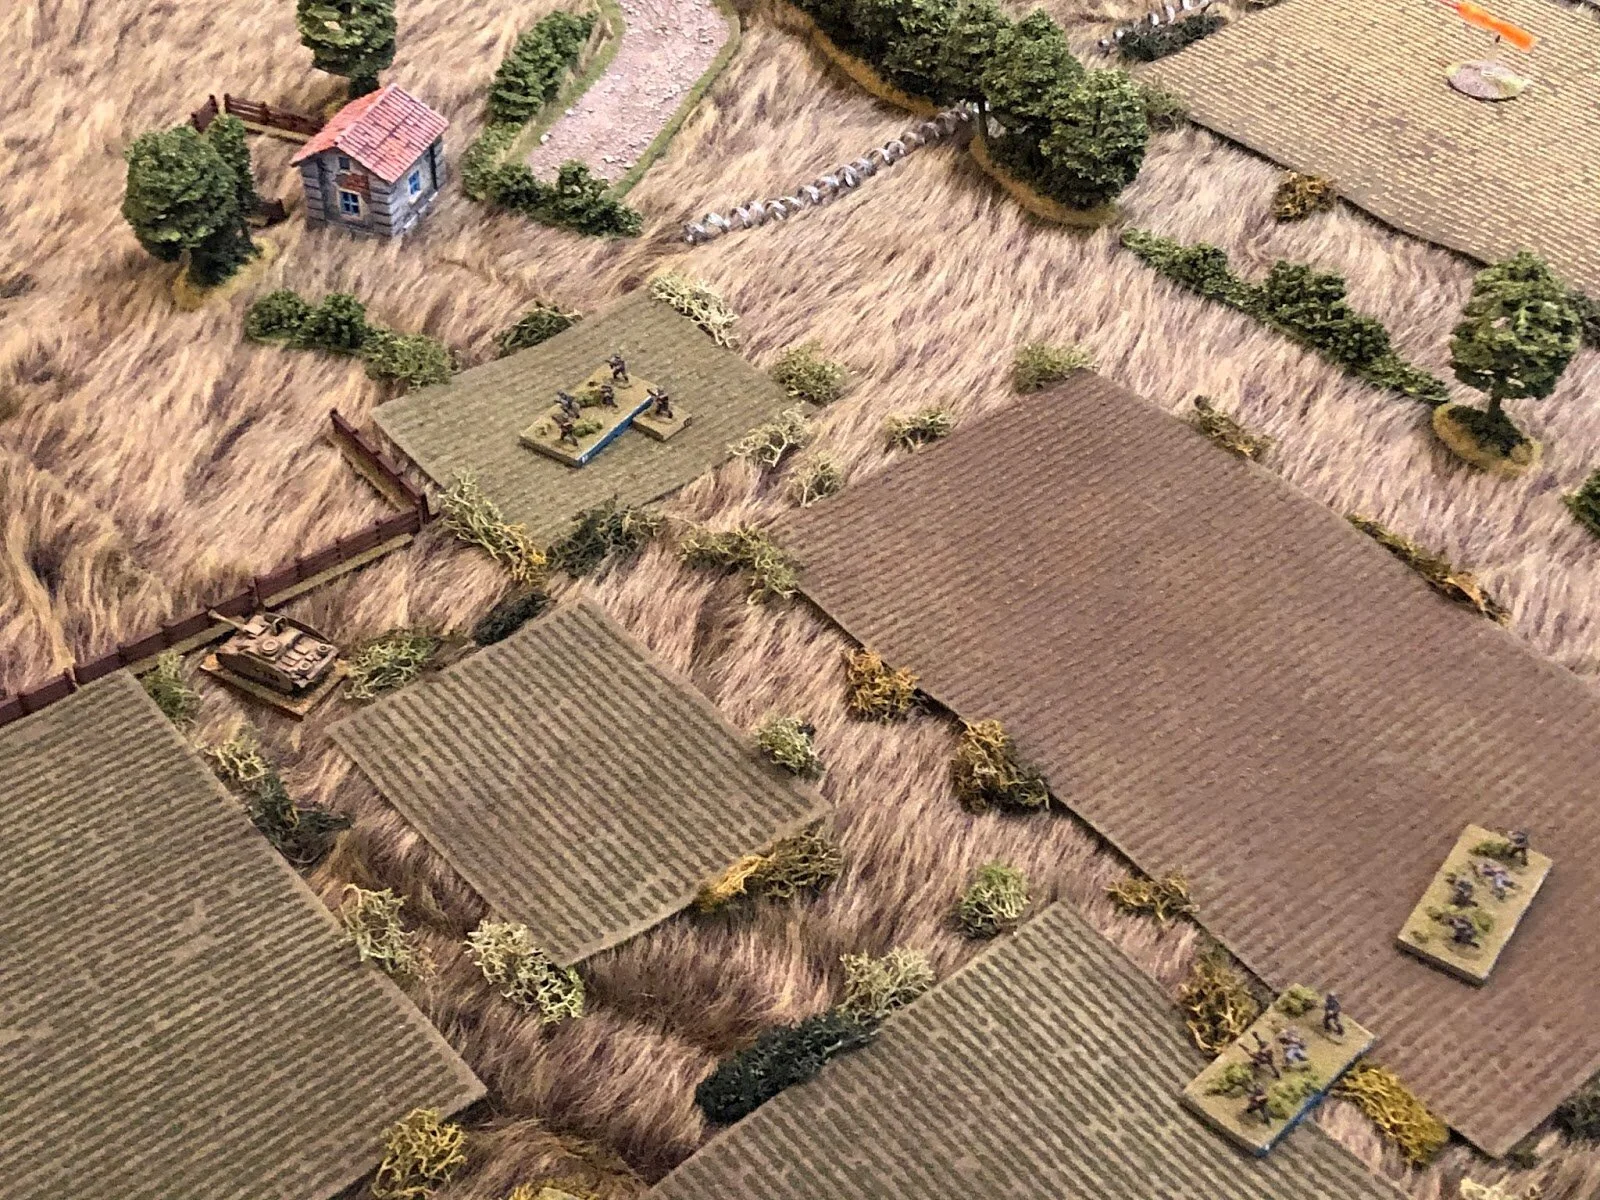


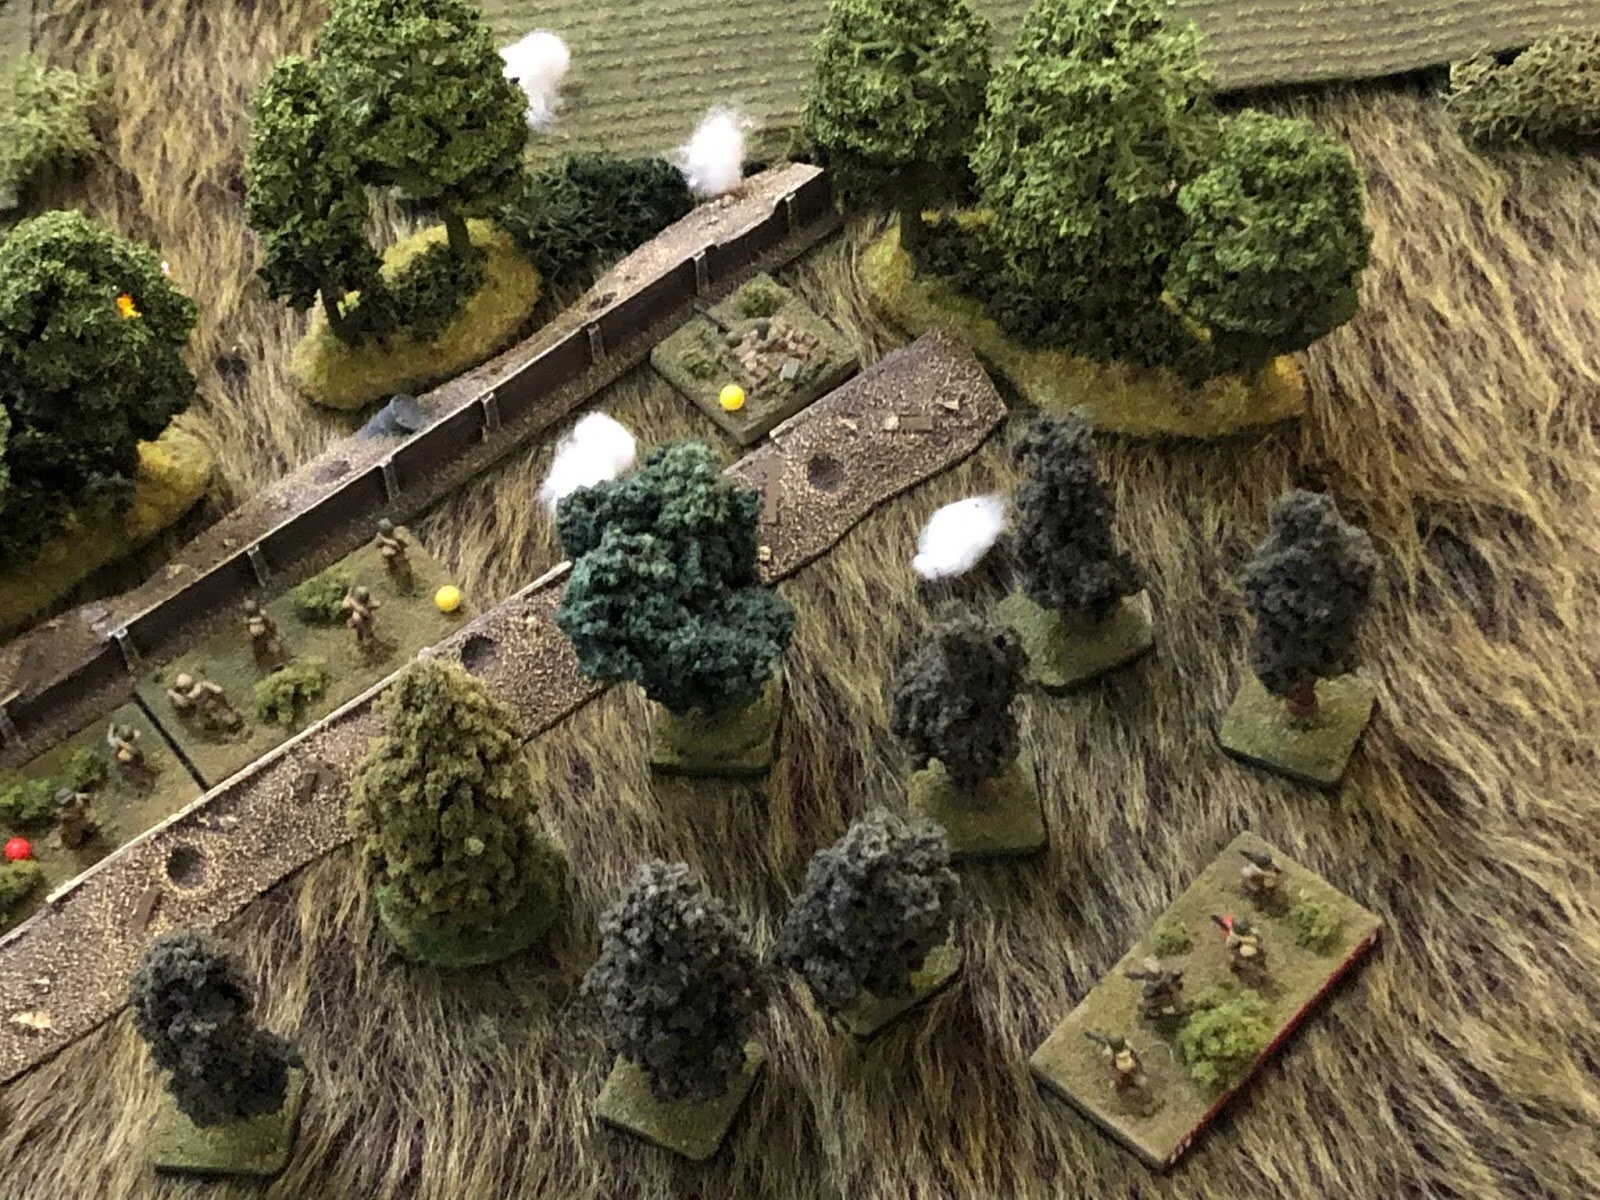

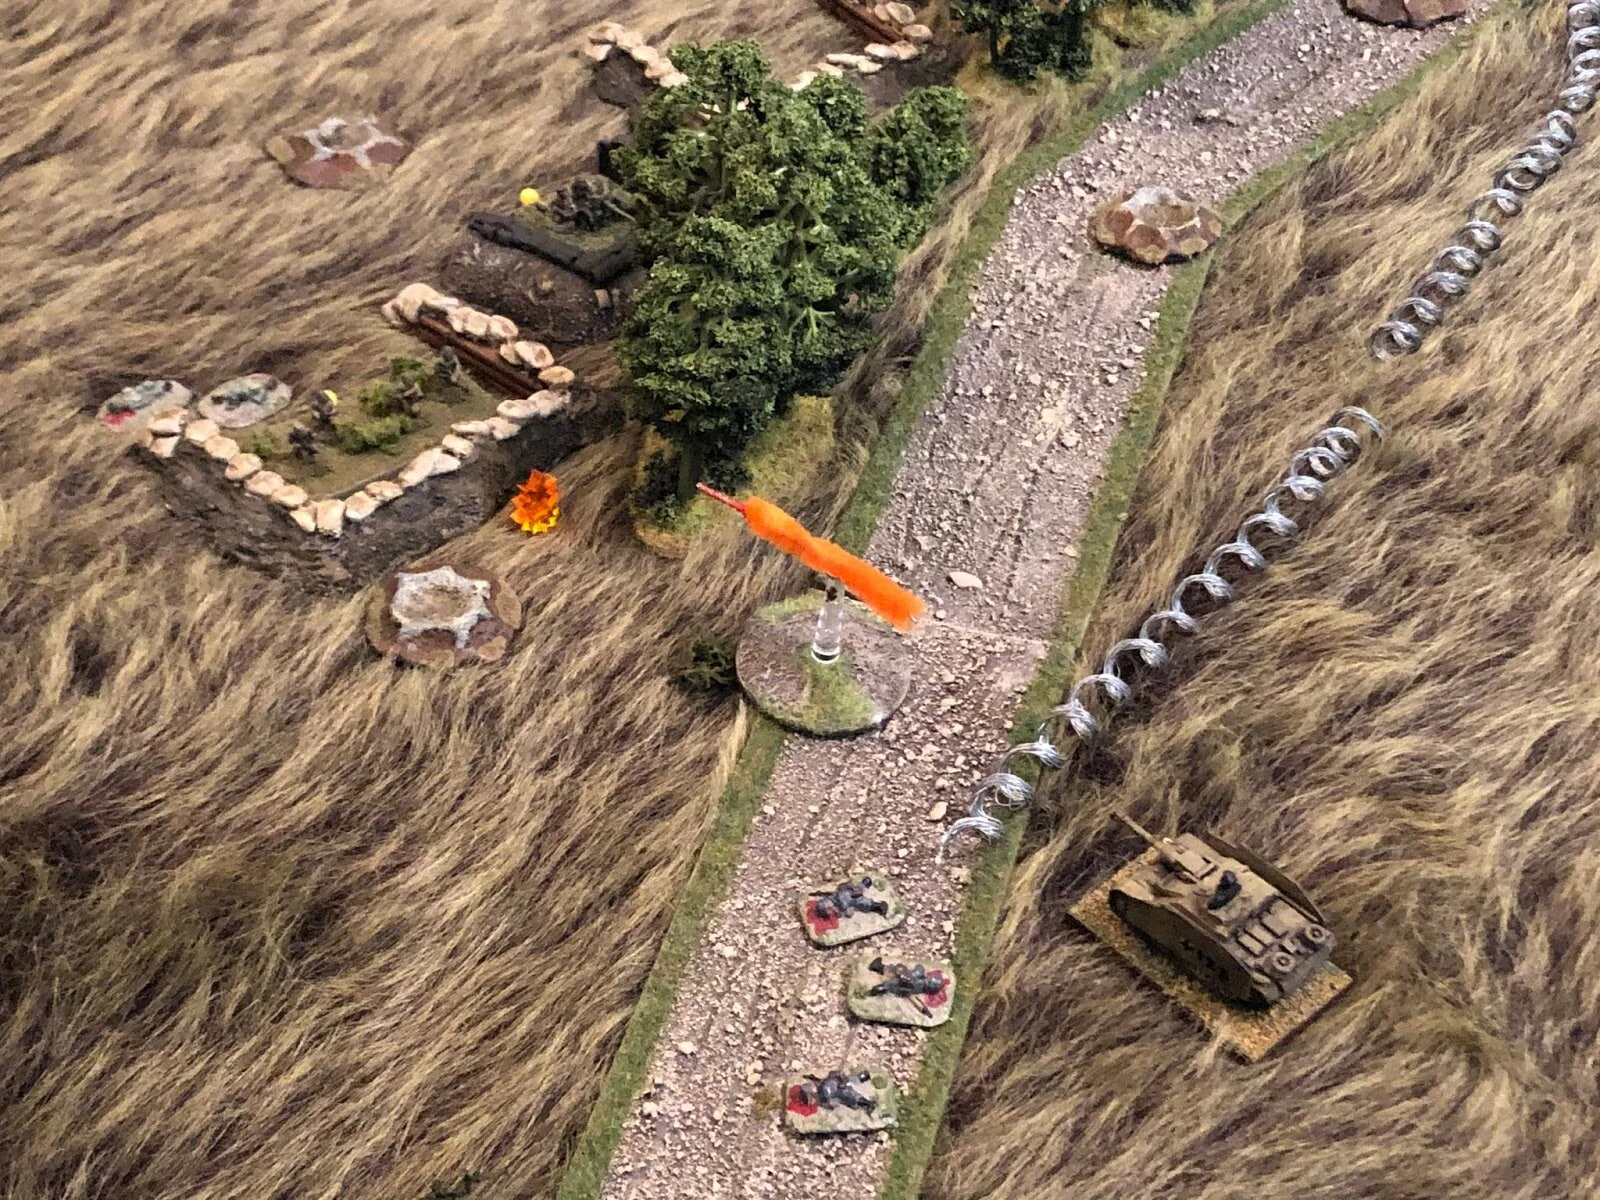


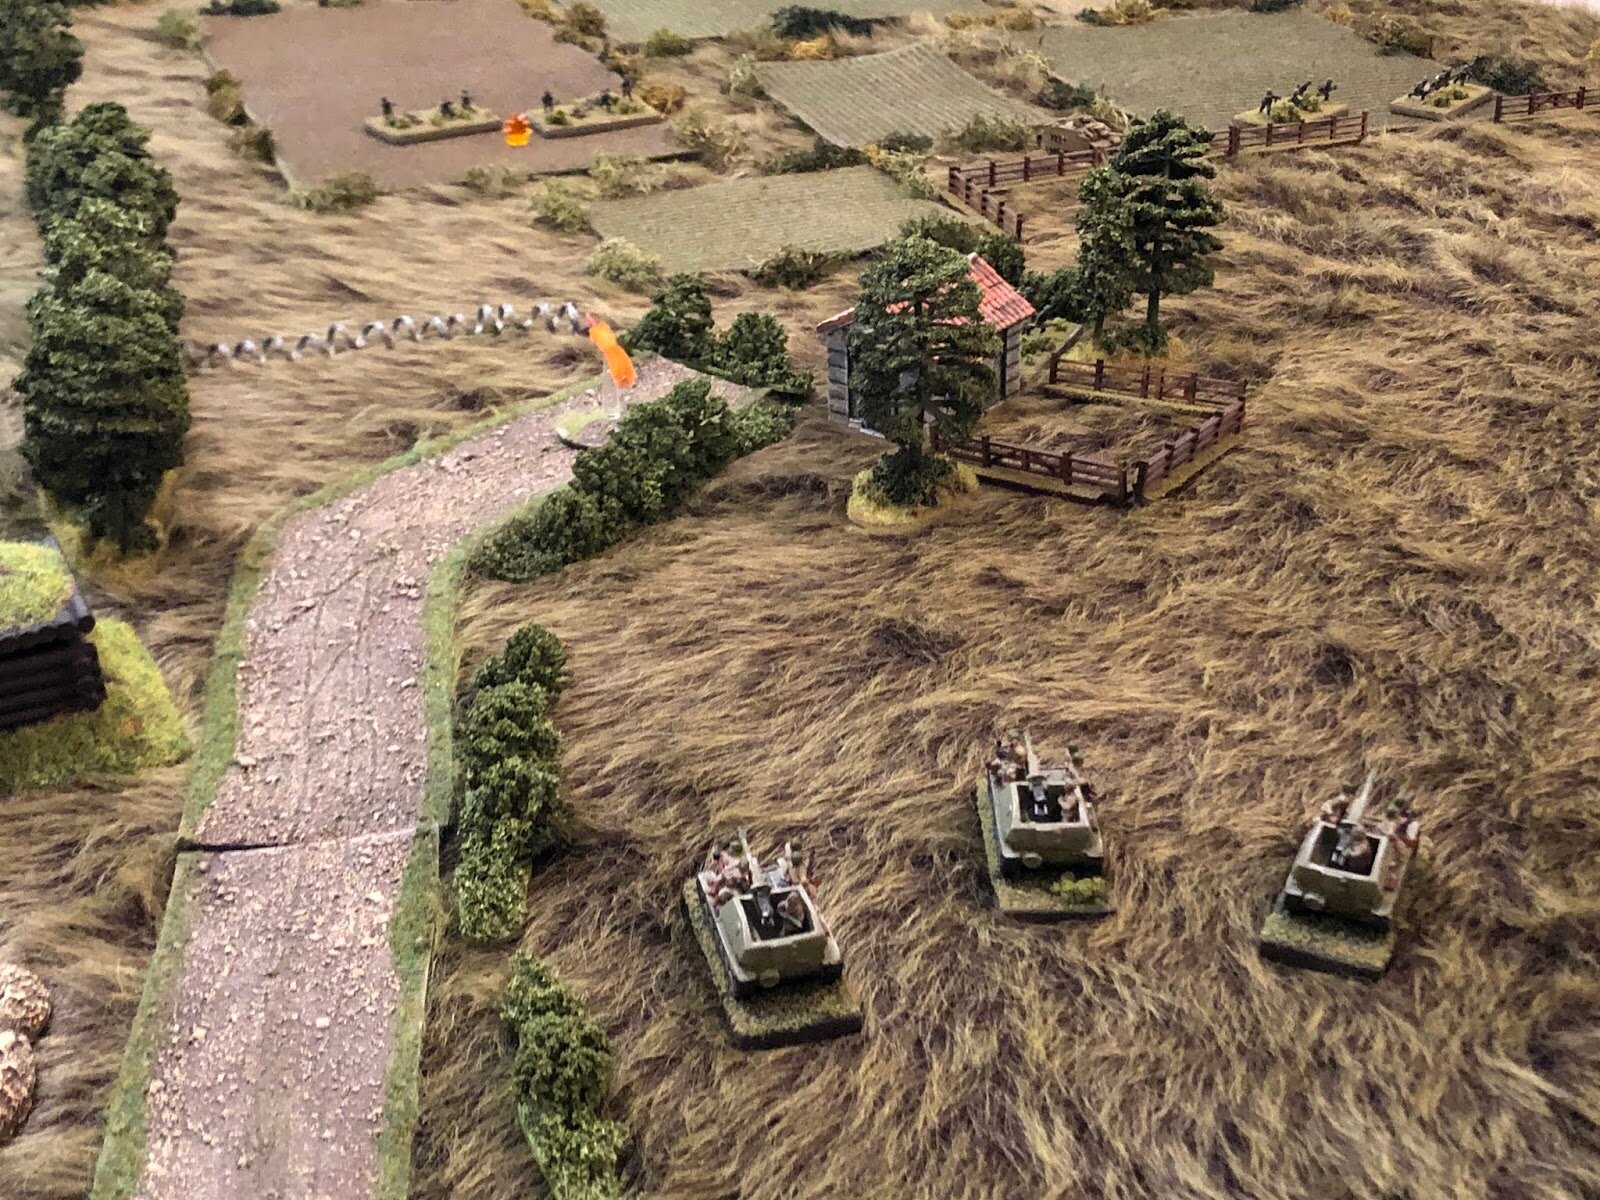


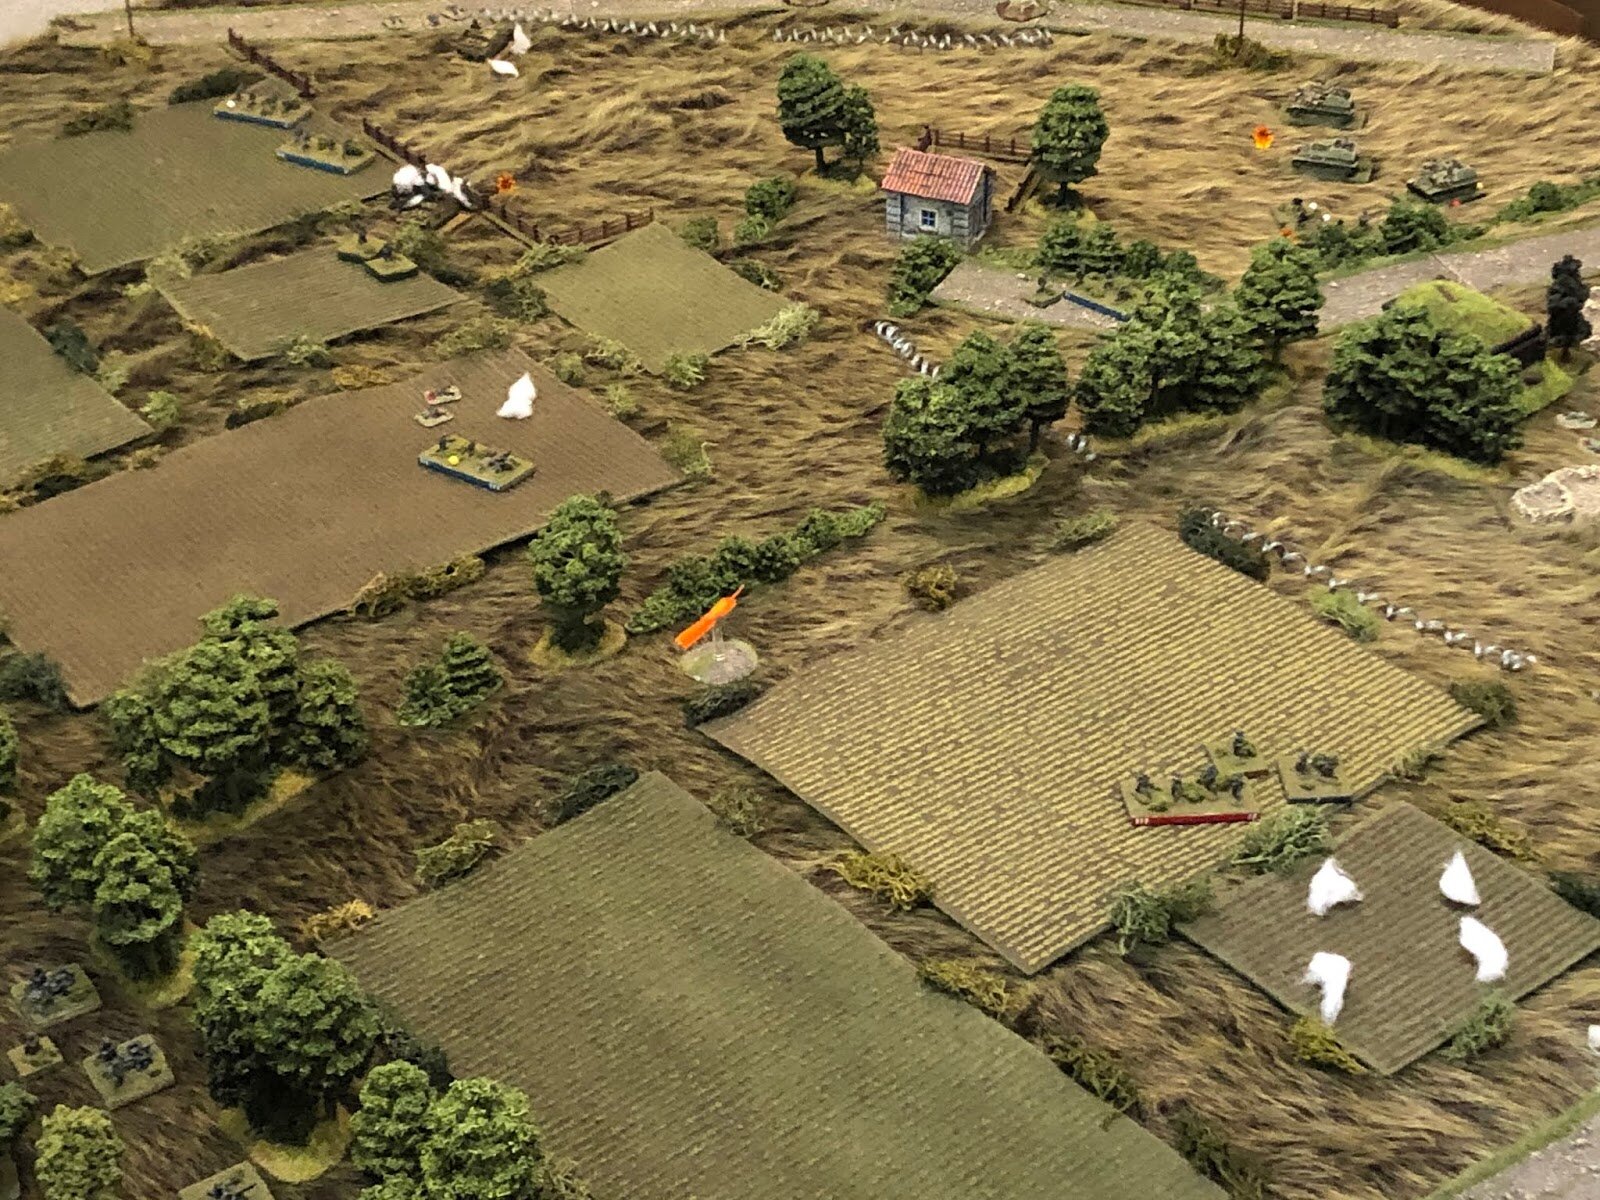


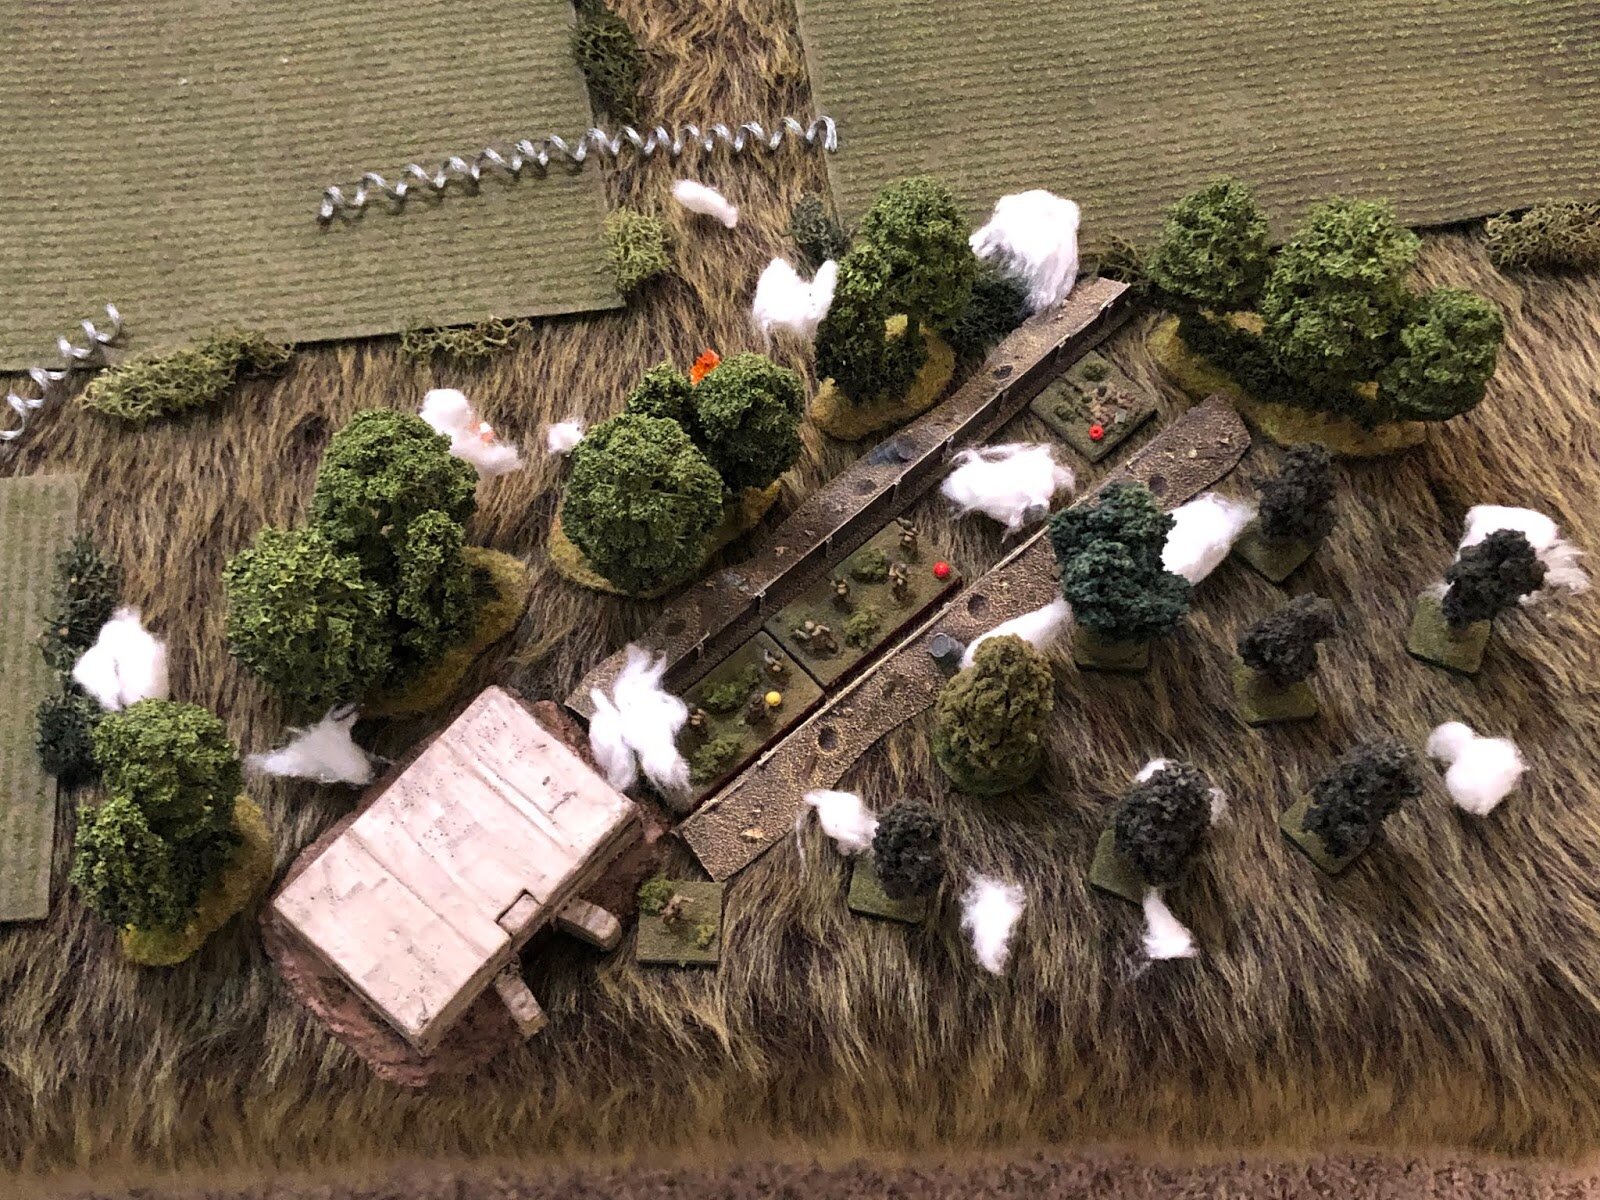


Interlude
The Germans call up their reserves (3rd Company and the PaK platoon), and designate Alexei's House as the TRP for all supporting fires. The Germans are pretty beat up, but still looking pretty grim for the Soviets; no one is occupying the objective. If the Soviet CO's card will come up, I'm going to have him fall back and turn his mortar platoon into an ad-hoc rifle platoon in order to go occupy Strongpoint Anna. If they can get in there, and get the Engineer Platoon in there as well, holding the objective, with their Su-76s prowling around, it may very well be that the Germans don't have the firepower and bodies necessary to dig them out again.
Off We Go Again…

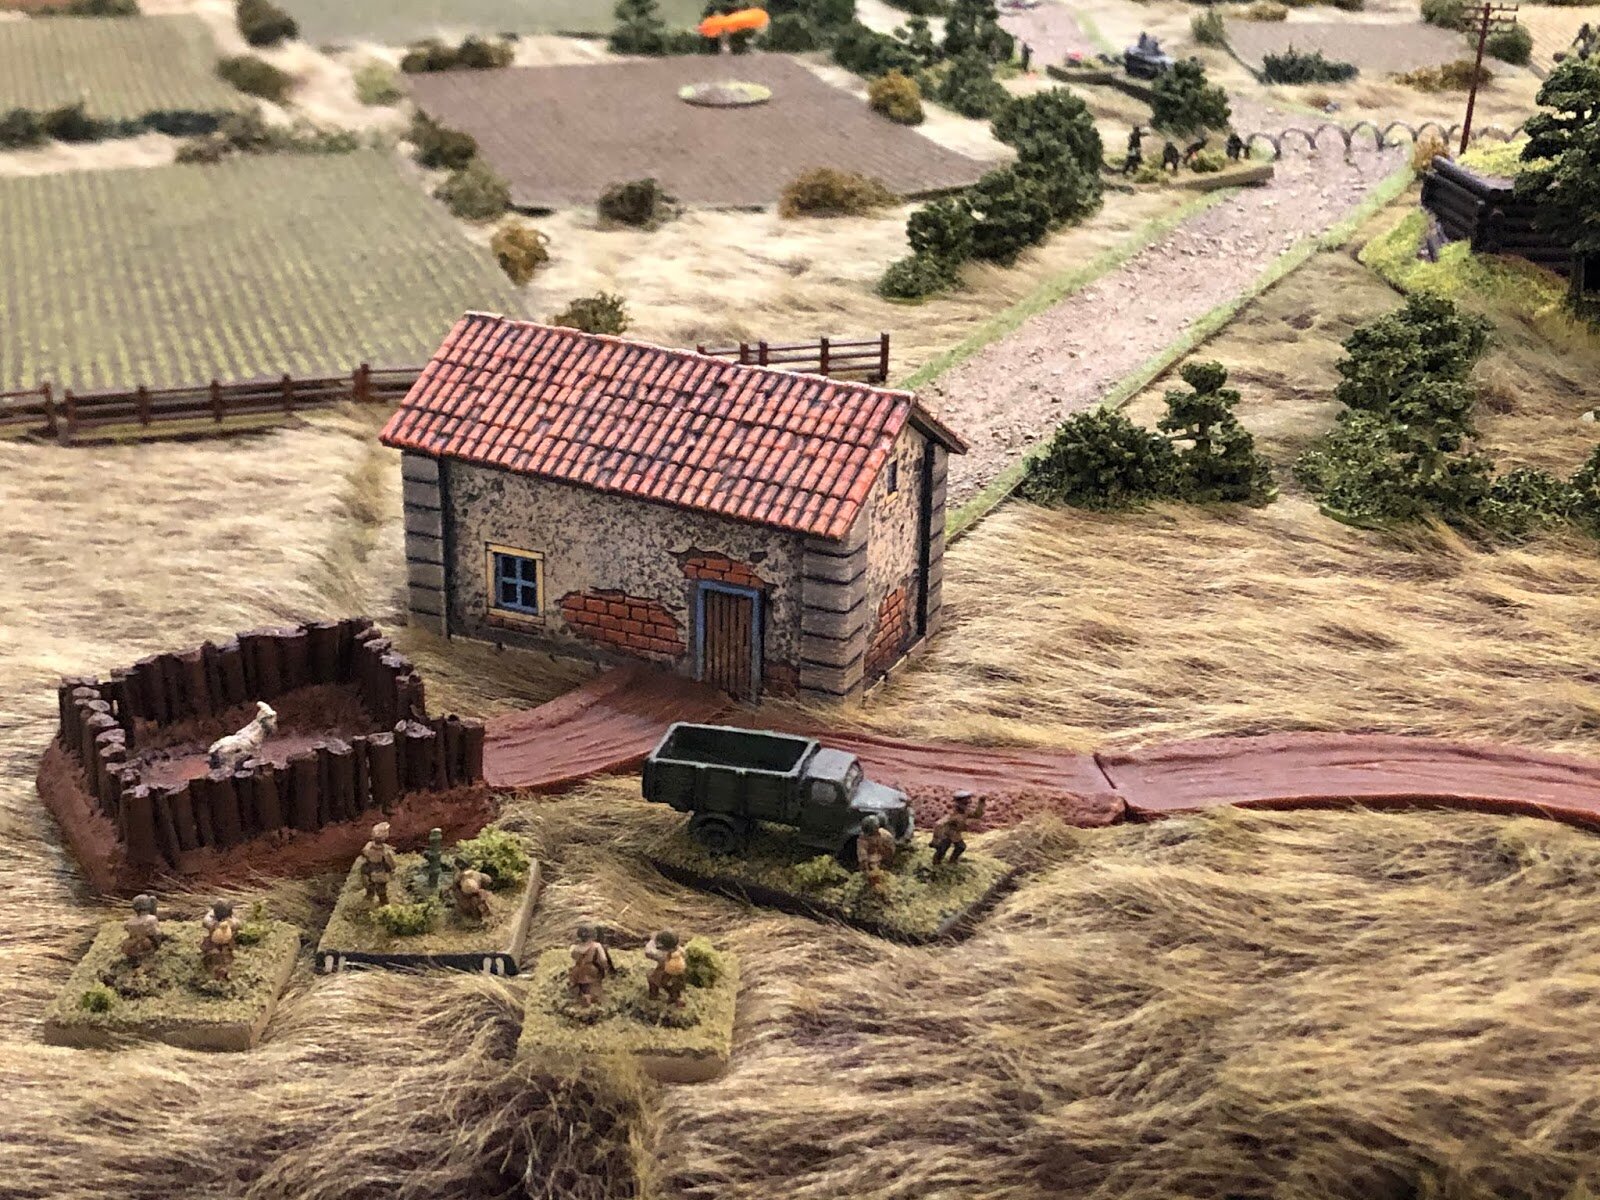


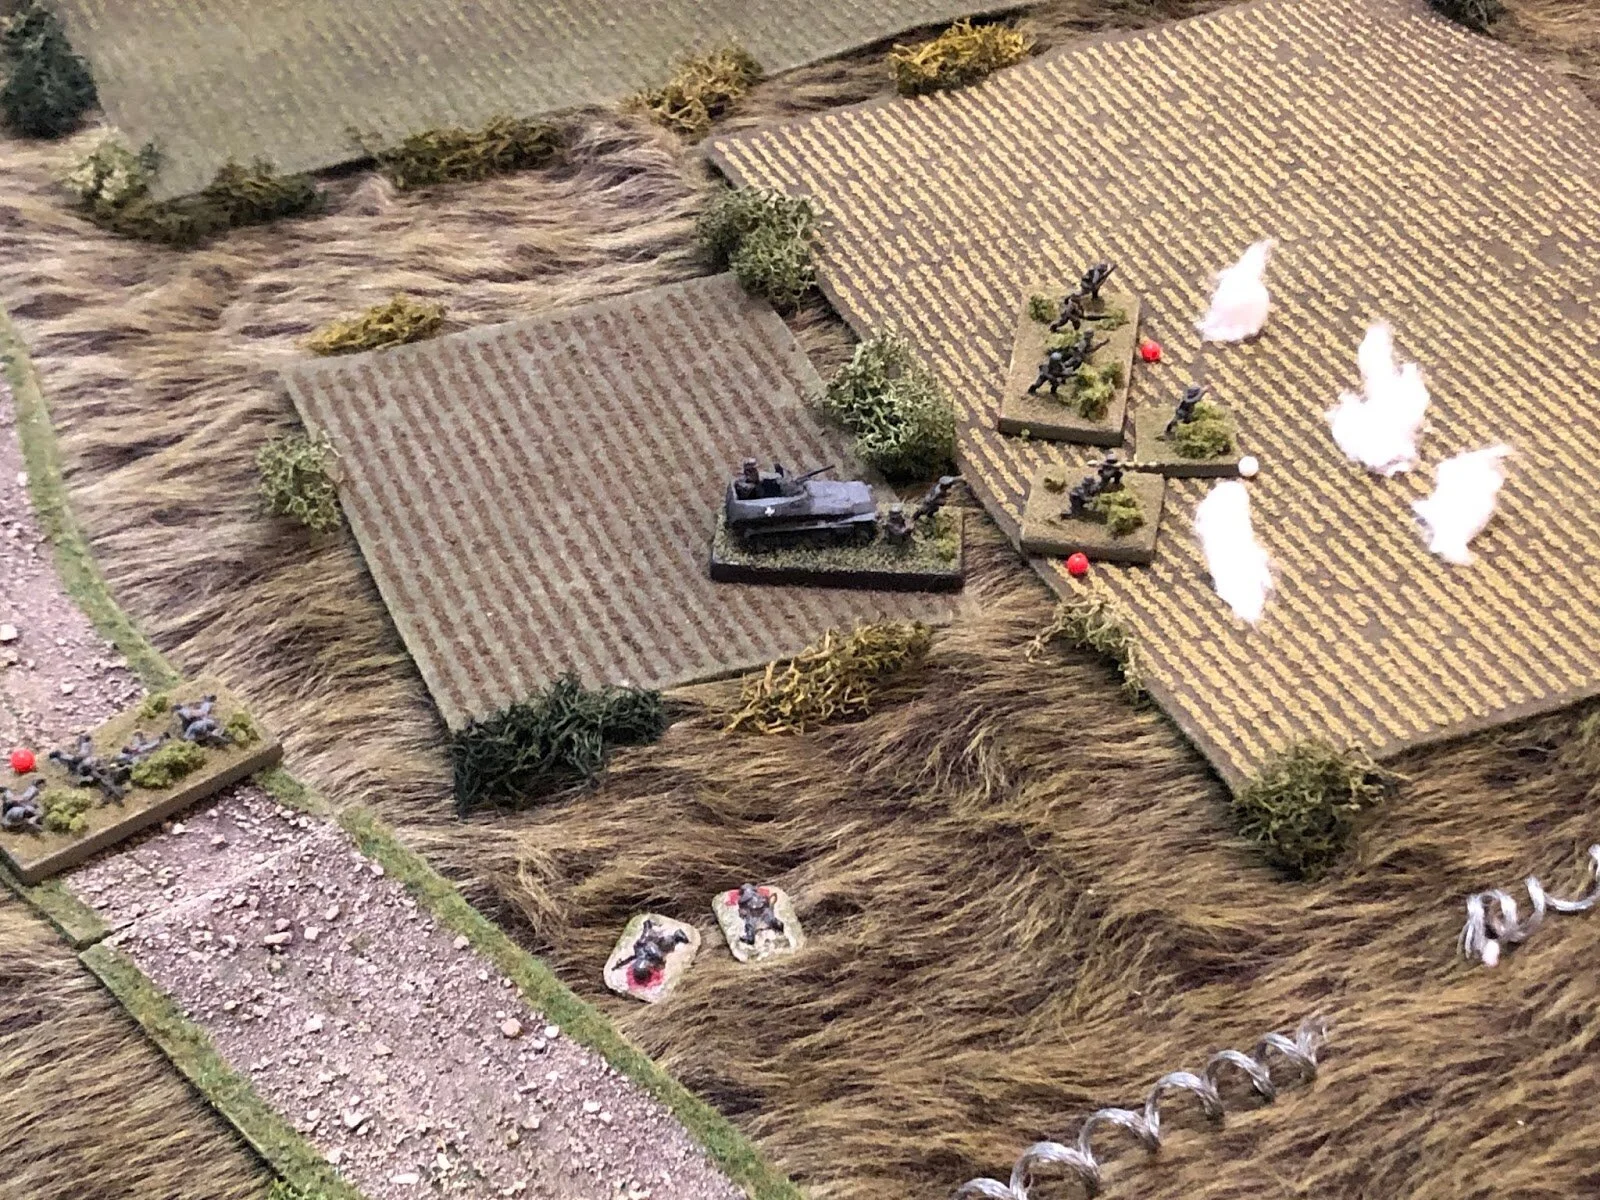


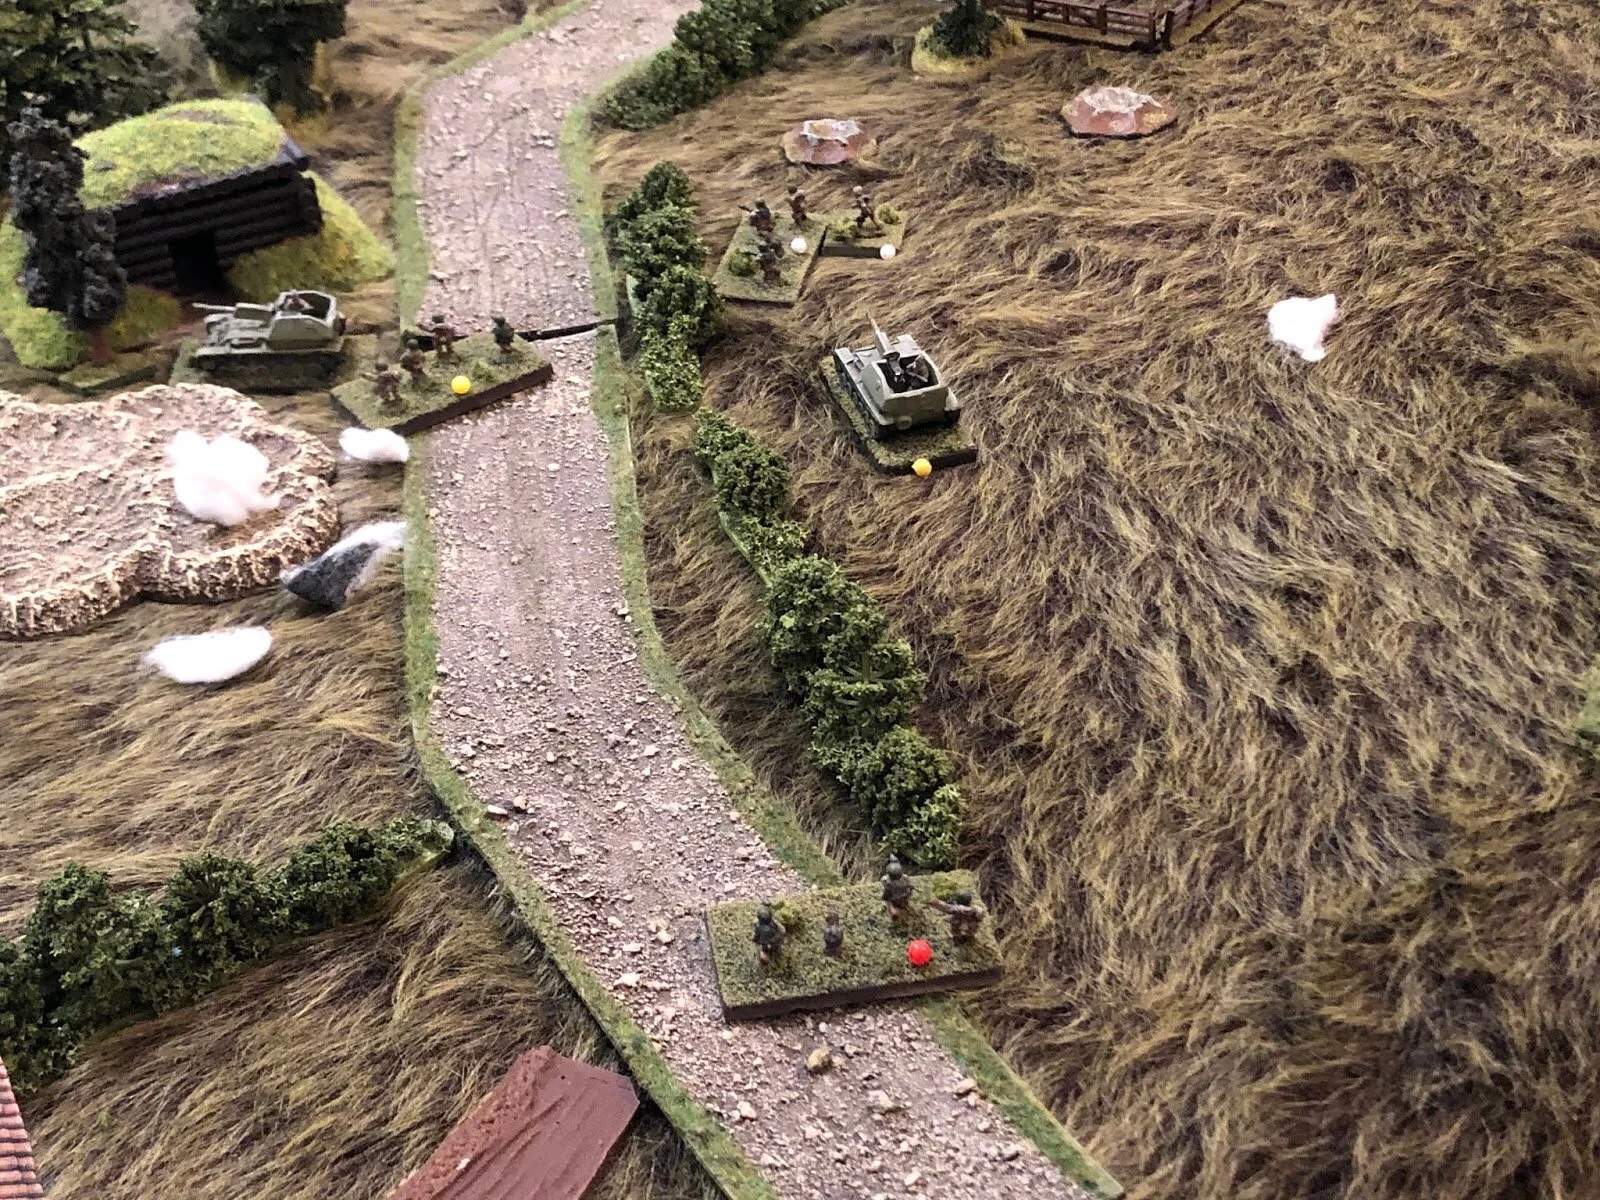


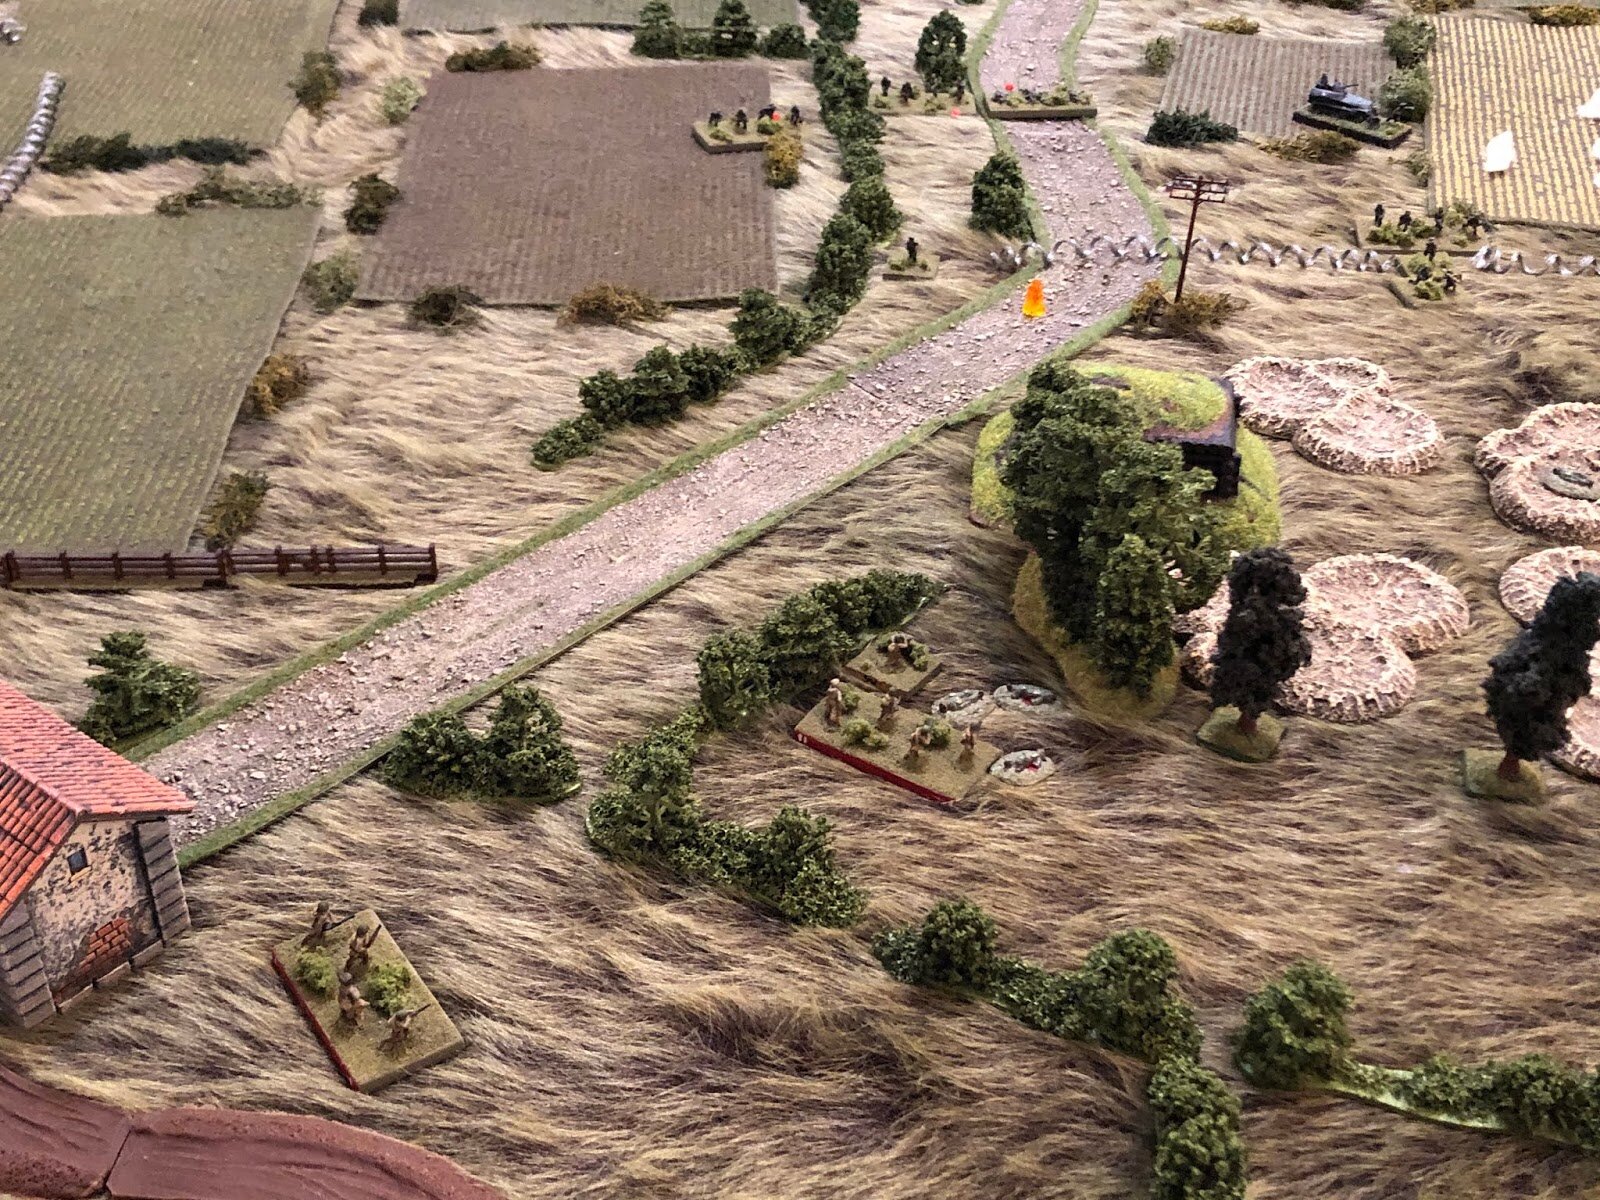

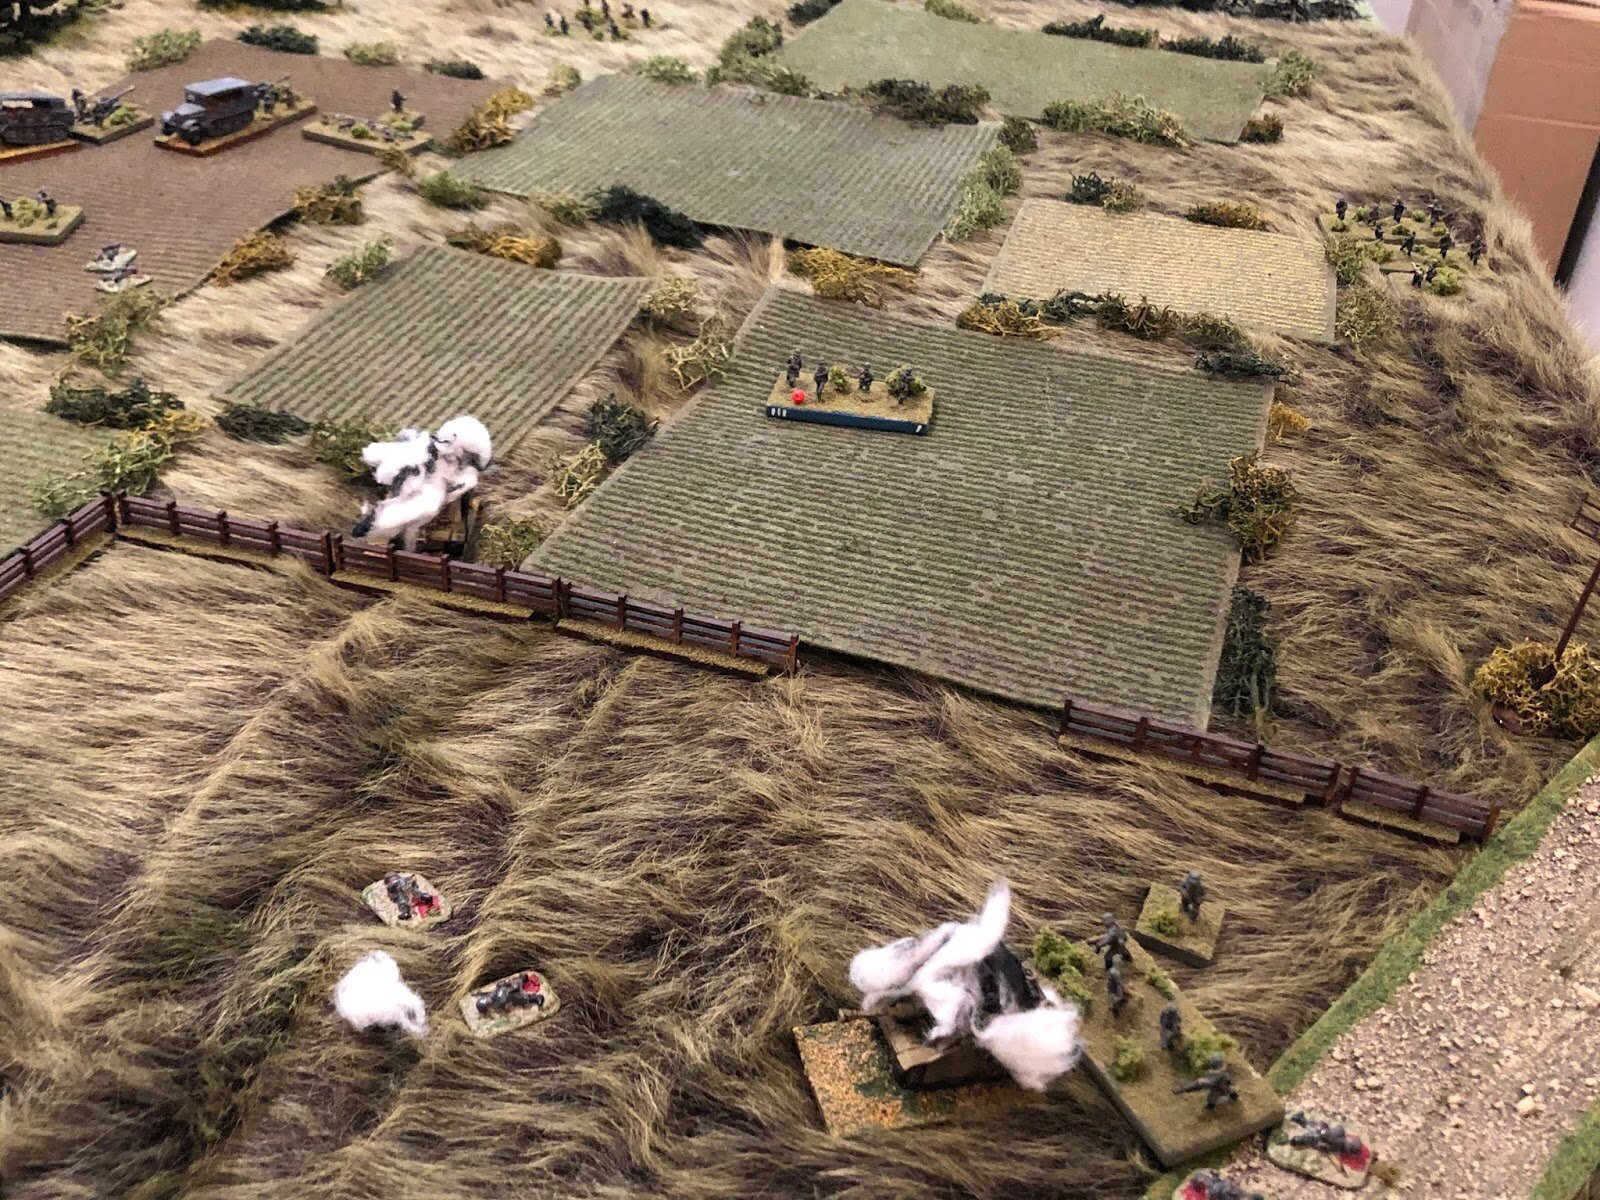


IABSM is always a treat, the friction it throws in the game can have you going mad, but I certainly enjoy it, especially for solo games, it makes the fight completely unpredictable. I'm sure it's not everyone's cup of tea; it can be so deliciously frustrating to have (for example) a PC and a squad sitting there, mere inches from a whole string of 'man down' and suppressed enemy forces, knowing that if you could just get them activated you'd surely charge, then knock out a whole string of troops. IF you could just get them to activate ;)
Regarding deployment, being omnipotent, I'm certain neither the plan of attack nor the plan for defense was the best, but I felt like they both gave the best opportunity for a great solo game. The 'hedgehog' approach to defense made a lot more sense than anything else I could come up with; it's historically relevant, and there was no way I was going to load everything up into Strongpoint Anna, knowing the German off-table arty assets in the fight. Conversely, knowing the Soviets were going with three strongpoints and didn't have any off-table arty, I could have just loaded up in the center and pushed the grunts forward, ignoring the flanks and daring the Reds to come out of their trenches and bunkers, but that hardly seemed sporting. Overall, I'm very happy with how the fight was planned and carried out, I thought the plans worked very well.
Man, what a fight! I hope you enjoyed it as much as I did. It's been a long time since I had that many troops on the table, felt good, though I can't say it want to do it all the time, so I'm looking at scaling at least some of my future fights in this campaign back to company-level. I can't wait to play some more next weekend. Awaiting my orders!
Just Jack

Lardy Day at the South London Warlords yesterday. IABSM game put on by Ian Spence, involved a US mixed force of tanks, reece and infantry pushing German defenders out of a village and driving off table.
A bloody affair which ended up with most German units eliminated, except the crucial platoon that held the village itself. We used the Oh What a Total Bummer dice driven variant of the rules, the first time that Lardy Rich had seen them being used.
Nice little game that had my US forces not doing what I wanted to do as often as I wished. As with all TFL rules, friction reared its’ ugly head and managed to stifle my infantry attack, but I was able to get my armour and reece to do the damage.
Hopefully we will do another Lardy Day next year and we get more people along to play games.


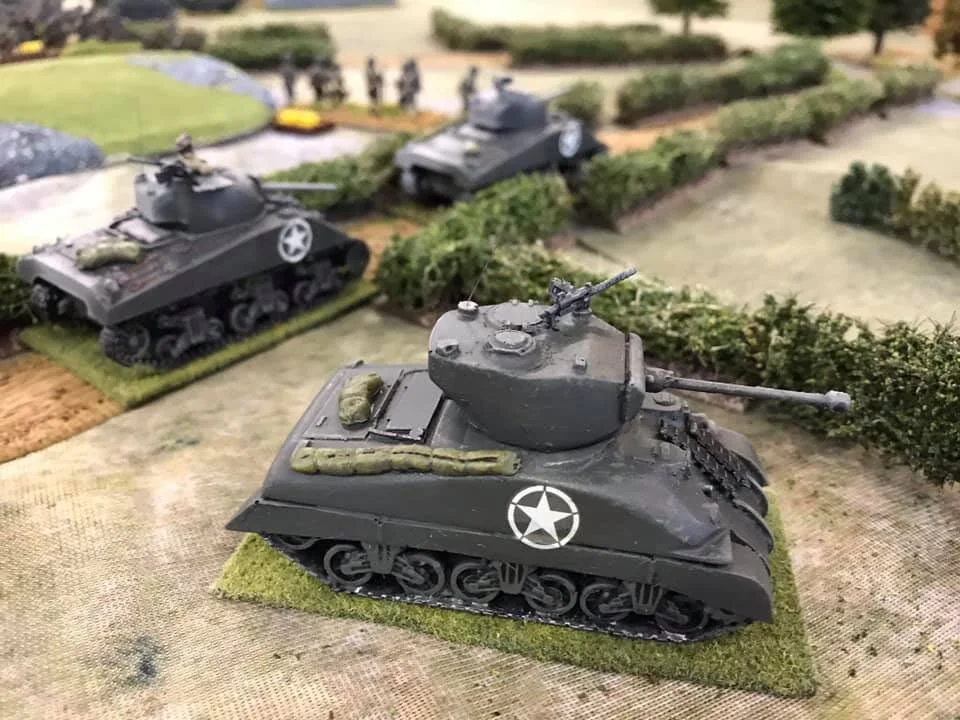


Desmondo Darkin

The stage is now set for tonight’s game using TFL rules ‘I Ain’t Been Shot, Mum’. the last stand of the Searchlights at Les Attaques, Calais 24 May 1940.
A scenario from the Defence of Calais scenario pack which supports the rules. It is set on the 23rd of May 1940 as the BEF retreats back to the coastal ports, fighting a rearguard action all of the way.
This is the advance of the forward units of 1st Panzer Division and their encounter with a scratch force of C troop, 1st Searchlight Regiment troops at the village of Les Attaques on the Canal de Calais.
David versus Goliath?
Well, goodness, what a game. Germans very cautious indeed. The myths of Blitzkrieg, eh?
Three German tanks disabled, two more abandoned and just one on its way to Calais!
The British fought every inch of the way.
Excellent scenario though and made a great storyboard to an actual historical event.
The first photo of the game (below) is very reminiscent of those pictures of the time full of damaged and abandoned vehicles.


Here are some more shots of the terrain:


Games 2 & 3
This scenario is additive!
Returned to play it twice more. Dale and Barry this time, with a swop over at half time. Some excellent gaming and some brilliant results using IABSM rules from TFL.
Getting ready to run it again tonight with two more teams.
Here are a few more action pics from games two and three:


Games 4 & 5
More pictures of the Les Attaques 1940 game. This time the 4th and 5th plays at it with different players. Certainly getting value for money with this scenario!
A few additional ideas built in this time to curb a few ideas at short cuts etc.


Tim Whitworth

Inspired by issue 184 of After the Battle magazine, I decided to do a late war game based on actions in one of the Oder Bridgeheads in February 1945. It allowed me to try some loaded-for-bear SS foot units, and was a change of pace from the Normandy kick I was on.
The Soviet 49th Guards Tank Brigade (with T34/85s) drove the SS Fallschirmjaegers out of Grabow on Feb 5. But then the Kampfgruppe Schwedt defenders received reinforcements: two batteries of Sturmgeschutz-Brigade 210 and Fallschirm-PanzerJaeger-Bataillion 54. So, along with units already in the bridgehead (SS Jagdverband Mitte, SS Fallschirmjaeger Btn 600 and the snipers of SS Scharfschutzen-Zug) the Germans counterattacked on Feb 7


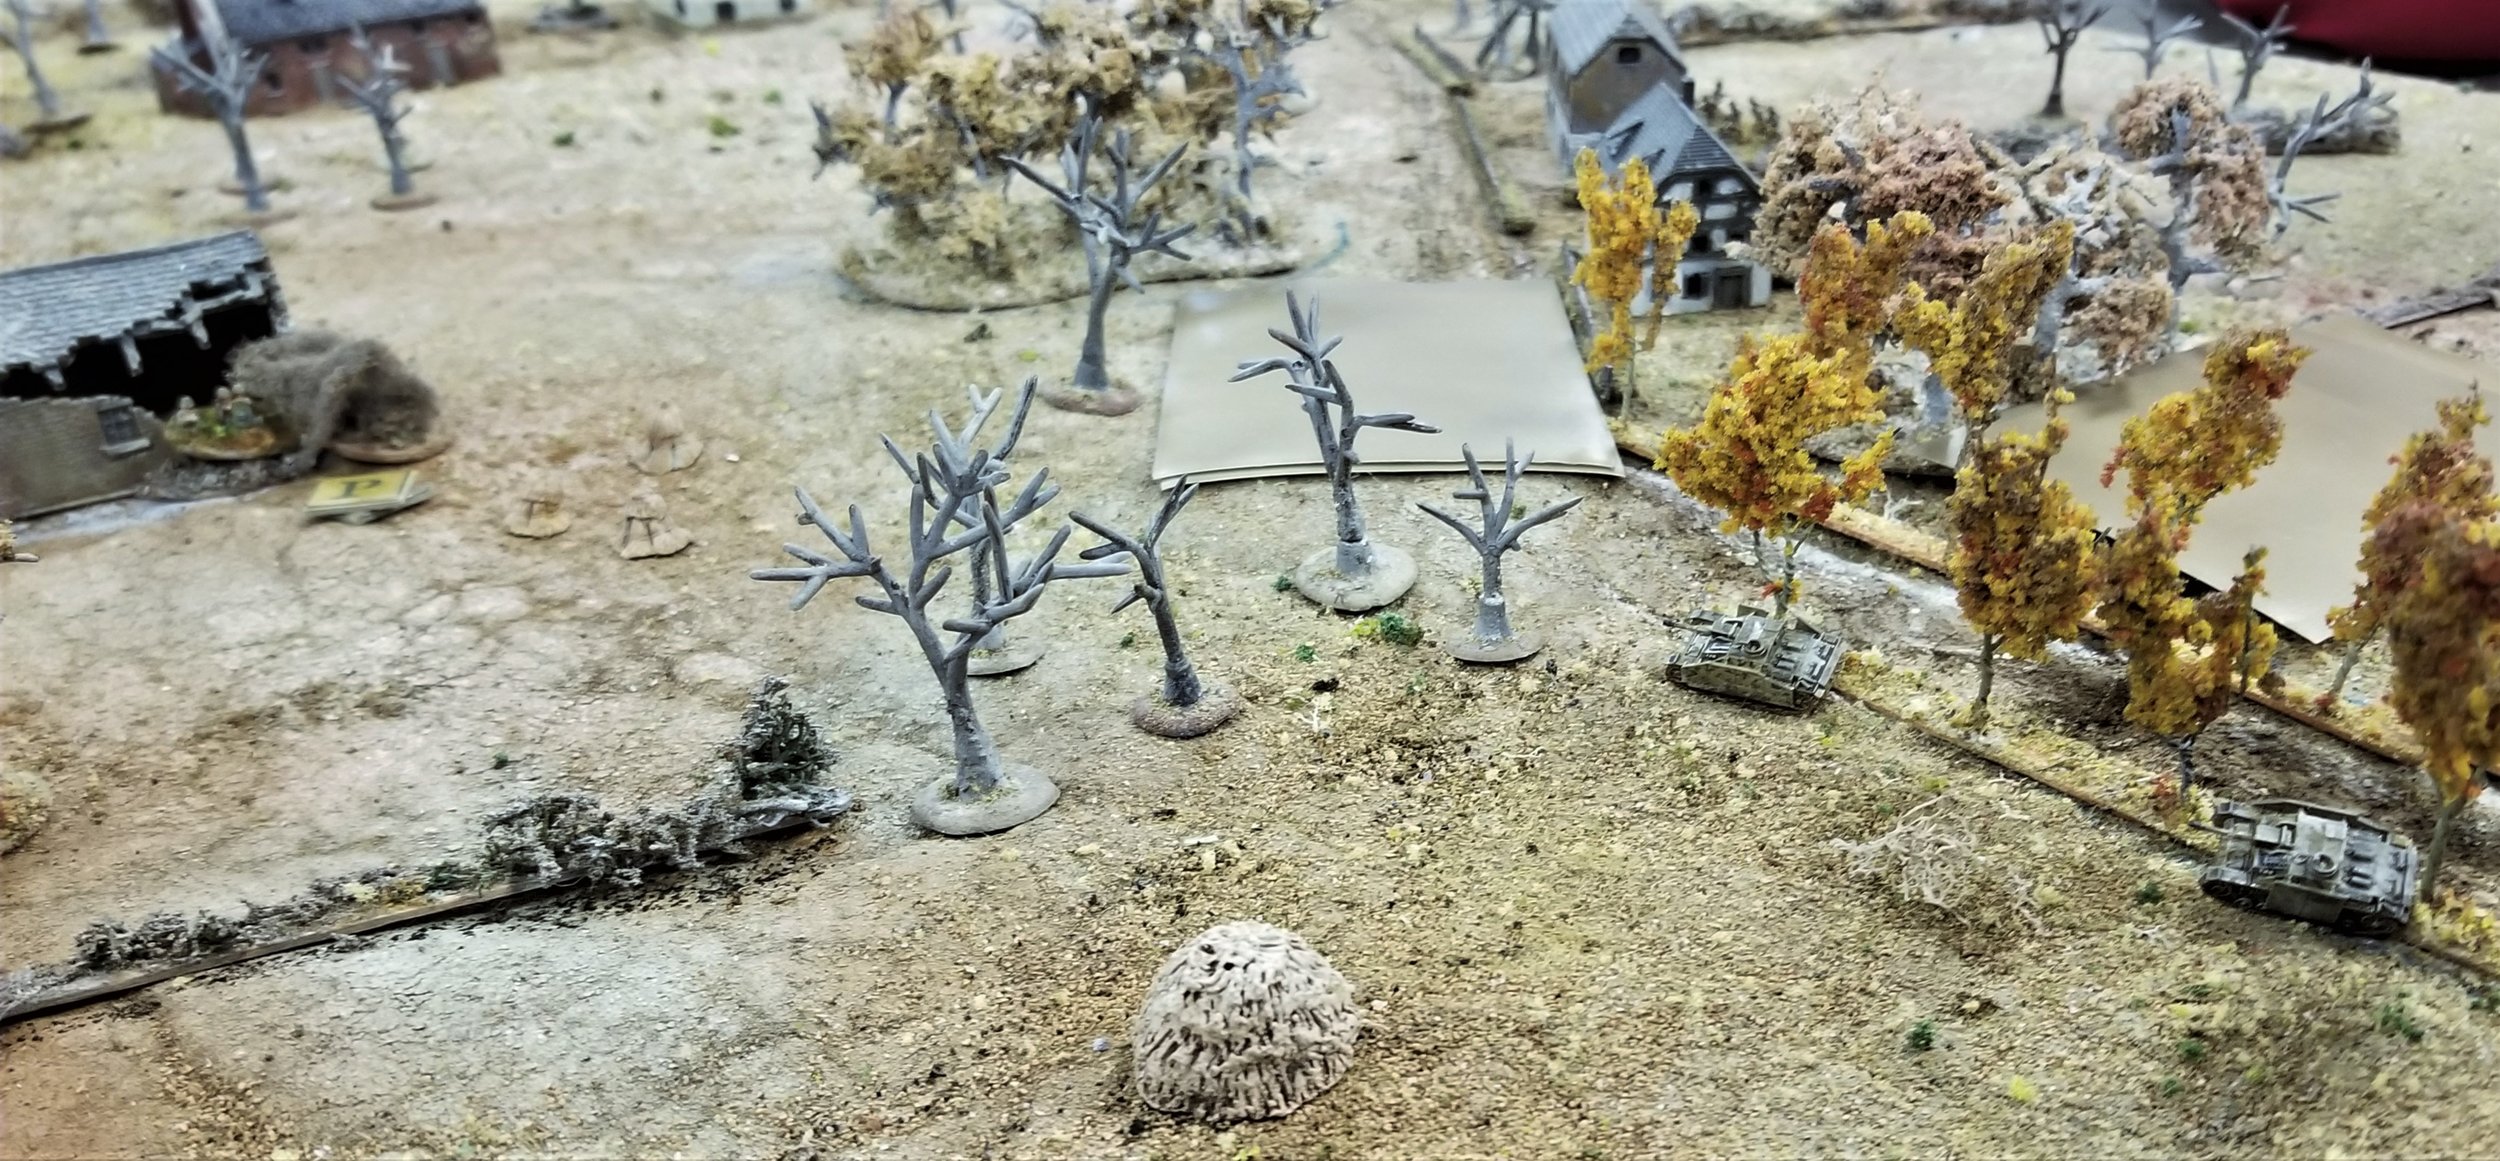


Final German casualties are two dead StuGs, and nine of the Fallschirmjaeger Panzerjagd down. Sheridan lost seven of his Jagdverband men and one MMG team.
I lost one M4 and forty-five men, two MMG teams, two platoon leaders and the Company CO. No point in the tanks hanging out here anymore. The war is going to be over soon.
Mark Luther

By the end of the first week of September 1939, the German 4th Panzer Division had advanced as far as Warsaw. Thinking the Poles would be knocked off balance by the speed of their advance, German commanders issued orders for the city to be stormed via the Ochota district on the western flak of Warsaw.
The Poles, however, had heavily reinforced the area, with units from the 40th “Children of Lwow” Regiment barricading streets and manning gun emplacements along all the approaches.
The Poles let the Germans drive into the city, and then opened fire with everything they had. Worse, many streets had been covered in turpentine, which was then lit on fire, destroying several German tanks and catching German infantry in the inferno that followed.
This then was the background for scenario #47 (Taking Ochota by Storm) of the second September war scenario pack. The game would begin as the Poles (played by Dave) open their attack on the advancing Germans (played by John). The Germans’ objective was just to get as many of their units as possible back off the table; the Poles’ objective was to destroy as many German units as possible.
The Battlefield
Two thirds of the table was taken up by the outskirts of Warsaw: a loose grid of streets with a goodly number of houses and factories. The other third was fairly empty rough ground.
A main road ran down the centre of the long axis. The Germans would start the game along this road spread out from the half way point deep into Ochota: the open ground behind them at the other end of the table being their way out.
The view down the main road into Warsaw
The Poles would start the game in a loose horseshoe shape surrounding the hapless Germans, initially separated by a bit of a gap. Their troops were dug in and, because of the seating arrangements in my wargaming room, mostly concentrated on one side of where the Germans were: Dave showing a marked reluctance to stand up and lean over the table!
The Germans
The Germans had a strong, well-balanced force: a slightly reduced company of Schutzen infantry supported by a couple of platoons of tanks.
Force commander was Hauptmann Siggi Schnitzel on a motorcycle combination. Directly under him were three platoons of Schutzen motorised infantry, each with a Big Man and two squads of eight men each. Each squad had lost their transport, but did have two LMGs, meaning that they would fire with an extra dice. In support was a platoon of four MMG teams in Kfz70 trucks.
Attached were Hauptmann Kurt Kirschwasser’s tanks: a company HQ of a Panzer Befelswagon and a Panzer II; then two platoons each of a Big Man, two Panzer IIs and a Panzer I.
The Poles
The Ploes were commanded by Kapitan Bazyli Barszcz: a man with far too many zeds in his name!
Their infantry contingent consisted of three line infantry platoons each of two 12-man squads. The 1st and 2nd Platoons also had an anti-tank rifle team, using the excellent wz.25 anti-tank rifle. In support were three MMG-carrying taczankas (to use the Polish spelling).
Also in support was Big Man Porucznik Burt Bigos with two 75mm field guns that would operate as an improvised anti-tank gun platoon i.e. each weapon would fire on a separate Anti-Tank card.
Finally, Porucznik Kori Kurczaka commanded a platoon of five 7TP jw (1939) tanks: the best armour the Polish army had available.
The Battle Begins
Both sides deployed under Blinds, with each side putting down one Blind at a time. As per the scenario, the Germans were clustered around the main road; the Poles had a blocking force on the road out of Warsaw, but were otherwise mostly to the south of the main road.
Both sides spent their first Activations in Spotting. The Poles spotted the German Panzers on the main road; the Germans spotted the Polish blocking force. The Poles also decided to deploy their tank platoon in order to get them into the action as soon as possible.
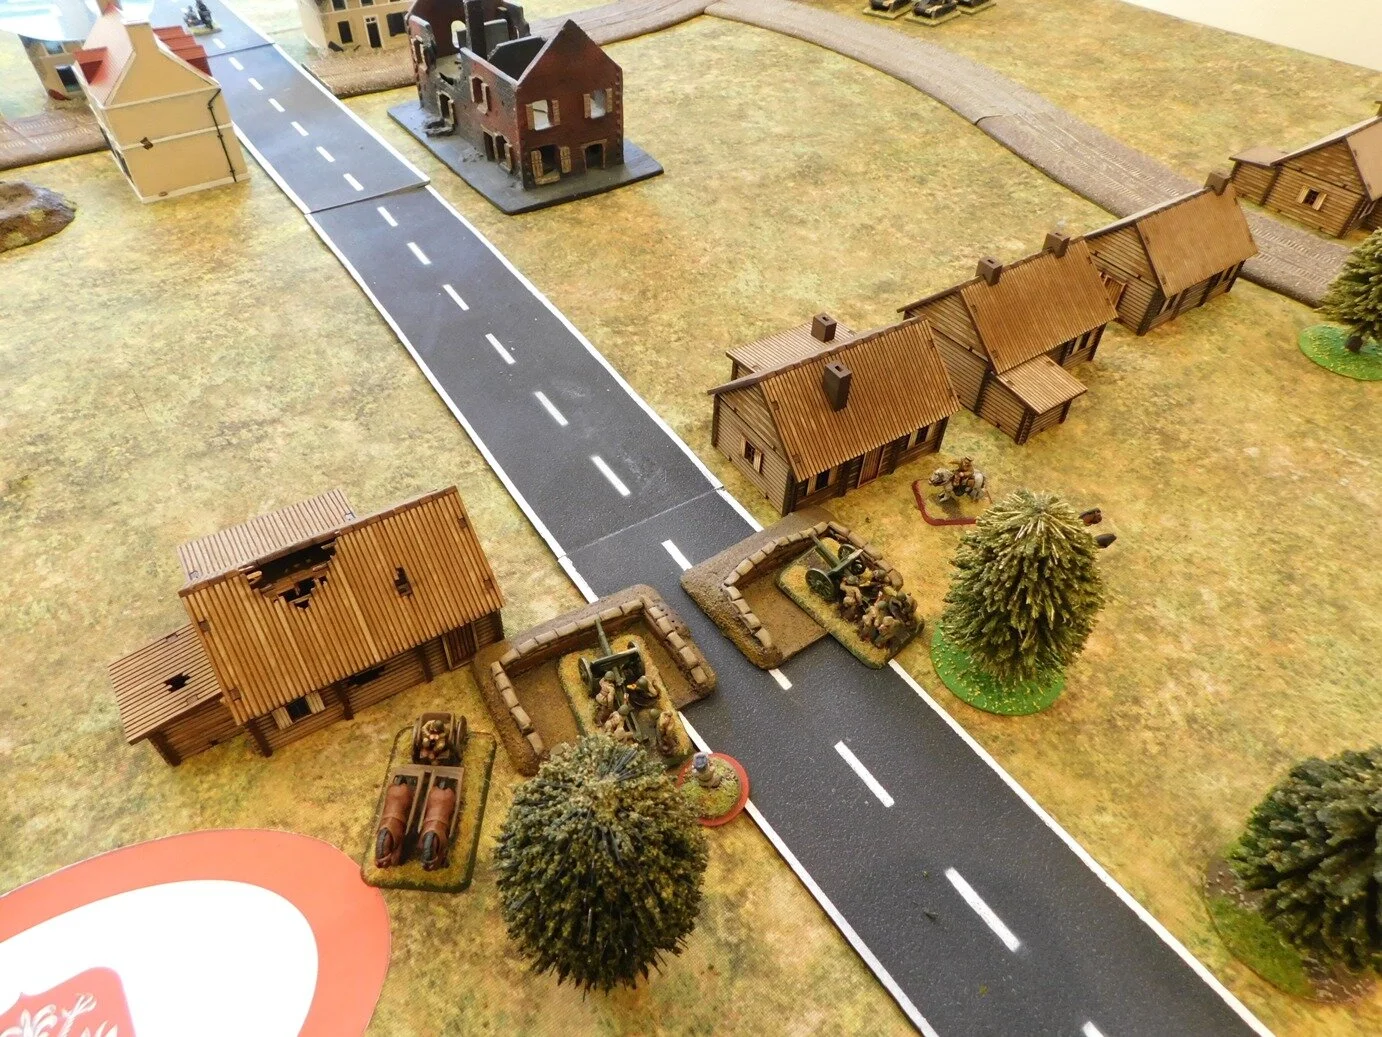


Things happened very quickly after that. The German Panzers scattered off the road, seeking to avoid the attentions of Burt Bigos’ guns. The tanks headed north, but left the Befelswagon behind: it was hit by several shots of 75mm HE and would spend the rest of the game trying to get moving again.
Without the German tanks to shoot at, the Polish field guns then turned their attentions to a German infantry platoon sheltering in a house near the road. The German infantry had already begun a firefight with the Polish taczanka platoon, and were somewhat perturbed when the house they were in was not only hit by the Polish guns but also set on fire: the Schutzen would have to vacate the premises on their next action.
Another Schutzen platoon, from its start point in the house opposite the burning building, also headed north, looking to carry out a combined attack on the single Polish unit north of the road: an infantry platoon that had just started to pepper the advancing Panzers with anti-tank rifle fire.
Unfortunately, the German infantry ran straight into the single Polish turpentine trap and were engulfed in an exploding fireball: the equivalent of being hit by a flamethrower. The German infantry platoon effectively ceased to exist, with only flame markers remaining in its place.
This was a bitter blow to the Germans and, I think it fair to say, sapped their morale. All the remaining Panzers now decided just to individually sprint for safety: all semblance of a coordinated plan not out of the window.
This left the two remaining German infantry platoons somewhat in the lurch: especially the platoon at the deepest-into-Warsaw end of the road. This attempted to make its way north of the road in order to loop around and away from the main Polish force, and would spend the rest of the battle dodging from house to house in an attempt to follow the Panzers, all the while gradually losing men to Polish fire.
The Death of Barszcz
Meanwhile the German platoon that had been forced to abandon the house set alight by Polish artillery had moved west, hoping to make a quick dash off the table.
Their progress, however, was stymied by the Polish tanks: the AFVs were moving north looking to get into firing positions on the flank of the fleeing Panzers. Kapitan Barszcz had, on his snow white charger, moved forward from the original Polish artillery blocking position, and was currently sat under the leas of a badly shelled house.
Unfortunately, that house was now occupied by the German platoon, above, members of which leaned out of the window and dropped grenades and improvised petrol bombs onto both the Kapitan and the nearest Polish tank.
Suffice to say that the tank survived but Barszcz did not!
Ed.’s Note: no horses were harmed in the making of this AAR. Please assume that Ogier dodged the petrol that so afflicted his master and was last seen cantering happily off into the distance.
Note the Germans on the top floor of the nearest house
The End
Barszcz’s death was really the last German success of the battle, and John conceded shortly after.
One or maybe two Panzers might have got off the table, but no more than that. It had been a crushing defeat for the Germans, a glorious (and historically accurate) victory for the Poles.
Post-match analysis revealed that John, the German commander, had gone into the game without a specific plan. His aim had been to spend a bit of time working out where the Poles were, then make something up “on the hoof”. No thoughts of dividing his troops into those aiming to flee and those aiming to hold off the attackers whilst they did so; no attempt to force a Kesselschlacht that would draw the Poles into a fight in one place whilst most of his troops punched through with a Schwerepunkt elsewhere.
IABSM, like most uncertain-activation games, requires a plan as the basis for what you are doing. You might not get the cards you need in the right order you need them, but a plan allows you to make the best of what you do get: okay, so I can’t do this bit of the plan now, which is annoying, but the card that’s appeared means that I can do this bit of the plan instead etc
Dave, the Polish commander, was happy. He acknowledged that things would have gone even better had he initially spread his units out a bit more, but German Unschlüssigkeit had meant that he could actually use his deployment to powerfully sweep across the table…and he hadn’t had to stand up much either!
For those interested, the game lasted about 2½ hours.
Robert Avery
Polish taczanka
Polish 7TP jw (1939) tanks