We recently decided that a campaign would be fun, so I picked up the Blenneville or Bust campaign from Two Fat Lardies written by Robert Avery. This is a fictional campaign set in a valley in Normandy immediately following the landings. The first game of the campaign involves an American reconnaissance effort.

Spoiler Alert - If you are planning to play the campaign and want to have limited intel, read on at your own risk.

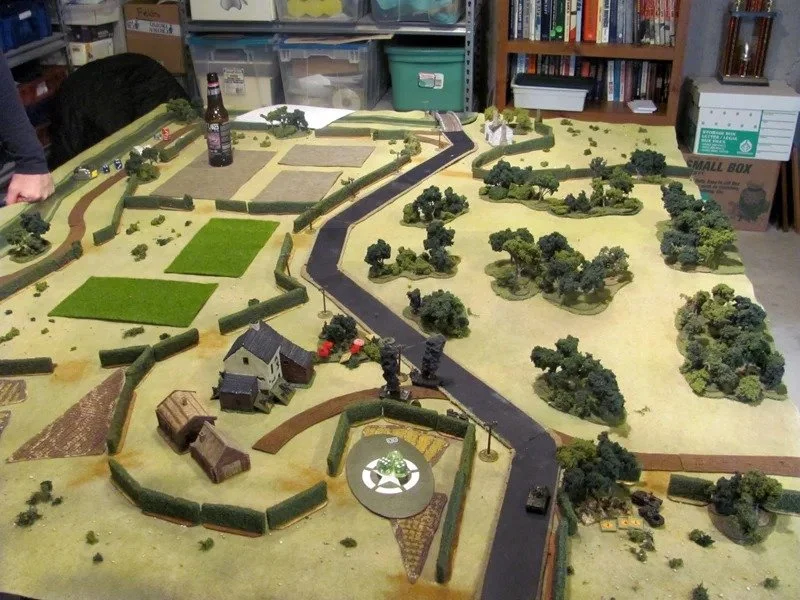
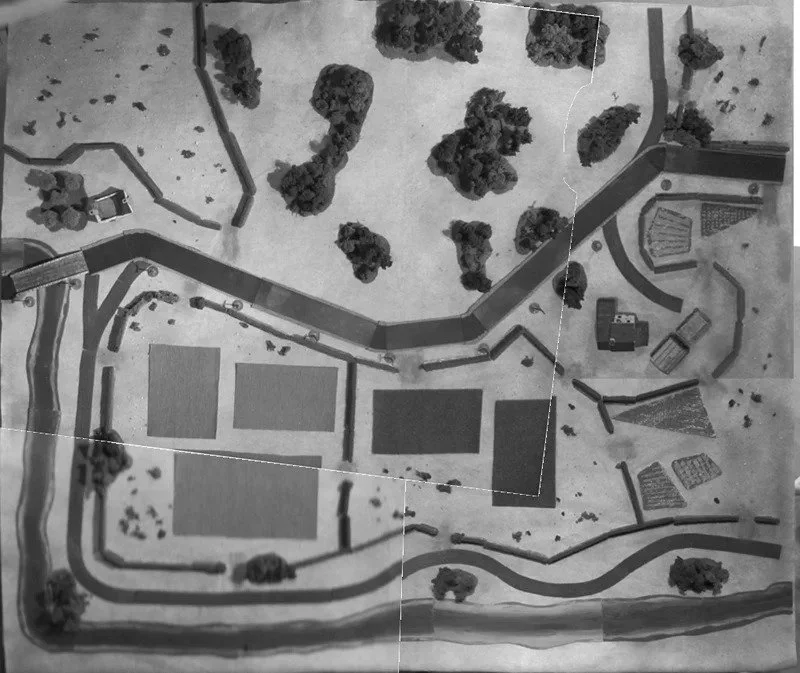
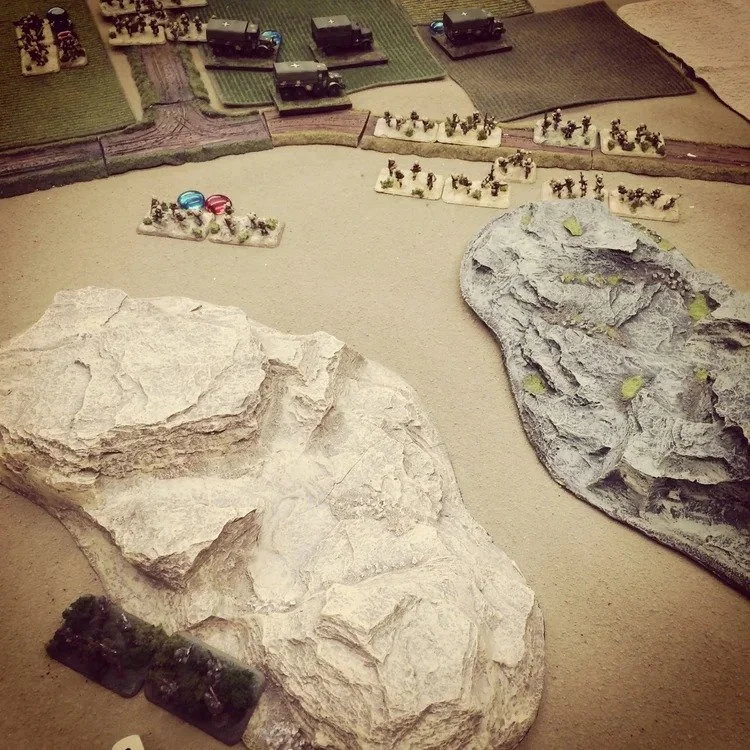
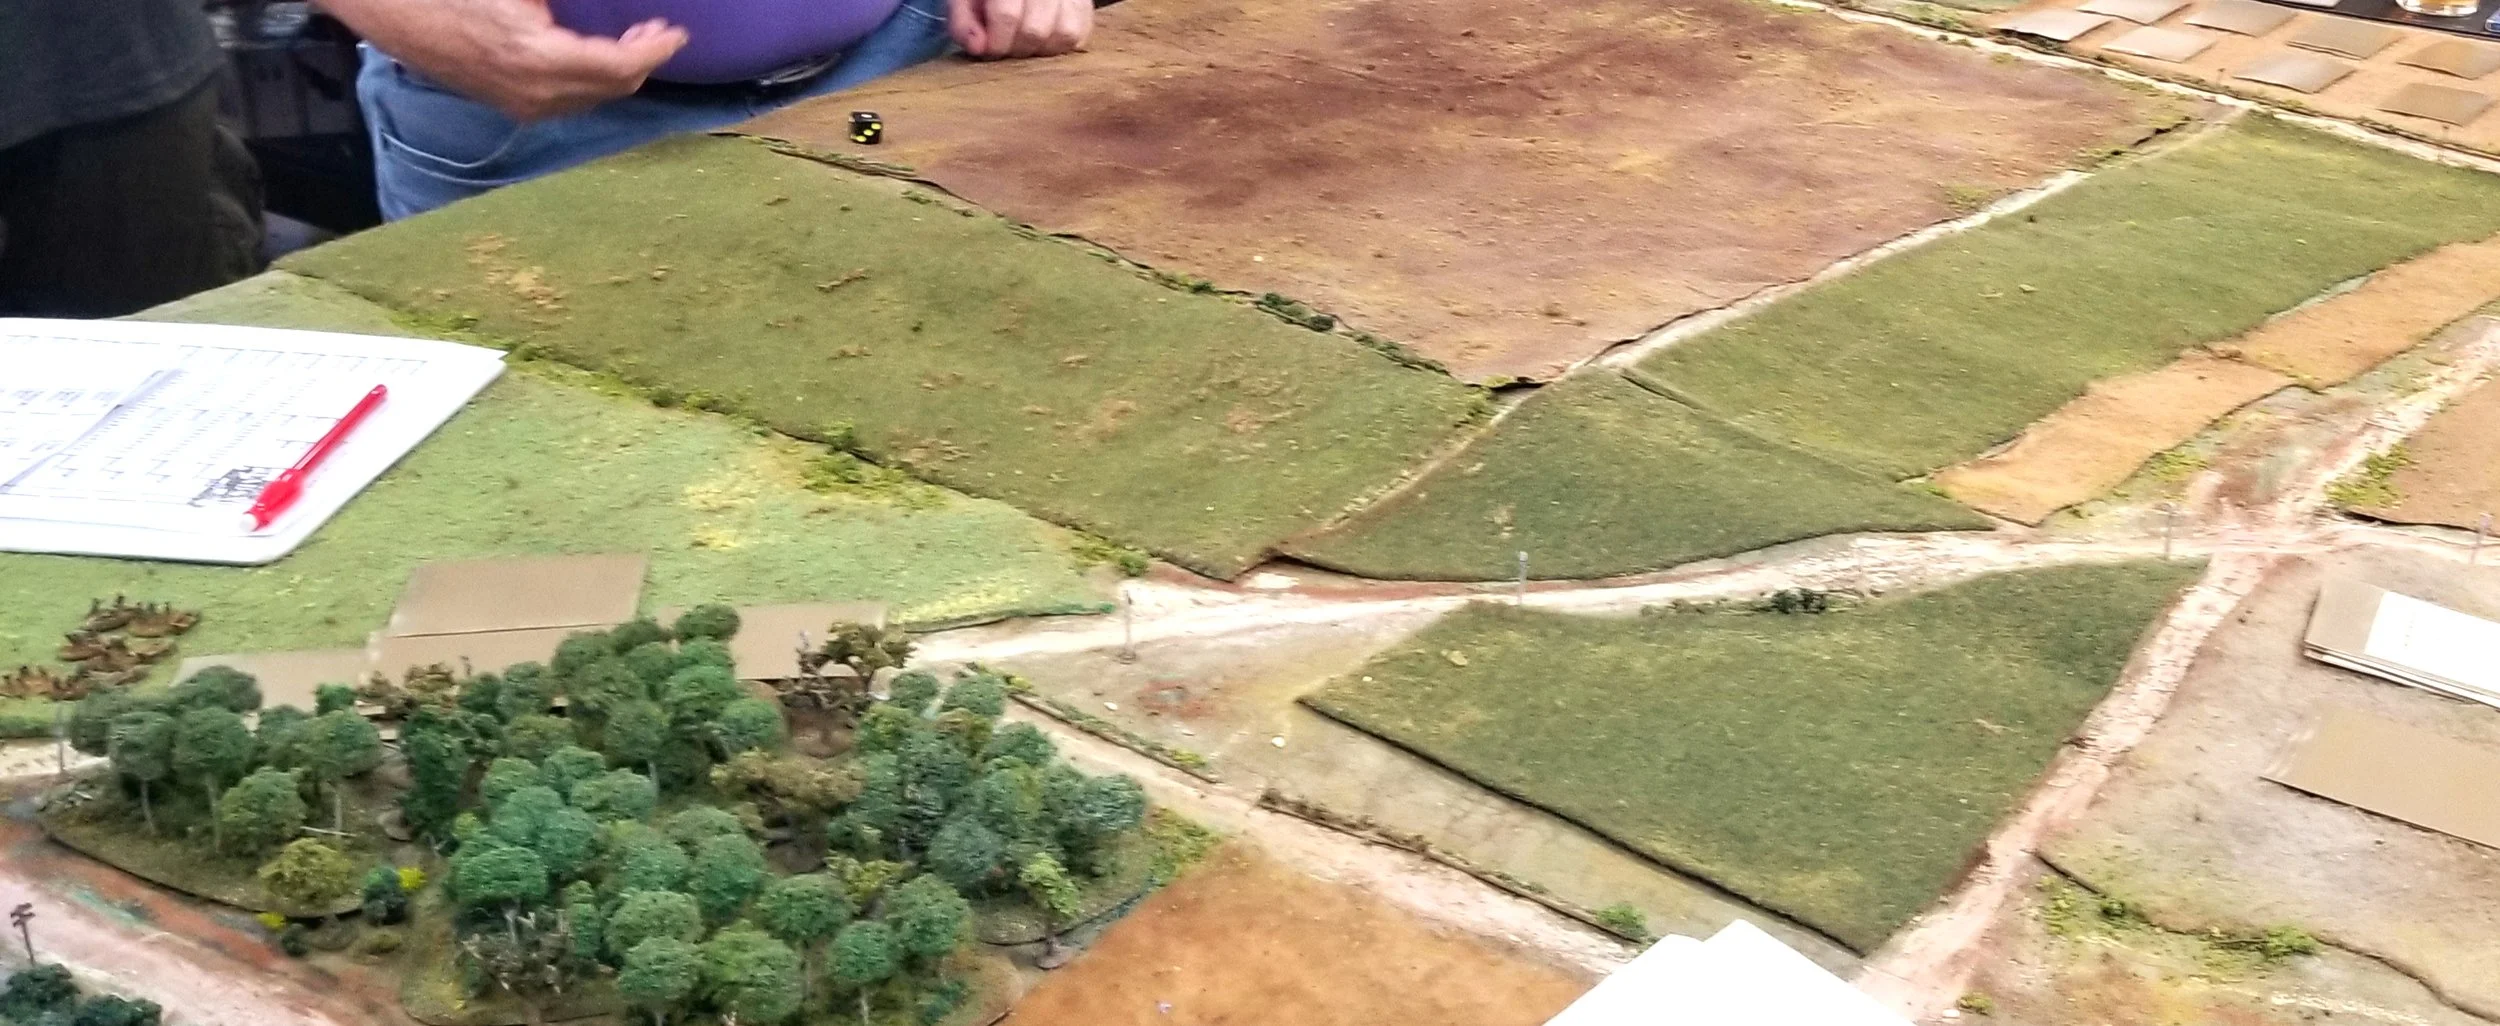
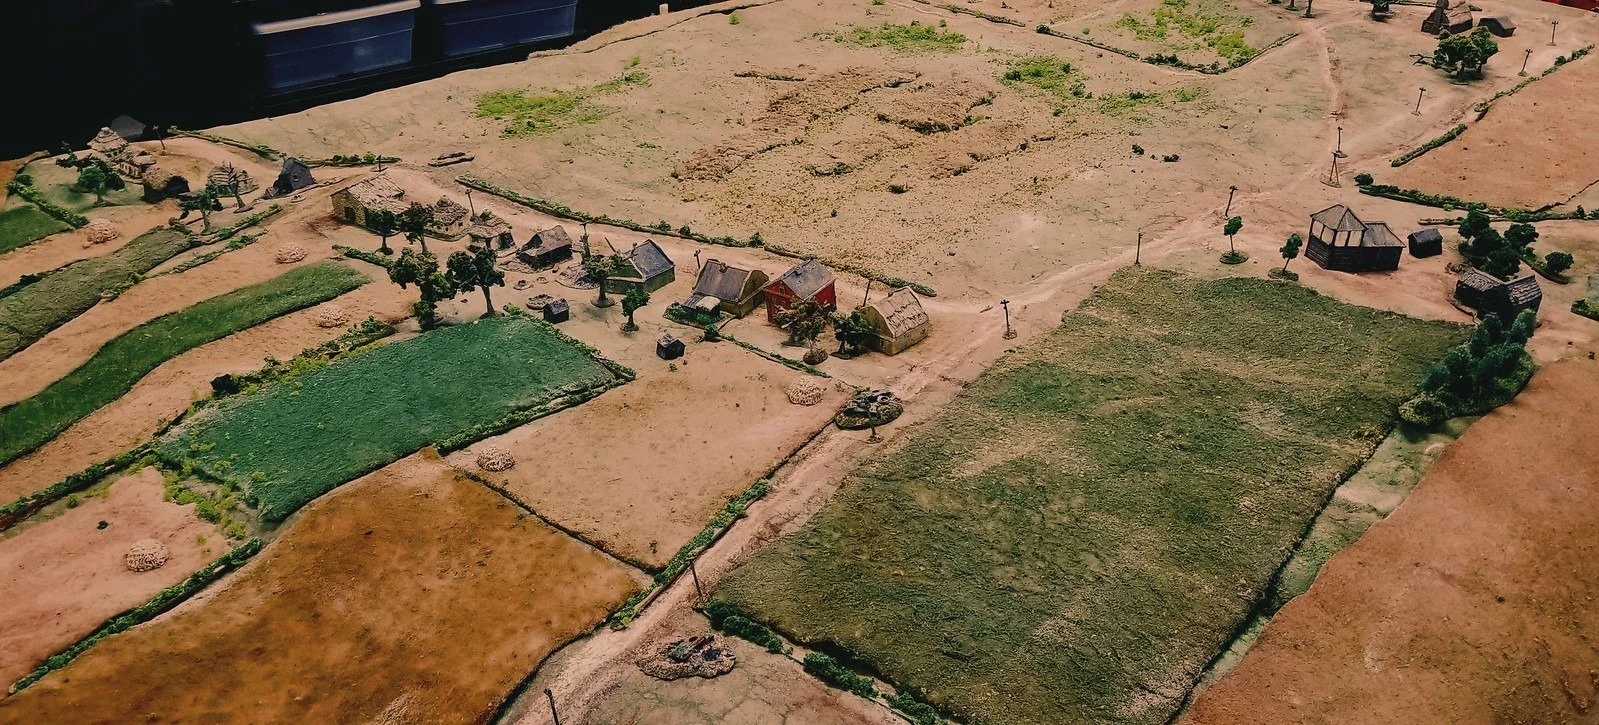
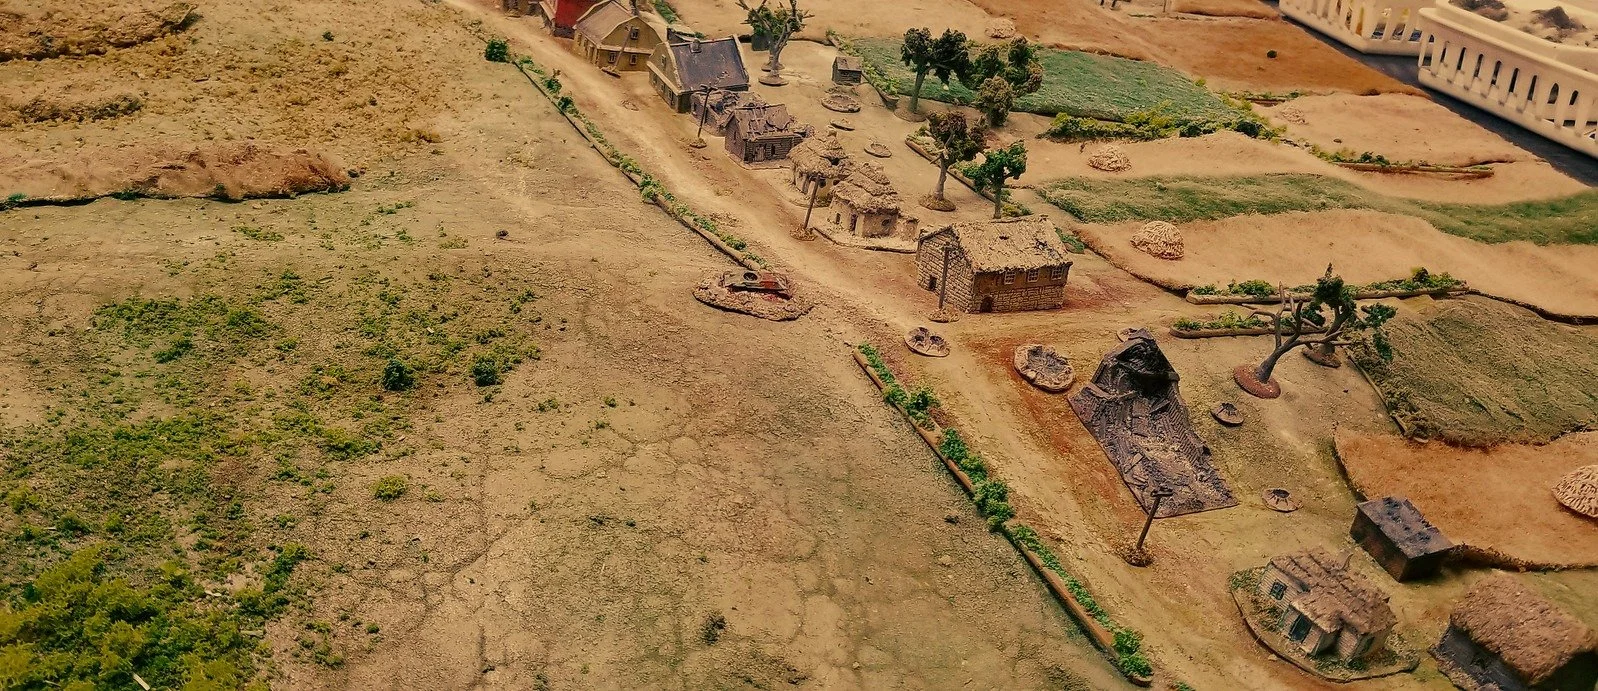
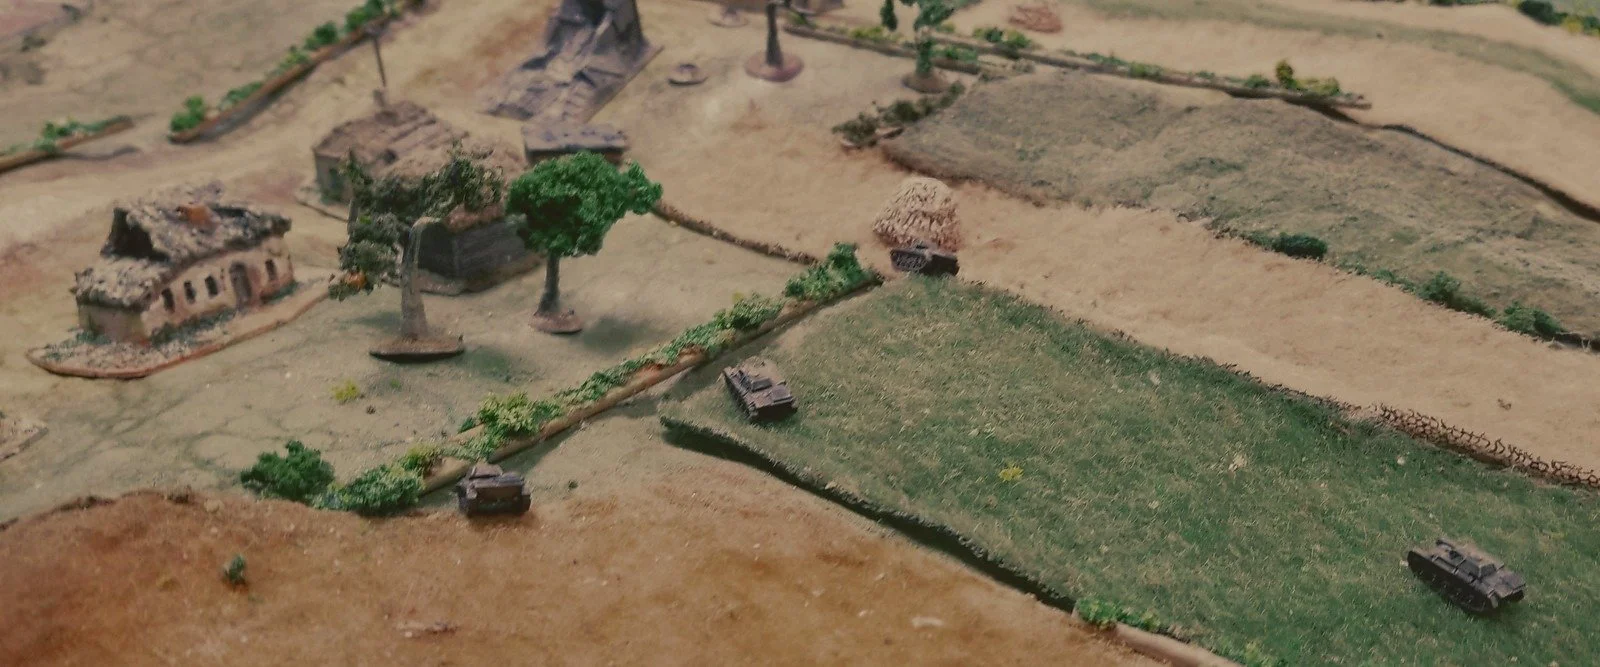
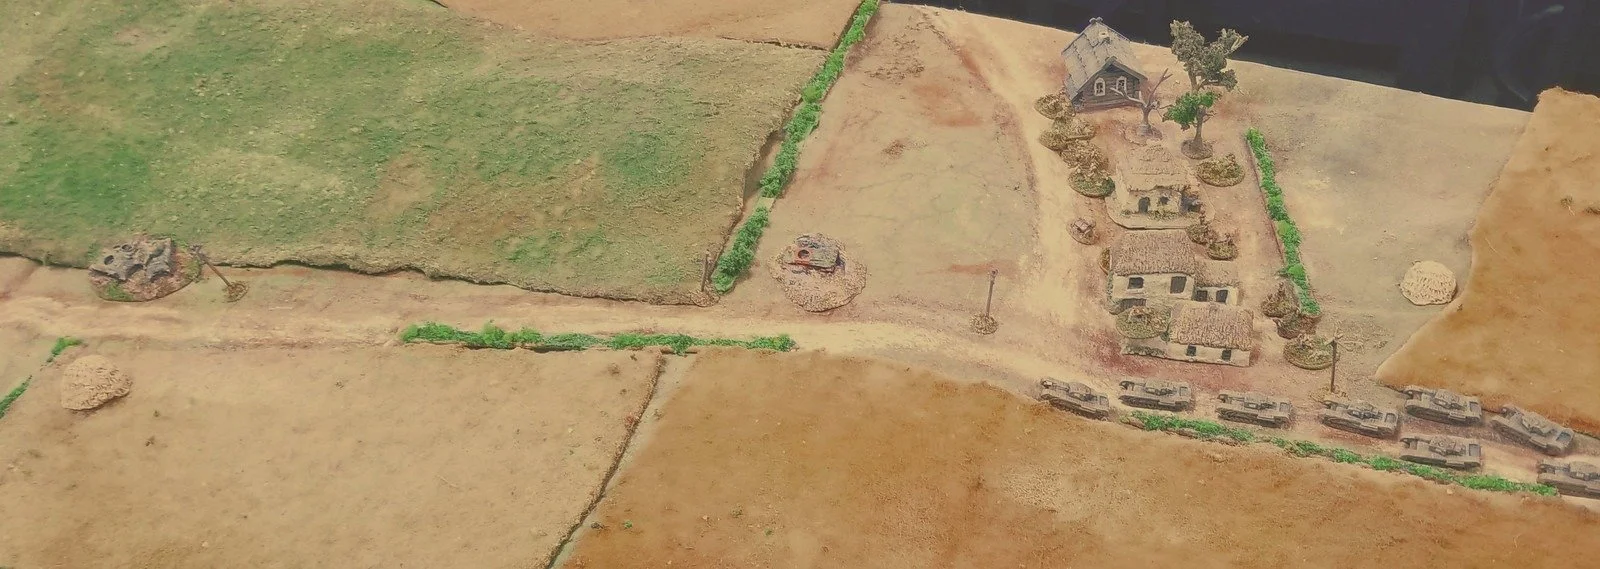
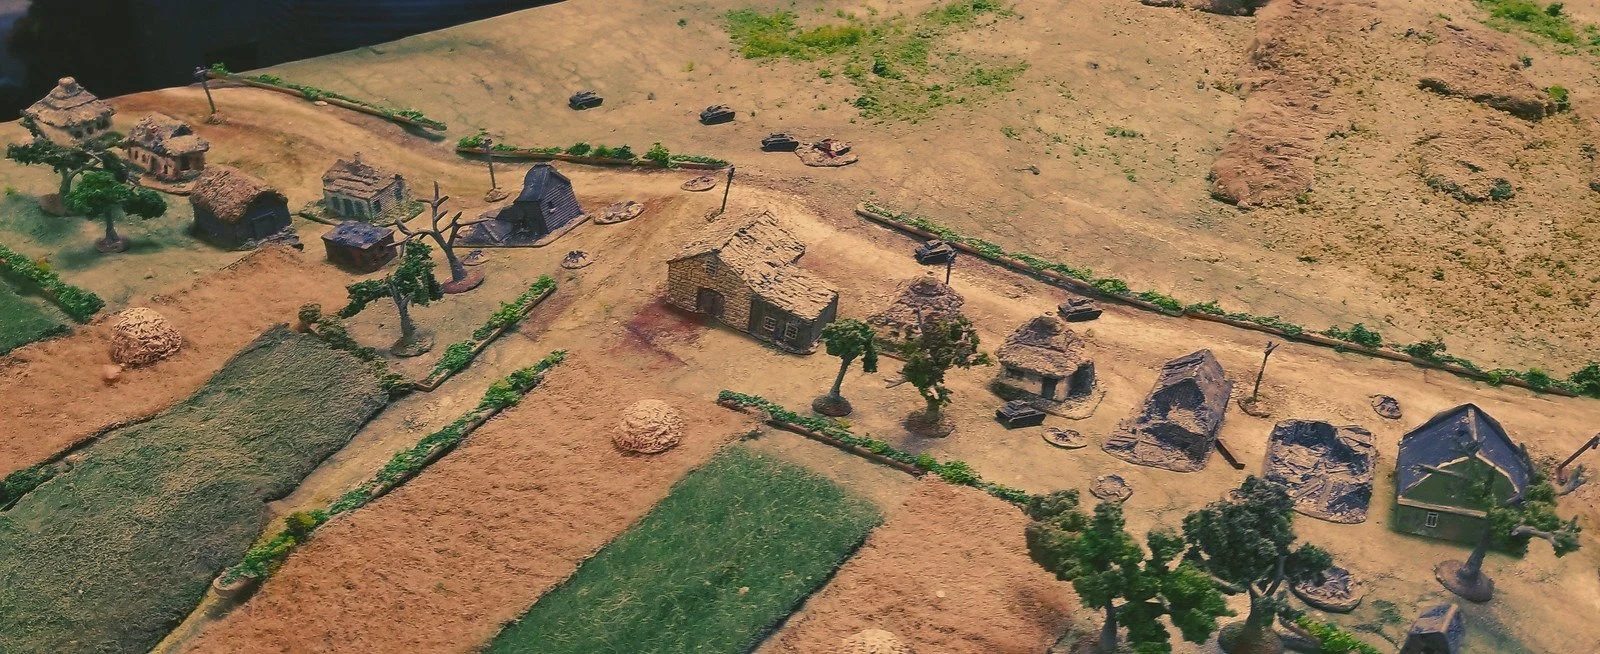
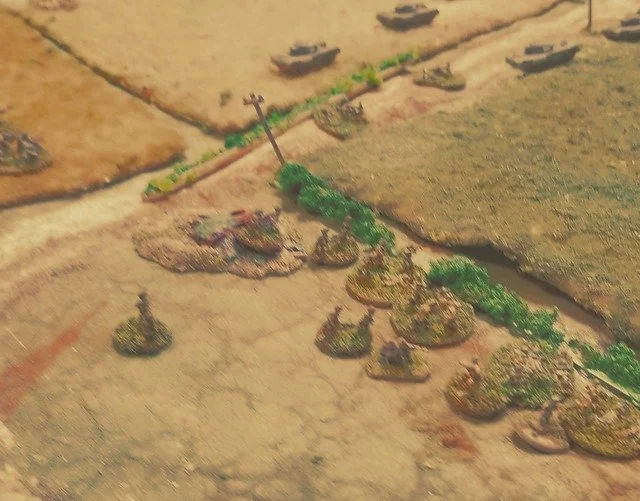
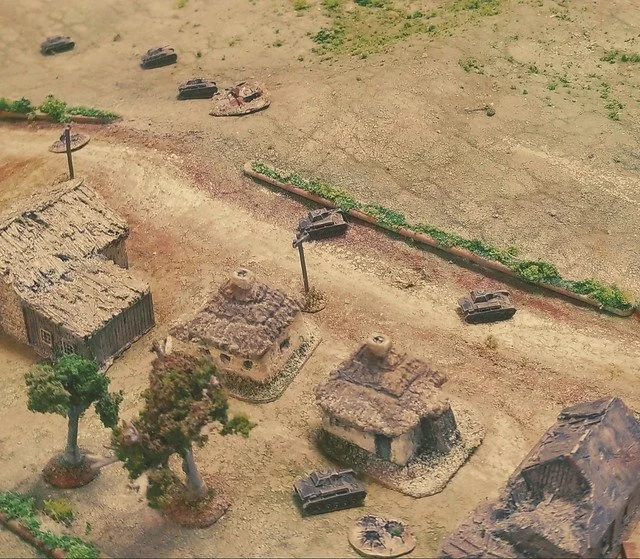
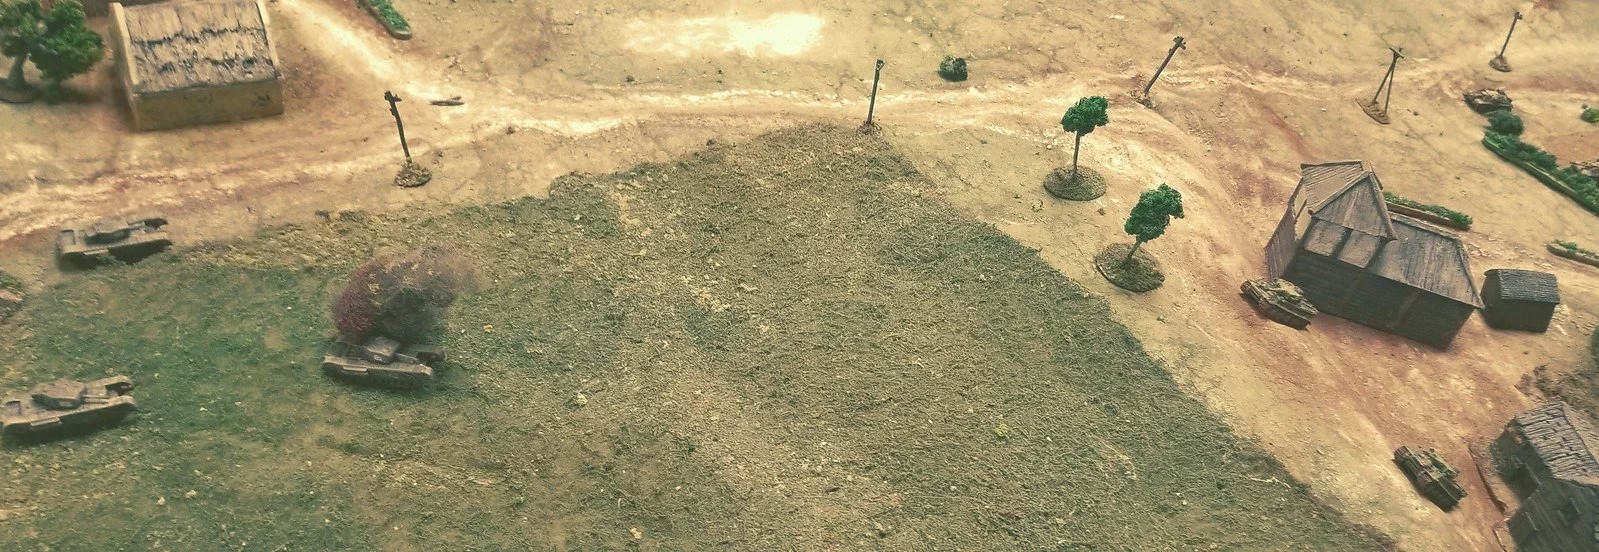
I set the game table up and took some aerial reconnaissance photos for the Americans to use when planning their attack (and I kept them away from the game table until their planning was done to put them into their company commander role).

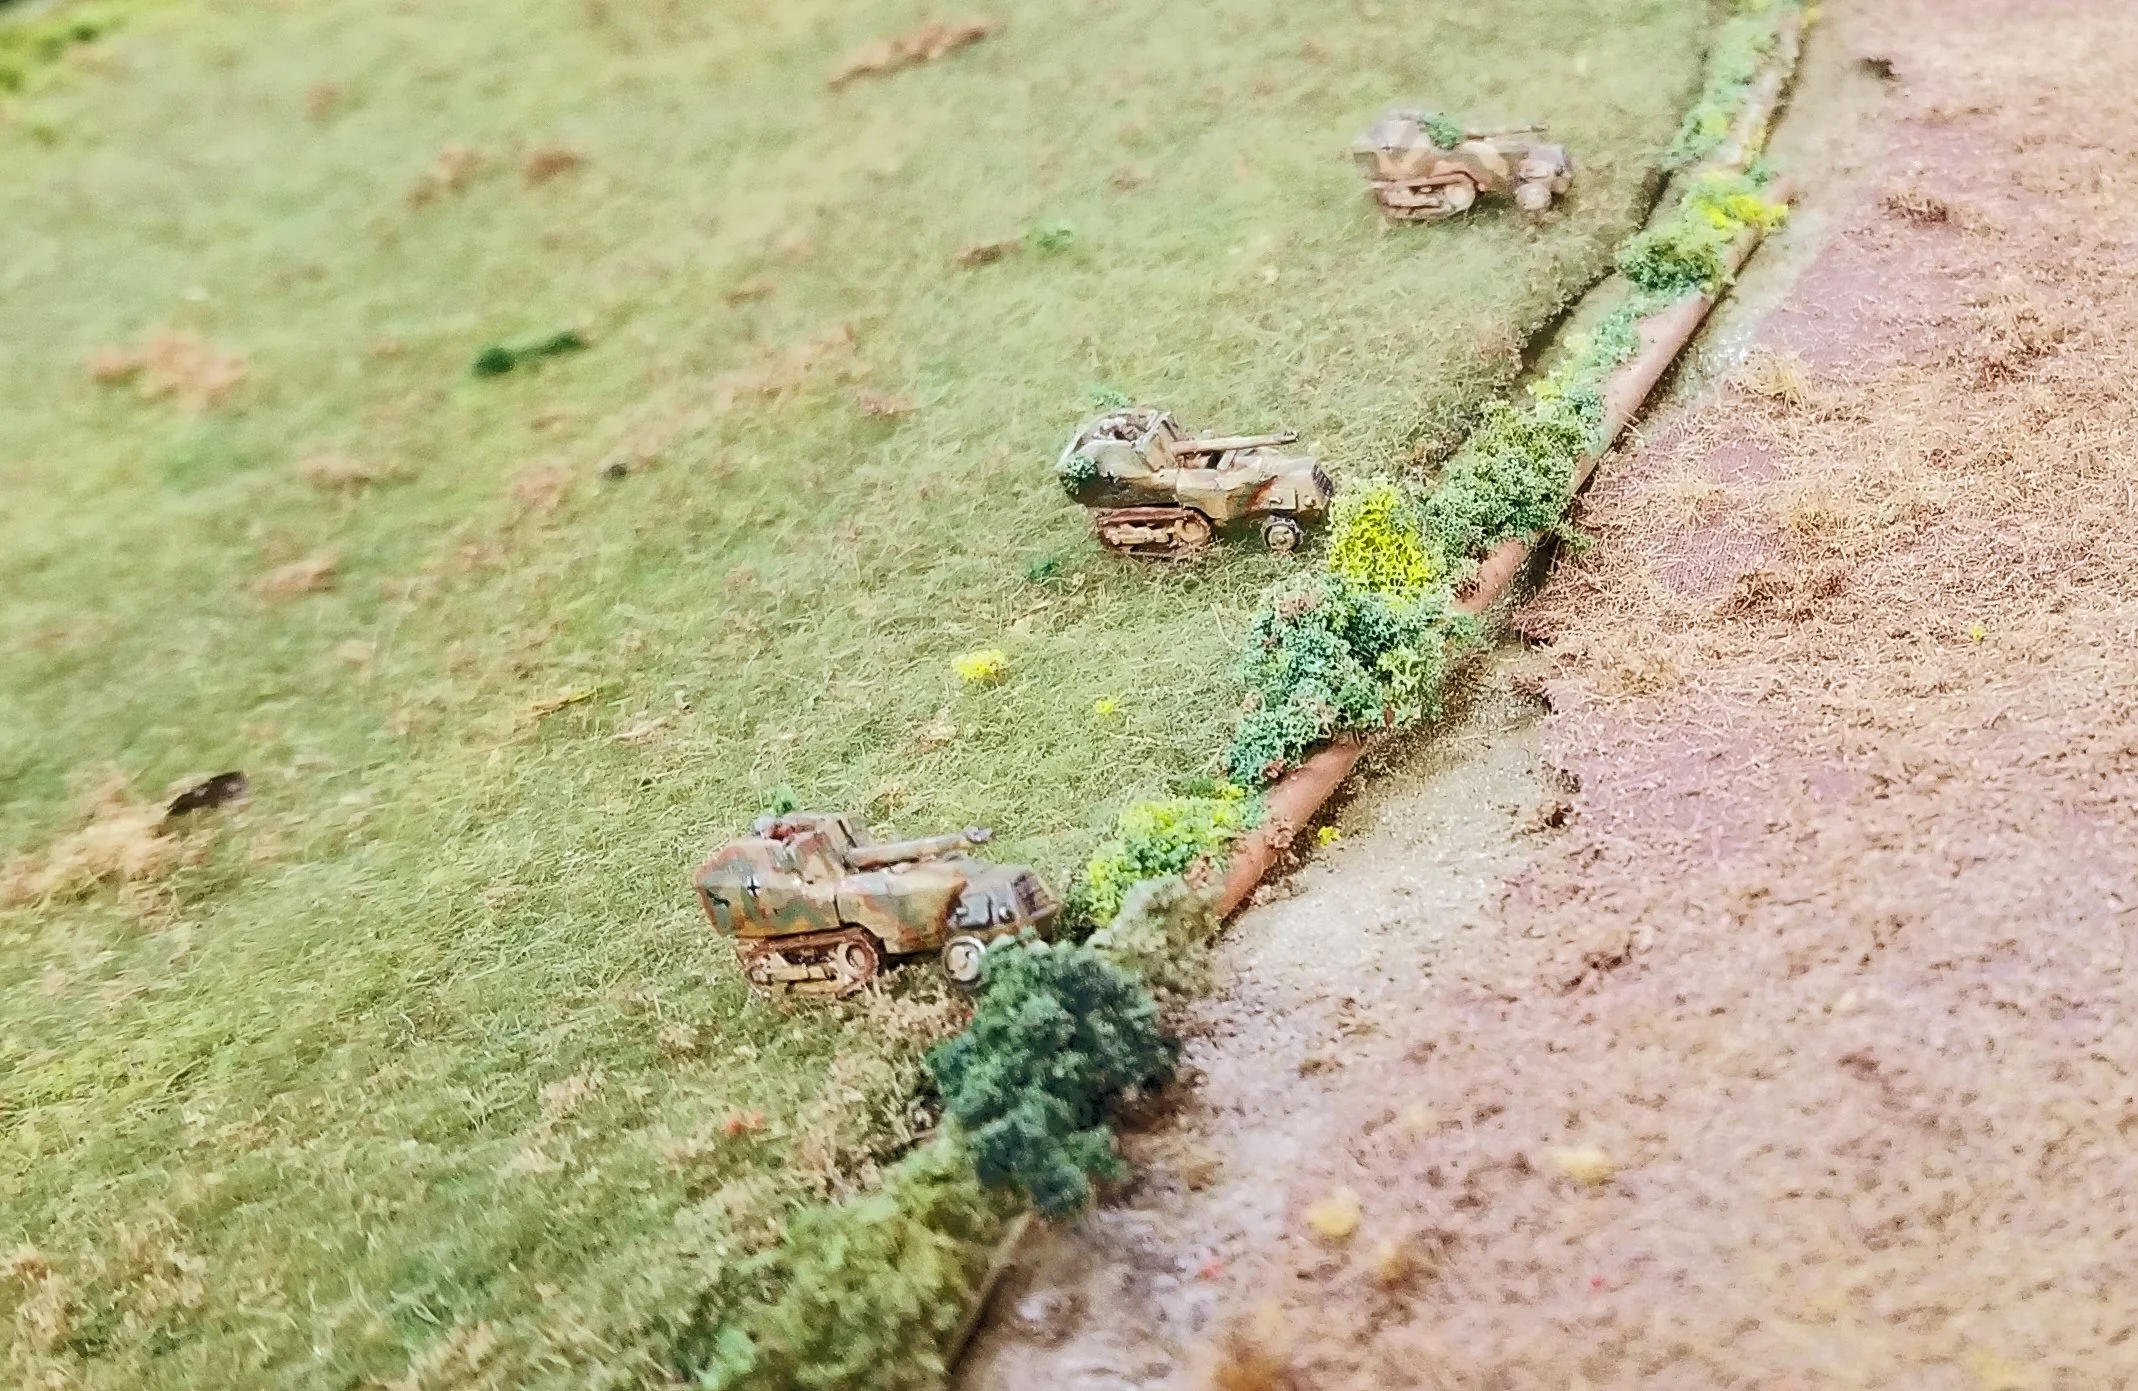
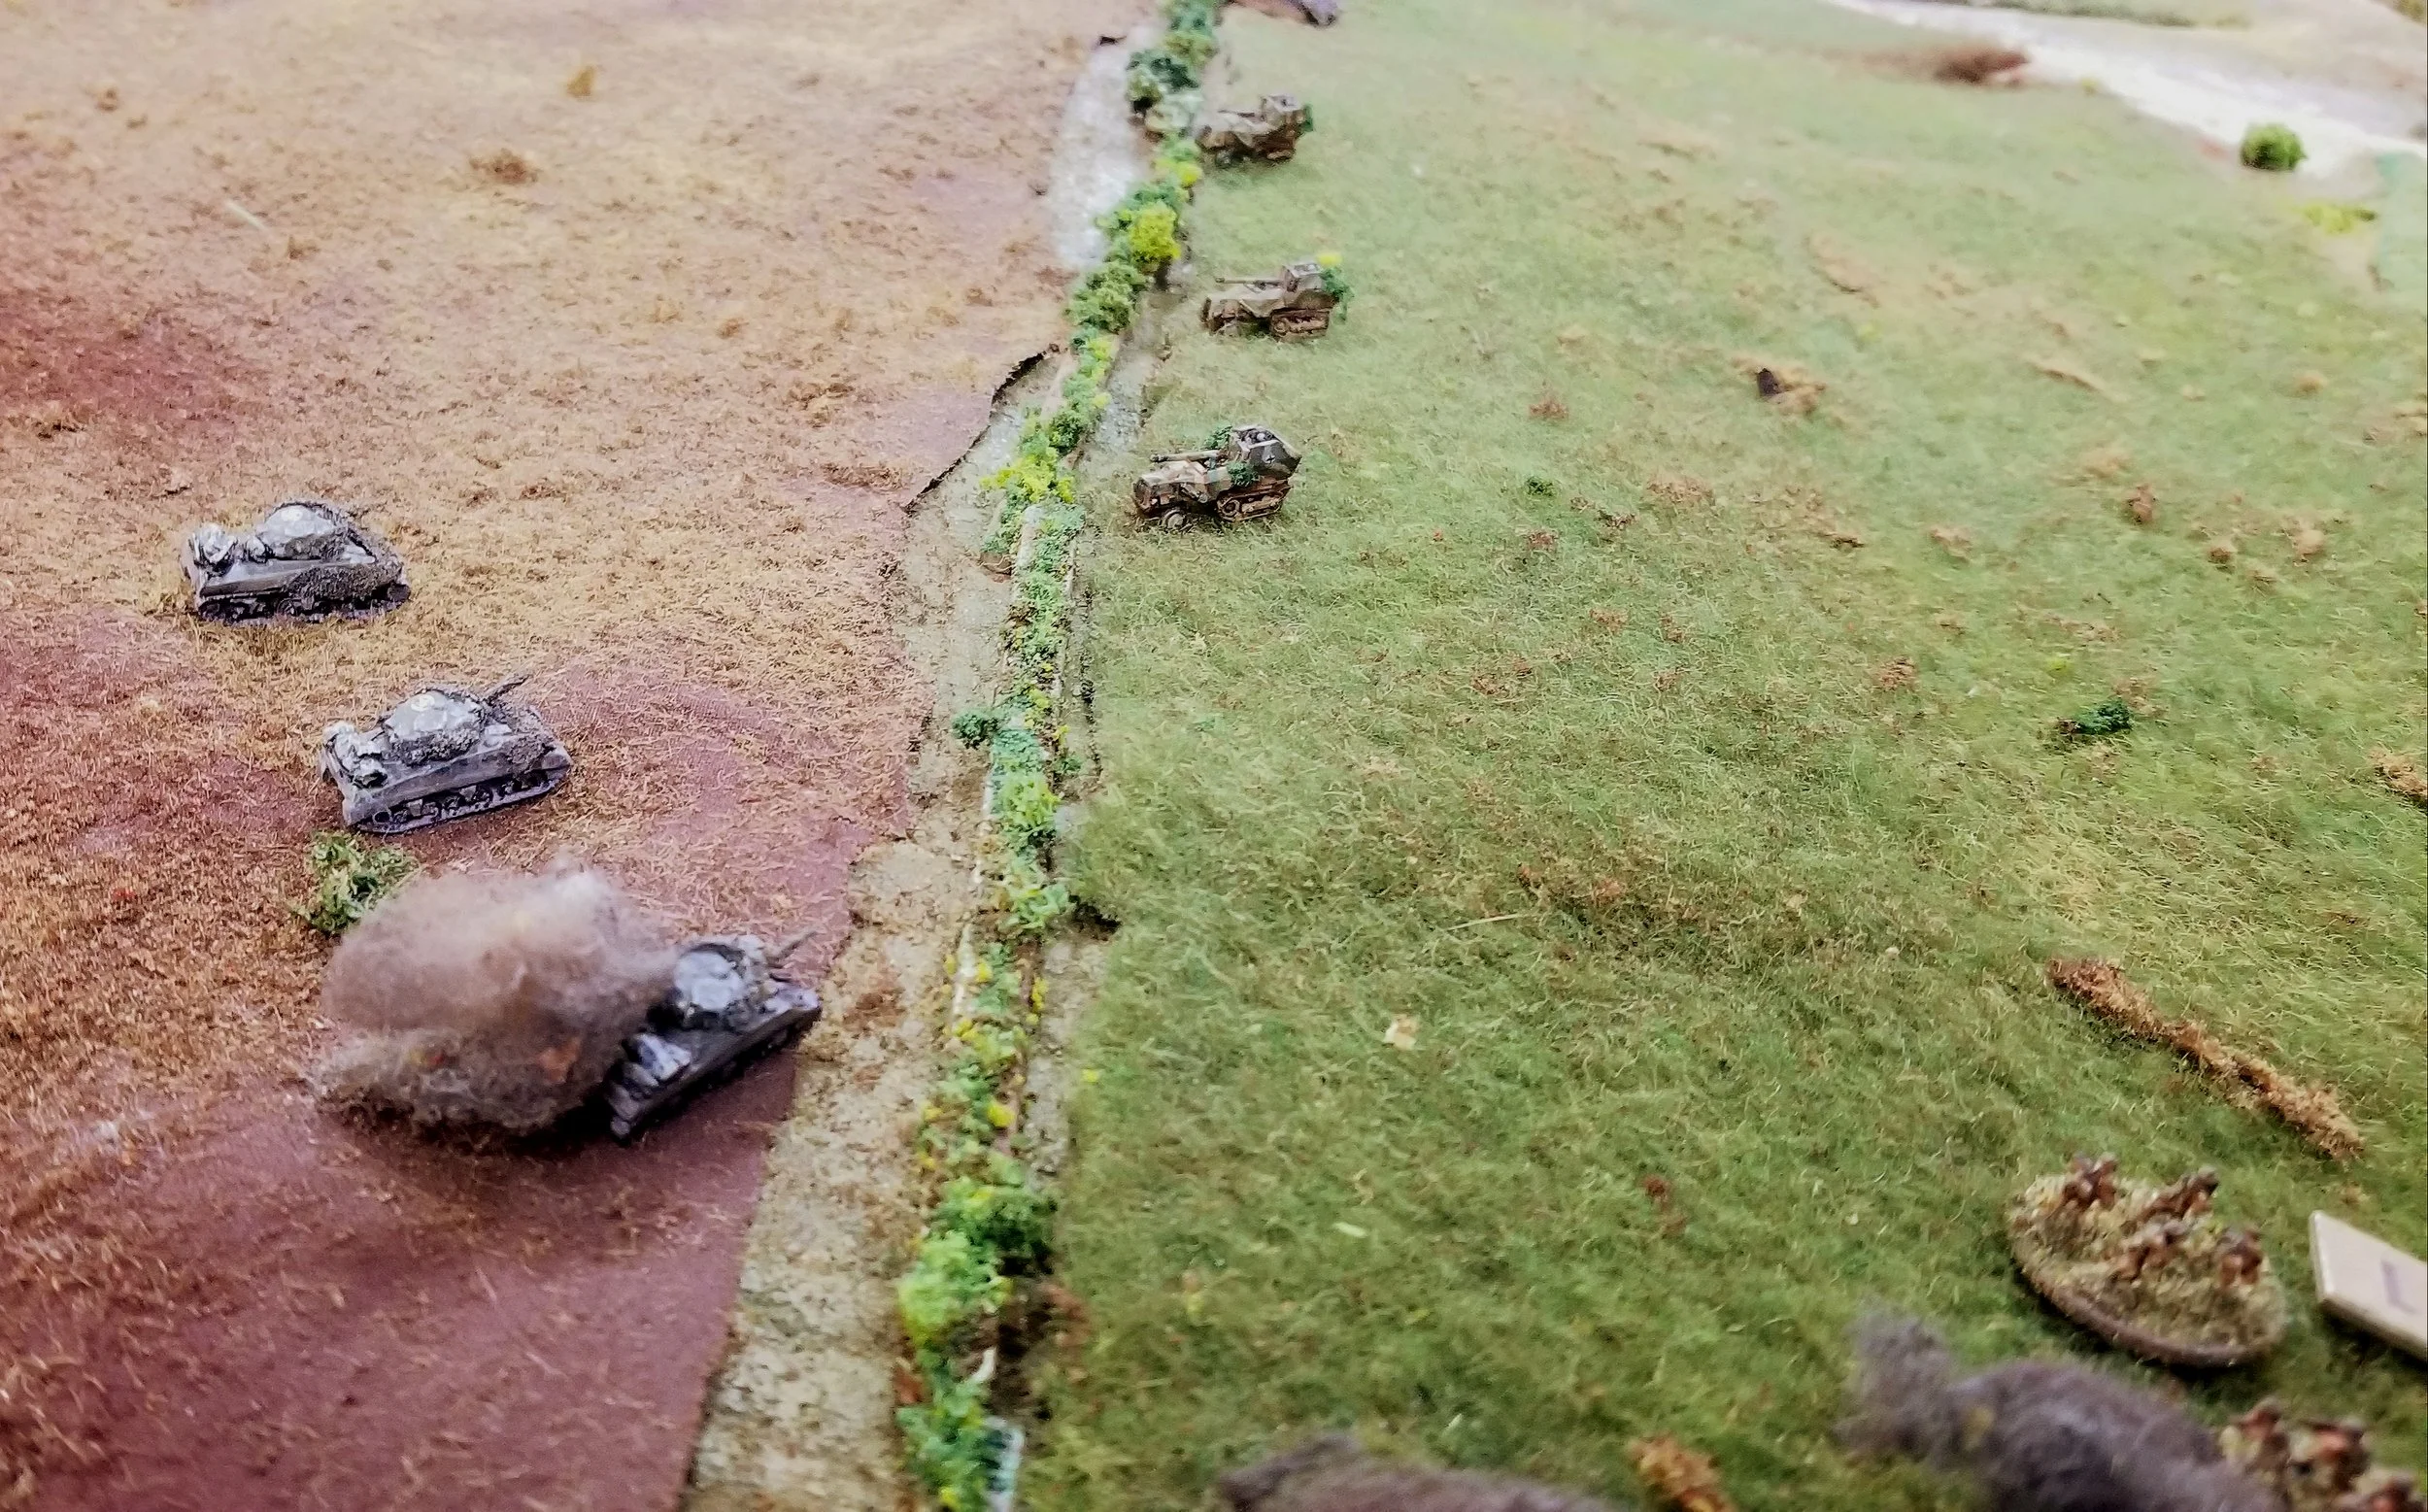
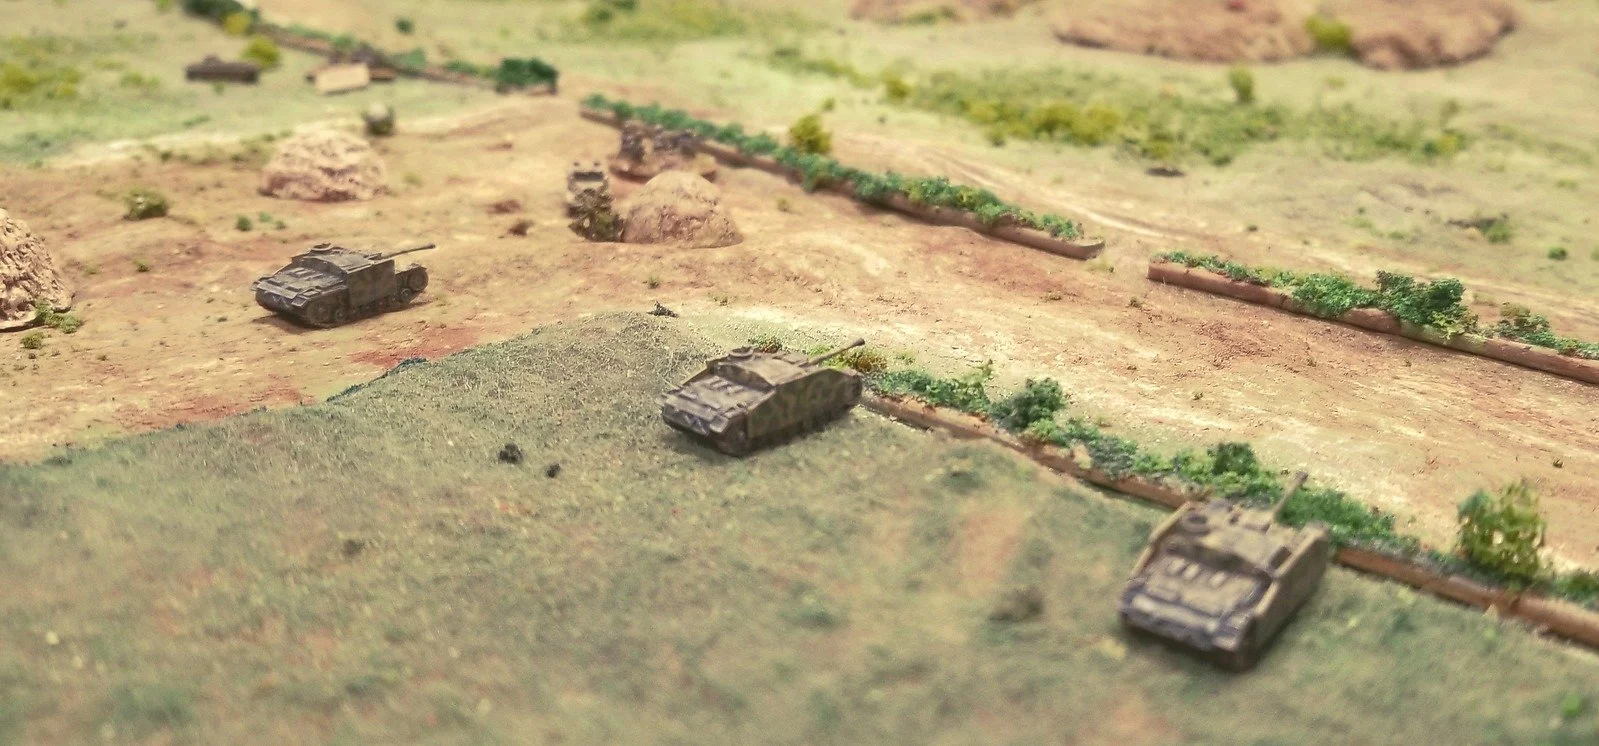
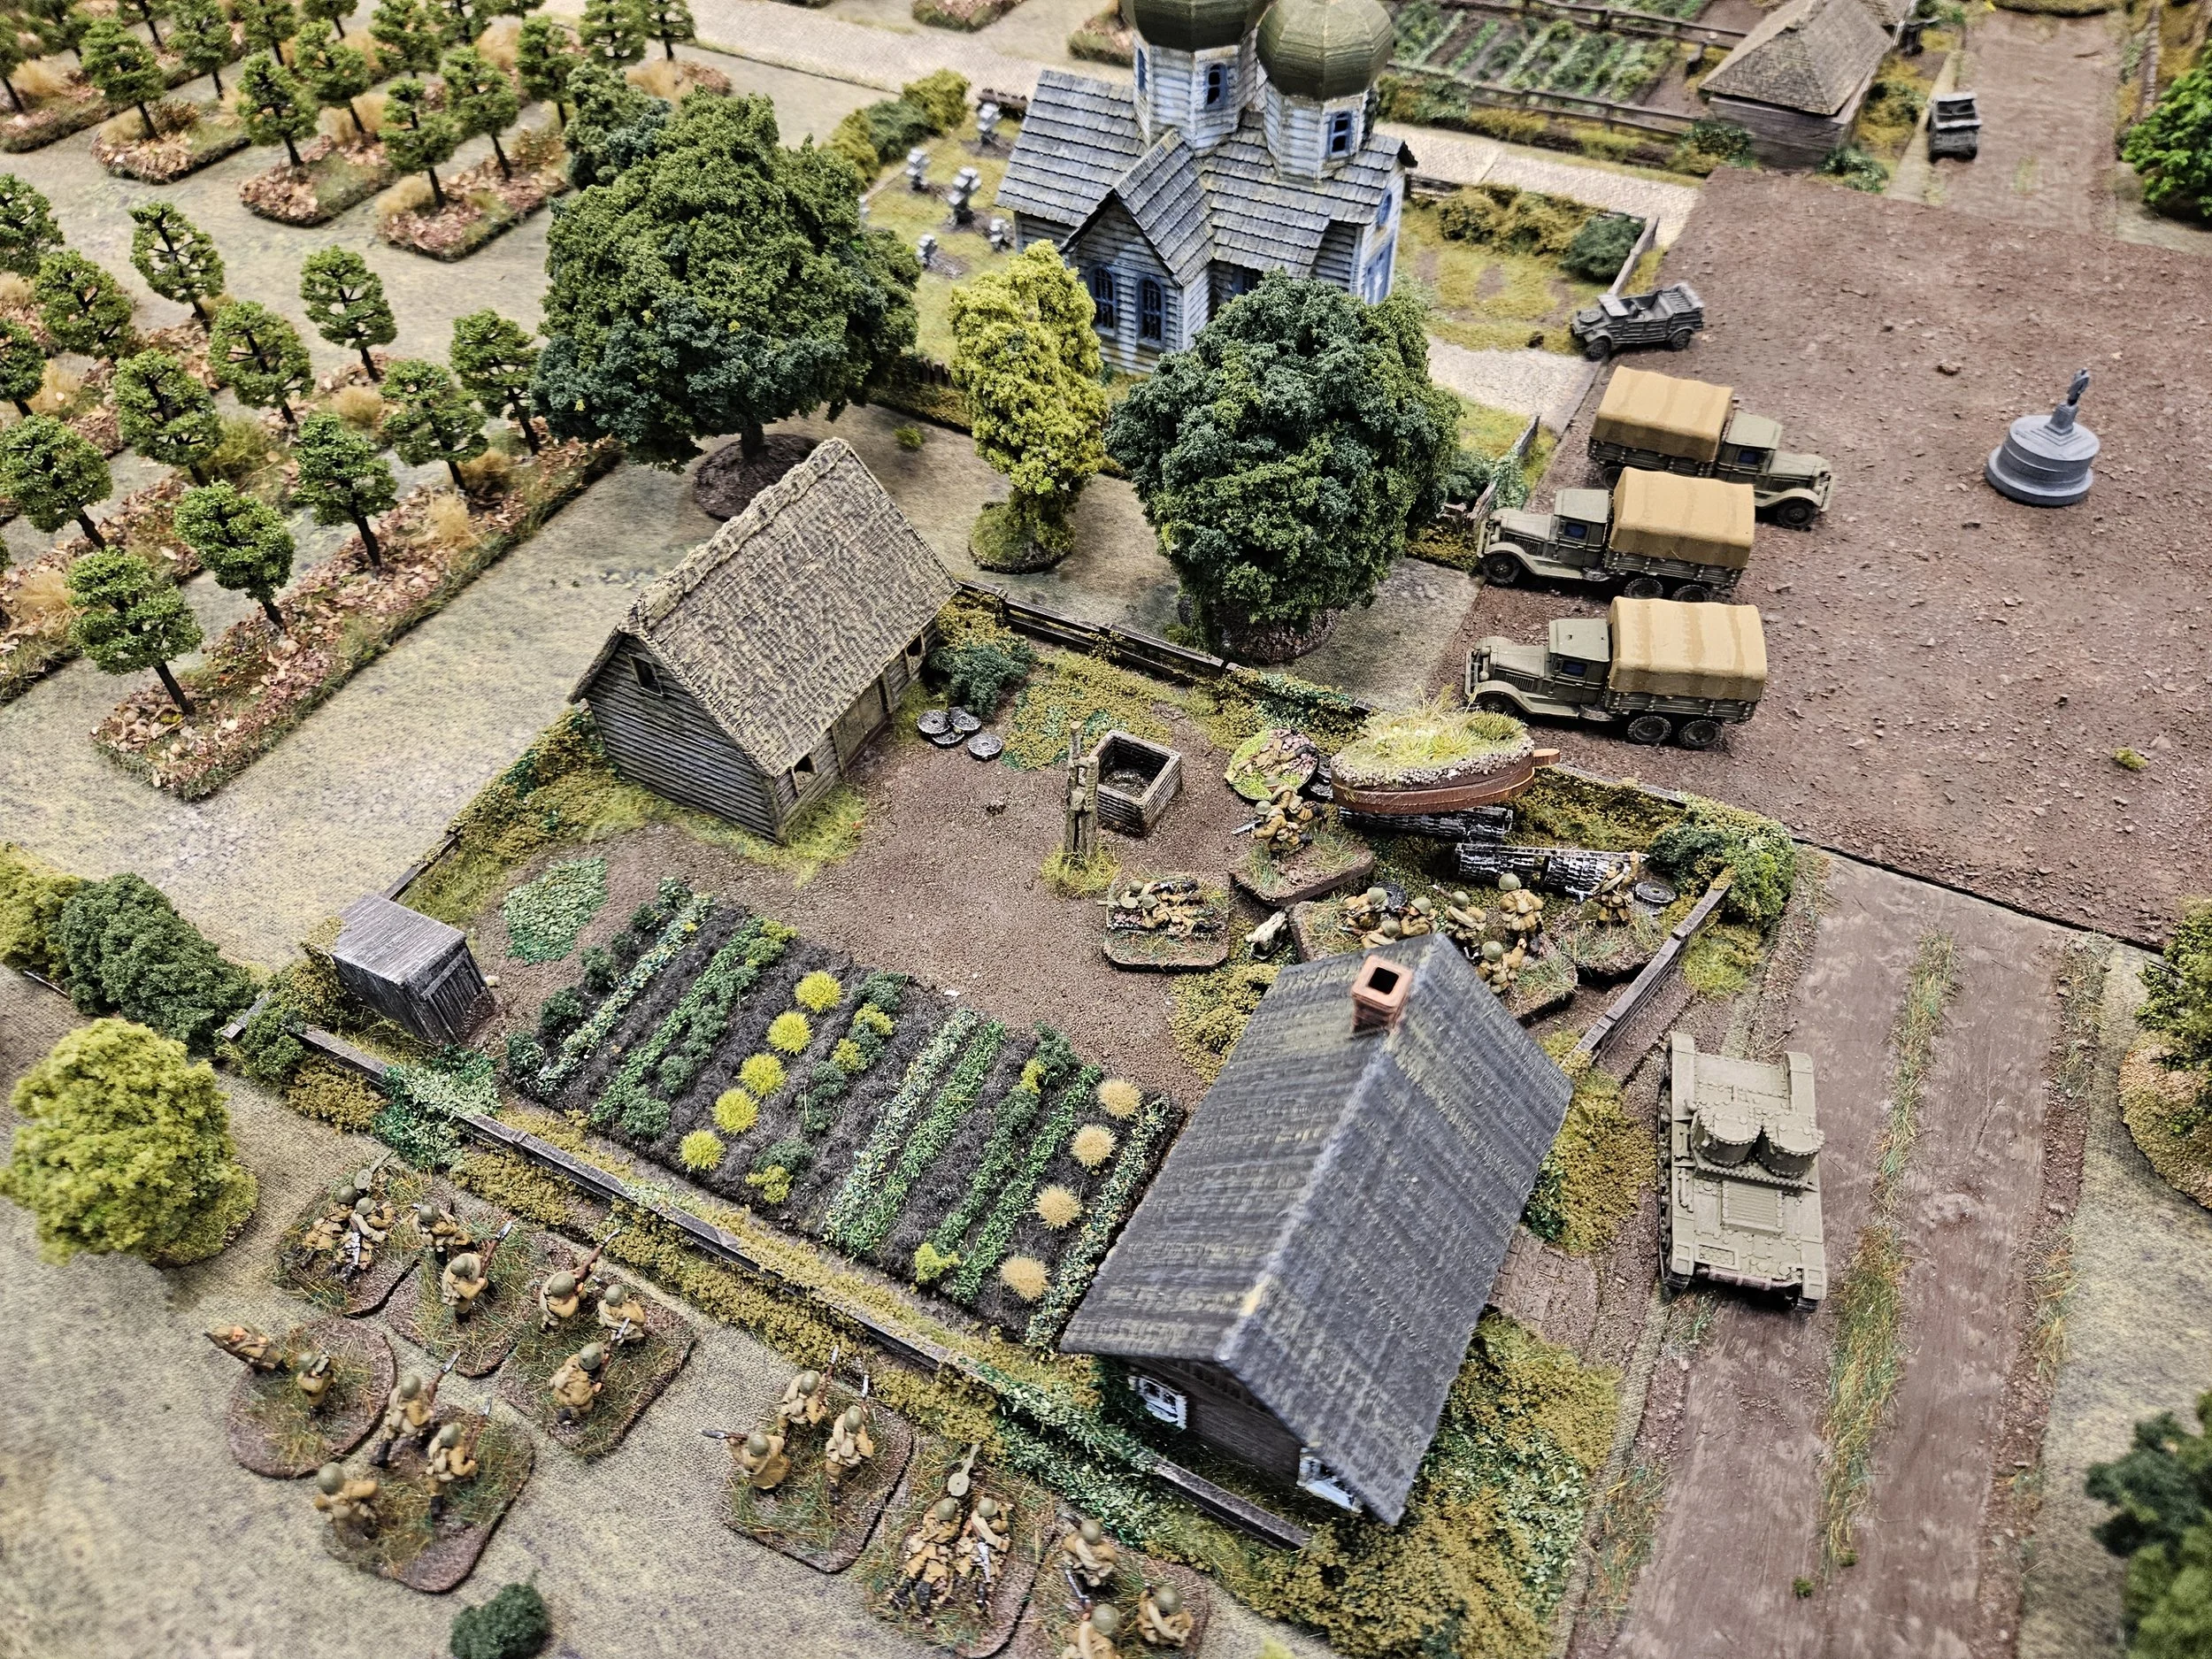
The German player decided to defend forward and to shut down the main road completely. He stationed an infantry platoon in and around the farmhouse, augmented by an MMG and a panzerschreck, and stationed a second platoon on the hill with the other panzerschreck. The 'AT platoon' made up of a couple of 37mm armed halftracks were positioned in the centre while the heavy armoured cars were off table as a reserve.

The German Anti-Tank Platoon

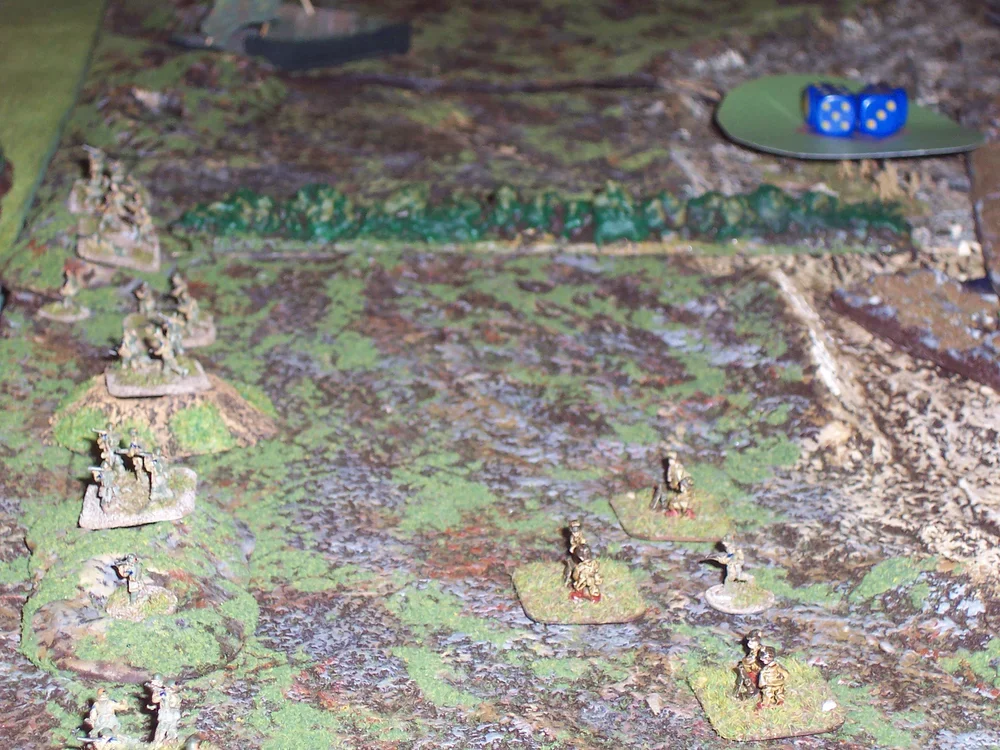
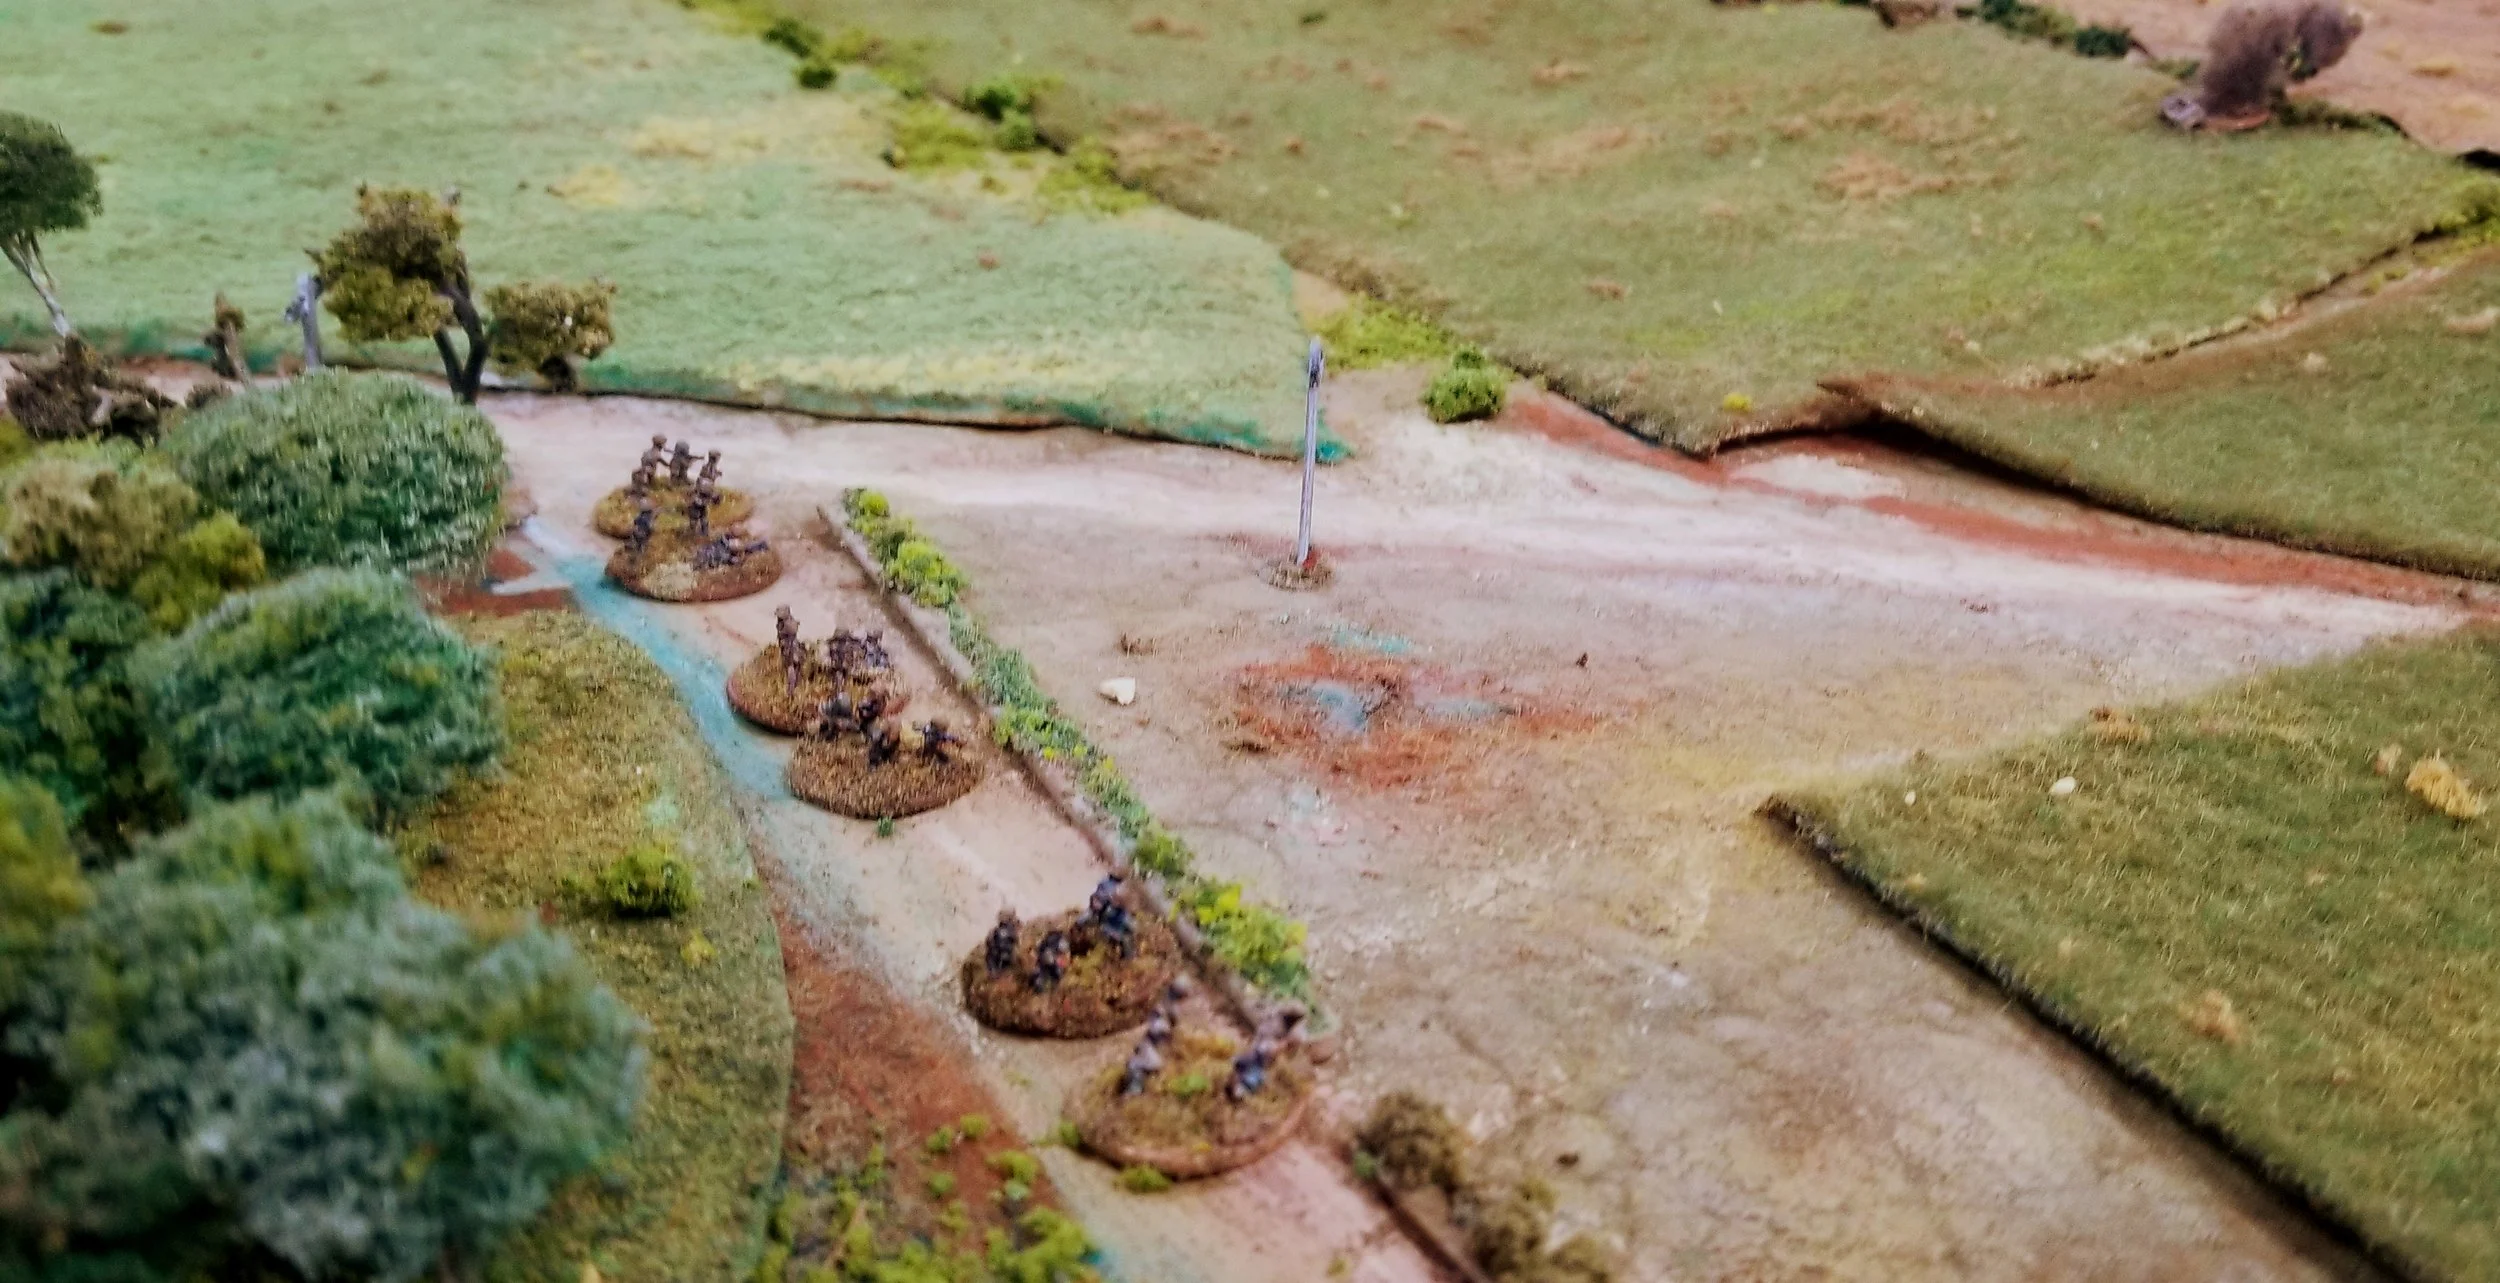
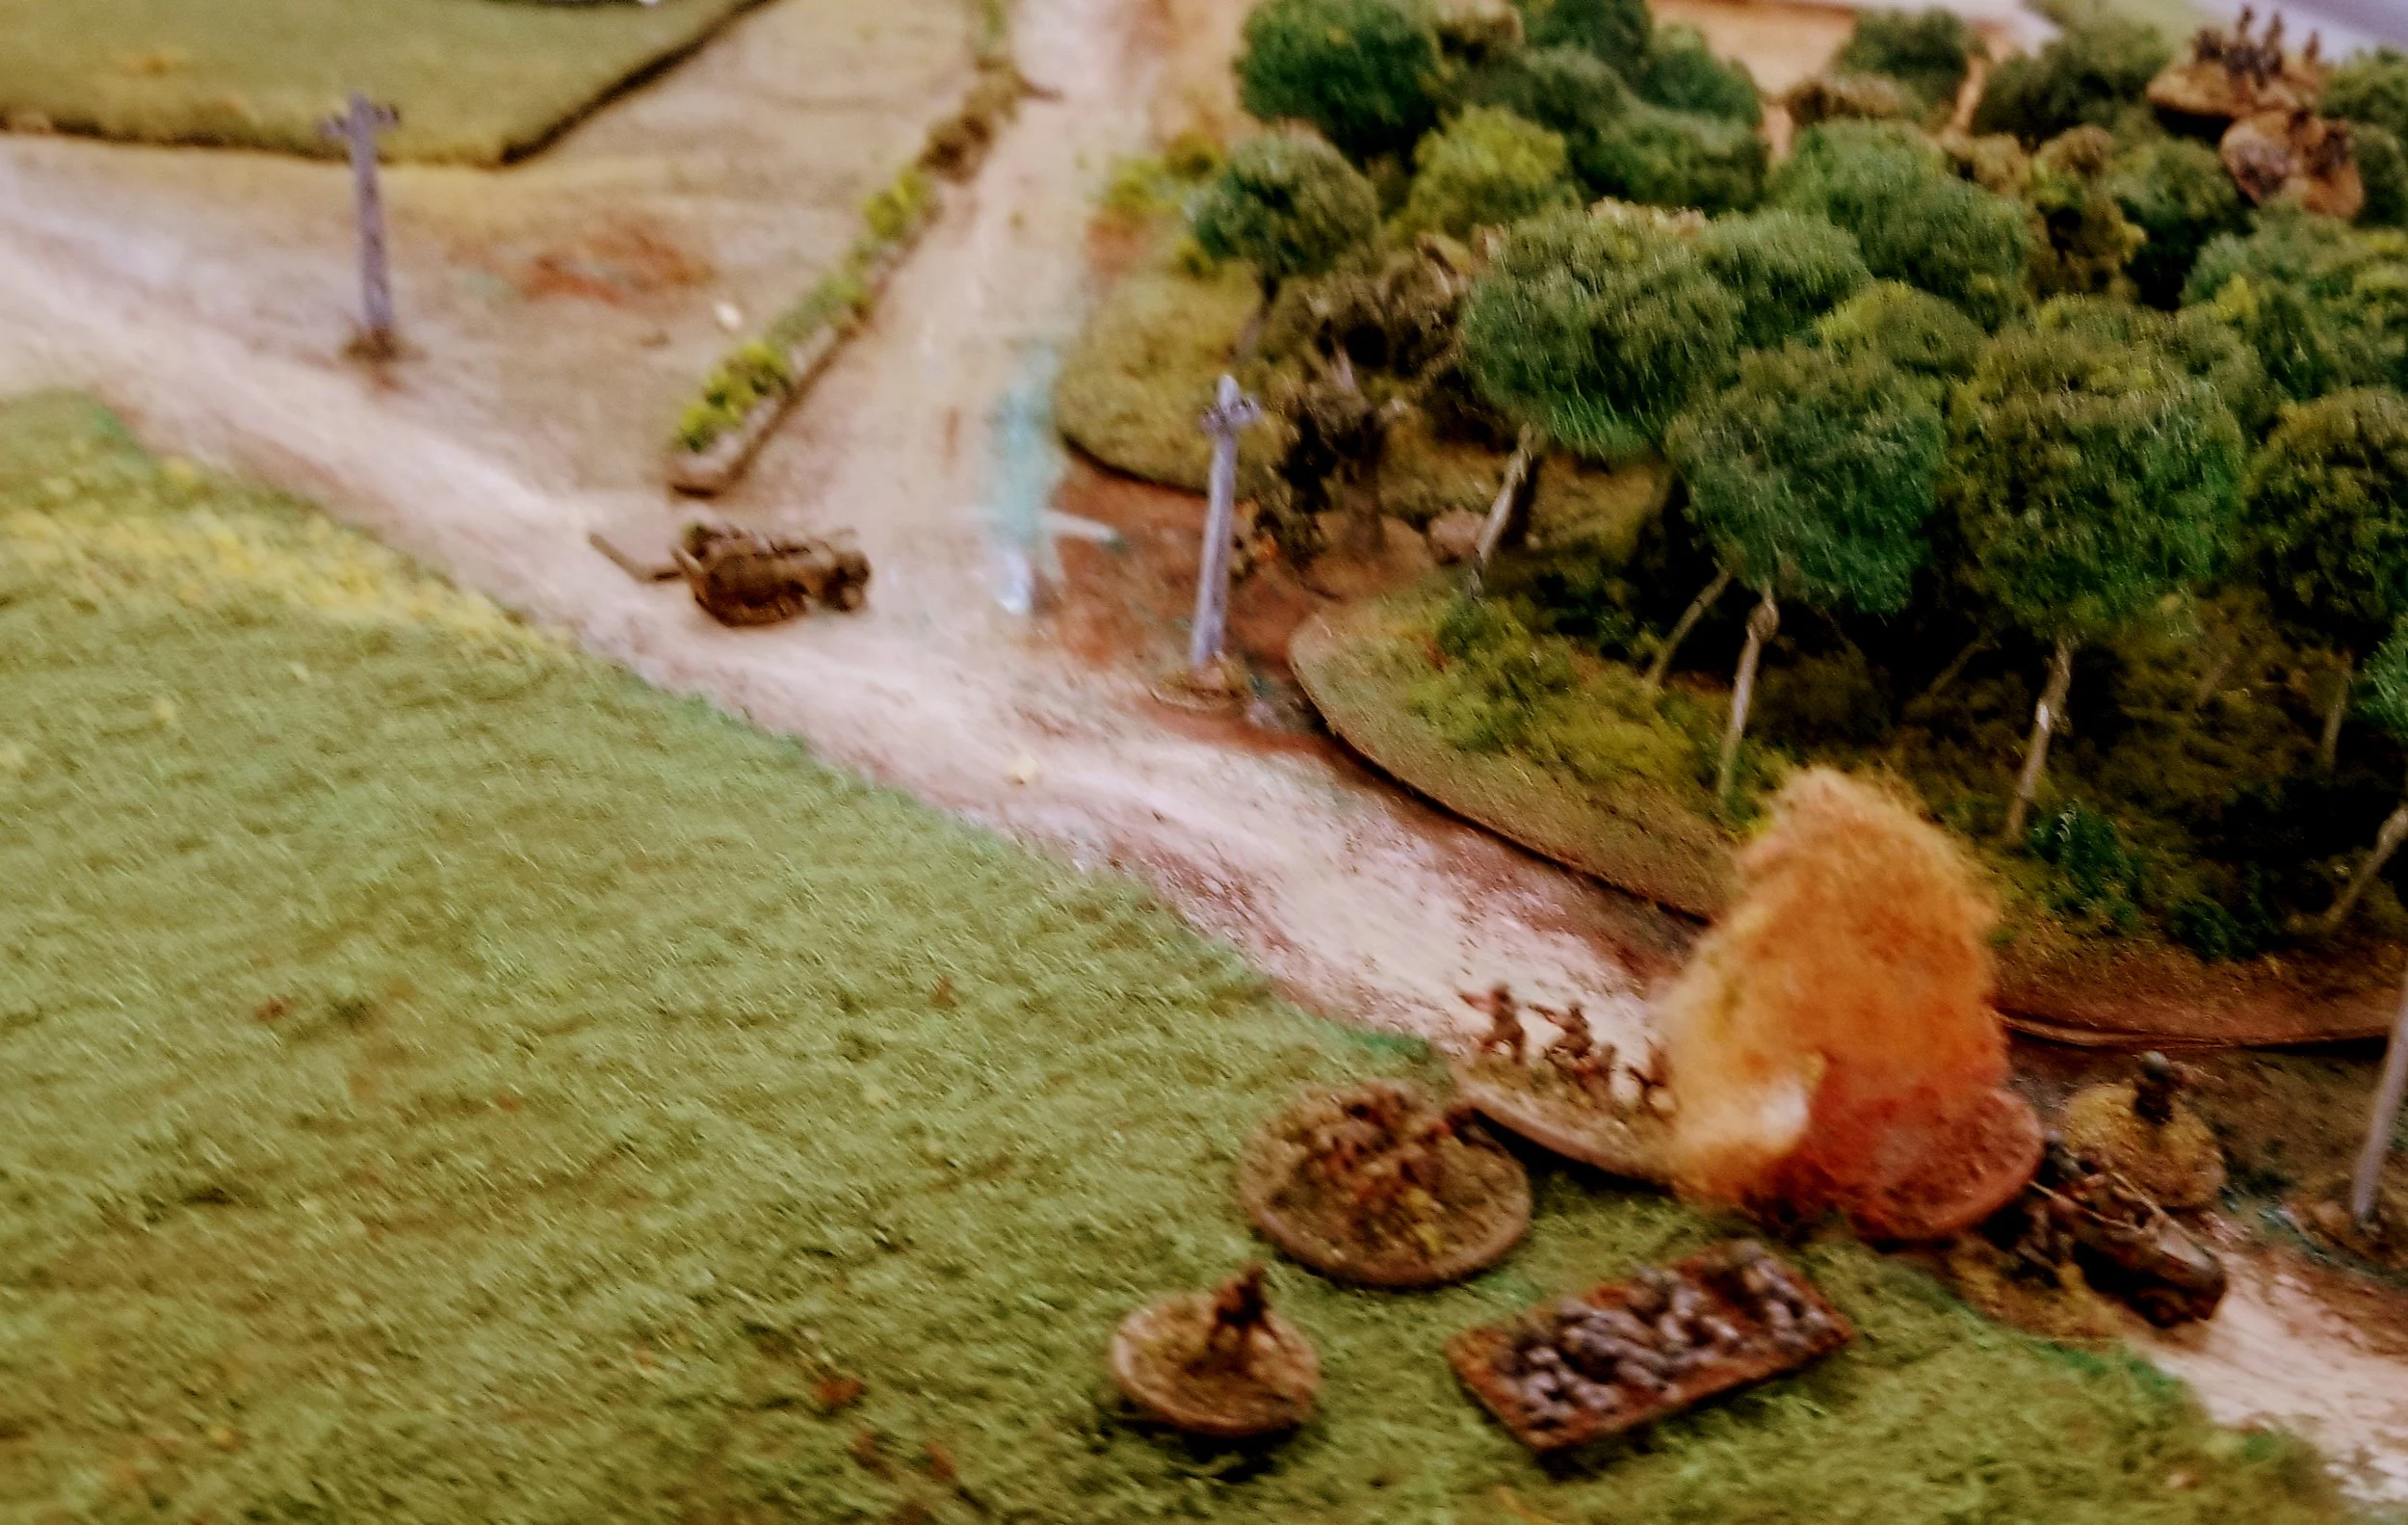
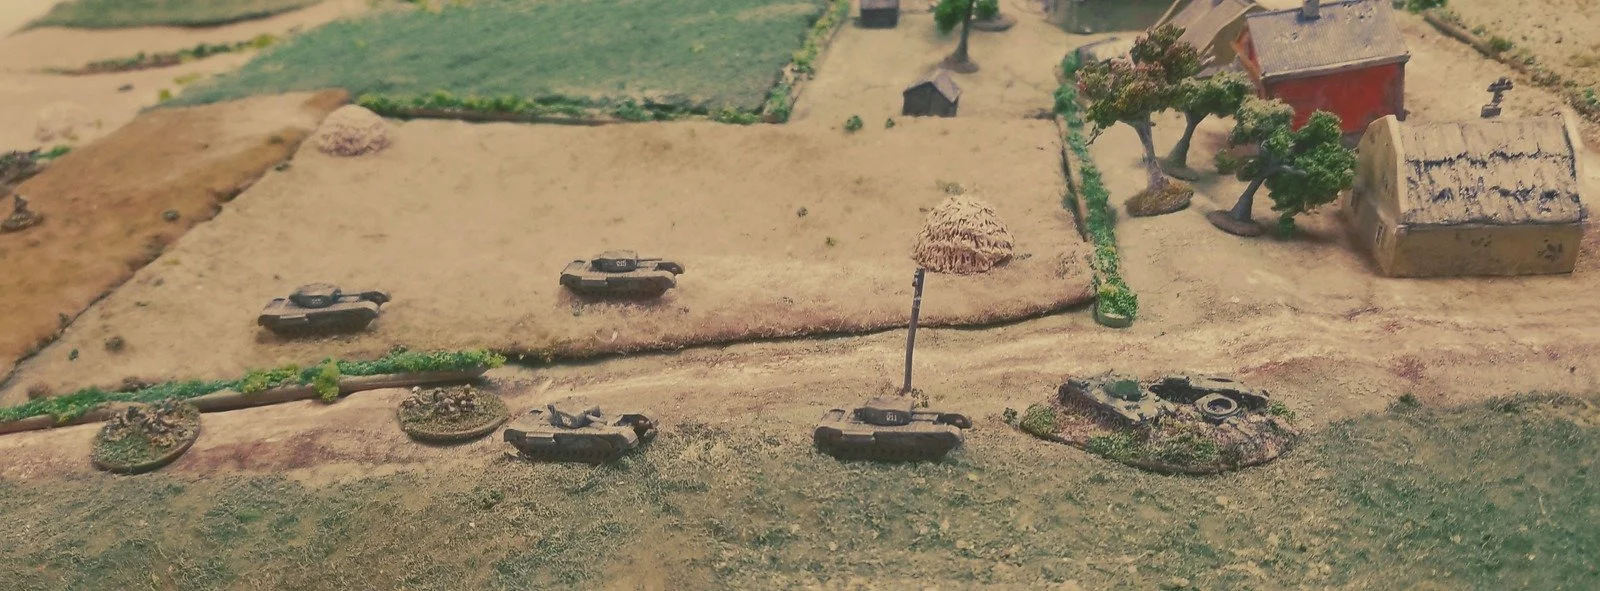
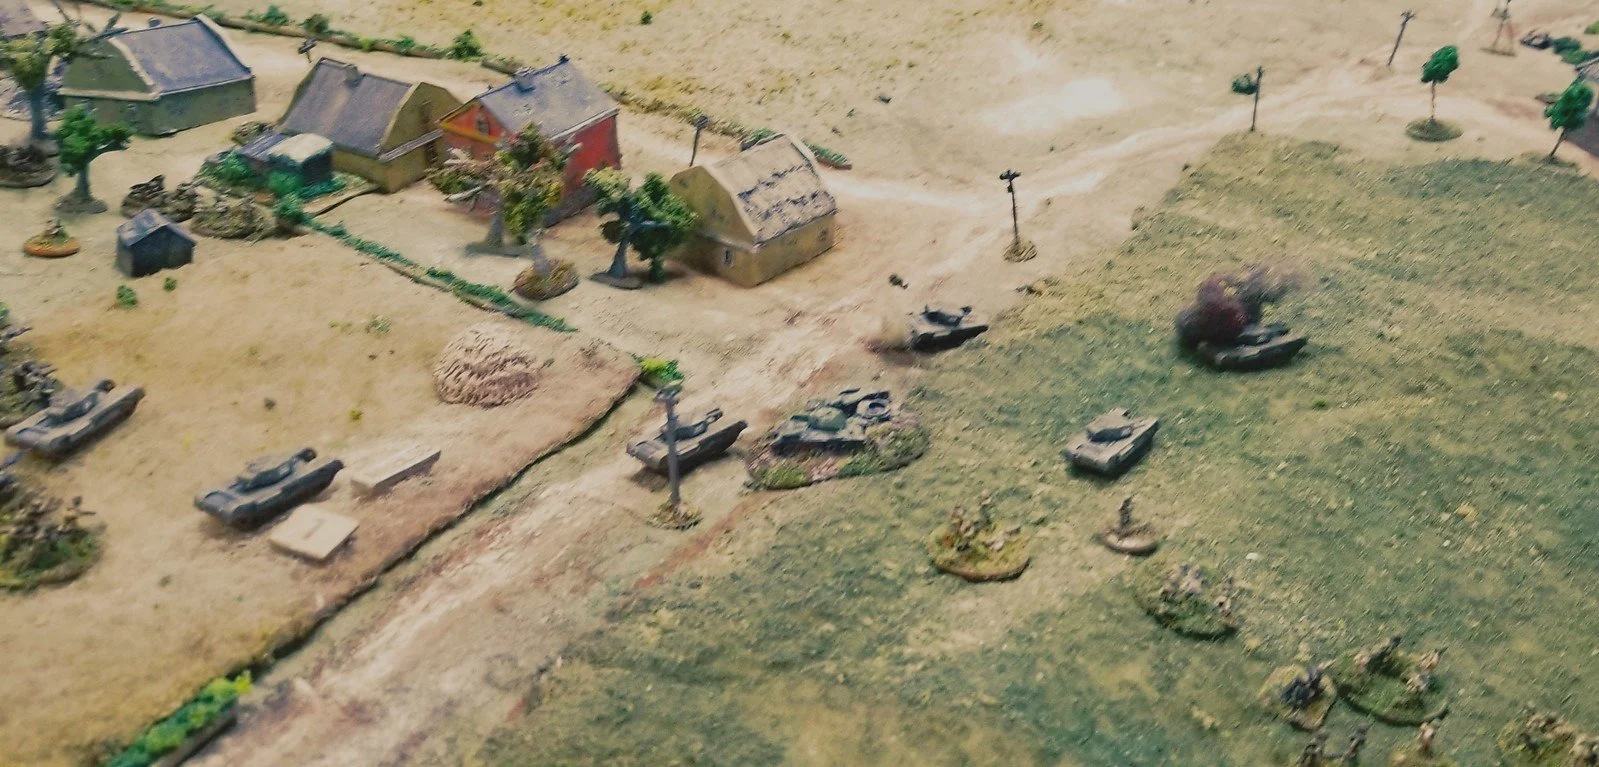
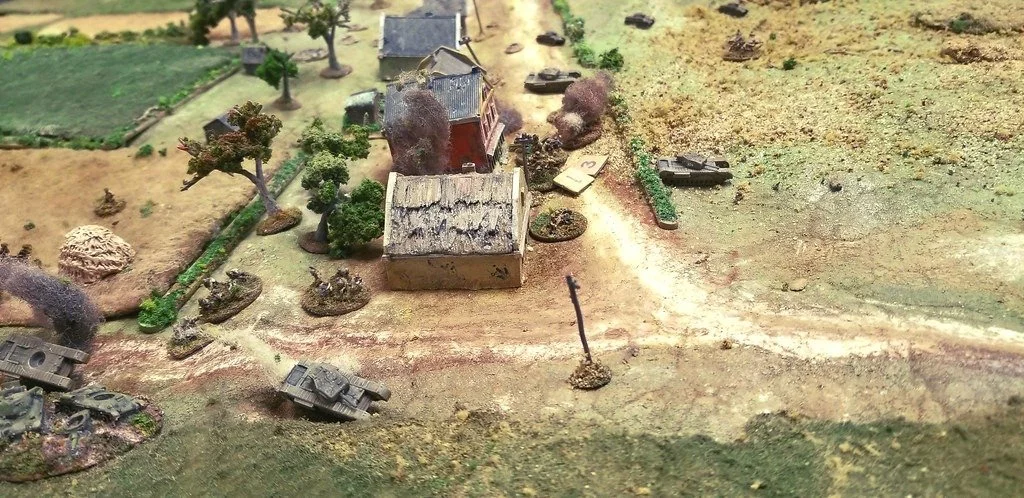
The American's initial probe was with one of their reconnaissance units right down the main road and toward the farmhouse. It was a classic example of recon by burning armoured car. The panzerschreck destroyed two M8s, and the MMG and small arms hosed down a couple of jeeps. The survivors fell back in disarray, but the lone surviving M8 was to be important as it proceeded to hose down the offending platoon with the pintel mounted 0.50 cal for turn after turn, keeping them pinned in place and inflicting shock and casualties.

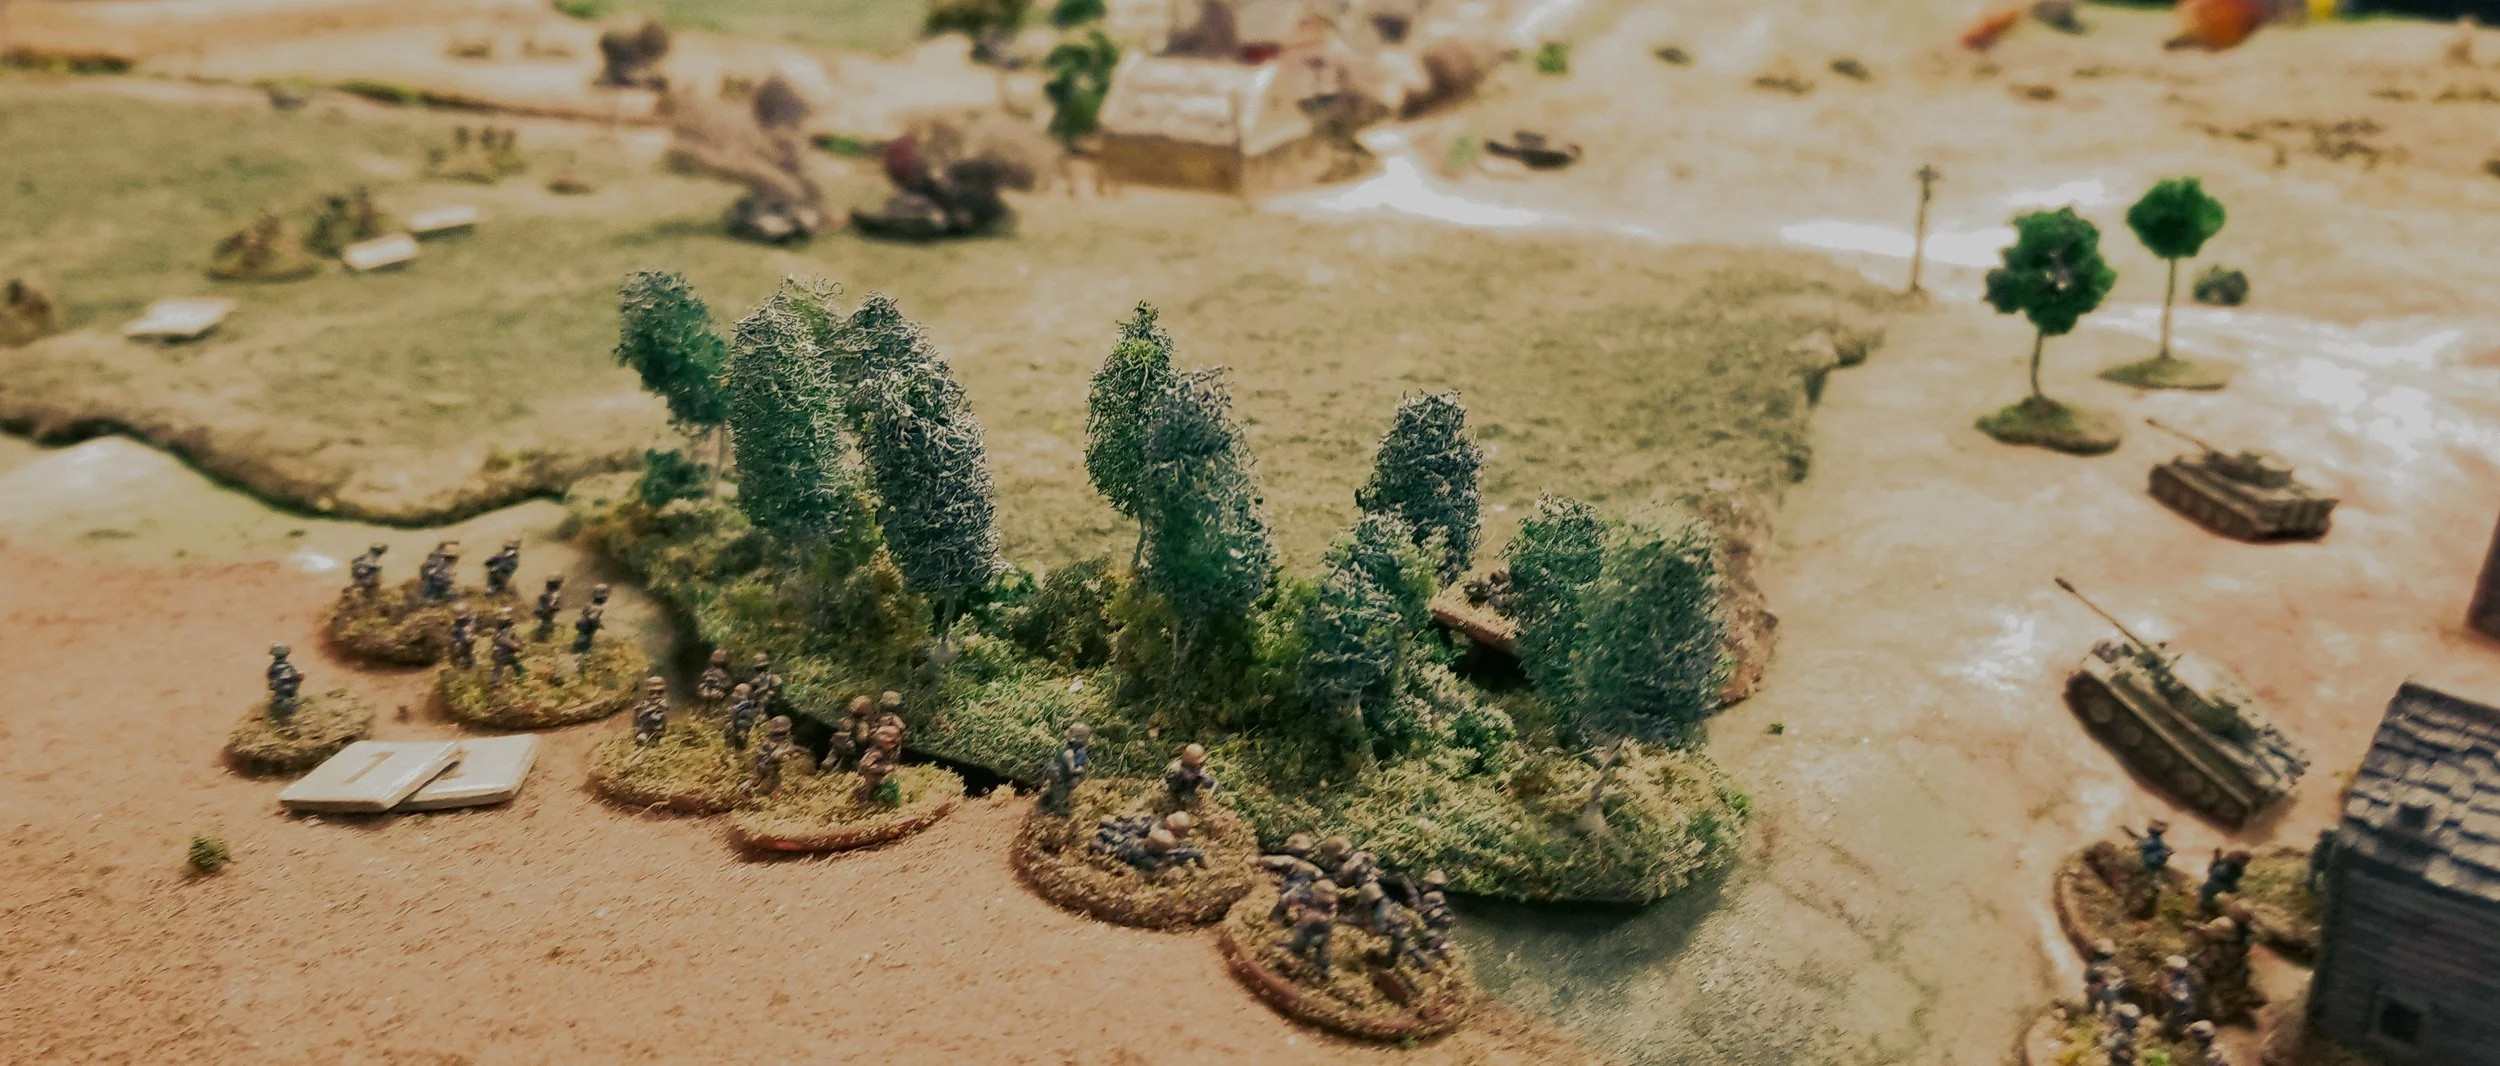
Panzerschrek Ambush!

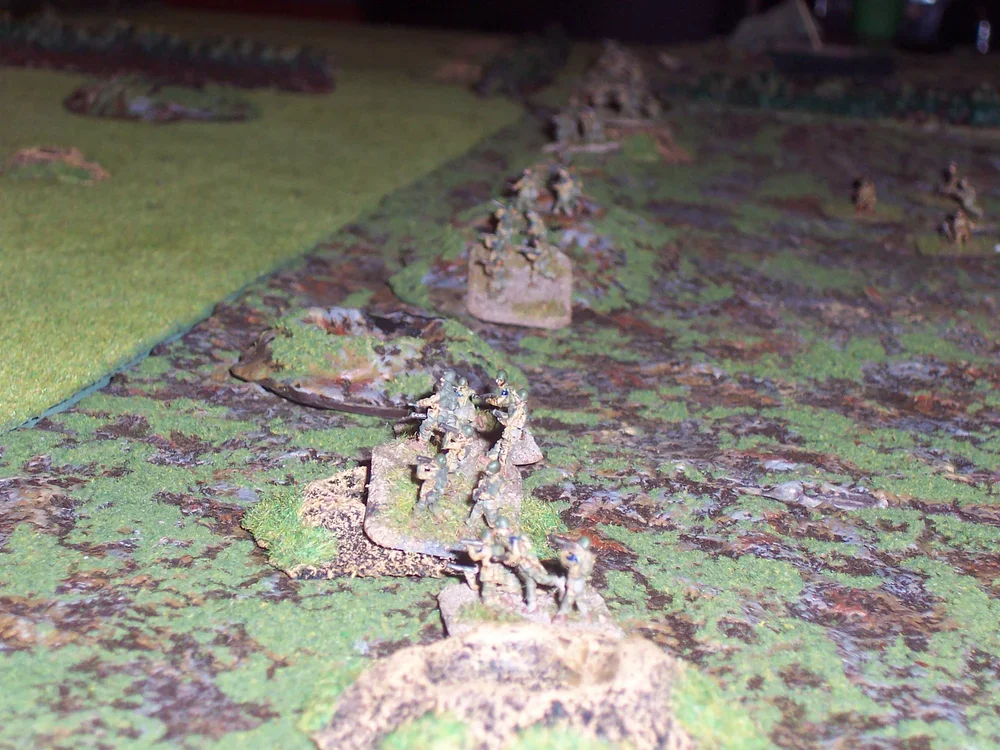
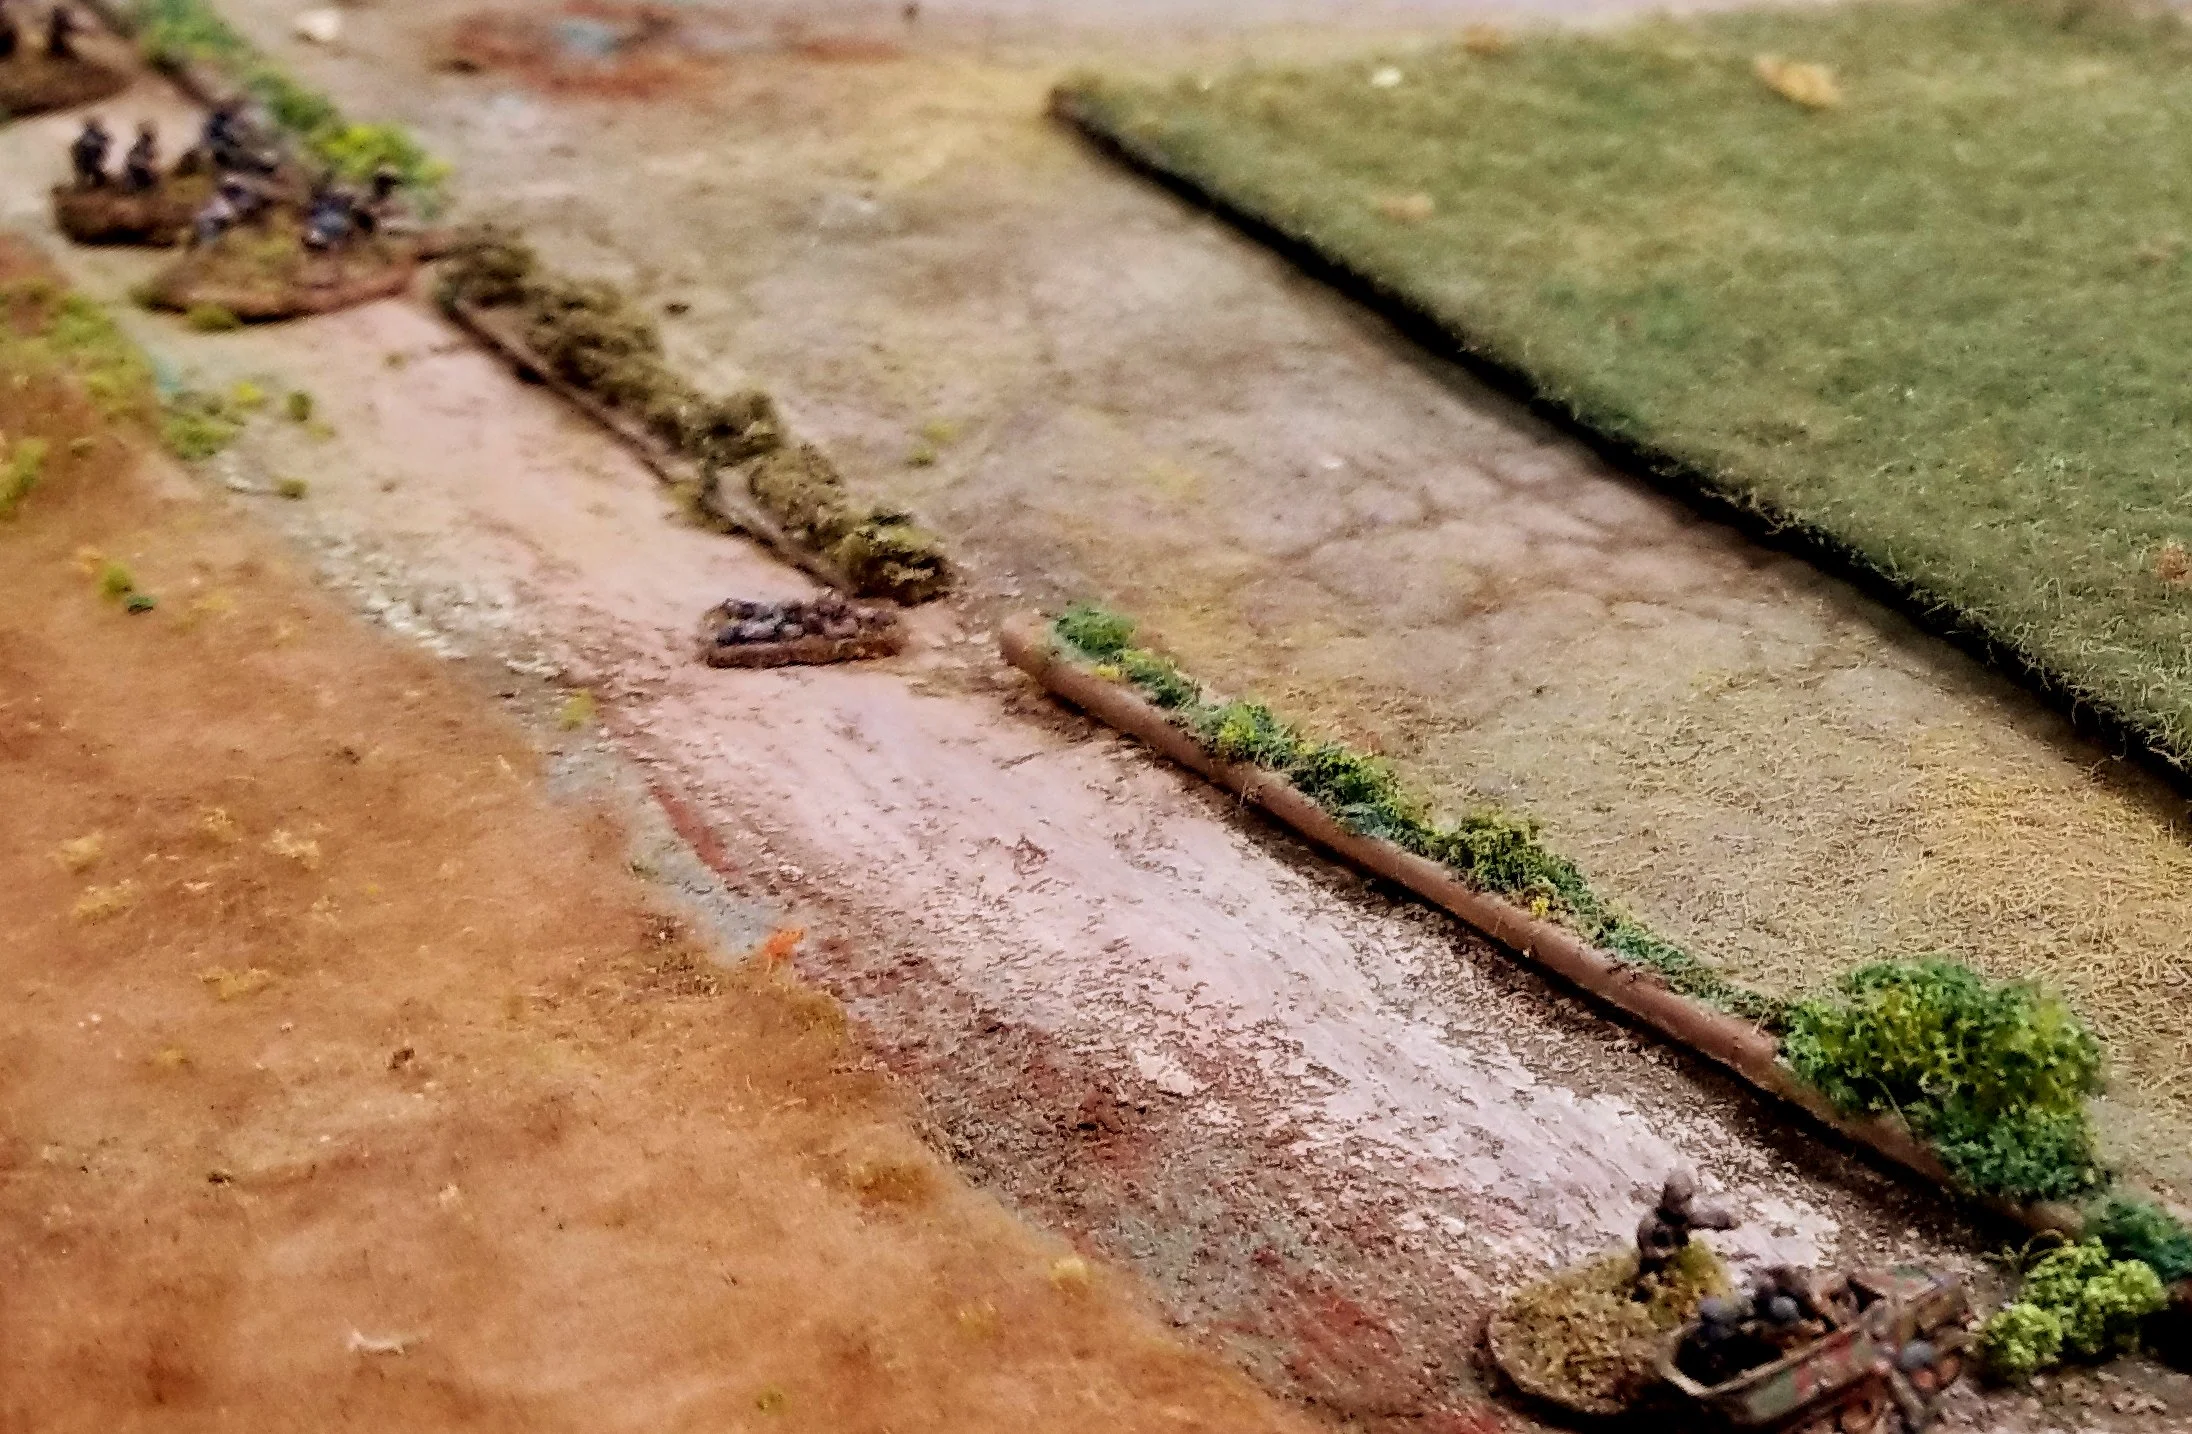
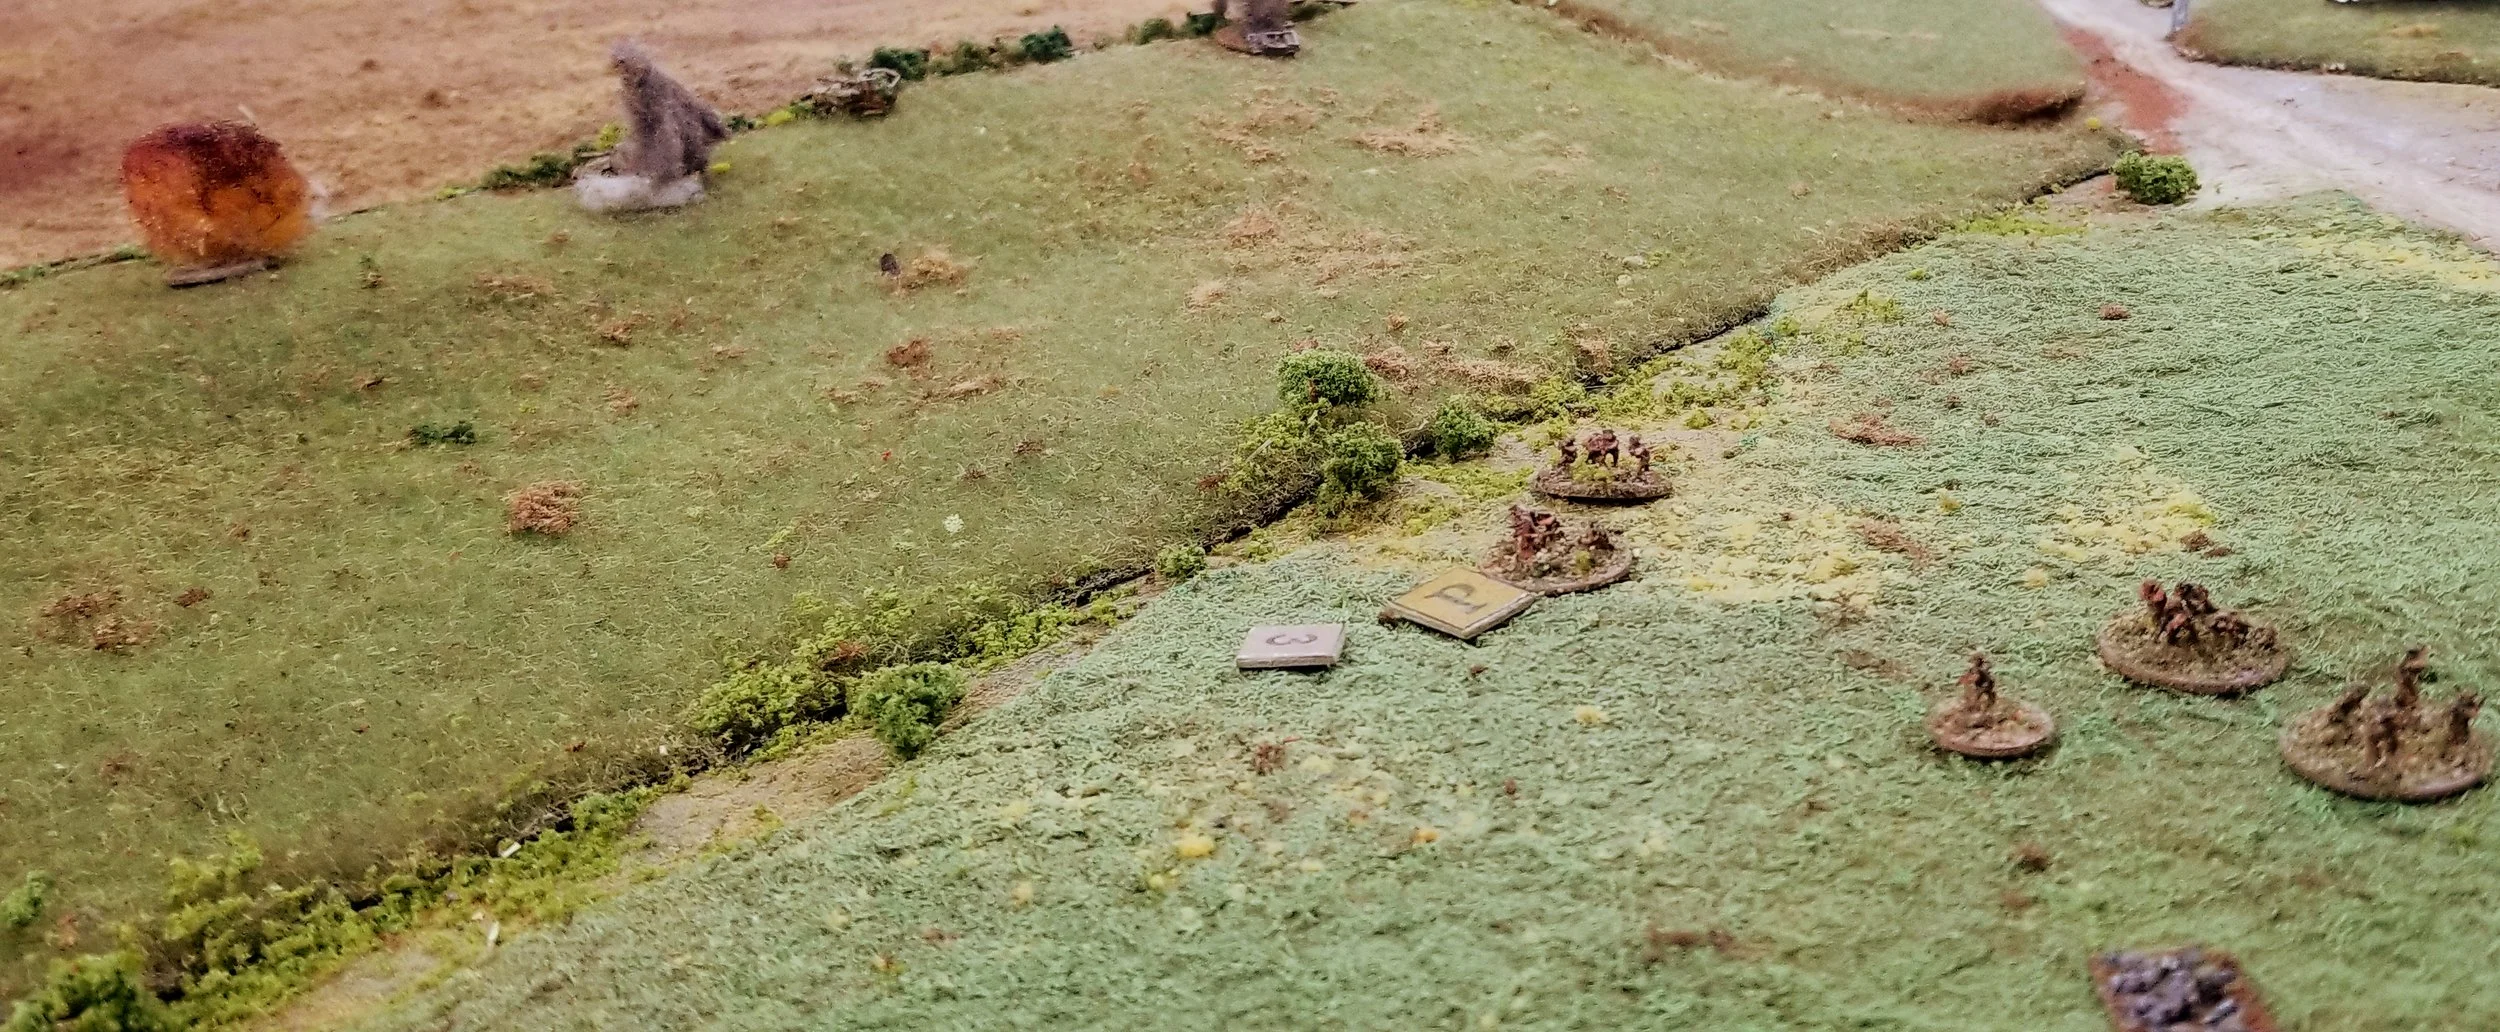
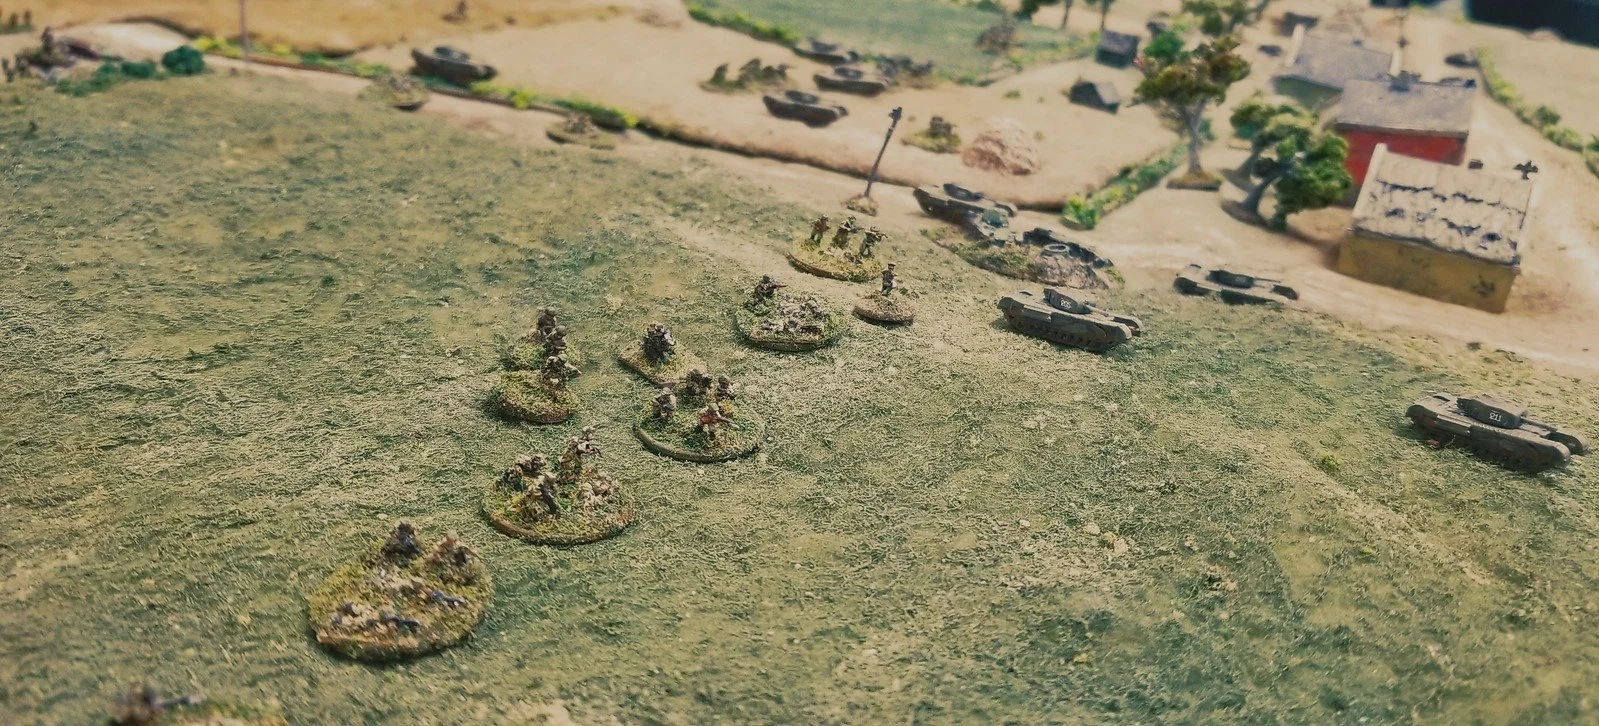
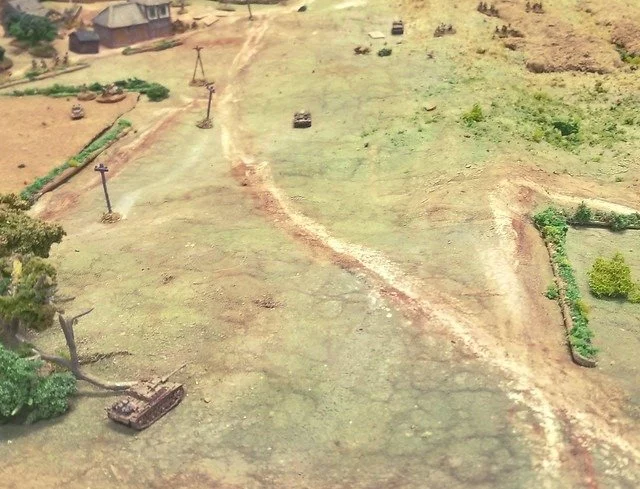
With the main road clearly well covered the Americans shifted their focus and started bringing units down the track alongside the river.

The attached Intelligence and Reconnaissance platoon manoeuvred into the fields in order outflank the farmhouse and keep the Germans deployed there pinned down and away from the real battle that was shaping up further north near the bridge as another Recon patrol raced north followed by the pair of M8 assault guns and a platoon of Stuarts.

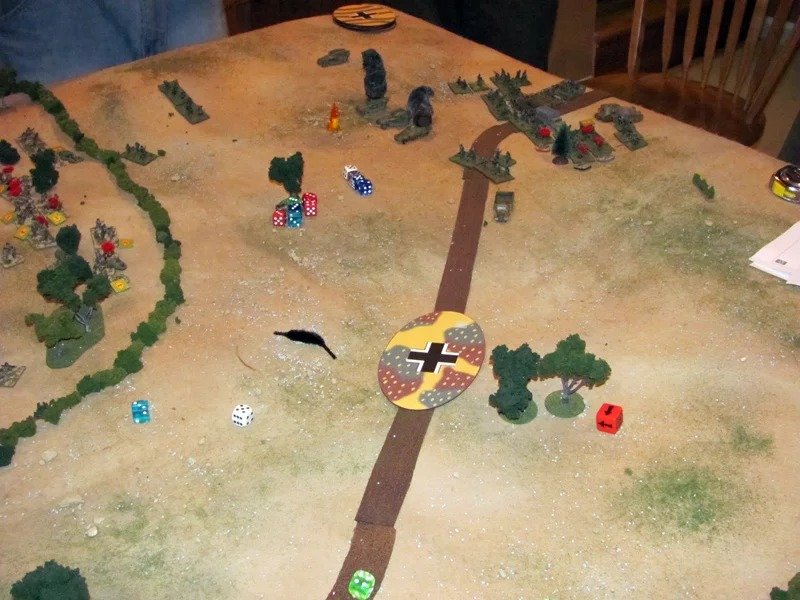
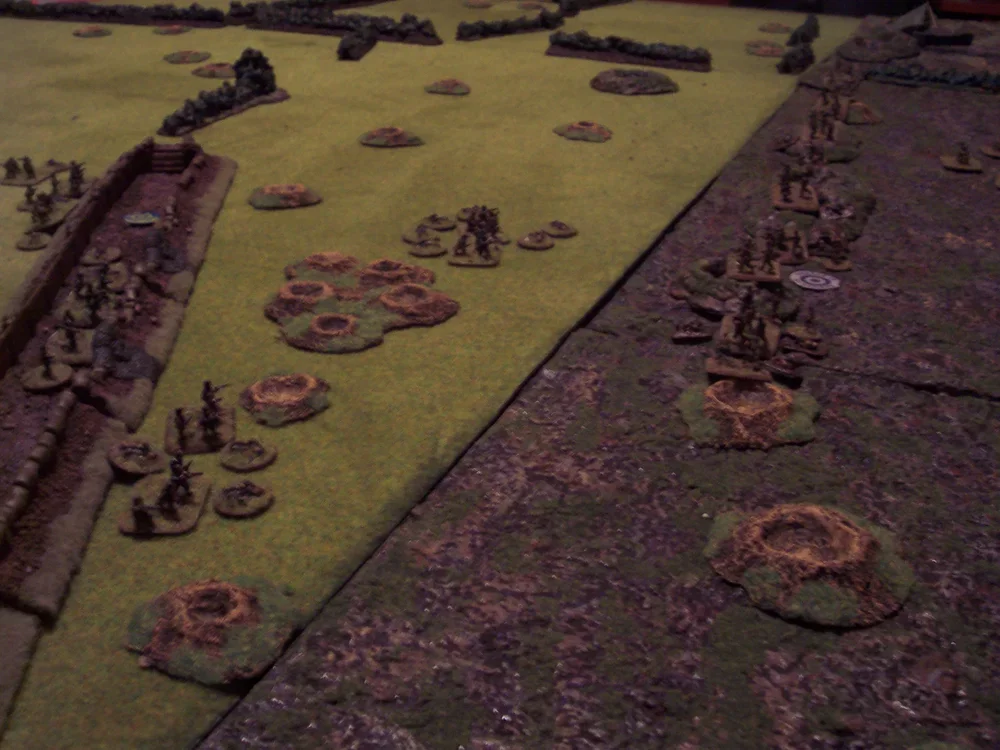
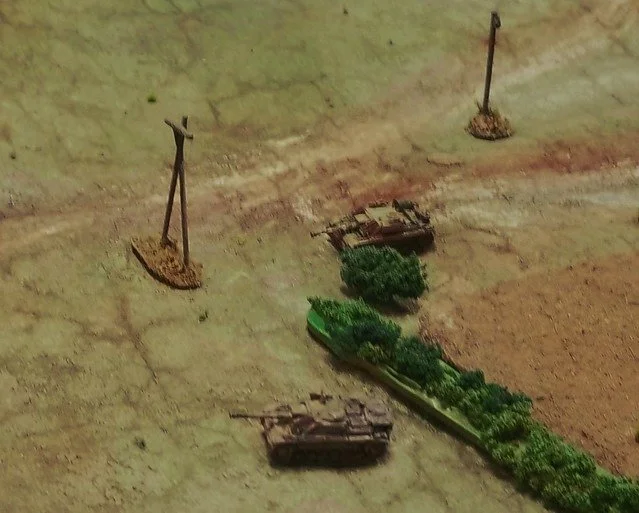
The recon patrol took a couple of passing shots through a gap in the bocage but soon rounded the corner at the north end of the table and came face to face with the German heavy armoured car platoon coming up from reserves.
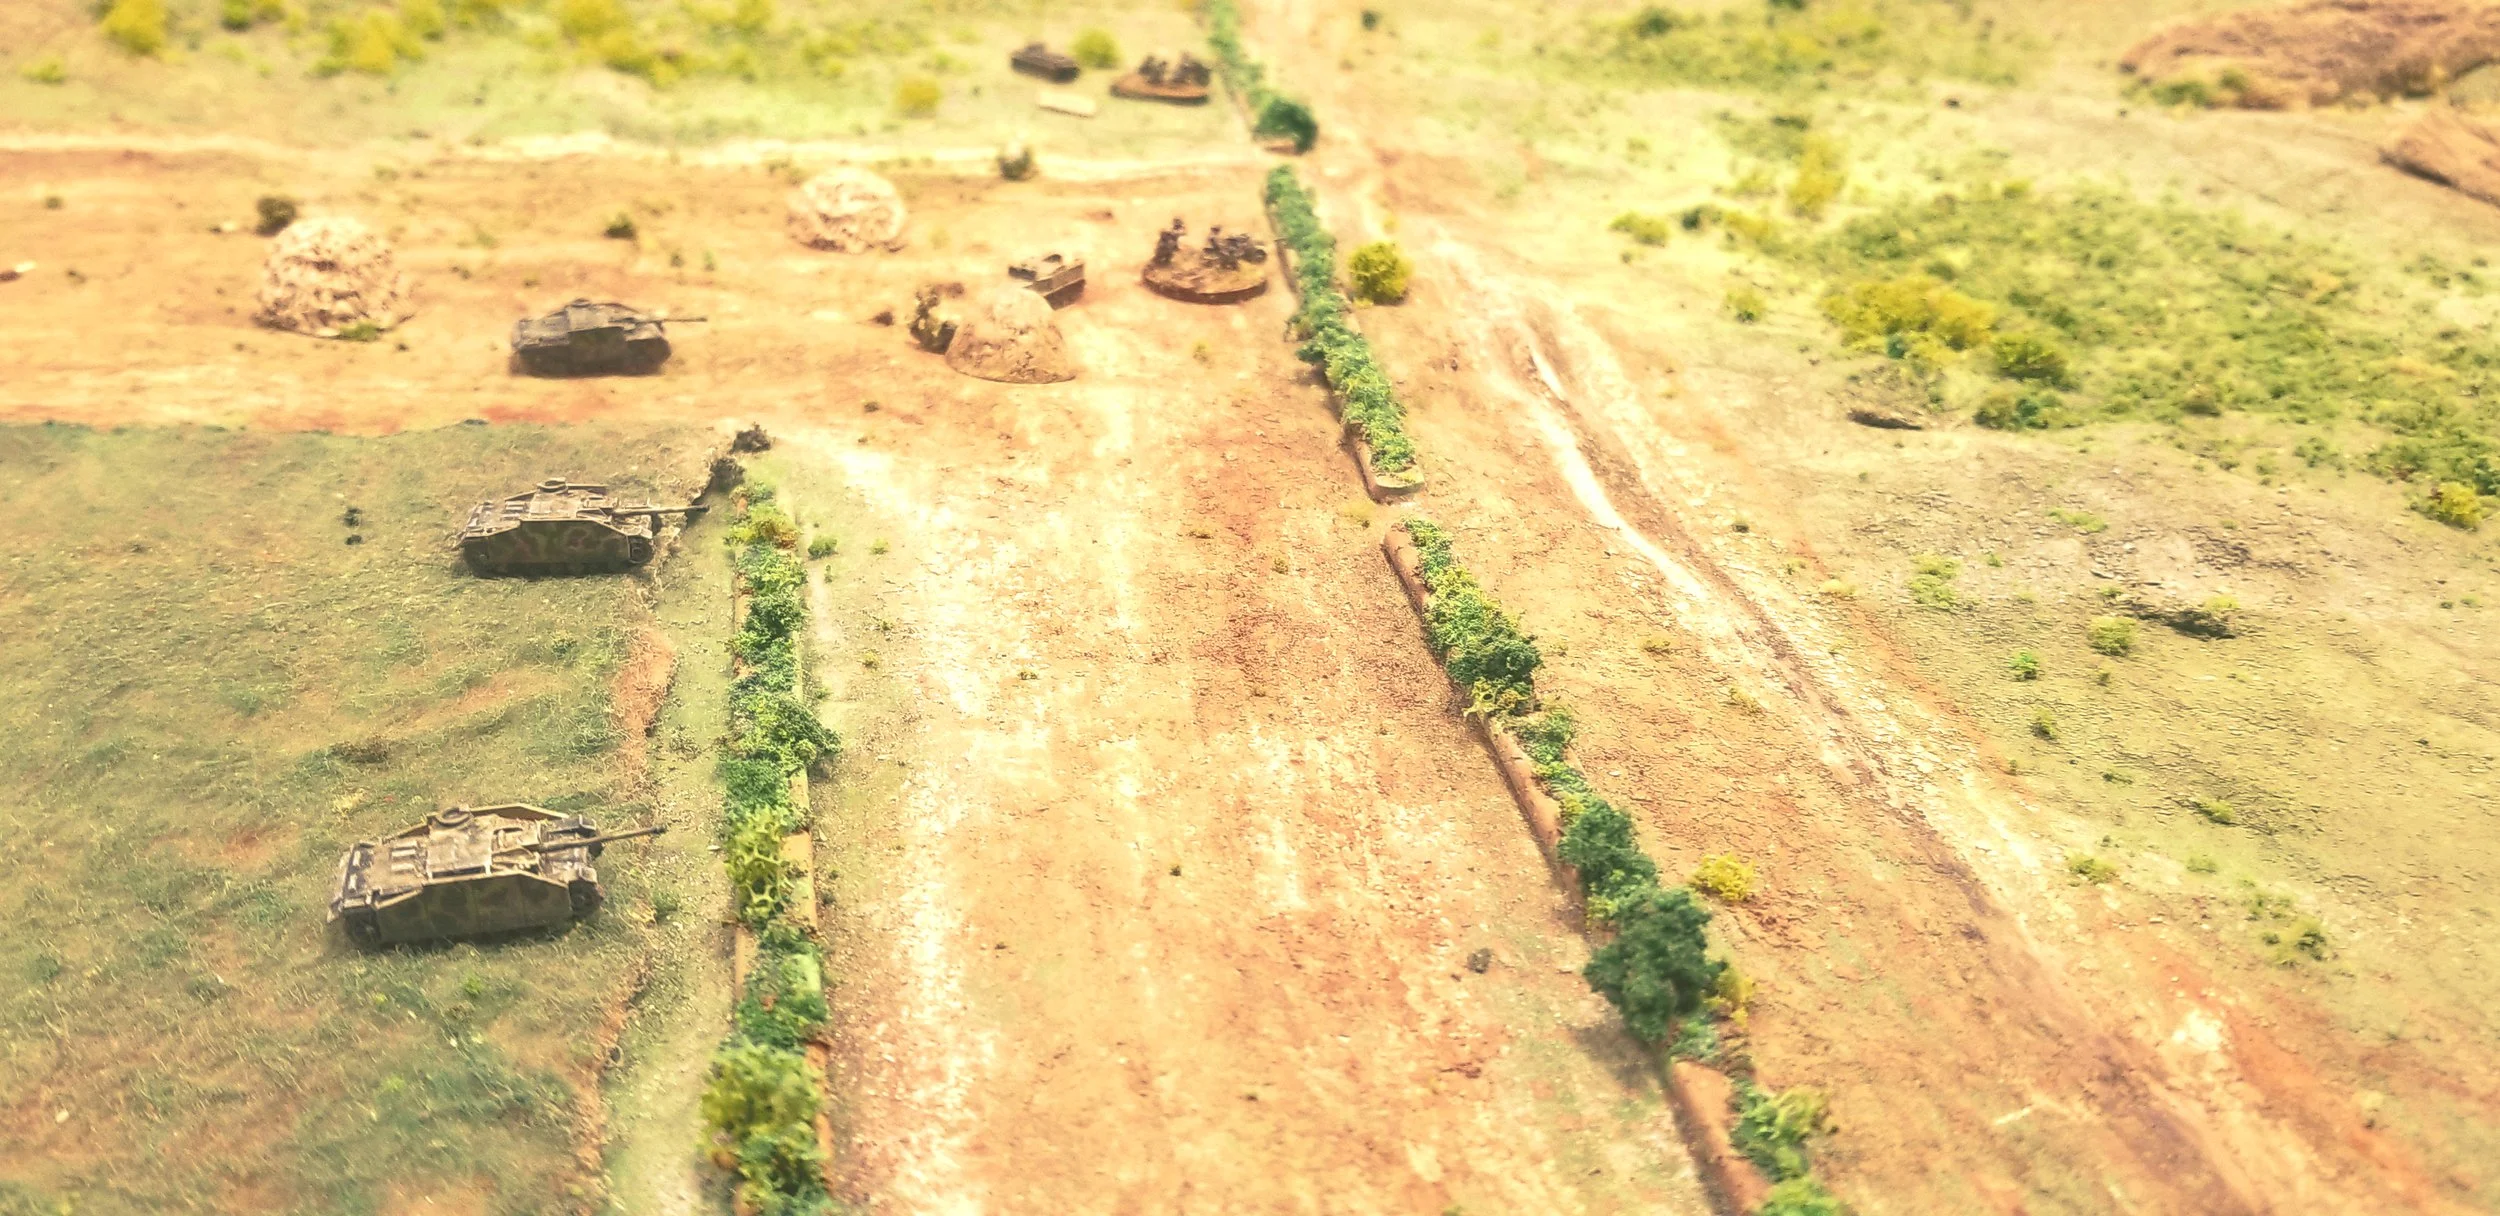
Recon Column II

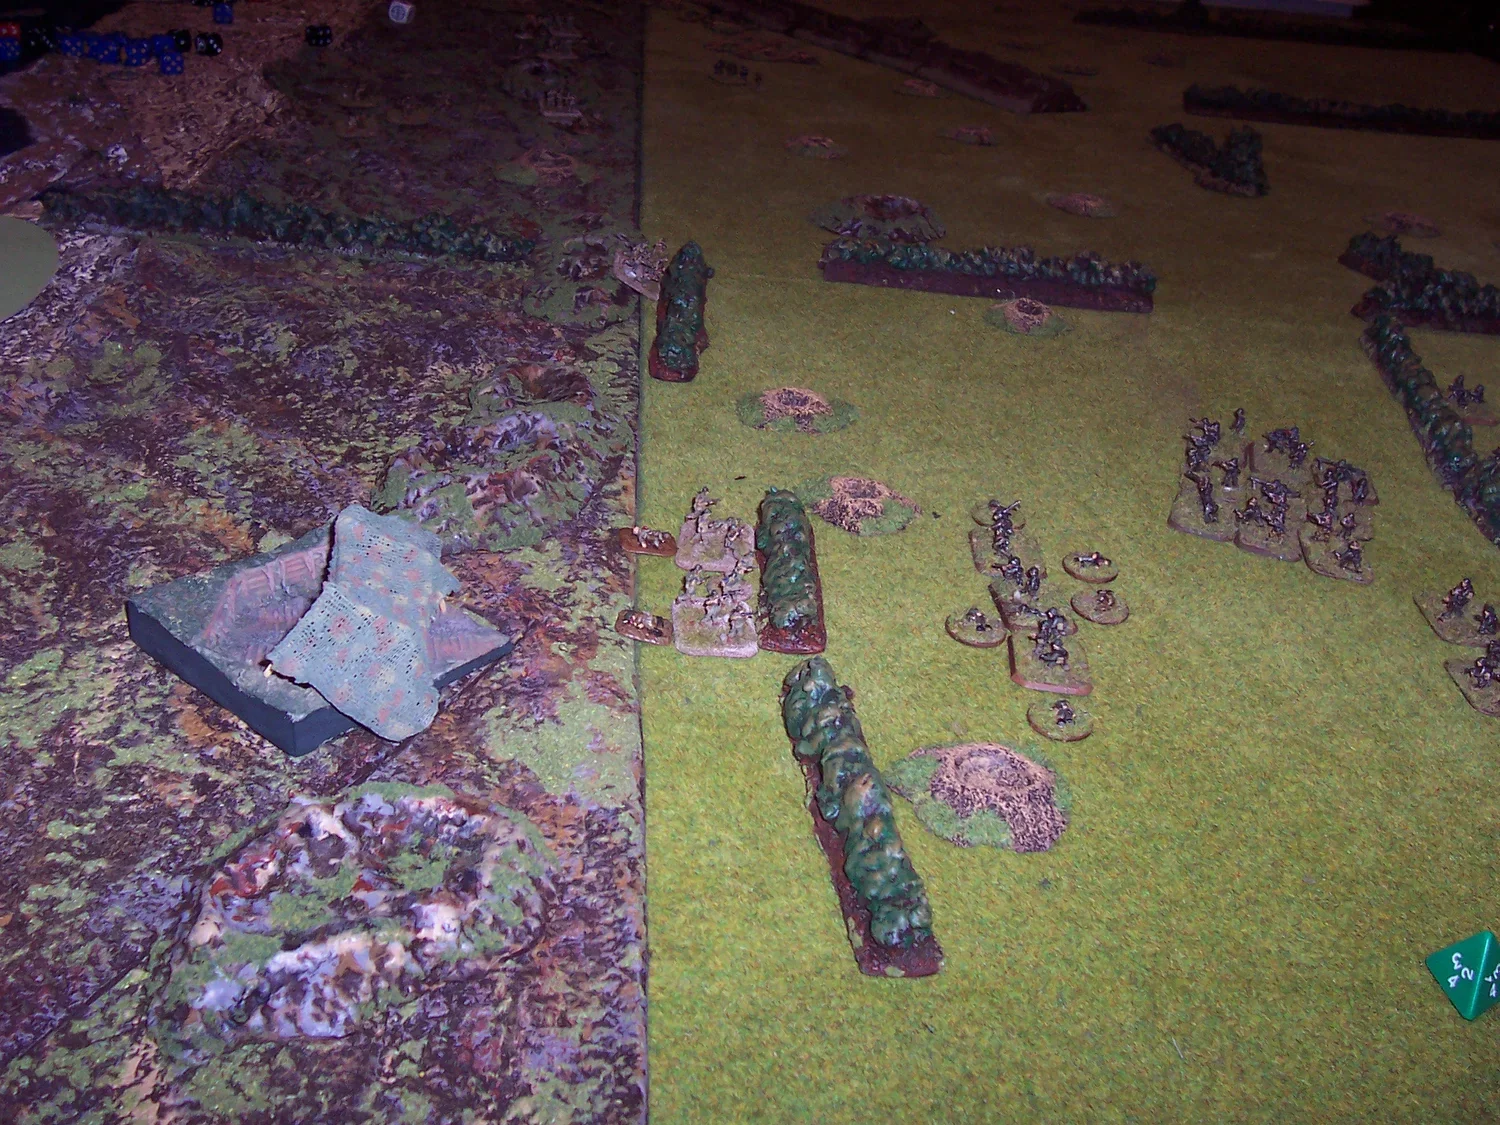
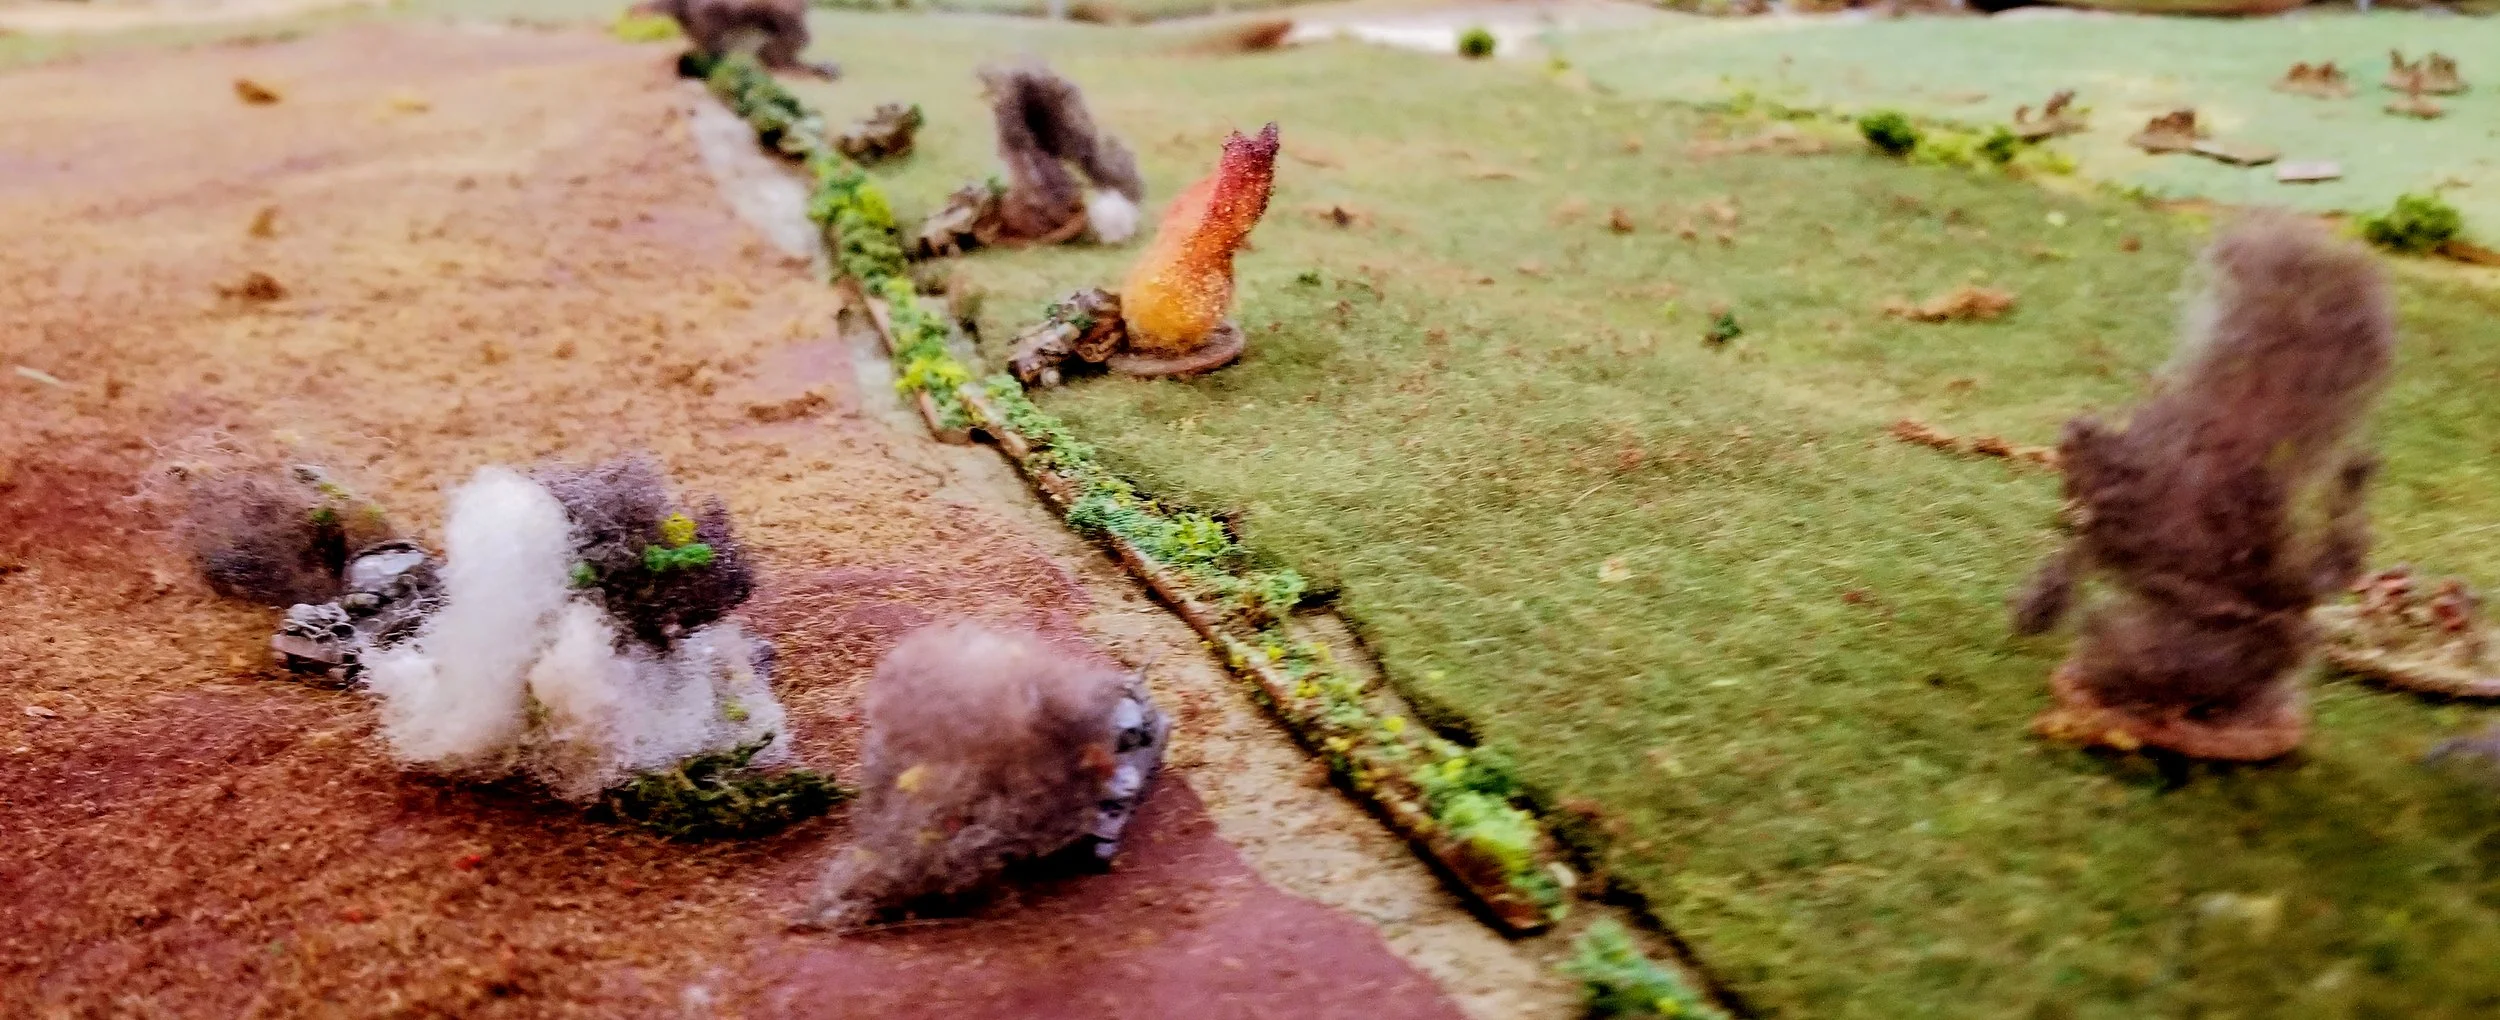
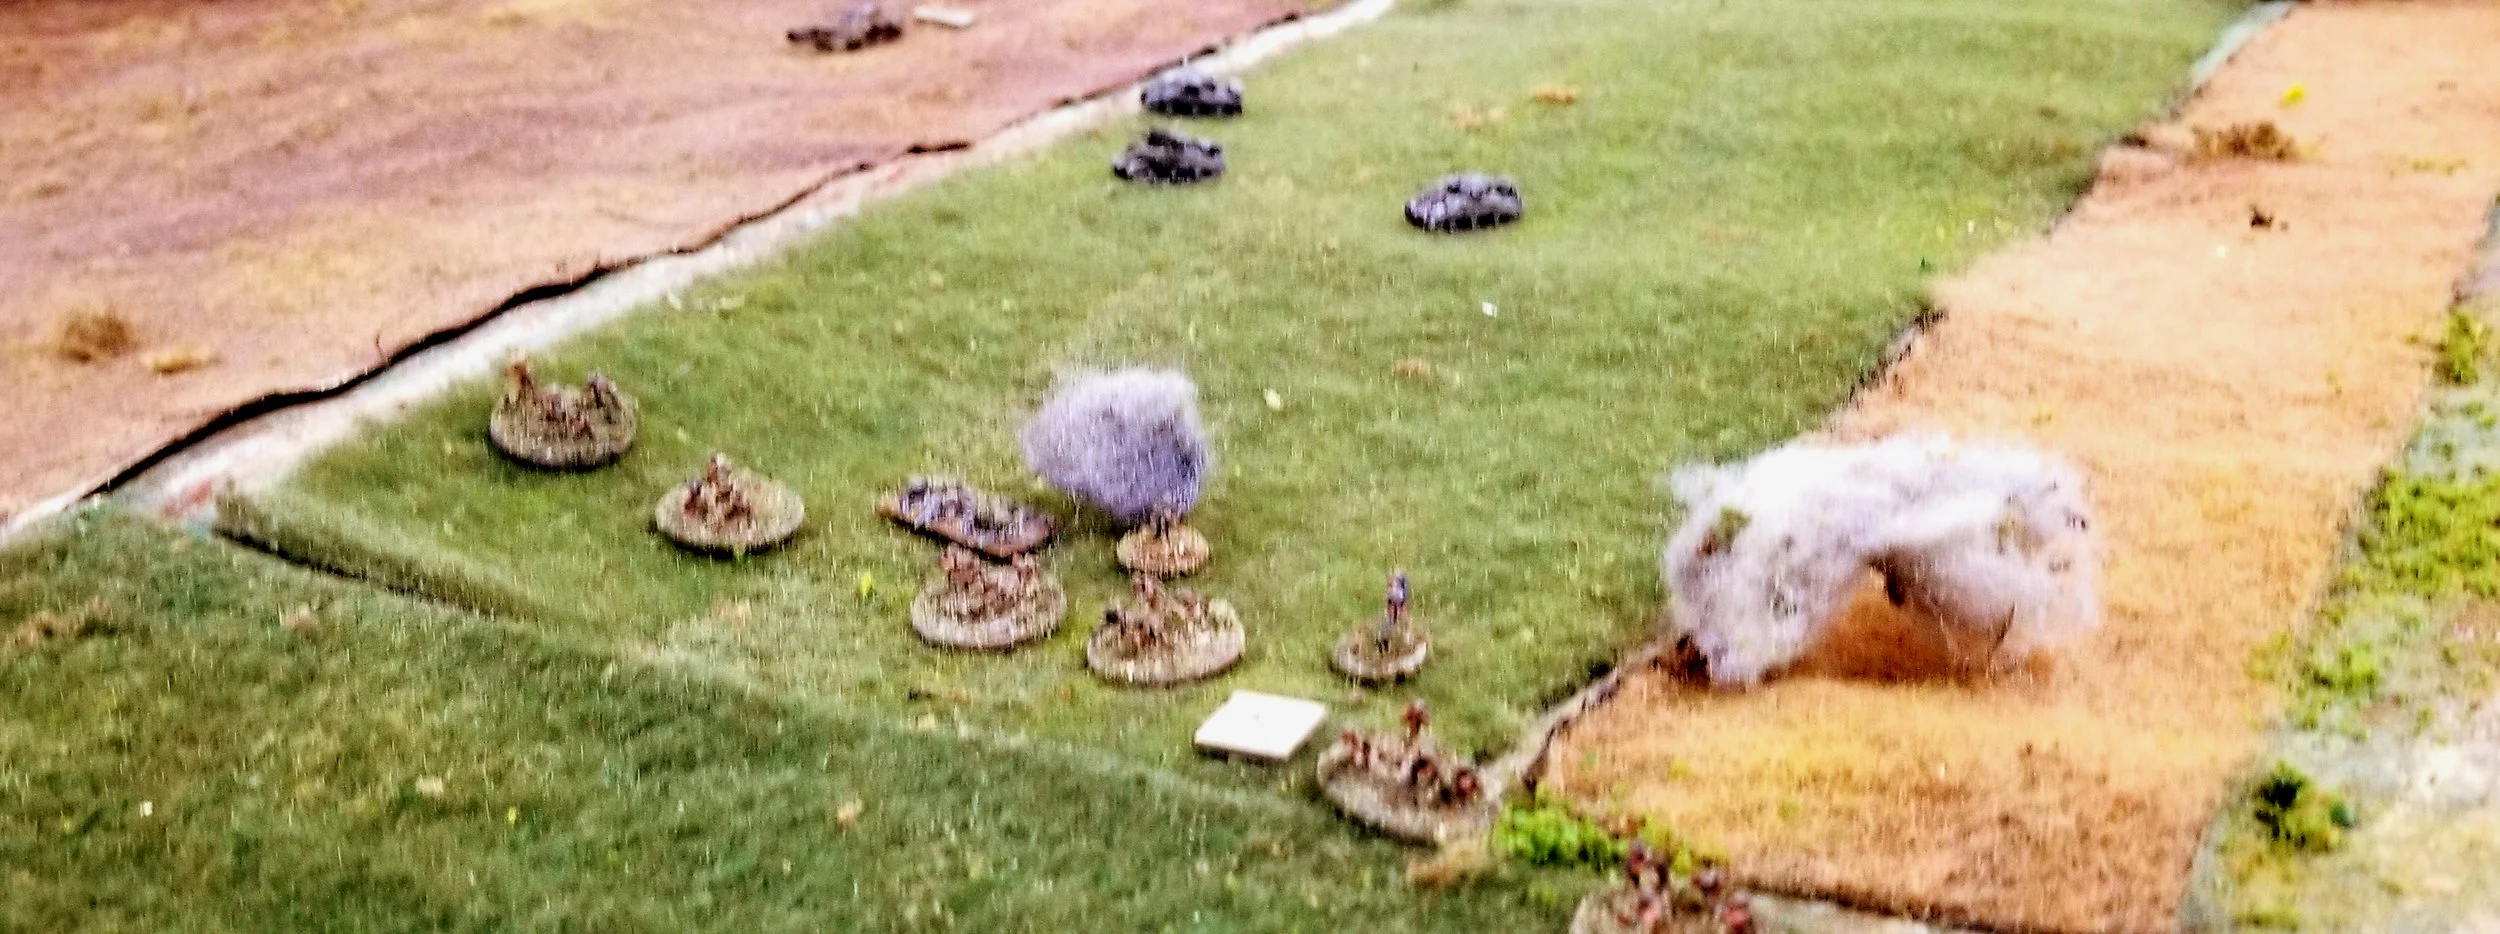
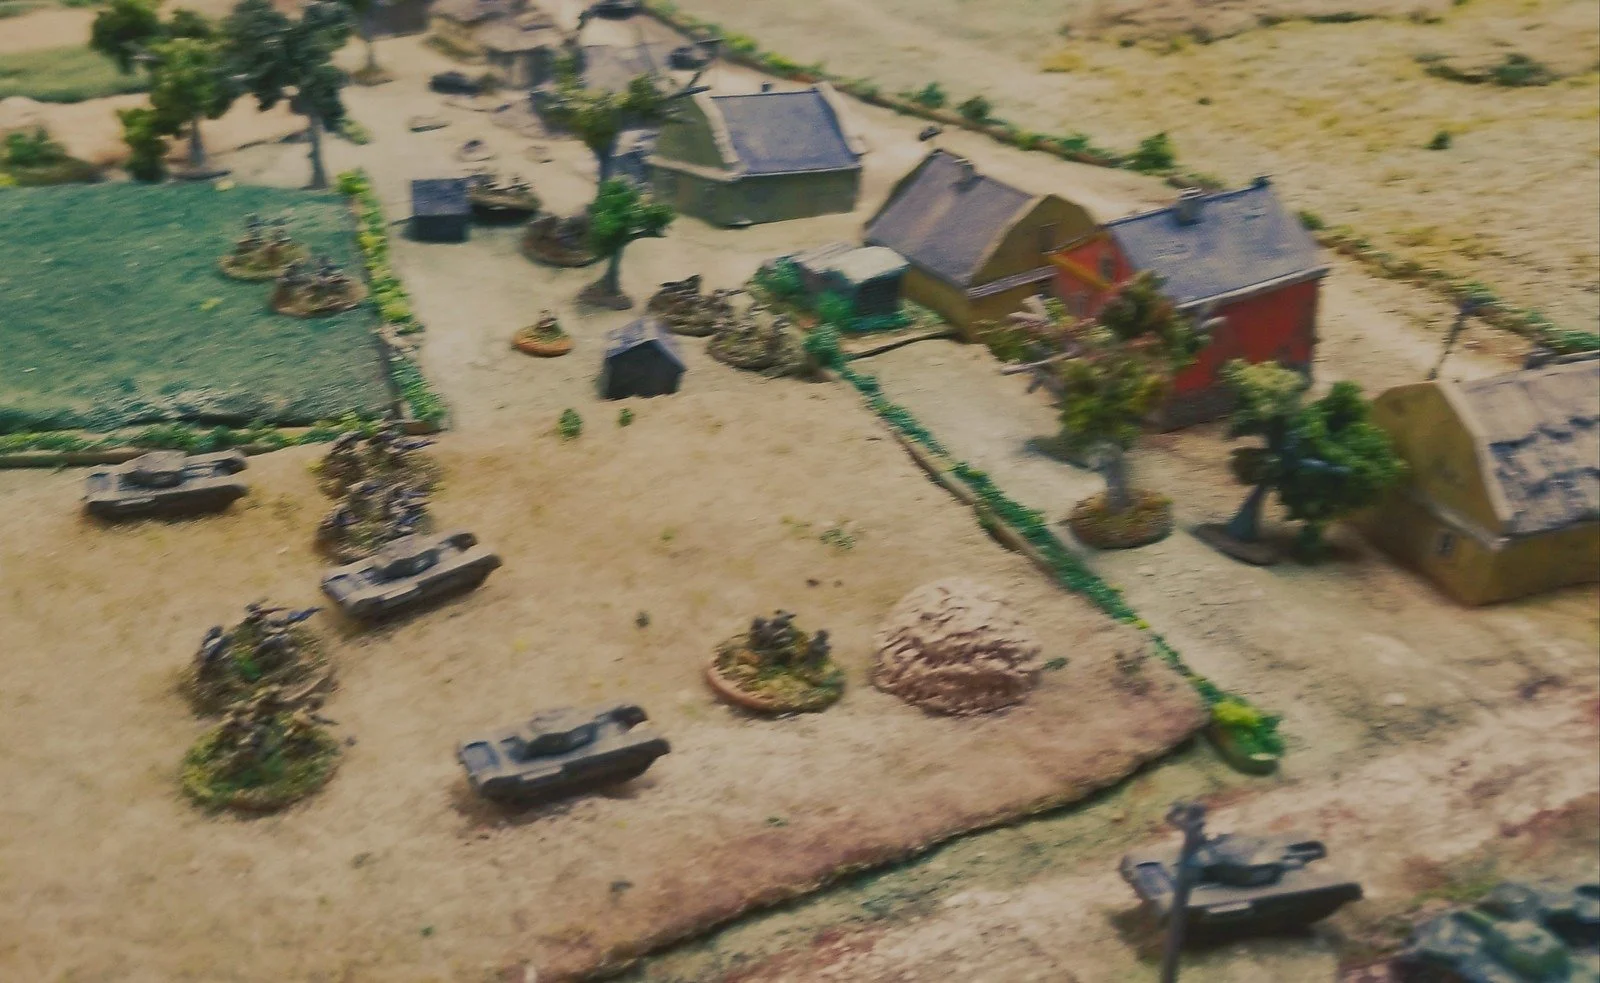
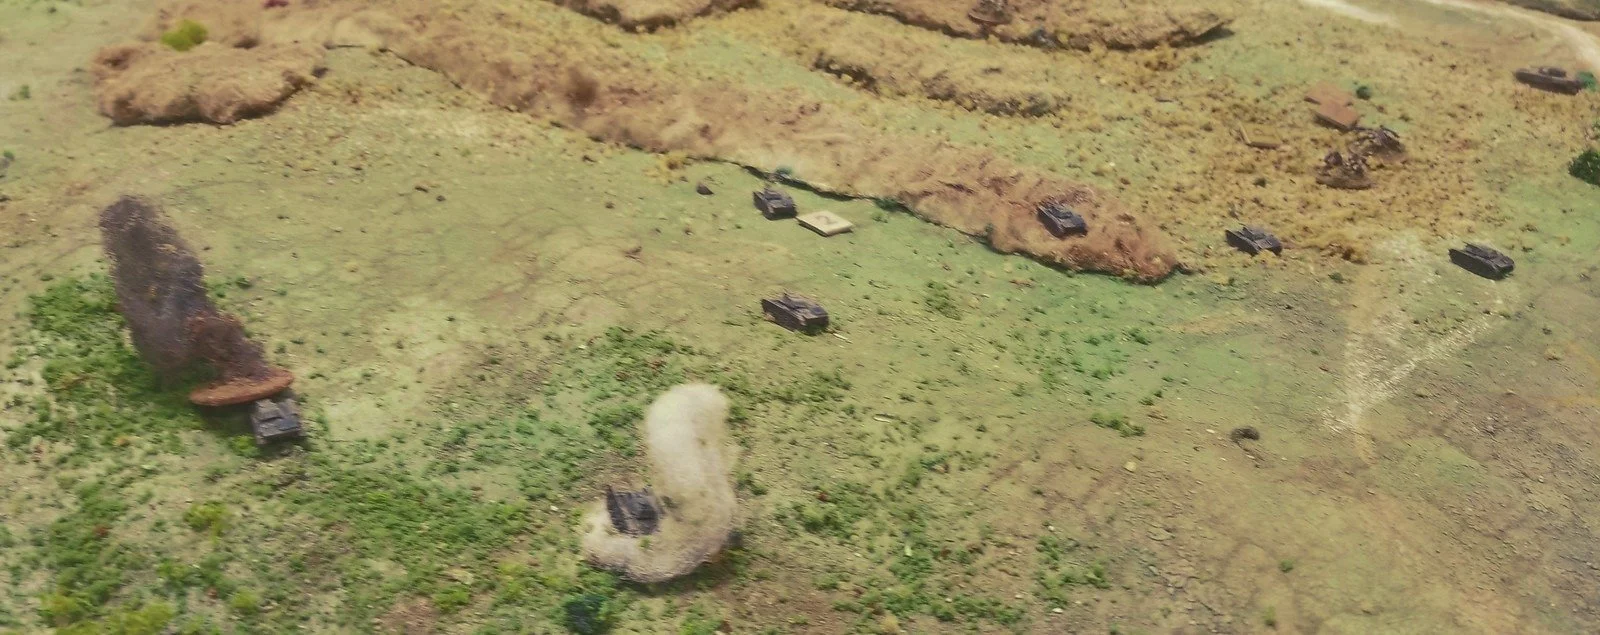
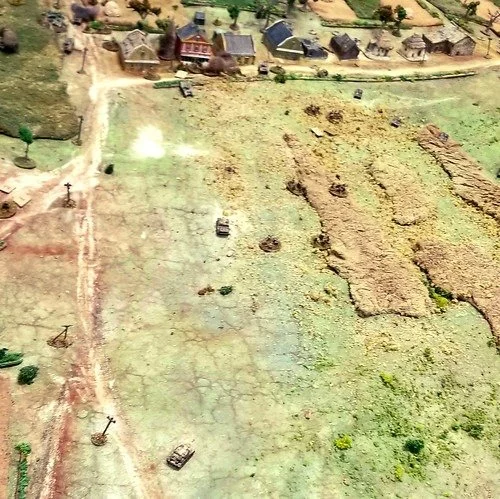
The M8s and the SdKfz 231s began a furious firefight that lasted for the rest of the game and dragged in the Stuarts and the German AT halftracks. 37mm and 20mm gun lack the punch to usually destroy vehicles outright, so for the most part the vehicles accumulated damage and shock until their crews abandoned them.

An immobilized Stuart kept fighting from the position it occupied in the opening to the field bordering the road. The heavier armour of the Stuarts gave them an edge, but the American gunners were not up to the task and missed many easy shots, allowing the Germans to remain in the fray. Adding to the Germans misfortune, a P-47 made a couple of passes over the battle area attacking the lightly armoured German vehicles with its eight 0.50 cal MGs.

Coffin Corner

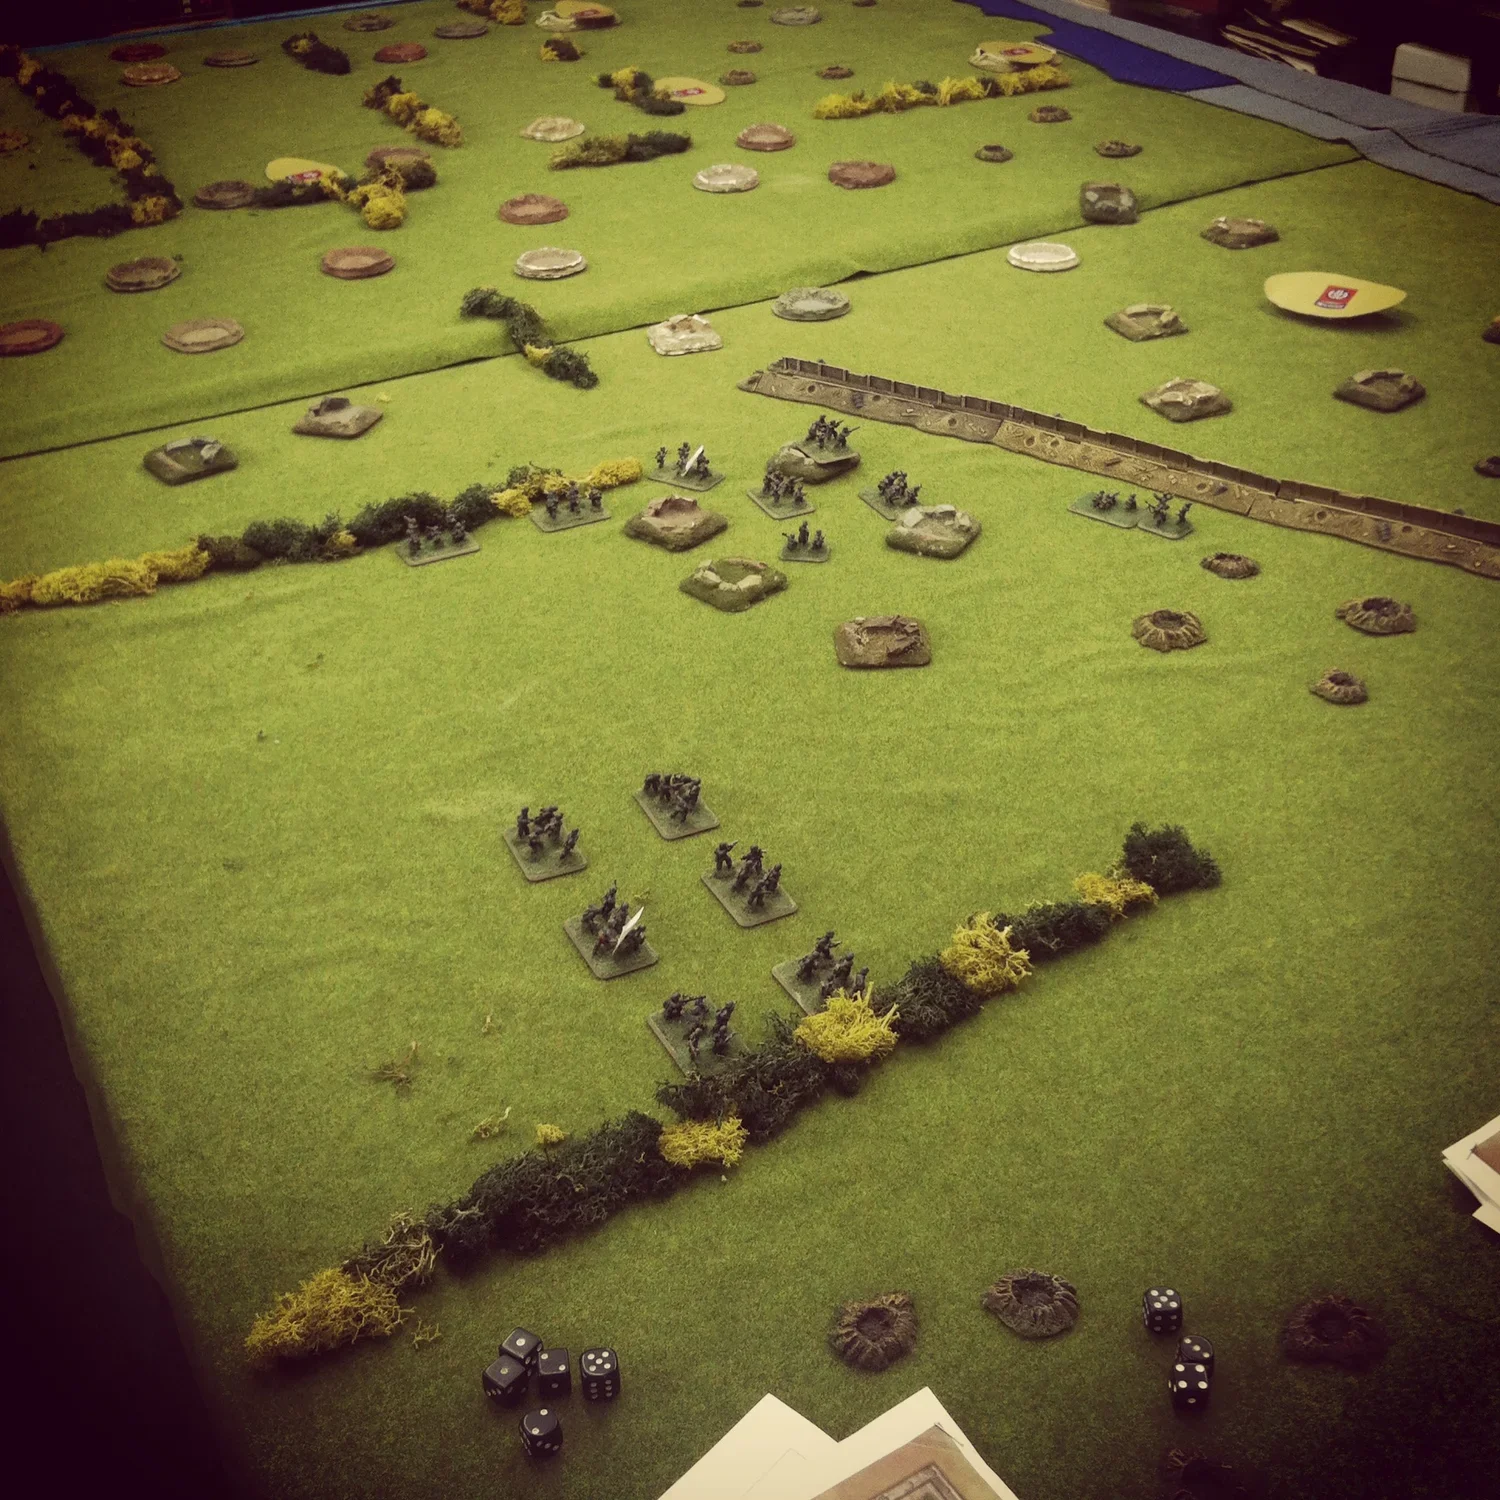
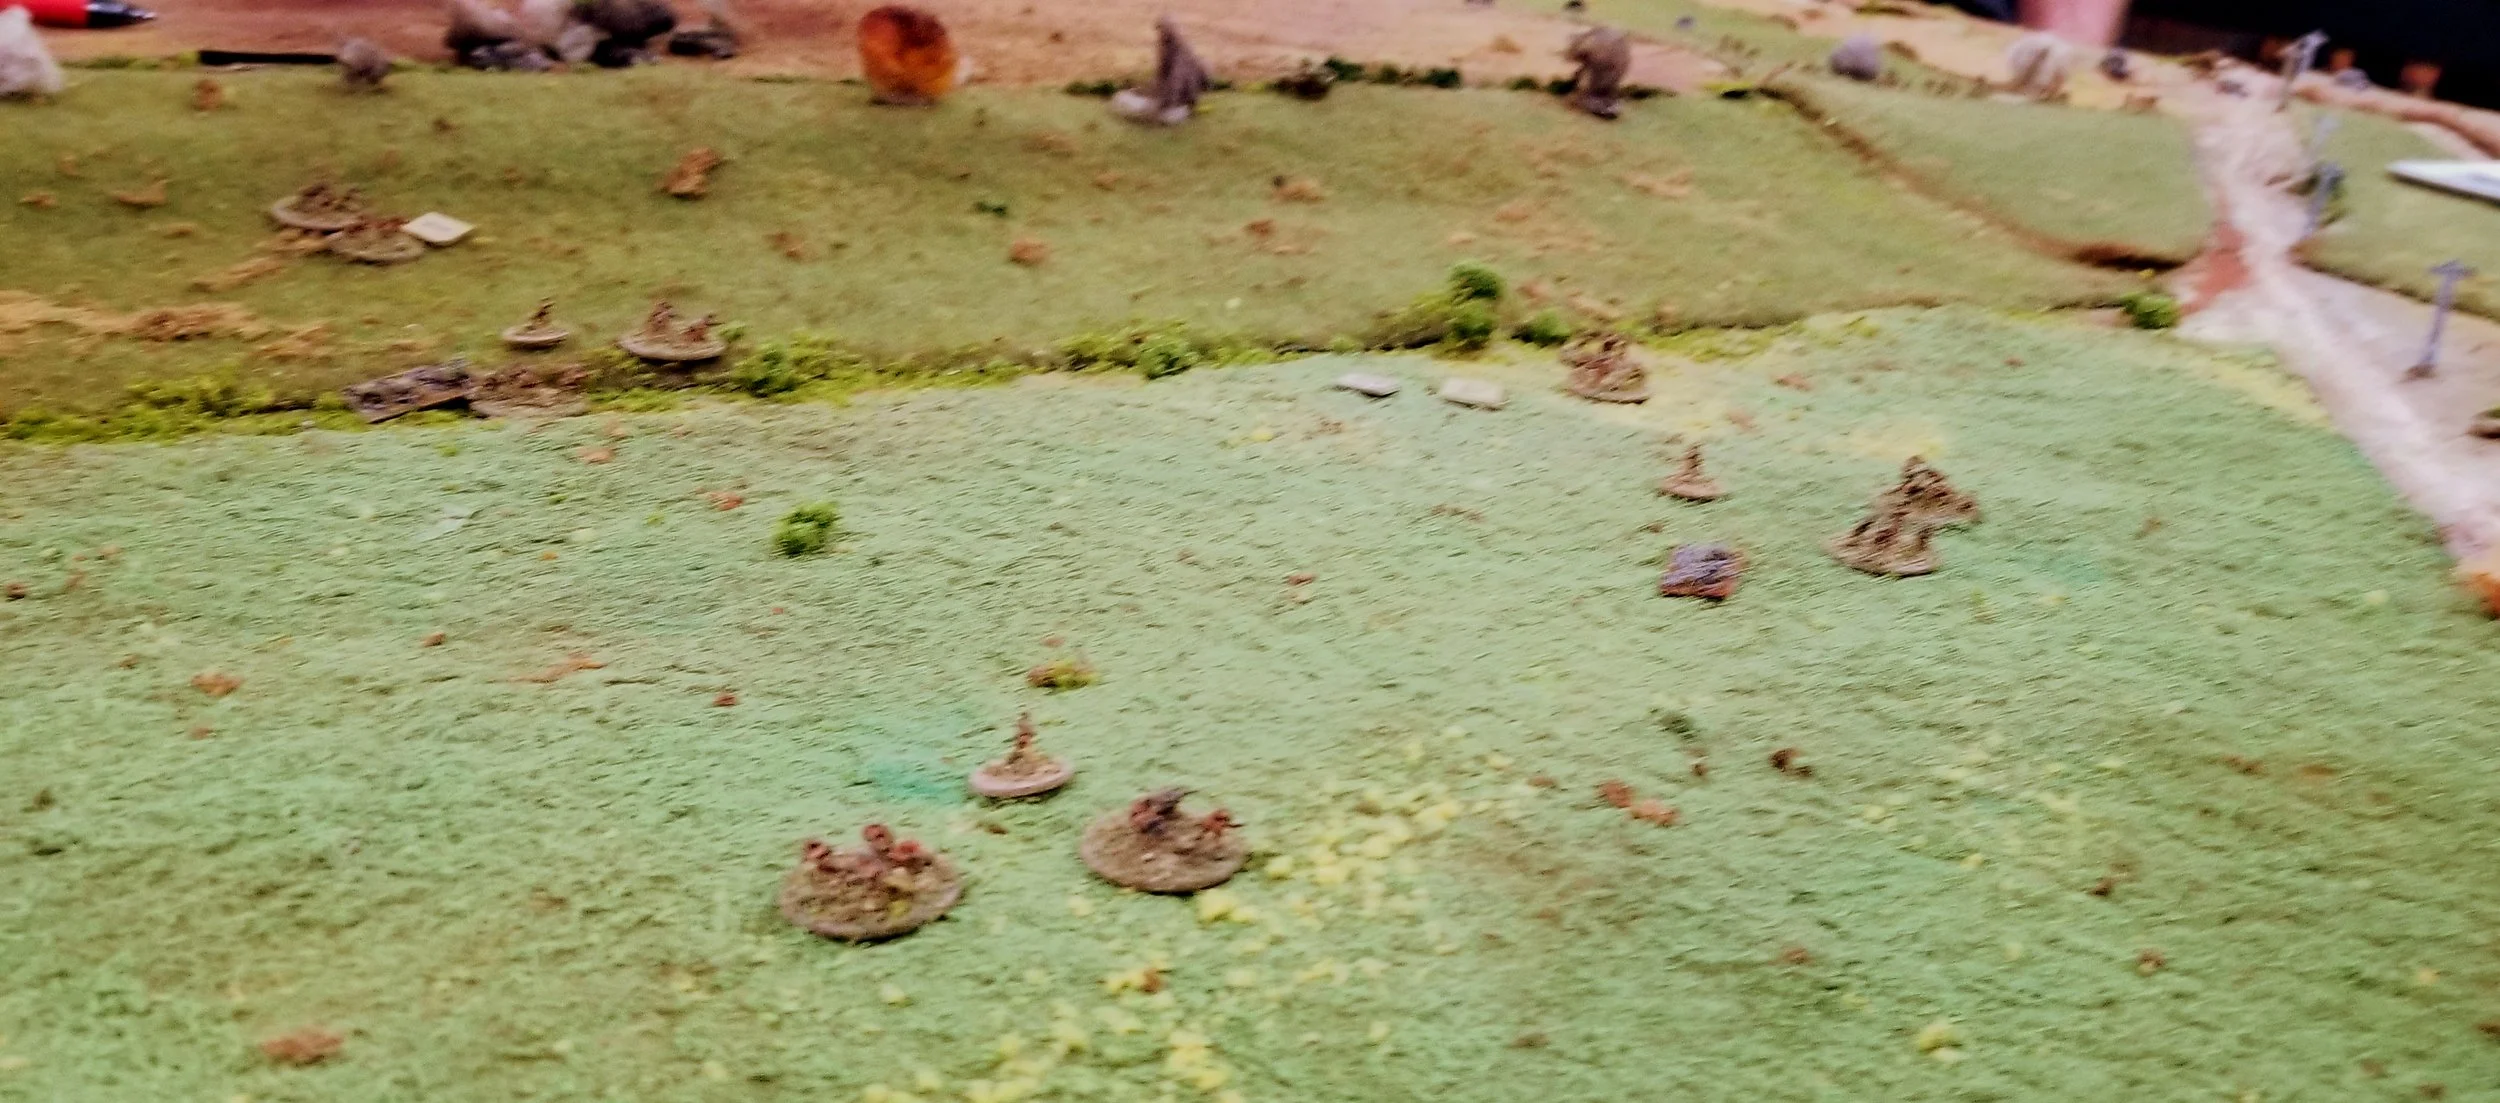
The second German infantry platoon had pulled out and retreated back to the house and woods next to the bridge, along with the second German panzerschreck. However the first platoon in the farmhouse was wiped out by a combination of 0.50 cal fire from the HQ platoon's M8s and assaults by the I&R platoon. This allowed the remaining M8s to start back up the road where they were able to bring additional 37mm fire into the flanks of the remaining German vehicles aligned to defend against Americans pushing toward the bridge from the west.

9th Tactical Air intervenes

At this point the wife declared that the beef stroganoff was ready, so we called the game and went upstairs for some food. The Americans were the winners as they had ample forces left to defeat the three remaining German armoured vehicles and ample M8s or Big Men available to rush one onto the bridge and satisfy the victory conditions. With the strength of the bridge determined, the allies are ready to continue their push forward up the valley and into the heart of France.

Another fun game of IABSM and a really fun scenario. The biggest gun on the table (other than panzerschrecks) was a 37mm and the M5 Stuart was suddenly heaviest and best armoured thing around.

Because the strike values on the weapons were low (3-5 dice), there were not many times where the guns scored the required 3 successes over the defender's armour save to produce a brewed up vehicle. So shock and damage played a huge roll, especially immobilizing hits that reduced the amount of shock required to force the crews to abandon the vehicles.

Both sides were using their Big Men in the vehicle platoons to activate vehicles sooner and get off the first shot, but in this case I think the better plan might have been to always use those guys to remove shock and keep your crews from abandoning their vehicles. Looking forward to the next game in the campaign, where I'll be playing the German defenders tasked with stopping the Allied advance.

Brian Cantwell


Played a fantastic game of IABSM yesterday against my regular opponent, Neil, who was fresh from winning a Warmaster tournament.

Scenario 11 from the Sicilian Weekend supplement: The Gela Plain. In a desperate manoeuvre, tanks (unsupported by infantry) from the HG Division have broken through the thin Allied line forming the outer defences of the beachhead and now aim to get into the beachhead itself to cause chaos and disruption.

The scenario features fourteen German tanks (Pz IIIs and IVs) crossing a wide, open plain towards where a makeshift collection of Americans defend the line of the sand-dunes marking the edge of the beachhead. Forget the need for justifications based on logarismic scales: this is 75mm and 105mm guns firing over open sights! The only advantage enjoyed by the Allies are the six-inch guns from the cruiser, Boise, now only 3,000 yards from the shore, its crew taking constant, nervous soundings, and more off-table artillery from a battery of 155mm howitzers.

One platoon of four PzIIIs burst onto the plain and immediately began a firefight with the US artillery. Although the guns enjoyed the first shots, having been under Blinds, there was something defective about the HE they were firing (must have got wet on the journey in) and all that resulted was scratched panzer paint. In reply, HE shells killed one artilleryman, but had real difficulty doing any real damage because of the dampening effect of the sand dunes.

A platoon of PzIVs then arrived, and under cover of more HE from their colleagues, raced into close range and began spraying the artillery position with machine gun fire.

Backwards and forwards the luck went, with the odd panzer being KO'd in exchange for more artillerymen going to that great arsenal in the sky.

Meanwhile, the US Big Men had frantically been calling in fire support and, after a series of ranging shots, the ground shook as salvos from the Boise's mighty six-inch guns began landing. More German tanks had arrived, still under Blinds, and unluckily, one Blind was hit by a salvo from the Boise followed by a salvo from the off-table 155s! The Blind revealed itself as four more PzIIIs: only to discover that three had engine fires as a result of the tender ministrations of Madame Boise! All three would eventually burn out!

USS BOISE

The Americans had also received reinforcements in the form of a couple of Shermans from the 82nd Recon Company. One was knocked out fairly quickly, the other sent scurrying back to the beachhead with a turret jam. With his artillery running out of crew, things looked a bit bleak for the Yankee commander, so he leapt aboard the departing Sherman and used his Heroic Commander card to not only turn the tank around but also fix the turret jam. I must have been feeling especially generous: after all, how do you heroically fix a turret jam?

Anyhow, the surviving Germans (who needed to exit a certain number of tanks to win the game) and Americans were still hammering away at each other, the US Big Men too busy to ask the Boise for more help. Two combat engineer bazooka teams were shot down, but only after taking out a PzIV. It looked as if the Germans would suppress all resistance and just have enough tanks to win!

Even more desperate measures were called for. An American Big Man led out a squad of combat engineers armed with improvised anti-tank bombs into close combat with a PzIV. The tank was set on fire, but the Yanks shot down by another German tank spraying their comrade in an attempt to clear the pesky infantry away.

Finally another German tank took a good, clean, direct hit from the only surviving US gun, and went up in smoke. The Germans could no longer win a victory, so were forced to limp backwards off the table, leaving the carcasses of many, many burning tanks behind. The beachhead was held: but only just!

A great game that followed what happened historically almost exactly. If the Boise hadn't pulverised one PzIII platoon, the Germans would probably have broken through...but she did, and they didn't! If I say that all the Americans had left at the end of the game was one 105mm gun with two crew remaining, and a handful of infantry, it shows you just how close it was. As for the Germans...well, fourteen tanks went in and only two came out unscathed!

Robert Avery


Operation Husky, July-August 1943 (area around Butera in green)

Operation Husky, the Allied invasion of the island of Sicily, commenced on July 9th 1943 with combined naval, air, airborne and amphibious forces from the United States, England and UK colonial nations attacking a largely Italian force backed by their German allies. Over the next five weeks, the Allies took the arid and rocky island of Sicily and opened up the Mediterranean for the eventual invasion of mainland Italy.

The Sicilian Weekend campaign guide for I Ain’t Been Shot, Mum offers 24 scenarios from the opening days of Operation Husky on July 10th and 11th 1943. Like the other scenario books from IABSM publisher Too Fat Lardies, the Sicilian book presents solid historical background and maps, along with force lists and detailed briefings for each side easily adaptable to a number of lines of 15mm WWII miniatures. The scenarios may be played individually or as part of a linked campaign, and so we recently started playing through a few of the Sicily scenarios at Metropolitan Wargamers in Brooklyn, NY.

We began with the eighth scenario in the book, Southeast of Butera, on the morning of July 11th 1943. Members of US 3rd Infantry Division are presented with a simple mission of aggressively pushing through the field to link up with their fellow Americans at Gela. The Italian force from the 33rd Infantry Regiment of the Livorno Division, must hold the invading Americans back.The scenario presents the Italian and American forces each entering the table in column on blinds. The counter attacking Italians rolled in mounted in trucks at one road at the table edge, and the Americans arrived on foot at one end of the table.

My first to arrive American machine gunners and bazookas quickly took up position on a rocky hill overlooking the road and a crossroads in the distance. Italian trucks moved in with their heavy weapons likewise leading the away with machine guns and 81mm mortars deploying at the road edge. Initial long range fire from the US machine guns pushed some of the Italian line back over the road. The Italians offered several rounds combined of direct mortar and machine gun fire in return, spraying bullets and landing rounds amid the bunched-up US machine guns. The Americans scooted back over the crest of the hill and the bazookas ran off to meet the other Americans arriving by the road to their right.

As the heavily-damaged US machine guns rallied, the Italian column continued to advance on the board in force. Four Italian rifle platoons spread out from the road to run at the advancing American column ahead and to cover the crossroads overlooked by two rocky hills. As the Americans moved straight on to meet the Italian front line, a recon platoon accompanied by four bazookas made way for the hills and the Italian flank.

With an Italian front deployed across the field in several lines and more rifles rushing into the hills at their left, the battle settled into two main firefights. American rifles at the center gradually pushed through the field toward the overwhelming number of Italians. Between the two hills on the Italian left, Italian and American rifles echoed back and forth. As gunfire was exchanged across the lines, US bazookas attempted to run to engage the Italian trucks which had made their way to safety beyond the battle at the rear. Despite moderately mounting Italian casualties, the Americans just could not break through.

The US forces ultimately ceded the field to the Italians. Even with superior command quality, the initial deployment of the US machine guns had been a bit premature and was not met by the quick arrival of supporting rifle platoons. Rushing them to the hills at the crossroads might have made a difference. The Italians had also managed to get the vast majority of their troops on the board early in the game, and their neatly arranged front line allowed them to angle directly over a defense of the road. In our refighting of the early hours of July 11th, 1943, the massed Italian counterattack had stalled the US invaders southeast of Butera. What awaited at Gela later in the day would unfold in our next battle.

Brooklyn Wargaming


Last week we got in our second game with IABSM version 3, this time using a scenario from the Sicilian Weekend scenario book published by Too Fat Lardies. This book contains a scad of scenarios covering the first two days of Operation Husky, the Allied invasion of Sicily in July 1943.

The scenario for this game was Scenario 7: The Road to Scoglitti. The Americans are ashore and forward elements of the 180th Regimental Combat Team, 45th Infantry Division, have established a blocking position north of the beachheads. On the German side the Herman Göring Division is counterattcking toward the beachheads. Lead elements of Kampfgruppe Links are tasked with brushing aside the US roadblock and opening the way for the rest of the battle group to drive the Americans back into the sea.

The players were given briefs for their side only and in keeping with the confused situation after an assault landing, neither side had a very accurate intelligence picture as to the other side’s forces or mission. The US had essentially an infantry company composed of good regulars and some airborne troops, reinforced by a machine gun platoon and fire support from half of a battery of 105mm howitzers. The sum total of the American anti-tank assets was four bazooka teams! The Germans attacked with a reinforced infantry company as well, but enjoyed a greater level of support. Each of their platoons was plumped out with an extra squad and one of the platoons was mounted in armoured halftracks, They also had a machine gun platoon, but the real danger to the US lay in the platoon of two 15cm self-propelled guns and the platoon of three PzKw VIE Tigers. The main German weakness lay in their leaders, who were all of lesser quality than their American counterparts.

The terrain was relatively open, with some terraced hills covered in olive groves on the American side giving some limited cover. I made these light cover, giving the US troops a place to conceal themselves, but not blocking line of sight, so once revealed, any German could see and attack them. The ground though was strewn with boulders and rocks, making off road travel for tracked vehicles slower and stopping the movement of wheeled vehicles off-road.

The US deployed their forces evenly, with a couple of platoon, two MMGs and two bazookas in the larger grove to the west and a single platoon, one MMG, and a couple of bazookas in the smaller grove to the east. The Germans entered the table on blinds from the road from the north. The Americans had a couple of dummy blinds on table and used these to spot some German units and soak up German spotting attempts in return. The first German units were revealed to be a unit of a truck and a kubelwagon screaming up the road and a unit of halftracks. The halftracks headed off road and toward the olive groves but were finding the boulders (and their bad movement dice) to be slowing their progress. As the grunts debussed and started forward the platoon came under fire from US artillery and a pair of MMGs that were revealed and started to fire on the oncoming panzergrenadiers. The German squad and MMG from the truck on the road also debussed into a hail of fire. These squads were cut down and gutted by a large volume of US fire, leaving the first panzergrenadier platoon with only a squad and some halftracks. The halftracks began to return fire using their pintle MMGs though and started to put some shock and casualties on the US machine guns. This brought down 105mm of US retaliation and two of the tracks were destroyed by artillery fire.

As the Germans fire began to reduce the effectiveness of the US machine guns, the US commanders moved two blinds forward to give them more firepower on the front line, each of which represented a full platoon of infantry. Once these blinds were spotted and the troops placed on table, the US forces found themselves tightly packed and presented excellent targets to the surviving Germans. This blunder (which was more of a game familiarity issue than a tactical blunder per se) opened the door for the Germans as the US troops took heavy fire and serious casualties. A couple of reduced German squads managed to reach the US lines and assault some of the suppressed squads, but didn’t have the strength to inflict telling losses and were subsequently wrecked by fire from the US line.

The Germans had suffered a few turns of delay where they did not get any Blinds cards to enable them to bring on fresh troops, but eventually began to bring on more blinds. One dummy blind raced across to the east olive grove and revealed a US MMG and bazooka. Another platoon of infantry moved on and immediately debussed, but before they could move away the tightly packed mass was hit repeatedly by American MMGs, suppressing the troops and heavy losses and shock. Two squads were chewed up before the German’s own MMG could begin to lay some effective suppressing fire on the American MGs and permit the surviving squad to clear out.

While the packed Germans at the road were being hammered, another German blind had moved about halfway up the road before being revealed as the platoon of three Tigers. A brave (foolish?) bazooka team crept to within range and fired off a rocket at the beast – and scored an immobilizing hit to the track! More importantly, the vehicle also picked up two shock and as it was immobilized and Morale III, one more shock would send the crew packing. Fortunately for the Germans the American bazooka was unable to score another damaging hit before two German Rally cards had come buy and allowed the tankers to recover their shock. A platoon of American infantry had been trying to cross from the east grove to the west grove when the Tigers appeared and now it was their turn to experience the rocky Sicilian ground. The lead squads of the platoon were only about 7 inches from the cover of the grove, but rolled miserably for movement and were caught in the open and hammered by all three Tigers. Only a few men ever reached the safety of the trees.

As the end game approached, the US players shifted their artillery onto the Tigers and between that and the work of their intrepid bazookamen, the big tanks slowly began to accumulate damage to optics and running gear. Their morale didn’t falter though as the German CO, Hauptman Klink, moved forward and used every bit of his limited command initiative to remove shock from the big tanks. The SP infantry guns had suffered rather bad luck in the card draws (slow loading crews perhaps), but were able to add additional fire against the US line. The German players finally decided that no nasty American AT gun was going to pop out of hiding and that no Shermans were on the way and dedicated full resources to squishing the last of the bazookas. When the last one was killed we called the game at the next Tea Break.

The game was decided to be a very, very minor and very, very Pyrrhic victory. The US infantry strength was dangerously low, they had no machine guns or bazookas remaining, and their AT power was reduced to the incoming artillery. The Germans on the other hand were also virtually depleted of infantry and their heavy panzers were all damaged. The SP guns and Tigers would be able to clear off the remaining American infantry, but there was no way this company was making any further advance on the US beaches.

Another great fun game with lots of tension on both sides. The friction introduced by the IABSM system was definitely at work on both sides during the game. The US, with more and better leaders was able to offset some of the friction on their side, but not always, as was the case for the ill-fated first platoon caught crossing between the olive groves. We also got to try out the artillery system extensively in this game and it is definitely a great improvement over IABSM2. Clean and easy to use, but still with a lot of the air of uncertainty that characterized WWII artillery close support. Against moving targets, it required great luck to bring the guns in before the target had moved off. Against a sitting target like the immobilized Tigers, the guns could be brought in and reliably hammer away at the target. Shifting to a new target was always a decision not to be taken lightly as it required restarting the entire process. I ran into a couple of the players a couple of days later and they were still thinking about what they could have done differently. A sure sign of an engaging game.

Looking forward to the next IABSM game.

Brian Cantwell


Another cracking game underway at 1st Cops Miniatures HQ up in Snaith.

This is another practice game in preparation for our Seelowe Nord game based on the book by Andy Johnson - Author of historical fiction.

Cracking game on a lovely table and an opportunity to test principals.

All kit and terrain from the collection of 1st Corps

Mercian Miniatures

And here are some more shots from Michael Curtis:


A few photos of The 1st Corps 28mm Eastern Front demo game at The Other Partizan today.

Michael Curtis

The Battle of Kamenewo, 6th October 1941

The Battle of Kamenewo on 6th Octobr 1941 marked a pivotal moment on the Eastern Front, showcasing the Soviet T-34 tank’s dominance and halting the German advance towards Moscow.

On 6th October 1941, near the village of Kamenewo south of Mitensk, the German 4th Panzer Division, part of General Heinz Guderian’s 2nd Panzer Army, advanced rapidly following the capture of Orei. Their objective was to push towards Tuis and ultimately Moscow. However the Soviet High Command, alarmed by the speed of the German advance, dispatched Major General Dmitry Letyushenko and his 1st Guards Rifle Corps to intercept the threat.

Letyushenko’s force was a patchwork of units, including the 4th and 11th Tank Brigades and airborne troops from 5th Airborne Corps. Crucially Mikail Katukov’s 4th Tank Brigade, equipped with the newly produced T-34 and KV-1 tanks, played a decisive role.

The German Panzer III and IV tanks, under-armoured and out-gunned compared to the Soviet machines, were caught off guard. The Soviet tanks attacked from the flanks, supported by infantry and airborne units blocking the front. The result was catastrophic for the Germans : most of 4th Panzer Division’s armour was destroyed, and advance towards Tula abruptly halted.

One of the standout Soviet tank commanders during the battle was Lieutenant Dimitry Lavrinenko who, with just four T-34s and three KV-1s under Sergeant Antonov, reportedly knocked out eleven German tanks and two artillery pieces in a single engagement. Lavrinenko would go on to destroy 52 enemy tanks in just two months before his death later that year.

The battle was a wake up call for the Wehrmacht. Guderian himself acknowledged the superiority of the T-34, noting that it was the first time his forces had encountered such formidable Soviet armour. The engagement at Kamenewo not only stalled the German advance but also prompted a reassessment of German tank design and tactics.

This clash demonstrated the growing competance of the Soviet tank commanders and the effectiveness of their new armoured vehicles. It was a turning point in the early phase of the Battle of Moscow, foreshadowing the fierce resistance that would ultimately blunt Operation Typhoon.

And here are some more photos lifted from the excellent Don’t Roll a One blog: highly recommended as a source of inspiration.

All figures, buildings and vehicles are by 1st Corps.


Quick IABSM Bash with Woody tonight

Dice and pizza and run out of IABSM rules to test forces and scenario ready for our weekend at the South Yorkshire Air Museum last weekend in November.

Swift German movement under covering fire pushed the strained British Infantry at rear of the gun battery at the Filey Gap into the sea and into a POW cage!

Mercian Miniatures


Neil and I played "Scenario 17: Fauville" from WTHHYBB yesterday. This is the one where US Airbourne come on one end of the table and the German/Georgians come on the other. Yanks have loads of elite infantry, Germans have huge numbers of superior infantry plus some ex- French tanks.

The game started badly for the Americans with Neil's realisation that he had brought the wrong tea chest of figures with him! Back into the car and home to get the Airbourne figures.

This, naturally enough, upset the American figures so much that they spent the first few turns sulking on their baseline, refusing to move on to the table! The Allied Blinds chip seemed stuck to the bottom of our chip bag!

At the same time, the Georgian 5th Platoon suddenly developed the running skills of Dame Kelly Holmes (although not the shoulders: that would have taken many more years of training...and I'm tempted to add the old joke about "or the balls either" but I won't! I was watching her on Strictly Come Ice Dancing and would put her in the ring with Amir Khan any day!) and hurtled into Fauville, occupying a house that dominated the southern approaches. They then spent the next ¾ of the game getting their breath back and doing nothing!

This delay in getting started, and the enemy's 5th Platoon's rapid advance, meant that the Airbourne troops could occupy the chateau, but then weren't sure what to do next. Orders were to take Fauville, but there did seem to be a lot of Germans (well, Georgians in German uniforms) already in there, and this was supposed to be an encounter game, not an attacker/defender game.

The Germans then brought up their mobile artillery, and began firing incredibly badly aimed shots at the Amis Fallschirmjagers. No casualties, but the Yanks realised that if they didn't do anything, and fast, they were just going to get chipped away at from long range until they lost their effectiveness.

A platoon chip followed by an heroic commander chip provided just what they needed, and 3rd Platoon charged across an open field straight into a German column moving to outflank them. With their extra SMG's and elite rating, the US were rolling over 50 dice verses the Germans under 30, and beat them easily: with enemy survivors surrendering and being taken to the rear ("to" the rear, Nick: "to" the rear).

The Airbourne troops then established themselves behind hedges: almost untouched after their efforts. Unfortunately, the German mobile artillery finally got their range in, and started dropping shells on them; the German tanks moved up and started machine gunning them; and the German 5th Platoon finally got their breath back enough to fire shots at them from the flank ie along the line of the hedge.

Continuing their aggressive tactics, Winters himself (orange paint!) led another platoon forward, and charged down a road, round a hedge, and caught another German platoon in the flank. All the dice in Berkshire were gathered up for the US close combat, and the German platoon evaporated!

Unfortunately, this proved to be the high watermark of the US action. Although they now threatened the German mobile artillery, they still hadn't dealt with the tanks, and had got a bit far forward from their support in the chateau. The two Amis platoons were subjected to a hail of fire from all sides, and had to go to ground with heavy casualties.

At this point, the US commander assessed the situation. He had lost about half to two thirds of two platoons, and their bazookas more to the point. The rest of his force was under cover in the chateau, but taking heavy (if largely ineffective) fire from large numbers of the enemy. Two German platoons had been destroyed, but that still left three almost untouched, three tanks, and two mobile guns plus a couple of MMG's. He ordered the retreat.

Although defeated, he could also take comfort, however, from the fact that his sniper (presumably murmuring biblical phrases all the while) had killed three German Big Men and left the fourth one in such a state that he refused to attach himself to anyone, merely hiding behind a house "in case he was needed later on in the game". The other Big Man, in his tank, had welded the turret hatch shut, along with all other ways a bullet could get into the tank!

A great game that the US lost really in the first half an hour. The delays getting onto the table meant that the Germans were able to effectively defend an encounter situation...and if there's one thing I'm good at, it's defending! Significantly, both German platoons that did move towards an attack were annihilated! What was also obvious was how devastating the US Airbourne troops are in combat. With a Big Man and a bonus for SMG's at Close Range, there were some firefights where a section of infantry were rolling 6d6+2 for shooting!!!!!! Without the armour and mobile artillery, the Germans would have been in serious trouble.

Neil, in a massive sulk I might add, was muttering something about Scenario 18 having the same situation but with my troops now attacked in the flanks by another company of US Paras but because he'd had to fetch his Americans, having forgotten them in the first place, we just didn't have time to play on! Shame!

Perhaps, later on, he took comfort from the fact the result was the same as the historical one...but I doubt it!

Robert Avery


The second scenario I did was the second scenario from the D_Day scenario booklet Where The Hell Have You Been, Boys?. Tough sledding, but the Rangers held the line. One German squad got through past the gun near Rudder, but was easily cut down. The rest of the line took heavy casualties but held.

George Gouveia


In “Holding The Pointe,” my Germans were on the counter-offensive and looking to push the Americans back into the sea.

With all my forces deployed at the game’s start and all American units under blinds, my Germans began in overwhelmed confusion. This disadvantage made the game play so much more like the actual action in Normandy as German forces scrambled to head-off the Allied attack inland. Rather than focus my attack, I made the poor gamble of splitting myself to chase two sets of US targets. By the time a large force of German reinforcements arrived in the seventh turn, my initial force had gotten chewed-up in a series of stand-off firefights amidst the thick bocage near my original deployment.

My divided force tactics were ultimately my undoing, and I’m certain a more textbook massed attack may very well have giving me a greater shot at victory.

Brooklyn Wargaming


The first D-Day scenario I did was the first scenario from Where The Hell Have You Been, Boys?:  US Rangers try to find hidden guns protected by German troops.

Ranger D and E Companies advanced from a trench and took fire from sniper and MG42 from the farm. The Rangers took some hits, drove on, and close assaulted the building, taking out the MG42. They then moved down the road, found the sniper, and took him out. 

Then MG42 fire started from the south side as the Rangers advanced down the road. The MG42 causes some casualties, and pinned the advancing rangers, who are trying to spot the hard pavement road where the guns might be.

Some Ranger reinforcements from Company F luckily arrive to the east of the town of Le Guay. This draws the attention of the MG42 for a few turns, allowing the Ranger D and E Companies to advance and run across the road to the left using bocage as cover. They move off the table to the south, find and blow the guns.

Rangers win but the Germans but cost the Rangers 18 men.

George Gouveia


My first game — “Find The Guns” — saw me playing as the defending Germans looking to hold off the Allied advance from Pointe du Hoc with a couple heavy machine guns, snipers and some off-board artillery. One of the remarkable things about IABSM is the vast amount of space represented on the table, making decisions of movement and firing very important. My artillery was also very unreliable, representing some of the German communication challenges come alive. That said, with only a few men at my disposal, I was able to stave off and force the Americans to redirect through constant harassing fire until their reinforcements entered under a blind at my rear. With one of my machine guns and both snipers finally destroyed, the last of my Germans found themselves pinched on two sides of more-skilled US troops who took the game.

Brooklyn Wargaming


The Set Up

Still WIP and …… I know there is not a Martello tower up north but I am no longer calling this Bridlington it is simply my ‘British Seaside Town’. Still lots to do and buildings to add in the background and then more details.

Yes. That is the Iranian Embassy minus a floor . It was always intended to double up as a seaside hotel.

Day One

Terrific first day at 1st Corps HQ:

The Germans managed to establish a foothold in Bridlington although suffering heavy casualties. Tomorrow is the British counter attack.

Great fun!

Day Two

Second day at 1st Corps HQ , Snaith:

The British put in a counter attack to drive the invaders back and recapture the harbour area to prevent second and subsequent German assault wave landings. .

A very even fight took place over nine turns but eventually the Brits pushed the Krauts back into the sea to secure a firm hold on the main and dominating feature of the hotel.

A terrific weekend was had. We sorted out lots of points concerning the forthcoming games weekend at South Yorkshire Air Museum the last weekend in November.

Salutes to Cookie who gets a Mention In Despatches for retrieving 10 x 4 sheets of our terrain base from three lanes of the M5 motorway! ( dont go there !!) . Fusilier Chris for all his efforts especially his ‘sausage surprise’ on Saturday and Sunday mornings! Michael , another Mention In Despatches for 3D printing throughout the last week, into Saturday night and for having no sleep over the next week or two either! Simon , as always for talking sense and sorting out lunch over two days.

Mercian Miniatures


Tomorrow Cooky and I are refighting Market Garden .

This scenario is based on 1st Parachute Brigade trying to reach the bridge at Arnhem. In their way is the blocking force set up by Sepp Kraft and his SS training school troops.

We are using I Ain’t Been Shot Mum rules and dusting off my 20mm collection that I painted thirty years ago.

Marcian Miniatures


This was a fictitious scenario that was based on some units of the 21 Panzer Division moving closer to the Sword Beach landing area than they did historically on June 6th.

A very open area (no buildings) wiith a low ridge in the center of the table, 8th Company and Panzer Grenadiers of the 192 Panzergrenadiers Regiment were tasked with meeting the British advance from Hermanville sur Mer as far forward as possible.

This game was one that the Germans could not reasonably win, but presented a plausible action with neither side knowing what was on the other side of the hill.

Overall the Germans lost every Panzerjaeger halftrack and the platoon leader, along with the command halftrack and two Big Men, and four of 24 grenadiers. The KSLI had a total of 20 casualties in its three platoons and one platoon leader killed One troop of the Staffordshire Yeomanry was destroyed by the halftrack PaKs.

A simple game that had some interesting kit for a June 6 scenario.

Mark Luther


This scenario takes place on the south bulge of the Kursk battle on July 12, 1943.

It was part of the counter offensive by the 18th Tank Corps of the 5th Guards Tank Army. The LSSAH's SS Panzer Grenadier Regiment 'T Eicke' and the 3/SS StuG Abteilung along with a pair of Tigers from the 13/ SS Panzer Regiment are holding the hill and village of Andreevka

Lend lease Churchills from the 39th Guards Heavy Tank Regiment, infantry of the 32 Motor Rifle Brigade and the 181 Tank Brigade are tasked with taking the position.

Five of the eight T70s were knocked out. Five of the Churchills were also destroyed and two had turret and gun damage. The Russian infantry had only 17 casualties at this point (out of 64 troopers) so was in decent shape, but one platoon was pinned down on the right and would have to retreat soon.

The Grenadiers lost one MMG team and seven other men. The only damage to the German armor was a StuG out in the center.

The game was designed to have at least one more company of T34s. There was another company of infantry available also. The Germans were lucky to be on the receiving end of an uncoordinated attack.

Mark Lutherr


Earlier this year with Winter Wonder Lard V then creeping up very quickly, Phil and Jen recruited Andy and I to play-test their new I Ain't Been Shot Mum scenario which featured a change of scene for them being set during Operation Barbarossa where a German reconnaissance unit was tasked with capturing a strategically important bridge...

Near the bridge was a Kv-1, unfortunately it had broken down and the crew were trying to fix it by banging it with spanners...

Starmaskaya village was a nondescript little hovel but had a nice church - and a Soviet supply dump.

The German reconnaissance unit, commanded by Andreas von Krähe, aggressively advanced down the main road to the bridge a Schwerer Panzerspähwagen leading the way.

Not realising the Soviets, commanded by the legendary Bolshevik Krasnyy Stiv, were lying in wait!

But before the Soviets could meaningful react Von Krähe gunned his BMW motorbike combinations down the road to the bridge, though some Germans were caught in the rear by Soviet rifle fire.

The Kv-1 crew manfully fought off the first assault by the now dismounted motorcyclists - more than one fascist receiving a dent in his helmet from a quality Workers spanner - but they were soon machine-gunned down. 

Heroes of the Soviet Union to a man, their sacrifice for the Motherland will not be forgotten and even as their still warm blood seeped into the soil of the Rodina, their noble delaying action allowed the Soviets to bring up more armour in the form of two T-70's!

Pikiruyushchiy Bombardirovshchik!!! With the German advance stalling on the outskirts of Starmaskaya a dreaded Stuka appeared and rained hell on the defenders inflicting casualties and shock!

On the opposing flank German armour appeared over the hill a second Soviet 45mm 53-K anti-tank gun (Sorokapyatka) engaged the panzers, though it soon fell victim to another Stuka attack!

However despite several of its crew lying dead around it the other Sorokapyatka fought bravely on...

An Sd.Kfz.231 falling victim to the deadly "little 45"!

Meanwhile with the Soviets no longer having any anti-tank capability to protect the other flank, Von Krähe aggressively pushed his jack-booted force forward...

The Soviets on the outskirts of the village put up an valiant resistance against the superior numbers of fascist invaders but were pinned under the weight of enemy fire and eventually pushed back into the village itself.

However with dusk starting to fall and the Sorokapyatka AT gun, now down to just one crewman, taking out a Sd.Kfz.222 (another Hero of the Soviet Union here!), Von Krähe realised he was not going to able to complete his mission despite the crumbling Soviet defence and would have to try again another day (assuming he was not sent to a Strafbatallion for his incompetent failings).

Another fun IABSM game owing a lot to Phil's running of it and Jenny's lovely terrain, it went down well at Winter Wonder Lard V and subsequent Lardy Days were P&J ran it - hopefully I'll get a chance to play the follow up 'Return to Starmaskaya' at some point and remove all traces of the fascist from the Motherland!

Steve


Defence of Calais 1940 fought between the same group of players including 1st Corps, Jerry Cook , Mark Wilson , Vince Noir , and Chris ‘Fusilier’ Keeber.

A very close game with the British Carrier Plattoon and armour creating high casualties to the Germans whilst at Calais the British defenders stood to at their defences and created a narrow British victory allowing British Forces to slip away to fight another day . 🫡

A great weekend , exciting games, awesome kit and fellowship. All of this possible because of our ancestors bravery and their sacrifice. We Will Remember.

Mercian Miniatures


My second game at this year’s Operation Market Larden was a superb looking I Ain’t Been Shot Mum battle set during Operation Barbarossa, the German invasion of the Soviet Union in June 1941.

I would play the Soviets, advancing onto the table to expel the Germans from Starmerskaya, securing the two bridges over the river in the process.

My plan was fairly simple. With three companies of infantry at my disposal, I decided to advance forward on three mutually supporting axies: left up the railway line, right up the road, and then threading their way through the fields in the centre.

I had two units of armour: a very weak unit of three T-26’s and, later on, five T-28s. The T-26s would also advance along the railway line, and we’d see where the T-28s were most needed when they eventually arrived.

The plan was to advance quickly forward until the infantry made contact, then bring up the armour to help, with each column free to help the others if required. I also wanted to get my one decent 75mm tank gun into a position where it could shoot at anything coming over a bridge.

The first action was on the left hand side of the field, near the railway tracks. #1 Platoon advanced forward quickly, supported by my single T-26 with a proper gun, and ran into a German recce section of three armoured cars.

A shot from the T-26 blew one apart, with another being close enough to get damaged as well. My infantry then swarmed the armoured cars and dispatched them and/or their occupants with grenades and sticky bombs. The only fly in the ointment was that a shot from one armoured car knocked the track off the T-26 so that although it was still operational, it couldn’t move.

Next contact was in the centre, where #2 platoon ran into a strong German position in the town square: a platoon of infantry and a couple of MMGs.

This proved a tough nut to crack, with one squad taking significant casualties (enough to send them flying from the field) before troops from #1 platoon, marching to the sound of the guns, arrived on the Germans’ flank and shot them to bits.

Meanwhile, one of my T-28s had arrived, taking position to cover the bridge at the other end of the road. It was lucky that it did, as a German panzer platoon had just started to cross.

A couple of shells from the T-28 winged their way towards the enemy tanks and was lucky enough to not only hit the lead tank but blow it to bits, utterly blocking the bridge. The ‘corpse’ was also still on fire, so its fellow tanks couldn’t even get close enough to shunt it out of the way. That bridge was firmly blocked, and would be for some time. The rest of the German tanks therefore retreated back to their side of the river and began making their way to the other bridge.

Meanwhile, platoons #1 and #2 had finished off the Germans in the main square and kocked out an anti-tank gun ‘guarding’ the central road. This would prove important later in tne game as I had two T-28’s heading towards that road.

The Soivet infantry then wanted to head over to the far road in order to take out the last German pocket of resistance (another anti-tank gun, another platoon of infantry) but couldn’t get across the square as it was still covered by the last of the recce armoured cars that had retreated away from platoon #1’s advance.

This last Sdkfz-222 proved a real pain to take out: I had to wait several turns until a tank arrived and then the 222 took out one of my HMG-armed T-26s. I needed more armour there!

Back on the elft flank, where the German panzers were now trying to cross the other bridge.

Fortunately by this time I had managed to get another two T-28s onto the table, and fire from them and the original T-26 hit and destroyed the lead Panzer IV.

It didn’t blow up, however, so one of the following tanks managed to push it out of the way…only to be hit and destroyed in turn.

There would be no Panzer IV reinforcements for the Germans!

Back to the right, and I was now in a position to send heavier armour up the central road to deal with the Sdkfz-222.

At the same time, my lead T-28 was now exchanging fire with a German anti-tank gun covering the road, only really surviving because of the intervention of the Soviet airforce who had pinned the gun crew with a strafing attack.

A T-28 then arrived in the main square and blew the German armoured car to bits.

This allowed platoon #1 to advance towards the bridges, and platoon #2 to both advance forward and help suppress the last pocket of German resistance around the anti-tank gun on the right. With another T-28 to help, that wouldn’t be taking very long!

Mindful of the fact that I needed to secure the bridges, I now had infantry from platoons #1 and #2 on the river road, shooting up the last German infantry platoon who had arrived from the right hand bridge after a hair-raising traverse past the burning panzer.

Soon they would be supported by the T-28’s who were just turning onto the river road from the left, past the smoking remains of three Panzer IVs.

Job done!

A great game of IABSM superbly set up and run by Phil and Jen.

I did have the luck of the devil in my initial firing, blowing armoured cars and tanks to pieces with ease, but I also succeeded by keeping the initiative and making my opponent react to my movements rather than vice versa. As ex-army man himself, he was kind enough to say that I had delivered a masterclass in how to play IABSM.

My thanks to everyone for the game: a cracking afternoon’s wargaming.


Brilliant test of the rules as loads of kit in table.

Massive effort by the boys at 1st Corps . Massively appreciated. Great fun as always.

Mercian Miniatures