Gallery by Steve Collins


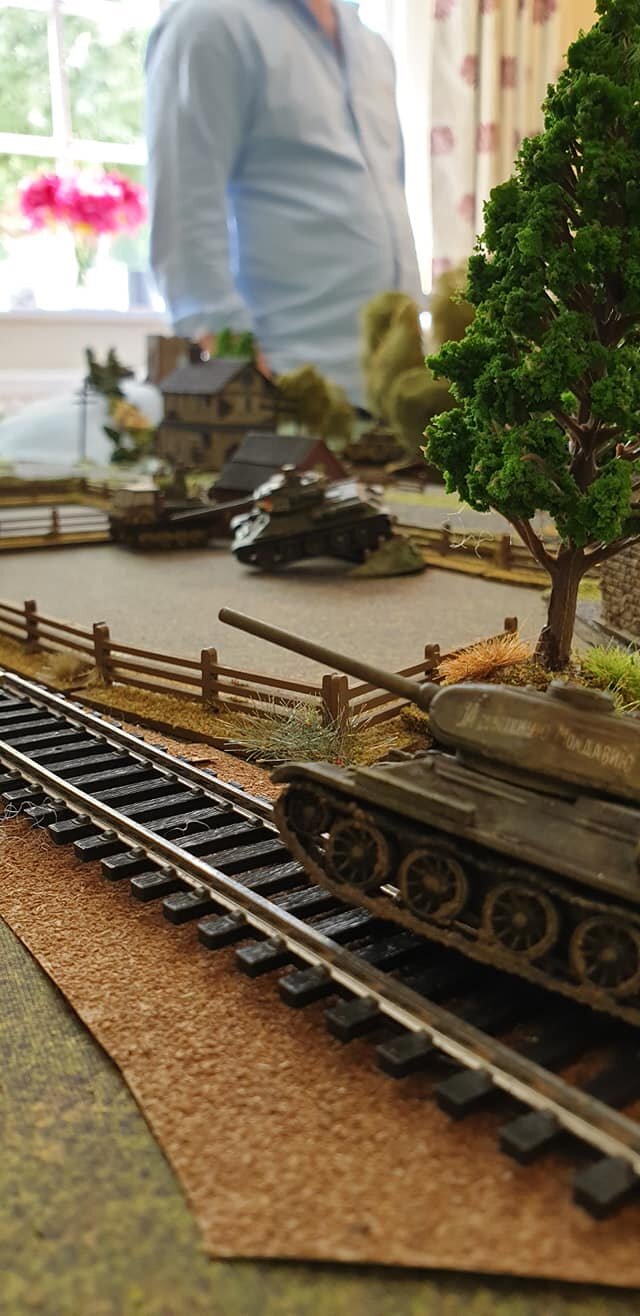
The Battle for Mount Ormel, Falaise Pocket, August 20, 1944
An epic game played outdoors this past Saturday on an unexpectedly warm November day here in Vermont. Outdoors on my patio, super safe from COVID!

In my backyard in South Burlington, Vermont. Brett McLay helped me command the Germans while Steve Smith and Mason Roberson commanded the Poles.

Available through skirmishcampaigns.com
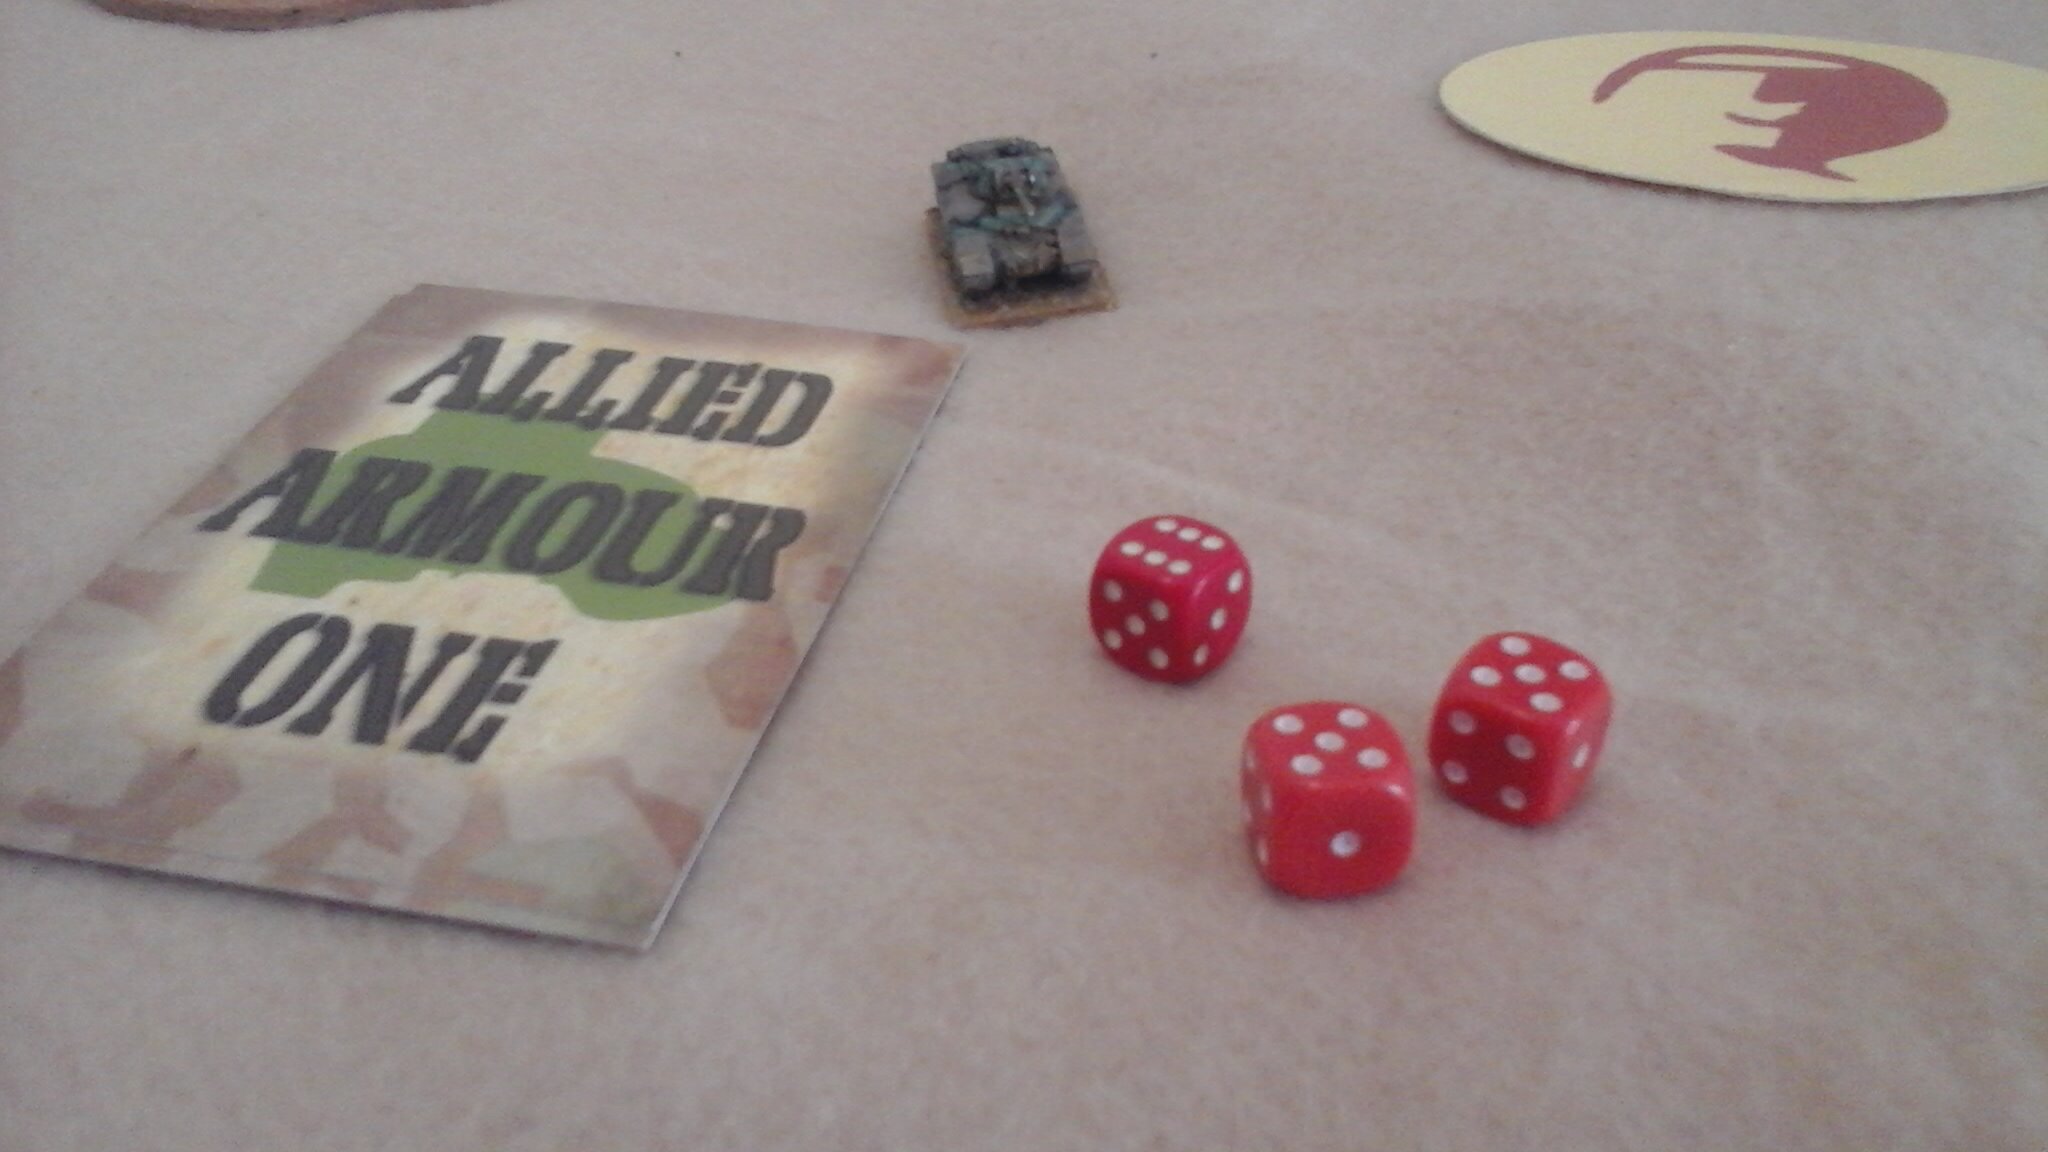
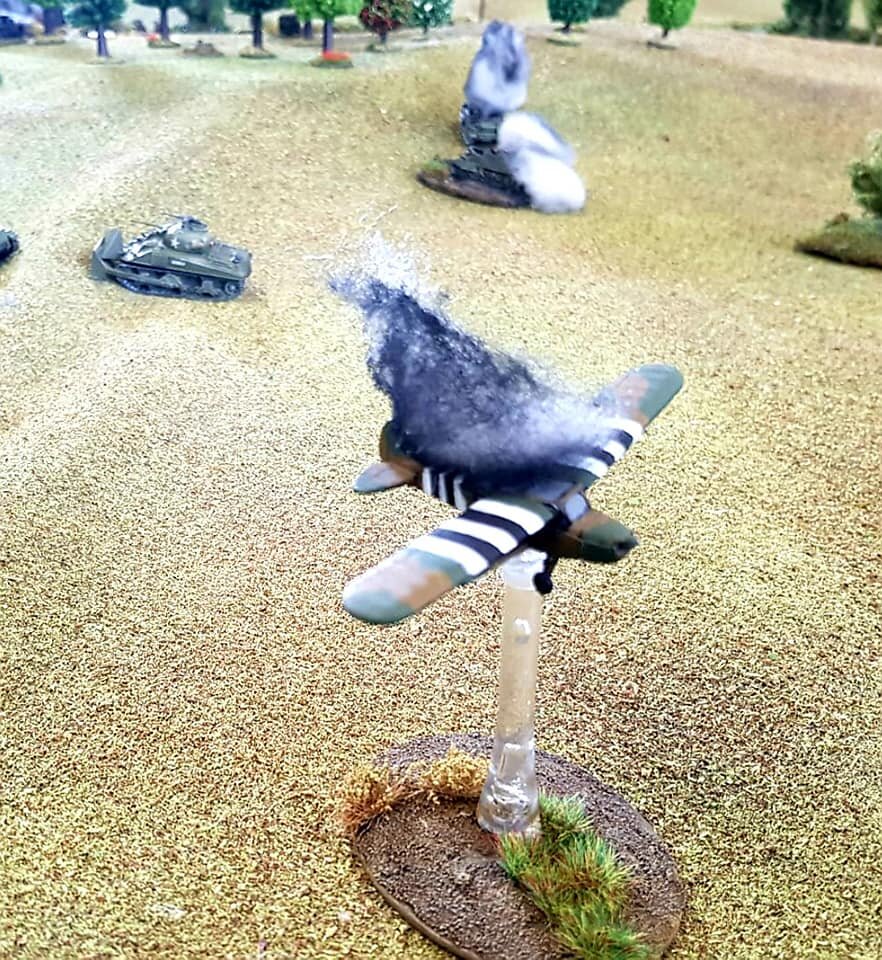
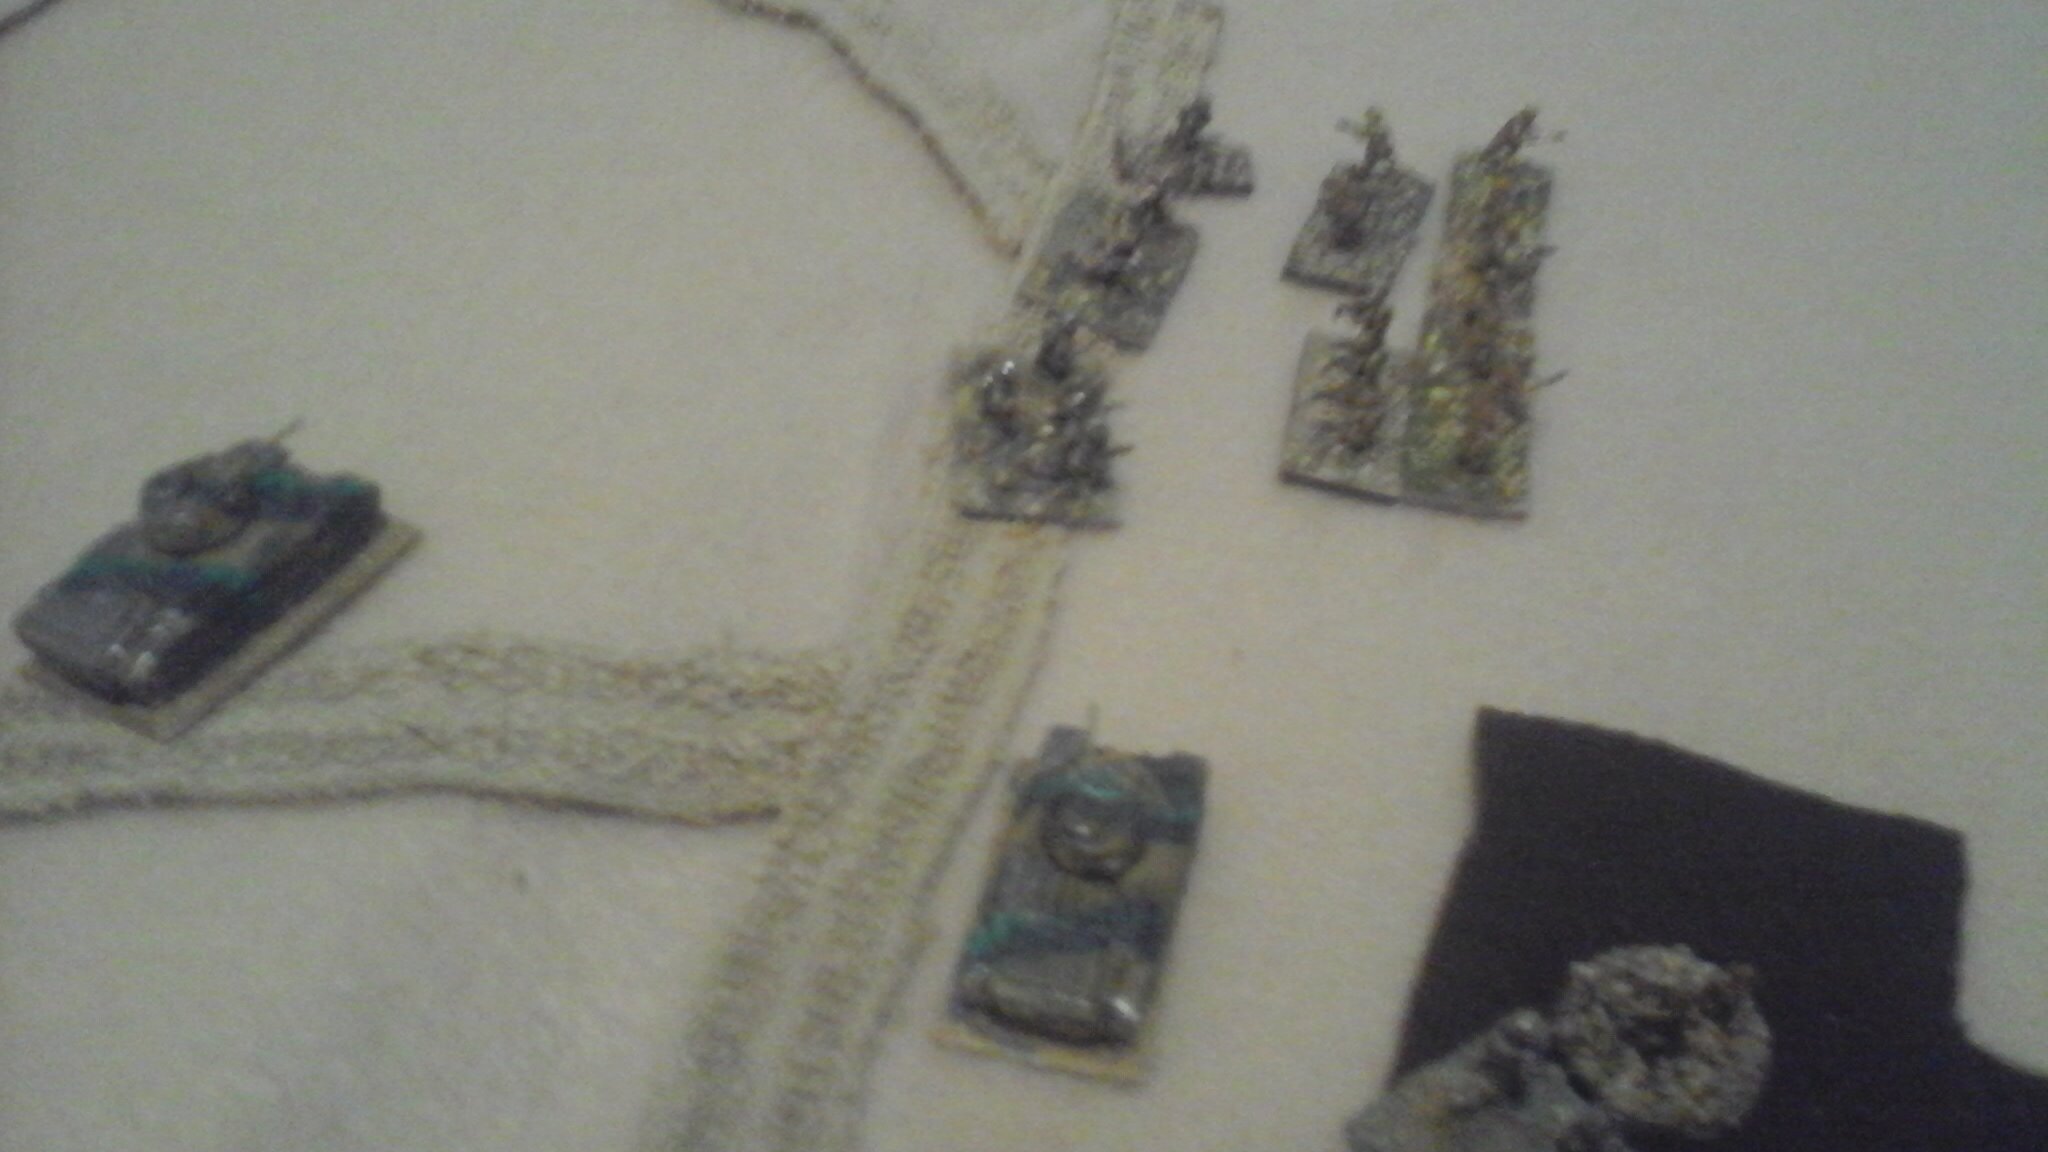
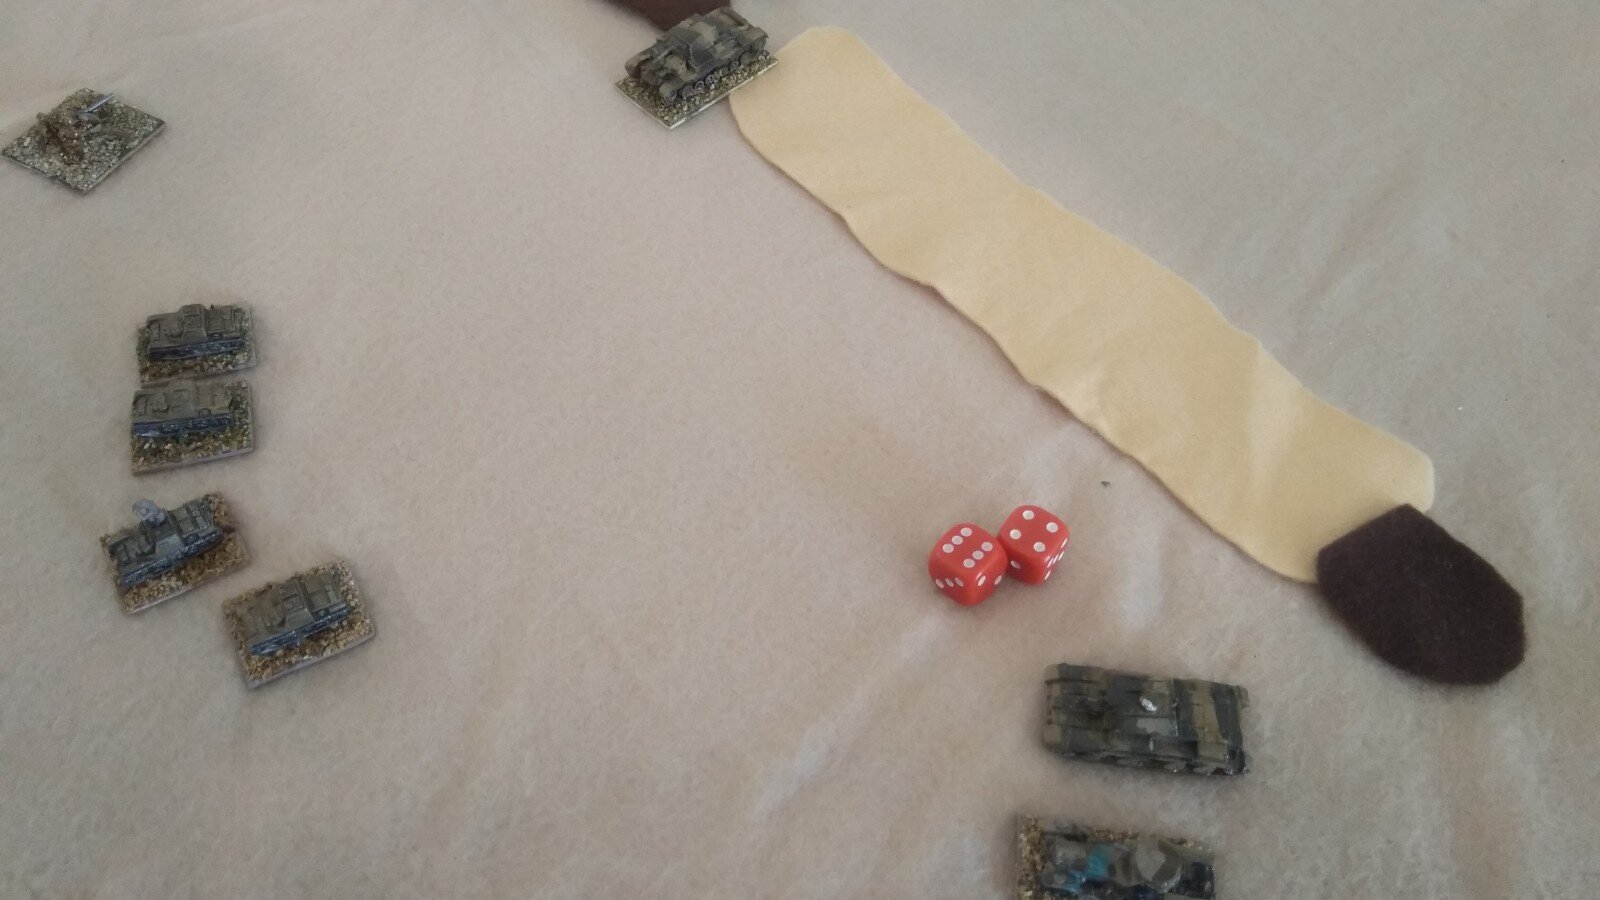
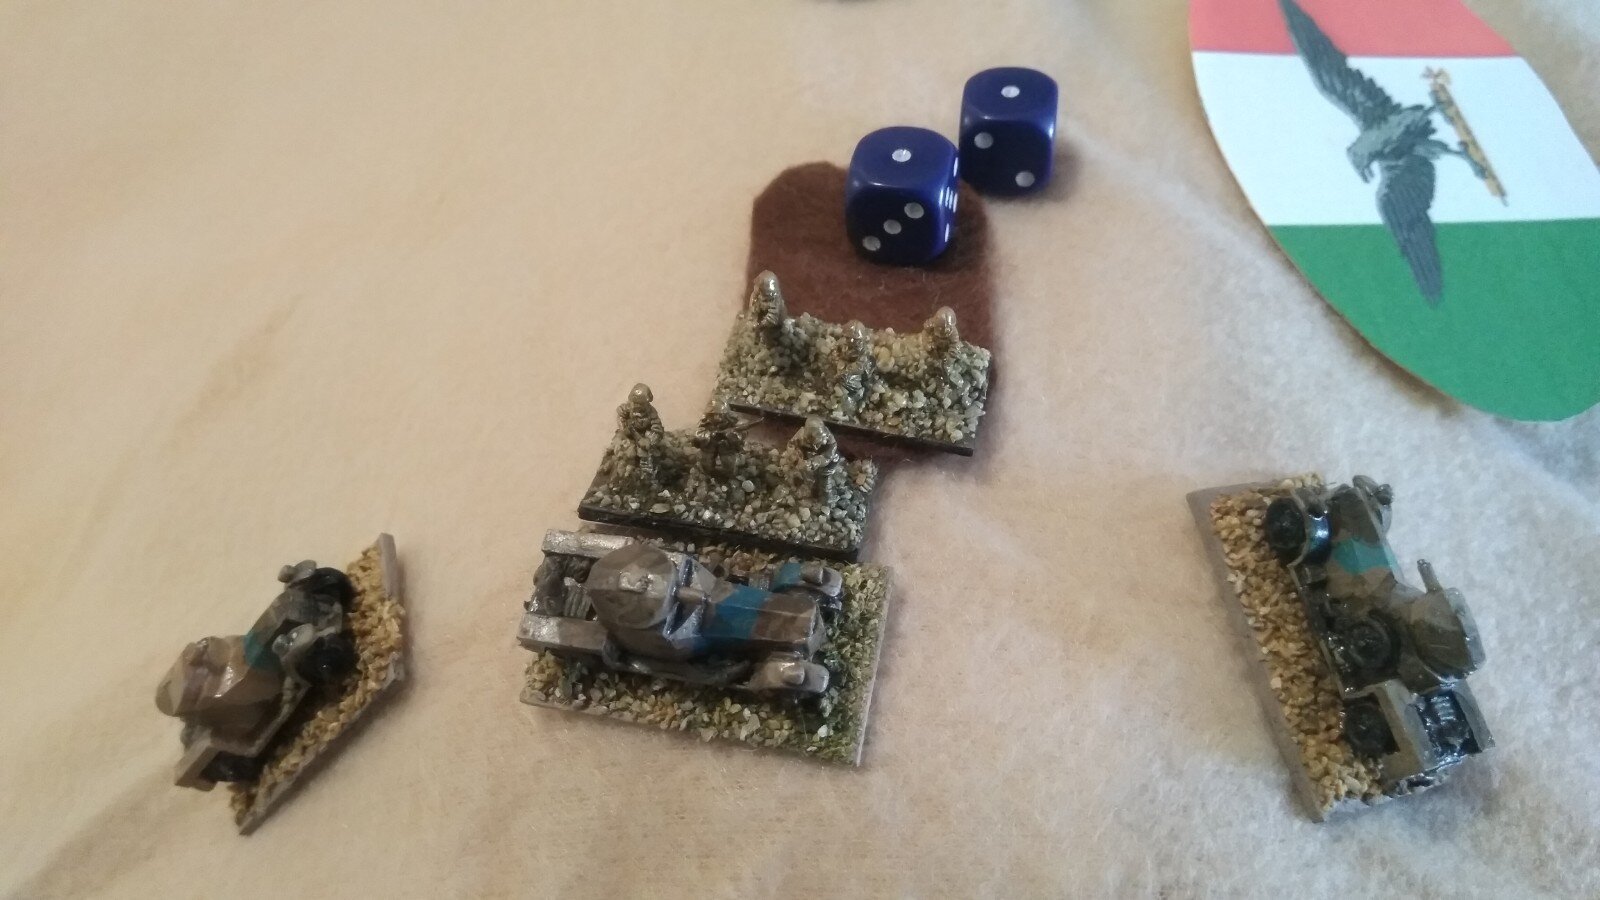
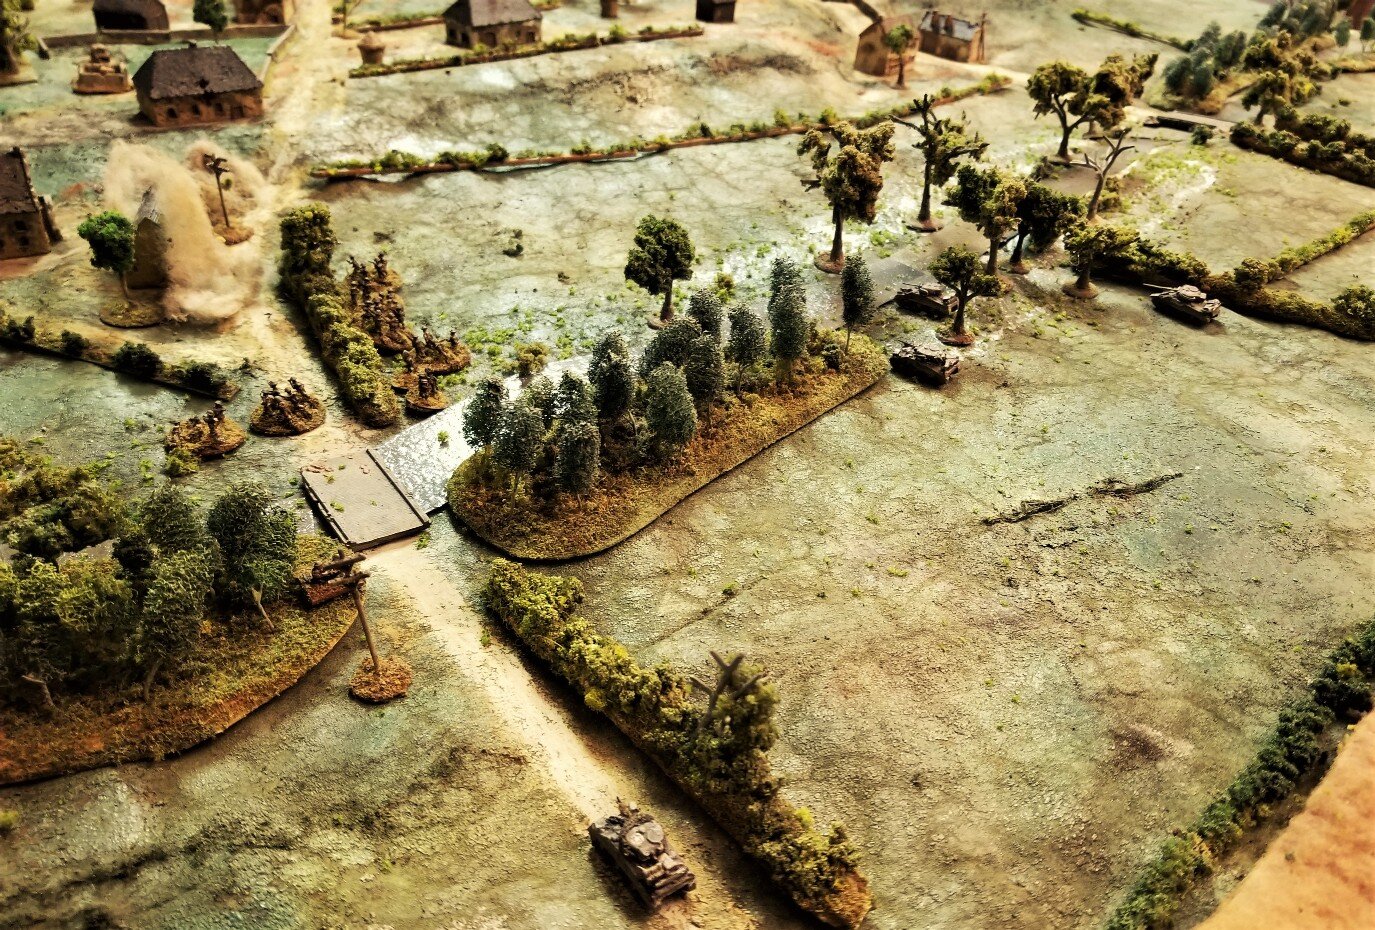
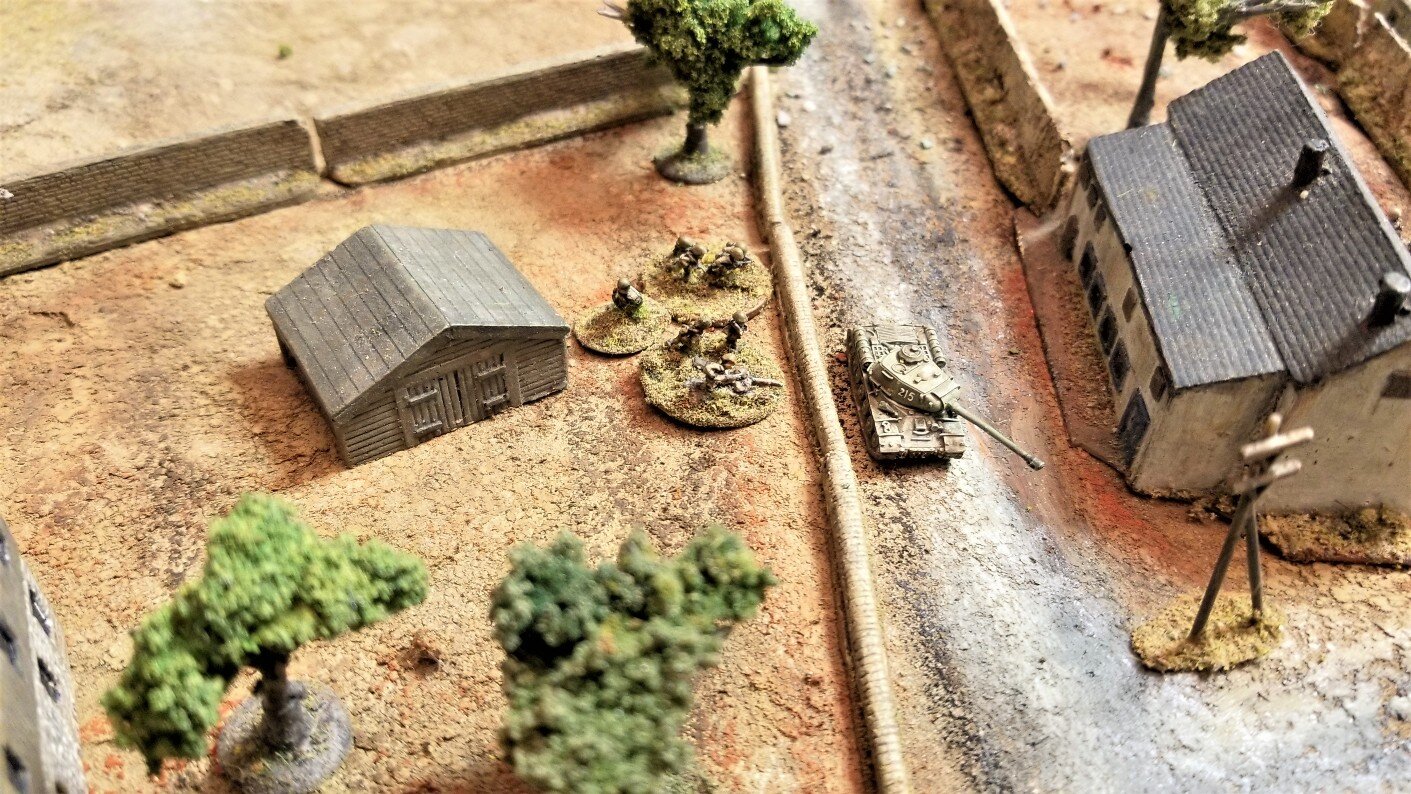
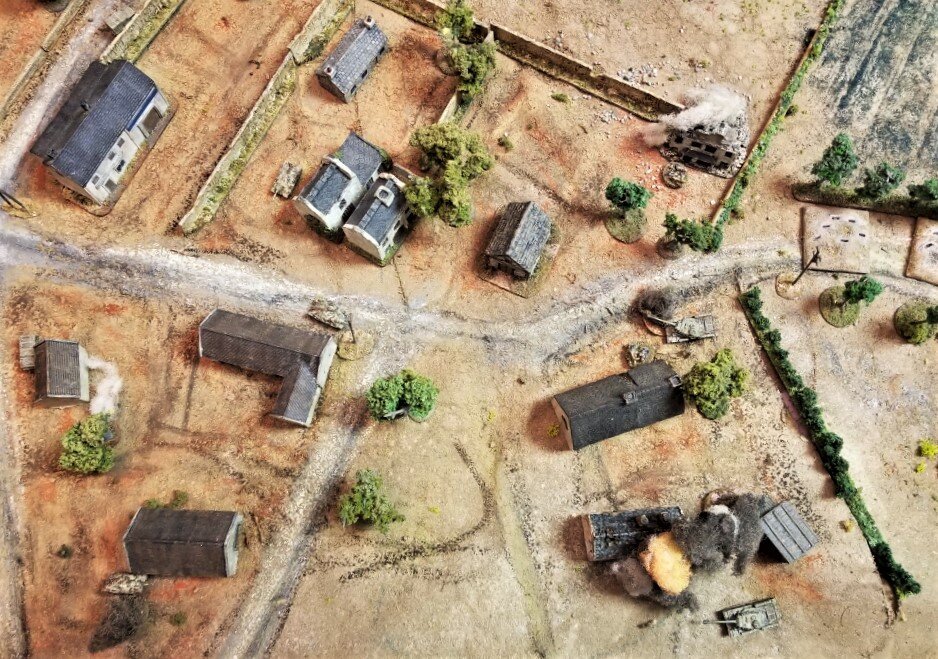
Scenario from Falaise Firestorm by Skirmish Campaigns. Translated to three platoons of 2nd SS Panzergrenadiers plus two PzIV-Hs and one panther vs two platoons of Polish Infantry plus HQ squad, PIAT team and one 6-pounder, two Sherman M4s and one Sherman firefly. Germans had to exit at least figures or tanks off the board for victory.
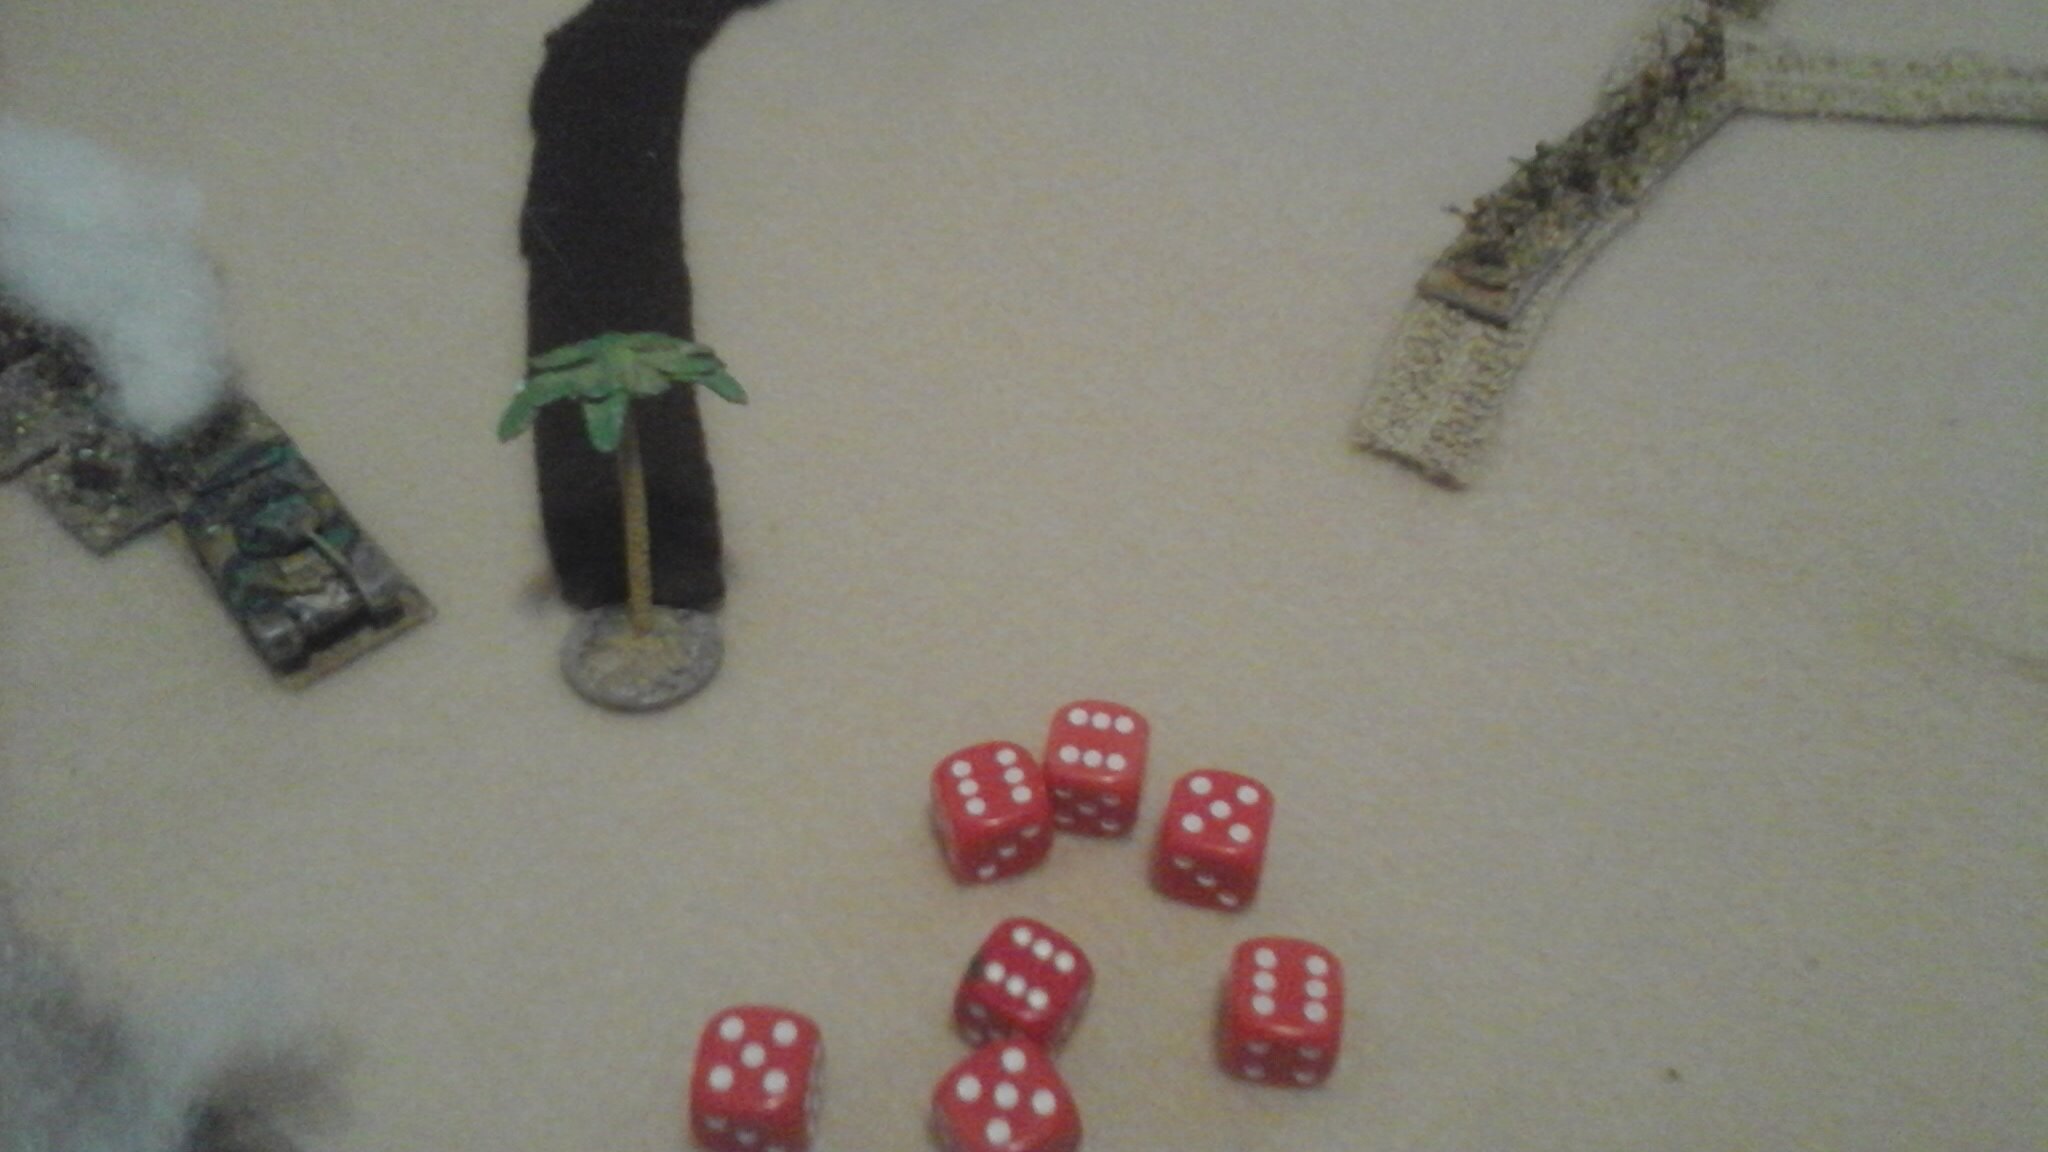
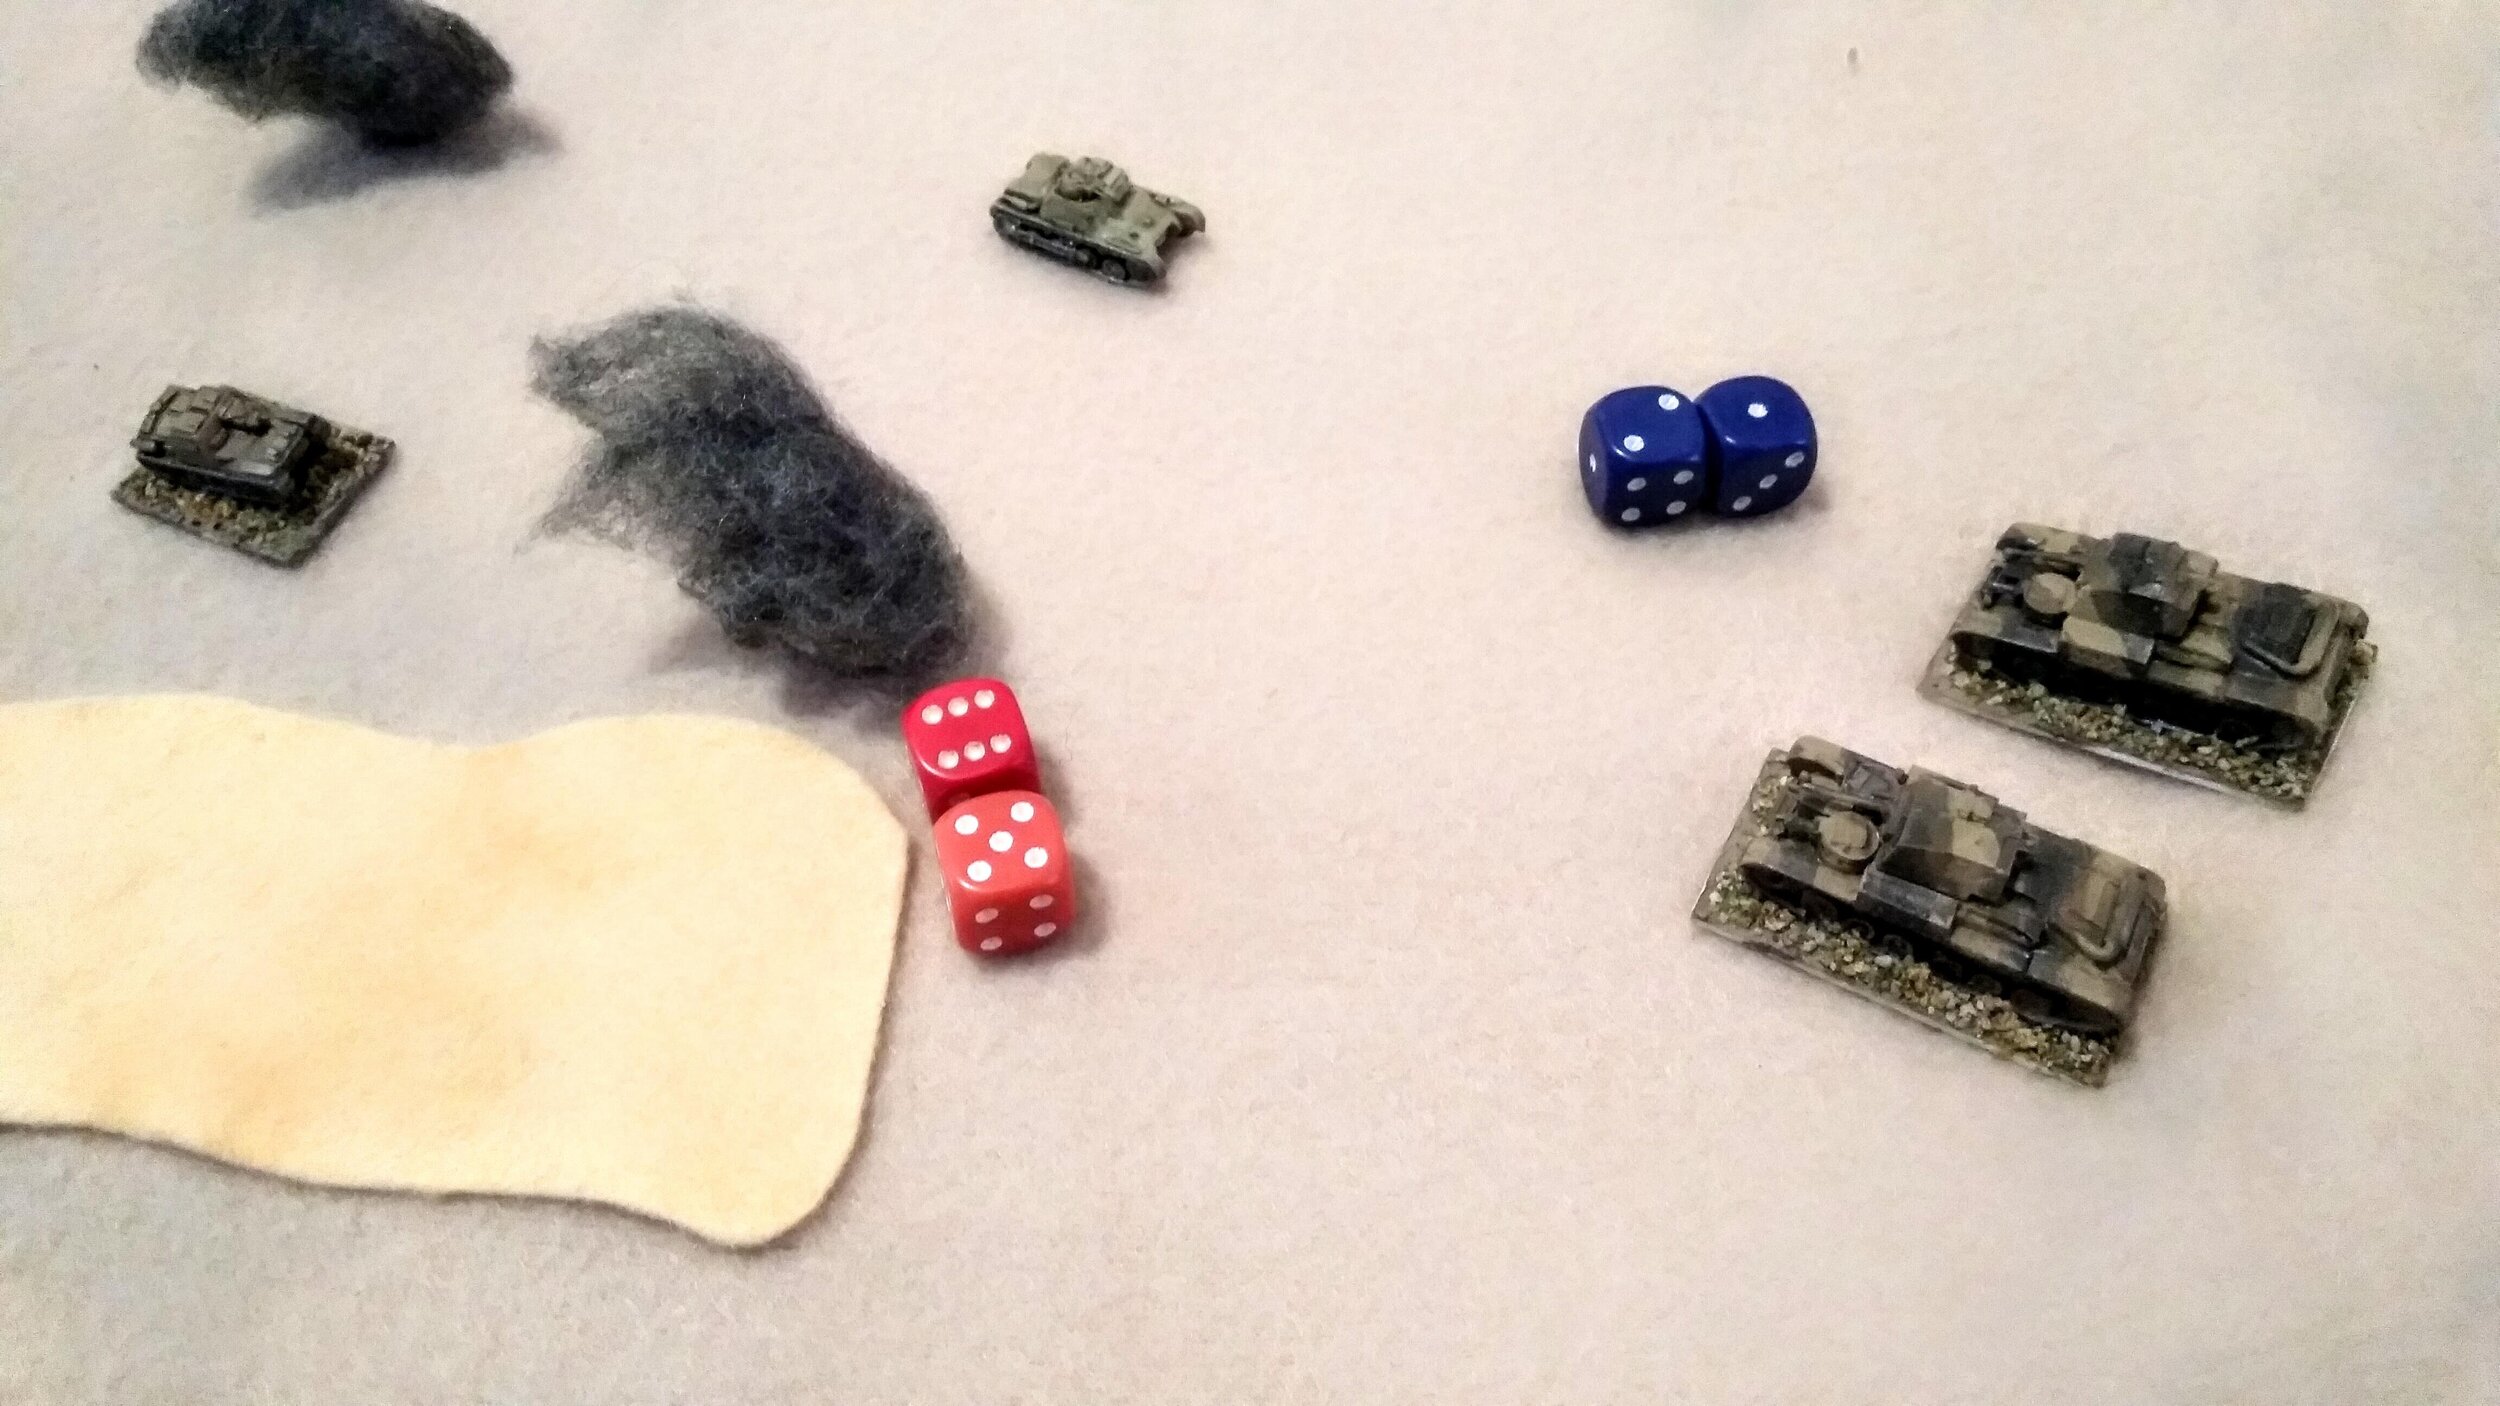
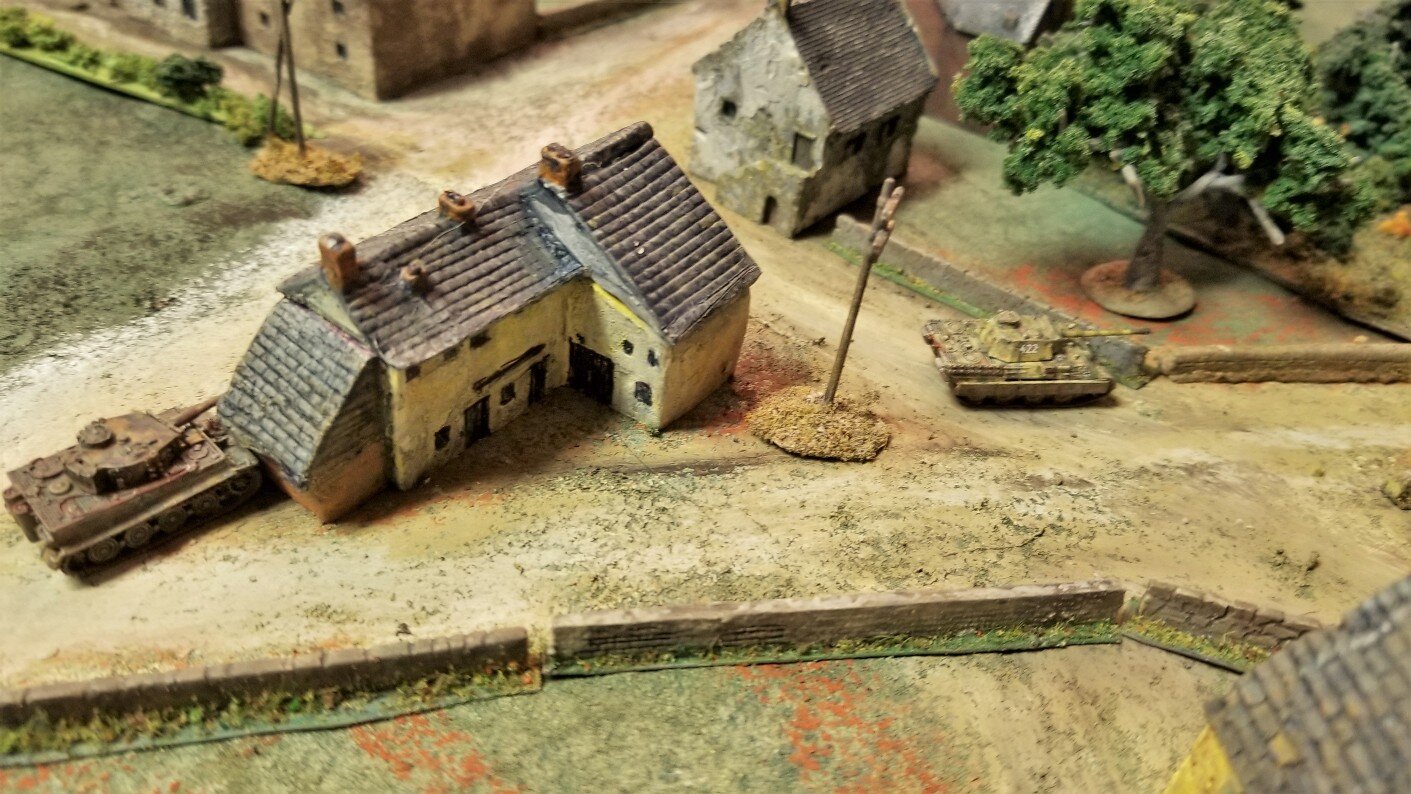
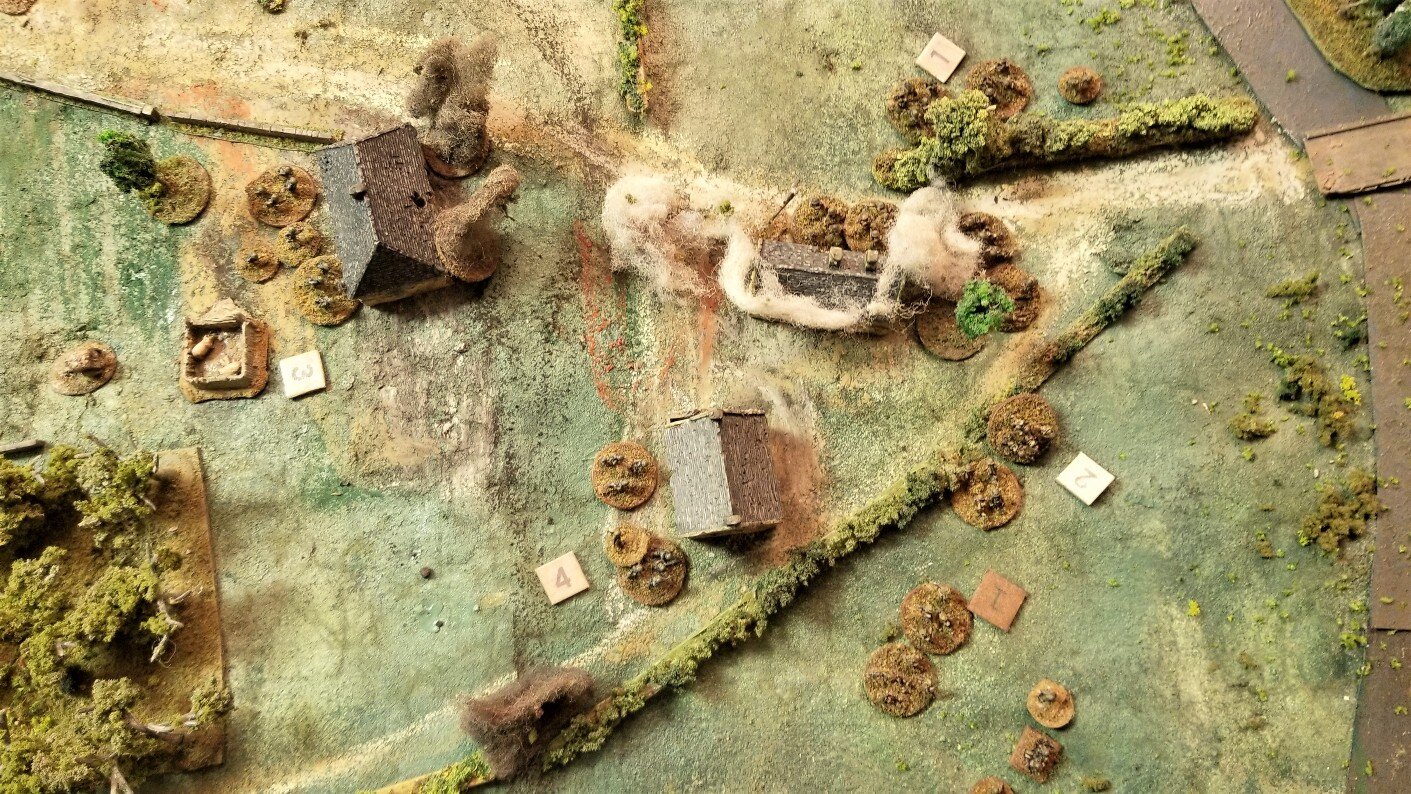
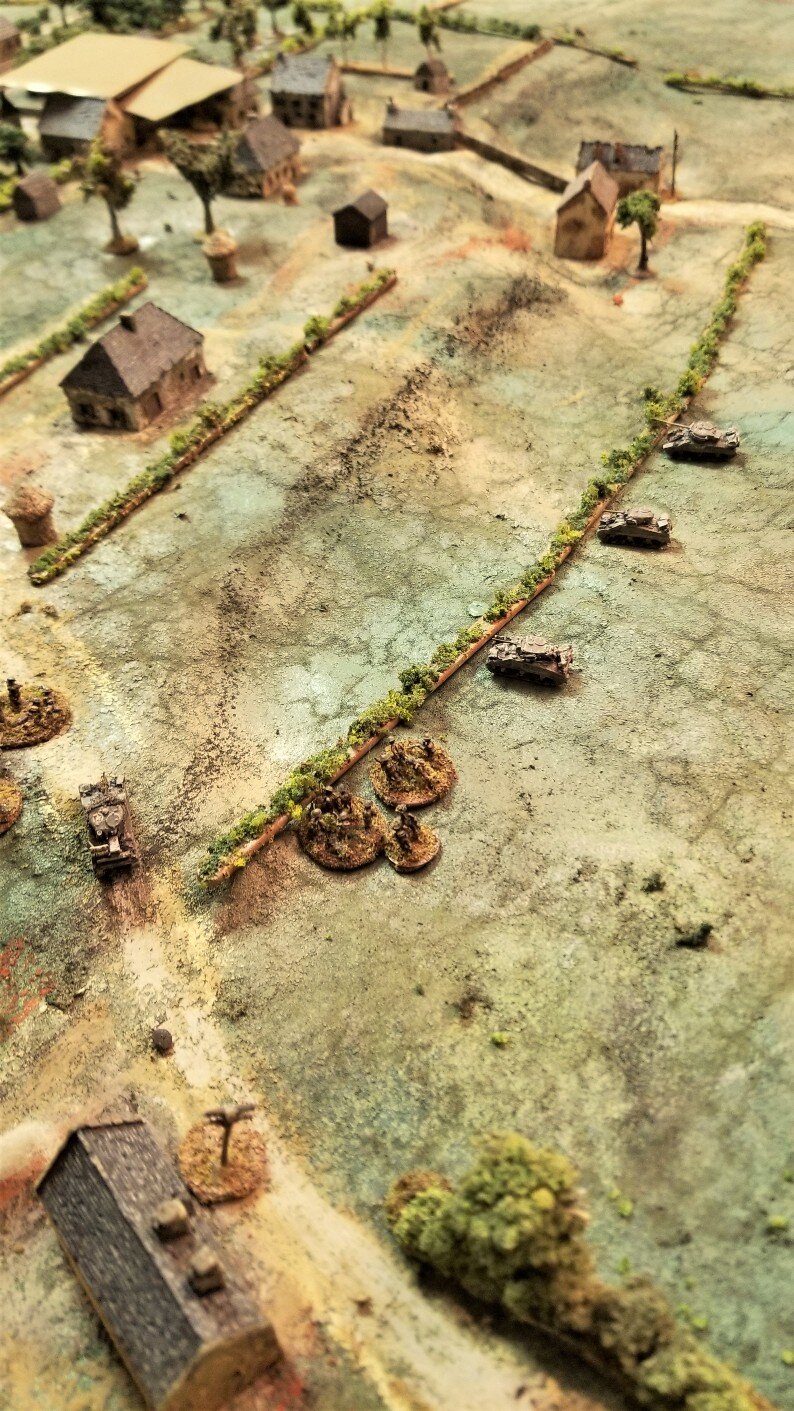
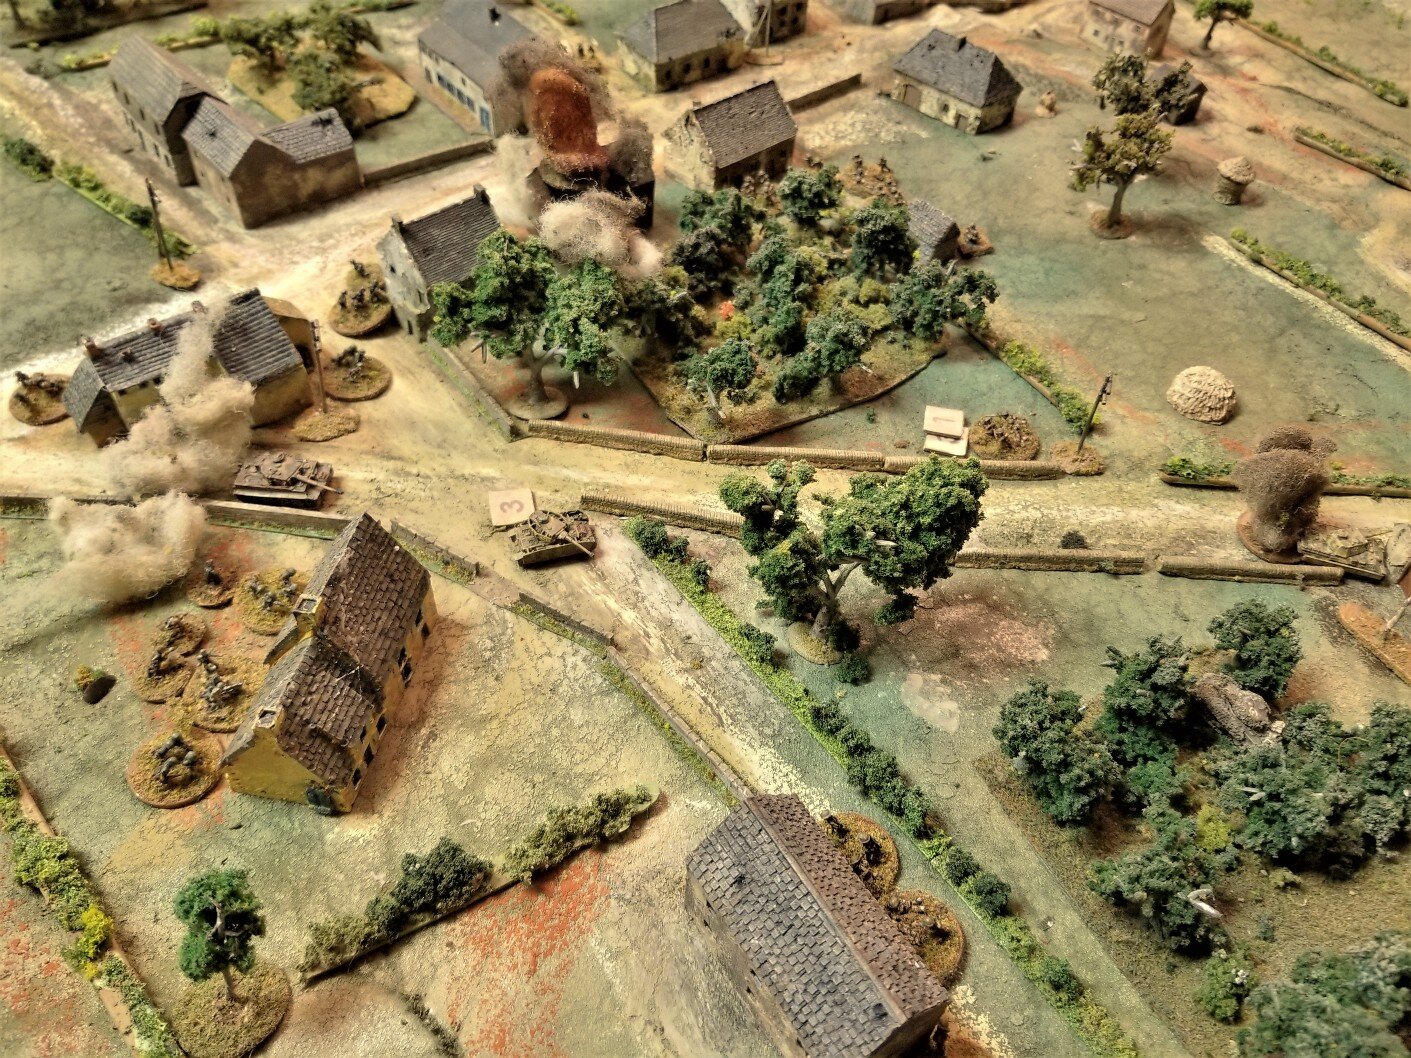
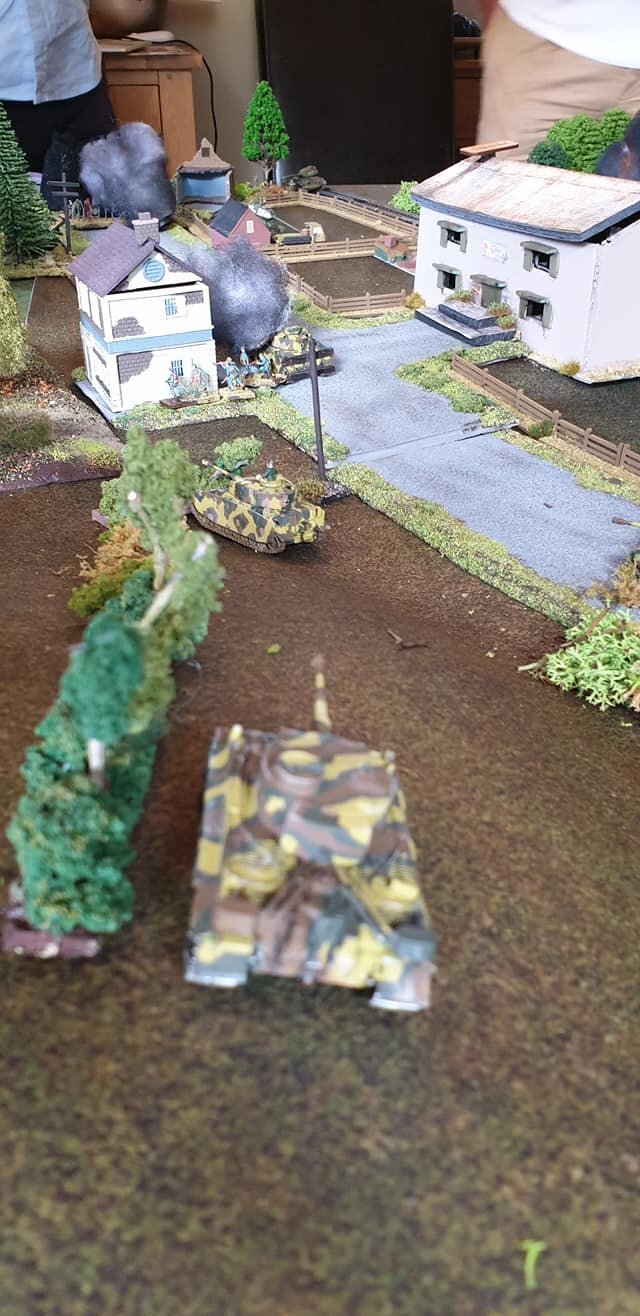
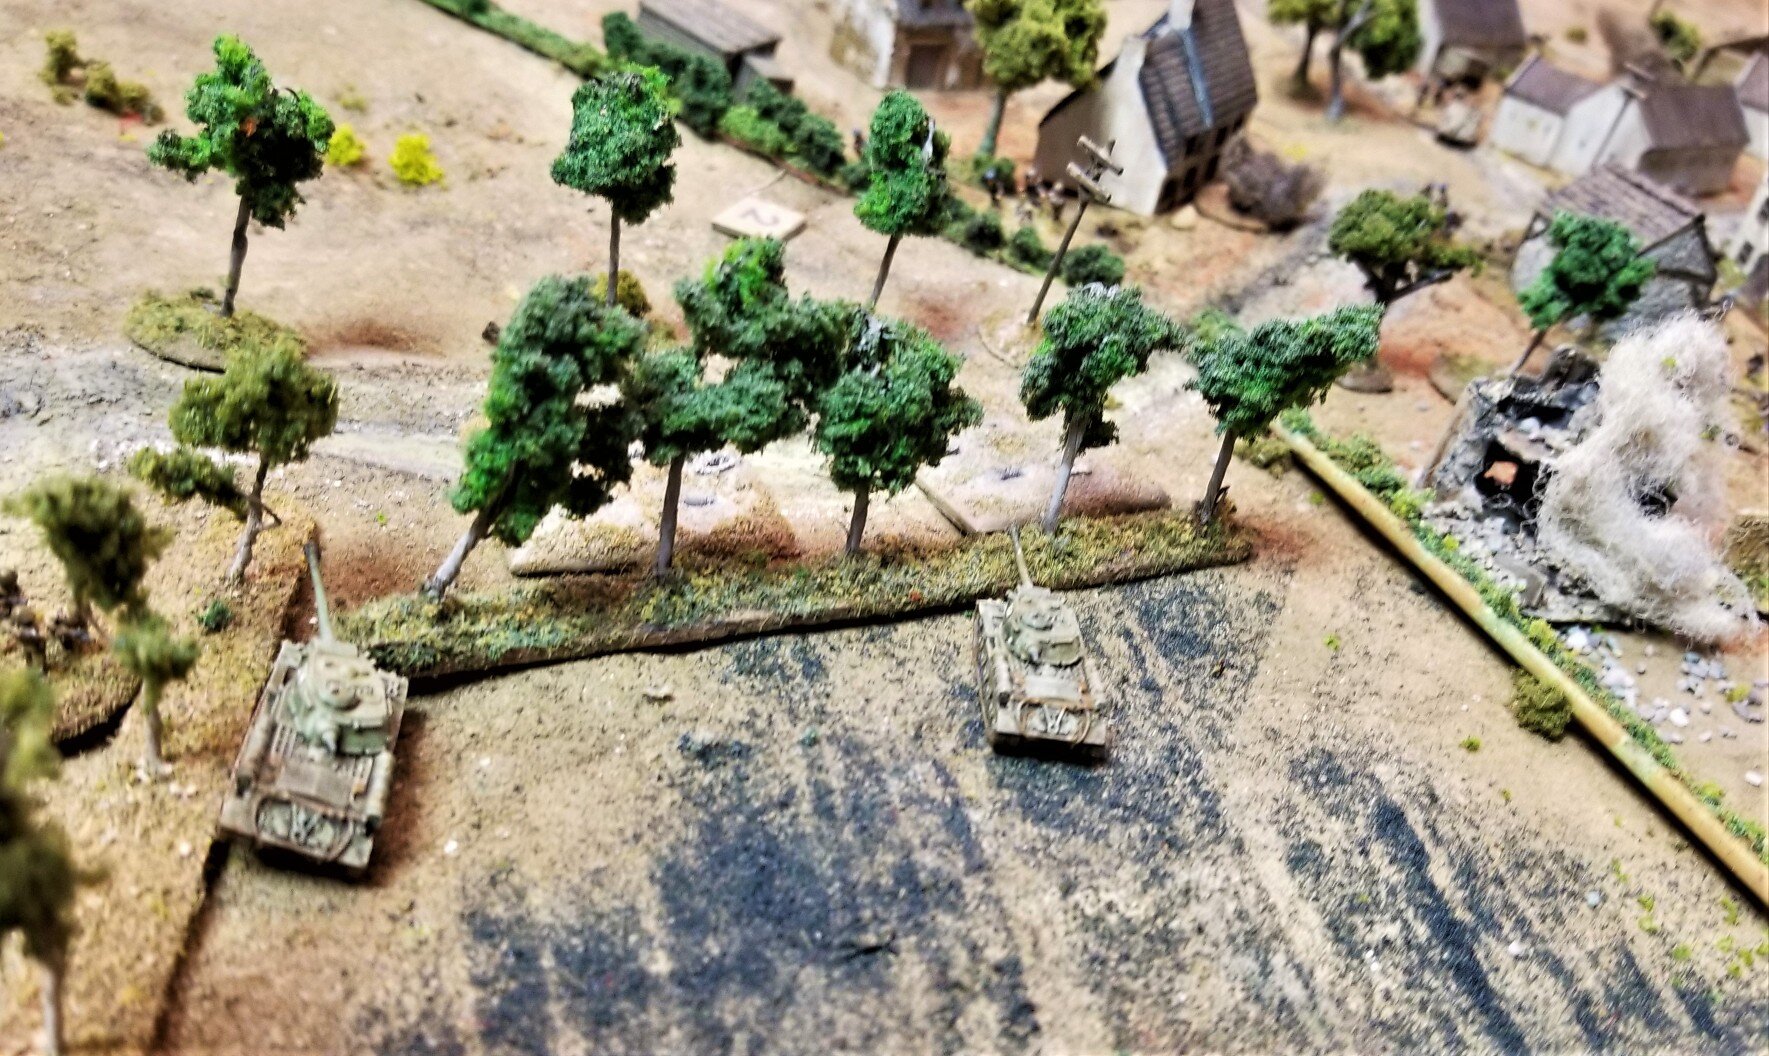
On German left, two platoons attacked hard on their left flank and after taking some hits were able to gain the woods and drive off one platoon of Poles. In German center, one Pz IV was brewed up and the other tried to flee after its main gun was knocked out. German Panther on right able to draw attention of two M4s while 3rd full platoon (on Blind most of game) was able to exit the board.
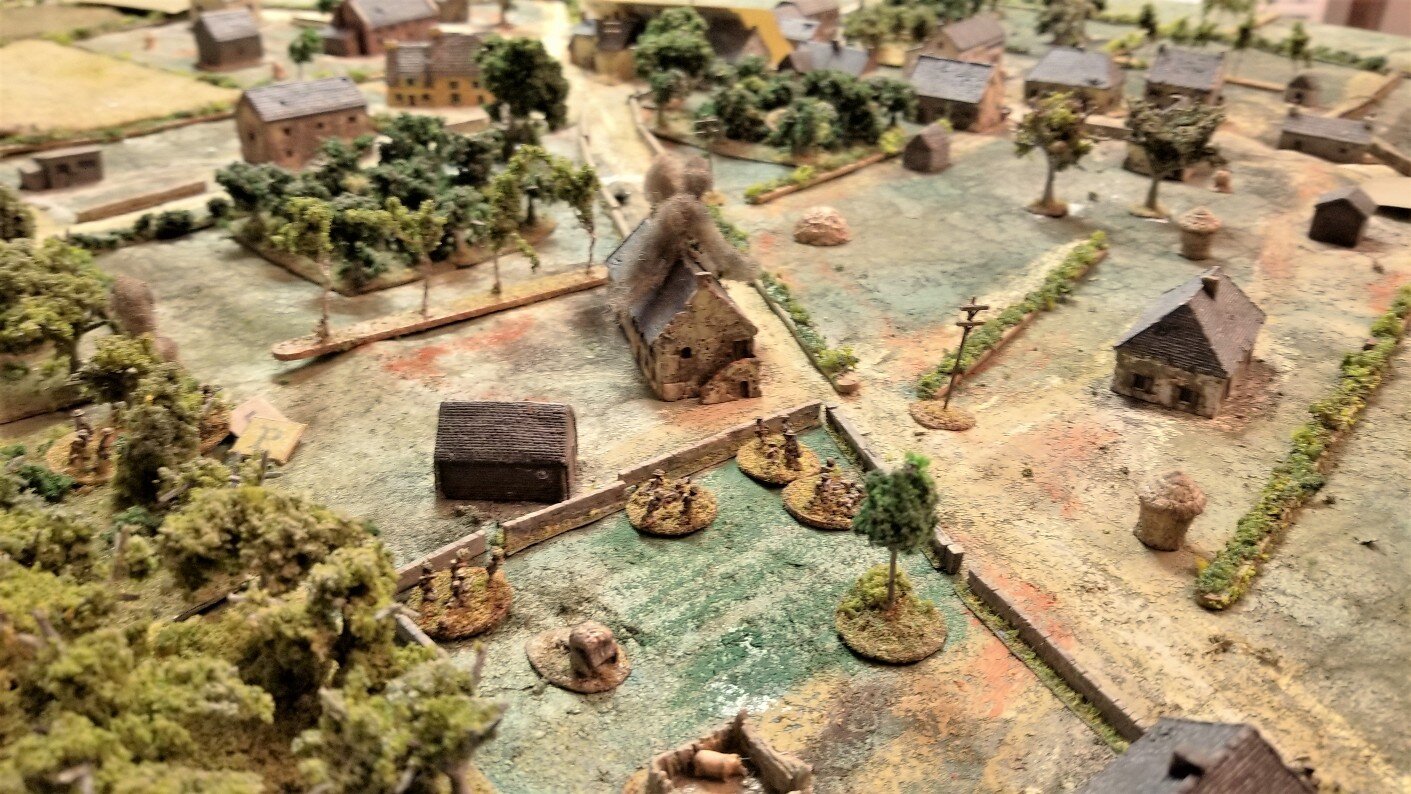
On account of darkness we called the game and on the last turn, on the draw of the Tea Break card we resolved simultaneous tank duel. A sherman and PIAT team engaged the Panther but his thick armor was able to shrug off the hits. On the last roll of the game the Panther brewed up the Sherman. Great game!
Love the detail in the Skirmish Campaigns books. I highly recommend them. See photos for detailed AAR.
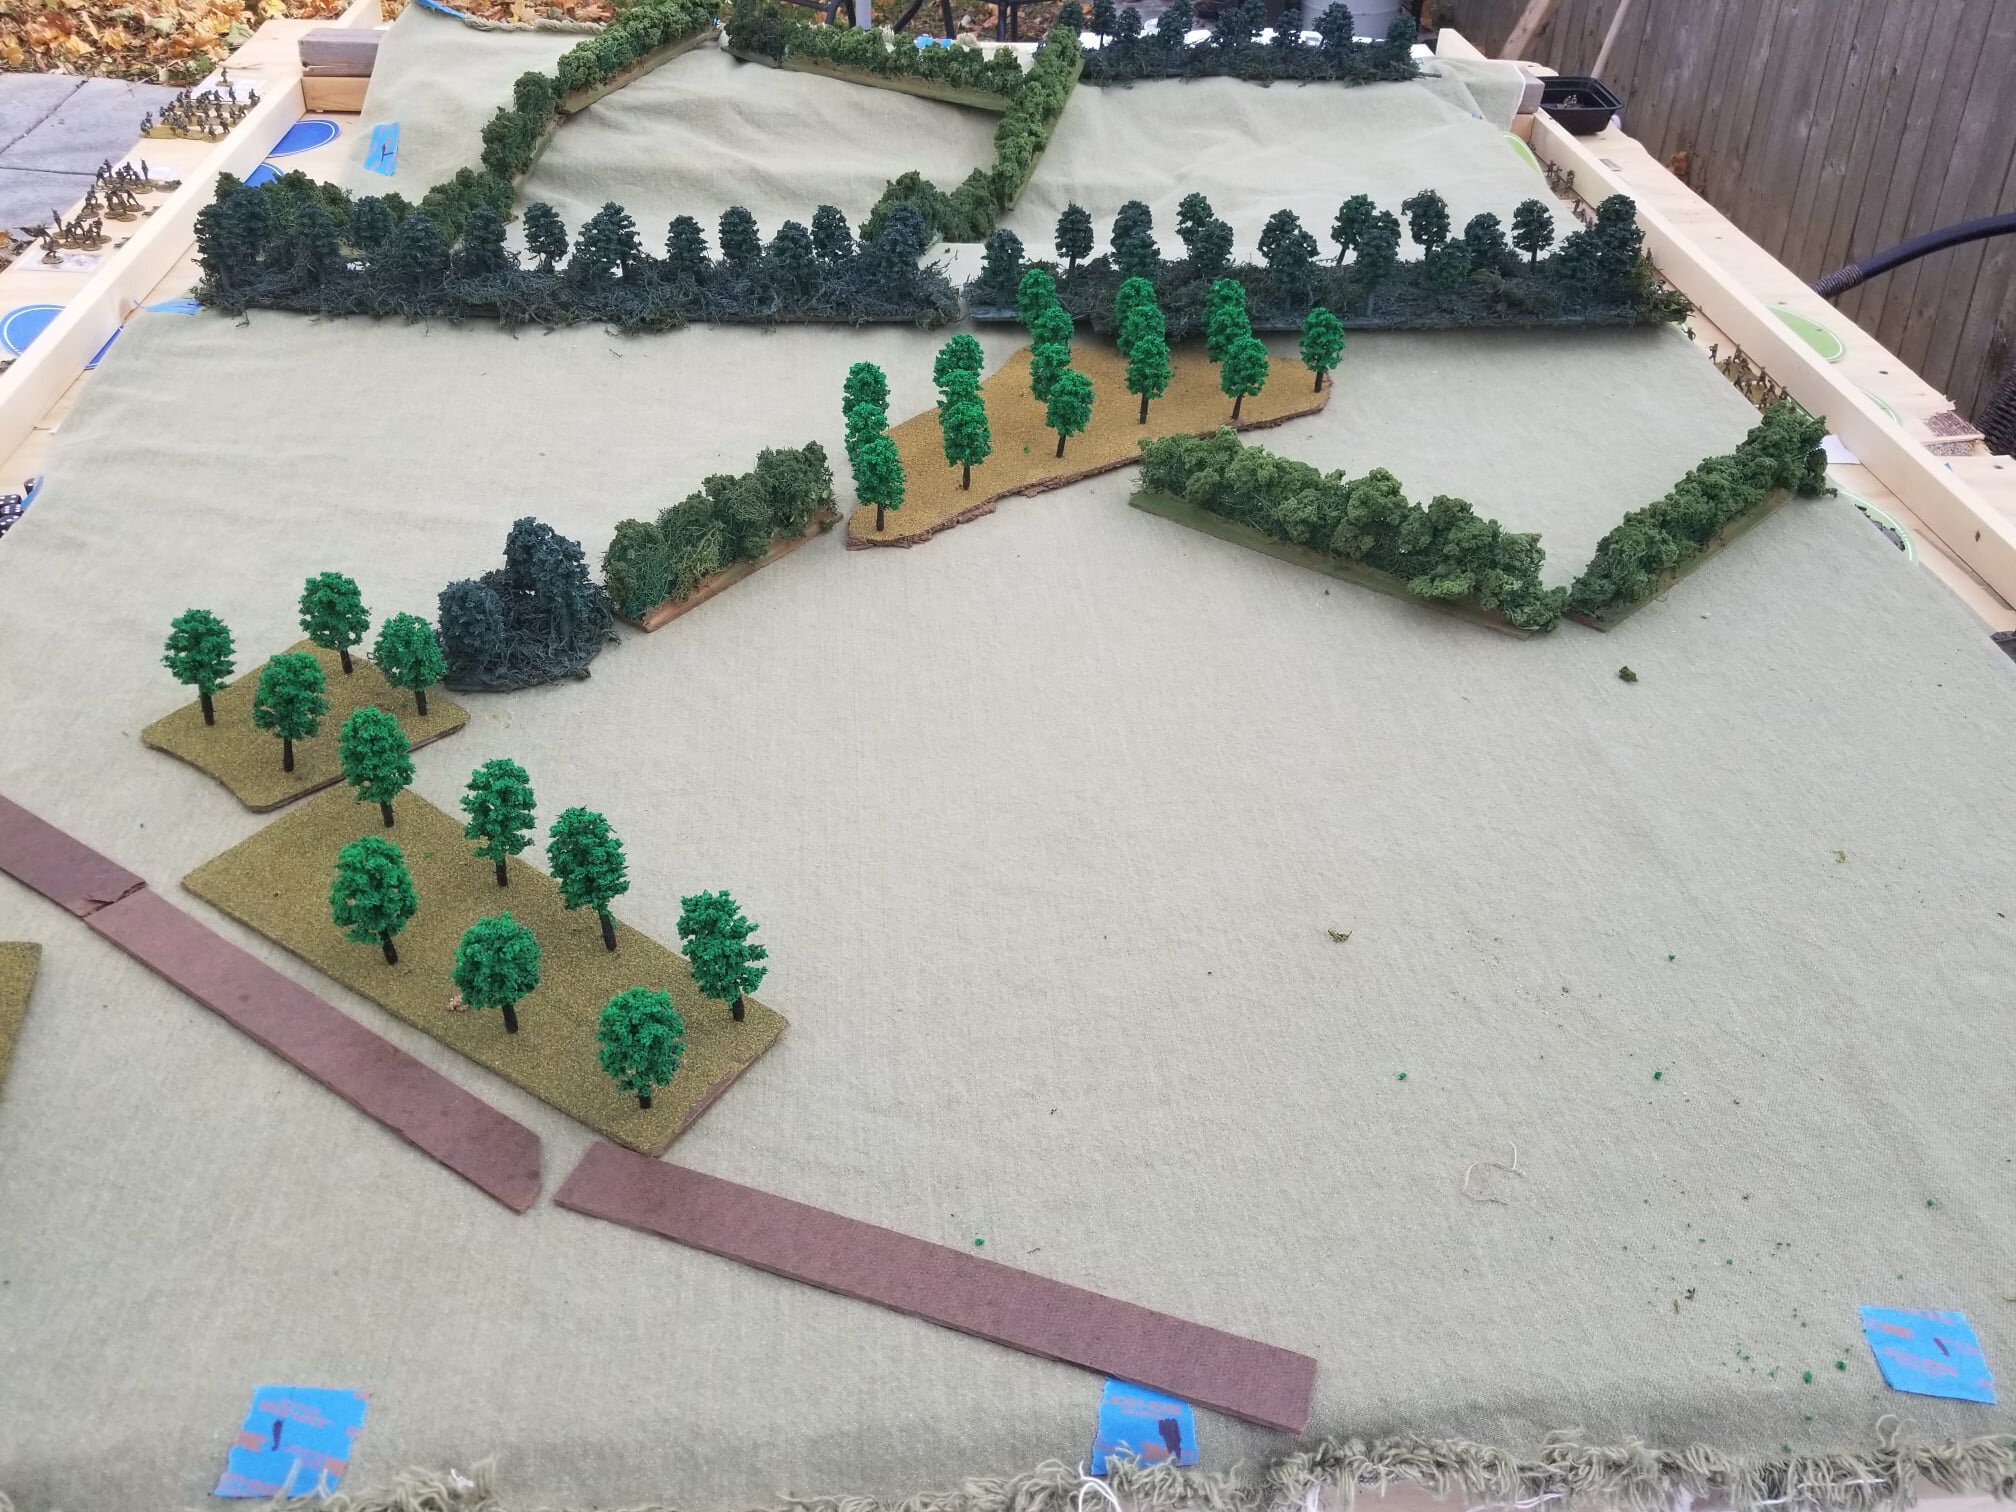
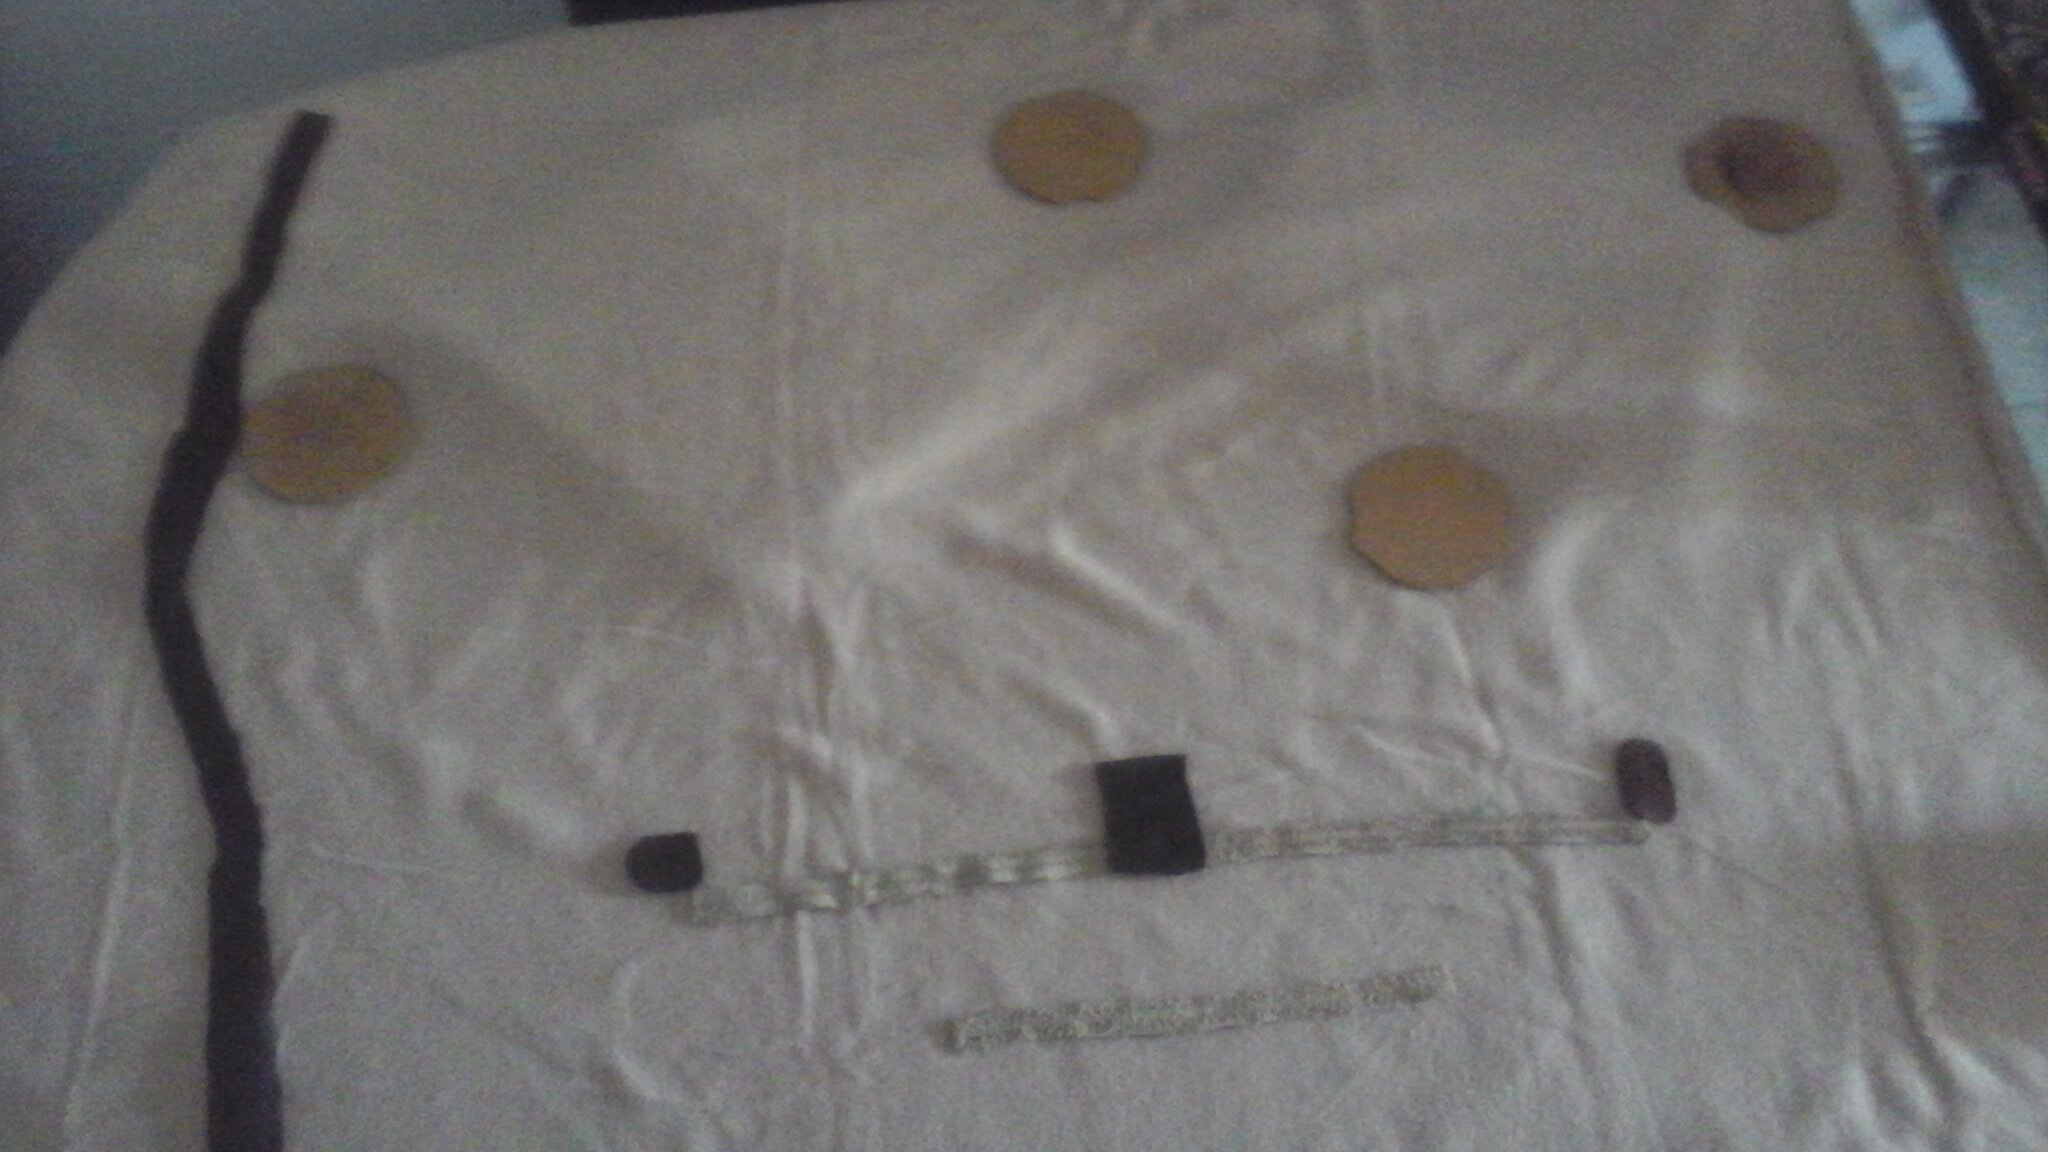
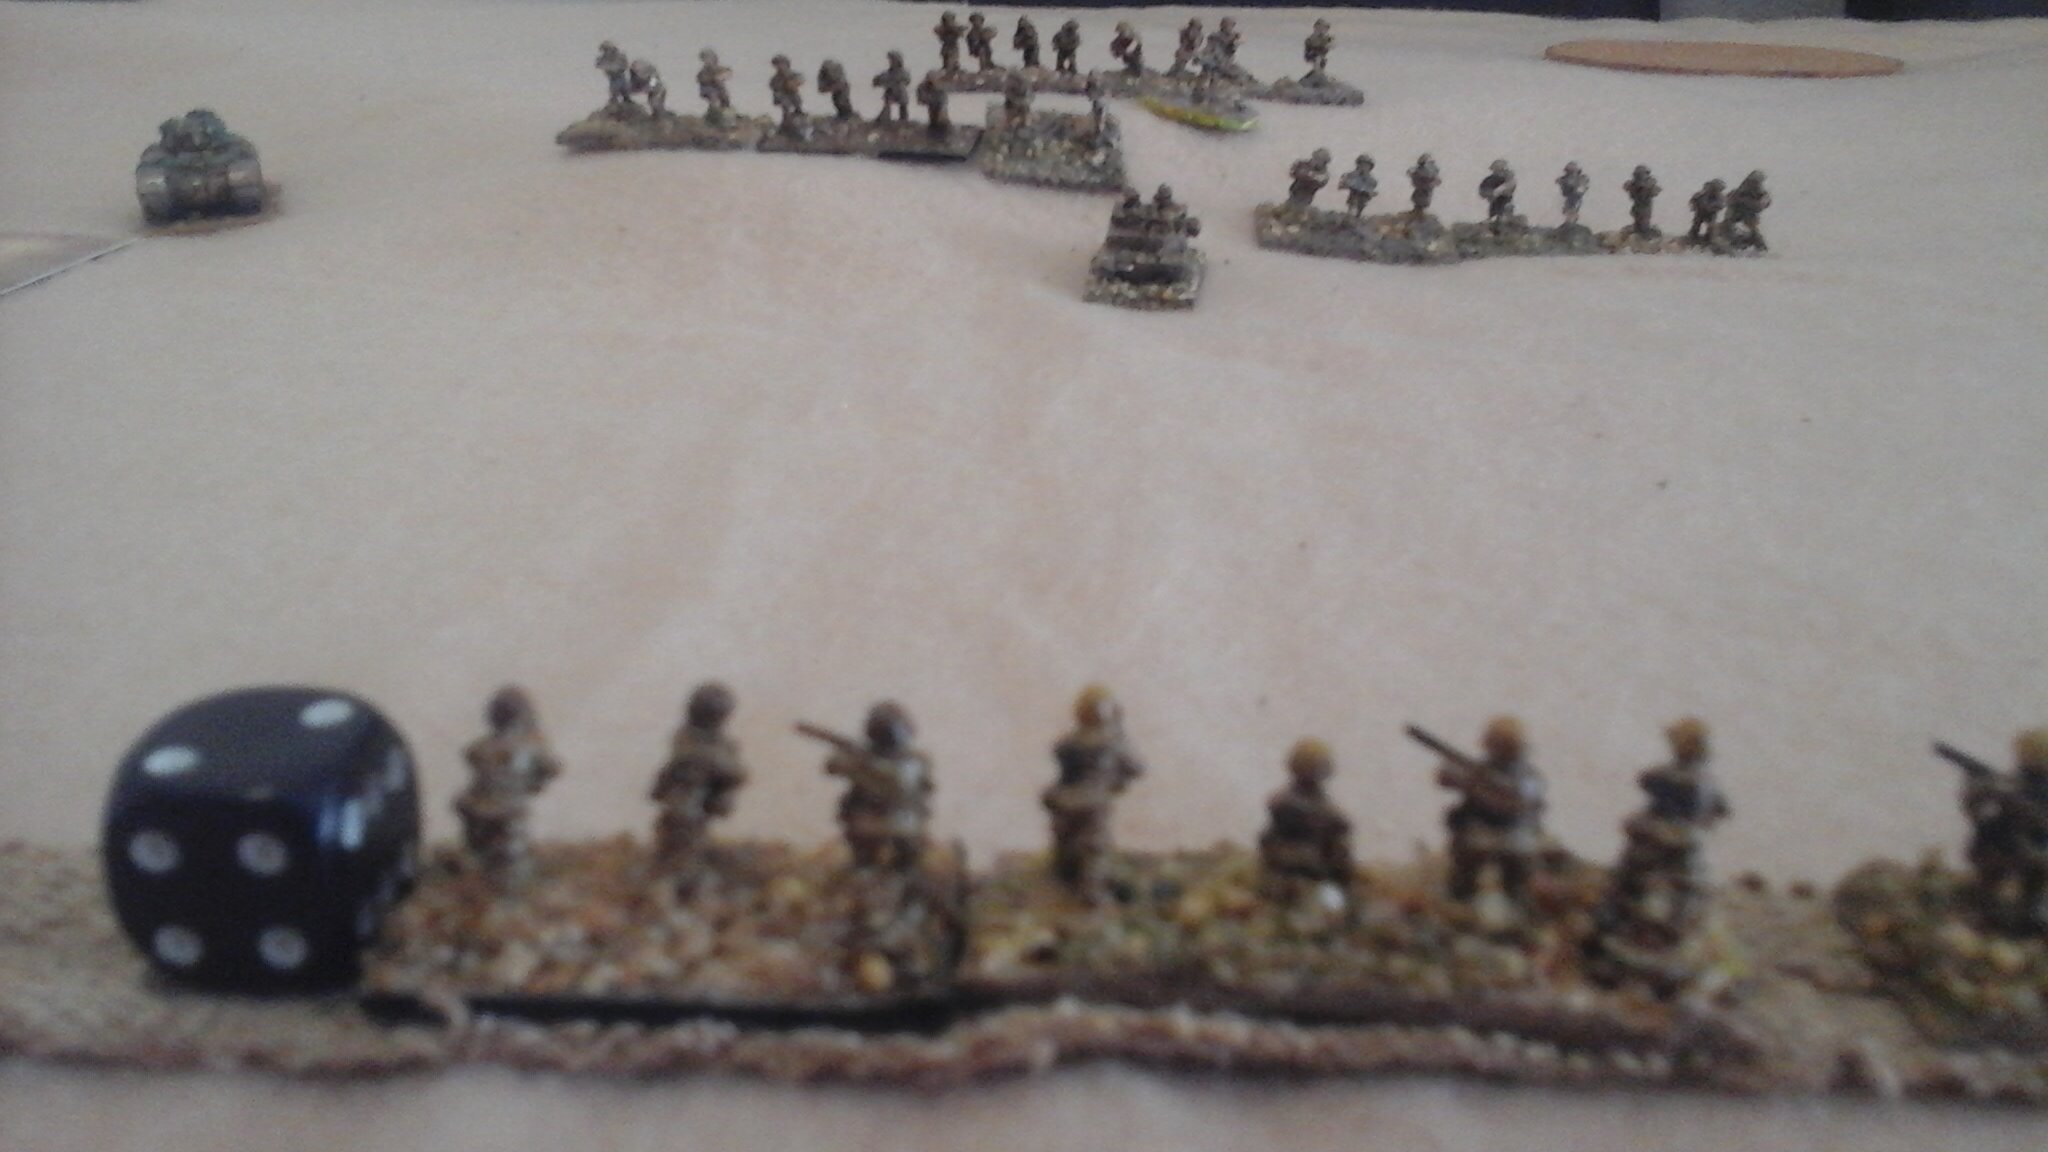
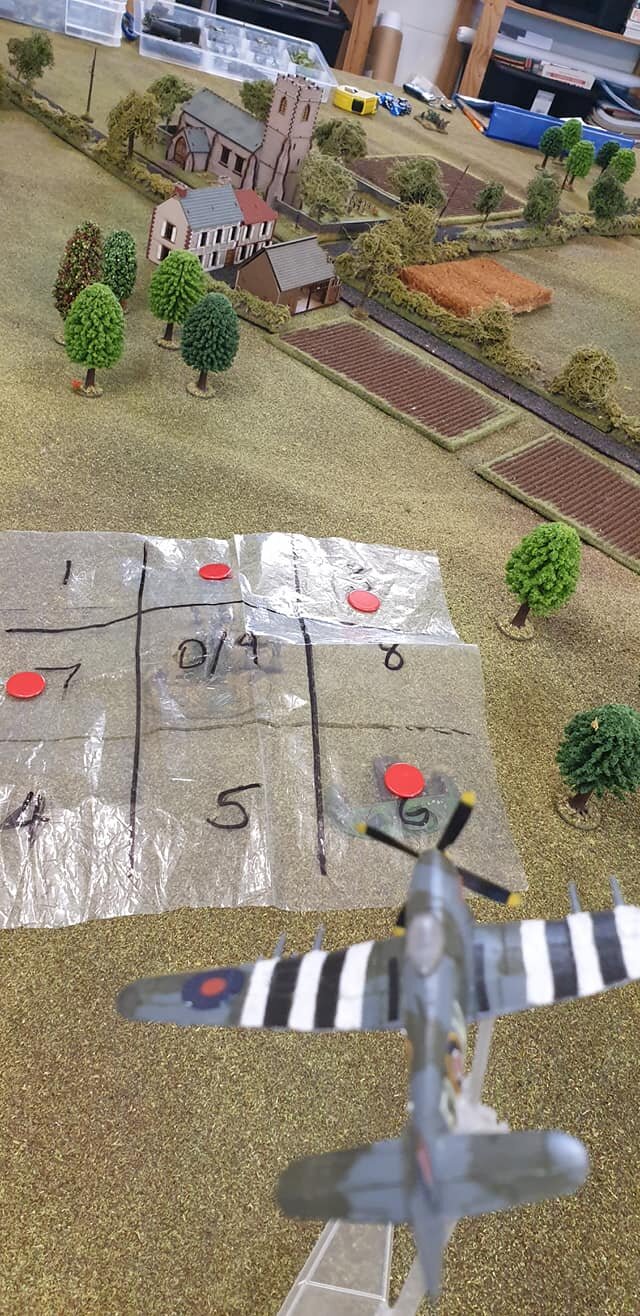
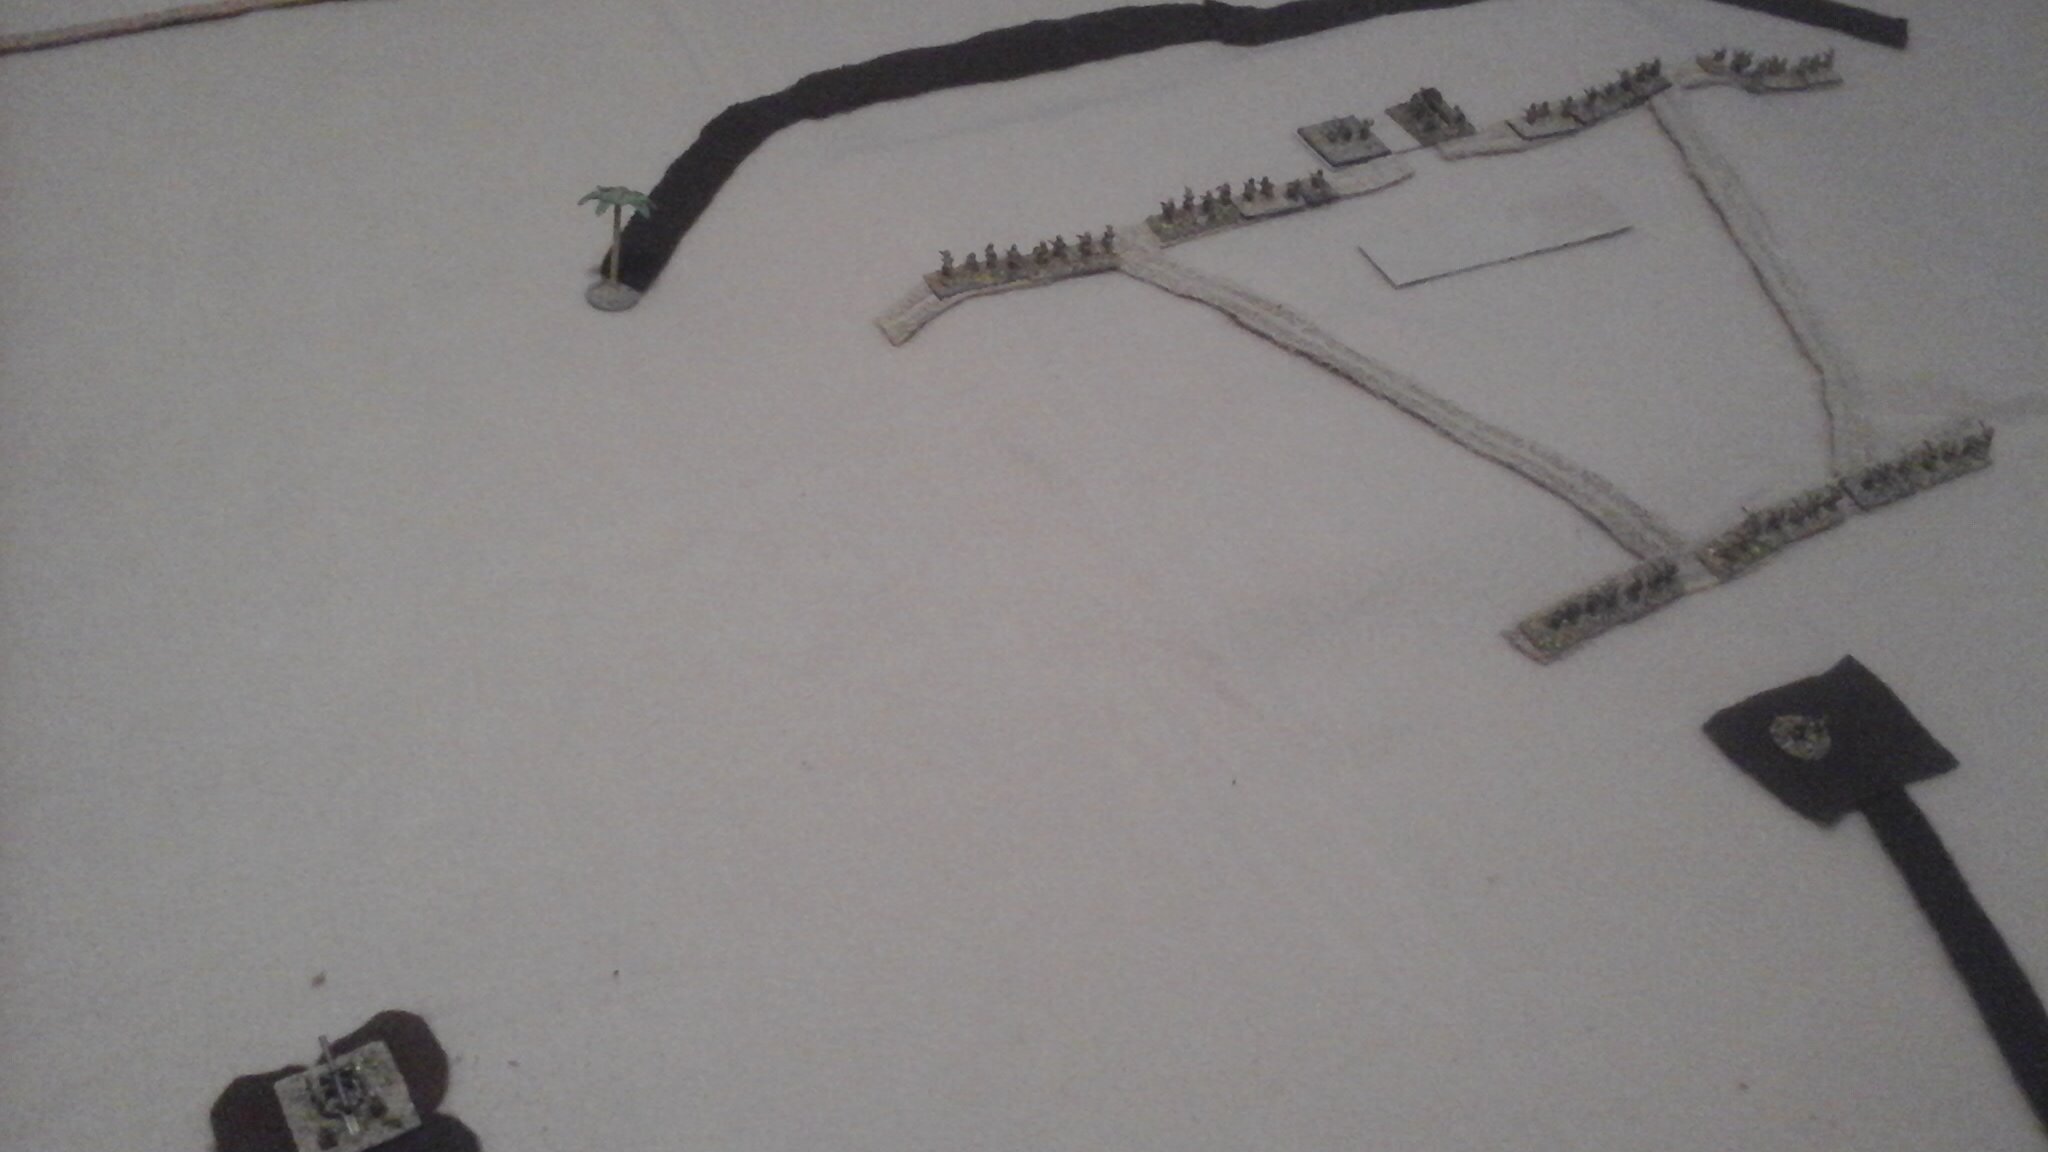
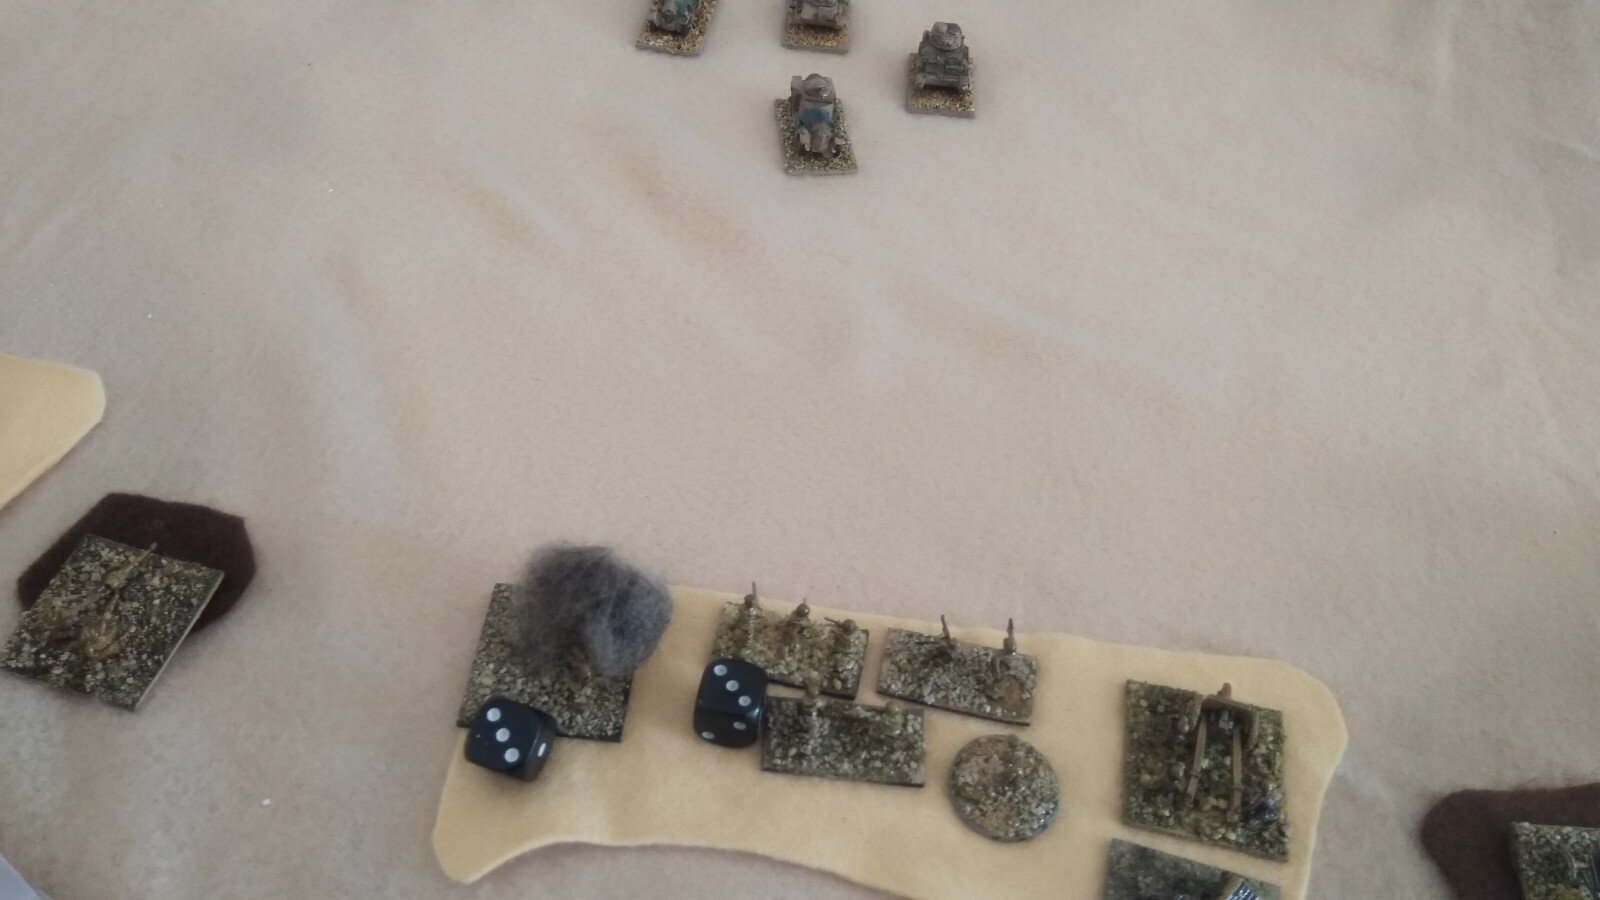
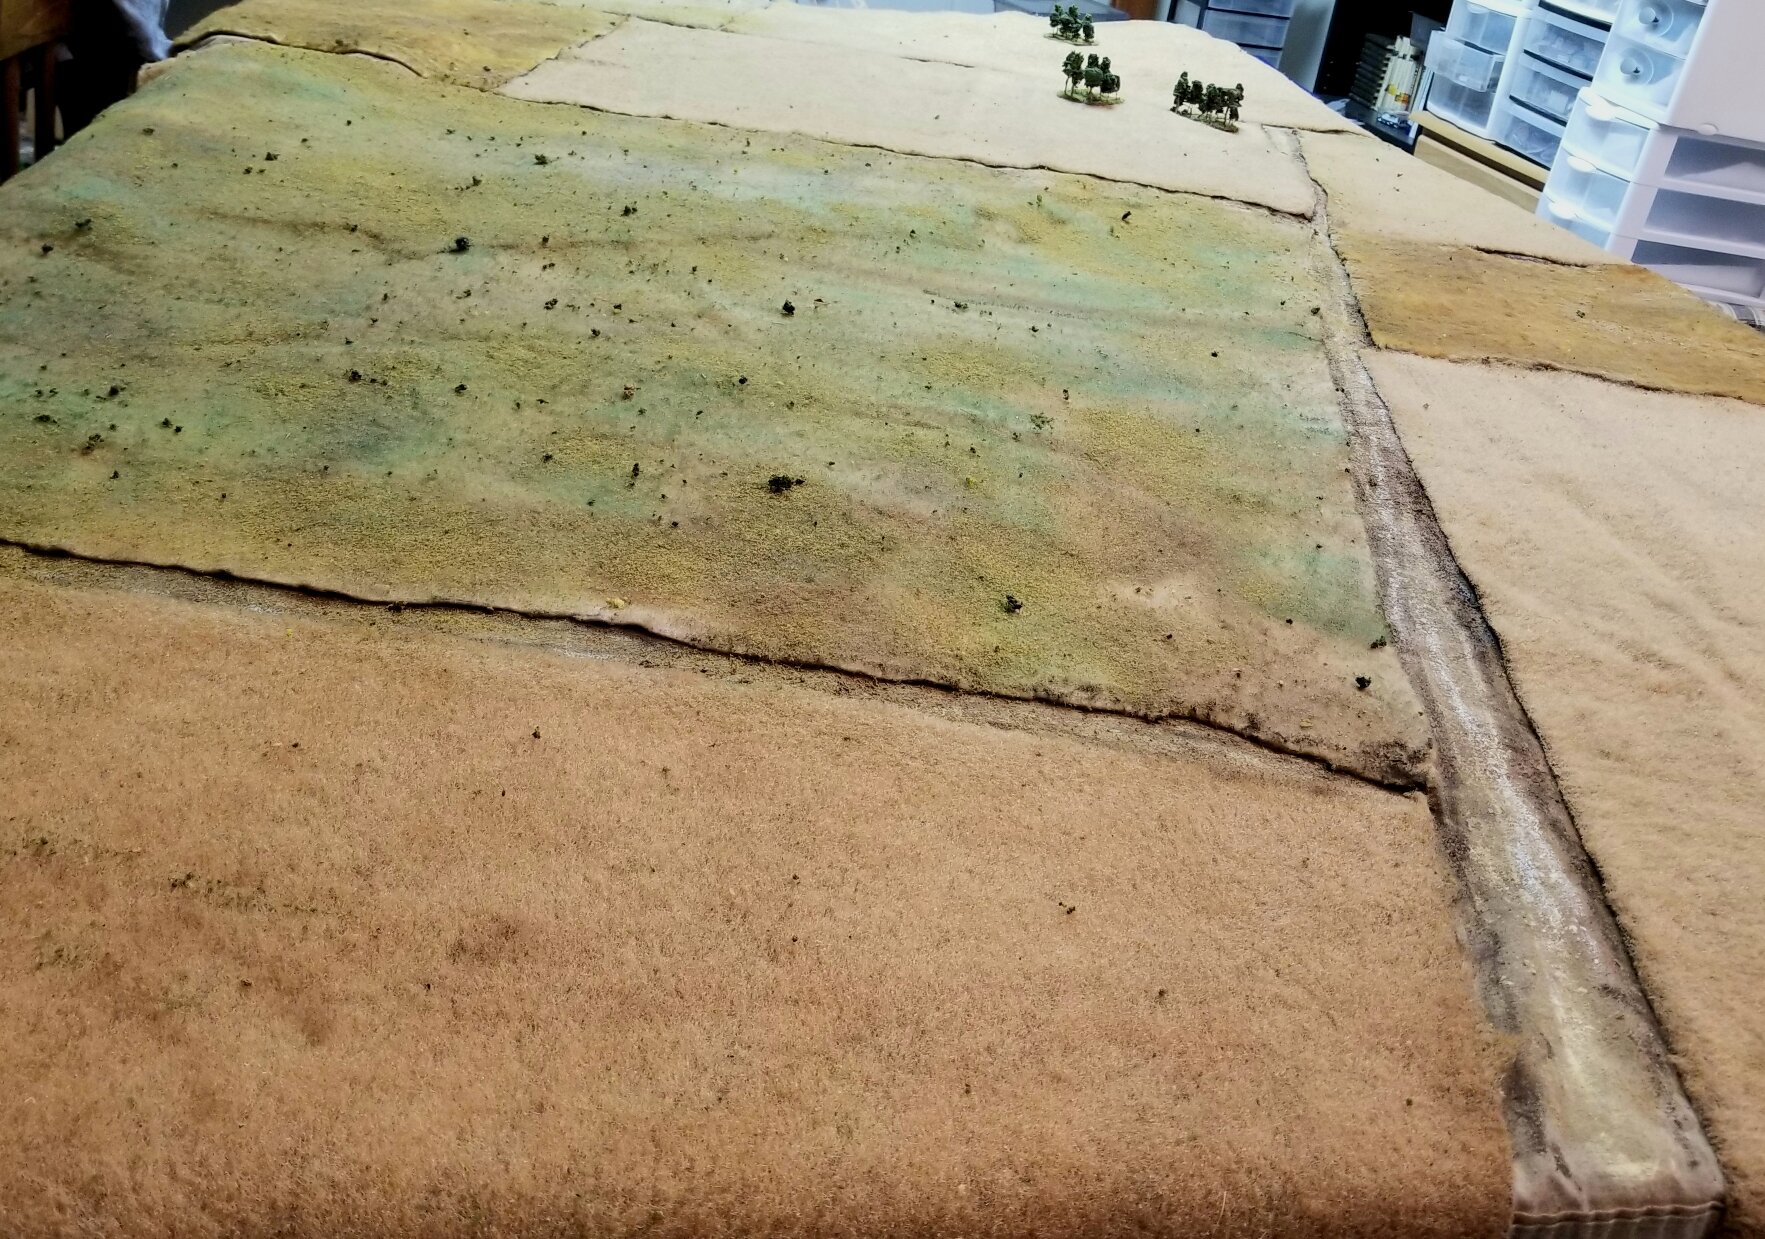
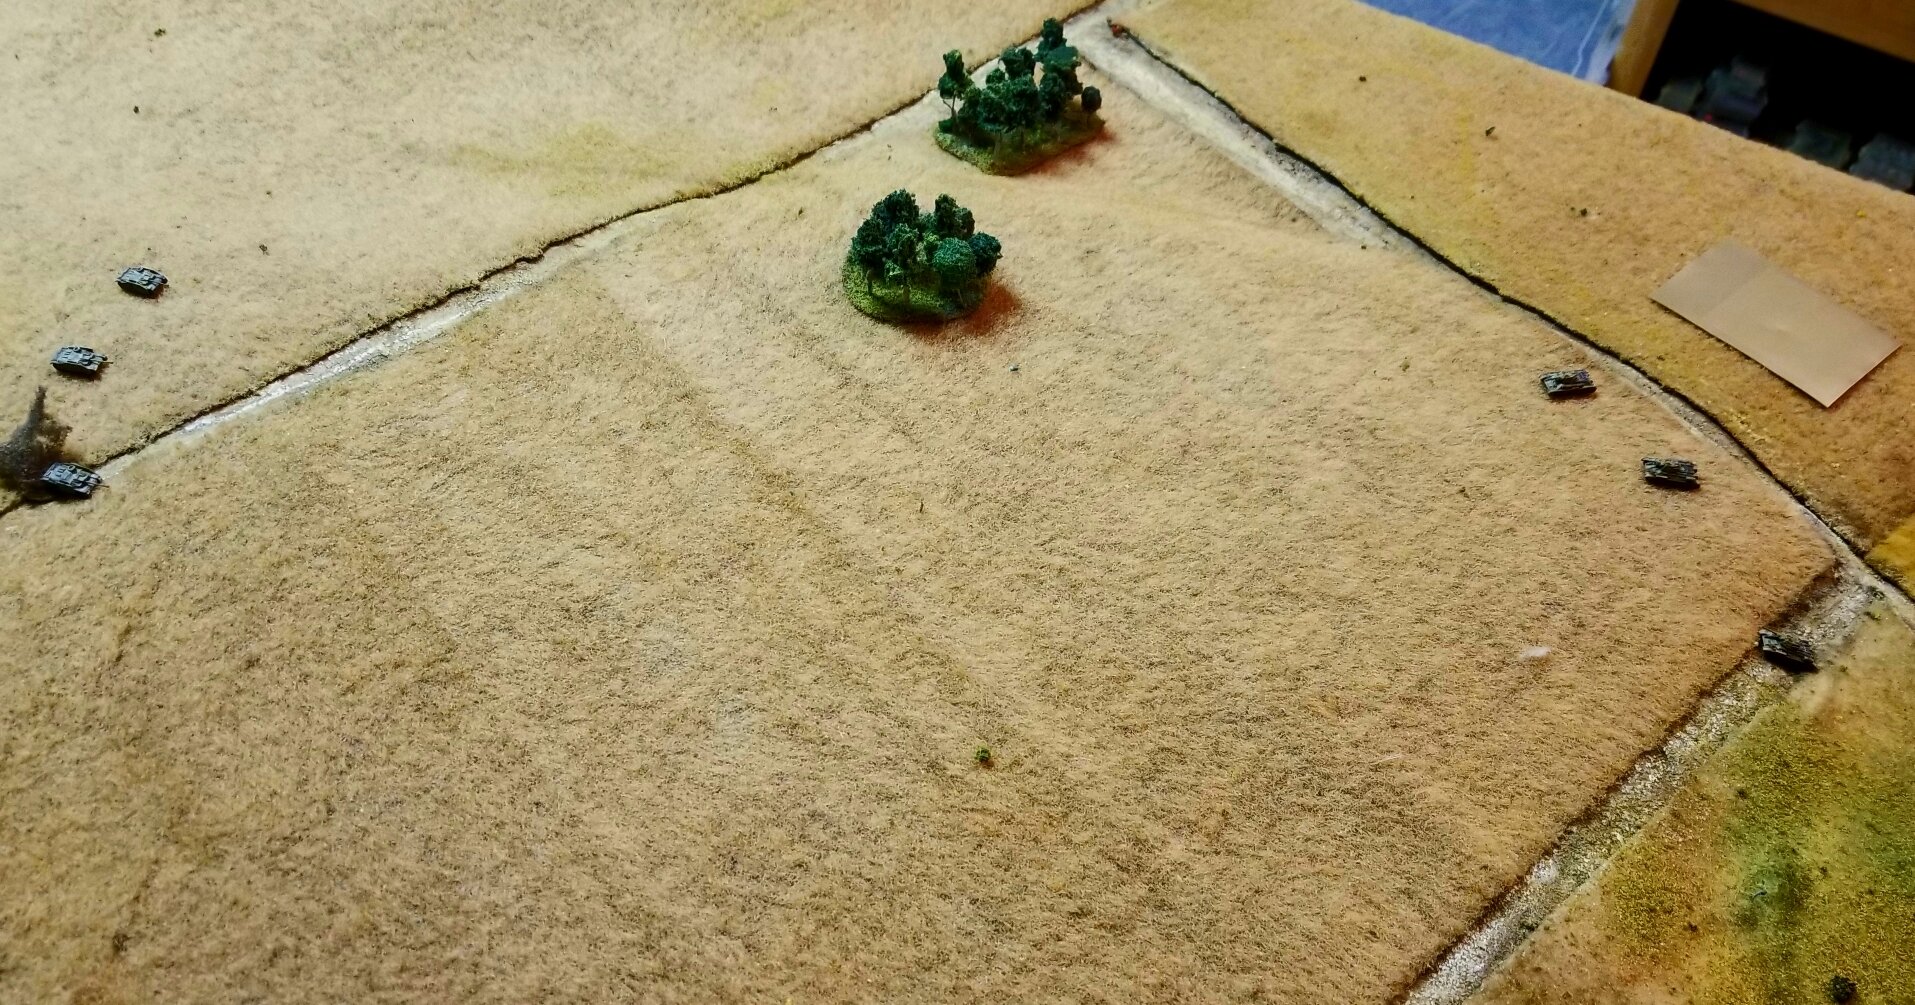
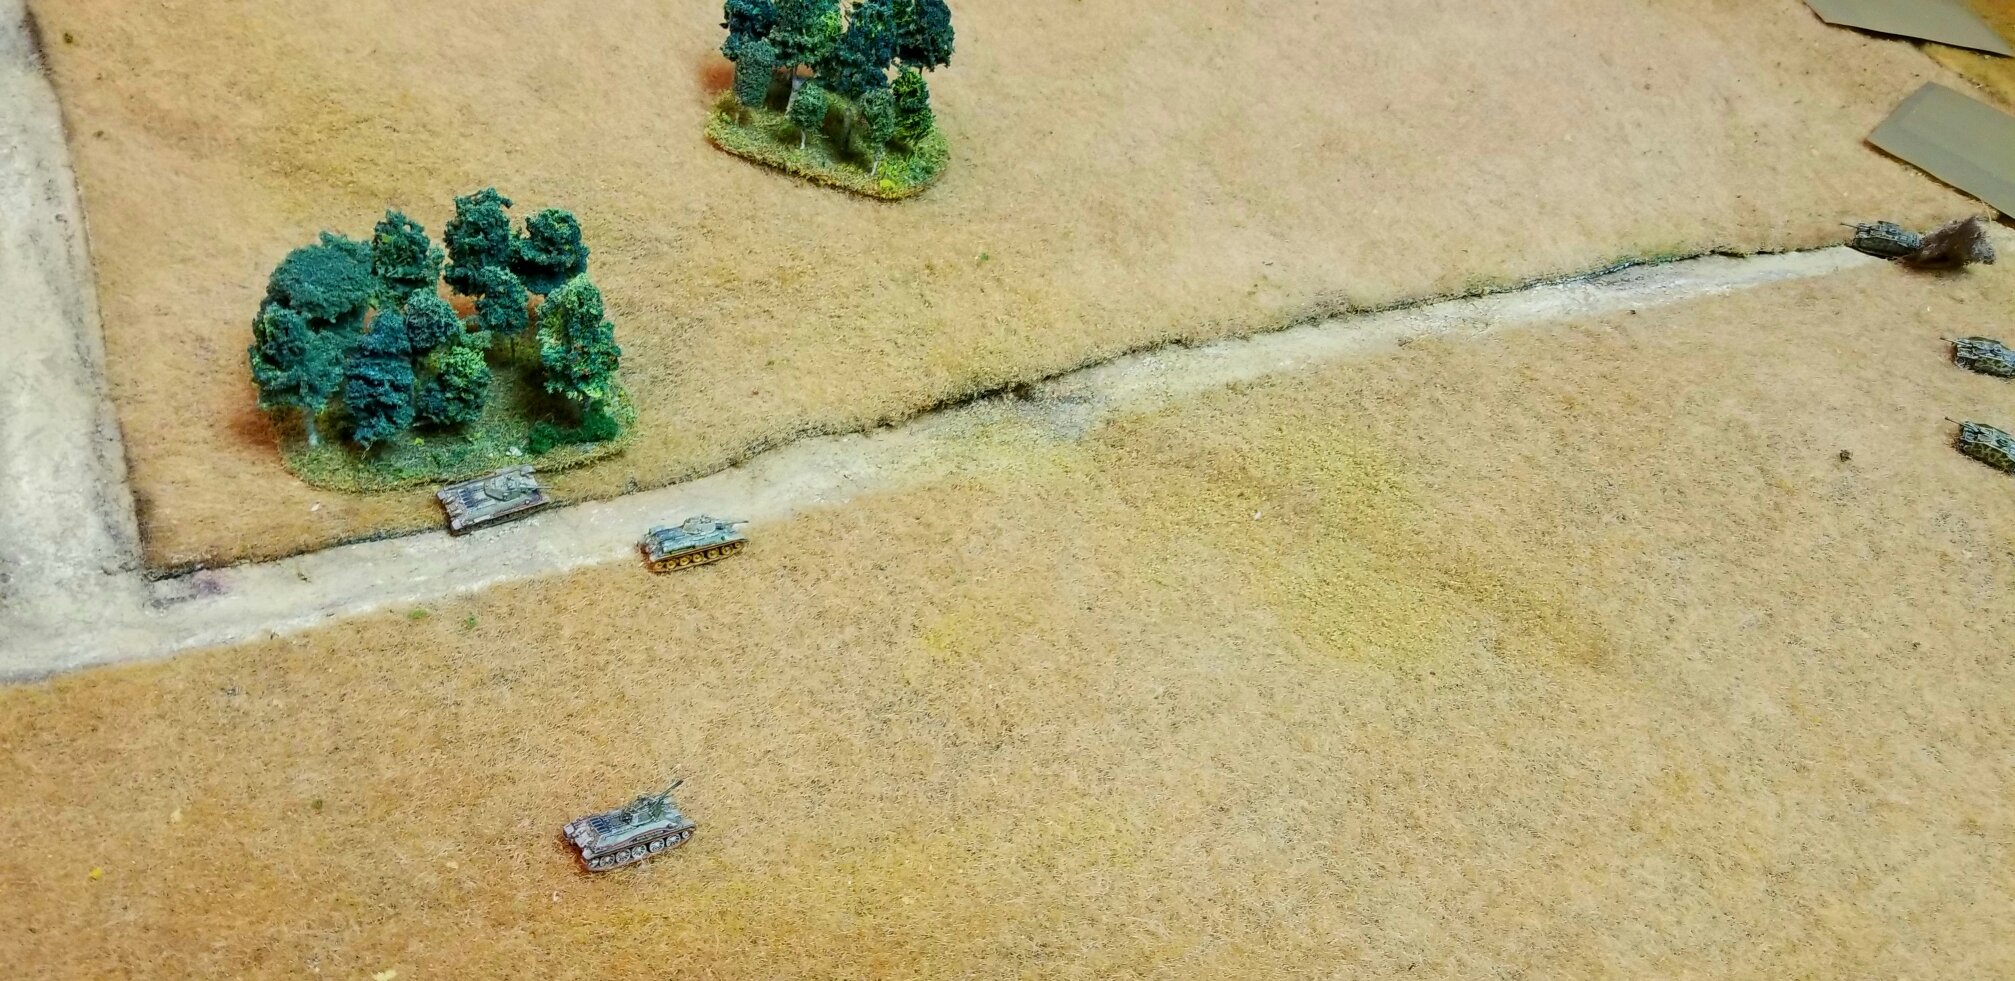
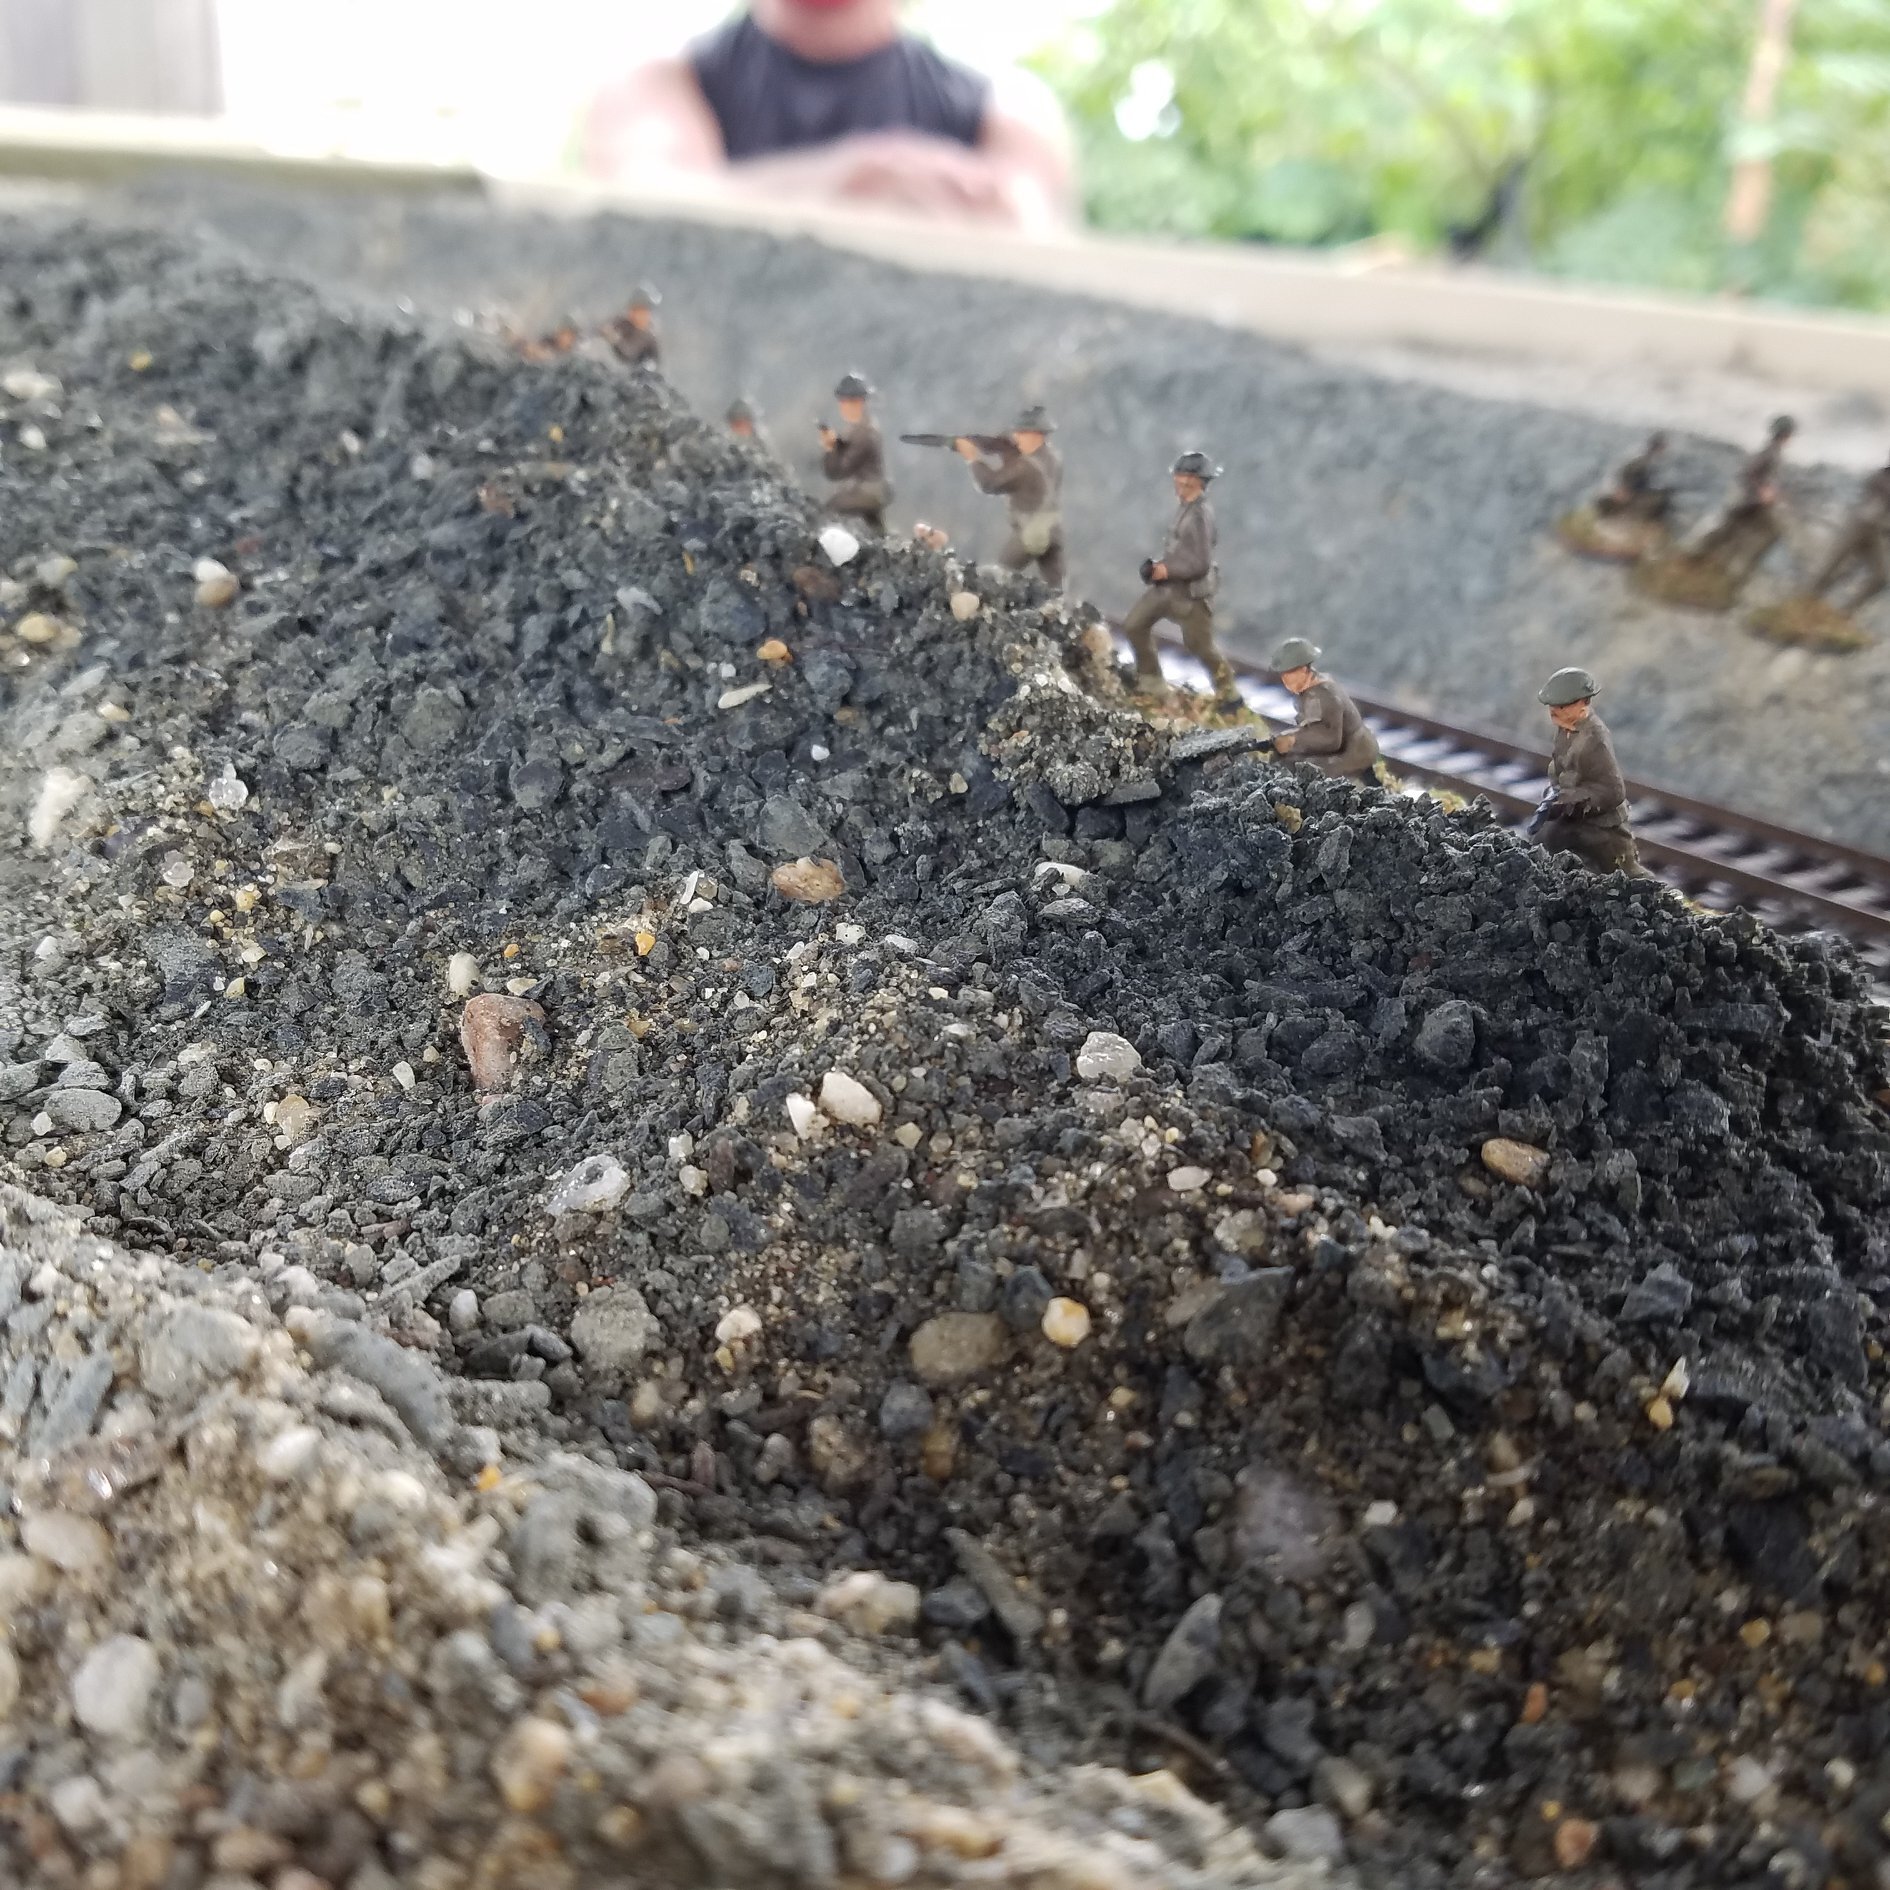
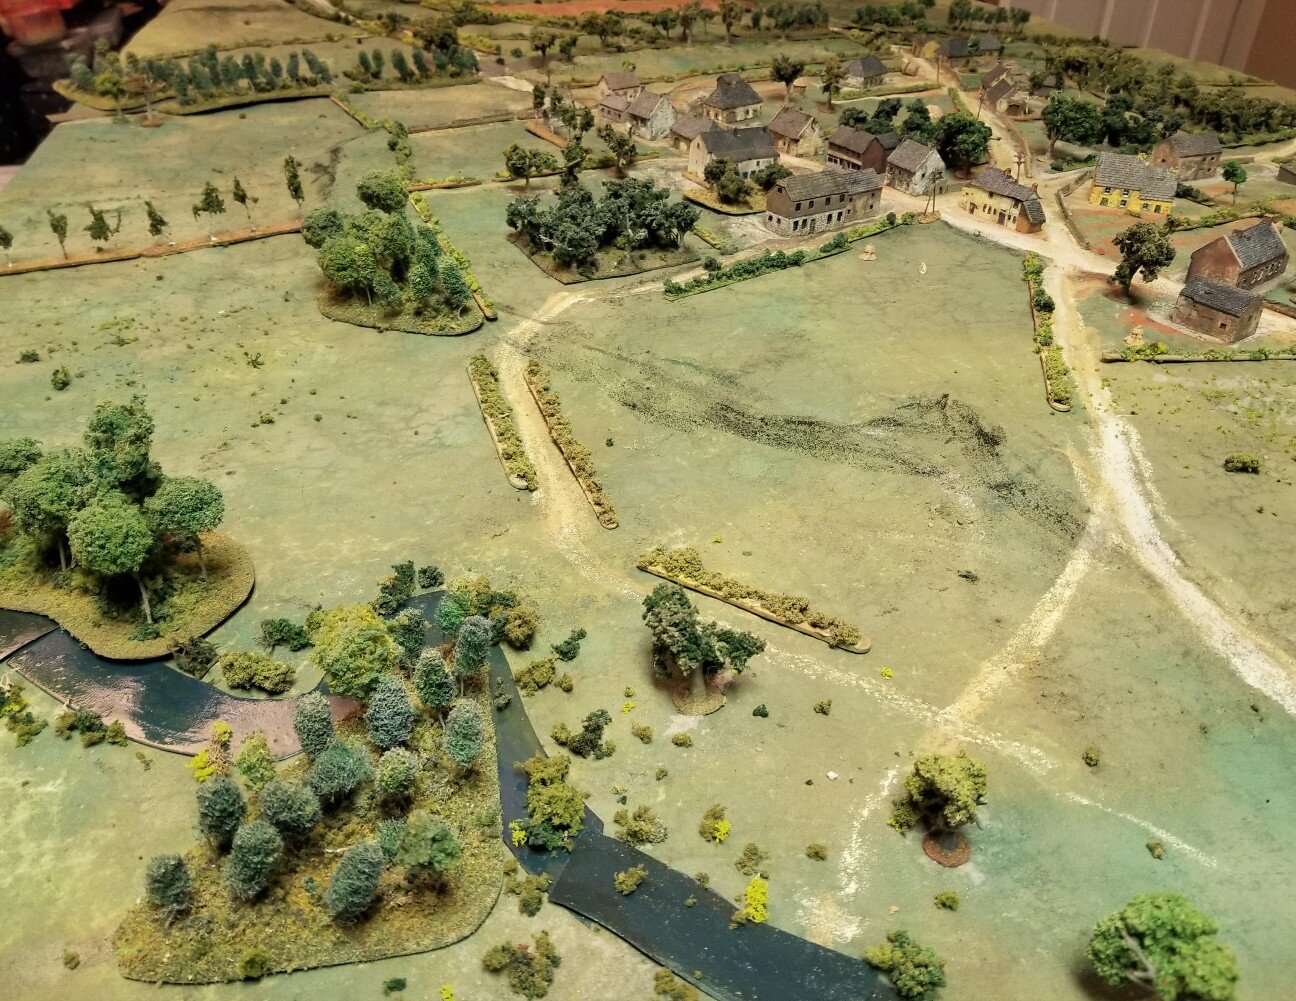
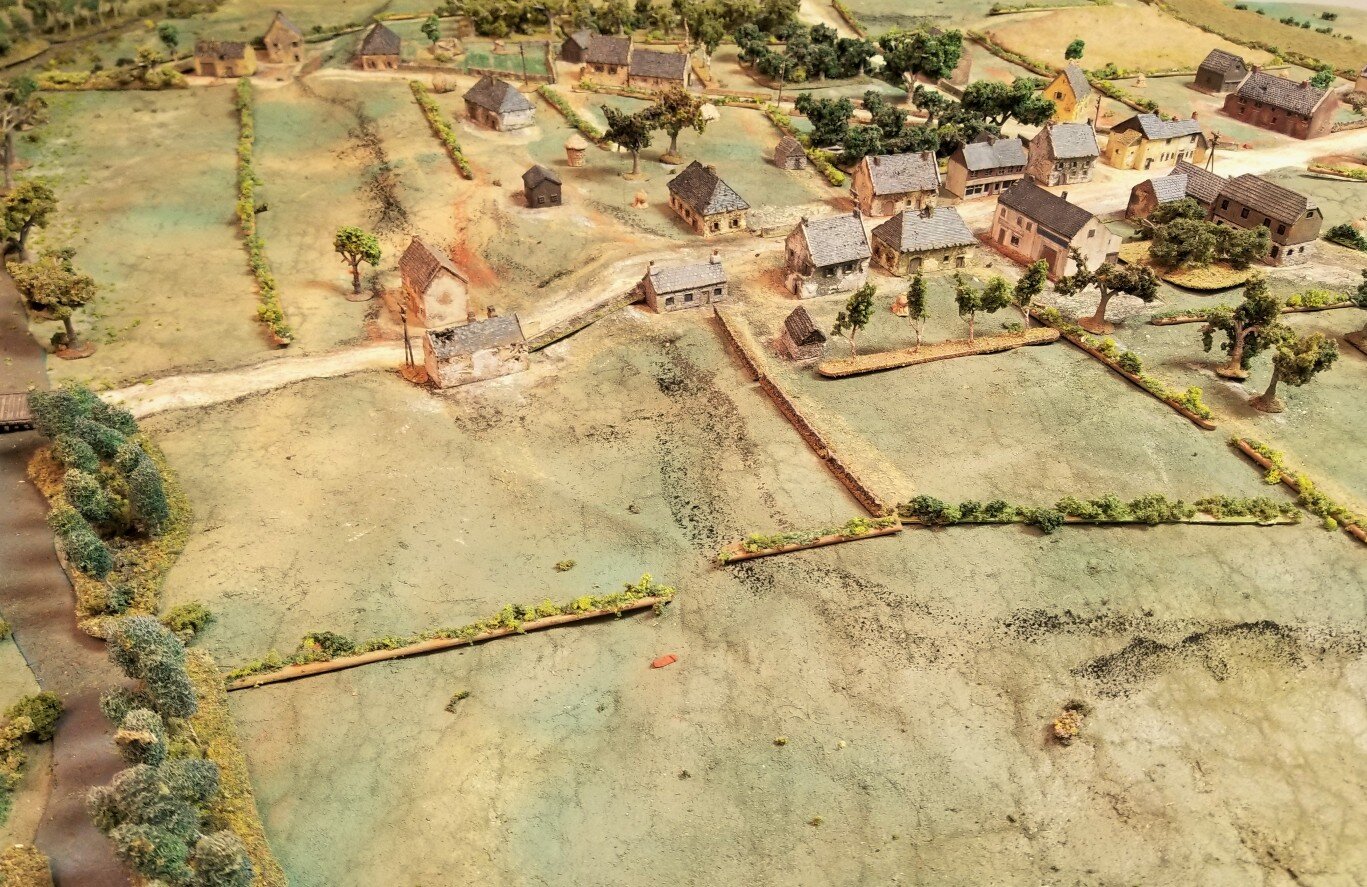
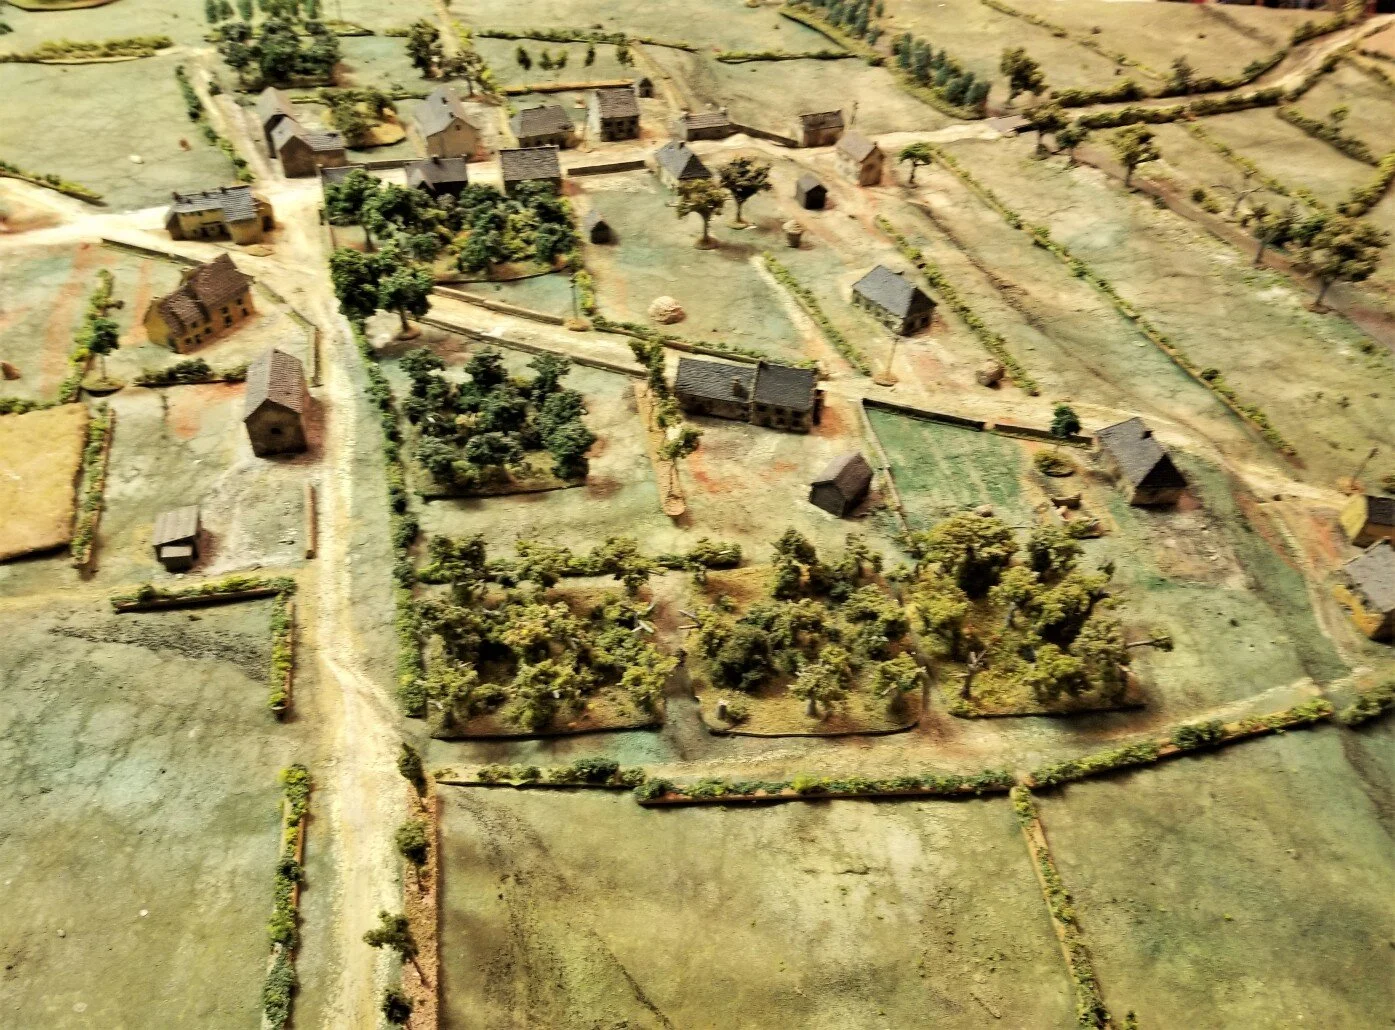
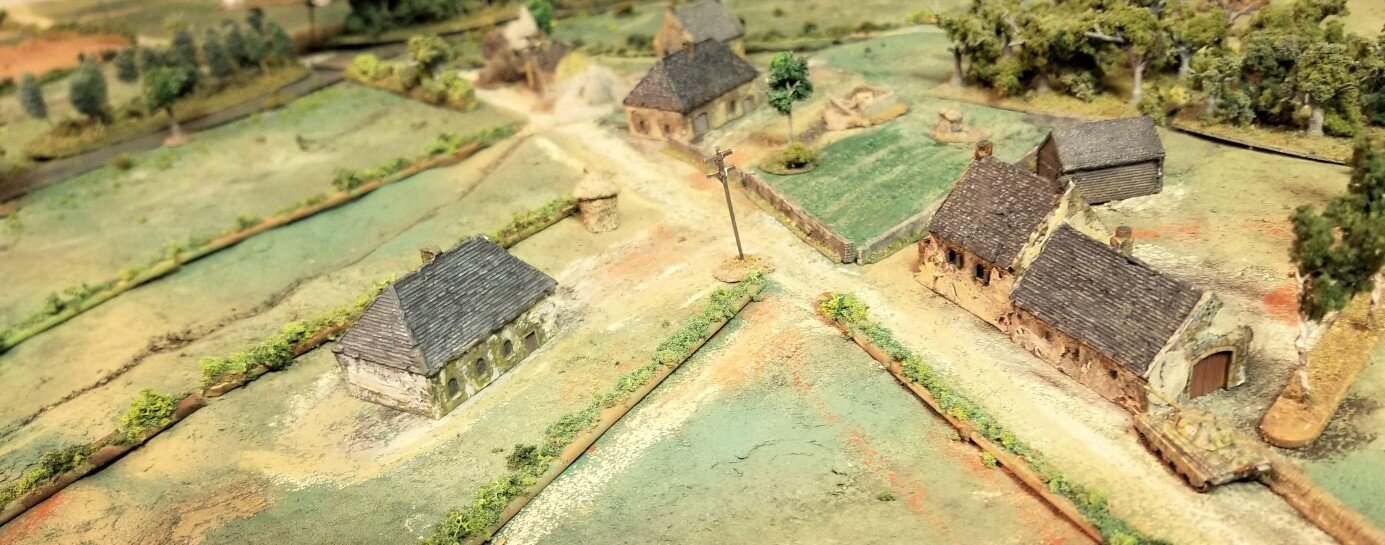
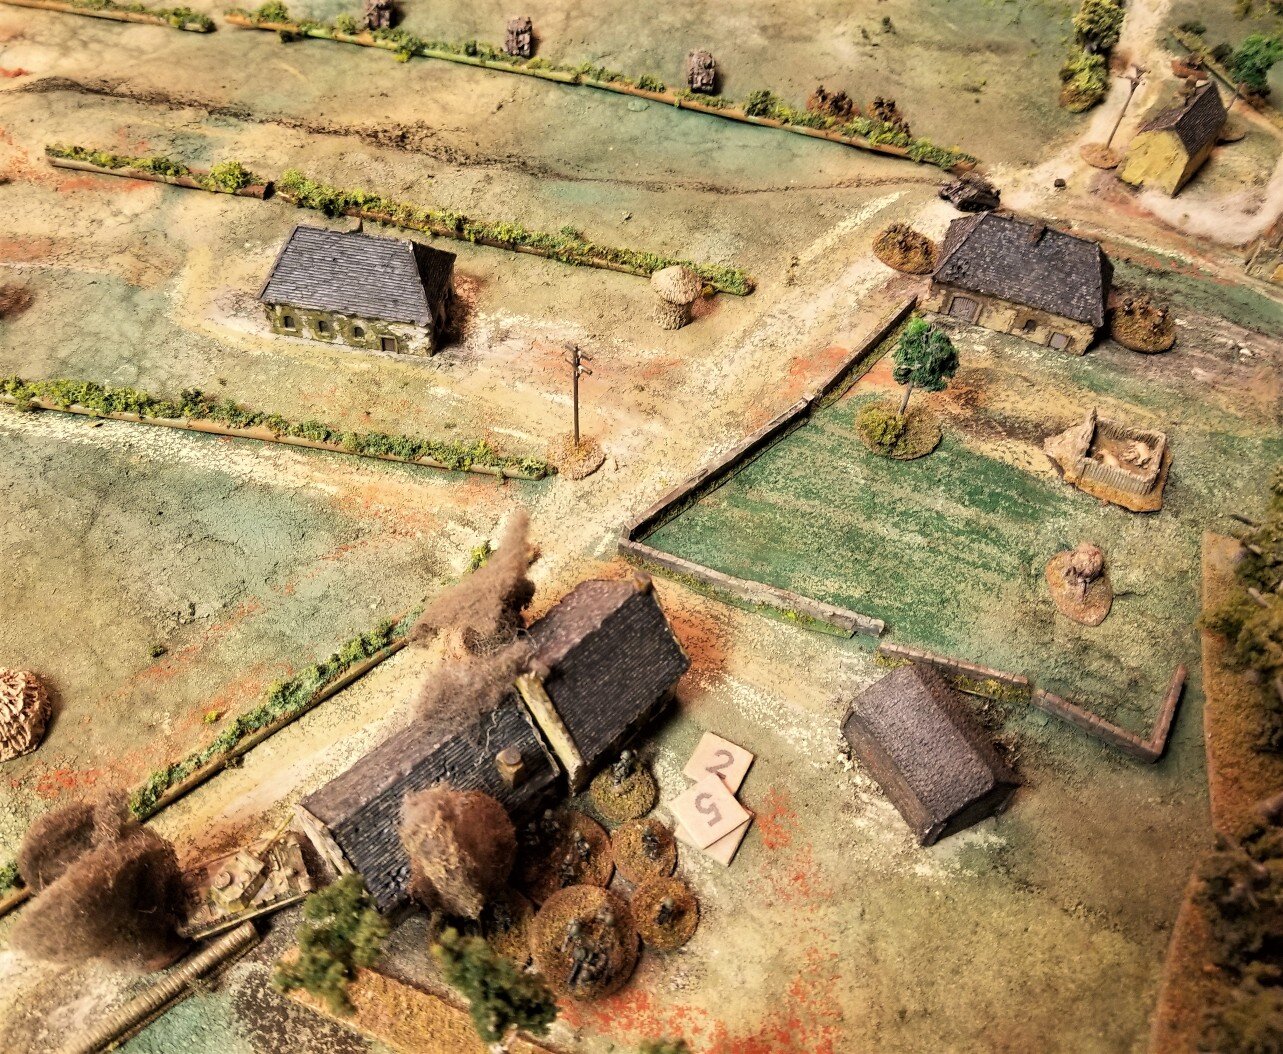
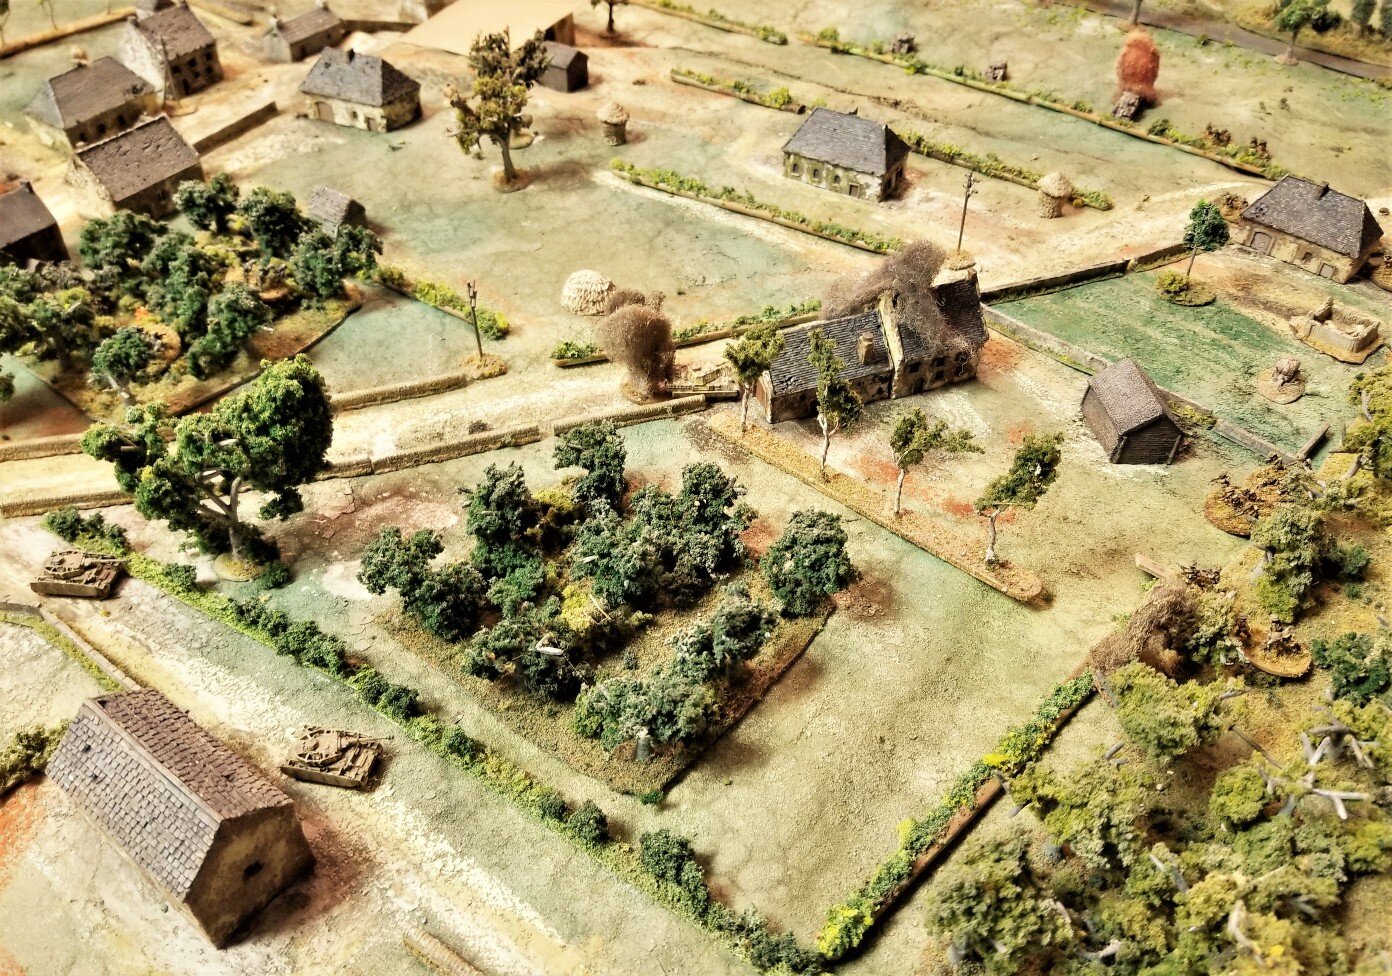
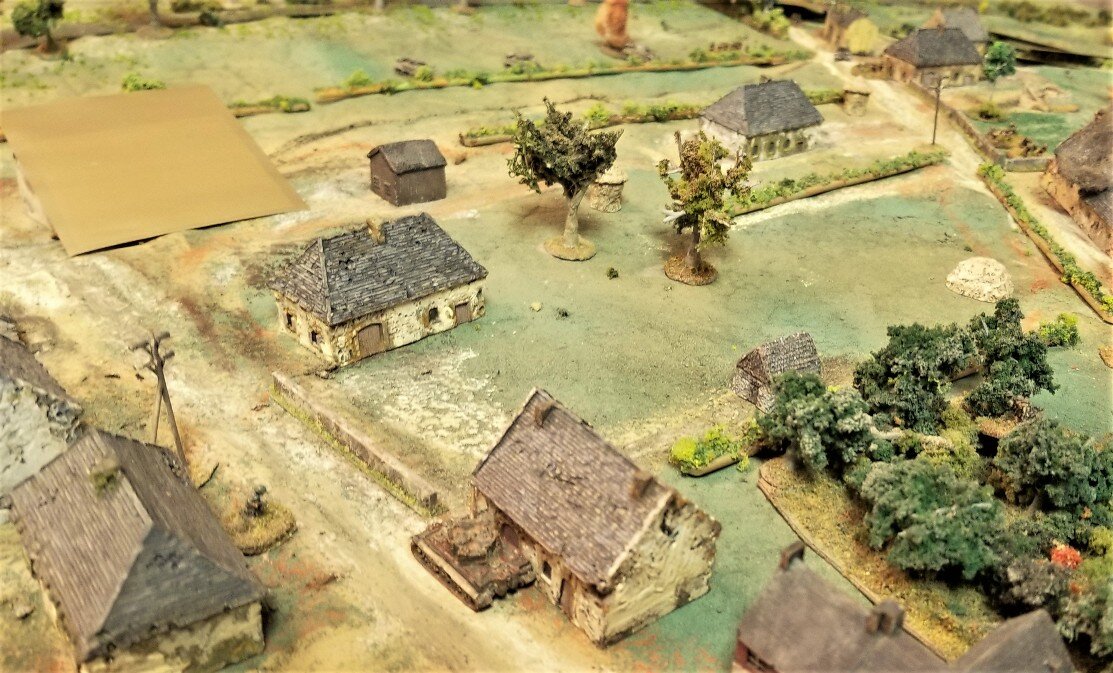
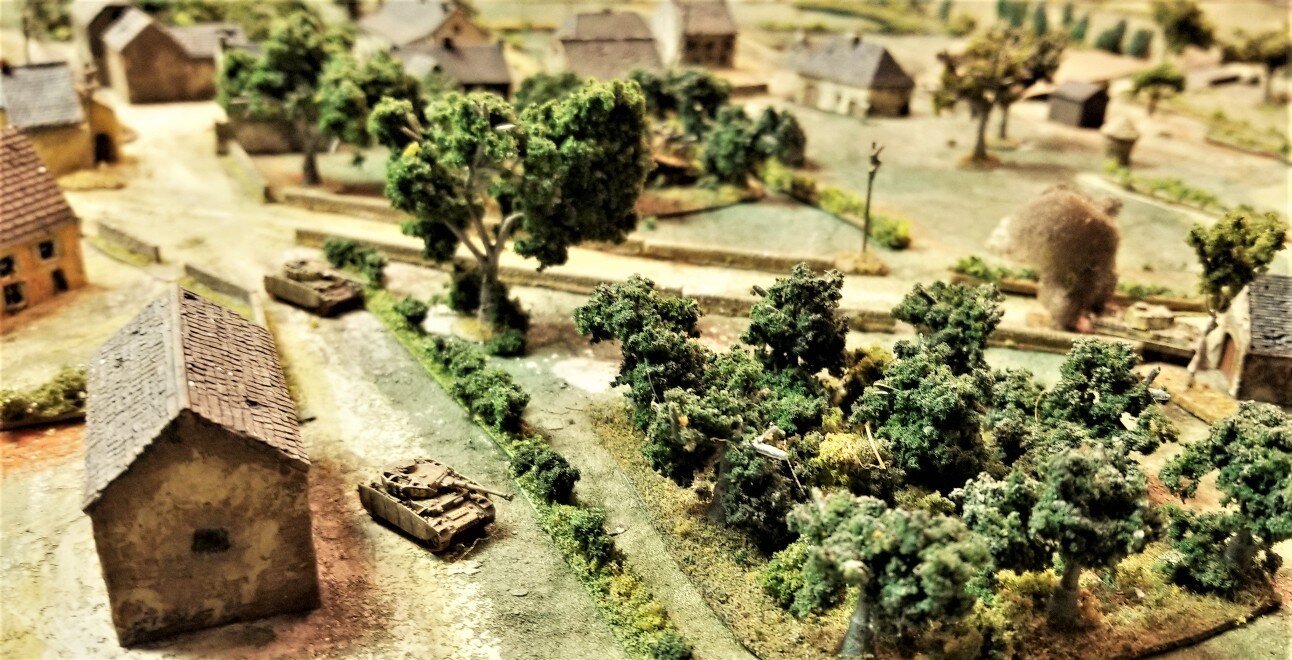
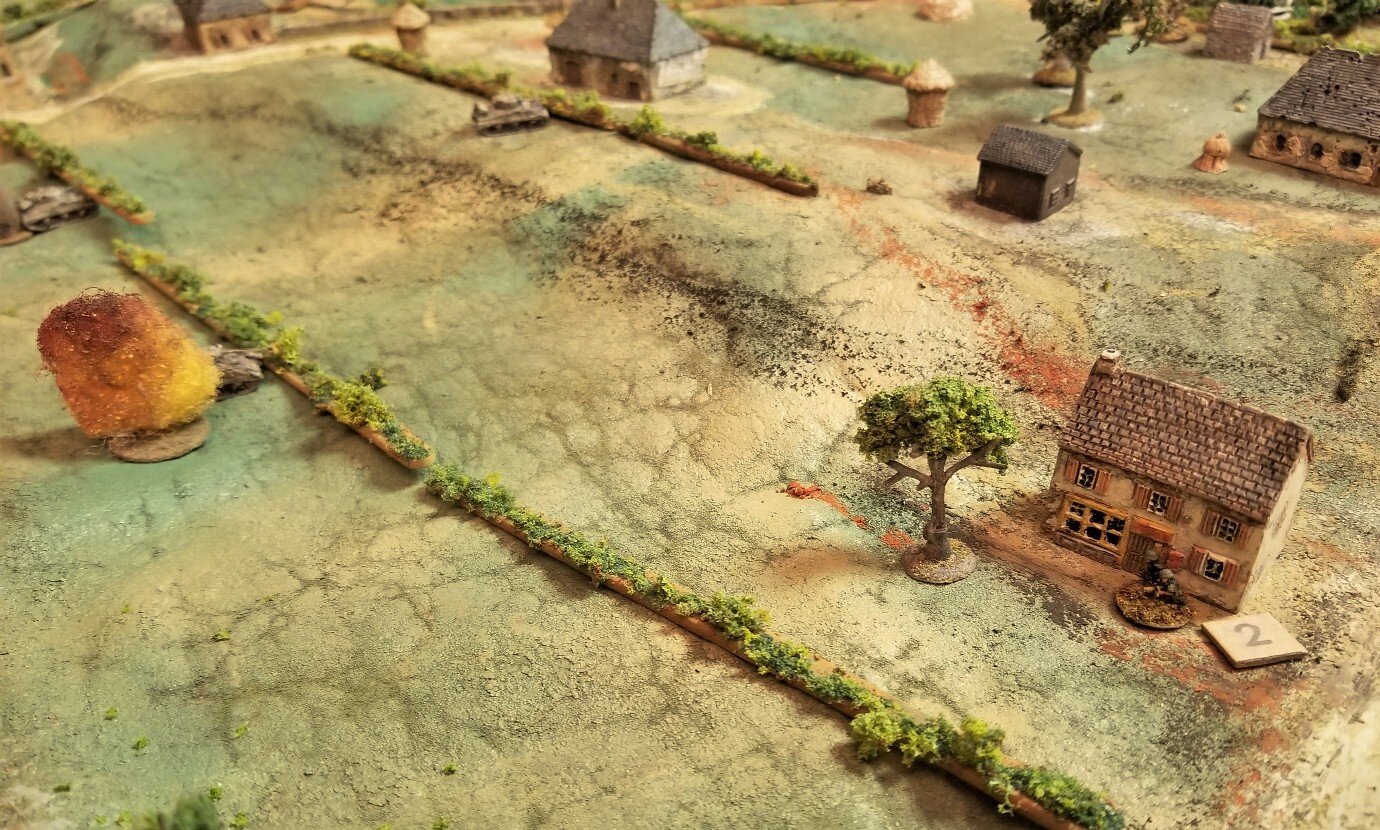
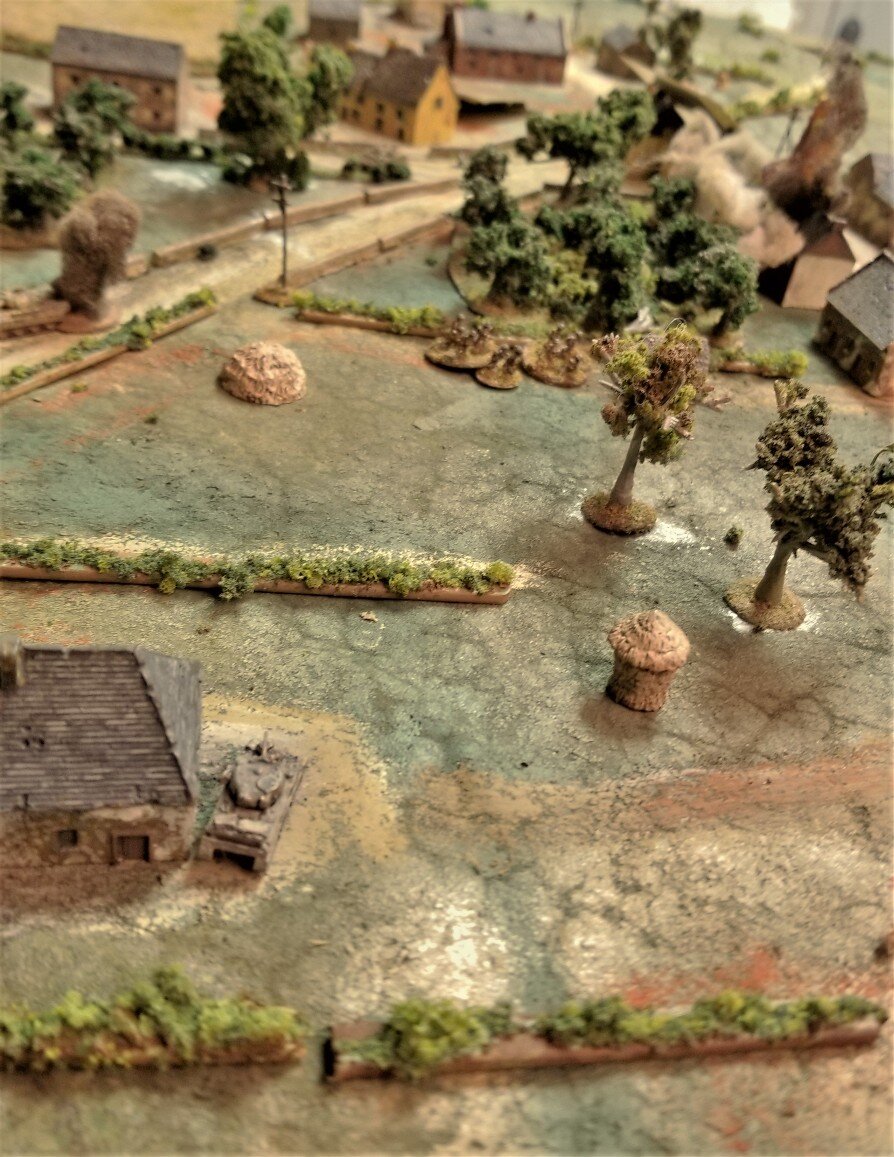
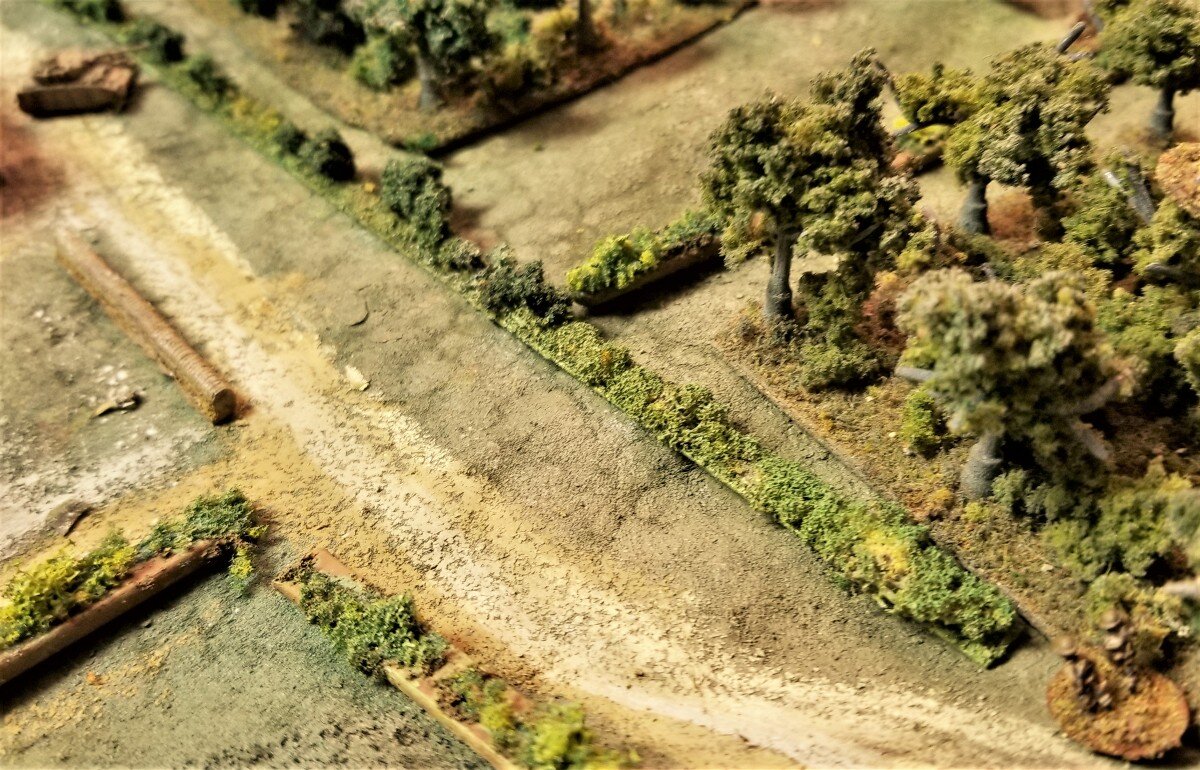
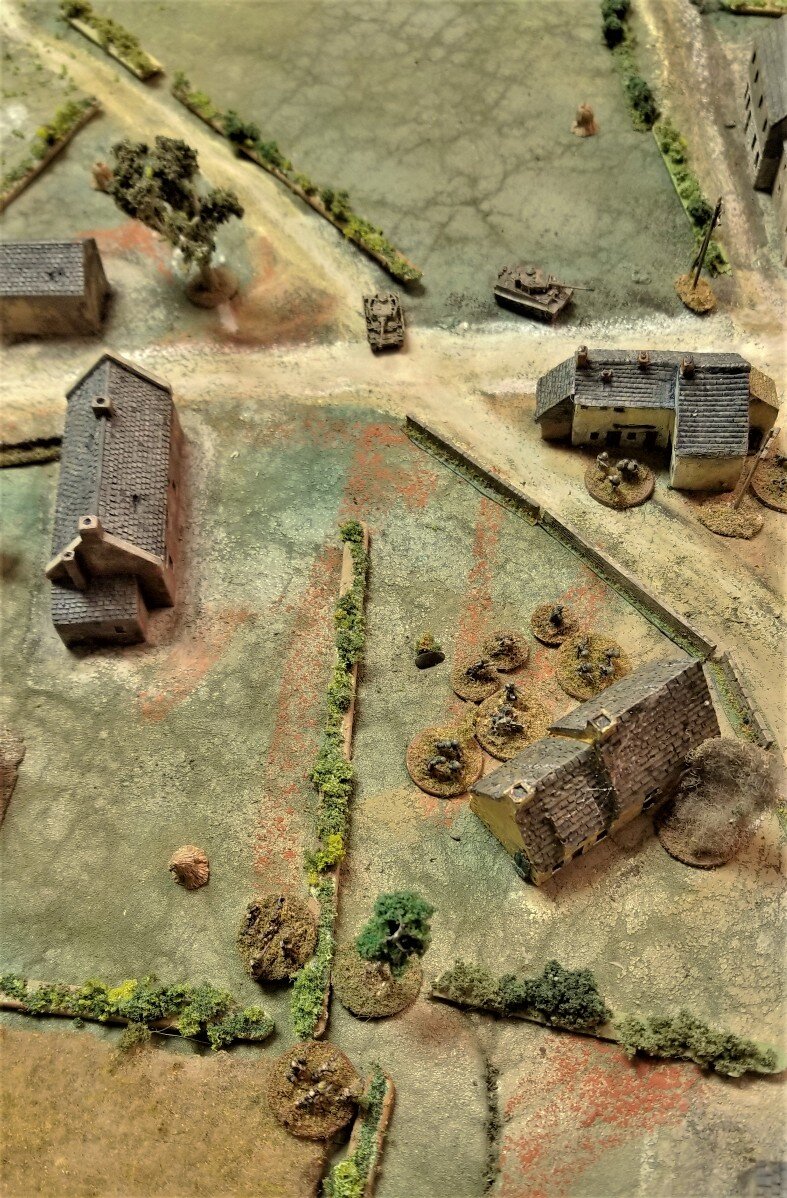
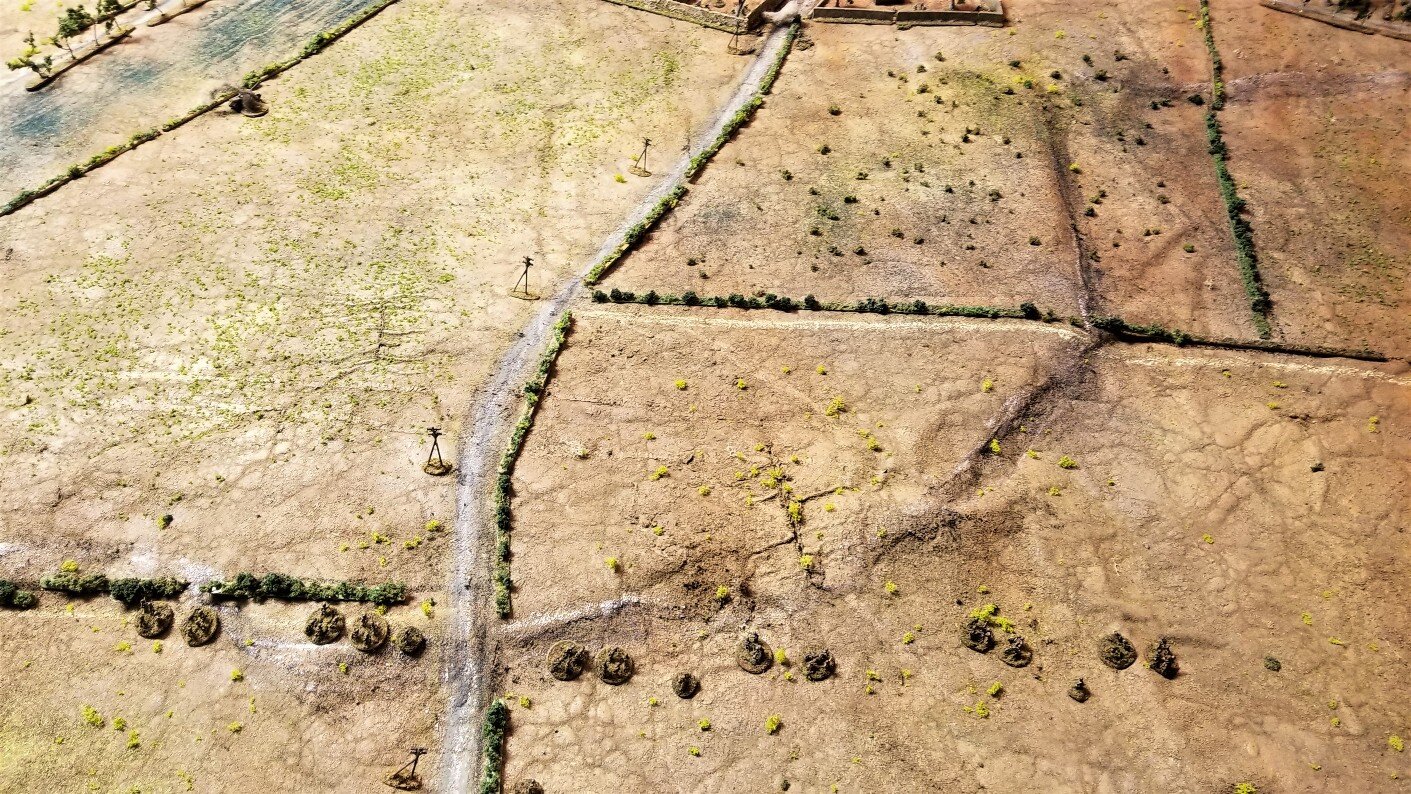
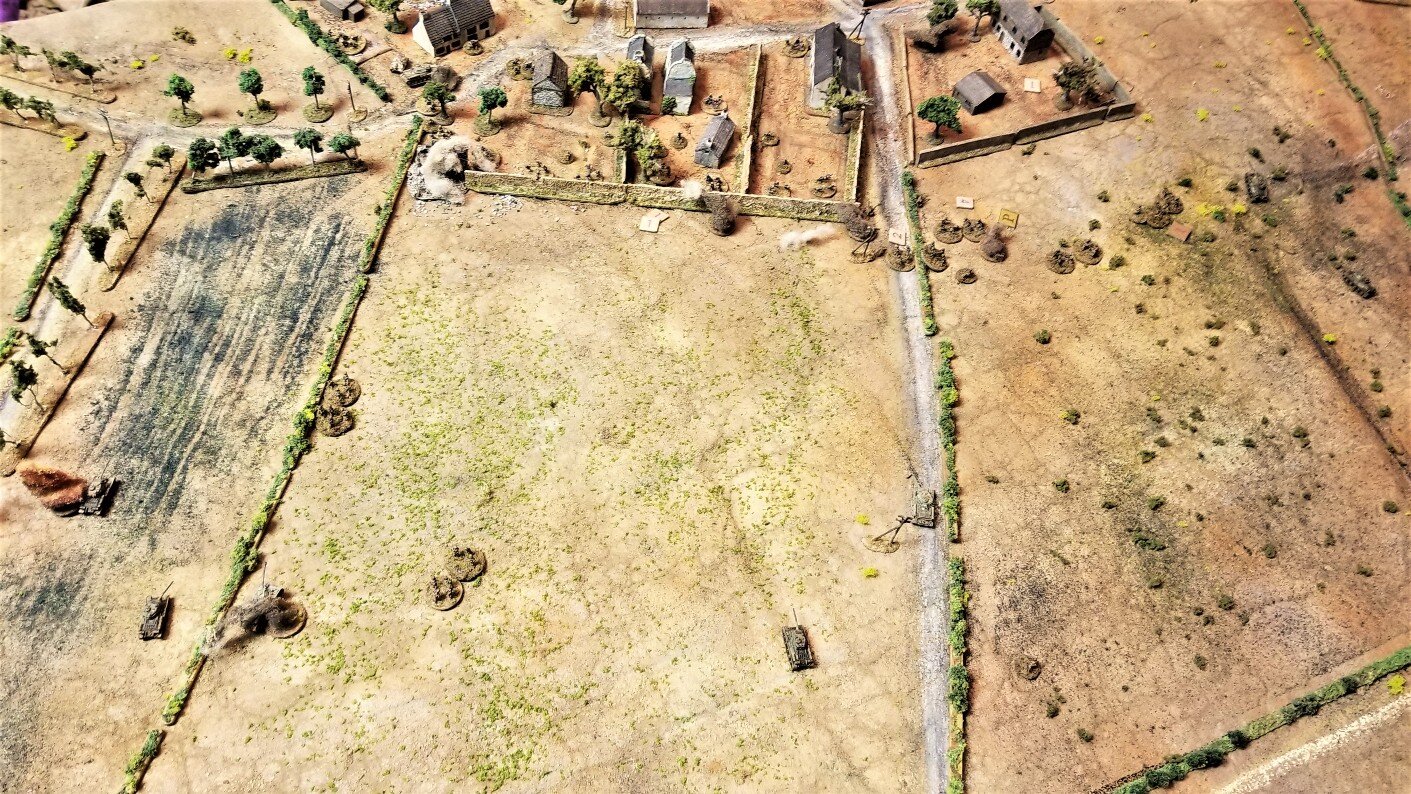
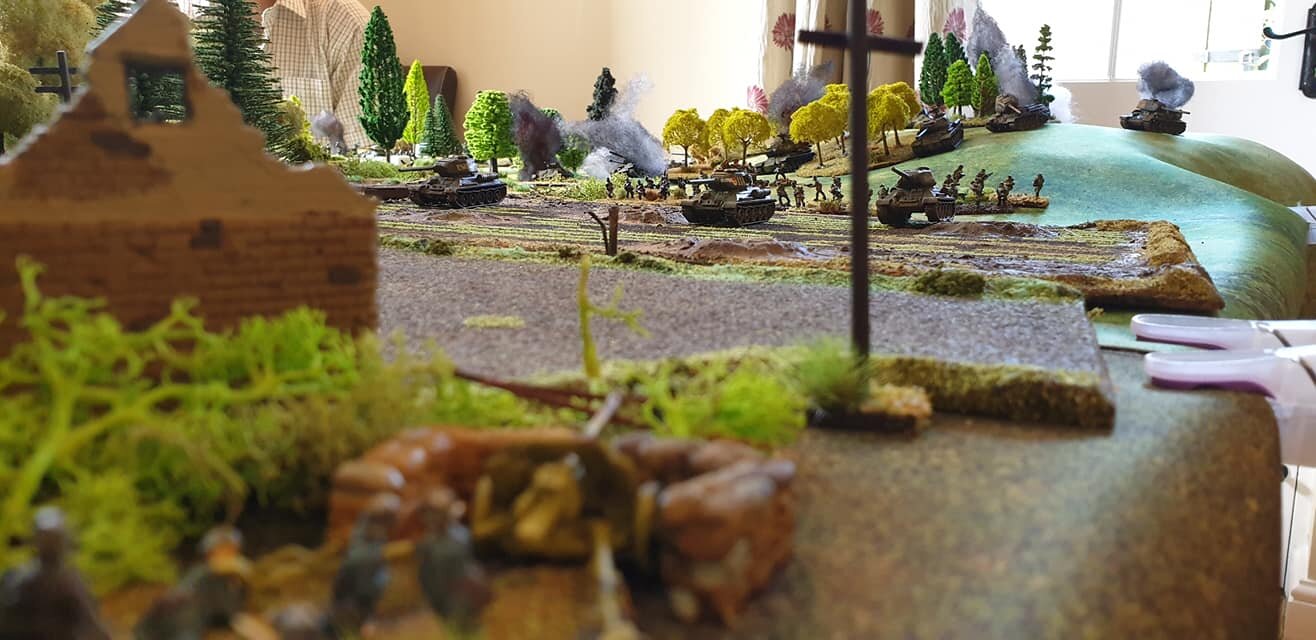
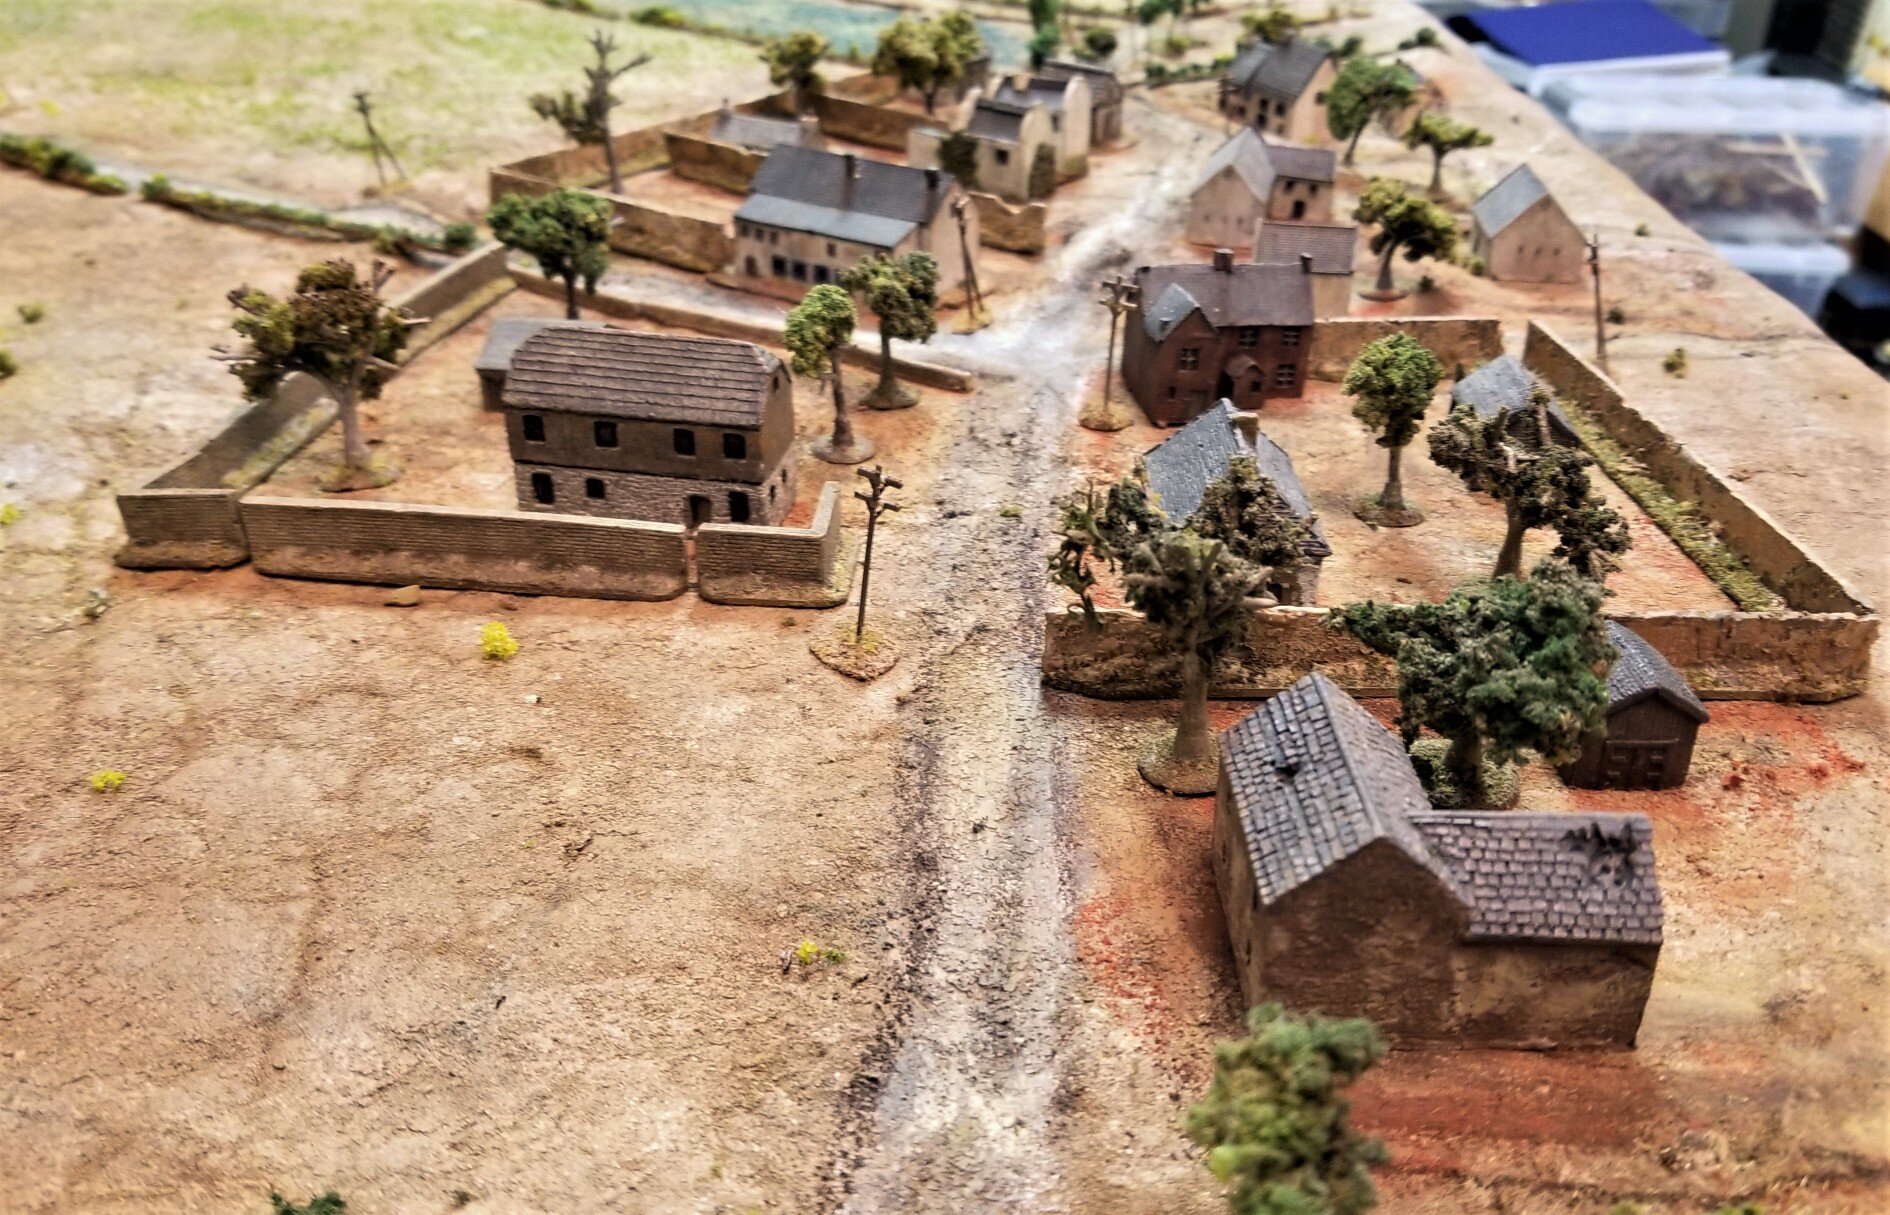
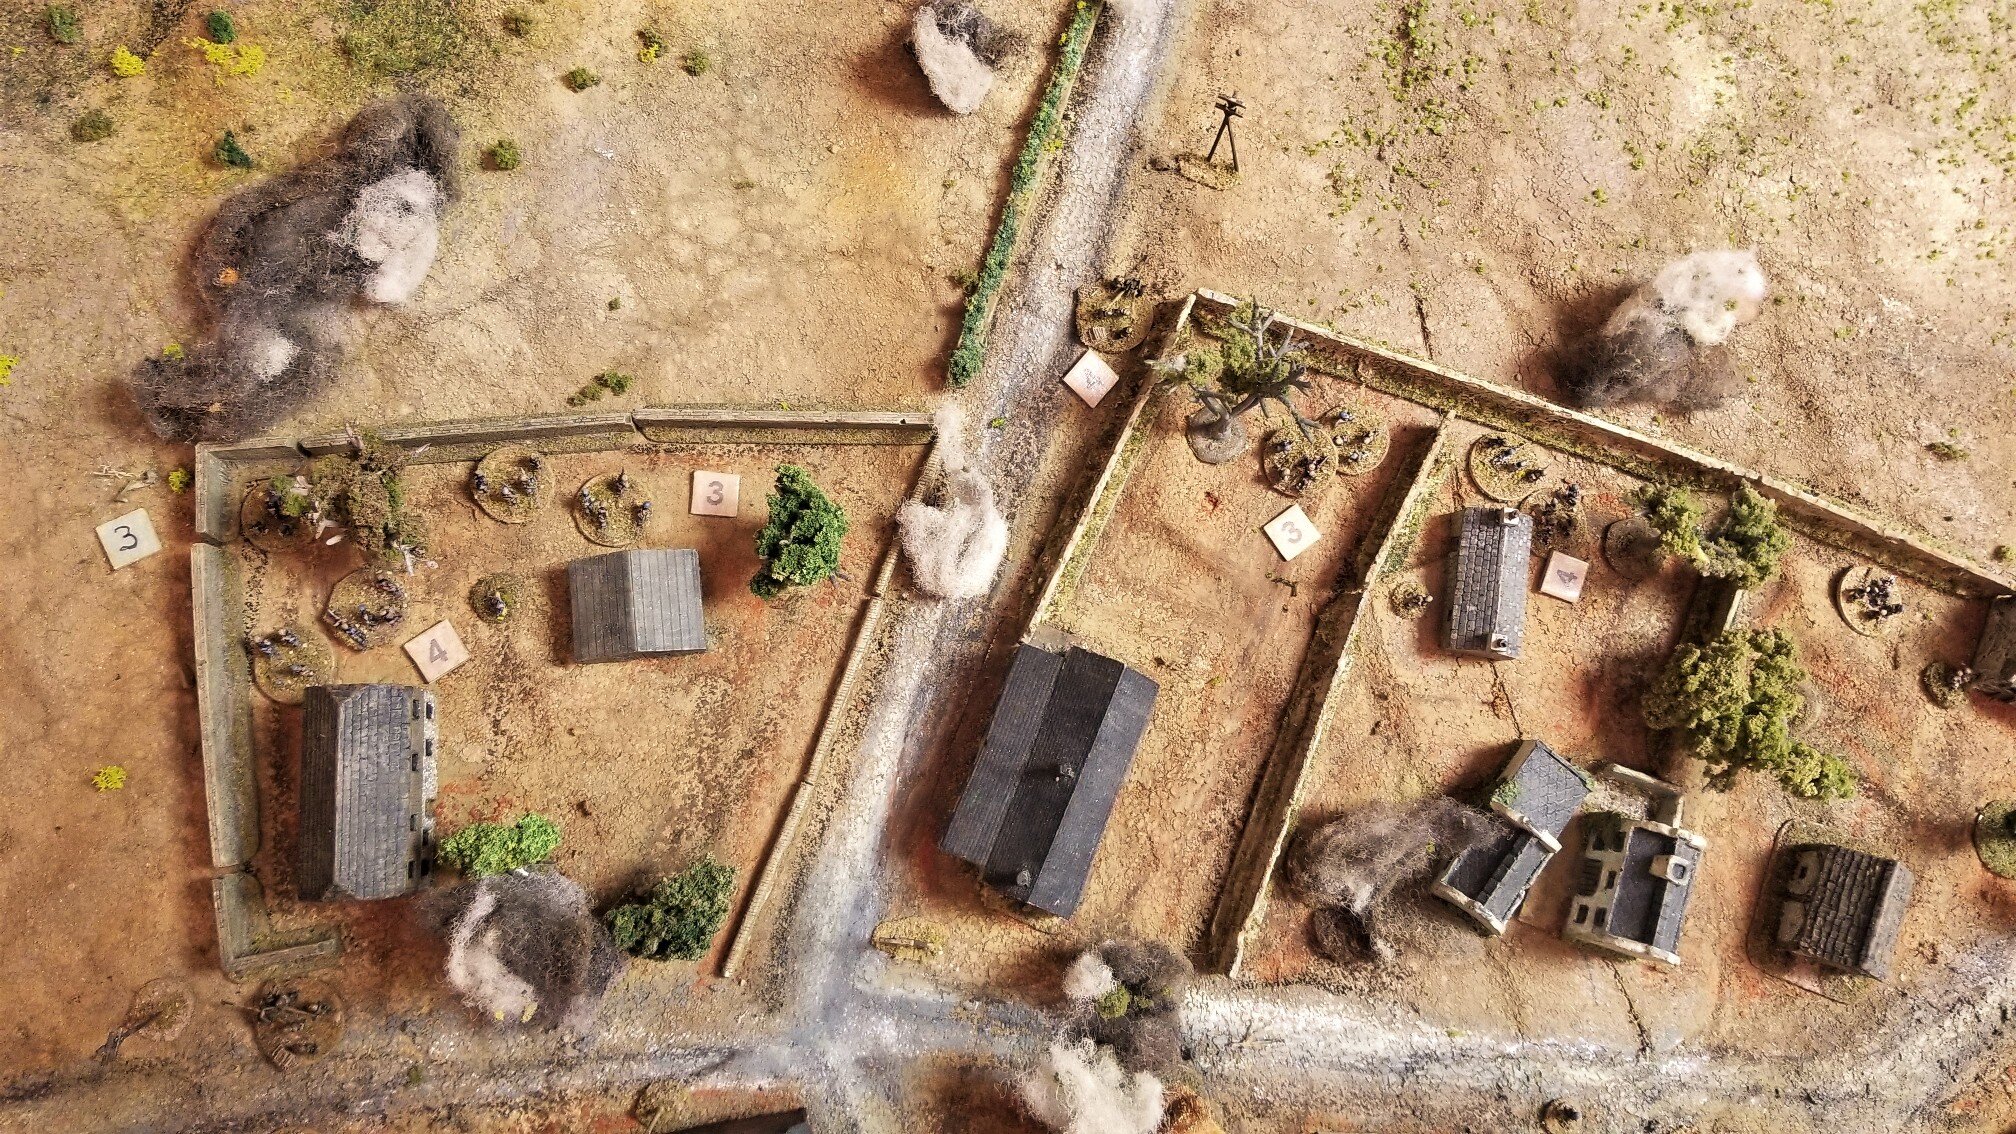
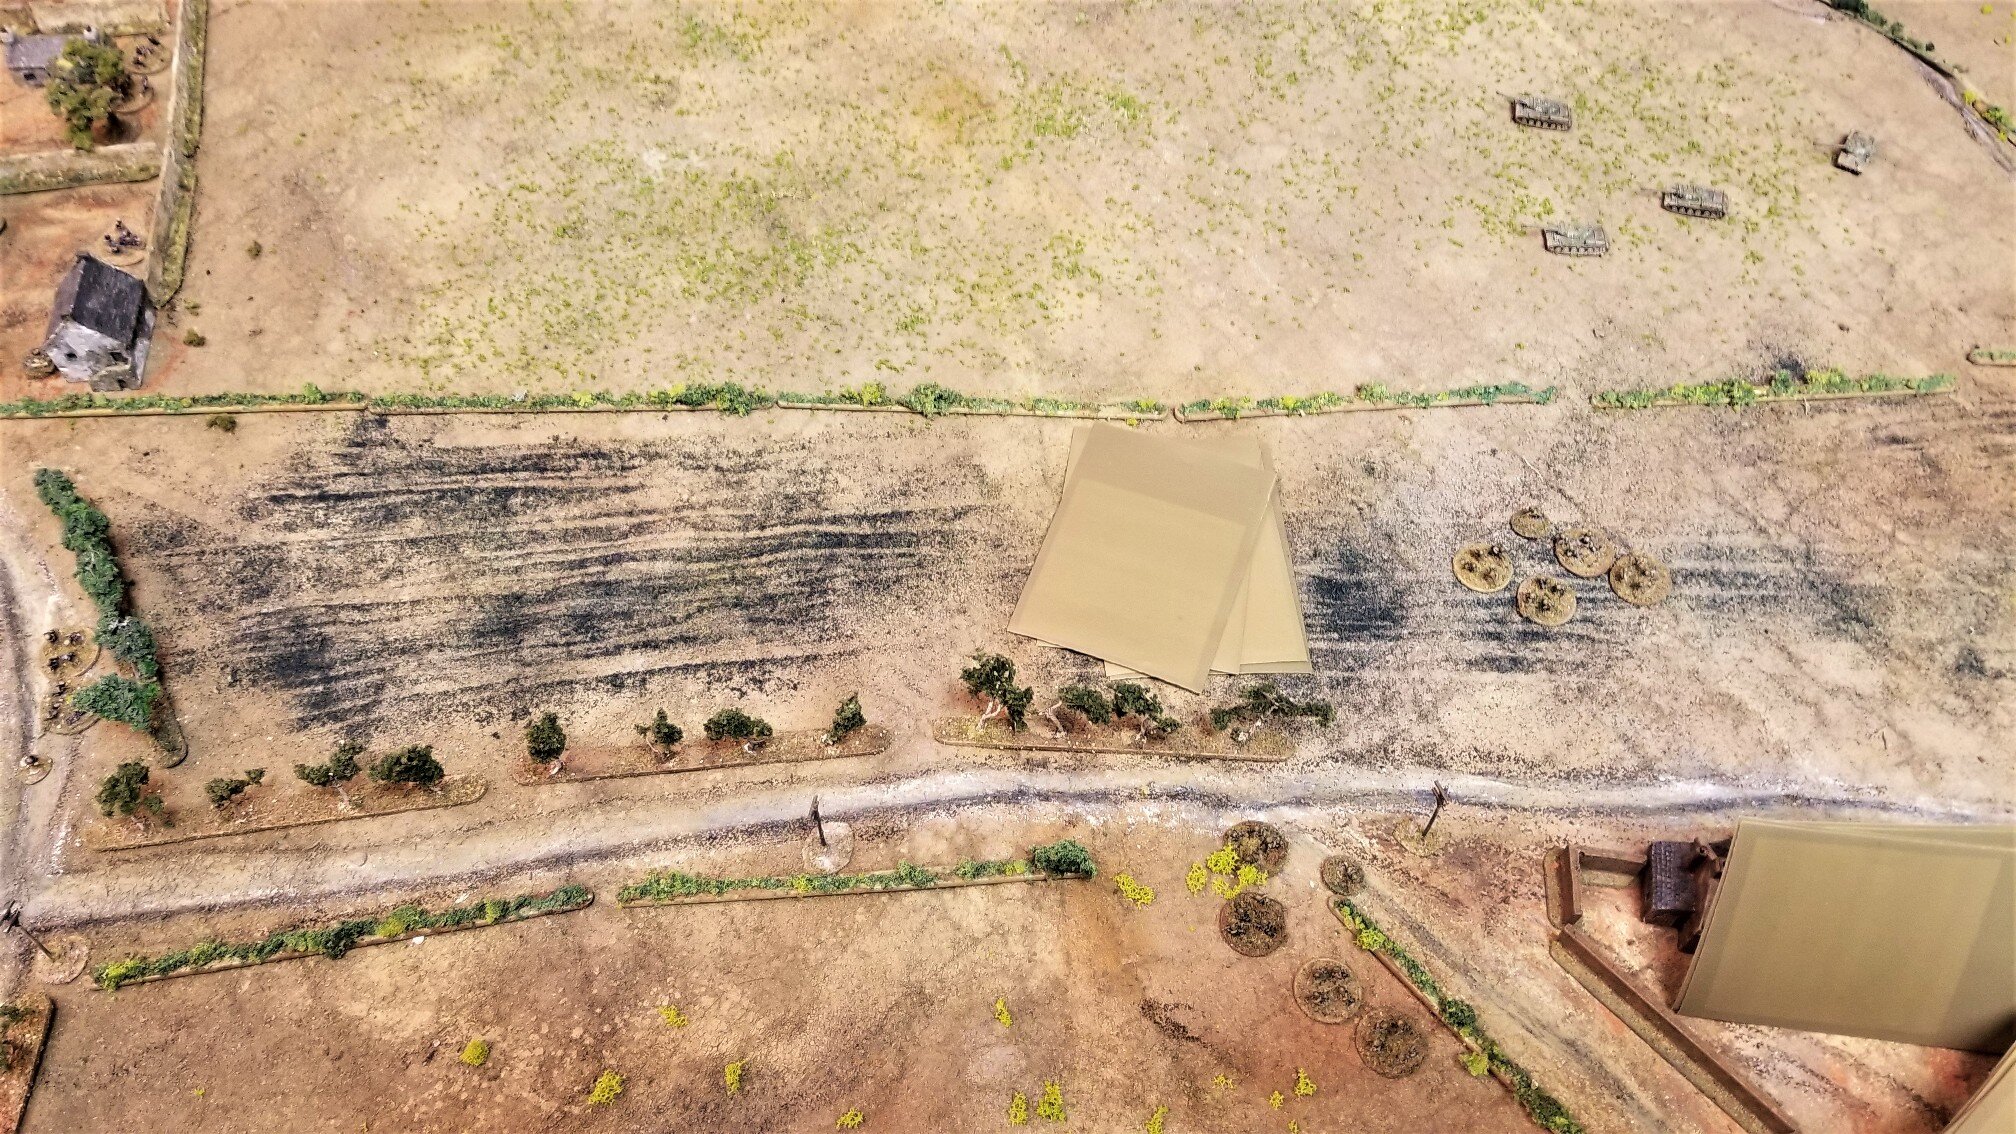
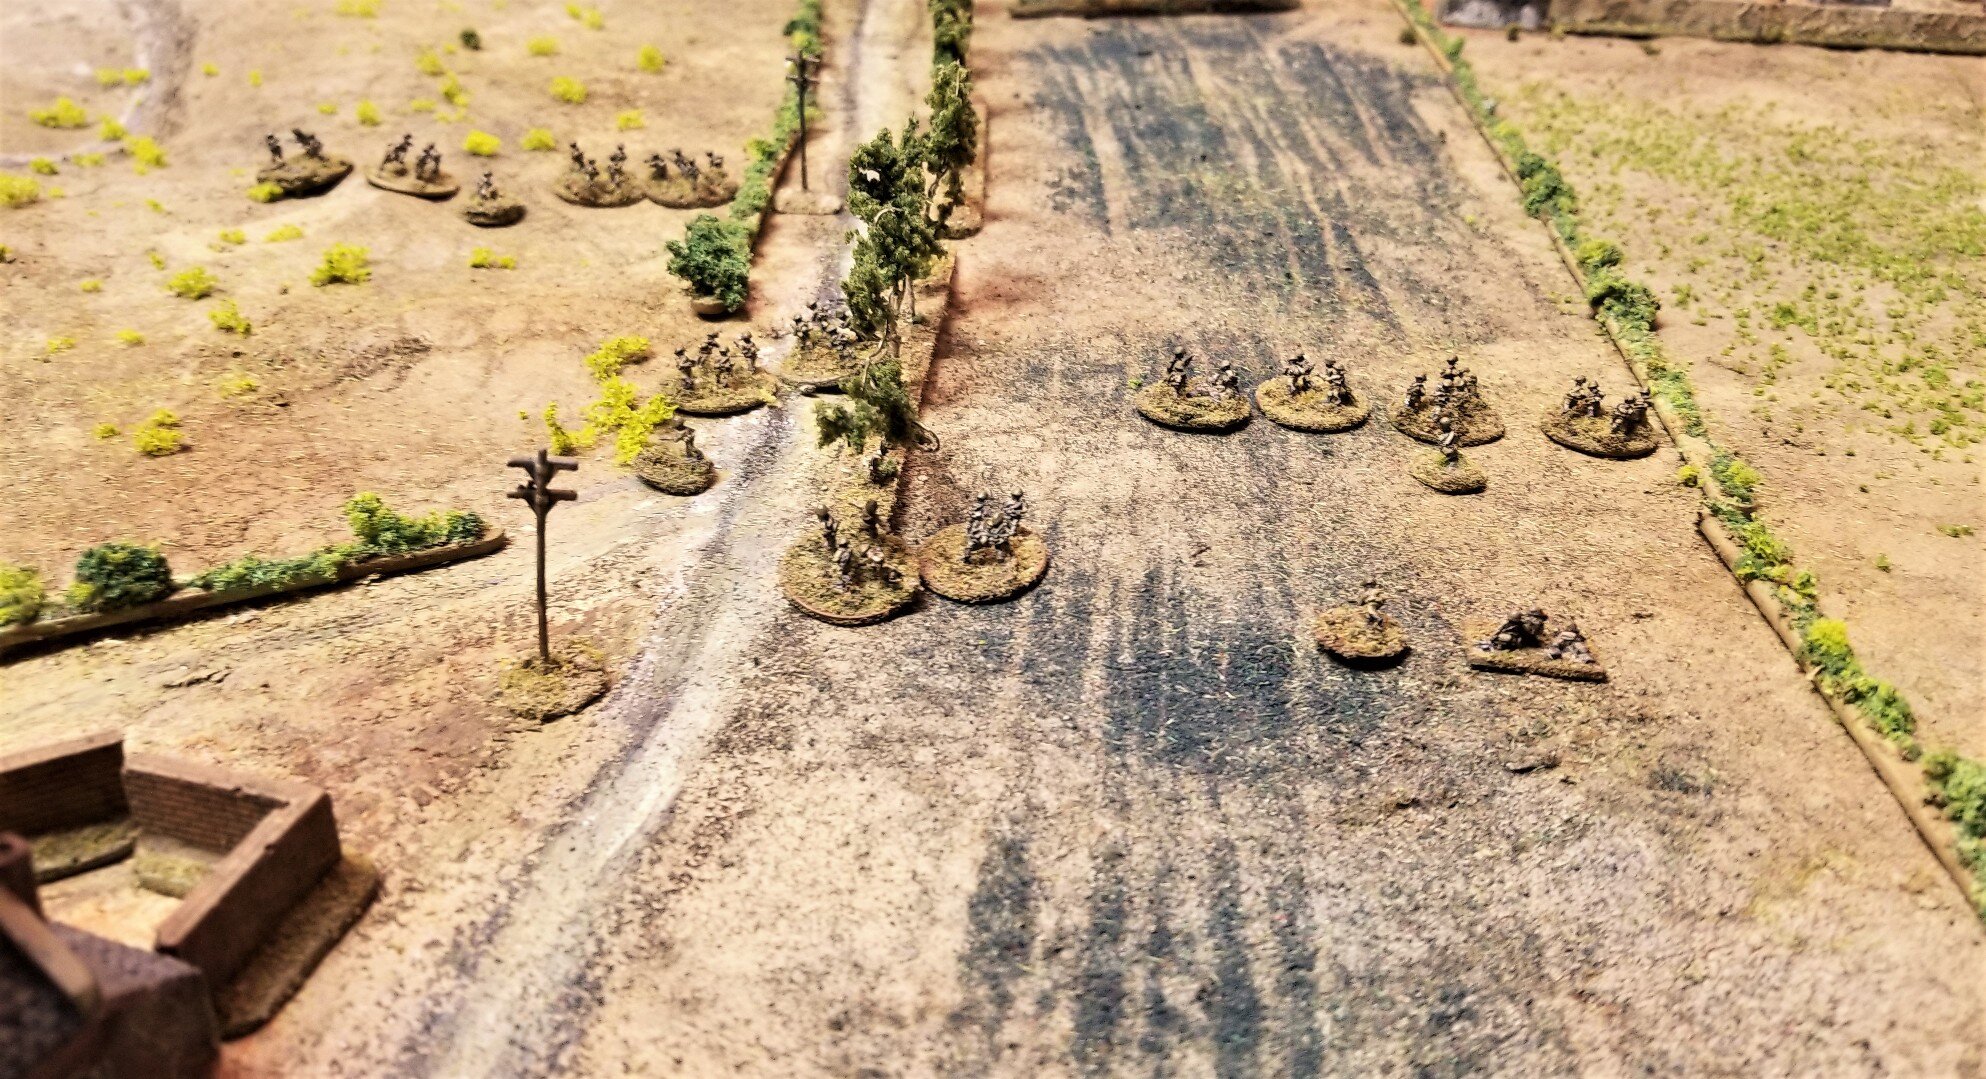
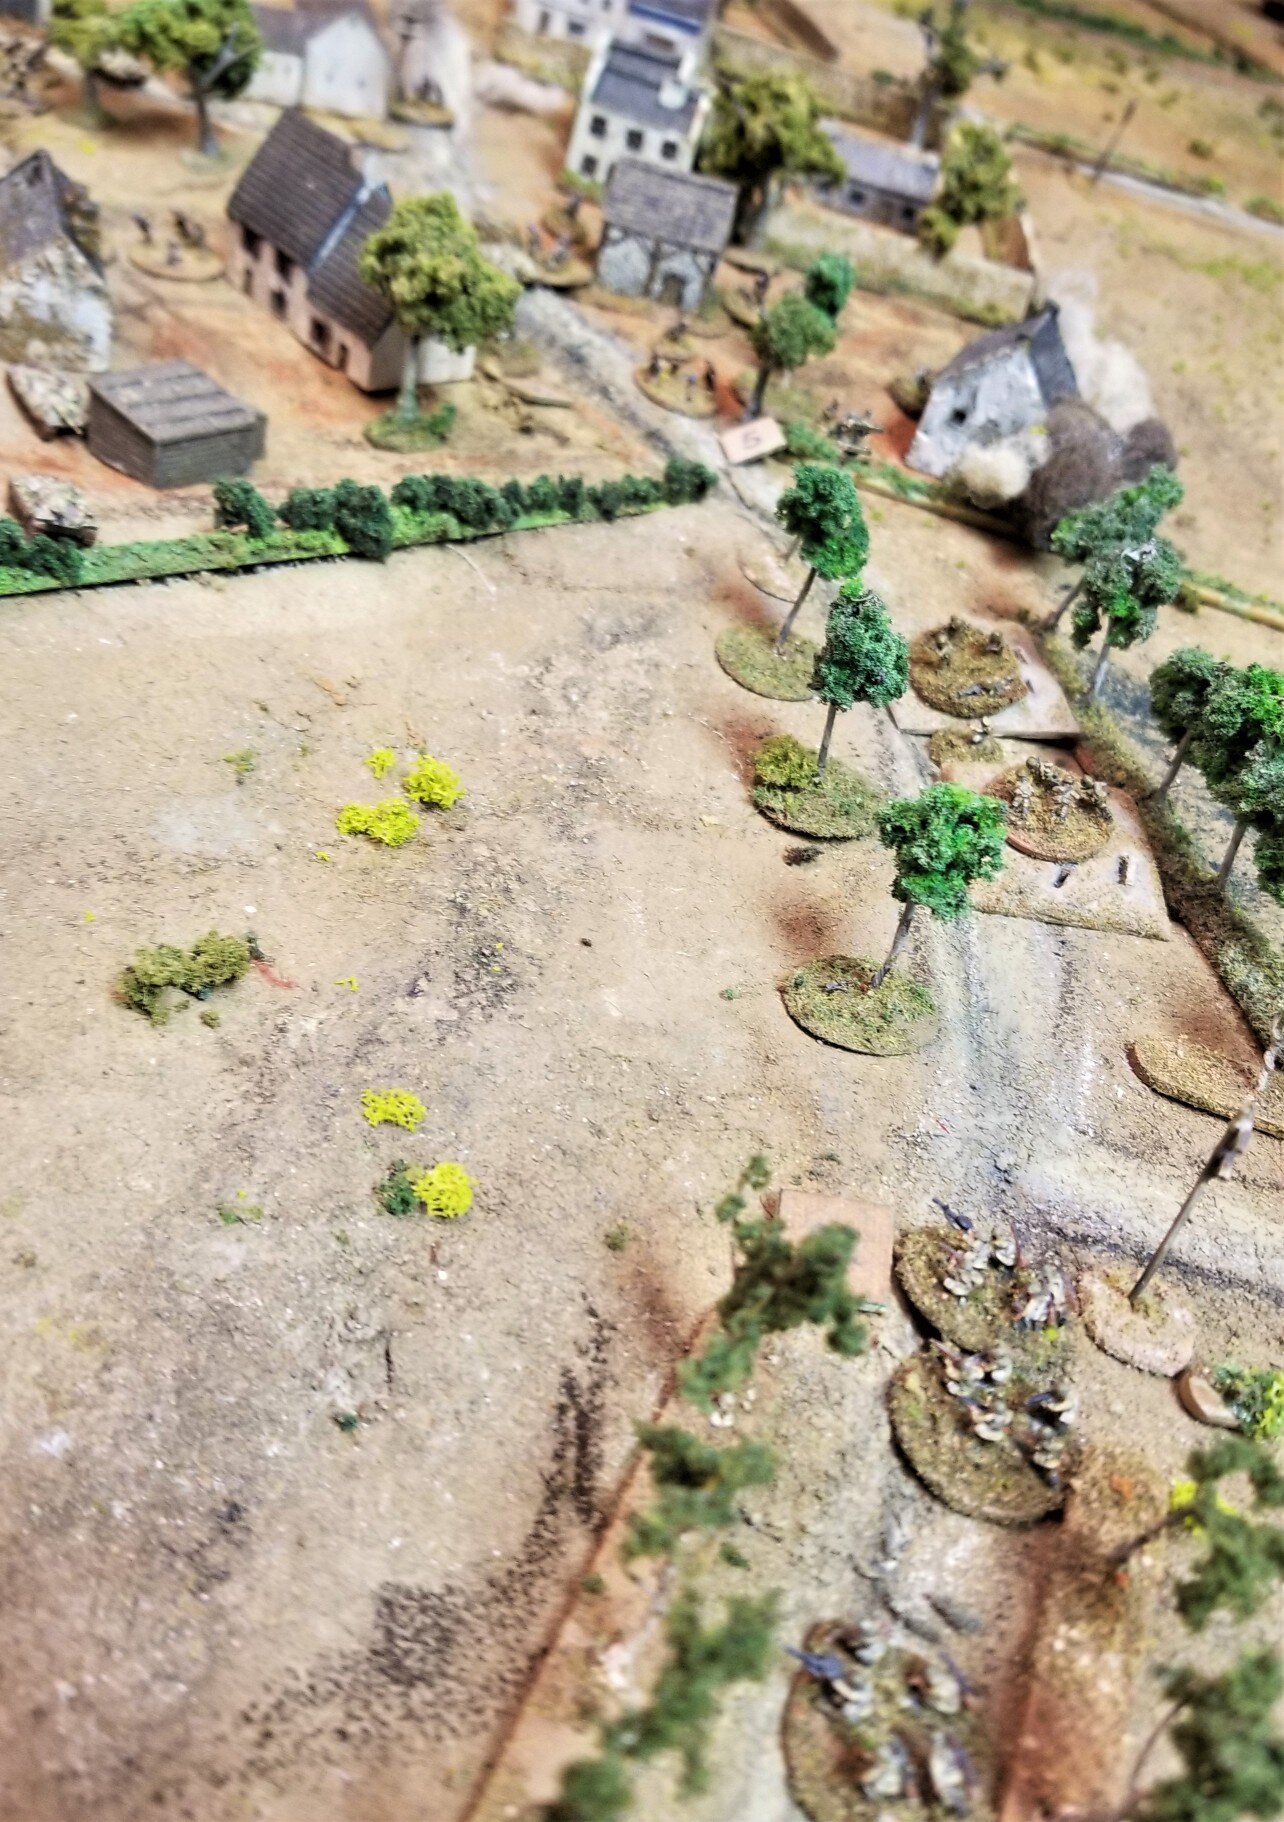
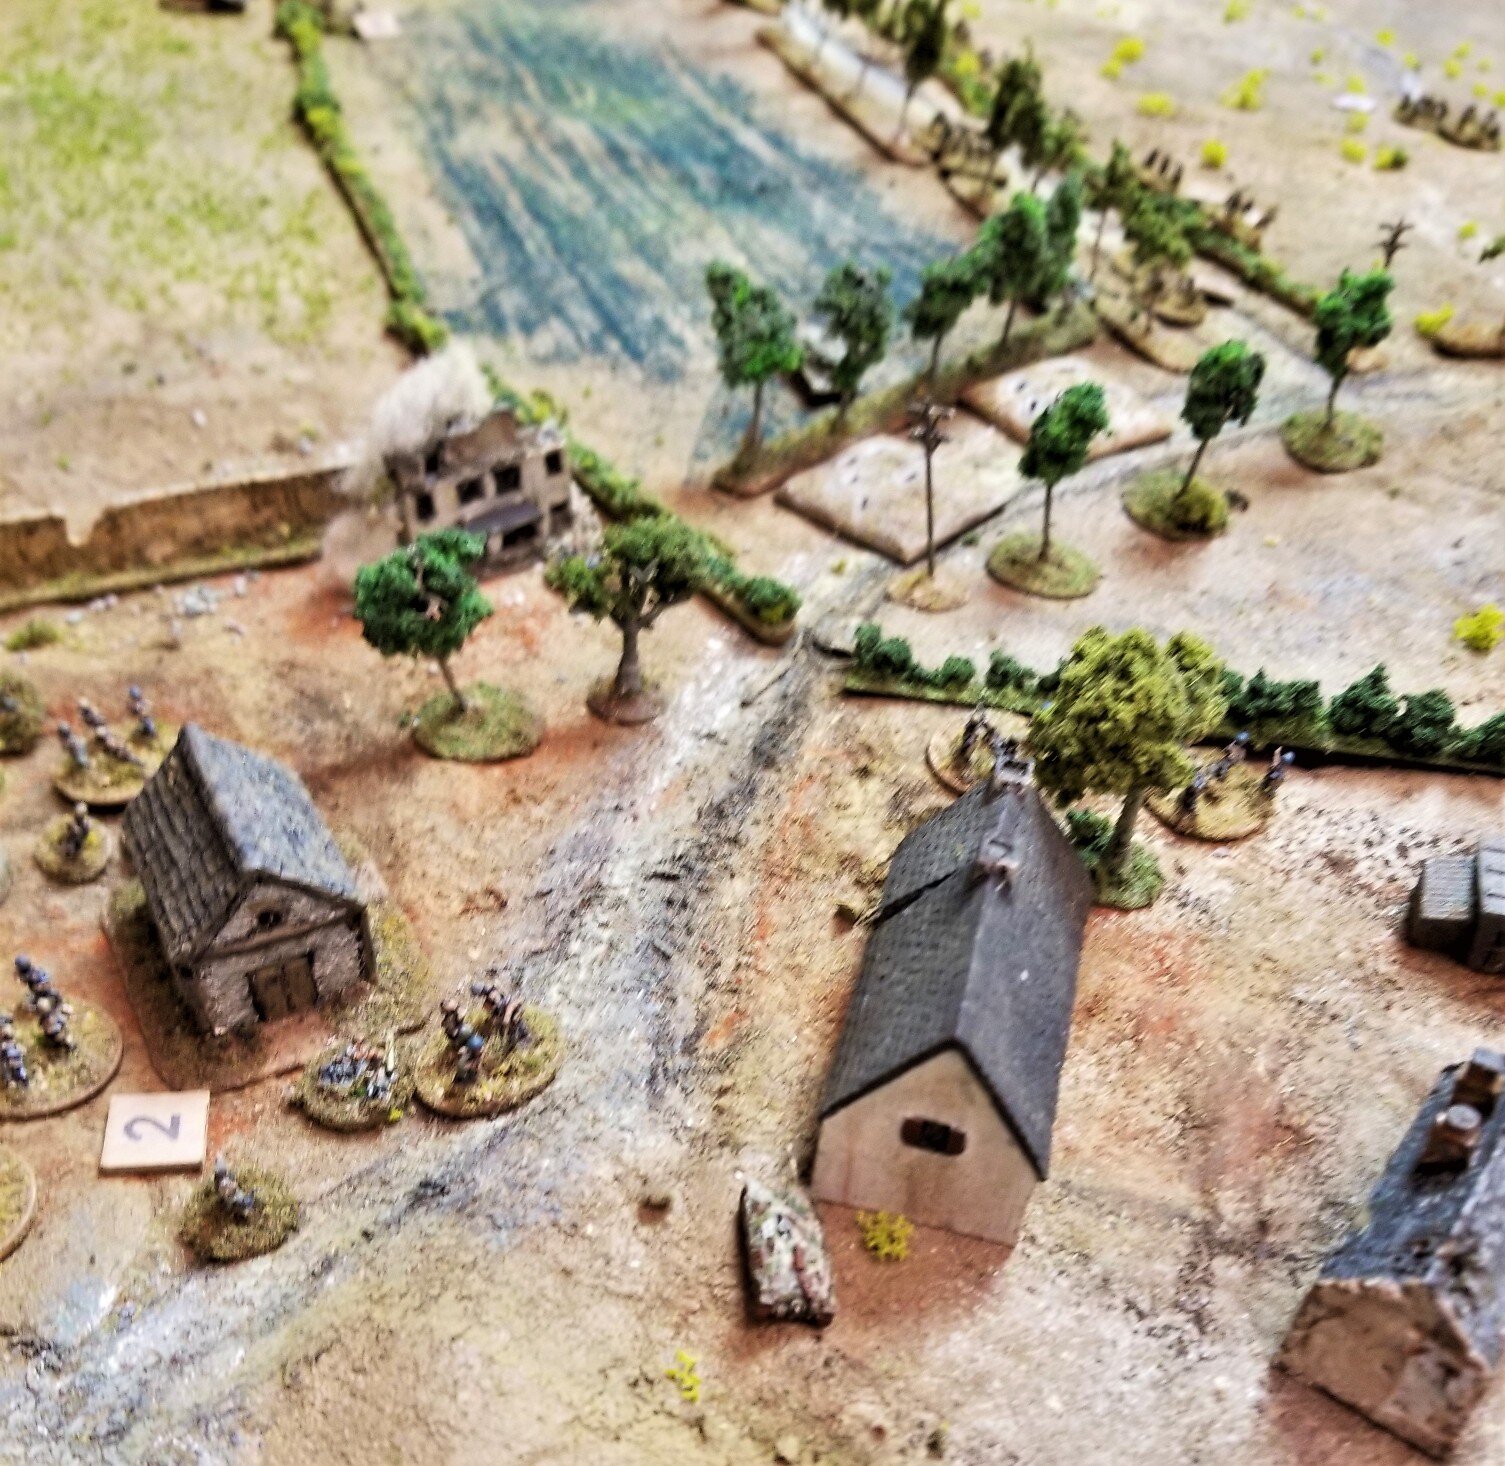
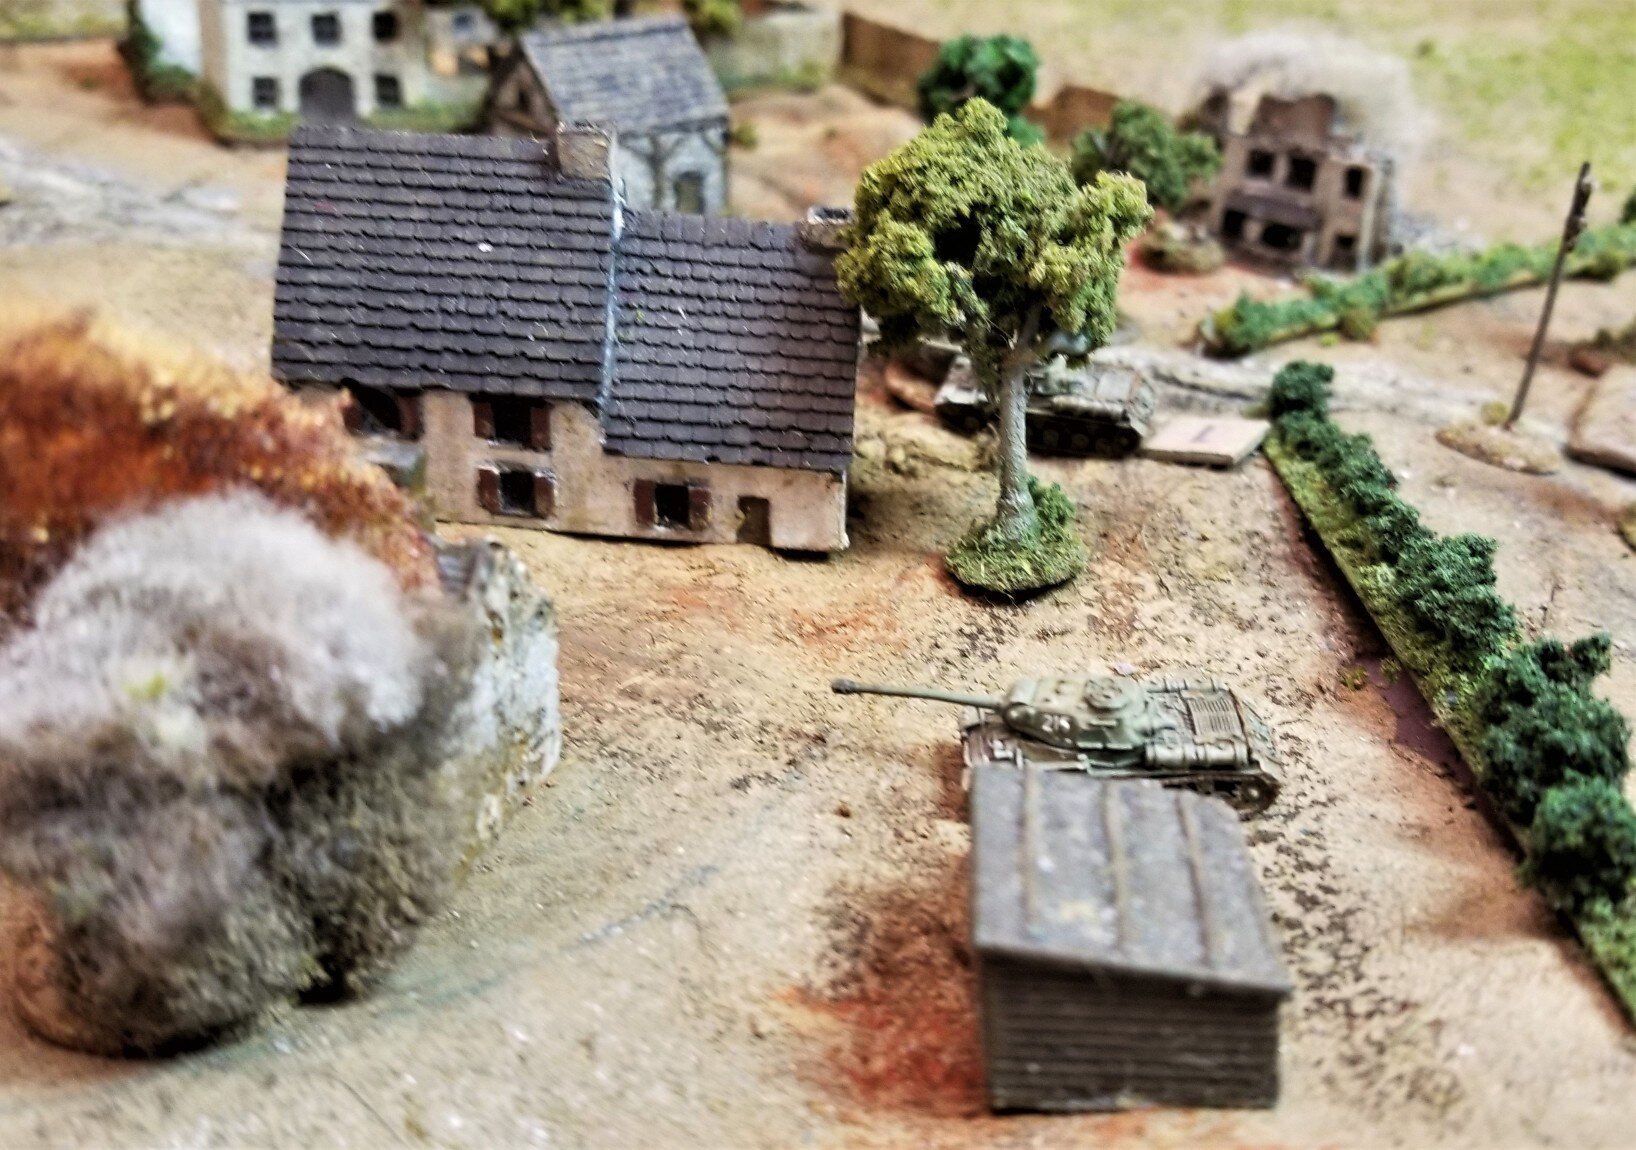
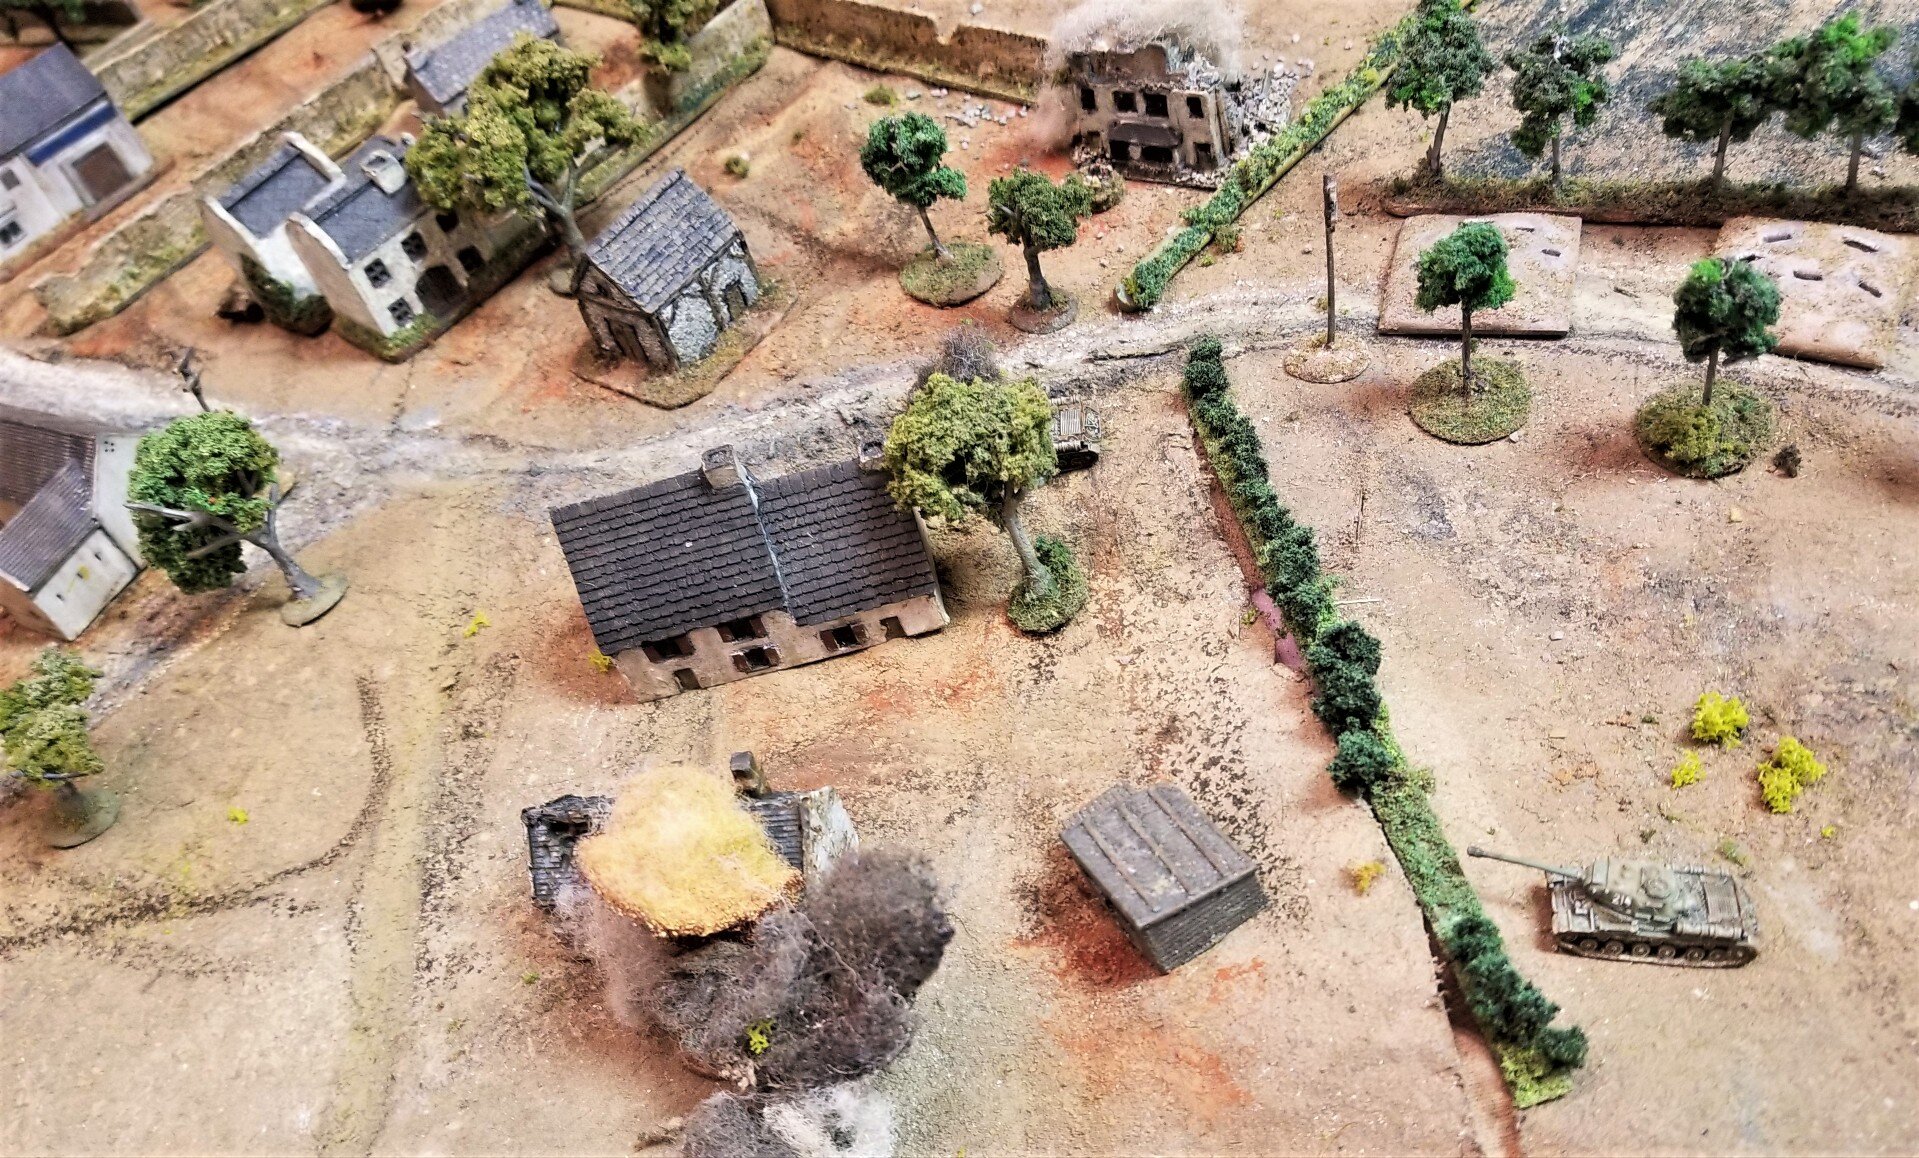
Overview of the battle landscape. Bocage, orchard and light woods. Germans attacked from left to right.
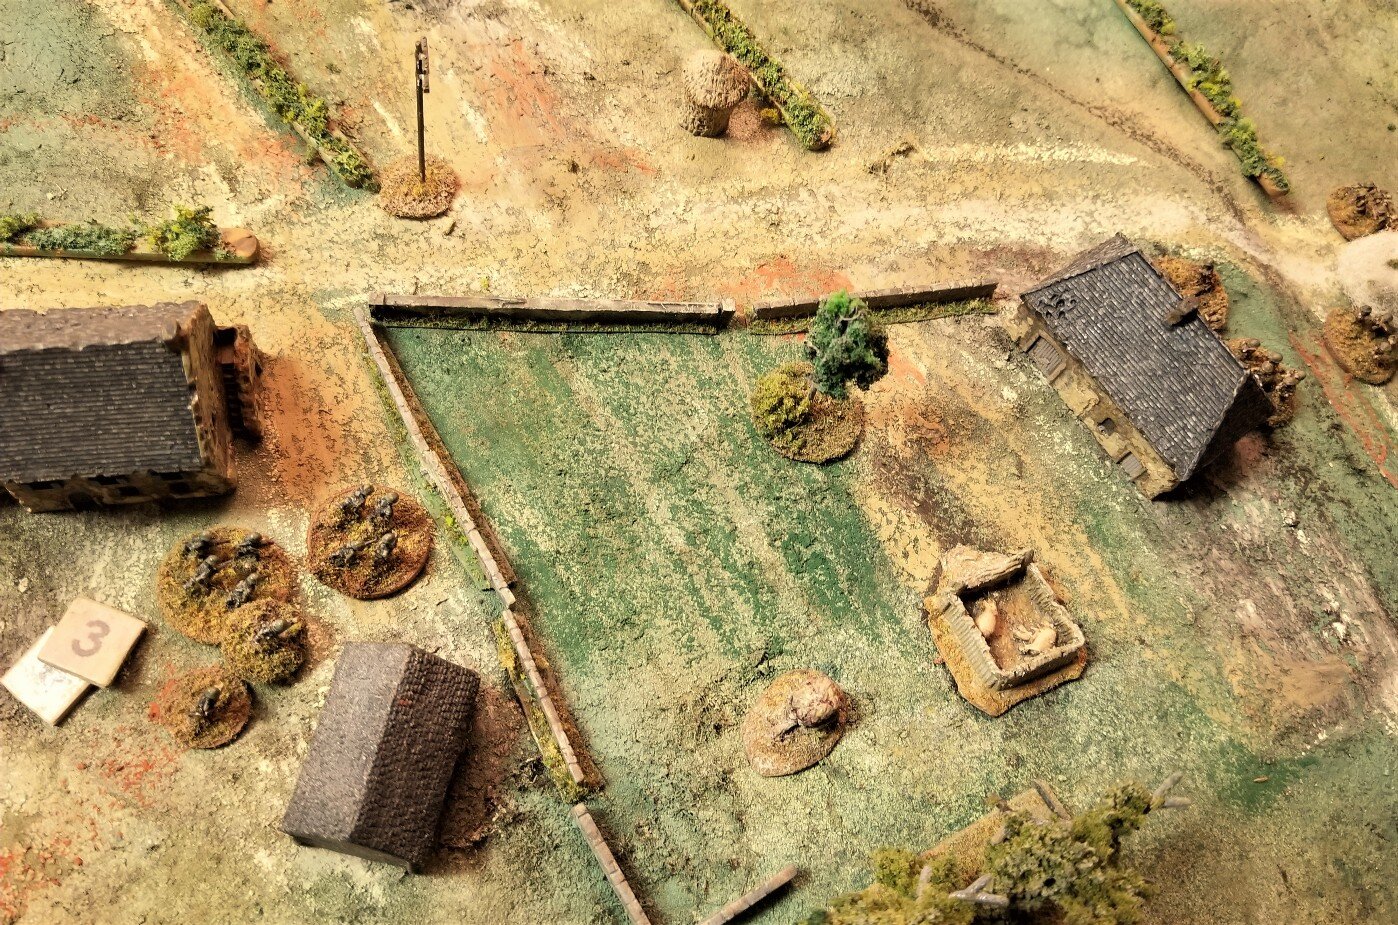
At the start of the game, German infantry moved on their left and had good rolls to gain protection of left-most bocage.
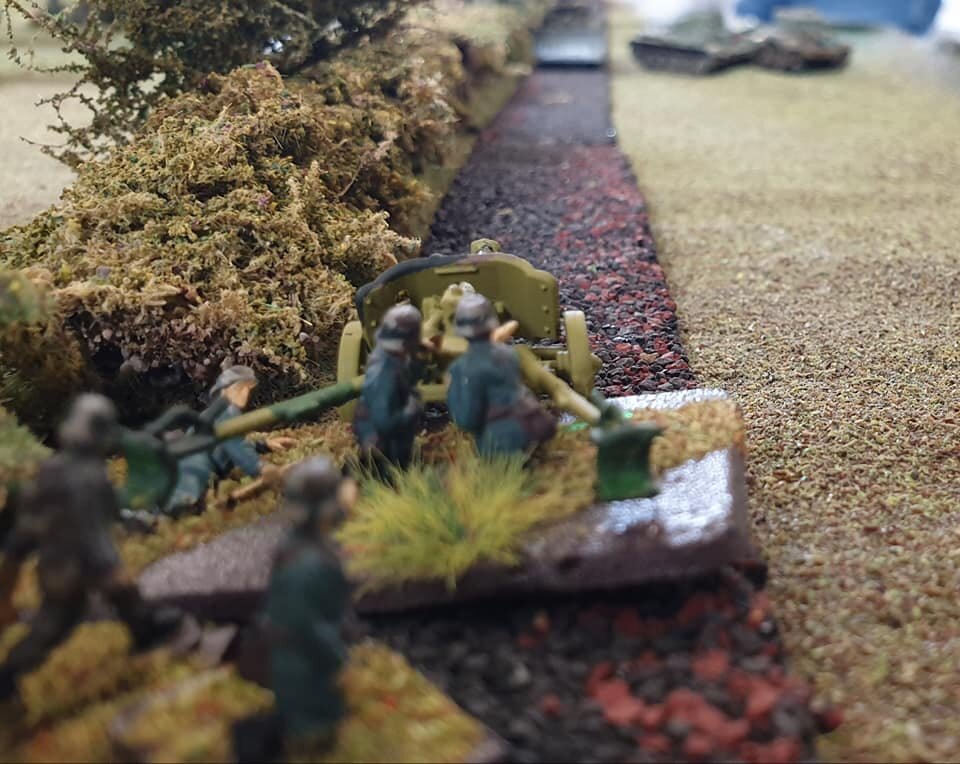
Polish infantry dug in behind the hedgerows.
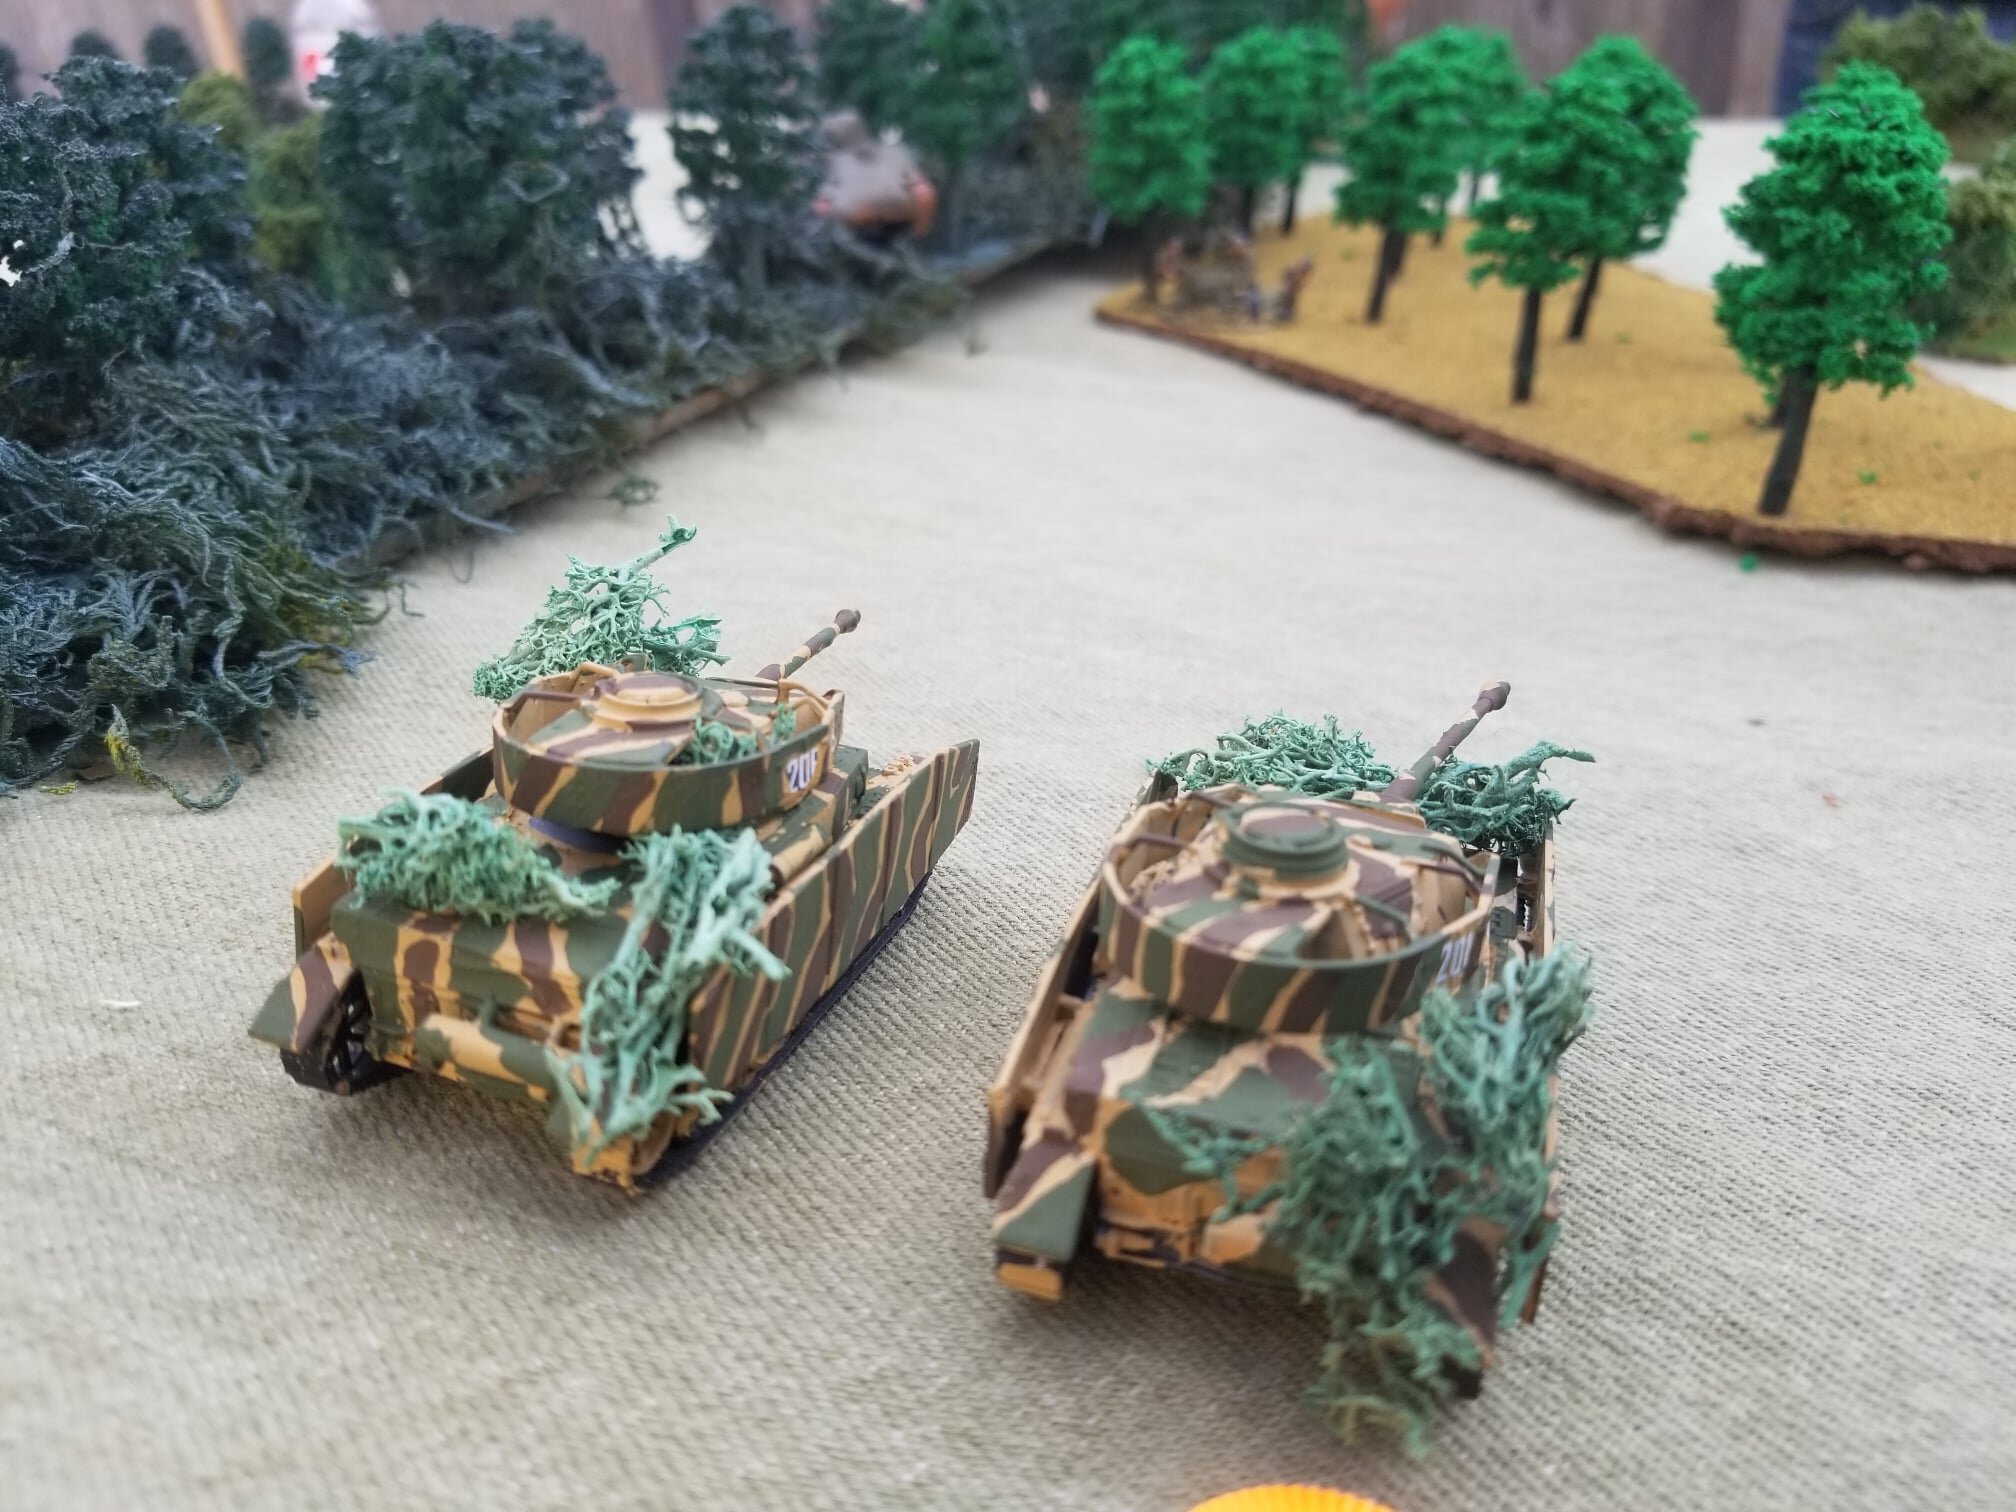
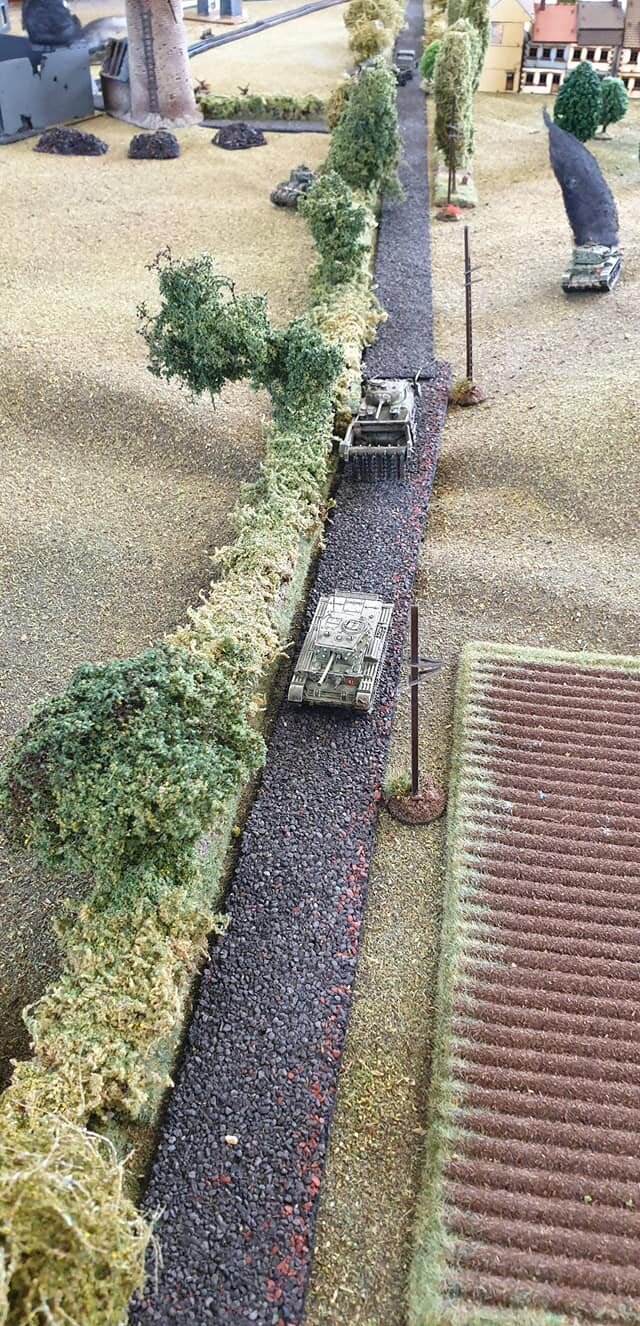
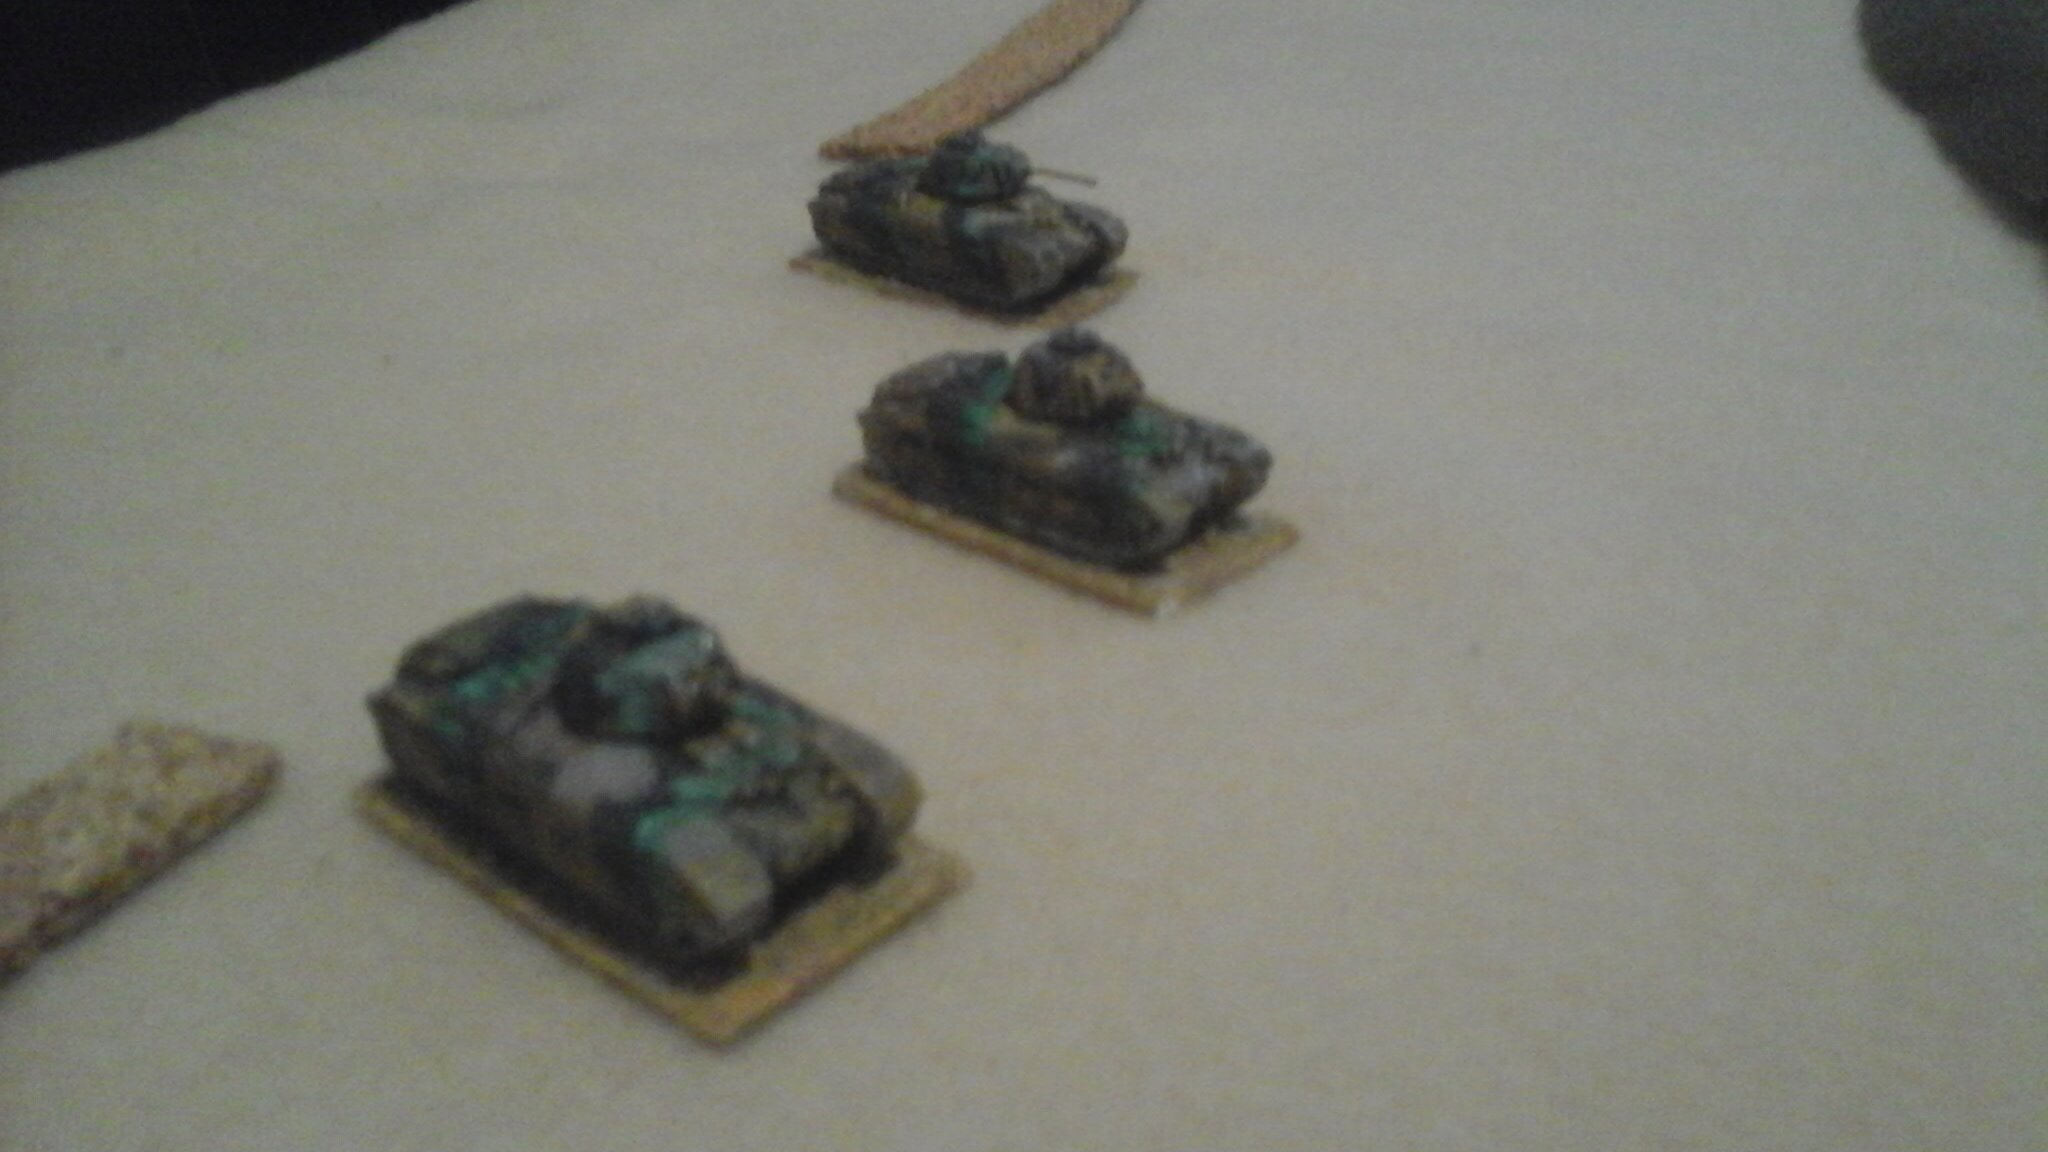
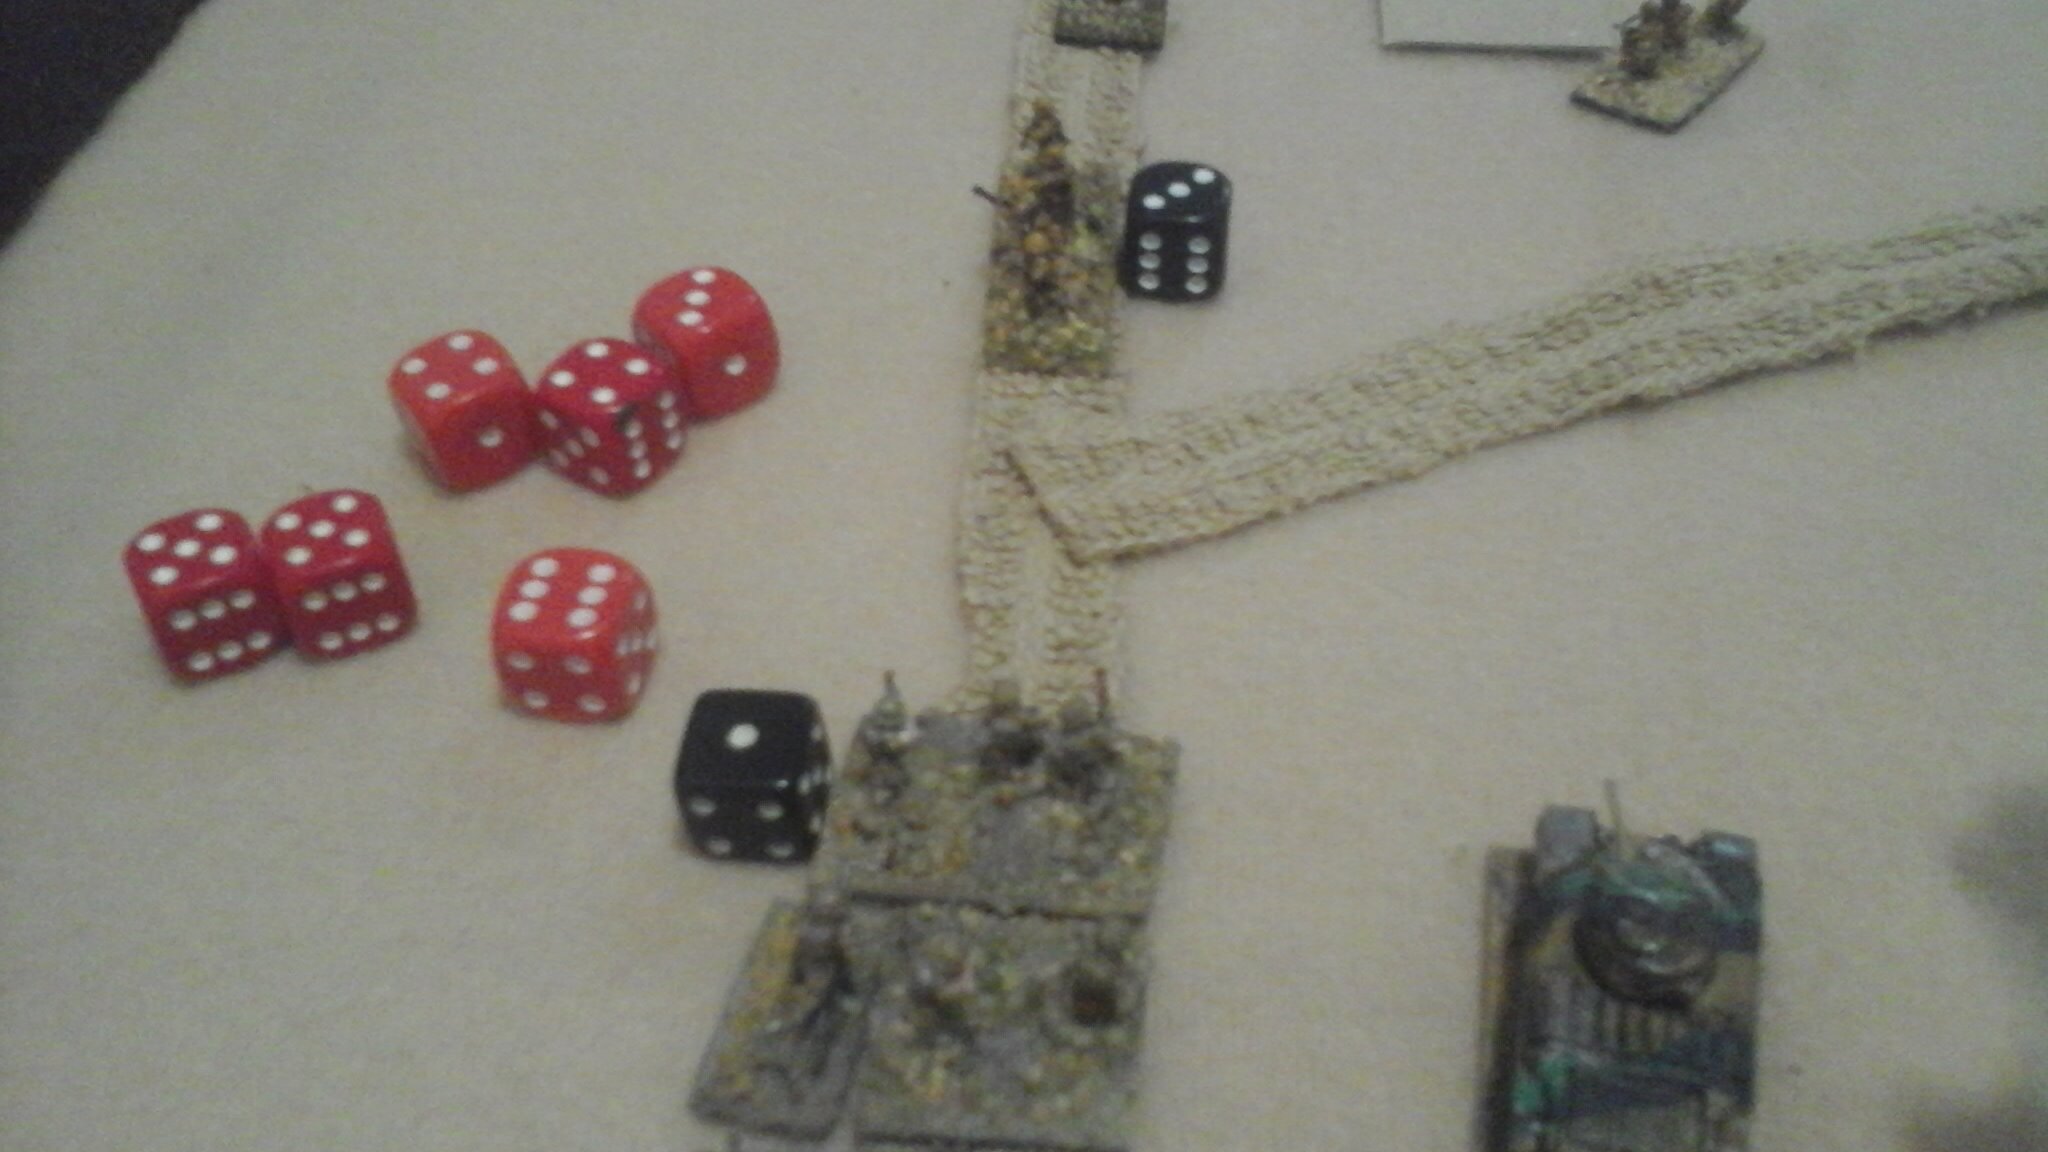
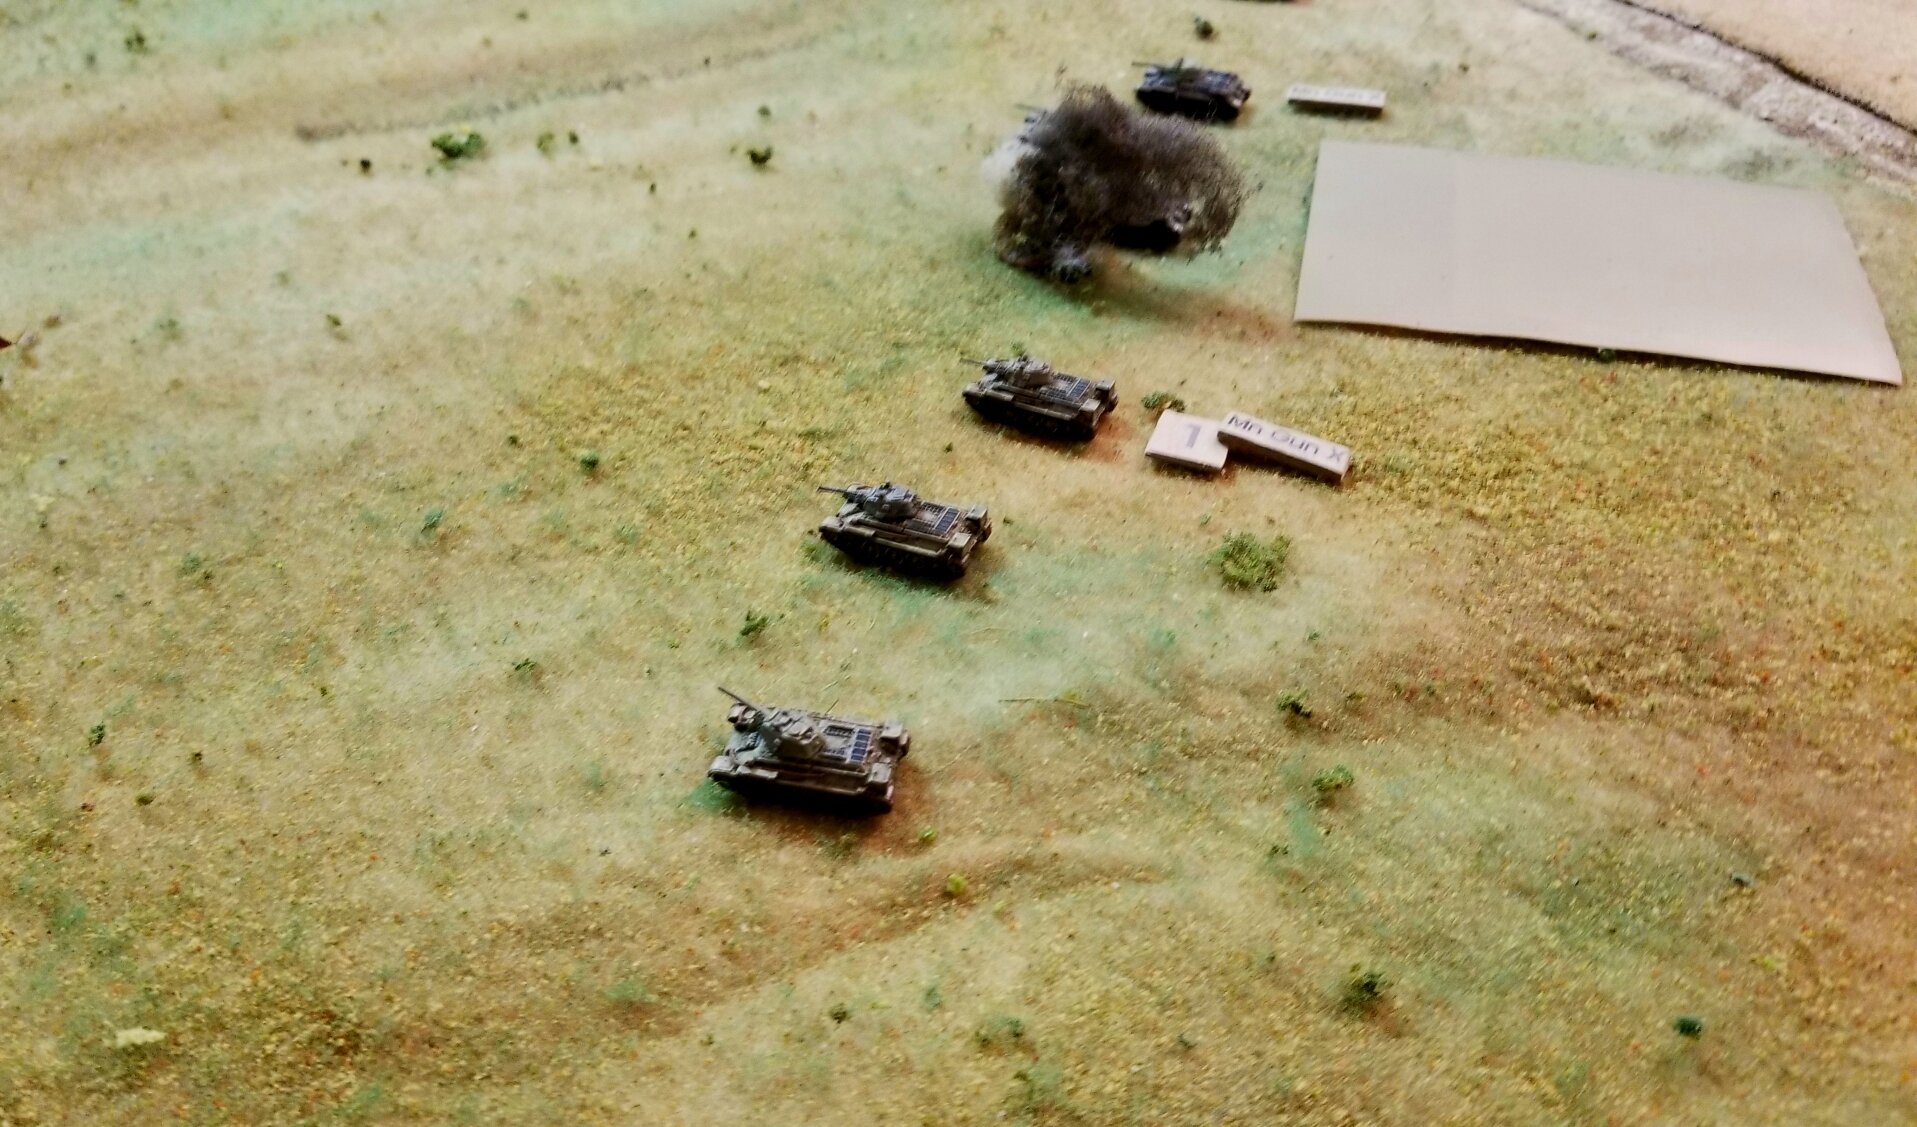
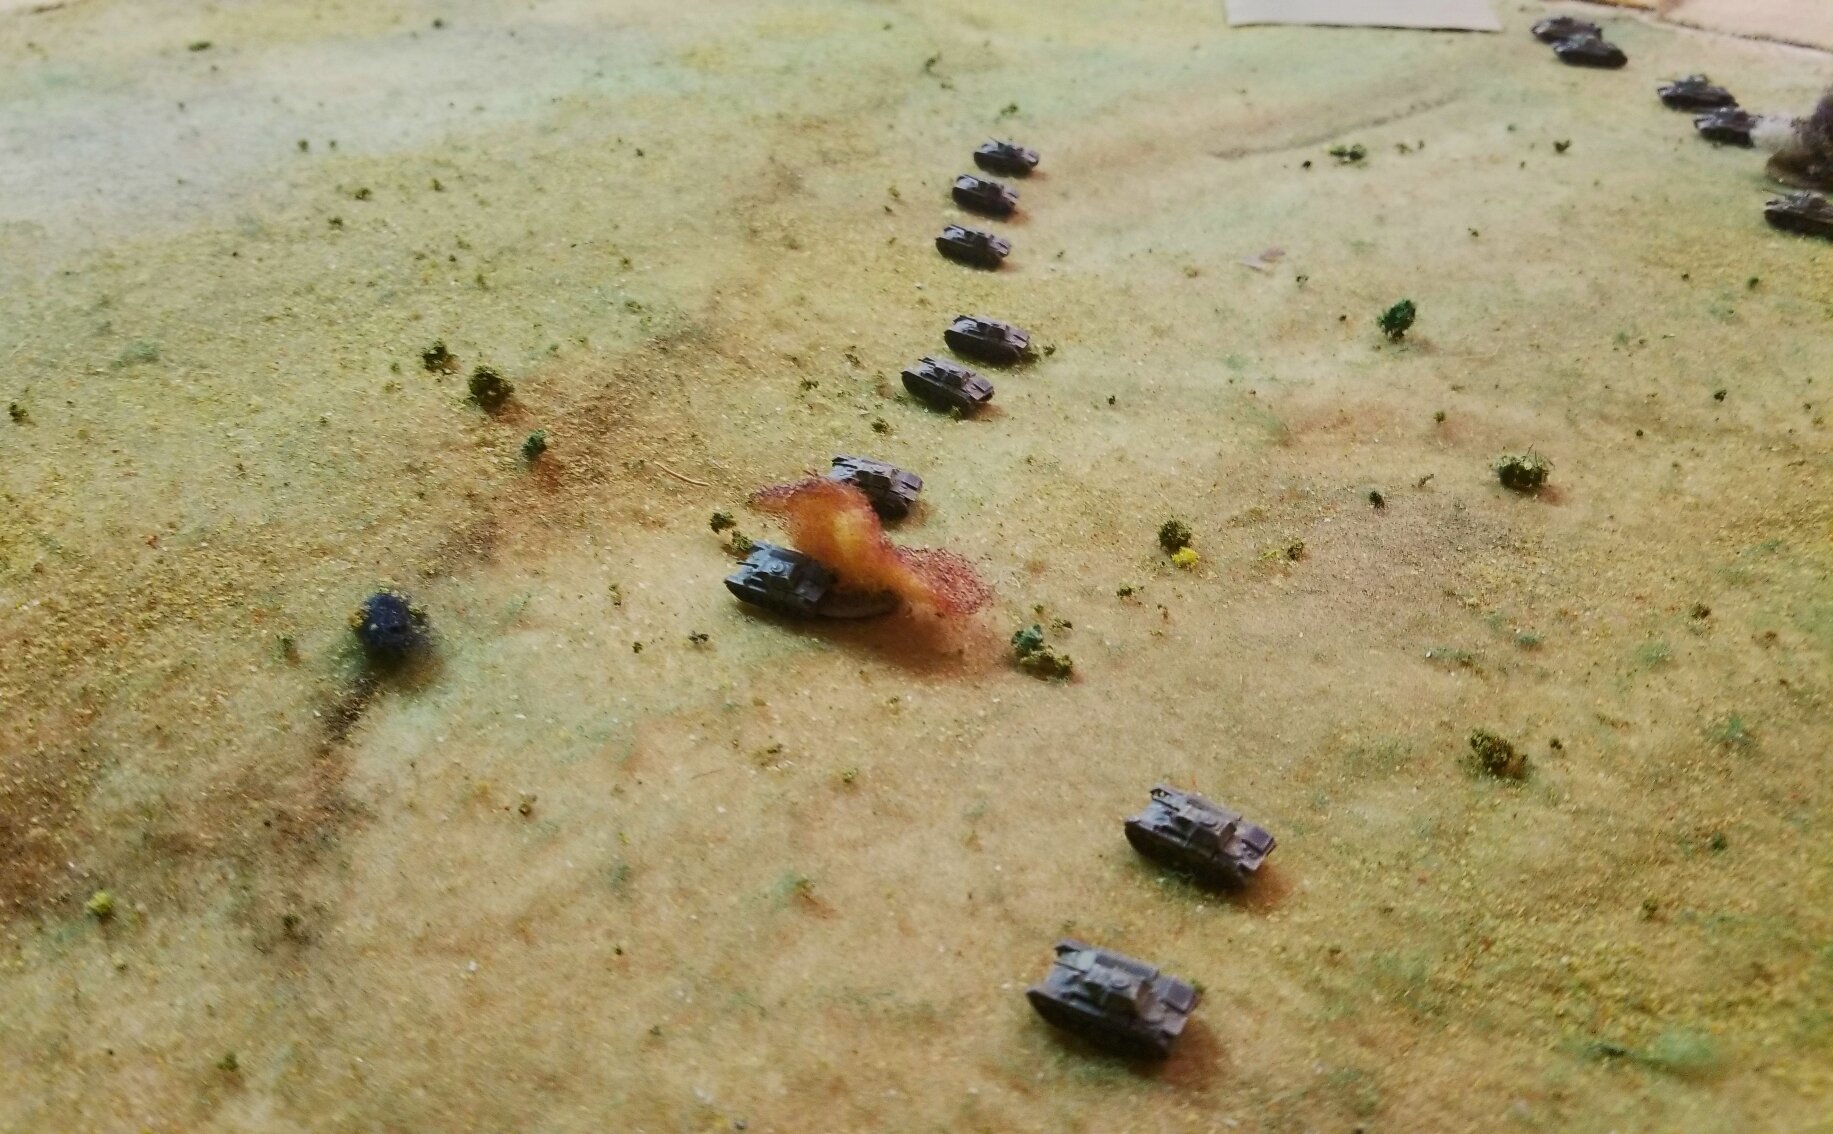
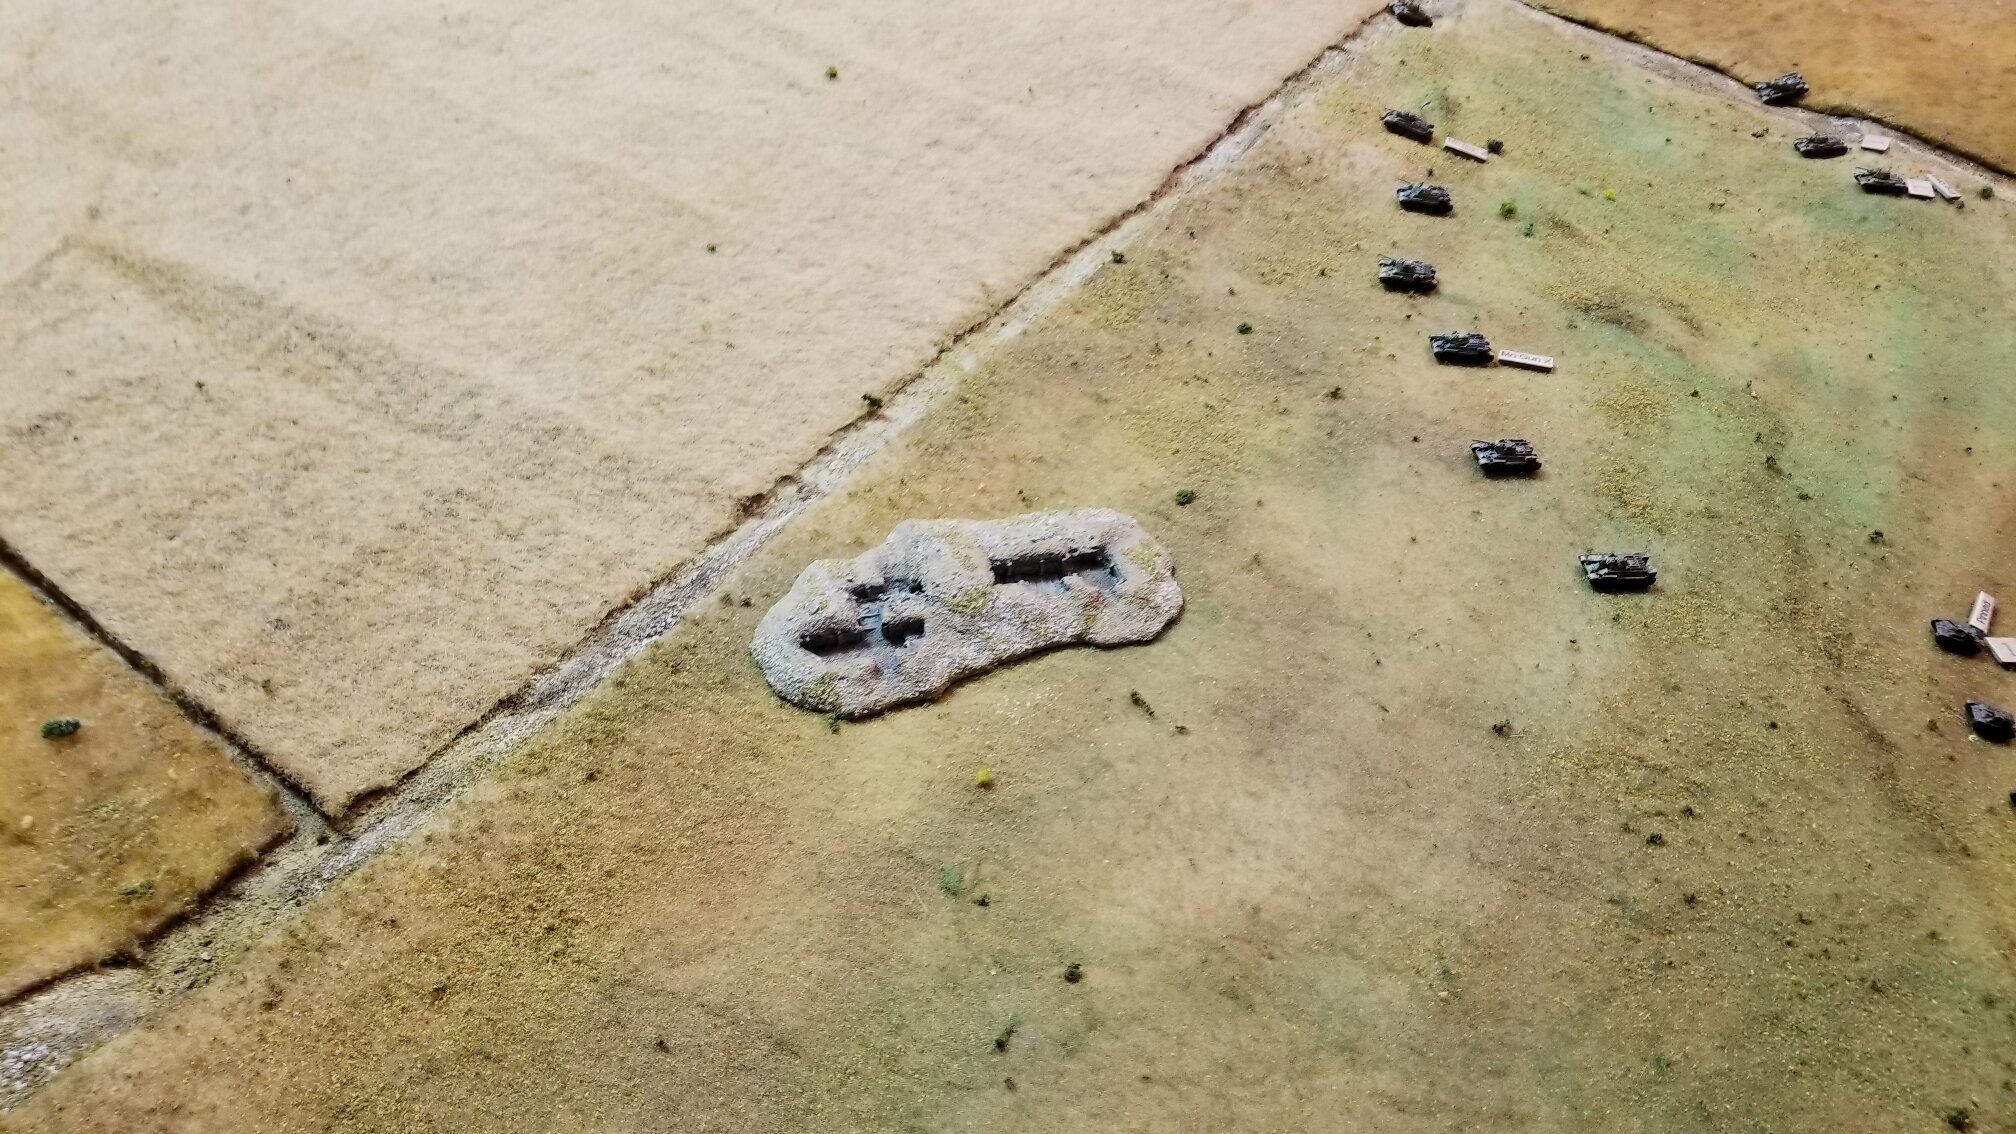
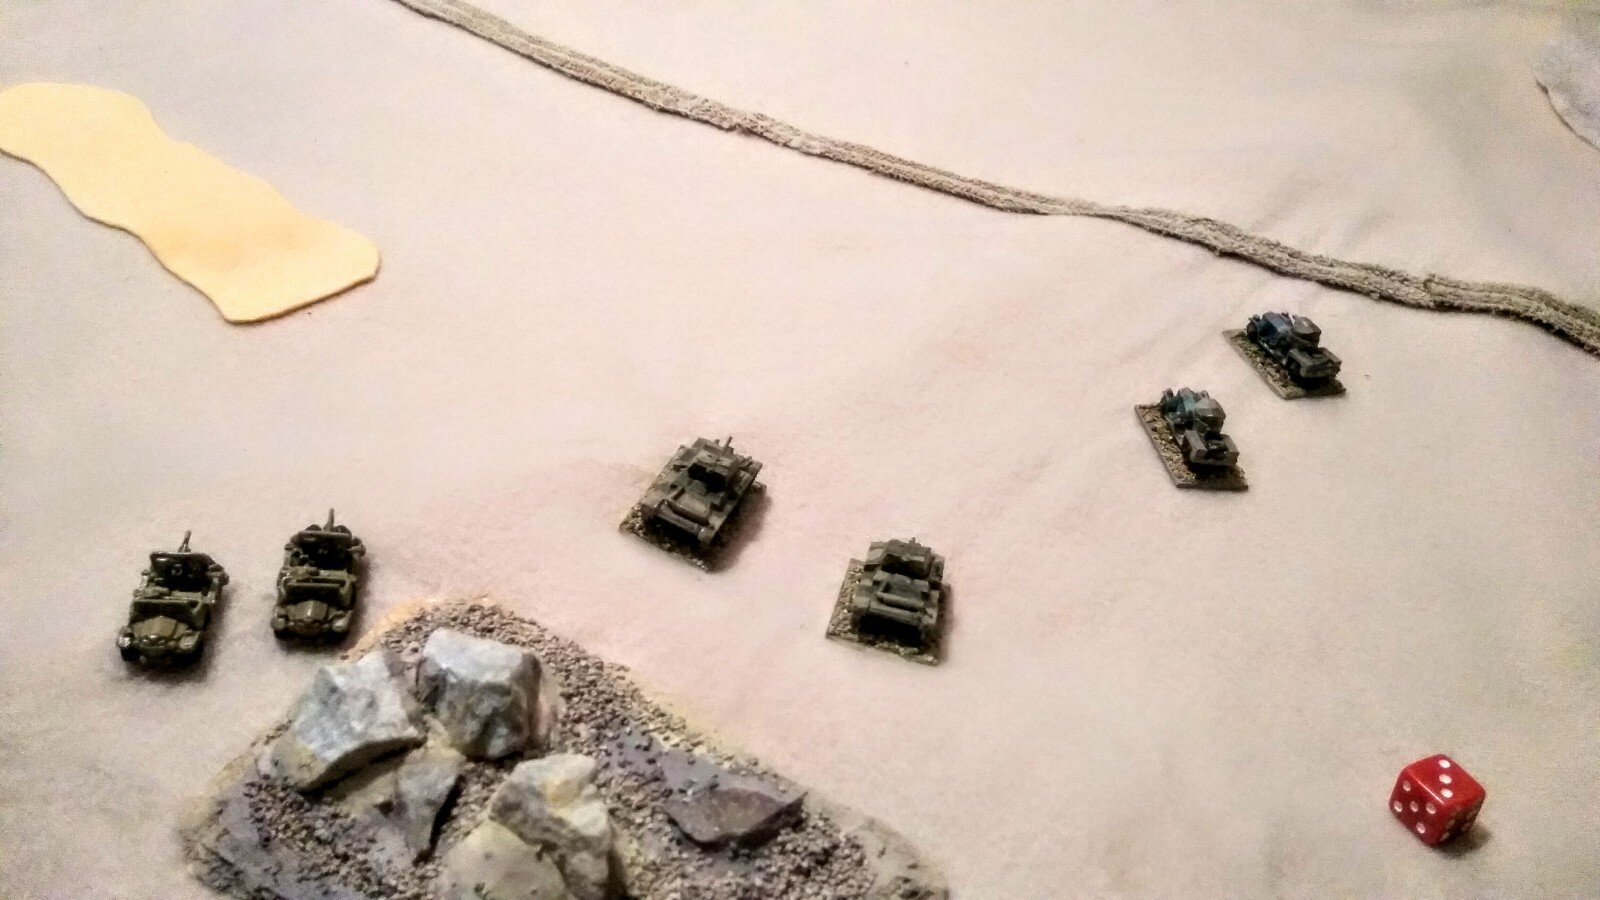
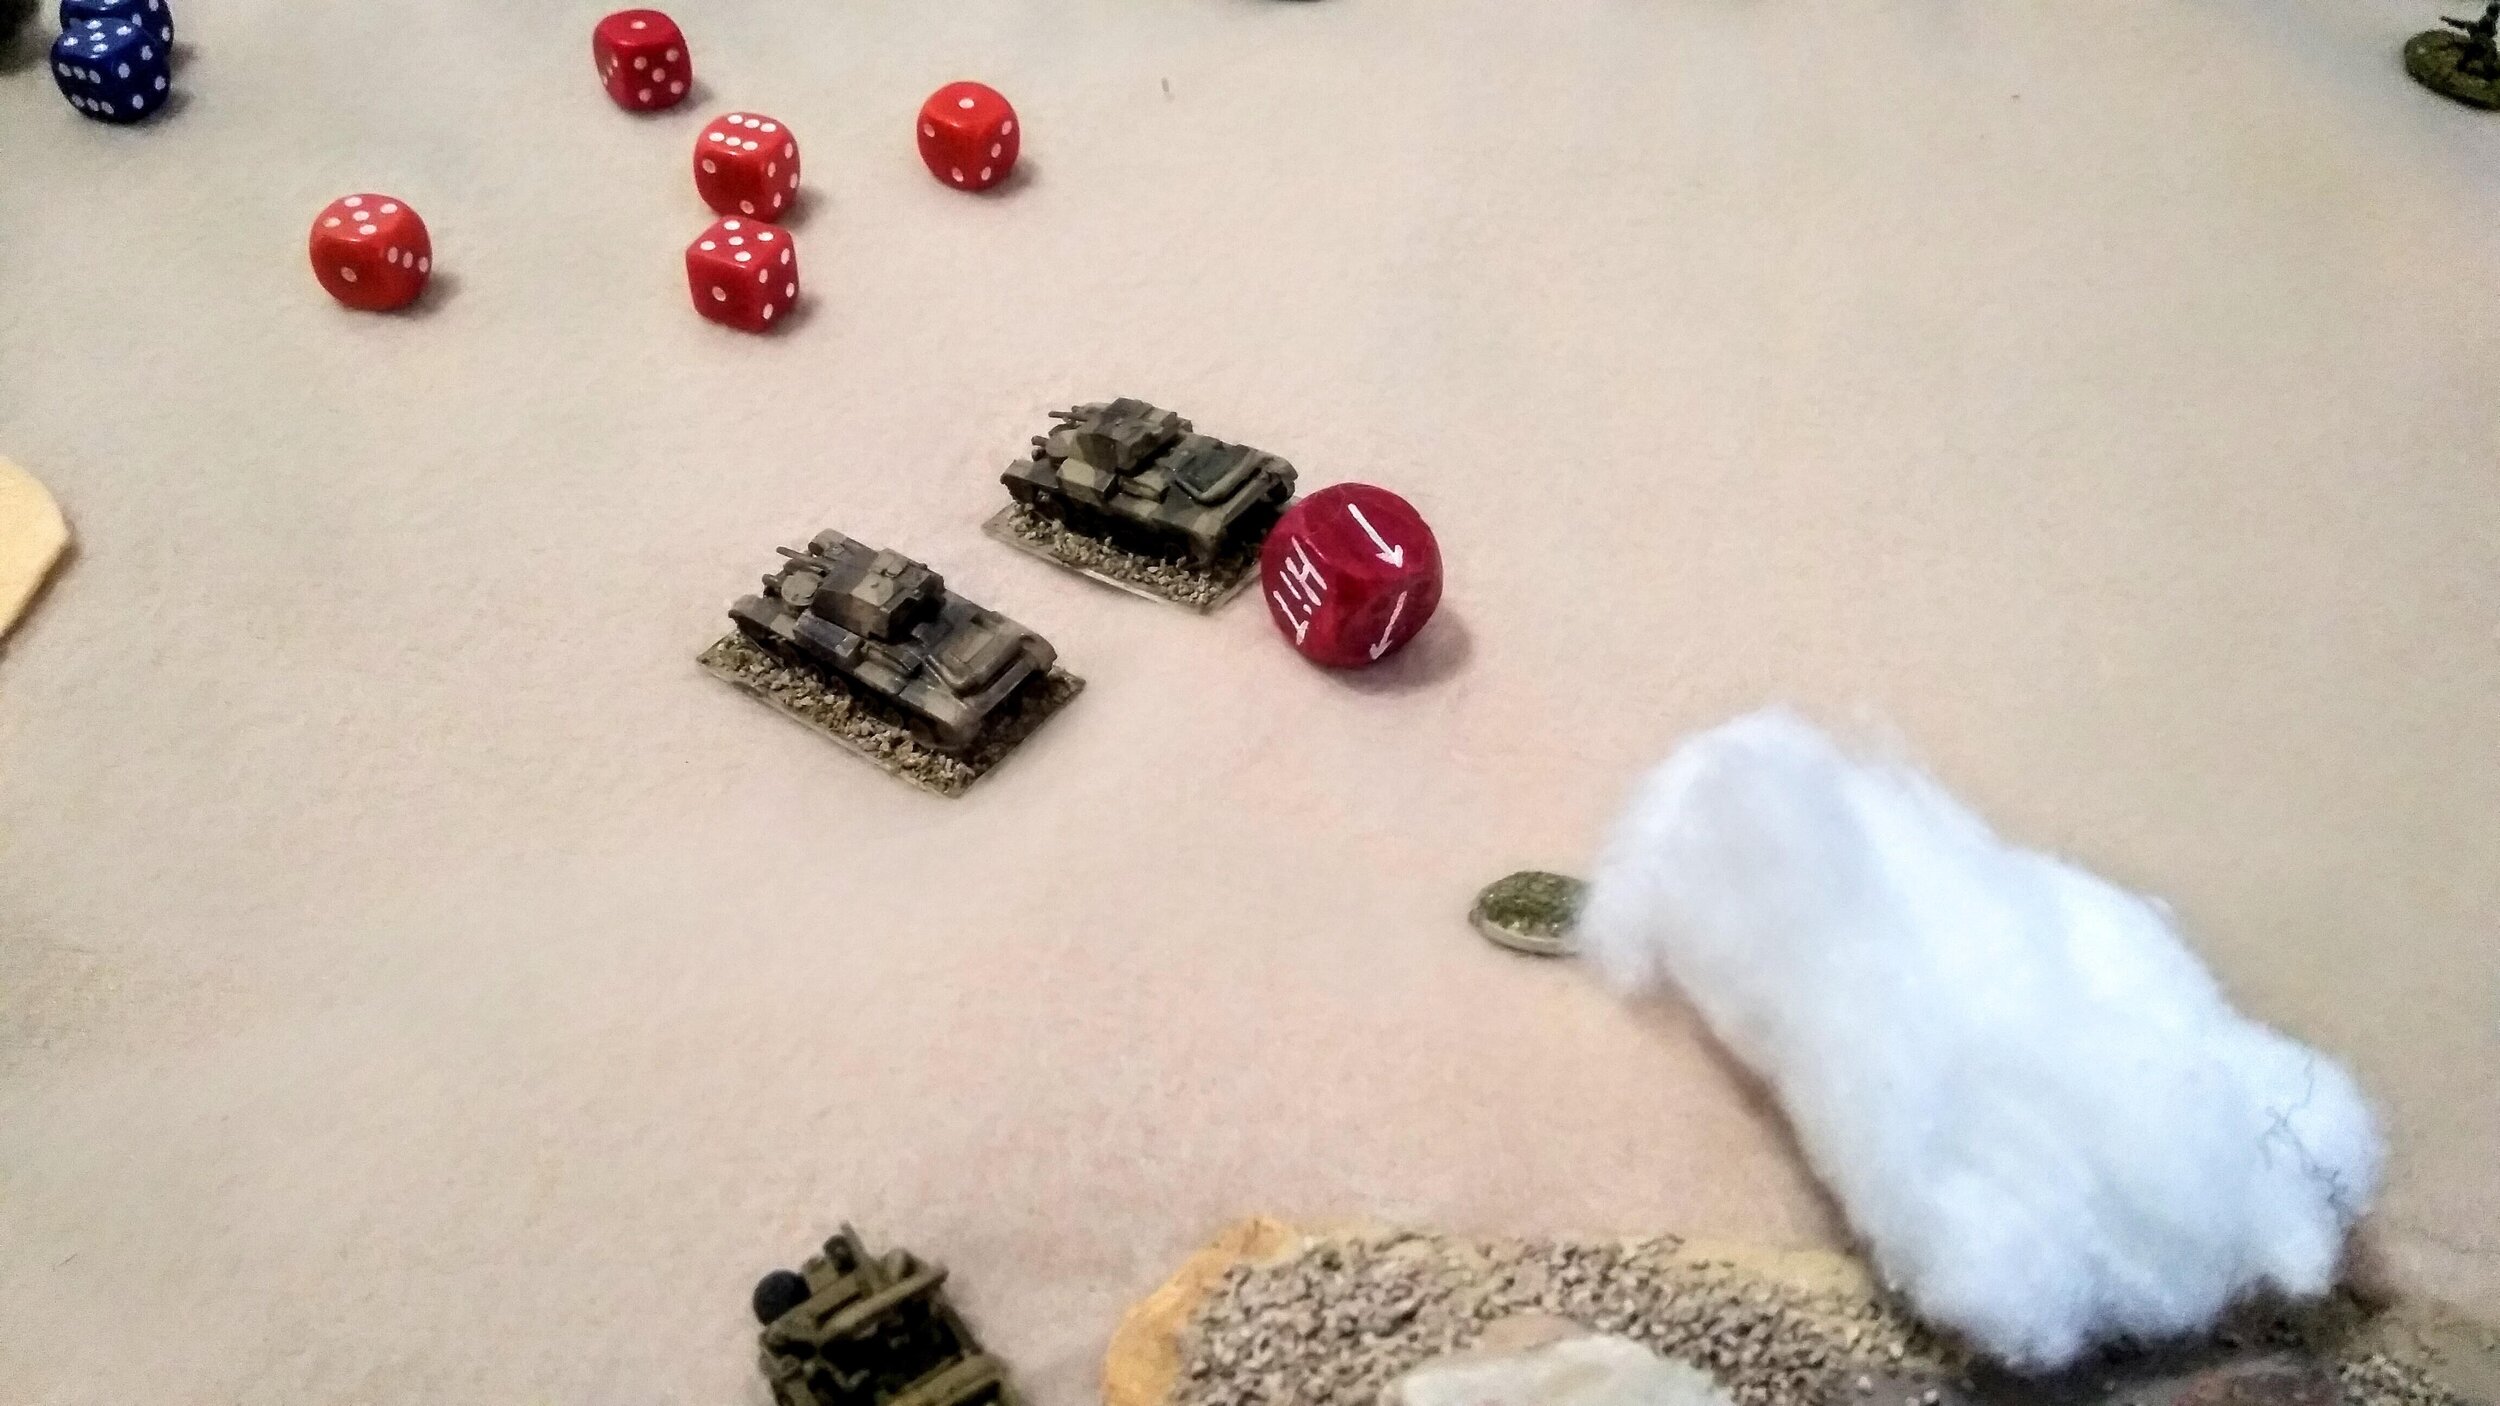
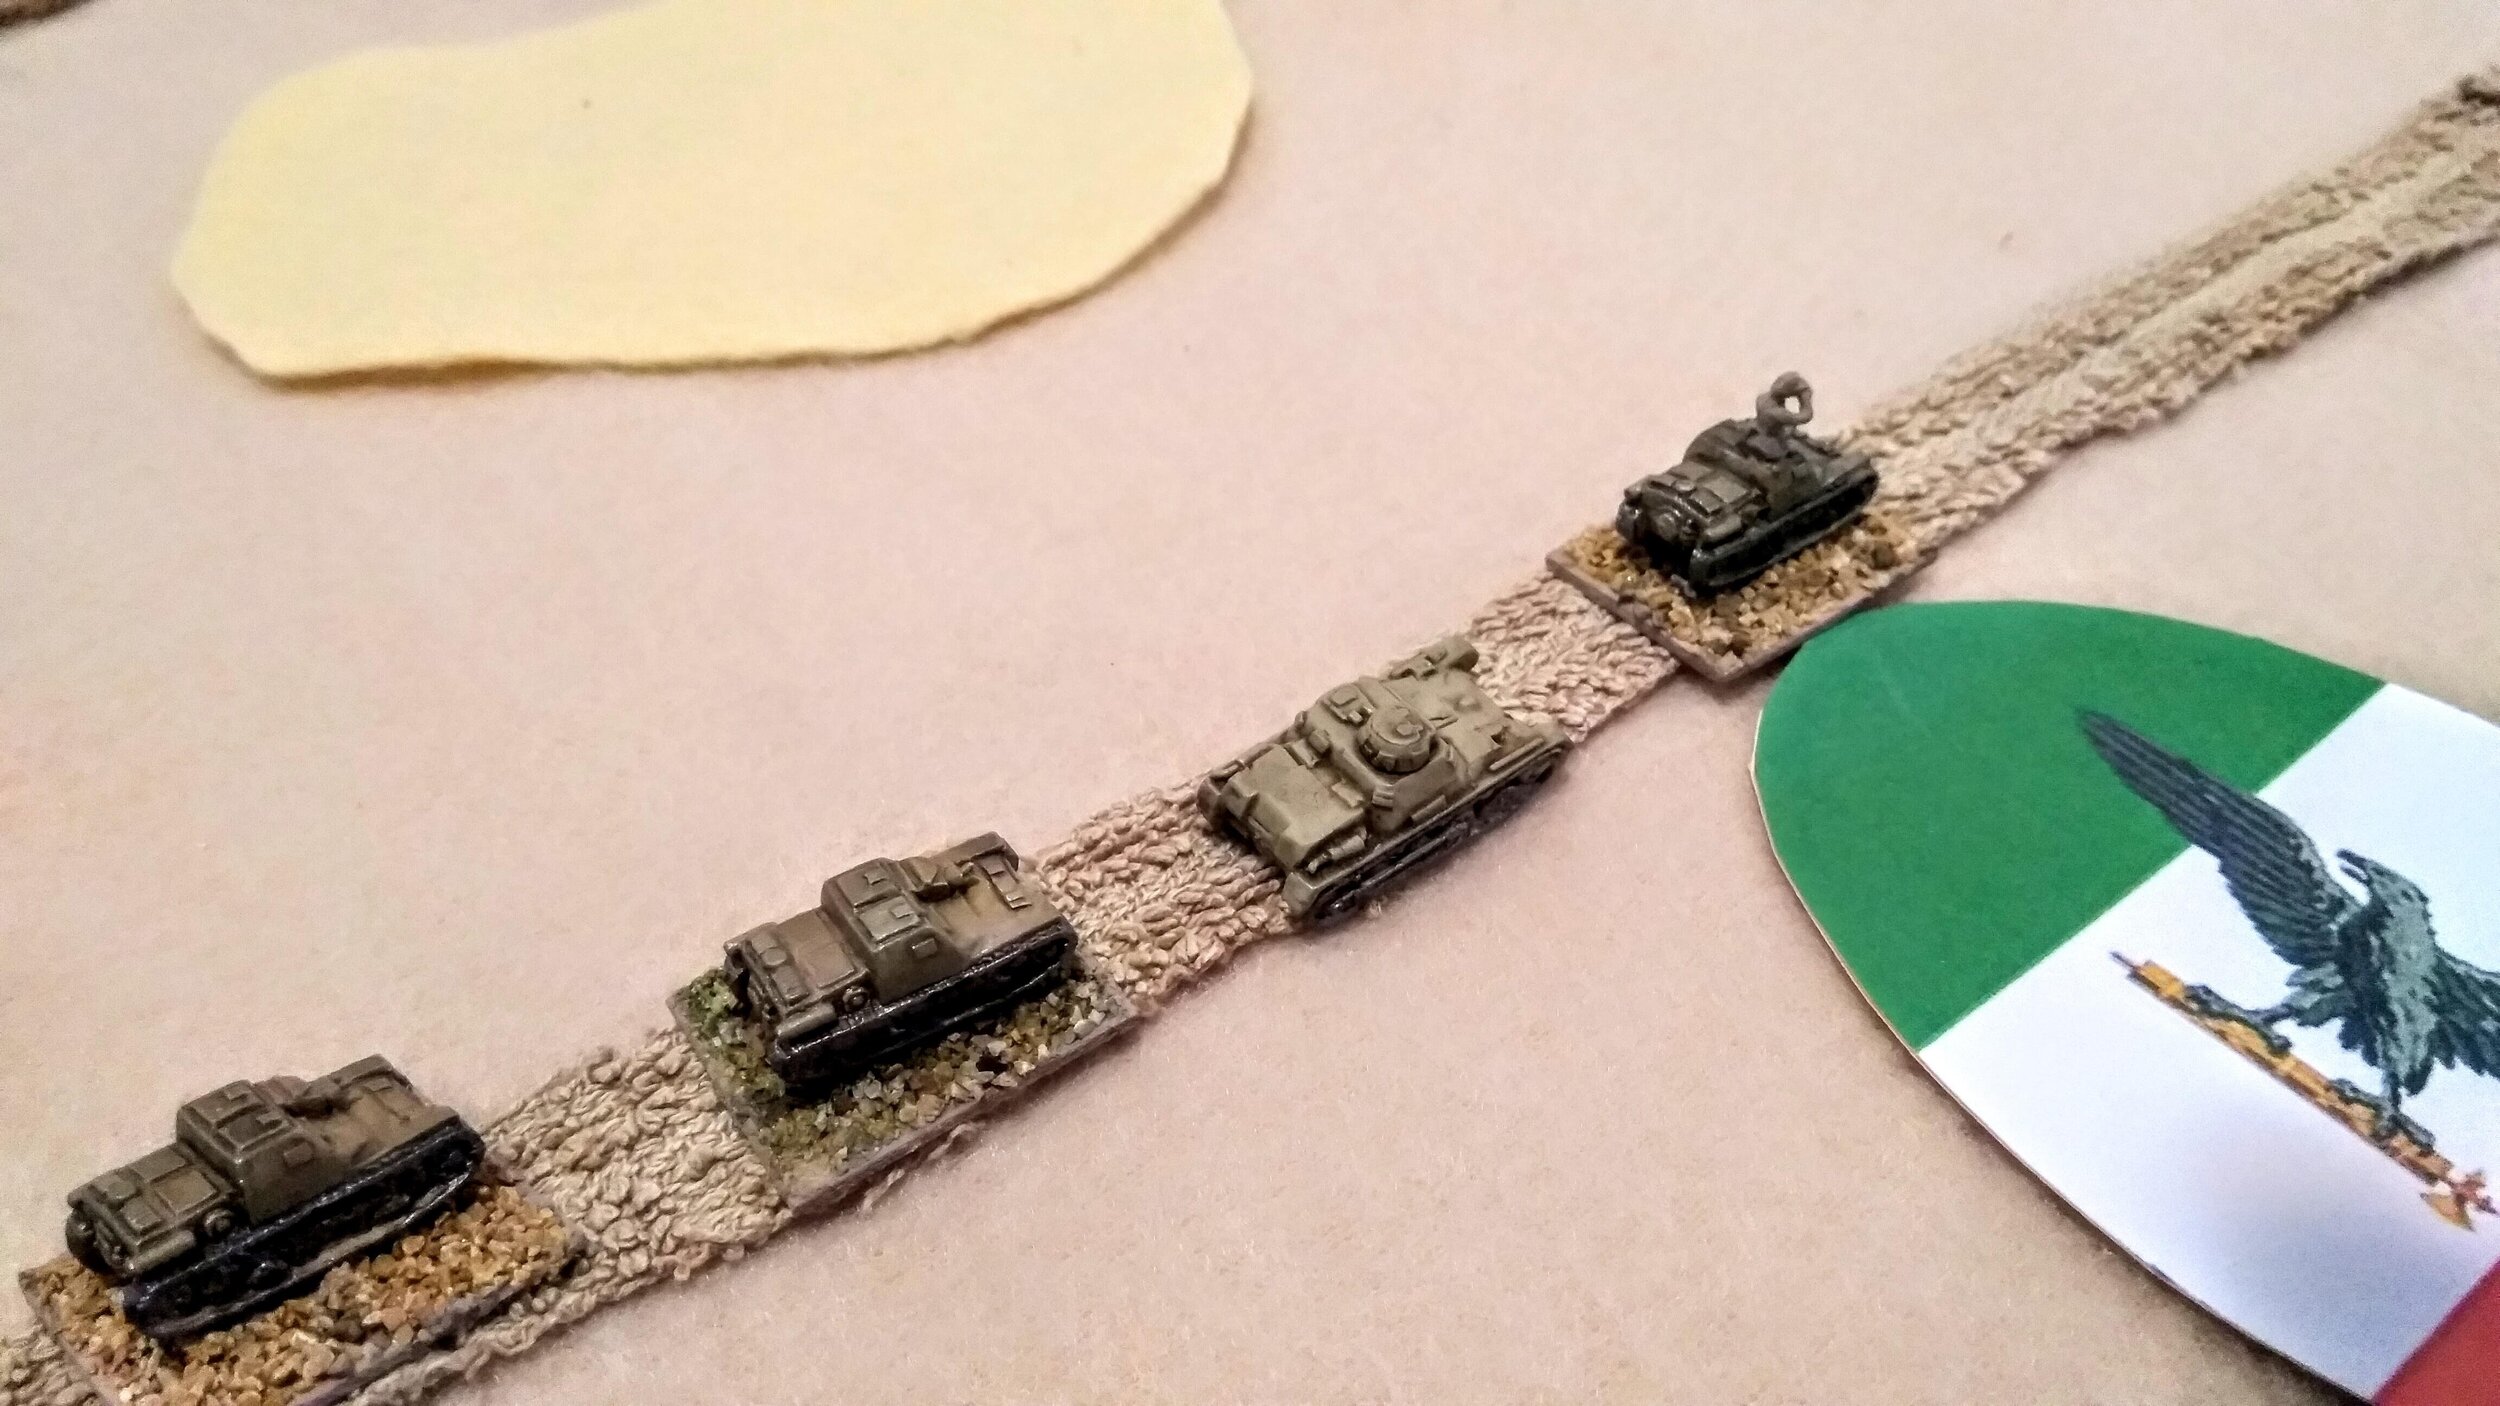
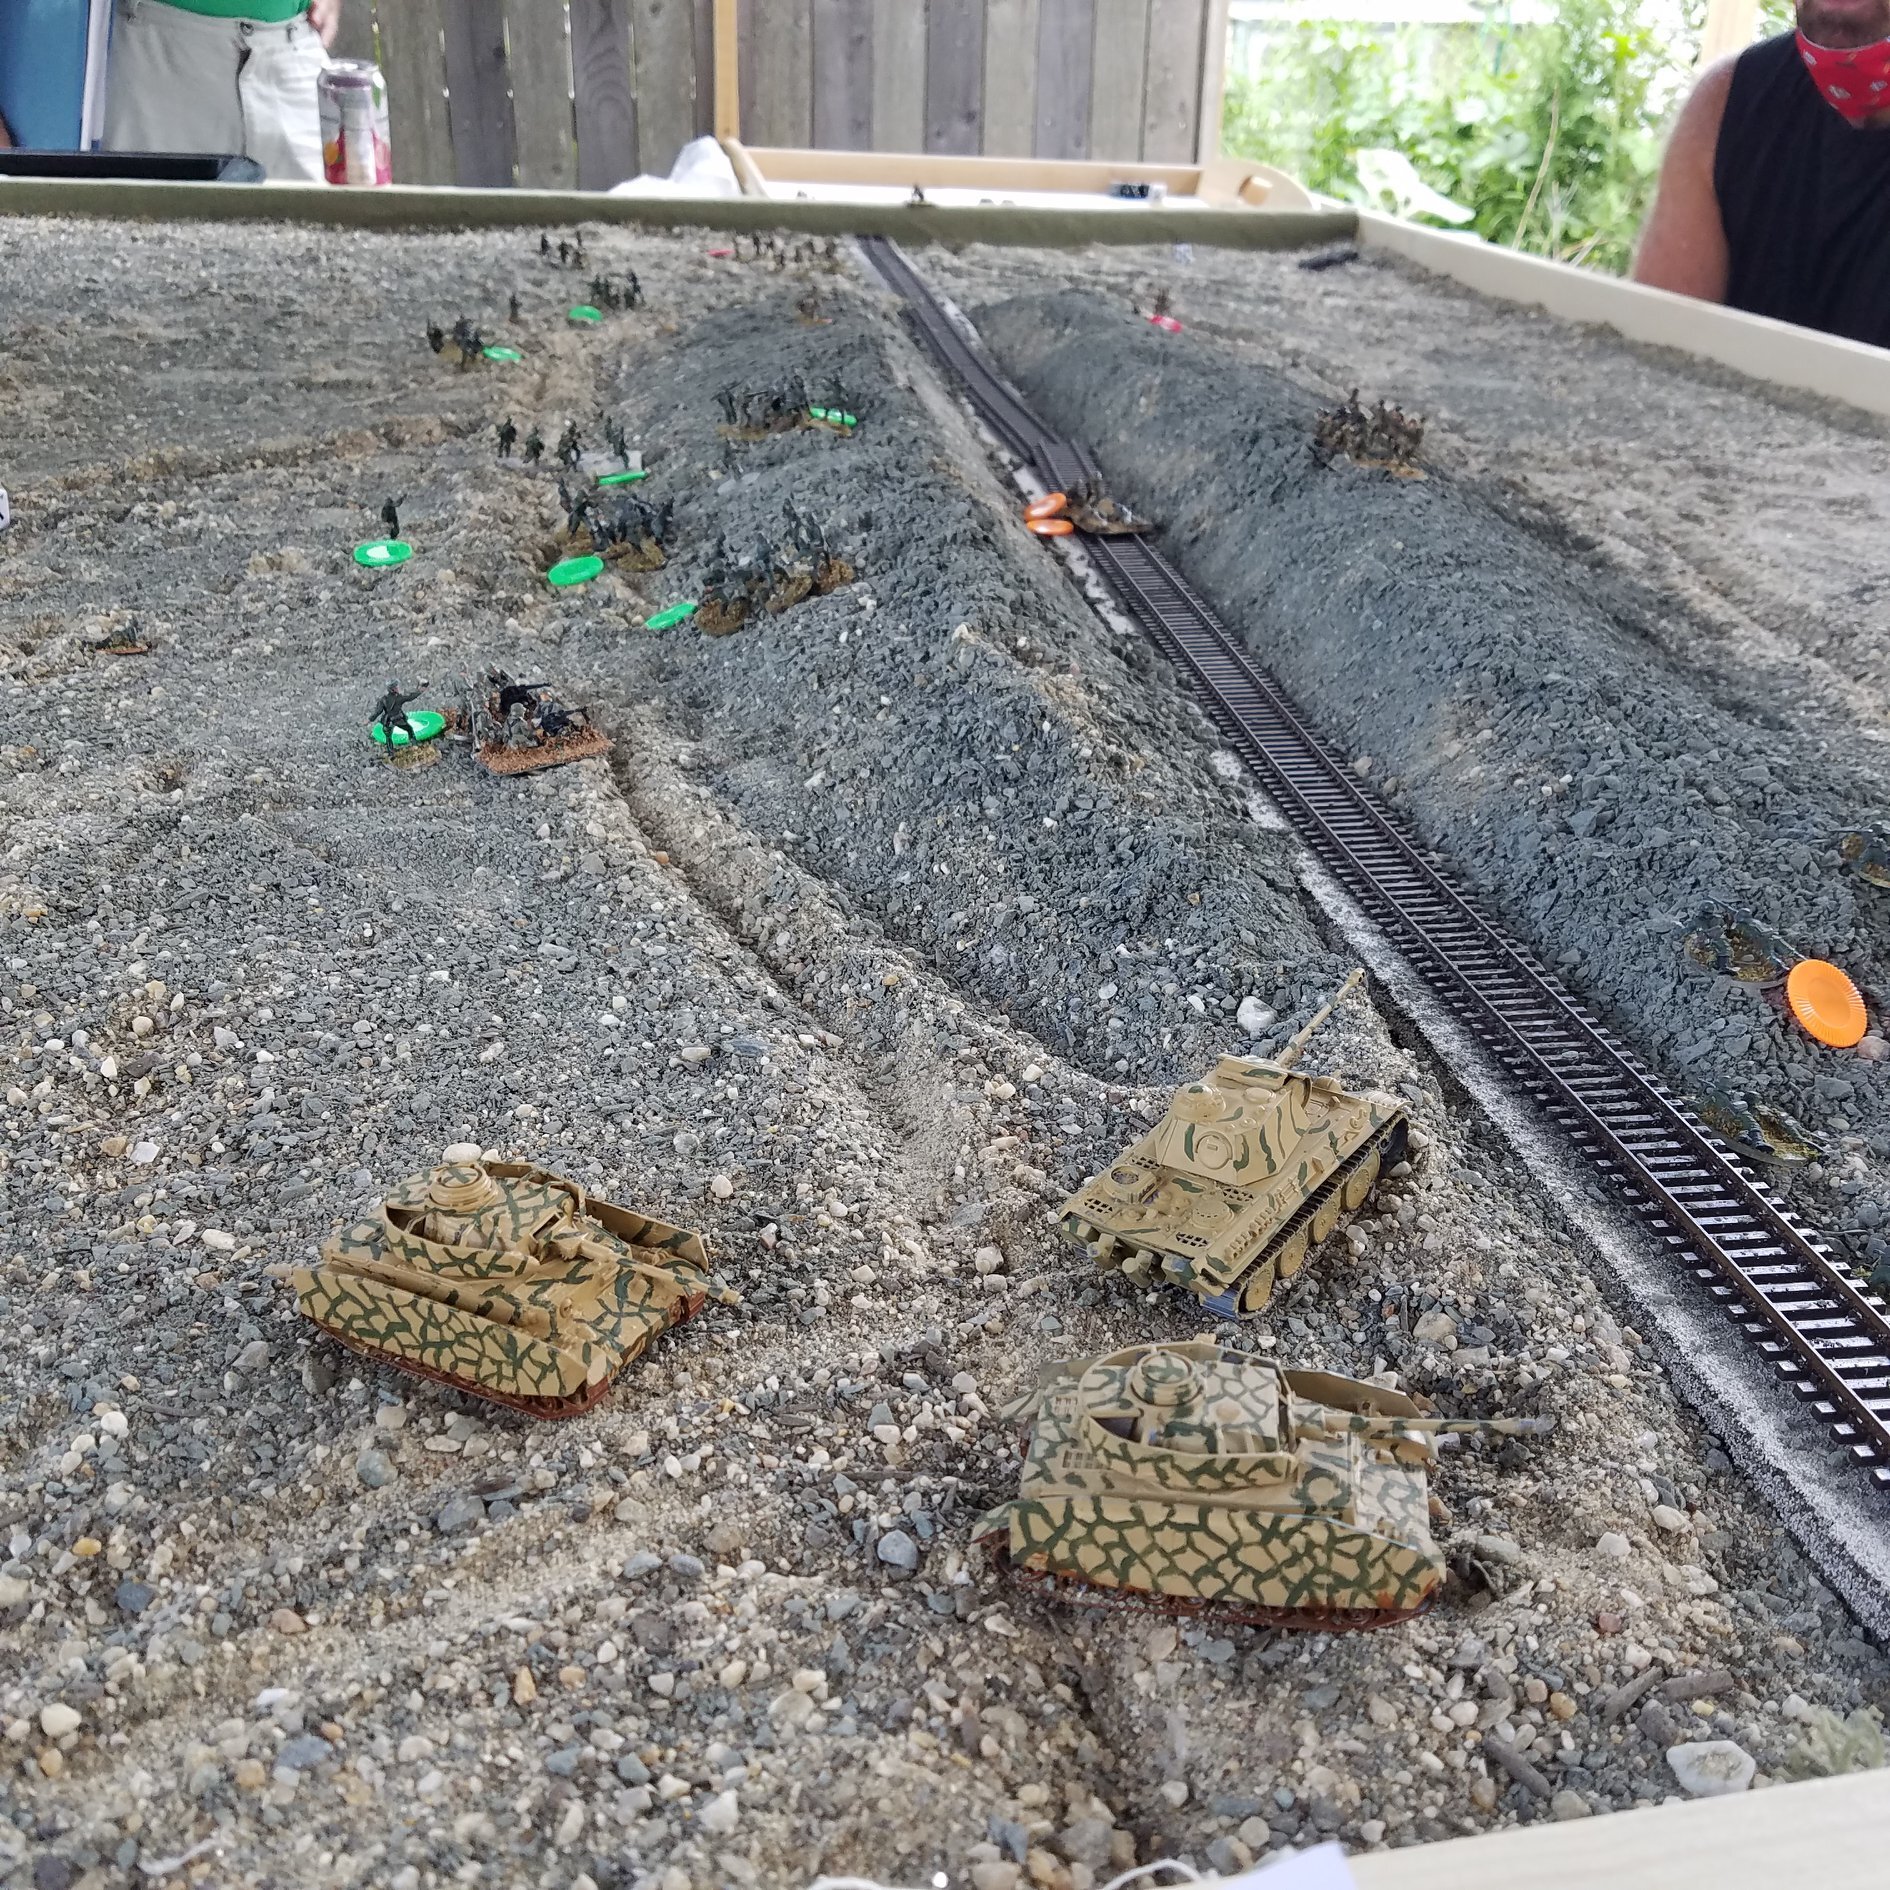
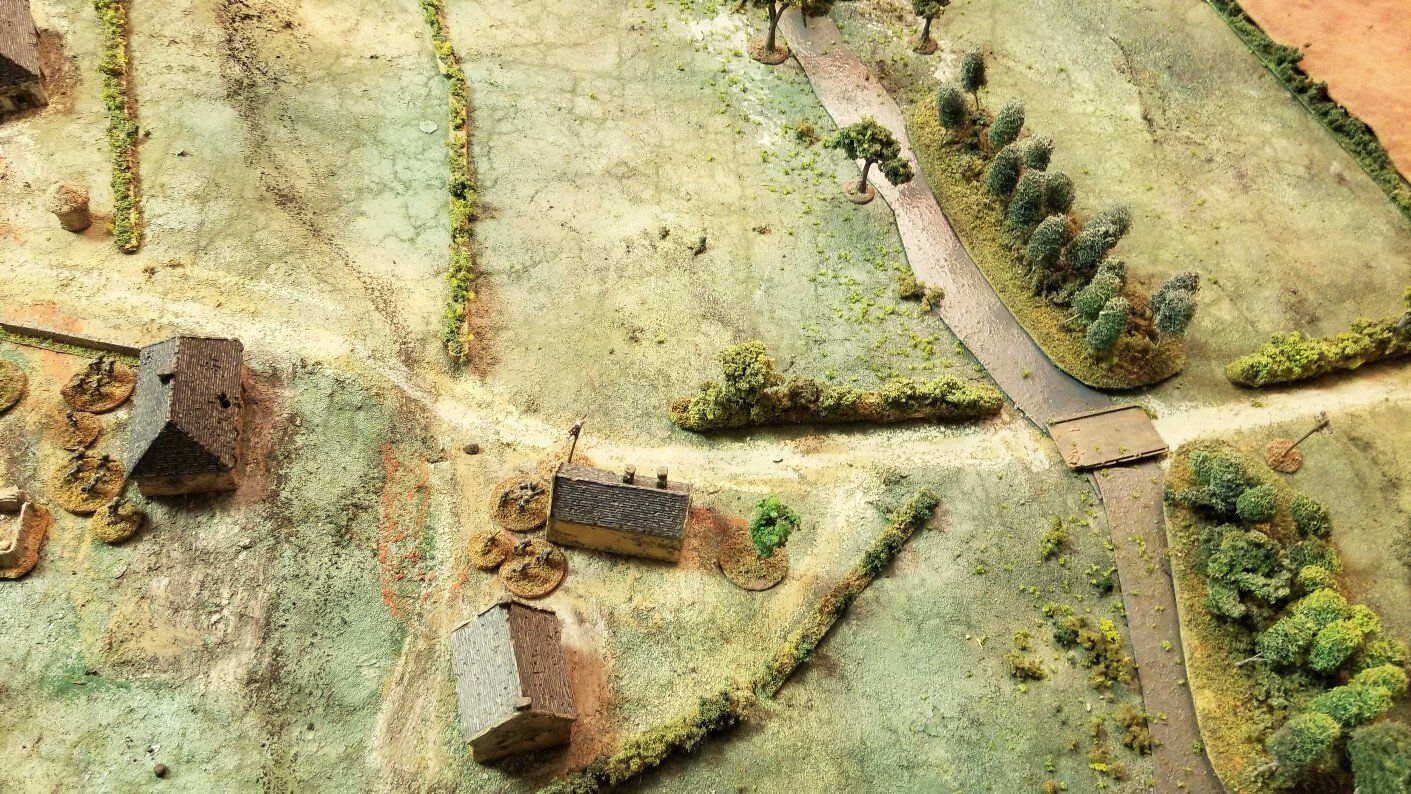
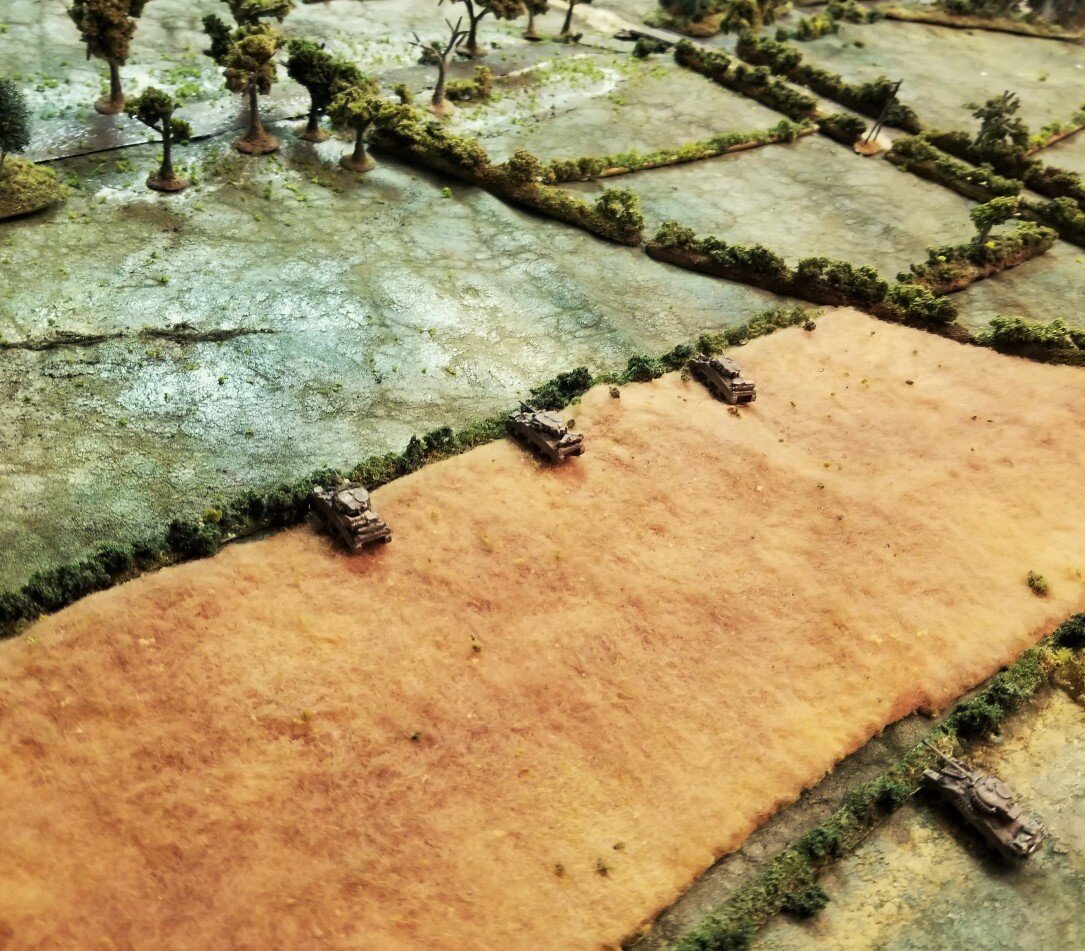
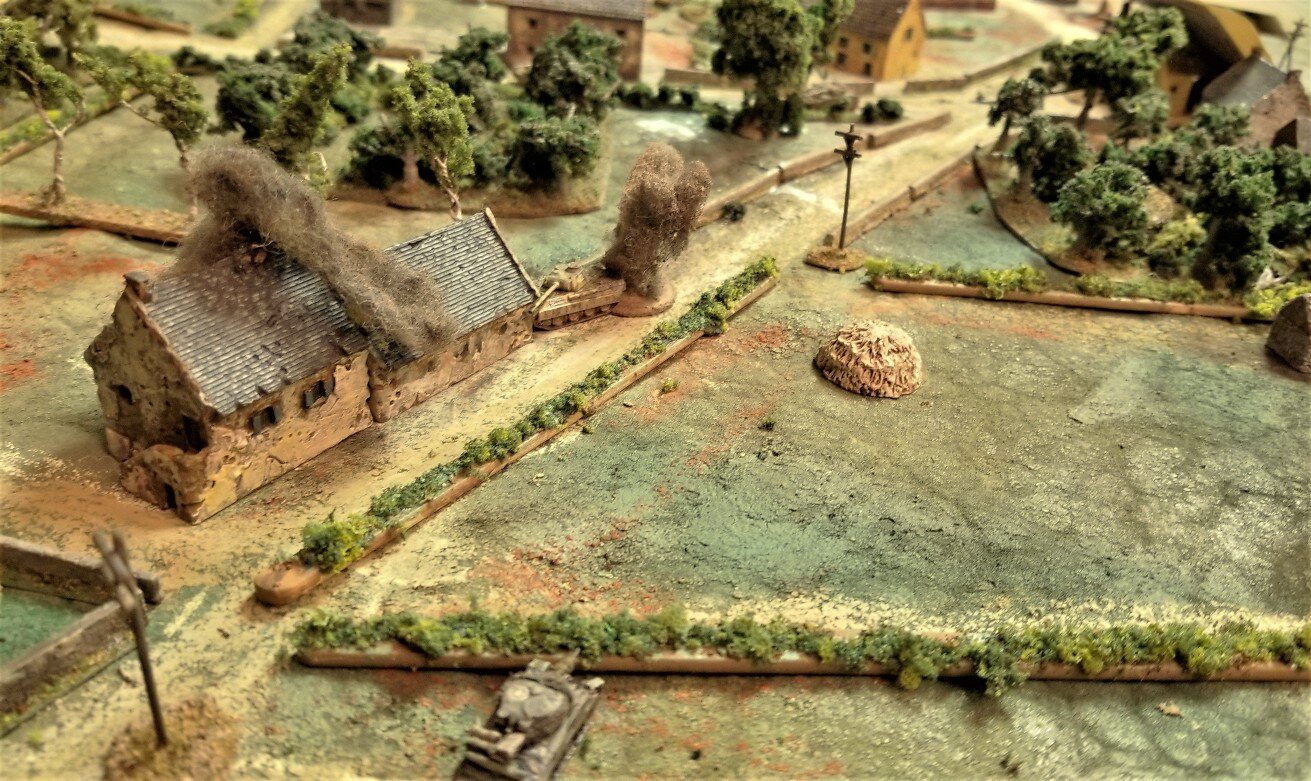
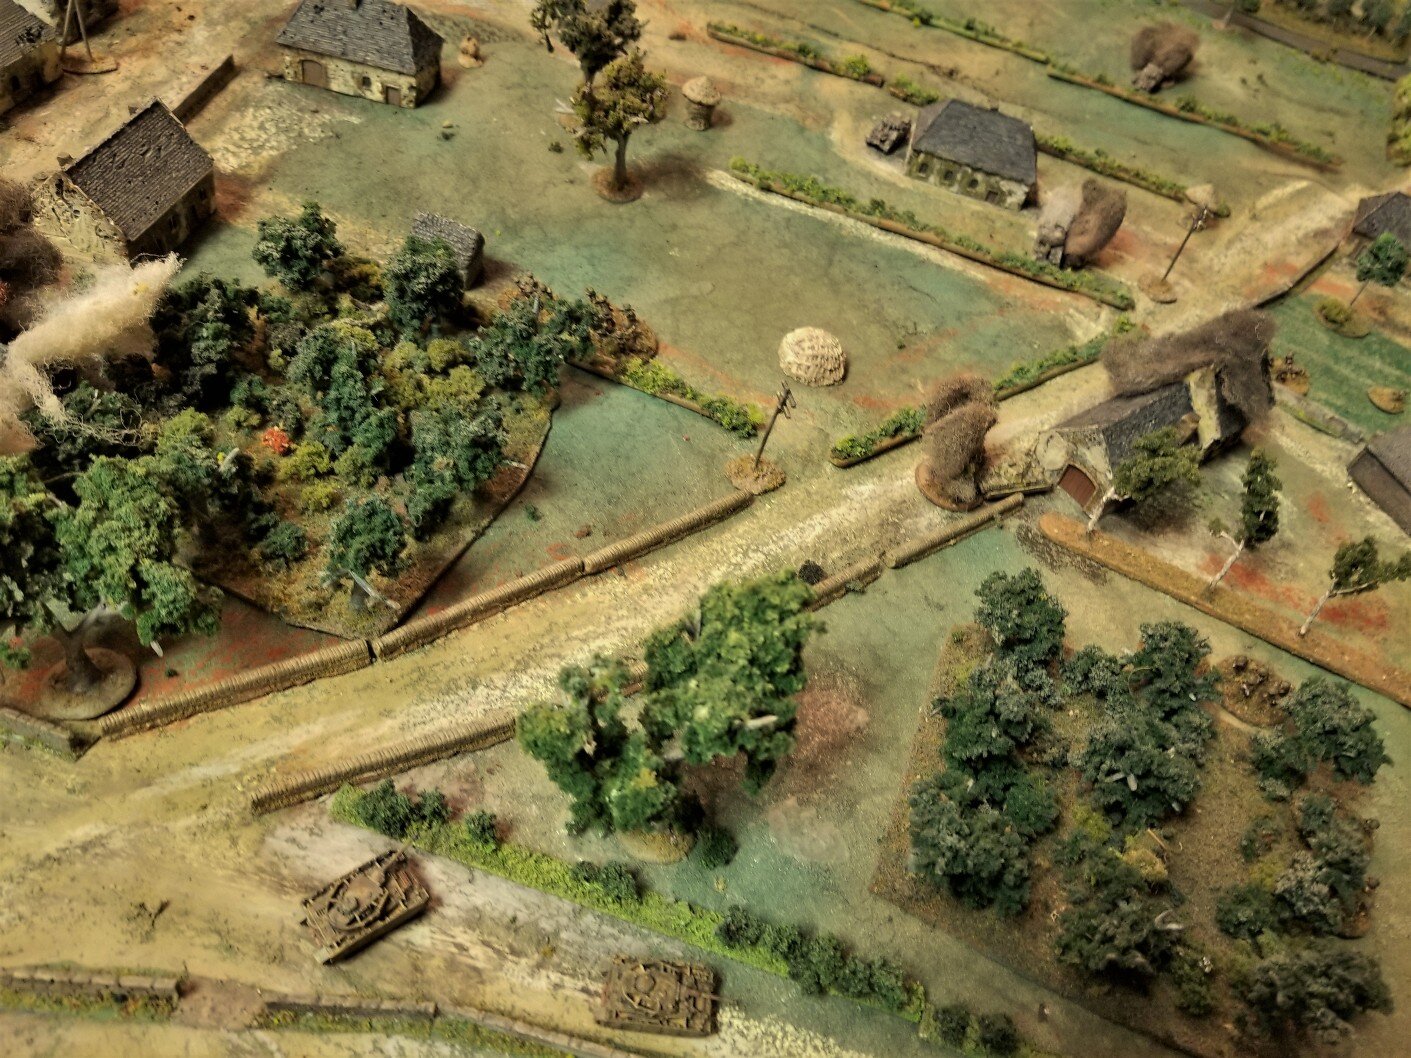
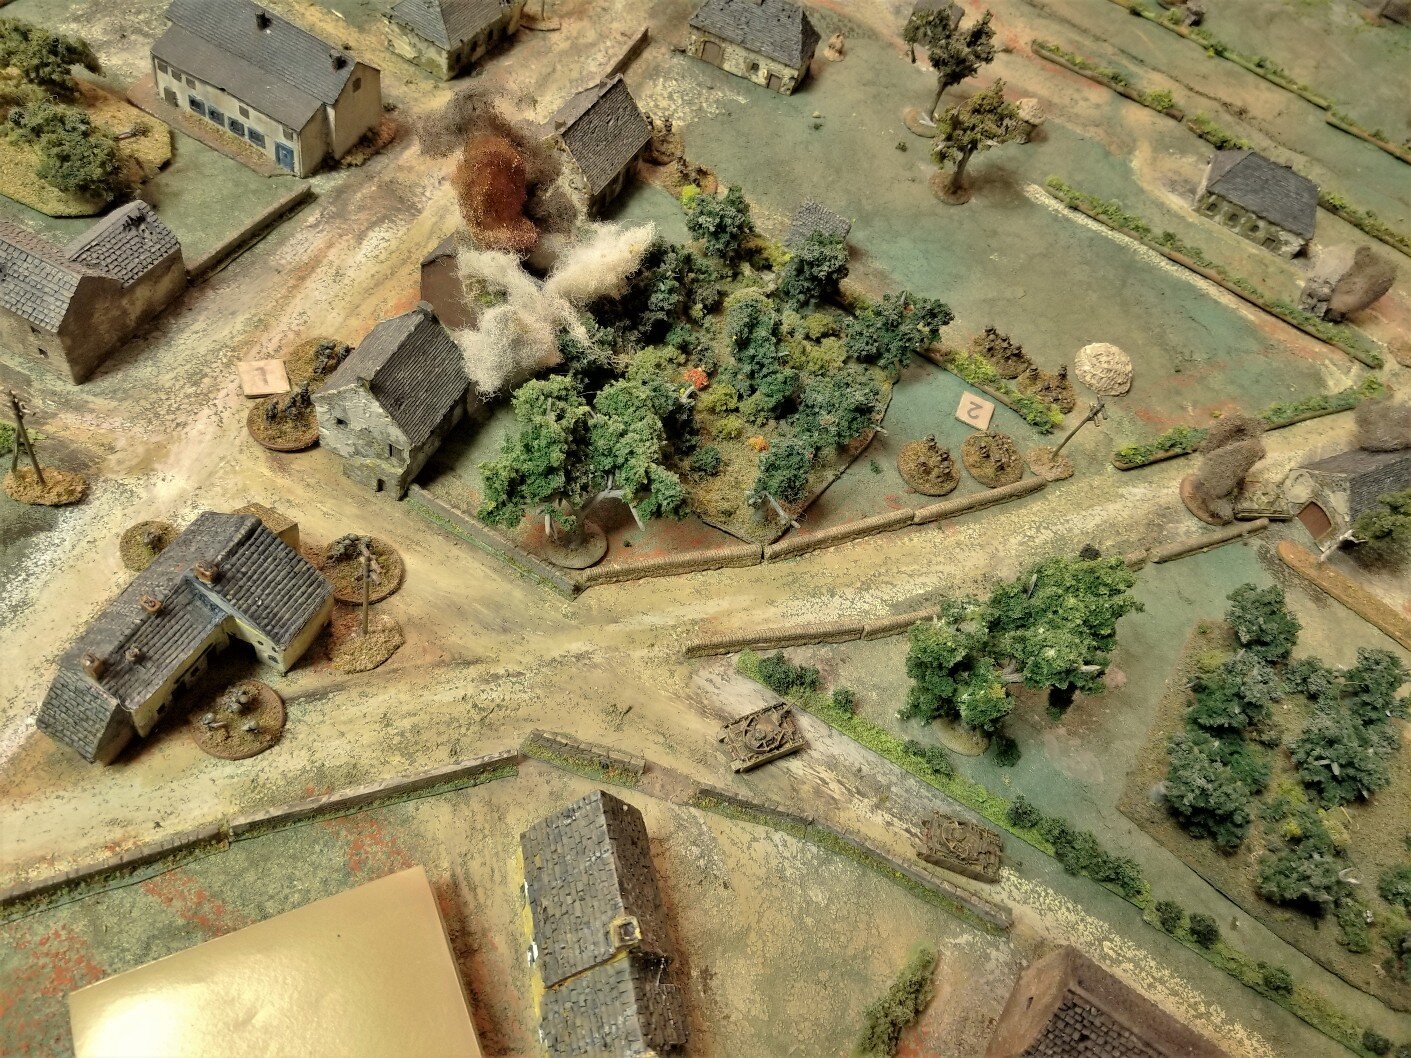
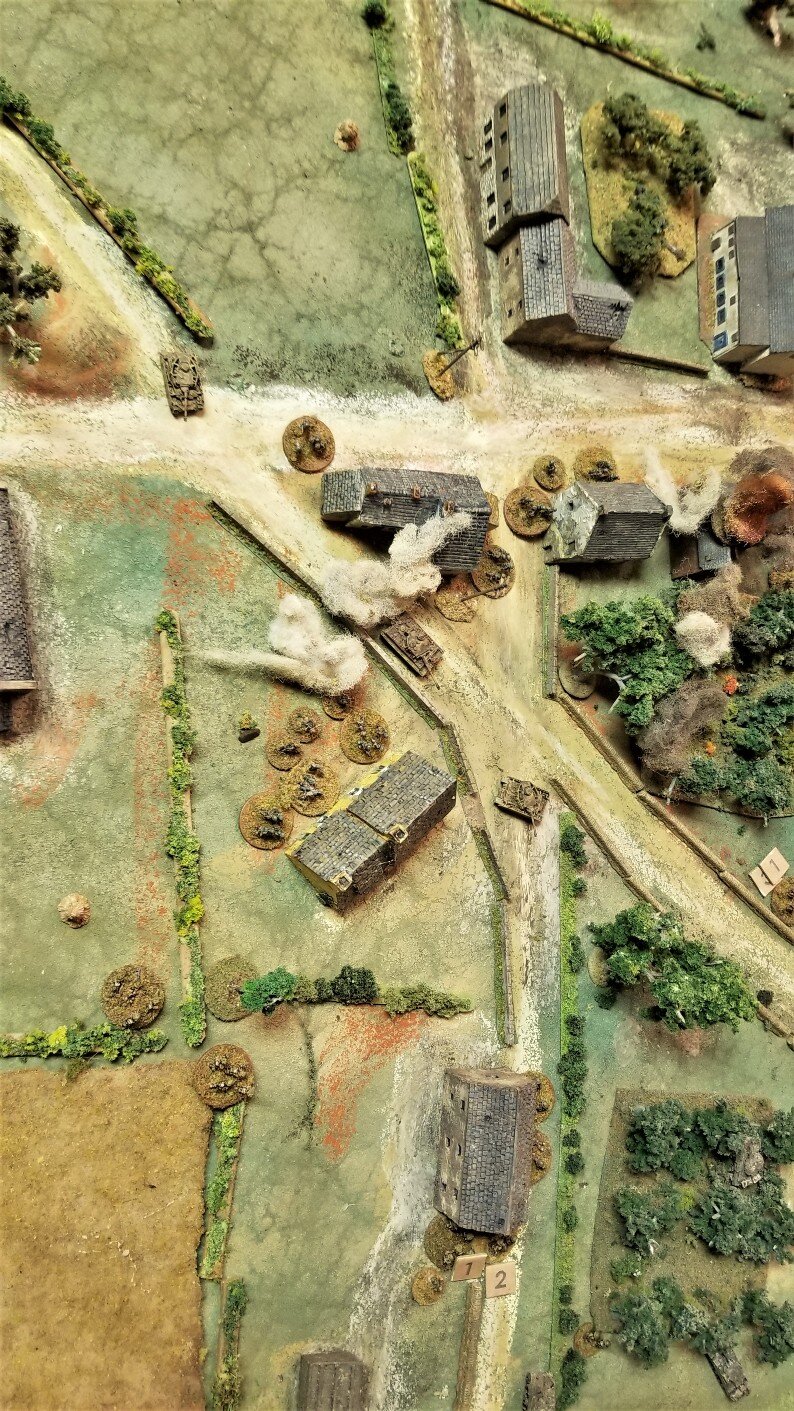
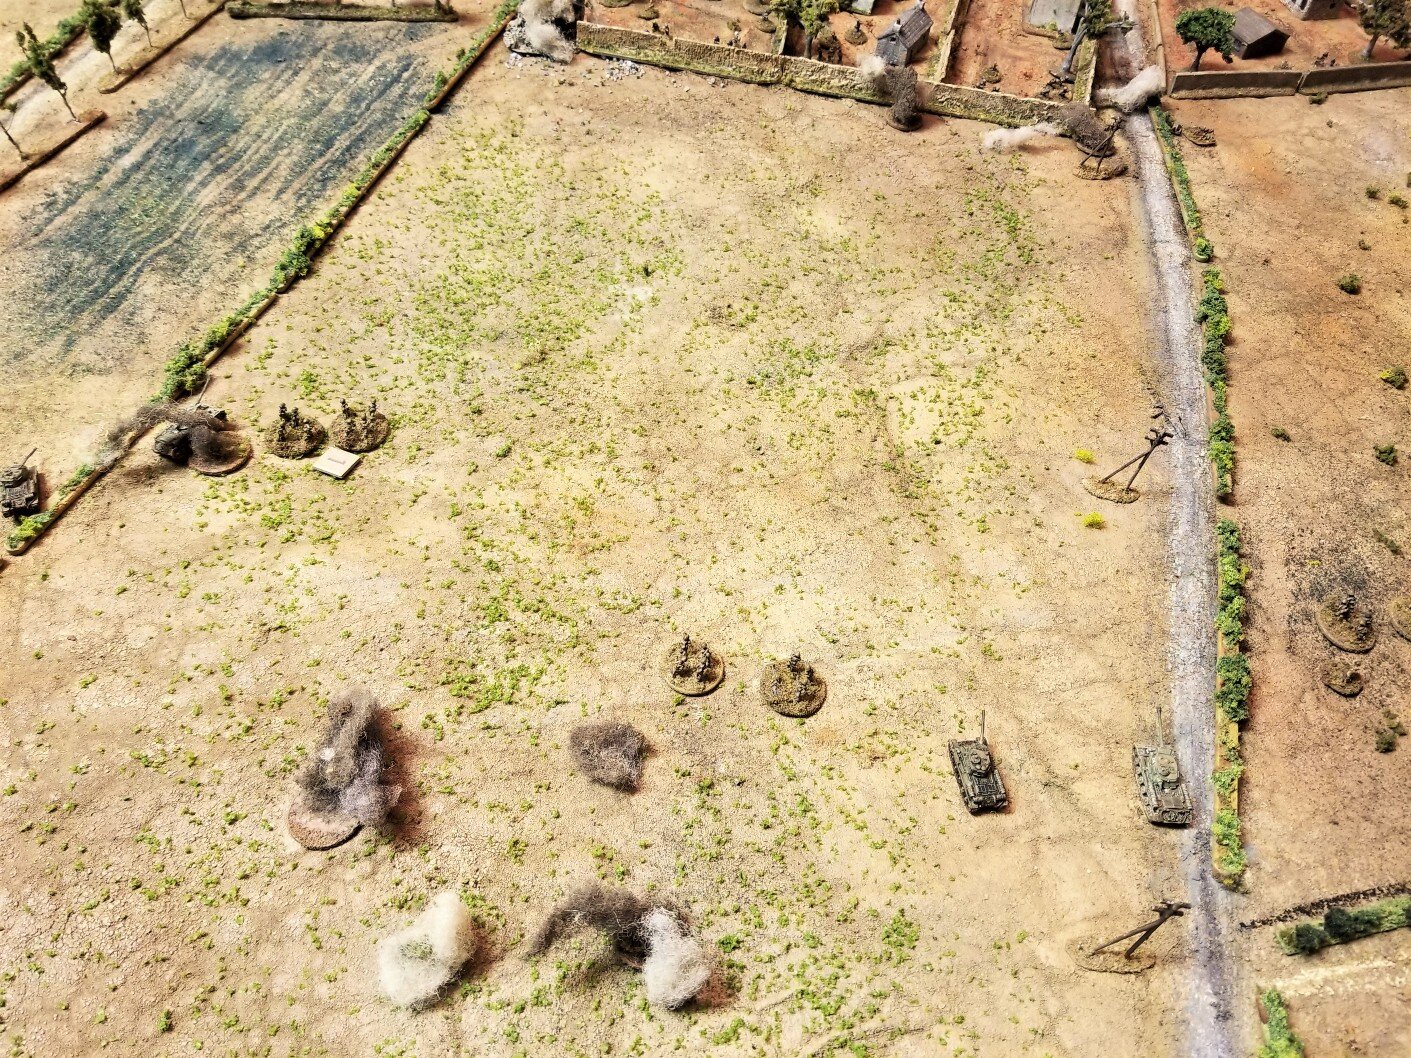
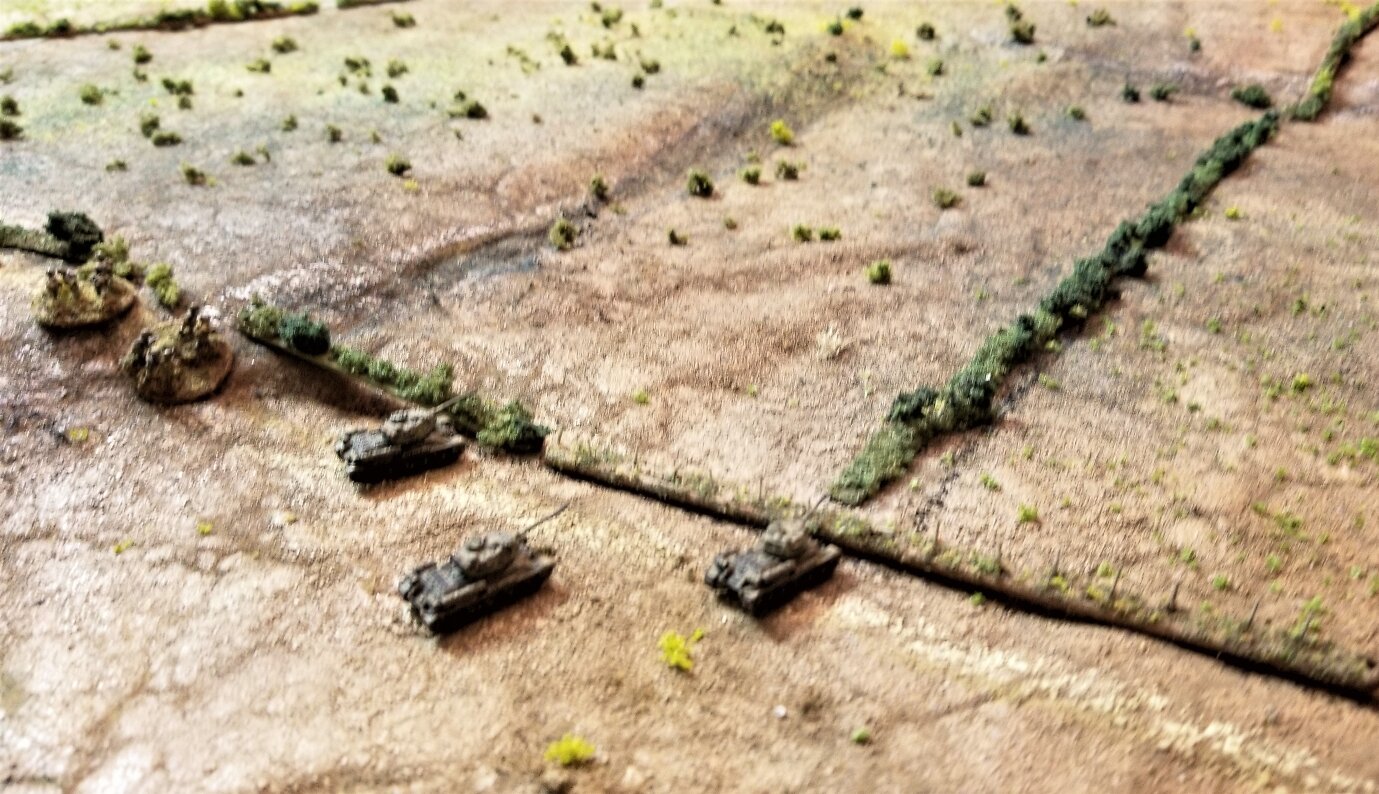
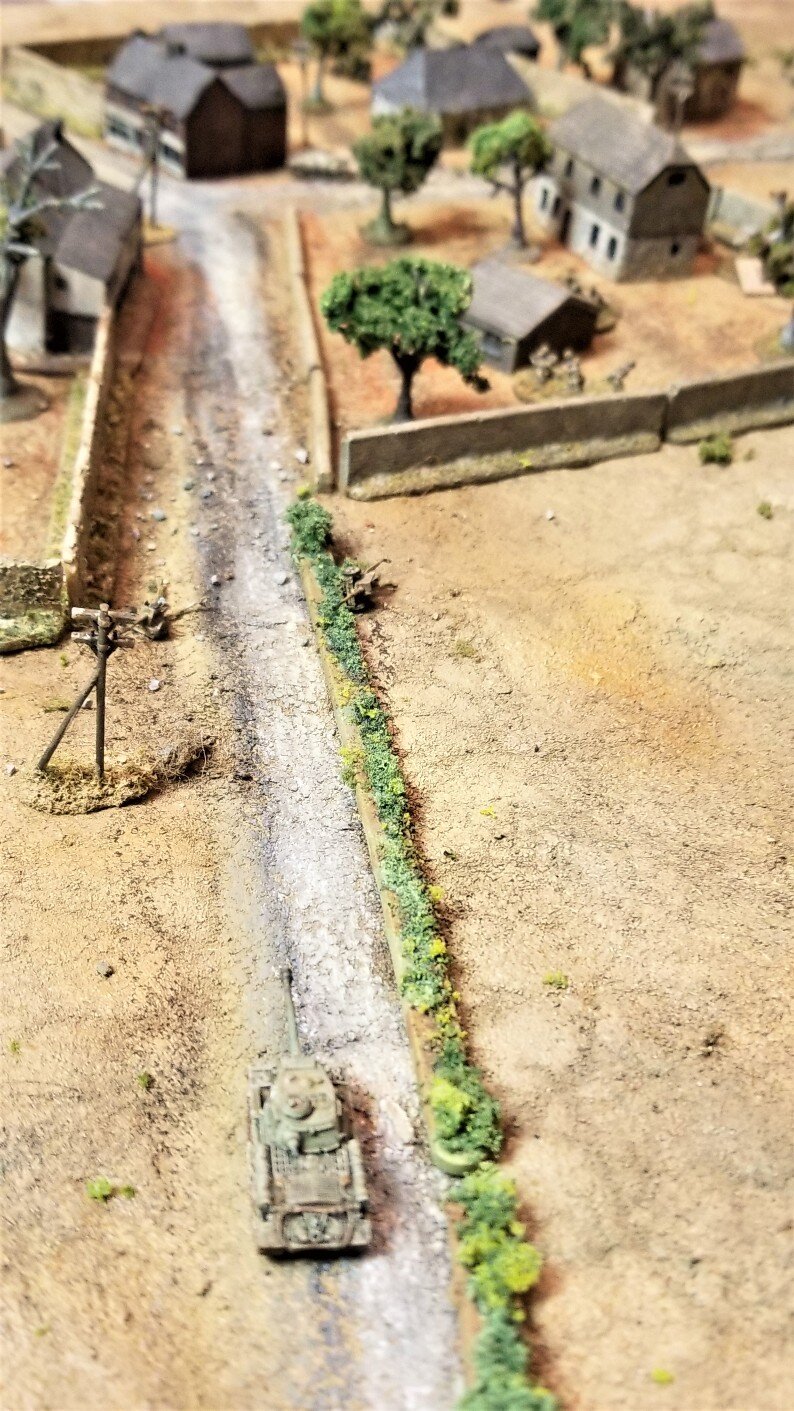
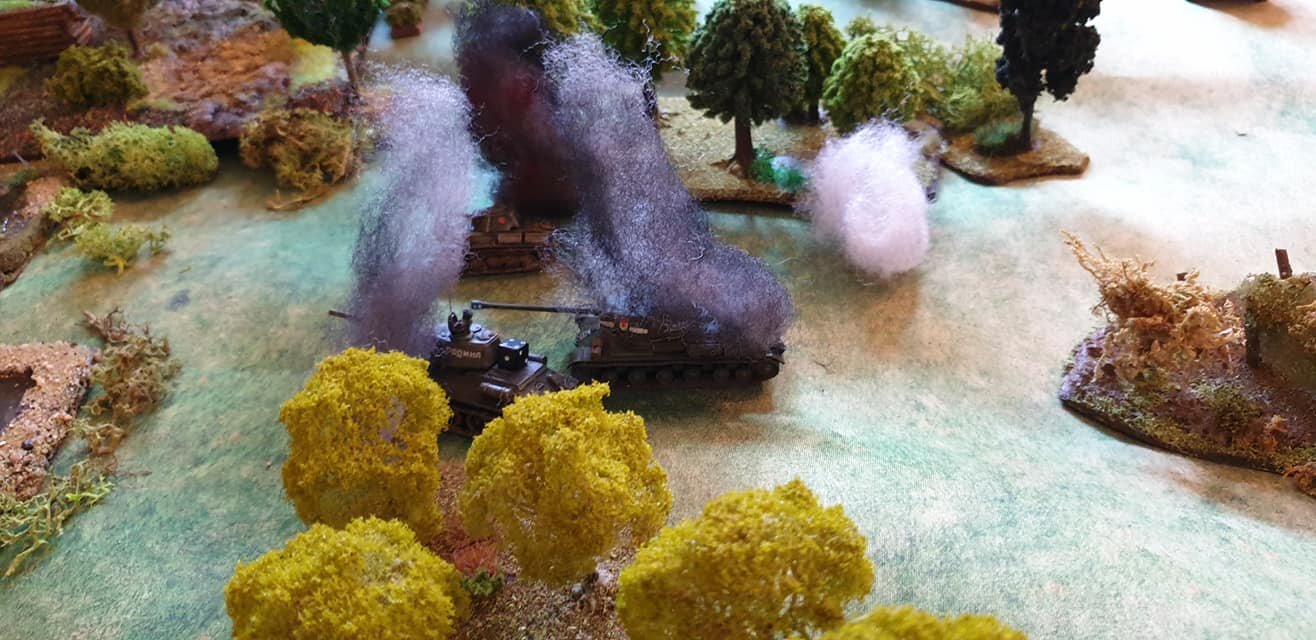
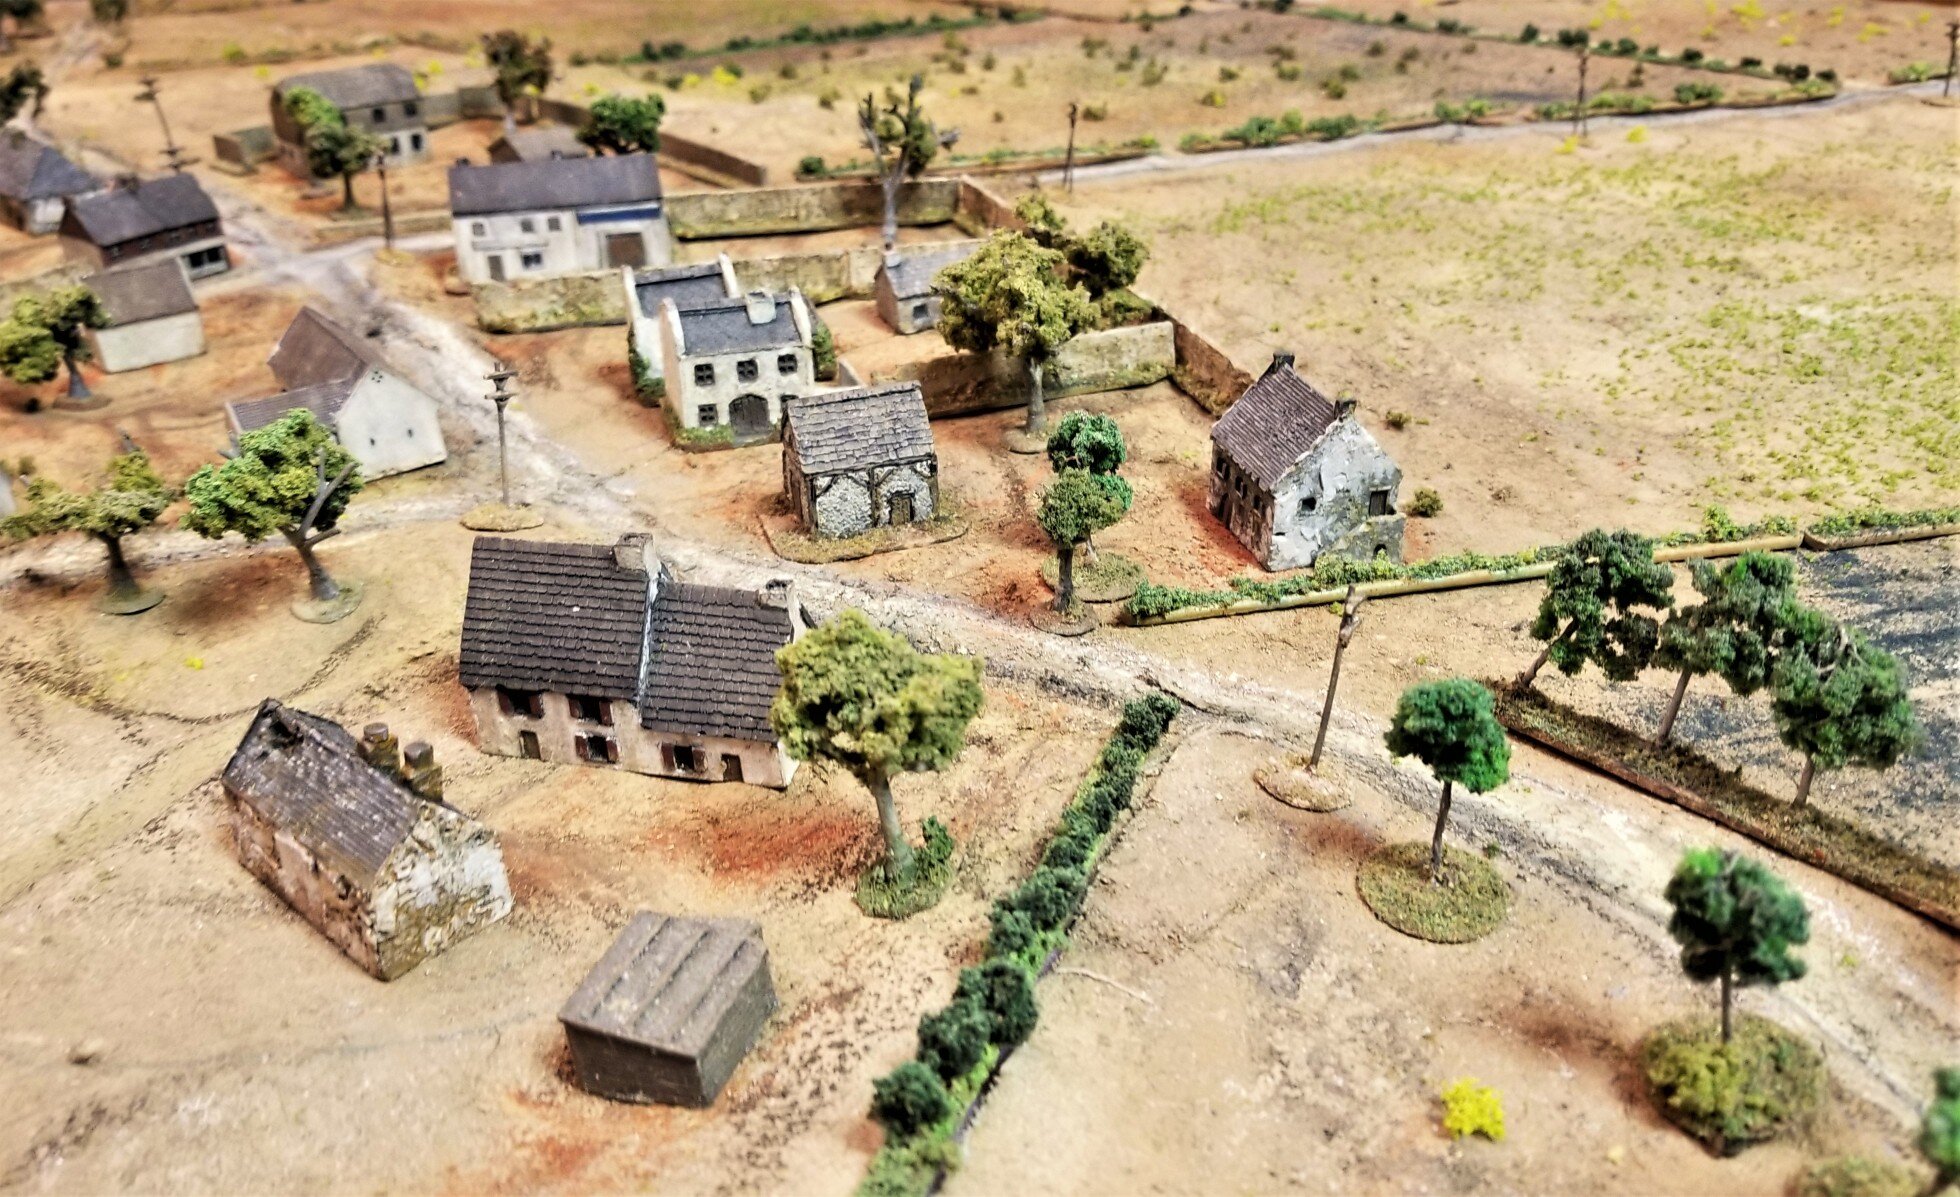
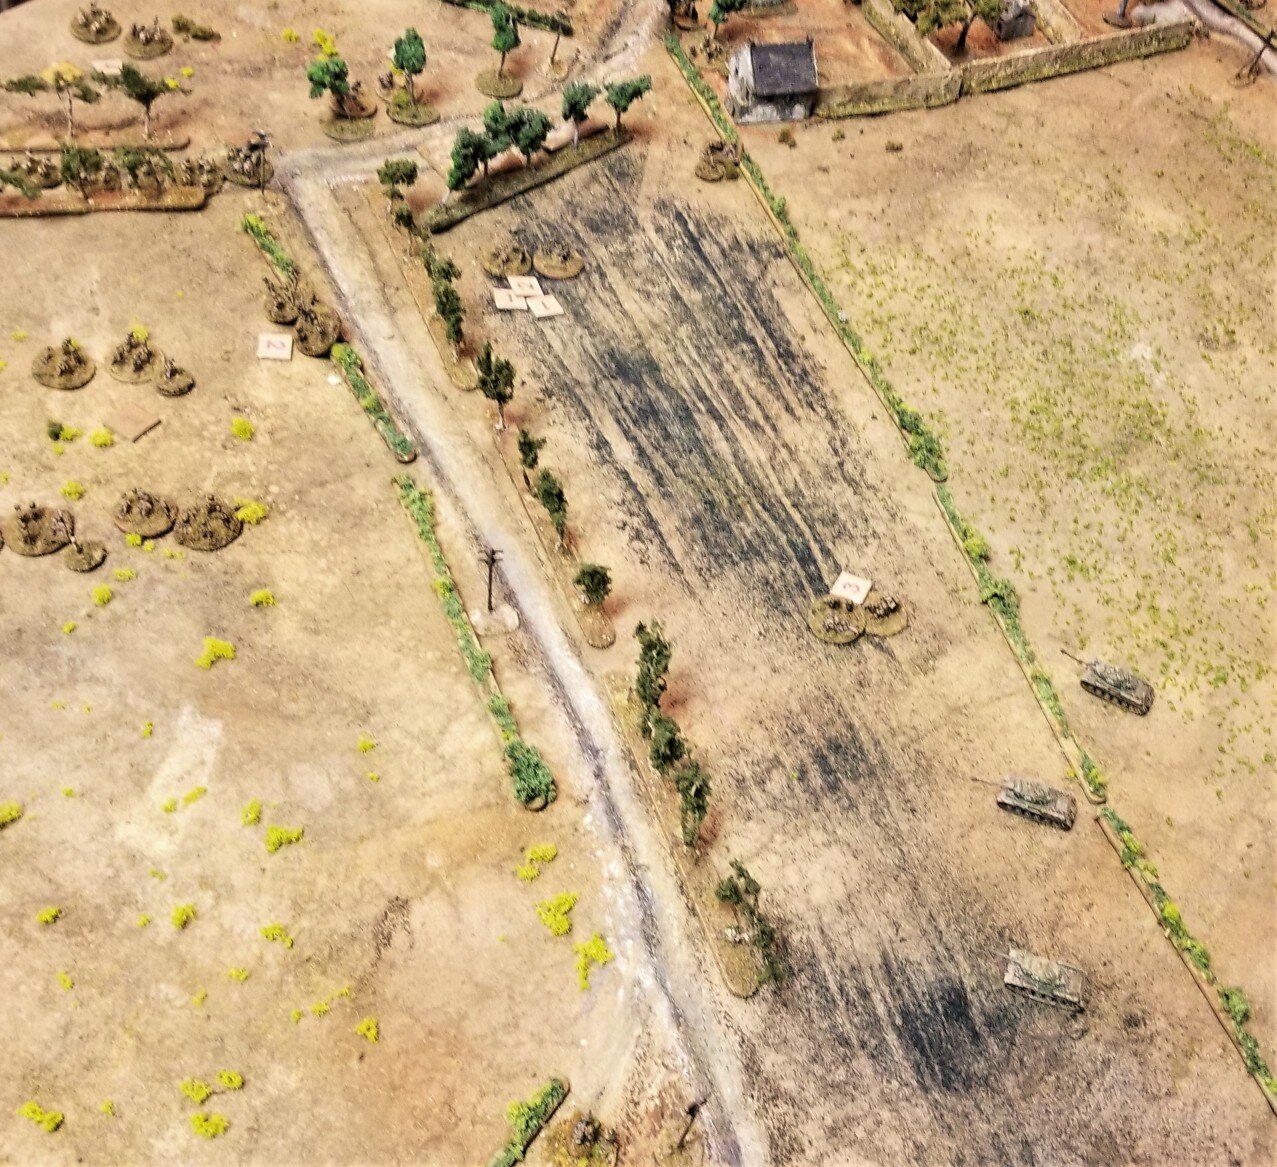
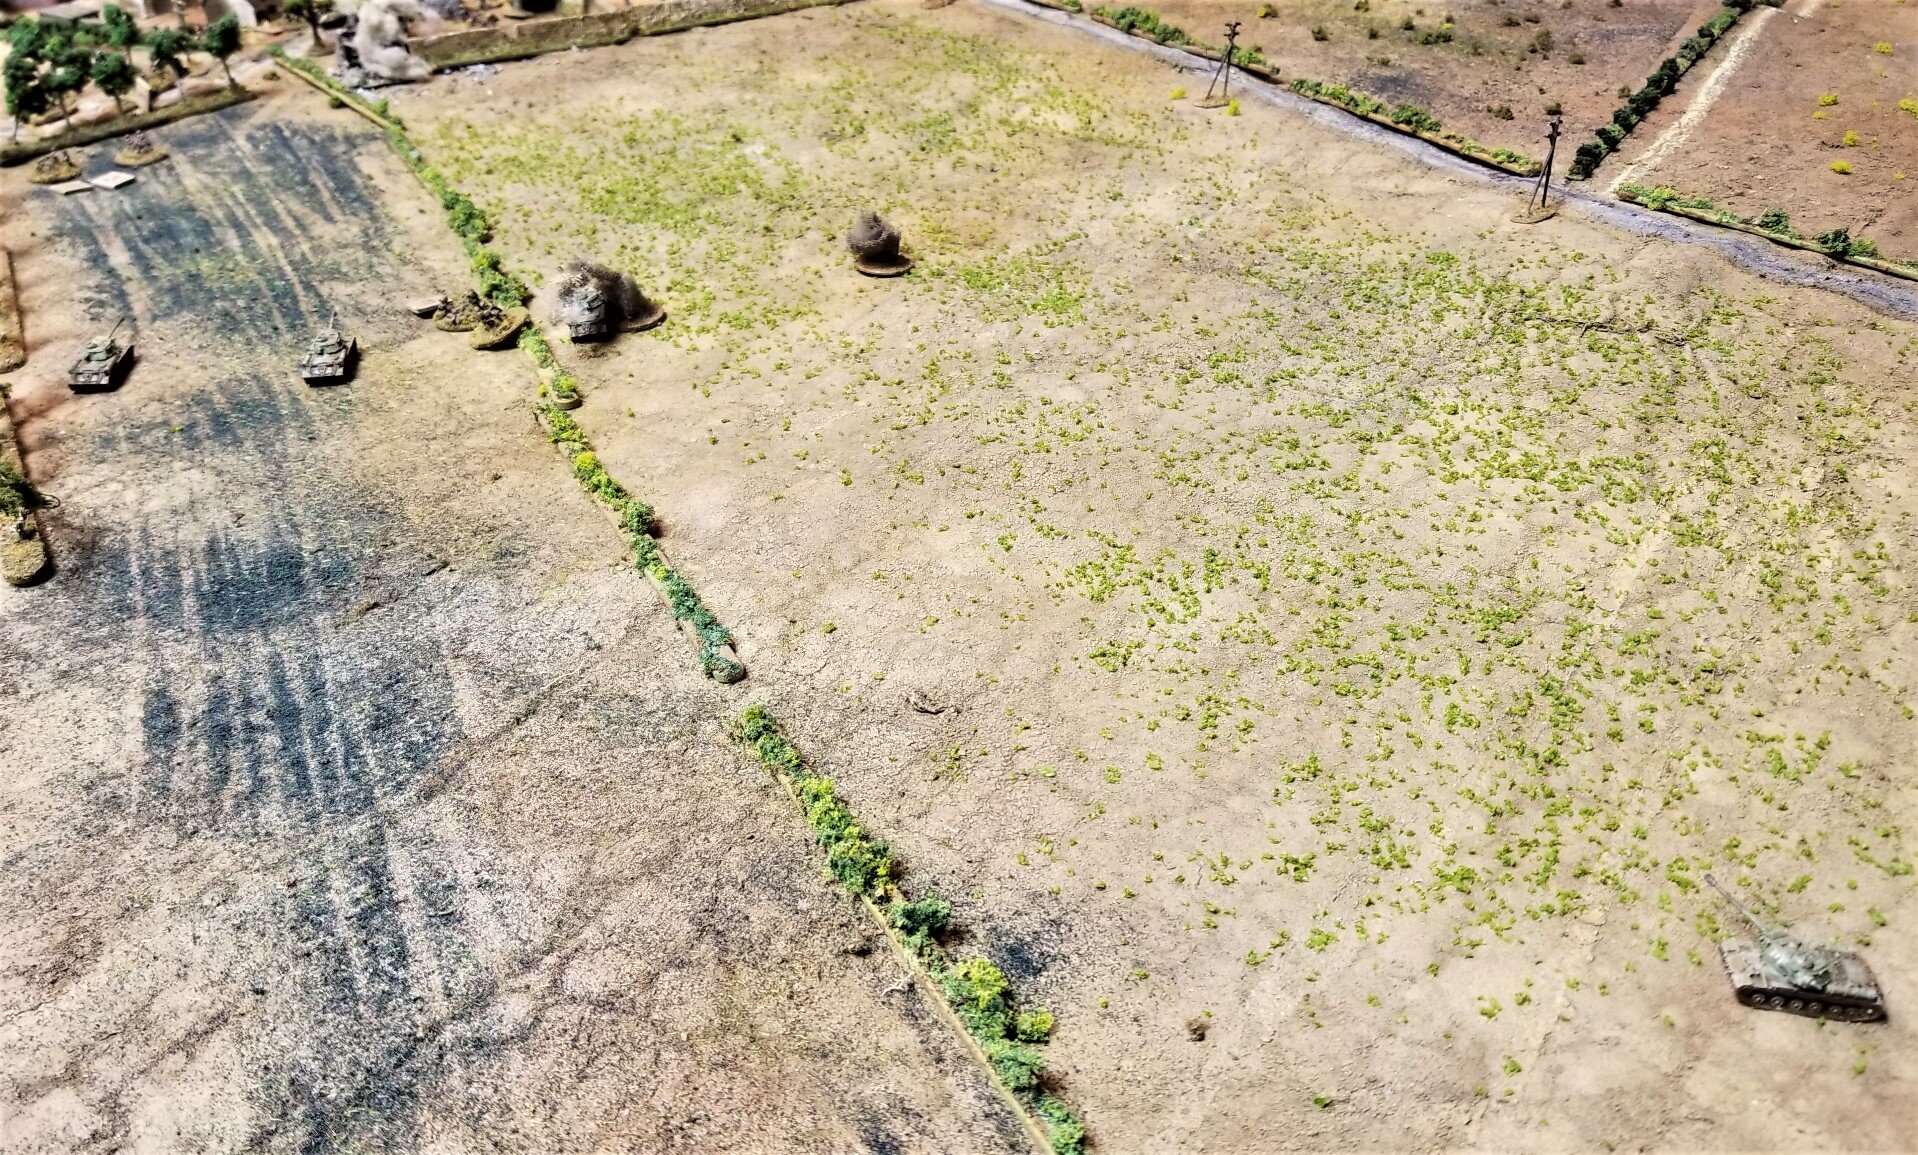
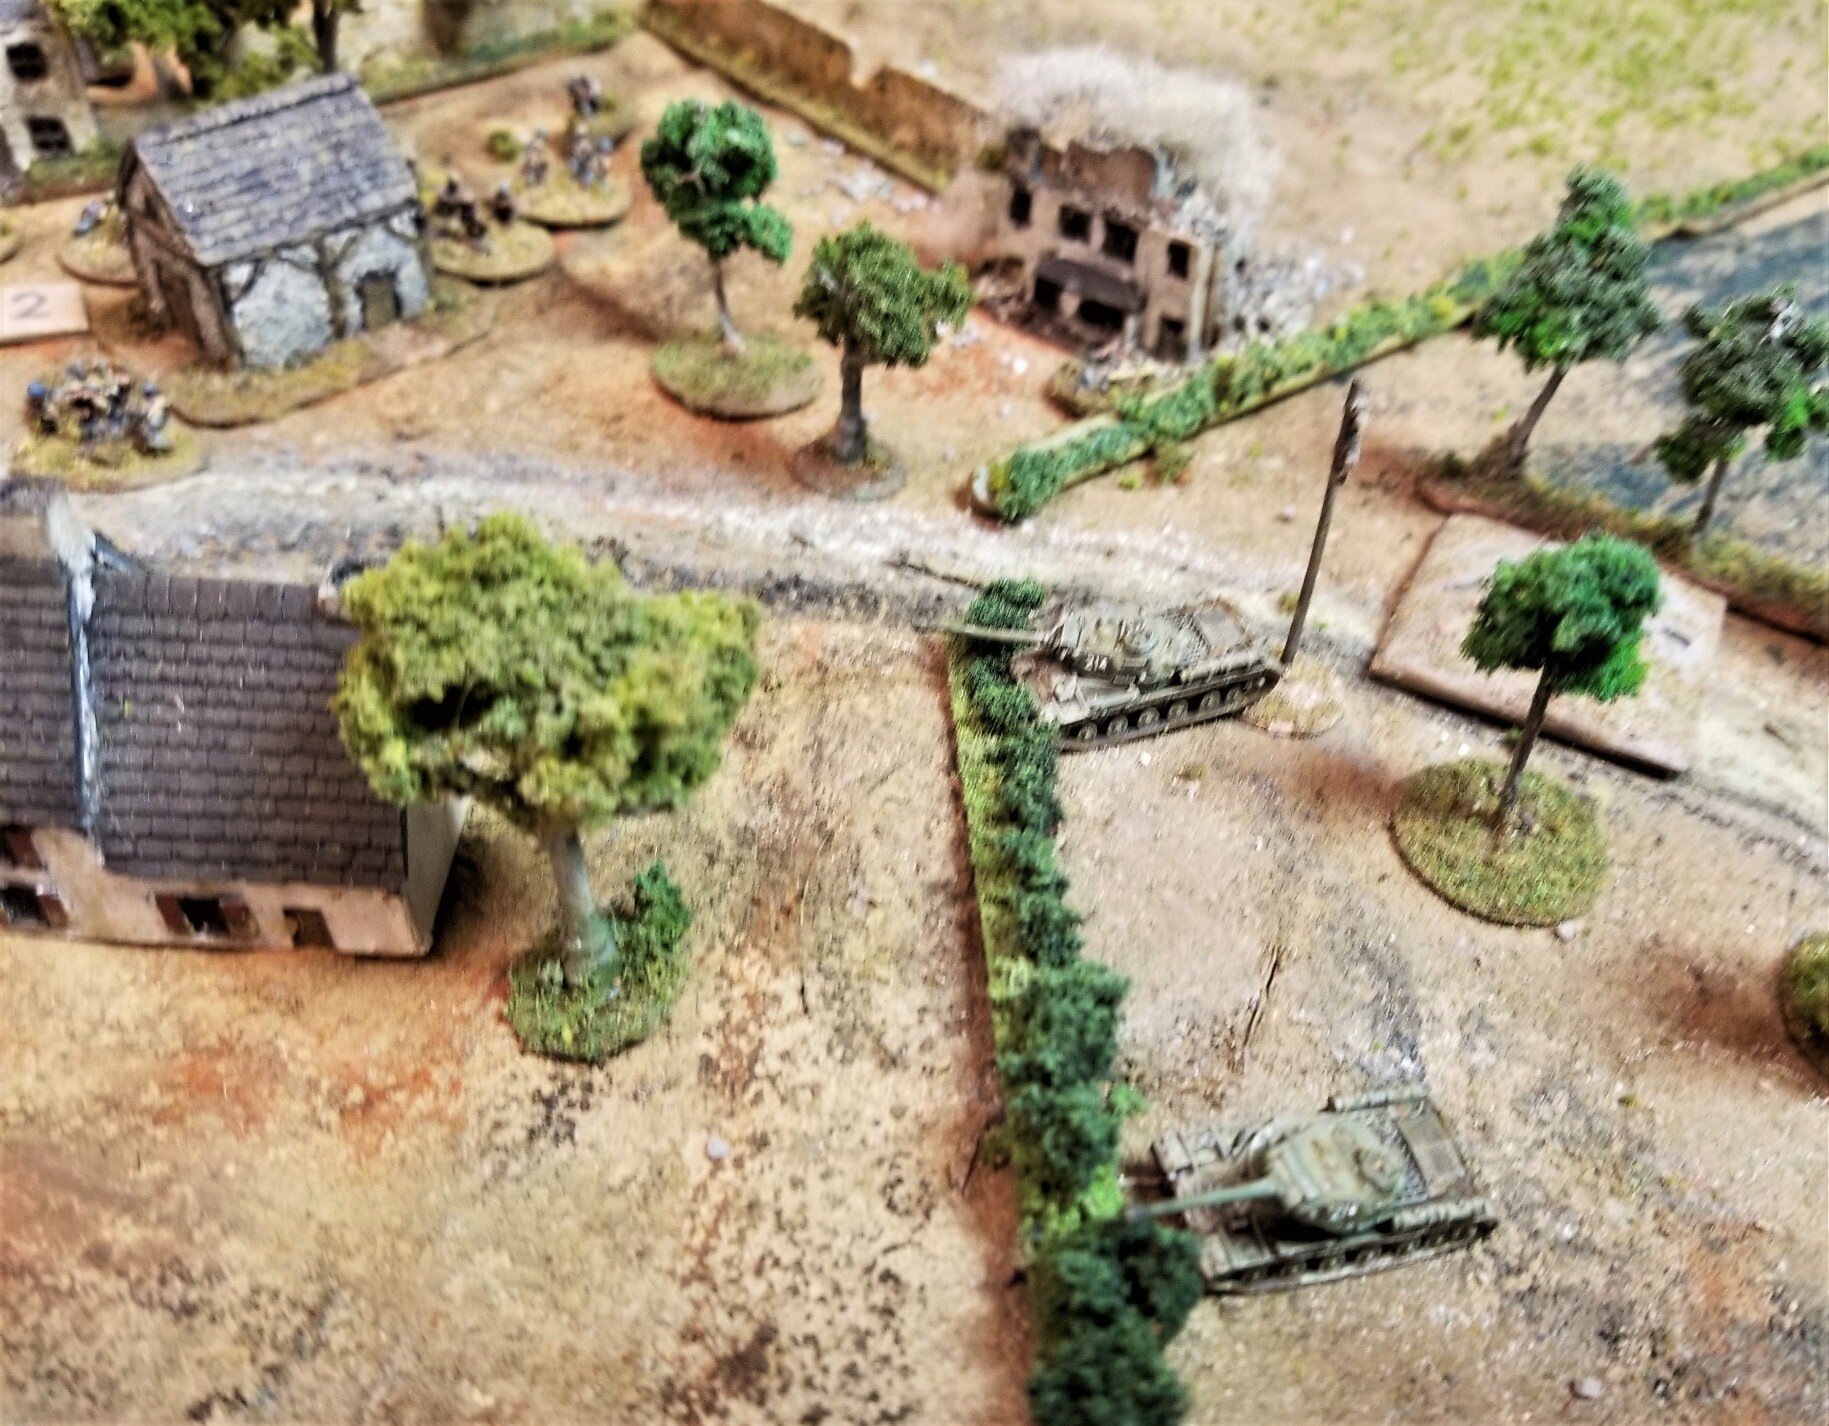
Pz IVs attempt to drive through the Polish center.
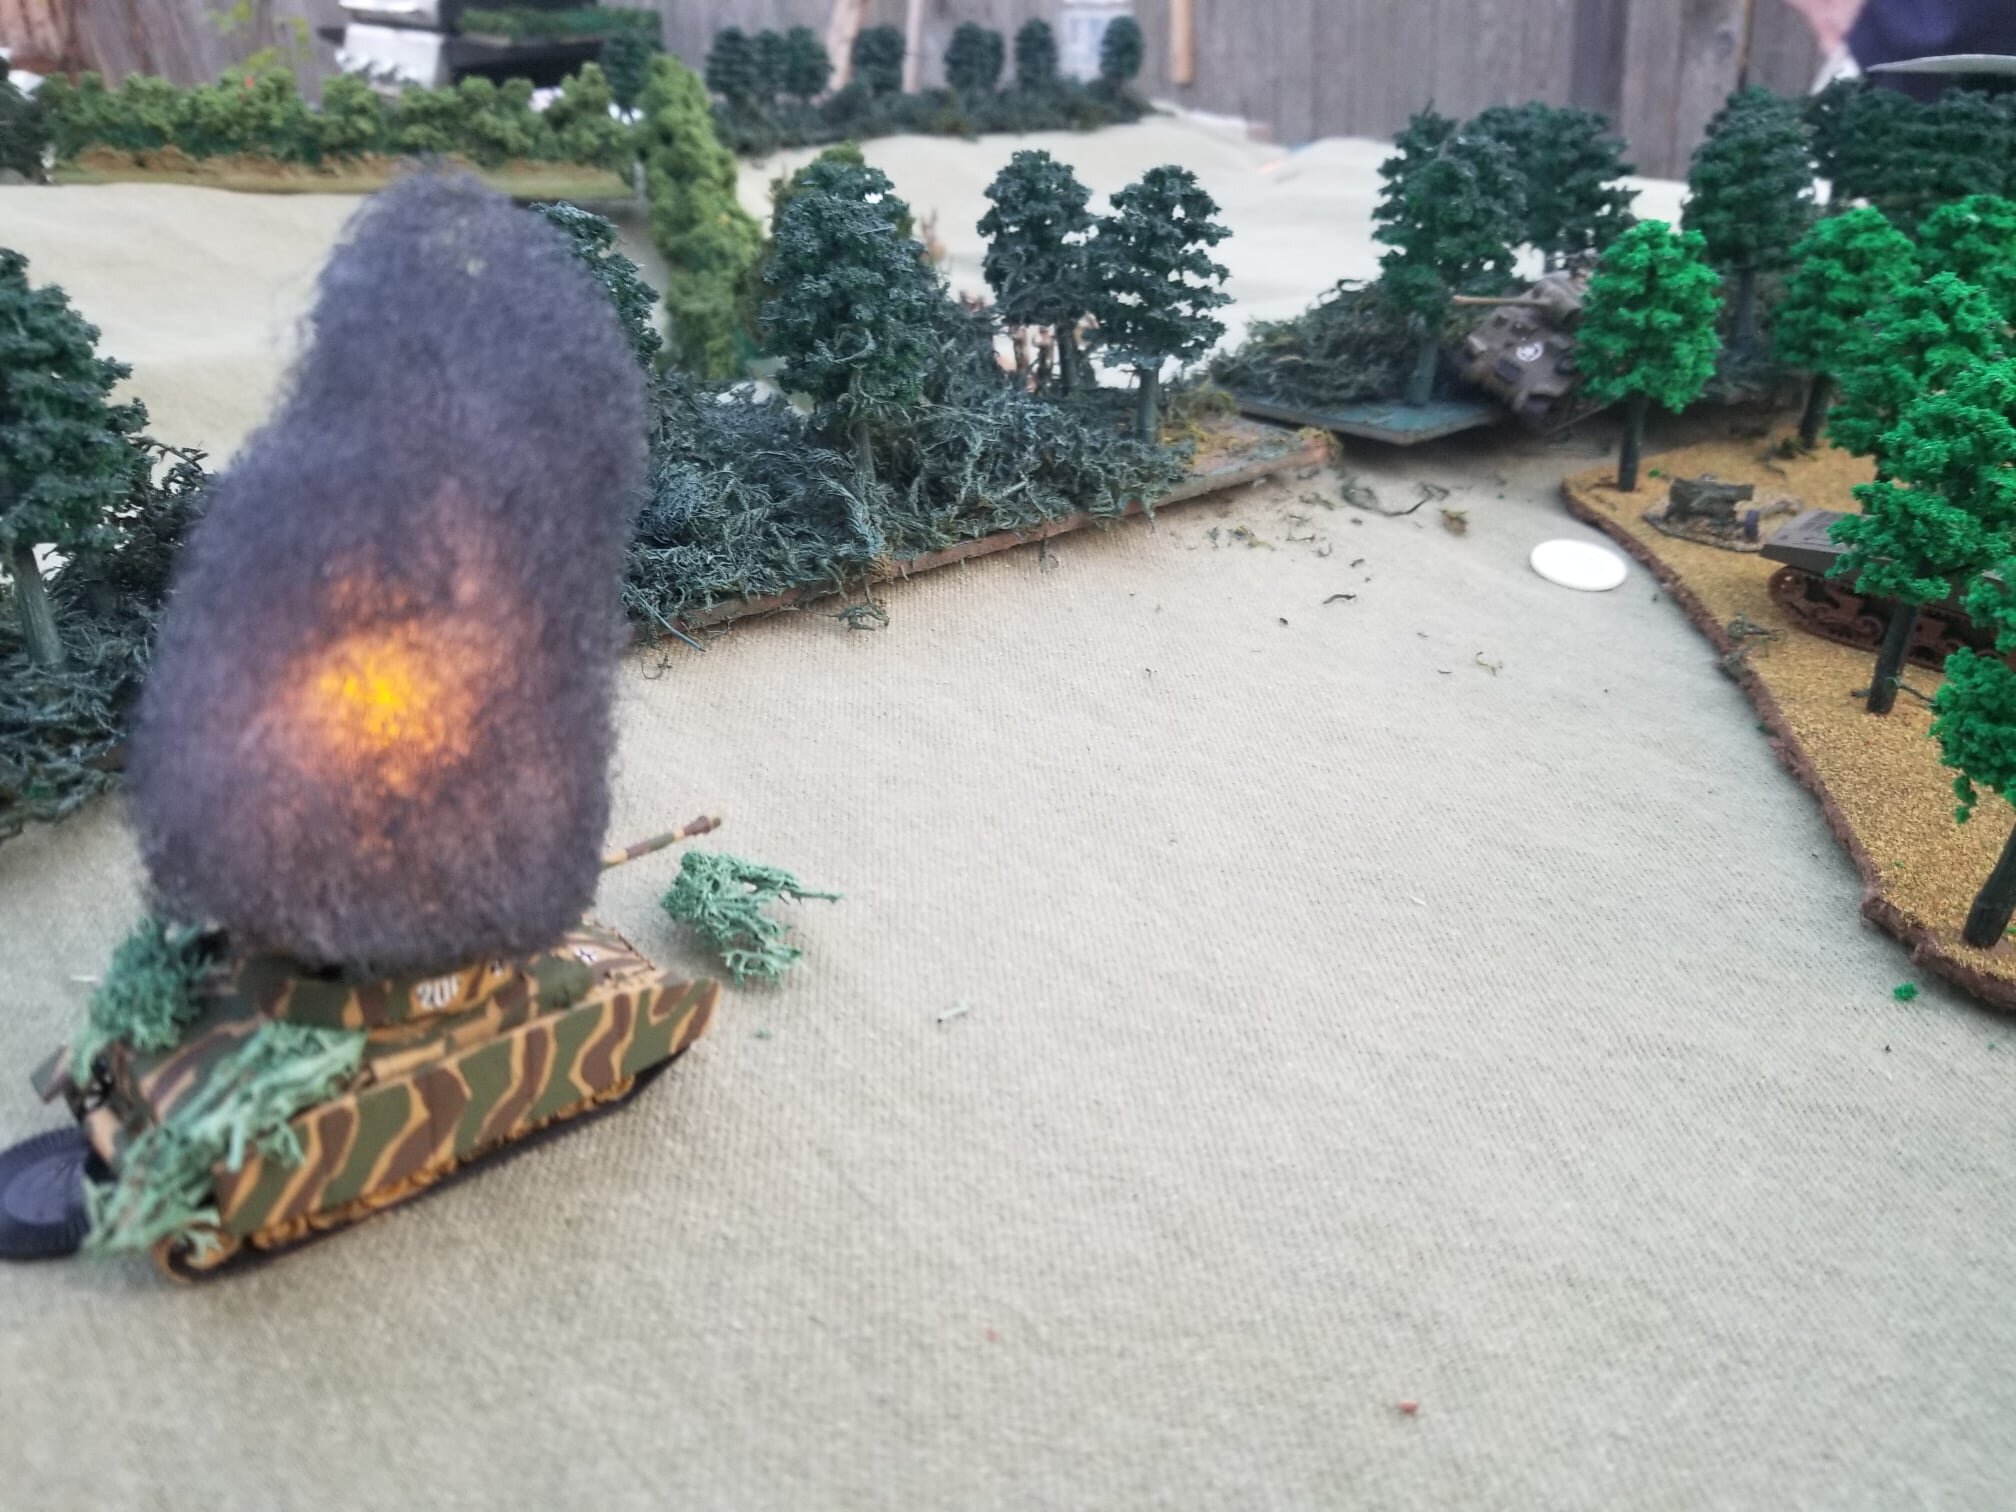
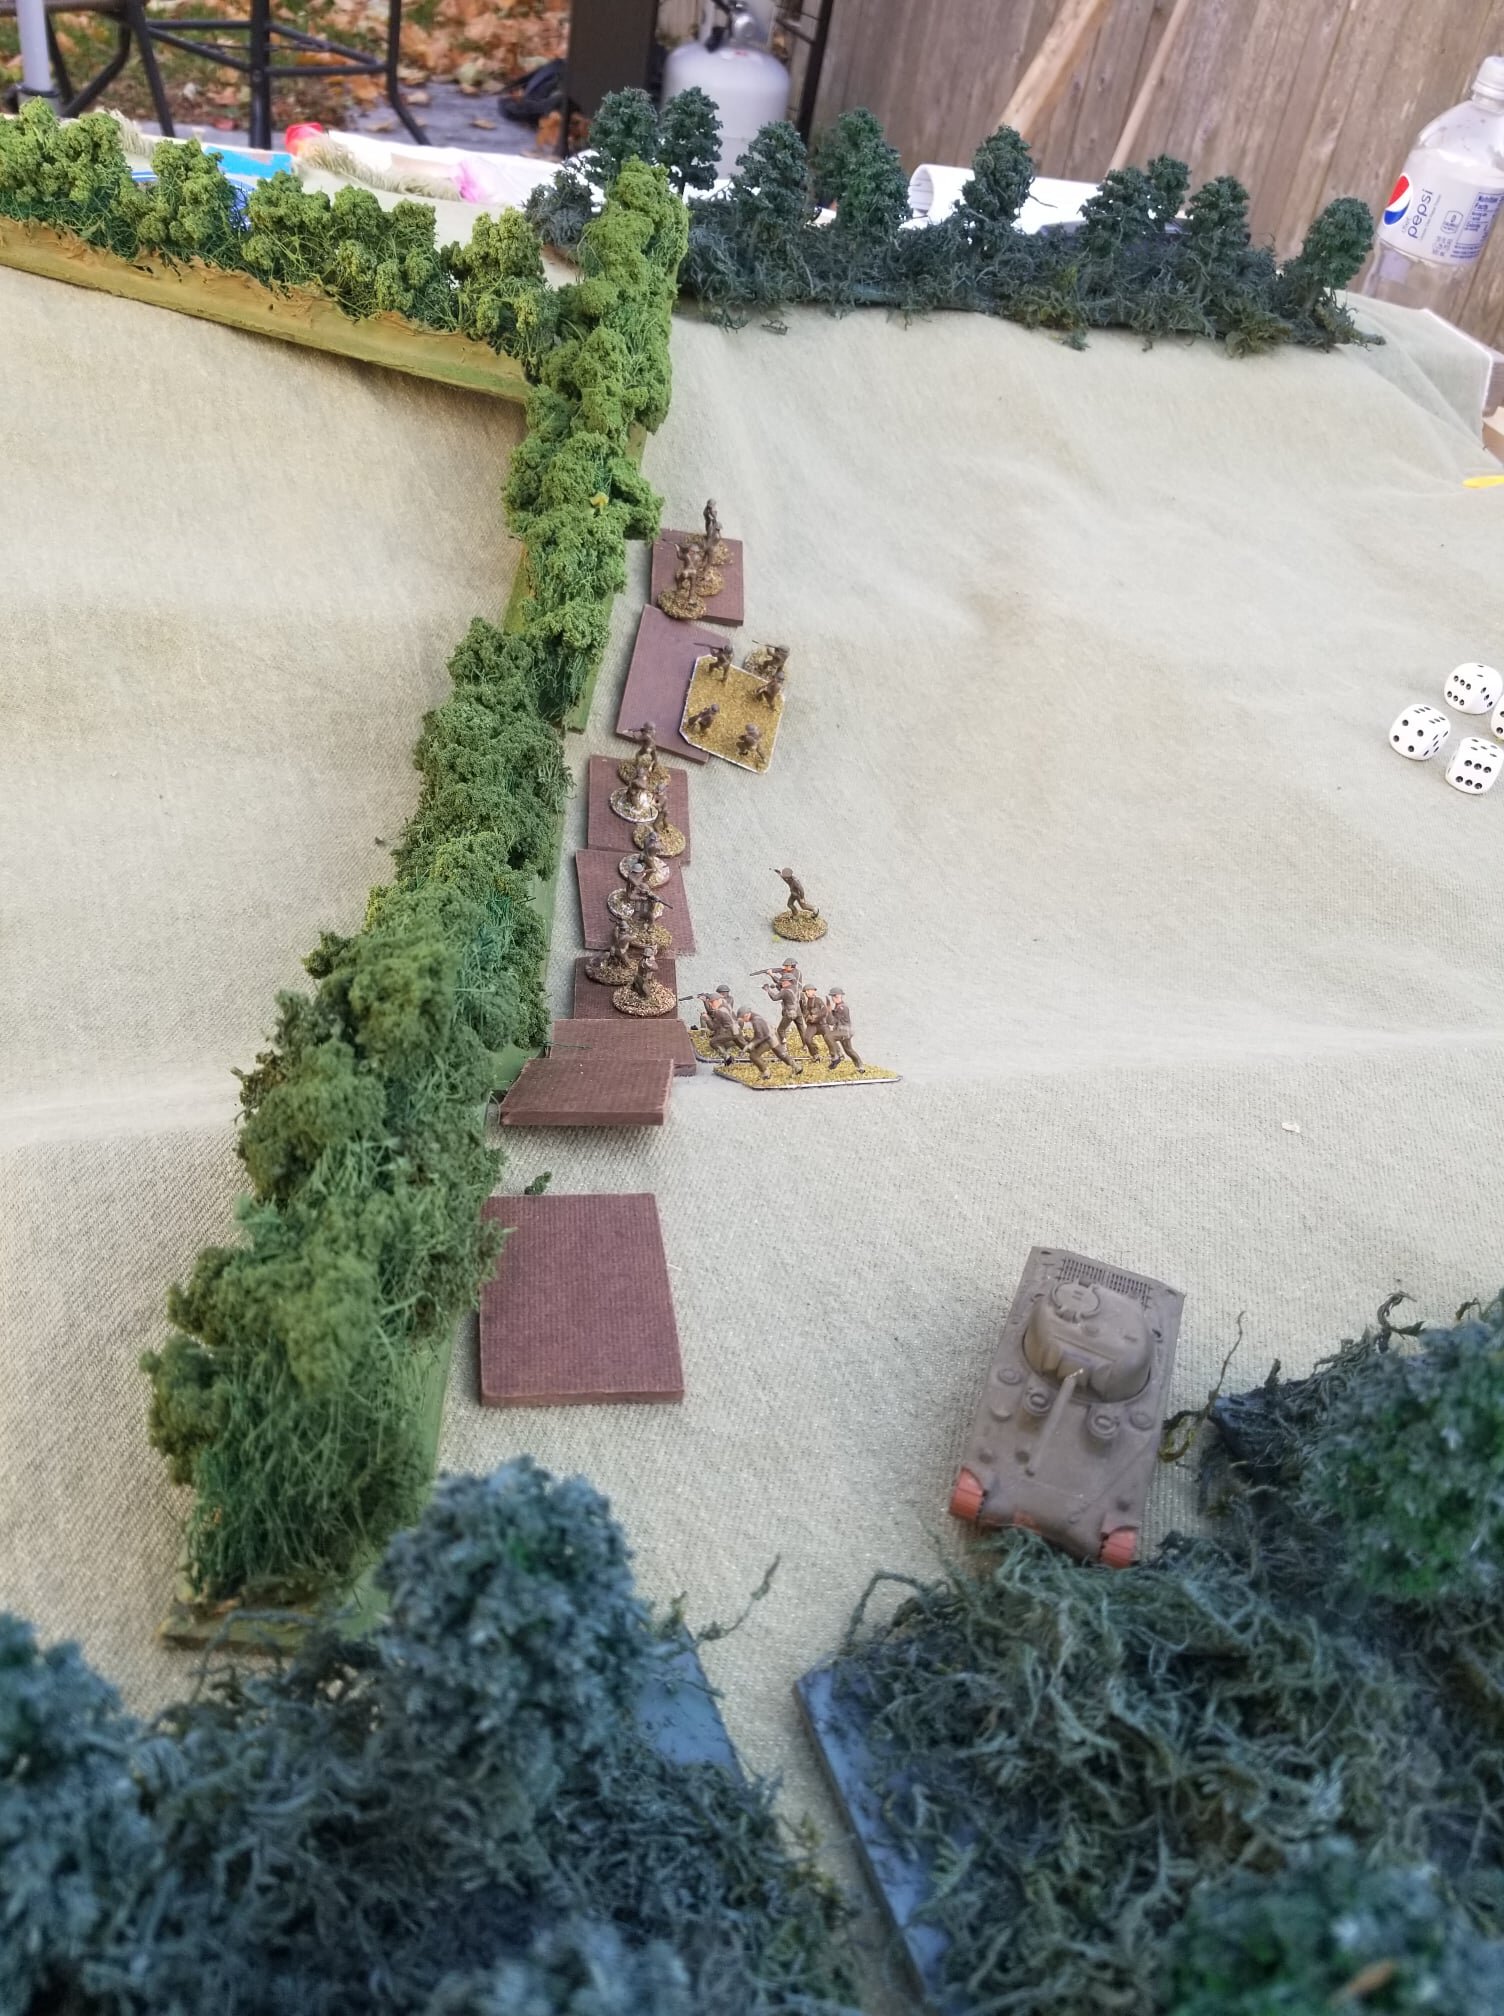
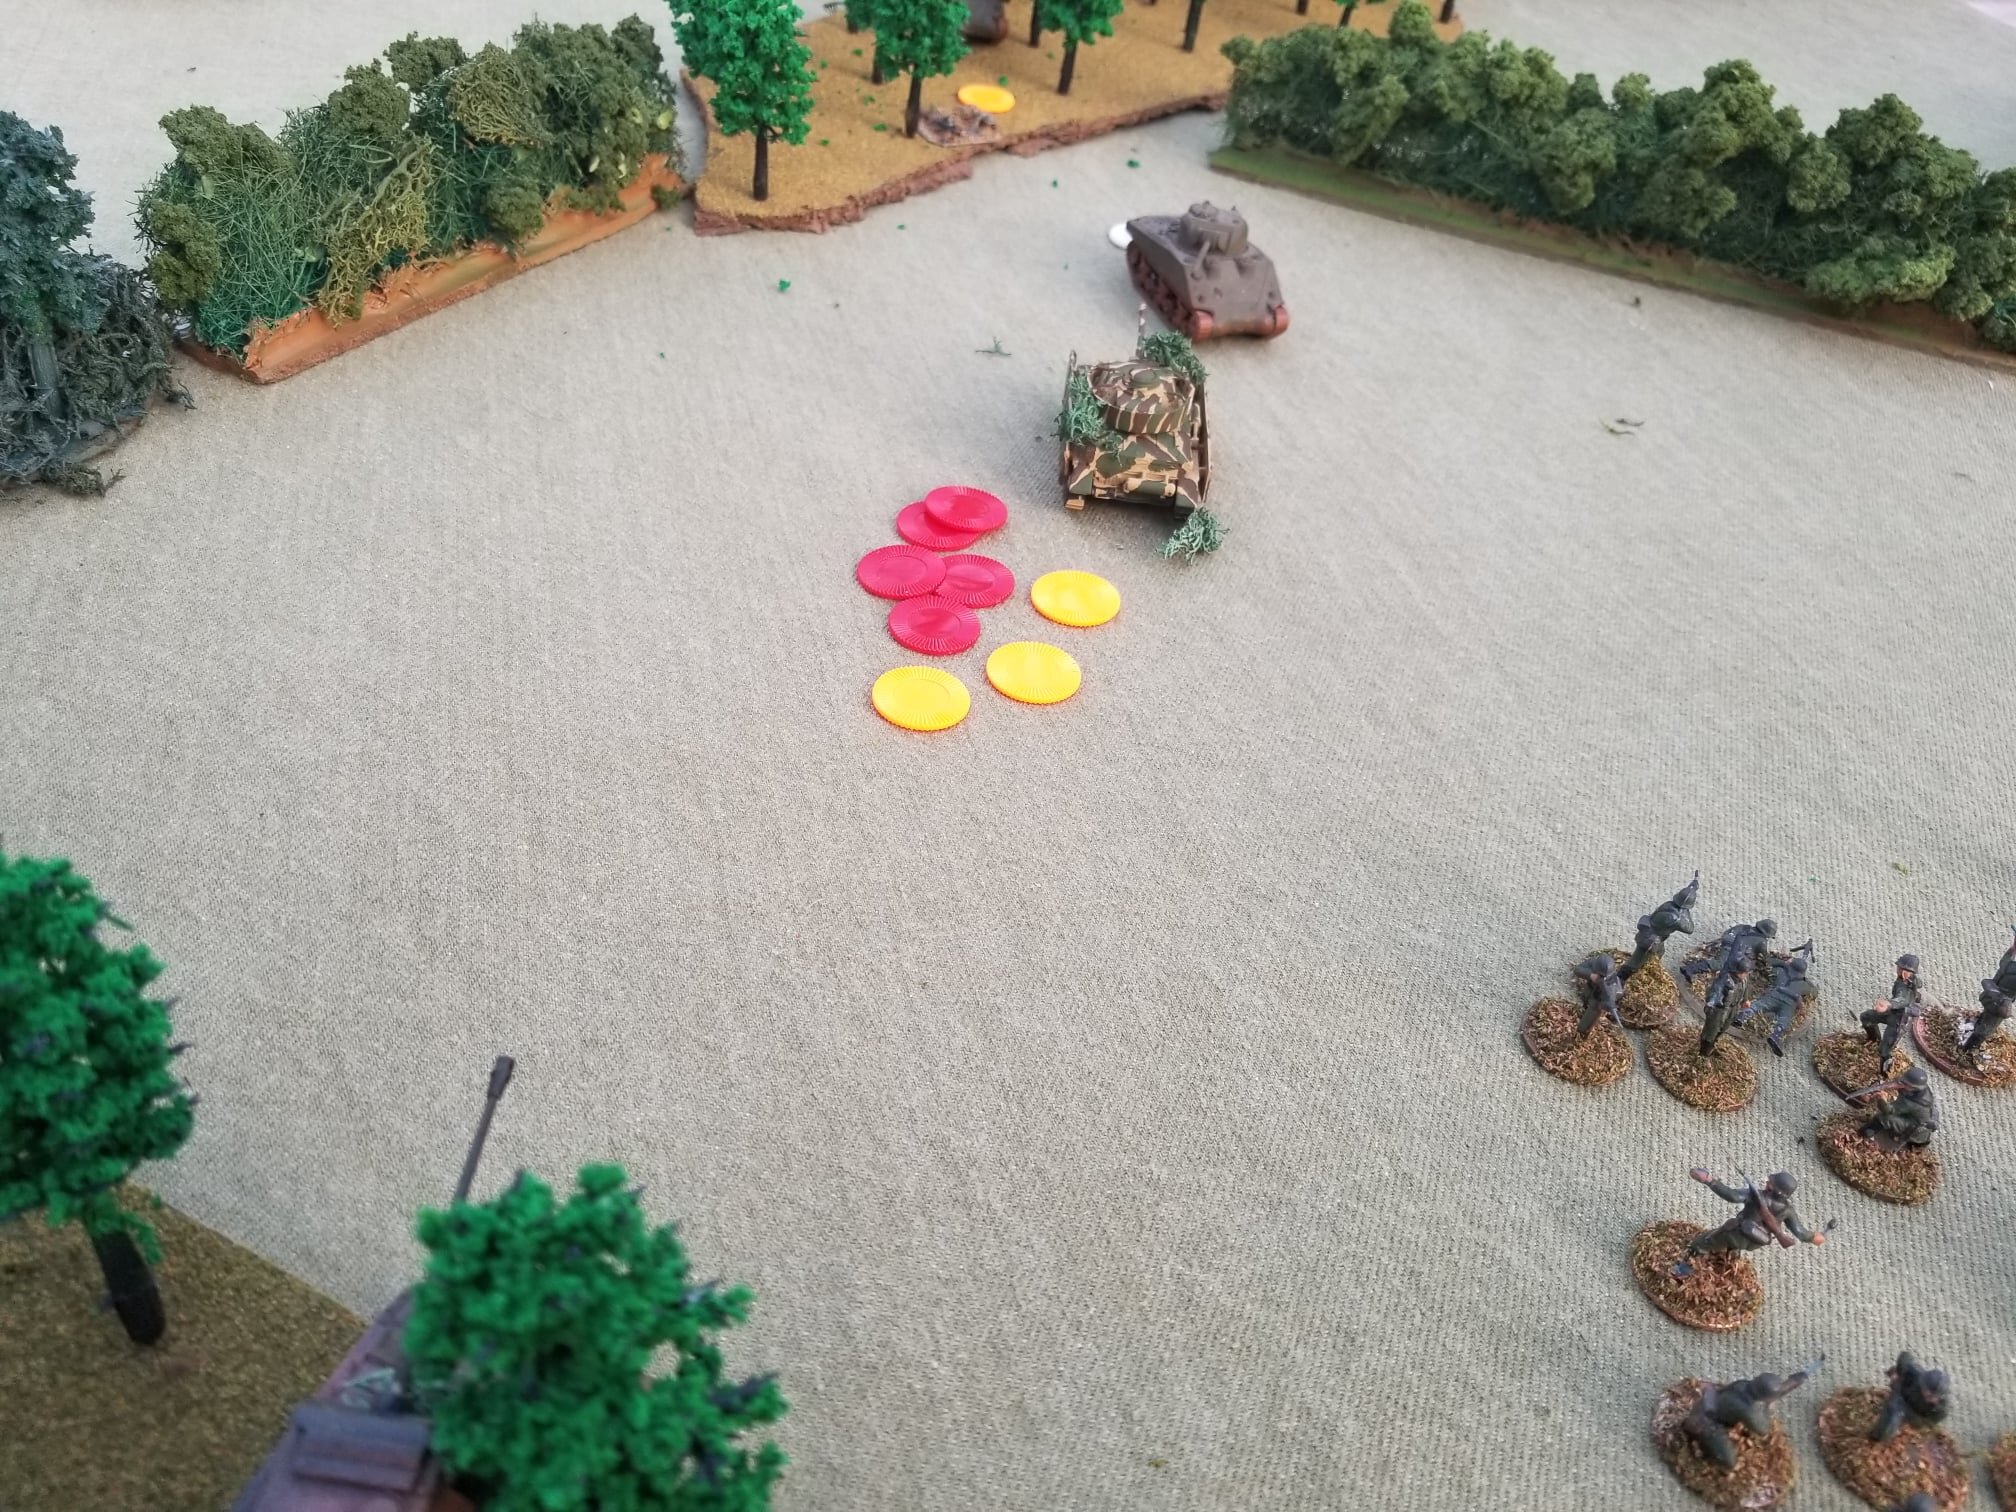
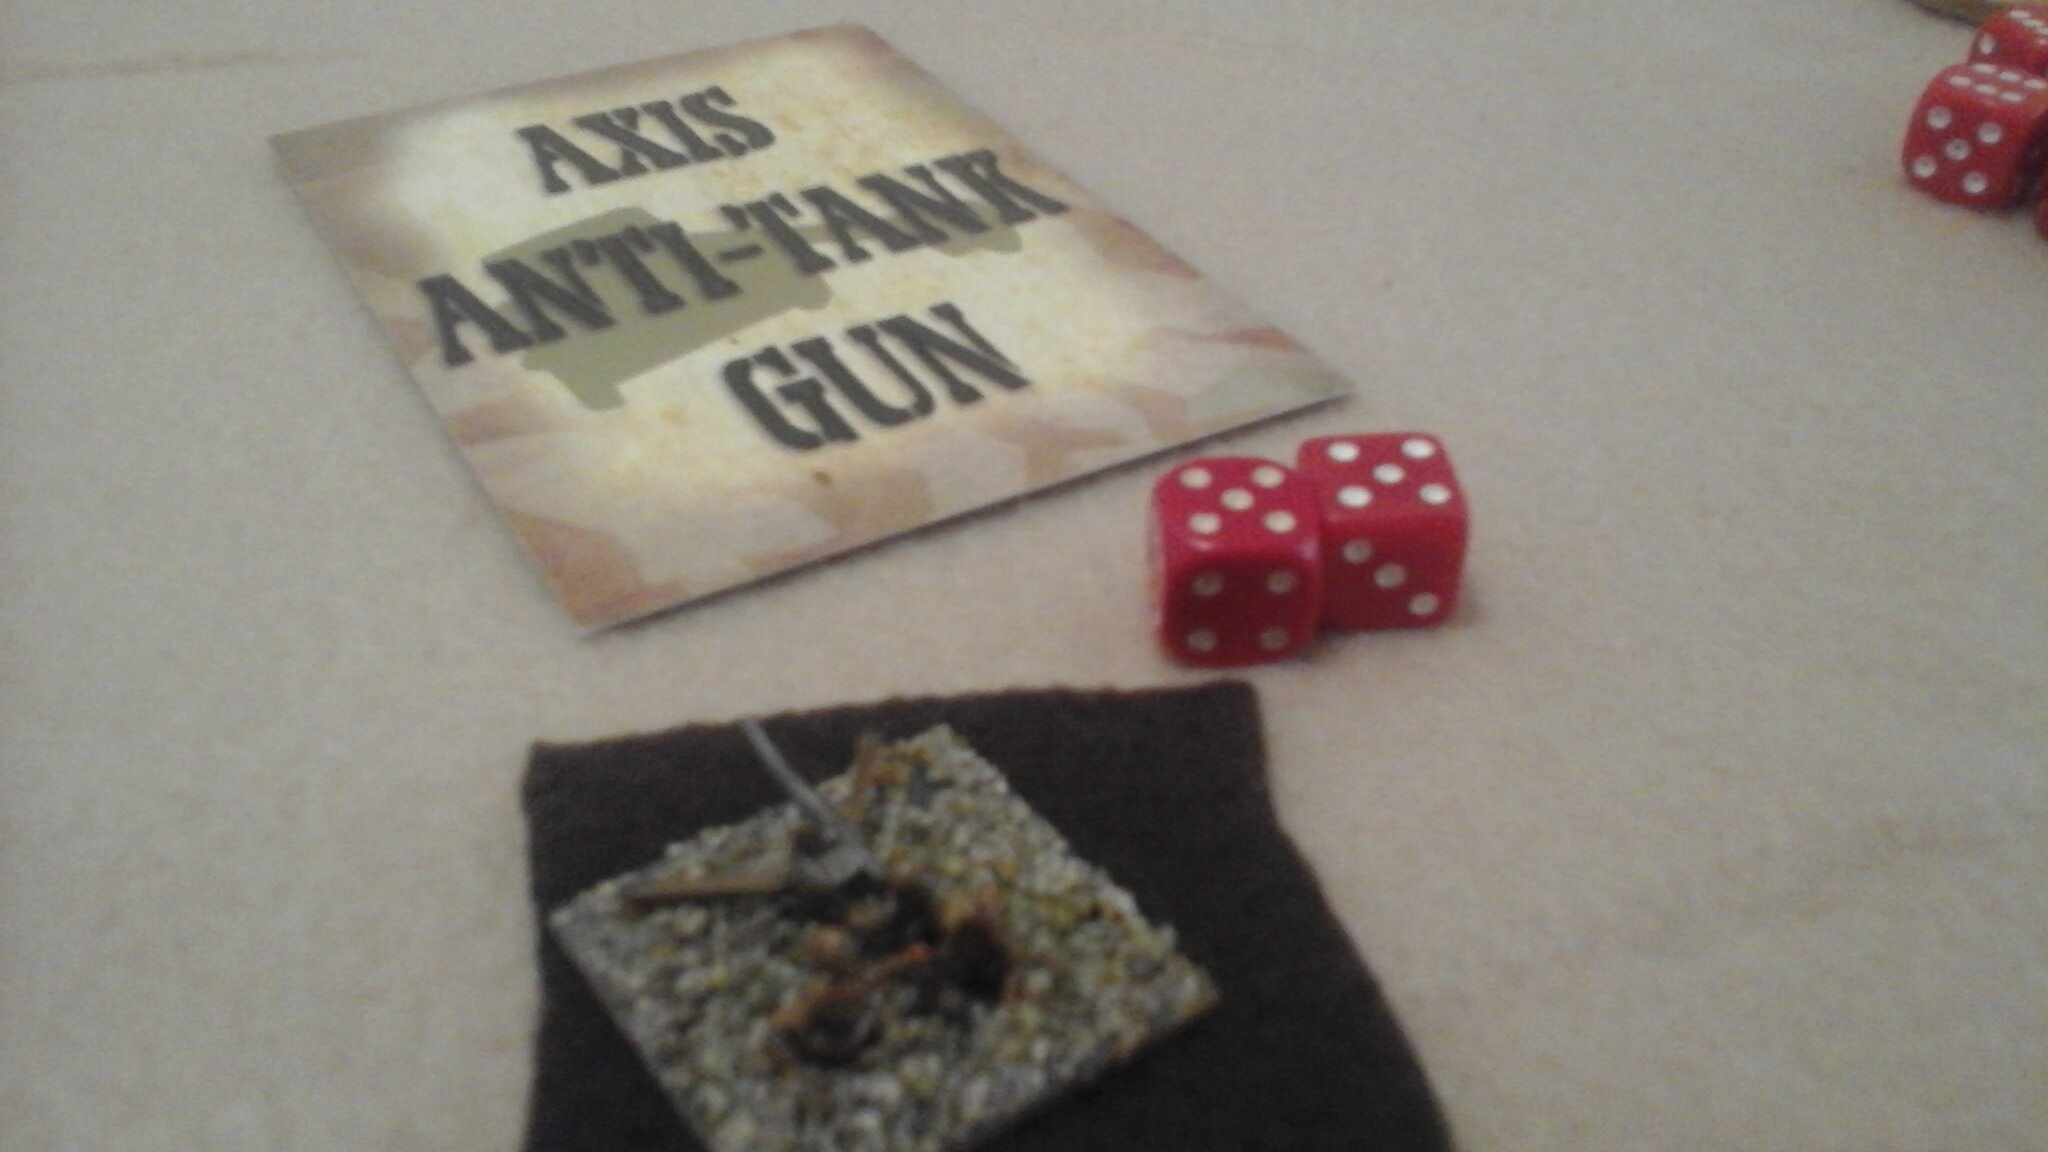
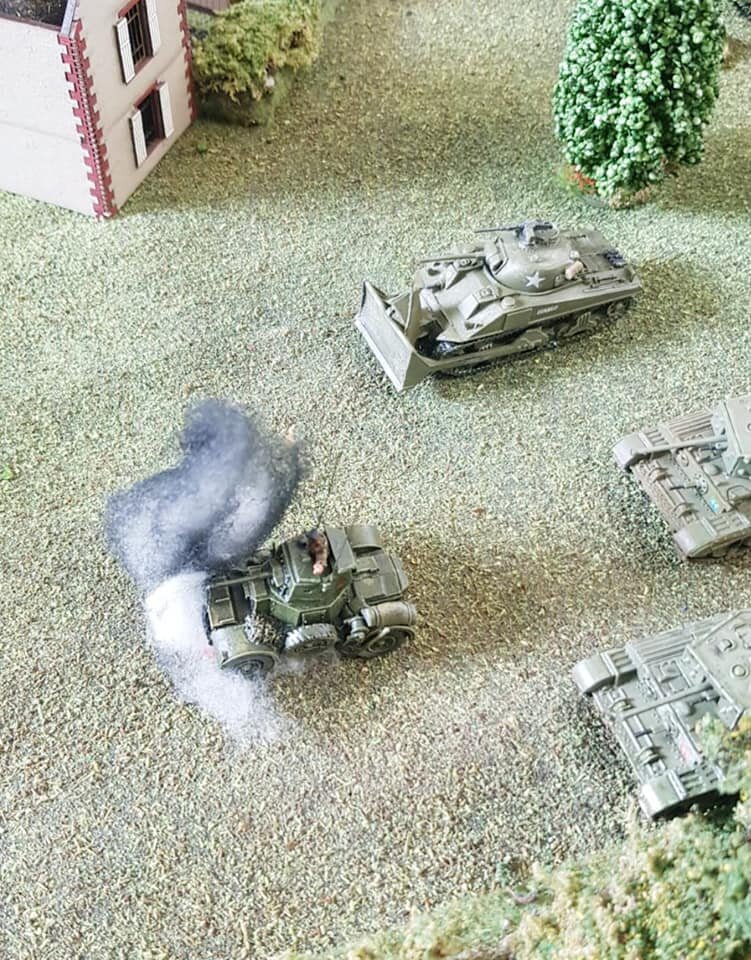
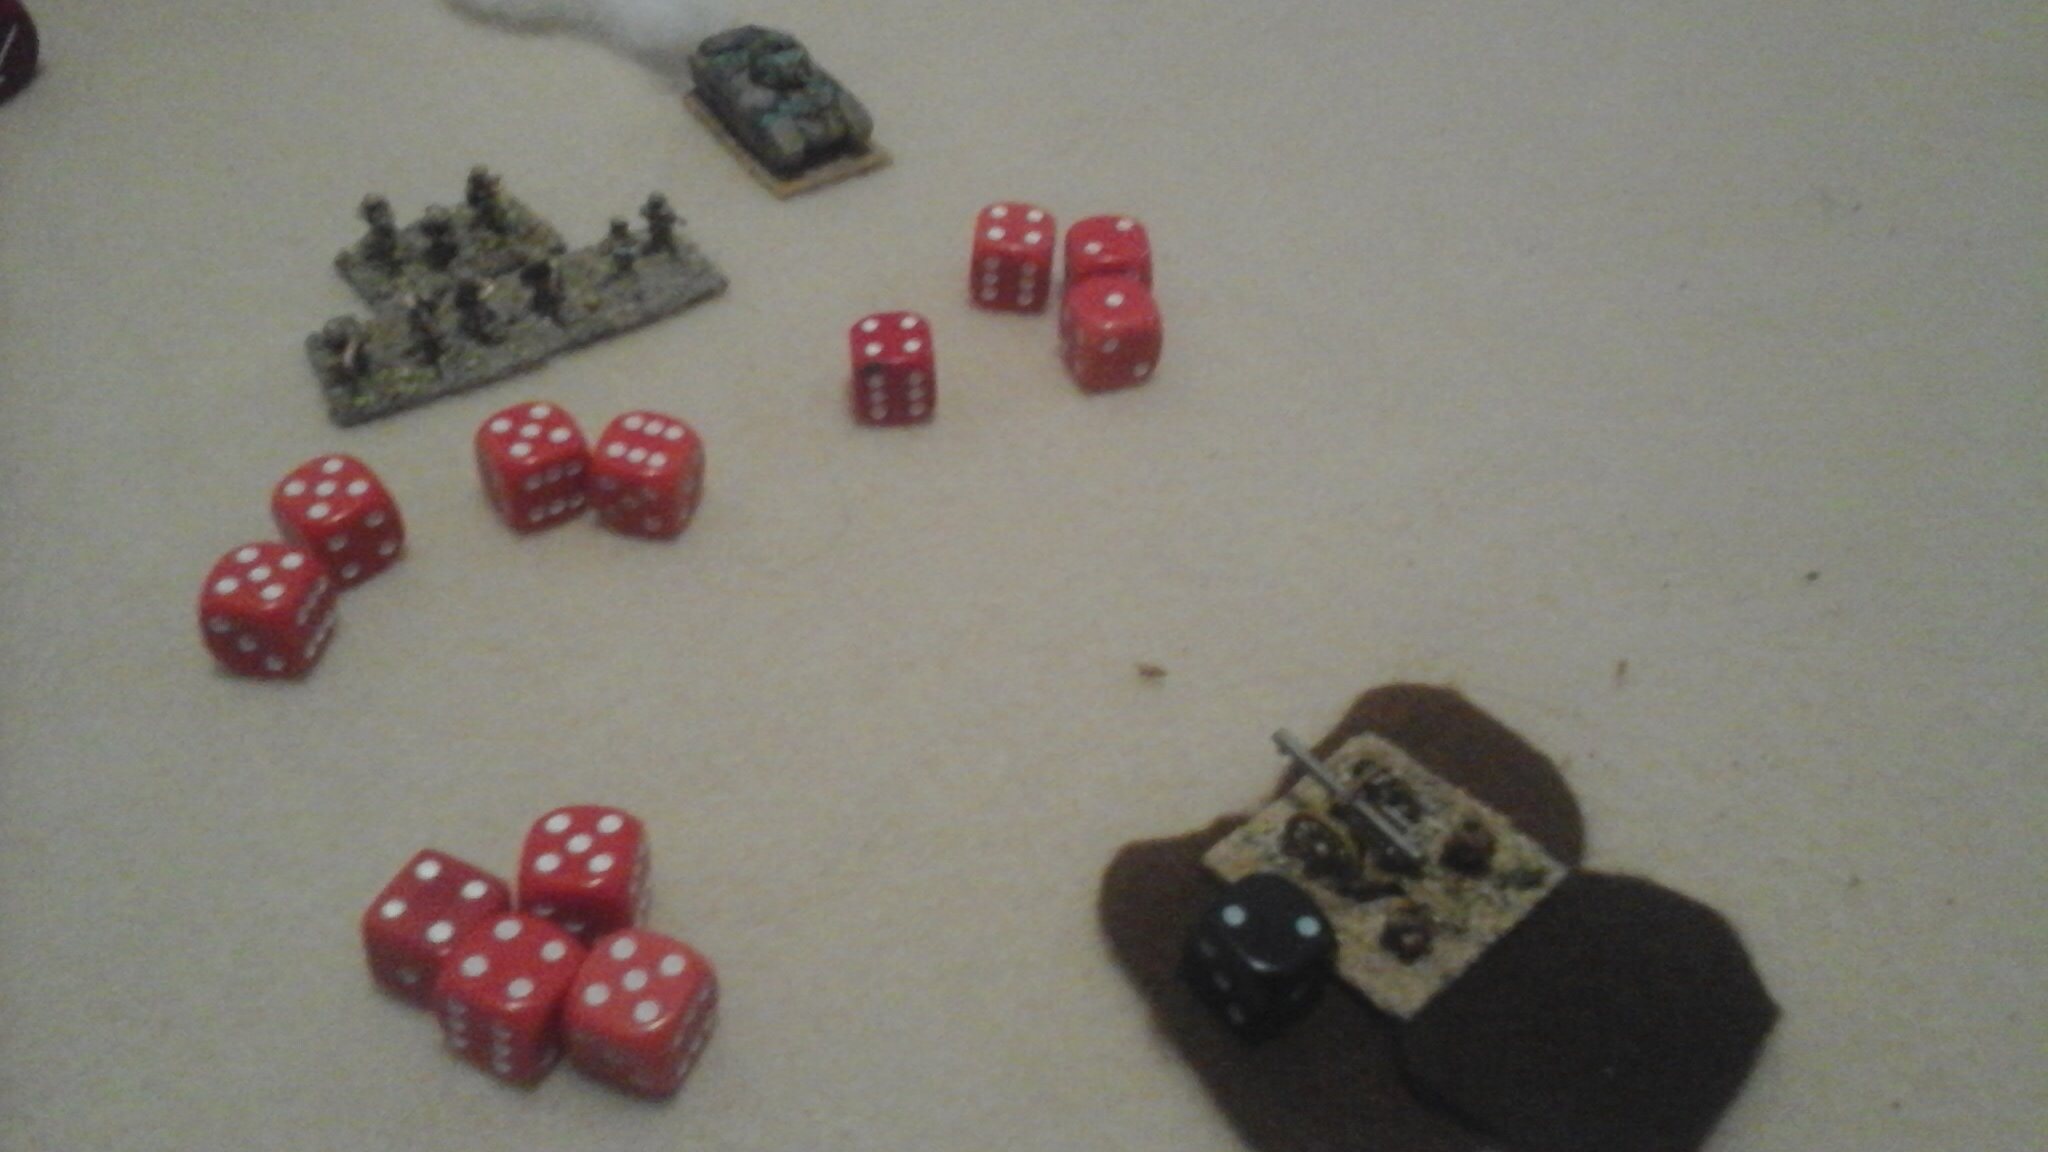
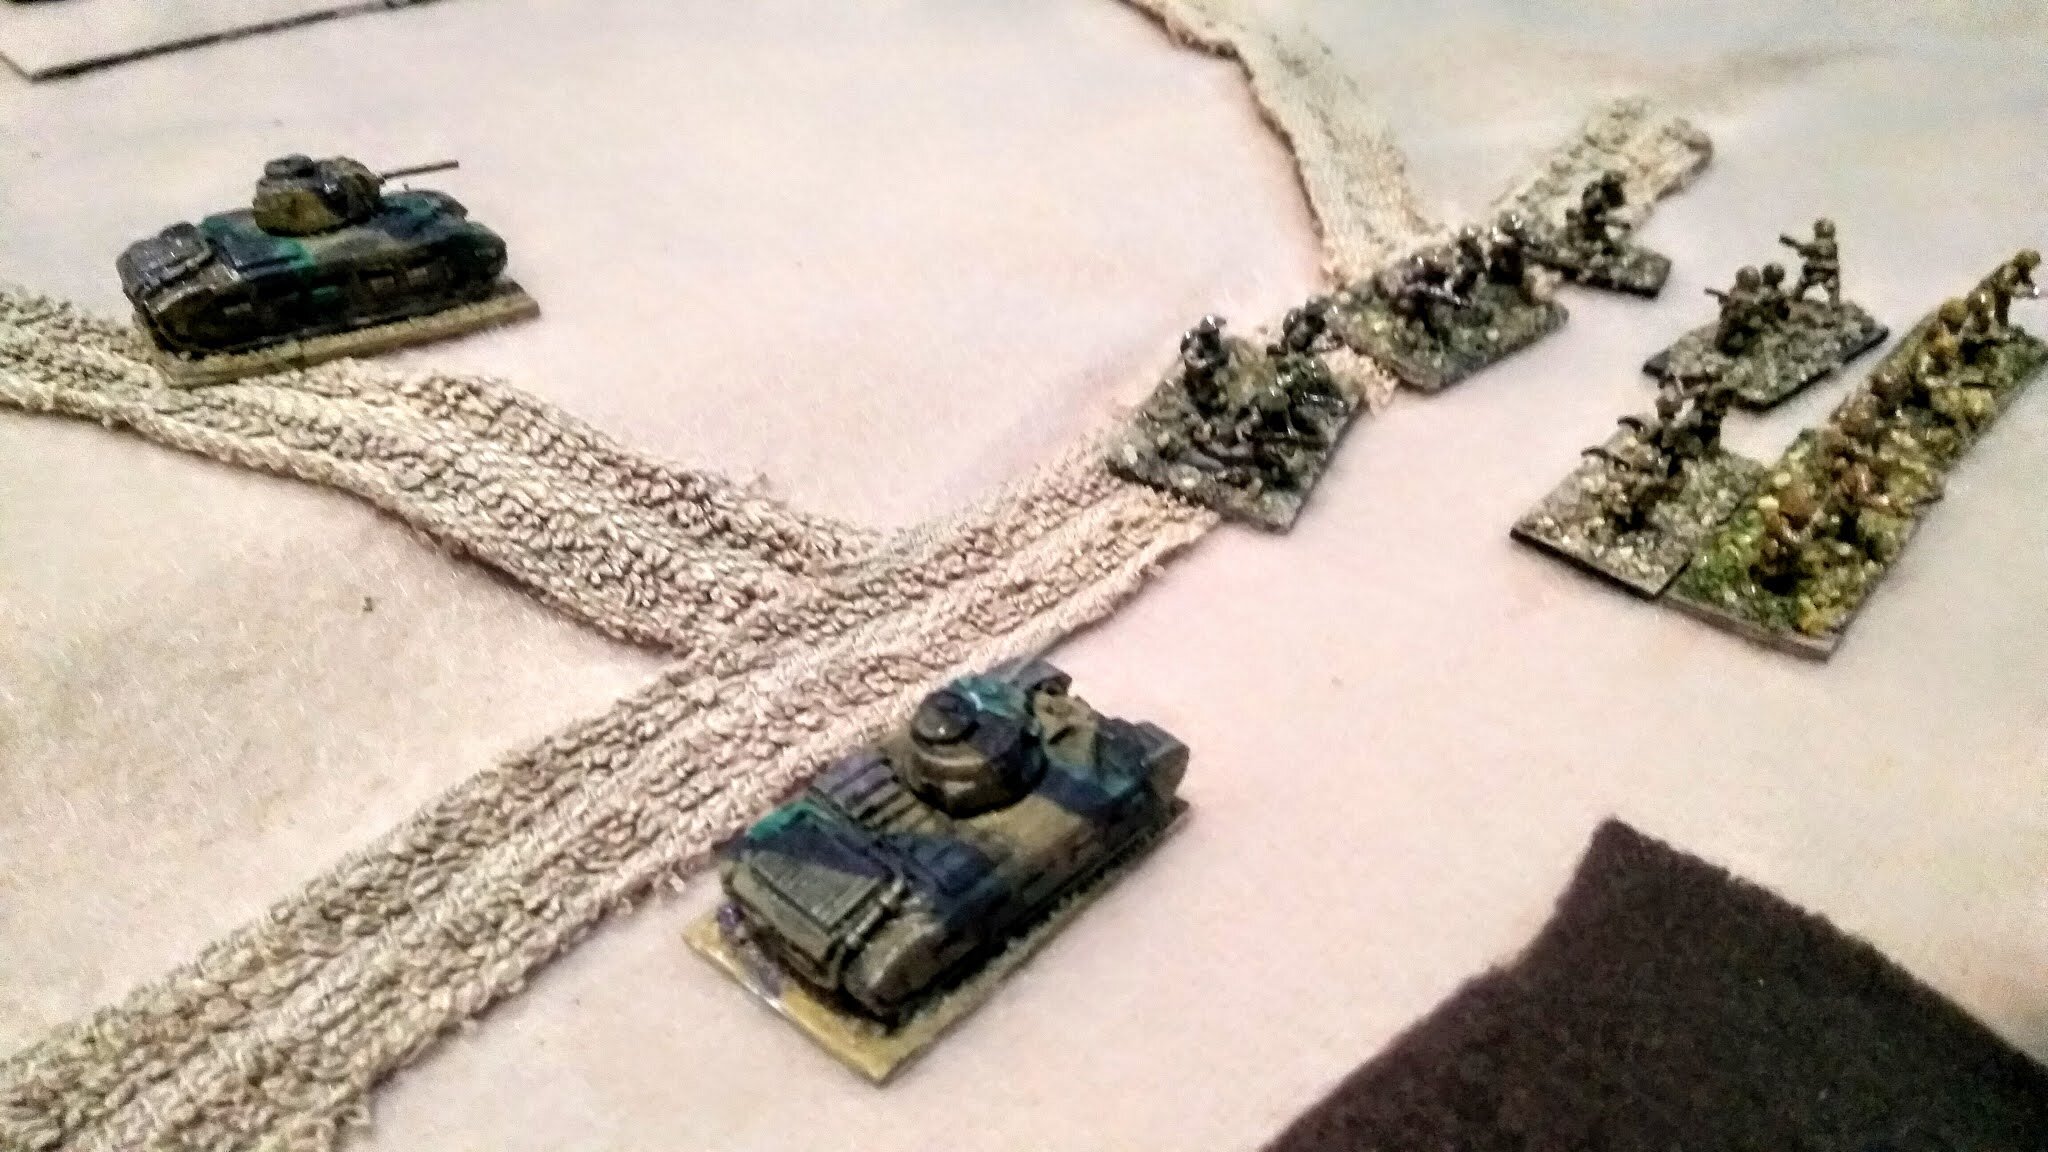
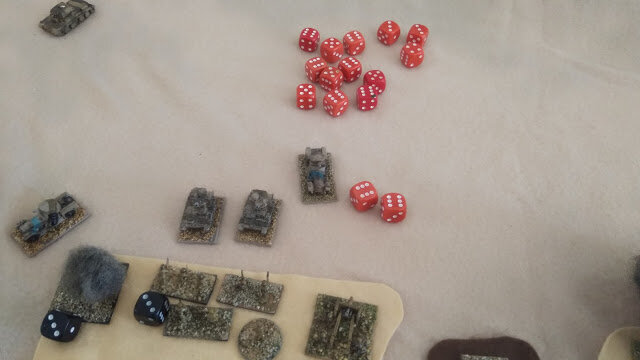
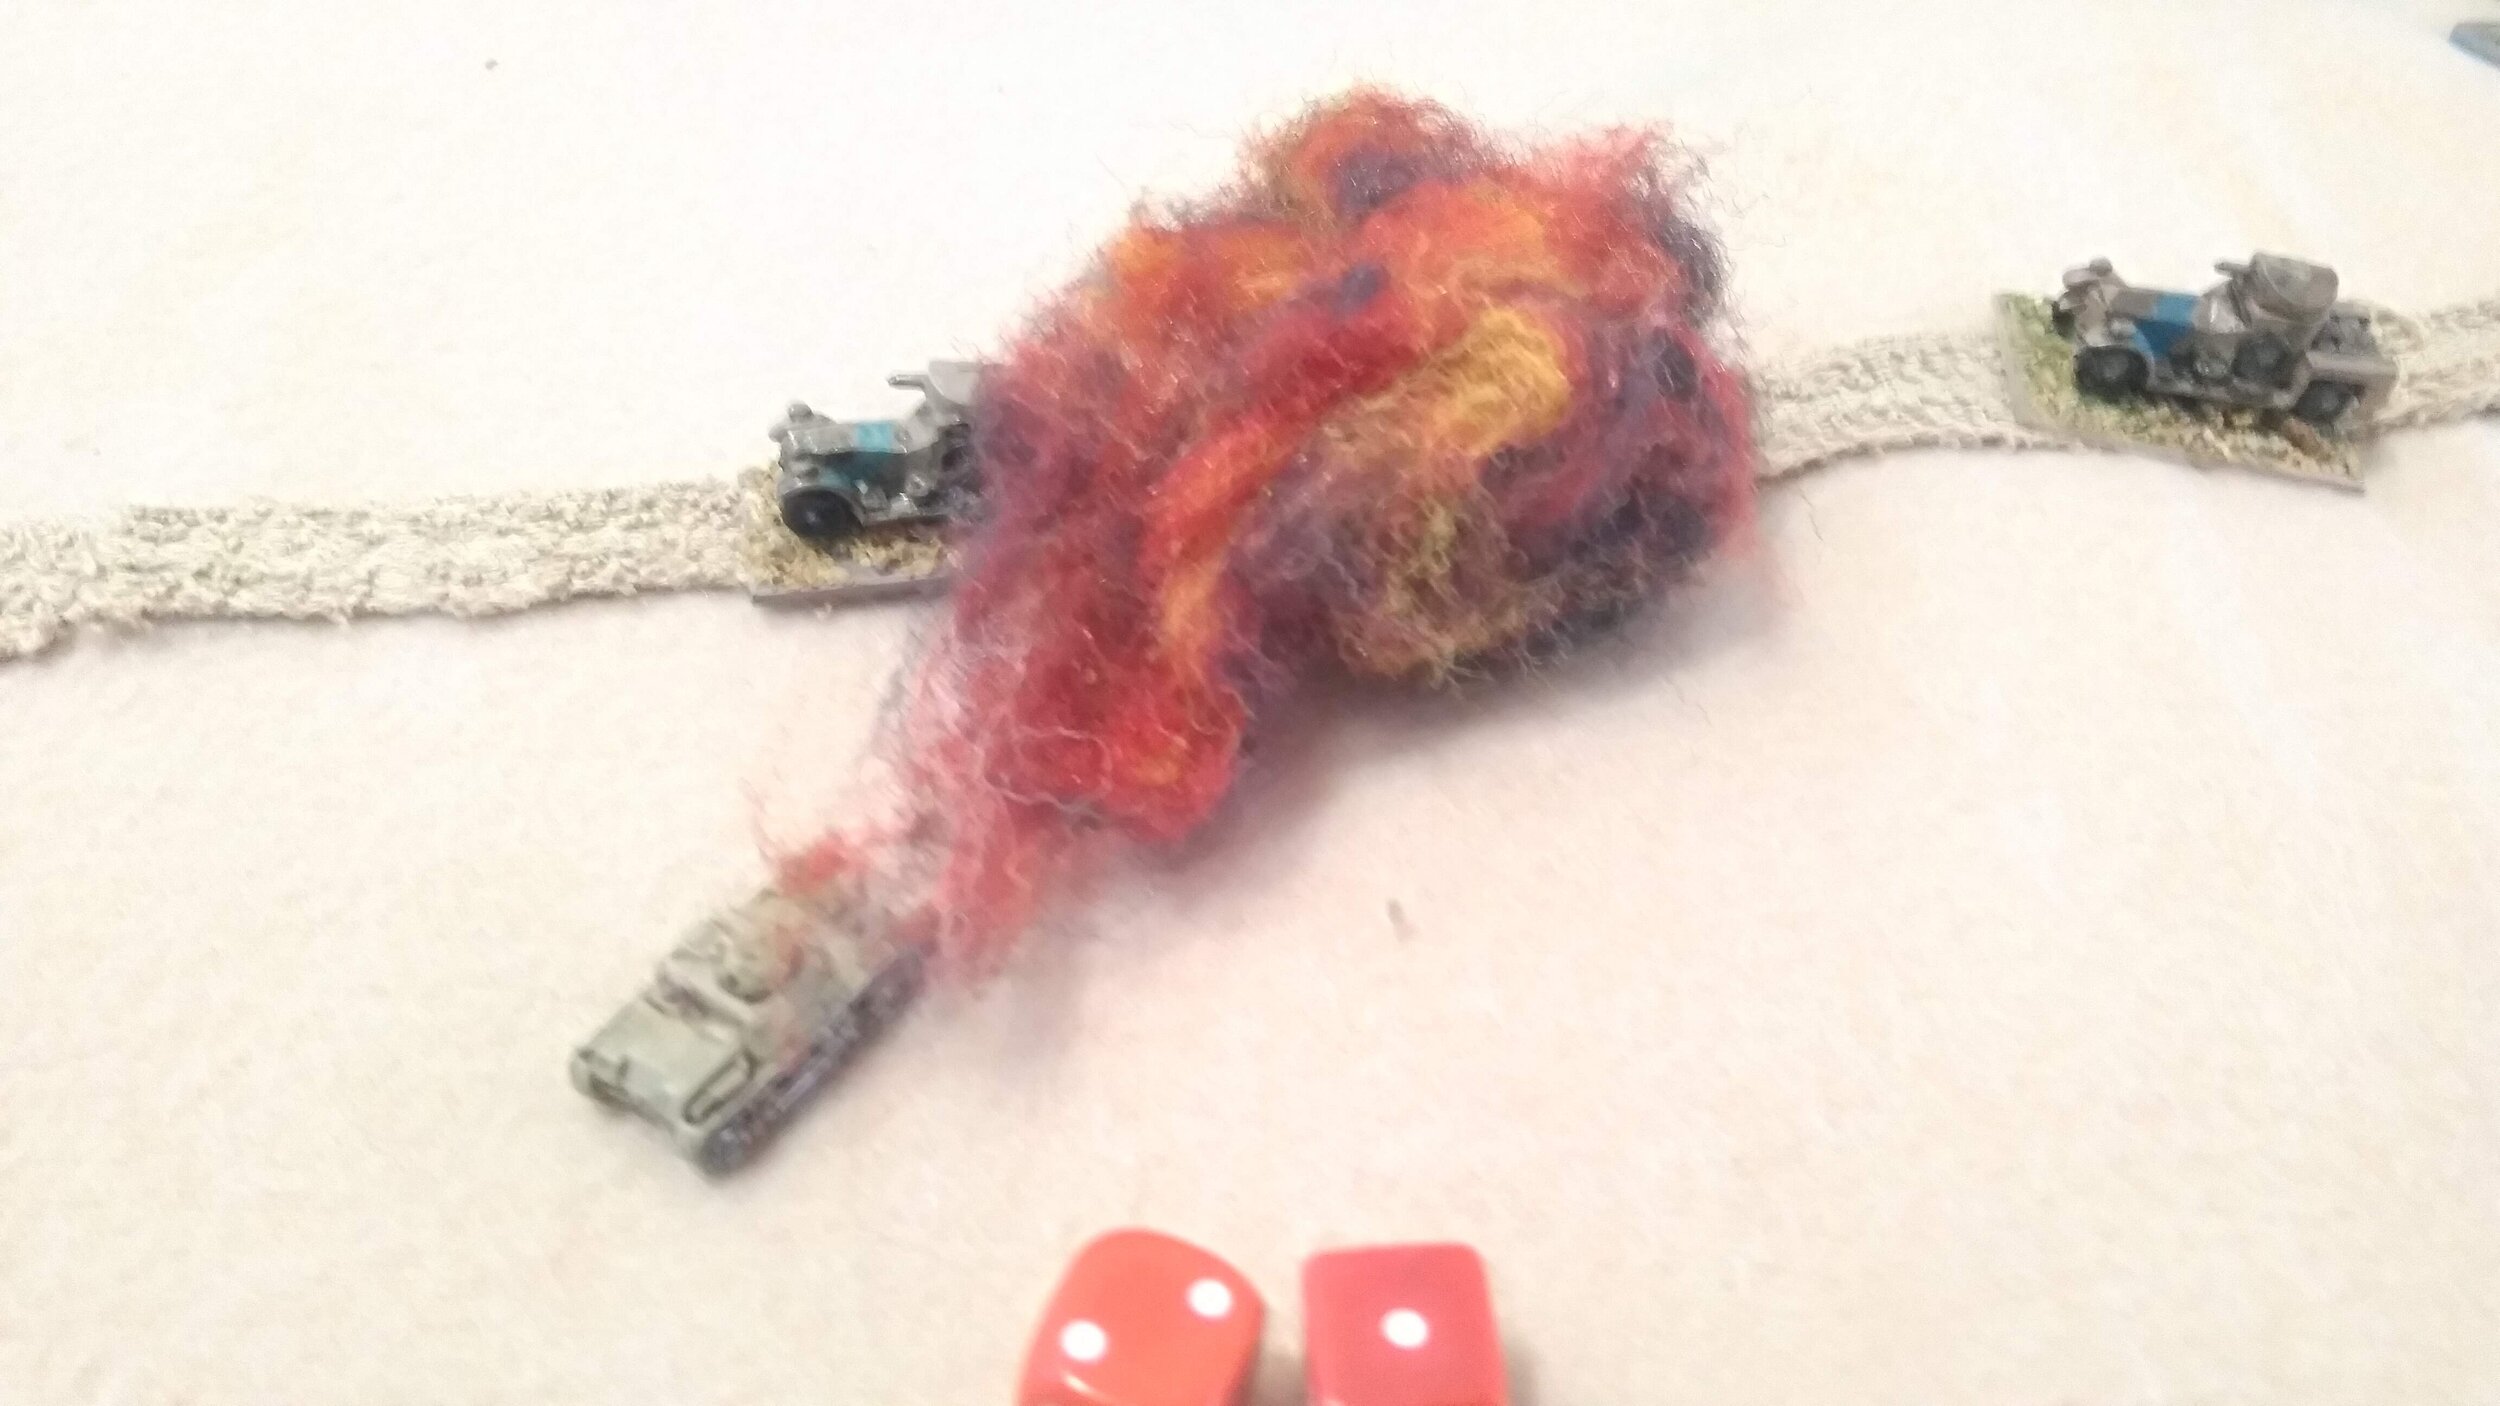
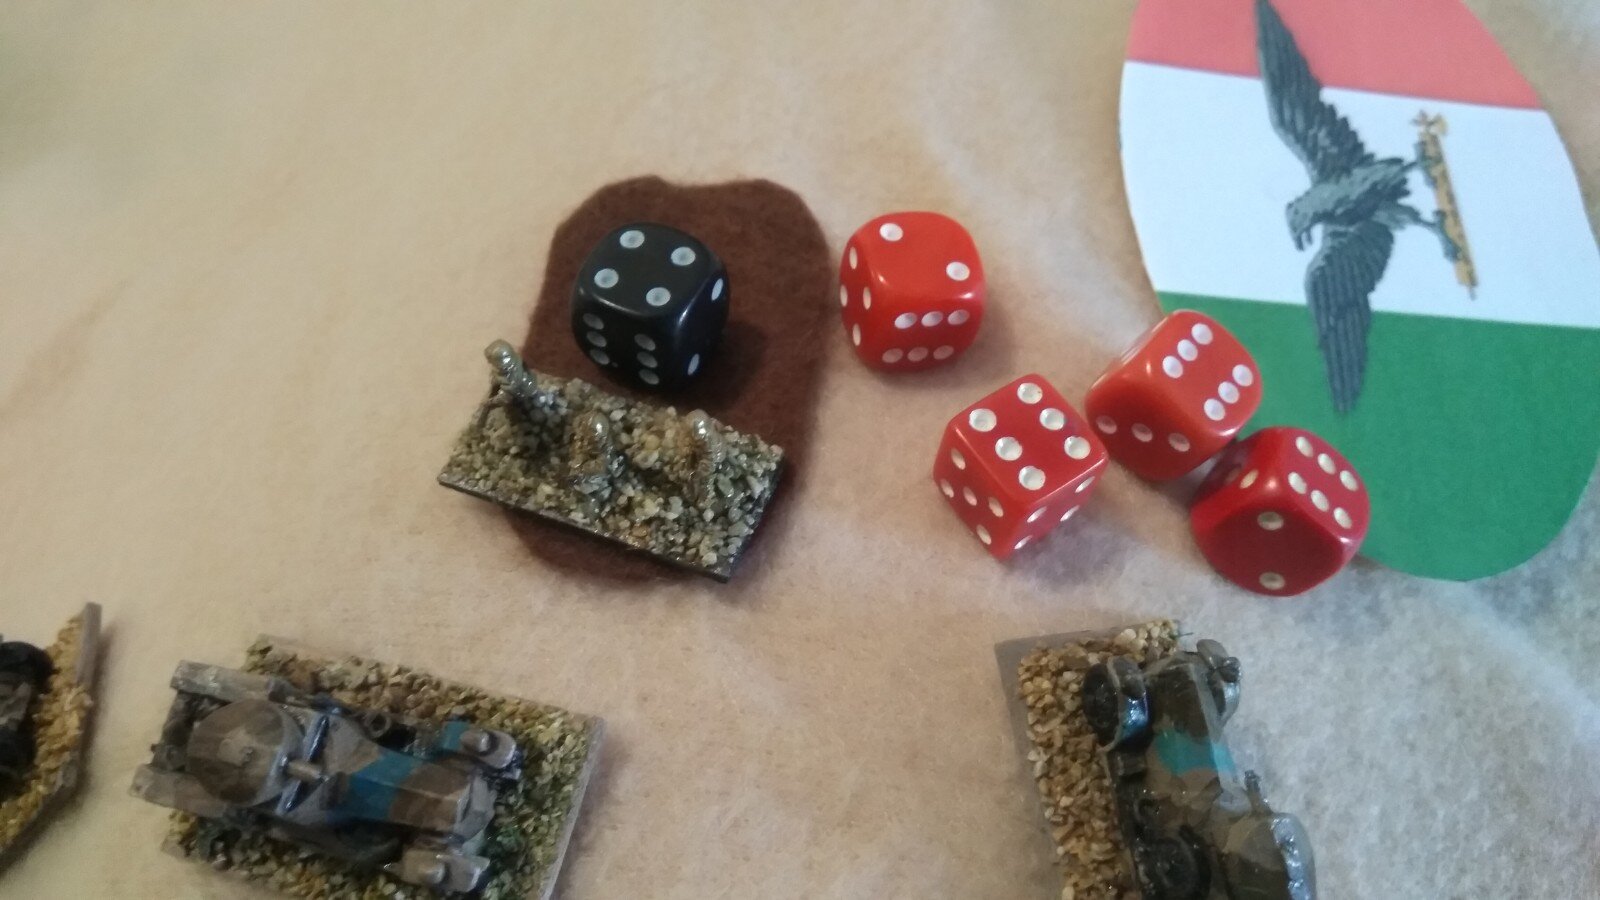
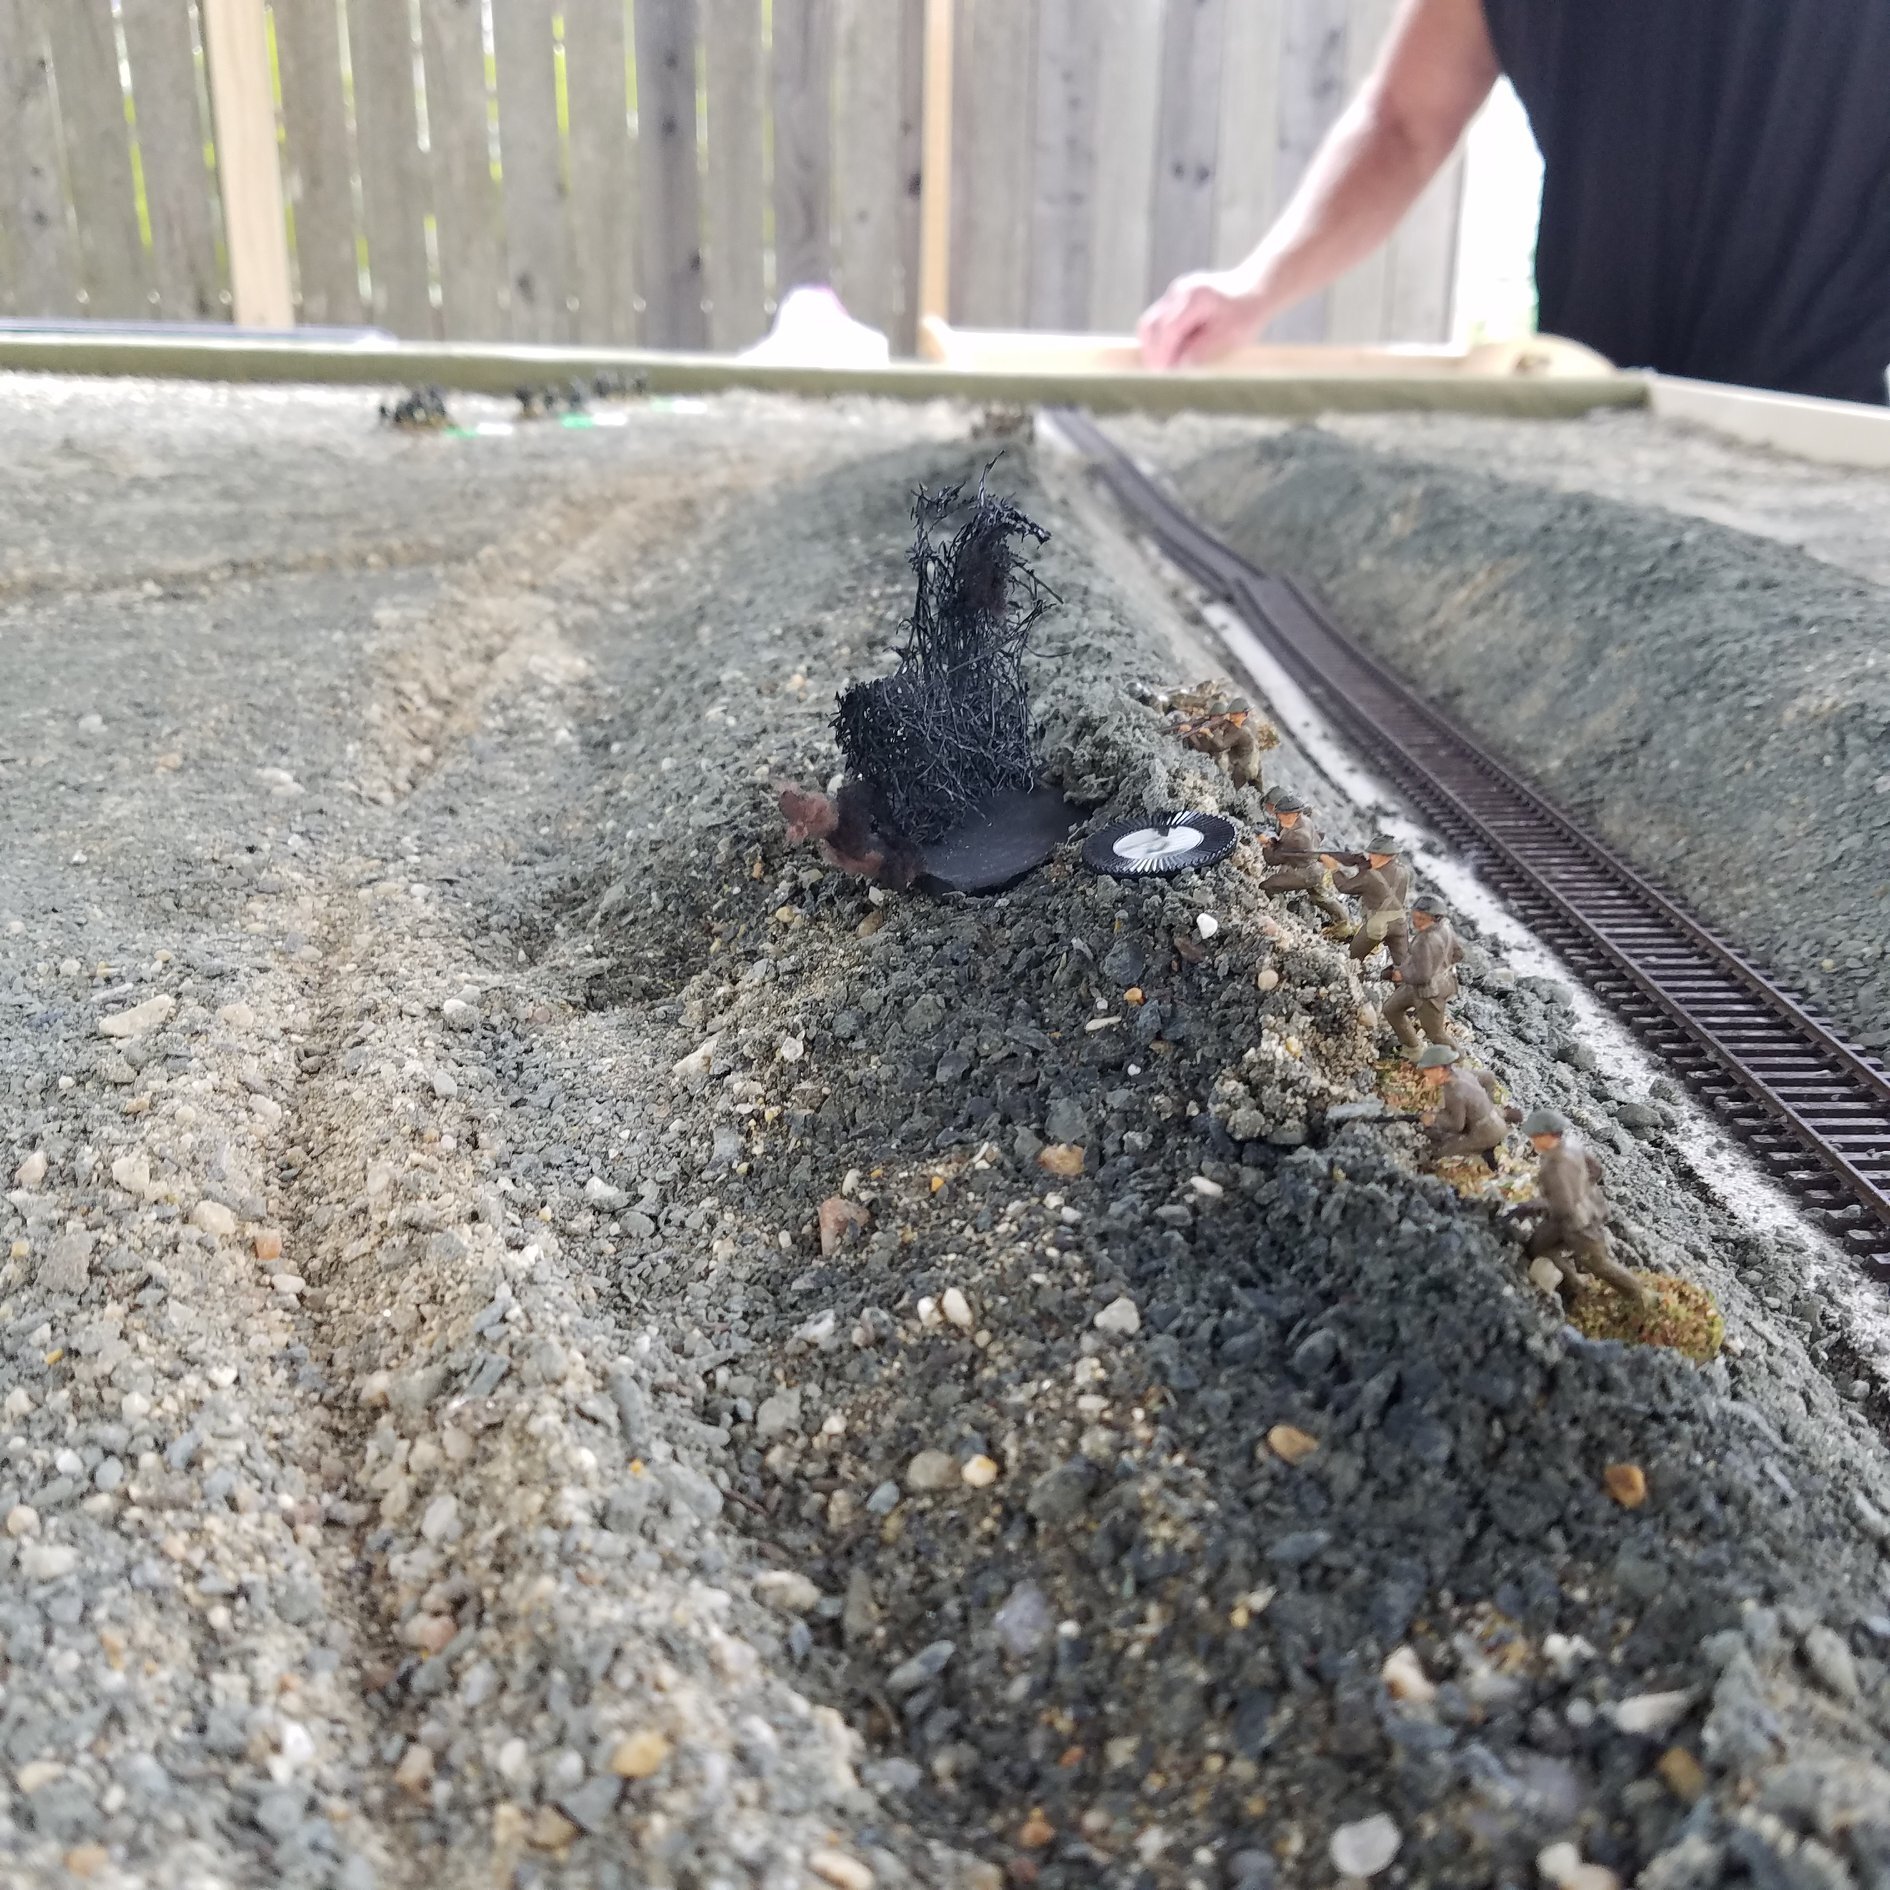
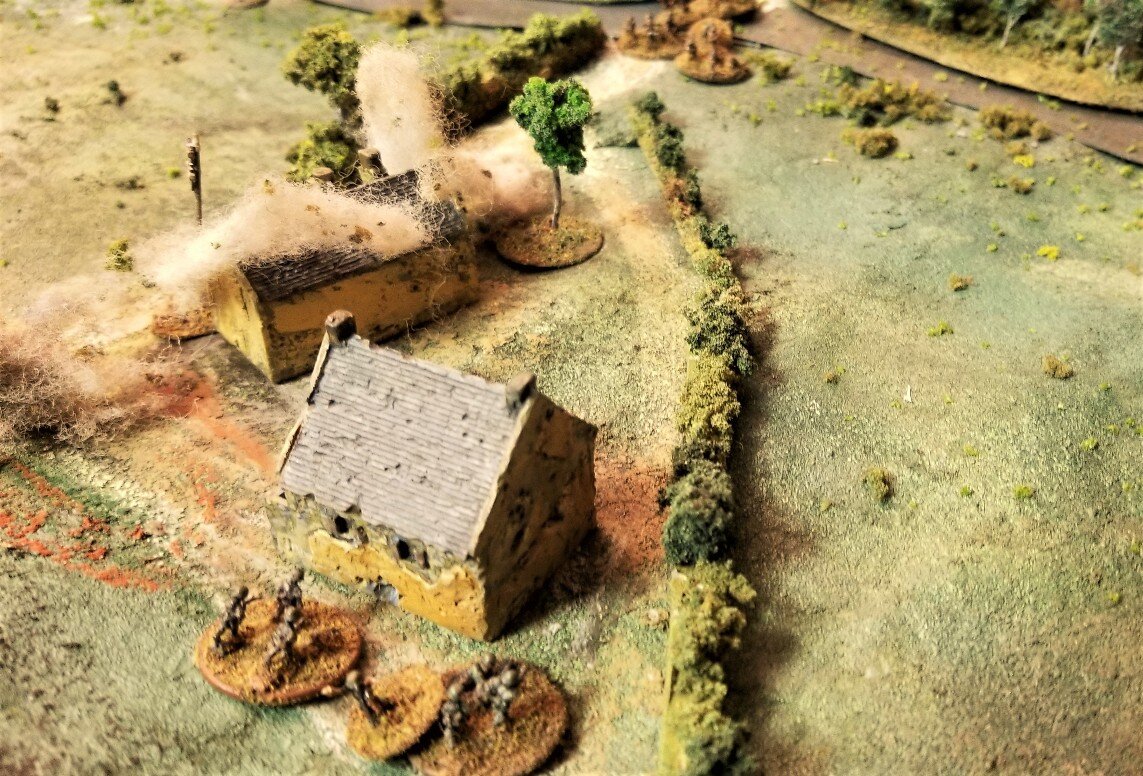
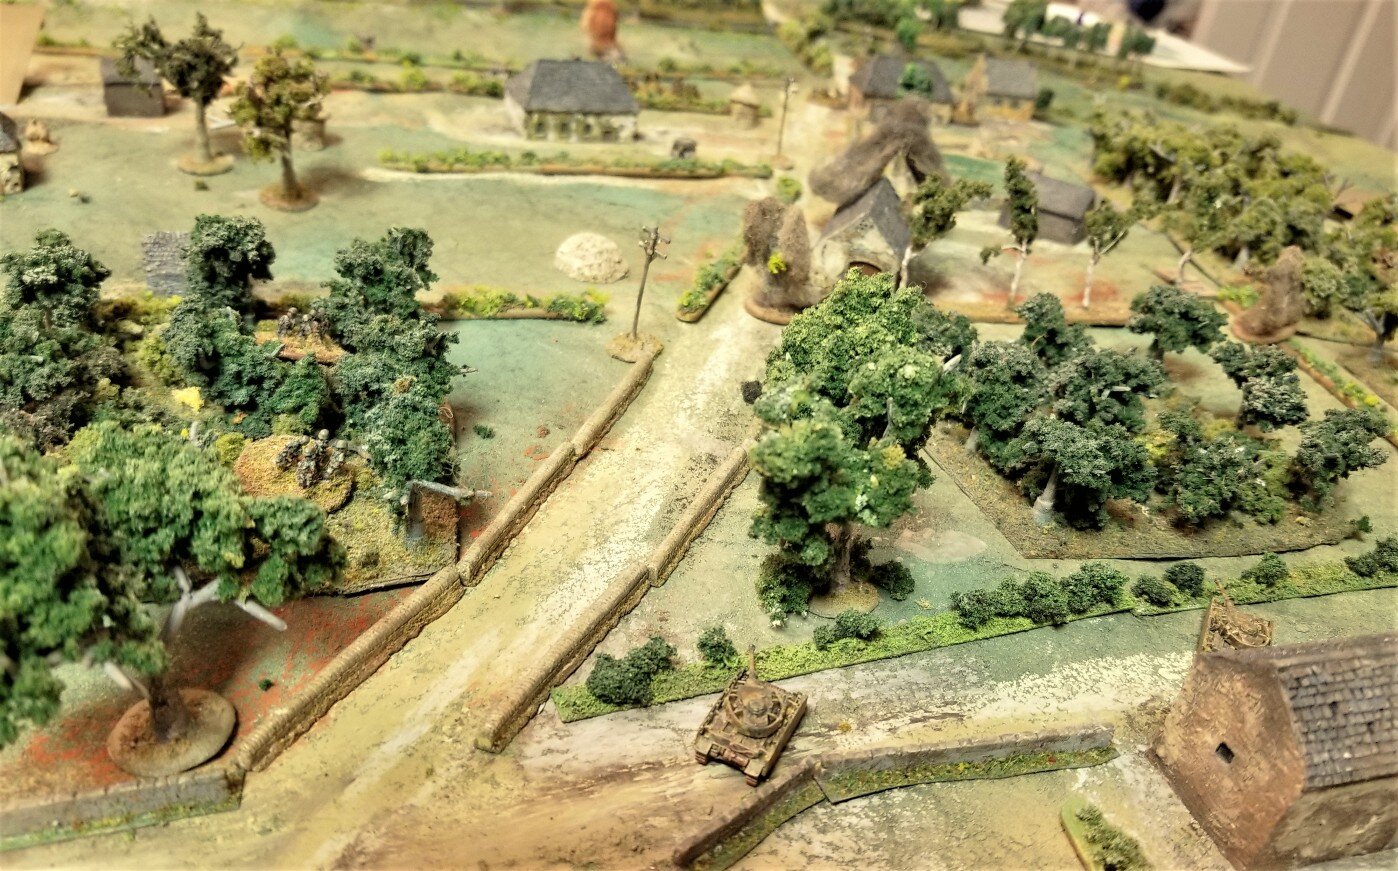
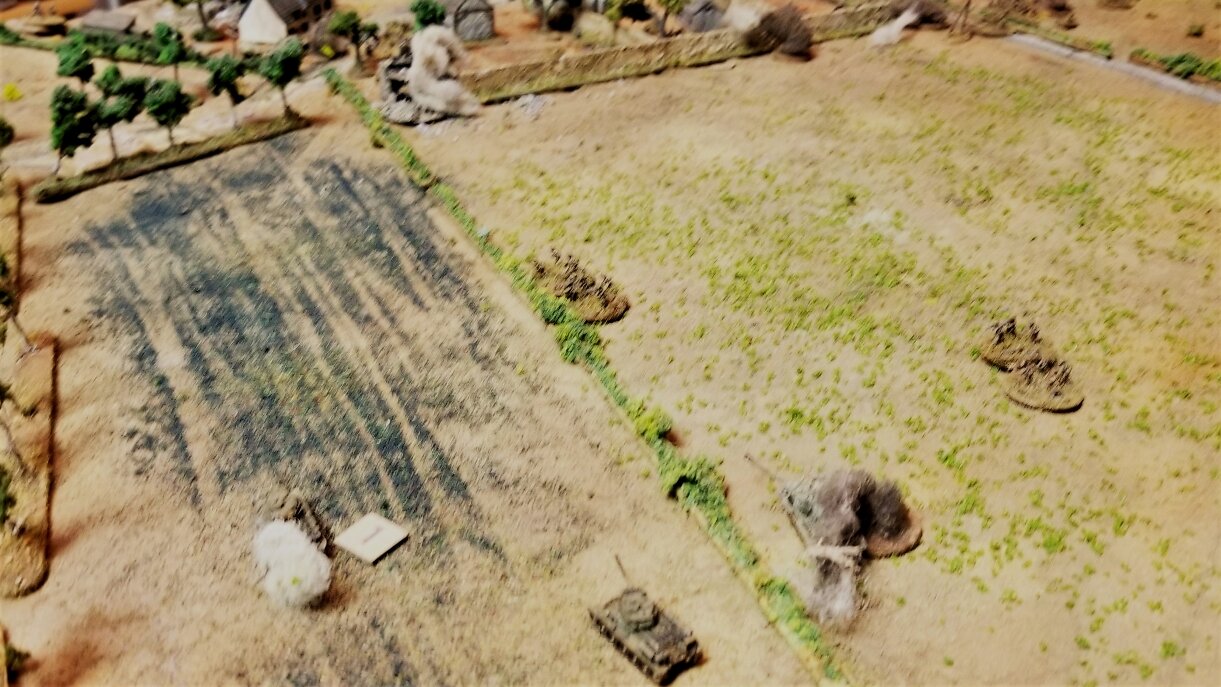
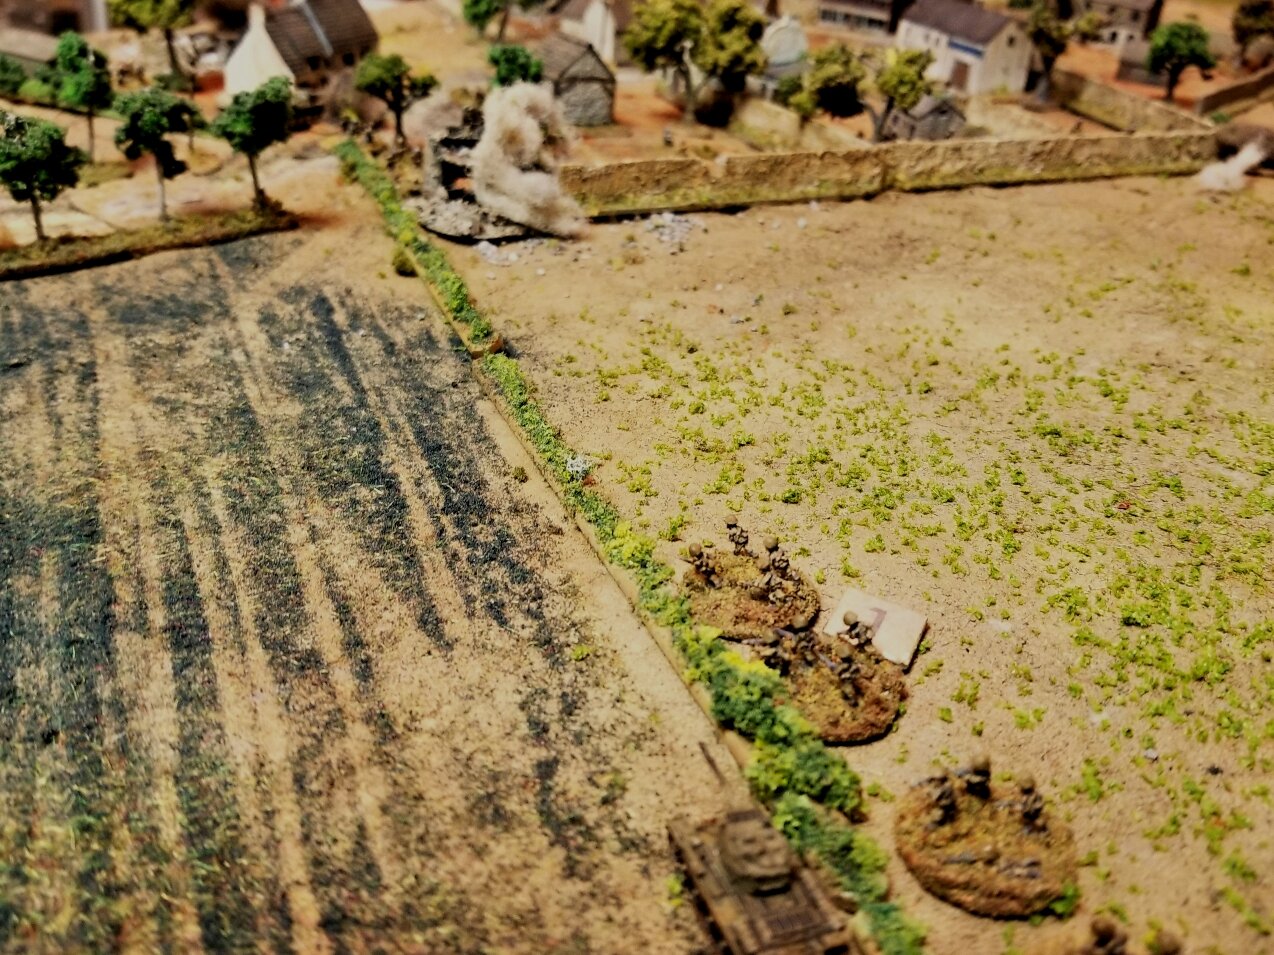
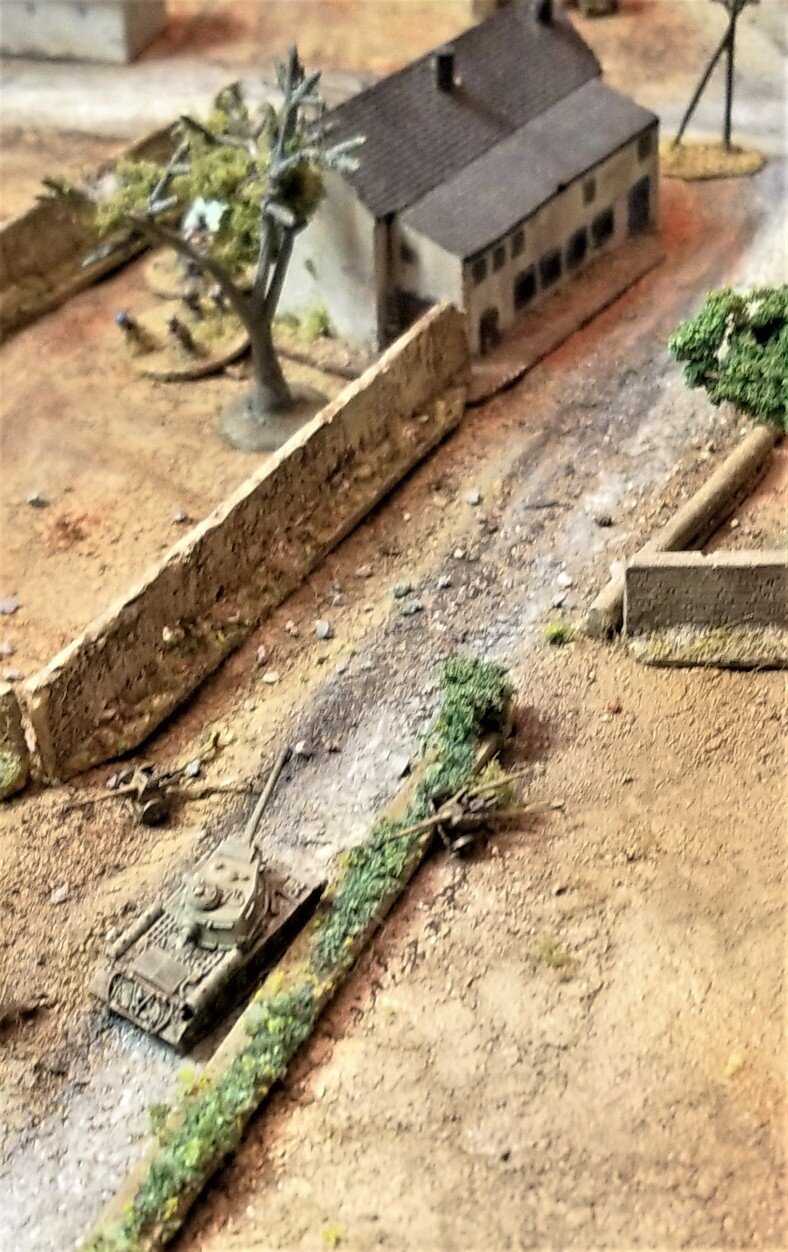
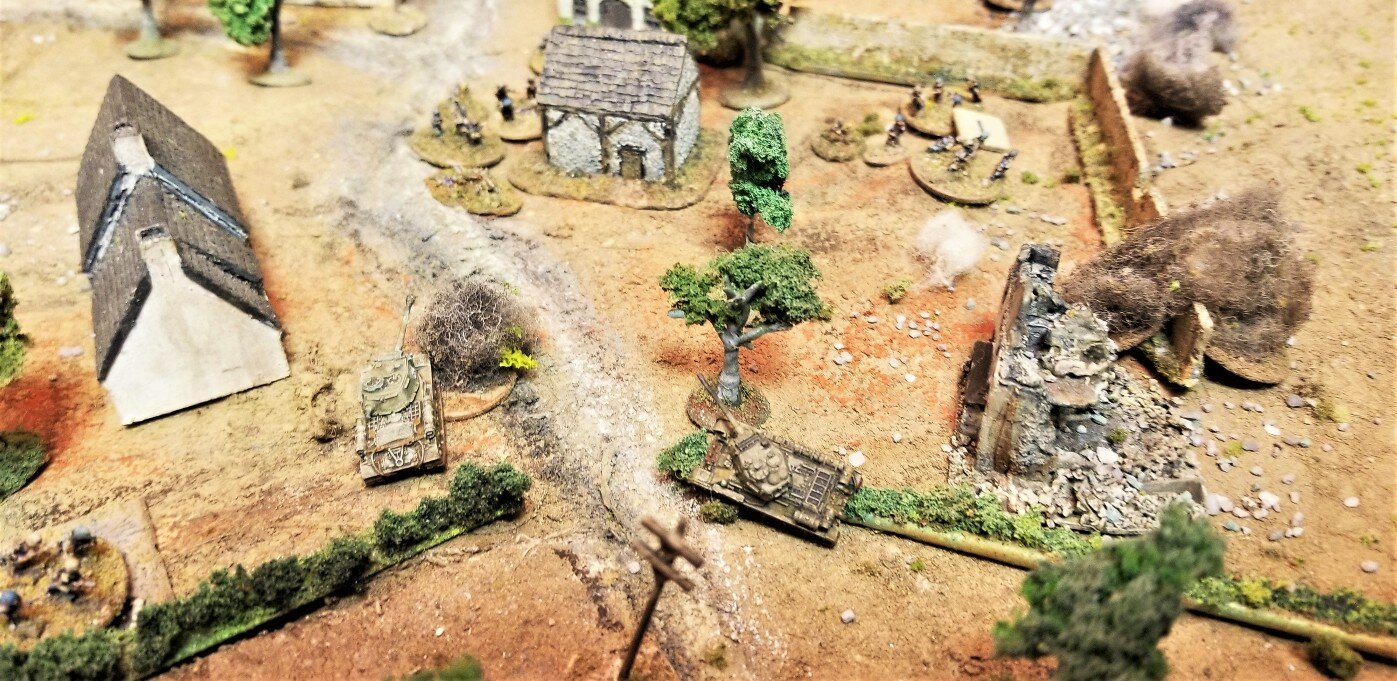
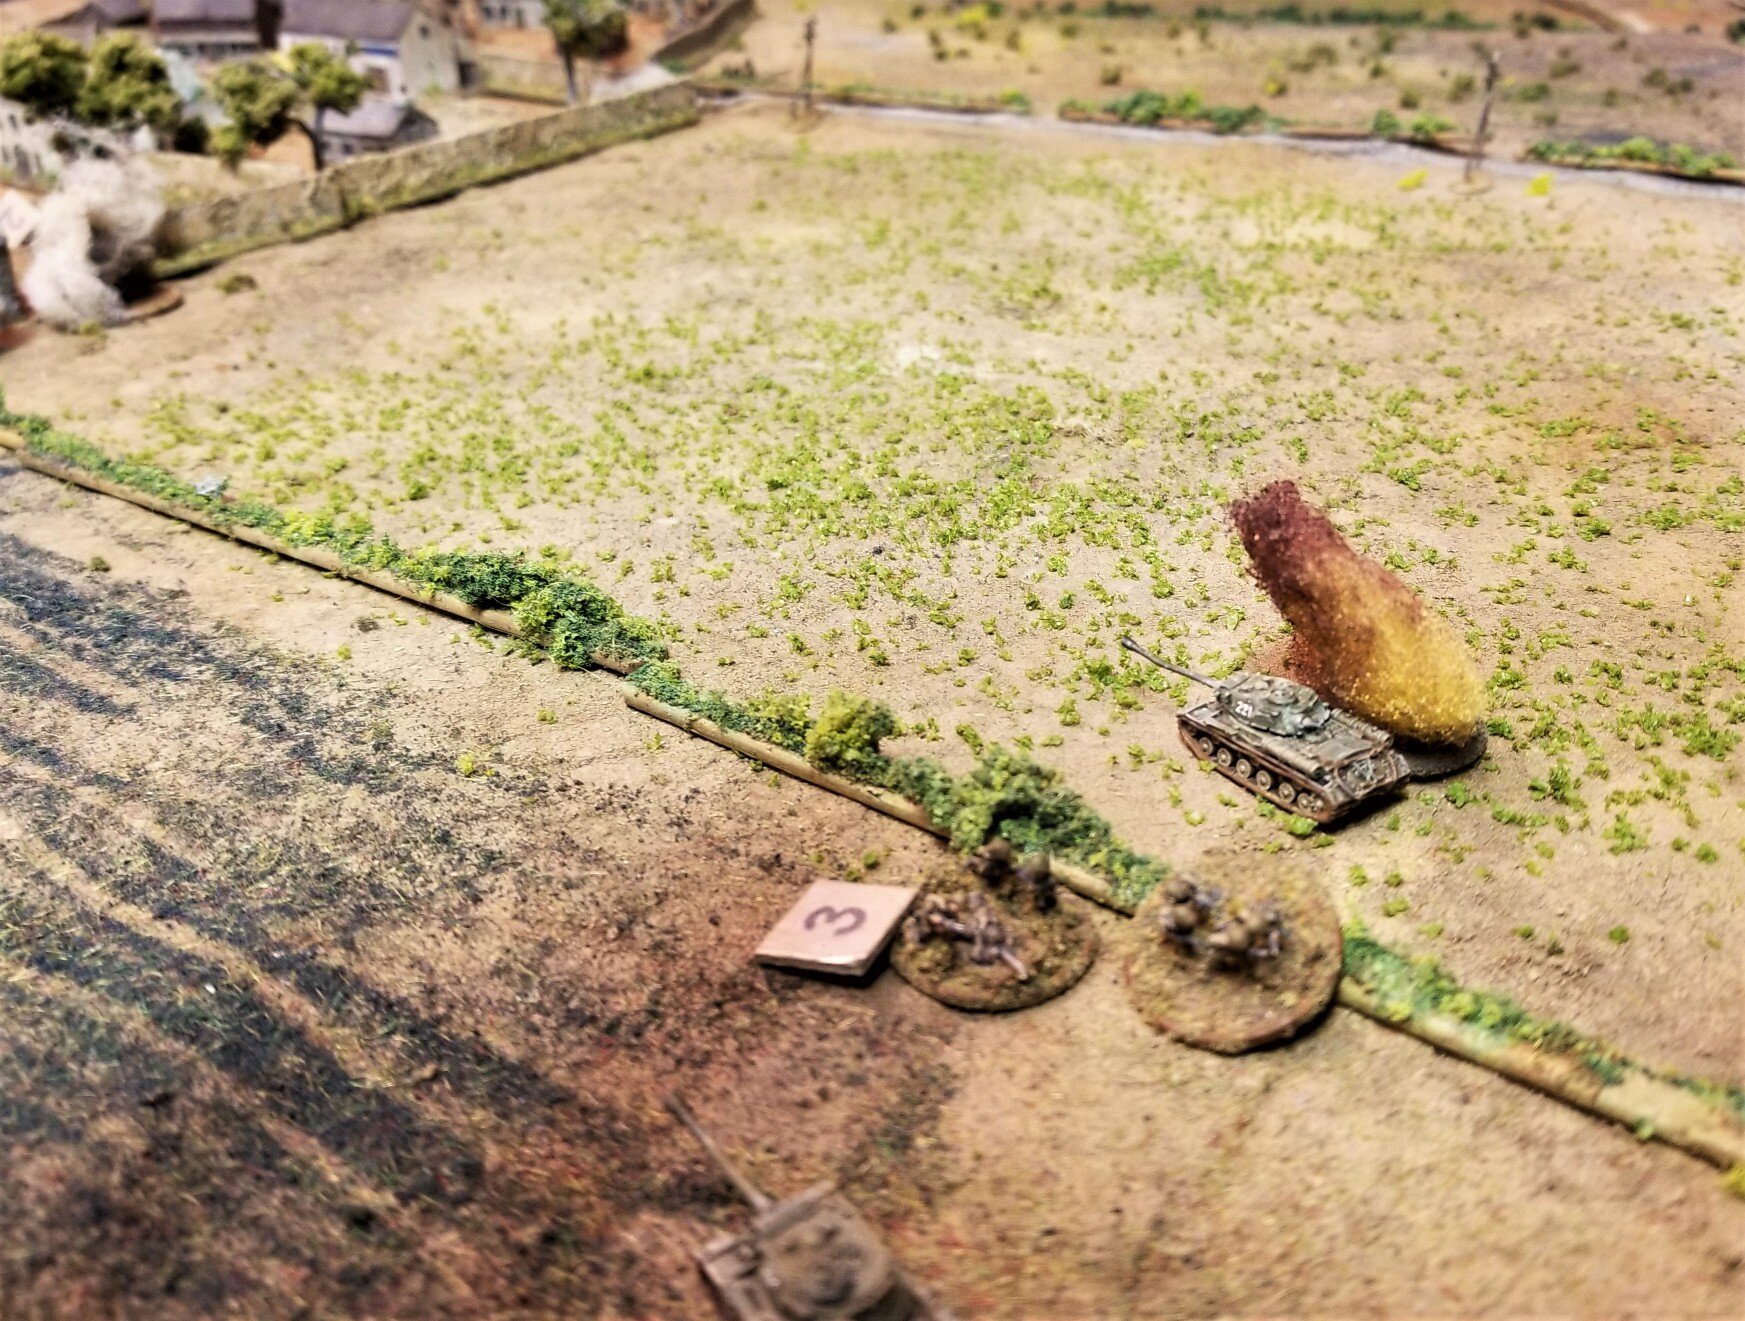
After being immobilized by the 6 pounder in the orchard, the Pz-IV got brewed up by the Firefly in the woods. Flaming smoke courtesy of Bud's Blast Markers.
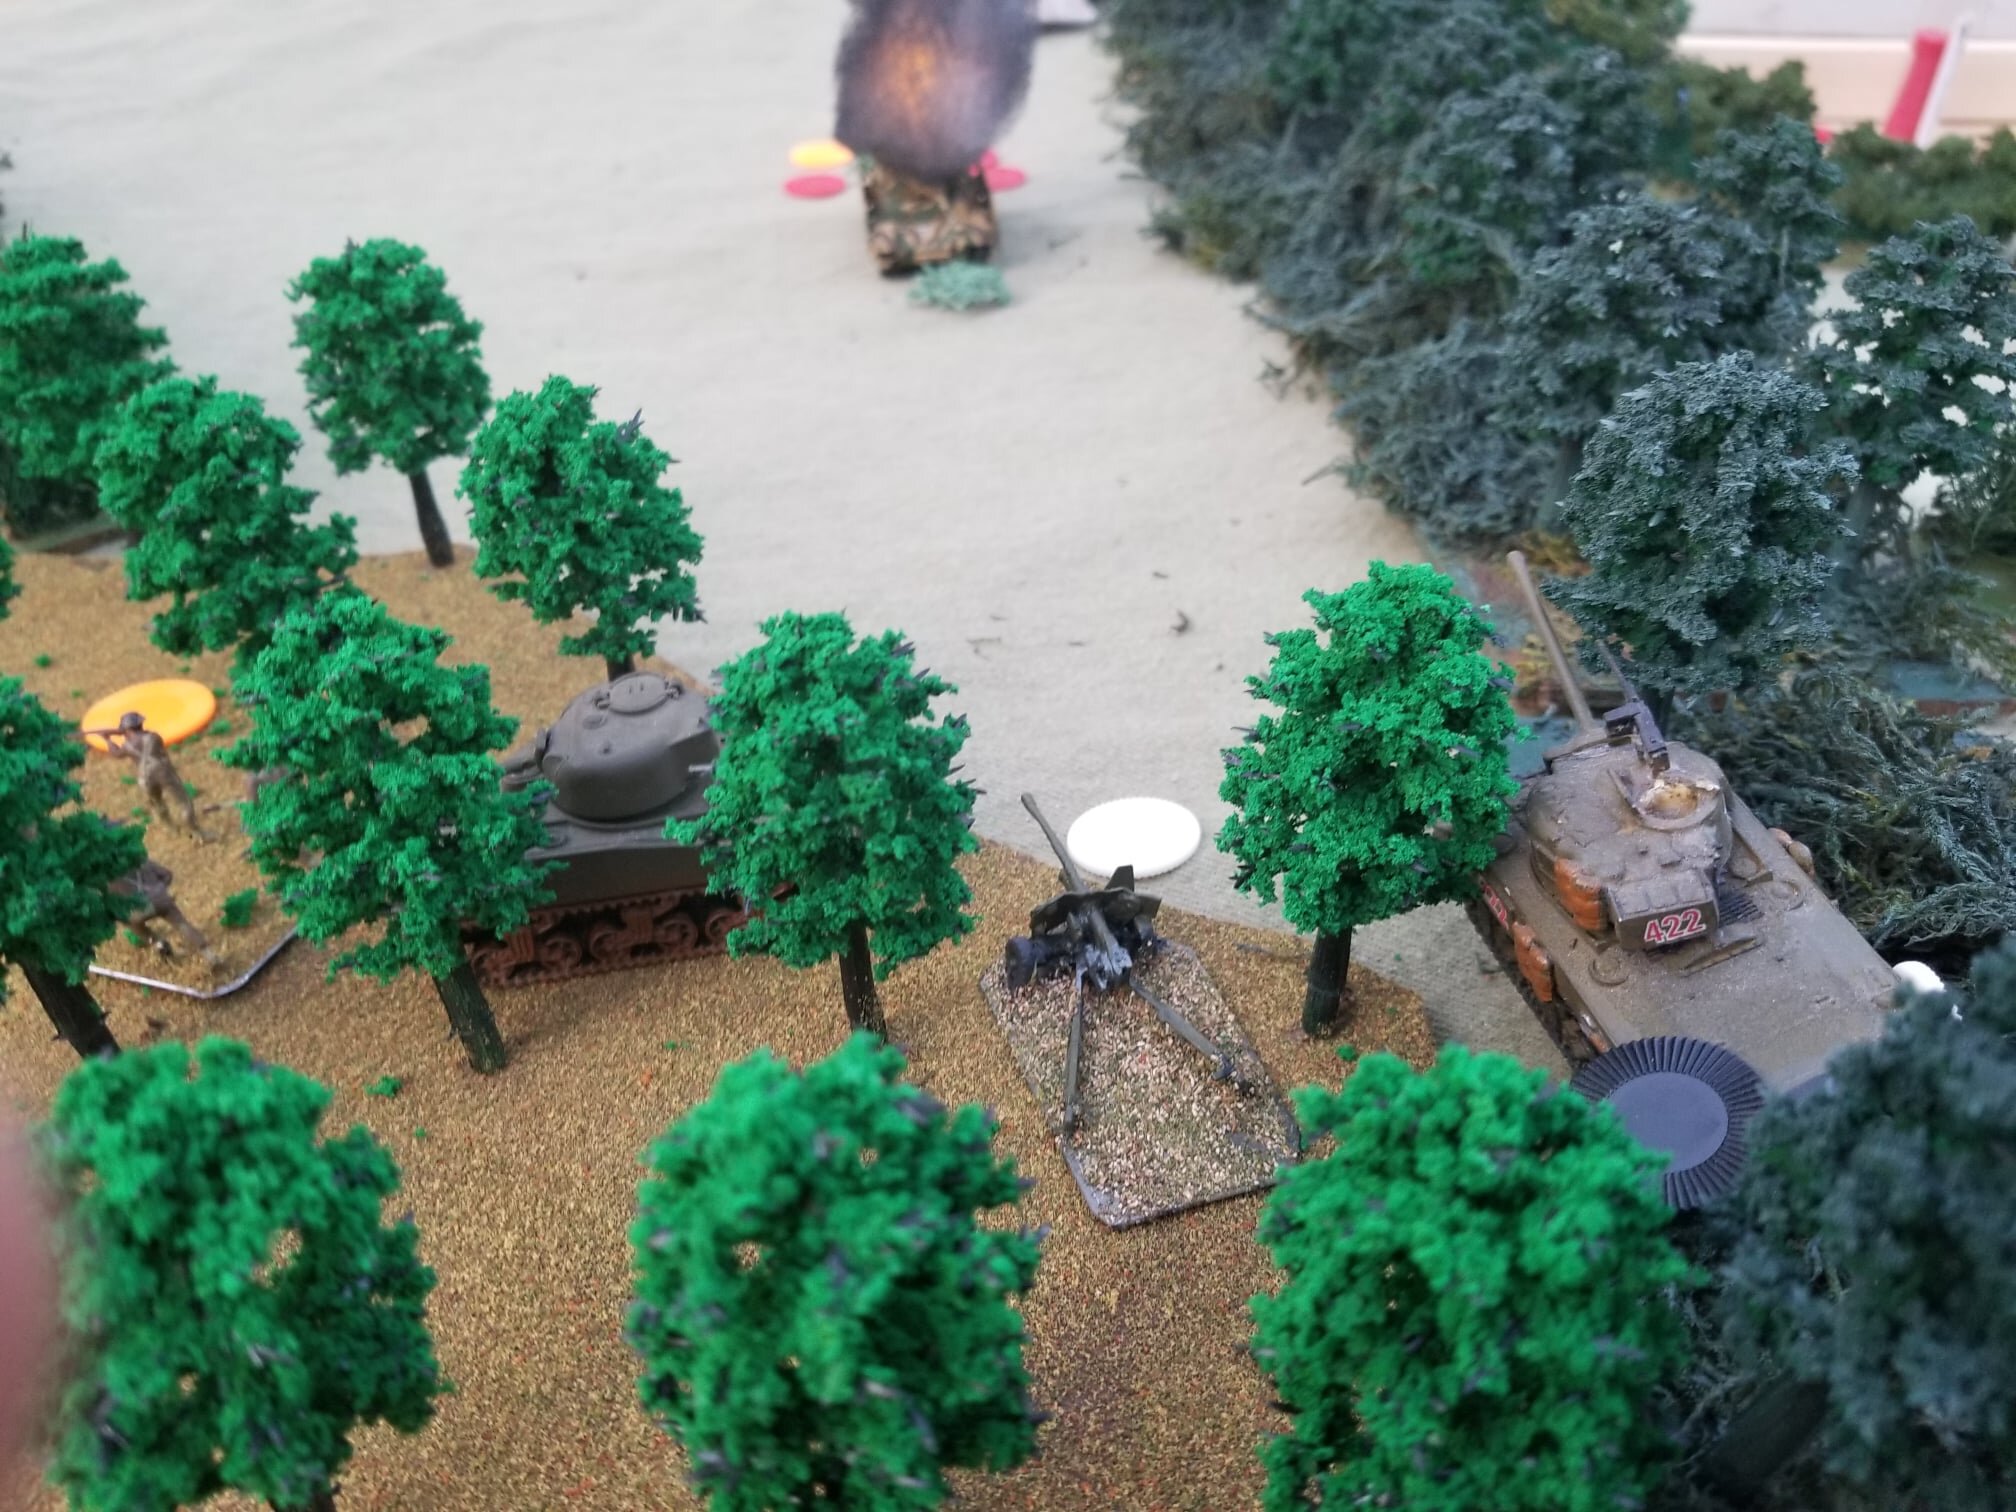
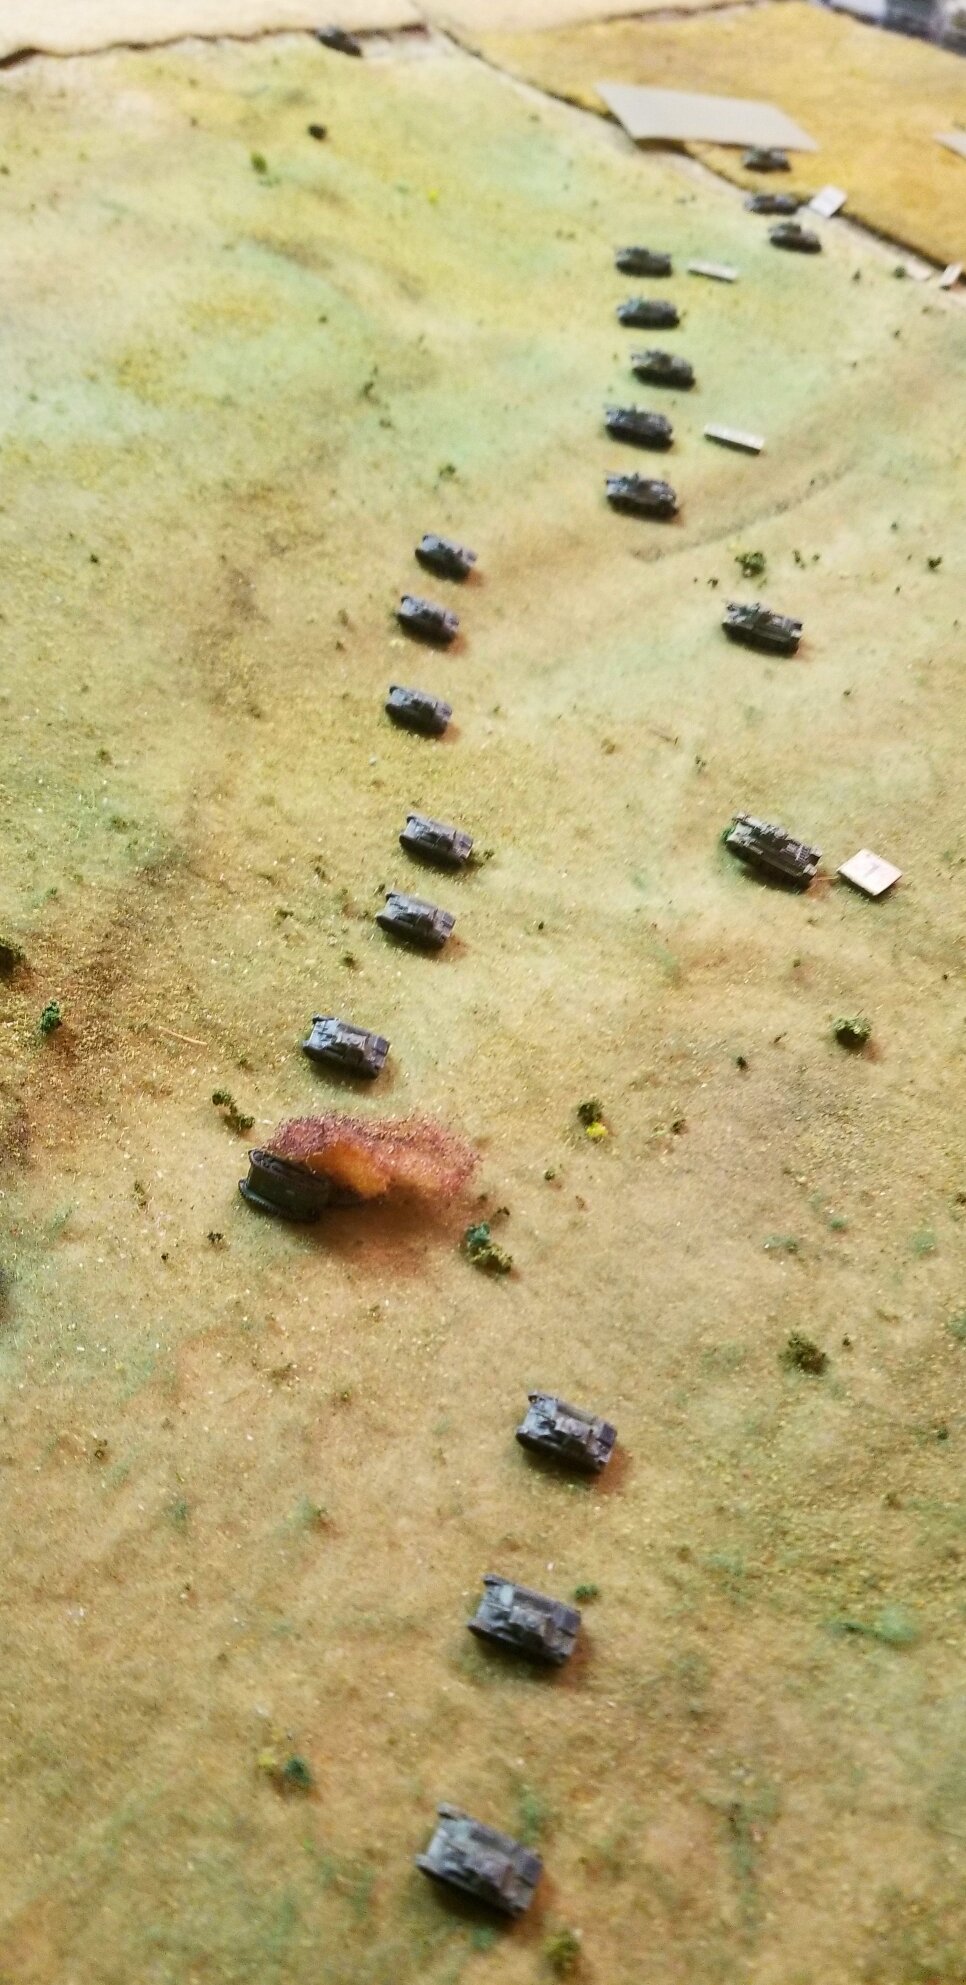
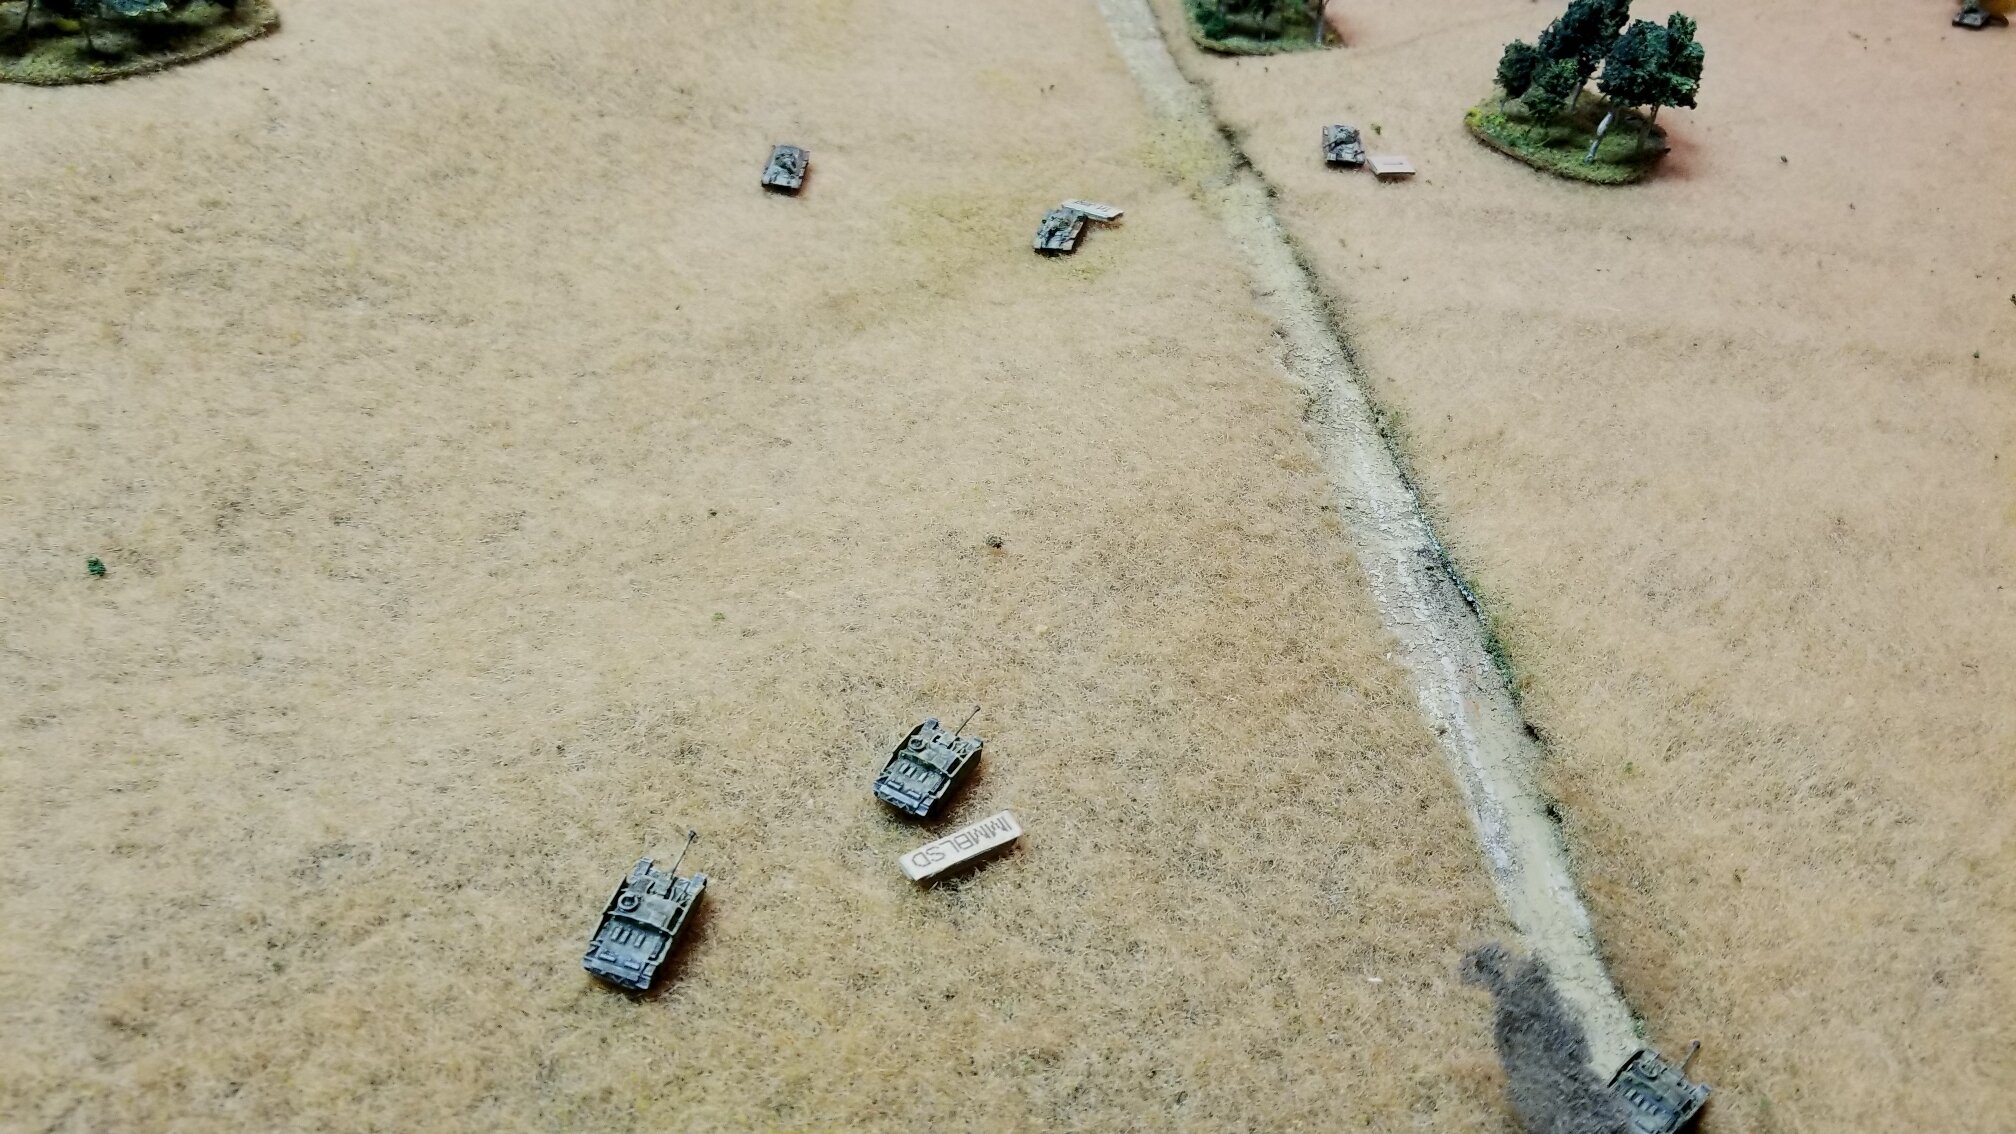
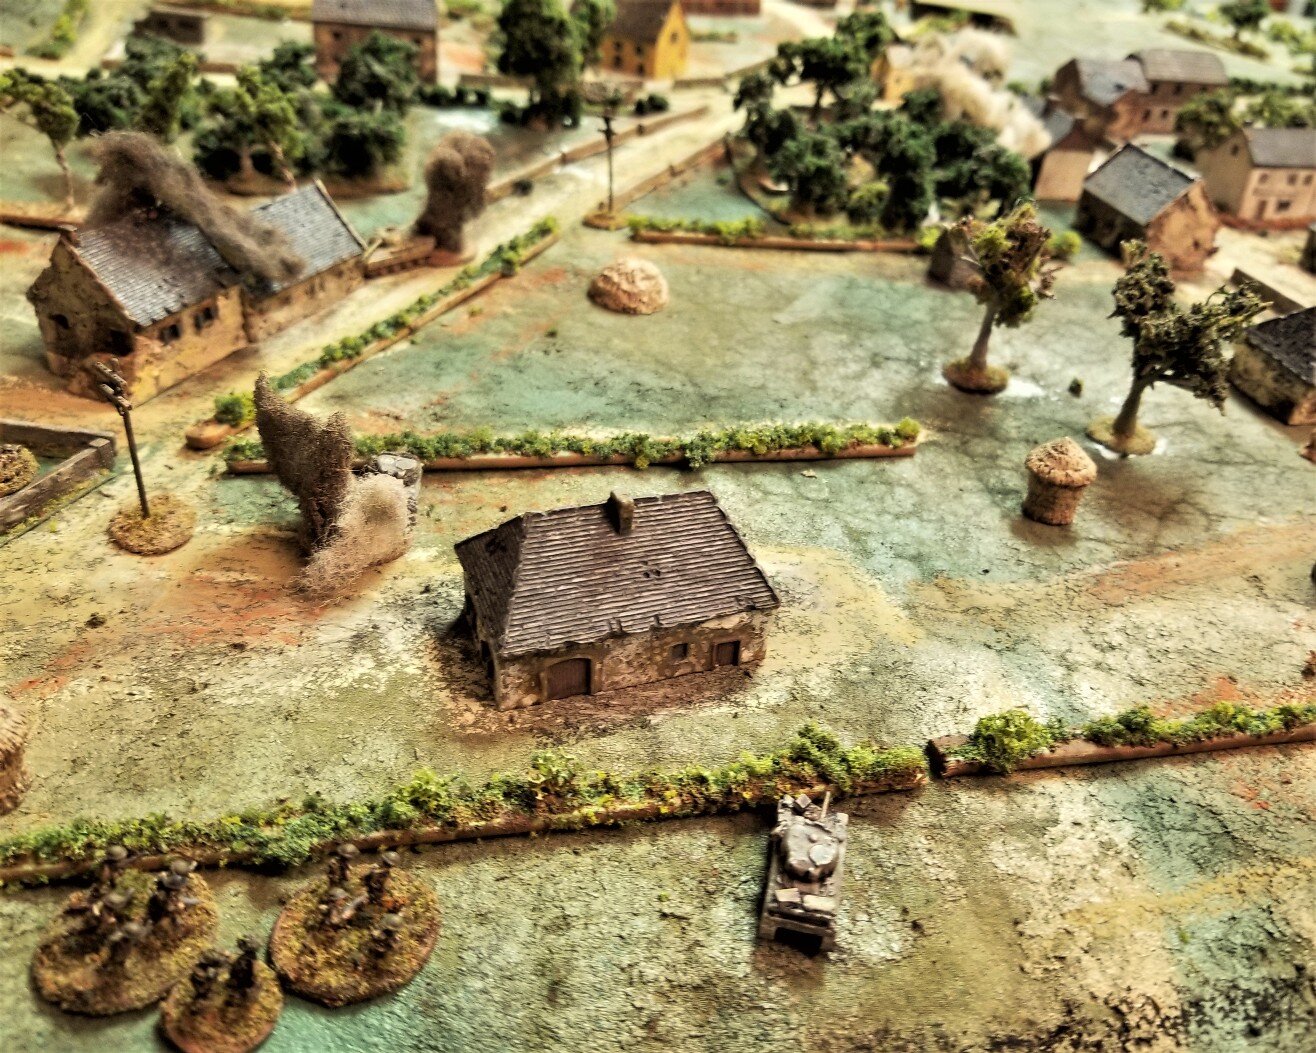
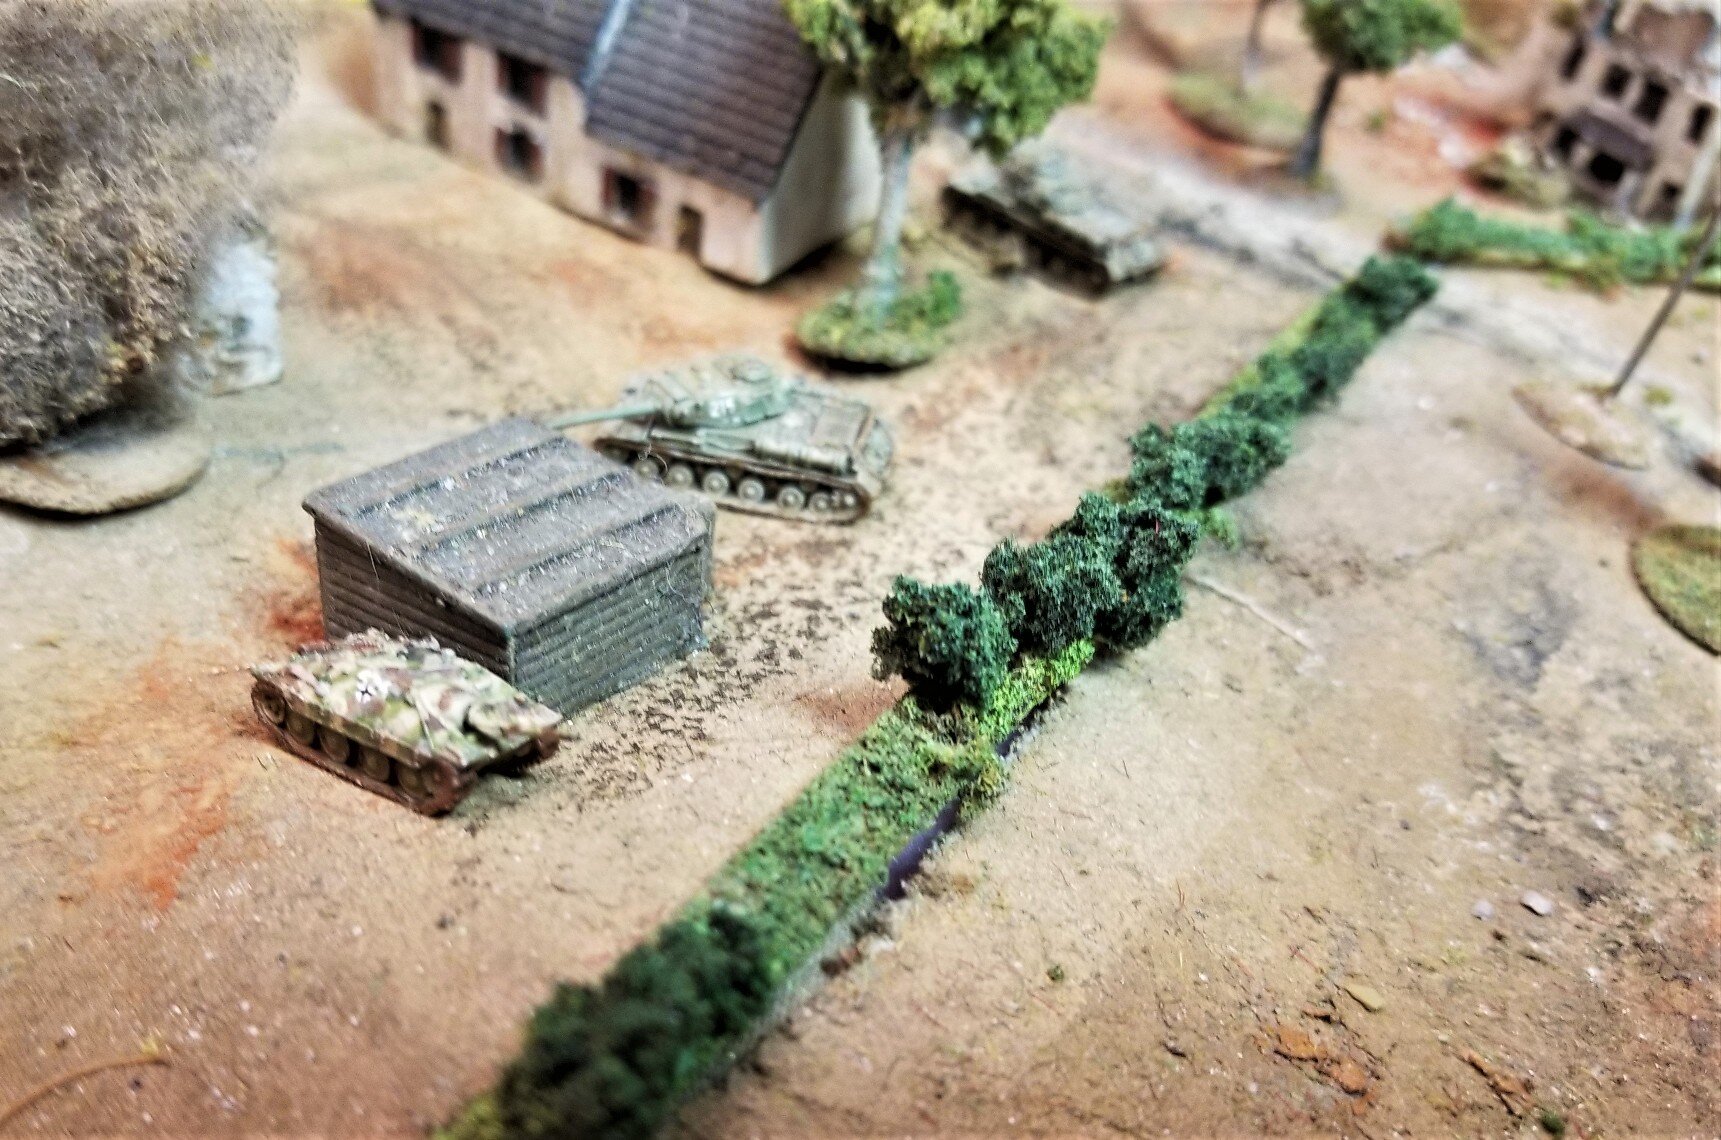
After running out of AP Ammo, the 6 pounder crew and an M4 move off to confront the threat from the Panther on their left. After brewing up the Pz IV, the Firefly was not much use from then on as they had been previously immobilized.
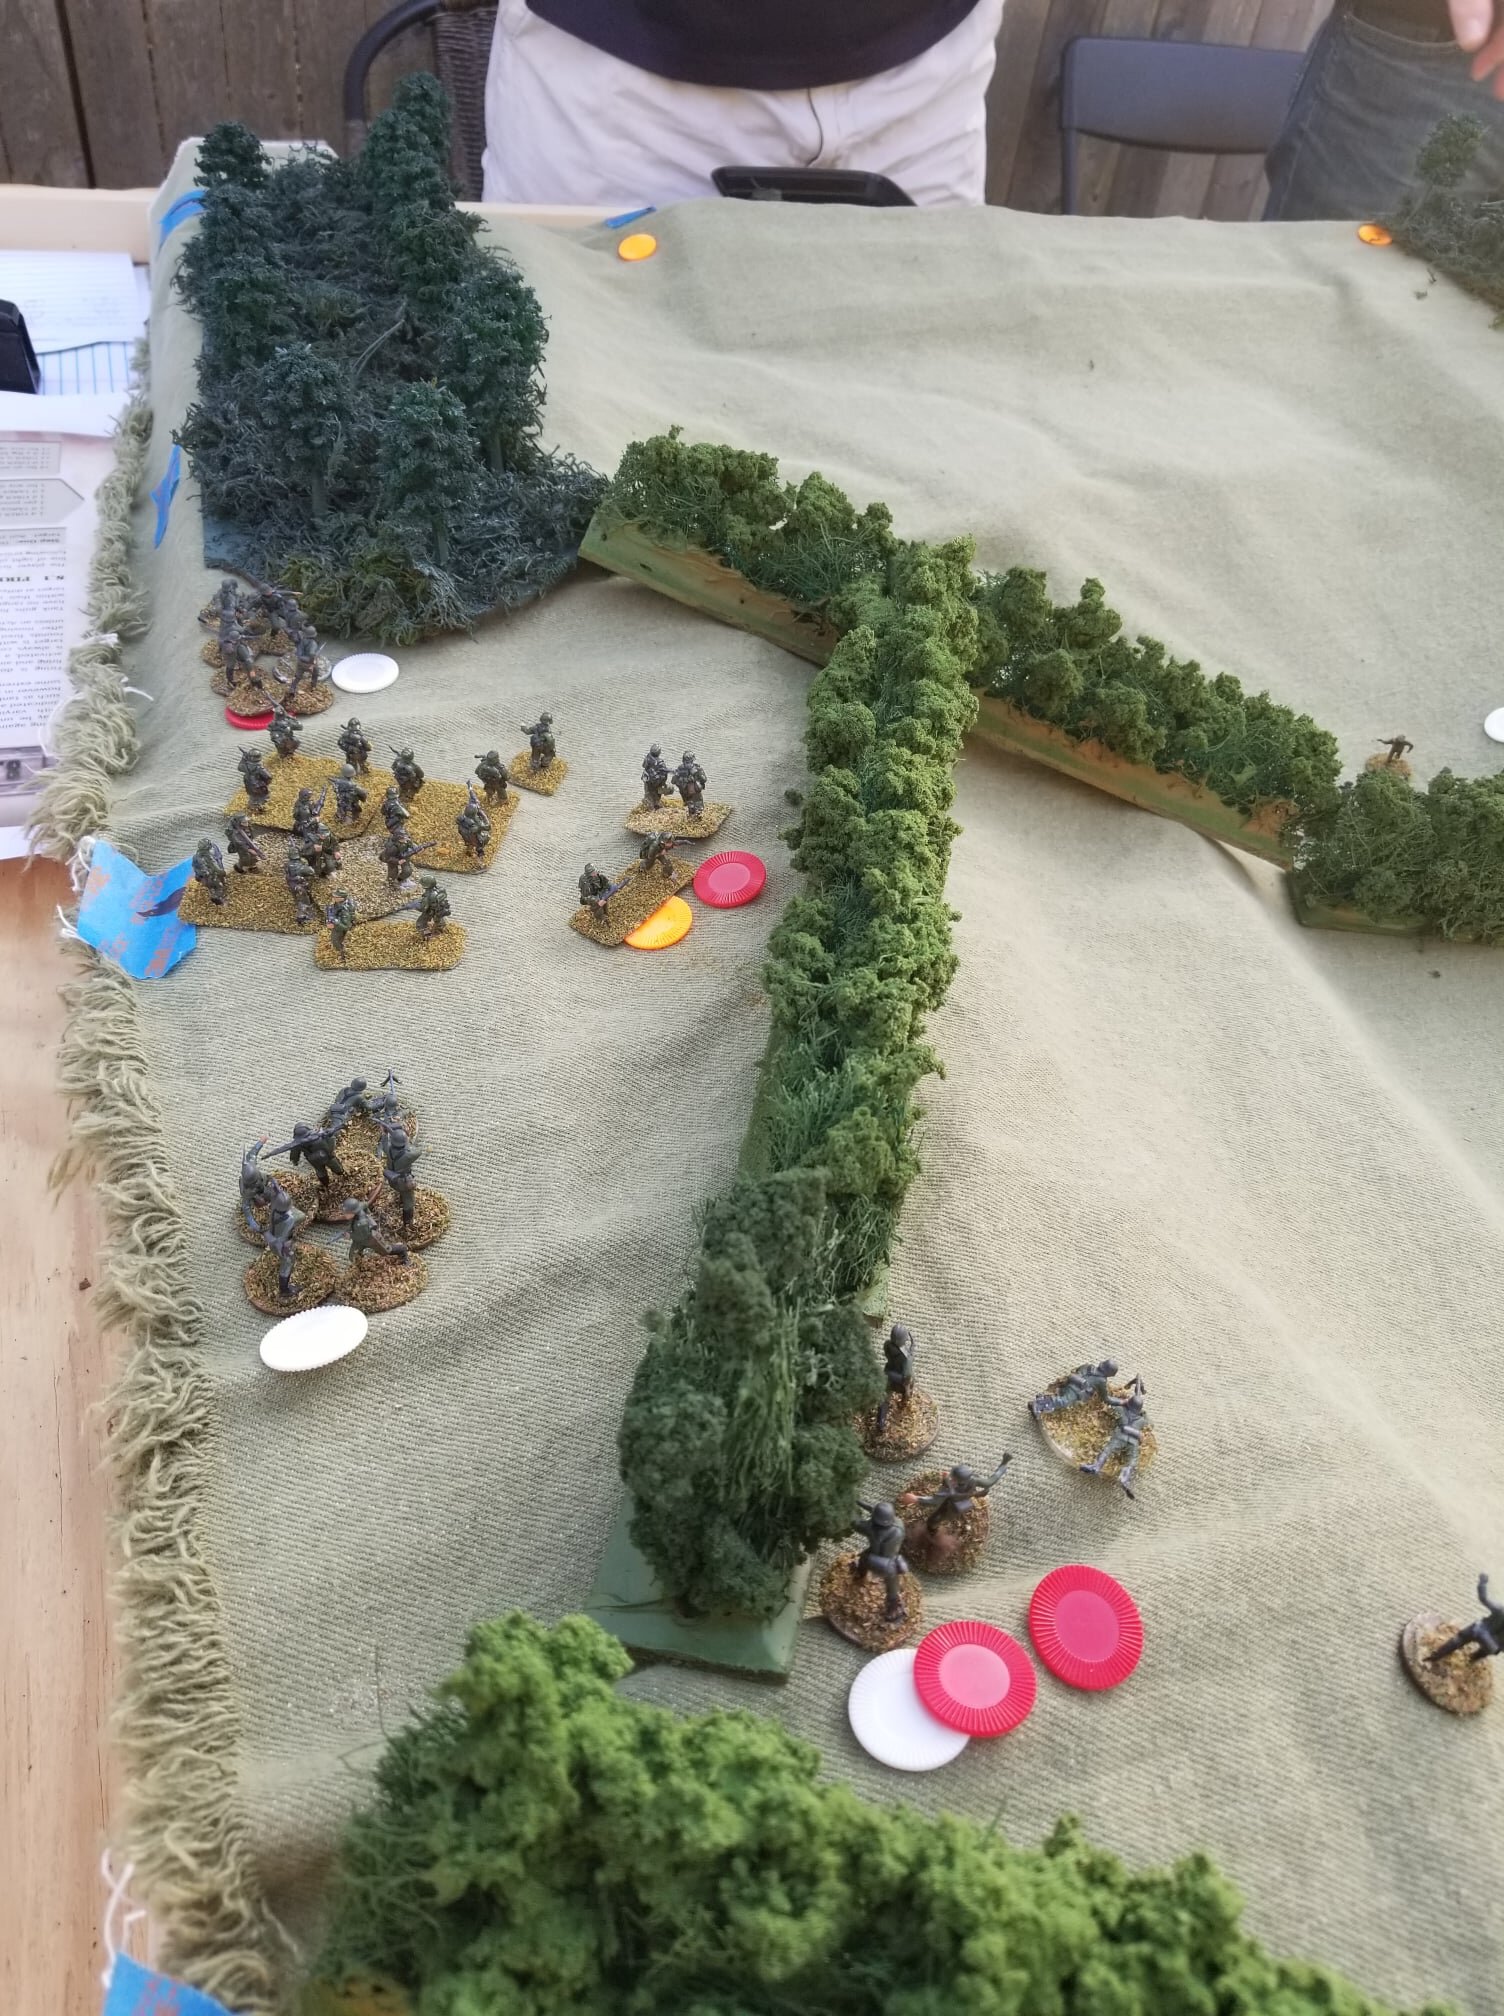
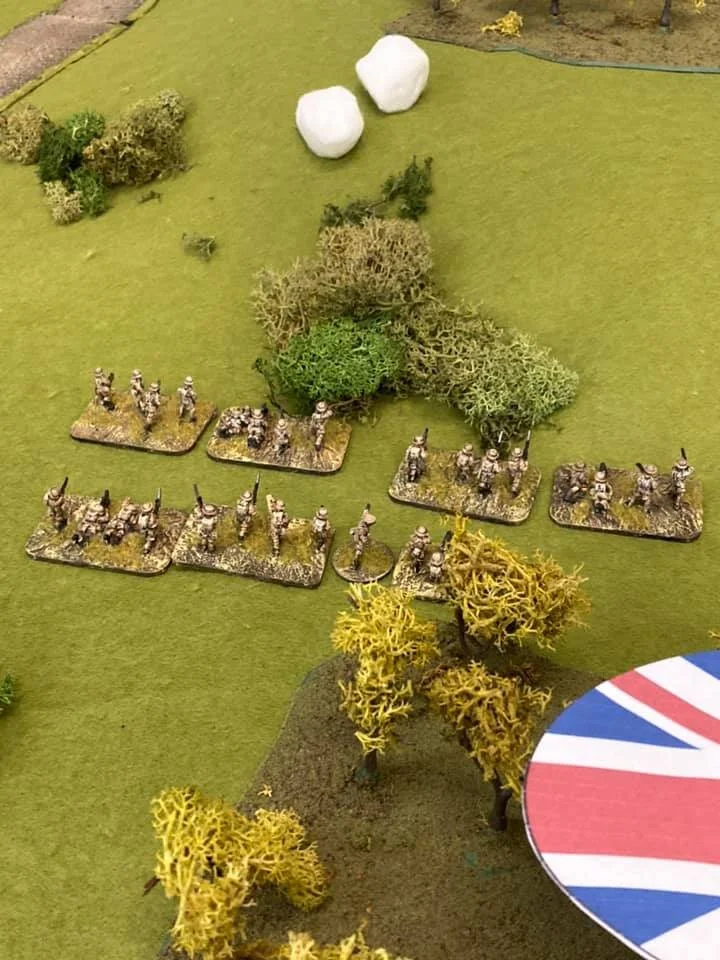
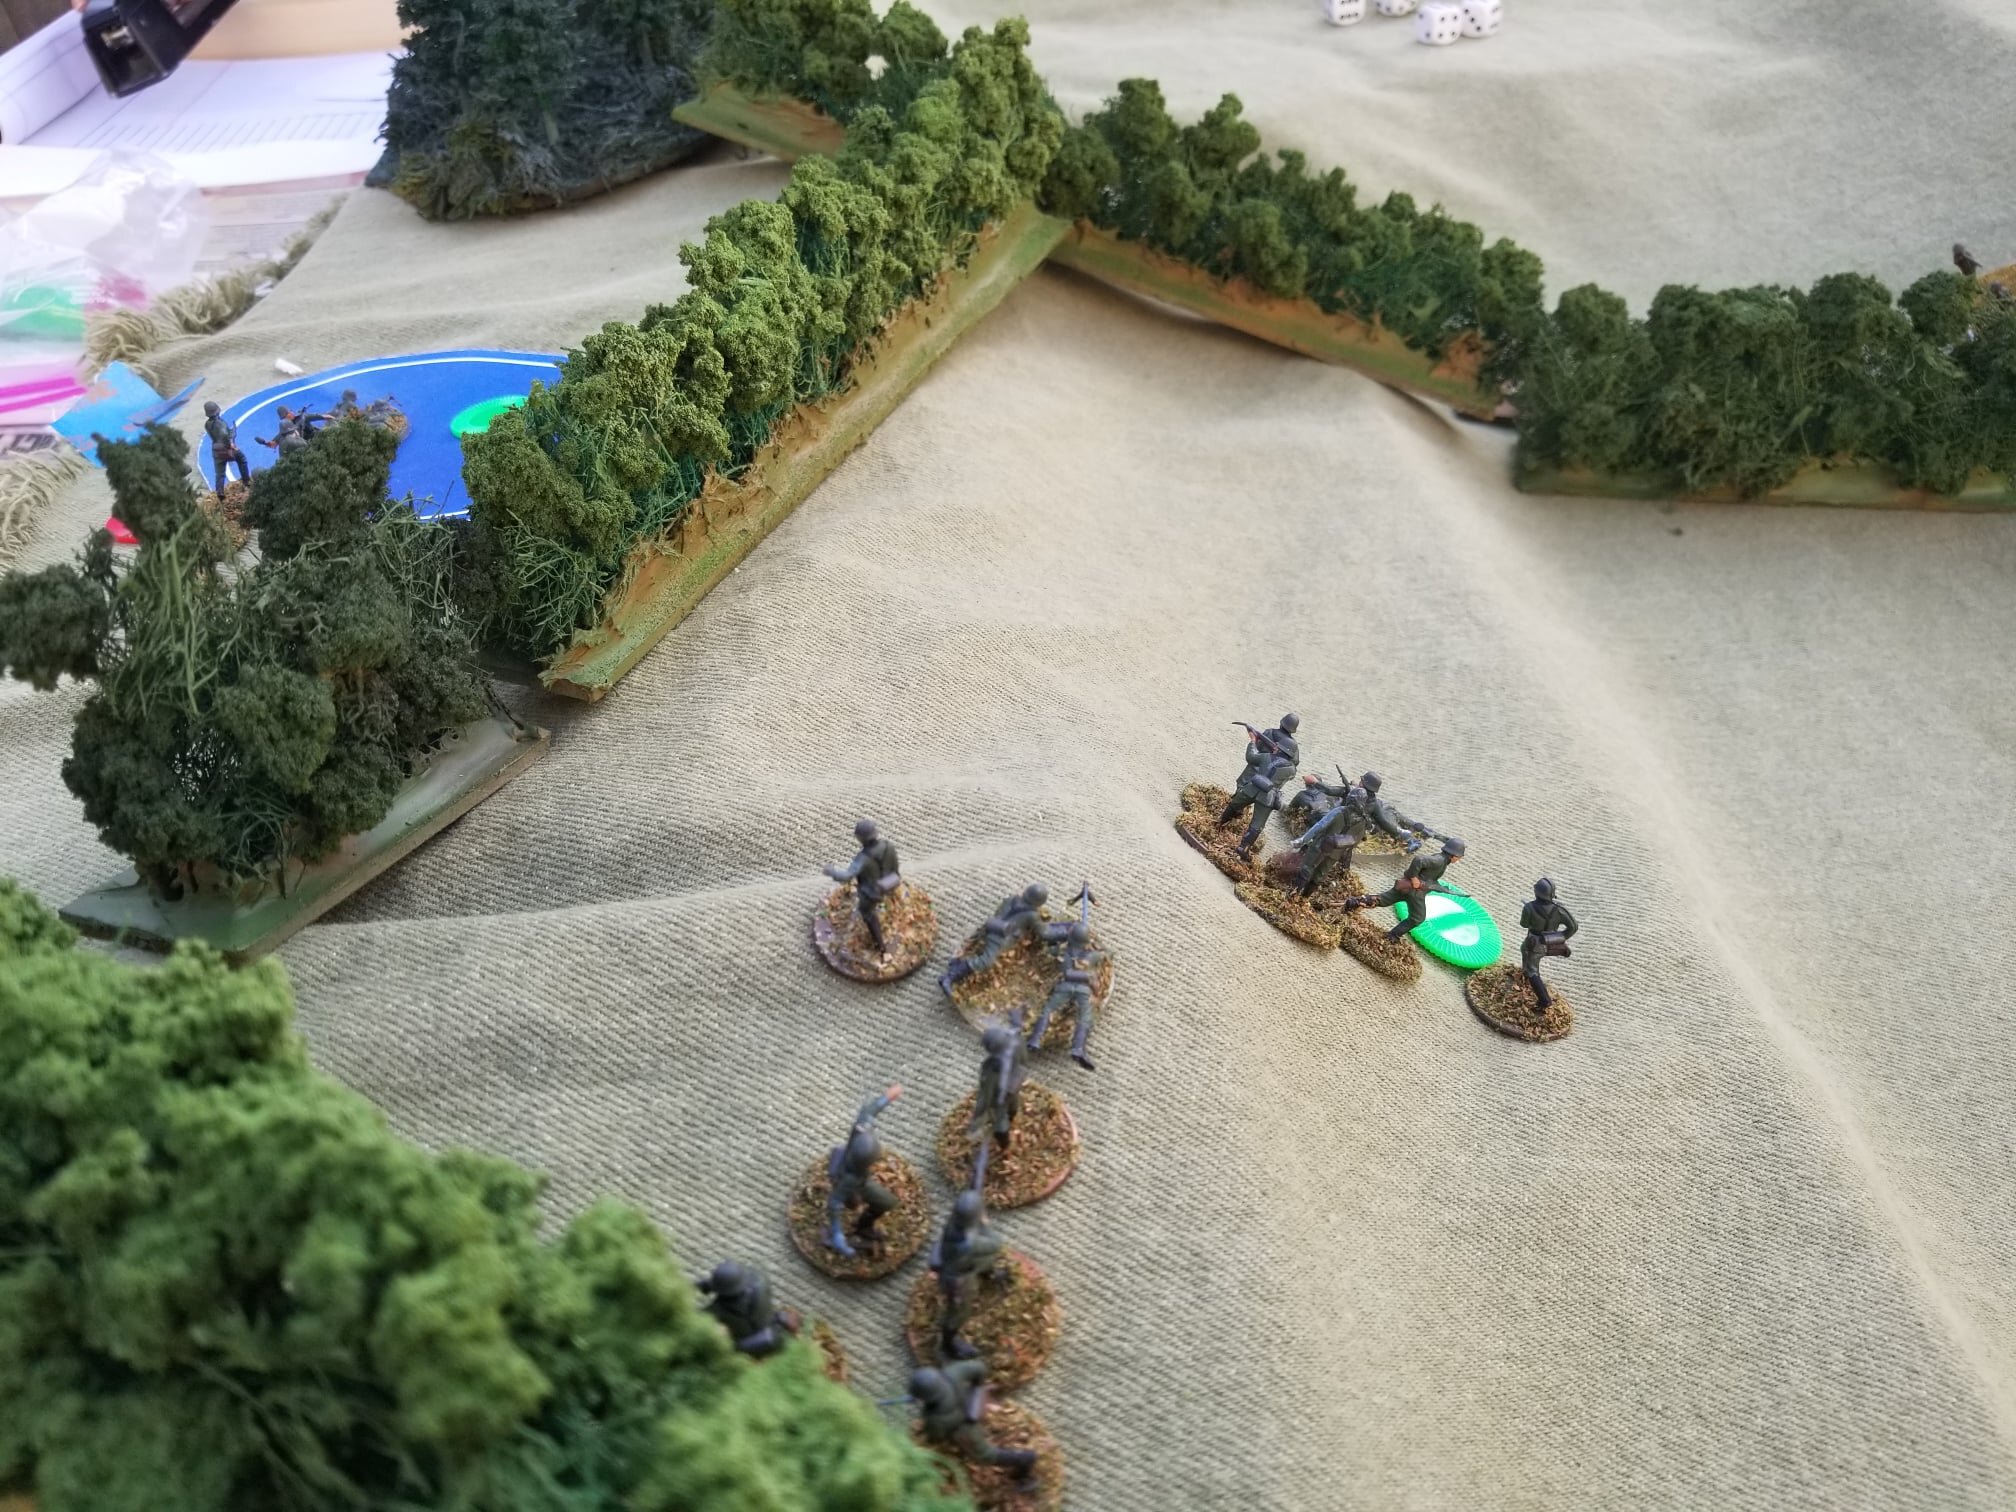
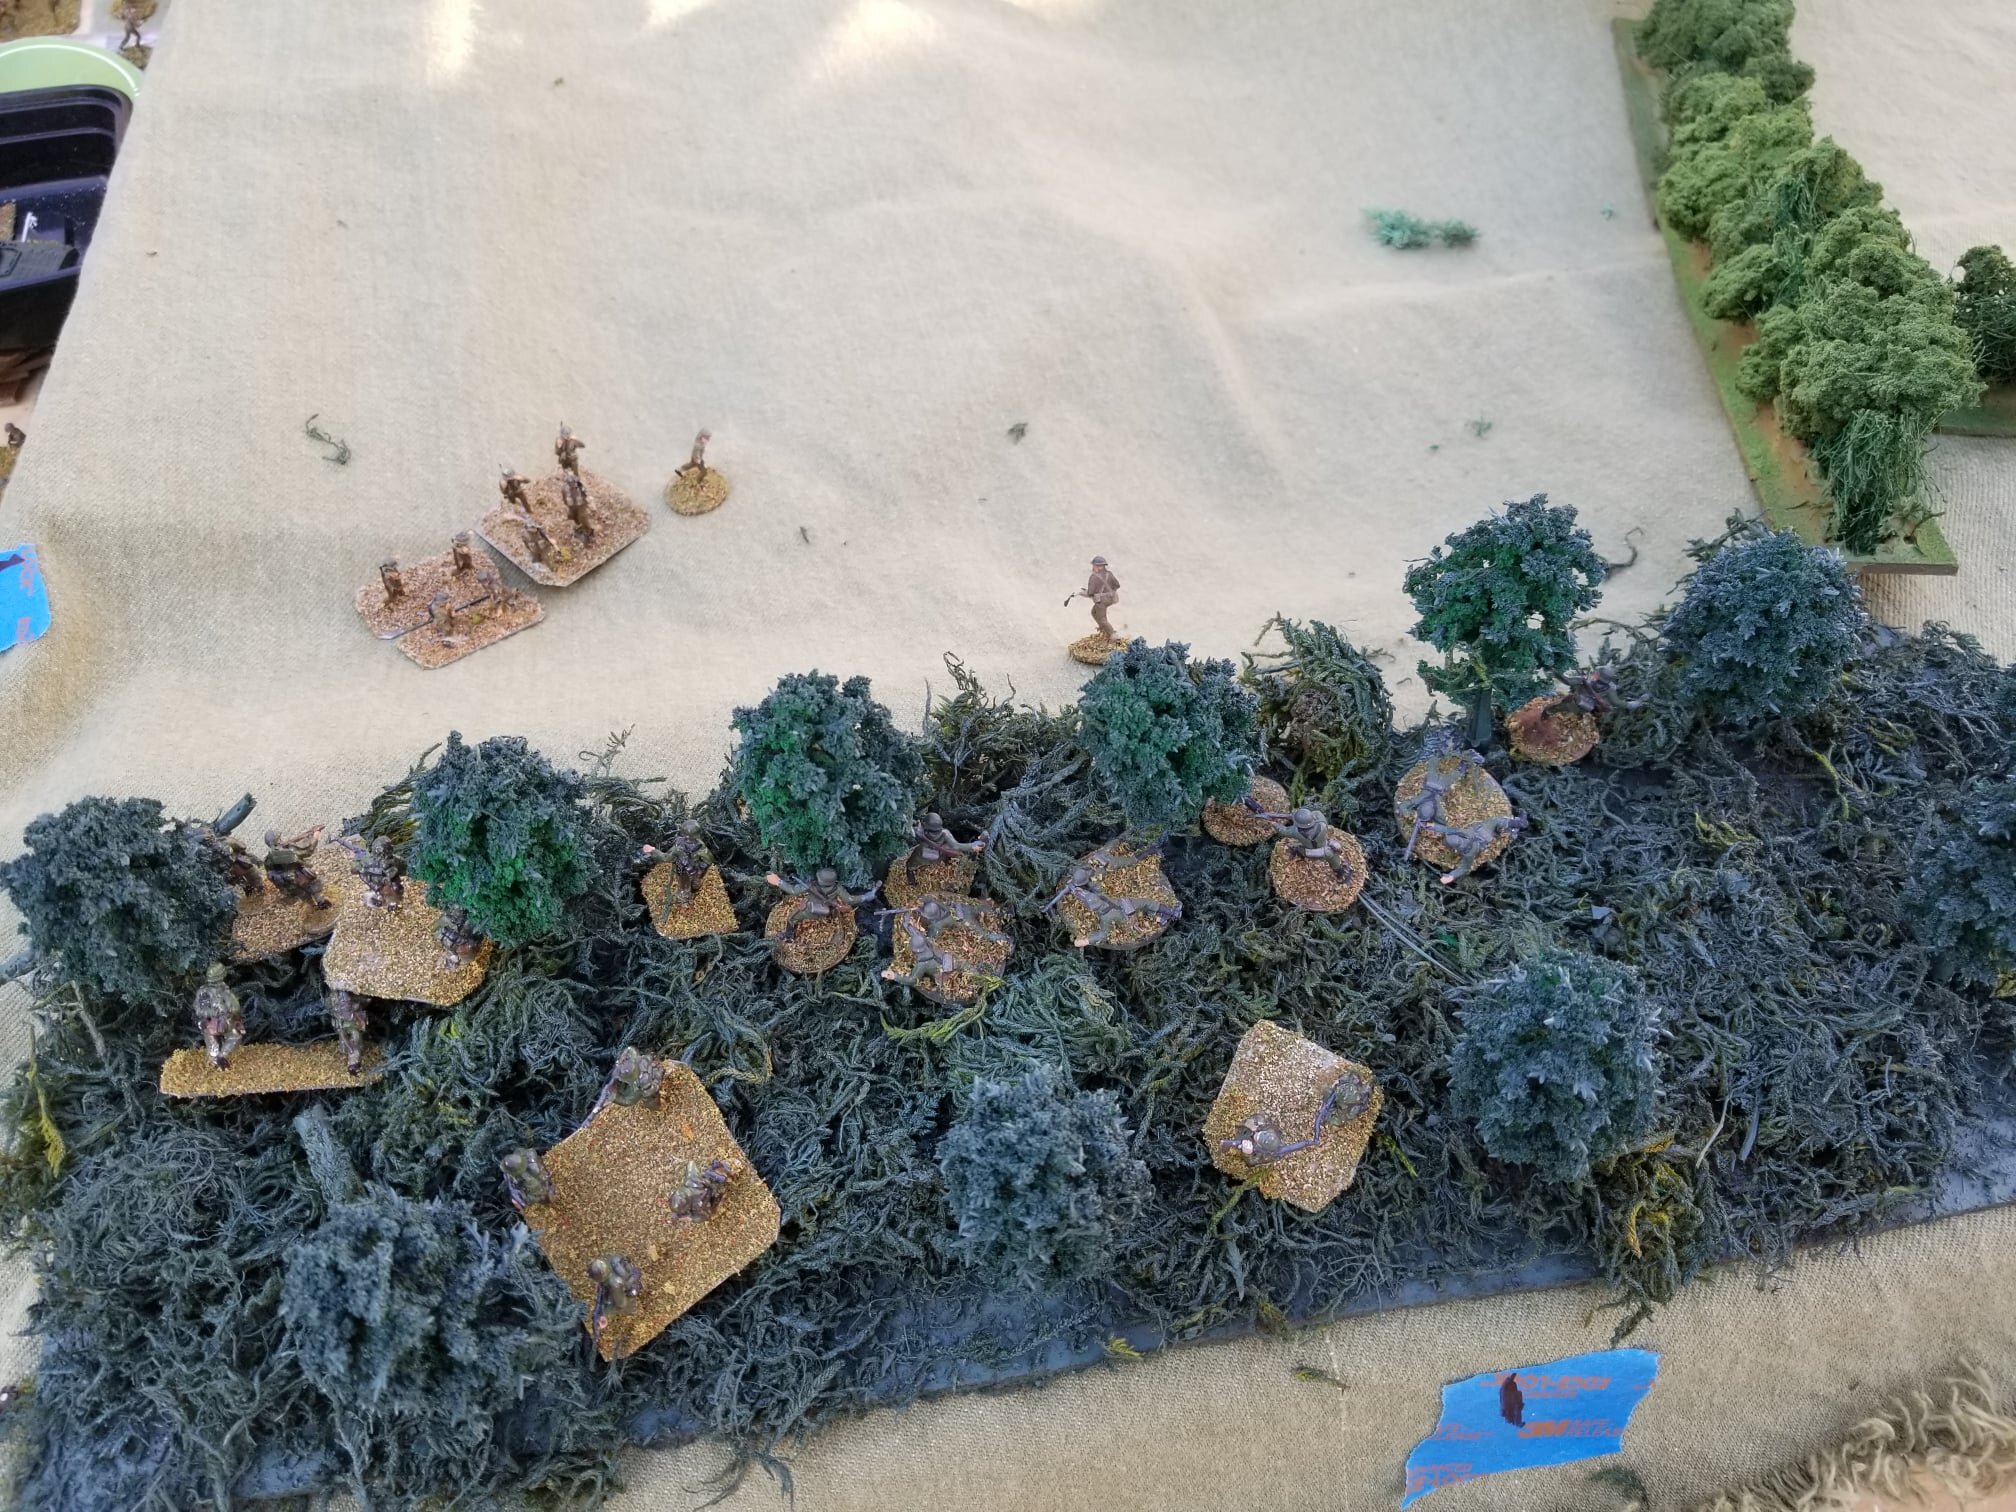
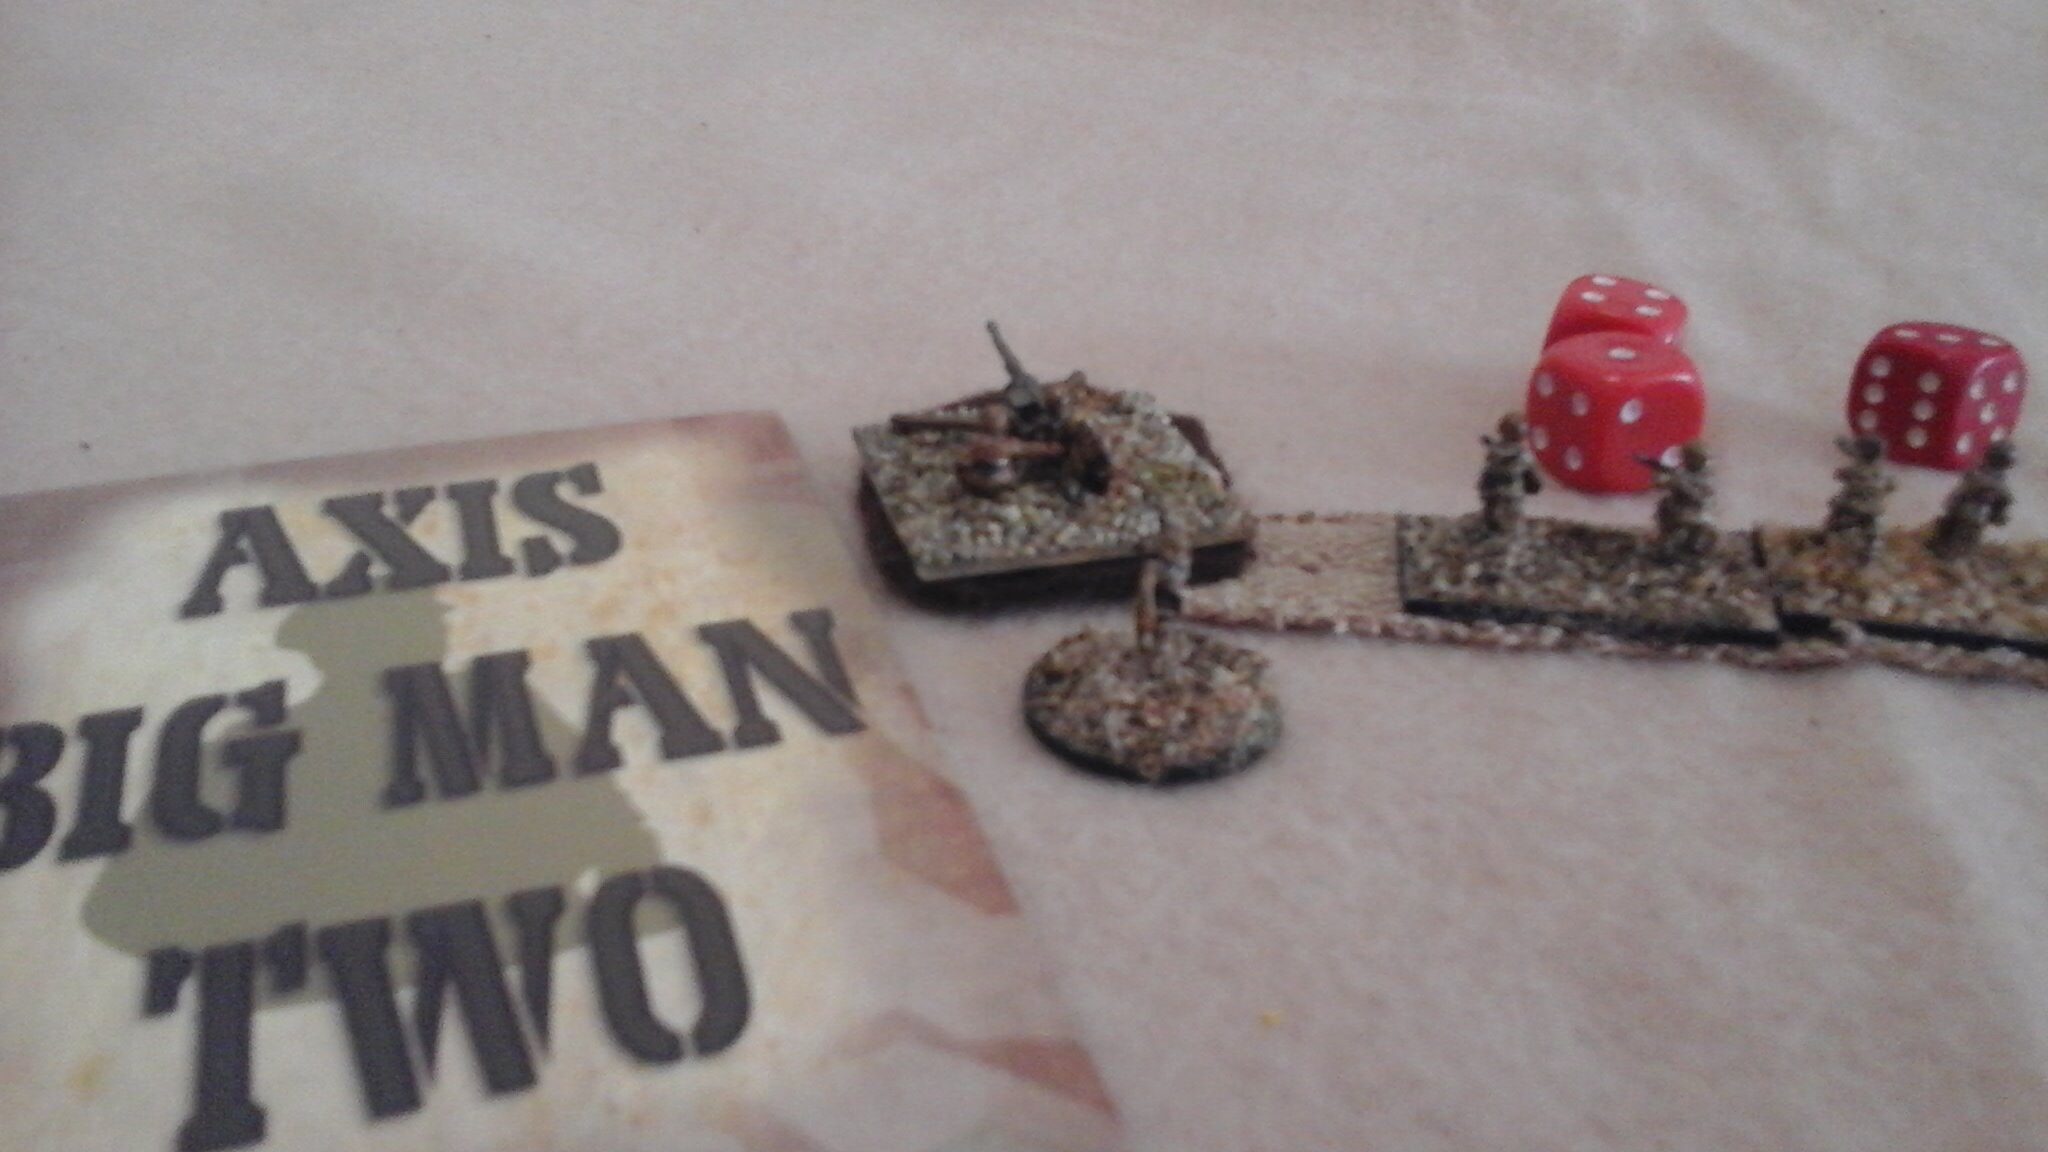
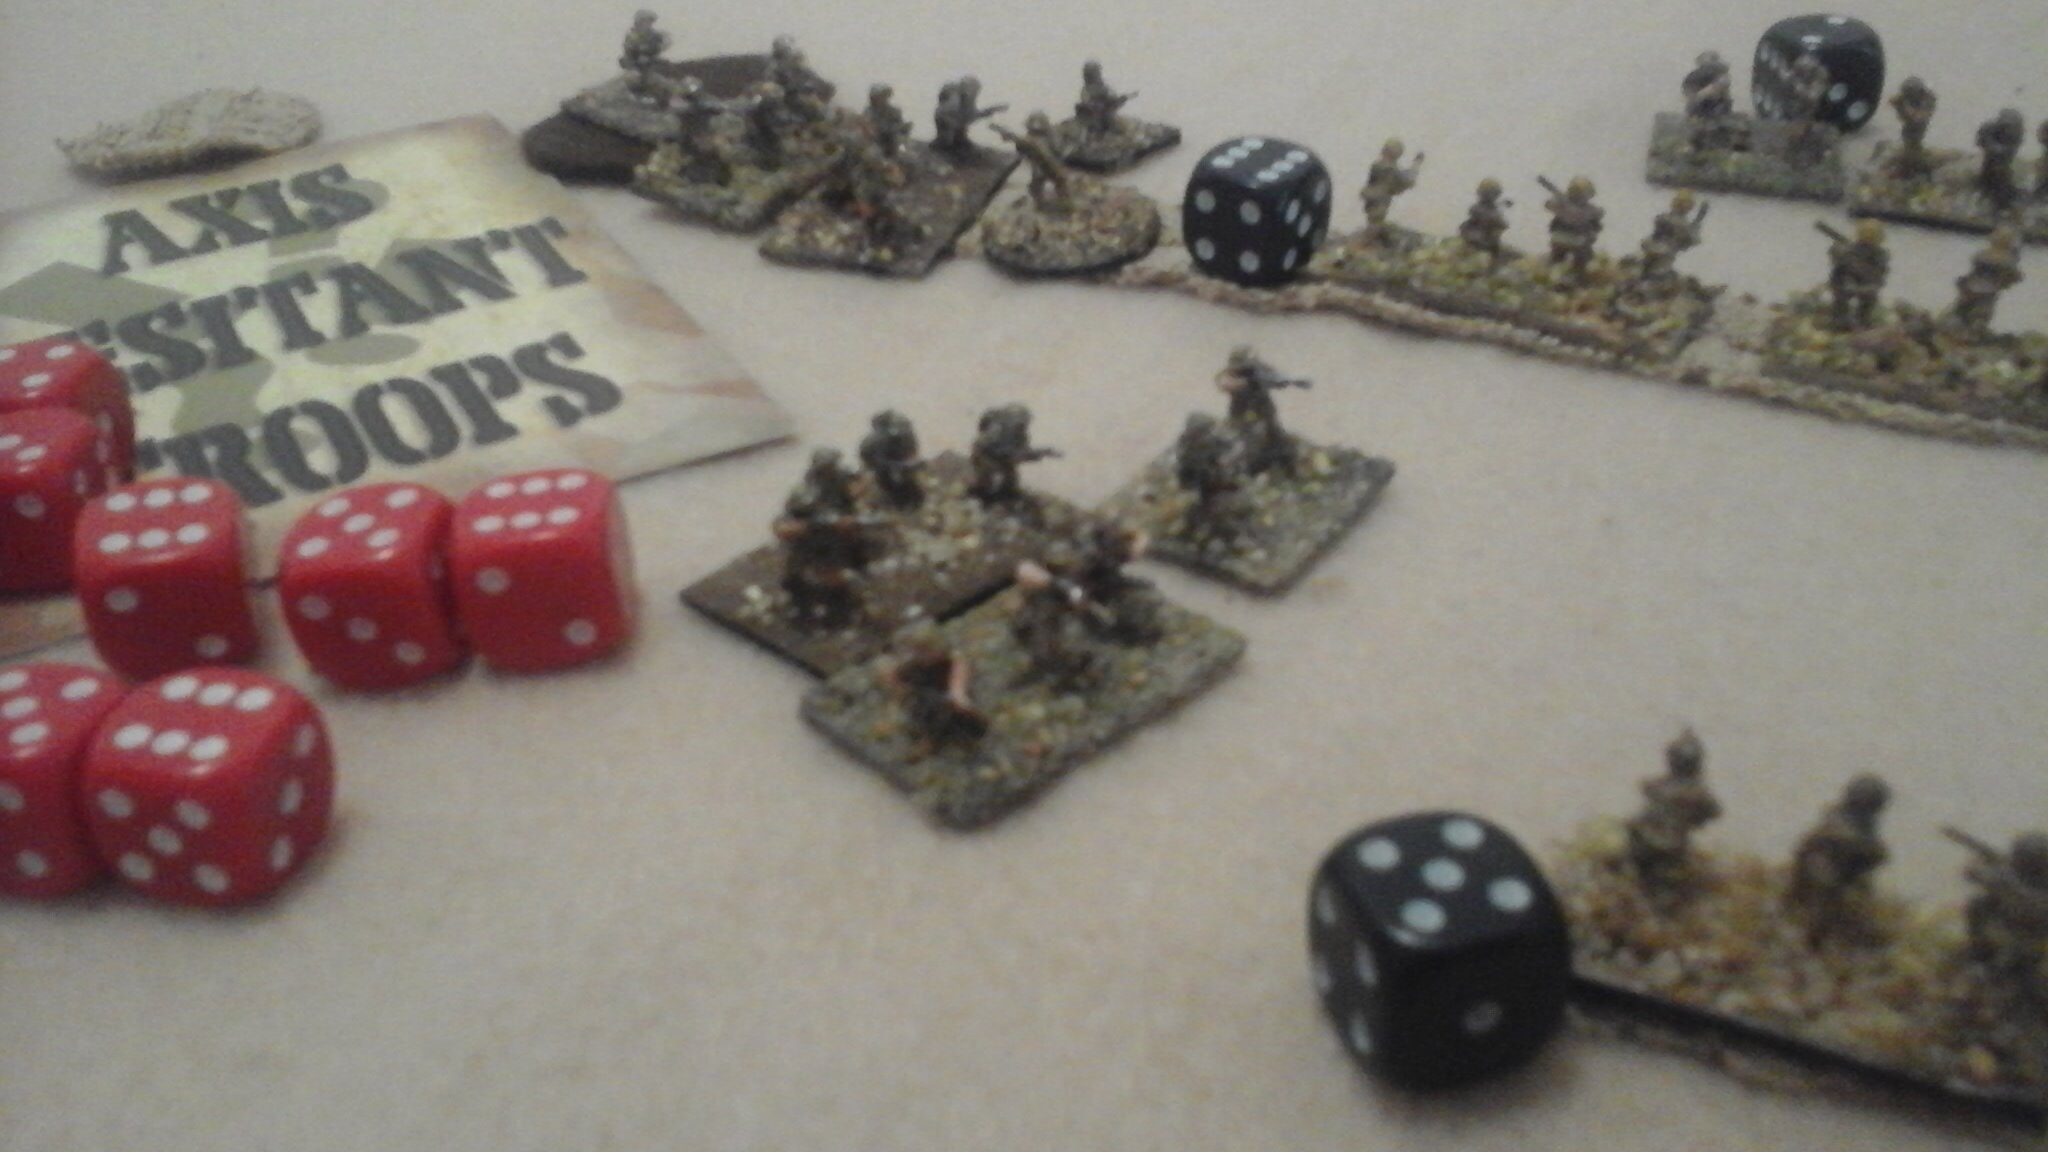
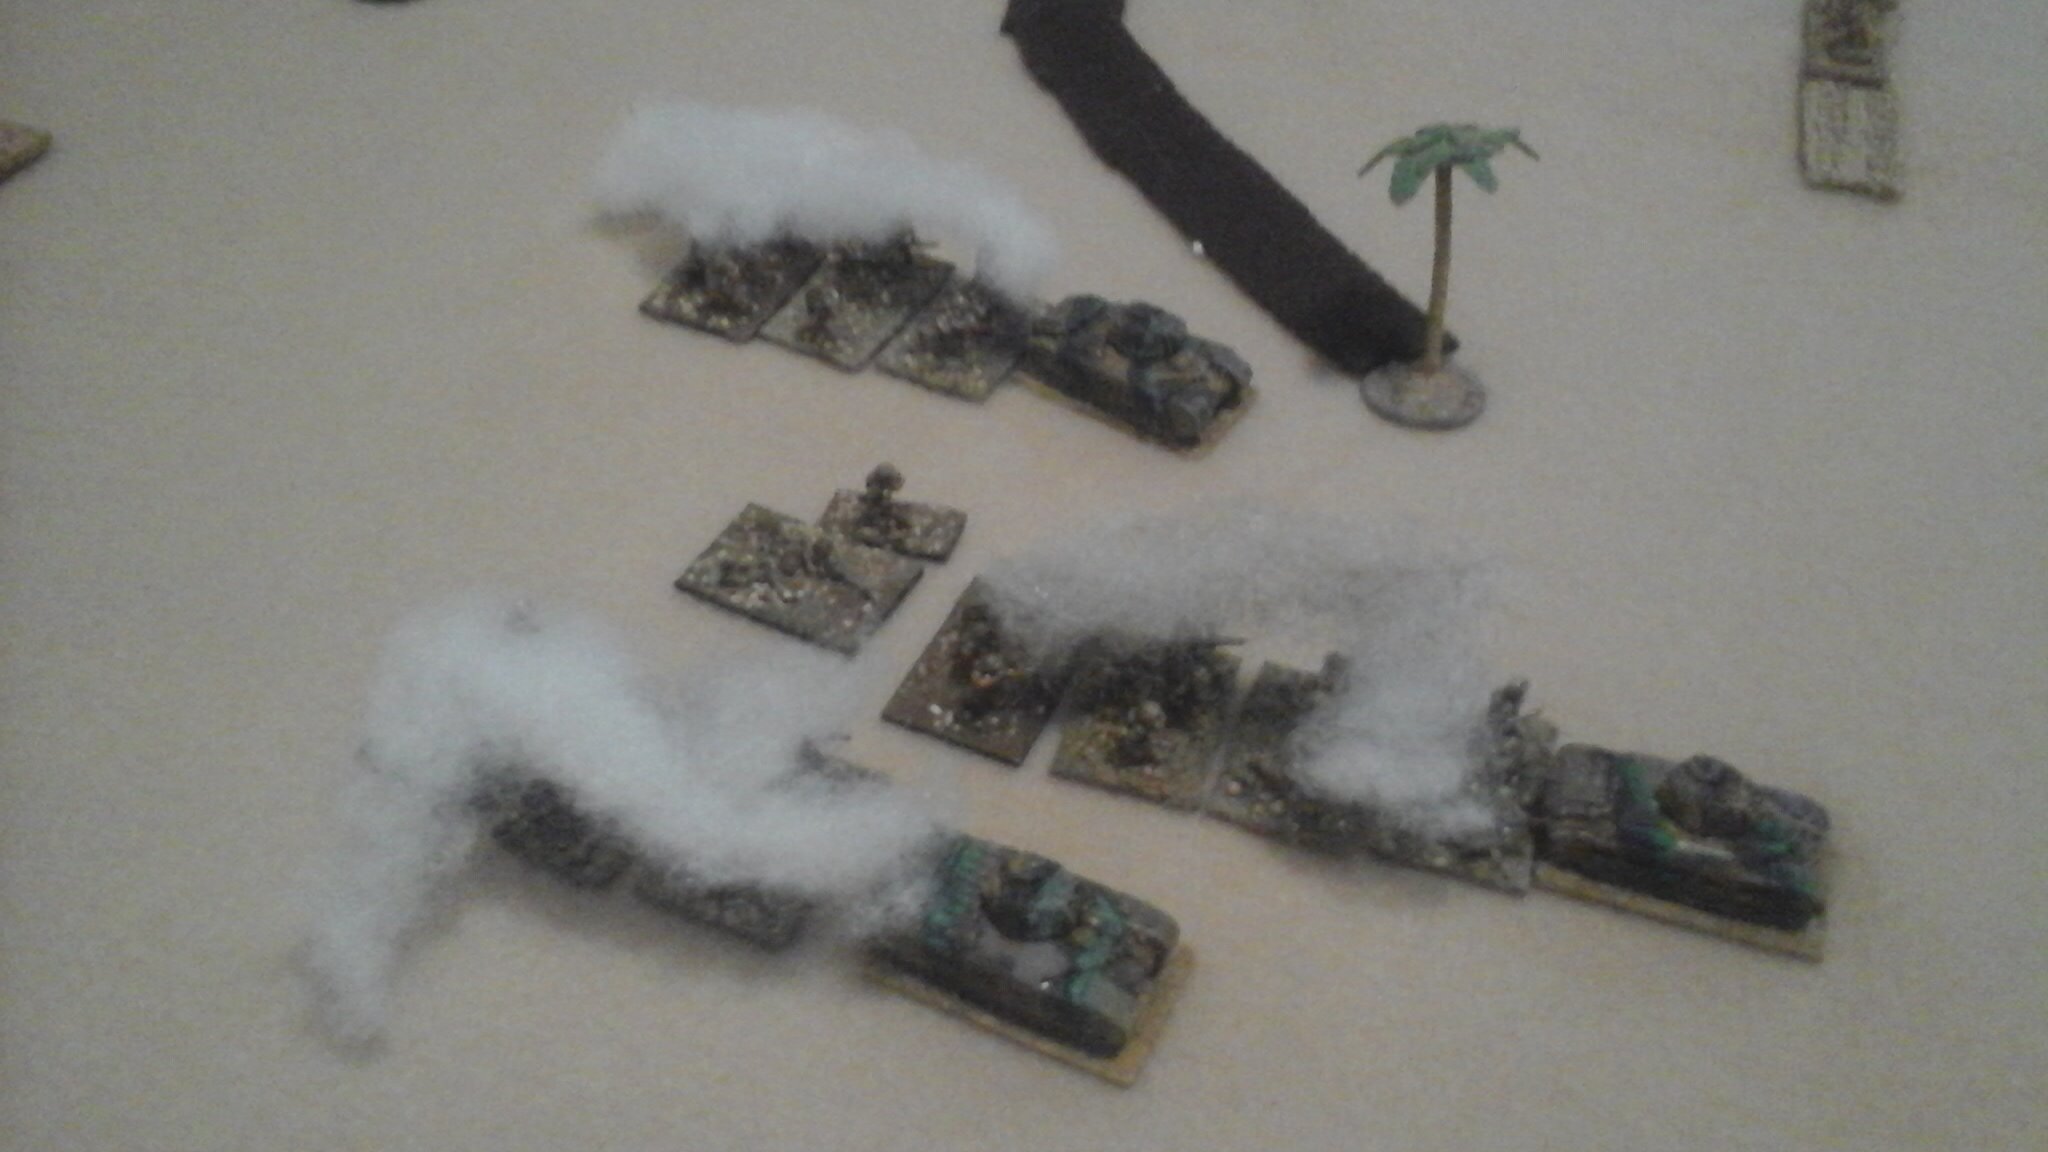
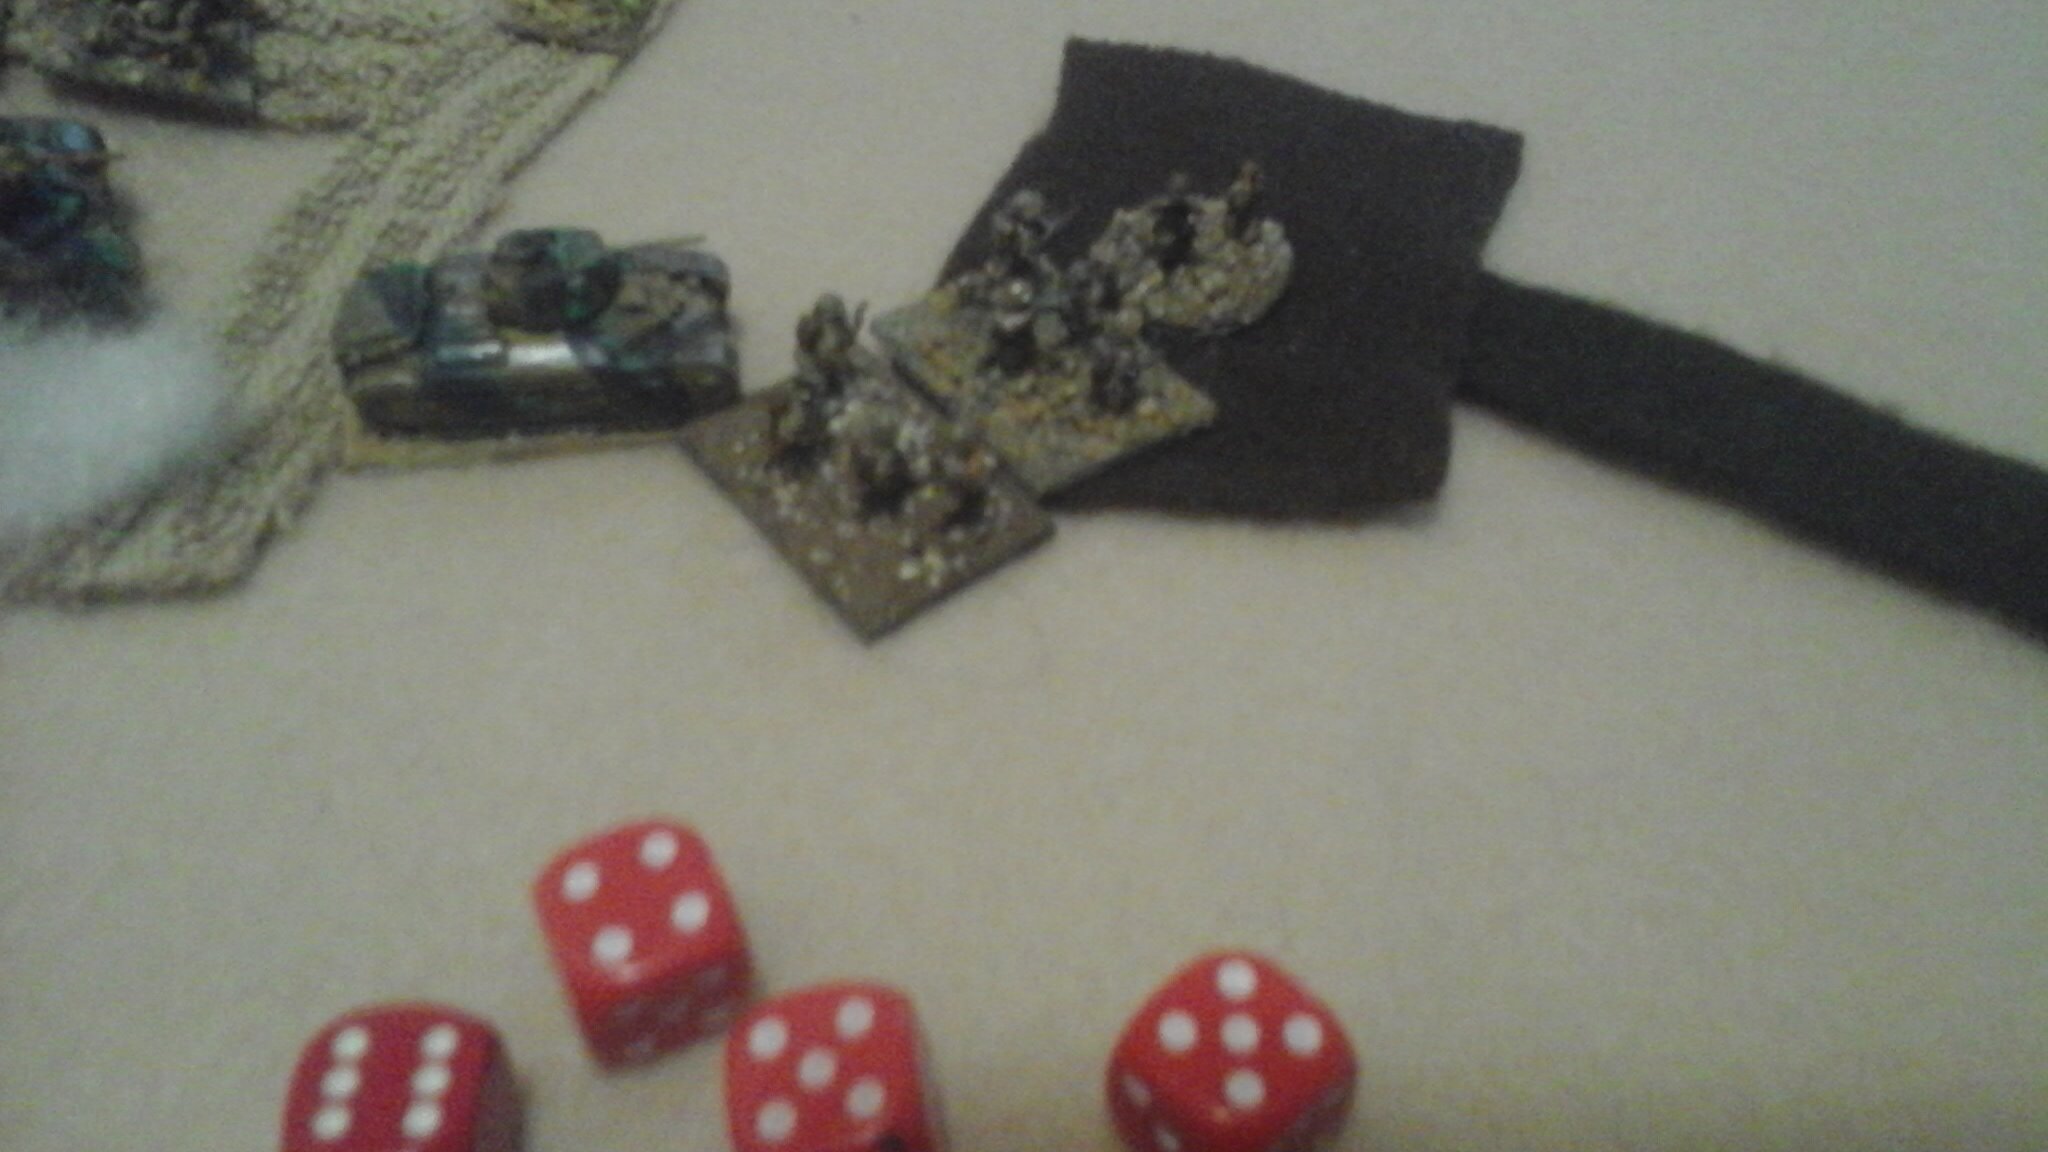
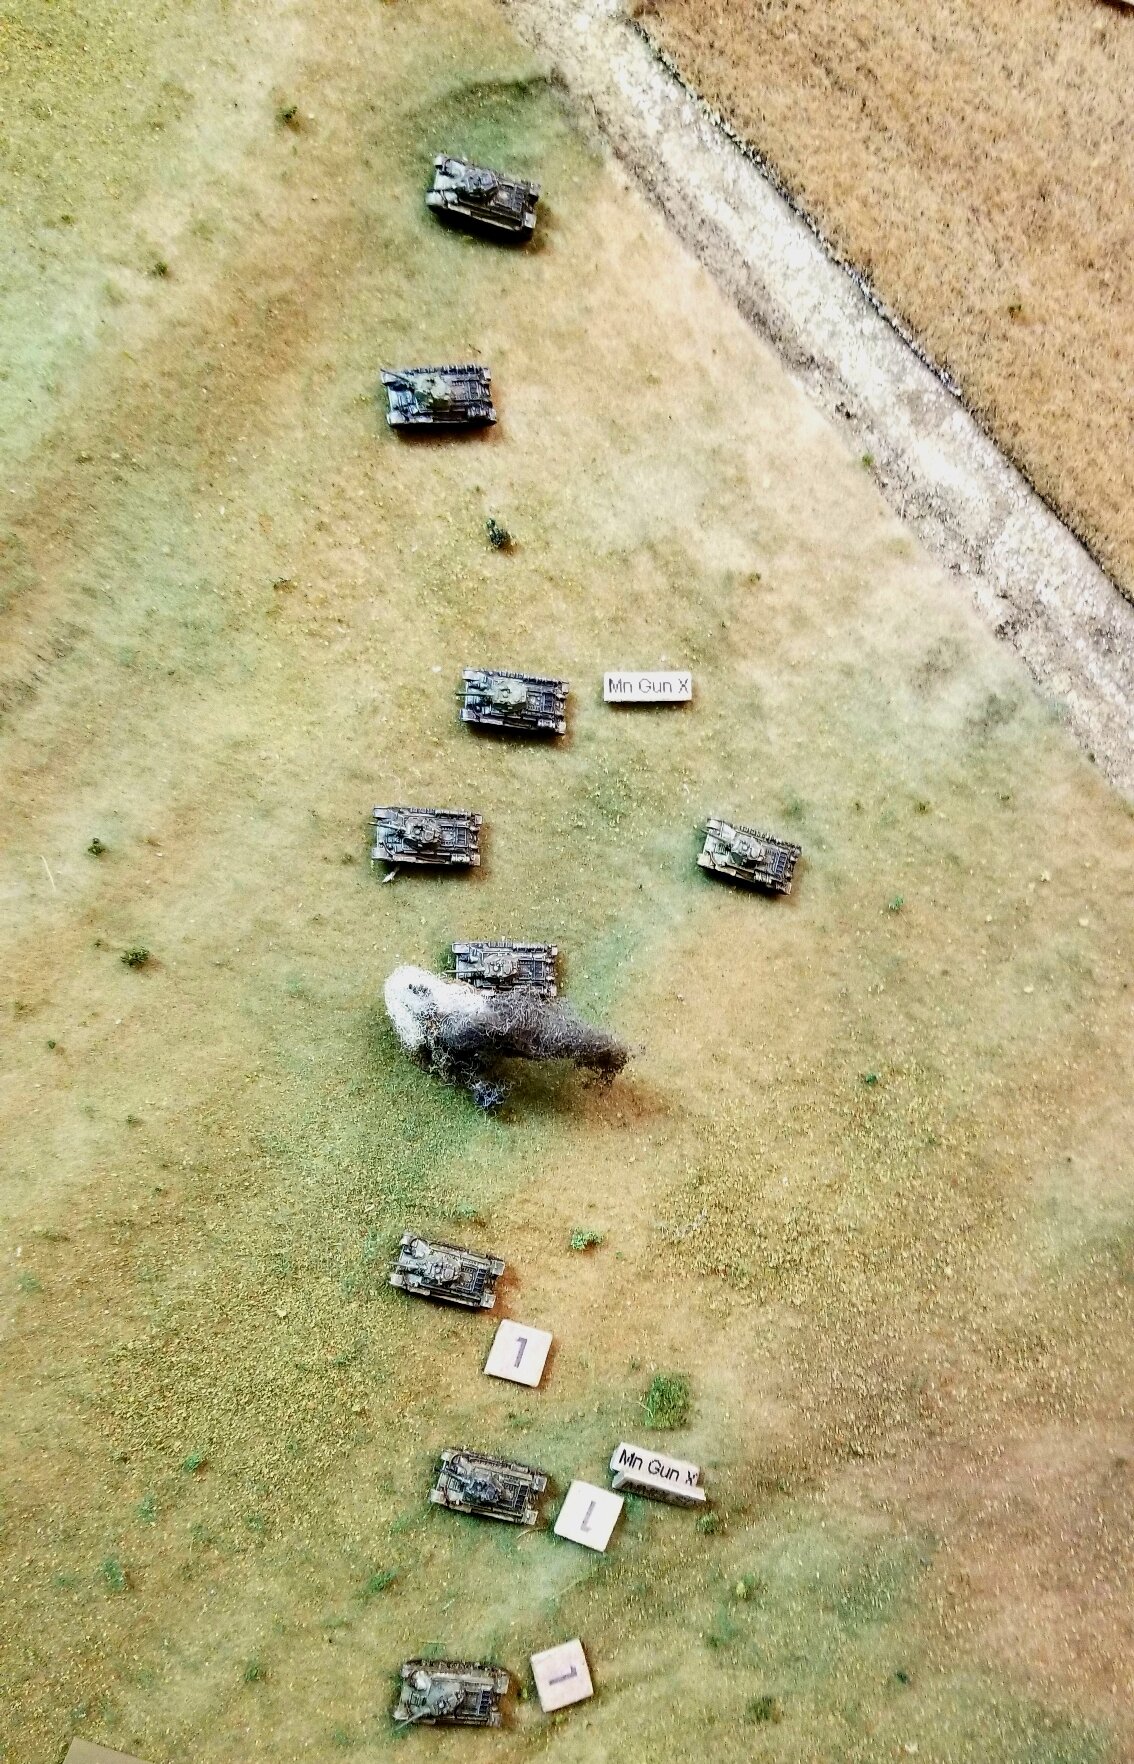
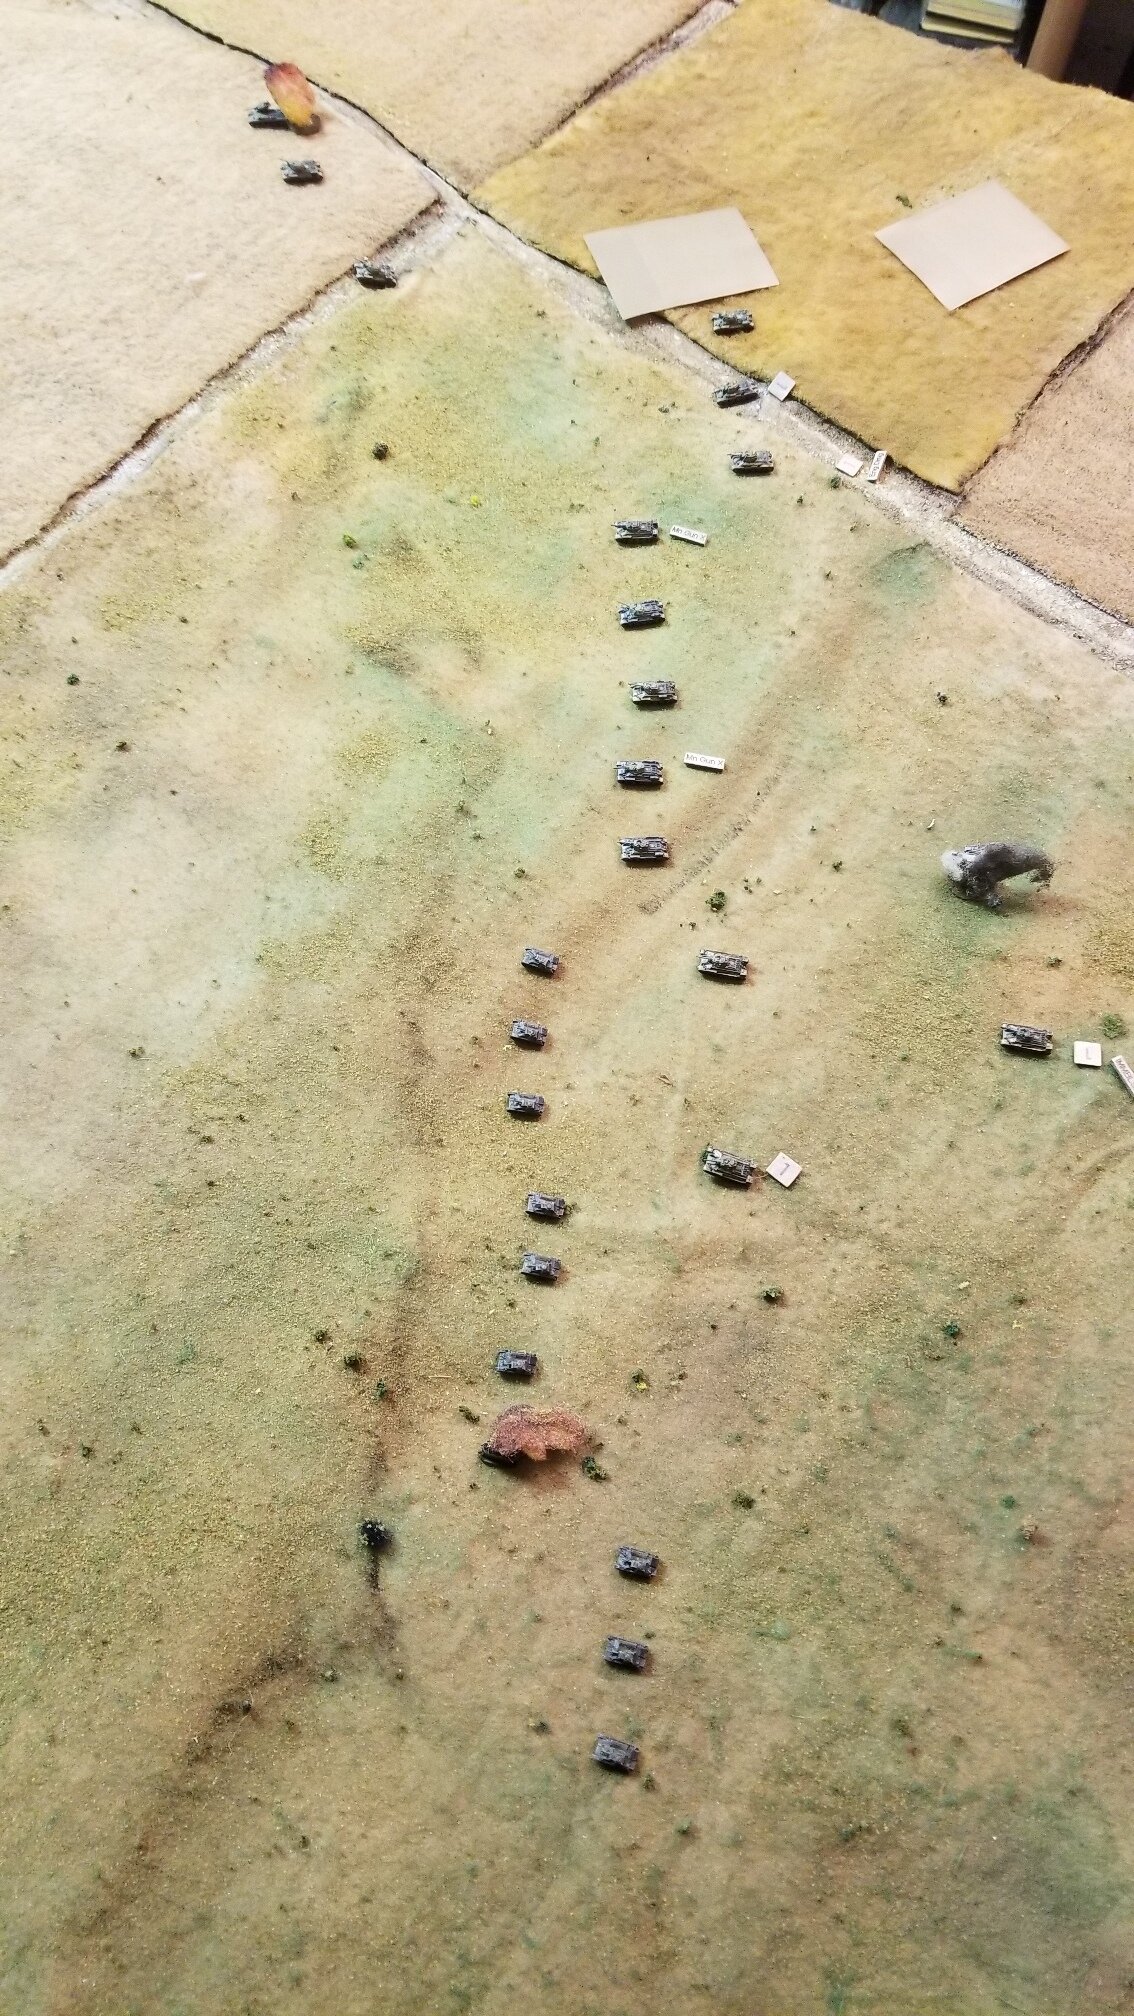
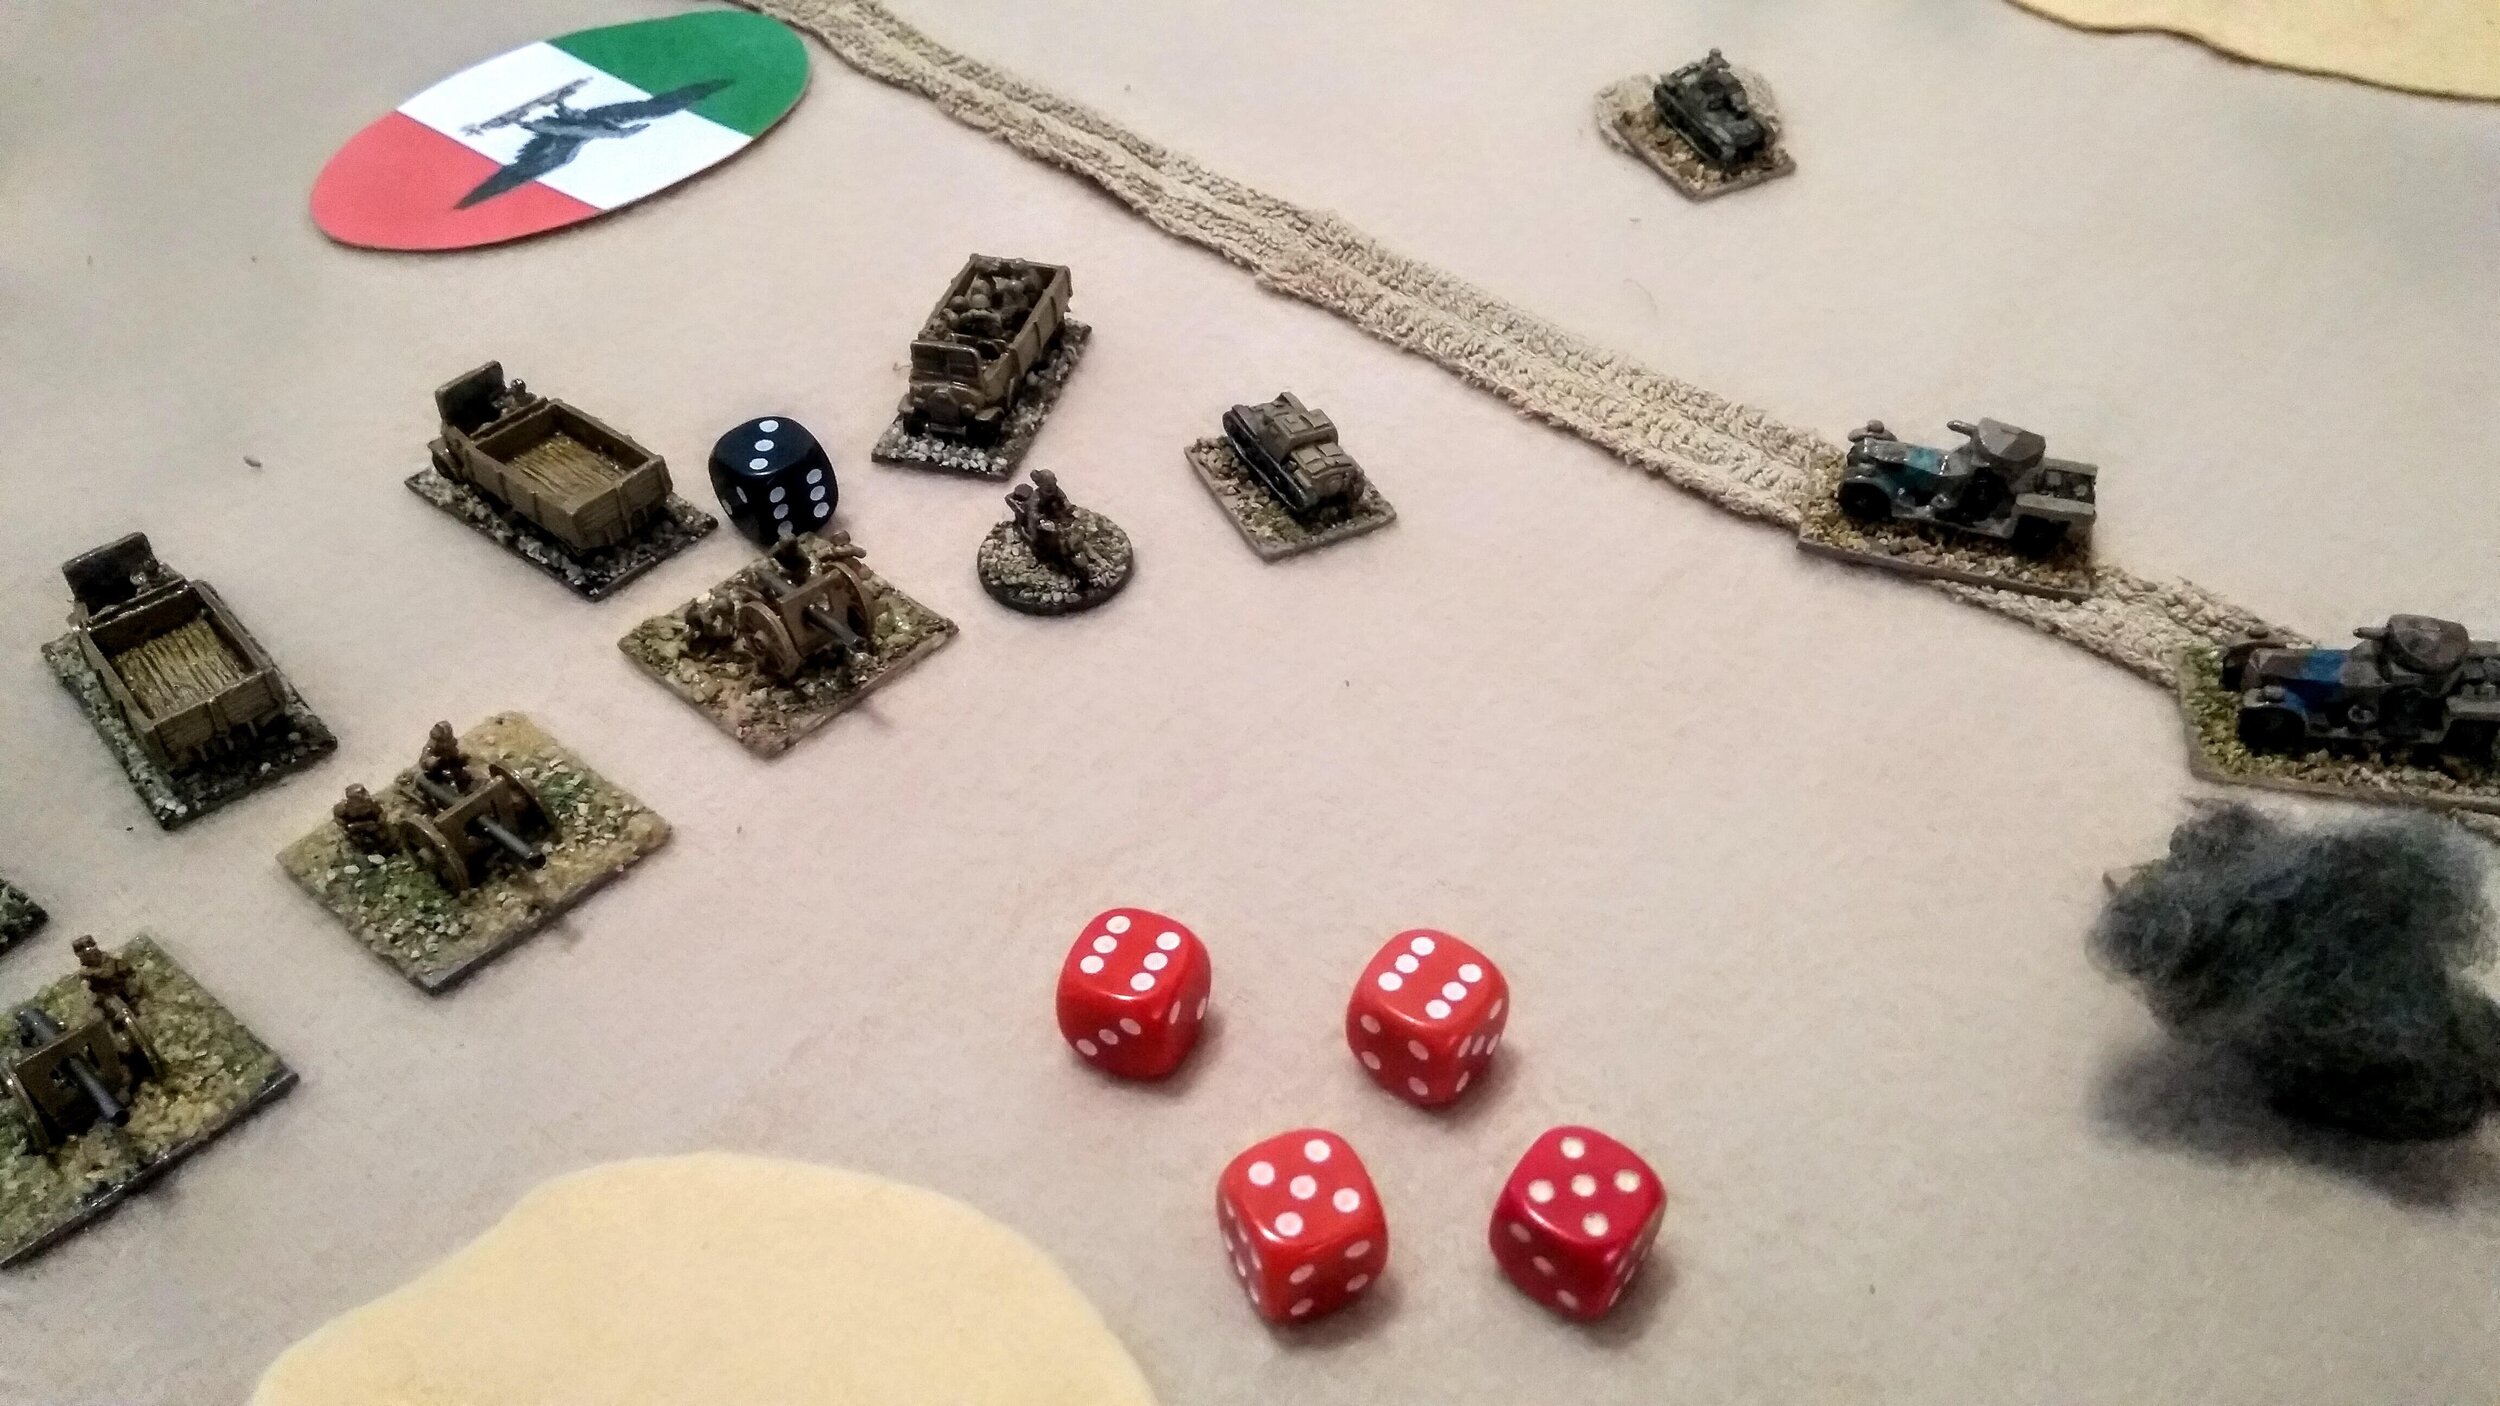
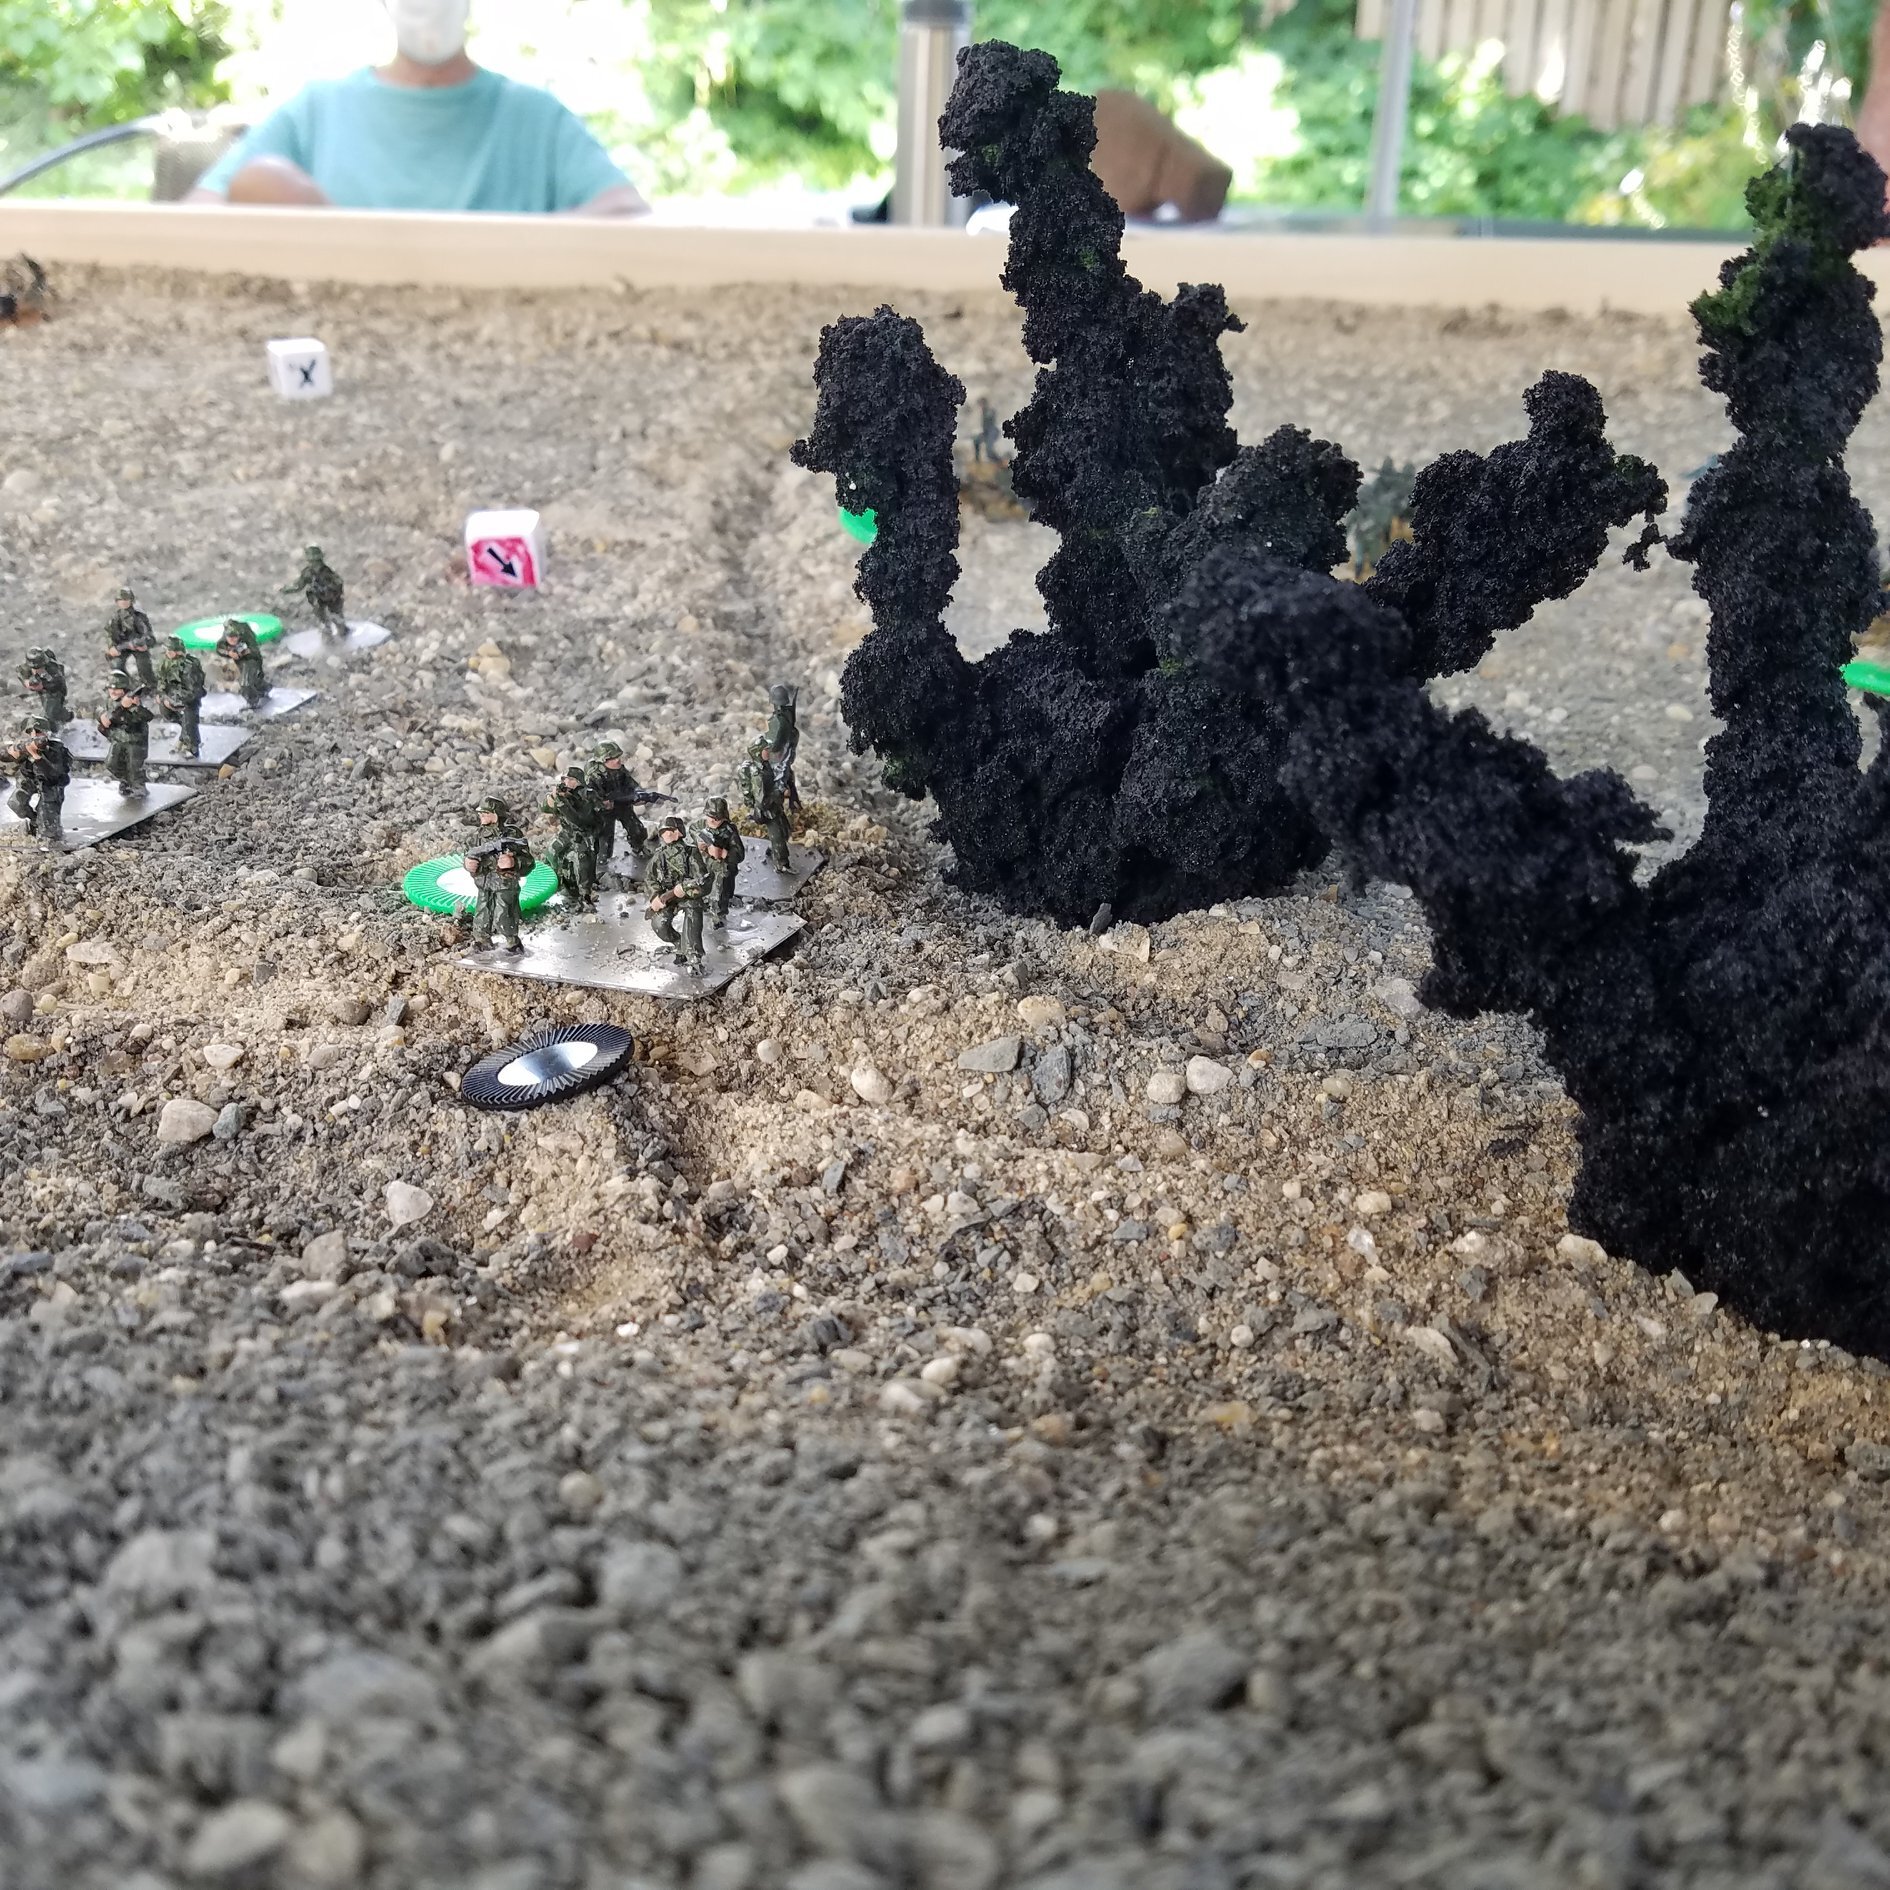
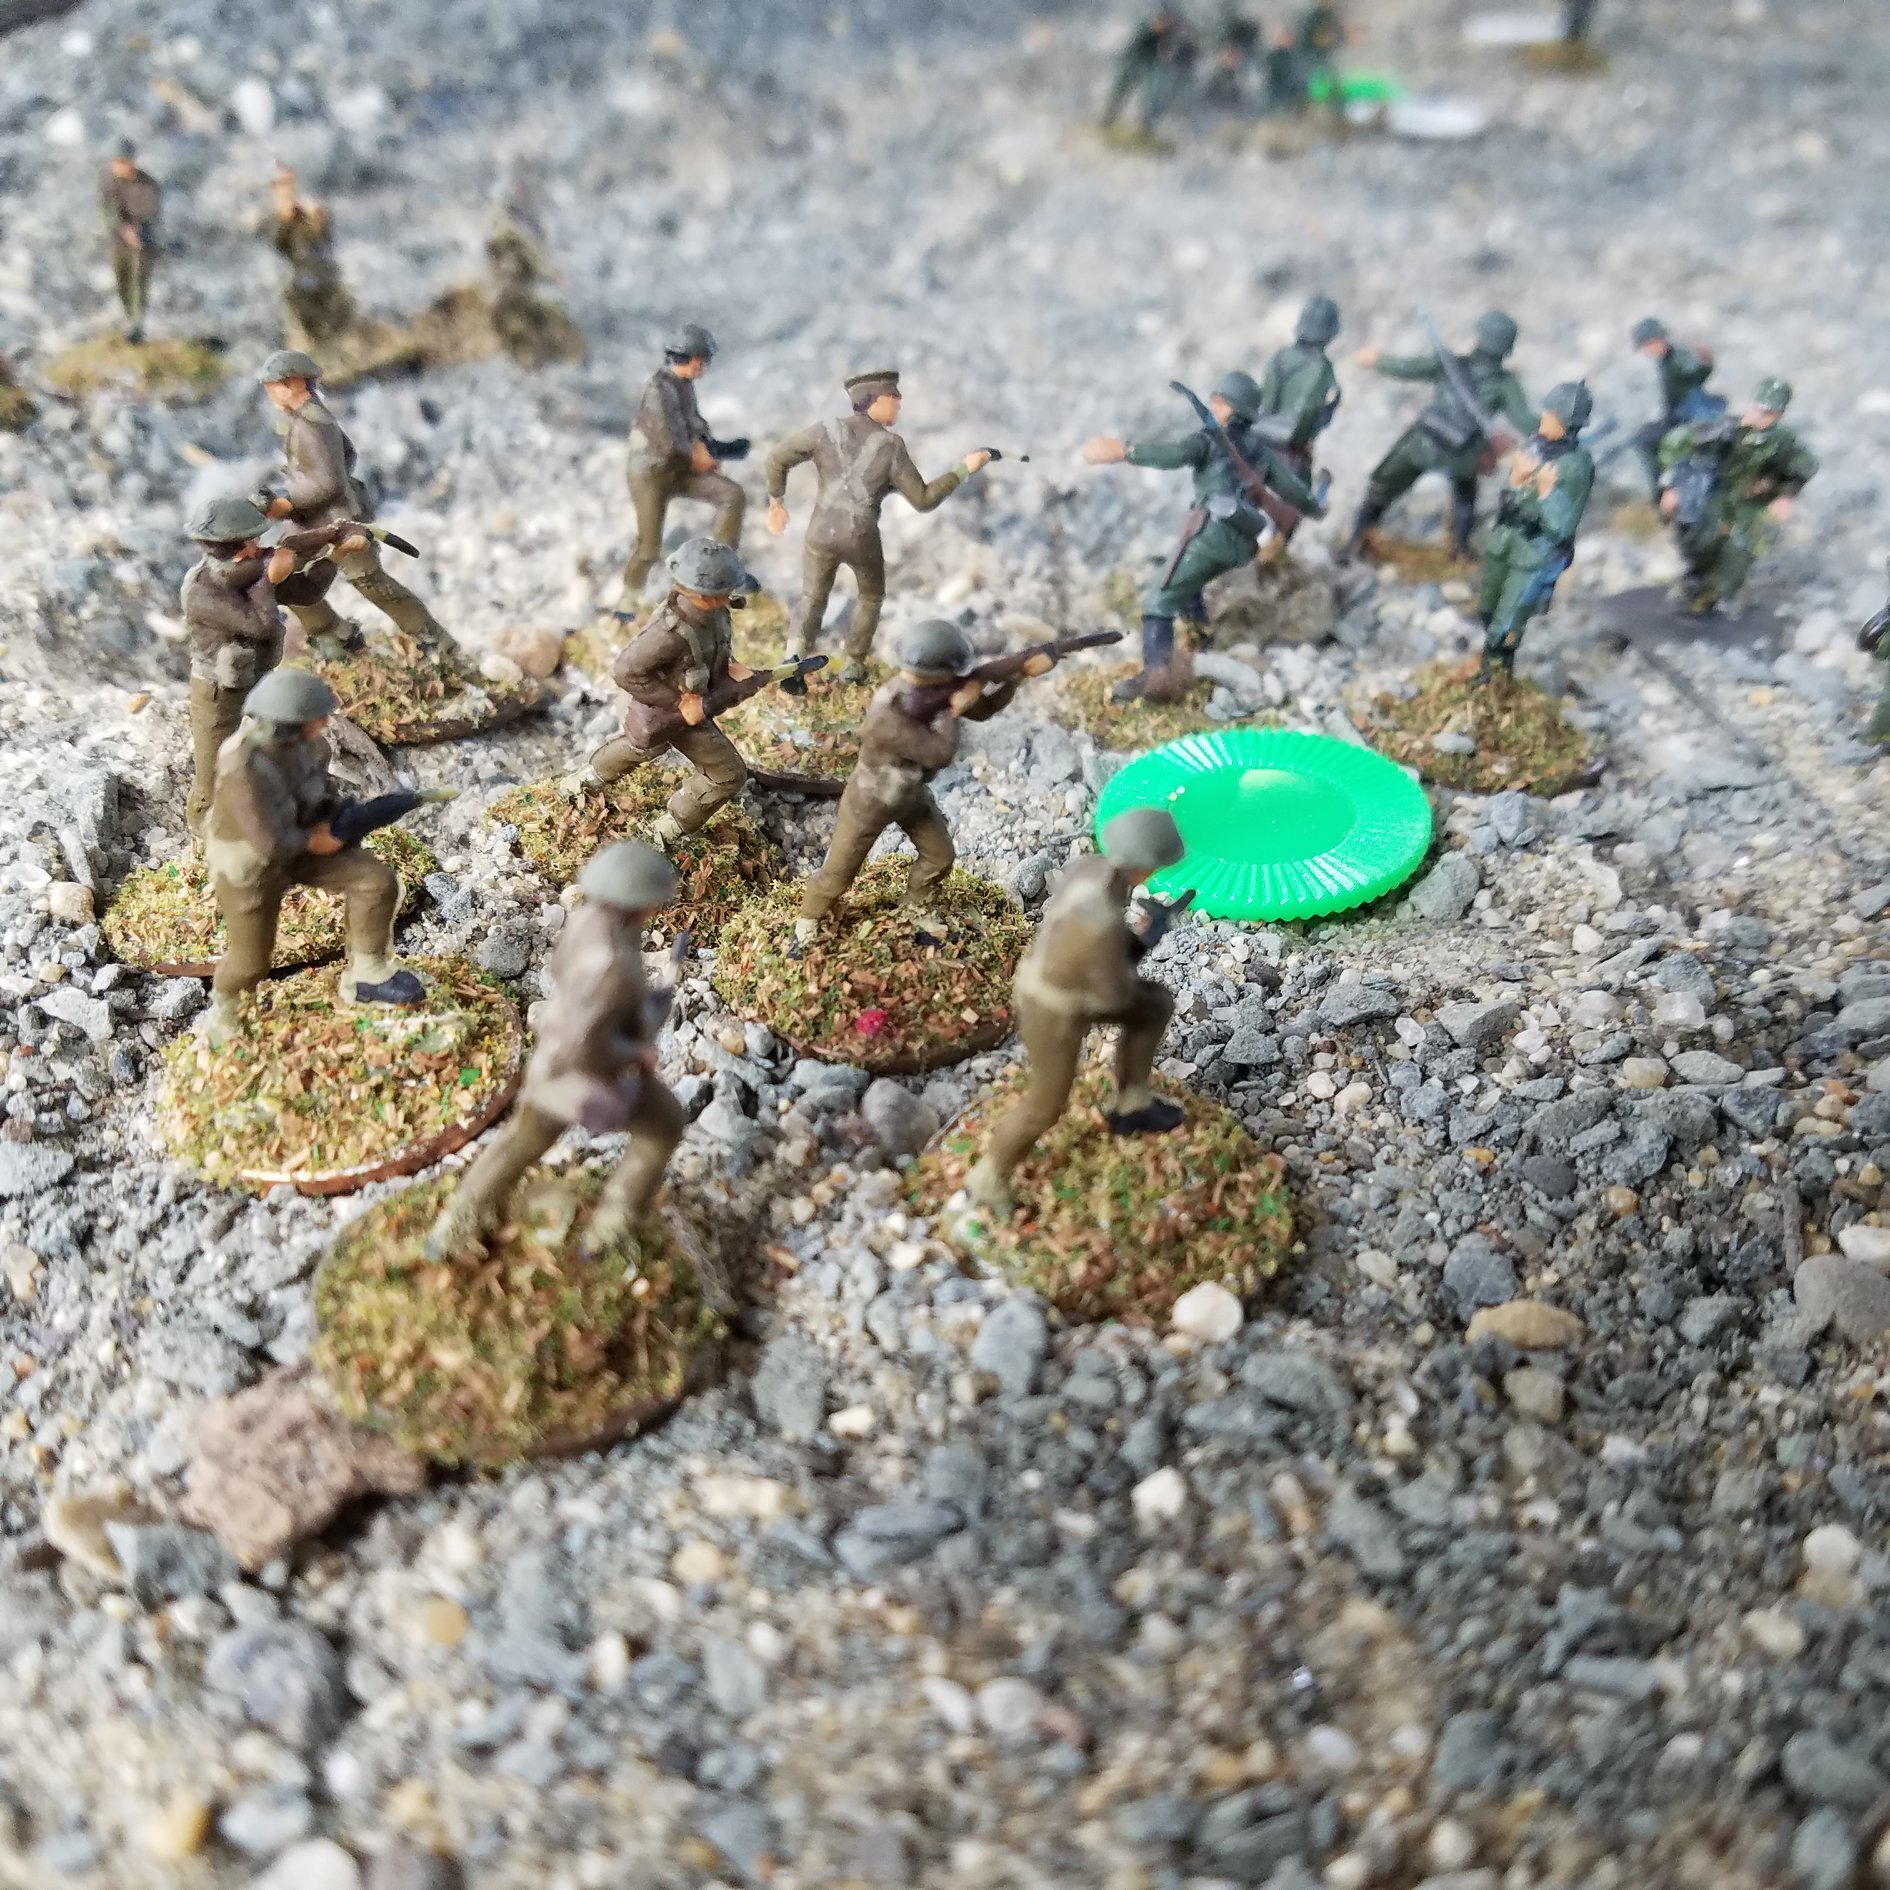
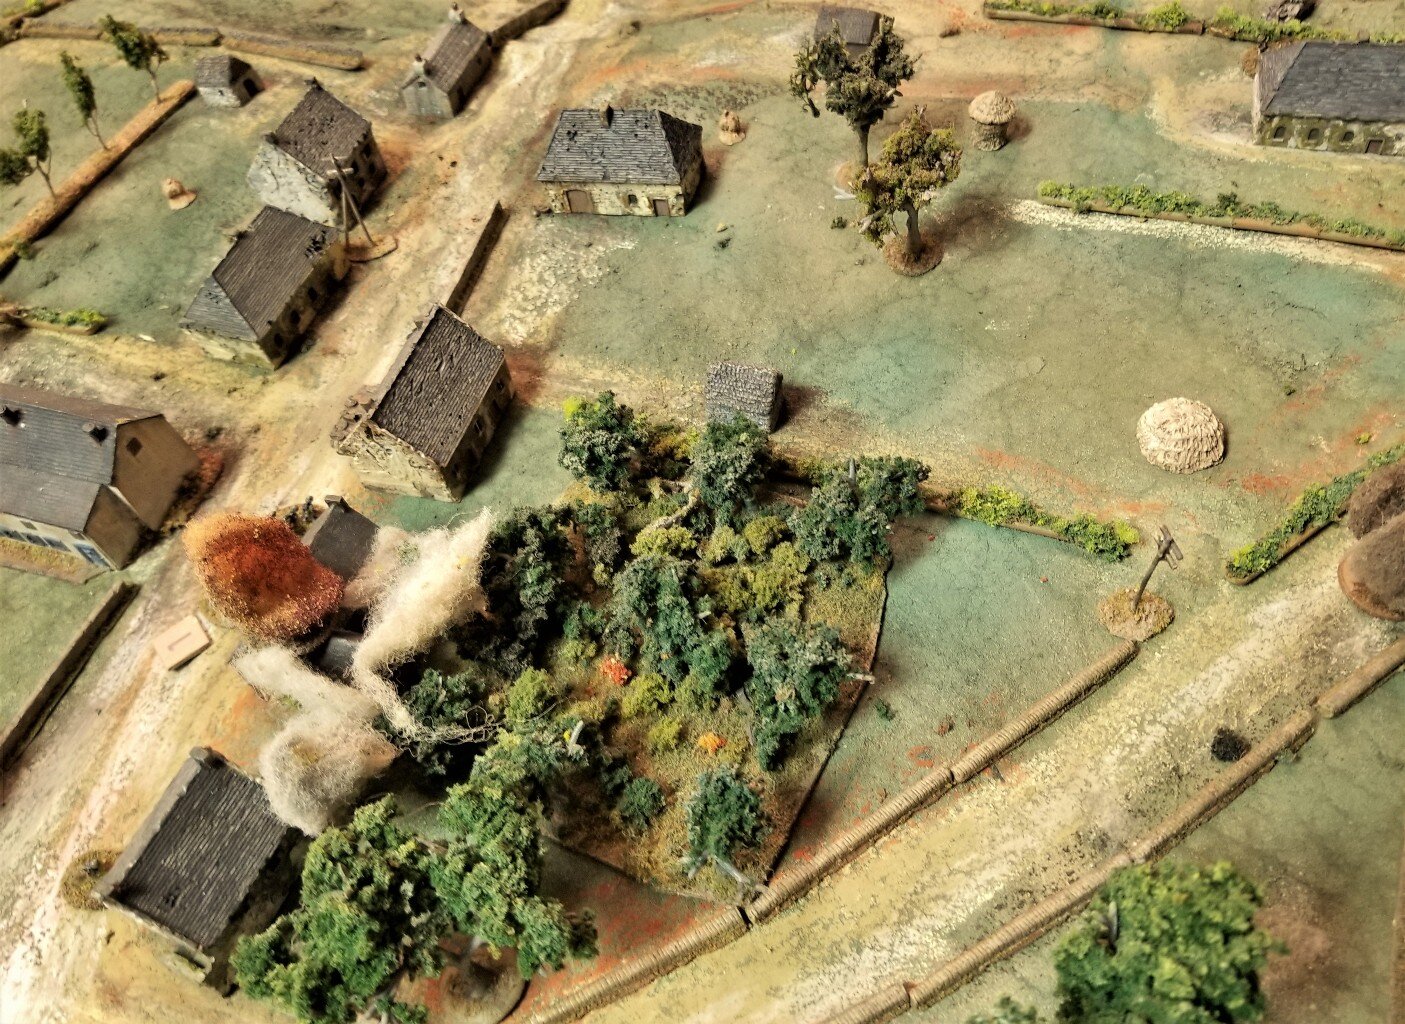
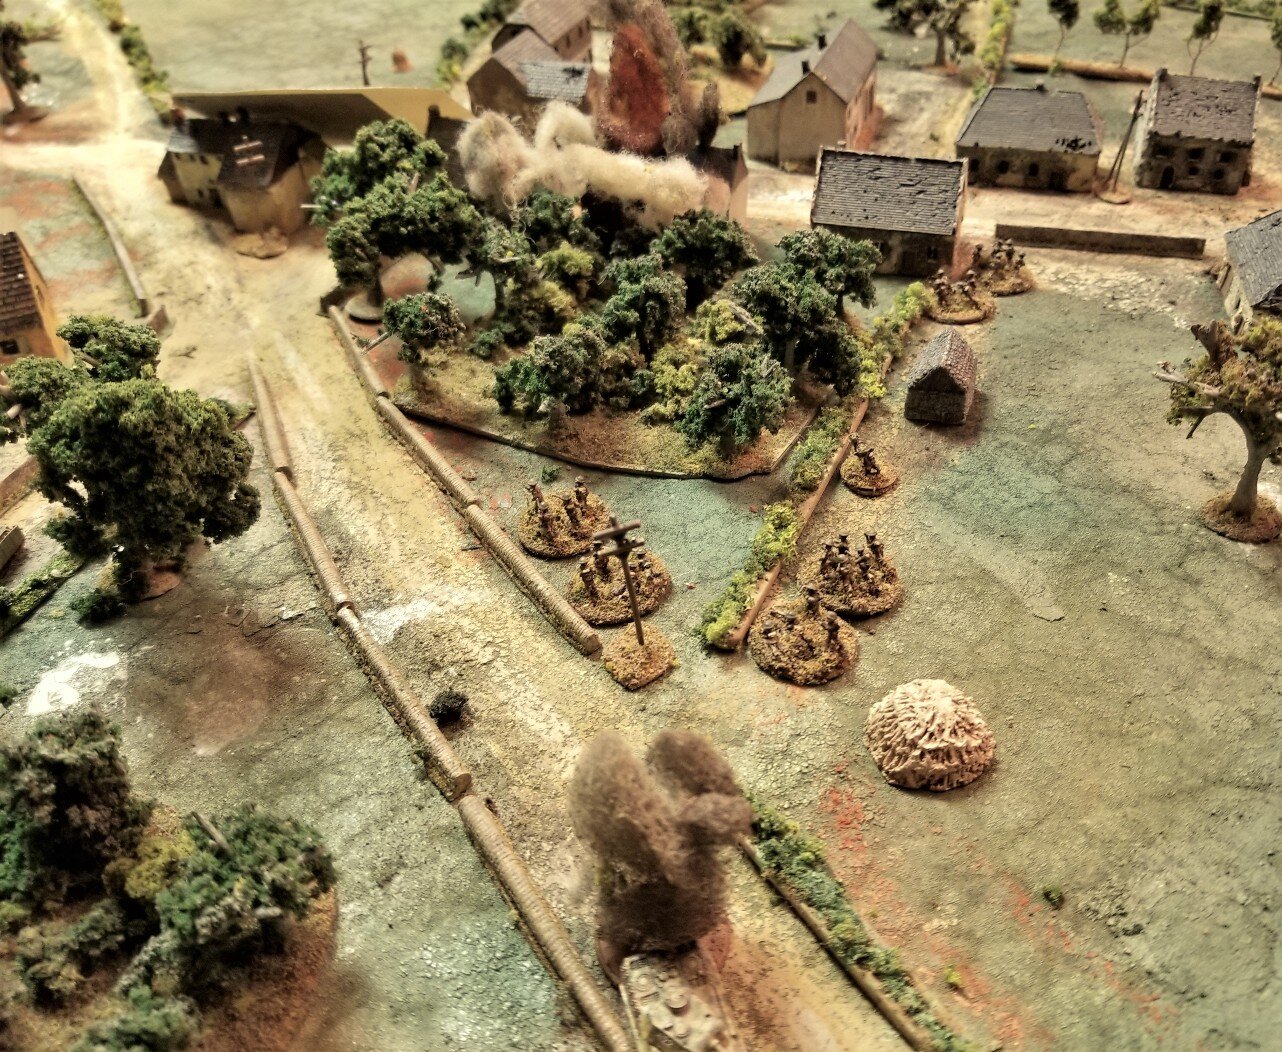
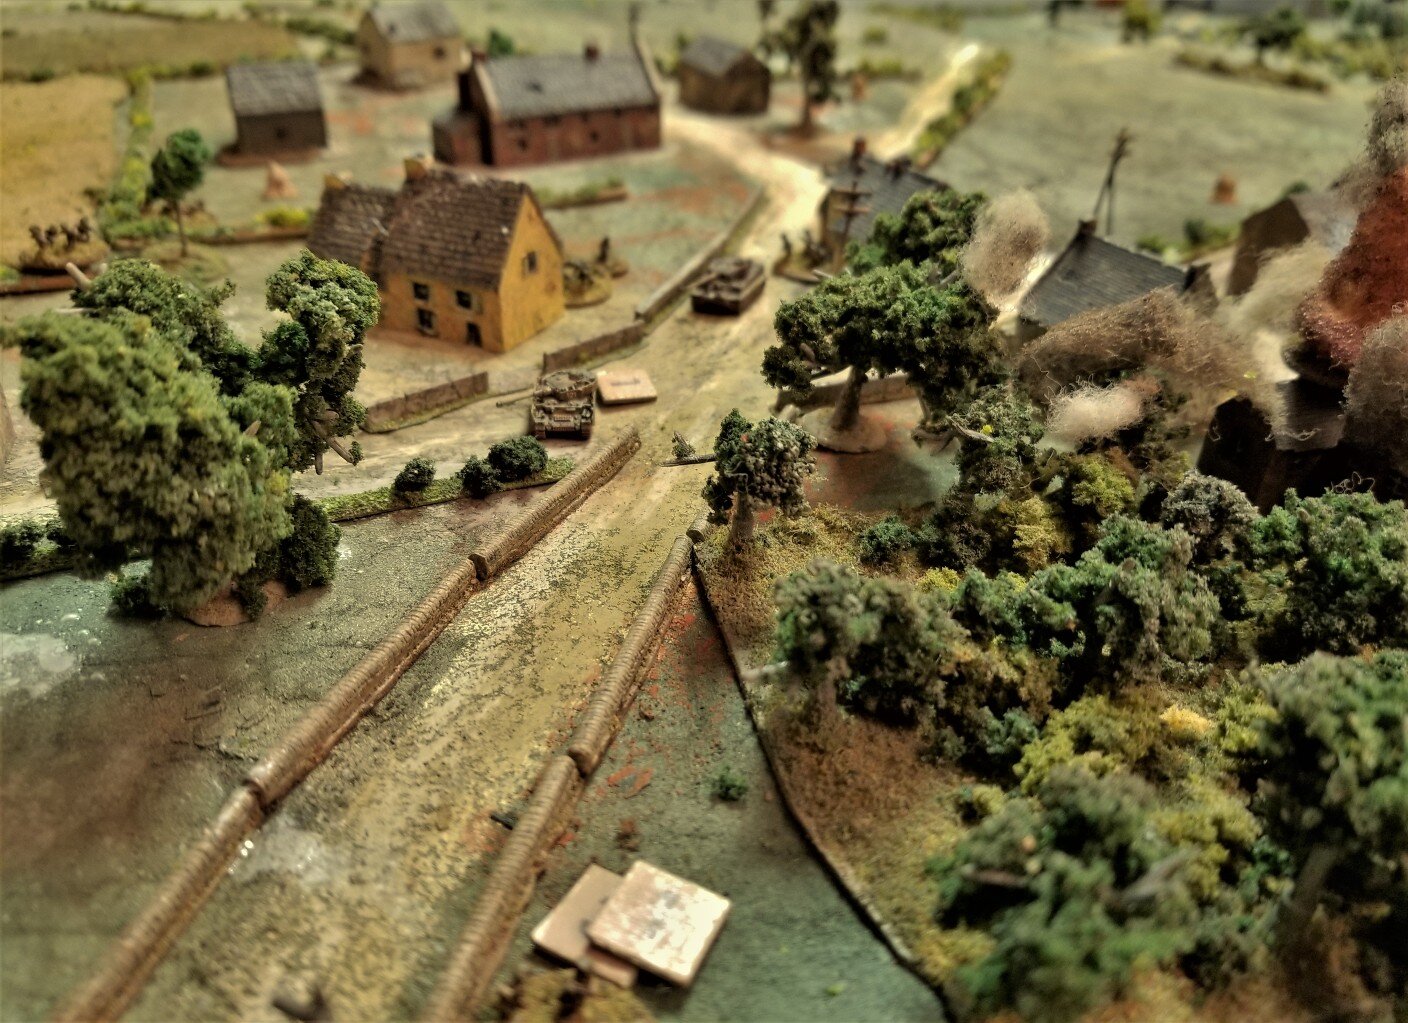
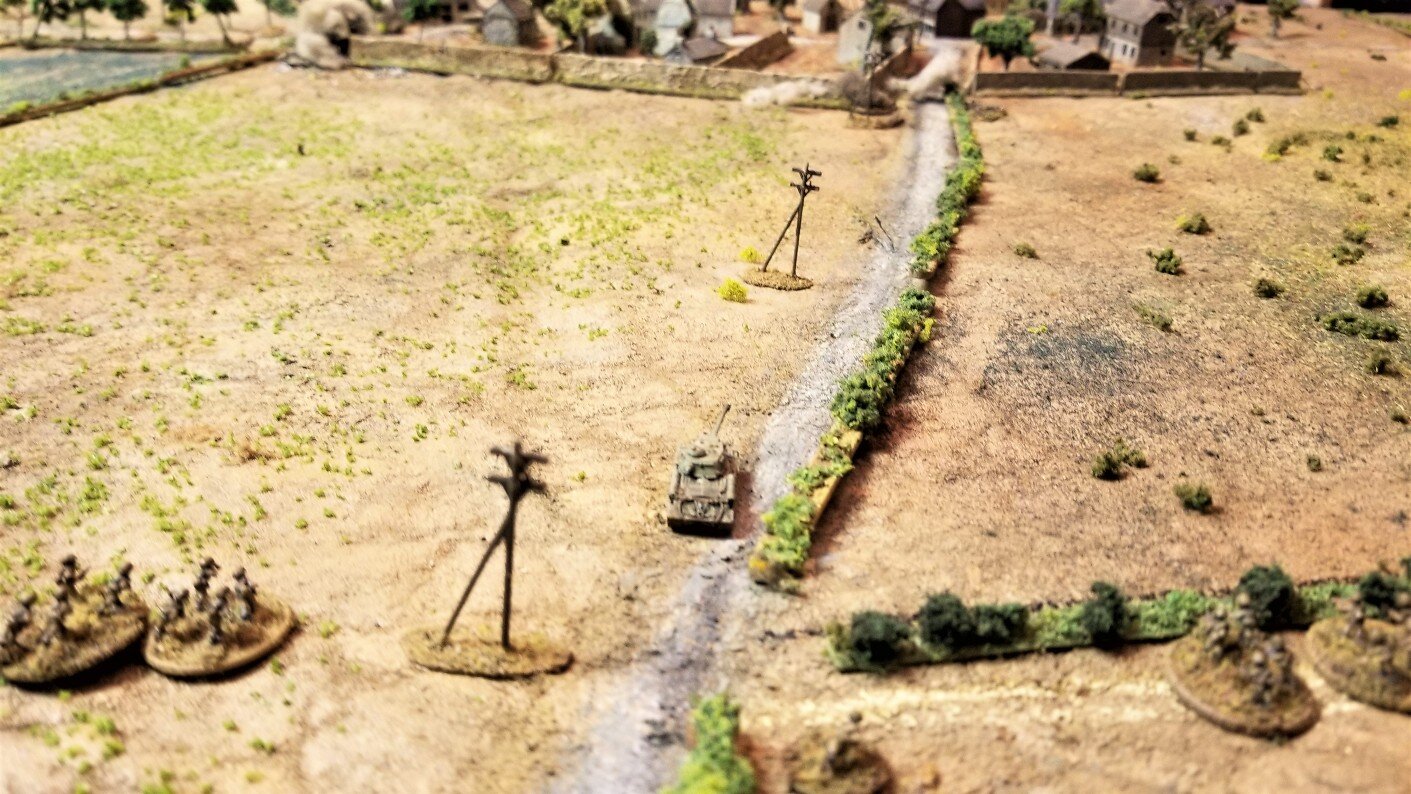
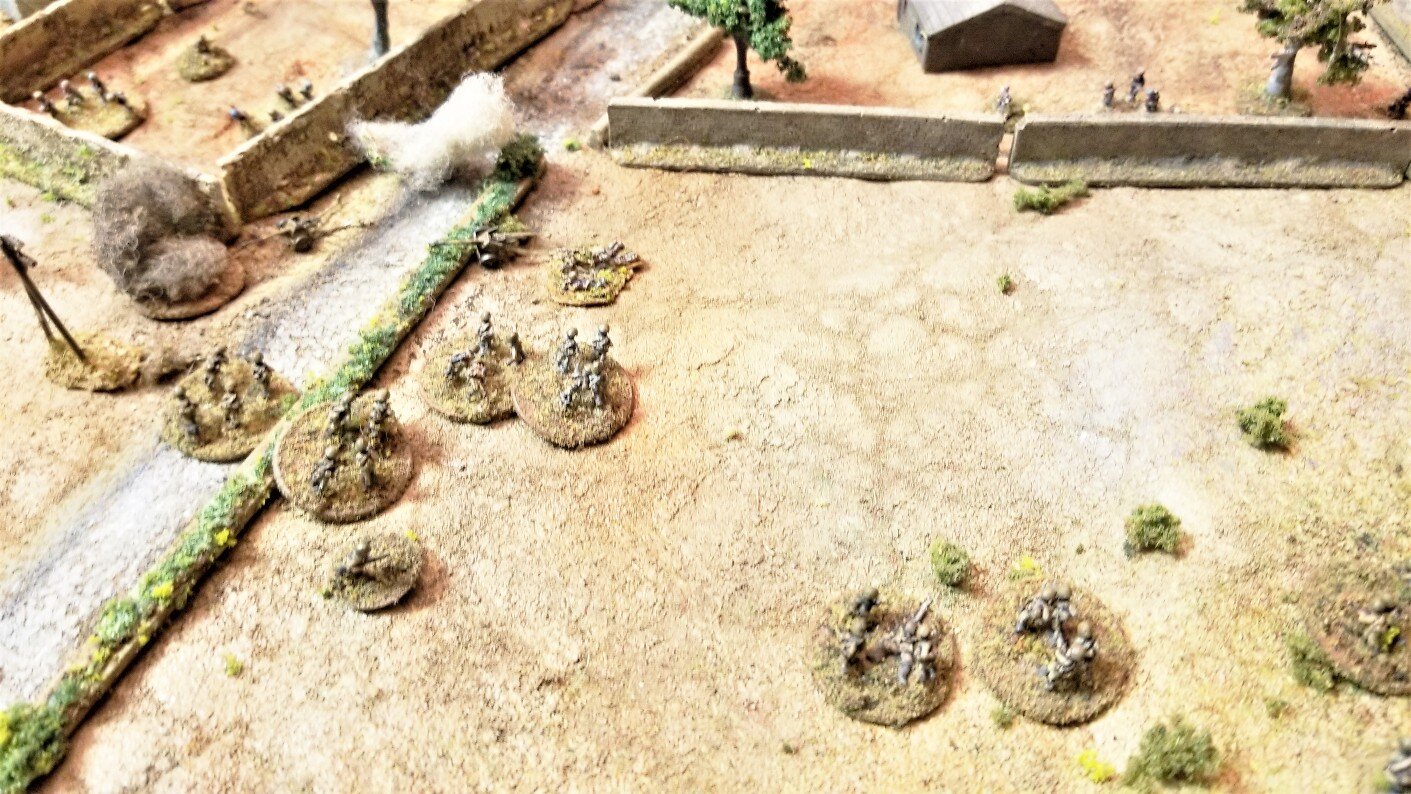
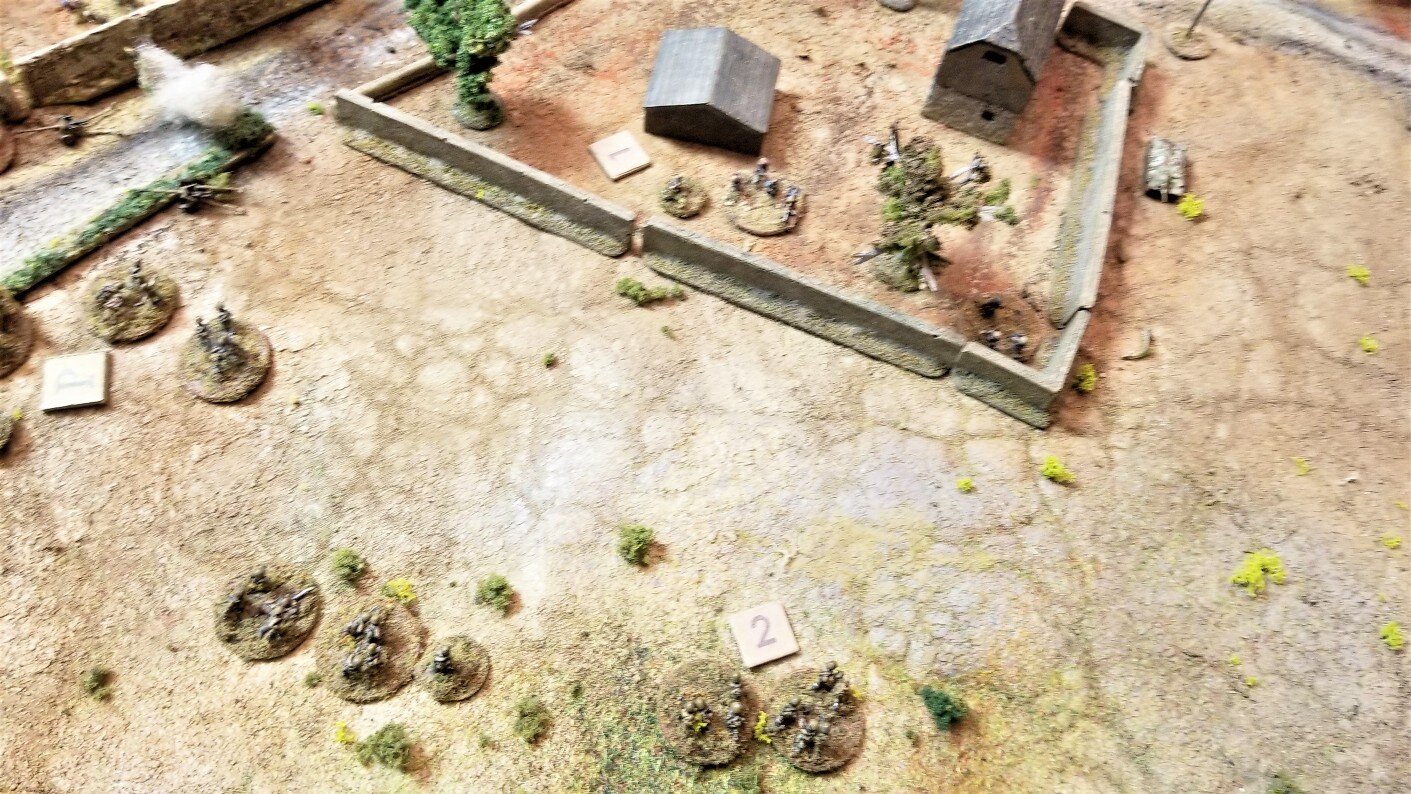
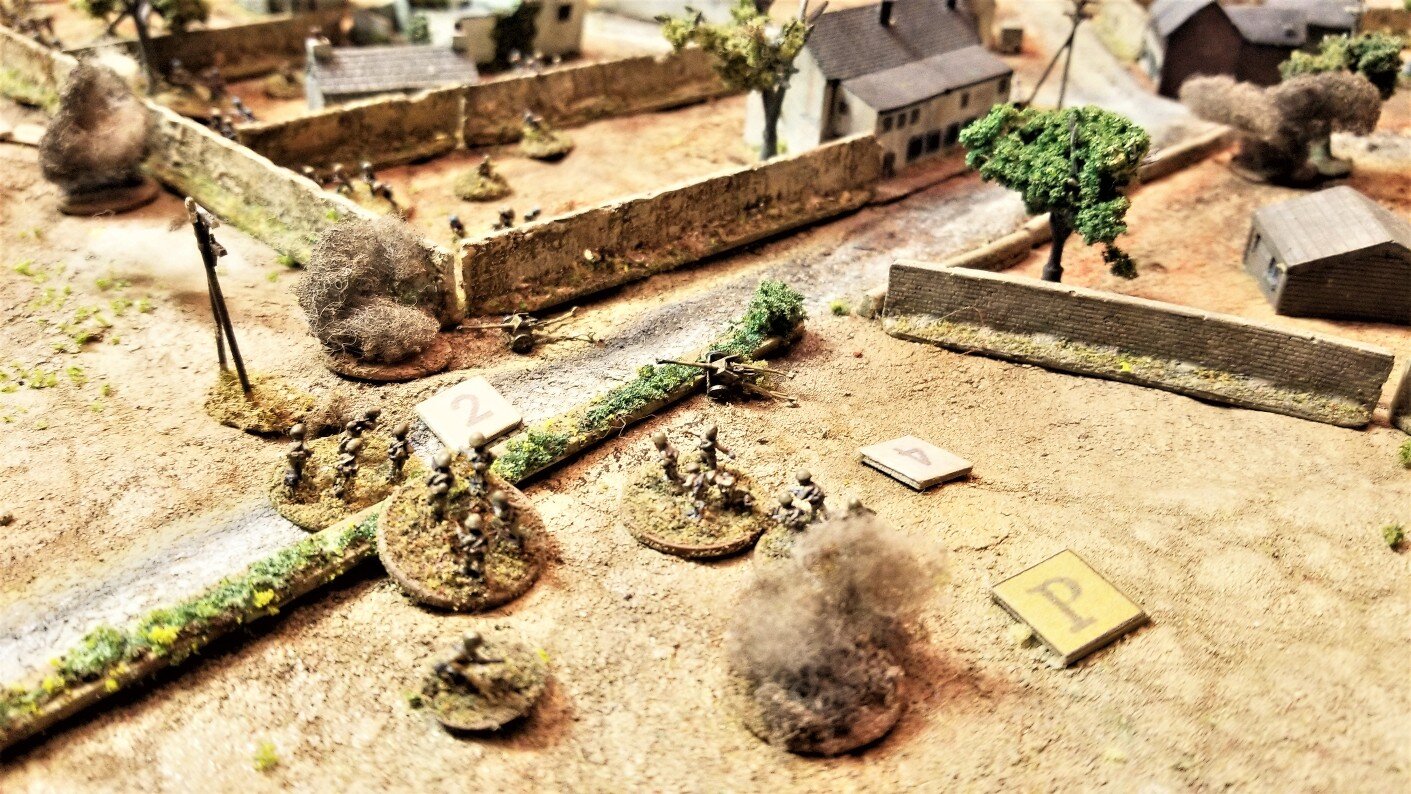
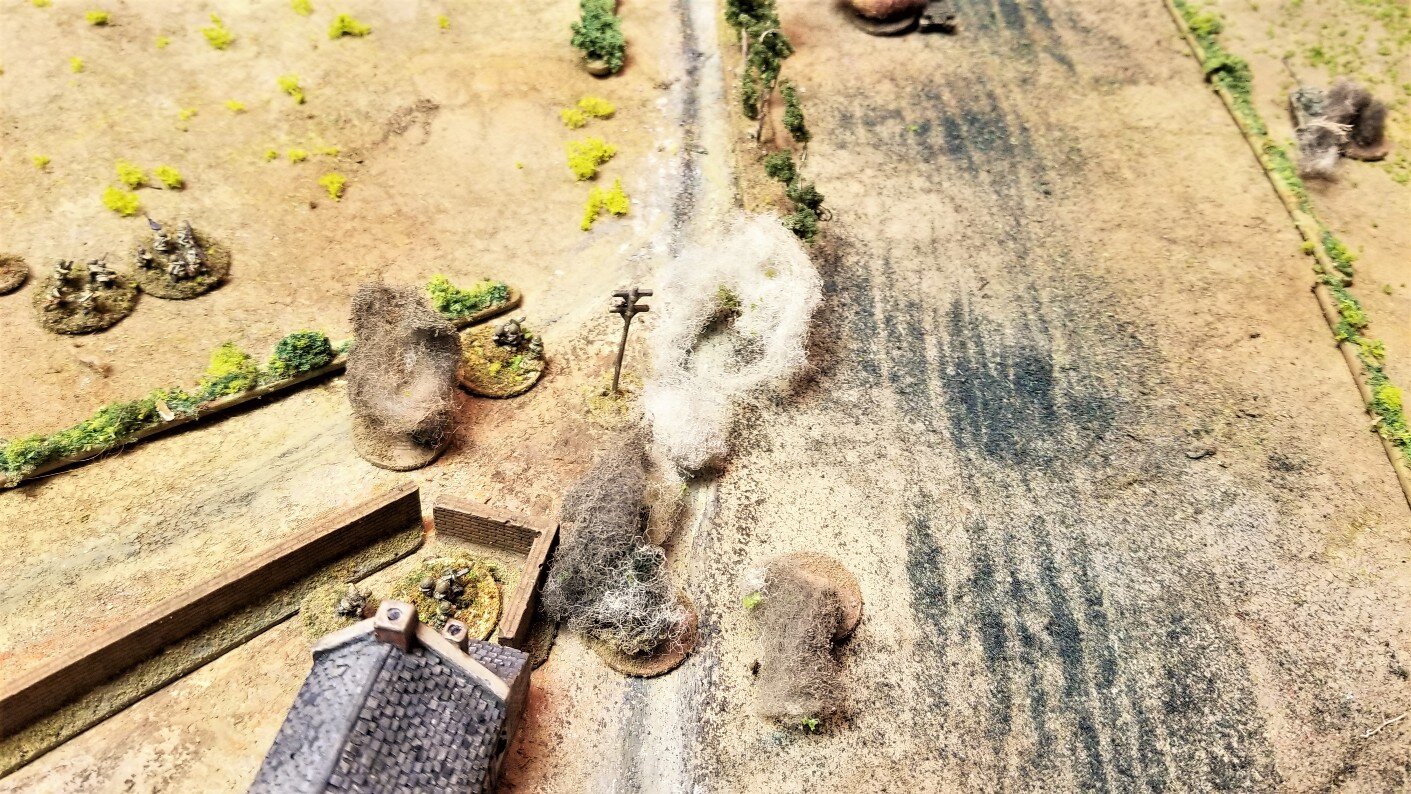
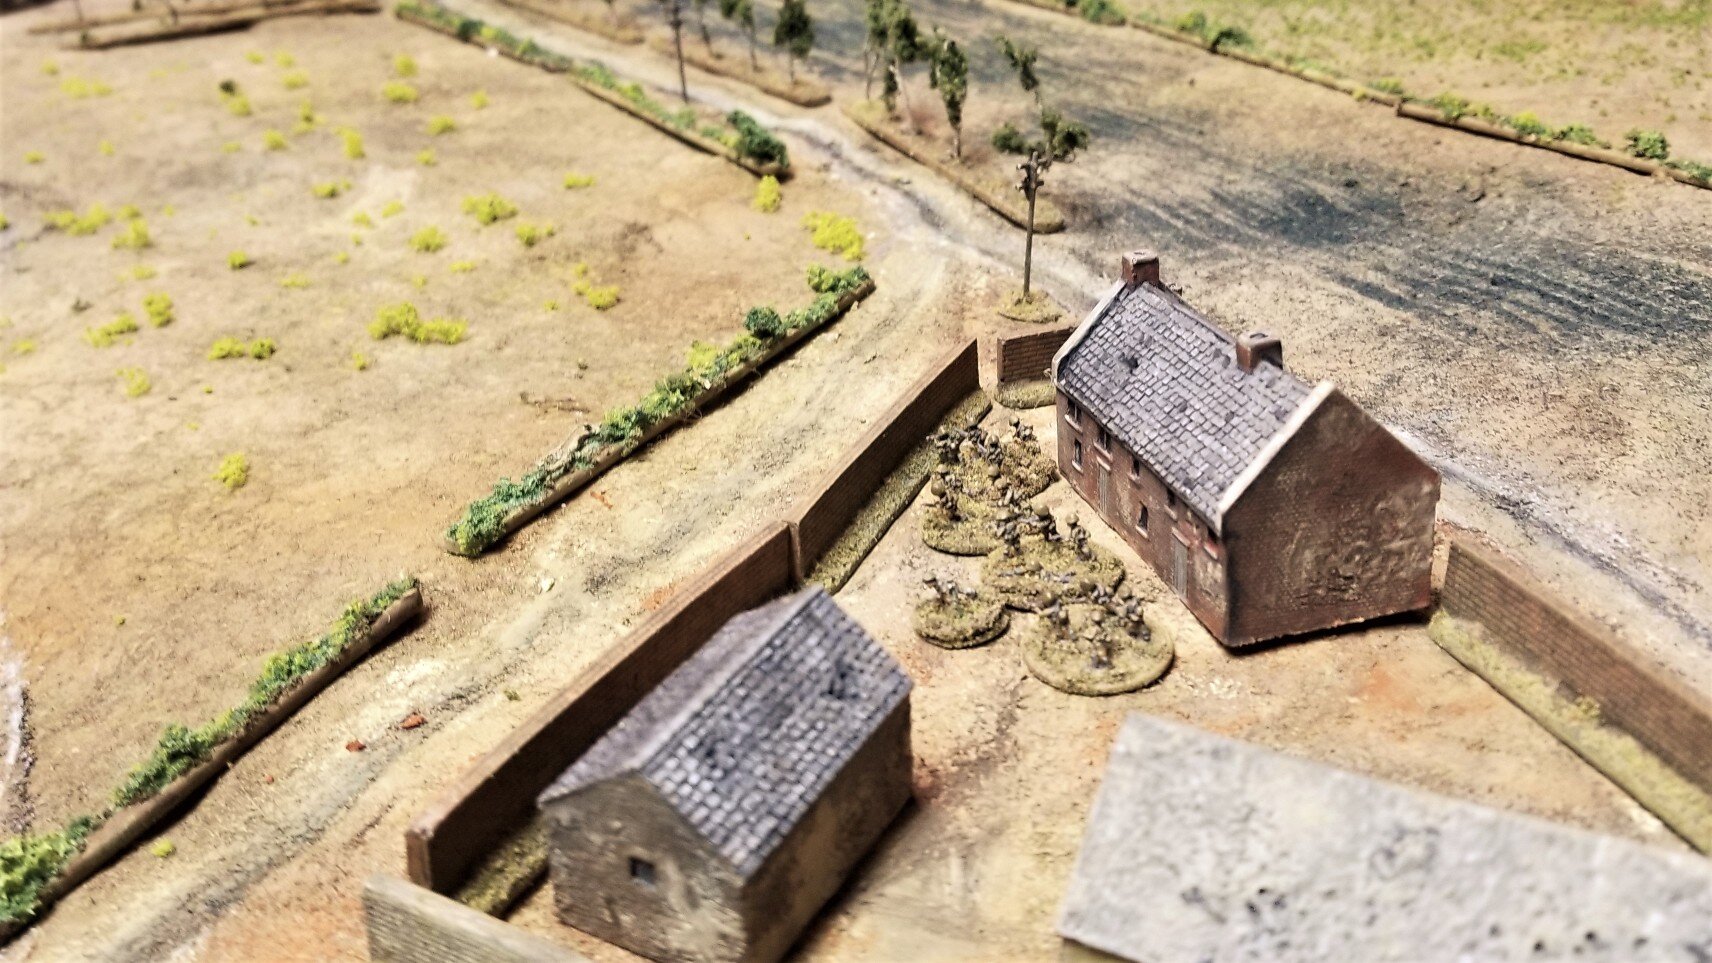
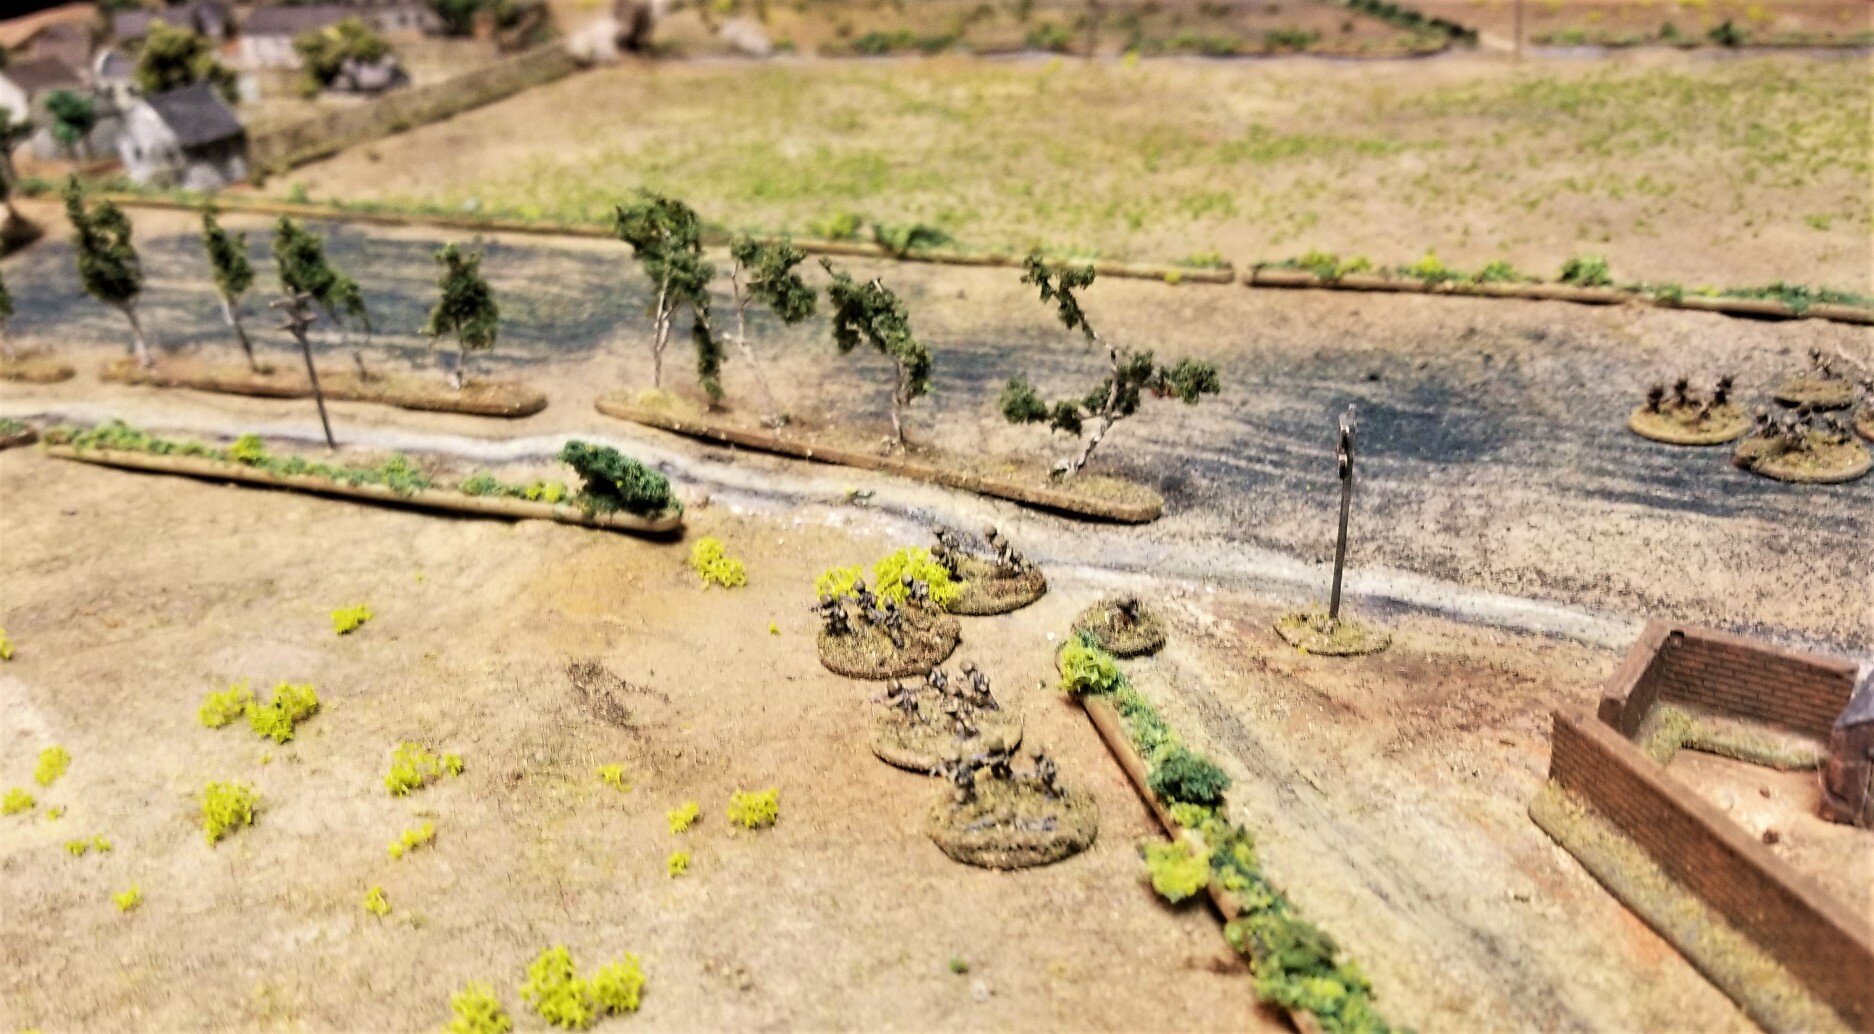
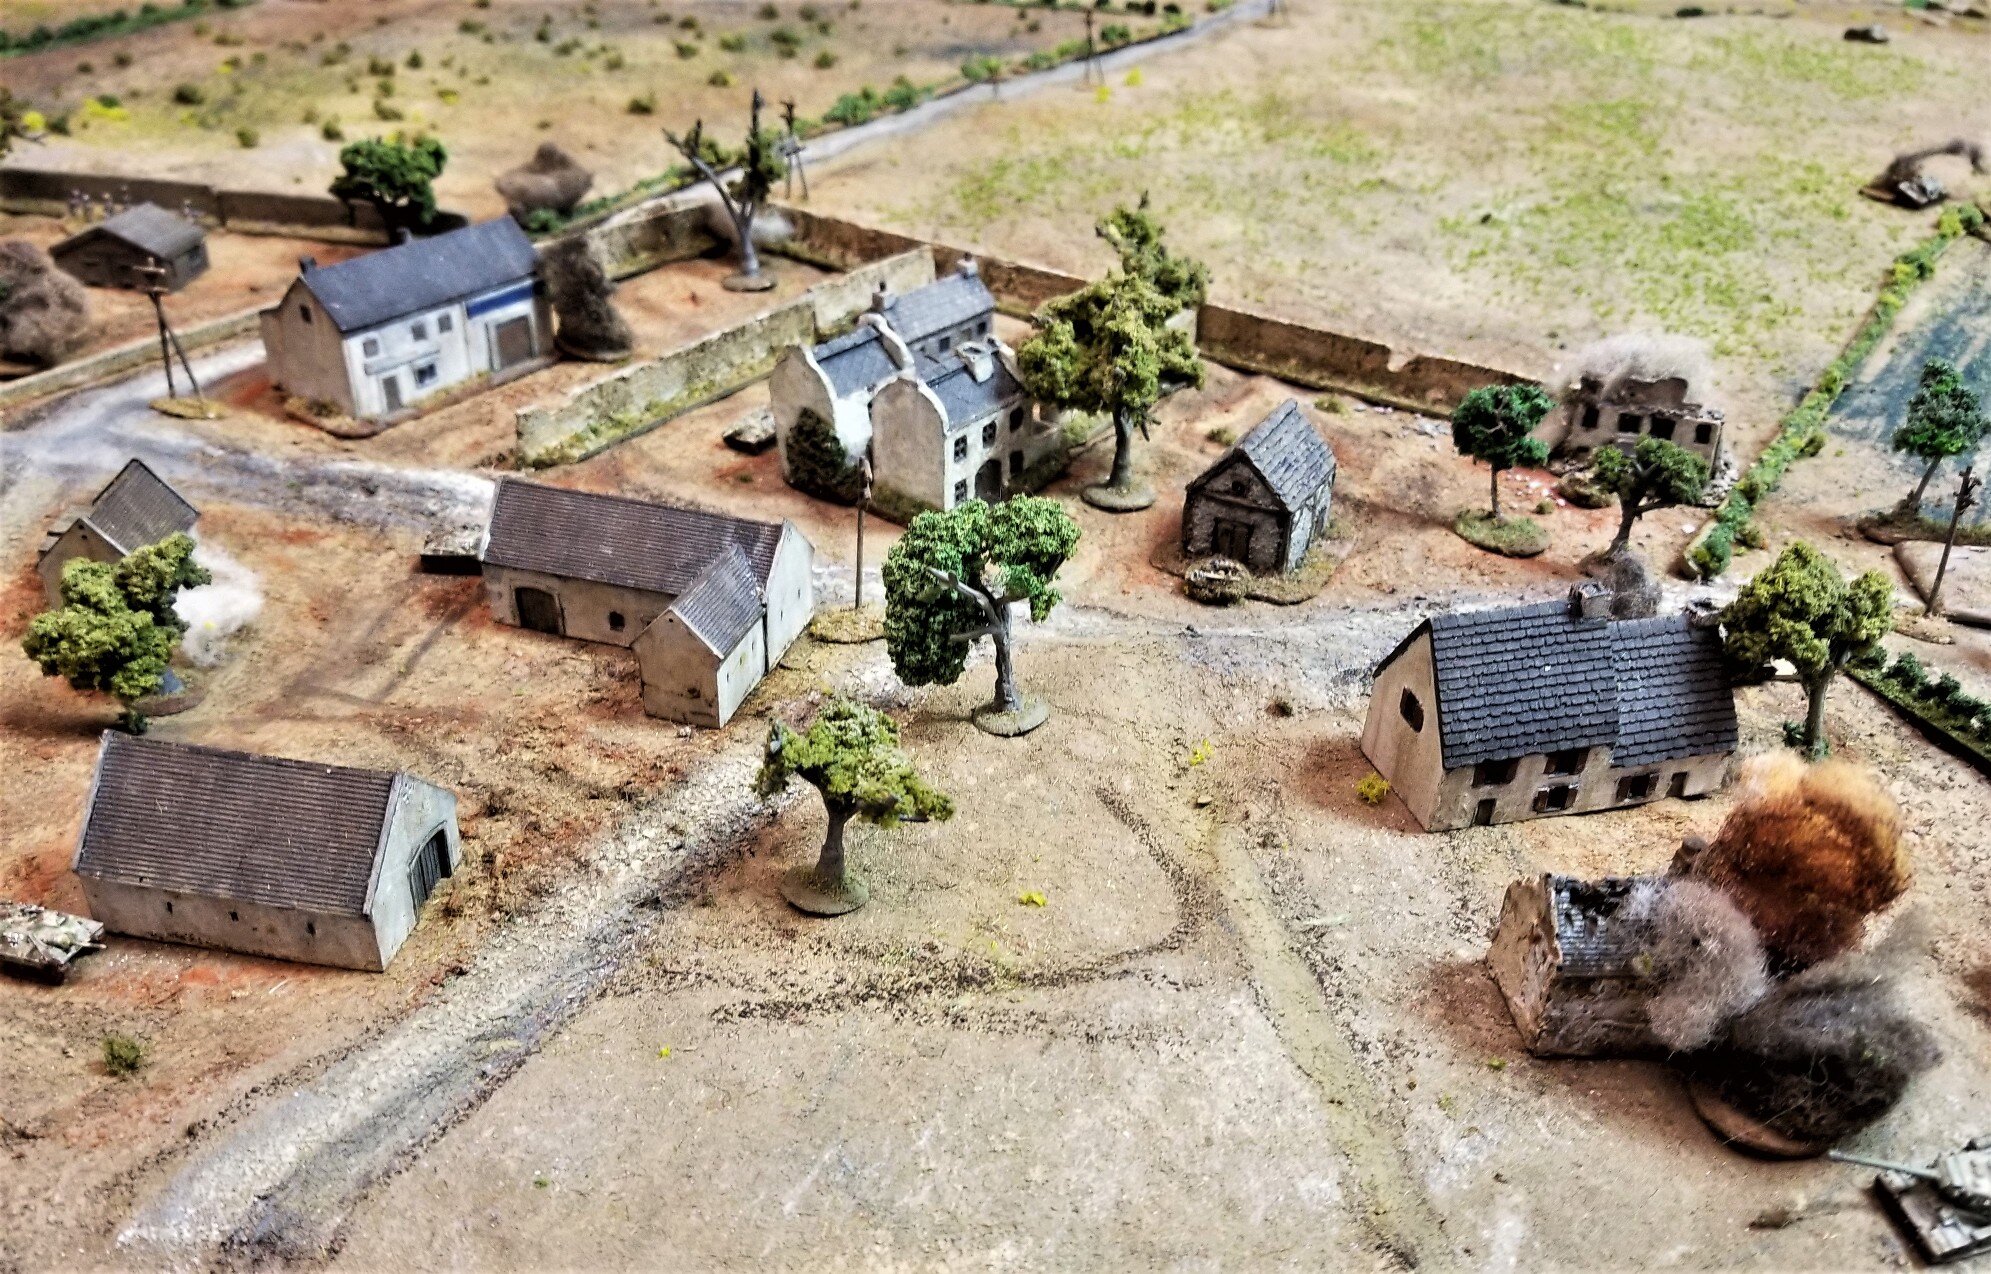
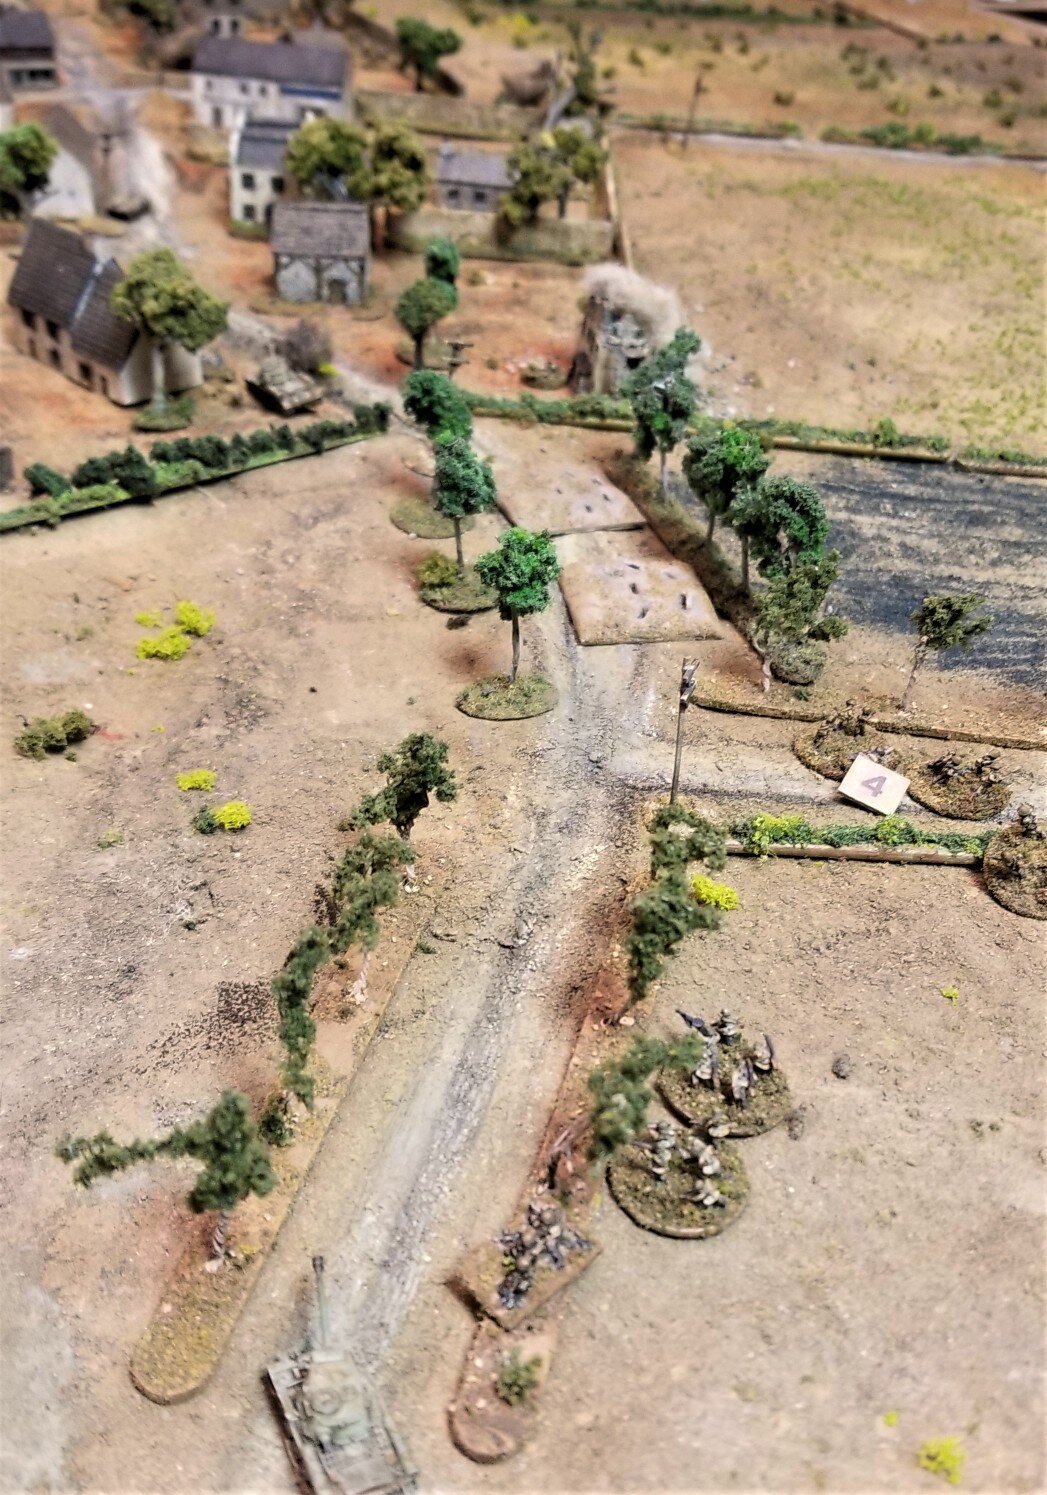
German Panzergrenadiers flood the Polish right flank and gain the cover of the woods. Red chips equals shock, yellow equals suppressed, white equals activated that turn.
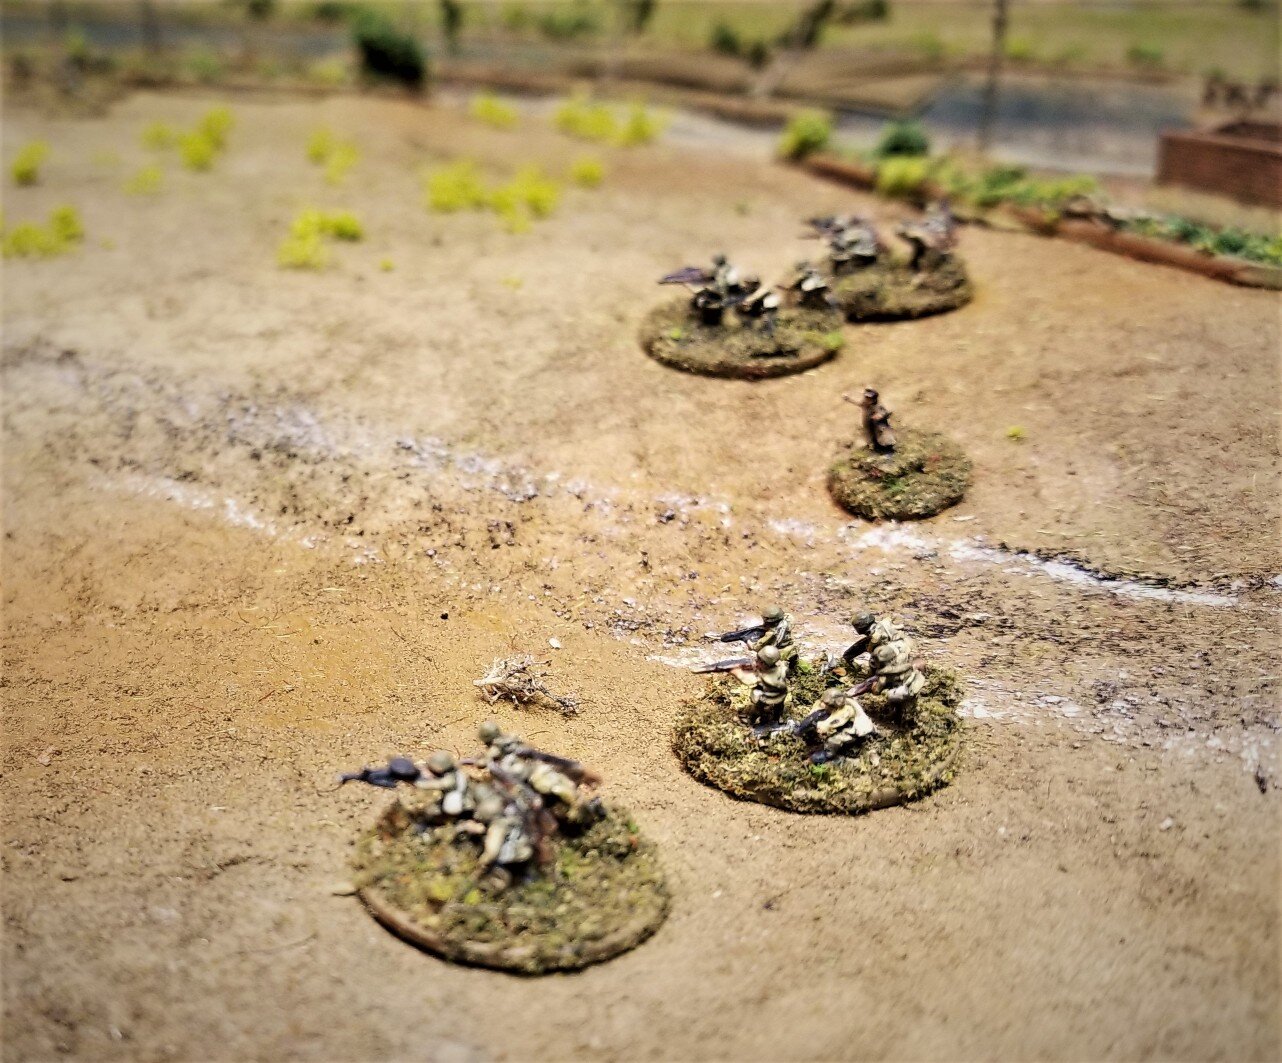
Two Polish squads try to hold back the Panzergrenadiers but there are too many of them.
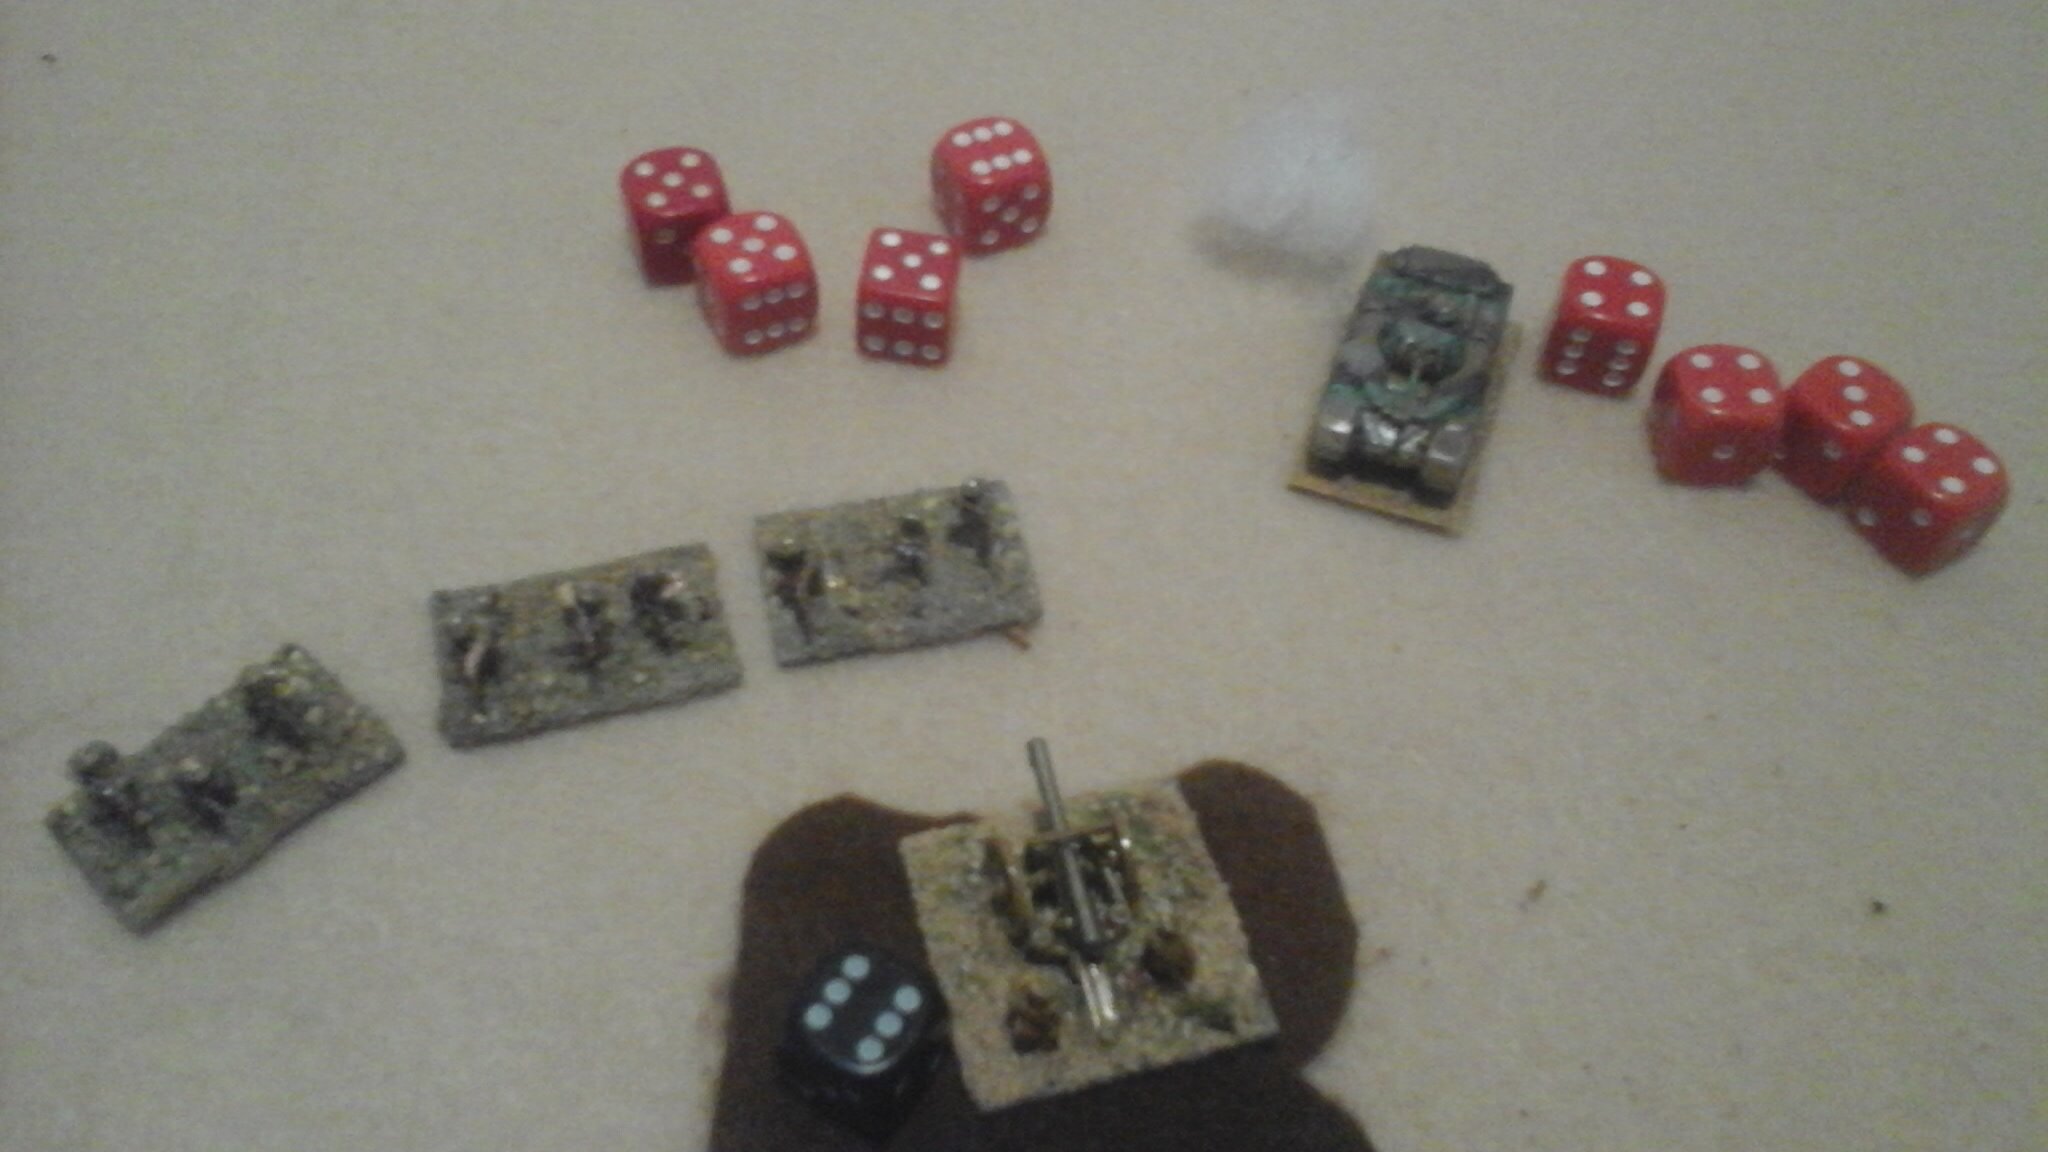
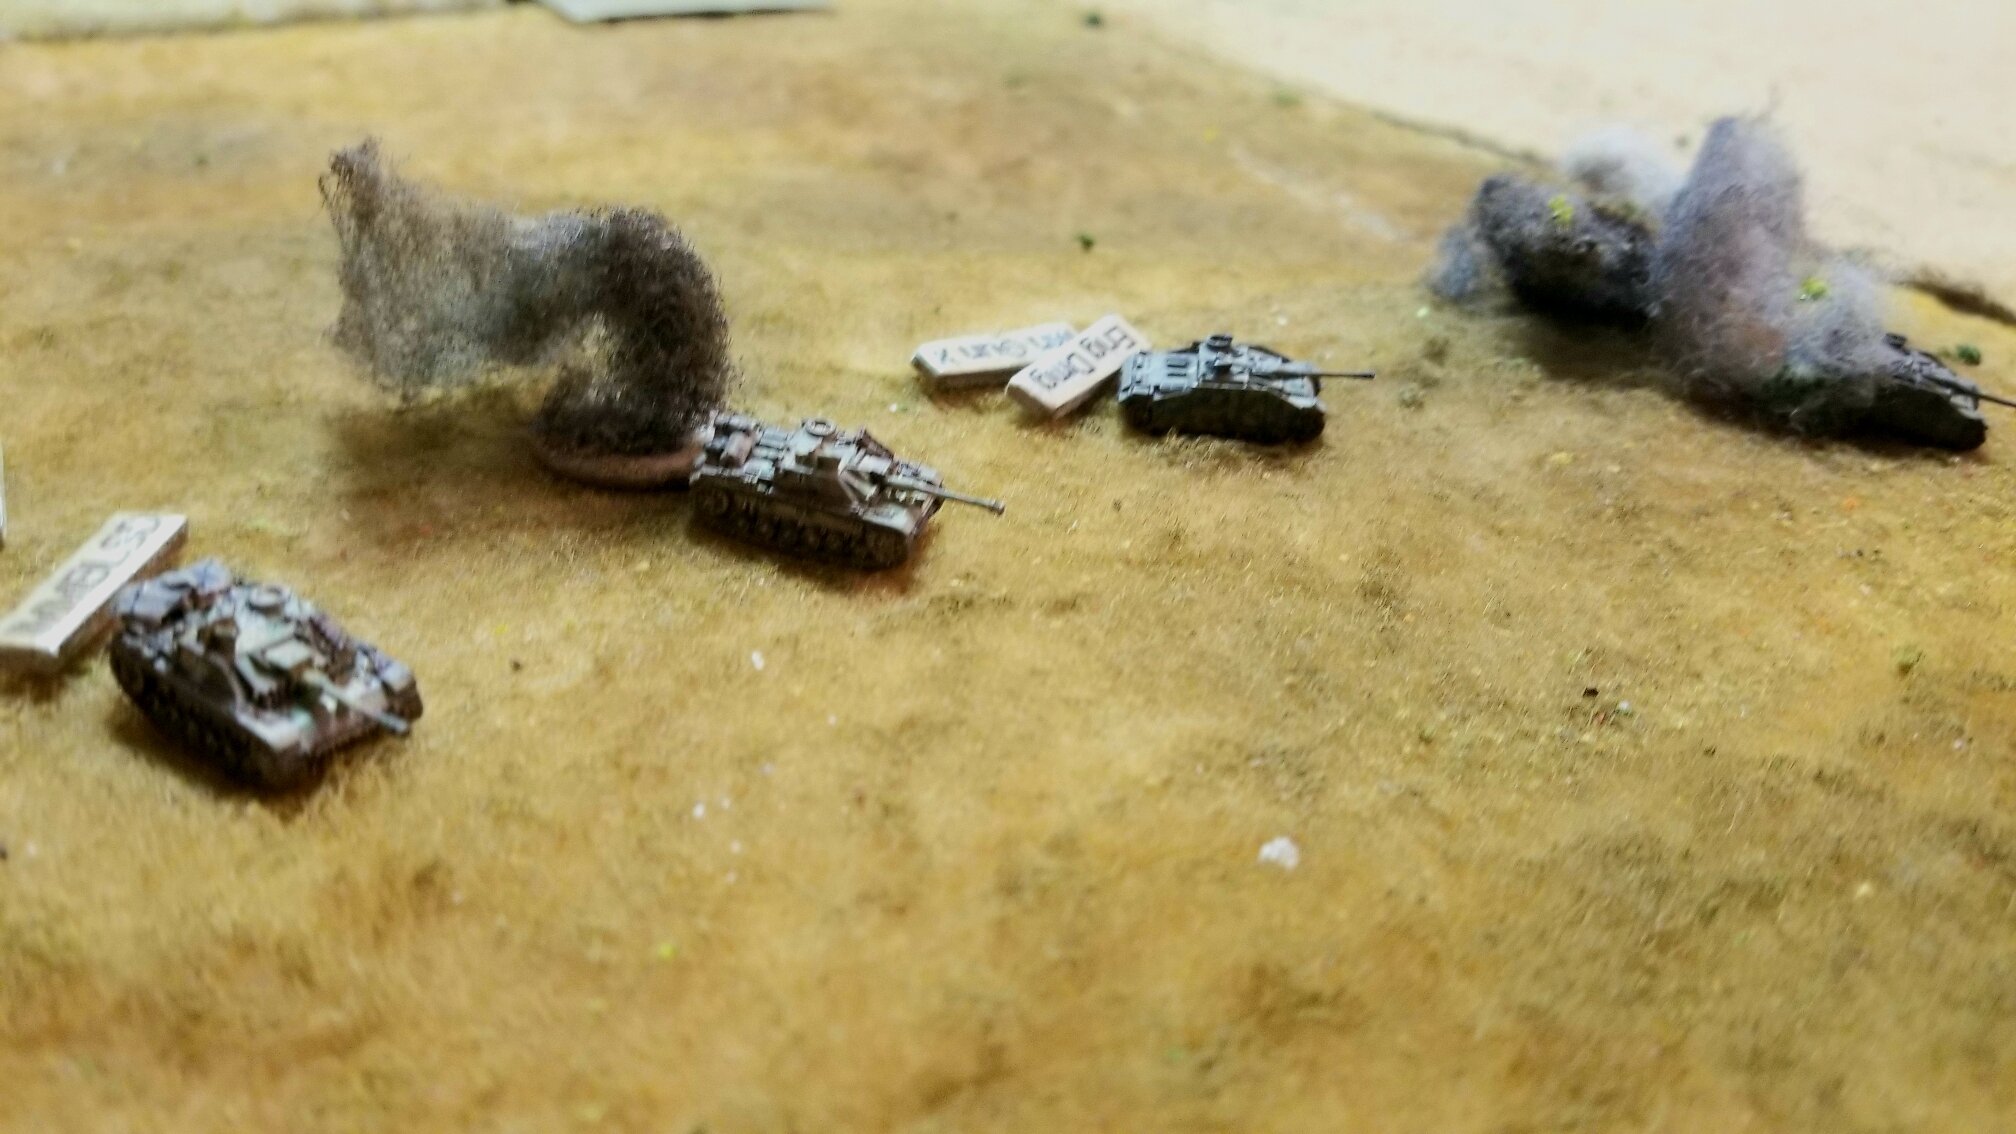
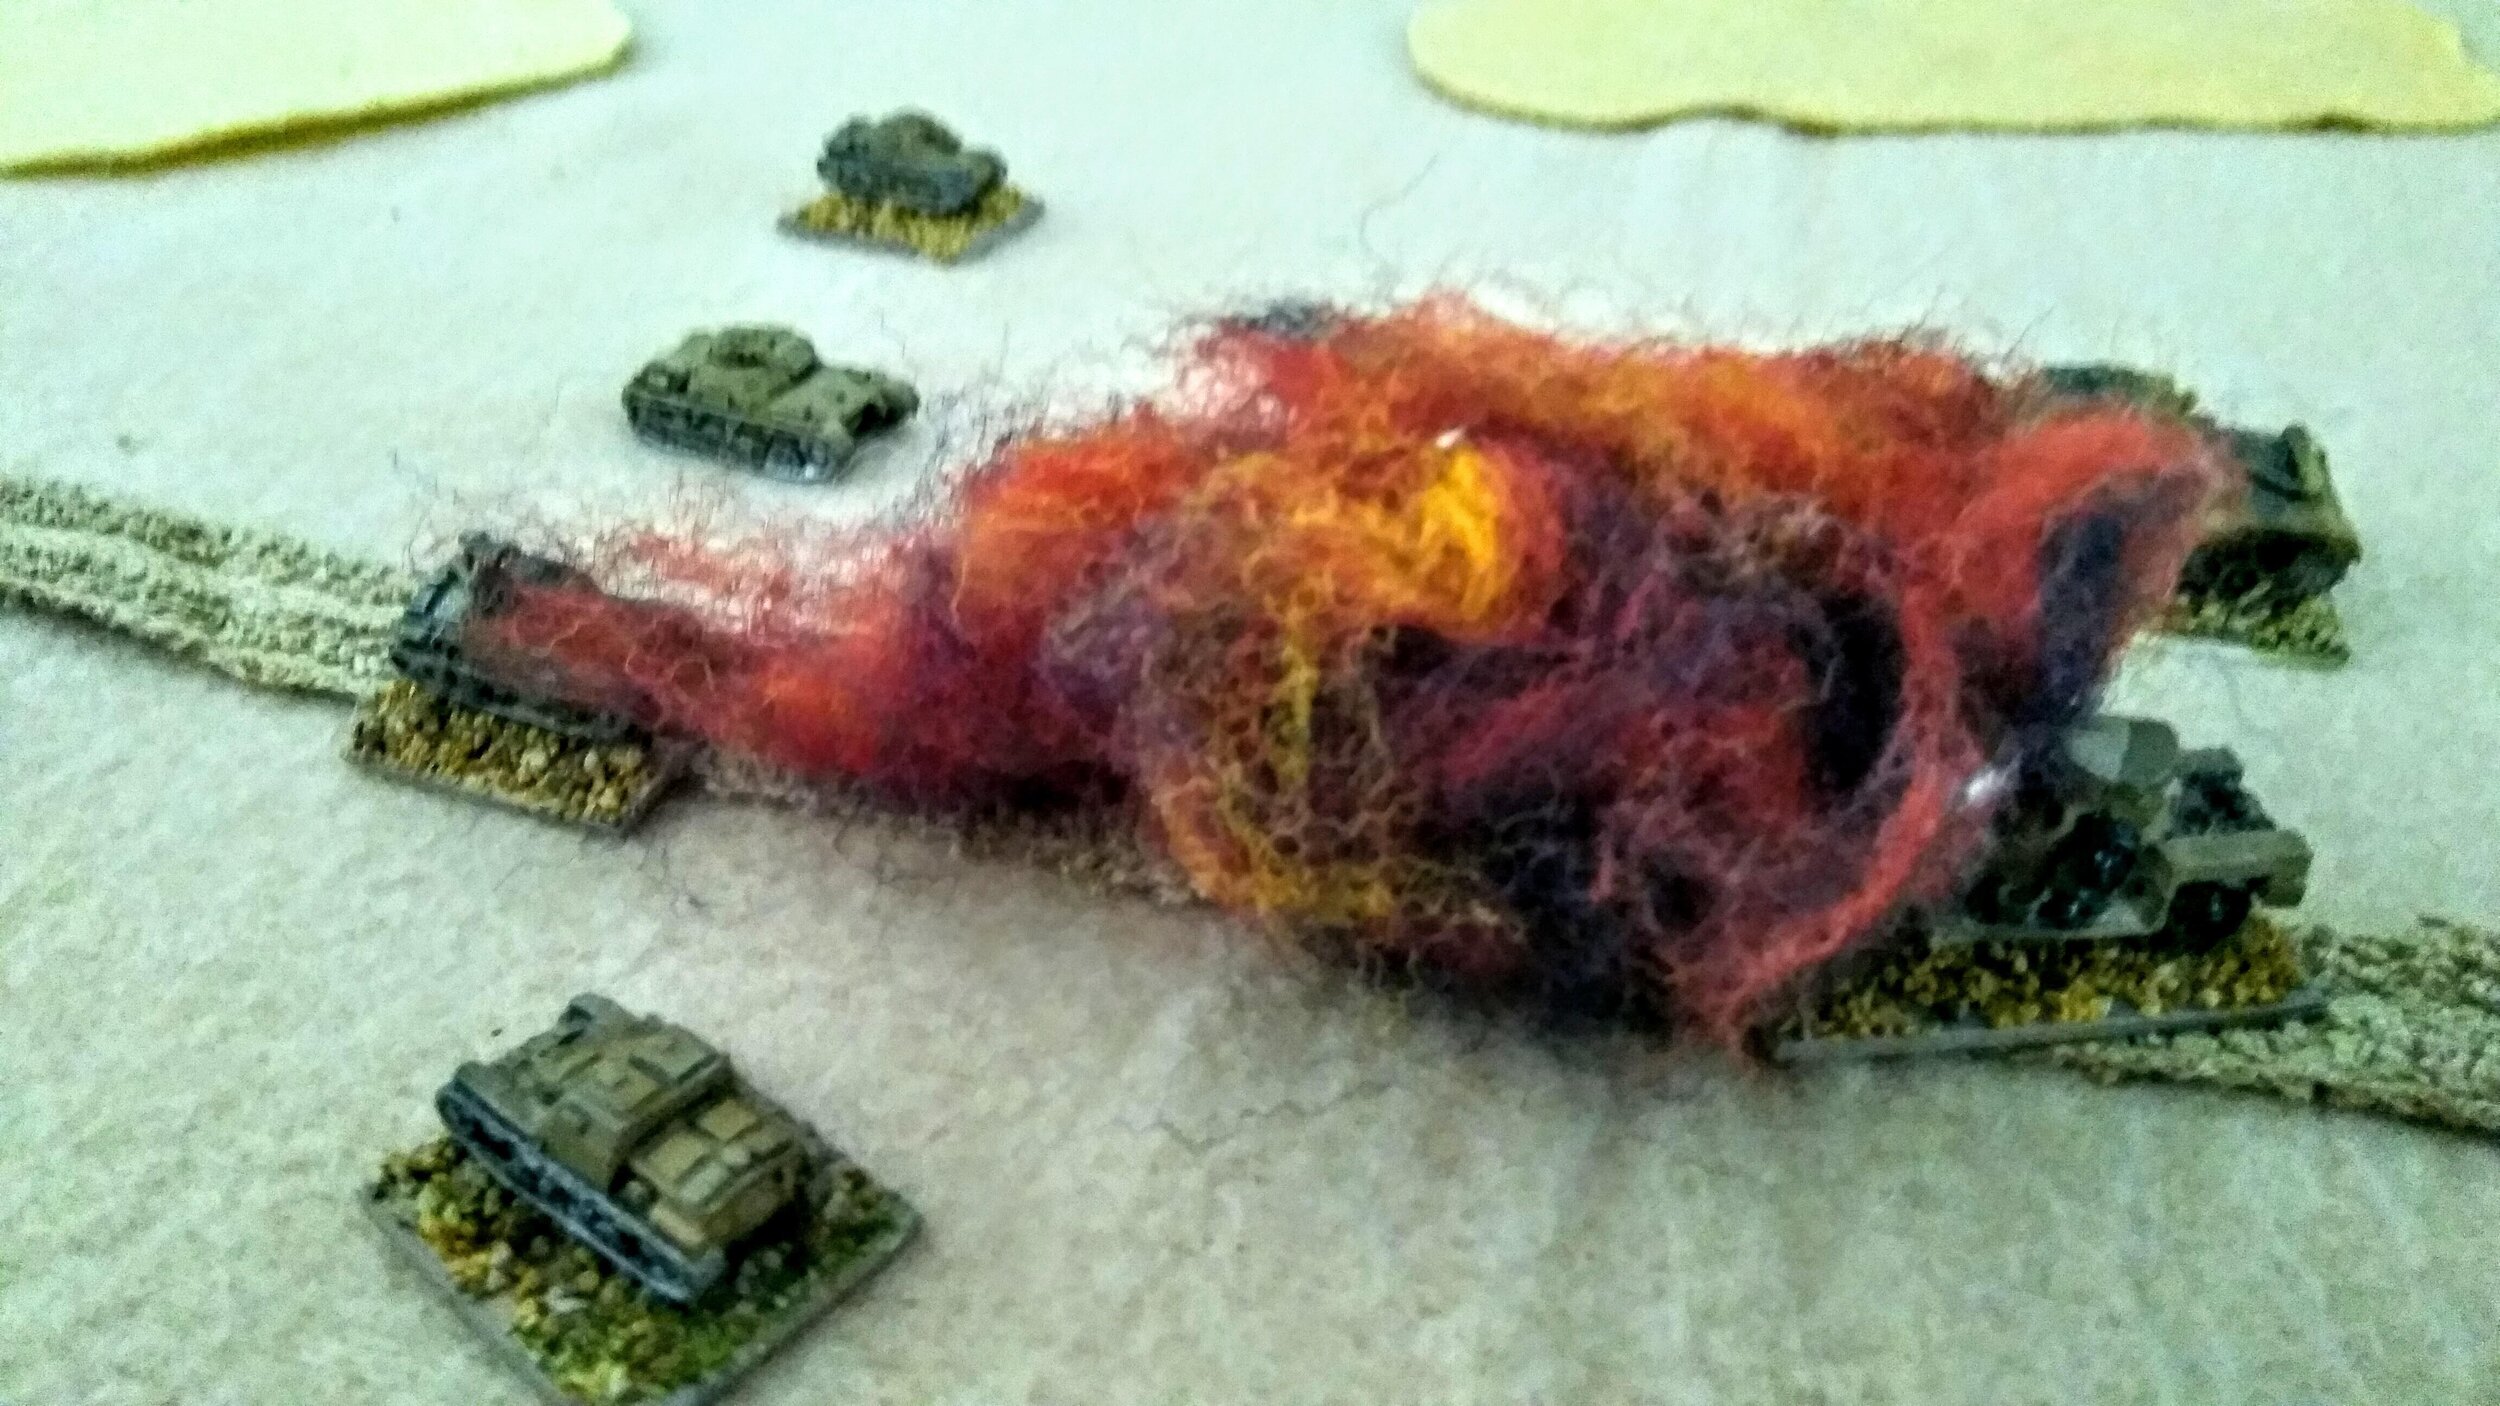
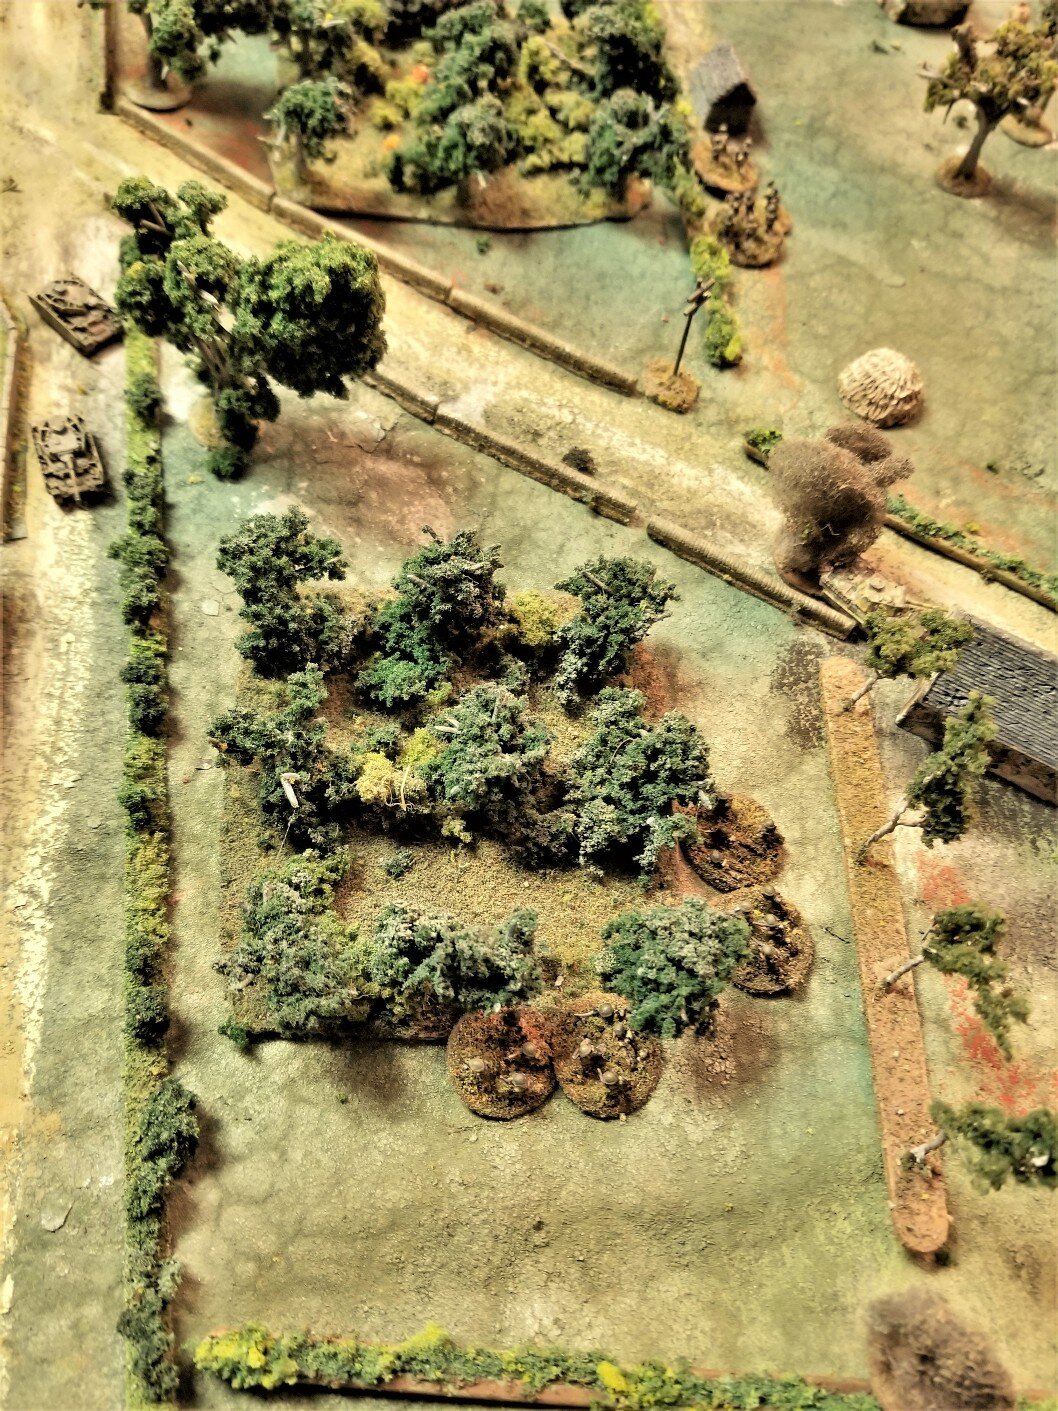
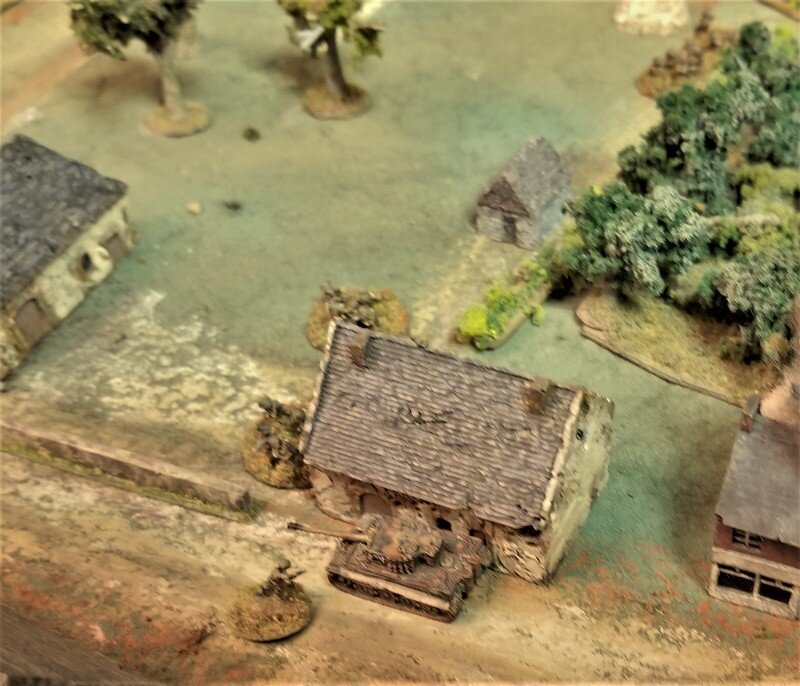
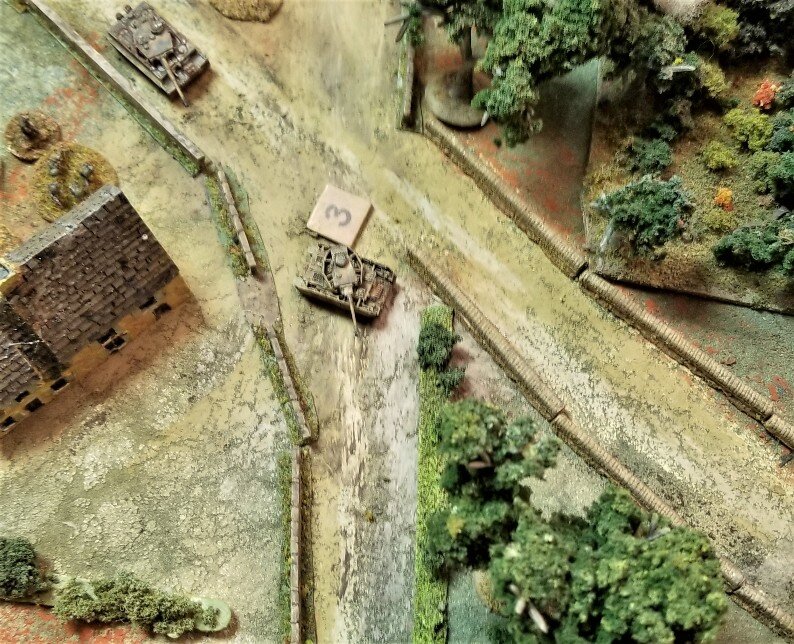
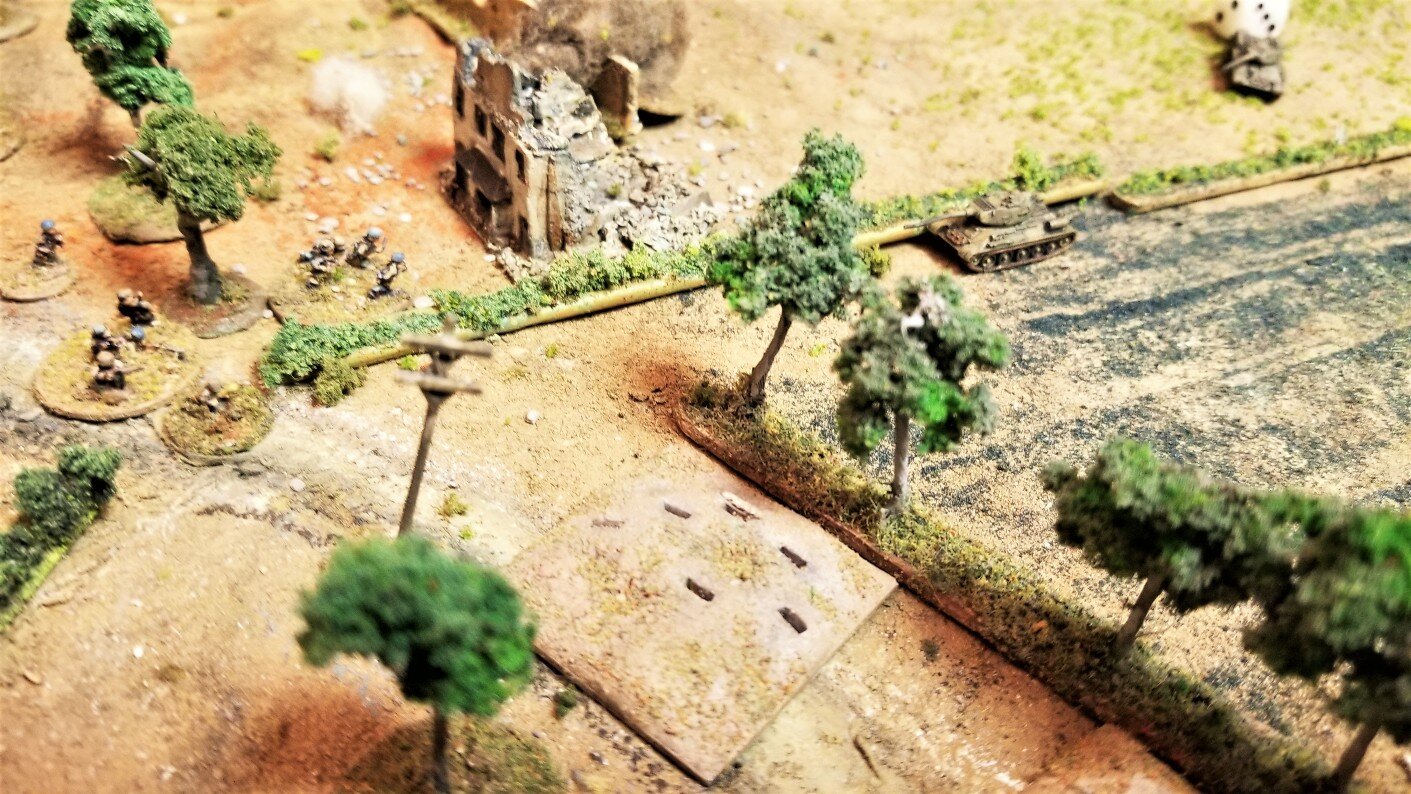
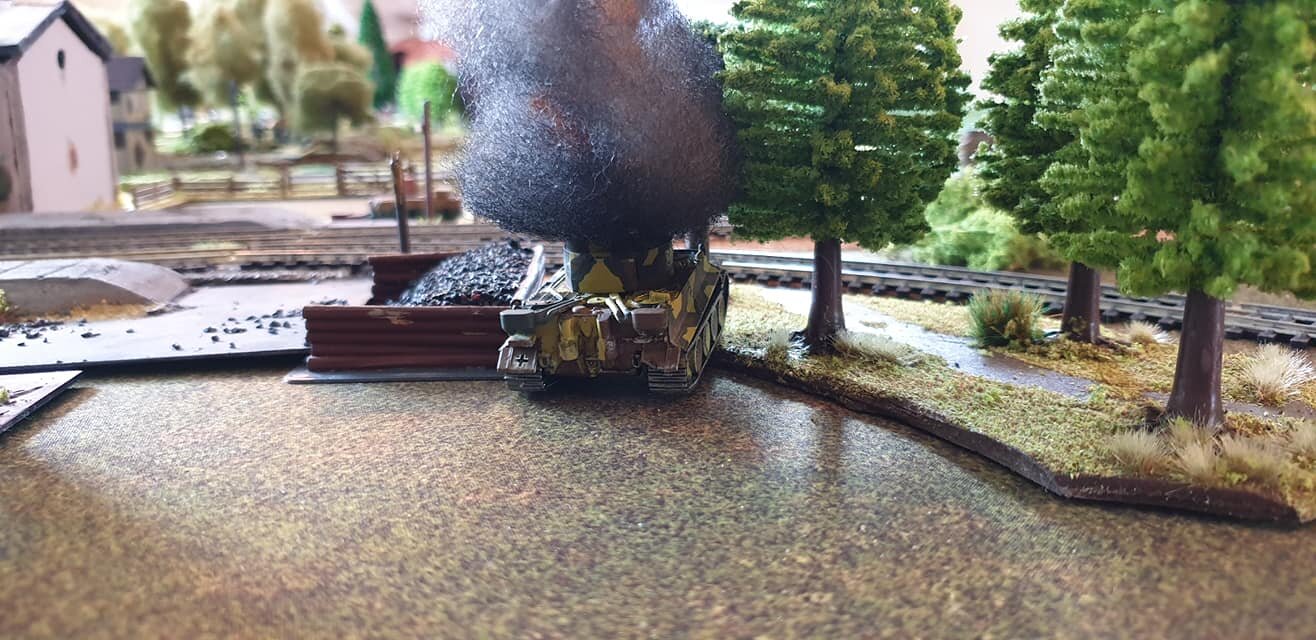
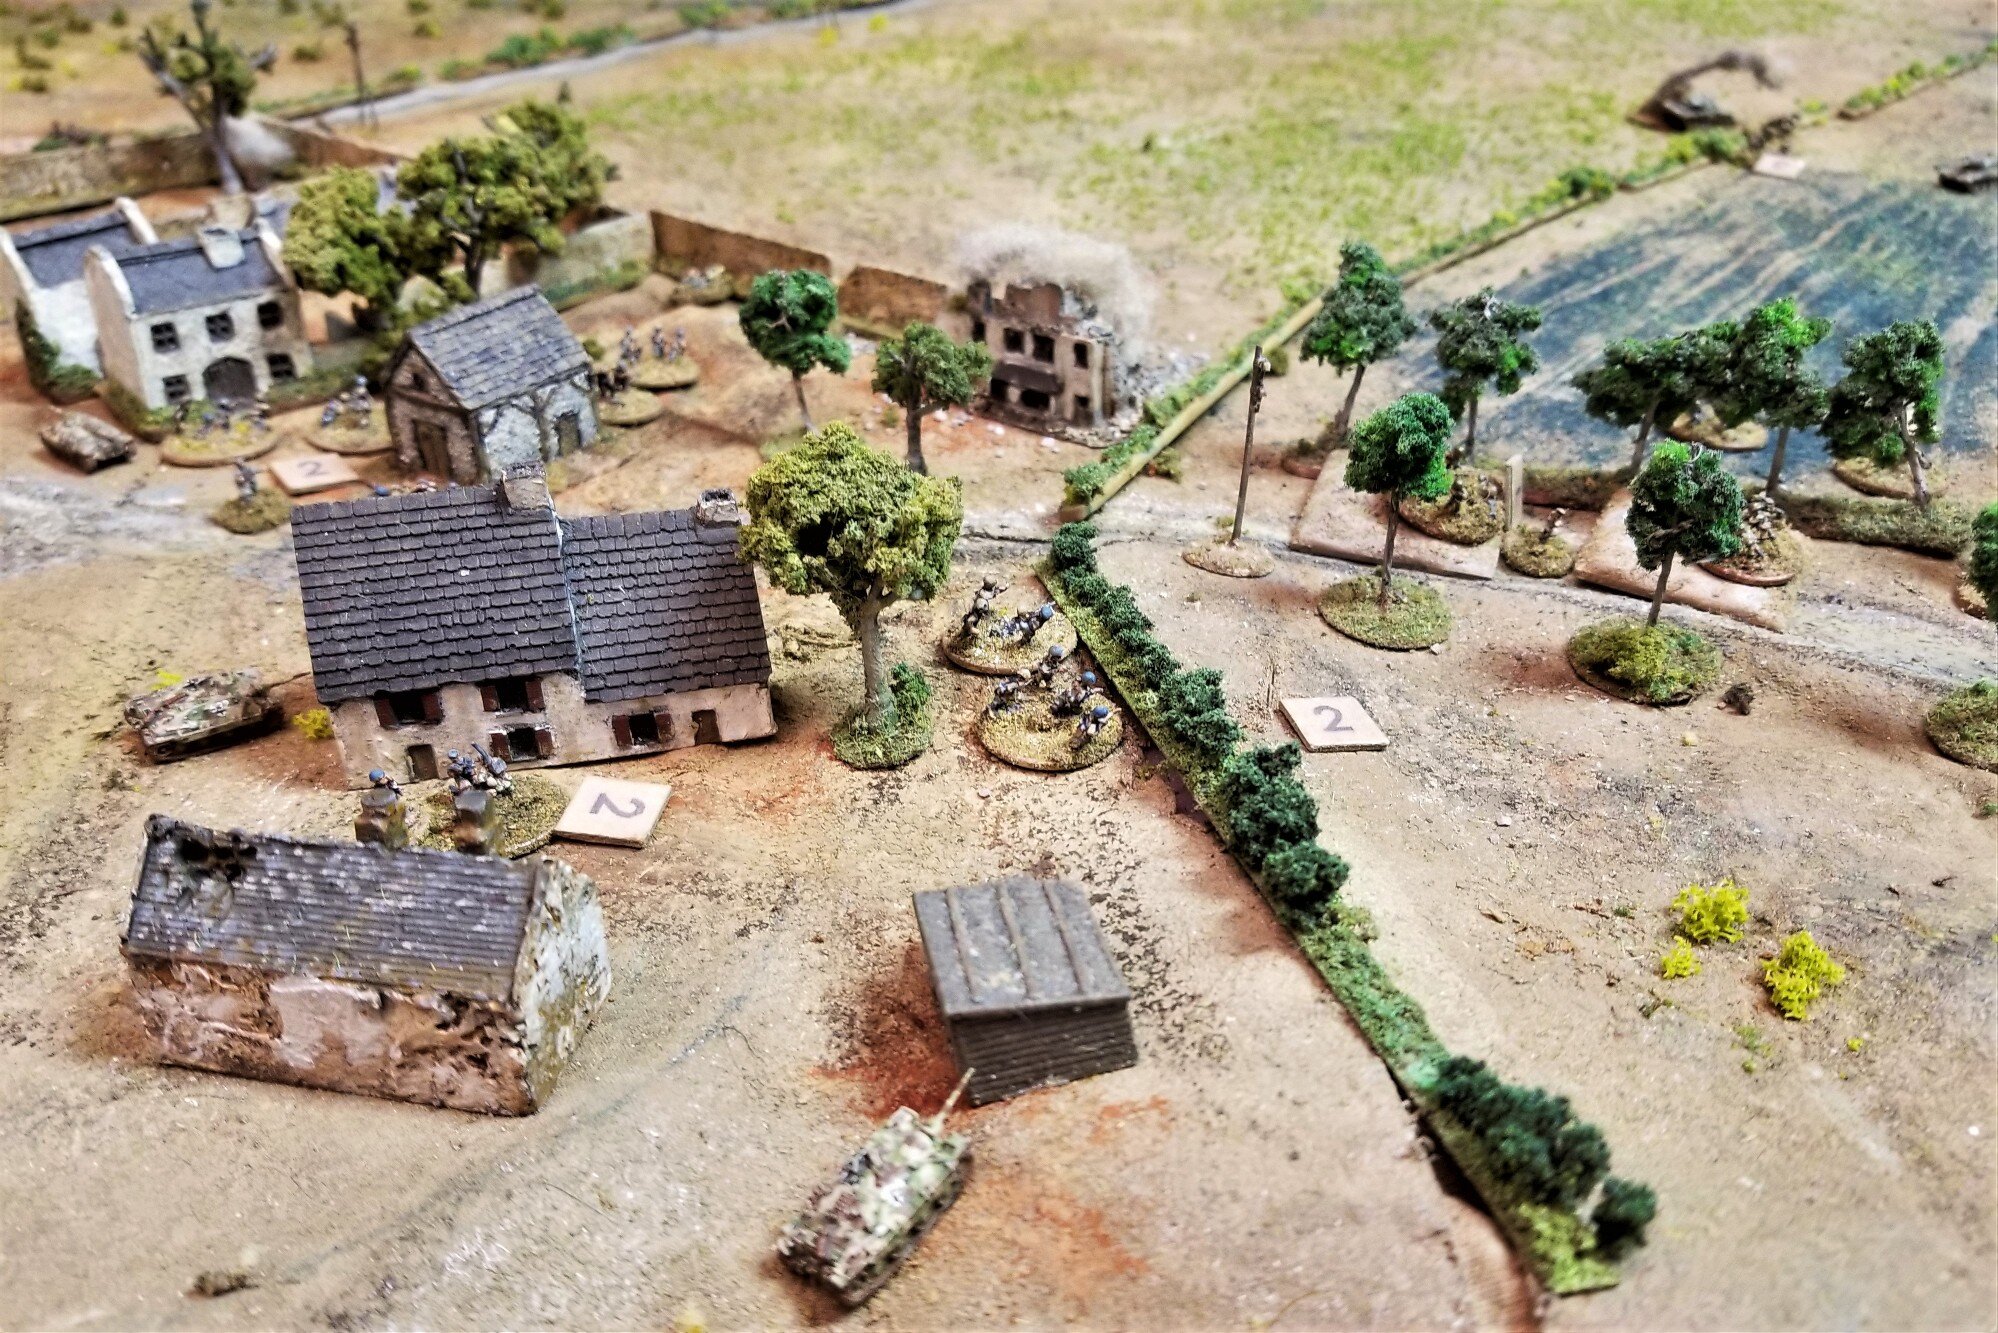
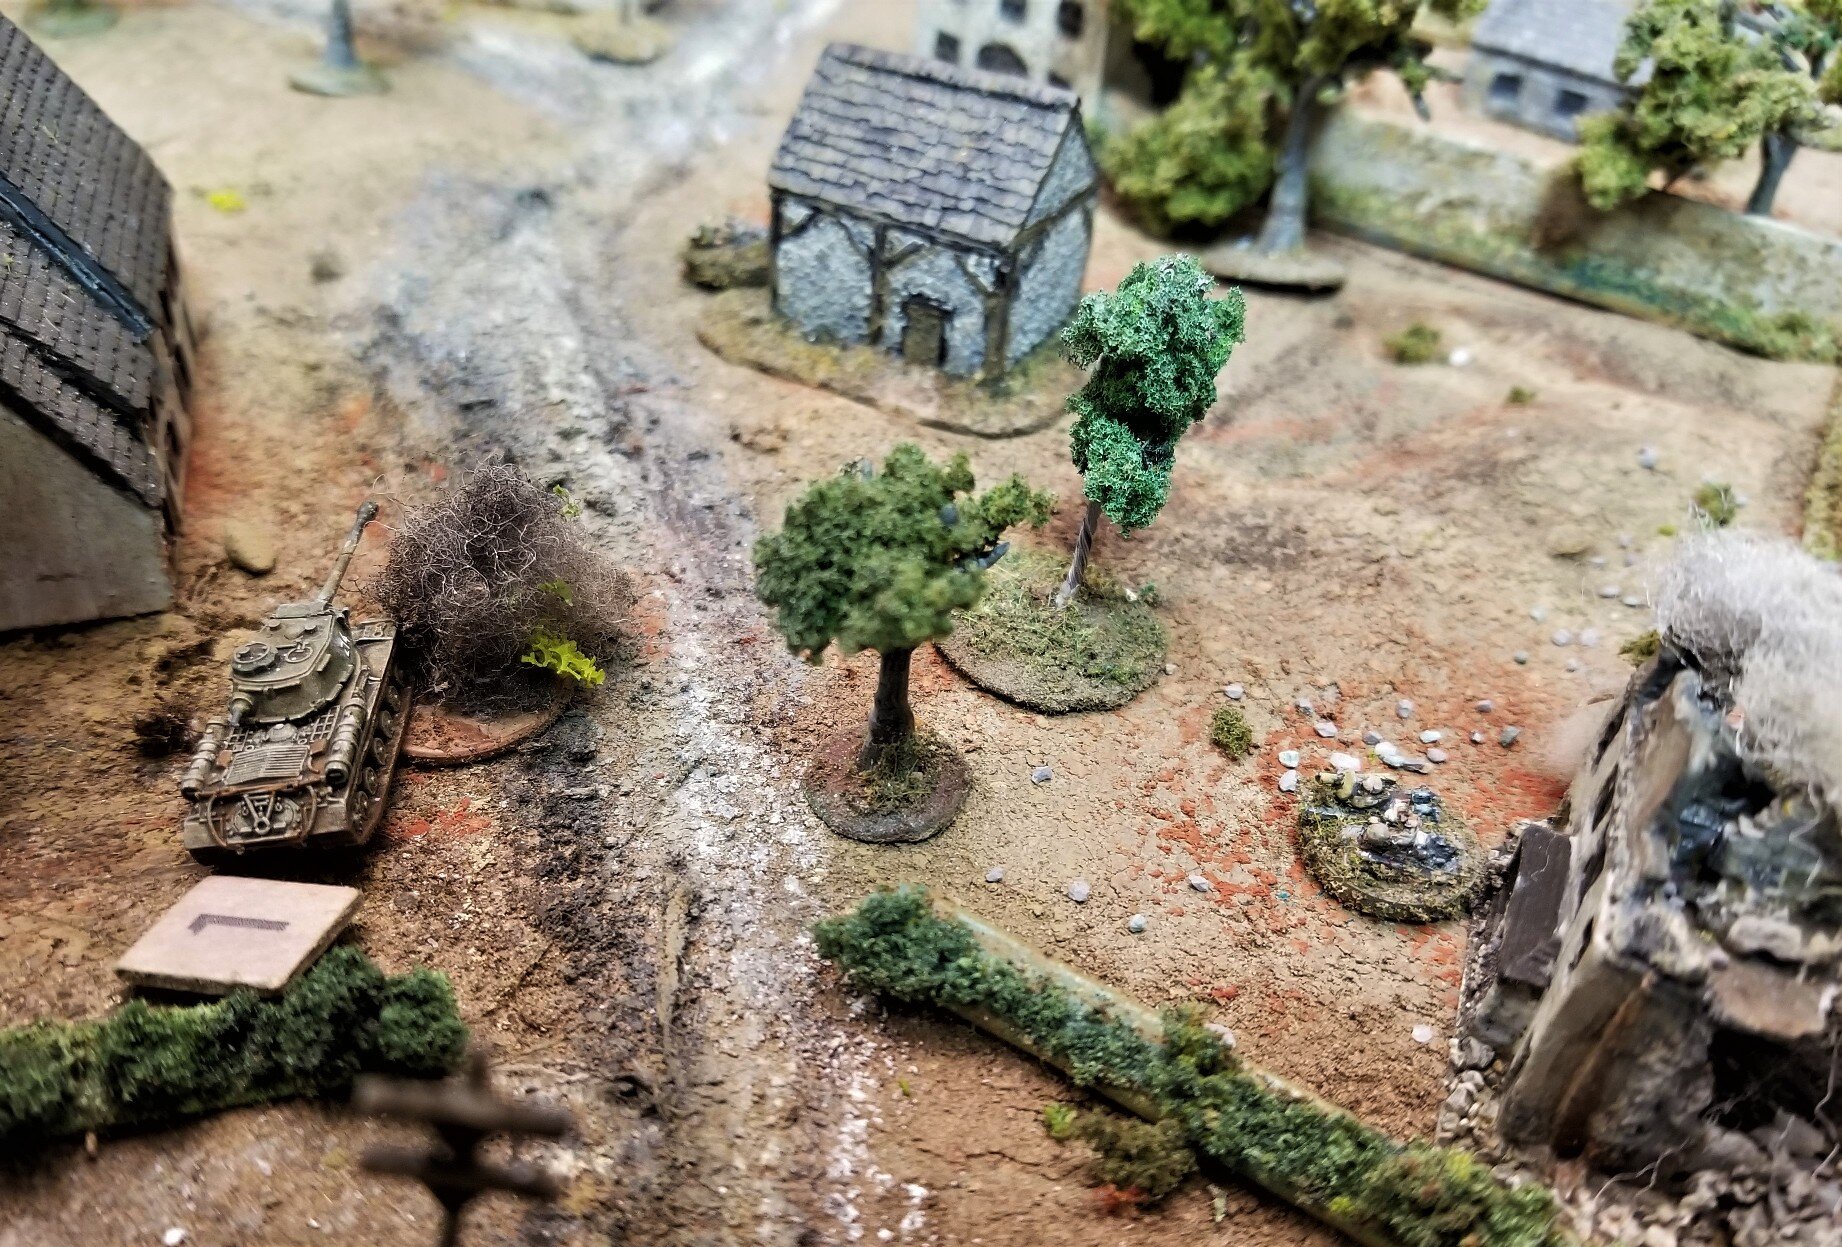
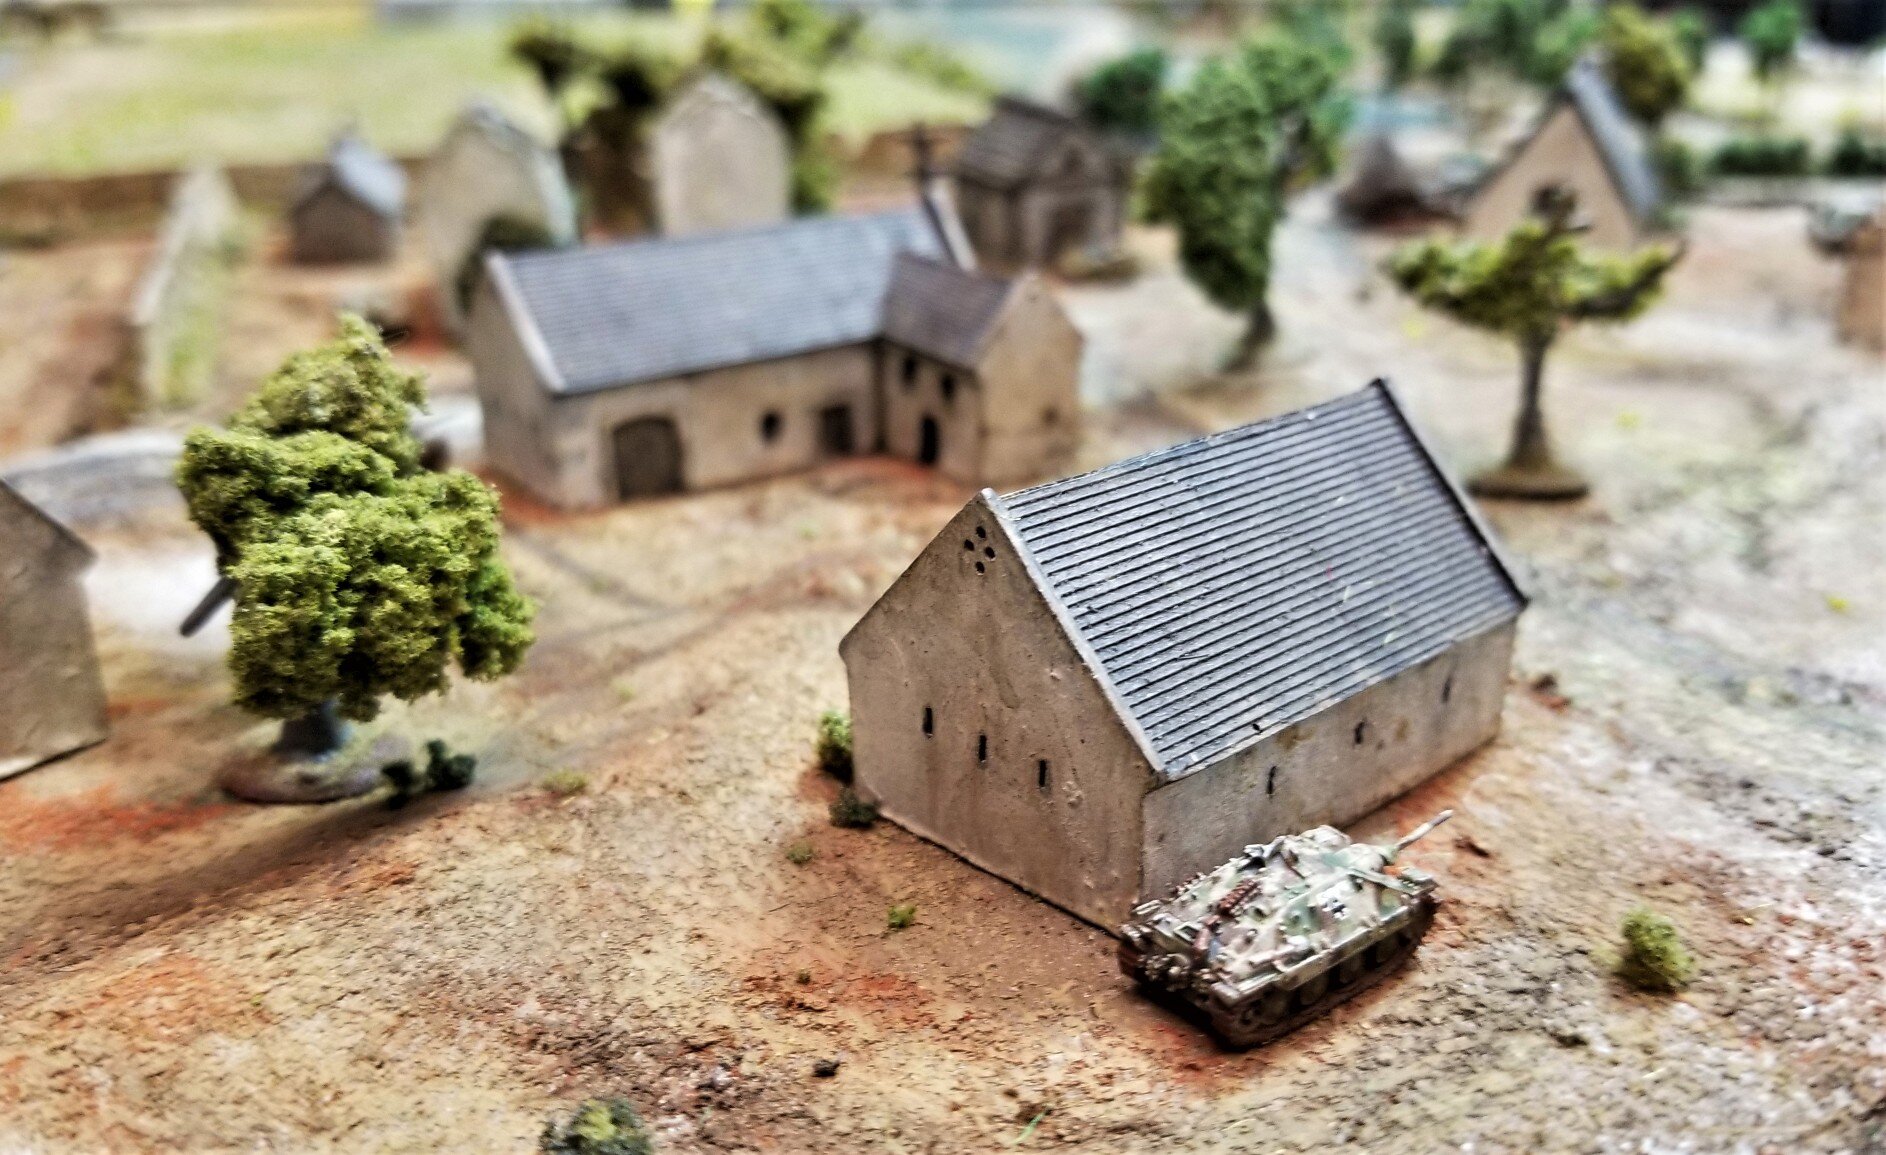
The crew of this Panzer IV had to bail as the Red shock points overwhelmed them. They did help the 3rd platoon in foreground to escape.
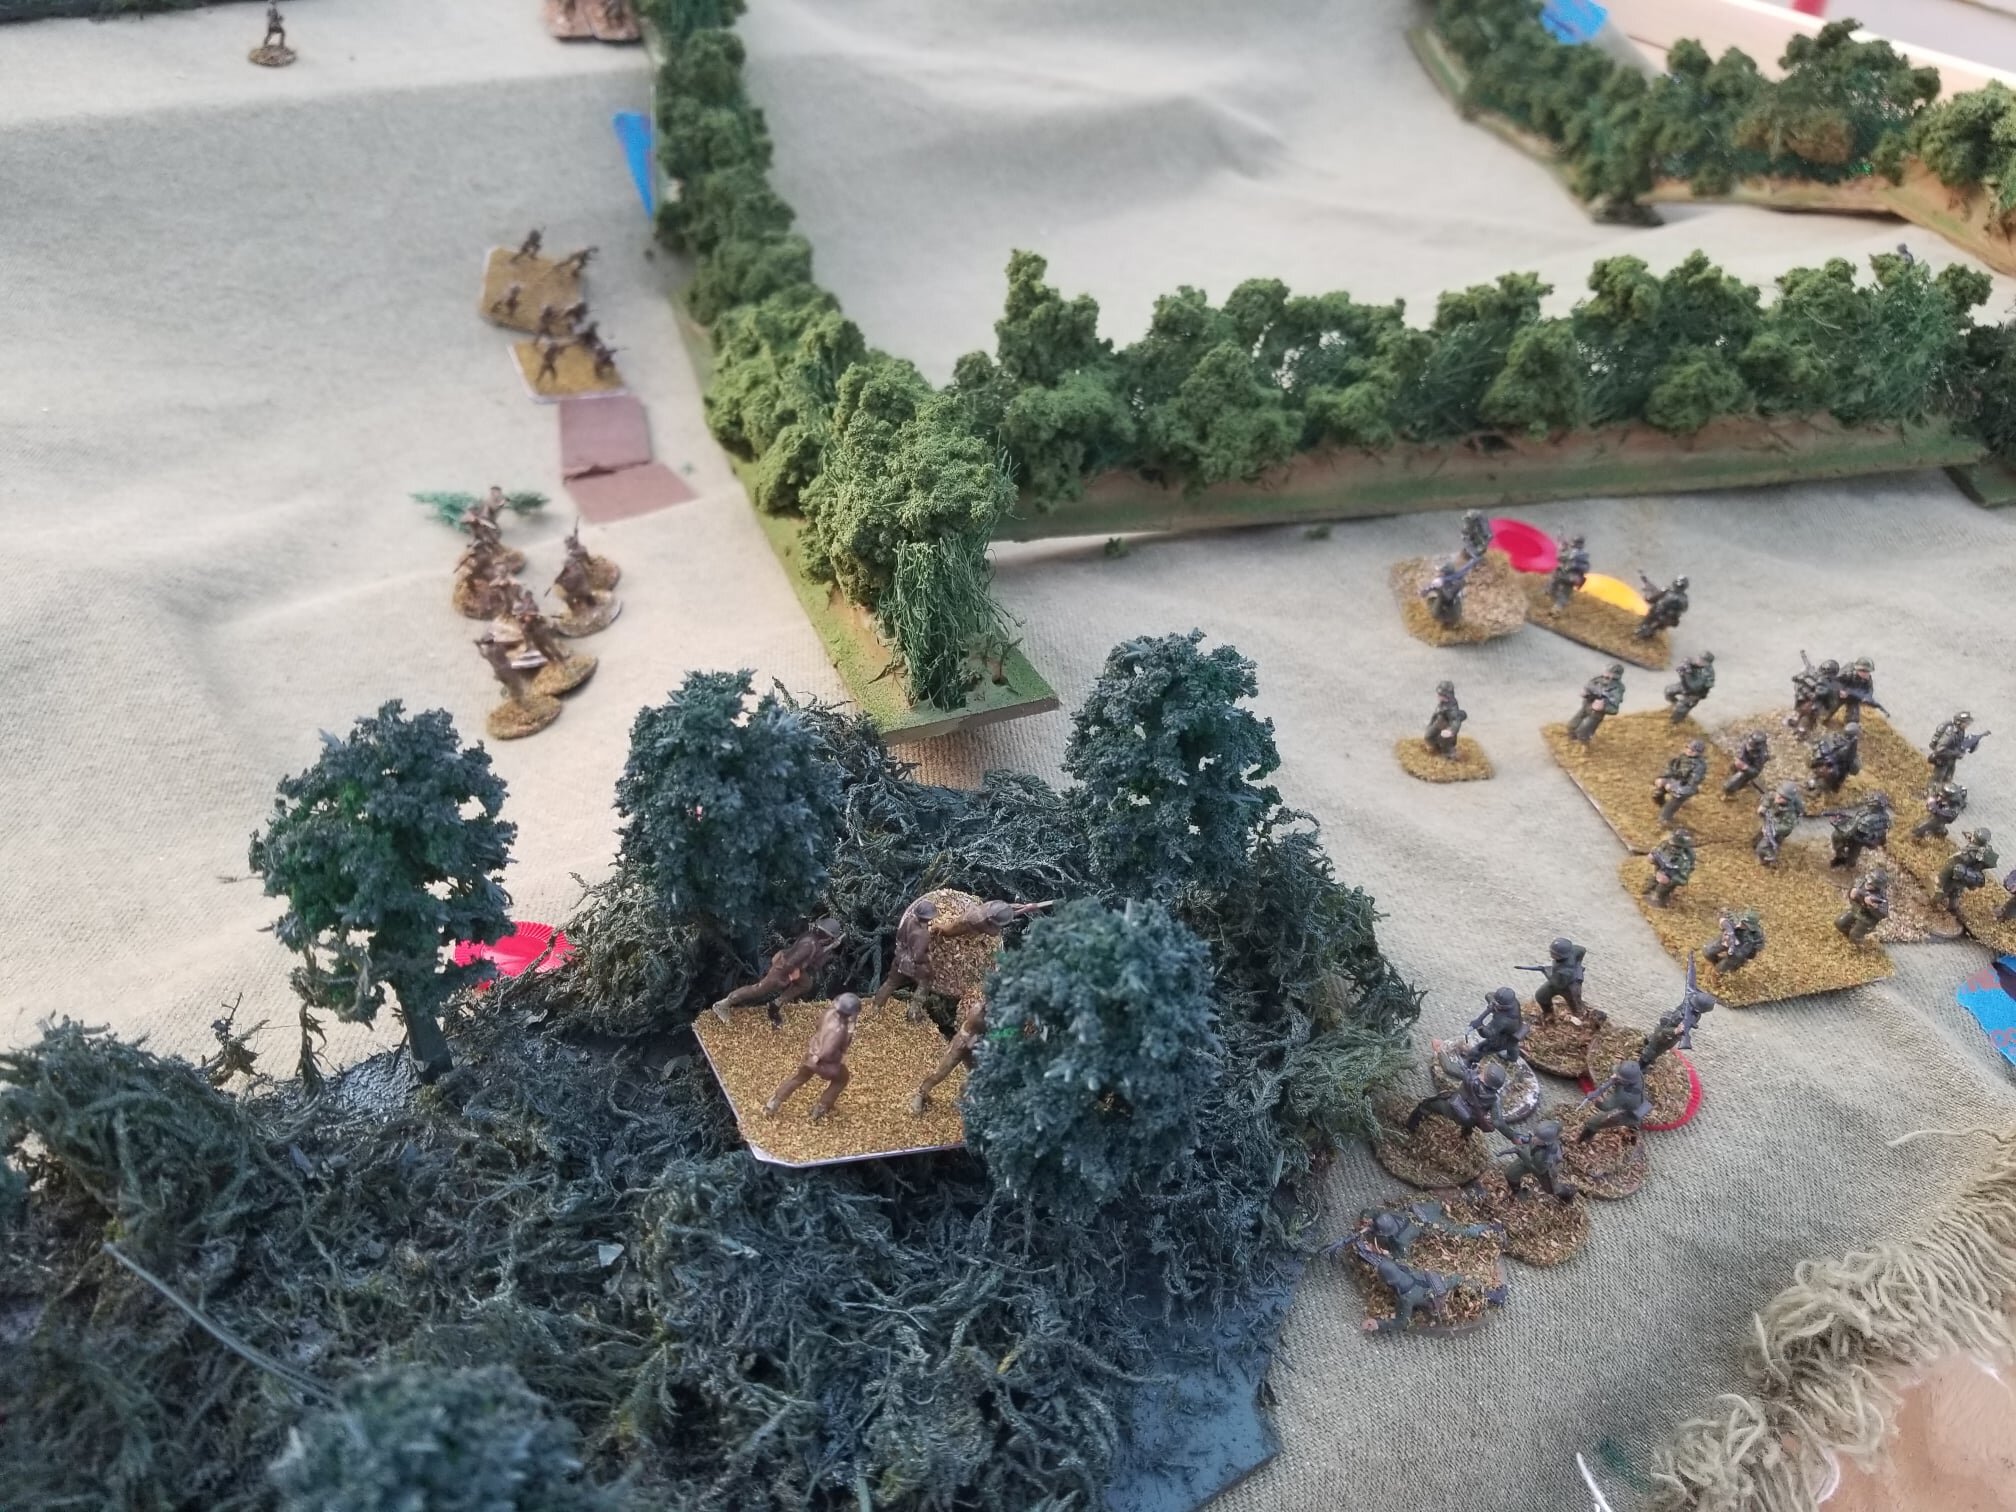
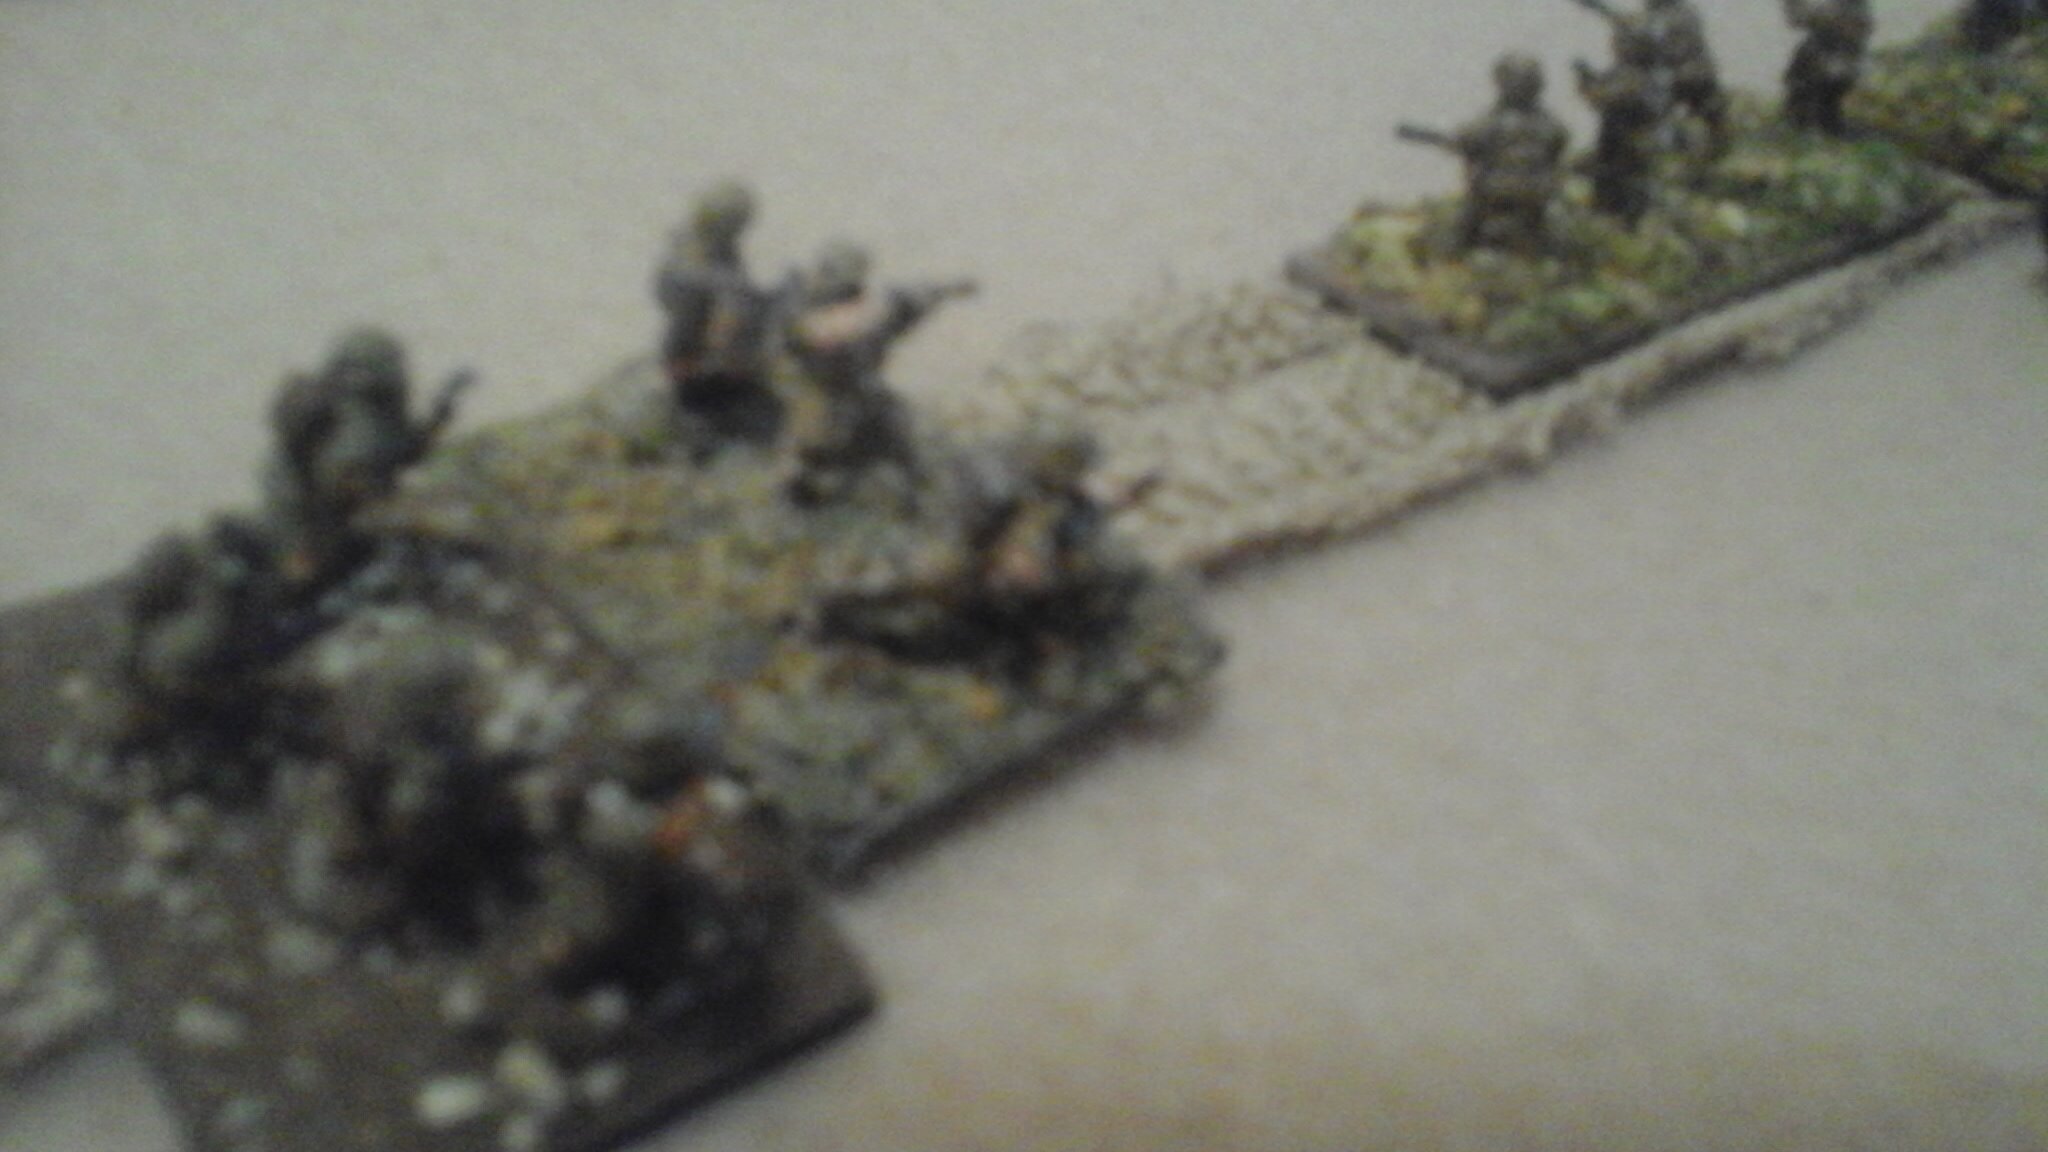
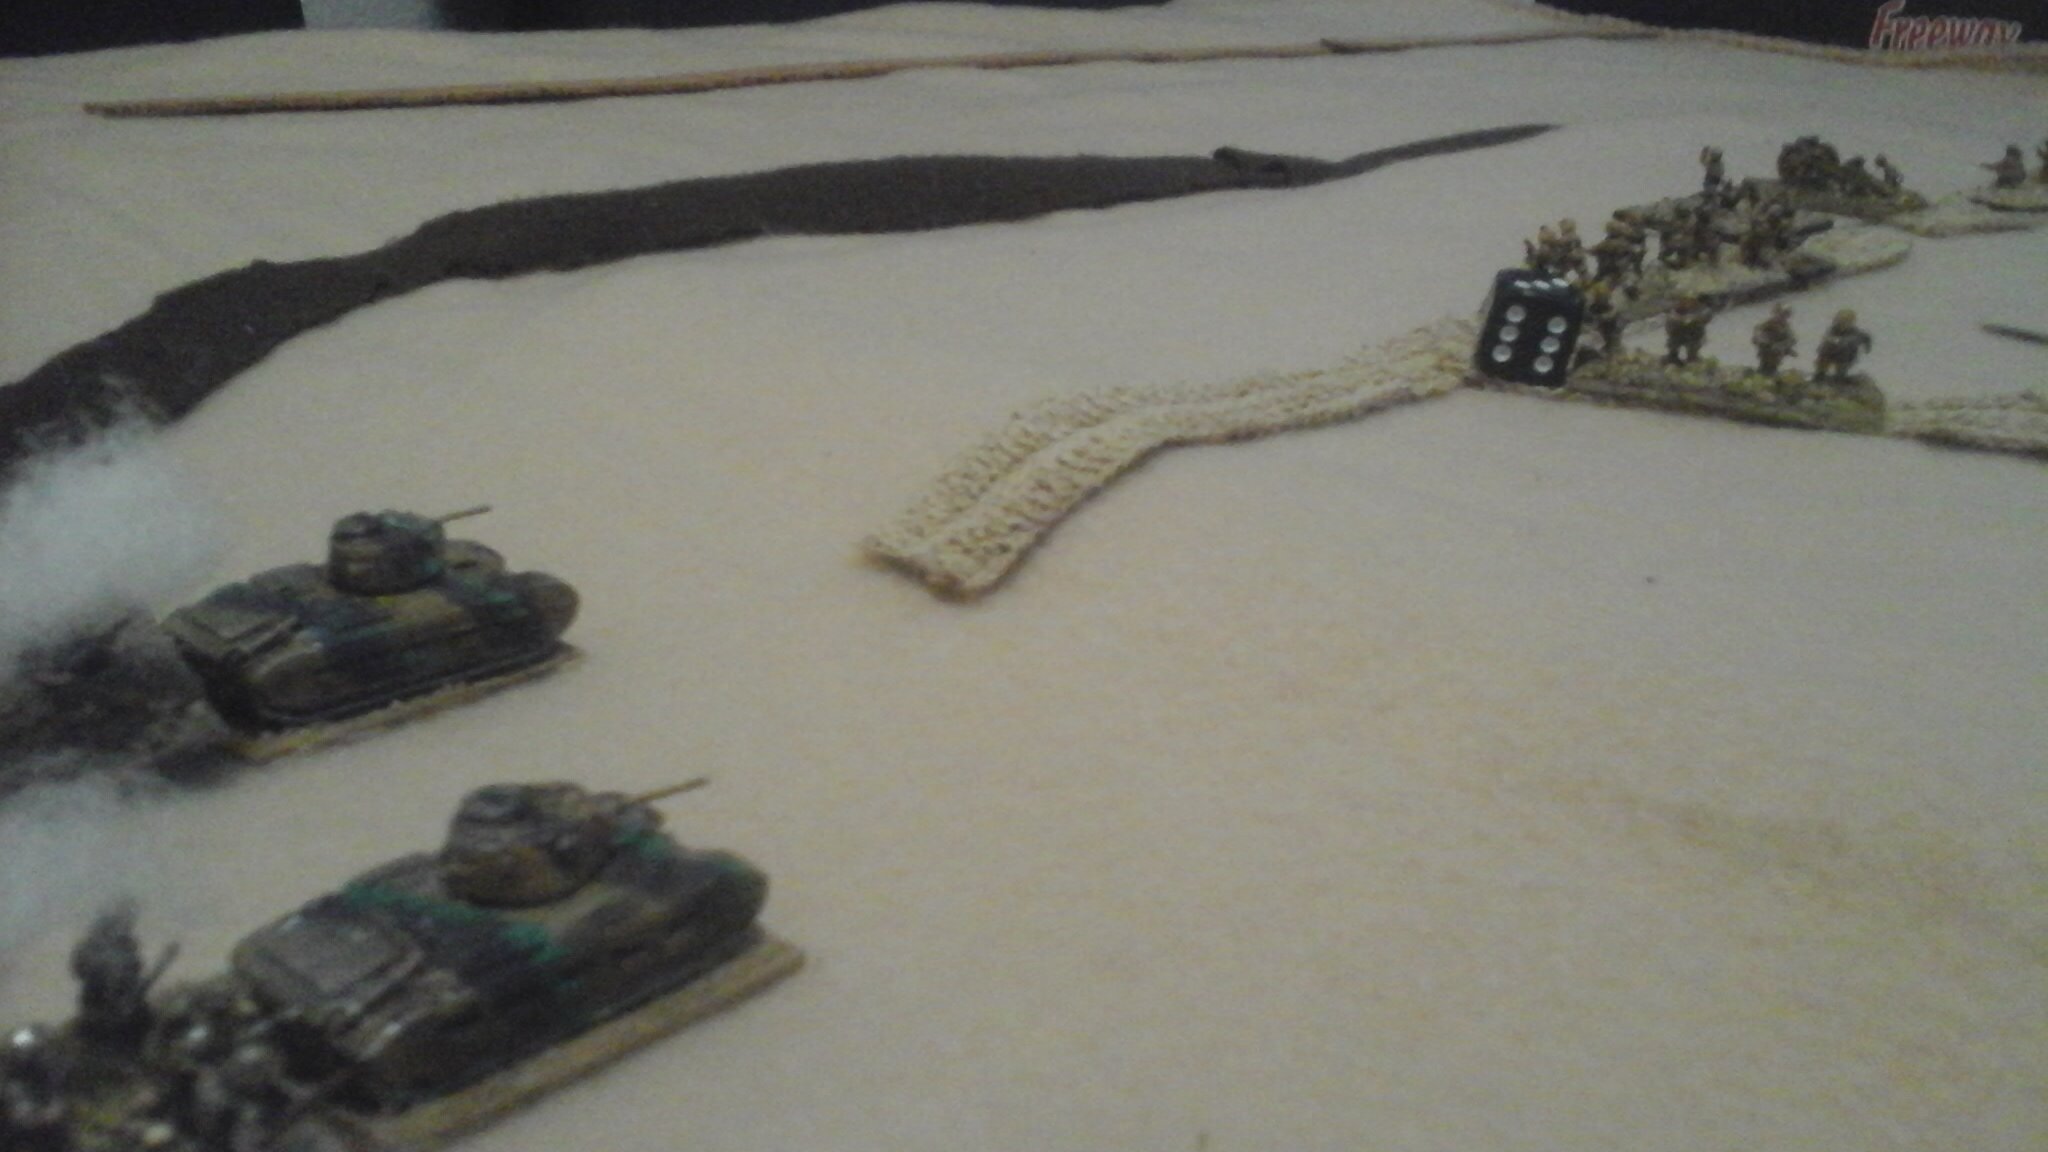
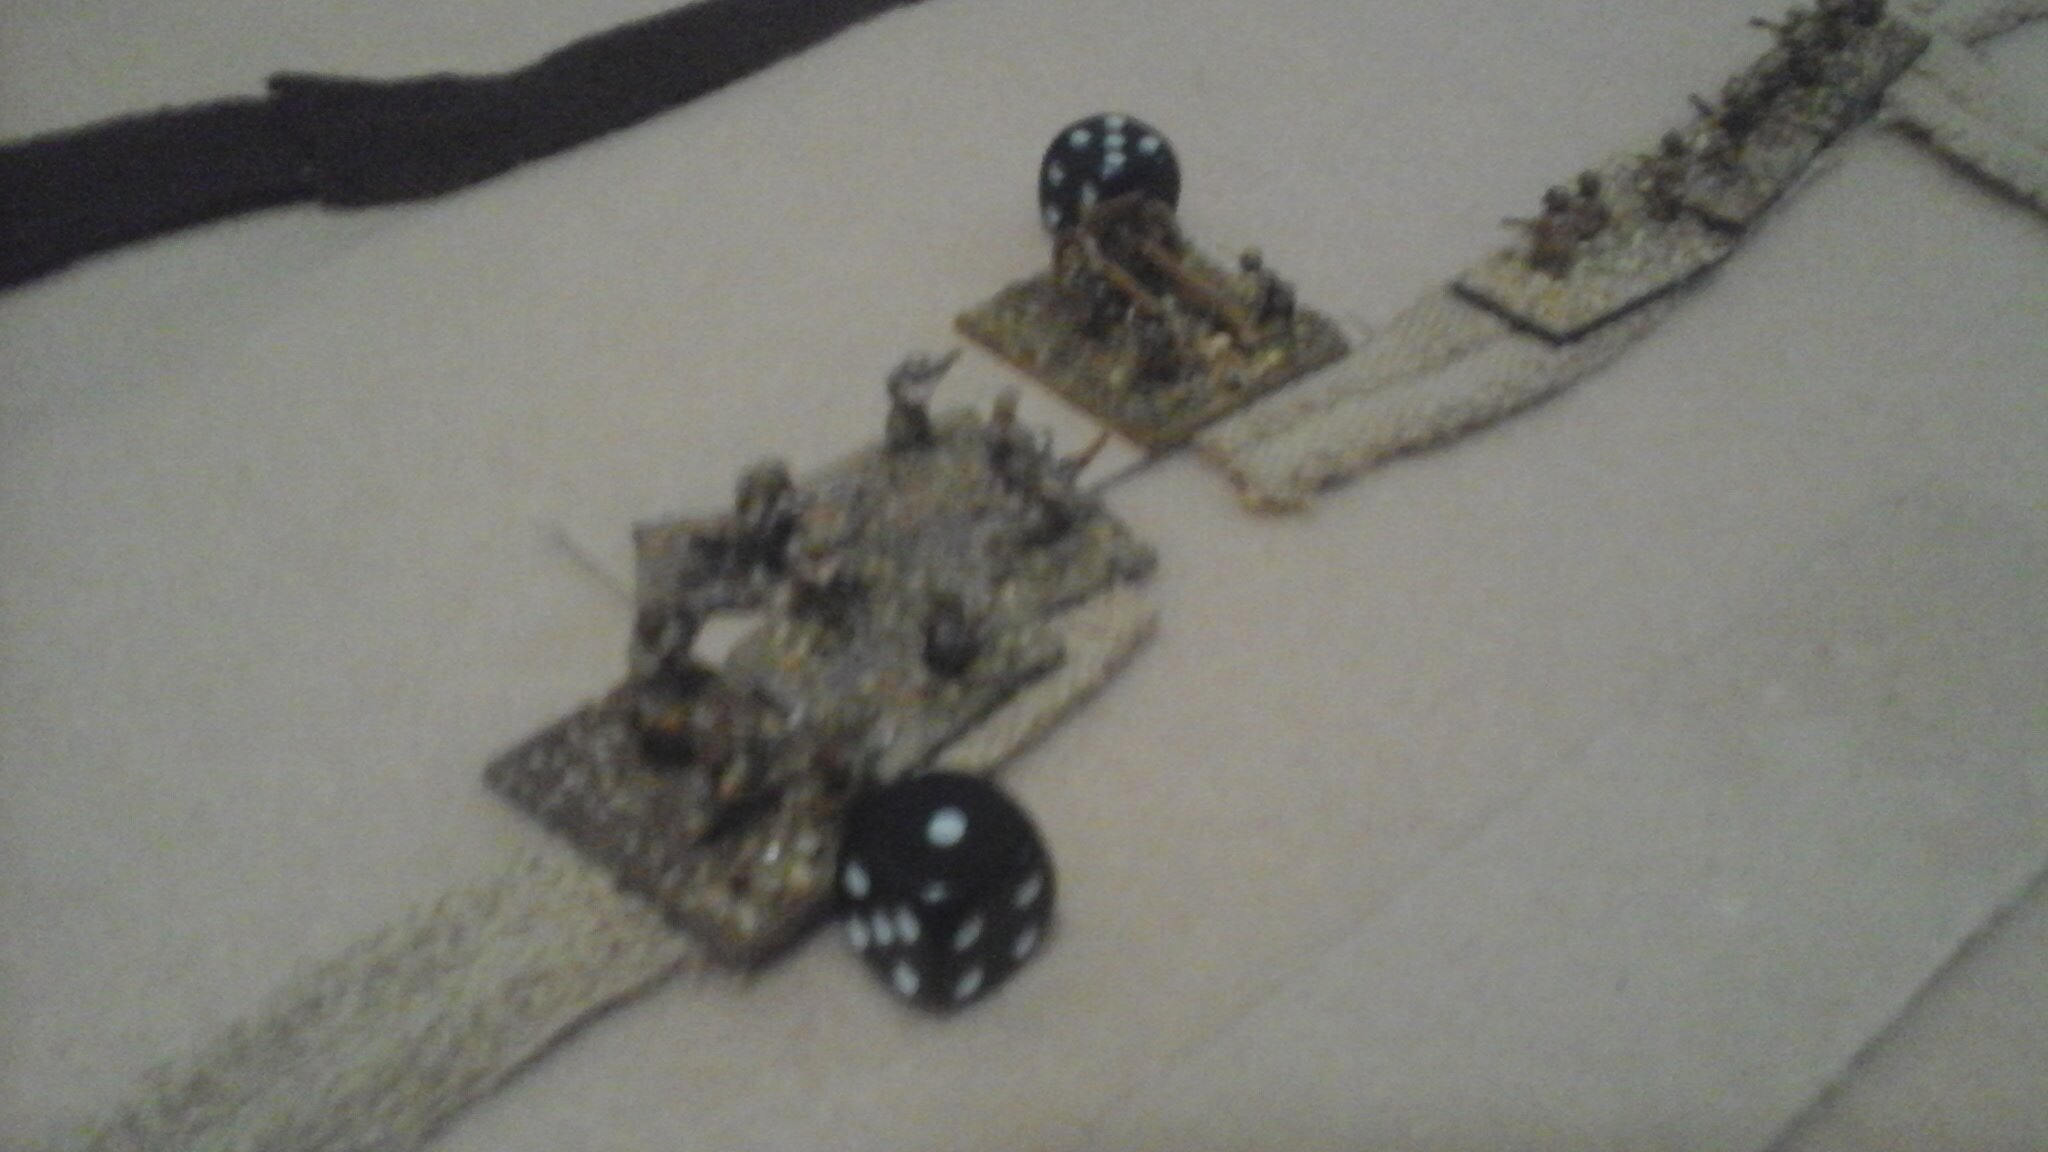
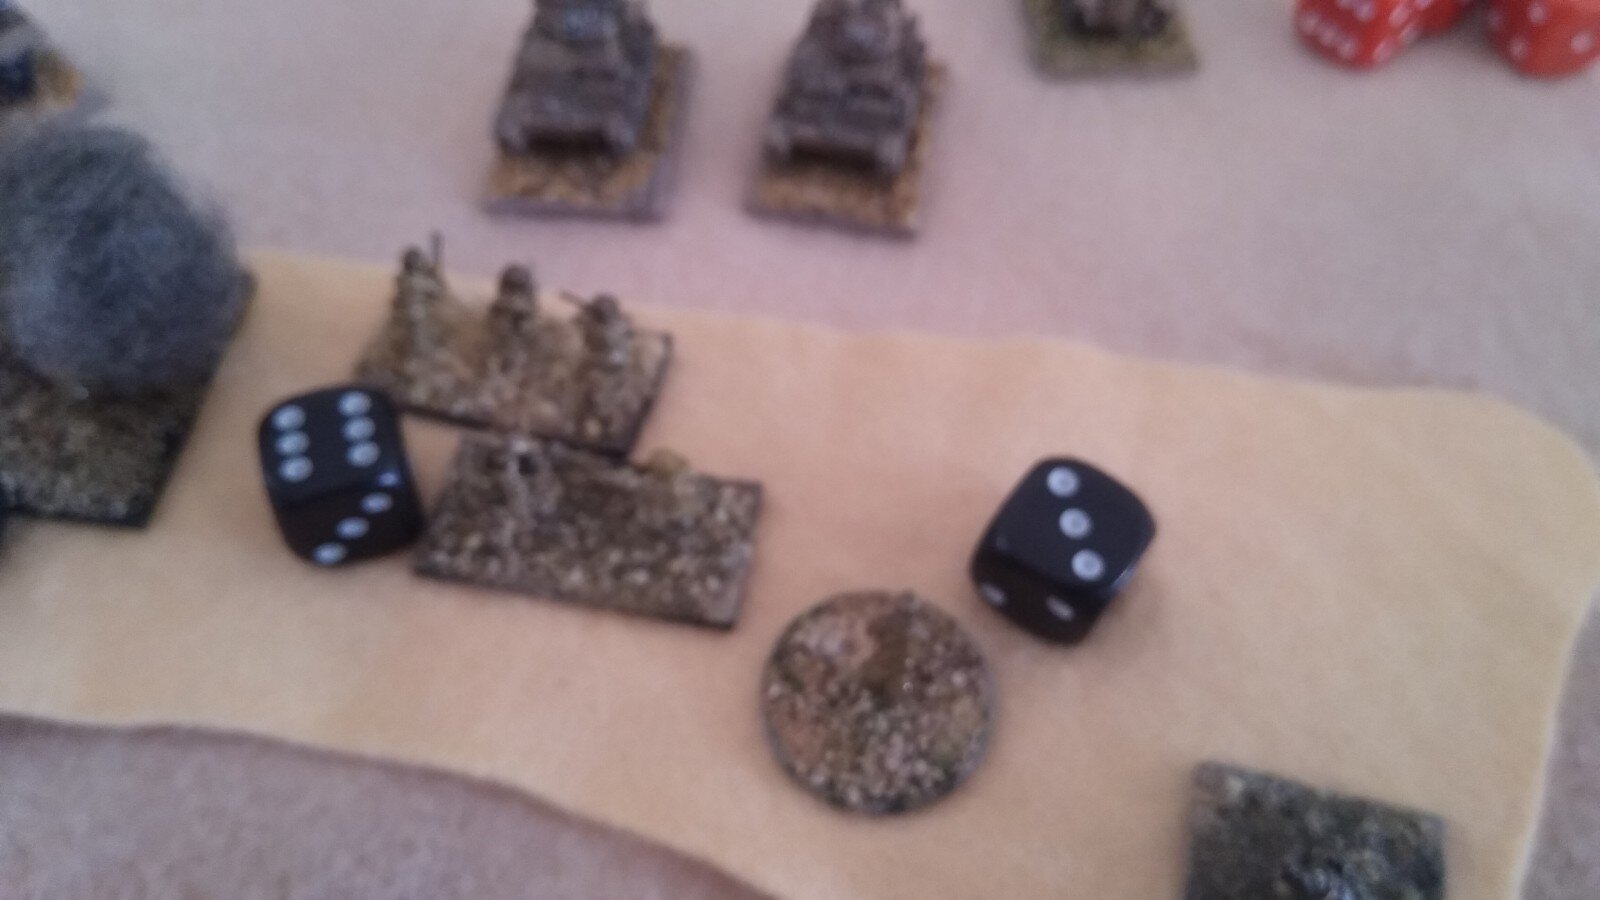
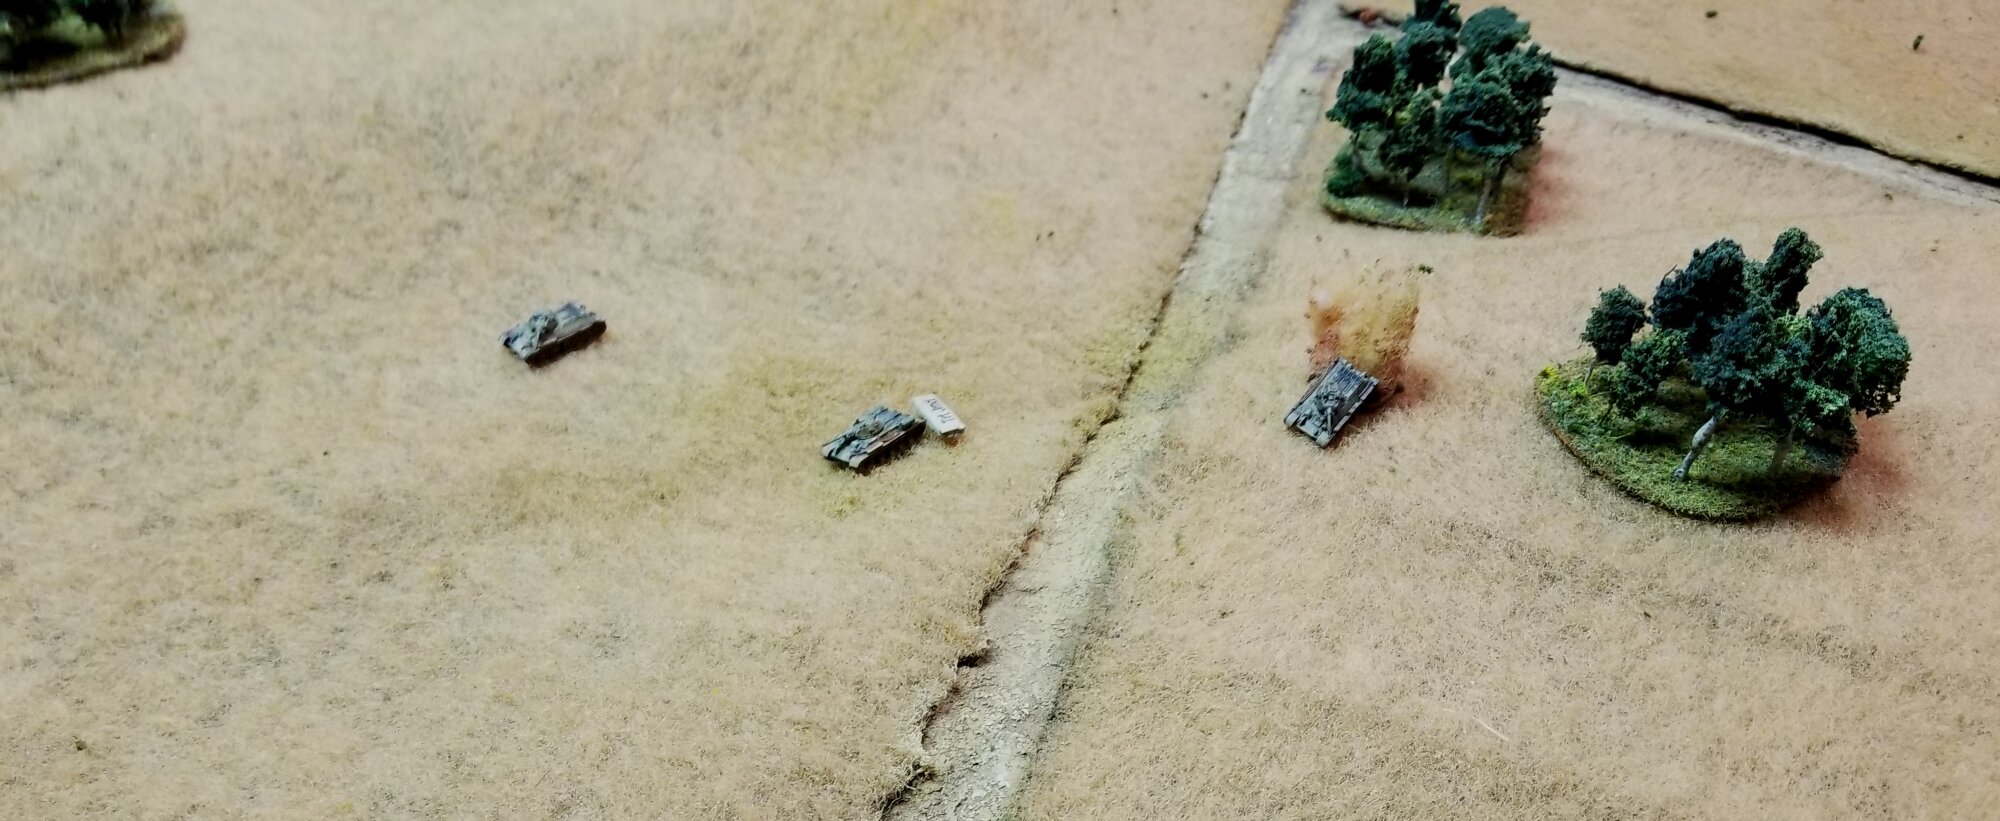
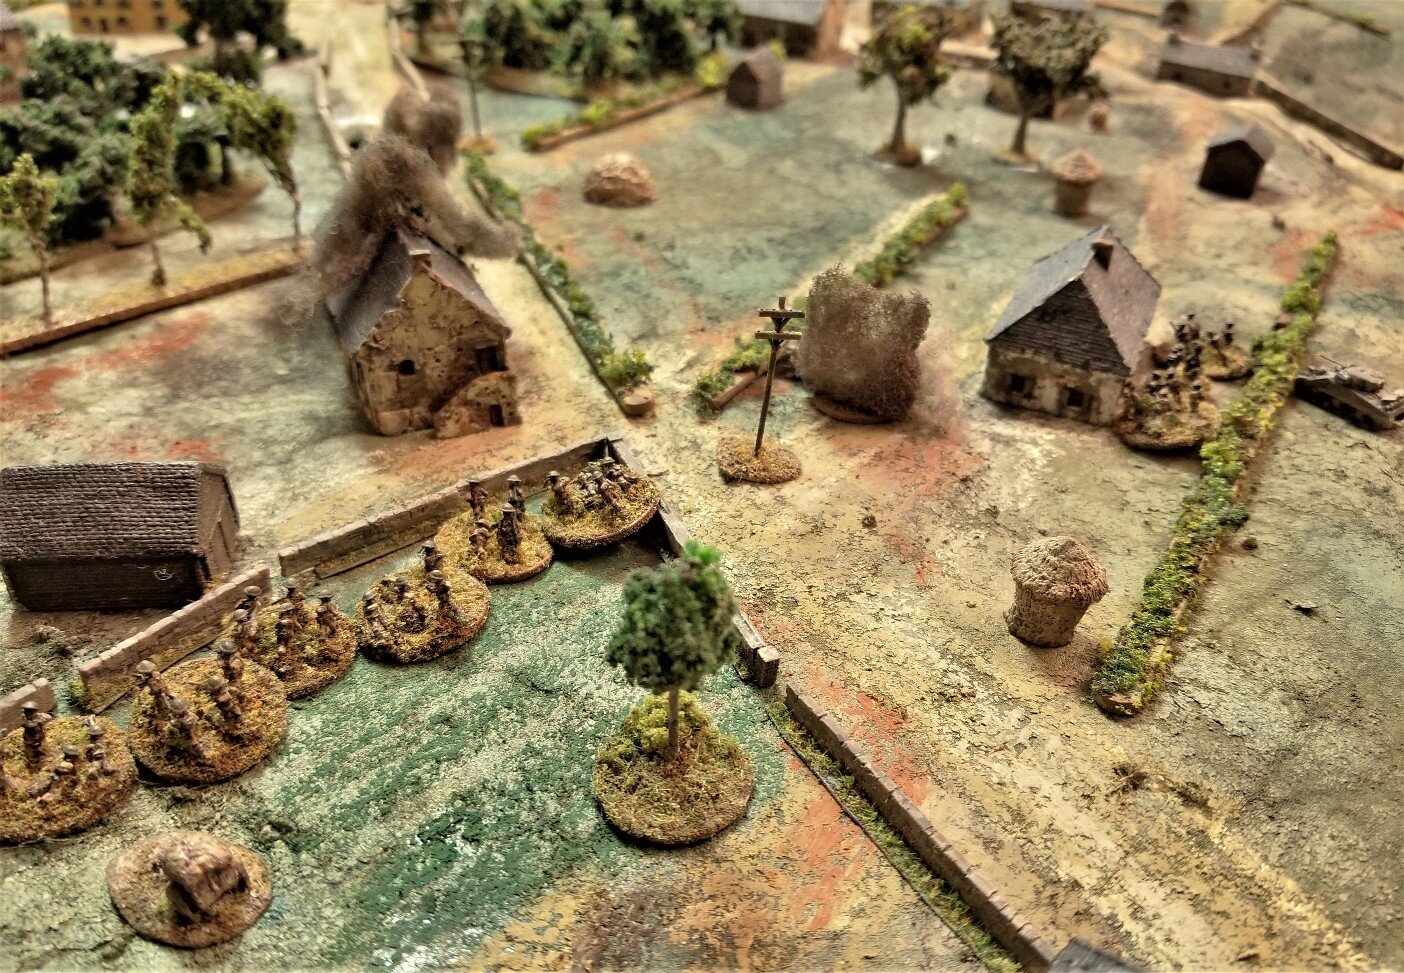
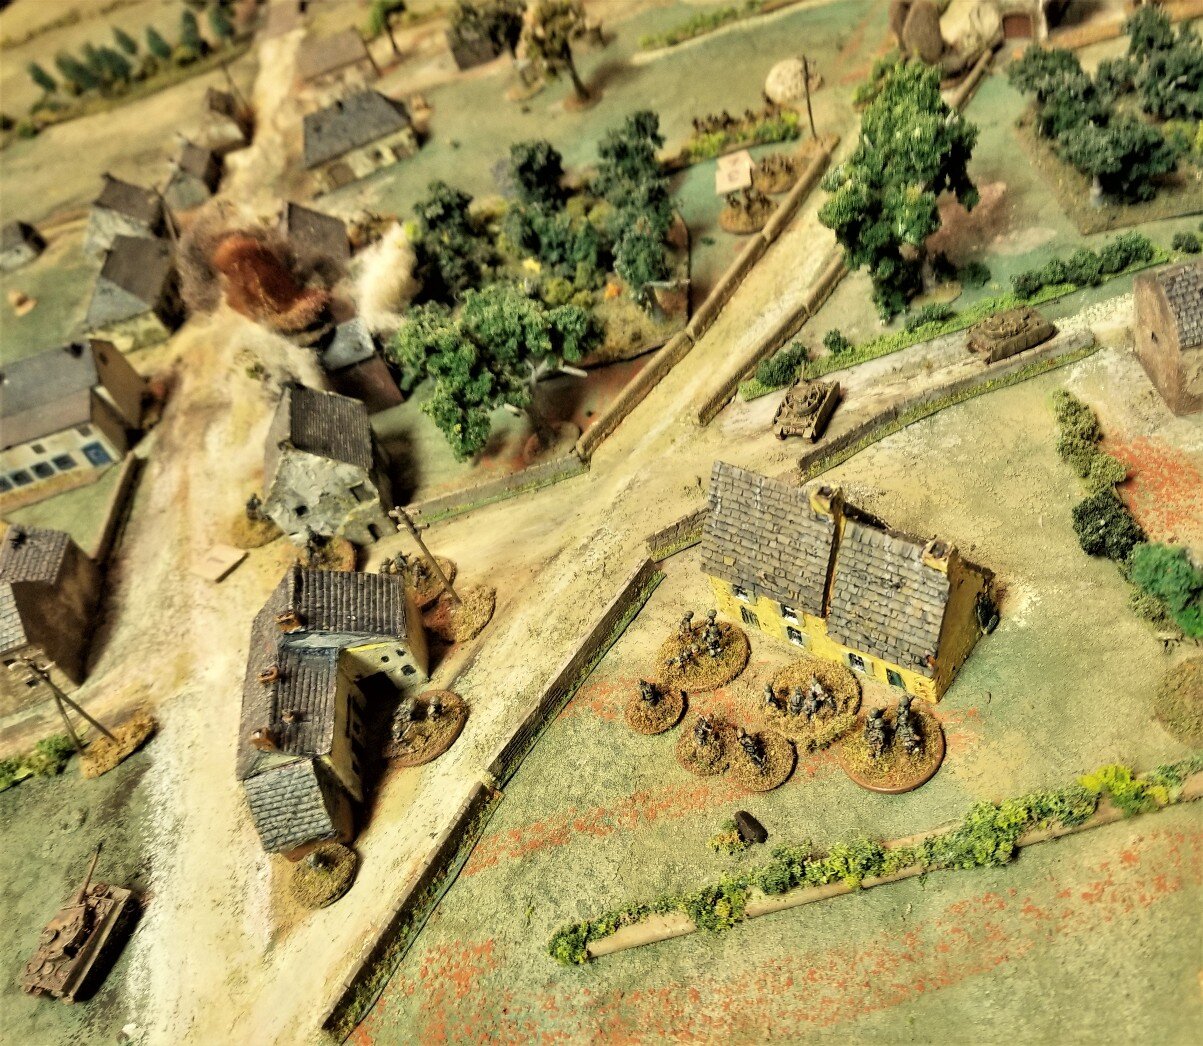
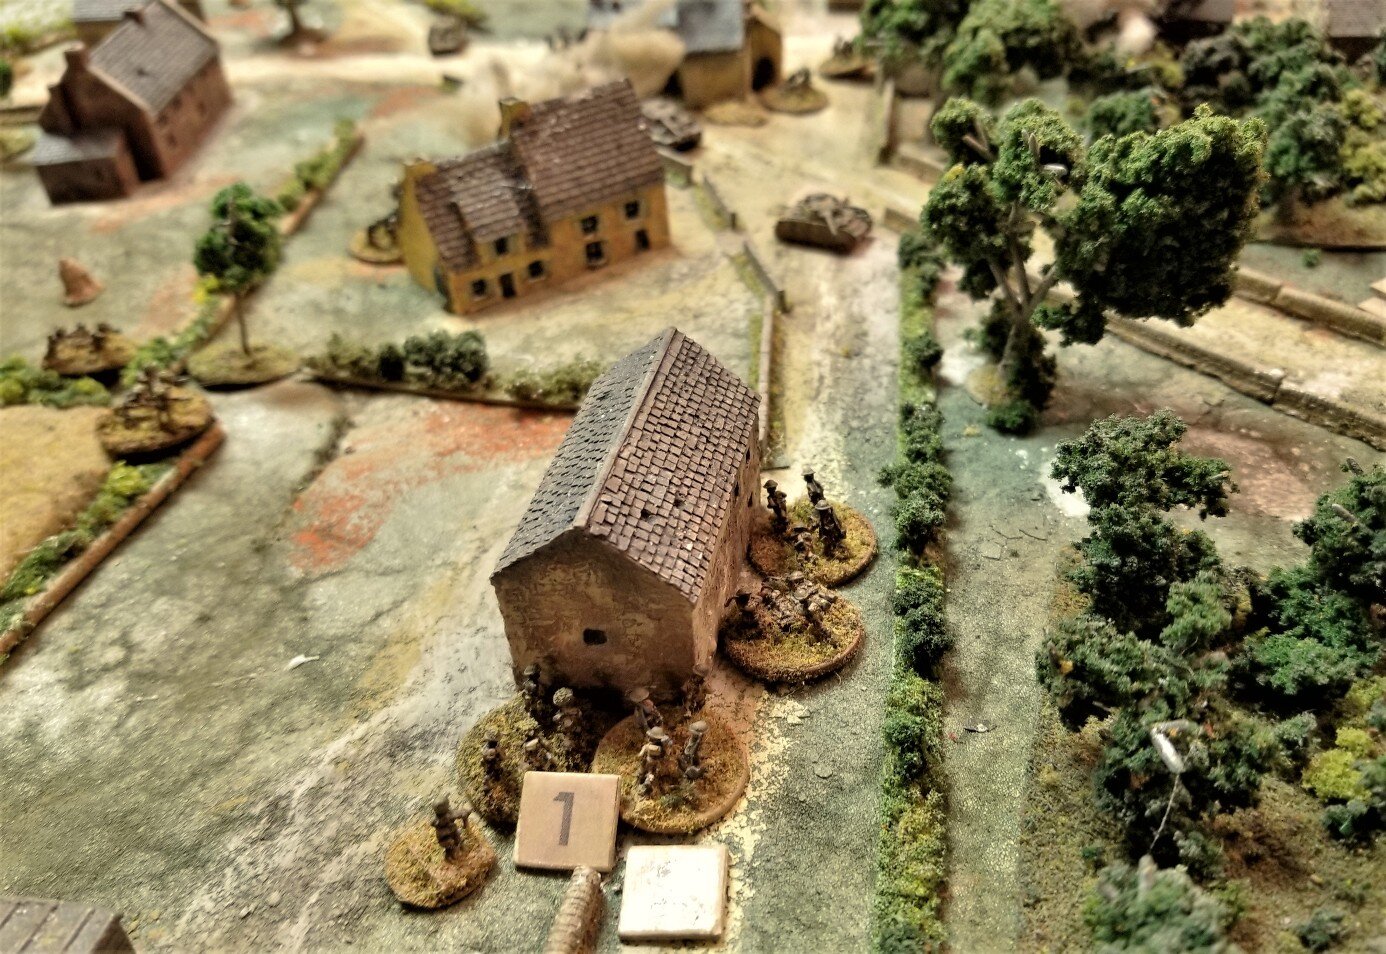
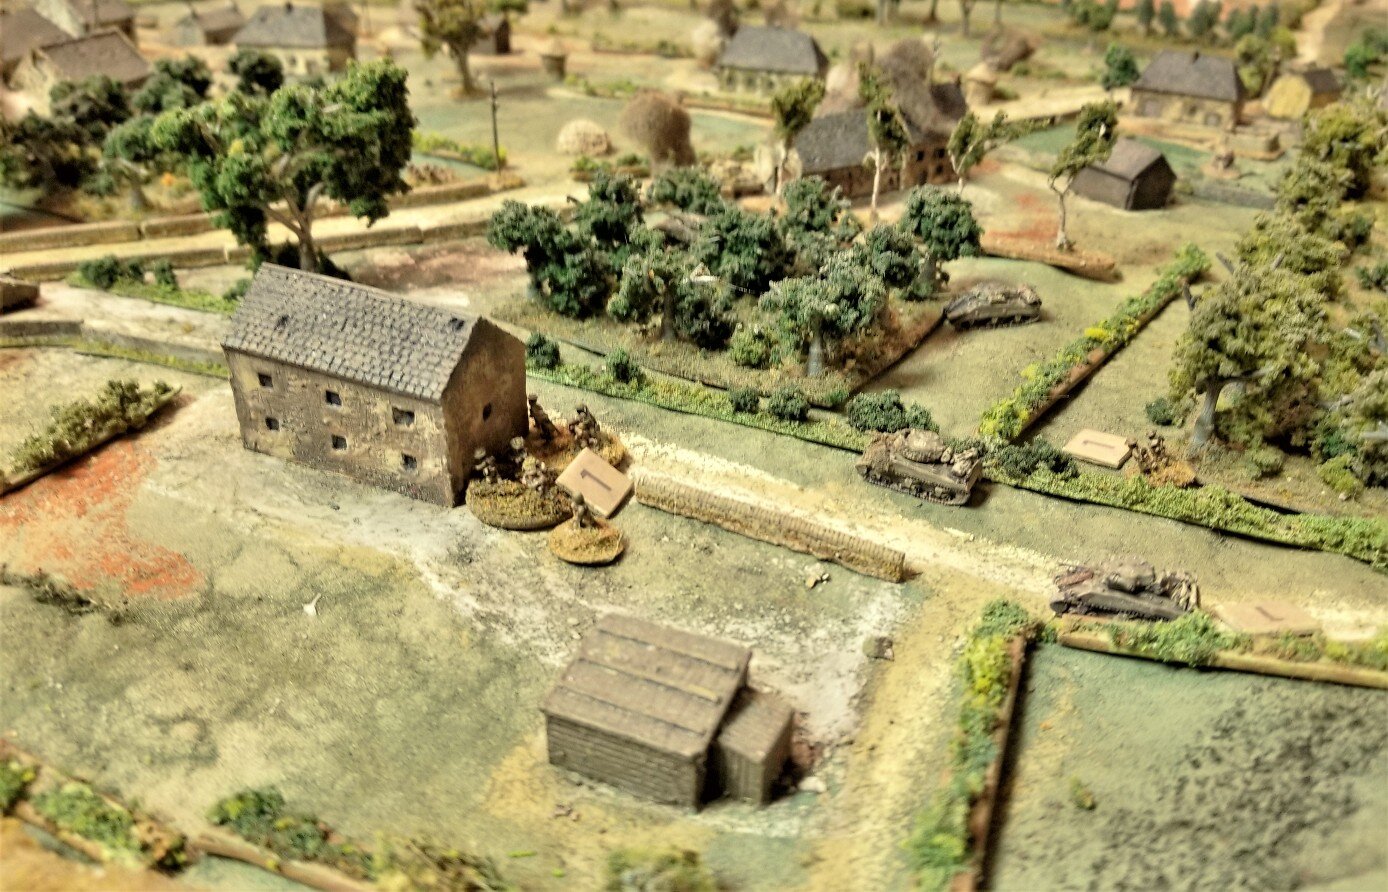
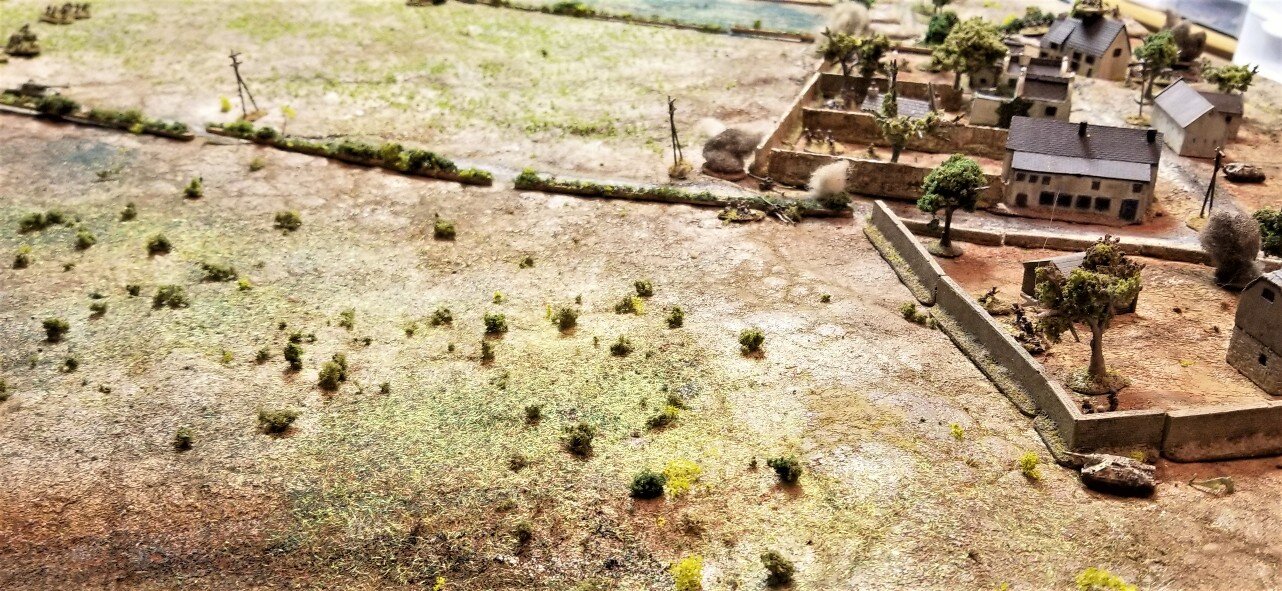
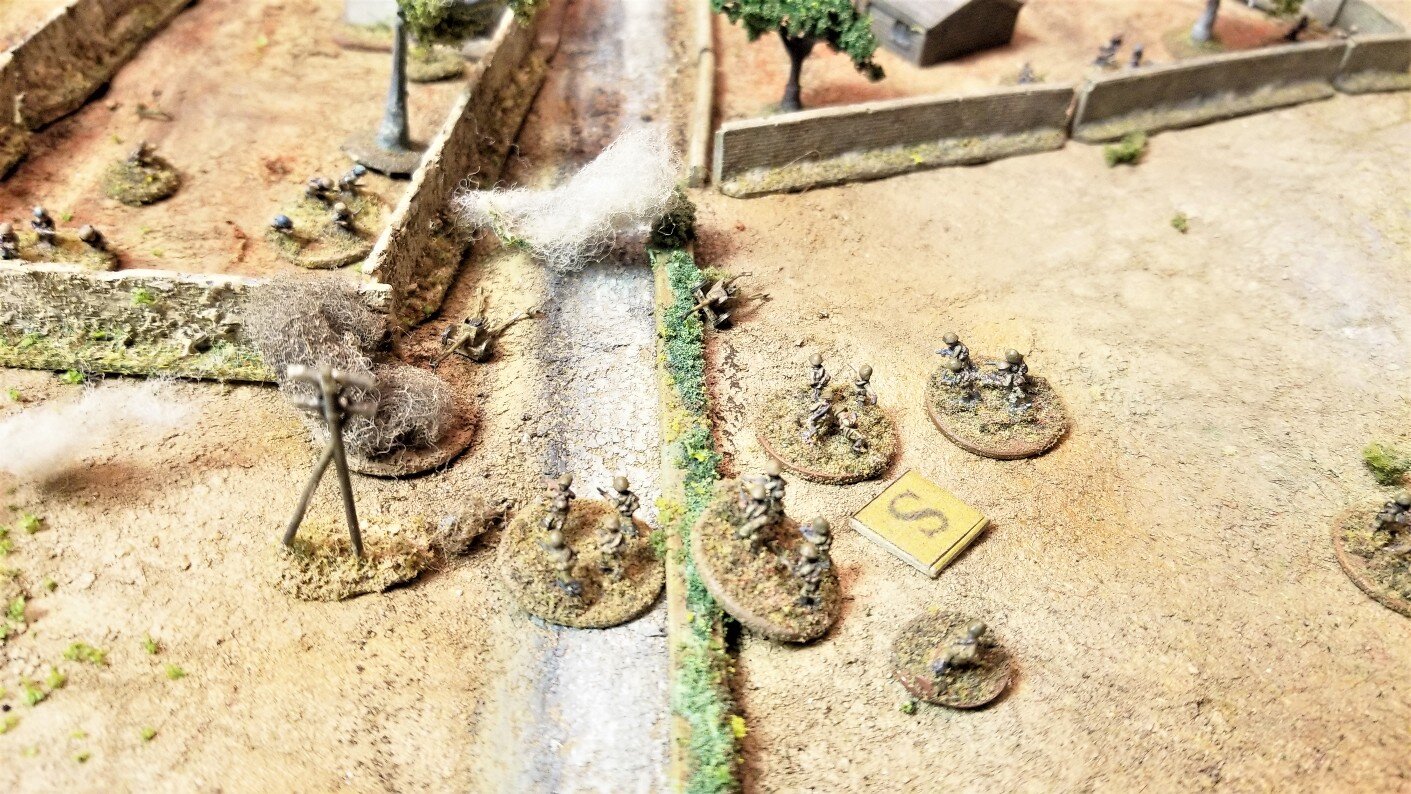
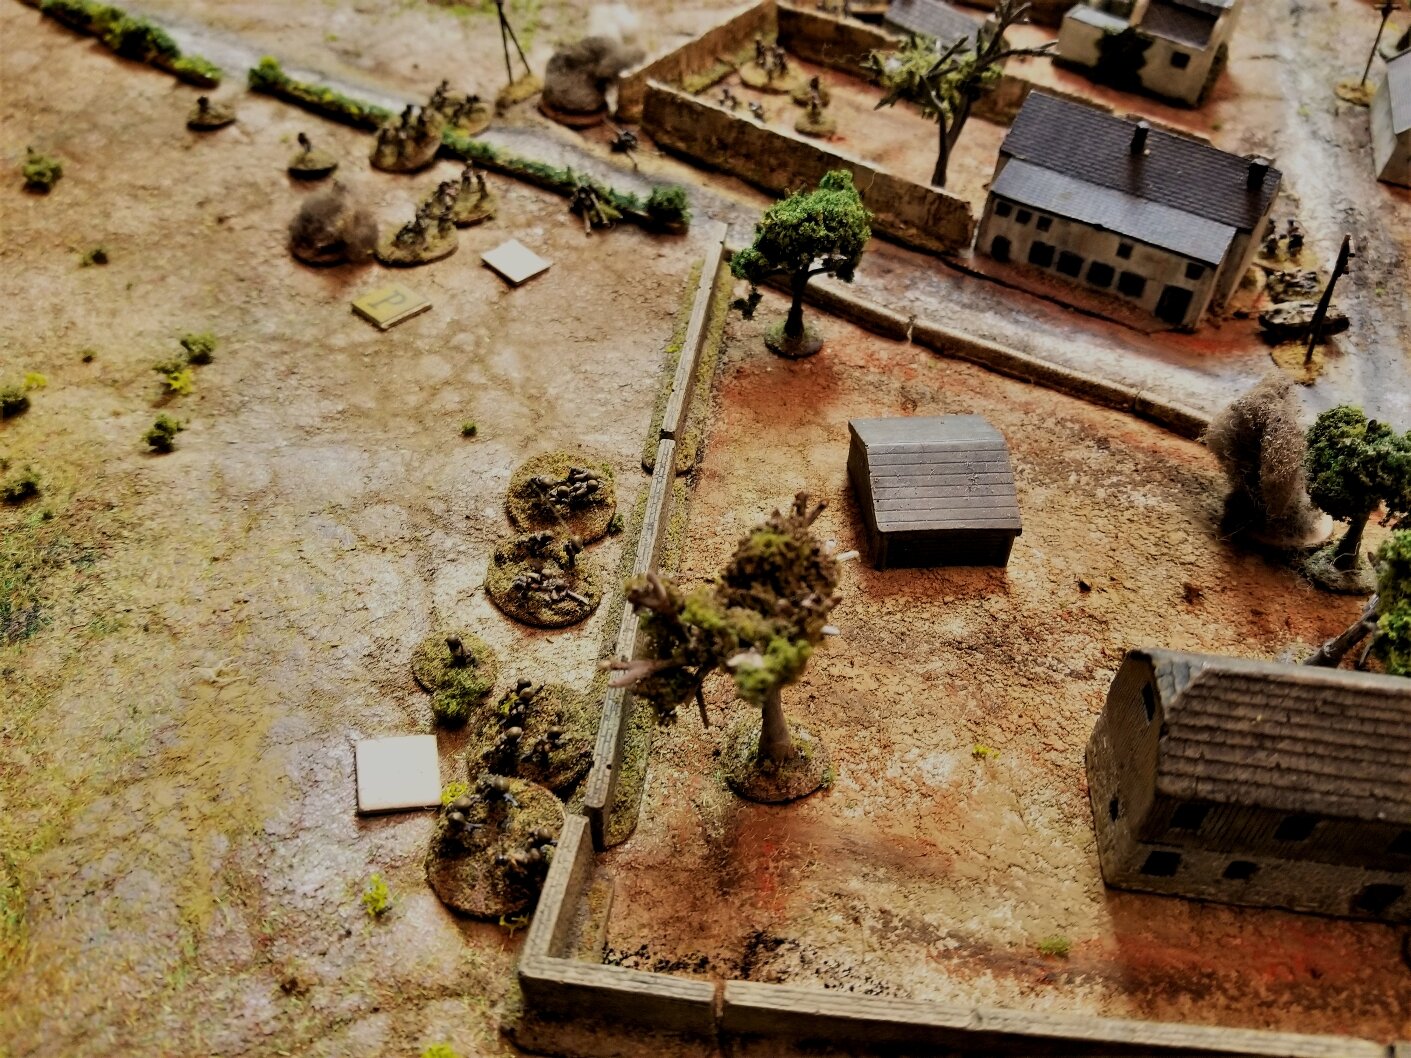
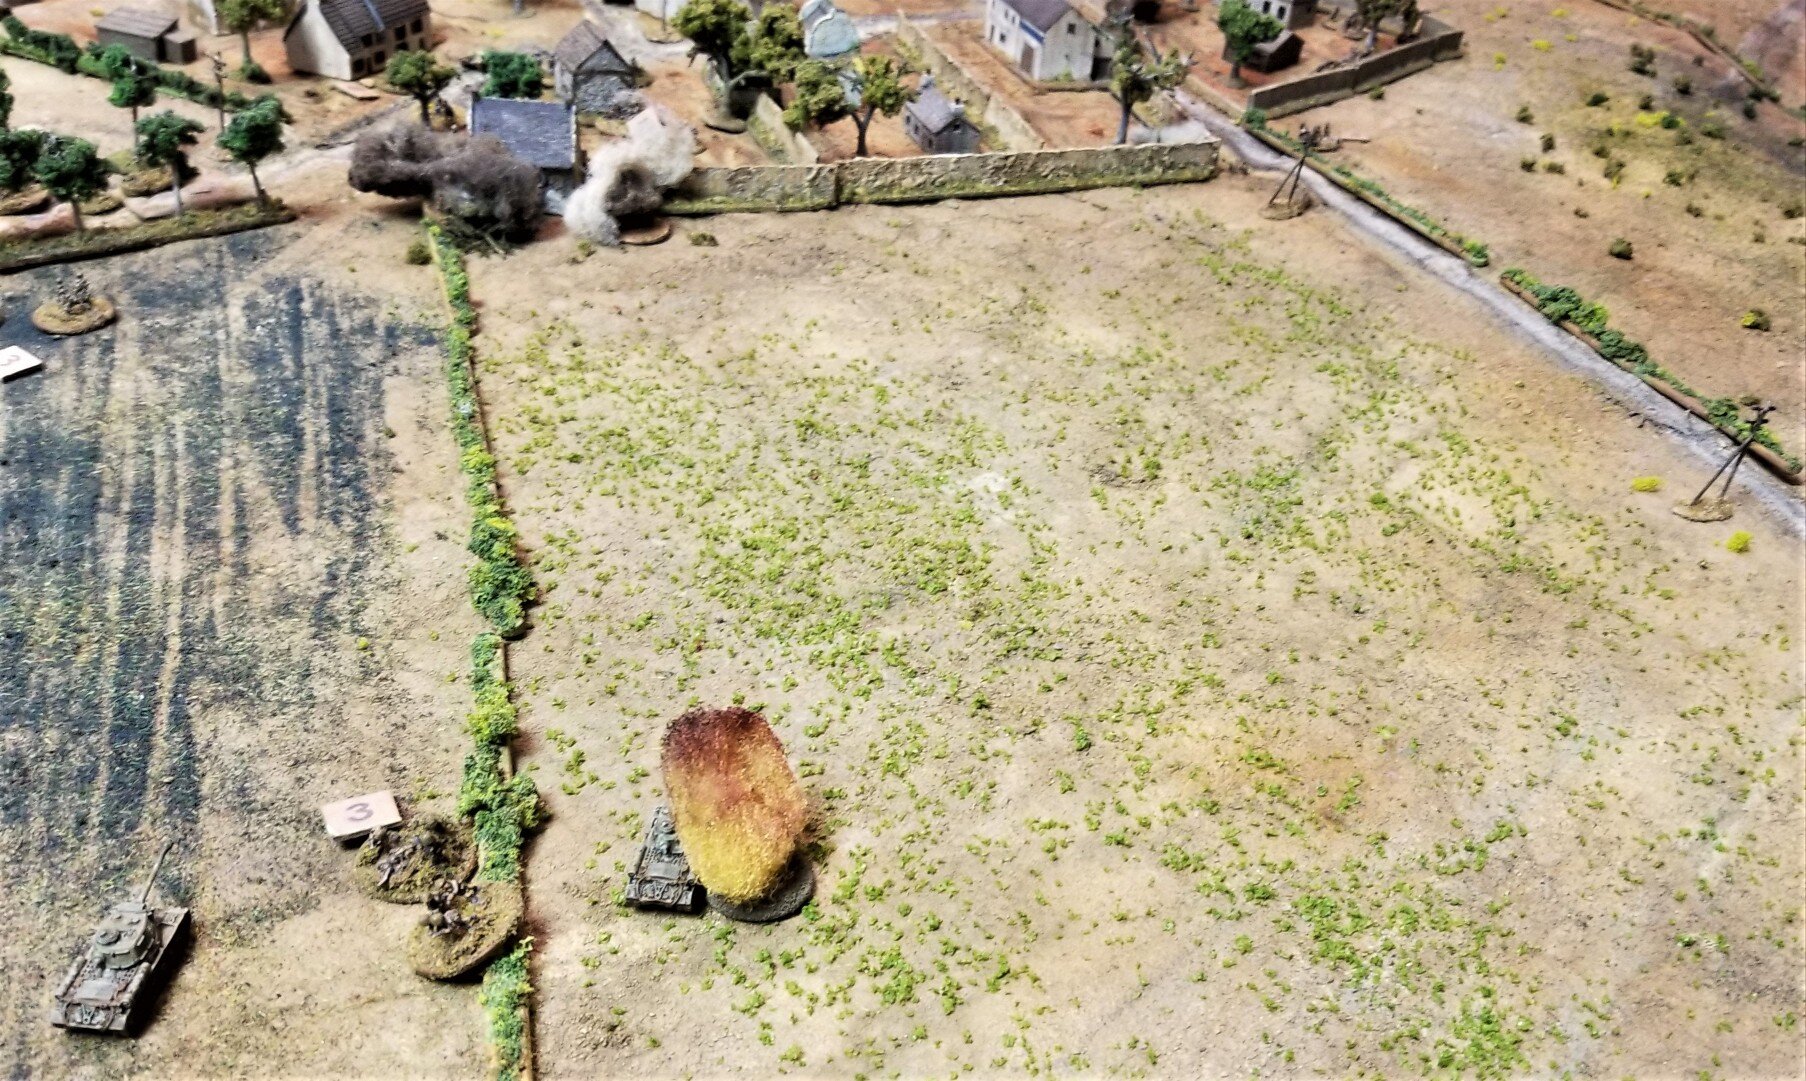
Panzergrenadiers stream through the woods after shattering the last of the Polish platoon. The Polish HQ squad tries to hold them off.
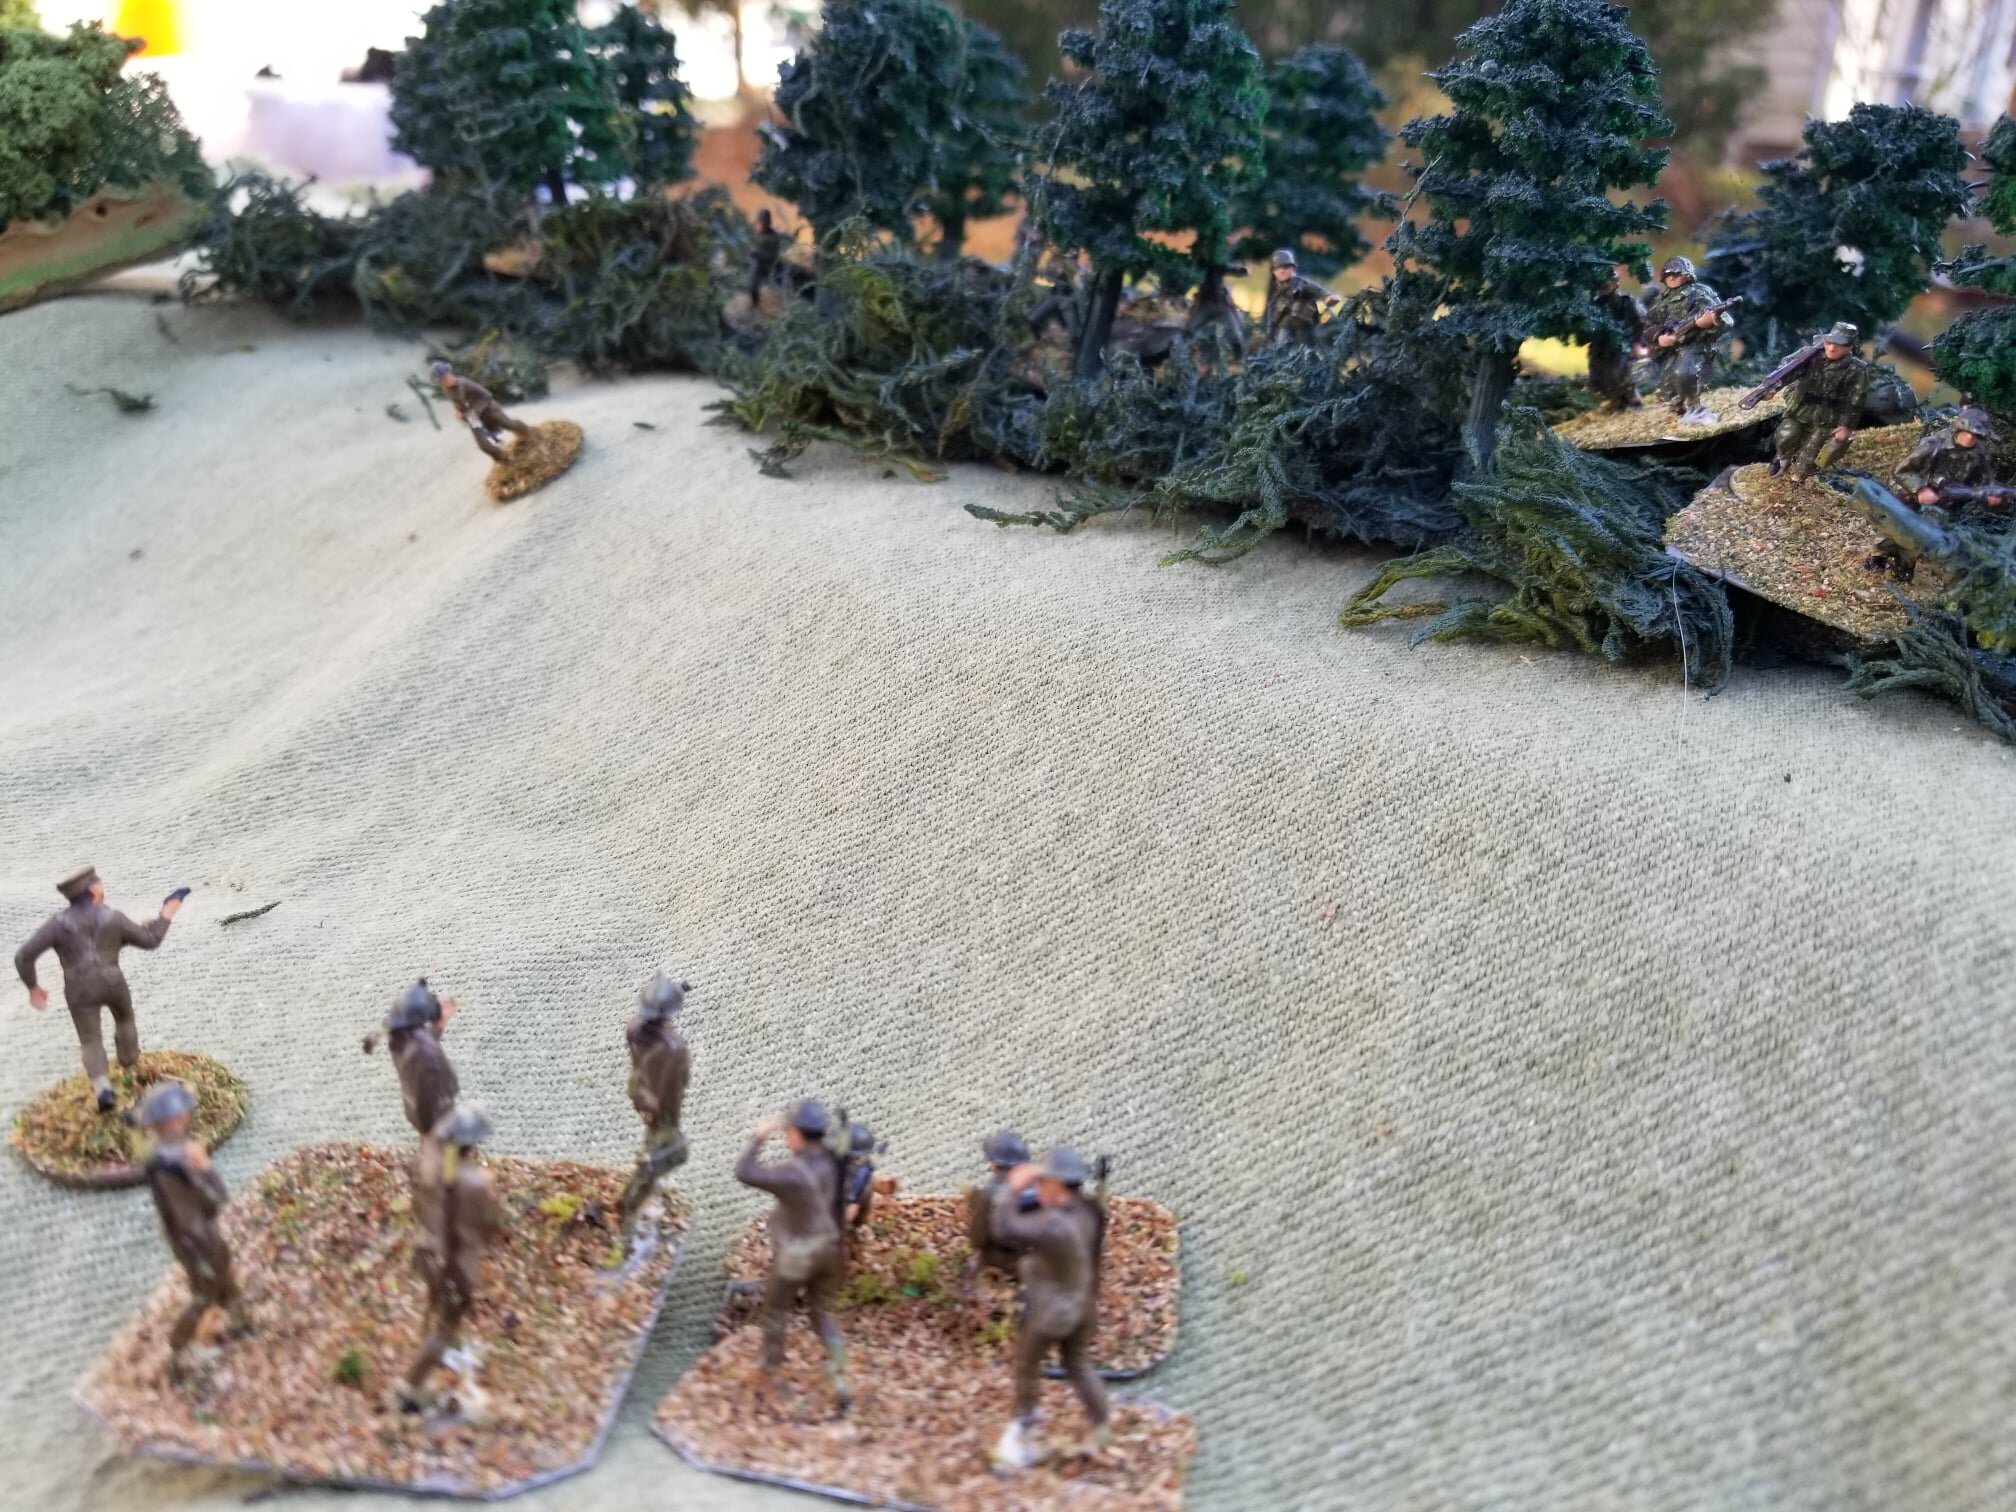
At the close of the game, the Polish HQ squad confronts the horde of Panzergrenadiers emerging from the woods.
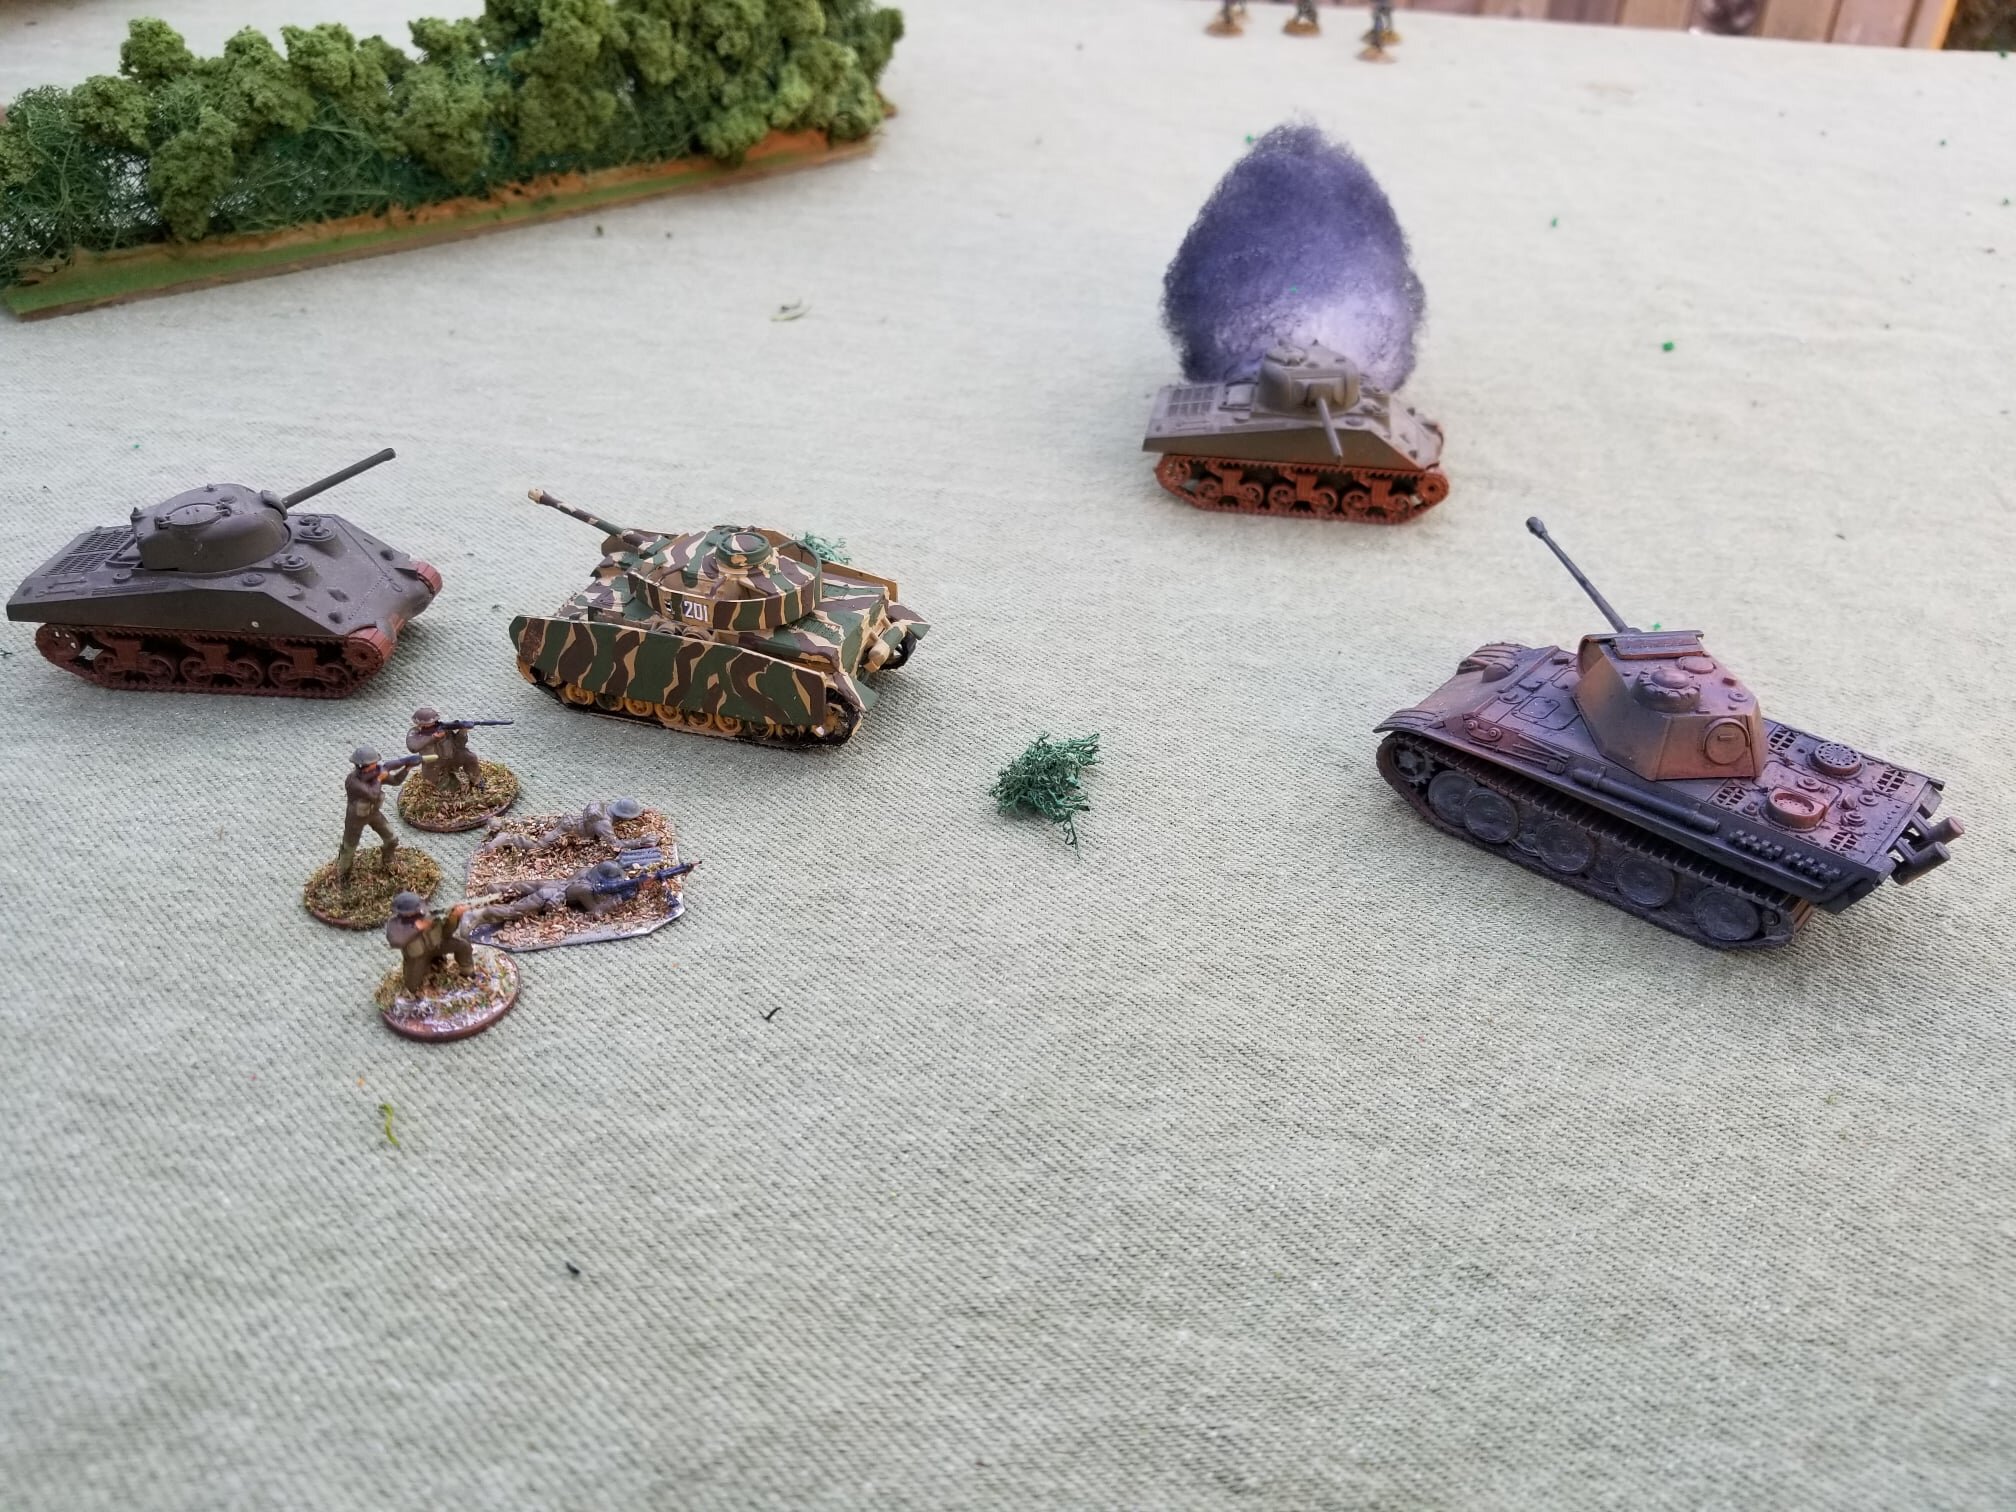
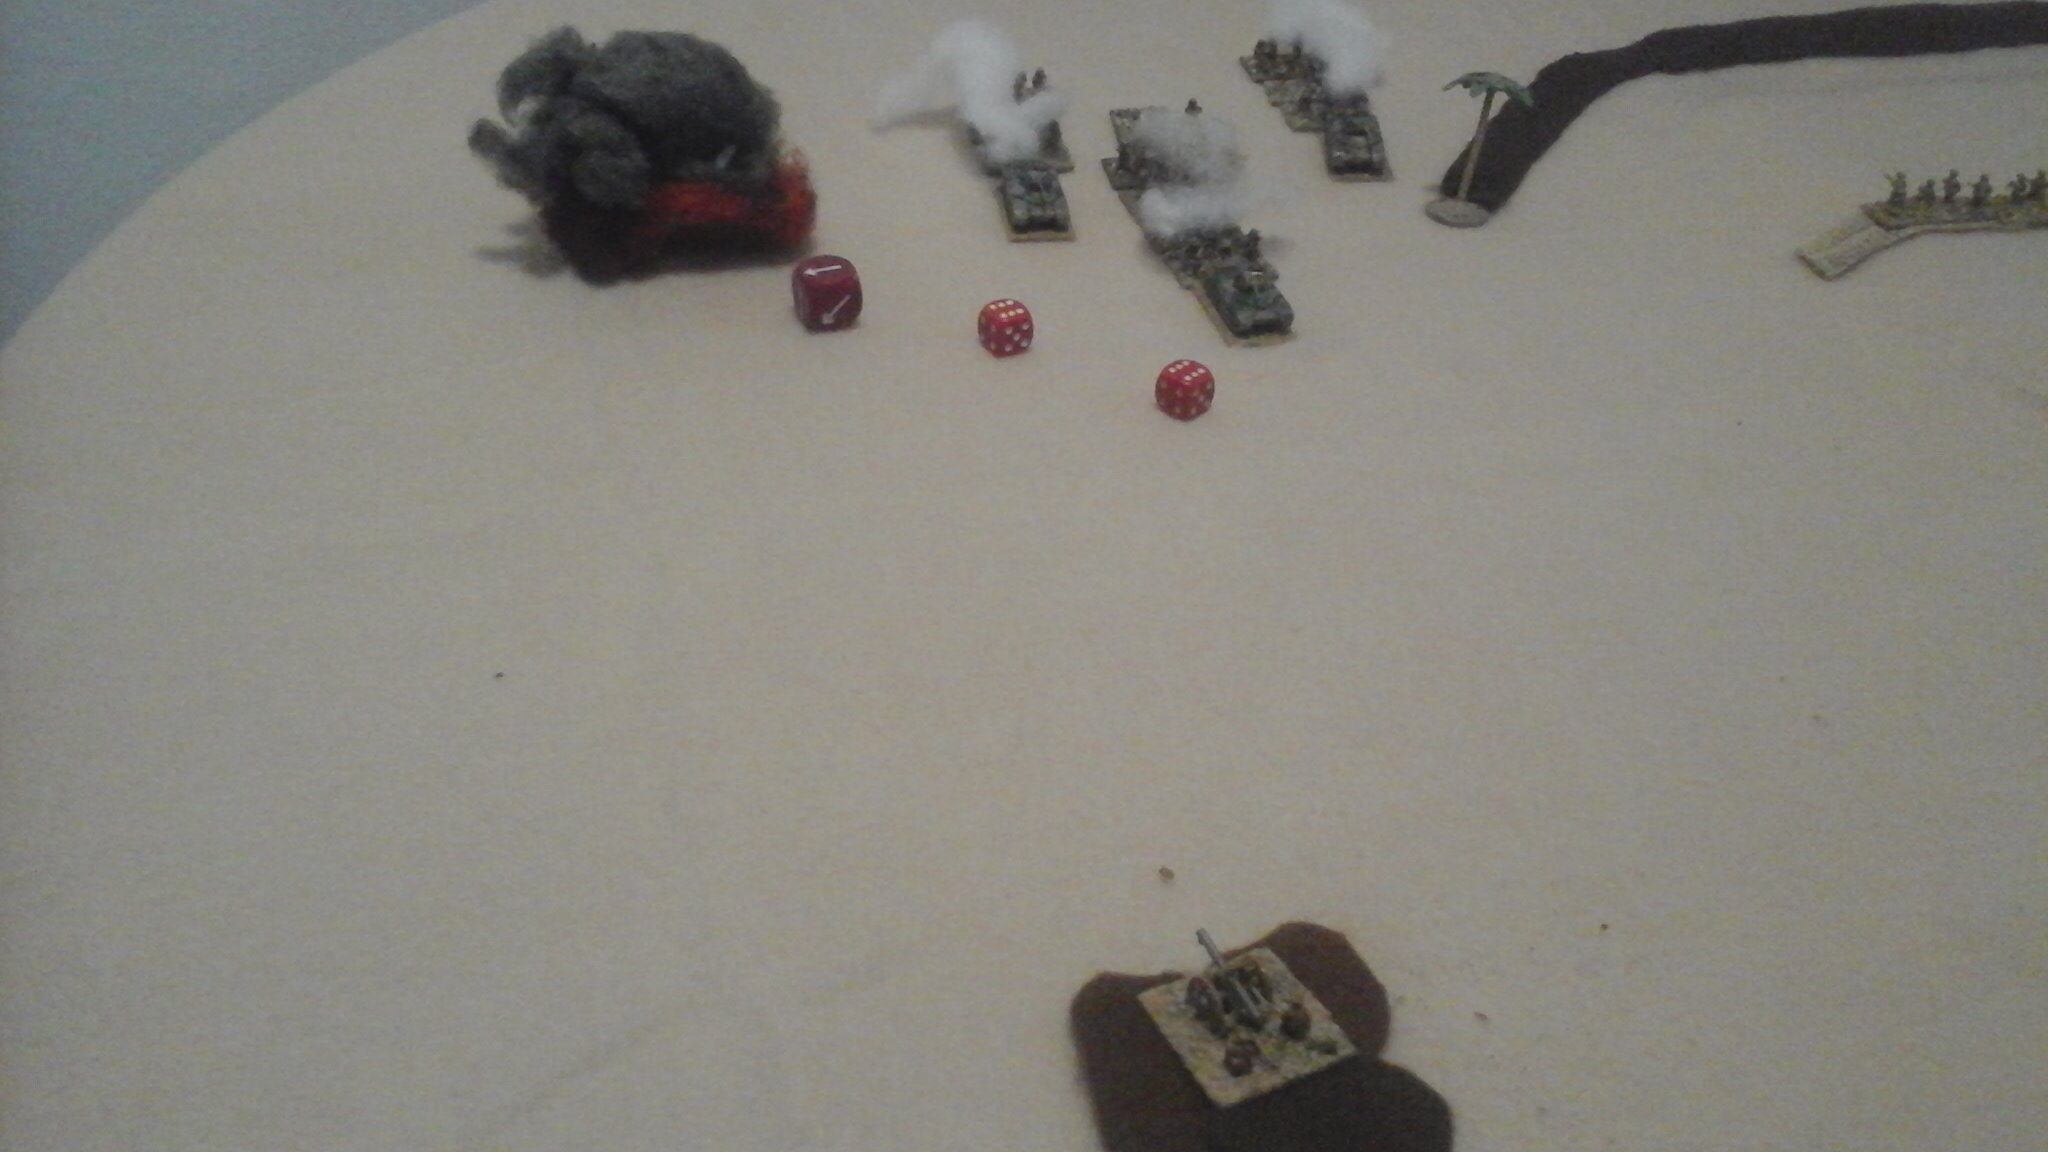
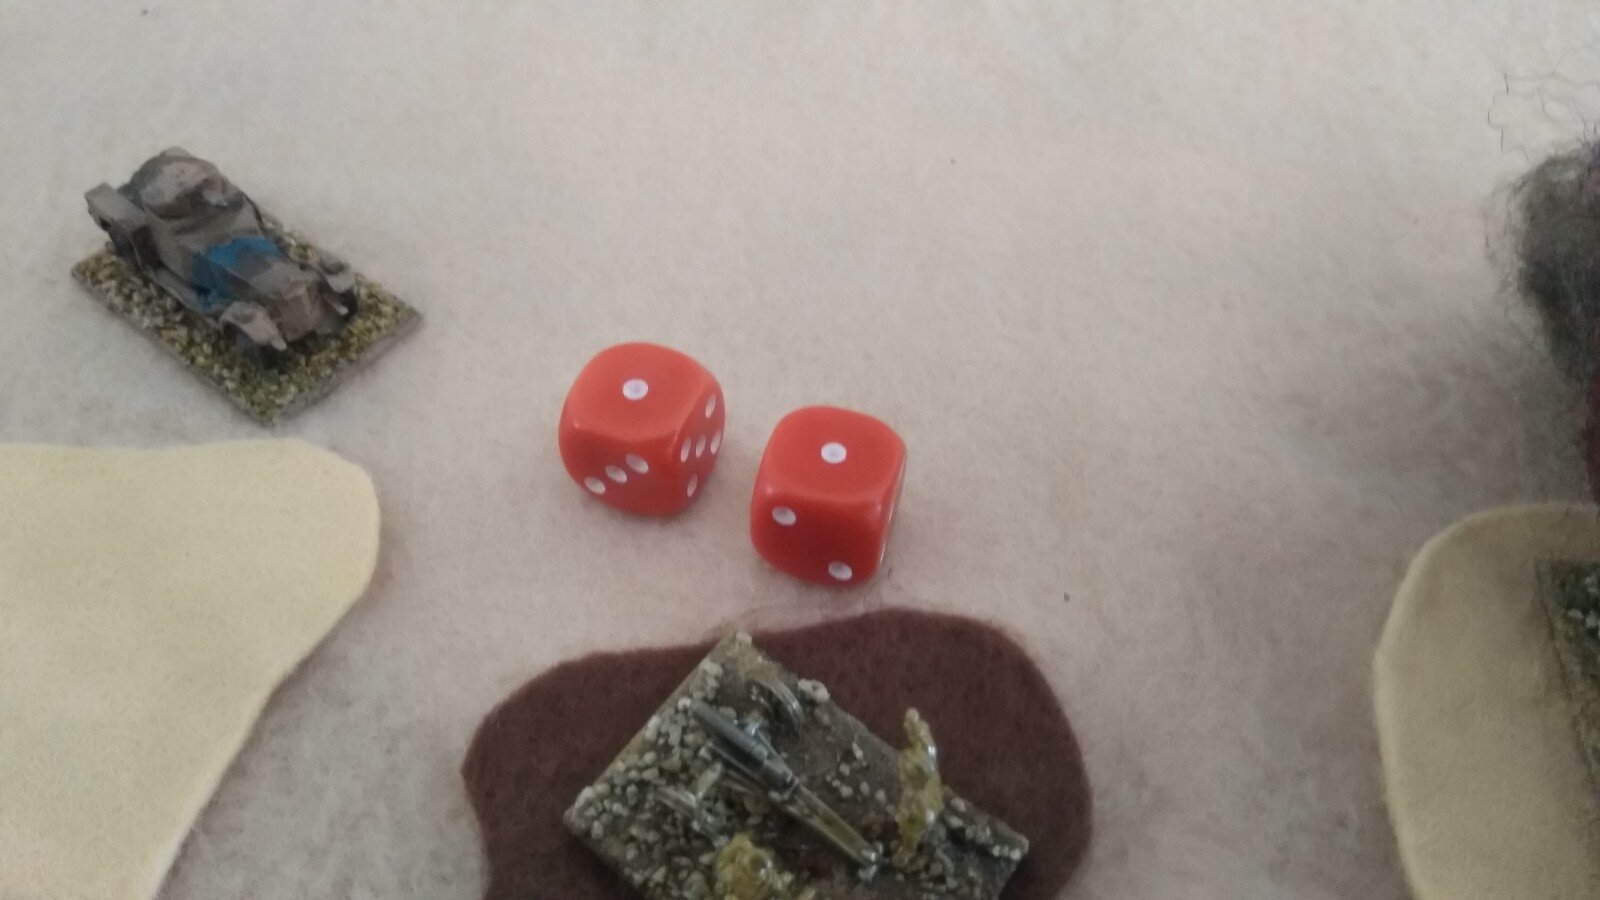
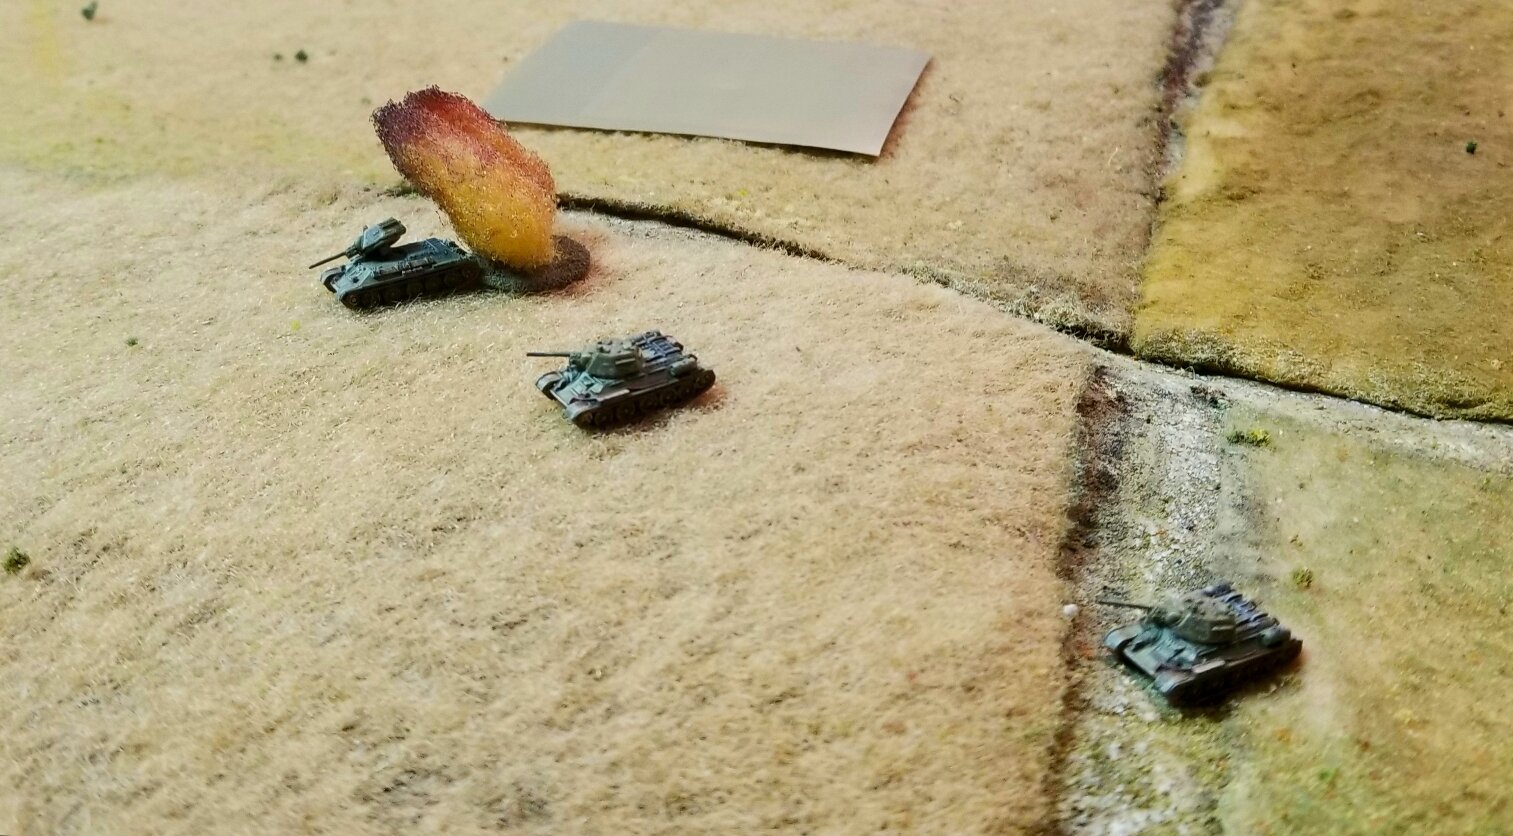
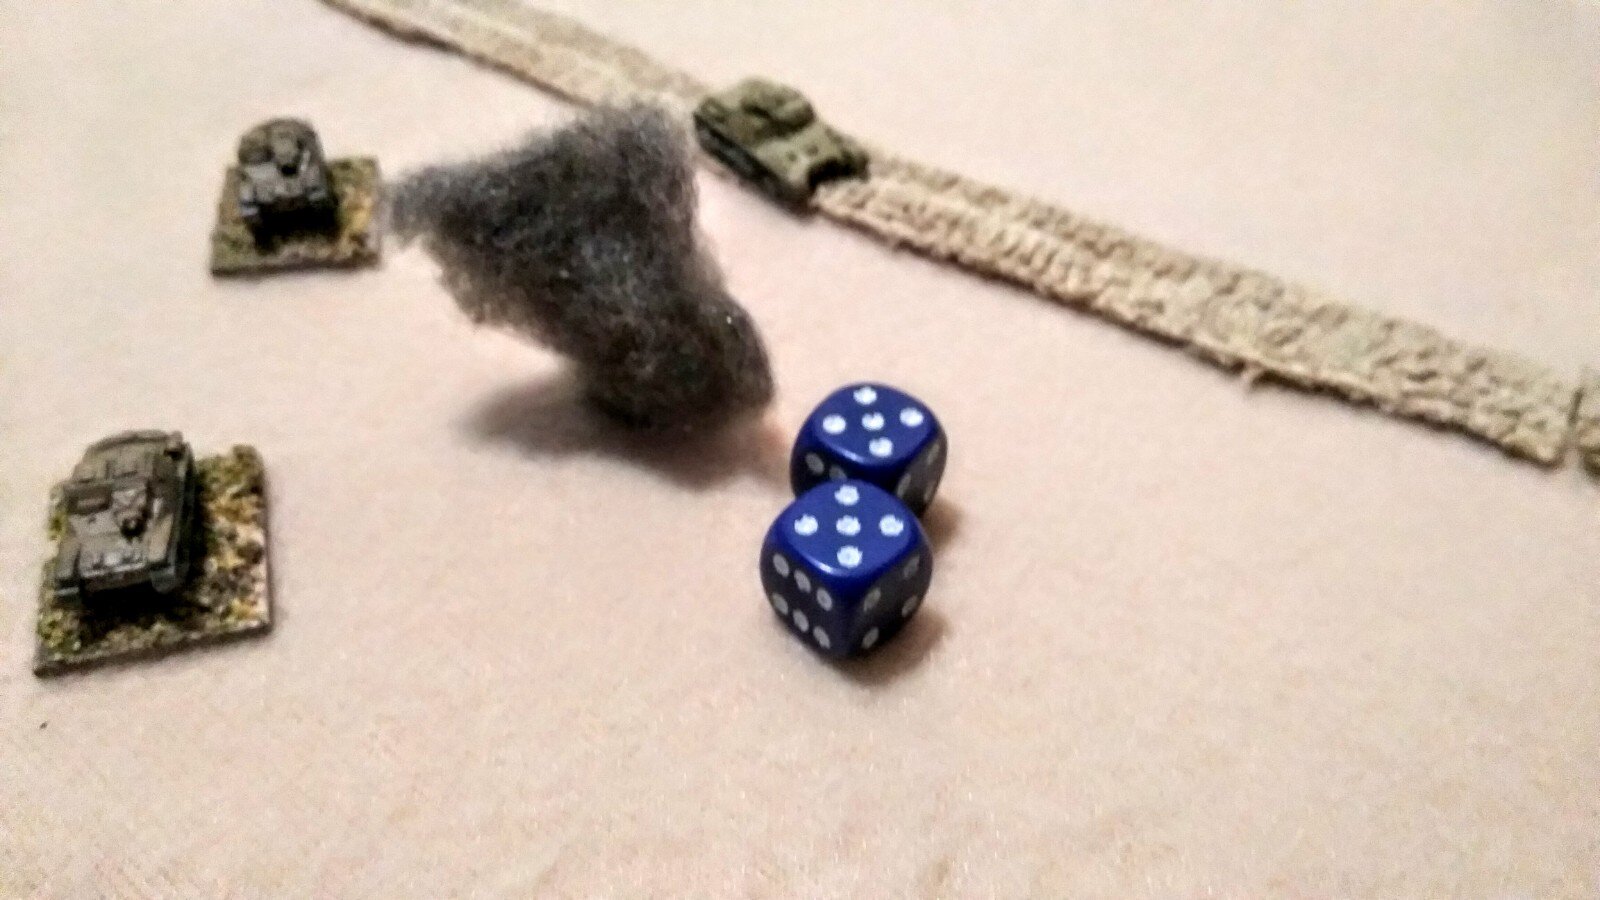
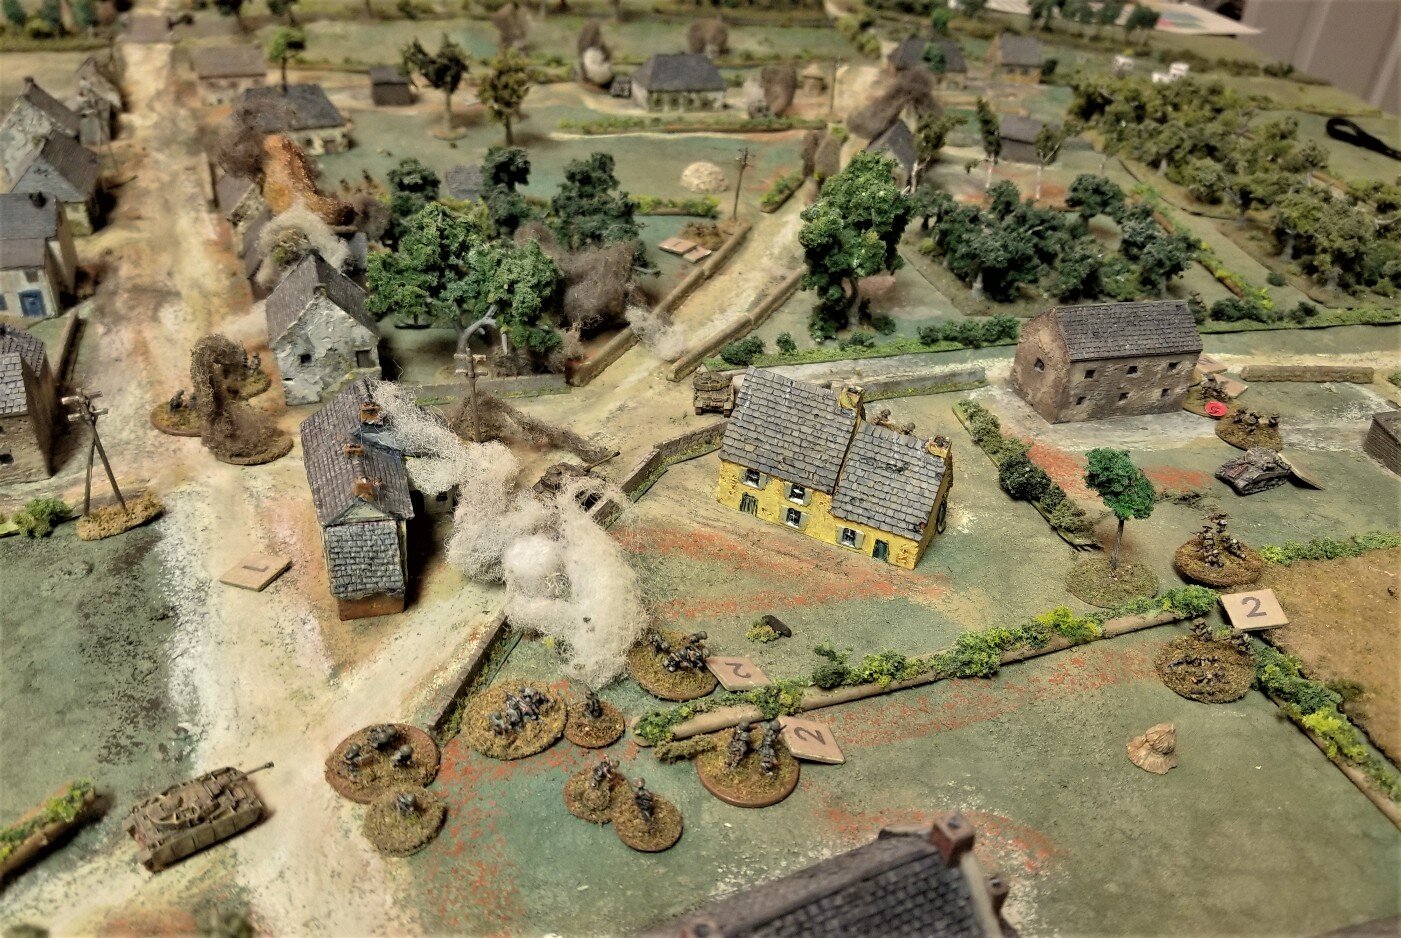
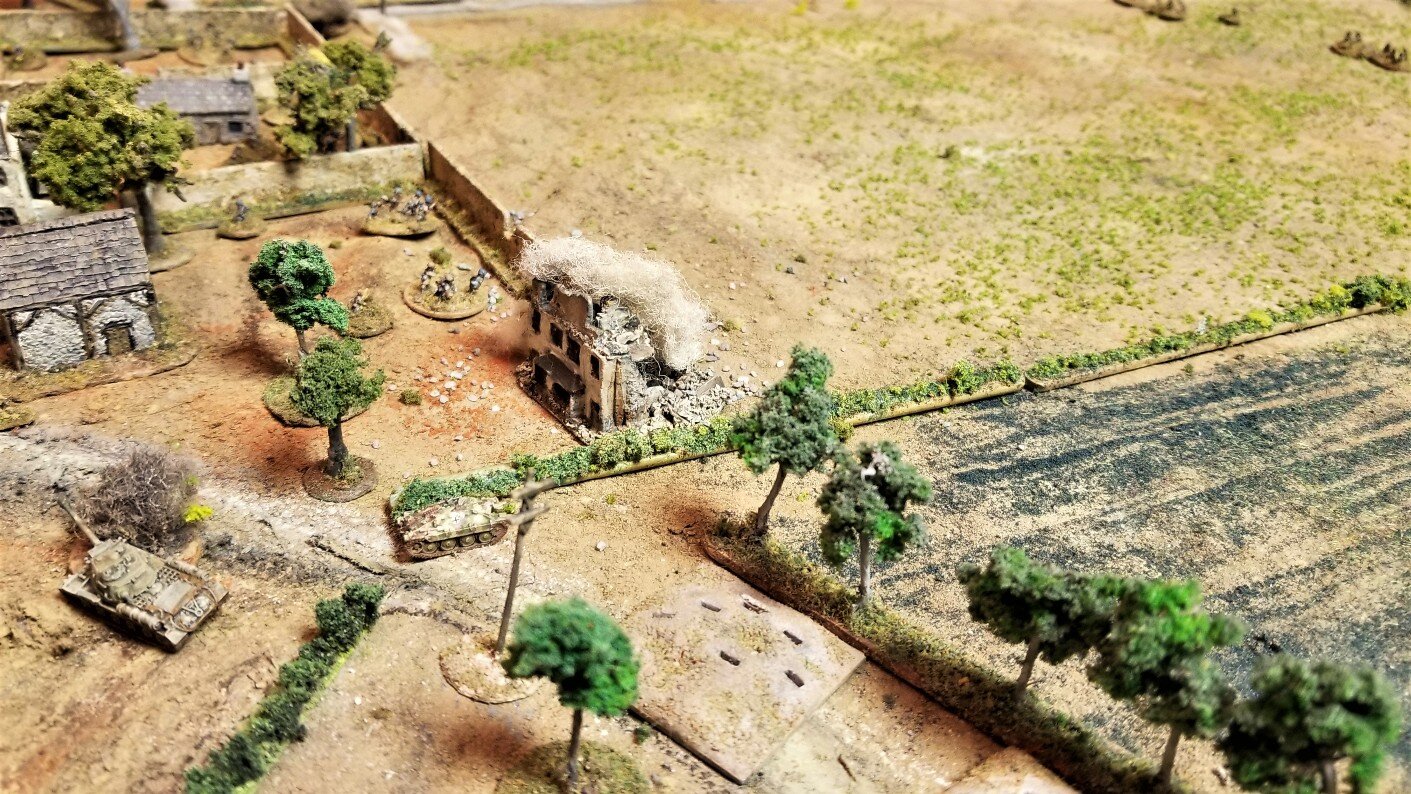
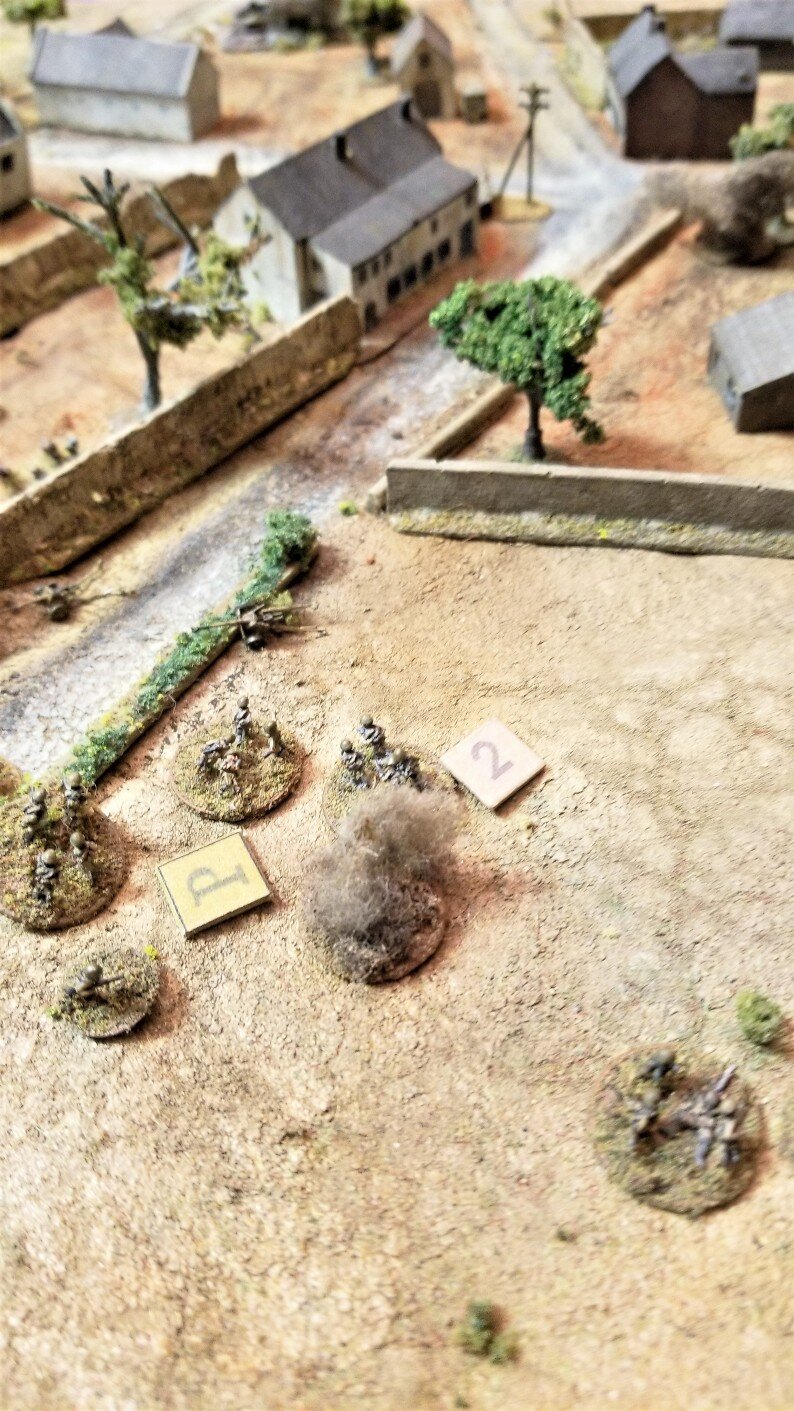
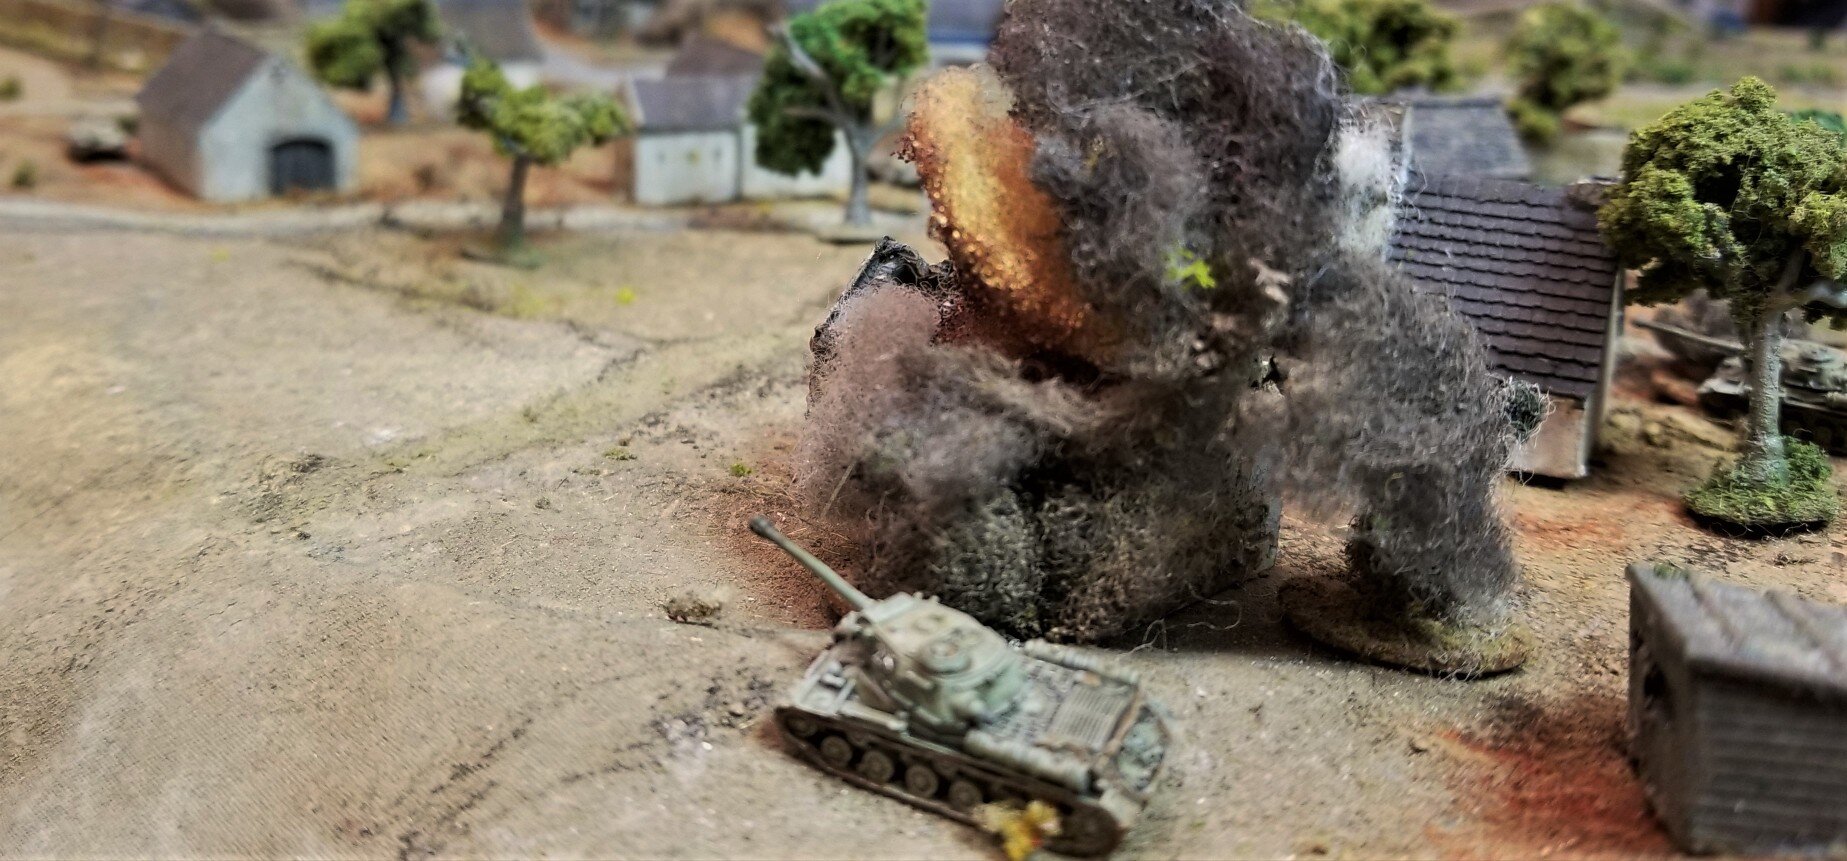
Last turn of the game. simultaneous firing after the Tea Break card. PIAT team and M4 unsuccessful due to Panther's thick armor. The M4 is brewed up by the Panther.
Dan Albrecht

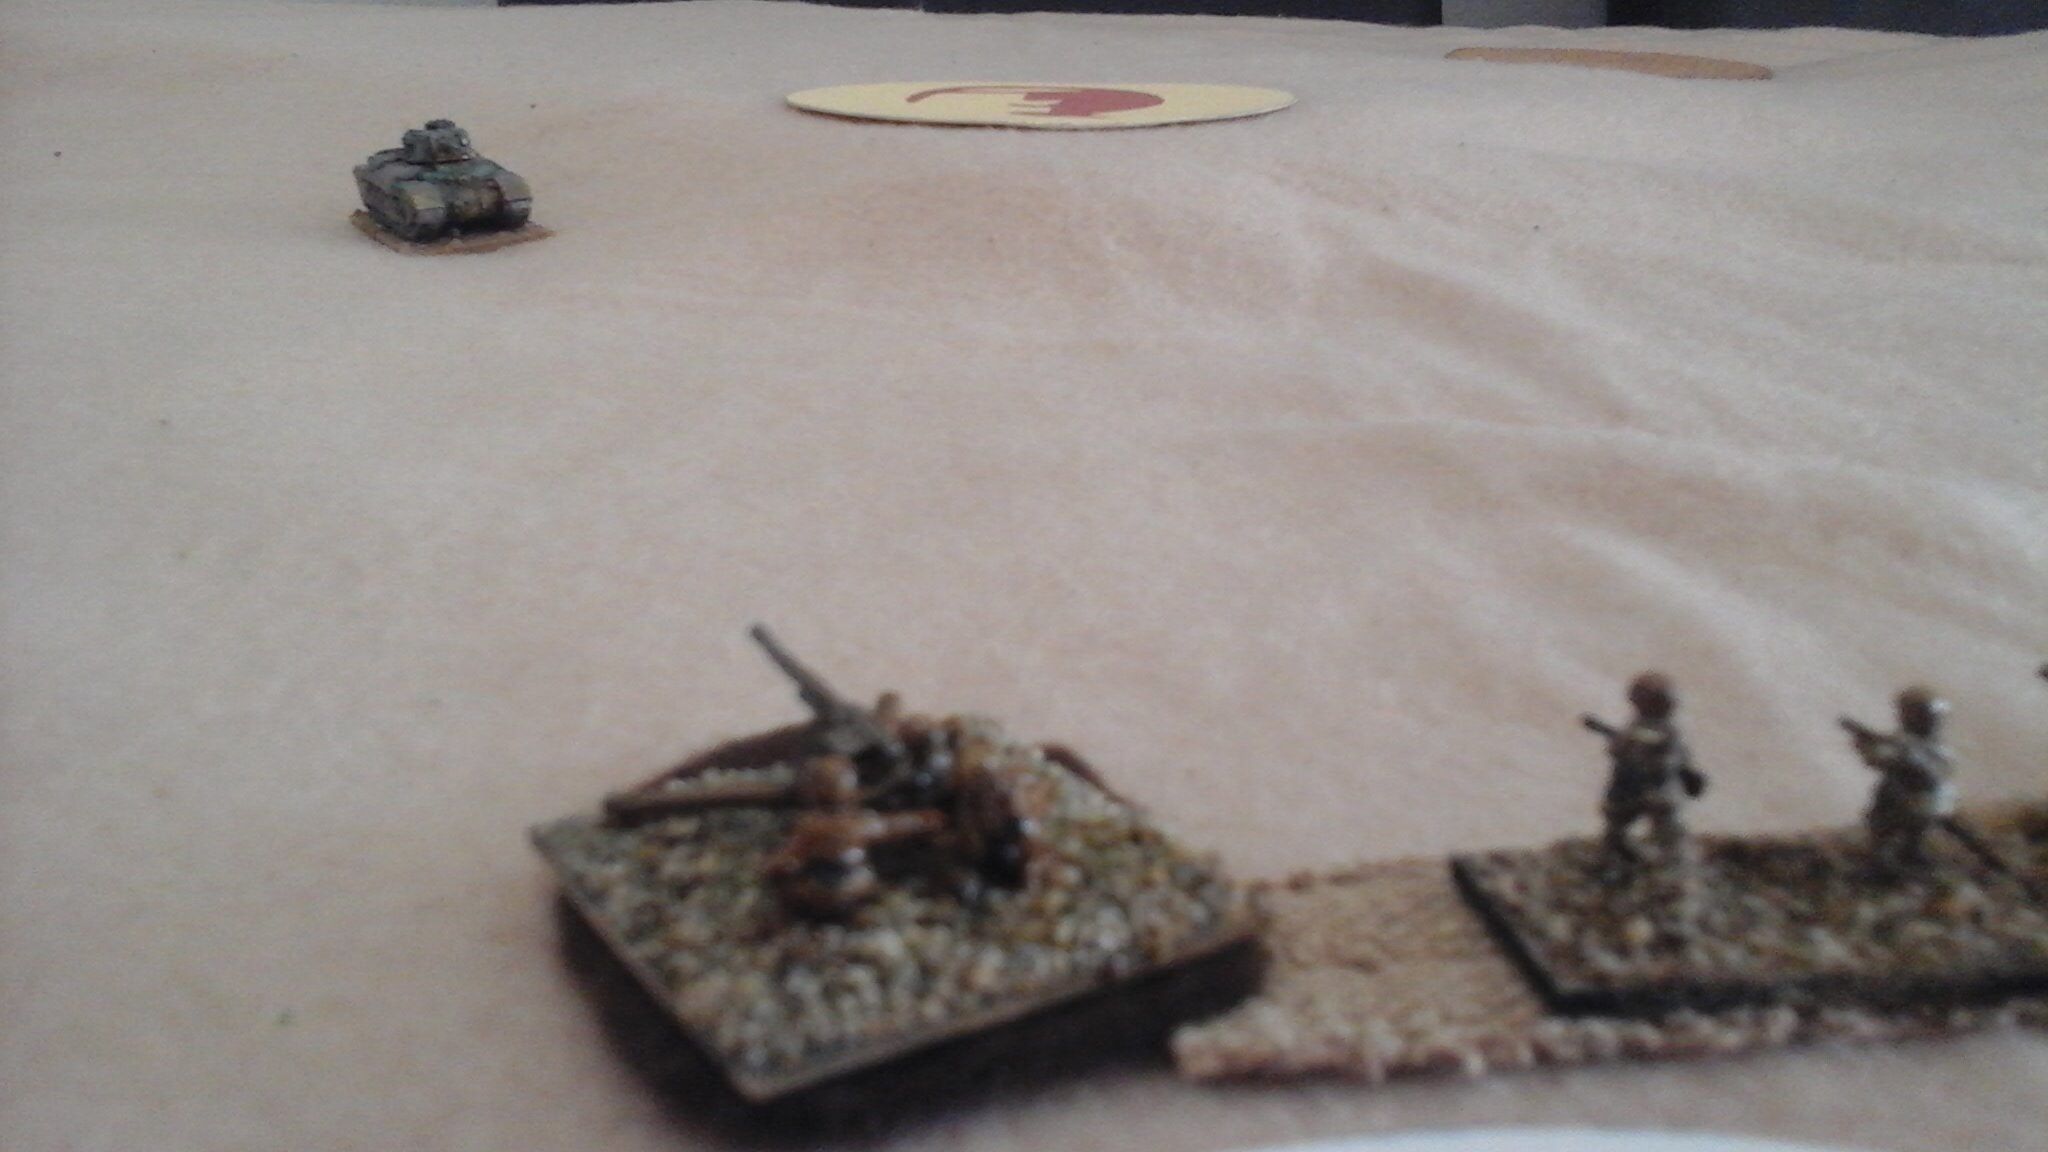
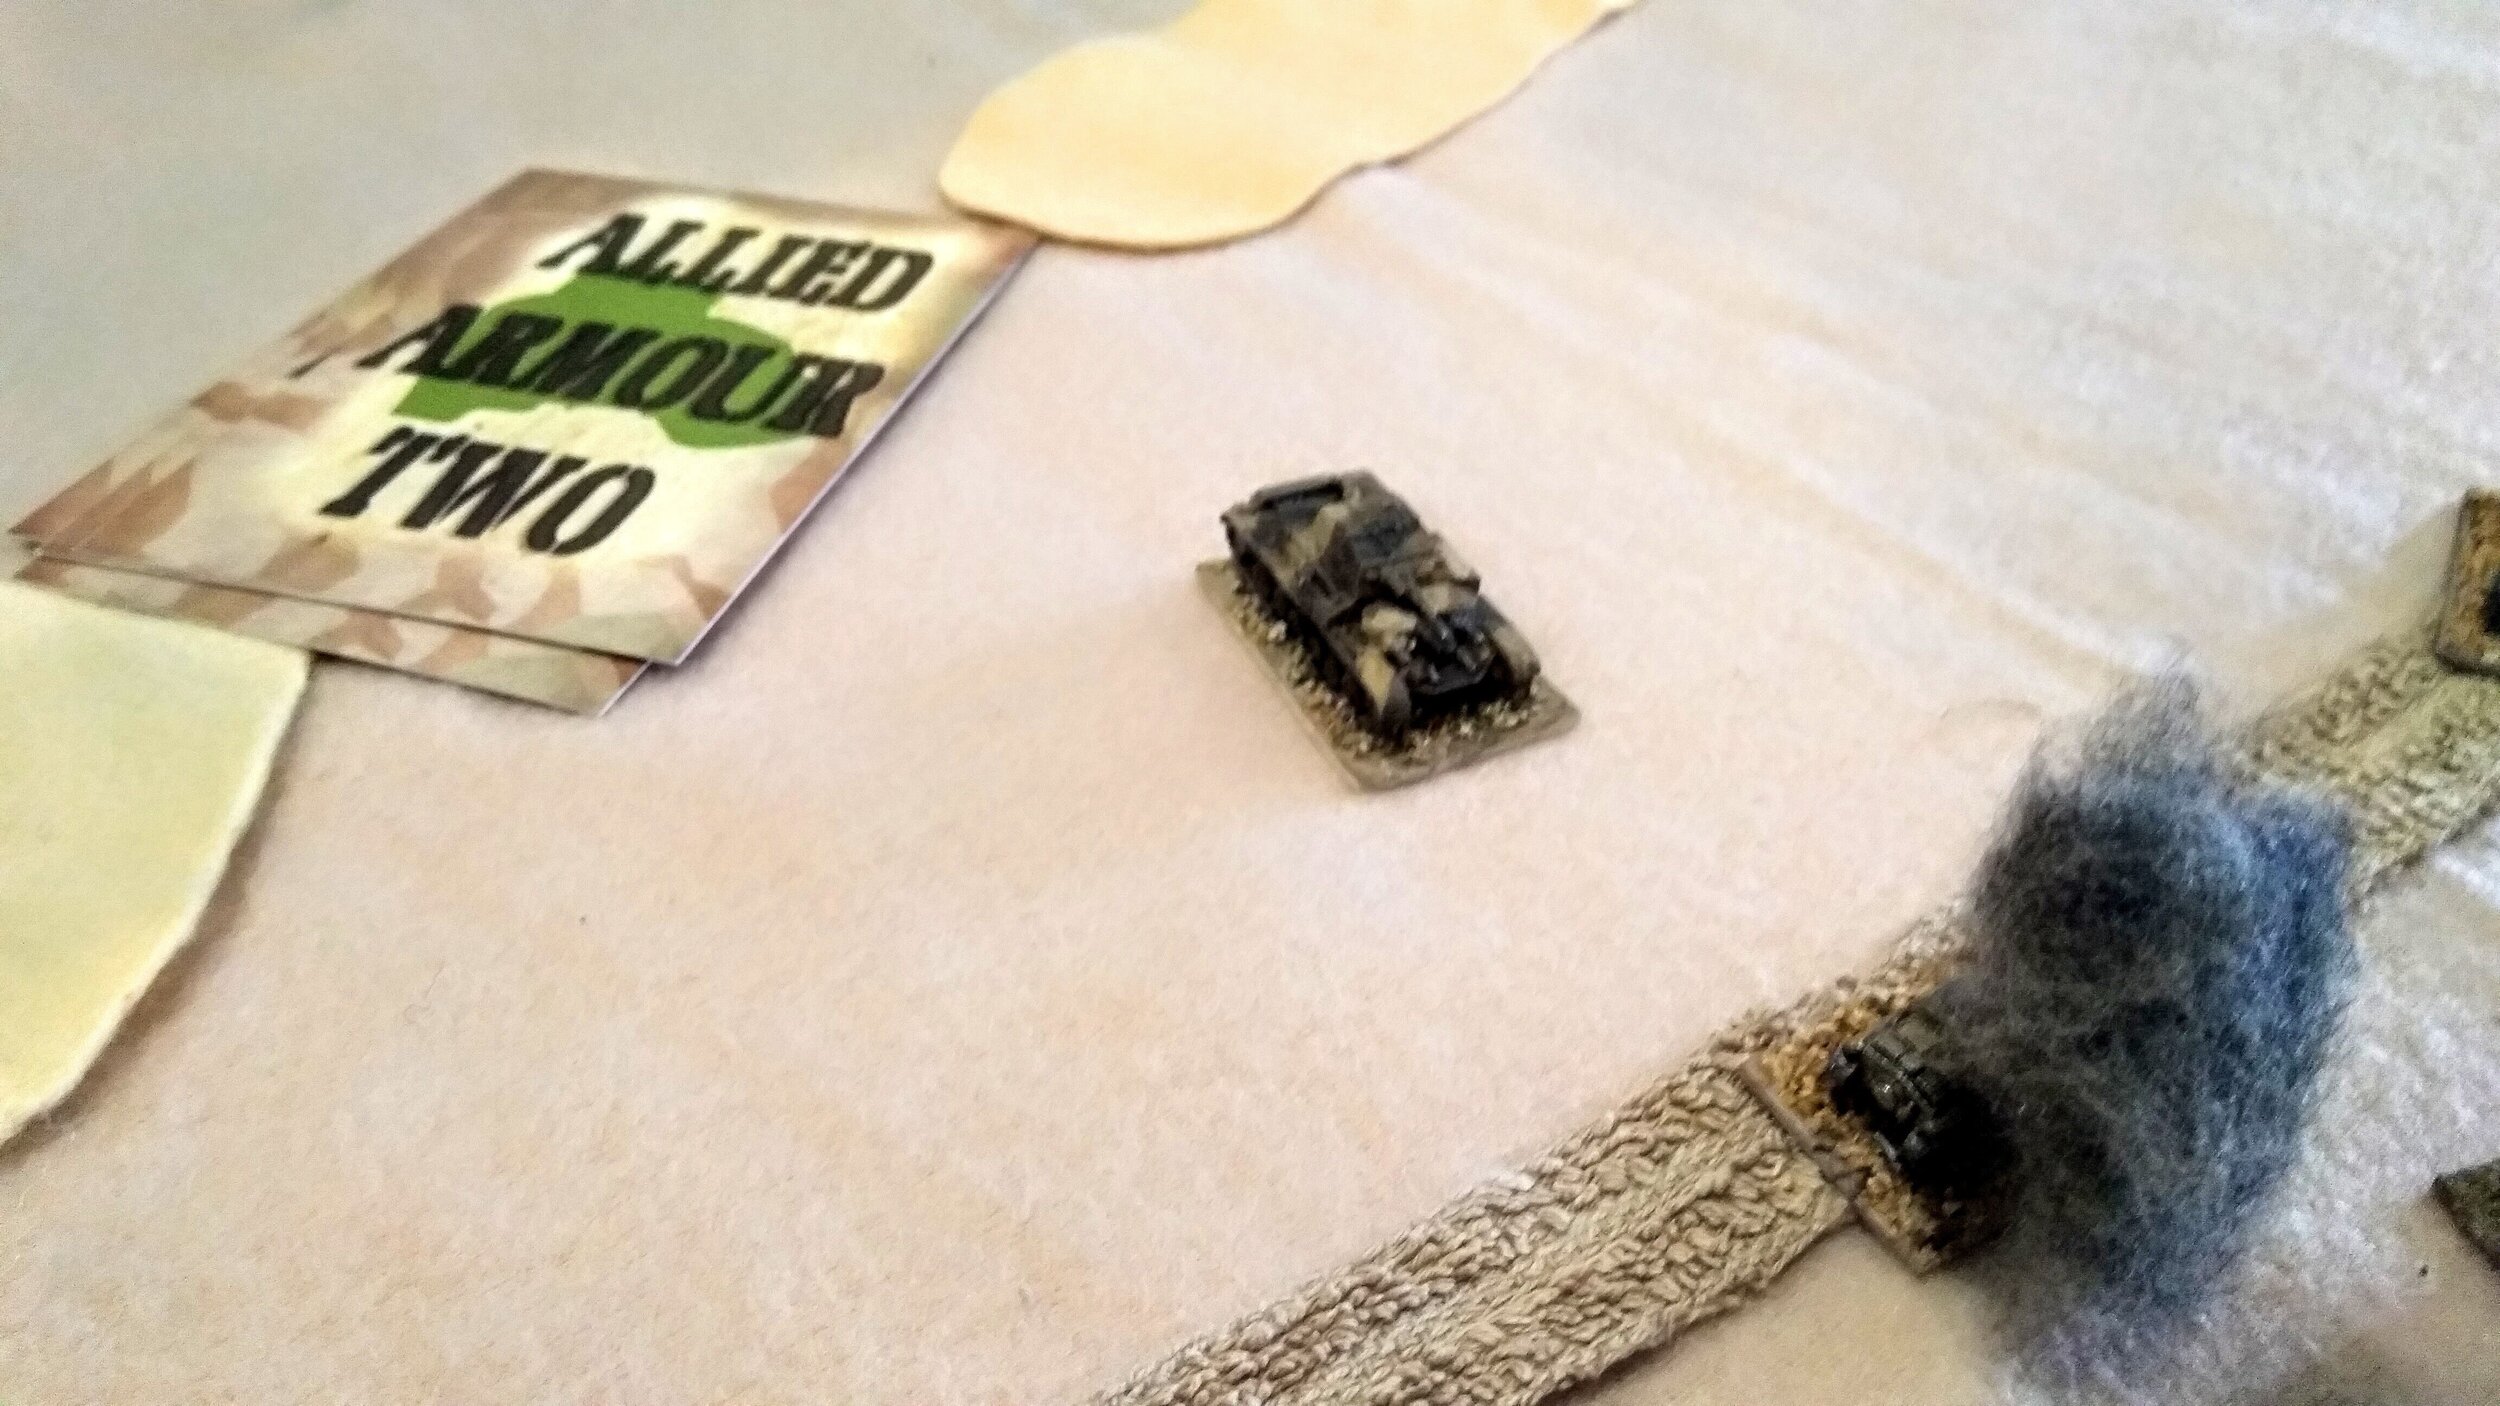
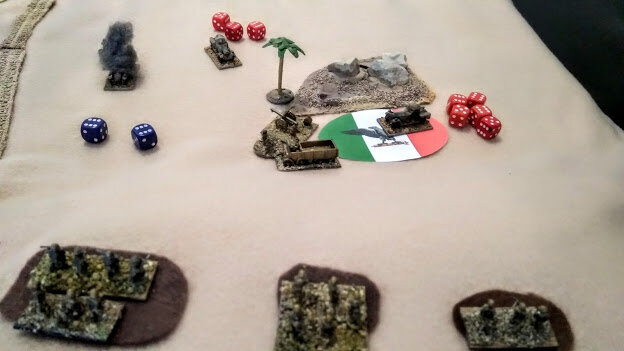
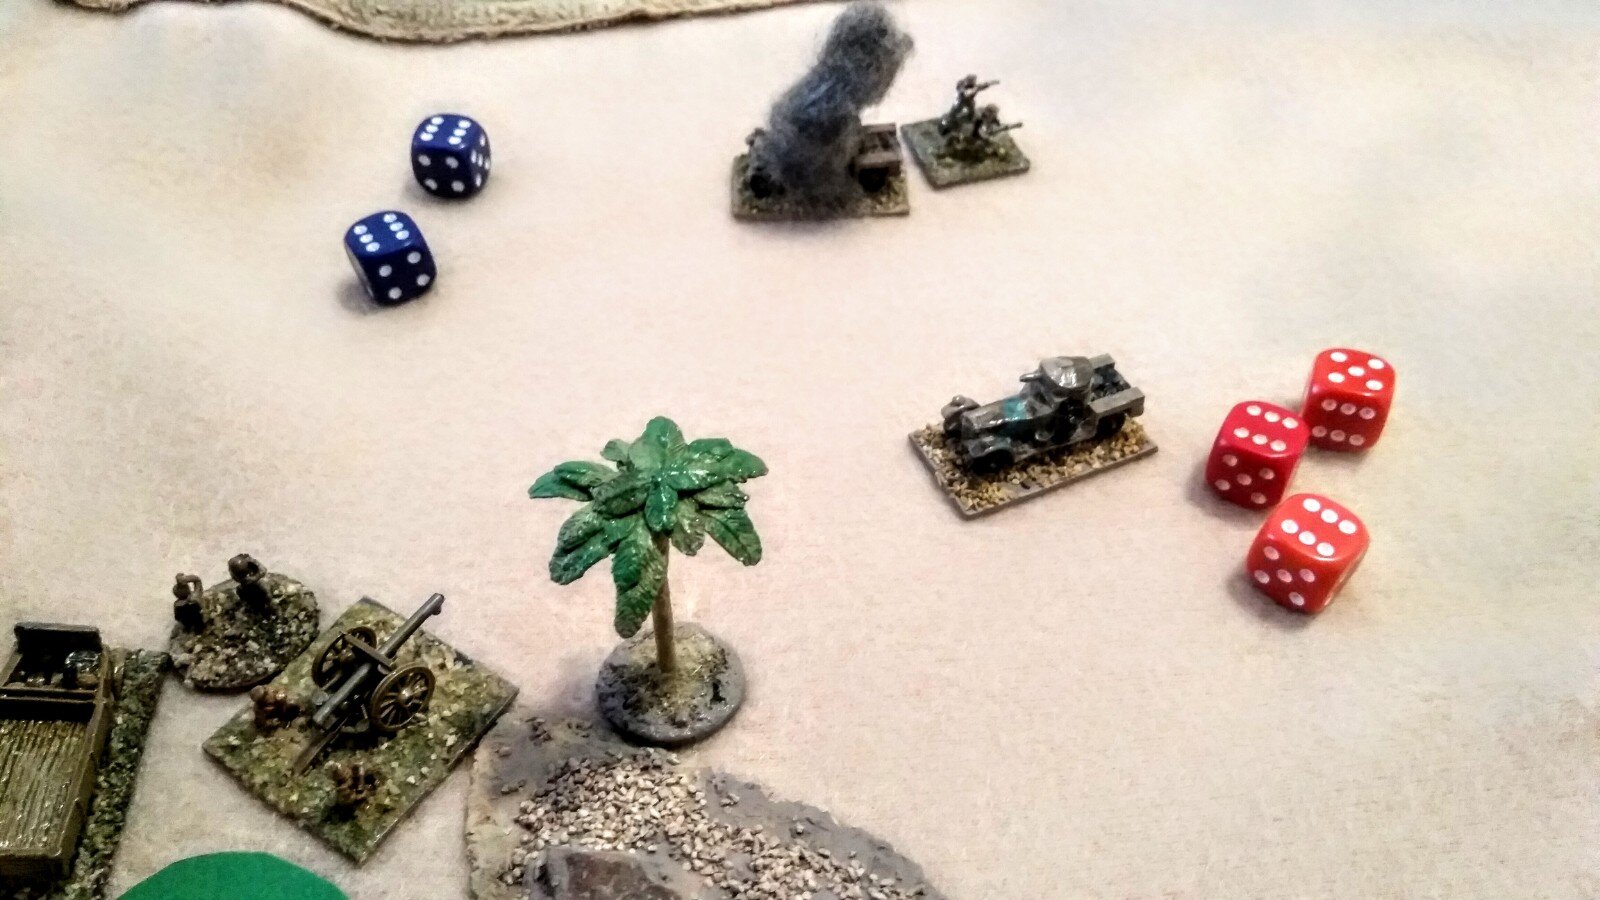
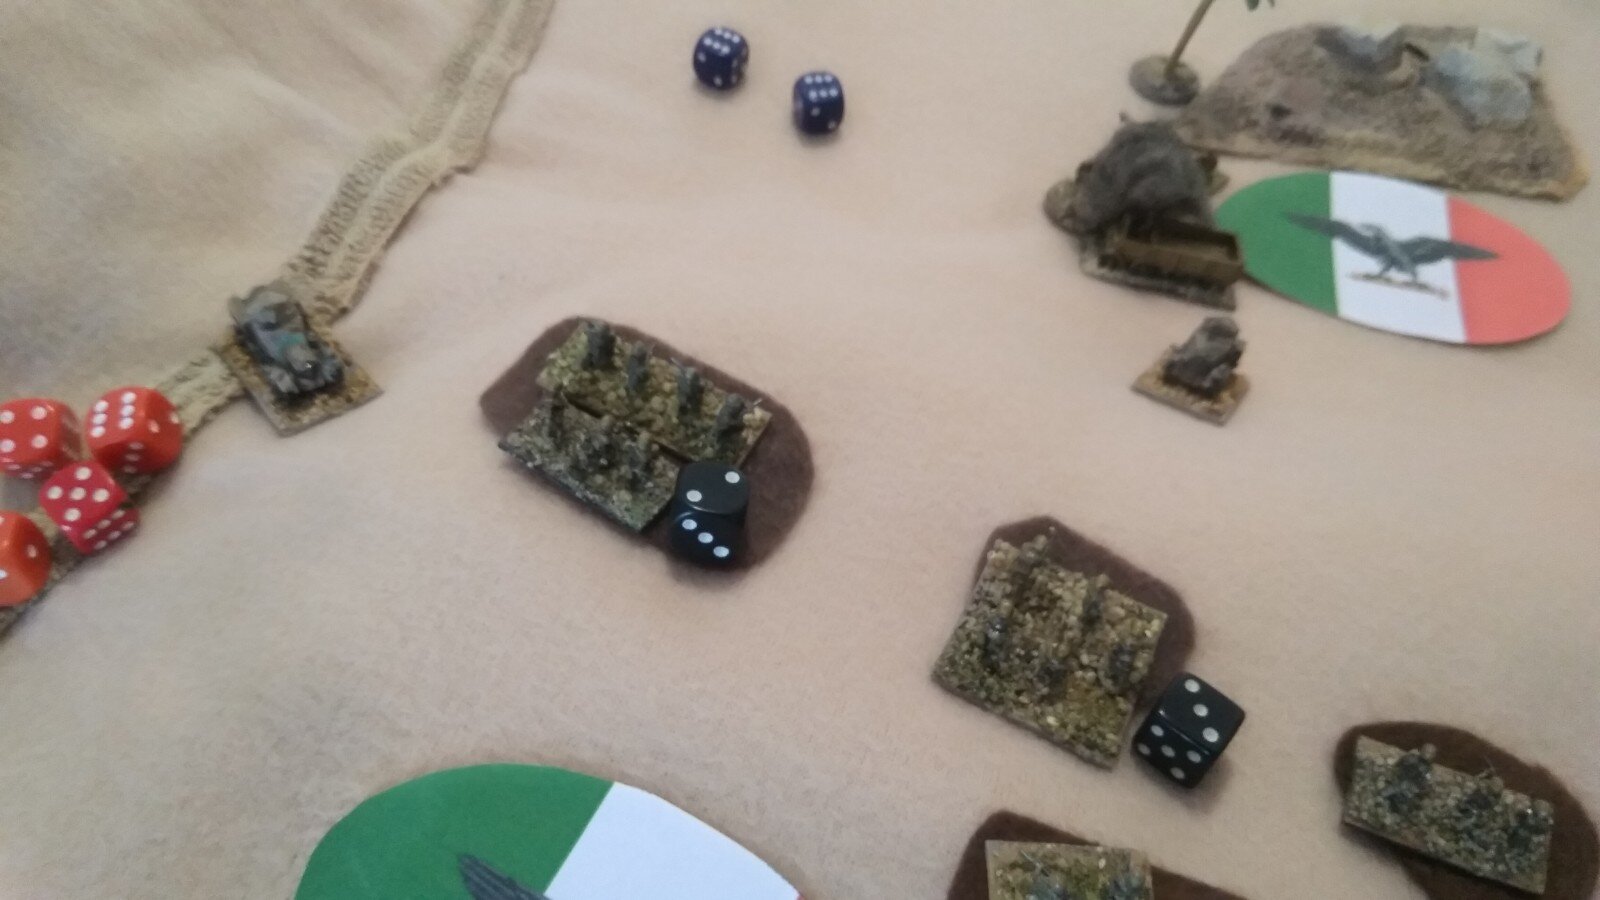
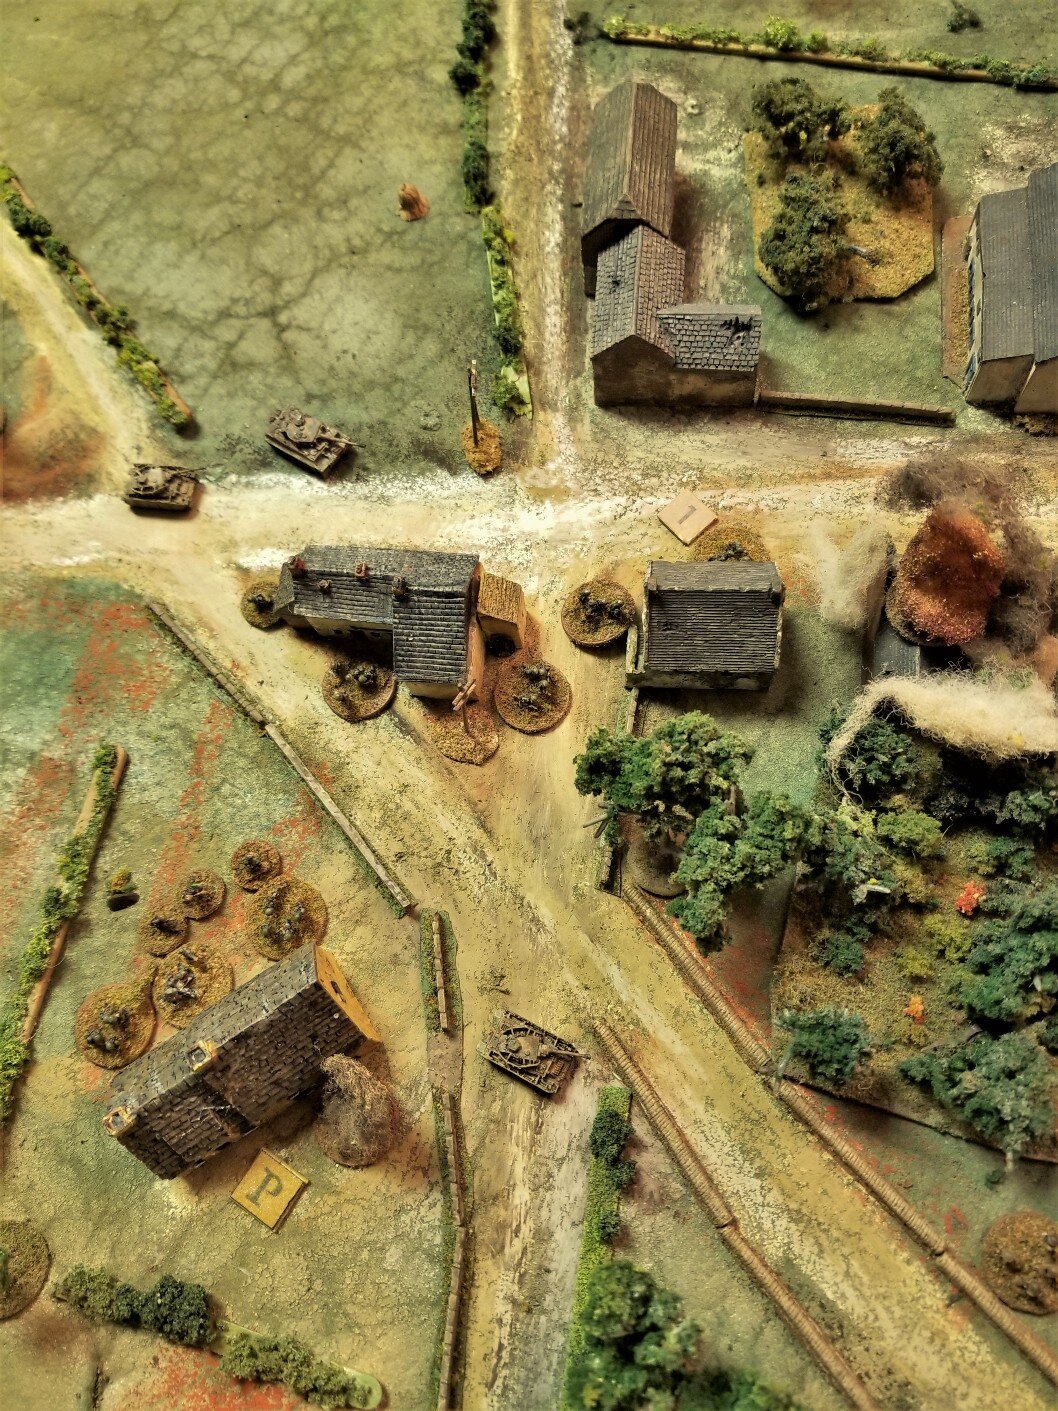
On the Front Line of Op Compass Major Mick Dundee of 2/2nd Australian Infantry had been in action all of yesterday, but today 4th January 1941, is the day that Bardia falls!
16th Australian Infantry Brigade with Dundee in the lead are within the Italian perimeter and have made some progress against a fairly irresolute defence. The Aussies have followed a wadi and discovered a second line of Italian defences ready for them.
During his attack on Post 41 yesterday Dundee rescued Lt Bumfluff Farthingdale, 11th Hussars, from the Italian command bunker where he was being tortured with Italian wine and Cheeses. Bumfluff has somehow ended up commanding a Matlida II tank attached to Dundee's force.

In front of the Aussies is a low hill that looks as if it will provide some protection from the Italian artillery. Dundee's plan is to advance to the dead ground behind the hill and then work out the best way of taking the guns!
"Right, Cobbers, let’s kick their arses, eh mates?"
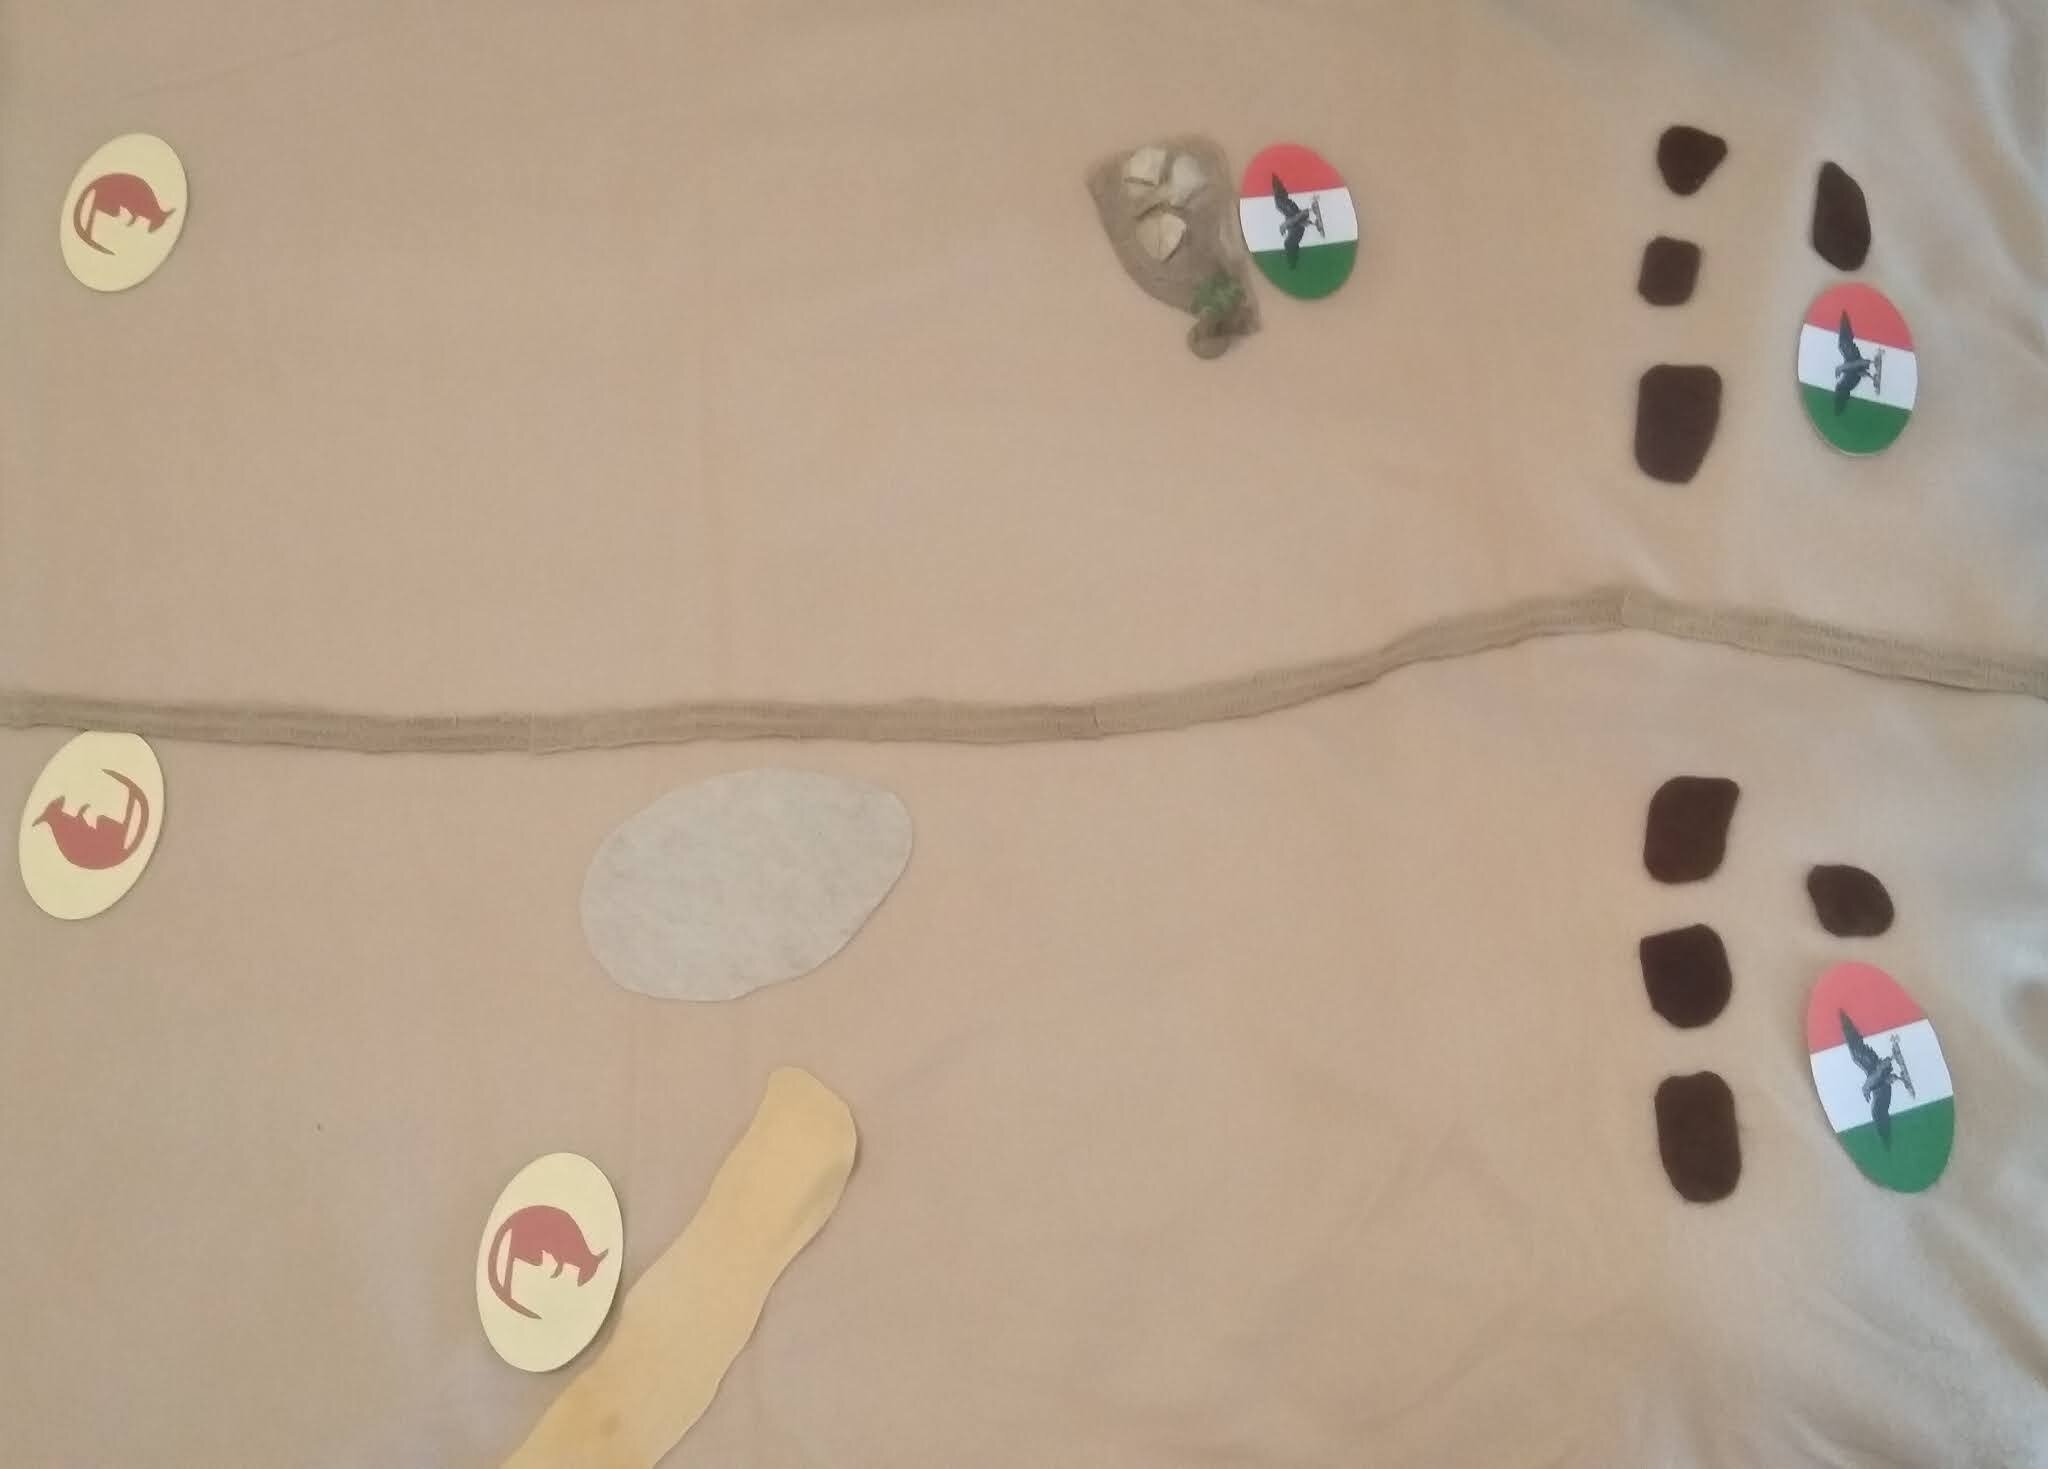
The terrain is flat, dusty and stony, with the occasional patch of shrub and gentle undulation that might give a prone man some cover.
The Aussies enter the table from the north-west table edge behind the major hill there i.e. they enter the table under cover from fire from the Italian position. They enter the table under Blinds, being able to enter up to three available Blinds each time your Australian Blinds card appears. One Blind per platoon available, with no False Blinds.
The objective is simple: neutralise the Italian position. You win a victory if, at the end of the game, there are no Italian troops on the table offering any kind of resistance.
Your accompanying tank (which has only just turned up: late again!) has no HE ammunition, only solid shot.
Company HQ
Major Mick Dundee
2 x 3” Mortar
1st Platoon
Lieutenant Eddie Everage
3 x Rifle Section (6 men each)
2nd Platoon
Lieutenant Kev Blanchett
3 x Rifle Section (6 men each)
3rd Platoon
Sergeant "Little" Wally Little
3 x Rifle Section (6 men each)
Tank from 7th Royal Tank Regiment
1 x Matilda II
All troops start the game in their position under on-table Blinds. You have one Blind available per platoon, plus an extra three False Blinds that can be placed anywhere on the table at the start of the game.
Hold your position at all costs. Failing that, try and remain as some kind of offensive force
Company HQ
Tenente Raymondo Liotta
2 x MMG (3 crew each)
1st Platoon
4 x Rifle Squad (8 men each)
2nd Platoon
4 x Rifle Squad (8 men each)
3rd Platoon
4 x Rifle Squad (8 men each)
Battery from 44th Artillery Regiment
Tenente Paulo Sorvino
3 x 75/27 guns (5 crew each)


Next up, Mick Dundee slaps on a band aid and joins the siege of Tobruk, whilst Bumfluff's Colonel desperately tries to keep him with 7 RTR rather than see him back with the 11th Hussars. Ever popular that boy.
A Wargamer in Cyprus

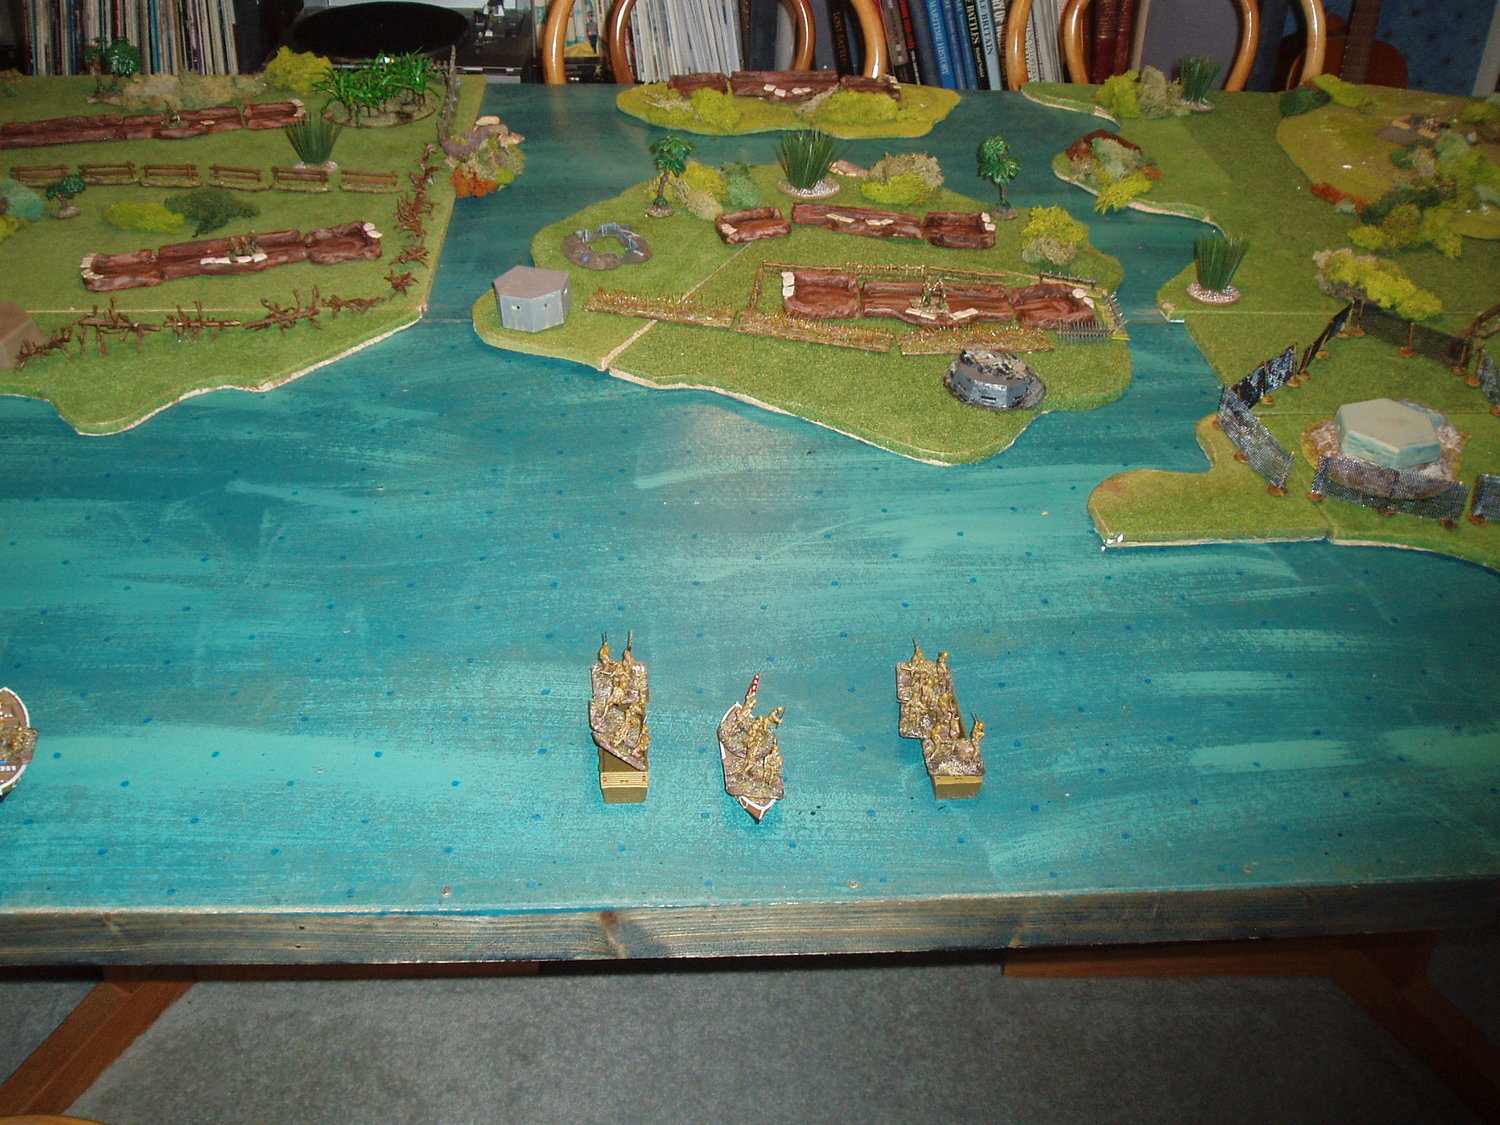
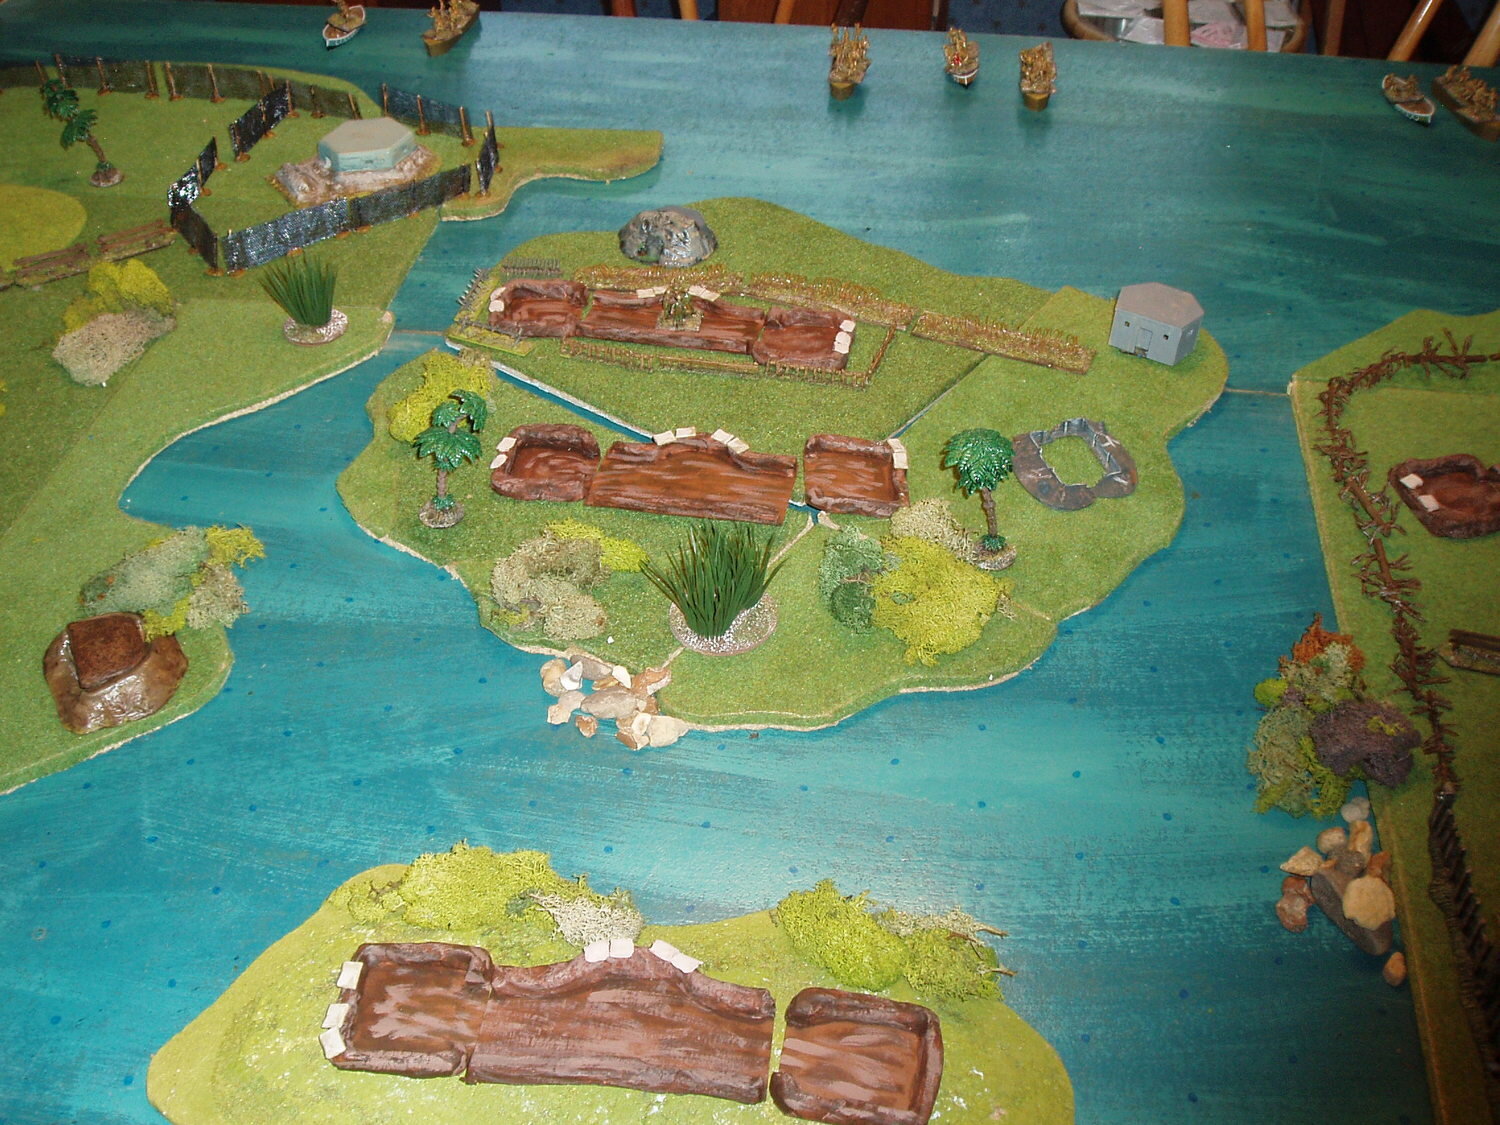
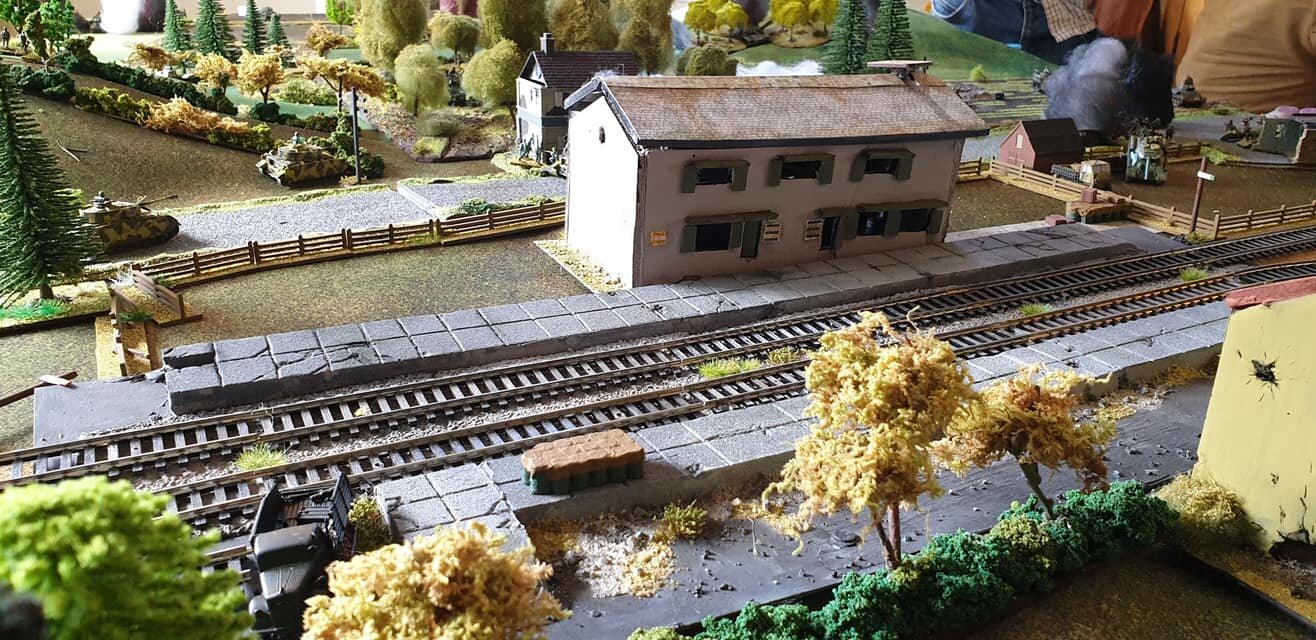
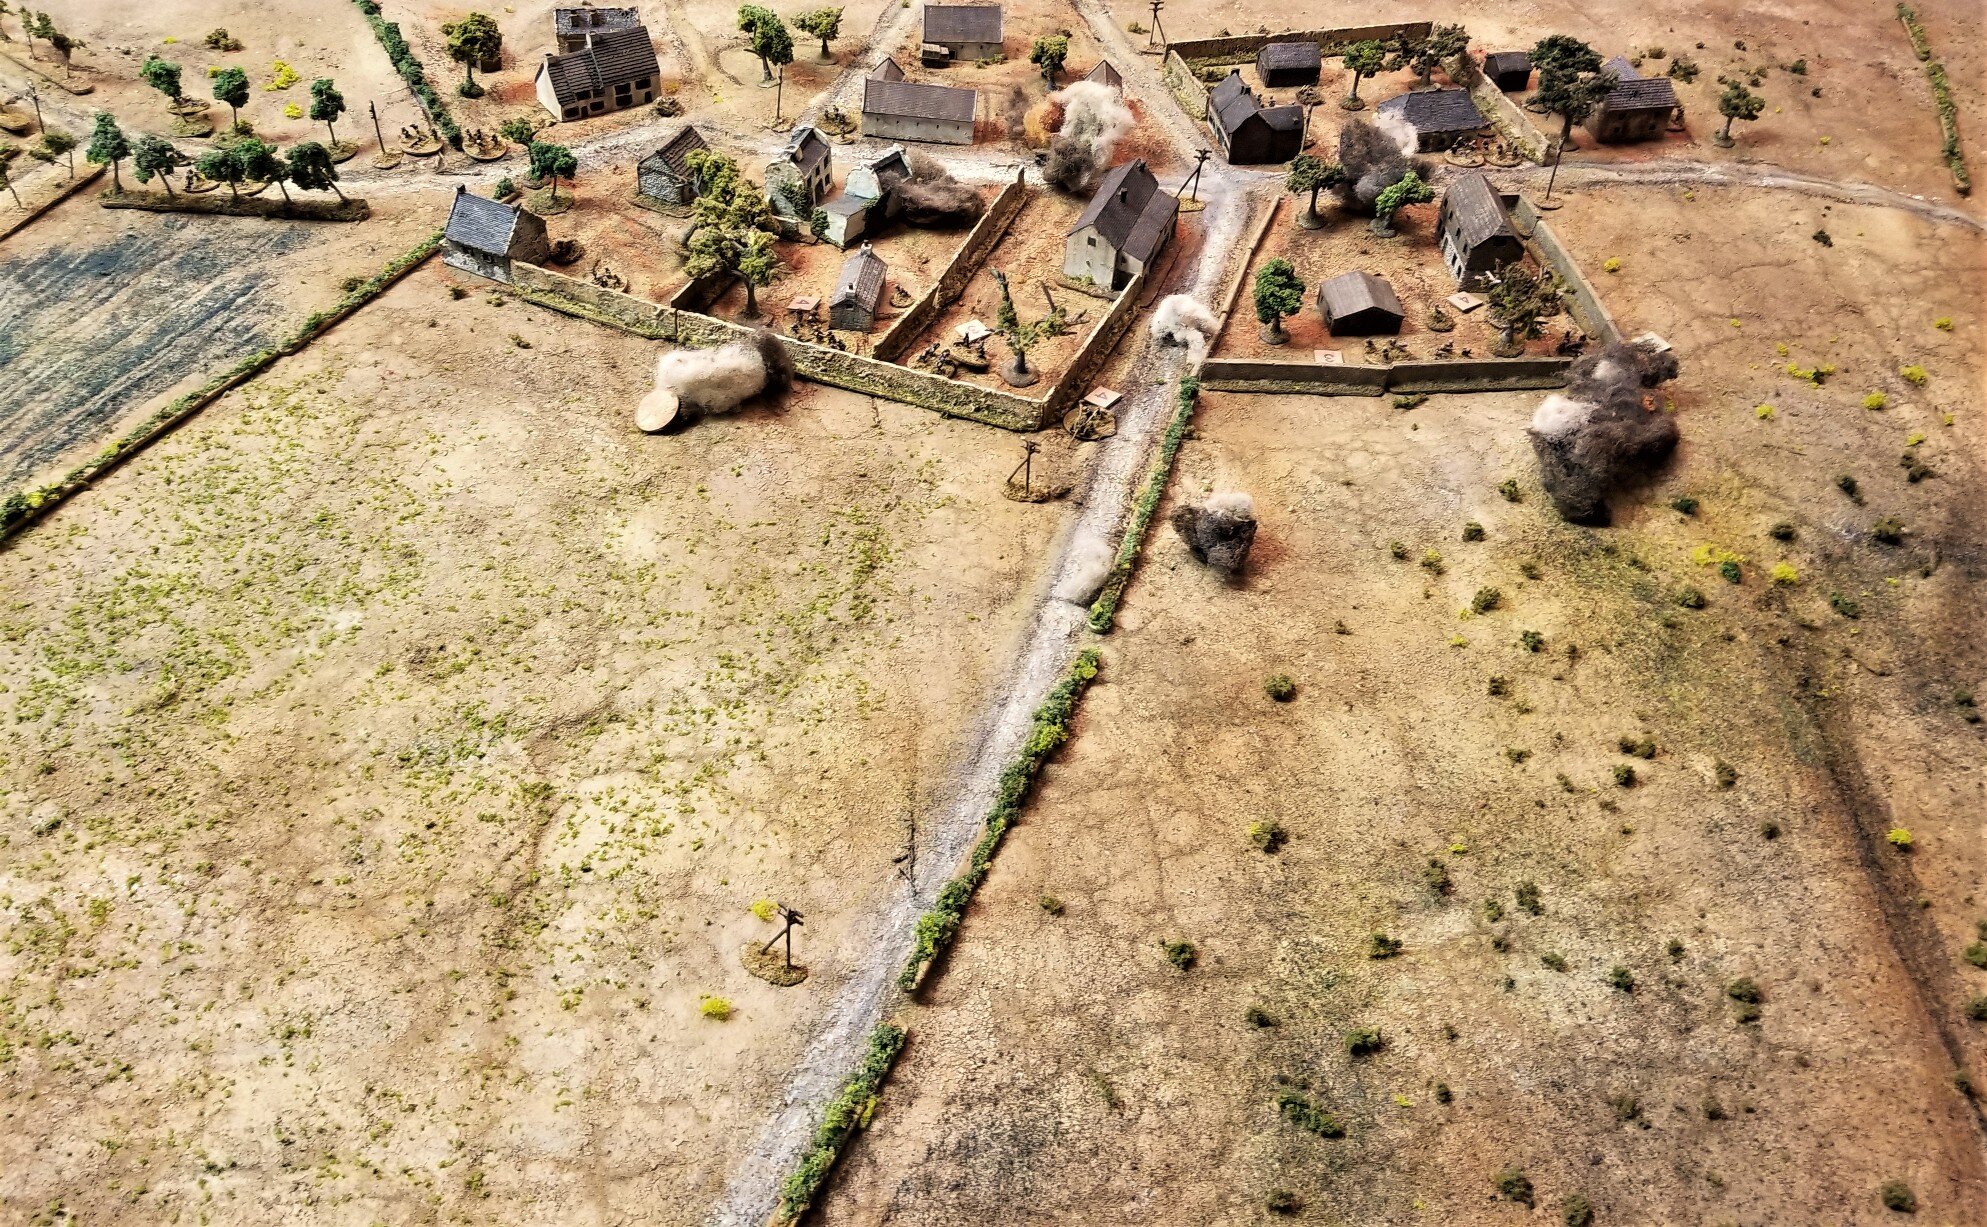
The attack on the railway station at Carrocetta, near Anzio, Italy during late January 1944.
The British were played by Martin and Togs The Germans were played by Barry with a little help from me and then, when he arrived, Mac settling on the British side.
A difficult nut to crack this scenario by Robert Avery.

The Outskirts of Campoleone
The British comprised a full strength company of the Grenadier Guards with a recce carrier section and a Sherman troop from 46 RTR in support.
They were to advance from the southern edge of the table and attempt to capture both the village of Carracetto and the local fascist party headquarters, some way off on the other side of the table.
Whilst there was very little cover about and the Germans occupied the high ground to the north and western edges of the table the guards benefited from conducting their advance in the cover of a 9 feet high disused Railway embankment that ran across the SW corner of the table.

The arrival of 46RTR
They were allowed a pre-assault stonk which they used to target the southern edge of the village. It did minimal damage and was almost as poor as the smoke screen that followed it.
The British attempted to smoke out the defenders and blanket their advance towards the village but quick turns in succession of the tea break card was enough to see that advantage removed from them further quickly. They were on their own with no further artillery support and any smoke they required would have to come from their 2 inch mortars.

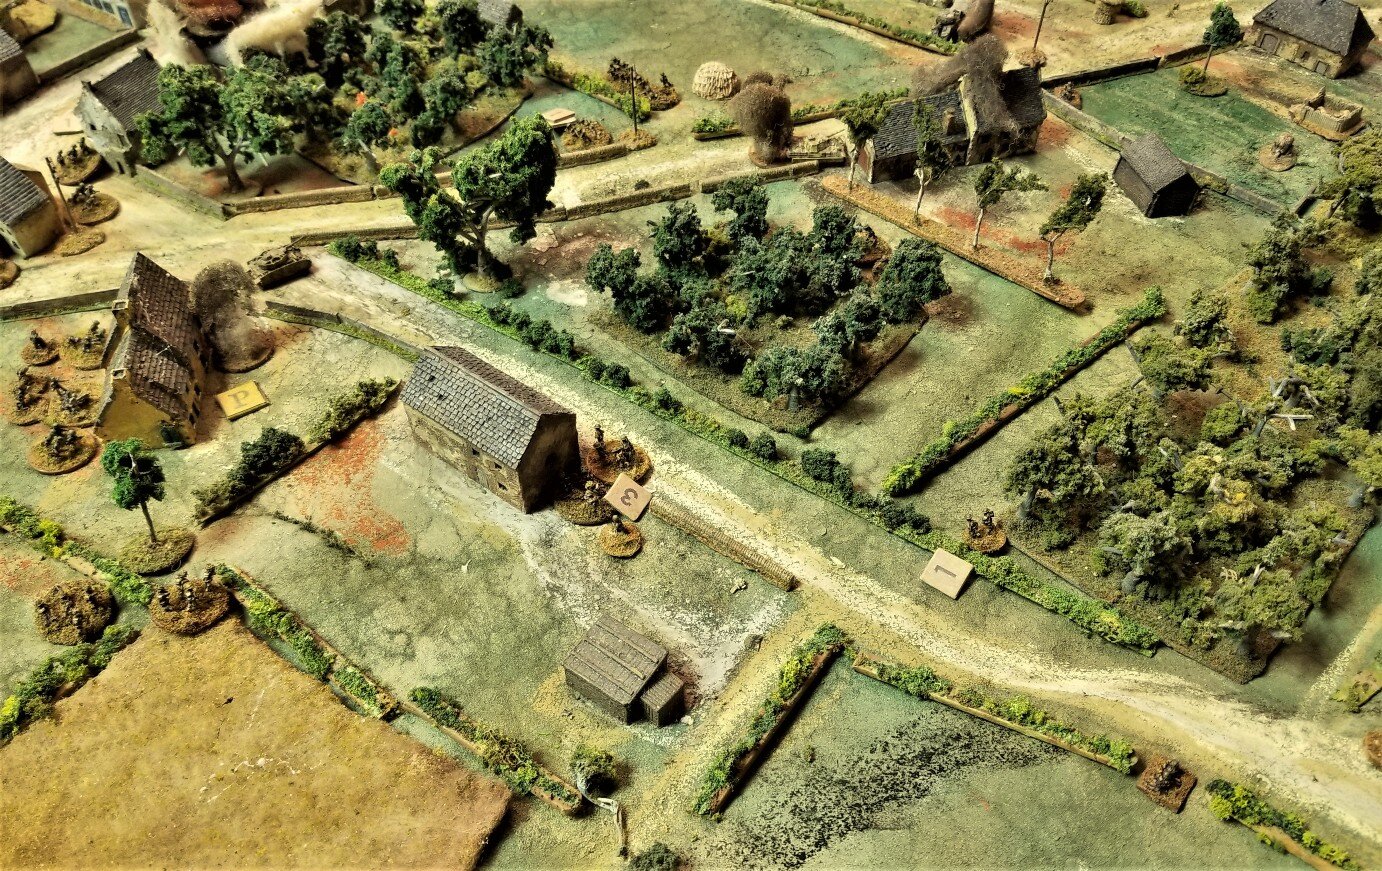
The railway station. The piece of wood represents the platform.
It was getting more and more difficult by the moment but as the lead platoons made a dash to the village and stormed two buildings they were greeted by small arms fire from the buildings and MMG fire from the high ground. Choosing to close assault the buildings the Guards met strong resistance from within. Although they cleared the premises the action lost them two of the already scarce Big Men.
The Guards slowly picked their way from building to building, receiving accurate fire from further infantry sections in the railway station and from Heavy support weapons teams, all of whom were fully dug into the fortified houses.
Eventually the Sherman support was brought up to deal with the increasing long ranged but deadly machine gun barrage. They were surprised by an infantry gun team dug into the ground floor of a house adjacent to the bridge. Would they survive the close range challenge?
The Germans luck, if indeed they ever possessed any, abandoned them and despite all of their shots hitting the lead tank they failed to damage it.
As their on table mortar fire continued to rain down on the Guards, the Germans were mindful that the British were gaining a strong foothold in Carracetto as their own casualties mounted. Oh dear.
With the British managing to advance a spare platoon around the western flank they managed to drive off a German machine gun through the clever use of smoke and fire and movement. It became obvious that the German position was helpless and after 12 tea break cards had been exhausted it was decided that the British had got the upper hand. With the village almost entirely captured it was only a matter of time before the advance would see them take the second objective and win the game out right.
Yet another wonderful scenario from the pen of Mr Avery and again almost executed all the lines of the actual historical event.
Mac was an instant convert to the rules. So much so that we expect to see him after Covid restrictions back in the War Office for another game.
Tim Whitworth

Amongst the chaos and crap of COVID, we gathered for (secure) gaming and what an utterly brilliant day we had.
It was actually day 2 of an Op Goodwood type of 1944 scenario. Armour Heavy Brits, with Typhoons, AVRE and Funnies pushed against PAK front and Heavy Tank support (PzVIs ).
On a lovely, and huge 12 ft x 8 ft table Germans were forced back to literally the final 18" of board, that included the objective, but just held on as dusk fell on our day.

Julian Whippy

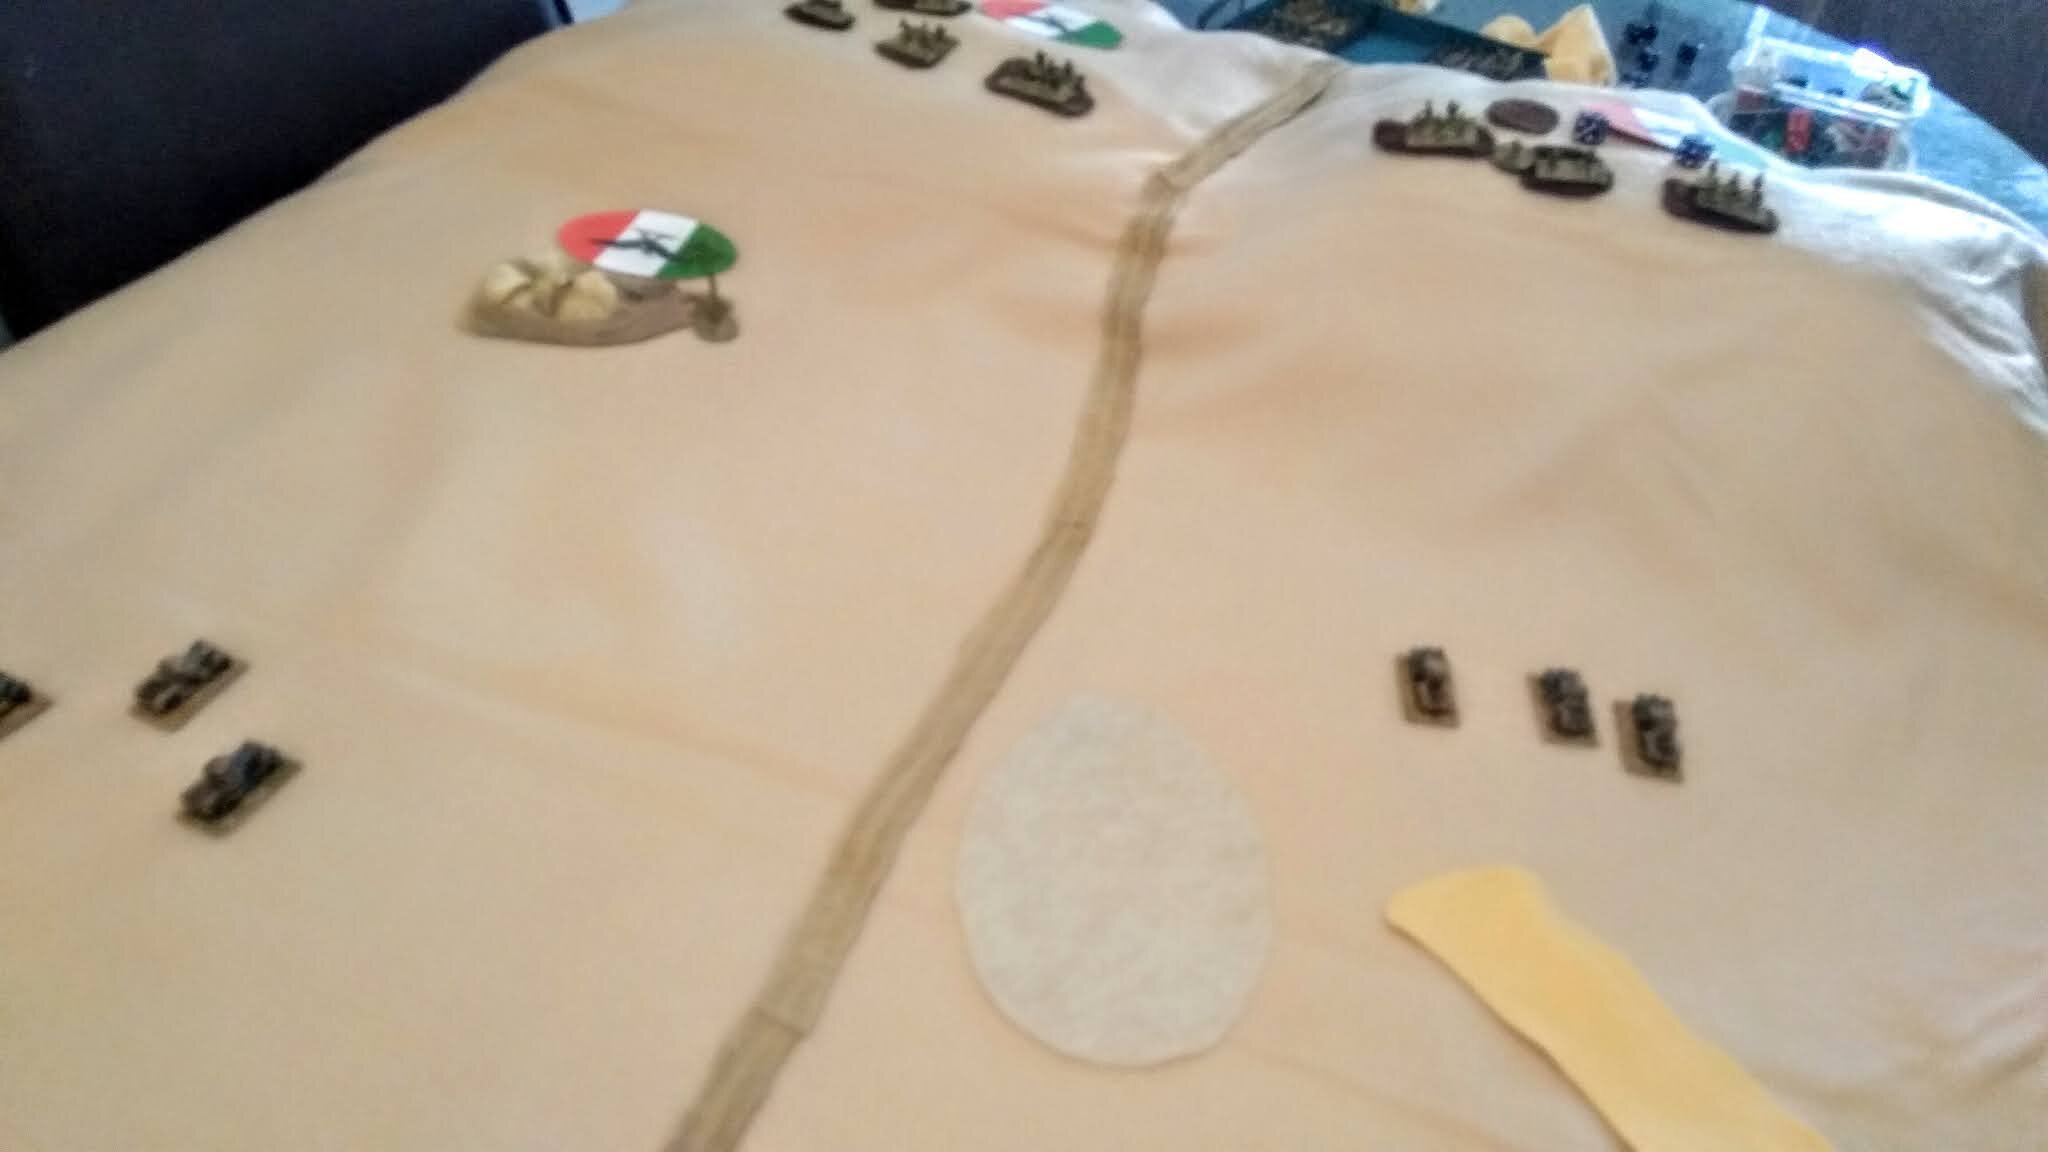
By 15th December the Italian army was out of Egypt and the British paused to count their gains, with both sides holding their positions. The Division, less 4th Armoured Brigade, surrounded Bardia waiting for the 6th Australian Division to be brought up to prepare for an assault on Bardia and for supplies to be brought up.

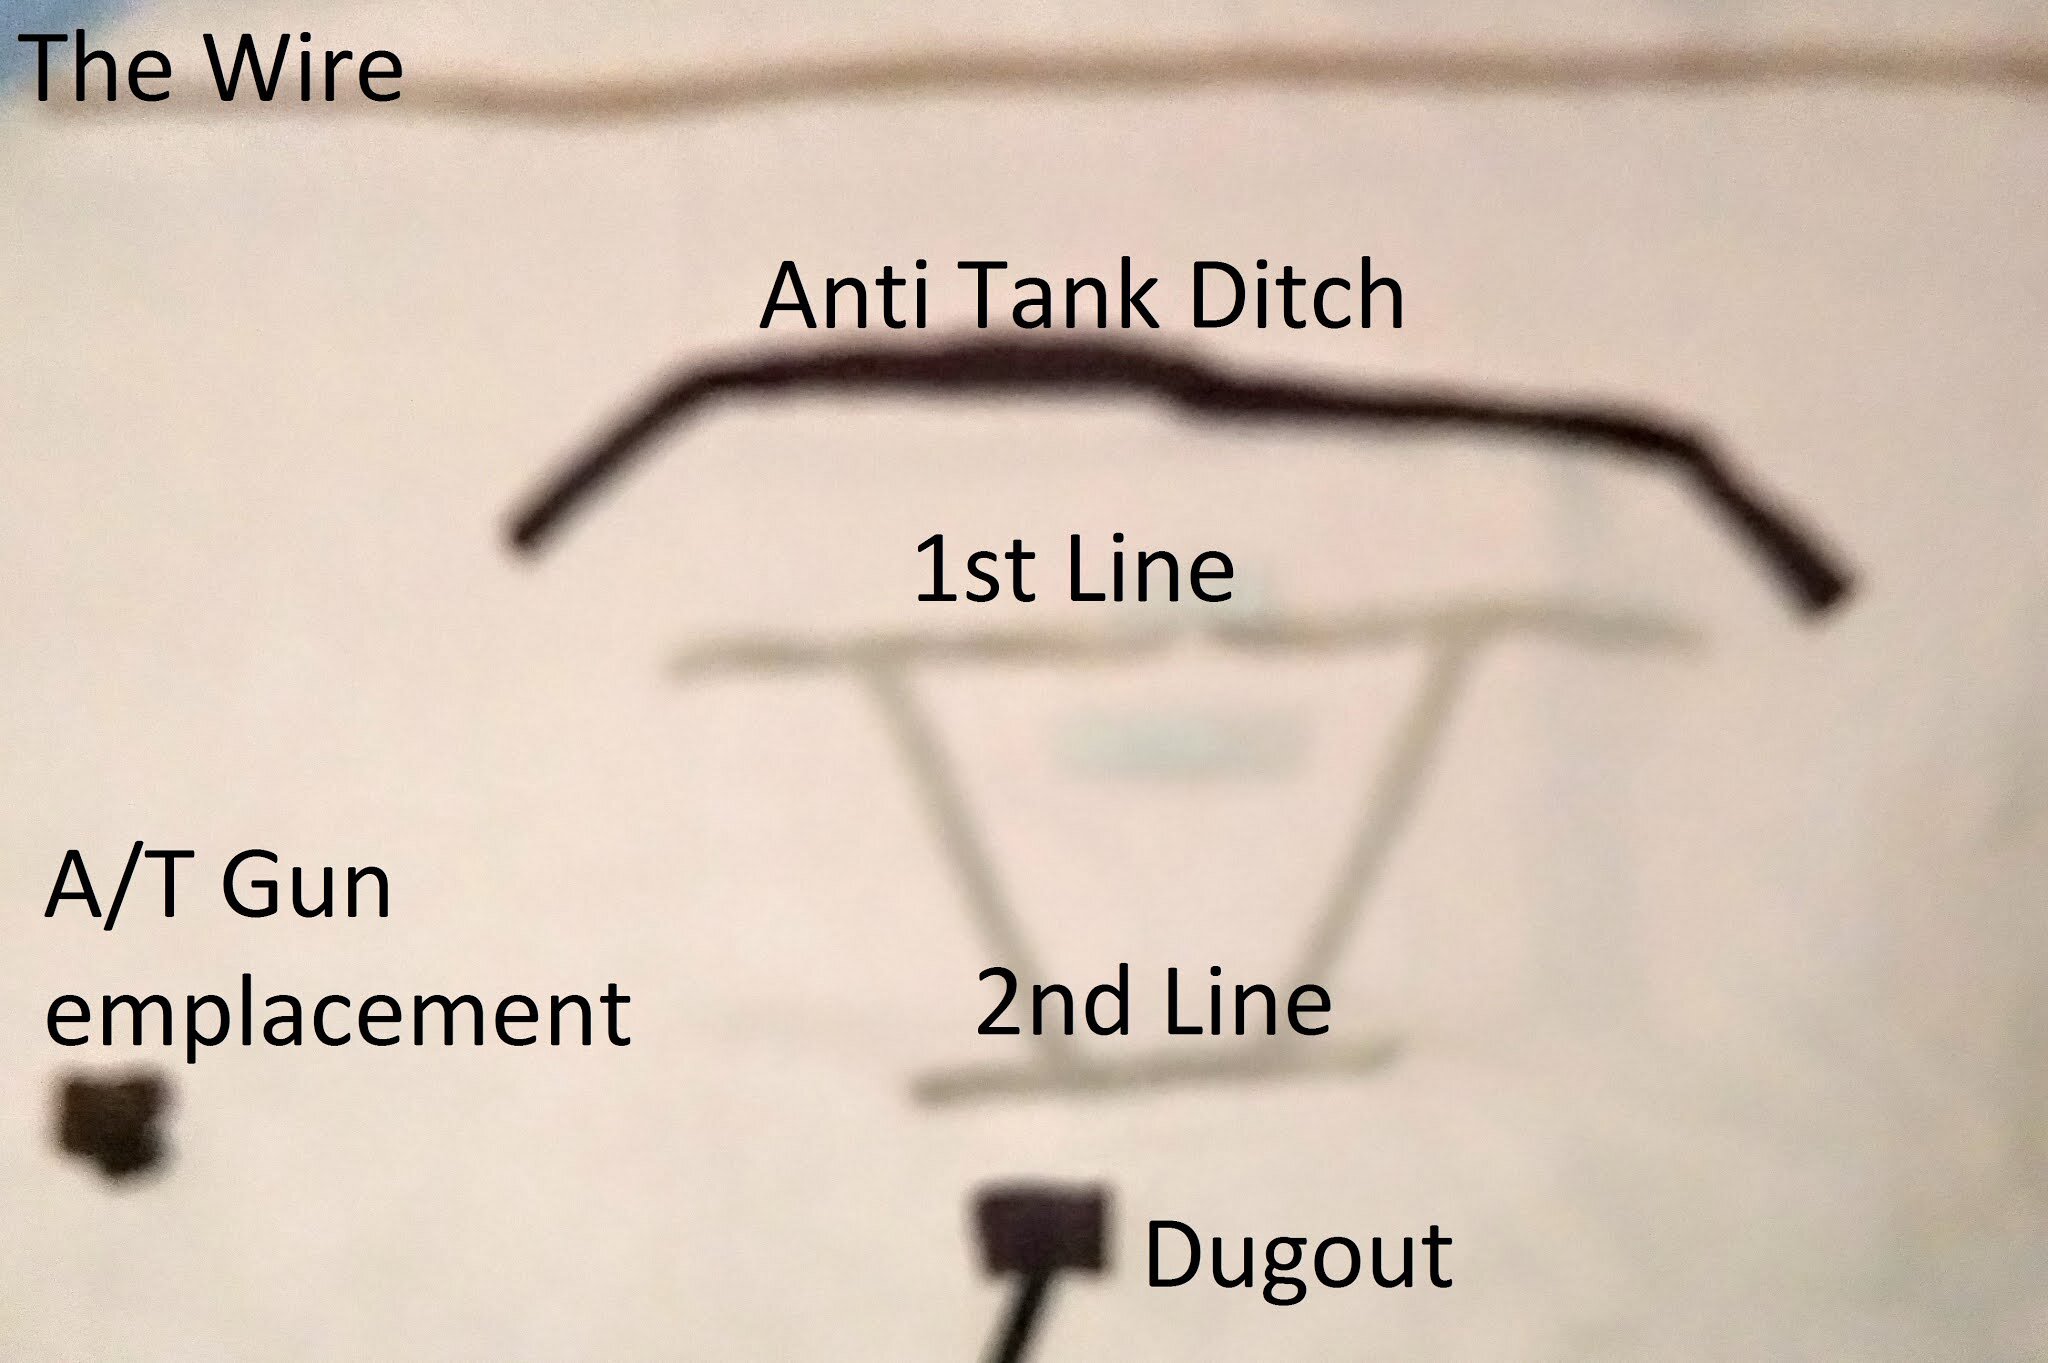
The enemy positions around Bardia, which was garrisoned by 45,000 men and over 400 guns (off all types), 12 M-13 Tanks and a Hundred L-3 Tankettes. consisted of a 18 mile long perimeter, with double barbed wire, a four foot anti-tank ditch, many natural wadis and scores of artillery and MG positions, plus six well dispersed minefields.
Having captured plans of these defences back in June, the defences were probed for weakness for a while. There was also a need to re-equip as the strength of 7th Armoured had dropped to 108 light tanks and 59 Cruiser tanks, of which many had outrun the designed track mileage.
While the Italians in Bardia enjoyed every luxury, the Australians and 7th Armoured Division settled down outside the perimeter for their Christmas lunch, waiting for the main assault in the new year.
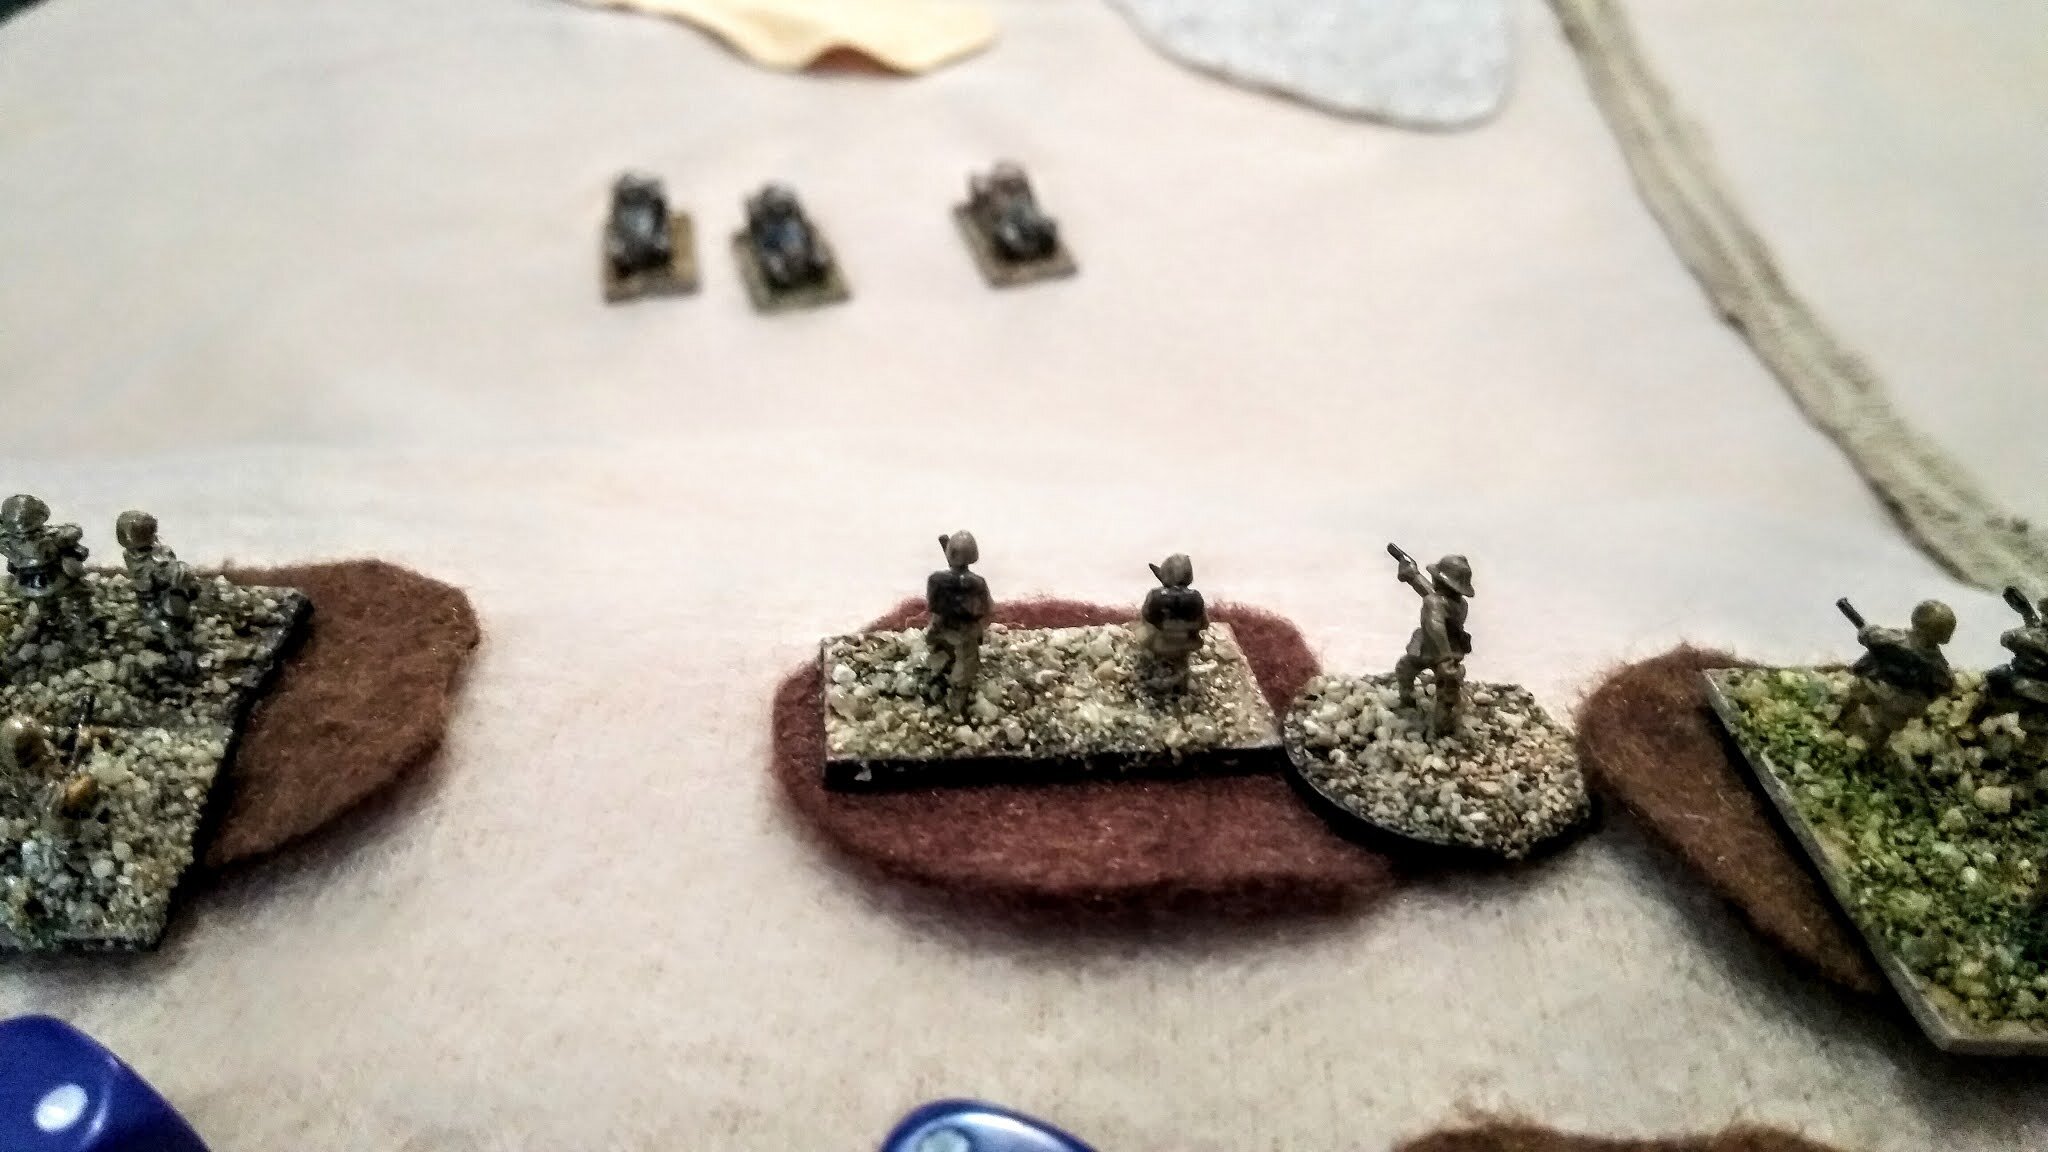
Major Mick Dundee of 2/2nd Australians has the task of capturing Post 41 and allowing passage of Matilda tanks from 7RTR. The Aussies are green but keen, having replaced the veteran 4th Indian Division up the Blue.

Major Mick Dundee with one of his mates, in happier times.
The Regimental diary of the 11th Hussars records that Lt Bumfluff Farthingdale was captured by the enemy on the night of 2nd January 1940. The Colonel was not too upset. Bumfluff`s armoured car was reported to have become "lost" in the area between post 41 and the Australian lines. As Major Dundee and his men prepared their attack on the post Bumfluff was being royally entertained by the Italians, and regaling them with tales of his time at Eton, don`t you know...
Clearly Mick's mission is not just to capture Post 41. He must also rescue that 11th Hussars idiot. It's not going to be easy.
Company HQ
Captain Mick Dundee
1 x Boys Anti-Tank Rifle Team (2 crew)
1st Platoon
Sergeant "Little" Wally Little
4 x Rifle Section (8 men each)
Supporting Tank Troop from 7th Royal Tank Regiment
2 x A12 Infantry Tank Mk II “Matilda” tanks

Headquarters Element [in easternmost bunker]
Tenente Giuseppe Pesci
2 x Rifle Squad (8 men each)
1st Platoon [in westernmost trenches, either side of gun pits]
4 x Rifle Squad (8 men each)
2nd Platoon [in easternmost trenches]
4 x Rifle Squad (8 men each)
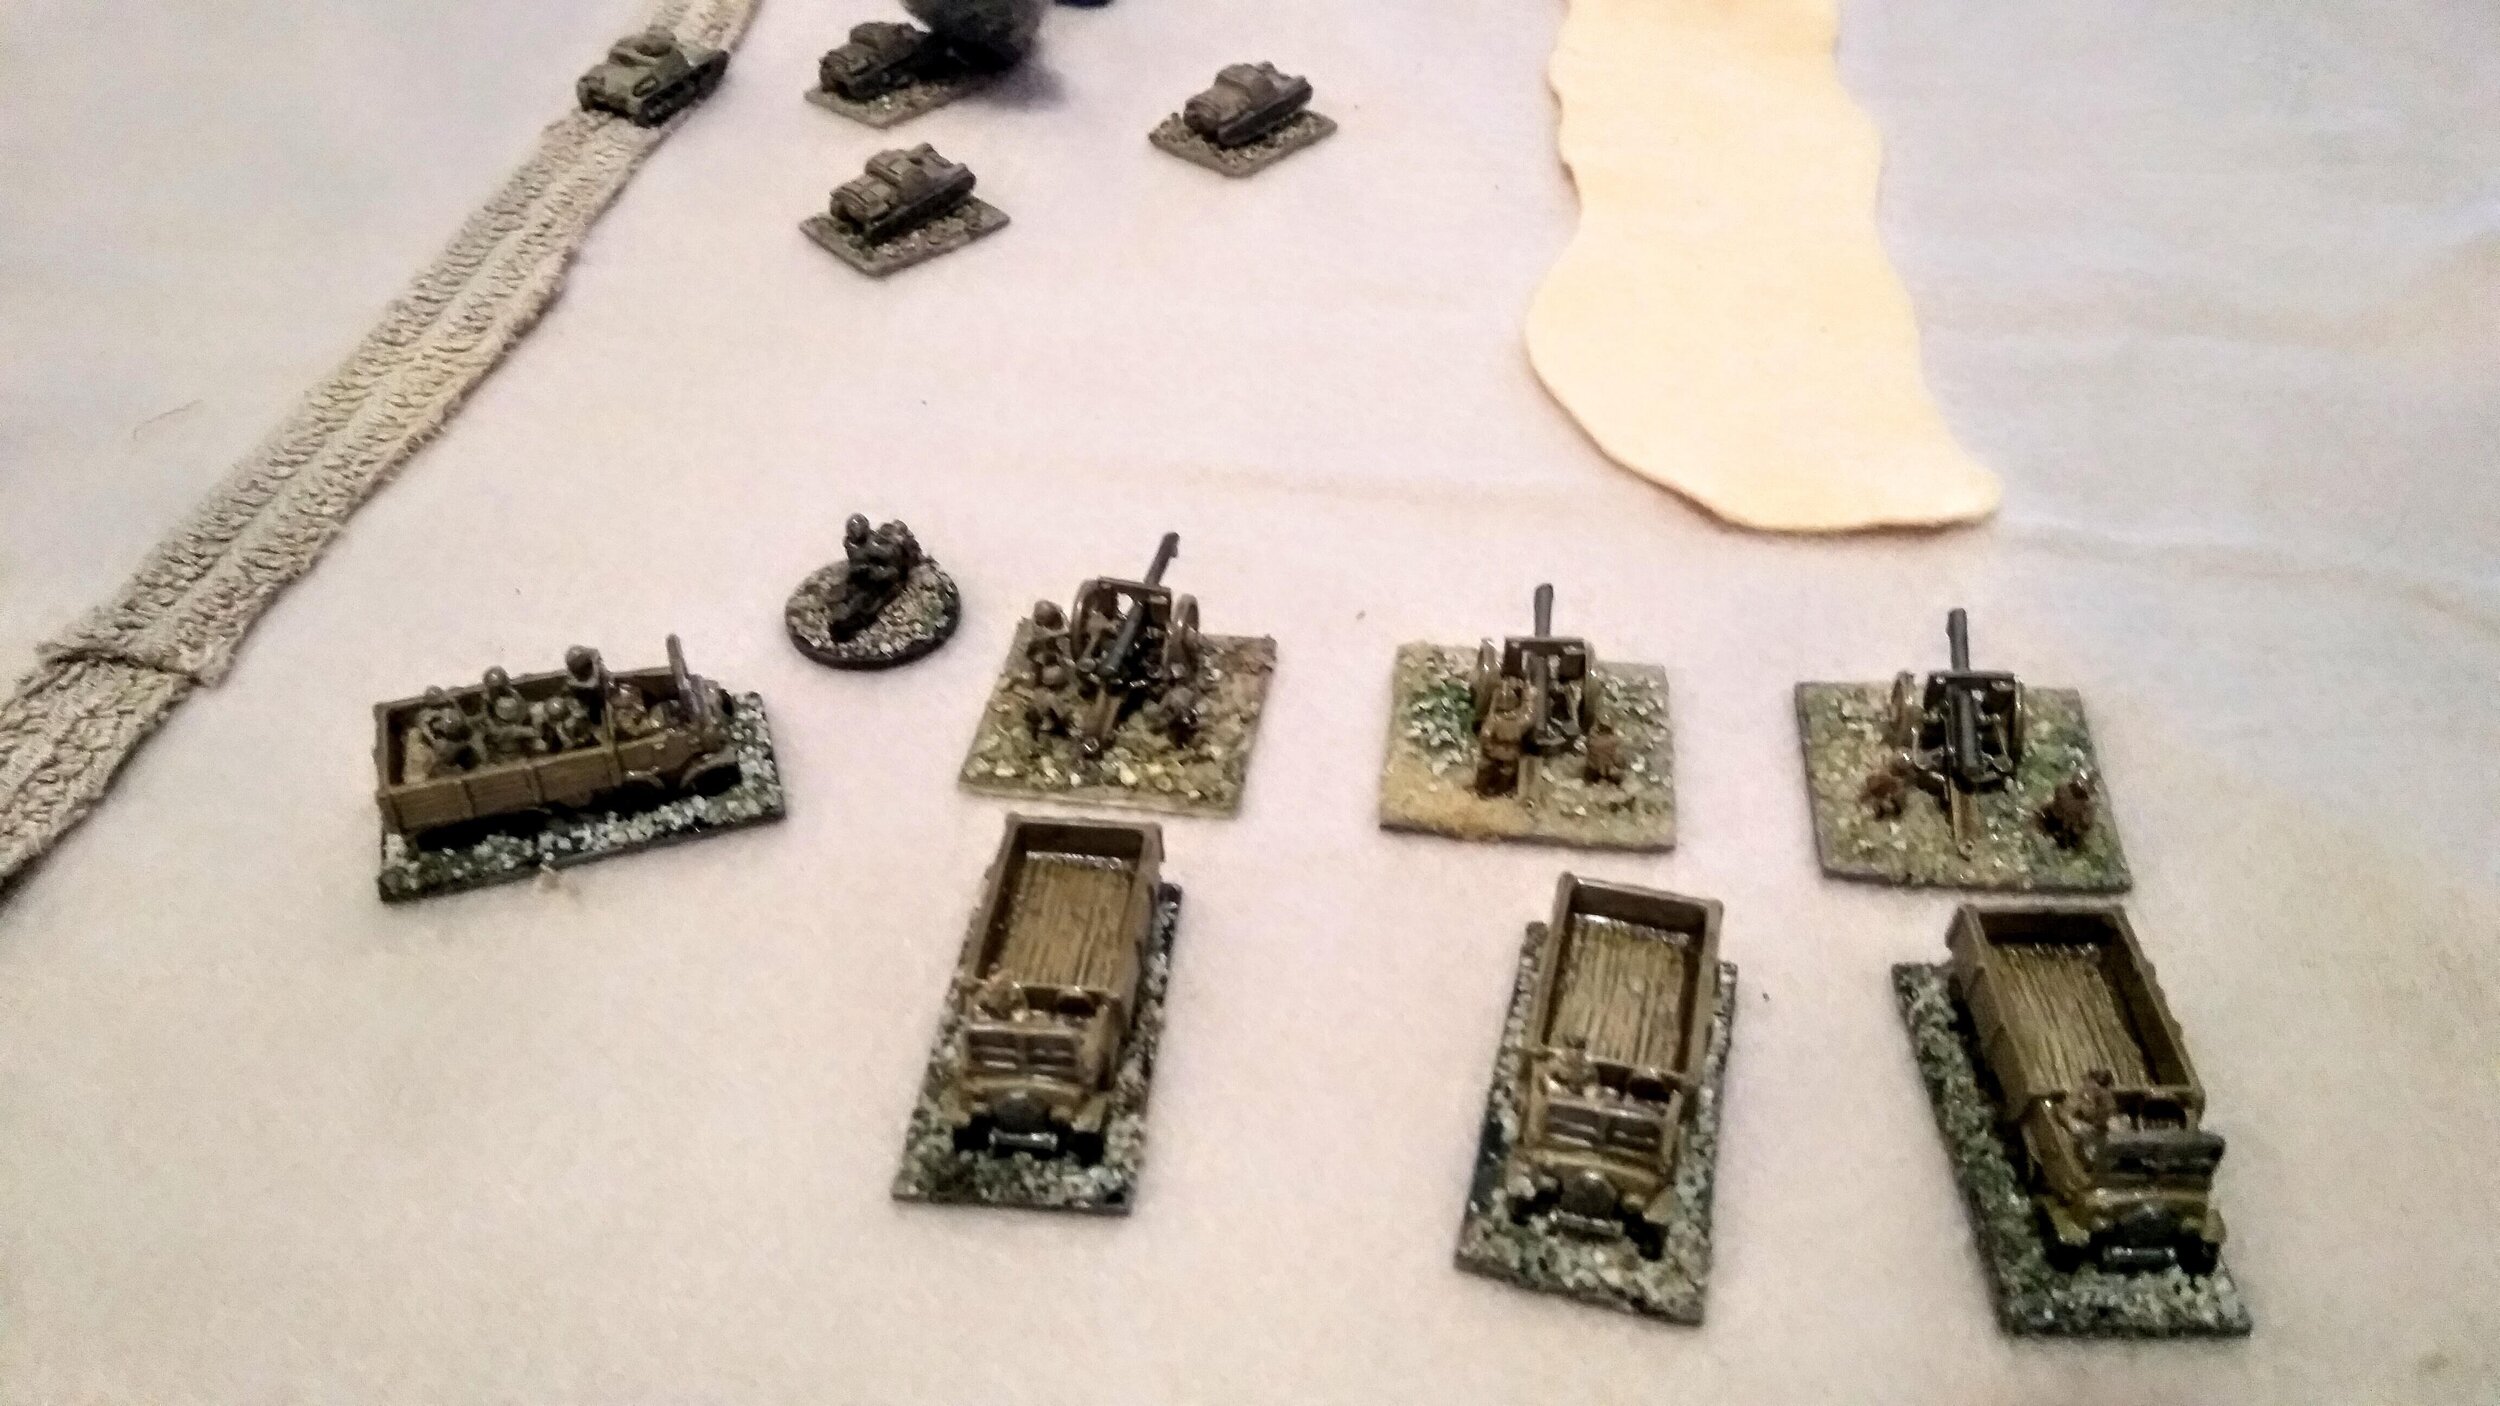
Weapons Platoon [in guns pits]
1 x 65/17 Field Gun (4 crew)
1 x MMG (3 crew)
Elements of 45th Artillery Regiment
1 x 75/27 Field Gun (5 crew)

A win for the Aussies, who must now continue with the assault and take the town. Major Dundee won`t have a chance to send Bumfluff back, so he has in effect been temporarily drafted into 7RTR for the second game.
A Wargamer in Cyprus

On 9th December 1940 whilst Op Compass got underway in attacks on the Italian camps, 11th Hussars discovered the Italian 64th Catanazaro Division, under General Armico, well dug into the dunes west of Buq-Buq. This was potentially a strong position, behind the salt flats, with thirty-five guns of all types covering the east and another twenty-five guns of all types covering the south.
A hastily assembled force of 3rd Hussars, a squadron of 2nd RTR, cruisers from the 8th Hussars, along with 'B' & 'C' Squadrons of the 11th Hussars, plus a battery of 4 RHA, all under the command of Lt-Colonel John Combe (11th Hussars) attacked the Italian force.
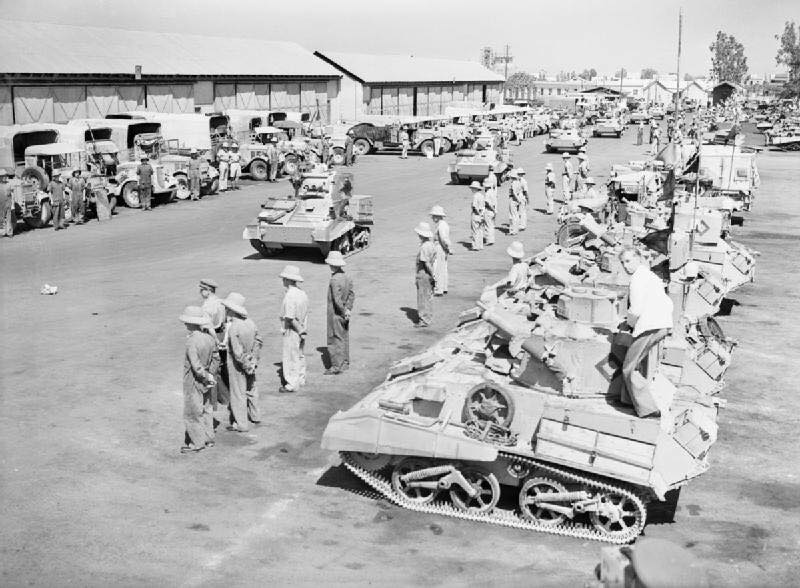
8th Hussars in 1939
I have some disagreement with the IABSM Op Compass Supplement, although I`m not following it directly. From my reading 8th Hussars were almost certainly using Vickers MkVI light tanks, upgrading from these to the Honey in 1941, but 3rd Hussars may well have been in cruiser tanks, probably a mixture of A9, A10, before upgrading to the Crusader.
Editor’s Note: Although for this scenario I chose to give 3rd Hussars their light tanks, I don't think we actually disagree on the composition of 3rd Hussars as on page 83 I do say: "the British had a habit of moving squadrons from one unit to another to ensure that each force had the right mix of light and cruiser tanks, so I am merely following suit! Note that this is why many histories that mention specific units are contradictory e.g. 3rd Hussars were a light tank regiment, but were bolstered by cruiser tanks either through attachment or through a squadron exchanging tanks with a squadron of cruisers from another unit." Scenario writing would be so much easier if people in real life stuck to their on-paper OBs!
In action at Sidi Barani
"Combe-Force" met strong opposition from the Italian artillery, which stopped the advance of 'C' Squadron, 3rd Hussars, and knocked out many of the tanks of 'A' Squadron. The Italians were finally overwhelmed by a flank attack by 8th Hussars, along the western seaward side.
In my IABSM game "Barker Force" are tasked to cause as much damage and chaos as possible to Italian communications and supply lines around Buqbuq. The Italians dug into the dunes are well equipped with field guns, infantry and light tanks. Should be an interesting fight.
11th Hussars C Squadron
Major The Hon. Ronald Barker VC
Sergeant-Major Ronnie Corbett
2 x Rolls Royce Armoured cars
Attached from C Battery, 4th Royal Horse Artillery
Lt Milligan
2 x 18/25-pounder Field Gun (5 crew each)
2 x Quad
Attached From Rifle Brigade
1 platoon 3 sections Lt Thomas Trinder
1 MMG Northumberland Fusiliers
Lieutenant "Bumfluff" Farthingdale 11H
Attached Armour from 3 Hussars:
2 x MkIV Light tank
Attached 2RTR Cruisers:
Lt Max Miller
4 tanks mixed A9 & A10.

Raggruppamento HQ
Colonele Lorenzo D’Gelato
Staff Caravanette filled with "luxuries"
1st Platoon, IX Light Tank Battalion
3 x L3 tankette
2nd Platoon, IX Light Tank Battalion
3 x L3 tankette
Elements of 17th Battery, Libyan Artillery
4 x 77/28 guns (5 crew each)
4 x Lorry
Elements of 24th Battery, Libyan Artillery
4 x 77/28 guns (5 crew each)
4 x Lorry
Position HQ
Capitano Vermicelli
1 x Rifle Section (8 men)
1 x MMG (3 crew)
1st Platoon
4 x Rifle Section (8 men each)
2nd Platoon
2 x Rifle Section (8 men each)
Artillery from 250th & 204th Artillery Regiment
1 x 65/17 Field Gun (4 crew)
1 x 75/27 Field Gun (5 crew)
1 x 10⁵/28 Field Gun (6 crew)

Il Duce has had a bad day. Perhaps the "fortress" at Bardia can hold?
A Wargamer in Cyprus

I was in the mood for a tank bash and I try to do a Kursk game every July - this time pushed back a month due to C19.
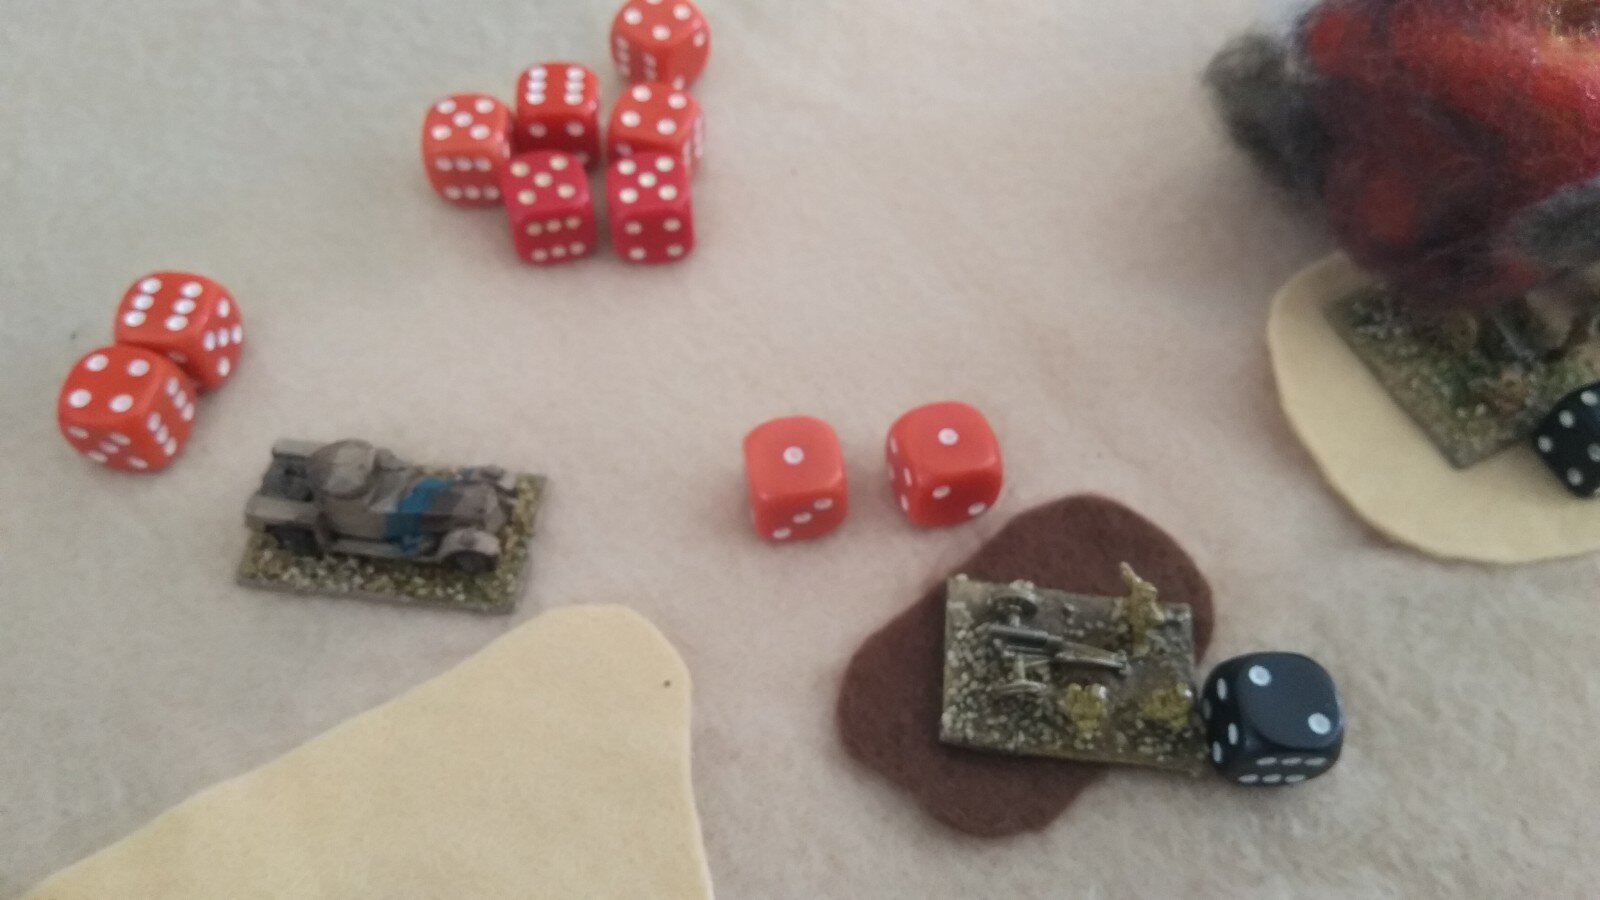
It was based on the lopsided engagement in the area between Step' and Hill 227.9 on the morning of July 6, 1943 involving the 107th Tank Brigade and the StuG IIIs of StuG Abt. 245 and off-table Tigers of s.Pz. Abt. 505.
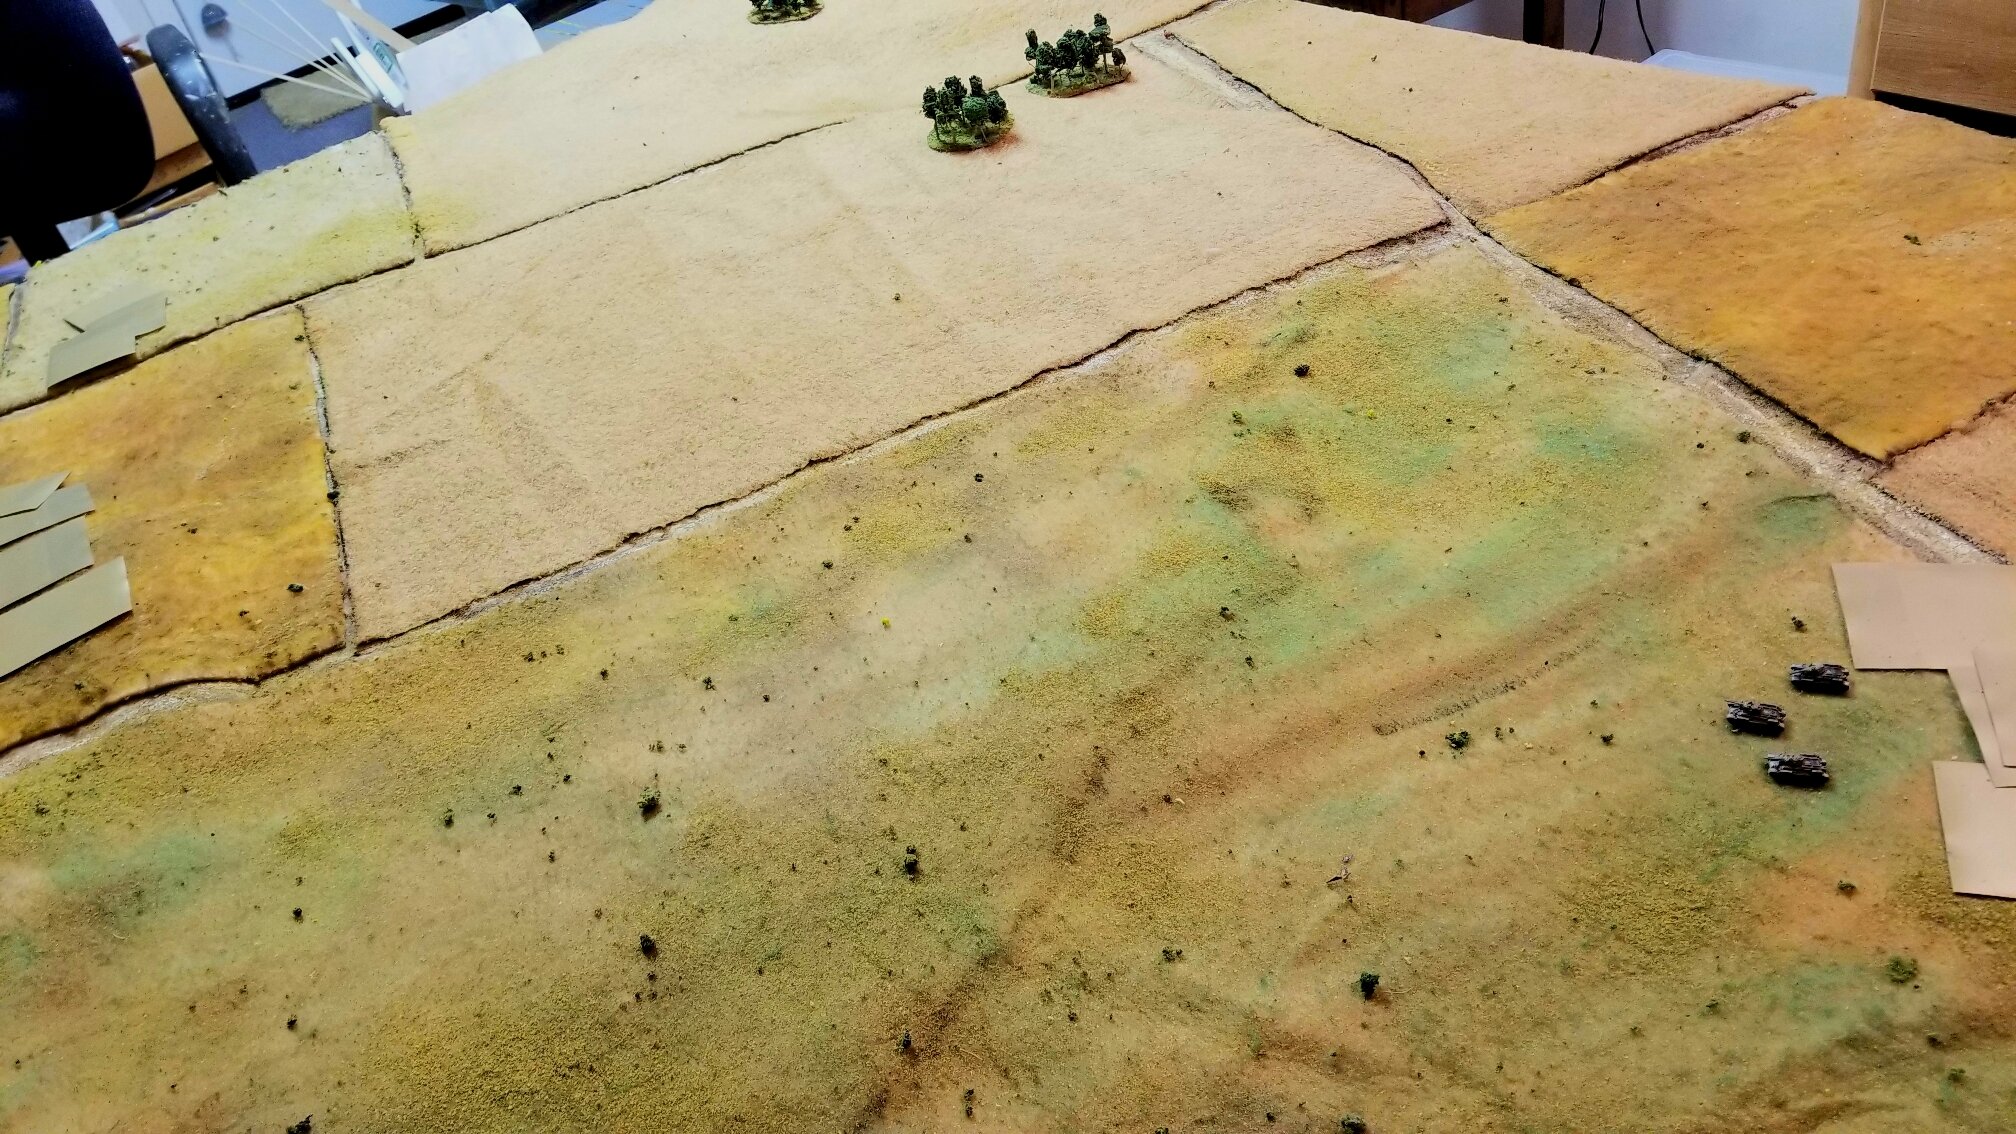
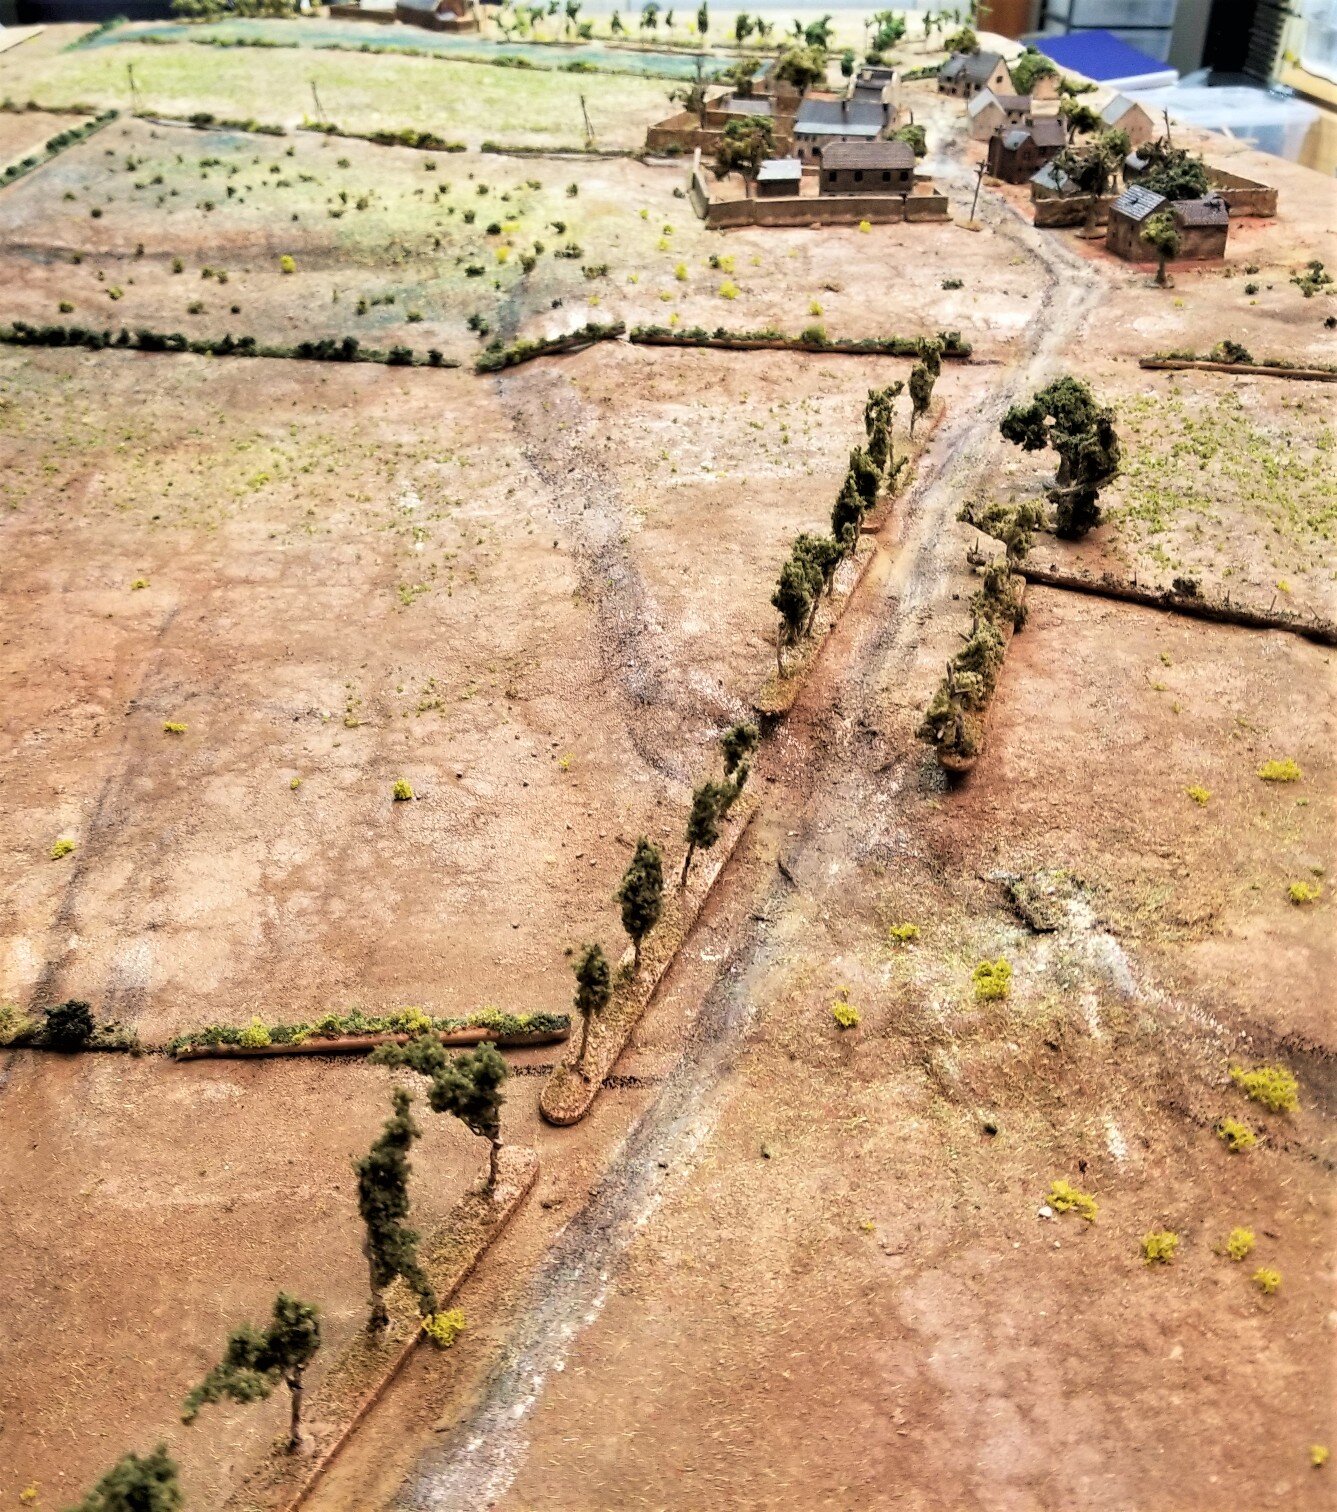
This shows the relatively flat featureless terrain that the latest 6mm IABSM remote texting game was played over.
This view is from the SW corner and close to the entry area of the 107th Tank Brigade.
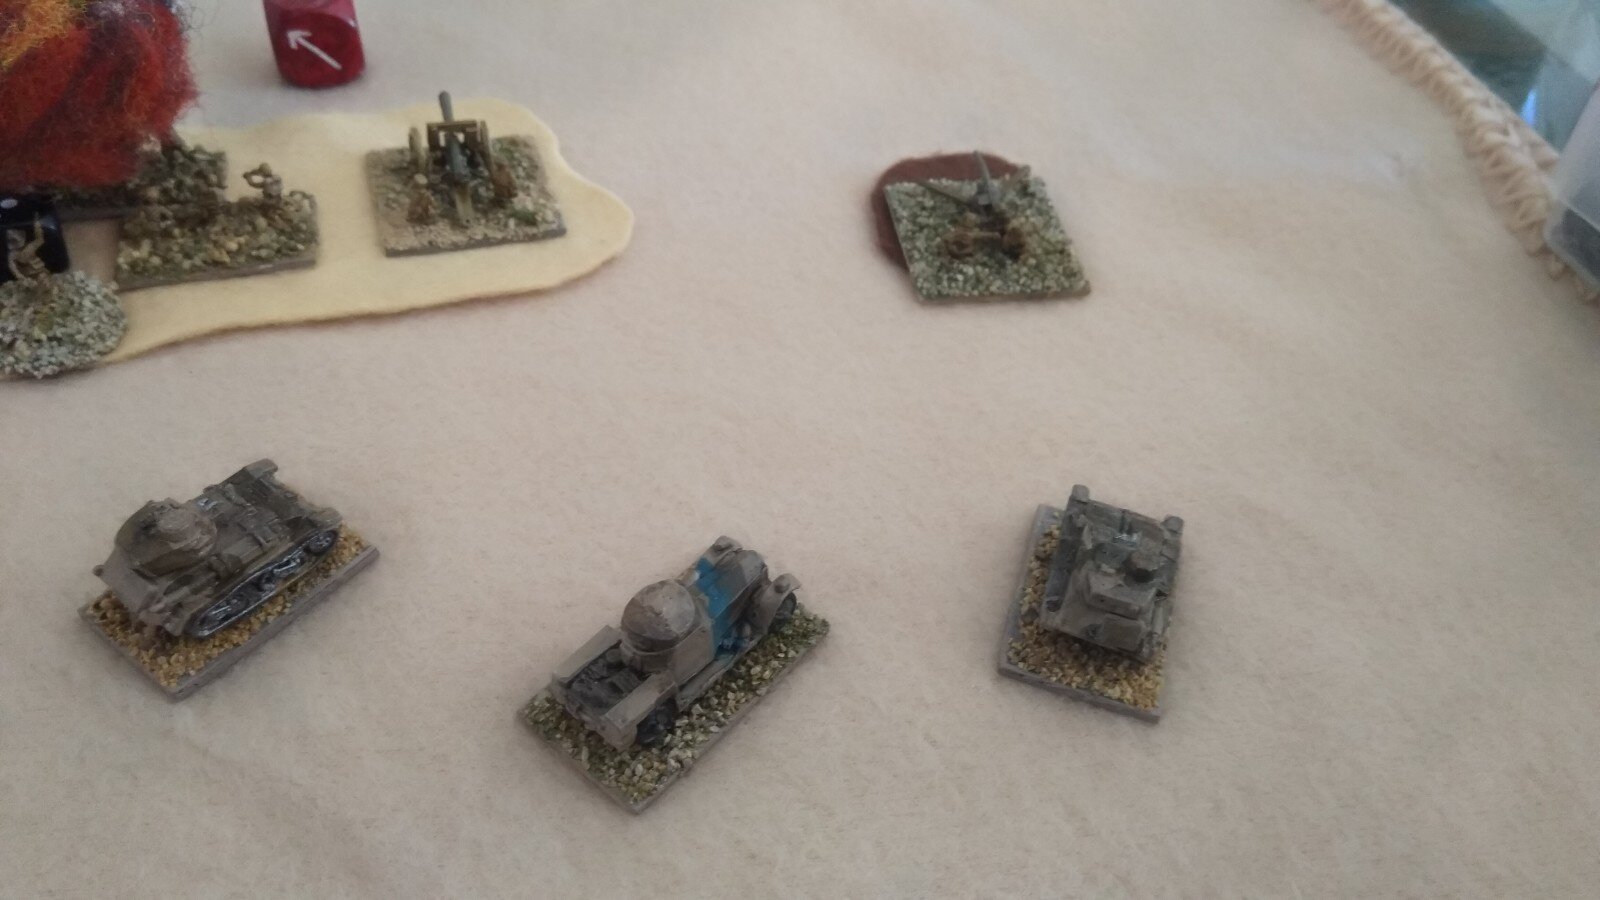
Looking west from the slightly higher east edge. The German player, William, units consisted of 2 batteries of 3 StuG IIIs with 2 lvl 1 Tank Aces. I would roll for the offbd Tigers. On every German Blind card I would have a chance to shoot 1 or 2 of the 88s (50/50 chance of 1 or 2 tanks firing). William's Stugs came in from the higher ground in the NE corner.
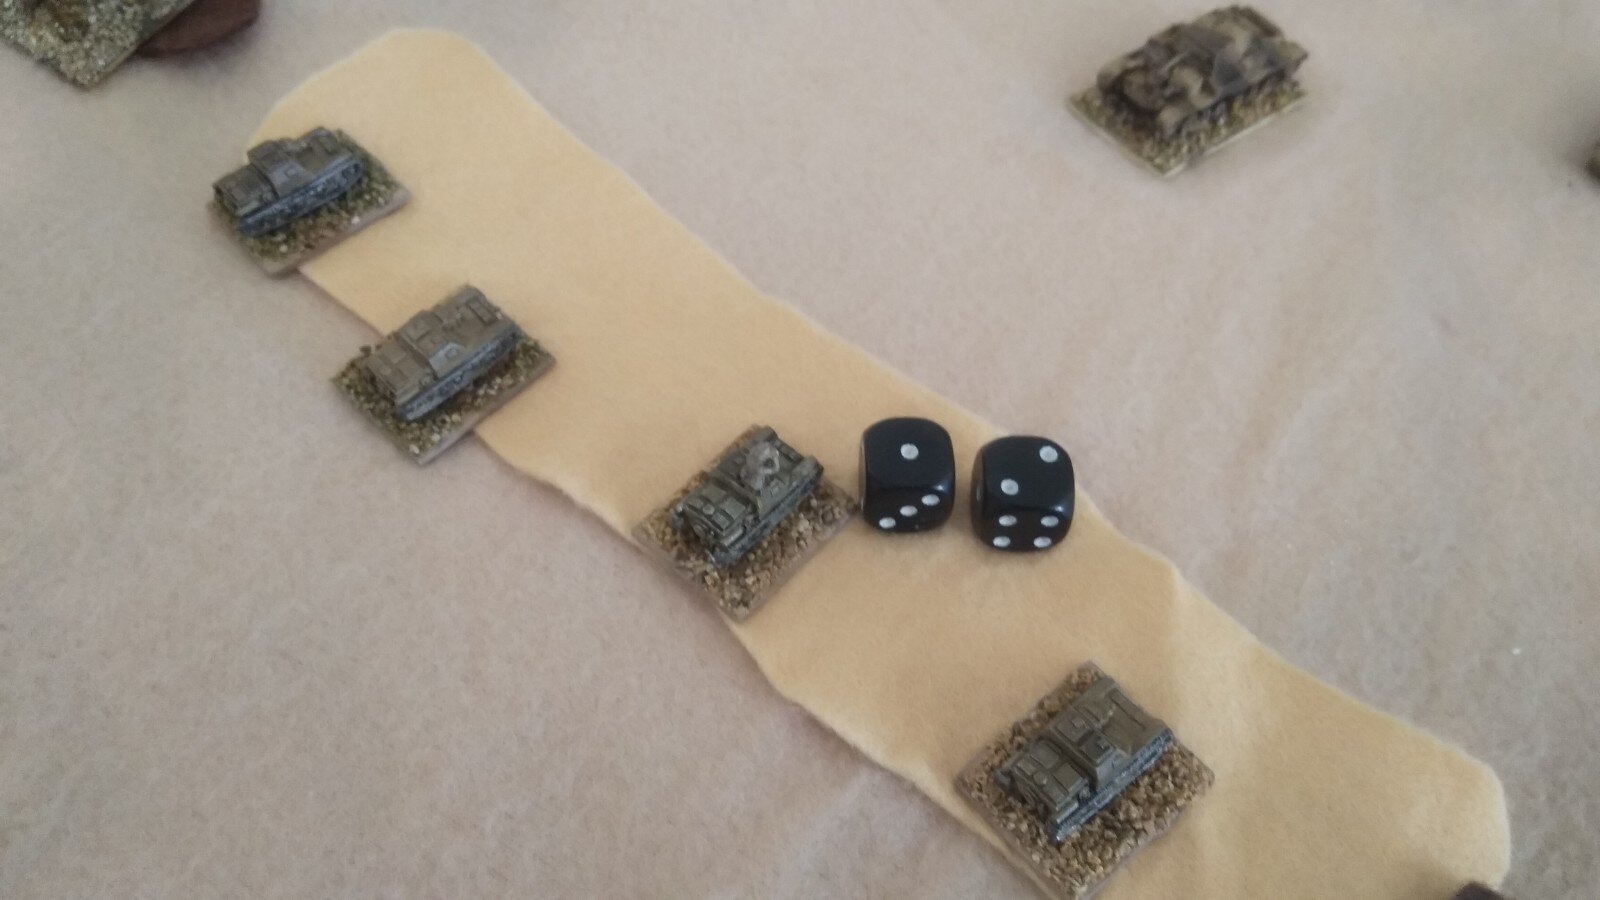
The 107th had a mix of 30 T34s and 20 T70s. That would overwhelm the scope of a 4 X 6 table so I went with 2 companies of 9 T34s and 1 of 10 T70s. Jess had the right company, Sheridan took the center and Martin was on the left with the light tanks. Only their company CO was rated as average with 3 Action points, all other crews were Green.
I gave the Russian players the option of how they wanted to deploy and they decided on a wave of 3 companies across, with Jess on the right staggering his entry over 3 turns.
Stug blinds are on the left edge They look bigger than they are. Each btty has a blind for the vehicles, a blind for their CO and 1 dummy blind. William also had 1 extra dummy blind on top of that.
Sheridan's lead platoon in the center was spotted first.

It was obviously easy to spot this wave. William began firing from his right and started off with a couple of misses.
It didn't get much better.
There were no instant knockouts from the StuGs. It was taking at least 2 hits to stop a single T34.
The Tigers off table didn't even fire for the first several phases.
Sheridan took a couple of gun/turret hits and a couple of mobility hits. Only 1 T34 was knocked out after 2 turns of firing.
Jess was sending his company around the right and William sent a battery to meet them. William's 3rd gun is whacked early due to his inability to roll a 5 or 6.
Jess was not having as good of luck with his robustness throws as Sheridan and lost 2 T34s quickly.
Jess gets a platoon around the flank of the StuGs. One of the assault guns brews up and the battery CO's vehicle (with a +1 tank ace) is immobized. I allow William to relocate the crew to the remaining runner.
I finally hit a tank with the off table Tiger(s)and did some damage. The T70s have an armor 5 and the 88's strike is 12. Plus the fact that the shots were coming in from the flank gave me an almost guaranteed chance of knocking out the light tanks. But, I had to hit them first and that was seemingly beyond my dice rolling ability.
However in William's brief absence, I rolled some damage for him and managed to knock out the gun of his tank ace on the right. This was followed by his return and he failed to get a single 5 or 6 in his damage rolls and lost another StuG.
I as initially afraid that this game would be too easy for the defending Germans.
And if we could hit them they would be in trouble.
The Germans saw at lest 3 tanks burning, and assumed several (4) non moving vehicles were probably bailed. But the Stugs were down to 2 runners with a pair of Stugs coming in as reinforcements.
A random event put a set of entrenchments on the table in front of the T70s. They were abandoned Russian works with a minefield in front, but none of the players were sure of their current occupancy.
Another random event was a grass fire starting next to one of William's burning Stugs. At least he was able to retreat his surviving 2 Btty Stugs behind it
The tank ace crew takes over the remaining 1 Btty vehicle and faces off against the flanking platoon.
2 of the T34s took turret hits and then had trouble hitting the Stug.
The 2 reinforcing Stugs had no better luck. A T70 got a lucky hit and KO'ed 1 almost immediately and the other had a temporary immobilization hit. The surviving 2 Btty vehicle pulled back to use the smoke from the burning field to cover its left flank. It had 2 mobility hits at this point and was not moving worth a crap.
But the transferred crew has its gun knocked out and starts its retreat. William continued with his dreadful robustness rolls.
Nice view of the Soviet advance.
William sent his 3 dummy blinds off to his left in attempt to divert more Russkies off to the angle but the Soviet players just kept plugging ahead.
And no viable Stugs here. William is backing out the last vehicle with the nonworking main gun
Time to call this one.
William had 1 undamaged Stug and another with -2 movement left. The Russians had 6 undamaged T34s, 3 damaged, and Martin still had 6 T70s running. Russian loses were 9 T34s and 4 T70s.
Total loses for the Germans were 2 destroyed Stugs, and 5 damaged or abandoned.
The story was in the dice though. Sheridan was hot and William and I were not. 3 out of 18 shots from the Tigers scored. William had terrible robustness rolls for the entire game. What I feared might be a one sided affair became one, but with a completely opposite result.
Mark Luther

14th September 1940. The Italians have finally begun their invasion of Egypt, what, what?
Two days ago, newly promoted Lt Bumfluff Farthingdale watched in amazement as a huge column of Italians - motorcyclists in front, followed by infantry in trucks, followed by those tin cans they call tanks - streamed across the border in almost a parade ground formation. Five divisions-worth!
And in front of them? Why, just the Whoosarse, supported by some gunners and grease monkeys from 1RTR. A sticky wicket, if ever there was one!
Ah but the Eyeties have to keep to a narrow strip of land near the coast - no good in the desert these foreigners: takes an Englishman to do the business, eh? - so can’t project their force properly around your flanks. Means as well that you can punish them as they come forward, eh? What? What?
Bumfluff has been ordered not to lose any guns or any tanks, but to delay and do as much damage as possible to our pasta-loving chums. Hah! Hah!
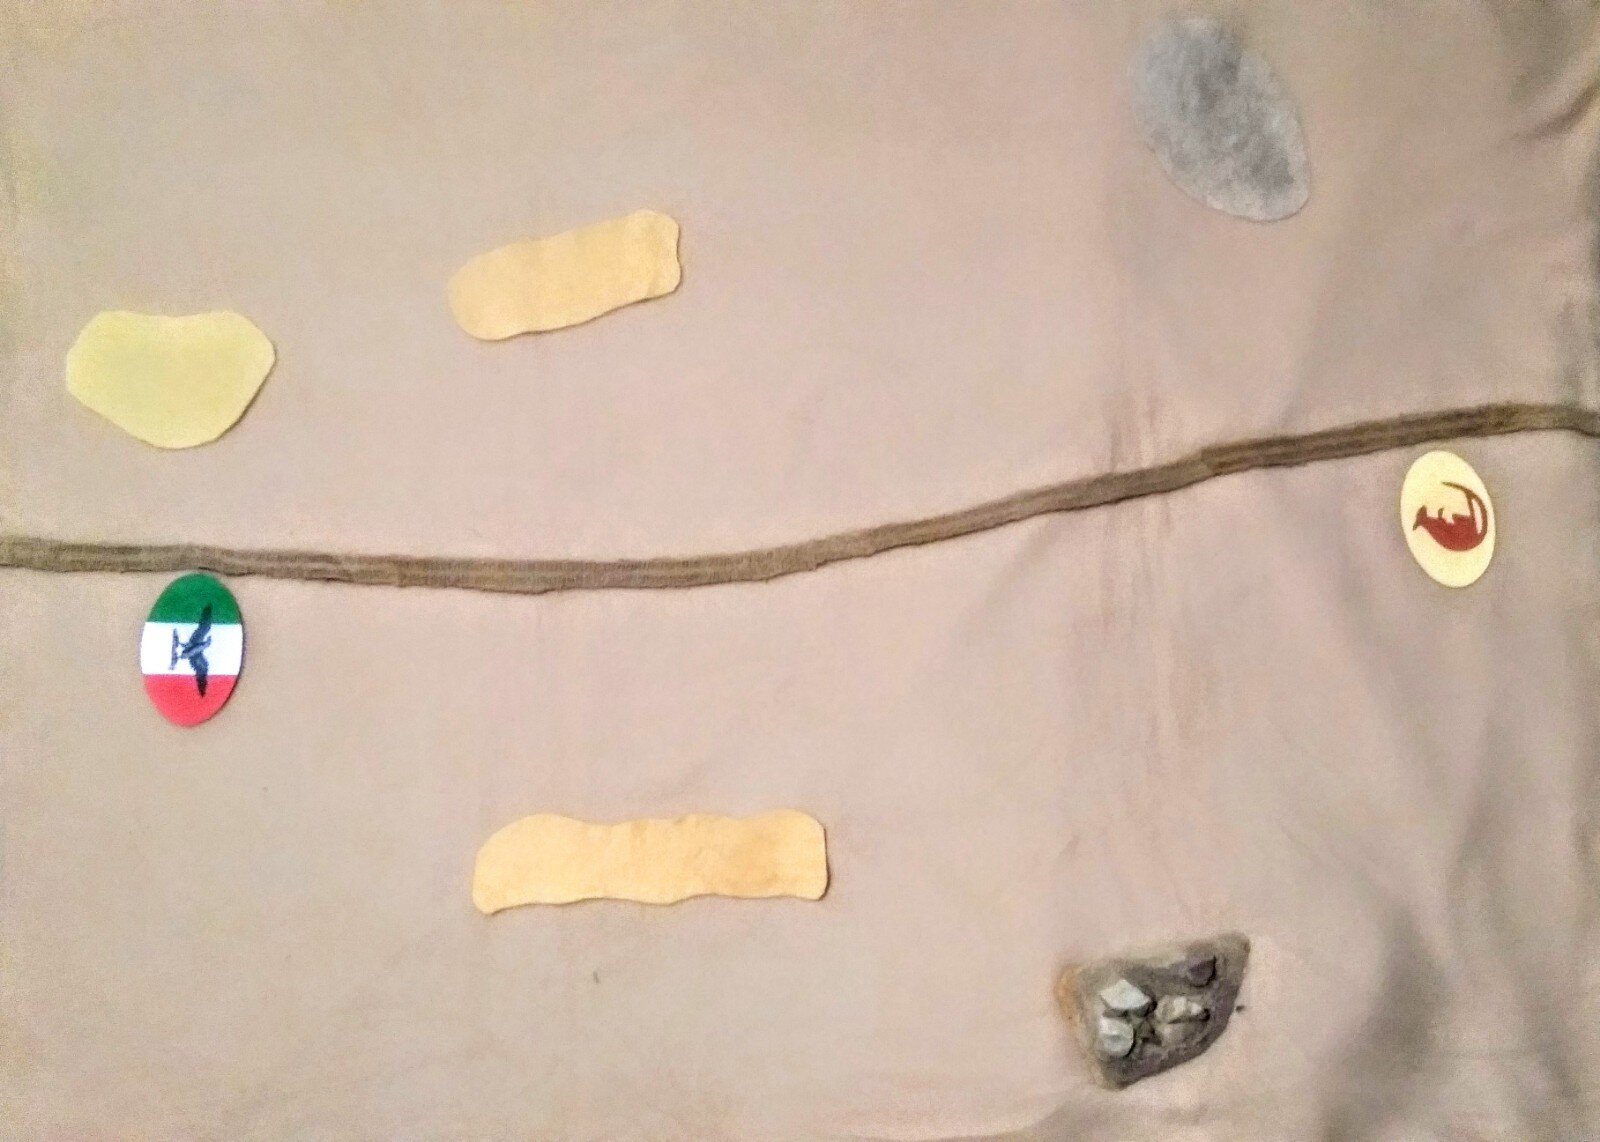
The map shows the path of the rough track running along the coastal strip. The track gives no benefit to movement. The terrain in general is very rough: any vehicle that intends to move must roll 2d6 at the start of its turn. If it rolls a ‘double 1’, then it has become temporarily bogged down, and cannot use its initiative dice for movement that turn. Otherwise it moves as normal over rough ground.
The hills and patches of rough scrub shown provide some sort of cover and spotting benefits, but are shallow/sparse enough not to affect movement.

Company HQ
Major The Hon. "Will" Hay
Sergeant-Major Stanley Holloway
1st Platoon, 3rd Coldstream Guards
Lieutenant Charles Hawtrey
3 x Rifle Section (8 men each)
Attached from 1st Royal Northumberland Fusiliers
1 x MMG (3 crew each)

Attached from C Battery, 4th Royal Horse Artillery
2 x 2pdr A/T gun portees (5 crew each)
Attached Armour from 1RTR
Capt George Formby
2 x A9 Cruiser Tank
Attached Armour from 11 Hussars
Lt Bumfluff Farthingdale
2 x Rolls Royce A/C
Company HQ, CILVIII “Tavogliere” CCNN Battalion
Capitano Pietro Porcini
1 x Staff Car
2 x Rifle Squad (8 men each)
1 x Truck
Motorcyclisti Scouts
1 x Motorcyclisti Squad (8 men, on motorbikes)
Recce Elements from XLI Light Tank Battalion
4 x L3 Tankette, 1 x L3-lf flamethrower tankette
1st Platoon, CILVIII “Tavogliere” CCNN Battalion
4 x Rifle Squad (8 men each) 2 x Truck
Attached from CCI MG Battalion
1 x MMG (3 crew) 1 x Truck
Platoon from XLI Light Tank Battalion
4 x L3 Tankette, 1 L3-lf flamethrower tankette

The Campaign Roll indicates that Bumfluff is out of favour for losing Sergeant Pitkin and one of the precious Rolls Royce armoured cars.
Division add a troop of Vickers Mk VI light tanks to 11th Hussars and the Colonel sends Bumfluff to command them. Mr Grimsdale will now command the 5th Armoured Car troop.
Worse, a troop of RAF Fordson Armoured cars is also added to supplement 11H, and Bumfluff must take these under his wing too (not having any Fordsons I will be using Marmon Herringtons for the next game).
A Wargamer in Cyprus

Just twenty-four hours after Mussolini declared war on England and France, six troops from 11th Hussars left Dar el Hamra and set out westwards for the Wire. The Hussars’ veteran Rolls Royce armoured cars were organised in troops of three, and were to immediately establish an ascendancy over their Italian enemies.
Whilst A Squadron was attacking Fort Maddalena, a larger British force had been assembled and tasked with taking Fort Capuzzo. The force, from 4th Armoured Brigade, was divided into two parts. Most of the brigade would attack Fort Capuzzo, with a smaller force protecting the northern flank by harassing the Italians around Sidi Azeiz. Fort Capuzzo fell without a fight after the garrison surrendered following an air attack. The Italian positions further north were located on a ridge astride the “road” from Sidi Azeiz to Fort Capuzzo. 11th Hussars made contact, and attacked.
The game reflects the assault on the ridge near Sidi Azeiz.
No.3 Troop B Squadron 11.Hussars
2nd Lt Bumfluff Farthingdale,
Troop Sergeant Major, Mr Grimsdale
3 x Rolls Royce Armoured Cars
No.5 Troop, B Squadron, 11th Hussars
Troop Sergeant Pitkin
3 x Rolls Royce Armoured Cars


Bumfluff begins these games as a 2nd Lt. As he progresses he will have the chance to rise in rank and reputation.
Bumfluff has a current reputation as a "bit of a duffer." It is well earned. He will (quite unhistorically) be swapped among the various regiments of 7th Armoured as they all try to get rid of him...
Company HQ
Sergente Gellato
1st Platoon
2 x Colonial Infantry Squad (7 men each)
2nd Platoon
Corporale Stracciatella
2 x Colonial Infantry Squad (7 men each)
Attached
Corporale Pistachio
One 77/28 gun from 2 Gruppo, 2nd Libyan Artillery Regiment.

And the moral of the tale:
"Rolls make a quality product," and "Don’t mess with the 11th Hussars."
A Wargamer in Cyprus

Some more IABSM last night as the British launched a probing attacking against Japanese pickets.
As ever the British advanced cautiously in two wings in order to try and confuse the Japanese but some effective handling of the Jap Blinds resulted in the left wing deploying earlier than intended. On the right wing, one platoon got caught up in the trees and failed to roll the needed dice to do anything useful.
Meanwhile the brave Japanese CO managed to get back to their nearest village and summon some light tanks.
Eager to get stuck in the British deployed their Boys AT rifle but failed to realise that the range was pitiful and instead tried their luck with the Vickers.
Meanwhile the Japanese deployed out of the jungle and managed to pin down a section or the right flank whilst slowing down another.
By the end of the game, the British had captured one of the bridge but with the Japanese tanks advancing and spitting lead, it would not be long before it had been lost.
Another great game of a IABSM..
Chris Lane

Today Bevan and I had a first try at a game based on the famous British attack near Arras on 21st May 1940. Yes the 7th RTR against the 7th Pzr Division, and the German's introduction to the Matilda II.

Unfortunately Trader Dave’s pictures disappeared into the technological ether, but here’s a picture from one of Michael Curtis’ Arras games: B Coy 7RTR Matilda II's and 8DLI cautiously advance towards Wailley
The British Attack had already broken through the main road west from Arras – the N25 - and this was an attempt to close the other viable road west Rommel would have to use to supply his over stretched tanks. This road (the D3) runs through the village of Wailley just west of Arras, so the British mission was to take the village and block the road. The German brief was to keep the road open at all costs.
The British attack was designed to simulate reality, with poor liaison between tanks and infantry and poor communications all round. Hence the four troops of British tanks, consisting of a recce troop of Vickers Vib's of the 11th Hussars with 3 troops of 7 RTR attacked on time with no sign of the supporting infantry. Initially the Hussars were slow to move, and it fell to the Matilda's to do the main spotting work – not an ideal start!
The 3 Matilda II's and 6 Matilda I's moved slowly of course, but their armour was a shock to the Germans and the 2 pdr on the Matlda II hammered the opposition, not helped when the two assigned 2 pdr ATG's of 65 ATR turned up and fired from the northern ridge. Panzer I's, II's and III's were wrecked or burning everywhere, but the tanks of 25th Pzr Regiment died hard and used all the terrain to best advantage, thanks to some effective deployment by Oberst Rothenburg.
The German infantry – a platoon of the 6th Rifles - holed up in the solid village houses, and with no HE shells available, spraying the buildings with MG fire from the Matilda I's was taking a long time to have an effect. What the British needed was supporting infantry, but the lads of the 8th DLI had taken a wrong turn and only their Coy HQ turned up and their light mortars and ATR's were never going to help much.
As time passed, the inevitable German response came. A platoon of Pzr IV's was not seen as a great threat, but a Stuka attack took out one of the Matilda II's whilst a couple of the Matilda I's were now abandoned as the German fire slowly knocked pieces off them. Finally, in the distance on the southern ridge, a battery of Flak 88mm guns appeared and some heavy artillery fire started to come in. The British commander (Lt Col Heyland) decided hanging around with a reduced force against an enemy growing in strength was not a good idea and pulled back over the northern ridge.
Trader Dave

Tonight saw part two of what has now become our fall of Singapore game.
In this battle, a full strength British company was tasked of taking two strategic hills while the Japanese (briefly) rested. The Japanese commander, played by Simon Godly-Kelly, was tasked with holding the hills but with the option of taking a junction for a major victory.
After some slow moving as the British tried to advance and spot through some heavy jungle, the company HQ and FO started getting to work with the 2” mortar laying some smoke.
1st platoon, after failing to spot anything on the first hill, managed to capture it.
However, the Japanese had some light cavalry that managed to outflank platoon 3 on the western side of the board and charged both into their flank and that of the Company HQ. Within moments the HQ had been wiped out but a fierce hand to to hand combat resulted in a stalemate for platoon 3 and elements of the Japanese horsemen.
The Japanese then used some of their cavalry to secure the junction, but only lightly.
Platoon 2 rushed back to secure the British line of retreat but a much delayed Japanese blind resulted in Simon being able to open up with his 37mm anti tank guns that threw in some rather nasty HE, putting the wind up the British. Simon had also successfully rolled for some of his light tanks to enter and they started to roll down the main road.
At this point, we called time. The British controlled one hill and the Japanese were due to loose the junction. They had also suffered significant losses to their horses. However the British has lost half of platoon 3 and taken loses to each of the other platoons with one section of platoon 1 being suppressed. In addition the company HQ had been utterly destroyed.
Simon generously called a Pyrrhic victory for the Japanese.
This game was designed to test artillery which neither of us got to use! The pregame stonk for the British was ineffective as it missed.
However it was a thoroughly enjoyable game and we continue to learn more.
Chris Lane

Had our first test game (I’ve played before but only only twice and a long time ago) with the Japs and British fighting it out over a rather European looking Malaya.
It was good training game as we got are heads round the basics. The British had to hold the river in a rearguard action.
In the end, the Japs got across and banzai charged the platoon holding the local buildings.
Thank you Simon Godly-Kelly* for a great game!
Chris Lane
*Who comments: There seem to be a lot of pictures of a failed cavalry charge and not too many of the village assault. Media bias I tell you...

From the Too Fat Lardies scenario book: "From Wildcat to Whale" Scenario #14.
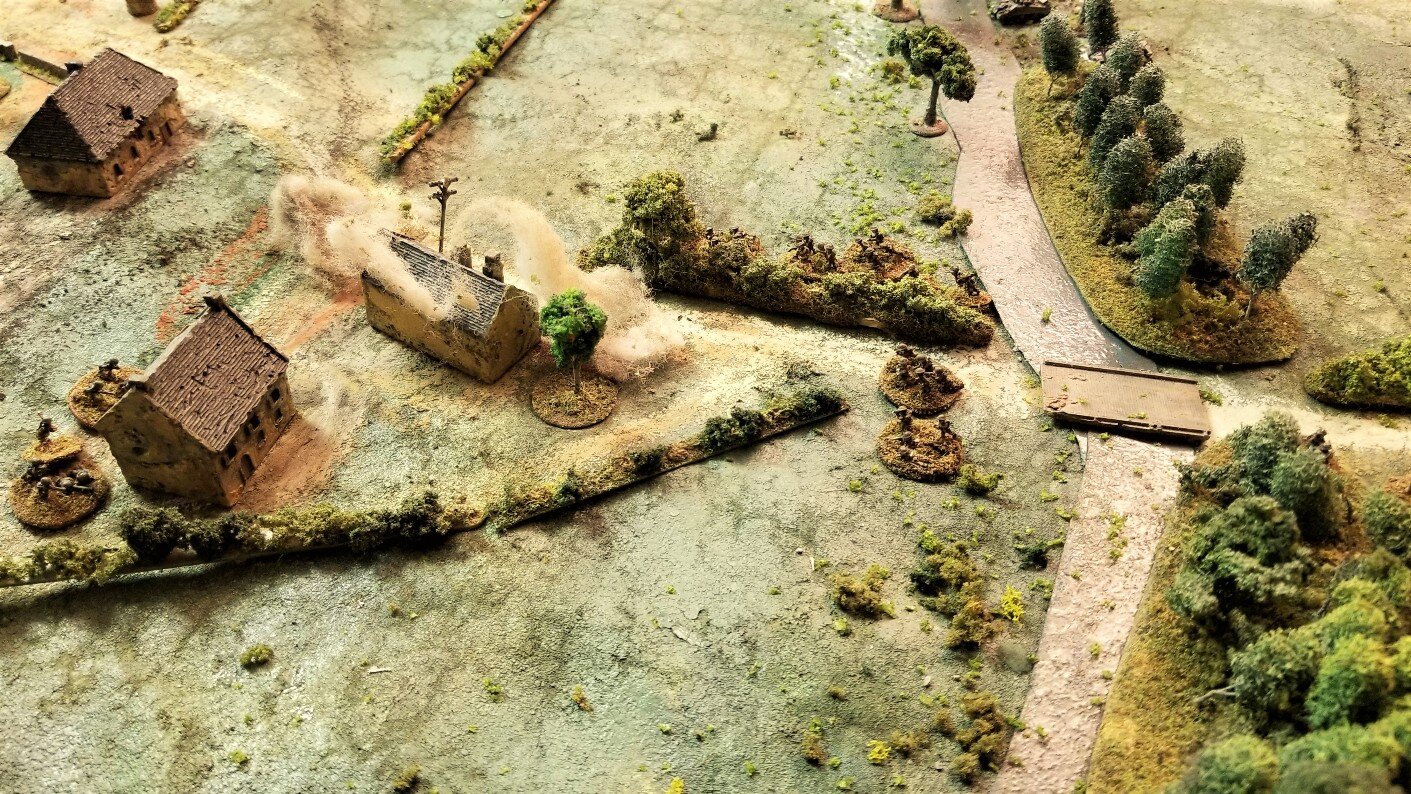
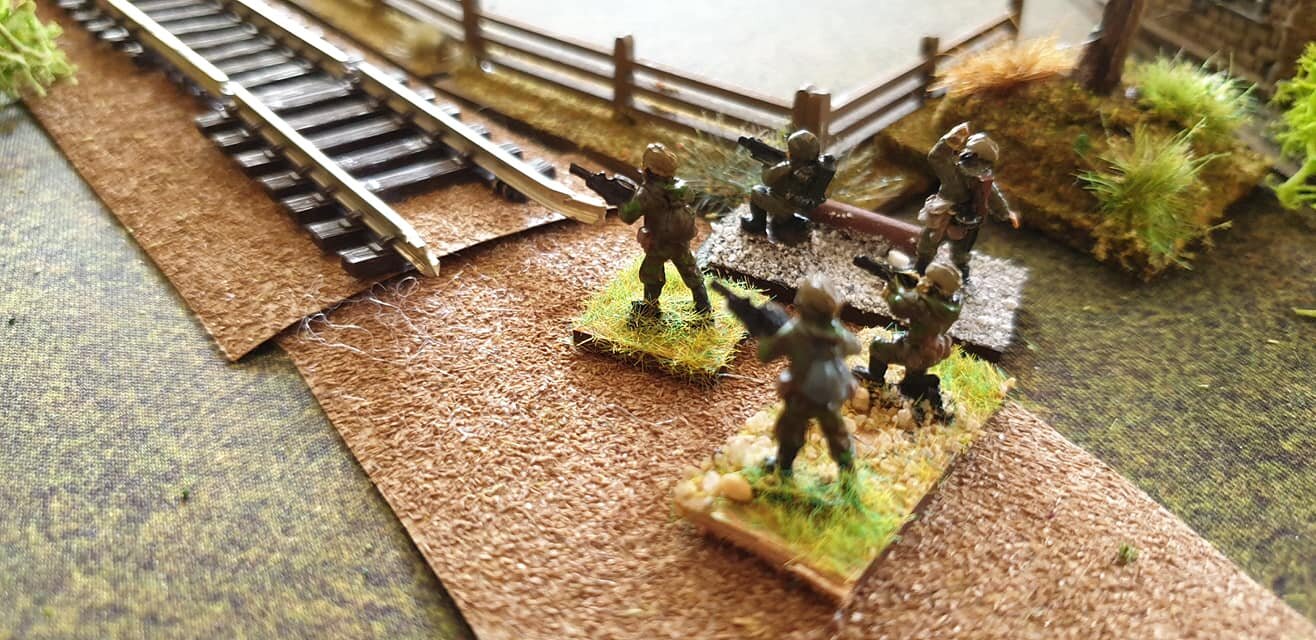
This scenario focused on the German attack on the Right Flank Company of the Scots Guards holding the area of Carroceto railway station during the late evening and night of 9th/10th February 1944. One of the forward companies of the Scots will be holding positions out along the railway track to the north: the Germans will be trying to wipe them out.

Dan Albrecht

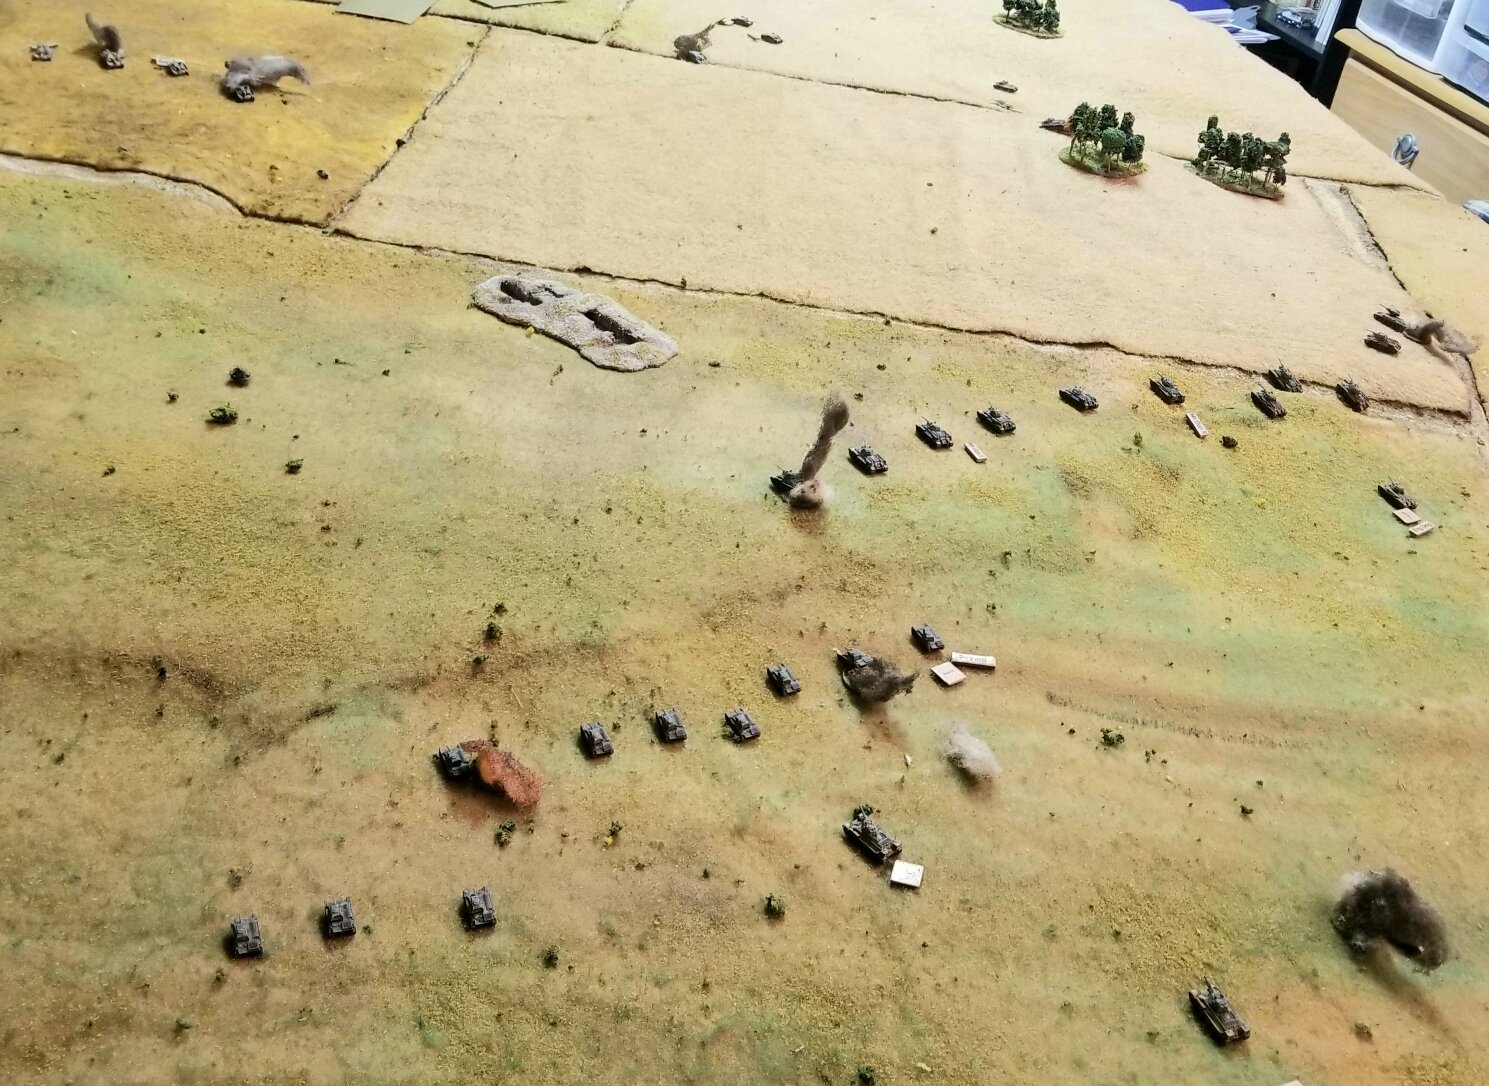
The latest remote viewing and text game was from the IABSM rule book. Scenario 4, A Canadian VC. This game is based on the August 19, 1944 Canadian advance into St Lambert where the Allies are trying to plug the Falaise Gap.
Normandy games look nice but with terrain like this you really have to send a lot of pics to convey the tight confines of views available. I did adjust the basic map a bit to add more buildings and some walls. Really one of the best scenarios I've played/run. We had four players scattered around Atlanta area and in Florida.
…since it was based on the Canadian VC game in the IABSM rules. I did adjust the basic map a bit to add more buildings and some walls. The Canadian entry edge is to the left(north) and the German entry site was the road at the SE corner.
Germans had to hold off the Allies and prevent them from capturing the main crossroads. Grenadiers (Martin) had two 2-section platoons, one with a panzerschrek and one with a panzerfaust per section. The 3rd Zug had a section and an MMG team and two panzerfausts. The armor was a zug of two PzIVHs and a zug of a Tiger and a Panther.
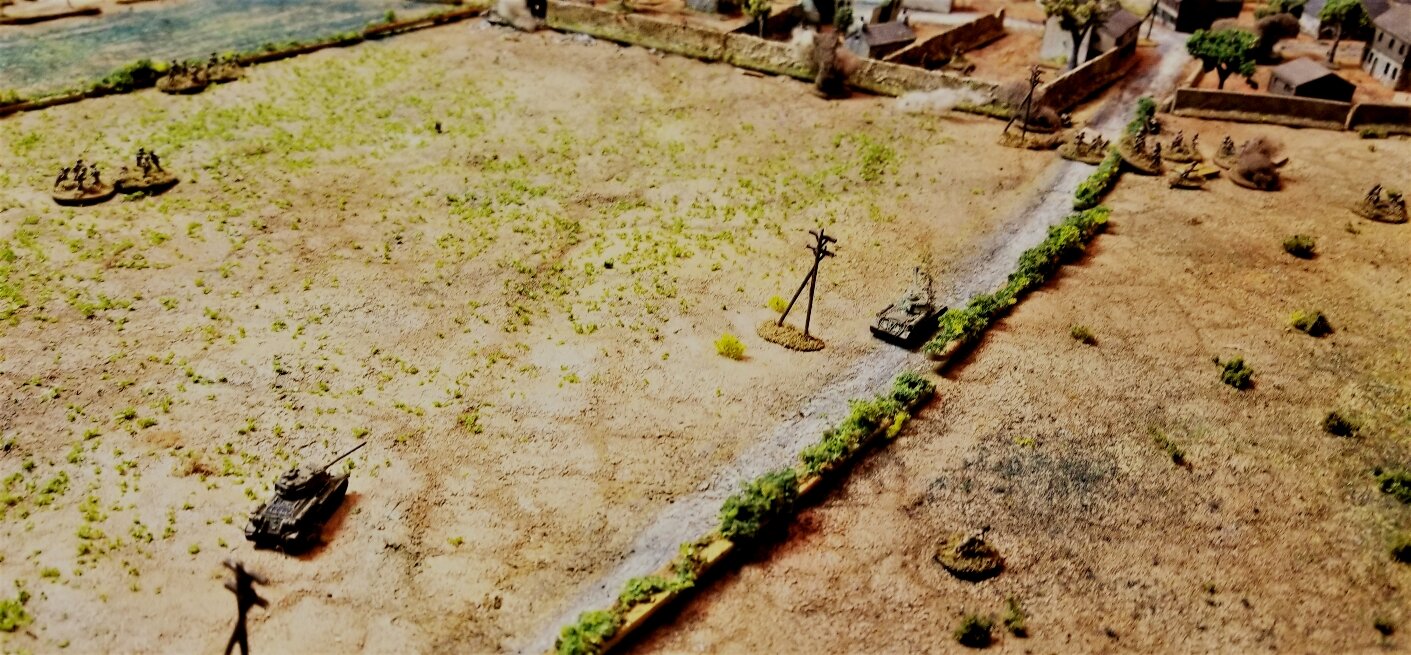
Looking north towards St Lambert
This game is based on the August 19, 1944 Canadian advance into St Lambert where the Allies are trying to plug the Falaise Gap
Canadian infantry has 2 platoons of 3 sections each and a Company HQ of Maj Ivan Martin (Level III). Lt Gil Armour (III) has the 1st platoon and CSM G Mitchell (II) the 2nd. Jess was the infantry CO and Sheridan the armor. There were 2 troops of Shermans in support. Maj Dave Currie (III) and Capt John Redden (II) were the leaders.
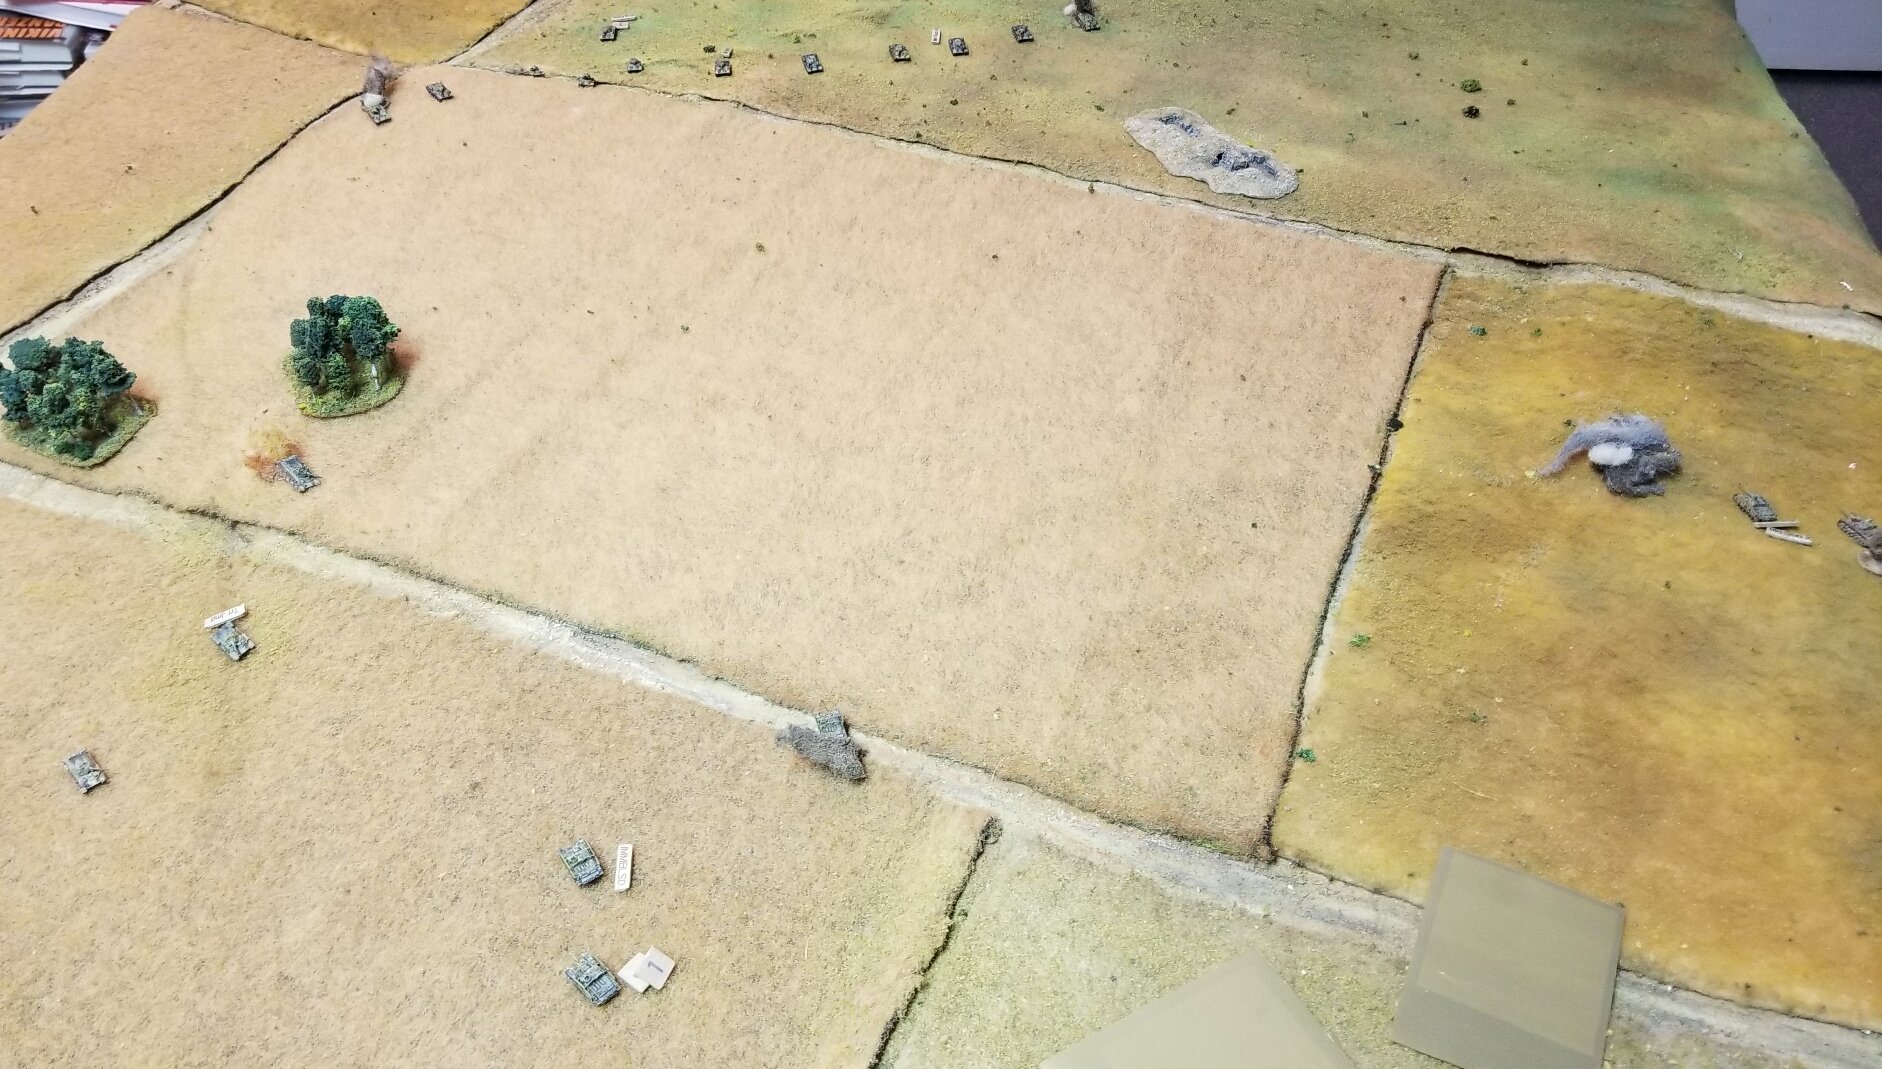
Looking west into town
The Germans had a choice of what they could begin with on the table. Martin (panzer player) and William (infantry player) were the Germans They each could begin the game with one of their understrength zugs. William elected to have the Tiger and Panther and Martin started with one of the 2 gruppe zugs up overlooking the NE bridge.
It can cover the bridge from here.
Martin put the zug of Feldwebel Klaus Siebowicz up front to slow down the 'Tommies'. They were in the hard cover of the farm houses and had a good view of the stream.
The Firefly of Currie is in the back.
Their previous location was smoked after they opened fire on the Canadians
2 M4s move next to the stream as Currie hangs back The other cards are both blinds.
Panther moved up along the road that the Canadians were coming in on. Tiger went up the other road. The 2nd Canadian infantry platoon moved to the left to cross the stream.
A very lucky hit from a M4 takes out the Panther early. It had fired and missed only to then get hit and fail its robustness roll.
Besides getting the devastating hit on the Mk V they were also shooting in their ground pounders. The 2" mortar was doing a decent job of putting smoke down too.
Overwhelming Siebowicz's zug. The 2nd troop is behind the trees getting ready to follow up Mitchell.
No threatening panzers in sight so the Shermans plaster the farmhouse with Siebowicz.
It wasn't all 1 sided as Lt Armour goes down. But the German platoon really wants to pull back.
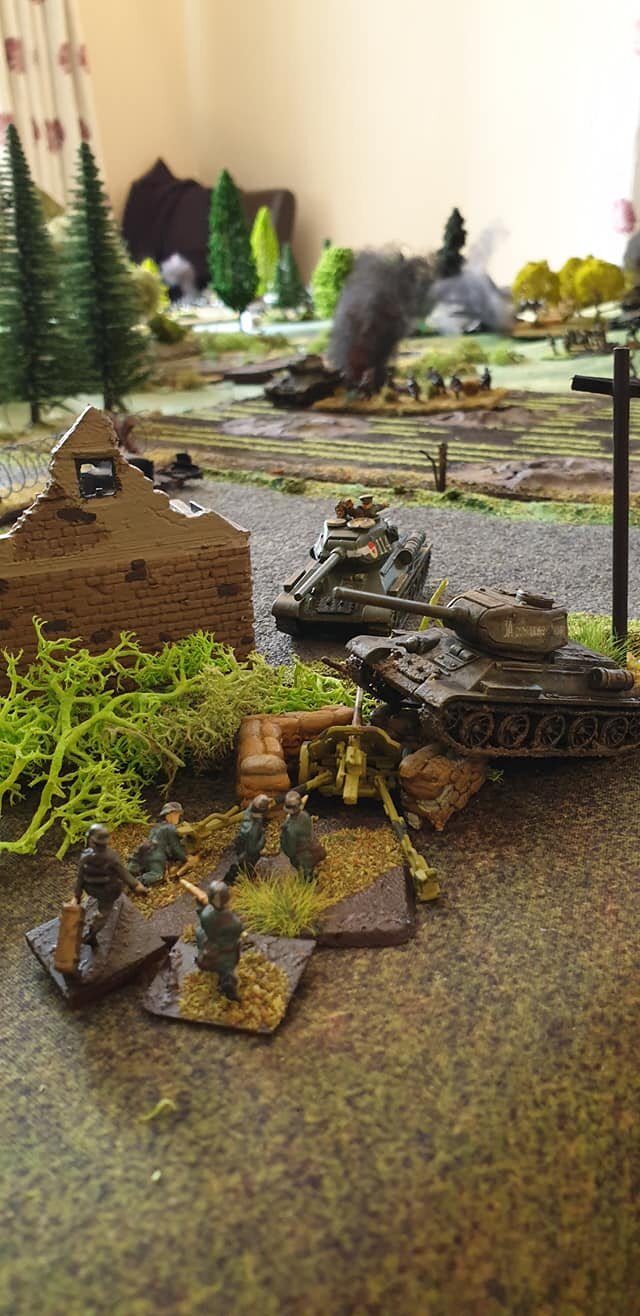
And the Canadians take the first German positions
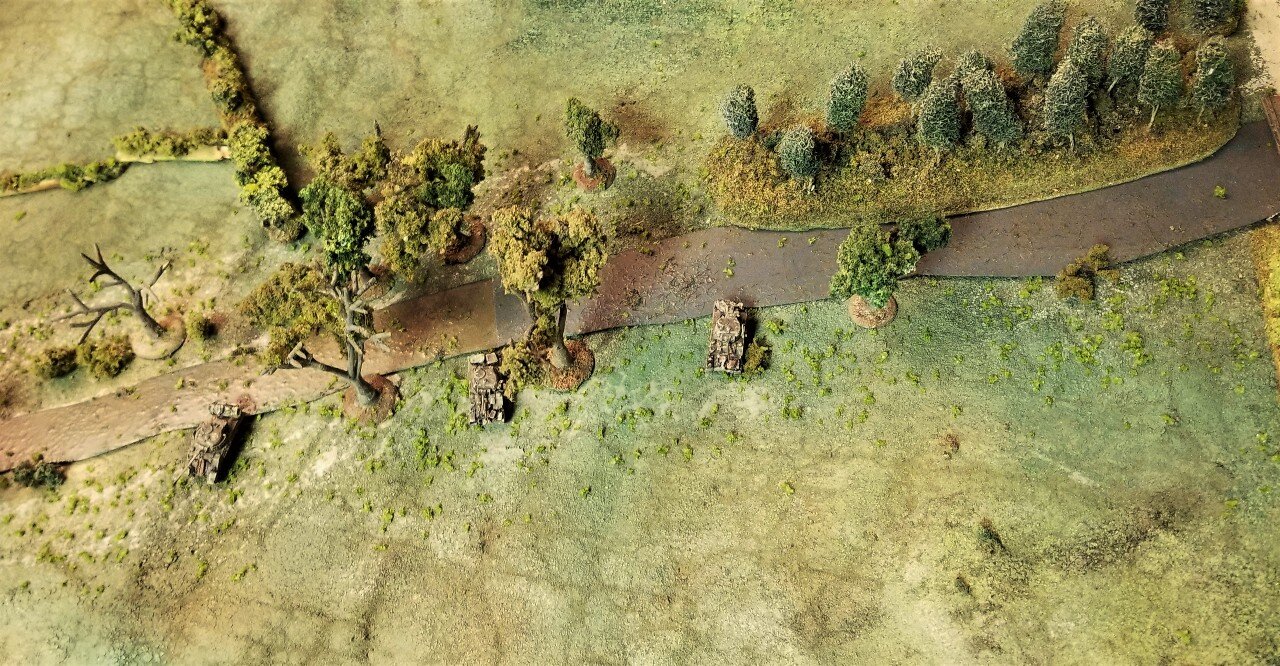
The troop under Redden has crossed the Dives also and is still under blinds.
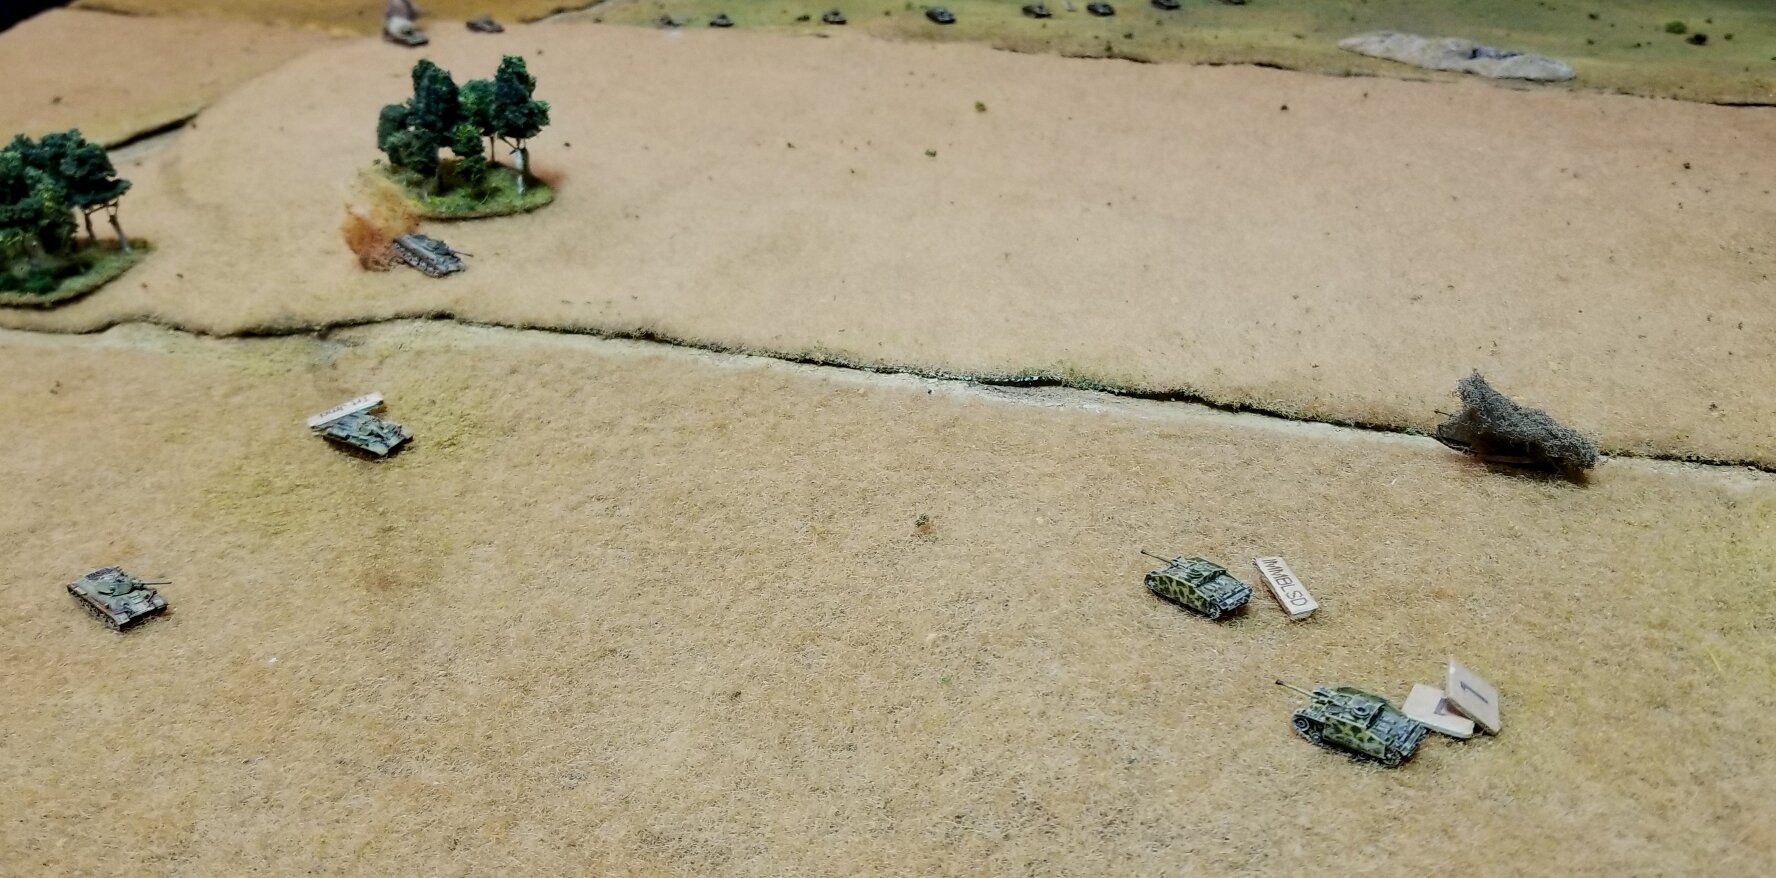
German reinforcements are slow to arrive. One zug under Schrfuhrer Richard Ziegler has come on table only.
The Germans attempt to regroup in the next farmhouse up the road, but the M4s shell that buildings also putting and end to their combat effectiveness for the game. The Panther continues to burn outside the building.
The blinds at the top are the Tiger and a dummy blind
Finally! William's 2nd panzer zug finally gets into action. They attempt to engage the advancing infantry coming up through the orchards on their right. The Tiger has just hit the center M4 of Currie's troop.
Not sure of where the Jerries are actually except for the PzIVs

The PzIVs and fire from the center stalls the advance.
The Panzers really were not on their game in this outing. The blind up front is the panzerschreck team of Ziegel
The panzer closest to the intersection took a mobility hit.
But the Sherman was hit and abandoned shortly after.
A gruppe from the 2nd Zug moved into the orchard to cover the right flank It didn't stay there long.
Random event catches a building on fire next to the grenadiers

Jess and Sheridan did a really good job coordinating their actions. Which is even more admirable since they were in separate homes and at the mercy of my messaging and interpretation of their moves

Tiger up front and the 2 sections under Ziegel in the buildings. They pulled back from the orchard after taking a great deal of fire from several sections.
No VC for this Major. The panzerschreck team was spotted before it could get off a round and took 2 shock. They still fired and hit causing the Firefly to explode.
The 2 Mk IVs were the only German units left on the east side of the table and had to respond to the Canadians moving across the road towards the center and south. They also knew that there were PIATs around.
The 3rd infantry zug was just a gruppe and an MMG team and pzfst. It really could've been used earlier, but the cards just weren't coming up for the Germans.
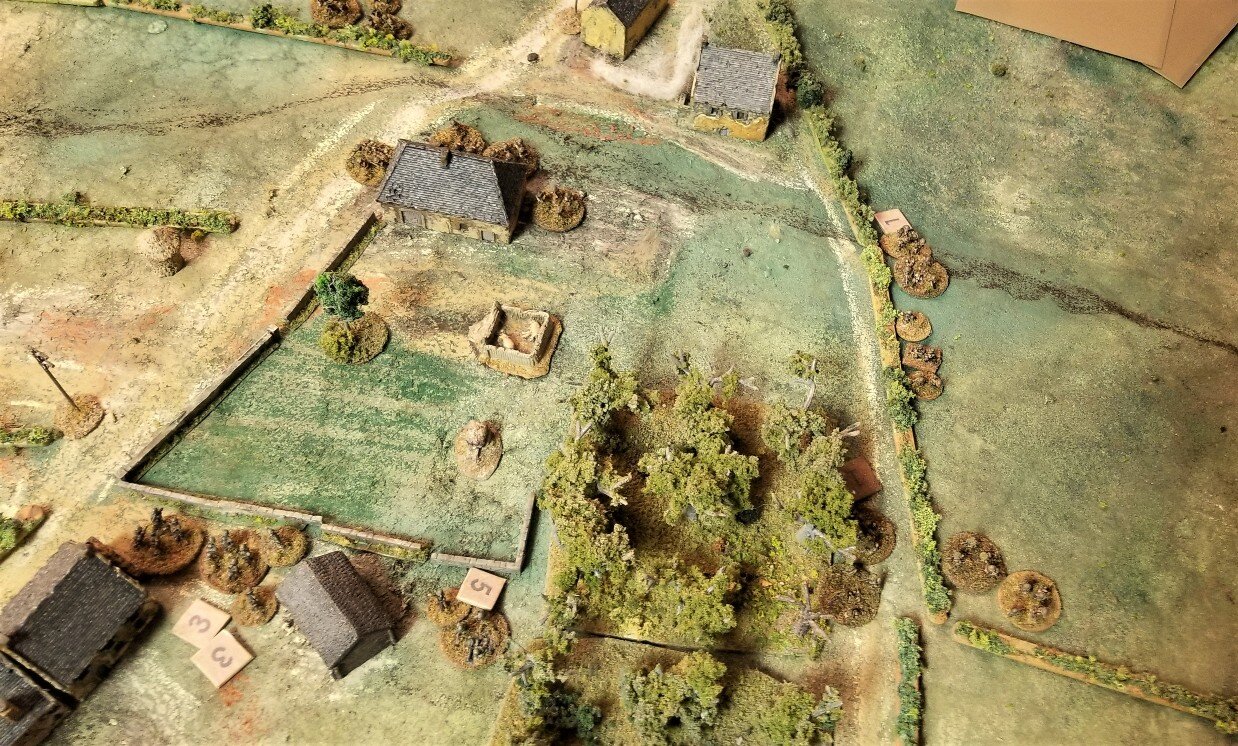
The 1 platoon under Maj Martin moved into the center of the table drawing fire from the MkIVs and grenadiers that had moved towards the crossroads.
And the Yellow house that the 3rd zug just moved up to.
The blind at the bottom is the 3rd zug
Using the Heroic Leader card, Maj Martin makes an attack on the Tiger. The tank CO is killed but the MkVI backed out as quick as possible. Close to duplicating the historic feat by Gil Armour but not quite.
This unit took a long time to make it on the table. Martin had moved the survivors of the 2nd Zug back to occupy the house in the crossroad and the building to the north of it. leaderless Tiger had backed up to cover the main road and escape the aggressive Canadian infantry.
And does hit but causes no damage.
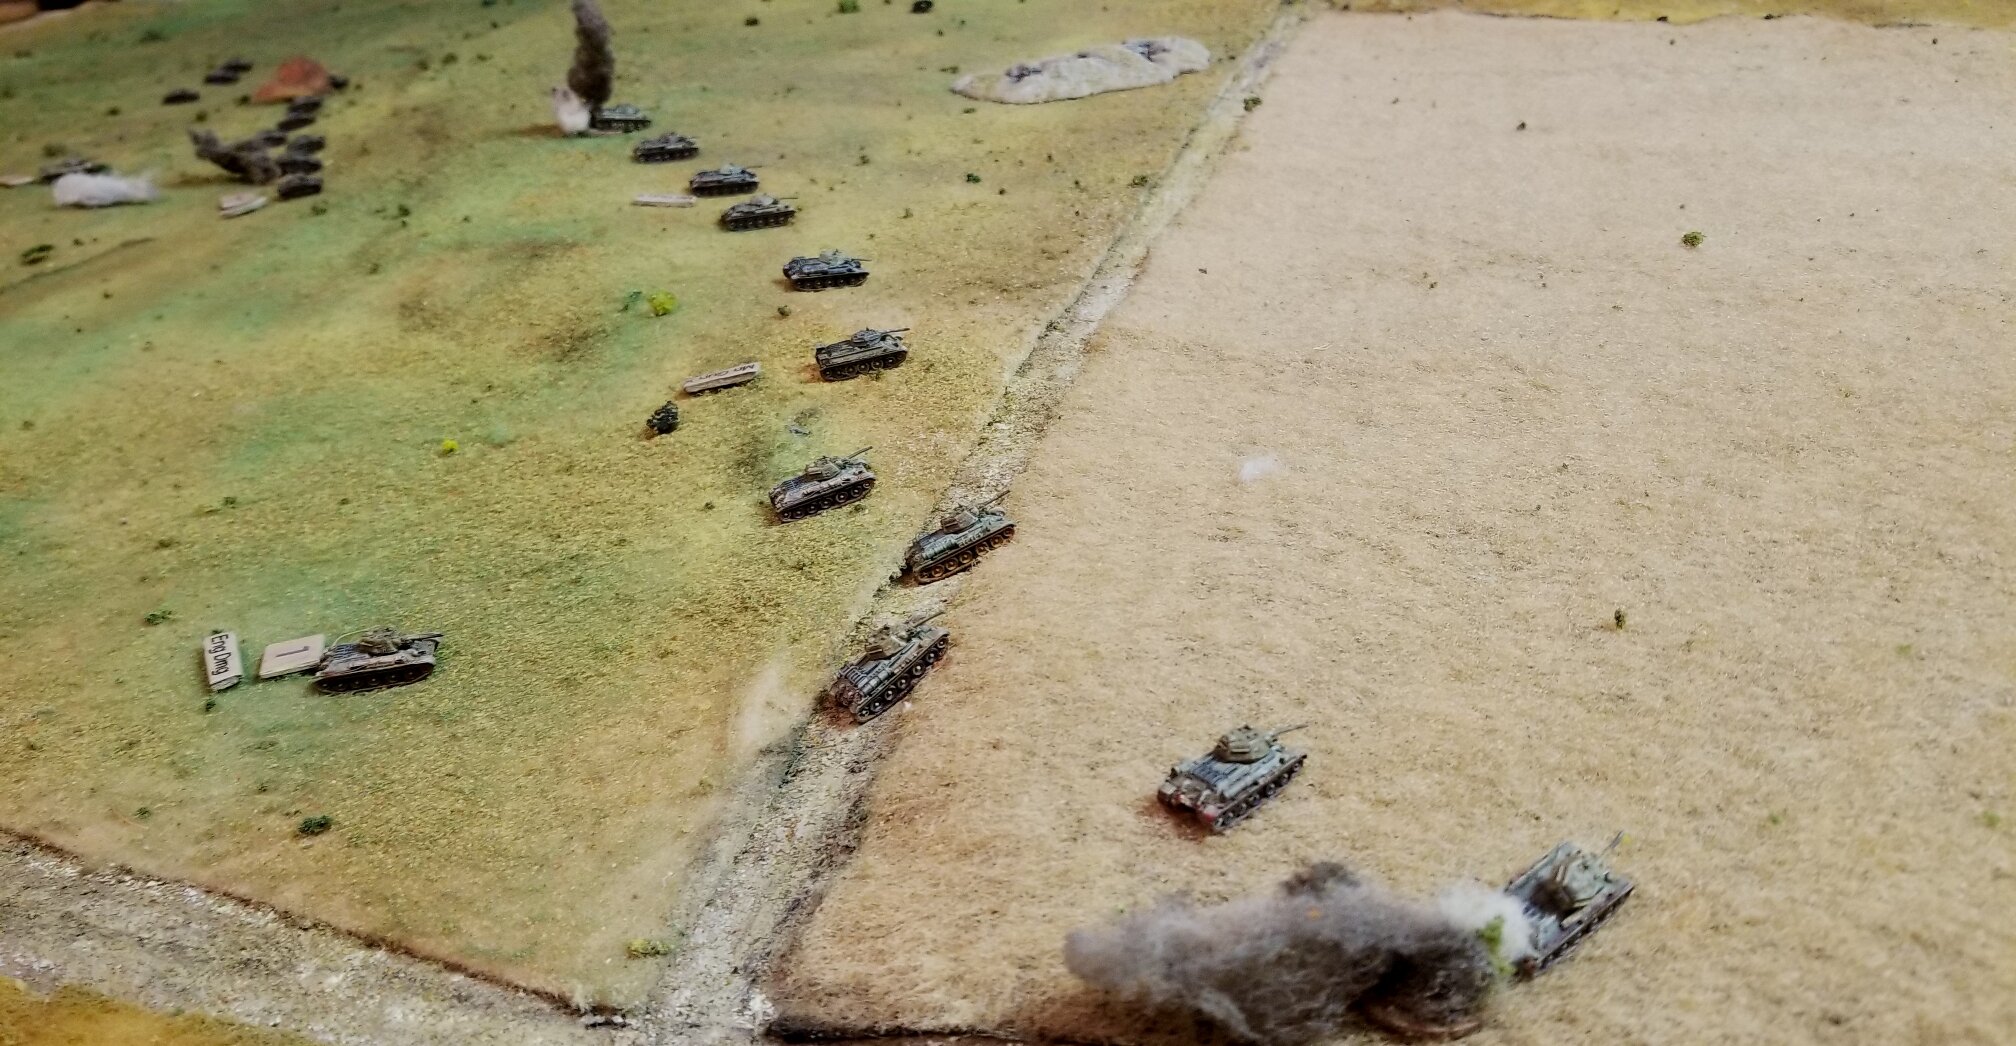
One of the MkIVs pulled back after having a PIAT round rattle it. The 2nd troop of Capt Redden has also worked it way around the eastern side of the long orchard and has a view of the yellow house.

The PIAT team suffered a shock point in return when the took another shot at a PzIV.
Canadians moving around their southern flank. The 3rd zug in the yellow house is a section and a MMG team only. It is under fire from the M4s.
It had already taken some engine/mobility damage and now was struck by a M4 from 2 Troop.
These veteran men moved up, covered by a 2" mortar, the PIAT, and the M4s
This leaves the Tiger and the 3rd zug in the yellow house isolated. Meanwhile the 1st pla is moving up through the orchard under cover of smoke and a burning house. Jess and Sheridan did a nice job of coordinating their movements.
The 2 troop moves up to fire on the yellow house and chase the leaderless Tiger back into the smoke.
We called it at this point. Smoke was covering the crossroads so the Canadians could move up to close assault the defenders who were suffering from HE fire.
Final tally was 2 German sections down to 1 action only and the 3rd zug had taken 4 casualties (out of 13). The 1st zug was wiped out. 1 Pz IV and a Panther KO'ed. The leaderless Tiger had damage to its gunsights.
The Canadians lost Maj Currie and 2 M4s and his Firefly. Lt Armour was down and his platoon lost 10 of 28. Mitchell's pla was down 11 of 28. The 2nd troop had taken 1 hit to a M4's track only.
This is one of the best scenarios I've run and could've gone either way.
Mark Luther

I spent Saturday 'at' (virtually) VL2: in the morning I ran an IABSM Lite game, with a couple of twists that were only possible on Zoom, and I played SP2 in the afternoon.
I ran a small IABSM scenario set in my favourite corner of WW2 - northern Italy. I nicked an idea from Bloody Omaha in that the Germans were a very small, well dug in force (a section., two '34s, a StuG, a PaK40 and a sniper) run by me as the umpire, and the four (reduced to three, sadly) players took a cut down British company: 2 sections, a carrier section, 4 Sherman IIIs.
The other twist was that they got a briefing and some recce photos, and from then on (as they were all connected via Zoom) they were restricted to a units-eye view (using an iPhone on a custom stand).
The British reccee photos: an overhead pass and, to quote, "One of the PRU Spitfires made a low pass over the valley this morning. Took MG fire from the church doing it, so the pilot really hopes you appreciate the effort." The British are attacking from the left (south).
8 Platoon make it across the river, and flush out some Germans in front of the church, as well as an MG34 in the nearer farm,
7 Platoon meanwhile are being very wary of the main farmhouse, in which they keep spotting movement but aren't sure what. CSM Moxon is kept busy yelling for more smoke from the 2".
“Gunner: Jerry tank, right of the pine tree…traverse…no, further right of the wall…fire…GOT HIM!”
We didn't finish, in part because I had three relatively new to IABSM players and was wrestling a bit with the tech. I'd love to run it again: definitely a fascinating game,. and the players seemed to think the viewpoint idea worked.
Mat by TinyWargames, buildings by Empires at War, Battlefront and I think SHQ, figures by Battlefront, Shermans by PSC.
Mike Whitaker

So a week later we had a couple of replacement gamers picking up the attack on Wulkow in eastern Germany on April 18, 1945 defended by elements of the 27th Fallschirmjager Rgt. Jess is now the FJ player and Sheridan the Soviet.The defenders are down 28 out of 76 men, both Paks are gone, 1 MMG gone, and they have 3 Hetzers left. Both the 120mm mortar btty and the 150mm sfH 18 were still around but would soon have to displace.Sheridan had a new company from the 301st Rifle Div, 1050 Inf Regt of 2, 3 sect platoons. A T34/85 (8 tanks) company from 51st Bttn, 220 Seperate Tk Brig and the surviving IS2 of the 92nd Gds Hvy Tk Rgt 1 IS2 was immobilsed but could provide fire support. The MMGs were also available to give support from the industrial area. 82mm mortars were also a possibility.
At least til it got close to the village. The 122mm gun was able to blast away at the walls.
The Hetzers would fire and pull back. One of the puppchen bravely set up close to where the PaKs had been destroyed earlier.
A Hetzer was placed on both sides of the village. IS2 still smoking from previous game.
Both the infantry and tanks started to fan out to the sides as they advanced.
One takes a mobility hit and has its speed reduced for the game
Rush from Russians causes the atg crew to abandon its gun before getting a decent shot off. Lots of automatic weapons firing from the walls.
Just too many small arms at close range to keep the attackers moving.
Fire from these walls not as effective and this platoon would gain the outskirts. Hetzer playing cat & mouse with the T34s.
Past a destroyed IS2 and a just-hit T34. The immobilized IS2 from the 1st game was able to bring some fire on the town from its position off pic.
Two tanks firing 122mm and several 85mm rounds was beginning to knock the walls down around the FJ
The Hetzer even put a HE round on the Russian infantry. Meanwhile 82mm mortars rounds are coming down in the village.
Burning T34 on the left. Shells impacting the walls across the town. Infantry scattered on the left advaance. Right flank attack is close to getting into the village.
Russian infantry using the scant cover of a hedge as they watch the tanks demolish the walls.
FJ survivors retreated back to the stone and wooden house
Still too many FJ defenders with their automatic weapons
The shoot and scoot tactic is keeping the TD alive (unlike the IS2 it is using for cover) FJ using as much hard cover as they can find.
Hetzer unable to stop the IS2
FJ has to refuse its left defense

Infantry on the right able to help out. Hetzer firing out to left flank about to get caught in the side by a 122 shell
Driving past the abandoned PaKs and puppchen
FJ scrambling back from the tanks
Helps to keep the 'fausts away
The puppchen had to run away from its position along the hedge. 1 shot fired and missed Pzfst also missed. Where is the Russian infantry?
1 Hetzer caught in the open and blasted to bits by the IS2. This left the battery CO and the defender on the FJ right. One of the T34s has taken 2 mobility hits and is limping along. Another was forced to bail after it was permanently immobilzed.

The TD had plenty of cover to hide behind--and was using that to its advantage against the T34 which also had to dodge faust attacks.
FJ troopers drew fire away from the faust attack and it worked. But it was getting late and the FJ troops were running out of hidey holes and men. We decided to end it here.
The Paras would attempt to ex-filtrate with the 2 Hetzers providing some cover. The FO teams had packed it in about midgame since their batteries were on the run. Both MMG teams were wiped out. The 1st company was down to 16 men (of 38) It had lost its company CO and the 2nd plt ldr to 122mm firing 2nd company had been hit hard in the 1st game and they now had only 14 survivors.
The attackers lost all of 4 IS2s(1 immobile) The T34s still had 5 runners. But infantry was scarce. 1st plt down to 5 of 16 men, no ldr left. 2 plt also had no plt CO and only 7 men of 16. the 3rd plt lost its cdr and had 8 men of 16. The company CO was still alive.
Another tough game for both sides.
Mark Luther

Ost Front 1944. Bagramyans drive to the coast of Lithuania with 5th Guards Tank Army colliding with Gross Deutschland and 551 Volksgrenadiers.
Russians had to clear the railway station and blow up the railway line with engineers before a train arrived in Turn 10. Captions on the pics.
We used Minefields and Naval Gunfire from Prince Eugen, and a Soviet Super-Stonk. What a cracking game!
Julian Whippy

I ran another remote game of IABSM using Messenger and my 6mm stuff. It was a late war East Front game that was suggested by one of the players. I decided to do something a bit different and set this up to be a game run over two sessions with a different pair of gamers each time. Being a lazy git it meant that I didn't have to make up a new table for the second game!
The scenario was to depict the defense of Wulkow in eastern Germany on April 18, 1945 by elements of the 27th Fallschirmjager Regiment.
A larger overview of the battle from Bob Mackenzie's excellent site:
On the 16th of April 1945 the Soviet army unleashed its last offensive against the German Reich. The bridgeheads over the Oder River split asunder and spewed forth red infantry and armor which forged forward to take Berlin. Although by this late stage in the war the German army was on its knees, it had a strong defensive position on the Seelow heights and gave a good account of itself, selling each meter of the Reich dearly.
Pressure began to mount and the German line broke. Soviet forces flowed either side of Seelow and pushed along Reichstrasse 1 into the country beyond. As the best German forces were deployed along the road, which was the direct route to Berlin progress was slow. However to the north of the road the Soviets had penetrated several km's further. This meant that the Germans around Reichstrasse 1 were on a salient. Guarding the North edge of the Salient was the village of Wulkow. The Soviets wished to take it and push to the south east to support their advance down the road to Berlin.
The main assault fell to the 301st Rifle Division, supported by the 220th Tank brigade. Behind were the tank brigades of the 11th Tank Corps and 1st Mechanised Corps waiting to exploit the the breakthrough. All the Soviet troops were seasoned fighting men.
This was open ground with some fields just coming into sprouting. The village is on slightly higher ground on the southern 6 ' edge of the table. The Soviets would come in from the north edge.
Martin (in Florida) had the defending force made up of the remains of I and III Bttn. This was really just 2 weak companies, each of 2 platoons of 2 sections of 8 men and a command section They were rated as having more automatic weapons so rec'd and additional dice when firing up to 18". They also had 2 MMG teams, 2 PaK 40s, and 2 Puppchen teams. Each 'bttn' had a Panzerschreck team. There was a faust for each section. They also had a FO for 120mm mortars and one FO for 150mm sFH18 off table support. These might go away because of other attacking Red units threatening their positions.
As before the players got pictures of the table along with the briefings. Martin gave me a detailed description of where he was to be deployed. He could set up on the southern half of the table, including a small industrial area on the NE side.
Walled area to the northeast of Wulkow.
This gives an ideal of the openness of the table.
The Russian player had 1 pregame stonk and William laid it across the town. It was pretty effective in causing lots of shock. I think it was about 27 points of shock but few dead. There are several FJ Big Men around so it made it easier to take off the shock. The German 'Rally' card was also in the deck. The FJ had a good chance to dig in and make loopholes across the village.
I didn't bother to use blinds for the FJ-I would show Martin the positions and results, but William just saw the explosions and the walls from his position.
The picture sent to William was close to the ground so their visibility was more limited.
William had a nice force to attack with--Elements of the 1050th Inf Rgt of the 301st Rifle Div. 2 companies, each of 3 platoons with 2 sections each (12 sections) of 8 men. There was also a small command group for each company. There is also a MMG platoon of 3 guns with a Big Man. A FO for a 82mm mortar btty. And 4 IS-2s for blasting down the walls.
William decided he would swing to his left and take the industrial area first and use that as a base to come into the east side of town.
Russians were identified pretty quickly
I think it was a surprise to William that there was no defenders in this complex.

The crew was down a couple of men after the stonk and missed 2 shots before it was silenced by the 122s on the IS2s.
William kept the troops moving
This was field was sprinkled with a dark green looking flock with a spinach color so that is what how we referred to this field.
The MMG platoon is moving into the industrial area, and another Russian infantry platoon just leapfrogged out in front.
These are newer sculpts from 2Dwargaming. The LMG team strips comes with 1 gunner and 3 ammo carriers. Bad photo does not do them justice.
Full company of Russian infantry advancing

The FJ troops had to scramble to get troops over to their right. They did have a couple of sections dug in along the hedges, but they and a MMG team couldn't stop the hordes.
The first close assault was beaten back along the road, but the German pla ldr was killed. Another 2 sections got around the flank and tried to get into the village, but were stopped by fire from a FJ section along the hedge perpendicular to the road.
A platoon is forced back from the road. 1 of the IS2s broke down out in the center field off pic. Another Pak40 moved up to take the place of the one already shot up by the IS2s at the top right of the picture. It is able to target the moving tanks -barely. The Soviet MMGs are firing into the village from the industrial area, trying to pin the defenders.
The tanks had been concentrating their fire on the wall and buildings on the east side. The Pak was able to move up into position without being spotted close to the original ATG.
The FJ MMG team is in bad shape there.
William ran into some automatic weapon fire that forced his left most units back to the road. The sections in the FJ trenches were taking a lot of fire from Germans back in the village.
The German mortars fire a ranging round that is off considerably. The broken down IS2 (random event card) is able to target the Pak to the right.

4 of these panzejagers arrived just before the ISs got into the town. Martin spread them out to mainly cover the east side. There is a puppchen in the lower center. This is similar to a wheeled Panzerschreck. More stable than a handheld weapon but not nearly as mobile. It fell back from the east side before it was overrun by the red infantry.
Both sides were losing men and the Russians were especially having trouble keeping their leaders alive
Good armor and great gun, but only able to get 1 shot off per phase. The Hetzers would move up, fire and pull back. They might hit but it seemed that the IS2s would generally get at least as many saves as strikes from the TDs.
And getting out of the way of their TD muzzle blasts. The game was now a cat and mouse game between the bigger guns.
Or at least tactically disperse towards the rear. There is a pzschk team waiting for a shot
It’s a real game of hide and seek with the IS2s stalking the diminutive Hetzers. When in doubt blast the building down it might be behind.
Hits the CO tank in the flank. One less IS2.
The building catches fire after a hit from the 122
The Hetzers have so far failed to cause any damage on the IS2s. It was the PaK that took 1 out and then the Schreck.
One of the Hetzer is caught and hit. It manages to only get its gun knocked out and suffers 3 shock, so the crew bails.

No contact from the command tank and a world of heat. It does see an abandoned TD in front of it.
Infantry made themselves scarce as the tanks roamed about. The Soviets were down 5 of 8 Big men and had a couple of sections still capable of action. The MMGs were getting mortared. Meanwhile the FJ lost a pla CO and one company was kaput. The only good units were still on the west side of Wulkow in their original positions.
Too many TDs and handheld ATGs to stick around
So we ended the first part at this stage.
The FJ still held Wulkow but had heavy loses. Both Pak40s were gone. 1 MMG was down to 2 crew. Total infantry loses were 28 out of 76 FJ. 1 of the 4 Hetzers was out of the gameThe Soviets had a rough time with their Big Men. Losing 5 of 8 including 1 company CO. Infantry was down 59 of 108 with only 4 functioning sections. 2 IS2s were knocked out and 1 immobile of the original 4.
Part 2 would be a second wave attack with Sheridan taking over for the Soviets and Jess handling the Paras.
Mark Luther