First game using the new terrain. We had just over three hours to play a German attack on a Soviet held village in 1944 using I Ain’t Been Shot, Mum! with a Chain of Command-modified activation system.

Both sides had a core Infantry Company and each side then picked support options using a Support list which is basically the Chain of Command list but sized up to IABSM-sized games. The Germans had 60 points, the Soviets 40.

I added in a wild card with the Soviets getting an Armoured Rail Car. They got this on Turn 3, and it made a glorious, but brief impact to the game.

Here are some shots of the terrain prior to playing the game itself:

The Game

Desmondo Darkin


BACK


BEF holding action vs advancing Germans - see photos for captions - we had a lot of fun and it was a near run thing 🙂 .

I love the way the Blinds and other mechanisms work to simulate ambushes

Alistair Birch


BACK


With the Soviets scoring the victory in the first encounter, we followed the scenario tree for the next encounter. Full details and forces can be found in Bashnya or Bust! campaign book.

In brief, this clash takes place around the small town of Osen. The Germans are holding out whilst their engineers set charges on the last remaining bridge (bottom left in the picture below), before withdrawing their remaining troops over the river and blowing the bridge to bits. They are outnumbered and face a swift Soviet attack that features plenty of T34s and SMG-armed tank-riders. They need to drive through and capture the bridge.

Overviews of the battlefield before any blinds were dropped

All figs and tanks by the ever-reliable (and recently relocated) Heroics and Ros. Buildings, roads, etc by Timecast.

Opening Phases

The Soviet Blinds chip made a couple of appearances and they began the engagement. In an unexpected move, the Germans deployed a single "dummy" Blind which shot up and spotted the tank HQ and accompanying T34-85s with (invisible) tank riders.

 It's a trap! Or ambush. Or ambuscade. Whatever word you choose, the Soviets are now in a spot of bother. Two Hetzer tank-killers open up on the Soviets at extreme close range.
Predictably the T34s take a pounding but remarkably none explode! Nice dice rolling by the Don. "Fritz" Freddie tramped outside to burn his dice. 

Trying out a new system for tank damage - yellow dice for shock and red dice for number of Actions remaining next turn (a common thing in IABSM). Chits explain nature of damage. It's a bit messy, so maybe a return to pen and paper for those details?

Aha, found you! A second Soviet tank zvod (the much-maligned T34-76s) plus tank riders spot a Blind in the town. This is auto-spotted at the end of the turn. A German rifle zug with attached PaK40 support replete with extra Big Man to command it (special German rule). 

At this point, it might have been a painful and quick end for the Russkis! 

The Tank Riders dismounted and, after a quick think and a spot of yodelling [why?], decide on the time-honoured charge into the face of the entrenched enemy. The thing is, it worked. Very much. 

Well, okay, one section fled after suffering extreme machine-gunning and mega-shock (mid-right) but the PaK40 was massacred. Can you massacre a gun? 

Cue question about Russians using captured German weaponry. 

Ouch! White dice were Russian (that's a lot of dead and shock). Black dice are German. That'll be a fistful of nothing, then. And just like that, the German centre started to evaporate.

The Mid-Game

More Russian Blinds - a dummy followed by more tanks and riders

After a lull we return to the original ambush, where the Hetzers brewed up / bailed the T34s this time. But they ran out of actions to attack the lone HQ tank. Would this be costly in the future? 

The tank riders got lucky and dismounted - they then scooted past the Hetzers and dug in on the far side of the wood. Over the next hour or so they crawled their way towards the bridge with grim determination ...

Meanwhile, see that smoking house in the picture below, right? It used to be intact and feature a section of German rifles plus NCO. The "useless" T34-76s got lucky with a double-6 with High Explosive. Boom! In the house directly above this, another High Explosive shell sees off another squad. 

Have we found out what the 76s should be doing? I think so ...

Meanwhile, Germans were racking up the demolition points whenever the Turn Card was drawn. 

Just 14 more to go ...

Nein! HQ tank gets a bit of revenge on the Hetzers who are now somewhat screwed (technical term).

Fritz got a bit nervous as his advanced guard disintegrated and he had no troops left on the table. Out plopped the Blinds chit a couple of times and the Germans showed their hand. Mind you, the troops would be dug-in and had a few more surprises up their sleeves.

Pooofffph! Another High Explosive shell from the 76s gets the lucky "66" and a house collapses around another squad. Ouch. Yup, load the HE boys!

No, I'm not quite sure what happened below either. 

Russians a bit strung out but heading en-masse for the bridge and to hang with the casualties!

Germans seem to have deployed their Stug IVs in the wood (mid-left).

Ah yes, the end is nigh. The Russian Blind got this close to the bridge (below) before the Stugs revealed themselves on a chip: the result was catastrophic for the last zvod of T34-85s. Once again the best Soviet tanks in the force go up in flames. The Soviet players began a dismal communist hymn to the fallen and prepare to throw in the towel.

The situation deteriorates for the Russians as their infantry is slaughtered in the open fields by a rifle gruppe and 2 MG teams activated by the CO Big Man (level 4 - powerful!)

SMG vzvod going, going, going, gone ...

Just a few more chips ... it seems to be drawing to a close. 

The Russians score some revenge on the centre rifle gruppe, rendering it useless.

Human Wave! Urrrraaaaaaahhh!

A run of unusual Soviet chips emerged, allowing the remaining infantry to scoot into position and charge the remained PaK40, German CO and associated MG teams in the rear/flank. Painful.

Heroic Leader! 

After a discussion, it seemed fair that the Russian CO (who finally arrived on the scene) could organise a last-ditch charge into the German rifle section that was guarding the bridge. 

It was swift and bloody.

Now the Soviets had control of the bridge!

The sideshow continued as the Soviet tank HQ zipped about and dispatched the final Hetzer.

Back at the bridge. One SMG vzvod was wiped out by the German rifles supported by Stug fire.

But the remaining SMG group plus Big Man dig in on the opposite bank.

German rifles come under fire from T34s and SMGs.

And that was where we decided to end it. Time was pressing on and the Germans were in a right old mess. Even the Stugs were being hit in the flank by now as they desperately tried to rescue the bridge. So, out of thin air, the Soviets pulled the win out of the bag!

German Dispatches:

Urgh. It was all going rather well until the final few rounds. It was another great scenario which was evenly balanced despite the uneven forces. The Russian steamroller was hard to stop. The Hetzer ambush did a decent job but their chip stubbornly refused to re-emerge and so they could not pull back to help defend the bridge. The Stug ambush also worked a treat. I think the exploding houses probably swung it as that weakened my defence in the town and allowed the Russian infantry to get to the bridge.

If I had it over again? Get the FOO onto the table sooner (attach him to a forward platoon before the battle); place at least one AT gun on the flank to make the Russians think about diverting to deal with it; I'd be tempted to deploy nearly everything near to the bridge, just to see how that panned out. My force was defeated in detail, really. That said, we were sitting pretty comfortably until that cinematic Uraaaahhh! turned the tide. You've got to love that. But with 2 losses now, the campaign is in danger of ending pretty quickly for the Germans.

Next time? It's off to Zima. My Tiger Is make an appearance and we have some hard-hitting troops to play with.

Russian Regimental History:

Kolbasa! This was an epic battle. The newspapers have no need to make up a story this time! Mind you, they might want to gloss over the inept T34-85 displays. Did any of them fire a shot? At all?

After our surprising discovery that Russian scout cars can lay down some serious firepower in a previous battle, it was interesting to see what the much maligned T34-76s achieved. The fast steamroller (swiftroller?) tactics seemed to work well enough and we had enough hardware to waste a few tanks here and there. Tank riding worked well and they can hop off pretty effectively if they come under fire. I also loved how the COs on both sides intervened dramatically and decisively.

Of course, bragging rights go to our boys for the charge that overwhelmed the German command stands.

The next "Zima" scenario looks tough. We have swarms of infantry again and the ISIIs make a pleasant appearance but other than that the support is pretty thin...

Captain Cliche


BACK


Played a second game of the St Aubin scenario and huge success.

Desmondo Darkin

 
BACK


Played our dice version of IABSM today. Afternoon game was a warm up for tonight’s bigger two Company game.

A Company of the Royal Winnipeg Rifles and a troop of the 1st Hussars land at St Aubin , 6th June 1944.

The Company cleared the beach defence line, but at a fearful cost.

Desmondo Darkin

 
BACK


We enjoyed our second outing of IABSM last night - and upped the ante on the force size after our simple game last week - this was Kicking in the Door from one of the old v2 Russian Front supplements.

My Germans got pretty much stopped in their tracks on entering the board and an attempt to flank a nasty sniping KV-1 (behind the house, top centre) on the left was equally thwarted. Still, was good fun, we're gradually learning the rules and are going to continue the battle next week, but I think it may be the Russkie's game

We played the second part of our Russian front game the other night, oranges having been served at half time...

My left flank Panzer push ended in multiple toasted German tanks, but attempts by my fresh second platoon of infantry to take the village initially went very well - my opponent had revealed a platoon of Soviet sailor boys who, despite their jaunty attire, got stopped by my fire.

Then he revealed another tank and another small platoon of Naval Infantry to my front! Yikes!

Flanking attacks from his NKVD and a KV1 stopped my infantry in its tracks and the game ended with the Ruskies still in charge of the objective.

This was our second outing with IABSM. We're enjoying learning the rules and there are some nice mechanisms which make for fun play.

Note to self: Don't de-cloak a platoon of infantry off a blind so near to the enemy that he can immediately fire and get a fistful of bonuses for adjacent targets!

Alistair Birch

 
BACK


‘Take the high ground’ is Scenario #04 from the Operation Sealion 1940 scenario booklet. The Hyde Home Guard Platoon defends Paddlesworth under the watchful eye of their daring commander Major Fforbes-Cole MC (platoon commander)(retired).

Barry Foster played the chaps from 7 Fliegerdivision whilst Dale Askew played the defending forces. It turned out to be a proper good game and played out in about 24 turns.

In the end, the British held the village despite the relentless assault by the heavily armed Fallschirmjagers.

Tim Whitworth


In this scenario, elements of the London Irish Rifles defended the small sea side village of Seabrook against the German 21st Infantry Regiment. The Germans had to capture this position on their way to Folkestone. Securing of the port of Folkestone was necessary to allow German armour to be brought ashore.

While the German advance was halted in the previous scenario because they lacked artillery and armour support, the German commander (Frederik) now had Stukas and two 75mm infantry guns to his disposal to pepper the British positions. Especially the infantry guns would prove to be very helpful. Anecdote: it was only a few hours before the start of the game that I suddenly realized that I had painted the wrong guns for this scenario. Fortunately, I found two 75mm IG in my boxes of unpainted stuff and gave them a quick paint!

Fearing a German attack along Seabrook Road and the Princess Parade, or even a seaborne German operation behind his lines, the British player (Elias) concentrated his troops in the southern sector. This left the northern sector quite vulnerable.

The Germans indeed seemed to focus their attack on the houses of Seabrook Road. A Stuka attack and the well-aimed fire of the infantry guns made the British positions hard to keep. Both sides took heavy casualties in house-to-house (and soon: ruin-to-ruin) fighting.

With all attention focused on the southern sector, Frederik managed to get one of his Blinds (a full platoon) over the weir, thus threatening the back of the British positions. The combination of German fire and this new threat proved too much for the British. Some elements were soon surrounded and fought to the last bullet (at least, so they told afterwards), while the few remaining British sections fell back to Folkestone. With British losses in the range of 60 to 85 k/w/m against 32 Germans, this third scenario ended in a German victory.

Karim Van Overmeire

 
BACK


Mike Whitaker ran his excellent “Bloody Omaha” game at Salute 2019. I stopped by several times, and the table was never less than three deep in players and spectators.

Here’s loads of pics of the set up and game:


Battle of the Underpass. The steep Railway embankment showed how terrain is a massive influence on combat and manoeuvre. Interestingly the Americans, who were choked by the Pontoon bridge, were slow to deploy but destroyed most Germans by artillery and mortars (realism evident).

German Marder anti-tank guns KO-d several Shermans & Stuarts, but were punished by infantry with bazookas when they nosed through the underpass with insufficient support.

A cracking game. Allied win.

Julian Whippy

 
BACK


In the second scenario of Sea Lion, German infantry of the 39th Infantry Regiment (played by Frederik) had to clear the area around Pevensy and overcome several pockets of resistance of the Duke of Cornwall’s Light Infantry. To balance the scenario, I allowed the British player Elias (who is only 9 y.o.) a free deployment and upgraded the local Home Guard platoon to regular infantry status.

Elias posted almost all his forces in the houses in Wallsend Road, overlooking both bridges that were vital for the German player to capture. Two sections of British infantry and a light mortar were positioned in the area of Bexhill Road with orders to delay the German advance. Although these two sections were eventually wiped out, they kept some German troops busy for most of the game.

The rest of the Germans advanced to the bridges, but were halted by heavy British fire. Lacking artillery support or armour, the Germans took heavy losses and managed to establish only a small bridgehead. After fifteen turns, the Germans had run out of steam (and troops) and decided to wait for further reinforcements. Although losses were about equal (42 British k/w/m against 40 Germans), the British had held their positions and had thus achieved a clear victory.

Karim van Overmeire


BACK


It’s September 29th, 1939, and Independent Operational Group Polesie are marching south towards Koch. Attacked by Soviet cavalry and tanks, the Poles are at first beaten back, but then counter-attack and manage to re-take the village of Milanow. This they then prepare to hold in the face of further attacks from Russian infantry with tank support.

The above is a condensed version of the bakground given to scenario #31: The Battle at Parczew from the September War scenario pack. I would play the Poles, defending Milanow; with John and Dave commanding the advancing Soviets.

The picture above shows Milanow as it was represented on our table. The Poles begin the game dug-in under Blinds. All the Soviets have to do to win the game is take one of the two objectives shown by the green ‘eagle’ markers within a certain time limit: the Polish position might be a good one, but it is quite fragile. The Soviets would also gain extra victory points by getting units off my side of the table.

The Forces Involved

The defending Poles had three platoons of infantry, each about 20-men strong. One was a regular platoon, but the other two were border patrol units (KOP). Supporting their infantry were a platoon of three machine guns, a platoon of three anti-tank guns, and a couple of medium mortars. They also had access to two batteries of off-table artillery, controlled by a couple of FOOs.

Much more fun, however, was the fact that a squadron of Polish cavalry would appear from one of the two table corners behind the Soviets at some stage during the game, with the only proviso being that the Russians knew which corner they would be coming from.

The Polish CinC pops in to the church: the spire is “off” to show where the Polish FOOs are

The Soviets had, on paper, a very strong force. In addition to a large company of infantry, (three platoons of 40 men each), they boasted a platoon of four machine guns and a whole of company of T-26 tanks: nine of them to be exact. They could also expect air support from Polikarpov bi-planes!

The only problem with the Soviet force was that is would arrive somewhat piecemeal, with only seven of their ten platoons starting the game on-table. The other three would arrive during the game, their appearance governed by the dice.

Initial Positions and Plans

I had deployed my men in three locations. Two platoons guarded the objective out to the left; one platoon, the machine guns and anti-tank guns guarded the objective in the centre; and my dummy Blinds were out to the right in an attempt to bluff the Soviets from punching through and then swinging round into my rear.

The Soviets had a cracking plan. Their seven initial Blinds would conceal all three infantry platoons, the machine guns, the tanks and their commander-in-chief for calling in air support purposes. All their strength would hit the right hand Polish Blinds (covering the objective out on the Polish left), with one platoon of tanks covering their open left flank.

The Game

Unfortunately, although the Soviets had a great plan, something got a bit mixed up in its execution!

Rather than starting the game with seven combat platoons on the table, the Soviets actually deployed only two of their three infantry platoons, one tank platoon, and their two HQ’s, the other Blinds being dummy. As this was a big game, with plenty of unit chips in the bag, this meant that they didn’t get to dice for their reinforcements very often and, as the Dice Gods were against them, didn’t get any extra troops even when they did.

That meant that rather than enjoying a numerical superiority appropriate for attacking dug-in troops (at least 3:1, should be more 5:1) they actually had eighty men and only five tanks against sixty Poles with six decent support weapons.

Each tank has its own little marker because each tank acts on its own chip

After much shaking of heads had taken place about their less than optimum deployment (presumably accompanied by the execution of several of their Big Men: “Shall we save on paperwork, Comrade?”), the Soviets deployed a tank platoon in the middle of the table, and two infantry platoons on their right.

The Poles quickly deployed the troops around both objectives on table: the aim being both to flood the chip bag to delay the Soviet reinforcements and to have as much time as possible to take pot shots at the Russians as they advanced towards contact.

Polish strong point in the centre of the table. Comrade John looks on disapprovingly!

A couple of the Soviet tanks fell victim to Polish anti-tank guns almost immediately, with the others scurrying for cover behind the woods.

Soviets take possession of a wheat field

It now looked as if the centre of the battlefield would settle down to a long, drawn-out war of attrition, with each side taking long range pot shots at each other without ever doing any substantial damage. This I didn’t mind: as the Poles, I wasn’t the one on a time limit!

Polish Anti-Tank Gun

Soviet T-26 crew abandon ship

Unfortunately, Soviet air support then showed up in the form of a rather ancient Polikarpov biplane. After one absolute miss, the pilot managed to drop a bomb right inside the Polish trenches, wiping out one anti-tank gun and a machine gun.

Missed by miles!

Spoke too soon!

This was enough for the Soviet commander to try and break the deadlock by charging out of the field in an attempt to close assault the rather bomb-damaged Polish position.

Unfortunately for the Soviets, there were still a couple of Polish machine gun teams available to defend their trenches, and the Russians were knocked backwards badly damaged.

Knocked back and badly bashed!

This is where the Soviet troops that hadn’t made it onto the table could have swept forward and finished the job.

Maybe.

That Blind in the picture above is a 20-man Polish KOP platoon dug in to the houses at the back of the Polish position. I also still had two anti-tank guns left…which would have made, it to say the least, “interesting”!

But the Soviets hadn’t got their extra men onto the table, and showed no signs of doing so…so a moot point. The salient point, however, was that the Soviets had been held and stopped in the centre of the battlefield.

Meanwhile…

Meanwhile, the Soviets had also been attacking the Polish position defending the other objective marker: moving slowly forward into assault range and then pausing to wait for the reinforcements that would give them enough strength for a successful assault to arrive.

These, however, showed no sign of appearing, so the Soviet commander, his time limit for success rapidly approaching, was forced to try and take the Polish position with what he had. This was unfortunately a bit of a forgone conclusion: forty attacking Soviets versus twenty-four dug-in Poles, and the attack came to nothing.

Commissar looks on as Russian troops are Pinned down

The End

So that, as they say, was that.

Without their reinforcements, the Soviets had been unable to break the Polish lines around either objective, and were now out of time.

To give you an idea of how serious this problem was for the Soviets, this is what they still had left to bring on:

Are we there yet, Comrade Kapitan?

That’s a few cavalry scouts, a platoon of infantry, a platoon of machine guns, and two platoons of light tanks.

Could they have done it with the above? Well, the battle would certainly have been a lot closer than it actually was, particularly as two of those tanks are KhT-26s i.e. flamethrowers!

A lost opportunity but a good game.

Robert Avery


BACK


Battle recap. Vermont Historical Gamer's Group. South Burlington, VT bunker.

Skirmish at "Grandcamp" from Skirmish Campaigns' book, "Heroes of Omaha and Panzer Lehr"

About ninety American infantry plus one Sherman and a six-man HQ squad versus twenty-four Germans augmented by two MMGs plus one LMG plus one 50cm PAK and one six-man HQ squad.

Americans moved quickly on their left and overwhelmed one German squad. Fierce close range firefights with Germans and Americans stumbling into each other led to decimation on both sides. On the US right flank fire from 1 MMG plus one full strength German squad completely decimated three US squads before they could close the distance.

The Sherman and the PAK exchanged fire with no result. One American squad penetrated the courtyard but then was pinned down by German defenders in the house and could not return fire. On the US left, two squads went down the flank with one squad overwhelming the PAK crew and then both squads moved on to engage in a protracted firefight with the remaining German defenders in the farmhouse.

The Sherman eventually found a safer way to get in HE fire on the building and set it afire. On the 12th and last turn of the game, with the building on fire, Germans were forced to flee. As they fled, a US sniper took out their 5th man, leaving the German squad with only four out of its original complement of eight and thus were rendered "combat ineffective."

All in all, a very accurate historical representation of the intense and deadly nature of infantry vs. infantry combat in the Bocage of Normandy.

Dan Albrecht

 
BACK


The Run for Tunis, an effort to capture Tunis in late 1942 following Operation Torch, had failed and since the end of the year, a stalemate had settled on the theatre as both sides paused to re-build their strength. The 5th Panzer Army defending Tunis was being strengthened as was the Allied First Army.

Map showing the campaign area and front in 1942 with allied forced centred around Medjez al Bab and the Medjerda Valley

The Battle for Longstop Hill showing the area for our battle around Sidi Ahmed to the north east

This battle takes place thirty miles from Tunis in the Medjerda Valley, which has the German held peaks of Djebel Ahmera and Djebel Rhar, later known as Longstop Hill after the position just behind the wicket keeper in a cricket match.

On the 22 December the Battle for Longstop Hill commenced with an assault on Djebel Ahmed by the Argylls and two squadrons of the North Irish Horse. By nightfall the Argylls supported by the Surreys had captured the hill but couldn't press the attack to Djebel Rhar the second peak until a small ridge to the north had been cleared of Anti-tank guns and machine gun nest, this ridge was called Sidi Ahmed.

The rule system I`m using for this is I Ain`t Been Shot Mum.

German Forces

  • HQ: Big Man (Level IV), two MG42 teams and one PzB 39 AT rifle team

  • Two Zugs of 3 x Gruppe (8 men, all veterans)

  • AT platoon of 3 x 50mm PaK 38 AT guns

  • Off board support of a battery of 105mm leFH18 Field guns, pre-registered fire support.

Reinforcements of 2 x Panzer IVs and 4 x Panzer IIIs enter after the Turn Card is pulled out three times.

Allied Forces

  • HQ: Big Man (Level IV), Big Man (Level III), one Boys .55 AT Rifle team

  • 4 x 3" mortars

  • Three platoons of 3 x 8 man sections, two veteran and one elite

  • Three troops of armour: 3 x M3 Grants, 3 x Sherman, 3 x M3 Stuarts

To soften up the defenders the Allies get one pre-game stonk.

The Game

The German position is set in a small group of buildings with a small compound to the left flank and other small buildings running through the middle of the deployment area.

A road runs through and off to the rear of the board where their are two small hills, one covers the right hand flank and the other to the rear of the left hand flank.

These two hills have an AT gun dug in on each and the right hand hill has a MG42 dug in. The buildings to the centre has a German Zug entrenched with a Big Man (Level IV). The small compound on the left has the other Zug and the MG42 with firing positions cut in and reinforced walls. The last AT gun and the AT gun team is positioned behind the compound looking down the road.

All German units set up on blinds with two dummy Blinds positioned in the centre of the defences.

The Allies have to advance across open ground towards the enemy with no cover at all but the dust churned up by the tanks. The tanks advance to the front with the M3 Grants to advance on the hill to the German right flank with the Sherman and Stuarts to attack the centre and compound with a veteran infantry platoon following close behind them. The other two infantry platoons are to attack the compound with a Big Man (Level III) and the mortars giving support.

The tanks made good the charge towards the German defences managing to get halfway across the stretch of open ground before two of the AT guns opened up on the Sherman`s,knocking out one and immobilising another. The Grants instantly returned fire with their hull mounted guns forcing the crew of the AT gun on the hill to their front to abandon the gun.

The infantry advancing on the compound came under fire forcing them to go to ground and, for the moment, stalling the attack.

The M3 Stuarts came out from their Blind to fire HE at the compound catching it on fire. The defenders had no choice but to abandon part of the building.

But the AT gun on the hill behind knocked out one of the Stuarts and the AT gun behind the compound knocked out another. With the building on fire and the defenders in disarray coming under ever increasing infantry fire from two infantry platoons which silenced the MG42 position and drove the defenders back into the courtyard on the opposite flank, the M3 Grants charged up the hill and over ran the AT gun and the MG42 position crushing the two guns.

It was then that the Allied 3"mortars decimated the AT gun on the hill behind the compound leaving just the one AT gun left intact behind the compound which had new targets in the form of M3 Grants on the hill.

The Zug in the middle opened up and fired at the advancing infantry behind the Shermans but with tanks on their flank they were over run in no time.

The AT gun behind the compound fired three times at the Grant with no results before one of the allied infantry platoons charged them from the rear and captured the position. With the compound surrounded and on fire the remaining Germans, with the sound of there own tanks just the other side of the ridge, surrendered. With the road captured and the guns knocked out the Panzers were pulled back.

With Sidi Ahmed captured the push for Djebel Rhar could now commence. By the 27 April the whole of Longstop Hill and Djebel Rhar had been secured. Longstop was the last great natural barrier barring movement towards Tunis.

On the 7th May, British armour rolled into Tunis, taking Axis forces buy surprise. By 15th May all Axis forces had been cut off and soon surrendered with more than 250,000 taken prisoner, ending the campaign in North Africa.

Carojon

 
BACK


Can't give away the details, as folks may well be playing this in a couple of weekends time. but suffice it to say I got the halftracks finished (without damaging that blasted bedstead aerial) as well as the Fiesler Storch objective marker and a British jeep.

Things you never think to ask when assembling a jeep - were WW2 British jeeps right-hand-drive? Turns out the answer is no, but I'd stupidly put a driver with a wheel in both front seats, so I had to over paint one with quite thick white so he looked like he was holding papers.

Anyway. Picture gallery without commentary for now. Other than to note that that's one of the best by-the-drill-manual uses of the British 2" mortar firing smoke I think I've seen on an IABSM table.


Mike Whitaker

 
BACK


Matthew Matic and friends ran a game of IABSM at Cold Wars this year. Here are a few photos…

 
BACK


Some pictures of the first scenario of ‘Operation Sea Lion’ that we played: ‘the Fight for the Military Canal’. A company of the British Home Guard had to guard a bridge. They were attacked by German paratroopers that had landed behind the British lines.

Frederik planning his attack

Because Elias, who played with the British, is only 9 years old, I upgraded the three sections of Home Guard to four sections of Regular Troops. Still, the British had a very hard time against the highly trained paratroopers, led by Frederik. Half of the British troops were on the wrong side of the Canal, and when they tried to cross, they were pinned on the bridge by German fire. With British troops on the bridge, it was not possible to blow it.

Germans attacking the village

Elias still holding out against the paratroopers

Soon, the Germans took the boathouse with the detonator and then dashed to the other side of the canal. By now, British reinforcements launched a counterattack with infantry and carriers, but this was halted by the German fire.

It’s hard to reach the middle of the table when you’re only nine!

British pinned on the bridge, explosives are in position

In the last turn, a determined British bayonet charge overran two German machineguns that were facing the wrong direction. That could not change the result: with the bridge in German hands and ten Germans killed against fifty-six British losses (likked/wounded/MIA), this was a clear German victory.

Karim Van Overmeire

Counter-attack with carriers and infantry

Germans dashing over the bridge


BACK


This was a scenario adapted from "Near Vchena" in the Bashnya or Bust campaign booklet. It delivered another cracking engagement, with the momentum swinging back and forth throughout. Excellent company and a game well played.

August 1944 and Operation Bagration is underway. We joined a desperate campaign along the fertile Bashnya and Chera valley in Lithuania. The full backstory is in the main booklet. This scenario featured a rapid counter-attack by German forces of the 30th Panzer and Panzergrenadier Regiments which aimed to capture a strategic road junction at Lardiarz (which would lead to them cutting the supply-lines back to Vcheva.) The Soviets had rushed up a combined-arms force to plug the gap and contest the T-junction. Both had the same objective: victory to the side that ended the game with infantry on or nearest the junction.

The paunchy village of Lardiarz consisted of a group of shabby dwellings and a somewhat dilapidated church. It was surrounded by dense woods that were impassible to wheeled vehicles and even slowed Blinds.

The Russians began with their scout infantry and armoured cars on the table (optionally on Blinds) and the Germans began with a solitary Puma on the table on Blinds. The OOBs were broadly comparable, with a random selection of reserves available, but the Germans could rely on better quality tanks and NCOs on the whole.

We diced off for sides, with John landing the canny German forces and the plucky Soviets being led by Charley and Mike. 

Hmmm. Where oh where to deploy the Scouts and those outdated Armoured Cars? The Soviets plumped for the limited cover and spotting advantages of the rather tasteless orange-walled Church (it's my paint-job so I can be critical ...)

German Blinds zip across the table. An assault-rifle zug seized the village but was spotted. The Puma, commanded by a Big Man called Spatz, pootled towards the crossroads and spotted the advanced vzvod of Russian T34-85s (below).

Leytenant Peykachu in the Armoured Scout Cars spotted the Panthers (mid-left) and the Sturm zug in the village. Handy. But this was worrying for the Soviets whose Blinds chip didn't show for several turns. We added a House rule involving command chips - a bit like SP2 - which allowed limited deployment, bonus turns etc.

This photo features the obligatory "wargamer's lower midriff and crotch shot"

Where's Spatz (in the Puma)? He'd reversed down the road and was hiding under a Blind. Meanwhile, Tiger I's fly into battle. Well, John rolled mainly 1s and 2s so crawled. Historically accurate, I'd say.

A ding-dong erupts between the T34s and Panthers. Panthers have the upper hand (boy they can hit hard and have good frontal armour.) Note the exceptional distance that the Tigers moved this turn. They redefined the word "slow". But the Soviets rolled well for reinforcements and 3x IS-2s appeared on Blinds and fairly rocketed down the road.

Nyet! Uh-oh, Panthers deploy in a wood off Blinds. 2 IS-2s are put out of action. As you can see, the Soviet armour is taking a pounding but some remarkably low hit rolls by the Germans saved the day. I've never seen so many "1s" rolled in succession like that before ... Meanwhile one scout infantry group is decimated in the church. Hey-ho, plenty more to replace them.

It looked a bit bleak for the Soviets at this point but the chips came out en masse for them and swung the momentum back their way.

Surprise! Turns out that BA-64Bs can churn out quite a bit of damage on infantry in wooden buildings. No-one quite expected that. Several Russian units are now skulking in the graveyard.

An apt situation to be in.

German Sturm Zug in the village is close to breaking. They quickly check their tactical doctrines and drill manuals, opting to hide under Hanomags. And the Dynamic Big Man dives under several Hanomags each turn to rally off shock. Top-left, 3x SU-85s swing around on Blinds to get a flank shot on the Panthers. The IS-2 explodes a Panther. Russian Blinds start to arrive in greater numbers. Will they be in time? Are they infantry?

The Puma completes its first full circuit of the wood to the top left and bags a T-34 en route.

Other side of the table. SU-85s deployed. Spatz in his Puma looks worried. His chip came out next and he promptly skipped off around the wood again for a second time. Consensus was that he would have continued to do this all night if given the chance.

Ominous. The Russian steamroller finally arrives (back of table.) In a classic Lardy moment, what will come out first? The chip for the Panther HQ in the woods or the freshly-arrived SU-85s? The smoke streaming from an SU-85 gives you a clue. Another of the SU-85s is immobilised.

Hard to see, but in the top-left the SU-85s get revenge and pick off a Panther. The second Panther (bottom left) goes up in smoke thanks to the lonely IS-2 on the road. A Schwerer Hanomag zug appears (centre of picture) and unleashes HE and MG fire into the church. Note the Tigers have bravely nosed forward an inch or two as well.

Sound the trumpets! Dushkin's Tank Rota finally arrives beside the church. These T34-85s blow up a couple of Schwerer halftracks and "persuade" the others to zip backwards. The lone IS-2 is sitting amidst the burning wreckage of lots of Soviet tanks. It has an unfeasible amount of Tiger shells bouncing off it. One of the plucky Soviet Armoured Cars bites the dust (but not before unleashing another nasty round of MG fire into the German infantry in the village.)

Sound the trumpets, play the balalaikas! The Russian infantry arrive in trucks off Blinds.

Predictably, they charge the Panther HQ in the woods. What?

The Tigers find their accelerators and, having seen off the final IS-2, obliterate the newly-arrived T34s. Alas poor Dushkin. His comrades are distracted by bits of T-34 thudding off their tanks. Ouch.

The Tigers take up a dominating position near the crossroads.

The Soviets didn't have much left that could hurt them.

Meanwhile (above) the SU-85s dispatch the newly-arrived Panther zug. Bottom-left you can see Russian infantry trucks hurtling towards the Panthers. Top left, Spatz begins his second or third circuit of the woods (he stopped and reversed at one point, so it gets confusing.)

His success is positively dizzying.

Heroic leader! After the remaining Panther shot up two of the trucks, the Soviet commander shouts "Uraiiiiiiiii" and leads his men on an assault into the Panther. Cue rummaging around the rules to find out what happens. It was very cinematic, totally unexpected, worryingly Eastern Front but in the end came to nought. The plan was to seize the woods and shoot up the Germans from behind which might just have worked.

The afternoon had flown by and it was rapidly approaching the witching-hour so we called it as a German victory and shook hands at that point. The Soviets had too little left to win the scenario or deal with the surviving German armour. The scout SMGs could have charged across the open fields from the church and sat on the junction for a technical win but that wasn't in the spirit of the game and seemed a bit unrealistic given that the Tigers were guarding the junction.

The game was played in excellent spirit and I really could not tell which side would win. For the Soviets, Peykachu's Armoured Cars deserve a commendation. The sole undamaged IS-2 was effective. My man of the match goes to Spatz and his perambulating Puma. He spotted pretty much the whole Russian force and bagged a tank. The Panthers were very effective and the Tigers were very strong in the centre.

For the record, the Soviets lost 2 vzvods of T-34s, an HQ T-34, 3 IS-2s, a Maxim detachment and most of the SMG scout infantry, plus a few odds and ends. The German assault infantry zug was pretty much wiped out. They also lost 5 out of 6 Panthers and a couple of Schwerer half-tracks. They'll be lacking a bit of mobility and firepower as they push on with the attack but the Soviets would have conceded the ground. Then again, what's that coming over the hill? Is it a steamroller?

Spatz, in the Puma, enjoying his 3rd or 4th circuit of the woods, but grumbling at having to dodge an immobilised Panther which really took him out of his stride and denied him a Guinness Book of World Records 5th circuit.

Mat and scenery supplied by John, who is also a superb host.

Buildings = Timecast and minis by Heroics and Ros.

Captain Cliche

 
BACK


Last night‘s game of TFL World War II. The attack on San Marco, Italy, July 1944.

Germans played by Ralph Gibson and Barry Foster. British played by Richard Hudson, Martyn Cartledge and Andrew Sharpe. Meth and Archie were in charge of the tea and Doritos.

As ever we used the rules “I Ain’t Been Shot, Mum!” from the TFL stable.

Both sides started on Blinds with the Germans defending the hillside between the factory and the village. They placed their only AFV, an assault gun, next to the factory covering the whole of the valley. Their only anti-tank gun was positioned on the edge of the village covering the main road from the valley, paying particular attention to the area around the gully where they hoped the Allied advance would take place. A lucky shot against any armour advancing through the gully would cause a blockage. They also placed their for machine guns liberally about the hillside and protected them with infantry sections.

The Allies were fortunate in the early rounds with the Blinds card appearing several times where as the Germans card didn’t and frustration set in a little.

Andy managed to get an infantry platoon under cover of smoke right up to the vineyard at the edge of the village under Blinds before falling victim to auto spotting. He was also supported on that flank by a group of Sherman tanks.

On the right flank Richard successfully negotiated the hillside which was heavily populated with olive groves. A combined infantry and armour assault here caused significant discomfort for the German defenders of the factory, who soon retreated with heavy losses.

The Germans responded with some very effective fire from the machine guns who raked the valley and caused mayhem. They combined this ferocity of defence with some determined artillery support who homed in on a series of pre-registered target points along the main road, between the gully and the village.

Not everything went the Germans way. Up on the hillside their StuG Assault Gun came under significant anti-tank fire from the Sherman troop in the valley. The clever use of tank support is key to British success in this game and Andy interchanged his AFV direct fire between the assault gun and by using direct high explosive at the closest buildings in the village.

We played the game for about two hours at which point the Germans considered a tactical withdrawal, leaving the British to clear the hillside under continuous artillery bombardment for the next day also. Very similar to the real thing.

Here are some pictures of the game:

Second Go

A second go at Attack on San Marco, Italy 1944 using IABSM rules. We imported/ exported half the players for good measure and to maintain some original play.

All set and ready to go we competed 12 packs of cards in 2.5 hours with Ralph Gibson and Togs aka Michael Togwell as the defending Heer with Bruce Carlton, Martyn Cartledge and Dale Askew as the British. Steve Meth and Archie ran the mobile NAAFI.

Here are some pictures:

Tim Whitworth


BACK


It was off to Benson again for another game of I Ain’t Been Shot, Mum. The scenario, written by Dave, was a Battle of Bulge encounter, with the action taking place on Christmas Day 1944.

We were to play in John’s shed which, although a great venue, can sometimes rival the Bulge in terms of temperature: it’s not uncommon for games played in the winter months to be so realistic that the players’ breaths are visible. A little disappointingly, however, today the weather was mild, and I could get by wearing only one coat!

John and Dave would play the Germans: attacking an American-held village. I would play the defending Americans, with Bevan joining us as British reinforcements once his Saturday morning chores were done! I’ve included all the briefings so that people can replay the game themselves if they wish.

US Briefing

It’s Christmas Day 1944, and here’s you, Colonel Dan Detroit of the 17th Airborne, sadly in charge of some two-bit little village in a godforsaken corner of Belgium…or is it France

The trouble is you have been put in charge of its defense and seem to be right in the middle of the Kraut’s line of attack. Feels like the whole Goddamn German army is heading for you!

A few miles behind you is the river Meuse and Dinant, which the Krauts need to capture if they are to get to Antwerp as the top brass seem to think they would like to. Having been there yourself you wonder why.

This offensive really caught Uncle Sam with his pants down, and chaos has been everywhere for the last week. However maybe things are changing now, with places like Bastogne holding out, the Krauts apparently short of gas and the brass finally getting themselves sorted out. Seems that some Limey General has been put in charge of this sector and he has herded up some Brits to act as reserve and they may even be headed this way. Maybe.

In the meantime your orders are to hold at all costs, with the forward supply depot just outside town of special importance. Some big shot three star made it quite clear on the radio that under no circumstances can the Krauts be allowed to capture it, but that since our boys need the gas as well, blowing it to hell prematurely would not be a good career move. Sounds like the usual Snafu!

You have a mixed bunch to hold with. You have some of your own Golden Talons boys (the 1st Platoon and the Support Platoon of the 513rd) and you know they will fight like hell. But how the bunch of rounded up cooks and orderlies will do.....

You also have some AT guys from a stray infantry outfit who were just passing through until you enrolled them, and some tanks and tank destroyers have just rolled, in assigned to you by Division.

You have been promised artillery support and air support just as soon as this weather lifts. Yeah right!

You have positioned one minefield and also some dummy mines (anything to slow the Krauts down) and have some wire and emplacements.

Time to go!

  • Company HQ

    • Colonel Dan Detroit (Level IV)

    • Captain William Baltimore (Level III)

    • Two Bazooka Teams

    • FOO

  • 1st Platoon (513rd) [Elite]

    • Lieutenant Steve Seattle (Level II)

    • Three 10-man parachute infantry squads

    • One Bazooka Team

    • One 60mm Mortar Team

  • Support Platoon (513rd) [Elite]

    • Lieutenant Beau Boston (Level II)

    • Three 60mm Mortar Teams

    • Three MMG Teams

    • One Bazooka Team

    • One Jeep & LMG

    • One Truck

  • 2nd Platoon (Mixed)

    • Lieutenant Sam Houston (Level II)

    • Three 10-man infantry squads

    • One Bazooka Team

  • Anti-Tank Platoon

    • Lieutenant Al Lincoln (Level II)

    • Two 57mm AT Guns

    • Two M3 ½ Tracks as tows

  • Tank Destroyer Platoon

    • Lieutenant Jack Kennedy (Level II)

    • Three M18 Hellcats

  • 1st Tank Platoon

    • Lieutenant Chris Carter (Level II)

    • Two Sherman M4 A3E8

    • Two Sherman M4 A3

  • 2nd Tank Platoon

    • Lieutenant Gerry Ford (Level II)

    • Two Sherman M4 A3E8

    • Two Sherman M4 A3

German Briefing

So it's Christmas Day. What did you expect: a Christmas Present from the old man with the long beard? Here I am, Oberst Franz Beckenbauer, in command of Kampfgruppe Beckenbauer, part of 2 Panzer Division, about to give the Amis their present.

The big attack, Wacht am Rhein, started well nine days ago, with the Allies taken totally by surprise and the Ami front line troops shattered by our offensive, whilst their High Command seemed paralysed.

The weather slowed us down, yes, but it also kept their damn air force off our backs, but now however things are more difficult.

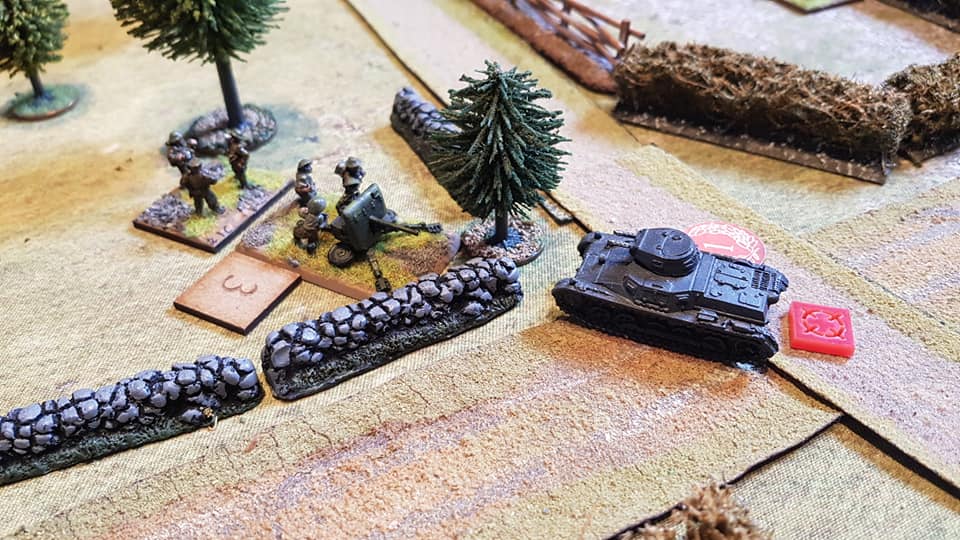
Supplies are getting fewer every day, fuel is critical, the men are tired and some Amis have actually fought well to delay us: even now that place Bastogne behind us has not been taken, and the pace of advance has dropped

Today could be the critical day I think.

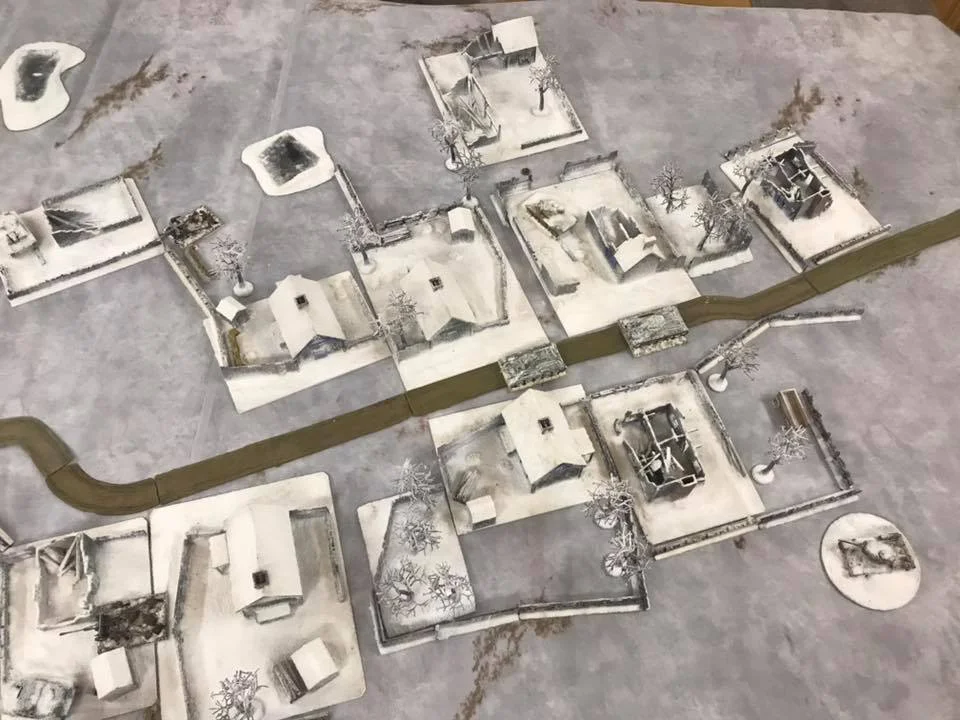
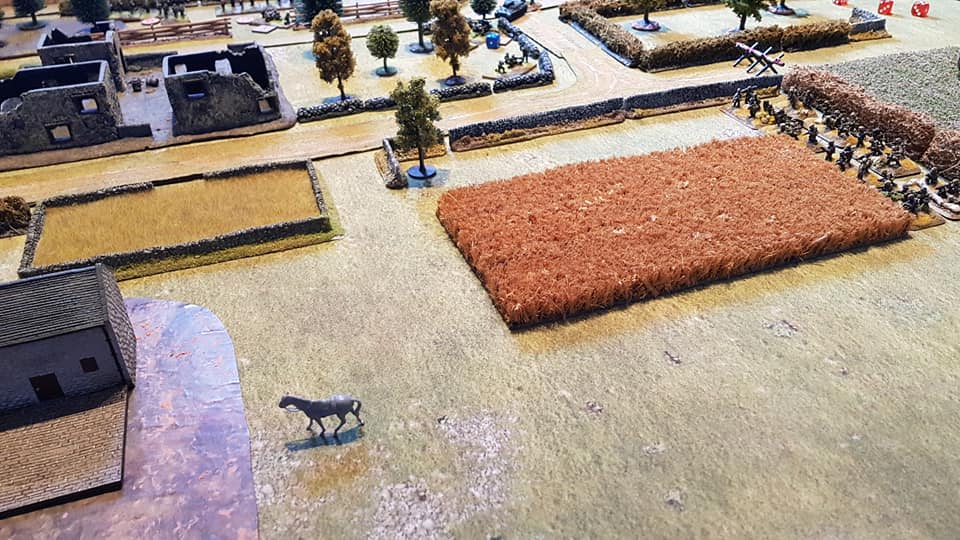
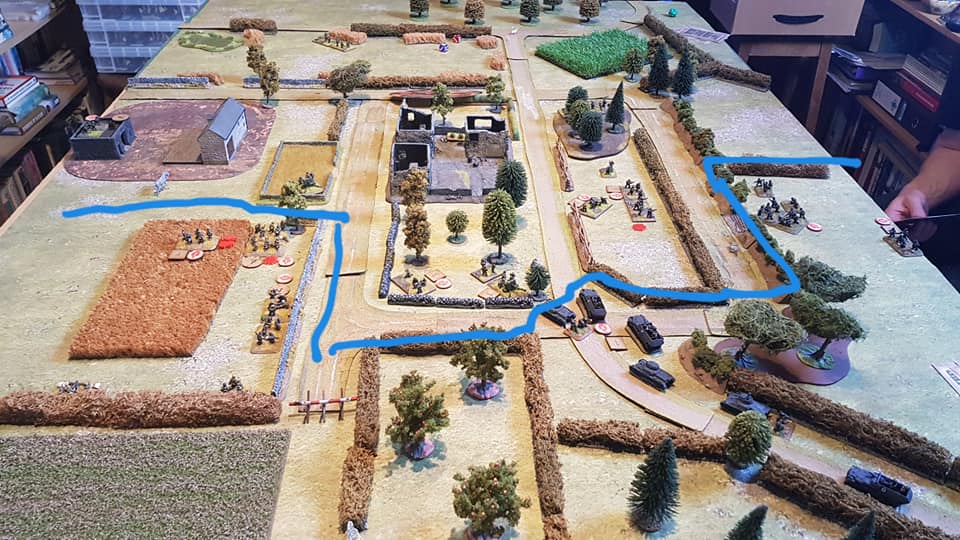
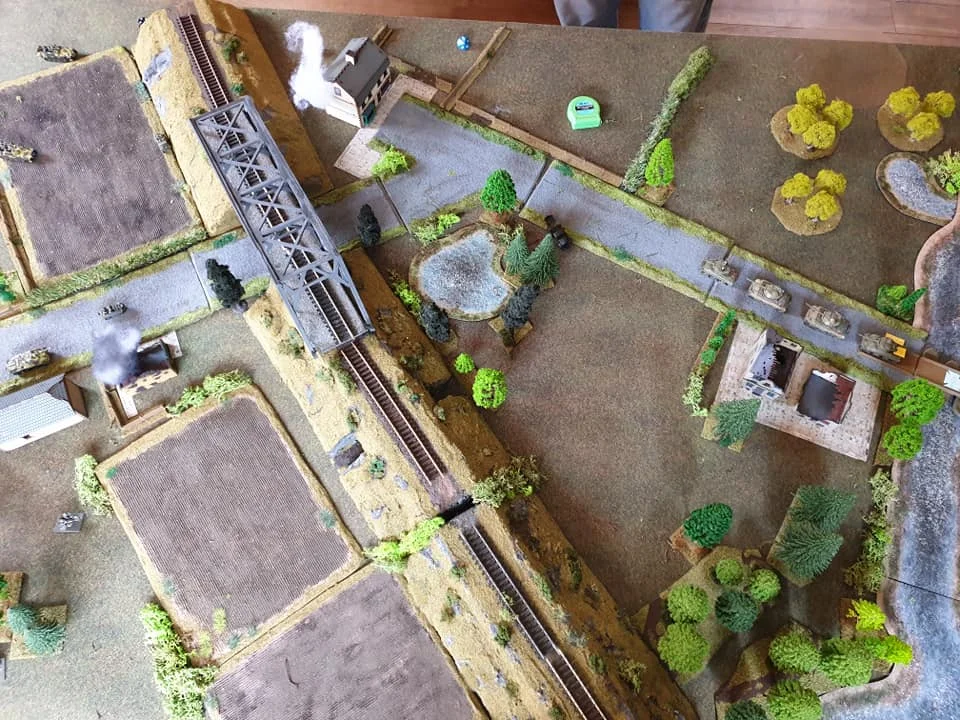
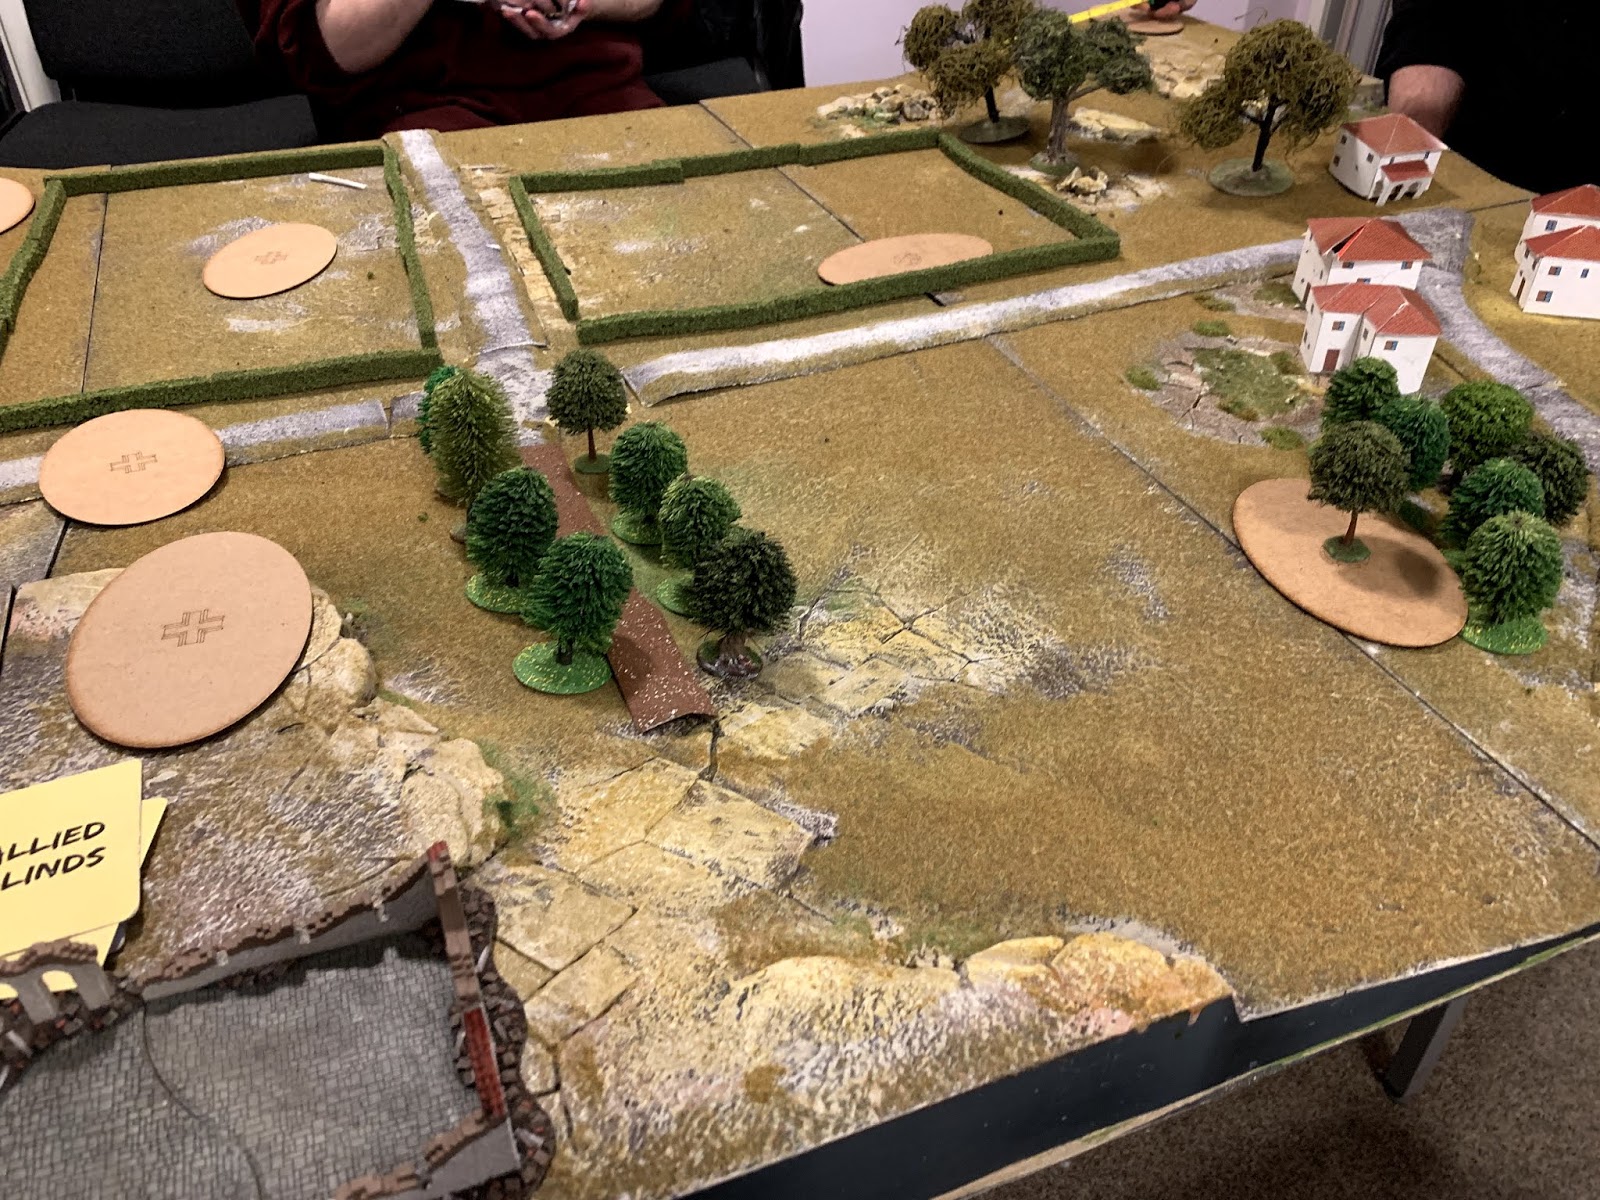
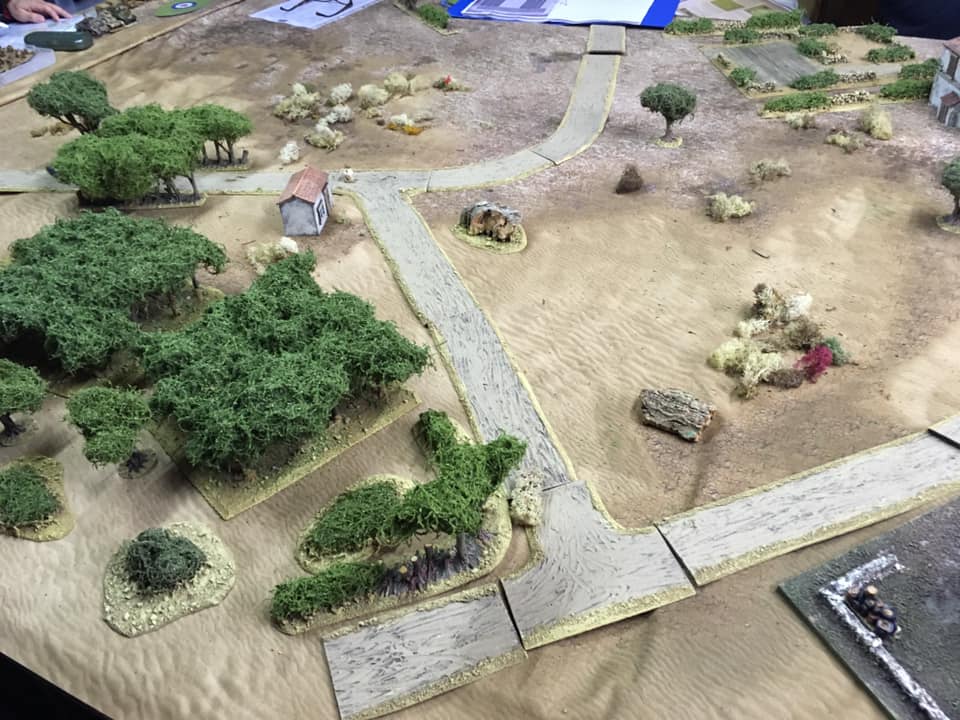
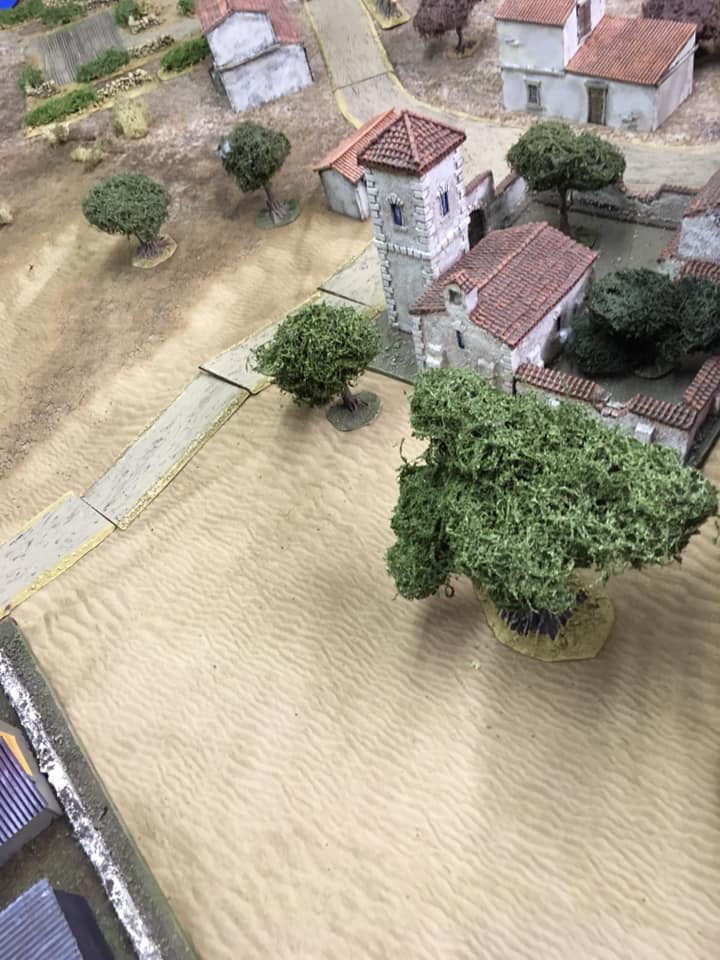
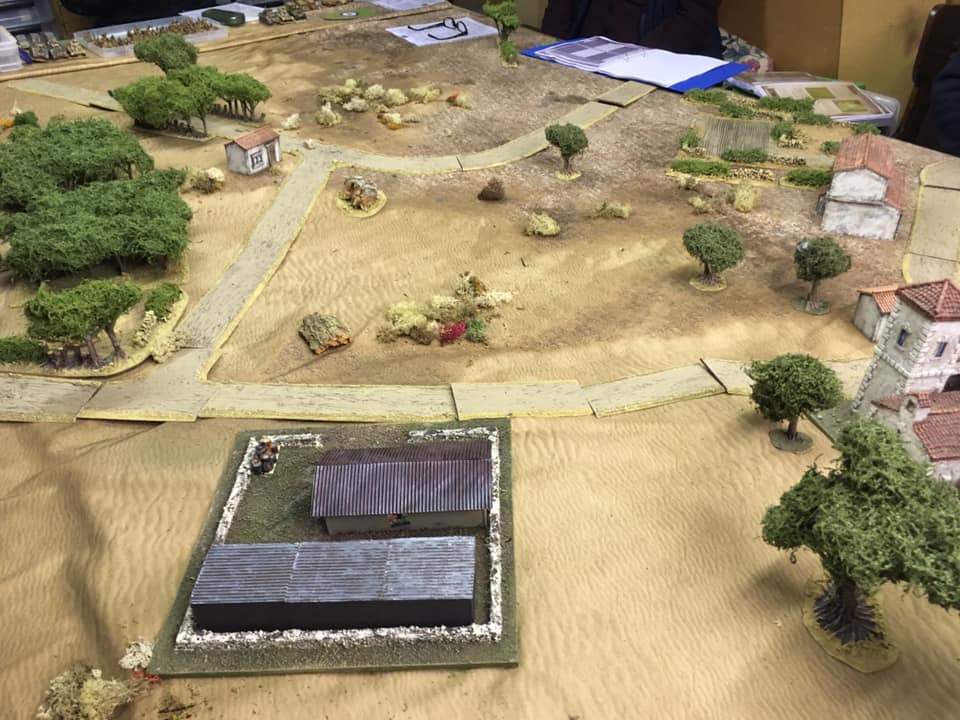
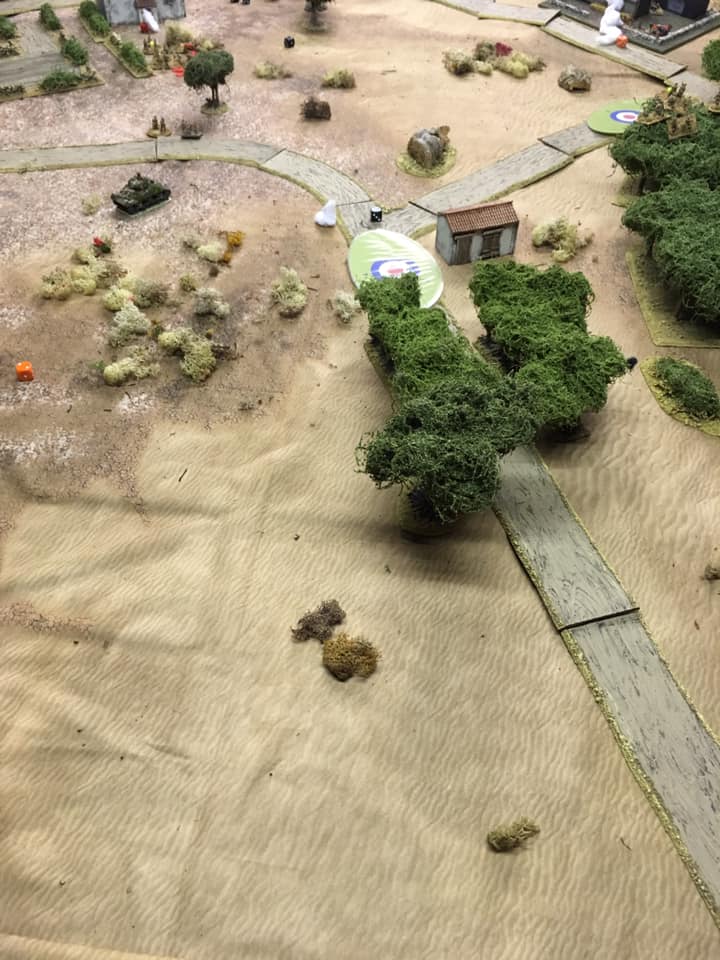
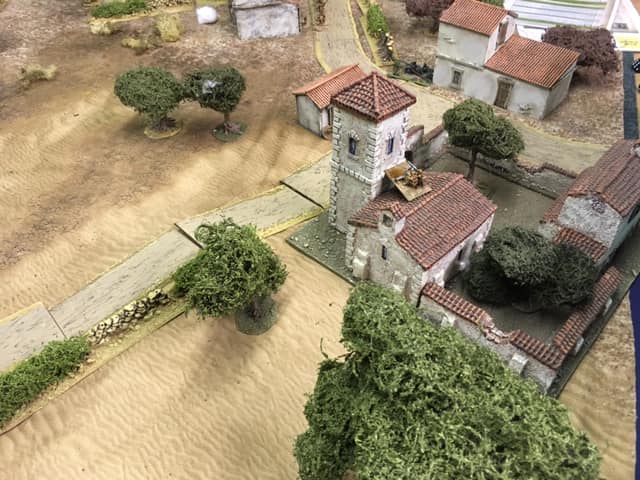
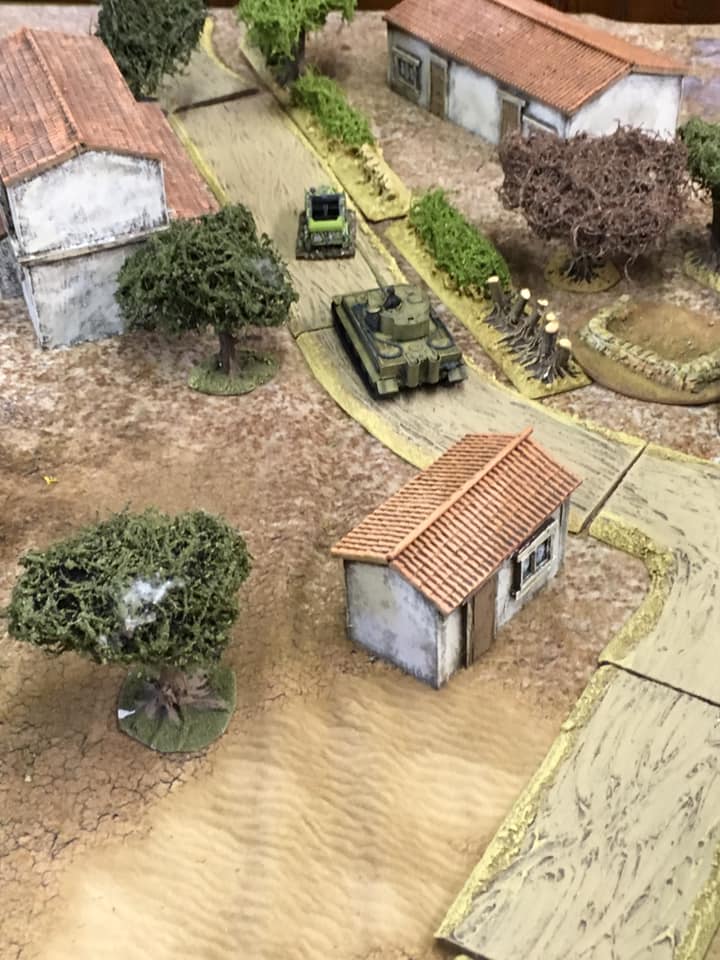
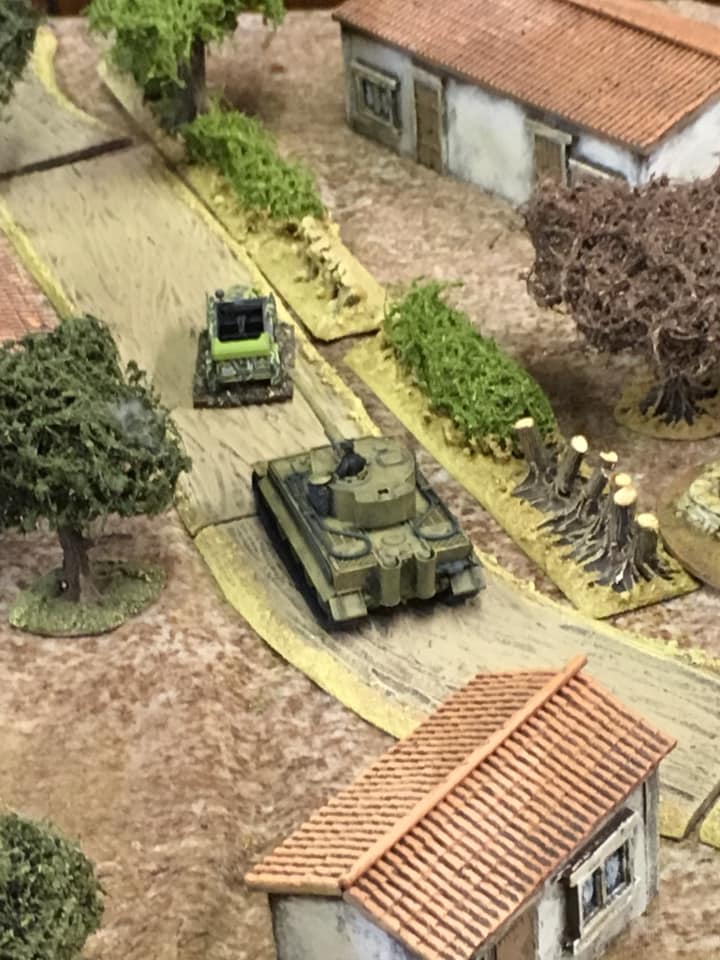
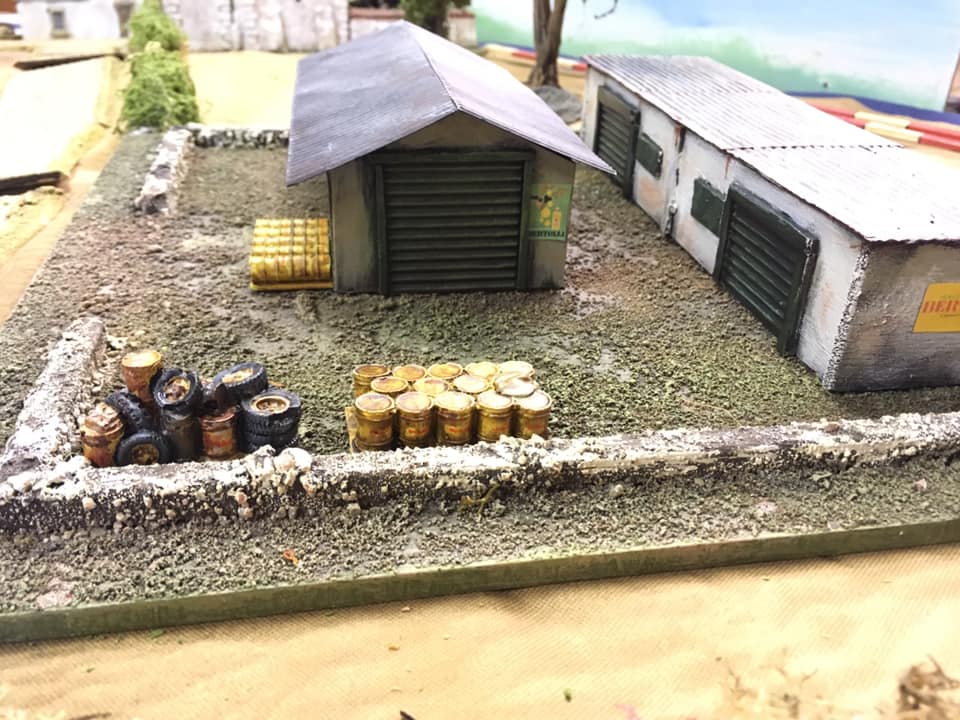
Ahead is the small town of Beauraing, with an Allied forward supply depot, and just a little further on is Dinant and the river Meuse. If we can get across the Meuse then Antwerp is ours and the Allies will be starved of fuel as their supply line is cut. If we can just get the tanks filled up in Beauraing, what is to stop us?

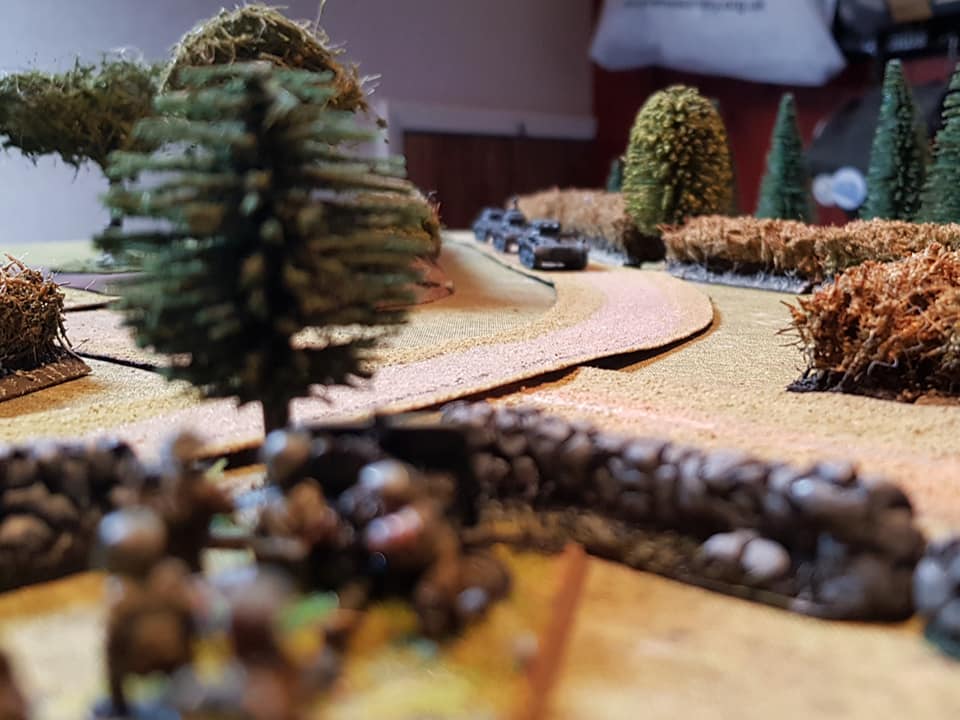
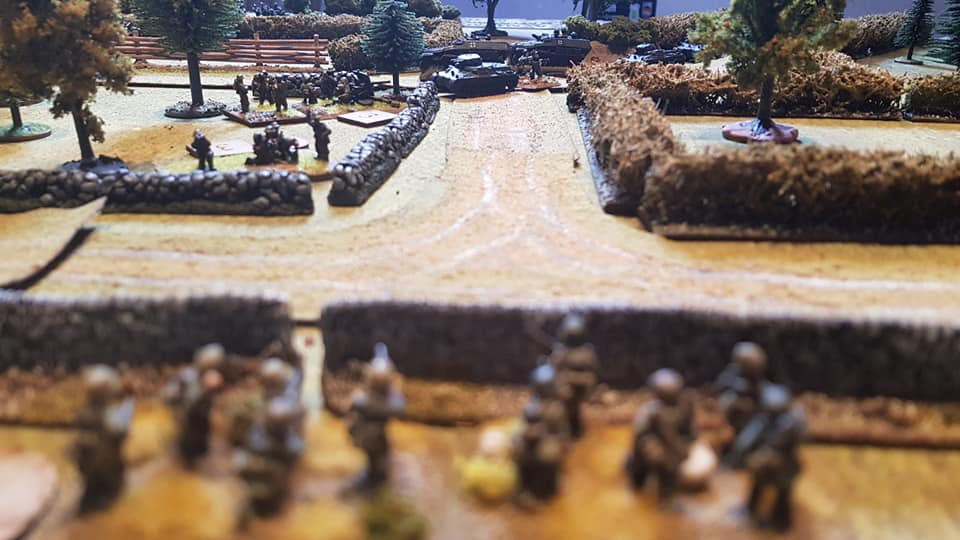
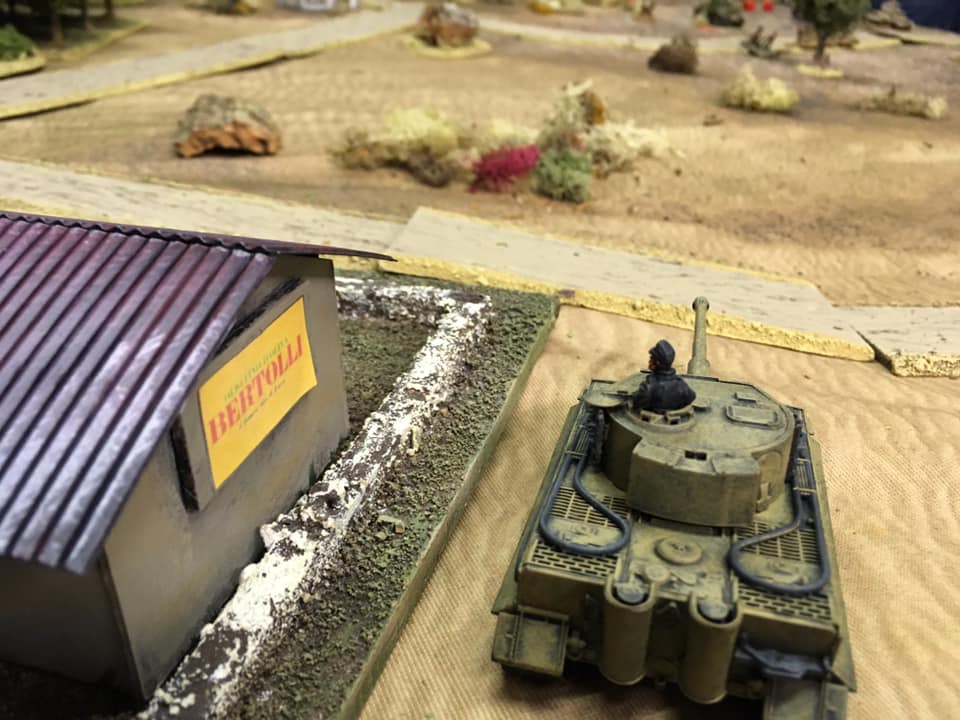
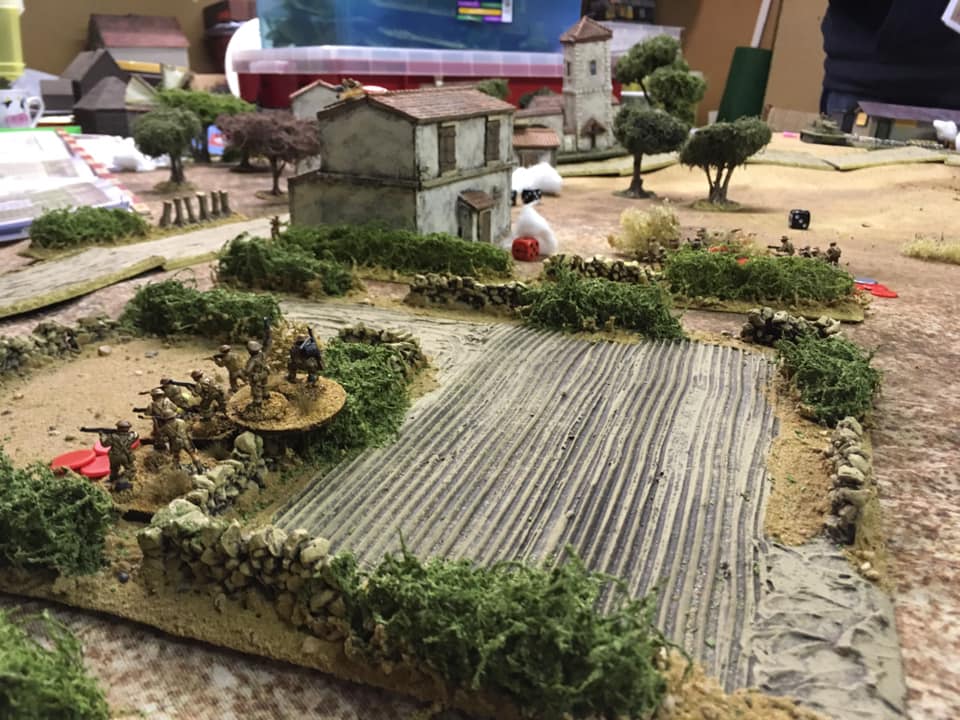
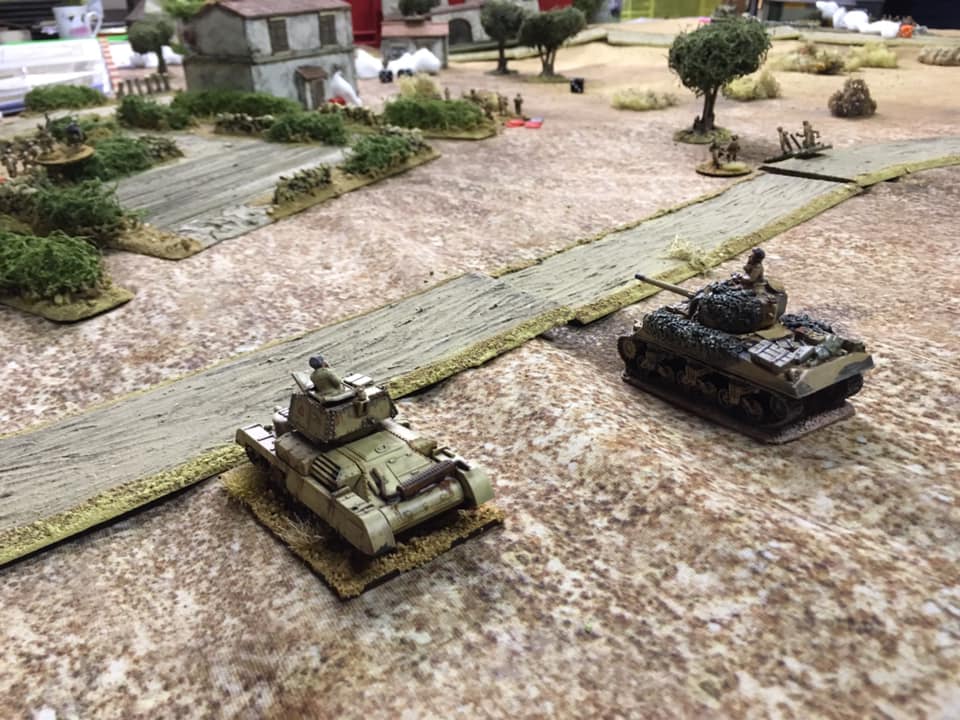
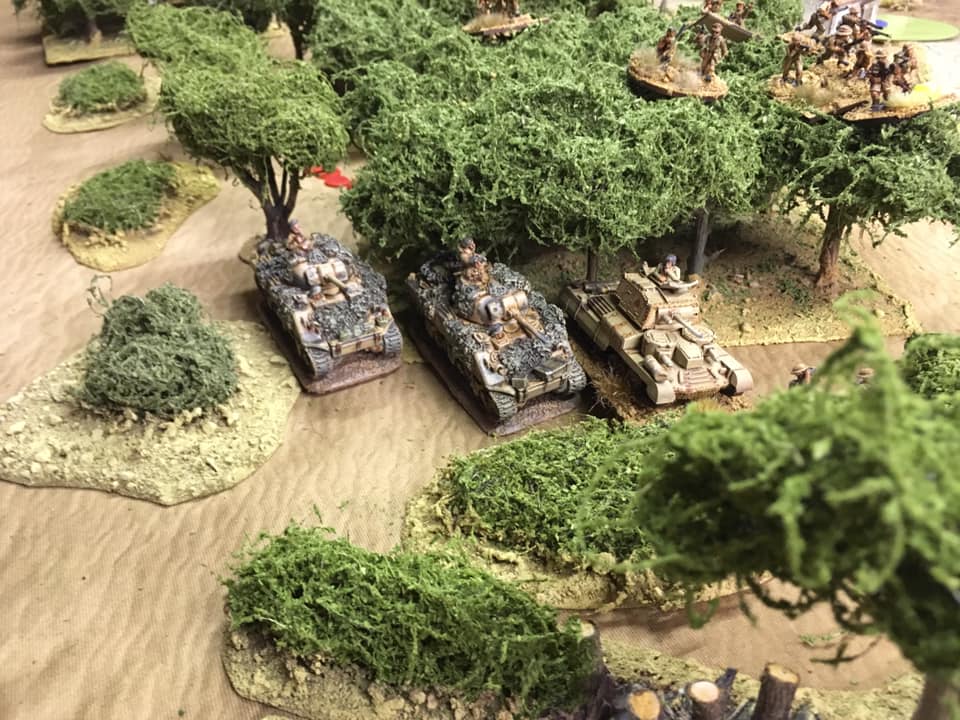
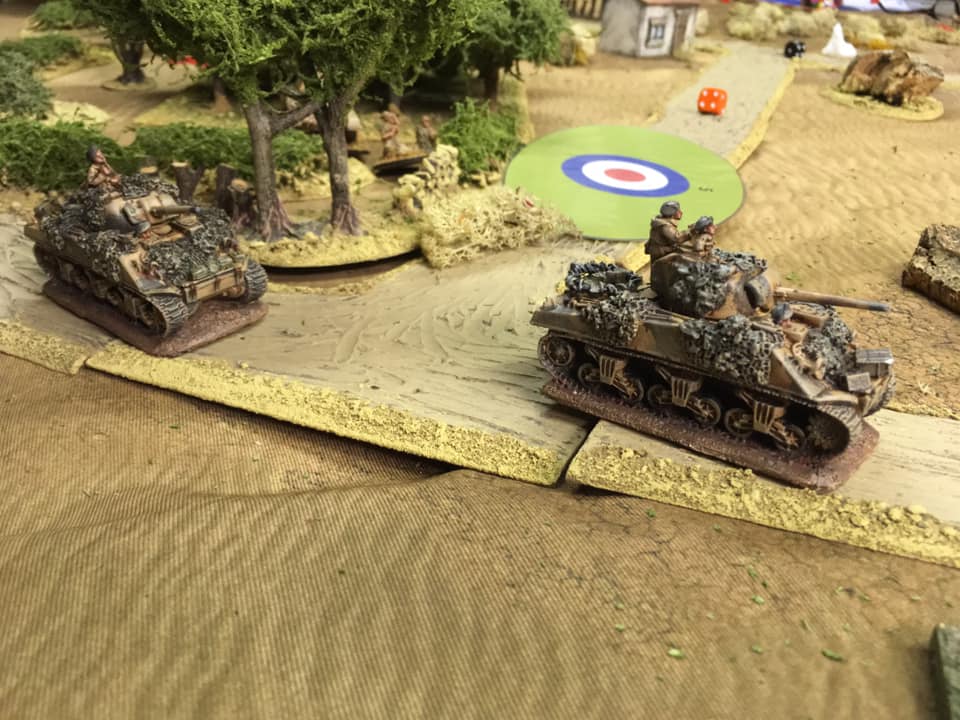
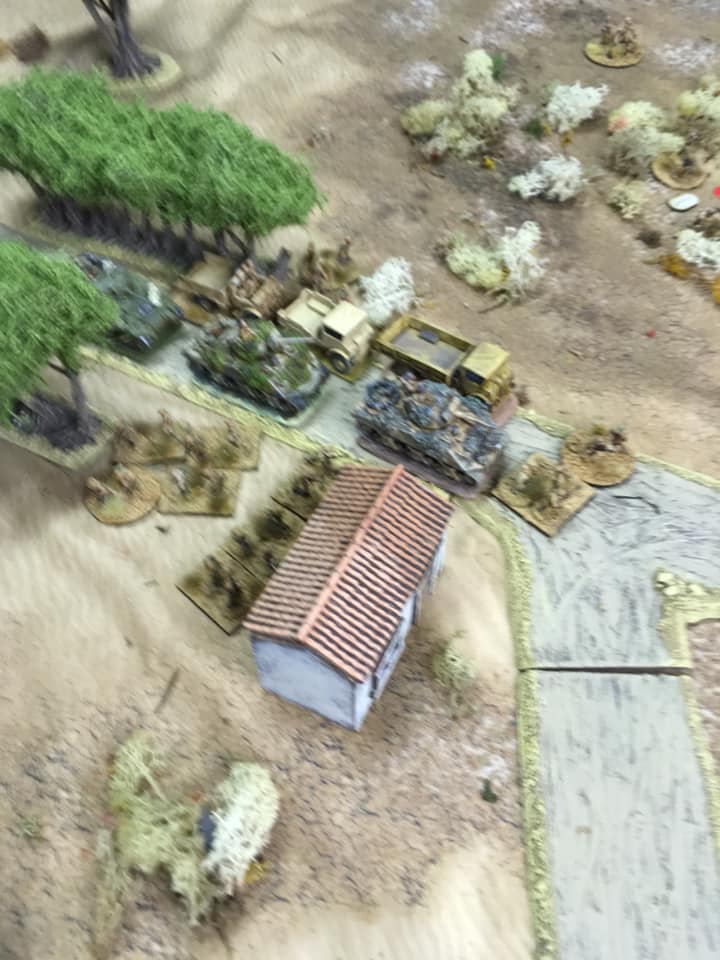
The troops are tired yes, but our Panzergrenadiers are the best and the new panzers are unstoppable – provided they keep moving.

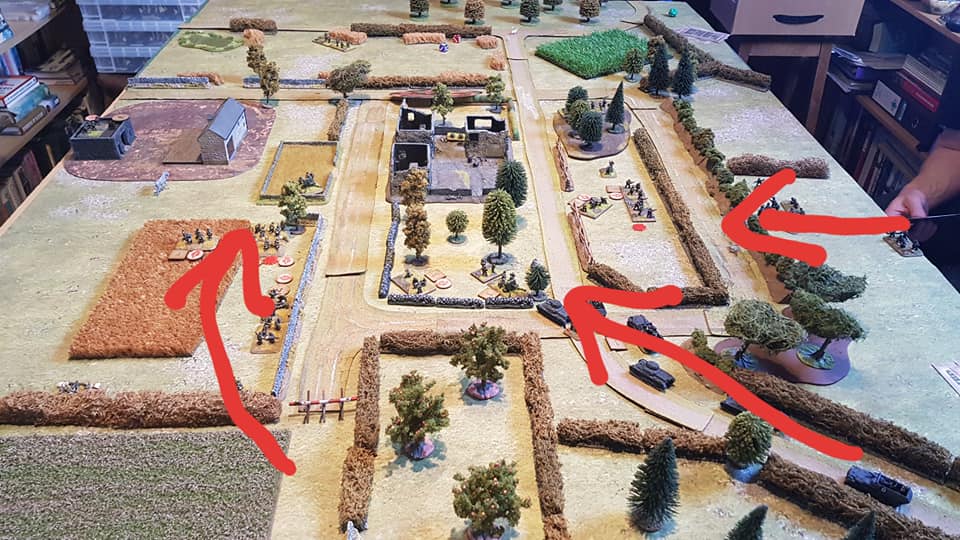
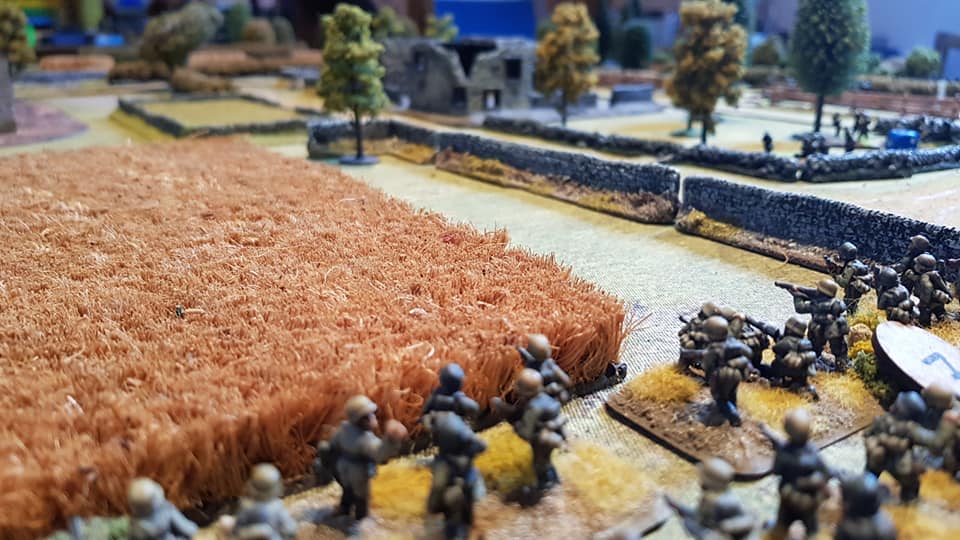
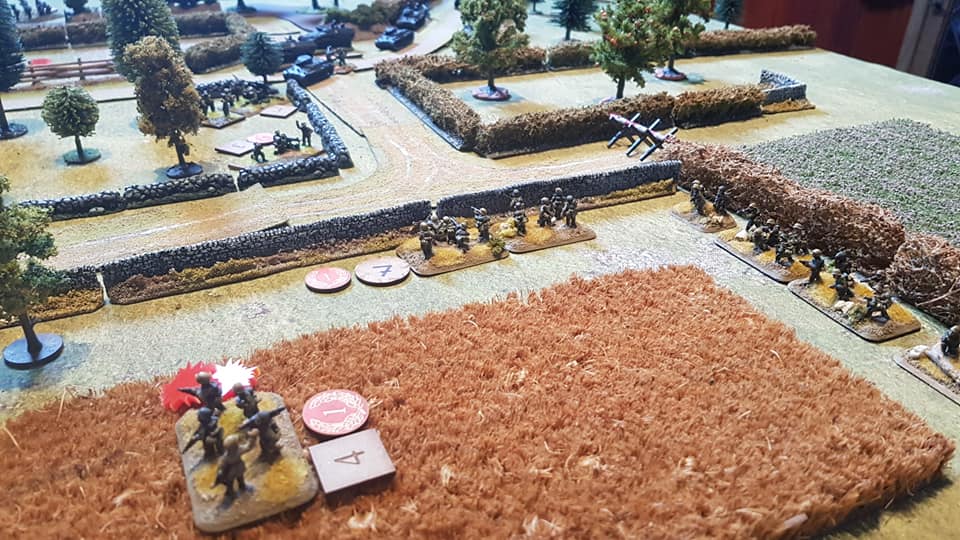
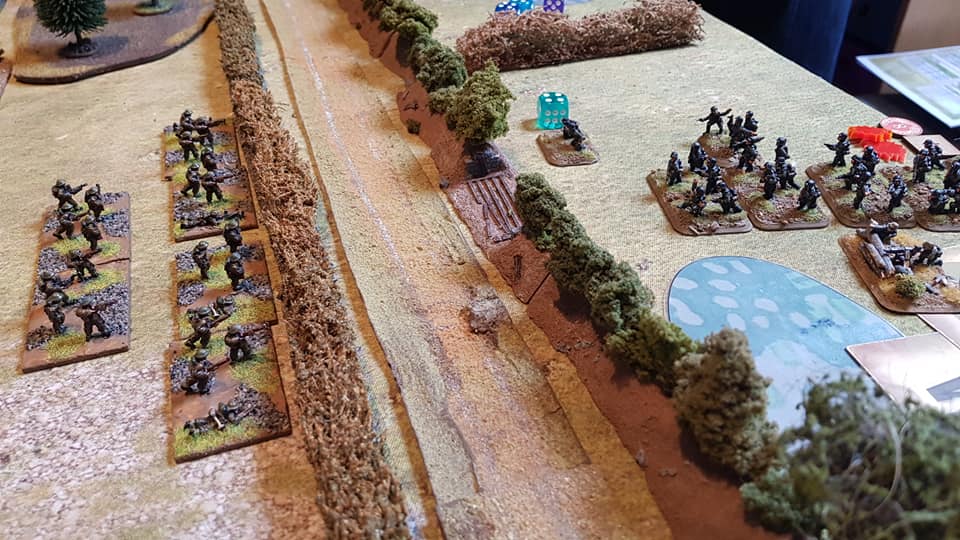
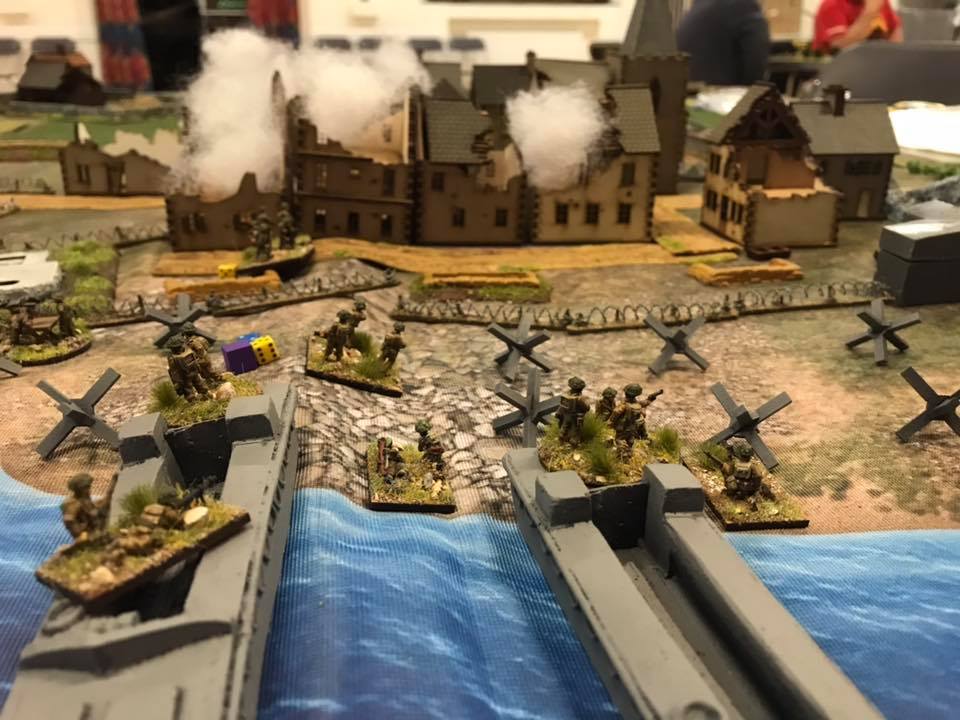
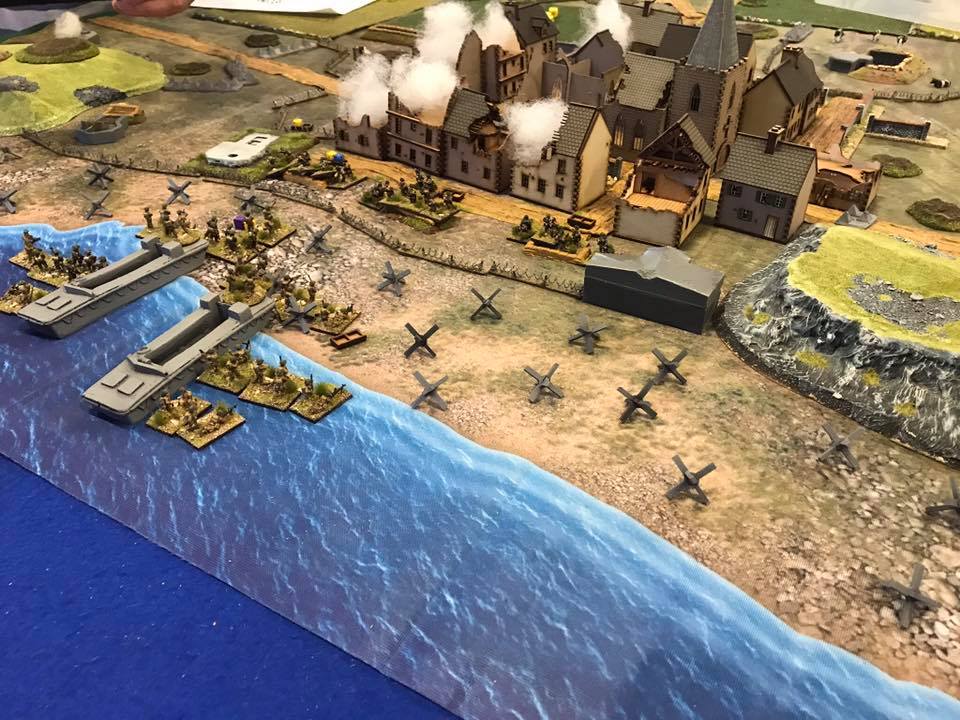
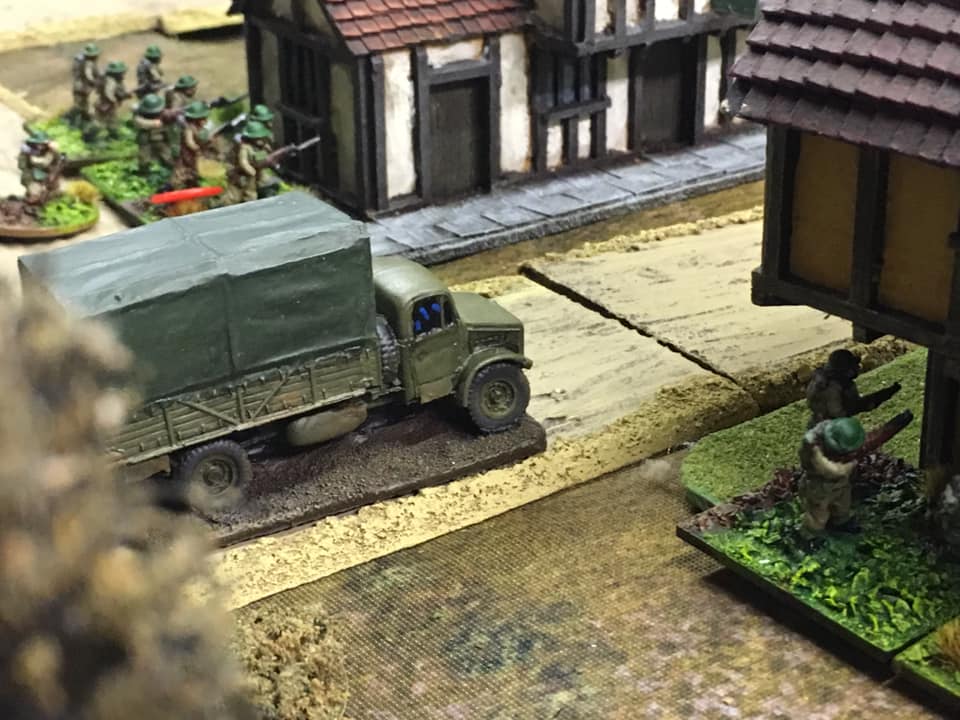
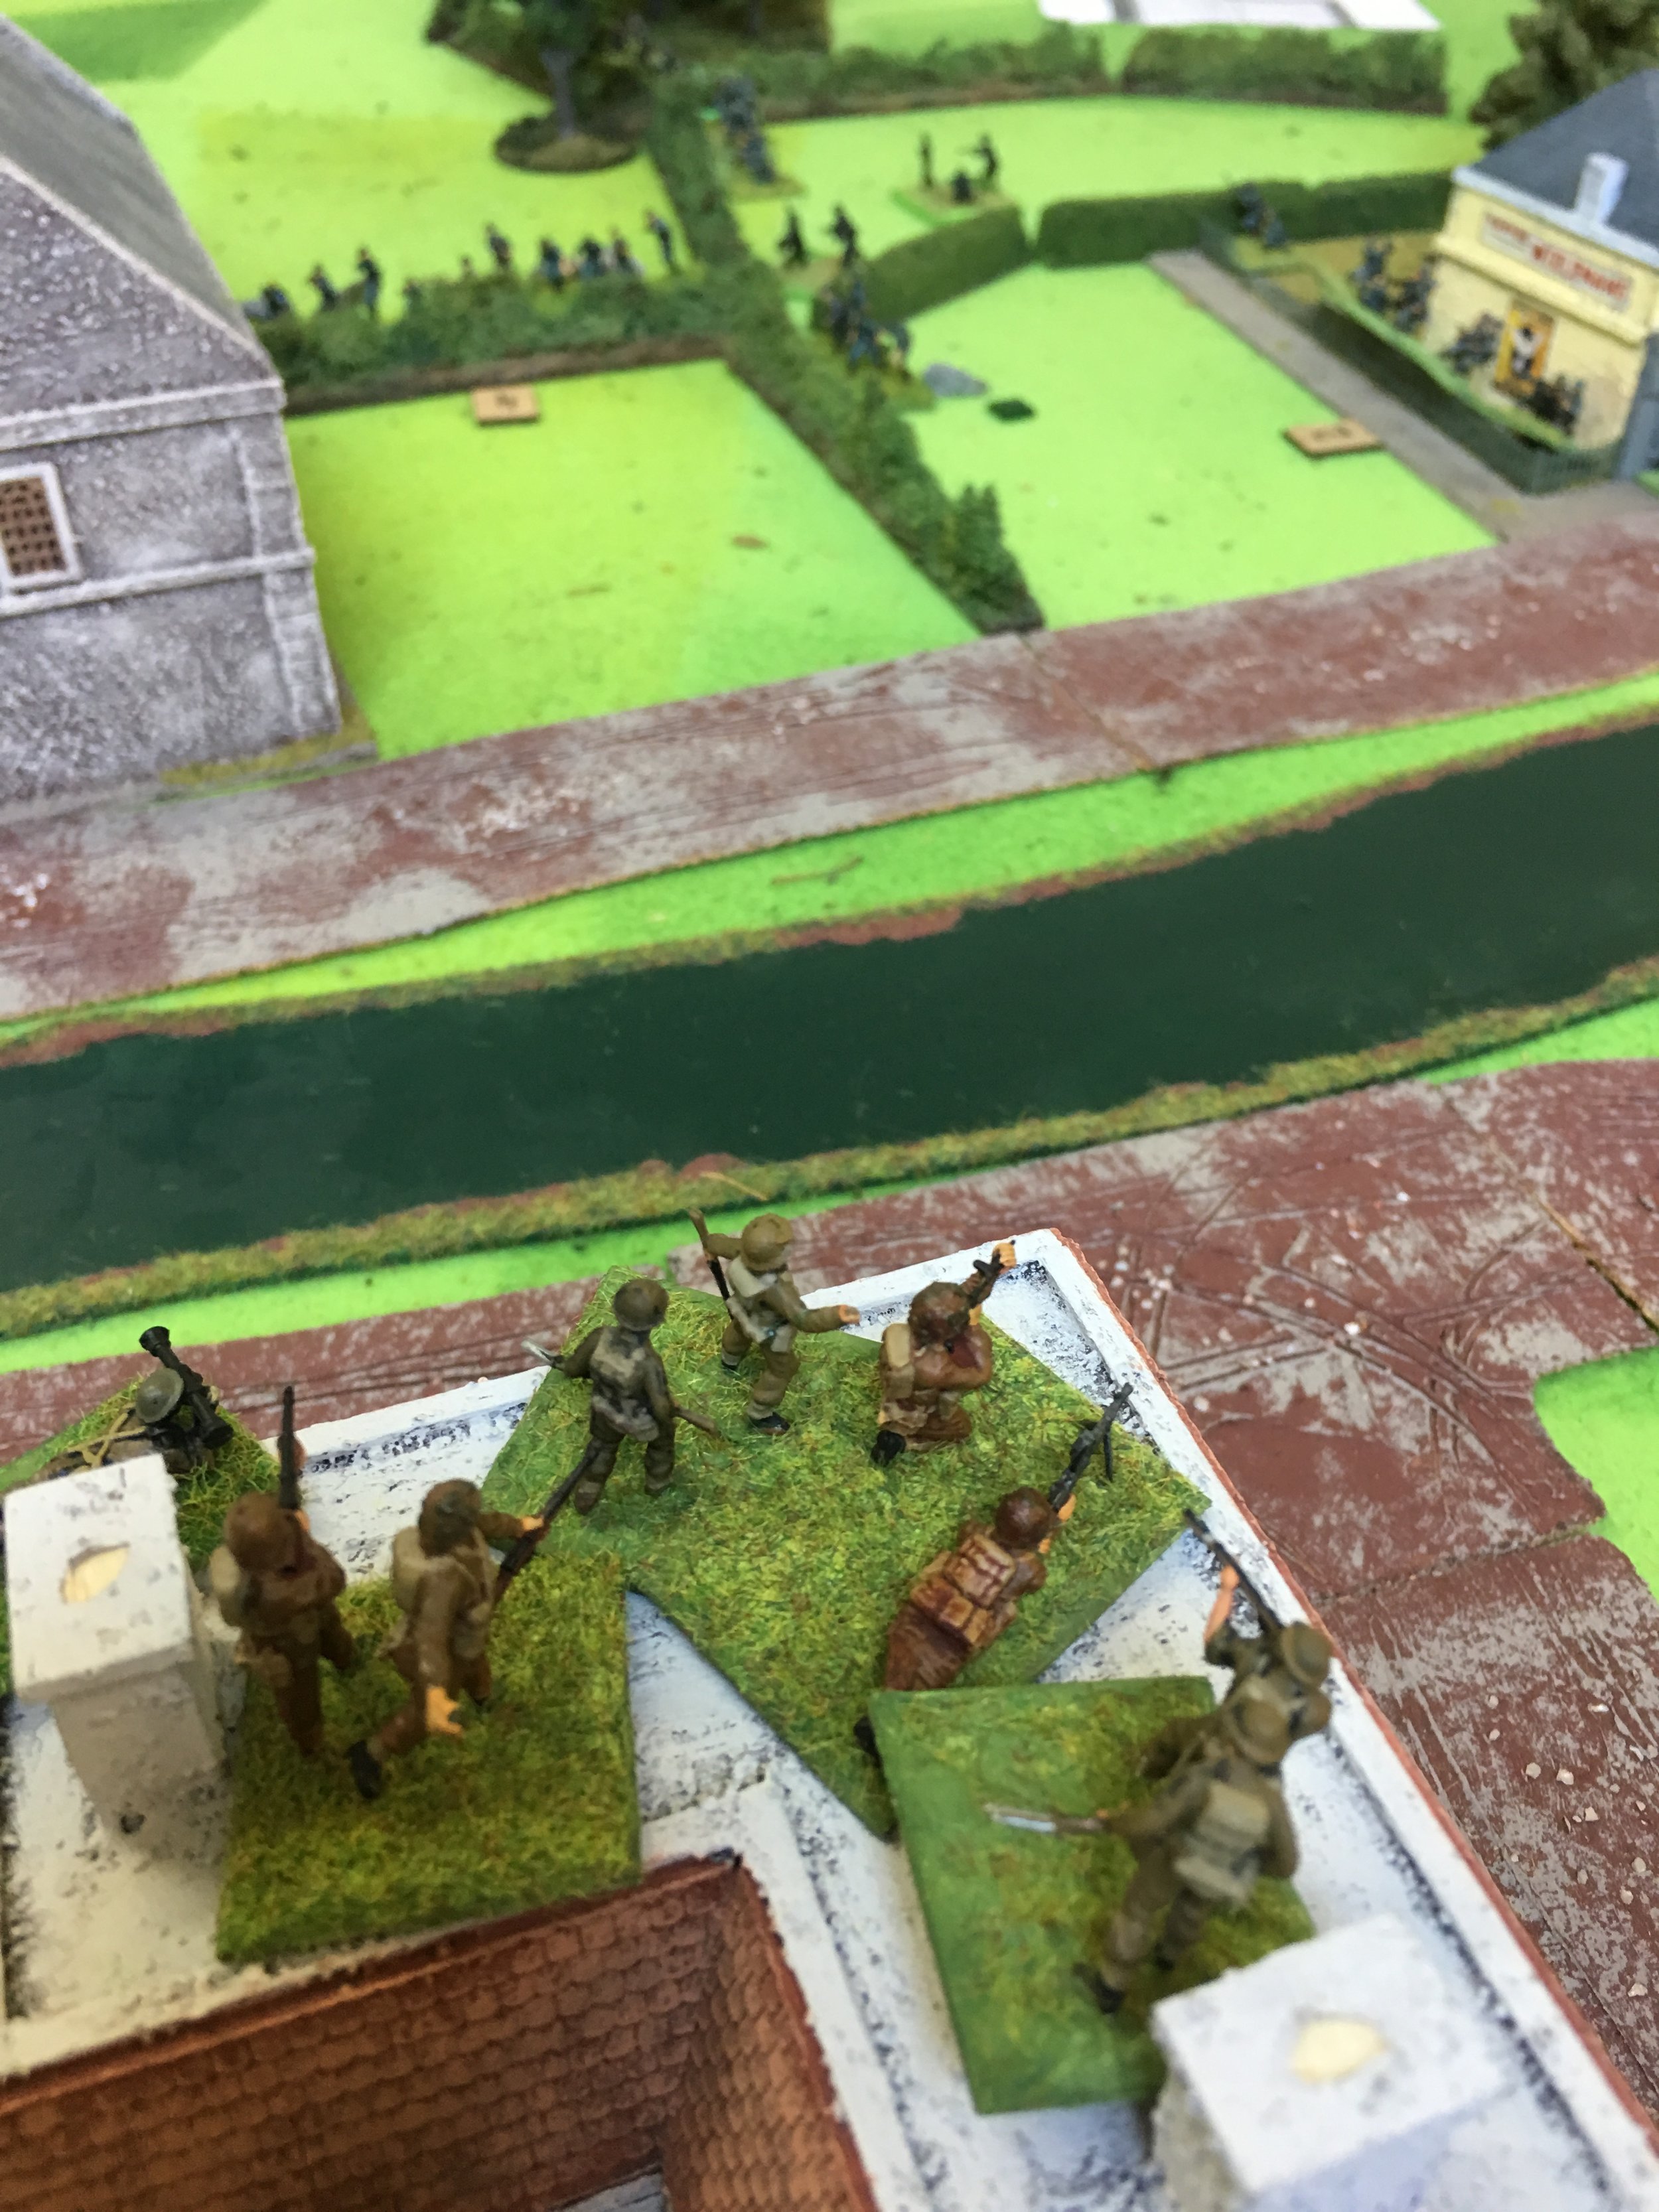
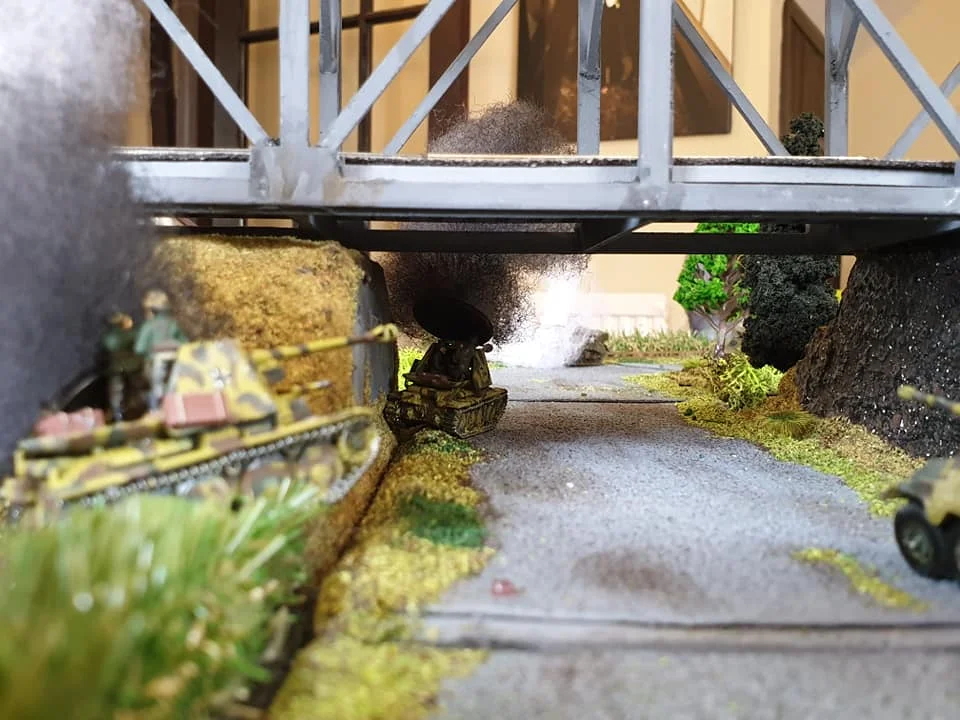
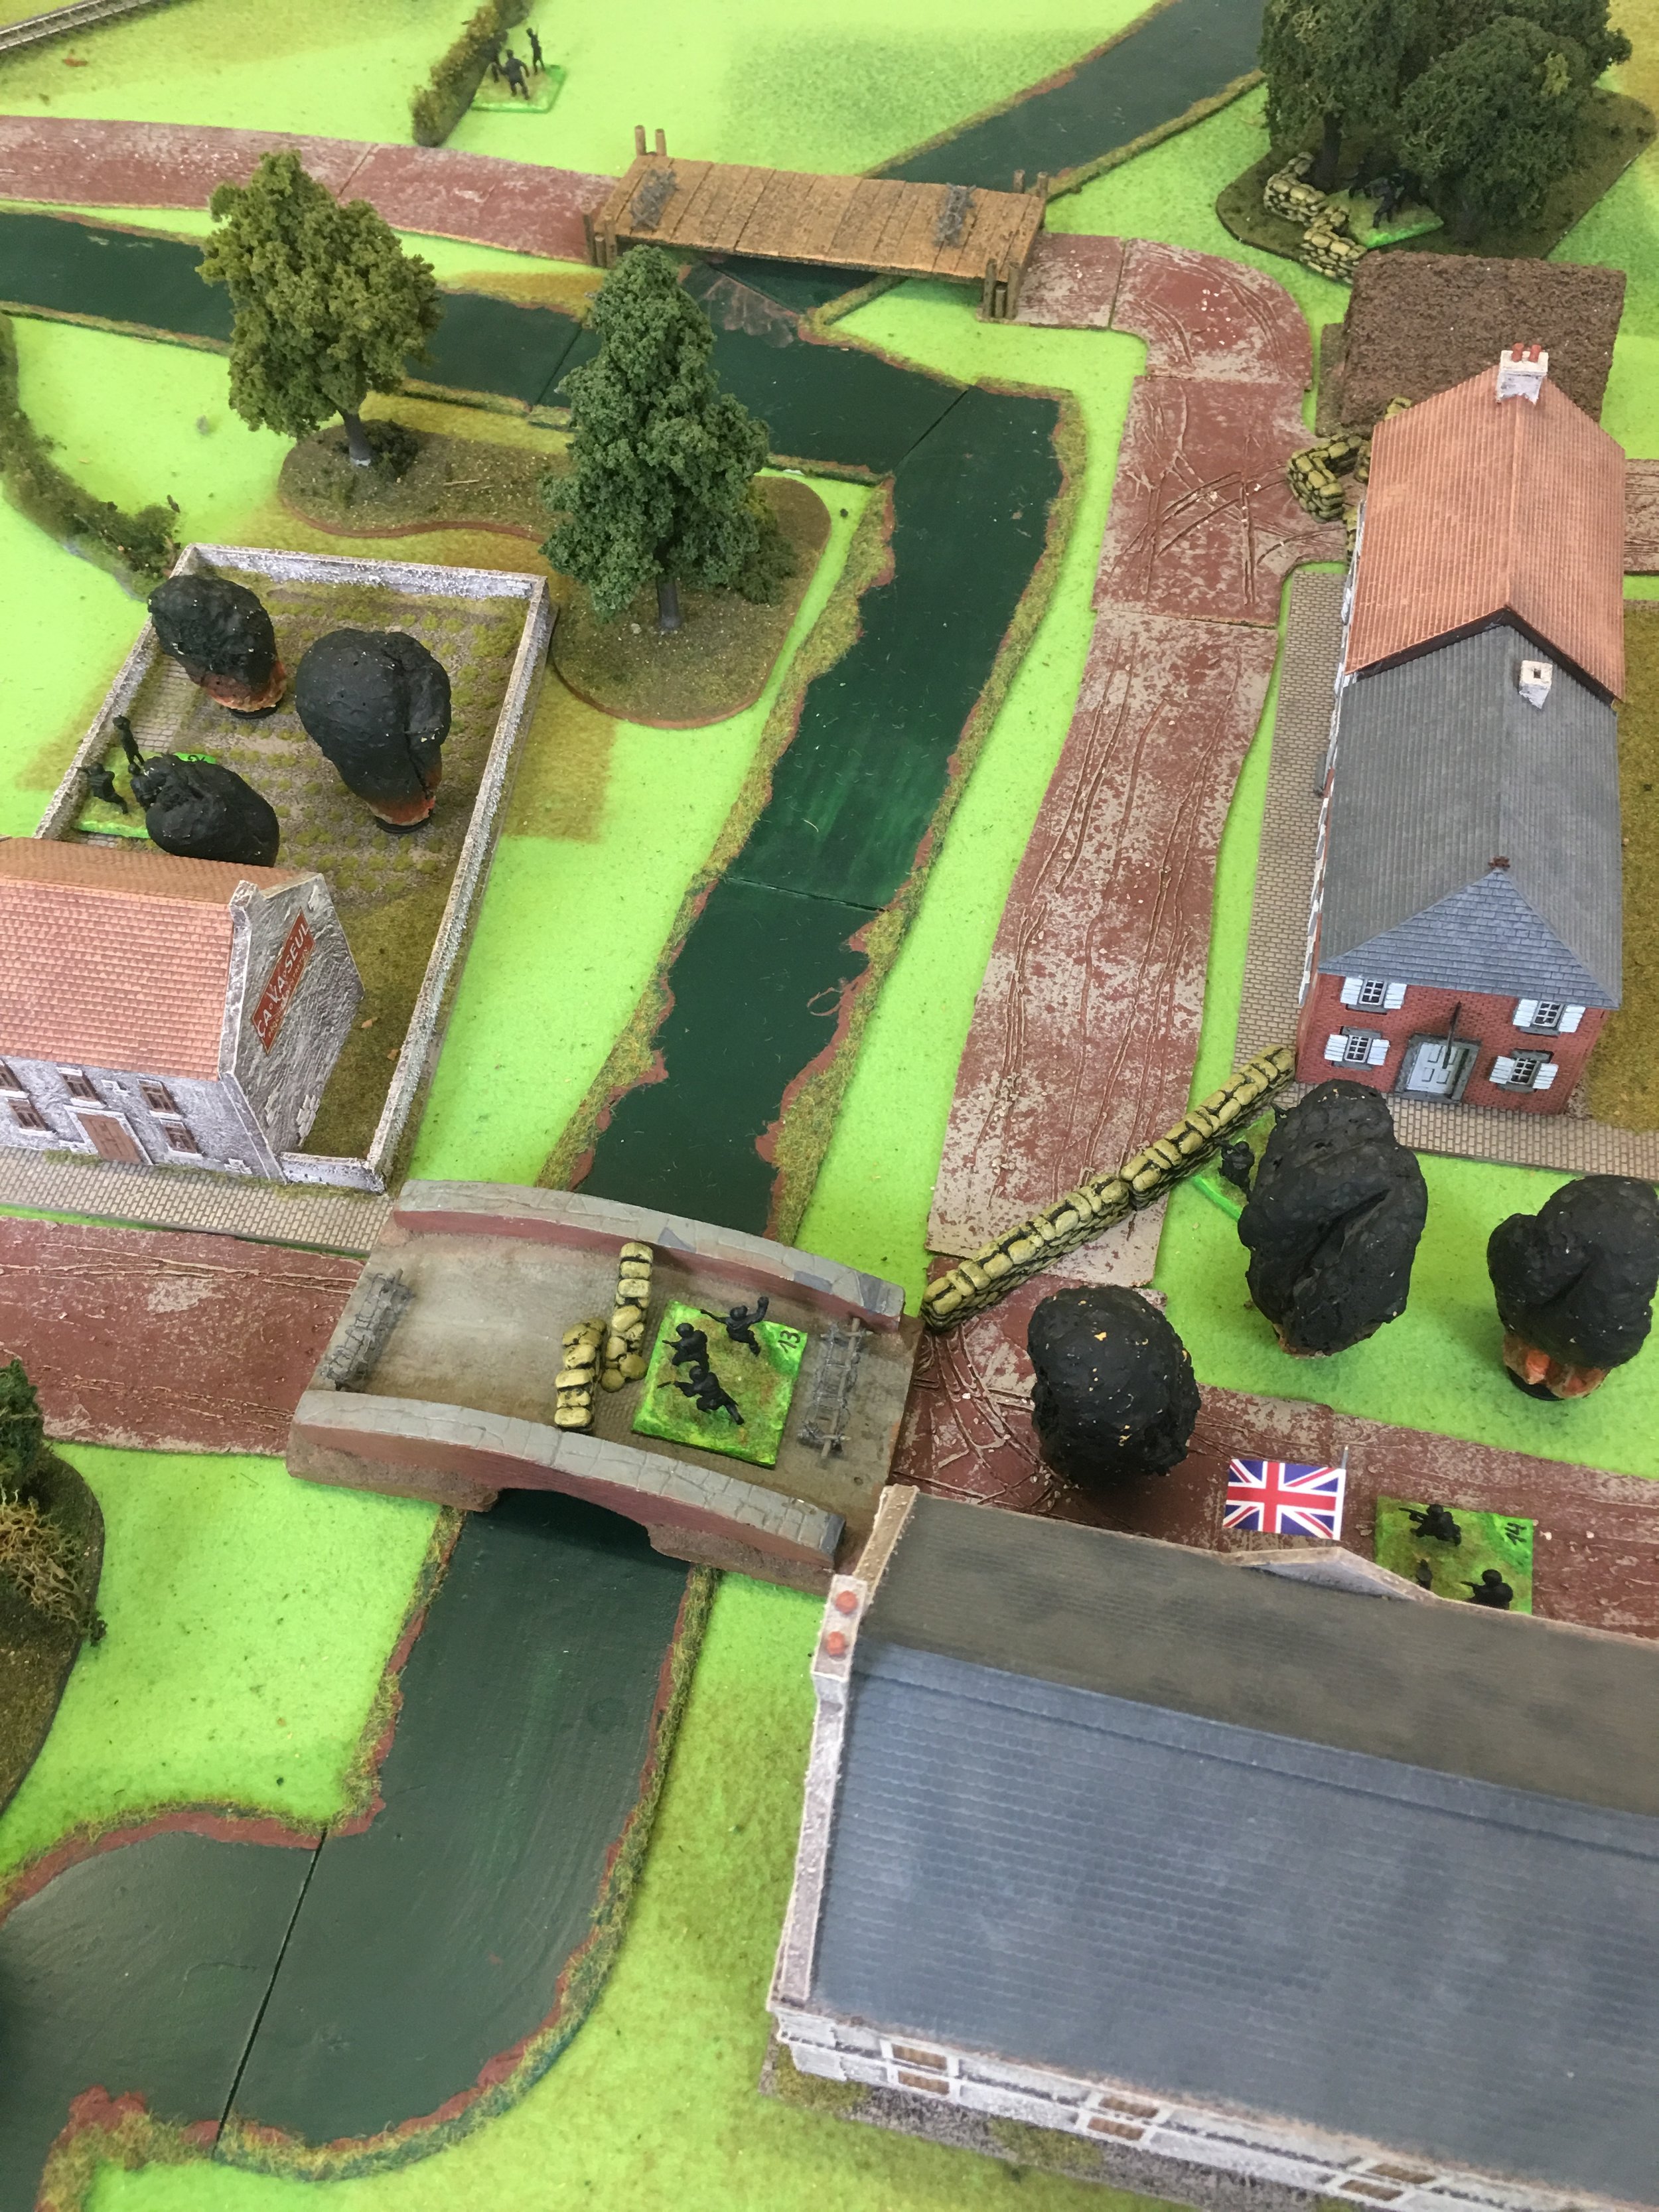
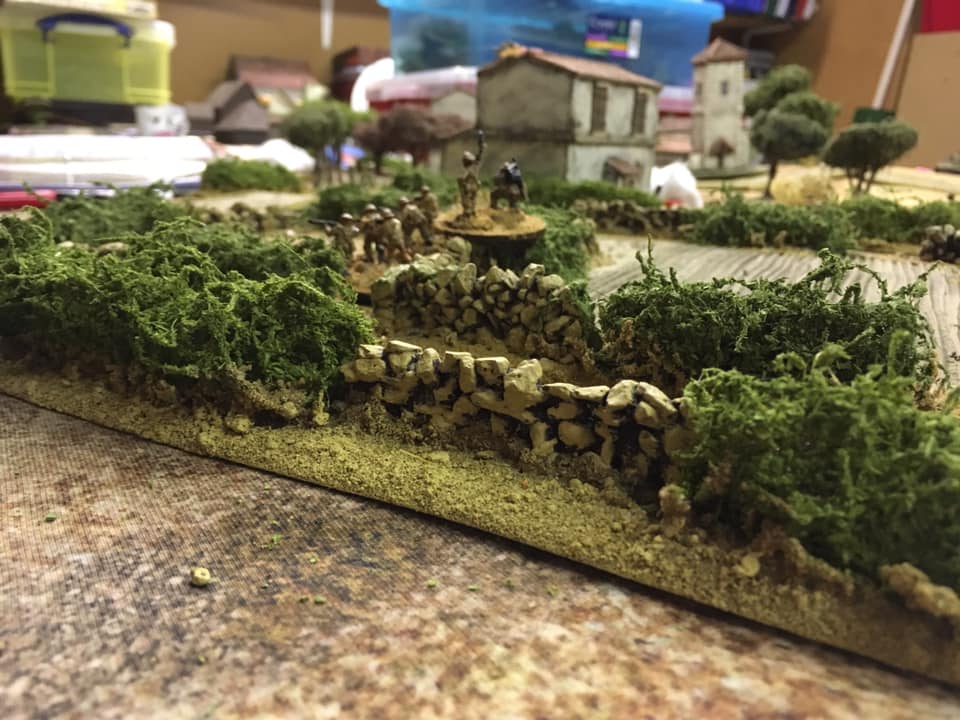
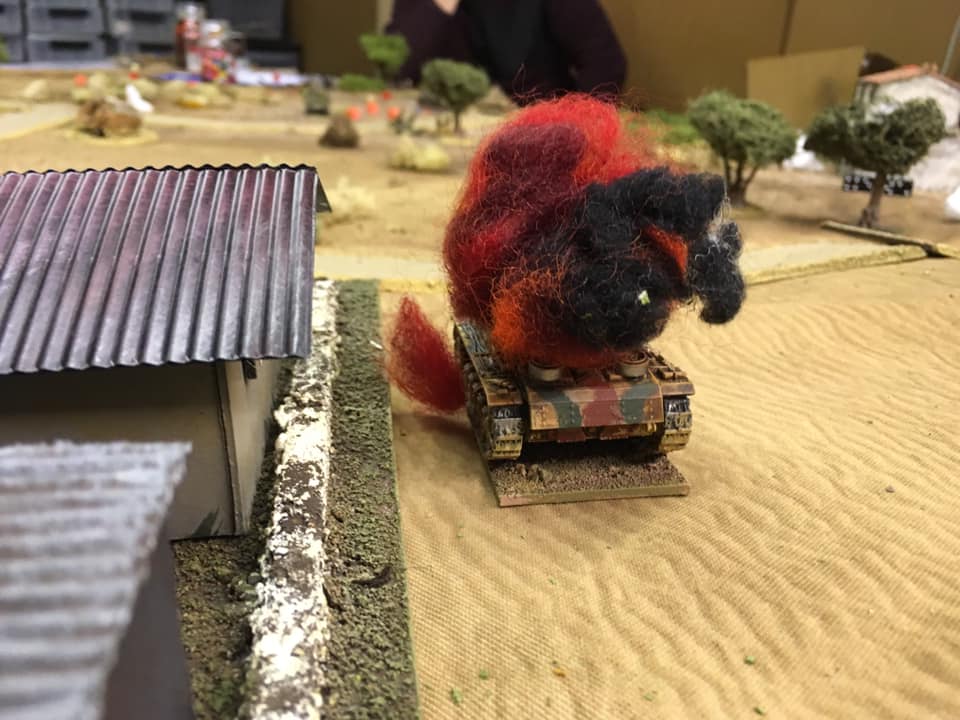
My Gruppe has been reduced a little over the last week, but I still have a balanced force with a real punch – infantry, tanks, artillery, tank destroyers and engineers as well – so the Amis will know we are here! I know there are some Ami paras up ahead walled up in the town and that they have tanks backing them up, but surely we can handle them?

We must be ready for surprises (have they mined the bridge ahead or the road?) but that's what Recon and Engineers are for!

This snow is bad, for whilst the roads are good, anything off road gets slowed down and wheeled vehicles risk getting bogged down.

The cloud is still heavy, too much for the Allied bombers perhaps and certainly too much for Goering boys. If it clears later then who knows?

Time to go, forwards!

  • Gruppe HQ

    • Oberst Franz Beckenbaur (Level IV)

    • Hauptmann Uwe Seeler (Level III)

    • Feldwebel Gerd Muller (Level I)

    • One Panther tank

    • Two Panzerschreck Teams

    • One ten-man Engineer squad

    • FOO

    • Two SdKfz 251

    • Various cars and trucks

  • Aufklarung Zug

    • Leutnant Siggi Held (Level II)

    • One 8-man infantry squad (one Panzerfaust)

    • One SdKfz 222

    • One Panzer II Luchs

    • One SdKfz 234/2 Puma

    • One Sdkfz 250/10

  • Zug One

    • Leutnant Fritz Weber (Level II)

    • Three 8-man infantry squads (one Panzerfaust)

    • One Panzerschreck team

    • Three SdKfz 251

  • Zug Two

    • Leutnant Helmut Haller (Level II)

    • Three 8-man infantry squads (one Panzerfaust)

    • One Panzerschreck team

    • Three SdKfz 251

  • Schwere Zug

    • Leutnant Hans Grabowski (Level II)

    • Two 81mm Mortar Teams

    • Two MG Teams

    • Two SdKfz 251

  • Panzerjaeger Zug

    • Leutnant Pietr Schmeichel

    • Two StuG IIIG

    • One Jagdpanther

  • Panzer Zug One

    • Leutnant Heinrich Klose (Level II)

    • Two Panther tanks

    • One Tiger tank

  • Panzer Zug Two

    • Leutnant Berti Vogts (Level II)

    • Three Panzer IVJ

British Briefing

  • Motor Company HQ

    • Captain Robert Moore (Level III)

    • Lieutenant Martin Peters (Level II)

    • FOO

    • One 3” Mortar Team in a Carrier

    • One scout car, one jeep, a truck

  • Scout Platoon

    • Lieutenant Alan Ball (Level II)

    • Carrier with LMG

    • Carrier with PIAT

    • Scout Car

  • Anti-Tank Platoon

    • Sergeant Geordie Banks (Level I)

    • Two Achilles

  • Platoon One

    • Two 8-man infantry sections

    • One PIAT Team

    • One 2” Mortar Team

    • Three trucks

  • Tank Troop One

    • Lieutenant Geoff Hurst (Level II)

    • One Sherman Firefly

    • Two Cromwells

Just what you needed! Christmas Day 1944 and your comfortable billet in Dinant is now but a memory. You, Captain Robert Moore of the 3rd RTR, have been specially selected to be amongst the first British troops to be thrown in to stop the Yanks from breaking under the strain of the Hun offensive.

You have your own tank platoon from 11th Armoured Div with a small force of infantry from 159 Brigade and have been ordered to the front line village of Beauraing where apparently a German attack is imminent. Seems there is a vital forward supply base there being defended by a mixed bunch of Yanks under a Para Colonel and you are to place your men at his disposal. The Hun must not be allowed to capture the fuel or they'll be over the Meuse and on to Antwerp before the music stops. Not at all what Monty wants for Christmas,

If only the weather would lift and the Typhoon boys could join in, but otherwise it will be down to you and your boys to stop Fritz's Tigers and Panthers. Not a nice Christmas present for Mrs Moore's little boy! You know your men's fighting ability, but who knows how these Yanks will fight? If all else fails your orders are clear: the enemy must not get those supplies.

Arrival

For our game, the British arrival was determined by what time Bevan arrived (truly random!). You will need to work out a suitable mechanic : say, after eight appearances of the Turn Card, or similar.


Terrain Etc

The road is clear of snow & ice, but off road drifts will slow all vehicle and foot movement, whilst wheeled vehicles risk getting bogged down (all movement off road is at -1 pip per dice rolled for movement, wheeled vehicles bog down if they roll more 1’s than 6’s).

The hills & woods are very bad going (woods are impassable to vehicles of any kind, and at -2 pips per dice rolled for movement for foot).

The stream is fast flowing but tracked vehicles can ford it. Wheeled must use a bridge.

The weather begins with low cloud, but a strong wind is expected as the cold front goes through, and this will break up the cloud and raise the cloud base. Fine words, but there’s no air support and no artillery support available for either side!

Strategies & Tactics

As I would deploy on table, I had the opportunity to spend a bit of time working out what I was going to do. My first thought, fairly obviously, was to hang back and defend the village: let the Germans come to me as I shot at them from behind cover.

That was a fair plan, but they were sure to have lots of Big Cats and other semi-indestructible big gun platforms, so I thought that I was probably onto a long-term loser if I did that. He could pound the buildings from relative safety, and only come to get me once I was properly softened up.

Rejecting that tactics meant that I had to defend forward. Risky, but if I could get some sort of ambush going, I might get one clear round of fire at his Cats before being swept off the table in a hail of armour piercing rounds, and if I could knock out his big stuff…well I was fairly confident that the Paras and Brits could deal with the rest.

I therefore decided to put both my tank platoons as far up the table as they could go, leaving the Crunchies under cover in the town.

The terrain meant that the Germans could get on the table and set up before coming forward into view (i.e. over the northern hill or around the bend in the road), so I decided to sit, out of sight, right in the lee on my side of the hill and my side of the wood, engines running, guns loaded, as a nice surprise for any German Blinds that appeared.

My FOO was in the church steeple, my anti-tank guns covering the road, so I reckoned that when the Germans advanced forward in strength from their natural deployment area, my Blinds card came up, I could spot with them, forcing the German tanks to deploy, and then blow them away with the Shermans. That was the plan!

Opening Phase

The game began with the Germans moving cautiously onto the table. This I was happy about, as the more time they spent dithering about sorting which Blind was which and how to get them all over the bridge meant more time for Bevan to finish up his chores and get the Brits onto the table to support me.

Very sensibly, however, the German commanders had their recon unit out front and, as they moved their force forward, these poked their noses around the corner of the road to see what they could see.

Well what their lead vehicle actually saw was a 57mm shell heading straight for them as my anti-tank guns opened fire. Exit one recon vehicle!

Incidentally. for those wondering why my Blinds aren’t on the table, IABSM allows troops waiting in prepared positions to be under Hidden Blinds rather than just Blinds: nicely simulating the fog of war.

This tweak on the nose unfortunately failed to provoke the Germans into a more general advance, but several of their Blinds did keep their momentum going. Their StuG platoon headed up the hill, neatly cresting it to observe and fire down onto the town from a fairly hull down position; and their HQ platoon moved into the gap between wood and hill.

This, of course, sprung my ambush…and not in the way that I wanted. I hadn’t had a chance to put my Blinds on Overwatch yet that turn, so my tanks were effectively sitting out in the open for the Germans to shoot at. Luckily he had already moved a lot of his troops, meaning that he wouldn’t be able to bring his full force to bear on me.

As I am sure you can imagine, all hell broke loose!

John and Dave were somewhat surprised by the appearance of my tanks, but nonetheless rallied quickly and fired at them with everything they had left to fire.

Luckily for me, the Dice Gods were with me, and despite the tender ministrations of the two ‘Schreck teams and the Panther, I lost only one Easy Eight: a blow, but not a killer blow.

I returned fire as soon as I was able, and managed to knock out one Panther, one Puma and a StuG, and knock bits off various other vehicles as well. On top of that, I managed to Suppress his infantry in the wood with a bit of HE pounding, and kill off quite a few of his footsloggers in the process.

Here’s a montage of pictures capturing the action described above:

Much would depend on who got the first shot off next turn.

Unfortunately, the Cards Gods were not with me, and the Germans acted first next turn. A painful round of fire followed knocking out one of my tanks. Fortunately, I was close enough that when the Tea Break card appeared early, I could get in an automatic shot which did some damage in return.

Even more unfortunately, this happened again next turn. Suddenly I was down to just five Shermans.

All was not lost, however, as developments had been taking place elsewhere on the battlefield.

Presumably keen to get everything he could into action against my Shermans, John revealed his Jagdpanther and accompanying Panzers on the other side of the table.

This was good news, as my three Hellcats edged into a hull down position from where they were concealed behind the hill near the town and opened fire.

It took seven shots, but the Jagdpanther was smashed about so much that its crew decided to abandon ship. Other fire knocked out one of the accompanying Panzers.

More fire followed from both sides. My Shermans in the centre were wiped out after a few turns by the two Panthers, a surviving ‘Schreck, and finally a fantastic ram by a Panzer II, but they had done their job: all that the Germans had left vehicles-wise was one Tiger…which still faced my two dug-in anti-tank guns and three Hellcats! The Germans had also lost a good chunk of their HQ and Schwere platoon: cut to pieces by flying wood chips in a hail of HE fire in the wood.

The carnage from the German Point of View

The eagle-eyed amongst you will also have spotted Bevan sitting quietly in a corner (behind the Hellcats in the pic above). He, and the Brits, had turned up just in time to see the last of the German Panthers blown up.

The Brits Arrive…A Little Late!

Unfortunately there wasn’t much left for him, and the Brits, to do. There was no way that the Germans could push forward now: they were done!

Aftermath

A cracking game which, once the Germans hit my forward line of defence, was nothing but action, action, action!

Admittedly I had some very lucky dice rolling in that first encounter, but the German commanders were definitely shocked by my tactics: enough to make a mistake with the deployment of the Jagdpanther zug and leave them open to destruction by the Hellcats.

When it came down to it, I did lose eight Shermans but, ignoring with difficulty the thought of the men who died in them, I could afford to lose them…and the Germans couldn’t afford to lose the twelve tanks (mostly Big cats as well) that it took to knock my AFVs out.

The person I did feel sorry for, however, was Bevan. Turns up expecting to save the day, and the Yanks have done the job already!

Robert Avery


BACK