IABSM AAR: Storming the Citadel V

It’s been ages since we’ve had an I Ain’t Been Shot Mum after action report, so it’s great to pick this one up from Will Depusoy on the IABSM Facebook Group.

Will and friends are working their way through the PSC Storming the Citadel campaign.This is the report from their table five game: the Soviets are falling back from village of Butovo with the Germans in hot pursuit.

Click on the picture below to see all:

TTS AAR: Timurids versus Normans

Here’s an After Action Report left over from last year: a game against an old friend of mine, Nog, that I hadn’t seen for ages. He’s only an occasionaly wargamer, and hadn’t played To The Strongest before, so this would be a teaching/learning game rather than all out battle.

I was keen to get my two newest armies onto the table, so Nog would play the Normans and I would play the Timurids. Not historically accurate, maybe, but somewhat mimincing a Crusdaer-rtyle clash!

The Timurids ready for action

Nog’s normans

I had ther initiative, so decided to advnace forward rapidly in order to engage the enemy with bowfire before closing to polish off any left standing.

Unfortunately, my mass advance faltered with my very first card, leaving my troops awkwardly split: some forward, some not.

Amusingly, Nog then proceeded to draw an Ace for his first card, but this time for the foot command in the centre, leaving his horsemen charging forward with the infantry left behind, and a very attractive (to me, anyway) hole in the middle of his line.

In my eagerness to get into bow range I had forgotten that there’s nothing a Norman likes more than charging home, so all those points spent on missile weapons for my Timurids were somewhat wasted as suddenly I had heavy horse all over me!

Both sides rapidly began losing units in the melee that followed. Although my lighter bowmen were outclassed and had to evade backwards, I had enough heavy cavalry of my own to hold the centre, although I did have to deploy the kharash (driven slaves) to bolsetr my line.

As the Normans pushed forward, I did manage to get some of my troops around his left flank and prepared to start rolling the Frenchmen up.

This led to an extraordinary run of cards, as shown in the photo below:

For the unitiated:

  • Draw a 6 to move into a position to charge the enemy flank

  • Try to charge, but draw a 2

  • Use the General to re-draw, pull a 9 and in they go…but combat cards are A and 2 meanign two misses

  • Need to draw a natural 10 to go in again: 10 drawn, but 2 and 5 for combat mean two more misses

  • Need to draw another natural 10 to go in a third time: 10 drawn (!) and two 8’s mean two hits and the enemy flee the field

By this time neither of us had many men left at all, and most of mine were on the point of fleeing:

We were, in fact, both down to our last coin, so it was a case of sudden death: whoever loses the next unit loses the game and, as mentioned above, my troops were in a lot worse state than his.

Fortunately, however, the luck remained with me, and a charge with some light troops returning from having evaded, hit the back of some of his, and just managed to dash them from the field. The last coin and the victory were mine!

It had been a great game, full of incident an excitement. We both agreed that I had been foolish to allow the Normans to close with my troops so early on in the game, and that Nog had managed to snatch defeat from the jaws of victory, helped by a final surge of luck on my part at the end of the encounter.

Cracking stuff, and we’re both eagerly awaiting our next battle.

Two the Strongest Tournament: Game Three

I’m still working my way through a backlog of battle reports that seems to have built up over the last couple of months.

Today features the third and final game at the Two the Strongest doubles tournament organised by the London Wargaming Guild back in November. My partner, Peter, and I had won our first two games and woulkd now face Tim and Matt playing Normans and 100YW French respectively.

The game would be fought across quite an unusual set-up representing a famous battle from history. Apologies, but I can’t remeber which one…but there were a lot of hills on the flanks!

The Romans

The French

For this battle, Peter and I reversed our roles: I would go forward against the Normans whilst Peter hung back against the 100YW French.

My cavalry (Equites Alares and Equites Contarium) duly swung out to the right and advanced forward at speed. They soon met the enemy coming the other way and, much to my delight, almost immediately knocked one Norman unit off the table and sent another to the retreat.

My Roman cavalry have tken some stick this year for their performance on the tabletop, but I must confess that they didn’t put a foot (hoof?) wrong this game: a fitting redemption in the last tournament game of the season.

Meanwhile, my legionaries had also advanced towards the enemy line and pinned them in place as planned. I needed to get a move on, however, as I could see that Peter’s troops were under some pressure from a horde of Late Knights!

My troops began to wheel to their left, ready to roll up the enemy line but, before they could do any significant damage, my cavalry inflicted another loss on the Normans, including killing their commander in chief. This was too much for these early Frenchies to take, and they fled the field, leaving their later compatriots to fight on alone.

The game was a bit of a foregone conclusion from then on, as Peter’s troops were still resisting, leading to an eventual 15-6 victory for the Romans.

Points were totted up and it turned out the Peter and I had actually won the day!

A very good way to end the season, with my first tournament win, and huge thanks to all the Guilders for organising an excellent competition that I shall certainly enter again next year.

If you look at the picture to the right, you will see I am clutching a box of Perry Plastics as a prize (along with the rather marvellous “playing card” trophy). This box turned out to be the naissance of my new 28mm army for 2024, although which later medieval army I will actually paint up is still in doubt at time of writing, along with whether I can actually get it finished in time for the Welsh Open at the end of January!

Two the Strongest Tournament: Game Two

Peter and I’s second game at the inaugural Two the Strongest Doubles tournament organised by the London Guild of Wargames was against Tom and Nathanial, each fielding a Wars of the Roses army: lots of longbows, billmen and knights!

Our plan was very much the same as in the first game of the tournament. My solid legionaries would hold the bulk of the enemy in place whilst Peter’s lighter cavalry got around the enemy flank and rolled them up. As our opponents wavered at the sight of their flank collapsing, in would go my Roman mincing machine to finish them off.

Much to our surprise, the first stages of the game saw everything going to the plan: Peter’s men got around the right flank of Tom’s troops and started knocking units off the table, then turning to head into the centre. Meanwhile, I advanced cautiously forward, wary of a storm of longbow fire.

Nathaniel also took a cautious approach so, for a time, all the action was on one side. Here’s a montage of these first evolutions:

Then I’m afarid our opponents made what must be considered a fateful mistake.

Concerned about their right flank, they turned some of their units in the centre to the right, intending to take Peter’s legionaries, now heavily engaged with the right side of the enemy line, in the flank. This, of course, left them open to a rapid advance from my troops into their now-exposed left sides, knocking a couple off the table and certainly preventing them intervening to the right as Tom had planned.

At this point Tom’s half of their army collapsed, leading to all his remaining troops being removed from the board and leaving Nathaniel to face the might of the Empire alone!

Now severely outnumbered and already in a poor tactical situation, it was only a matter of time before Nathaniel’s troops were overwhelmed. It also didn’t help that his artillery now showed an alarming propensity to draw Aces!

So in all a fairly convincing 16-0 victory for the Romans, leaving us in a good position overall as we faced the final game of the day.

Two the Strongest Tournament: Game One

This November just gone, those stalwart men of the London Wargaming Guild put on the first To The Strongest Doubles tournament at the 7 Dials Club in Covent Garden.

The concept was simple: teams of two players, with each player fielding 100 points of army. The armies did not have to be connected but it would obviously be better if they were.

Originally the idea had been for each team to be one experienced player and one less experienced if not novice player, but this requirement was softened in the run-up to the tournament…although personally and, as it turned out somewhat hypocritically, I think enforcing this would actually be an excellent idea for the future.

I say “somewhat hypocritically” because my partner was none other than Peter R., many times champion of many tournaments, which would presumably have made me the novice player!

Our first game was against Sid and Rob: the former also fielding Early Imperial Romans, the latter fielding Polybian Romans.

Our plan was simple: I would pin Sid’s EIR’s in place, whilst Peter lapped around the Polybian left flank. As it happens, our strategy was the same-but-opposite from that adopted by Sid and Rob: Rob would pin Peter’s troops whilst Sid wrapped around my right flank!

The two lines quickly came together, and immediately the flanking generals on each side began to do their thing.

Below left you can see my legionaries holding Sid’s in place whilst below right you can see Sid’s horse and lights attempting to turn my flank:

Fortunately I was able to turn my cavalry to face this threat and, with the Auxilia in Orbis (i.e. fighting to all sides) was able to keep Sid at bay.

Unfortunately for other Rob, Peter is a past master at outflanking, and Rob’s Polybian Romans were soon in a great deal of trouble: their cavalry driven from the field by an endless series of flank attacks from our light troop, leaving his infantry to fall in turn as our cavalry turned on them as Peter’s legions moved into contact.

With his camp falling to some Numidian light horse, Rob was soon forced to remove all his troops from the table, leaving Peter’s men free to come to my aid.

Fighting two opponents at once is never much fun and, despite valiant efforts, Sid’s men were soon reeling from the field as well, leaving us victors 18 points to 9.

TTS @ Warfare: Game Four: EIR versus Tang Chinese

My fourth and final game at this year’s To The Strongest competition at Warfare was my Early Imperial Romans against Peter Ryding’s Tang Chinese.

Peter is a wily opponent and an expert of using a force that is a mixture of light cavalry, heavy cavalry and solid infantry…and the one thing I didn’t want to happen was him to get his Chinese around the end of my line and outflank my Romans.

As the battle began, Peter immediately went for my flanks with his light cavalry. I didn’t think I’d have a problem on the right: I’d kept that flank strong, intending to deal with the lights then use my superior drilled mobility to curl in and attack his infantry in the centre.

Likewise, on the left, all I would have to do is to move the rear left hand unit of cavalry (with the red cloaks) out to the side and I was sorted.

Unfortunately the poor cards that had been dogging me all day reared their ugly head again, and things did not go according to plan.

On the right, I shot down one of his light horse units almost immediately, and closed with the other to drive it back.

All well and good…but then my central infantry, which I had been intending to get back to the left to engage his main force, just refused to move. Where was my superior drilled mobility? It was buried in Aces!

Oh, and if you look, Peter is making it even more difficult to close with his troops by refusing that flank and presenting me with an oblique line to attack…meaning my men would have even further to go before being able to get stuck in. Clever, very clever!

Worse, the aforementioned red cloaked cavalry on my left had also refused to move as planned, leaving that flank horribly exposed. Peter, never one to miss an opportunity, took full advantage, and soon that flank was completely buggered!

I mean, look at them just sitting there! They obviously haven’t moved since their original deployment when only the smallest movement of one square would have stopped the Tang lights in their tracks.

Now there are those of you who are reading this who are saying “oh look, there’s Rob again complaining about his luck as opposed to admitting he’s playing badly”.

Yes, point taken: you play the cards you’re dealt and all that, and Peter has made no mistakes in executing a very cunning plan…but take a look at the photo below to show what happened as I moved in on his camp: something that could potentially have gained me enough coins to turn the battle my way.

Three Aces are showing…and what’s even more amusing is that for this game that wasn’t even the worst cards that I drew!

Anyway, suffice to say that I didn’t get into the enemy camp or in amongst his infantry before the flank attacks on my left took their toll and the Romans gave way and fled the field, giving Peter a colossal and well-deserved victory.

Results

One colossal loss, one massive victory, and two losing draws gave me a seventh place in the overall competition: a bit of a disappointment to say the least!

But no matter: there was still the Doubles competition at the Seven Dials Club in Covent Garden to come.

My partner?

Peter, of course!

The reports on that tournament will follow in due course…

TTS @ Warfare: Game Three: EIR versus New Kingdom Egyptian

My third game at this year’s To The Strongest tournament at Warfare was my Early Imperial Romans against Nathaniel’s New Kingdom Egyptians.

Don’t be fooled by the compact look of Nat’s army: there were a lot of light chariot units clumped together, all with bows, so I could expect a hail of bowfire as I closed with the enemy.

I have an NKE army myself (in 15mm) and so was also expecting the Egyptians to rapidly expand their position and attempt to lap around my flanks, always a danger for an infantry army like the Romans. This didn’t happen, however, and Nat kept his troops closed together as he advanced towards me, doubtless determined to just shoot me down head on.

Unfortunately for Nat, this played directly into my strengths.

My Romans can usually soak up arrows or rally off any disorders that they do take on the way in, and love to melee with lesser quality infantry or, even better, light troops. Likewise, my cavalry would be happy to just keep charging his light chariots until they evaded off the table.

And that’s what happened for the rest of the game, as you’ll see from the photos below:

As you can see, enough of my infantry units won their initial clash quickly enough to help out those who hadn’t (the superior manouevrability of the Romans really helping those flank charges go in) and my cavalry did indeed chase his light chariots off the table.

So a workmanlike 13-2 victory for the Romans, with my only loss coming from a General who got in the way of one arrow too many!

TTS @ Warfare: Game Two: EIR versus Polybian Romans

Game two of the To The Strongest tournament at Warfare, using my Early Imperial Romans, was an interesting match against the Polybian Romans: an earlier-period Roman army that presented in a quincunx formation i.e. deployed in three lines in a chequerboard formation, with the younger hastati in front, followed by the more seasoned principes and the veteran triarii behind. This would allow Nigel’s units to rotate his lines on the spot: meaning that he could rally and bring more pila into action even when in a “zone of control”.

Romans in Quincunx

My plan was not a subtle one: it was to get stuck in with my legionaries whilst trying to lap my cavalry round his flanks. Accordingly, as the game began, I marched my troops forward smartly.

Things started well, with me managing to get a two-on-one advantage on two of his quincunx, one of which I managed to destroy. The picture below shows two legionary units perpendicular to each other as one has just moved into the square where the quincunx was:

Unfortunately this turned out to be the high point of the game for my Romans!

The two battle lines came together and a grinding melee developed with fortunes swaying backwards and forwards between the two sides. Here’s a pic taken just before the lines clashed:

At tbis point my flank forces should have finished with his and come back in to hit the sides of the enemy line, giving me victory.

What actually happened was that my flank forces got bogged down and couldn’t get the local victories I needed to break themselves free to intervene elsewhere. As an example, here’s a unit of enemy horse sandwiched between two of my units: it should have died very quickly, but just kept surviving everything I could throw at it!

All this grinding melee was using up the clock and, before I knew it, time was called.

We totted up the points and I had lost the game by the narrowest of margins: 6 points to 7!

Really interesting to face the Polybian Roman quincunx, well played by my opponent, but a frustrating result.

Two games in to the tournament and two losing draws racked up: not good!

TTS @ Warfare: Game One: EIR versus Eastern Franks

One of the main reasons for me going to the Warfare show this year was that I was competing in the To The Strongest tournament there. Four games in one day, 135 points, my Early Imperial Romans ready for action.

I was expecting my first game to be against Andy’s Dacians-with-Sarmatian-allies, as I nearly always face Andy’s Dacians in round one of a tournament as they and the Romans are usually the closest together historically, but Andy wasn’t there so I would instead face Tim’s Eastern Franks. Talk about out of the frying pan and into the fire…just what my Romans hate: an all cavalry army.

The photo above shows the position just after the start of the battle: you can see Tim is looking to sneak around my flanks. I’m not too worried, at this stage, about my right flank (my legionaries can oblique right) but I do need to pull my cavalry back on the left to protect against the enemy horse on the other side of the wood advancing forward and getting behind my line.

This should have been a fairly easy move to make, but unfortunately Fortuna obviously had it in for me that day and both my cavalry brigade and the left hand legionary brigade froze in place, presumably bamboozled by the fact that there were no Dacians to be seen!

Although not a good situation, all was not lost: all I needed to do was to turn my cavalry to face the outflankers and get the legionaries into action.

Aaargh!

Another turn where my troops would do nothing…unlike Tim’s Franks!

I was now down a cavalry unit, but managed to stabilise the far left by sheer good luck as my other unit of Equites Cohortales survived being hit in the flank, turned, and drove off their attackers. They then advanced forward themselves to threaten Tim’s camp.

The left-centre, however, was a mess. Tim had brilliantly taken advantage of my stagnation by concentrating his heavy horse: knocking out two of my legionary units there and effectively bursting through my line.

With me threatening his camp, and him threatening to surround and wipe out the rest of my cavalry, it looked as if we’d end up about honours even overall, so the game would be decided on the right.

Here things had not gone badly, just not well. I’d lost the Auxilia to another nicely executed outflanking manoeuvre, but killed one of Tim’s generals in return.

All this to-ing and fro-ing had, however, drained the clock and we were now out of time. Totting up the points, a winning draw to Tim 8-5.

Here’s the position at the end of the battle:

So a tight first game with a disappointing result. Excellent play from Tim: using his superior mobility on the flanks and then taking full advantage of the opportunity in the left centre.

Three games still to go: so plenty of time to rescue the situation!

FK&P AAR: Munce's Wood

Friend Rob and I are playing through the Siege of Norchester scenario pack. After narrowly losing the first game, Tounton Bridge, my Parliamentarians would face the Royalists at Munce’s Wood.

A pack of Royalist-sympathising Clubmen have been caught by a much larger Roundhead force. Fortunately for the Clubmen, there’s also a Cavalier army in the vicinity. The scene is set for a clash at Munce’s Wood.

Royalists on the left, Parliamentarians on the right (Clubmen in the middle!)

With the opposition a bit fragmented, and with superior quality cavalry on my left, my plan was to advance strongly on my left and centre, holding back my weaker right flank. Hopefully the Roundhead cavalry would quickly beat the fewer Cavaliers in front of them and then be able to surl around to take the enemy centre, by then presumably locked in place by my central advance, in the flank.

That was the plan, but unfortunately my cavalry just couldn’t beat their Royalist foes back. The enemy was defending a hedge line, and a particularly sticky unit of Swedish horse just plain refused to give way despite overwhelming pressure from my Dutch troopers.

Not only that, but my troops in the centre fought so badly that I was forced to pull some cavalry from the left to reinforce my centre. Things were not going well!

Meanwhile, much to my surprise, my commanded shot and artillery on the right flank were holding their own against the Royalist horse.

My three weak units held up Rob’s stronger three units for the whole of the battle and, although I would eventually lose all three, that sacrifice was worth it to keep his horse off my right flank.

On the left, my Dutch horse were still trying to get over the hedge, but just couldn’t do so in the face of continued opposition from the Royalists.

With that flank stalled as well, the game would be decided in the centre.

Things were beginning to thin out now as various units on both sides had broken and fled the field. In the end it came down to who could keep fighting for longer, and unfortunately it wasn’t my troops!

The final act was for one of my few surviving battalia of Border Foot to smash through the enmy opposite them, but then be hit from all sides by other Parliamentarians. As a final act of humiliation, it was actually a unit of Clubemn - the very people we were trying to surpress - that dealt the coup de grace, and my command generally collapsed and routed.

So a second defeat for the Parliamentarians in the campaign to take Norchester. Let’s hope I have more success at Cadmore Hill, the site of the third clash!

FK&P AAR: Transylvanians vs Swedes - The Re-Match

As we still had plenty of time left after our last game (Transylvanians vs Swedish, a narrow victory for me) Si and I decided to play again.

I offered a change of sides, but Si said that now that he’d taken the Swedes for a test run, he’d like to use them again “for real” this time. That was fine by me, so we re-set the table and both re-deployed.

Both sides placed their infantry facing the small village on the far side of the picture, above. I faced my Elite National Cavalry off against the Swedish Cuirassiers and cavalry in the centre, with my light horse on the left wing hopefully enough to slow down or stop more Swedish cavalry facing them.

An advance by both sides rapidly saw the two battle lines come together in the centre and on my left in a series of cavalry melees that swung backwards and forwards in terms of advantage for both sides.

Although I managed to hold the left flank, my center had to give ground and soon all I could see was my own horse thundering back towards me!

Fortunately I had troops available on my left to bring into the centre as reinforcements, and the battle broke up into a series of individual melees as units that had disposed of one enemy looked for another opponent to engage. In the confusion, one of my light horse units also managed to sneak through and take the Swedish camp, a much needed boost to my fortunes at that point!

Meanwhile the two infantry lines had slowly advanced towards each other and begun exchanging long range fire, with the Transylvanian militia troops getting the worst of the deal.

At this point I stopped taking photographs as it was neck and neck as to who would run out of victory medals first. In the event, it was me: giving Si and the Swedish a narrow victory.

A cracking couple of games decided by very narrow margins.

FK&P AAR: Transylvanians vs Swedes

Friend Si coming round for a gaming session provided the perfect excuse to get my new 17th century Cuirassiers onto the table.

Si would field the Swedes (with said Cuirassiers) and I would play the Transylvanians:

The Swedes

The Transylvanians

My plan was to hold his superior infantry on my right whilst my better cavalry rolled over his centre and his right.

Originally I had planned to sweep my light cavalry around the left, but realising that he could block that move with his horse, my first action was to try and reposition my lights so that I could use them either as general reinforcements or to bolster up my right. You can see them moving across the rear of the battlefield in the pictures above, and here’s an even better shot:

Grand tactics!

The two main battle lines then came together with a crash, with the Transylvanians definitely getting the advantage as their elite cavalry went in. The Swedes reeled backwards, apart from one unit of Cuirassiers that stubbornly refused to give way, and a period of jostling backwards and forwards ensued.

This continued until the relentless pressure from the Transylvanian horse finally proved too much for the Swedes to bear, and their centre began to crumple (their right had given way much earlier).

Meanwhile, there had not been a lot of activity on my right flank: my infantry had indeed advanced forward and then stopped to hold the ground, but the Swedes had been too busy elsewhere to worry about them.

Just as the Swedes thought they might have to do something on their left, their centre finally gave way and the game was mine.

FK&P AAR: Muscovites vs Transylvanians

With my Transylvanians having lost the first game by only one Victory Medal, it was time to swap sides for a re-match: this time I would take the Muscovites, with Bevan playing the Transylvanians.

As you can see in the picture, above, both sides have deployed very traditionally: infantry in the centre, cavalry on each wing. You’ll also see that my horse on my left flank considerably outnumber their mounted opponents, so my plan was very much to punch through there and then roll the Transylvanian line up.

With that in mind, I opened the game by advancing forward on the left as hard and fast as I could.

As you can see in the bottom two pictures above, on the far left, left of the woods, I didn’t manage to punch through the enemy lights quite how I had hoped, but did manage to open up a bit of space just to the right of the woods. The question now became whether I could exploit this advantage!

Meanwhile, elsewhere on the field, the two battle lines had generally come together, with a series of fierce melees taking place:

Now was the time for my troops on the left to curl inwards and roll up the Transylvanian line: something I really needed them to do as they represented a good proportion of my fighting strength, and my lesser-quality centre wouldn’t hold for ever!

Above you can see a couple of pictures showing how I was trying to get my horse back into the action: but they do seem to have an awful lot of ground to cover!

And all that ground proved my downfall, with my centre and right flank giving way before I could get the cavalry back into the game.

Regular readers will know that I lost the first game in this two-battle series by one Victory Medal…and so it was again in this game! If I had survived one more turn in the centre/on the right then my cavalry would have made it back into the action in time to win the game for me, but victory evaded me by the smallest of margins as one unit too many fled the field.

So that was four games with Bevan in two days…and four defeats. Ouch! But, as Michael Jordan once said:

“I’ve failed over and over and over again in my life and that is why I succeed.”

Good to know that I’m secretly a success at this wargaming thing!

Very secretly!


If you've enjoyed this post, please do consider "buying me a coffee" : you can be sure that all proceeds will be channelled back into wargaming, leading to even more content for you to enjoy!

FK&P AAR: Transylvanians vs Muscovites

Time for another game of the eastern Europe variant of For King & Parliament: my Transylvanians would take on Bevan’s Muscovites.

Transylvanians

Muscovites

This was a cracking game where the action swayed backwards and forwards across the field.

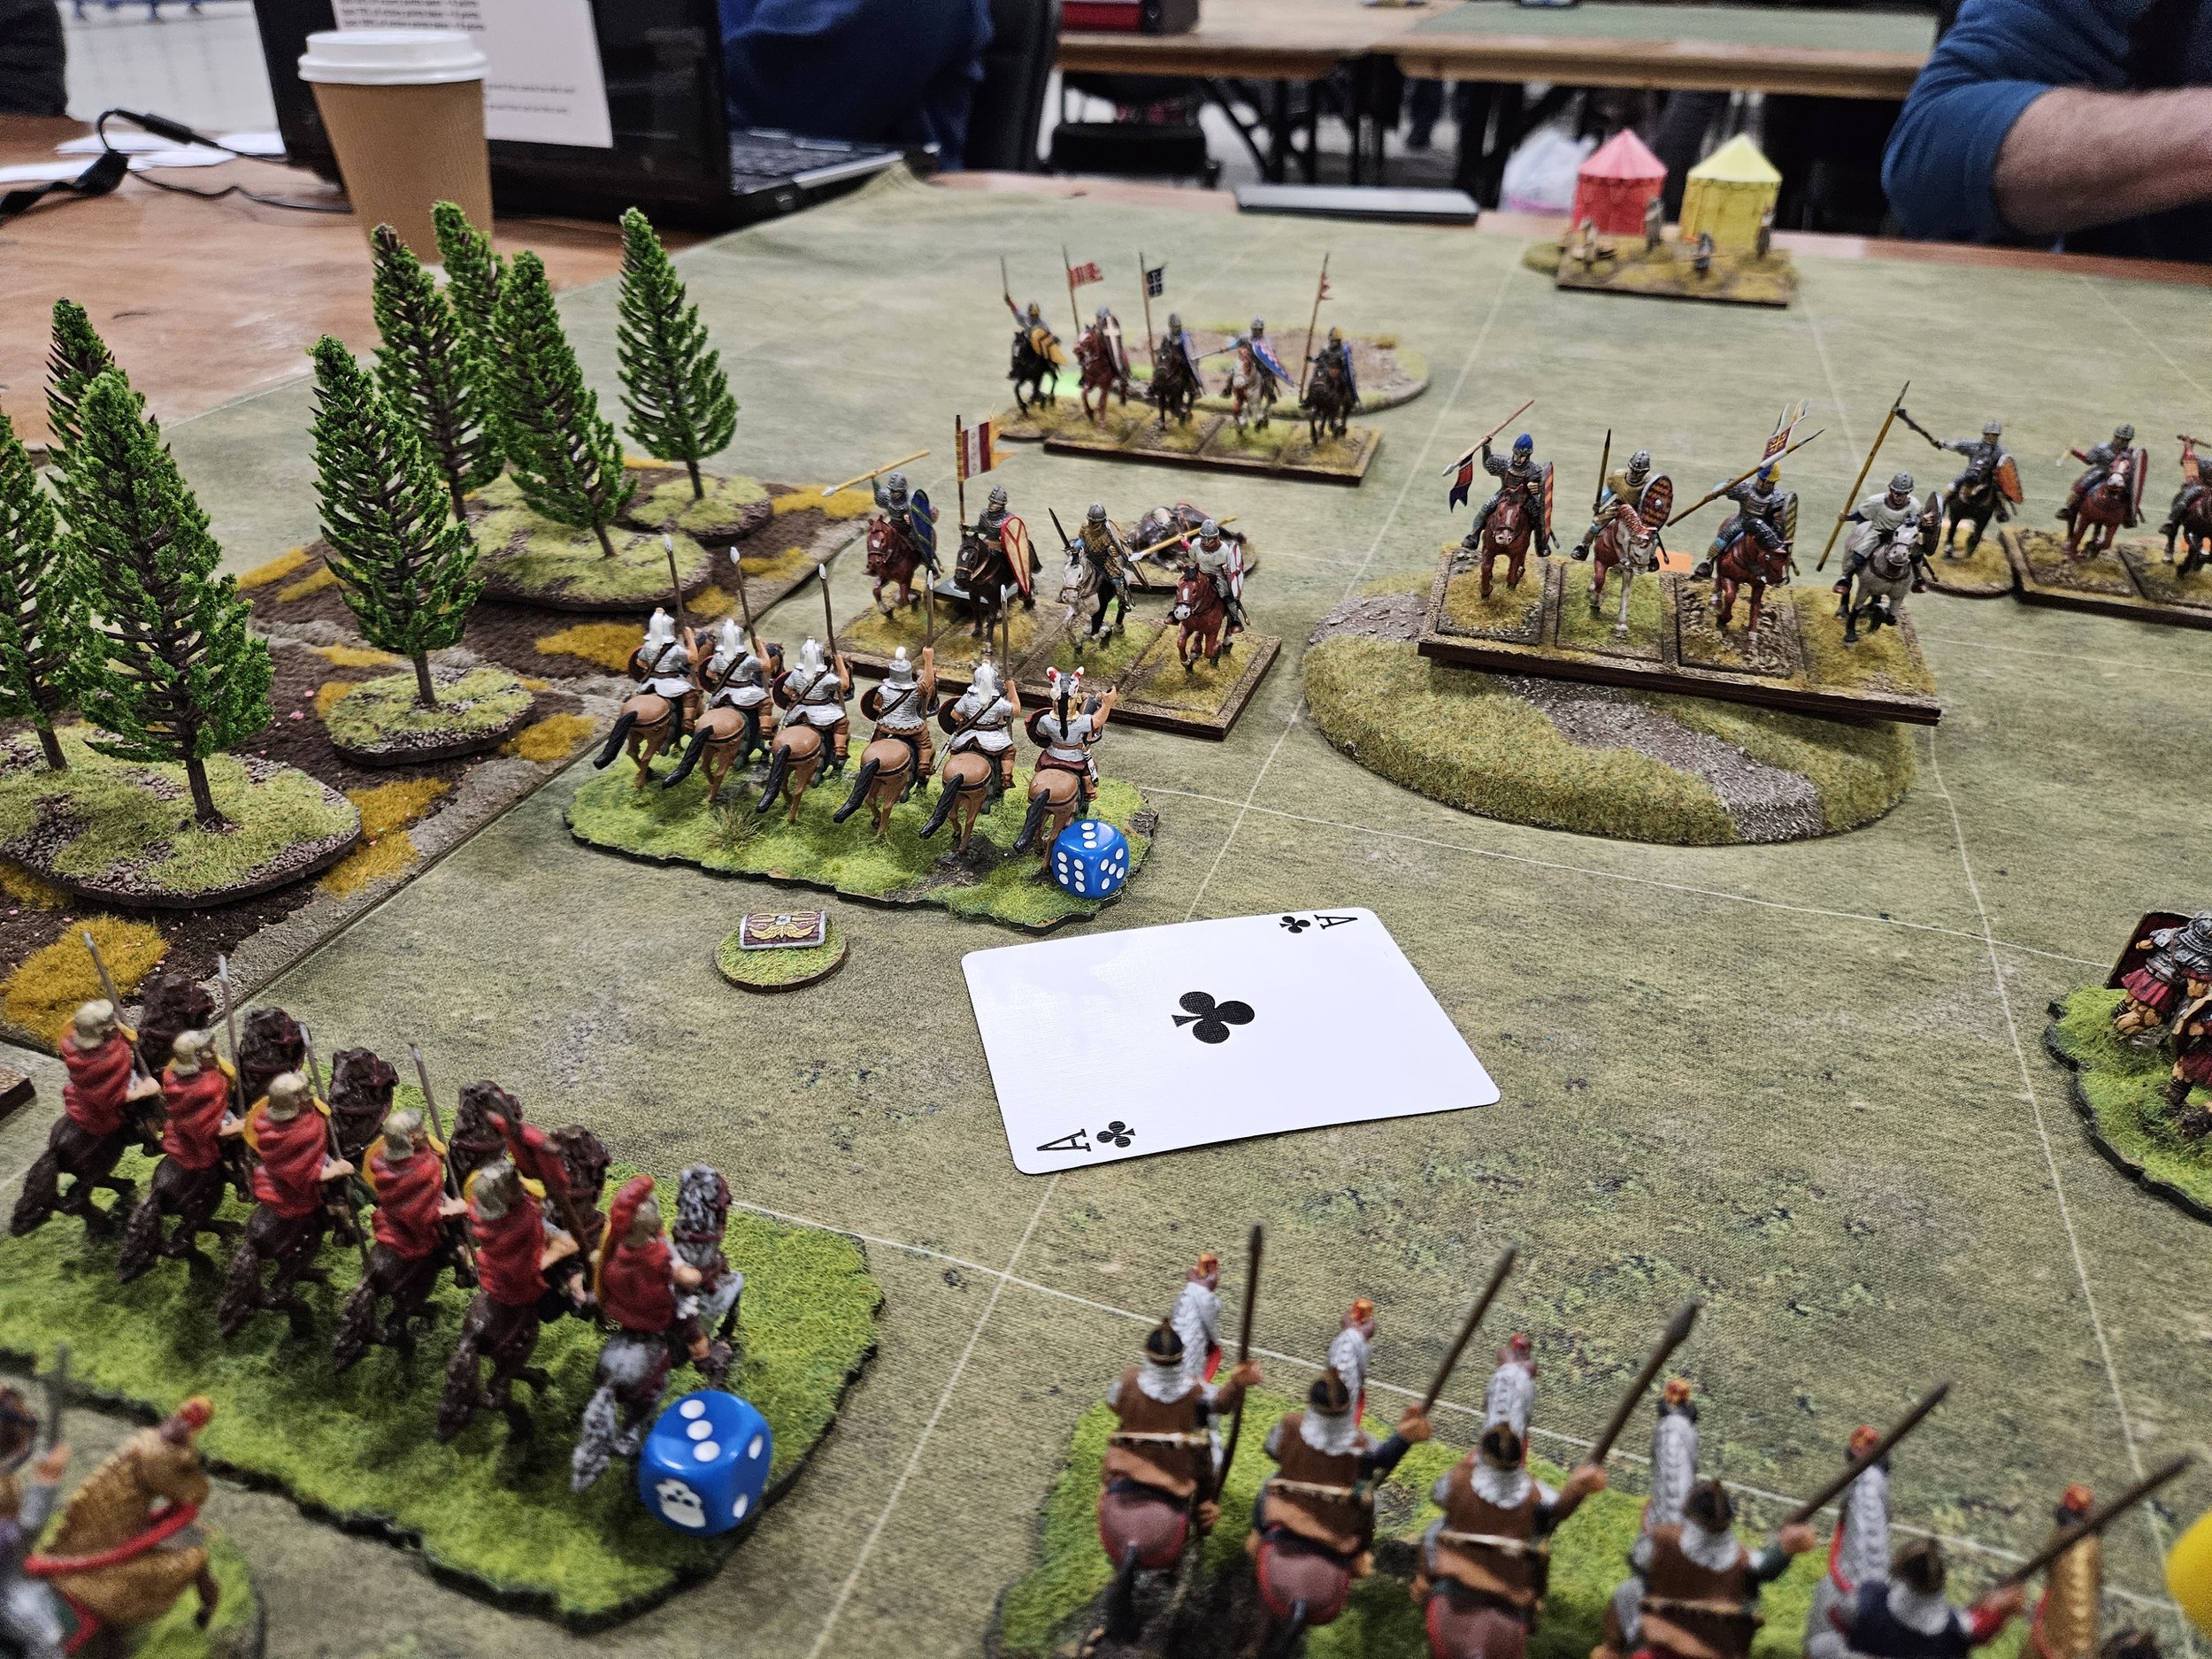
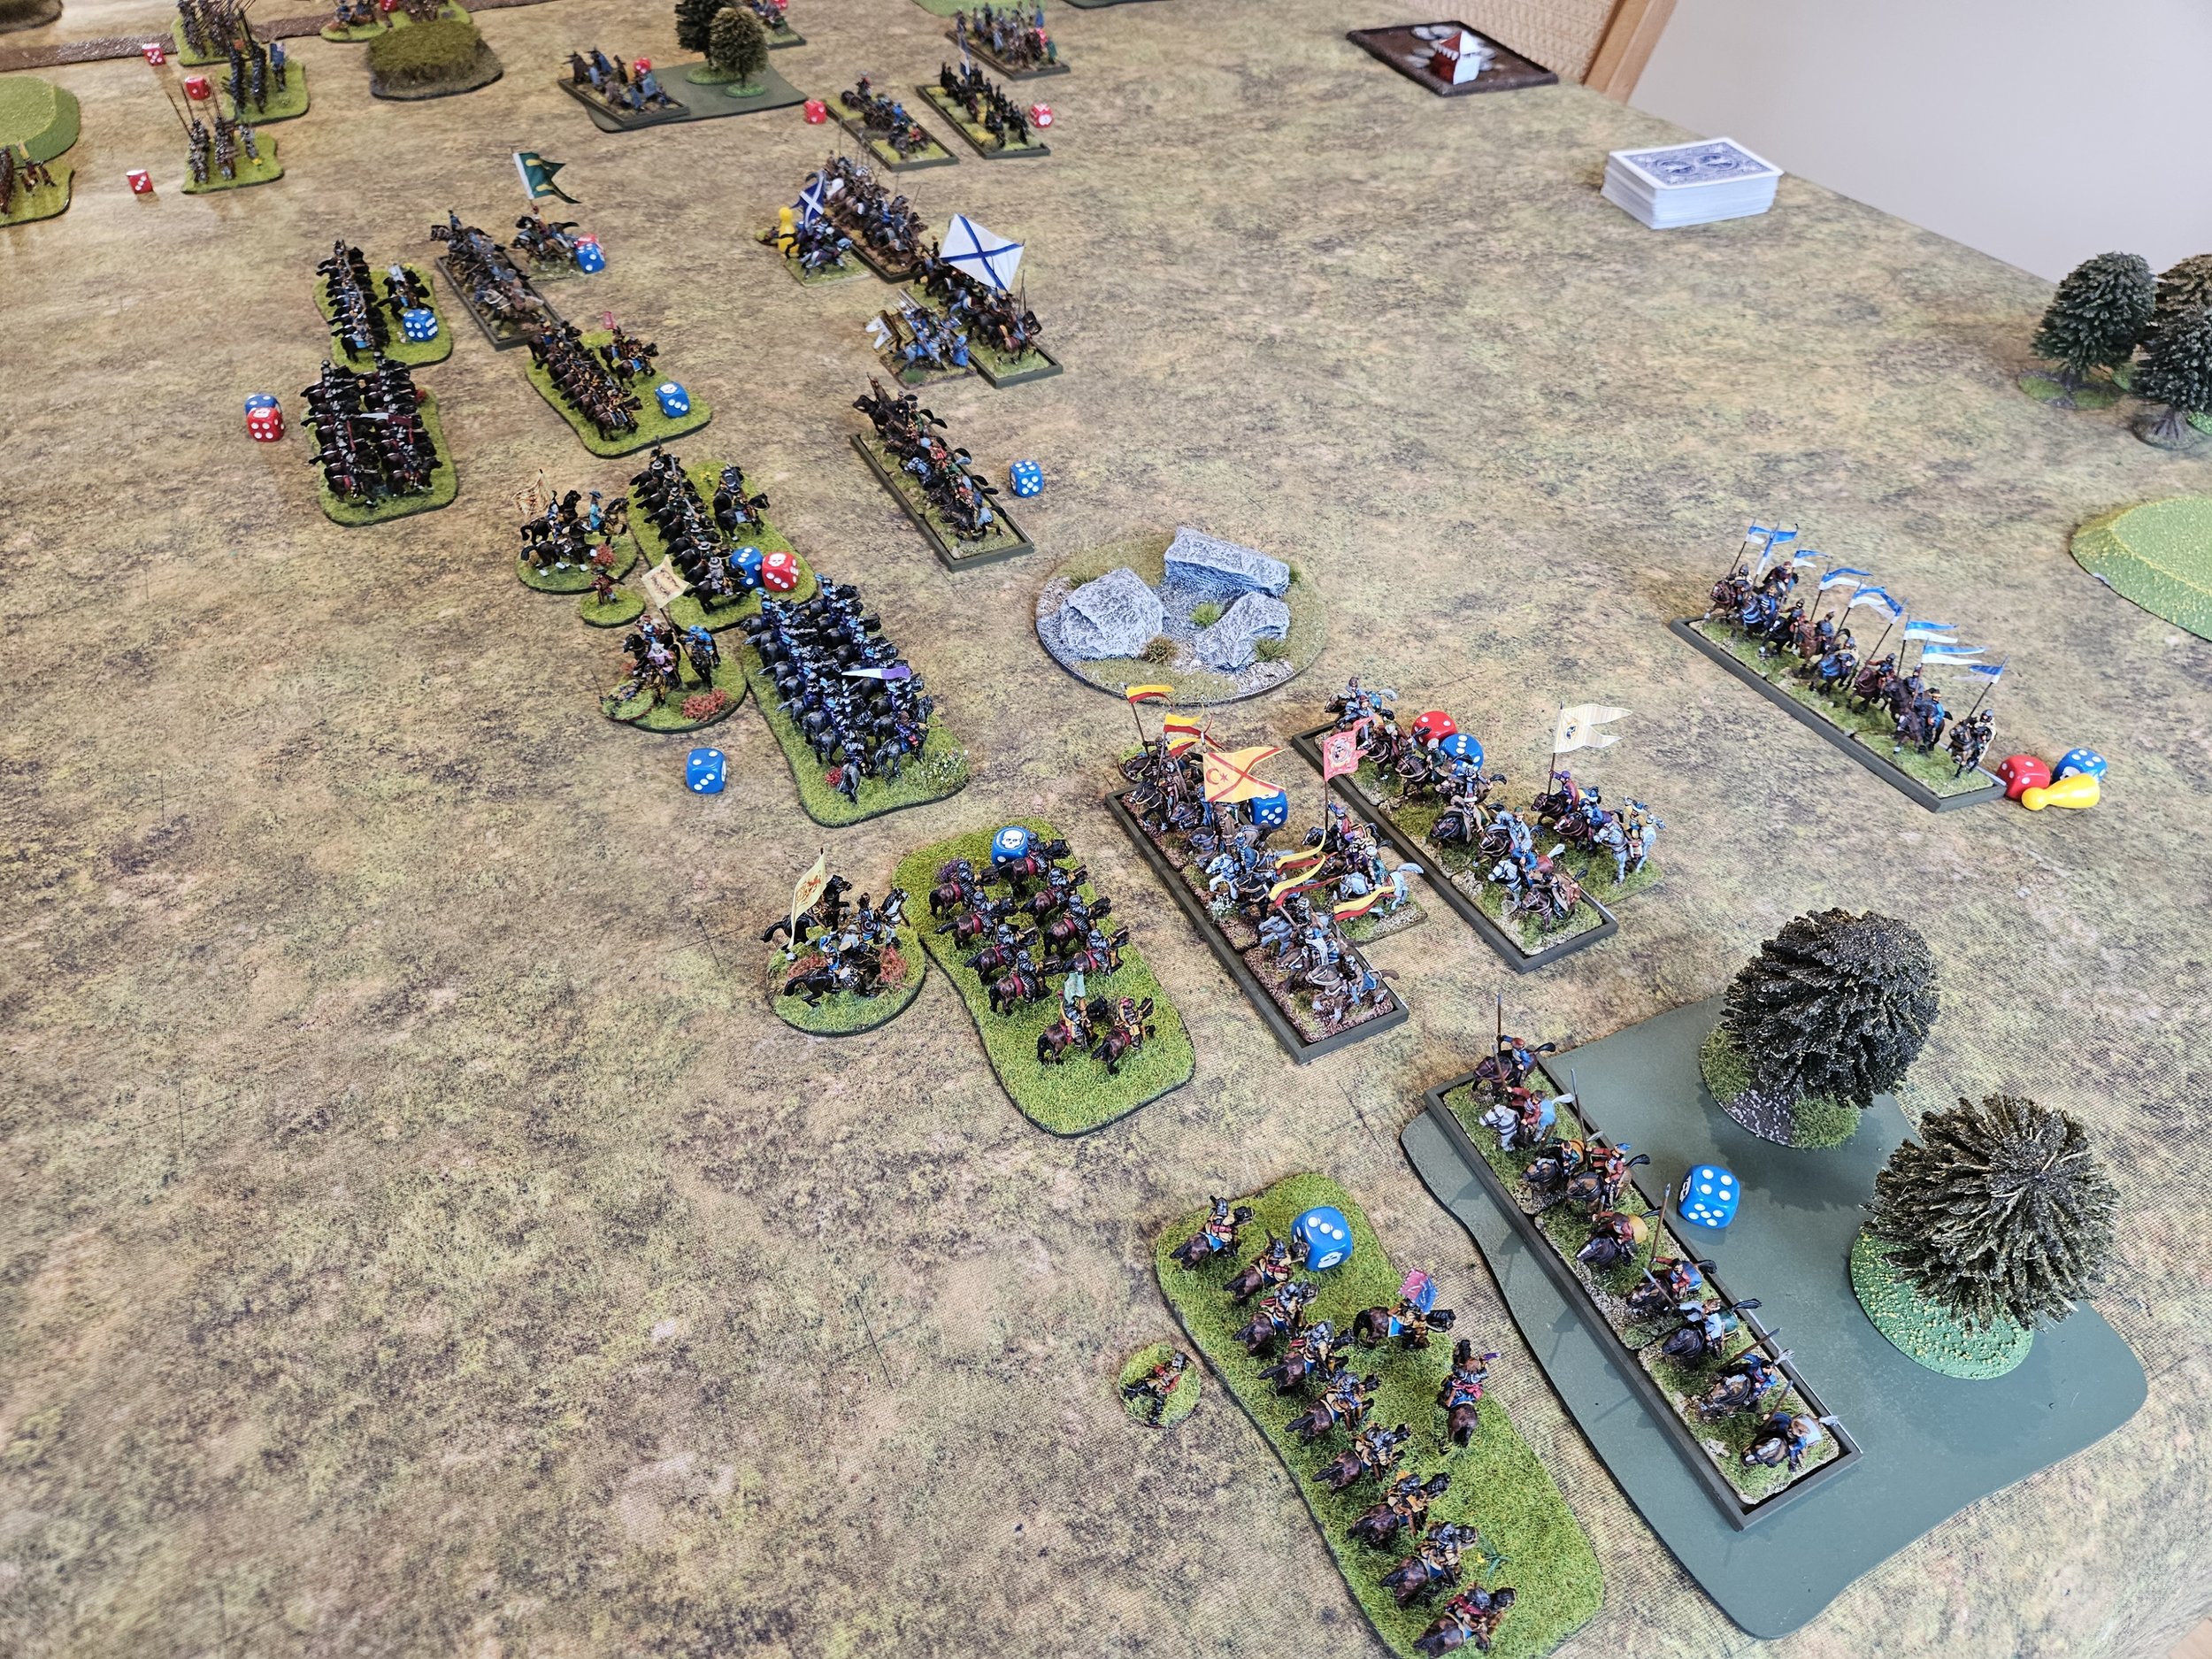
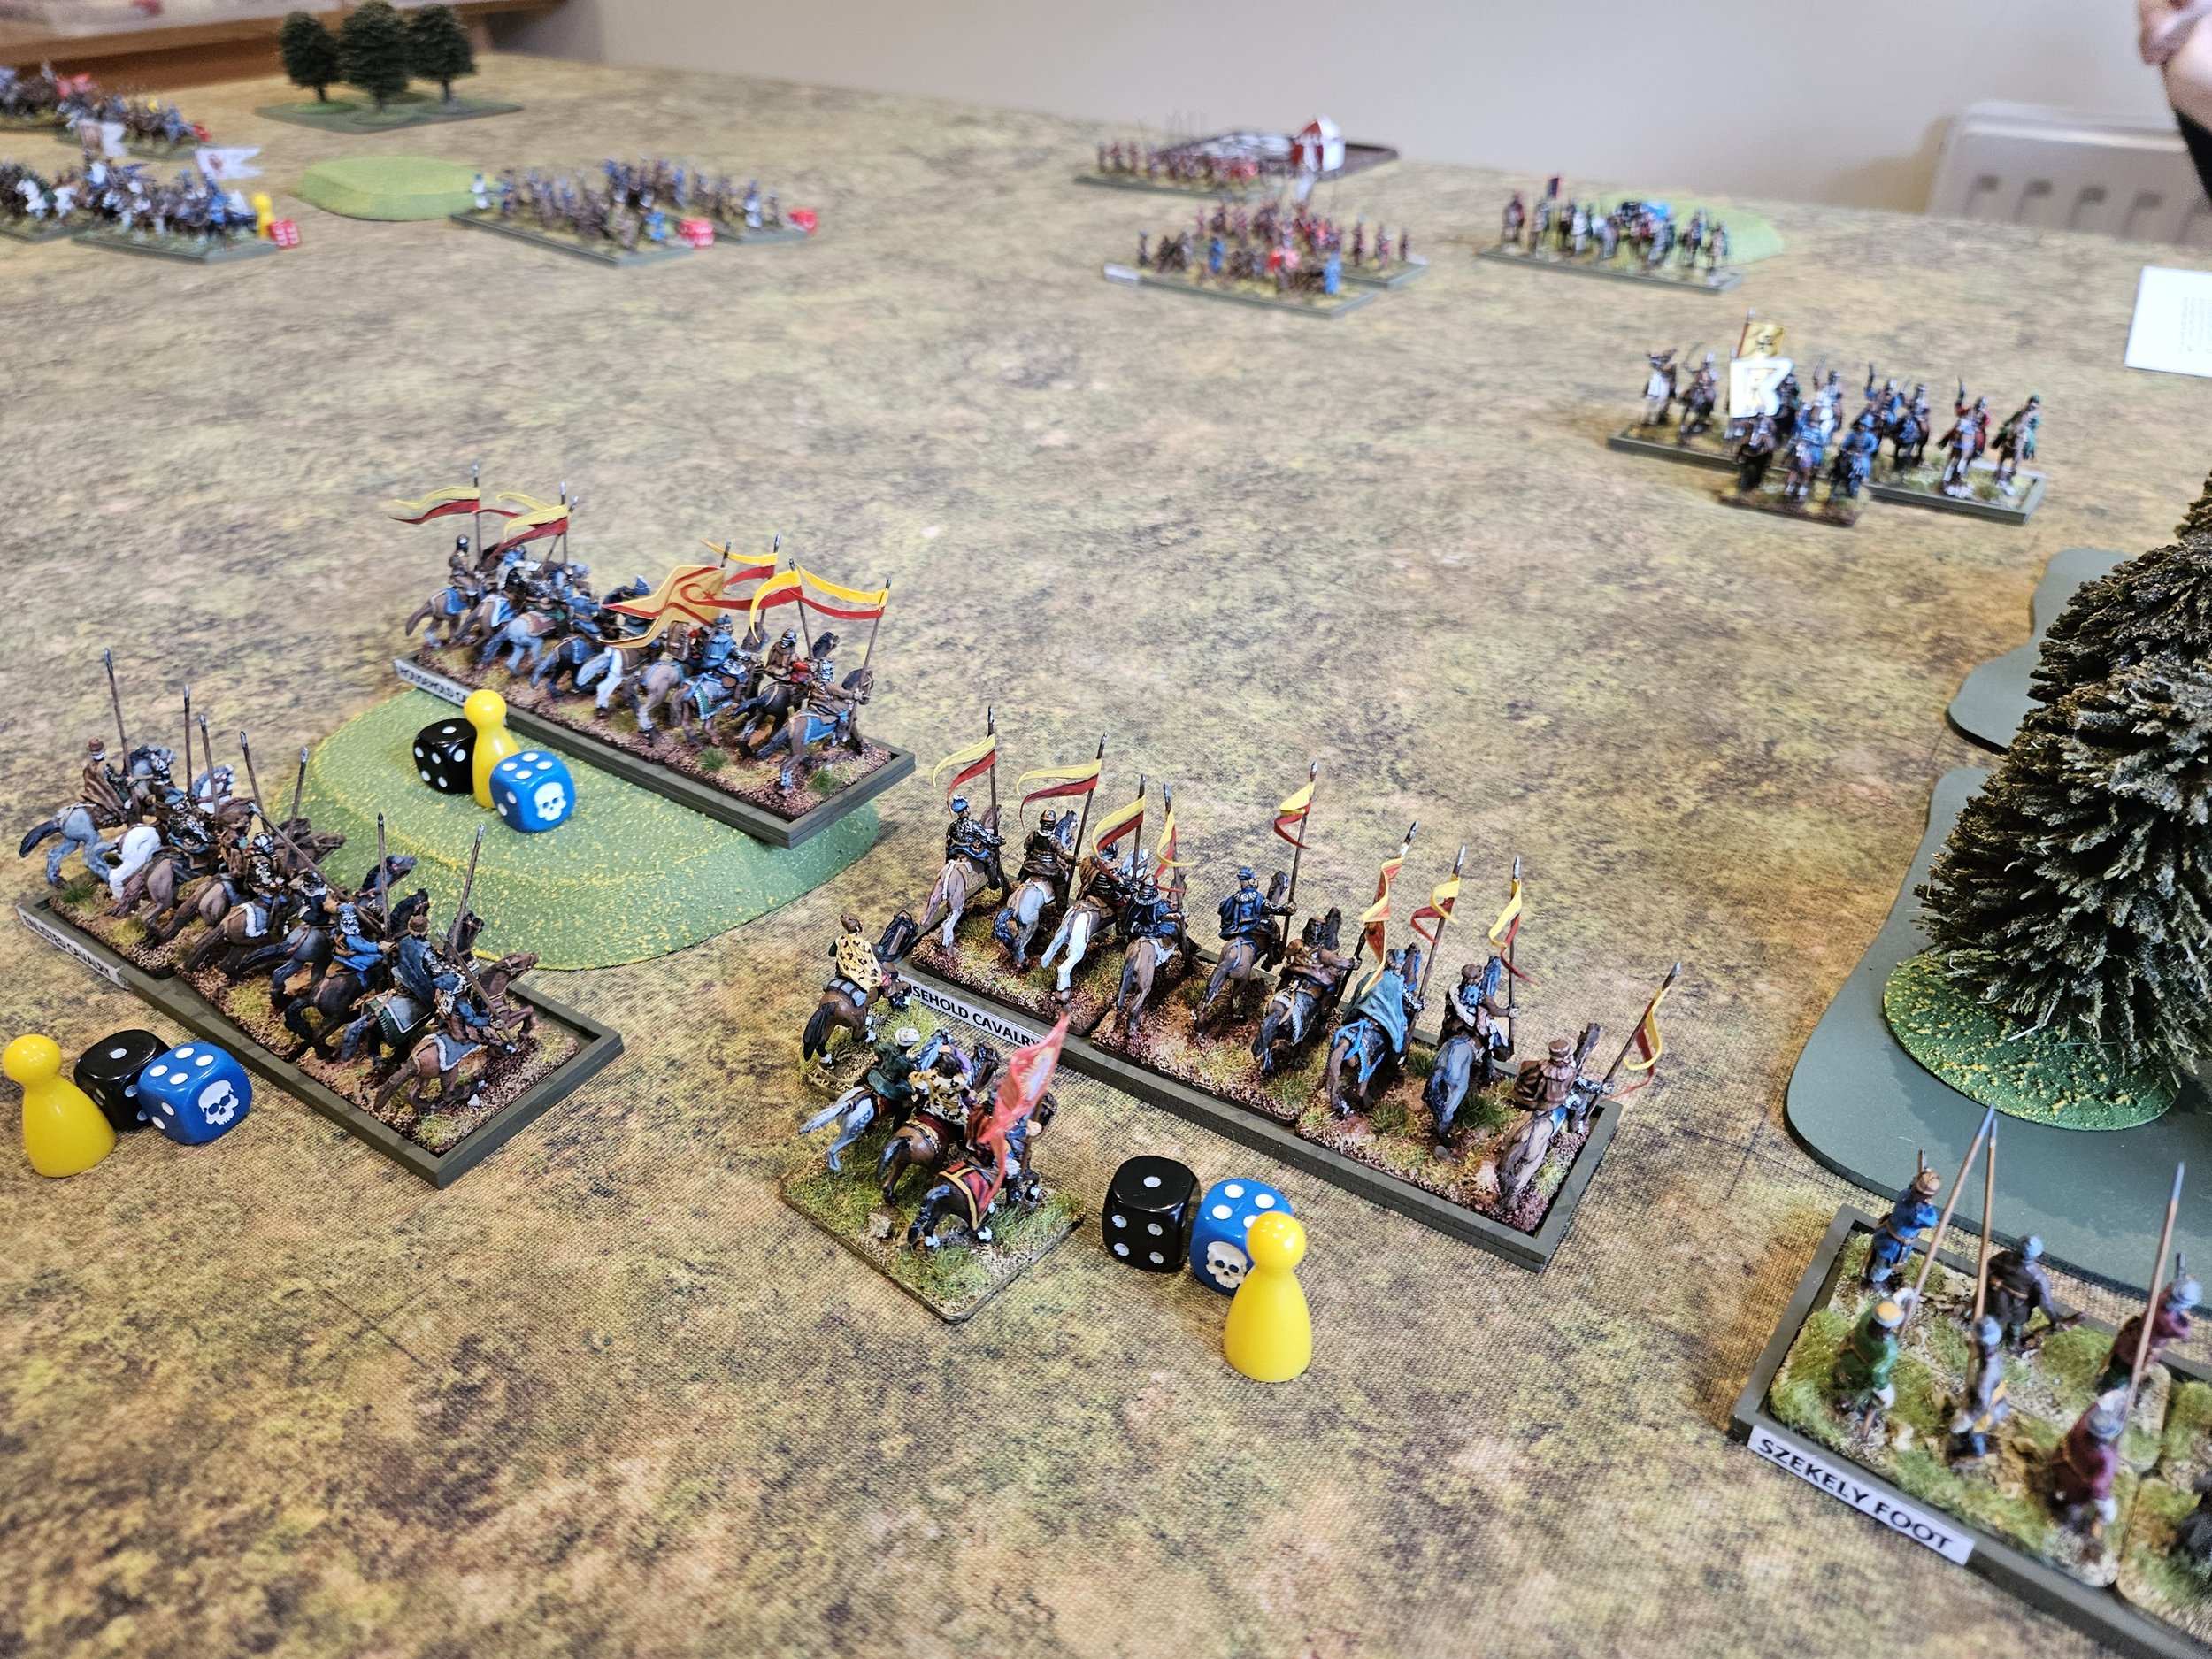
In summary, the Transylvanian elite National Cavalry (the chaps with the yellow and red lance pennants) charged forwards right of centre of the field and swept all before them: smashing enemy units from the field with ease!

On my left flank, however, the mass of Transylvanian light horse were comprehensively butchered by Muscovite heavy cavalry, who steam-roller-ed over them with barely any effort at all.

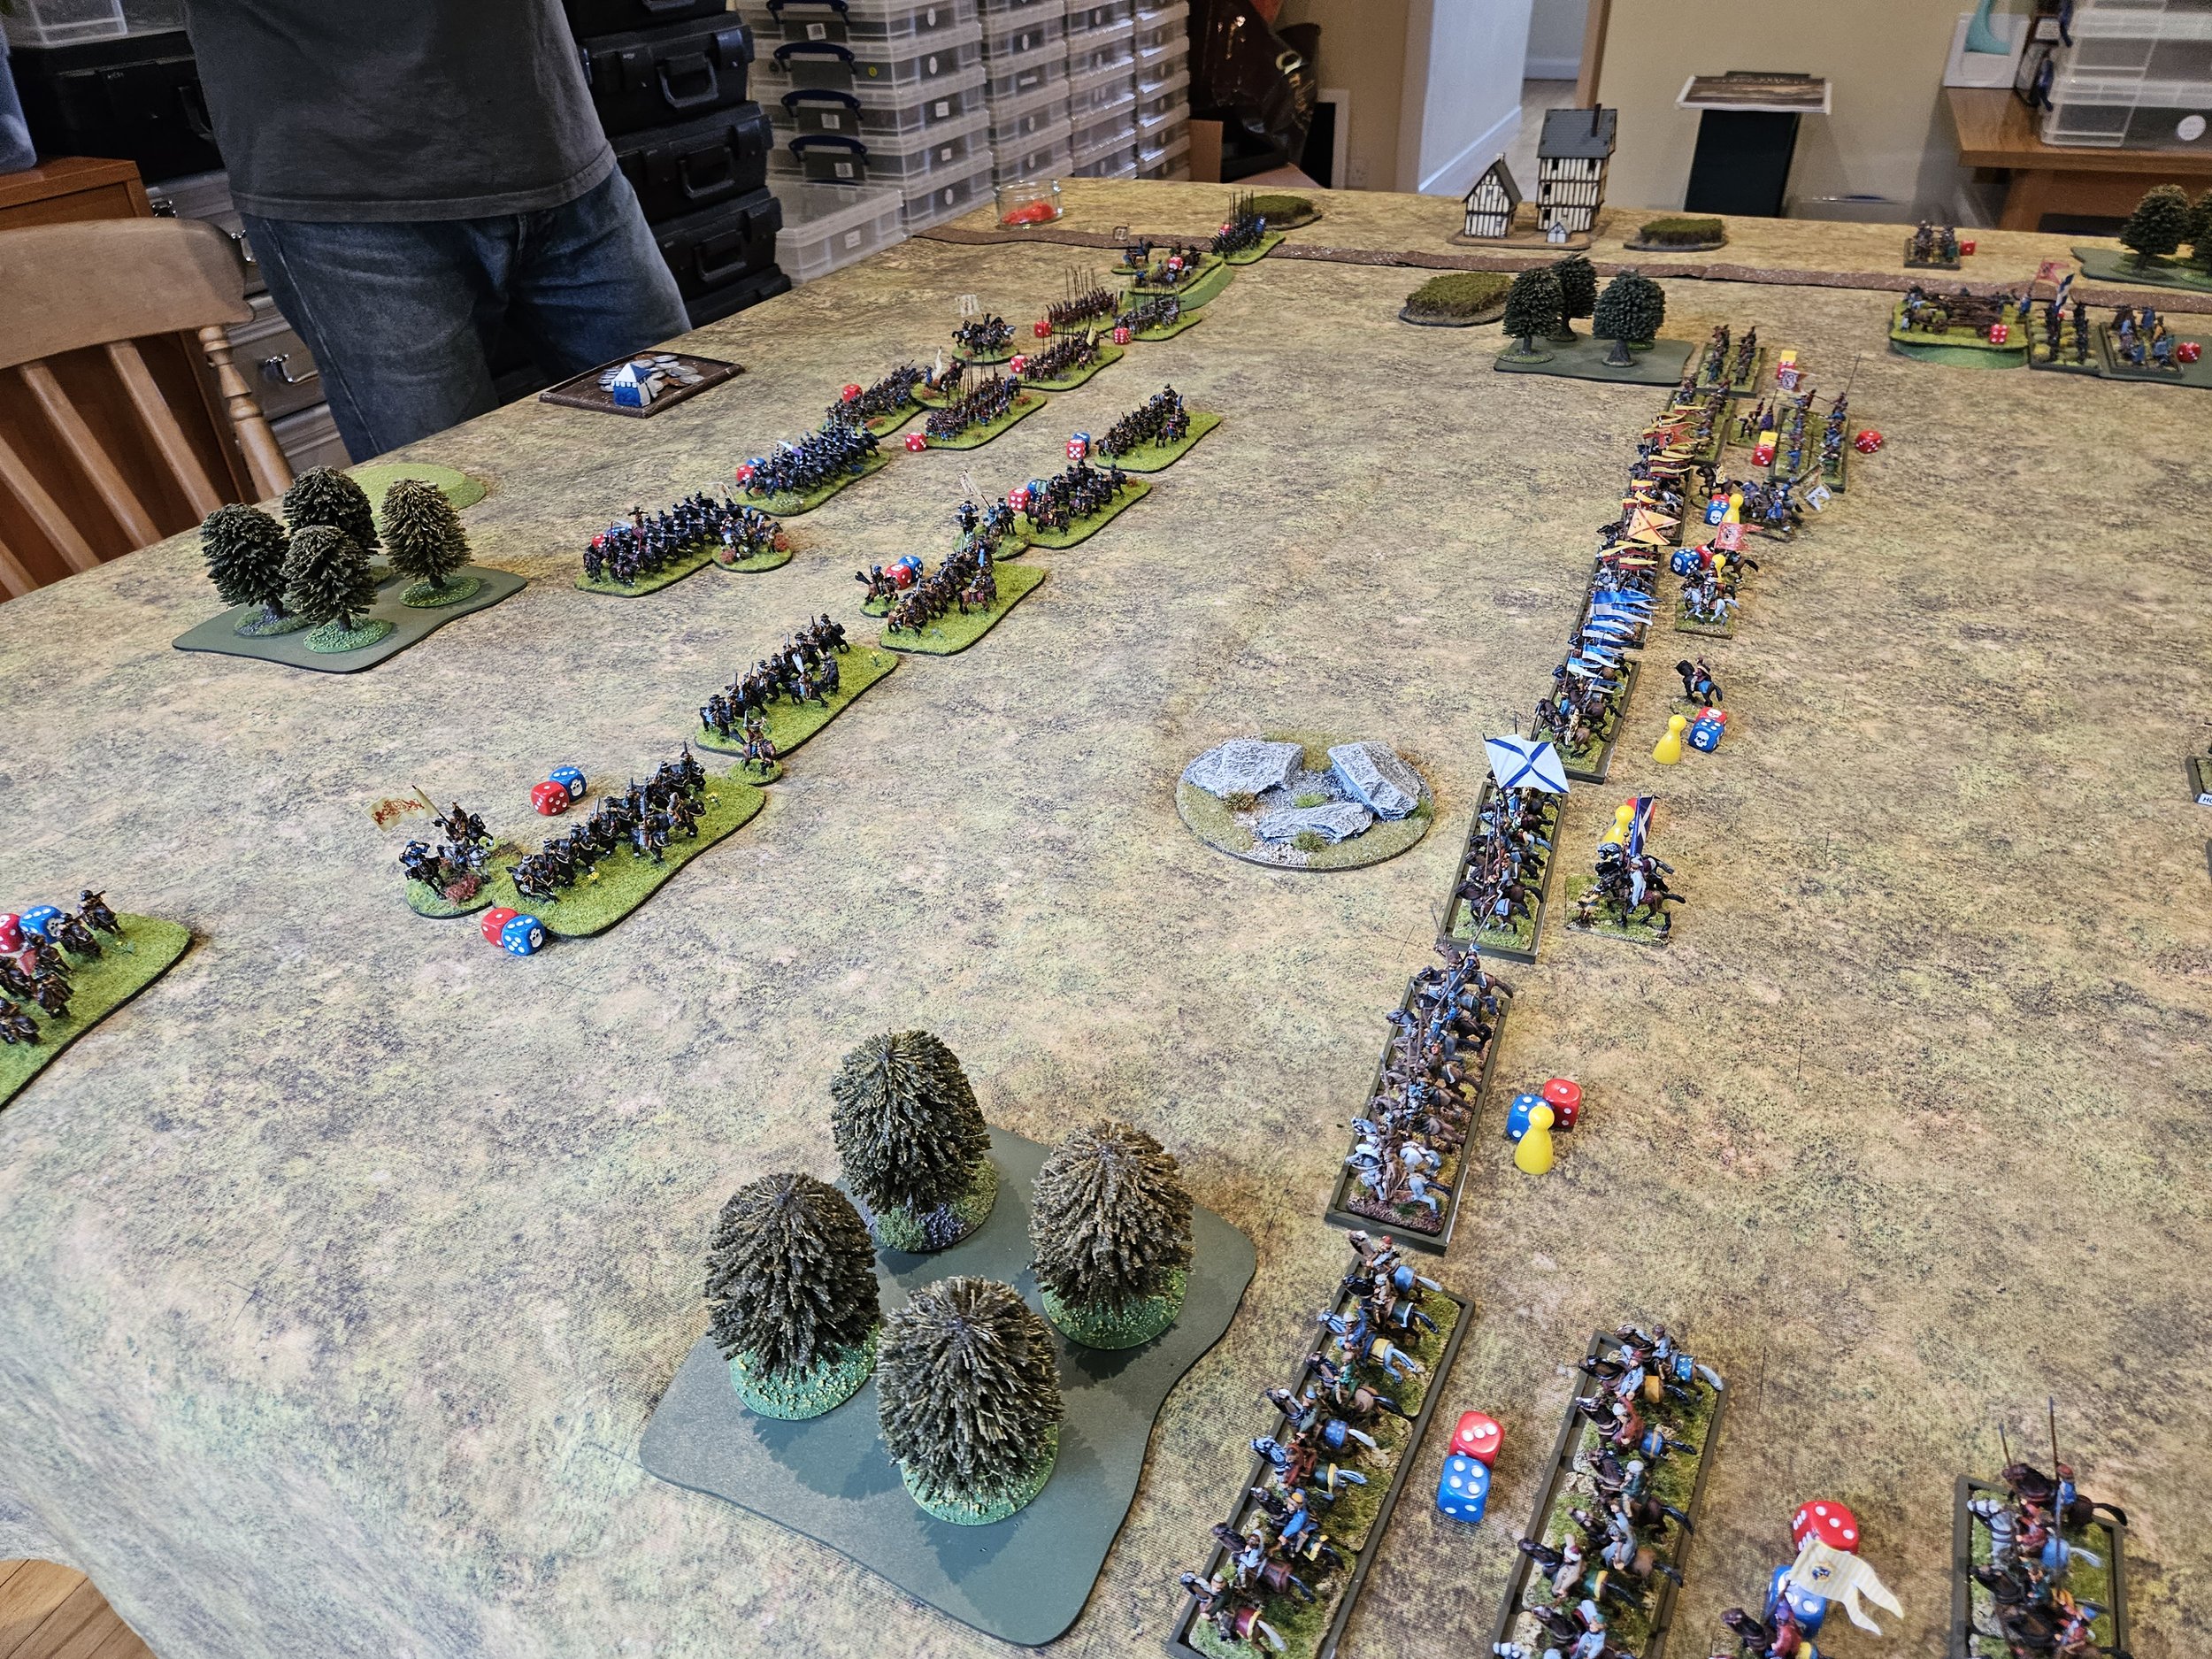
In the centre, the two sides came together as the actions above were taking place and, unfortunately, my troops got the worst of it and slowly began to give ground.

Honours were even, with both sides hemorrhaging victory medals, until the very last moments of the game, with the Muscovites just taking the win 16:15!

As I said above: a cracking game…with the charge of the Transylvanian elite National Horse being one of those moments that will go down in gaming history!

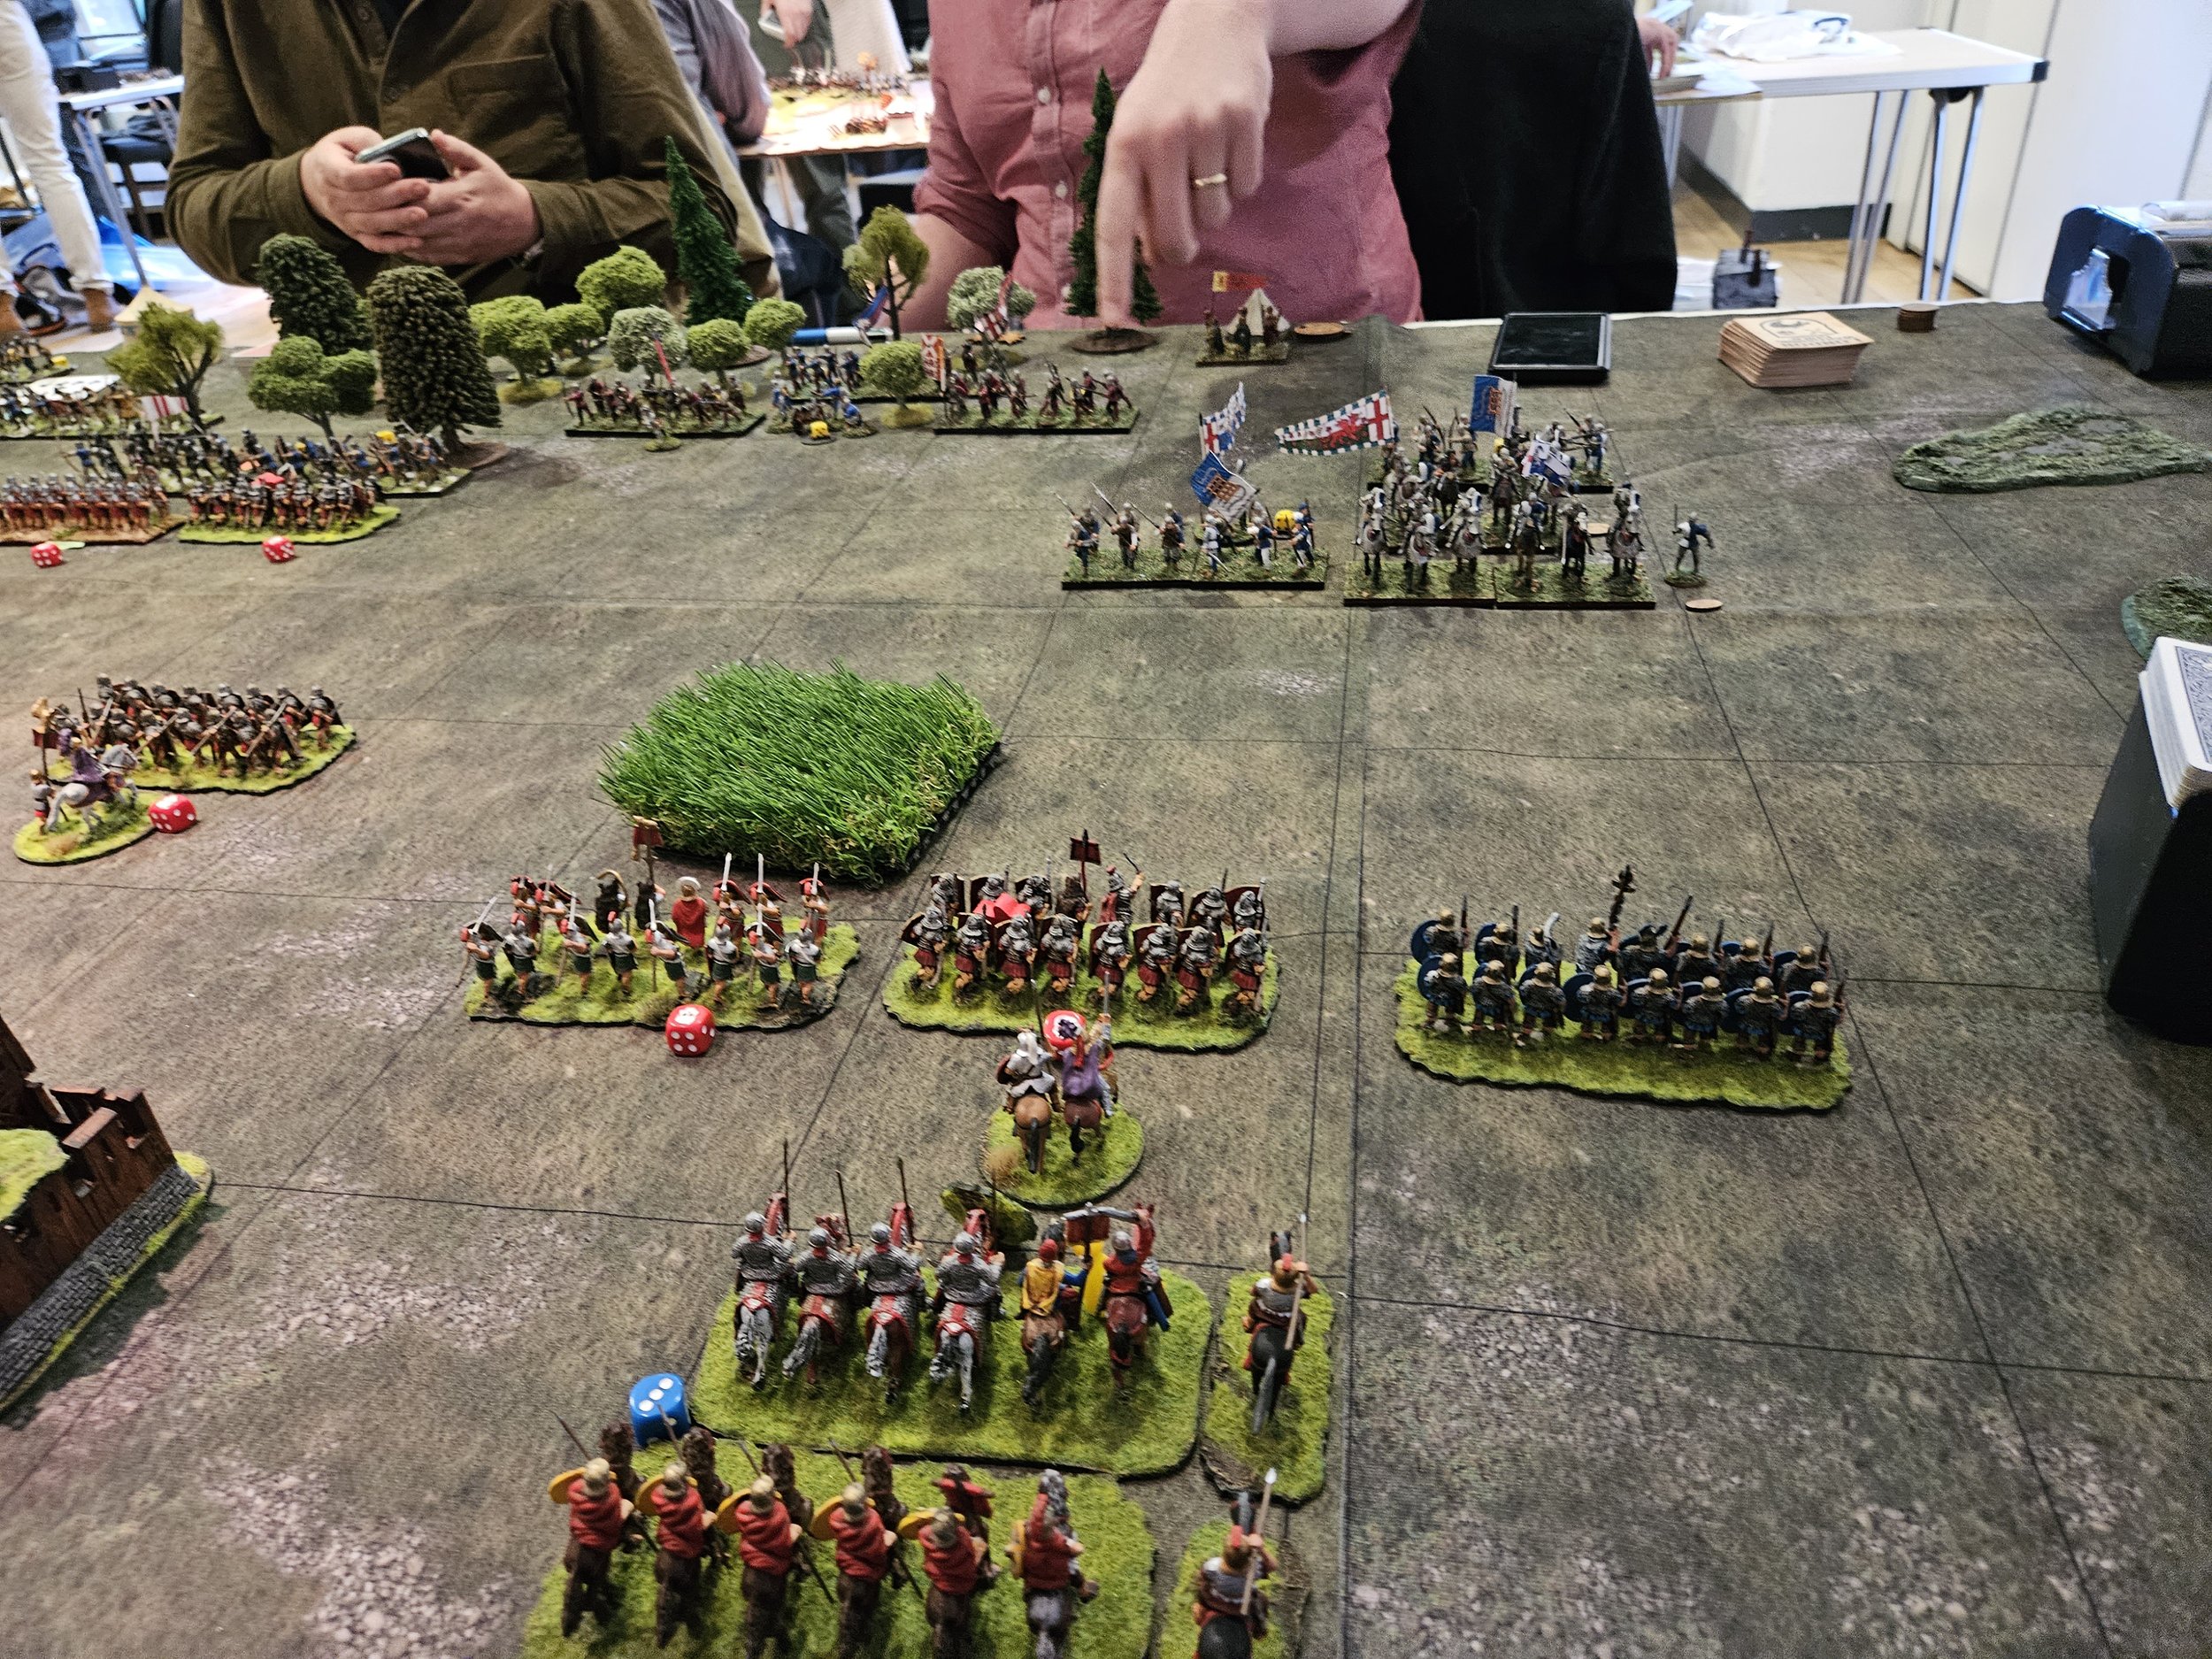
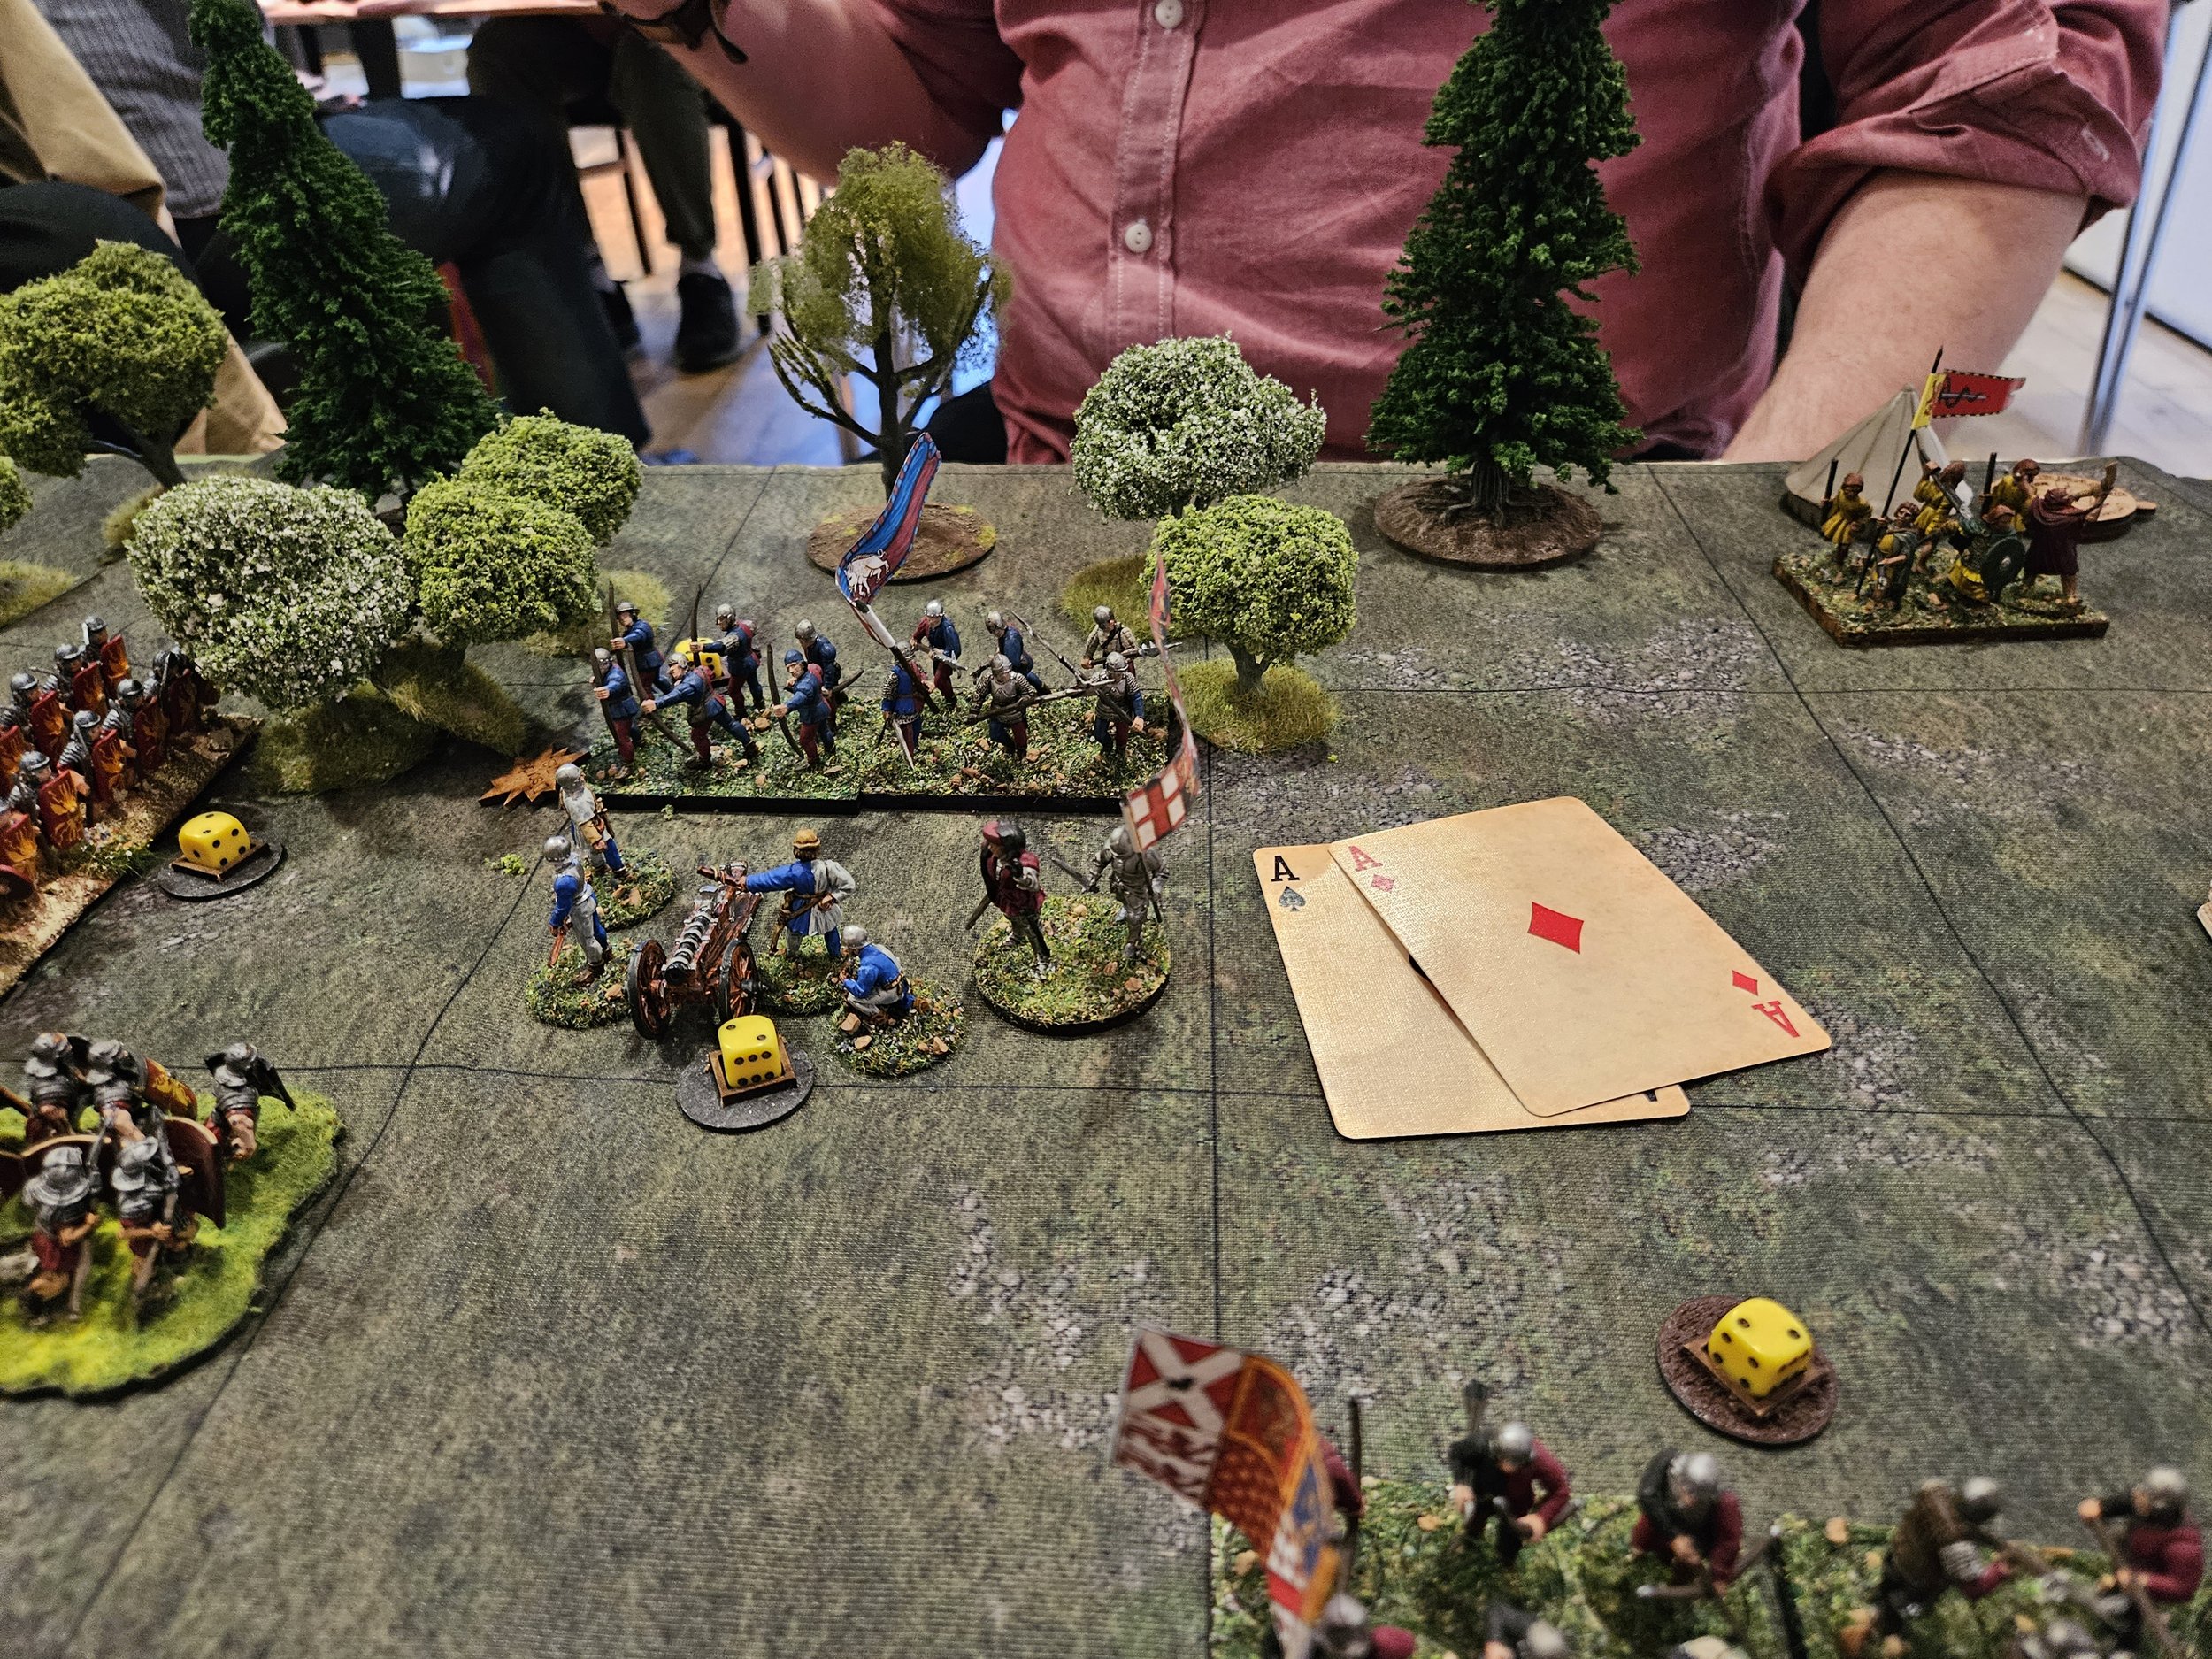
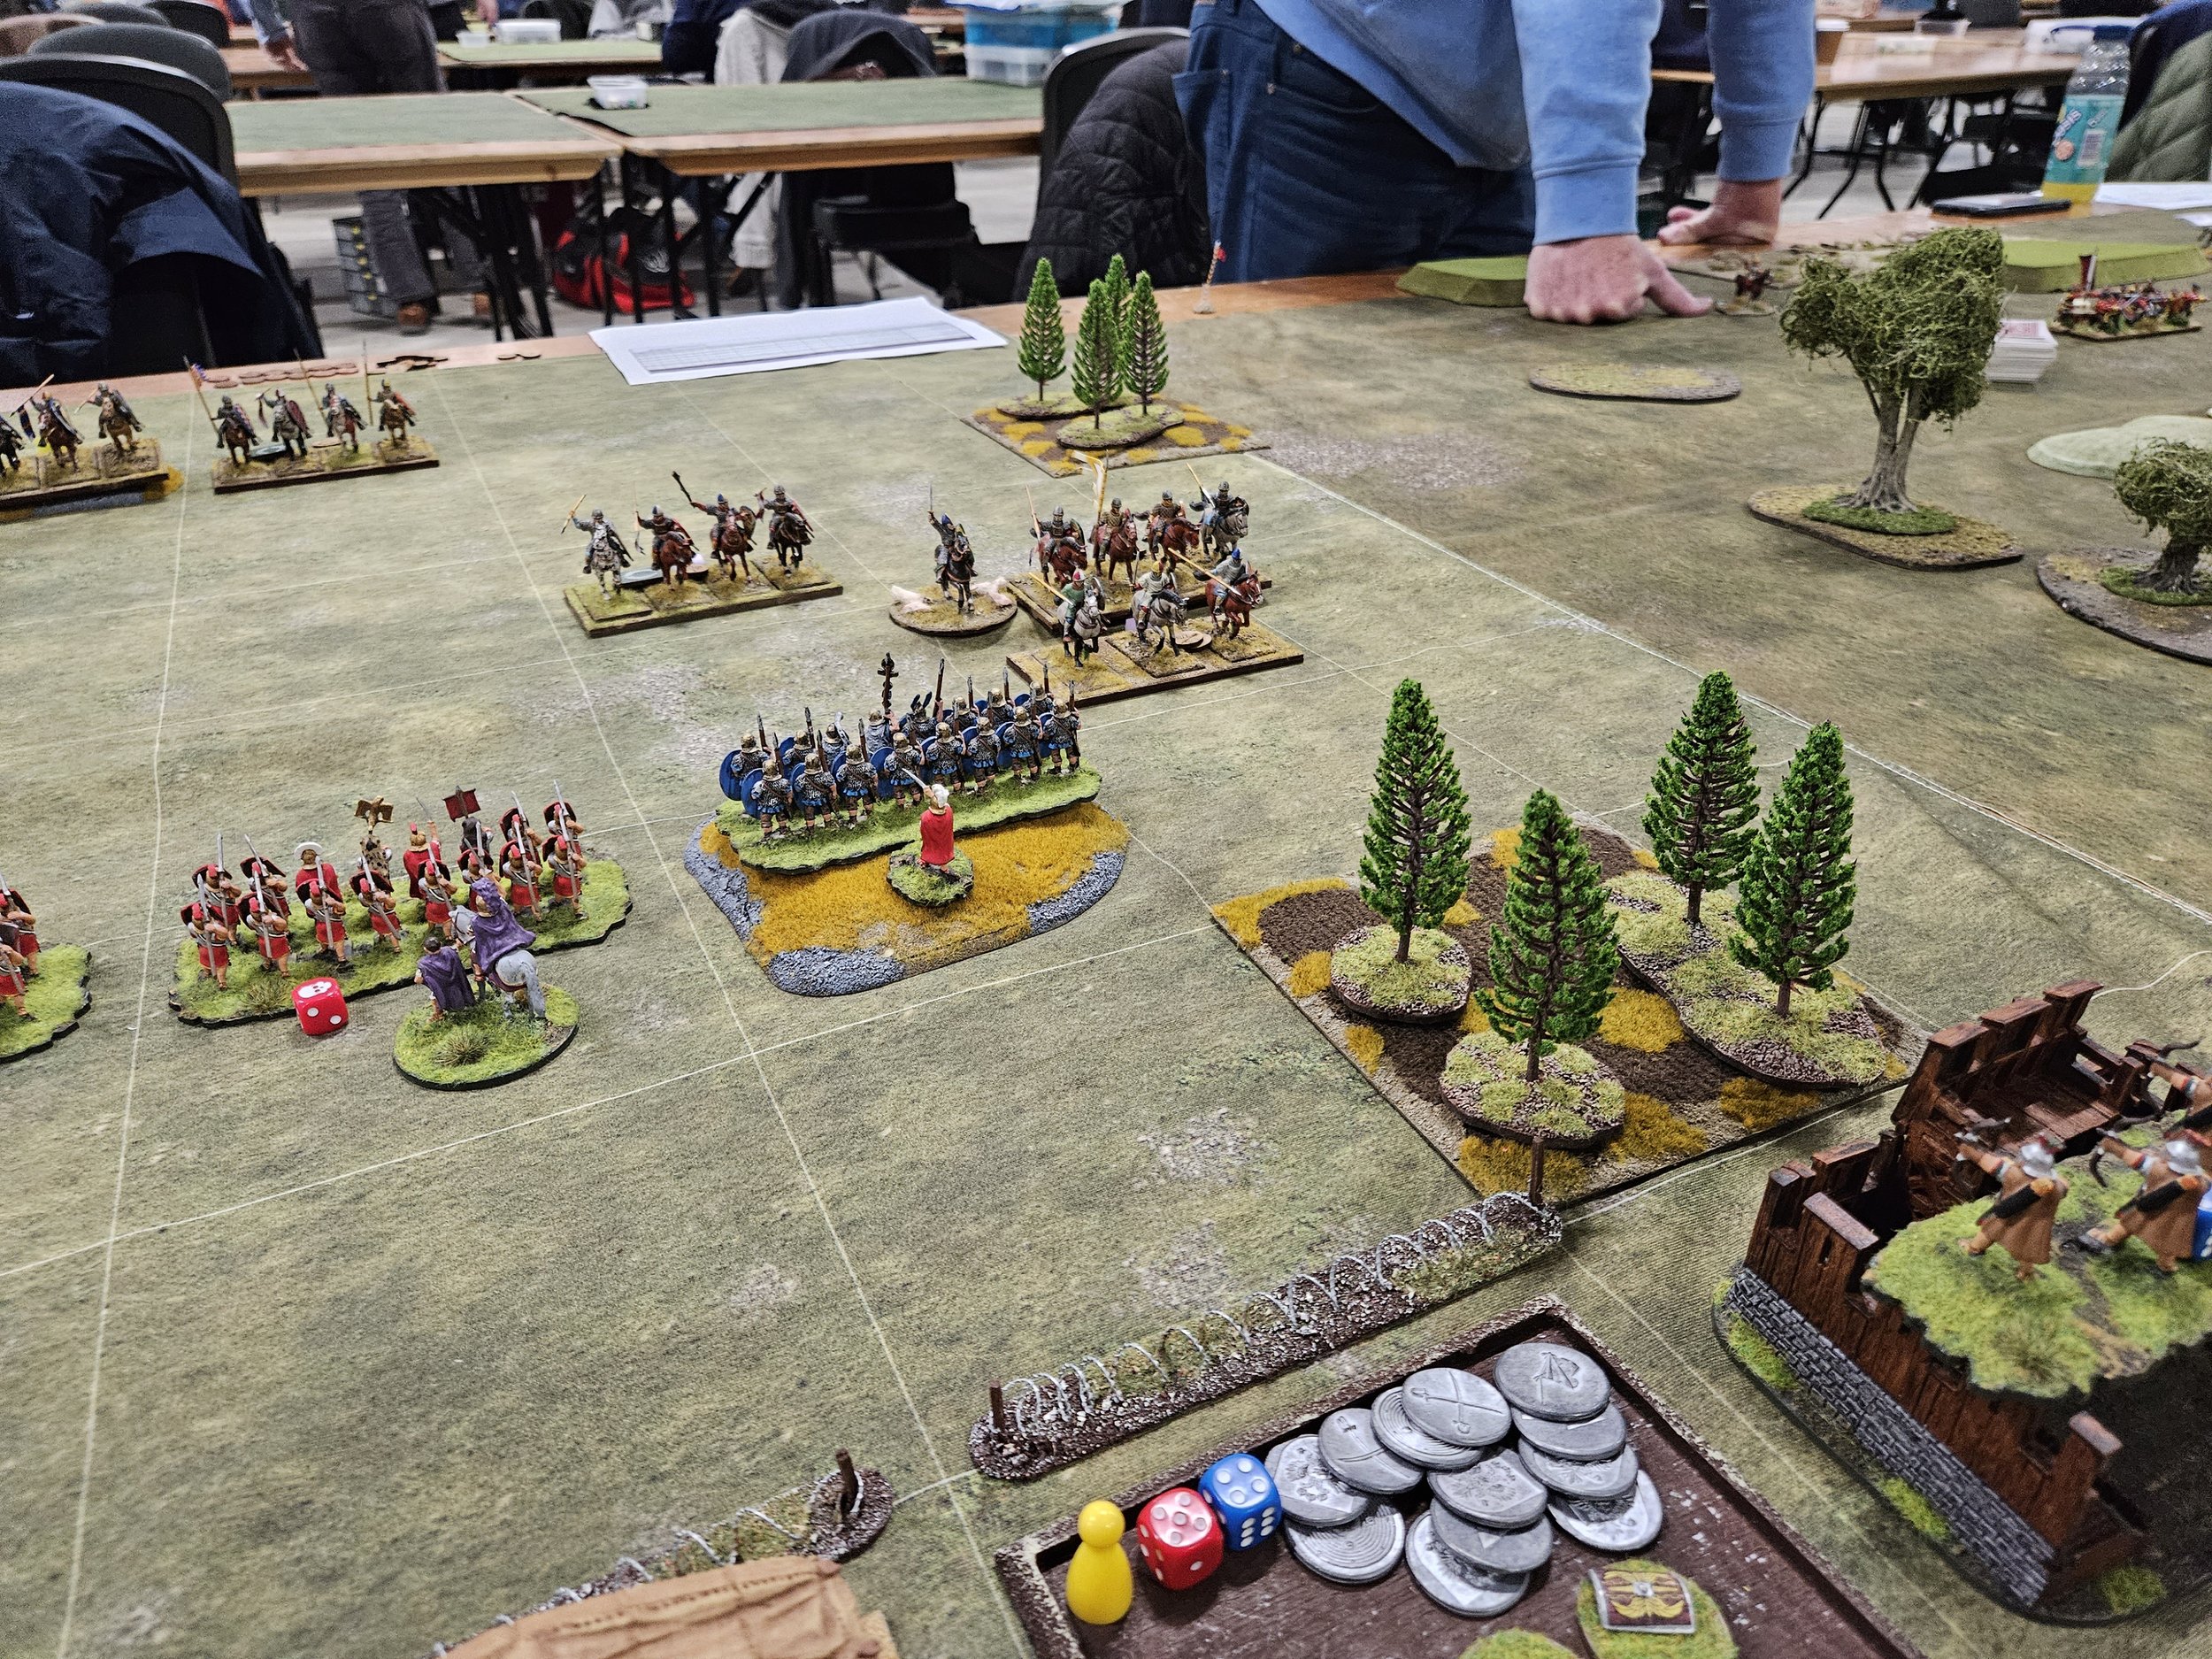
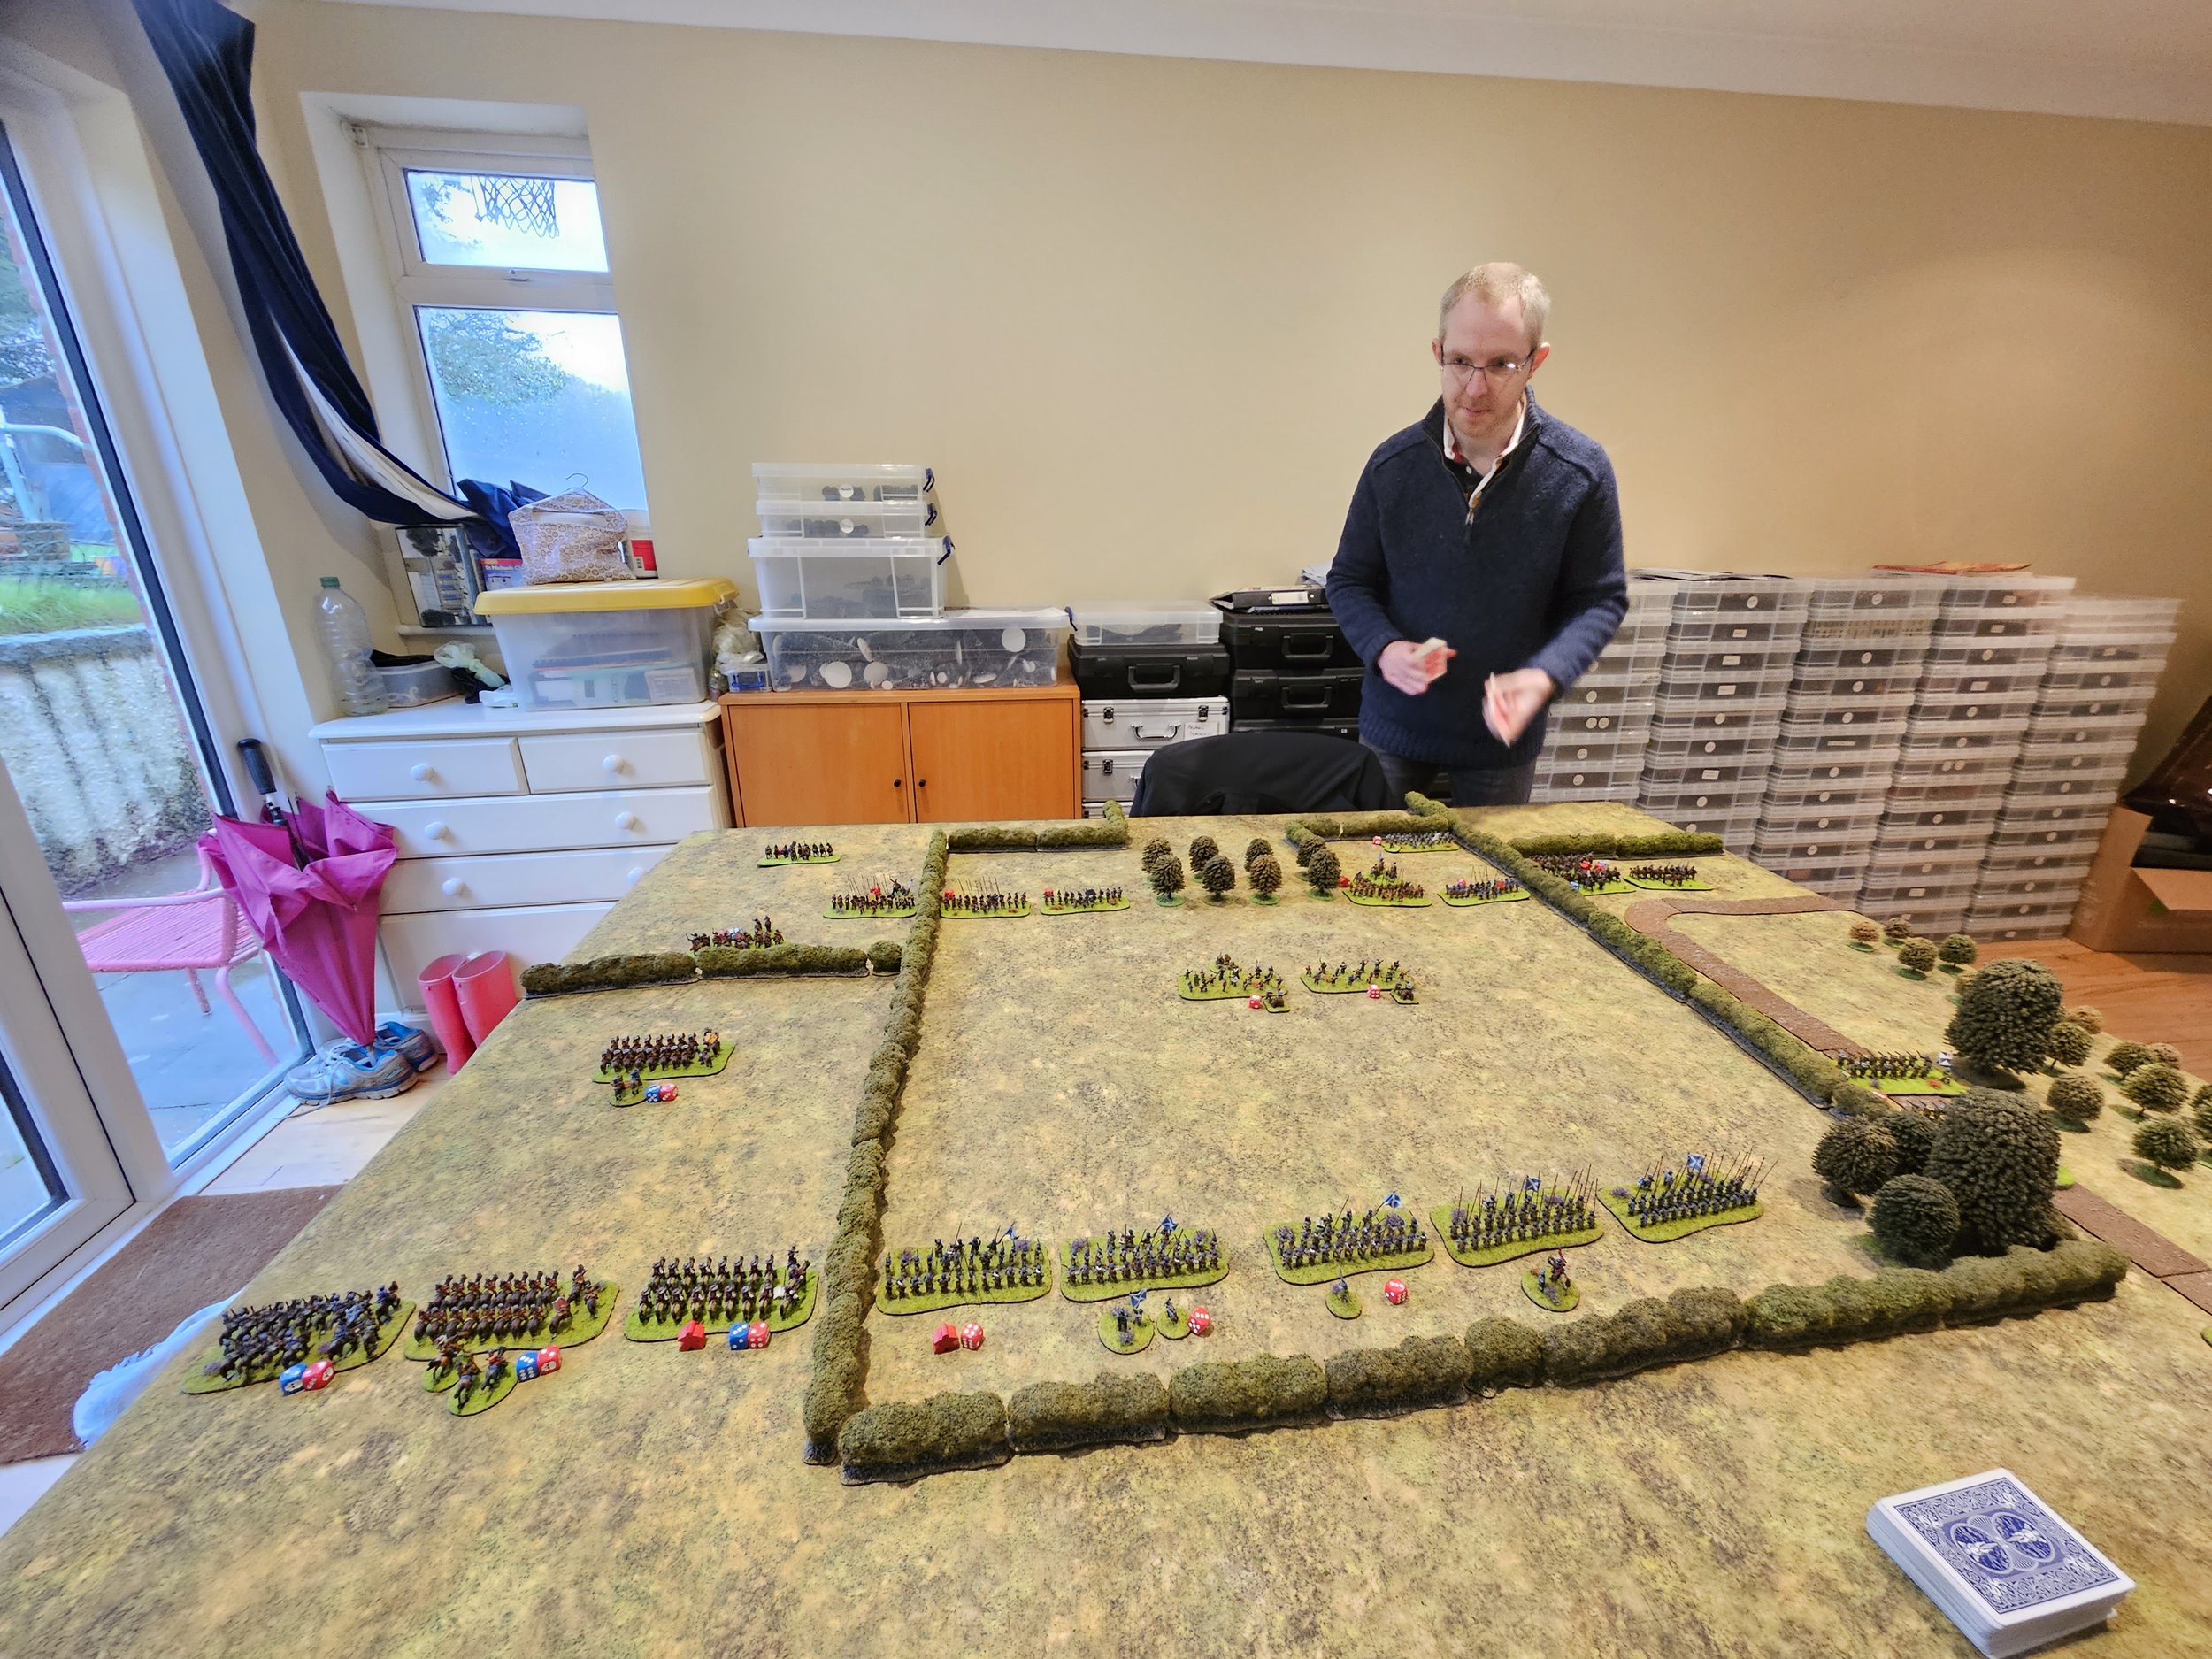
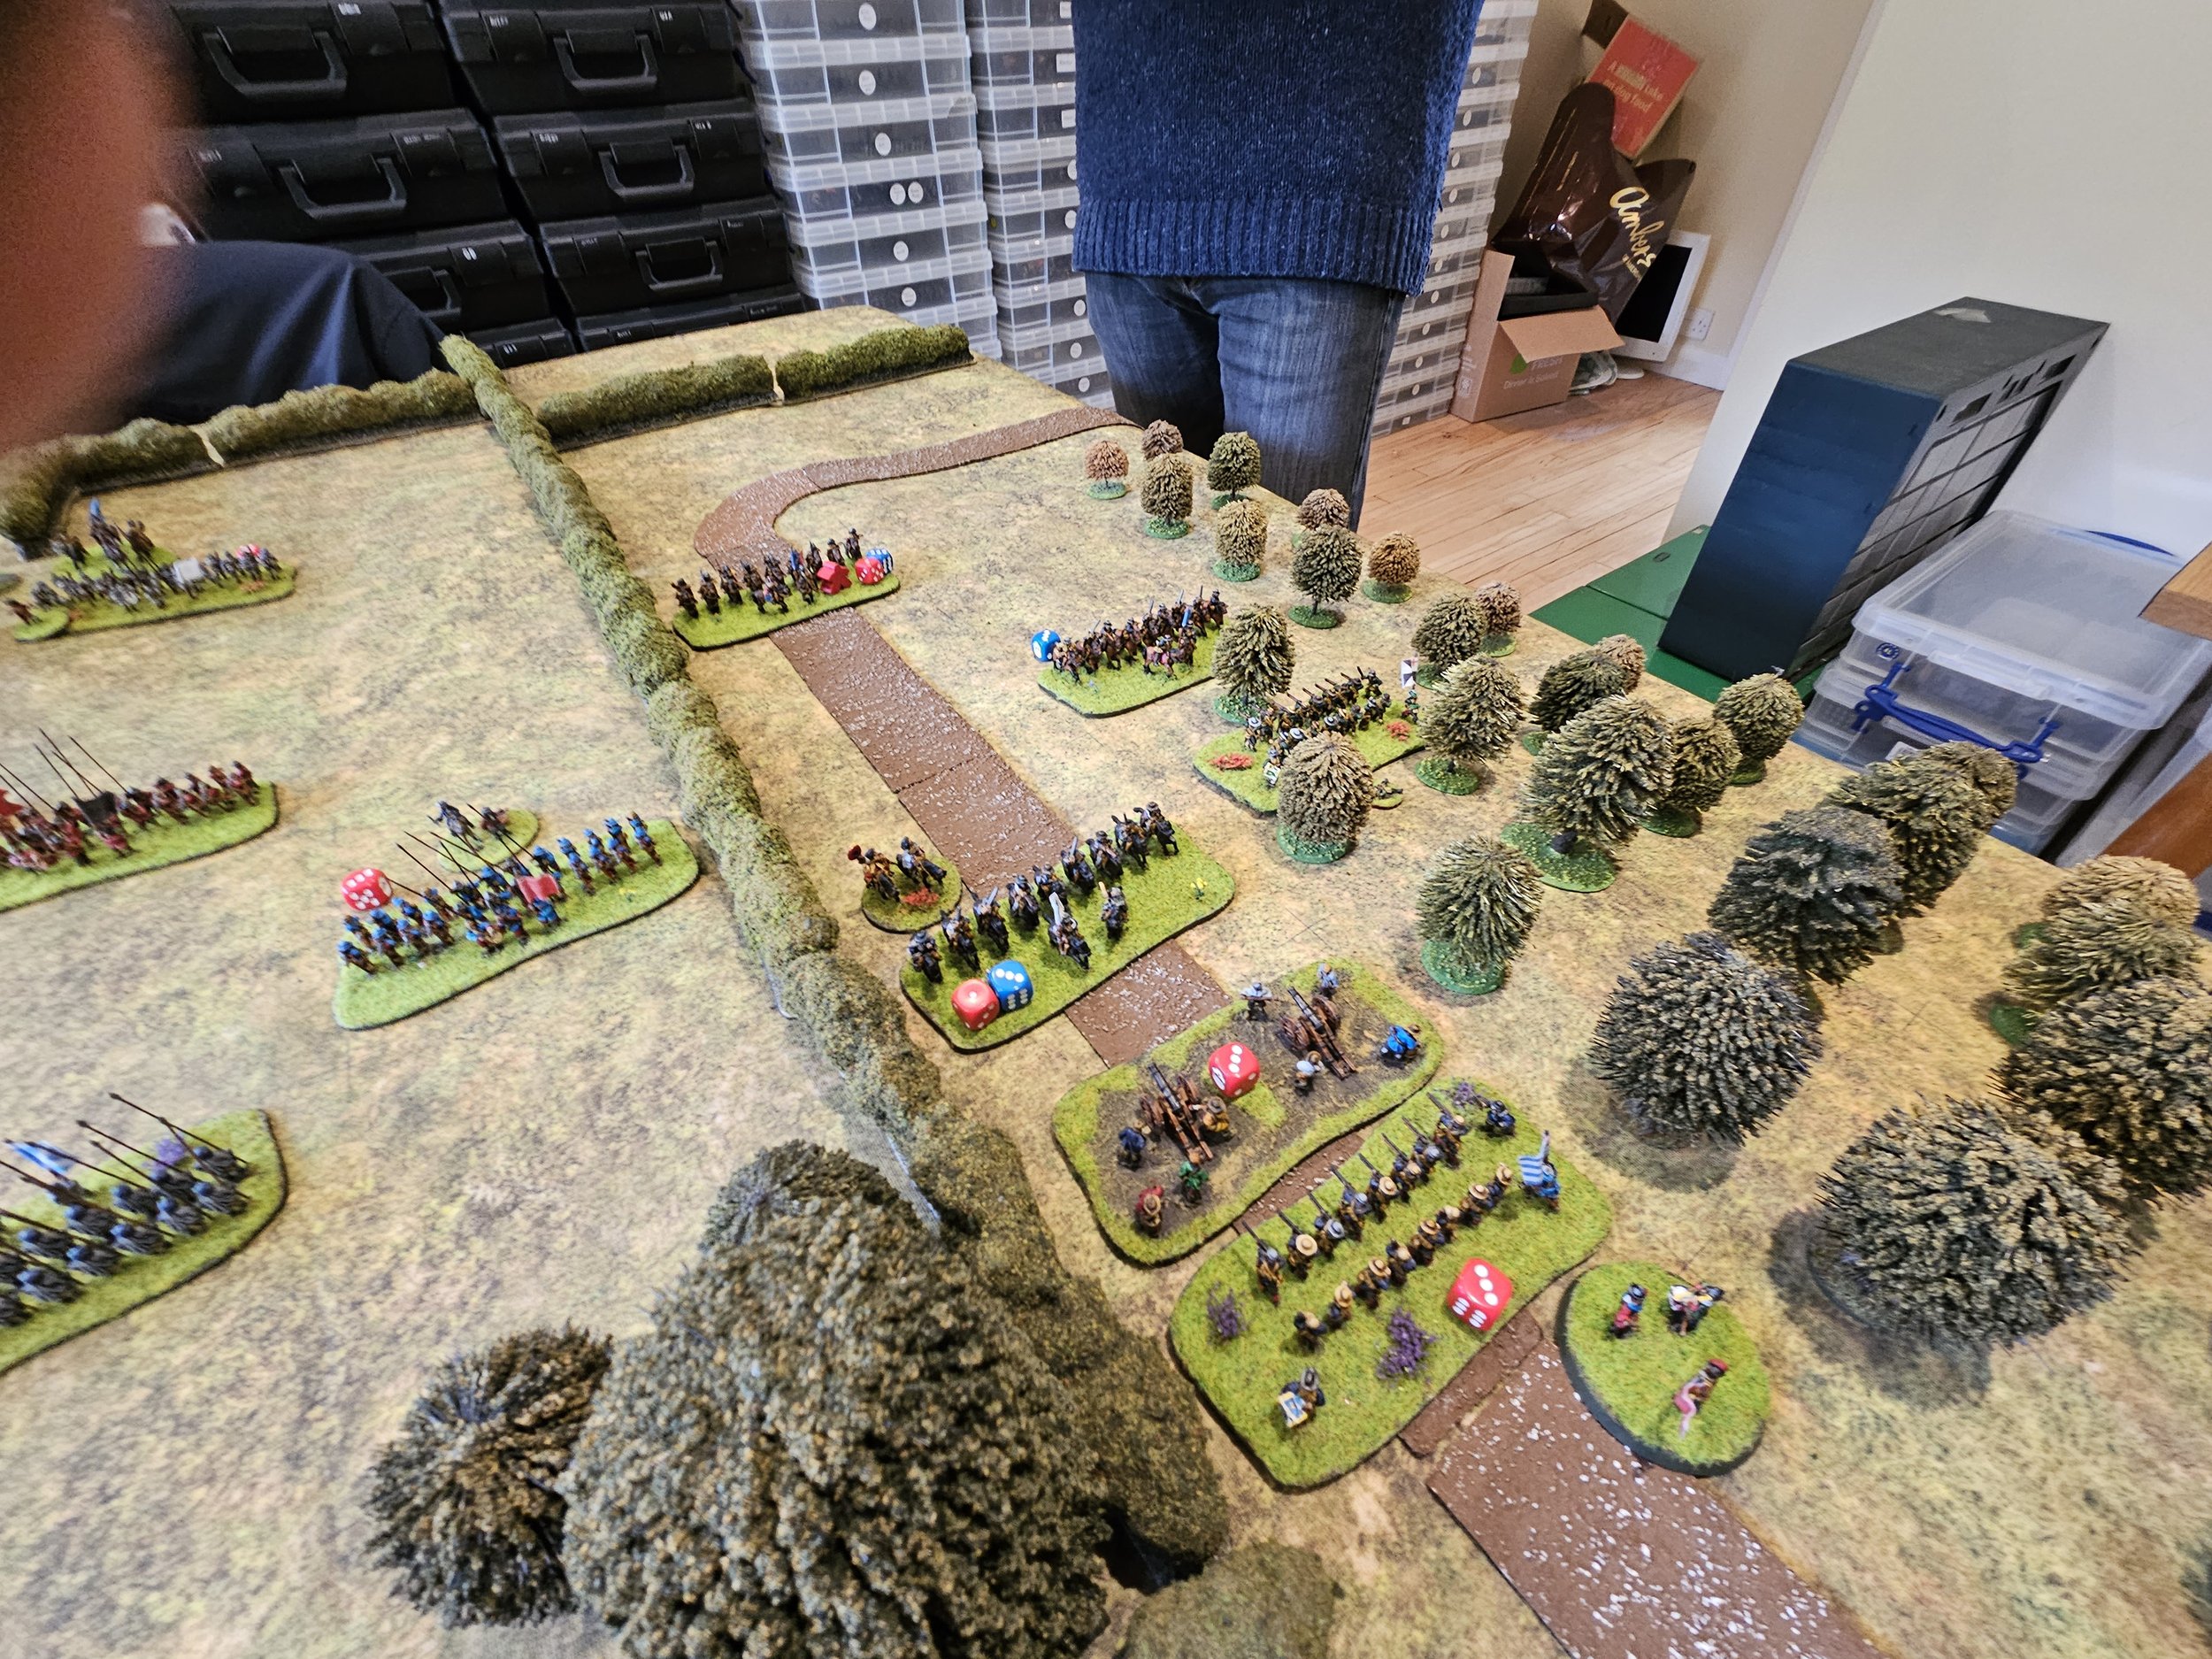
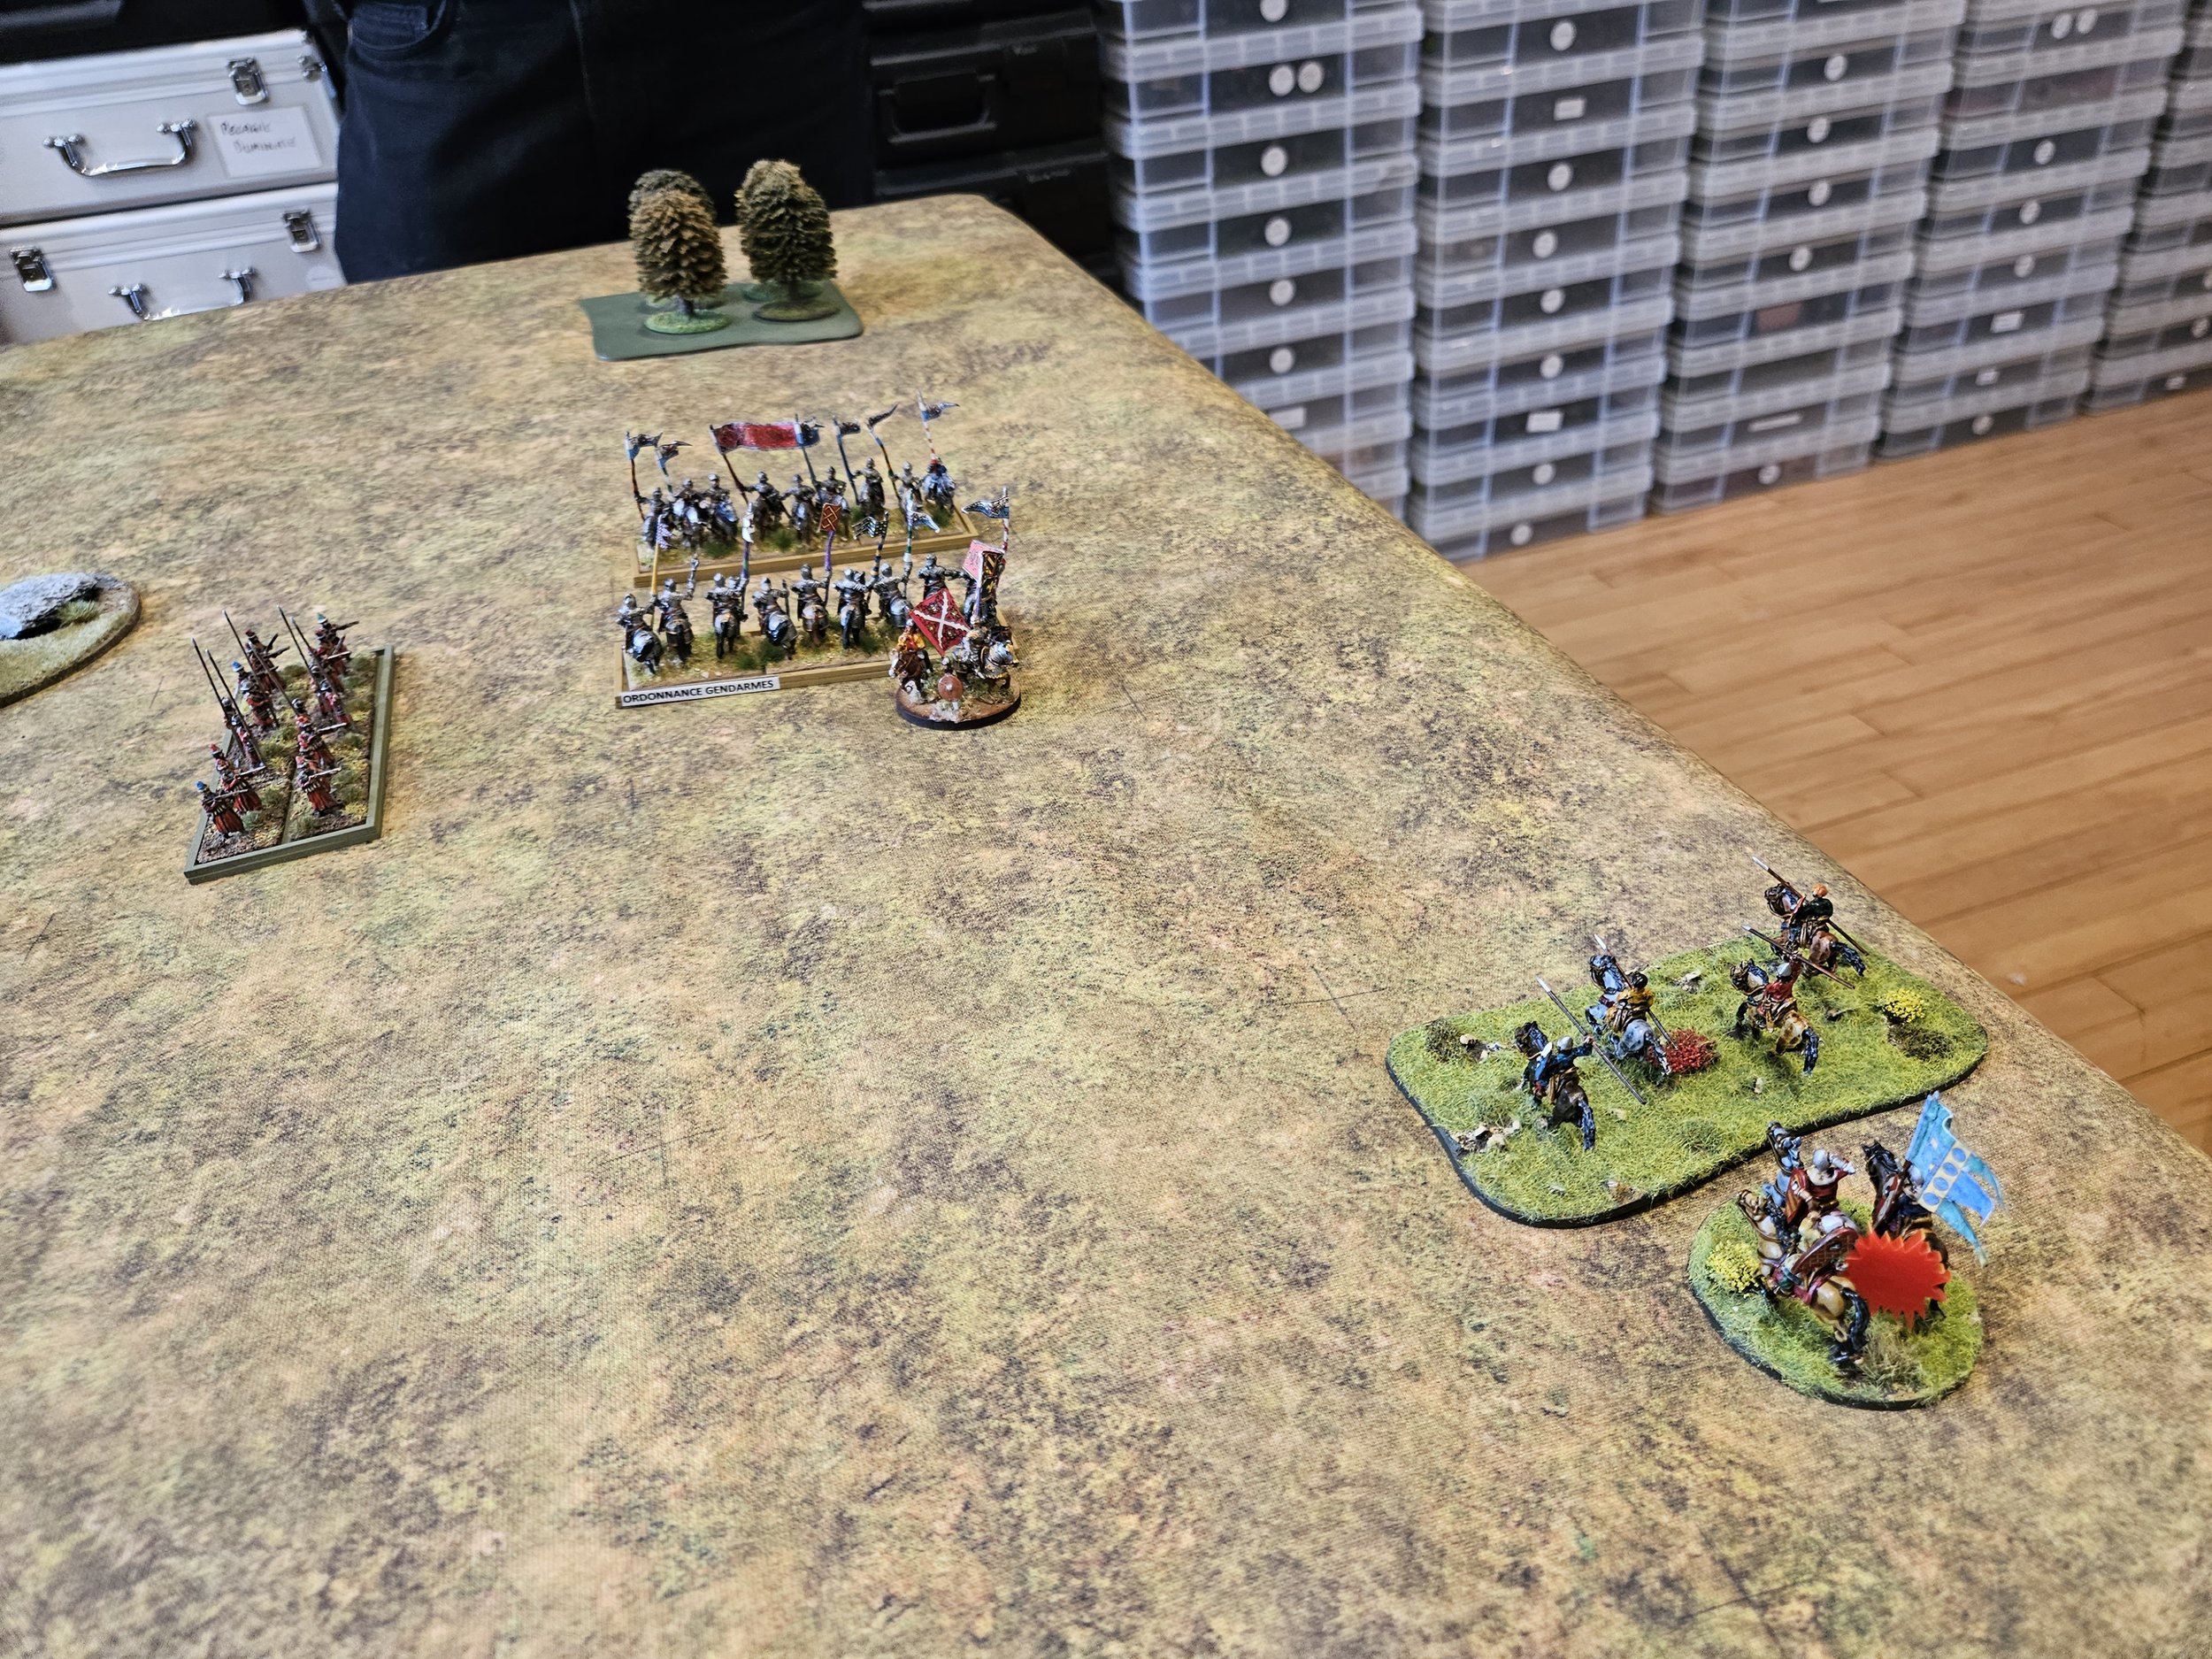
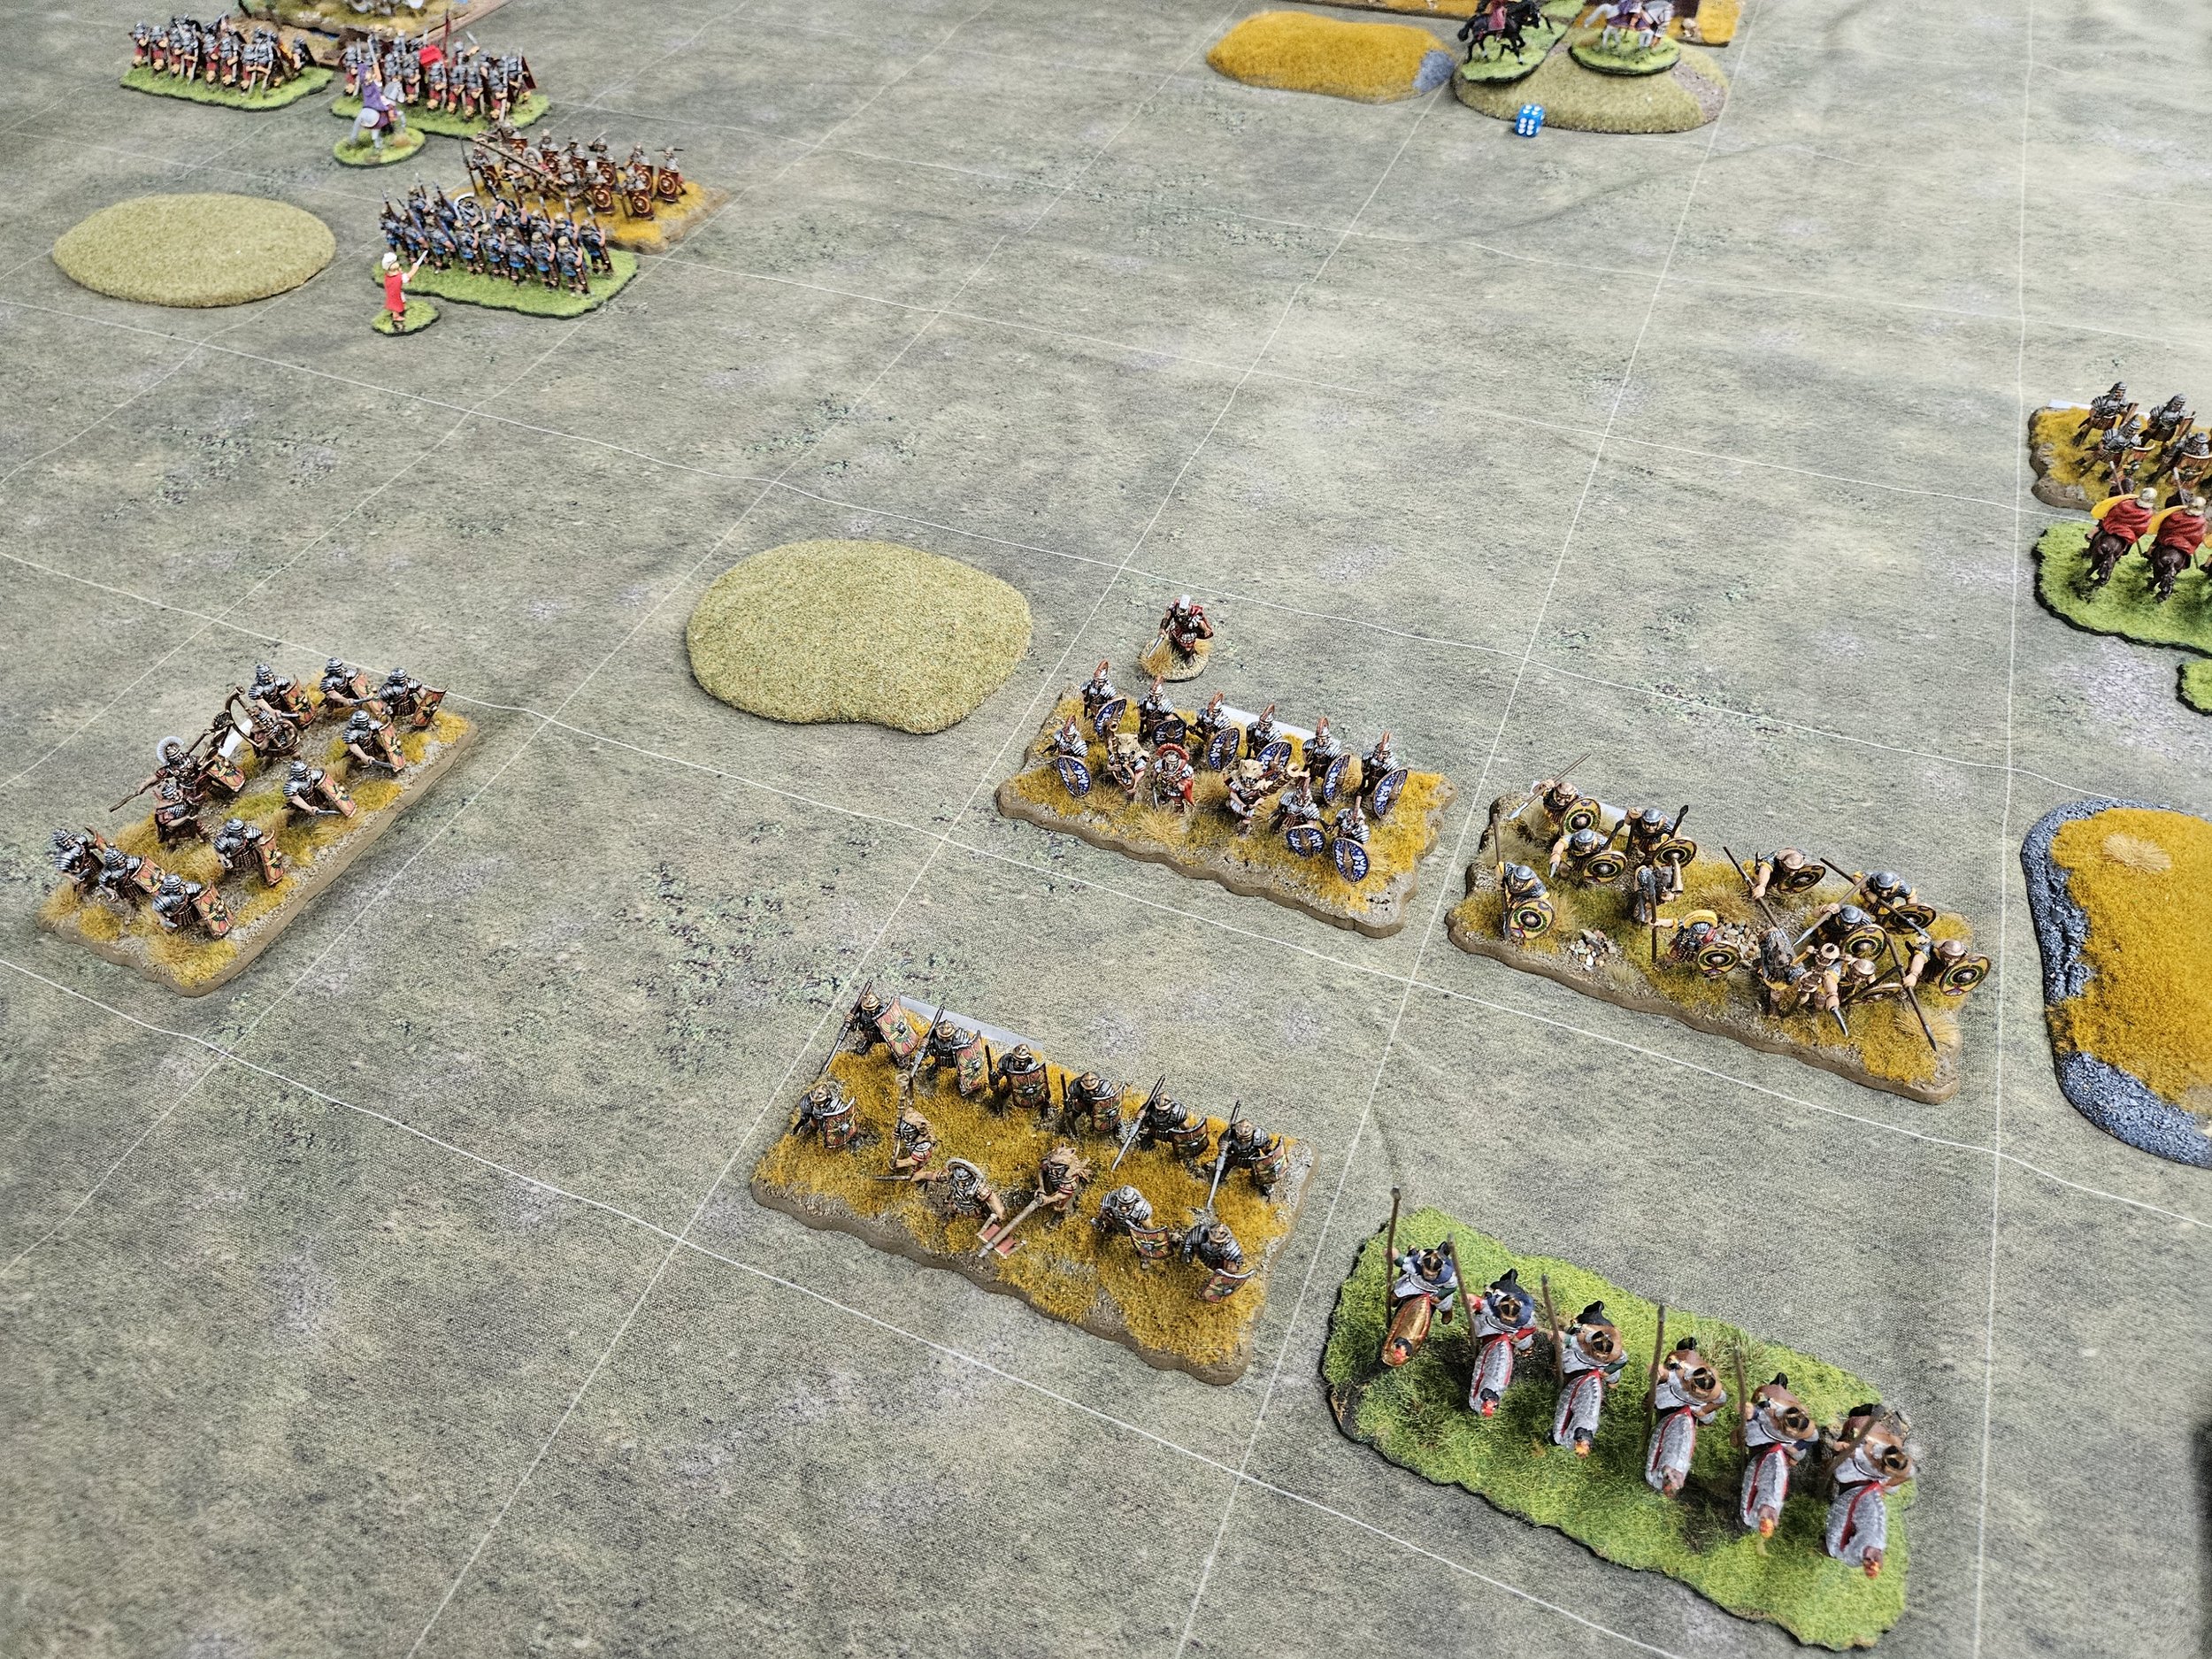
Here the battle in pictures:


If you've enjoyed this post, please do consider "buying me a coffee" : you can be sure that all proceeds will be channelled back into wargaming, leading to even more content for you to enjoy!

TTS AAR: Sicilio- Normans: The Return Match

With plenty of time remaining and the table and figures all set up, Bevan and I decided to swap sides and play again: I would take the Papal Italians (proxied by a Burgundian Ordnance army) and Bevan would play the Sicilio-Normans.

Now if I thought my luck was bad in the last game, in this game it really fell off a cliff!

On the right flank I lost a unit of Knights to some scummy Sicilian light cavalry, leaving a huge hole in my line that enemy Knights immediately exploited. I did manage to get a breakthrough of my own going, but it took longer than it should and the battle ended elsewhere before I could take full advantage.

On the left, I got into the perfect position to do some damage, but the cards weren’t with me, and my glorious flank charges fizzled out unsuccessful!

Meanwhile, the Sicilio-Norman infantry ground forward in the centre and, with what I had lost already and the fall of my camp to the enemy Knights that had broken through, I was soon out of victory medals.

A frustrating game: as Bevan said afterwards, I didn’t do anything tactically wrong…it’s just the cards didn’t fall my way. To misquote the great Les Dawson: I had all the cards I needed, just in the wrong order!

No matter, these things happen. At least I could get my revenge in quickly, as we were due a couple of games of For King & Parliament, Eastern Front Variant in 24 hours time, with my Transylvanians facing the Muscovites. But more on that later…

TTS AAR: Sicilio-Normans take to the field

Now that I had painted up the Italo-Norman militia, it was time to get them into action. I wanted them to face a contemporaneous army, so friend Bevan would field my Burgundian Ordnance collection masquerading as Papal Italians!

Okay, so things weren’t entirely apt, as I was actually fielding Sicilio-Normans instead of pure Italo-Normans, but as the country of Italy wasn’t actually formed until 1870, I decided that stretching things slightly too far south wouldn’t matter too much.

As you can sort of see in the picture, above, both sides had concentrated their cavalry on one flank (my right, Bevan’s left) so the stage was set for a fairly mighty clash early on in the game…and that’s exactly what happened.

Meanwhile, the each side’s infantry contingent slogged forward towards the enemy, with an unusual run of cards meaning that my troops advanced forward in echelon.

Unfortunately for me, the Pope had obviously secured some divine intervention to support his forces, as my unusual run of cards continued with me drawing appalling cards for the cavalry combat, with what should have been a fight in my favour (four heavy units vs three heavy units, two light units vs one light unit) ending up with my cavalry just about wiped out (one light unit remaining) whilst leaving two of his heavy cavalry units still very much in action.

Meanwhile, the infantry lines had, in a ragged way, closed and gone to melee. Things looked a bit better for me here, and I had started to get back into the game a bit.

Even better, going completely against convention, my newly-painted unit of Italo-Norman militia had burst through the enemy line and had got to within striking distance of the enemy camp…and as Bevan only had four Victory Medals left at this stage, if I could just hold on for another turn, there was a fair chance I could nab the camp, pick up another Medal from somewhere else on the field, and win the game.

Unfortunately, the consequences of losing the cavalry battle on my right wing then came back to haunt me with a vengeance, as the two enemy units of Knights arrived back into the action: flank charging some poor Sicilio-Norman spearmen with devastating effect.

Already Disordered, the Sicilians crumbled and fled, and the game was Bevan’s!

A cracking encounter that, despite my earlier bad luck, got down to the wire, with both sides being in a position where the next casualty would have lost them the game. Sportingly, Bevan did agree that I had had universally bad luck throughout the game, but you have to play the cards you’re dealt so no complaints!

TTS AAR: British Open Game 4: Early Imperial Romans vs Chin Chinese

My final game at this year’s British Open To The Strongest tournament, held at SELWG, was against Dene’s Chin Chinese.

Nasty opponents: massed crossbow fire hammering in from distance and then dagger-axemen, spearmen and heavy chariots to fight in melee!

To be absolutely honest, I don’t remember a huge amount about what actually happened during the game! I know that it began with my troops advancing steadily towards the enemy, undergoing the expected hail of crossbow bolts. On the right, I used a unit of Legionaries to hold some cavalry and lights in place. On the left, my equites alares/cohortales effectively cancelled out the rest of his cavalry. In the centre, the two lines clashed with both sides losing some units. Honours even so far.

Things continued to be neck and neck until we both both down to one victory medal: it was going to be sudden death for the next person to lose a unit. I was, however, in a better position tactically, with my troops in a slightly better state than Dene’s. If I could survive his turn, I should be able to win in mine.

Unfortunately, Fortuna deserted me: Dene drew three 10’s in five cards (well, three chits marked ‘10’ in five chits as he was using TTS chits not cards) and KO’d a Legionary unit, meaning that I lost the game 12-13! Talk about close!

So what did that mean for the tournament as a whole?

Tim and his Galatians that I had beaten in Game 3, Dene and his Chin Chinese and I and the Early Imperial Romans all had three wins and one loss…which meant that points wise Tim won the tournament on 613 points, I came second on 596 points, with Dene in third place on 520 points. I was pipped at the post again!

Whatever the result, it had been a great tournament, with four very enjoyable games against very gentlemanly opponents.

As I have said before, I highly recommend taking part in those tournaments that you can manage if only to meet other people from the TTS community.

Finally today, here are some more shots of the final game:

IABSM AAR: Storming the Citadel IV

Will Depusoy and friends have been playing through the PSC Storming the Citadel campaign set during the battle of Kursk , 1943, and posted this After Action Report on the IABSM Facebook group.

Here, the Soviet 67th Guards tries to hold the village of Butovo against German Grossdeutschland divison.

Click on the picture below to see all:

TTS AAR: British Open Game 3: Early Imperial Romans versus Galatians

My third game at this year British Open at SELWG was against Tim and his Galatians.

Galatians are a unique army: like Gauls or Ancient Britons, but nearly all deep fanatical warrior units with loads of heroes. It was going to be tough to chew my way through them!

Neither Tim nor I were in the mood for any shilly-shallying around or tactics or anything like that: both battle lines headed for the other determined to get stuck in as soon as possible:

Annoyingly, one of Tim’s units burst through the Auxilia and made it into an undefended part of my camp.

Honours were even on my right: whilst most of my cavalry were forced to retreat, the Contariorum smashed an enemy unit off the table, and threatened to wreak havoc in the Galatian rear (ooh-er, madam!) despite the threat of scythed chariots.

On my left, I was cautious about his cavalry swinging wide around the wood and coming in from the flank. I therefore held back a unit of Legionaries against that threat: something that I was very glad I had done when suddenly a couple of chariot units appeared from off-table on that side - good use of the stratagem card that I thus neutralised by accident!

So, as ever, it was up to the main body of Legionaries to do the job…and they did. Pushing forward relentlessly, the Praetorians and other veteran units smashed three enemy units from the field, giving me a pretty narrow 13-9 victory.

So not much finesse, but a win. A warning to those intending to fight Galatians: those warrior units are tough! Three hits to kill them, they rally easily, and ignore wounds until they are dead. A battle I was glad to get through!

TTS AAR: British Open Game 2: Early Imperial versus Middle Imperial Romans

My second game at the SELWG competition was a bit of a time-displaced civil war: my Early Imperial Romans versus Colin’s Middle Imperial Romans.

This meant that I would be facing a foe as manoeuvrable as my troops, and able to play the retreat-rally-re-engage game as well as I could. Colin was also fielding three camps, although his were behind a much bigger wall than mine!

Romans versus Romans

As I had the initiative, I advanced forward rapidly: my troops were slightly better quality than his and so the sooner I got into contact the better.

I also noticed that as the enemy came forward to meet me, they moved the Auxilia that had been protecting the right flank of their camp into a position where they could support their front line, leaving a gap that I thought my light cavalry might just be able to exploit…so over to my left I sent them.

The initial clash was a little bit in Colin’s favour: although I routed one of his cavalry units, one of my legionary units fled the field, and a risky move by my Auxilia didn’t pay off as their flank charge didn’t go in.

On the plus side, however, my equites sagitarrii (horse archers) had managed to get right the way around the end of the enemy line and captured one of Colin’s three camps. You can see them somewhat precariously balanced on the battlements in the picture below!

The situation in the centre and on the left continued on - my cavalry dispersing his and preparing to turn and hit the left-rear of his line; his infantry properly bursting through my centre - but those horse archers of mine were merrily ransacking the next enemy camp:

Those of you familiar with the system and of a mathematical frame of mind will have worked out that with two of his cavalry units defeated and two camps taken, I only needed that final camp to fall in order to win the game.

The enemy did get back to re-claim one part their camp, but it was to no avail: by that time I had managed to kill two more of his infantry units, including the Auxilia lurking in the marsh shown in the picture below.

In all, a victory for me 12:6.