TTS AAR: Classical Indians versus Akkadians

Having played Kavan using the Akkadians versus his Classical Indians, we decided to swap sides and play the game the other way round.

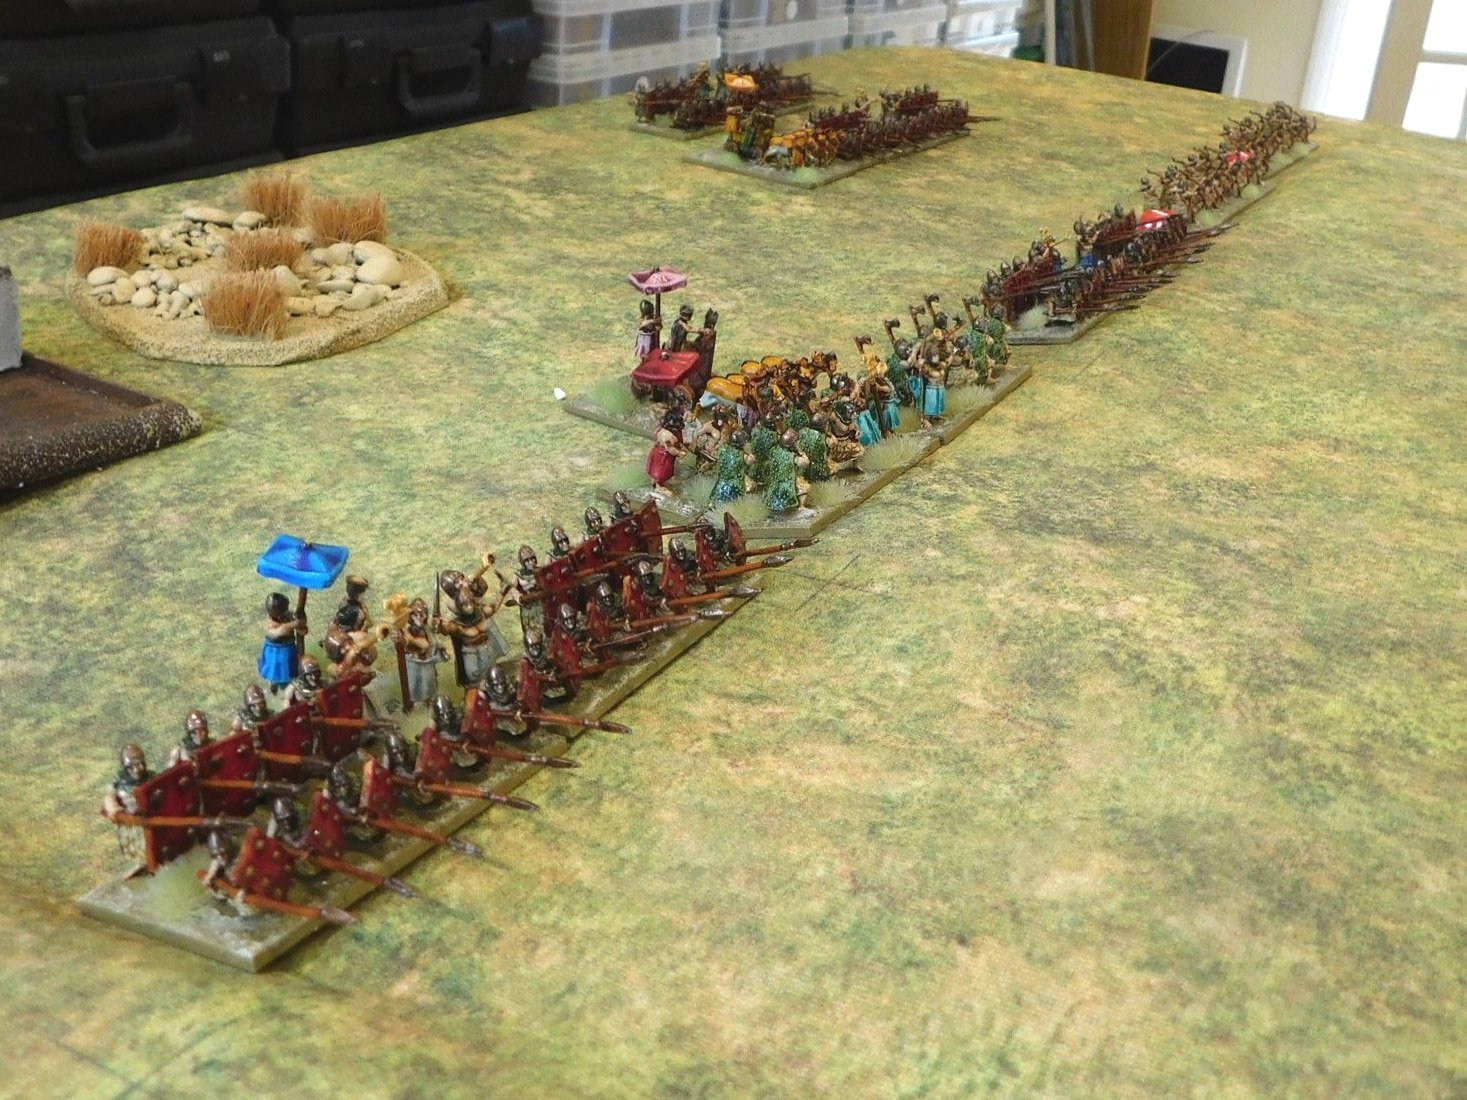
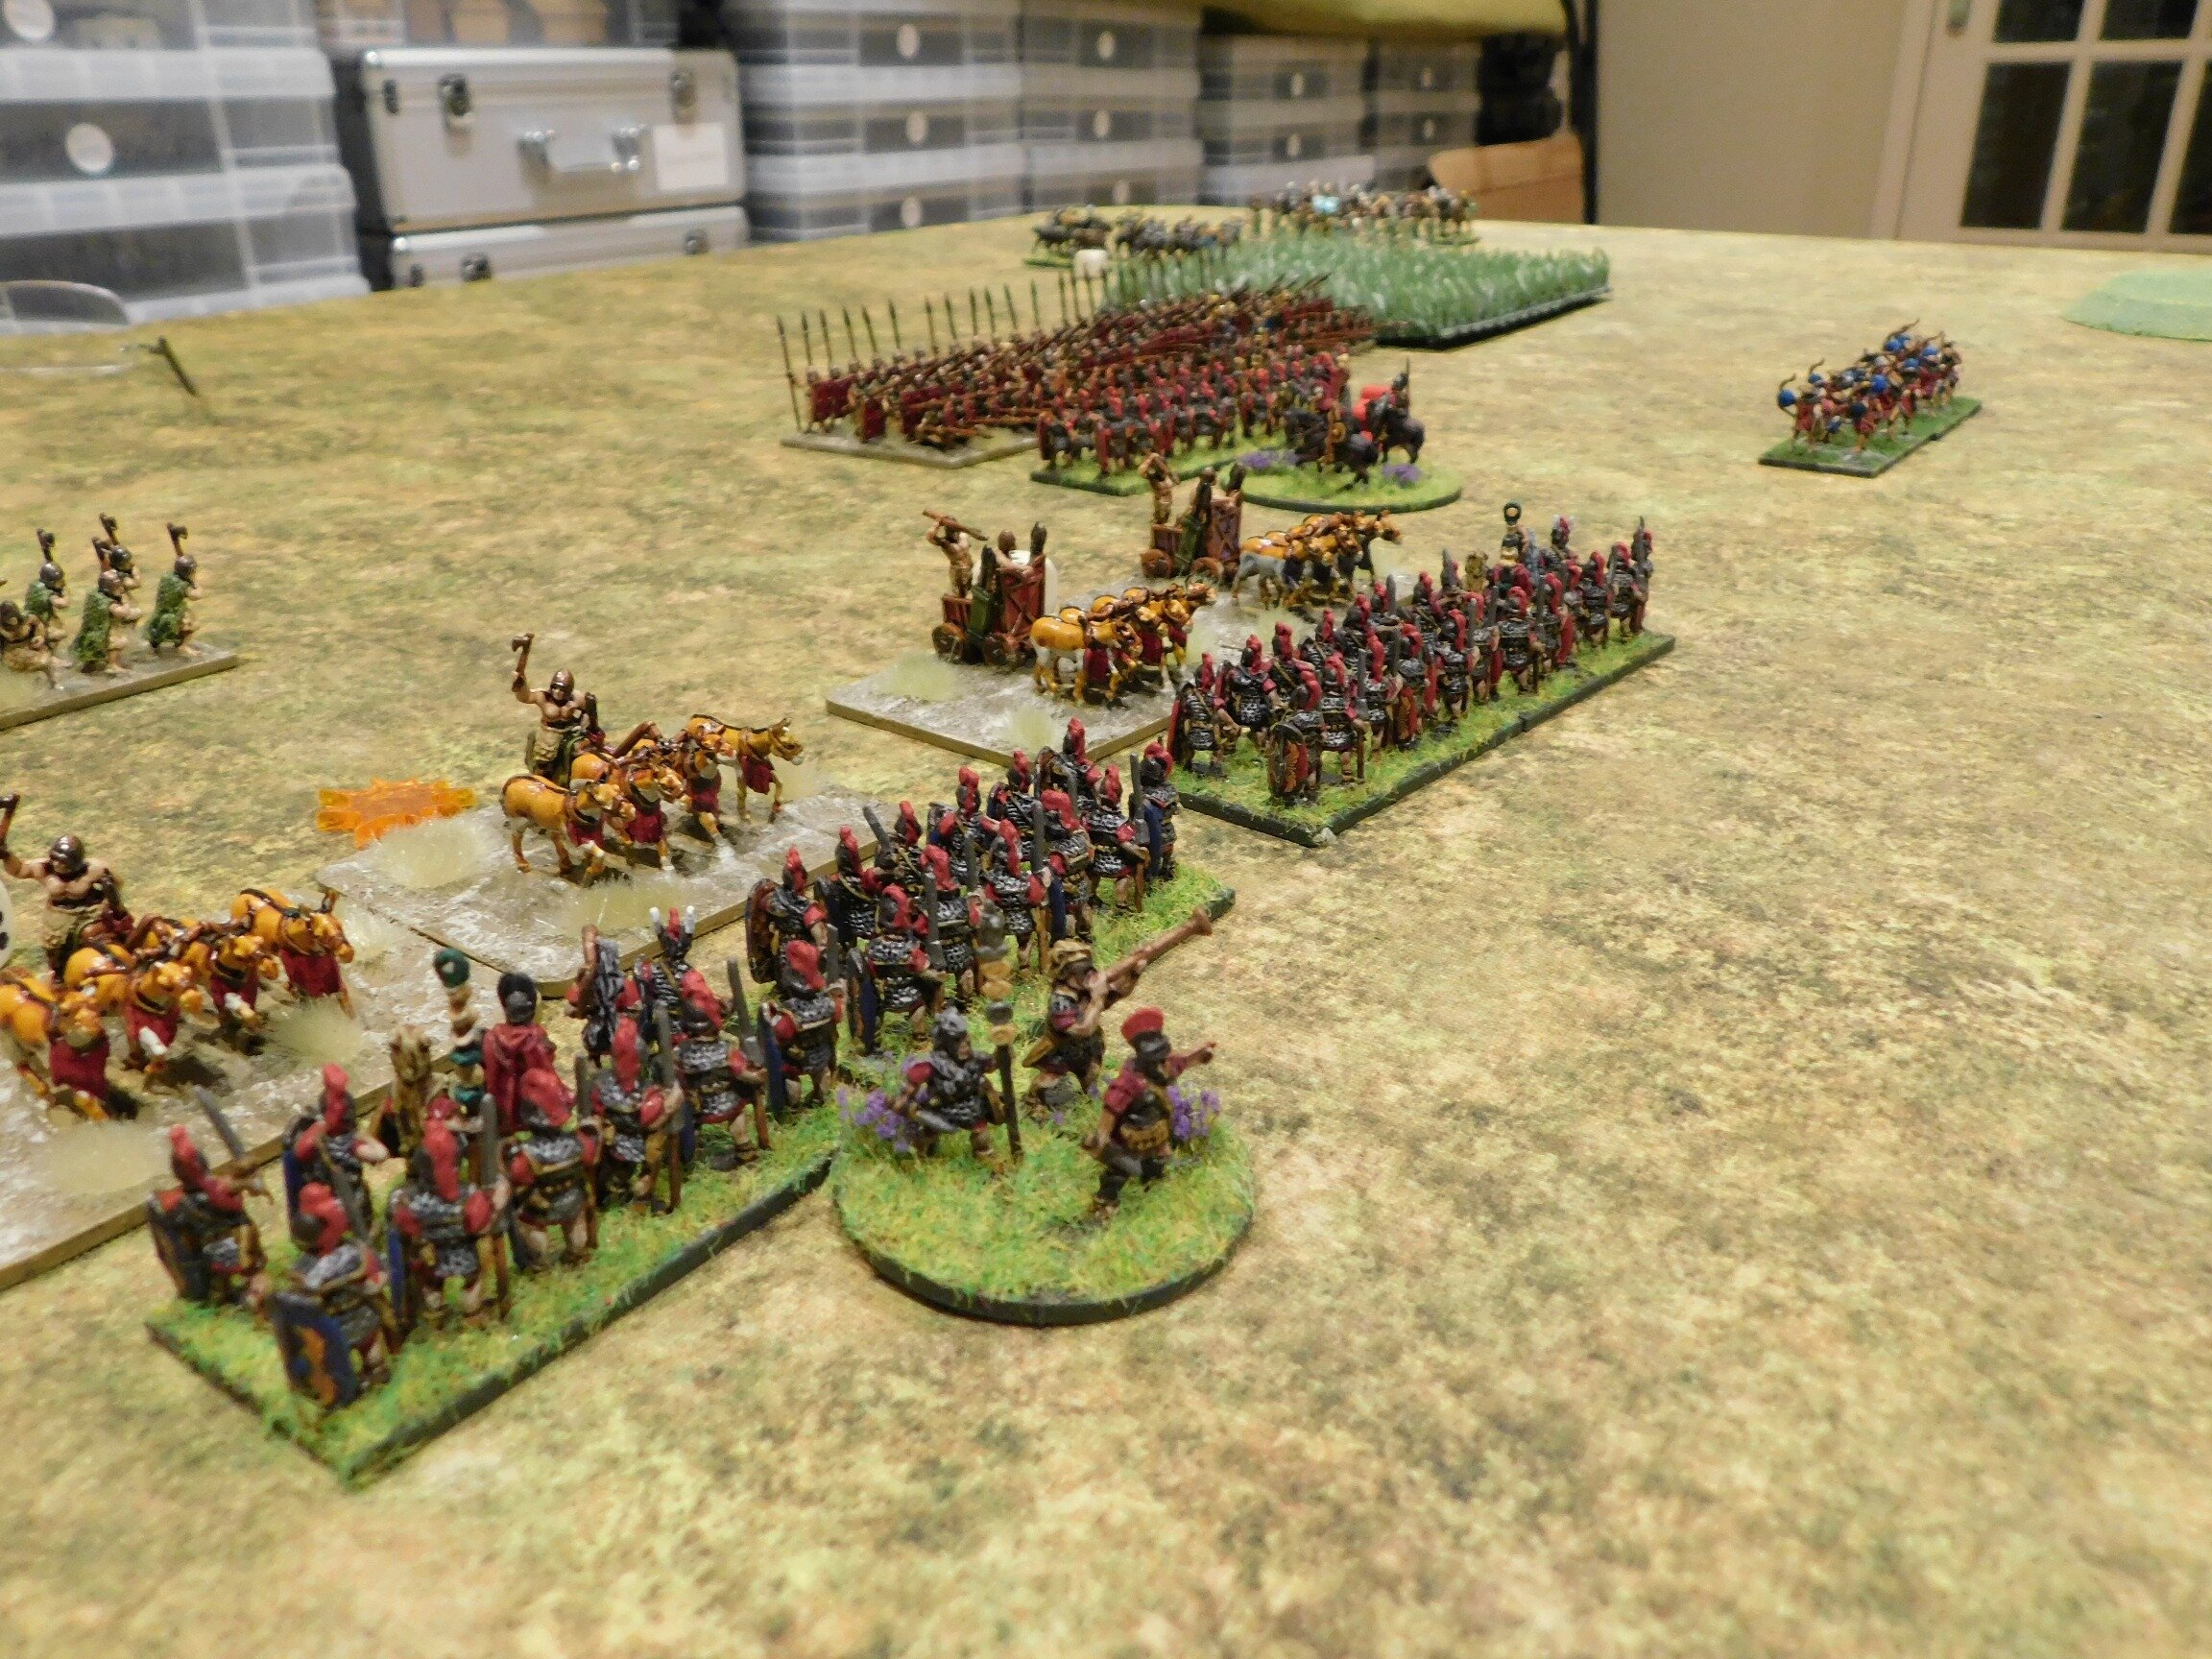
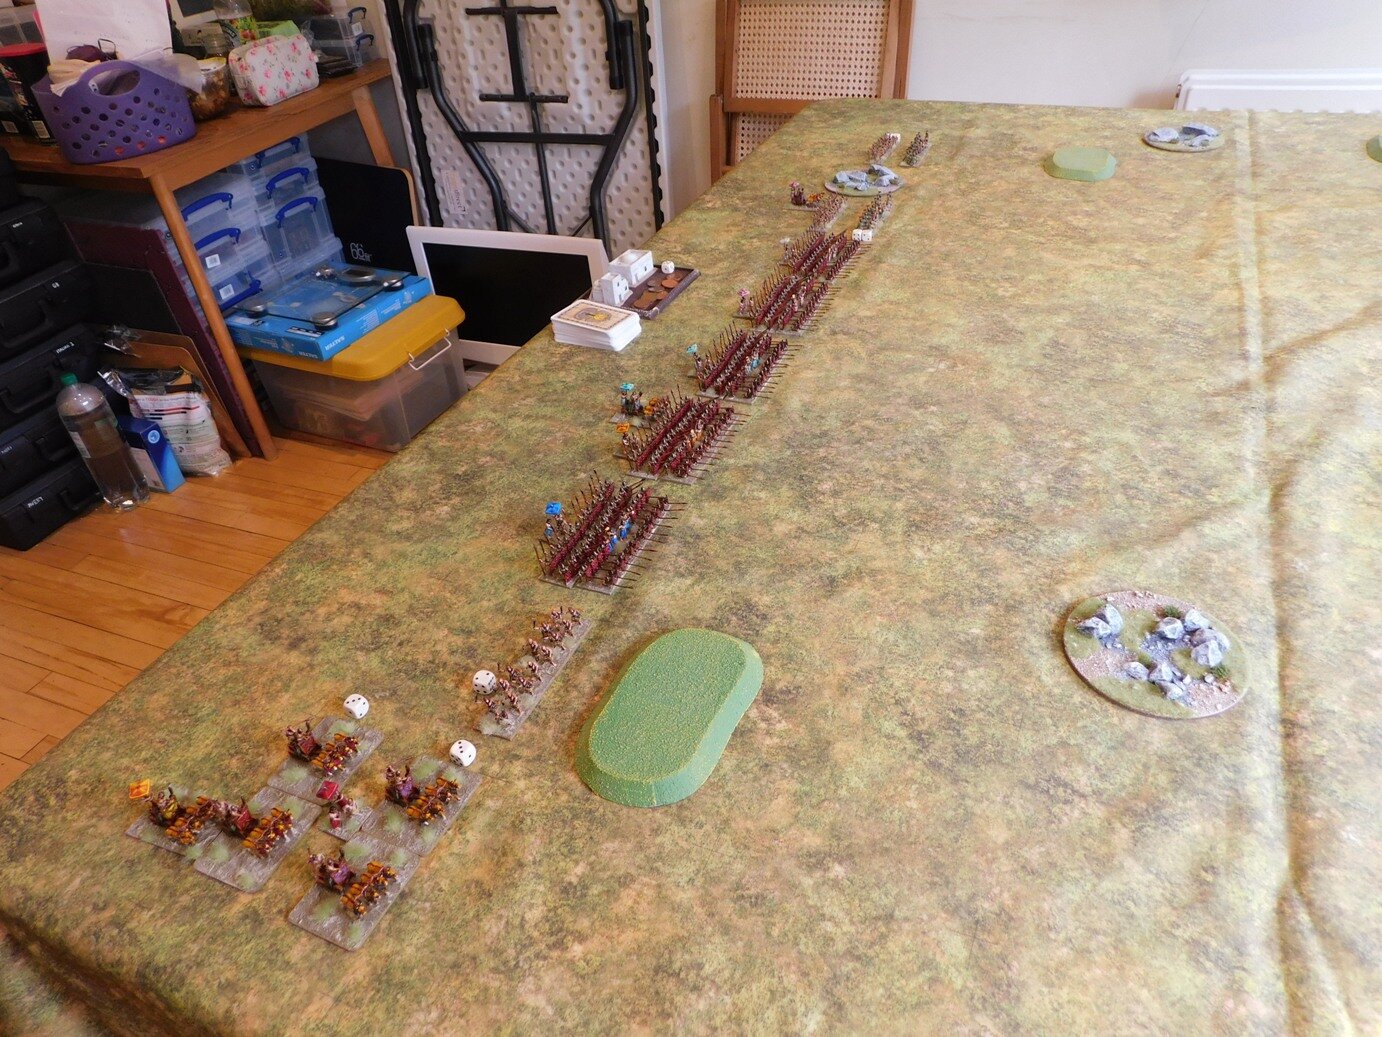
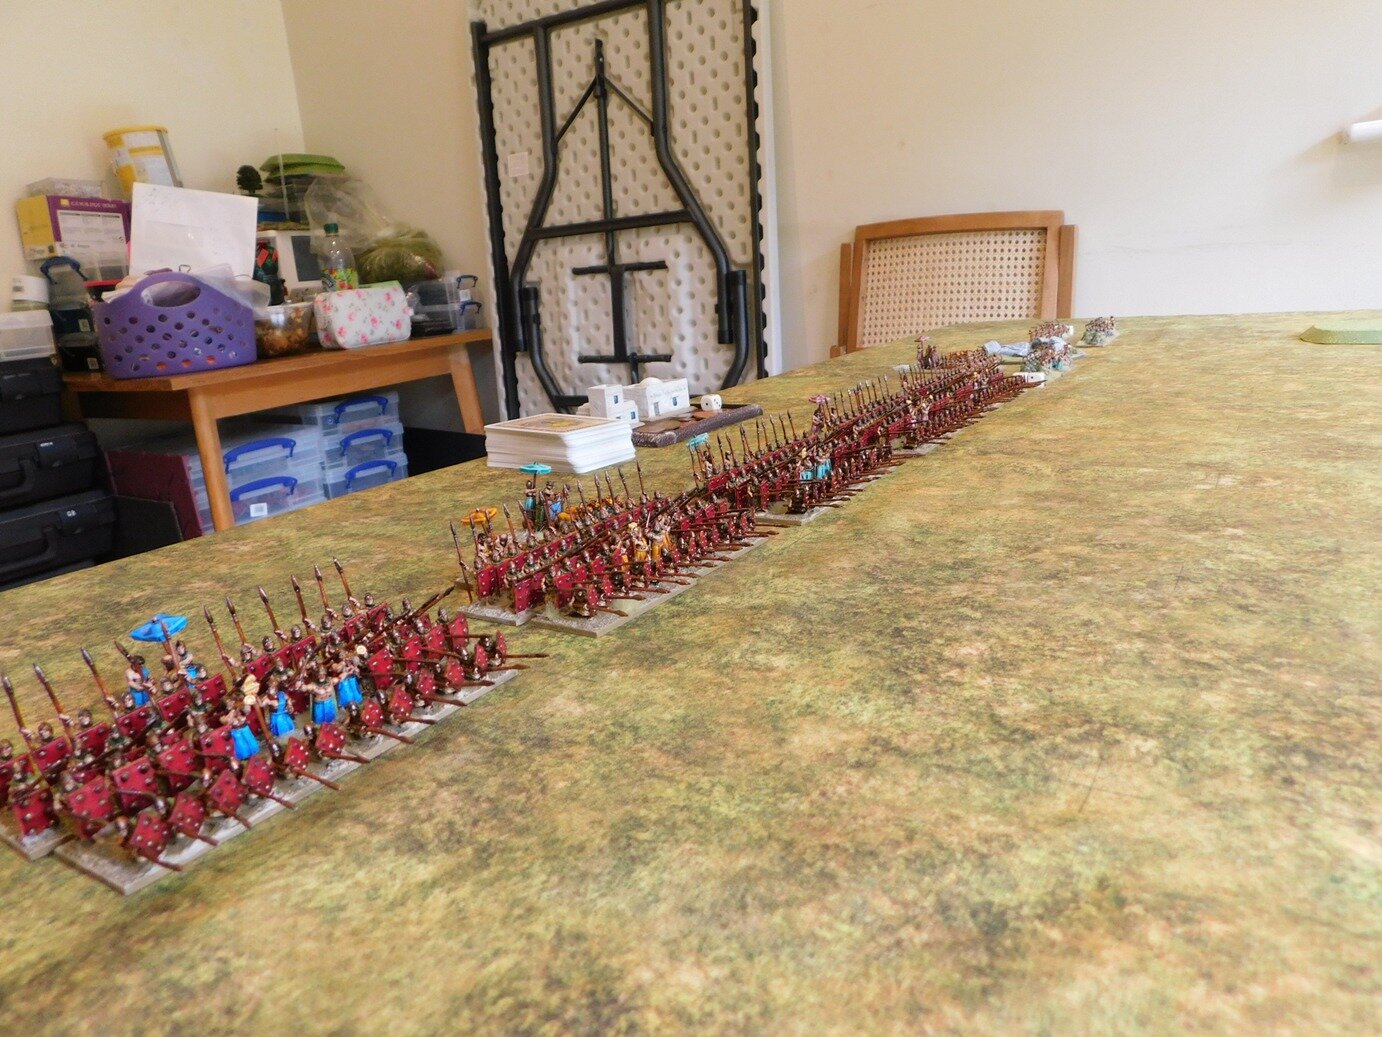
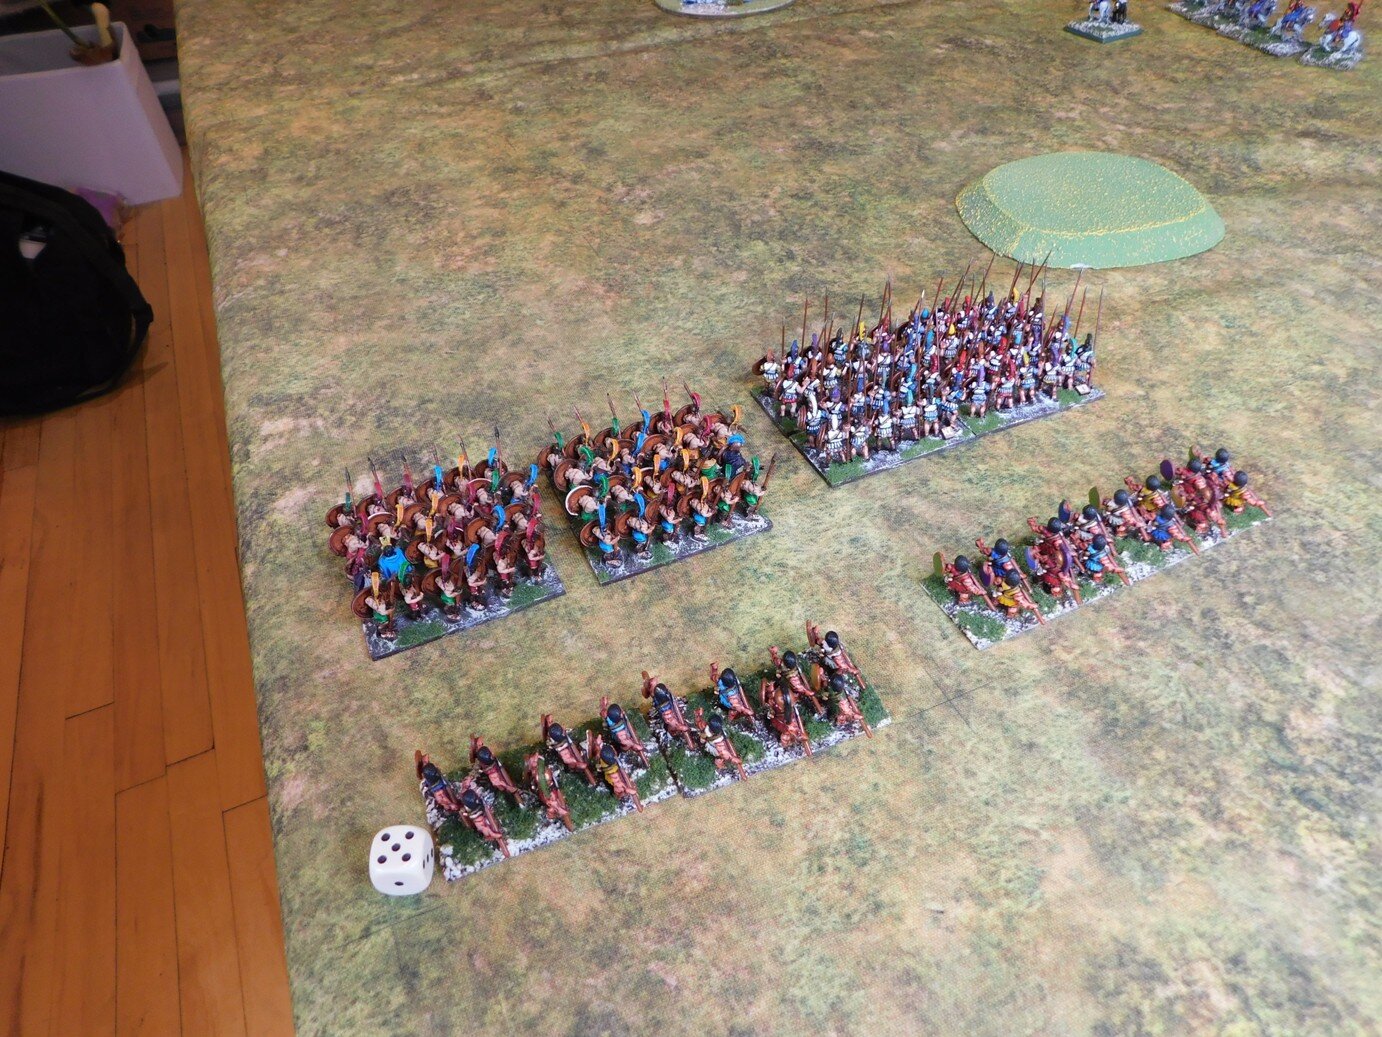
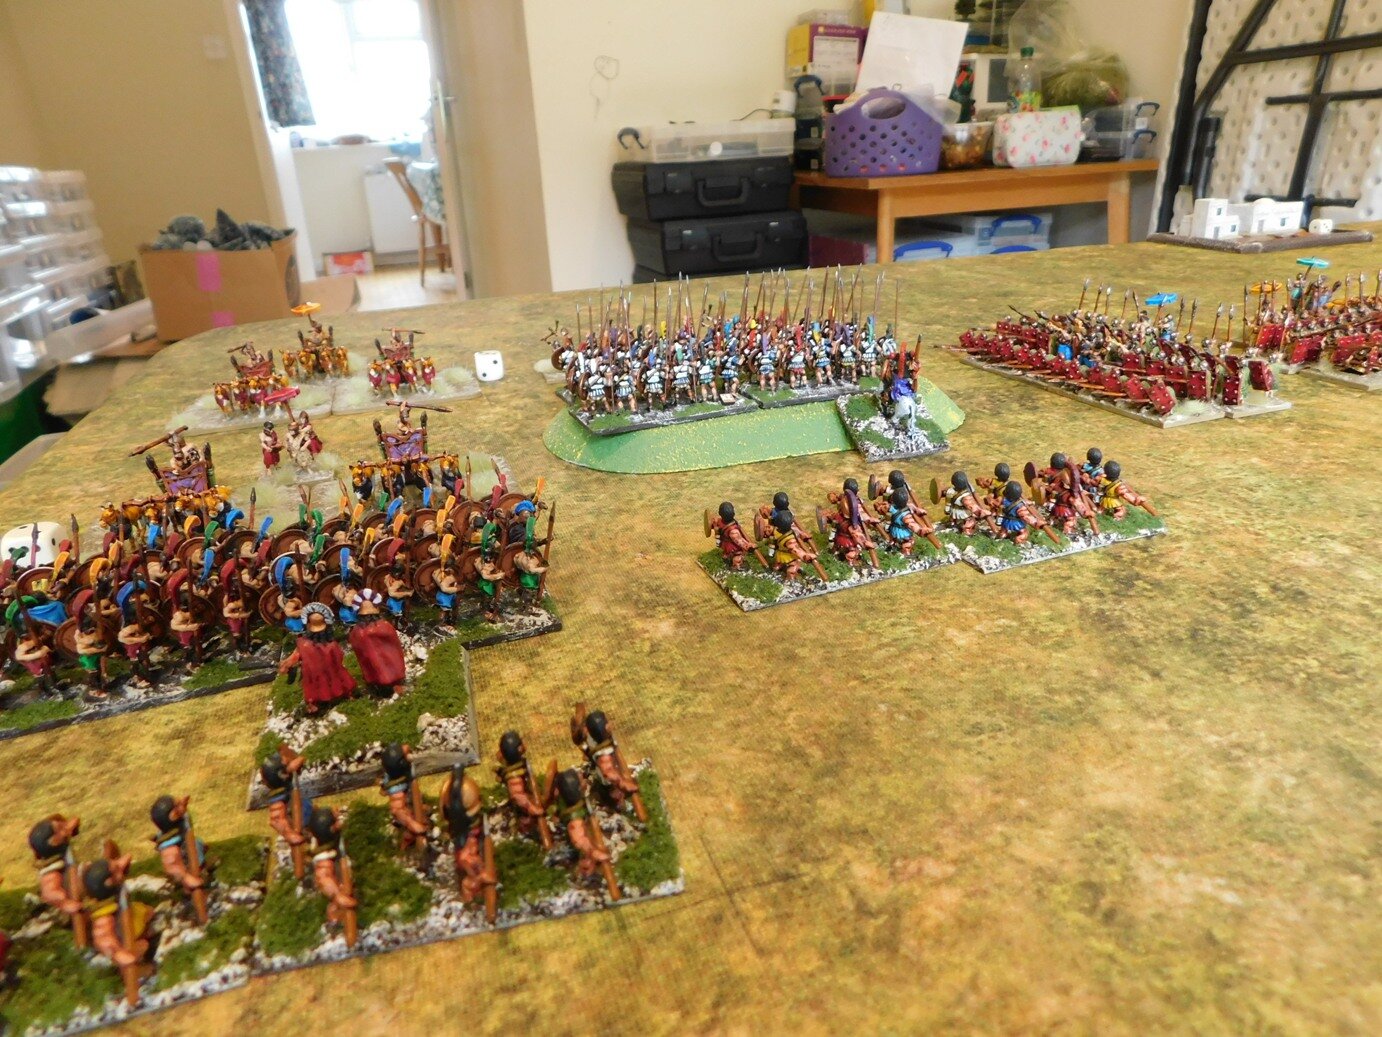
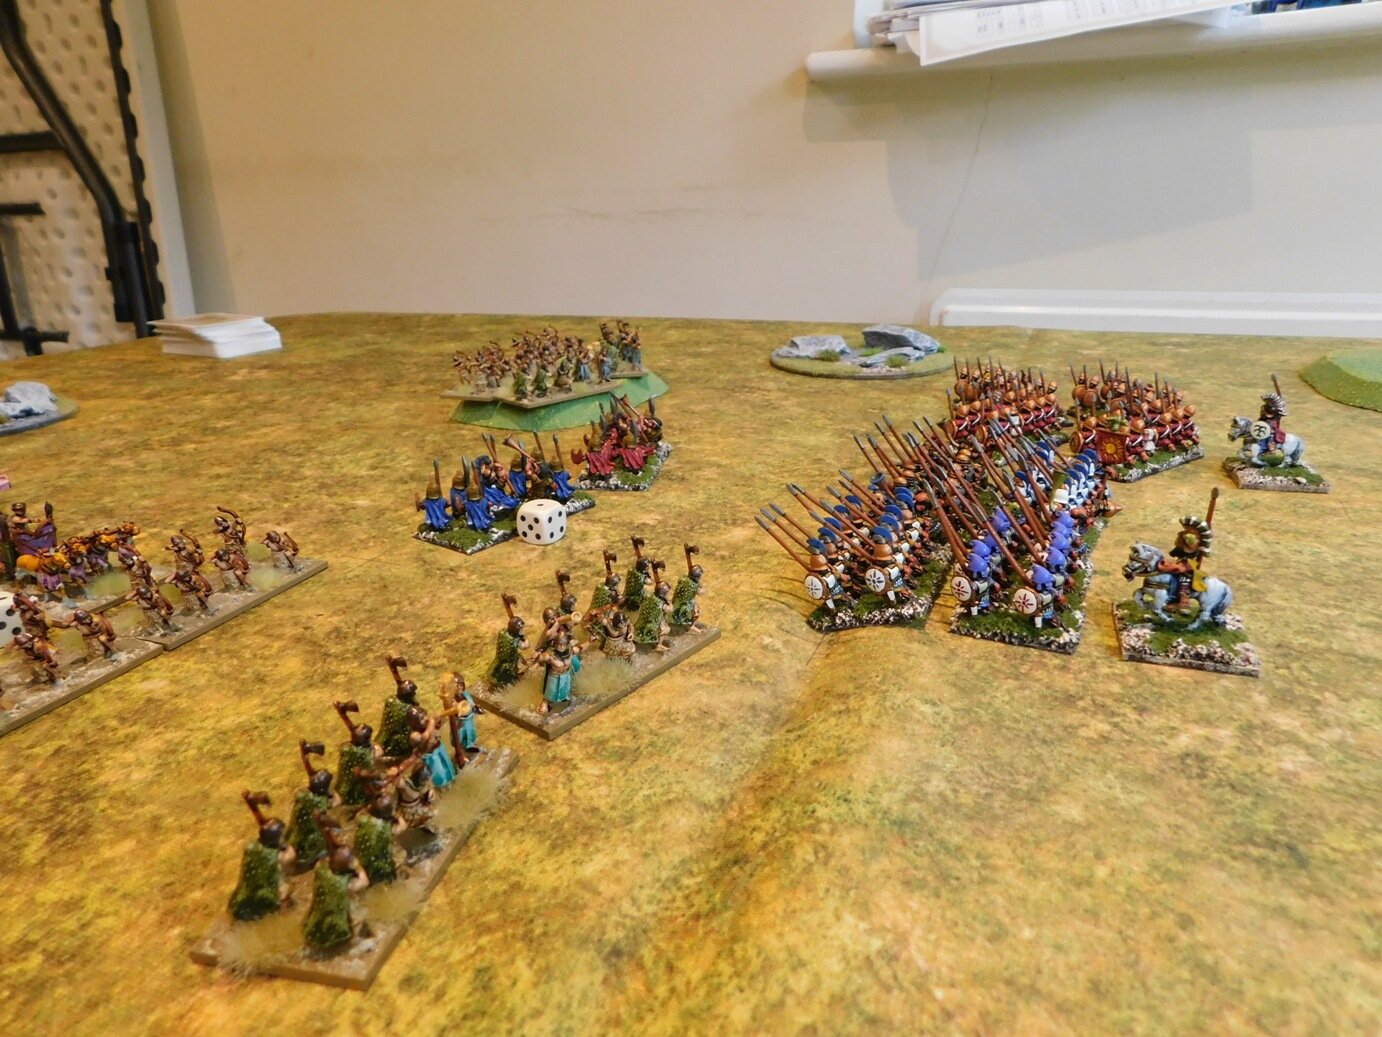
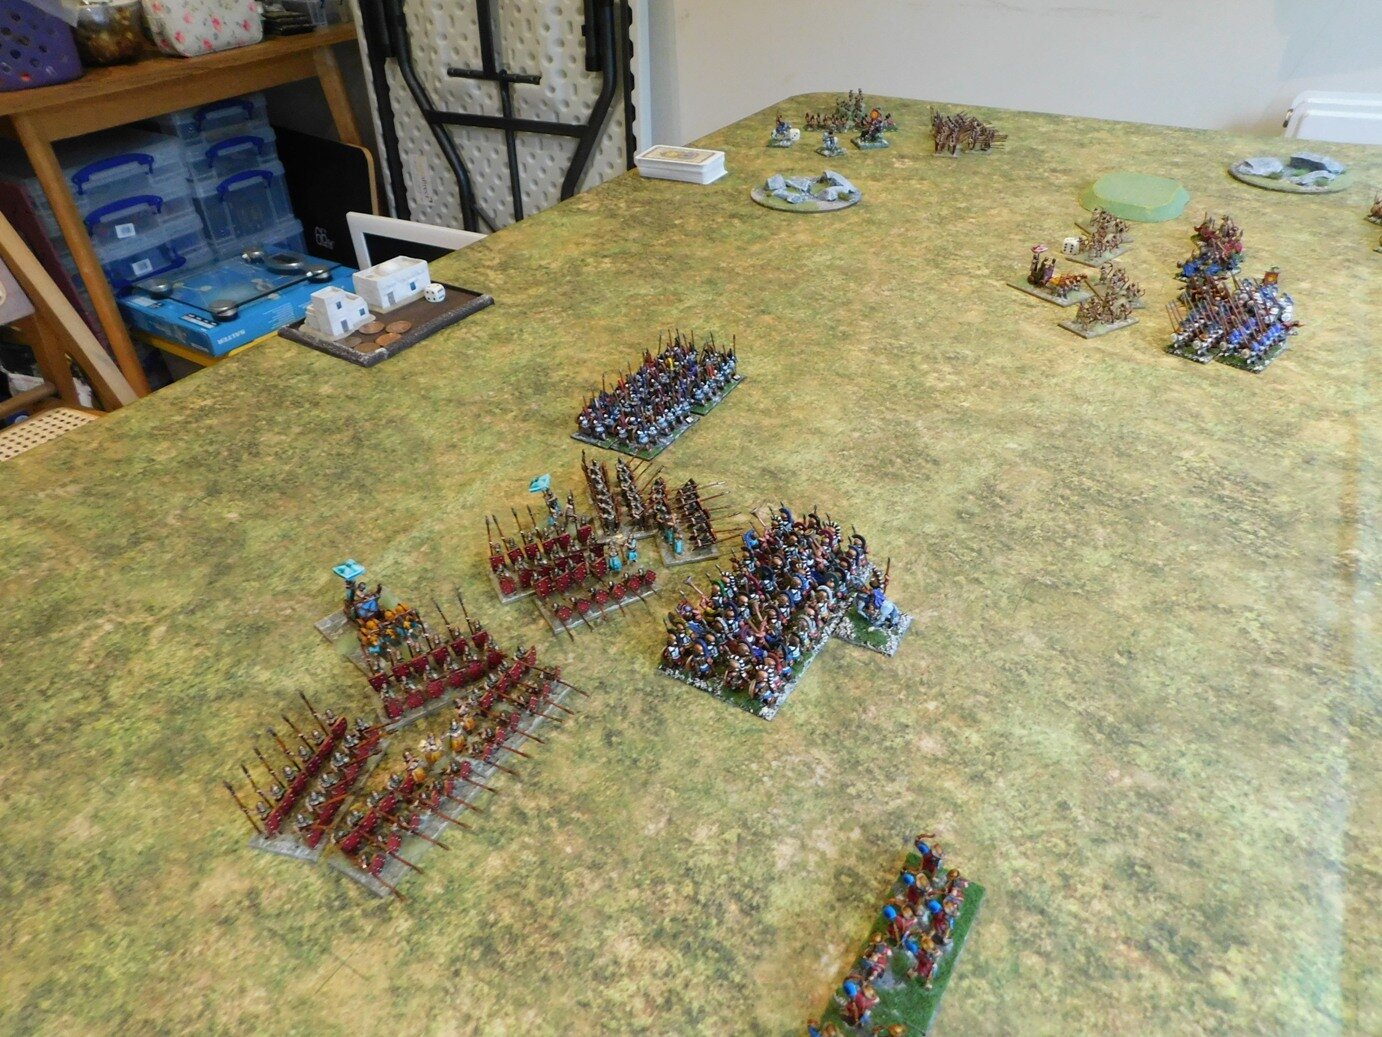
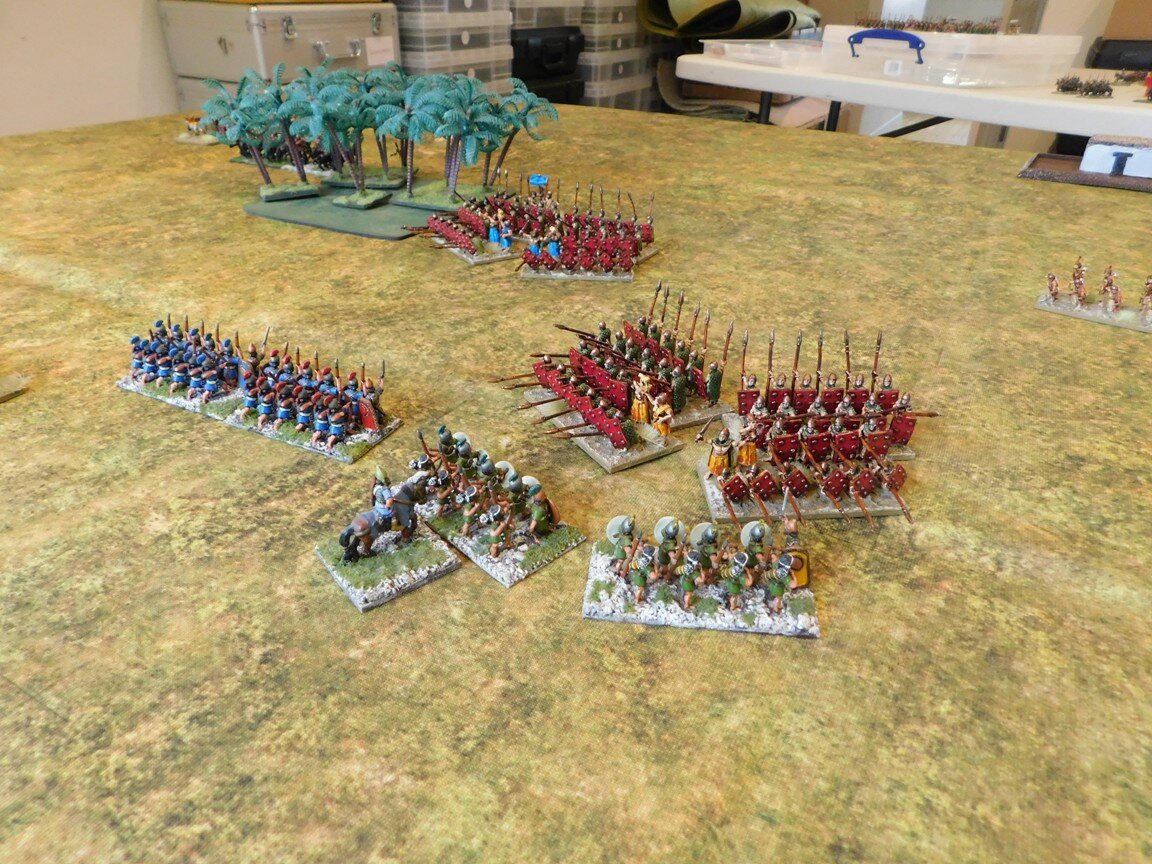
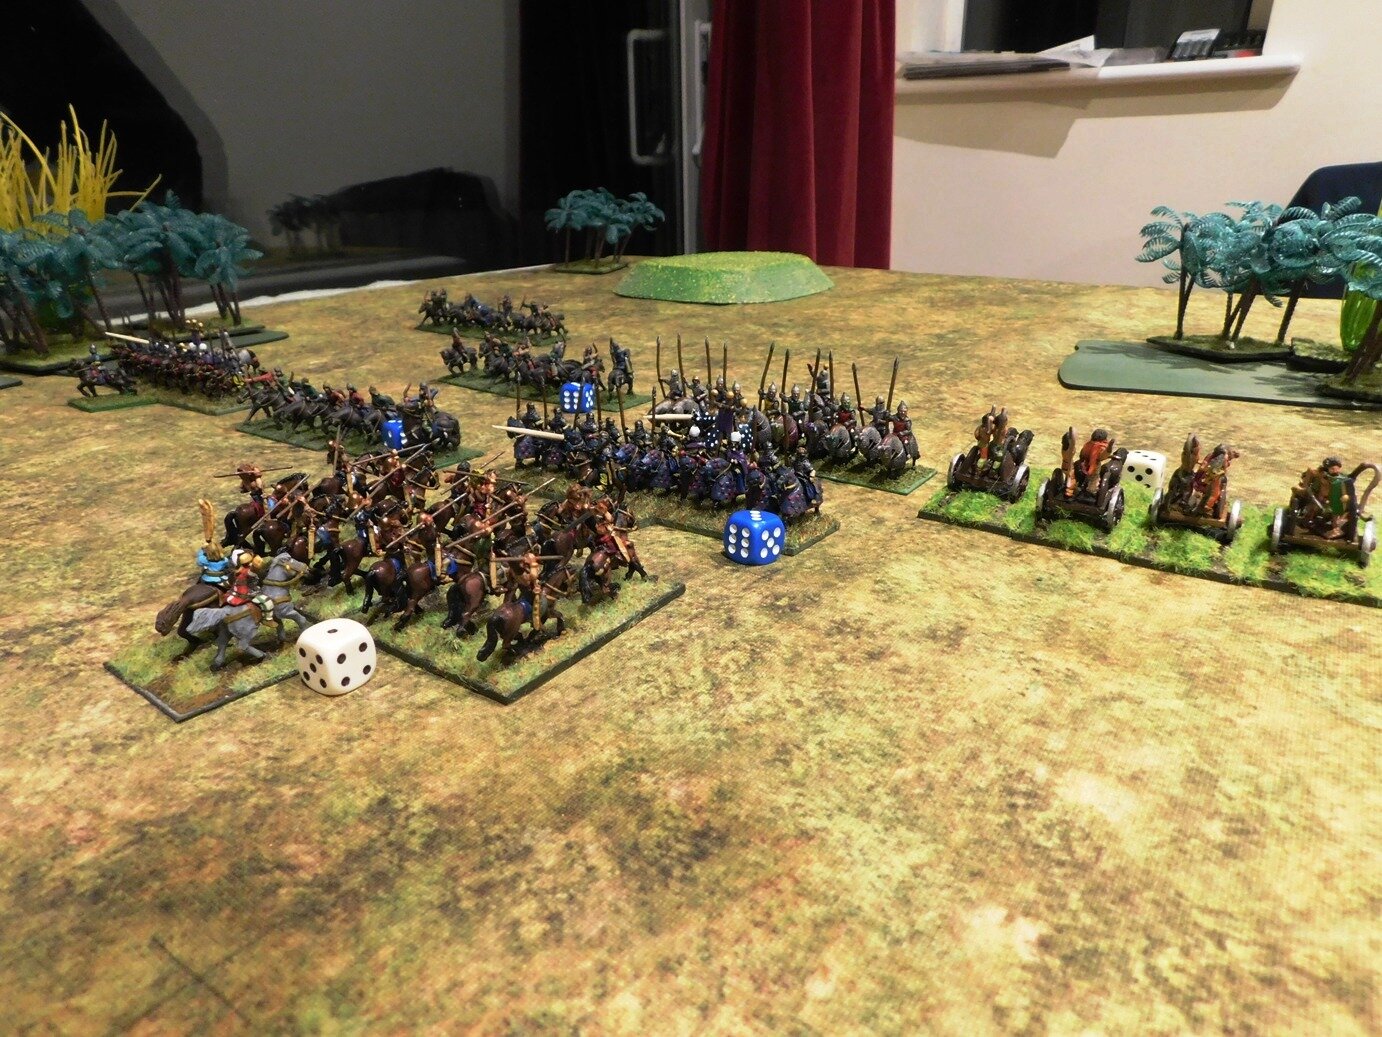
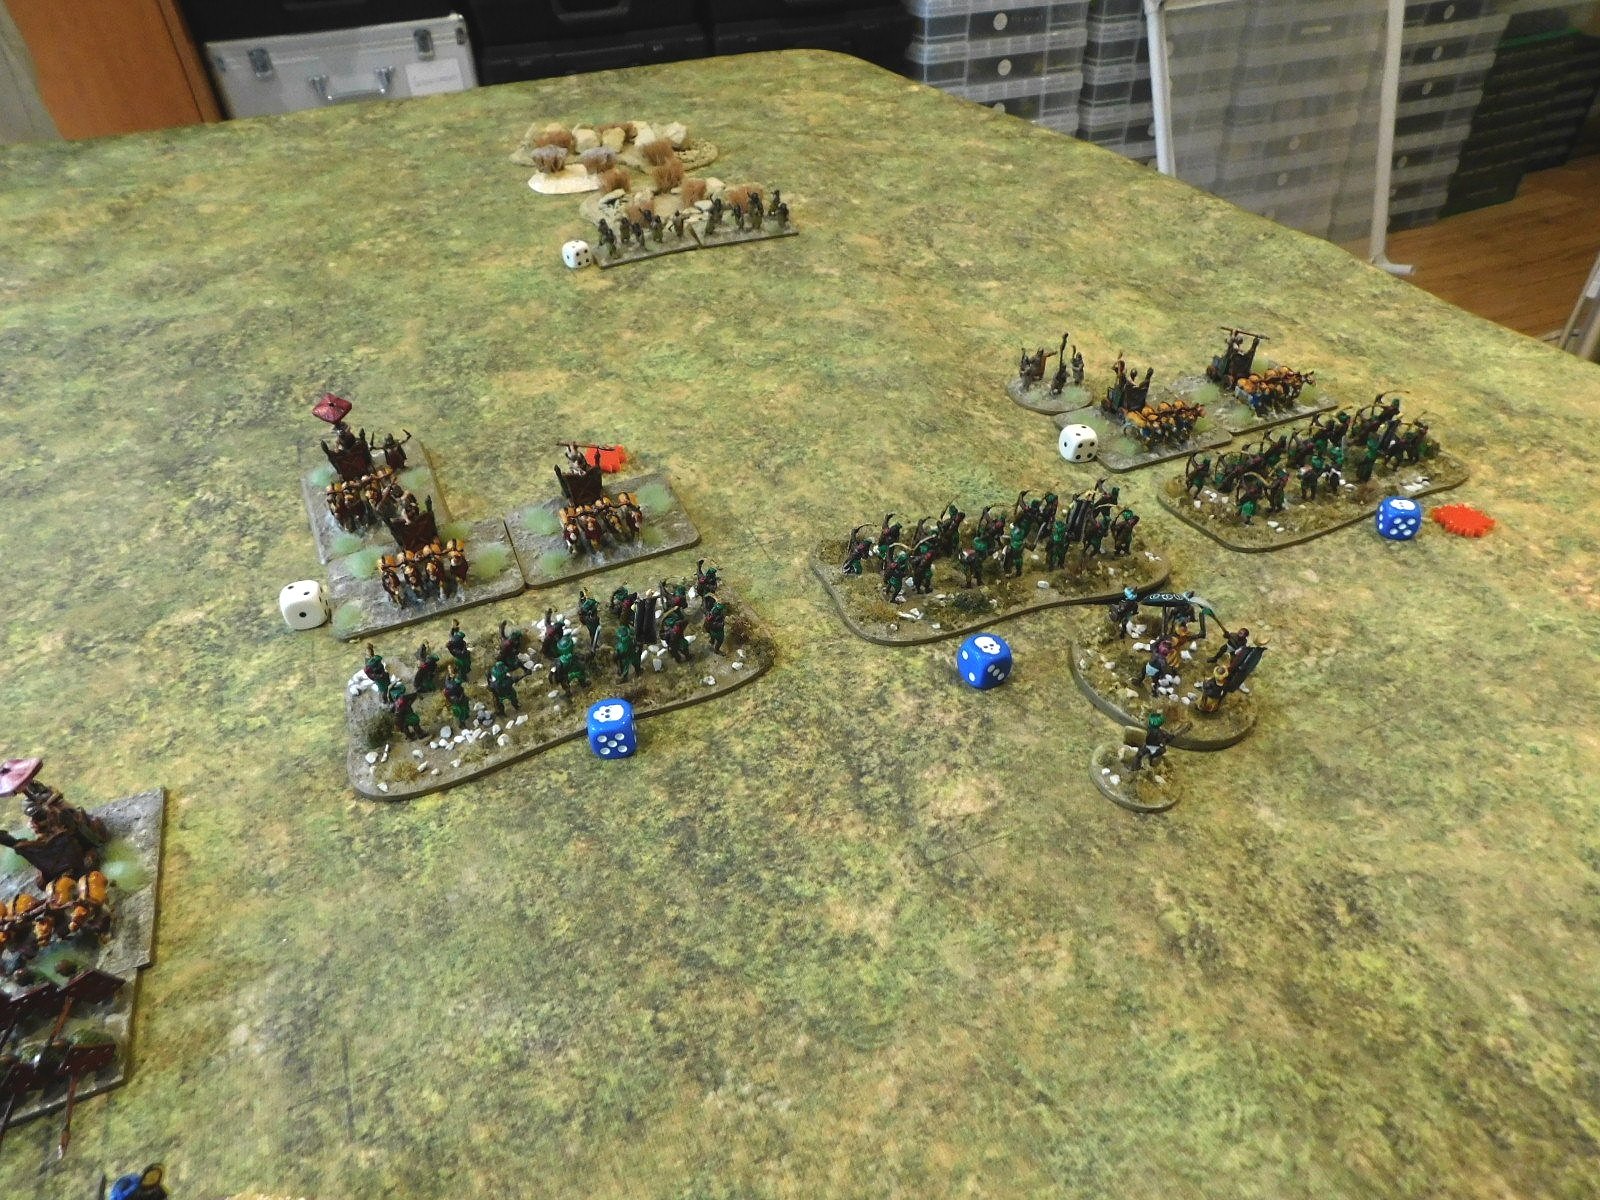
The Akkadians were outscouted, and set up in a long line of men holding sharp pointy sticks, placing their veteran battle carts on their left/my right. I matched their infantry with my own, but put all my chariots and cavalry on my left. My plan was to hold my infantry back, giving them as long as possible to shoot their longbows, whilst I outflanked and won the battle with my mounted troops on the left.

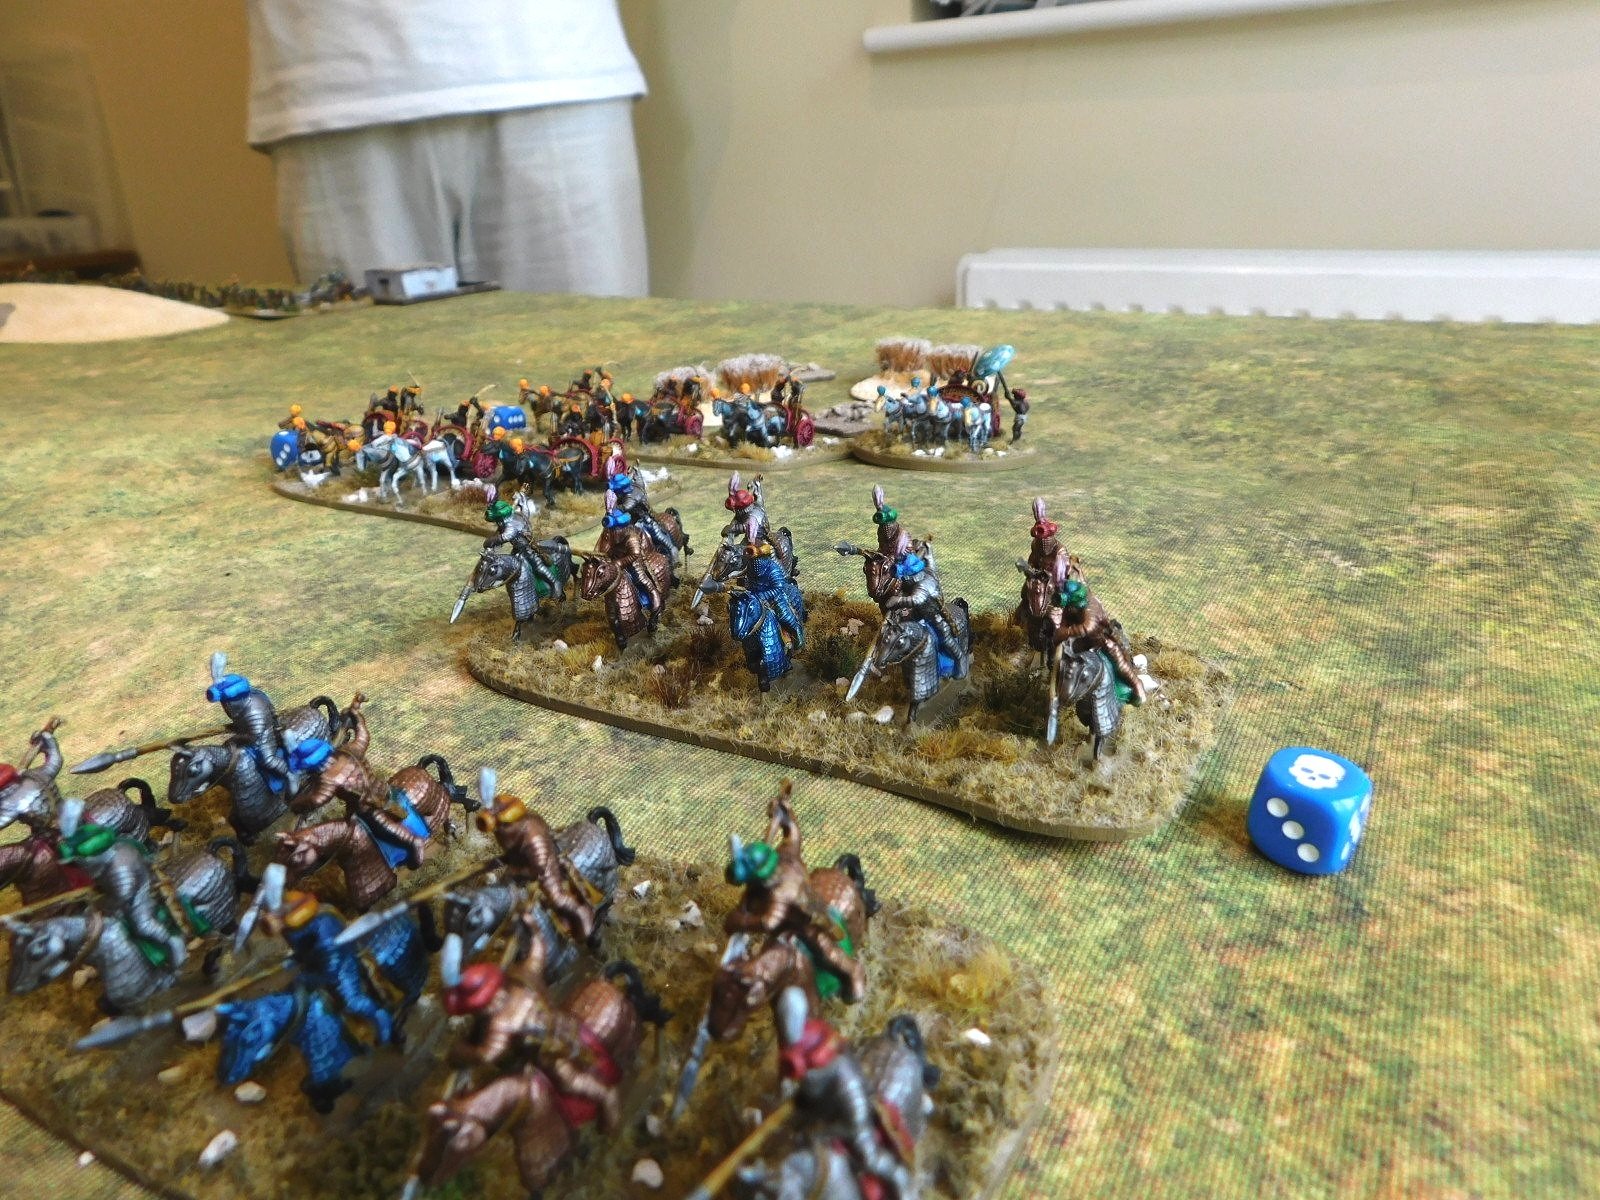
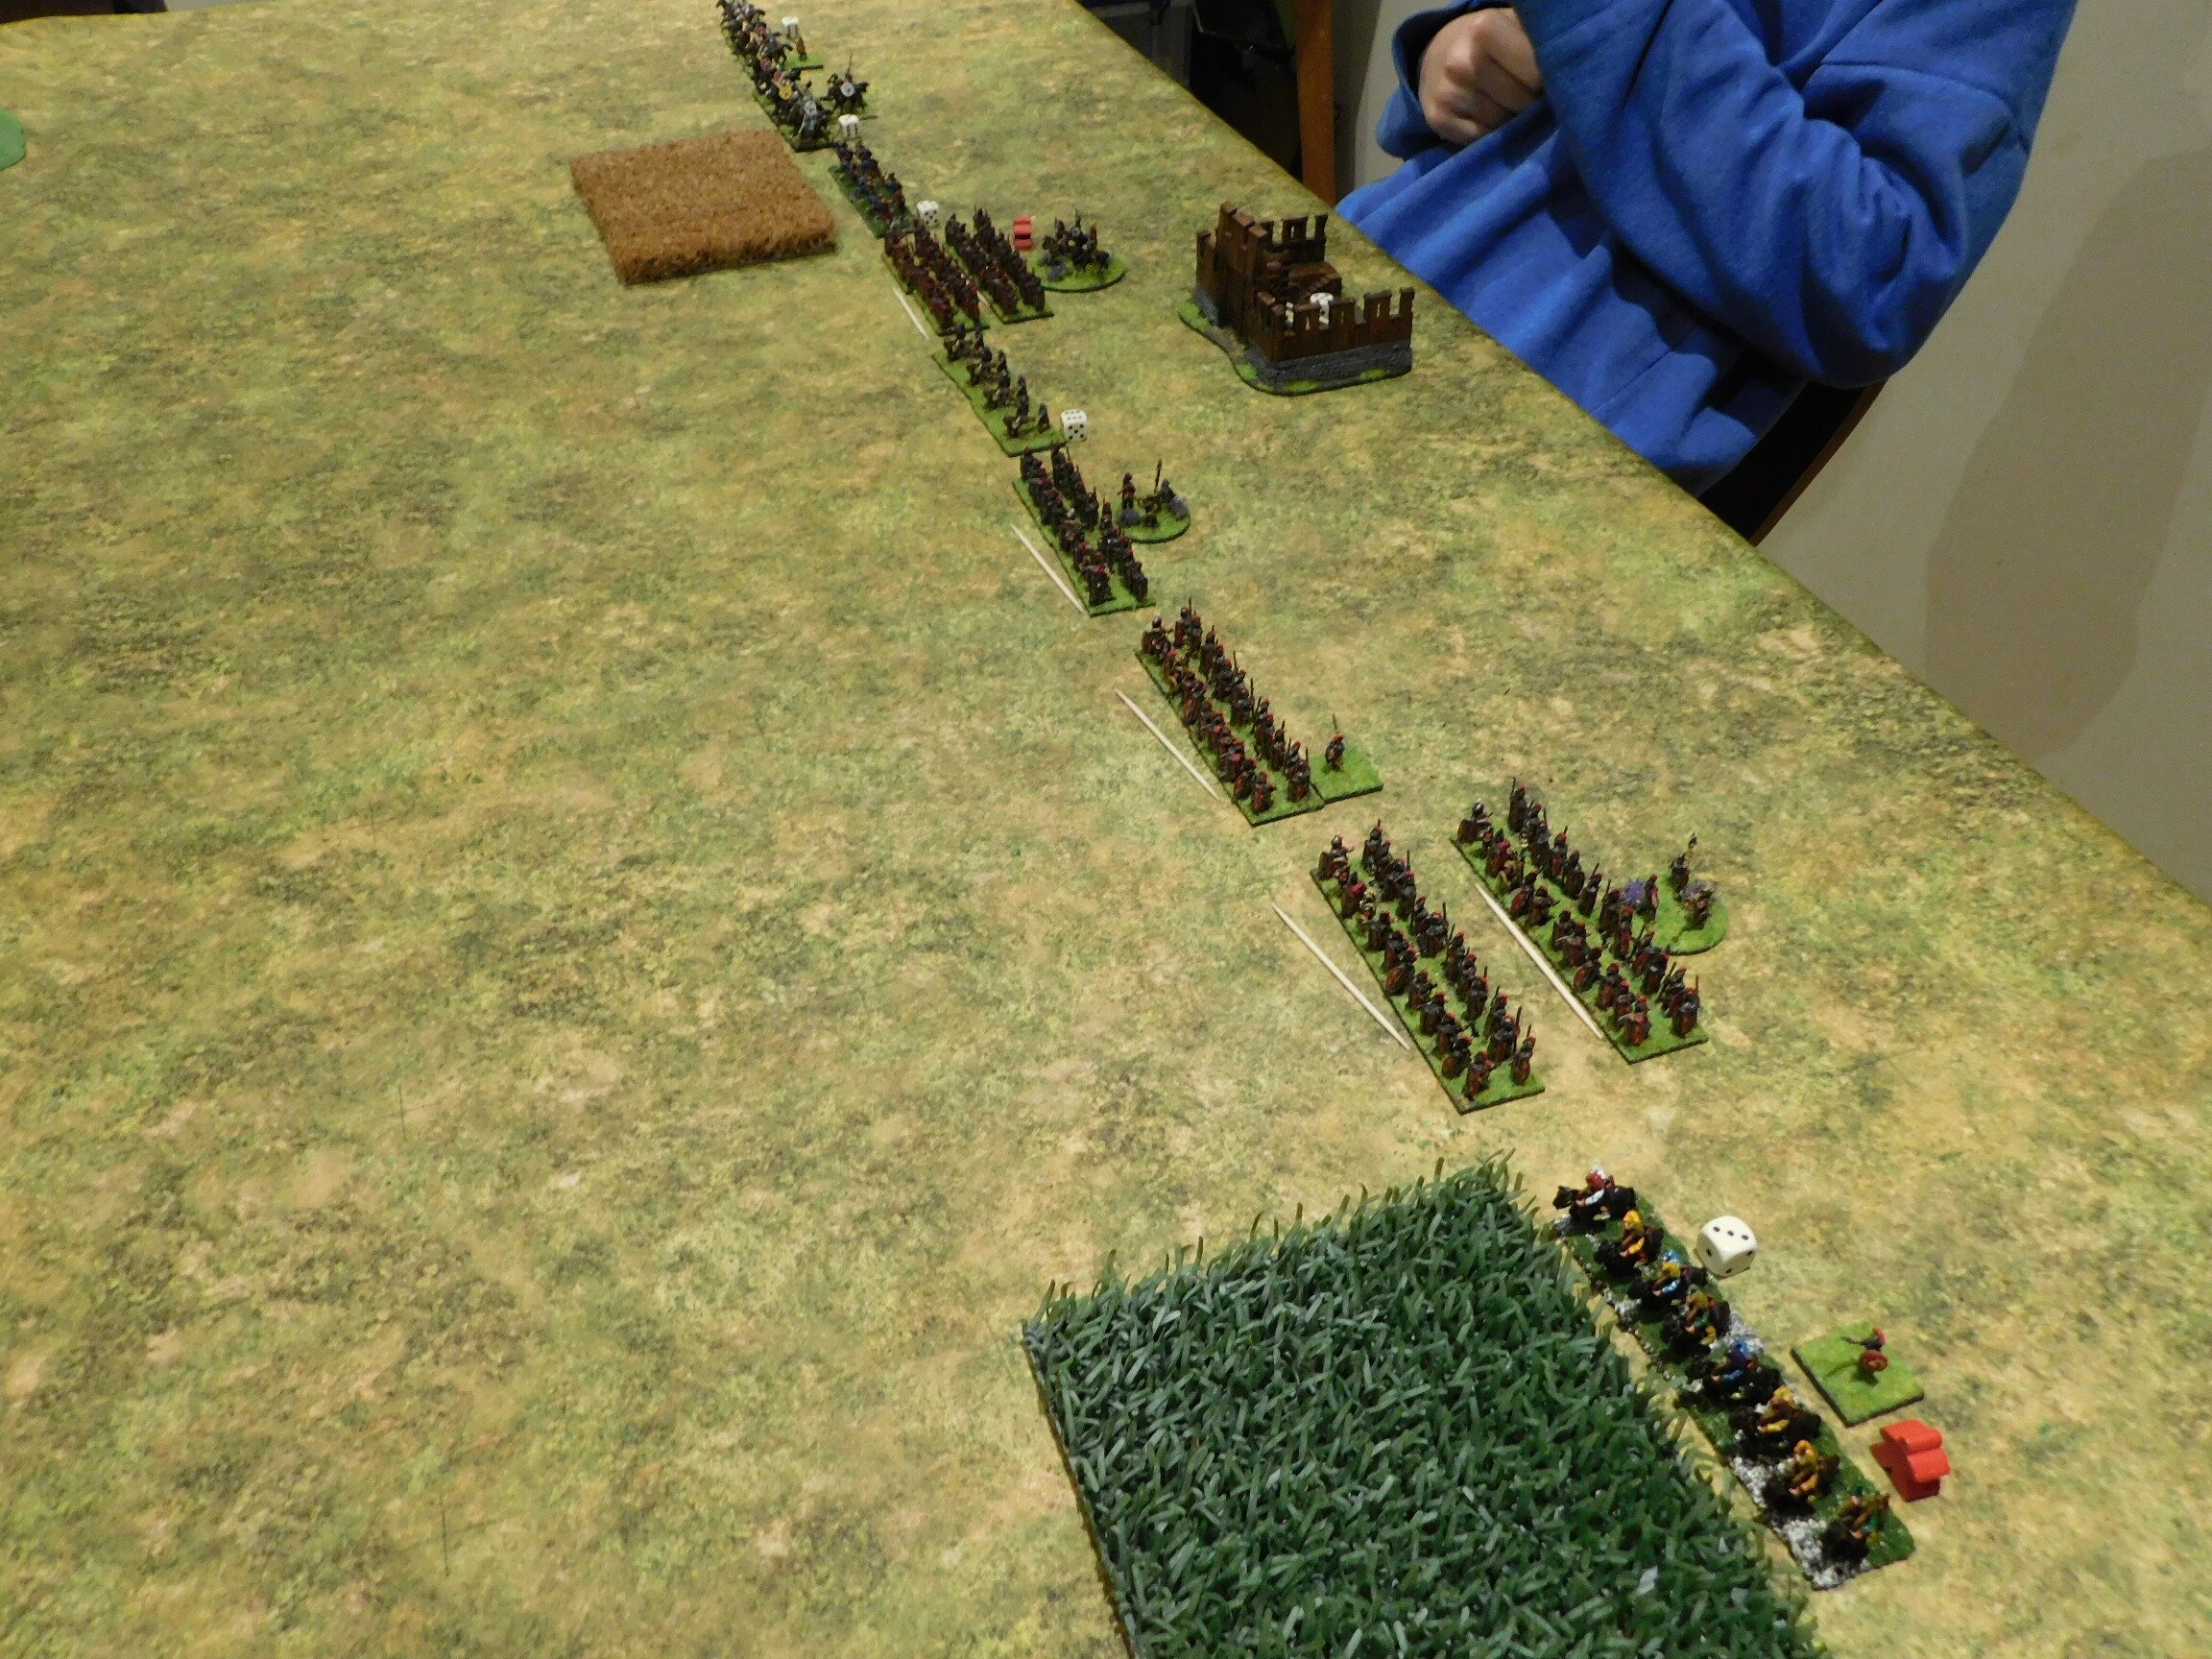
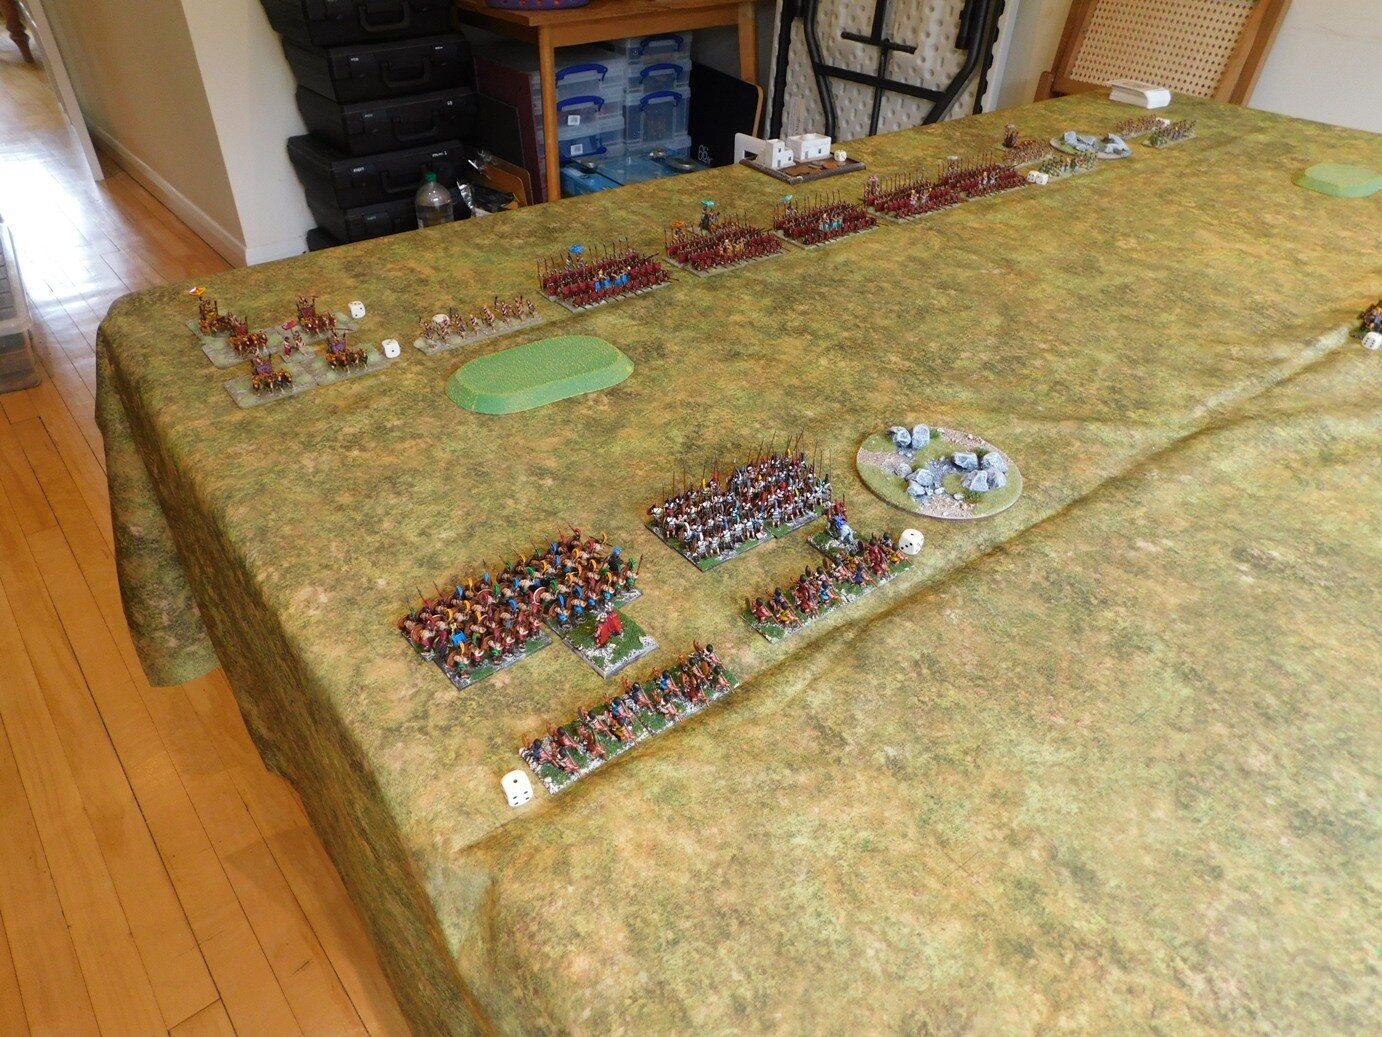
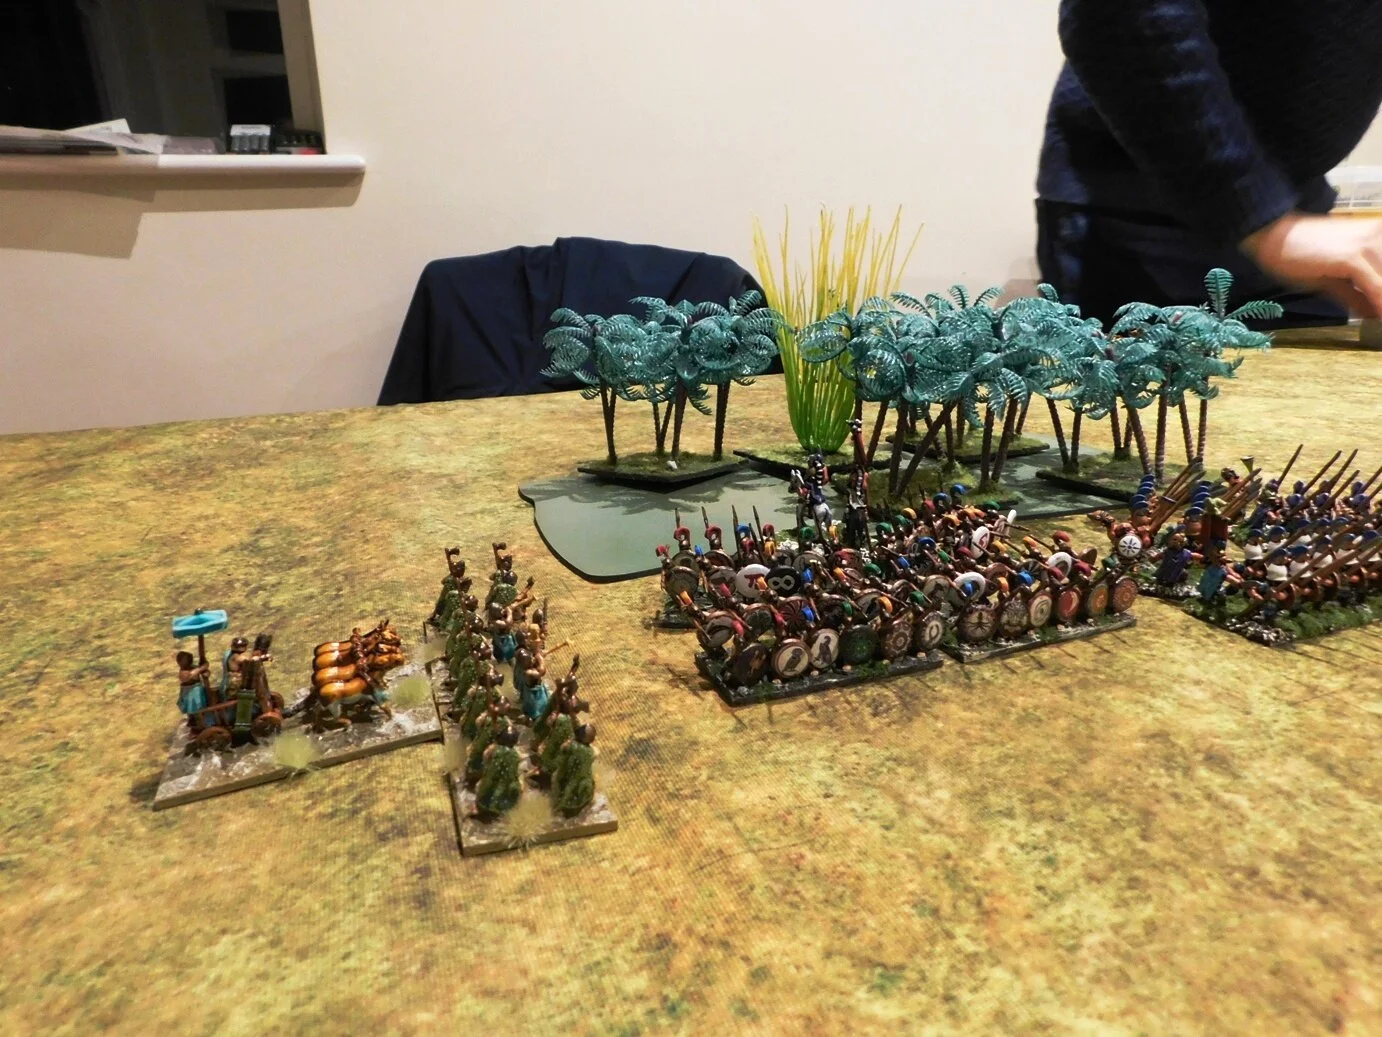
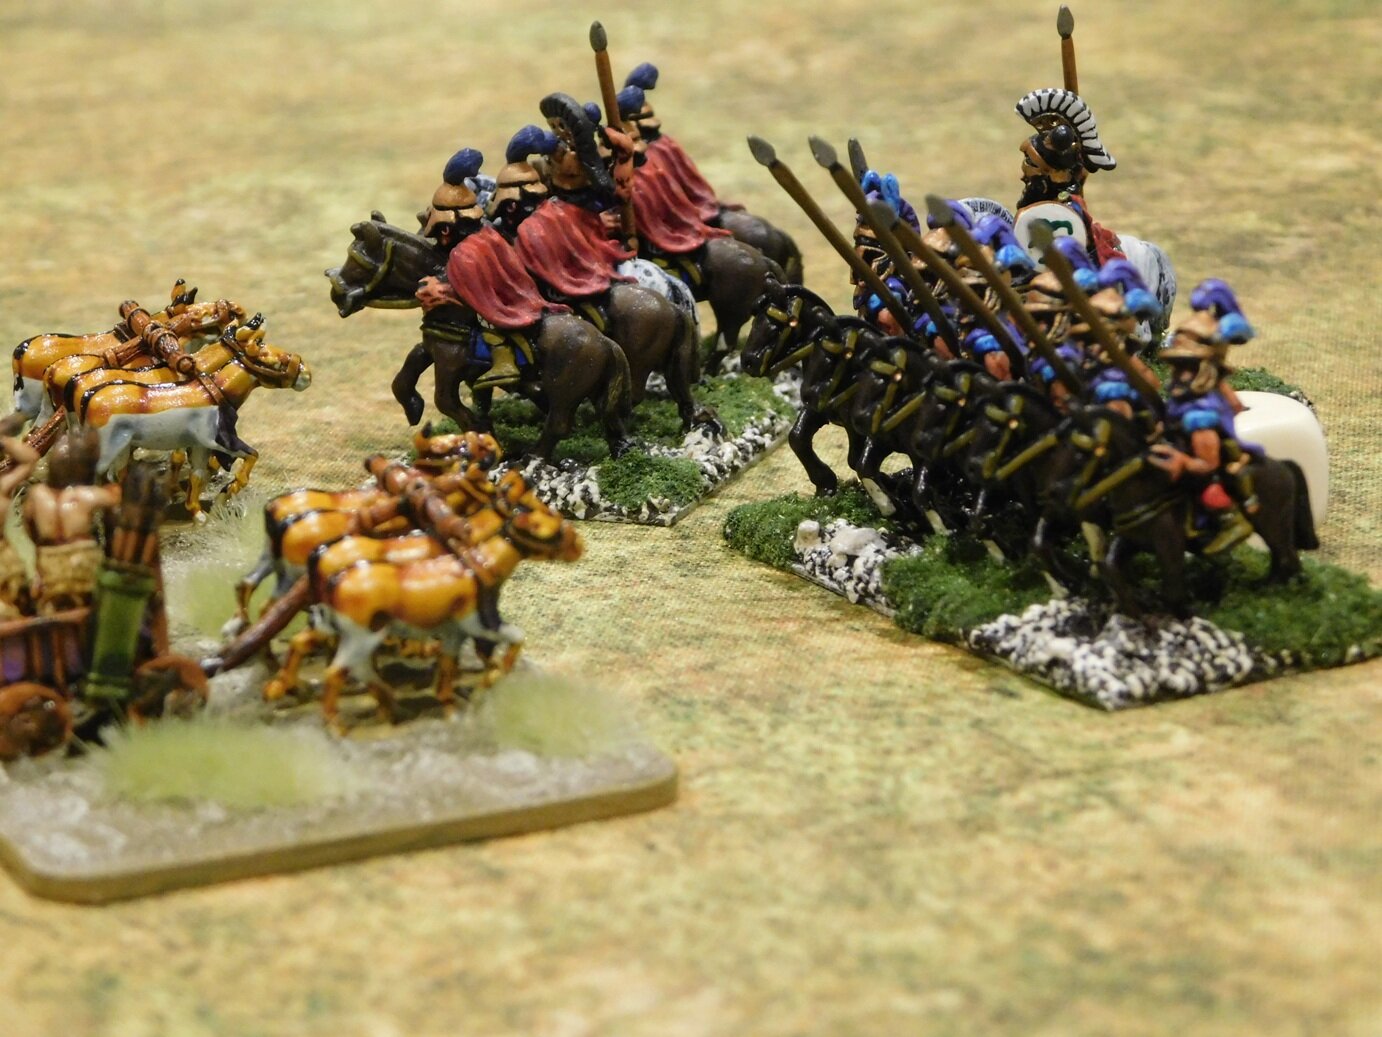
Initially, this actually worked very well indeed. On the left, my chariots and horse neatly swung out a bit and headed past the end of his line at a rapid rate of knots.

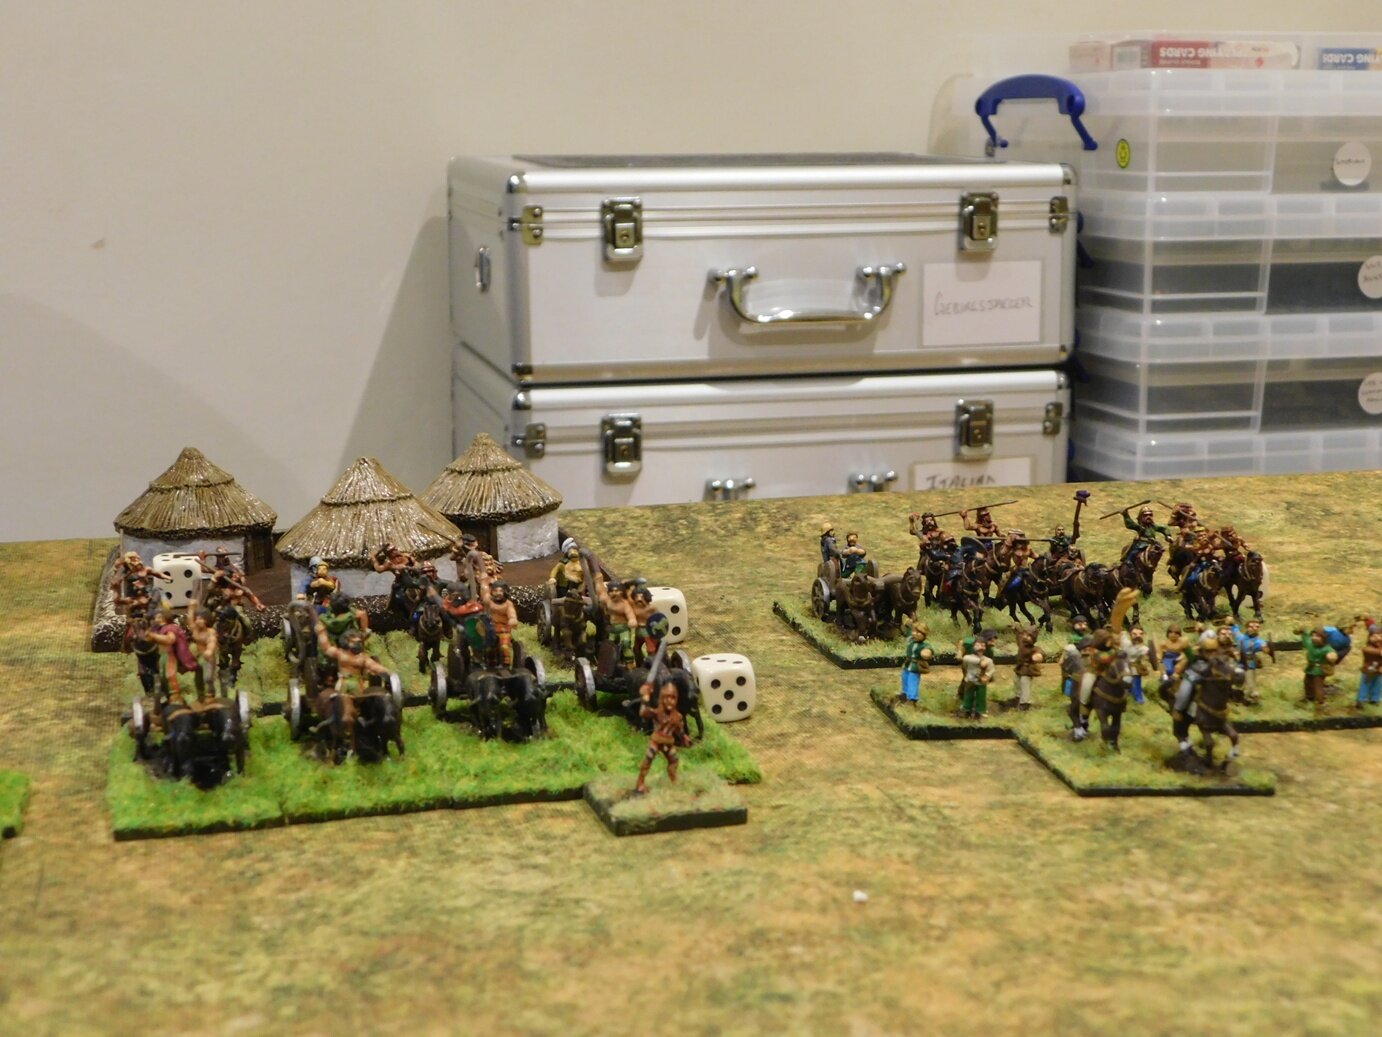
This allowed me to send one unit of chariots towards his camp, and the other into the flank of his right-hand infantry.

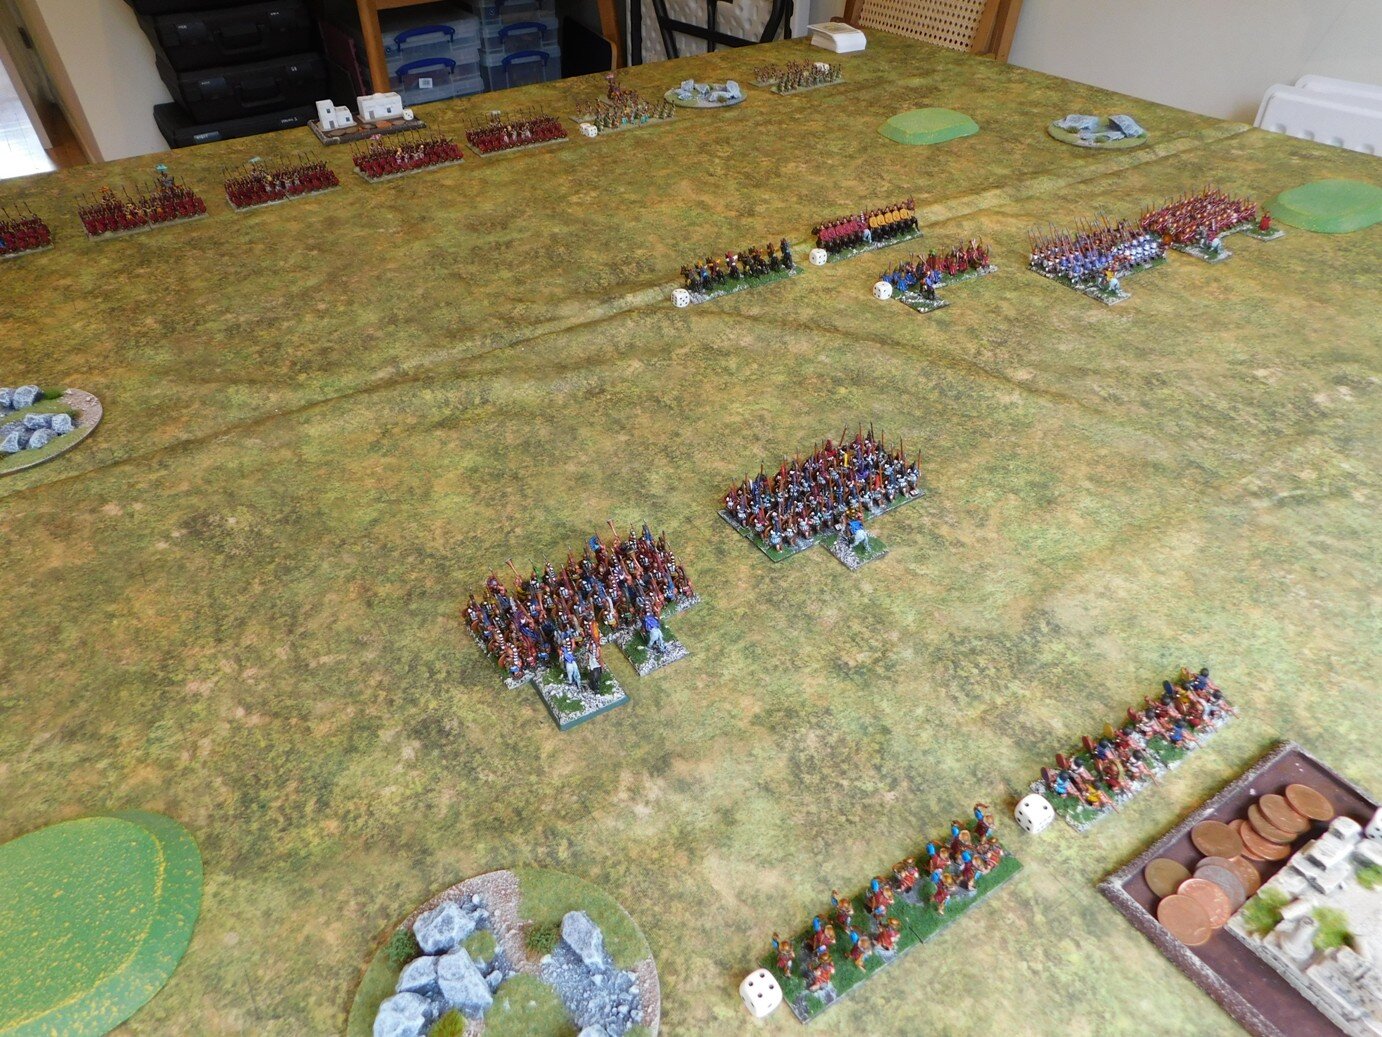
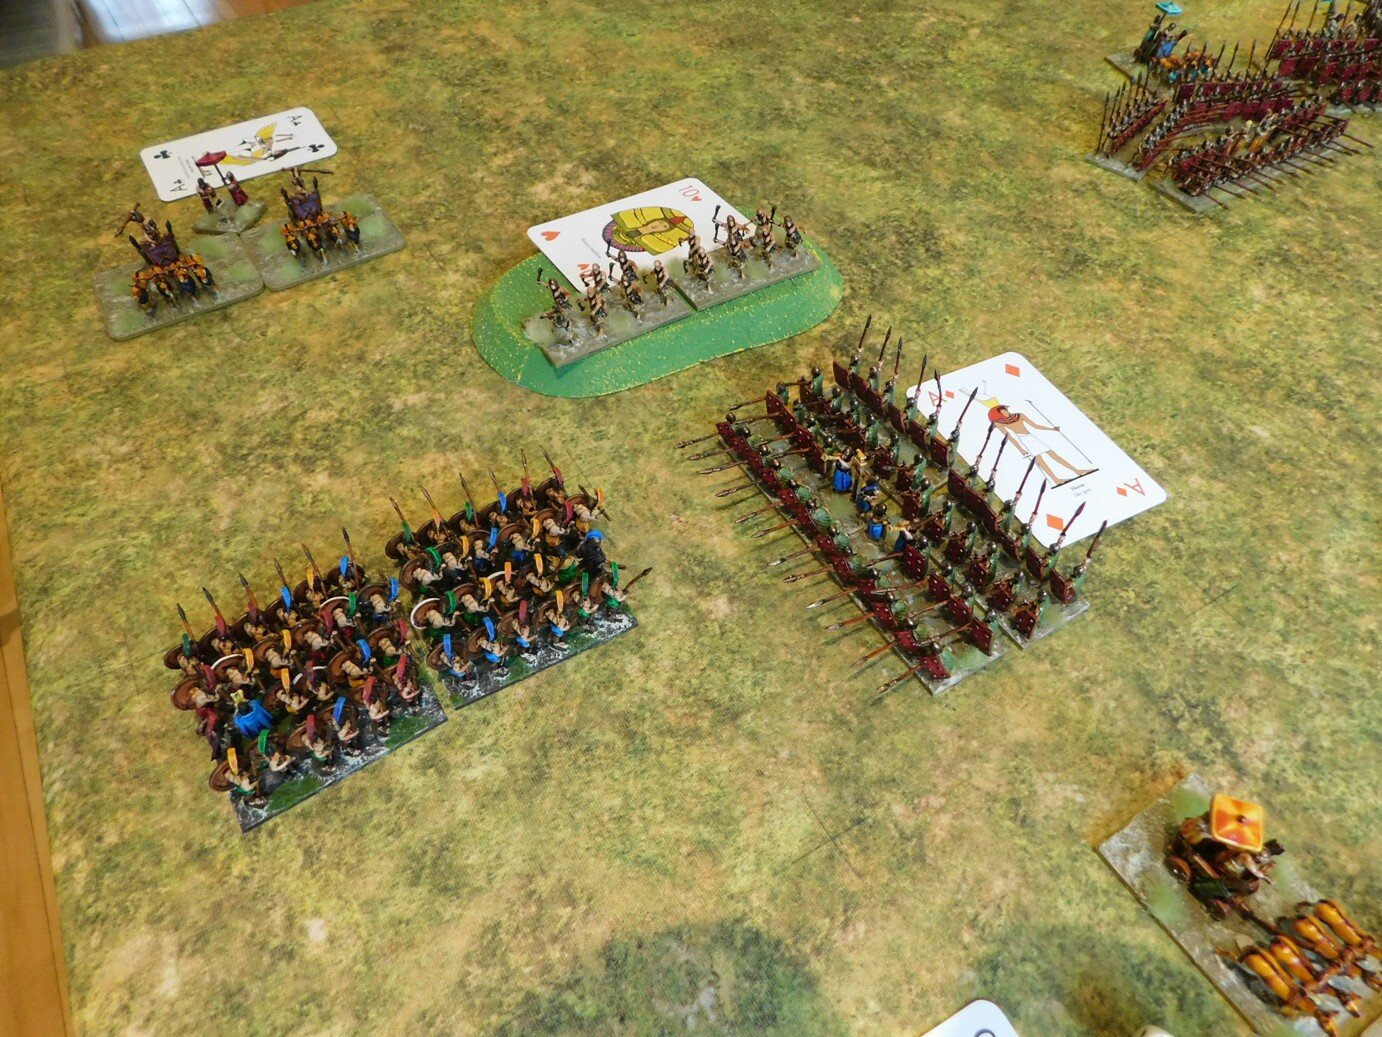
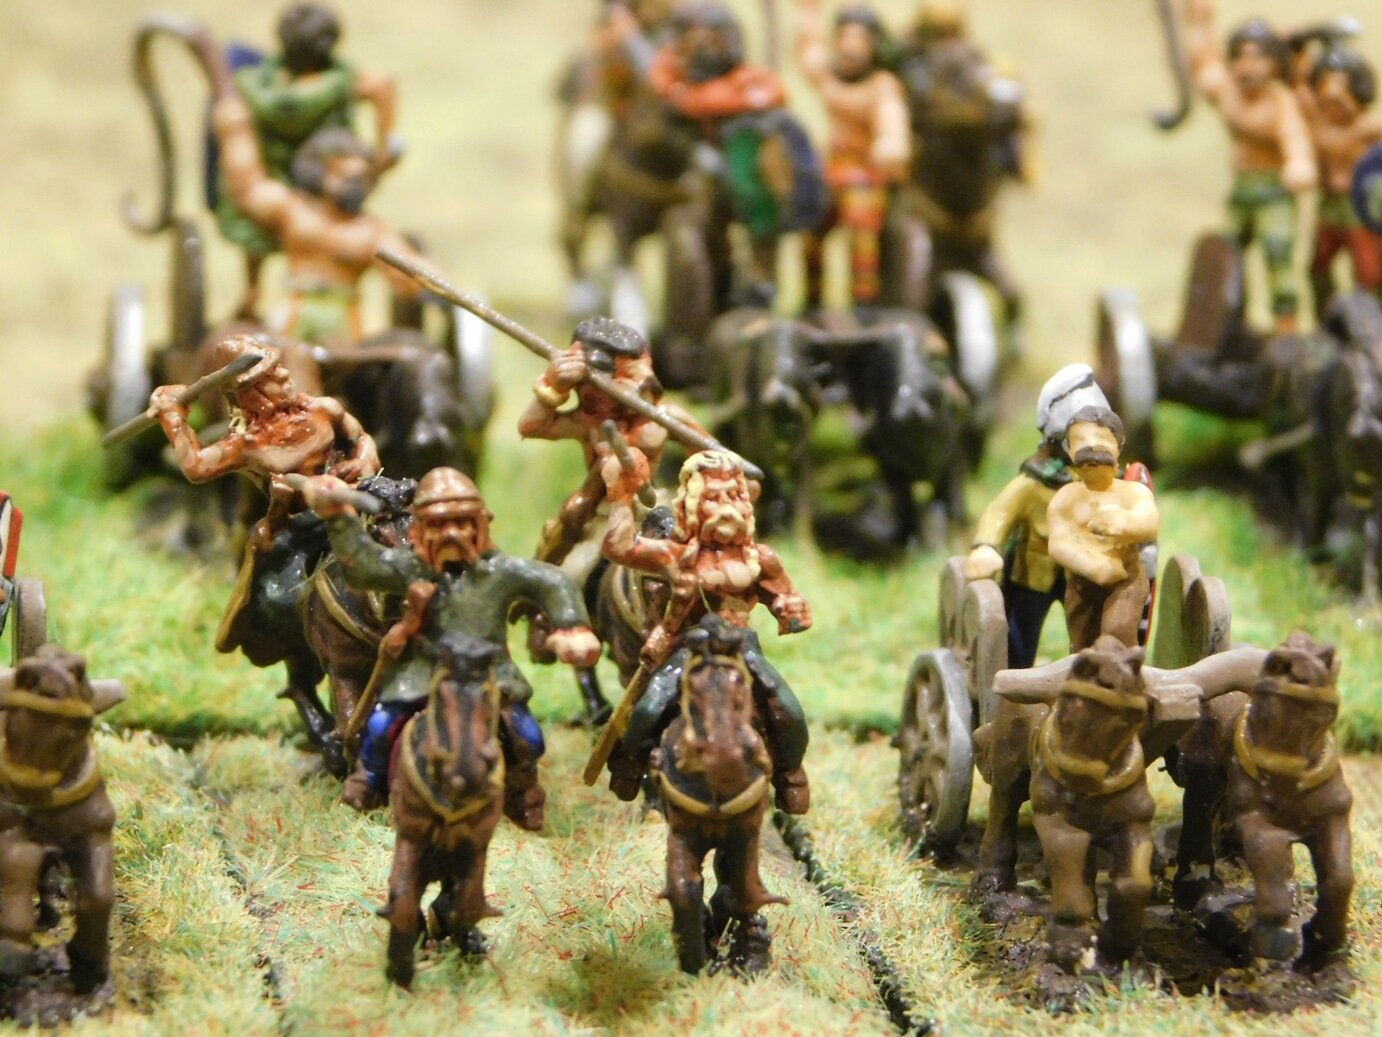
Surely this was the game sown up…but, no, the Gods laughed and shuffled the deck, and the lone Akkadian spear unit at the end of his line snapped round neatly and disposed of my (previously outflanking) chariots without much difficulty!

This was disappointing, but his camp was still about to fall:

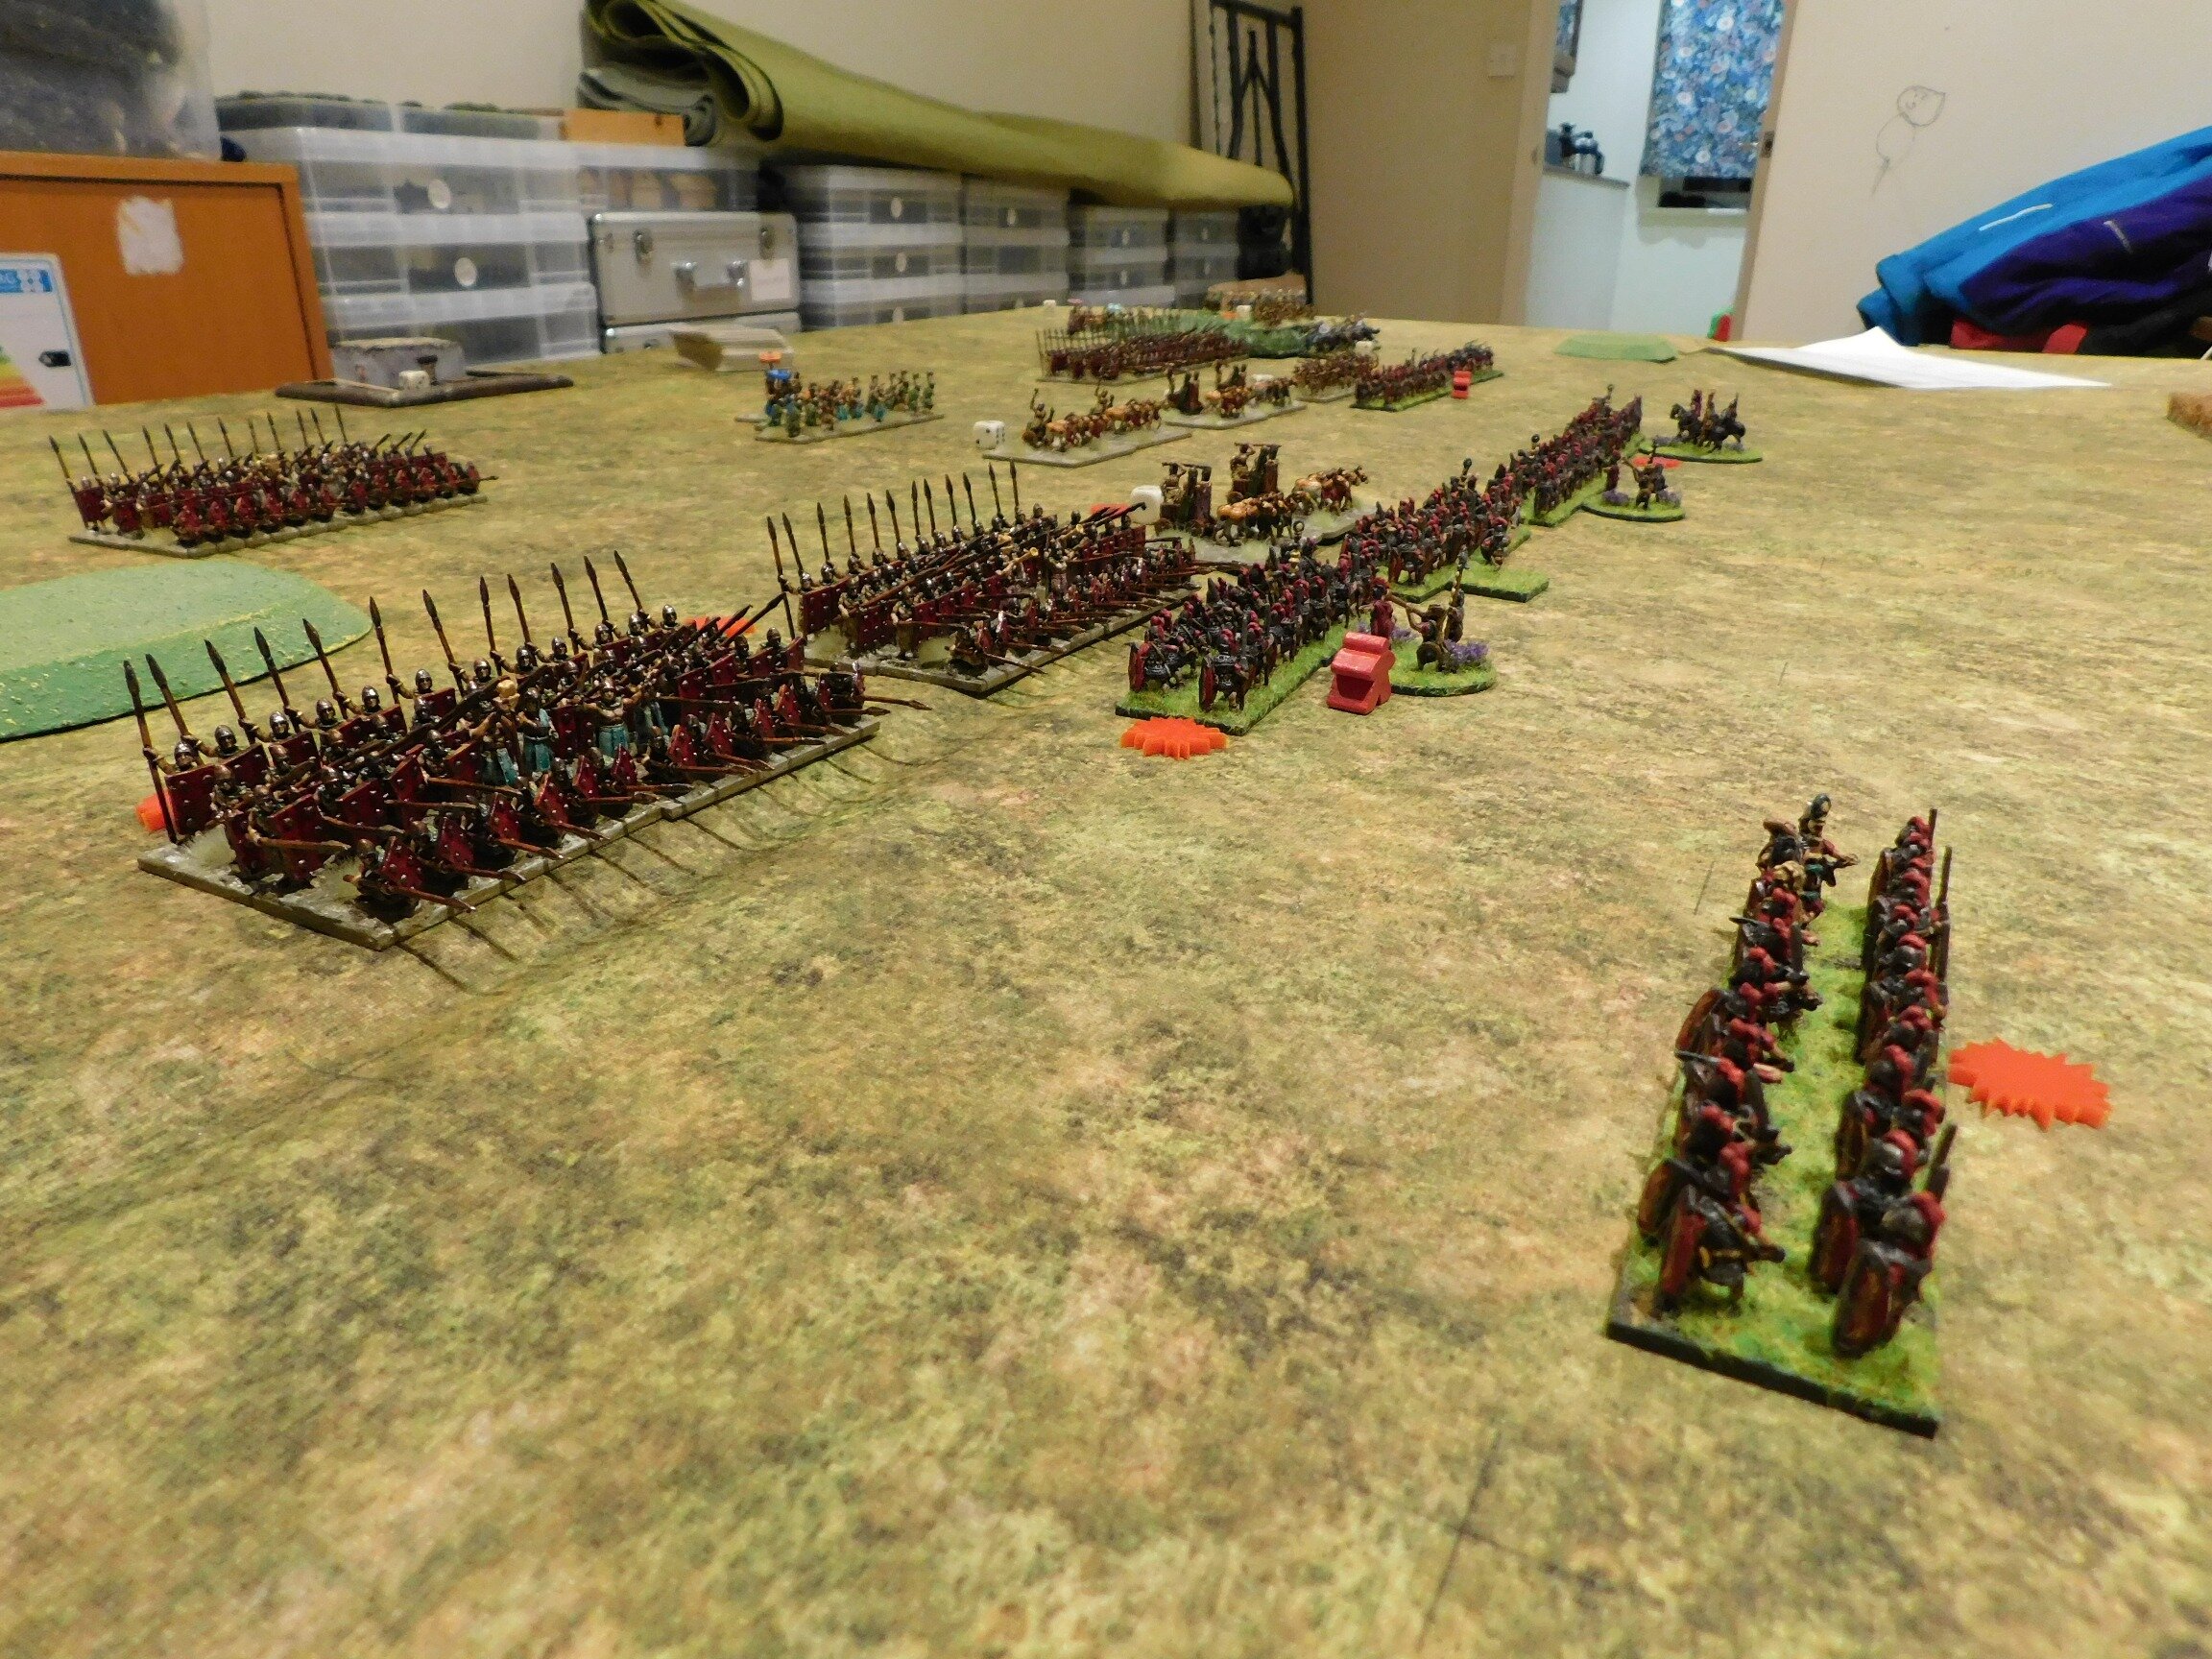
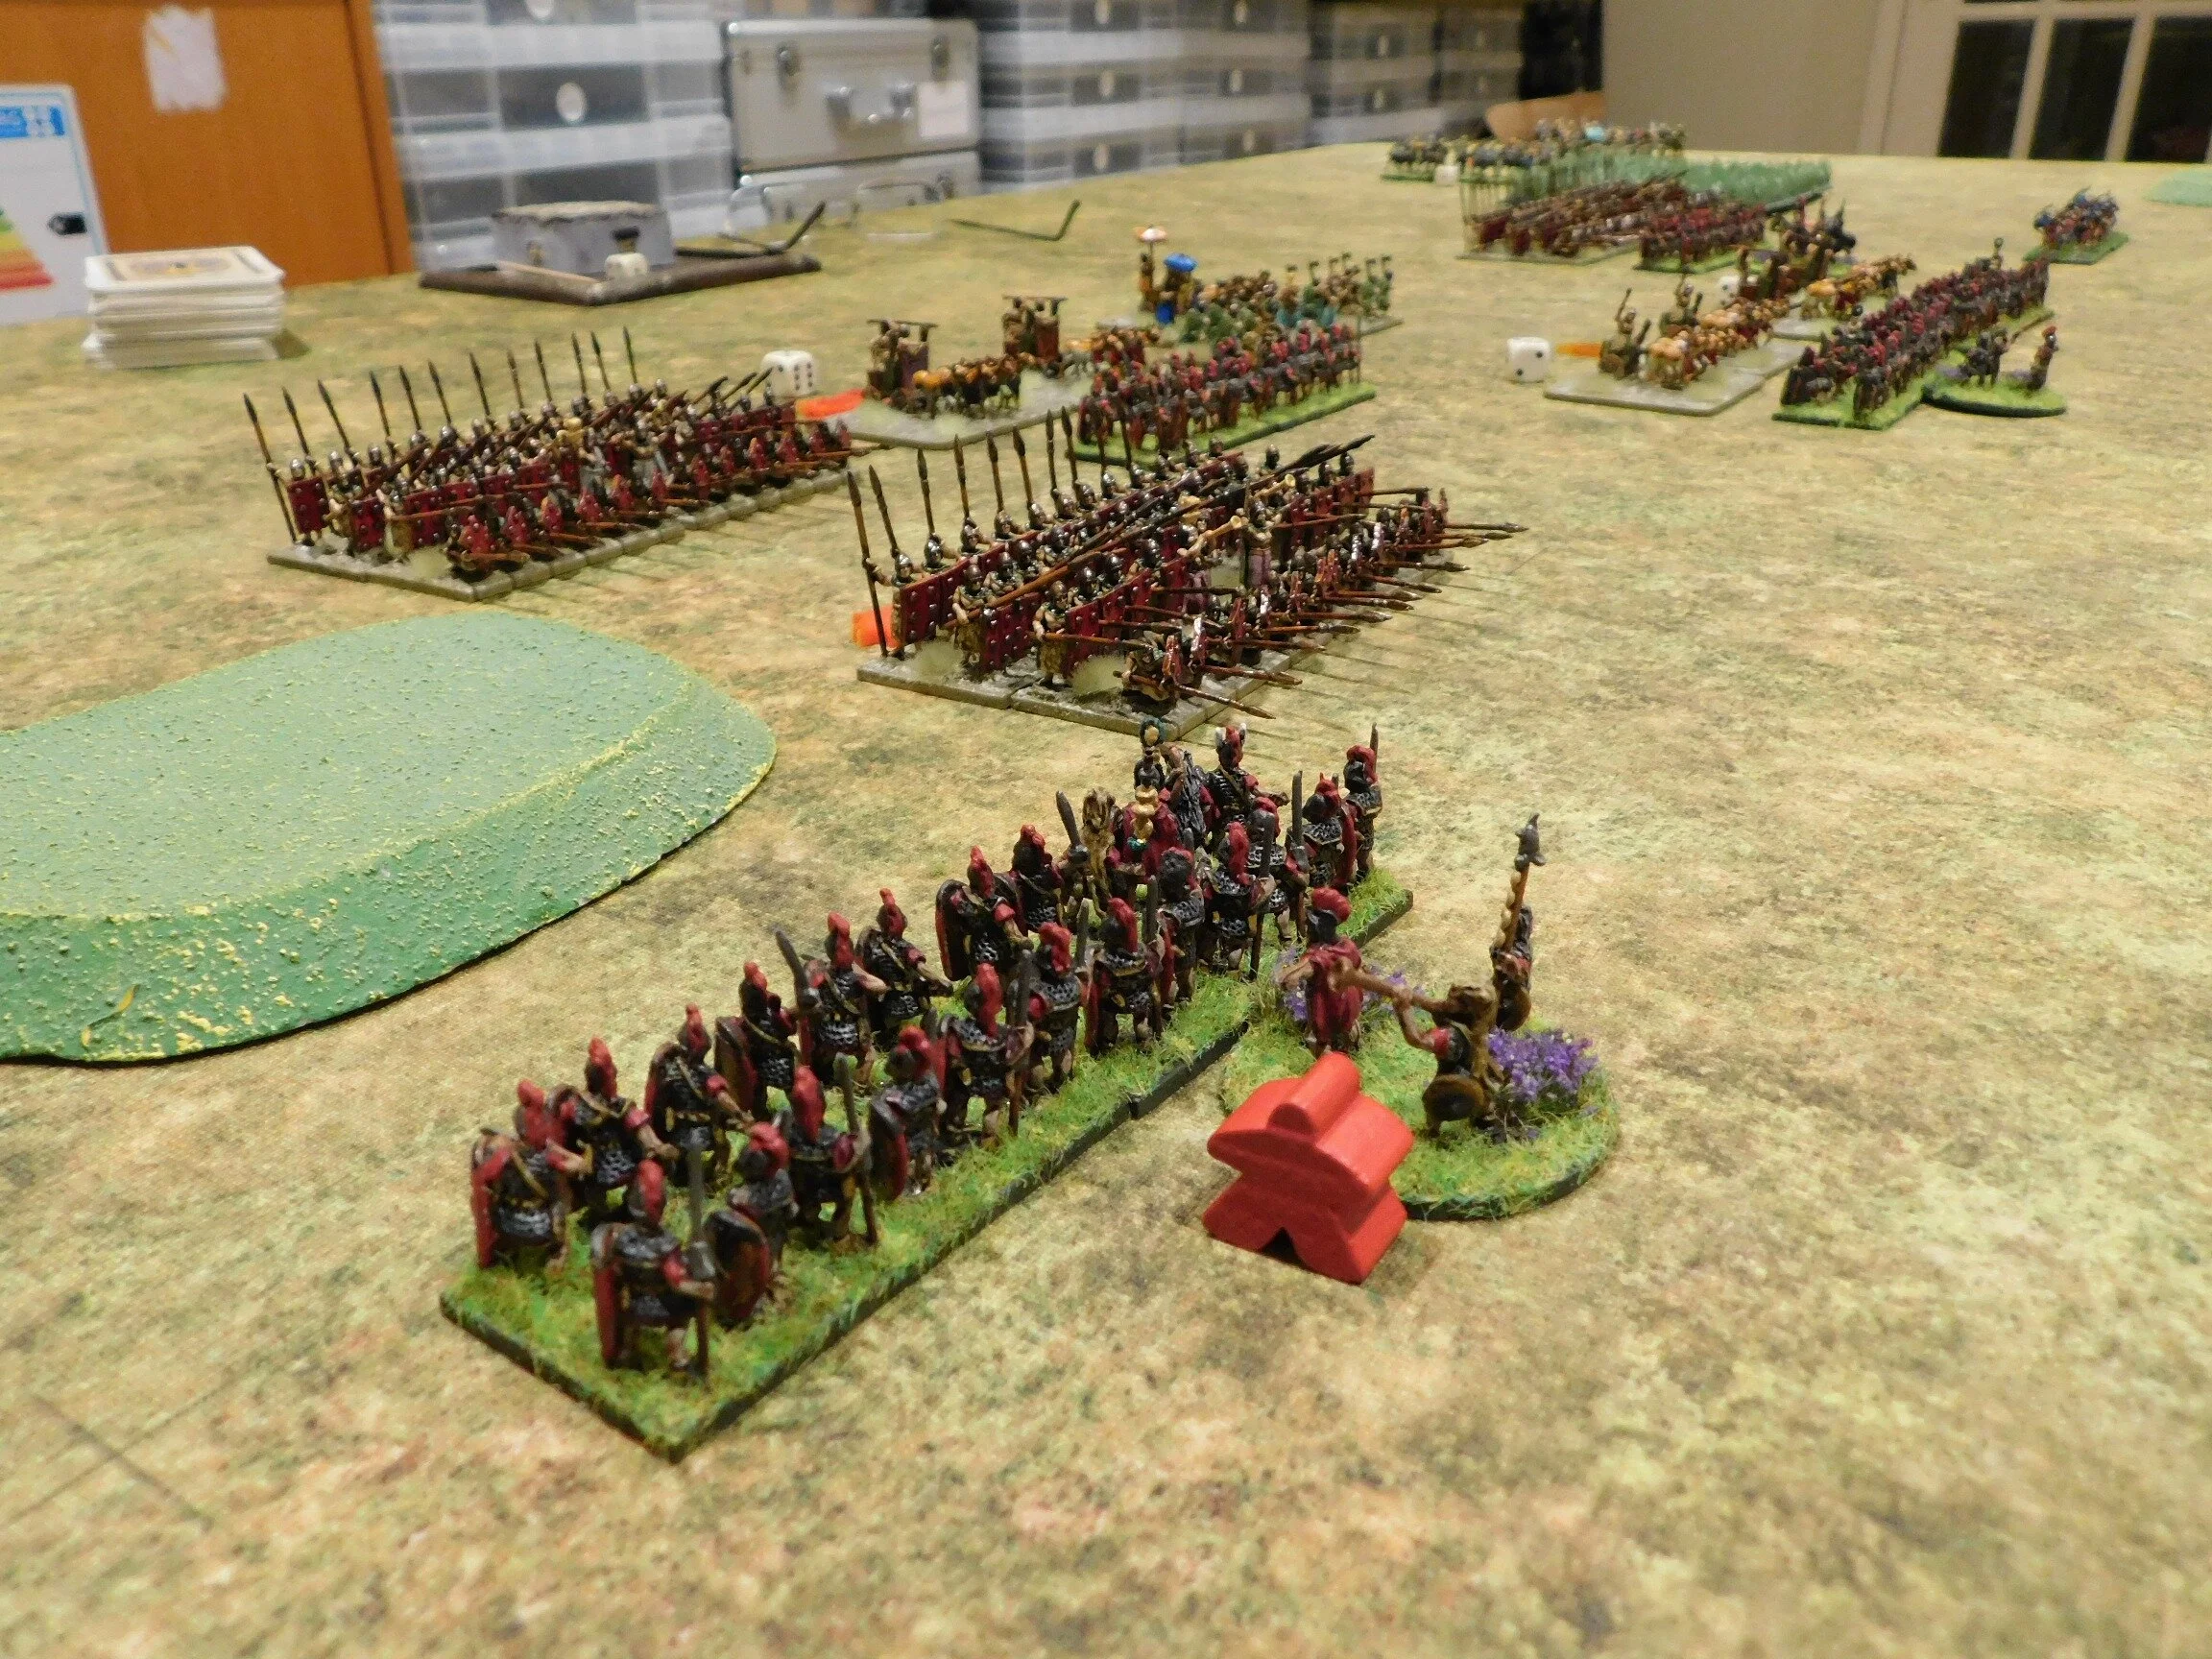
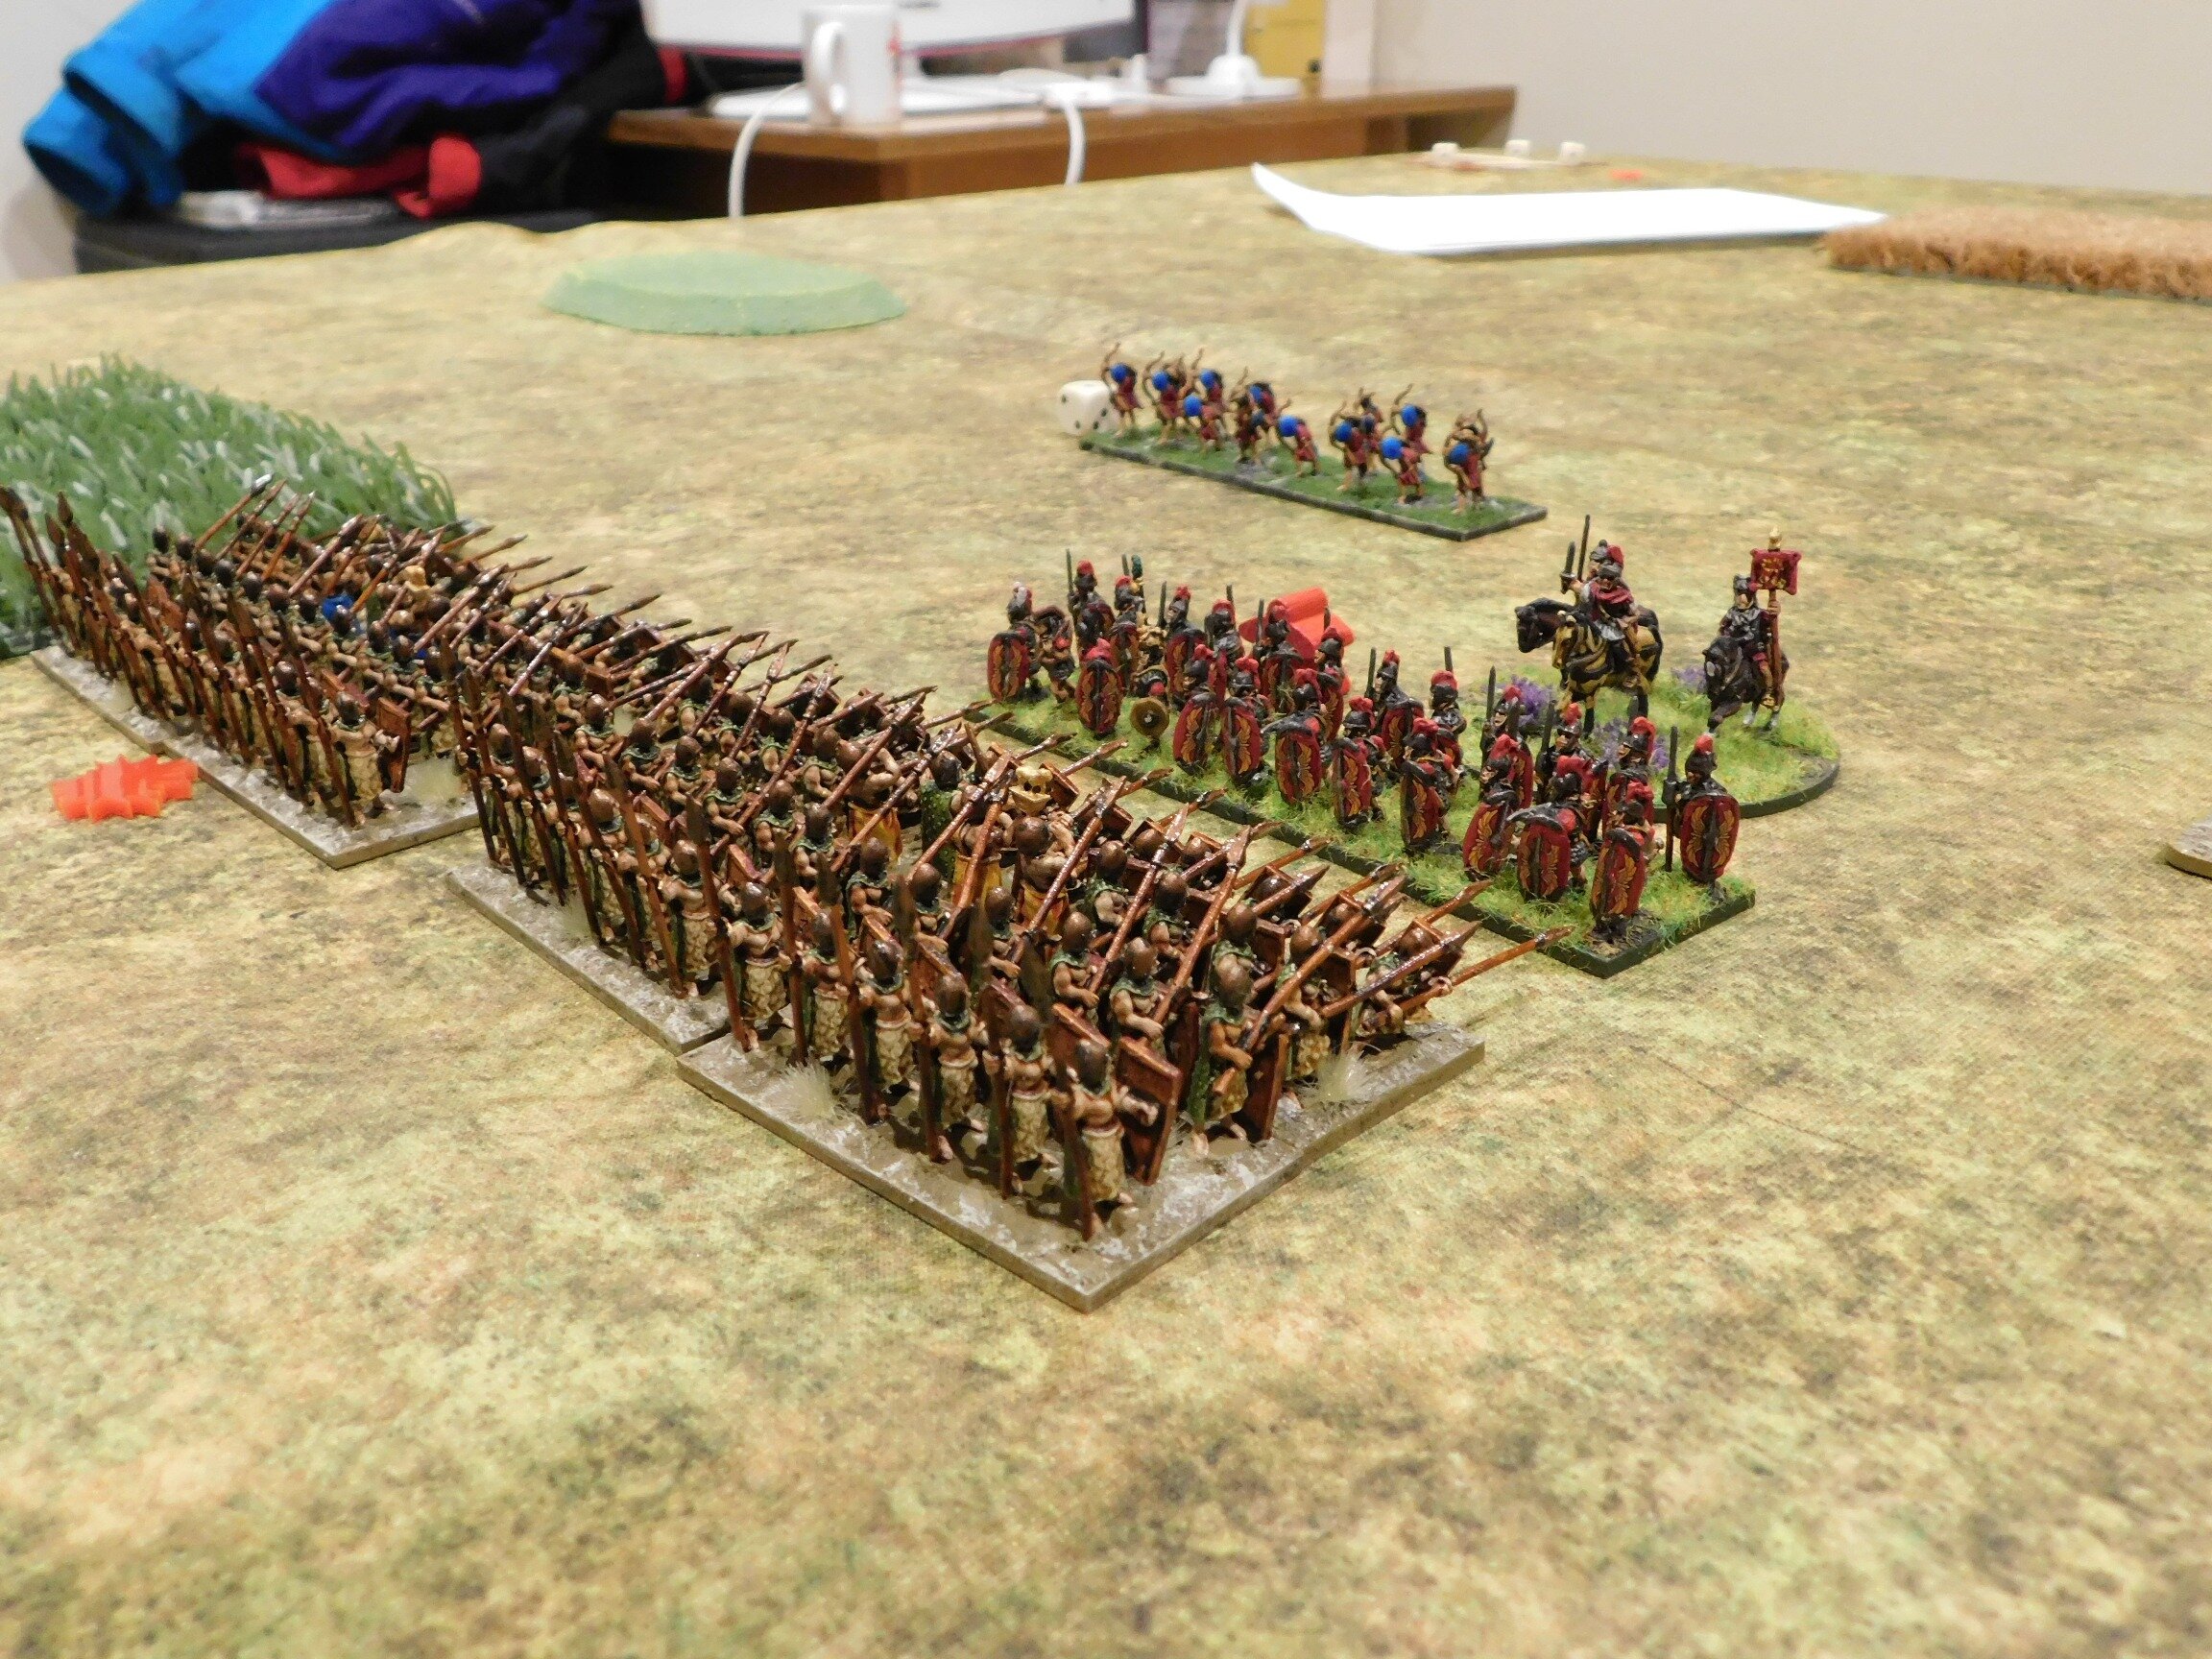
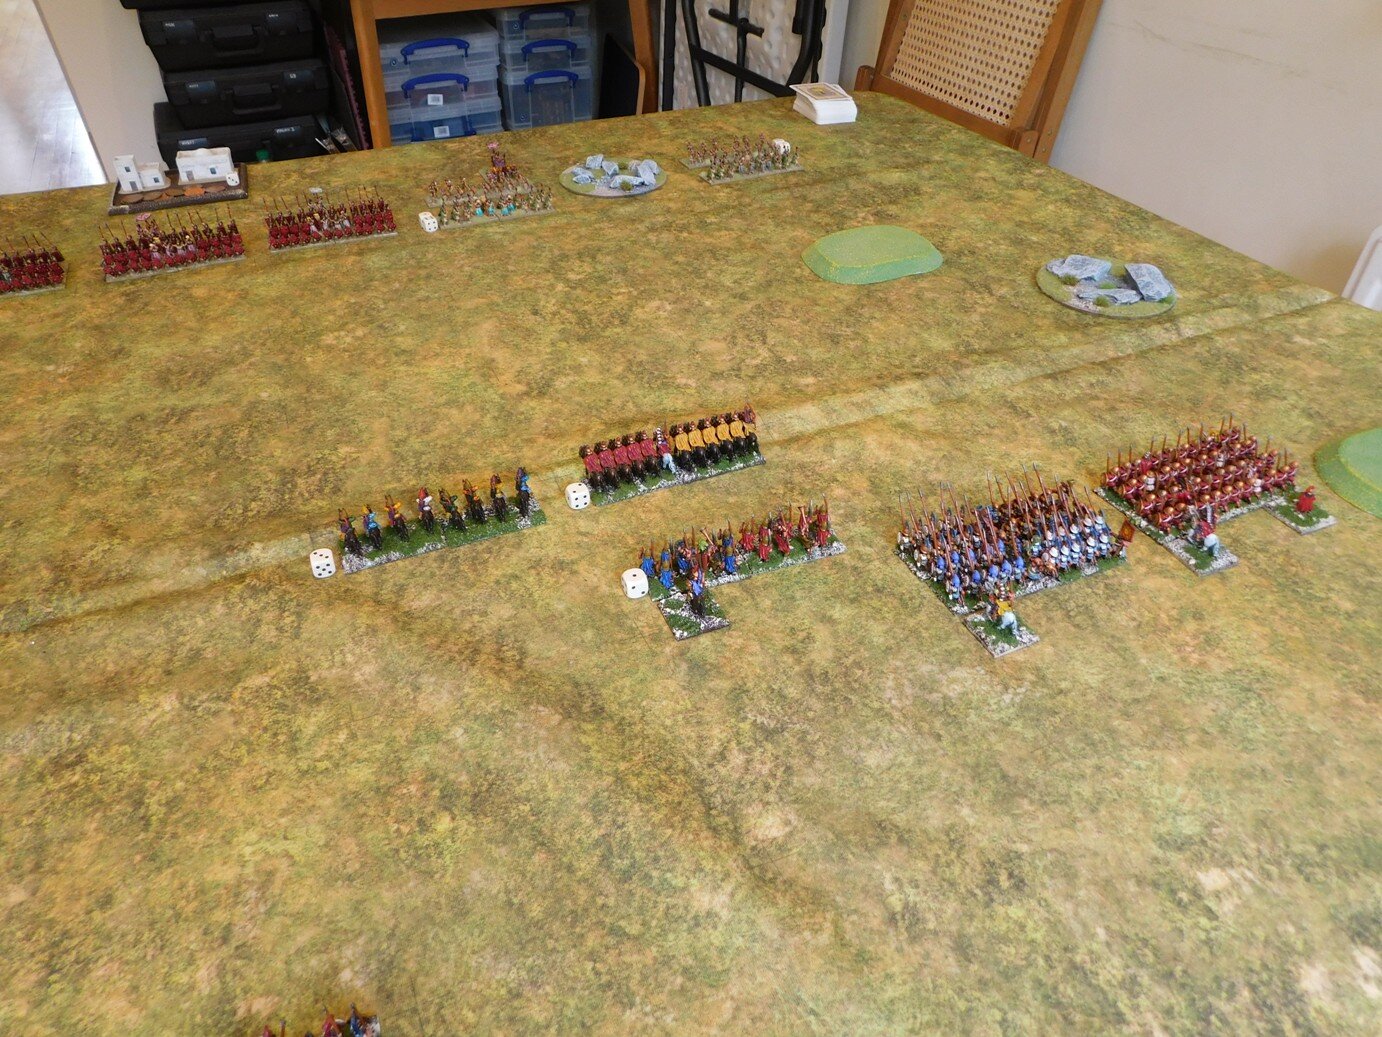
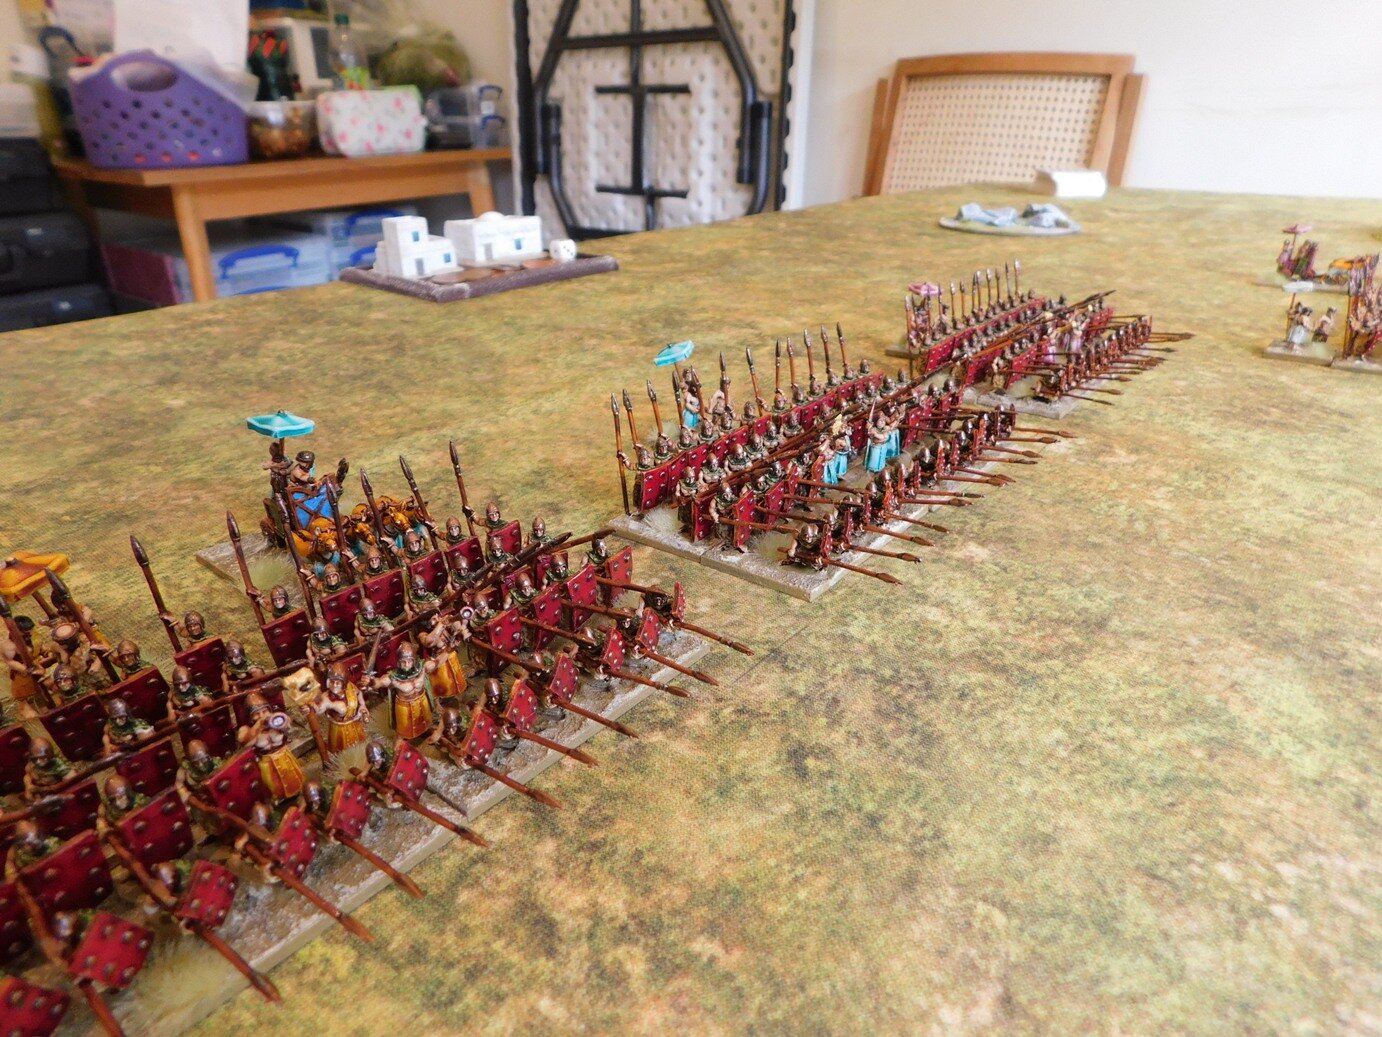
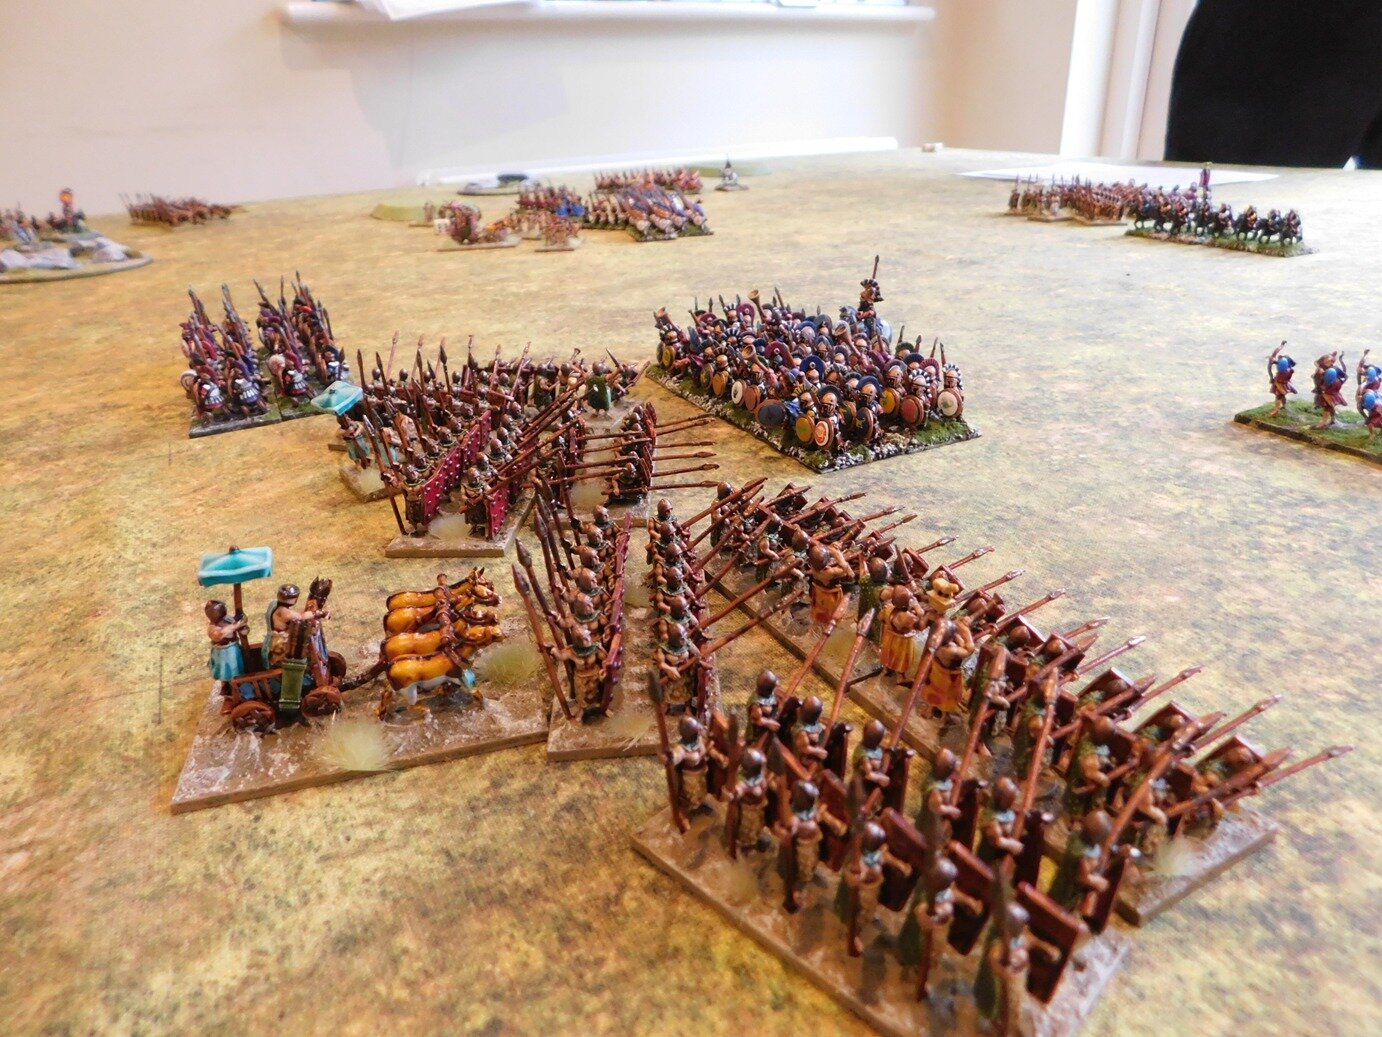
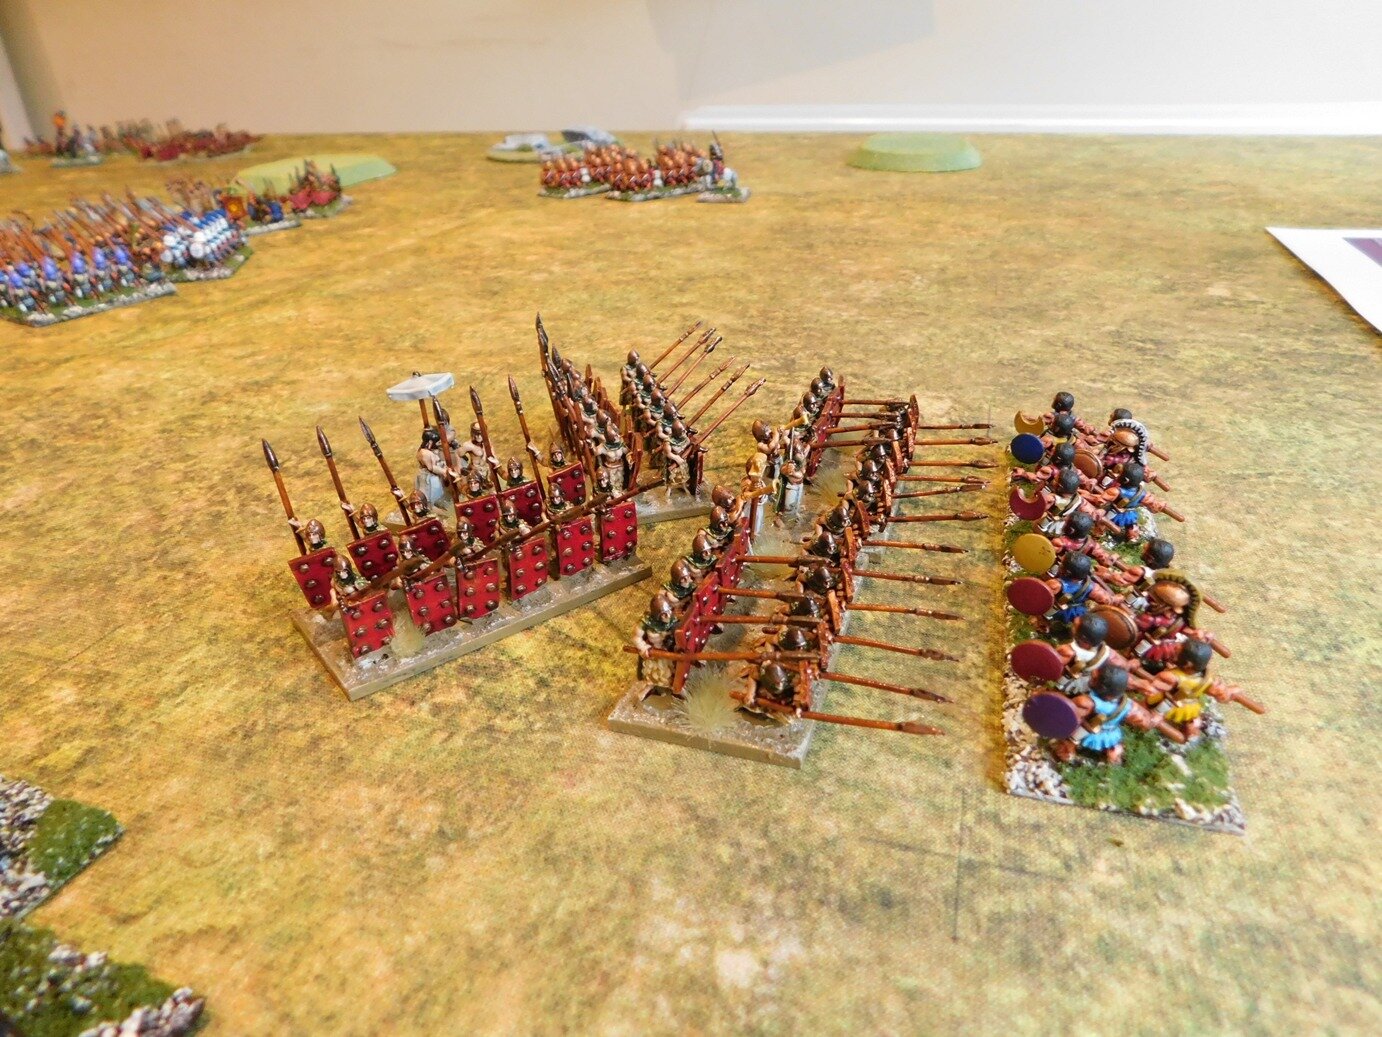
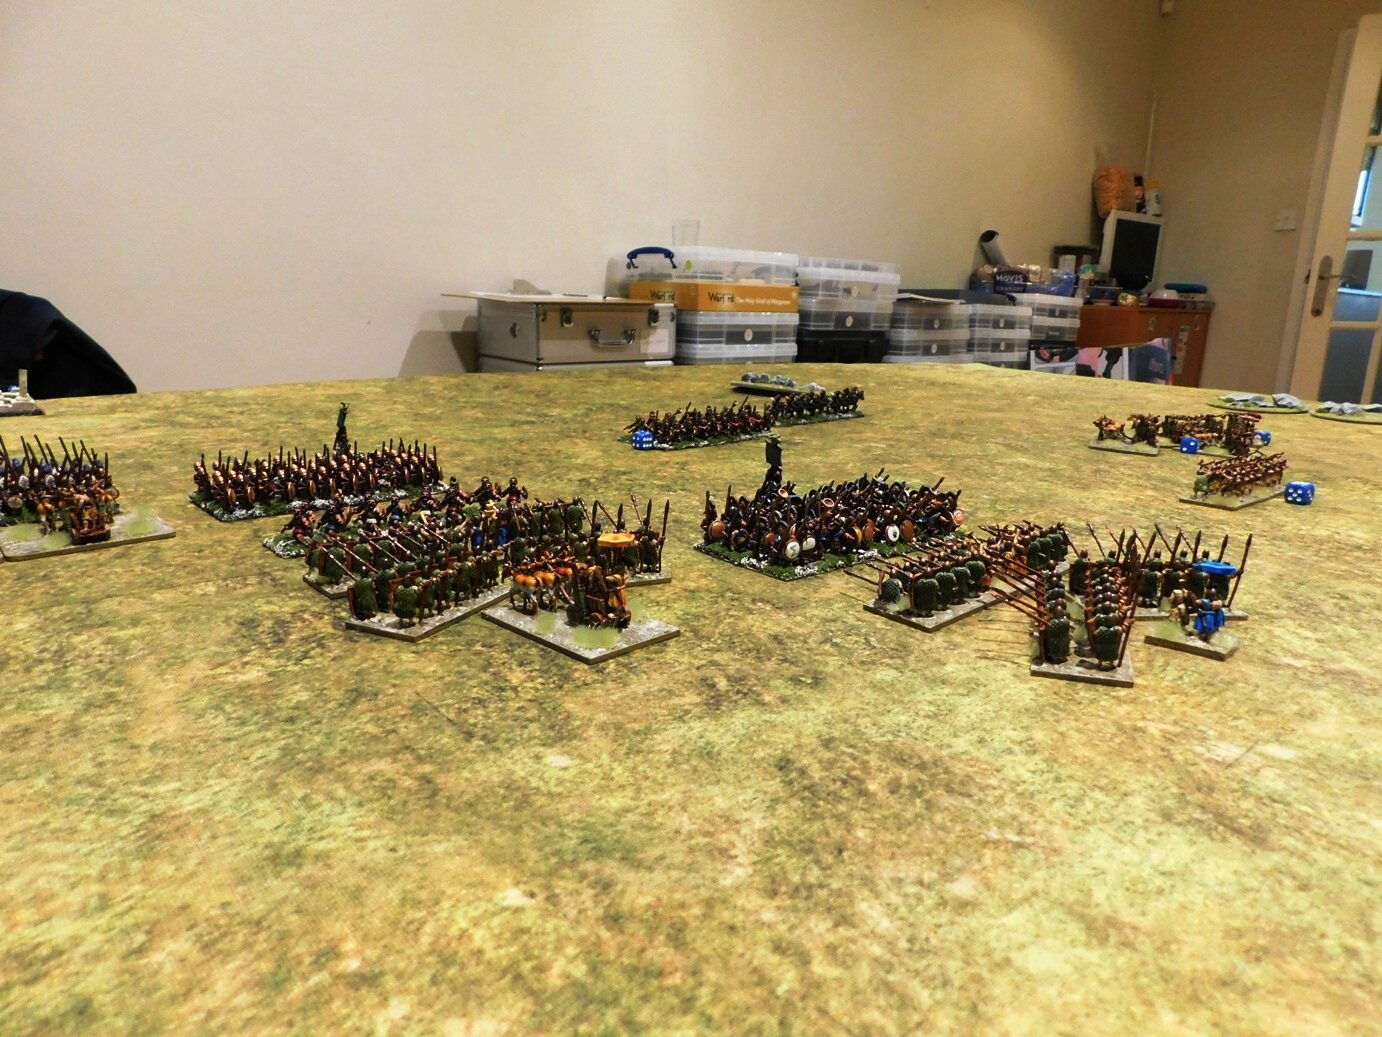
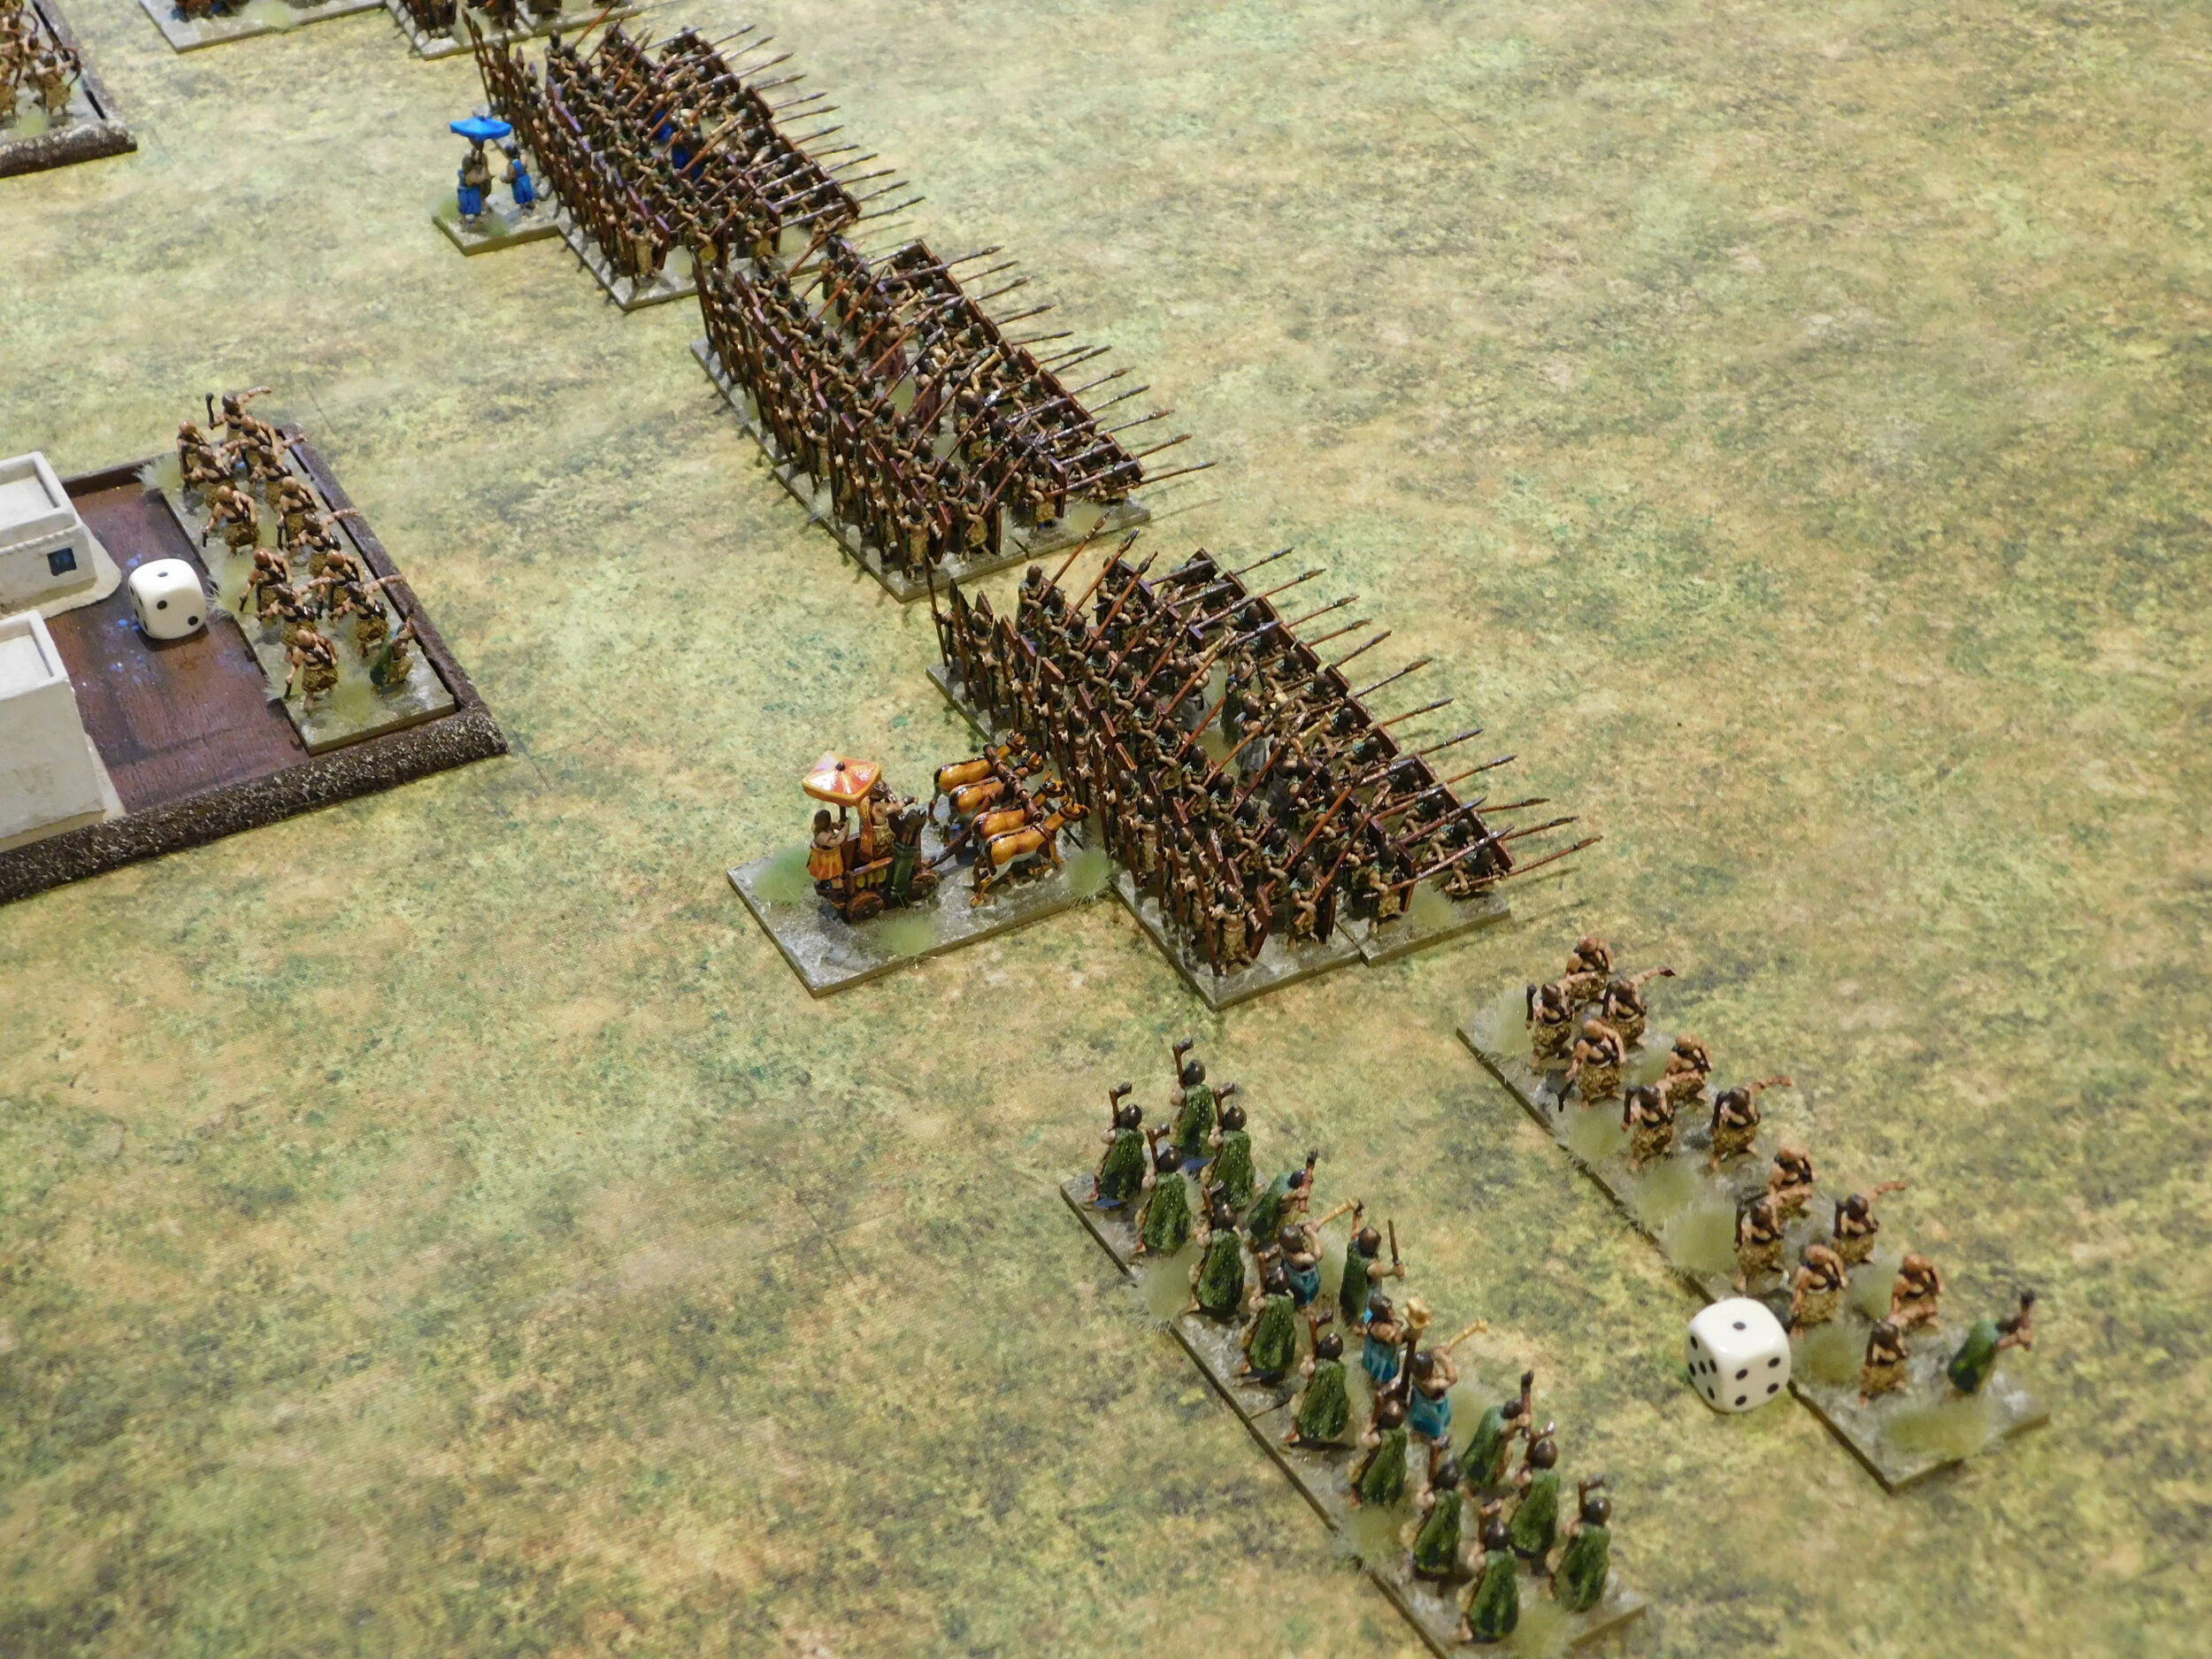
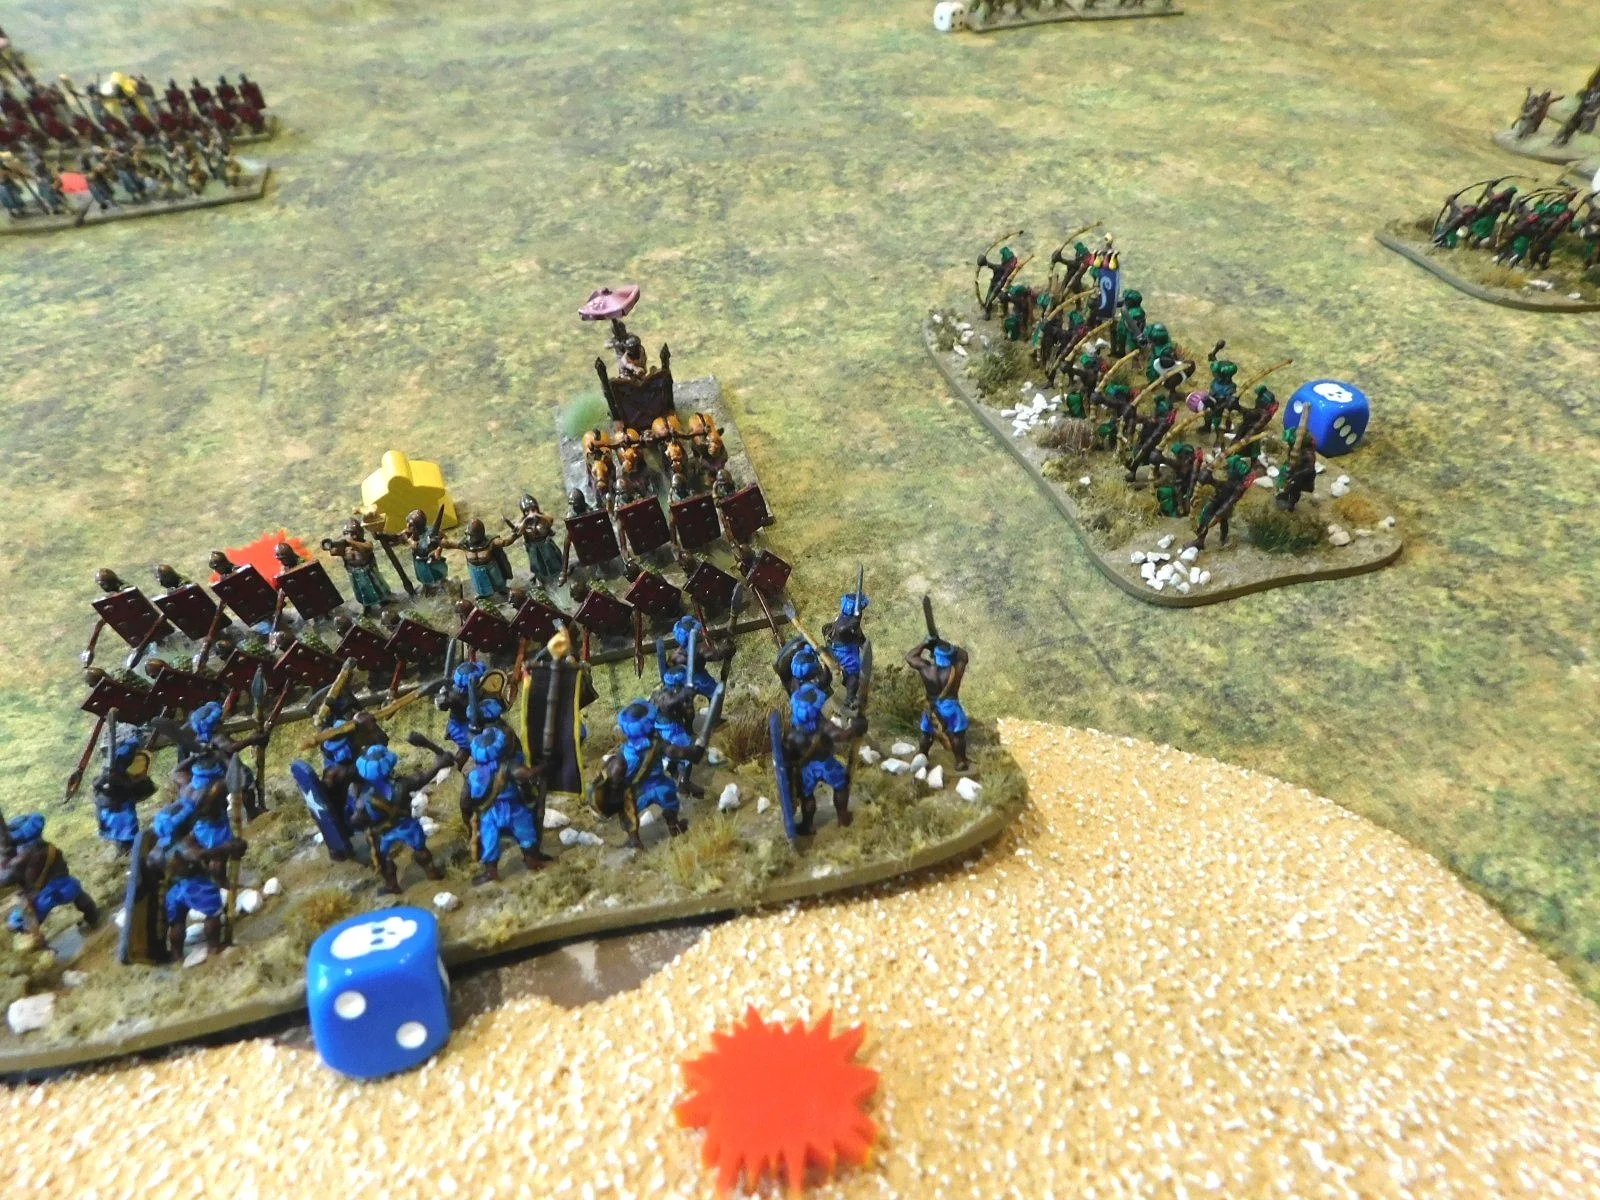
Meanwhile, on my right, his battle carts and infantry had finally reached my line and were dashing themselves against it.

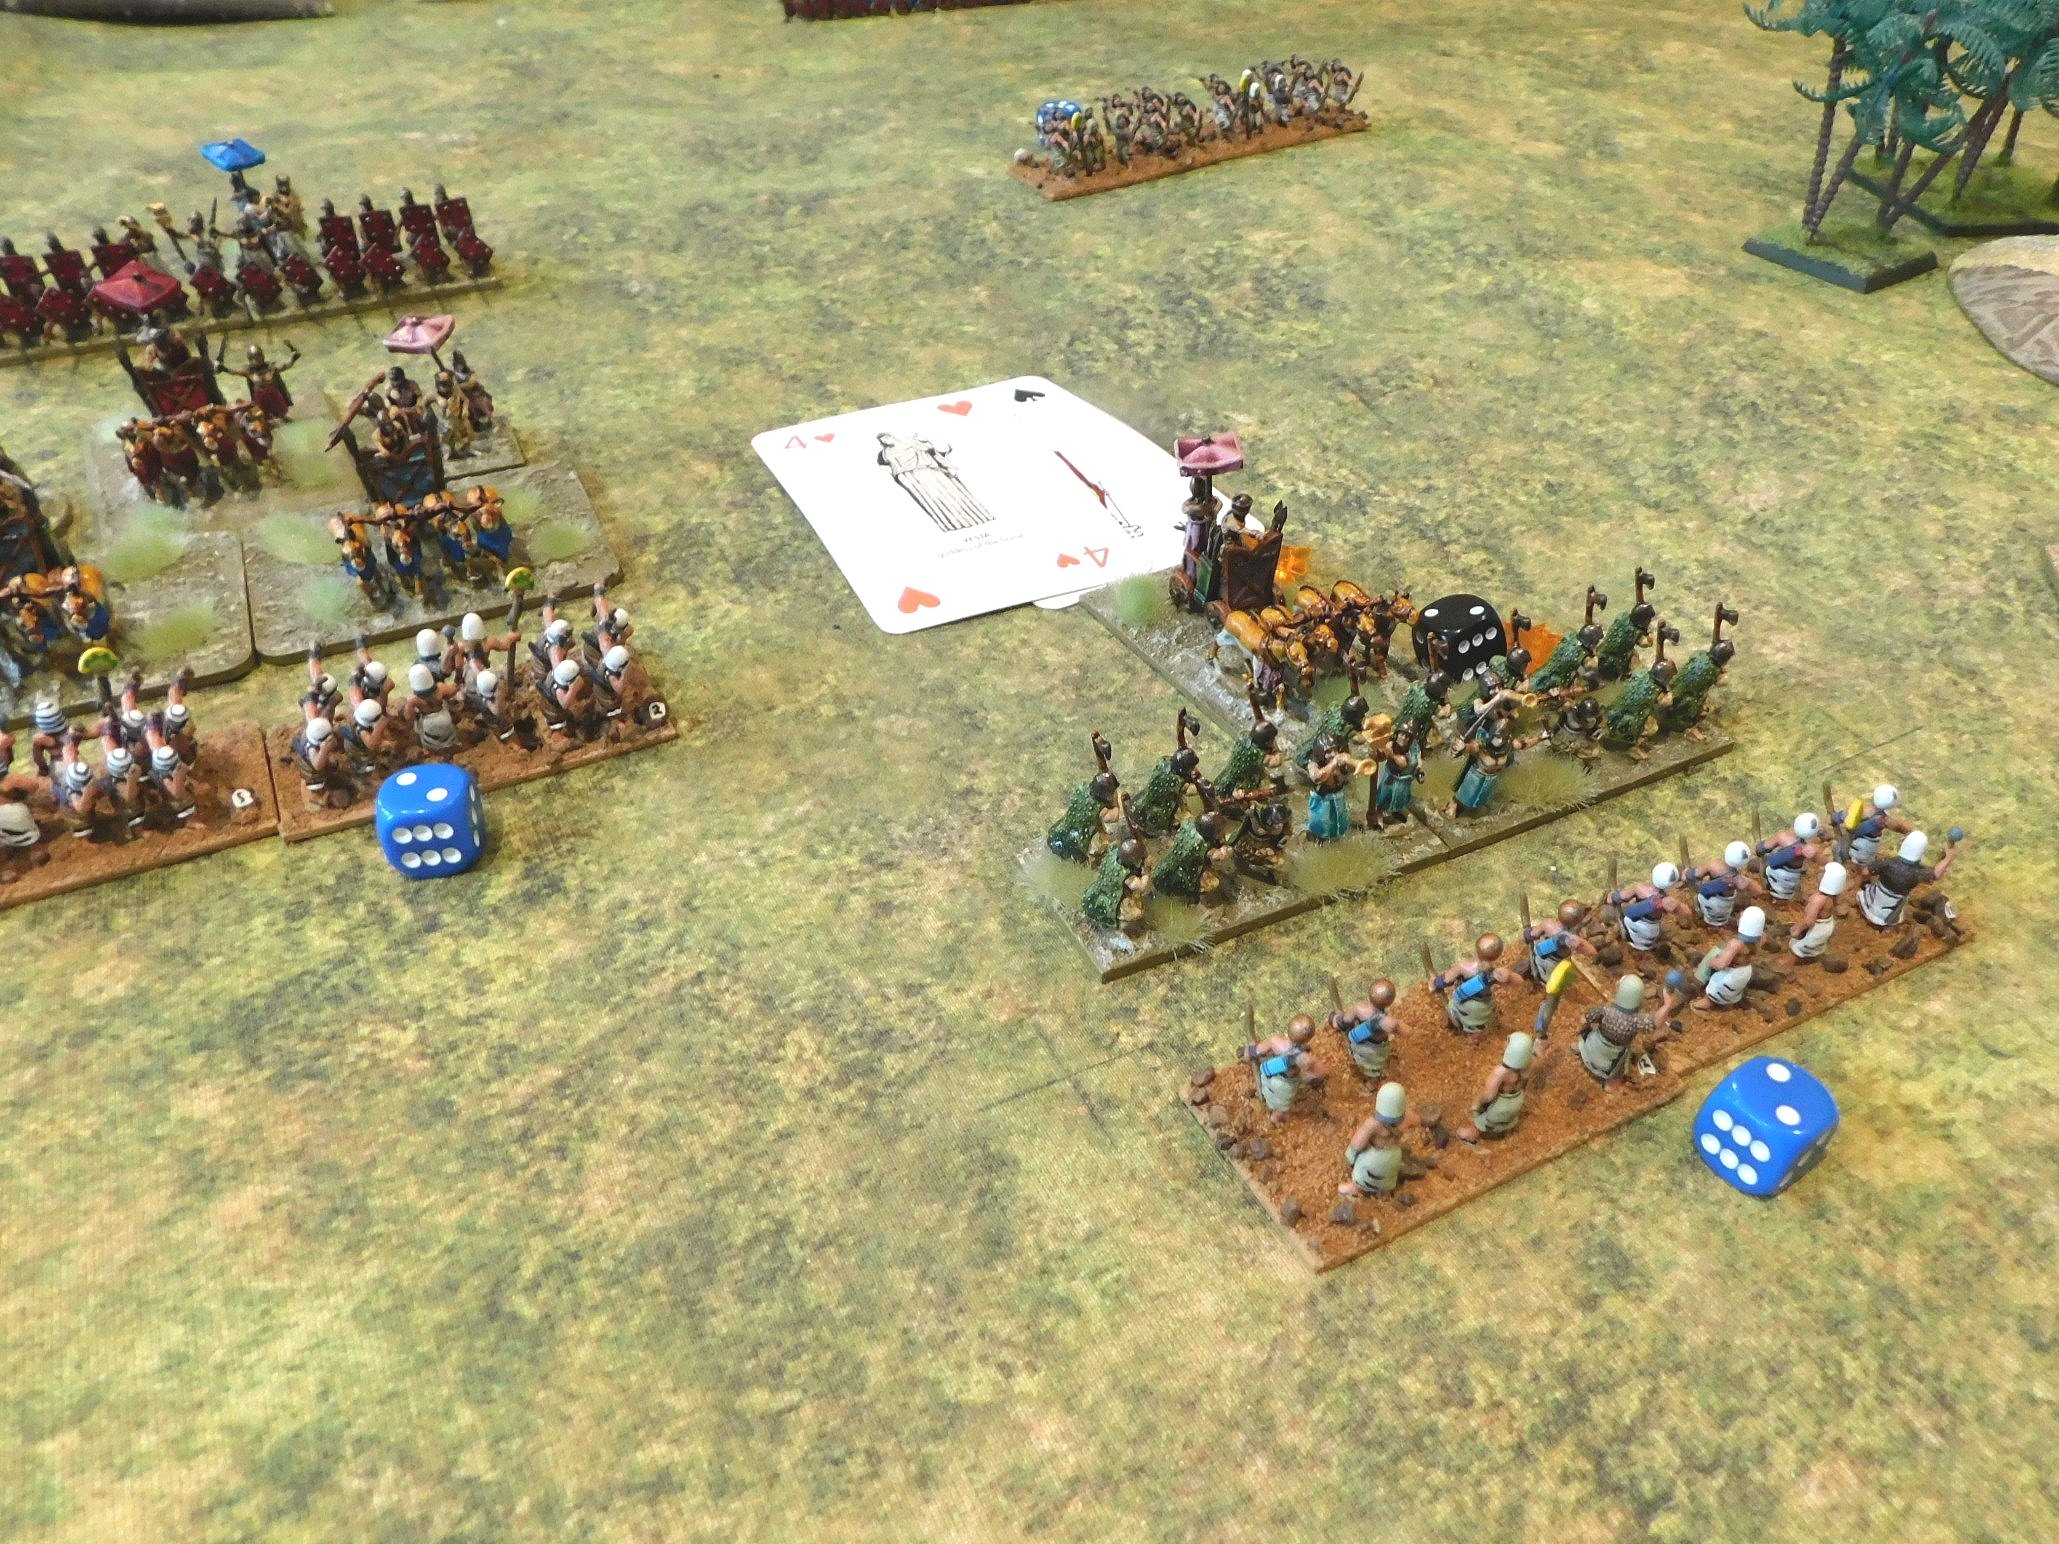
This was actually quite worrying as although my javelinmen can hold their own in hand to hand combat, my longbowmen have a tendency to crumble really quickly.

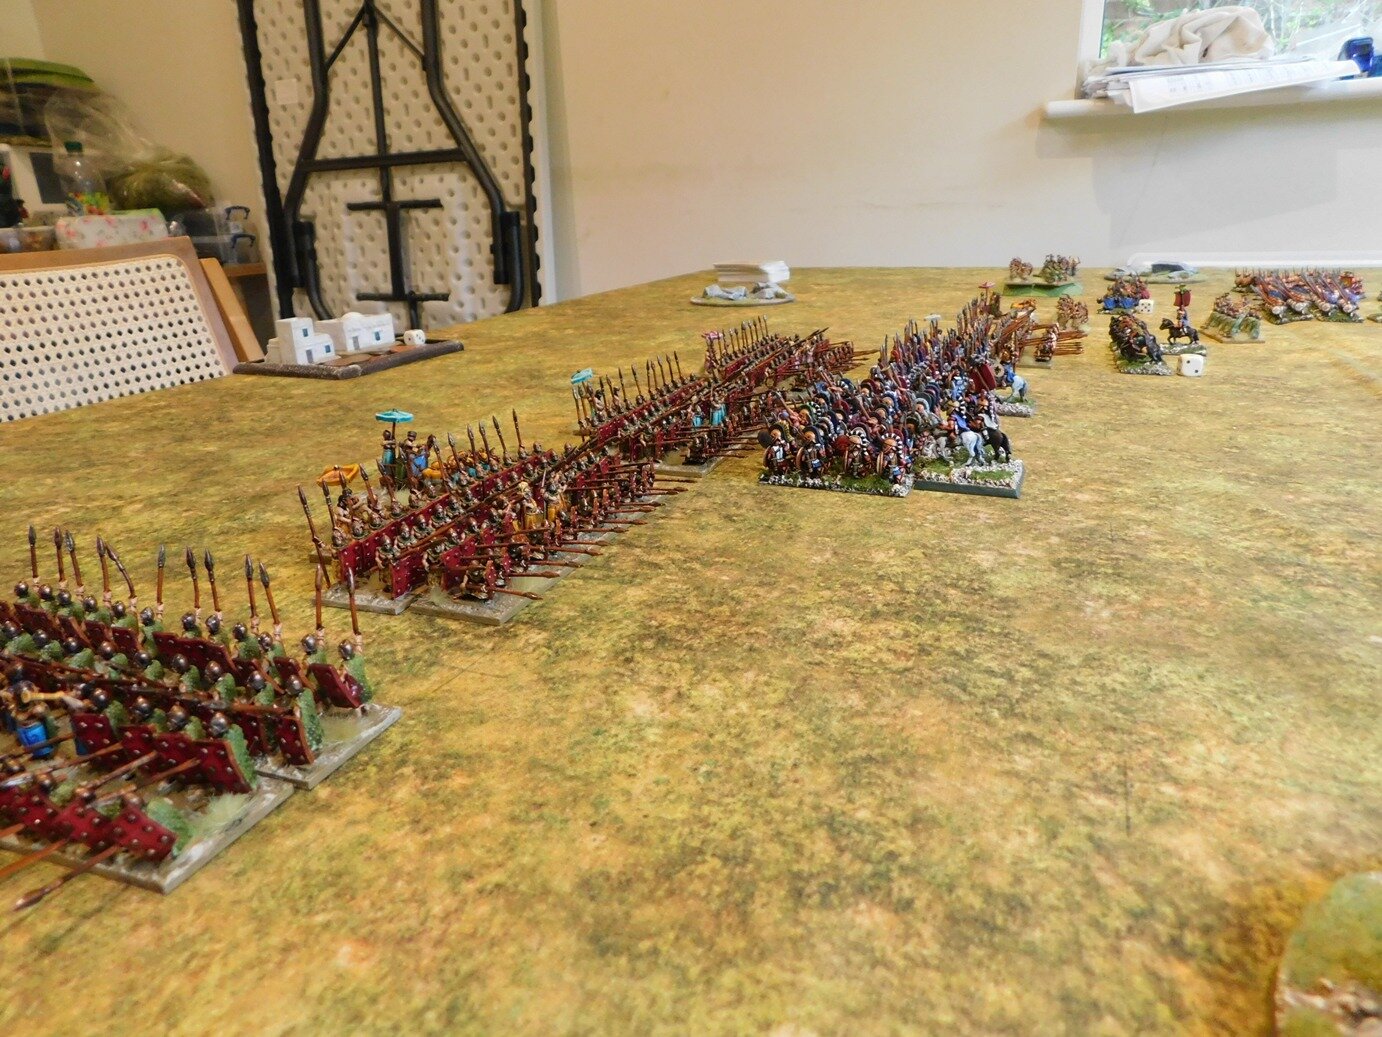
Fortunately, the Akkadians assaulted the longbowmen piecemeal, so my three units of archers could concentrate their fire and pincushion the most forward enemy unit each turn. This meant that they tended to hit my line disordered, which really evened things up.

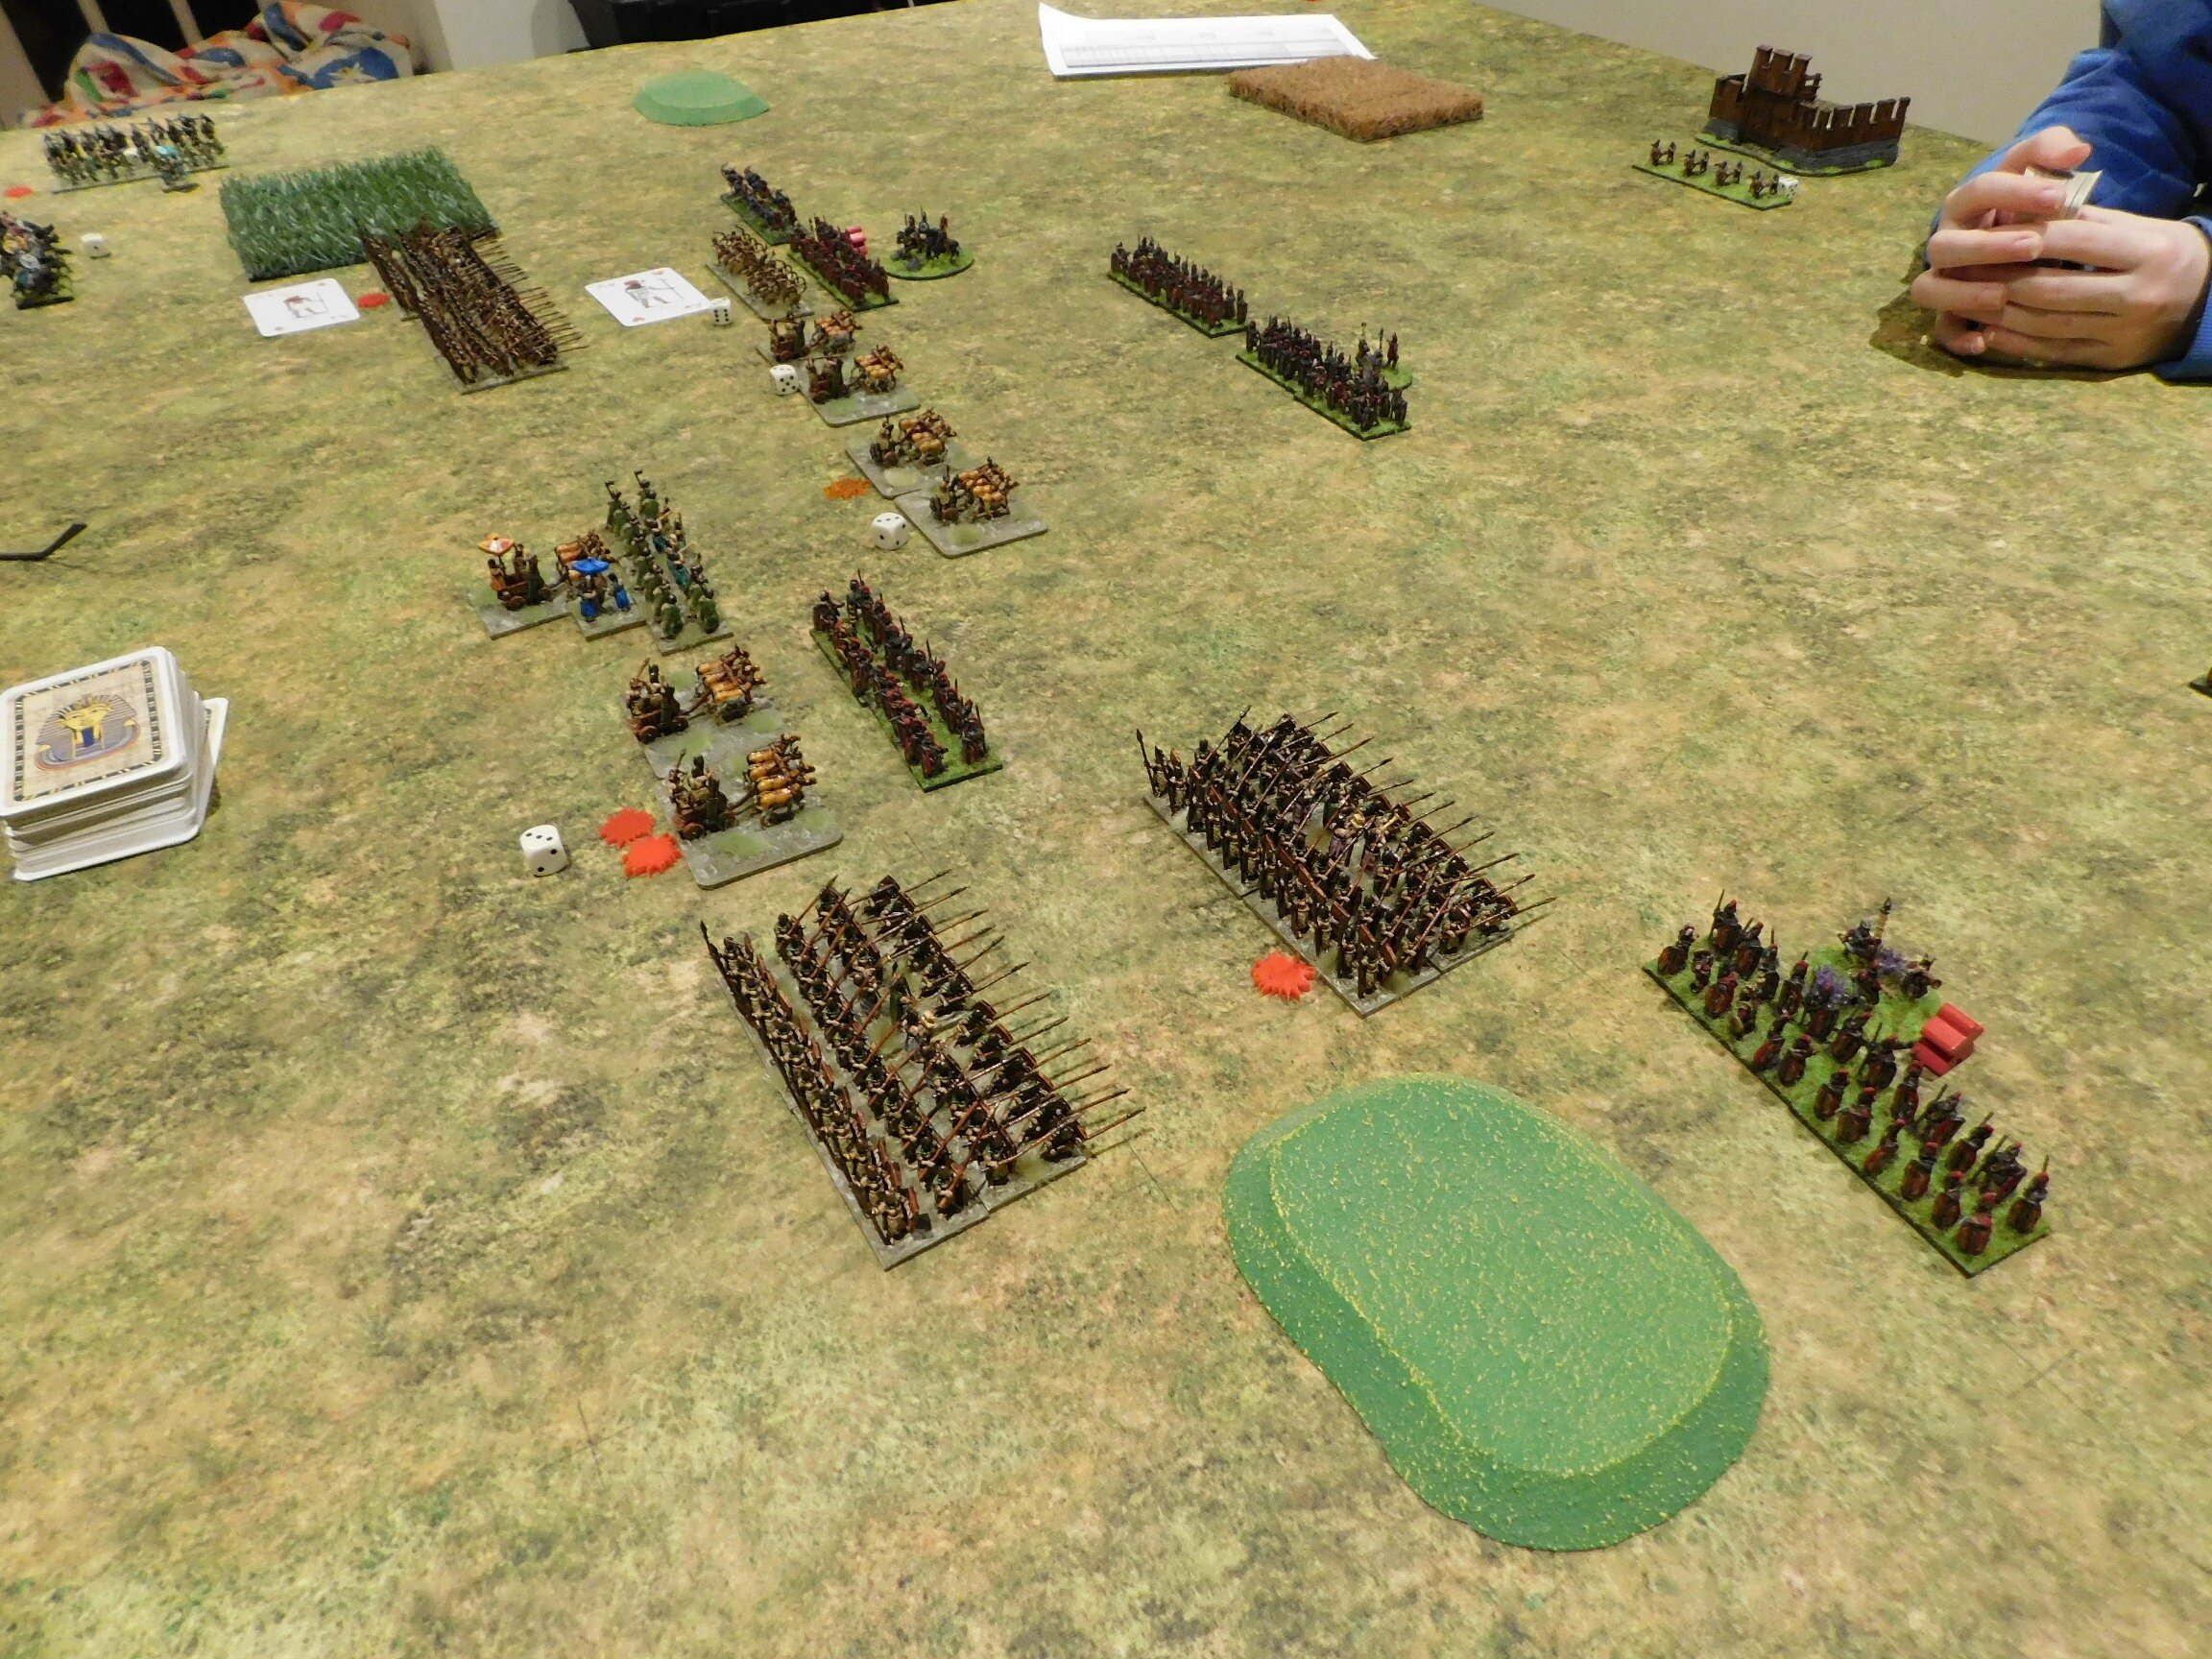
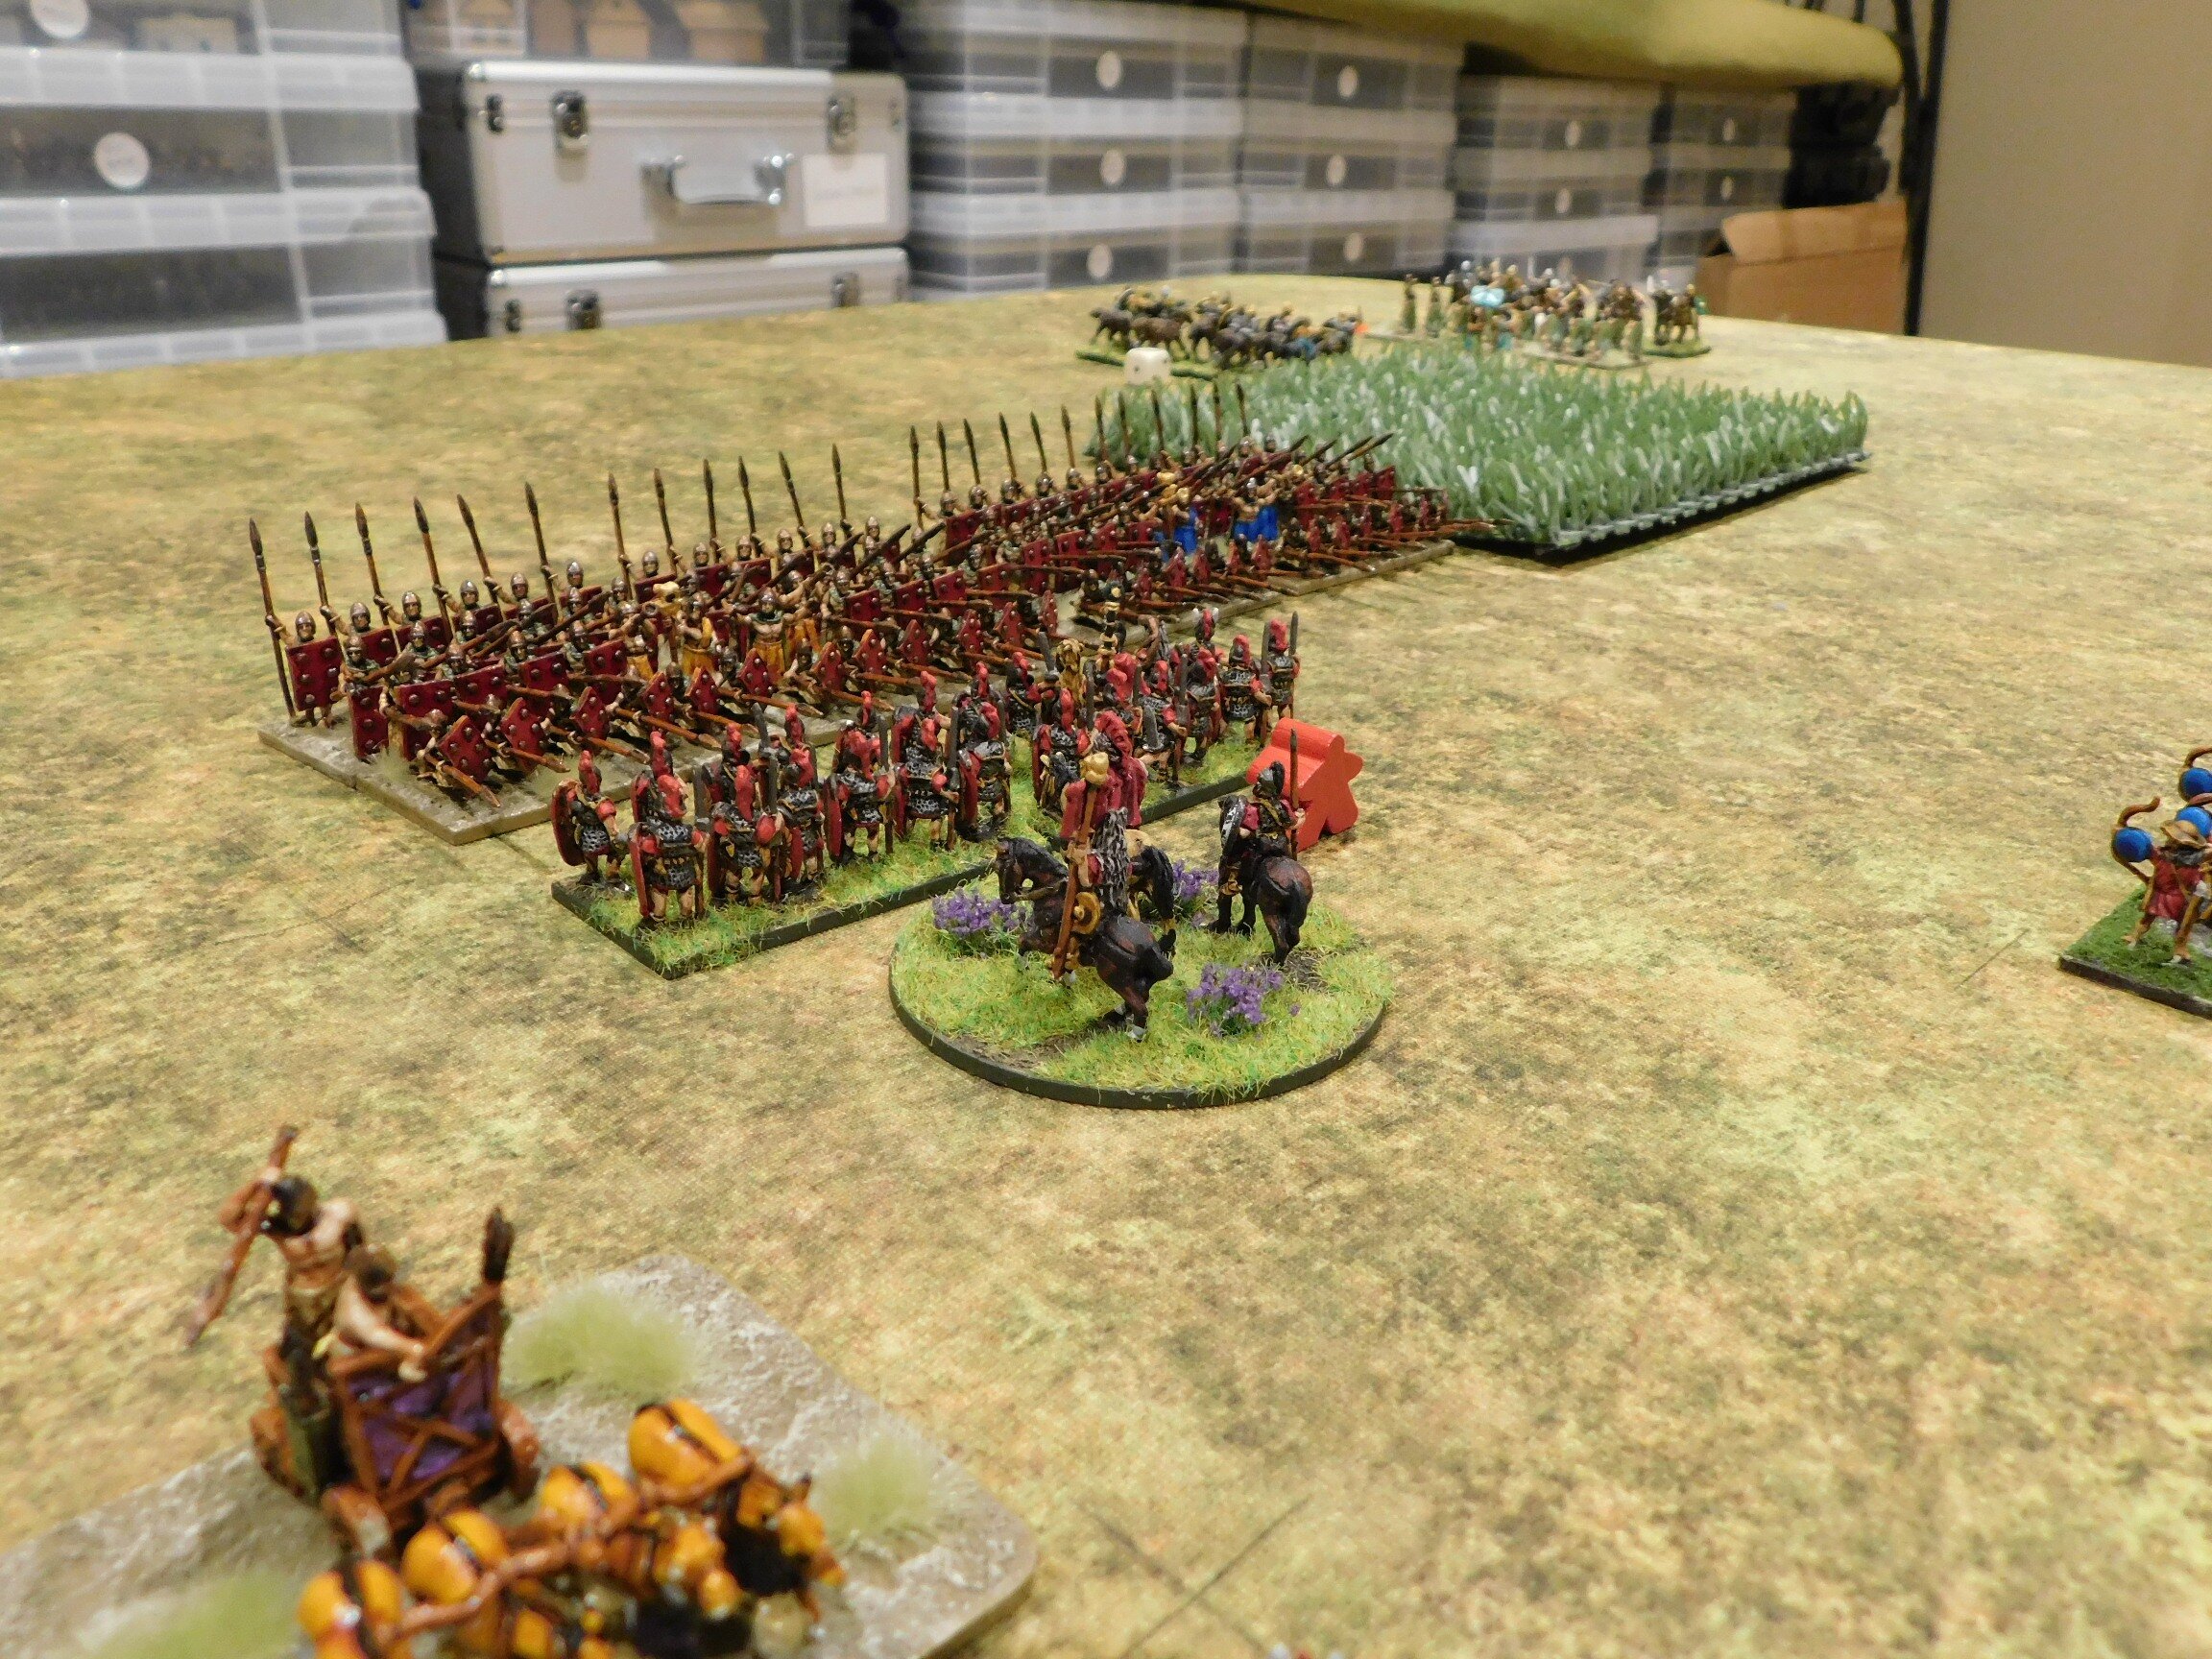
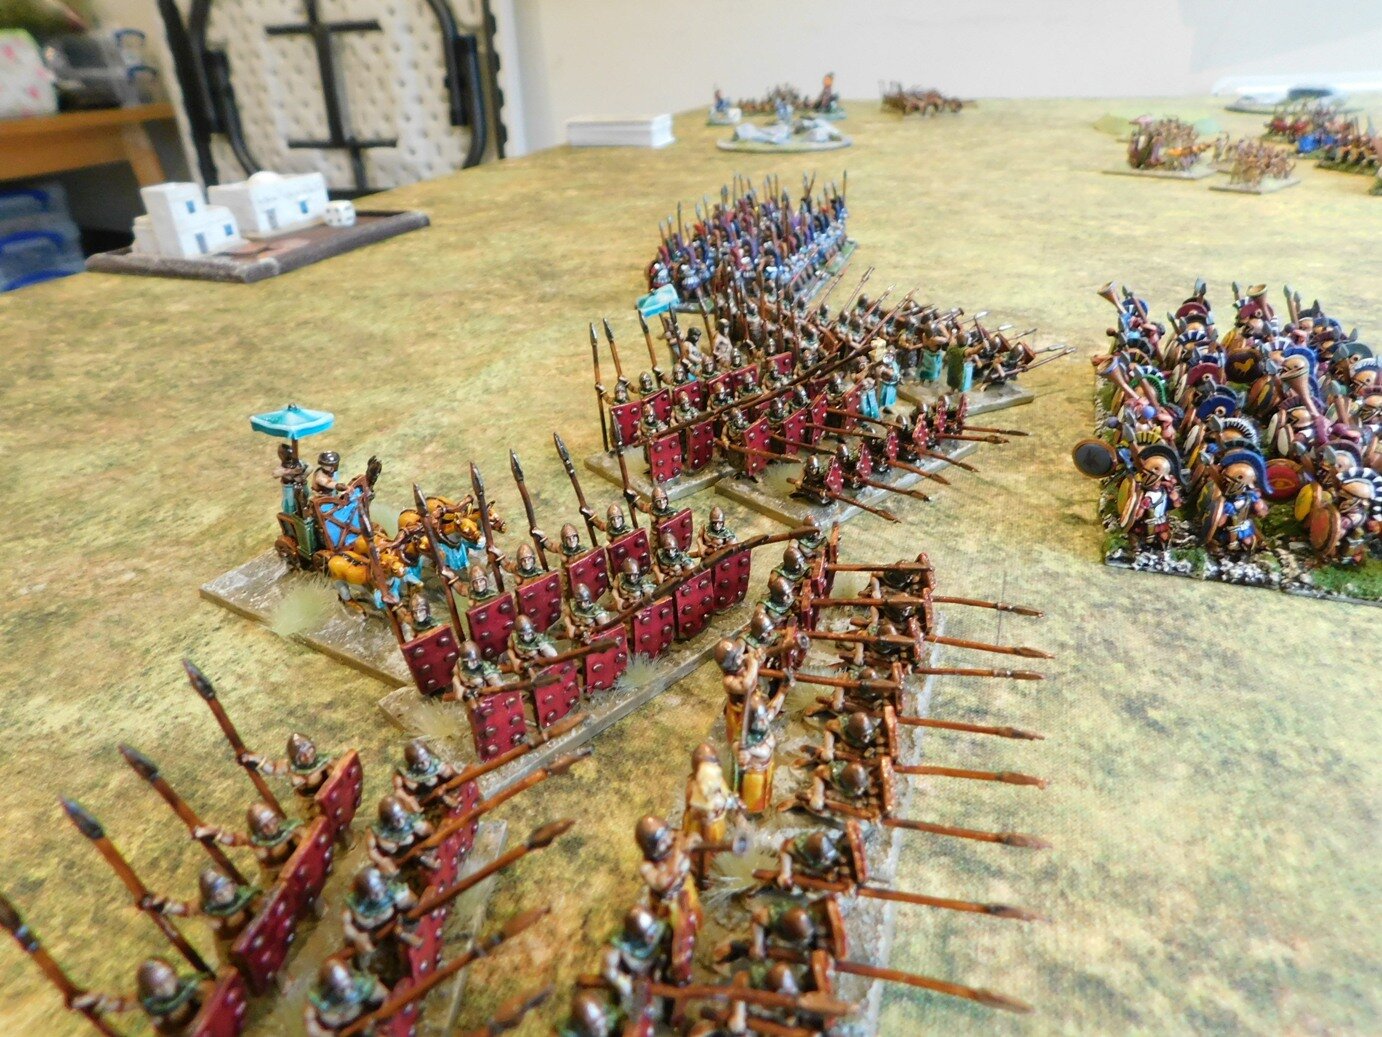
Moreover, my javelinmen were up on a hill, and resolutely refused to give way no matter what. Here’s a pictorial account of events on that wing:

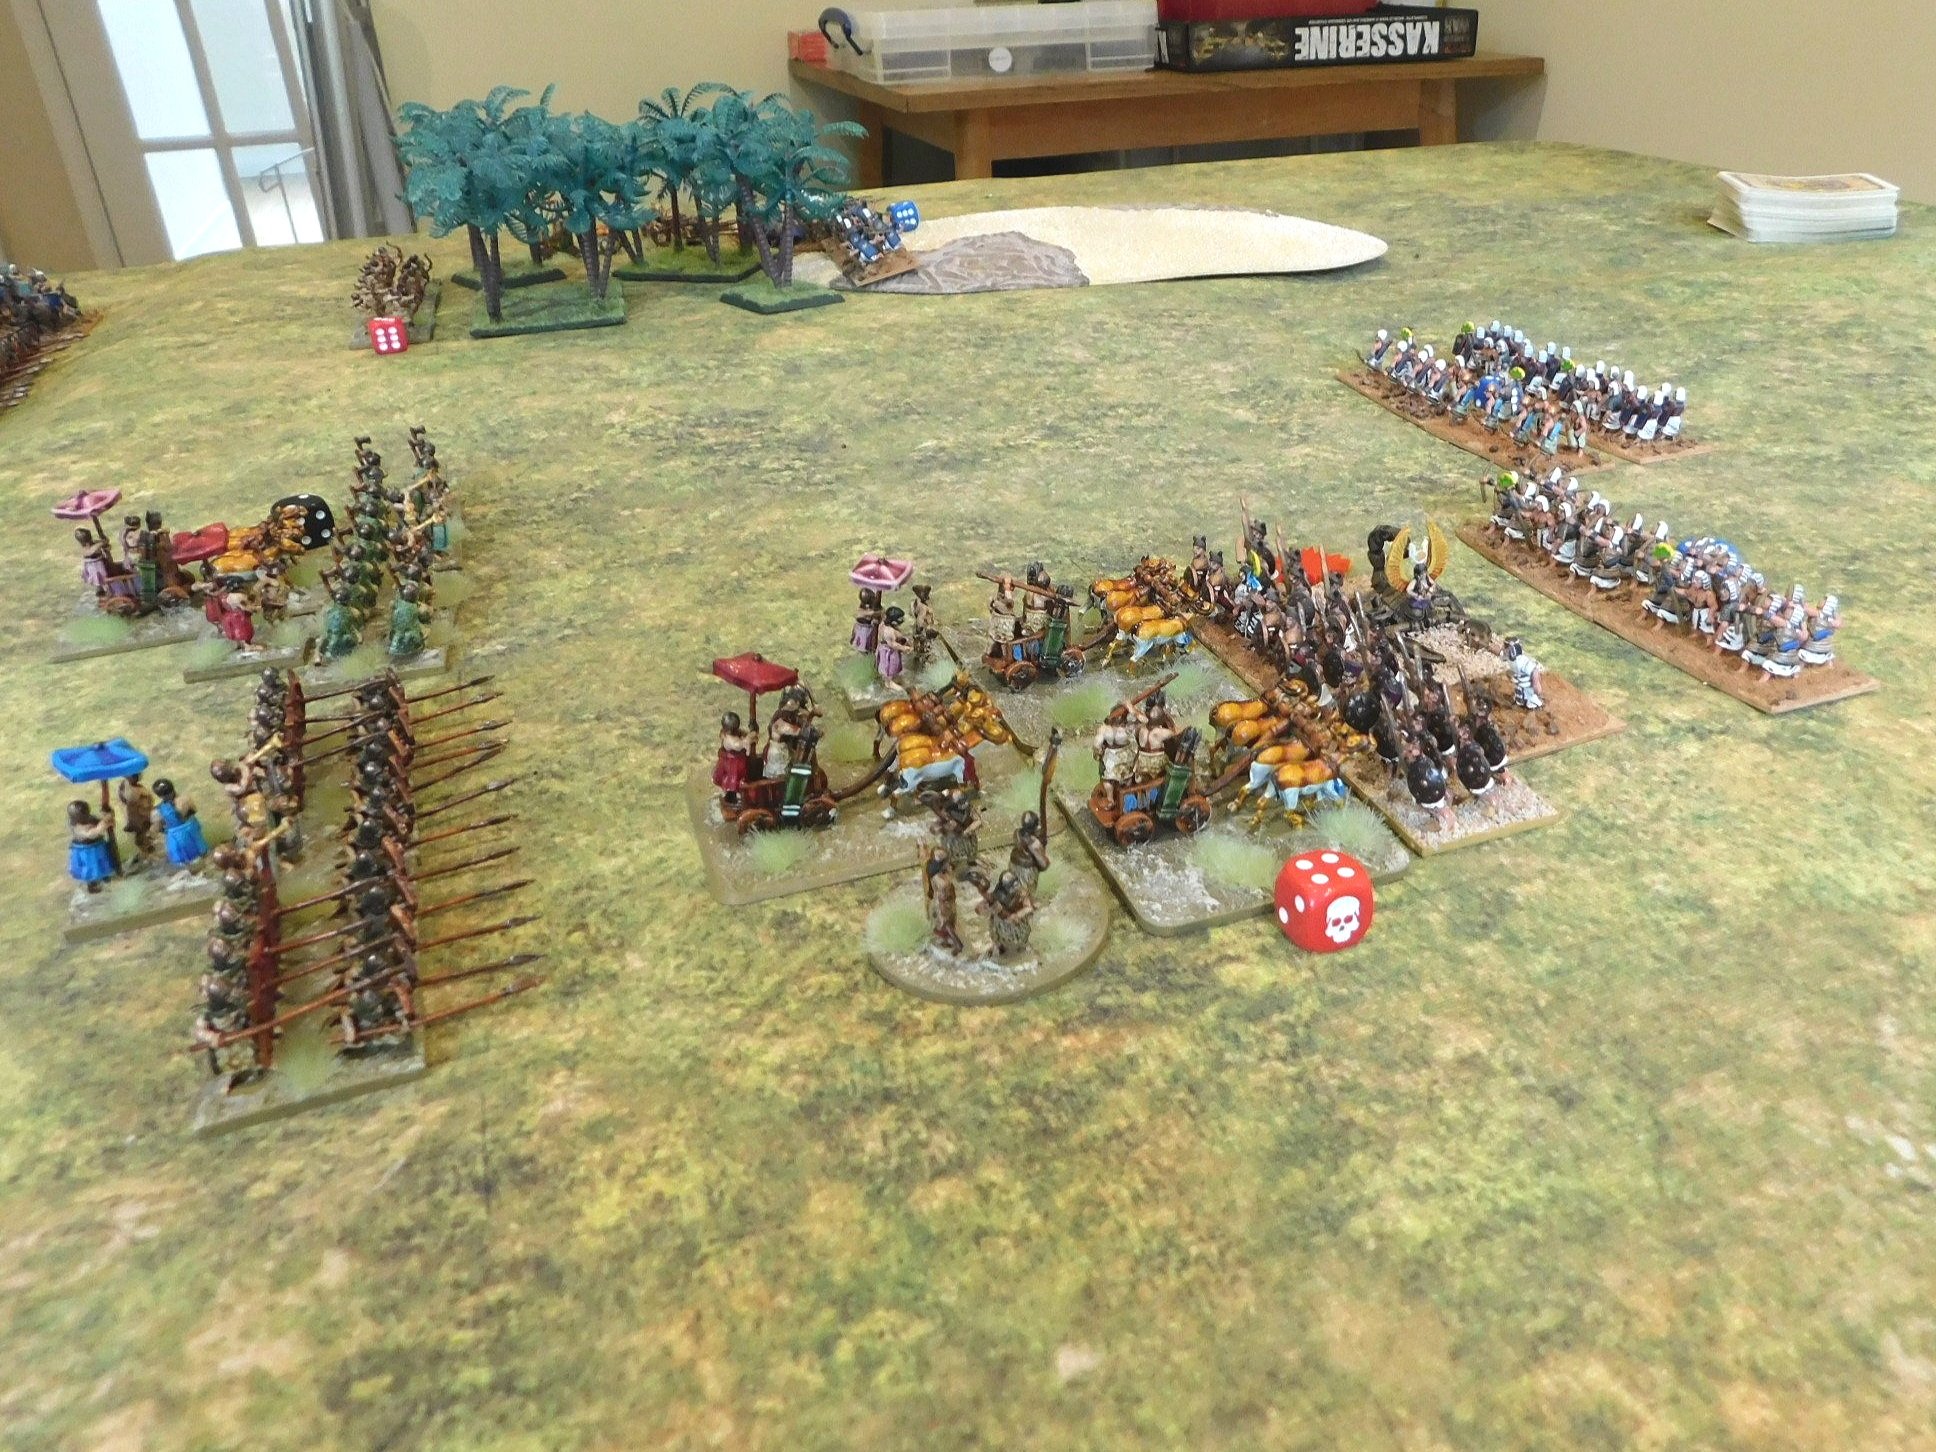
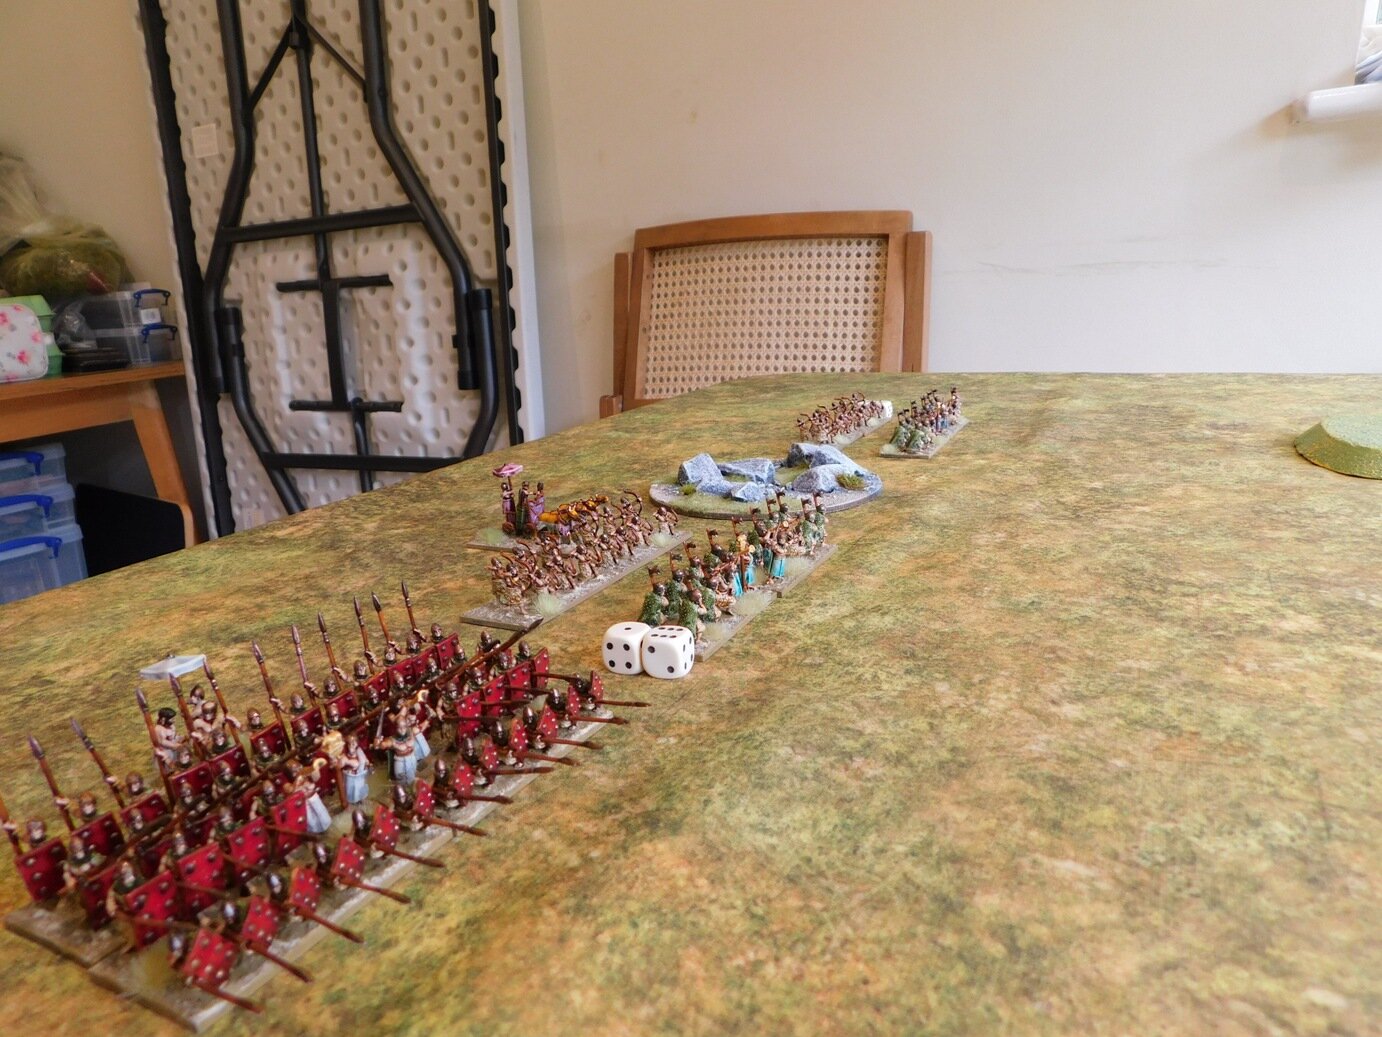
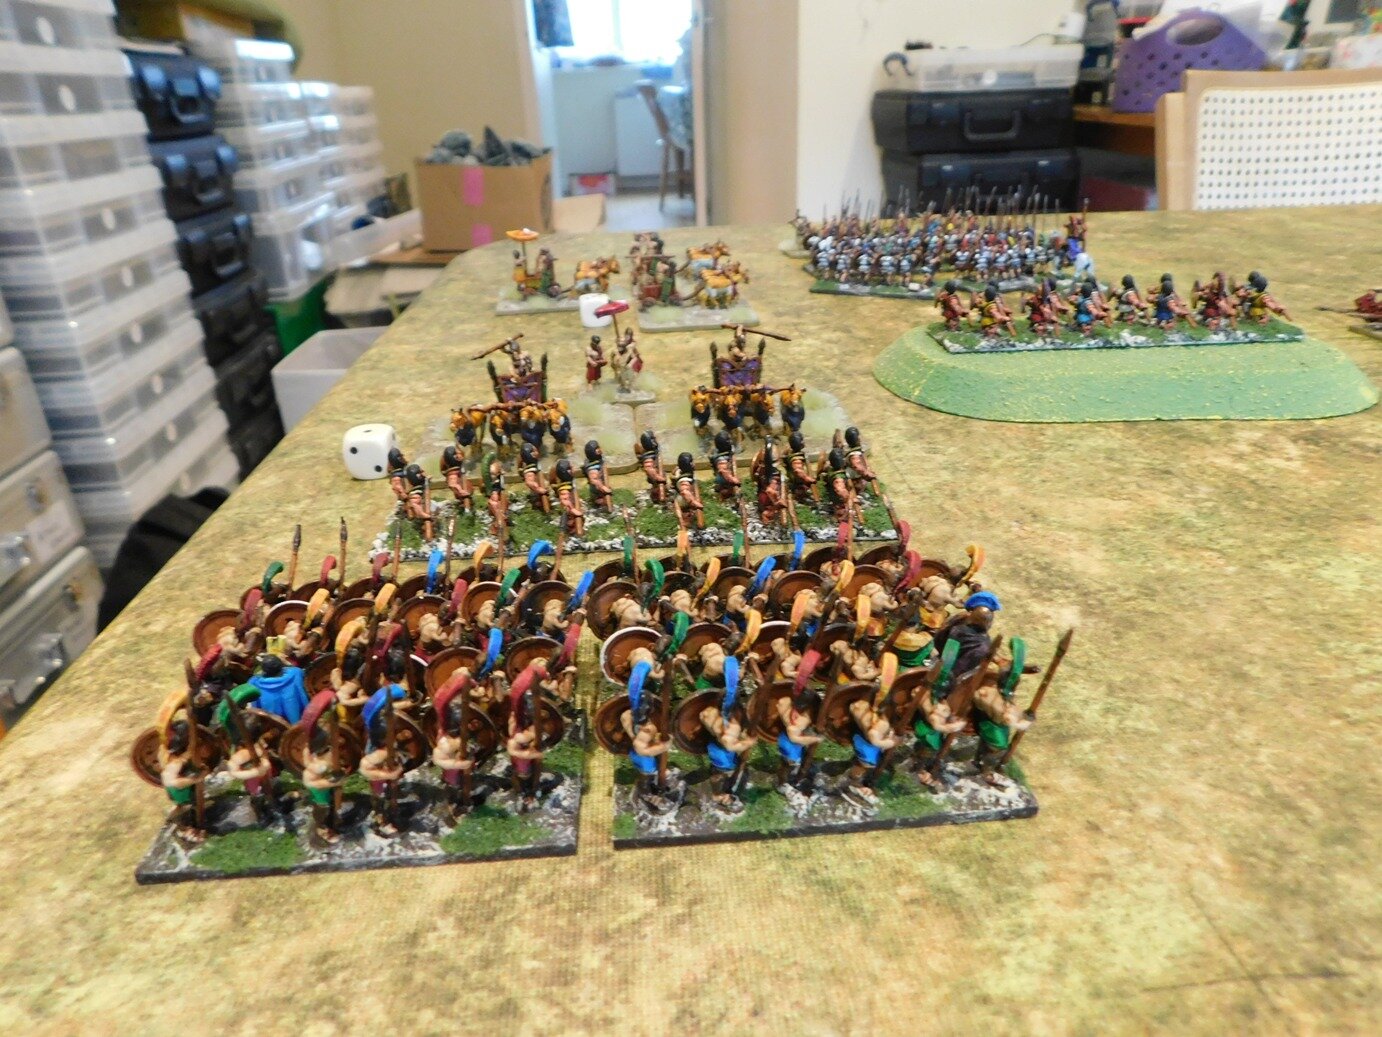
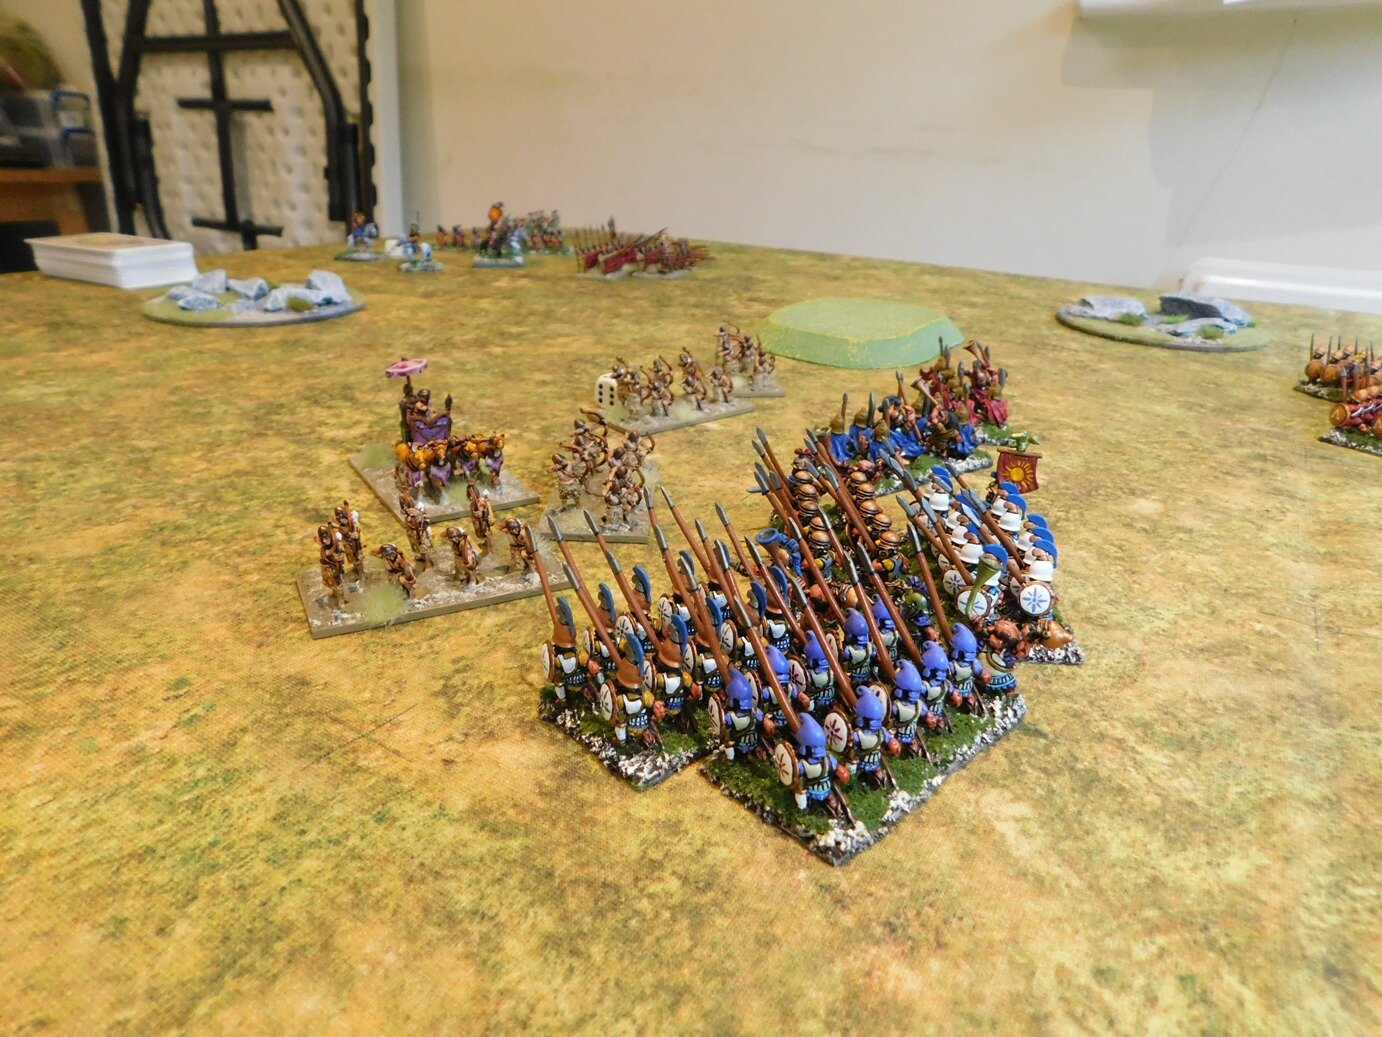
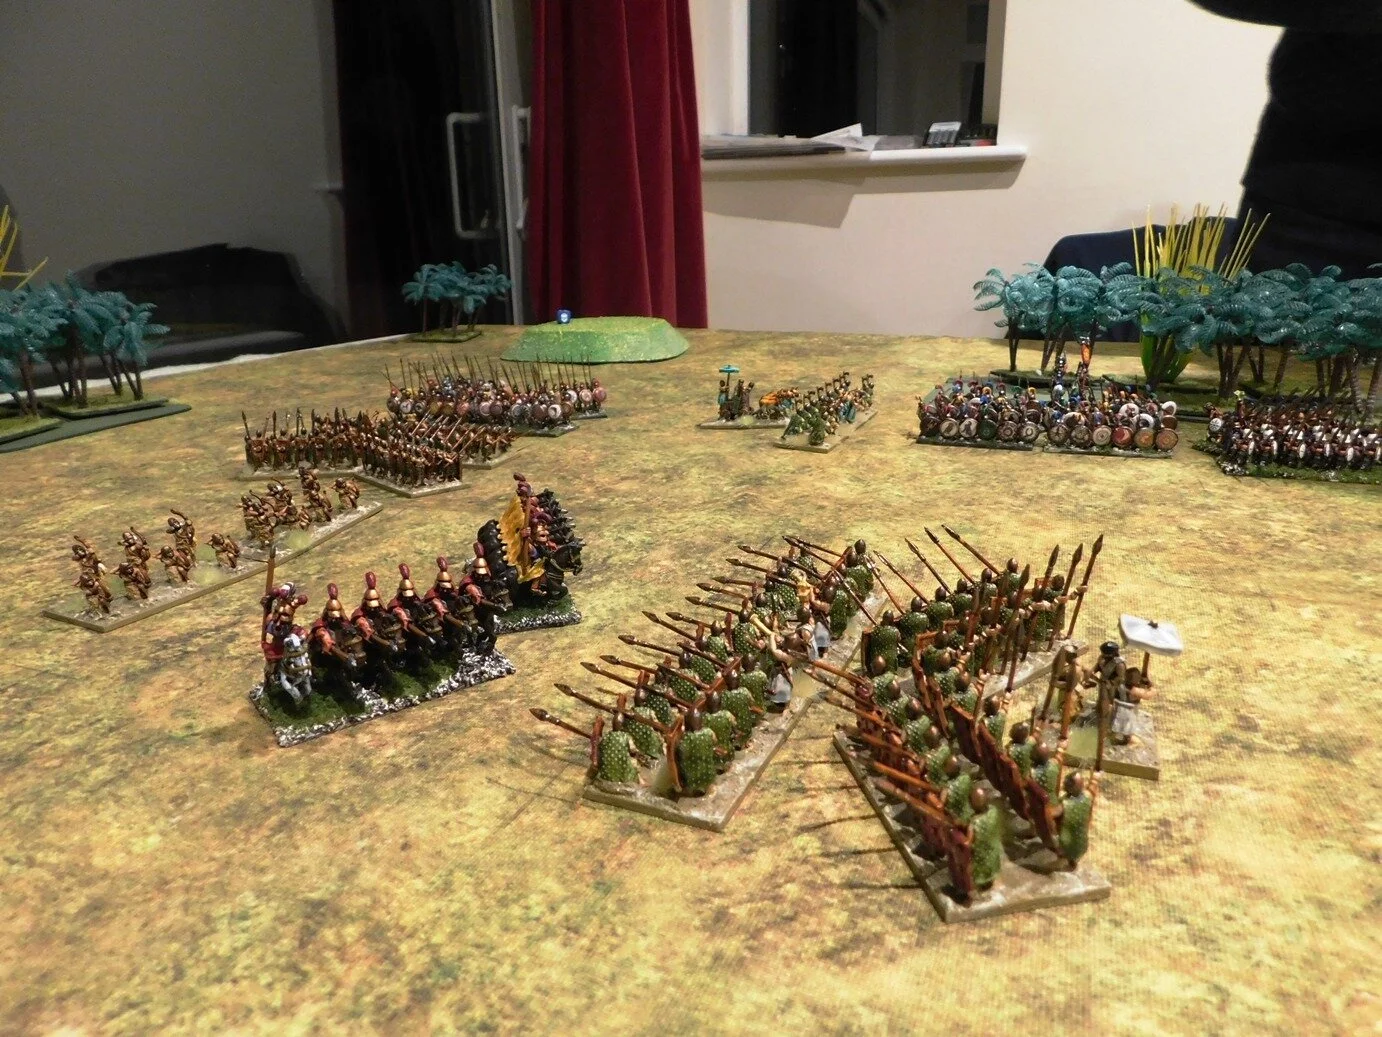
So the left wing was doing well, but hadn’t won the game for me; and my right wing was holding, but under pressure. I would now have to win the game in the centre, and that was where I had my elephants and the elite Maiden Guard.

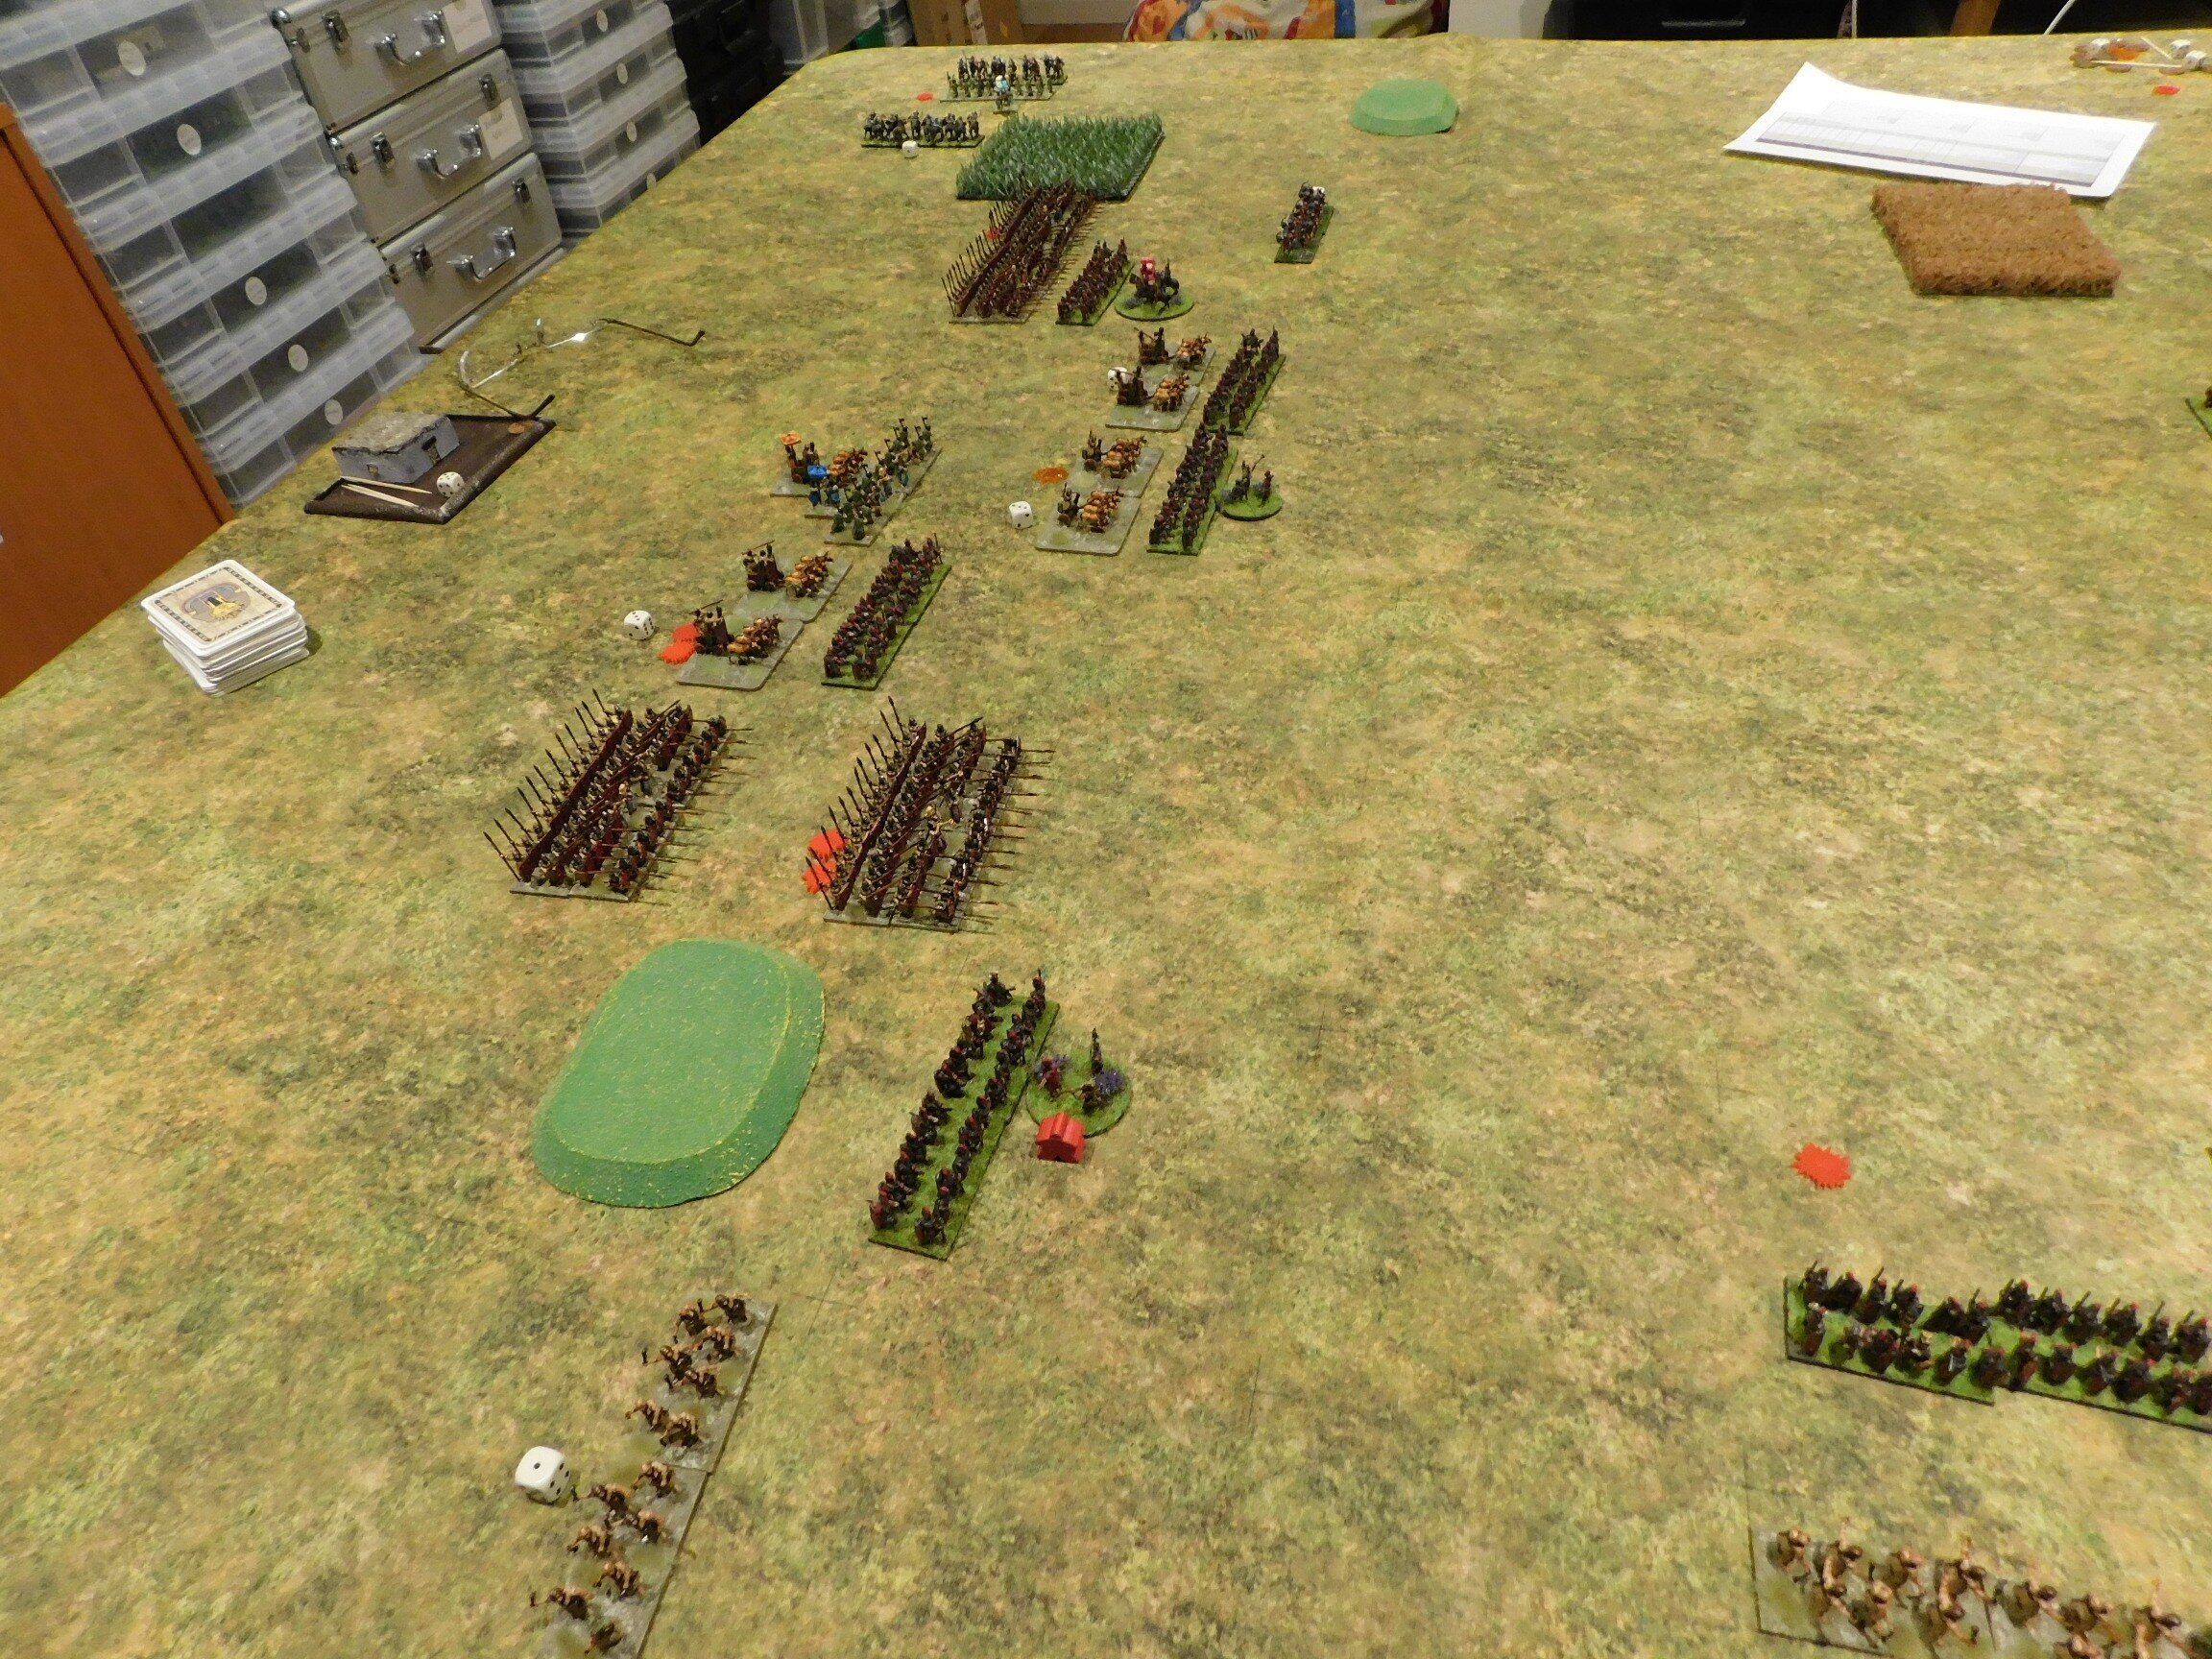
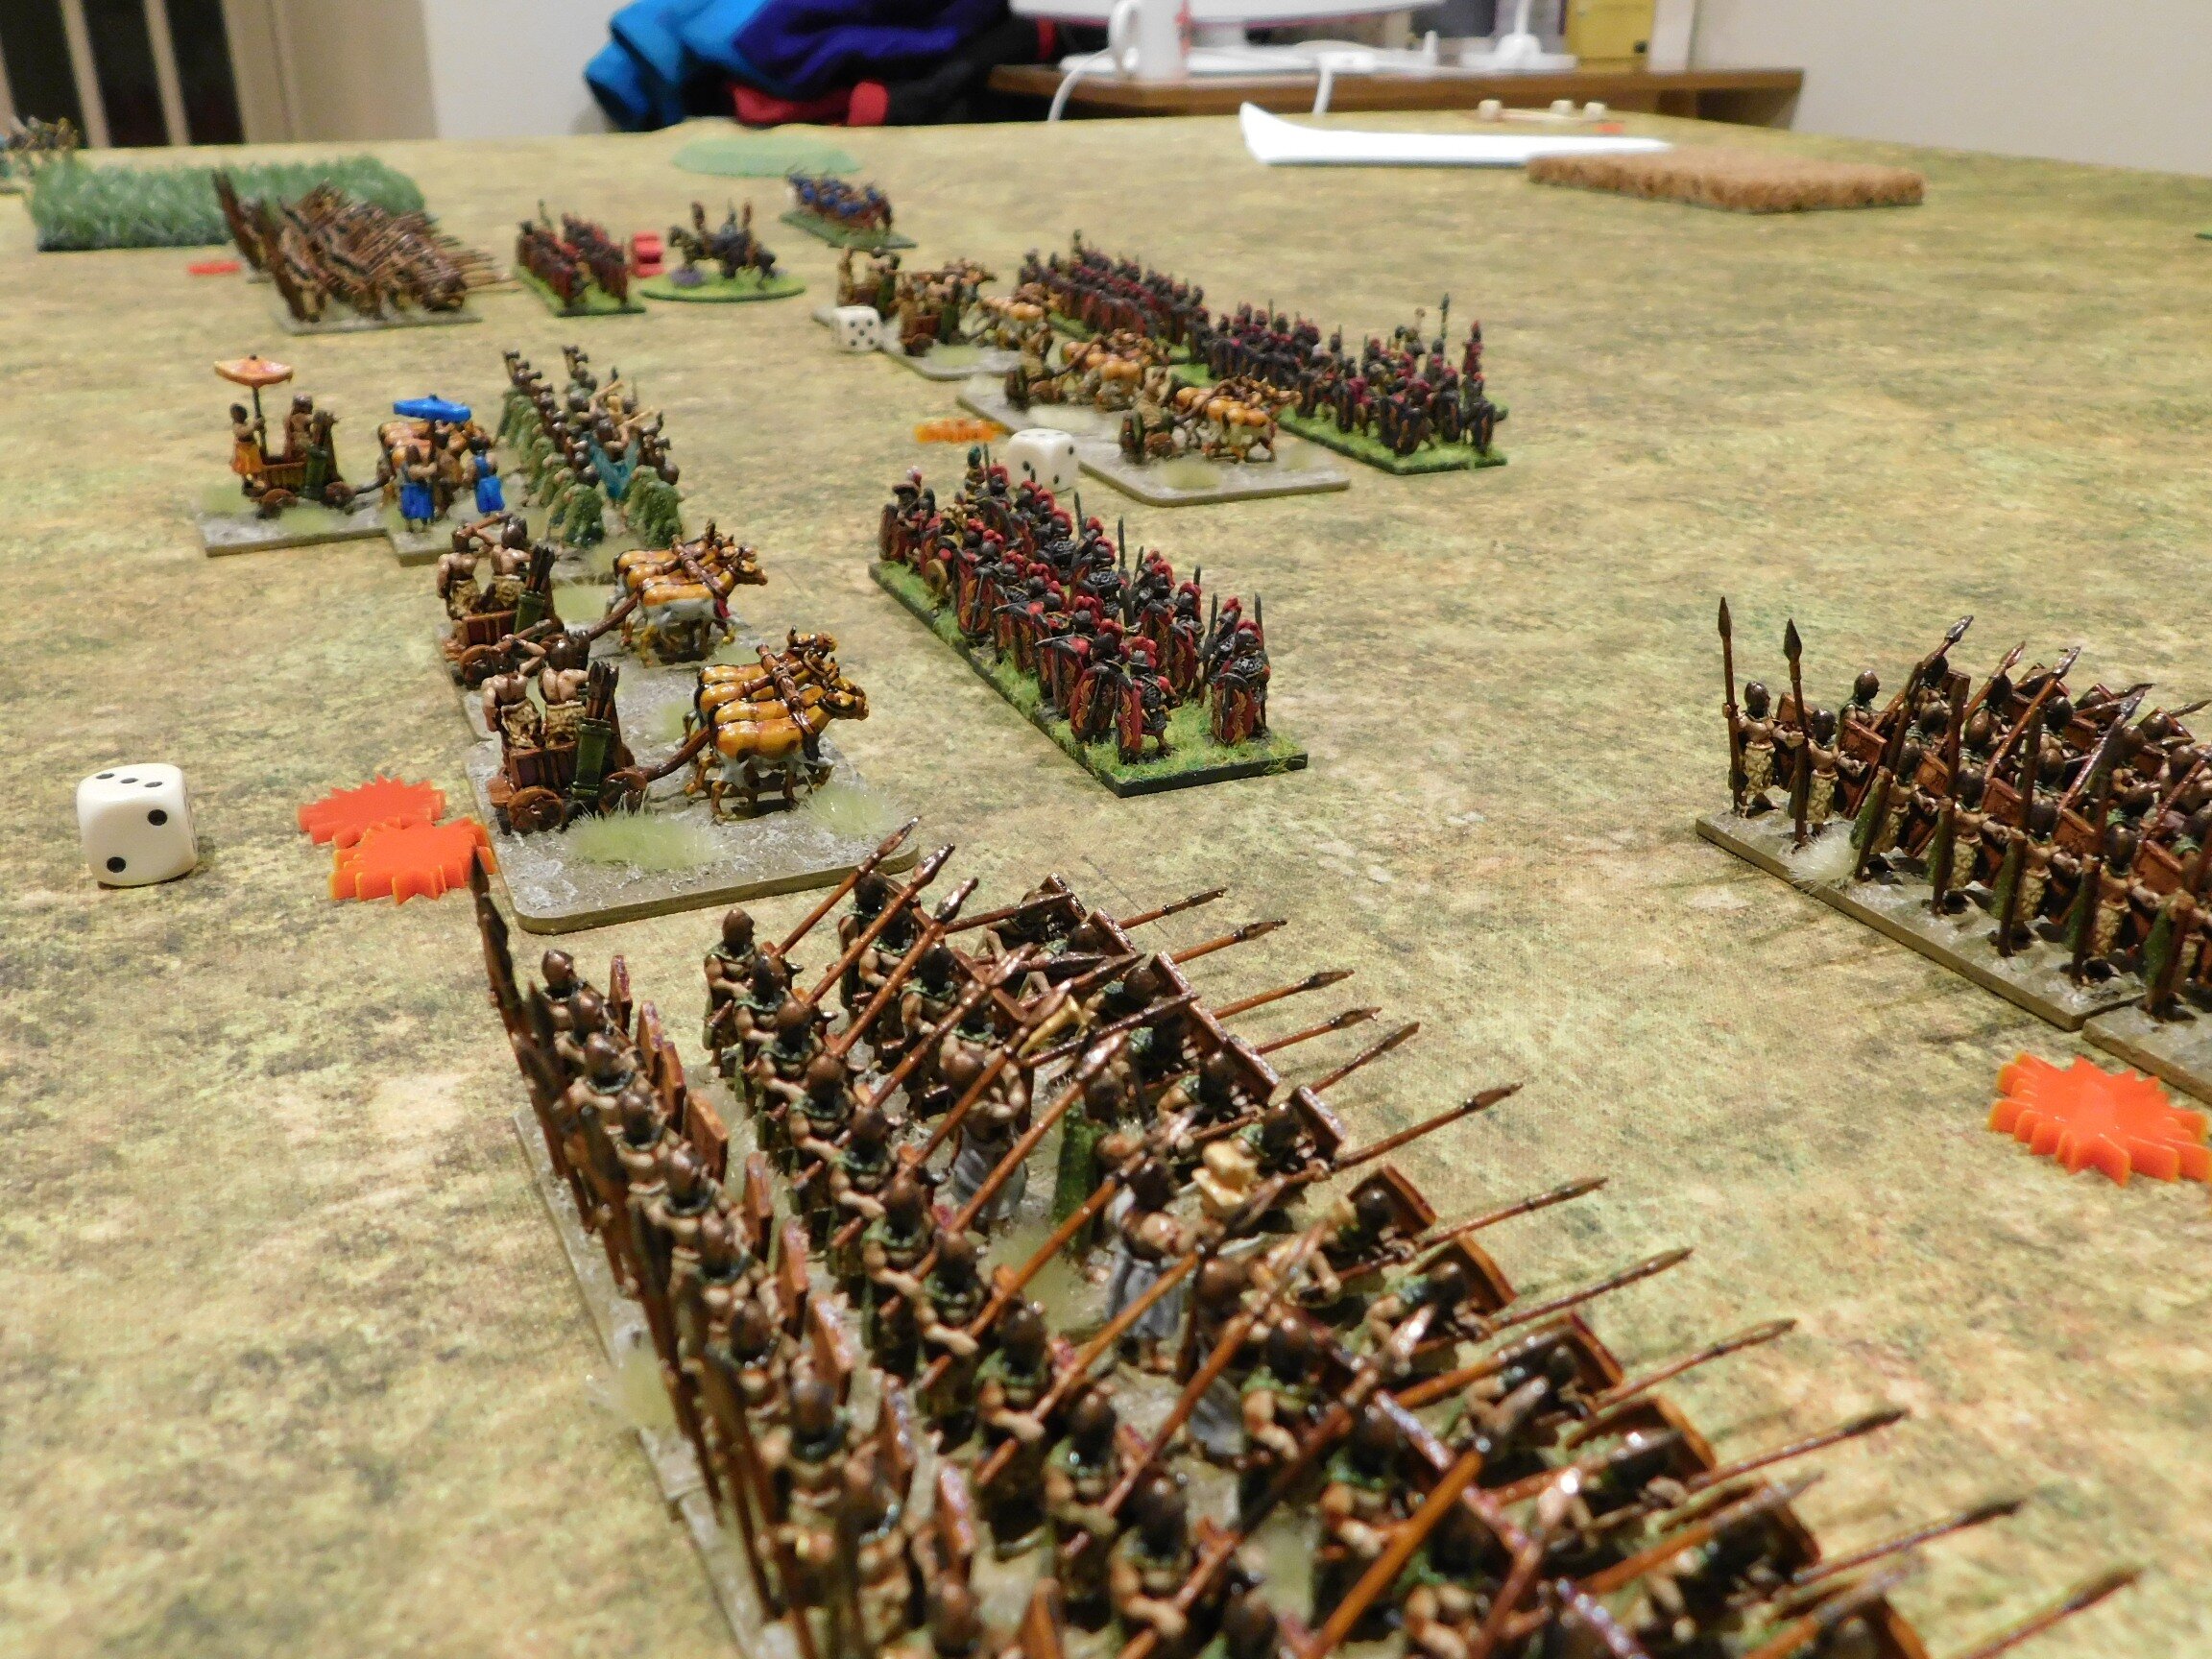
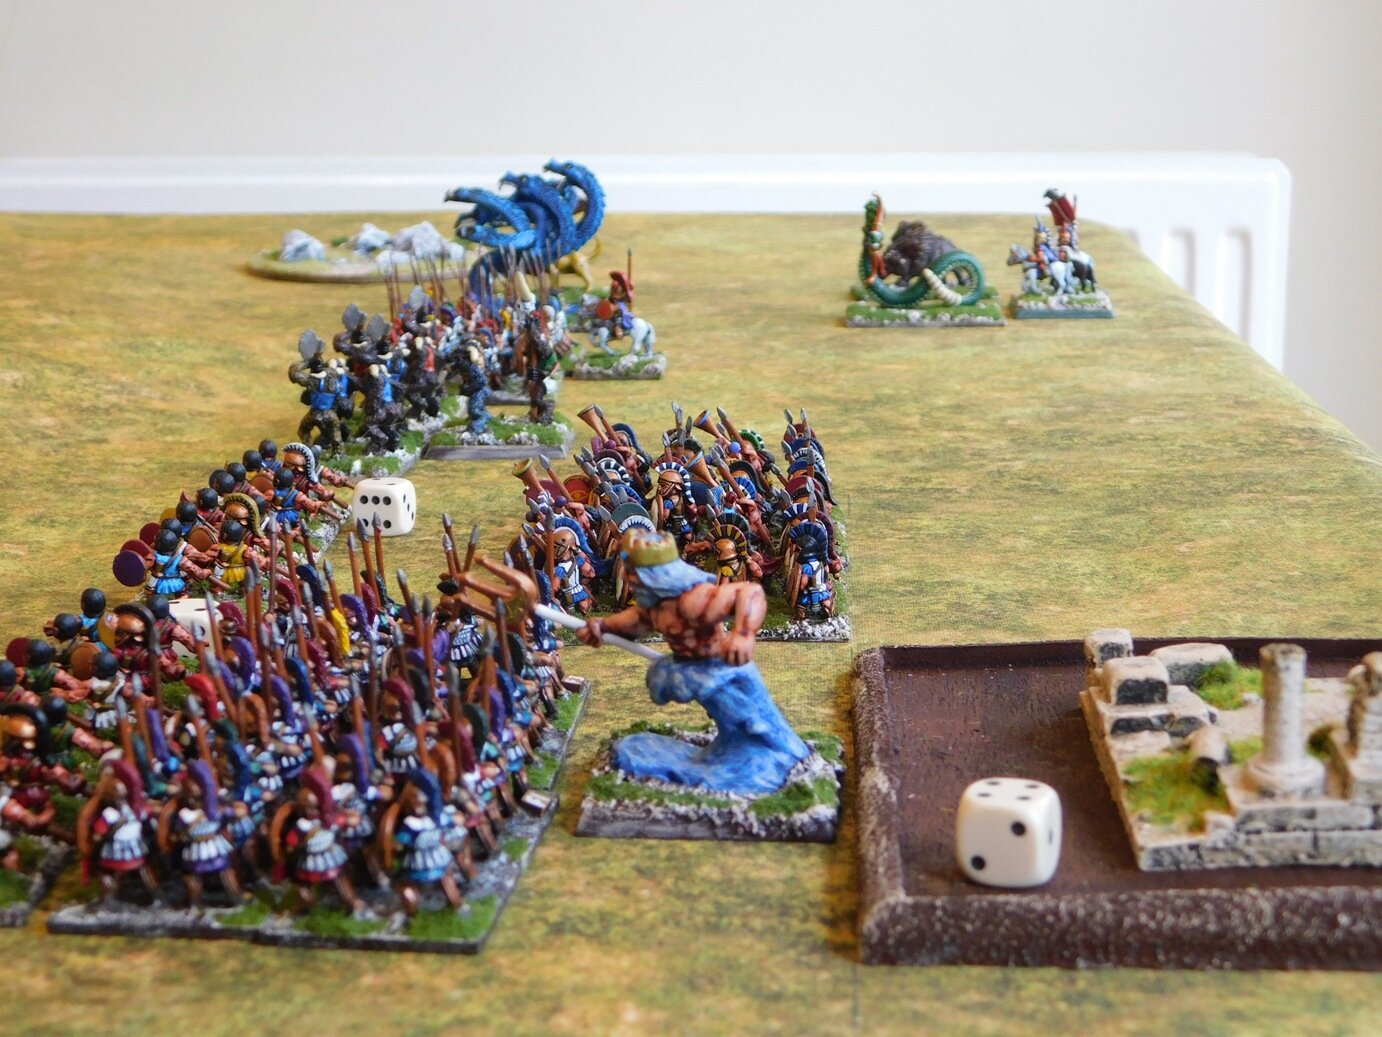
In they went as fast as a charging pachyderm, and nothing could stand before them!

Well, that’s a slight exaggeration, but with the cavalry on the left now free to assist, and the right wing just about won, the elephants did provide the coup de grace needed to take the last of Kavan’s victory medals.

A glorious victory for the Classical Indians!

TTS AAR: Akkadians versus Classical Indians

Time for a game of To The Strongest: I would take the Akkadians (the new, ‘slim-line’ version from the latest army lists) and Kavan would use a Classical Indian army of the Republican variety.

My plan was to act almost purely defensively: luring the Indians forward onto the tips of my spears. My only offensive move would be to send my heavy chariots forward on the left to try and get around the Indian right flank.

Everything went almost to plan, as the Indian javelinmen, chariots, elephants and cavalry hurled themselves forward without the first on the list even bothering with their extra longbows. To cut a long story short, they impaled themselves on the Akkadian line, and the game was won pretty easily.

Chronological pictures of the game appear below, but it’s worth mentioning why I said “almost” above. My heavy chariots did indeed thunder forward on the left most impressively, but then ran into bother facing a couple of raw units of Indian javelinmen. I sent some Household Infantry to help, and they got into trouble as well!

Unbelievably, the only thing that saved the day was the unit of Nim skirmishers in the rough ground (the unit with the die with ‘1’ on it in the picture above) who not only resisted every attempt of the Indian javelinmen to evict them from said rough ground, but went on to use their javelins to wipe them out as well!

Their success held my left flank together and allowed me to win the battle in the centre and on the right.

So a relatively workmanlike victory for the Akkadians. Here are the pics:

One thing to note: figures for both sides come from the Museum Miniatures CAD-designed Z ranges: highly recommended.

AAR TTS: Trialing the Massed Light Rule

Bevan and I manged to squeeze in a quick game of To The Strongest last week. Choice of sides was up to me, so I decided to test out the new-ish massed lights rule (where two light units can join forces and keep most of the characteristics of a light unit but be a bit tougher in combat) by fielding my New Kingdom Egyptians. Against them Bevan would take the newly slimline Akkadians: their deep spear units being reduced to normal size under the latest incarnation of the army lists.

I deployed my infantry in the centre, with two strong chariot-based units on either wing. My plan was to use my superior missile fire to weaken his troops and then either smash his weakened centre with my foot, or have my chariots harass his flanks…and it almost worked!

On my left, Pharoah himself led his veteran chariots forward. They shot loads of arrows at the enemy but failed to make any impression: there was obviously something wrong with their bow strings that day!

They then spent the rest of the battle being slowly pushed back or, in one case, sandwiched i.e. keeping the enemy’s right wing occupied, but not much else.

My right wing, however, did exactly what it was supposed to do. Quickly disposing of some light infantry, one unit of chariots swept around the flank of an enemy spear unit and drove it from the table. The other chariot unit skirmished with another enemy spear unit until it was sufficiently wounded, and then charged in and finished it off.

Great success, but the fact that I was hitting only on an “8” (light units remember) meant that it had taken more time than I had anticipated to achieve what I had done. One unit of chariots was also now quite a long way from the action, although the other was in a position to strike a commanding blow by taking the enemy’s camp.

Unfortunately, the cards failed me at the last minute and I ended up one square short (photo: right, above). The other chariot unit, or perhaps a unit of light infantry, also missed charging into the rear of an enemy spear unit in the centre by a similar margin. I would win the next turn, but could my centre hold out long enough for me to do so.

The simple answer was “no”. The Akkadian spear and axe units in the centre had been grinding forward and my mixed force of archers and spearmen just could not hold them. On Bevan’s next initiative he manged to break enough of my units to win the game just as I was poised to do the same to him!

So another great game of TTS. Looking at that last turn, I had four chances to take Victory Medals, two of which I needed to make happen in order to win the game. In the event, none of the four came off: by such slim margins are the fortunes of war decided!

TTS AAR: Slim-Line Akkadians Take The Field!

Amongst those of you who read my previous post (last Tuesday) about the changes to the To The Strongest army lists turning my Akkadian double-depth units into normal-depth Spearmen was friend Bevan. He suggested that the best thing to do was to immediately try out the new look “slim-line” Akkadians and proposed a battle.

This we duly arranged, fielding the Akka’s against a Classical Indian army. Figures for both sides came from the Museum Miniatures CAD-designed “Z” ranges, so looked very good indeed.

akkadians (left) versus classical indians (right)

The Akkadians boasted four brigades: a shock brigade of two units of battle carts (good in a straight line!) supported by a unit of lights; two foot brigades each of one “bodyguard” unit of Spearmen with extra bows and two normal Spearmen units; and then a reserve brigade of two raw, militia Spearmen units and two units of light archers.

The Classical Indians, on the other hand, had only three brigades. One consisted of a couple of units of veteran Heavy Chariots supported by a unit of crappy horse. The other two were built around a unit of escorted elephants: one had the veteran Maiden Guard (hard women all!) and two Longbowmen units, the other had three Longbowmen units.

The Game Itself

The two sides set up very differently. The Akkadians concentrated their battle carts on the left, opposite one of the Indian elephant brigades. The Indians concentrated their heavy chariots on the left (i.e. at the opposite end of the battlefield to the Akkadian battle carts) opposite the Akkadian reserves. Both sides deployed their main infantry bodies in the centre.

The game began with both sides moving forwards whilst maintaining their battle lines. On the Akkadian right, the reserve brigade refused the flank, leaving the Indian chariots with no-one to immediately charge.

the advance

The Indian longbowmen opened fire as soon as the Akkadians came into range. A storm of arrows headed their way, but there was something wrong with the Indian bows and the results of two rounds of longbow fire were one disordered Akkadian spear unit. Admittedly this unit then spent the rest of the game skulking in broken ground trying to rally, but the Akkadians had still got off lightly.

On the Indian right, one unit of elephants and the raw longbowmen headed forward, but the longbowmen hung back as the elephants surged towards the enemy…who wasn’t really there any more. Not liking the smell of the pachyderms (you don’t get too many elephants in Akkad) the battle carts had headed into the centre of the battlefield to join the main charge there, leaving some lights to keep the nellie’s occupied. The elephants would spend the rest of the game uselessly chasing the Akkadian skirmishers around that area.

elephants

The Akkadians initiated the main clash of the two battle lines, which rapidly turned into a disaster!

The Maiden Guard destroyed a unit of Spearmen, and either combat or longbow fire accounted for another…which happened to be the veteran unit carrying the Akkadian army standard and lost their accompanying general as well. That was seven coins (out of 13) down in one hit!

Losing generals seemed to be the theme of the game. Out of the seven generals who arrived on the battlefield at the start of the game, five were killed!

Losing to a bunch of ladies!

All was not lost, however, as the Akkadians settled down and got stuck in.

One Akkadian spear unit (the one out front in the first picture in this post) burst through the Indian line, destroying some longbowmen in the process, and managed to take the enemy camp, a significant loss of coins for the Indians.

The Akkadian reserves moved forward and filled the hole caused by the losses suffered so far, preventing the Indian chariots from lapping around the flank.

Other Akkadian units also saw off enemy units, killing generals in the process.

Taking the camp

The reserves are committed to cover the right flank

The climax of the battle was now upon us: with each side having just one victory coin left i.e. the next kill would win the game…and with disordered units all round, and lights on the Akkadian side, there were plenty of opportunities for either side to win.

The initiative was with the Akkadians: no kills on their turn!

The Indians tried their best: no kills (phew!) but the Akkadians were wavering. If I didn’t pull off a win in my next turn, there was no way I was surviving another round of Indian attacks.

I went through all my obvious kill possibilities (my good morale units versus his disordered units, flank fire on the raw Indian cavalry etc) with no result. Oh dear: this was not looking good.

There was, however, one last thing to try. Veteran, but disordered, battle carts charging diagonally at the disordered Indian Maiden Guard.

The battle carts managed to make the difficult move into contact, but failed to hit the Guard. Oh no!

But what was this? Striding forward came an Akkadian hero (the chap under the blue parasol in the picture below) and smote the Maiden Guard with a cracking hit. Bevan and I held our breaths as his save card was turned: a five and therefore a fail. The Guard fled the field and I and the Akkadians had won the day!

As always, a cracking game of To The Strongest and a game that had gone down to the wire. The narrowest of victories for the new slim-line Akkadians!

All Change for the Akkadians

Over the many years that I have been gaming, I have often heard people discussing the negative effects of a change in codex i.e. an official change to a set of rules or army list that renders an army or units that they use effectively useless. The codex change eithers removes that army or unit entirely from the lists available (the best example of this is the demise of the entire Squat/Space Dwarf race from the 40K universe) or severely lessens their fighting effectiveness.

I, personally, have never encountered this…until now!

Regular visitors will know that one of the armies I use to play the To The Strongest Ancients rules is an Akkadian army, representing a force from the city of Akkad dating between 2334 and 2154BCE. Up until now, the core of the army has been deep (i.e. double depth) units of Spearmen that are unwieldy to manoeuvre but have a lot of staying power.

I have duly painted up six units of spearmen, each of 48 figures, i.e. 288 figures in total.

A bit unwieldy, but plenty of staying power

The latest version of the lists, however, accompanied by a new v10 edition of the Even Stronger official amendments, has changed all this.

No longer are the Akkadian spear units deep: they have reverted to being normal depth.

Now I don’t actually have a problem with this - I get more units in my army, my force becomes more flexible tactically, and my army can now have an army standard, something I have always felt lacking in the pre-biblical lists - but that does mean that half of my 288 figures will now be sitting on the sidelines during a game rather than marching to victory with their comrades.

Luckily I have based them so that I can easily represent the change (I’ll just field the front two elements rather than former four, and it’s lucky that the command figures are in the second rank not the third where I’d originally intended to put them) but it still seems a shame that half the core army won’t now see action. Perhaps I’ll just field them as is, but treat them as normal depth!

On the plus side, however, as mentioned above I can now field an army standard so, as I wanted a different standard to my existing Museum Miniatures Z Range Sumerian unit standards, I quickly ordered a standard and some additional figures from Eureka…which leapt to the front of the painting queue as soon as they arrived.

Nice figures that size well with my existing collection. I still prefer the Museum Miniatures figures for their chunkiness (the axes and standard pole are a bit puny on the Eureka figures) but these make a nice change.

As I was already on the Eureka site, I also took the opportunity to buy some light javelinmen for the Akkadians. Even Stronger now allows mounted troops (such as my Akkadian Gish Gigir 4-wheeled battle cars) to be supported by lights in a way that means that I can take a hit meant for the battle cars onto the lights rather than onto the battle cars themselves. As the battle cars are my only mounted troops, so nasty to lose, and I don’t get that many of them, this is a very useful rule change indeed.

The Eureka lights are a bit stiffer in pose than my Museum lot, but do enjoy magnificently flowing locks of, presumably, black hair. I’d better look for a regimental barber figure too!

So it’s all change for the Akkadians, and I look forward to trying out the new, nimbler version of the army as soon as possible!

More from Sumer!

One of my new year’s resolutions was to mix painting newly-bought figures with those forming the considerable lead mountain that haunts my dreams.

One significant component of the lead mountain is made up of the final units needed to complete a particular army, and one example of that has been, for quite a long time, the final unit of spearmen for my Sumerians.

Playing To The Strongest at 130 points, the Sumerians (or Akkadians or any other city state from around that time) definitely need four deep units of spearmen, and could really do with five, and maybe sometimes need six. I had five, and at 48 figures per unit, that meant I’d already painted 240 of the little devils. Hardly surprising that at that point I ran out of steam and couldn’t finish the sixth.

Those poor spearmen from the sixth battalion had been sat on my painting table, in a tray, trying to guilt me into painting them for over two years so, as I waited for the next batch of vehicles to finally finish motorising my WW2 Poles to arrive, I thought that they would be the next chunk dug out of the lead mountain.

And what a pleasure it turned out to be. I had forgotten how much fun it was to paint these chaps: all from Museum Miniatures’ excellent CAD designed Z Range. Basing them was still the same old pain (all those spears need to interlock), and I couldn’t remember how I painted the equids pulling the war wagon, but it was still a refreshing change from Poles, Cossacks or even Polish Cossacks!

And I cleared a space on the painting table too!

TTS AAR: Akkad versus India

Time for another game of To The Strongest: I would play the Akkadians, friend John would play the Classical Indians.

The Classical Indians were of the Republican variety: normal rather than heavy chariots (two units); loads of longbows (five units); a unit of Maiden Guard javelinwomen (questionable historically, but lovely figures, pun intended); two units of elephants escorted by light infantry (hard to kill); and two units of not very good cavalry.

My brave Akkadians consisted of a couple of units of battlecarts (four-wheeled proto-chariots drawn by equids: as manoeuvrable as that sounds); lots of citizen spearmen (five deep units); three units of regular soldiers (two carrying axes and one armed with bows); and four units of fairly scummy light infantry (two units of slingers, two units of archers).

My plan was simple. Battlecarts on the left would smash through the enemy cavalry then wheel round into the rear of the rest of the Indian army. The rest of my troops would advance steadily forward, spears to the front, weathering a storm of longbow fire but pinning his troops in place until the battlecarts arrived. What could possibly go wrong?

Opening Moves

Accidental advance in echelon

To answer the previous question: quite a lot actually. Firstly, my various brigades refused to advance together and I ended up moving forward in echelon.

Secondly, the enemy cavalry, which should have folded before the might of my battlecarts, proved stubbornly difficult to break: in fact, at one stage it looked as if it would be my battlecarts that were smashed from the field!

On my right, enemy chariots smashed into one of my spear units and drove it and its accompanying light infantry from the field. I should have been able to support the spear unit that broke with another brigade of troops, but they were at the back of the field stubbornly refusing to move forward.

Two against one: my “BLUE” spearmen are about to leave the field

That meant that John could advance his elephants in the middle of the field, attempting to defeat each of my brigades in turn.

two against one again: elephants and longbowmen combine against my “turquoise” spearmen

The game was definitely starting to look in the balance. Although I managed to hold the centre, with both sides taking a lot of casualties, my left wing battlecarts were bogged down in melee and on my right wing the Indian chariots threatened to run riot into the flanks of what remained of my centre.

All was not lost, however, as an extraordinary passage of play was about to occur in which the Akkadian Royal Household Axemen, previously stuck miles from the action as part of the brigade that had stubbornly refused to advance, finally got forward and set to work.

Facing two Indian chariots units, they destroyed both and killed the Indian general commanding them. They then resisted attack after attack from the elite Maiden Guard despite already being Disordered.

The Royal Household axemen: heroes of Akkad!

This success gave me time to reorganise my centre and to get things sorted on my left wing. The battlecarts were reinforced with some infantry and finally broke through the enemy cavalry and swung round, as planned, into the enemy rear.

With their centre hit from the rear and under pressure from a reinvigorated Akkadian army, along with the Royal Household Axemen who were still clamouring for more, the Indian army collapsed and fled the field. Victory was mine.

Aftermath

Well that had been a close run thing! At the moment when the battle was truly in the balance, a rather convenient run of luck with the cards on my part swung the day in my favour, and all centred around one unit.

the situation at the end of the battle

A great game!

TTS AAR: Romans vs Sumerians

With lockdown back upon us and Daughter #1’s boyfriend back at University, my only potential opponent for a battle was Daughter #2. A little bit of gentle arm-twisting persuaded her to abandon the questionable delights of K-Pop YouTube videos and join me in the wargaming room for a game of To The Strongest.

I wanted to use two of my newest armies: the Sumerians and the Marian Romans. I politely gave her the choice, thinking she was bound to go for the Sumerians with their exciting four-onager chariots, axemen etc, but instead she chose the more space-invader like Romans. I felt a little disappointed here, as I’d wanted to play them, especially as I know hoe good they are. Competitive Dad? Well, you have to take your victories where you can!

Both sides deployed. The Sumerians looked their usual impressive selves: the blocks of citizen spearmen supported by light infantry; the aforementioned chariots; and three units of axemen or archers.

The Romans, under the so-called Beardless Pro-Consul, looked a little ragged by comparison, which just shows that appearances can be deceptive:

DSCN2045.JPG

The Game

Both sides opened the battle by advancing forward smartly.

In the centre, my heavy chariots headed straight for the oncoming Romans, hoping to hit them whilst they were deployed with gaps in their battle line. Apparently not all my chariot units were equally keen on getting stuck in, so there were holes in my line too, but I didn’t think this was a problem as I reckoned that being mounted meant that any stragglers would catch up fast.

On my right flank, some equites saggiarii tried to sneak past my flank, but were blocked and eventually destroyed by my lights:

On my left, however, two units of Gallic Cavalry had a bit more room to play with, getting past my flank, and causing me (along with some Cretan archers) huge problems for the rest of the battle.

Note the Gallic horse right out on the right of the picture. They have got past my flank and forced me to deploy my reserve to face them.

Back to the centre, and the two lines came together with a mighty crash. Unfortunately, the mighty crash mostly involved smashing chariots as, using their excellent manoeuvrability, the Roman legionaries snapped into an unbroken and pilum-toting line of heavy infantry. Who new Daughter #2 knew what she was doing!

I pulled back in an attempt to re-organise but, of course, this just gave the Romans a chance to reorganise themselves and to then slam forward once more, again using their quality and agility to always be in the right place at the right time with the right units. I tell you, if you can’t get round the flank of the Romans (which I had singularly failed to do) then you are in big trouble: the Roman mincing machine makes, er, mincemeat out of anything it faces!

Here’s a series of pictures showing what happened in the centre:

I did have a couple of light units pushing past the Roman left flank but all that happened was that one double cohort of legionaries swung neatly sideways to face them, and without the help of the other light unit (who had been previously occupied in finishing off the horse archers) I was not going to get anywhere anytime soon.

But it was on my left flank that I was most in trouble.

I had managed to get my reserve into play in order to head off one lot of Gauls from rolling me up but, just at the critical moment, luck deserted me, and two of my brigades drew consecutive Aces at the start of their activations.

This left me unable to get anything done, and the Gauls closed in, hitting my blocking force from both front and back:

And that, really, was that: my left collapsed, my centre crumpled and I haemorrhaged coins faster than you can say “bloody Romans”!

Aftermath

A great game of To The Strongest despite my somewhat embarrassing defeat! Showcased how good the Romans can be in a straight up fight where their flanks are safe.

TTS AAR: A Very Narrow Victory

Time for the weekly battle with Daughter #1’s boyfriend K, trapped with us for the duration of lockdown.

We’d left it a bit late in the day to start (family quiz evening!) so elected to play To The Strongest. I would take the Neo-Sumerians, K would play the Athenian Hoplite Greeks. This is one of our favourite combinations: both sides consisting mostly of deep spear-armed blocks of infantry.

In TTS, there are several variants of the basic Sumerian army. In chronological order, they are Dynastic Sumerian, Akkadian and Neo-Sumerian. I had chosen the Neo-Sumerians because although their spear blocks are almost all raw citizen militia , they do have the ability to field a sizeable Royal Guard of archers and axemen.

My plan, therefore, was to keep my spearmen away from the mincing-machine of his Hoplites whilst the Royal Guard knocked out as much of the rest of his army as possible. I could then surround the Hoplites and polish them off.

Here’s what actually happened in the form of a pictorial report…

And that was the battle won, with only one of my coins remaining!

Aftermath

Well that was a very close run thing!

The Royal Guard performed appallingly, and it was really only the fact that K kept getting his generals killed that allowed me to win the day. K lost three officers, take two away and he would have had four coins remaining as his Hoplites made mincemeat out of my militia. As it was, I scraped home with only one coin to spare.

Another great game!

AAR: Smash of the Titans!

So #1 Daughter’s boyfriend had been roped into cooking the Easter Roast, which left me no-one to play with except for #2 Daughter.

She felt that she could manage another battle, but only if it had “monsters and aliens and stuff” in it.

Not a problem my dearest fruit of my loins: time to make To The Strongest literally fantastic by breaking out my Legendary Greek figures.

I would play the Sumerians, #2 Daughter would take the part of Poseidon leading a contingent of Hoplite Greeks spiced up with few “monsters…” etc.

In effect, this meant that she fielded (nearest to furthest in the picture above) a unit of Pegasus horse that could ignore terrain penalties; two units of Centaur cavalry (one horse archers, one cavalry); a unit of Minotaurs counting as axemen; and two units of monsters: the Hydra, the Erymanthian Boar, the Chimera, and the Medusa (treated as elephants).

The Sumerians remained unphased by this display of divine horrors:

The Battle Begins

The game began with one of those weird series of multiple Aces appearing on each side, with the result that although the lines crept slightly closer together, the only interesting event was the Hydra and Chimera bounding forward to attach the Sumerian left flank.

Very sensibly, the slingers ran for it…and here #2 Daughter made a mistake. Instead of crashing through the poor terrain, or lurking in its lee, the Hydra and Chimera decided to go round it. Not being very manoeuverable, however, they got stuck with their rear ends sticking out!

This would prove to be a very inviting target for the, er, pink Sumerian spearblock, and they would eventually charge the two monsters in the rear and do enough damage to send them straight off the table, therefore negating the regenerative abilities that I had assigned to both (automatically regenerate from disordered when activated).

The two battlelines then got on with the business of smashing into each other, each advancing forward as fast as they could.

As Sumerian commander, I sent in my battlecars first: determined to soften the Legendary Greeks up a bit before committing my infantry.

This was all going nicely, with the Centaur horse archers eradicated when they failed to evade, but I had forgotten about the terrain-ignoring Pegasus cavalry: which snuck around my flank and threatened to roll up my entire line!

Fortunately, great Zeus was obviously determined to make sure that his somewhat soggy brother was humiliated, and the flank charge only managed to KO one unit of battlecars before a spear block managed to get forward fast enough to force the flying horses to evade beyond the trees.

Unfortunately, the other two units of battlecars believed in a different divine panoply, and were destroyed by the Hoplite unit backed by Poseidon himself and, a bit unexpectedly, the Centaur cavalry. Things were looking a bit dicey on my right flank, but I had the infantry brigade behind ready to stabilise the situation.

The action now swung to the other side of the field, where the Minotaurs had been easily dismissed: obviously their tales of martial prowess were complete bull! I had, however, lost my Axemen, so the situation looked like this:

Zeus intervened again, and somehow I managed to dispose of the Medusa and the Boar, and get my spearmen back across the field and into the rear of what had been the Minotaur-led Hoplites.

Their loss proved too much for the Legendary Greeks to take, and the field of glory was mine.

Aftermath

A most enjoyable game which, I must confess, that I won by sheer luck of the cards. #2 Daughter, who is not yet old enough to drive, made only one tactical error, at the beginning, and otherwise came close to annihilating an entire flank which would, I think have given her victory. As it was, I was only one coin behind her in terms of defeat.

I think I might actually make a serious attempt to define some characteristics for the Legendary Greeks, if only because it’s nice to get some unusual figures on the tabletop.

Right, off to the Temple of Zeus to give thanks…

A Right Result!

So here we all are stuck under lockdown and unable to go out. No wargaming clubs are open, no wargaming friends can come round: what on earth is one to do.

Well I have had a right result.

Daughter number one came back from university just before lockdown and brought her boyfriend with him as a house guest for a couple of months (he lives abroad normally, but can’t get home at the moment). This is not a bad thing: we have plenty of room and he, unlike me, likes cooking. Even better, the kids were so desperate for entertainment yesterday that they agreed to have a battle: daughter number one and boyfriend on one side; daughter number two and I on the other.

I chose the To The Strongest rules for Ancients as it’s probably the easiest introduction to wargaming for beginners: no measuring, no dice, simple grid-based movement and combat rules etc. D2 and I took the Neo-Sumerians, D1 and BF took the Assyrians.

Neo-Sumerian Battle Line

This was an interesting clash: lots of slow-moving, poor quality Sumerians versus small numbers of deadly, fast-moving Assyrians.

Each side chose to put their heavy chariots on the right flank, so we rapidly got to a situation where the centre was a tie and each side’s right flank was winning and left flank was losing.

The advantage then swung back and forth with both sides ending up with only two coins each i.e. one more unit lost would mean an overall loss. As it happens, one of the Sumerian heavy onager units managed to knock out an Assyrian cavalry unit and the game was ours!

And the right result?

Not the win, funnily enough, but the fact that D1’s boyfriend really enjoyed himself and declared an interest in playing more battles. Well, if we’re stuck together for another ten weeks, his wishes are going to be more than fulfilled! A convert!

Here are some more pictures of the game:

An Afternoon of "To The Strongest"

Second weekend of the year and I’ve managed to get in an afternoon of “To The Strongest”.

Bevan and I managed two games. The first was a grinding clash between two quite similar armies: I played the Akkadians, Bevan took an Athenian Hoplite force. Each side had a core of a number of deep blocks of close-formed infantry (Spearmen for the Akkadians, slightly superior Hoplites for the Athenians); but the Akkadians had their veteran four-onager heavy chariots plus Royal Bodyguard axe- and bowmen versus a mix of low quality cavalry and lights for the Greeks.

As mentioned, the game was a truly grinding clash. The Akkadian chariots, out on their right wing, threatened to curl around the Athenian left flank, but began the game seemingly unable to move. This meant that the Greeks could come forward and join a general line-against-line engagement that slowly started to bow the Akkadian battle line backwards.

But somehow the Akkadians held on. The Royal Bodyguard axemen did stirring work, the line began to straighten slightly, and then the heavy chariots finally got going and smashed in from the right. In the end, this was a colossal victory for the Akkadians, who didn’t lose a single unit and managed to capture the Greek camp. Here are some pictures:

For the second game, I took the Ancient Britons, with Bevan playing the Sassanid Persians.

The Brits had a huge chunk of (somewhat unwieldy) warriors in the centre of the field, and large numbers of light chariots/cavalry and infantry on each wing…so many lights, in fact, that (much to Bevan’s surprise) his all-horse Sassanids were matched in terms of scouting points.

Looking at the set up, I was confident of victory: there was no way his incredibly small force was going to beat the Ancient British steamroller!

Unfortunately, Bevan and the Persians begged to differ, and what followed was the dissection of my army with surgical precision. First my lights were stripped away unit by unit as I struggled to get my warriors moving, and then enough of those warriors that did move were beaten for me to lose (given that I’d lost a lot of coins through my lights). It was a superb demonstration of how to use a horse archer and cataphract based army.

Fortunately I did manage to kill at least one of his units, so technically the afternoon as a whole was to my advantage, but the way my Brits were annihilated didn’t make it feel so!

Here are some more pictures:

Sumerians Finally Hit The Tabletop!

A great start to my Xmas holiday with an afternoon of gaming To The Strongest, so also a chance to get the Sumerians that I have been so assiduously painting over the last few months onto the tabletop.

First off was an encounter with the Ancient Britons. Weird how I would never think of playing a non-contemporaneous battle when playing WW2, but accept it as normal for the Ancient period. Doubtless the Brits were on holiday, and when asked where they wanted to go, just replied “Errr…”

Moving swiftly onwards, I had to deploy first, so it was chariots on the left, militia in the middle, and good troops on the right. Opposite me, the Brits had adopted a very traditional deployment: chariots and light horse on the wings, infantry in the middle.

In a nutshell, the battle went as follows. The Britons opened the game by moving forward really quickly. I responded by sending my chariots forward on the left, but they spent just about the whole game dealing with his light chariots and horse, who just wouldn’t stay still long enough to be properly mullered. On the right, the same thing happened with my Royal Guard axemen. I tied his chariots up, but that was all. That left the infantry in the middle to win or lose the battle. My troops were largely militia raw troops, his were screaming barbarians: I lost!

So on to a second battle, where although the Ancient Brits were unchanged, I switched my Dynastic Sumerians into the slightly more advanced Akkadians. With no raw militia, I was slightly more confident of success but my opponent, Bevan, was very clever and tactically astute: all his light chariots and horse went on one flank, whilst his infantry advanced in echelon towards me.

Those of you who are equally tactically astute will of course know exactly what happened next. His light chariots swarmed all over my ponderous battlecarts: if I chased one, it evaded, and then the others attacked my flanks and so on! Meanwhile my infantry just couldn’t get a grip on his foot and found themselves always facing two units or a threat from a flank. I lost again, and lost badly!

Our final game saw me using the Akkadians again, but this time facing another geo-anachronistic foe: a Pyrrhic army composed mostly of Hoplites. This was more my type of opponent: no hordes of light chariots to annoy me.

I deployed with my battle carts facing his cavalry on my right, my Household Axemen and Bowmen facing his elephants on the left, and a straight up infantry face off in the middle.

My battle carts literally smashed his cavalry from the field (apart from a nasty charge from his lancers), and then proceeded to take his left hand camp, with the other only a turn away from falling as well. On the other wing, my bowmen saw off his elephants without too much difficulty, which left an infantry clash in the middle. This was more even, with the fortunes of war swinging backwards and forwards. My successes on the wings, however, meant that although we each lost the same amount of infantry units in the centre, his army lost its morale first.

So two losses and one win for the first Sumerian outing: not a bad performance. Here are some more pictures of the day’s gaming:

More Sumerians

Closing in on the last few units of my 15mm Sumerian army for To The Strongest.

Today’s offering is firstly a fifth spear block of 48 spearmen: a rather daunting prospect when you see them all ready to be undercoated, but fine once you get into the rhythm of painting them.

Next we have some of the marker pieces I’ll need. These are the Heroes: allowing you a one-off re-try of a round of melee i.e. draw the wrong card, use our hero, draw another card, discard hero.

As you can see, each of my heroes comes complete with their own scribe (to record their valiant actions) and their own parasol holder (to keep the hero cool until he is needed).

Once again, lovely 15mm figures from Museum Miniatures.

Sumerian Commanders

Coming close to finishing the Sumerians now: just two more units of spearmen, some heroes, and some skirmishing archers to go.

That means it must be time to paint the generals: three of them needed, each in a four-equine chariot:

And very nice they are too: this really is a cracking range of 15mm figures from Museum Miniatures.

The Sumerian Panzer Division

More of the lovely 15mm Sumerians from Museum Miniatures. This time it’s the bronze fist of the army: the battle carts!

These are a bit like heavy chariots…except for the fact that there are no horses available, so the somewhat less sophisticated equids are used instead; and primitive technology requires the carts to have four wheels instead of two i.e. making them hard to manoeuvre.

Other manufacturers take note: these are easy to put together in that the carts are basically one piece with the yoke and pole being another. Add in the bow cases on the sides and you’re done.

As usual, I’ve painted these mostly with Citadel Contrast paints. I’ve covered how the Sumerian infantry are done in previous posts, but the equids are undercoated as usual, then have the legs and lower body lightly painted in Apothecary White. The upper body is then painted in Nazdreg Yellow. The mane down the back is simple black, black tufts on the ears and in the tail, and you’re done. Horse equipment was Contrast Snakebite Leather.

If I have any complaint, it’s that the warrior in the back is in a bit of a weird pose. I question how easy or practical it is to hold the spear like that for a sustained period, or even to thrust. I know holding a Japanese bo like that wouldn’t work unless you’re talking about literally the very final point of a somewhat unusual overhand thrust: I went and got mine out of the car to try it out!

But that’s a minor gripe: overall very nice figures.

You'd Have To Be Crazy...Sumerian Saddle Carts

Next up for the Sumerians (15mm from Museum Miniatures) are another non-core unit: the absolutely insane Straddle Carts:

The view from the rear, below, shows them better, but it’s a chap sitting on a mini-vaulting horse being pulled along by four equids!

This seems like a very good way to die!

What is a shame, however, is that the army lists from To The Strongest rate these as just about the worst troop type you can get: Raw Lights. Now I know that is probably the author reflecting his slight disbelief that these things ever existed (carvings, presumably, being open to misinterpretation), but I think a Veteran rating would be more appropriate. For a start, more people would use them, adding to the uniqueness of the army; and secondly, as I say in the title, you’d have to be crazy i.e. Veteran to ever get on to one of them in the first place!

Sumerian Archers

I’m making a real push to finish my Sumerians now. These are from the excellent Museum Miniatures 15mm range, painted with Citadel Contrast paints.

Today’s offering is a non-core unit: a regiment of either Bodyguard or City archers:

Lovely figures, as you can hopefully see, and really easy to paint. Here’s a view from the back:

On to the Battle Carts next!