US Tanks for North Africa

Earlier this year, I bought the Kasserine boxed set at a show, and having already completed the Panzers for the Germans, it was time to have a crack at the Americans.

In the box, you get enough plastic sprues for five M3 Stuarts, four M3 Lees, and three M4 Shermans. To these I added not two French hens and a partridge in a pear tree but some Battlefront special edition Sherman base I’d had lying around for ages. Let’s take them each in turn.
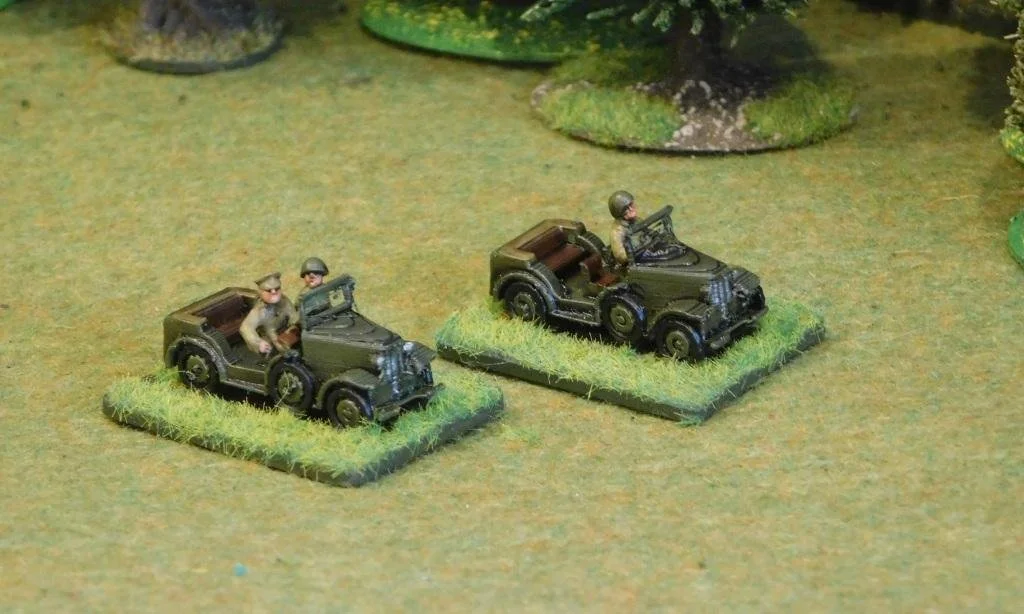
The Stuarts

First up were the five Stuarts. The build did not get off to a great start when the first thing I did was to snap the gun barrel in half on the first Stuart I was building. I’ve often said that clipping the gun barrels from the sprue is often a risky business, and so it had proved again.

This was a real pain in the backside, but I solved it by using a decapitated pin instead. It’s the barrel on the command tank (the one with the chap sticking out the turret) in the picture above.

Otherwise, the build wasn’t too difficult, although getting the upper hull to sit flush on the main body proved almost impossible. That means that there’s a gap on both sides of most of the models, but I stuck the stowage on the side where it was worst and the paint job conceals the other.

As a point to note, these kits have no tolerance for badly clipped parts: you have to make sure there are absolutely no bumps or it just won’t fit together.

The Lees

The same notes about gun barrels and no tolerance applies to these kits as well. Also, you need to make sure that you get the 75mm gun the right way up: get it right and you can fix it in place without glue so that it swivels.

Otherwise, these kits go together well, especially the mudguards: they were actually strangely satisfying to fit!

The Shermans

This is where the fun began…but “fun” entirely of my own doing!

It was quite an overcast day when I sprayed these in the garage and, as is my custom, I took the trays with all thirteen tanks out of my spraying area and put them on the front step just outside the front door of the house. It’s a place that’s in the sun and, once dry, I wouldn’t have to go through the rigmarole of walking to the garage (all of twelve steps!), opening the garage door, getting the models, closing the garage door etc.

I then went into the house and started watching a bit of TV, eventually dozing off as I’d had an early start.

The thunder and lightning of an enormous storm woke me, and for a while I sat watching the lightning fork down and the wind sweep the rain horizontally across the front garden.

Then I remembered my models: still outside “drying in the sun”!

By the time I rescued them, the trays with the Stuarts and Lees were half an inch deep in water, and the tray with the Shermans was nowhere to be seen! I eventually spotted it blown down the drive some twenty metres away!

Rushing out into the teeth of the storm, I managed to rescue the Stuarts and Lees without too much difficulty, and then went back out into the darkness to find the Shermans. We leave no-one behind!

I found all three Sherman hulls, but only one turret, so the models below have been built using the spare turrets from some Plastic Soldier Company Shermans that I’d built some time ago: like many plastic models, there’s one PSC sprue for a Sherman that allows you to build all the variants i.e. it has the parts for various shaped turrets on it dependent on which variant of Sherman you are building.

Okay, so the turrets don’t turn, and have no .50 cal…but that’s better than throwing the incomplete models away and they seem to have turned out okay.

Fortunately, the Battlefront special I was also painting was made of metal and resin, so was a pretty solid affair that hadn’t been blown away in the wind.

Summary

So that’s another foothill of the lead mountain dealt with.

The Battlefront Kasserine box set is good value (especially the discounted price I paid for it) and the kits aren’t really too hard to put together. Take a bit more care than I do and none of them should be a problem.

One thing: no decals are included in the set. I’d have rather paid a bit more and had the right decals than have to specially buy a pack or two of yellow stars for the US tanks, and I couldn’t find anyone who does 15mm yellow strips to go either side of the stars like on the pictures of the models on the box. I could have tried to paint them myself, but experience has shown me how difficult that is, so I didn’t bother to even try!

Looking back at my post about building and painting the Panzers (click here) I see that I gave the German side of the box set a Recommended. I can’t give the US side of things the same rating, mainly because of the build on the Stuarts and the overall lack of specialist decals: it gets a solid Average for being convenient and good value, but that’s all.

Panzers for the Afrika Korps

I used the long weekend to build and paint up all the German tanks with the Battlefront Kasserine box set.

There were nine tanks in all: three Panzer IV and six Panzer III, all of which could be built in a variety of different marks. I opted for a mixture of tank types to give me maximum flexibility when fielding them on table.

The kits went together very, very easily…even for someone as bad at kit building as I am. Really confirmed my belief that plastic really is the way forward.

First off the production line were the Panzer IVs: one F2 or G with the long 7.5cm gun, and two F1 with the short 7.5cm gun.

Then came the three Panzer III L with the long 5.0cm gun:

Finally another three Panzer III, this time the H or J with the short 5.0cm gun:

All were painted in the same way: a spray undercoat of Desert Yellow washed with Agrax Earthshade then drybrushed with Vallejo Iraqi Sand. Tracks were painted metal and then washed with a heavy Flesh-coloured wash. Finally decals were added with the use of a decal softener: essential if you’re applying the turret numbers to the bumpy bit on the side of the turret (I put a bit of softener on the turret, then apply the decal, then paint more softener over the top; leave for twenty seconds or so, then gently press down with a tissue).

These really are very nice kits that paint up beautifully, even with my crude skills. At less than £2 a tank, I cannot but recommend this boxset for anyone wanting a quick fix of Afrika Korps.

A New Project: Afrika Korps

One of the gaps in my collection of WW2 figures is the Afrika Korps. I have Western Desert Brits and Italians, but no Germans. When, therefore, I was at the Vanquish show a couple of weeks ago, and saw the Battlefront Kasserine boxed set, already good value at £42 for twenty-one vehicles/guns, reduced by another 20% by those nice gentlemen from The Pit, I quickly reached for my wallet and snapped it up.

I also bought one of their Team Yankee sets to join the others currently languishing in the lead mountain: so when I do eventually get around to painting some modern Russians, I will have everything I need to hand.

Anyhow, those who are regular readers will know that this year’s rule is that I’m only allowed to paint something new if I also paint something from the lead mountain as well. Lucky then that also lurking at the back of the cupboard of shame was the Battlefront 90th Light Africa Division “themed formation” box set that I’d also picked up at a heavy discount somewhere else. A quick shop to buy the right paints and bases etc, and I was ready to go.

SdKfz 6/3 “Diana”

The first unit off the painting table was a zug of SdKfz 6/3 “Diana” self-propelled anti-tank guns, unique to the aforementioned 90th Light Africa Division. There were only nine of these ever produced but, hey, I might be able to field them one day even if I have to write the scenario for myself.

The models were very easy to put together, even the usually tricky ‘mounting the gun and shield’ bit and, as you can hopefully see, paint up nicely as well. I painted the crew figures (there are two manning the gun in the back) effectively on the sprue by cutting a small slit in a blister pack blister and fitting the tab on the end of the crewman figure into the slit. That was much easier than detaching them and trying to hold a small tab whilst painting.

PaK 36(r) 7.62mm AT Guns

Next up, and from the same 90th Light Africa Division boxset were some ex-Soviet anti-tank guns. These had been captured in 1941 and re-purposed for north Africa.

The models (metal guns with plastic crews) also went together very well, although I had the usual problems with getting the gun barrels absolutely straight after the mangling they had taken in the Battlefront factory and in transit. Is it really so hard to take what is arguably the most important part of the model, or certainly one of the most noticeable parts, and ask your staff to be particularly careful when extracting them from the mold?

Finally I was on to the first unit from the Kasserine box set: a zug of PaK 38 anti-tank guns. The whole box set is plastic, so these needed to be clipped from a sprue before use.

Pak 38 5cm AT guns

Now plastic gun barrels don’t bend like the metal ones but you have to very careful when clipping them from the sprue, as thin barrels can flex as the clippers go in and end up snapping…which is what happened to the gun at the back in the photo above. I glued the barrel back together, but it just looks wrong at most angles. How very annoying! Of course I could have scrabbled around in the bits box for a different barrel, or sent off for a replacement etc, but I was painting them now, so I didn’t, so will have to put up with the wonky barrel for evermore!

So that’s a fair start on the Afrika Korps. Nine Panzers to paint and then I’d better think about what infantry to buy…and what I’m going to paint from the lead mountain to justify that expenditure!

Colours

Vehicles and guns were undercoated with Army Painter Desert Yellow spray then washed with GW Agrax Earthshade. They were then dry-brushed with Vallejo Iraqi Sand.

Crew were undercoated with GW Wraithbone spray then the uniforms block painted using Vallejo Yellow Green. I painted this lot wearing full Afrika Korps uniforms, but when I come to do the infantry, there’ll be a mix of Afrika Korps green and Italian yellow elements i.e. trousers, tops, caps. The helmets, gas mask cases and webbing were Iraqi Sand. The whole figure was then washed using GW Agrax Earthshade. I had then intended to highlight using Yellow Green, and did on the crew for the Dianas but, to tell the truth, it didn’t make much difference, so I just highlighted the faces on the gun crews (forehead, nose, chin, cheeks).

Polish WW2 Howitzers

Even though IABSM is a company-level game, where any artillery heavier than 75mm would be way off-table, I like to have one artillery unit per army painted up and ready to go. There’s the occasional scenario featuring things being so bad that the artillery is firing over open sights, or they can act as objectives or even battlefield scatter.

With the Poles, I’d already painted up all the limbers and tractors I needed: all that was now required was the guns. With Battlefront hit hard by the COVID crisis, I just couldn’t get hold of any set Polish artillery packs so had to try and make up my own.

Luckily the Poles used the ubiquitous Czech Skoda 100mm guns produced under license, which they called the wz. 14/19, so I was able to order four plastic sprues from Battlefront. They look ages to arrive, and at first I thought that I had the wrong model: the wheels didn’t look exactly the same as the image in the Battlefront shop, and it looked as if either the Poles used a shorter barrel for their version or that I had mounted either the shield in too laid back a position or the gun too far forward as the barrels seem to stick out more than they should. Here’s a picture from the Battlefront website to show you what I mean:

This was all very disheartening, but then I did a search on the web and found this picture:

And loads of other variants as well.

It seems the wheels could be correct for some versions, the gun shield didn’t necessarily cover the wheels, and it seems the barrel did stick out - perhaps not quite as far as mine, but closer than the Battlefront picture model. One thing: the barrel seems to have extended past the recoil cylinder. Annoyingly, the wz. 14/19 is one of the few guns not looked at in detail on the the otherwise very comprehensive PIBWL military site.

So a bit up in the air, but my models will definitely do!

The crews are from Peter Pig, who are usually excellent for providing small packs of figures. Here I used two packs of Soviet artillerymen, who are usually a very good substitute for Poles. Unfortunately I must say that I don’t think these are up to the usual Piggy standard. The faces, usually very detailed, are a bit stodgy, and the limbs/poses a bit off too. I had to double check that I hadn’t used early Battlefront models by mistake!

But they are done, and at a range of 3ft they will look perfectly good on the tabletop. It’s just me that will worry all the time that they are not quite right!

Polish Artillery Limbers

Whilst going through my Poles, I realised that I really needed some more horse-drawn artillery limbers. I looked around the web, but couldn’t find any matches to what I was after. The closest seemed to be the Peter Pig WW1 Russian artillery limber, pictured below:

This looked to be a lovely model, just crewed by chaps from the wrong nationality. No problem: Peter Pig also do an excellent range of spare heads, two of which (one set in Polish infantry helmets, one set in rogatwykas) I could use to convert the Russians into Poles.

The conversion itself is fairly easy. Snip off the existing head with a pair of pointed pliers, use a pin drill to bore a little hole in the now-headless torso, glue new head in place. It can sometimes be a bit fiddly, but you get better with practice and I would recommend having a go if ever you need to.

As you’d expect from the image above, the limbers came out very nicely indeed. Rather than my now-usual Contrast Paints, I matched with how I painted the original Poles with black undercoats, acrylics base painted on top, then an Agrax Earthshade wash, and finally some highlighting.

Job done!

Polish Artillery Tractors Ready To Rock!

Regular visitors will know that I am building a force of 1939 Polish motorised infantry, and that one of my wants was an accurate C4P artillery tractor. You can read the post about it here.

I’ve now had a chance to paint the models up, and am very happy with the result:

To re-iterate, these are custom designed 3D prints in 15mm from Syborg 3D Printing and, to me at any rate, represent what a C4P should look like.

All I need now is for Battlefront to get around to sending me the guns. How spoiled we all are now: it’s only been four weeks and I’m thinking how overdue they are!

At the same time as painting up the C4P tractors, I also completed the larger C7P tractors. These were not normally used for towing guns (they occasionally towed the really heavy stuff) and were used more as tank recovery vehicles by the armoured troops or as general mules for the engineers.

God only knows why I ordered four of them, but I’ll attach two to my tankers (double what’s needed!) and keep two to attach to my engineers…when I get round to painting the engineers that is.

Lovely models again, and I can’t emphasise enough what a pleasure it was to deal with Simon at Syborg: almost instant responses to my queries and a great deal of patience as I wanted the design for the C4P model tweaked again and again.

Oddball and Bowser!

Not the worst named estate agents in the world, but a quick bit of painting to fill in the gaps between Six Nations matches!

First up are two 3D printed Shermans from Syborg.

When I was looking at re-photographing my US troops, I noticed that I was short the tank company HQ. At the same time, whilst browsing the Syborg website I noticed that they do an “oddball” version of a Sherman i.e. a Sherman tank with a loudspeaker mounted on the side in the same way as the one commanded by Donald Sutherland’s spaced out Oddball character in the film Kelly’s Heroes. This was too much of a happy coincidence to resist, so I bought two and clipped the speaker off one of them. I now have both my tank company HQ and a one-off model that could be used as an objective or for a specific scenario.

My only word of caution with these models is that they are a little bit bigger than a PSC plastic Sherman. It doesn’t really make that much of difference once gaming, but it is noticeable.

Second up is one of those delightful bits of tail that make the tabletop really come alive: a water bowser i.e. a truck that carries a tank full of, er, water or, as someone suggested for the Brits today, tea or gin & tonic!

This is also from Syborg, and I would emphasise that “in the flesh” you can’t see the layers built from the printing process as much as you can in the photo. In fact it’s a cracking little model that will go really well with my NAAFI truck and the fuel tanker that I already have.

So two “highly recommended” models from Syborg.

Sourcing a C4P Artillery Tractor

The next part of motorising my 1939 Polish collection was to add some artillery tractors.

Most artillery used horse-drawn limbers, but those attached to the two motorised units used the C4P artillery tractor: a half-tracked lorry. There were two versions of this vehicle: an early model with an open cab that was almost certainly obsolete by September 1939, and a later, closed cab version:

Being Polish and being early war, none of the main-stream manufacturers do a 15mm version of the C4P, so it was back to Syborg 3D Printing to see what Simon could sort for me (see previous post Motorising a Polish Infantry Company.

Simon quickly sent through the designs that he had been able to find: the standard, accepted versions of the C4P, which split into two versions: one with benches, one with benches and boxes.

Neither looked right to me, so I consulted the “bible” for Polish military vehicles: the PIBWL military site. That site (an invaluable tool for the September War wargamer) has a whole section on the C4P, including some more pictures, one of which clearly shows the vehicle from the rear:

A few things to note here:

I also read through the (excellent) Brushes & Bayonets post about actually making your own C4P by converting other models, with the author eventually going for something like this:

Whilst I am deeply impressed by someone being able to convert like that, I’m not sure it’s quite right. As I pointed out to Simon: “I'm pretty sure that everyone who has produced a model with lower benches and/or the boxes on the back is wrong. There's deffo no pictorial evidence for your rear end on the right, just a load of pictures of models that people have made over the years. On top of that, the description from that Polish website I sent you (the WW2 Polish vehicle bible for most people) does say Underneath high benches, especially in the rear, there were some stowage boxes of unexplained purpose the key word being ‘underneath’.

“I can see why people think what they do: it looks very precarious for the crewmen my way, but it's what's in the photos: the crewmen sit, effectively, on top of storage boxes, with not very much holding them in place!!!”

I then attempted a little design work of my own, using Powerpoint to mock up what I meant:

As I’ve said before, it all looks very precarious for the crews, but then for someone who’s previously sat on a seat behind a horse-drawn limber (which looks terrifying when at the gallop) this is probably the height of safety and security!

Simon’s next attempt was almost there:

But still not quite right. This time I sketched what I wanted: emphasising the height of the box-benches and the fact they run right the way to the back of the chassis (see image, right).

A Leonardo-like work worthy of inclusion in the Louvre, I’m sure you will all agree!

Within an hour or so I had the next iteration of Simon’s designs which, I am sure this time that you will all agree, look about as right as you are going to get considering the limitations of the medium:

Although not shown, there’s a spare wheel to be stuck on, and I think the addition of some seated crew will finish it off nicely.

If anyone has any comments or further info on the subject, please don’t hold back: I can’t find a clearer photo of the actual vehicle (a photo: not a model that someone had made or a picture that someone has drawn) showing the rear bed, but I can see that my crew will sit at the right height i.e. shoulders just above the top of the cab, backsides at the same height as the truck sides.

Now I know I should end this post with a “reveal” of the completed model painted up, based and ready to rock…but they haven’t arrived yet. Give the poor man a chance to print and post them to me as we only agreed the final design yesterday!

Rest assured that when they do arrive, they go straight to the front of the painting queue, so stay tuned for more!

Motorising a Polish Infantry Company

Quite a few of the games in the two September War scenario packs involve motorised Polish infantry, and although I had the basic troops, I didn’t have any of the vehicles necessary to represent either the 10th Motorised Cavalry Brigade or the Warsaw Armoured Motorised Brigade.

I’d thought about motorising my basic troops before, but couldn’t find anyone who did any of the FIAT 508 and FIAT 508/518 cars/jeeps/pick ups that they used, or produced an affordable FIAT 621 truck of the right type. If there’s one thing to remember when starting to collect a motorised formation, it’s the fact that they have a lot of trucks on their roster!

Then I was at Warfare 2021 at Ascot Racecourse, and got talking to Simon Ryan, who runs Syborg 3D Printing. As I was buying some tankers and bowsers (I love the wide range of “tail” vehicles that he does), I mentioned that no-one, not even him, did any of the Polish transport vehicles mentioned above. We swapped e-mail addresses, and a few days later I got a message to say that he could now print me as many of the various different Polish transport vehicles as I wanted, and sent me pictures of the CAD versions so that I could see what I would be getting.

This was too good an opportunity to miss, especially as the 508s and 508/518s were only £2 each, and the 621s only £4 each.

The Motorised Infantry Company

First up were the vehicles to carry the main infantry company (IABSM being a company-sized game). I needed one FIAT 508 staff car for the boss, and then a 508/518 jeep and two FIAT 621 trucks for each platoon.

The original designs for the 621s had open flat beds, but the pictures I had found online showed them with benches for the troops to sit on. A couple of e-mails to Simon and I had trucks with benches.

The jeeps came without drivers, but a rummage in the bits box provided them.

The Machine Gun Platoons

A motorised company has three types of MG platoon. First up are a couple of MG teams in two FIAT 508/518 jeeps; then there are four MG teams in two FIAT 621 trucks; and finally, my favourite, four MG teams each mounted taczanka-style on the back of a 508/518 pick up:

As you can see, although I just had the transport element for the integral two-gun platoon, I put seven crew members in each of the trucks: seven in the back, three in the cabin, for two five-crew teams in each truck.

Again, the passengers came from the bits box, which is why, if you look carefully, you’ll see a wide variety of helmets…although they all look just about the same in 15mm. The Uzis and Kalashnikovs that some of them are carrying are a different matter, but I’ve tried to paint them out.

The taczankas come with the stand and the gun. The standing crew member is a left-over American, the chap standing offering more ammo is a Peter Pig Soviet.

Anti-Tank Guns, Mortars and an Ambulance

Four more FIAT 508/518s were needed for the regiment-level anti-tank platoon; two more 621s provided transport for the regiment-level mortar teams; and Simon produced a rather nice hard-body version that can be used as a workshop, command vehicle or, as I have it here, an ambulance.

I used a slightly different version of the 508/518 pick ups for the AT tows: I thought they’d want to be able to jump out easily to deploy the guns quickly!

Again the crews for the mortars come from the bits box and are as cosmopolitan as before!

Motorcycle Reconnaissance Platoon

All those soft-skins can’t just motor forward willy-nilly, so I dug a pack of Battlefront Polish motorcyclists out from the depths of the lead mountain, and knocked them out to lead the way.

I only have one squad and the platoon commander, but will add a second and third squad with motorcycle combos as soon as Battlefront start producing them again.

Building and Painting

Building the models was easy: some of them needed the wheels putting on, but most came complete. The trucks needed the benched flat-beds stuck onto the frame, but that wasn’t too difficult. Getting the arms on the Battlefront motorcyclists to sit right (the drivers arms and the bike’s handlebars come as one piece so that you have to glue the rider in place then seat the arms and handlebars just so) was more difficult than assembling all of the 3D printed models combined.

To paint the models, I undercoated in Army Painter Army Green. I then block painted all the crew figures, canvas and equipment before covering everything with a GW Agrax Earthshade wash. I then washed the vehicles again to get a darker green (just the vehicles) and highlighted the crew figures. Didn’t take that long at all.

I did think at one stage that I should have painted every vehicle in the Polish three-colour camouflage, and there are artworks and pictures of models produced like that. I couldn’t, however, find any photographs showing either motorised brigade with camouflaged vehicles: most look to be the standard Polish brownish-green. My rationale was also that maintaining a fleet of vehicles in their camouflage would have been a nightmare for the workshops involved: far easier to realise that these are transport not fighting vehicles and stick to an easily-painted standard greenish-brown!

Quality

Some of the models show the graduated layers used in the printing process, but they just add a bit of depth to the look. Some of the wheels are a bit manky, and some of the edges a little “hairy” with loose strands, but nothing that doesn’t clean up quickly and easily.

Quality-wise, I would put these on a par with standard resin or metal vehicles and behind plastic vehicles…but I didn’t have to clip a whole load of parts out from a plastic frame and then glue or fit them all together. They’re also slightly cheaper (PSC £4.59 a truck, Zvezda £4.24 a truck), especially the cars/jeeps/pick ups.

Overall I’m very happy with my new transports for a Polish Motorised Infantry Company and supports. I got great service from Syborg and would highly recommend them as a supplier. I don’t know whether Simon will add these Polish models to his general listing, but I’m sure an e-mail would get you similar if you want them or, indeed, any other obscure vehicles. Highly recommended.

Artillery for the Gebirgsjaeger

With the 17th Century Cossacks now done, I needed something to paint whilst I decide what’s next.

Regular visitors will know that I re-photographed a lot of my collection of 15mm WW2 figures over Christmas, and re-building their galleries inspired me to fill in some of the gaps.

One such hole was some heavier artillery for my German Gebirgsjaeger mountain troops, and I remembered that somewhere in the lead mountain lurked the figures I needed. Much banging and crashing and sorting through boxes and cupboards later, I found the packet I was after: a Battlefront special order of two 105mm GebH 40 mountain howitzers (the GebH is short for Gebirgshaubitze).

The GebH 40 was the heaviest mountain howitzer ever made, but still broke down into four loads on single-axle trailers towed by kettenkrads or five pack loads carried by mules. Some 420 were made between 1942 and 1945, firing HE, AP, smoke and illumination shells.

Manpower Shortage

So I had the guns but no crews…and with Battlefront working on a reduced inventory (COVID etc) I needed to delve a bit deeper into the Lead Mountain to see what I could find to use.

First off were a few Gebirgsjaeger infantry, including two officers who would now command the gun teams: two down, eight to go.

Next I found some spare crew for the heavy mortars already in the Gebirgsjaeger collection, and although they are obviously toting mortar bombs rather than artillery shells or charges, they would do: six down, four to go. That’s where I hit the wall: no spare German artillerymen anywhere!

I did, however, find some Battlefront British artillerymen in shirt sleeves and some spare Gebirgsjaeger heads from Peter Pig’s head swap portfolio. A snip, a drill and a pin later, and I had my ten crew.

Making a Match

The next problem, of course, was how to paint them to match my existing Gebirgsjaeger: something made more difficult by the fact that I’ve been using Contrast paints almost exclusively for the last few years and the Gebs pre-date that change.

Fortunately I keep a rough record of what colours I paint things: nothing fancy, just a spreadsheet with rows labelled things like “Headgear”, “Coat”, “Trousers”, “Boots” etc. To give you an idea, the list for the Gebs was so old that it pre-dated the new GW acrylic range, so I also had to look up, for example, the fact that GW Graveyard Earth was now called GW Steel Legion Drab and, as you will see, I still didn’t get it all correct.

Some advice to all you painters out there:

  1. Never throw any spare figures away

  2. Always have a supply of spare heads (Peter Pig recommended)

  3. Always write down what colours you use for your figures

The Finished Product

So here they are: two 105mm GebH 40 mountain howiters:

These look great…but I am going to have to repaint the greys because I now realise that the grey doesn’t match the Shadow Grey highlight that I used on my originals. Apparently I should have used a colour called The Fang but didn’t: I looked in the pot and thought it looked a bit blue.

So it’s back to the painting table for these guys when I get a moment: the colour will have to go on over the varnish but it’s only for a touch-up highlight so should be okay.

Here’s the infantry guns picture so you can see what I mean:

Next up: a massive bit of hole-filling for the WW2 Poles!

More WW2 Galleries Updated: Allied Airborne Troops, Late War Germans

Six more galleries showcasing my collection of 15mm WW2 figures have been updated. This time it’s the turn of the Allied Airborne troops and the Late War Germans.

British

Air Landing Company 1943-45

Parachute Company 1943-45

There are a few gaps in the rosters that I would like to fill, but the thought of painting any more of the camouflage Denison smocks worn by the Brits is enough to persuade me to concentrate elsewhere!

Late War Germans

Gebirgsjaeger Kompanie 1943-45

Panzerkompanie 1943-45

Japanese Staff Cars and the Japanese Gallery Re-Vamped

With everyone sleeping in until gone 11 o’clock this morning, there was time for me to finish off the two 15mm Japanese Type 95 Kurogane Staff Cars that I bought from Syborg 3D printing the other day:

These are absolutely lovely little models that, in the flesh, aren’t as layered as they might appear in the picture.above: the trouble with good cameras that pick up all the detail is that sometimes they pick up all the detail!

Syborg delivered these to me in just three days, and you get both versions in the same pack for the very palatable sum of just £4.

I can’t recommend these enough: just the thing to keep your Japanese staff officer from getting his boots muddy as he drives down the Grik Road!

Re-Vamped Japanese Galleries

In fact, these were so nice, and the house was so quiet, that I was inspired to re-photograph my Japanese collection against a jungle background as opposed to the rather stark, white background I was using before.

This actually took me an hour or so less than I thought it would (I had predicted 4-6 hours, but it took me three) and I’m very happy with the result. Check out the three galleries here:

Japanese 25th Army in Malaya/Singapore

Japanese 15th Army in Thailand/Burma

Japanese 14th Army in the Philippines

Here’s a selection of other shots:

IABSM Figure Galleries

No gaming face-to-face for a bit as everyone’s nervous about catching COVID just before Xmas.

I don’t blame them actually: having had it in early December, I can recommend avoiding it if possible: four days of the worst head cold you could possibly imagine followed by a couple of weeks of an annoyingly constant cough. I’m still largely deaf in one ear (problems with the eustachian tube!) and have no puff at all.

But enough of the complaining…

IABSM Figure Galleries

I’ve been schroffing up some of the galleries of my collection of WW2 figures: filling in the gaps that I’ve, er, filled since I first created them; making sure the links work; and adding in a couple of Japanese companies from the relatively new Blitzkrieg theatre pack.

You can visit the index page, here, where you can find links to the various galleriers.

A Gap Filled: German motorised light artillery battery

My next task is to re-photograph all the units that are currently shot against a white background, or just photographed anyhow for the painting challenge, against a more set up background like the German guns, above.

That’s a hellishly long task, though: find the figures, lay out each unit, photograph each unit, load the photographs onto the PC, edit each image, go back and re-take the photos where the original shot didn’t work, build the web page, load the images, caption the images, link the page and, finally, check it all through for errors.

I reckon each gallery takes 4-6 hours to complete, so don’t be surprised if I prioritise other things! The results are very satisfying, though, so well worth it I suppose.

It also gives me a chance to make sure all the figures are stored in the right place: there’s nothing more annoying than being unable to find a unit of tanks that you know you have but that aren’t where they should be!

They’re here somewhere!

SdKfz 7 Half-Tracks

Finally managed to get some units off the painting table and into the finished pile!

Here are four SdKfz 7 half-tracks from Battlefront:

These are intended as tows for my early war German artillery: I painted up four 10.5cm le FH18 howitzers last year that are in need of transport.

Those of you who know these sorts of things will know that that sort of howitzer was actually pulled by the smaller SdKfz 6 half-track but, as far as I know, Battlefront don’t do those, and I got these in one of their 40% off sales…which shows how long they’ve been waiting for a coat of paint!

What’s the difference between the two, you ask?

Well, the SdKfz 7 is bigger: 50cms longer, 15cms wider and 14cms taller, and weighs a third more. There were also a lot more of them: about 12,000 built versus about 3,500.

Hopefully no-one will notice when they’re on the tabletop!

Top Marks to Zvezda

I’m a great fan of the Zvezda 15mm plastic vehicle kits. Not only are they very nicely made and very easy to put together, but they produce some quite rare vehicles at very cheap prices.

My latest purchase was a platoon of three Wurfrahmen 40 “Stuka zu Fuss” rocket launchers built onto SdKfz 251 half-tracks.

I say my latest purchase, but i actually bought these before Christmas and have only just now got around to building and painting them.

These, as I said, are 15mm and plastic: the kits snap together without really any need for glue…although I tend to glue some of the major parts just in case. The half-tracks go together in about 90 seconds, but the individual rocket-launchers (six per vehicle!) are a bit fiddly, especially with clumsy hands like mine. Not difficult: just fitting three small parts together when you have to line up pegs and holes. I’m sure there’s an easy way of doing it involving tweezers or small children or something, but I couldn’t find it.

Obviously a completely impractical kit for I Ain’t Been Shot, Mum! as any such weapons would have been way behind the front lines: in wargaming terms, in the next room or even next house away! They do, however, allow me to field a rather nice objective and (let’s face it, the real reason) complete my collection so that I can now field the alternative third platoon structure of a company of engineers.

Recommended.

Three Tankers

Regular visitors will know that I picked up a handful of 3D printed 15mm vehicles when I went to the Overlord show in Abingdon the other day. Time to get a bit of paint on the models to see how they turn out:

Front to back they are the US GMC CCKW 353 tanker, the British/Commonwealth CMP tanker, and the Soviet Zis 5 tanker.

As you can see, the 3D printing is pretty obvious at this close range, but is actually far less noticeable at usual wargames table 3ft distance. I also think the effect is magnified by seeing the three vehicles together.

On the whole I’m pretty happy: each vehicle was only £4 or £5, and as these are the only tankers I’ve come across in the marketplace…

www.syborg3dprinting.co.uk

Good Time at Overlord

I last went to Overlord, Abingdon Wargames Club's annual show, some years ago, and all I remember was how small the show was, with few trade stands, and quite frankly not much to do.

I remember it well, incidentally, because that was where I bought my Peter Pig solid resin French buildings for use in my May 1940 WW2 gaming…not that I would ever buy solid resin buildings again: they look great but where do you put the troops that are in them? This must have also been before the great mdf scenery explosion, as that’s what I would buy now!

Anyhow, a throw-away comment by a fellow-gamer reminded me that it was on yesterday and, as it happens, I was able to negotiate a trip, and very glad I was too.

Aside from meeting up with said fellow-gamer and friends, the show is now in Abingdon & Whitney College, which has ample carparking, nice toilets (unisex!), a reasonable snack bar, and much more room for trade stands and games.

One of the games that caught my eye is pictured above: a 28mm “China invades Australia” game using Empress Figures. Very nice indeed.

There were also about thirty trade stands there, so I was able to get what I went for (flowers to dress the element bases of my ECW armies) and have a browse to see if there was anything new to see.

Well, there was: Syborg 3D Printing, a new (to me!) company producing 3D printed model vehicles in 15mm, specialising in somewhat obscure types from WW2 to the present day.

What caught my eye was their WW2 fuel tankers: a GMC CCKW 353 Truck for the Americans, a Canadian Military Pattern - Tanker for the British, and (my favourite) a Zis 5 truck - Tanker for the Soviets.

They were all bought very quickly, and have leapfrogged to the front of the painting queue! I shall be keeping my eye open for more from them too.

So a good trip to Abingdon, and a date for my diary for next year too.

A Couple of January Sales

I don’t often post this sort of, er, post, but worth mentioning I think a couple of January sales that are currently underway.

First up, those of you who have seen my Sumerian and Hoplite figures from Museum Miniatures will be pleased to hear that they are currently running a 25% off everything sale.

This is a proper sale, with a decent reduction, so well worth seeing if you can take advantage.

Some of my Museum Miniatures Sumerians

The second sale that caught my eye was that of Arrowhead Miniatures, producers of a great range of 1/44th kit, including WW2. Arrowhead are offering 20% off everything they do until the end of January, and although 12mm isn’t my scale, their stuff does look very good.

Here’s a picture of their Hummel SP gun.

If there are any other manufacturers who are having a sale at the moment, drop me a line and I’ll post about them as well. Address is in the sidebar on the right.

Battlefront 40% Off Black Friday Sale

I though I’d at least better mention that Battlefront are currently running a 40% off Black Friday sale covering, as usual, some of their lines that obviously aren’t selling as well as they had hoped: western desert, Vietnam, Great War and Arab/Israeli.

I’ve been through it myself, but couldn’t really find anything I wanted to buy: incredible though that may sound. I’ve got enough to field decent size forces for ‘Nam and Arab/Israeli, and although I had thought to launch a western desert collection off the back of this, quite frankly I’d rather buy a whole load of PSC or Zvezda plastics.

Let’s take an example: Panzer II tanks. Battlefront sale gives you five resin and metal tanks at a sale price of £19.80 or £3.96 each. When they are in stock, PSC will do you a platoon deal of five Zvezda plastic tanks for £15.95 or £3.19 each. They are much easier to build (I used to let my daughter build my Zvezda Panzer IIs when she was seven!) and I actually think they look better than the resin and metal ones. Incidentally, the non-sale Battlefront price for five Panzer IIs is £33 or £6.60 each!

Same with the SdKfz 231s. Four from Battlefront in the sale at £17.40 or £4.35 each; five from PSC not in any sale at £20.95 or £4.19 each. And the PSC models are lovely.

So take advantage of the sale if you like, but do make sure you shop around first…and even if you don’t think you like plastics as an alternative to traditional resin and metal, do give them a go at least once. Makes an army easier to carry for a start!

Postscript

Okay, okay, I found something to buy!

I’m buying the Afrika Korps 90th Light Division box set. No, you don’t get the whole division for £22.50, but you do get the specialist tank hunters from their 605th Panzerjaeger Battalion: three Diana’s and three PaK36(r) anti-tank guns. At an average of £3.75 each, worth getting in case I ever need to field three of the nine Diana’s that actually fought!!!!!!

Kfz 13 and Kfz 14

Regular visitors will know that my favourite era of WW2 is the early period: 1939 through to early 1942, with a big focus on the campaigns of 1939 and 1940. This period, however, is not the most popular: most gamers go for the mid- to late-war period with its bocage, big cats, Panzergrenadiers, Americans and tank-riding Soviets.

This means that it can often be quite difficult to find 15mm versions of some of the more esoteric early-war vehicles: it’s just not worth the whiles of figure manufacturers to go to all the expense of having them sculpted and cast - they just won’t sell enough of them.

One solution is Shapeways, custom-printed to order…but it’s often hard to find a Shapeways model that doesn’t look as if it’s been 3D-printed: the build lines can be very apparent, especially when using wash techniques to paint them. Washes, after all, are designed to run into cracks and crevices.

Recently, however, I was browsing the WW2 section of the Lead Adventure forum when I came across a post from a chap who has produced a number of uncommon early war vehicles on Shapeways. The picture of the vehicles looked better than normal, so I thought I’d give them a go. They were, as the title of this post suggests an Adler Kfz 13 reconnaissance car and, based on the same chassis, an Adler Kfz 14 radio car.

Here’s the link to the MojoBob’s Shapeways page.

The vehicles arrived promptly and actually look quite good indeed. Here they are painted up, with a suspiciously familiar command figure for scale comparison:

Adler Kfz 13

Adler Kfz 14

The machine gun in the Kfz 13 is very nice: grown from the bottom of the chassis with a little seat thrown in as well. No awkward sticking teeny-tiny pieces into teeny-tiny holes! Likewise, the antenna on the Kfz 14 comes integral to the vehicles, meaning that for both models all you have to do is undercoat and paint. The Kfz 14 also has a seat and radio-like boxes in the main compartment.

The only downside to the models, along with almost everything on Shapeways, is the rather hefty price tag: an average of £10 a vehicle, or at least double what you’d pay at Battlefront or Peter Pig etc.

But I like them, and they aren’t available elsewhere.

So we’ll give MojoBob a recommendation, especially as I’m currently eyeing up the Guy Lizard command vehicle, the Lanchester armoured car, and all three Soviet artillery tractors!