19C AAR: Crimean War Clash

Having re-based my Crimean Russian army a couple of weeks ago, it was now time to get them onto the tabletop. These figures had last seen action 23 years ago, so it was a real pleasure to wheel them out again and just proves my adage: never sell any figures, never give any away!

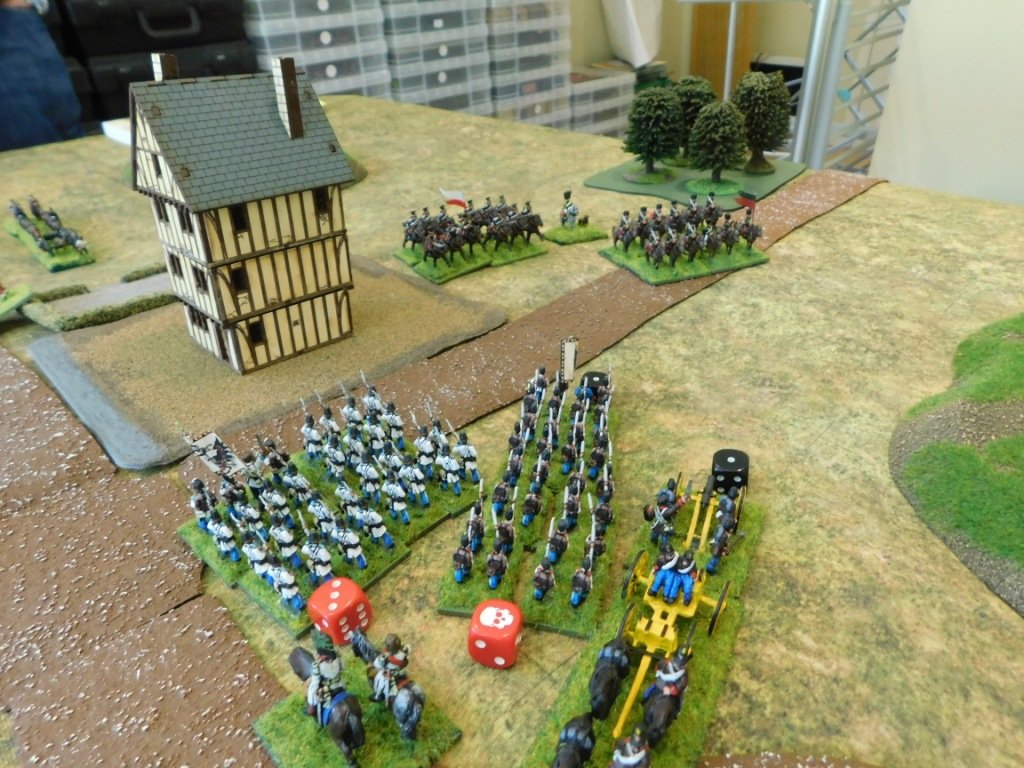
The game, using Neil Thomas’ Rules for 19th C Warfare, would therefore feature my Crimean Russians against John playing my Crimean French army in a fight for control of a strategically vital crossroads atop a ridge somewhere near Sebastopol.

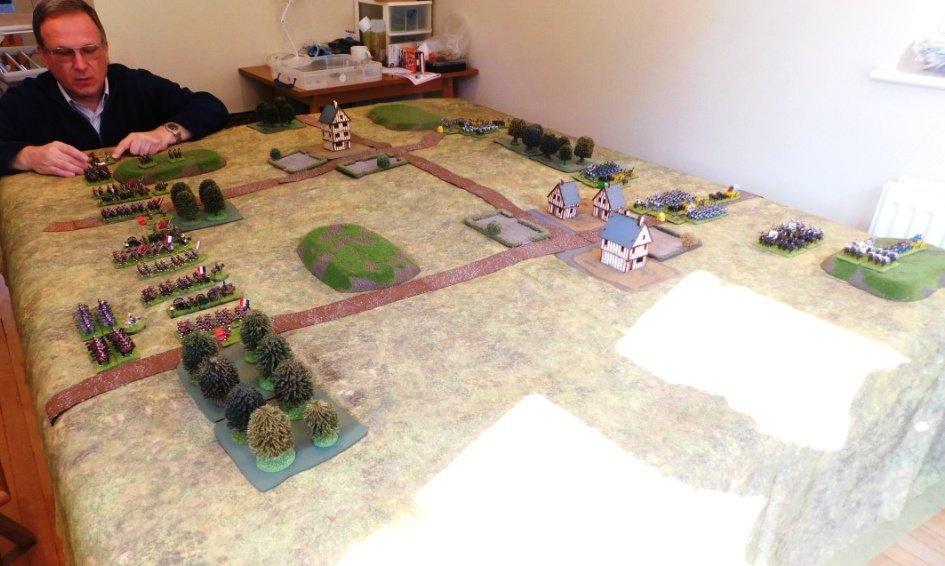
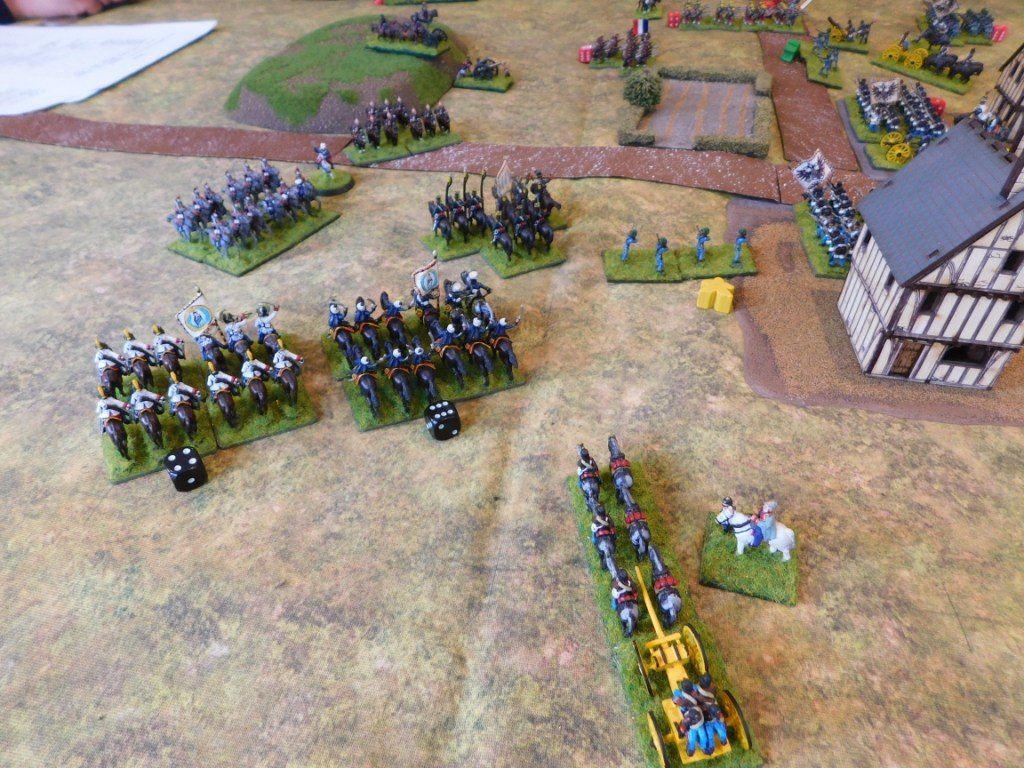
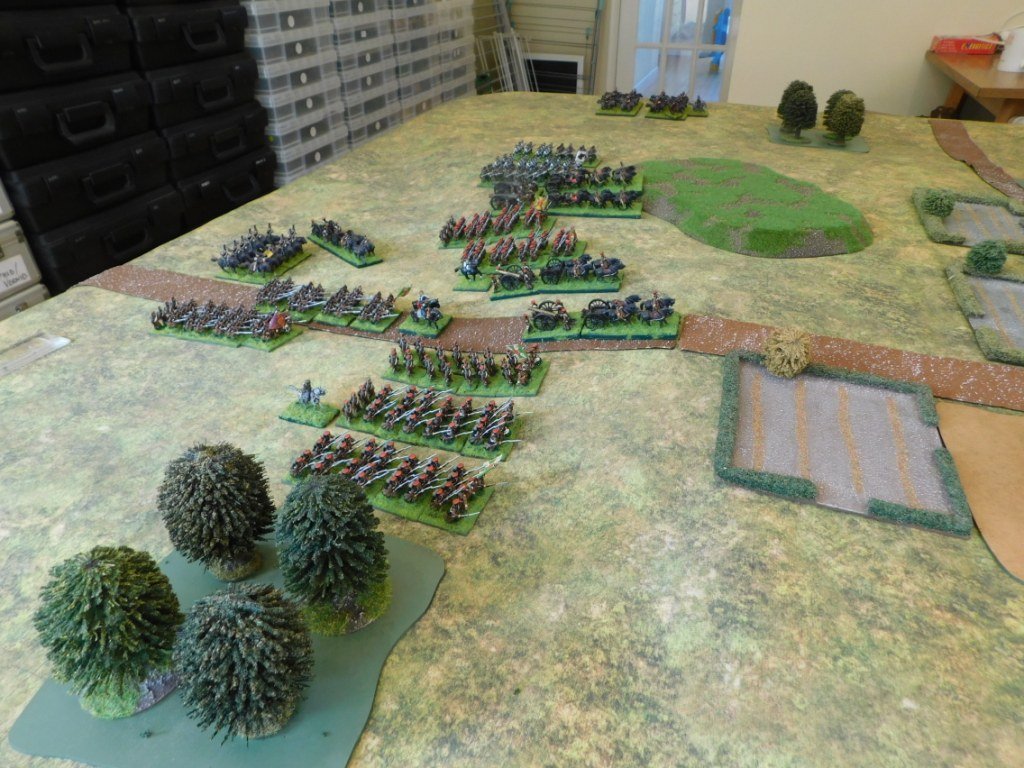
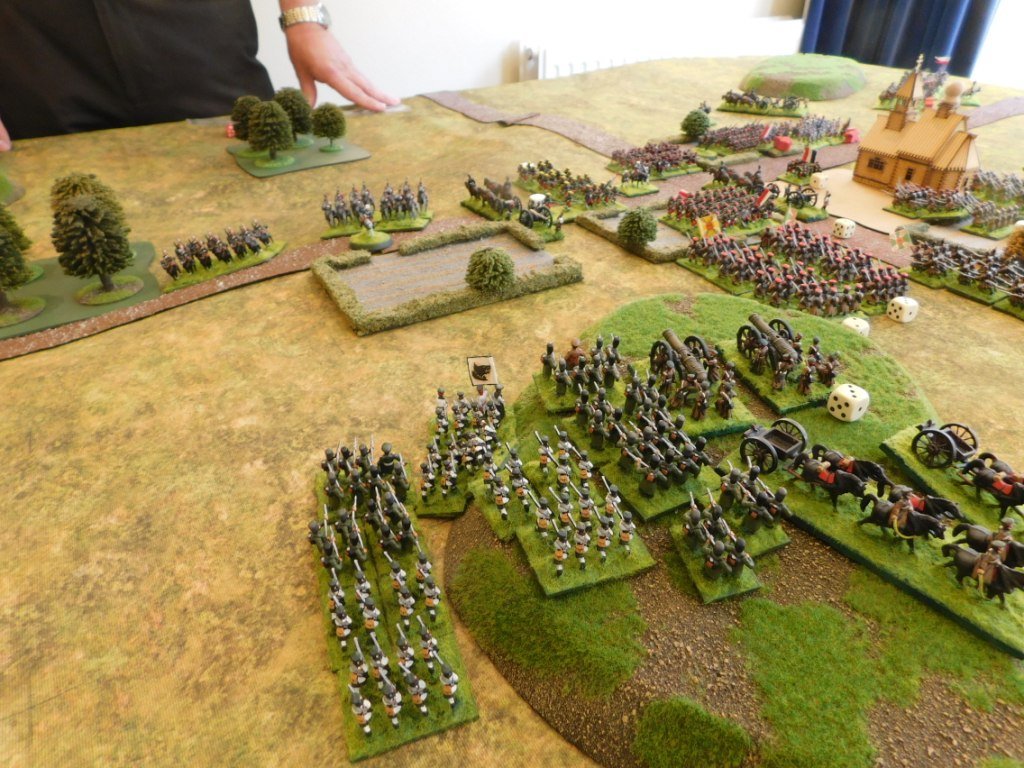
Russians to the left, Frenchies to the right. The aim of the game was to take the crossroads in the middle of the table

As we wanted a big game and weren’t too bothered about making things fair, we fielded every figure that I had in the two armies concerned. This left the French pretty outnumbered, but with much better command and troops of generally better quality. The French could also form line for firing, unlike the Russians who were forced to stay in column throughout the game, and were armed with rifled muskets unlike the smoothbores of the Russians. Finally, the French could also field skirmishers (the Legere units) to harass the Russian columns as they advanced.

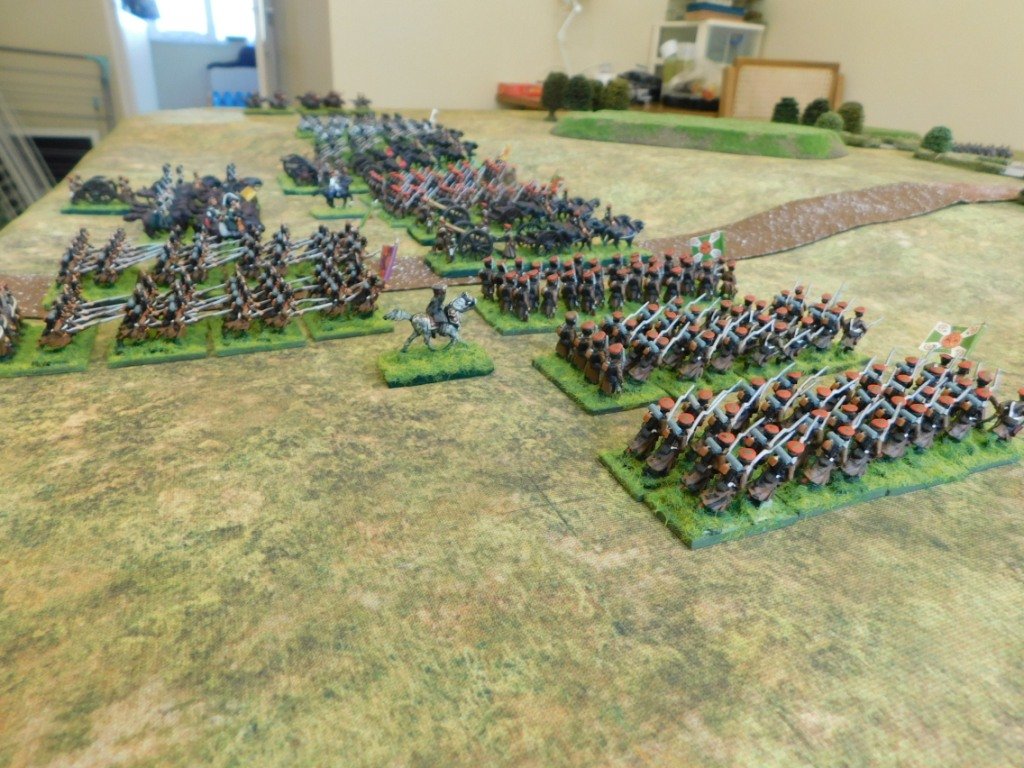
The Russians fielded four infantry divisions and a cavalry division for a total of ten infantry units, four cavalry units, five batteries of artillery and a couple of dubious looking sotnias of Cossacks.

The French fielded three infantry and one cavalry division for a total of six infantry units, three skirmisher units, four cavalry units and three artillery batteries.

So a hard fought victory for the Russians!

The French retreated in good order having lost all their skirmishers and half their line infantry. They managed to save two batteries of artillery, but lost most of their cavalry.

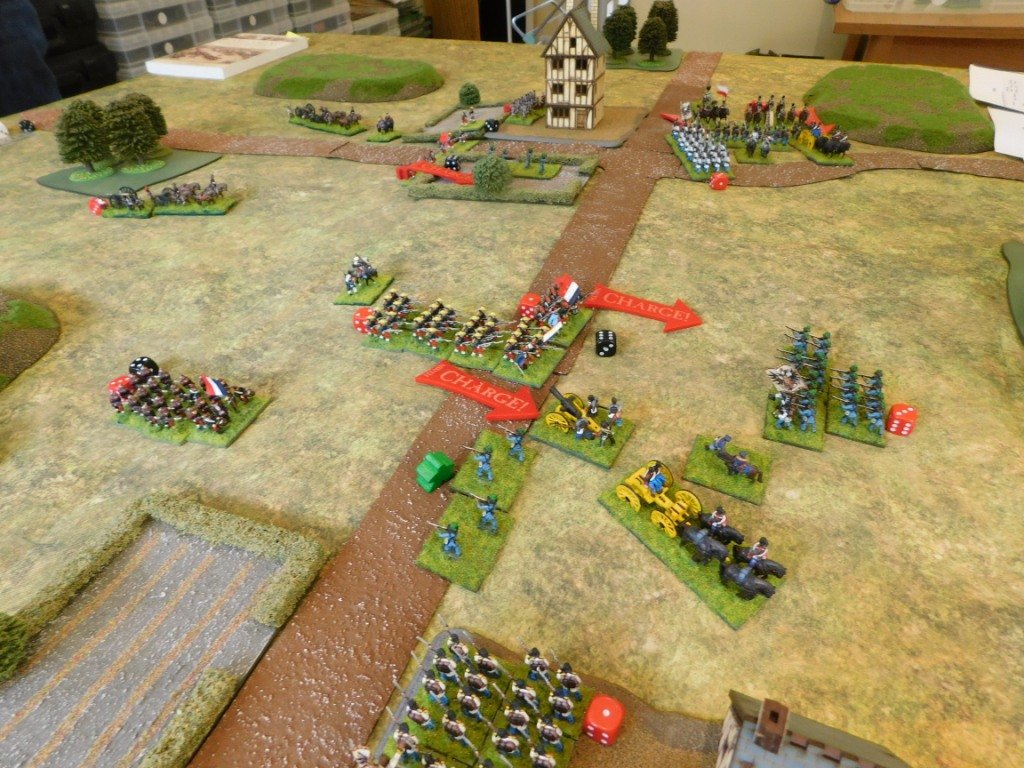
The Russians advanced to occupy the crossroads, but had lost half their infantry, half their artillery, half their cavalry and most of the Cossacks.

As the Russian commander, I knew my only route to a win was to just grind the French down, and grind them down I did.

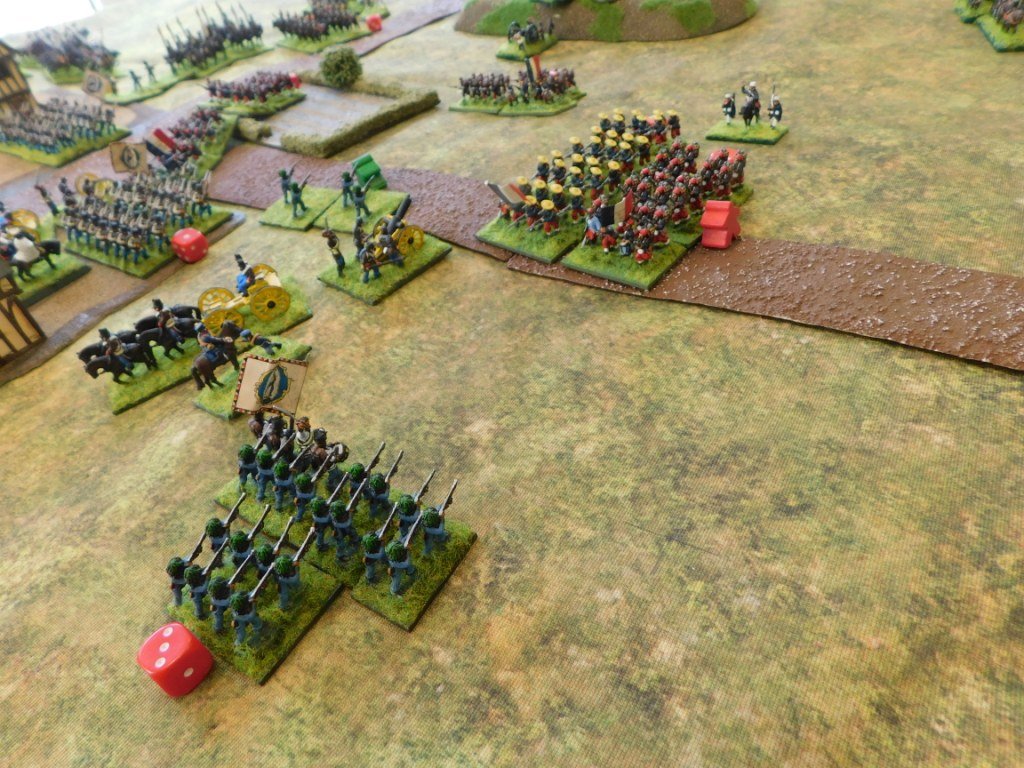
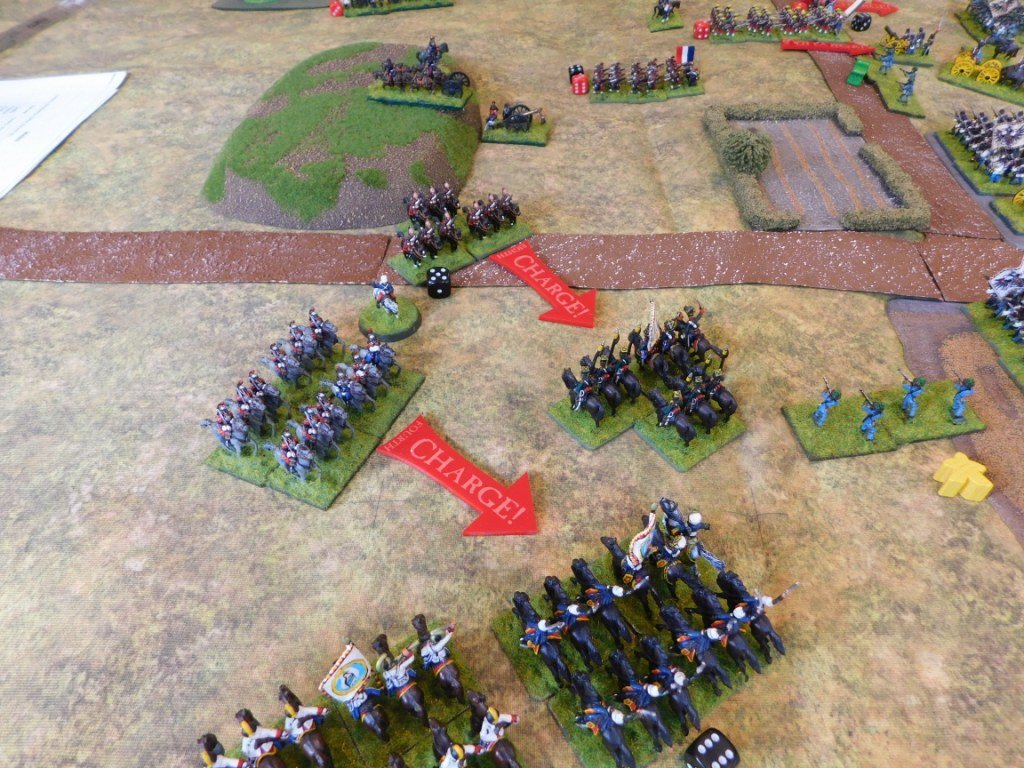
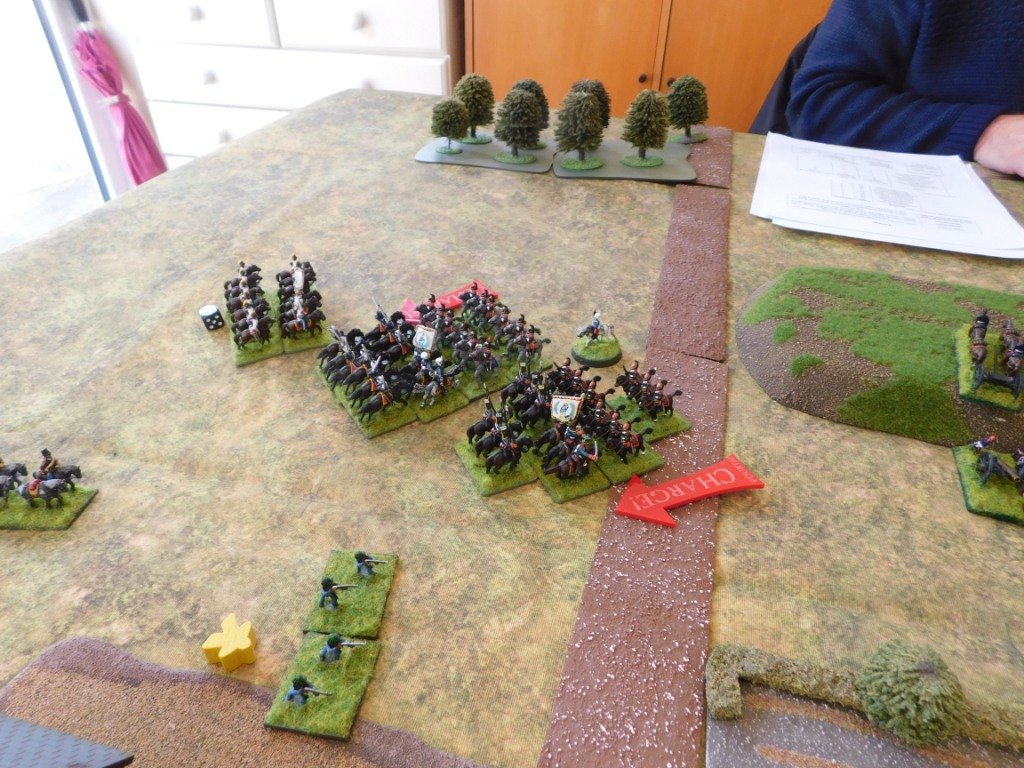
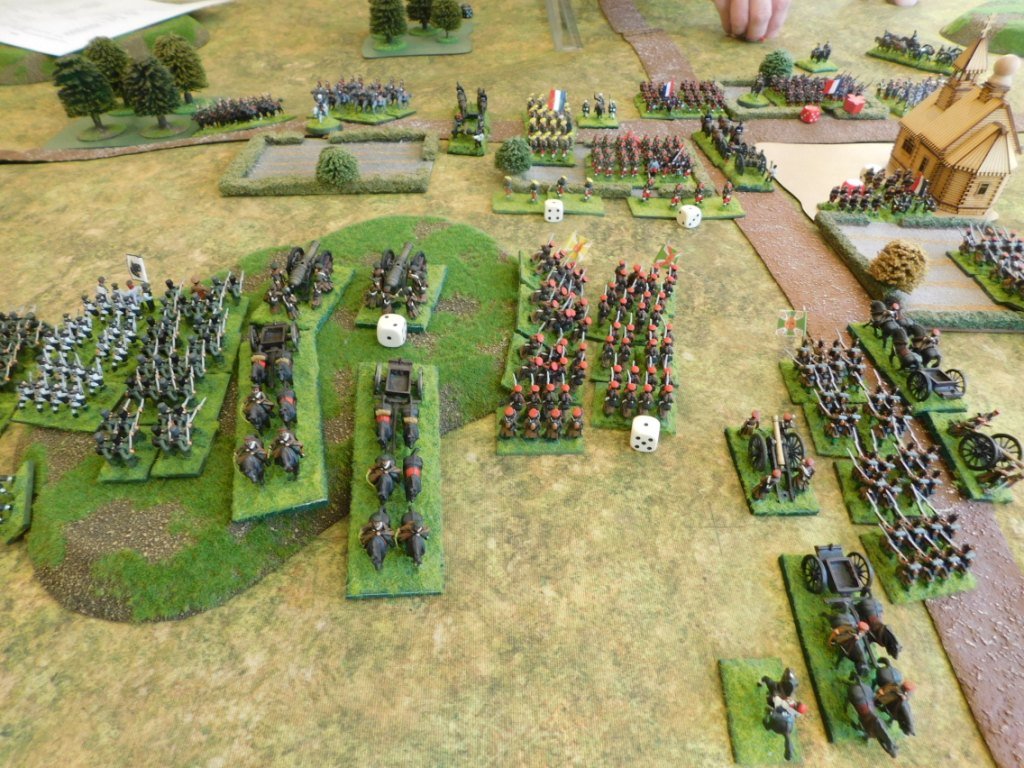
John admitted that his infantry got bogged down in the fields and hedges near the town: his infantry mainly stayed static and tried to win by musket fire alone, which was a shame as every time the French attacked they smashed the Russian columns back. More elan needed next time!

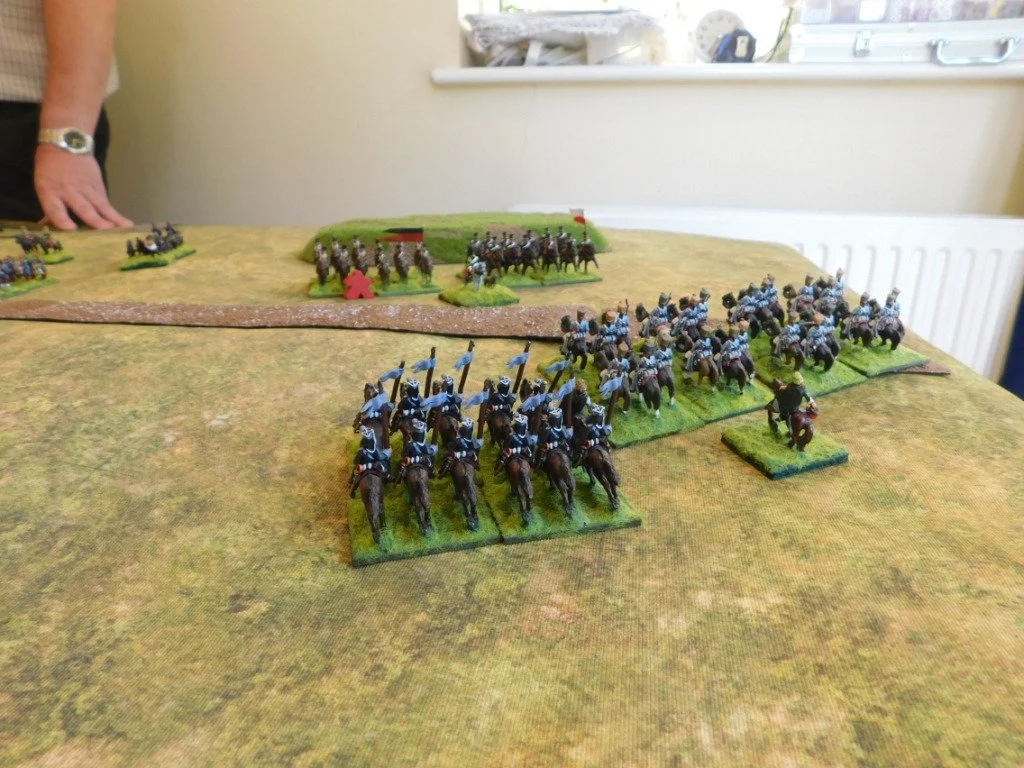
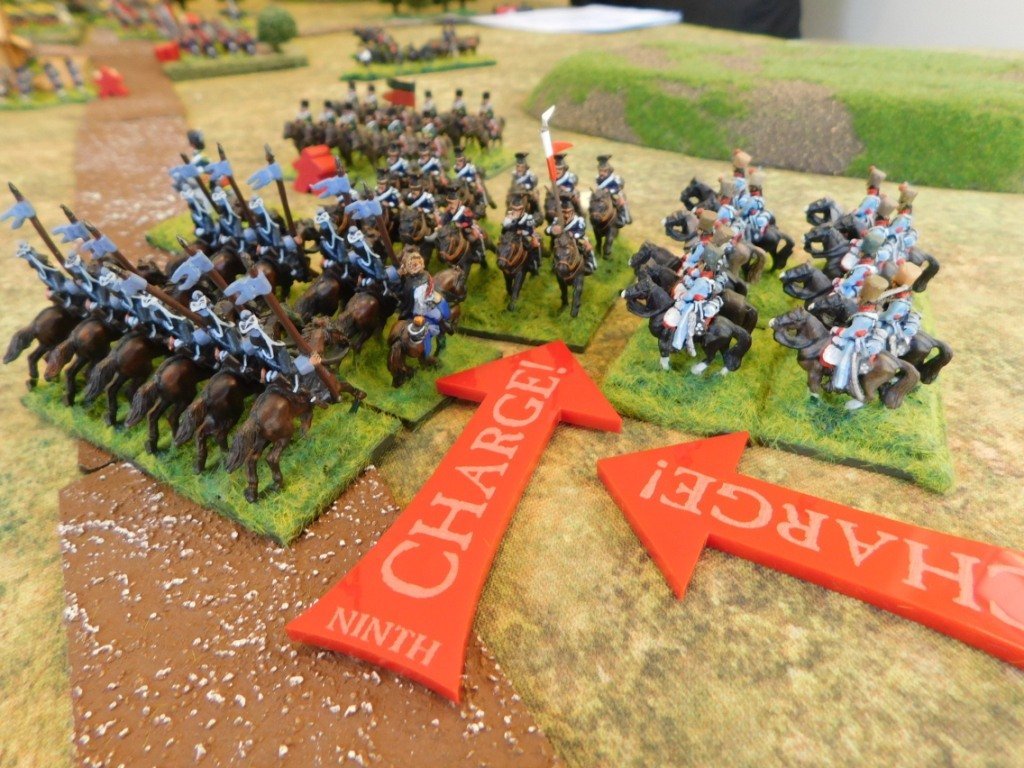
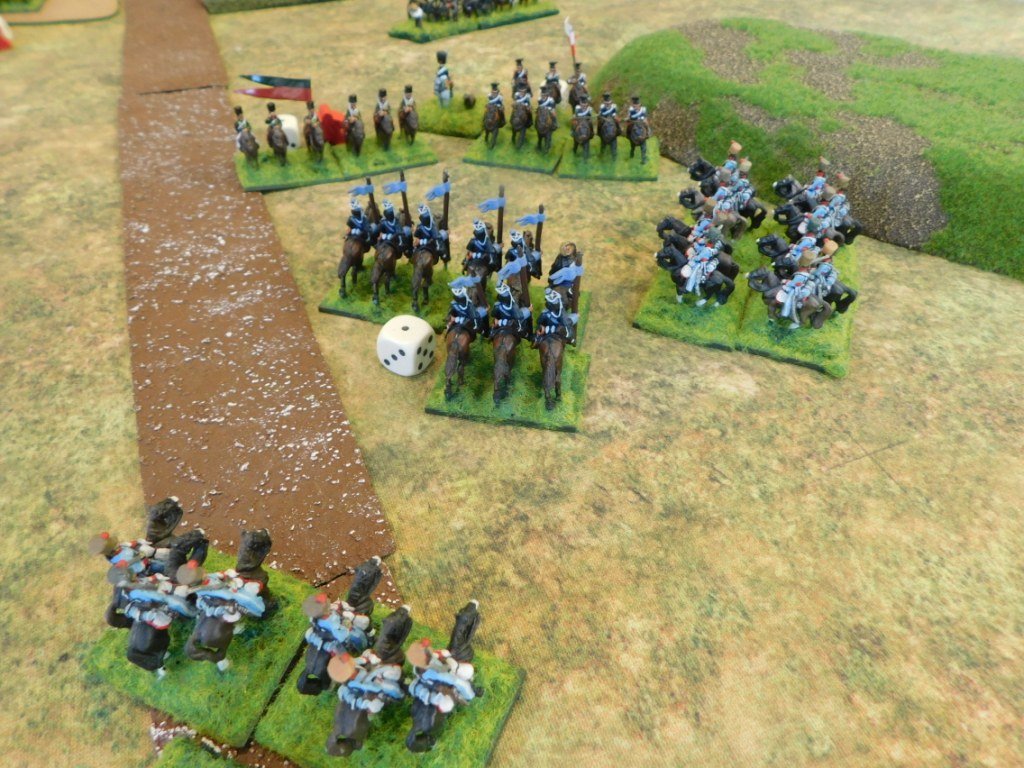
The cavalry action on the Russian right was just a distraction: three units of Russians took care of two units of French, but hadn’t the strength to do much more. On the Russian left, the Cossacks were effectively wiped out by the French Guides, and it was again a shame that the French Cuirassiers had to be sacrificed in a vain attempt to stop the three columns of Russian infantry coming forward. At least they dies knowing that they gave the surviving French infantry in the centre time to retreat in good order!

All in all a cracking game!

19th C AAR: The Battle of Rigatoni

Time for some 1859 Franco-Austrian War action using Neil Thomas’ Wargaming 19th Century Europe 1815-1878 rules.

It’s what would become northern Italy, and the two small towns of Rigatoni and Bolognese are about to eb the subject of a major clash or arms.

On the left in the picture below are the French. They outnumber the Austrians in infantry and cavalry 6:5 and 4:3 respectively. The French are better commanded troops, a real advantage under these rules, and many of their units are Elite.

The Austrians, coming from the right, suffer from poor quality generals. They do, however, have more artillery (5:3), start the game uphill from the French, and begin the game closer to the two towns.

Both sides began the game by rapidly heading forward, with the Austrians reaching the towns first.

The French delivered three main thrusts: one on each town and one in the gap between them.

First in was the thrust against the Austrian right flank that forced the Austrian infantry out of the town. Good news from the French, but the Austrians rallied outside the town and punished the French with rifle and artillery as they reorganised after their attack.

One French battalion was wiped out as it took a battery of Austrian guns, the other was content to lurk amongst the safety of the buildings…and their accompanying cavalry was about to lap around the Austrian flank.

The French were also now approaching the Austrian left and centre, but the Austrian cavalry (much delayed by its painfully slow commander) had finally arrived:

Back to the left, and the French cavalry attacked the Austrian infantry that had been ejected from the town at such great cost to the French infantry.

The French cavalry charged forward, but were cut down in a hail of fire.

The Austrian left flank was now secure, and the town there could be re-captured…but only if the rest of the battlefield also remained in Austrian hands.

In the centre, the French infantry columns reached their destination and attacked. Again, however, although initially successful, the almost-victorious French infantry either exhausted themselves in an ultimately indecisive charge, or were shot down by the Austrian infantry in the town on the Austrian left flank.

That left only the Austrian left flank to be decided, and that was where the Austrian cavalry were massed.

Both sides hurled their cavalry forward, and a massive, swirling melee broke out. At first the French did well, but Austrian numbers soon began to tell, and eventually the remainder of the French horse were either dispersed or forced to fall back, especially when the Austrian horse-artillery rockets got into the action.

And with the defeat of their cavalry, the French’s chances of victory slipped away, and the pantalons rouge were forced to retire.

A hard fought victory for the Austrians, whose troops managed to absorb the initial charges of the French attack columns before wiping them out with rifle fire: a great game much enjoyed by either side.

Here’s a shot of the battlefield as the game ended.

More Franco-Prussian War Action

Keen to get his revenge for my win last time, Neil suggested a re-match, but with him playing the Prussians this time.

The situation was fairly similar: von Neil's troops holding a ridge that ran down the centre of the table, with my French aiming to knock them of it. I outnumbered him about 2:1, but Prussian reinforcements were expected, and would arrive at a time determined by a roll of the dice.

The Prussian Line

Looking at the Prussian line, I noticed that all their artillery was in the centre, and that the Prussian right wing was hanging. His left was hanging a little, being sort of anchored on a farmhouse, but it was his right that looked vulnerable.

I therefore set up in a long line parallel to the ridge, but with a column of four battalions of zouaves (nasty, fighting, little buggers) supported by a mitrailleuse and a battalion of chasseur sharpshooters as an attack column on my left flank. My aim was to advance forward, give the Prussian line an unanswerable volley due to the superior range of my Chassepots, and then slam in my attack column. Once I had a foothold on the ridge, the attack column would roll him up as my line kept hammering in the fire. Tres simple but hopefully tres effective!

My commanders were obviously having a good day, as on the first turn my entire army moved forward into rifle range. I took some artillery fire from the Prussian centre battery, but because of its positioning, my densely-packed attack column remained untouched.

On my next turn (the Prussians remaining stationary and relying on their guns) I let loose a volley with the entire line that proved satisfyingly effective, with many Prussian units taking significant casualties. More importantly, the Prussian right flank brigade was disordered, mainly due to some brilliant shooting by the Chasseurs. The mitrailleuse jammed, of course!

Note also that the Prussian left flank brigade was also disordered, leading me to think that there might be something I could do here as well...but more on that later.

the french centre and left (about-to-be-victorious zouaves in the background)

My four-battalion column of zouaves charged up the hill and hit the end of the Prussian line. The lead battalion had been disordered by the fire coming at them as they charged in, so failed to simply smash the Prussians from the ridge, and fierce hand-to-hand combat broke out. Weight of numbers quickly began to tell, however, and the first brigade of Prussian infantry evaporated.

Over to Neil and his next turn: the next brigade of Prussians along attempted to punish the zouaves with fire from their Dreyse needle guns, but someone had obviously blunted their needles as they had no effect at all, not a single casualty being caused.

This was obviously quite worrying for the Prussians, as they retreated both the brigade that formed the right of their line and their guns off the ridge and down into the valley below. The left of my line quickly consolidated their gains: that end of the ridge was in my hands!

Meanwhile, at the other end of the line, I had decided that the opportunity of a disordered Prussian brigade was too much to resist, and had thrown two brigades of infantry up the hill in an attempt to dislodge them as well. Proving that the 2:1 odds were right for scenario (my zouaves had been 4:1 and supported by chasseurs), les gens brave found it hard going, and a hard-slog pushing match developed.

Hitting the prussian left (note the cavalry in the background)

Weight of numbers, however, meant that my men gradually pushed the Prussians back but, just at the moment that his line began to break, Neil sent his regiment of divisional light cavalry into the flank of my assaulting units.

Very messy, and even sending in another battalion of infantry to hit the cavalry in its flank in turn didn't really help matters.

Numbers, however, still told in the end, and although I effectively lost a brigade of infantry doing it, the right hand side of the ridge was now also in my hands so, with the enemy centre retreating, I had achieved my aim.

At that point, however, the Prussian reinforcements began to arrive. Unfortunately, the clock wasn't just ticking for the French, it was ticking for Neil too, so we had to call the game before he could get his extra troops into action.

Saved by the bell, the French were victorious!

losers!

AAR: Franco-Prussian War

It's been a long time since I've played any 19th Century (i.e. Waterloo to Mons) wargames, so it was most pleasing when Neil, my regular opponent, offered to bring round his new 6mm Franco-Prussian War collection and run a game using a modified version of the Black Powder rules.

He duly arrived, laden with not many boxes (6mm, you see!) and set up what looked like a huge game on my 5ft by 6ft gaming table.

I would play the Prussians, versus the French, obviously, with the aim of smashing a French rearguard from their positions atop a ridge at the other end of the table from my start point. All directions are given from the point of view of the army being described.

prussians!

At my disposal, I had a Corps of Prussians consisting of:

  • Corps Commander
    • Corps Artillery (4 batteries)
    • Corps Cavalry (2 regiments Cuirassiers, 2 regiments Dragoons)
  • Left Flank Division
    • Divisional Commander
    • Divisional Light Cavalry (1 regiment)
    • Divisional Artillery (4 batteries)
    • 1st Brigade
      • Brigade Commander
      • Brigade Infantry (6 battalions)
    • 2nd Brigade
      • Brigade Commander
      • Brigade Infantry (6 battalions)
  • Right Flank Division
    • Divisional Commander
    • Divisional Light Cavalry (1 regiment)
    • Divisional Artillery (4 batteries)
    • 1st Brigade
      • Brigade Commander
      • Brigade Infantry (6 battalions)
    • 2nd Brigade
      • Brigade Commander
      • Brigade Infantry (6 battalions)

I could also expect reinforcements at some stage.

Against me, lined up on the ridge line in front of me was a single division of French facing my left flank division. 

I decided that I would strongly probe the French right flank and see what happened, so I set up my left hand division on the left and the right hand division in the centre, with the Corps cavalry protecting my right flank.

The left hand division began the game by advancing strongly, halting inside my artillery's range, but outside Chassepot range. The artillery opened fire with a round of counter-battery fire that had no effect.

Meanwhile, my right hand division and corps artillery (also deployed in the centre) had not moved: its orders having been mislaid or delayed or some such.

we are ready down to our last gaiter buttons!

The French, for their part, now revealed another division set up in line on the left hand side of the ridge. They therefore effectively had an unbroken line of infantry across the entire table's edge.

The artillery of the left hand division now switched targets to the enemy infantry on the ridge, and immediately forced one battalion to retreat in disorder. Excellent!

This left not only a hole in the French line, but led to the more central of two brigades facing my left retreating back behind the ridge in the face of the advance of the corps artillery in the centre.

This obviously left the other brigade isolated, so my left hand division moved forward and prepared to assault. A round of fire peppered my line, but I still had plenty of troops for the attack.

Unfortunately, the corps artillery were then told to move immediately to the right (a "blunder"), meaning that the French brigade that had moved back could now move forward again. In tactical terms, my left hand division could now punch up the hill and destroy one French brigade, but would then be destroyed in turn by the other.

This was not something I was prepared to accept, so my infantry fired one round with their Needle Guns, and then retreated back out of Chassepot range.

This doesn't seem in keeping with my orders, but the good news was that I had received reinforcements in the shape of another division of infantry behind my right flank.

This division kept in column and punched up the right hand side of the battlefield, aiming to hit the left hand brigade of French infantry. Behind my reinforcements were the four regiments of Corps cavalry, Cuirrassiers to the front. 

the prussians in position for their assault, about to receive fire from the french line

What had been the right hand division was now in the centre. One brigade of this division headed left and, together with the left hand division, kept the French on the left hand side of the battlefield from helping stop my right-hand assault. The other brigade headed straight up the hill in line and began a firefight with the right hand end of the French line on the left: I took casualties, but this meant that they couldn't intervene either.

keeping the centre of the french line occupied (note the corps cavalry charging in on the right)

My full divisional column smashed up the hill against a single French brigade that had already been softened up by artillery. At the same time, my Corps cavalry came out from behind the infantry and charged the centre of the French left-hand line, which had become disordered as a result of the fire of the right hand brigade of what was now the centre division.

prussians assault the ridge

misere de misere!

It was carnage!

Although the French Chasseur battalion in the house protecting the left hand end of their line resisted all attempts to dislodge them, the left hand brigade lost three battalions and its artillery were over run...and that was before the cavalry hit.

The Cuirassiers (big men on big horses!) were disordered by the fire from the two French battalions in front of them, but kept going nevertheless. They slammed into the equally disordered French infantry that, effectively, ceased to exist!

At this point we called time and declared a Prussian victory. The right hand side of the ridge was in my hands, and it would not take much for me to wheel left and start to roll up the rest of his line in conjunction with a general advance from my left hand and now-centre divisions. The French retreated: battered!

the french right

keeping the french right occupied

It had been a great game: and a game that looked really good as well. There's something very satisfying about huge numbers of 6mm infantry or cavalry blocks manoeuvring around the tabletop.

Not that I'm going to switch to 6mm, I hasten to add...but I'll certainly have a some more games like this!

My thanks to Neil for putting on a great game. 

Vis Imperica Galleries: The French

My French figures have fought throughout the nineteenth century from the Crimea through the Franco-Austrian War, the Maximillian Adventure in Mexico, the Franco-Prussian War right up to the Boxer Rebellion in China. Obviously some of the units are specific to specific campaigns (the sombrero-wearing Marines for Mexico, for example) but I've never worried too much about getting exact representations.

The figures are almost from Freikorps: a manufacturer that I used a lot for my 19th century European armies. Must confess that I don't even know if they still exist now (if only we had an easily accessible source of the world's knowledge!) but I used to pour over the catalogue for hours on end.

These are still painted in simple block colours style, but are an improvement on some of my earlier work. I will eventually get around to highlighting them and flocking the bases which, I think, will improve them no end.

Click on the picture to go to the gallery.