TTA AAR: Venetians Abroad versus Ayyubid Egyptian
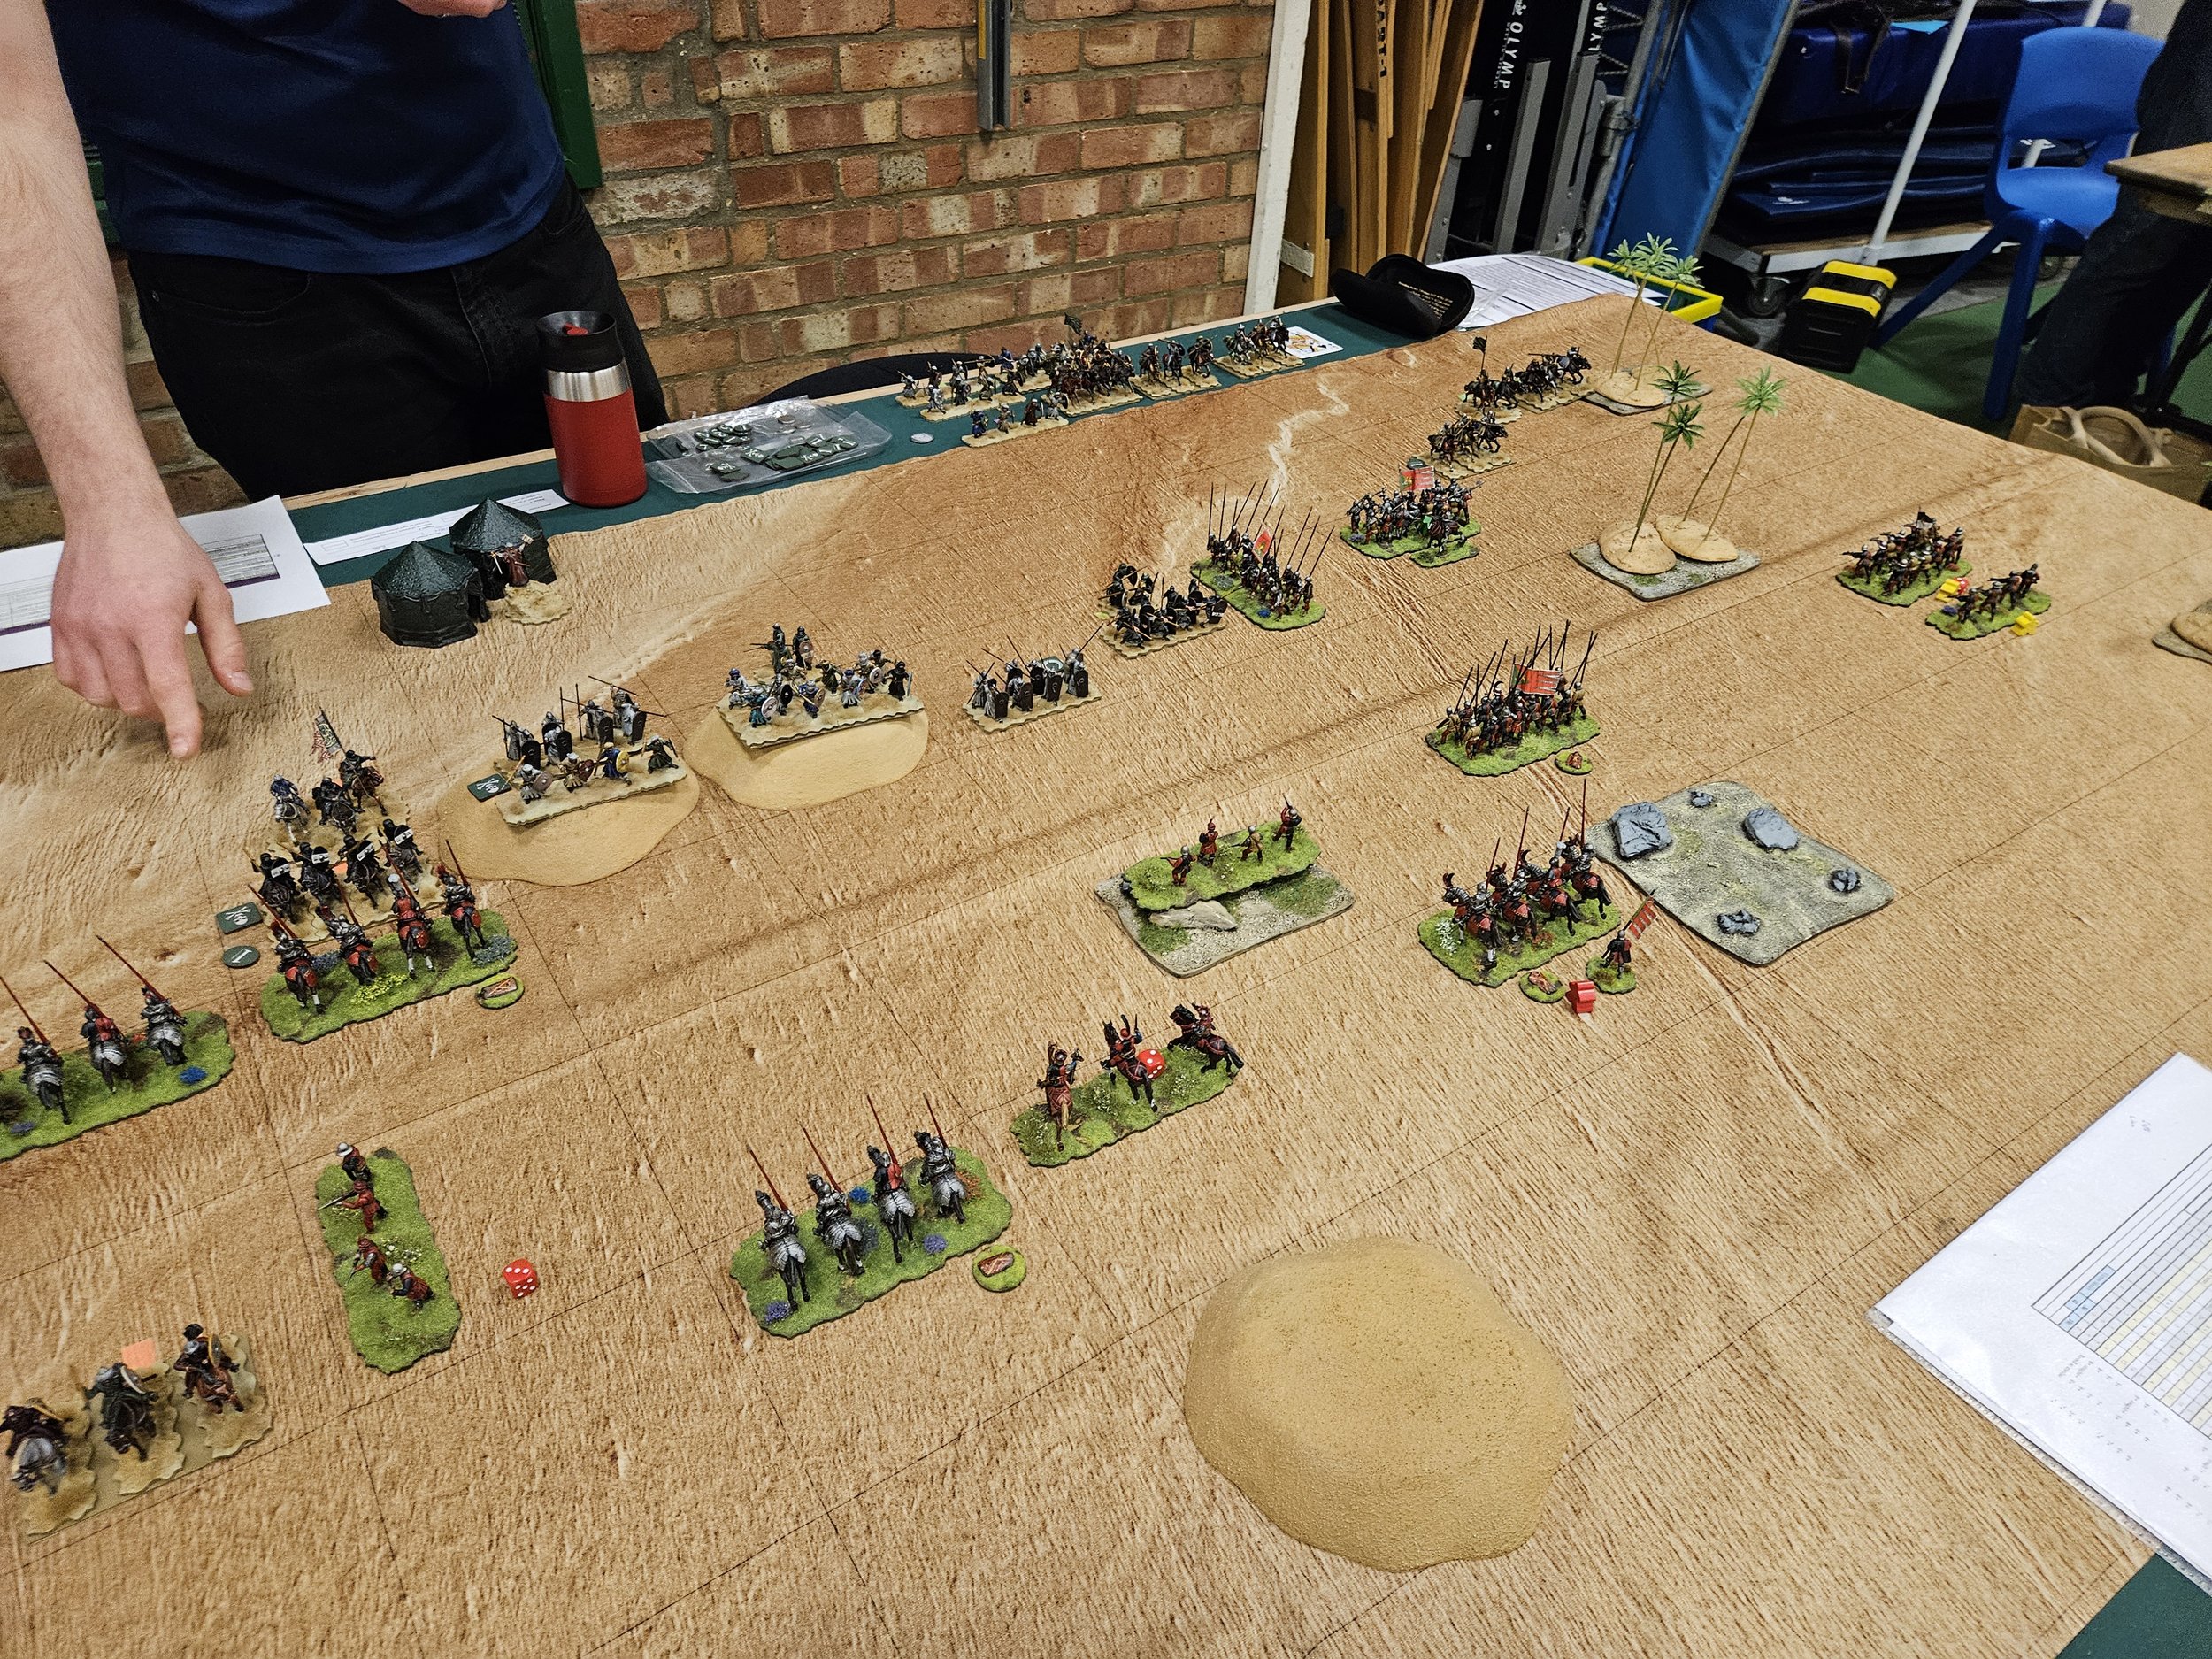
My third game at Roll Call 2024 was against Andy’s Ayyubid Egyptians: another beautifully painted army.

Neither side was particularly interested in doing anything excapt having straight at the enemy, although I did make a point of maintaining my line as much as possible.

The game quickly split into two sectors: the centre/right and left.

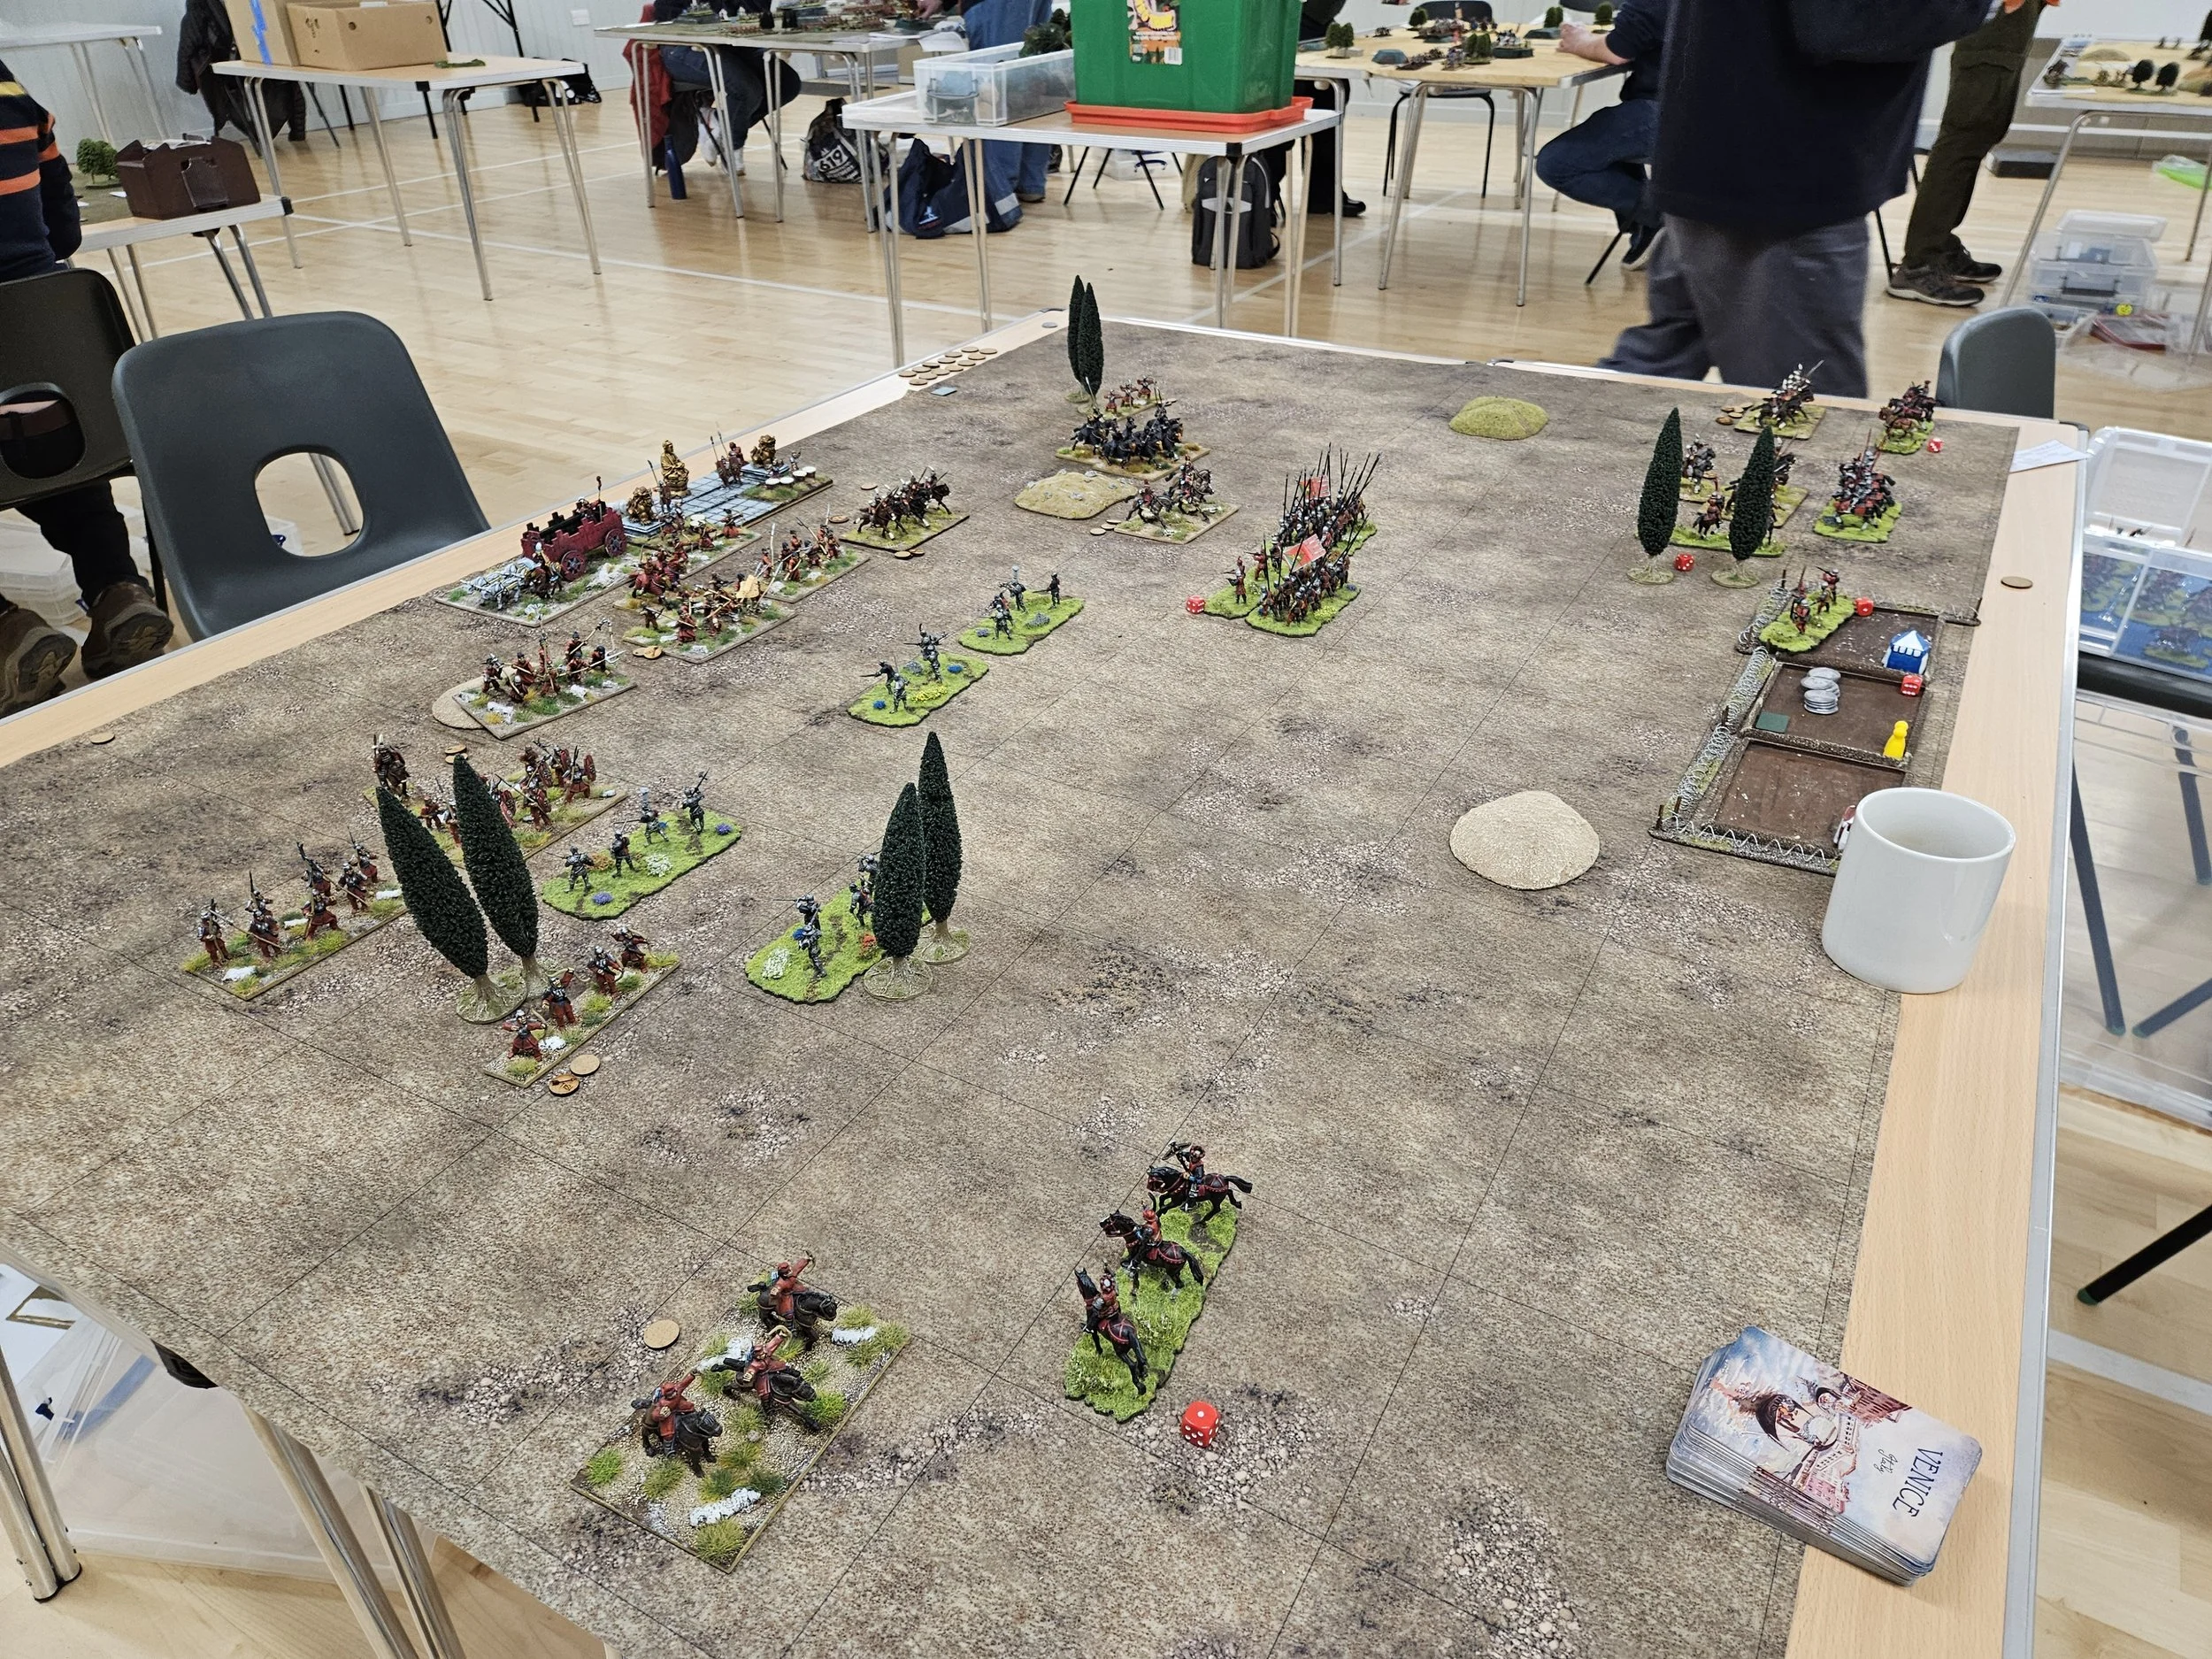
On the centre/right, my Knights and Lights worked together to drive back his quality cavalry and infantry. As usual, half my Knights rode straight over their opposition without difficulty and half failed to achieve anything at all…but, generally, the action in this sector went in my favour.

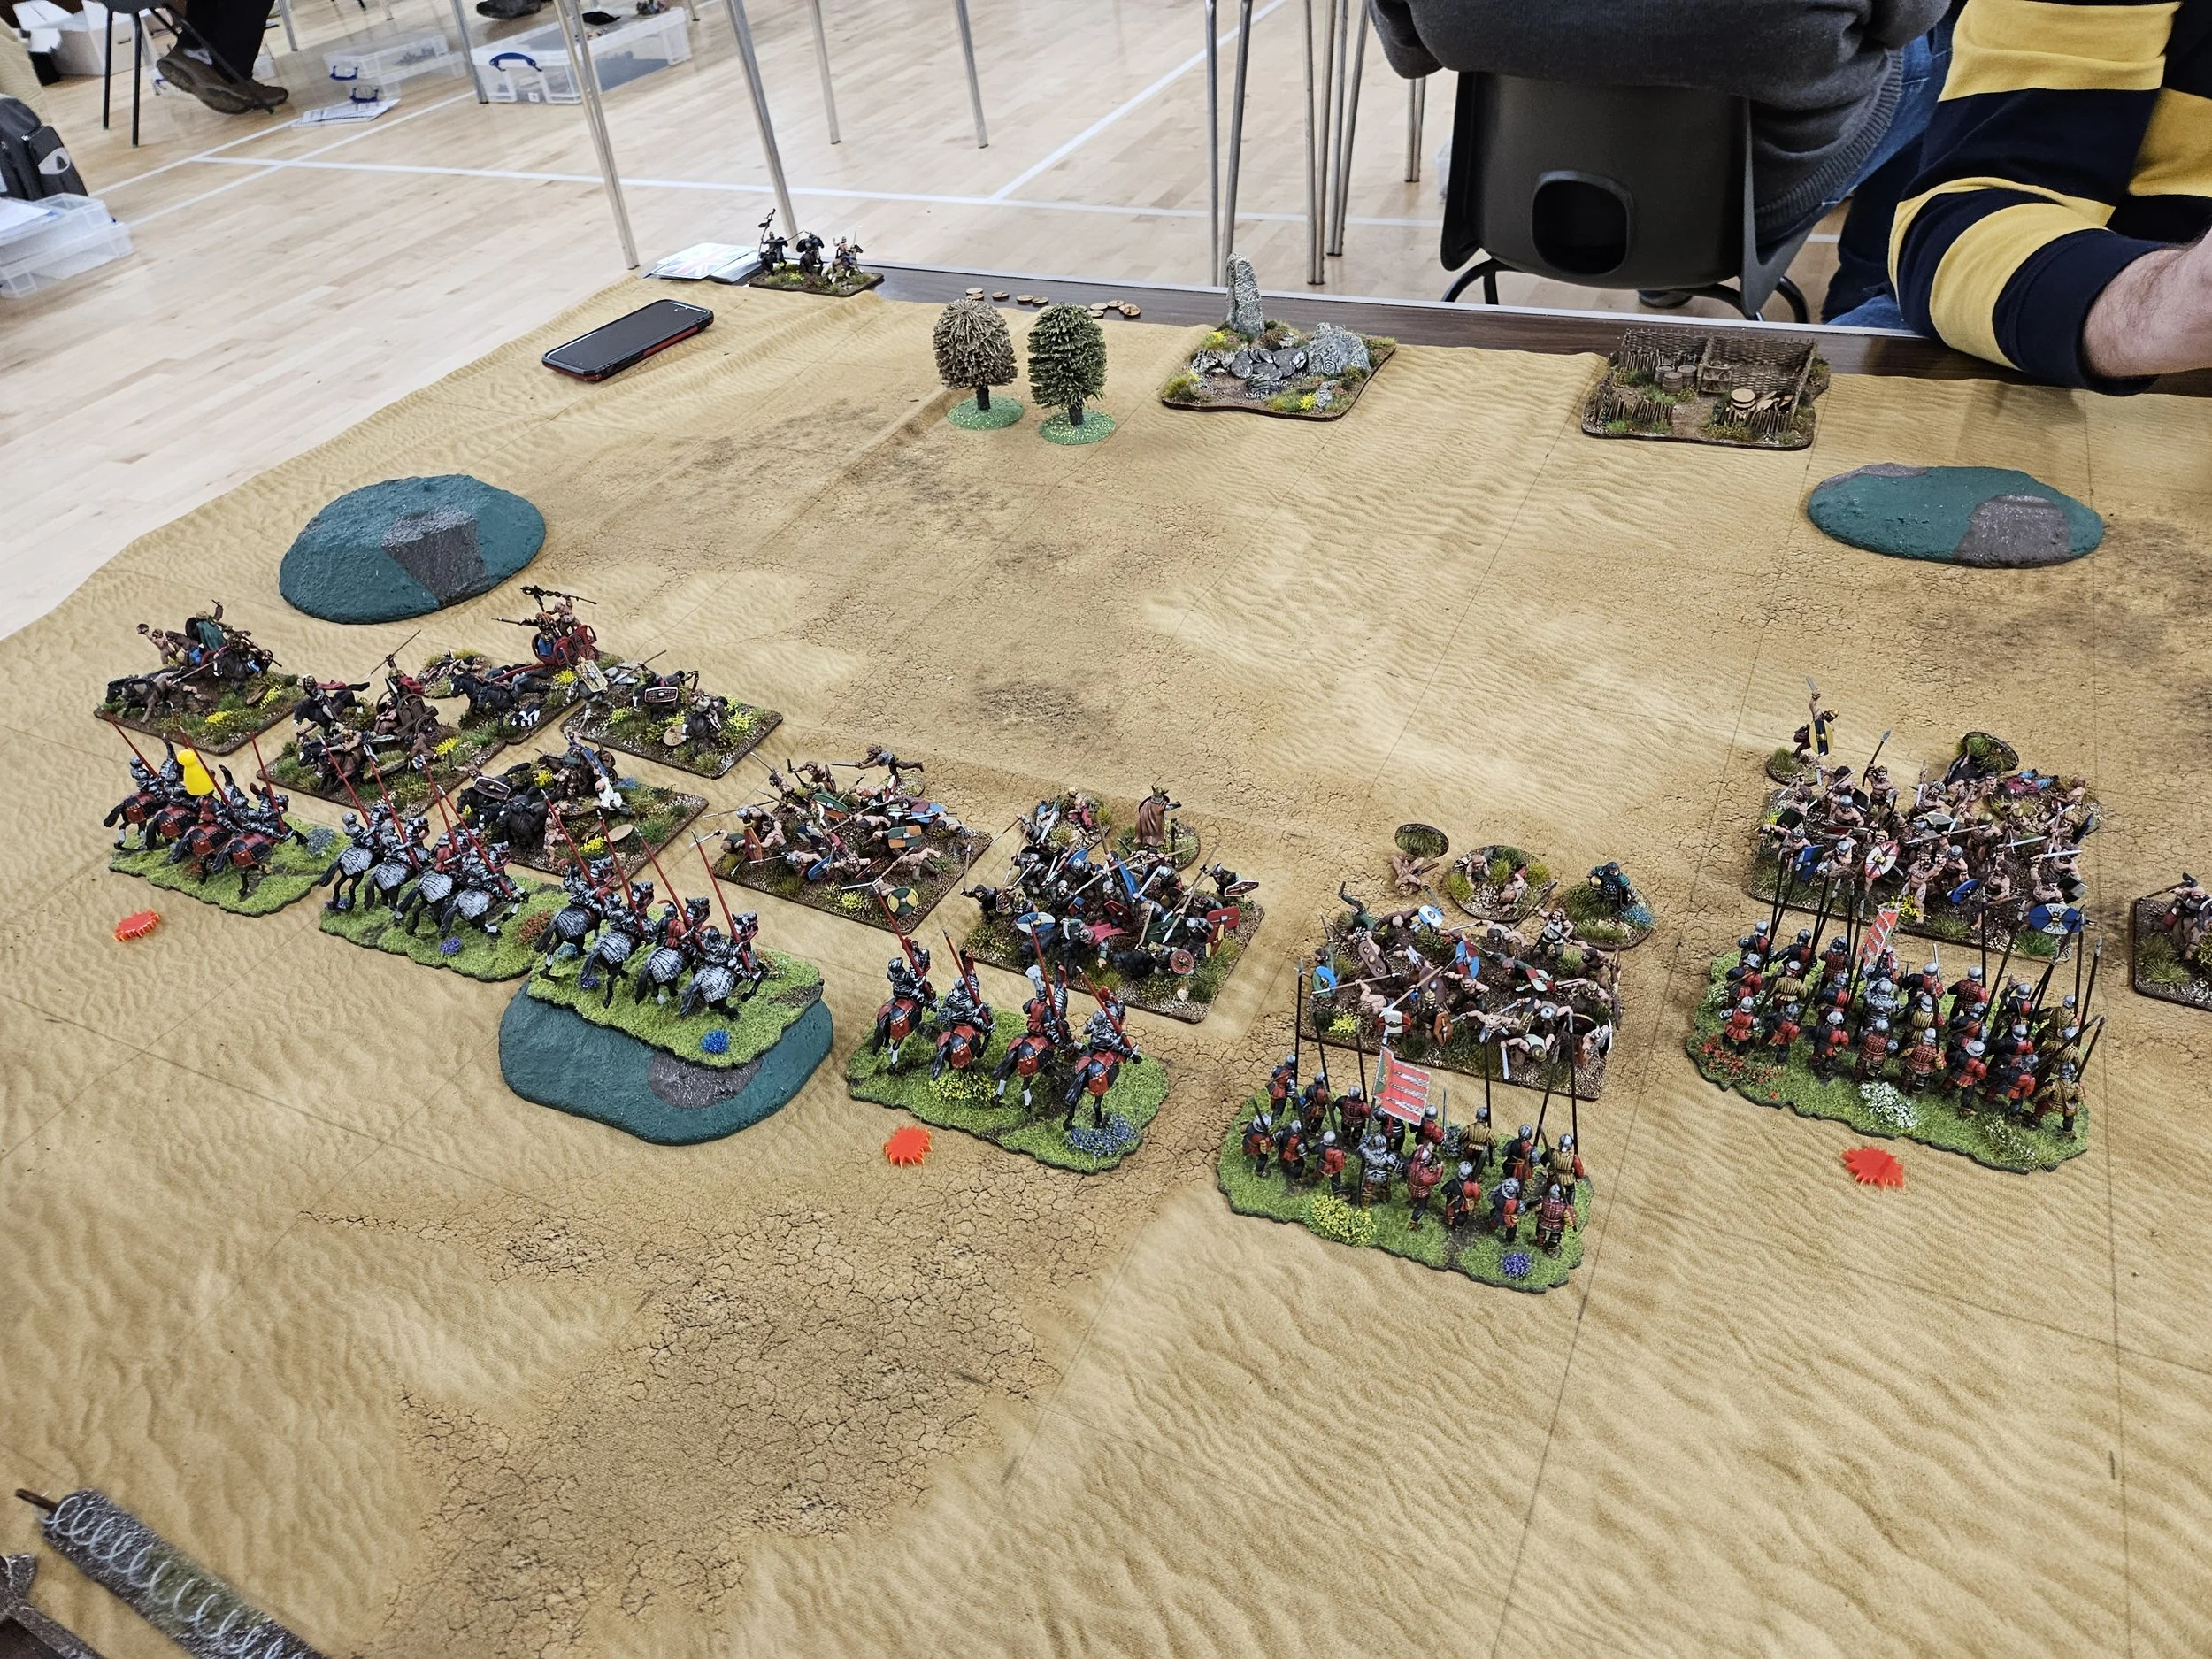
On the left, however, my infantry didn’t do as well as I had hoped, and soon the Ayyubid’s were threatening my camp.

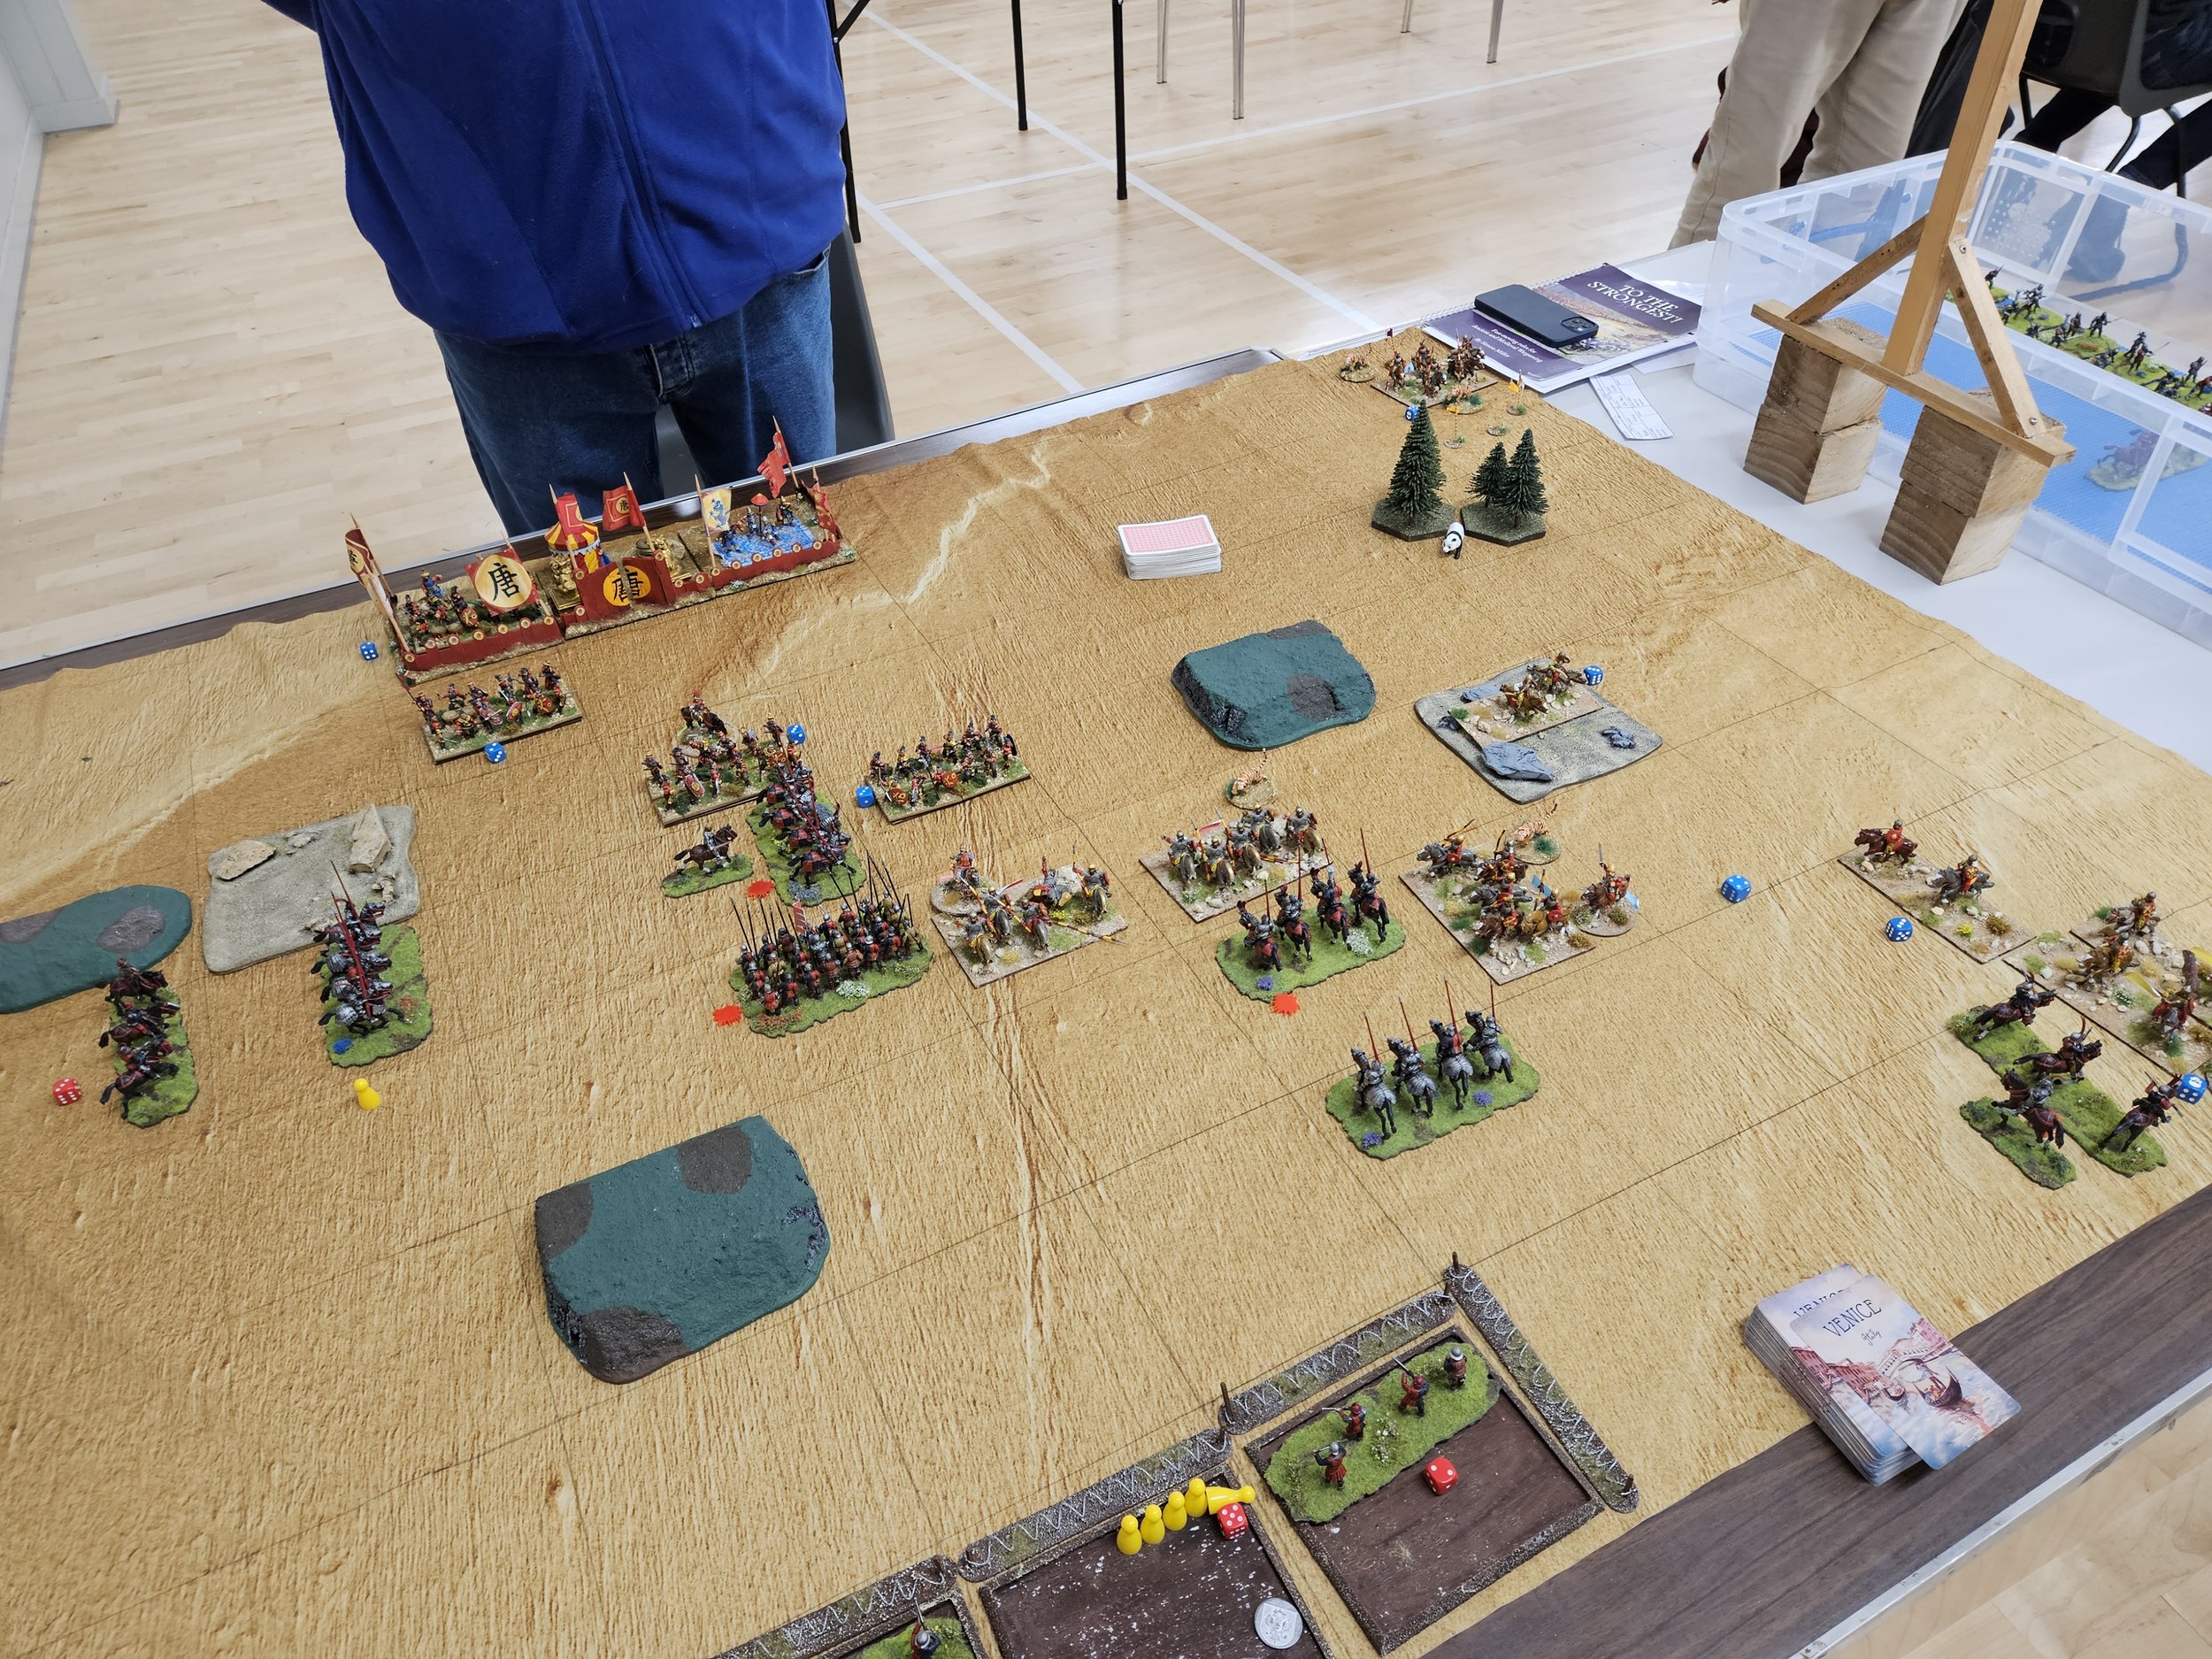
The game looked in the balance at this point but, fortunately, my troops on the right were now in a position to hammer their wavering opponents. They duly did so, and the collapse of the Ayyubid left gave me a 12-6 victory before Andy did to me on my left what I had just done to him on his left.

So a loss, two wins, and one more game to go!

Last of the Venetians?

As I’m now using the Venetians Abroad list rather than the Later Italian Condotteri (Venice) list for my latest To The Strongest army, I found myself in need of some extra Spearman units.

Regular visitors will know that I have gradually added these in over the last couple of months, with only the one to go: the raw, militia Lancieri dredged from the depths of the dankest, darkest canal!

I wanted something different for these boys: I like to be able to identify my units without markers (yes, I know I usually have Meeples everywhere! - but that’s to help you, not me) so decided to really make the militia stand out.

Here’s a regular Lancieri unit:

Very serious looking chaps.

And here are the militia:

No flag, no armour, only the back rank are properly equipped - the rest have had to grab whatever’s left in the armoury - and, best of all, the man in charge is not the usual officer but a chef:

This is a cracking figure that I sourced from Kingdom Games: Drunk Cook DnD Dungeons and Dragons Miniature - Epic Miniatures 28mm. I am loving the chicken!

So now my Venetians are complete, although I realise that this phrase is utterly meaningless to a true wargamer!

TTS AAR: Venice Abroad vs Almoravid Berber (Roll Call Game Two)

My second game at Medieval Mayhem at Roll Call this year was against Matt’s Almoravid Berbers.

This was a beautifully painted army consisting of a unit of Black Guard veteran cavalry, a unit of Mercenary Knights, some Shieldwall (including more veteran Black Guard types) and then lots of light horse with javelins.

As the Berbers won the scouting, you’ll see from the montage, below, that my Knights faced off against his cavalry and infantry, with my foot deployed slightly to the right and mainly facing the light horse. Methinks I might get outflanked on the right!

Both sides opened the game with an advance and, with a bit of help from the cards, I was lucky enough to be able to extend my line out to the right before the Berber light horse had a chance to lap around it. Okay, so I only had raw crossbowmen and light crossbowmen out there on the flank, but that was better than nothing at all.

My plan, for those interested in that sort of thing, was to hold his infantry and light horse in the centre and right respectively whilst my Knights and Later Knights punched through his cavalry on the left, took his camp, and then the rest of his line in the rear.

The action began on the right, when Matt’s light cavalry came forward to harrass my advancing infantry. Crossbow bolts headed their way and, much to Matt’s dismay, one of his units was shot off the table. The other made no impression on my infantry, who continued to advance remorselessly.

By this time battle had also been joined on the left, with the Christian mercenary caballeros being blasted from the table by my Knights in one glorious impact whilst my Later Knights attacked the mounted Black Guard.

Unlike the Knights, the Later Knights bounced off the Black Guard and ended up very vulnerable to a counter-attack.

Up to now the plan had worked perfectly, but the cards just wouldn’t let me get the rest of my Knights stuck in on the left. Instead an uneasy stalemate occurred with neither side able to make any headway against the other.

This meant that I had to bring up my infantry before my left was overwhelmed by troops moved to reinforce Matt’s right and, fortunately, my Alabardieri and Lancieri were on tip top form and proceeded to convincingly win the centre.

My Knights on the left still weren’t managing to make any headway…

…so it was up to the Alabardieri to force the last of the Berber light cavalry off the table and win the game.

So having lost the first game 5-12, a 12-5 victory in the second game put me back to even-stevens and all ready for game three.

TTS AAR: Venice Abroad vs Later Swiss (Roll Call Game One)

My first game at this year’s Medieval Madness competition at Roll Call was against a very testing opponent: Dillon’s Later Swiss with their veteran, extra-deep and, in some cases, fanatical pike blocks!

I wasn’t sure what I was going to do against these beasts: stay away from the front and attack the flanks seemed to be the best course of action, but unfortunately the table we were on didn’t have a huge amount of terrain in place to slow the Swiss down.

Worse, the Swiss were also mounted infantry, so the game began with his pike blocks already one extra square towards me:

Dillon had outscouted, so took his turn first, with a very good run of cards getting the pike unit in front of my camp (the pike block top left in the picture, above) into contact immediately.

No matter, I had troops either side who could advance forward and swing into his flank. Then I pulled my first card of the game:

This was not good, to say the last, but no need to panic: the pike blocks on the other side of the field hadn’t got to me yet, so a decent run of cards there would help out:

Fortunately this was only a temporary set back, and my troops soon surrounded two of the Swiss pike blocks and began thumping at their flanks:

And meanwhile a unit of Knights had snuck through and taken half the Swiss camp:

This was all well and good, but the pike blocks in the centre were just refusing to die. Flank charge after flank charge, rear charge after rear charge, I just couldn’t get the four hits I needed to kill them, and the Swiss light infantry was doing a good job in distracting my men as well.

You can also see that the Swiss pike block facing my camp has chewed its way through one unit of Venetian Spearmen and is now right up against the camp itself: unfortunately defended only by some raw militia types.

This meant that both my camps soon fell, taking the last of my victory medals with them, for a 5-12 loss.

Not a very good start, but not a disaster, and three more games to go!

Painting Epic Scots

Friend John kindly gave me a couple of those Warlord Epic Scots Covenantor free sprues that came with Wargames Illustrated a few months ago, so it was time to get them painted and onto the table.

First up was a large unit of Commanded Shot. I decided to give them a natty pair of red trousers: not very dour but I fancied a change from Hodden Grey. The command figures came from Eureka: a bit taller than the Epic’s, but then you want some big men in charge!

As before, the epic slugs painted up very easily and were actually quite fun to do. In fact, it took me so little time to finish this lot that I went straight into painting a second batch, this time with more traditionally coloured trews!

The flags, by the way, come from Maverick Models. They are a simple Cross of St Andrew custom printed for me by Steve, the proprietor. The cloth effect makes them very simple to use (much easier than paper flags) and they end up looking very good indeed.

With two large units of Commanded Shot completed in record time, I could spare the effort to use some of the single figures on the sprues to produce three bases of Attached Shot: something to give my artillery a little better chance of survival on the battlefield.

These were obviously just like painting standard 15mm figures…they are nicely posed and I particularly like the chap priming his pan (front left on the right hand base).

Finally, although not Scots, or Epic 15mm scale, I also had a chance to paint up another Spear unit for my 28mm Venetians. These are Perry plastics and, as usual, a slight pain to build compensated for by the variety and realism of the poses that can be generated, and the ease with which they paint up.

TTS AAR: Venetians Abroad vs Timurid

A practice game for the forthcoming Medieval Mayhem competition at Roll Call saw my Venetians travelling Abroad to fight Peter’s Timurids. This was the first time I had used the Venetians using the Venice Abroad list rather than the Later Italian Condotteri list, so I was interested to see how they would do.

First up, the Venetians were outscouted (a distinct lack of canals on the Steppes!), with the result that the two battle lines ended up as below: both sides overlapping only in the middle of the field.

I suspected that Peter planned to lap around my left flank with his cavalry, so quickly moved my Knights across to face his horsemen. My infantry also began to move diagonally forward in order to get into th action as soon as possible.

I was aware that I ran the risk of “wasting” my troops in the centre of the field against scythed chariots and driven slaves - neither of which, if destroyed, would cost Peter any victory medals - but, as I said, this was a test game just to see what the army could do.

My plan, therefore, was to hold the left, or at least achieve like-for-like losses, whilst my centre chewed through the Timurid “disposables” and then pivot my line so we fought each other perpendicular to our start points.

As expected, Timurid light horse lapped around my left, but my Knights largely ignored their presence, getting stuck in to the enemy heavy cavalry as soon as they could.

All seemed to be going nicely to plan when fortune kicked me firmly in the fork!

If you look at the picture below, you will see three of my units of Knights in action. Two are engaged with the enemy heavies (one winning their encounter, the other even-stevens) whilst another (the one in the foreground) has got behind Timurid cataphracts and is presumably about to drive them from the field.

At this point, the unit of enemy light cavalry that you can see bottom right turned and attacked my Knights from the flank. No problem, I hear you cry, these are Knights, Later Knights at that, they laugh at the efforts of lights to inconvenience them.

Not so today. Two successful activations followed by a great (from the Timurid point of view) run of cards saw my Knights first disordered then sent fleeing from the field!

Leaving aside the activations, that’s two successful 30% chances to hit followed by two 40% chances of failing a save: or a 1.44% chance of the cards falling as they did.

The Timurids naturally took full advantage of the situation, and soon my Knights on the left were under attack from all sides.

Meanwhile, in the centre, my troops were having a hard time disposing of the Timurid ‘disposables’: they just wouldn’t die!

That changed very rapidly, however, when my veteran Later Knights, with General and Army Standard, intevened and, after a slight hiccup in round one of their attempt, swept both units of Driven Slaves from the field in two glorious charges. It was just a pity they weren’t worth any victory medals!

As one unit of my Knights on the left just refused to die, and I kept pushing the Timurid Light Cavalry off table, the overall situation was actually fairly even at this point: I held the right hand side of the field, Peter held the left and with only a slight advantage in terms of victory medals won.

Most of my troops were, however, now disordered, and before I could get my rallies in, the Timurid horse archers managed to do the damage they need to send one unit of my Spearmen from the table. That, combined with eventually losing the last unit of Knights on the left, was enough to lose me my final victory medal, so the game was Peter’s.


So a bit of a damp squib ending to what had been an absolutely cracking encounter. Some would say the battle was effectively over when I unexpectedly lost the Later Knights on the left, but the Venetians almost pulled it back despite that unlucky blow.

THis weekend, the Venetians continue their voyage Abroad with a trip to, of all places, Milton Keynes for Medieval Mayhem at Roll Call. There must be some canals there, surely!

A bit of Miscellaneous Painting

Always good to add some character units to your rank and file, so when I saw that the 3D printed March to Hell range of Celts included war dogs and a handler, I knew I had to get one to act as one of the many "Heros” accompanying my Ancient Brits.

A nice little piece that paints up very easily indeed. The hounds were a single coat of Contrast Basilicum Grey over undercoat; the handler was painted as a normal Celt: dark blue tunic with light blue stripes.

Next are a couple of extras for my Venetians.

My Spearmen don’t seem to be achieving much, so here’s a unit of Alabadiers or Billmen who, hopefully, will fare a bit better.

The Alabardiers are made from the heads and bodies of spare normal infantry combined with the arms and weapons of spare knights, which is why they all look a bit top heavy!

It also got a bit crowded on the base…which is why, in the back rank, one of them is smashing the back end of his axe into the face of another! I should perhaps have dropped a figure from each line or at least spaced them out properly.

Finally, a unit of light crossbowmen and an infantryman carrying a flag that I can use either as an army standard or to mark where a dismounted general is or the like.

TTS World Champioships 2024: Game 4: Venetians vs Tang Chinese

My fourth and last game at World’s pitted my Venetians against another Tang Chinese army…and having lost rather badly against Peter’s Tang in Round 2, I was rather hoping to do a bit better against Roger’s Tang in Round 4!

As things hadn’t been going very well so far, I decided to throw caution to the wind and (a) field most of my Later Knights as dismounted and (b) just get stuck in as soon as possible. Tactics, schmactics and all that!

Accordingly, as soon as the whistle went, I sped forward: my foot Knights sprinting up the field towards the opposition:

The sharp-eyed amngst you will have noticed that Roger had sent some horsemen rushing forward towards my right flank, seeking to get behind my advancing Knights or to sack my camps.

Fortunately I had antipated such a move and left a small force to deal with these intruders and, with a little help from the cards, the two enemy horse units were soon destroyed and my flank secured.

Meanwhile, on the left, I had sent some Knights forward to see if they could work their way around Roger’s flank.

Unfortunately, although I did manage to kill a couple of enemy units, it took me some time to do so - winkling lights out of a wood proved more time-consuming than I had anticipated - and, at the end of the game, my troops here were only just starting to break through.

All of which meant that it was centre that would decide things.

My dismounted knights, spear and pike units stormed forward, intent on causing mayhem, but their earlier sprint up the field had obviously exhausted my knights who proved unable to break the enemy in front of them.

My pikemen, however, did much better: driving forward clearing all before them before turning in to threaten the enemy flank.

By this time, however, Time’s winged chariot had hurried near, and the clock had somewhat un-Marvellously run out, the last game of the day being a either a really long one with no time limit or, in this case, a somewhat truncated affair due to needing to end the day on time.

The result? A winning draw 7-3 for my Venetians: not the score I needed to resurrect my fortunes. This meant that, once the scores had been totted up, that I came 14th overall: very disappointing.

Still, it’s all about the playing, not the winning (he said through gritted teeth with his nose visibly lengthening as he did so) and they had been four great games against four worthy and sporting opponents. The day was also superbly organised, so thanks to all involved: Si, Mark, Bevan, Steve, John et al. I really would recommend this event to any TTS player.

Meanwhile, my troops slunk back to their canals for more training: duri ai banchi as we Venetians like to say!

TTS World Championships 2024: Game 3: Venetians vs Ancient British

The story so far: one big win, one big defeat…so it was all to play for in game three of the 2024 To The Strongest World Championships.

This time, my Ventians would face Matt’s Ancient British, and lot’s of them there were too!

The Ancient British outcouted, and before I knew it, I had shed loads of barbarians coming right at me: chariots and cavalry on the wings, infantry in the centre.

There was nothing for it but to get straight back at them and see what happened!

The two lines came together with a mighty crash…

…but honours were fairly even. The Brit infantry were in deep units, but my Knights had better saves, so things pretty much cancelled themselves out.

Cue a grinding melee that swung backwards and forwards between us: before too long, most of Matt’s units were on two disorders and most of mine were on one, but my pikemen and spearmen were having a good day and were pushing forwards towards the British camps: it was all going to be down to who gave way first.

Then disaster struck: one of Matt’s warbands broke through my line and charged towards my camp.

No matter, I thought, I have light infantry handgunners behind fortifications, and whenever I have tried taking a fortified camp packed full of light infantry, I have failed again and again and again.

Not today, however.

With barely a pause to draw breath, the British warband smashed straight through the fortifications into the camp, killing my lights as they did so. Four coins down!

Next thing, the game ended due to time considerations, with the Venetians recording a 4-9 losing draw: actually the first time I have not had a clear “win/lose” result in a competition game.

It had been a great encounter with a tough opponent. Had we continued, I think Matt would have quickly taken the rest of my camp and therefore the game but, on the other hand, there was also a fair possibility that I could have caused a general collapse in his line first, which could just about have given me the win…but I guess we will never know.

Must be an excuse for a return match some time in the future!

TTS World Championships 2024: Game 2: Venetians vs Tang Chinese

The consequence, or course, of having had such a good first game meant that in round two I was once again up against Peter - winner of many, many tournaments and a regular opponent - and his Tang Chinese.

To my shame, I must admit that I did have a minor temper tantrum at the news: but, in my defence, I was very tired after a very long week’s work, and who would want to face Peter in a tournament…charming chap that he is, he does have a tendancy to win!

Anyhoo, tantrum over, it was time to settle down to the game:

As you can see from the picture, above, things did not start off very well for me!

Peter’s Tang outscouted my Venetians, and a superb deployment on his part and some good cards to begin saw his light cavalry, soon to be followed by heavier cavalry, all over my right flank.

This move to the (his) left, also meant that a third of my army was effectively facing thin air: not a good situation.

Some good manouevring on my part, however, brought the left hand contingent of my heavy knights back into the action and, in fact, got them into a great position to flank charge some of his central units.

Unfortunately, my new specially-bought,Venice-backed playing cards chose that moment to wobble, and my flank charges and moves across the field failed to happen as I had planned: disaster!

This meant that rather than putting the battle on a more even footing with some locally good superior numbers and flank attack possibilities, Peter had the time to turn to face my troops coming at him from his right flank to block my advance there. He was effectively where I had been at the start of the battle on my right, but also in an echelon formation that further prevented me using my superior numbers to advantage.

Meanwhile, of course, he had already achieved superiority of numbers on my right flank, and was able to use them to bash me up there before I had the chance to do the same to him on his right. He was (as ever, some would say) one step ahead of me.

Now it was just a matter of time, and Peter was soon able to start to sending my troops fleeing from the field, meaning that I suffered a very bad 2-12 loss!

A superb example of how to wrong-foot your opponent from deployment, and although I was a trifle unlucky not to be able to at least partly rescue the situation in the middle part of the game, as we all know, a plan that depends on luck is not a plan at all!

TTS World Championships 2024: Game 1: Venetians vs Sengoku Samurai

This year’s To The Strongest World Championships was held at Blewberry in Oxfordshire. It was a superbly organised event that all who took part agreed was good fun.

My first opponent was Colin and his Sengoku Samurai: a nasty combination of Samurai types,both mounted and dismounted, with their longbows and naginata two-handed cutting weapons, and Ashigaru Teppo mixture of spearmen, bowmen and musketeers. This was not going to be easy!

Fortunately I won the deployment, and watched as Colin set up his troops crowded on to the left hand side of the battlefield.

This gave me an excellent opportunity (helped by a suitable stratagem card) to get on to his left flank, and that’s exactly what I did:

Unfortunately, however, his corner unit of veteran Samurai proved tough as old boots (or whatever the Japanese equivalent is) and, to make matters worse, my pike block took not one but two surprising hits from missile fire.

Meanwhile, the rest of my troops had got stuck in to the Japanese main line, with my left hand unit of Knights also managing to see off one unit of Samurai horse and threaten the flank of another.

With my troops now fully committed, it was time to turn from Athena to Mars and hope that my troops were up to the task:

As you can see, although the Samurai centra began to give way, the remaining Samurai horse on the left wing proved very resilient despite the cards giving me every opportunity to best them!

Fortunately most of my frontline troops were Later Knights, and quality began to tell. More and more of Colin’s units were either sent fleeing the field or forced to retreat into his camp, and eventually victory was mine.

A good start to the competition with a 13-1 victory.

Venetian Casualty Markers

Next stage for the Venetians was to fill in all the peripheral bits and pieces needed to actually play the game, including casualty markers and heroes.

I wanted some nice casualty markers, but didn’t want to go to all the trouble of building and painting actual figures. My Romans have a set of markers, kindly donated by friend Peter, which consist of a Roman shield mounted on a single-figure base, so I decided to mimic that for the Venetians.

Regular visitors will know that I am ujsing Perry plastics, whose various sprues include pavises: the stand-alone shields used by crossbowmen for shelter whilst they reload. These looked ideal, so I cut enough off the sprues and sprayed them with a white undercoat.

Next I bought some pavise-shaped transfers specifically designed for the Perry pavises from Little Big Man Studios (an excellent company, by the way: highly recommended) which were really, really easy to mount. Finally, a quick scoot round the edges with some brown Contrast paint and each pavise-marker was now ready.

The bases are 2p coins with a light coating of basing material and then flock and the finished pavises glued on top.

Experts amongst you will have spotted that the pavise transfers are actually in Burgundian colours (all that was available) but actually the red and yellow works very well with the colour scheme I’ve adopted for the Venetians, so I’m very happy with these: I just hope I don’t have to use them very much!

The heroes are just standard cavalrymen but using some of the fancy heads that the Perry’s kindly provide. These really are lovely figures and, again, highly recommended for those seeking to build some kind of late medieval army.

Venetians Almost Up To Strength

Regular visitors will know that I am currently building a 28mm Later Italian Condotteri (Venetian) army to use of this year’s To The Strongest competition circuit.

An incomplete army, with borrowed figures to fill the gaps, took to the battlefield at the Welsh Open last month, but with the World Championships fast approaching, it was time to get cracking on the rest.

First up were the Lanzieri provisionati or spearmen. I decided to use the same figures as for the pikemen, but just use less of them. Not sure if that is correct, but the alternative was to perform reductive surgery on the pikes to make them shorter. which seemed like an awful lot of hard work and fragile joints!

Then I needed to paint up the final unit of Later Knights. Again I went for the un-surcoated look as this unit wouldn’t have an officer attached to it and could be used to represent lanza spezzate “broken lance” mercenaries.

This also made the knights very easy to paint: reins, horse, paint everything armoured in black then dry-brush with silvery-steel to get the armour effect. Lances in bright red and you’re done!

I’d already painted two units of foot knights (to use in case I need to dismount my cavalry in the face of, for example, elephants, camels, bad terrain, mucho missile fire etc) but needed three more to complete the set:

I loved painting these. Using Perry plastics enables you to build figures in some really unique, characterful poses, and they are even easier to paint than the mounted knights (no horse!). I also like the idea that such a puny looking unit (only four figures) can carve their way through a deep warband like the proverbial knife through barbarian butter!

So that is most of the army now done. Just need to do a few heroes, a spare unit of light crossbowmen in case I want to go earlier than handguns, and then an army standard and some Alabardieri (halberdiers) to bulk things out for bigger points totals.

All I have to do now is hope that the curse of the “first time on the tabletop” doesn’t apply at the World’s!

First of the Venetian Foot Knights

As regualr visitors will know, I have been building a 28mm Later Italian Condotteri Venetian army to use on the To The Strongest competition circuit this year.

It’s a nice little army: five units of mounted Later Knights with Lances provide the punch, with light cavalry and foot units in support.

One problem I might encounter, however, is facing elephants. I know it isn’t exactly historically accurate for Venetians to expect to face elephants in combat (although I understand it’s hellish difficult to get them out of the canals once they’re in!) but this is competition gaming so a certain flexibility of approach is required.

Anyway, back to the problems facing of facing elephants. In TTS, cavalry of all types do very badly against elephants as the horses, unless they are familiar with pachyderms, won’t close with the beasts, giving an elephant base a huge advantage in any combat with them.

The solution is to dismount some or all of the Knights, who are somewhat slower but equally formidable on foot: their Lances change to 2-handed cutting weapons, giving a bonus in combat, and they gain extra bonuses when saving against missile fire.

Elephants? We poop on elephants!

As I like to be able to field the right figures rather than proxies or mark a mounted unit as dismounted, and its a good excuse to buy more figures, I decided I needed a foot equivalent for each of my five Later Knights bases. Here are the first two.

These are Perry Foot Knights: easy to build and even easier to paint: black with a silvery steel drybrush then add a bit of detail as required.

Three more bases to go!

TTS AAR: Welsh Open, Game 4: Venetians vs Parthians

The stage was now set for my final game of the tournament. With two wins and a draw behind me, I would need a substantial win to have any chance of placing towards the top of the leaderboard.

My opponent for this final clash was the formidable Sid and his equally formidable Parthians:

Things started quite well: Sid’s cataphracts on my left attempted to charge forward, drew an Ace, so over-extended themselves into disorder. Unfortunately, I was unable to capitalise on this, and the veteran heavies quickly re-ordered themselves.

Equally unfortunately, this proved the high point of the game for my Venetians!

On the left, a combination of horse archers and heavy cavalry/cataphracts disposed of my Knights, and began curling into my centre. I had my Schioppettiere handgunners to defend my camps, but that meant I couldn’t use them elsewhere.

On my right, the same combination of lights and heavies overwhelmed my troops, although I did manage to do some damage before the flank crumbled.

I was now beginning to think that the Parthians had been taking lessons from the Zulus, as the horns of the buffalo began to close on my centre…

And it wasn’t long before the final curtain as the Parthians on my left flank broke through and took one of my camps and the last of my victory medals!

Excellent play from Sid, leaving me trounced 5-12!

So what did that mean for my overall ranking? Well, two wins, a draw and a loss left me an unexpectedly high 6th place: disappointing but not a complete disaster. Here are the rankings:

Overall a highly enjoyable event, and Firestorm Games is a fantastic venue. I would highly recomend the TTS Competition Circuit to players of the game. Next up are the World Championships “To the World’s Strongest” at the end of Feb.

TTA AAR: Welsh Open, Game 3: Venetians vs Tang Chinese

One of the problems with winning your first two games in a competition is that the Swiss Chess system usually in place means that you then have to fight someone else who’s won two games i.e. someone a bit good!

And so it was with the Welsh Open, where I found myself up against Peter and his Tang Chinese. Not it’s fair to say that Peter is a very good player. He’s knows all the rules back to front, and has a very tricky way of getting you on the back foot right from the start of the battle. This was a game that was going to be very tough!

The deployment phase was interesting. Rather than being spread out along the baseline, Peter went for a very one-sided deployment, which I then followed. I told you: very tricky…

The grey patches are woods, by the way

As I advanced forward, Peter didn’t come forward to meet me, but started to shift his troops to the right…

This was obviously part of some cunning plan that I needed to counter…so I moved my men to the right as well…whereupon Peter switched back to advancing on the left…so I shuffled my men back that way to match.

This was a period of move and counter-move with neither side prepared to commit.

One interesting point was that I had drawn the “Lost!” card as my strategem for the game: meaning that one of my units had begun the game lost off the table. I could choose when to bring it on, but it would appear at a random location somewhere on the table’s edge.

That meant that I had to wait until Peter had moved his troops forward a bit, as otherwise I would have just been swamped with flank charges rather than the rear charge that I would be hoping to perform. This was important, as I had taken a bit of a risk and it was a unit of Later Knights that I had declared lost i.e. one of my main fighting bases rather than something like a unit of lights or the like. As it happens, the Knights appeared on the right flank of Peter’s line: you can just see them top right in the photograph, above.

Finally Peter seemed to have had enough of all this shilly-shallying around and sent his heavy cavalry forward. On my left, I lost a unit of Later Knight, but managed to tie up the troops that had broken through with my light cavalry.

In the centre, however, things had gone much more my way, and I had pushed forward and knocked one of his decent cavalry units off the table. Honours were even so far.

Unfortunately my ex-lost Knights hadn’t managed to do much,and had retreated back to their hill to rally and re-arm with lances.

You’ll also see the pikemen, disordered, just by my pack of cards. What I really wanted to do now was to re-order them and move forward again. Here are the cards I drew: activation cards behind the unit, rally cards to their right…

The Pikemen are keen to do anything except rally!

Unfortunately at this point we ran out of time: all that tactical manoeuvring at the beginning of the game had soaked up all the fighting time required later on!

Tallying up the points, the game was an absolute draw: five victory medals versus five victory medals.

What would have happened if we had carried on? Who can say? At the point we ended the battle I was perhaps in a very slightly advantageous position, but that means nothing when facing a player of Peter’s calibre. A draw it was and, as someone said at the time, a result that really opened up the overall tournament ranking overall.

One game to go!

TTS AAR: Welsh Open, Game 2: Venetians vs Later (Eastern) Romans

My second game at this year’s Welsh Open To The Strongest tournament was against William and his Later (Eastern) Romans.

William’s army was truly massive: 16 victory medals worth versus the mere 12 that I was fielding. The only downside was that many of his troops were raw but, being Auxilia, they still had an averagely decent save.

The terrain was quite heavy (the flat grey patches in the pictures are actually woods) and infantry get a lot of advantage defending against mounted, so I decided to dismount two of my Later Knights units to give me a bit of flexibility in attack.

The action began on my left, with the Roman cavalry advancing quickly towards my lines. As luck would have it, that’s where I’d put one of my dismounted knights…which just goes to show what can happen when you try to be too clever!

No matter: the Roman horse pushed a couple of my light cavalry units back but left themselves in a position where I could charge them from the flank with the foot knights. Should be no problem: I had an officer with the knights, so all I needed for success was anything except a couple of Aces in a row…

Meanwhile the two lines had come together in the centre and on the right as two separate clashes.

On the right, my mounted Knights charged home and had initial success, disordering two of the enemy Auxilia units and leaving them ripe for destruction. unfortunately, his men then turned on their personal forcefields: William spectacularly saving against every attack I could throw at them. I distinctly remember four flank charges going in against disordered Auxilia with no result!

Equally anoyingly, my dismounted knights could see a way through to his three undefended camps, and were the boys to take the nine victory medals that they represented, but just couldn’t get the cards/freedom to do so.

The Aces were also still coming thick and fast!

If you look at the photo above, you’ll see two of them on the table: one (on the far side) stopping my light cavalry from taking his camps (the nine points eluding me again); the other preventing a unit of Later Knights from rallying for the third or fourth time in a row.

By now I had actually killed his cavalry, meaning that the dismounted knights that had disposed of them could head back into the centre to help out the pike- and spearmen, who were under some pressure from advancing Romans. You’ll also see, in the photo below, that on the right I have withdrawn to regroup, although I did kill two to three of his units before doing so.

Things finally turned my way. The unit in front of the pikemen (about to be hit in the flank by dismounted knights) charged forward already disordered. Unfortunately for them, the cards fell my way, and they managed only to impale themselves on the pikes facing them, taking them and their general off the table.

Almost unbelievably, this turned out to be the straw that broke the Roman camel’s back: the four victory medals gained being enough for me to win the game 16-5, despite the fact that it had seemed to me as if I was on the back foot throughout.

Or it might have been that the Knights then crashed into the Bowmen behind the unfortunate infantry, and it was those two victory medals that won me the day. To be honest, I can’t remember which it was!

It had been a thrilling battle: the epitomy of a small number of elites versus a huge number of less than veteran troops. William’s troops’ ability to save against my attacks was truly legendary, and I seriously thought I was going to be swamped at any moment.

Two games in and two wins: good going so far…

TTS AAR: Welsh Open, Game 1: Venetians vs Ayyubid

This weekend just gone I started off the 2024 To The Strongest competition season with the Welsh Open in Cardiff.

This was held at Firestorm Games: an excellent venue with a cafe, toilets, plenty of light, plenty of parking and plenty of shopping opportunities! Highly recommended to all wargamers if you happen to be in the area.

Last year on the ‘circuit’ I exclusively used my only 28mm army: the Early Imperial Romans. I fancied a change this year, so over Christmas invested in a Later Italian Condotteri army, specifically designed (and sort-of painted up) as Venetians. The Welsh Open would its first airing and I was looking forward to see what it could do, even if I was feeling a little “jaded” after going out into Cardiff for a curry the night before!

My first opponent was Mark and his Ayyubid Egyptians.

The battle started well, with my Venetians outscouting and moving forward to dominate the cengtre of the field. On the right flank, a unit of my Later Knights dashed some Ayyubid heavy cavalry from the table only to have the Someone has Blundered strategem card played on me: not only was my glorious victory annulled, but my Knights decided that they’d heard the dinner bell and ended up facing away from their opponents just asking to be charged up the backside!

“Someone has Blundered” on the right

Melee on the left

Honours even in the centre

The advantage now swung towards the Ayyubids for a bit (my Later Knights seemed to have decided to wear cardboard rather than steel armour!) until a lucky charge knocked back the Ayyubid Al-Halqa al-Khassa veteran cavalry and killed Salah-ad-Din himself!

This caused the momentum to swing back towards the Venetians, and the game now teetered on a knife edge with both sides down to only a few coins left.

The Ayyubid’s salute their fallen leader!

At this point I should mention that Mark and I both forgot that as a ‘great leader’ Salah-ad-Din should have had another save which may have resulted in him being wounded rather than killed.

But forget we did, and a final charge from either the pike of the Condotteri Knights broke the ayyubid morale and the game was mine.

My final charge goes in…

The final result was a 12-8 victory to the Venetians, so a win by the skin of our teeth.

My Later Knights, although very effective when charging forward, proved very vulnerable to enemy action: as you’ll see in the picture above, I only had two of five left at the end of the game.

Mark made superb use of his Someone has Blundered strategem, completely reversing my initial success and firmly taking the initiative, and if it wasn’t for Salah-ad-Din’s untimely demise, things could have been very different.

So one win and on to the next game.

Knights & Crossbowmen

With the first tournament of the year (the Welsh Open) rapidly approaching, I have upped the speed at which I’m producing units for my new Later Italian Condotteri army.

First up are the last of the infantry that I need: a unit of Crossbowmen:

These are Perry platics taken from the Mercenary Infantry 1450-1500 box, and very nice they are too.

The Crossbowmen are pretty easy to build, and you have a nice variety in poses for both shooters and those reloading.

Next up are the first of the Later Knights, also Perry plastics:

The horses were fairly easy to put together: the only tricky bit was getting the surcoats to line up properly at both front and back.

The knights were a bit tougher: head and left arm were easy, but getting the lance-arm in the right place was a real pain as, presumably in the interests of pose flexibility, the lance and the arm come in two parts: the lance and the hand holding it, and the handless arm. Getting it all to fit together after wrestling with the horse surcoats and the rest of the rider was not fun!

They are, however, easy to paint: lots of good detail and relief. The panels on the horse surcoats come with some embellishments and studs along the seams which, as you can hopefully see, can be painted in a bronze/gold colour that really makes the figure pop. The rest of the model is mostly armour: black undercoat highlighted with steel.

All in all I love the look I’ve achieved with the Knights…almost enough to make up for the pain that was the lance arm!