FK&P AAR: Muscovites vs Transylvanians

With my Transylvanians having lost the first game by only one Victory Medal, it was time to swap sides for a re-match: this time I would take the Muscovites, with Bevan playing the Transylvanians.

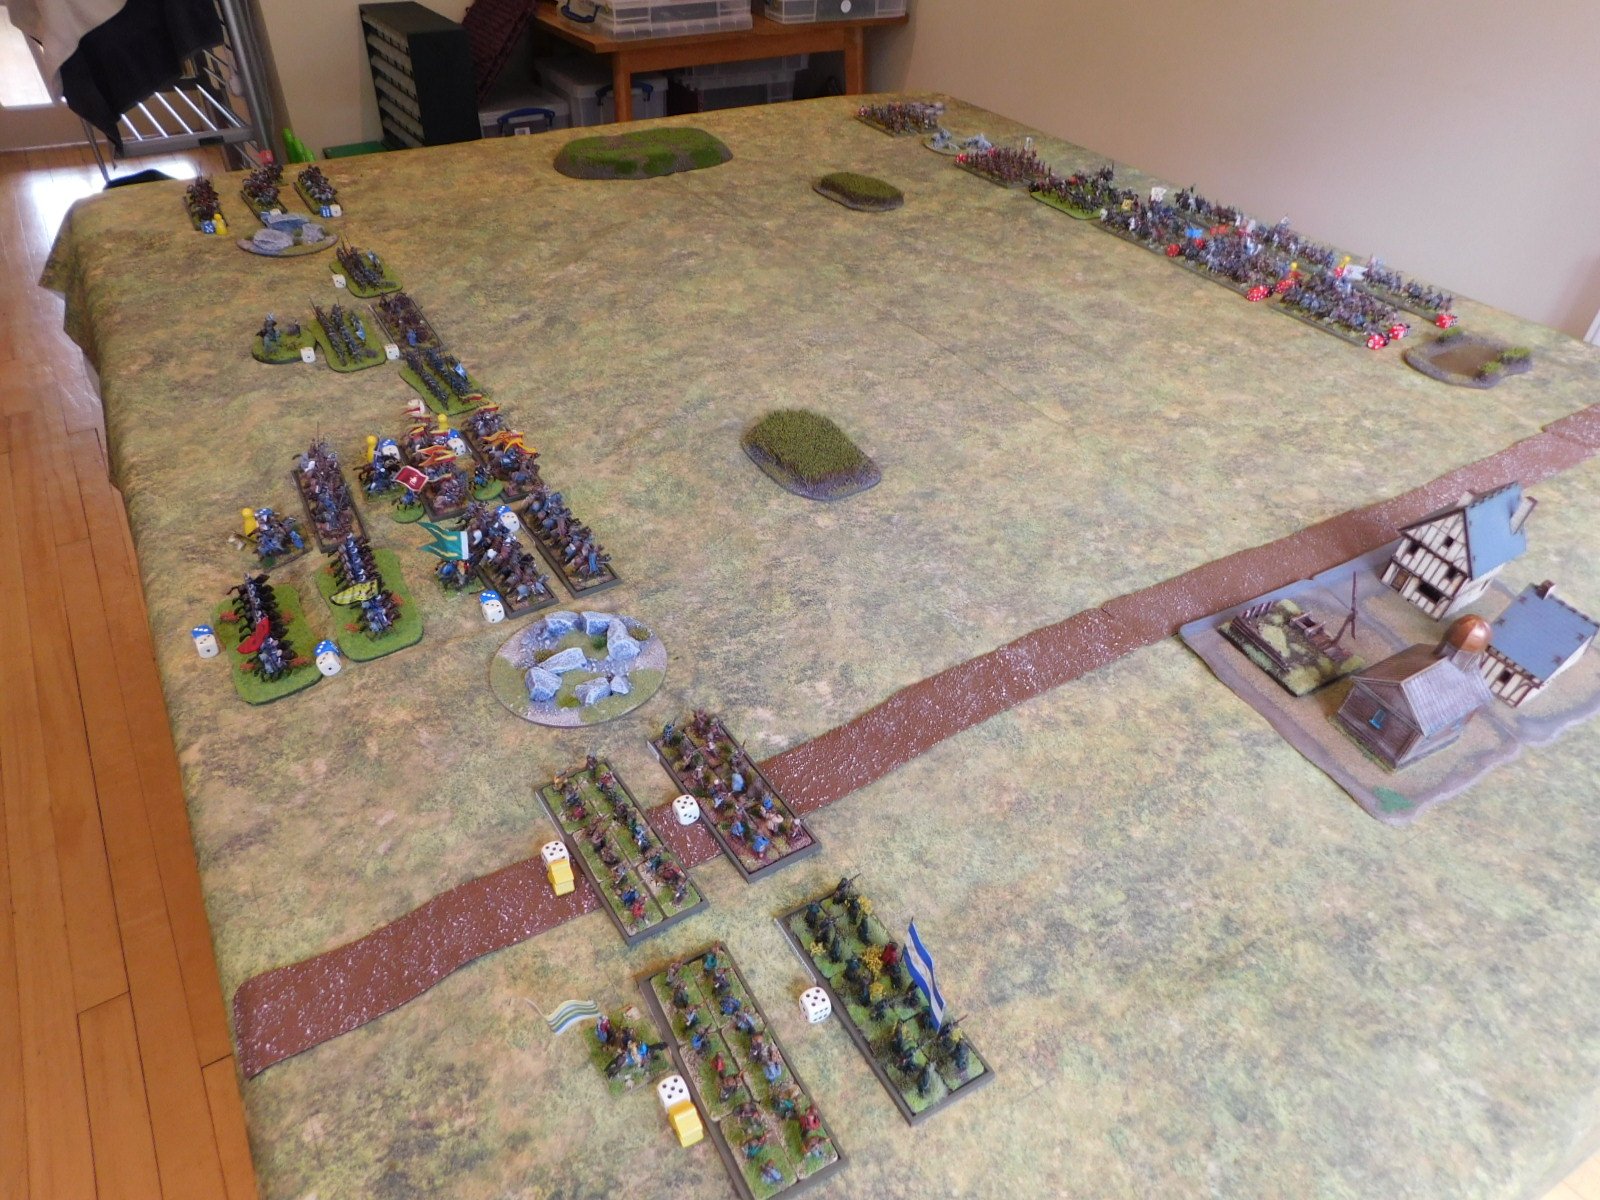
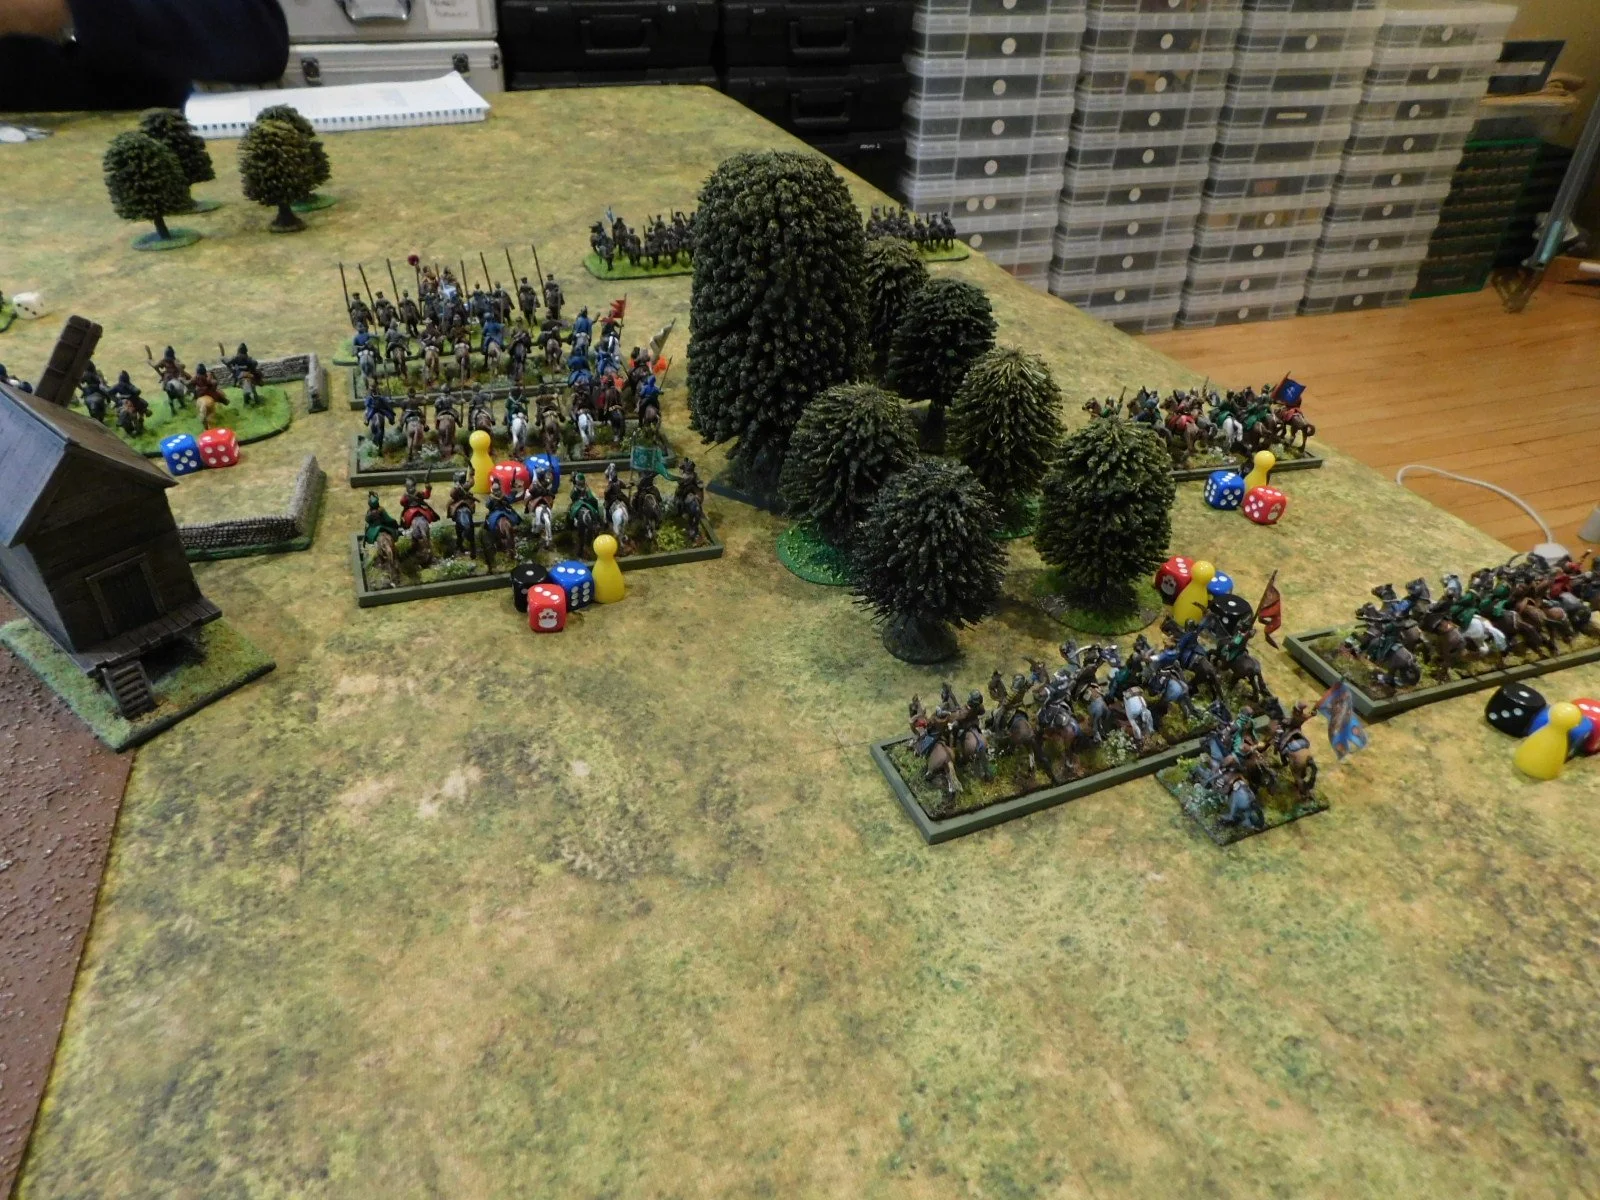
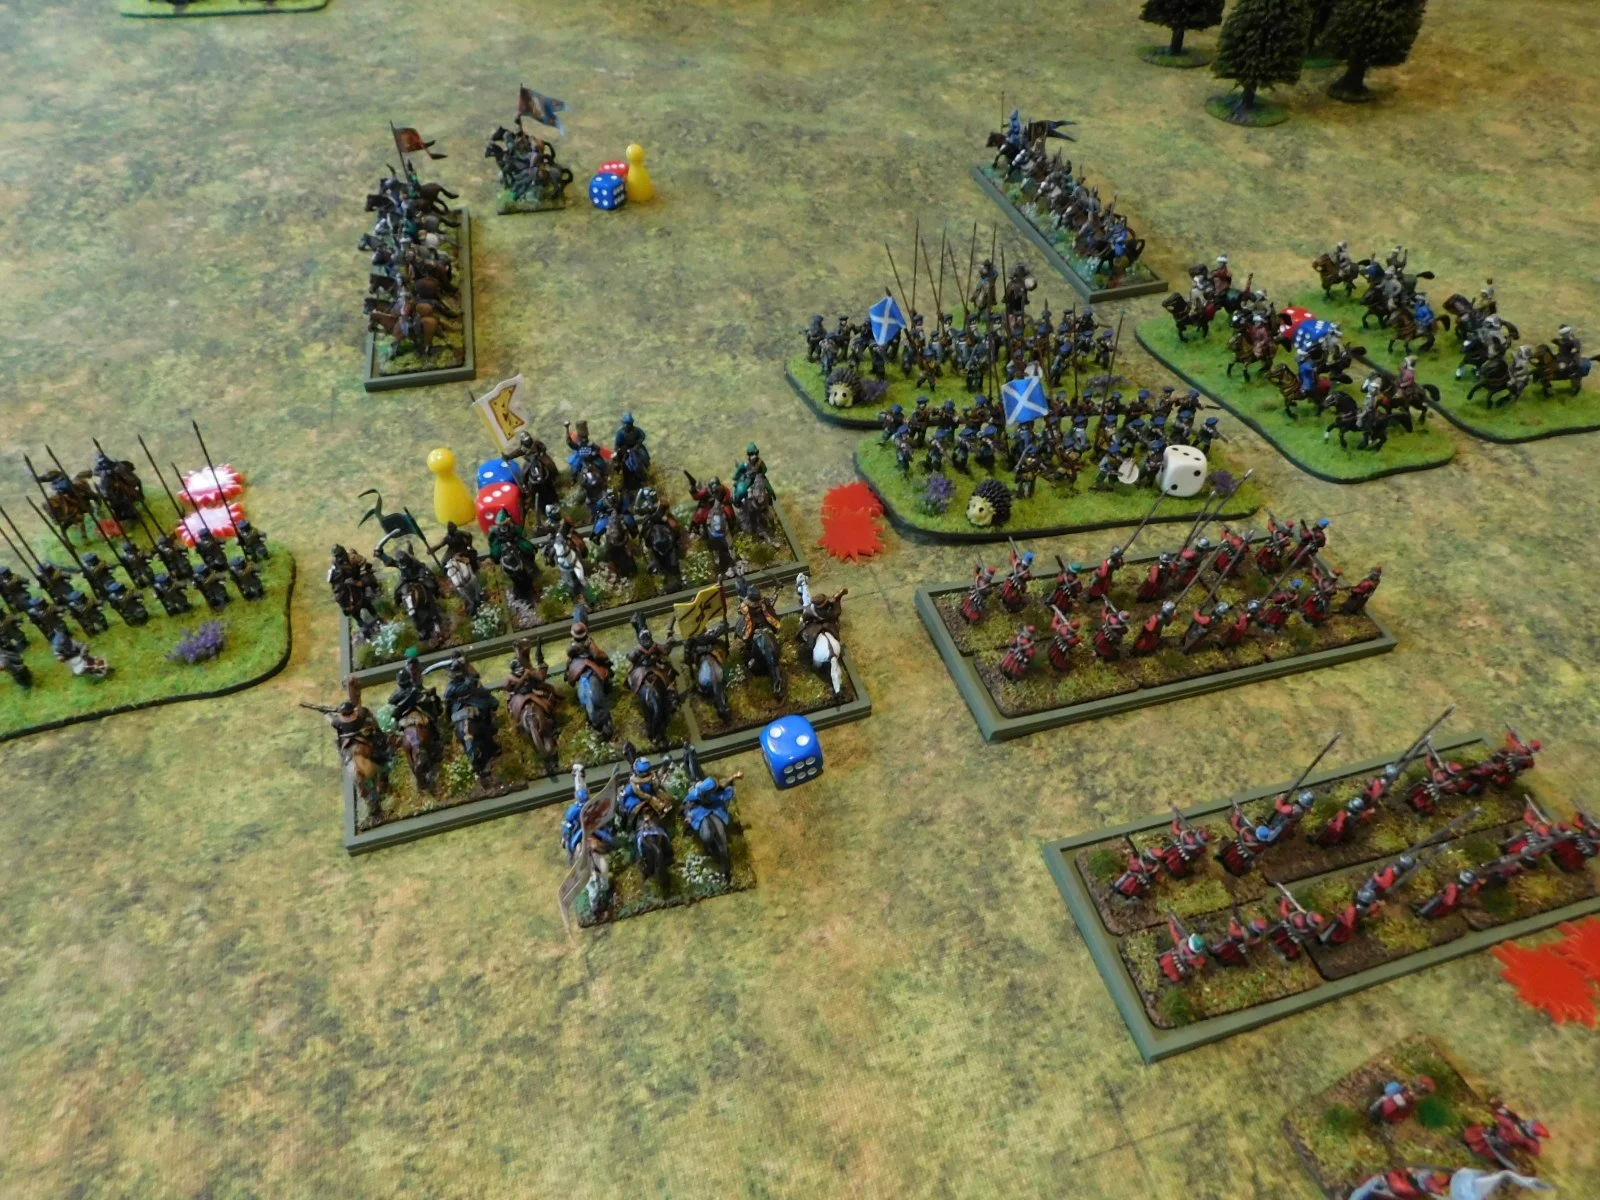
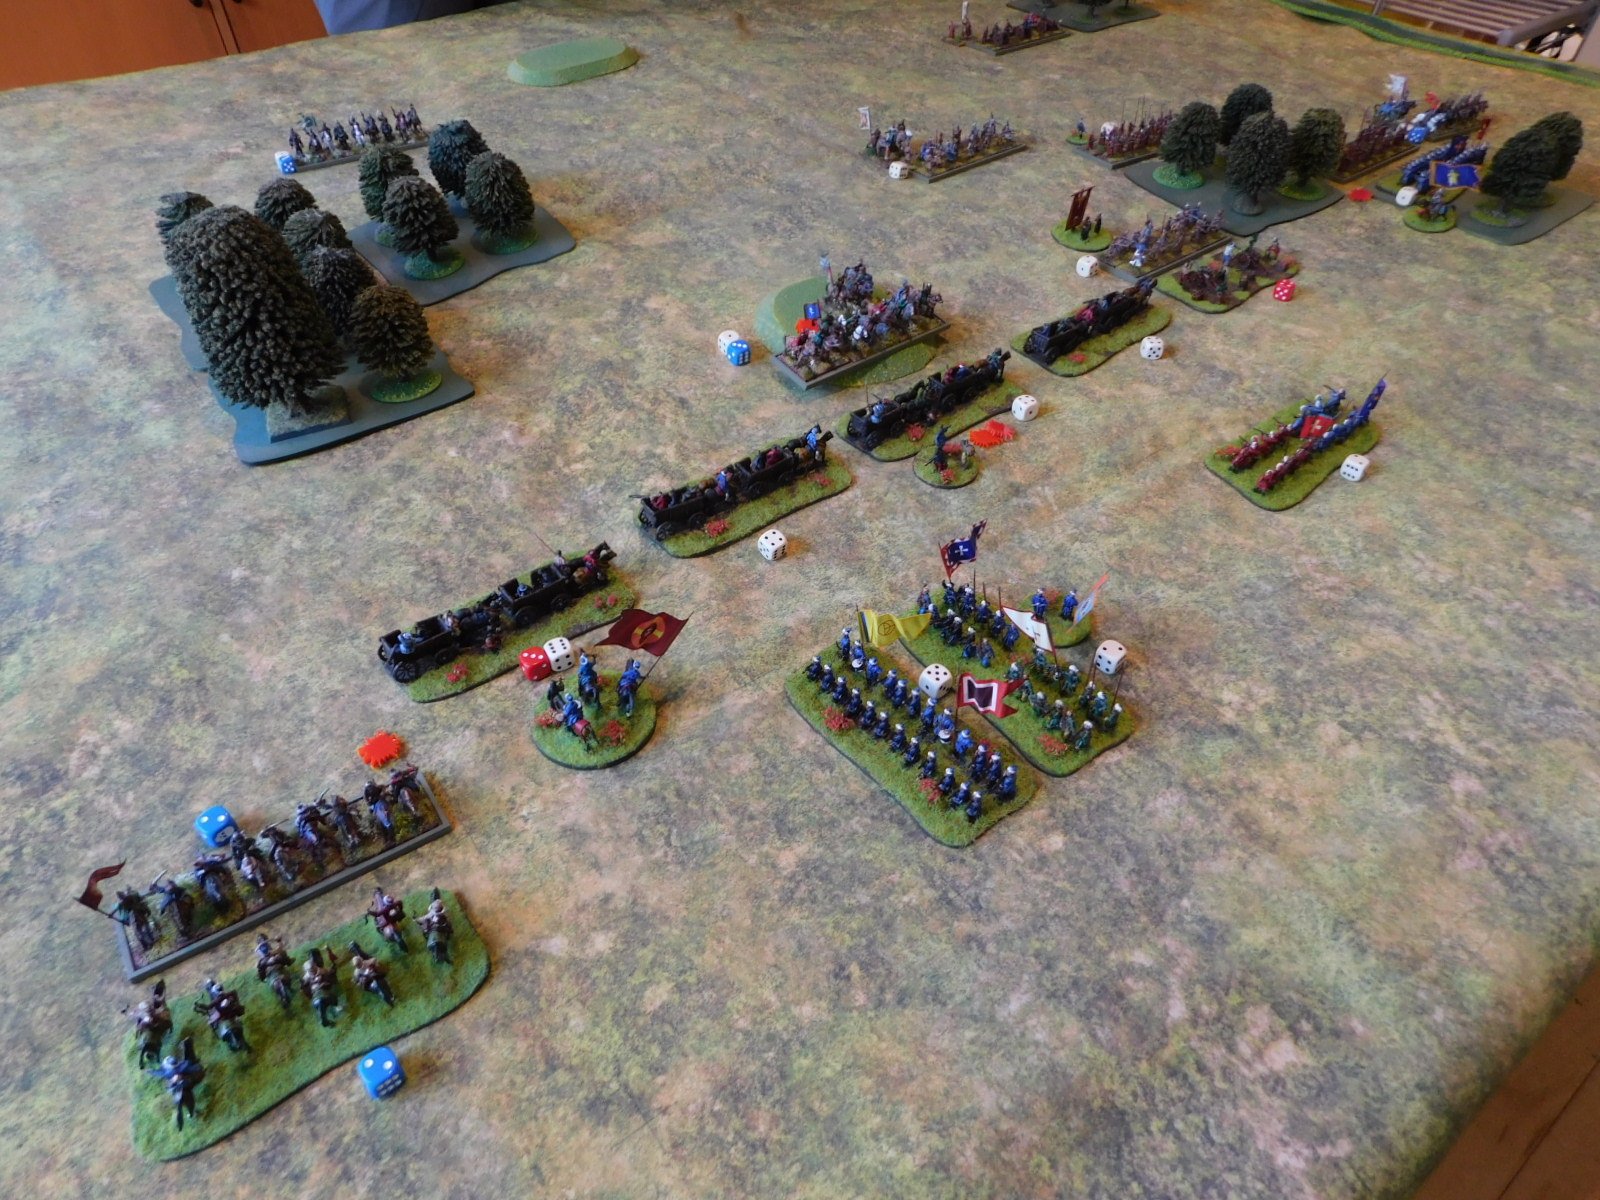
As you can see in the picture, above, both sides have deployed very traditionally: infantry in the centre, cavalry on each wing. You’ll also see that my horse on my left flank considerably outnumber their mounted opponents, so my plan was very much to punch through there and then roll the Transylvanian line up.

With that in mind, I opened the game by advancing forward on the left as hard and fast as I could.

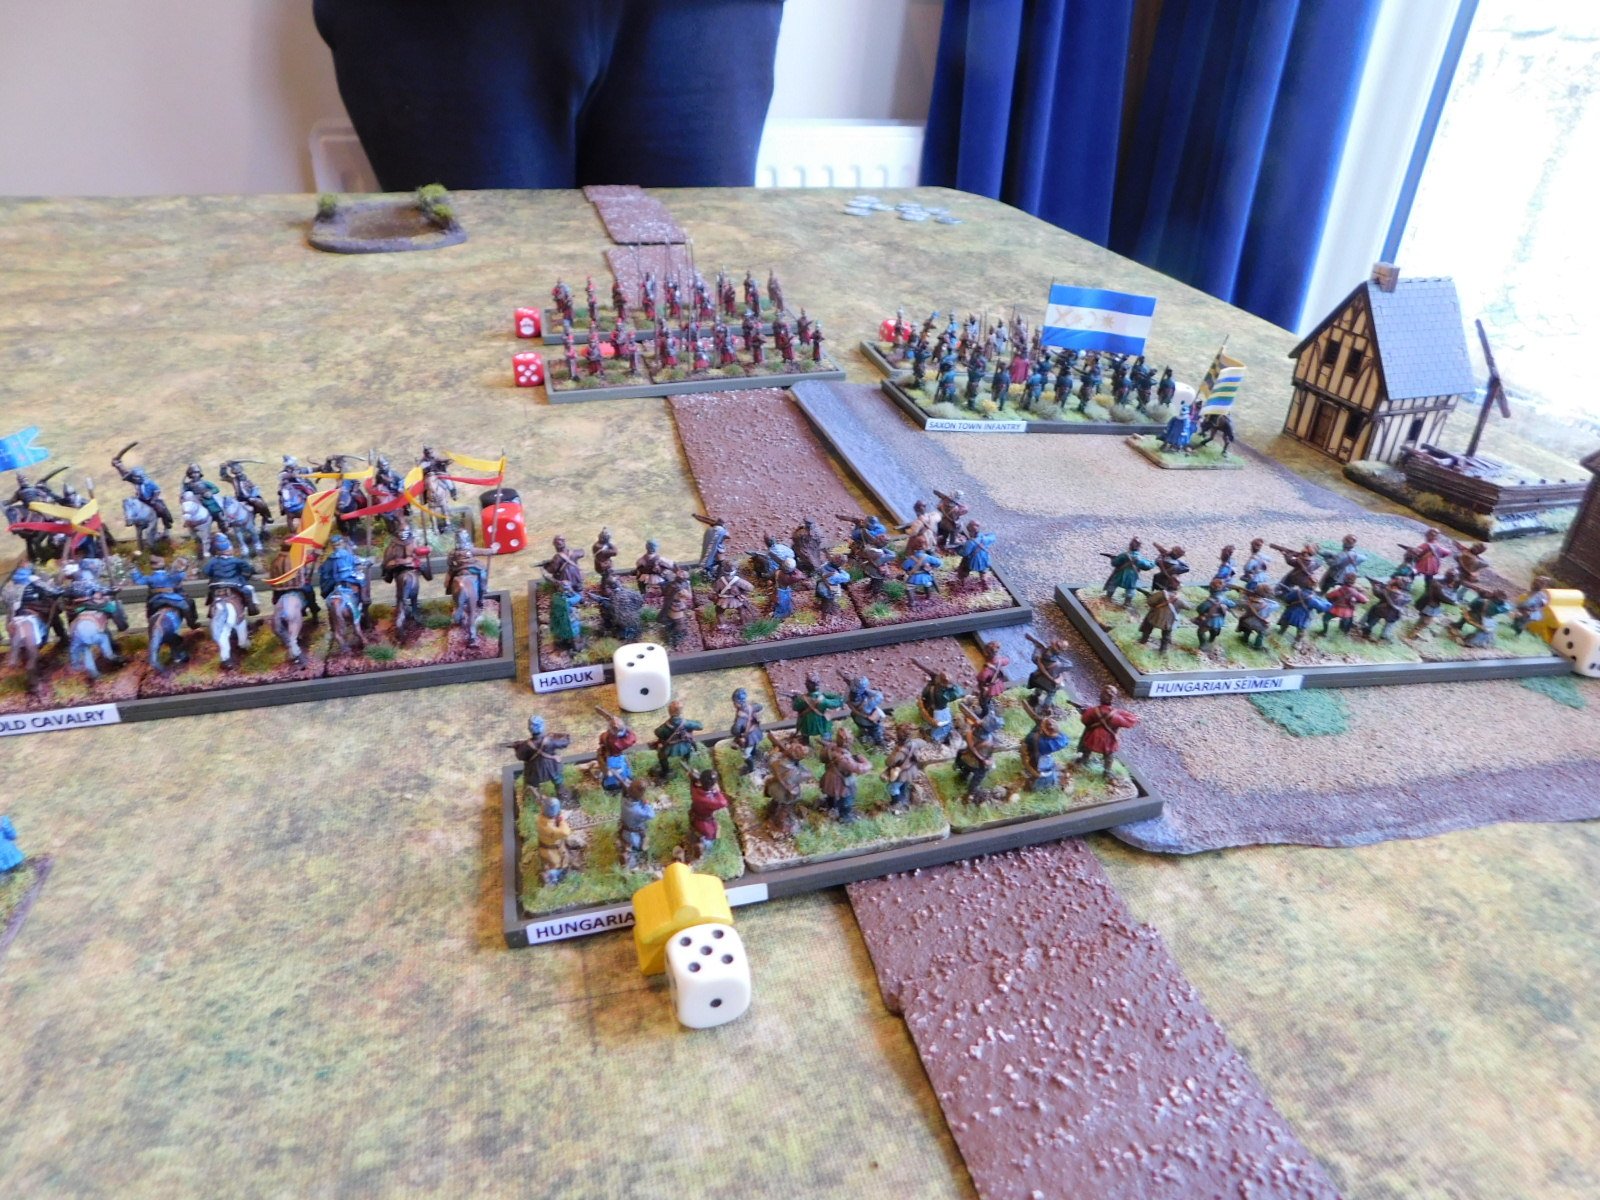
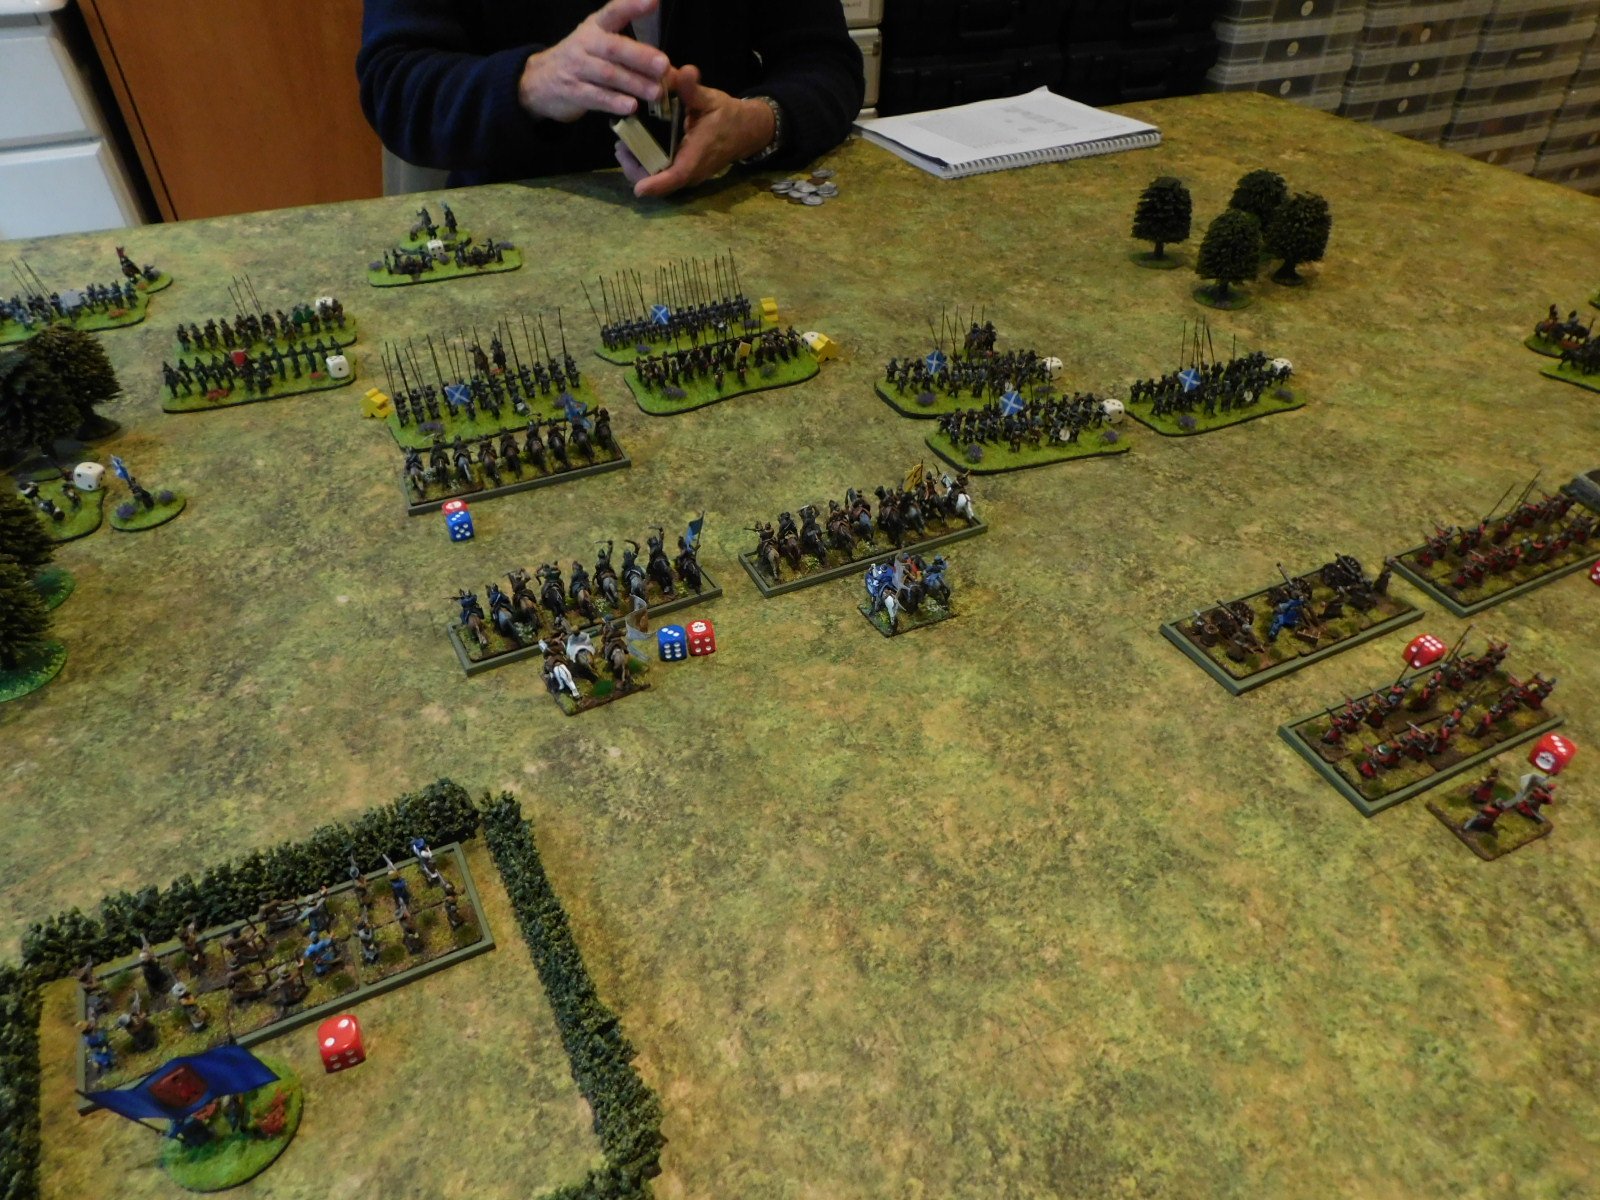
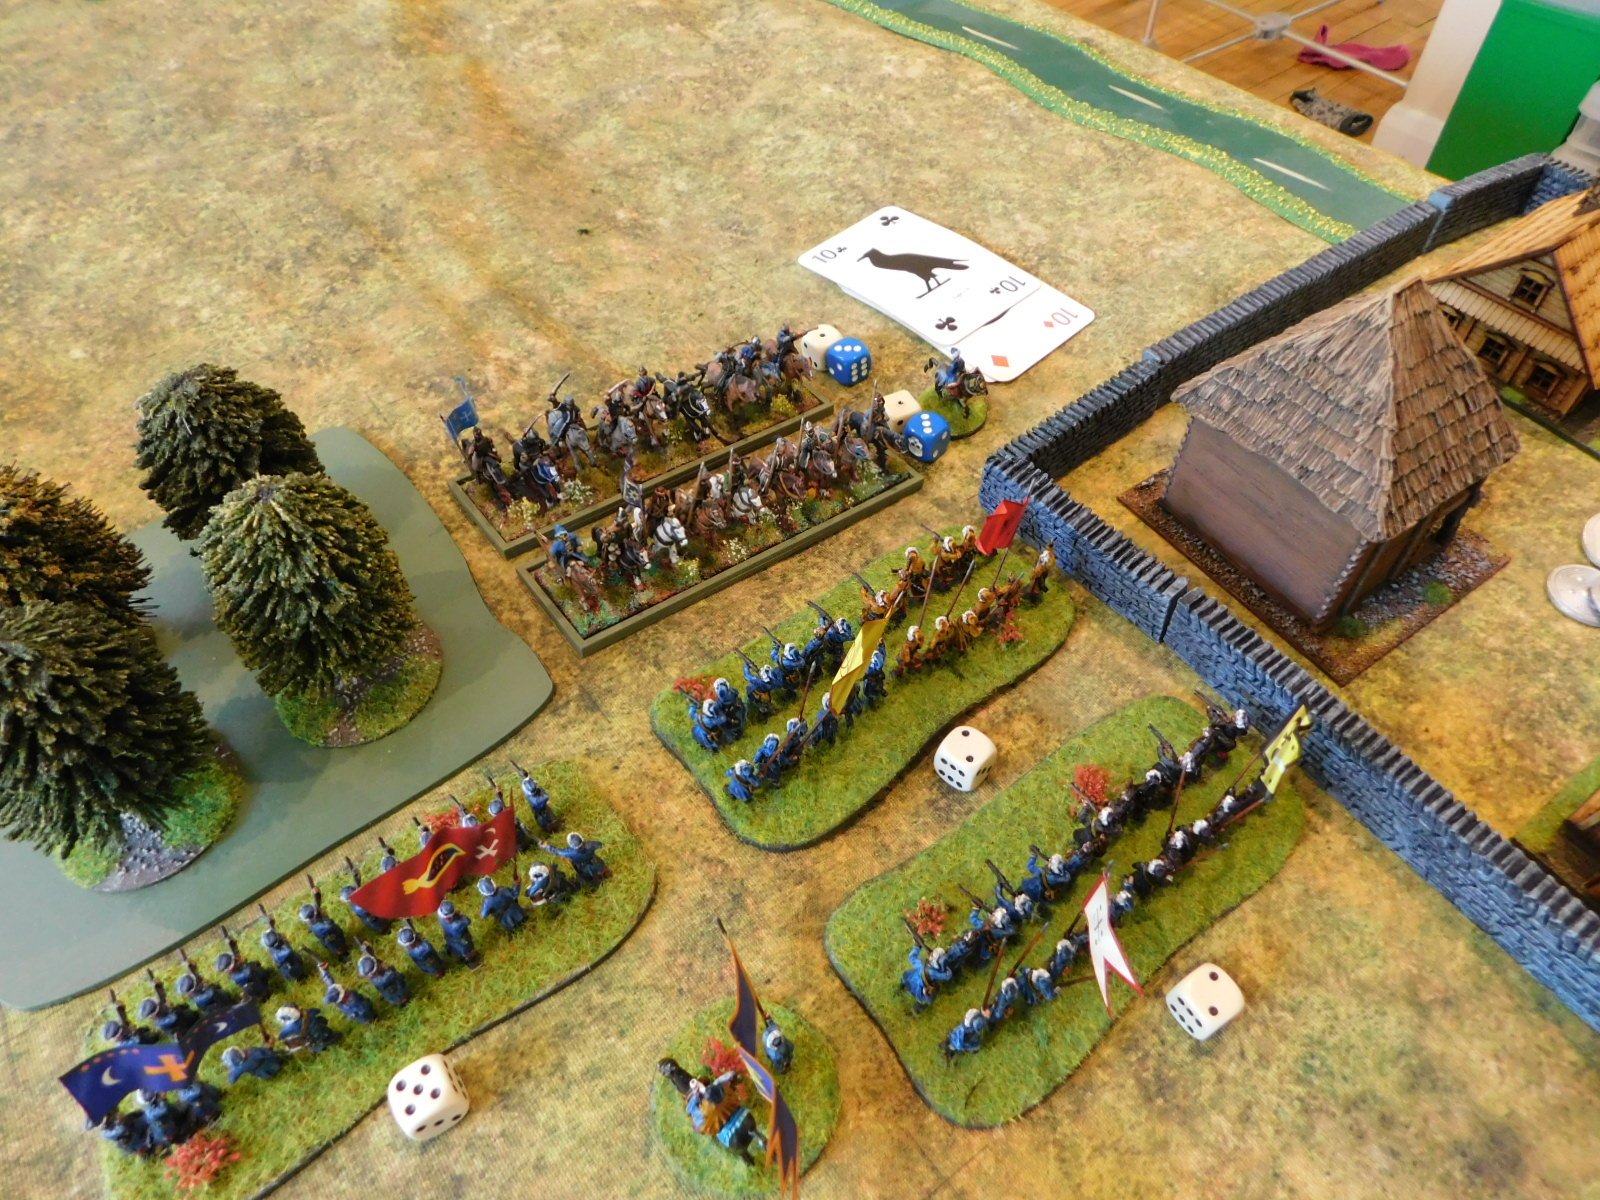
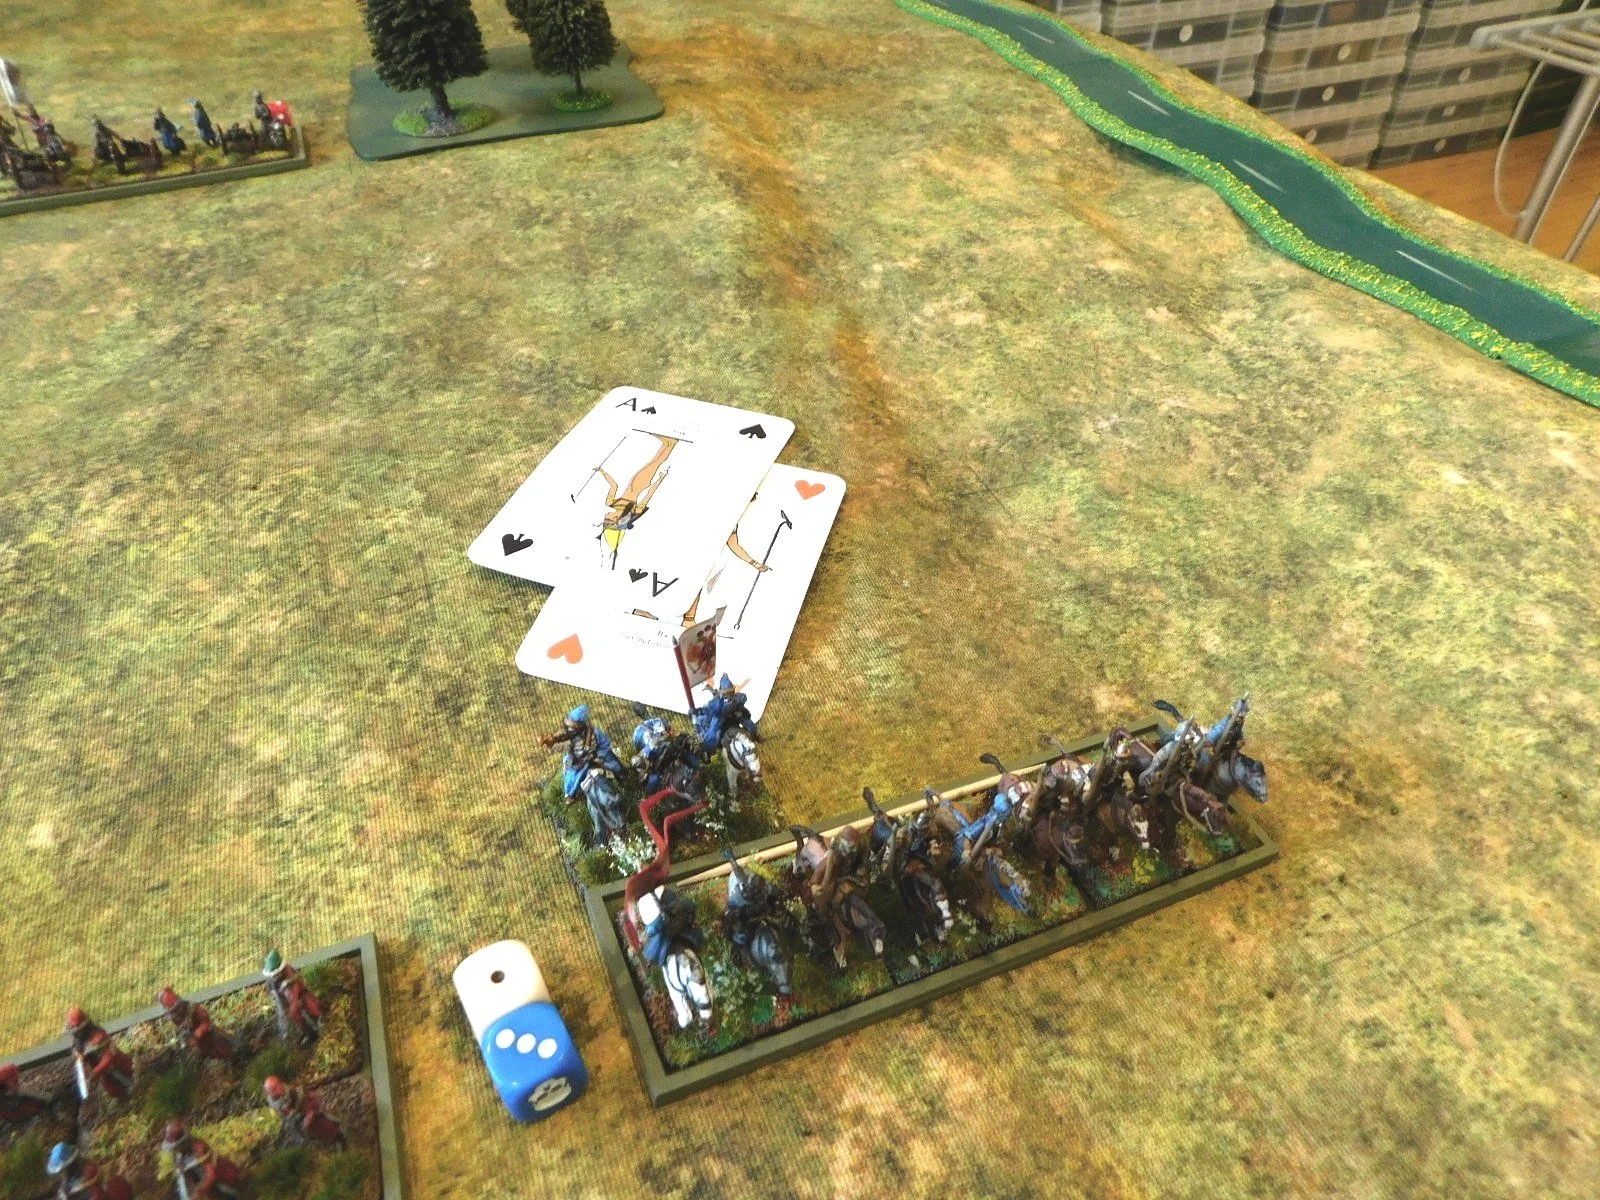
As you can see in the bottom two pictures above, on the far left, left of the woods, I didn’t manage to punch through the enemy lights quite how I had hoped, but did manage to open up a bit of space just to the right of the woods. The question now became whether I could exploit this advantage!

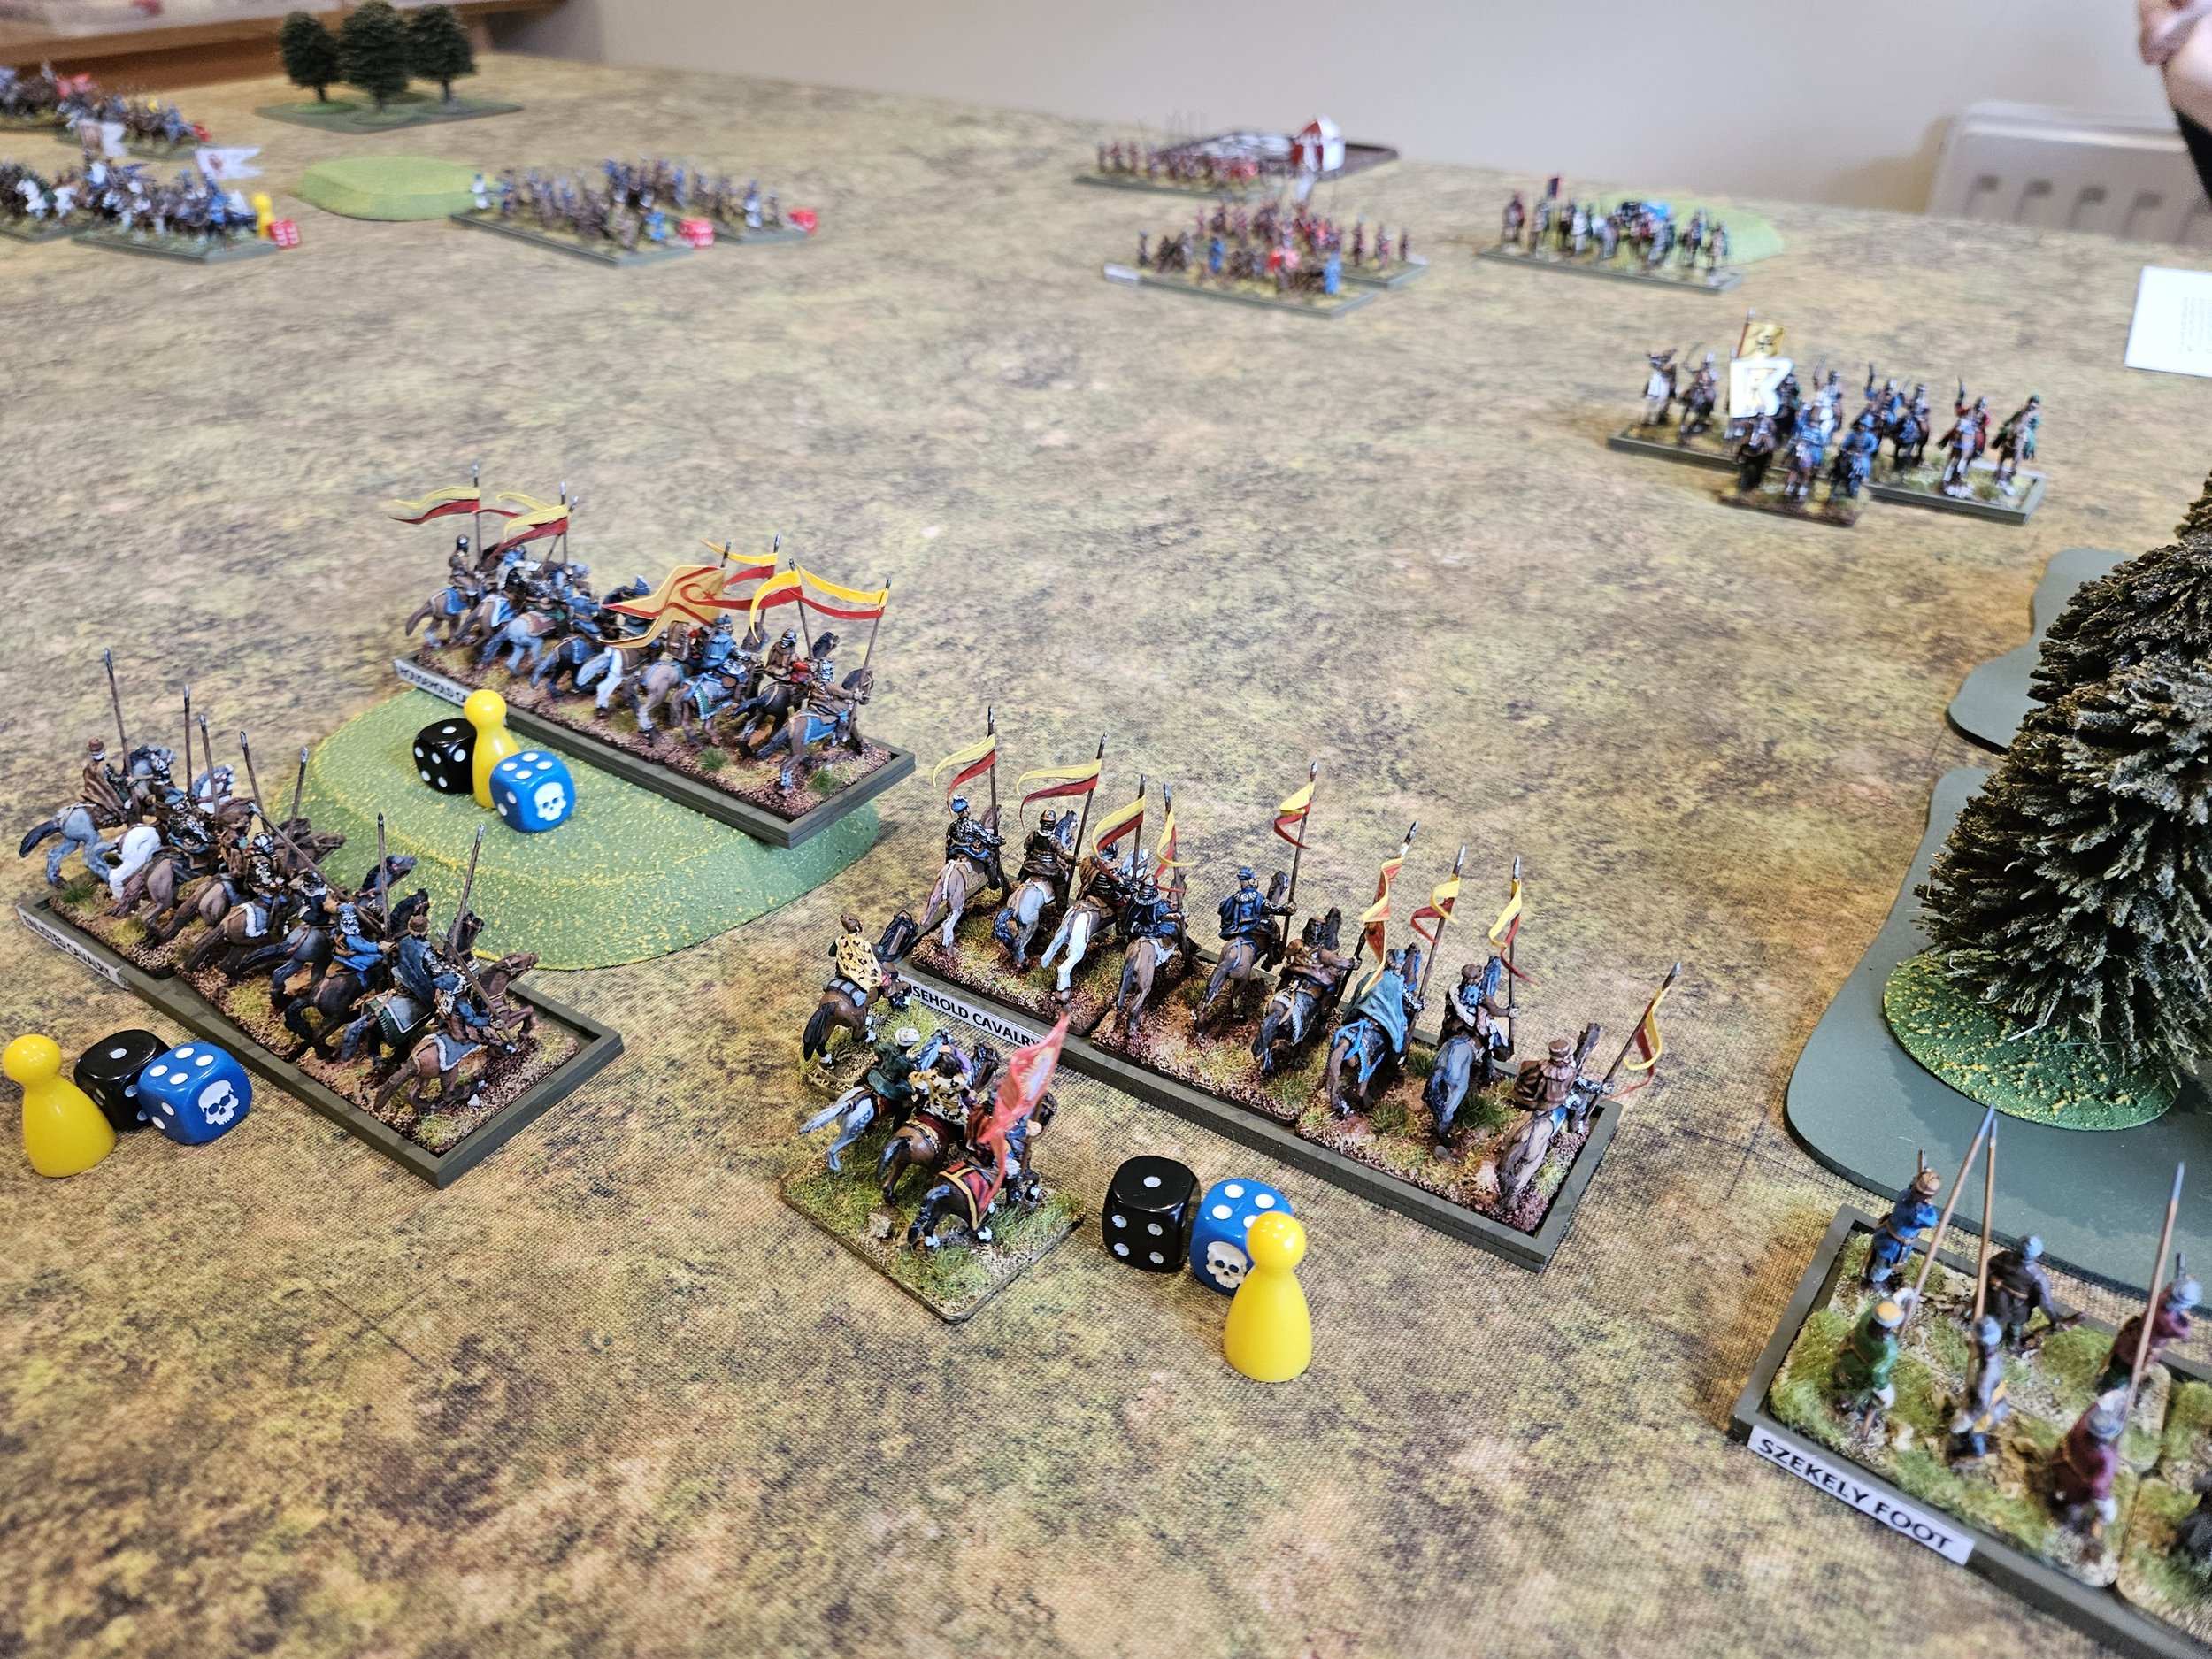
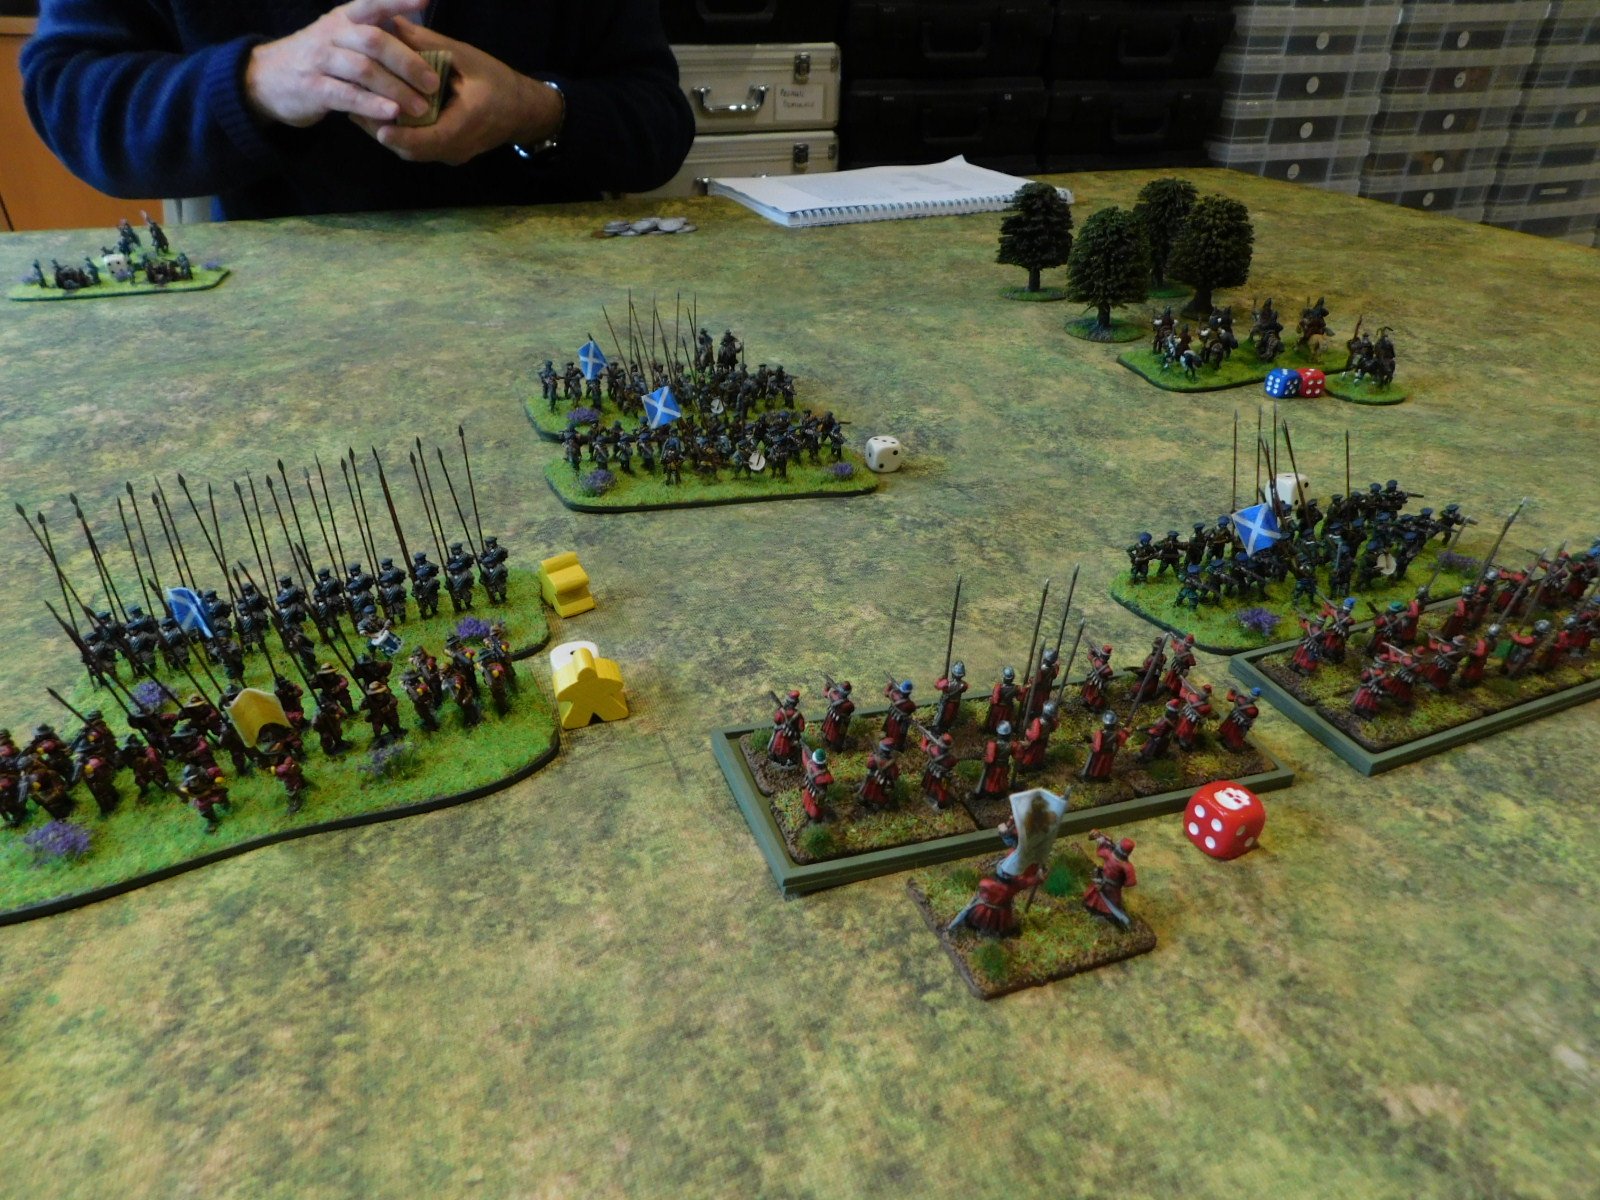
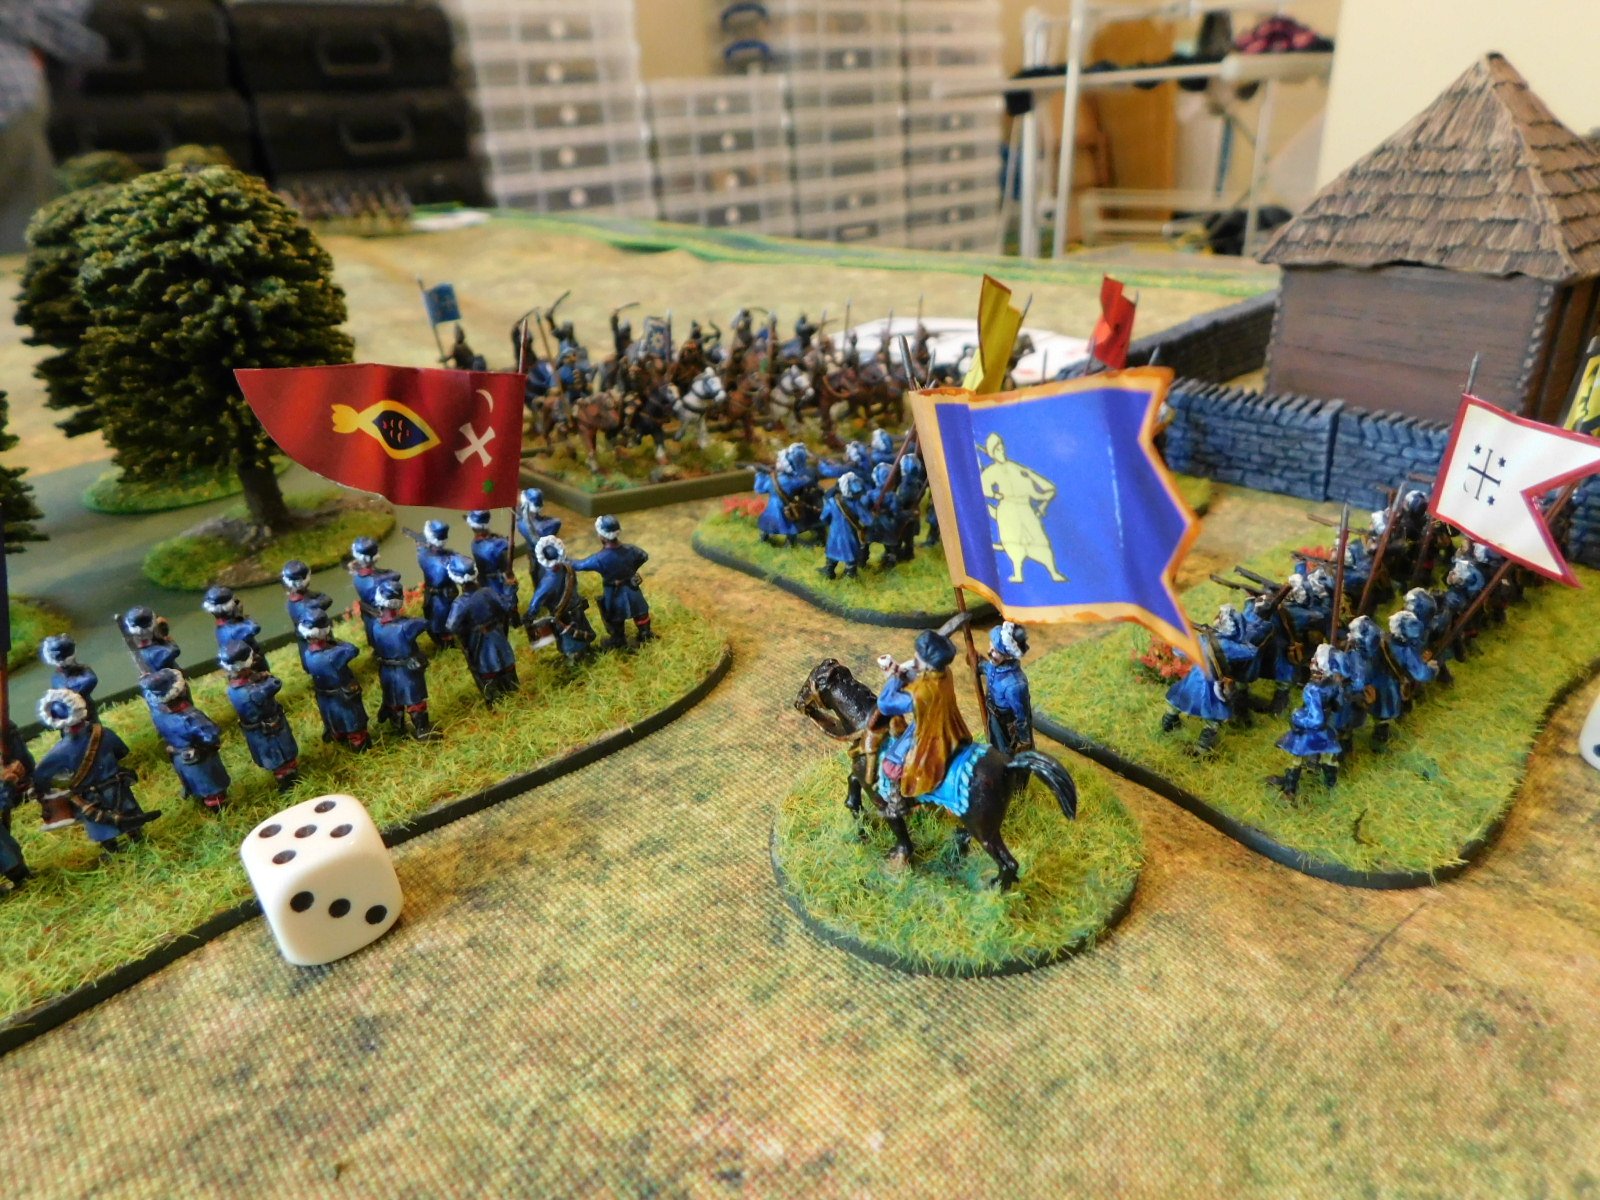
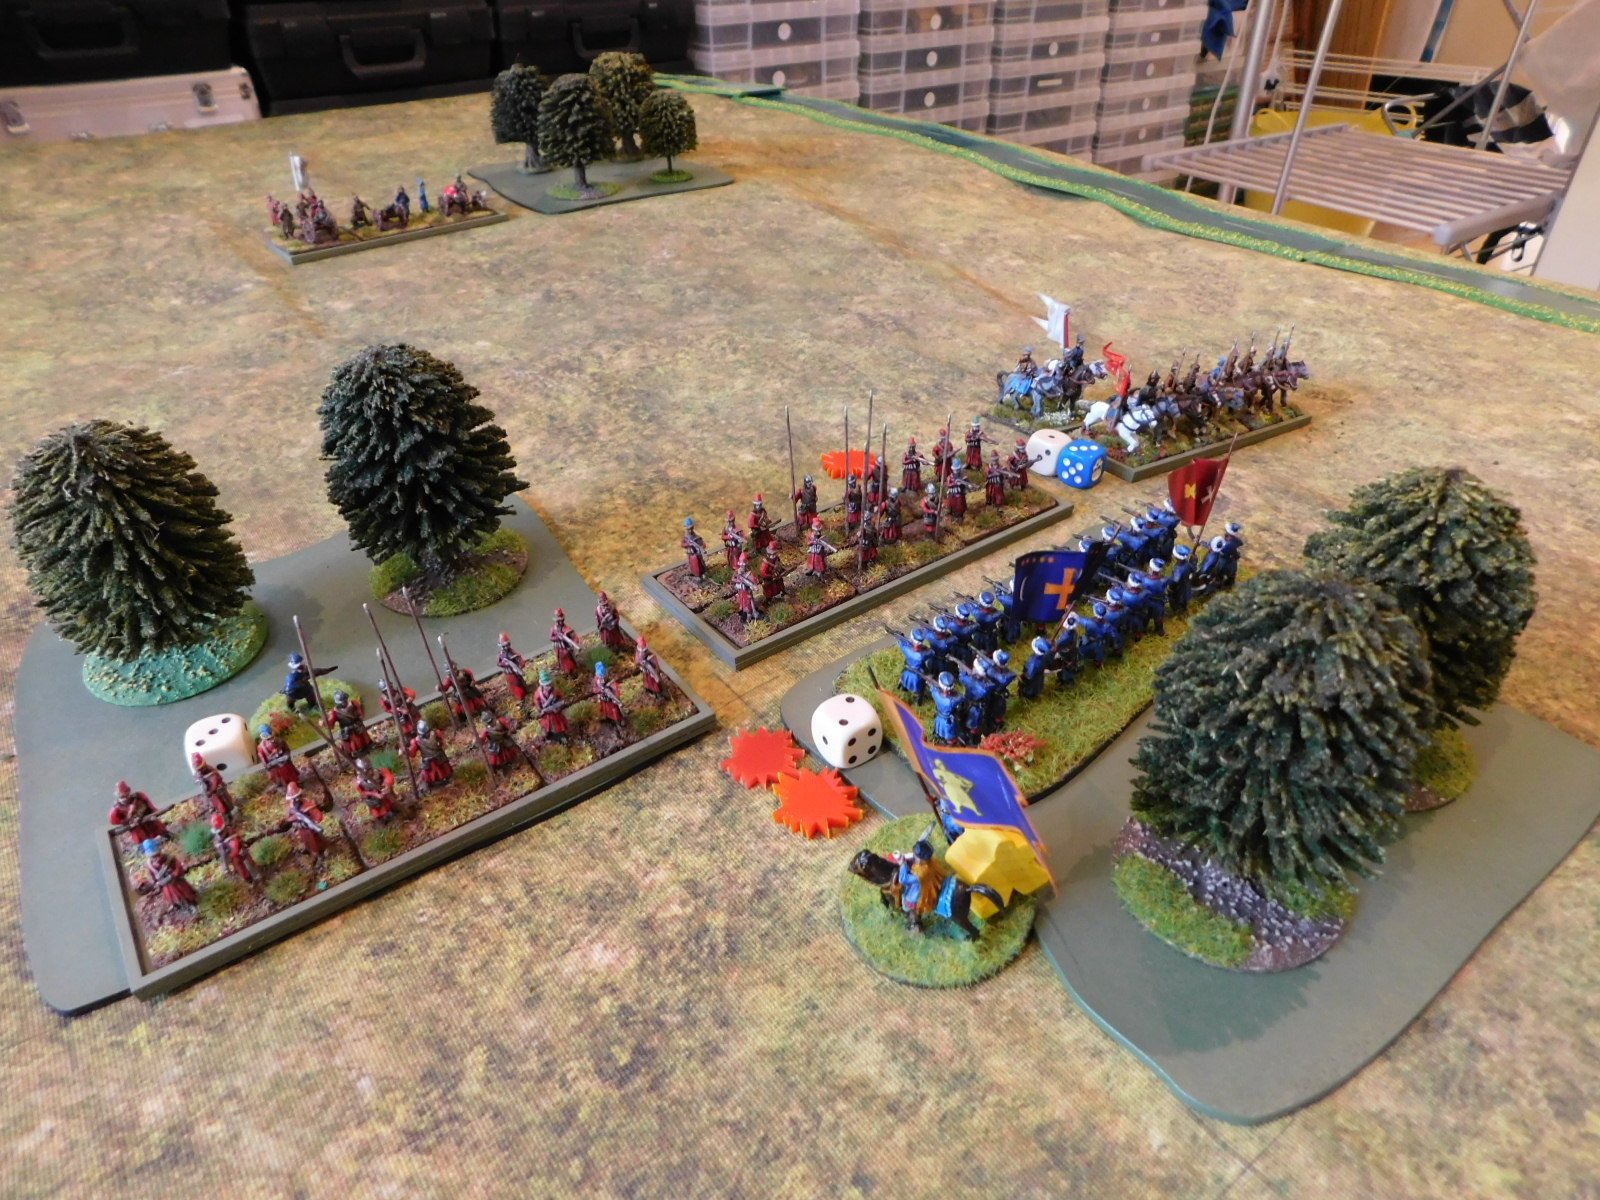
Meanwhile, elsewhere on the field, the two battle lines had generally come together, with a series of fierce melees taking place:

Now was the time for my troops on the left to curl inwards and roll up the Transylvanian line: something I really needed them to do as they represented a good proportion of my fighting strength, and my lesser-quality centre wouldn’t hold for ever!

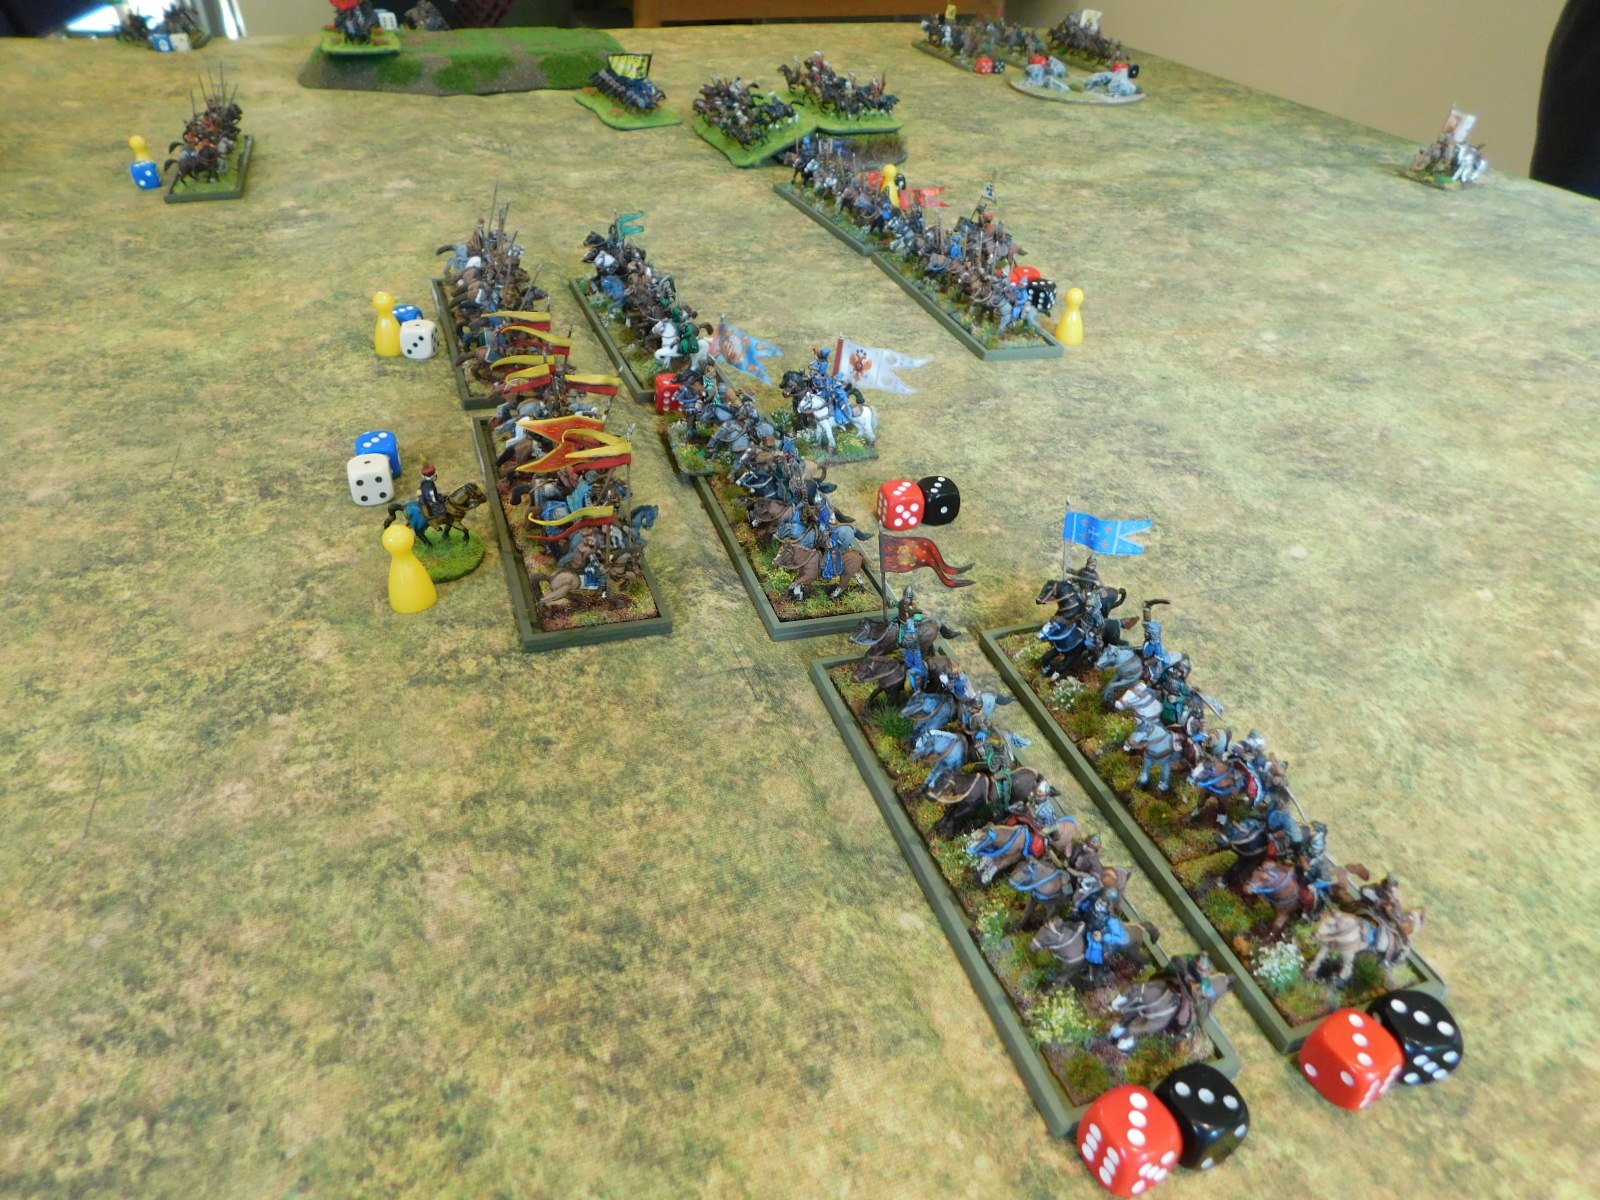
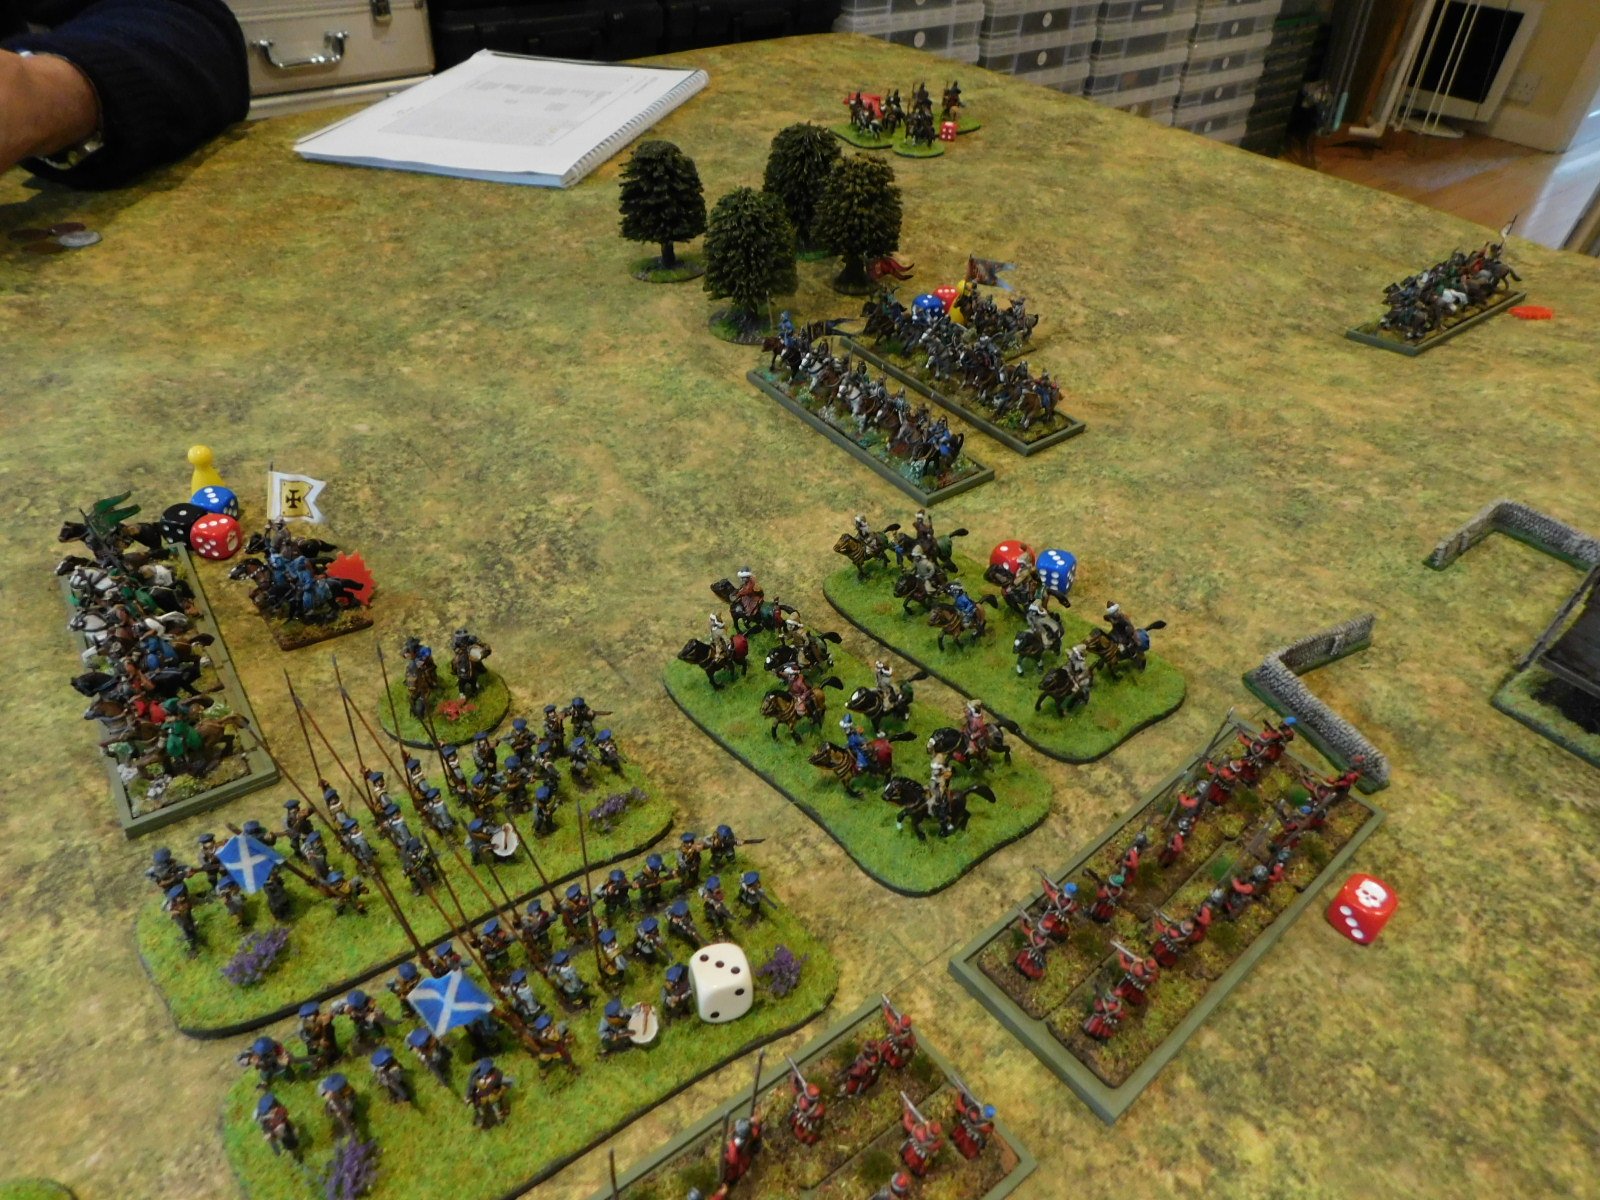
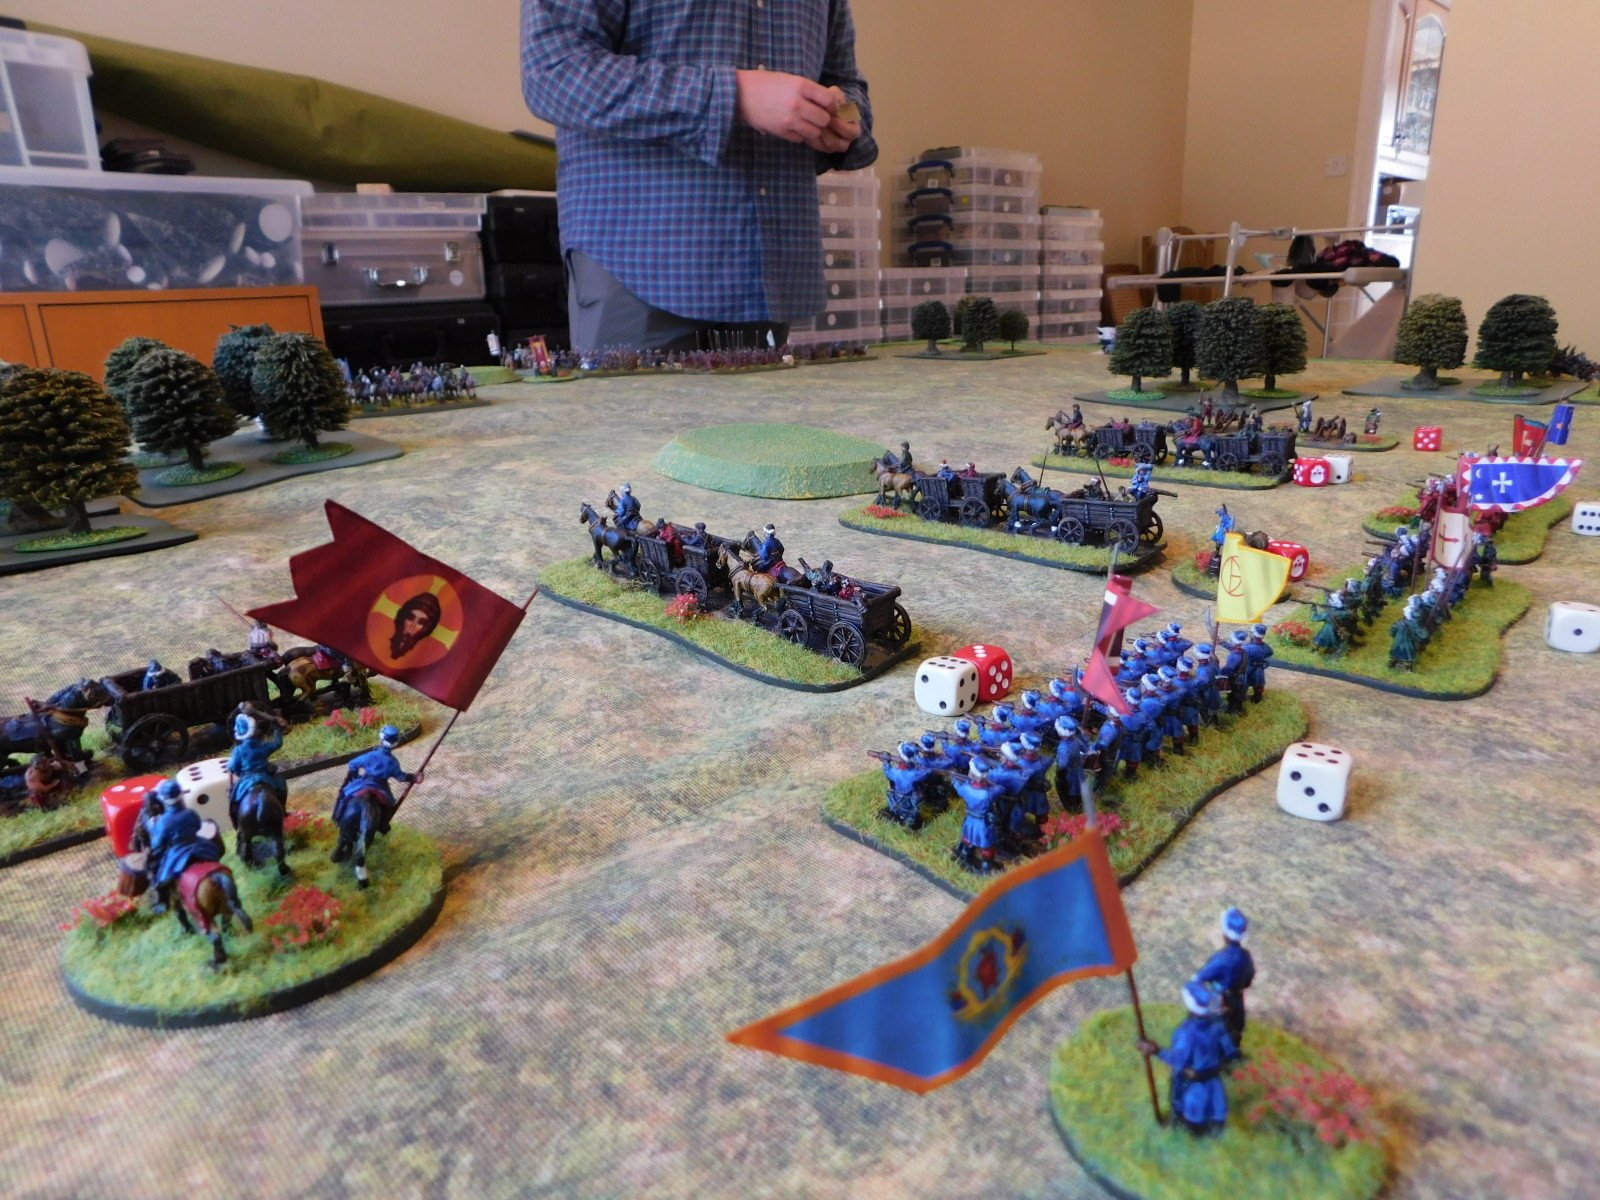
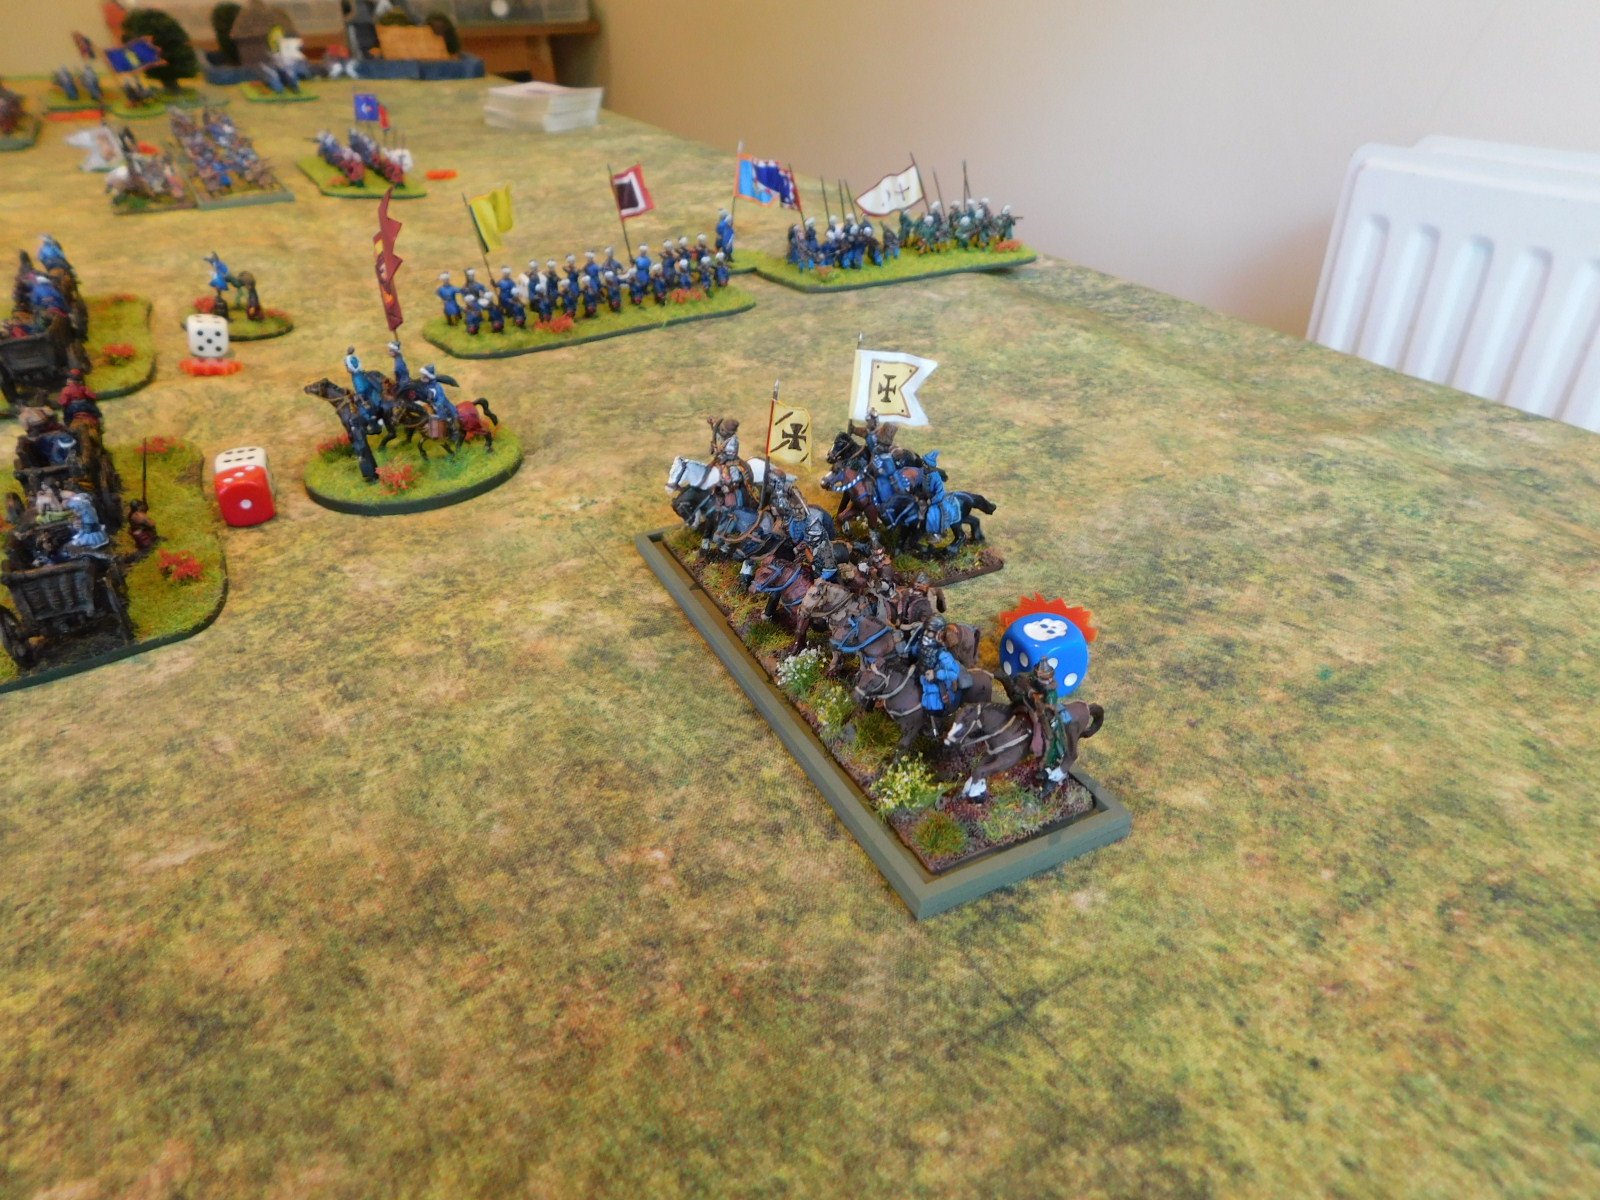
Above you can see a couple of pictures showing how I was trying to get my horse back into the action: but they do seem to have an awful lot of ground to cover!

And all that ground proved my downfall, with my centre and right flank giving way before I could get the cavalry back into the game.

Regular readers will know that I lost the first game in this two-battle series by one Victory Medal…and so it was again in this game! If I had survived one more turn in the centre/on the right then my cavalry would have made it back into the action in time to win the game for me, but victory evaded me by the smallest of margins as one unit too many fled the field.

So that was four games with Bevan in two days…and four defeats. Ouch! But, as Michael Jordan once said:

“I’ve failed over and over and over again in my life and that is why I succeed.”

Good to know that I’m secretly a success at this wargaming thing!

Very secretly!


If you've enjoyed this post, please do consider "buying me a coffee" : you can be sure that all proceeds will be channelled back into wargaming, leading to even more content for you to enjoy!

FK&P AAR: Transylvanians vs Muscovites

Time for another game of the eastern Europe variant of For King & Parliament: my Transylvanians would take on Bevan’s Muscovites.

Transylvanians

Muscovites

This was a cracking game where the action swayed backwards and forwards across the field.

In summary, the Transylvanian elite National Cavalry (the chaps with the yellow and red lance pennants) charged forwards right of centre of the field and swept all before them: smashing enemy units from the field with ease!

On my left flank, however, the mass of Transylvanian light horse were comprehensively butchered by Muscovite heavy cavalry, who steam-roller-ed over them with barely any effort at all.

In the centre, the two sides came together as the actions above were taking place and, unfortunately, my troops got the worst of it and slowly began to give ground.

Honours were even, with both sides hemorrhaging victory medals, until the very last moments of the game, with the Muscovites just taking the win 16:15!

As I said above: a cracking game…with the charge of the Transylvanian elite National Horse being one of those moments that will go down in gaming history!

Here the battle in pictures:


If you've enjoyed this post, please do consider "buying me a coffee" : you can be sure that all proceeds will be channelled back into wargaming, leading to even more content for you to enjoy!

FK&P AAR: Transylvanian Double Act

I recently spent a bit of time properly marking up my 17th Century “eastern front” Transylvanian and Muscovite armies: by “marking up” I mean putting identifiers on each unit that allows me to remember which are which! That done, it was time to get them onto the tabletop.

The Transylvanians were a bit of a mish-mash. Their core Household troops (heavies and lights) were supported some more light cavalry and two brigades of infantry, one of foreign Commanded Shot and one of Szekley Pike & Shot (represented by Scots!).

The Muscovites were similar: a core National Cavalry and foreign Reiters supported by a brigade of Tartar horse-archer allies, with two brigades of foot, one Cossack, one Soldat (foreign-trained foot).

Game One

Our first game was very short. My opponent, Kavan, had forgotten how important it is in For King & Parliament not to lose your commanding general (as valuable as a couple of camps in To The Strongest) and blithely sent his CinC forward with the first wave of attackers.

The Transylvanian Household Cavalry were, however, having an exceptional day: their first charge smashed the squadron of enemy cavalry led by the Muscovite CinC from the field (meaning that Kavan lost about half his Victory Coins in one go) and then charging again to KO a second unit as well.

Combined with losses elsewhere on the field, this was enough to break the Muscovite morale and send them fleeing back to “the first throne” in some disarray!

Game Two

As the first game had been so quick, we decided to re-set the sides and play again, but this time with the Muscovite CinC safely at the back of his troops rather than leading from the front!

Two key differences in this game. Firstly, the Transylvanian infantry had to fight for possession of the small town on their right flank; and secondly the Transylvanian Household Cavalry didn’t achieve the same success on their initial charges as last time.

This meant that the heavier Muscovite cavalry had time to drive back the Transylvanian light horse, particularly on the Transylvanian left wing, and then curl around to threaten that entire flank.

A combination of steady foot and charging horse put the town into Muscovite hands and that, plus the combination of lost light units and the usual battlefield attrition in the centre, meant that the Transylvanians were gradually ground down and, after a series of reverses in the centre, were forced to retreat.

Aftermath

Two great games of For King & Parliament/Eastern Front Edition and honours even with one win for each side.

Success for the Transylvanians has to come from understanding how to make the significant numbers of light horse work. I didn’t manage it in either game really (the first game was the Household cavalry’s show!) so something to work on for next time!

FK&P AAR: Muscovites and Scots

John and I fancied a game of For King & Parliament, but I didn’t fancy using straight ECW armies. Eastern front was a possibility, but I didn’t fancy using the Cossacks, which meant my only complete army was the Muscovites, but who to fight against them? Step forward the Scots and we were good to go, albeit for a rather odd if contemporary mash up!

I would play the Muscovites and, incredibly considering the amount of horse I had, immediately lost the initiative and had to start deploying first. My plan was to put most of my cavalry on the right and win there whilst my infantry held the centre and left, then swing my victorious cavalry into the rear of his infantry once they were fully engaged with mine.

Only potential problem was that I didn’t have much infantry, so had to use a brigade of Reiters (heavy horsemen) in the middle to fill a gap.

The Scots read my cavalry deployment superbly, and placed their large cavalry brigade opposite them, meaning that not only were my Tatar light cavalry immediately wrongfooted (I wanted to sneak them round the flank but their way there now led through some Scots Pistoliers) but my National Cavalry were squashed up behind a windmill! C- could do better for deployment!

Lots of lovely Muscovite horse, but they’re not quite in the right place

As battle commenced, the Scots hung back: advancing only their Highlanders on my left and their cavalry on my right. I quickly led my entire army forward except for the Servant Cossacks and Border Dragoons on my far left: I didn’t fancy mixing it with some mad Clansmen!

I also attempted to sort out the mess on my right flank by getting one of the brigades of National Cavalry to swap places with the Tatars: what a mess!

The aforementioned mad clansmen

Swapping two brigades of cavalry over is not easy

Fortunately John’s Scots had a fit of the slows, and I was able to get my horse sorted out and push forward to start the engagement that should sweep the Scots cavalry from the field and thus fulfil stage one of my cunning plan.

Meanwhile in the centre, the main body of Scots infantry had finally started moving forward. My Reiters headed out to meet them, but as I didn’t fancy charging well-ordered pike blocks, my cavalry turned around and retreated before any significant action took place.

The enemy were now effectively advancing in echelon towards me, which suited me fine as it gave my National cavalry more time to win on the right. The only trouble was that the Scots horse were proving hardier than expected!

The cavalry melee on the right went on and on, and I just couldn’t seem to break the Scots donkey-wallopers!

This meant that the Scots infantry were able to advance on my line and a series of sporadic firefights and melees broke out. My Reiters were still able to outpace the advancing Scots, but my Soldats and Border Dragoons were not so fortunate. A good thing, however, was that my Tatars had now managed to slip through the enemy line, going over the crest of the hill through the grounds of the windmill.

Finally, however, the Scots horse broke, and my cavalry were able to turn and head to the left. The Tatars led the way, forcing the nearest Scots pikemen into hedgehog. My heavier horse cantered past the spikey beasts and then curled round and slammed into the rear of the units next to them. At the same time my Reiters now charged forward meaning the Scots were caught front and rear.

Once the surviving Muscovite heavy horse got into a position on the flanks and rear of the enemy line, the battle was really all over for the Scots. I won’t describe every moment of the roll up: suffice to say that it got very bloody very quickly, and once one or two of their pike blocks had broken, the domino effect soon had all their troops fleeing for the safety of the Glens!

It hadn’t quite been a text book victory: too much had gone wrong with my initial deployment, meaning that my left and centre had only just held out for long enough to let my right wing do what they did. Had the Scots been even a little quicker off the mark on their left and centre, then I would have lost the battle there before my National Cavalry had even dealt with the Scottish horse.

FK&P AAR: Cossacks & Transylvanians versus Muscovites

After the Cossacks got so badly hammered last time out against a Muscovite army, it was time to reinforce them with some Transylvanians: the Cossacks would provide the war wagons and foot, the Transylvanians some fairly decent cavalry.

The Muscovites were, again, mostly Sons of Boyars or Reiter cavalry supported by two small brigades of infantry.

View from behind the Muscovite line

Muscovites

Transylvanians & Cossacks

Muscovite Reiters

Elite Transylvanian Cavalry

As the battle began, both sides advanced forward smartly, with the terrain meaning that the game divided into three sectors: my left flank, the centre and my right flank.

On My Left

On my left, some scummy looking Border Guards had appeared in front of me: the perfect target for the Transylvanians!

Apparently not, as rather than running over them like a badly dressed speedbump, my horsemen got impaled on their pikes. This flank then turned into an uneasy stalemate as horse and foot units milled around charging each other with little effect. The battle would be decided elsewhere!

On the Right Flank

On my right flank, I had some Transylvanian Enlisted Light Cavalry supported by two Haiduk units sheltering in the woods.

The plan was to send the light cavalry forward to soften up the three units of Reiters coming towards me so that the Haiduks could wipe them out from safe amongst the trees.

This did not work: the light horse were swept away almost immediately, and then the Haiduks were charged from the flanks and front and, despite the bonuses for being in cover, were swept away as well. The final unit of Haiduks did hold out for some turns, but eventually succumbed, leaving my centre now vulnerable to flank attacks.

Meanwhile in the Centre…

Meanwhile in the centre, the main body of Muscovite Reiters steamed towards my line: a mixed line of raw Moloitsy short-pike-and-shot and tabor war wagons.

My tabor fired valiantly away with both their light guns and musketry, but because I only had two of them rather than my usual four, I couldn’t get the concentrated fire I needed to halt the enemy Reiters heading towards me.

The Moloitsy were charged and gave way, leaving the tabor as islands of resistance amongst a swirling sea of Muscovite horsemen.

By this stage, I was also getting very short of victory medals…

The End

As my right wing collapsed, the loss of one unit too many caused my army as a whole to collapse: the Muscovites had won the day!

This wasn’t a hammering, I hasten to add: the Muscovites had been losing units as well, but it the Cossacks and Transylvanians who crumbled first!

Another great game, through, even if the Muscovites are currently proving unstoppable!

FK&P AAR: Cossacks vs Muscovites

Time to get my new Muscovites onto the tabletop and into action, with their opponents being the Zaphorogian Cossacks. Russians verses Ukrainians: who would have thought!

I played the Cossacks, daughter #1’s boyfriend, Kavan, played the Muscovites. The rules used were For King & Parliament with the Eastern Front adaptations taken from the Tales from a Wargaming Shed website.

This turned out to be a fast and furious battle with what seemed like an endless wave of Muscovite horse crashing onto the Cossack tabor and infantry.

Here a gallery of the set up so that you can see the two sides:

The battle opened with a brigade of Muscovite Reiters thundering forward on the Cossack right flank, held by a brigade of Moloitsy and Registered Cossacks. The cards were with Kavan, with a couple of consecutive “10’s” ensuring that he actually charged home on his first turn!

The rapid charge had, however, obviously exhausted his cavalrymen, as they bounced backwards from the Cossack infantry, losing one squadron in the process.

The Muscovites also advanced another brigade of Reiters on my left flank, but not as fast, so I sent my Tartar allies out to deal with them whilst I advanced the tabor forward and prepared to deploy.

I almost came a cropper at this point, as his Reiters were once again quick off the mark, and hit one of my tabor wagons before it had a chance to deploy. Fortunately, I managed to survive the charge, but there was definitely now a weak point in my line!

Even worse, my Tatar Nobles (the best troops I had) had obviously been bribed by the Muscovites, as they left the table, along with some of their horse archers, without achieving anything!

I was now in quite serious danger of being outflanked on the left!

Fortunately I had a reserve brigade of infantry that I could deploy to face this threat, and the battle became a series of Muscovite assault on a fortress of Cossack tabor. Again and again, the Reiters and elite National Cavalry charged home, and again and again the Cossack line held.

My artillery was overrun, two of the tabor wagons were overrun, my Registered Cossacks on the right were wavering, but still we held, and the relentless assaults were costing the Muscovites dearly.

Kavan also wasn’t helped by a run of bad cards, including what you can see in the last picture, above: an absolute dead-cert winning flank charge on the reserve unit holding my left flank foiled by a couple of Aces drawn in a row.

This gave me the chance to get the last remaining unit of Tatars in on his flank and, finally, the Muscovites had had enough and retreated. A very narrow escape for the Cossacks!

It had been a terrific game, with everything coming right down to the wire. I had lost half my army, but had just managed to hold on long enough to get the win. Roll on the next game!