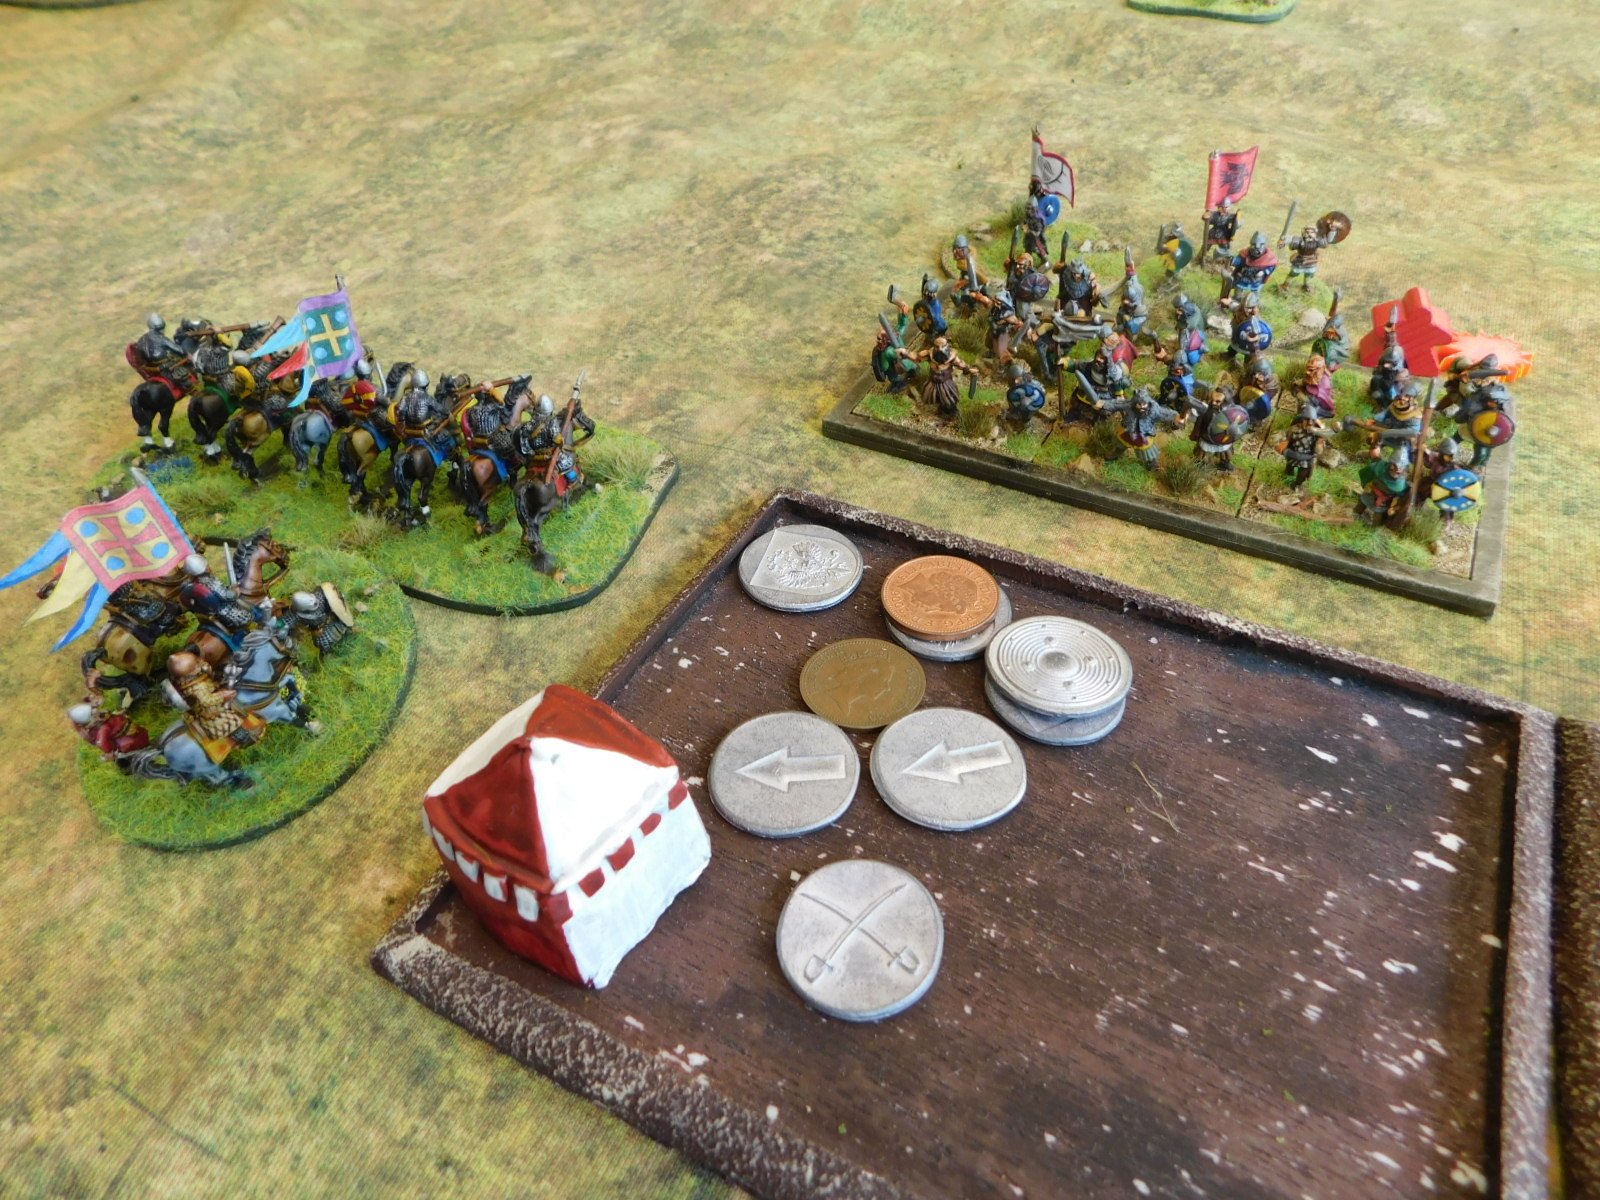
TTS AAR: Timurids vs Vikings

This was the return match from the game reported on Feb 15th: last time my Vikings beat Kavan’s Timurids, now we would swap sides and play again.

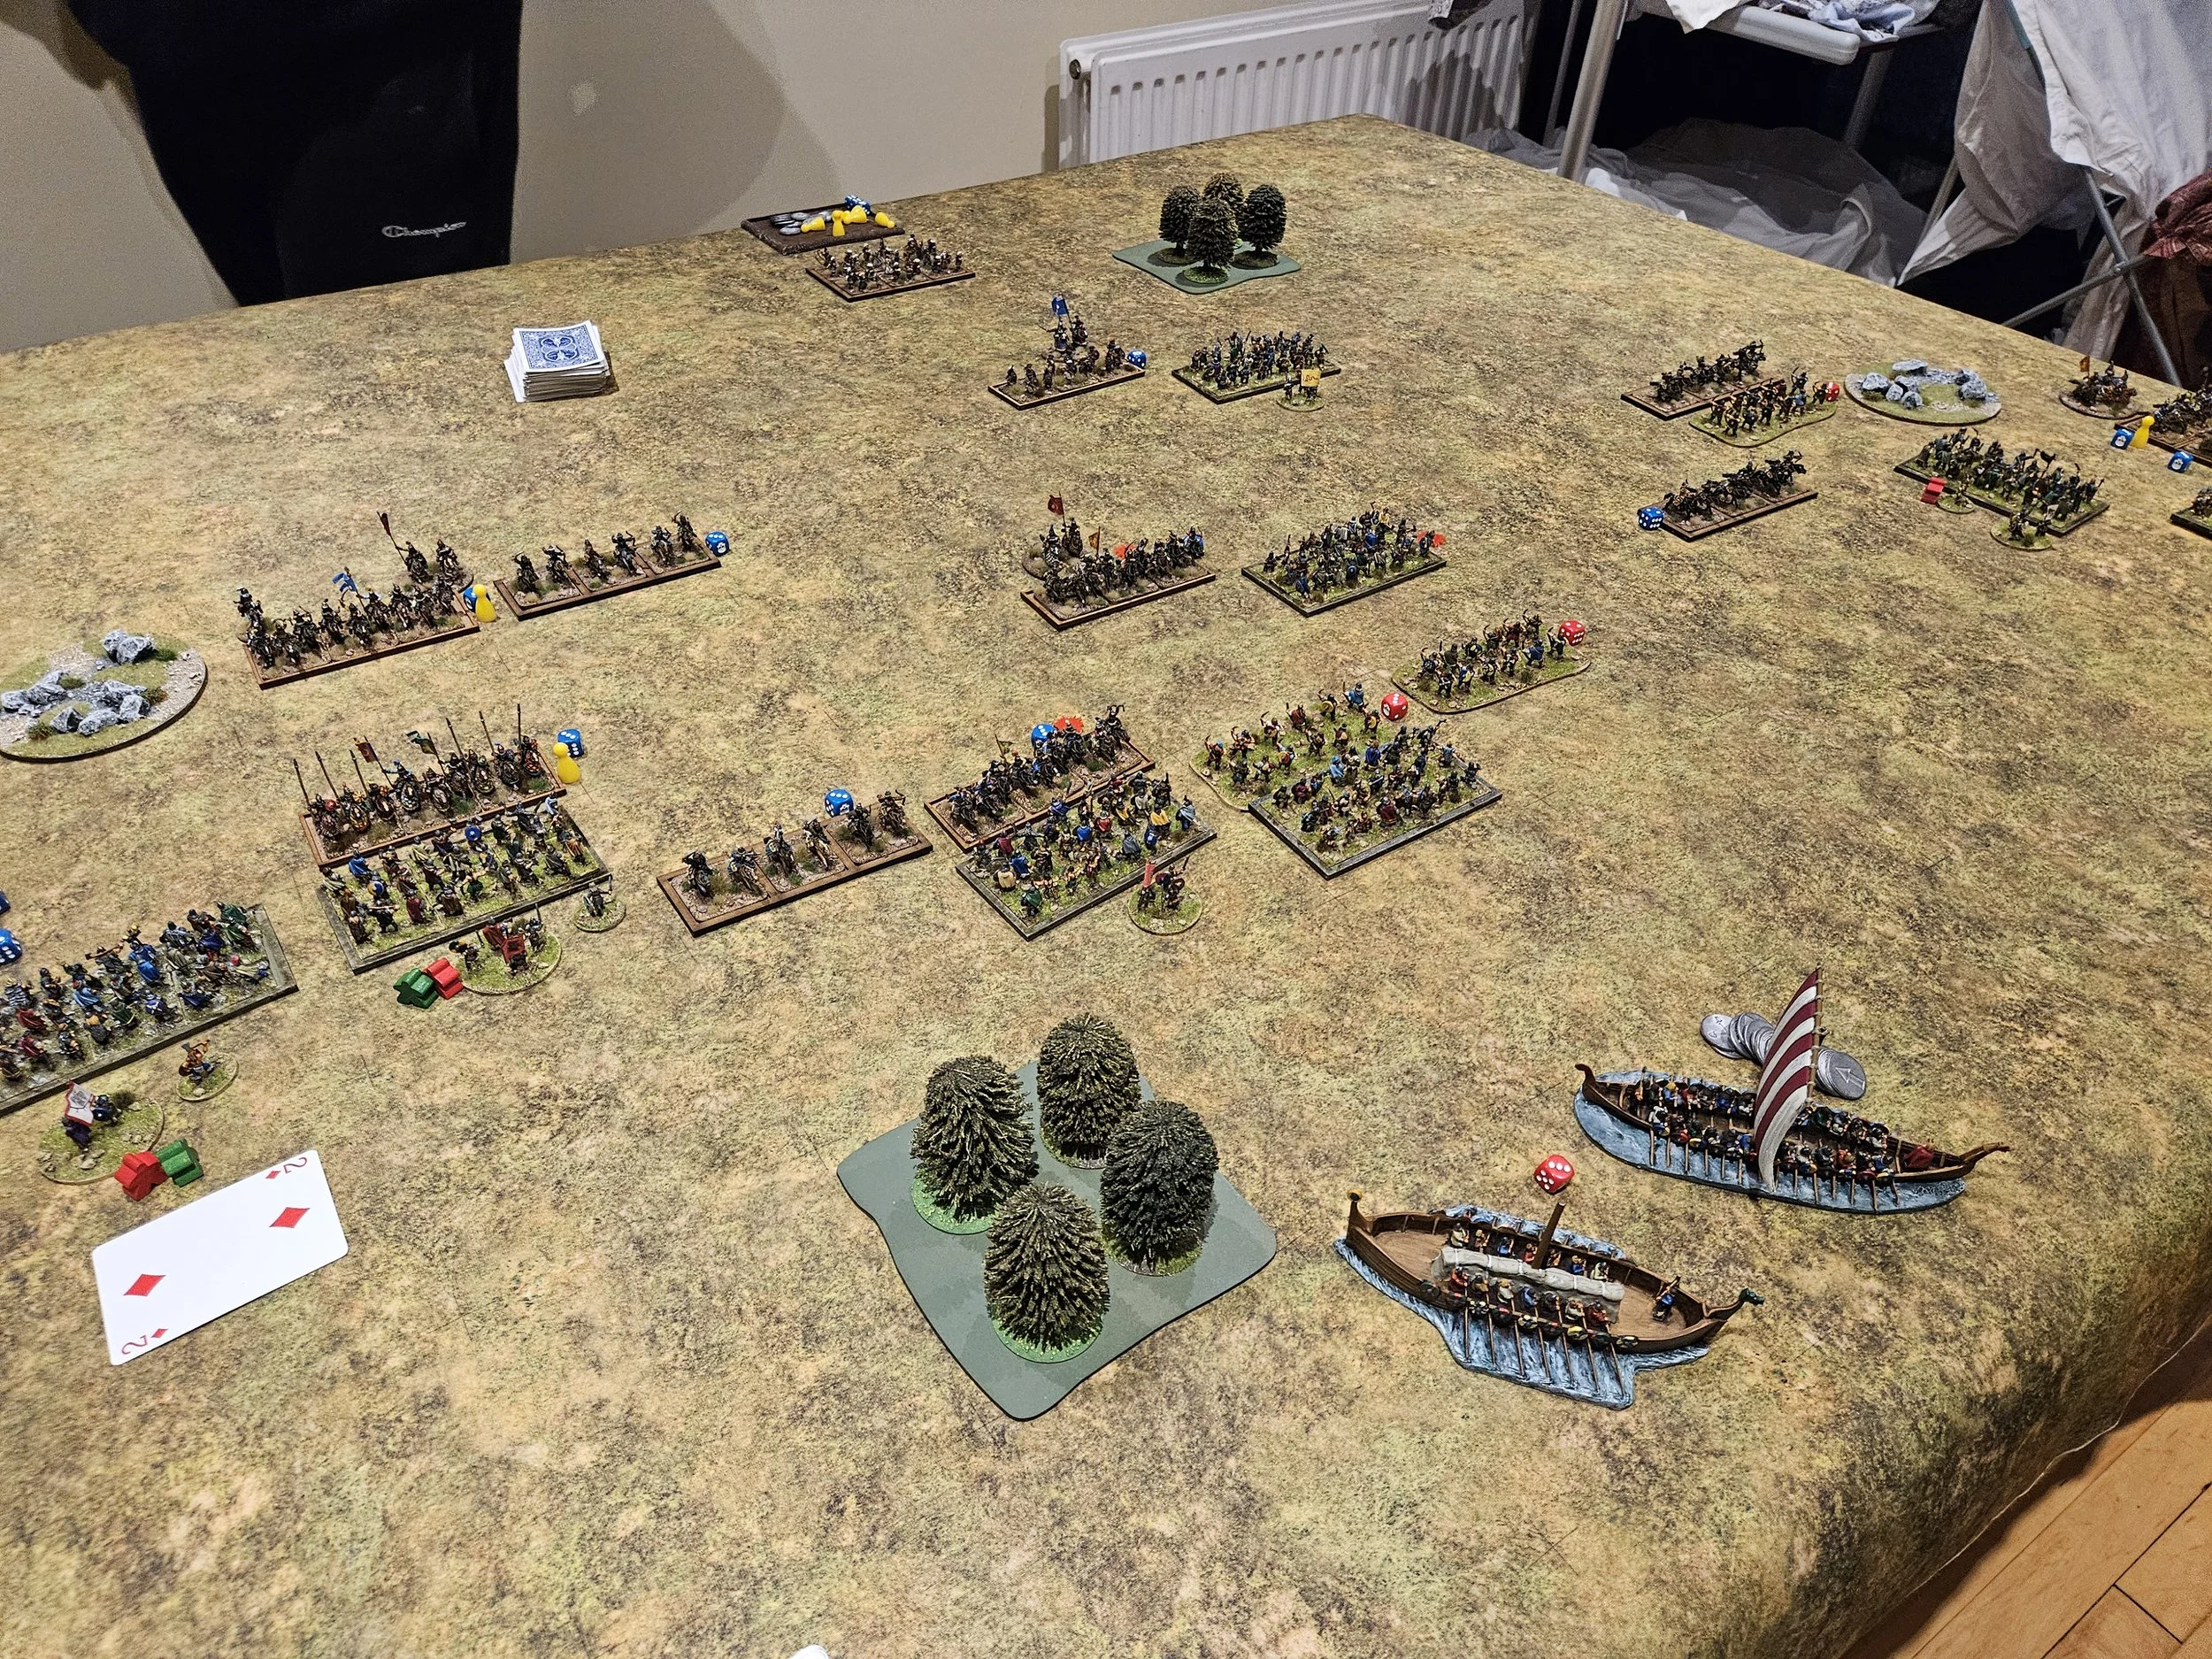
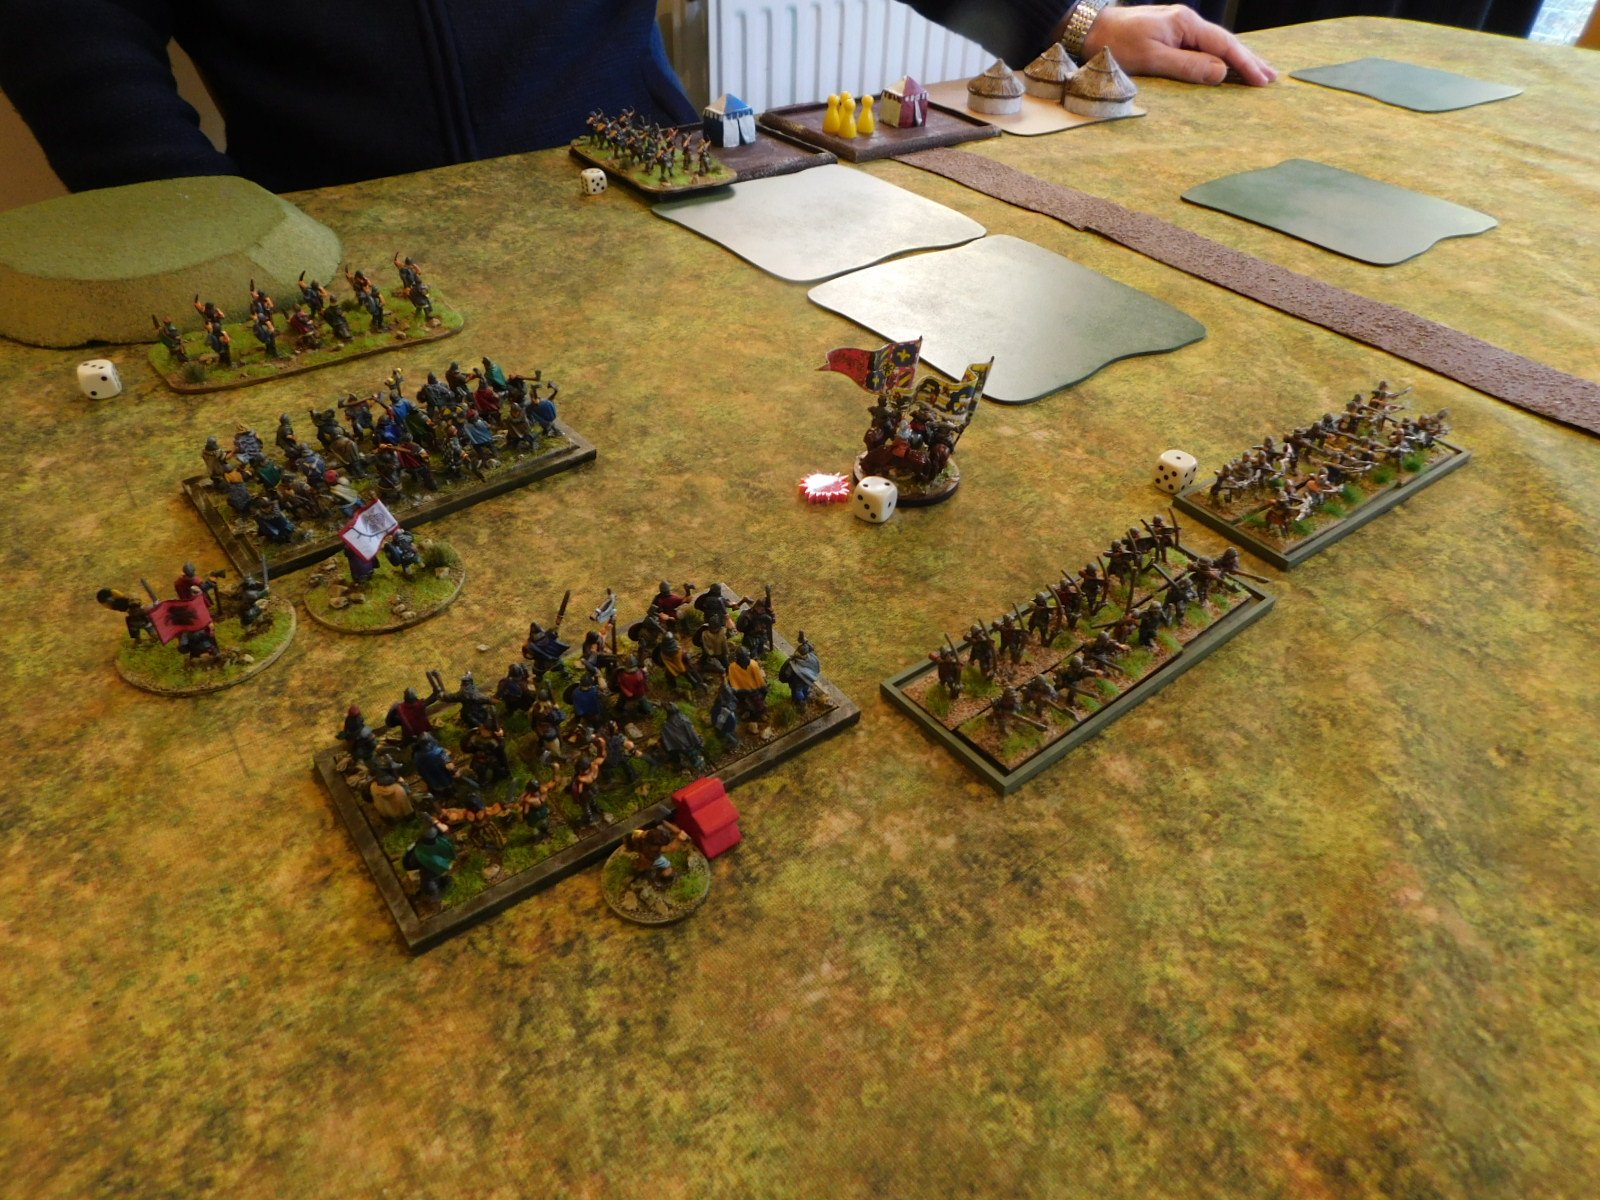
As you can see from the pictures above, I won the scouting phase and set off towards my opponent at a rapid rate of knots.

When Kavan moved his Vikings forward to meet me, he accidentally created a gap between his two wings where his longboats were beached…and I thought “ah ha! I can defeat the two halves of his army one at a time and hit him from his inner flank”.
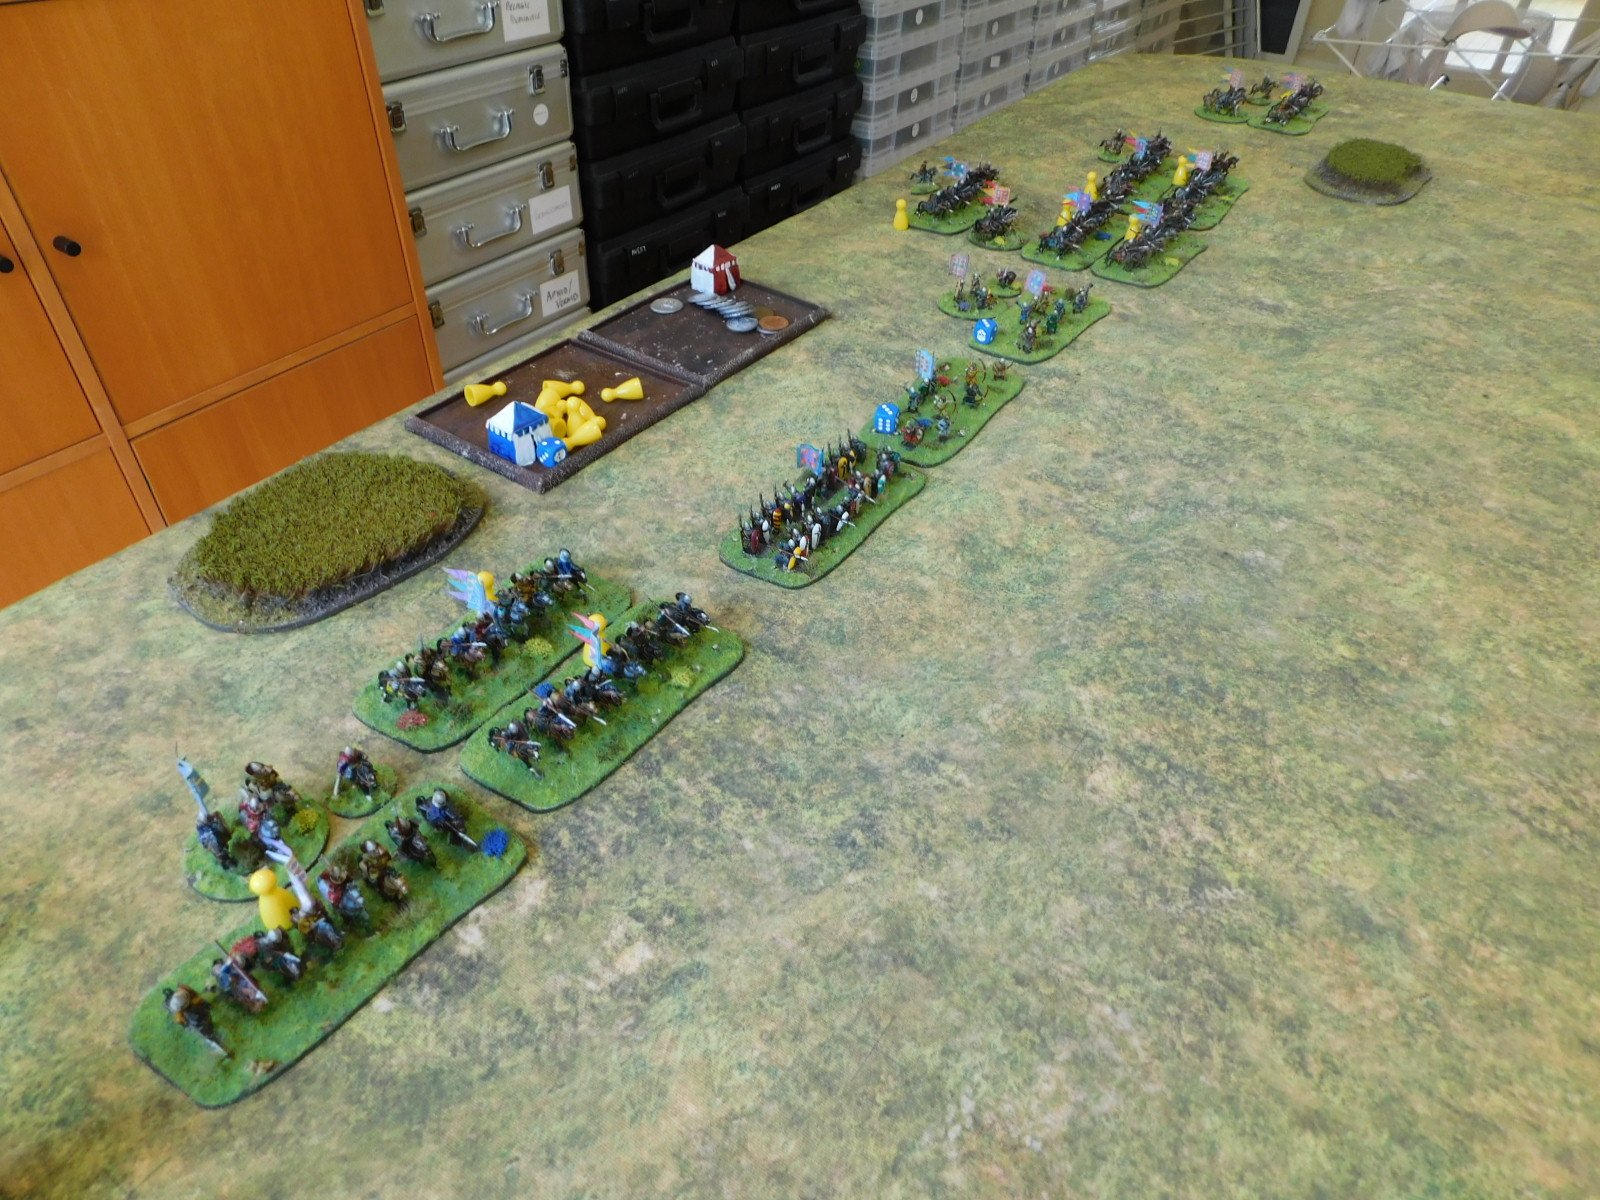
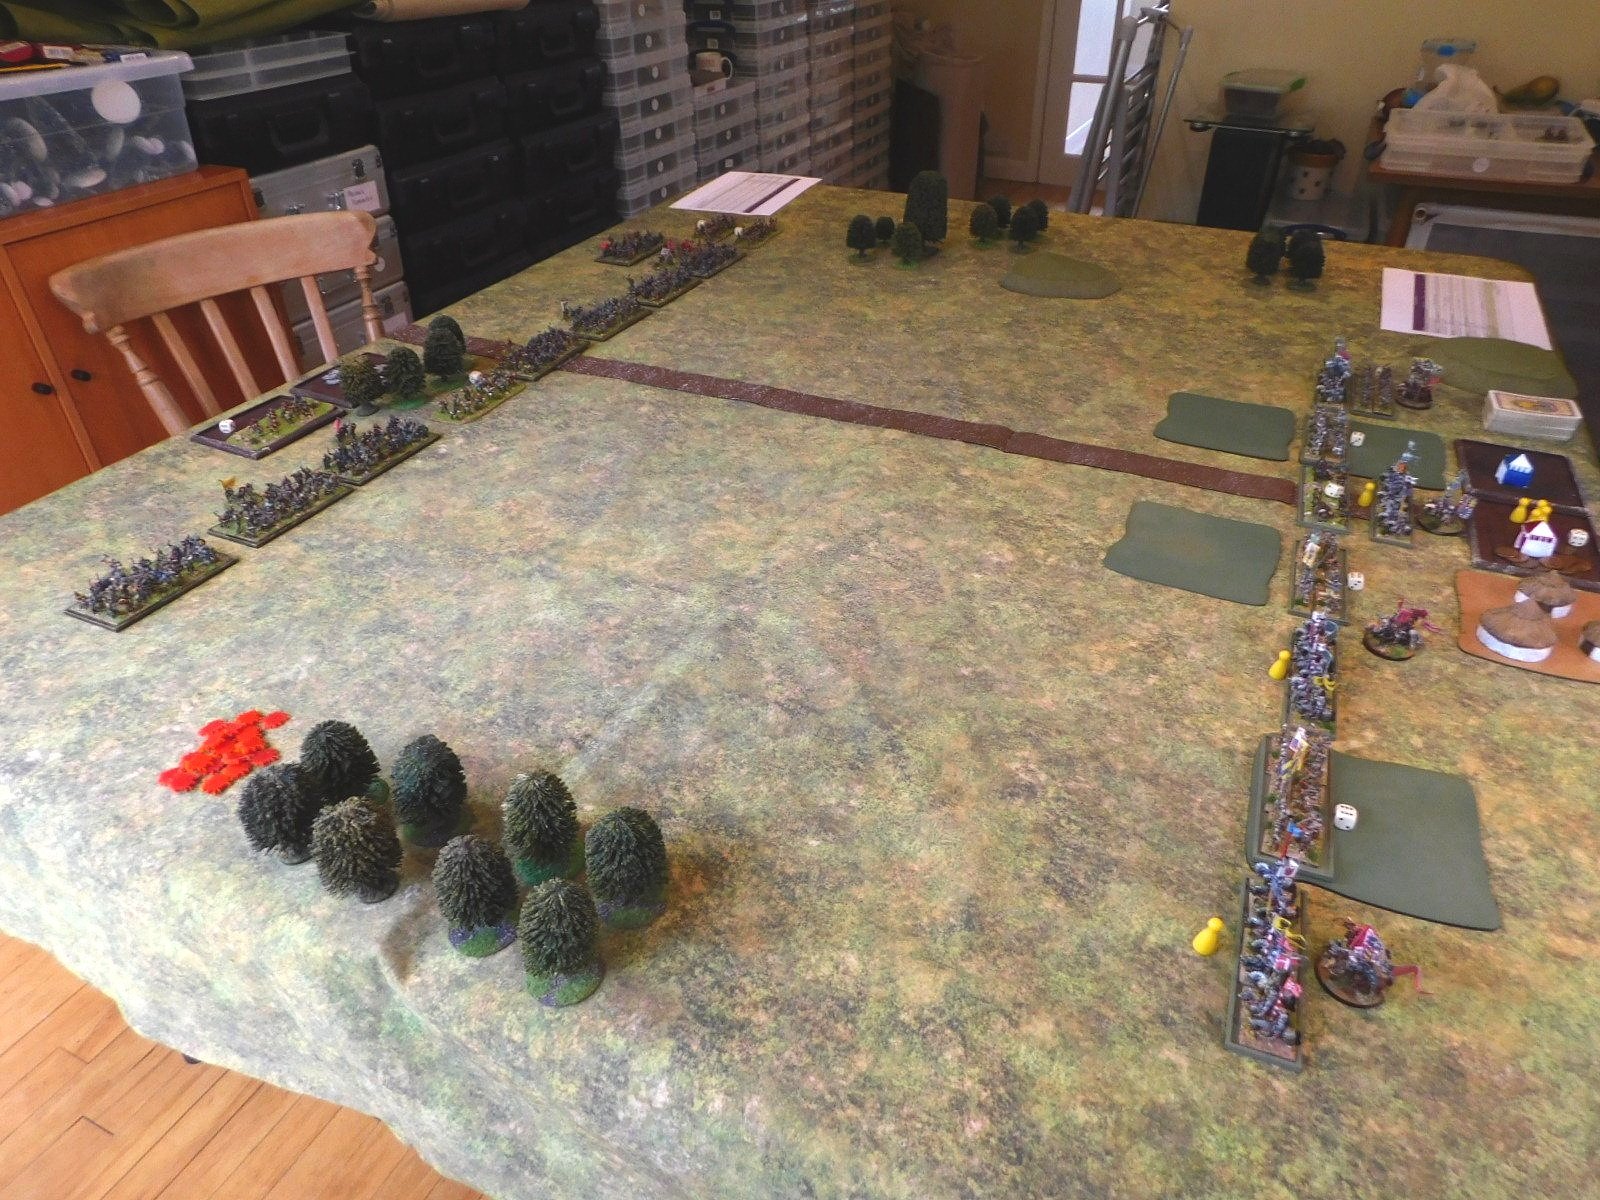
The Left Flank

This was the side where I needed to hold his troops up for long enough for me to defeat the Viking right flank.

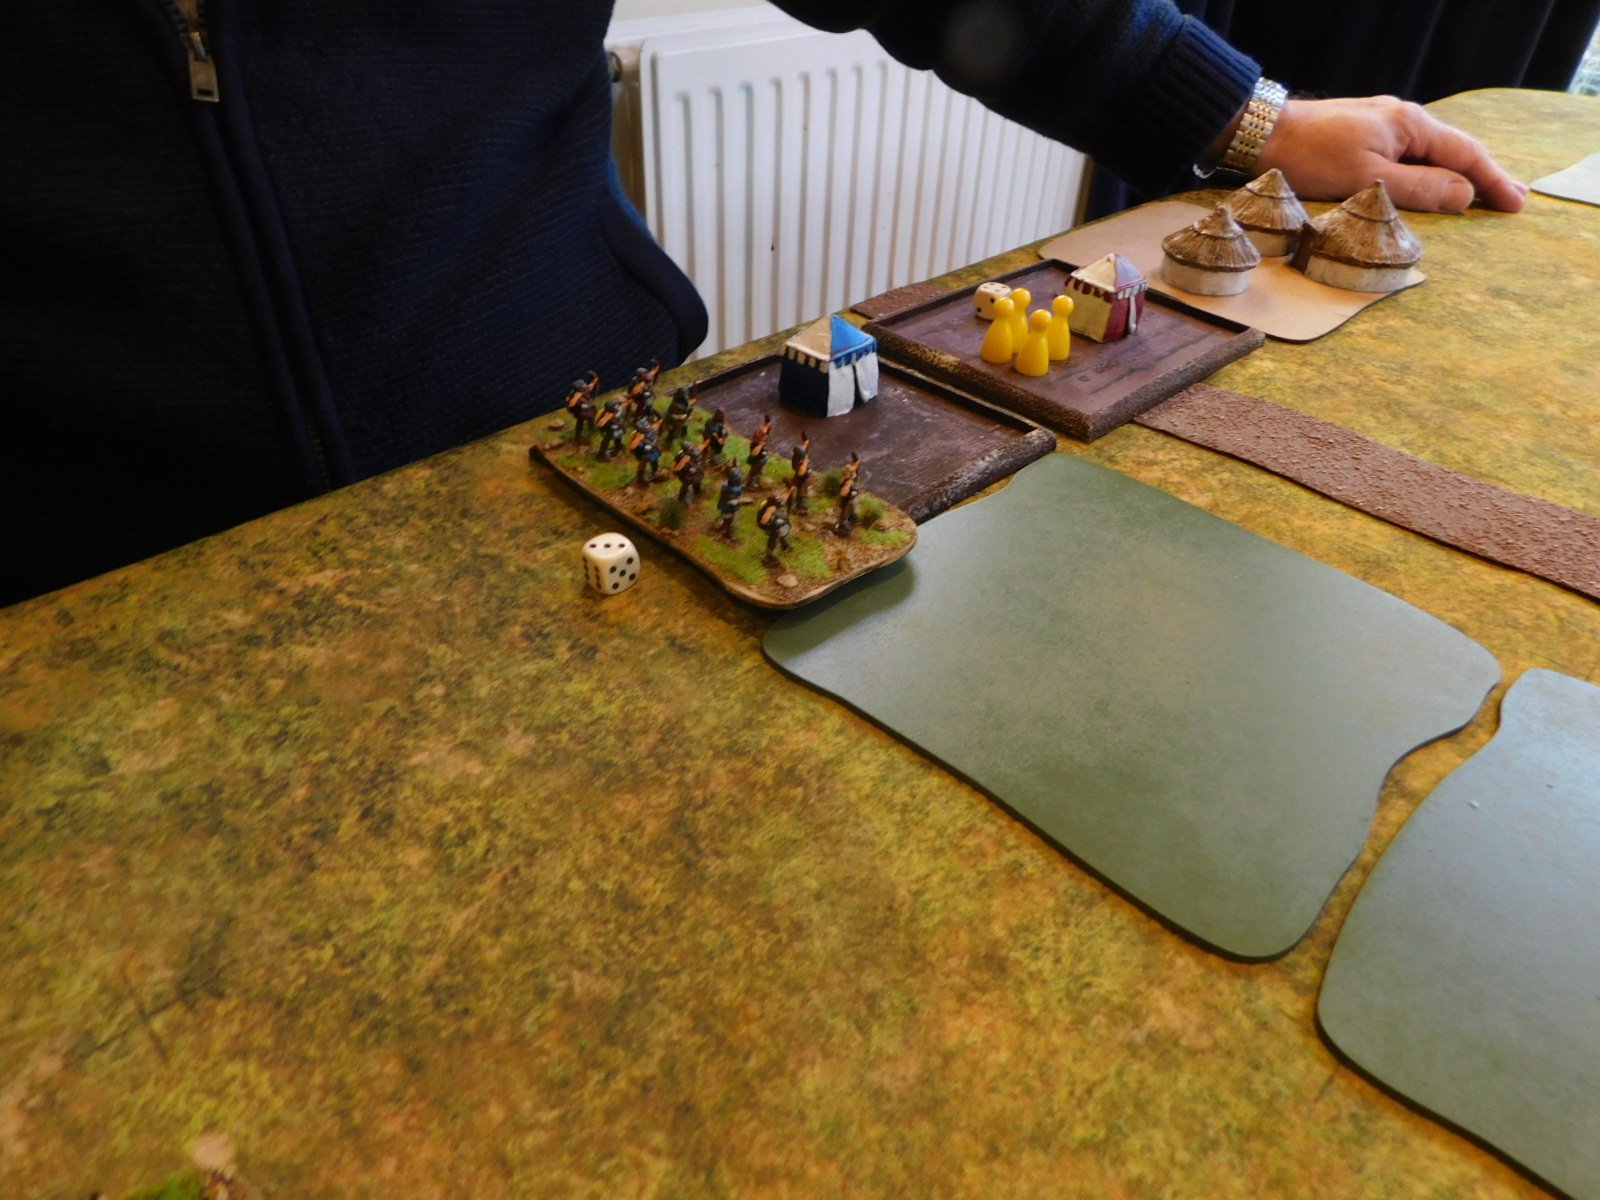
I assigned three Turkoman horse archer and three Timurid lancer bases for this task. Facing them were four Viking warbands supported by two light archer units.

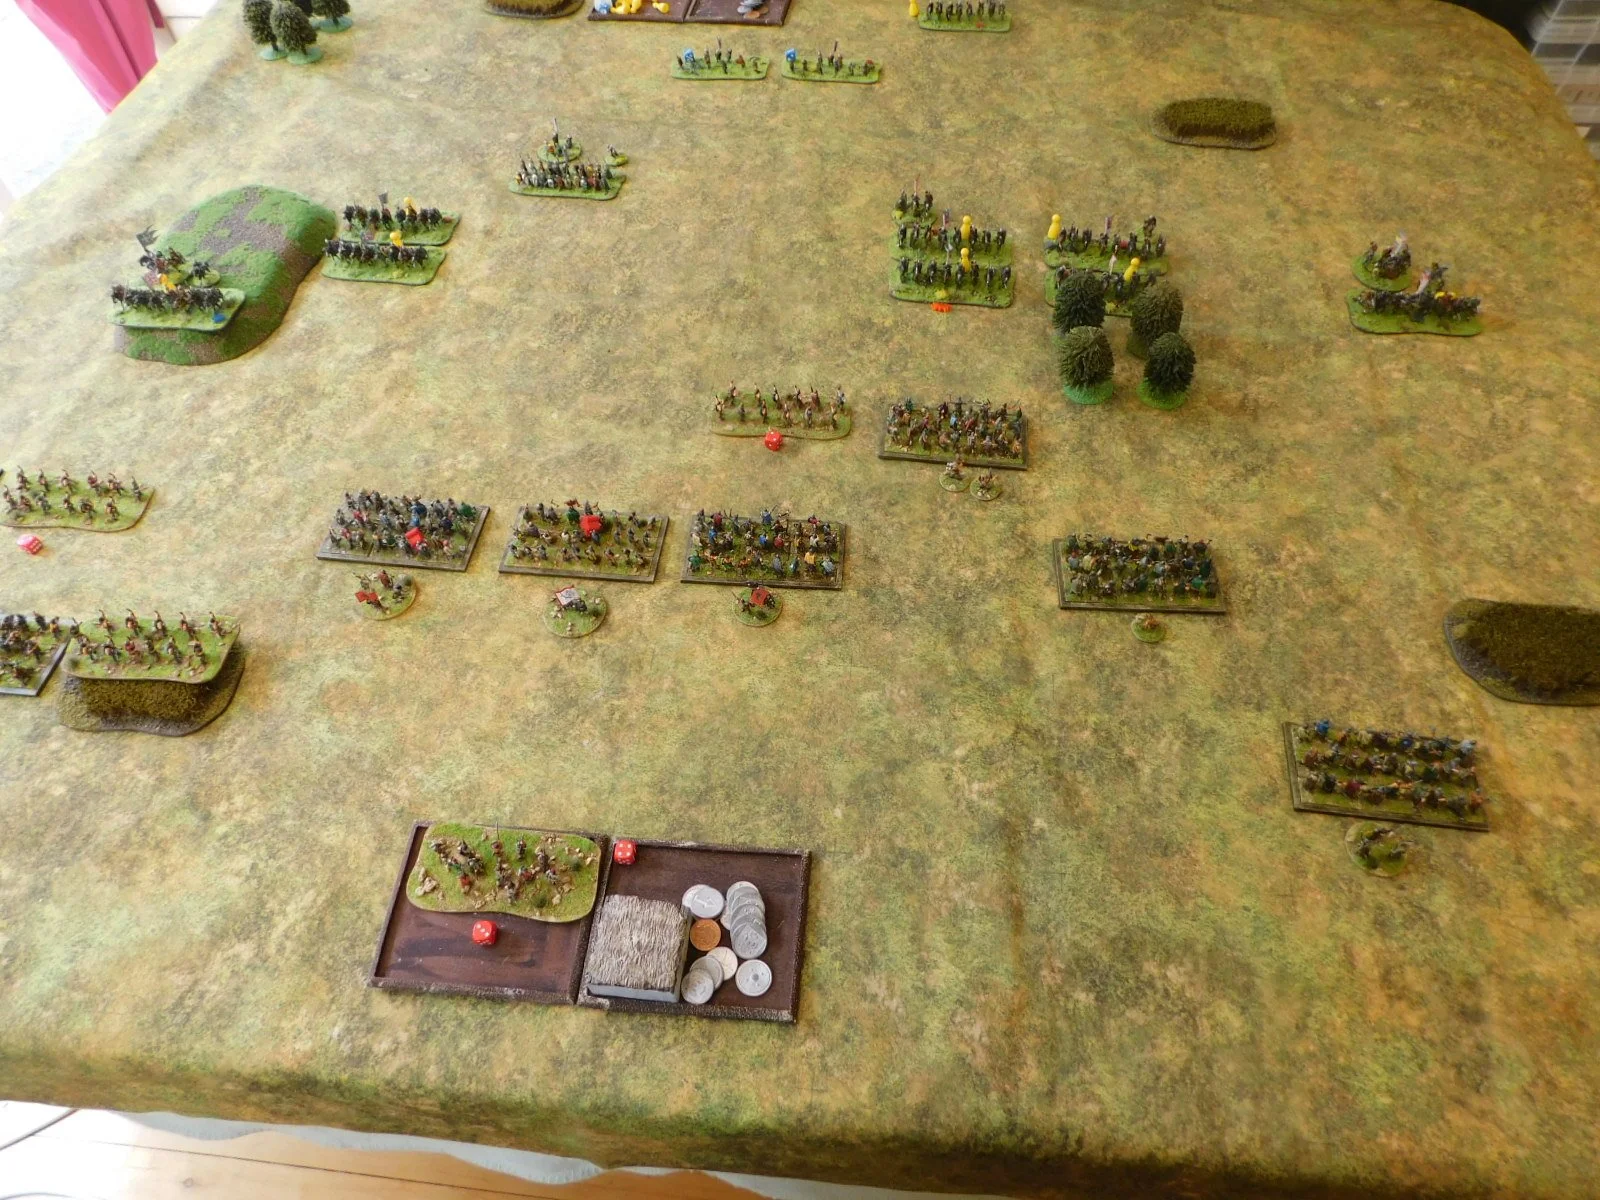
As you will see from the pictures, below, things initially went quite well for me: flank charging and destroying a Viking warband and disordering two more.

Unfortunately, that was the high point of my success here: the Vikings recovered well and, with the help of one of their reserve warbands from their camp, managed to finish this phase of the game ahead: two warbands destroyed, three warbands and two light units remaining versus my Timurid force reduced down to two horse archer bases!

So the Vikings slightly ahead, but that was okay, as the idea was just to hold them whilst my right wing went to work.
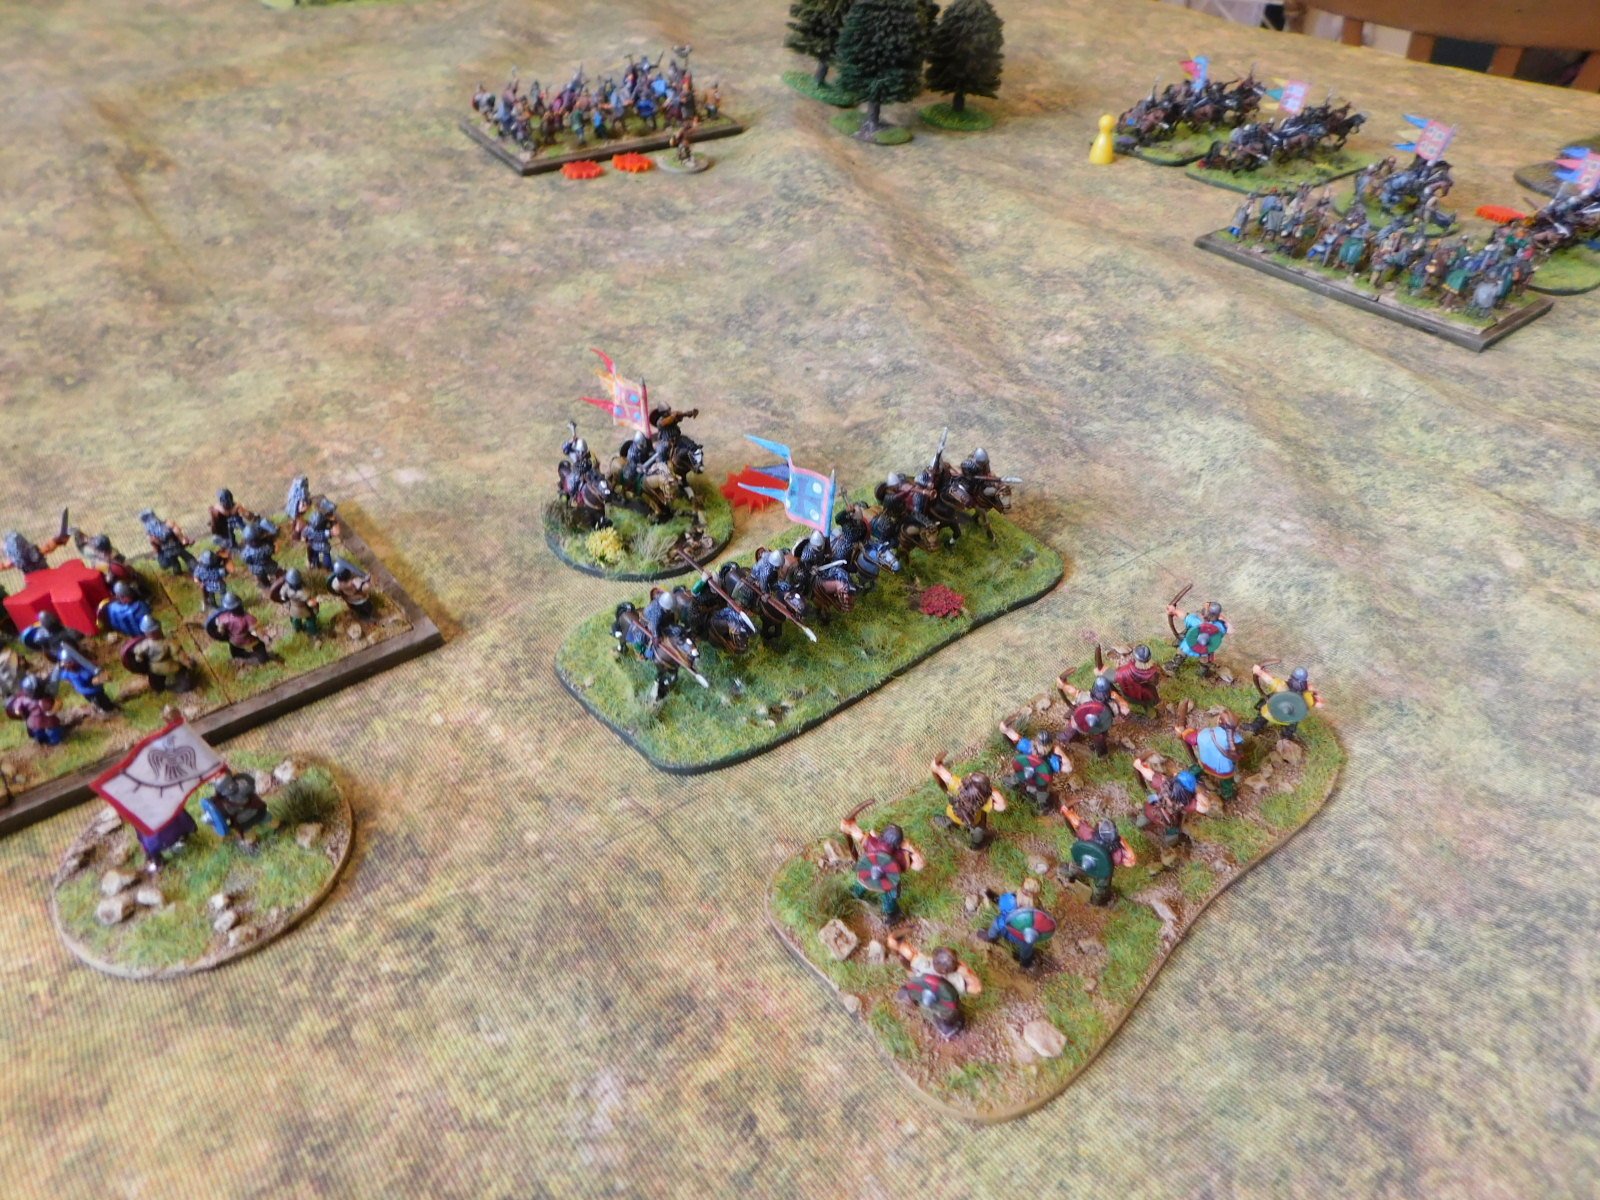
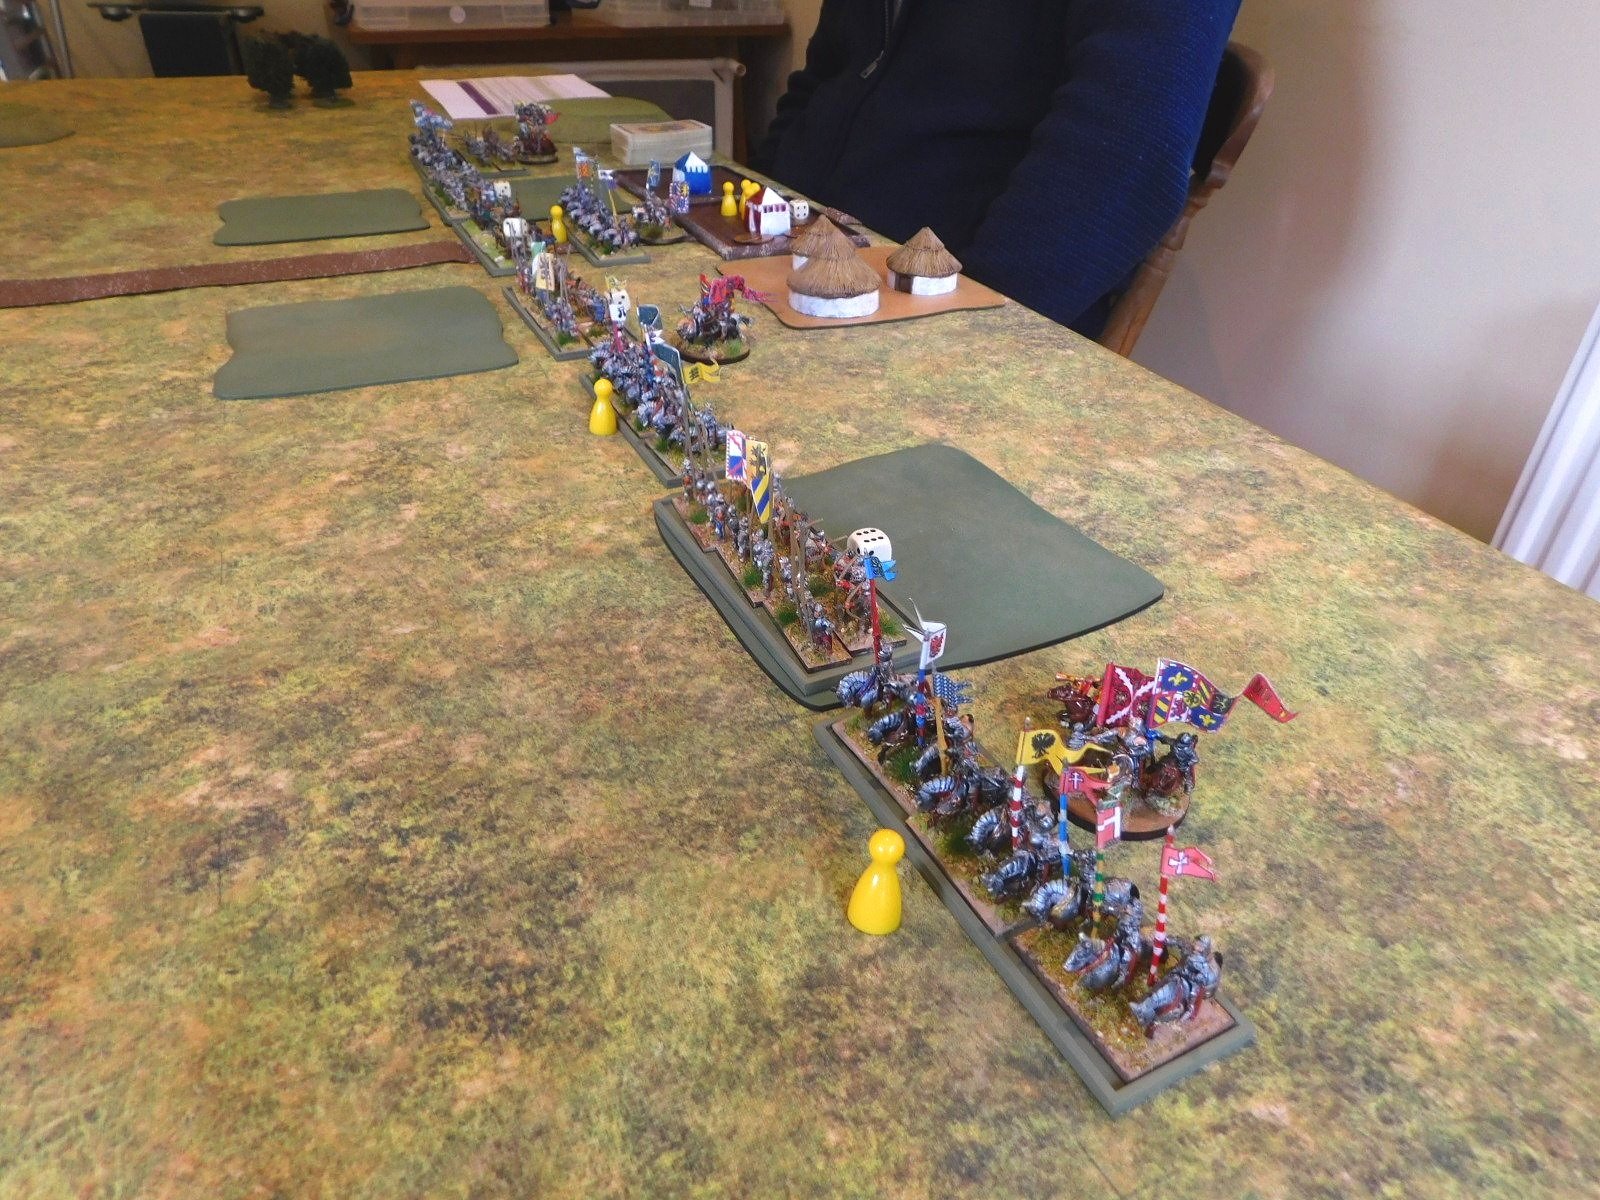
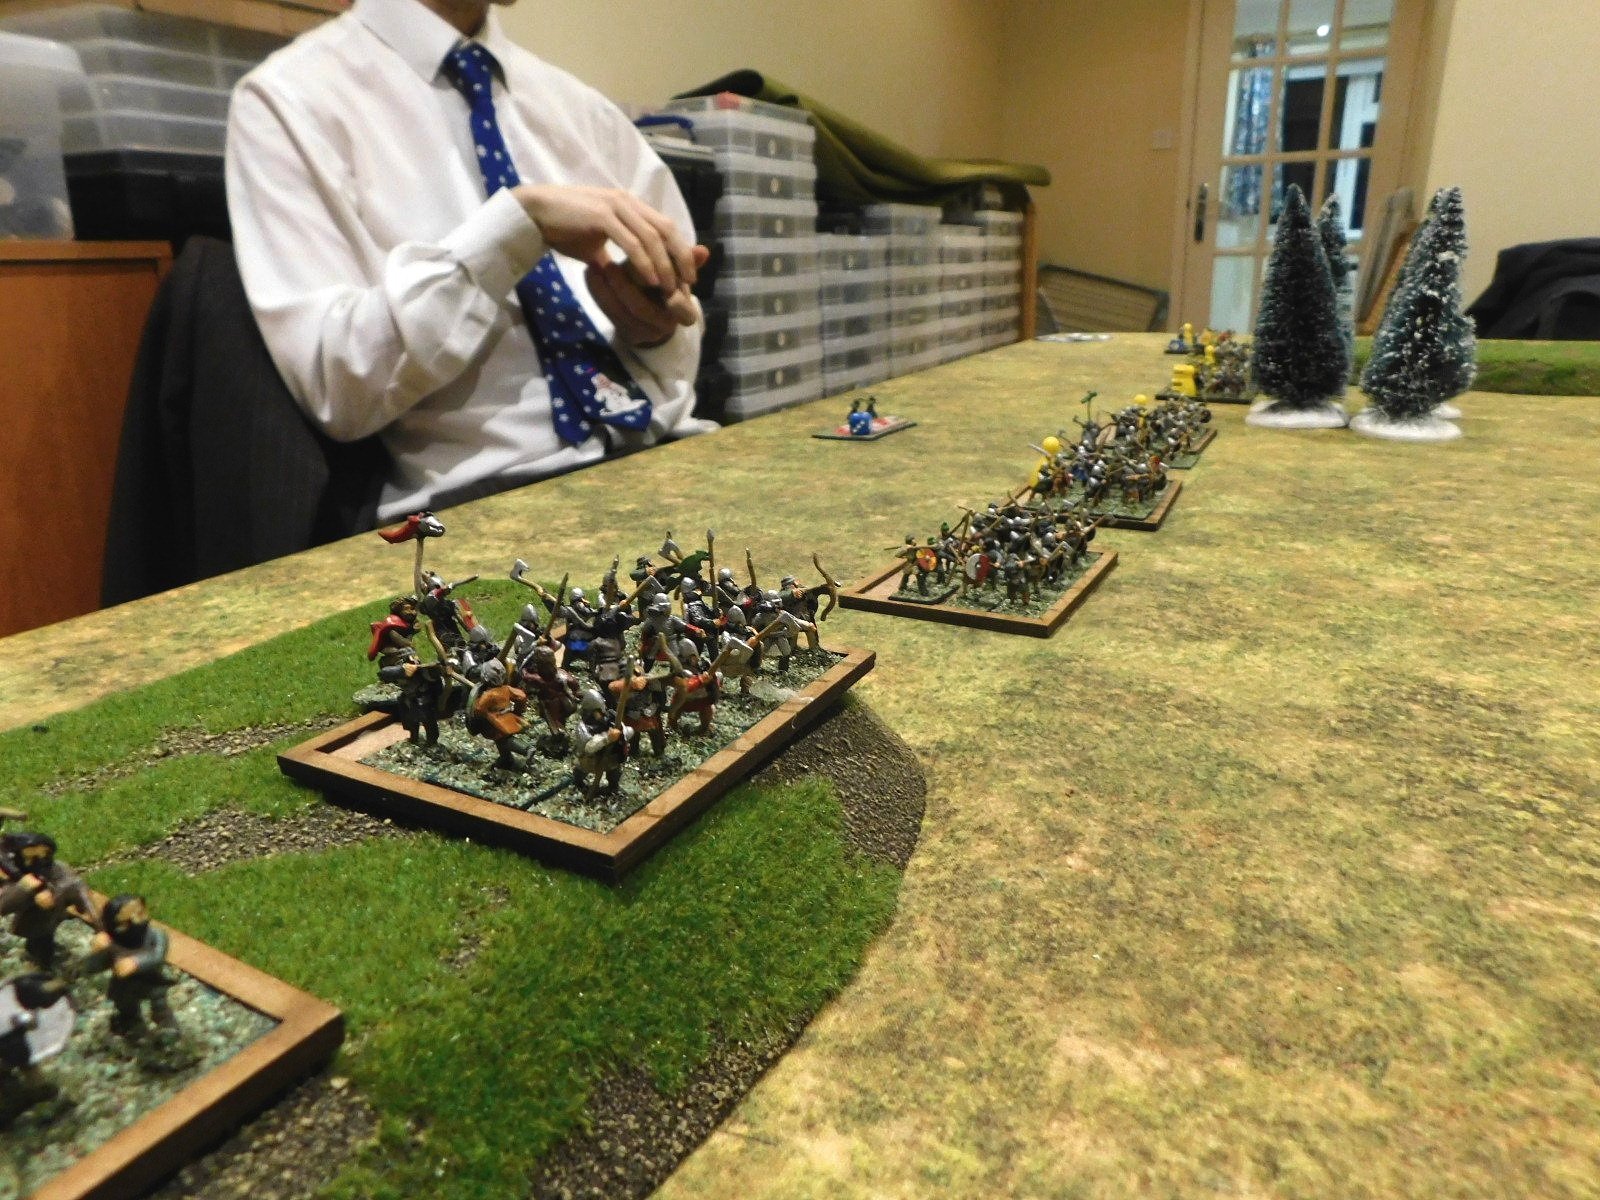
The Right Wing

Although I initially only assigned one Timurid lancer unit here, they were supported by three bases of Turkoman horse archers, and the Vikings had got themselves pinned up against some impassable ground, meaning I could just focus on one of their bases at a time. I also quickly sent one reserve lancer unit to help finish them off.

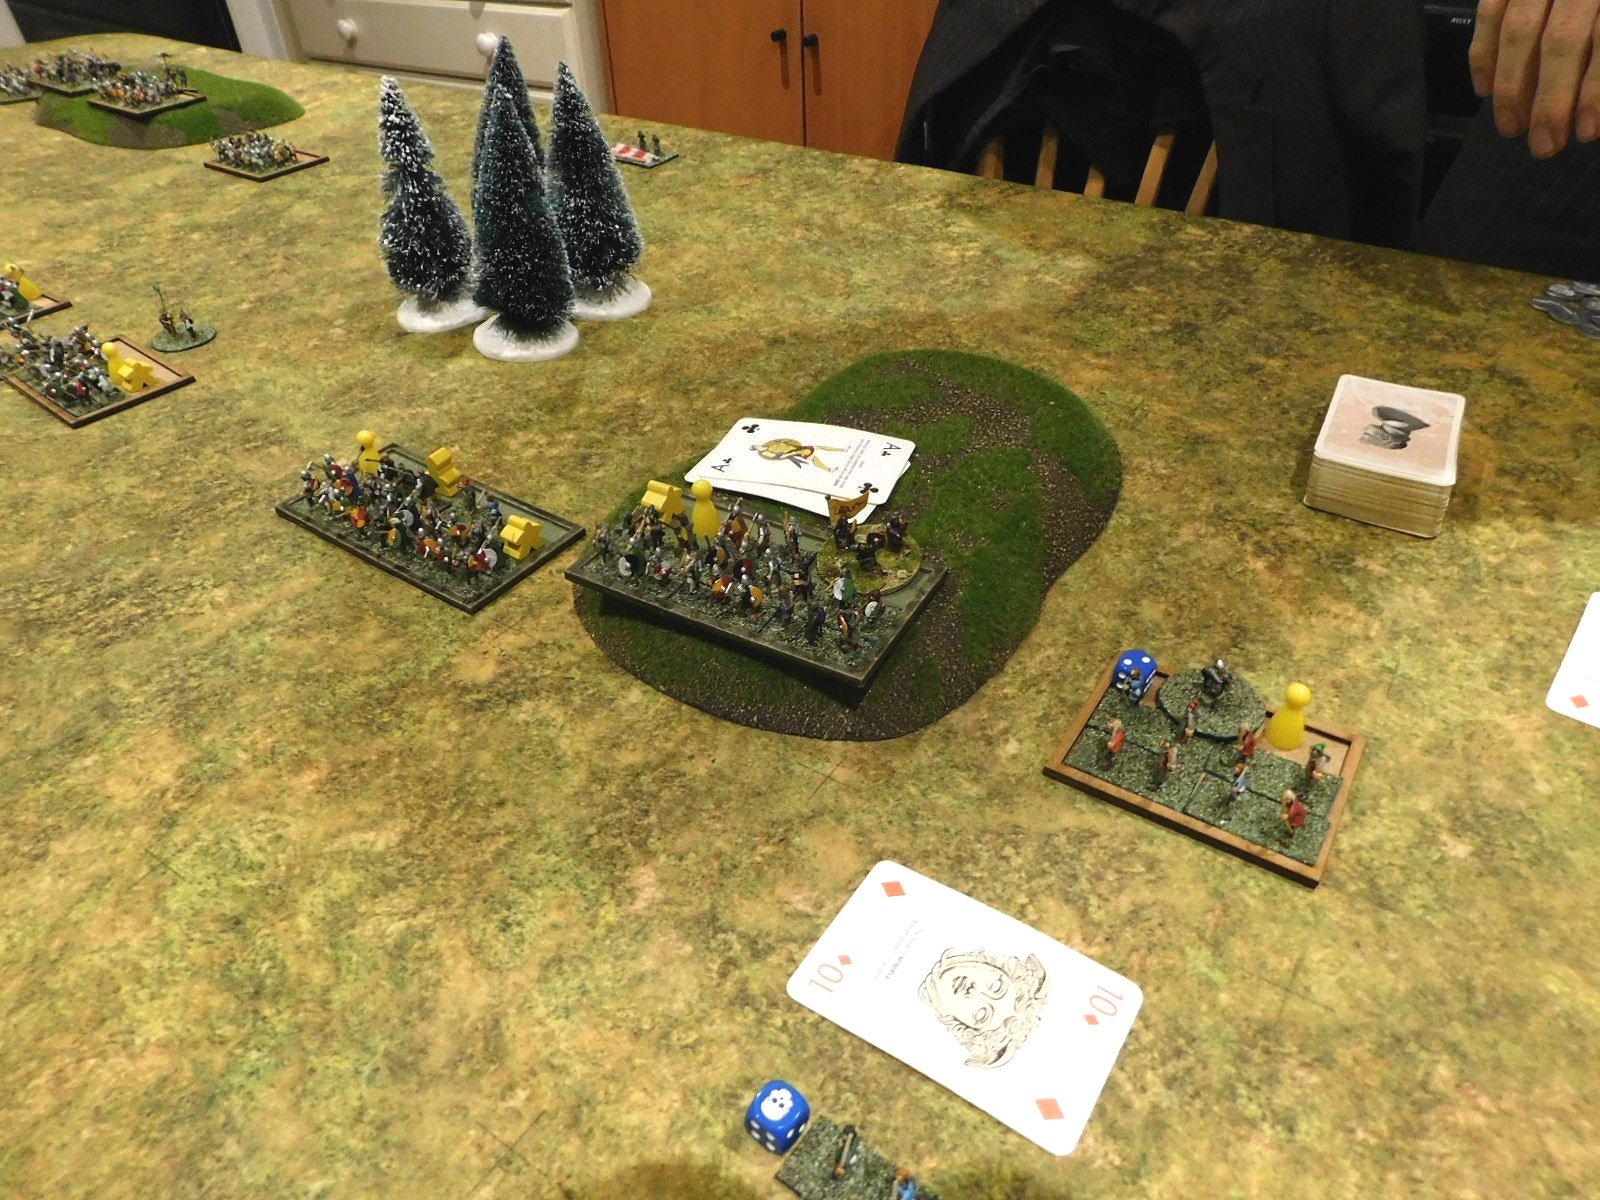
This was potentially rich pickings for me, as the not-pinned base had an army standard (so was worth four coins) and the pinned base had King Cnut himself in charge, making the base worth six, or maybe even seven coins. Take out these two, and that was two thirds of the Viking hoard (not horde!) taken care of.

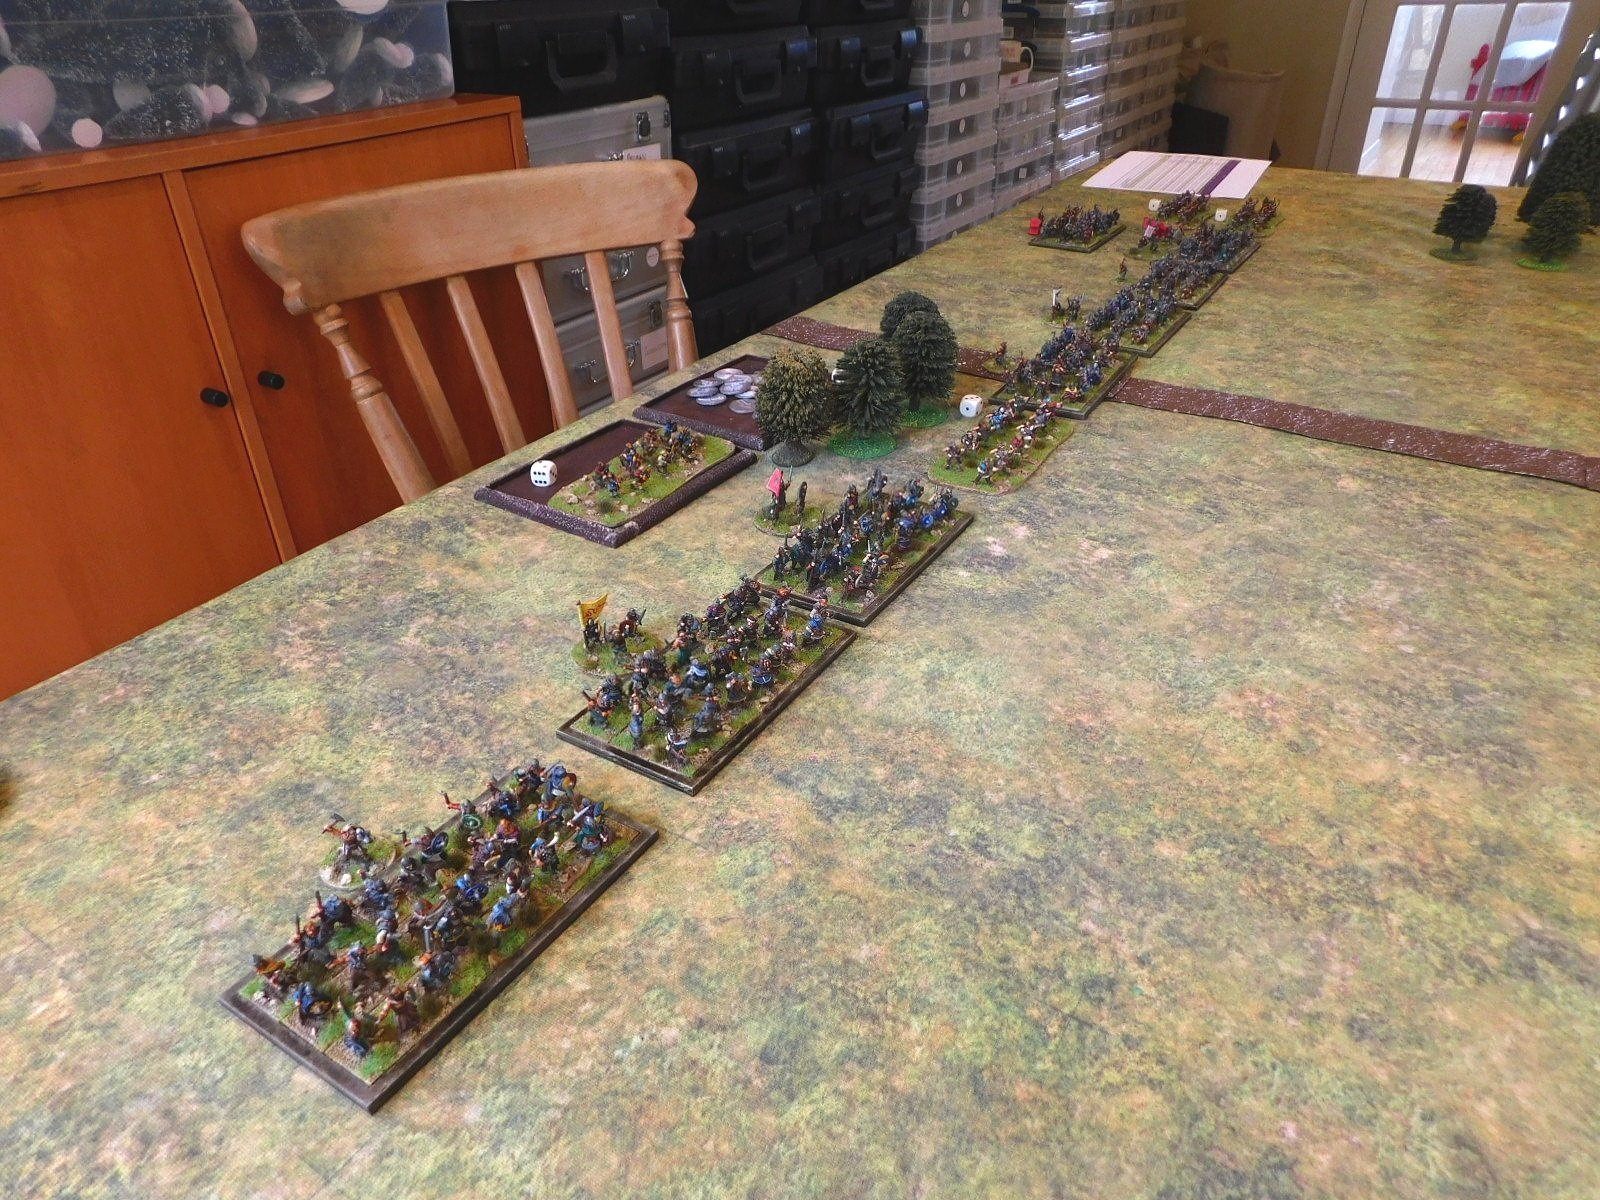
Again things started very well, with the standard-bearing warband destroyed and King Cnut lightly wounded. Go the Timruids!

Unfortunately, rather than debilitating Cnut, his wound seemed to inspire him, and the beggar just wound’t die no matter what I threw at him and his men:

In fact, the game ended with Cnut and his men retreating back towards their longships presumably in need of some refreshing beverages, with far too much of my army in hot pursuit!

The Final Phase

By now we were almost out of time. The Vikings still had just over half their warbands intact, whereas my Timurids were down to only three medals. The result was therefore only slightly in doubt and I was happy to resign the game rather than to flog the proverbial dead horse.

So that was two games of Vikings versus Timurids and two victories for the Vikings: slightly surprising considering how underrated they usually are.

Okay, so their victory in the last game was slightly lucky - King Cnut holding out against extraordinary odds despite being wounded and all that - but that’s presumably why he’s counted as a Brilliant General!

I still haven’t properly got the hang of using Timurids - that combination of missile fire to soften the enemy up then a charge home with lances to finish them off - but that just means more practice needed…

TTS AAR: Vikings vs Timurids

Another game of To The Strongest, this time featuring my Vikings against a Timurid army played by Daughter #1’s boyfriend, Kavan - who hopefully realises that the key to his continued relationship with my offspring is to lose heavily whilst loudly congratulating me on my brilliant play!

A rather empty battlefield: more tundra than fjord!

Beached longships form the Viking camp

The Timurid right wing

As the Vikings are an infantry-only army (no room for horses on those cross-North Sea longship ferries) my big fear was being outflanked and suddenly finding Timurid cavalry in my camp and up my backside!

I therefore put a couple of strong shieldwall units on either flank, rather than concentrating them in the centre and leaving the flanks to the lights as I usually would.

As with many of my more brilliant ideas, this worked well in theory but not in practice, as the cards conspired to prevent my deep shieldwall unit on the left making a very simple diagonal charge to drive two units of horse archers off the table.

This allowed those two units to neatly bypass the shieldwallers, leaving them nicely in a position to turn and either hit me in the rear or to ride for my camps:

“Four or more needed…”

not an ideal outcome

I was also in a bit of trouble on the right, as although I did manage to dispose of his lights there, Kavan had followed up his horsearchers with a couple of meaty heavy cavalry units, who also managed to get around onto my flank and were quickly set to drive at least one shieldwall unit from the field.

Fortunately the top unit in the picture above (the one with the Raven banner) was on fire, and although the bottom unit did indeed get driven from the field, the top unit managed to take out both of the Timurid cavalry units shown, although they did need a bit of luck to do so:

All this action on the flanks did mean that the Timurid centre was a bit weaker than it might have been, and soon another Viking shieldwall unit had broken through towards the Timurid camp, defended only by kharash (driven slaves).

The Timurid camp wasn’t the only one under attack.

Although I had managed to hold off some horse archers, Timurid heavy cavalry charged into one part of my camp, and threatened to take the other, even with two bases of Viking light archers present.

I had started with fifteen victory coins, but was now down to nine, which was about to become six.

Kavan had started with eleven victory coins, but was now down to three. This was unlucky for him, because the Viking unit that threatened his camp had now cleared the kharash off the field, and was able to crash, unopposed, into the Timurid camp.

This was enough, just, to give me the win: a surprise victory for the Norsemen over the more manoeuvrable Timurids.

Here’s the game in longshot…

TTS AAR: The One With The Mid-Game Earthquake!

As our first Normans versus Vikings game hadn’t taken that long, Kavan and I decided to swap sides and play again. This was to be a very exciting game, but for all the wrong reasons!

Deployment was pretty quick. Having seen how the Normans were able to harry the somewhat dispersed Vikings in the last game, I was determined to keep my troops together to protect the flanks of each unit whilst giving maximum opportunities for mutual support. I put the huscarls, my best troops, in the centre hoping to punch through to his camps…and made sure I left my light javelinmen to protect my camps: no repeat of the last game here!

The Normans advanced towards me really quickly so, not wanting to have no room for tactical retreats and the like, I pushed forward as well. I also moved my light archers to the front determined to use every advantage I had despite the fact that missile fire had had almost no effect in the last game.

The initial clashes produced mixed results, and it looked as if we were in for a grinding clash determined not by subtle tactics but by blunt force!

Then disaster struck!

I have used the same fold-up tables for many years, and have never had a problem with them. This time, however, I must have neglected to lock the legs on one table properly, and as Kavan leant forward to position one of his units for the attack, the table underneath him collapsed!

Fortunately the rapid advance of the Normans means that almost all the figures were on my side of the battlefield i.e. on the other table, and it was only one set of legs that collapsed not both, so only a few units were affected and even those mostly by jostling rather than a long drop to the floor!

We were therefore able to put the battlefield back together fairly easily, and re-order all the jostled units with no damage done. Phew!

At this point in the game, the Normans were doing pretty well: pushing the Viking units back with a series of hard charges from their lance-armed heavy cavalry.

Now, however, the tide turned: the “earthquake” had obviously been the Allfather, or perhaps the Odinson, intervening!

My men rallied, and began knocking Norman units off the table one by one. Even my lights contributed: with an initial clash between the big boys often resulting in one disorder a side even a single, successful hit from Viking light archers meant an enemy unit cleared from the table (my “deep” units could take two disorders before breaking, the Normans only one).

My idea about mutual support proved useful, as several times warbands that had already dealt with the enemy horse in front of them were able to turn and intervene in another clash, as below:

Here, the intervening Vikings smashed the enemy they flank charged from the table, giving the unit under pressure time to rally off a disorder. Yes, they were then in a terrible position being flank charged in turn, but the Vikings are tough and can usually take one flank charge without breaking.

Fittingly, it was a light archer unit that polished off the last of the Norman victory medals:

A great game with a very narrow escape. I will make jolly sure the table legs are locked next time!

TTS AAR: Normans Take The Field!

As mentioned in my last post, with the last of the Milites finished it was time for the Normans to finally take the field with a game of To The Strongest versus Kavan playing the Vikings.

This would be quite an interesting battle as the Normans were mostly heavy cavalry and the Vikings were all infantry. My plan was to take advantage of my extra mobility and get around his flanks, as charging formed infantry with cavalry is rarely a good idea!

As the game began, both sides advanced forward strongly, with the battle rapidly dividing into three sectors: the left, the centre and the right.

In the centre, Viking huscarls (the units with the red Meeple) had sped forward and hit a line of Norman cavalry in the Norman half of the table. With three Norman units in play against just one Viking, I was fairly confident that I could win the first clash, but I had underestimated just how ‘hard’ the huscarls were: being a deep, veteran, shieldwall unit with extra two handed cutting weapons!

My first Norman cavalry unit just evaporated and, worse, the follow up huscarls, led by their overall commander and waving their ‘land-waster’ standard, hit my own overall commander’s unit and forced him to make the decision to run away as fast as possible! Oh, the shame!

A quick overview pic, with the Viking huscarls bursting through my centre!

Meanwhile, on the left flank, my plan had actually worked out rather well.

Three units of milites had faced up to a couple of the lesser-quality Viking bondi units supported by some lights, and used their superior mobility to get around the hairy infantry and into the Viking camp. Six glorious victory medals headed my way as my horsemen remembered their heritage and sacked and plundered the enemy camp for all its worth!

My Viking Longships haven’t arrived yet, so the Viking camp has a weird looking hut in it…and lots of Norman cavalry!

In the centre, however, the Vikings were about to do to me what I had done to them, with their commander’s huscarl unit crashing after my fleeing horse and then into the Norman camp and refusing to be shifted even by William himself!

Fortunately only one half of my camp was taken, but that still meant three victory coins to Kavan!

Casualties were now mounting on both sides, so it was obvious that the battle would be decided on the right where, up to now both sides had cautiously crept towards each other.

Somehow I had managed to get into a decent tactical position where I could get two of my cavalry units onto one of the bondi units but, as I have said before, these deep units are tough and the bondi survived long enough to pull back and get some support.

Not even the toughest Viking, however, can keep taking charges from the front and flank, and so it was here as well. The bondi unit broke and with that Kavan’s final victory medals were spent and the Vikings decided to retreat.

A great game and a very narrow victory for the Normans as I only had five coins left myself.

It was an interesting battle and one where I learnt that Norman cavalry definitely do not want to take on Viking huscarls or bondi units head on, even with lances: the only way is to get around their flanks or hit them two-on-one.

TTS AAR: Vikings Resurgent!

Time for a quick game of To The Strongest. Today’s game would feature the Vikings, commanded by Yours Truly, versus the Burgundian Ordnance, commanded by John.

The yellow caps are lance markers, the red meeples indicate veteran Huscarl units.

Two very different armies: my Vikings are a foot-only army comprised mostly of big shieldwall units (I’ll call them warbands) with a few lights thrown in; the Burgundians are a combination of lethal and indestructible Knights with some useful missile-armed spearmen in support.

I knew I would lose if I let the Burgundians pick me off one unit at a time: the only way to win was to move forward and attack en masse so that my battle line could absorb the initial charge of his Knights then swamp them with numbers.

I also knew that my light bowmen were useless against the Knights (the arrows would just plink off!) so determined to send both light units up the far left flank and try and get behind his battle line and into his camps, knowing that he didn’t have enough units to face my warbands and defend his rear.

I therefore moved my warbands forward in a long line, being careful not to let the more impetuous Vikings surge forward in an uncontrolled manner.

This meant that when the main lines did clash the outcome was exactly as I had predicted: the warbands hit by the Knights were badly disordered at first contact but not destroyed, and then other warbands piled in to help.

Keep your eyes on the light units to the far left as well: they are doing what they were supposed to do!

By now I was whittling down his army, especially on my right flank. With so few Burgundian units on the table, he just couldn’t afford to lose many and, as we reached the climax of the battle, I had wiped the four units on his left and left-centre for the loss of only one of my warbands.

That meant that I only really needed one big push to win the day and, rather pleasingly, that came from (yes, you guessed it) one of my light units finally taking the first Burgundian camp.

With half their army destroyed and their baggage taken, that was enough to send the neo-Frenchmen packing: the Vikings had won the day!

TTS AAR: Burgundian Ordnance vs Vikings

As Bevan had his Vikings out and I wanted to get my still-relatively-new Burgundians onto the table, we decided to have a game that would set the two against each other.

The Viking army was the same that had beaten my Vikings: maxed out on Bondi with a few lights in support. My Burgundians fielded four units of Later Knights supported by four units of sound infantry: three mixed spear or bill and bow units and a unit of crossbowmen. I also had an organ gun present.

View from behind the Burgubdian line: there’s an awful lot of Vikings over there!

The Vikings rushed forward, but were unprepared for the sheer weight of the Burgundian Knights that charged them. Two of my armoured units, shot in by archers to disorder the shieldwalls just before impact, smashed straight through the Vikings in front of them, sending them fleeing for their longships.

One of victorious Knights units then took the enemy camp whilst the other roamed around the centre of the field looking for more Vikings to charge.

Just after the first of the viking shieldwall units disappears from the field

taking the enemy camp (top leftish); rolling them up (centre right)

Meanwhile, on the right, one unit of Burgundian infantry used their horses (i.e. the Mounted Infantry bonus) to advance forward fast enough to split the advancing Viking line. This enabled another unit of Knights to turn right and hit the right flank of the Viking left-flank force that was currently engaged in a massive shoving match with some more Burgundian infantry.

With three Bondi units and their camp now destroyed, this proved too much for the Vikings to bear and, as another Bondi unit fled the field, the rest of the enemy army crumbled and followed. A glorious victory to the Burgundians!

Actually I was a bit lucky on my left, where a huge Viking outflanking force effectively took no part in the game because (a) having the initiative meant I could stay well away from them at set up and (b) Bevan’s attempts to move them into an outflanking position were stymied by the cards, who had obviously decided they didn’t like Vikings any more!

The whole game took only about an hour and further proved the power of the Burgundian charge!

TTS AAR: Vikings vs Vikings: the Decider

Having fought the Vikings versus Vikings battle twice over with one victory apiece, it was time to play the decider. Forces were unchanged from the last game.

Bevan’s Vikings had the initiative, and soon the two battle lines were thundering towards each other.

Looking at the picture above you’ll see that Bevan overlaps my main line with one unit of Bondi and a unit of lights, facing only a unit of light archers. Knowing I was going to be outnumbered, I had deliberately put my Huscarls (veteran troops indicated by the red Meeple) to protect my flank.

The lines came together with a mighty smash. What you can’t see is that out of frame to the left, his extra unit of Bondi and their accompanying lights are driving my lights backwards and will eventually send them off the table.

Much disorder on both sides after the first clash, with no-one really getting an advantage…which is not what I wanted as I needed to win quickly if I was not to be overwhelmed by superior numbers. Still out of frame to the left are his extra Bondi!

A couple of my units break through the centre, introducing the possibility of an assault on the enemy camp, but there’s now a mass of enemy units on the right flank…

…and worse, as you can see in the picture above, his Bondi on the left have finished dealing with my lights and have manoeuvred themselves into a position from which they can assault my main battle line from the rear!

Those Bondi do indeed charge me from behind and the resultant loss of my end Huscarl unit leads to a general disintegration of my line.

A resounding defeat results!

Aftermath

A great series of Viking vs Viking clashes. You can see from the picture to the right that the two enemy units in front of my Huscarls are about to give way, so if I had just been able to kill them one turn earlier, then my veterans could have turned to face the flanking unit that did so much damage.

The sagas will now record that my Vikings slunk away, defeated. Doubtless they will re-group and be back into action soon!

TTS AAR: Vikings Win!

Those of you who play To The Strongest will know that although the points system is supposed to make all armies equal, some armies are less equal than others.

One such are the Vikings: large numbers of unmanouverable shieldwall units lacking any cavalry and with only a smattering of lights in support. Head on it can pack a punch, but its opponents generally dance around its flanks leaving its brave warriors to be surrounded and cut down one by one.

I recently acquired a rather nicely painted Viking army in 15mm purely on the basis that I liked the idea of a Viking army. Ever in support of the underdog, however, I was under no illusions that I would have any great success with them!

Odin, hear our call: can we just win one battle please!

I was discussing the problem with friend Bevan, another proud but disappointed owner of a Viking army, when we both had a light-bulb moment of inspiration: let’s get our Viking armies on the tabletop together, to fight each other. That way one of us is bound to win and give their brave Scandinavian heroes the victory they so deserve!

With this genius idea decided upon, the next couple of weeks were spent in the customary ritual taunting - my Vikings are harder than your Vikings etc - until at last the big day arrived.

The Armies

The armies we had put together were significantly different.

My Vikings consisted of four commands: each comprising two deep, shieldwall units and one light infantry unit. One command consisted of Huscarls with mighty axes, the other were Bondi. I also had four heroes and an army standard.

Bevan’s mob also consisted of four commands, but was less pleasingly symmetrical than mine. One command comprised a couple of Huscarl units; one command was one Huscarl and two Bondi units; one command was three Bondi units; and finally he had a command consisting of some Irish javelinmen and light infantry. He also had five heroes and an army standard.

Somewhere in Scandinavia

Bevan’s Mob

My Glorious Vikings

The Battle

Both sides tried to outflank on the right. Bevan’s outflanking manoeuvre got off to a terrible start when he drew a couple of Aces for movement, but mine was more successful: a Huscarl unit led by the CinC got past the woods in front of them and were in a great position to chew into the enemy’s Irish allies.

Unfortunately, the Irish proved a lot more resilient than planned (is it not ever so!) and one of my best units spent the rest of the game blocked from doing anything useful!

Blocked!

Meanwhile, in the centre, the two main battle lines had closed and, for a time, things swayed backwards and forwards as a mighty shoving match took place. My lights proved useless in this sort of game: they shot off their arrows with little effect, then spent the rest of the time hanging around behind my line, unable to get around an enemy flank and unwilling to mix it with the big boys.

On my left, Bevan’s Vikings finally got moving, and a separate battle developed between various Bondi units from each side. This I won fairly decisively and for a time it looked as if I had the advantage.

Unfortunately, back in the centre, the left hand side of my main line eventually gave way, and two enemy units burst through. This allowed them to turn and charge into the rear of the rest of my Bondi, who spectacularly survived one turn being hit twice from behind, and then almost did the same thing next turn as well.

By this time, Bevan was down to four coins, I was down to one, so when my Bondi hit-from-the-rear gave way, the rest of my men lost heart and fled the field. If I had survived that impact (and I almost did: drawing a Ten and a Six when a Ten and a Seven would have done it) then I would almost certainly have won the game…it was that close!

Two enemy units, top right, have burst through my line. One is about to charge my rear!

But it was not to be: my Vikings had lost…but at least Bevan’s Vikings had won!

Despite my defeat, it was a glorious game, and one that we will definitely be repeating, although this time let’s hope the correct set of Vikings come out on top!