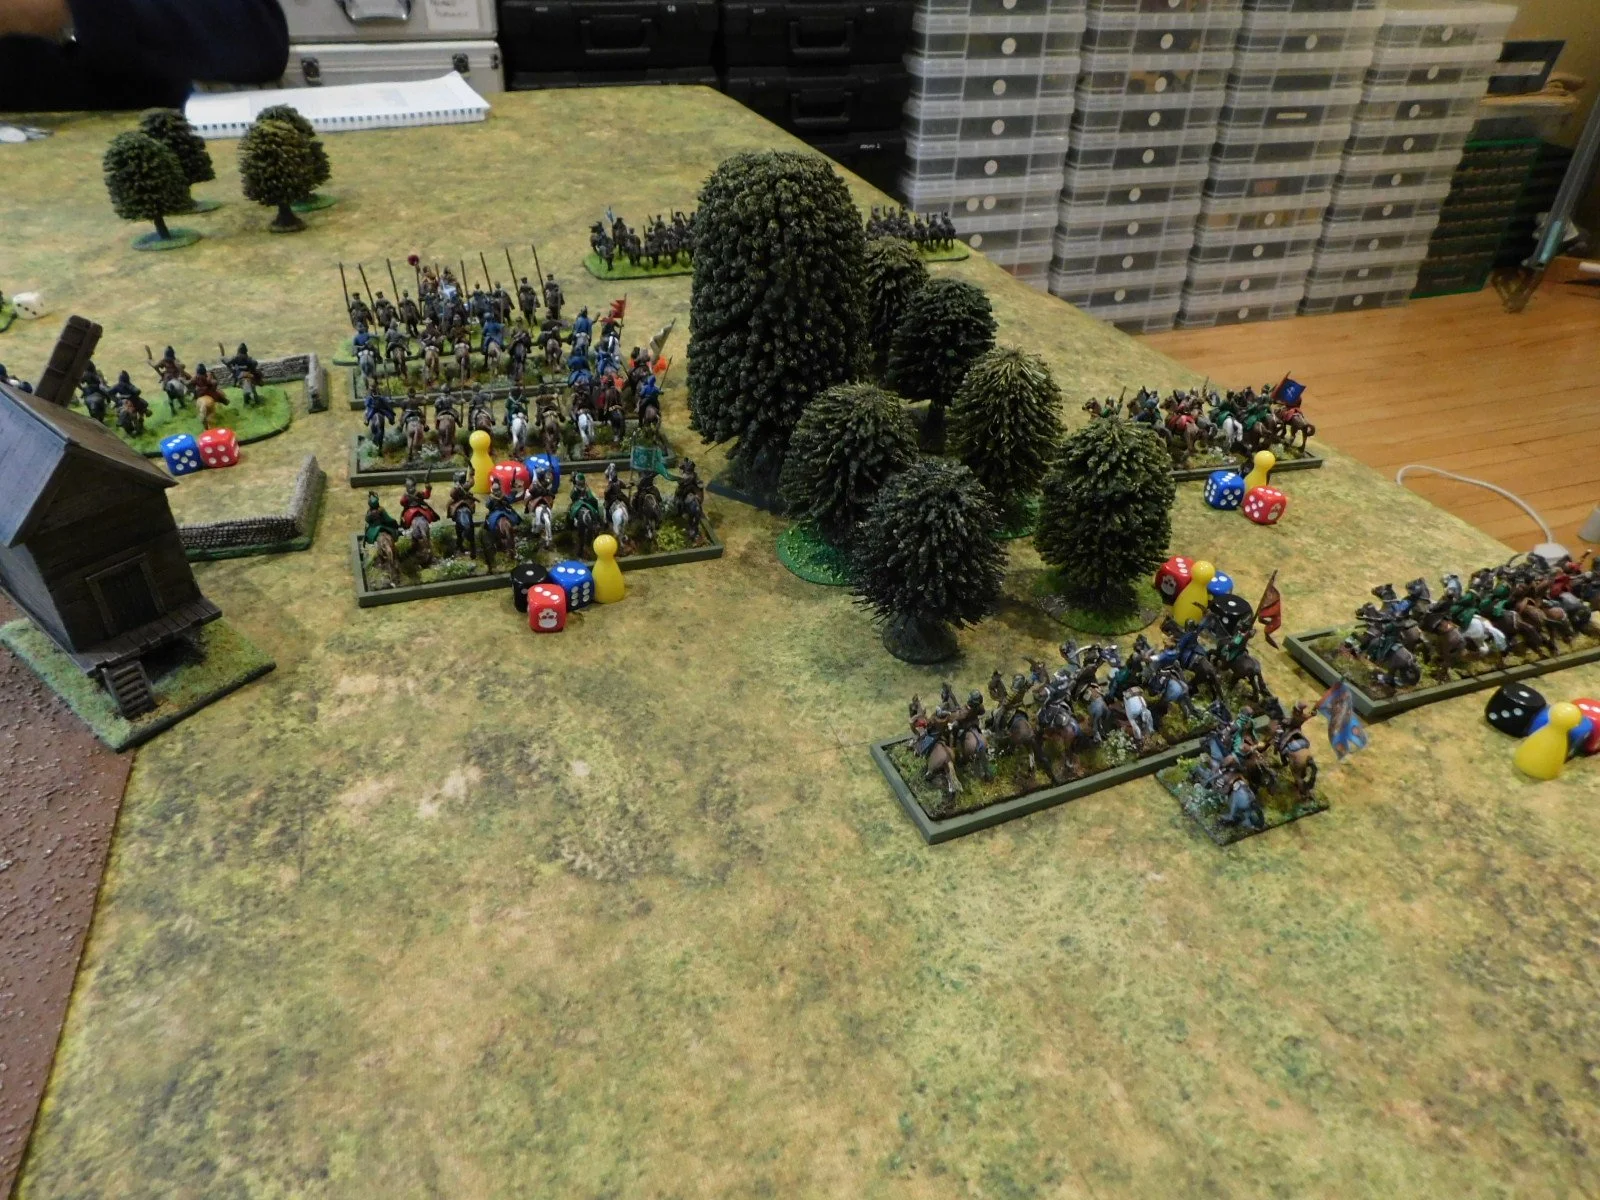
Painting Epic Scots

Friend John kindly gave me a couple of those Warlord Epic Scots Covenantor free sprues that came with Wargames Illustrated a few months ago, so it was time to get them painted and onto the table.

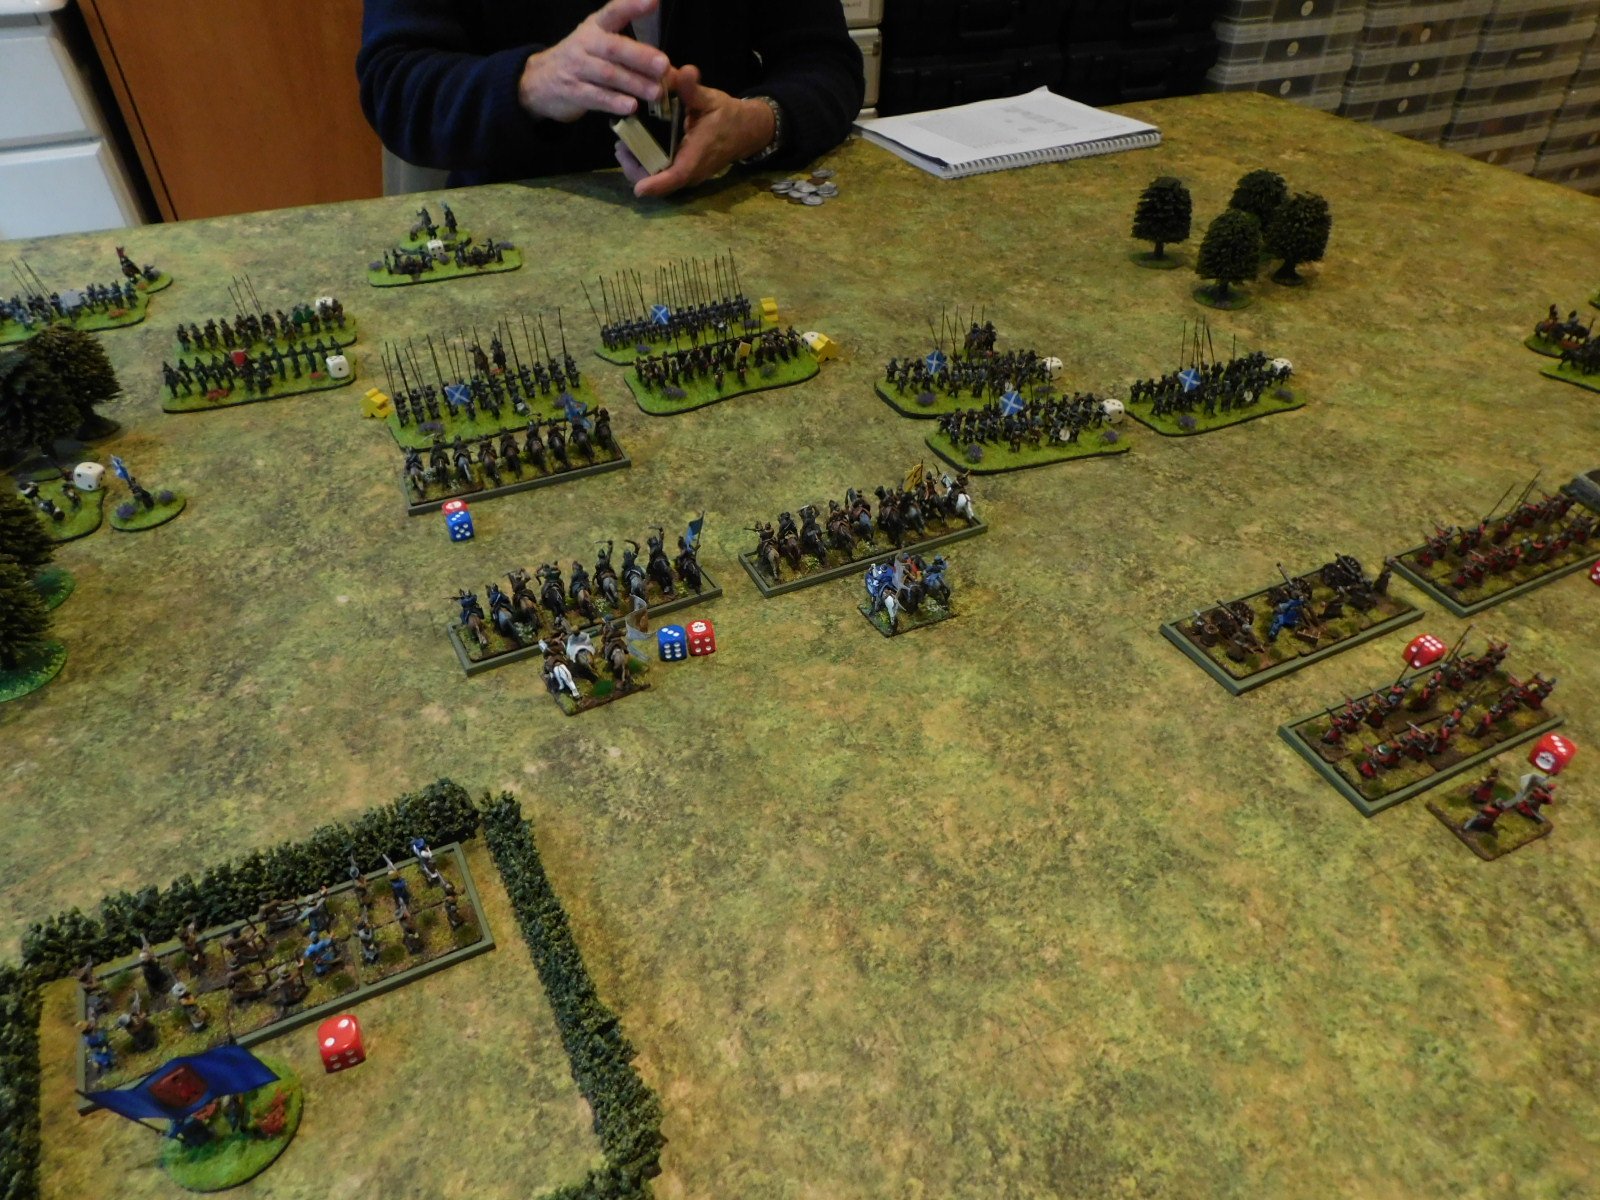
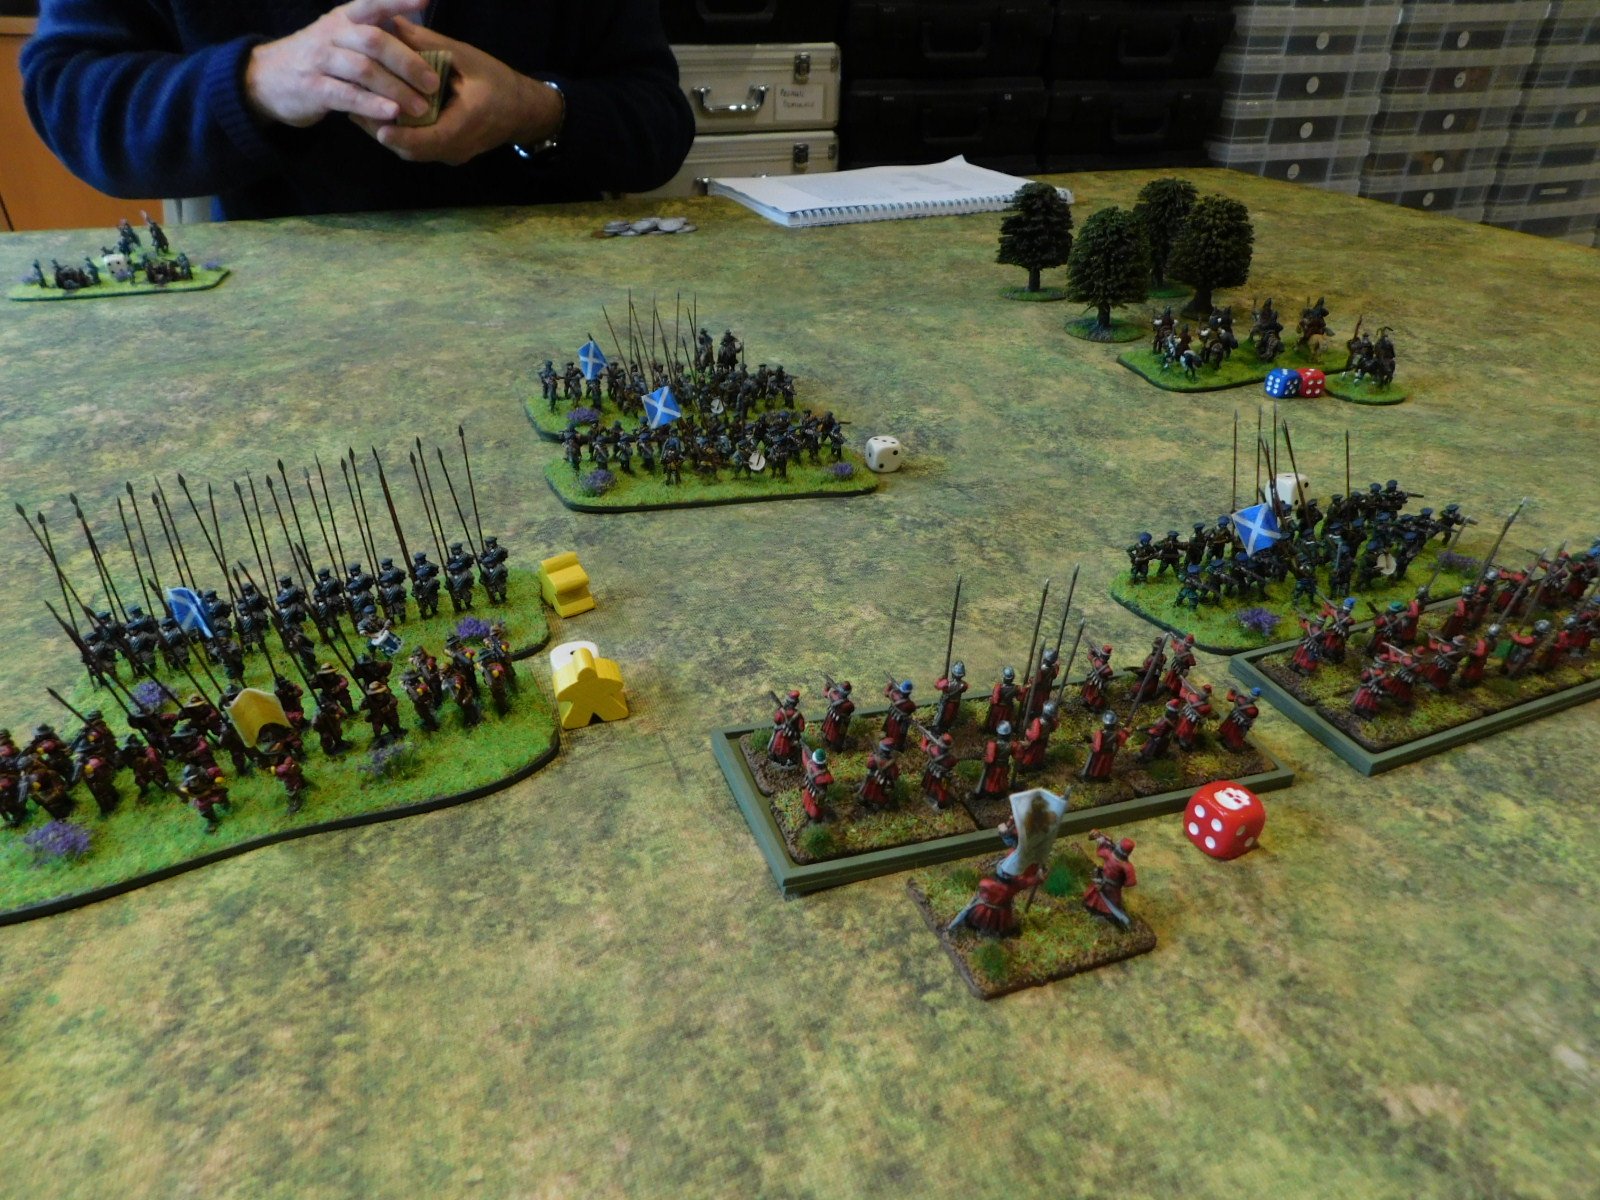
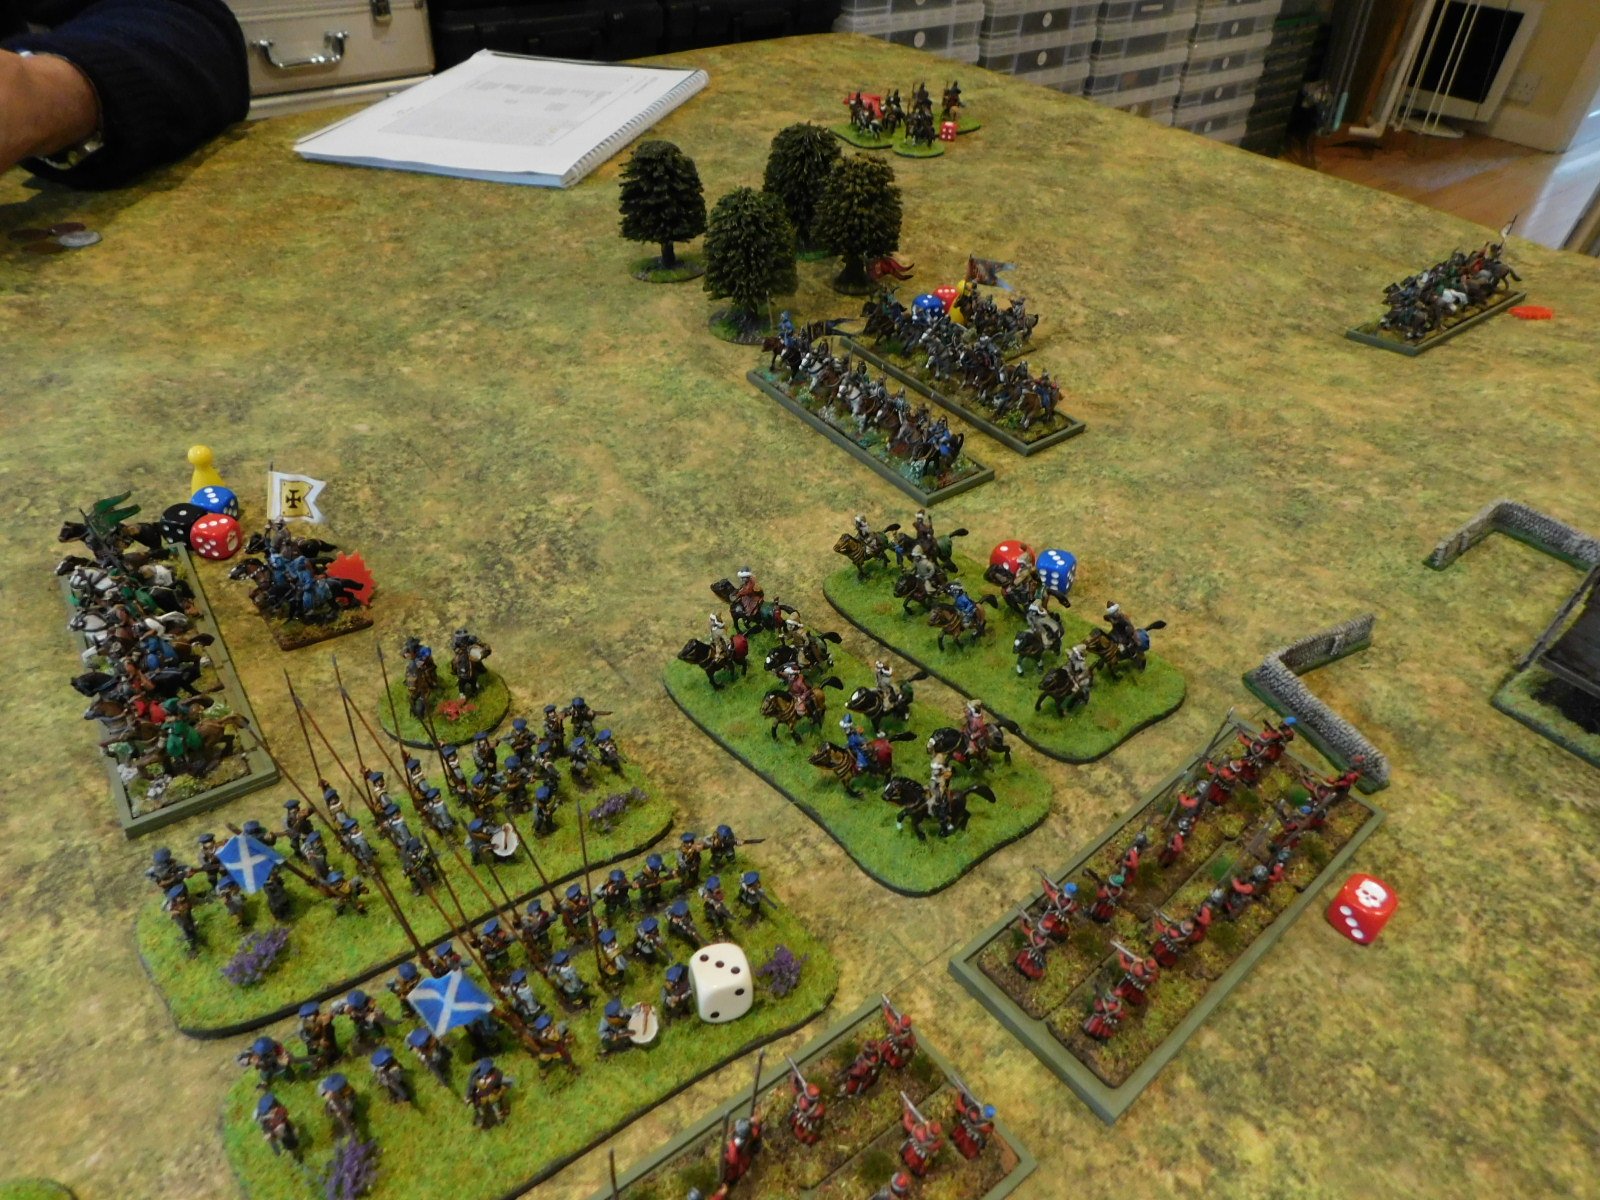
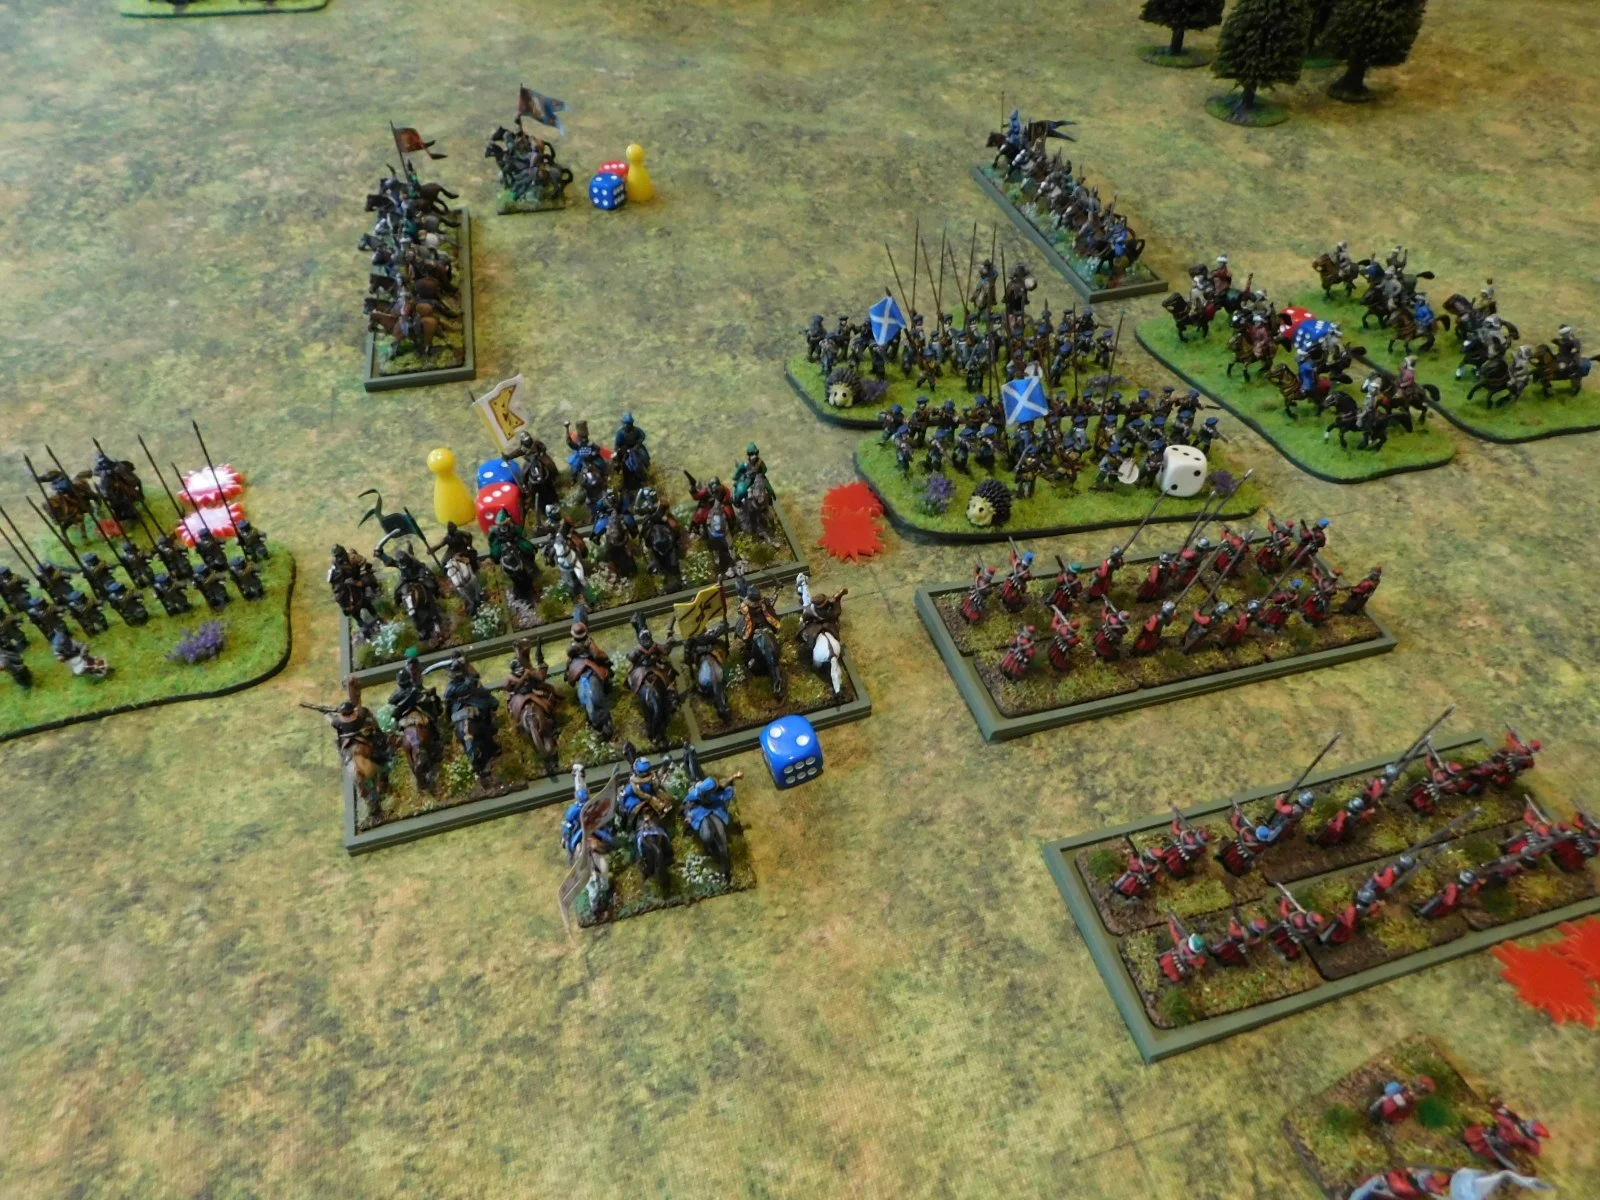
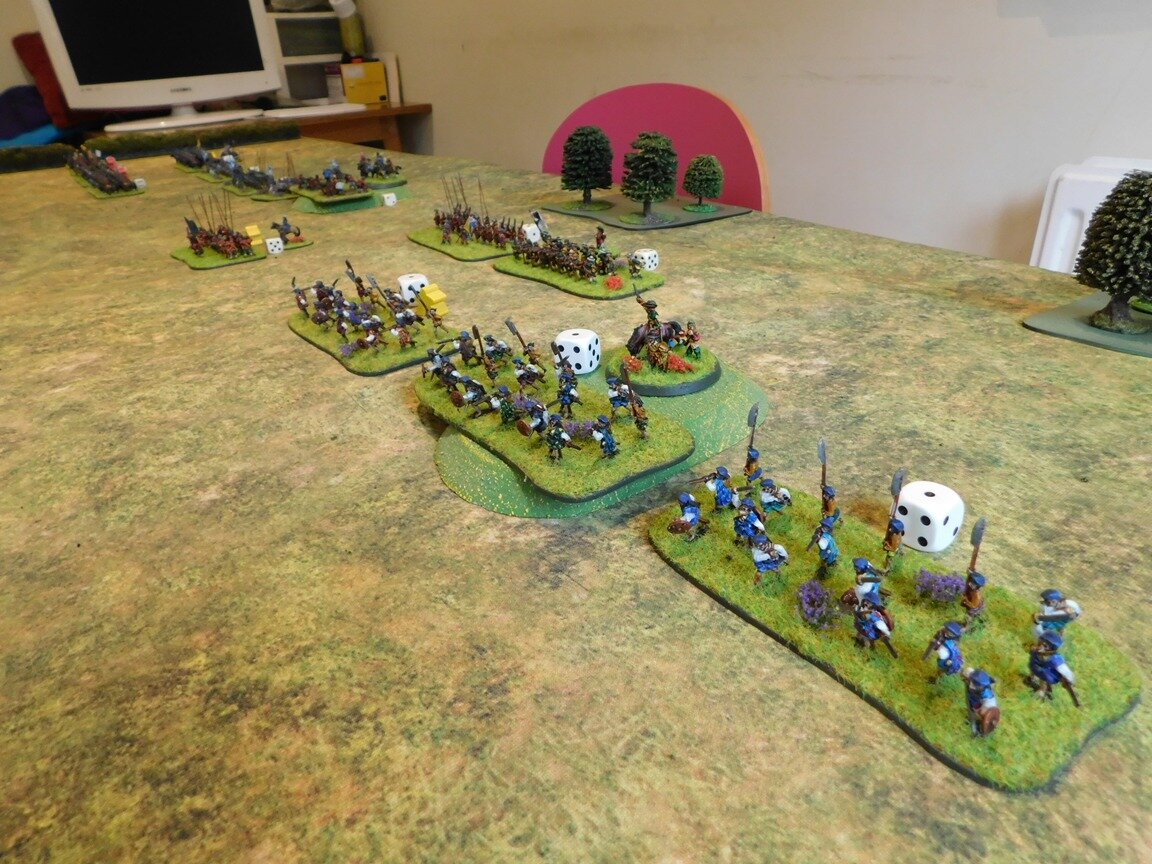
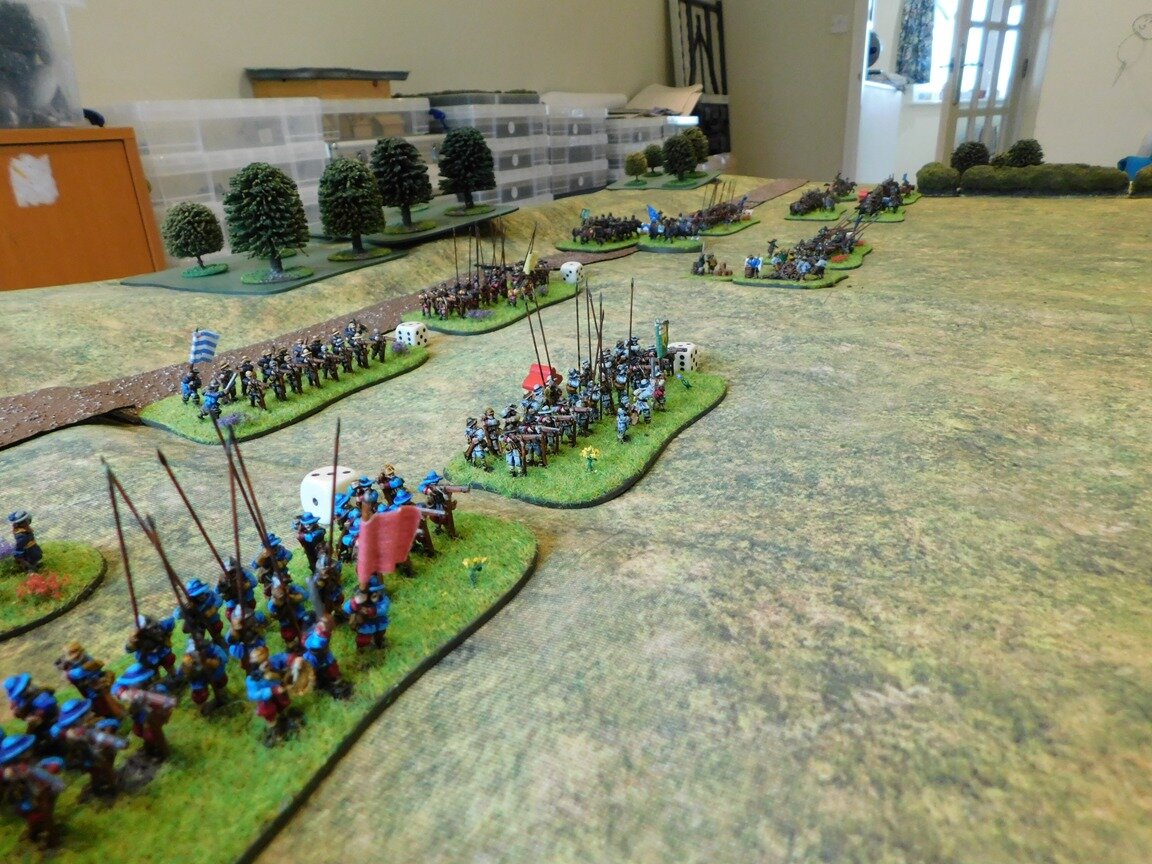
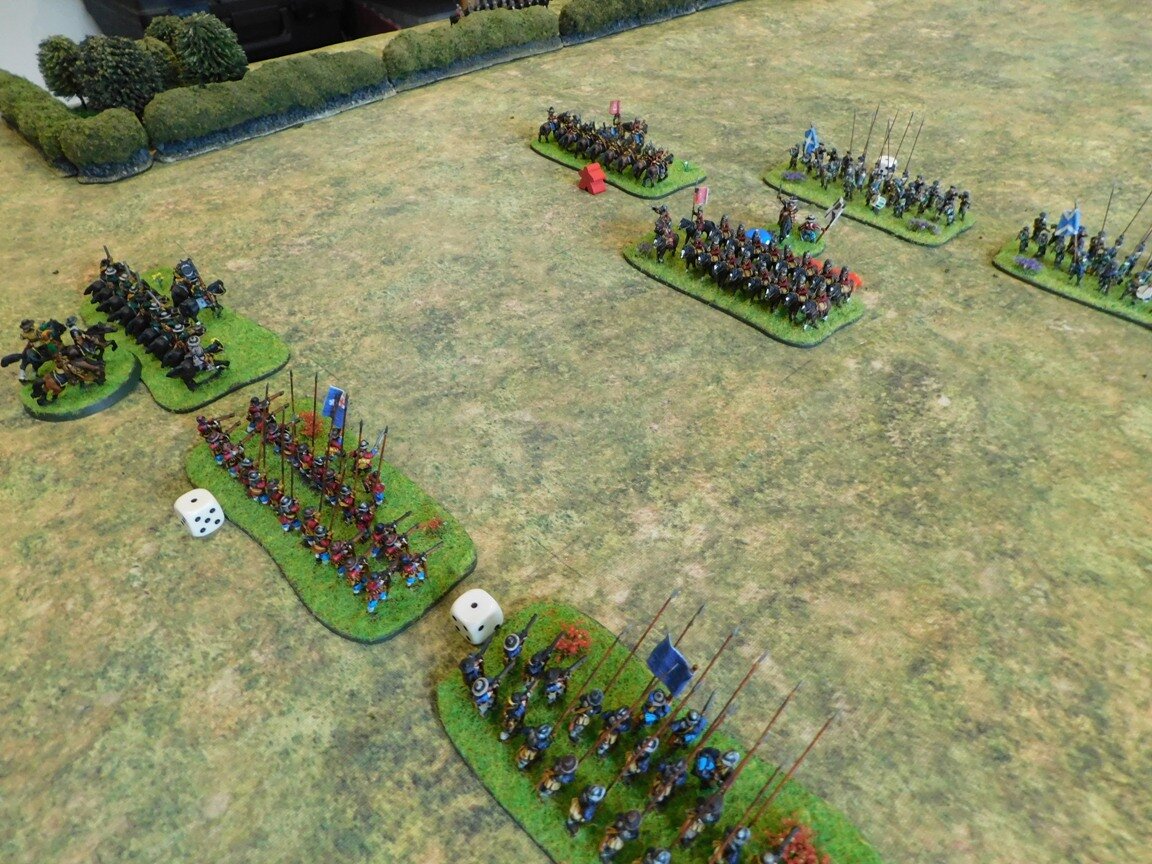
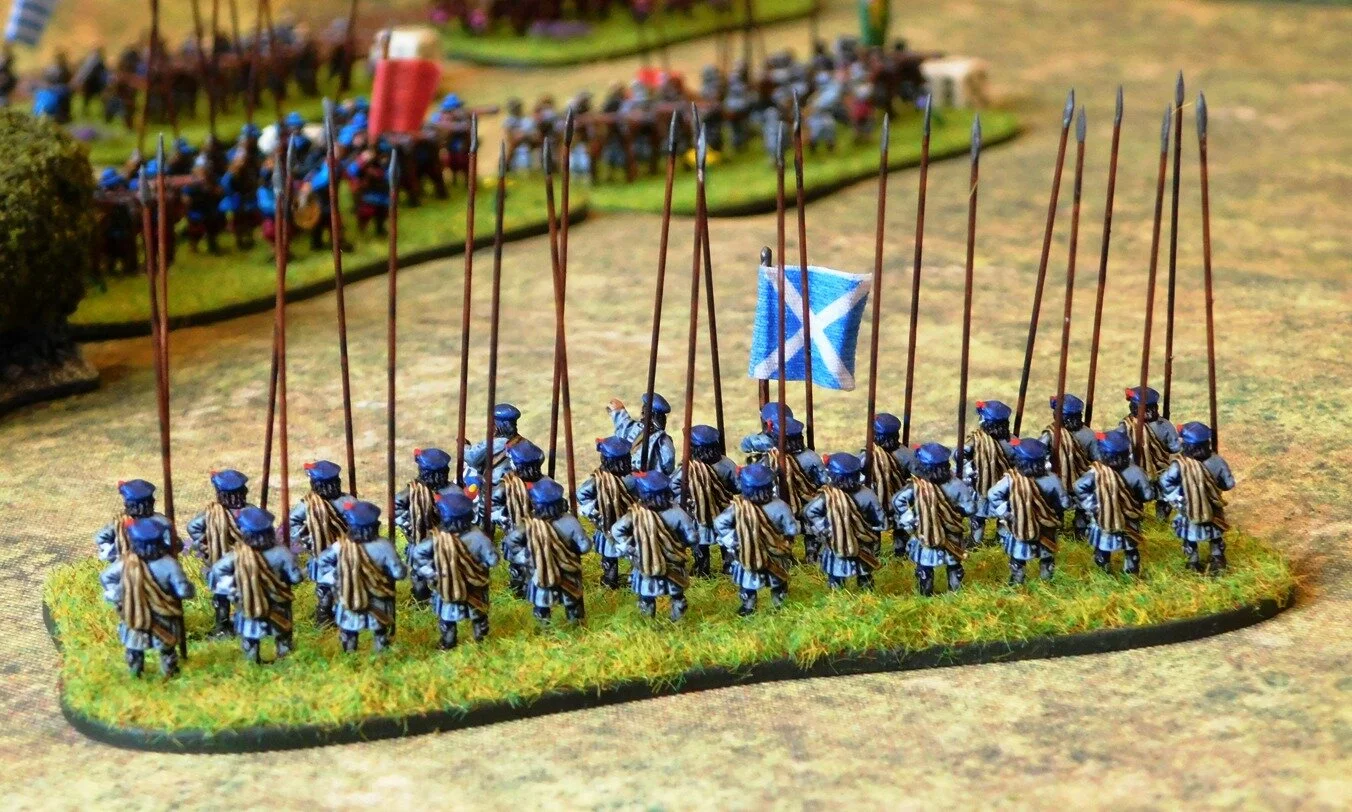
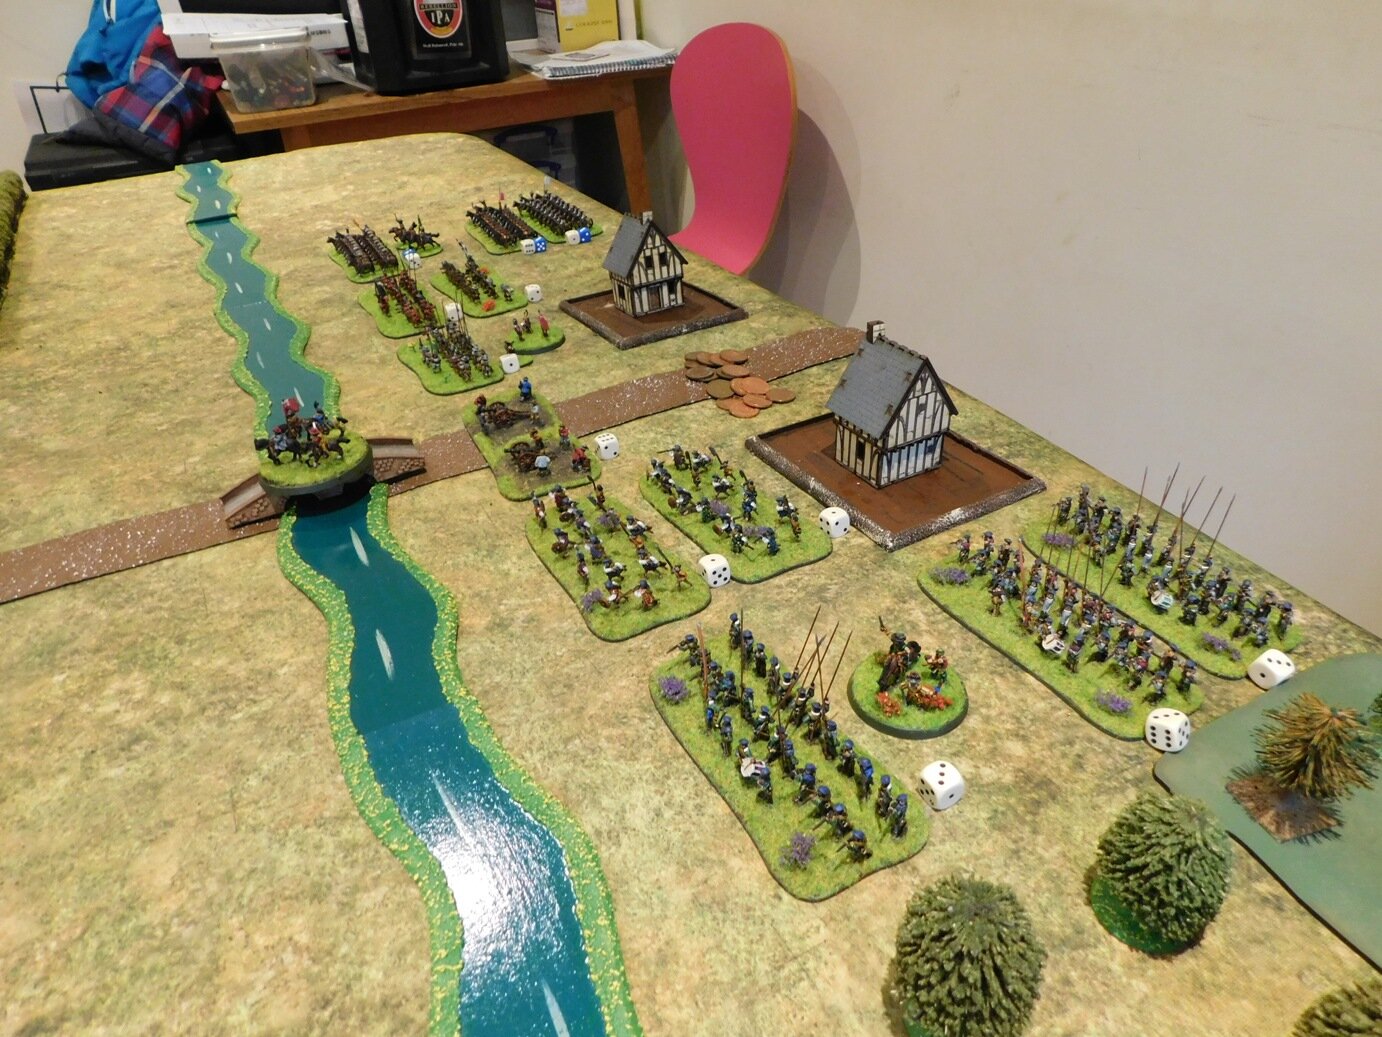
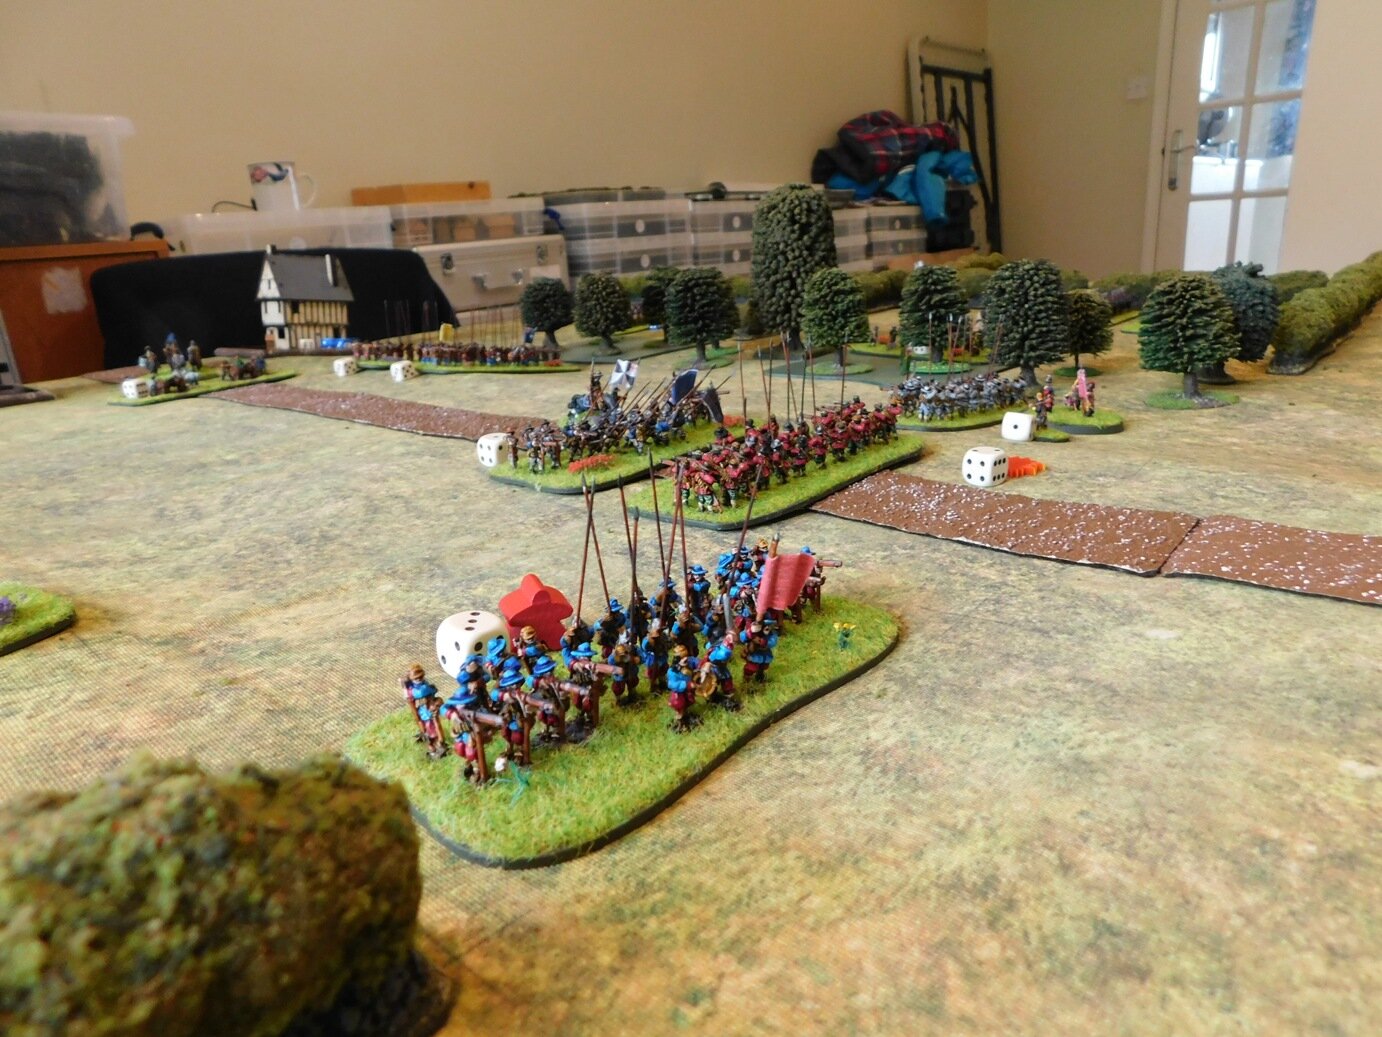
First up was a large unit of Commanded Shot. I decided to give them a natty pair of red trousers: not very dour but I fancied a change from Hodden Grey. The command figures came from Eureka: a bit taller than the Epic’s, but then you want some big men in charge!

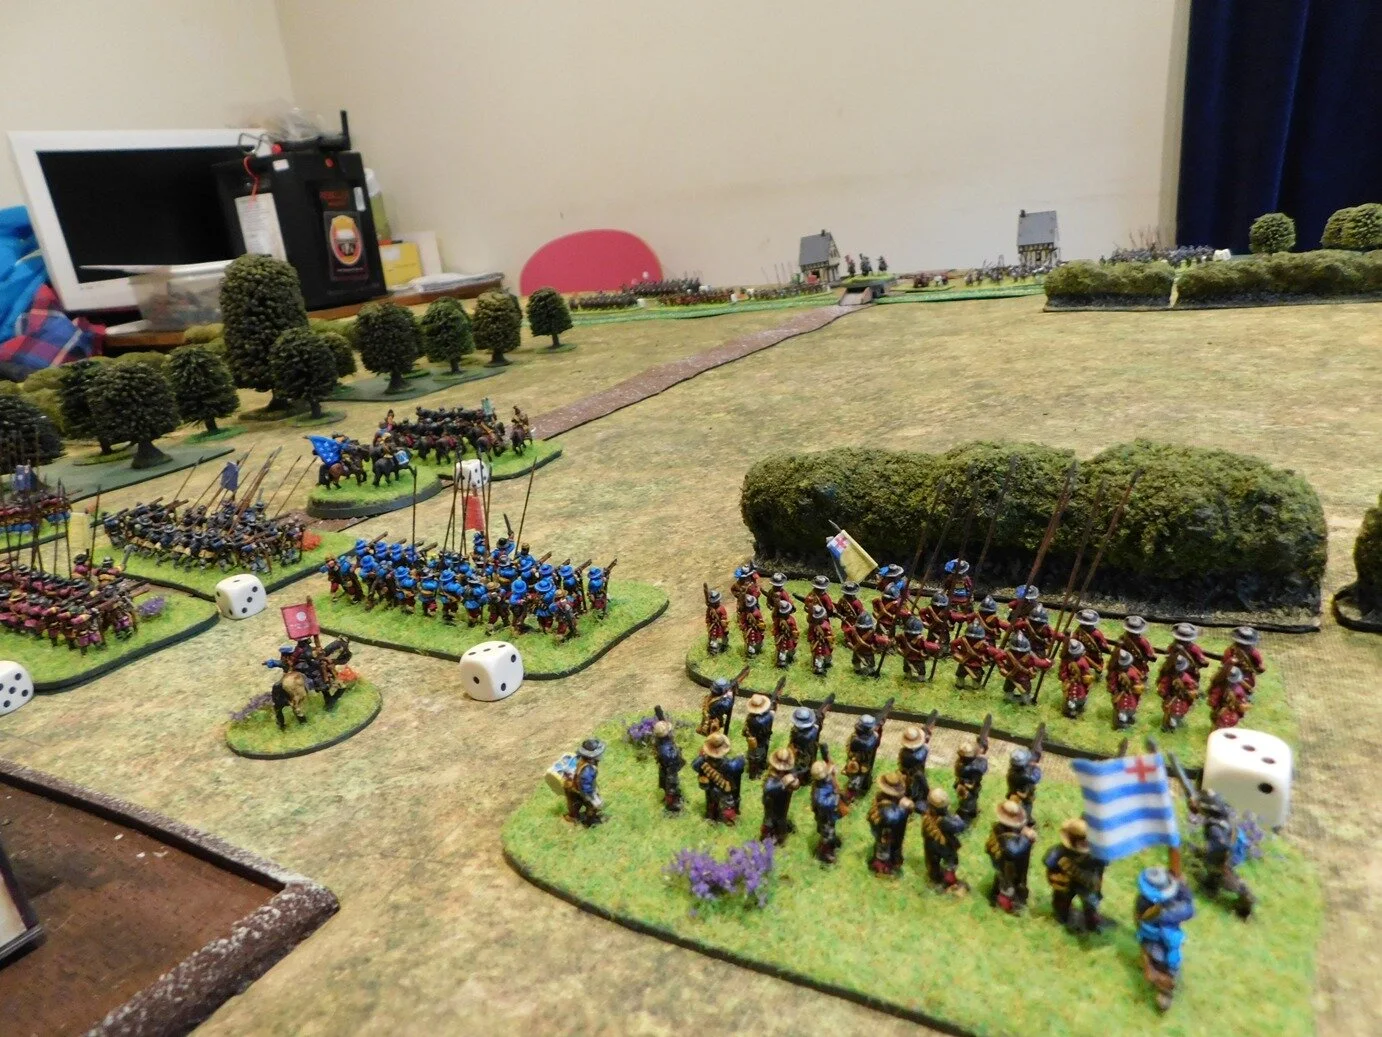
As before, the epic slugs painted up very easily and were actually quite fun to do. In fact, it took me so little time to finish this lot that I went straight into painting a second batch, this time with more traditionally coloured trews!

The flags, by the way, come from Maverick Models. They are a simple Cross of St Andrew custom printed for me by Steve, the proprietor. The cloth effect makes them very simple to use (much easier than paper flags) and they end up looking very good indeed.

With two large units of Commanded Shot completed in record time, I could spare the effort to use some of the single figures on the sprues to produce three bases of Attached Shot: something to give my artillery a little better chance of survival on the battlefield.

These were obviously just like painting standard 15mm figures…they are nicely posed and I particularly like the chap priming his pan (front left on the right hand base).

Finally, although not Scots, or Epic 15mm scale, I also had a chance to paint up another Spear unit for my 28mm Venetians. These are Perry plastics and, as usual, a slight pain to build compensated for by the variety and realism of the poses that can be generated, and the ease with which they paint up.

FK&P AAR: Plumleigh Common

Those of you who have been following Rob and I’s play through of the Siege of Norchester campaign will know that so far my Parliamentarian have not been doing very well: I’m currently ten victory medals behind overall, so really needed a decent win at Plumleigh Common to put me back on track.

In this scenario, the Cavaliers are trying another assault on the Roundhead siege lines, but this time the Parliamentarians are ready for them, resulting in an all out battle.

The picture above shows the view from behind the Parliamentarian lines, with Norchester itself being top left. My plan was to advance my Borders Horse on the far right around the flank of the enclosed fields, block any advance of enemy infantry out of the enclosures, and strongly advance in the centre and win the battle there.

The Battle of the Enclosures

The first part of my plan was to drive the enemy horse back on the far right flank. Although our forces numbered the same, my troops were mounted on nags rather than the sleek chargers of the oppositiom, so I knew I needed to win quickly or have my cavalry blown for the rest of the game.

The Royalists helped my cause by attacking piecemeal, and soon I had the advantage:

Unfortunately that didn’t last, and the situation devolved into a back and forwards encounter that neither side seemed likely to win until Rob sent some infantry in to reinforce his cavalry.

This gave him a temporary advantage and, for the moment it looked as if that flank would be lost to me.

Back in the Centre

Meanwhile, back in the centre, I had advanced quickly forward. On the right side, I had no wish to advance against the Royalist infantry safe behind the hedges of the enclosure, so was happy just to block their exit. In the centre centre, I advanced forward quickly in order to gain the initiative. Both sides avoided moving troops into the ground between Norchester and my works: too swept by artillery to be safe!

Battle was soon joined, and a general melee broke out:

All was going well until a squadron of Royalist cavalry threatened the left flank of my line. Fortunately I had a unit of the Puritan Horse there against just such a move, so charged the enemy horse downhill, confident of victory.

Unbelievably, Rob’s cavalry made four saves against the attacks on them, meaning my men swept downhill and literally bounced off the enemy. To add insult to injury, the Royalist cavalry then counter-charged and sent my men fleeing from the field!

Luckily I had reinforcements I could move to protect the flank…well, to be honest, it was a battalia of infantry that had got stuck, unused, behind the main battleline, so it was good to actually have something useful for them to do!

The fighting in the centre was now intense, and I had already had to recyle one of my Scots Battalia: it was all going to be down to whose troops could last the longest.

My left flank was also looking problematic, and even moving some of the pioneers out of the siege works to help didn’t make a huge difference. In the scenario, pioneers are represented by Highlanders: very much a one-shot weapon and useless against the cavalry they were facing!

Endgame

The main line finally shattered in both directions at once: with one of my Puritan Horse units fleeing the field whilst another broke through. At the same time, the Pioneers distracted a squadron of enemy cavalry so much that they were pinned in place, unable to take advantage of their position.

It was still neck and neck but, suddenly, gloriously, my cavalry on the right wing, long forgotten about, decided to intervene and win the day.

Freed from the cavalry melee by the intervention of one of my Borders infantry battalia, who head soundly beaten the enemy infantry that had kept my horse pinned in place, the Scottish lancers crashed into the flank of an already disordered enemy infantry battlaia and smashed them from the field.

This, combined with all the losses taken by each side so far, and the fact that two of the Royalist cavalry squadrons left the field in pursuit, reduced Rob’s pile of victory medals to zero, giving me the victory.

It had been carnage on both sides: checking my pile of coins I saw that I had gained a four-medal victory, so combined we had lost 28 victory medals between us: the equivalent of around nine units or a third of the units depoloyed at the start of the game.

So, after five games, the Parliamentarians now trail by only six victory medals overall, and it’s on to Dick’s Tower for the next encounter!

FK&P AAR: The Battle of Stour Road

Friend Rob came up from Andover-area for the fourth game in our play-through of the Siege of Norchester scenario book for For King and Parliament. So far, my Parliamentarians have won one game and lost two, so I’m a few medals behind overall.

Today’s game features a Royalist attack on nascent Parliamentarian siege lines. The Royalists have got around the flank of the Roundheads with their cavalry and now prepare to sweep all before them…

The outskirts of Norchester can just be seen top left, parliamentarian siegeworks are top right

Royalist outflanking force

Parliamentarian mobs work the siege lines

As the Royalist infantry and cavalry moved in, the Roundhead Mobs moved into the siegeworks, and the ‘corner’ battalia of Border foot went into hedgehog:

moving in for the kill

moving in for the safety!

The first action involved two of the Royalist cavalry units combining to drive a Parliamentarian battalia from the field.

Unfortunately for the Royalists, as one of their cavalry units followed the fleeing infantry in pursuit, the event triggered the arrival of the Roundhead’s cavalry reserves, who promptly charged them in return, driving them from the table as welll.

roundhead reinforcements arrive: it’s the puritan cavalry brigade

The action then switched to the ‘corner’of the Parliamentarian line, where the battalia of foot were holding their own, unlike the pike-only battalia behind them, who were crumbling fast:

the corner of the parliamentarian line

in hedgehog

The Puritan cavalry had effectivly dealt with one Royalist regiment of Swedish-style horse, but didn’t seem to be able to polish off the other.

Meanehile, the action was hotting up at the ‘corner’ and, in the distance, you can see that Royalist infantry have now engaged and are beating up the Roundhead mobs (armed only with picks and shovels).

Puritan cavalry engaged…

…and in pursuit

The action at the ‘corner’ hots up

As my infantry was now under so much pressure, I really needed the cavalry to intervene.

Unfortunately, although one unit of Puritan horse continued their pursuit and swept the Royalist commander’s small unit of cuirassiers bodyguard from the field, it then disappeared off into the distance, never to be seen again.

Almost worse than that, my other unit of Dutch horse was still trying to deal with almost the last remaining Cavalier Swedish horse regiment: no matter what I did, the enemy horse just woudn’t break, leaving my men pinned in place!

With my cavalry thus neutralised, finally the pressure on my infantry became too much and they began to break.

A last ditch attempt by the chaps who had been digging the siege works failed to achieve anything either - their shovels and picks being no match for pike and musket - and the Parliamentarians were forced to retreat, leaving the Royalists in possession of the field.

A great game but another defeat for Parliament. Rob is now ten coins ahead overall: just about a whole battle in hand!

Onto to Plumleigh common: where we’ll see if these Royalists can stand up to the might of siege gun Titan!

Epic Scots Painted Up

I stopped buying Wargames Illustrated shortly after it turned into the Battlefront catalogue (a pity, as I have every issue of the old style magazine and still dip in and dip out of them on a regular basis) but, when I saw they had a free Warlord Epic ECW Scots sprue as part of the package, thought I’d take the opportunity to (a) give the new-look WI another chance and (b) try out the Warlord Epic Scots.

I hadn’t really interacted with any Warlord Epic figures up to this point: my collection is nearly all 15mm and thought of buying Napoleonics that were slightly but significantly smaller that what I have (the admittedly larger, more like 18mm AB range) didn’t appeal.

In fact, I’d always wondered what on earth Warlord were thinking when they introduced another unique scale into the wargaming world. Why not go 10mm or 15mm rather than something in between? Or were they trying to create a Hobby like GW?

Anyway, reading around, the Epic ECW ranges were supposed to be larger than the Epic Napoleonics, more like 13.5mm, so I was happy to give them a go. I duly bought my copy of WI and settled down to have a read and a look at the free sprue.

First impressions were good. A nice lot of detail on the figures and they certainly seemed a good size. They also looked like they would be quick to paint: no picking up lolly sticks with 3-4 figures on them, just bases of 10 figures a time…plus the fact that a percentage of each figure wouldn’t need to be painted as it was hidden by their neighbour next door.

The 10-figure blocks were a pain in one way, in that they don’t fit with my existing basing system, but I don’t have any Commanded Shot bases for my Scots yet (in fact, the army is positively short of muskets having several Pike Only battalia) so I thought I’d give four “shooter” blocks a go as an oversize Commanded Shot unit.

So, what do I think?

Yes, very nice really.

They were easy to paint: really detailed relief takes Contrast Paint beautifully, and they were as quick to paint as I thought they would be.

I added a command figure from Blue Moon’s 18mm range that towers over them a bit, and a standard bearer from Alternative’s Furiosa range who fits nicely. And a dog just for laughs.

The $64m question, of course, is how they would fit in with my other figures: mostly Peter Pig and Hallmark 15’s.

Well, the photo below shows the Scots and a battalia of English pike and shot side by side for comparison:

The height difference isn’t noticeable at all. In fact I think the Epic figures are 15mm from top of bonnet to foot and that the 13.5mm measurement is to their eyes.

They are obviously a little more densely packed than my usual basing system, but that won’t be a problem providing I’m consistent with deploying any Scottish Commanded Shot like this.

One thing: they are a bit slimmer front-to-back then their metal equivalents, almost on their way to being flats, but I’m going to put this down to a diet of good Scots’ porridge rather than anything else!

The price is also good. The sprue also contains four pike 10-man blocks and a smattering of singles, horsemen, artillerymen etc. Would certainly work out much cheaper than buying everything in metal.

Will I buy more?

Probably not…but only because I have loads of Scots already.

I do need some more Commanded Shot, however, so if anyone would like to donate a sprue they received with WI but don’t want, Comment or PM me at the usual address and I’ll quite happily take it off your hands!

Would I buy Epic if I didn’t have any ECW figures and wanted to get into the period?

Yes, I would.

I’d have a basing system that suited the 10-man blocks (FK&P is a very forgiving rule system basing-wise) and would quite happily have built a large collection of Royalist, Parliamentarian and Scots figures up.

So a big recommended from me, and I will certainly look at the other Epic ranges provided they are also 15mm equivalents.

They look even better from behind: the only direction I will ever see them from of course!

FK&P AAR: Munce's Wood

Friend Rob and I are playing through the Siege of Norchester scenario pack. After narrowly losing the first game, Tounton Bridge, my Parliamentarians would face the Royalists at Munce’s Wood.

A pack of Royalist-sympathising Clubmen have been caught by a much larger Roundhead force. Fortunately for the Clubmen, there’s also a Cavalier army in the vicinity. The scene is set for a clash at Munce’s Wood.

Royalists on the left, Parliamentarians on the right (Clubmen in the middle!)

With the opposition a bit fragmented, and with superior quality cavalry on my left, my plan was to advance strongly on my left and centre, holding back my weaker right flank. Hopefully the Roundhead cavalry would quickly beat the fewer Cavaliers in front of them and then be able to surl around to take the enemy centre, by then presumably locked in place by my central advance, in the flank.

That was the plan, but unfortunately my cavalry just couldn’t beat their Royalist foes back. The enemy was defending a hedge line, and a particularly sticky unit of Swedish horse just plain refused to give way despite overwhelming pressure from my Dutch troopers.

Not only that, but my troops in the centre fought so badly that I was forced to pull some cavalry from the left to reinforce my centre. Things were not going well!

Meanwhile, much to my surprise, my commanded shot and artillery on the right flank were holding their own against the Royalist horse.

My three weak units held up Rob’s stronger three units for the whole of the battle and, although I would eventually lose all three, that sacrifice was worth it to keep his horse off my right flank.

On the left, my Dutch horse were still trying to get over the hedge, but just couldn’t do so in the face of continued opposition from the Royalists.

With that flank stalled as well, the game would be decided in the centre.

Things were beginning to thin out now as various units on both sides had broken and fled the field. In the end it came down to who could keep fighting for longer, and unfortunately it wasn’t my troops!

The final act was for one of my few surviving battalia of Border Foot to smash through the enmy opposite them, but then be hit from all sides by other Parliamentarians. As a final act of humiliation, it was actually a unit of Clubemn - the very people we were trying to surpress - that dealt the coup de grace, and my command generally collapsed and routed.

So a second defeat for the Parliamentarians in the campaign to take Norchester. Let’s hope I have more success at Cadmore Hill, the site of the third clash!

FK&P AAR: Tounton Bridge

Friend Rob came over for a game of For King & Parliament yesterday and we ended up playing through the first scenario from the Siege of Norchester campaign pack.

For this battle, the Royalists need to keep possession of a bridge near the hamlet of Tounton, with the Parliamentarians obviously needing to wrest it from them.

Tounton Bridge is to the left

The Royalists, under Sir Edmund Dexter, were in four brigades. There was a small brigade of Swedish Horse on each wing; and two brigades of foot in the centre, one of which had not seen battle before. Out front was Rankin’s Forlorn Hope, at back were Miller’s Guns.

Facing them were the Roundheads under General Thomas Dread-Naught. Core to his force was a large brigade of Puritan Horse under Colonel Kill-Sin Rhapsody: you can see God’s light shining on them as they enter the field in the picture above! The rest of his men were trawled from the border regions: a brigade of foot, one of horse mounted on steeds really only fit for the knacker’s yard, and a small brigade of tartan-clad men from further north. A rag-tag force maybe, but plenty powerful too.

The action opened with a general Parliamentarian advance against the largely static Royalists.

In the centre, the Royalist Forlorn Hope was dealt with fairly easily, but on the Roundhead right wing, one squadron of Royalist horse dispersed the Border Lancers without difficulty. This left them facing a wood full of Highlanders, but their blood was up and they charged in regardless of the terrain. The Highlanders, supported by some Mounted Pistoliers resisted the charge and that left a stalemate around the wood that lasted for the rest of the game!

Behind this action, however, another unit of Pistoliers had flank charged and dealt with the other squadron of Royalist horse, leaving the Scots to head north towards the rear of the rest of the Cavalier lines and the bridge, albeit on blown horses.

Meanwhile, on the other side of the field. Colonel Rhapsody was leading his Puritan Horse to disaster. Two of his squadrons tried an outflanking manoeuvre on the far left wing, but the Cavalier horse near them proved too fleet of foot: one unit neatly hopping the hedge, turning to face, and then charging furiously into the Puritan’s rear. Two squadrons of God-fearing cavalry got to meet their Lord sooner than they expected!

Onto the centre, where the Parliamentarians had moved forward and thrown their line into a general engagement. The Royalists moved to meet them, then retreated, then moved forward again, musket fire and the shouts of charging pikemen drowning out the cries of the wounded, and this indecision allowed the Roundheads to open a gap in the Cavalier line.

Ideally they would have had cavalry ready to exploit the hole, but the rest of the Puritan Horse was stuck on the left so it was up to some commanded shot to move forward and begin to outflank the Royalist line.

Meanwhile the Roundhead Borders/Scots horse that had broken through on their right had slowly (blown horses puffing and panting their way forward) managed to get around the rear of the Royalist position. Trotting past some enemy Commanded Shot who were happy to keep hiding in Tounton (the unit just wouldn’t activate despite the fact that the Roundheads were a sitting duck!) the Scots, much to their surprise found that they had taken the bridge. Surely the battle was now decided?

It was not, however, as simple as that. Yes, the Royalists were reduced to one coin, and the Parliamentarians technically had the bridge, but the Roundheads had lost an awful lot of cavalry and were also down to one coin. It was sudden death time!

Earlier in the game: the roundheads advance to contact

The Roundheads were pretty convinced that they could destroy the Royalist unit on the right - it was already disordered and surrounded on three sides - they just had to survive the next turn in order to do so. This was when the Royalist Commanded Shot that had been skulking in Tounton finally got their act together, moved out of the houses they had been sheltering in to a position from which they could fire onto the flank of the Scots horse, who had moved off the bridge to cut down the Royalist gunners from behind.

The double-shotted volley rang out and the Scots horse disintegrated! This was too much for the rest of the Roundheads, and rather than push forward to victory, they began to retreat. Moving back onto the bridge, the Royalists had won the day!

Enemy horse? What enemy horse?

The bridge taken.

Enemy horse? What enemy horse? All we can see is two lone scotsmen officer-types!

Totting up the points, the Royalists had won a narrow victory 16:14: snatching victory from the jaws of defeat! It had been a cracking game, with the advantage swinging backwards and forwards throughout. On to Munce’s Wood for the second game in the campaign!

Untried Royalists (the yellow meeple) await the Parliamentarian onslaught!

FK&P AAR: Muscovites and Scots

John and I fancied a game of For King & Parliament, but I didn’t fancy using straight ECW armies. Eastern front was a possibility, but I didn’t fancy using the Cossacks, which meant my only complete army was the Muscovites, but who to fight against them? Step forward the Scots and we were good to go, albeit for a rather odd if contemporary mash up!

I would play the Muscovites and, incredibly considering the amount of horse I had, immediately lost the initiative and had to start deploying first. My plan was to put most of my cavalry on the right and win there whilst my infantry held the centre and left, then swing my victorious cavalry into the rear of his infantry once they were fully engaged with mine.

Only potential problem was that I didn’t have much infantry, so had to use a brigade of Reiters (heavy horsemen) in the middle to fill a gap.

The Scots read my cavalry deployment superbly, and placed their large cavalry brigade opposite them, meaning that not only were my Tatar light cavalry immediately wrongfooted (I wanted to sneak them round the flank but their way there now led through some Scots Pistoliers) but my National Cavalry were squashed up behind a windmill! C- could do better for deployment!

Lots of lovely Muscovite horse, but they’re not quite in the right place

As battle commenced, the Scots hung back: advancing only their Highlanders on my left and their cavalry on my right. I quickly led my entire army forward except for the Servant Cossacks and Border Dragoons on my far left: I didn’t fancy mixing it with some mad Clansmen!

I also attempted to sort out the mess on my right flank by getting one of the brigades of National Cavalry to swap places with the Tatars: what a mess!

The aforementioned mad clansmen

Swapping two brigades of cavalry over is not easy

Fortunately John’s Scots had a fit of the slows, and I was able to get my horse sorted out and push forward to start the engagement that should sweep the Scots cavalry from the field and thus fulfil stage one of my cunning plan.

Meanwhile in the centre, the main body of Scots infantry had finally started moving forward. My Reiters headed out to meet them, but as I didn’t fancy charging well-ordered pike blocks, my cavalry turned around and retreated before any significant action took place.

The enemy were now effectively advancing in echelon towards me, which suited me fine as it gave my National cavalry more time to win on the right. The only trouble was that the Scots horse were proving hardier than expected!

The cavalry melee on the right went on and on, and I just couldn’t seem to break the Scots donkey-wallopers!

This meant that the Scots infantry were able to advance on my line and a series of sporadic firefights and melees broke out. My Reiters were still able to outpace the advancing Scots, but my Soldats and Border Dragoons were not so fortunate. A good thing, however, was that my Tatars had now managed to slip through the enemy line, going over the crest of the hill through the grounds of the windmill.

Finally, however, the Scots horse broke, and my cavalry were able to turn and head to the left. The Tatars led the way, forcing the nearest Scots pikemen into hedgehog. My heavier horse cantered past the spikey beasts and then curled round and slammed into the rear of the units next to them. At the same time my Reiters now charged forward meaning the Scots were caught front and rear.

Once the surviving Muscovite heavy horse got into a position on the flanks and rear of the enemy line, the battle was really all over for the Scots. I won’t describe every moment of the roll up: suffice to say that it got very bloody very quickly, and once one or two of their pike blocks had broken, the domino effect soon had all their troops fleeing for the safety of the Glens!

It hadn’t quite been a text book victory: too much had gone wrong with my initial deployment, meaning that my left and centre had only just held out for long enough to let my right wing do what they did. Had the Scots been even a little quicker off the mark on their left and centre, then I would have lost the battle there before my National Cavalry had even dealt with the Scottish horse.

ECW Scots Lancers

Another lot of figures rescued from the depths of the lead mountain: a unit of Scots Lancers for the English Civil War period.

What I usually find is that I get into a new period or army and fanatically paint enough figures to enable me to get it onto the tabletop as soon as possible.

As I’m doing that, however, I add more units to my core, initial purchase as I think about all the different variants I could play. These, new, purchases generally go to the back of the queue and, as my initial surge wears off, get relegated to the lead mountain as I switch from painting the army to playing with the army. Painting-the-same-uniform-a-million-times fatigue also sets in!

So here is a unit of Covenantor lancers that were initially bought a couple of years ago when I first started putting my ECW Scots together. It was actually a pleasure to paint them. The lancers are 15mm figures from Khurasan, with a Peter Pig command figure. Paints were from the Contrast range, with the horses actually painted in Fyreslayer Flesh!

Time for another game of For King and Parliament

FK&P AAR: Tounton Bridge

Friend Bevan wanted to play some more ECW battles, and as we had exhausted all the scenarios I had written for the Marlowe to Maidenhythe scenario pack, it was time to get the quill out and write a new one.

The background is simple: the Royalists are withdrawing into a walled town but need to cross a bridge to do so. Sir Henry Carlyle therefore volunteers to hold the Roundheads off from the bridge whilst his comrades make their retreat. His opponent is Sir Edward Dexter, leading a force of men from the Borders supported by a brigade of Puritan horse (commanded by Colonel Kill-Sin Rhapsody) and some rather uncouth Reivers.

View from behind the Parliamentarian column. The bridge is just behind the village.

This turned out to be one of the best games of For King & Parliament we have ever played, with the luck being evenly split all game and the result in the balance right to the last moment.

The Royalist Forlorn Hope opened the game by deciding that their position was not just forlorn but actually untenable. They were also blocking the fire of the Royalist artillery. They therefore retreated behind a nearby hedgerow to await developments.

The Roundheads took their time to shake out from column into line, with the Puritan Horse performing various convoluted evolutions to end up heading across the battlefield on the far left Roundhead flank. The Royalists watched all these developments with interest from behind their hedgerows, but eventually decided that something needed to be done about the Puritans, so dispatched Col Shaw’s Swedish horse to deal with them.

Parliamentarians shake out their line

There are an awful lot of Puritans!

As the Parliamentarian pike in the centre of the field approached the Untried Royalist “Just-Raised” brigade, the Cavaliers opened fire at long range and promptly disordered themselves due, presumably, with their surprise at how loud their guns were! This was a right pain, and would dog me for the rest of the game as I never had a spare moment in which to try and rally them.

Meanwhile, however, one of Shaw’s horse units had sprung forward and smashed a squadron of Puritans straight off the field: the first time we could remember a 3-hit Dutch horse unit succumbing to a 5-card attack in one go. The other unit didn’t do quite so well though, ending up even-stevens on one disorder apiece.

The Royalist centre-right scares itself silly!

Some initial success for Shaw’s horse

As all this was going on, some nag-mounted Parliamentary Pistoliers from the Border regions rode forward, survived the long-range fire from some of my Commanded Shot, and then promptly charged them and dashed them from the field. Not good, especially as this left a big hole in my line right in front of my guns. Worse, those very same Pistoliers survived flank fire from one of my veteran Battalia. Surely my guns were now toast!

Gulp!

Most unusually, however, the guns actually worked for a change, and blew the Pistoliers away. Crisis averted.

Meanwhile, the main melees rolled on:

Here’s a look at the whole battlefield. Note how I’m desperately trying to get a horse unit over from my left hand side to help shore up my centre and right!

Things now started happening in rapid succession (too fast for many pictures).

My two units of Swedish horse on the right finally succumbed to the four units of Dutch horse they faced, but they had down a good job in holding them off for so long. One unit of enemy horse came forward and threatened to turn and hit my infantry line from behind, but those reinforcements I’d moved across blocked them.

Then, in the main melee, one of my Untried units gave way, but this allowed me to turn the Battalia directly under command of Sir Edward onto their flank and destroy them. That gave me access to the flank of the main Parliamentarian line, and I took full advantage and destroyed another enemy Battalia.

The battle reached its climax

This left both Bevan and I on three coins each i.e. the first person to lose another unit would lose the game. There were also two combats underway: my reinforcements versus the enemy horse, my triumphant Battalia against some enemy Commanded Shot.

I chickened out of sending my Swedish horse in against his Dutch boys (the photo above left is actually from slightly earlier so my horse had become blown by now, which meant two cards versus two cards with death to whoever lost) thinking that I would charge his Commanded Shot from the field but, as you will see from the photo above right, I drew an Ace which meant my lads wouldn’t charge home.

Bevan then turned his Commanded Shot towards me and opened fire: two Nines, no Saves from me, Battalia and game lost!

Aftermath

An absolutely terrific game of FK&P: tactical challenges, extreme but even luck on both sides, and a succession of notable events: Swedish horse bashing Dutch horse from the field; three Untried Battalia disordering themselves; the guns surviving a frontal charge by blowing their enemy away; a succession of flank charges; reinforcements rushed from one side of the field to the other just in time to charge an outflanking enemy units; and, of course, everything coming down to the last combat.

Epic stuff, and I’m now inspired to write Scenario #02!

Robert Avery

More Bits and Pieces

Whilst I’m still waiting to find inspiration for my next major project, I thought I’d finish up a few bits and pieces from the lead mountain.

First up are a couple of Gallant Gentlemen for my Scots Covenantor ECW army:

Wallace-sized. The real one, not the shorty Gibson effort.

These are 18mm figures from Blue Moon’s new Scottish ECW range, and lovely figures they are too.

I bought these as a test to see how well they fitted in with my existing collection as I still can’t get the hang of whether 18mm figures are actually large 15’s, small 20’s or a scale all of their own!

With these, however, there is no doubt: they are too big to fit in with the Hallmark (via Magister Militum), Peter Pig and Khurasan models that form the main part of my 15mm ECW forces.

That said, a couple of comparative giants as Gallant Gentlemen fit right in with the concept of the GG, so I am very happy to have these two fearsome warriors on board!

As I said: lovely figures, but 18mm, so highly recommended if you want to field an 18mm ECW Covenantor army, but not if you want to field one in 15mm.

Next up was another general for my Classical Indians:

May the Fourth be with you!

These are more figures from Museum Miniatures excellent CAD-designed “Z” range of Classical Indians.

I’m always being told that I should field four generals when playing To The Strongest at 130 points. Now, with these, I can…and I actually needed a more cavalry-orientated commander for the later Indian armies anyway: by the time you get into the ADs, chariot-mounted generals are so yesterday!

Finally, I’ve had these undercoated on my painting table for, like, forever (as Daughter #2 would say).

Thundercats are go!

These are more of Khurasan’s excellent Felids mounted on jetbikes. I already have a couple of squads worth, so can now field a platoon.

These new versions are painted with GW Contrast Paints, and it’s interesting to contrast them (did you see what I did there?) with how I painted their predecessors:

Both look really good, but the old-platoon were painted with the base coat/wash/highlight method (i.e. each figures was picked up three times per colour) whereas the new ones, with the Contrast Paints, are only one coat per colour i.e. each figures was picked up only once per colour.

You can decide which is better!

FK&P AAR: McCleod's Odyssey

With my Rabble bases now painted, it was time to have go at scenario #10 from the Marlowe to Maidenhythe scenario pack: McCleod’s Odyssey.

In summary, the Scots who have featured as mercenaries in previous scenarios in the campaign are making their way home, but run into a force of Militia backed up by locals who want a word, shall we say, about the Scots’ behaviour as they went south.

It’s a standard encounter battle, with both sides directed to get stuck in as soon as possible.

The Scots, to the right, approach the village of the Gappe, held by the Militia and local folk

Deployment

The Scots placed their Highlanders on the left, opposite the rough and more enclosed terrain, their artillery and pike only units in the centre, and their standard battalia on the right. In reserve were their horse: a unit of poorly mounted pistoliers and a unit of poorly mounted lancers.

The Militia occupied the Gappe: infantry battalia in the centre, Swedish horse on the left and Dutch horse on the right. The three units of Rabble were on the far right, facing the Highlanders.

The Battle Begins

My plan was for my Highlanders to deal with the Rabble then sweep in to the Gappe from the flank. Bevan, my opponent, however, was up to all my tricks, and moved his Dutch horse to the right of the village, threatening the Highlanders’ flanks.

At the same time, the enemy Swedish horse moved out to their left. Not wanting my day ruined by the sudden arrival of cavalry on my right flank, I moved the Scots horse to counter: you can see them top left in the picture below.

Finally, my main infantry units moved forward…but my pike-armed battalia decided that they had walked far enough and just about refused to move.

Everything then seemed to happen at once.

On the left, two of my Highlander units were charged, as predicted, by the enemy Dutch horse, with both surviving the charge but becoming disordered in the process. I struck back and, incredibly, one unit of Dutch horse was double-disordered and had their Colonel wounded.


This was a great opportunity for a game-winning opening clash but, try as I might, I just couldn’t find a way to break the enemy horse and would now have to suffer the fate of all loose infantry attacked by large numbers of close formation horse!

Meanwhile, on the other flank, my horse and the enemy Swedish horse now faced each across one of the fields outside the village.

A victory for the Scottish horse, despite their manky mounts, but now they would Pursue their fleeing enemies from the field unless they stopped and rallied.

As these actions were happening on the flanks, my centre moved forward, me seeking an advantage by overlapping his left wing.

Mid Game

After the initial clash, I had won the right flank but was about to lose my left flank: the Highlanders were outnumbered 5:3 and could do nothing except take the charges from the Dutch horse.

One unit of Highlanders crumbled and fled, leaving a gap through which one unit of Dutch horse could pour. The enemy horse pursued for a bit, then rallied and headed into the big open space behind my centre. All that was in front of them was my guns, and although I managed to disorder the horse and wound the General with them with some startlingly accurate artillery fire, I was soon overrun.

Meanwhile, another of my Highlander units had gone, leaving the third in a dire situation.

Meanwhile, the two centres were fighting it out but, despite having superior numbers, a bit of bad luck meant I was losing.

If my cavalry didn’t return soon, I was going to be out of victory medals!

End Game

The left side of my centre was now beginning to crumble as well as his successful right wing started to curl in on me.

We were both down to a handful of victory medals, with enough units at double-disorder to settle the matter one way or the other if they broke.

My pistolier horse quite their pursuit and crashed into the left side of the enemy battalia in the right hand building. That pike unit broke, and the advantage was momentarily mine, but then my pike-only unit in the centre of the field (bottom left in the pic above) went, and we were evens again.

It was down to whoever lost the next unit and, finally, my last unit of Highlanders could take no more: they had been fighting front and flank for three turns now, somehow hanging on…and that was the last of my coins gone!

The day was lost: but it had been an epic battle that, once again, had come down to a could-go-either-way climax.

Afterword

My big mistake was to let my Highlanders get into combat with Dutch horse: I should have retreated to cover if I could. That would have meant I went into the more successful clashes on the right and centre without having haemorrhaged victory coins on the left.

A great game, however, whatever the result.

ECW: The Mob!

Finally managed to actually finish some painting: four bases of Rabble for my ECW armies and a coach & horses model to provide an objective or battlefield colour.

Let’s start with the coach:

This an Essex Miniatures model, with outriders from Peter Pig. It is a lovely, chunky bit of kit, and not too complicated to build.

That’s not to say it was easy (it wasn’t, and there was a lot of Superglue involved, most of which ended up on my fingers) but it was easier than the Magister Militum version that I bought at the same time. That arrived with no wheels, and had so many teeny-tiny fiddly bits that I eventually gave up trying to build it at all!

The problem for both is the way that the coach part is supposed to “float” above the carriage bit, hanging from the suspension springs that attach to uprights from the carriage. If you look at the picture above, that odd bit of blue above the rear wheels (don’t understand how that ended up there: there’s no blue on the model!) is where the suspension spring attaches to the upright. On this model, the suspension springs are very cleverly part of the main coach body, bending out from it at whatever angle you need them to. On the MM version, you had to build each part bit by bit i.e. tiny bit attached to tiny bit attached to tiny bit. I’m sure a better modeler than I would have coped, but it was too much for me.

As you’ll see, I based the model to fit with how I’m going to use it when playing the grid-based For King & Parliament rules. The team is separate from the coach, so when the coach is in a square on its own or with nothing in front of it, I shall put the team on the table; and if there’s no room, I won’t. It seems a bit odd, but works without having to use one of my double-deep bases to fit the coach and team on in one, which would then prevent me putting another unit into the same square.

The Mob

You need some Rabble bases for three of the scenarios in my newly published Marlowe to Maidenhead ECW scenario book, so I thought that I’d better finish the ones that I’ve had part-finished for some time.

The figures are a real mixture. There are all the civilian figures I could find from Magister Militum’s Hallmark range; there are the Peter Pig clubmen and peasants; there are the Peter Pig plague doctors (I had to find a use for them somehow!) and then there are a few carefully chosen “specials” from Minifigs’ ECW range. All in all, a wide variety of poses that look properly mob-like.

I always think that it’s difficult to get a good looking Rabble base, and I’m still sure of that now. These are okay, and will do, but they don’t look at good as, say, the equally-mob-like Highlanders that I painted for my Scottish ECW army. On reflection, rather than going for a wide variety of colours, I should have decided on a very simple colour scheme and used that for all the figures, making allowances only for what they are wearing.

Well, looking at them again in the picture above, maybe they don’t look as bad as I thought. Let me know what you think via the comments.

Oh, and that is a single Minifigs Highlander out front: a Gallant Gentleman for the Scots.

More Scottish Pike/Warbases Deliver!

Here’s another unit for my 15mm ECW Scots Covenanter army: a second pike-only battalia.

The fine-looking pikemen are from the Hallmark range via Magister Militum; and the command figures are Peter Pig. These are painted mainly with GW Contrast Paints, with just the metalwork being normal acrylics.

As regards everything else, the flag is a custom order from Maverick, the pikes are from Northstar, the heather is from Boontown (see yesterday’s post for more) , the base is from Warbases (see below for more), and the flock is from Hobby Round.

Warbases Deliver!

The story so far: a load of lockdown loot ordered from eight different manufacturers/suppliers last Sunday. On Wednesday, Boontown won the race to be the first to deliver, and yesterday the ever-reliable Warbases came in second with my order of vehicle bases (which I use for 15mm elements such as the pike, above) and a packet of command bases.

So far, therefore, we have:

  1. Boontown (3 days)

  2. Warbases (4 days)

Pretty impressive stuff!

Scottish Lancers

I’ve finally had a chance to finish a unit that’s been sitting on the painting table for almost a week: a unit of Scottish Lancers for my ECW Covenantor army.

The main body figures are from Khurasan’s ECW Scots & Irish range, painted mainly with GW Contrast Paints. The two command figures are Peter Pig. The flag is a custom design from Maverick. As I didn’t have a command figure holding a flag, and wrapping it around one of the lancers looked weird, I decided to have the chap on the left waving a cut-down version!

The unit is based for For King & Parliament on a Warbases vehicle base. The purple heather is from Boontown.

I also managed to paint up a Colonel’s command base for the troops: a couple of figures from Peter Pig:

These were painted in the same way as the Lancers, above.

FK&P AAR: Cock Marsh

After the battle for Cookham Moor, the Parliamentarians have retreated in some disarray: falling back to a position where their rear and one flank is protected by the river Thames.

This protection, however, forms two sides of a potential cage, so the Royalists have hurried forward to do battle again, knowing that if the Roundheads break, there is nowhere, at least on two sides, for them to run.

Could this finally be the decisive battle that both sides have been seeking?

The Field of Battle

The action takes place on Cock Marsh: a bleak, wind-swept area of open ground between Winter Hill and the Thames. The lower slope of Winter Hill borders the south side of the battlefield. The north and part of the east side of the battlefield are bordered by the Thames i.e. impassable terrain. Any unit that is forced off-table into the Thames is lost.

The main part of the tabletop consists of moorland separated by hedgerows and the odd patch of trees. All hedgerows count as linear rough terrain. All wooded squares count as rough terrain. There are two Iron Age burial mounds on the Parliamentarian side of the field.

The Game

Postscript

I’d like to say that my (extremely heavy) defeat was all my fault, but that would be to underplay John’s skill at exploiting my errors.

I am now writing out one hundred times "Do not throw away your cavalry on a frontal charge against even or worse odds” whilst Sit Christopher and his surviving men drag themselves out of the water on the far side of the river!

A great game of For King & Parliament despite my defeat: 150 points a side played out in just over 90 minutes.

Robert Avery

Pike Only Battalia

To round out my ECW forces, I thought I’d better have some pike-only battalia and, as my Scots need a bit of a boost, I thought I’d make them Scottish.

scot1.JPG

The main body of the unit is pikemen from Hallmark Figures via Magister Militum. The three command chaps are from Peter Pig. They are painted mostly with GW Contrast paints, and mounted as a For King & Parliament element on a “vehicle base” from Warbases. The pikes are from North Star, the flag is a custom order from Maverick, and the heather is from Boontown.

scot2.JPG

More Dutch Horse

This weekend I finally had the chance to get back to the painting table and polish off another unit of “Dutch” horse for my 15mm ECW collection.

The figures are Hallmark from Magister Militum, painted with GW Contrast Paints.

As with all my ECW figures, I mounted them as a For King & Parliament element on a Warbases Vehicle Base. They are lovely and chunky to move around the tabletop, but I am somewhat terrified of dropping one!

Whilst I was waiting for the paint to dry between colours on the above, I also managed to paint a command base for my Scots Covenantor force. Here I used the Peter Pig special Scots pack of ensign, preacher and dog and a Hallmark gentleman command figure.

I must remember to brush off the spider’s web before photographing!

These came out quite well, and I do love the preacher. One thing I must remember to do, however, is to brush off the bits of errant spider’s web that the varnish picks up when I’m spraying in the garage before photographing the figures. It comes off easily, but you can barely see it in normal light…or at least that’s my excuse.

Onto some pike-only units now.

FK&P AAR: Cookham Moor

After the encounter at Whyteladyes Lane, the Royalists retreated to the small hamlet of Cookham. The Parliamentarians, however, rather than withdrawing to regroup, have followed them.

Cookham, a pleasant place mostly home to farm labourers, is split by the Moor: an open piece of land crossed one way by a small stream, Strand Water, and the other way by Dean Lane, now more of a road.

Unwilling to surrender the Moor, “Little John” Boulters leads his men forwards to the eastern edge of the open ground only to see Sir Christopher and his men just arriving on the other side. The stage is set for another epic For King & Parliament clash!

And that’s where I ran out of coins!

Snatching Defeat…

Well that was a game that was really going my way when a sudden paralysis amongst my troops caused by the loss of my Colonel of Cavalerie and Sir Kavan’s defection (I can see no other explanation as to why Aces suddenly appeared all over his brigade!) meant that the Roylaists were given a chance to rally, catch their breath, and then move forward and concenrate their numbers with devastating effect.

It didn’t help that my CinC, Sir Christopher, led a sorely-needed Scots mercenary battalia on a complete Jeb Stuart-like perambulation up the wrong side of the left hand wood, effectively taking them out of the battle at the moment of decision. That was deffo my fault though!

A great game that saw John keeping his nerve as I scored early successes, pulling back and then seeing an opportunity and taking full advantage. Just to emphasise the point: at one stage of the game (after the early clashes) I was something like eight coins in front!

Time for the Parliamentarians to retreat and regroup!

Robert Avery

Scots Covenantor Artillery

Another unit for my ECW Scots Covenantor army: this time it’s the artillery.

These are figures from Khurasan Miniatures’ 15mm Scots & Irish range, with one man per crew coming from Peter Pig.

They are painted with GW Contrast Paints, and mounted on a vehicle base from Warbases. The “heather” comes from Boontown.

DSCN1999.JPG