

TTS AAR: A Defeat for the Legions!
/Time for another game of To The Strongest with John.
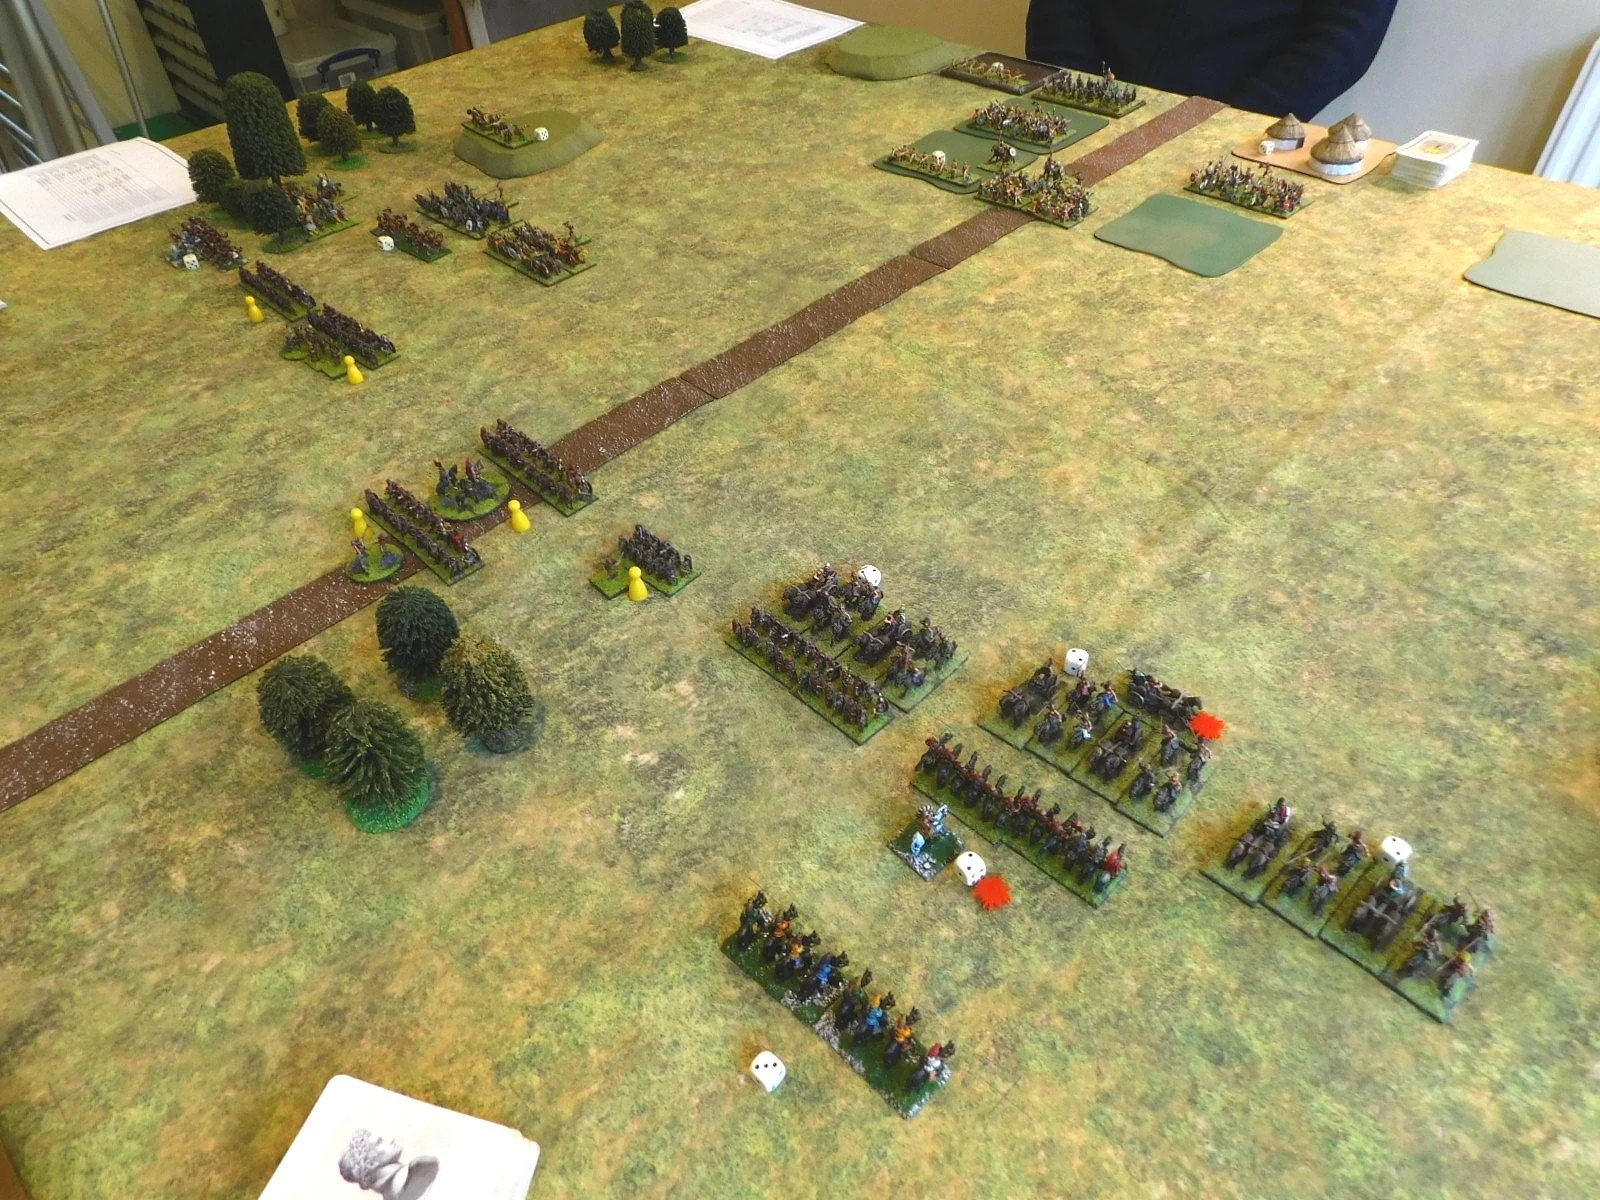
Rather than play a standard pick-up game where each side lines up on opposite sides of the table, we went for a more scenario based encounter, with the Romans starting the game in three columns: their main legionary force in the centre, their horse to the right and their lights to the left. The Celtic types facing them were largely deployed as one might start a standard game, but with enough exceptions to make things interesting.
To have any chance of victory, the Romans needed to deploy for battle as soon as possible: a task completed fairly easily as the superb drill of the legionaries kicked into play. There was a gap in the line on the road itself: the Cohorts VIII and IX not performing as expected!
Note that the yellow markers indicate that the Romans have pila ready to use.
The Celts announced their intention to move forward en masse. Their wings duly did so, but for some reason (the vagaries of the cards) their centre units hung back. This gave me a real opportunity to defeat them in detail on either flank before turning to crush their centre.
On the right, my single unit of legionary cavalry, supported by some auxiliary horse archers, duly moved forward to engage the enemy horse and chariots rapidly trying to curl around my flank. I also brought four cohorts of infantry (two units in TTS terms) across in support.
This really was a good opportunity to win on this flank, but the Gods decided otherwise: consecutive 2’s drawn from the pack meant that my legionary horse sat stationary rather than charging home.
My supporting legionaries were, however, able to charge home, dispersing the Celtic cavalry in front of them (kudos to the single Cohort X base for its contribution to the fight) but this wing was still very much in dispute rather than going my way.


Things weren’t going my way on the other wing either. For some reason, my main legionary force, including the double-size Cohort I with the aquila or Eagle Standard, also hung back, meaning that rather than fighting two enemy warbands with two Roman units, I now risked a delayed fight tying up my units until they were overwhelmed by more Celts coming into the fray!


And so it came to pass: the Celtic warbands in the centre ‘woke up’, and headed forward…
It would now be much more of a traditional stand up fight, and all would be well if I could get the Roman ‘mincing machine’ into action: I needed to bring my men together, make full use of my remaining pila, and rotate units in and out of the front line as required.
Unfortunately none of that happened!
Having split my line to deal with each wing of the initial enemy attack, I couldn’t get free enough of the rampaging Celts to get it back together again. So rather than fighting as one command, my Romans had to fight as three isolated commands on the left, in the centre, and on the right.
Secondly, my legionaries had obviously packed their pila away for the march, as not a single volley had any effect on the opposition. I also suffered a wave of officer casualties including the two tribunes commanding the main body of the legion. On top of that, even John remarked that the cards had turned against me: I was missing hits that should have gone in and failing saves that should have been easy. It was just not the Romans’ day!
My cohorts were gradually disordered and then wiped by the Celts using their superior numbers, and I just didn’t have the coins to withstand those losses for long.


So a defeat for the Romans probably stemming from my failure to wipe the enemy wings at the beginning of the battle. I’d made a bold tactical decision that had a good chance of success, particularly on the right, but it hadn’t worked and I’d suffered the consequences against the remorseless Celtic hordes commanded by John!


