Jagdtigers from Zvezda

One of the recent new 15mm releases from Zvezda was the Jagdtiger: joining the Sturmtiger and Elefant on the list of available German wunderwaffe.

Now I don't know why Zvezda would concentrate on such rare vehicles as opposed to, say, expanding their early war range or starting on the Polish, Italians or Japanese,  but I'm glad they did, as it means that I can add them to my collection guilt-free at about £3 a time rather than having to pay an exorbitant amount for the Battlefront equivalent.

As you can see from the photo, they paint up beautifully and are certainly not short on detail.

The Jagdtiger were a little bit more difficult to put together than some of the other Zvezda models that I have made, and I actually had to use a bit of green stuff to fill some gaps, but still the two combined took me only a couple of hours to complete from start to finish.

Highly recommended, as are all Zvezda's models.

Incidentally, if anyone is wondering, in IABSM the Jagtiger has armour 16 and gun strike 20: ridiculous!

PS  If Mr Zvezda is reading this, can we have some Polish 7TP tanks now please.

New 15mm WW2 Figure Manufacturer

Having sorted out the list of sci-fi figure manufacturers, I thought I'd better take a look at the WW2 list as well.

Coincidentally, just as I was doing this, a notice about a new one appeared on TMP:  Butlers Printed Models.  This is a 3D printing outfit who will print your required vehicles to order.

As it's 3D printing, the finish is a bit rougher than resin or plastic, but then tanks (especially Soviet ones!) tend to be pretty rough to the touch.

At the moment, Butler's have all the basic vehicles required at some very competitive prices. All they need to do now is a Polish 7TP and I shall be reaching for my credit card!

Click on the pic below to see all:

More Goodness from MBA

Regular visitors to this site will know that a month or so ago I took advantage of the 50%-off Miniature Building Authority sale to order some 15mm terrain from the US. See the post by clicking here (will open in new window).

I was so pleased with the buildings, and the fact that the 50%-off made them affordable to buy from the US, that I decided I'd better get some more in order to make my middle eastern town a bit bigger. A few clicks later, and I had another of the compounds and four more little houses on the way.

Whilst I was on the site, a couple more of the buildings caught my eye, and I duly ordered some of them too: manufacturers take note: all you have to do is get me there!

First up is the sawmill. Great little building this, and ideal for one of the scenarios in Bashnya or Bust! Unfortunately, the site said it was out of stock, but an e-mail to Kirk (good man that he is) led to him uncovering one deep in the recesses of the warehouse.

A nice little building, quite distinctive, that comes with a couple of piles of wood (okay, so they are a bit pants!) and some fencing to make an outside area. Loving this: will make any wooden Russian town or village a bit more interesting.

The next thing to catch my eye was the MBA Russian church. I'd coveted one of these for some time, but the problem is I already have at least three (it might be four, I deliberately forget!) Russian churches. If I bought this one, I was well on the way to having enough to portray a different church in each of the various towns and villages  in all 32 of the Bashnya and, indeed, all the Vyazma, scenarios as well. I definitely did not need another Russian church.

So here is my new MBA Russian church proudly sitting on the tabletop:

Another lovely model that comes with two gold crosses for the steeple: a really nice touch as I am bound to break or lose one over the next few years.

Here are the two buildings together rather than in isolation, and you can see the new middle eastern kit behind them as well:

So how did the financing work out this time?

Using an exchange rate of $1.30:£1.00, here's the calculation, rounded to single units for ease of consumption:

  • List price: $290 (£223)
  • 50% off: $145 (£112)
  • P&P:  $85 (£65)
  • Tax: $36 (£28)
  • Total Paid: $266 (£205)

So a saving of around £20...and I have some very nice buildings that are usually only available (due to cost) in the States.

The MBA sale is still on, click on the banner below to visit their site. Please mention VL if you do end up buying: I've already received one angry e-mail from a spouse about the money spent by her other half the last time I posted about MBA!

New Battlemats Arrive

One of my impulse purchases at Salute this year was a couple of battlemats from Tiny Wargames. As my tables are 6'x5', I custom  ordered one of the South Pacific coastal mats and one of the planet Mars mats, both cloth only, paying £150 for the two, including p&p.

Arriving home yesterday, well within the 21-day custom order time given by Tiny Wargames, I was greeted by a good sized package containing the two mats...and they are cracking!

First up, the coastal mat. Okay, so I could have got a slightly bigger one made (that's my fault!) but the mat looks fantastic and I cannot wait to try it out.

Here's a few pictures without any other terrain on board, just a couple of Japanese landing craft:

And here's the Mars mat: again looks great...and it makes me almost sorry that I've homogenised all my sci-fi troopers onto grass bases.

So a couple of recommended purchases there, and I shall be treating myself to a winter mat once the finances have recovered.

www.tinywargames.co.uk

MBA Middle Eastern Town Arrives

Some of you may have read the news that terrain manufacturer Miniature Building Authority is moving out of the 15mm space and, as a result, selling of their stock of 15mm terrain pieces at 50% off list price.

The MBA buildings are the ones that come painted and in two halves: put the halves together, you have a pristine building, but take the top half off and you have a ruined building. Ideal for IABSM when you're trying to show a building rendered unstable by artillery fire!

I've often lusted after their stuff, but as they are in the US it hasn't been economical to buy any. With the sale, however, it seemed to be worth having a punt, despite the shipping and tax I would have to pay. I duly contacted Kirk at MBA, we sorted how much the postage would be, and I ordered a complete middle eastern town for my desert war and 6DW collection.

After I'd paid the VAT, Parcelforce duly delivered a big box, which unpacked as follows:

Very nice looking and I'm very happy with them. So happy, in fact, that I've gone back and asked for more!

Anyway, what I'm sure you're all interested in is the financials: how did it work out.

Using an exchange rate of $1.30:£1.00, here's the calculation, rounded to single units for ease of consumption:

  • List price: $316 (£243)
  • 50% off: $158 (£122)
  • P&P:  $88 (£68)
  • Tax: $59 (£45)
  • Total Paid: $305 (£235)

As you can see, although I didn't really save any money (£8 or $11!), the sale made the buildings cheap enough to import. Given the quality of the products, well worth investing if you ask me.

MBA are also discounting some of their 28mm buildings. For those interested in either scale, you can click on the link below to visit their site. If you do end up ordering anything, please mention Vis Lardica when you do so.

For Sale: Kev's Desert War Collection

In addition to his many other talents (househusband, father, wargamer, ballet dancer) fellow Lardy Kev "Fat Wally" Lowth is a professional figure painter. You can see many examples of his work in his Painting Challenge galleries.

All his new stuff means that he is having to clear space in his collection, and his chosen sacrificial lambs are his 15mm WW2 desert war collection: both Afrika Korps and 8th Army, plus a whole load of scenics.

You can download the whole list of what's for sale by clicking here.

And can see examples from the collection by clicking on the links below:

He's looking to shift the lot for £1,650, and would be prepared to accept payment in three instalments. If you're a serious prospect, then please e-mail him on fatwallyuk@yahoo.com.br

Here are some more pictures:

Kev's website can be reached by clicking here.


SdKfz 231 and 232 from Plastic Soldier Company (plus hints and tips for assembly)

The latest 15mm offering from the Plastic Soldier Company is the SdKfz 231 box set.

I say '231', but the set allows you to build any five vehicles from:

  • the SdKfz 231 8-rad
  • the SdKfz 232 (the one with the radiator aerial)
  • the SdKfz 263 (command car, also with radiator aerial)
  • the SdKfz 233 "Stummel" (the one with the gun)

Now I already have one SdKfz 231 8-rad (and a couple of 'obsolete' 6-rads) so what I was after was another two 231's and then three 232's to make up a six vehicle heavy armoured car platoon of the sort used in Poland in 1939.

Here's the five vehicles from the PSC box set:

Very nice models that are relatively easy to put together (see below for more).

One thing to note is that they are considerably shorter than a Battlefront SdKfz 231: about 0.5cm shorter, in fact. You don't really notice unless lined up next to each other and, anyway, my Battlefront 231 is a later model with the extra front and rear armour, so looks different anyway.

Putting Them Together

The assembly instructions come in the form of the usual picture-diagram guidelines. Below you will find a few extra hints that, let me assure you, will make your life a bit easier:

Part 3: Assemble Hub Top

I found that the turret knob didn't fit in the hole in the hull top, so I'd advise you to widen the hole a little bit before you glue it to the hull base. Just easier to do at this point than later.

I just stuck a knife in the hole and rotated it a few times!

Part 4: Assemble Lights etc

You can't really see this in the diagram, but the wider set of lights goes at the front i.e. in the plate with the pickaxe and axe on it. Makes a big difference, as it won't fit together if you get these the wrong way around!

Secondly, when you are clipping the plates from the sprue, make sure you clip or then carve the surface of the plate flush i.e. don't leave a little nubbin of plastic where you clipped it. The assembly at this point has zero tolerance for a not-properly-clipped plate. Zero!

Part 6: The Mudguards

The mudguards, the mudguards!

I am sure even the great Piers Brand now occasionally wakes from a fevered sleep shouting "the mudguards, the mudguards", as these are a complete pain to fit.

The basic problem is that the mudguard tabs fit onto an inclined surface, so if you try pressing them straight into place, the mudguard slips down the incline.

Okay, you think, I'll just glue them, then position them gently, then leave them to dry. Problem is, if you do that, then you generally get a loose mudguard: either at one or both ends or somewhere along the middle.

The trick is to turn the vehicle over. Where the star shape pipes are in between the wheel holders is the key to getting the mudguard to fit. That is a flat surface, albeit a small one, where you can hold the central bit of the mudguard in place for long enough for Superglue to bind.

So, put a little blob (little!) where the notch is at the end of each mudguard. Put a little blob of glue on each of the main tabs on the two main bodies of the mudguard. Put a blob of glue on the central bit, where you are about to apply pressure. Flip the vehicle, settle the mudguard in place, and hold the central bit in position, making sure the central tabs and ends of the mudguard are all lined up and flush too.

Now work out how to unglue your fingers from the assembly and you are done.

Note:  leave the mudguards to fully dry before carrying on. If you don't, you'll only pop them off again when you are holding the vehicle in the later stages of assembly.

And yes, when you ignore me and they pop off...that is me saying "I told you so"!

Part 11: Aerial for the 232

Two things here. Firstly, the back aerial stand is the long legged one, not the short legged one. Small point, but worth making.

Secondly, if you are careful, you can build this so the turret still rotates.

Yes, you can!

I found that they key here is firstly to glue the tripod onto the turret. The diagram doesn't show this, but the side legs go just behind the widest part of the turret - literally just behind, I mean right just behind - and the front leg goes onto a little square etched into the centre of the top front of the turret.

Then glue the top of the back legs to the aerial. While the glue has some cohesion but is still drying, flip the radiator and glue the back legs to the front of the nubs on the rear hull. The diagram seems to have them on top of the nubs, but I couldn't get that to work, so fitted them just in front of them, resting on them in fact. Now just place the front hole on the aerial on top of the knob on top of the tripod, but don't glue it in place. You should then have a aerial that has solid back legs, but allows the turret to rotate.

I'm not sure how hardy this is going to prove to be, as the vehicles are yet to hit the tabletop, but they seem okay during the painting, basing, decal and varnish stages.

Final Word

These are recommended. At effectively £20 for five vehicles, you can't go wrong, despite the sometimes annoying assembly.

I shall definitely be buying another box's worth to use as early Afrika Korps vehicles.


Converted Polish Infantry Guns Completed

The latest unit to roll off my painting table is a platoon of 75mm wz.02/26 guns for my WW2 Polish collection. 

When fielded as a two-gun platoon, these will represent an infantry company's division-level Infantry Gun Platoon; when fielded as a three-gun platoon, these will represent a cavalry squadron's brigade-level Horse Artillery Platoon.

The guns themselves were nicknamed "orthodox" by the Poles, as they were old re-chambered Russian guns left behind on Polish territory after WW1. Always good to be equipped with the latest kit!

As for the models, the guns are from Battlefront by special order. I think they are down as Finnish or something as Battlefront doesn't really acknowledge its Polish range at the moment: far too busy in the desert!

The crew are actually WW2 Soviet artillerymen with head-swaps using Peter Pig's excellent range of heads. I've used infantry helmets for most of the crew, with an officer type wearing a rogatywka.

The limbers are general purpose Battlefront limbers, again with the driver having a swapped head.

Finally, I've also now reorganised my Polish cavalry squadron gallery. Click here to see them all (will open in a new window).

Objective Markers from Baueda

As previously mentioned on this blog, some of the games from my new scenario book for IABSM, The September War, covering Poland 1939, require one or more objective markers. As also previously mentioned, my first thoughts were to use Army Group North's excellent Polish Eagle crest markers, shown to the right.

They look great but, of course, are artificial:  as the name suggests, they are a 'token' rather than being something that belongs on the battlefield. I therefore thought I'd try some of Baueda's portfolio of objective markers, starting with two of what look like the easiest to paint: the fuel dump and the ammunition dump:

Well they do paint up very easily, and will certainly do the job. If you look on the Baueda website you will also see how a decent painter can turn them into mini works of art!

I must confess that I'm still not sure which I will use - the tokens or the objectives - but at least now I have the option.

PS  Another AAR from The September War appears here tomorrow.


Polish Tankettes

To finish off Polish week on Vis Lardica, celebrating the publication of The September War, my new scenario pack for IABSM covering the German invasion of Poland in 1939, here's a picture of some painting I completed last weekend: a unit of five Polish TKS tankettes.

These are Battlefront models and, as you can see, I have built two of them with the 20mm cannon and three of them with the standard MMG.

Now these things are small: significantly smaller than an Italian tankette or a Bren gun carrier. Although I can see that it would be nice to have a bit of protection against smallarms fire, I think you'd have to be crazy to ride one of these into battle against panzers!

Whilst I was researching The September War, I came across the fact that every year there is a big military re-enactment in Poland celebrating one of the battles of the campaign. Here's a couple of pictures of a TKS tankette from two of the re-enactment days.

As I said: these things are small!

Polish Cavalry Conversions

To celebrate the publication of my The September War scenario pack for IABSM*, I am declaring this week to be Polish week on Vis Lardica. All the posts through to Friday will be Polish in nature.

To start us off, here a bit of painting that I finished this weekend: a squad of Polish cavalry and a Big Man.

All the above are actually converted Battlefront Cossacks i.e. I've taken spare Cossack figures and given them new heads using Peter Pig Polish cavalry heads.

This was remarkably easy to do: snip off the old head, use a pin drill to create a hole in the decapitated torso, then pop the new head in. Takes about five minutes a time and gives you a nicely varied set of cavalry and reduces the lead mountain as I was never going to use those Cossacks.

Tomorrow's post features an AAR from the play-testing of The September War.

*The September War publishes on Wednesday  15th March 2017. It contains thirty-three scenarios from the German invasion of Poland, 1st September to 6th October 1939, and will be priced at £9.50. It is largely based on the first half of Alexander Kawczynski's Poland in Flames scenario pack for FOW, but totally adapted for IABSM.

Polish Armoured Cars

I'm just getting the figures ready for the next playtest of one of the scenarios in my forthcoming Poland 1939 scenario pack (barring major disaster, should be due for publication next week).

Here are three wz.34 Polish armoured cars from Battlefront. Nice little models, and you get all three, i.e. a complete patrol, in one pack.

The wz.34 was apparently the main armoured car used by the Poles during the September campaign, although some wz.29 armoured cars fought around Modlin. Crew of two, with either a 37mm gun (platoon commanders only) or a 7.92mm MMG.

Polish Mounted Commanders

Following on from my "Don't Forget the Officers" post, below, here are three mounted commanders for my WW2 Polish cavalry:

These are not actually Polish officers at all, but the remainder of the German mounted command pack from Peter Pig with a head swap into rogatywkas.

You can't see it very well from this angle, but the headgear they are wearing aren't peaked caps but  rogatywkas: from the other side, they have a lovely mortarboard like flat surface that makes them quite distinctive.

The head swaps are, of course, because Peter Pig doesn't do a Polish range (but maybe they should, eh?) and I didn't want to buy an entire company of cavalry from either Battlefront or FiB just to get a few commanders.

Head swapping, btw, is really easy. All you need is a pair of clippers and a pin drill...oh, and some new heads from Peter Pig. Just snip the old head off, drill a hole where you want the neck to be, glue in the new head. It really is that simple.

Here's the two figures together:

Never Forget the Officer!

Regular visitors will remember that I recently painted up a couple of squads of Peter Pig WW2 German cavalry that I'm using as early war mounted scouts:

Although you can see the squad commanders (two of them, furthest row) you'll note the absence of Big Man to lead the platoon forward. Well that's because as I was ordering them I was thinking that I had plenty of German Big Men, so wouldn't need any more. Problem is, of course, that although I have Big Men, I don't have any mounted Big Men!

This is where Peter Pig really come into their own. You can buy four "German Mounted Officers" in a pack rather than with, say, Battlefront, having to buy a whole blister or make some sort of never-arriving special order.

So here's the Big Man to lead the mounted scouts forward. Face looks vaguely familiar...

Polish Taczankas

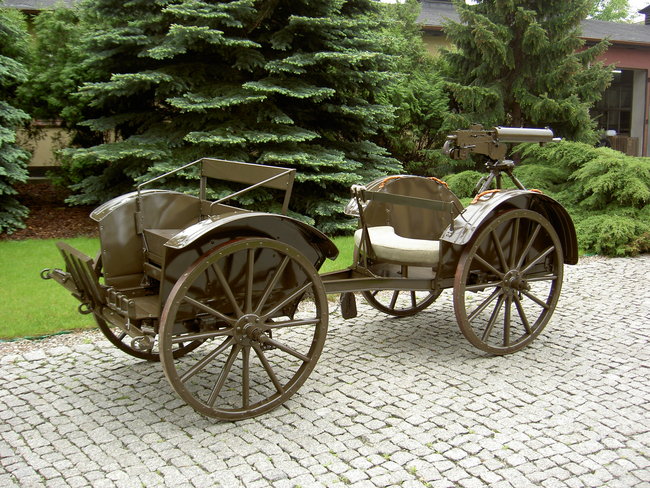
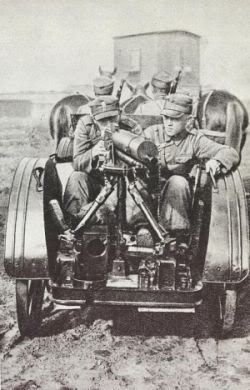
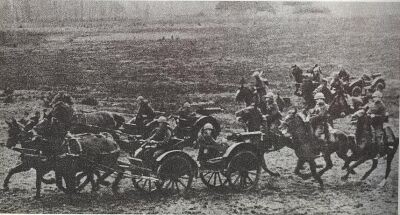
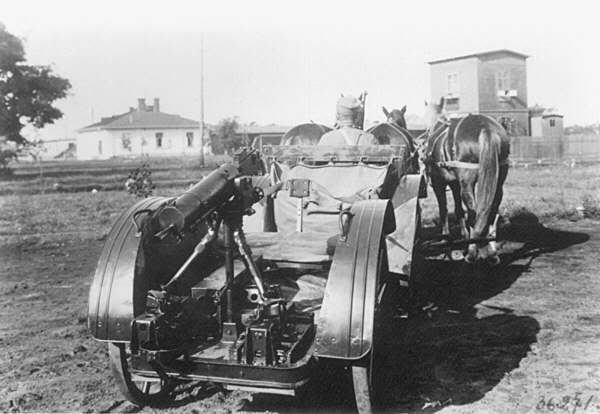
A couple of week's ago, I was complaining that I couldn't find any decent 15mm WW2 taczankas for my nascent Polish army: all that was on offer was the model from True North which was too solid, had four horses, and not enough crew.

Well as I still haven't been able to find any, and need to start play-testing the scenarios from my forthcoming September War scenario book (I've written the scenarios: just formatting it all now), I decided to bite the bullet and see what I could do with the four True North versions that I'd already bought.

So I now have are four pseudo-taczanka that will be fine on the tabletop but won't stand up to close scrutiny!

The base is the too-bulky True North wagon, with its horribly cast crew of two sitting figures, one in a forage cap and one in what I think is supposed to be a French-style helmet. I've cut the shaft (or tongue) right down, and put only three horses in front, evenly lined up as opposed to being driven unicorn.

The sitting gunners are from either the Battlefront or the Forged in Battle Polish MMG set (I forget which); the standing gunner is a spare Battlefront Polish anti-tank gun crew member, kneeling next to the True North (unmanned) MMG.

So I think that they will do for the moment, and can possible be replaced if anyone ever does release a better model. Now on with the play-testing...

Wanted: 15mm Polish Taczankas

As I get to the end of actually writing the Polish campaign book for IABSM, it's time to start finishing off my Polish army so that proper play-testing can begin.

I've got my infantry (Battlefront), and most of my cavalry (Forged in Battle), and what armour I need is readily available (Battlefront mostly, I think). The only thing I can't find anywhere is a Polish Taczanka i.e. the purpose-built cart to carry an MMG.

Both Battlefront and Peter Pig do Soviet taczankas...but they are very different, much heavier, than the Polish versions. They also have four horses, whereas the Polish version had three horses.

True North, via Old Glory, do a "Polish" taczanka, but having bought four, I can tell you that the cart is all wrong, it has four horses, no-one to fire the machine gun, and the sitting figures are horrible. QRF and Outpost both do Poles, but neither has a taczanka in their listings.

So...help!

Where can I find 15mm models of the Polish taczanka? Is there anyone out there who does one? Here are a few pics to help jog the memory:

Bloodaxe Miniatures Added

I try and keep my listings of manufacturers of WW2 and Sci-Fi figures as complete and up-to-date as possible, but I'm always coming across new ones that I've previously missed.

One such is Bloodaxe Miniatures, who produce a variety of esoteric ranges (Ancient Hawaiians anyone?) and WW2 figures for both the early and later war periods.

I haven't got any of them myself, but their site does contain a few pictures of unpainted models so that you can see what you are getting.

Here's a pic of something that did take my fancy: a "generic field car".

Might get one of these as a range tester!

A Rather Useful Tool

I was in my local Games Workshop the other day, stocking up on various paints after the Christmas break, and was idling chatting to the store manager about various painting techniques and the like.

As I was popping a pot of one of their texture basing 'paints' onto the counter, I happened to mention that I used old paint brushes to apply the texture. Ah, said the manager, you should use one of these:

Now I'm all for having the right tools for the job, but this seemed a bit excessive, especially as that finely carved bit of plastic will set you back £5.

However, I was using up a voucher, and had enough left over to indulge, so I thought I'd get one and try it out...especially as I was fully expecting to be disappointed and have the opportunity to be suitably obnoxious about it next time I was in (what is it about GW stores that make me want to be obnoxious? I don't know: but it's true of all of them!).

Anyway, turns out I was wrong. I used this to base the Israeli half-tracks I posted about yesterday, and it really makes the job a hell of a lot easier that using an old paint brush, even when you attempt to carve said old paint brush into a suitable shape. I would go as far to say that that bit of plastic is the best thing as a basing tool since, er, sliced bread.

So, as compensation to GW for being prepared to doubt their products before I've even tried them, I'm posting about their tool here, and recommending one to everyone who needs to smear a bit of basing material onto a base!

More 15mm Poles

Still working on my 15mm WW2 Poles for the September War, and the Christmas break has allowed me to finally finish the lancers.

I don't know what it is about cavalry, but they seem to take four times as long to finish as infantry. It must be something to do with all the horse furniture!

Anyway, here are twenty lancers from Forged in Battle which, if I say so myself, have turned out quite well.

I've also painted up four two-man anti-tank rifle teams. These are in infantry helmets, but will probably serve as dismounted cavalry as well.

These look okay on the tabletop, but haven't photographed particularly well.

Right, that's it from my painting in 2016. Plenty on the painting table that will just spill over into next year...

15mm Sturmtiger from Zvezda

You've got to hand it to Zvezda.

Of all the vehicles they could have released to compete in the WW2 wargaming marketplace, they release the Sturmtiger: a vehicle that no wargamer could possibly want more than one of (except for Kev: he needs loads). They only built nineteen of the damn things anyway.

But release it they have, and bought one I have...probably to use as some kind of objective or objective marker.

It's a nice model: easily up to Zvezda's usual high standards. Paints up well. As I said, the only problem is finding an excuse to actually get it onto the tabletop.

Here's a couple of shots of mine: