FK&P AAR: The Attack on Marlowe Again

New friend Rob came up for a couple of games of For King & Parliament, a system he was considering but hadn’t played before, so where better to start than the first game from my Marlowe to Maidenhythe scenario pack.

Without going into the detail of why and what for, the Royalists are attacking a Parliamentarian force “dug in” on the approaches to Marlowe. Rob would play the Royalist, I took the Parliamentarians.

Royalists on the left, Roundheads on the right

Here’s a pictorial account of the game:

So a win for the Royalists, and for Rob in his first game.

FK&P AAR: Swedish vs Moghuls

With the Moghuls having defeated the Cossacks in short order (see previous post) there was time to have another game. This time I thought that I would wheel out the Swedes: not sure quite how the contemporary but not contemporaneous Swedes and Moghuls would ever encounter each other…but then that’s the great joy of wargaming!

I was a bit more confident of victory this time: the Swedish army has a good mix of pike-armed infantry and decent Reiter horse: surely this would be enough to put the upstart easterners in their place!

The Swedes

The Moghuls

I drew up my Swedes in entirely the traditional manner: two brigades of infantry in the centre, a brigade of cavalry on each wing. My plan was to advance in a line and just get stuck in as soon as possible: my pike should be able to defeat his largely musket- or sword-armed infantry through reach alone!

The Moghul plan was to sweep his wings forward using weight of numbers to win the cavalry battle there, then curl in to take my main line in the flanks just as his main line hit them from the front.

His cavalry duly swept forward, with my cavalry advancing to meet them.

Left flank

Right flank

As the cavalry on both sides began their fight for dominance on the wings, the Swedes marched their infantry forward in the centre.

On the left wing, my cavalry were initially successful, and had a great opportunity to charge his main horse units in the rear by swinging around the small wood top left in the left hand picture above. Unfortunately, I drew a “10” for my first movement card, so got into the perfect position to launch the charge but just couldn’t actually charge before the way into the enemy cavalry’s rear was blocked by Moghul elephants.

Meanwhile, on my right wing, the cavalry clash had proved inconclusive. Both sides had lost multiple units, and things ended up with his cavalry technically ready to do more, but positionally unable to do so before the main battle lines clashed.

With the cavalry actions on the wings proving inconclusive, it was obvious that the battle would be decided in the centre. The two lines moved into contact and a grinding melee began.

As with most grinding melees, it was 50/50 who would win: the advantage I had from my pikes countered by the Moghuls slightly outnumbering me.

To cut a long story short, after a long series of to-and-fro clashes, I lost. At the end of the battle, the Moghuls had only three victory medals left, so if I’d broken one of his foot units before he broke one of mine, then I would have won.

All that was left in the centre of battlefield!

A great game, with the Swedes proving decidedly harder for the Moghuls to beat than the Cossacks!

Here’s a chronological, pictorial history of the battle:

FK&P AAR: Cossacks versus Moghuls

Friend Bevan has recently acquired a 17th Century Moghul army, so naturally we had to get it onto the tabletop as quickly as possible.

The Moghuls’ first opponents would be my Zaphorogian Cossacks, and we’d use the “eastern front” version of For King & Parliament (in turn the ECW version of To The Strongest) that we have built up based on some core rule variants that you can find on the Tales from a Wargaming Shed blog.

The Moghuls

The Cossacks

My plan was to anchor my left flank on a patch of impassable ground, placing my artillery behind it so that they couldn’t be charged from the front (you can see this in the picture, above right). The left flank would be held by one foot brigade consisting of a sotnia of Registered Cossacks and two sotnias of Moloitsy.

Stretching out to the right from this point were the tabor war wagons, able to hold the centre of the field with sheer weight of fire. To their right were a second infantry brigade (same as the first one) and then, on the far right wing, the stars of the last battle, a brigade of Tatars: one squadron of noble lancer types, two clumps of horse archers.

The plan was, as I said, to anchor my left and centre, win on the right, and then sweep in and take his centre, battered from the fire of the tabor, from the flank.

Bevan’s plan, on the other hand, was to stay well clear of the killing field in the centre in front of my tabor, and advance strongly on the flanks. Hopefully his men there would win, and he’d decide what to do after that. Seems like quite a good plan to me!

The battle opened with the Cossacks being extremely reluctant to move forward at all. I managed to get the left wing into place, but only one tabor war wagon did what it was supposed to do. On my right wing, although the Cossack infantry were well up for a fight, the Tatars were not interested at all. This was slightly worrying: were my allies not quite so allied as I had thought? Had the Moghuls paid them off with more coin than I could afford?

The Moghuls trundled forward towards me.

Rather than spell out each phase of the battle in turn, let me give you an overview of what happened. In essence, Bevan’s plan worked perfectly.

On my left flank, my infantry, who should have been able to give a good account of themselves, especially as they were supported by the artillery and one end of the tabor line, crumbled under the weight of the Moghul attacks. One moment i had a left wing, the next I didn’t.

It was even worse of the right wing. The Tatars, the battle winners of my last two games, just refused to engage at all, and when they were attacked, just melted away. Definitely some dodgy politicking or bribery going on in the background!

Once my flanks were broken and driven it, Bevan’s Moghuls curled in on my flanks and the last of my victory medals soon disappeared. My tabor had hardly got to fight at all.

A nicely executed plan by the Moghuls and a well deserved victory. Here’s a chronological pictorial account of the game:

FK&P AAR: Swedish vs Cossacks

Now that I had my Swedes all planned out, it was time to take them into action against my only other vaguely contemporaneous army, the Zaphorogian Cossacks.

This would be an interesting clash, as the two armies were very different: essentially a western pike & shot army (the Swedes) against an eastern pike & shot army (the Cossacks). Indeed, so different were the Cossacks that Bevan, my opponent, asked if he could use the Swedes (despite the dice initially saying otherwise) as he wasn’t sure how to fight with the Cossacks.

The Cossacks, therefore under my command, consisted of a brigade of four tabor war-wagon bases and some artillery; two brigades of Tatar cavalry, each consisting of two horse archer units and one heavier cavalry unit; and two brigades of infantry, each consisting of two Moloitsy units and one Registered Cossack units.

The Left Wing of the Cossacks

The Swedes, commanded by Bevan, were more like a conventional ECW army. They fielded two brigades of Reiters (like harquebusiers) , each with three squadrons; two brigades of pike, one consisting of three “Swedish” or pike-heavy battalia, the other consisting of four “German” standard battalia; and finally a battery of artillery and an orphan brigade of mixed cavalry consisting of a small unit of cuirassiers and another unit of standard Reiters.

The Reiters grouped together on the Swedish left wing

Despite having all the Tatar bowmen to seek out the opposition, the Cossacks were out-scouted and had to deploy first. The ground wasn’t ideal for war-wagons, with the only open space on my left, so that’s where they went along with a brigade of Tatar horse. The two infantry brigades went in the centre and centre right, with the final brigade of horse out on my right. I planned to hold the hedgerows on my right whilst the war wagons dealt with the Swedish left wing, and go from there!

The battlefield from the Cossack side. My CinC is obviously off to visit the church in the middle of the field!

The Swedes massed their cavalry on their left wing, and lined their infantry up next to them but stretching across the rest of the battlefield. That looked like an awful lot of cavalry facing my right, and I could immediately see that Bevan was intending to punch through my right hand cavalry brigade and then bring his horse round onto my flank. Gulp! I’d better win elsewhere rather quickly then!

The Battle Itself

The battle itself divided neatly into two halves: with action taking place on either side of but not along the road that ran up the centre of the field.

On the Cossack left flank, the tabor trundled forward with the Tatar horse easily keeping pace. Opposite them, the pike-heavy Swedish battalia advanced in a slightly ragged line, with the orphan brigade of cavalry behind them.

As the two sides got closer, the tabor turned and deployed ready for action, quickly opening fire with their light guns and muskets. One Swedish battalia was disordered by their fire, so the Tatar horse archers moved forward and double-disordered them with bowfire.

This was too good an opportunity to miss: the veteran Tatar Noble Lancers charged the disordered pike and smashed them from the table! Behind the pike were the Cuirassiers, but they were also dashed from the field by the rampaging Tatars. Unfortunately, the exhausted Nobles were then dispersed by the Reiters accompanying the cuirassiers, but they in turn were then routed by the horse archers following up their Noble comrades.

Meanwhile, one tabor was locked in combat with a battalia of pikemen. The action swayed back and forth, but the Swedish pike were too strong, and the tabor’s crew fled the field.

That was, however, the limit of Swedish success on this flank. Another battalia was hit in the flank and routed by horse archers, and as the battle on the other side of the field reached its climax, more Swedish infantry were about to be charged in the rear by the rampant Tatar horse: the combination of fortress-like tabor shooting any enemy that moved and the nimble Tatar horsemen proving a winnig combination.

It was, however, on the other flank that the battle was decided.

The Swedes wanted to push their horse forward en masse and just overwhelm the outnumbered Tatars in front of them. Unfortunately the cards did not smile on this endeavour, and their attack was first delayed and then delivered piecemeal.

This allowed the Tatars to focus their efforts on the front-runners and break two squadron of horse, but this initial success turned into a gradual retreat in the face of overwhelming numbers of Reiters and, as the battle ended, all three Tatar/Cossack units had been routed and the Swedish horse was preparing to lap around the right flank of the Cossack infantry.

The three Tatar/Cossack units had, however, effectively neutralised the initial Swedish plan of punching huge numbers of Reiters around the Cossack right flank meaning that, along with the successes on the left flank, the Cossacks had a real chance to win the battle with their infantry in the centre…provided they could do so before the Reiters eventually arrived.

The gallery below shows the cavalry action on the right of the Cossack position:

So the battle would be decided in the centre-right axis of the Swedish advance, where the good quality “Swedish” (pike-heavy) infantry moved forward against the Cossack foot: mostly raw infantry armed with long spears rather than pike.

The Cossacks lined the hedgerows near the crossroads and the Swedes advanced to contact. Cossack musket fire was largely ineffective, and they were soon forced to retreat away from the hedgerows in the face of a series of determined charges by the enemy pike.

I brought up reinforcements from the other flank, but so crowded was the nature of the fighting that I couldn’t find a way of extricating my disordered troops from the front line so that I could replace them with fresh. This, as I said, was due to the ferocity of the Swedish attack: continually pressing forward.

And then Lady Luck smiled upon the Cossacks: the Swedish Commanding General was cut down by Cossack musket fire as he led his infantry line forward!

In FK&P, your c-in-c is worth a lot (and I mean a lot) of victory medals, so this really tipped things in my favour. If I could break just two more Swedish units (across the battlefield, not just on this flank, so including all the action on the other flank, happening simultaneously with what I’m now describing) then the day would be mine.

The death of the swedish C-in-C

Unfortunately, Lady Luck is nothing if not even handed, and the very next turn the Cossack commanding general was first lightly wounded and then also killed, losing me an equal number of victory medals!

Death of the Cossack Commanding General

Both sides were now down to just two victory medals remaining: whoever next broke a unit would win the battle.

The initiative was with the Cossacks, so my line of Moloitsy and Registered Cossacks opened fire, bur failed to break the enemy. They returned fire…and this proved too much for one of my raw Moloitsy battalia. They broke and fled the field, taking the rest of my infantry with them.

Seeing their right flank broken and, indeed, with the survivors about to be cut down by rampaging Reiters, the victorious Tatar cavalry and tabor on the left flank remembered an important appointment elsewhere and also skedaddled. The day was with the Swedes!

Aftermath

It had been an epic game that, once again, came down to the final action.

All credit to Bevan for having a great plan and deployment: if his infantry hadn’t carried the day then his Reiters coming in from my right would have finished me off for sure.

17th Century Swedish Command

Over the last couple of year’s I’ve built up a sizeable 15mm collection of English Civil War figures. To them I’ve added some Cossacks and am in the process of building a contemporary Polish army as well.

Looking to get more use out of all the above, I realised that I could quite easily use the bulk of my English Civil War collection as Swedish troops for the Thirty Years War. After all, the Swedish troops dressed in “western” styles rather than the “eastern” styles of the native Polish or Cossack infantry: so my “Swedish-style” ECW cavalry could masquerade as Swedish reiters, and the infantry could be fielded as is.

That was a good start, but I didn’t have any idea as to the composition of a Swedish army…but a couple of hours online and with the FK&P rulebook enabled me to put together the following, which I think does the trick nicely.

The main elements of the army would be reiters and either “Swedish” of “German” foot. “Swedish” foot were rarely actually Swedish of course (a lot of Finns and a surprising amount of Scots): the name comes from the way they were fielded in terms of pike/musket ratio following Carl Gustav’s reforms. Likewise, “German” foot were not all German, and the term applies to any foot with a more conventional pike/musket ratio.

I could have gone into more detail and noted that CG’s army were often short of pikemen, so all the infantry were effectively “German” stylee, but that’s probably an unnecessary complication: it’s enough that I can call pike-heavy battalia “Swedish” and standard battalia “German”.

The next question was how to make the army look a bit more Swedish. The solution was actually quite easy: the Swedish Command pack from By Fire & Sword gives you seven different command stands plus flags.

One problem is that the By Fire & Sword models are really difficult to get hold of in the UK: exports from Poland presumably more difficult now due to a mixture of Brexit, COVID and the dramatic increase in postage/transport costs. I manged to get one of the last I could find from Entoyment in Poole.

The models are generally up to the usual high standard of By Fire & Sword except, unfortunately, for a lot of the faces. I don’t know whether it’s the original sculpts or the casting, or even worn out molds, but many of the faces just didn’t have the relief that you’d normally expect. I’m not the best painter in the world, so I reply on clearly defined detail on figures to bring out the, er, detail, including faces. Base colour, a wash then highlight forehead, nose, cheeks and chin only really works if you have a clearly defined forehead, nose, cheeks and chin…otherwise you’re actually painting faces from scratch, well beyond my talents!

This was disappointing, but I still think the By Fire & Sword packs are great: everything you need plus flags.

So that’s a Swedish army created from existing stock and one pack of command figures. I might see if I can do the same with some of the other TYW nations…

FK&P AAR: Cossacks March Out Again

Time for the Zaphorogian Cossacks to ride out again, this time with an away fixture at friend Bevan’s house.

It was an unusually shaped battlefield, and one criss-crossed by small streams and (impassable) lakes. There was also a chunk taken out of one corner, meaning any units deployed there ran the very real risk of falling off the end of the world!

After their first encounter ended in ignominious defeat, the Cossacks had re-organised their army: equipping their tabor wagons with light artillery and dropping the brigade of raw Cossack horse.

On this battlefield, therefore, I placed my up-armed tabor in the centre, infantry to the left and right of them, and a brigade of Tatars on the far right just in front of the edge of the world. That left me a brigade of horse in reserve just behind my tabor’s right flank.

As before, our opponents were the Lithuanian Polish, hereafter known as the Poles or the Polish. They had their infantry and artillery in the centre, with loads of really quite good horse on either wing.

The battle opened with the Poles advancing rapidly on either wing, and the game split into two halves.

On my right flank, my Tatars (one unit of veteran nobles and two units of light bowmen) took on four units of decent Polish cavalry. My lights were quickly sent fleeing from the field, but their veteran comrades managed to destroy two of the Polish horse units despite, at one stage, being hit in the flank.

Half the Poles who had been chasing my lights from the field then returned and, eventually routed my tired nobles, but I’d still effectively won that flank, certainly in terms of victory medals lost.

Meanwhile, on the other flank, waves of Polish horse, most of it rather decent, some of it the dread Winged Hussars, came forward and crashed onto the three Cossack foot units right at the end of my line.

[The Winged Hussars were being represented by only their bases as painting their leopard skins had caused a delay in production. This was quite unnerving…as the temptation was to visually dismiss the units that were actually the most deadly on the table!]

Time and time again the Polish cavalry crashed into one unit of Cossack Moloitsy militia: a unit that just refused to break. Two light units and two medium units of Polish cavalry were sent packing before, finally, the Moloitsy gave way, leading to a general crumbling of that flank.

So exciting was this passage of play that I don’t actually have many photos of it. Below, left is the first wave of Polish cavalry moving forward. Below, centre is the situation after the first wave of Polish cavalry has been repelled, with the black-base-Hussars moving forward in the background. Below, right is after the Hussars have finally shattered the Moloitsy infantry.

Meanwhile, the Polish infantry had also split into two halves. On my right centre, they advanced towards the Cossack foot brigade amongst the trees and rough ground in the bend of the river. A firefight broke out between the two infantry forces, with each of us eventually losing a unit.

On my left centre, after hanging back for some time, the other Polish infantry brigade came forward. They advanced towards the left hand tabor unit but so keen was Bevan to get them into action at the same time as his Hussars were wiping out my Moloitsy that he left their flank exposed.

No sooner seen then acted upon: one of my reserve cavalry units, Tatar lights, smashed into their flank and smashed them from the field. The Tatars went on to knock off a unit of enemy Tatar light horse (Taras Bulba anyone?) before retreating back to safety.

The climax of the battle was now upon us. Before my Cossack Moloitsy on the left broke and ran I had been comfortably ahead: nine victory medals verses the three that Bevan had left. Once my left flank had broken, I was down to three victory medals. Could Bevan now snatch victory from the jaws of defeat?

As his troops massed for further charges into my left flank, the battle was actually decided back on the right centre, where Bevan’s remaining infantry unit had retreated back from its firefight with some of my Registered Cossacks in order to re-group.

I followed up, also deploying my final reserve: a unit of poor quality mounted Cossacks. These managed to pin the retreating Polish Haiduks in place, giving my Registered Cossacks time to follow up and hit them in the flank. They crumbled, their victory coins were lost, and the battle was mine!

The gallery below shows the initial clash between infantry lines on the right center. The position after this initial clash, and then the climactic moment mounted and Registered Cossacks dashed the enemy Haiduks from the field:

So a first victory for my Cossacks, but a very hard fought contest won only by the narrowest of margins.

Again the Poles avoided frontally assaulting my tabor wagons, concentrating on trying to win the battle by killing all my other troops. In this game that actually worked in my favour a bit: my tabor were free to deploy their new light guns with significant effect and the terrain was such that my infantry could hold on for long enough before fleeing the field.

For me, I tried to avoid throwing my cavalry away. Admittedly the veteran Tatar noblemen played a blinder and did much better than they should have, but keeping the other cavalry brigade in reserve worked really well: I would only have lost them to the mass of enemy cavalry as it advanced forward, and this way I was able to shore up my line and then exploit the retreat of the enemy infantry when the time was right. For my next outing, I think I’ll add a unit of artillery to the roster, sacrificing some infantry Gallant Gentlemen to do so. After all, I can only use them if I’m attacking, and my infantry won’t charge enemy horse!

Here’s a pic of the table at the end of the game.

Cossacks Take To The Field (Briefly!)

My first game of the year, so it was only right that the Cossacks finally take to the field with their opponents, the Polish/Lithuanians (hereafter known as the Poles/the Polish), provided by friend Bevan. So new to the table were both armies that the Poles hadn’t even been properly based yet.

The table was set up quite differently to our usual ECW terrain: no hedges and loads of irritating patches of rough or impassable ground.

We used the excellent eastern front modifications to For King & Parliament available on the Tales From A Wargames Shed blog.

View from the Polish side

The Poles arrived with a fearsome army: two units of Winged Hussars; four units of Pancerni horse; three units of Petyhorsy horse; three units of Tatar mounted bowmen; and four infantry Haiduk units.

Not properly based! Are the shades of the wargaming room to be thus polluted?

To oppose them, my brave Zaporogian Cossacks fielded four tabor war wagons; two brigades each of one unit of Registered Cossacks and two units of Moloitsy; and two Tatar warbands, one of two units of mounted bowmen, the other the same but with a unit of Tatar noble lancers as well.

Tabor in the centre, then the infantry, then the cavalry on the wings.

Here’s how the game went:

In summary, the Poles sent their cavalry forward on each wing. This proved too strong for my horse, who were mostly Tatar bowmen and reluctant Cossacks, leaving the end of my infantry/tabor line exposed.

My musket fire proved ineffective (I think it must have been raining) and although they did cause the Poles some damage, the Moloitsy infantry then began to crumble.

As the battle ended, the Poles were about to fall upon the Registered Cossacks whilst my tabor still sat in the centre watching what was going on!

Aftermath

An excellent game (despite the result!) and it was good to get back to gaming and give my latest army a baptism (of fire!).

Cossack Artillery

Fanfare please: the last of the Cossacks roll off the production line!

Well, I have one more, unopened packet of Moloitsy, but even if I did want to paint them up, there’s no room in the two Really Useful boxes that I’m using to store the Cossacks in (it’s a bit like a tabor after all!) so who knows where I’d put them. Bored of painting Cossacks now, anyway: with 231 painted since 21st October, I feel I have more than done them justice.

Just working on my tan, Alexy

First up, in the photo above, is a Light Gun base to augment stationary infantry or tabor units. Figures and gun are from By Fire & Sword, and very nice they are too, if a trifle tall.

I do like how the Contrast paint has covered the torso of our sunbather with the ramrod: that’s just one coat of Darkoath Flesh over the grey undercoat. Loving Contrast paints very much!

Next up is a standard artillery base. Not quite such a good photo, though.

You can see that I have had to import some spare Peter Pig artillerymen as the original artillery pack only contained enough gunners for two crew per piece. I’ve painted the Piggy’s contribution in the same green both on the above and the next piece: I’m calling them non-Cossack mercenaries used to train or improve effectiveness!

I do like the pose of the chap in the red trousers on the left: the one with his foot up on the barrel and staring dreamily into space. You can’t quite see it in the pic, but in his other hand, the one by his waist, he’s holding what looks like a piece of paper. I like to think it’s a letter from that special little Cossack lady expressing her love and admiration…but it’s probably a Dear John or a bill!

Finally, here’s a little gallery of the single siege artillery base I’ve painted up.

This artillery set comes with not only it’s own resin gun emplacement, but also with a separate “slide-in” base for the gun and gunners so that you can also use them on their own, behind a tabor for example. Very nifty and much appreciated.

Again, not enough crewmen though, so I’ve added a Piggy mercenary and a couple of spare command figures (the standard bearer and the drummer) to make the scenic base a bit fuller.

So that’s the Cossacks done now (or as done as any wargames project ever can be) and it’s on to the next section of the lead mountain.

No sneak previews, but I think I’ll be moving forward through time to WW2…

Cossack Command

I’m now just working through the last few bits and pieces for my Zaporogian Cossack army for the (unofficial) eastern European version of For King & Parliament.

Here’s the latest offering, once again showcasing the beautiful banners that come ready provided by the chaps from By Fire & Sword.

Cossack Cavalry

It’s always nice to see who’s going to be first to get an entry into the new year’s Painting Challenge and, this year, it happens to be me: the extra bank holiday day giving me the chance to both start and finish a couple of units of Cossack cavalry.

These are more from the By Fire & Sword range, and very nice they are too. It was also such a relief to paint a “regular” unit (i.e. one where the figures are all the same) after the five units of Tatars that were my final entries into last year’s Challenge.

And that, of course, is one of the reasons that I have been able to finish them so quickly: less time switching between paints and poses. That and the fact that they have very little in terms of “webbing” or equipment.

Oh, and if anyone is wondering how I got the roan colour on the unit with the purple and yellow banner, it’s using GW Contrast Fireslayer Flesh with a Cygor Brown mane and tail. I think I should have given them white socks as well, but that can easily be fixed the next time I want a roan horse.

Only a few more Cossacks to go now…

More Marlowe to Maidenhythe AARs

As mentioned in previous posts, one of the things I like about publishing scenario packs (in addition to the extra money to buy more figures) is reading people’s AAR of the games therein.

I’ve featured a round of reports from the first scenario of the Marlowe to Maidenhythe pack, The Attack of Marlowe, and am pleased to say that the people playing through the campaign seemed to have enjoyed the first game well enough to play through the second: Widbrooke Common.

Here a link to the Blunders on the Danube blog where disaster is narrowly avoided during the game when one of the tables used collapses! Despite the unexpected earthquake (this is Berkshire after all!) this is a great looking game with some lovely figures deployed. Here a pic:

The Start of the Game

Then it’s on to the Troop Time! blog, where Widbrooke Common has also been played out, thankfully without any near-catastrophes.

The author of the blog, Zanoni, does mention that he’s disappointed that the M2M scenarios aren’t linked more closely, but as I’ve explained before, that’s the way they are designed.

As the first multi-game supplements for FK&P, I wanted M2M and SoN to be scenario books that primarily provided people with lots of easily run games i.e. without any barriers to playing any of the 24 scenarios provided in any order.

I did think about going the whole hog and writing a campaign based on a dependency tree and with characters/units who can progress or expire (much like I do for my IABSM scenario packs) but felt that, at this stage, what FK&P needed was just lots of individual games that people can play

That said, I also wanted to link them together in some way, so there's a strong campaign thread running through each pack, the games feature the same people and units throughout, and there a neat tracker provided so that players can keep a running score of how they are doing: hopefully a good compromise, "best of both worlds" product.

So hopefully Zanoni will keep playing through the pack: he certainly seems to be enjoying himself so far.

The two lines clash! Picture from the Troop Time! blog.

Now all we need is the Iron Mitten to catch up with his Widbrooke Common game!

FK&P AAR: Disaster at Skirmett's Orchards

Here’s a battle report from the playtest of the final scenario in my newly-published Siege of Norchester scenario pack for the English Civil War rules, For King & Parliament.

As the title of this post suggests, this was an absolute disaster for my Parliamentarians!

“Went the day well, my dear?”

“No it bl**dy didn’t!”

The day started very well. Above is a view from behind the Royalist lines, with the village of Skirmett in the centre of the table. My plan was to win on the wings then envelop the Cavaliers in a “horns of the buffalo” manoeuvre.

Northern Donkey Wallopers to the Front!

On my left wing, I had a brigade of Borders horse: poorly-mounted, but out-numbering the opposition. The lancers on the far left were quite nasty in a first clash, so I was pretty happy that I could get an advantage here.

The centre and right

I was a bit more concerned about my right wing, where the Roundheads had quite a few units of Swedish-style horse versus my monolithic Dutch-style troops, but my infantry were nearby and could always pore fire into the flanks of any rampaging Royalist cavalry before they got too close.

Back on the left wing, the two lines of cavalry smashed in to each other: complete disaster!

I may have gone a little over the top on the disorder markers!

Let me explain. I got my tactics just right and ended up with three cavalry units facing just the one of his. Not only that, but I was uphill charging downhill. Yes, I had both my CinC and the Brigade Commander with the central unit, but officers casualties are quite rare, yes?

Wrong!

In the first clash I lost both my CinC and the Brigade Commander: both killed outright!

This was particularly painful as in FK&P not only are officers really useful for, er, officering but, representing the cult of personality around so many ECW commanders, your CinC is worth a great many Victory Medals. Combined, I lost just about a third of all my Medals with the death of just two men! This obviously meant that even if things went 50/50 from now on, I would lose the game in short order.

Anyway, we decided to play on for a bit…

Even Stevens on the Right

Another cavalry clash on the right, with my troopers getting an initial advantage.

The Centre standing Firm

Unfortunately that advantage didn’t last. Lady Luck again deciding that she was for the King!

Centre cavalry unit couldn’t even last long enough for the infantry to intervene!

Which meant that when my already battered left flank finally gave way, I was out of Victory Medals and on the stage coach to Losertown!

The Left Crumbles

So a very quick battle mainly due to the surprising death of my CinC and a cavalry brigade commander. Still an enjoyable game and, looking for the silver lining, the speed of my defeat gave us time for another game…

FK&P AAR: Napshill Downs

Regular visitors will be aware that last Friday saw the release of my second scenario pack for the For King & Parliament English Civil War ruleset: The Siege of Norchester.

The pack contains twelve free-standing, fictional scenarios in a loose chronological order. It tells the story of the investment of the fictional, Royalist-held city of Norchester. It begins with the Parliamentarians gradually pushing the Royalist foraging parties back into the city itself, then looks at the Royalist attempts to delay the construction of encircling works. There’s an assault on the outskirts of Norchester and then a Royalist attempt to get a messenger through to the King to ask for aid. Finally, there’s the arrival of a Royalist relief force, the fall of Norchester and the attempted escape of the main Cavalier protagonists. The same officers and units are used throughout the campaign, and it is hoped that the players will come to adopt and recognise them as their own or the enemy.

The pack is designed to give players who don't have enough time to write their own scenarios a number of games that they can play with little or no preparation. All you have to do is print out the game and player briefings, set up the table according to the map, break out the figures and cards, and start the first turn. You don't even need to print the pack out in full: just the pages you need for the scenario you're going to play. The games can be played either as a series of linked games or as a collection of one-off battles. To emphasise: each scenario is free standing and they do not have to be played in any particular order…but it is anticipated that players will play them in order as a campaign, keeping a running total of each sides’ score as they go along. The pack provides a Campaign Record Sheet as an easy way of doing so.

Finally, although specifically designed for FK&P, with a little work the scenarios can be adapted for any set of English Civil War/Renaissance rules: the basic elements of why, where and with what each side is fighting being largely common to all systems.

Napshill Downs

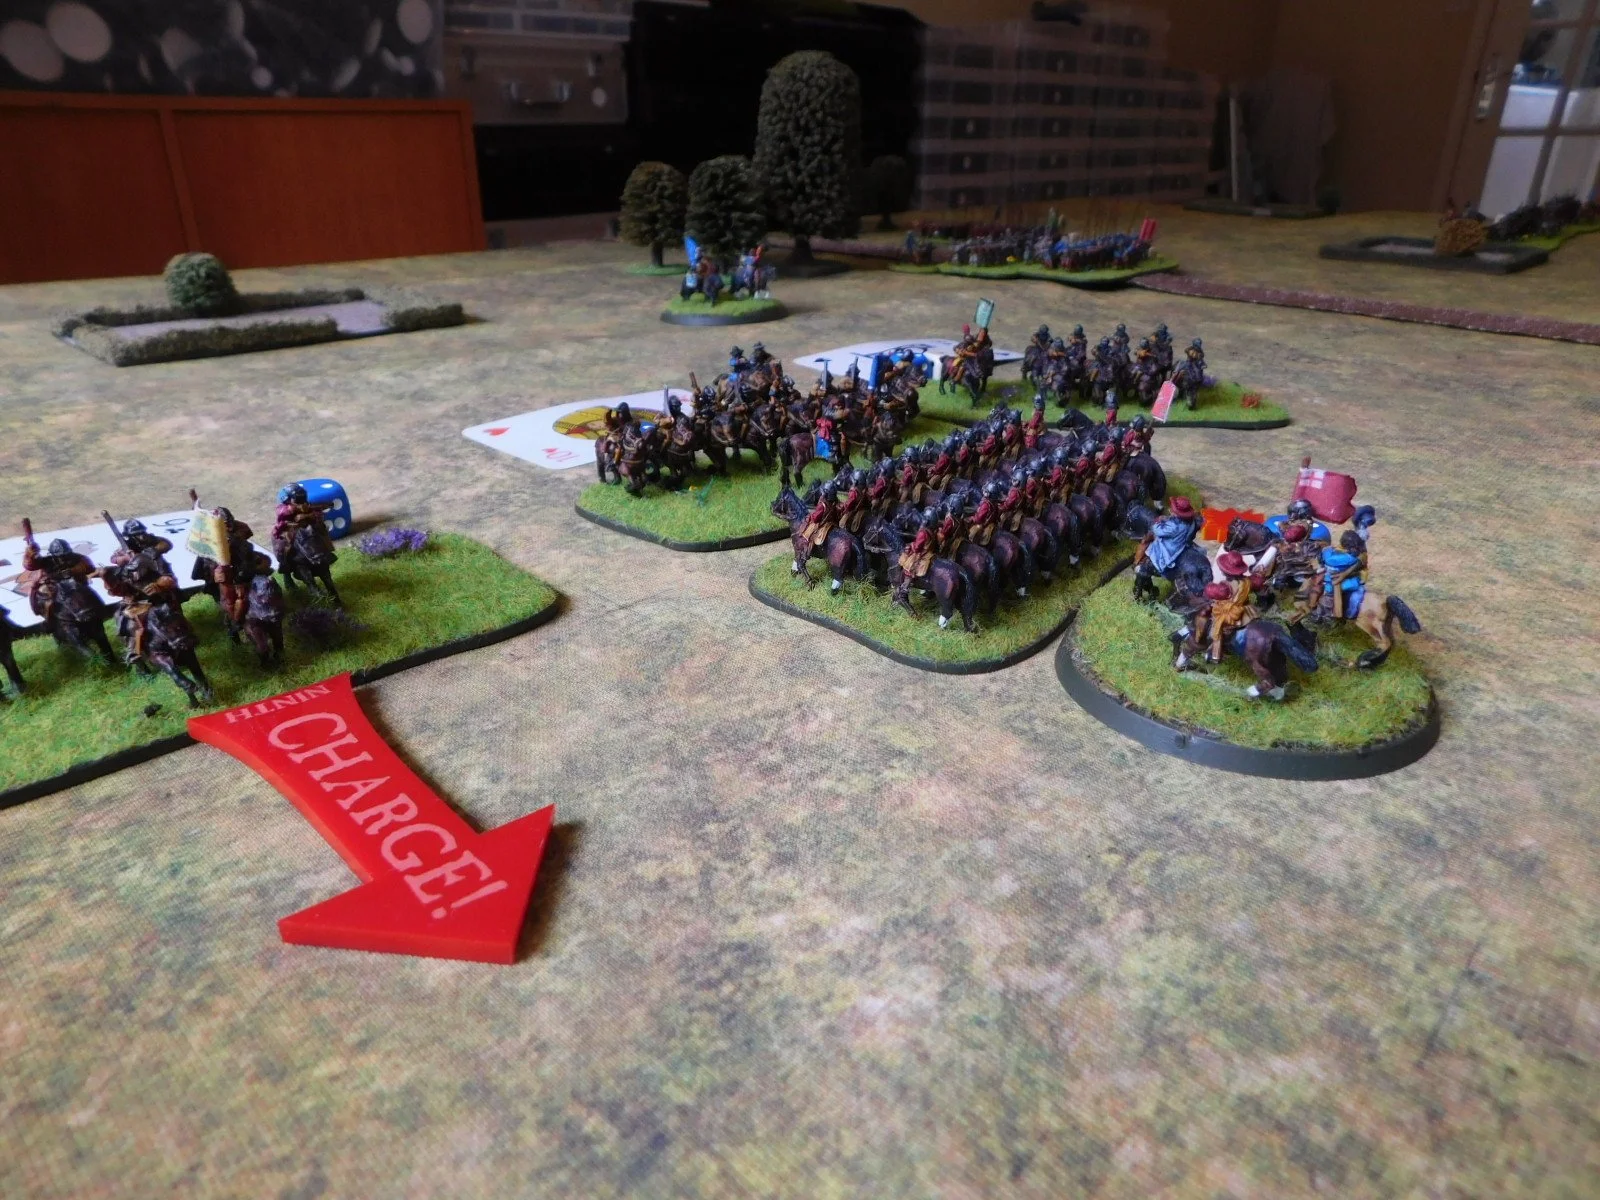
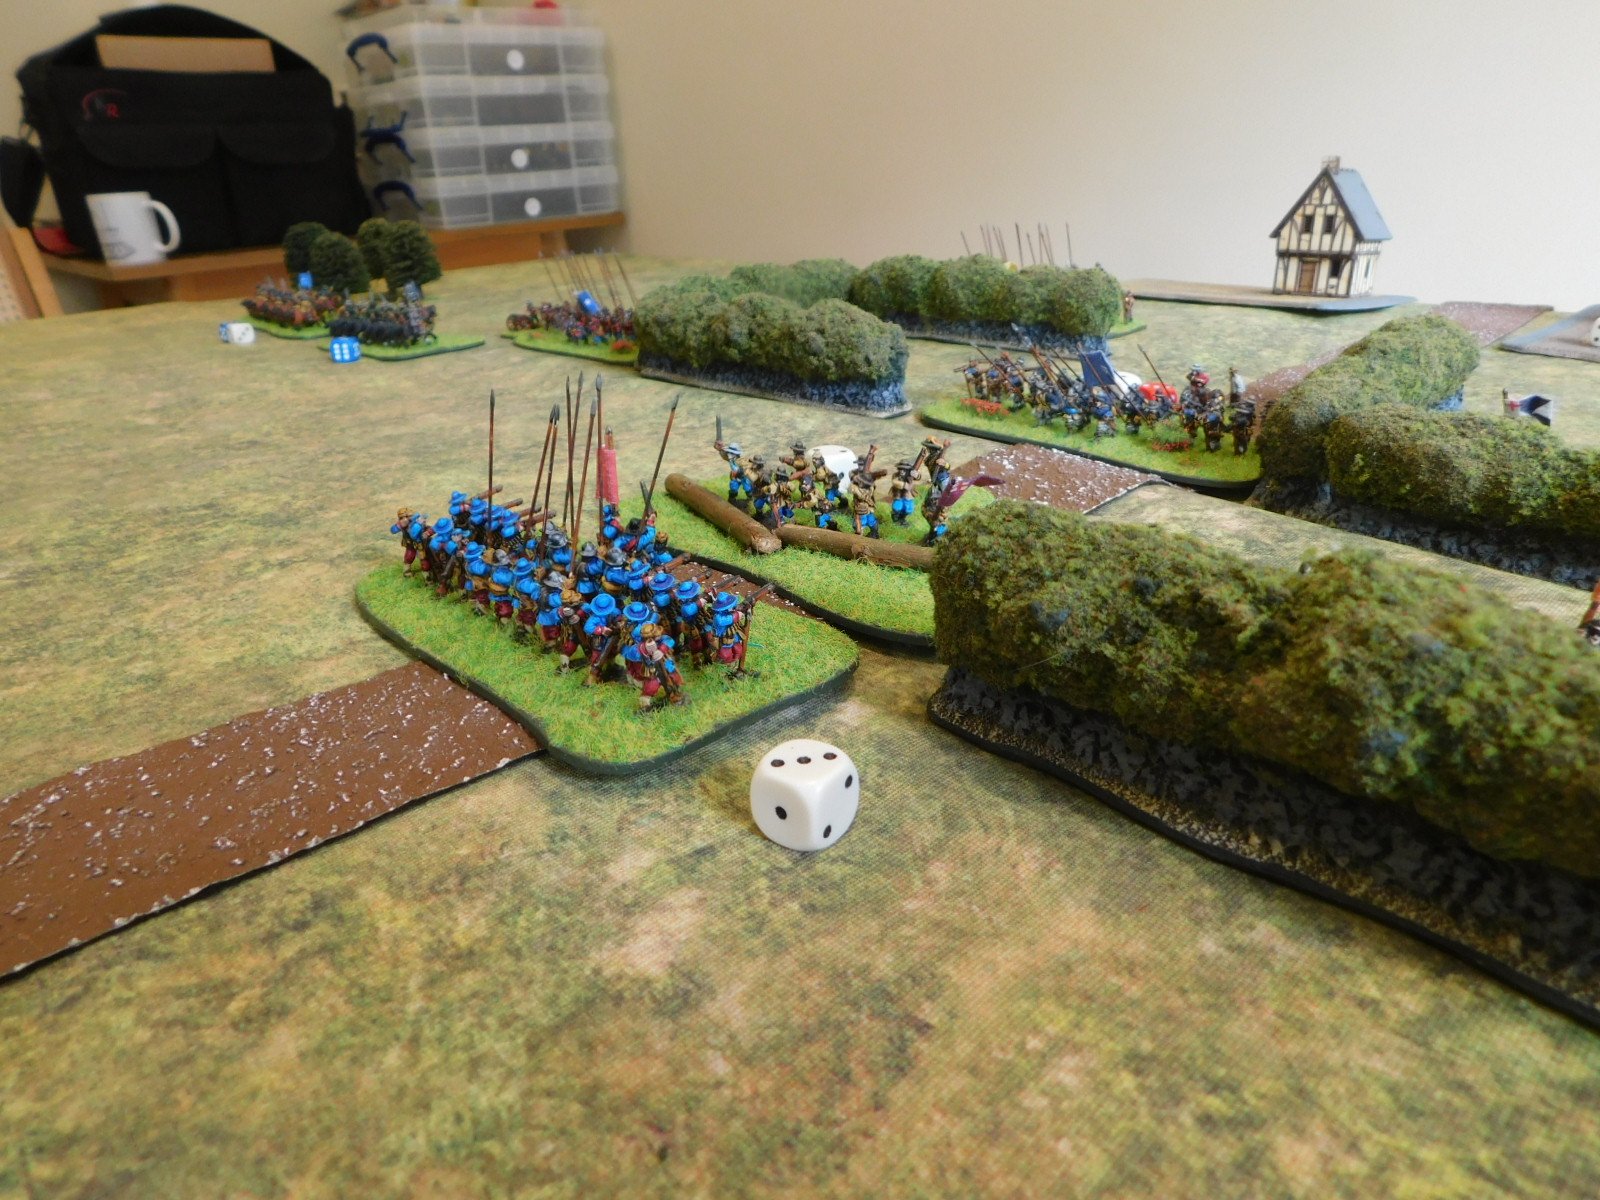
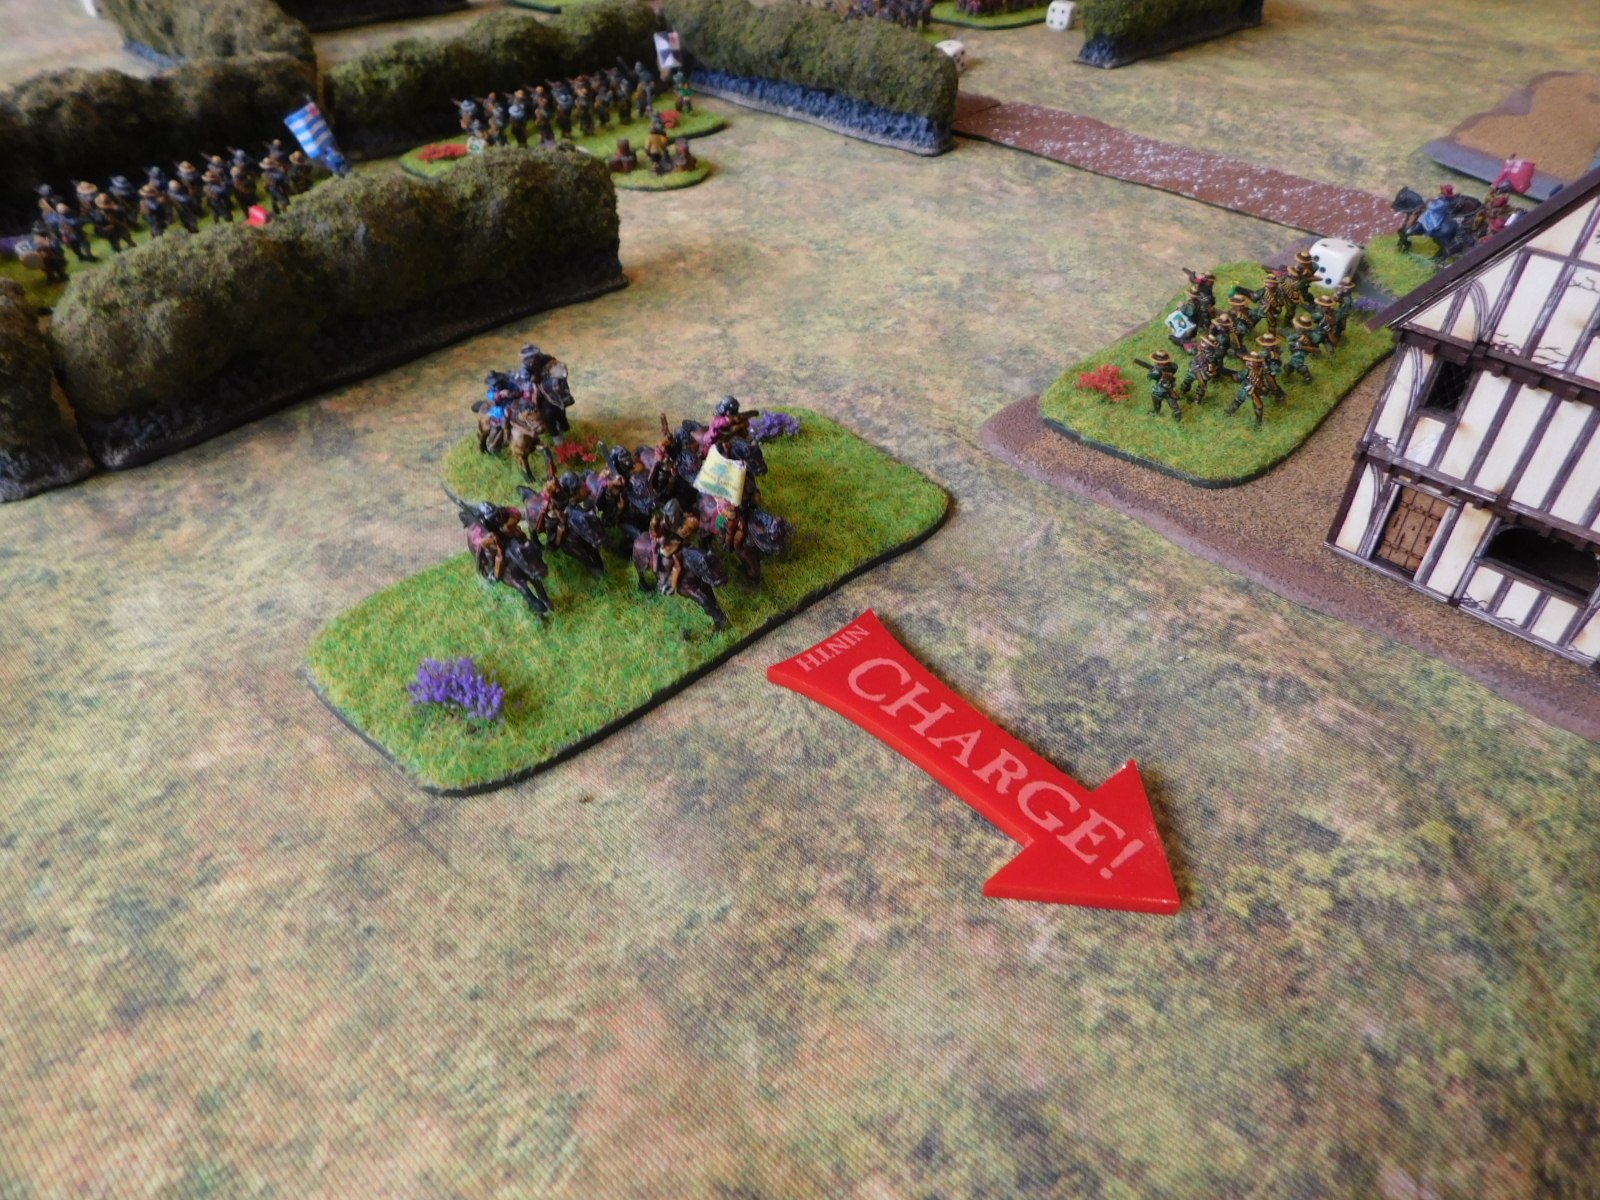
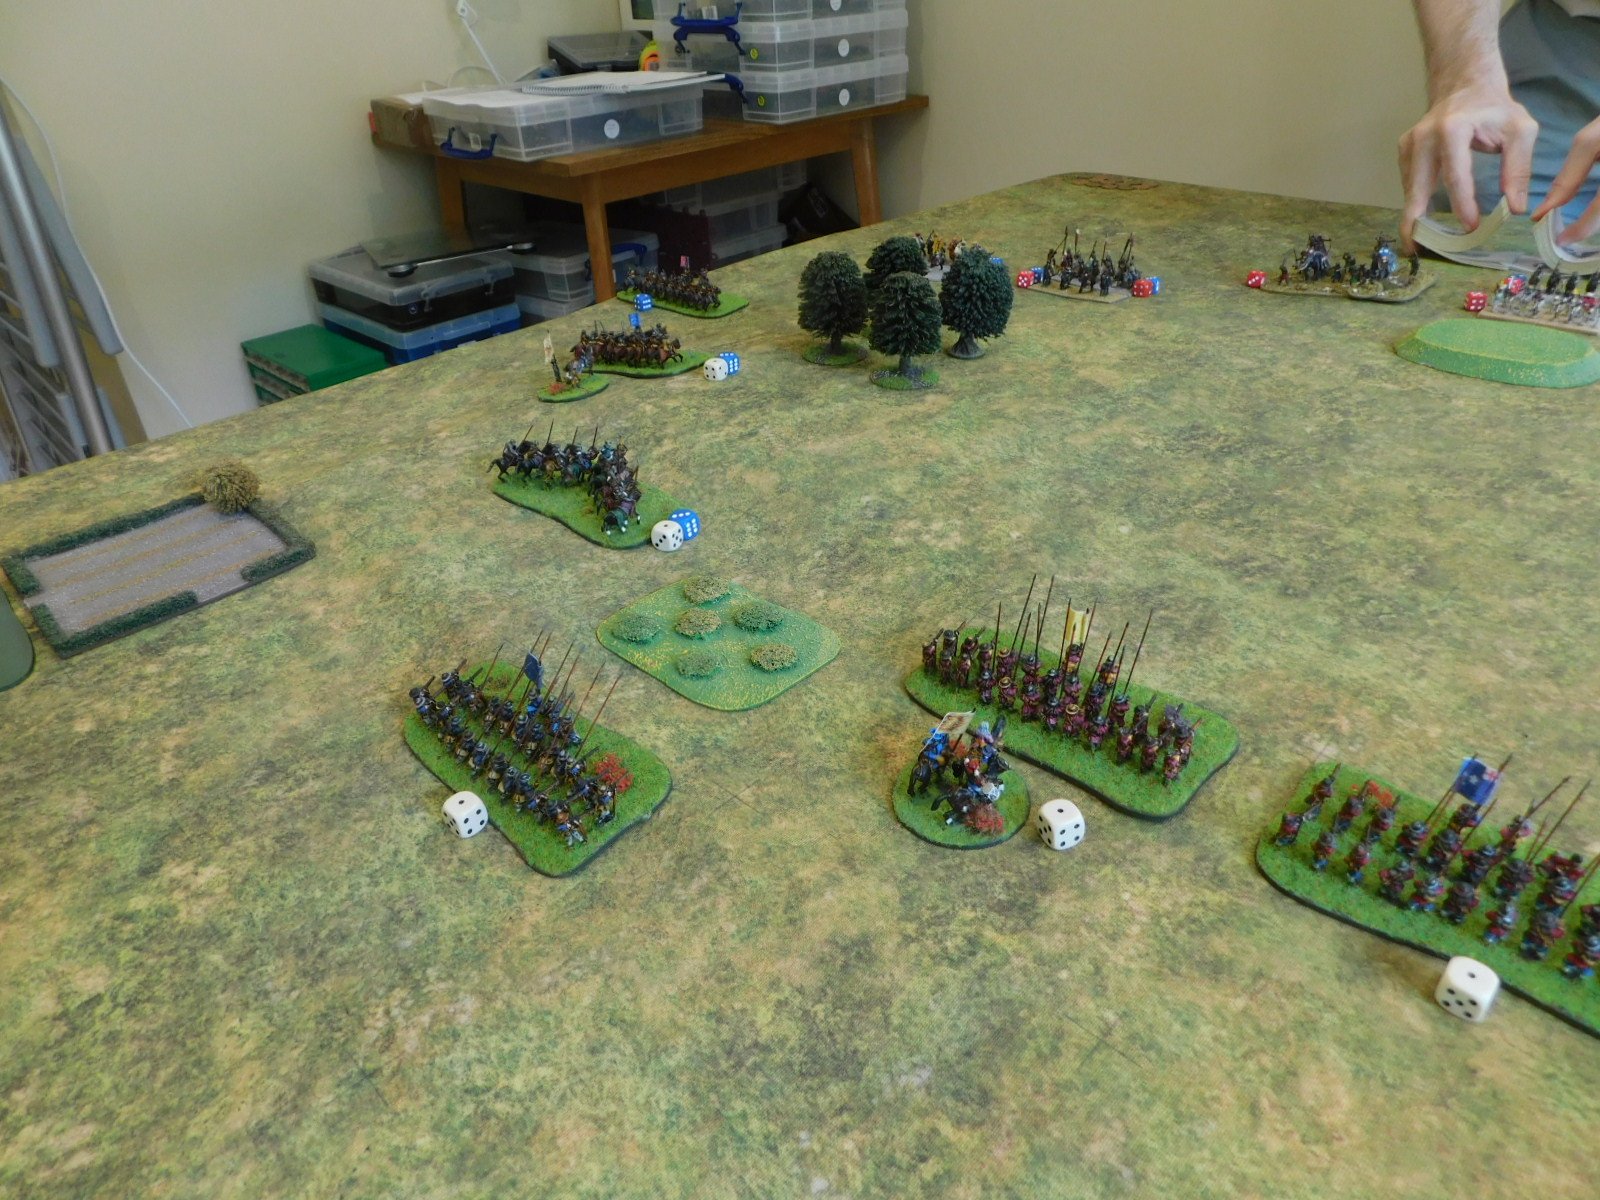
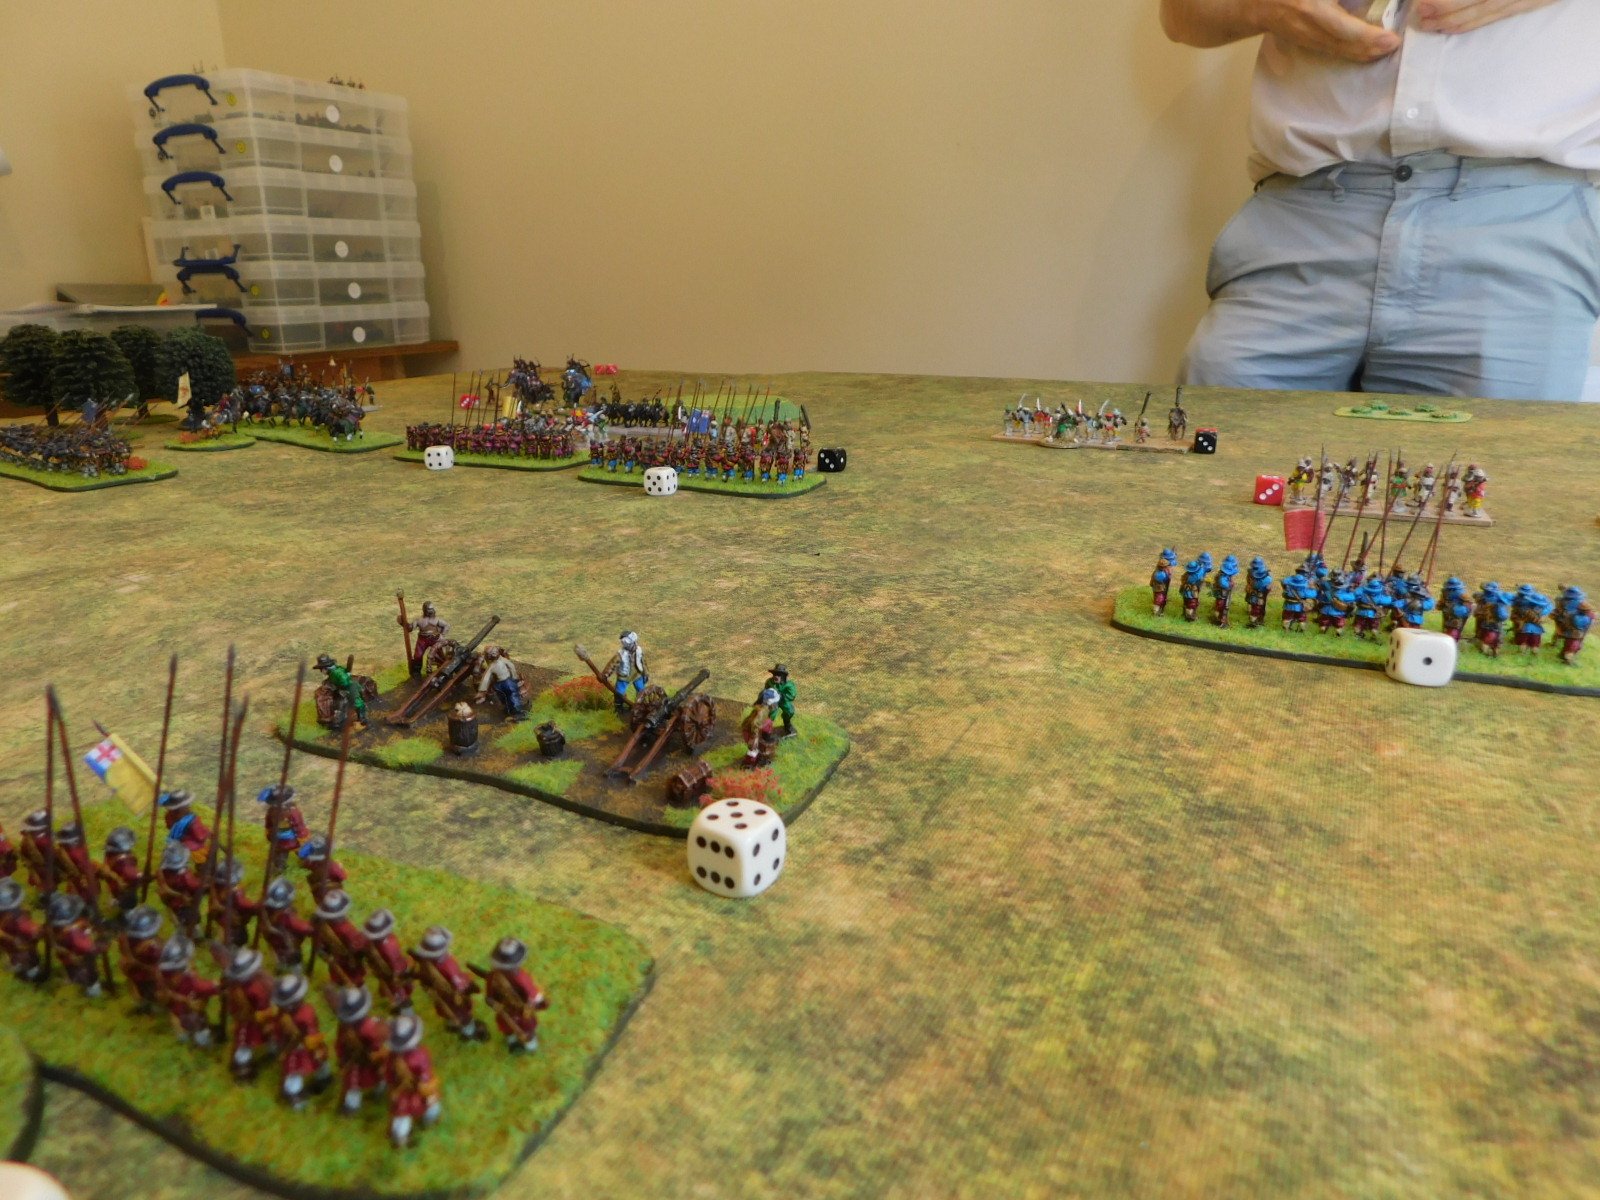
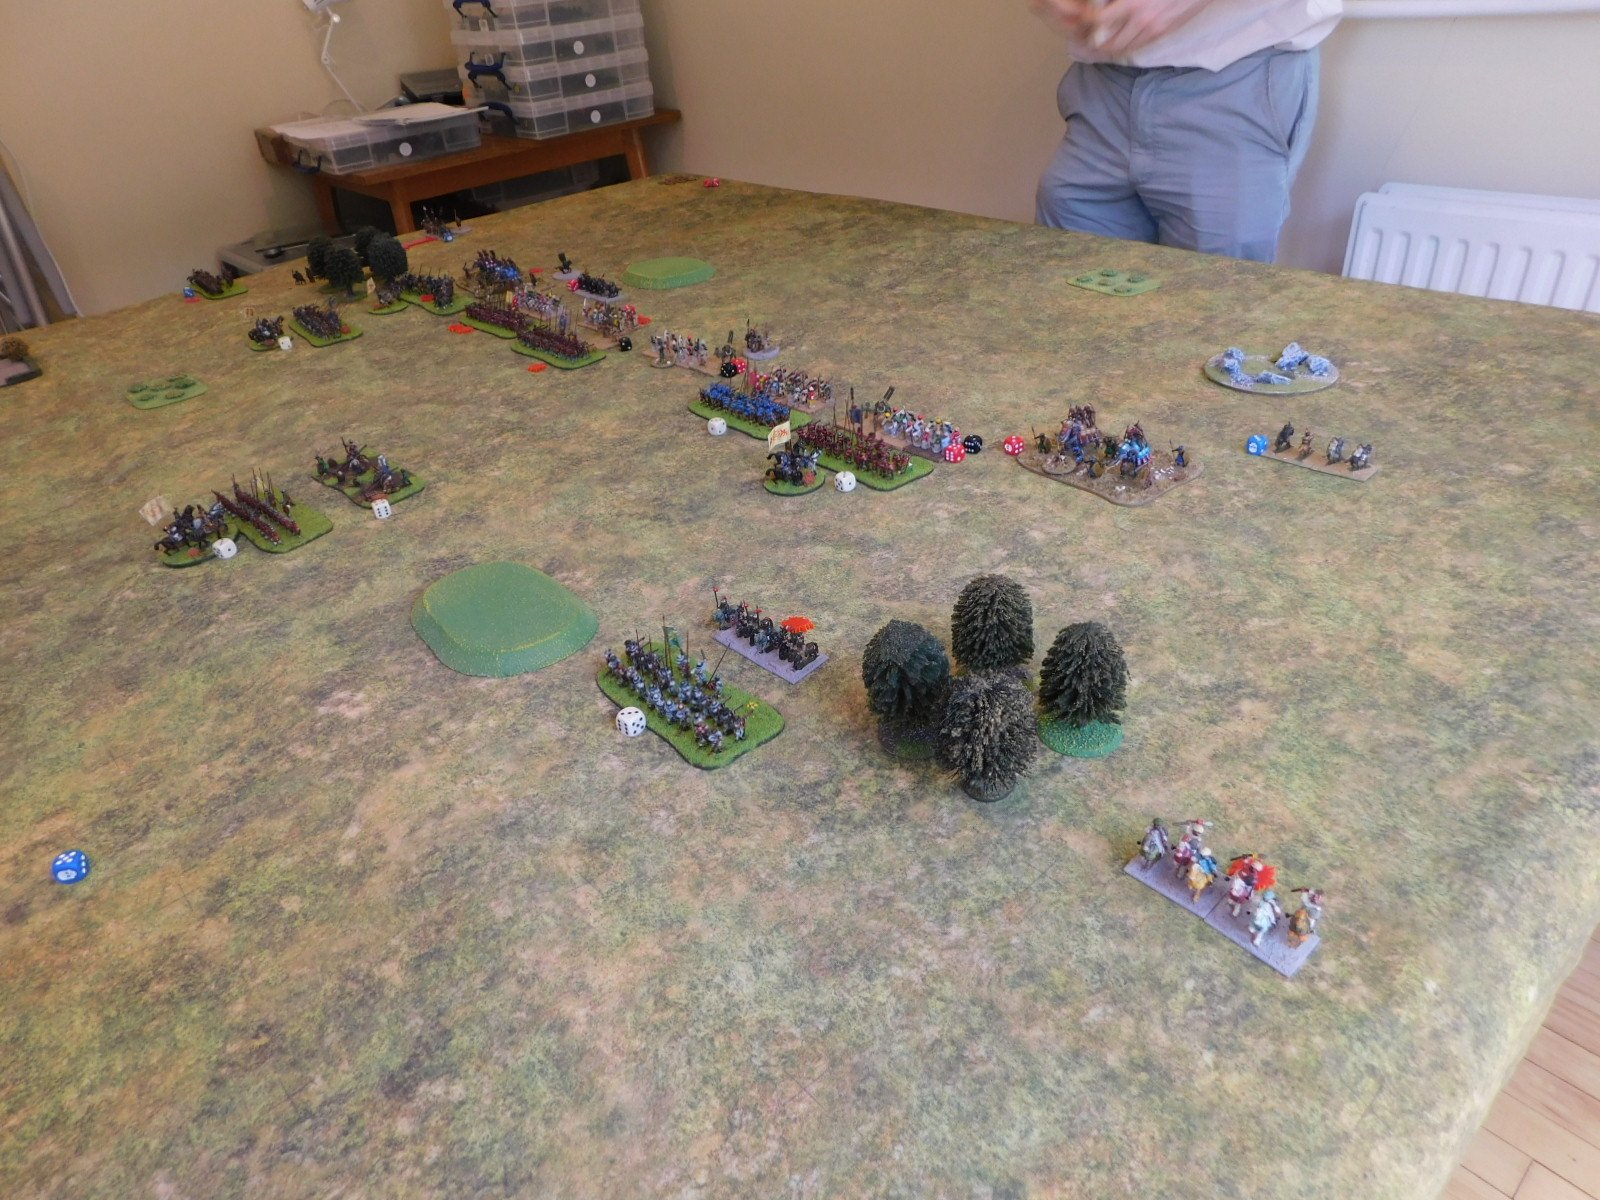
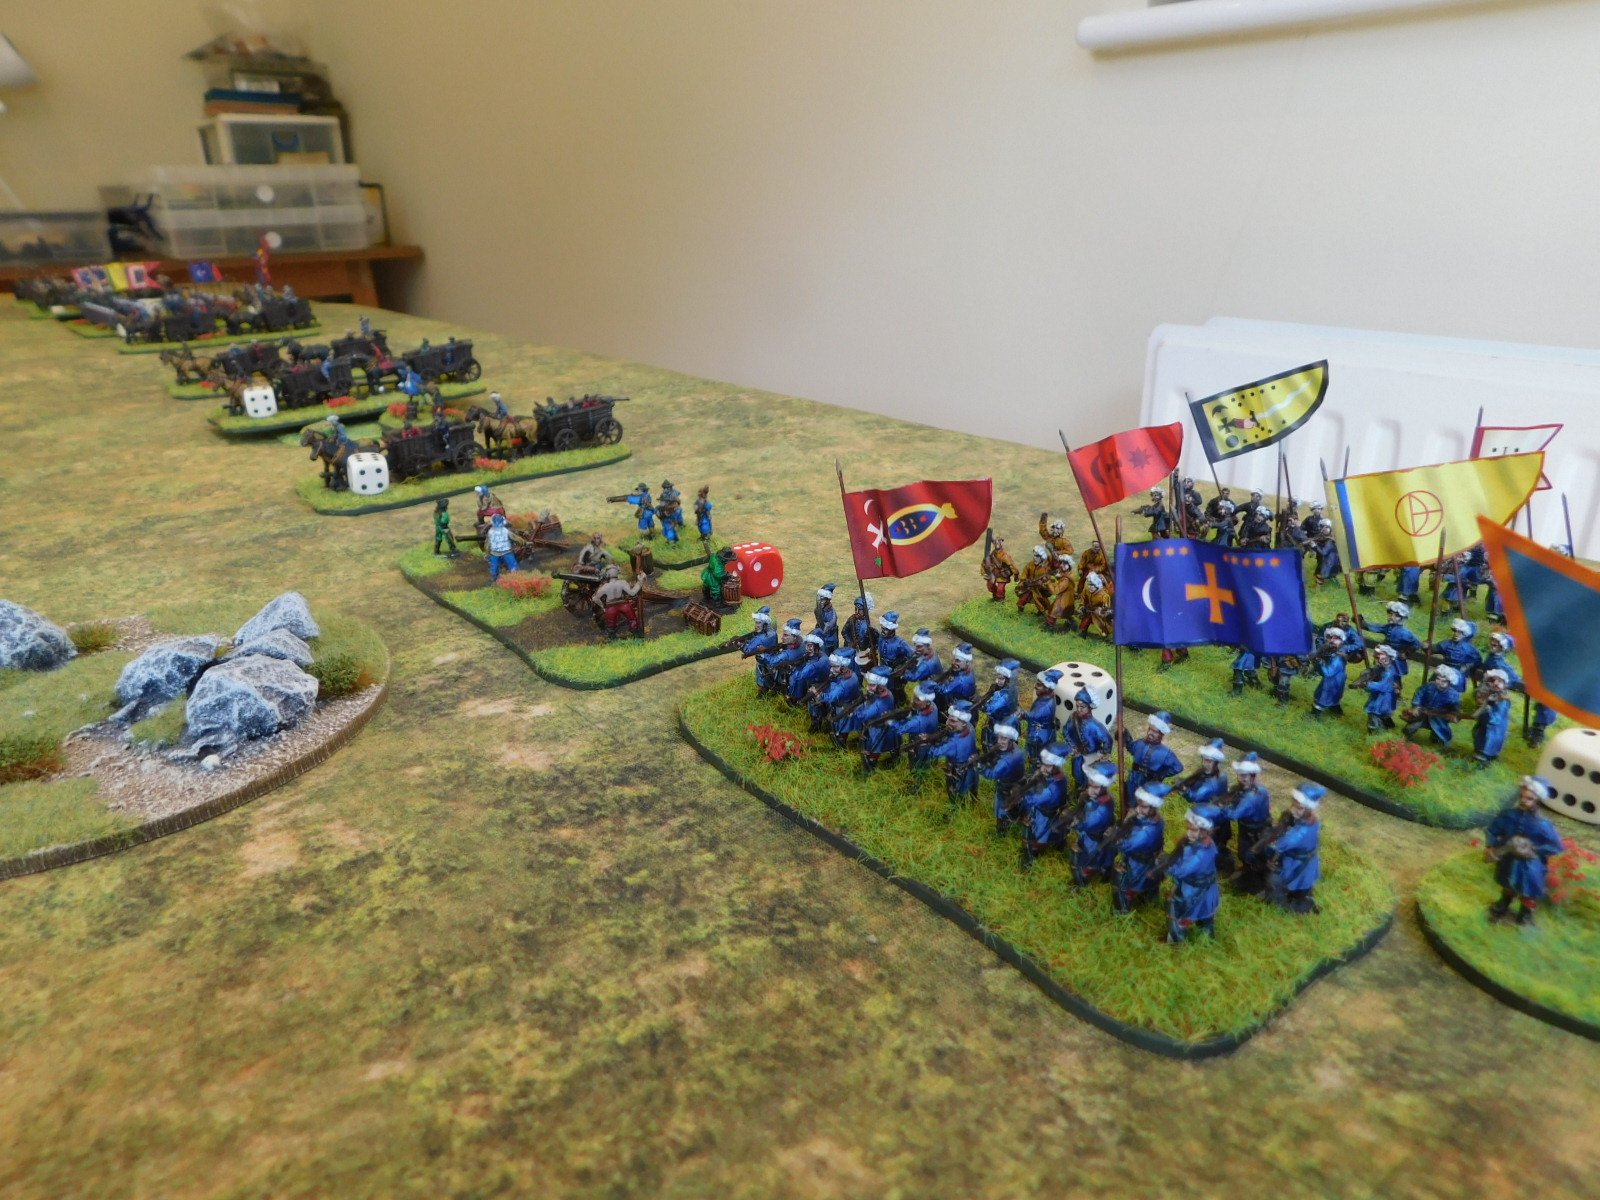
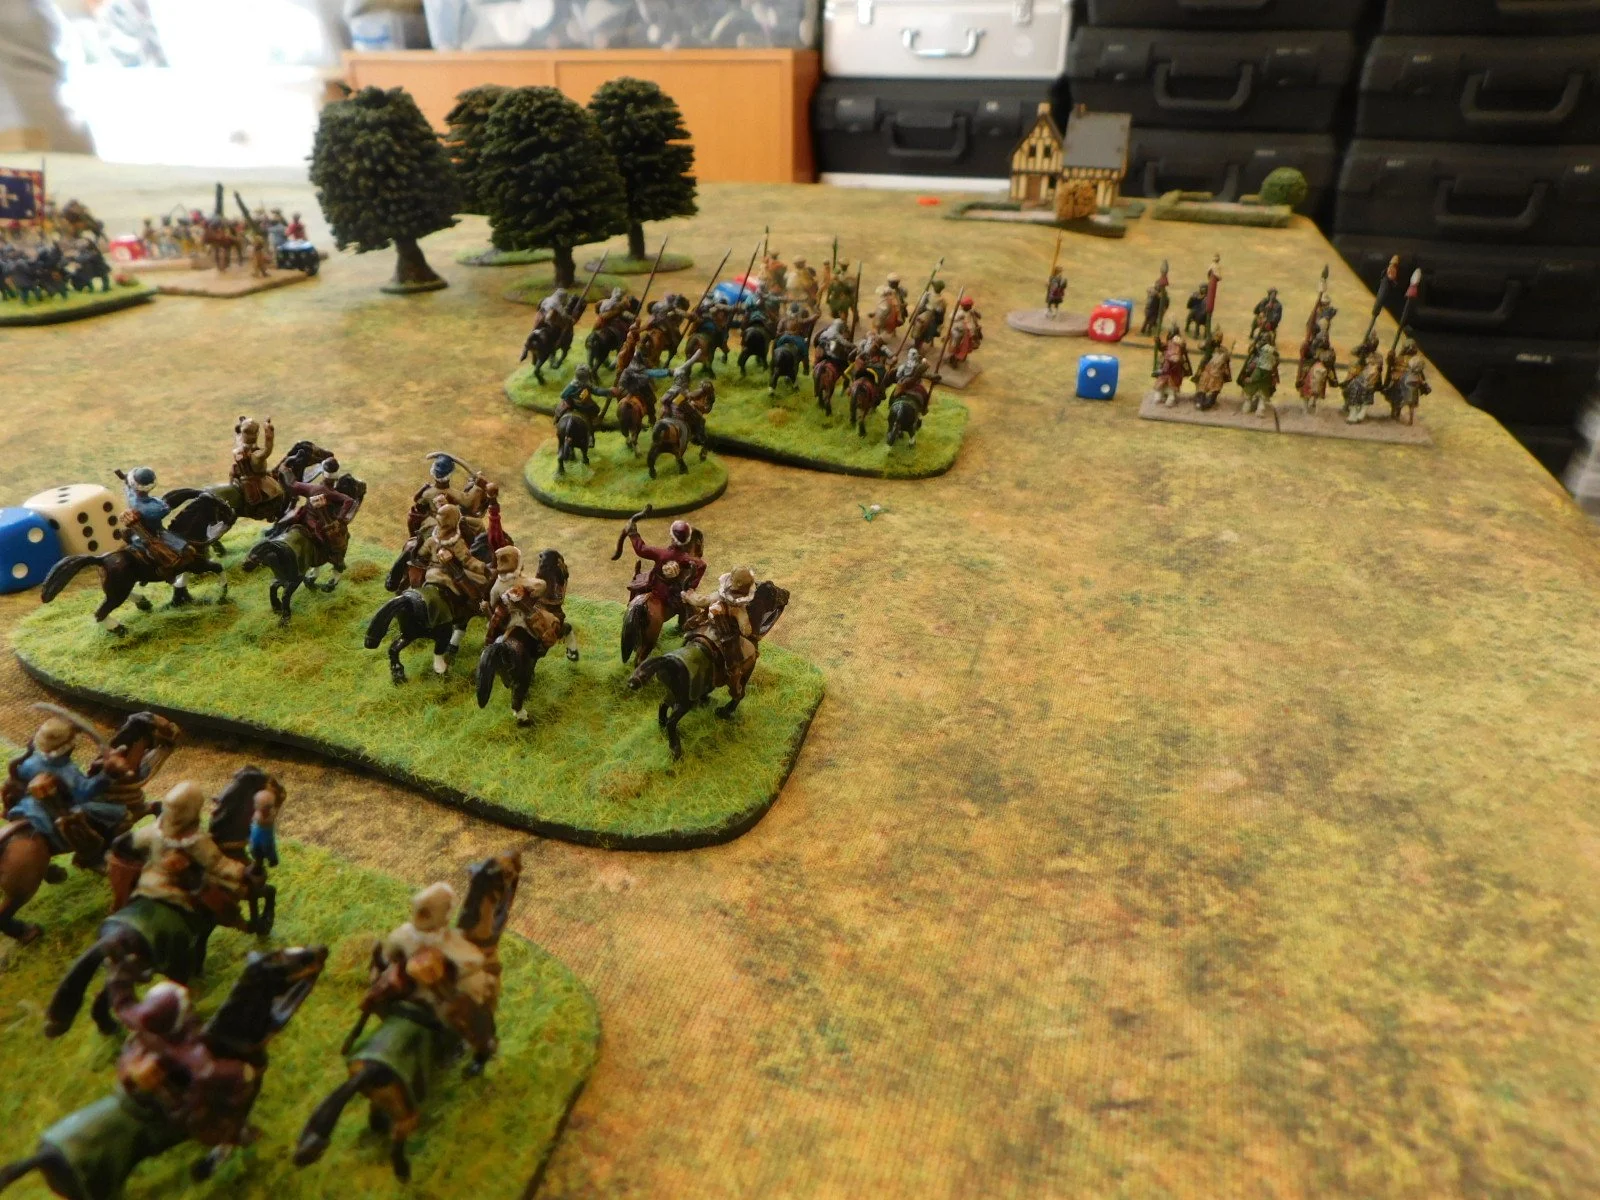
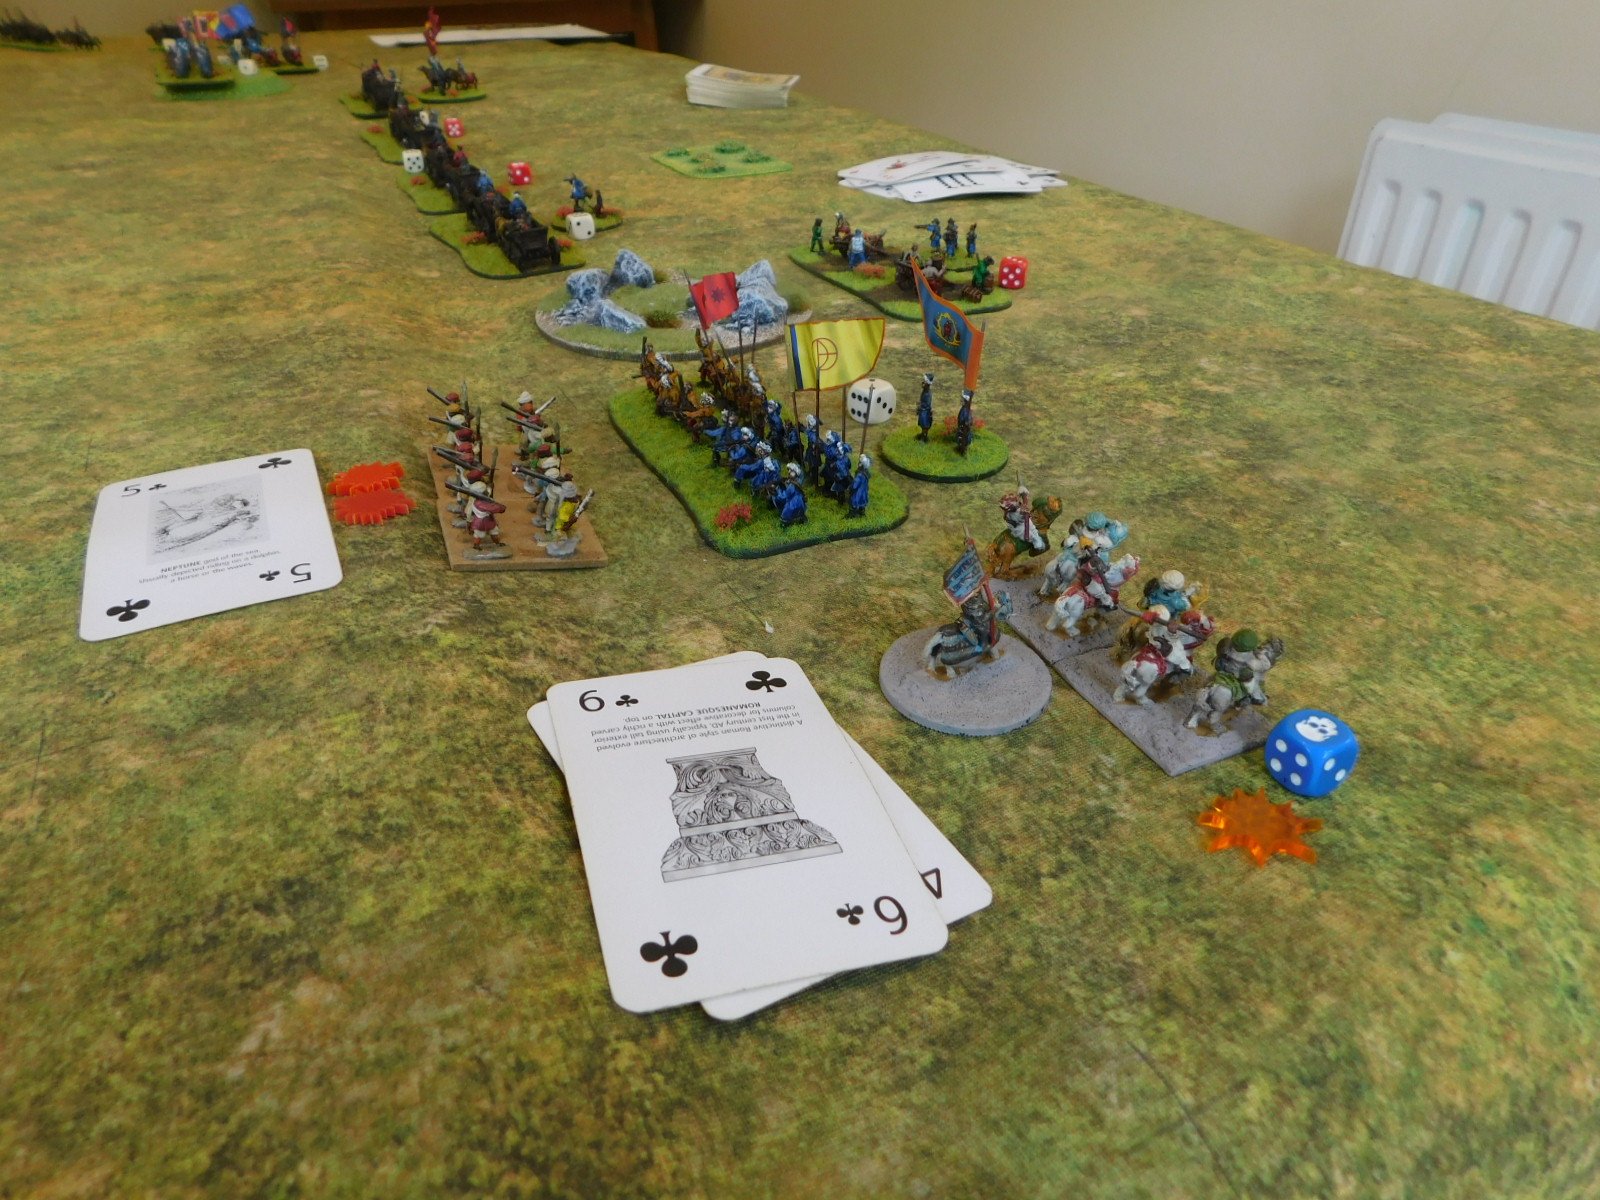
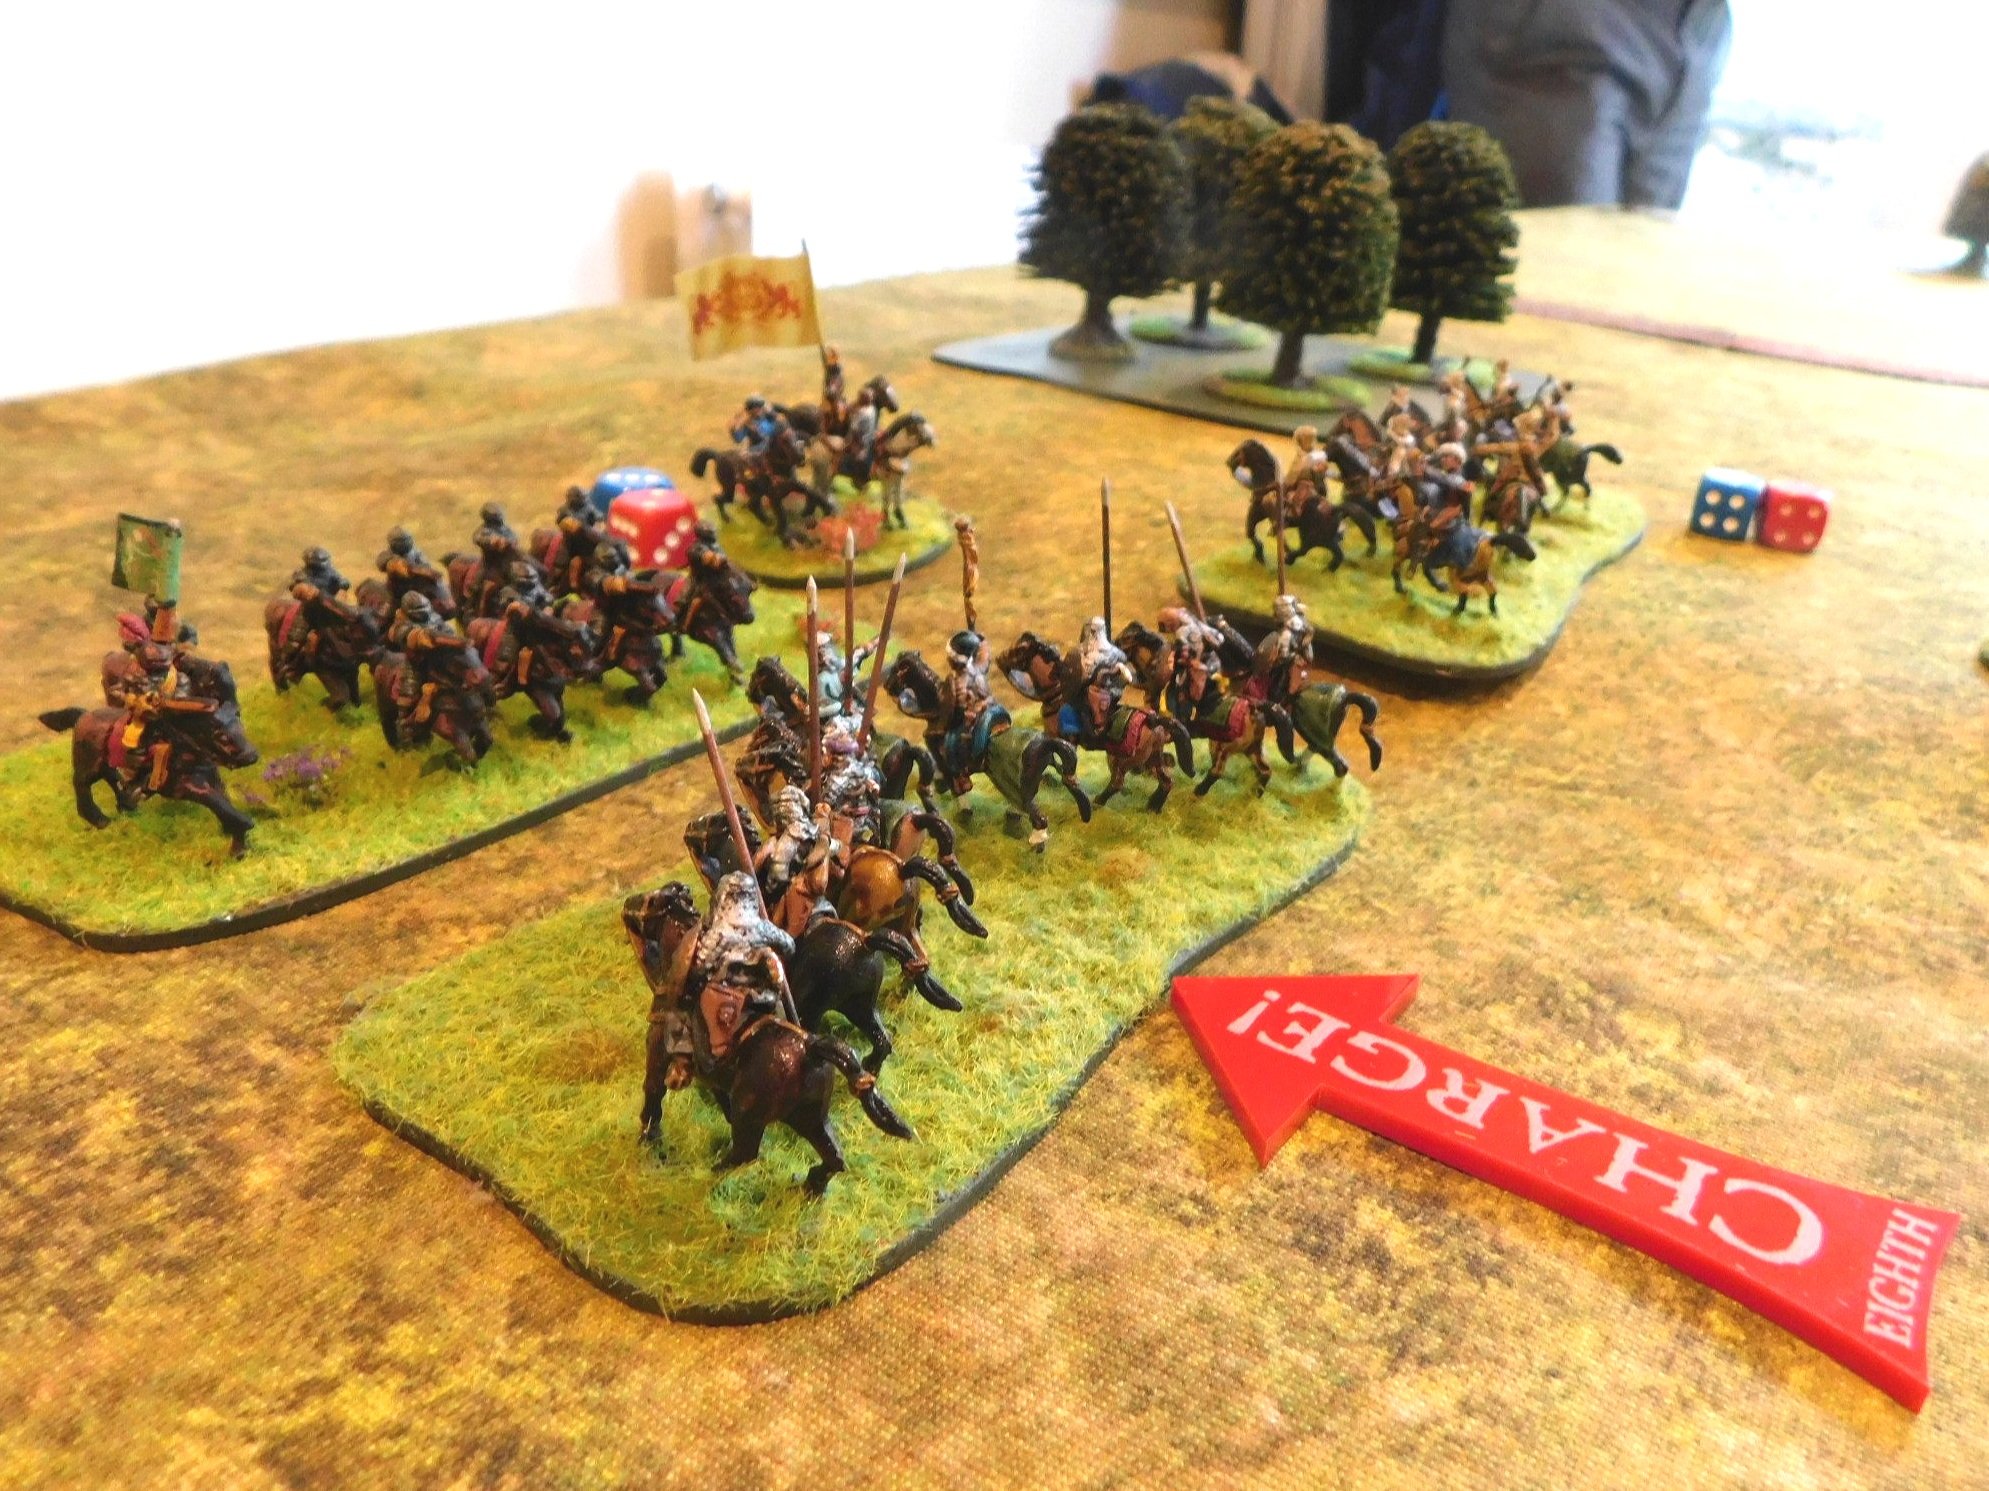
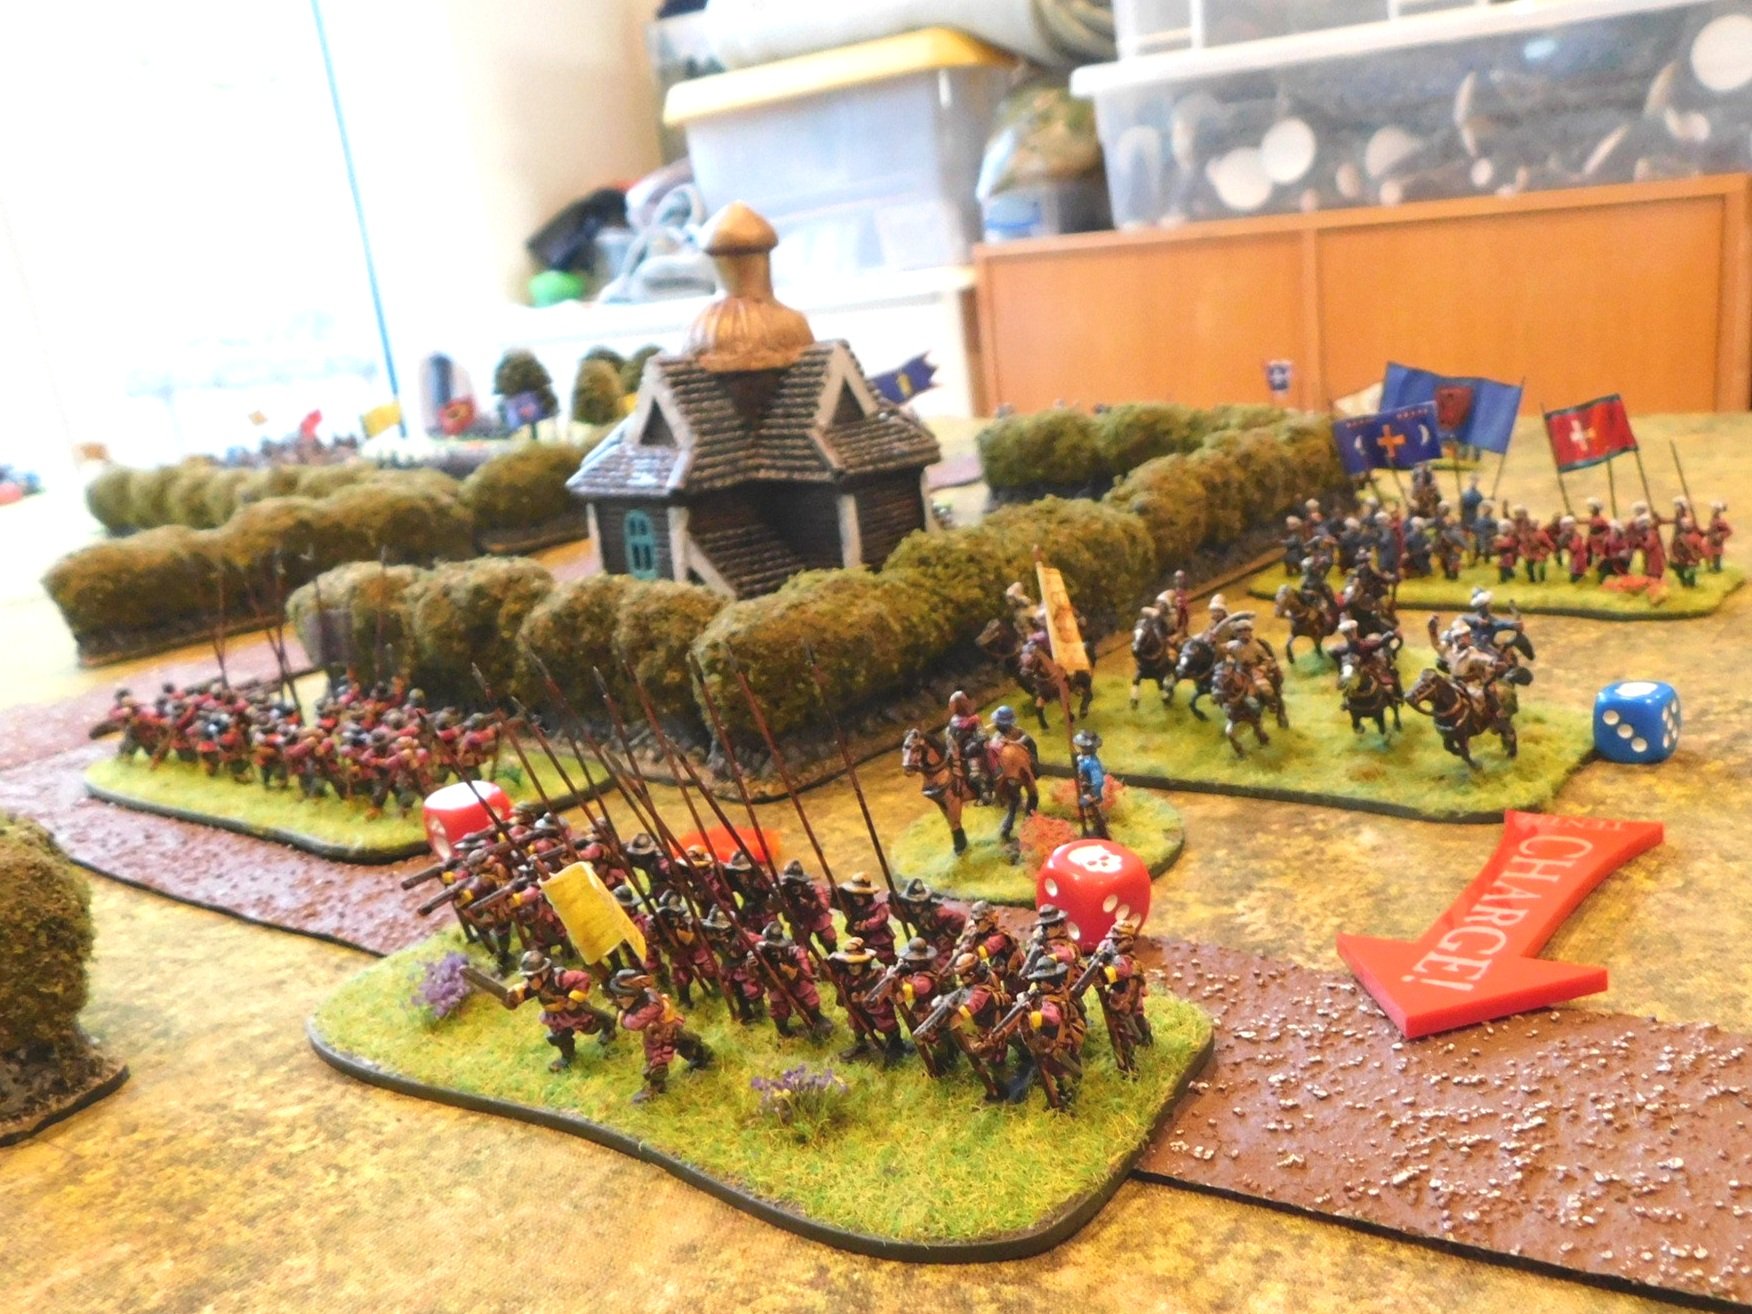
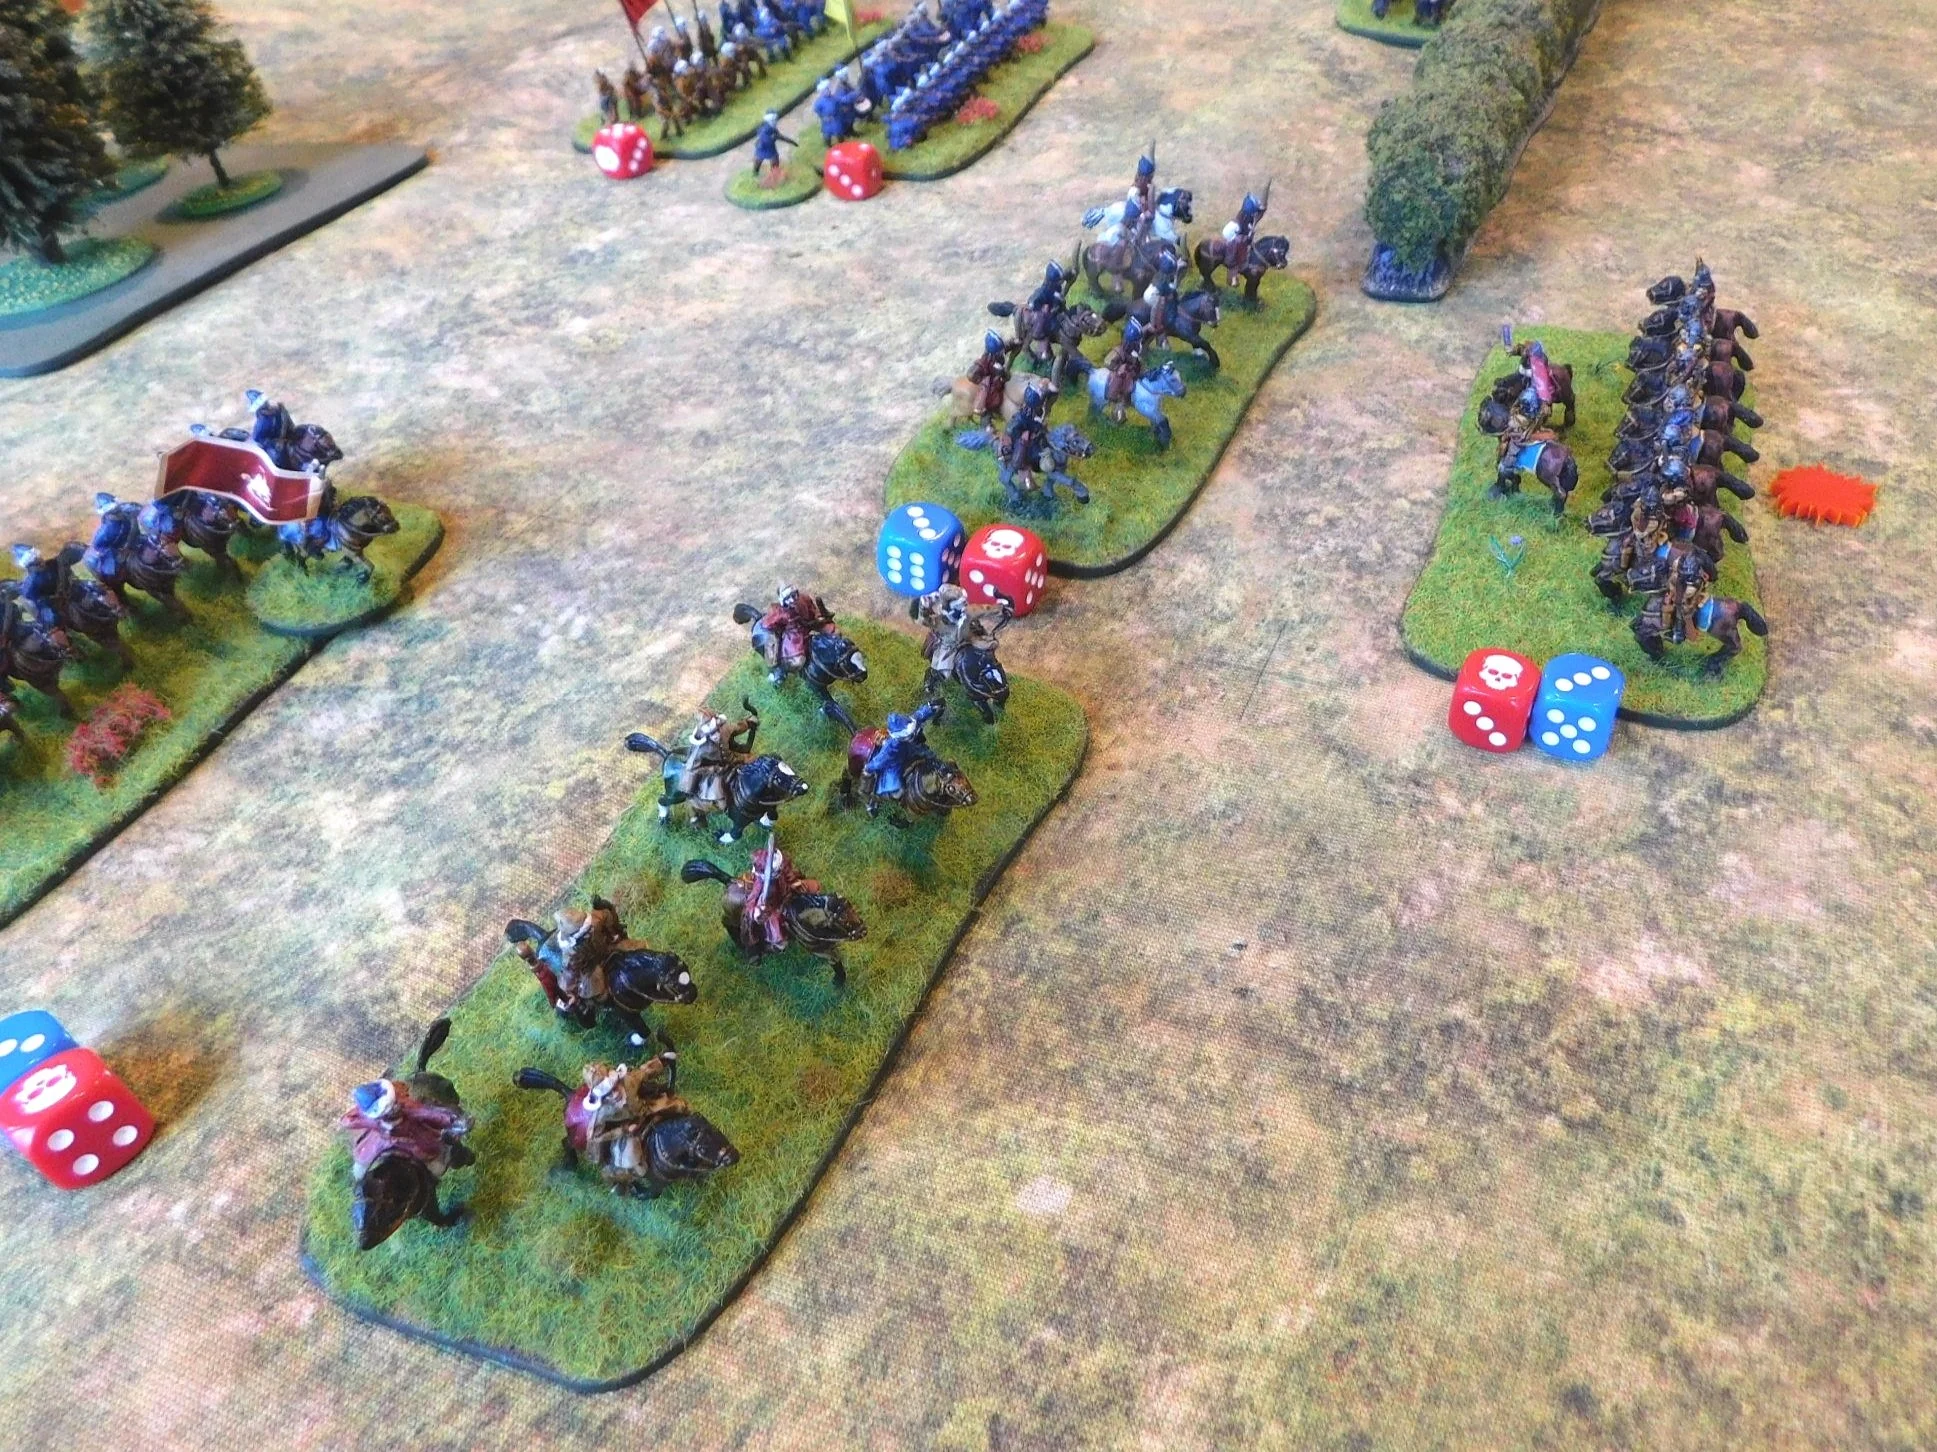
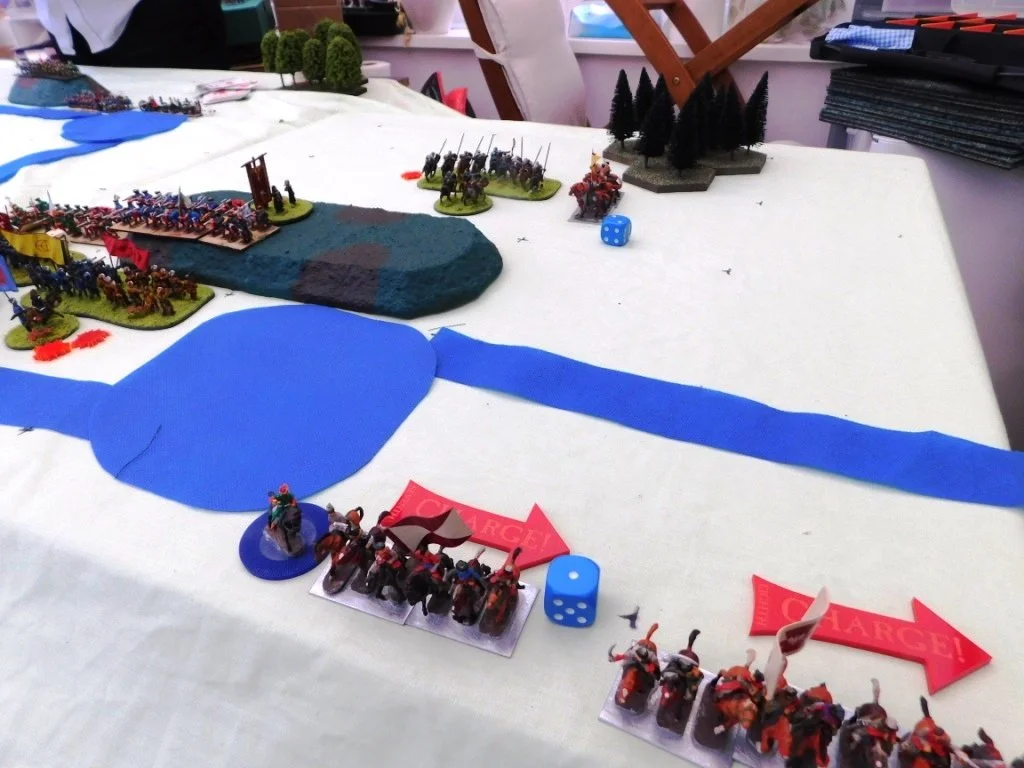
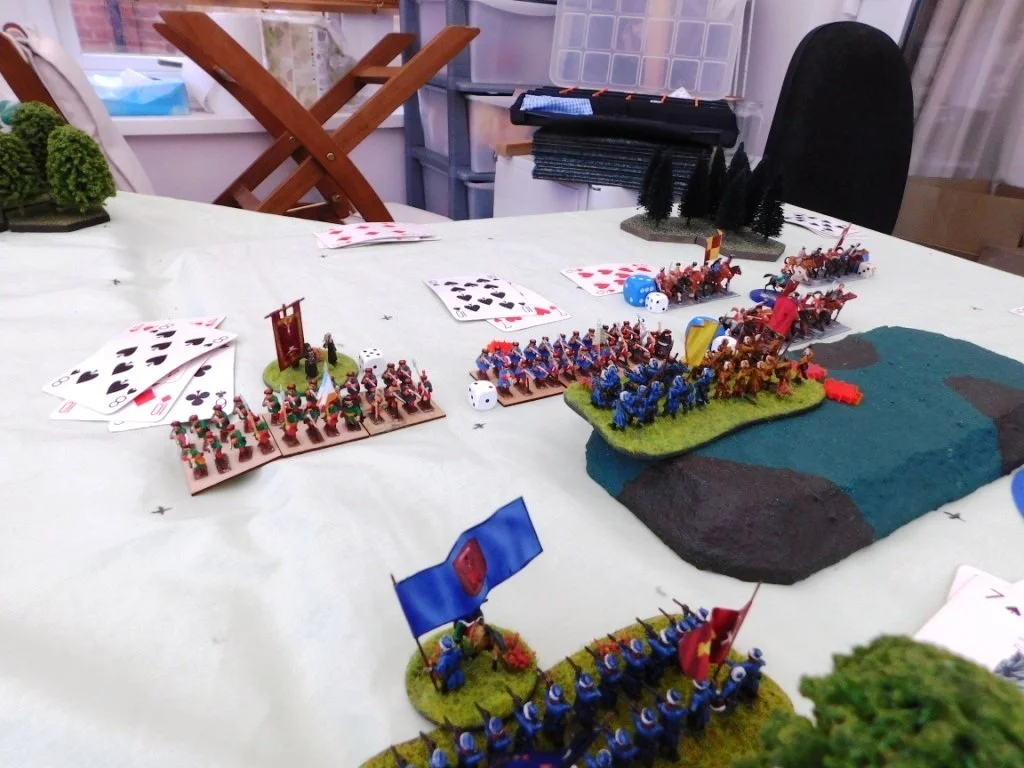
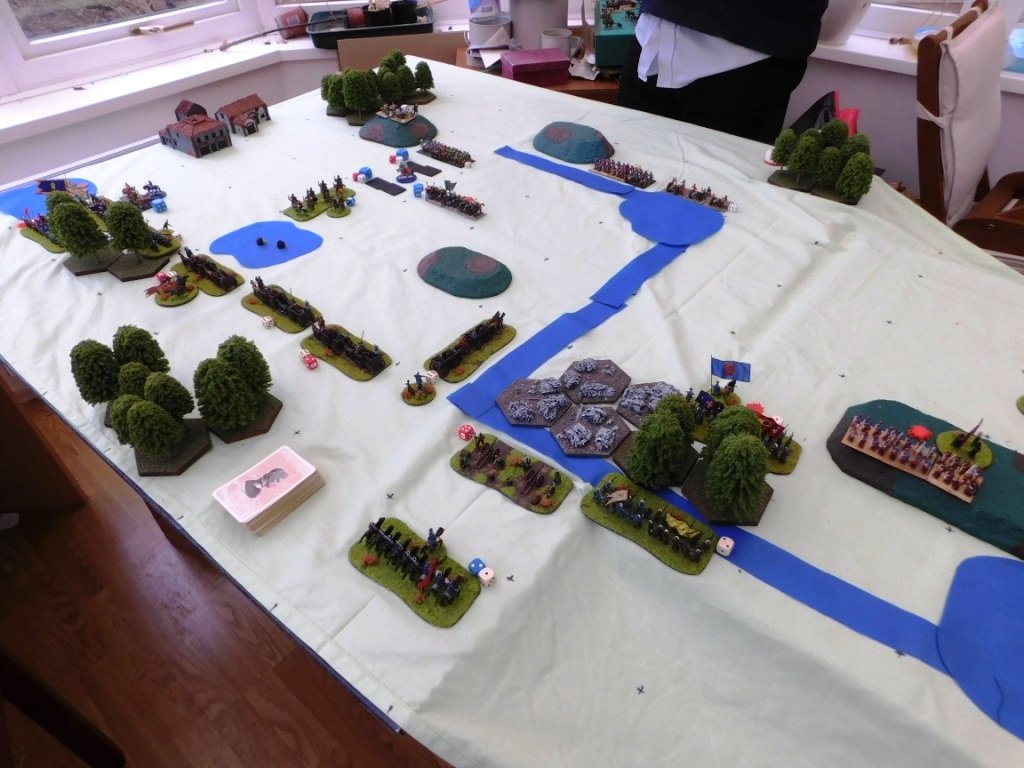
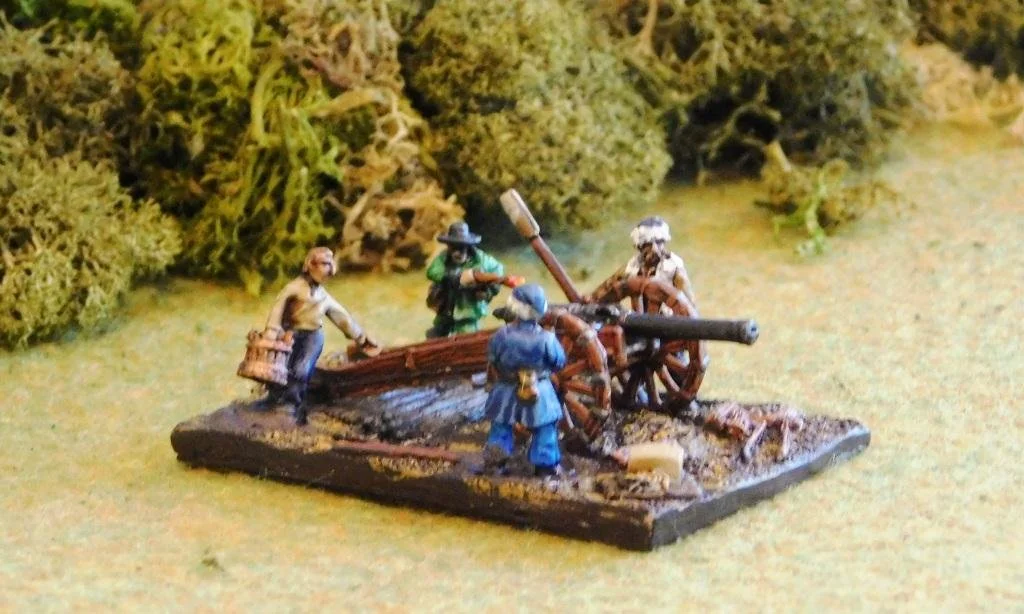
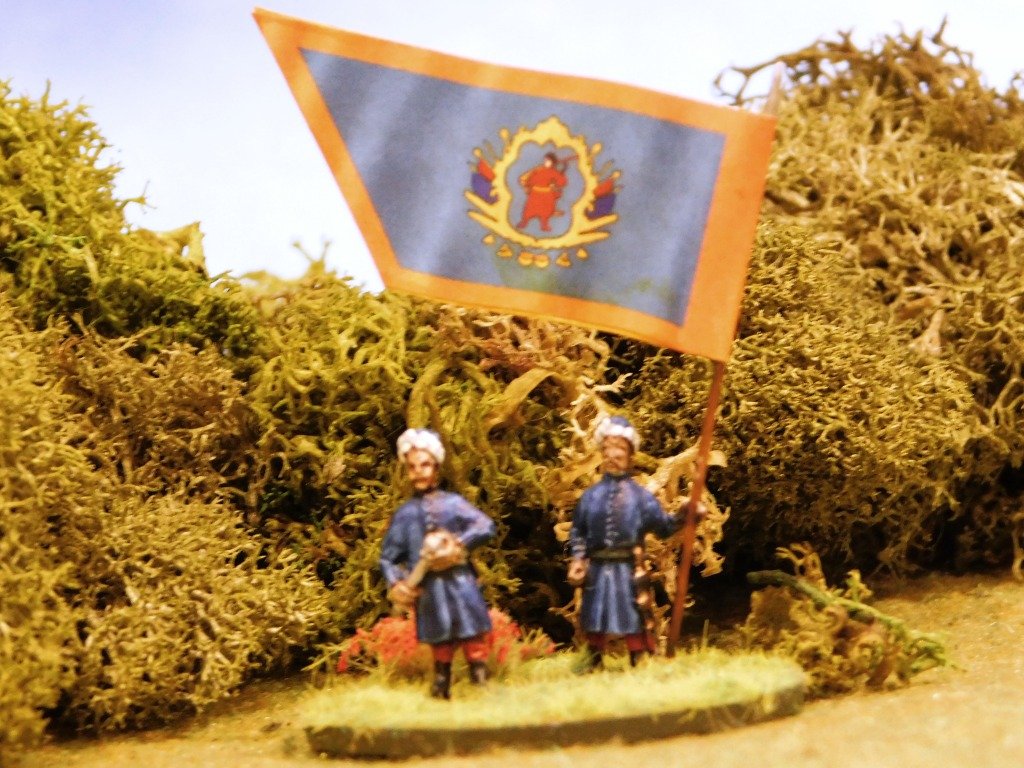
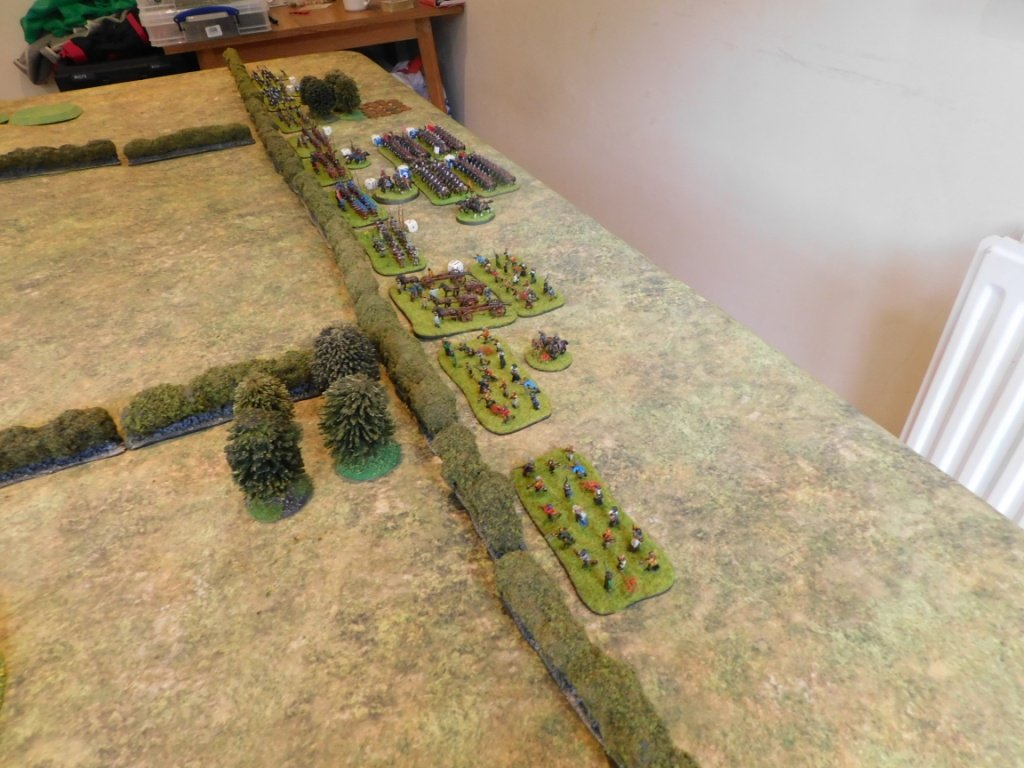
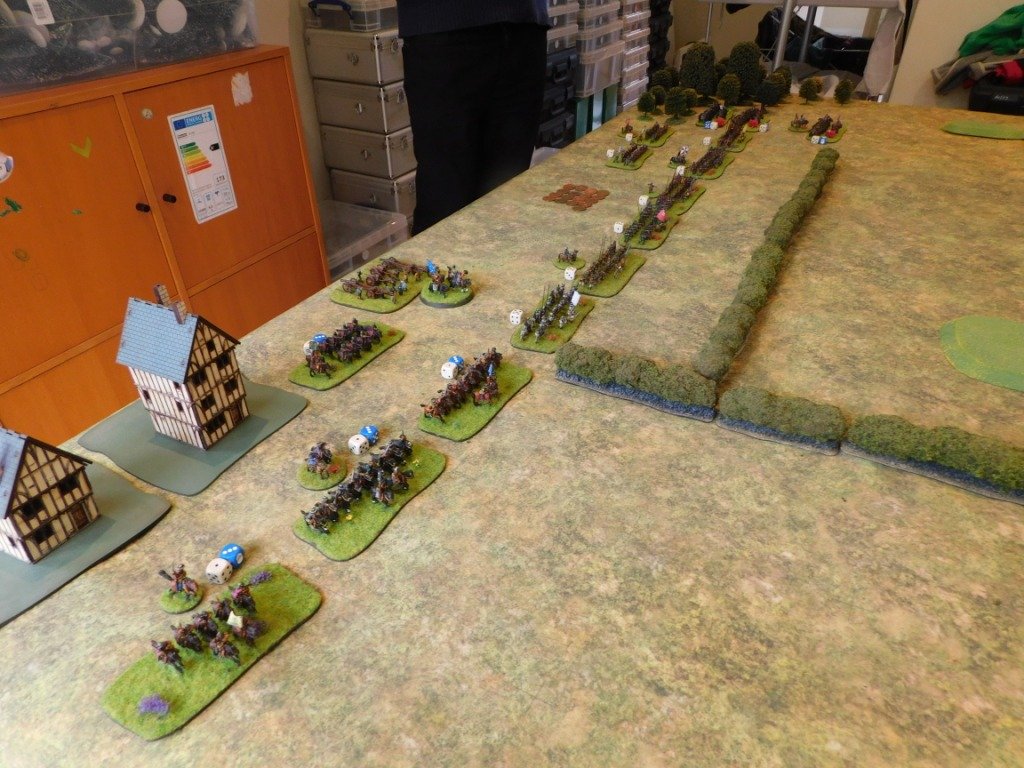
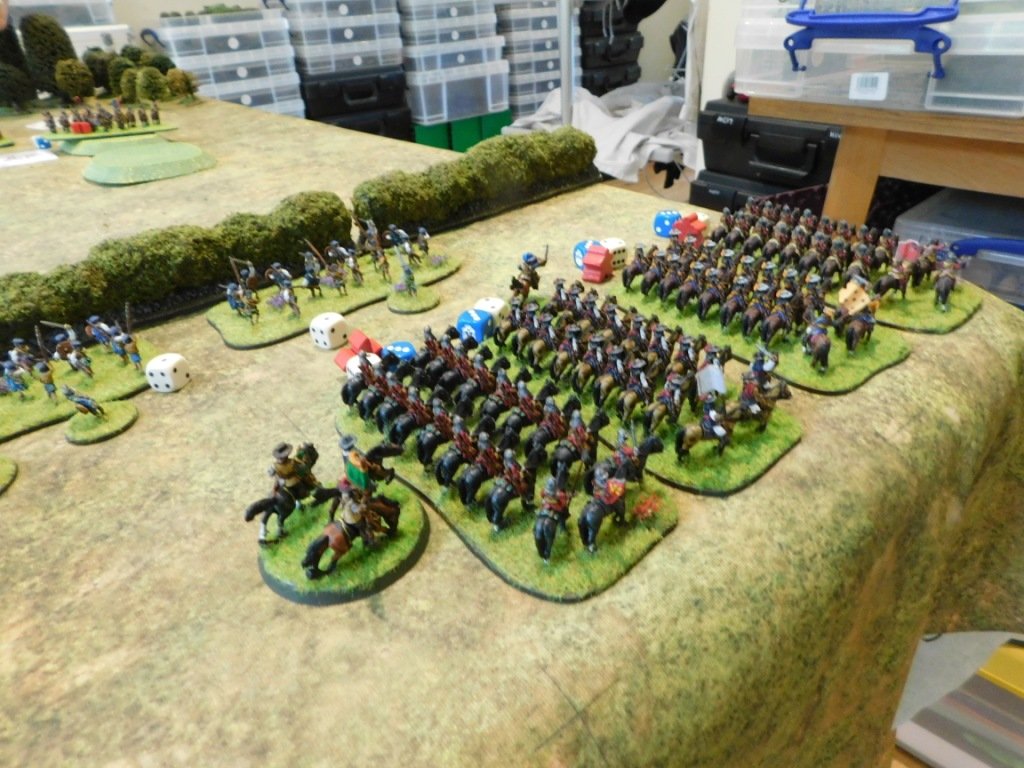
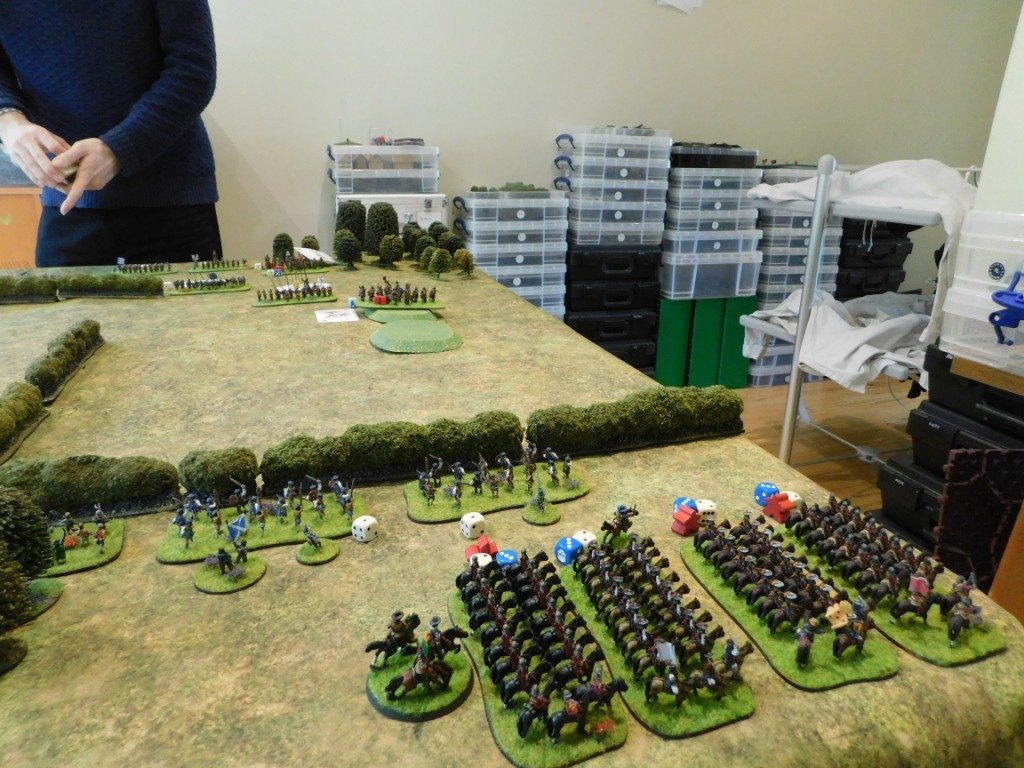
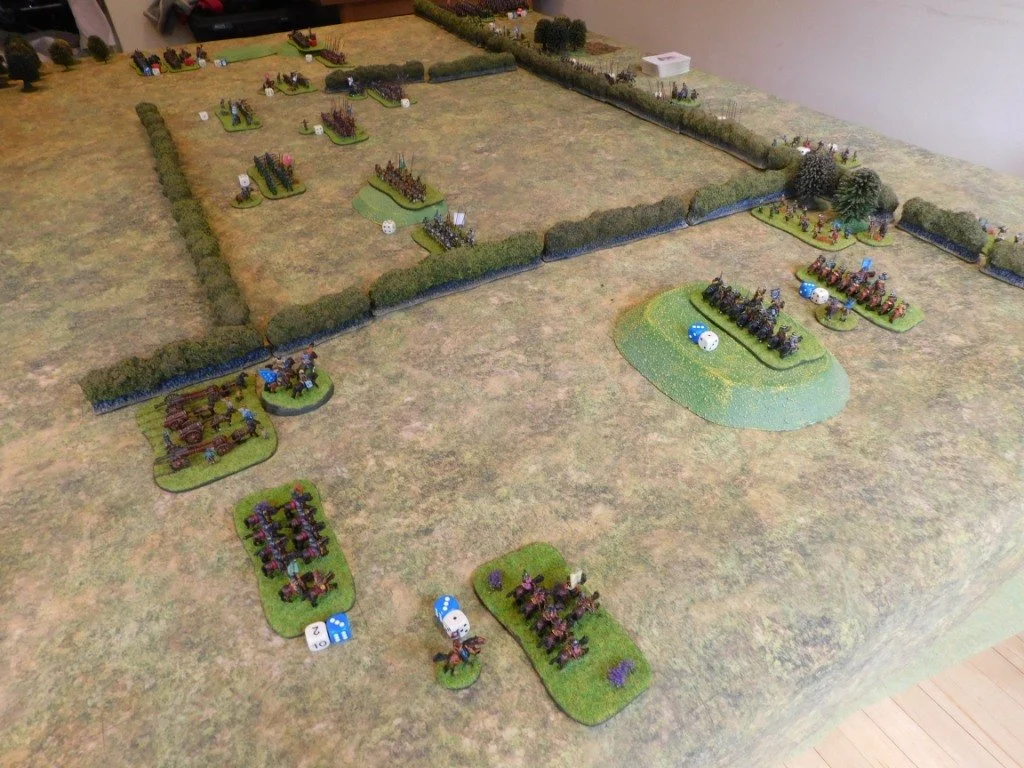
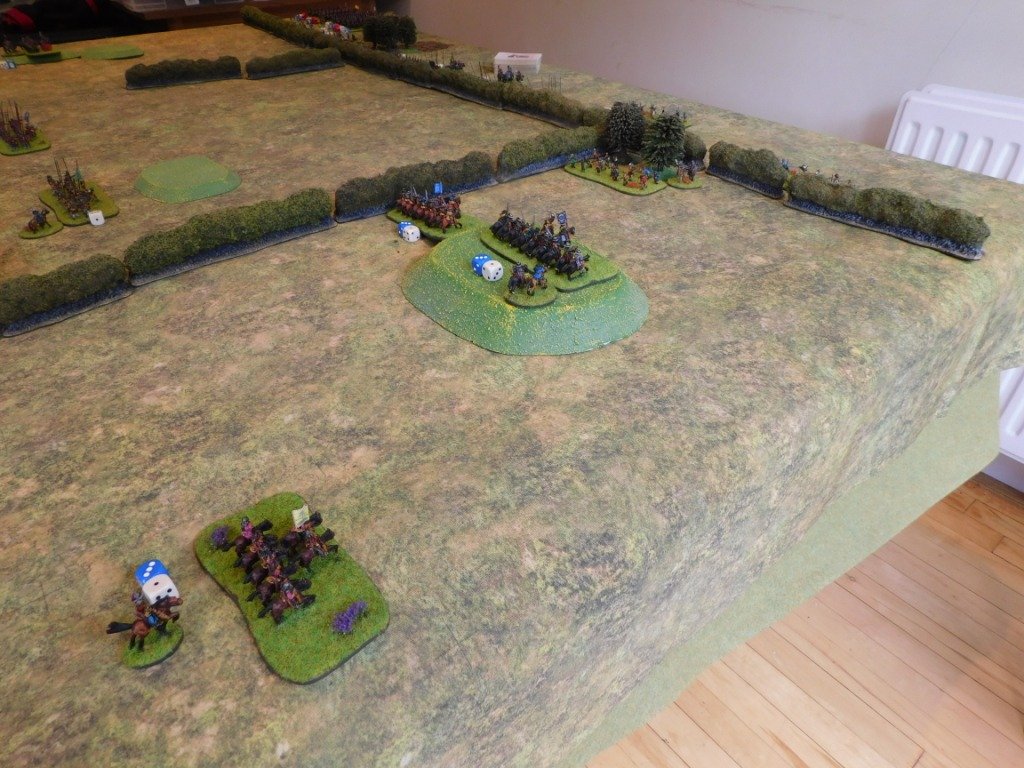
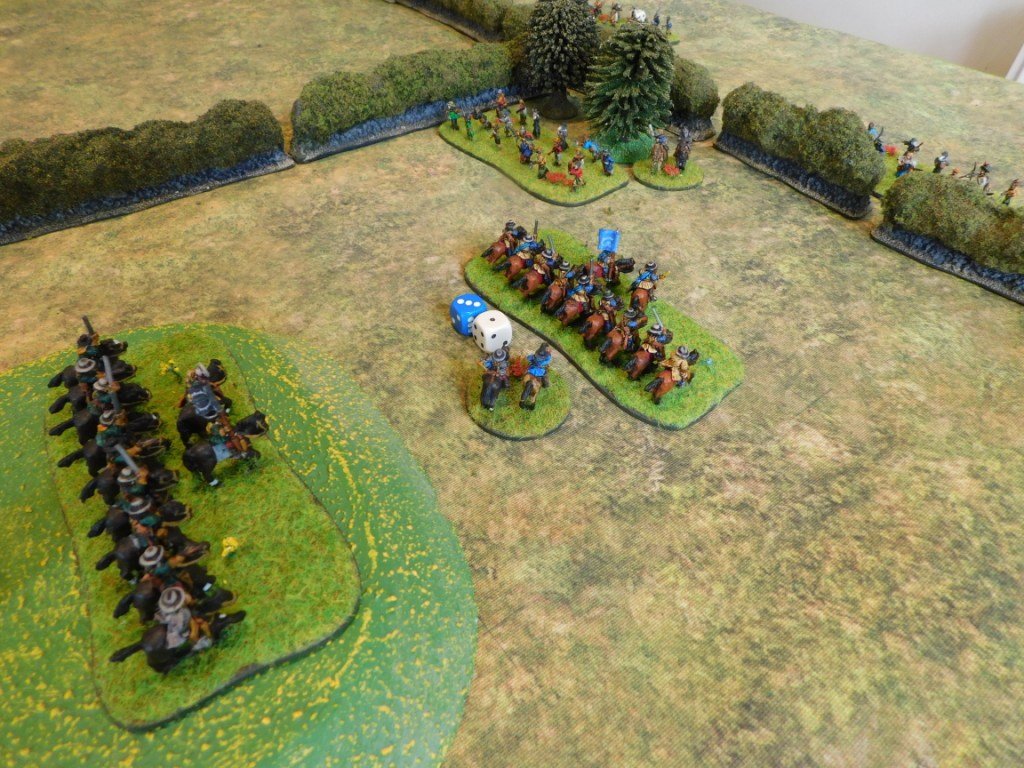
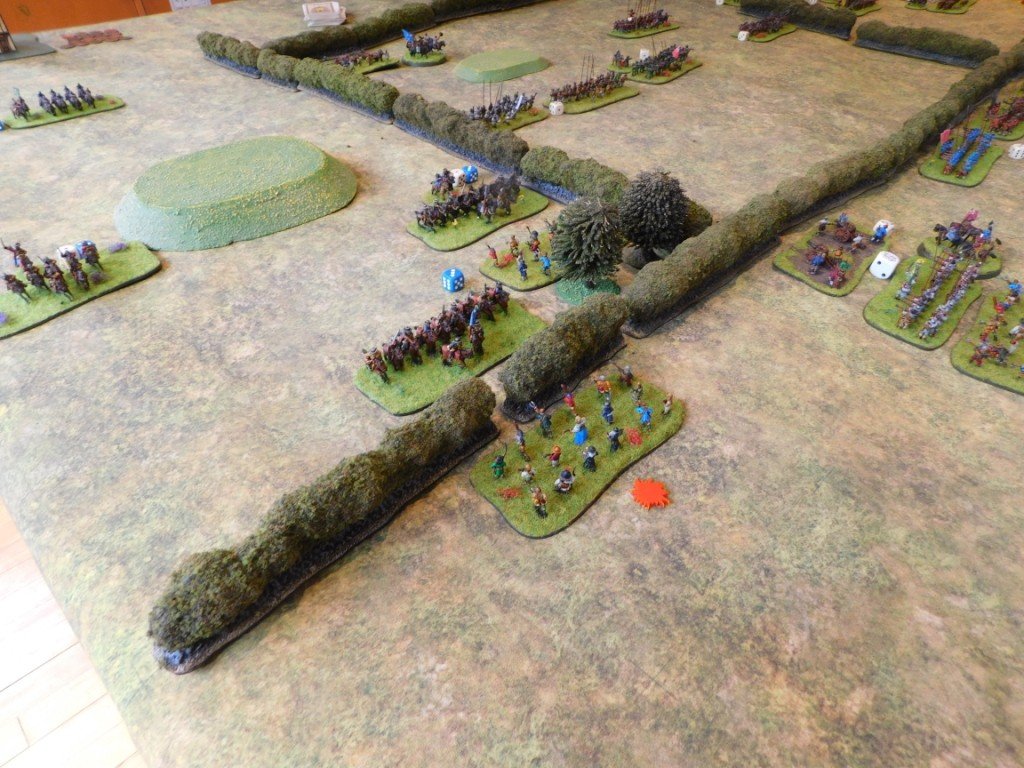
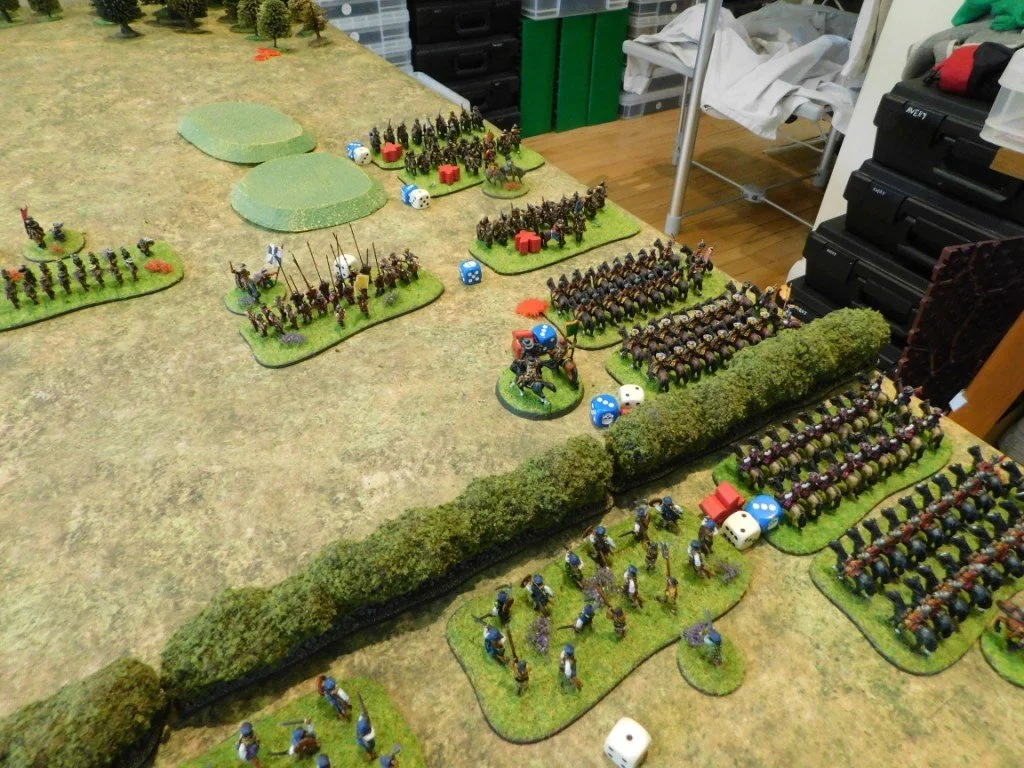
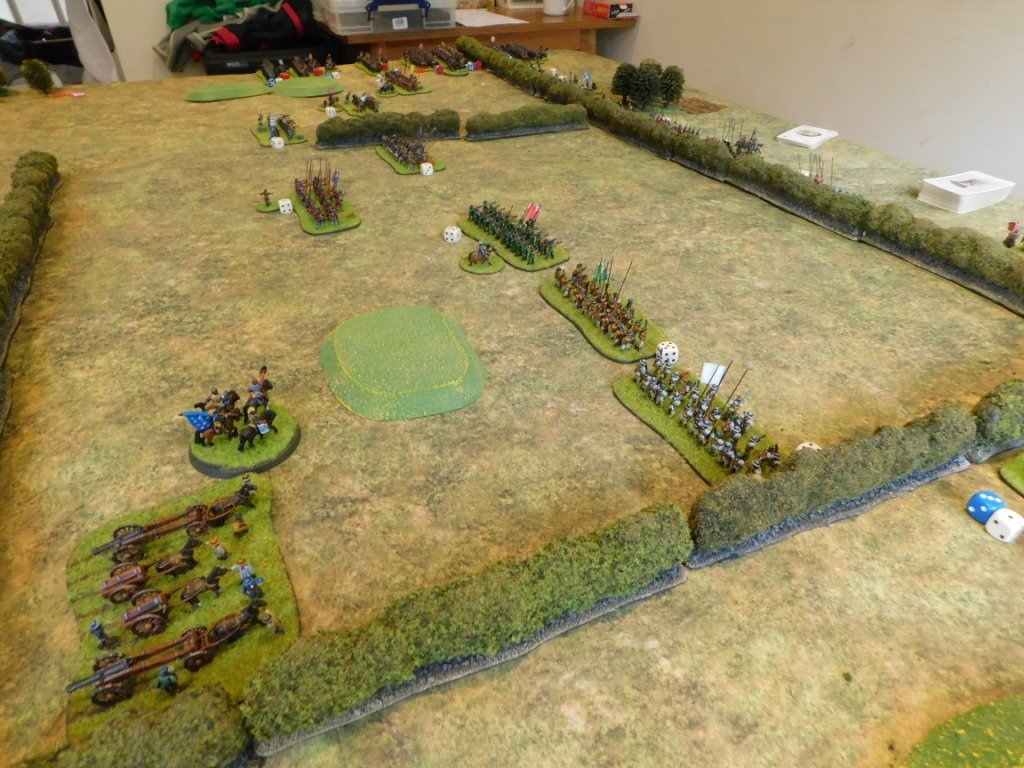
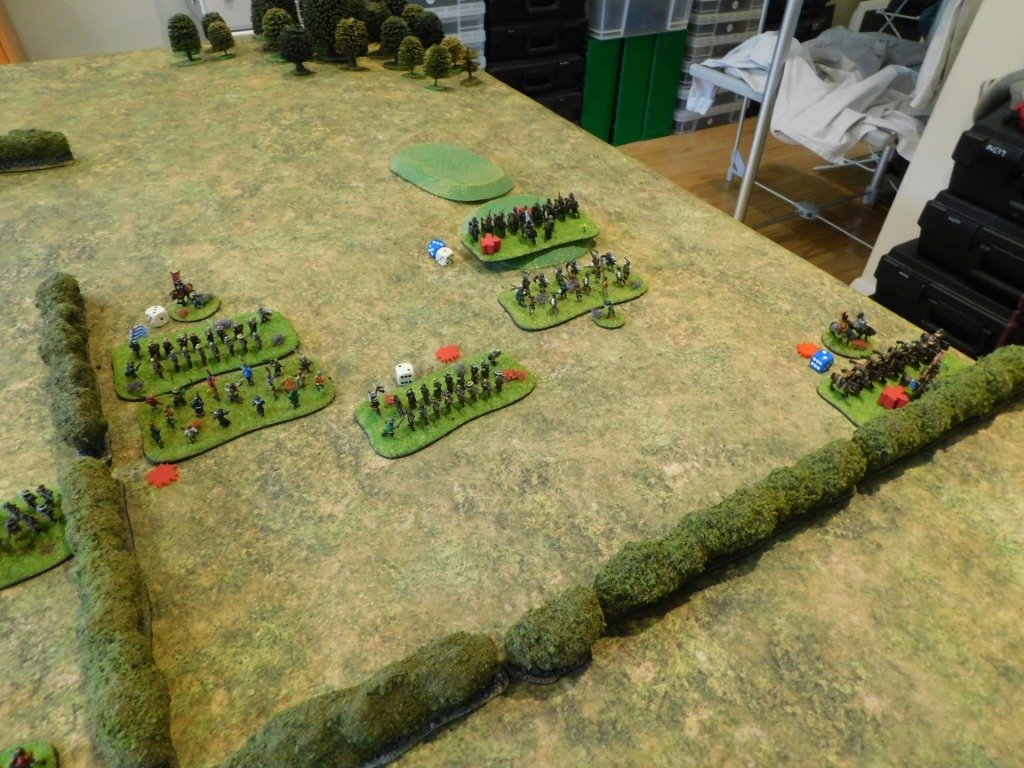
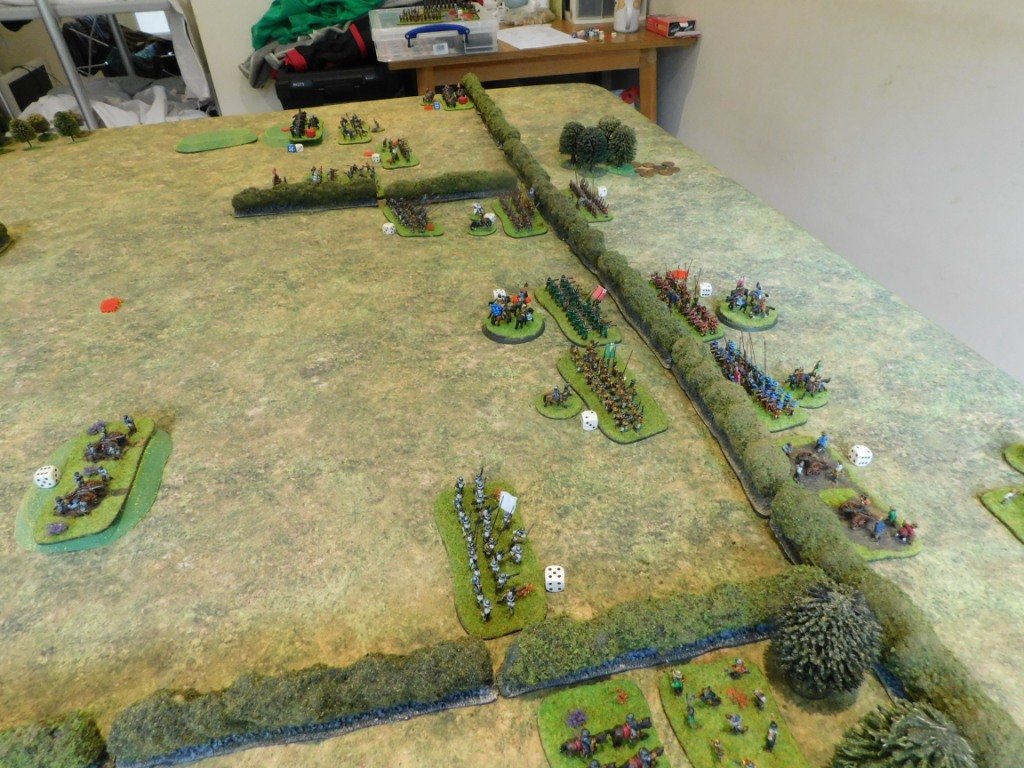
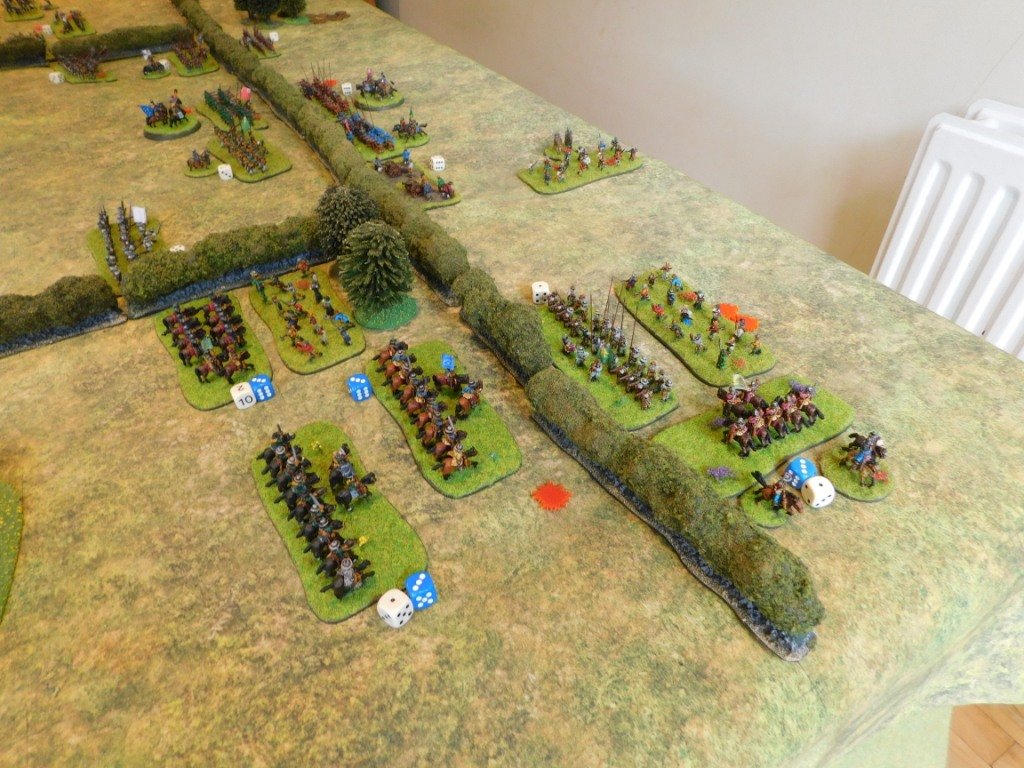
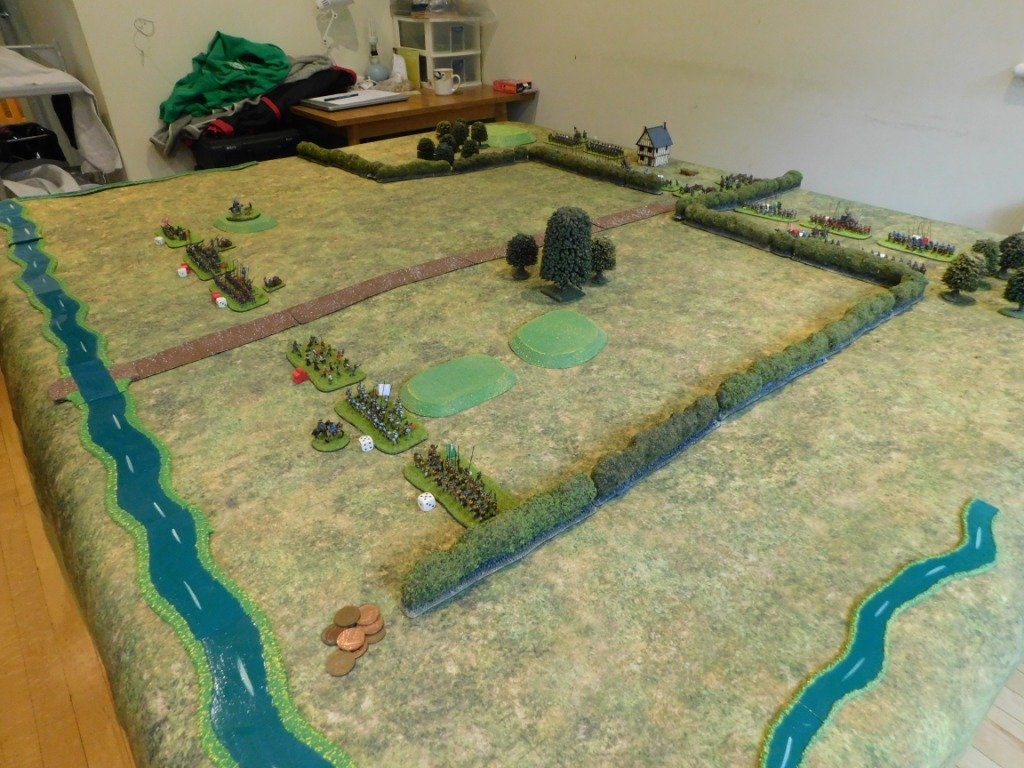
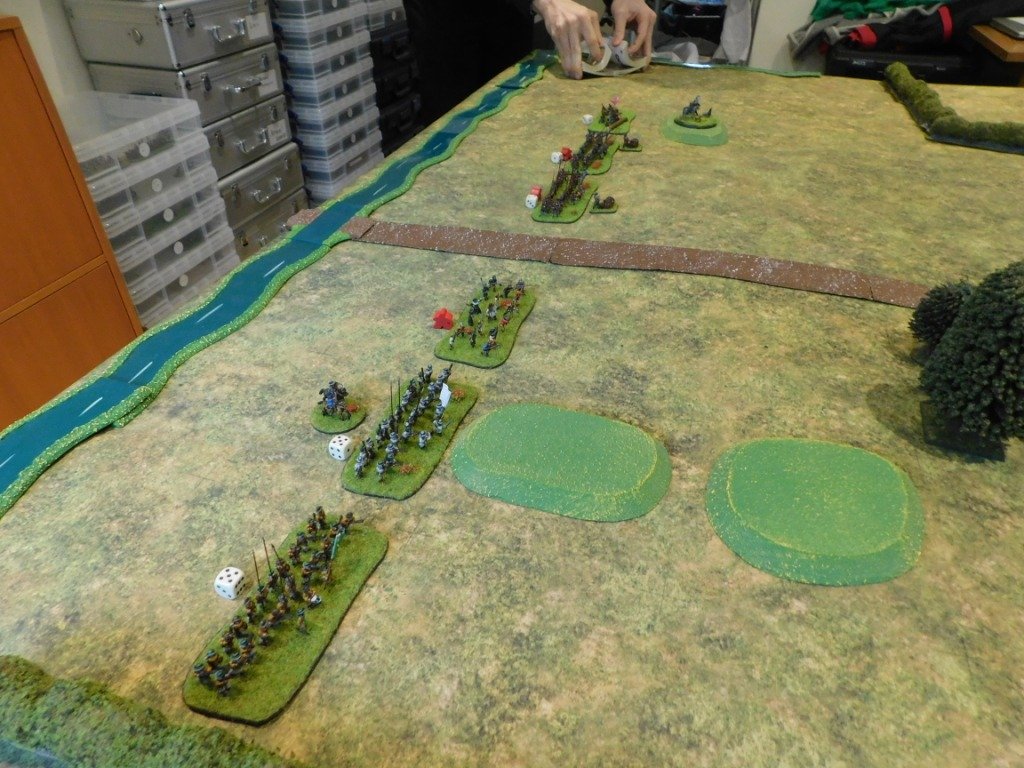
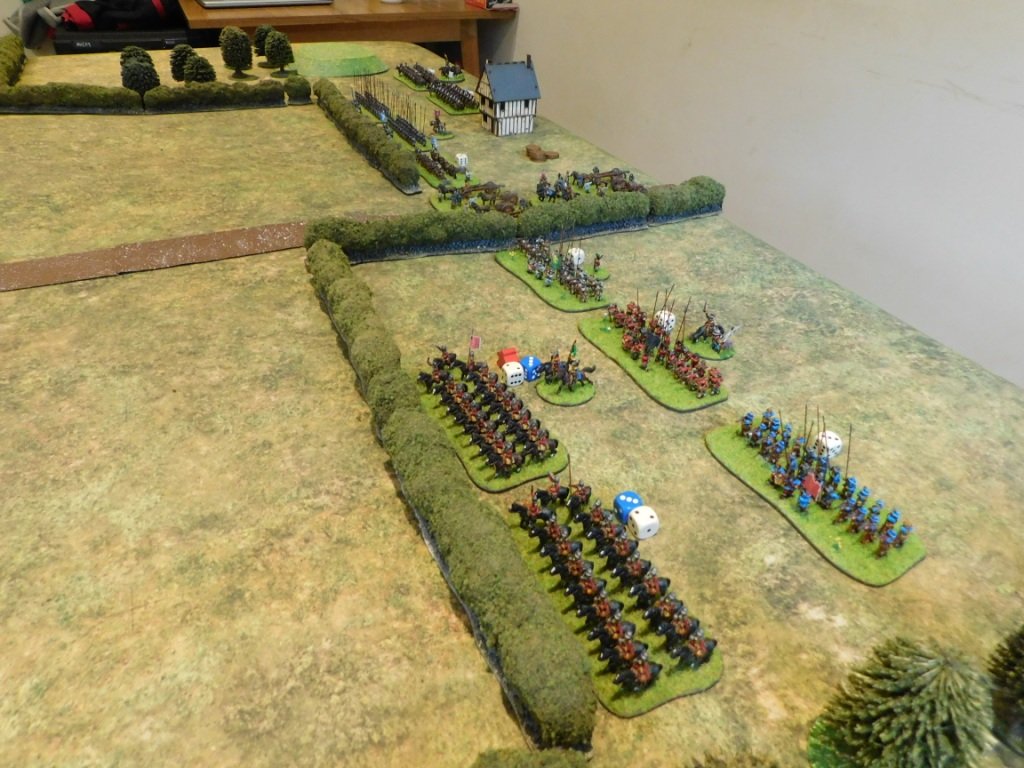
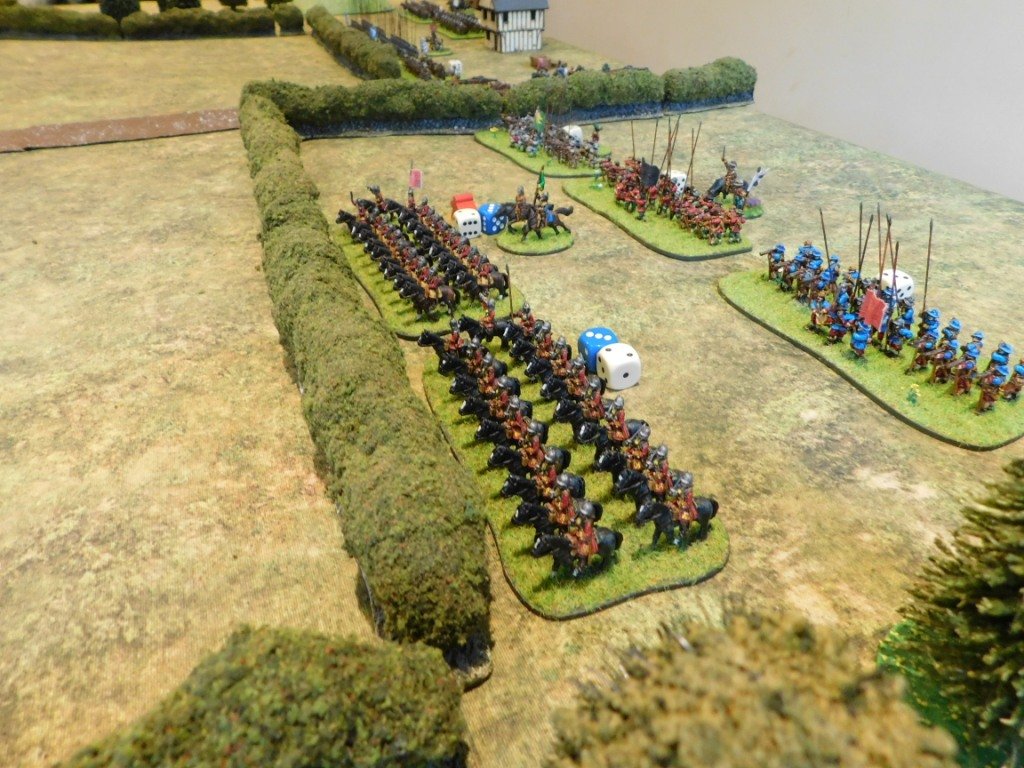
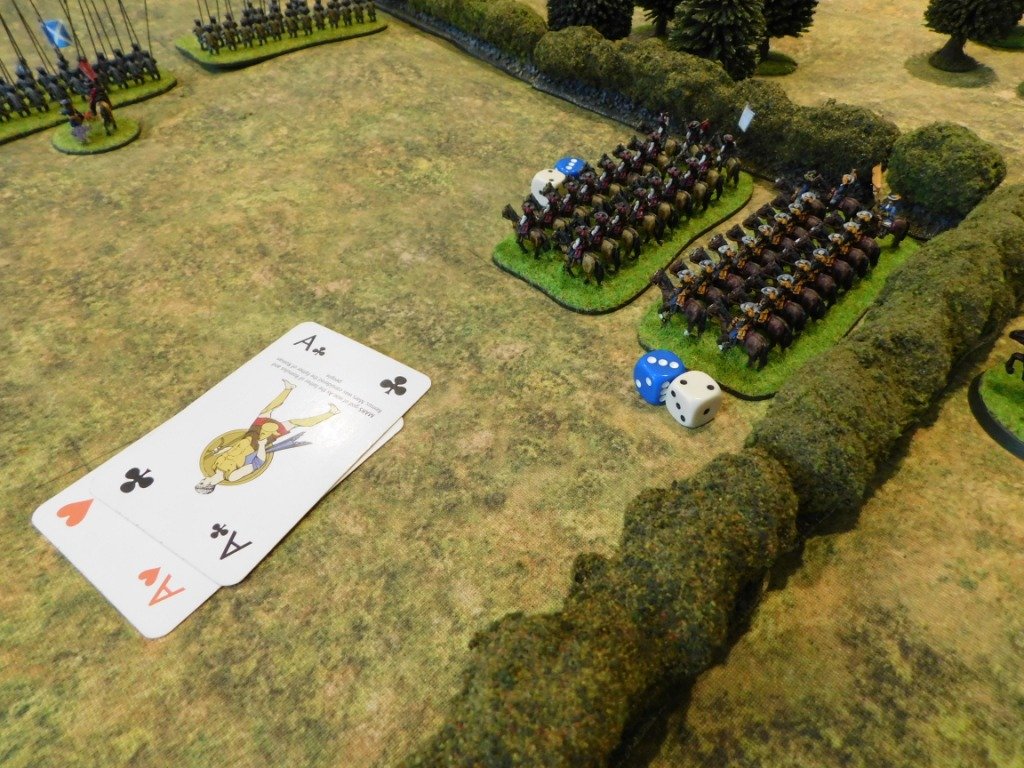
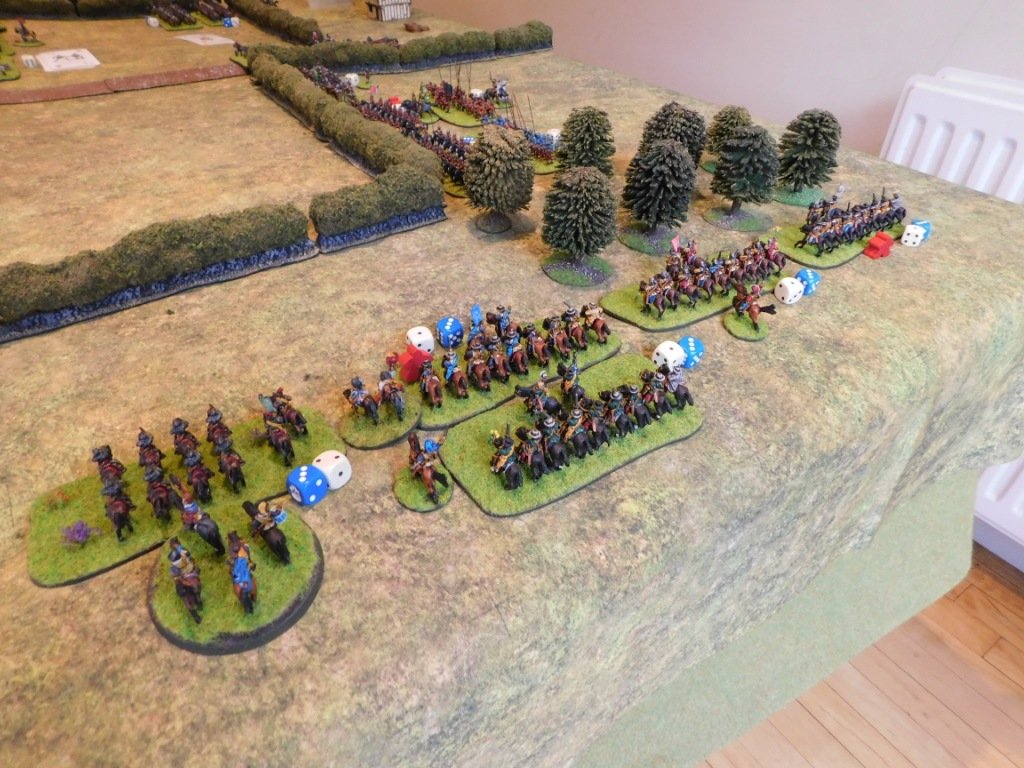
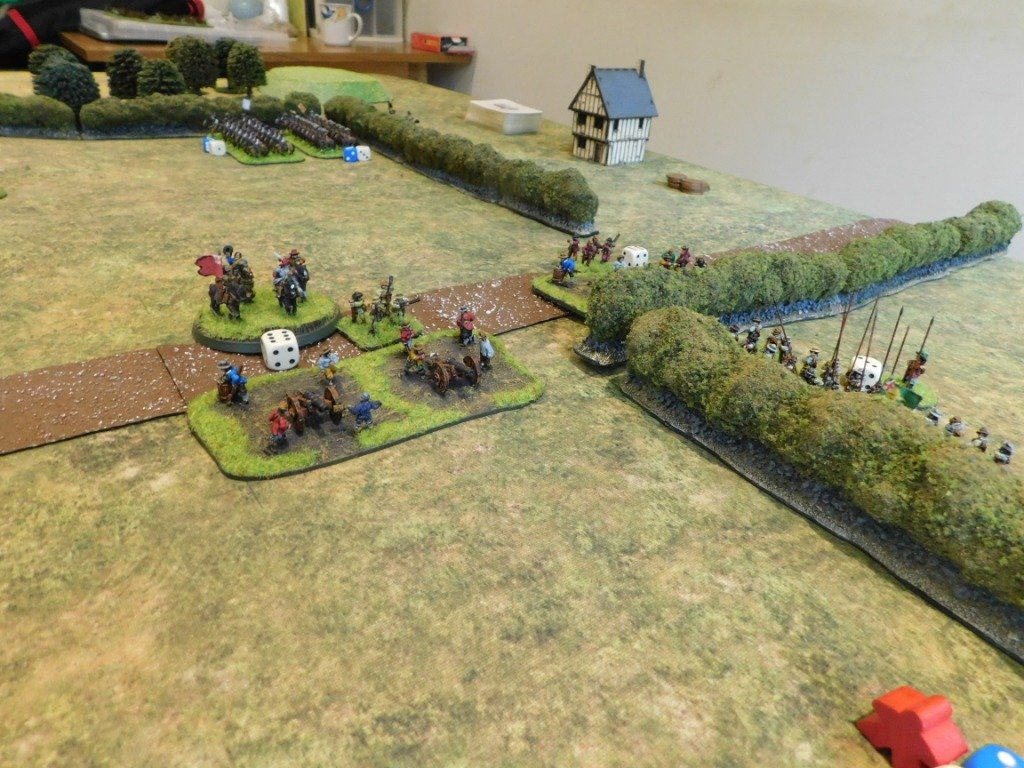
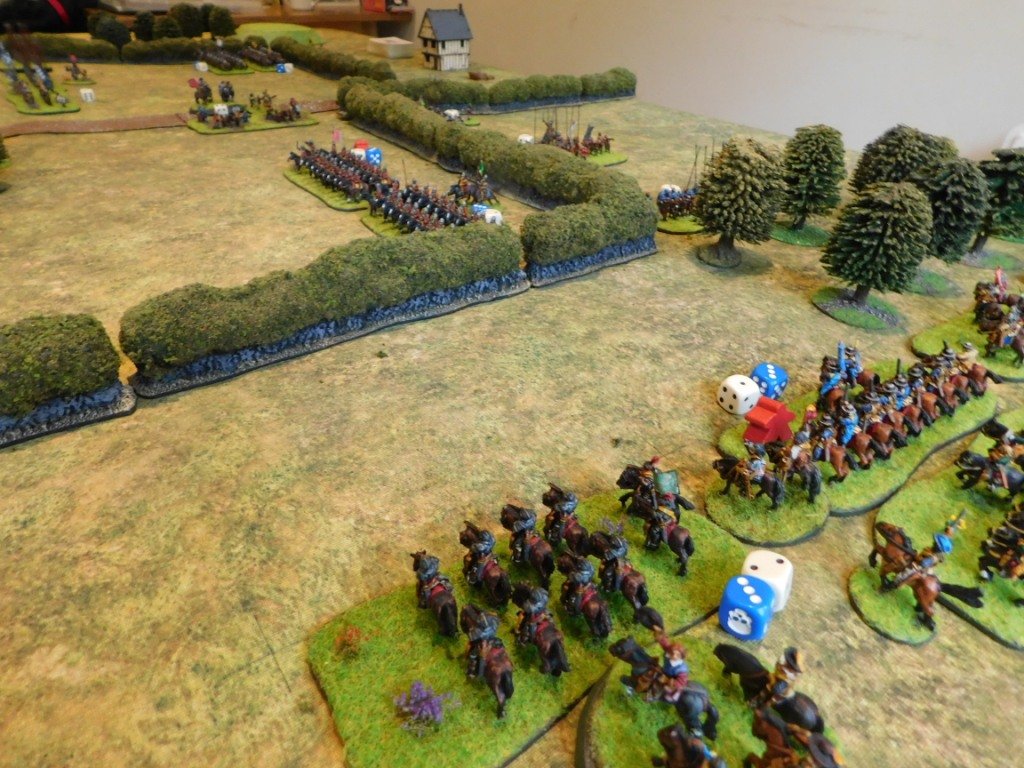
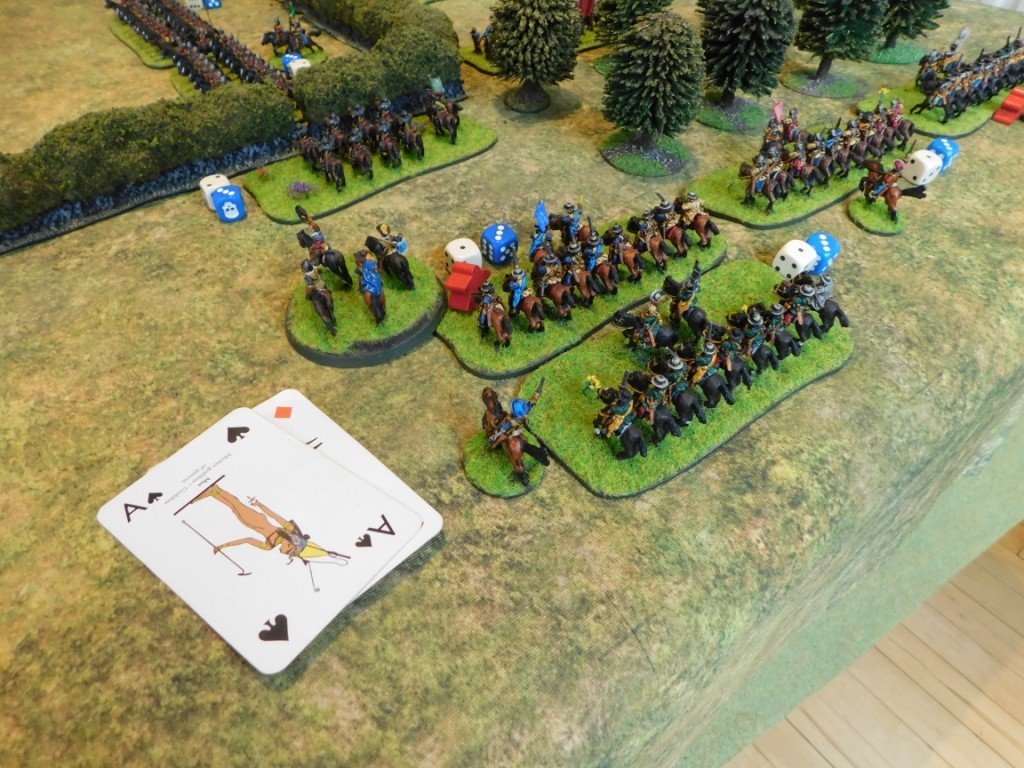
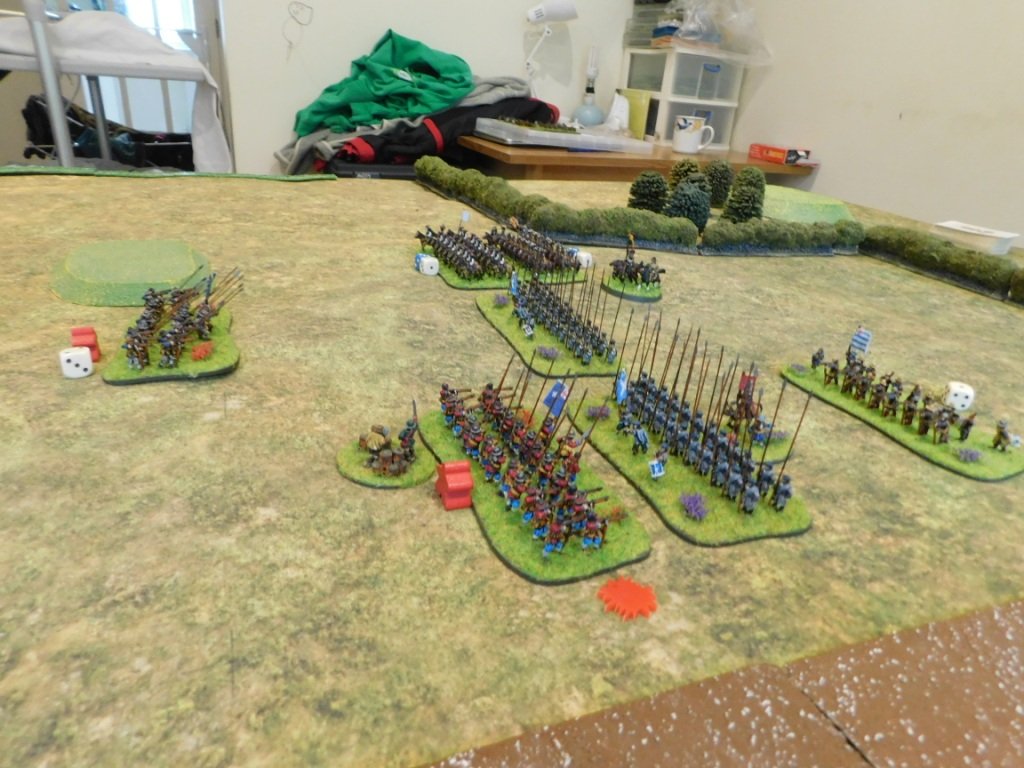
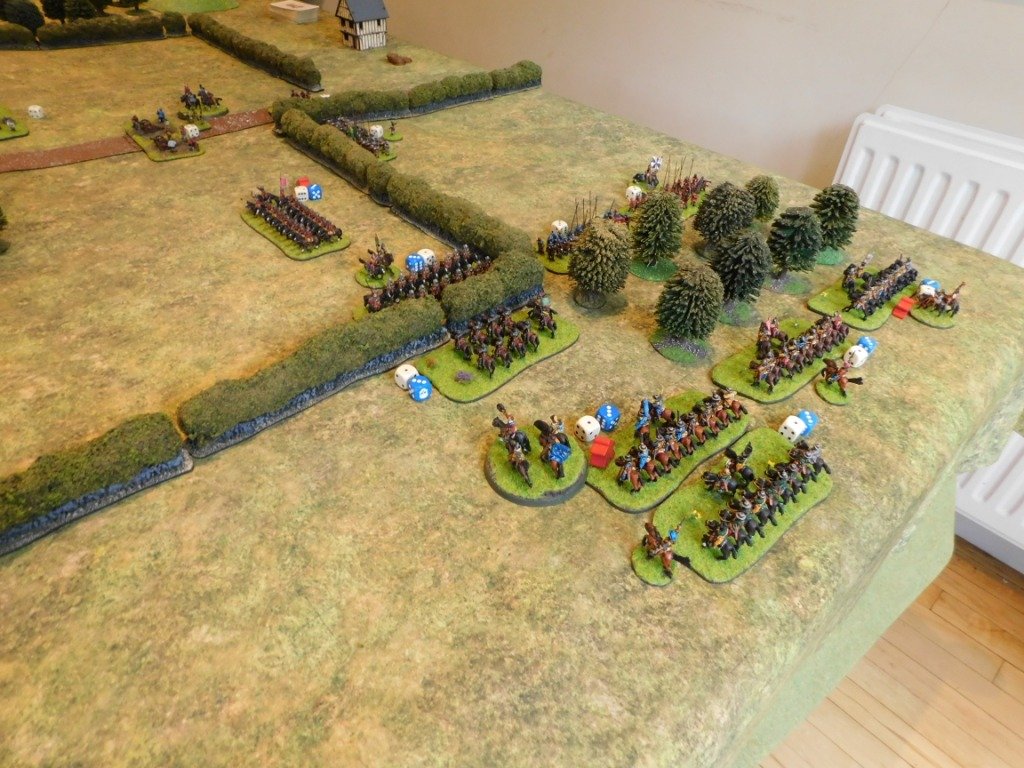
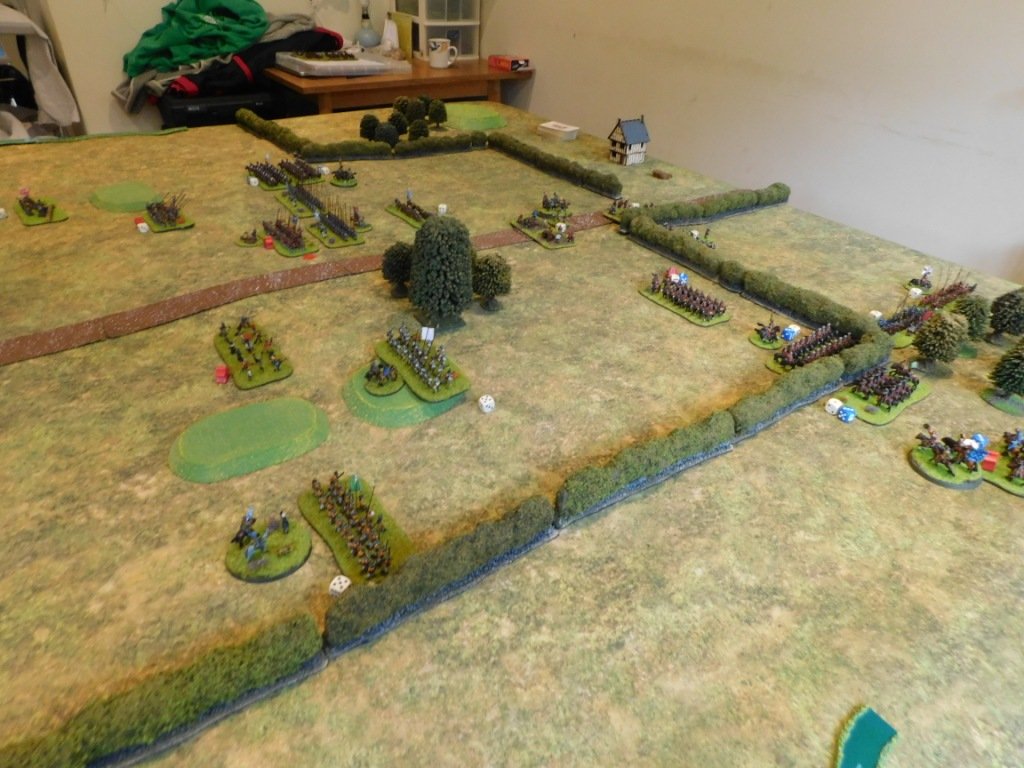
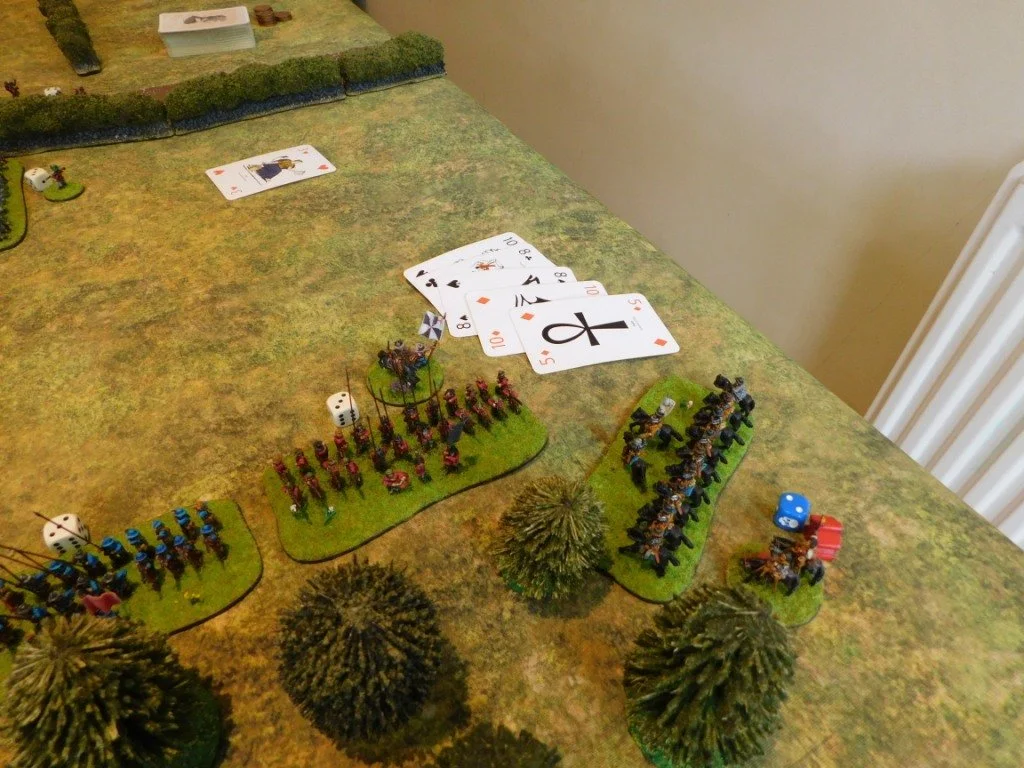
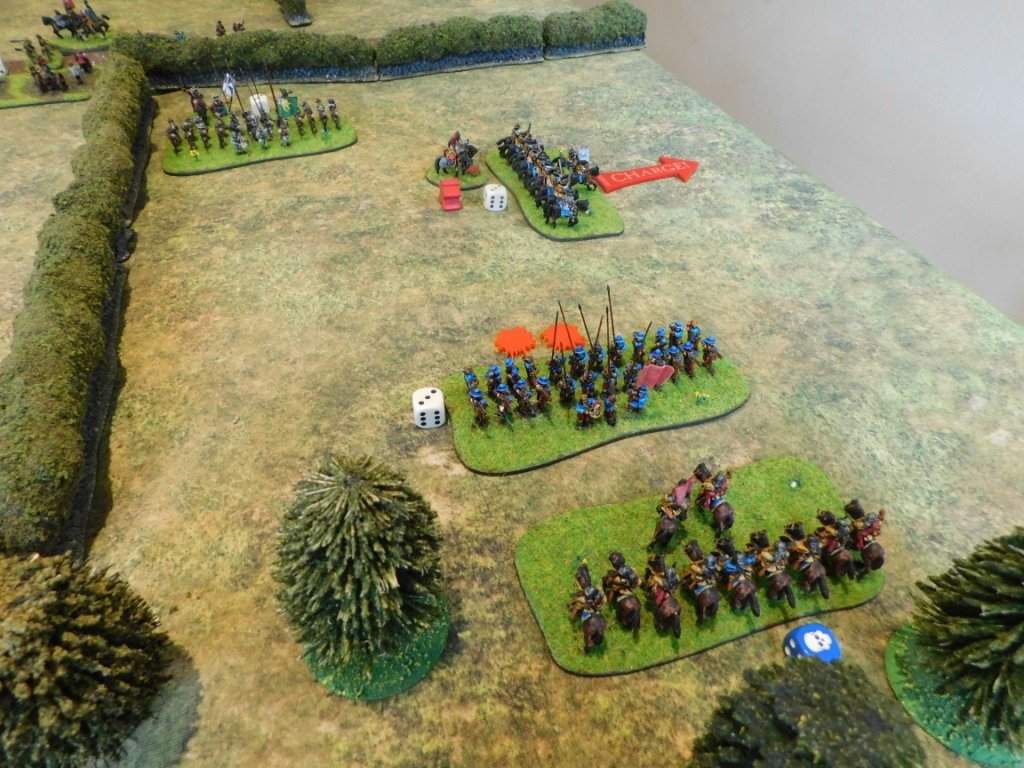
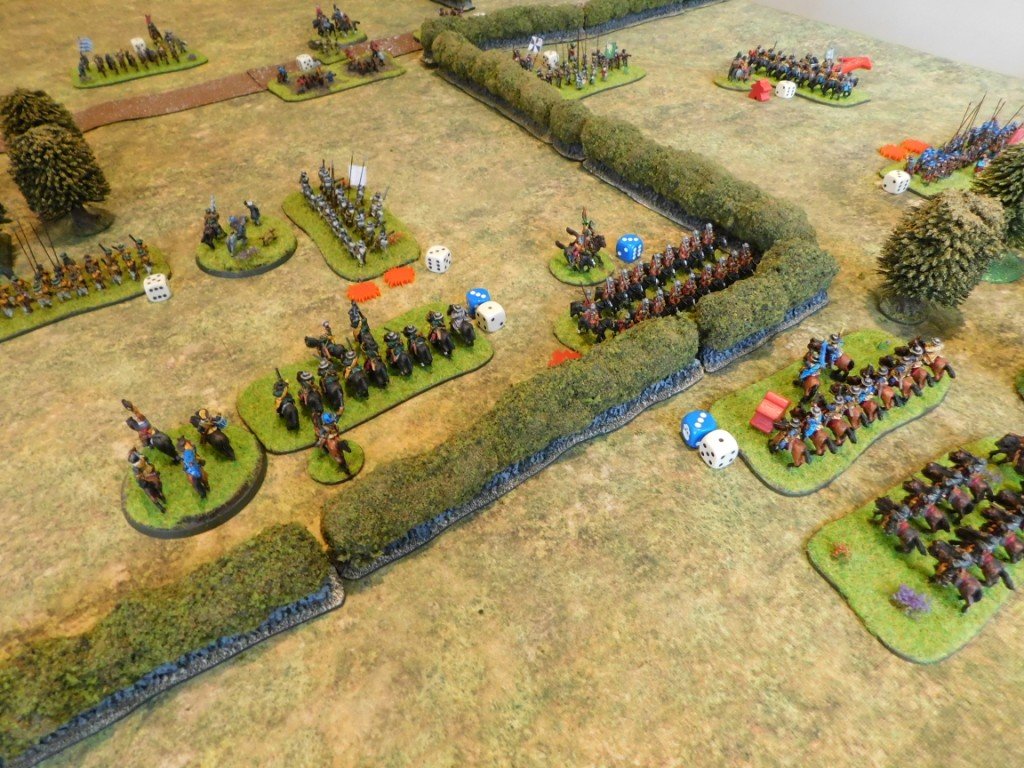
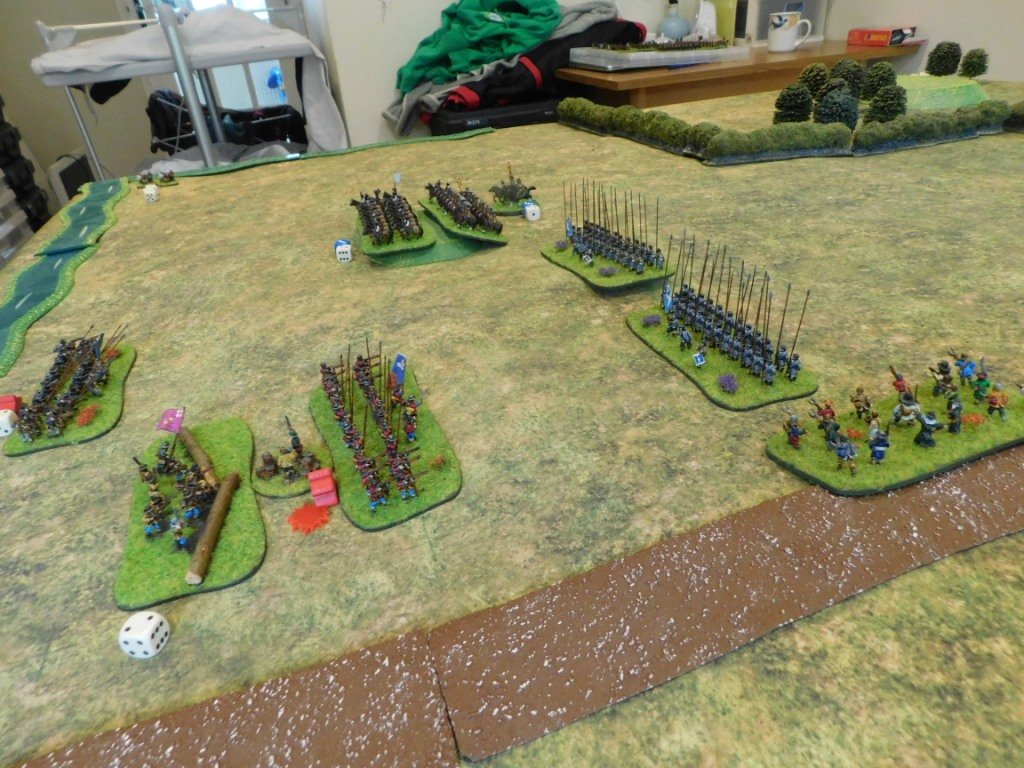
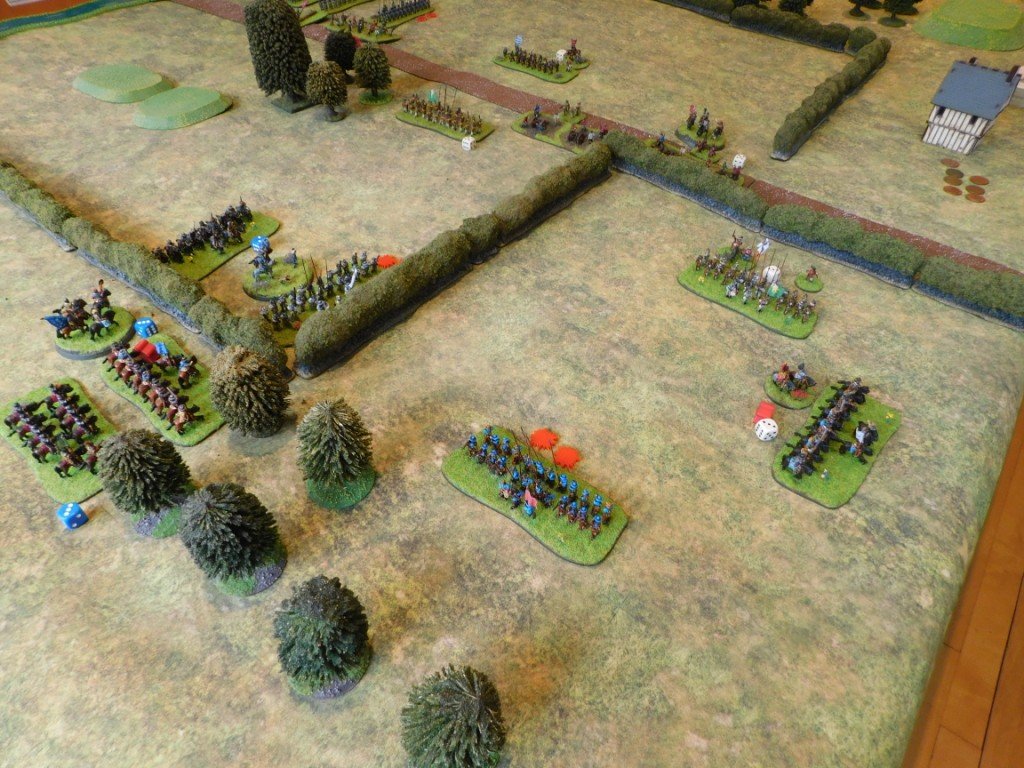
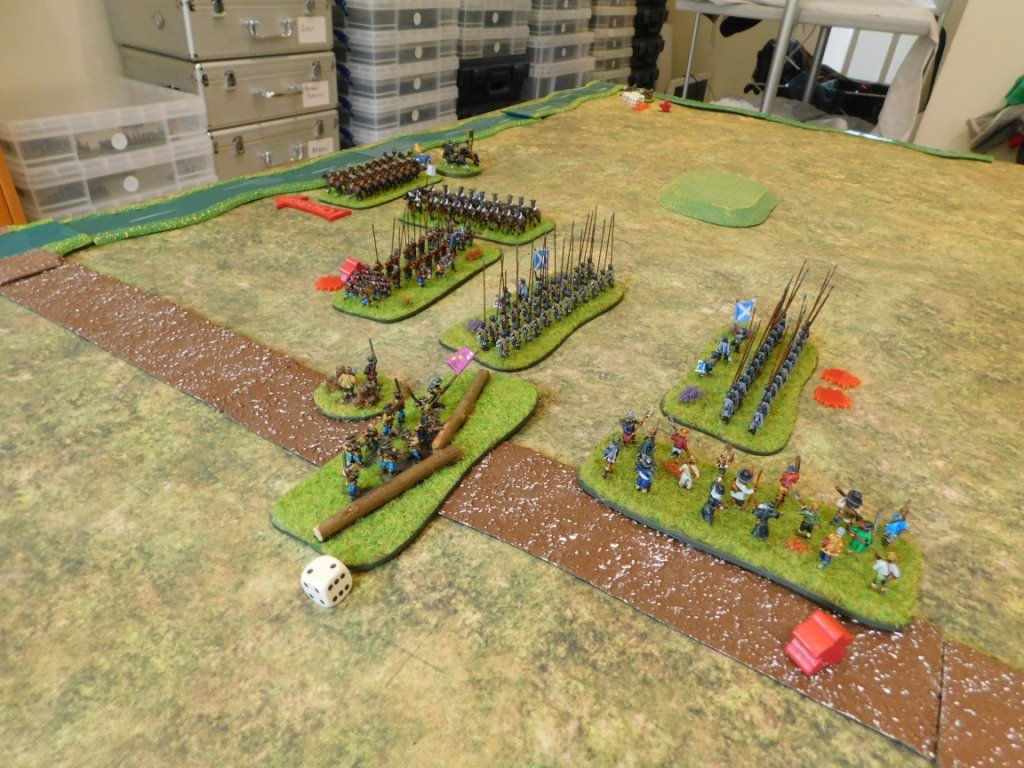
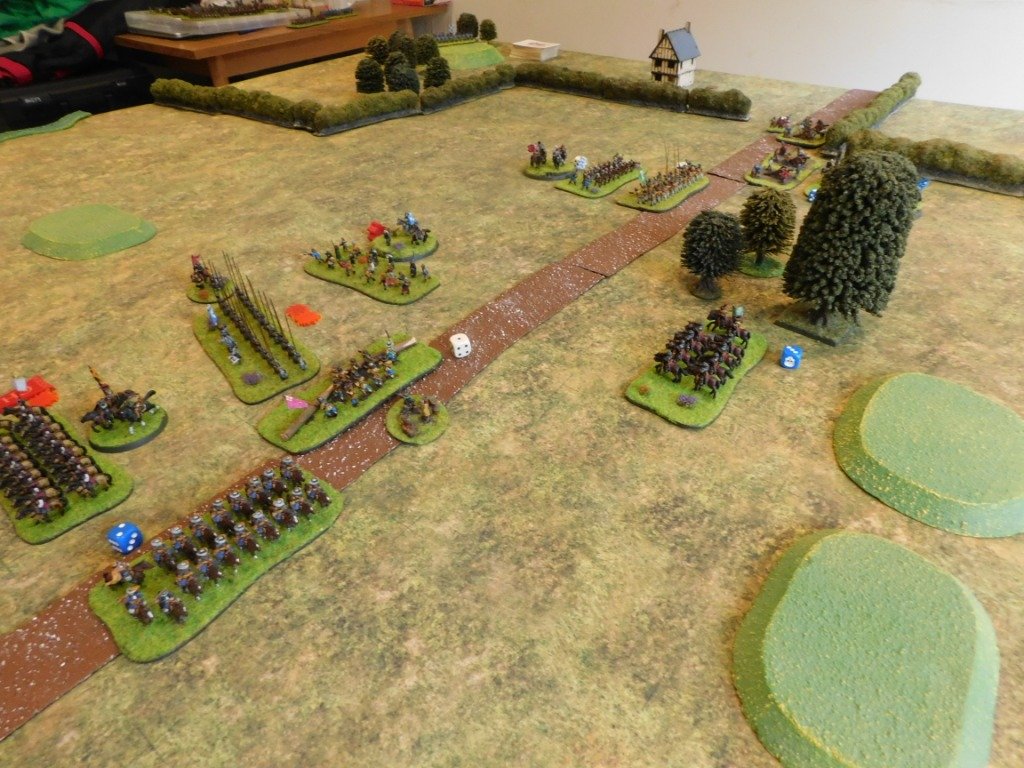
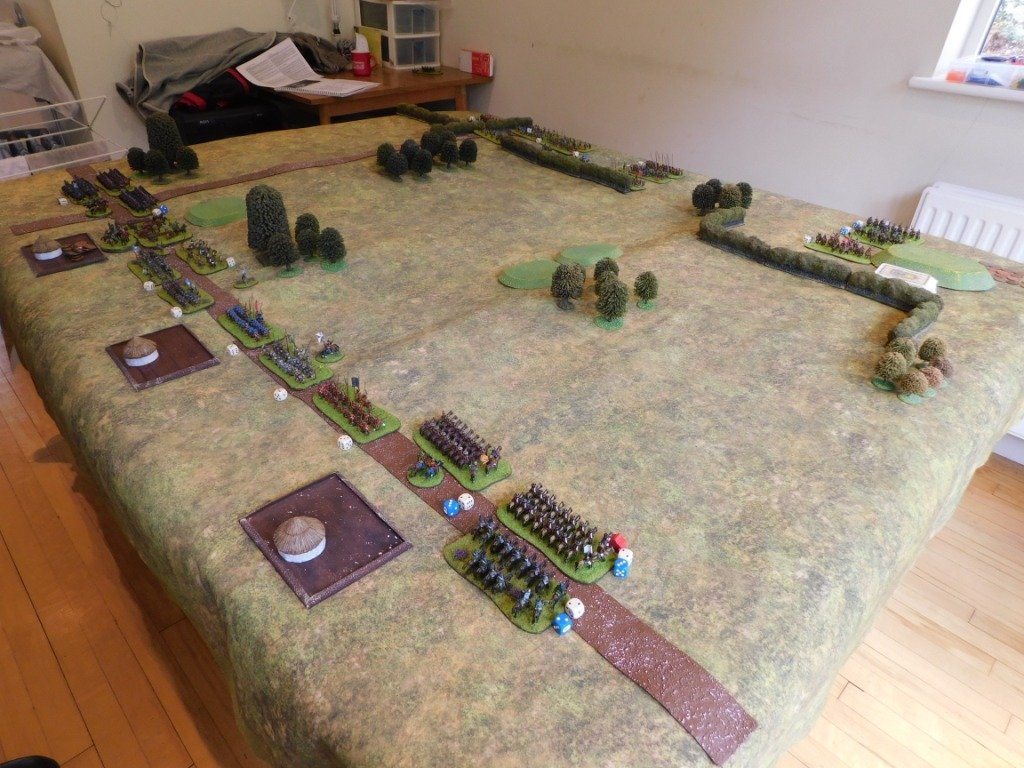
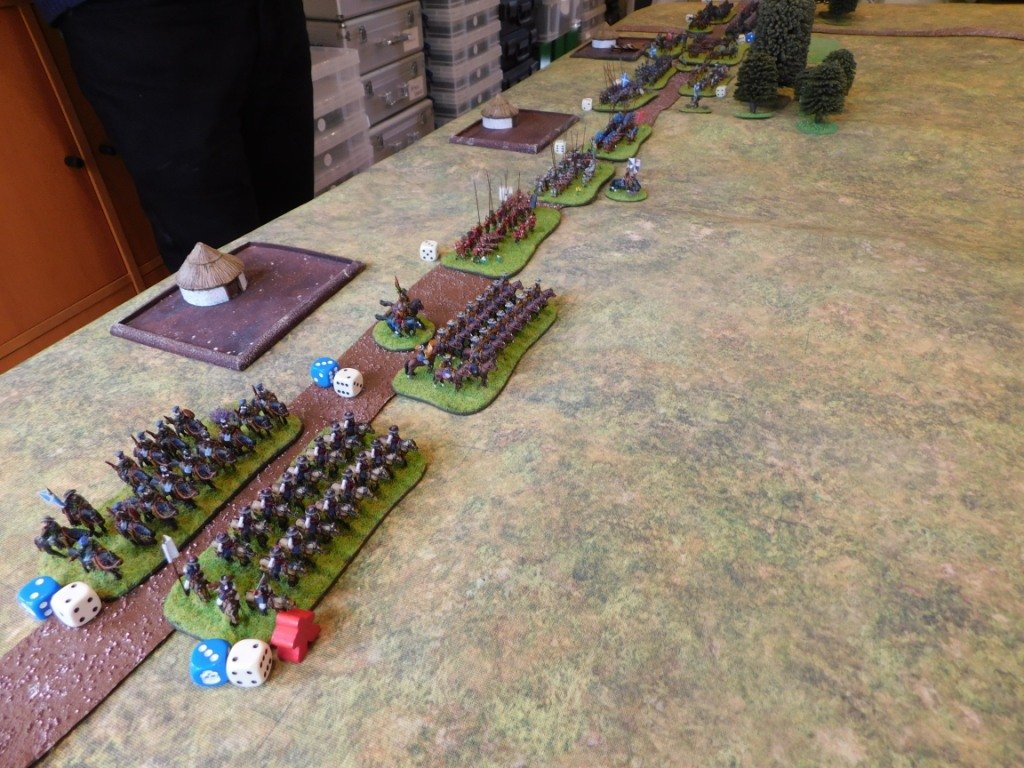
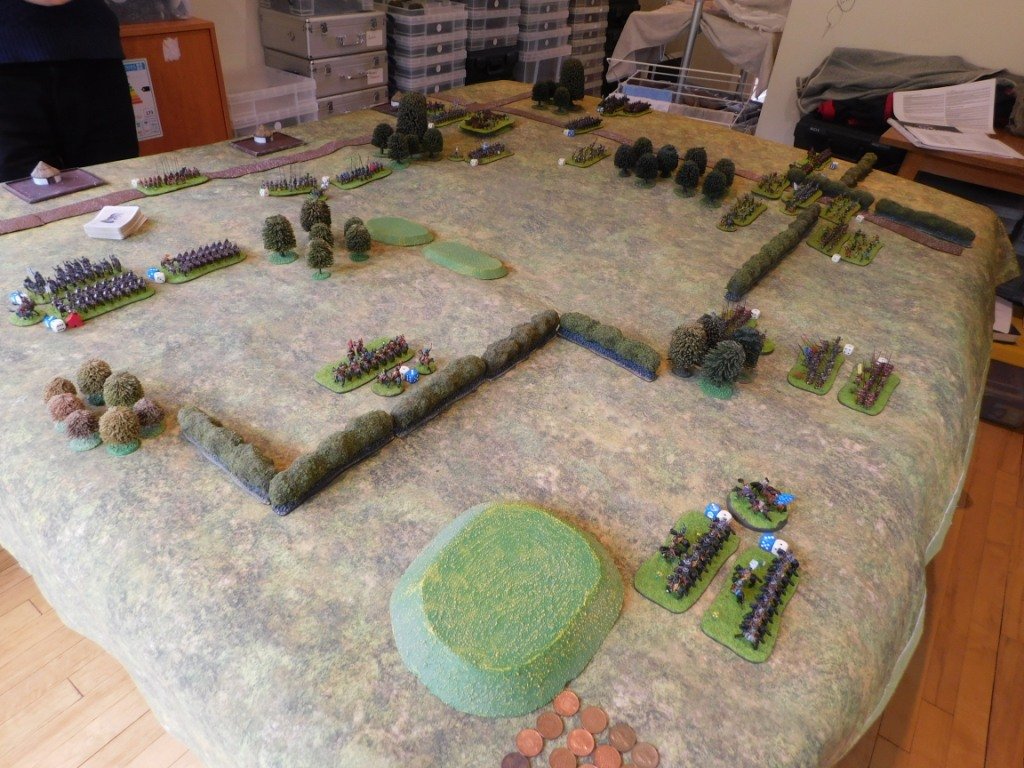
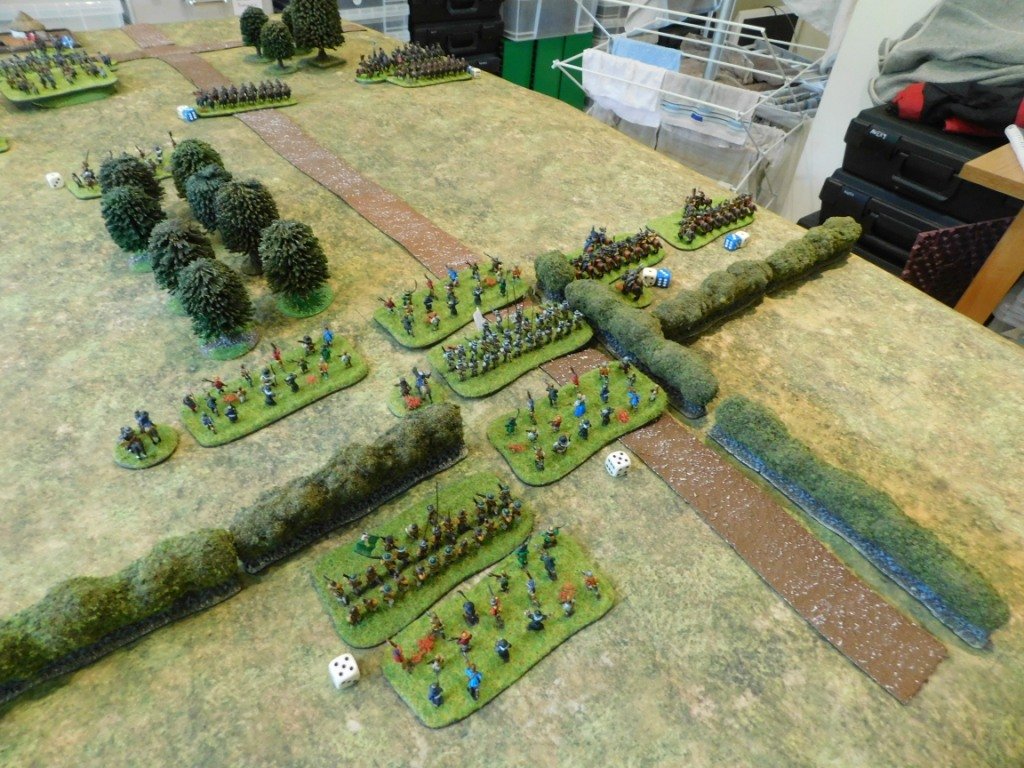
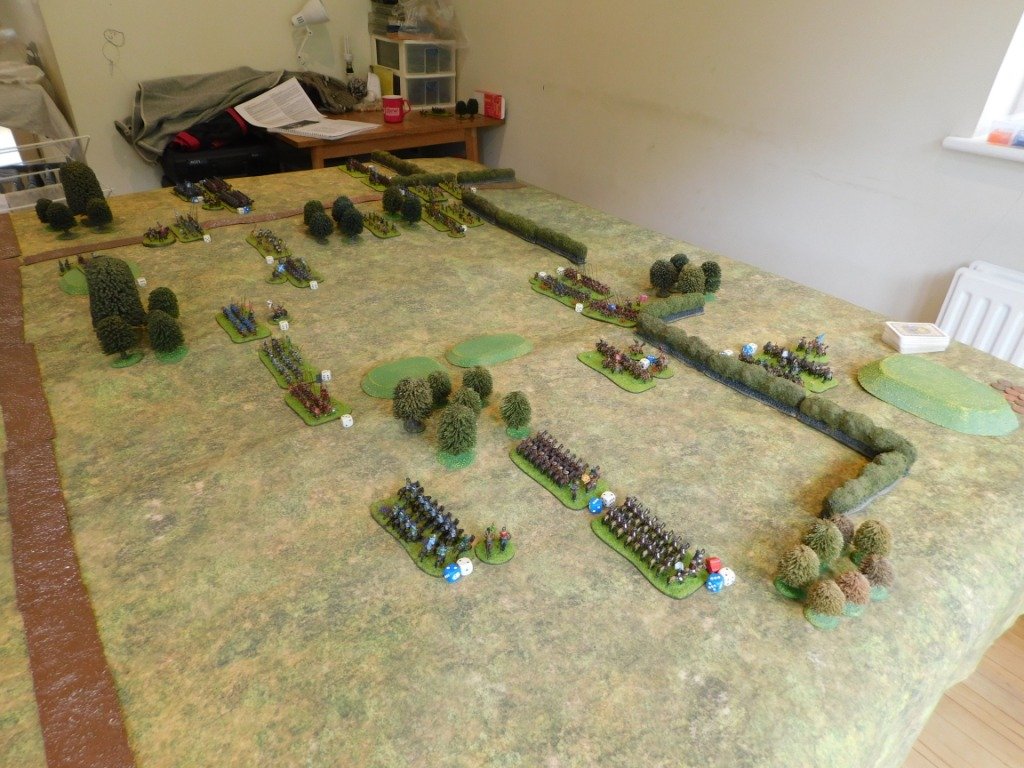
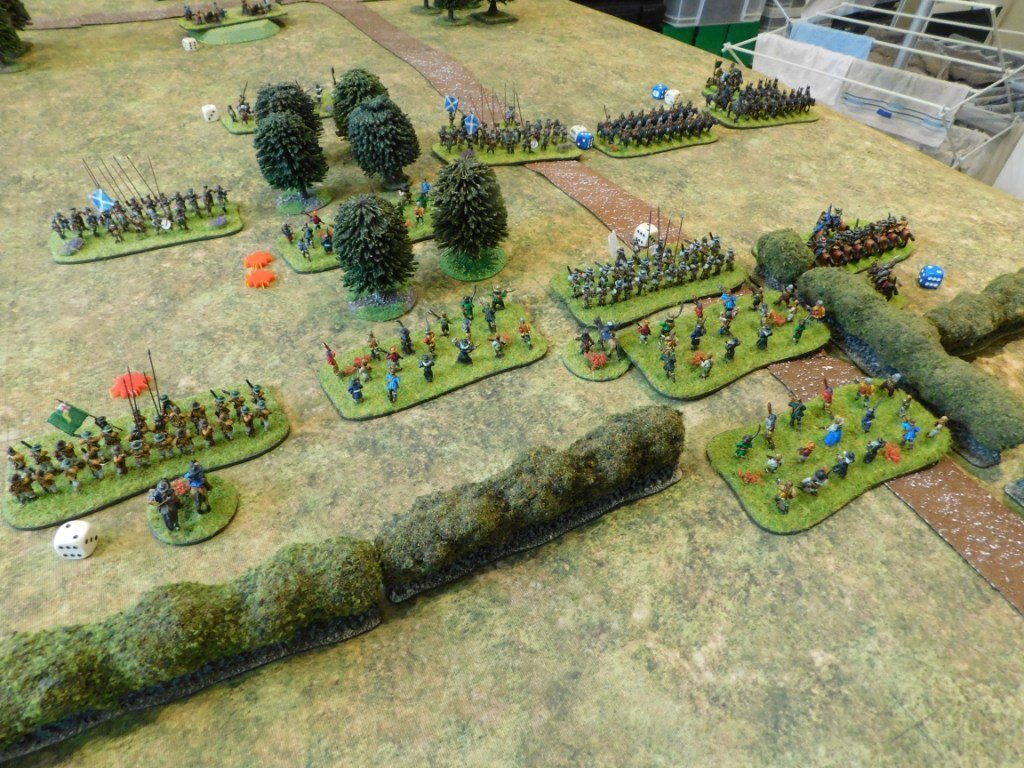
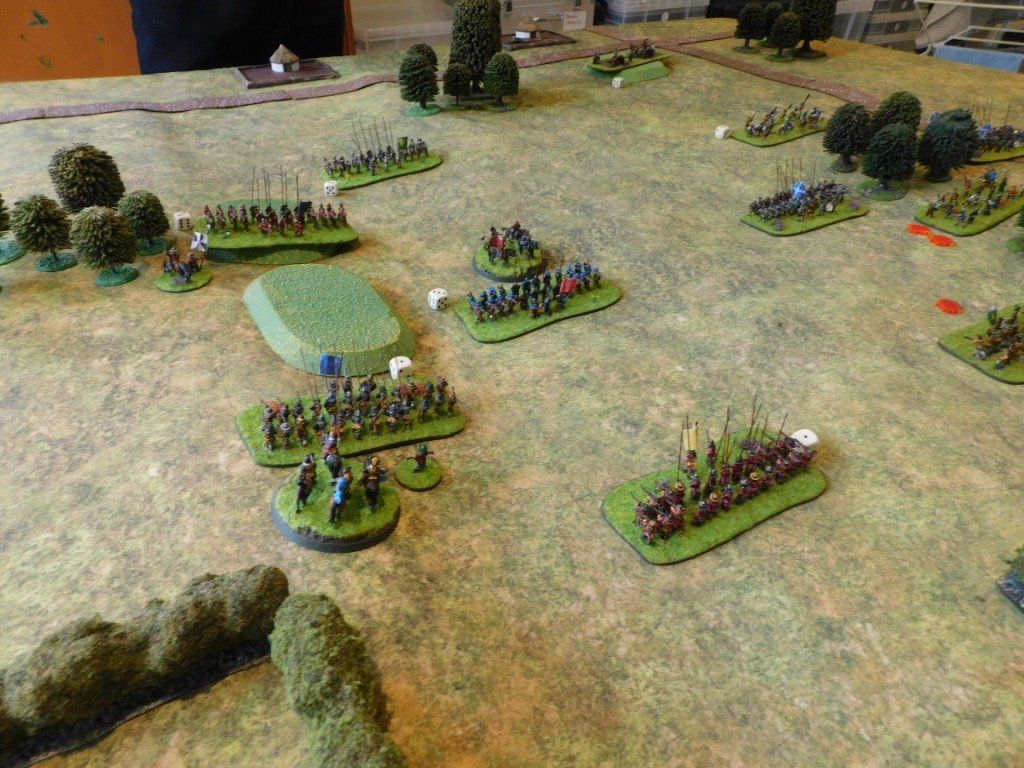
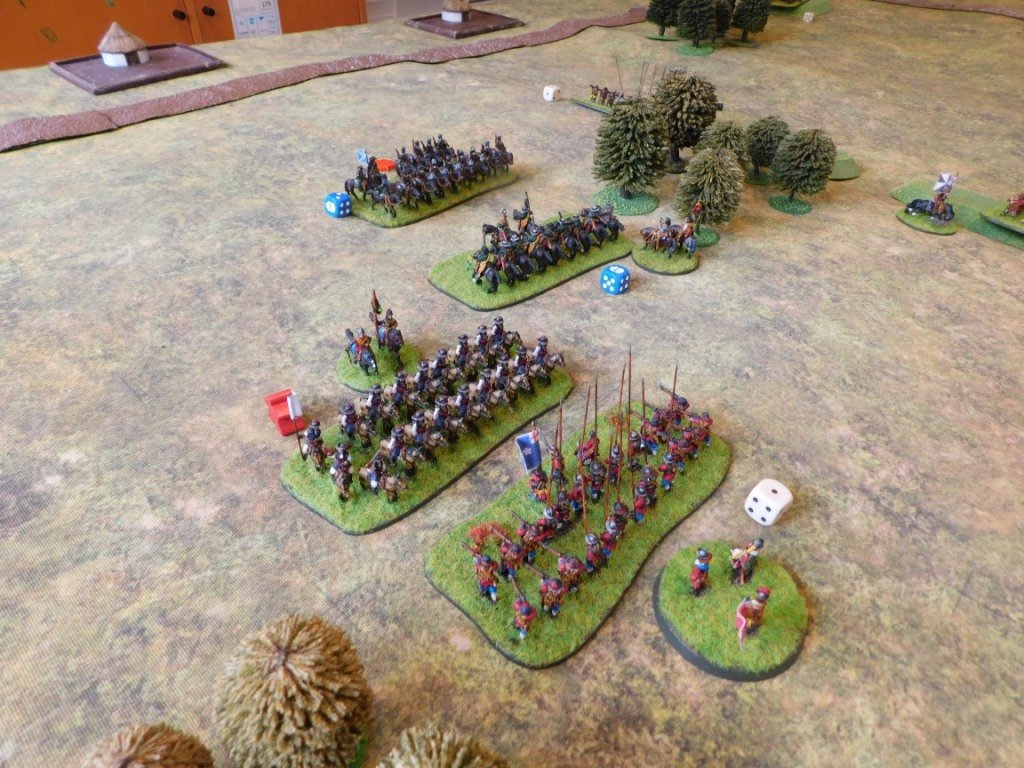
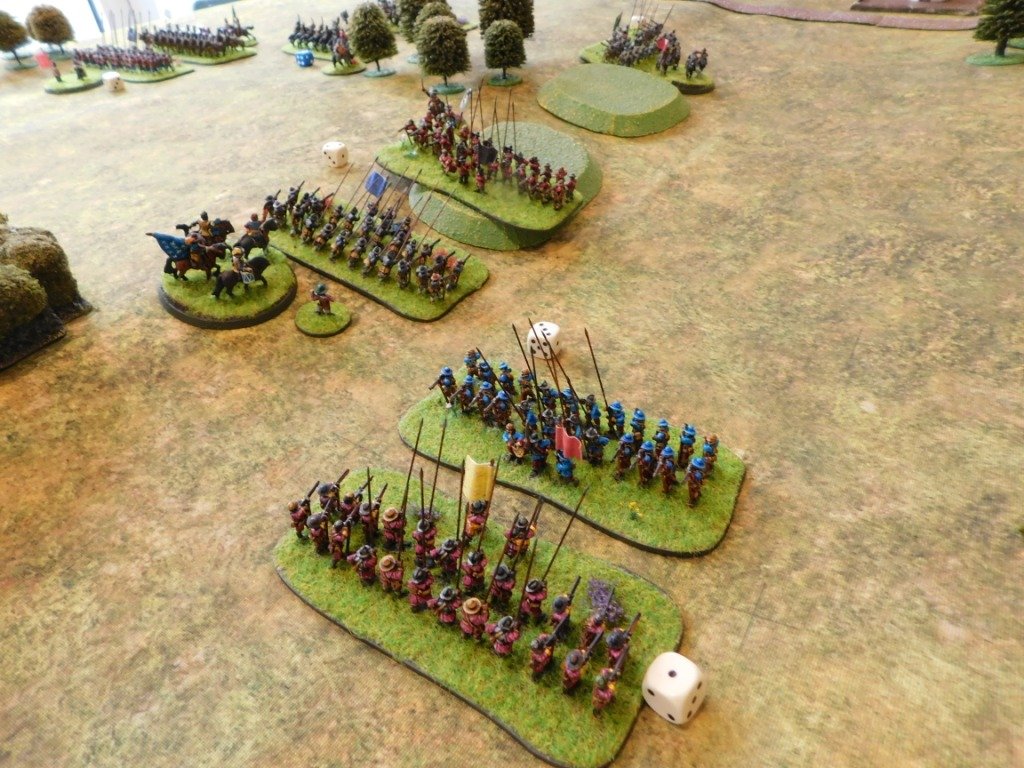
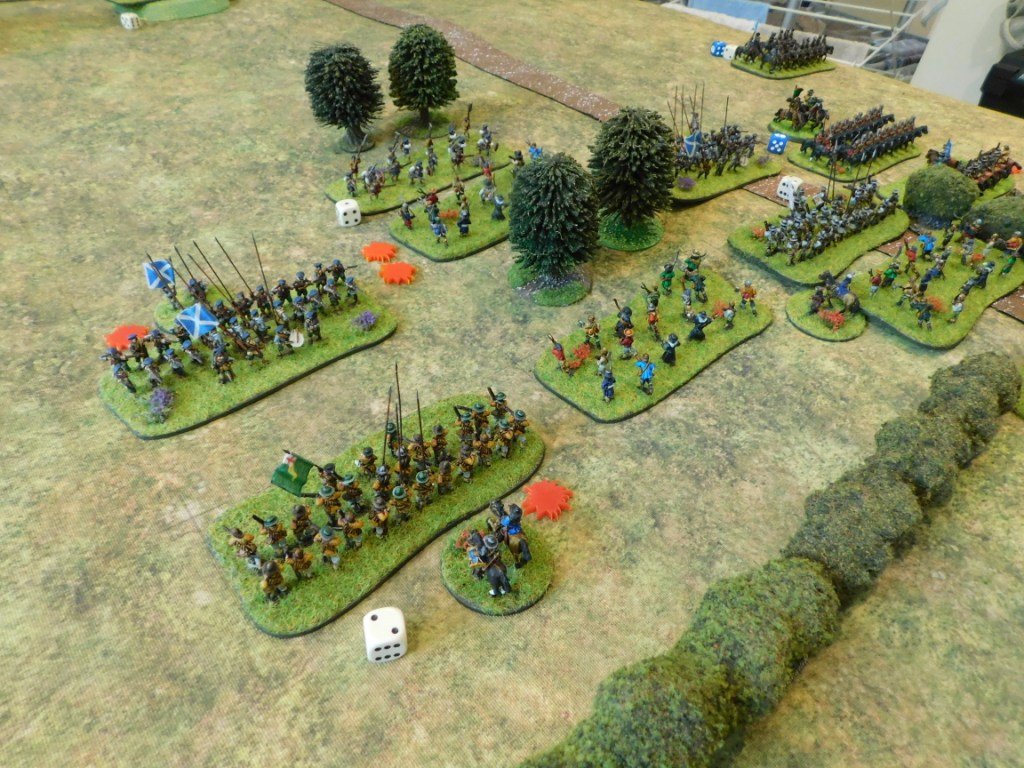
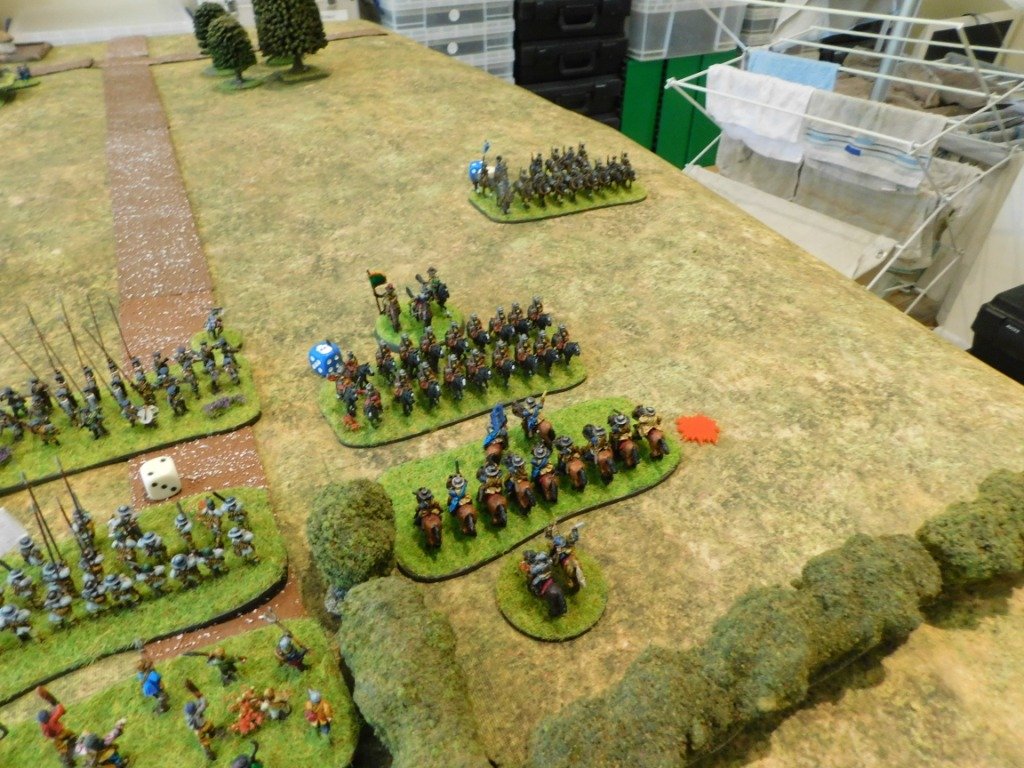
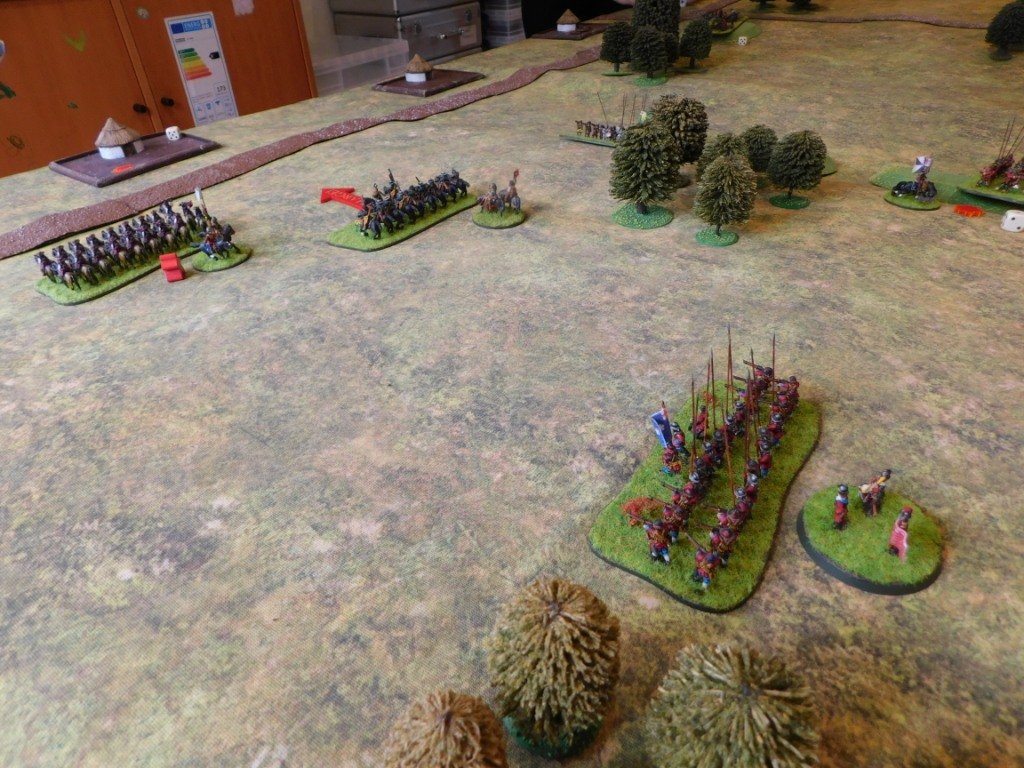
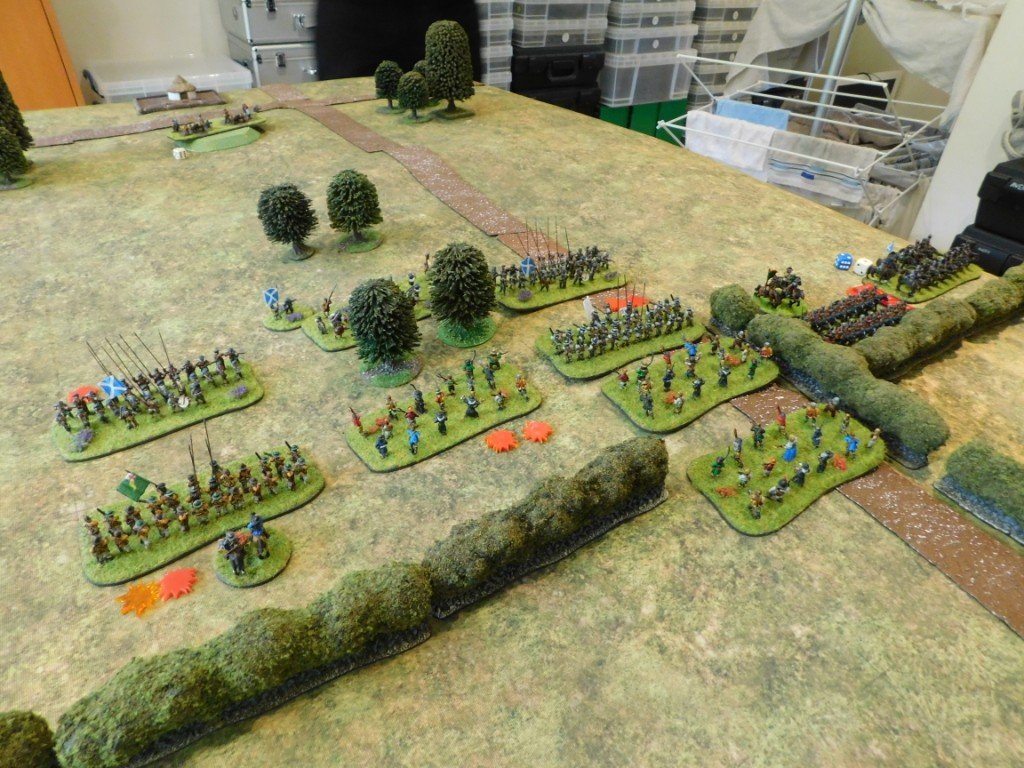
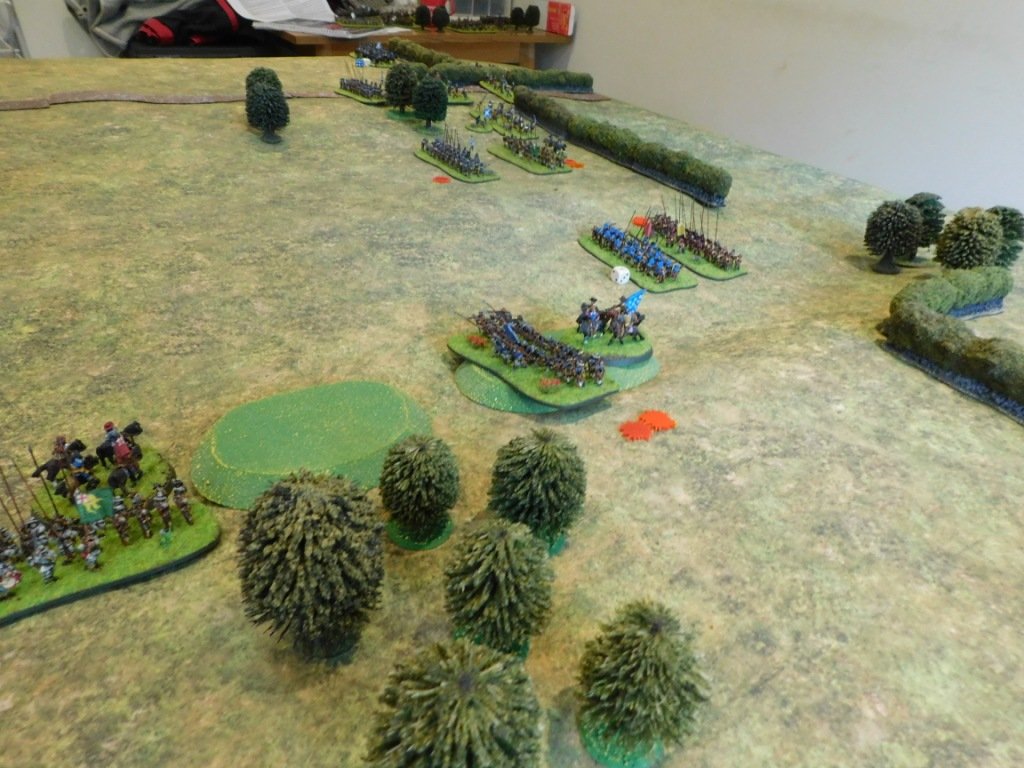
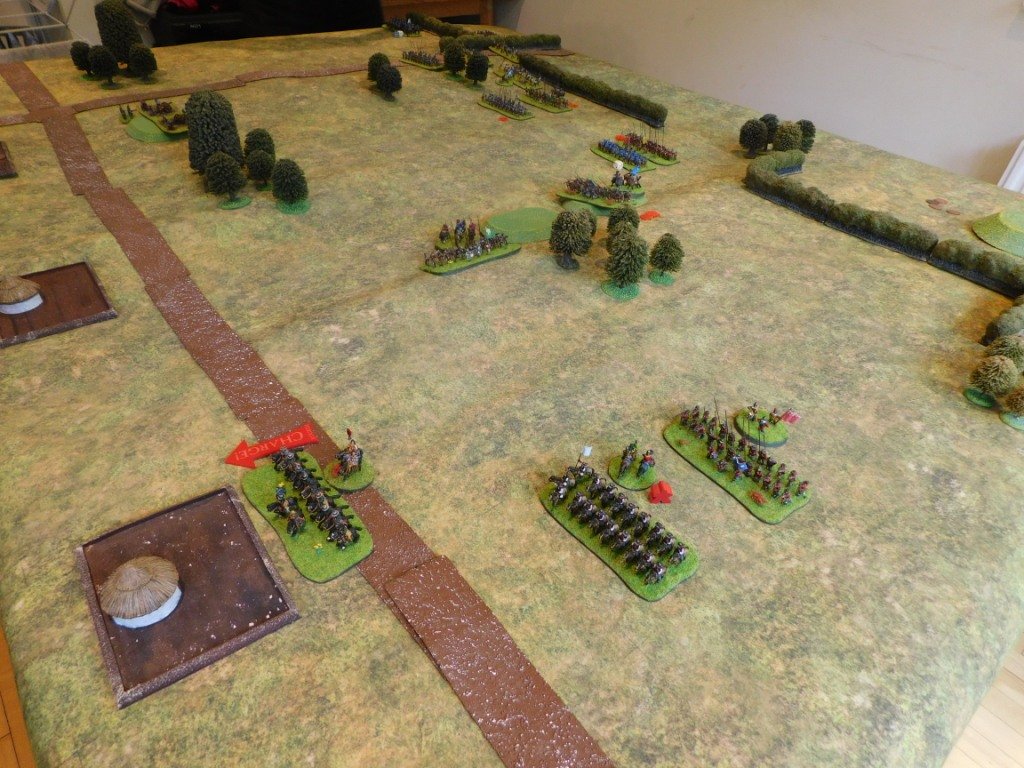
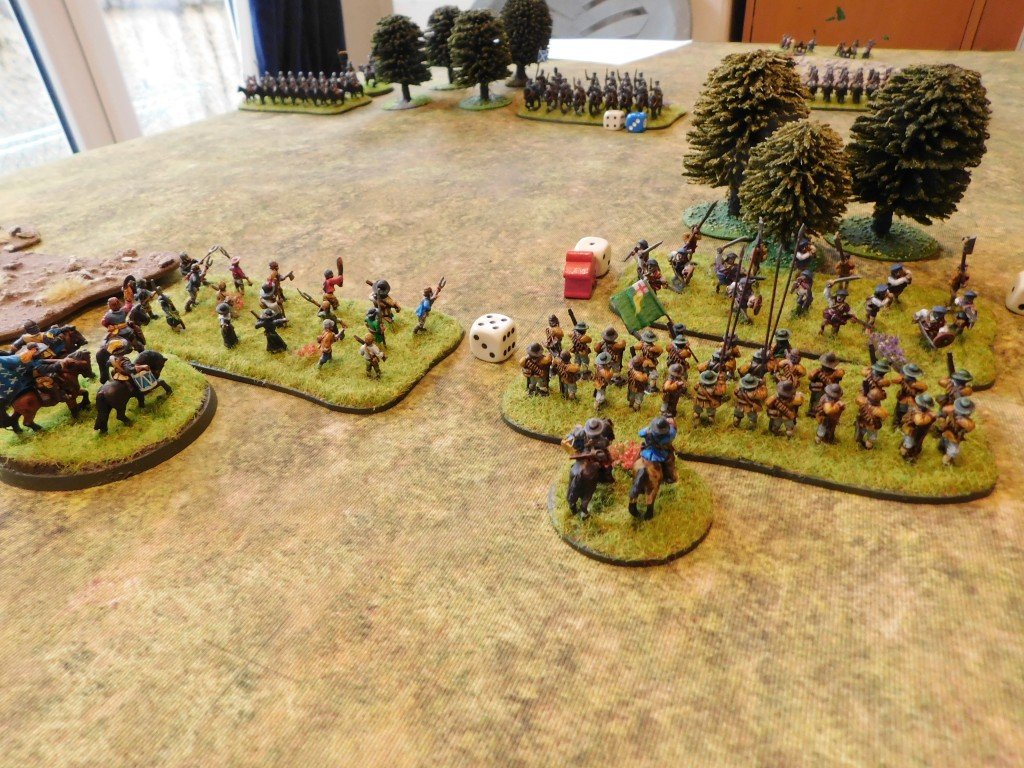
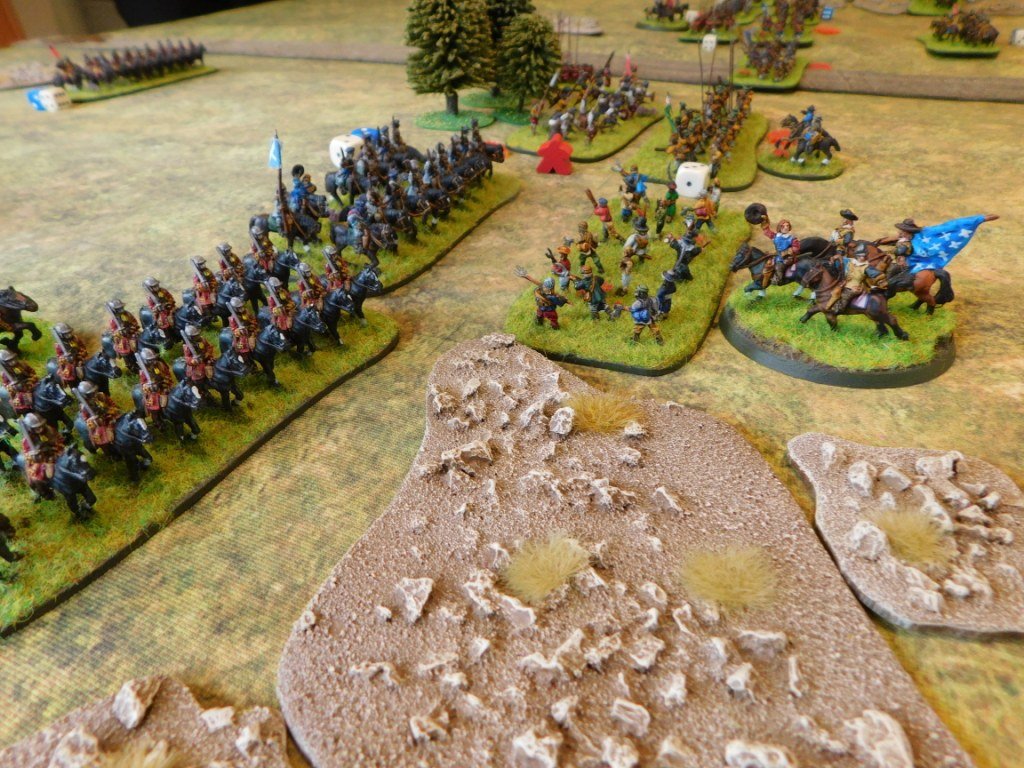
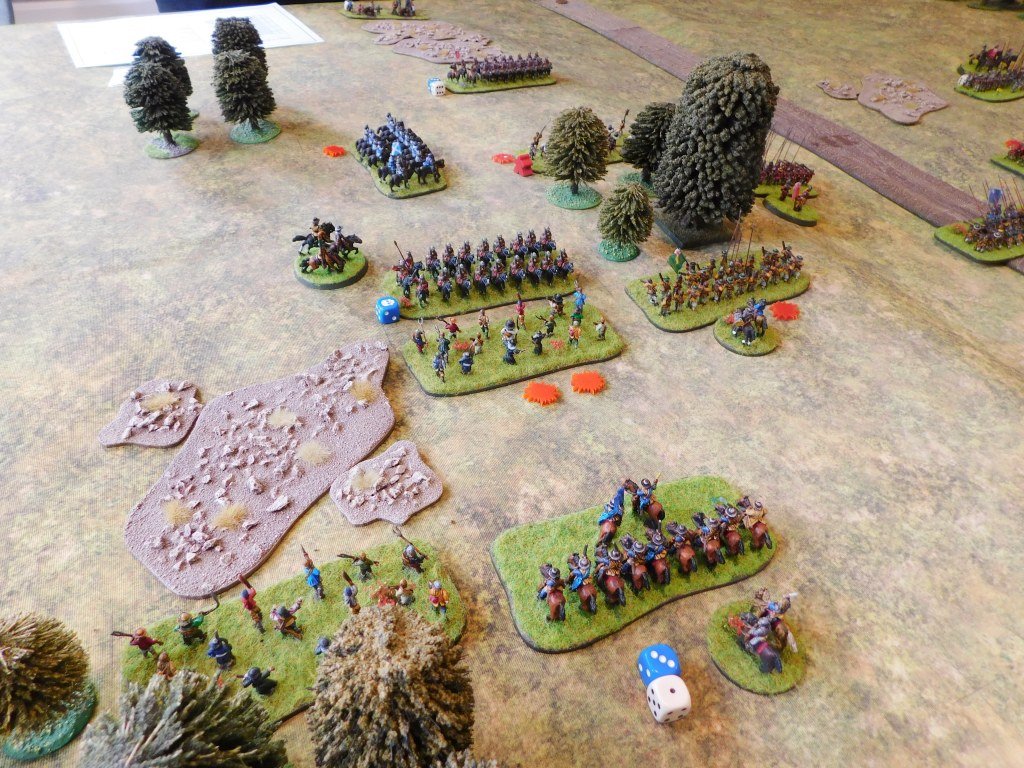
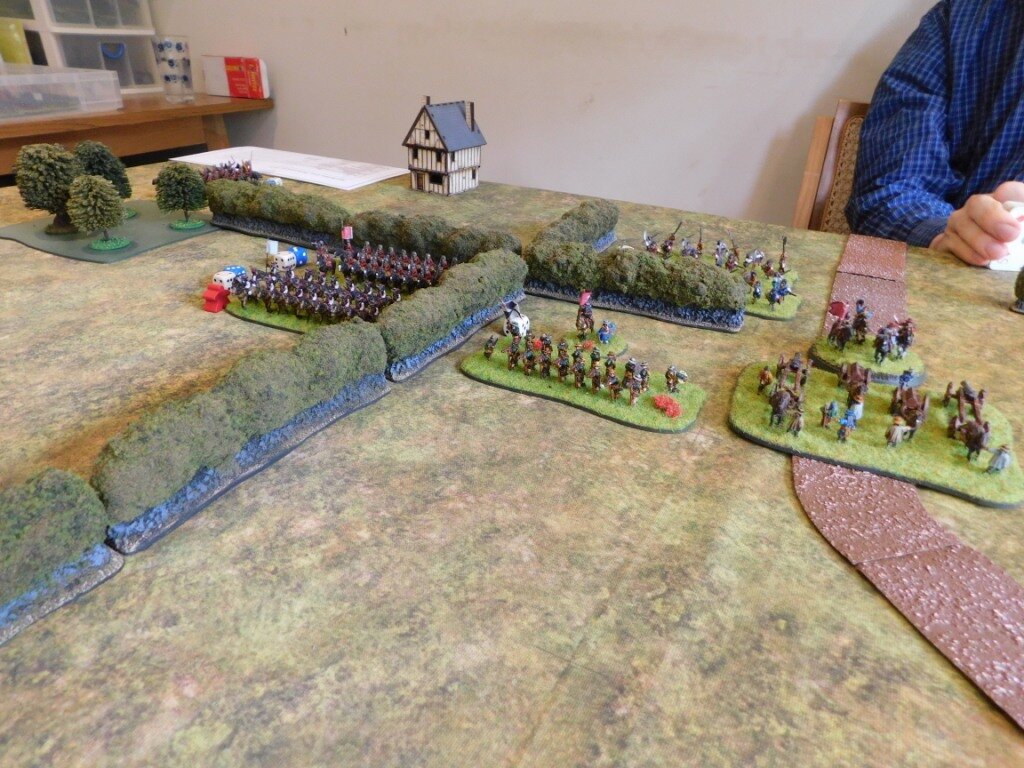
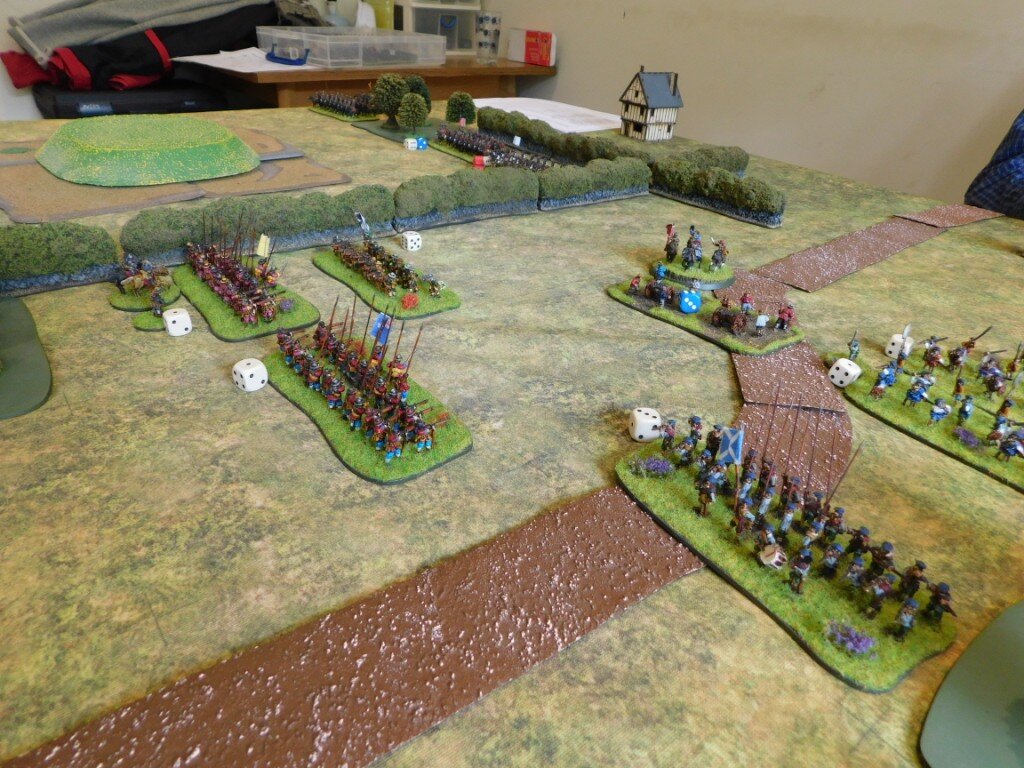
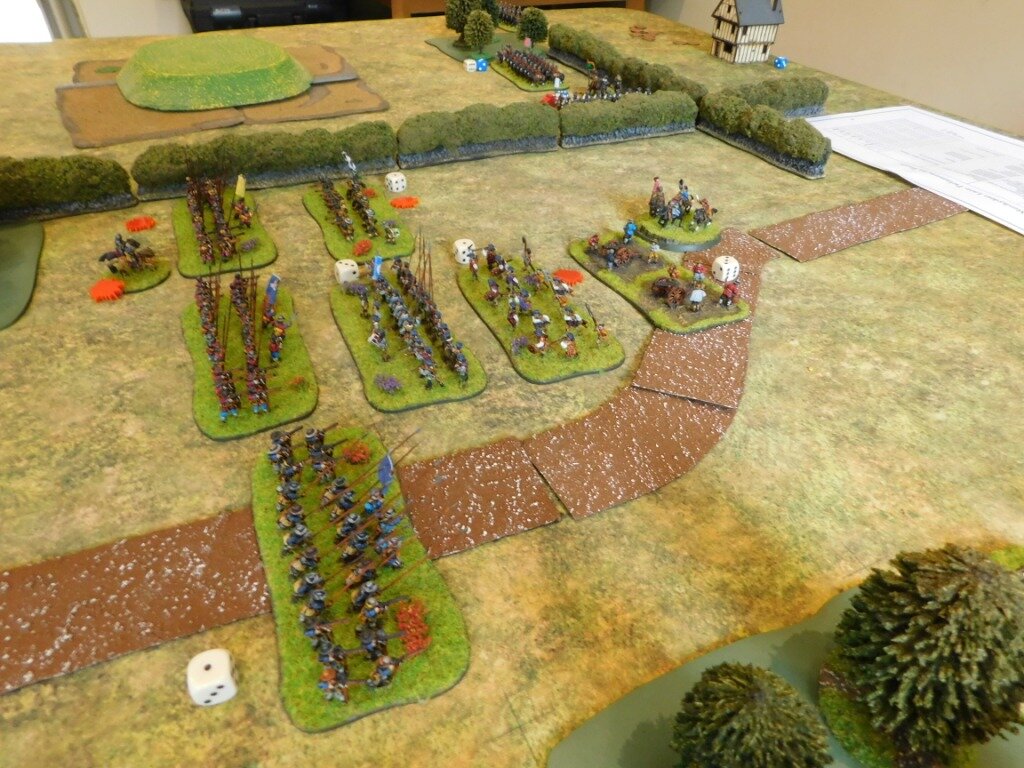
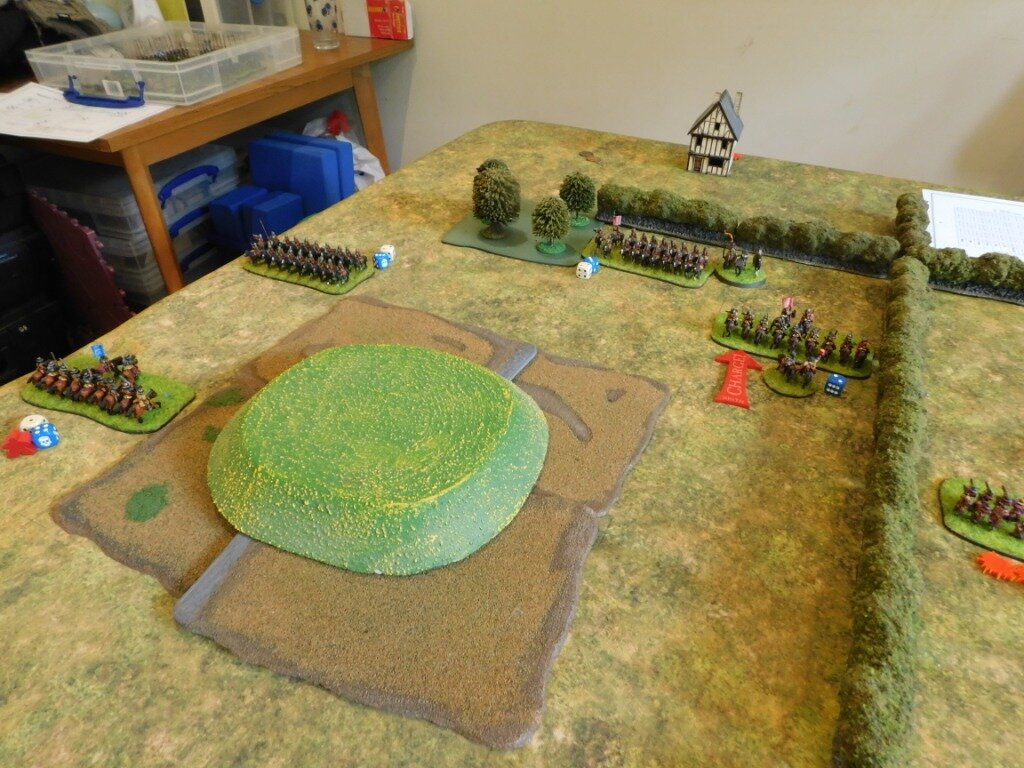
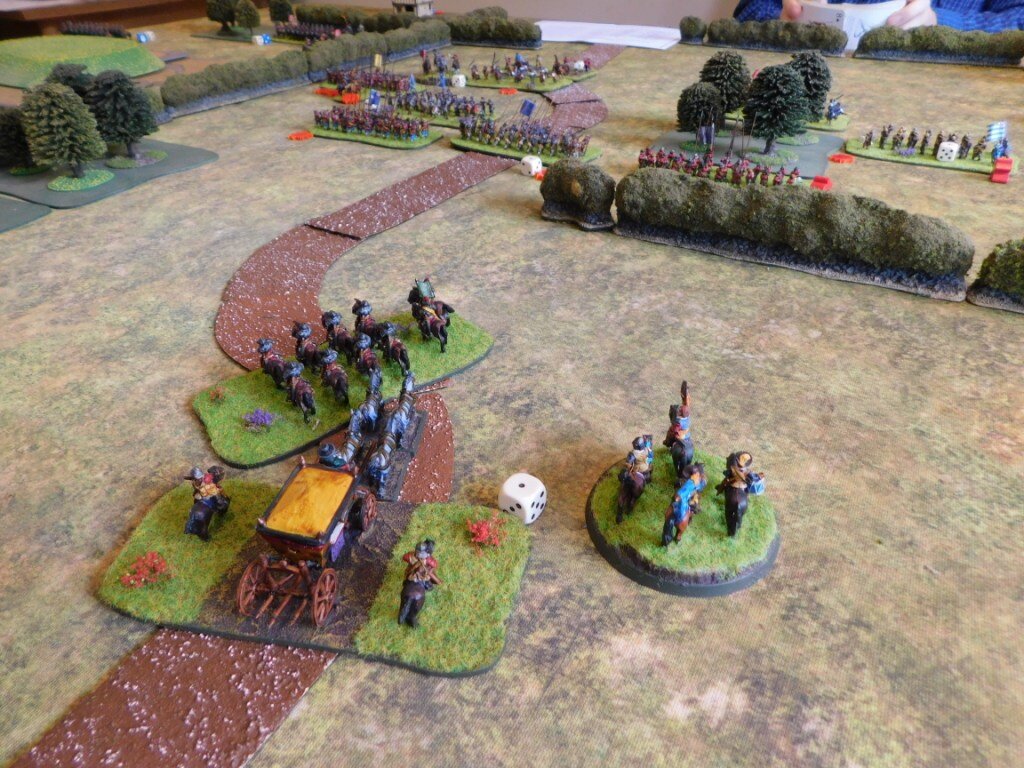
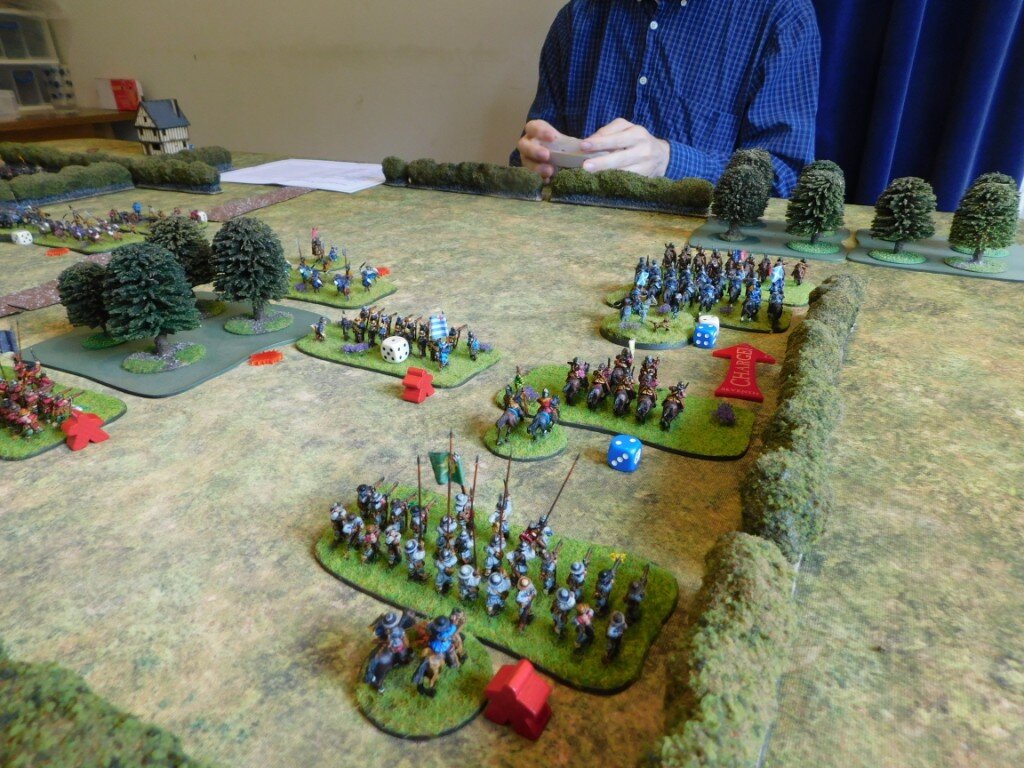
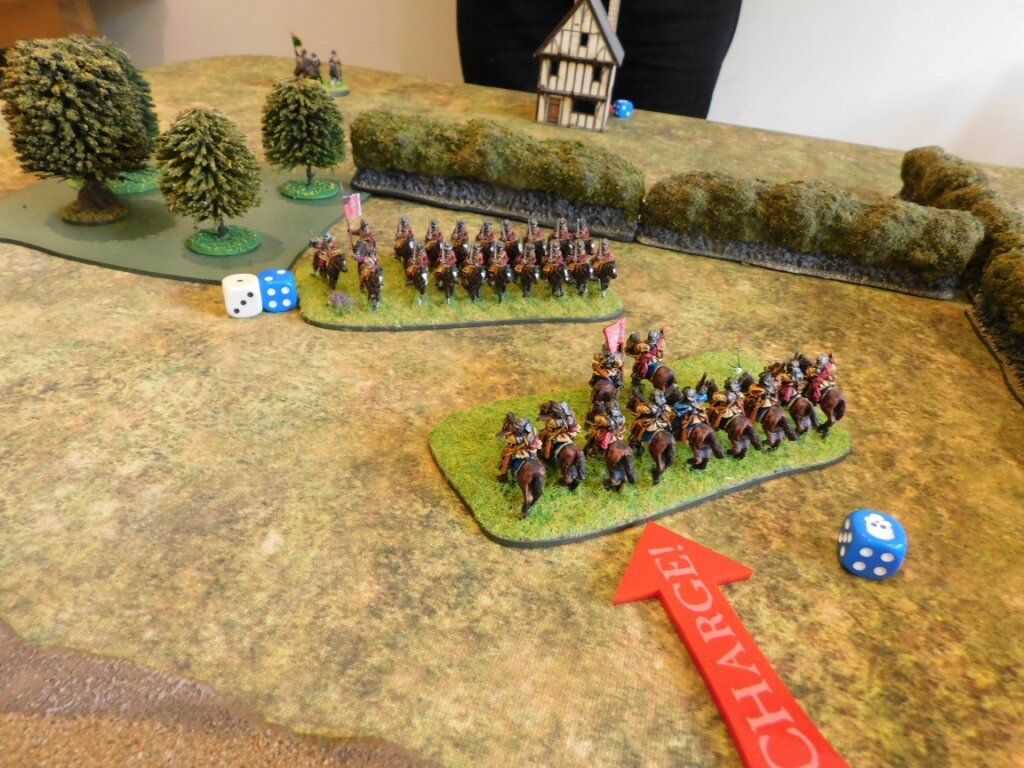
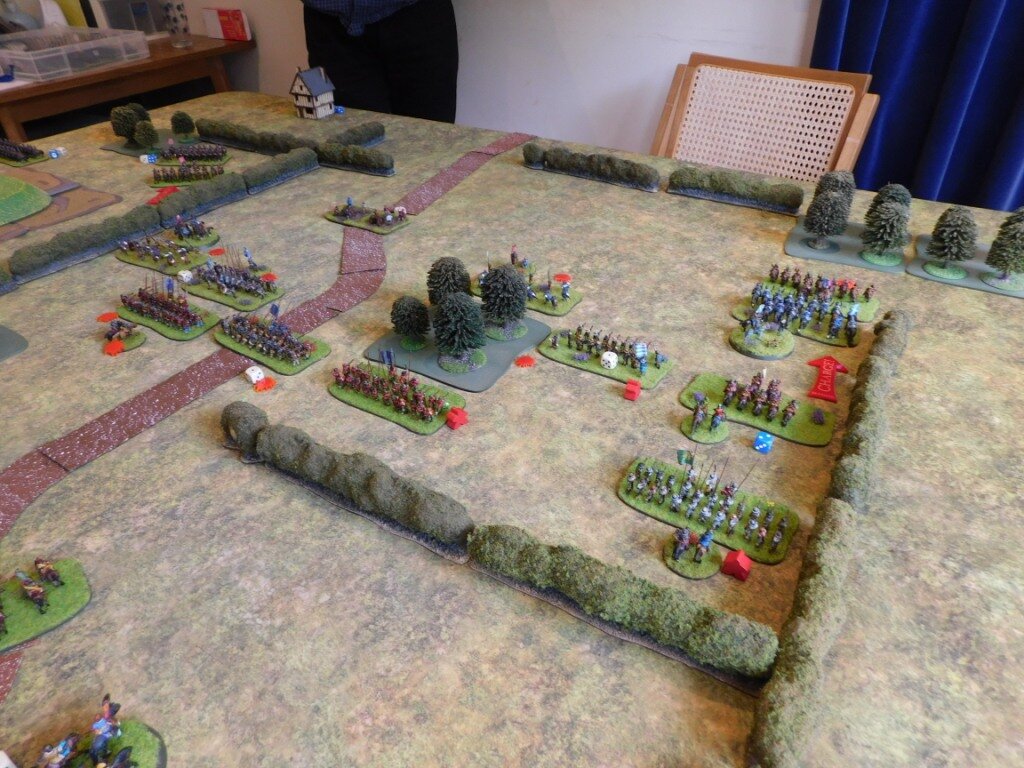
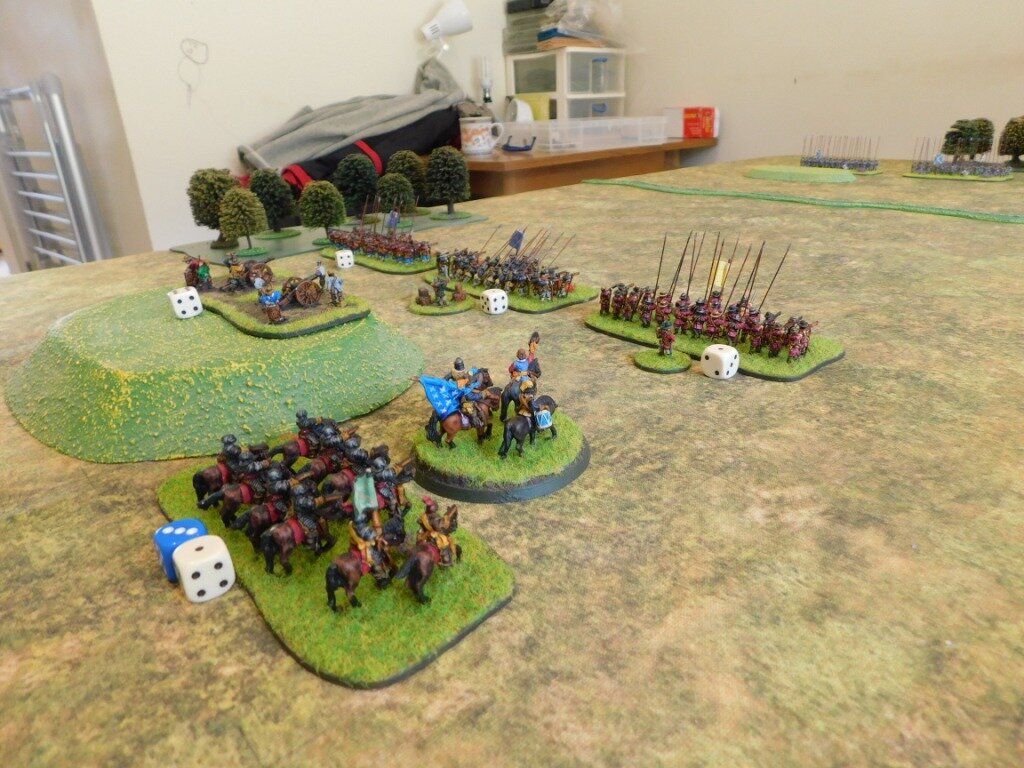
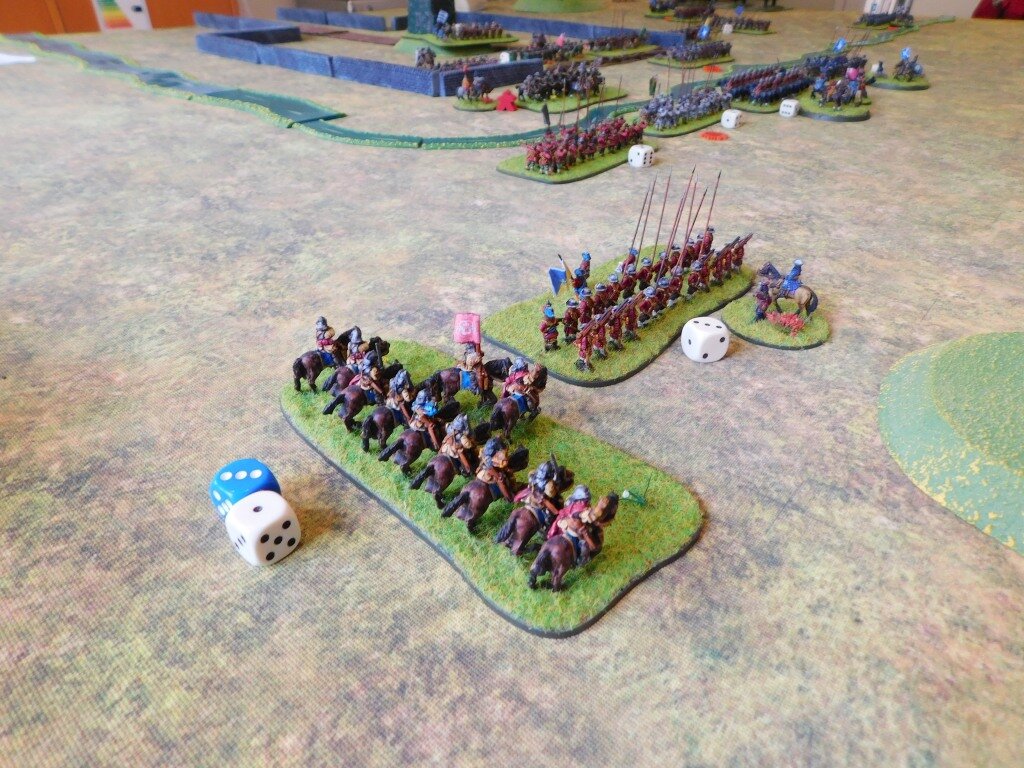
An important part of the preparation for launch is to playtest all the scenarios in the pack, and below you will find a gallery of images from the playtest of scenario #11: Napshill Downs.

As one of the later scenarios, the background is that Norchester has already fallen so some of the Royalist erstwhile defenders are trying to make their escape from the region in order to continue the fight against the Parliamentarian traitors elsewhere. The Roundhead force (which I was commanding) is tasked with bottling them up and destroying them.

This was one of those games that went wrong for me just about right from the beginning when I completely cocked up my opening moves! Read on to share my pain!

The Attack on Marlowe

Meanwhile, blogger Zanoni has started playing through my previous ECW scenario pack: Marlowe to Maidenhythe, which is now available in both digital and physical form.

His first AAR, covering scenario #1 The Attack on Marlowe has lots of pictures of his beautifully painted collection of ECW figures. Recommended as a feast of eye candy!

Click here to see the report on his excellent Troop Time! blog.

Siege of Norchester Scenario Pack Now Available

Simon Miller and I have just published the digital edition of my second scenario pack for For King & Parliament: The Siege of Norchester.

Buy The Siege of Norchester here

Hopefully you'll have seen (and had your appetites whetted!) by some of the many playtest battle reports posted here (the last post before this one being an example) but for those who haven't, here's the marketing blurb:

The Siege of Norchester is a supplement for TtS! For King & Parliament that contains twelve free-standing, fictional scenarios in a loose chronological order.

The pack is designed to give players who don't have enough time to write their own scenarios a number of games that they can play with little or no preparation. All you have to do is print out the game and player briefings, set up the table according to the map, break out the figures and cards, and start the first turn. You don't even need to print the pack out in full: just the pages you need for the scenario you're going to play.

The Siege of Norchester tells the story of the investment of the fictional, Royalist-held city of Norchester. It starts with the Parliamentarians gradually pushing the Royalist foraging parties back into the city itself, then looks at the Royalist attempts to delay the construction of encircling works. There’s an assault on the outskirts of Norchester and then a Royalist attempt to get a messenger through to the King to ask for aid. Finally, there’s the arrival of a Royalist relief force, the fall of Norchester and the attempted escape of the main Cavalier protagonists.    The same officers and units are used throughout the campaign, and it is hoped that the players will come to adopt and recognise them as their own or the enemy.

action from scenario #2: munces wood

The games can be played either as a series of linked games or as a collection of one-off battles. To emphasise: each scenario is free standing and they do not have to be played in any particular order…but it is anticipated that players will play them in order as a campaign, keeping a running total of each sides’ score as they go along. The pack provides a Campaign Record Sheet as an easy way of doing so.

Finally, although specifically designed for FK&P, with a little work the scenarios can be adapted for any set of English Civil War/Renaissance rules: the basic elements of why, where and with what each side is fighting being largely common to all systems.

So whether you’re for the King or for Parliament, The Siege of Norchester gives you everything you need for many hours of joyful gaming!

Buy The Siege of Norchester here

FK&P AAR: Ramshackle Road

Another game of For King & Parliament using a scenario from my forthcoming Siege of Norchester scenario pack. This time it’s an encounter at Ramshackle Road, where the Royalist raiders are pinned against a river!

Although I did definitely lose the battle, the game was actually closer than the report above suggests. The appearance of the Royalist horse on my flank was a nasty shock, and I didn’t cope with it very well!

A great game, despite the result!

FK&P AAR: Laundry Day

Another day, another Norchester playtest!

The Royalist raiders, headed by Sir Arthur d’Artois area heading for the rear of the Parliamentarian lines, determined to take some of the pressure of their colleagues under siege in Norchester.

The Roundheads, however, have been tipped off and are expecting them: they have a force drawn up in front of the rear of their camp and are prepared to do battle!

Another cracking game, with the scenario passed as playtested.

The battle swung this way and that, but always with me having the edge, right up to the last moment. To indicate how close it was, my opponent had only one Victory Medal left himself i.e. if I’d broken one more unit or taken that camp, then victory would have been mine.

The final turn began with me on four Victory Medals: all of which I lost on the right as my troops finally gave way: about as close to victory as you can get without actually winning!

On to the next scenario now: Ramshackle Road…

Action from Marlowe to Maidenhythe

Most of you should know that Norchester will be my second scenario pack for For King & Parliament, with the first being Marlowe to Maidenhythe.

Always great to see my scenarios being used: here’s a link to the Blunders on the Danube blog where there’s a great report of the first scenario from M2M: the Attack on Marlowe

Blunders on the Danube/M2M AAR

FK&P AAR: Happy Valley

Another playtest of a scenario for my next scenario pack: Happy Valley.

Quick summary of the situation: Royalists are besieged in Norchester and have called for aid; the vanguard of a relief force is intercepted in the aforementioned Happy Valley; a battle ensues.

Do click on the images in the gallery below: there’s more description of what’s happening on most of them.

Although it might not seem so from the descriptions above, this was a very close game: I was down to three Victory Medals by the end, so one more unit lost for me would have lost me the battle.

Another great game of For King & Parliament!

The Cossack Tabor Rolls Up

Tabor Commander

Finally finished the first four bases of Cossack Tabor: the war wagons that can serve either as fortifications or as a moving fort.

These figures are the first of the By Fire & Sword miniatures: a Polish figure manufacturer specialising in 17th Century eastern European wars. Friend Bevan is collecting Poles, so I went for the Zaporozhian Cossacks.

I thought these were going to be a bit like the Cossacks you see in Taras Bulba (i.e. masses of light cavalry) but actually these particular Cossacks had rubbish cavalry (substituting Tartars when they needed horse) and were specialists in infantry fighting from behind lines of war wagons. Ah well, you live and learn!

What with lockdown, lorry drivers, Brexit and an imminent second edition, By Fire & Sword miniatures are quite hard to get hold of in the UK. I started my collection by cleaning out the Entoyment Hobby & Wargames Centre online store. Entoyment are an excellent supplier who not only offered a slight discount but also posted my figures to me the very next day after I’d ordered them. Highly, highly recommended.

I don’t usually bother with an unboxing photo, but the By Fire & Sword packaging for their Cossack Tabor box set is absolutely lovely. Here’s a little gallery of the original outside packaging, the inside box, and what the box looks like when you open it. Lovely: really got me enthused to get painting.

The Build

The wagons come in several bits: the wagon body, an under-wagon frame that holds the wheels and provides the tongue/shaft, the horses (about half with saddle and rider, half with just a yoke), a few small cannon to mount at the corner of a wagon, and the wagon crew.

Putting the wagons together is fairly easy, although I did find that I had to drill out every wheel’s socket with a pin drill before being able to fix them. A pain, and certainly much more difficult than most wagon wheel attaching.

I chose not to attach the crews onto the wagons before painting, although I did attach all the riders to their mounts.

The Paint

Painting was fairly easy: I used GW Contrast Paints as usual but restricted myself to dark reds, dark greens and two 0r three blues for the Cossack crews.

This is how they turned out:

Overall I’m very happy with these, and looking forward to getting them onto the tabletop. I’ll be using them with an adaption of For King & Parliament, using a single base as the Tabor as a Fortification, and double bases as the Tabor as moving, deep war-wagons

Next up are the Registered Cossack infantry…

FK&P AAR: Mundaydean Lane

The next scenario in the The Siege of Norchester campaign involves the besieged Royalists trying to get a message through to summon help. Looking at the picture below, the Royalists are on the left, with the Roundheads on the right.

Just behind the Royalist line is a coach containing the messenger (see left hand picture, below) so this is a “Catch the Pigeon” scenario wherein the Royalists have to exit the coach off the other side of the table (or defeat the Parliamentarians so the road becomes clear) and the Roundheads have to make contact with the coach and achieve a single hit to stop it and capture their prey.

The battle began with an advance from both sides. I had a bit of luck here and managed to get my right flank cavalry force and a brigade of infantry nicely forward to the half way point (see picture, below, far left) whilst the Roundheads hung back a bit.

My second infantry brigade, however, seemed very reluctant to advance, leaving a bit of a hole in my centre: perhaps they were cautious about outstripping the coach by too far! See picture, below, centre.

On my left flank, the Parliamentarian horse facing me remained passive. I was quite happy with this, so did the same: my plan was to smash his horse from the field on the right then curl around the enemy left flank with what remained of my cavalry whilst my infantry advanced to contact. The Parliamentarians would be hit on two sides and I could then roll up their line like a piece of used carpet!

My left flank cavalry thus charged the Borders Horse in front of them as soon as possible (see picture, below, left) whilst my infantry moved forward. I kept my commanded shot back, intending to shoot from behind the hedge rather than face a charge by men with long pointy sticks (see picture, below, centre). Finally my other infantry brigade got the message and moved forward as well (see picture, below, right).

For some reason, the enemy horse on my left were still stationary. That suited me fine, as there were a lot of them and although the fact that my horse fought in the more modern Swedish style, I couldn’t risk one of his squadrons breaking through and going after the coach carrying the “pigeon”.

On the right, the two infantry lines were now fully engaged (below, left and right pictures) and I was gaining an advantage. On the right, a volley into the Highlanders in the wood was enough to drive them backwards, and a two-on-one situation near the hedge was enough to destroy one of his battalia. I had also achieved a two-on-one situation in the centre, and was just waiting for the opportunity to drive the enemy back there as well.

Meanwhile my horse had indeed destroyed or driven back their opposition and, despite both full-size squadrons threatening to leave the field in pursuit, one had been stopped by a wood for long enough to regain their senses, and had rallied and returned to hit a unit of Borders pistoliers in the flank. The small squadron that had been my reserve charged over the hedge into the flank of an enemy battalia and it looked as if I had decisively won that flank and could start the roll up process.

Meanwhile on the left, sensing that something needed to be done urgently if the battle was not to be lost, the enemy horse had finally begun to move forward.

I covered the advance of the squadron on the far left and, in an extraordinarily successful charge, another squadron of my cavalry had smashed the Dutch horse in front of them from the field. I was being very lucky with my cards!

With his right flank largely destroyed, his centre beginning to bow under the pressure, and his left flank reserve surprisingly now at a disadvantage, it was only a matter of time before the Roundheads retreated. The pictures below show the end stages of the battle:

My plan, for a change and helped by some lucky cards, had worked perfectly: the Roundheads collapsed and the coach and its passenger were able to sedately trot down the road and exit the table unmolested by any Parliamentarians!

FK&P AAR: Dick's Tower

Back to For King & Parliament and the playtest of the next scenario in my forthcoming pack: Dick’s Tower.

Quick precis of the story so far: Royalists holed up in the city of Norchester besieged by the Roundheads. Parliamentarian guns have been pounding away at the city walls, focusing their efforts on a section of wall by the ruined building known locally as Dick’s Tower. A breach has been made, time for the attack to go in.

Dick’s Tower

The Royalists start the game in and around the tower: see pictures, below.

Defending the breach are two battalia of shot-heavy infantry, with a couple of commanded shot battalia coming up to reinforce them. On their left, outside the walls, is a brigade of infantry supported by some guns. The CinC’s bodyguard cuirassiers, the Norchester Disenfranchised, along with General Sir Edmund Dexter are there too. Lurking on the right are a couple of squadrons of horse, just waiting for the opportunity to sneak-attack the Roundhead attackers.

The Parliamentarian attackers (see picture, above) consisted of ten battalia of infantry supported by a large squadron of Dutch-style horse, the Perform-Thy-Vows Puritan horse.

Opening Moves

As the sun rose, the Parliamentarian line moved smartly towards the small stream surrounding the tower. The Royalist supporting force moved up parallel to the walls, whilst the Staplehurst Horse on the right trotted forward looking for the Roundhead flank.

The Parliamentarians crossed the stream without pausing and threw themselves at the breach. Their troops on their right hung back slightly, looking to fight one battle at a time.

Staplehurst was still leading his horse forward and, as one Roundhead battalion (Manning’s Foot, in blue) was smashed from the field by fire from the shot-heavies, charged the far left of the Roundhead line.

Engaged from the front and flank, the Parliamentarian battalia there (Kelsey’s Foot, in grey) crumbled and fled. It would have been great if the Royalist horse had charged on to hit the next enemy battalia in the flank as well, but the Cavaliers were carried away by their success and turned to pursue their fleeing foes!

The Climax

Meanwhile the Royalist left were beating the Roundheads in front of them: the timely intervention of the cuirassiers breaking what had looked like being deadlock.

The Roundheads were now in some trouble: their line had recoiled from the walls surrounding the tower, and although they had reformed and were preparing to go back in, both flanks were crumbling.

Indeed, before anything else happened, the second unit of lurking Royalist horse also managed to turn an enemy infantry battalia’s flank.

And that was really it: the Parliamentarians had started the battle with ten infantry battalions but were now reduced to four, who promptly voted to leave the field as fast as possible!

Aftermath

An interesting game. I’d played the Royalists and was now dying to have a go as the Parliamentarians!

John and I agreed that he had come forward without much tactical manoeuvre: although he had been unlucky with his cards on his left…my horse should never have been able to get around the side like that.

What would I have done differently? When I do play this as the Roundheads, I think I’ll initially ignore the Tower and its defenders and concentrate on wiping out all the Royalists out in the open. I’ll then be able to concentrate my strength on the units behind the fortifications, hopefully using my (then) overwhelming numbers to win victory. Can’t wait to try this, but if you have any better ideas, please do comment to let me know!