19thC AAR: The Battle of Nachod

Bevan and I played another game using Neil Thomas’ 19th Century rules, this time using one of the scenarios included in the book: the battle of Nachod from the Autro-Prussian war of 1866.

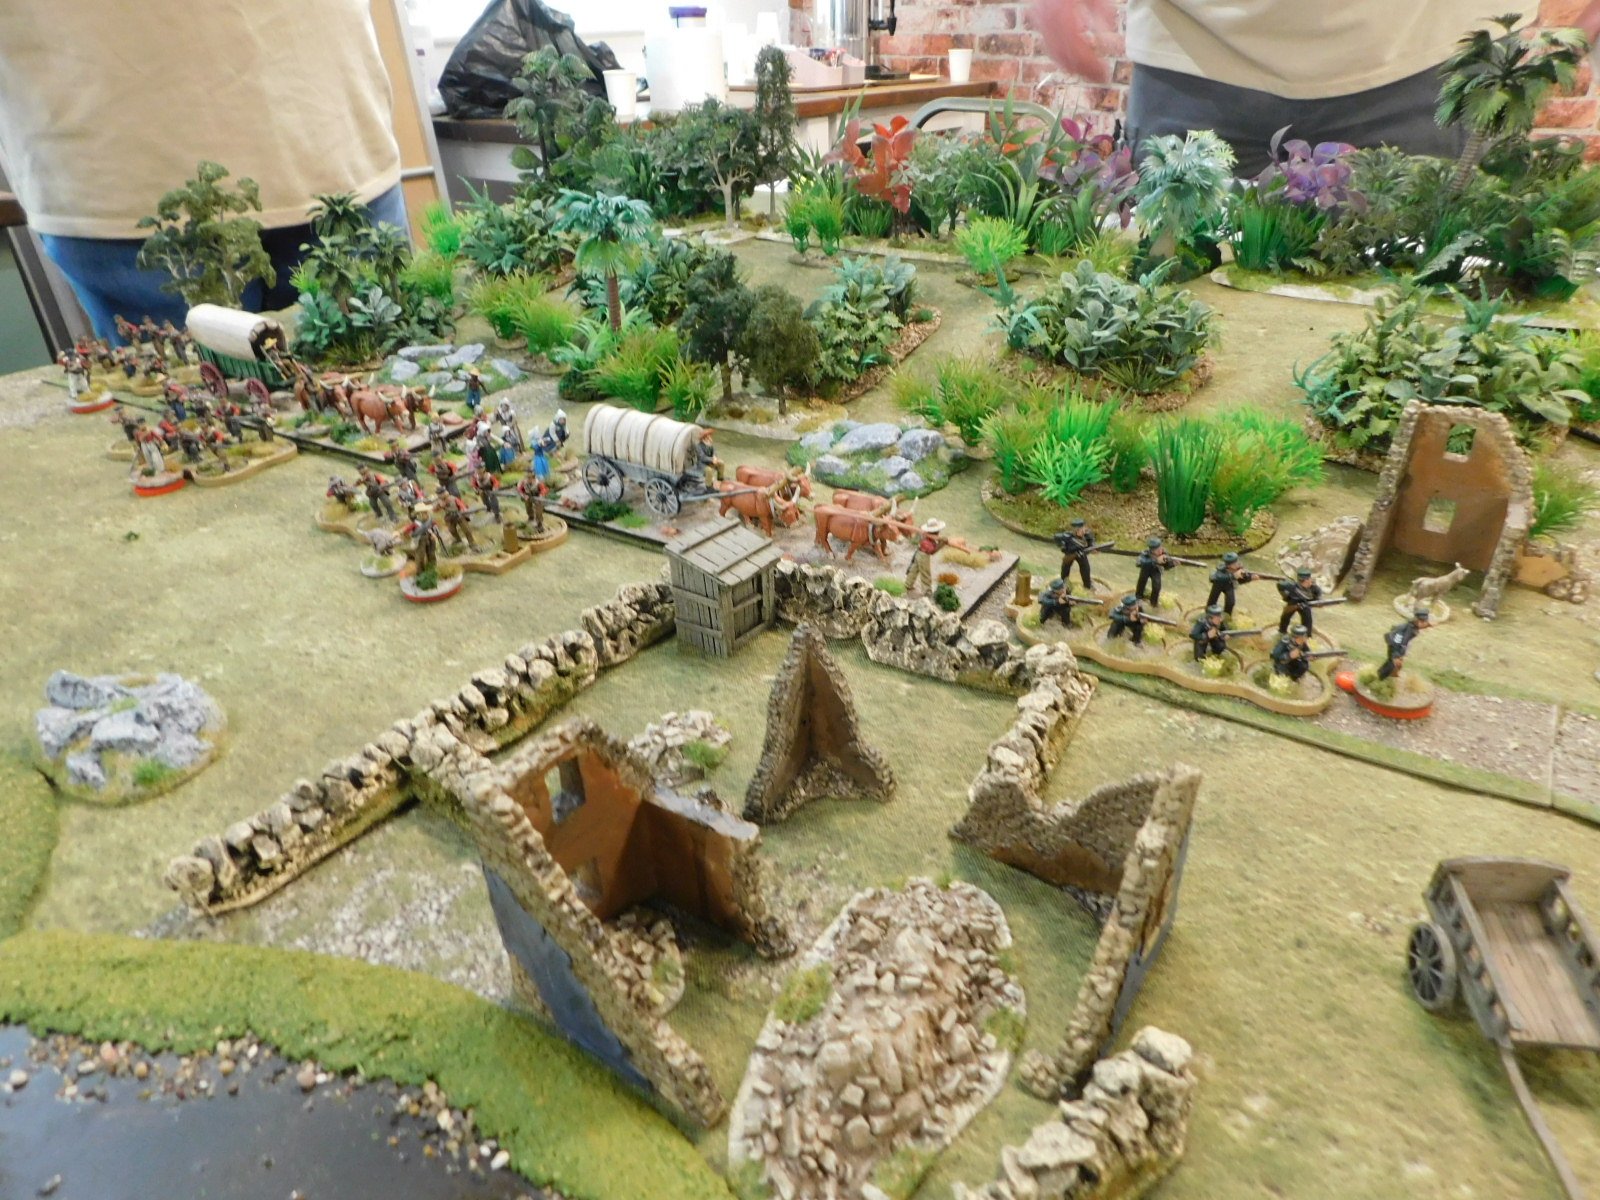
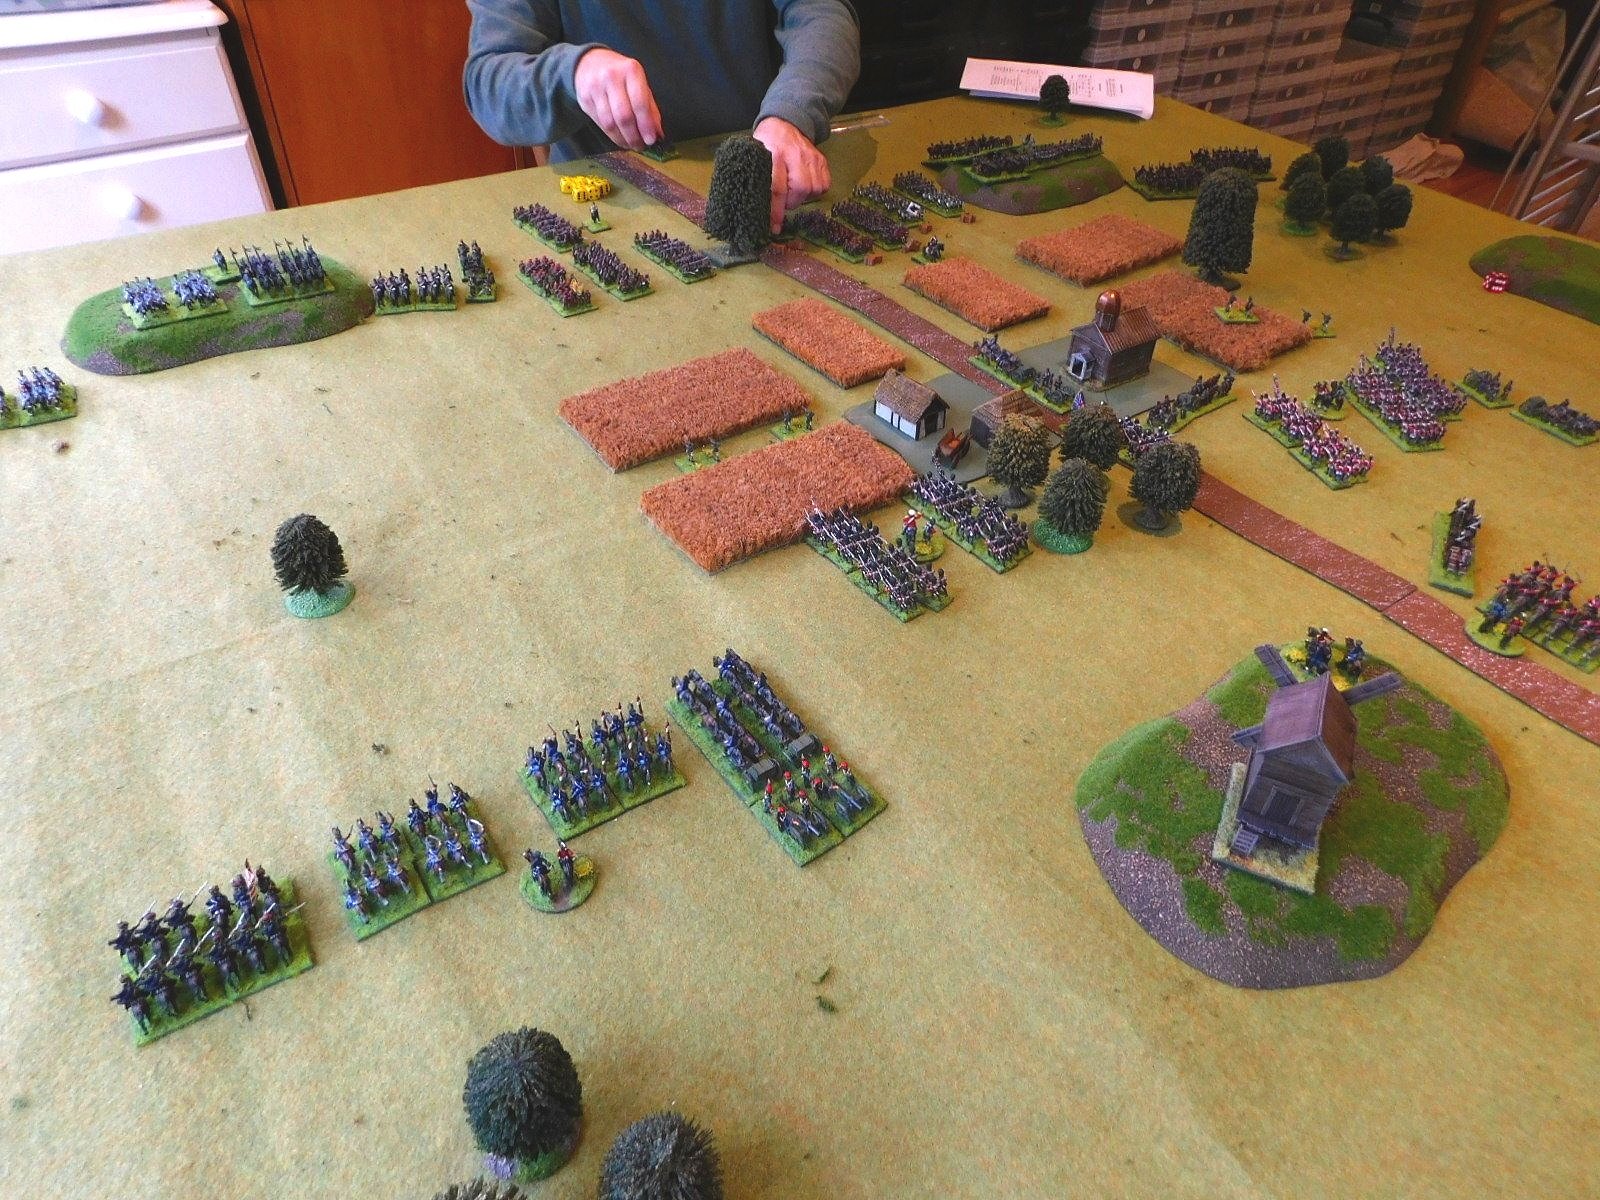
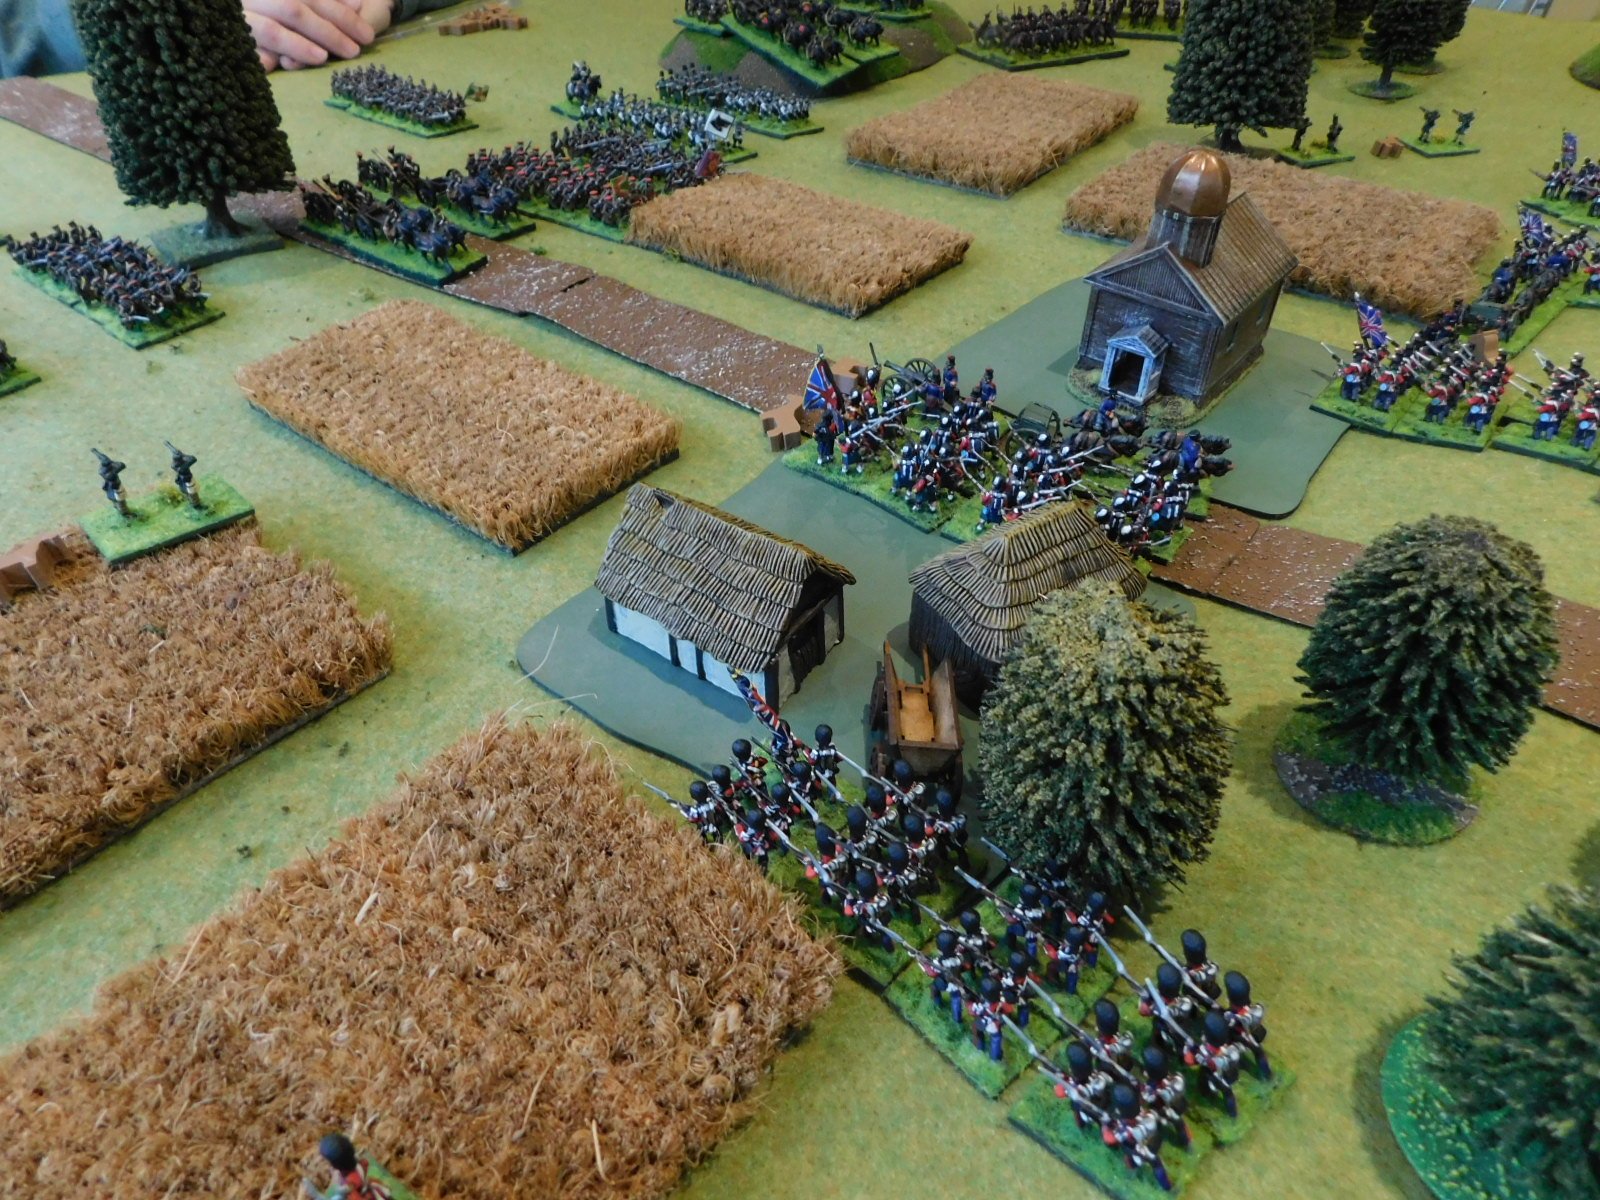
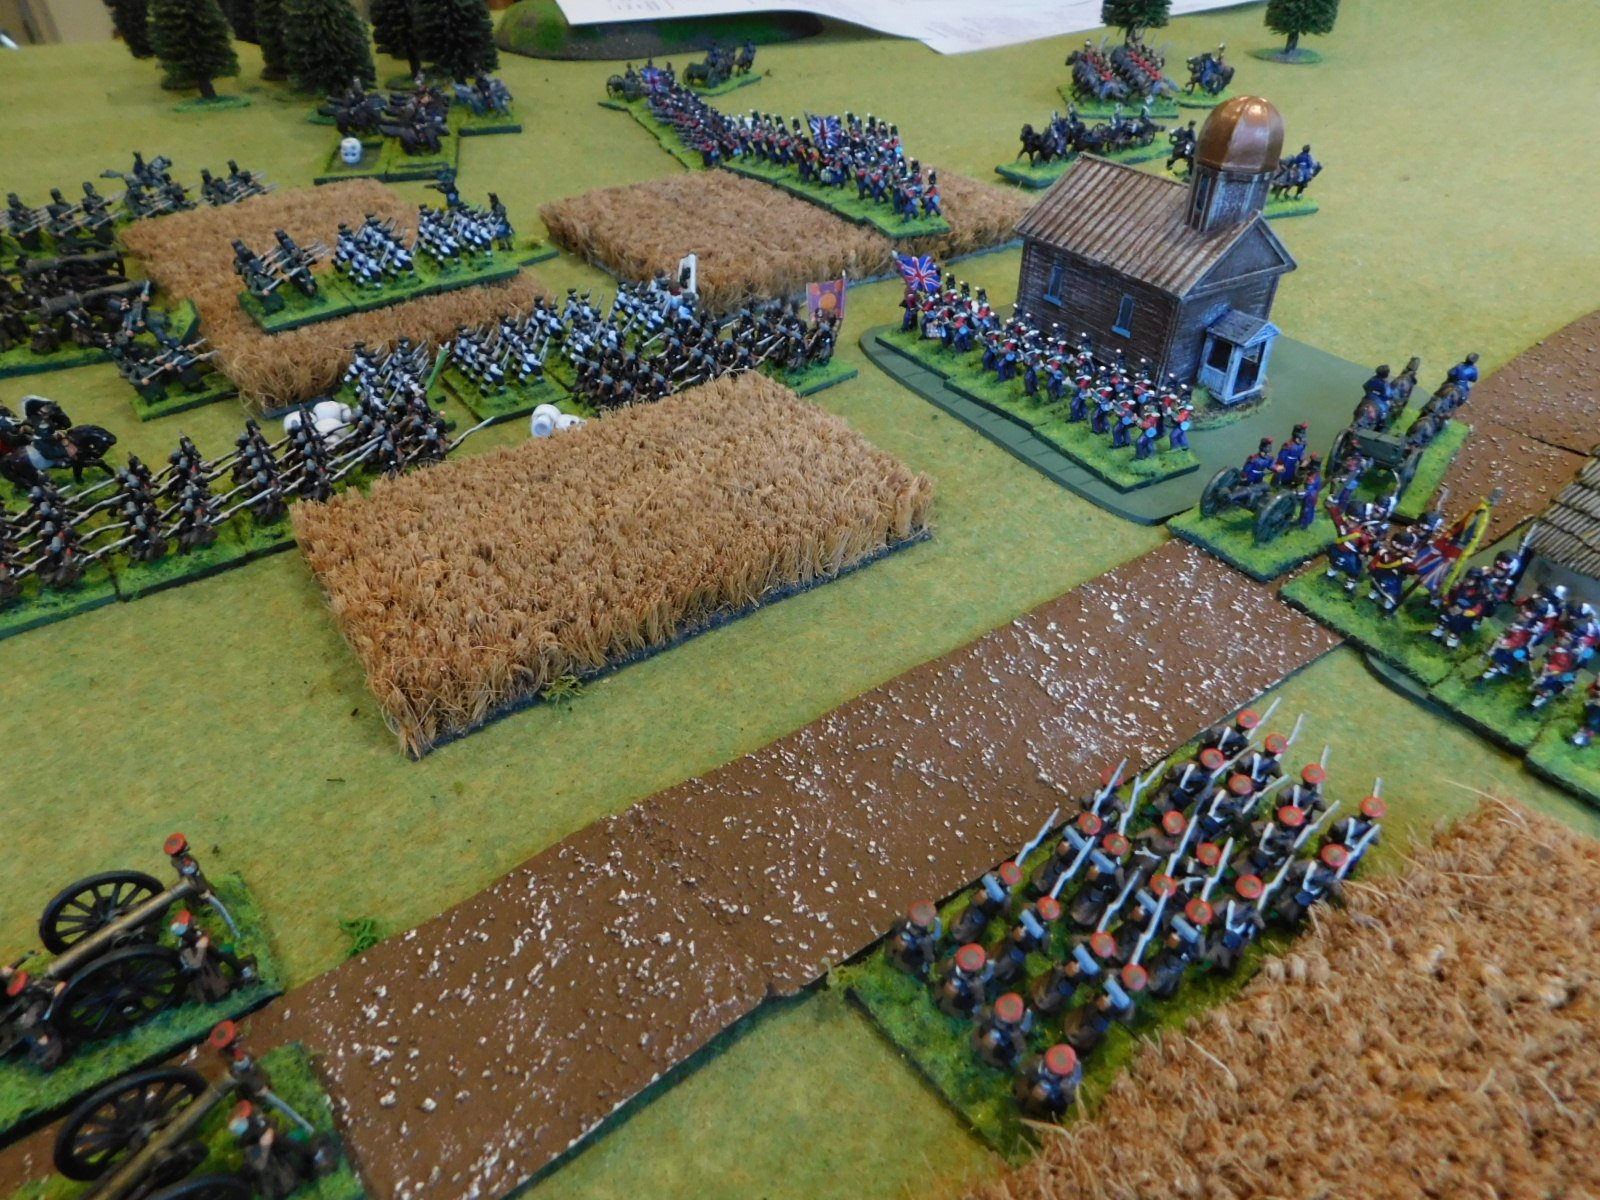
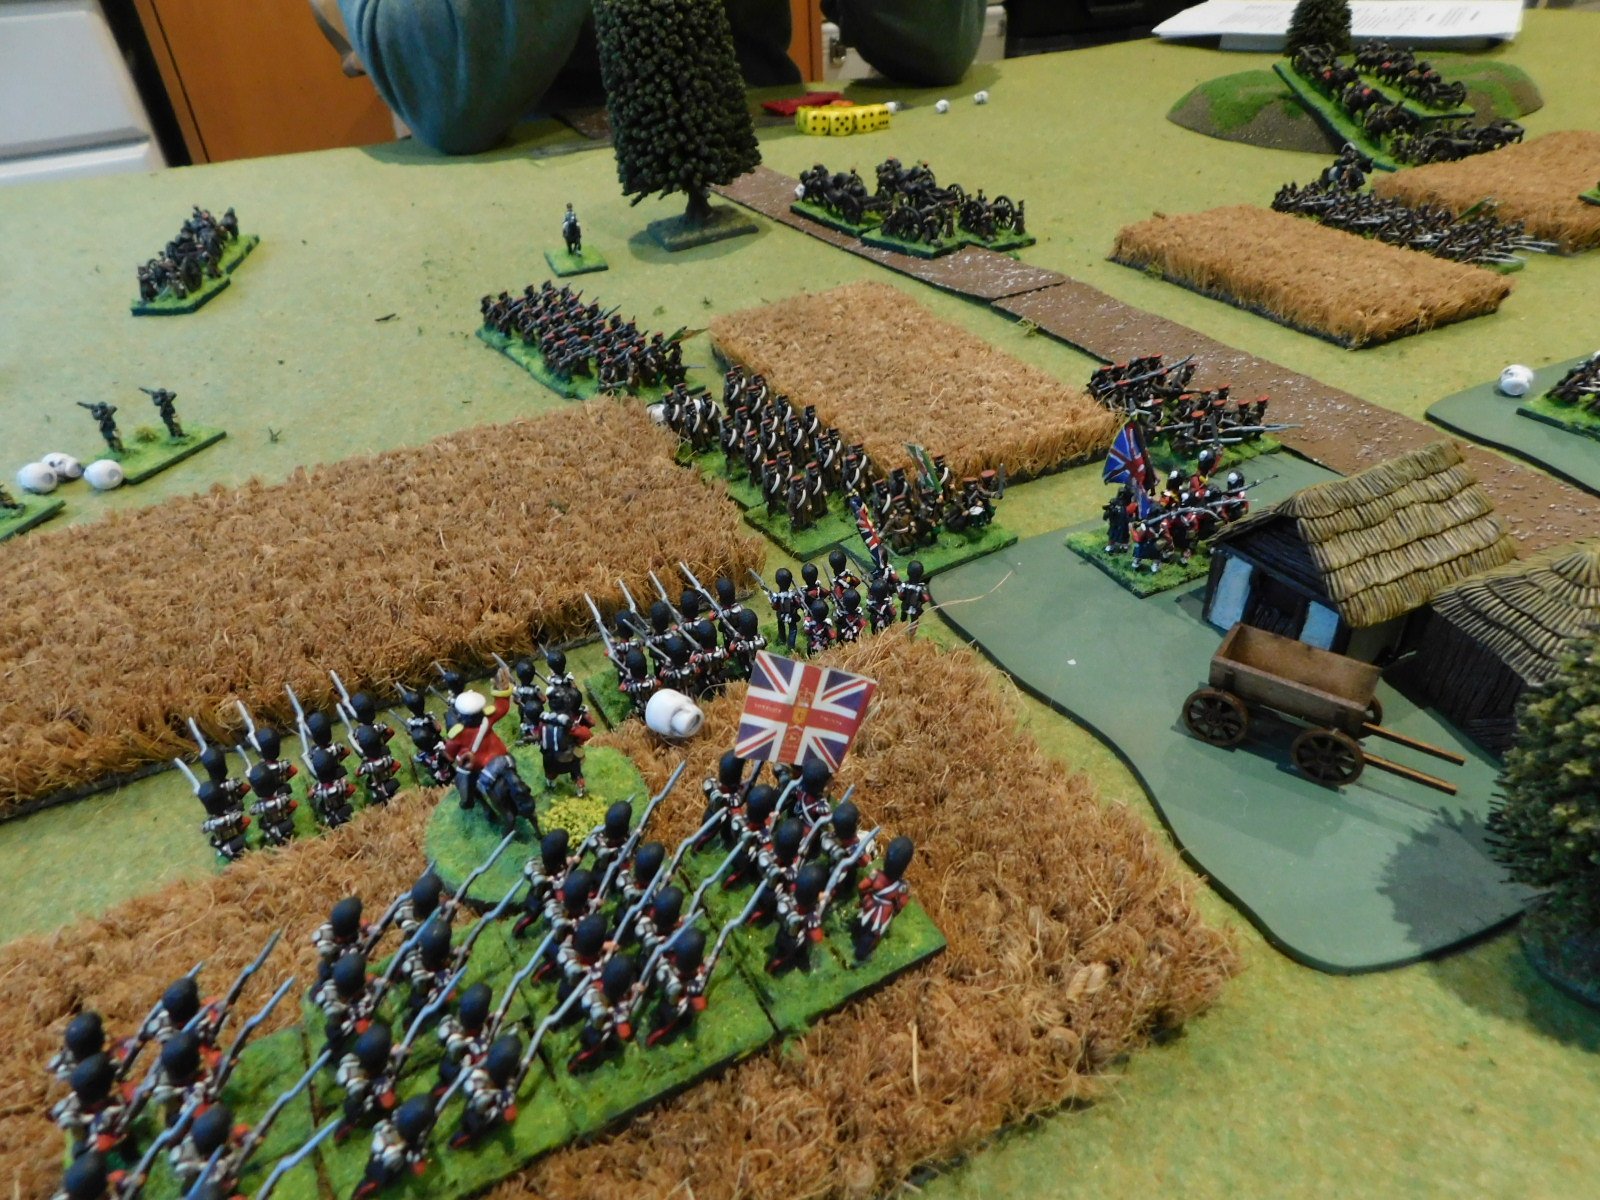
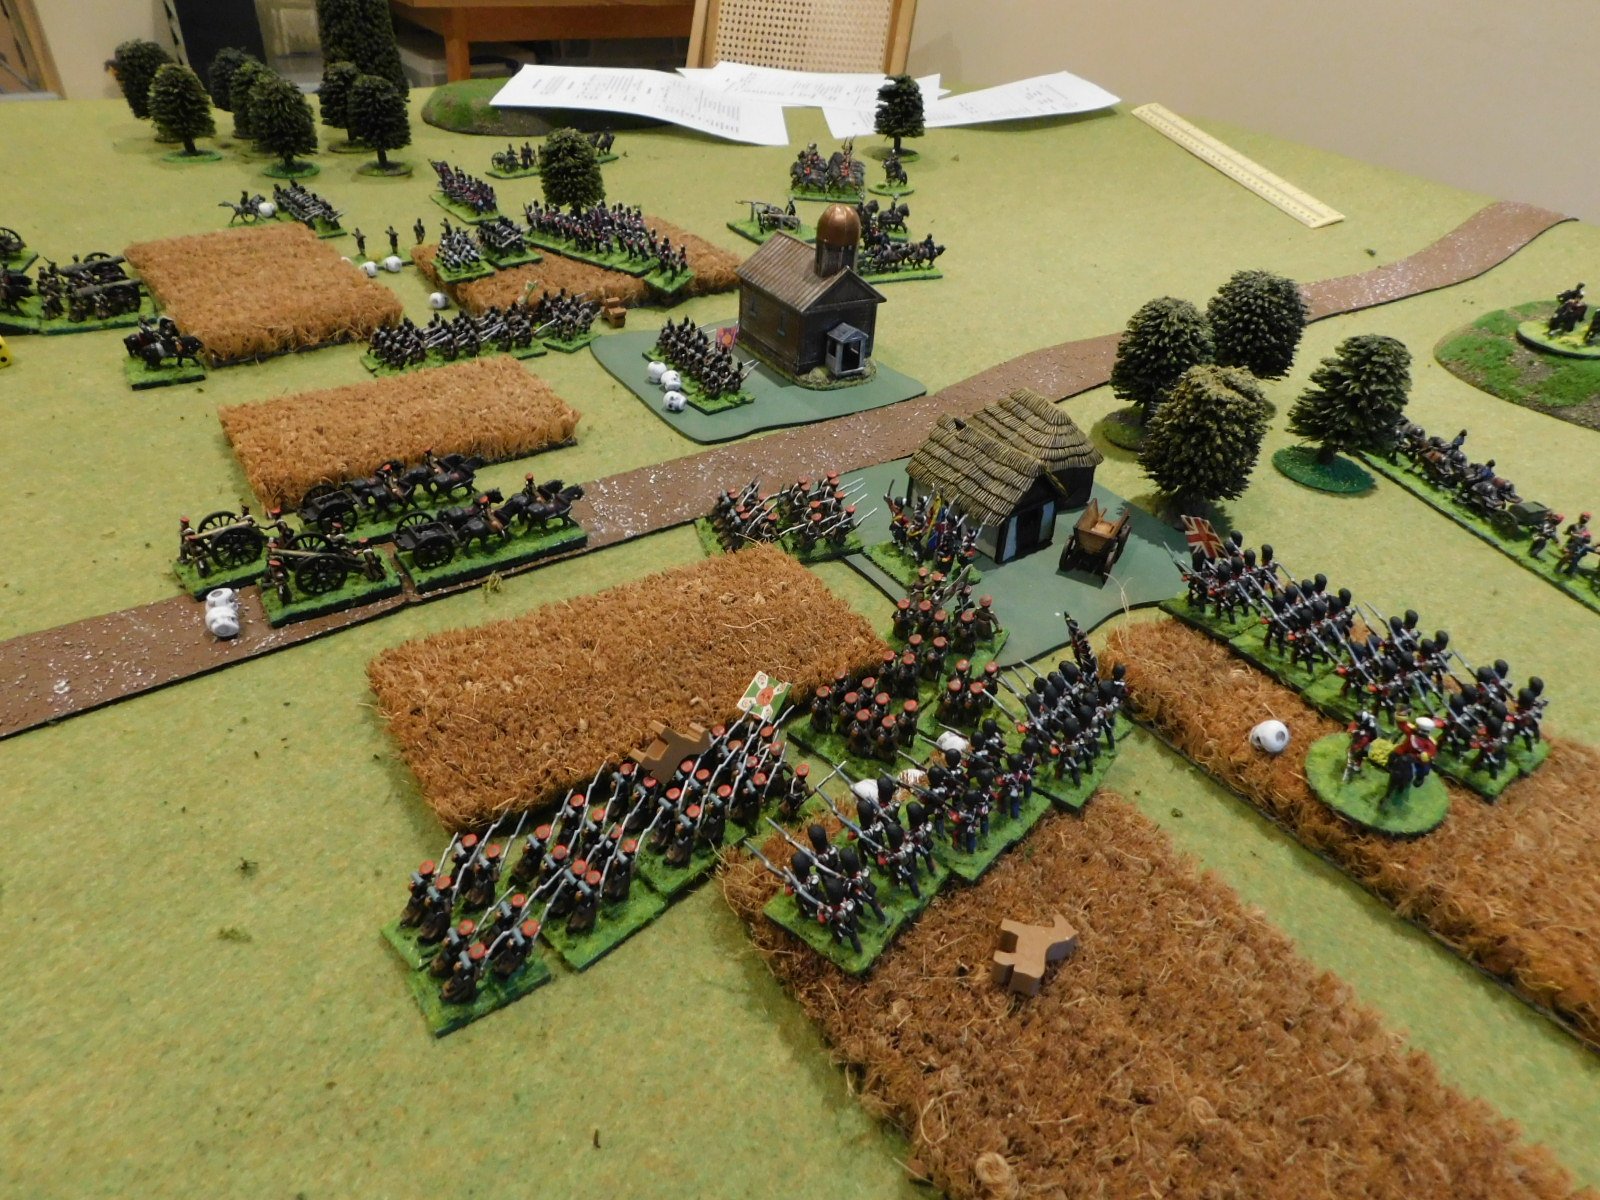
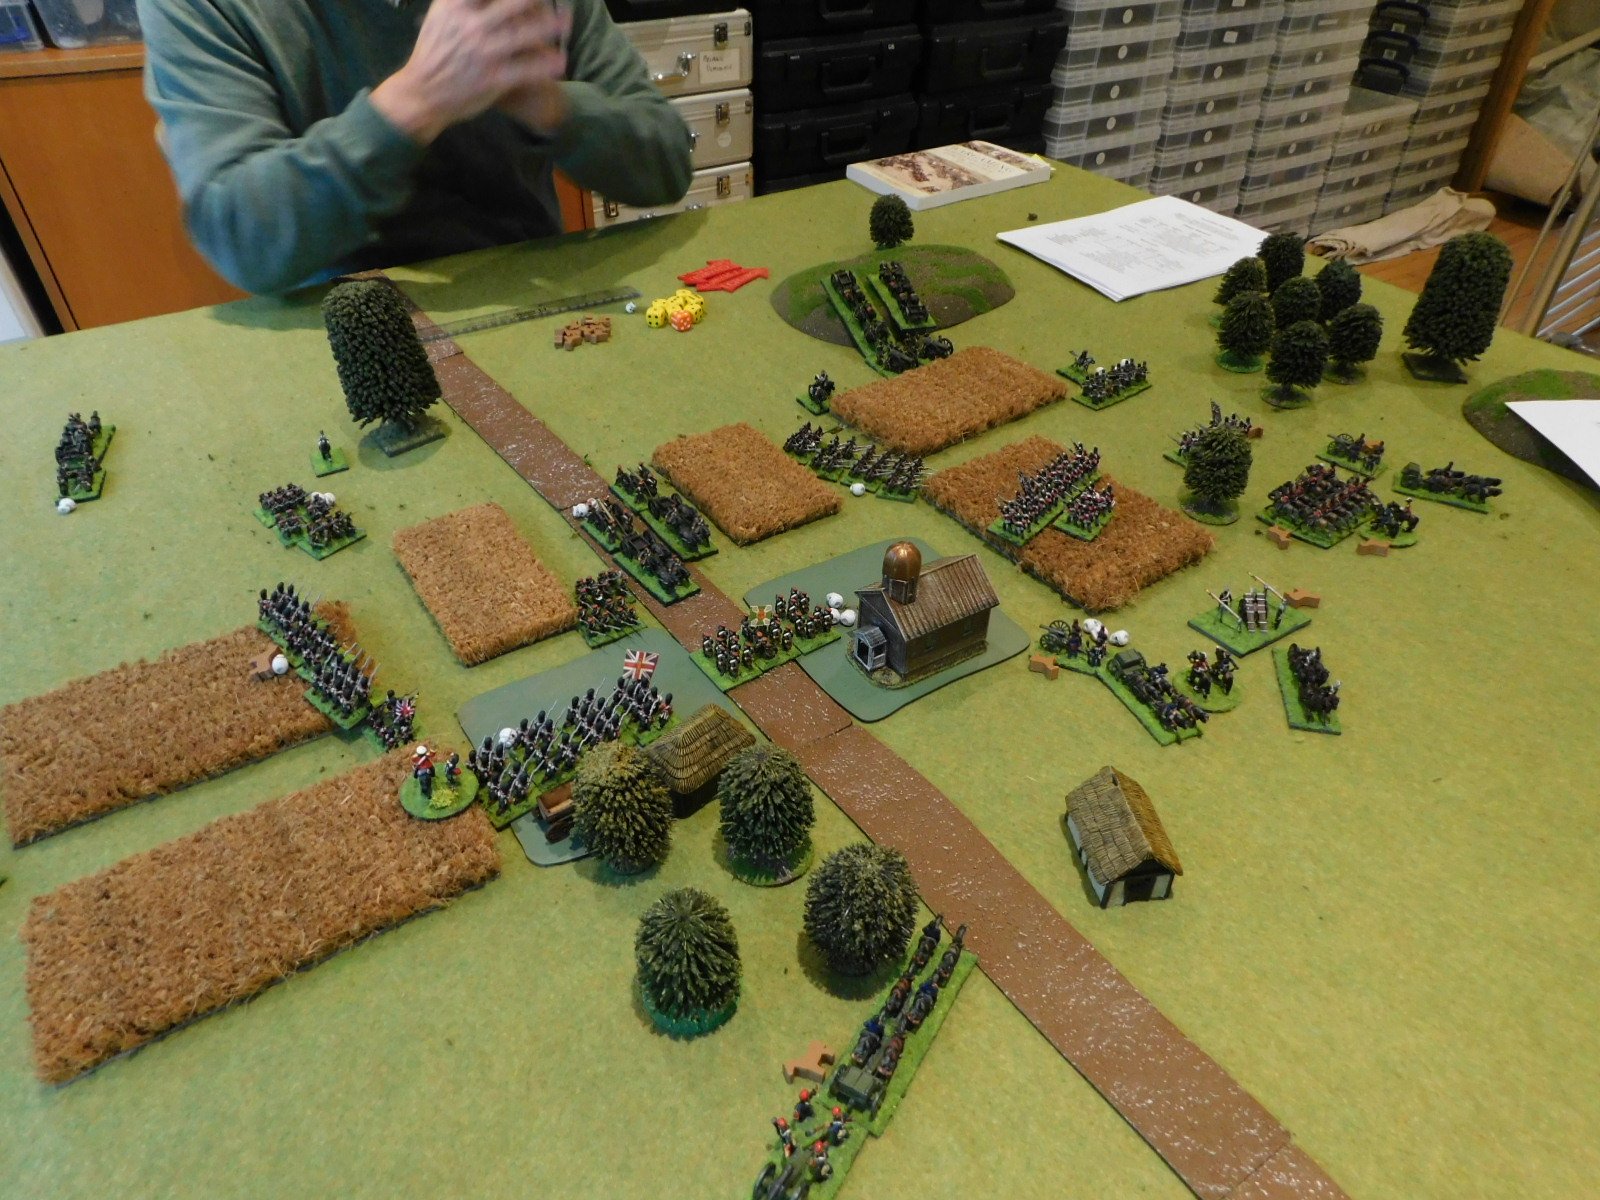
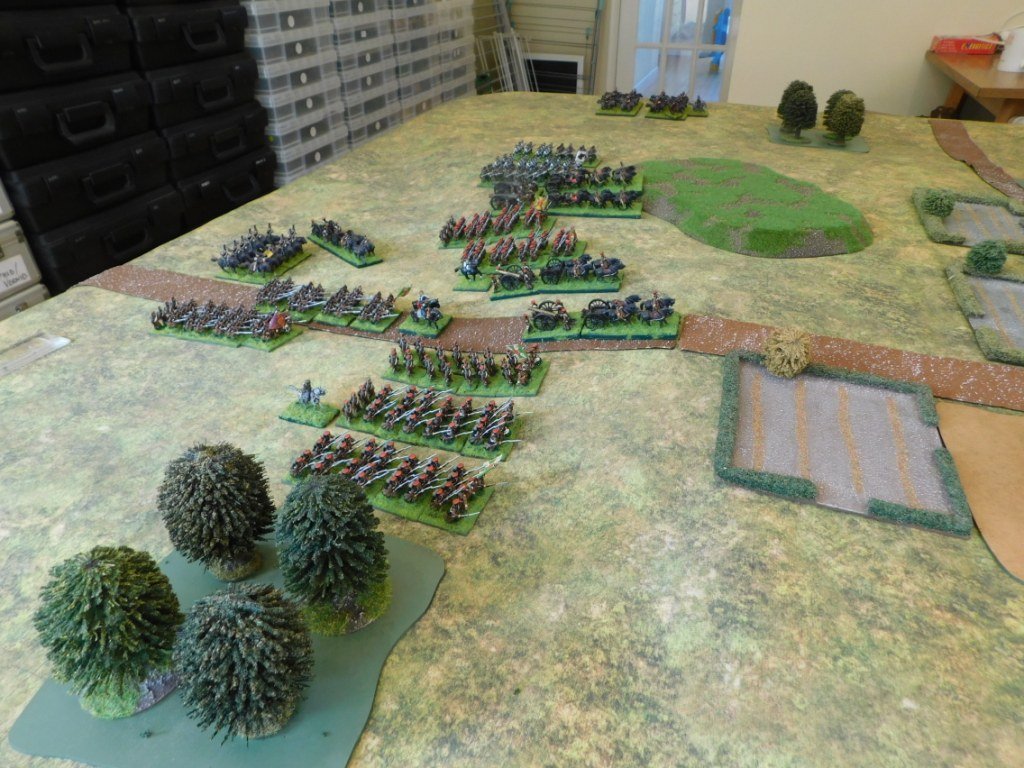
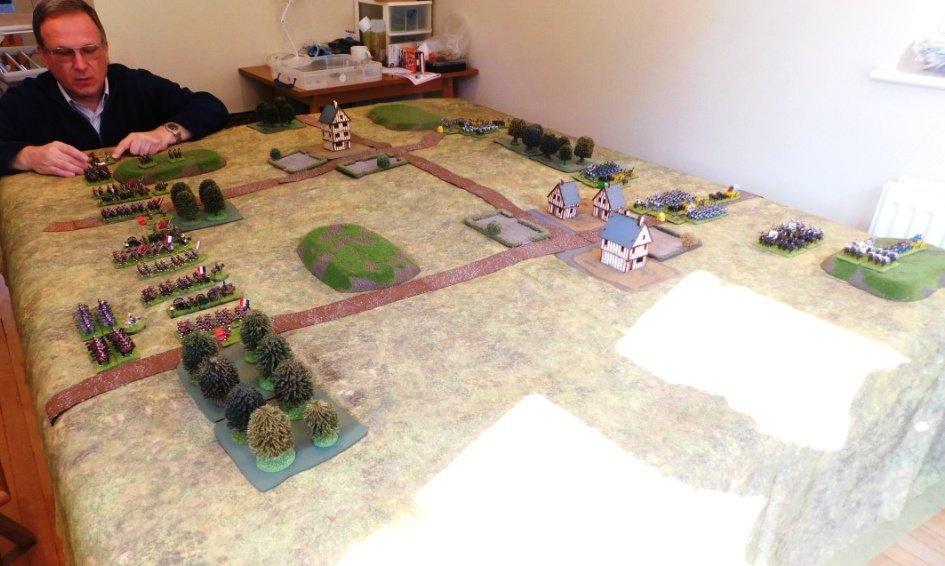
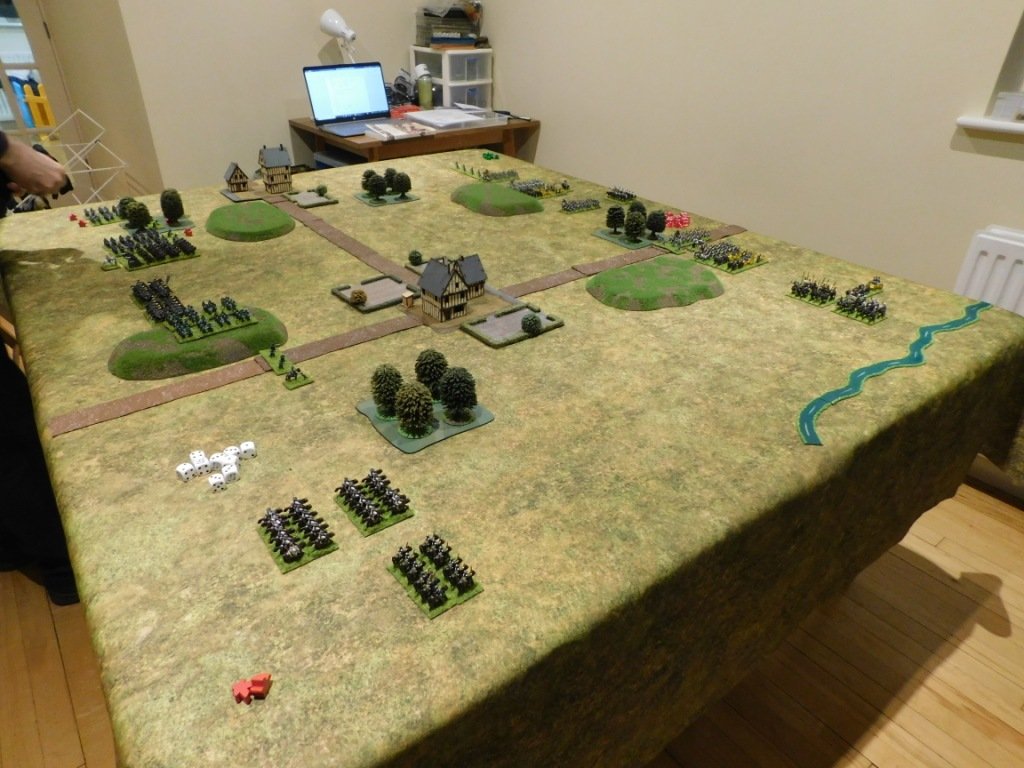
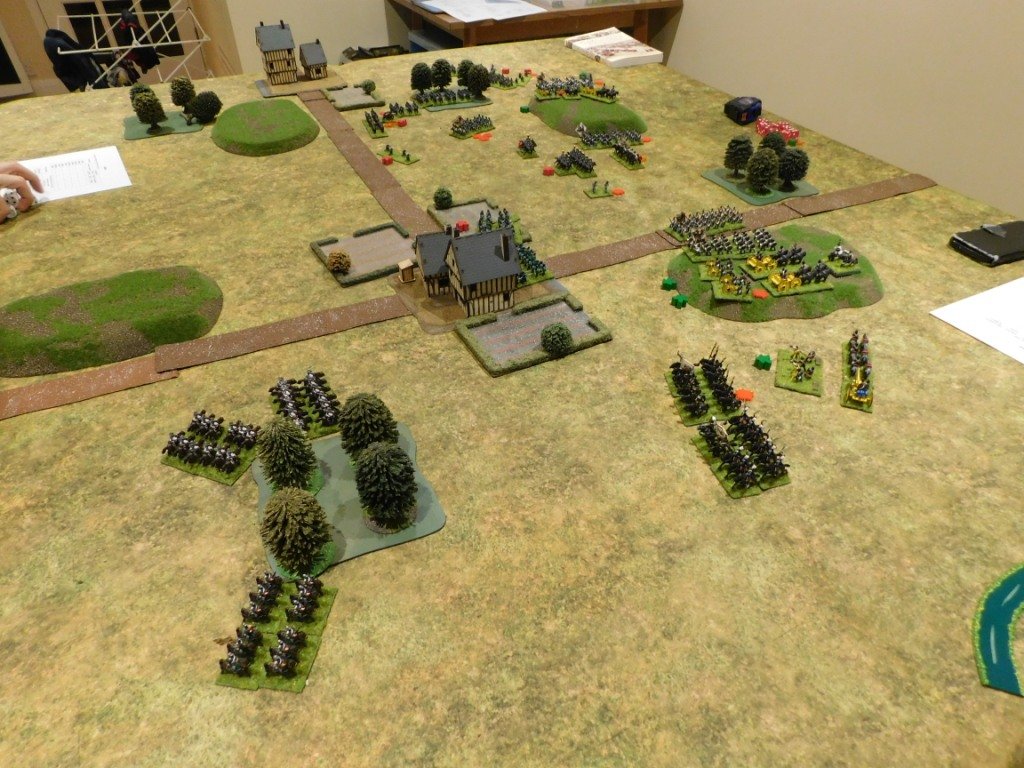
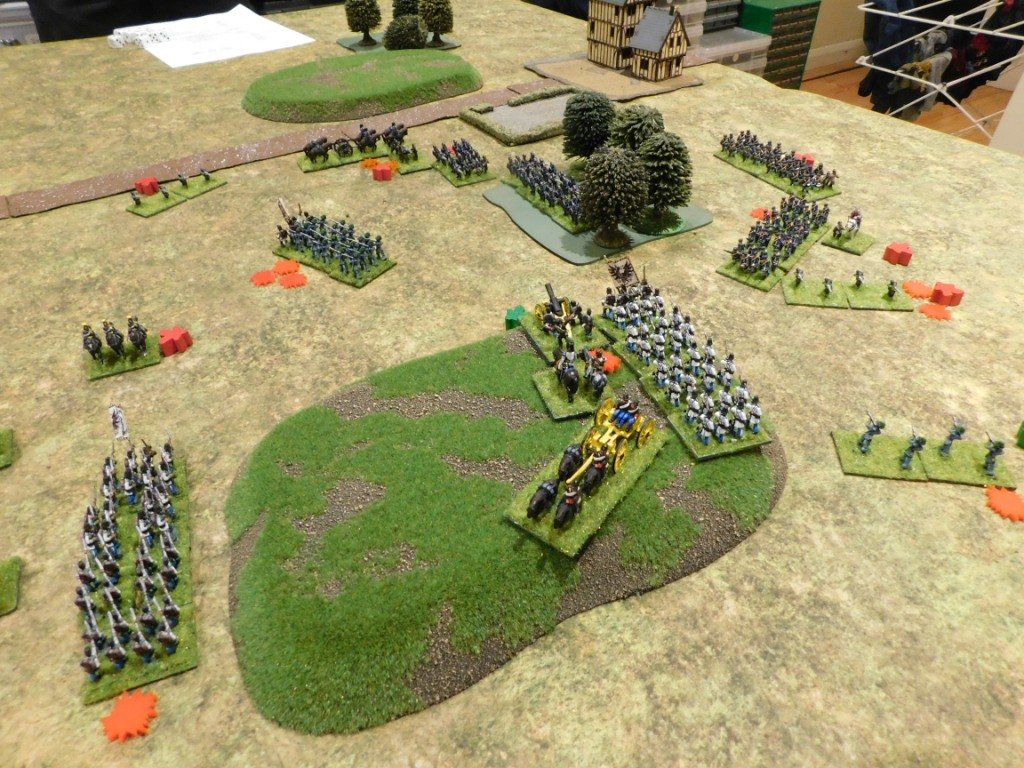
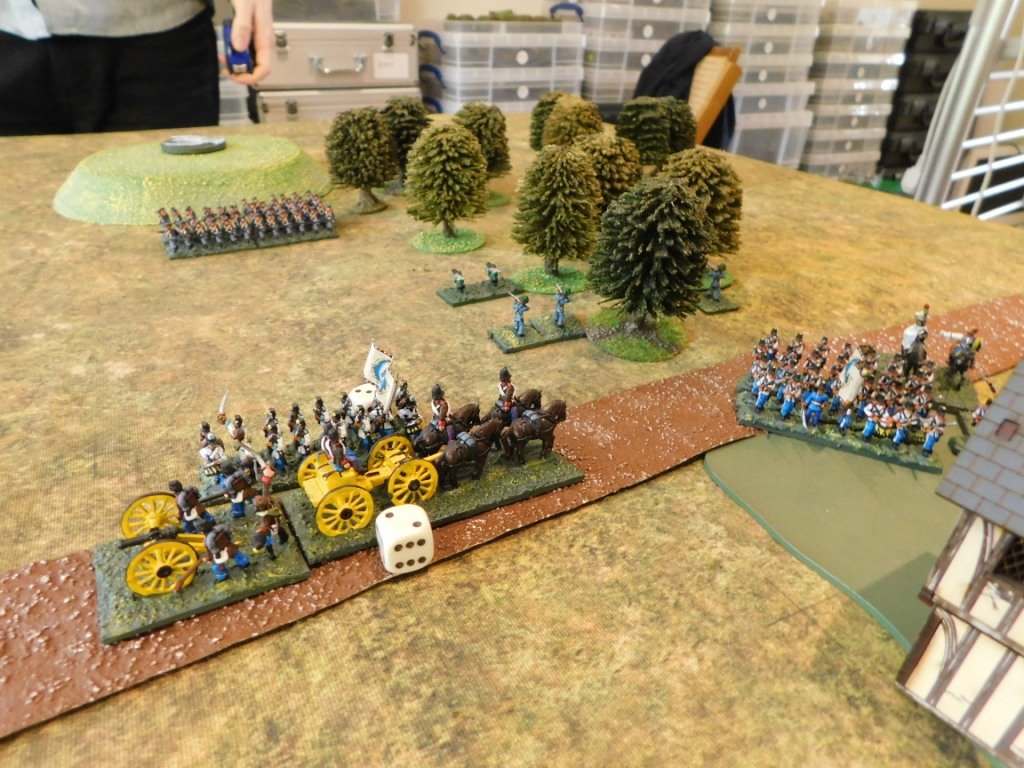
There are three small towns above Nachod (which is the one with the pond): Wenzelberg, Wysokow and Aldstadt. The Prussians occupy two of them, Wenzelberg and Wysokow, with cavalry on the hill above and reinforcements on the way. The Austrians are just arriving near Wenzelberg. Victory goes to whoever occupies all three of Wenzelberg, Wysokow and Aldstadt at the end of turn 15, with any other result being a draw.

The Austrian infantry pushed the Prussians out of Wenzelberg fairly easily (historically they were cut to pieces by defensive fire) but rather than retreating the Prussian previous owners hung around and, together with the Prussian Uhlans and Jaegers, caused huge delays in the Austrian advance towards Wysokow.

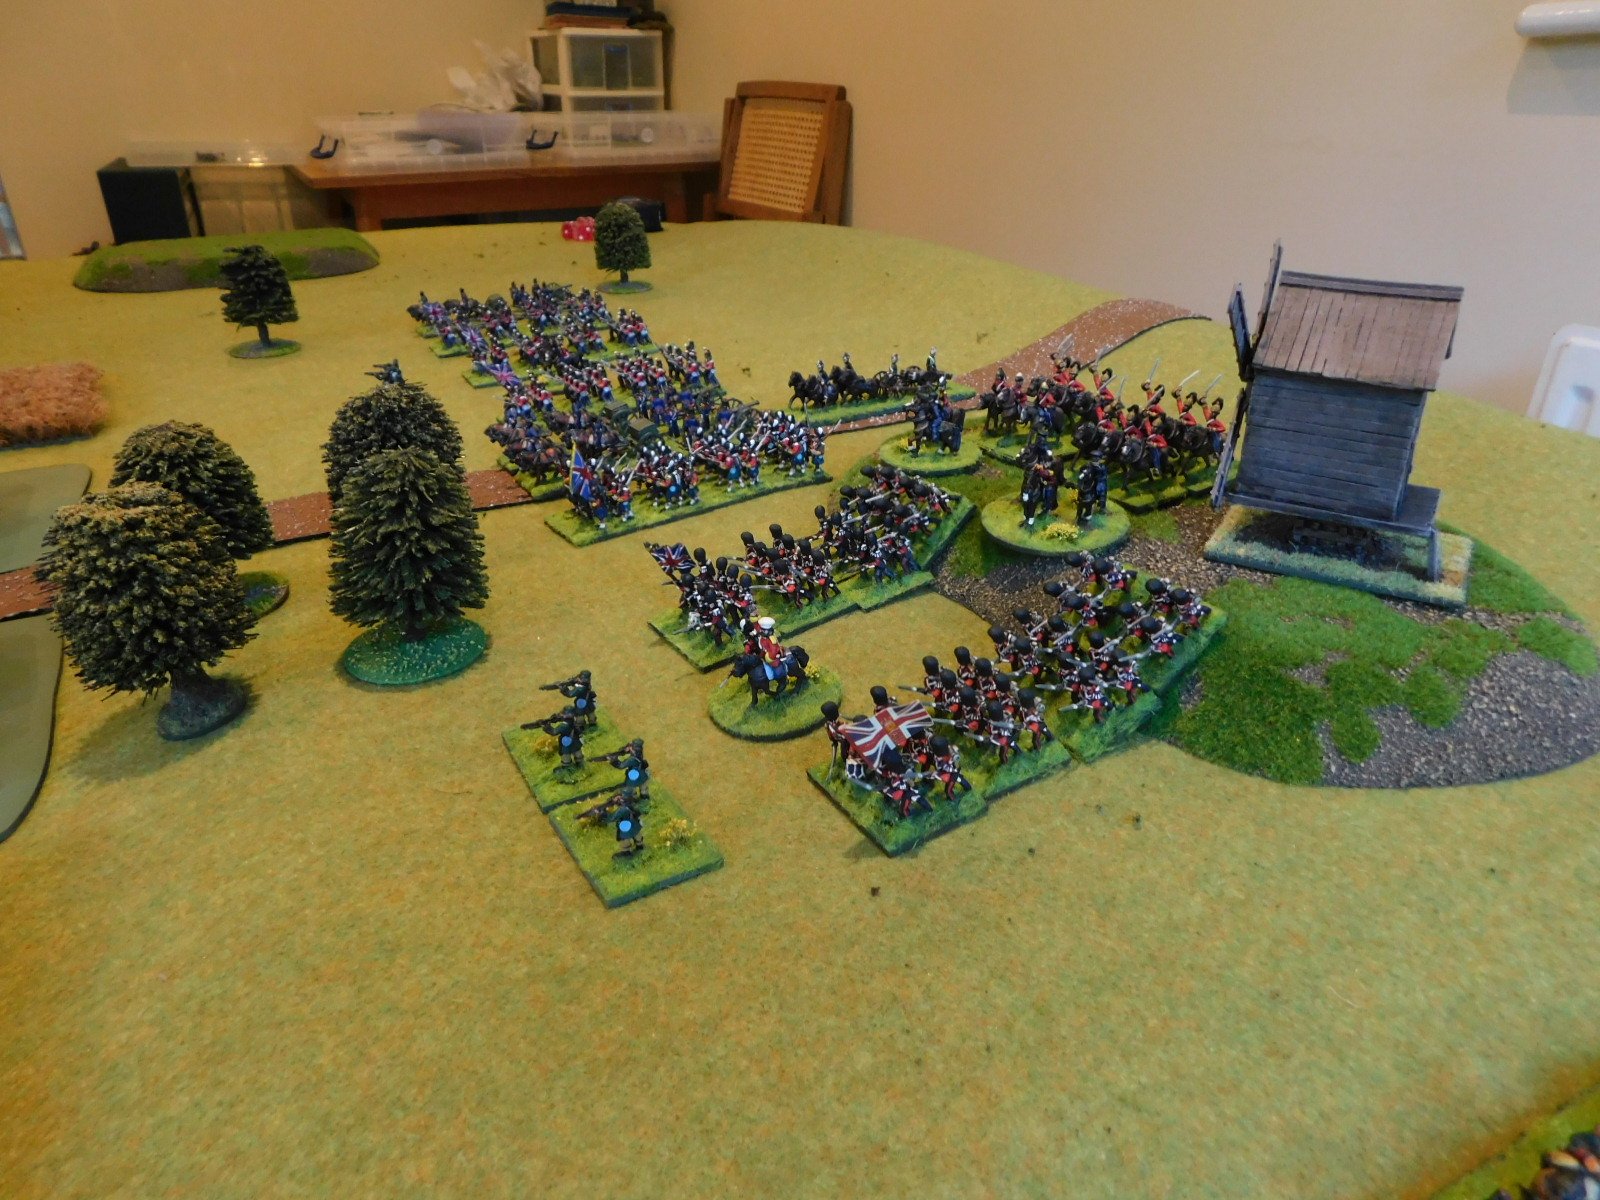
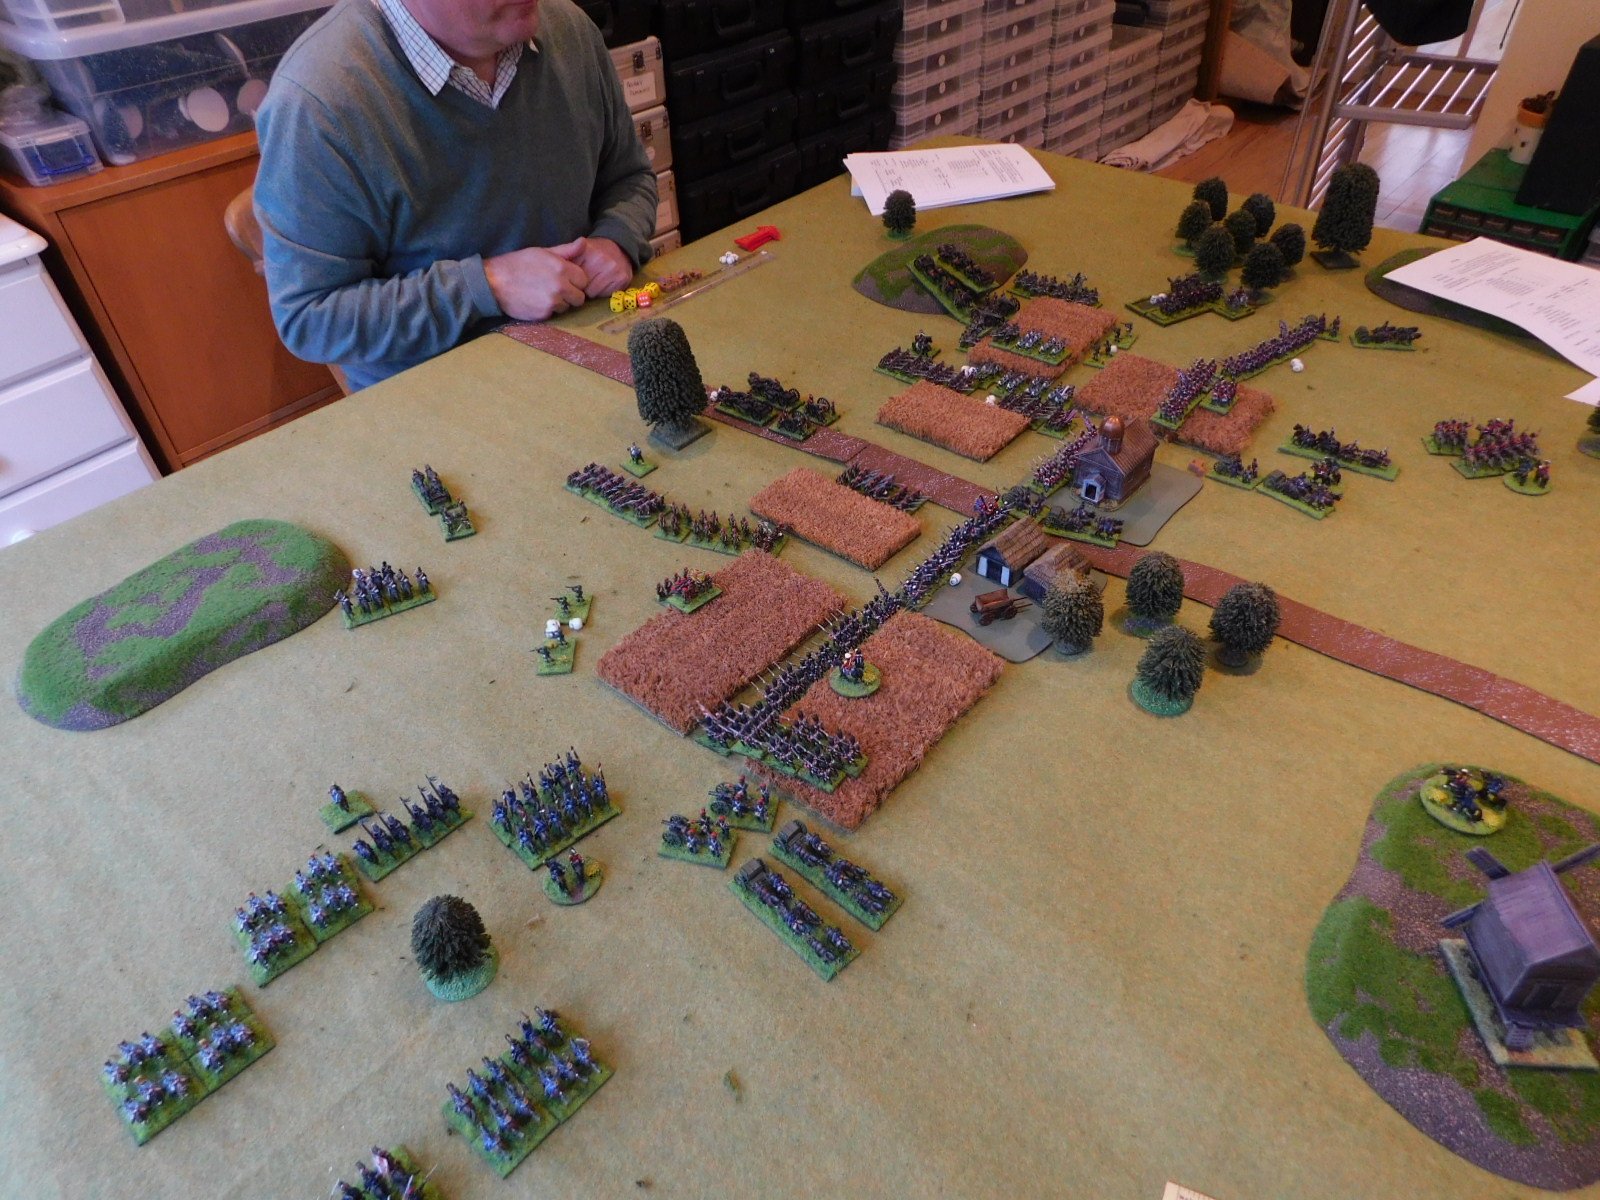
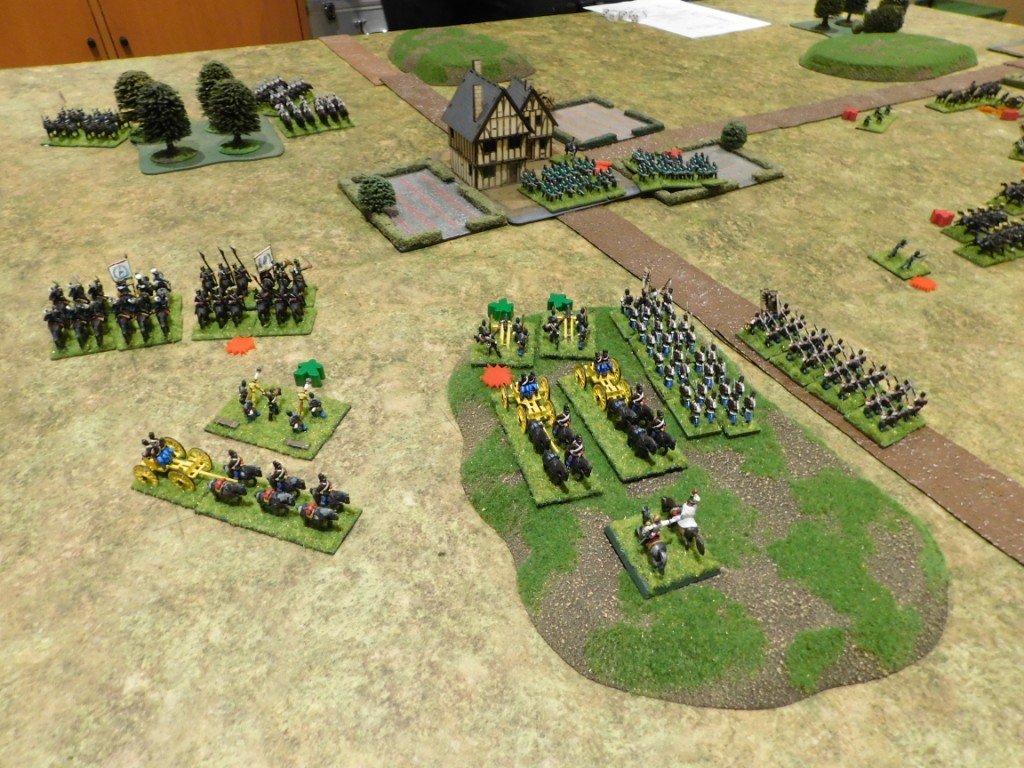
Meanwhile, the Prussian reinforcements had also started to arrive.

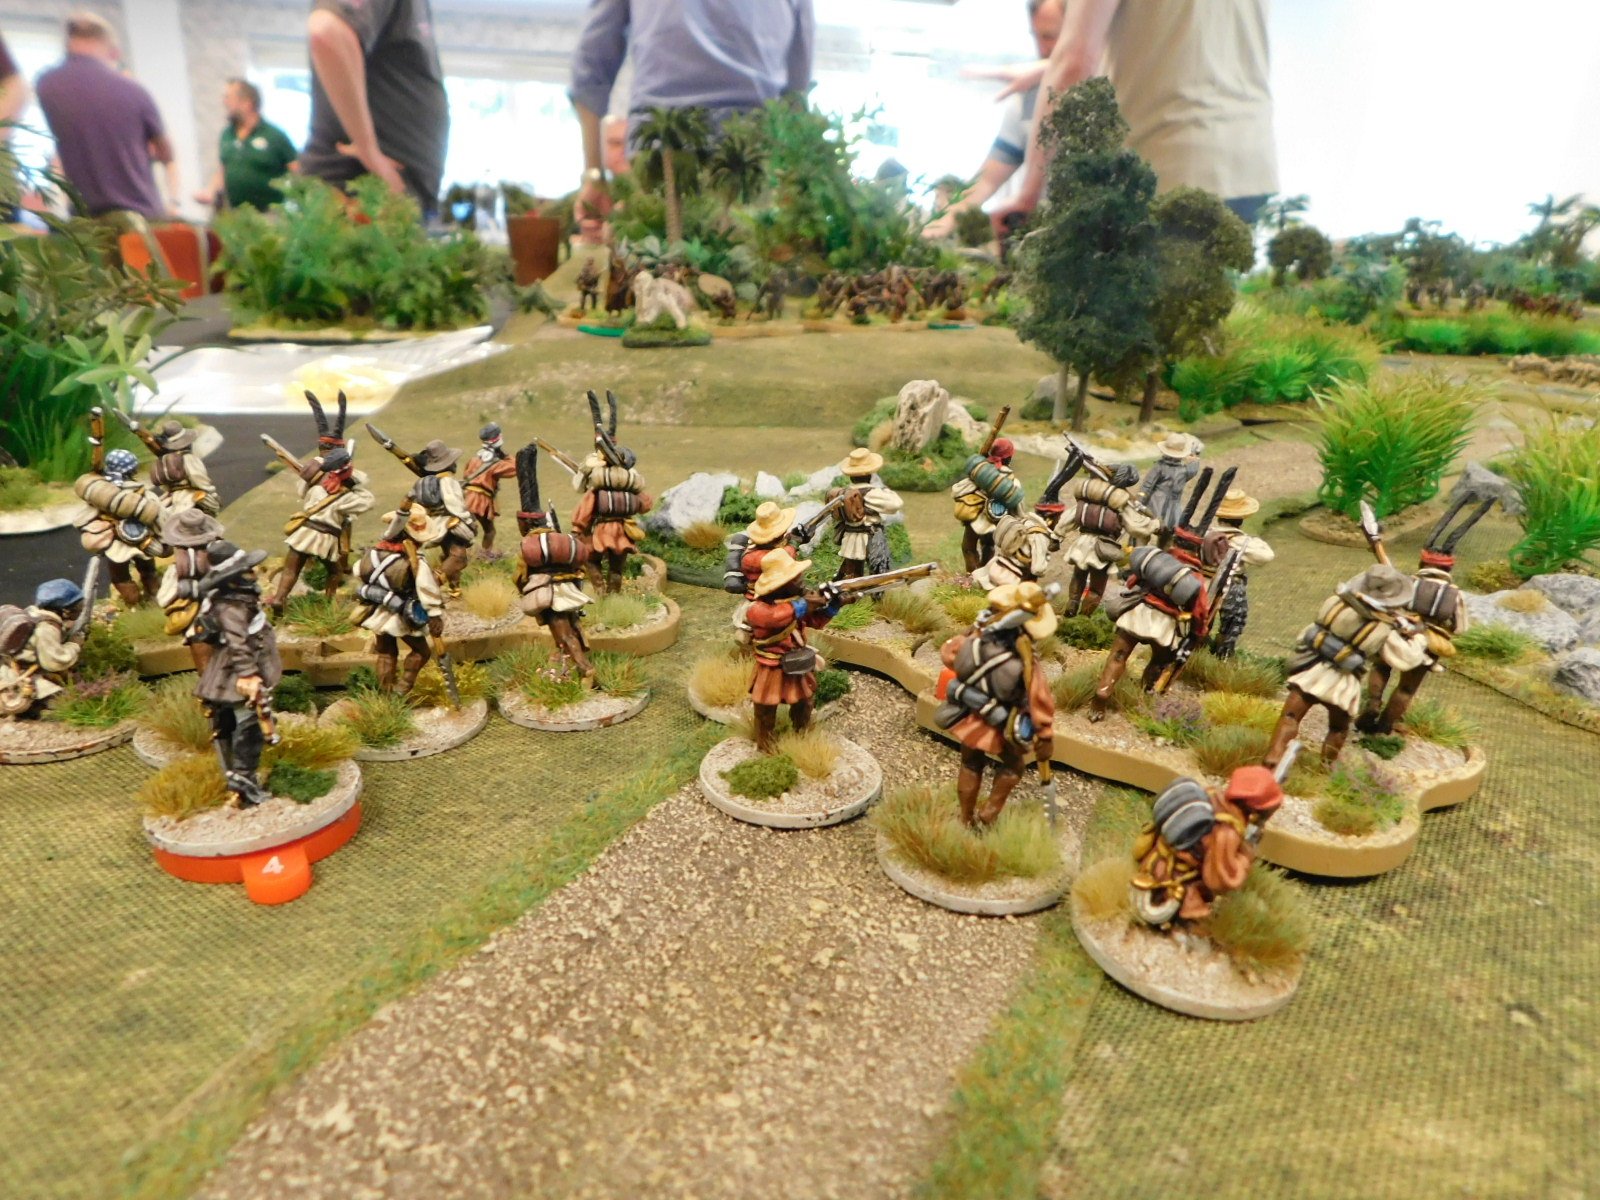
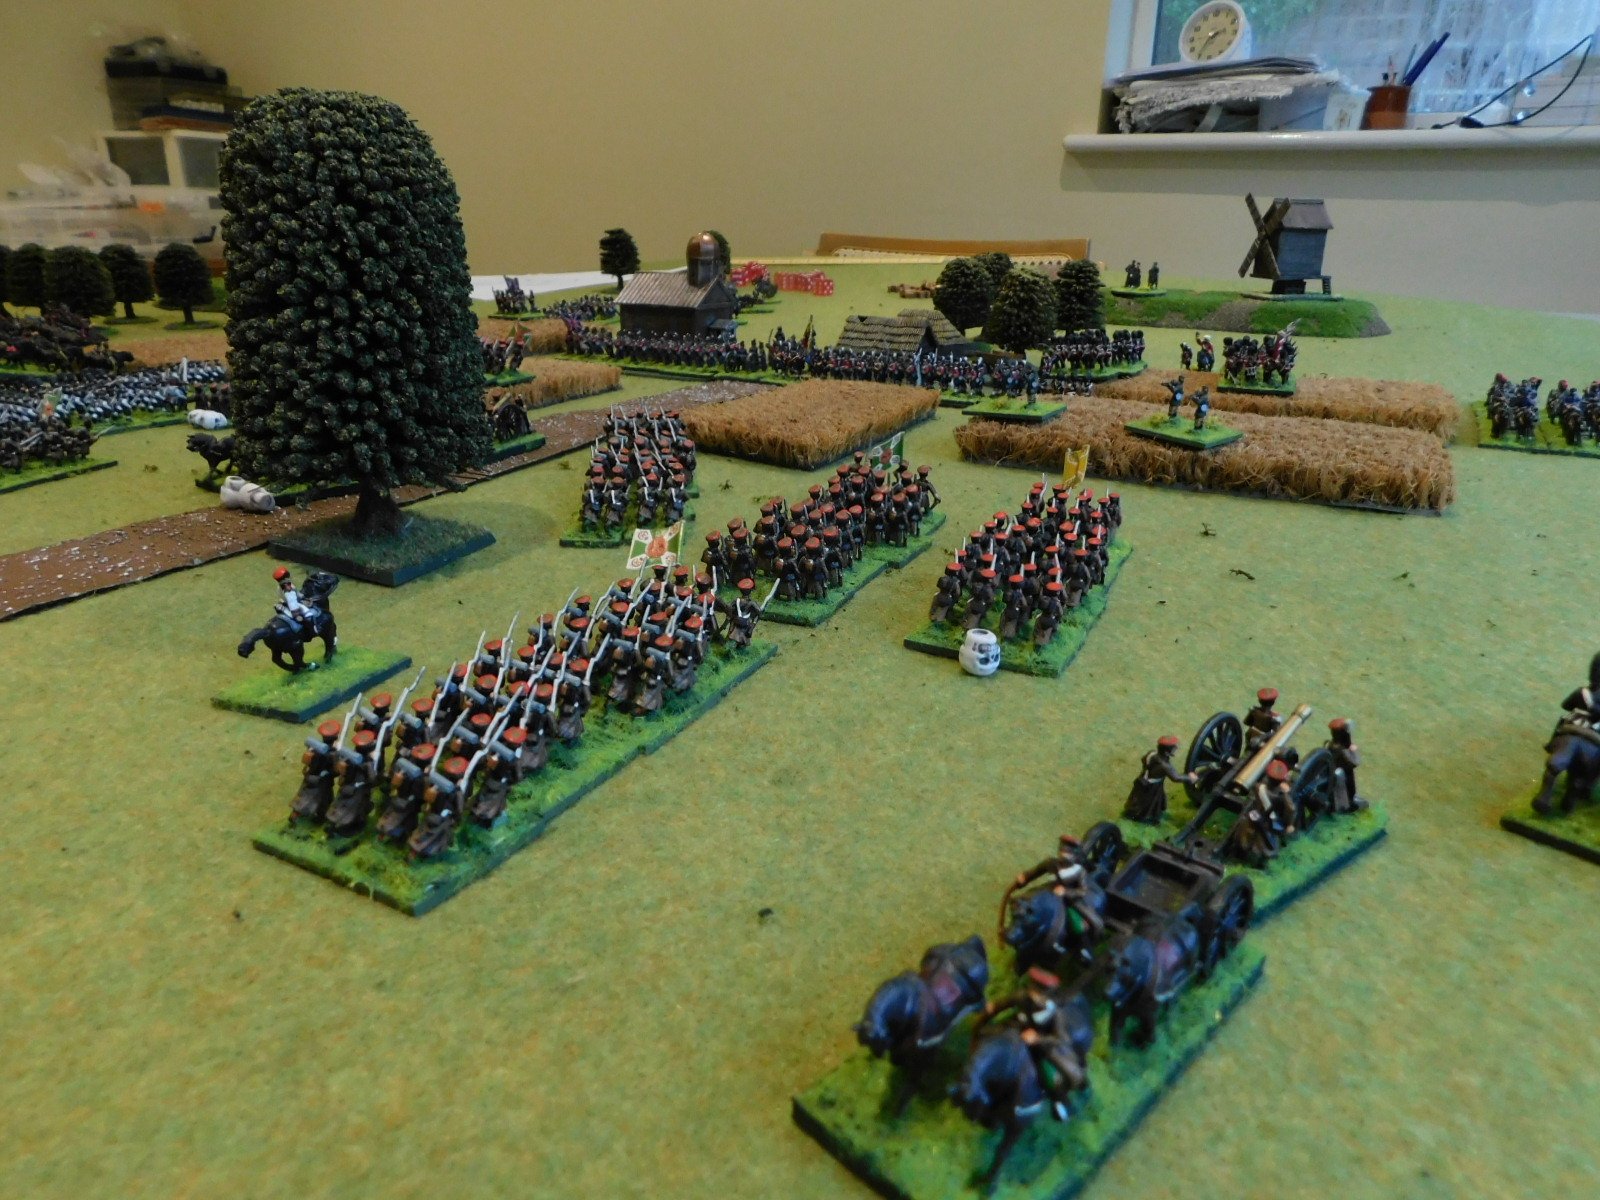
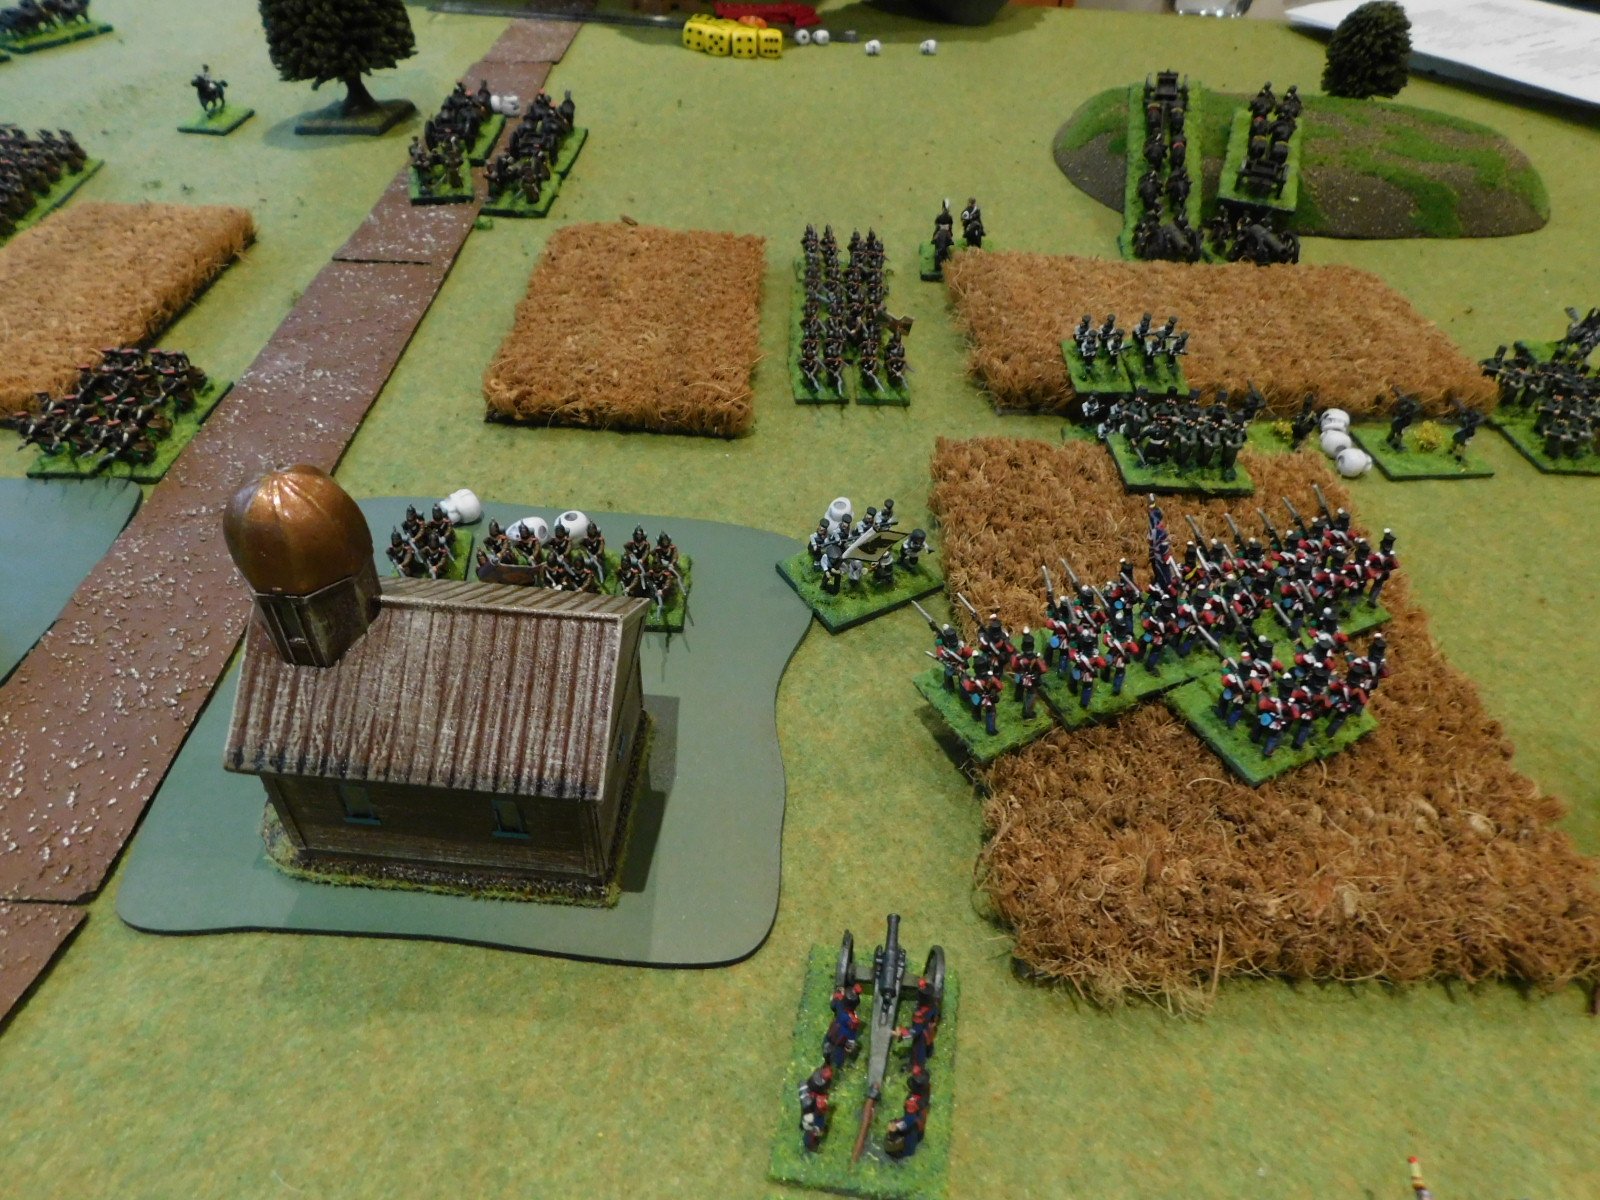
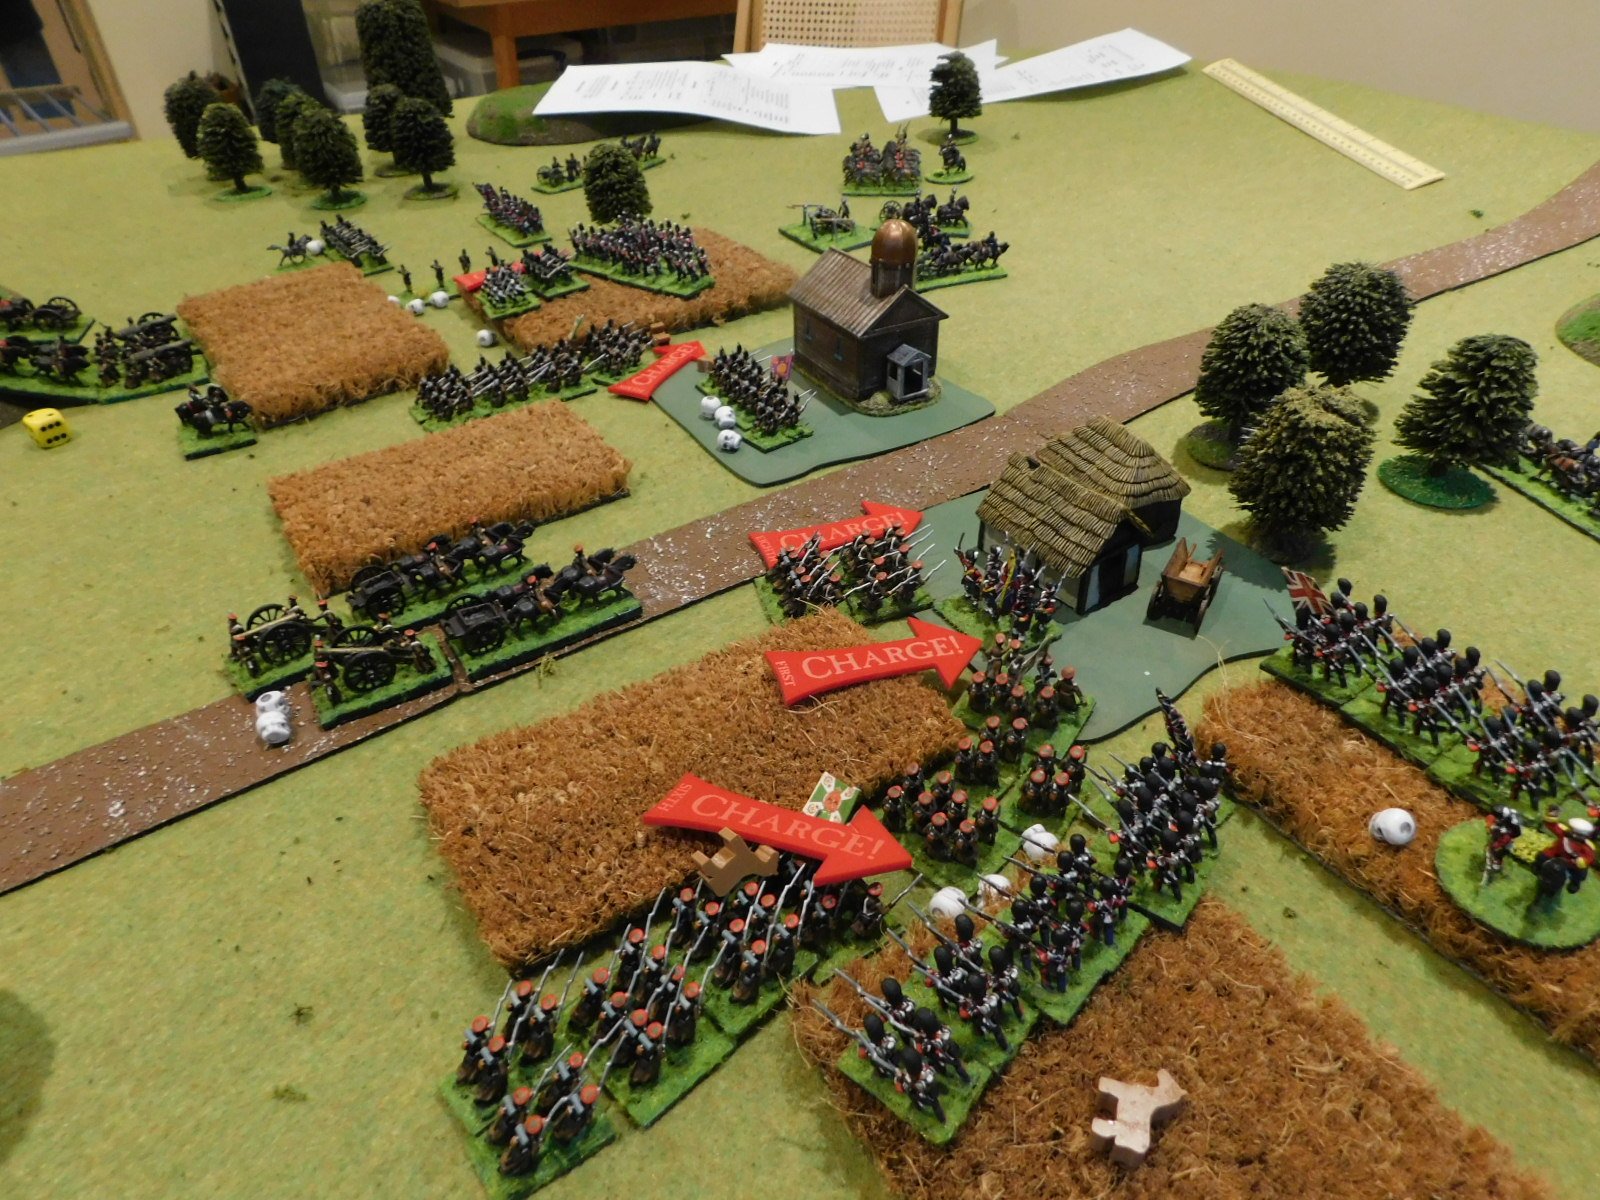
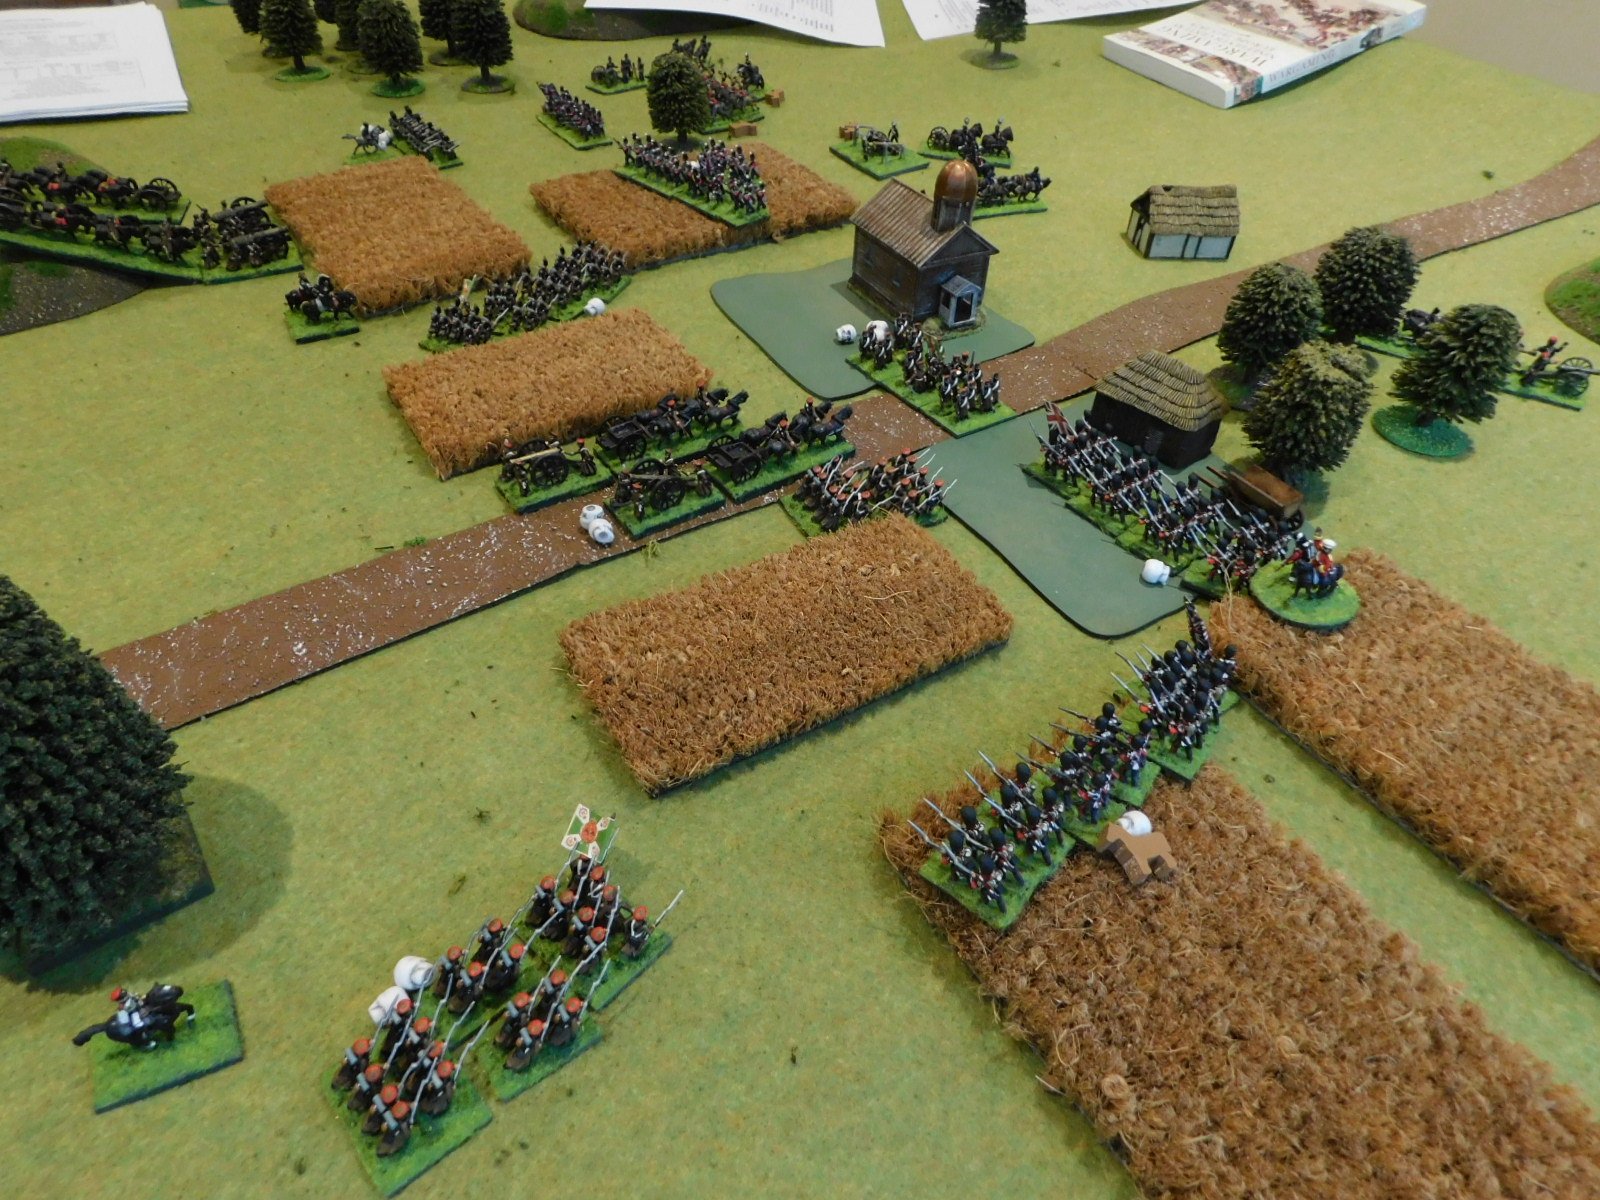
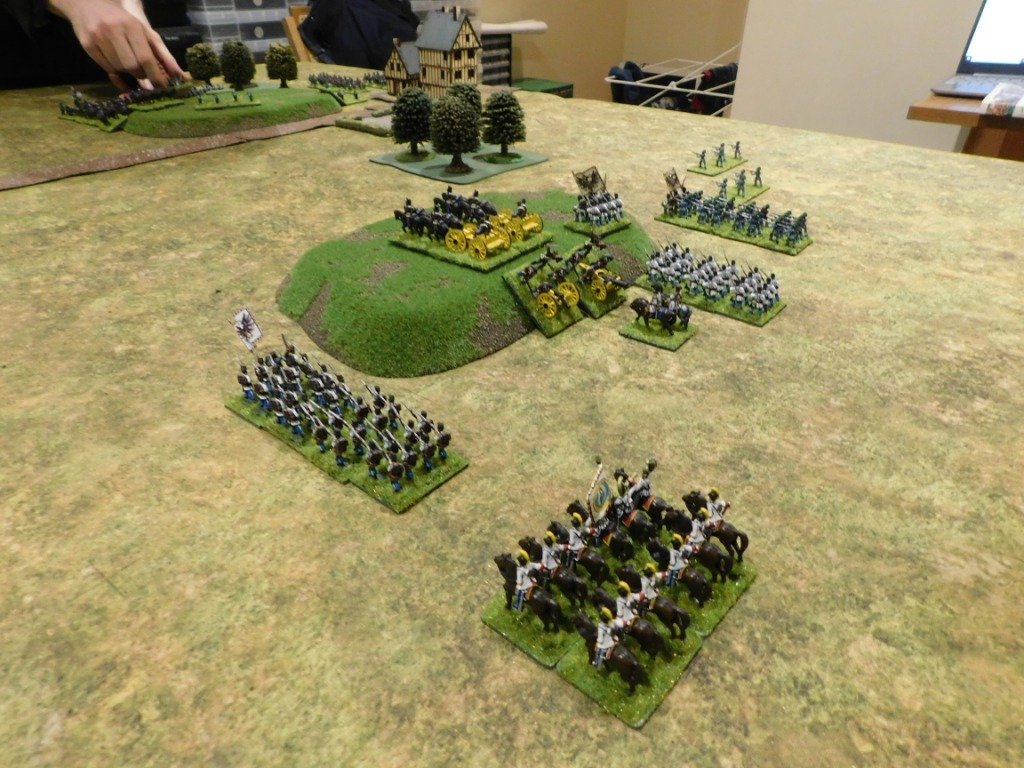
The Austrian were pouring troops onto the battlefield, and lined up ready to begin their assault on Wysokov. Behind them, the Prussian Guards from Wenzelberg were still causing problems, and it took another two Austrian units to finally get rid of them.

This was all taking up too much time: the Prussian column was getting closer!

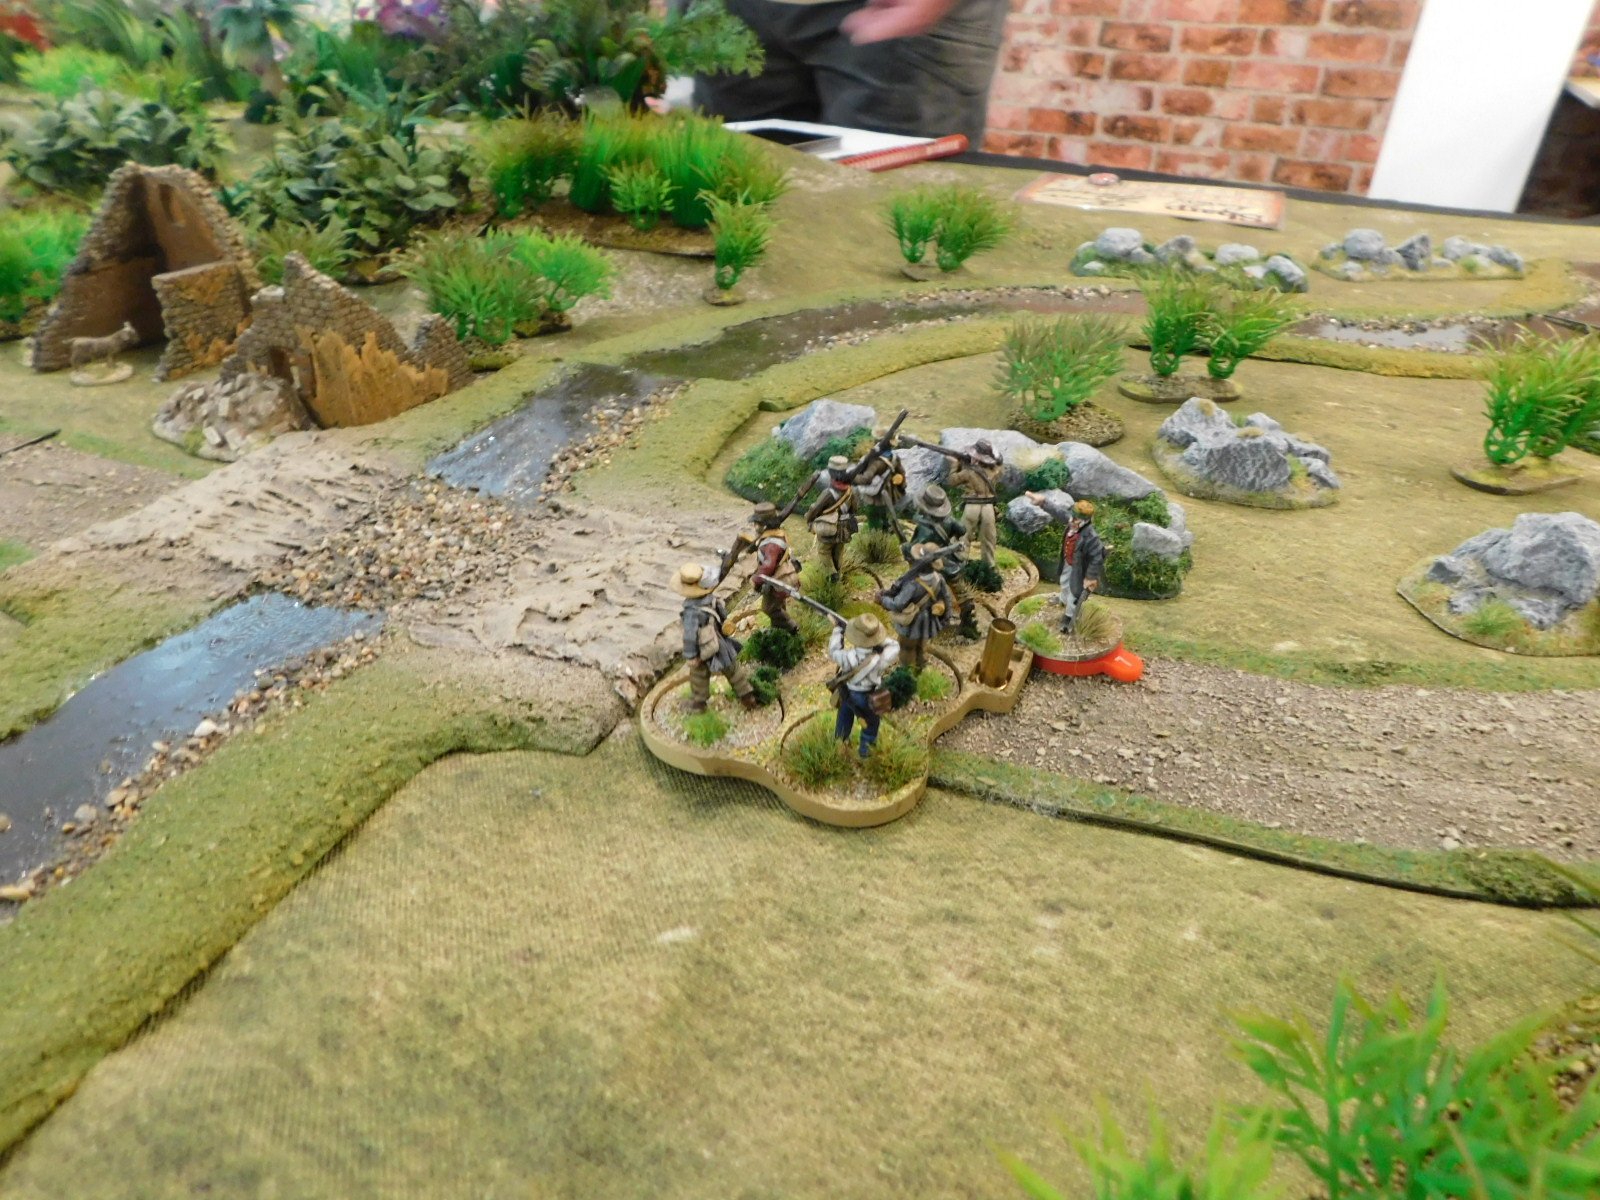
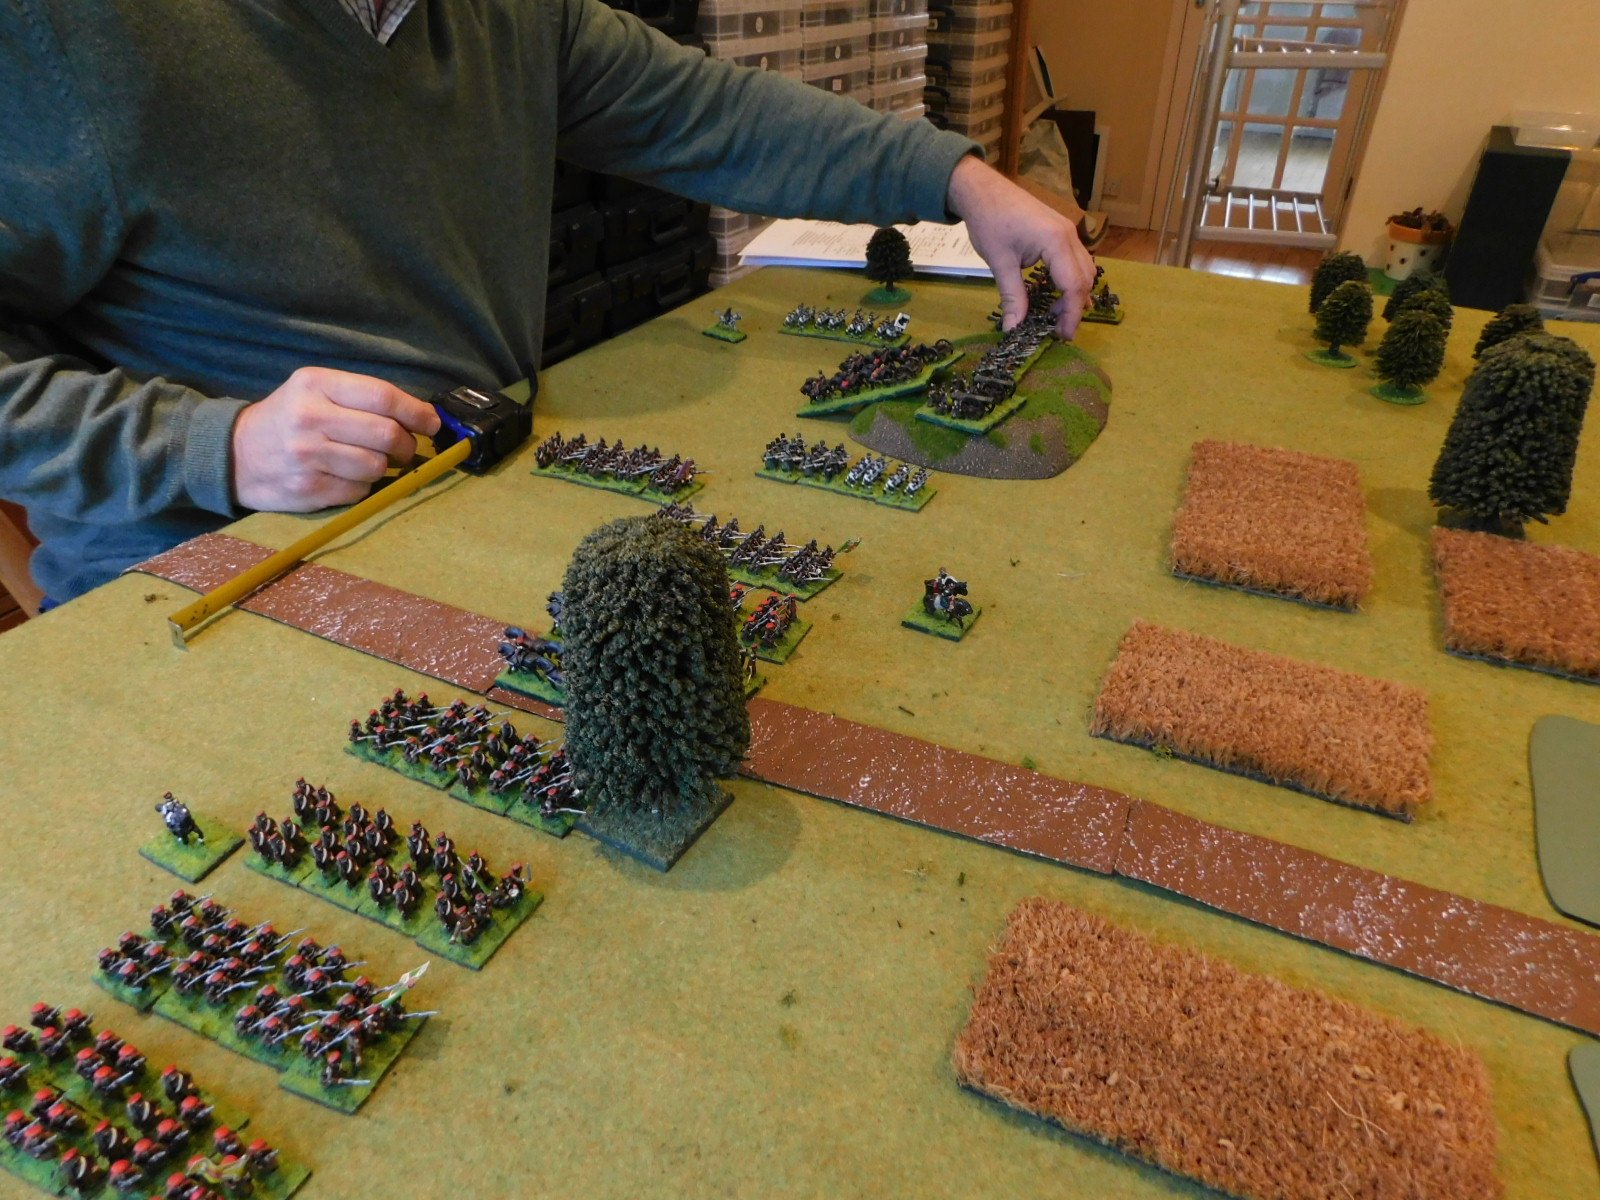
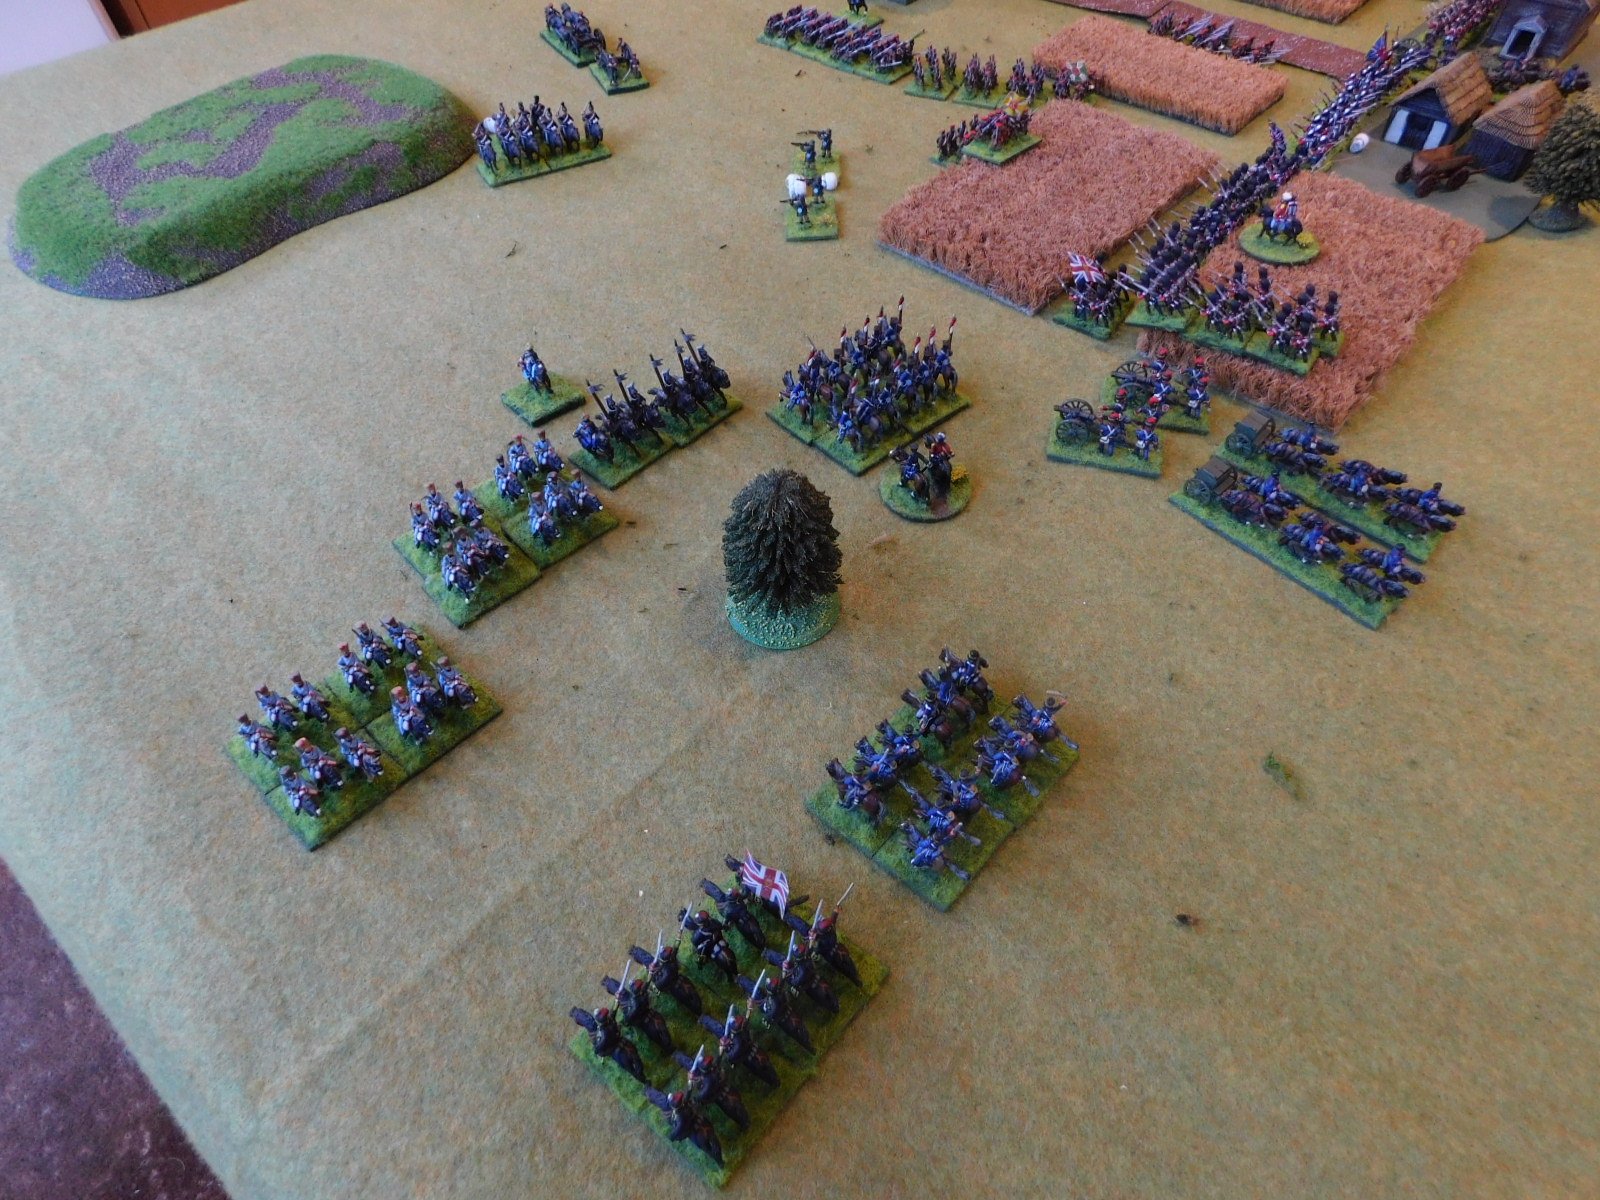
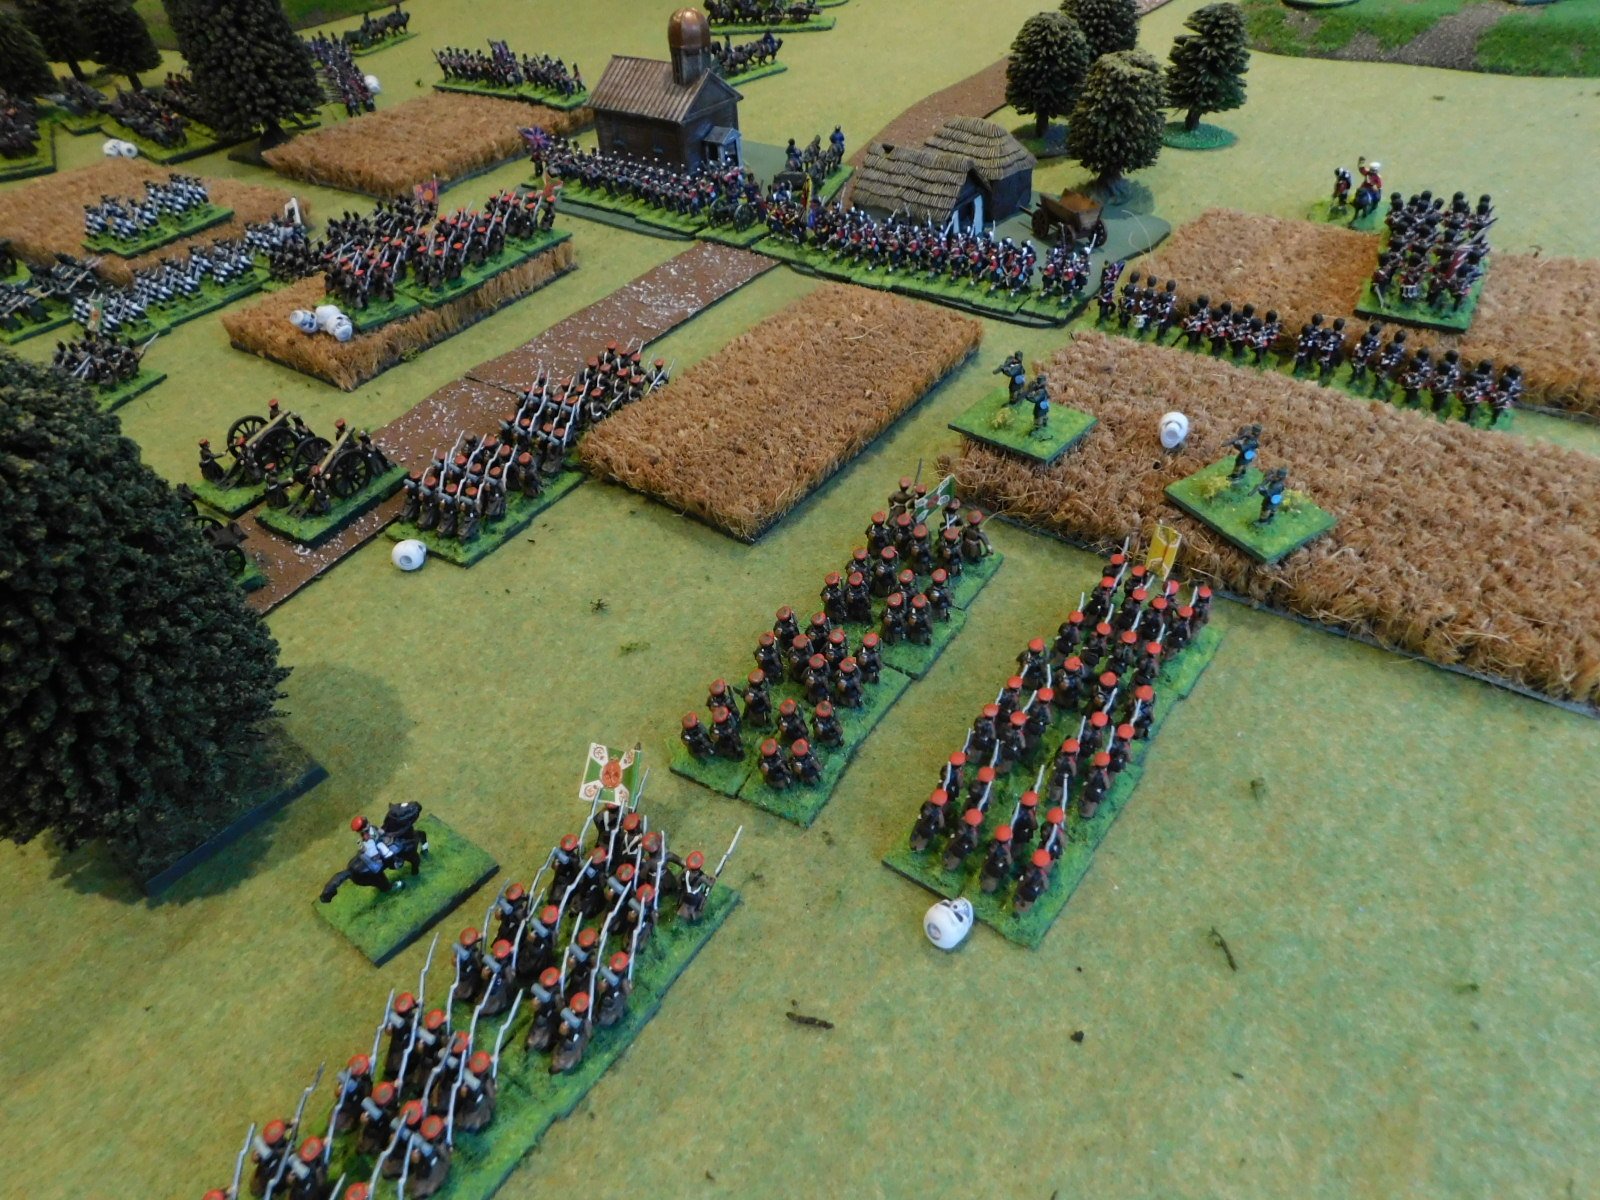
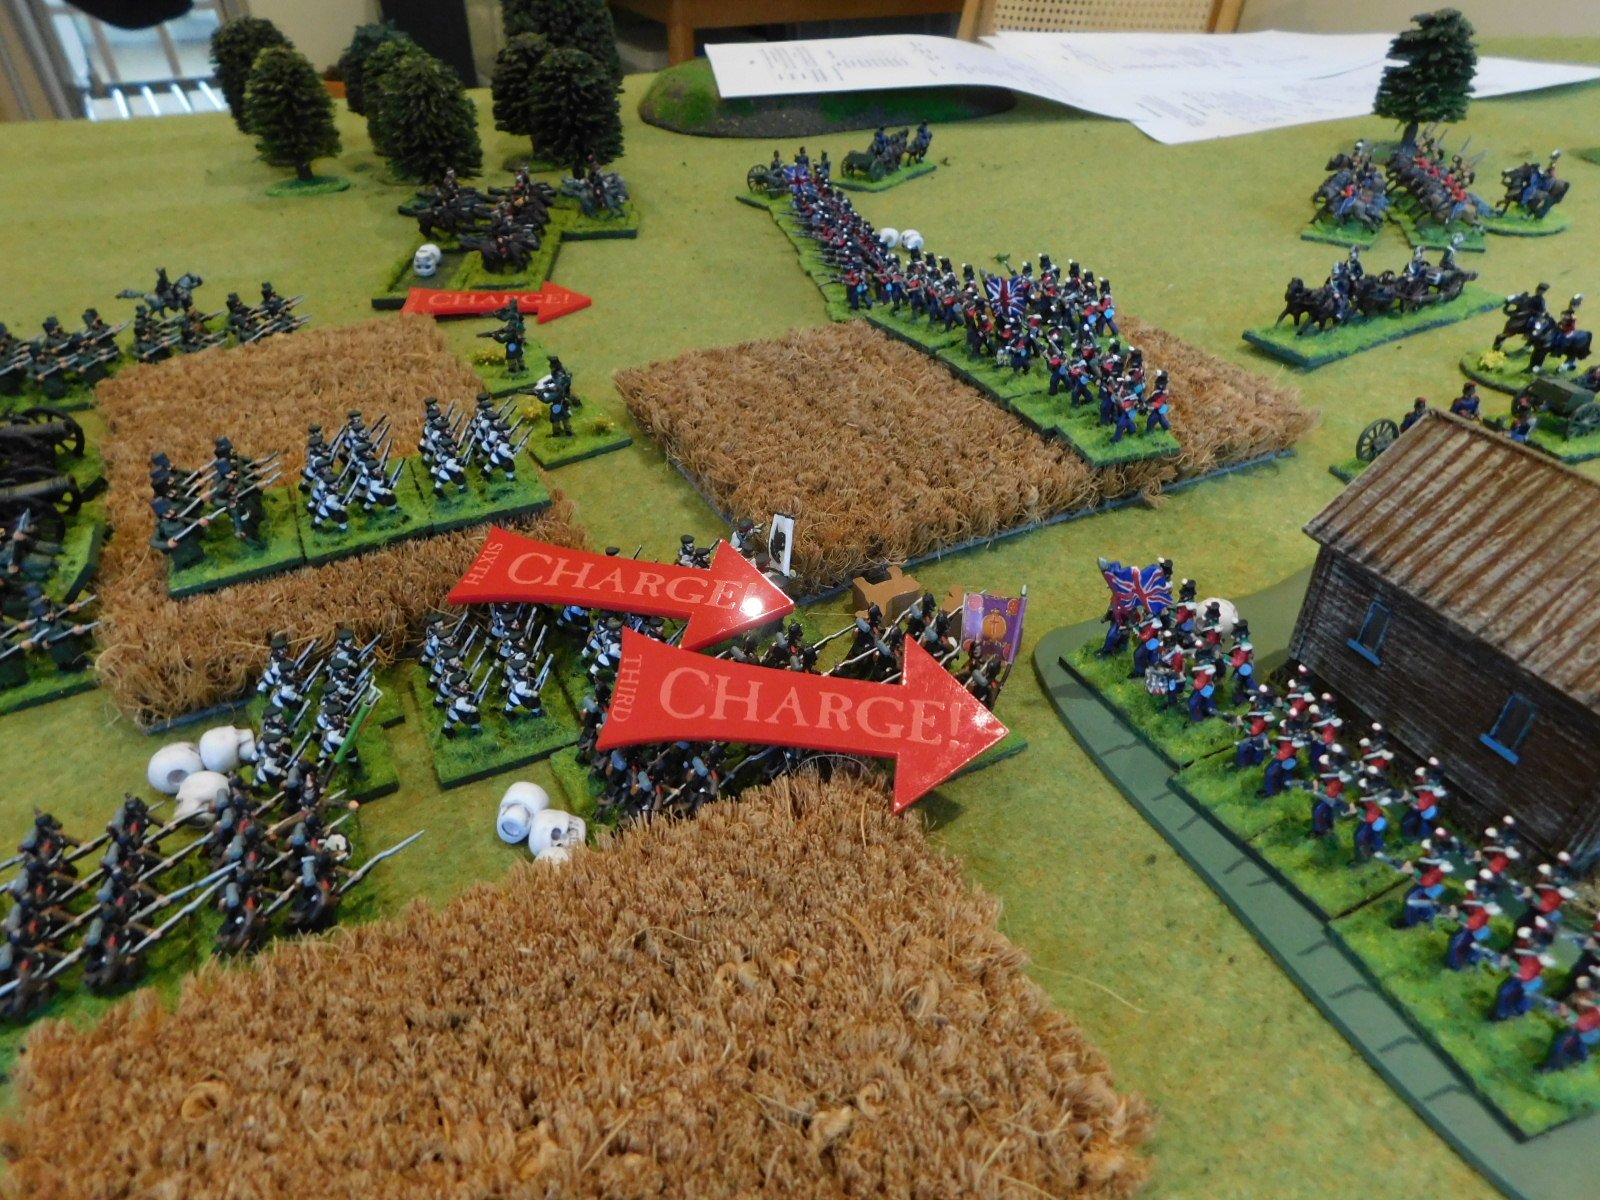
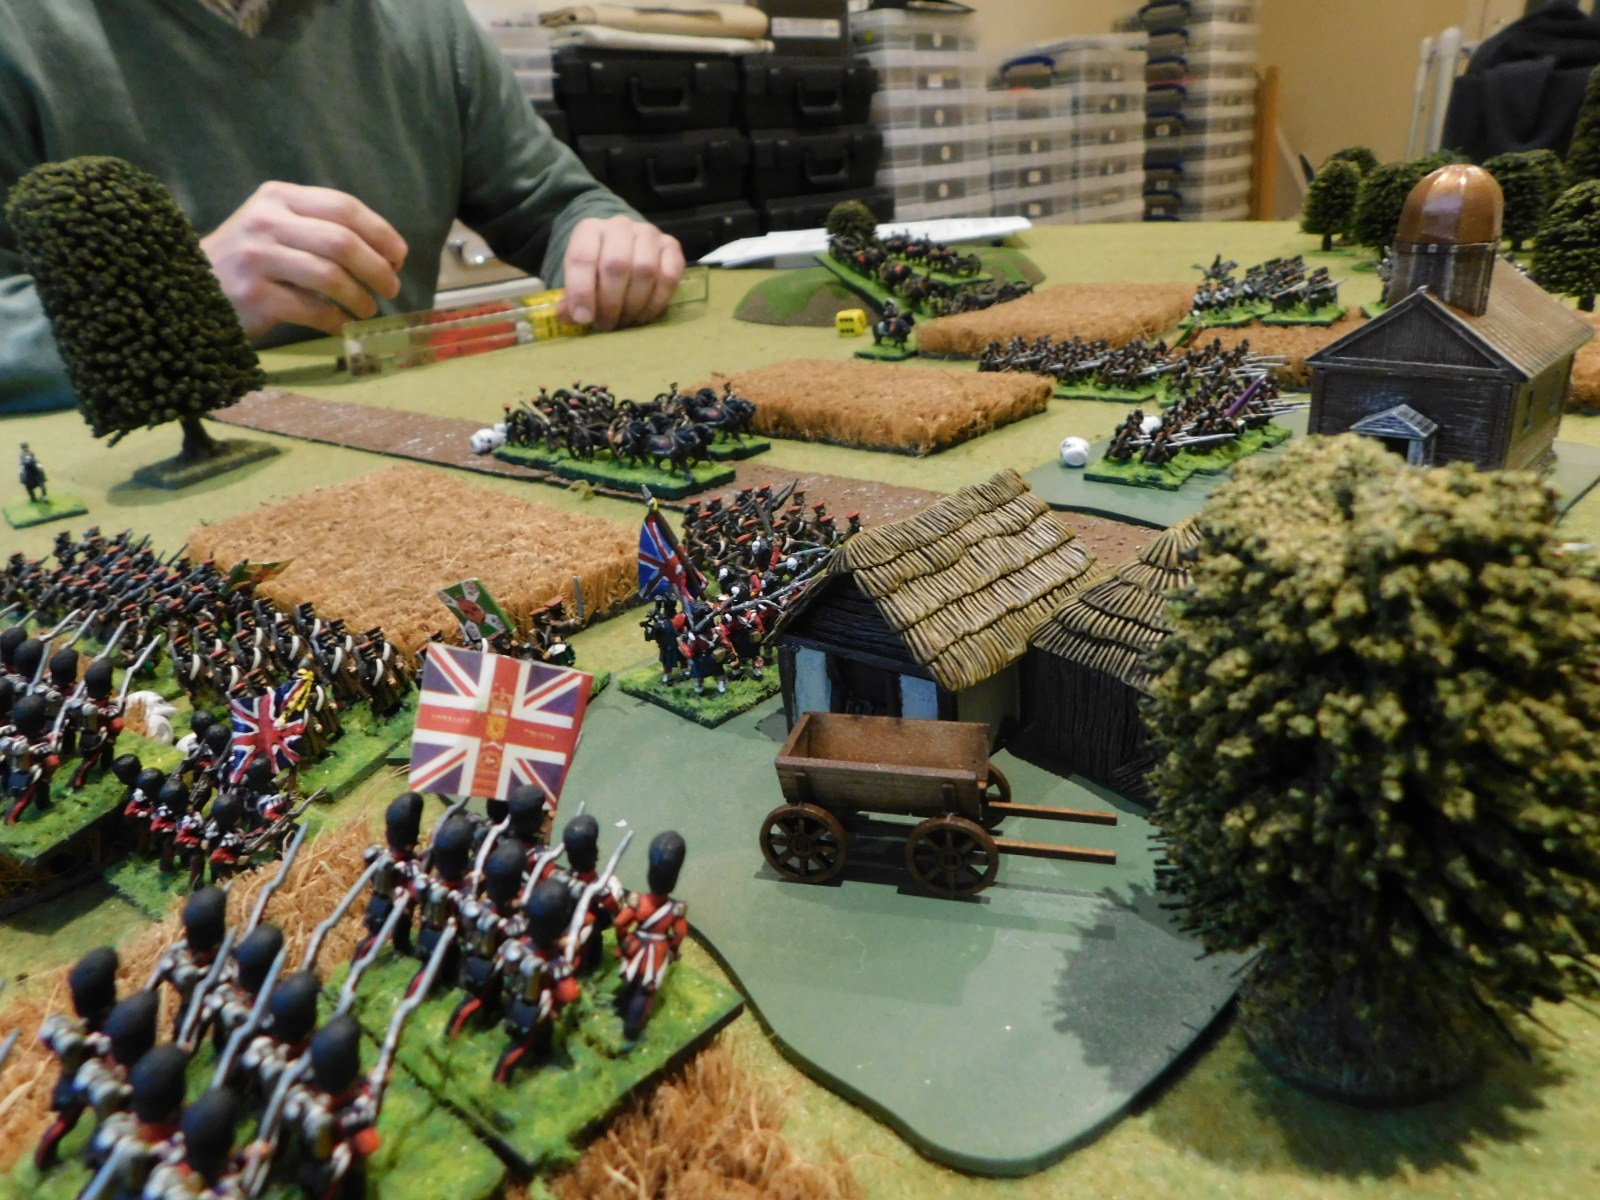
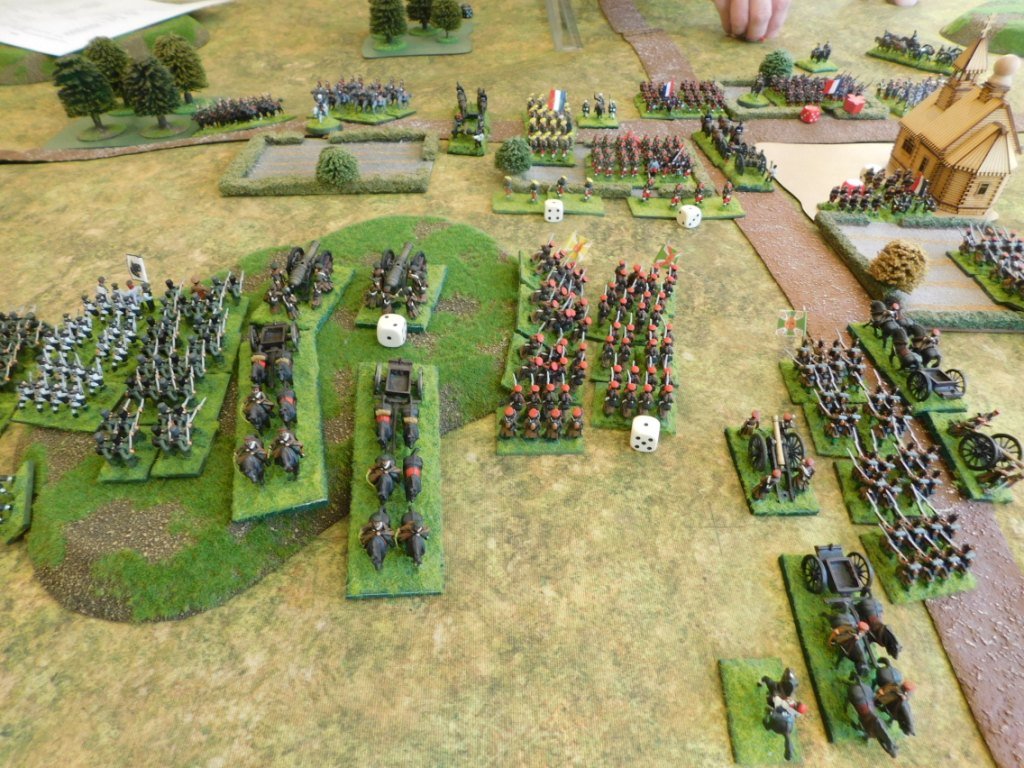
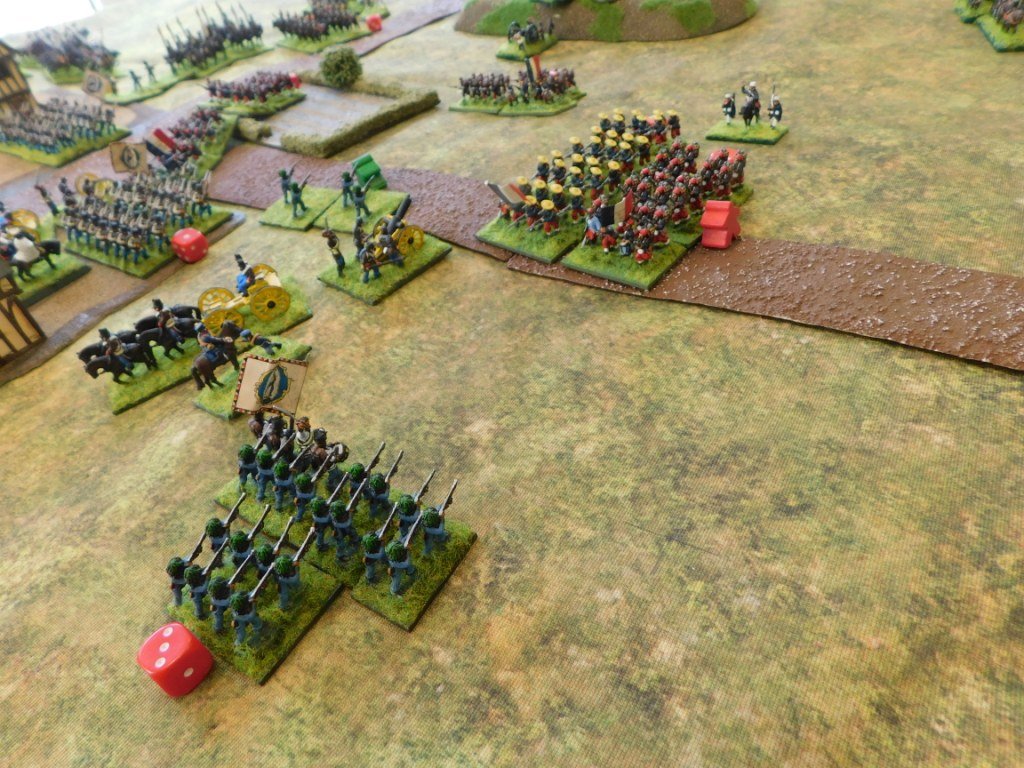
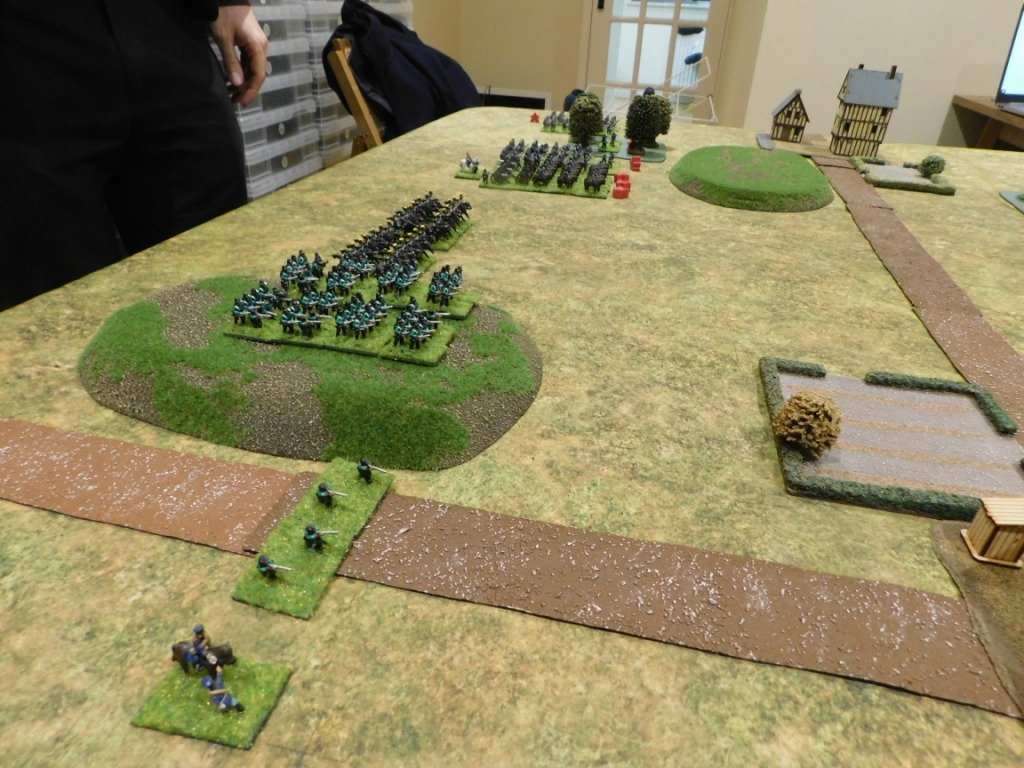
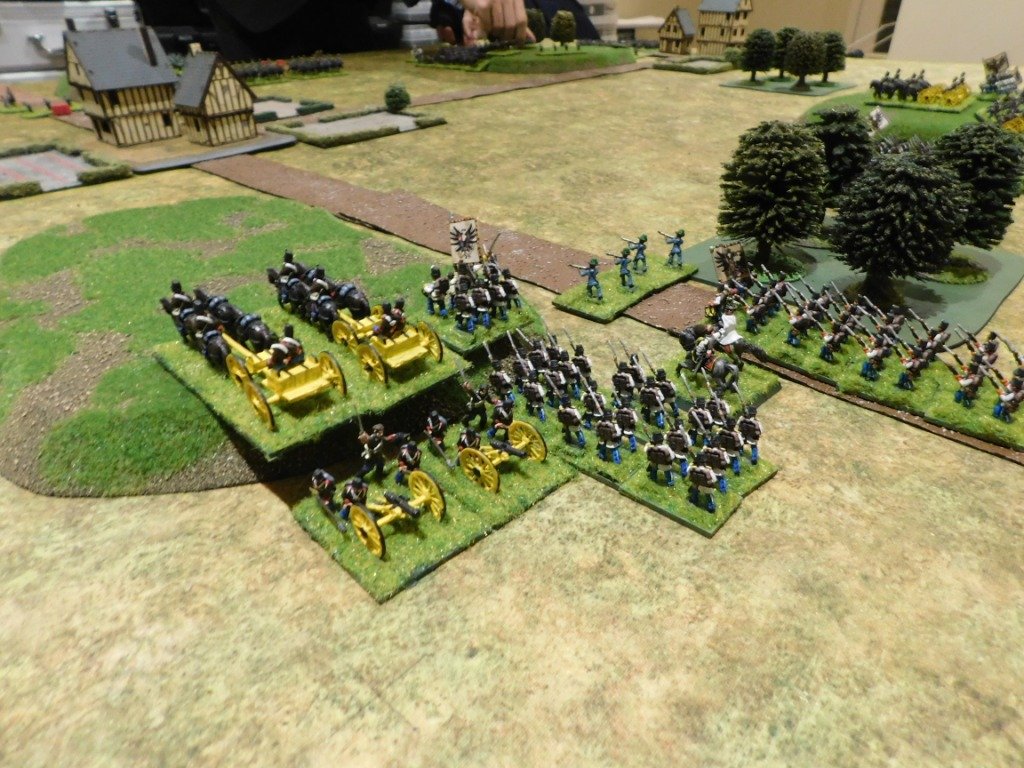
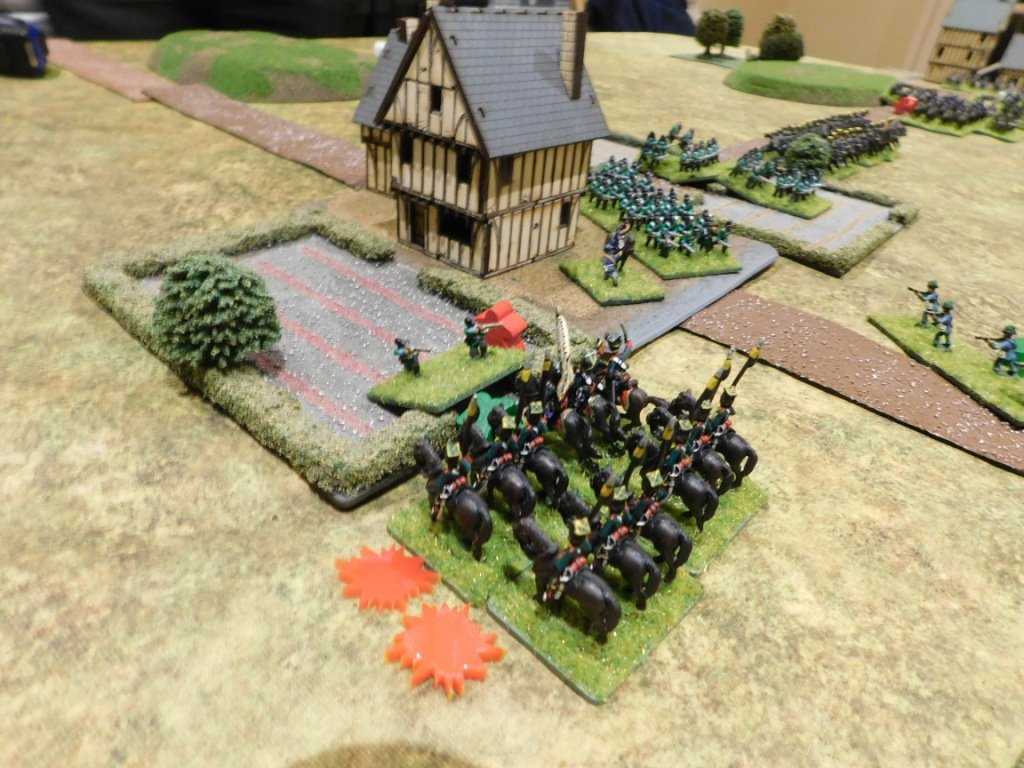
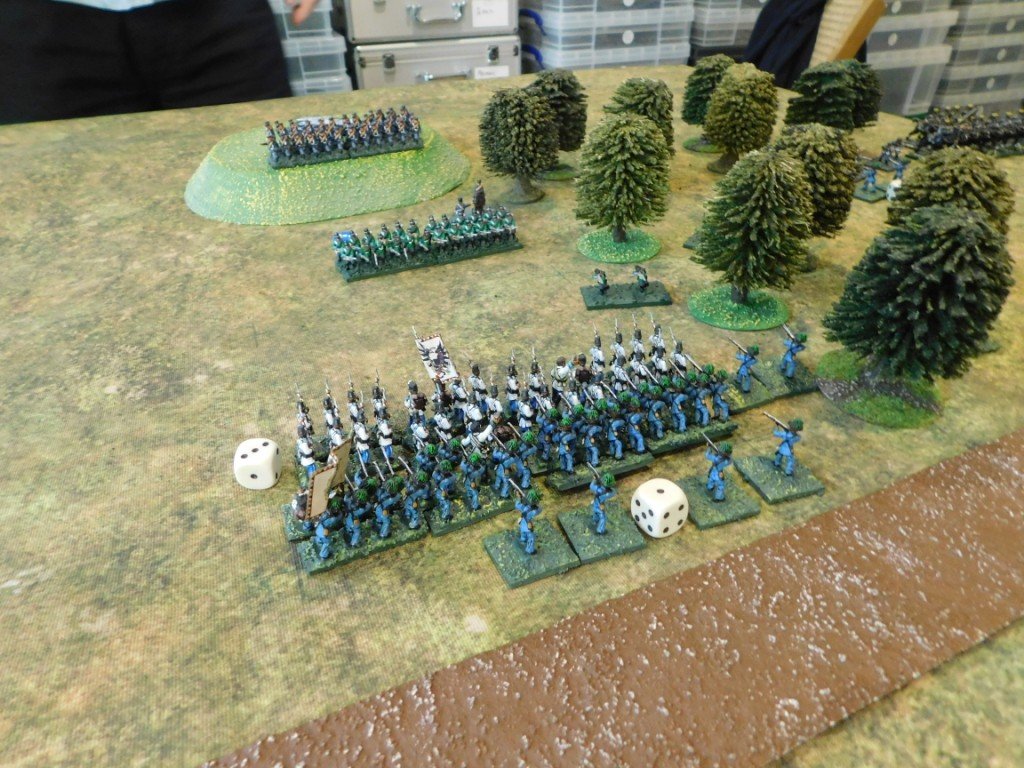
The Prussians in Wenzelberg weren’t waiting for the Austrian hammer blow to fall: taking advantage of a pause in the Austrian advance (the Austrians were “exhausted” for three turns i.e, couldn’t charge, and moved and fired at half effect) they advanced out of the town, formed line, and began blasting the advancing Austrian columns with fire from their breechloaders.

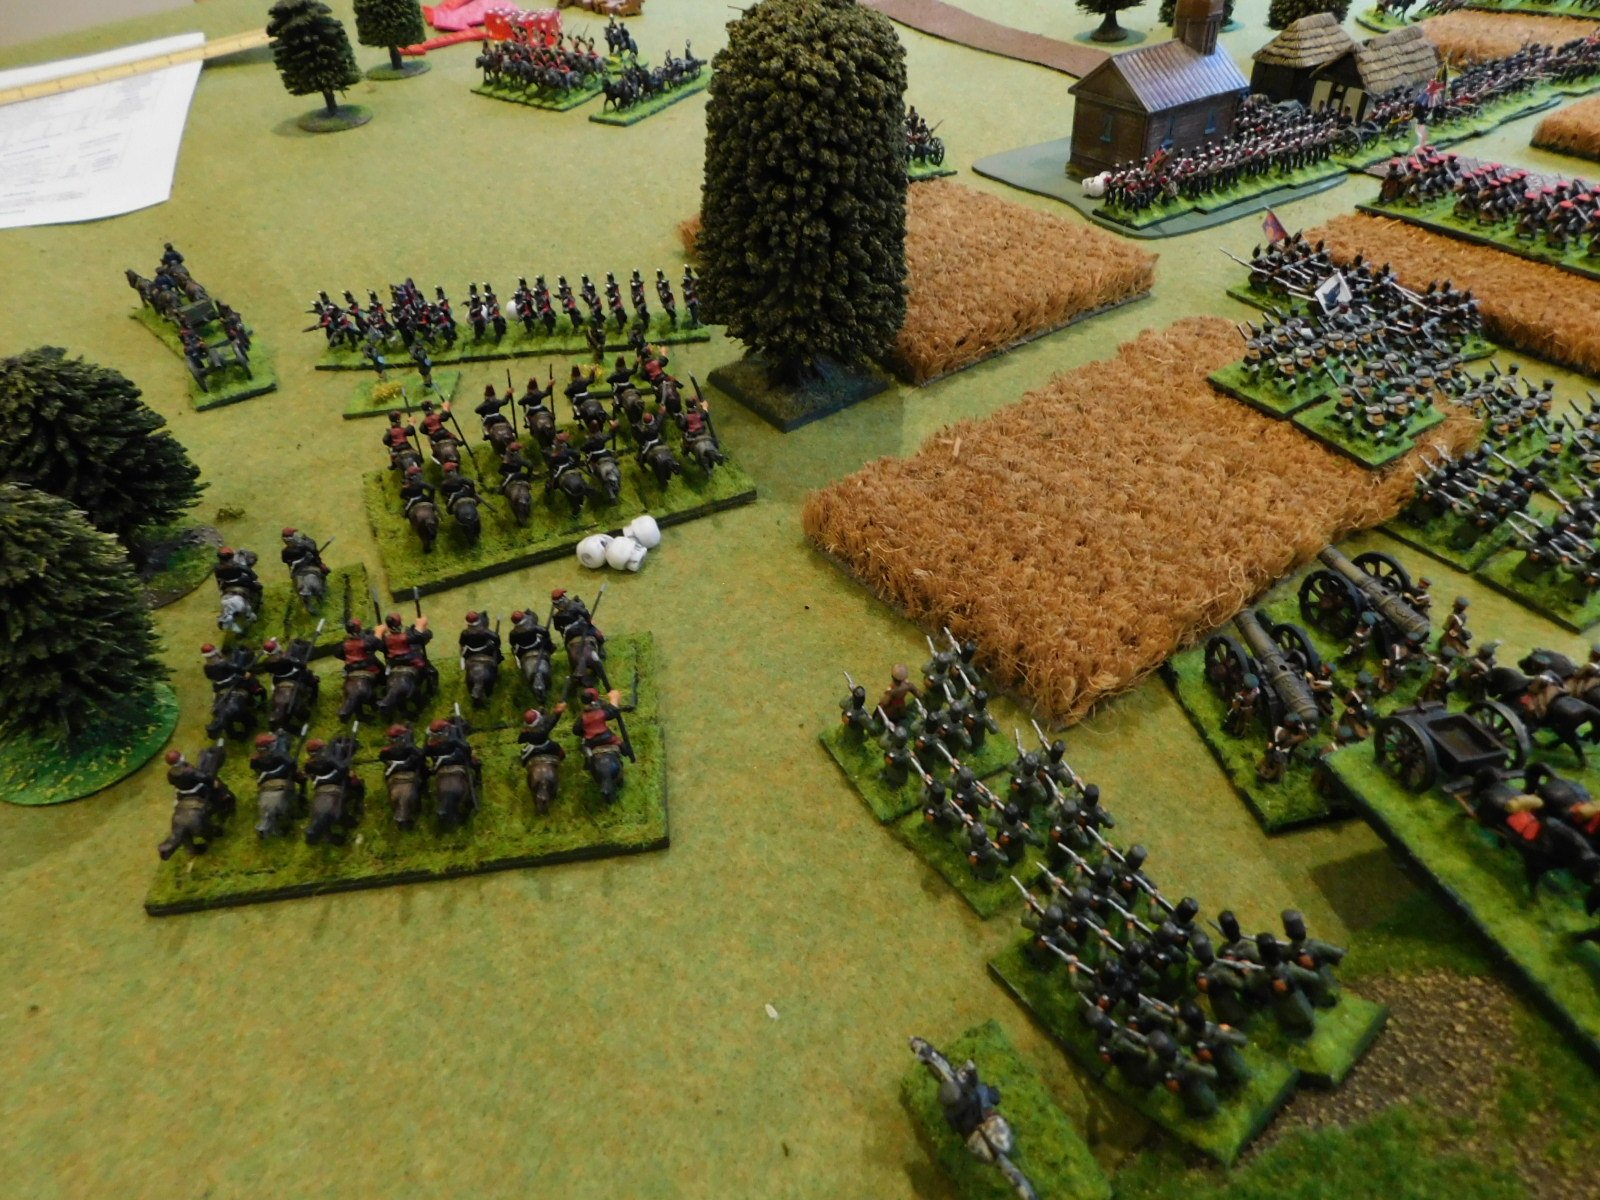
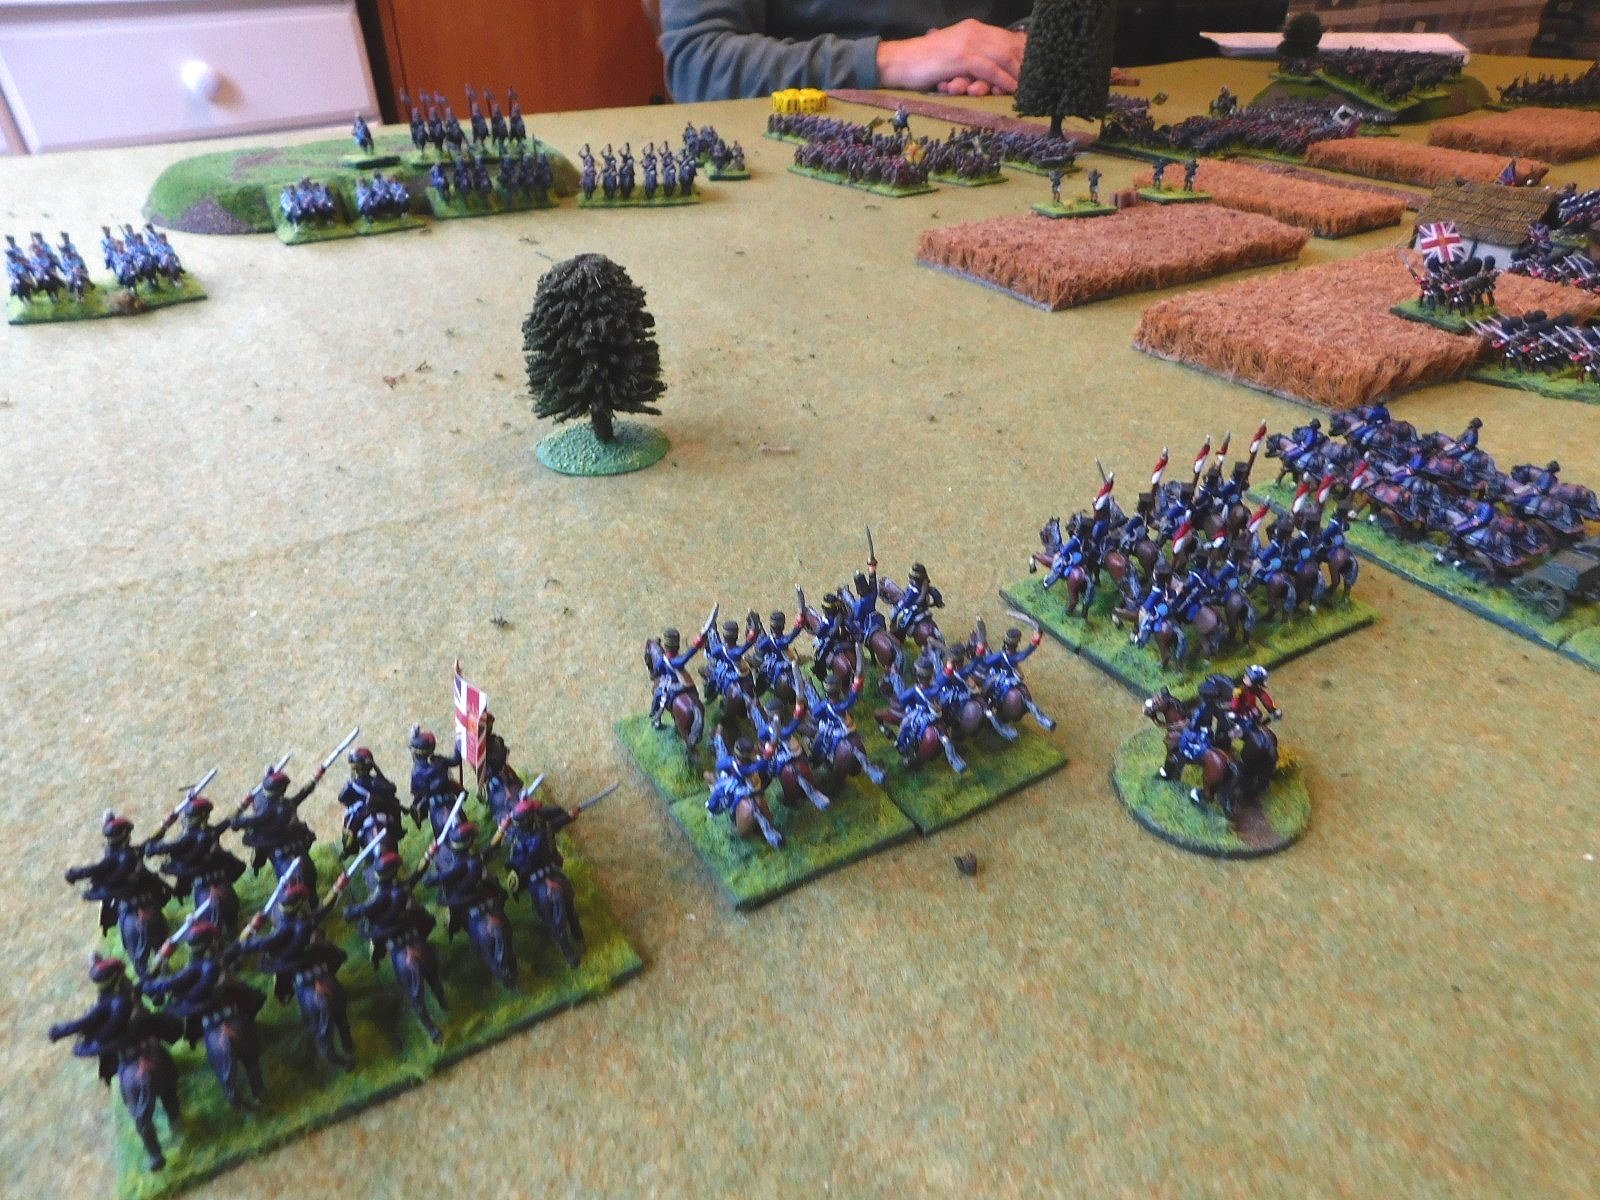
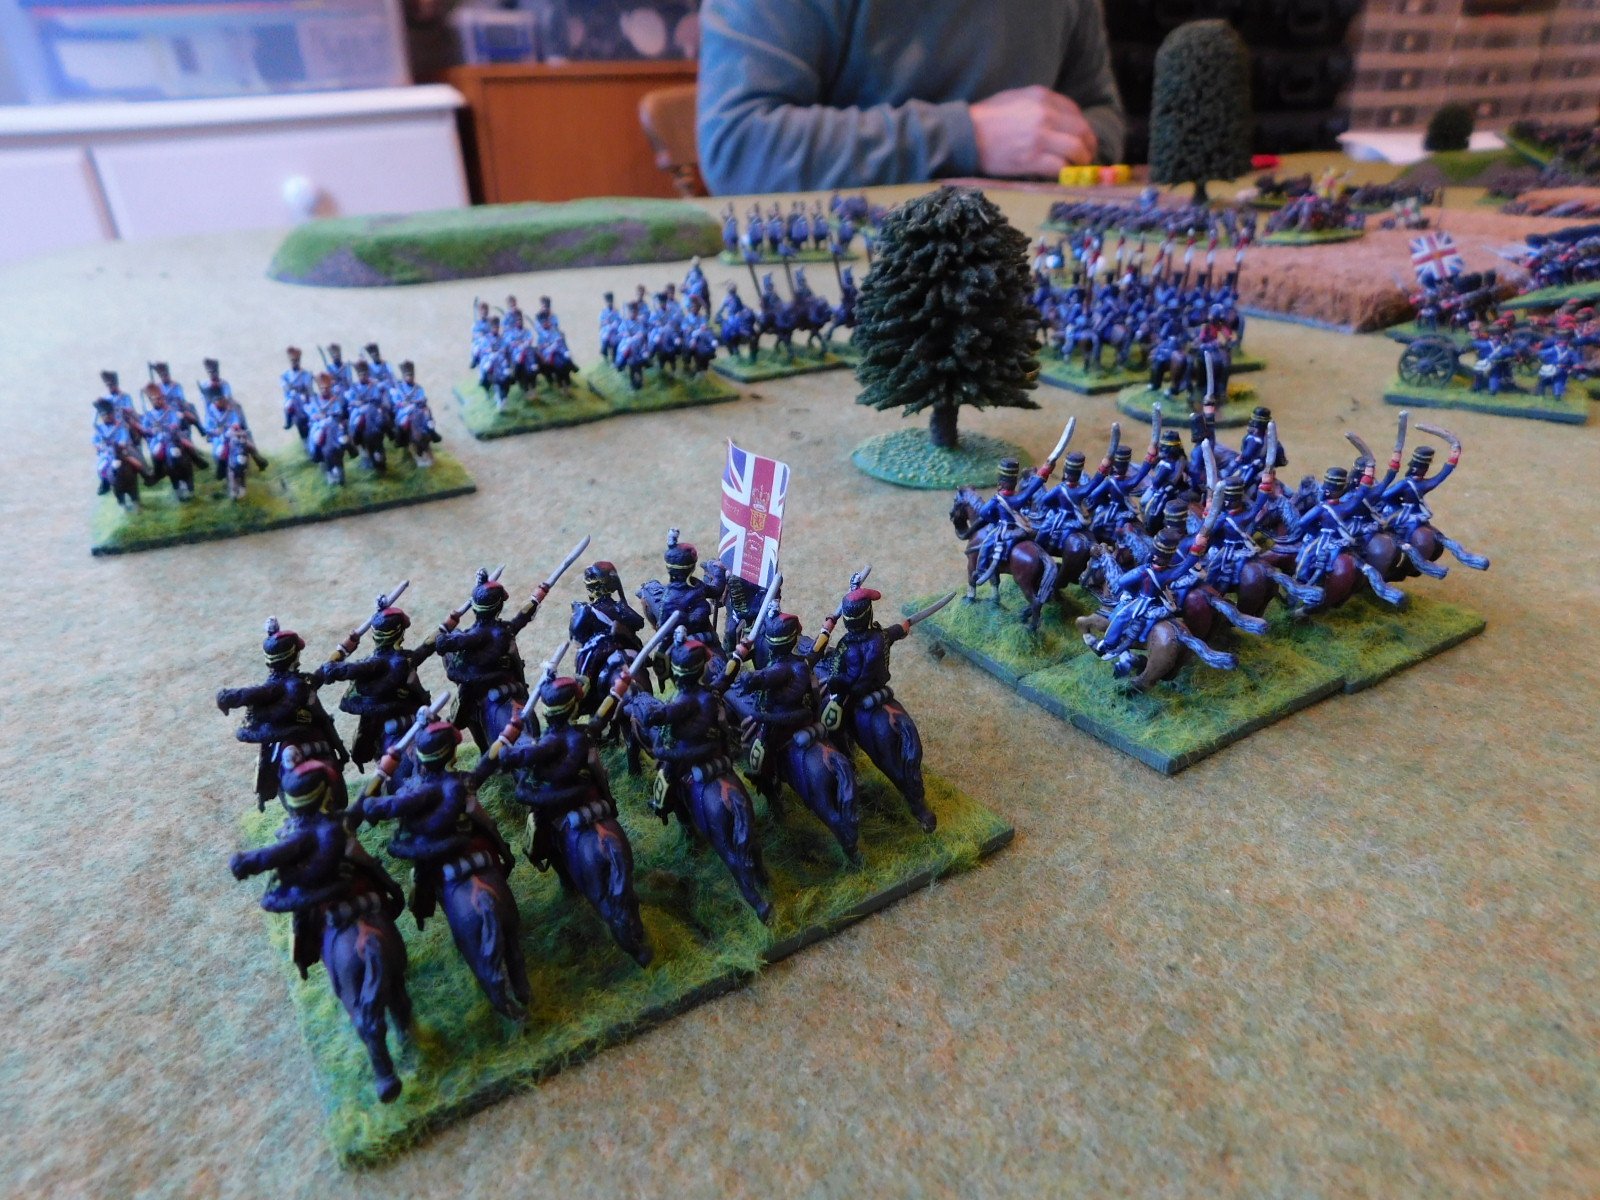
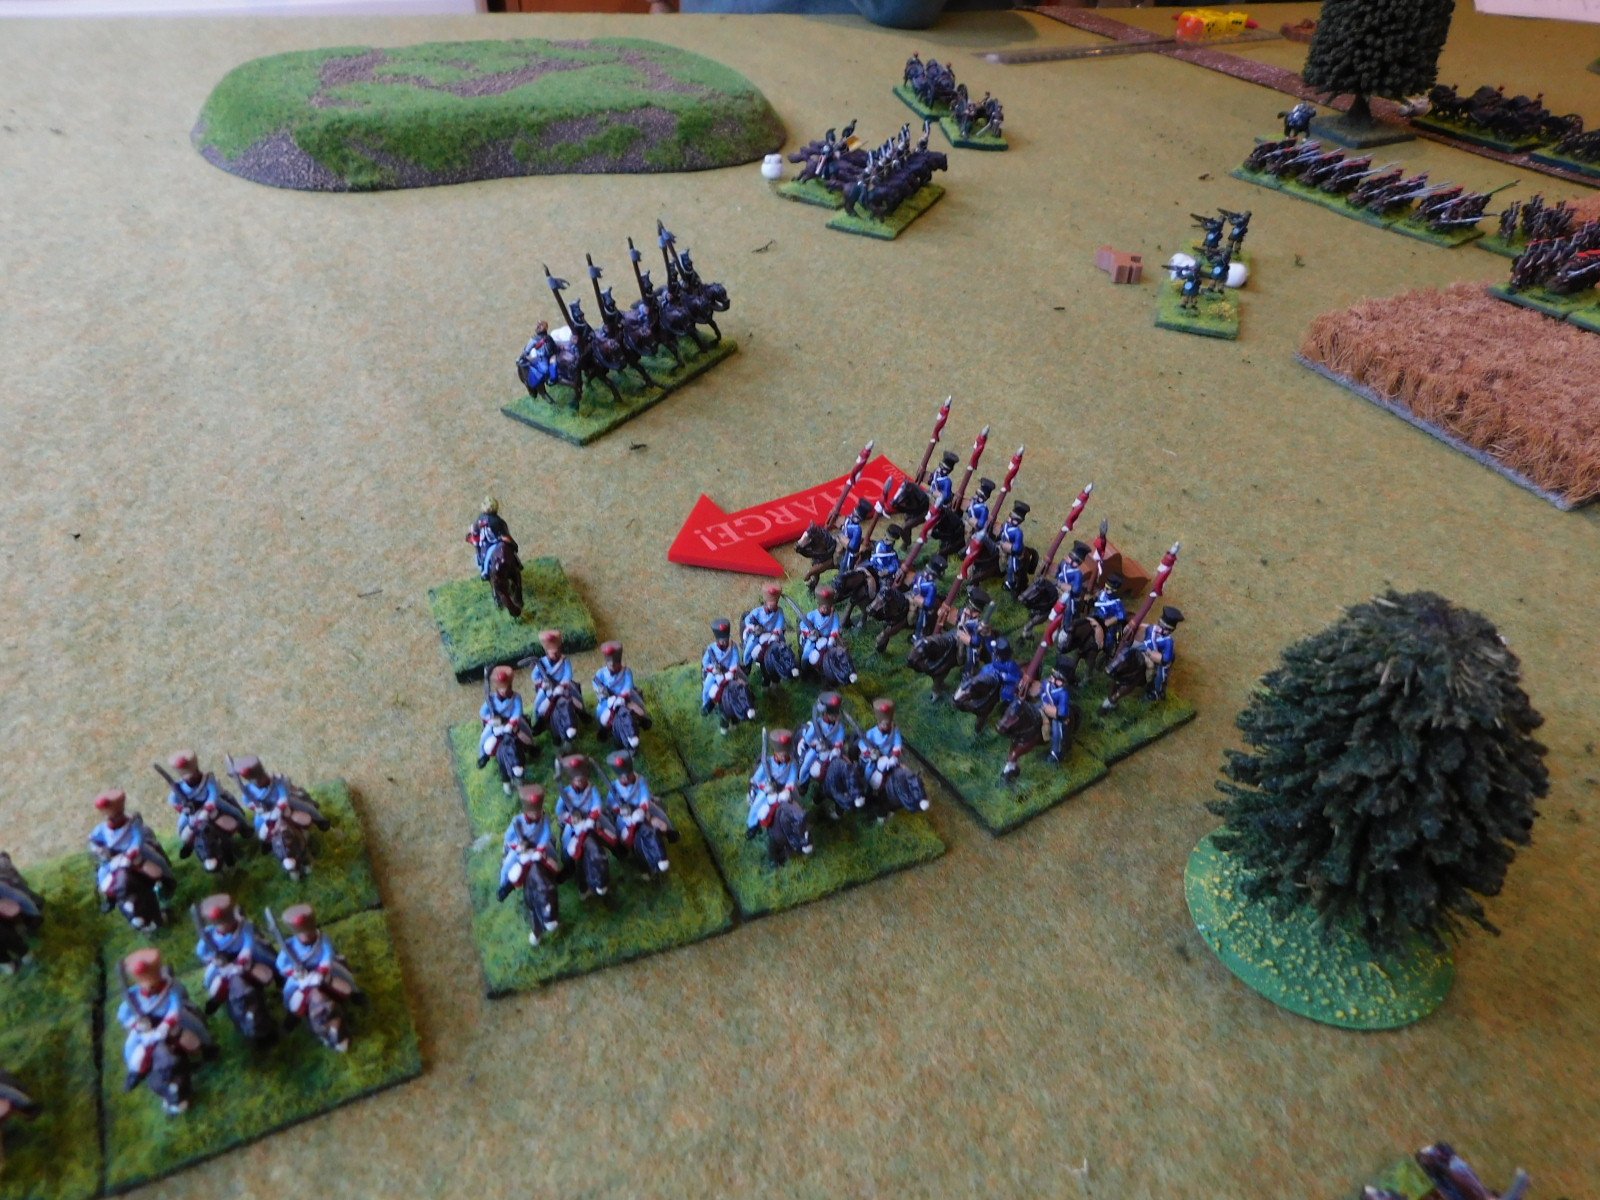
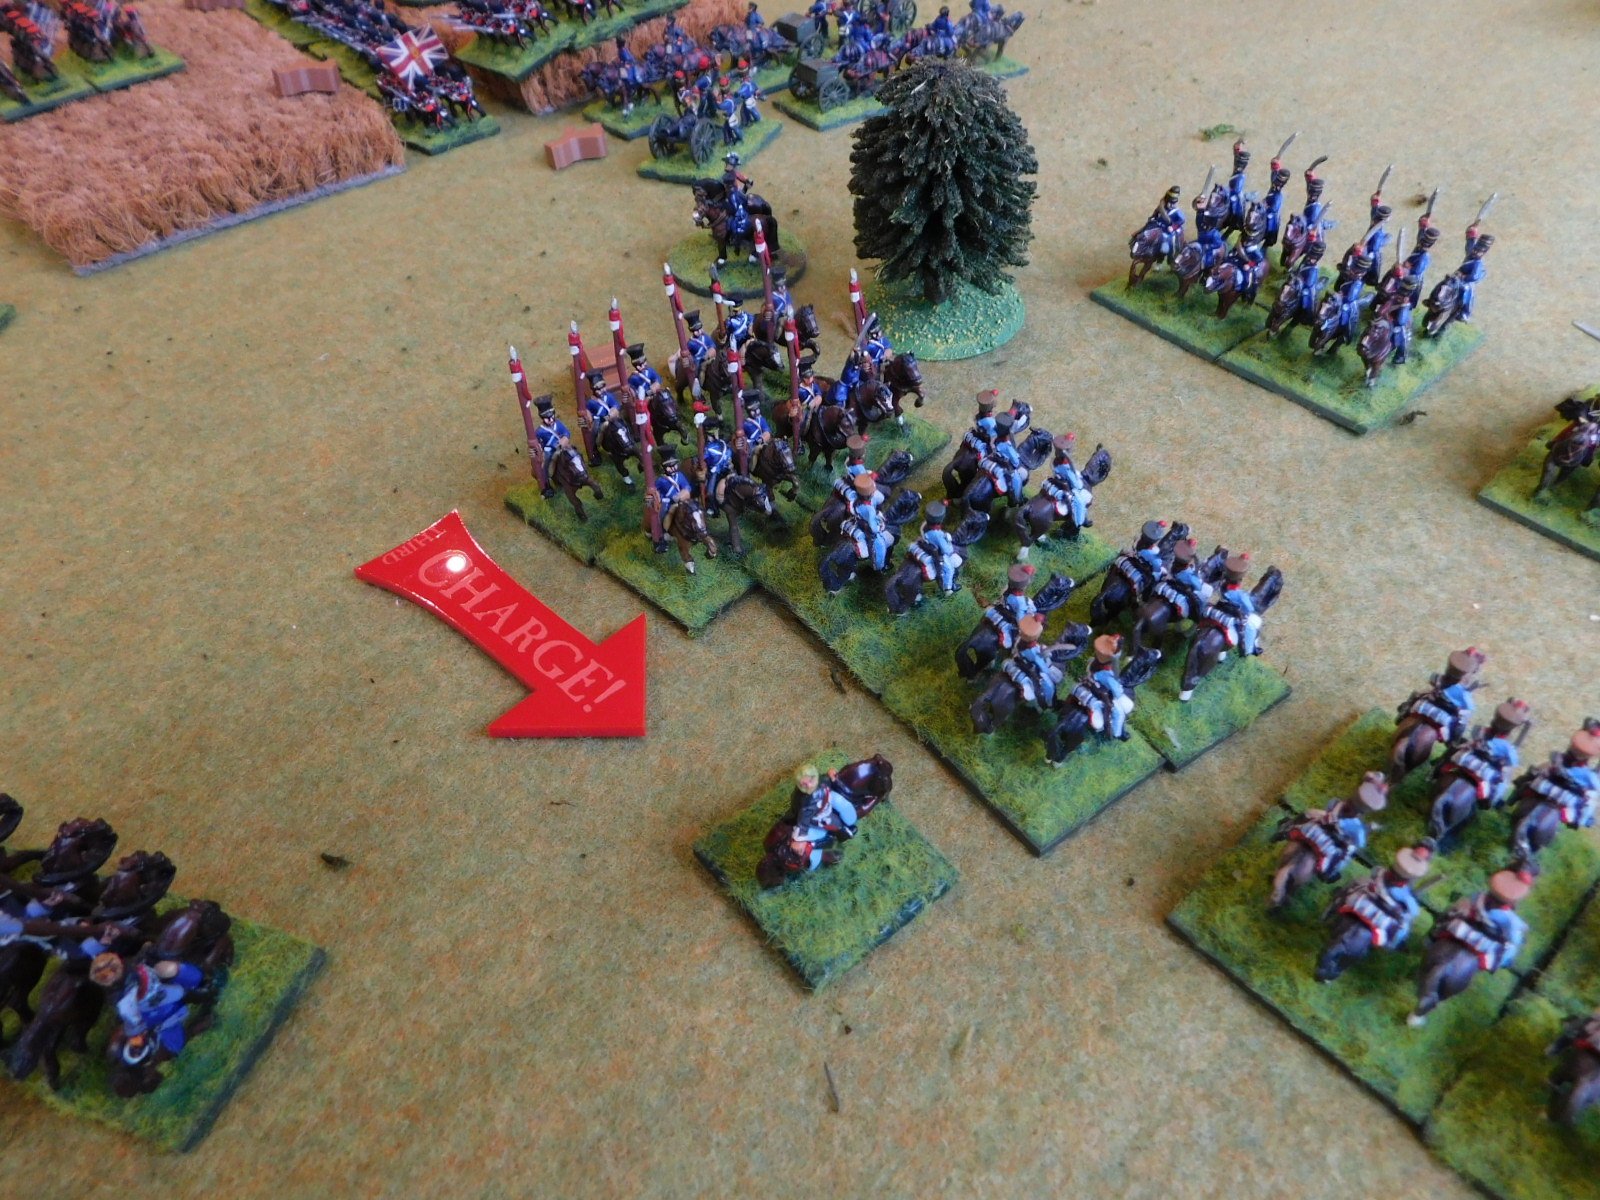
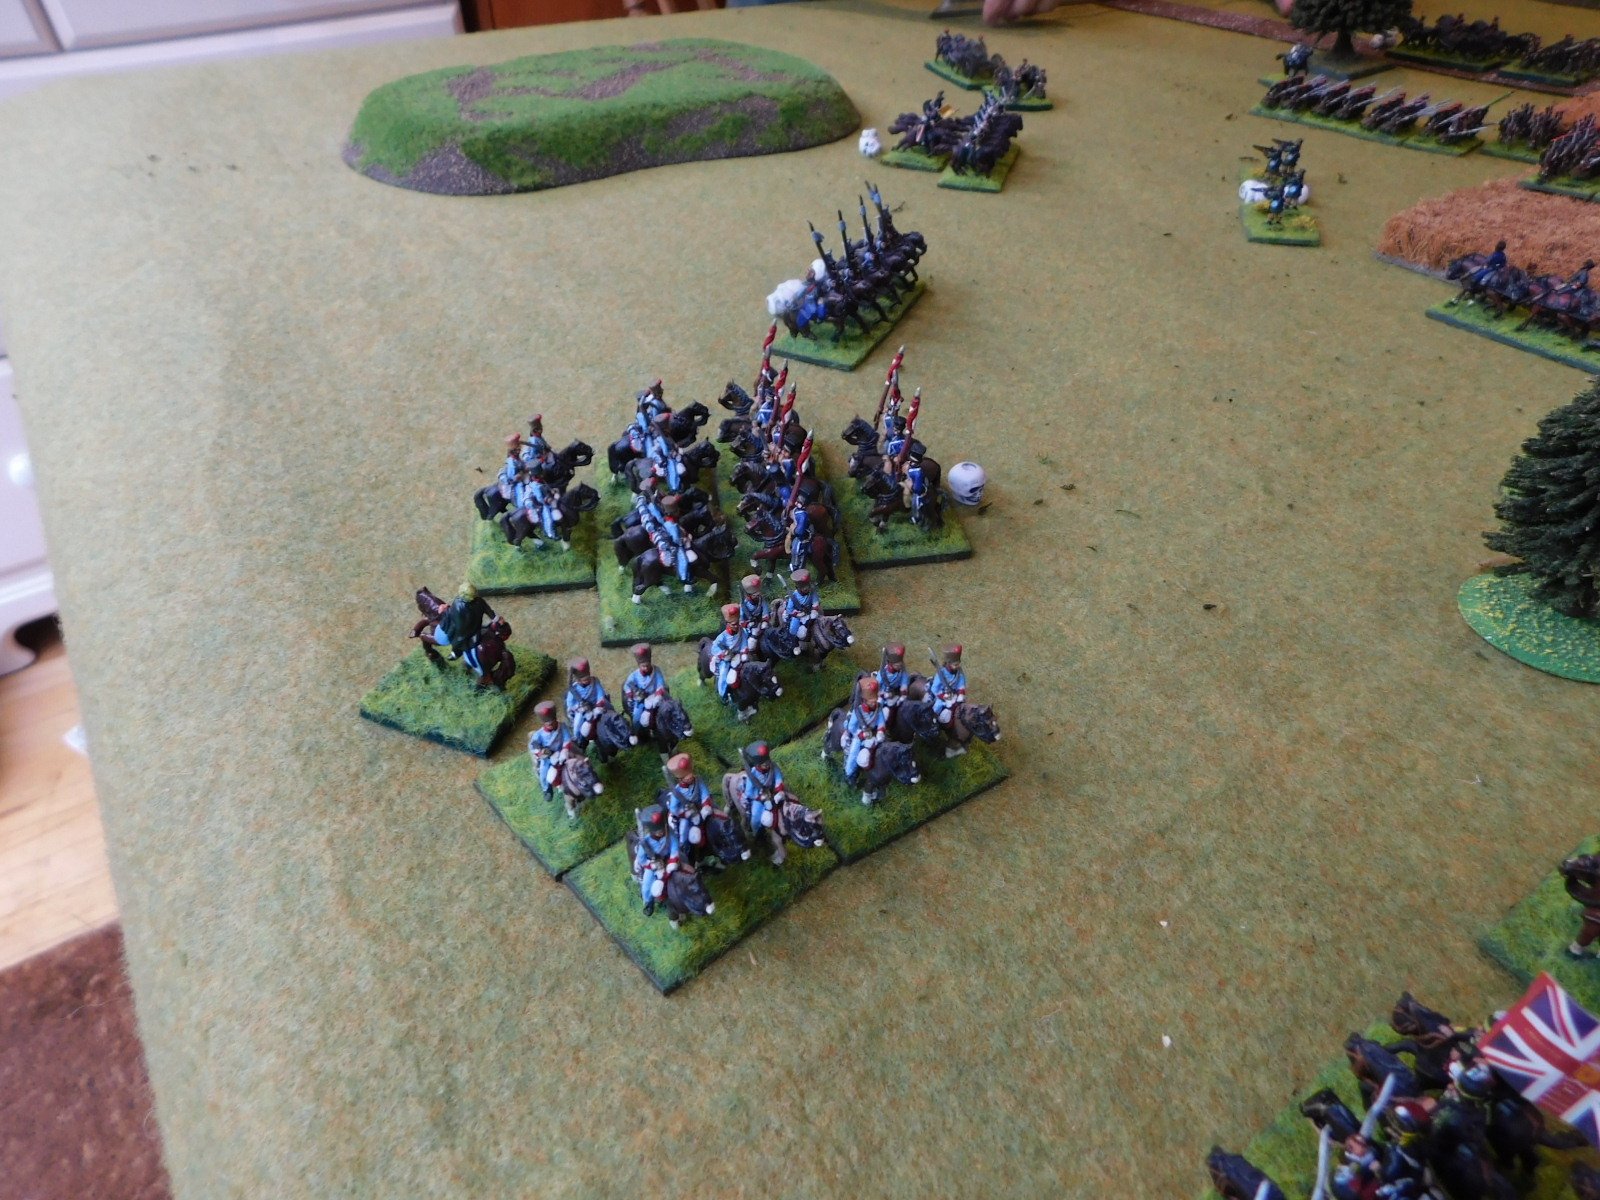
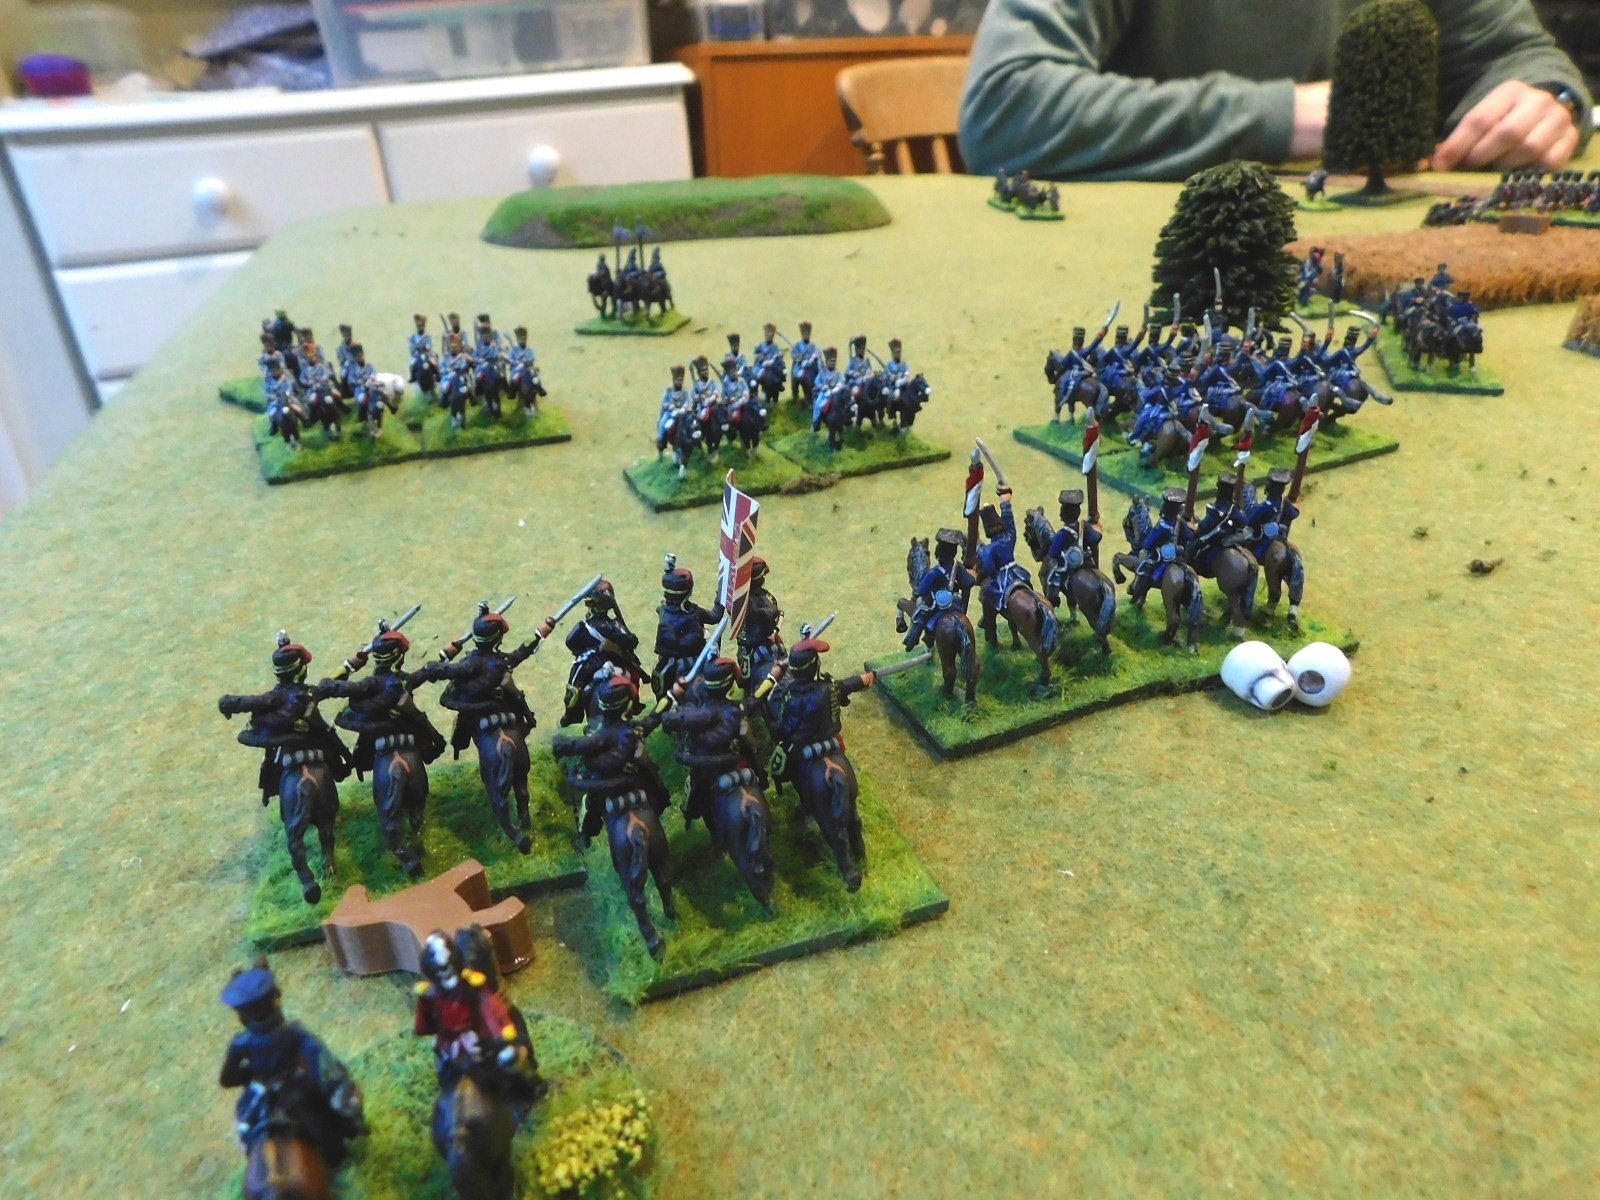
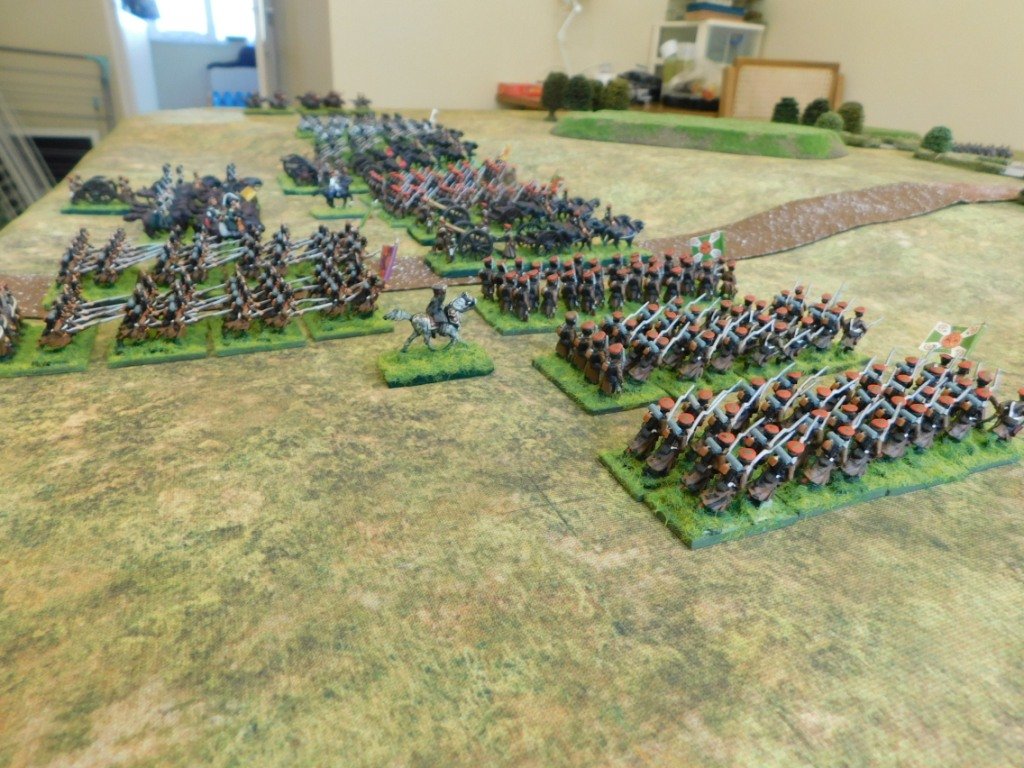
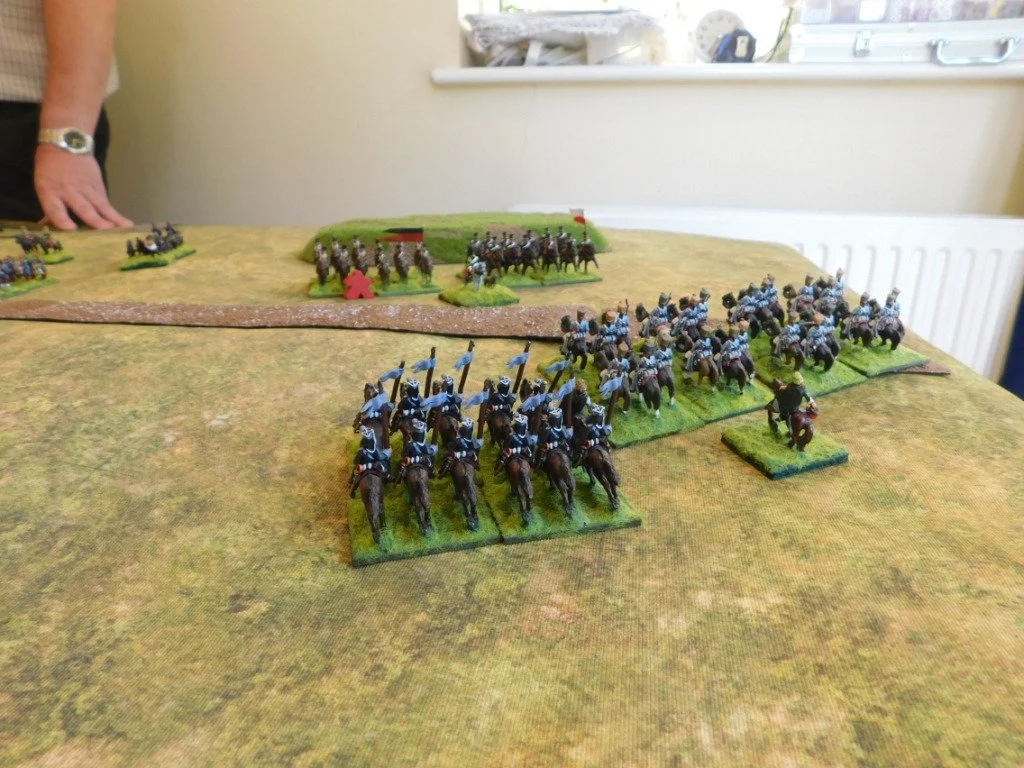
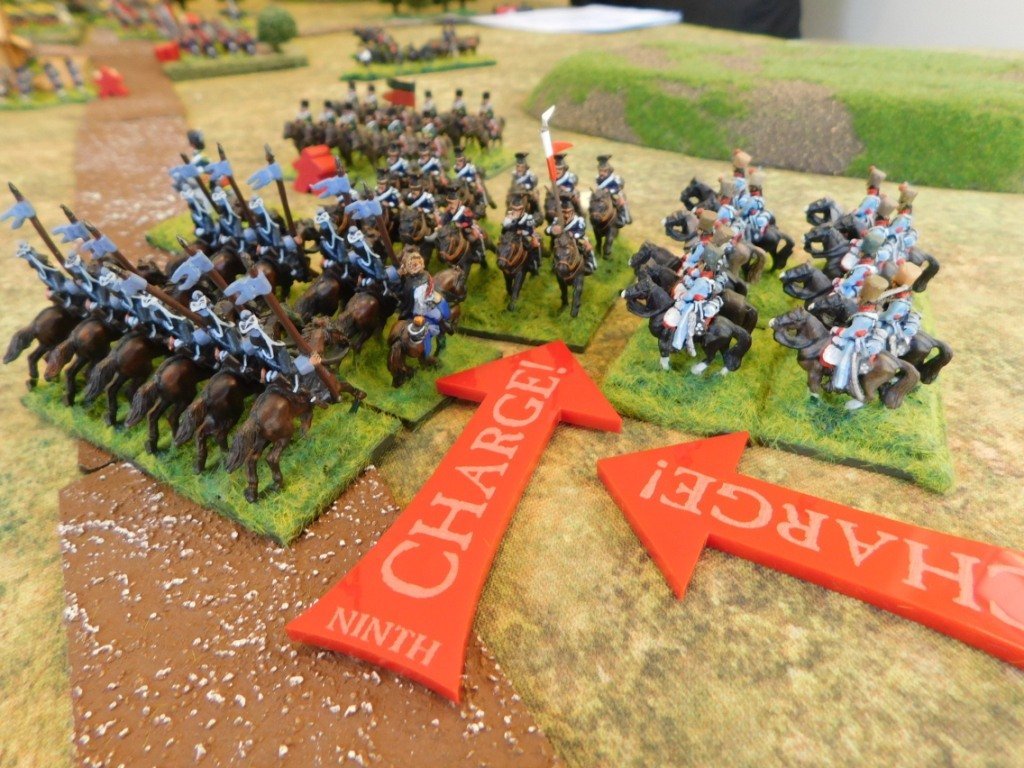
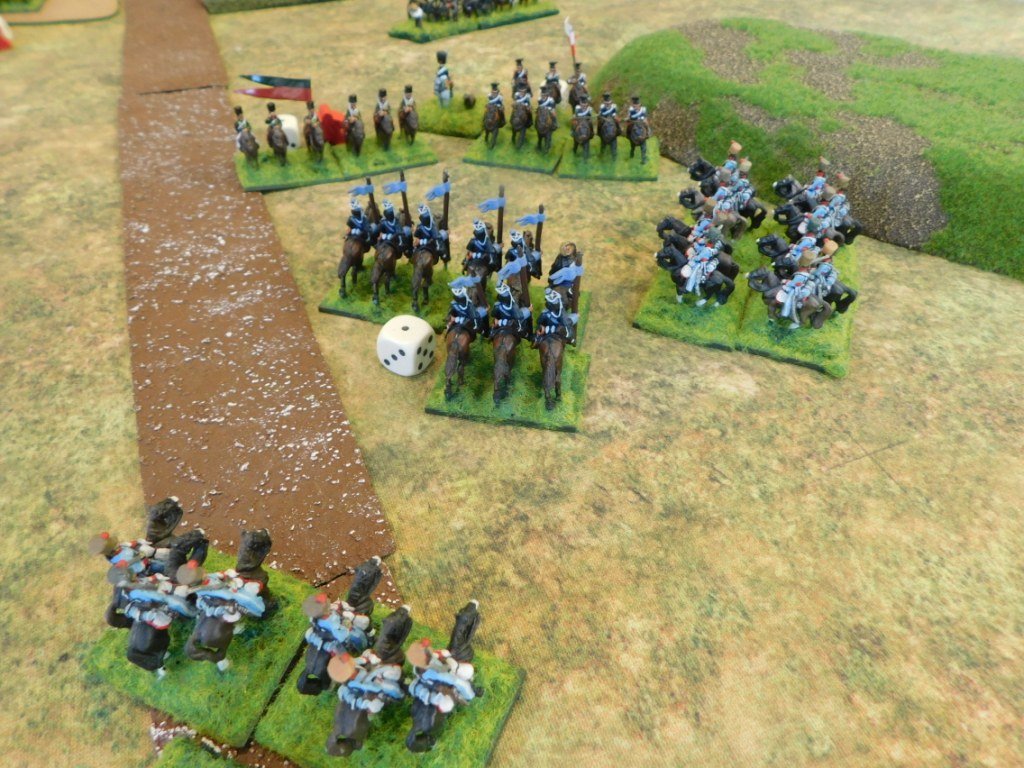
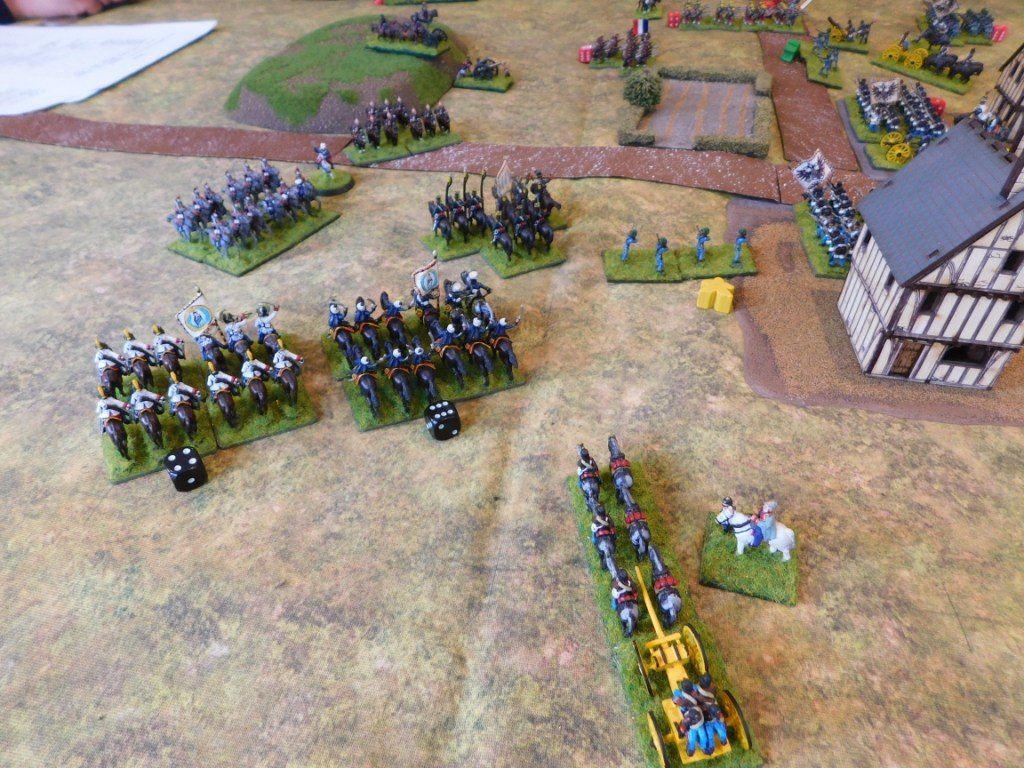
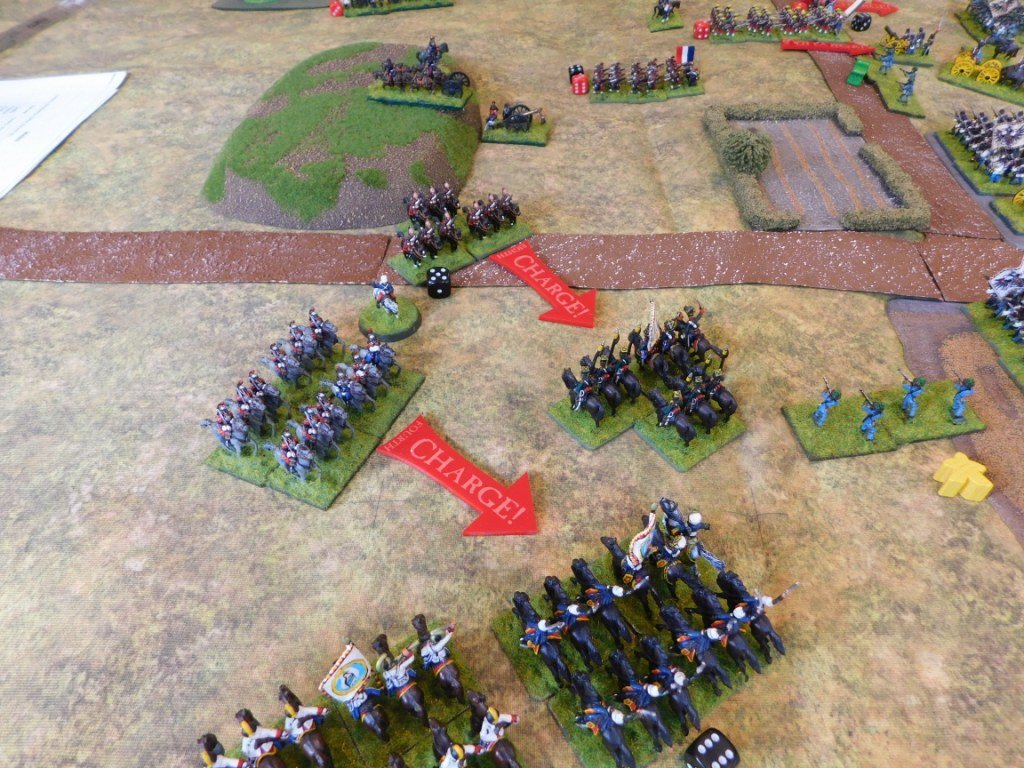
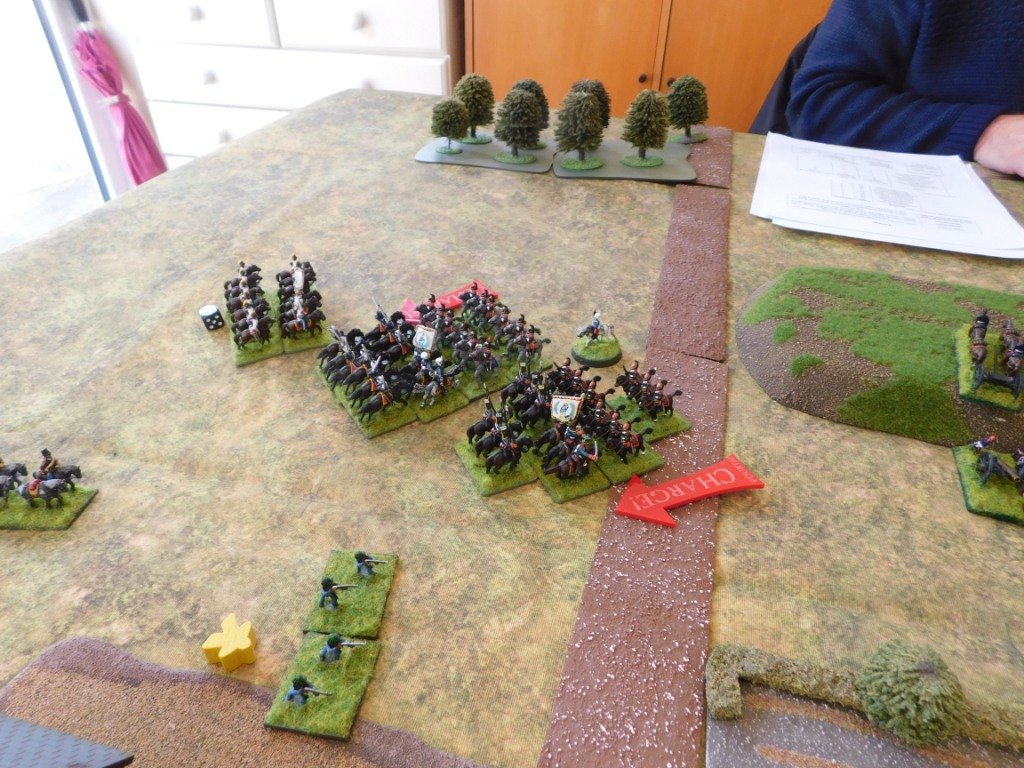
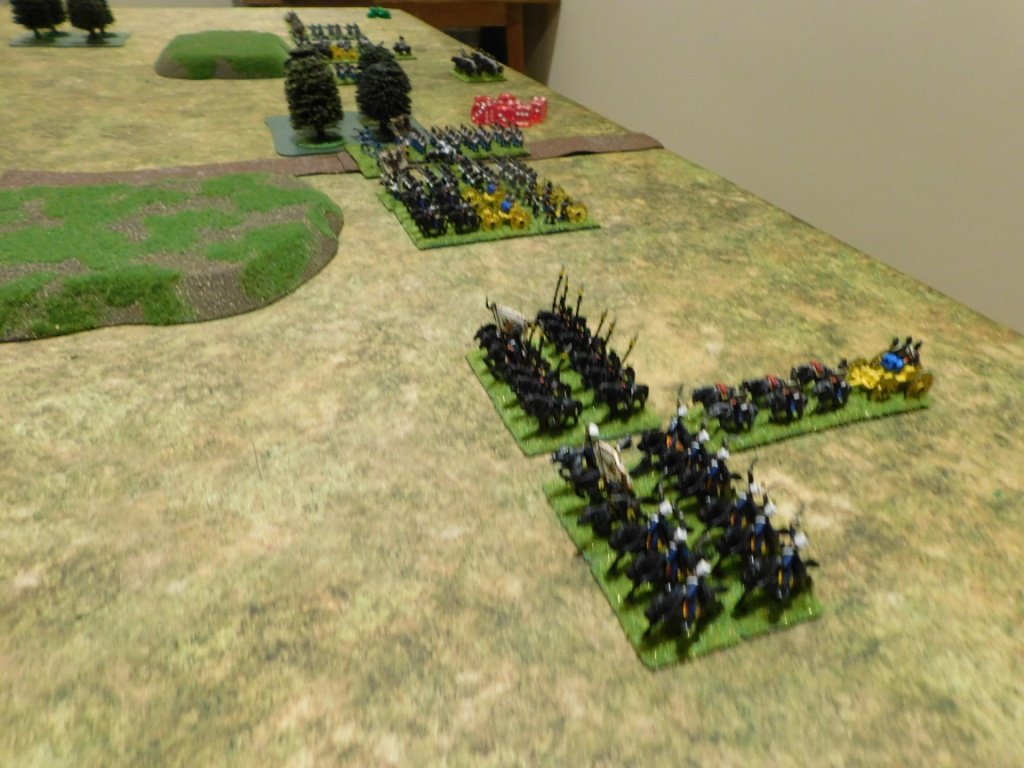
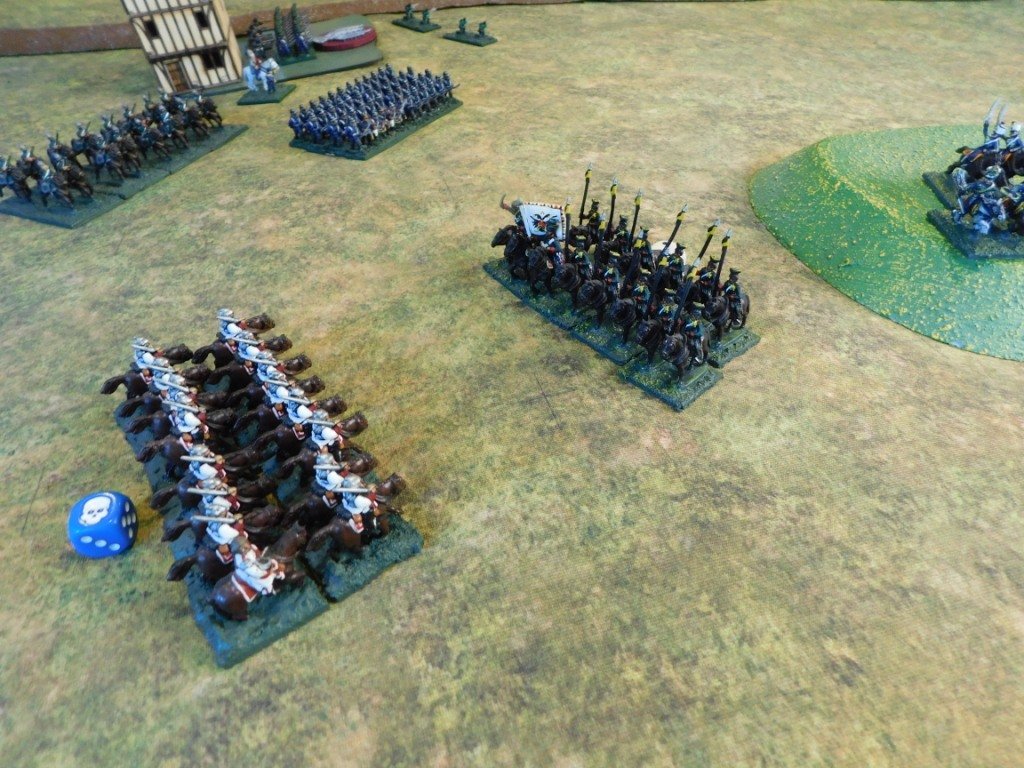
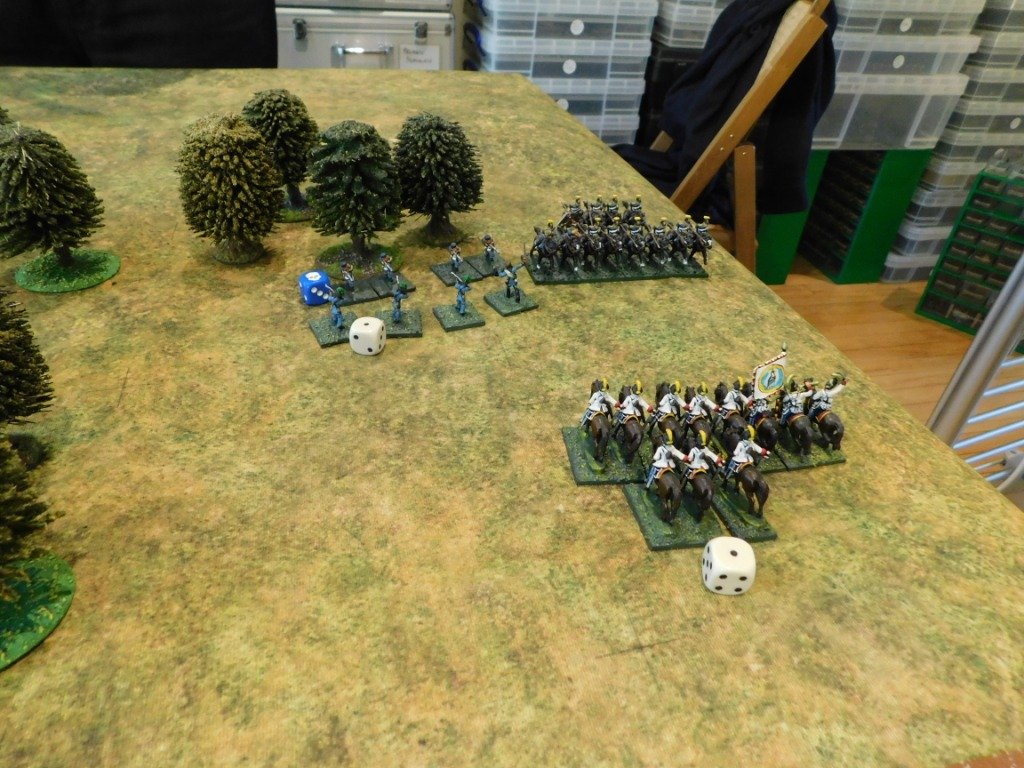
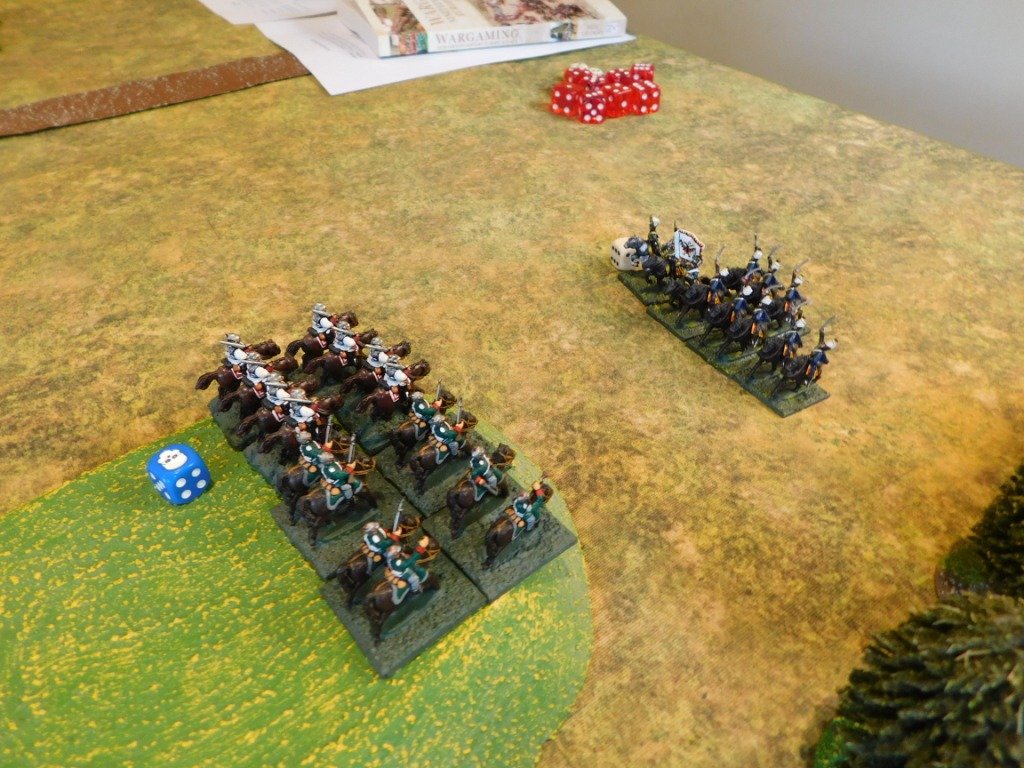
Meanwhile, a terrific cavalry battle developed between two Prussian and three Austrian regiments. The Prussian Uhlans were, however, on fire, as they were historically, and although the various cavalry melees would continue until the end of the game, the Prussian Uhlans would effectively fight the superior number of Austrian cavalry to a standstill.

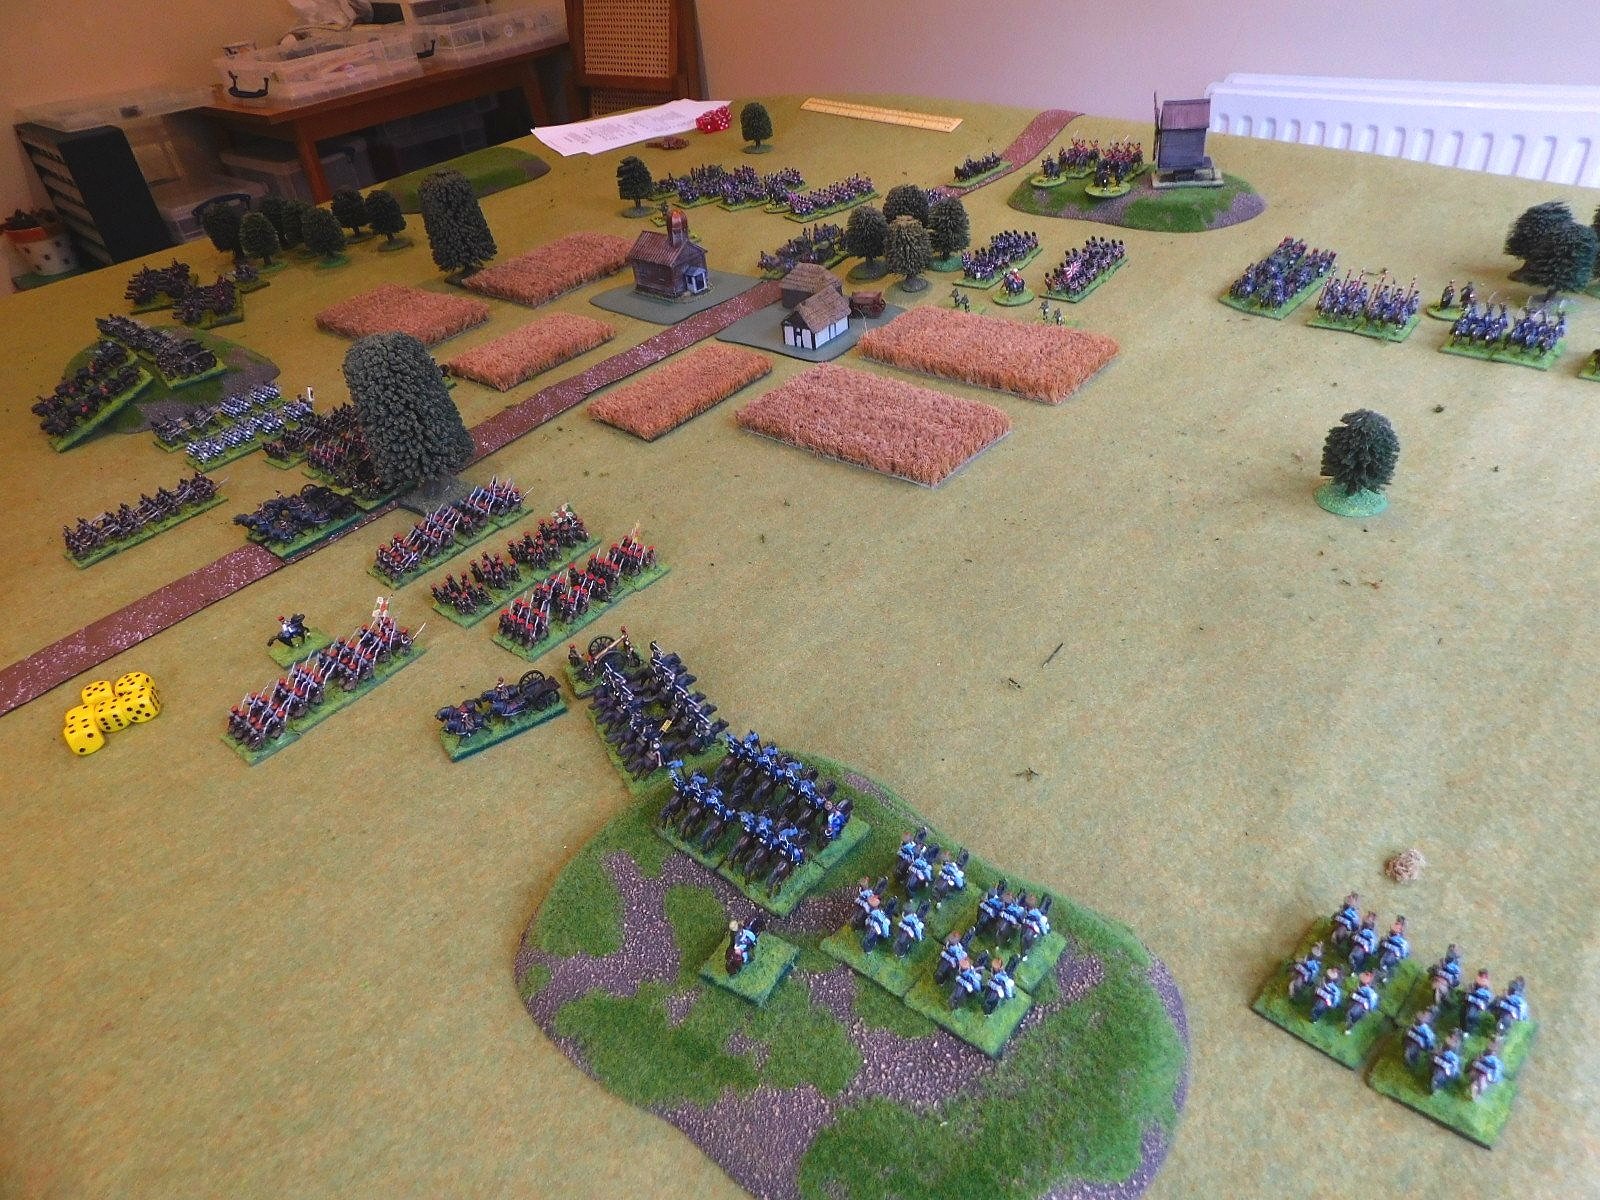
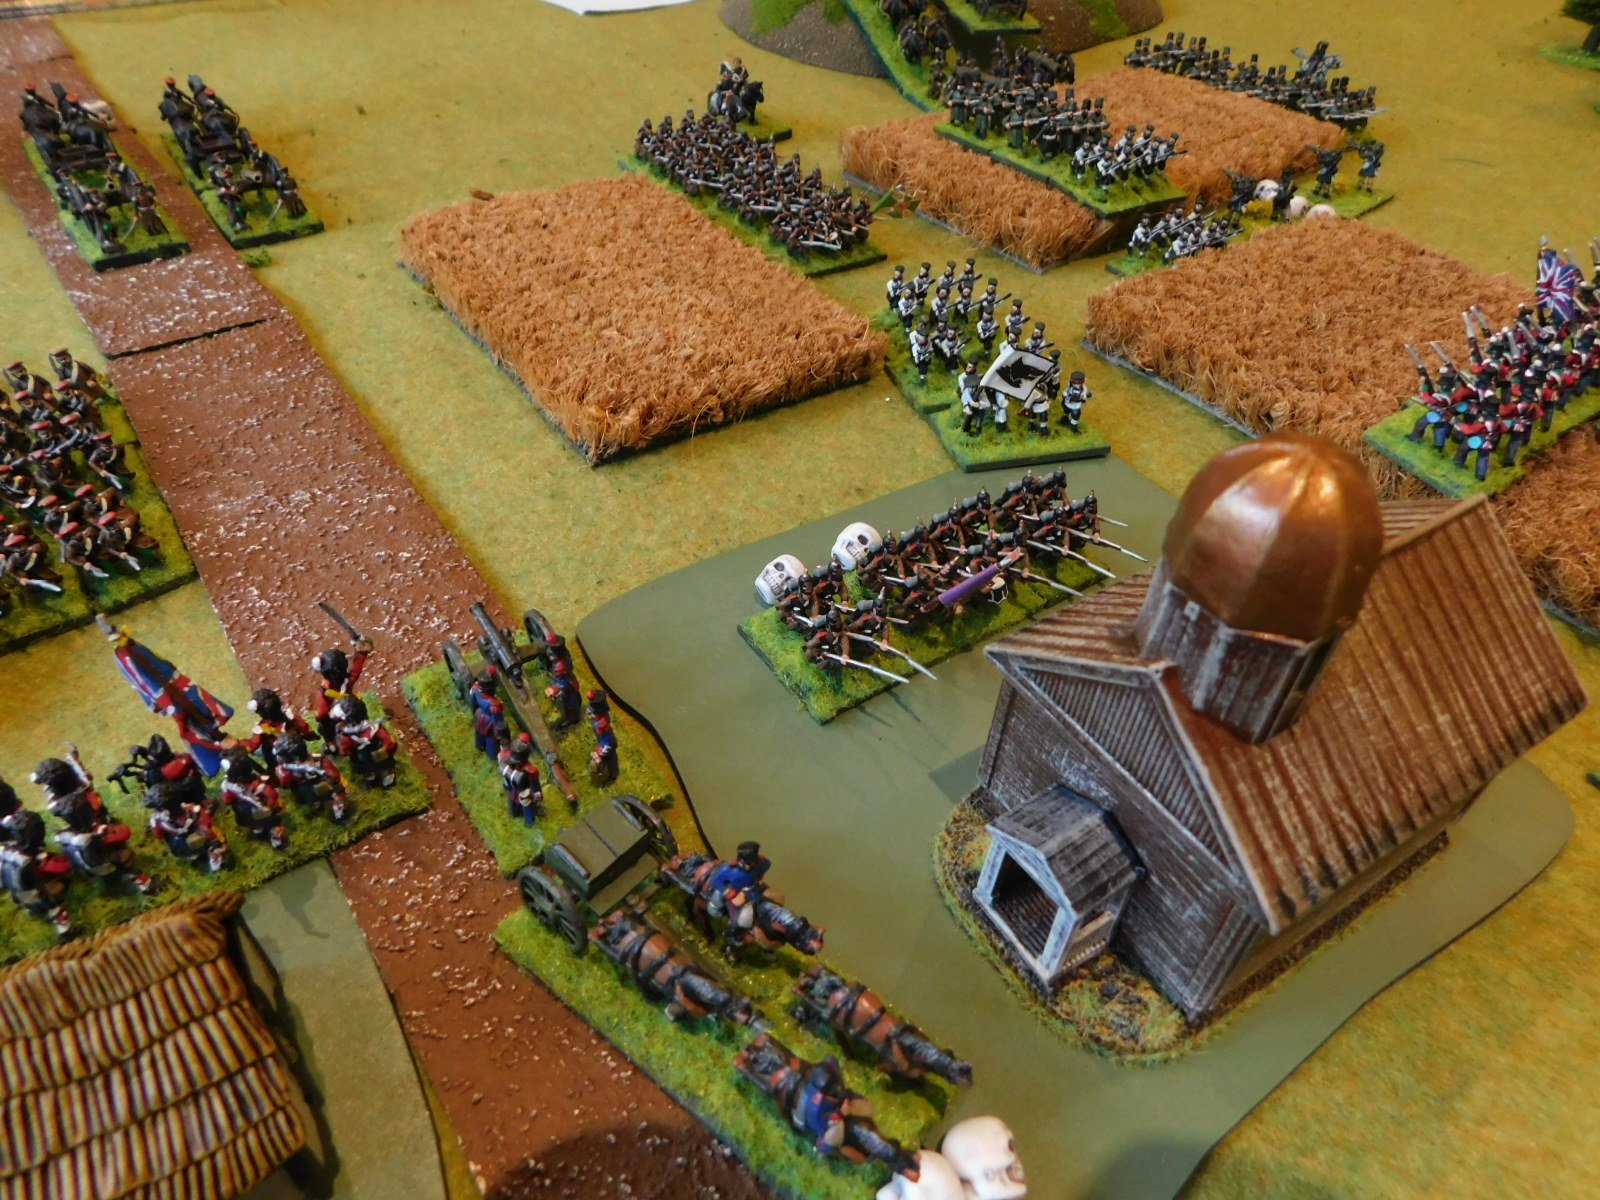
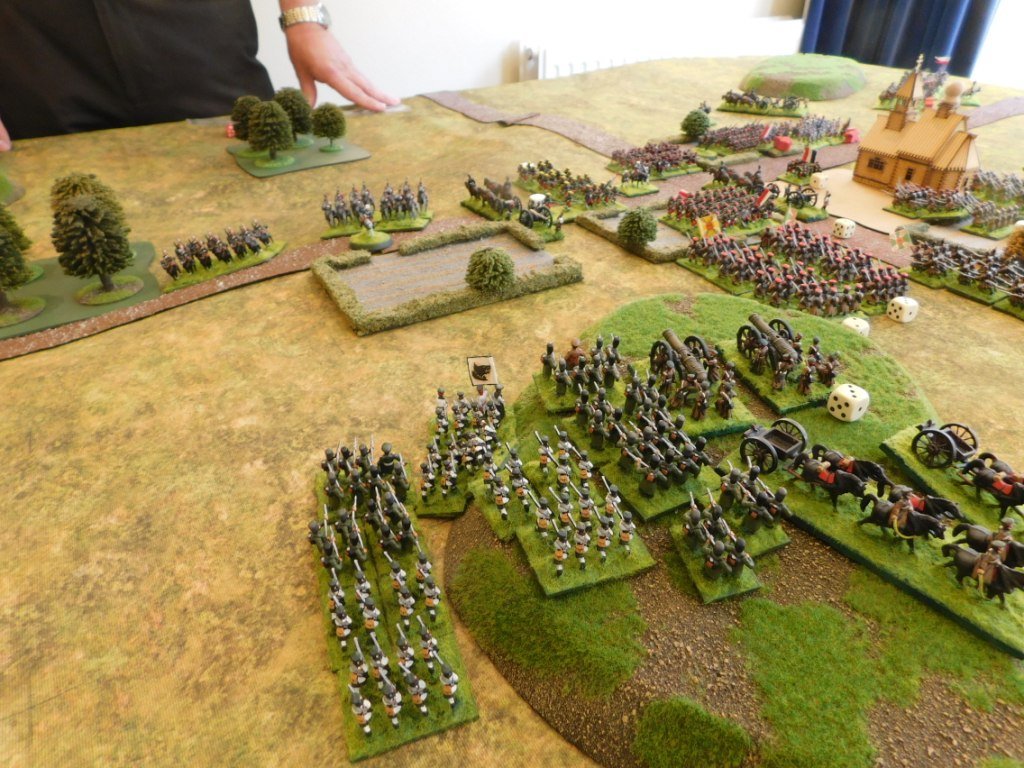
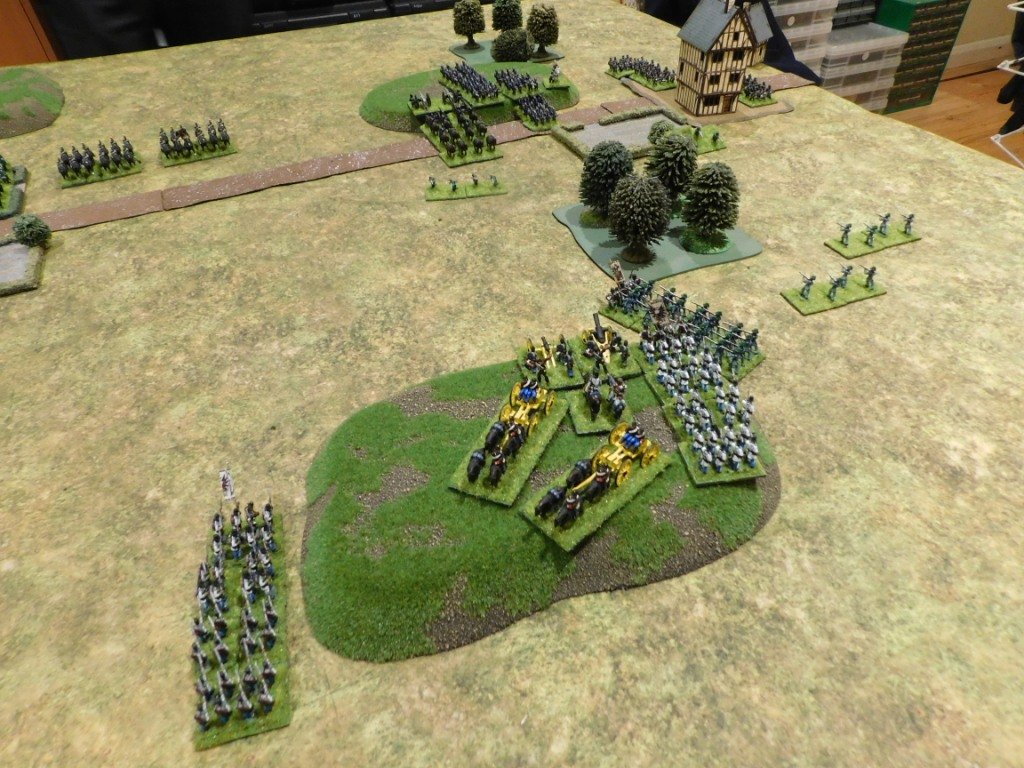
The Austrian infantry were, however, doing better than their donkey-walloper comrades and, ably supported by artillery, were able to defeat the other regiment of Prussian Guards and occupy Wysokov. They then prepared to face the onslaught of the arriving Prussian reinforcements.

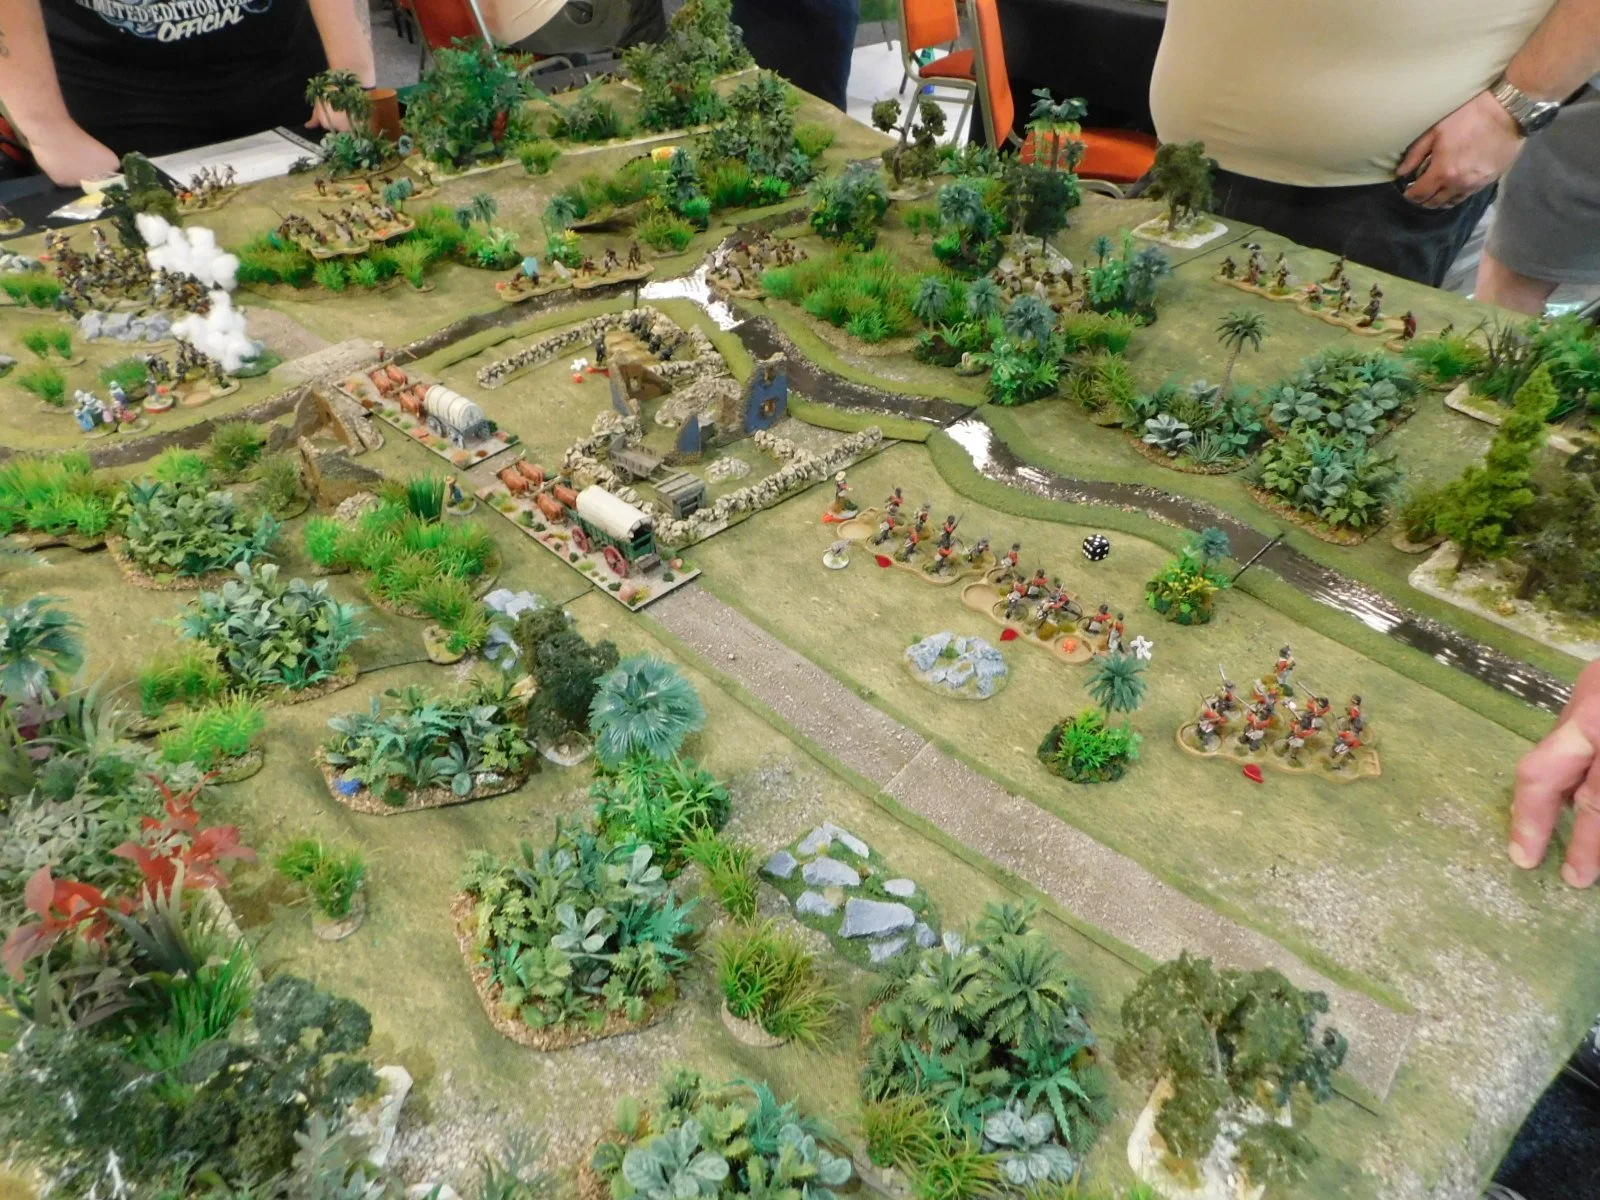
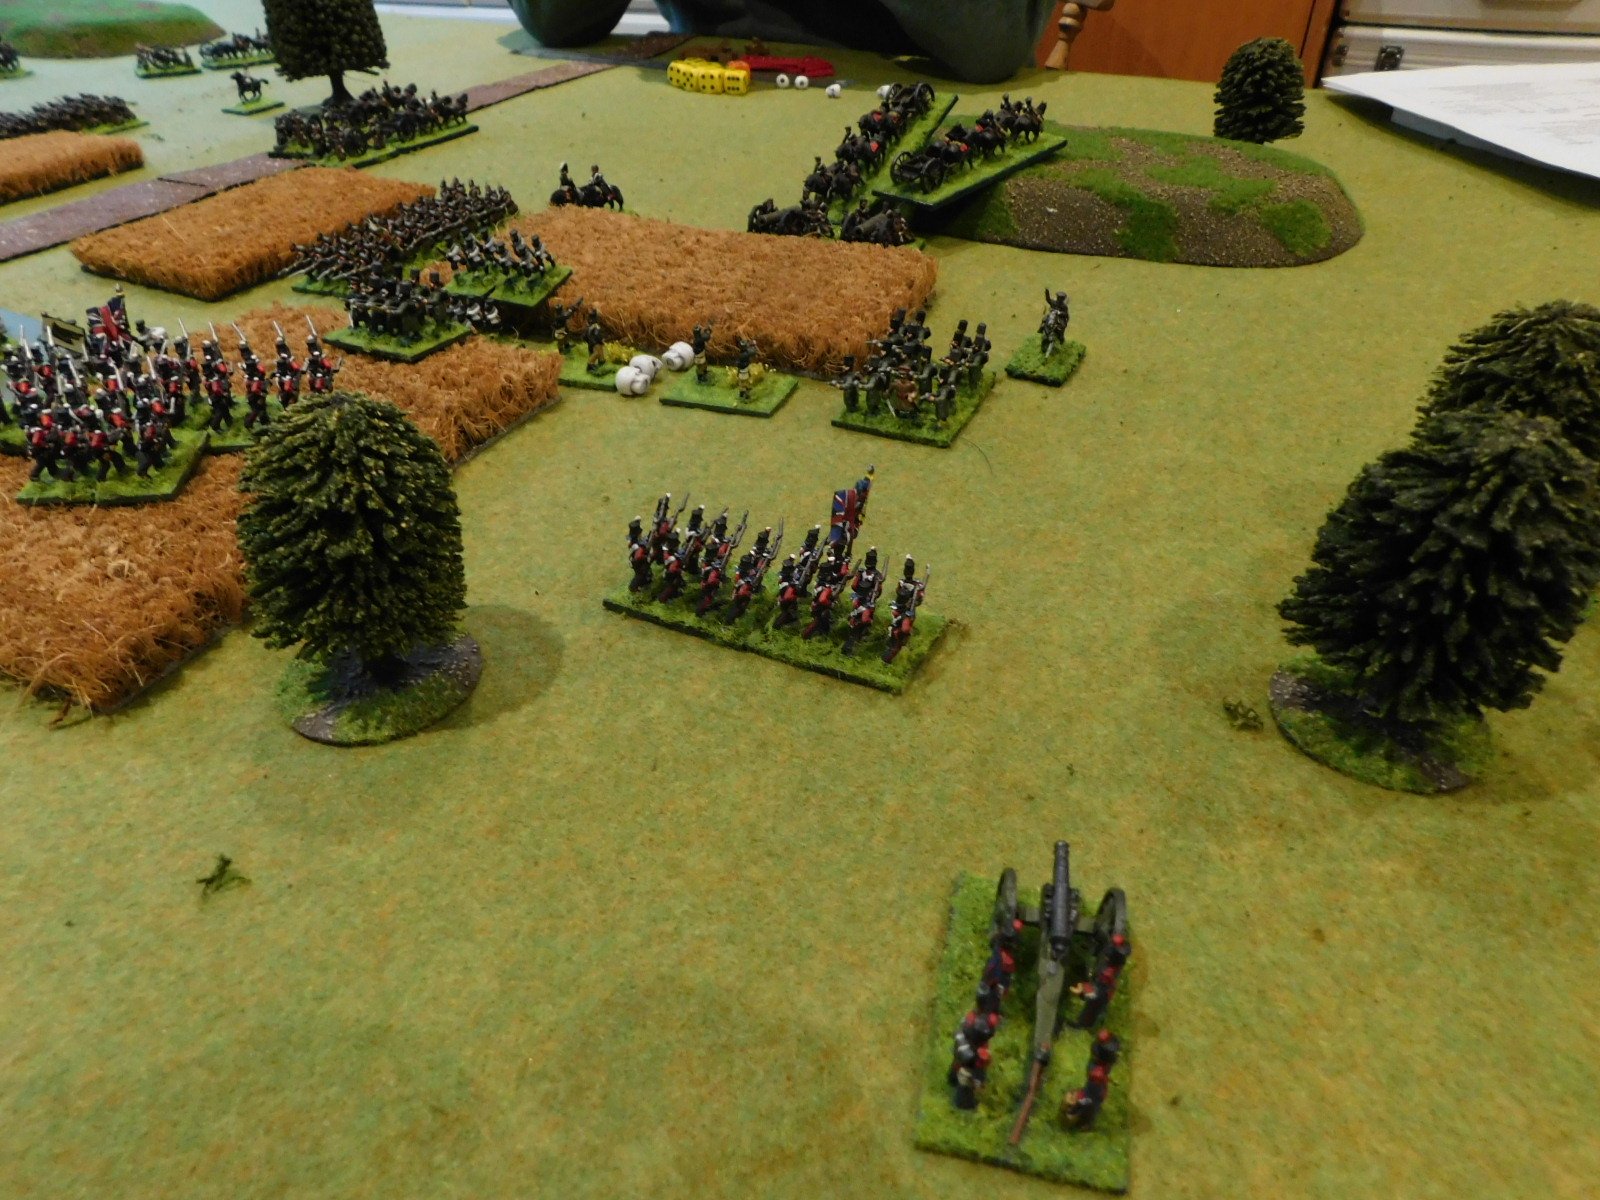
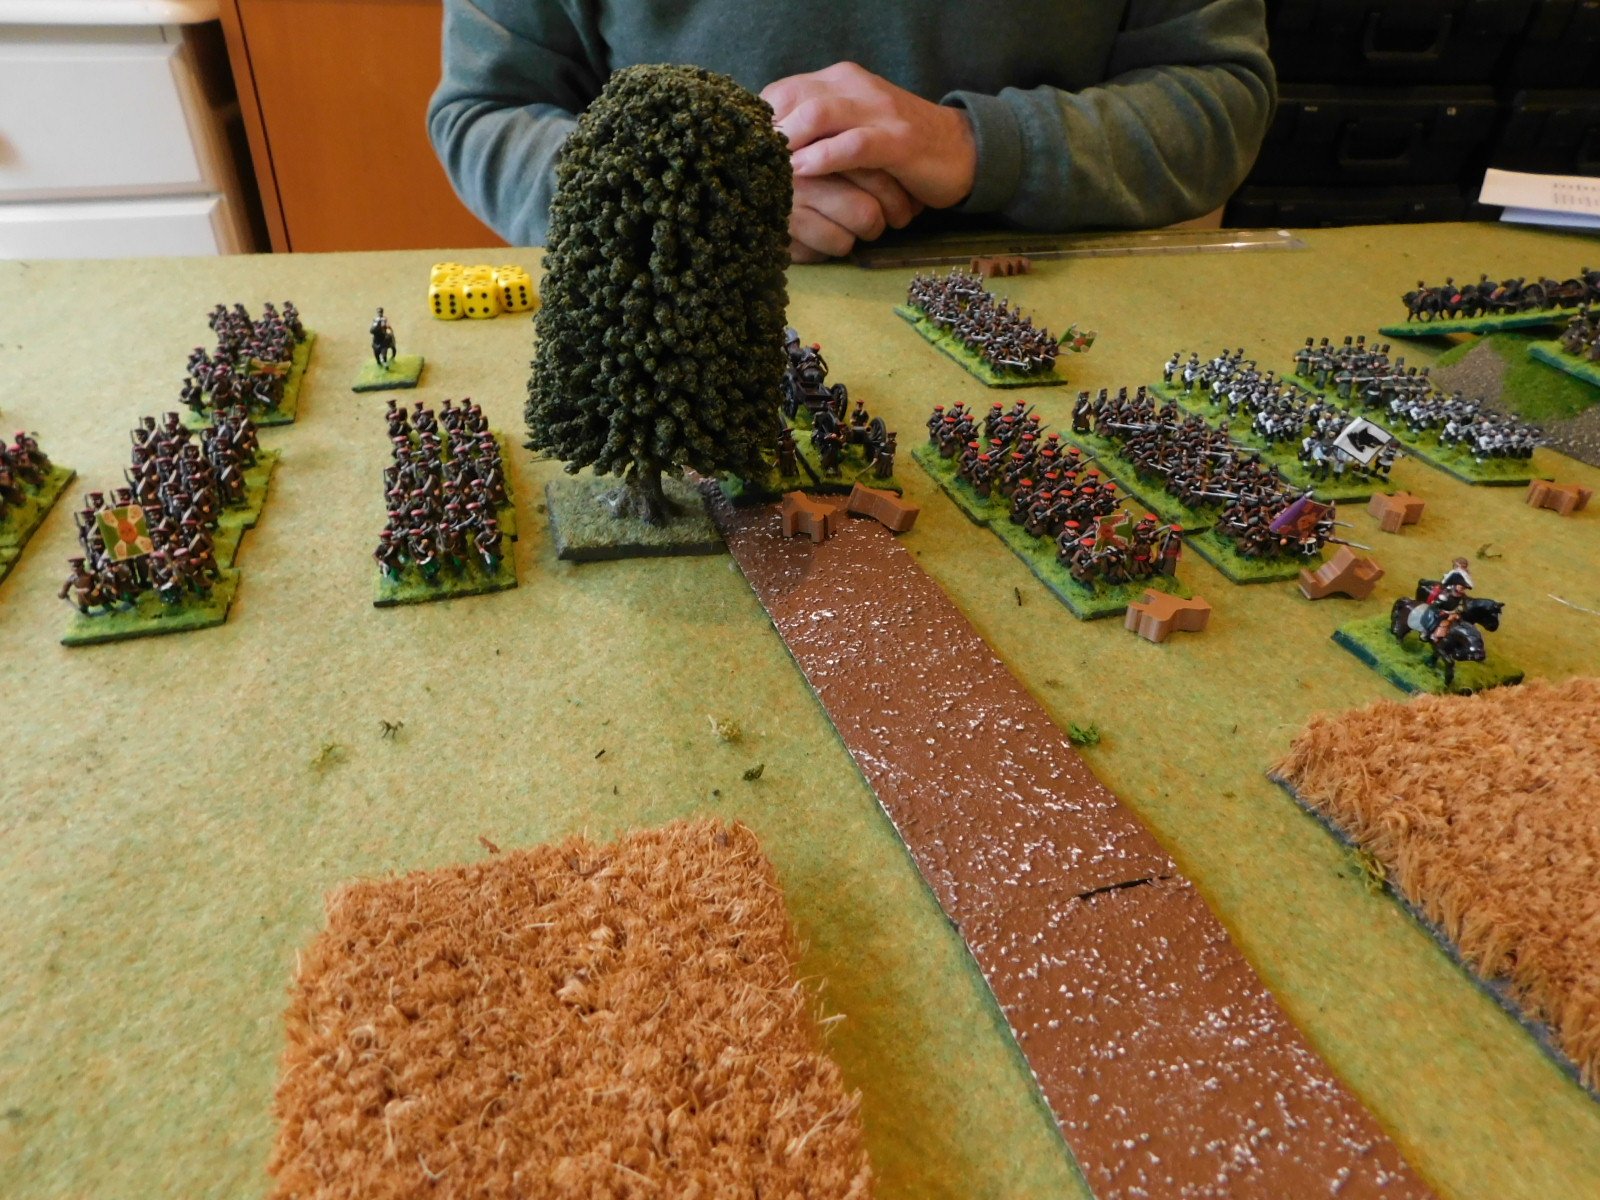
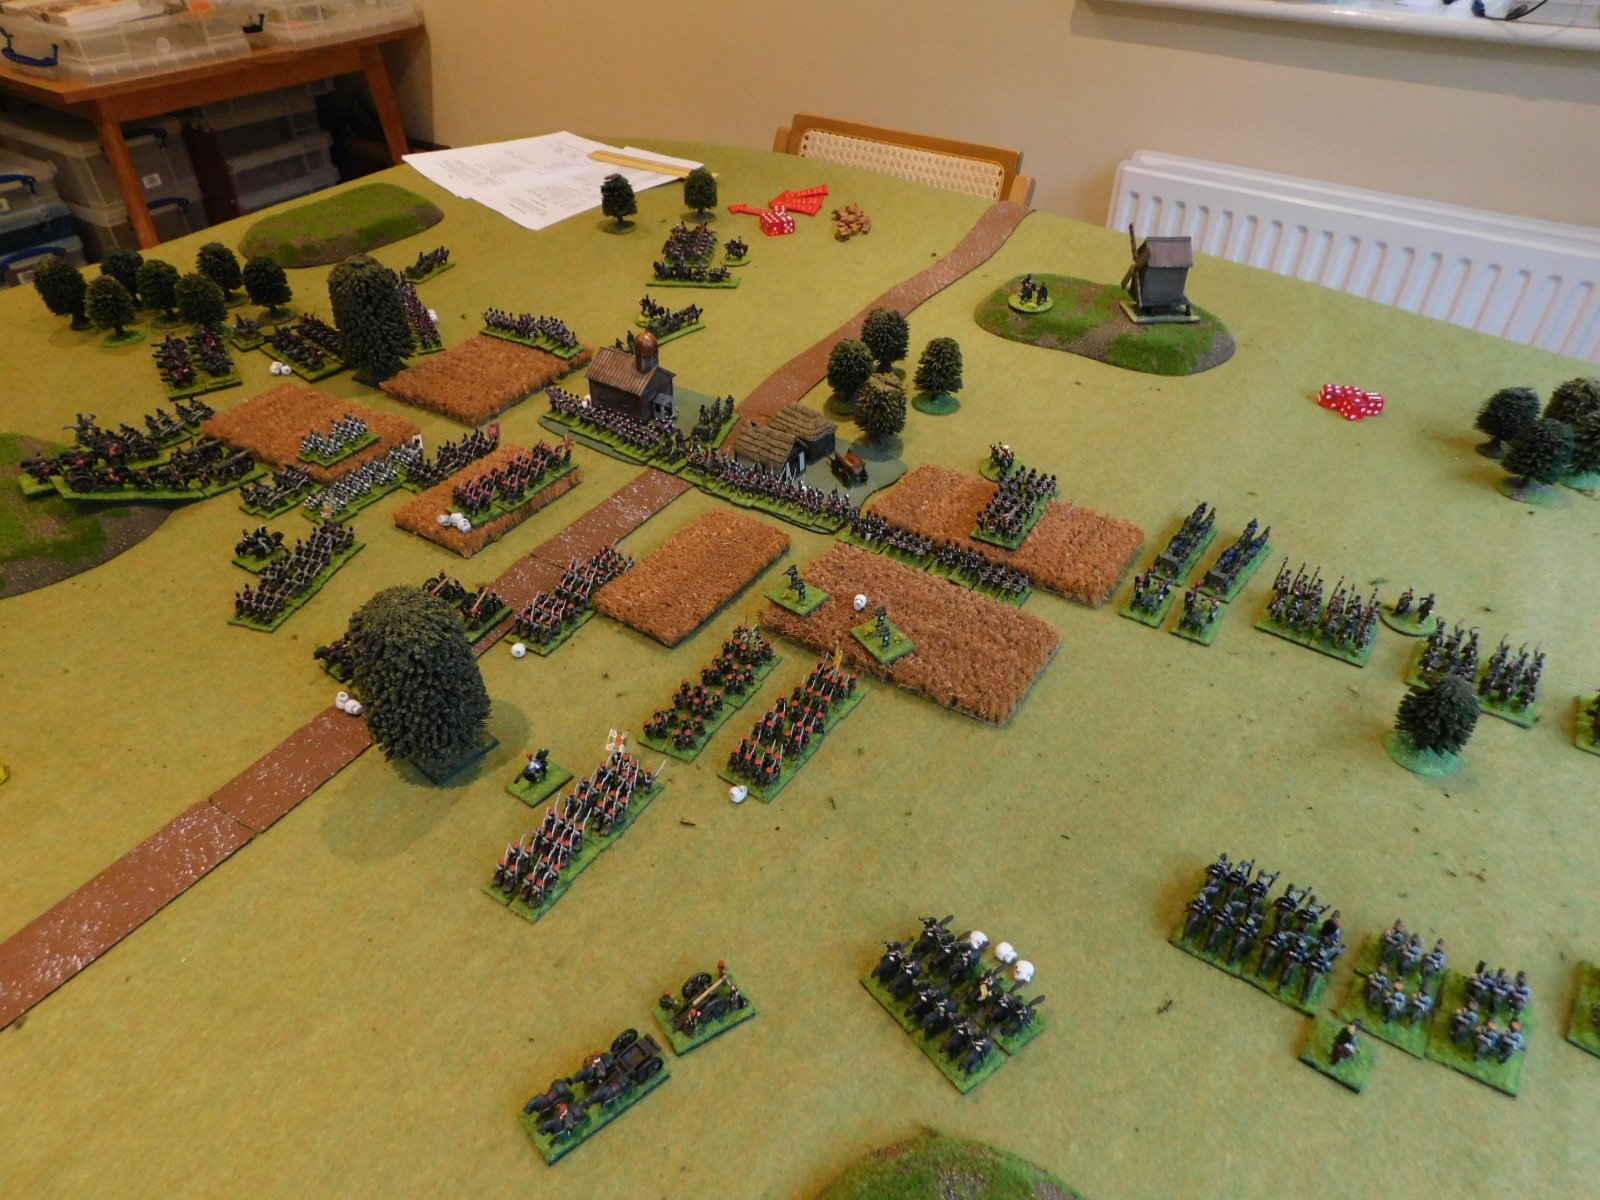
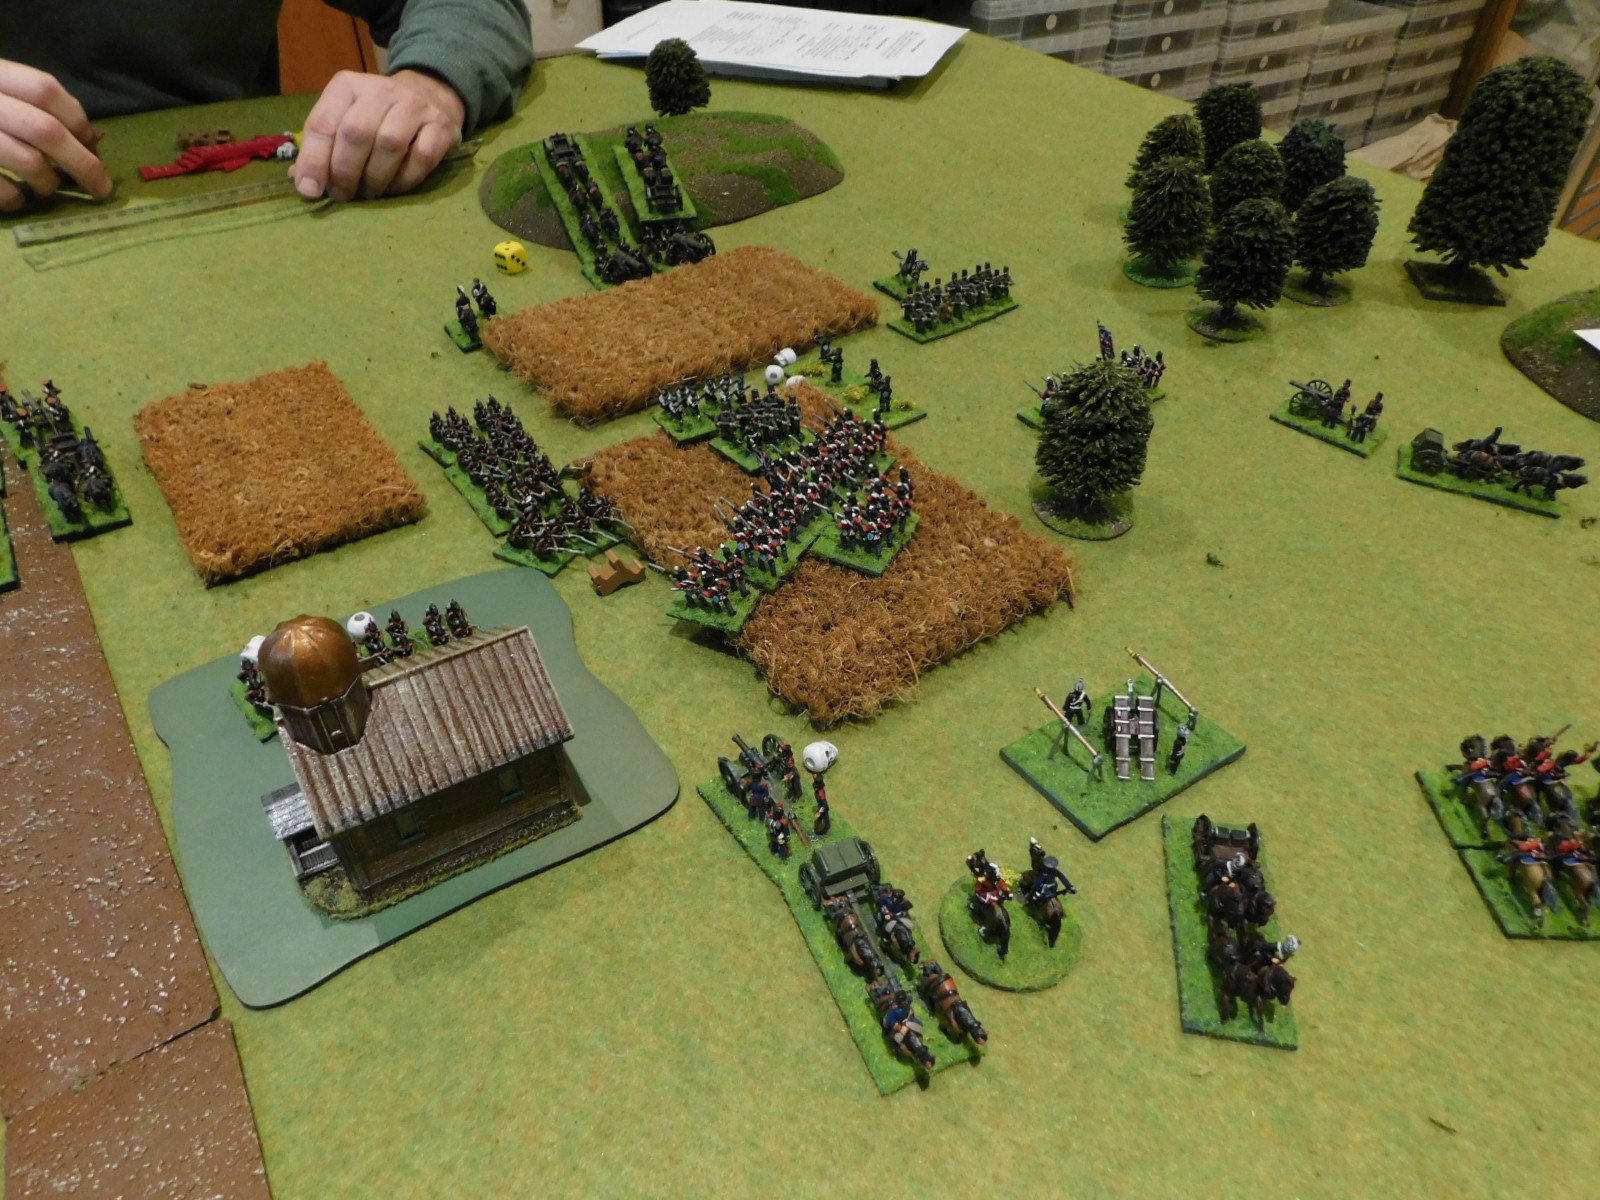
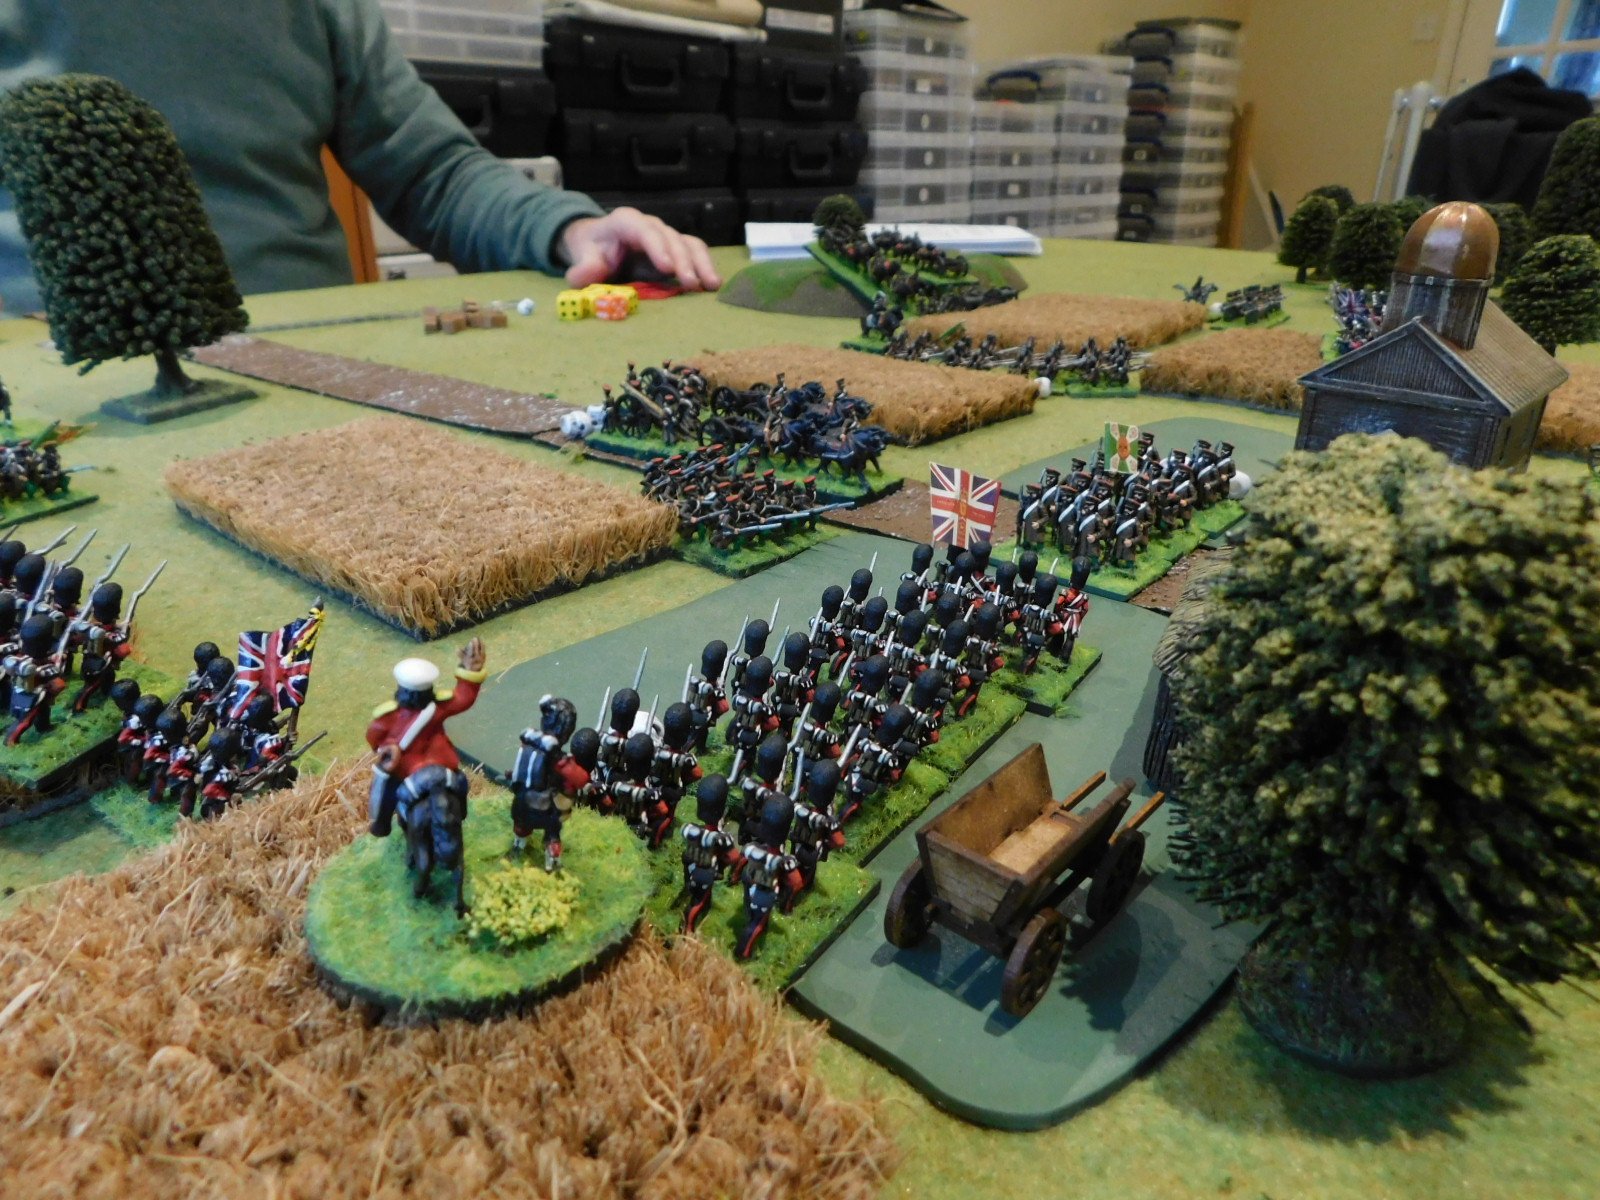
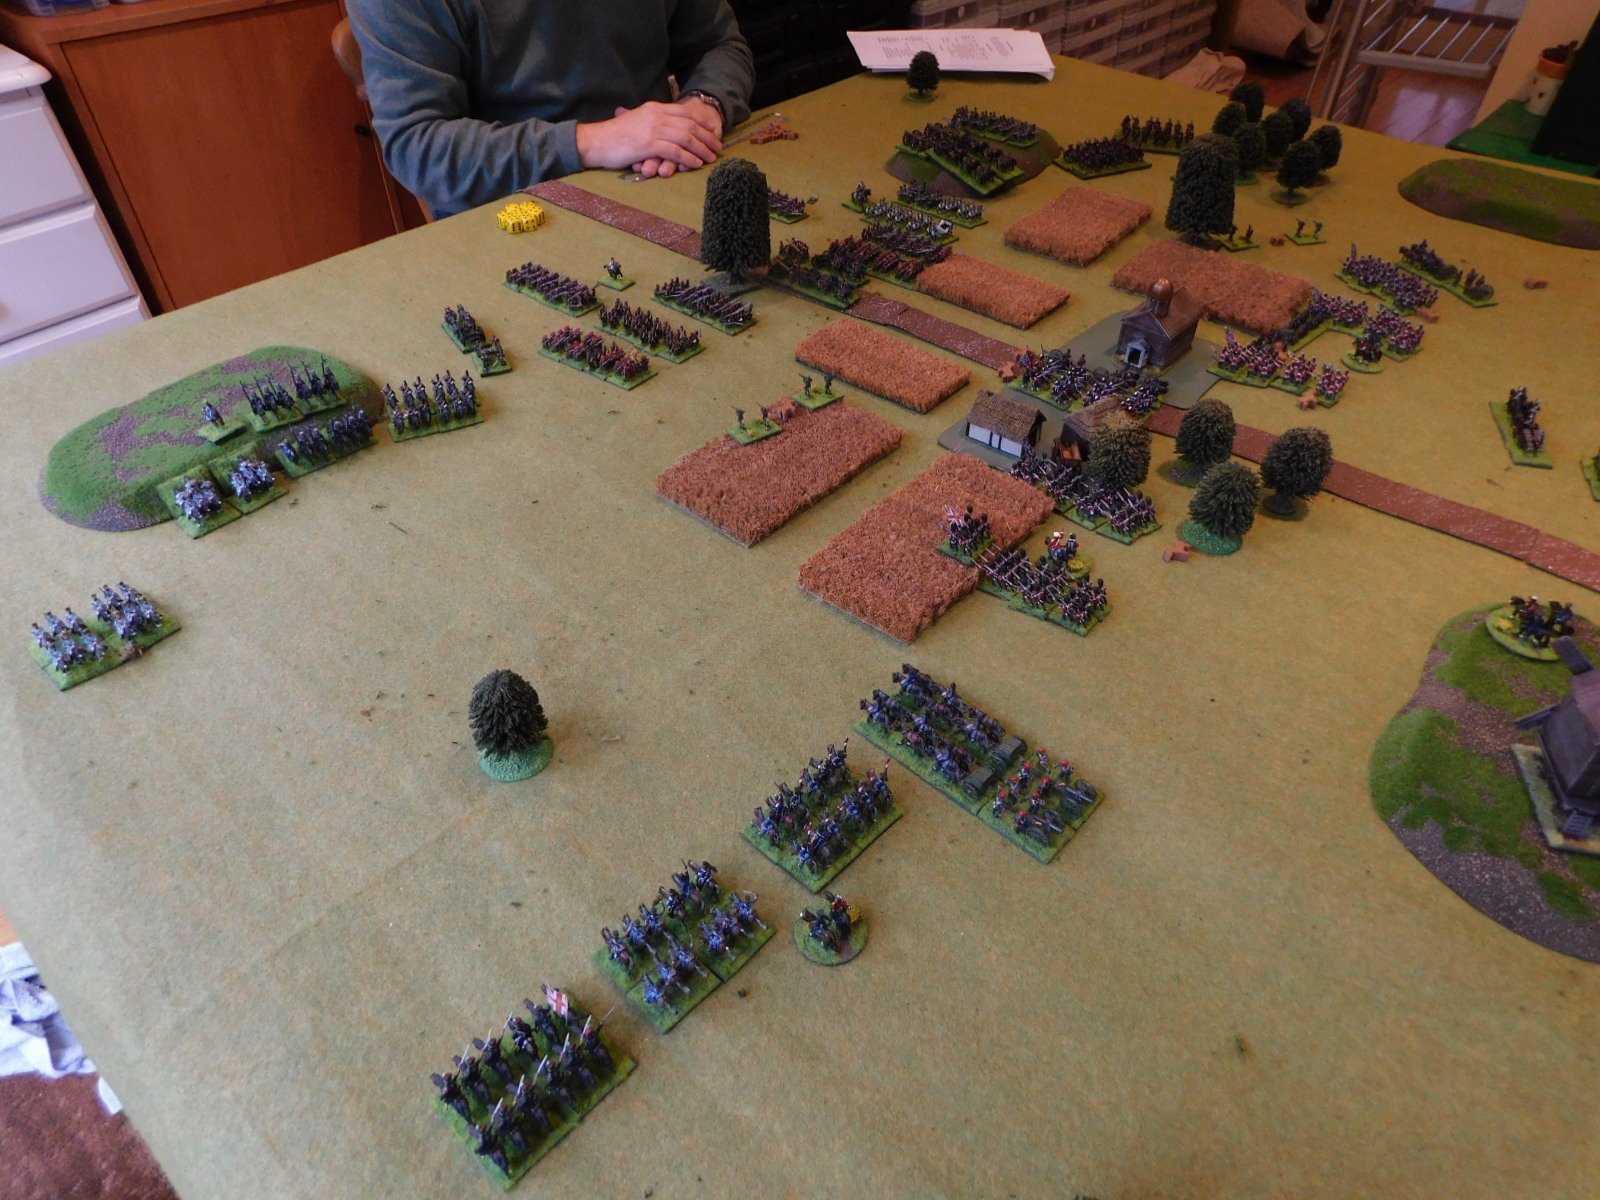
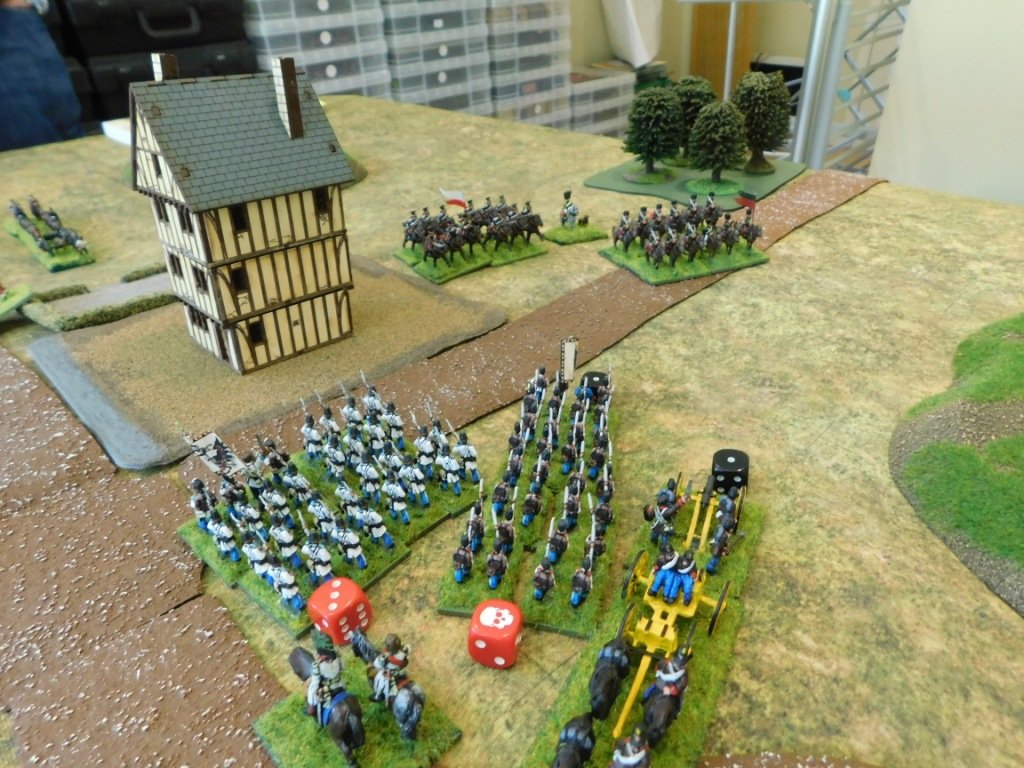
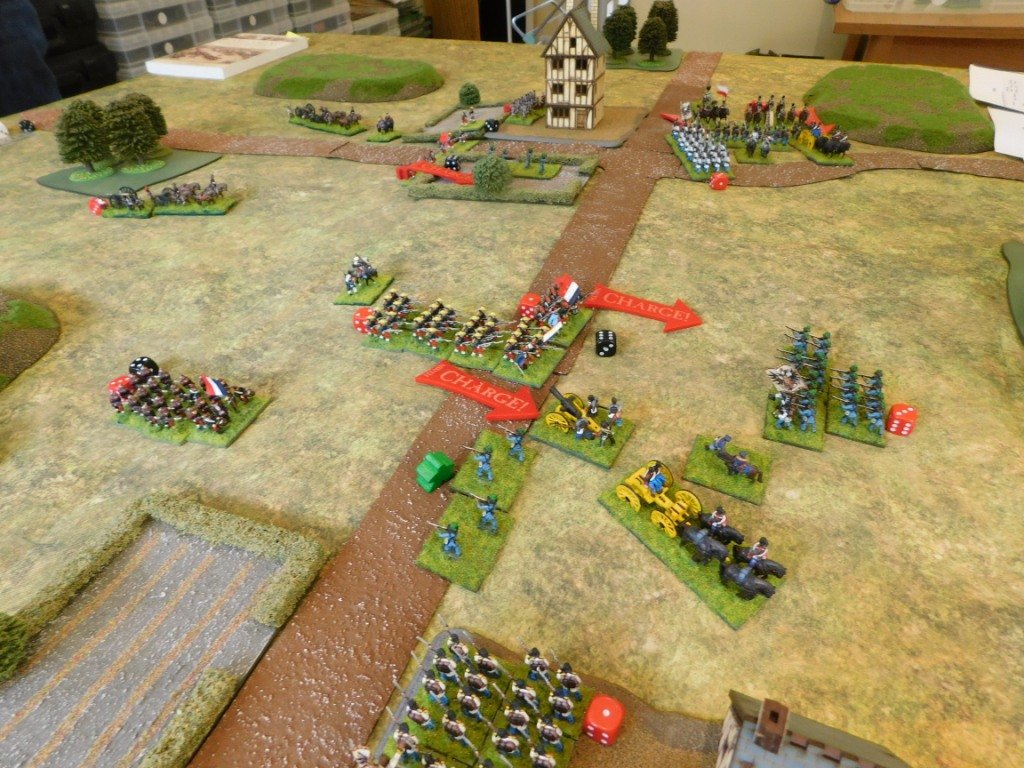
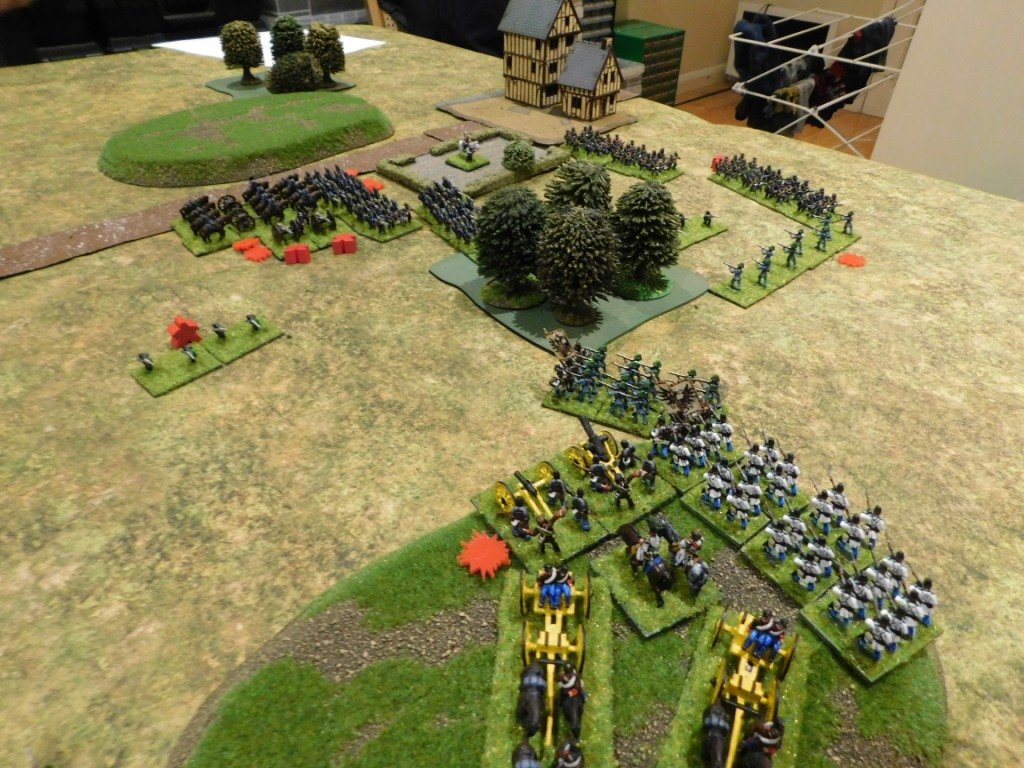
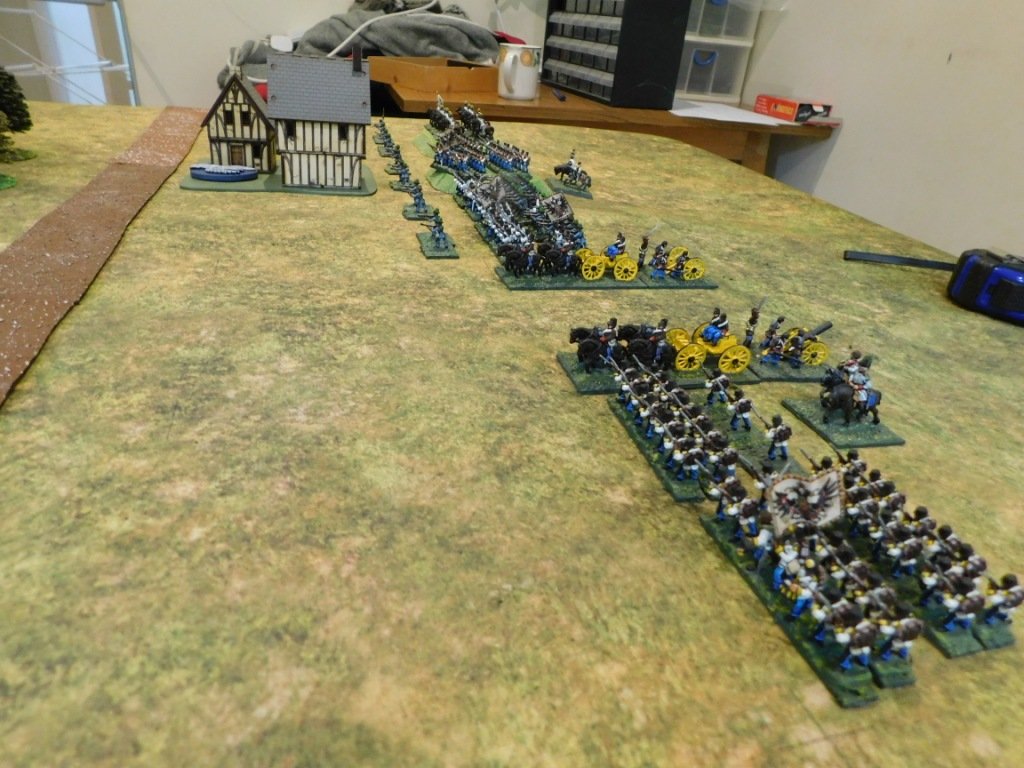
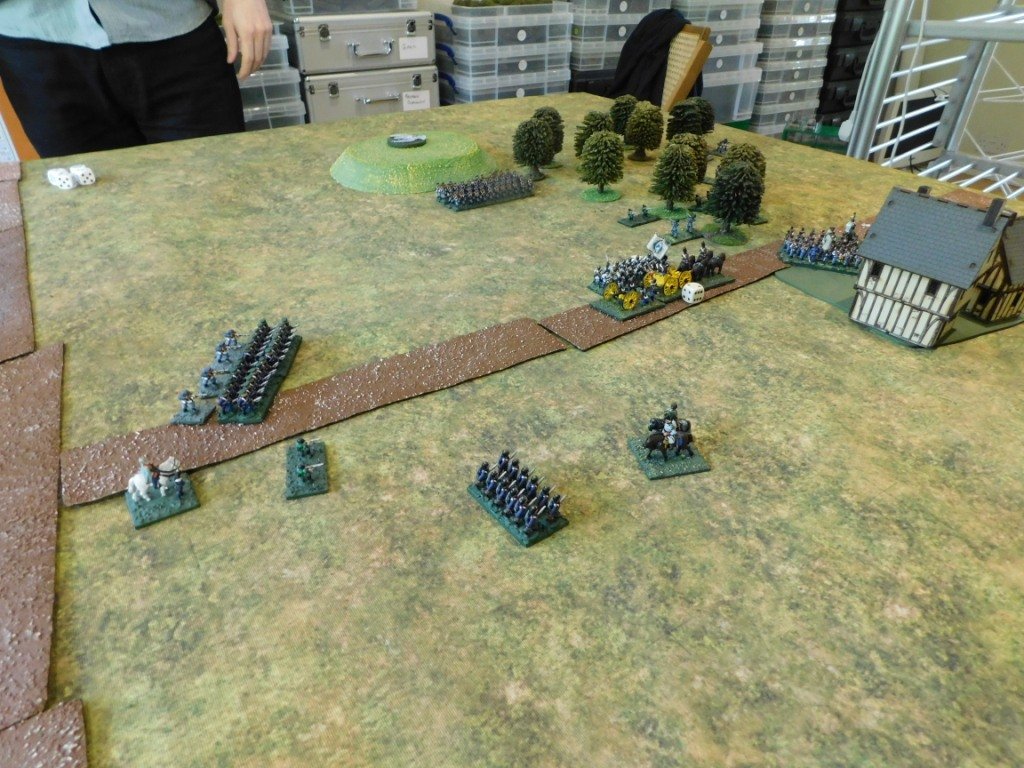
Keen not to allow the Prussians any time to deploy effectively, the Austrian columns marched straight out of Wysokov and straight at the enemy.

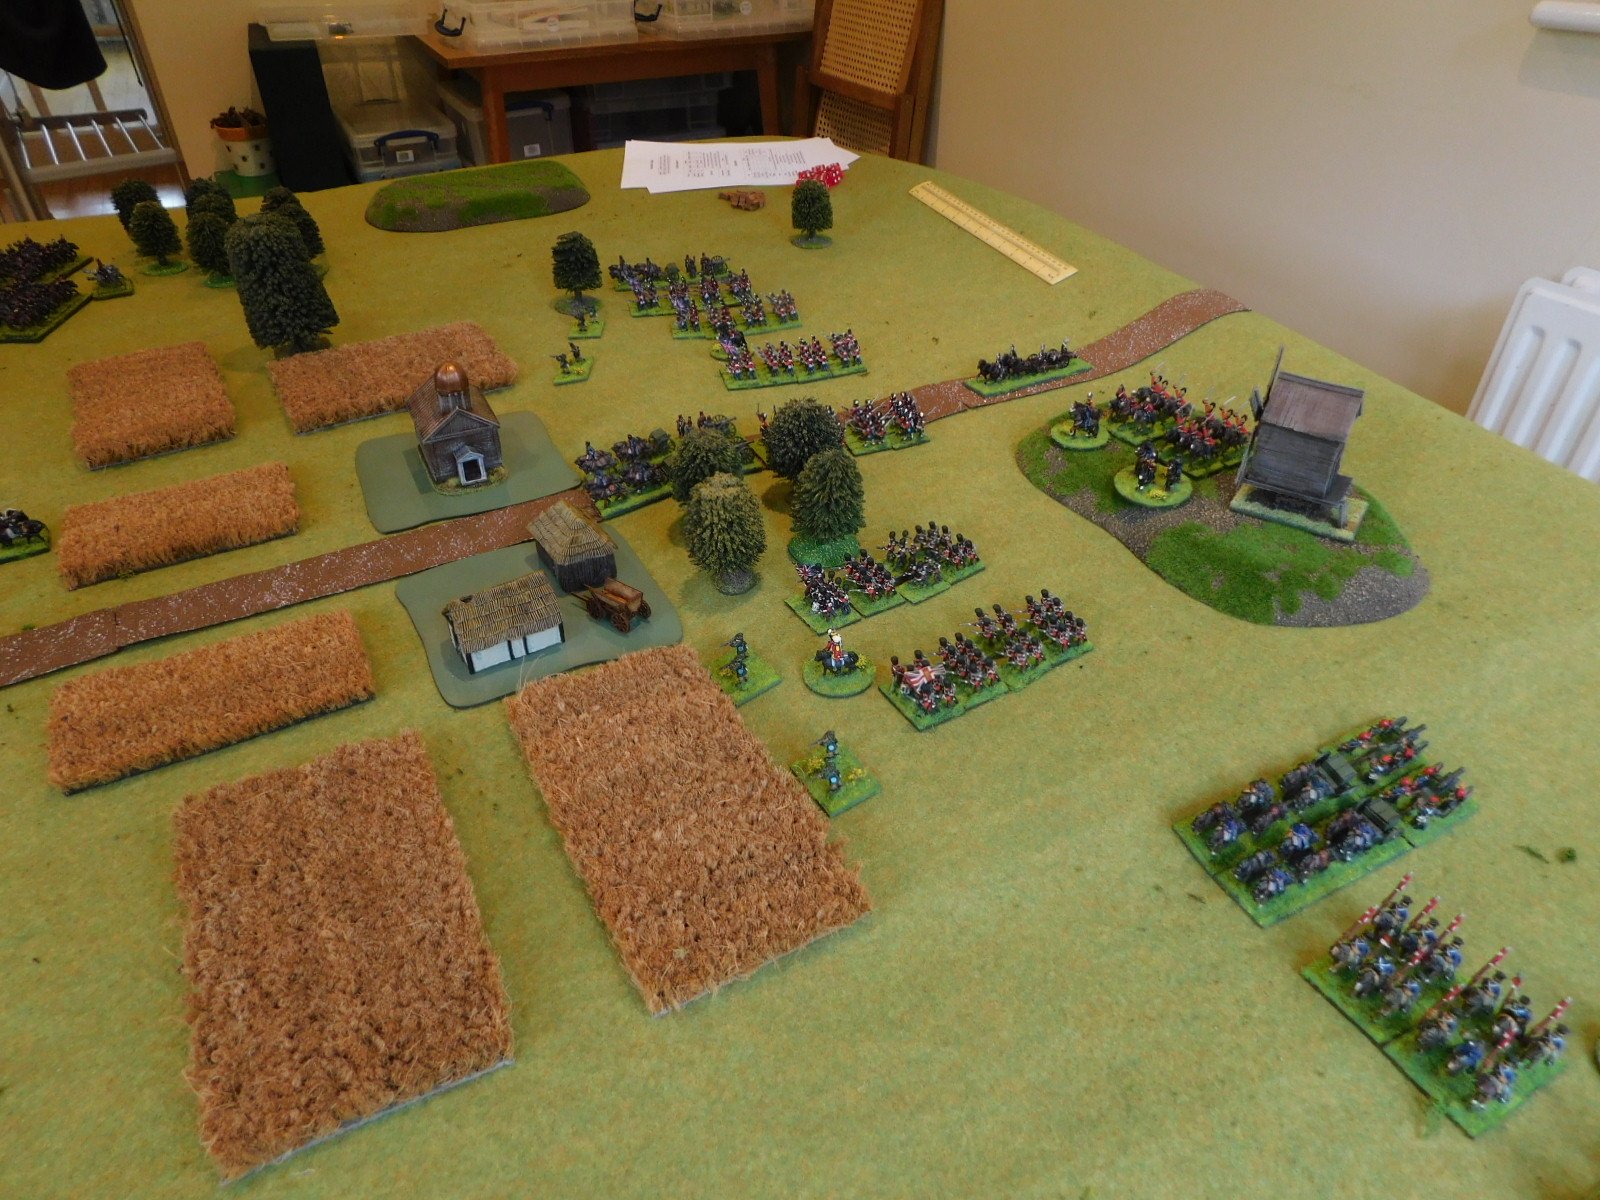
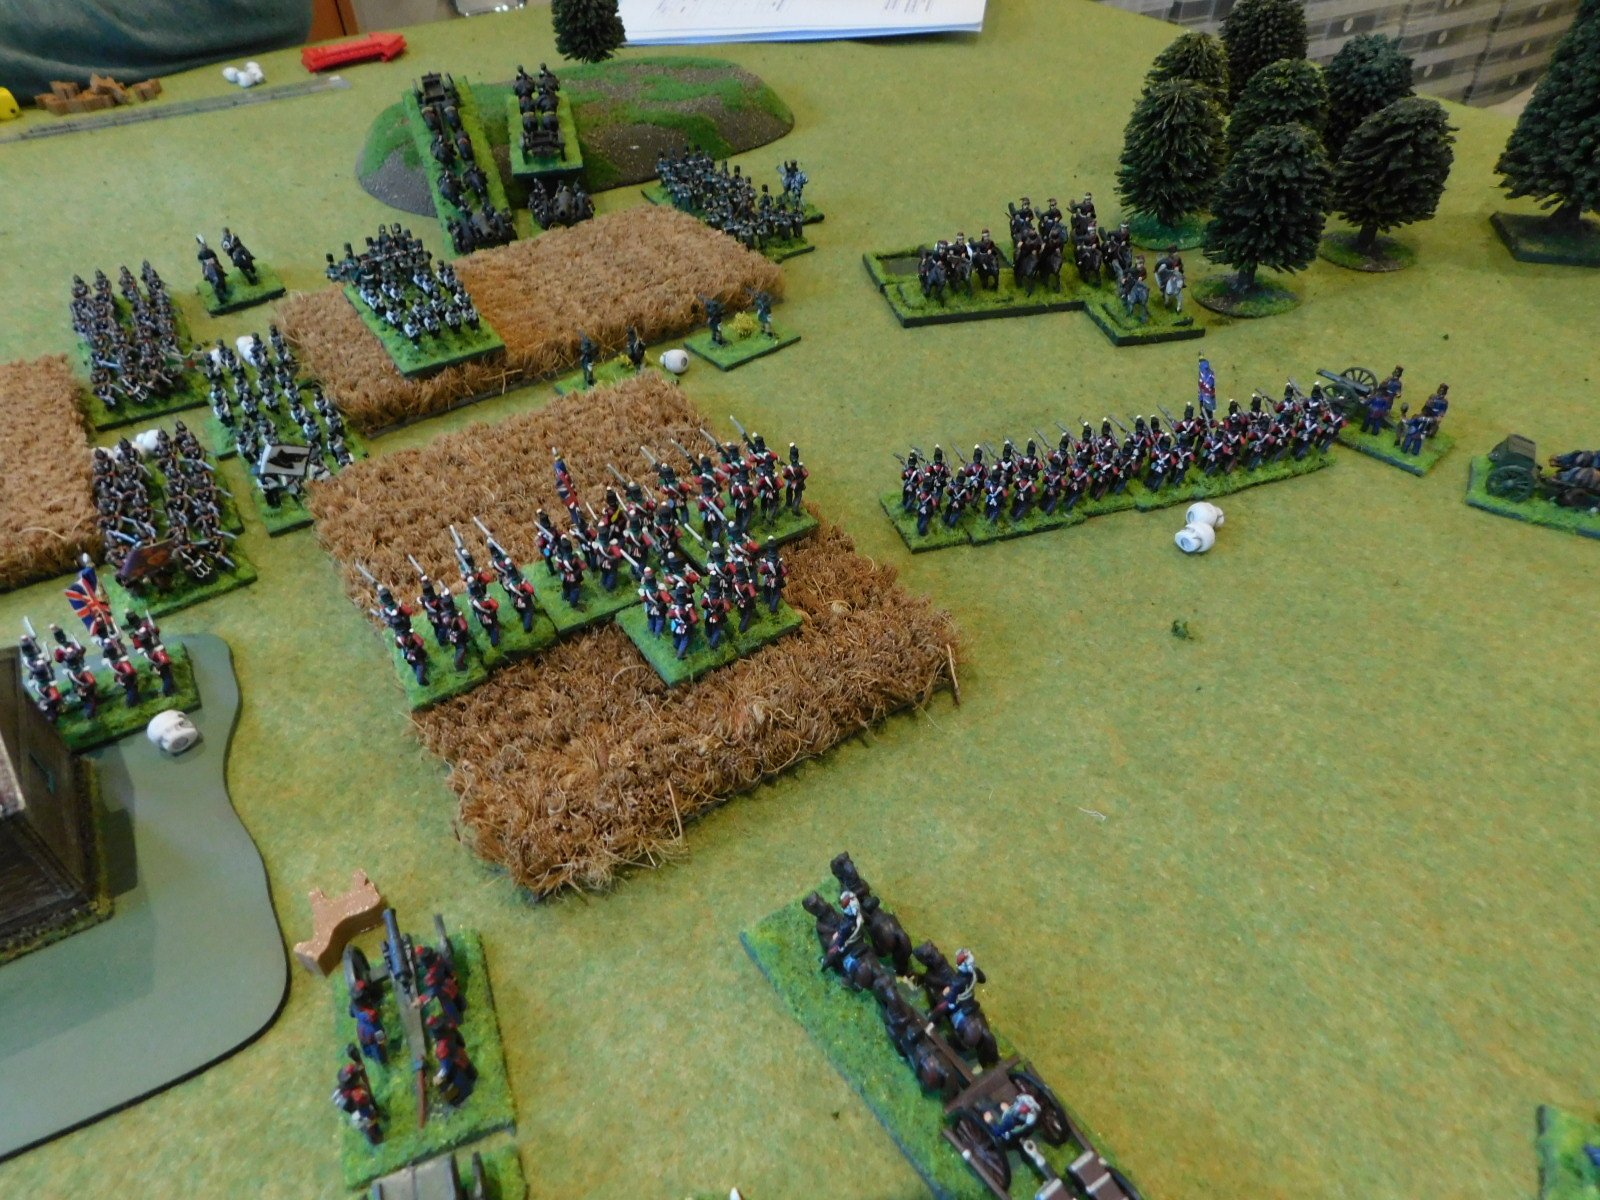
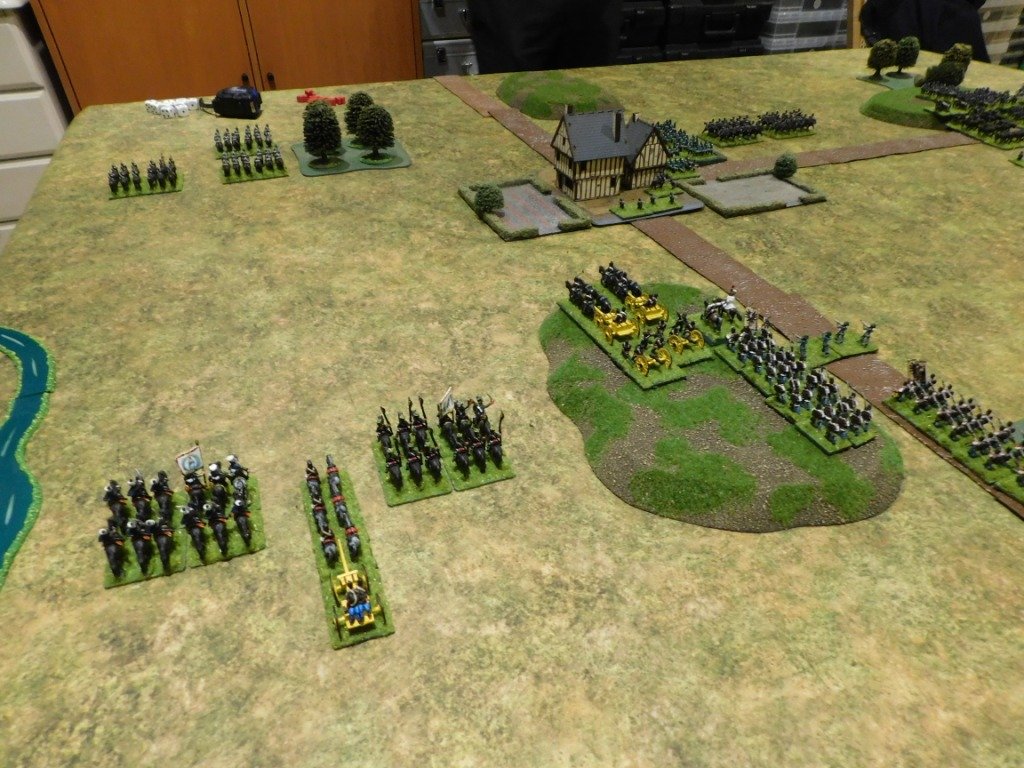
The Prussians had managed to deploy some of their regiments into line, but their guns were still on the road behind them, and although those that had deployed opened up a withering fire on the Austrians, there just weren’t enough of them ready to fight.

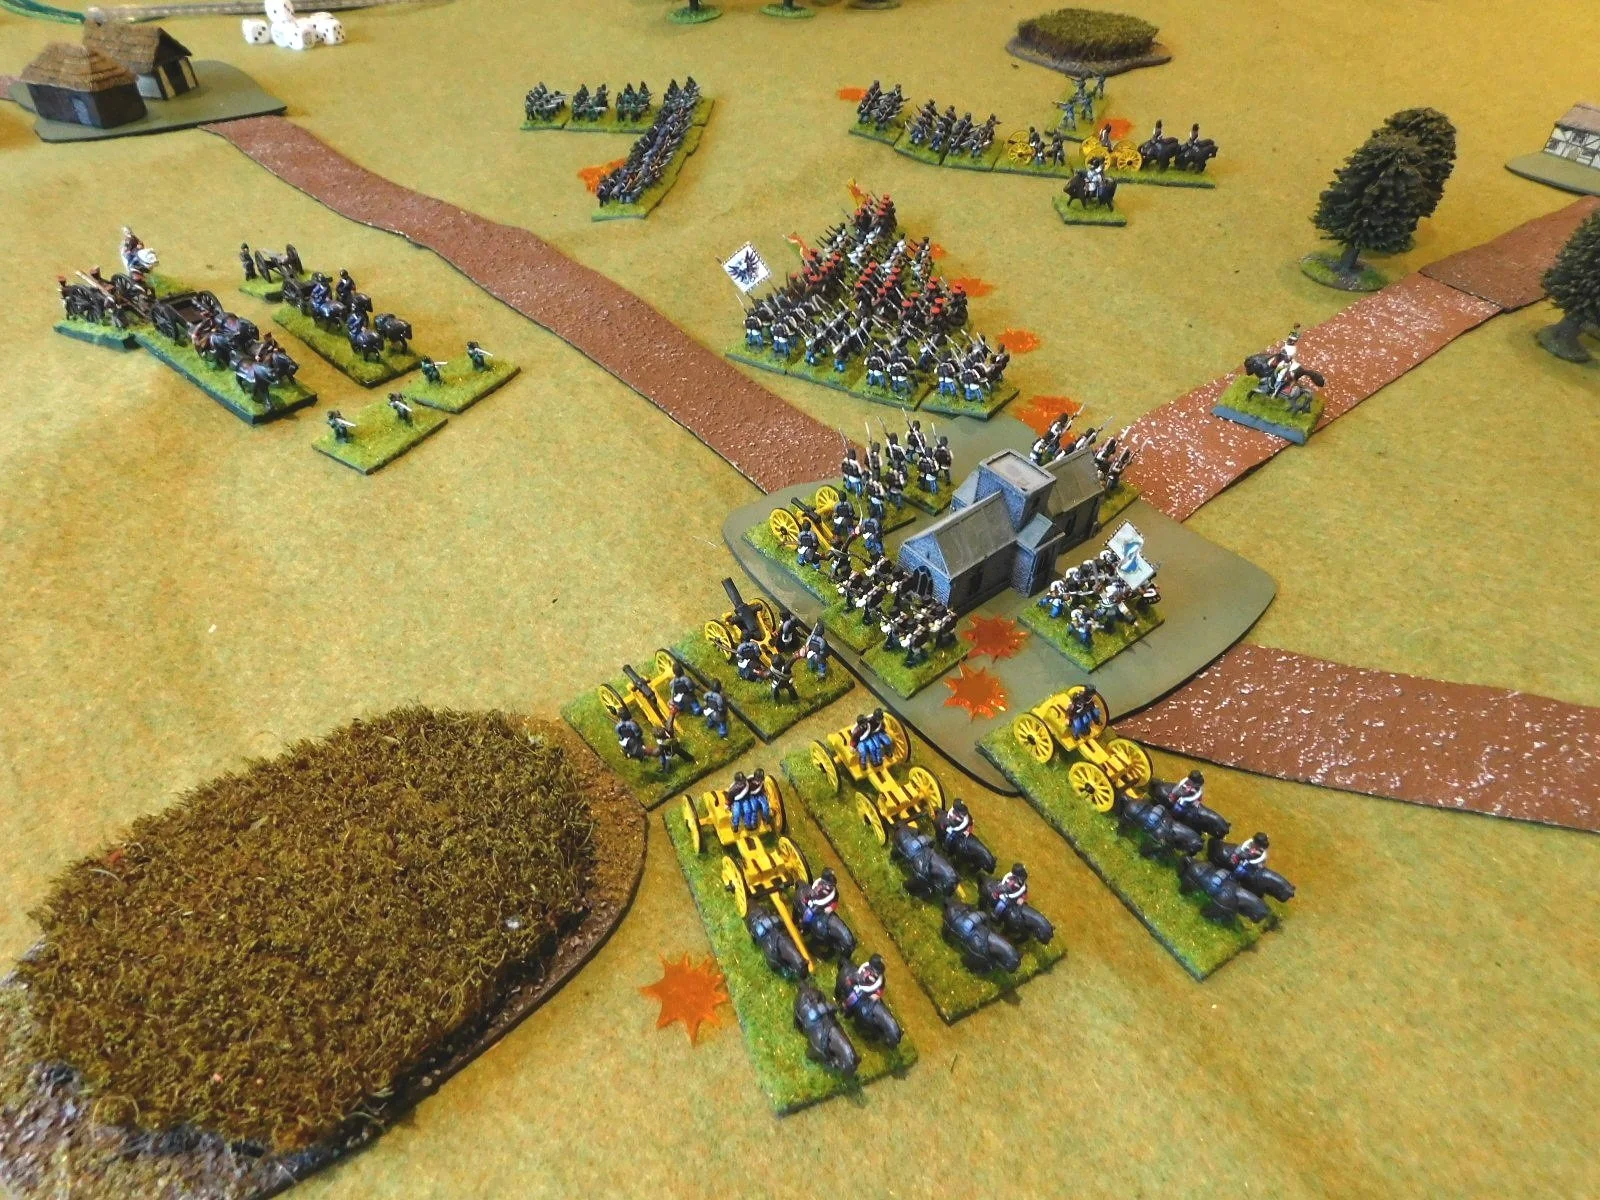
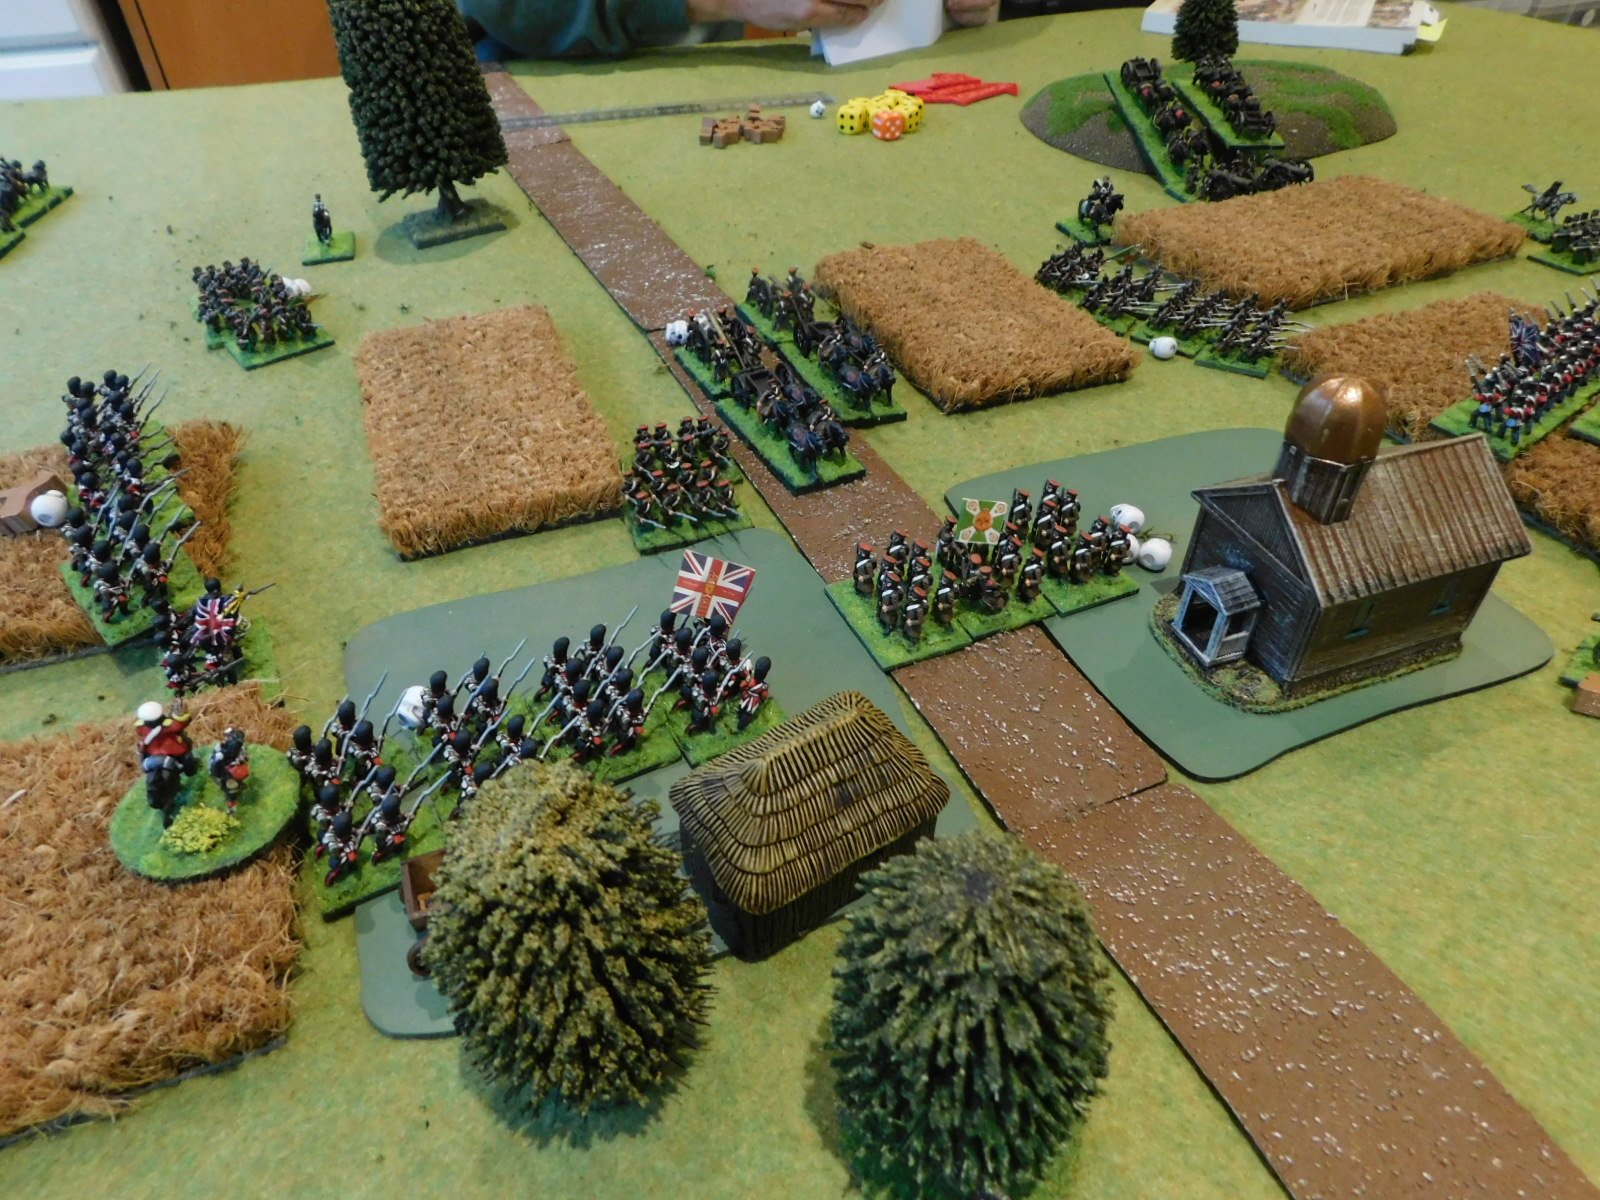
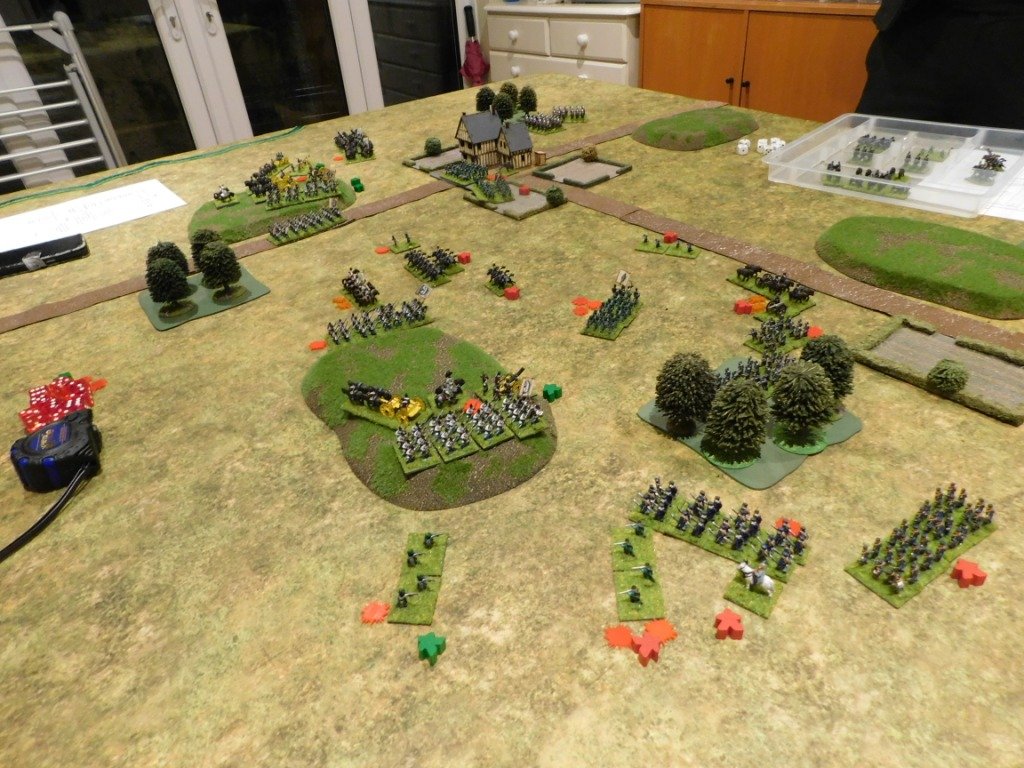
As the game drew to a close, the two sides were locked into a firefight that was slightly going the Austrians way: if only because their guns were deployed and firing whereas those of the Prussians were still limbered.

With two of the three objectives in Austrian hands, and with a superior tactical position, the game was declared a winning draw for the Austrians.

Aftermath

This was a tight-fought game with the Prussian Guards fighting for every yard: at one stage, two units of Prussian guard were fighting six units of Austrians and holding their own! It was only when the Austrian guns came up that the situation turned against them.

In the end, Austrian aggression won the day for them, although we probably had the width of the table too wide by 30cms or about two turns of road movement. A right-sized table would have let the massive Prussian column of reinforcements close with the Austrians earlier than actually happened, something that could well have turned the game in their favour.

So a draw was the right result: as the person playing the Austrians, I was not looking forward to facing the Prussian breechloaders should they have had the time to properly deploy!

SP AAR: OML9: Xhosa Raid!

My second game at Operation Market Larden 9 was a game of Sharp Practice set in South Africa in 1846.

To quote the briefing, “Xhosa raiding parties have brough terror to European settlers along the border with Cape Colony, destroying farmsteads, murdering their inhabitants and driving off livestock. The Governor has ordered both Regular and locally-raised auxiliary units up into the Waterkloof mountains to escort the civilians back to safety”.

I would play the commander of the auxiliary units tasked with rescuing the civilians.

The column I was helping to protect. My auxiliaries will enter the table from far to the right of what you can see here. The xhosa will come from where the camera is and off to the right as well.

This turned out to be a Ripping Yarn of a game, with waves of Xhosa initially trying to overwhelm the column and my troops with fire then, realising that we were winning the firefight, attempting to charge in and fight us at close quarters.

Most of the work, I admit, was done by my colleague controlling the Regulars, who established a firing line towards the rear of the column and a group of Riflemen in a ruined farmhouse and, quite frankly, shot the Xhosa to death.

For my part, apart from an initial hiccup with Corporal Nutter’s section of militia, who used my first move to retreat behind cover and then did not activate for the whole of the rest of the game, I managed to get some very useful Frontier Light Horse types into a position where they were protecting the road and could use their double-barrelled carbines to good effect, and then started rolling up the Xhosa’s left flank with the rest of my troops.

A charge from the Xhosa just about wiped out another of my units (horsemen who were, at that point, fighting dismounted) but that left the charging Xhosa vulnerable to a couple of volleys and a counter-charge that sent them scurrying from the table.

In the end, we defeated the Xhosa without taking too many casualties ourselves. Here’s a gallery of the action:

My thanks to everyone who was running/playing the game (it was great to use such beautifully painted figures on a cracking layout) and, of course, to Ade Deacon for organising the event as a whole. Can’t wait for OML10!

19thC AAR: Battle in the Crimea

Having recently re-based all my British Crimean figures, it was time to get them onto the tabletop. Like some of my other 19thC figures, these troops hadn’t seen the light of day for almost twenty years: a testament to my inability to sell or give away any of my collection!

As I had done all the work, I would take the British, with friend John taking the Russians. Set up was a simple one: both sides were after possession of a strategically important village in about the centre of the table. We would use the Neil Thomas Rules for Wargaming the 19th Century.

As the game begun, both sides hotfooted it towards the village.

As you can see, the Brits were a bit faster (and maybe closer, but we rolled for sides!) so managed to get into the village before the Russians. Also note the opposing sides’ cavalry moving towards each other slowly on the near flank.

Before we move on with the narrative, here’s a great shot of the British during their approach:

The Fight for the Village

The British reached the village first and barely had time to form line before the Russian columns started to charge home.

On The Right

On the right hand side of the field, a British battalion supported by skirmishers faced off against two large masses of Cossack horse supported by heavy artillery and a battalion of Cossack foot.

Throughout the rest of the game, this battalion would hold this flank, sending the three Cossack units flying back to their steppes. The price was high: only half the British infantry were still on their feet at the end of the battle.

On The Left

On the left hand side of the field, the British cavalry slowly advanced towards their opponents: the plan was to protect the left flank then, once the Russian infantry were fully committed to the village, to smash the enemy horse from the field before looping around the Russian rear.

Unfortunately, although the flank was indeed protected throughout the game, when the British cavalry did eventually commit to combat, the result were…mixed! There was certainly no rapid smashing from the field going on and the situation developed into a grinding melee that lasted until the end of the battle.

The British eventually probably had the best of the encounter, but their cavalry had done all they were going to do for the day: no looping around the rear was going to occur.

This was very disappointing, as I was expecting the cavalry to quickly carve through their opponents and then go on to wreak havoc in the Russian rear.

With the two flanks fought to a standstill, resolution was going to occur in the centre.

Extreme Action In The Centre

As previously mentioned, the Russian columns charged into the village, focussing their efforts on the lone battalion of Highland infantry occupying the buildings on the left hand side of the road.

Time and time again, fresh columns of brown clad infantry advanced into the fight until the area was strewn with their corpses, but sheer volume of numbers was beginning to tell and soon there were only a handful of brave Scots left. These resisted for another turn or two, then were finally sent flying, leaving the left hand side of the village in Russian hands,

At the same time as the above, more Russian columns attacked the British battalion holding the right hand side of the village. These crumbled somewhat faster than the Scots, and soon the entire village was in Russian hands! Things looked a bit grim for the Brits!

This was, however, only a temporary setback. The two battalions of Guardsmen on the left of the British line had repelled the Russians in front of them and now took the offensive. One formed columns and moved towards the left hand side of the village whilst the other pivoted around its right hand man to flank more Russian columns as they advanced forward.

This proved too much for the Russians, and soon the left hand side of the village was back in British hands, with no more Russian reinforcements on the way.

Meanwhile, on the right of the central British line, a battalion of line infantry had been holding its position in the centre of a cornfield, repelling any Russian columns who came towards them. Fortunately for the Brits, the terrain meant that the Russian attacks had come in piecemeal as opposed to a co-ordinated push.

Although honours were now technically even, with each side holding one half of the village, the Russians were down to only three effective infantry units (from eleven!) whereas the British had only lost two of their six infantry battalions. With the wings stalemated, the Russian commander declined to waste his troops on further assaults, or even to try and hold the gains that they had made, and ordered a general retreat.

Aftermath

Another great game and one that was actually very close indeed.

When the Russian columns pushed two British battalions out of the village, I was seriously concerned that I wasn’t going to get back into them, especially as my “elite” cavalry were busy getting nowhere.

To finish, here are a couple of shots not included above of the battle in progress:

19C AAR: Crimean War Clash

Having re-based my Crimean Russian army a couple of weeks ago, it was now time to get them onto the tabletop. These figures had last seen action 23 years ago, so it was a real pleasure to wheel them out again and just proves my adage: never sell any figures, never give any away!

The game, using Neil Thomas’ Rules for 19th C Warfare, would therefore feature my Crimean Russians against John playing my Crimean French army in a fight for control of a strategically vital crossroads atop a ridge somewhere near Sebastopol.

Russians to the left, Frenchies to the right. The aim of the game was to take the crossroads in the middle of the table

As we wanted a big game and weren’t too bothered about making things fair, we fielded every figure that I had in the two armies concerned. This left the French pretty outnumbered, but with much better command and troops of generally better quality. The French could also form line for firing, unlike the Russians who were forced to stay in column throughout the game, and were armed with rifled muskets unlike the smoothbores of the Russians. Finally, the French could also field skirmishers (the Legere units) to harass the Russian columns as they advanced.

The Russians fielded four infantry divisions and a cavalry division for a total of ten infantry units, four cavalry units, five batteries of artillery and a couple of dubious looking sotnias of Cossacks.

The French fielded three infantry and one cavalry division for a total of six infantry units, three skirmisher units, four cavalry units and three artillery batteries.

So a hard fought victory for the Russians!

The French retreated in good order having lost all their skirmishers and half their line infantry. They managed to save two batteries of artillery, but lost most of their cavalry.

The Russians advanced to occupy the crossroads, but had lost half their infantry, half their artillery, half their cavalry and most of the Cossacks.

As the Russian commander, I knew my only route to a win was to just grind the French down, and grind them down I did.

John admitted that his infantry got bogged down in the fields and hedges near the town: his infantry mainly stayed static and tried to win by musket fire alone, which was a shame as every time the French attacked they smashed the Russian columns back. More elan needed next time!

The cavalry action on the Russian right was just a distraction: three units of Russians took care of two units of French, but hadn’t the strength to do much more. On the Russian left, the Cossacks were effectively wiped out by the French Guides, and it was again a shame that the French Cuirassiers had to be sacrificed in a vain attempt to stop the three columns of Russian infantry coming forward. At least they dies knowing that they gave the surviving French infantry in the centre time to retreat in good order!

All in all a cracking game!

19th C AAR: The Battle of Rigatoni

Time for some 1859 Franco-Austrian War action using Neil Thomas’ Wargaming 19th Century Europe 1815-1878 rules.

It’s what would become northern Italy, and the two small towns of Rigatoni and Bolognese are about to eb the subject of a major clash or arms.

On the left in the picture below are the French. They outnumber the Austrians in infantry and cavalry 6:5 and 4:3 respectively. The French are better commanded troops, a real advantage under these rules, and many of their units are Elite.

The Austrians, coming from the right, suffer from poor quality generals. They do, however, have more artillery (5:3), start the game uphill from the French, and begin the game closer to the two towns.

Both sides began the game by rapidly heading forward, with the Austrians reaching the towns first.

The French delivered three main thrusts: one on each town and one in the gap between them.

First in was the thrust against the Austrian right flank that forced the Austrian infantry out of the town. Good news from the French, but the Austrians rallied outside the town and punished the French with rifle and artillery as they reorganised after their attack.

One French battalion was wiped out as it took a battery of Austrian guns, the other was content to lurk amongst the safety of the buildings…and their accompanying cavalry was about to lap around the Austrian flank.

The French were also now approaching the Austrian left and centre, but the Austrian cavalry (much delayed by its painfully slow commander) had finally arrived:

Back to the left, and the French cavalry attacked the Austrian infantry that had been ejected from the town at such great cost to the French infantry.

The French cavalry charged forward, but were cut down in a hail of fire.

The Austrian left flank was now secure, and the town there could be re-captured…but only if the rest of the battlefield also remained in Austrian hands.

In the centre, the French infantry columns reached their destination and attacked. Again, however, although initially successful, the almost-victorious French infantry either exhausted themselves in an ultimately indecisive charge, or were shot down by the Austrian infantry in the town on the Austrian left flank.

That left only the Austrian left flank to be decided, and that was where the Austrian cavalry were massed.

Both sides hurled their cavalry forward, and a massive, swirling melee broke out. At first the French did well, but Austrian numbers soon began to tell, and eventually the remainder of the French horse were either dispersed or forced to fall back, especially when the Austrian horse-artillery rockets got into the action.

And with the defeat of their cavalry, the French’s chances of victory slipped away, and the pantalons rouge were forced to retire.

A hard fought victory for the Austrians, whose troops managed to absorb the initial charges of the French attack columns before wiping them out with rifle fire: a great game much enjoyed by either side.

Here’s a shot of the battlefield as the game ended.

19C AAR: The Battle of Lederhosen

With both the Austrians and the Prussians now rebased (see previous posts) it was time to get the armies back onto the tabletop. This would be their second outing after over twenty years in storage!

The Austrians

  • 1st Division

    • 1st Line Battalion

    • 2nd Line Battalion

    • One Jaeger Company

    • Two artillery batteries

  • 2nd Division

    • 1st Jaeger Battalion

    • 3rd Line Battalion

    • Two Jaeger Companies

    • Two artillery batteries

  • Cavalry Division

    • 1st Uhlan Regiment

    • 1st Hussar Regiment

  • Army Reserve

    • 1st Dragoon Regiment

The Prussians

  • 1st (Jaeger) Division

    • 1st Jaeger Battalion

    • 2nd Jaeger Battalion

    • One Jaeger Company

  • 1st (Line ) Division

    • 1st Guards Battalion

    • 2nd Guards Battalion

    • 1st Landwehr Battalion

    • 2nd Landwehr Battalion

    • One Jaeger Company

    • Three artillery batteries

  • Heavy Cavalry Division

    • 1st Cuirassier Regiment

    • 2nd Cuirassier Regiment

    • 1st Dragoon Regiment

  • Light Cavalry Division

    • 1st Uhlan Regiment

    • 2nd Uhlan Regiment

And that was where we had to end the game unfortunately.

I was certainly in a very good position on my left, honours were even in the centre, but I was definitely losing the right,. So we called it a draw, with a slight strategic advantage to the Prussians balanced by the extra casualties they had taken.

A great game, and I’m now rebasing the French so that they can join in the fun!

19thC AAR: Austrians vs Prussians

As we’d been playing For King and Parliament almost exclusively for the past few months, my regular wargaming opponent and I fancied a change. He’d spotted my fairly extensive collection of 19th Century figures, so suggested we dust them off and have a game.

Good idea, says I, so the next question became a discussion about what rules to use. I wanted something simple, with no need for protractors and laser pointers and the like, so we thought we’d give Neil Thomas’ Wargaming 19th Century Europe 1815-1878 a try.

This compact little booklet contains a wealth of information. There’s a large background section followed by six pages of rules and then large numbers of army lists, battle scenarios and historical information.

Six pages of rules sounded good to me, especially as I knew that I would need to re-base my collection to play any commercially available rules, so would only need to expend a little brain power to work out how to use my existing figures and play-test the system before making any sort of re-basing decision.

We set up a quick encounter game using as many of my Austrian and Prussian figures as possible, and set to…

The Battle

As I said, above, we used my existing figures based as is, and made loads of mistakes with the rules - despite their simplicity!

I won’t therefore do a full AAR, just a gallery of the action. Suffice to say that my brave but outnumbered Austrians were soundly beaten: the breachloaders used by the dastardly Prussians proving highly superior to my Lorenz rifles!

It was a most enjoyable game, however, with the rules proving simple yet infinitely subtle. It certainly had the feel of a 19th Century battle: very pleasing as many rulesets for the period, in my experience, are a Napoleonic battle with a bit of advanced weaponry tacked on!

I’ve now started re-basing my troops to suit the system (and many other sets as there’s nothing too outre about what’s needed) and we’ll have more of a proper game next time.

Oh, and it’s worth mentioning that none of the figures featured had been on the tabletop for over 20 years!

Viva Juarez!

When I used to play a lot of 19th Century gaming, one of the campaigns that really interested me was the French Intervention in Mexico in the 1860s.

Without going into too much detail, in 1861 Britain, Spain and France decided to persuade Mexico to pay their extensive debts by sending troops to Veracruz. It soon became obvious that the French had actually decided to not just get their money, but invade Mexico properly with the intention of turning it into some kind of client-state. Although some Mexicans sympathised with the French, others, under President Benito Juarez didn’t, leading to a combination of all-out French invasion and Mexican civil war. As is so often the way, the invading French were initially very successful, taking Mexico City and installing the puppet Emperor Maximilian on the throne, but eventually they were worn down by the constant guerilla warfare and withdrew, leaving Maximilian to his fate.

It’s a fascinating campaign full of colourful personalities and even more colourful uniforms. The only thing that has really been lacking is a single source of information that puts everything easily in one place for the wargamer.

Until now!

Those fine chaps at the Virtual Armchair General (aka TVAG: with whom, I might add, I have no connection) have published not one but two books on the campaign: Viva Juarez Volume 1, The Armies; and Viva Juarez Volume 2, The Battles.

These were initially available on a pre-subscribe print on demand basis: a service which is quite extraordinarily incredible. I ordered both books via e-mail, paying via PayPal, and got them in the post the next day!

These are proper wargaming books written, it seems, by wargamers for wargamers. They are full of the detail that normal historians tend to ignore but that are vital for those recreating the conflict. There’s a lot of chrome as well: information to add colour to your games.

The Armies book has easy to decipher OBs backed up by vast numbers of uniform plates that provide a great guide for the painter. The Battles book effectively gives you a large number of wargaming scenarios that you could almost play straight from the book.

I include all TVAG’s blurb below, but would highly recommend both volumes to anyone who has any sort of interest in the period. Excellent work TVAG!

Click here to go the the TVAG page where you can buy these.

TVAG’s Blurb

Over two years in development, Viva Juarez! is now the most complete single source for all matters military pertaining to the French Intervention in Mexico, Napoleons III's mad scheme to create a puppet Empire of France ruled by an Austrian prince.

Though a number of good English language books have been available, none have detailed accounts of any of the key battles and sieges, only generic references, and little or no Order of Battle information. Uniform data is out there, but a thorough collection of all that is available--and a number of uniforms that are not--previously took a major effort to find.

The Los Supremos Podres, figures from my collection

The Los Supremos Podres, figures from my collection

Well, that is all ended now. Viva Juarez! has it all, and then some, in two unique volumes. "Volume One--The Armies," has 62 pages of full color uniform plates, many contemporary to the events, and a good number of new ones specifically made for this project by former Disney illustrator, Nick Stern. But more than just the plates, there is full organizational information for all combatants: Mexican Republicans, Franco-Mexican and Imperialists, Belgians, Austrians, Egyptians, and, of course, Second Empire French. Color plates of weapons and their operating stats for all armies, and more, make this the single most complete source on the armies engaged. "Volume Two--The Battles" contains in its 204 pages full details of 31 actions, each with OB's and at least one period battlefield map. These maps have been reproduced in full color and printed full page size in order for the terrain and troop movements to be easily studied. Further, there is a section on Key Personages, brief biographies of some of the most influential players which can help the reader keep track of who-is-who and their affiliation(s) during the war. Twenty appendices are include for thoroughness, including a full chronology of the war, Regional OB's for different stages of the war, and organizational information on the Imperial Gendarmerie and the disposition of captured Republican Officers sent to France. Attention to Mexican topography has been taken, as well, to help illustrate it effects on campaigns and logistics with descriptions and pages of special maps.

The 2nd Battalion of Mexican Infantry (they can fight on either side!)

The 2nd Battalion of Mexican Infantry (they can fight on either side!)

Even current devotees of The French Intervention will learn more than has ever been available to them before. This Editor was able via the Internet to source Spanish, French, and German language books, contemporary magazines and periodicals, memoirs, and reports not previously translated to English. Besides the actual events of many battles not previously accessible, the sheer volume of contemporary photos, illustrations and maps is without precedent. Of particular value was Mexico's Mapoteca Orozco y Berra whose generous staff made available maps previously thought non-existent.

While Viva Juarez! can be read by any history buff, it is truly aimed at the wargaming possibilities. With the actual battlefield maps and detailed OB's, it is definitely possible to re-fight any of these historical actions with great authenticity using whatever rules are preferred. But of particular interest is the fact that most of the battles fought in Mexico can be represented on the table top with no more than 100 figures. The great sieges of Puebla, Oaxaca, and even Queretaro are possible, especially if only key actions are played, but so many were affairs were of only a few thousand to a few hundred combatants. No massive Napoleonic or American Civil War collections required here! And yet the variety of troops by nationality, uniforms, weaponry, terrain (jungles, not just desert!), quality and numbers on the table is best likened to the most exotic Colonial Wargames. There are even amphibious operations along both coasts of Mexico recounted in detail. Viva Juarez! is now the "go to" source on the subject.

Viva Juarez! is available in two volumes, each is a stand alone devoted to its topic. Volume One--The Armies Retails for $30.00, plus postage. Volume Two--The Battles Retails for $40.00, plus postage.

Click here to go the the TVAG page where you can buy these.

SP AAR: Ball's Bluff at Virtual Lard IV

Yesterday I took part in my third virtual game in ten days, this time as part of Virtual Lard IV: the equivalent of a regular Lardy Day, but with all the games being played remotely.

Today’s game was a re-fight of Ball’s Bluff. It’s the beginning of the war and a super-keen Union artilleryman has advanced his guns forward over the James river into Reb territory. The Rebs have cottoned on to the fact that the gunners are out on their own and have sent a force to capture the guns; Union high command have seen this coming and dispatched troops to bring the guns safely home. The stage is set for an epic clash!

Click on the picture below to see what happened:

Pickett's Charge Now Available

Although a divisional rather than a company-sized game, here's news of the launch of the first TFL/Reisswitz publication, Pickett's Charge.

"Written by veteran game designer Dave Brown, Pickett’s Charge are an exciting and dynamic game with plenty of fast-paced action combined with a command and control system which is intuitive and simple to use, but nuanced and subtle enough to provide the gamer with interesting and testing command challenges. ‘Simple to learn but a challenge to master’ has never been more the case as the player is constantly presented with decisions about how to best influence the action, to seize the initiative from the enemy and to inspire his troops on to great deeds.

"Packed with Civil War flavour, Pickett’s Charge is designed for Divisional and larger battles in the American Civil War, with the Regiment being the smallest manoeuvre element, the Brigade the lowest tactical command. A typical club night action involving several Brigades per side and a full day or weekend handling a Corps or two with ease.

"82 pages in length, Pickett’s Charge includes rules for using both 15mm and 28mm figures, suggestions for organising your armies with a point system and a guide to rating force. An introductory scenario is all you need to get playing with this great new set of rules from the master of the big battlefield.

"PLEASE NOTE:  This advanced order option is for the hard copy rules with the bonus of a free PDF of the rules. The PDF will be emailed to you on the day of publication, the 26th of October."

You can buy the rules by clicking either here or on the picture of the front cover.

Sharp Practice: Advanced Orders Now Being Taken

Exciting news from Lard Island: with advanced orders for Sharp Practice now being taken.

Sharp Practice is the TFL large scale skirmish game designed for use from the Napoleonic era to the end of the catalytic wars.

Here's what Big Rich had to say about the release:

The rules are at the printers, the cards are being produced, the Poker Chips are en route and the Game tokens are rolling off the production line.  That can only mean one thing: Sharp Practice will be released on St George’s Day later this month and we are now taking advanced order.

And what spankingly good advanced orders we have for you too.  You can, of course, get the rule set on its own, but there are also five bundle deals which you can select from which provide some assistance when playing the game.  Let’s take a look at what these bundles contain.

The Rules

It's a 120 page book which contains the rules and Army Lists for five different conflicts.  These are the French Indian War, the AWI, Peninsular War, ACW and Indian Mutiny.  

However, the rules won’t stop there.   We have lost of other periods ready as free downloadable Army lists covering stuff like Garibaldi in Italy, Napoleonic warfare, Revolutionary Wars in Italy, US Mexican Wars and a whole host of other exciting stuff.

The Cards or Poker Chips

You can choose whether you want to use a card deck or pull chips from a bag or cup.  It’s entirely up to you which you use.  You will need ONE set or cards or chips to play a game.  You do not need one per player.  

The poker chip set are 34 tokens in engraved MDF which are very easy to paint up and look superb when they are done.  The cards are a proper poker standard set with rounded corners and come in a tuck box.  As it happens we got 40 cards to a deck as this suited the printer card sizes so the card deck is slightly larger.

Game Tokens

A set of 18 acrylic tokens to indicate when units Present (ready to fire a controlled volley), when they are firing an uncontrolled volley and when they are broken.  We have played many many games and this set of 18 tokens have been all we needed for any game situation.  No need to duplicate unless you are really going to push the boat out on game size.

We will be posting photos of all of the items as they arrive from suppliers, for now you’ll have to trust us as to the fact that they are all designed for purpose and rather swish.  Here’s the bundles in detail.

The Bundles

Bundle 5

The monster of a bundle with everything anyone would wish for on the Sharp Practice front.

  • Hard Copy rules with 120 pages packed with army lists, scenarios and, of course, the game rules.
  • Bumper Card Deck of 40 cards
  • MDF Poker Chip Set of 34 Chips
  • Game Token set in acrylic
  • Free PDF of the rules.

At £38 this saves you £21 as a bundle.

Bundle 4

Chips with everything  (as per Bundle 5 but no card deck)

  • Hard Copy rules with 120 pages packed with army lists, scenarios and, of course, the game rules.
  • MDF Poker Chip Set of 34 Chips
  • Game Token set in acrylic
  • Free PDF of the rules.

At £34 this saves you £19 as a bundle

Bundle 3

Card Sharp (as per Bundle 5 but no Poker Chips)

  • Hard Copy rules with 120 pages packed with army lists, scenarios and, of course, the game rules.
  • Bumper Card Deck of 40 cards
  • Game Token set in acrylic
  • Free PDF of the rules.

At £35 this saves you £19 as a bundle

Bundle 2

Rules & Chips

  • Hard Copy rules with 120 pages packed with army lists, scenarios and, of course, the game rules.
  • MDF Poker Chip Set of 34 Chips
  • Free PDF of the rules.

At £28 this saves you £17 as a bundle

Bundle 1

Rules & Cards

  • Hard Copy rules with 120 pages packed with army lists, scenarios and, of course, the game rules.
  • Bumper Card Deck of 40 cards
  • Free PDF of the rules.

At £29 this saves you £17 as a bundle.

These bundle orders are for the hard copy rules with extras and they PDF comes free as a “thank you” for placing an advanced order.  Please note, the free PDFs will be sent out on the 23rd of April, the release date.

We will be releasing the PDF bundles on the 23rd of April which will cover the PDF versions of the rules along with bundles of hard copy cards, chips and tokens, so if that’s your bag keep your eyes on the web site or Lard Island News for more details.

The TooFatLardies shop can be reached by clicking here.

More Franco-Prussian War Action

Keen to get his revenge for my win last time, Neil suggested a re-match, but with him playing the Prussians this time.

The situation was fairly similar: von Neil's troops holding a ridge that ran down the centre of the table, with my French aiming to knock them of it. I outnumbered him about 2:1, but Prussian reinforcements were expected, and would arrive at a time determined by a roll of the dice.

The Prussian Line

Looking at the Prussian line, I noticed that all their artillery was in the centre, and that the Prussian right wing was hanging. His left was hanging a little, being sort of anchored on a farmhouse, but it was his right that looked vulnerable.

I therefore set up in a long line parallel to the ridge, but with a column of four battalions of zouaves (nasty, fighting, little buggers) supported by a mitrailleuse and a battalion of chasseur sharpshooters as an attack column on my left flank. My aim was to advance forward, give the Prussian line an unanswerable volley due to the superior range of my Chassepots, and then slam in my attack column. Once I had a foothold on the ridge, the attack column would roll him up as my line kept hammering in the fire. Tres simple but hopefully tres effective!

My commanders were obviously having a good day, as on the first turn my entire army moved forward into rifle range. I took some artillery fire from the Prussian centre battery, but because of its positioning, my densely-packed attack column remained untouched.

On my next turn (the Prussians remaining stationary and relying on their guns) I let loose a volley with the entire line that proved satisfyingly effective, with many Prussian units taking significant casualties. More importantly, the Prussian right flank brigade was disordered, mainly due to some brilliant shooting by the Chasseurs. The mitrailleuse jammed, of course!

Note also that the Prussian left flank brigade was also disordered, leading me to think that there might be something I could do here as well...but more on that later.

the french centre and left (about-to-be-victorious zouaves in the background)

My four-battalion column of zouaves charged up the hill and hit the end of the Prussian line. The lead battalion had been disordered by the fire coming at them as they charged in, so failed to simply smash the Prussians from the ridge, and fierce hand-to-hand combat broke out. Weight of numbers quickly began to tell, however, and the first brigade of Prussian infantry evaporated.

Over to Neil and his next turn: the next brigade of Prussians along attempted to punish the zouaves with fire from their Dreyse needle guns, but someone had obviously blunted their needles as they had no effect at all, not a single casualty being caused.

This was obviously quite worrying for the Prussians, as they retreated both the brigade that formed the right of their line and their guns off the ridge and down into the valley below. The left of my line quickly consolidated their gains: that end of the ridge was in my hands!

Meanwhile, at the other end of the line, I had decided that the opportunity of a disordered Prussian brigade was too much to resist, and had thrown two brigades of infantry up the hill in an attempt to dislodge them as well. Proving that the 2:1 odds were right for scenario (my zouaves had been 4:1 and supported by chasseurs), les gens brave found it hard going, and a hard-slog pushing match developed.

Hitting the prussian left (note the cavalry in the background)

Weight of numbers, however, meant that my men gradually pushed the Prussians back but, just at the moment that his line began to break, Neil sent his regiment of divisional light cavalry into the flank of my assaulting units.

Very messy, and even sending in another battalion of infantry to hit the cavalry in its flank in turn didn't really help matters.

Numbers, however, still told in the end, and although I effectively lost a brigade of infantry doing it, the right hand side of the ridge was now also in my hands so, with the enemy centre retreating, I had achieved my aim.

At that point, however, the Prussian reinforcements began to arrive. Unfortunately, the clock wasn't just ticking for the French, it was ticking for Neil too, so we had to call the game before he could get his extra troops into action.

Saved by the bell, the French were victorious!

losers!

AAR: Franco-Prussian War

It's been a long time since I've played any 19th Century (i.e. Waterloo to Mons) wargames, so it was most pleasing when Neil, my regular opponent, offered to bring round his new 6mm Franco-Prussian War collection and run a game using a modified version of the Black Powder rules.

He duly arrived, laden with not many boxes (6mm, you see!) and set up what looked like a huge game on my 5ft by 6ft gaming table.

I would play the Prussians, versus the French, obviously, with the aim of smashing a French rearguard from their positions atop a ridge at the other end of the table from my start point. All directions are given from the point of view of the army being described.

prussians!

At my disposal, I had a Corps of Prussians consisting of:

  • Corps Commander
    • Corps Artillery (4 batteries)
    • Corps Cavalry (2 regiments Cuirassiers, 2 regiments Dragoons)
  • Left Flank Division
    • Divisional Commander
    • Divisional Light Cavalry (1 regiment)
    • Divisional Artillery (4 batteries)
    • 1st Brigade
      • Brigade Commander
      • Brigade Infantry (6 battalions)
    • 2nd Brigade
      • Brigade Commander
      • Brigade Infantry (6 battalions)
  • Right Flank Division
    • Divisional Commander
    • Divisional Light Cavalry (1 regiment)
    • Divisional Artillery (4 batteries)
    • 1st Brigade
      • Brigade Commander
      • Brigade Infantry (6 battalions)
    • 2nd Brigade
      • Brigade Commander
      • Brigade Infantry (6 battalions)

I could also expect reinforcements at some stage.

Against me, lined up on the ridge line in front of me was a single division of French facing my left flank division. 

I decided that I would strongly probe the French right flank and see what happened, so I set up my left hand division on the left and the right hand division in the centre, with the Corps cavalry protecting my right flank.

The left hand division began the game by advancing strongly, halting inside my artillery's range, but outside Chassepot range. The artillery opened fire with a round of counter-battery fire that had no effect.

Meanwhile, my right hand division and corps artillery (also deployed in the centre) had not moved: its orders having been mislaid or delayed or some such.

we are ready down to our last gaiter buttons!

The French, for their part, now revealed another division set up in line on the left hand side of the ridge. They therefore effectively had an unbroken line of infantry across the entire table's edge.

The artillery of the left hand division now switched targets to the enemy infantry on the ridge, and immediately forced one battalion to retreat in disorder. Excellent!

This left not only a hole in the French line, but led to the more central of two brigades facing my left retreating back behind the ridge in the face of the advance of the corps artillery in the centre.

This obviously left the other brigade isolated, so my left hand division moved forward and prepared to assault. A round of fire peppered my line, but I still had plenty of troops for the attack.

Unfortunately, the corps artillery were then told to move immediately to the right (a "blunder"), meaning that the French brigade that had moved back could now move forward again. In tactical terms, my left hand division could now punch up the hill and destroy one French brigade, but would then be destroyed in turn by the other.

This was not something I was prepared to accept, so my infantry fired one round with their Needle Guns, and then retreated back out of Chassepot range.

This doesn't seem in keeping with my orders, but the good news was that I had received reinforcements in the shape of another division of infantry behind my right flank.

This division kept in column and punched up the right hand side of the battlefield, aiming to hit the left hand brigade of French infantry. Behind my reinforcements were the four regiments of Corps cavalry, Cuirrassiers to the front. 

the prussians in position for their assault, about to receive fire from the french line

What had been the right hand division was now in the centre. One brigade of this division headed left and, together with the left hand division, kept the French on the left hand side of the battlefield from helping stop my right-hand assault. The other brigade headed straight up the hill in line and began a firefight with the right hand end of the French line on the left: I took casualties, but this meant that they couldn't intervene either.

keeping the centre of the french line occupied (note the corps cavalry charging in on the right)

My full divisional column smashed up the hill against a single French brigade that had already been softened up by artillery. At the same time, my Corps cavalry came out from behind the infantry and charged the centre of the French left-hand line, which had become disordered as a result of the fire of the right hand brigade of what was now the centre division.

prussians assault the ridge

misere de misere!

It was carnage!

Although the French Chasseur battalion in the house protecting the left hand end of their line resisted all attempts to dislodge them, the left hand brigade lost three battalions and its artillery were over run...and that was before the cavalry hit.

The Cuirassiers (big men on big horses!) were disordered by the fire from the two French battalions in front of them, but kept going nevertheless. They slammed into the equally disordered French infantry that, effectively, ceased to exist!

At this point we called time and declared a Prussian victory. The right hand side of the ridge was in my hands, and it would not take much for me to wheel left and start to roll up the rest of his line in conjunction with a general advance from my left hand and now-centre divisions. The French retreated: battered!

the french right

keeping the french right occupied

It had been a great game: and a game that looked really good as well. There's something very satisfying about huge numbers of 6mm infantry or cavalry blocks manoeuvring around the tabletop.

Not that I'm going to switch to 6mm, I hasten to add...but I'll certainly have a some more games like this!

My thanks to Neil for putting on a great game.