Blitzkrieg in the West: The Germans: Cover Revealed

Just to give my latest handbook for I Ain't Been Shot, Mum a little pre-publicity, I got the cover through from Rich today.

The handbook will be available from the TooFatLardies website on May 10th (next Thursday) and weighs in at over 180 pages!

The good news is that despite its huge size (over twice as big as the other handbooks in the series) we're not making it more expensive than the other books: it will be the same price as the French, the BEF and the Dutch/Belgians.

The handbook will cover the German army that invaded France and the Low Countries in May 1940. It will contain lists for each of the ten different types of infantry division, each of the ten different Panzer Divisions, the cavalry, the SS, the Fallies, the army troops...you name it, it's in there!

IABSM AAR: Operation Compass #18: Siret el Chrieba

Tony Cane has been working his way through the Operation Compass scenario pack for I Ain't Been Shot, Mum. His last post featured the tank battle at Mechili, this one covers the Australian attack on the Italian aerodrome at Siret el Chrieba.

Here, the Australians are faced by a huge expanse of open ground (“flat as a table and devoid of cover” as the official history puts it) dotted with the occasional hanger or building. Their target is to take the hangar and buildings on the other side of the open ground.

Click on the picture below to see how they do...

Loving the aircraft hanger and the dust-covered Blinds!

Blitzkrieg in the West: The Low Countries now available

I'm very pleased to announce that the third in the series of early war handbooks for I Ain't Been Shot, Mum, Blitzkrieg in the West: the Low Countries, is now available from the TFL website.

The handbook is 88 pages long (bigger than either the French or BEF books) and contains two separate sections: one on the Belgian army of 1940, and one on the Dutch army of 1940.

The Belgian section contains sixteen separate lists covering everything from the Active divisions through to the Cavalry and then on to the Chasseurs Ardennais and Border Guards. There's also a section on the forts and bunkers positioned along the Belgian border.

The Dutch section contains seventeen separate lists covering everything from the First Line divisions through to the Light and Peel divisions through to the three independent brigades, the cavalry and the various territorial commands. There's also a short section on the defence of the main airfields and another on the defence of Rotterdam.

Both the Belgian and Dutch sections contain a lot of background information, so the handbook should be very useful for players of other game systems as well.

And don't forget the other two handbooks that are already available:

As one review on the TFL website says about the BEF handbook: 

Picked this up this morning – I got the French one last month. Absolutely brilliant resource that I really look forward to using. Can’t wait for the German one. *****

Jonathan

Coming Next Tuesday: Blitzkrieg in the West: The Low Countries

Just in case people were wondering why it's all still been a bit quiet on here lately, it's because I'm still working hard on the series of Blitzkrieg in the West theatre books for I Ain't Been Shot, Mum.

The French and BEF handbooks are already available from the TooFatLardies website, and I'm pleased to announce that the handbook covering the Low Countries - Belgium and the Netherlands - should be available to buy right after the Easter Bank Holiday weekend i.e. Tuesday next week, 3rd April.

The handbook is 88 pages long (bigger than either the French or BEF books) and contains two separate sections: one on the Belgian army of 1940, and one on the Dutch army of 1940.

The Belgian section contains 16 separate lists covering everything from the Active divisions through to the Cavalry and then on to the Chasseurs Ardennais and Border Guards. There's also a section on the forts and bunkers positioned along the Belgian border.


The Dutch section contains 17 separate lists covering everything from the First Line divisions through to the Light and Peel divisions through to the three independent brigades, the cavalry and the various territorial commands. There's also a short section on defending the airfields and another on the defence of Rotterdam.

Both the Belgian and Dutch sections contain a lot of background information, so the handbook should be useful for players of other game systems as well.

So don't buy that extra Easter egg: save your money for Tuesday morning and a trip to the Low Countries!

Blitzkrieg in the West: The BEF Now Available

I'm very happy to announce that Blitzkrieg in the West: The BEF, the second of the series of theatre handbooks covering the early war in the West is now available.  It covers the British Expeditionary Force from 1939 to the fall of France in 1940. Designed primarily for use with IABSM v3, the handbook will still prove useful to all players of WW2 company-sized wargames.

This incredibly detailed guide to British forces, written by me, is 75 pages in size and is packed with data, including the following British forces:

  • From the Infantry Division
    • The Infantry Company
    • The Infantry Battalion Carrier Platoon
  • From the Motor Infantry Division
    • The Motor Infantry Company
    • The Motor Infantry Scout Car Platoon
    • The Motor Infantry Motorcycle Company
  • From the Line of Communication Troops
    • The Line of Communication Infantry Company
    • The Pioneer Infantry Company
    • The Searchlight Infantry Troop
  • From the Reconnaissance Troops
    • The Divisional Cavalry Squadron
    • The Armoured Car Squadron
  • From the Detached Element of the BEF
    • An Infantry Company from Saar Force
  • From 1st Tank Brigade
    • A Tank Squadron from 4RTR
    • A Tank Squadron from 7RTR
    • Parkes Force
  • From 1st Armoured Division
    • A Paper-Strength Armoured Squadron from 1st Armoured Division
    • A Tank Squadron from the Queen's Bays
    • A Tank Squadron from 10th Royal Hussars
    • A Tank Squadron from 2RTR
    • A Tank Squadron from 5RTR
  • From Calais & Boulogne
    • A Best Guess Tank Squadron from 3RTR
    • A Motor Infantry Company at Calais
    • A QVR Motorcycle Company at Calais
    • The Guards at Boulogne
  • From the Beauman Division
    • An Infantry Company from A Brigade
    • An Infantry Company from B Brigade
    • An Infantry Company from C Brigade

With additional sections on the Second British Expeditionary Force, other British independent formations, fielding British forces, rating your forces and a comprehensive armoury. 

The handbook is available in PDF format only from the TooFatLardies website. Click here to go straight to that page.

Blitzkrieg in the West #1: The French Now Available

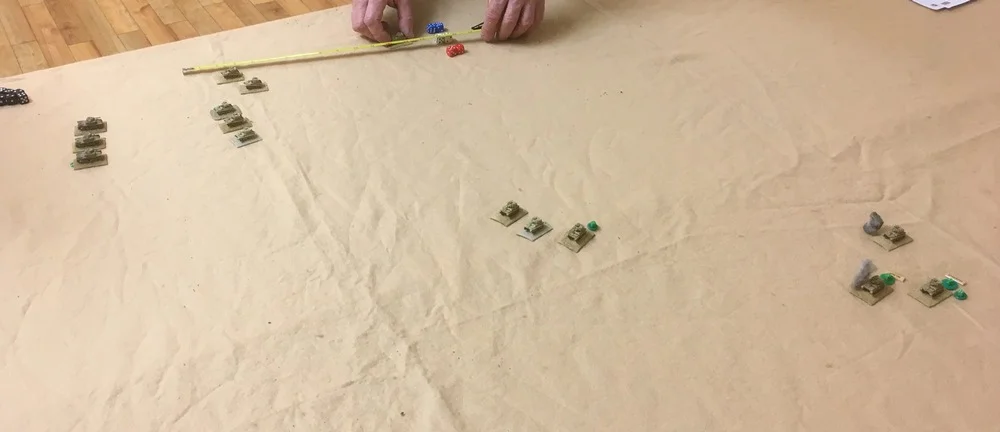
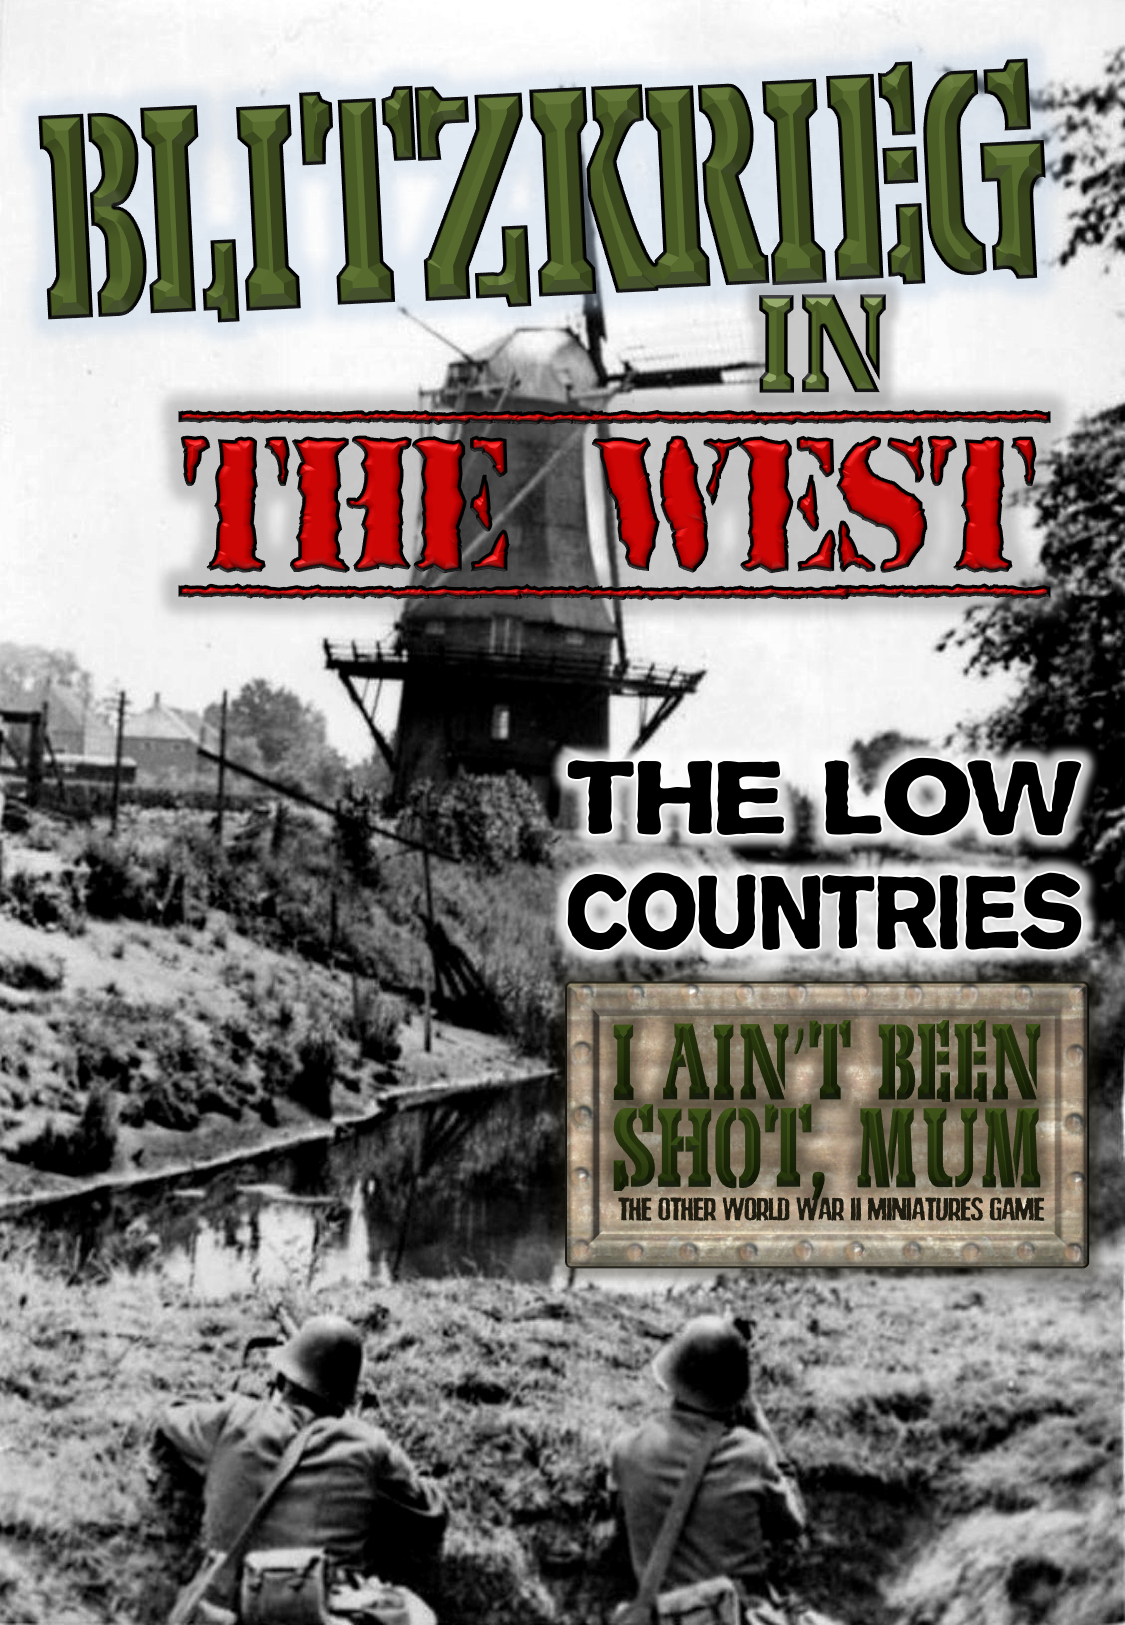
When IABSM v3 was published, two late war handbooks quickly followed:  Battle for Liberation and Vpered Na Berlin. I am very pleased to say that today sees the publication of the first of the v3 early war handbooks: Blitzkrieg in the West #1: The French.

The handbook is 73 pages long, and covers the French Army from 1939 to the fall of France in 1940. It has twenty-nine force listings in it, all looking at core company structure and then the possible battalion, brigade, regimental, divisional and higher level supports. It also has a guide to rating your French forces, and a comprehensive armoury.

Available only as a pdf from the TooFatLardies websiteBlitzkrieg in the West #1: The French costs £8.40.

Handbooks covering the BEF, the Belgians and Dutch, and the Germans follow one per month in March, April and May this year.

Blitzkrieg in the West #1: The French contains the following lists:

Infantry Divisions
Infantry Company
GRDI Cavalry Squadron
GRDI Motorcycle Squardon

Motorised Infantry Divisions
Motorised Infantry Company
DIM Motorcycle Company
GRDIM Motorcycle Squadron
GRDIM AMD Squadron
GRDIM AMR Squadron

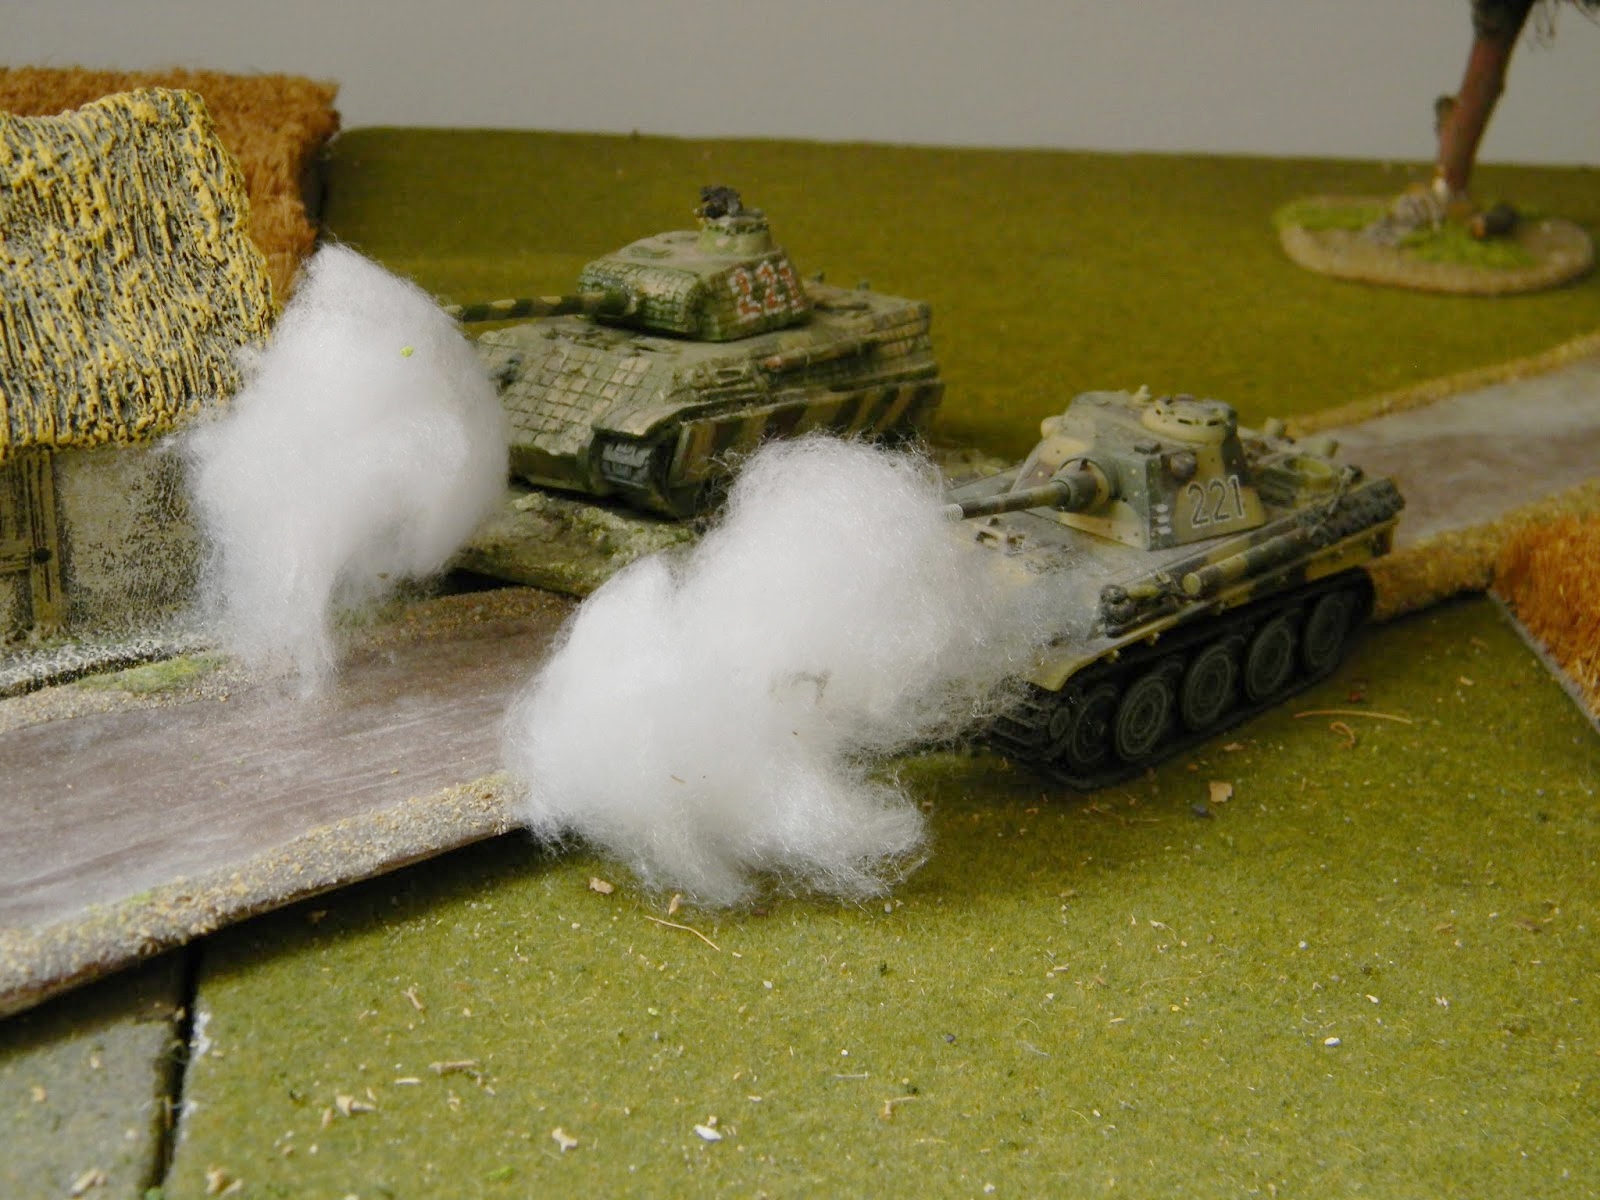
Independent Tank Formations
Independent Tank Company (R-35, H-35, D-2 or fCM-36)
Independent Tank Company (FT-17)

Colonial Infantry
North African and Foreign Legion formations 

Light Cavalry Divisions
Cavalry Squadron
Mechanised Dragoon Fusiliers
Dragoon Mixed Reconnaissance Squadron
RAM AMD Squadron
RAM AMC Squadron
RAM Motorcycle Squadron

Cavalry & Spahis
The Cavalry Squadron

Corps Reconnaissance Groups
GRCA Cavalry Squadron
GRCA Motorcycle Squadron
GRCAm Motorcycle Squadron

Light Mechanised Divisions
Tank Squadron
RDP Mechanised Dragoon AMR Squadron
RDP Mechanised Dragoon Fusilier Squadron
RDP Mechanised Dragoon Motorcycle
RD AMD Squadron
RD Motorcycle Squadron

Reserve Armoured Division
DCR Heavy Tank Company
DCR Light Tank Company
BCP Fusilier Company

IABSM AAR: Operation Sealion: Tally Ho!

Here's a battle report from a game I played in last weekend, using the Tally Ho! scenario from the Operation Sealion scenario pack.

The report is not written by me, but by Dave...who had the unfortunate task of referring a game in which I was participating. John and Mark played the Brits trying to re-claim a small corner of the UK for Queen and country; I played the dastardly Hun seeking to expand the Third Reich over England's green and pleasant land.

Click on the pic below to see how it all turned out...

IABSM AAR: Operation Compass #03: The Invasion of Egypt

Although just being published now, this AAR covers my last game of 2017.

It's the Libyan/Egyptian border in September 1940, and the Italians have finally got their act together and invaded. A huge column snakes its way down the desert strip towards Egypt. In their way are the Coldstream Guards and their supports.

Find out how the Italians did by clicking on the picture, below.

Nice Plug for Compass

Here's a link to a nice post about the Operation Compass scenario pack.

Yarkshire Gamer has been using the pack as the basis for his new campaign. Okay, so he's not using IABSM, but it just goes to confirm that the games in the TFL scenario packs are easily adaptable for other rule sets.

Click here to visit the Yarkshire Gamer blog. 

And completely co-incidentally, I played a Compass scenario myself last week: report will be published here tomorrow morning...


IABSM AAR: The Dukla Pass (Poland 1939)

On 8th September 1939, German Gebirgsjaegers moving along the Carpathian mountain range bumped into a unit of Polish Border Protection Corps mountain troops near the Dukla Pass. After a short battle, the Poles withdrew, leaving the pass open for the Gebirgsjaeger to continue their advance.

That was the background to scenario #39: The Dukla Pass, taken from my just-published scenario booklet, The September War, Part 2: another thirty of so scenarios for IABSM covering the German invasion of Poland in September 1939.

The game would involve both sides wrestling for control of two objectives, with victory going to side that controlled both objectives on any appearance of the Tea Break card.

Click on the picture below to see who triumphed in the two games we had, and why one of them ended in a Steward's Inquiry!

IABSM AAR: September 2 #58: Jablon

Whilst I'm waiting for the go-ahead to publish my latest scenario pack, The September War, Part II, giving you another thirty early war scenarios covering the invasion of Poland in 1939, here is a battle report from one of the play-test games.

It's late September, and a mixed bag of Polish troops are holed up in the village of Jablon. They want to slip away over the border, but there's a fast-moving column of Soviet tanks and infantry heading towards them. They'll have to hold out until nightfall...

Find out if the Poles held off the Red Army hordes by clicking on the picture, below, and don't forget to keep a tenner of your Christmas money back to buy the pack once it's out!

IABSM AAR: Operation Martlet #02: Pushing On

Fellow Lardy James Tree has been converting the scenarios in the Chain of Command Operation Martlet pint-sized campaign pack to I Ain't Been Shot, Mum, and posting the results on the IABSM Facebook page.

Here's the report from the second scenario in the pack: troops from the British 49th Infantry Division push on against some rather battered opponents from the German 12th SS Panzer Grenadiers.

See how they get on by clicking on the picture, below.

Best of all, James makes it easy for you to play the scenario yourself. Please do...and send your own AARs in to admin@vislardica.com.

IABSM AAR: Operation Martlet Game

In addition to publishing the company-sized WW2 game  I Ain't Been Shot, Mum, the TooFatLardies also publish the very popular platoon-sized WW2 game Chain of Command.

In addition to the rules, TFL also publish a series of "pint-sized campaigns": scenario booklets for CoC that cover very specific actions over the course of 6-8 games priced, as the name suggests, at the price of a pint of beer.

One such booklet covers Operation Martlet:  the combined arms operation launched by the British 49th Division immediately prior to Operation Epsom to seize the Rauray Spur from the defenders from 12 SS Hitlerjugend.

The pint-sized campaigns can be fairly easily translated for use with IABSM, and this is what James Tree has done for his latest AAR, lifted from the TFL Facebook page.

Click on the picture below to see how he got on...

IABSM AAR: All American #10: Neuville au Plain

Another great after action report picked up from the IABSM Facebook page.

This time, Desmondo Darkin leads his Luftlande Grenadiers into action against the 82nd Parachute Infantry Regiment in a scenario taken from the All American scenario pack.

Click on the picture below to see all:

Summer Special 2017 Arrives

This year's TFL Summer Special is now published and available for purchase. Here's Big Rich on what's in it:

"Stop all the clocks, cut off the telephone,
Prevent the dog from barking with a juicy bone,
Silence the pianos and with muffled drum
Because the Summer Special has arrived!

"So, allegedly, said W.H. Auden when we released the contents list of one of our earlier Specials and this one is just as packed with Lardy fun as any we have seen before with great scenarios, rule ideas and variants and plenty for Lardies old and new to enjoy.

"Let’s take a look at the contents:

  • Flashman and the Emperor: Give yourself top billing as you step into the shoes of Harry Flashman. Can you guide our hero to a safe outcome in this campaign-launching tale of derring-do set in Mexico in 1867.  Will Harry Save the Emperor Maximilian or will he face an untimely death at the hands of the Juaristas?
  • Holding the Line:  Internationally famous wargaming celebrity and lover of gnomes, Mike Hobbs and his chums take us to Normandy 1944 for this Chain of Command scenario with some fun rules additions to tickle your fancy.
  • Sacker of Cities: If the only Homer you know is on the Simpsons, allow “The Colonel” Dave Parker to introduce you to the excellent Trojan Wars expansion for Dux Britanniarum produced by the intellectual giant which is the Durham Wargames Club. “Beware the Wrath of the Gods” says Dave.  I have enough trouble keeping the missus happy…
  • 1745:  David Hunter leaves the safety of the Crossroads Motel and parties like it’s 1745, taking Sharp Practice for a Highland Reel north of the border with unit Rosters and rule adjustments for the Jacobite Rebellion.
  • Cracking the Westwall: Big Rich heads for the Siegfried Line and reveals all you could ever want to know and more about this vision in concrete.
  • Build a Bunker: Inspired by his research, Big Rich shares a step-by-step guide of how to turn polystyrene to concrete.
  • Achtung! Big Rich completes his West Wall trio with a bunker assault scenario for Chain of Command.  Pick your squad, choose your tools and see if you can break through the West Wall.
  • Using Field of Glory Renaissance Armies in Sharp Practice. In the first of our two articles looking at extending Sharp Practice into the age of Pike and Shot, Carole gives us some interesting rule suggestions as she expands Sharp Practice for her evil ends.
  • The Battle of Frank Sanbeans Farm:  This ACW Sharp Practice scenario from Jim Ibbotson, as seen at OML5, wins an award for the worst ever punning title for a game, but we forgive him for his wonderful brush-work.
  • Action in the Valle Delle Marie A hard fighting scenario for I Aint Been Shot Mum from the pen of Mike Whitaker as he heads for the hills and valleys of la bella Italia.
  • LRRP teams in Charlie Don’t Surf:  Charles Eckhart gives top tips on using LRRPS in CDS, plus a scenario to test your new skills.  Can you find Charlie?
  • The Attack on Sochaczew:  Robert Avery pushes his panzers to the limit with an Early War scenario for I Ain’t Been Shot Mum
  • The Bridge at Saindoux:  Fat Nick goes Commando with a scenario for Chain of Command and the outcome is, predictably, explosive.
  • Unternehmen Rollshufahren.  An German airborne assault on a critical British installation see the LDV fighting for their lives as criminal elements assist the naughty Nazis in this Operation Sea Lion scenario for Chain of Command.  Nothing if not topical!
  • Sharply Buffed:  Our second foray into Pike and Shot with rule ideas and force rosters from Nick Worthington
  • Sharpening Up I Ain’t Been Shot Mum:  Frugal Scot Wee Derek Hodge squeezes two rule sets into one Page in a remarkable fusion of ideas.
  • The Roundwood Report Sidney brings up the rear with a topical look at Command and Control the key trends in the hobby.

"At 123 pages in total this is packed with some great ideas as well as the usual mix of scenarios and other Lard-based fun.  When we first produced the Specials in 2004 we tried to make them the best value in wargaming.  Thirteen years on we are still doing the same, holding the price at just £6 for the sixth year running."

You can buy the Special by clicking here or on the picture of the front cover, above.