AAR: Charlie Don't Surf! at Clotted Lard 2018

This Saturday just gone saw the inaugural Clotted Lard games day at the Devon Wargames Group. At what will hopefully be an annual event, large numbers of fellow Lardies gathered for a fun-packed day of gaming.

You can read the after action report of the games day itself by clicking here.

One of the games on show was a superb 10mm game of Charlie Don't Surf! put on by DaveJ. Click on the picture below to see a quick AAR from Carojon, accompanied by more photos of what looks like a most impressive game:

IABSM AAR: The Tuchole Forest

Played a great game of I Ain't Been Shot, Mum! at the weekend: scenario #08 from the first September War scenario pack covering the invasion of Poland in 1939, The Tuchole Forest.

The battle, set in the Polish Corridor, was all about territory and objectives, and proved a very different kettle of fish from the usual head-on clash.

Click on the picture below to see who held onto what to win the game:

IABSM AAR: Anzio #13: Aprilia

Cracking game of I Ain't Been Shot, Mum fought this weekend just gone.

We used scenario #13 from the Anzio: Wildcat to Whale scenario pack featuring the action on 8th/9th February 1944 as the Germans advanced on Aprilia (the Factory).

Click on the picture below to see all:

IABSM AAR: One Of Our Planes Is Missing

Fellow Lardy Tony Cane has sent me another IABSM AAR, but this time with a bit of a difference: the game is set on the North West Frontier in the early 1920's.

According to Tony, the mission creep away from pure WW2 is all down to the purchase of Lardie specials. The scenario itself is from the Summer 07 edition, the piece on Mussolini's Baubles is in the Summer 06 edition, and those two combined with his collection of WWI German East Africa war figures and the fact he happened to have Pathans in the lead pile...

One of our Planes is Missing

The scenario, with minor changes to the orbat, follows that printed in the Summer 07 issue of the Lardie special, and uses the Mussolini’s Baubles adaption of IABSM in the Summer 06 edition.

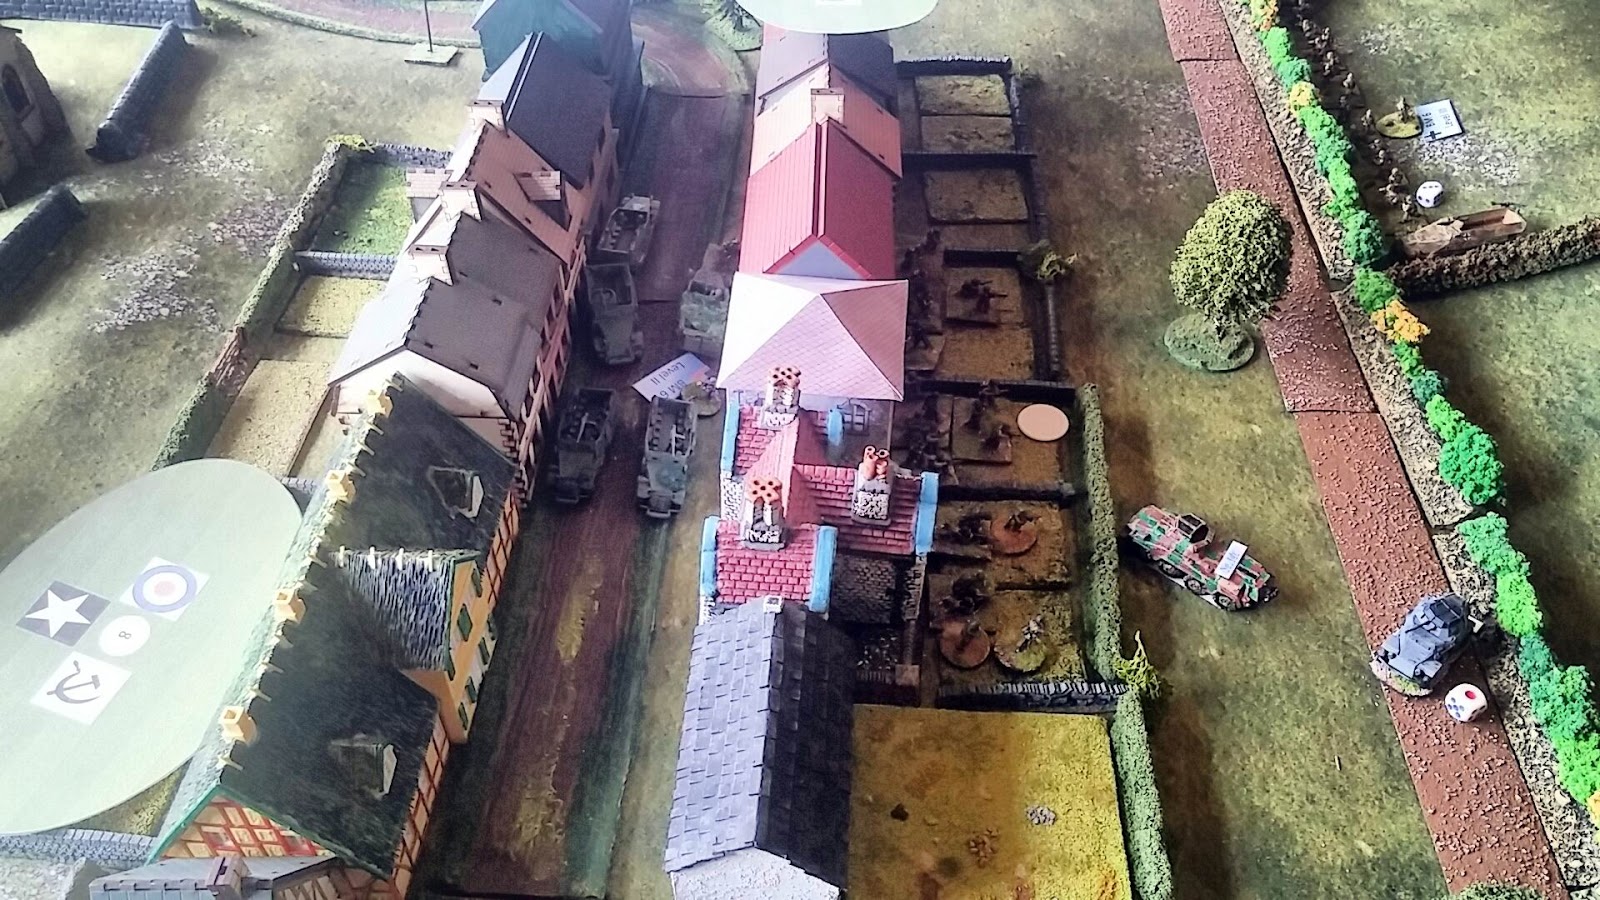
"It's India's North West Frontier, the early 1920’s, and the CO has just asked me to lead a small force for a rush job requested by the RAF. They want a downed plane in the tribal area destroyed, hopefully before it is stripped of useful gear by the locals. This is a bit of a blow as I was looking forward to playing polo tomorrow afternoon!  

"A team of engineer types has been provided for the demolition, along with motor transport for the whole force, and even an armoured car has been rustled up. So perhaps if we start early it should be just a case of motoring in, destroying the plane and then back out again. With a bit of luck I may still make the polo match, and then on to the RAF club for free drinks perhaps."

Events were to prove that Lieutenant Harrowell-Clarke was a bit optimistic about how easy things would be.

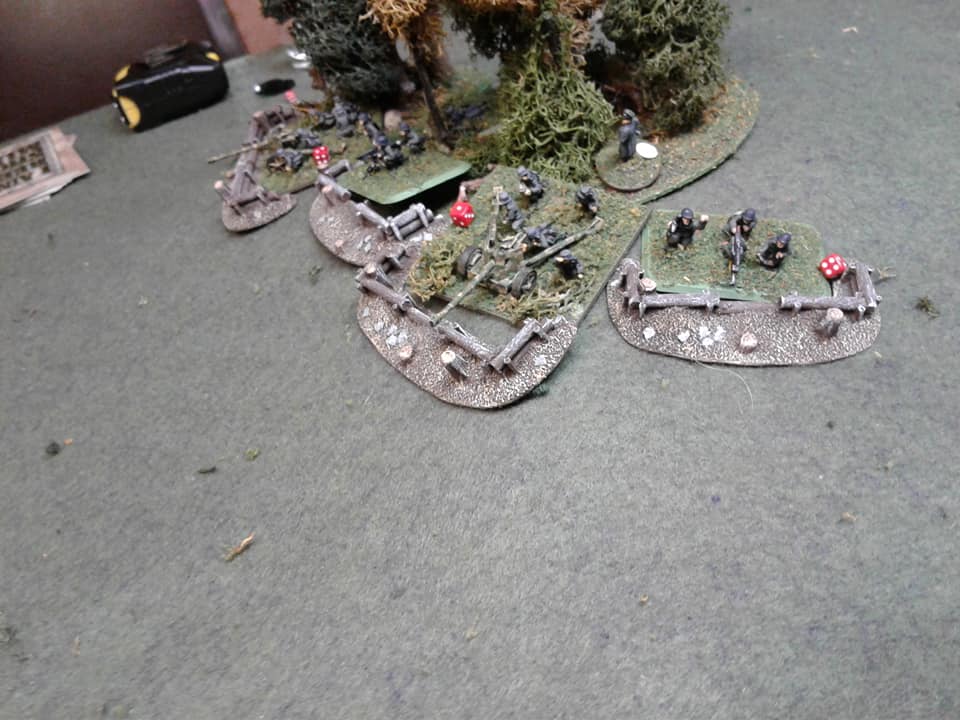
The local tribe were clearly fired up by the chance to get to grips with the forces that had bombed their village. They basically opted to prevent the enemy from even getting through the pass. First into the breach was a suicidal attempt by a small team to blow up the road as it exited the pass.  The fates (cards) were not kind and two volleys from the section advancing on the road block wiped them out before the charges could be set. Still their sacrifice had caused a useful delay.

The Pathan snipers were however proving to be more effective. Repeatedly stalling attempts to remove the road block and actually causing a casualty on the MG team, and forcing it to retire. They were only overcome when chased off by the eventual advance of the Imperial forces.

Pinned down by sniper fire the lead section were not going to clear the road block any time soon.

The remainder of the force was now ordered to outflank the Pathans and, debussing from the transport, started toiling up the steep slopes.

Having organised the HQ section into firing positions on the right flank the commander returned to the troops stalled in the pass and finally got the attack moving and the road block removed.

A second Pathan band had joined those blocking the exit of the pass but caught in the open, the withering fire, of the now effectively deployed Imperial forces soon disposed of them as a fighting force.

With return fire slackening and time running out for the Imperial forces a hasty advance seemed worth the risk. First with the armoured car, then with the troops and transport of the HQ section. With this rapid progress the plane was reached in time (9 out of 12 turns allowed) and destroyed without any further interference from the Pathans.  The first platoon moved up the road to cover the village but were not needed.

In the end a glowing report on a mission accomplished could be written by Lieutenant Harrowell-Clarke  on the lines of, despite initial difficulties the aircraft was destroyed at the cost of only four casualties to the entire force. Though he probably did not get back in time for the polo match!

Tony Cane

IABSM AAR: Operation Compass #11: Bardia/One

Some great desert action from Tony Cane, as he and friends play the eleventh scenario from the Operation Compass scenario pack: Bardia/One.

The scenario covers one of the Australian assaults on the Italian-held town of Bardia as Compass turns from raid to army-beating campaign.

Click on the picture below to see what happens when you underestimate the opposition...

IABSM AAR: Blenneville or Bust! #5M: Chemont

Another great battle report from the excellent blog of Sergeant Steiner. 

Here, he and his friends play scenario #5M: Chemont from the Blenneville or Bust! scenario pack: involving a clash between Fallschirmjaeger and US armour.

My enjoyment comes as much from working out which BoB scenario the game is taken from as reading the report itself! Blenneville or Bust!  is a pyramid campaign involving five levels, so there are thirty-one possibilities in all. There's no mention of the name of the village in the report, but only the village of Chemont has a layout like that shown in the picture below. That means it's one of #5B, #5F or #5M. Only #5M involves German Fallschirmjaegers, so scenario #5M it is!

Click on the pic below to see all:

IABSM AAR: Bashnya or Bust! #4A: Holm

Another great I Ain't Been Shot, Mum! AAR from Sergeant Steiner's marvellous blog, this time also supported by the comments of the Duc de Gobin, author of the epic Warfare in the Age of Cynics blog.

This time, The Sergeant and the Dice Demon, Steve, are playing one of the scenarios from the Bashnya or Bust! scenario pack for IABSM: scenario #4A Holm.

What's quite fun for me, as the author of Bashnya or Bust!, is working out which exact scenario they're playing from the photos. On this occasion, I knew it was Holm immediately (distinctive terrain!), but which one. Well the only one with that exact number of T-34/85s and that exact number of Panthers is 4A...so hopefully that's it!

Anyhow, click on the pic below to see all. Recommended...along with a quick visit to the two blogs this comes from as well. Excellent stuff.


As usual, I hope that neither of the gentleman mentioned above objects to me re-posting their text and pictures. It is genuinely intended as a way to spread awareness of both IABSM and their excellent blogs rather than anything else.

IABSM AAR: Piotrkow Trybunalski

Just written up an AAR from the game we played yesterday using scenario #45 from the second September War scenario pack: the battle of Piotrkow Trybunalski.

A big game covering the actions of 5th September 1939 as the Germans drive down from the Borowska Heights.

Each side fielded a company of infantry and tanks, with the game taking about 3½ hours.

Click on the pic below for more:

IABSM AAR: Eastern Front

Another great battle report from Burt Minorrot's excellent Spanish-language blog Las Partidas de Burt. As I have said before, I hope he doesn't mind me reproducing it here.

Here, in a game dating back to 2014, Burt and friends fight a battle on the eastern front: a Soviet column advances against hidden German opposition.

Click on the pic for more:

IABSM AAR: Operation Compass #18: Siret el Chrieba

Tony Cane has been working his way through the Operation Compass scenario pack for I Ain't Been Shot, Mum. His last post featured the tank battle at Mechili, this one covers the Australian attack on the Italian aerodrome at Siret el Chrieba.

Here, the Australians are faced by a huge expanse of open ground (“flat as a table and devoid of cover” as the official history puts it) dotted with the occasional hanger or building. Their target is to take the hangar and buildings on the other side of the open ground.

Click on the picture below to see how they do...

Loving the aircraft hanger and the dust-covered Blinds!