IABSM AAR: Attack on San Marco
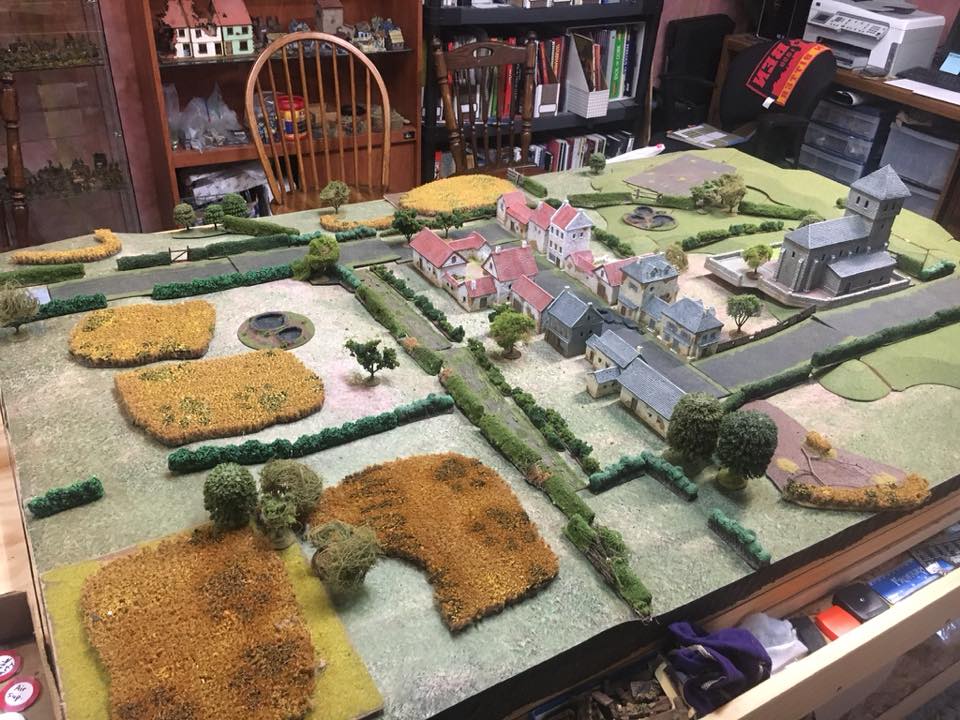
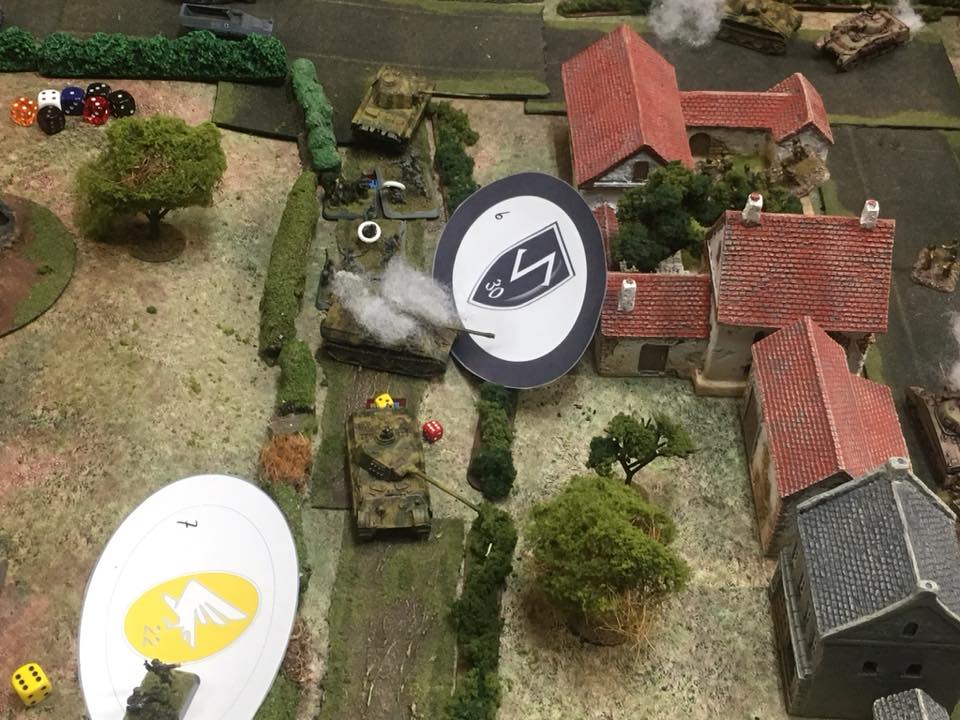
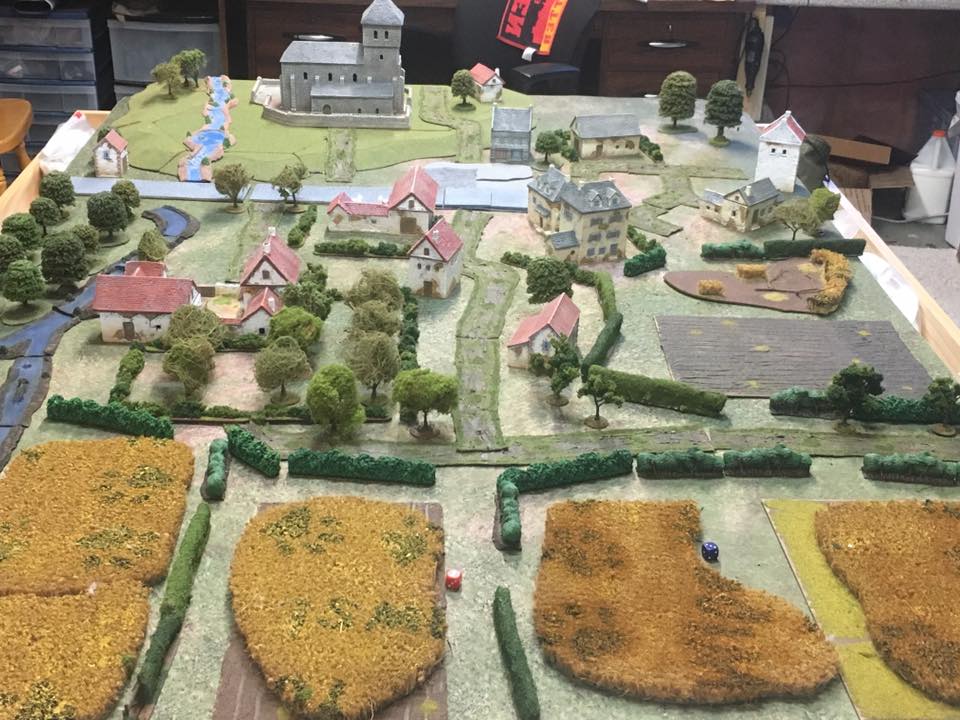
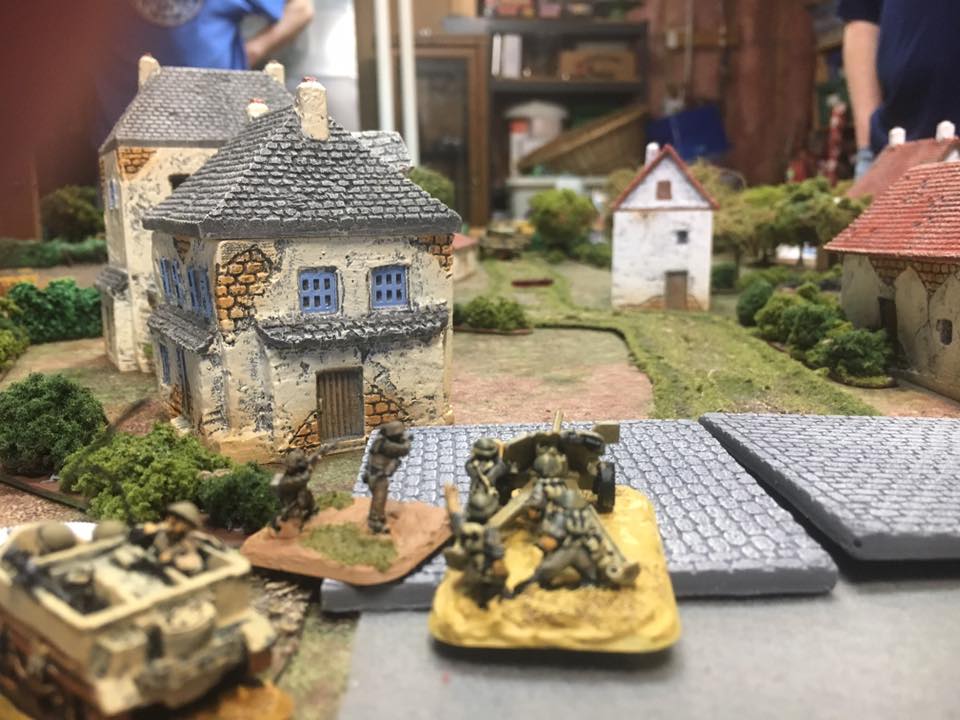
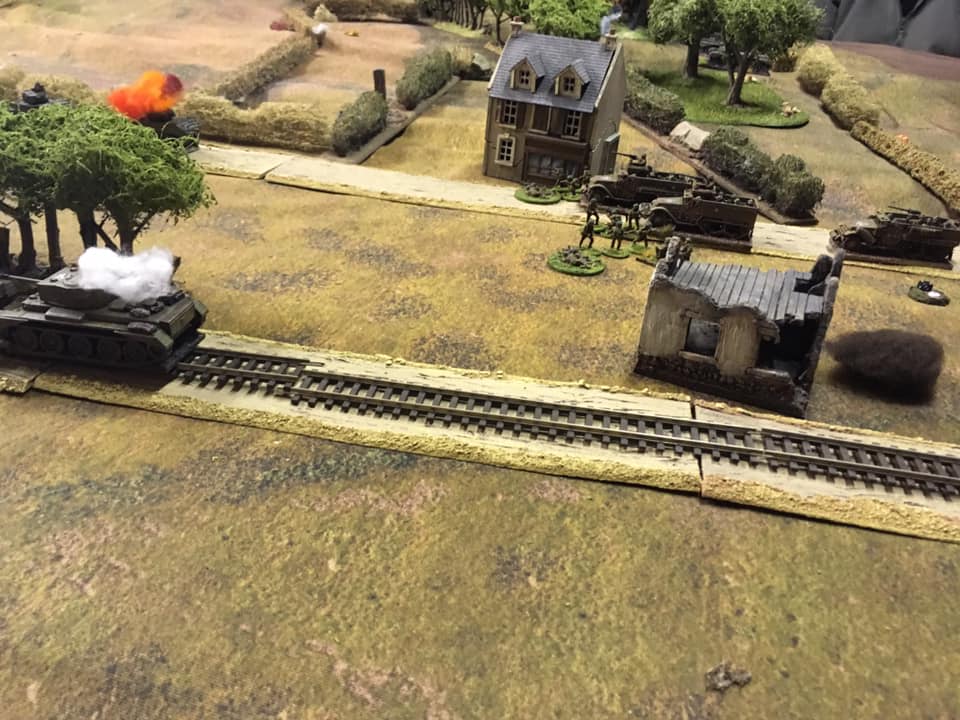
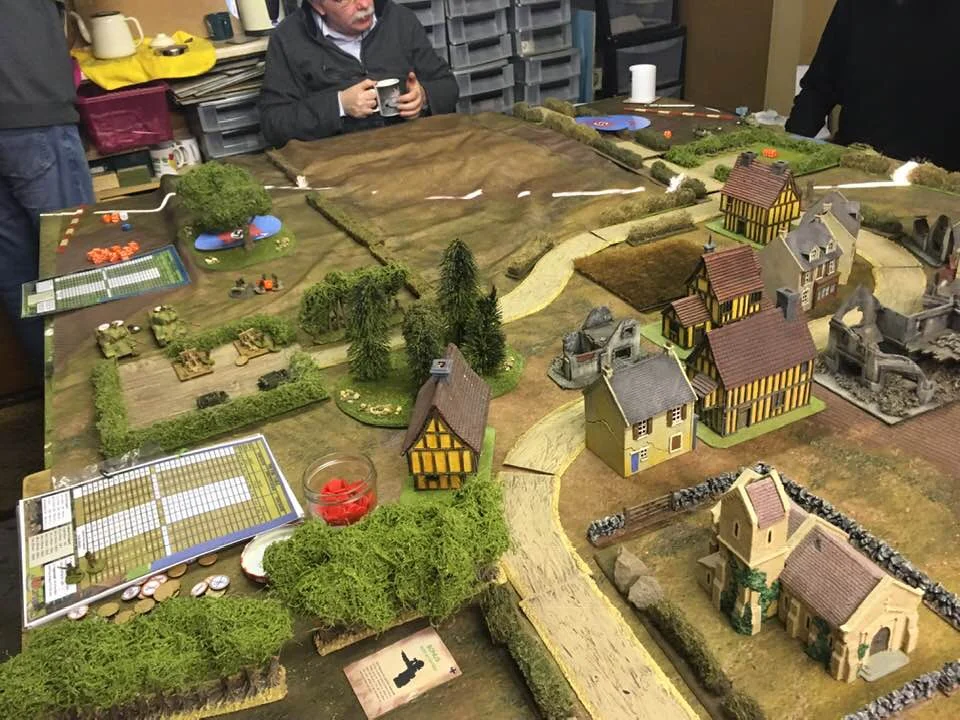
/Another great 20mm IABSM game from the Like a Stone Wall Wargames Group.
This one is set in Italy in July 1944, and represents the British attack on San Marco.
Click on the pic below to see all:

Another great 20mm IABSM game from the Like a Stone Wall Wargames Group.
This one is set in Italy in July 1944, and represents the British attack on San Marco.
Click on the pic below to see all:

This weekend just gone, John, Dave, Bevan and I re-fought the Battle of the Bulge scenario that we played a couple of years ago. You can read the AAR for that game here (opens in a new window).
I played the Germans in that one, but played the Allies today. A cracking game that was action, action, action from the moment battle was joined.
Click on the picture below to see all:

Here’s a collection of great pictures from the “Like A Stone Wall” wargamers latest game of I Ain’t Been Shot, Mum.
Set during Operation Epsom, there are some lovely 20mm figures on show. Click on the pic below to see all.

It’s always great when someone sends me an AAR for inclusion on the site, especially when they also say nice things about one of my scenario packs.
Here’s an example of what I mean: Captain Cliche (you can read his excellent blog here) and his wargaming friends have begun playing through the Bashnya or Bust! scenario pack (more details here, opens in a new window), starting with the first encounter: Near Osen.
Click on the picture below to see all, including some great 6mm figures:

A nice little after action report from Desmondo Darkin, orginally posted on the I Ain’t Been Shot, Mum Facebook page.
Not only do we get the first part of an AAR (the rest being lost in the mists of time!) but also some hints and tips on how to run an island invasion of your own.
Click on the picture below to read more…

Quite appropriately for whether we have been having recently, Tim Whitworth and the Like A Stone Wall wargames group raided the 2005 Summer Special for a scenario with which to play their latest game of I Ain’t Been Shot, Mum!
Not much commentary, but some lovely pictures of their terrain and models. Click on the pic below to see all:

Another of Mark Luther’s superb games of I Ain’t Been Shot, Mum in 6mm.
This battle features an encounter between mechanised Soviet and German forces on the north bank of the Danube in 1945. Highly recommended viewing.
Click on the picture below to see all:

Here’s a few pictures from a recent game of I Ain’t Been Shot, Mum played by Dan Albrecht and his chums at the Vermont Gamers Group.
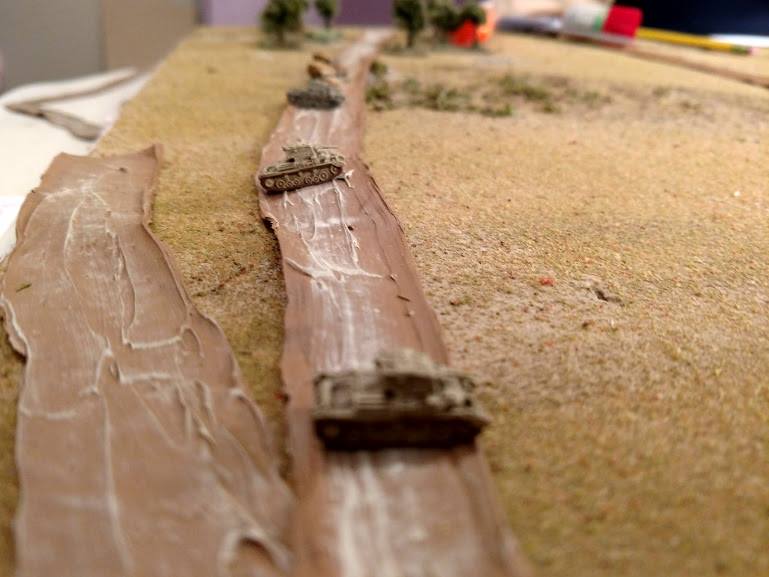
The scenario was #21: The Pimple from the Operation Compass scenario book (written by Yours Truly). Dan says:
“True to form the Italians took it on the chin. With Brits in hull-down position and Italians with only two Actions, no Big Men to remove Shock, after 10 turns most all M13/40s were knocked out or their main gun was damaged or immobilized. Still, good way to learn the rules, practice shifting artillery fire with FOs and besides…no American football on the TV this past Sunday!”
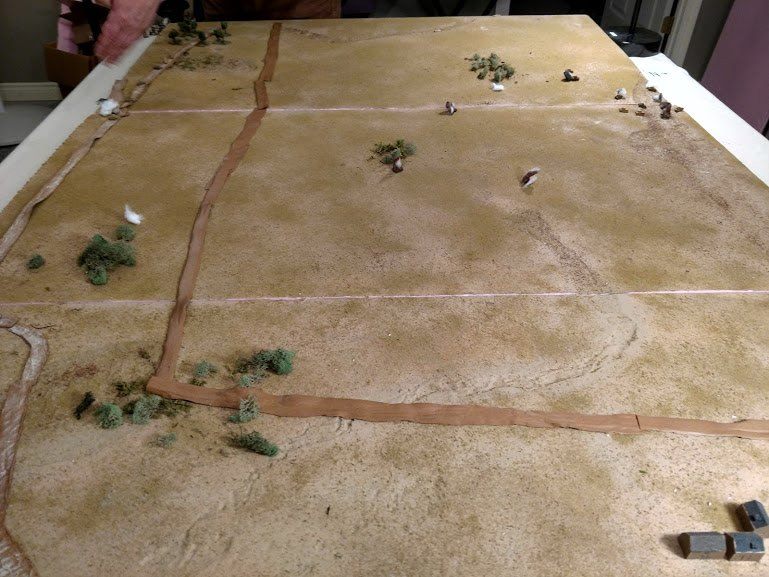
Steve Smith: The terrain is actually 3 form boards painted with some features made with a dremel. The brown strips that you see were made with caulk. A bead was laid down on a piece of wax paper. Then, a wooden popsicle stick was used to spread out the caulk. When dried they make good roads. You have complete freedom to make them in as many shapes as you want too. You can add dry brushing to get more definition if you like as well.. You can use the same process with blue caulk to make rivers and streams. These strips here are probably a little too big for this scale as roads(6mm)...originally intended for using with my Great Northern War collection and Boer War collection in 15mm. In this game the darker strip signifies the beginning slope of the Pimple edge. The lighter strips behind represent the crest of the Pimple. Improvising.

A few pictures from a James Manto solo game which he posted on the IABSM Facebook Group recently.
As James says:
Some pics from my solo game last weekend including a close up of what I'm calling "the world's luckiest PanzerJaeger I " which survived a duel with the KV-2.
Personally, I’m also loving the aircraft.
Here’s a quick AAR taken from the I Ain’t Been Shot, Mum Facebook group, posted by the Chevalier de la Terre. The scenario used is the South of Cherbourg scenario from IABSM v3 rulebook; and has resulted in a beautiful looking game.
Click on the picture below to see all:

I’ve also added an even quicker AAR from fellow Lardy Julian Whippy, also from the I Ain’t Been Shot, Mum Facebook group. You can see the rest of Mr Whippy’s pics by clicking on the picture below.

Another great battle report from Tim Whitworth and the ‘Like a Stone Wall ‘ Wargames Group, this time put together from several Facebook posts mostly from the I Ain’t Been Shot, Mum! FB group.
This game is a continuation of their fight for the village of Sint Jooth in Holland in 1945. The British pulled out their war weary infantry on the night of 20th of January and re-grouped for an attack the next day (you can read the AAR covering the previous day’s action here).
Click on the picture below to see if the British had more luck on Day 2:

The I Ain’t Been Shot, Mum! Facebook Group is a great source of information and inspiration. It’s also a place where people post a lot of short and snappy After Action Reports slightly different from the larger write-ups you find on people’s blogs.
Now not everyone wants to be a member of Facebook, which I can perfectly well understand, so below you’ll find links to a few recently-FB-posted AARs that I’ve copied across to Vis Lardica.
I’ve got specific permission to do so from most of the authors, but for those few that I haven’t, I hope that they don’t mind: VL is a not-for-profit website (it’s the old joke: “How do you make a £1 million from wargaming? Start with £3 million!”) designed only to spread the Lard.
Belle Maison
Click on the links below to see the reports:
Croissantville by Julian Whippy
Action in Tunisia
And so to the first battle of 2019: a game of I Ain’t Been Shot, Mum! against Dave using one of the scenarios from the TooFatLardies Summer Special 2016. For those unaware of the Specials, and now the Lard Magazine, these are a wonderful source of scenarios, information and inspiration for all Lard games.
The scenario, by Richard Morrill, was called George of the Jungle, and was set in Burma, 1945. A Company, 9th Borders, part of 63 Brigade of 17th Indian Division, was tasked with clearing a small village near Meiktila of Japanese. The reason for the scenario’s title is that this action includes the participation of George McDonald Fraser, author of the Flashman novels, and is mentioned in his autobiography Quartered Safe Out Here. I would play the Japanese, and Dave would play the British.
Click on the picture below to see what happened:

Bruce Romanick posted another IABSM AAR on the IABSM Facebook page.
Following on from their last game using the Blenneville or Bust! scenario pack (scenario #3D: Saint Melotte) this time the SAGE group played scenario #4G: Belle Maison, where both the Germans and the Americans are aiming to the occupy the same village in the valley.
According to Bruce’s post, which I hope he doesn’t mind that I reproduce here, the Yanks managed to push the German out of the village, with an opportune air strike taking out a Panther. A minor US win after 3+ hours.
Tim Whitworth and the lads from the Like A Stone Wall wargames group played another game of I Ain’t Been Shot, Mum the other day, this time using the Cymru Am Byth scenario pack.
The scenario pack covers the operations of the Welsh Guards during WW2, and includes sixteen unique scenarios and a mini-campaign.
The LASW chaps played scenario #13: Swanning Up To Brussels: a German heroic rearguard action versus 1st and 2nd Battalion elements of the Welsh Guards Group that took place on 2nd September 1944.
Tim’s general comment was: “I'll just say the British found it hard going. In these rules the tactics that you employ certainly matter!”


A few pictures from the Like a Stone Wall wargaming group playing a Normandy 1944 break out game. The British are defending against a German counter attack.
Note the use of the Lardage measurement sticks. The LASW chaps have swapped from using inches to Lards, with one Lard being equivalent to 1½ inches. This allows them to play on their rather swanky 12 foot long table!

This game was a replay of the last i.e. a clash between two homogeneous Sengoku Samurai forces. You can see the sides in the post from December 12th.
The Battle is about to begin
I deployed half my foot samurai on each of the left and right flanks, with my Ashigaru right-centre and my mounted cavalry left-centre. As before, my plan was to hold the centre and then loop around whichever flank opened up first.
Neil, as last game, deployed quite in depth. He placed his “mobs” on his left; his big Ashigaru command mixed in with his cavalry in the centre; and his main samurai command on his right.
This was a much closer game than last time. On the right, I pushed forward quickly with one Samurai command and an Ashigaru command, leaving the other Ashigaru command in reserve. Over the course of the battle, this wing would hit the enemy line several times , but not quite manage to gain a significant advantage. In fact, towards the end of the battle, I had to commit my reserves to prop up this section of my line or risk being pushed back.
My right wing advances
In the centre/left-centre, my cavalry moved forward and managed to get a positional advantage on the Ashigaru facing them. Again, however, no mater how much I tried, I couldn’t quite get in a blow hard enough to crack Neil’s line and, again, towards the end of the battle, my troops began to look a bit “thin”. Fortunately I had a spare unit of foot Samurai from the left that I could move right in order to cover my camps against enemy breakthrough, so the situation remained at least stable.
My left flank moves forward
On my left flank, I advanced strongly and, again, had mixed success. Although, as above, I couldn’t break through Neil’s line, my command of three foot samurai units managed to kill three of the four foot samurai units in front of them for the loss of only one of their own. This left me with two units, one of which I used to reinforce the centre, the other managing to manoeuvre around a rocky outcrop and get behind the enemy line.
At this point, both sides were down to around four to six Victory Coins, and each side had three to four units disordered i.e. about to break at a cost of two Victory Coins per unit: so it was definitely turning out to be a very close run thing.
As it happened, in the endgame, the cards fell my way. My unit of foot samurai that had managed to get around the end of Neil’s line had a series of activations that allowed them to take one of his camps, and one of my reserve Ashigaru Teppo units, firing for the first time, blew a unit of disordered mounted samurai away. With that, Neil’s Victory Coins were all gone, and he was forced to retreat. The day was mine!
Another cracking game of To The Strongest. Again, the maxims of trying to break your opponents line and making sure you have a reserve held true, with flank charges and taking camps being very successful routes to victory.
Back to painting the 15mm Ancients now: loving the Samurai armies, but they are very small!
Bruce Romanick has been learning the IABSM ropes whilst playing some of the scenarios from the Blenneville or Bust! scenario pack.
He’s posted a few photos of his latest game, scenario #3D Saint Melotte (where the British are defending a small French village against German armoured attack) on the IABSM Facebook page, which (and I hope he doesn’t mind) I reproduce here.
Apparently the plucky Brits managed to hold off the Germans…
Wargaming buddy Neil told me that he had a couple of large 10mm Samurai armies in his attic somewhere. They were based for Warmaster Ancients but, with a bit of jiggery-pokery, translated nicely into two Sengoku Samurai armies for To The Strongest.
The sides, largely homogeneous, were as follows:
Senior General
3 x Mounted Samurai
General 1
3 x Foot Samurai
General 2
3 x Foot Samurai
General 3
2 x Ashigaru Spearmen
2 x Ashigaru Teppo
General 4
2 x Ashigaru Spearmen
2 x Ashigaru Teppo
Senior General
4 x Mounted Samurai
General 1
6 x Foot Samurai
General 2
1 x Foot Samurai
3 x Mobs
General 3
4 x Ashigaru Spearmen
3 x Ashigaru Teppo
Mounted Samurai from the Soft-top Box Clan (the red markers are Heroes)
Neil and I each deployed one command at a time. I was playing the Soft-top Box Clan (i.e. the figures from the box with the soft top!) and deployed my mounted Samurai on my right, opposite Neil’s mounted Samurai; one of my Ashigaru commands in the middle, opposite Neil’s large Ashigaru command; and both units of Foot Samurai on the left, opposite Neil’s mob unit and unit of Foot Samurai. I kept one Ashigaru command in reserve behind my centre.
My plan was to hold the right and centre whilst my superior numbers on the left beat his right, and then swept on into the rest of his line from the flank.
The centre of my line (the teppo are behind pavises)
The left of my line
The key difference between our two set-ups were that, without a reserve, Neil’s line was stacked two deep in places. This would have a significant effect on the forthcoming action, as where he had a numerical advantage, he would have difficulty bringing these superior numbers to bear.
The action began on my right, where my three units of Mounted Samurai faced off against his four units of the same. I took advantage of some rocky terrain and tried to lure him into attacking me, but Neil was too canny to fall into that trap. I therefore bit the bullet and charged forward: his double-stacking meaning that I could fight two-vs-two rather than four-vs-three.

The action on the right unfolds
My initial charge met with mixed success. One unit of his cavalry were destroyed, but one of mine became disordered and was forced to retreat and rally. I renewed my attack, this time supported by a unit of Ashigaru spearmen and, eventually and largely due to the cards very much falling my way, his cavalry crumbled and were removed from the field. This would then leave the way clear for the CinC’s Mounted Samurai to get past his line and capture Neil’s left hand camp.
Meanwhile, on my left, I had pushed my Foot Samurai forward, intending to being superior numbers to bear on that end of Neil’s line. Unfortunately, the Yellow command got a bit tangled in the terrain, and I ended up with one unit destroyed, leaving two more units facing four units of his Foot samurai. This would usually spell disaster, but some how these two units refused to be beaten. Despite being disordered again and again, the brave Yellow Samurai rallied each time and, at the end of the game, were still very much in the battle.
This left me with four Ashigaru units facing Neil’s six Ashigaru units in the centre. Again, however, Neil’s stacked line meant that we each had four units in play and, again, the cards fell in my favour, and I quickly destroyed two of his units. I was then able to bring in my reserve force of four more Ashigaru units, guns fully loaded, and win the resultant eight-vs-four combat. Neil should have been able to support his Ashigaru with his command of peasant Mobs, but the fact that by this time my cavalry had broken through and was threatening his camps meant that he had had to withdraw them in order to defend his baseline.
Ashigaru action in the centre
Once Neil had started haemorrhaging victory coins, it was hard to stop, and eventually he ran out and was forced to retreat. Somehow I had managed to inflict a pretty hefty defeat on him: I had lost only four coins by the end of the game, Neil had lost twenty!
Although we both agreed that the cards had very much fallen my way, we also agreed that Neil had perhaps stacked his units too deeply to begin with: my rapid advances never giving him the chance to properly deploy. Significantly, I had run into difficulty on my left, where I had also stacked units deep, so it seems as if that is something to avoid.
Although I did seem to win by a lot, it never seemed to me as if I were winning, except right at the end. A good game, made interesting by the homogeneous forces involved.
Time for another game of I Ain’t Been Shot, Mum! with John and Dave…but what to play? Dave has requested an early war encounter, so a quick look back through my library of scenarios and I settle on one of Richard Clarke’s games: Lille.
The premise is simple: Rommel’s Germans are advancing rapidly on Lille, aiming for the village of Lomme, whose capture will seal off the escape route of all English and French forces in the area. The Allies have realised what the Germans are up to, and have dispatched a small force to hold Lomme for as long as possible. The scene is set for an epic clash!
Click on the picture below to see all:

Vis Lardica is a website devoted to wargaming and military history, with a special emphasis on the company-sized rulesets produced by the TooFatLardies: I Ain't Been Shot Mum (WW2); Charlie Don't Surf (Vietnam); and Quadrant 13 (science fiction). There’s also a lot of content devoted to To The Strongest (Ancients/Medievals) and For King & Parliament (17th Century).

Welcome to Vis Lardica, a not-for-profit website mostly dedicated to the company-sized wargaming rules produced by the TooFatLardies, but encompassing my other gaming interests as well.


If you need to contact me, you can do so at:
vislardica@gmail.com
If you have enjoyed visiting this site, please add a link to it on your own wargaming blog: www.vislardica.com.