TFL Painting Challenge: Half Year Update

Well we’re half way through the year now, and perhaps time to see how everyone is doing: the Scorecard is updated, but a few worthy mentions are due before we get onto today’s entries.

No-one has hit the 2,000 point mark yet, but we do have:

1,500 points: Lloyd “the hat” Bowler; Chris Cornwell and Matt Slade;

1,000 points: Carole Flint and Sapper

500 points: Richard Clarke; John de terre neuve; Mervyn Douglas; Andy Duffell; John Emmett; John Haines; Andrew Helliwell; Travis Hiett; Mark Luther; Joe McGinn; and Chris Stoesen

Well done to them, and well done to the rest of you too just for entering and getting some submissions in. Remember: it’s not a competition, it’s way to encourage us all to paint more and better.

Contributing to the point above, today’s entries are:

  • Andy Duffell with some WW2 figures and then some rudey-nudeys! Don’t worry, Andy, I’m sure, being Lardies, that we’ve seen it all before!

  • Some Baluchis from Steve Burt

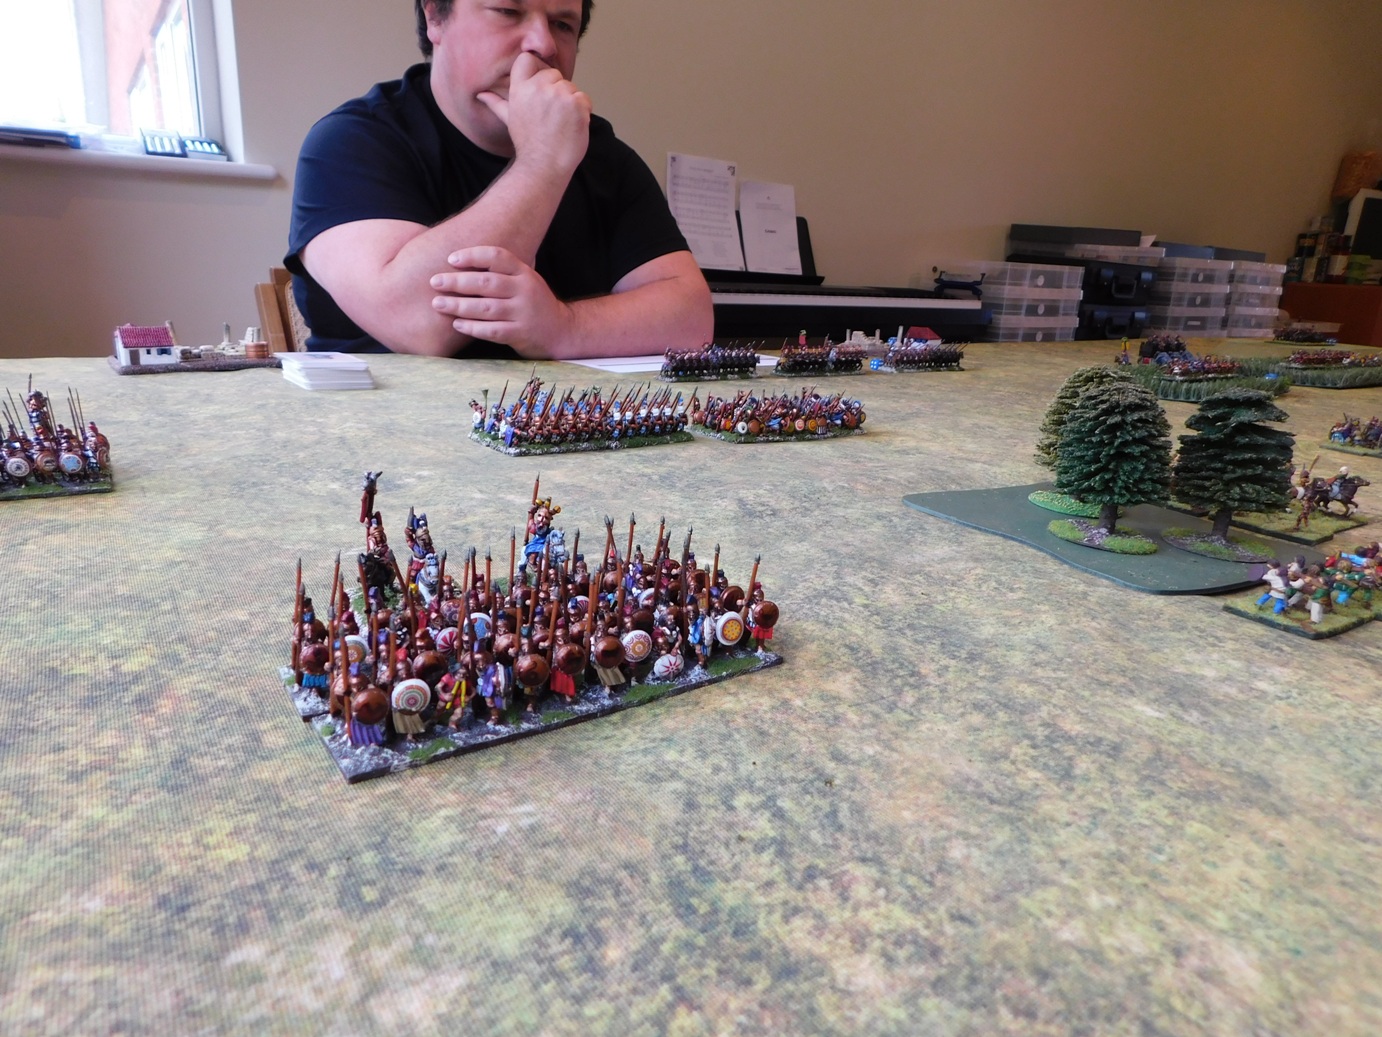
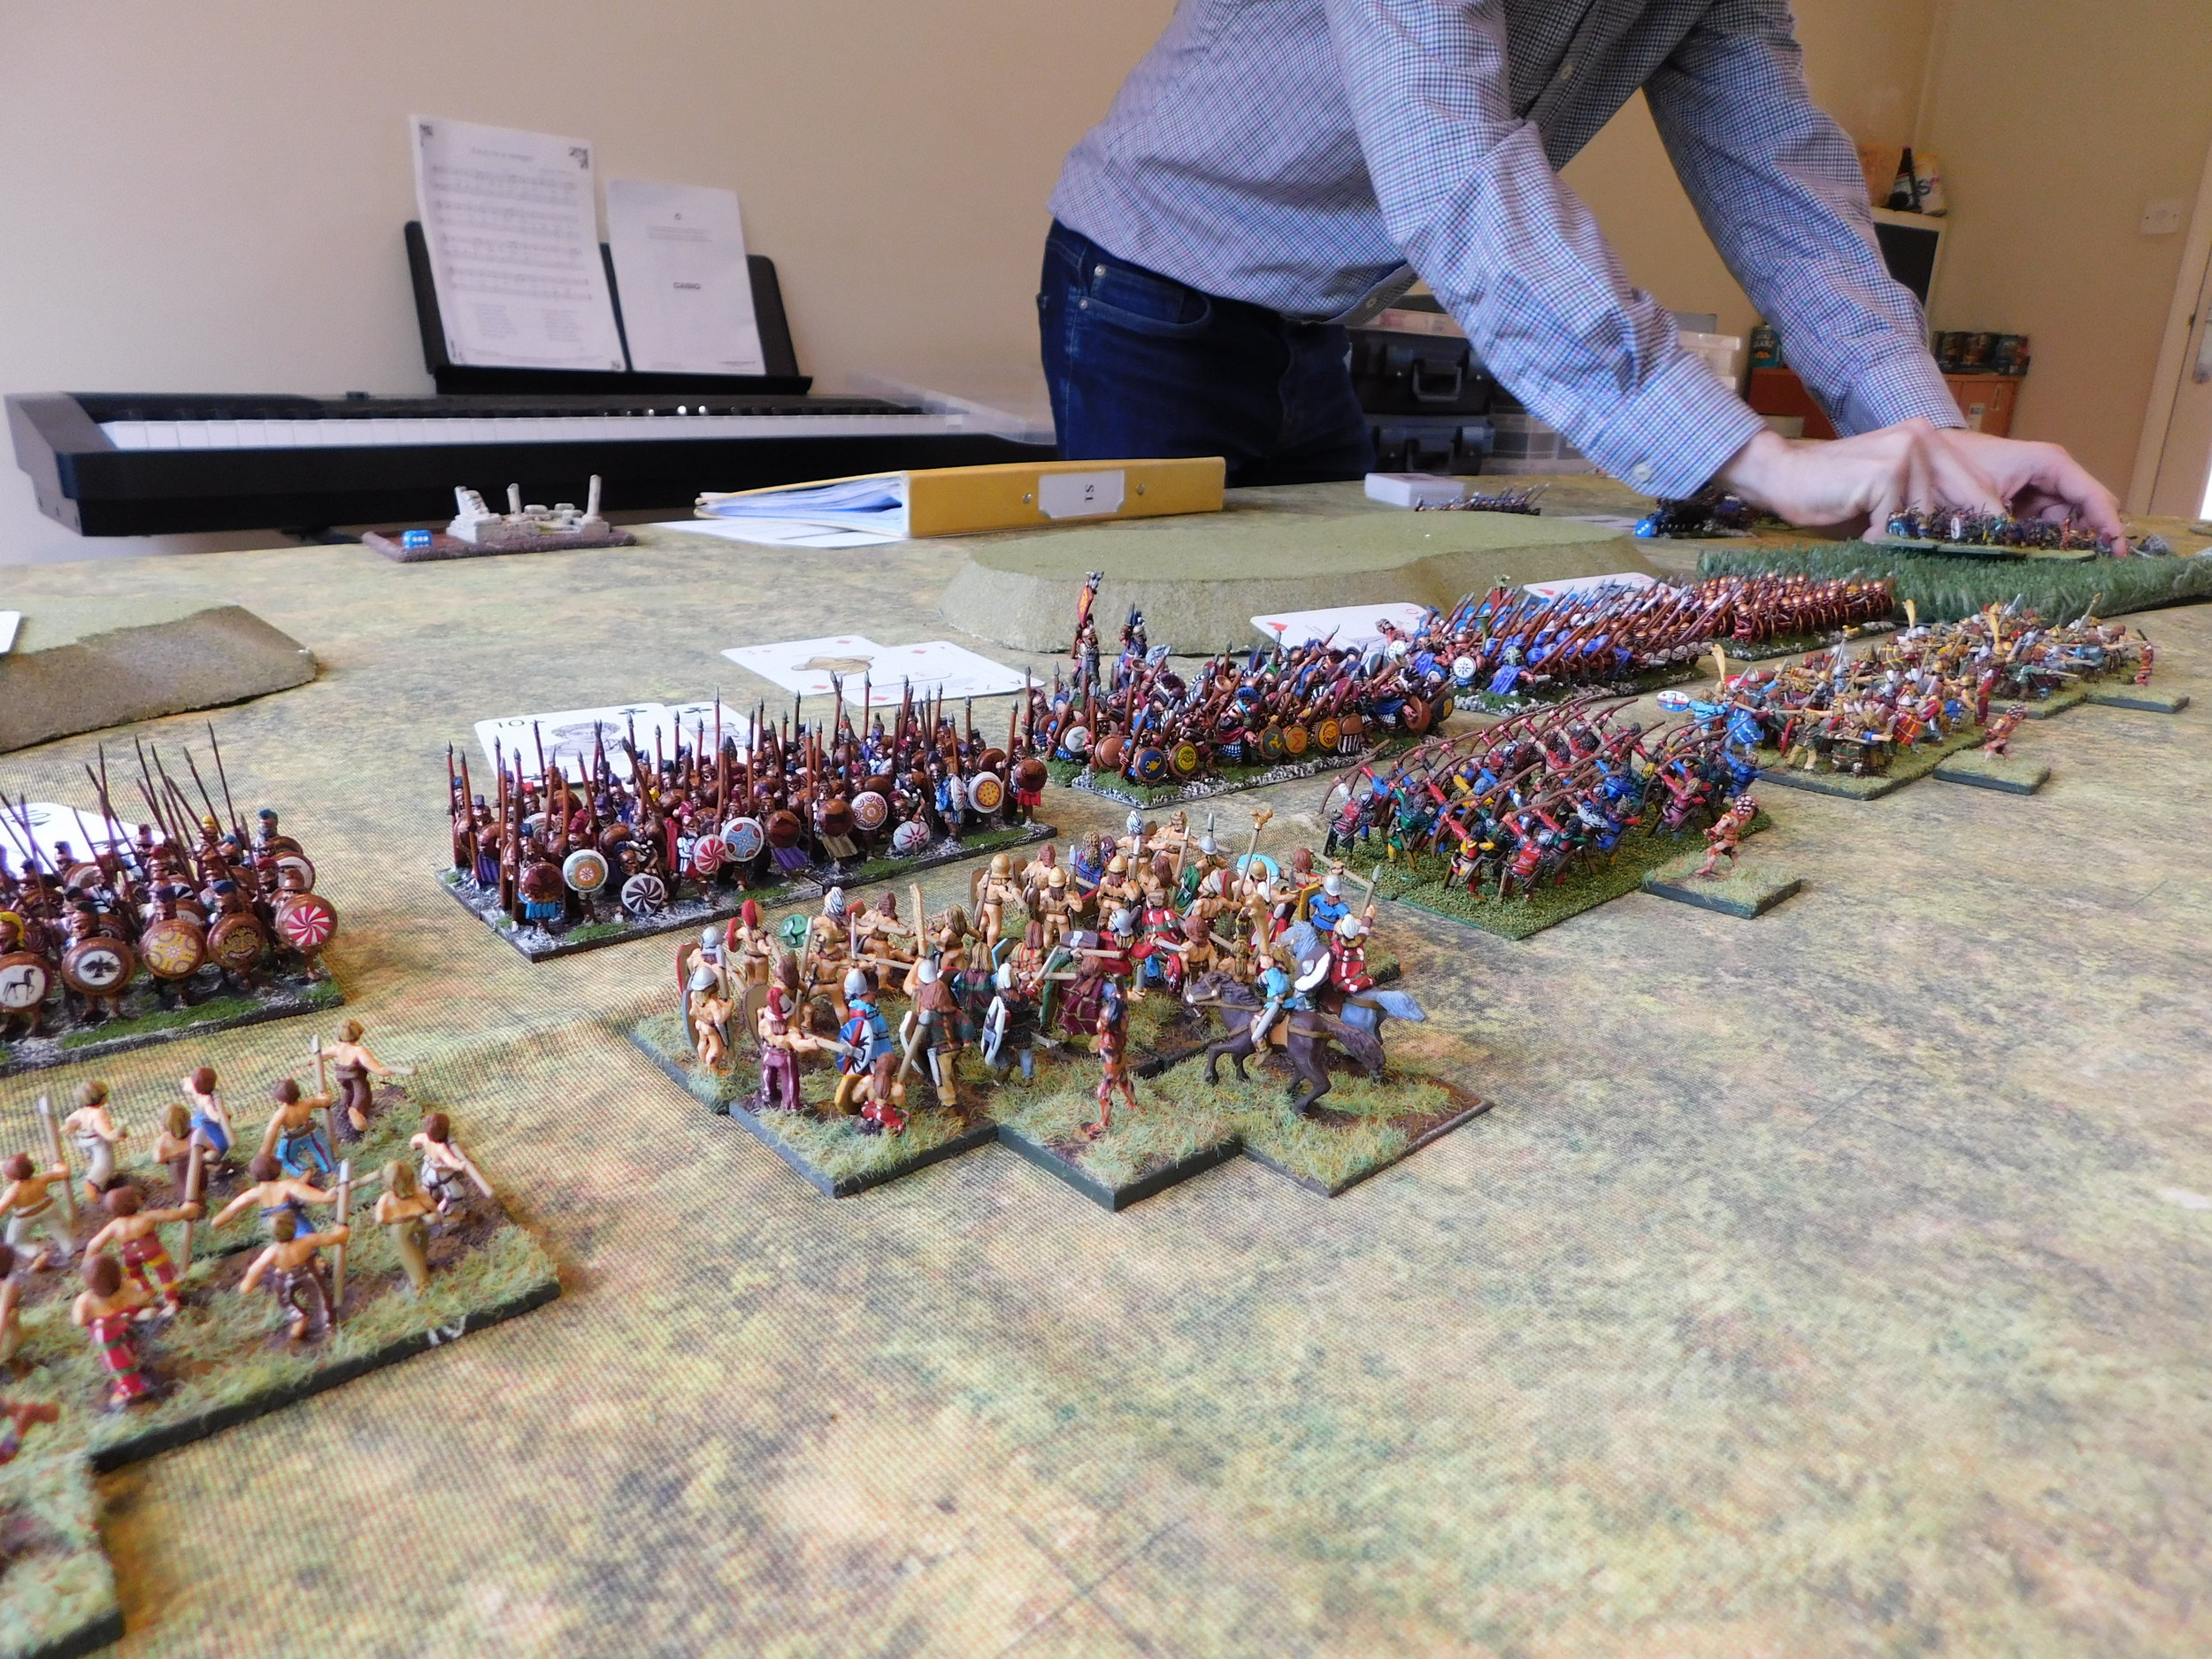
  • Late Romans from Carole

  • Travis has some more winter-kit German WW2 Grenadiers

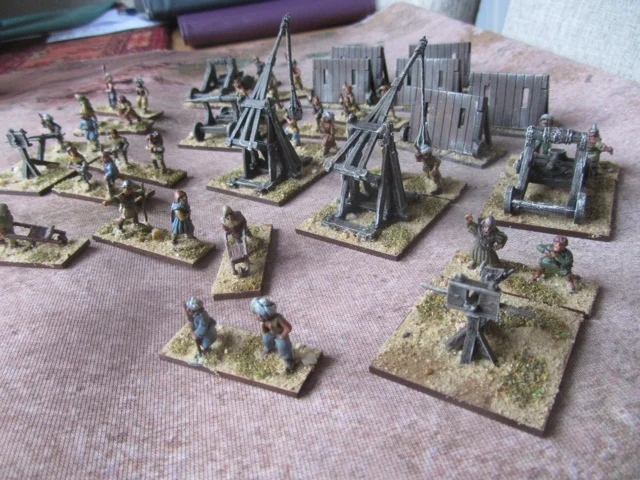
  • A first (and earlier than normal) entry for the year from Fred Bloggs: Epic!

  • Chris Stoesen sends in a mixture, including a very nice gaming mat for which he received lots of points

  • More Sugar from Mr Luther

  • Sapper has been watching Eurovision with Edward III

  • The Hat has a huge entry: almost 600 6mm figures and some rather nice 1/300 landing craft and loads

  • A variety of lovely WW2 figures from John Emmett

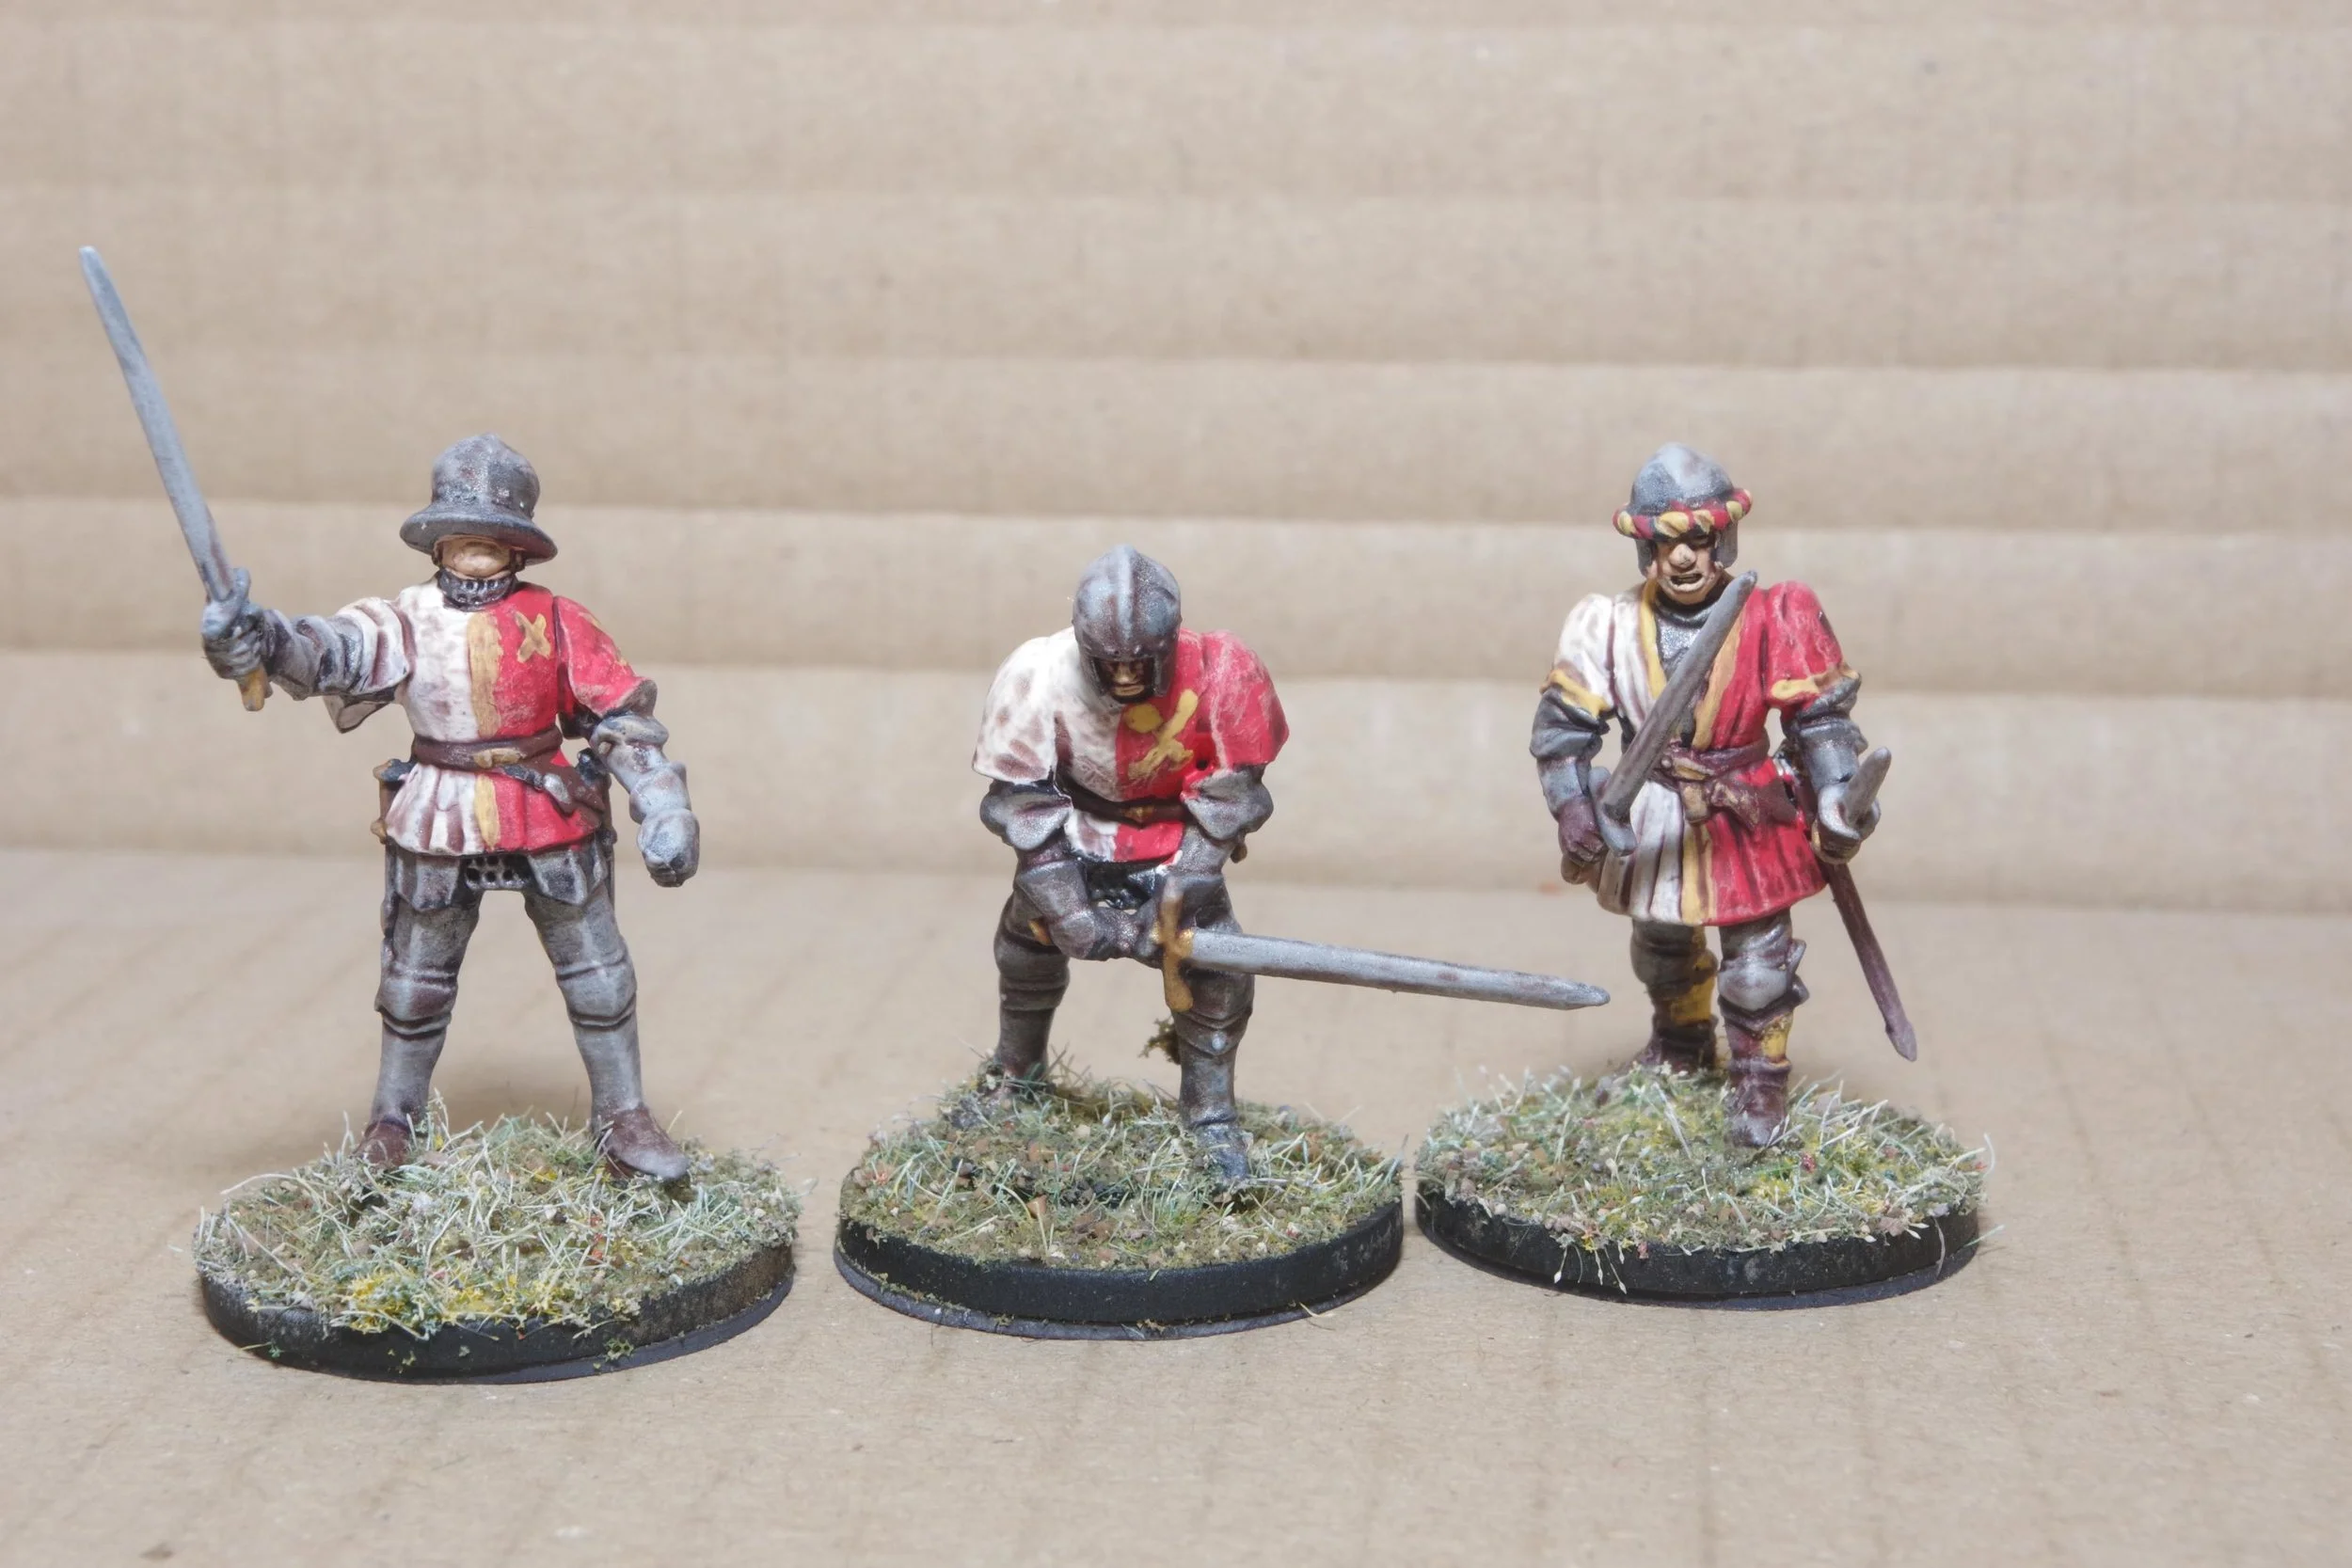
  • There are some nice Italian Wars troops from Mr Cornwell

  • And last, but by no means least, some Indian Mutiny Highlanders from Joe McGinn

As usual, clicking on the name of the person in the list above will take you straight to their gallery (opens in a new window).

Here are today’s pictures:

A Late Entry today: Belgians from John Emmett

More Celts

One thing about playing the To The Strongest rules for Ancients in 15mm is that you need an awful lot of figures, especially if playing an army whose units are mostly “deep”.

I’m playing on a 15cm grid, with a normal unit represented by two Vis Bellica bases i.e. two bases 6cm wide and 3cm deep next to each other, frontage 12cm. Already that’s double the number of bases that you’d need for a game of VB.

Now add the fact that one of my collections is Ancient British/Gallic (or indeed anyone vaguely Celtic) and that their units are deep and therefore four bases in all (so a unit has frontage 12cm and depth 6cm) and you can see that I needed to quadruple the number of bases that I used in VB to play TTS.

Well, not quite, as I used to play very big games of VB, but the point is that my Celts needed reinforcements. I’d already painted the chariots/light cavalry I needed, and one warband, but couldn’t face painting another. So I got someone else to do it for me!

Here’s a lovely bunch of Celts painted by friend John. Can’t wait for them to take the field!

IABSM AAR: Pegasus Bridge Playtest

This year is the 75th anniversary of the successful assault on Pegasus Bridge by glider infantry of the 2nd Battalion, the Oxfordshire and Buckinghamshire Light Infantry, British 6th Airborne Division, commanded by Major John Howard. The successful taking of the bridges played an important role in limiting the effectiveness of a German counter-attack in the days and weeks following the Normandy invasion.

The Soldiers of Oxfordshire Museum (SOFO) is putting on an exhibition to celebrate the anniversary, and it looks as if a few of us might be able to run a demo game of IABSM one weekend at the museum to help bring the event to life for the general public.

All the running for this is being done by friend Dave, so all I had to do recently was to take part in a playtest of the game to be run. Click on the picture below to see all…

TFL Painting Challenge

Another big update for the Challenge this week, so let’s jump right in and see what’s what:

  • Derek has spent a month basing and re-basing figures

  • There’s a variety of entries from Travis

  • Mr Luther continues his building programme, and adds a few pirates for variety

  • A combination of big dragoons and tiny infantry from Sapper

  • Steve Burt has the Moors in

  • John Haines is preparing to become the Swamp Fox

  • Romans and peasants re-based by Stumpy

  • More Condottieri from Carole

  • Soviet partisans from Mr Duffell

  • More boats from the Hat

  • Joe McGinn sends in some infantry for Through the Mud & Blood

  • Mervyn is Under Siege

  • Mr Helliwell has been busy

  • And last, but not least, Chris Kay sends in some more figures for Star Wars

As usual, clicking on the names of the people in the list above will take you straight to their gallery (opens in a new window).

Here are today’s pictures:


CoC: Taking the Gembloux Gap

Although we don’t usually write about CoC on this website (now there’s a sentence that deserves re-writing!) we do always try to feature the new releases for that system, particularly as many of them can provide ideas for IABSM.

So here’s news of the latest pint-sized campaign for Chain of Command: Taking the Gembloux Gap. Here’s the blurb:

A twenty-eight page PDF, Taking the Gembloux Gap contains an overview of the events of May 1940. as the German panzers rushed across Belgium, to be met by French troops advancing to assist their neighbours as part of ‘Plan D’.  If the German armour can break through at Glembloux, the flank of the entire B.E.F. is turned and the road to the sea lies open.   This campaign focusses on the critical actions of the 15th of May as the French 110e Regiment d’Infanterie attempts to stem the tie of 3 Panzer Division spearheaded by 3 Schützen Regiment.  This campaign is designed to be used with the Blitzkrieg 1940 Handbook.

The campaign is a total of five game tables with the duration running between five and nine games.  Briefings are provided for both sides, along with measurable objectives, period maps, force and support option listings and everything you need to play this campaign through to its conclusion.

Like all of our Pint-Sized campaigns, this PDF is available for the price of a pint in our local pub.  We’re sure that you’ll agree, that is great wargaming value!

Buy it here.

IABSM AAR: Sochaczew

Always nice to see people using my support material to play their games, so here’s an after action report from Tim Whitworth and the Like a Stonewall wargamers using the Sochaczew scenario that I wrote for the TwoFatLardies Summer Special 2017.

Set in 1939, Polish troops are desperately defending the town as the German infantry and Panzers sweep in. Click on the picture below to see what happened…

TTS AAR: The Sasanids Ride Out!

The final game in my recent set with Neil was my Sasanid Persians versus, again, the Pyrrhics.

This promised to be quite interesting: an army composed of extra heavy cavalry and horse archers against a mostly spear and pike-armed force.

In the event, however, it turned out to be quite a mundane battle. My horse archers quickly got around his flanks and started shooing anything that moved. In the centre, I held back until his heavy foot advanced past a line of hills running down the centre of the battlefield, leaving only one unit each side to guard their flanks.

As the two main lines came together, the single unit of heavy clibanari that I had put with each horse-archer command was just coming into play, pinning his flank units in place as the lighter cavalry shot at and charged their flanks.

With his flanks crumbling, his main line getting nowhere, and horse-archer nipping at his Hoplites’ heels, Pyrrhus decided that discretion was the better part of valour and surrendered!

A workmanlike victory for the Sasanids.

IABSM AAR: France 1944

Iain Fuller and friends recently played a game of Des Darkin’s IABSM/CoC variant, with this AAR being lifted from Iain’s excellent Tracks and Threads blog.

The encounter takes place in France, 1944, and involves an American force attempting to take a German held village.

All is going smoothly until…well, click on the picture below to find out what happens next!

Even More To The Strongest

More pictures from a recent day of To The Strongest gaming.

First game was a replay of the last: me and my Ancient Britons vs Neil and the Pyrrhics.

Unfortunately, this time he protected his flanks well, and kept his battle line very closely together. I tried the same tactics as before: warbands in the middle, outflank with the chariots, but this time just couldn’t get through.

On my left flank, he advanced as quickly as possible and used his cavalry to drive my chariots back until they were forced off table. His cavalry were then free to take one of my camps and then turn back towards the rear of my line. meanwhile, the elephants and lights on his left flank were doing exactly the same thing: drive my lights back with charges that might not actually connect, but do force my lights to evade and evade until they are no longer relevant to the main action.

In the centre, my infantry were held by his Hoplites and pikemen until his cavalry appeared in my rear…and that, as they say, was that!

A loss to the Ancient Britons.

Robert Avery

Bank Holiday Painting Challenge Update

It’s the second of the British summer bank holidays (not that the weather seems to accept the “summer” bit) so I’ve plenty of time to update the TooFatLardies Painting Challenge.

Not just an update, but I’ve also had a chance to load last update’s points totals as well: so we should be totally and absolutely up to date now.

In no particular order, in today’s challenge entry we have:

  • Mr Plowman with some nice looking sci-fi vehicles

  • A mixed bag from Chris Stoesen

  • Joe McGinn sends in some Brunswickers

  • After a long gap, Steve Burt return with some Saracens and Pygmies.

  • Travis deploys some rather good skeleton knights and some sailors (apparently painted for a friend, don’t yer know)

  • The Hat is still sailing the ocean’s blue: this week’s entry is a somewhat anonymous tanker

  • Carole pops in some armoured knights for her Condottieri

  • It’s a mixture of samurai and fantasy for John Haines (sounds like my perfect movie)

  • Mervyn’s been ill, but sends in some houses anyway: brave lad!

  • There’s a HummVee and partisans from Mr Duffell

  • And, in a circular fashion, a mixed bag from Mr Helliwell

As usual, clicking on the name of the person in the list above will take you straight to their gallery (opens in a new window).

Today’s pictures are below:

More To The Strongest

Just to leaven the flow of I Ain’t Been Shot, Mum! battle reports that have been flowing through this site, here are some pictures of another day spent playing the Ancients ruleset To The Strongest.

One of the great things about the game is how fast it plays, so an afternoon’s gaming can often involve three games of TTS…and so it was the last time that friend Neil came around to play.

The action began with Neil playing a Pyrrhic army against my Ancient Britons. Not exactly contemporary or contemporaneous, but not spectacularly unbalanced either.

I placed my warbands in the middle of the field, and my massed chariots on either flank. Neil lined up his Hoplite and pikemen on his right flank, his cavalry in the middle, and his elephants and light infantry on his left wing.

Unfortunately for Neil, his Hoplites took too long to advance forward, which allowed me to engage and pin his centre whilst I sent a mass of chariots around behind his left flank. This led to me rapidly capturing his camps, and then threaten the rear of his main line: a victory to me.

Here are some more pictures of the game:

IABSM AAR: Return to St Aubin (again, again)

Another superb AAR from Desmondo Darkin based on his D-Day St. Aubin scenario.

This time, he and the South London Warlords are using a bigger piece of coast and a sandy beach instead of shingle. For rules, they used I Ain’t Been Shot, Mum! with Desmondo’s Chain of Command-modified activation system.

Click on the picture below to see all:

IABSM AAR: Winter Attack!

Fellow Lardy Desmondo Darkin and gang have played their first game using their new winter terrain.

They had just over three hours to play a German attack on a Soviet held village in 1944, and used I Ain’t Been Shot, Mum! with Desmondo’s Chain of Command-modified activation system.

Both sides had a core Infantry Company and each side then picked support options using a Support list which is basically the Chain of Command list but sized up to IABSM-sized games.

Click on the picture below to see loads of pictures of Desmondo’s superb terrain and some shots of the game itself:

IABSM AAR: Bashnya or Bust! #2A: Osen

Another great battle report from Captain Cliche this time featuring action from the second scenario from the Bashnya or Bust! scenario pack.

After a Soviet victory in the first battle of the campaign, this clash takes place around the small town of Osen. The Germans are holding out whilst their engineers set charges on the last remaining bridge , before withdrawing their remaining troops over the river and blowing the bridge to bits. They are outnumbered and face a swift Soviet attack that features plenty of T34s and SMG-armed tank-riders. The Russians need to drive through and capture the bridge.

Click on the picture below to see if the Soviets took the bridge.

TTS Battle Day Game 3

Onto the third battle of the three that took place as part of a TTS battle day with friend Bevan. Regular visitors will know that by this time I was down two-nil, so rather keen to finish the day with a victory! The sides would be Pyrrhic (played by Bevan) and Ancient British (played by me).

The Ancient Brits are a favourite of mine: in fact, they were the army I used to use when I played WRG 6th competitions in 28mm some thirty years ago…when your chariots were known as the Ancient British Panzer Division.

Under TTS, the Ancient British have an even greater proportion of their army as light chariots than under WRG 6th, so I decided to keep things very simple and employ that well known AncBrit tactic known as “the horns of the Highland Cow”!

This actually worked surprisingly well. My light troops on either flank overwhelmed his light troops through sheer weight of numbers and, most pleasingly, before his Hoplites could start trying to chew through my warbands.

As my chariots curled around onto his rear, the Pyrrhics realised that this was not going to be a Pyrrhic victory so much as a Pyrrhic disaster, and surrendered.

End of the day score: Bevan - 2, Me - 1 .

A great days gaming with what is a delightful little rule set!