TTS AAR: Ewelme 25 Game 3: Venice Abroad vs Late Romans

My third game at this year’s Ewelme tournament was against Si and his Late Romans, rapidly becoming my nemesis opponents! It’s a small-ish army but packed full of veteran legionaries and auxilia that do very well against my Venetians, and a nasty shock unit of veteran cataphracts.

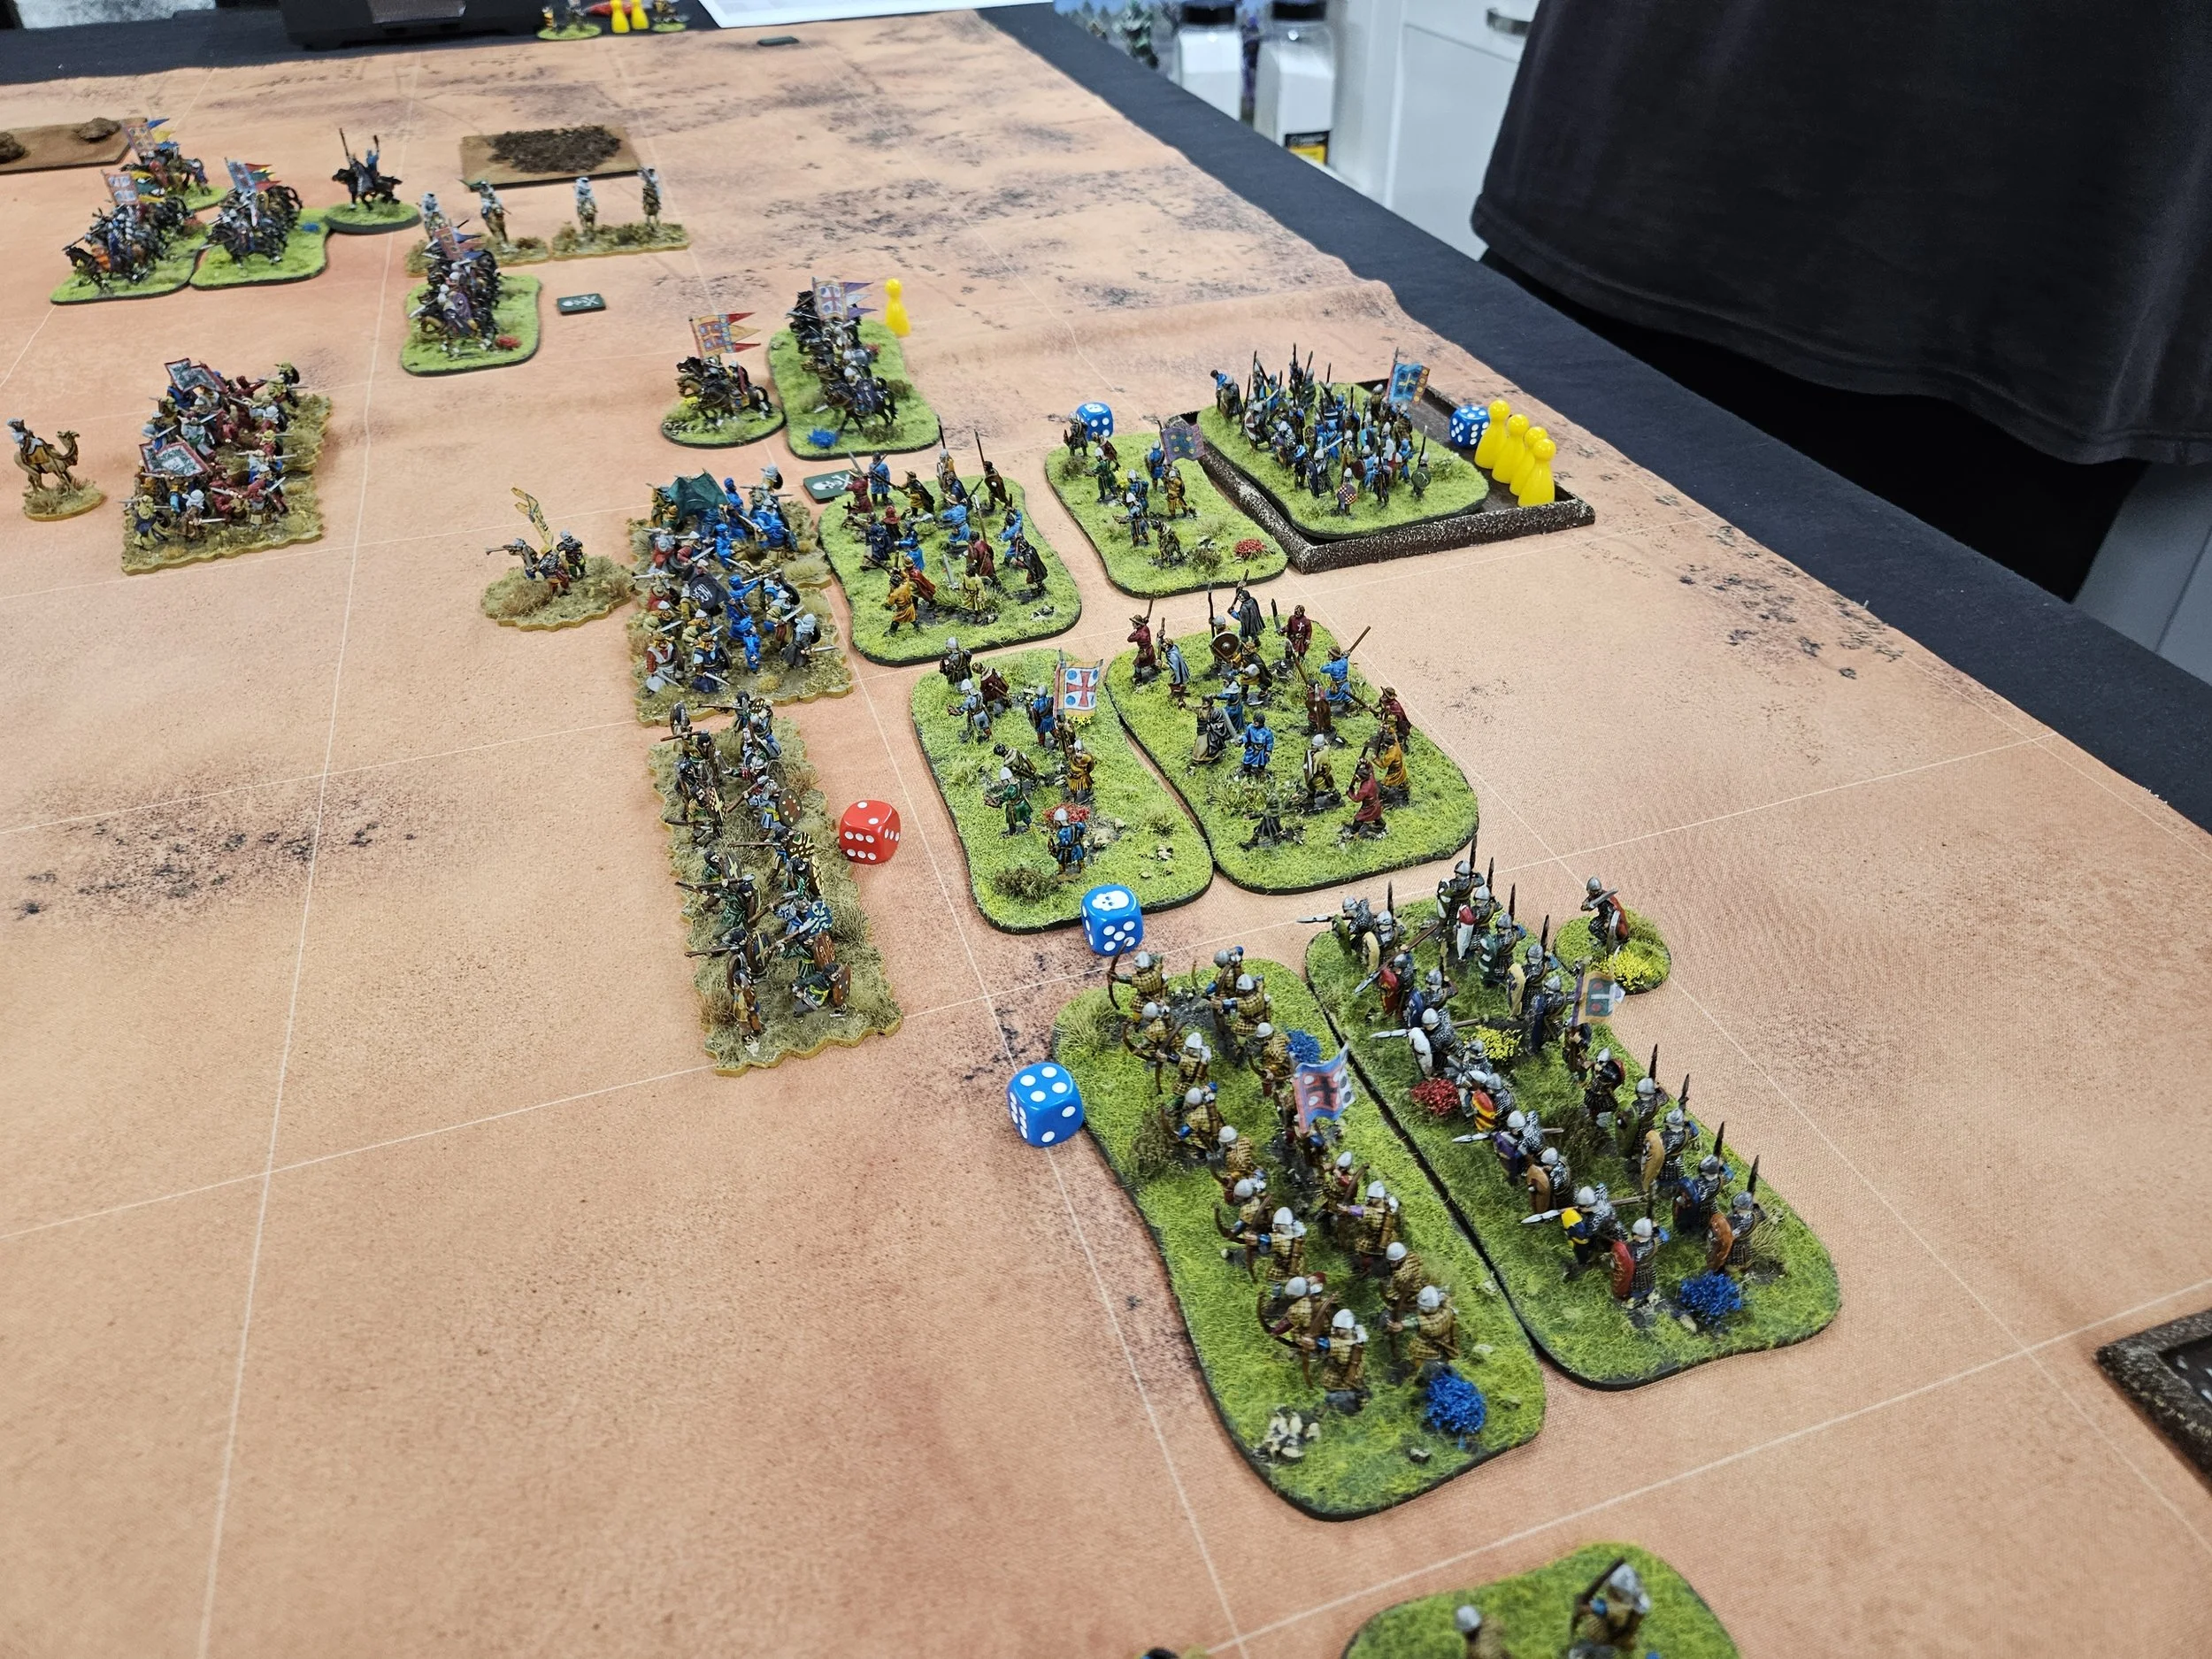
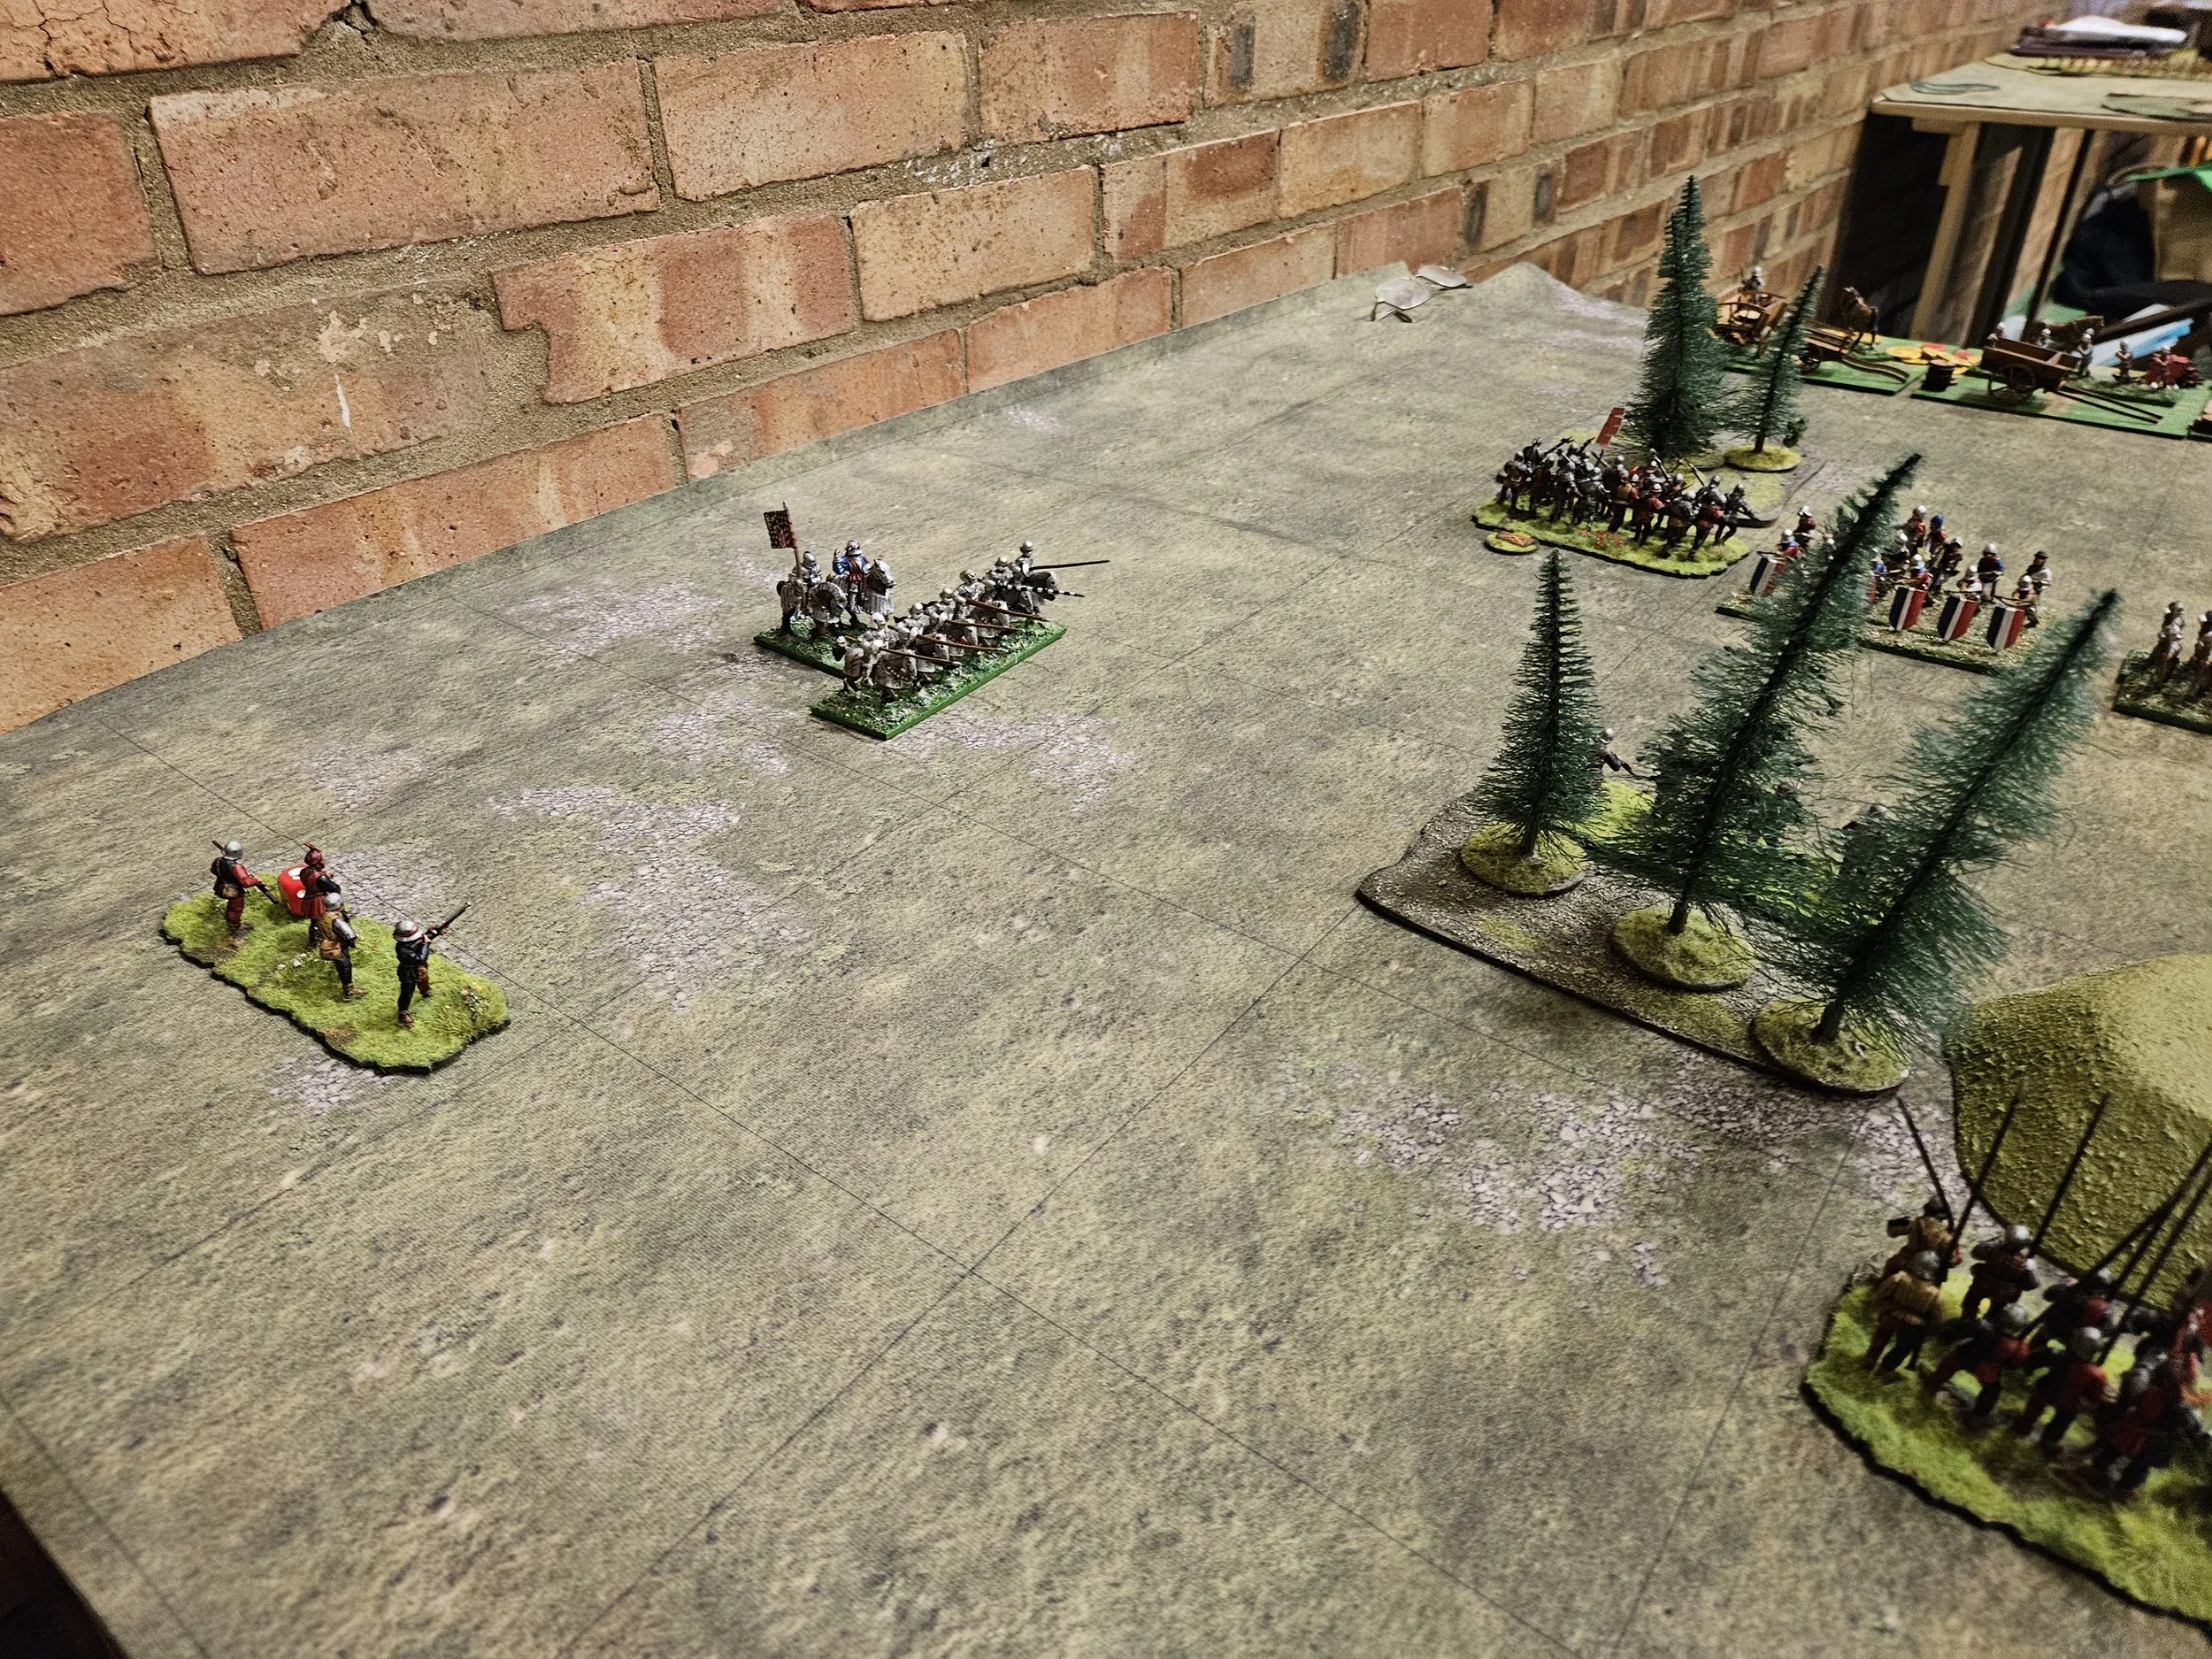
Both sides began the battle by advancing forward cautiously. On the left flank, I carelessly allowed the Romans to get an overlap, and would spend the rest of the game defending from a tactically outnumbered position there.

This meant that I needed to force the right as soon as possible, so I advanced my infantry and second command of knights forward as fast as possible.

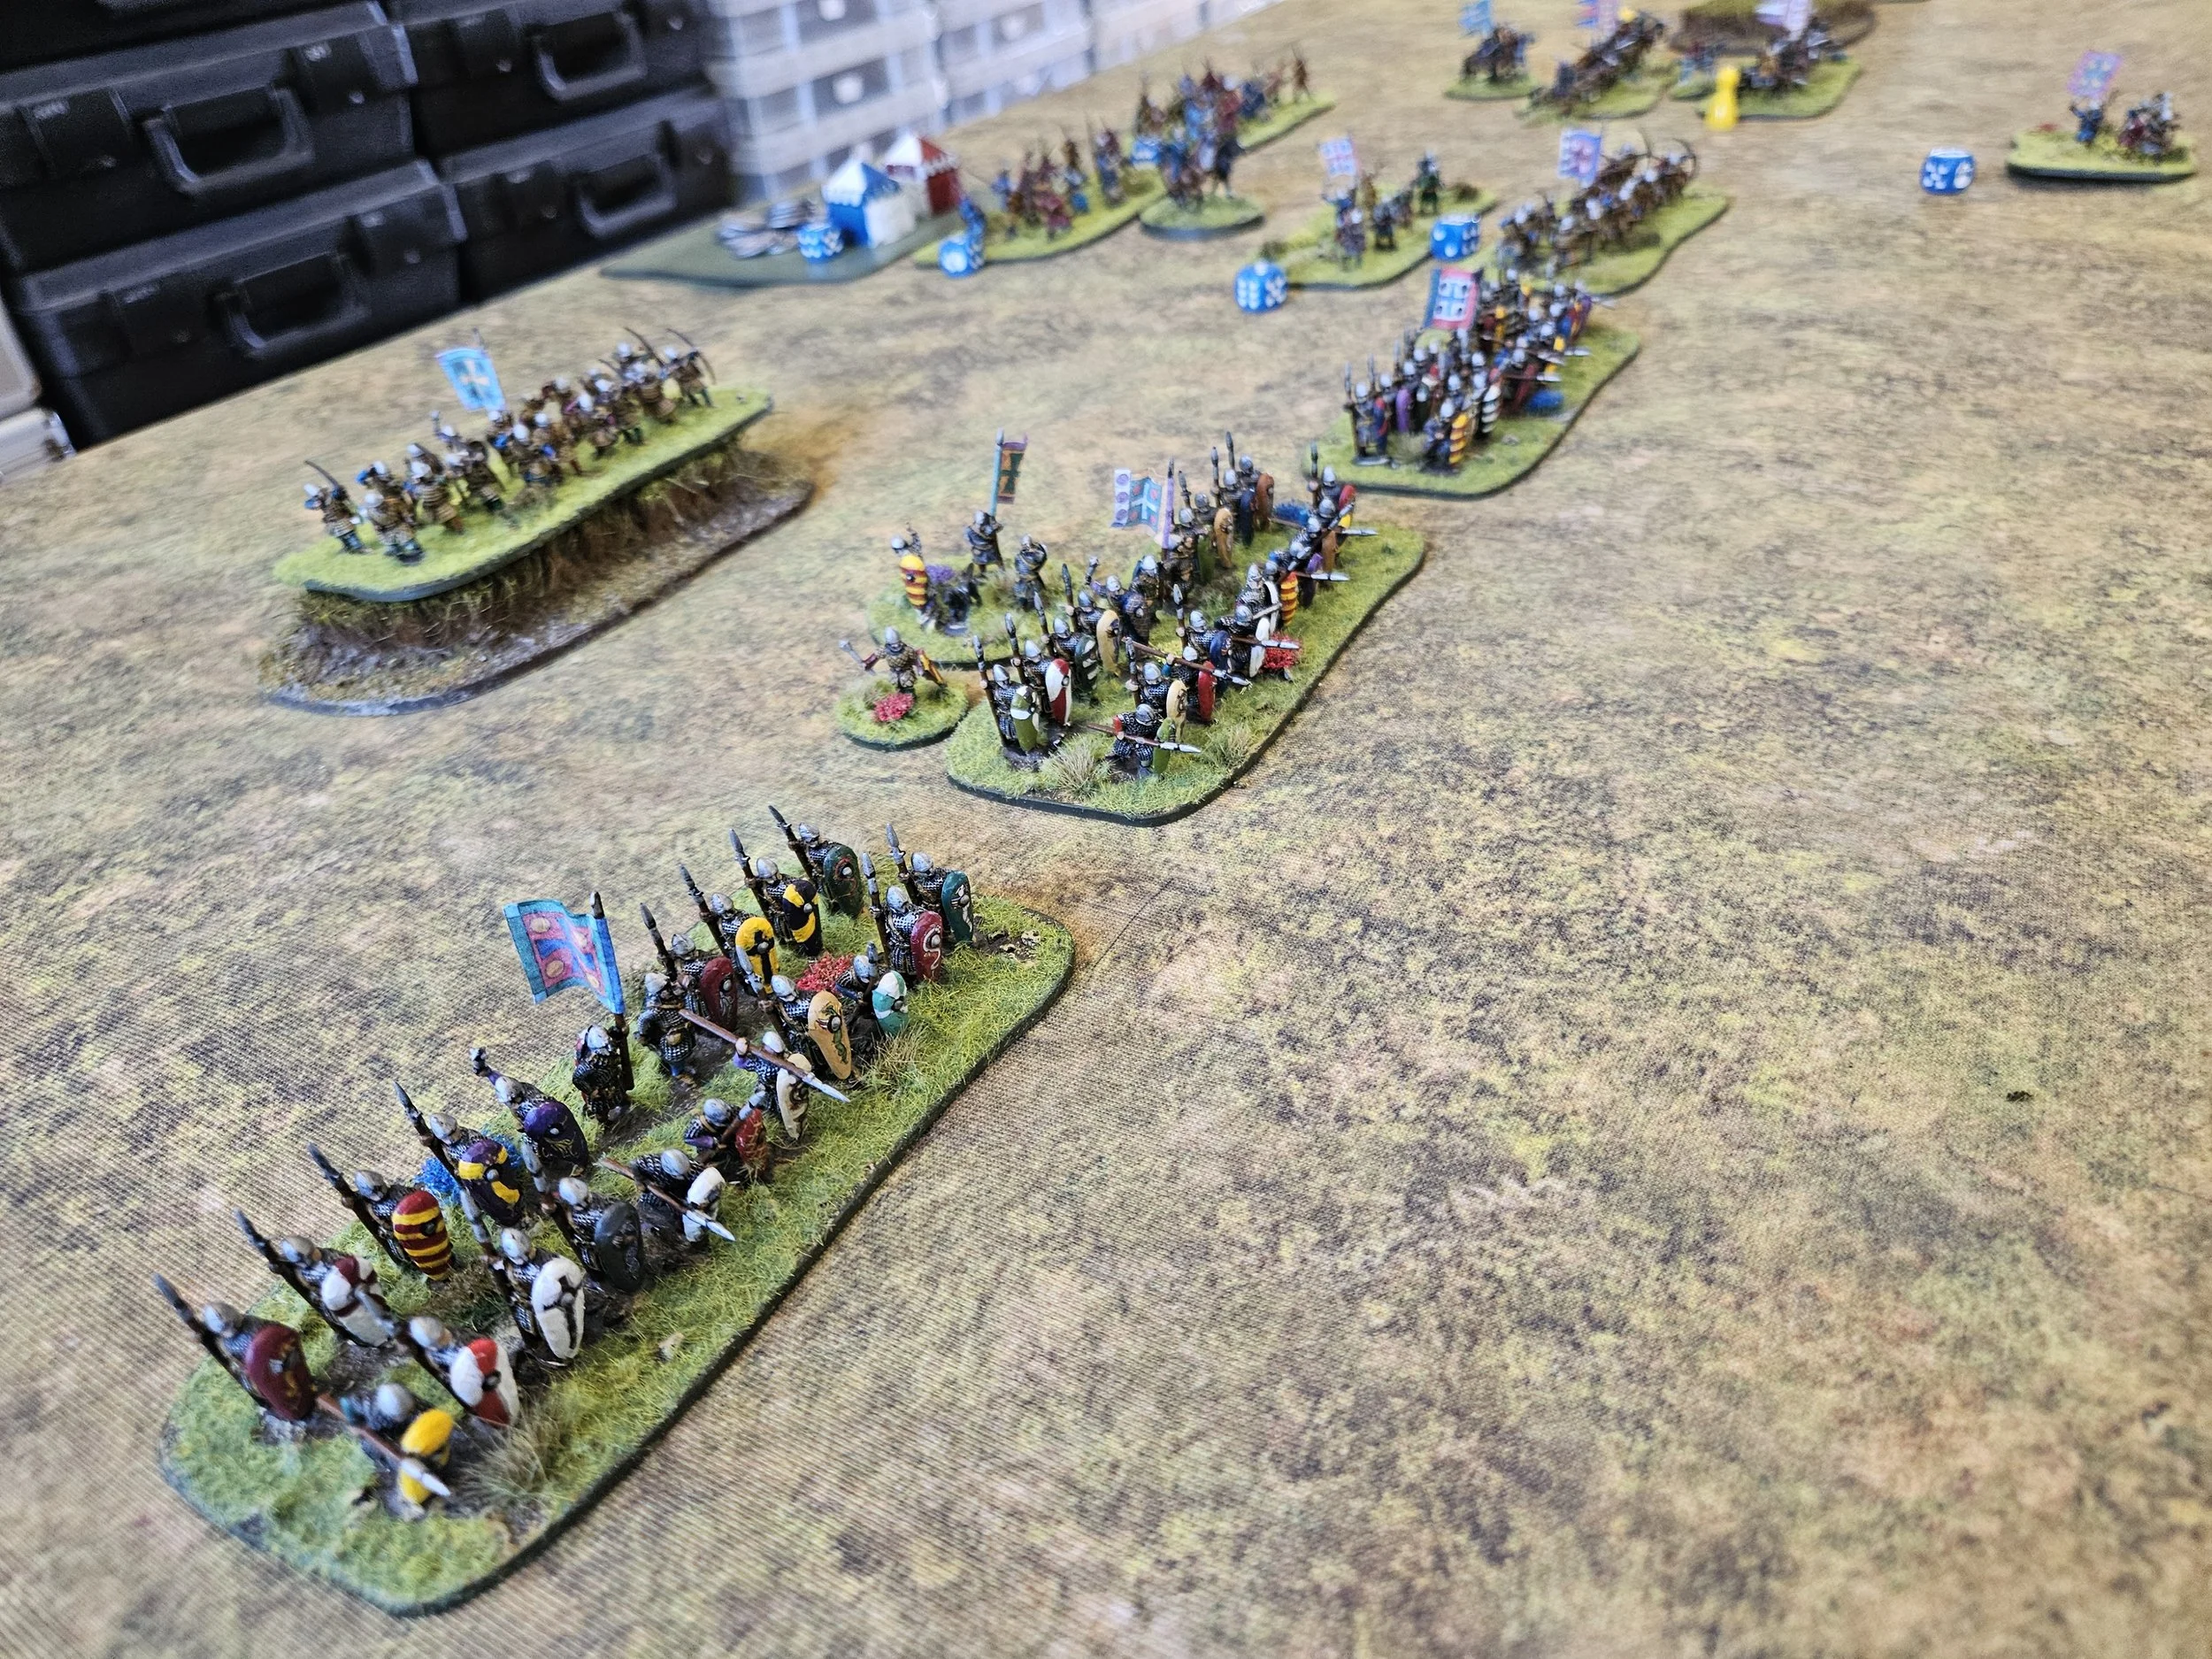
Battle was generally joined on the right but to no clear outcome in the main line, although some of the Roman infantry on the far left did punch through and head for my baseline. No matter, I had some knights who could sort them out!

Much to my surprise, the infantry battle in the centre wasn’t a complete disaster, with the Venetian foot holding their own against the veteran Auxilia. Maybe I could win on the right before Si’s cavalry stuffed me on the left!

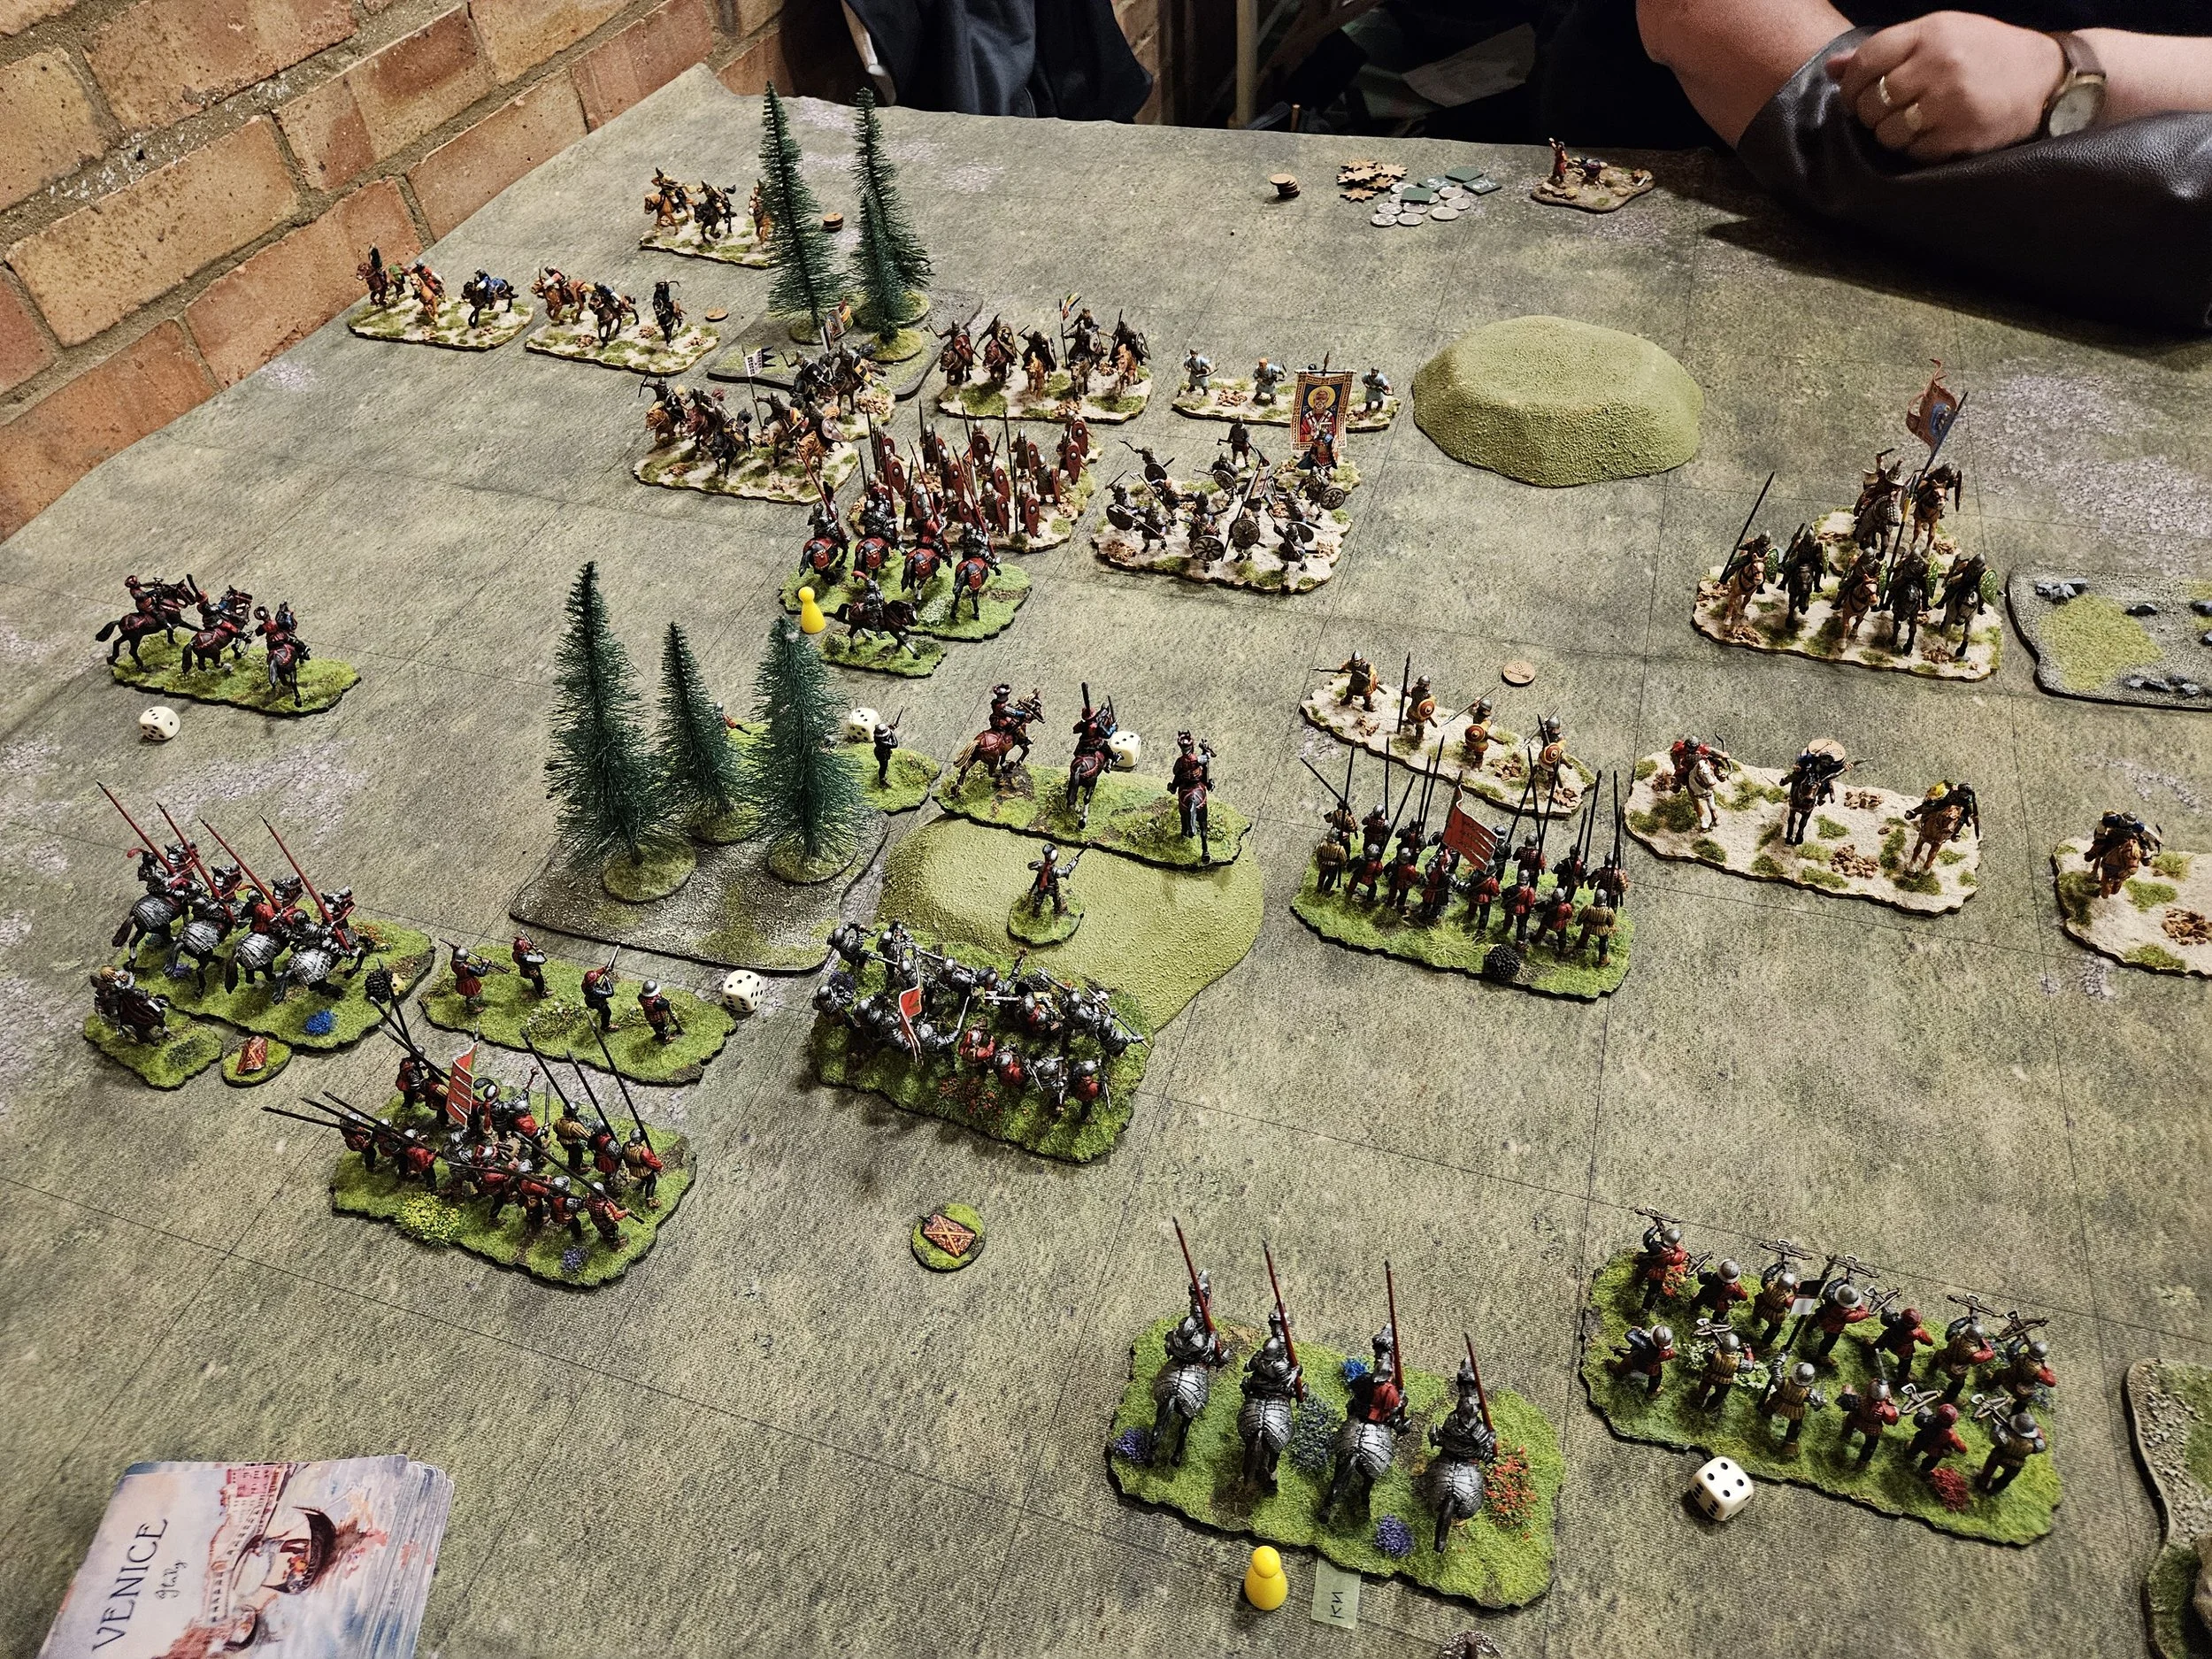
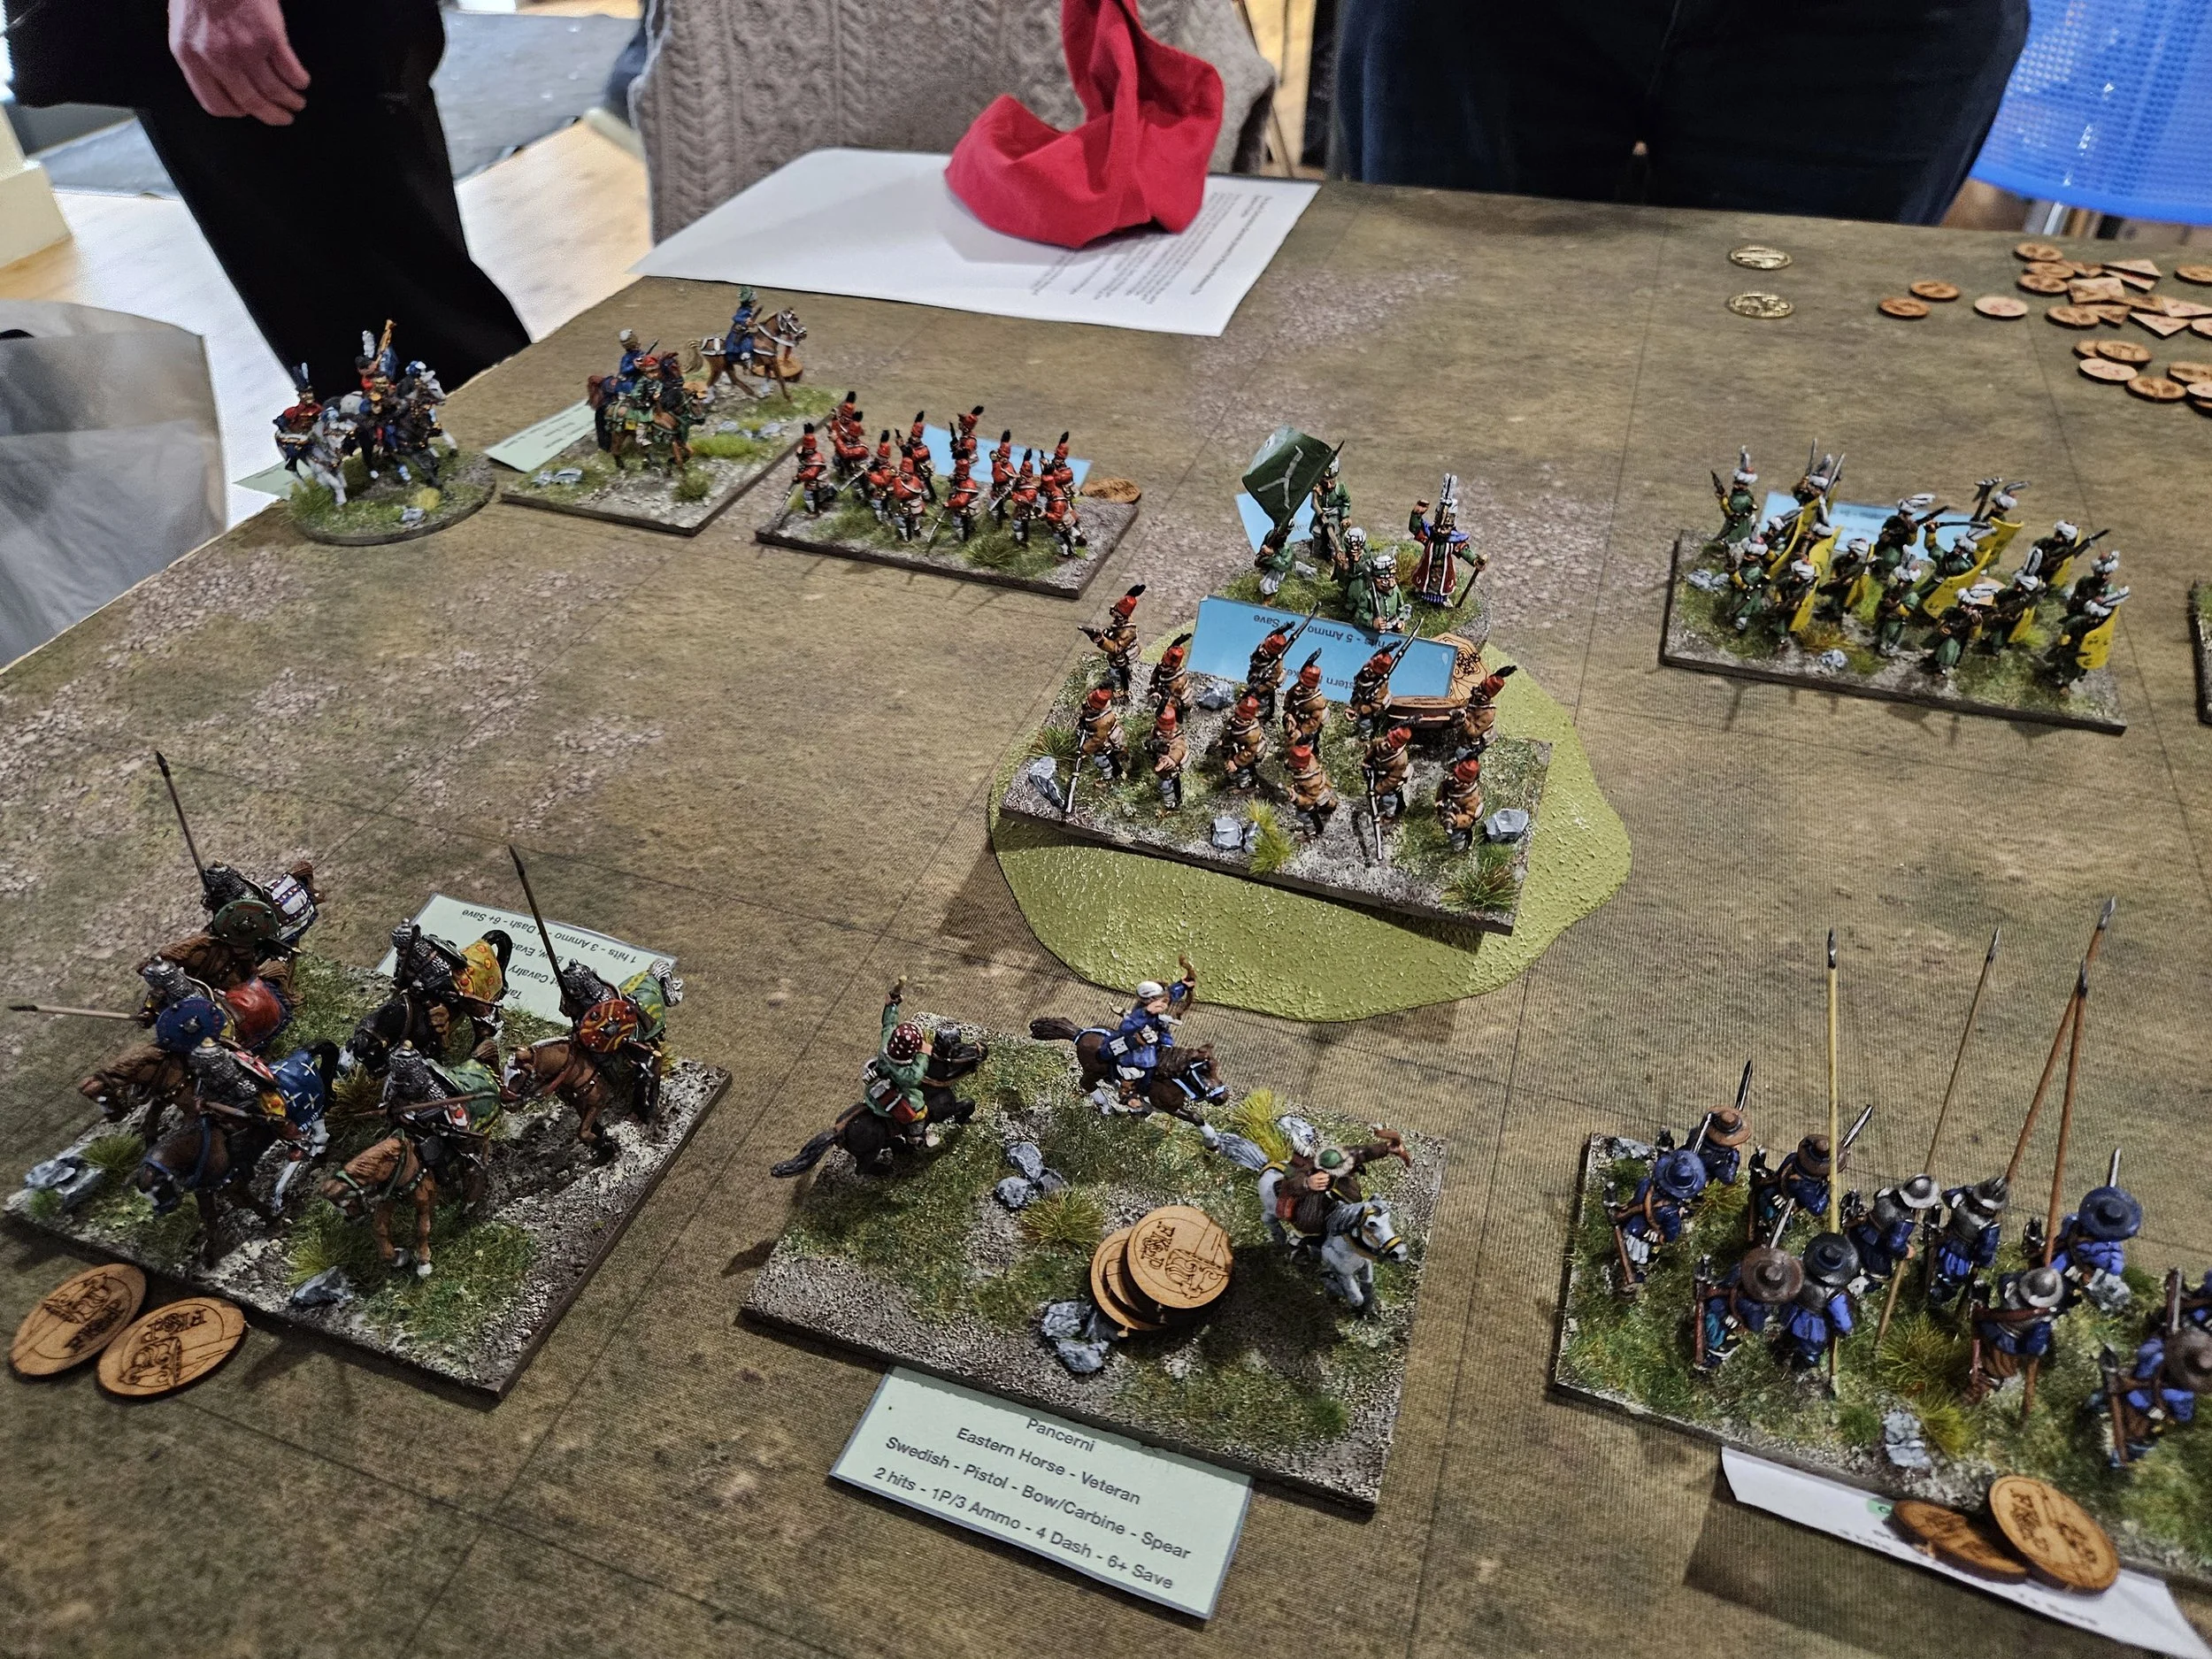
First up, I really needed to get rid of that pesky unit of Legionaries down in the left hand corner: a nice four coins just waiting to be collected by the Knights.

But they needed to get their skates on, as things were not going well on the left…

But in the end it was not to be.

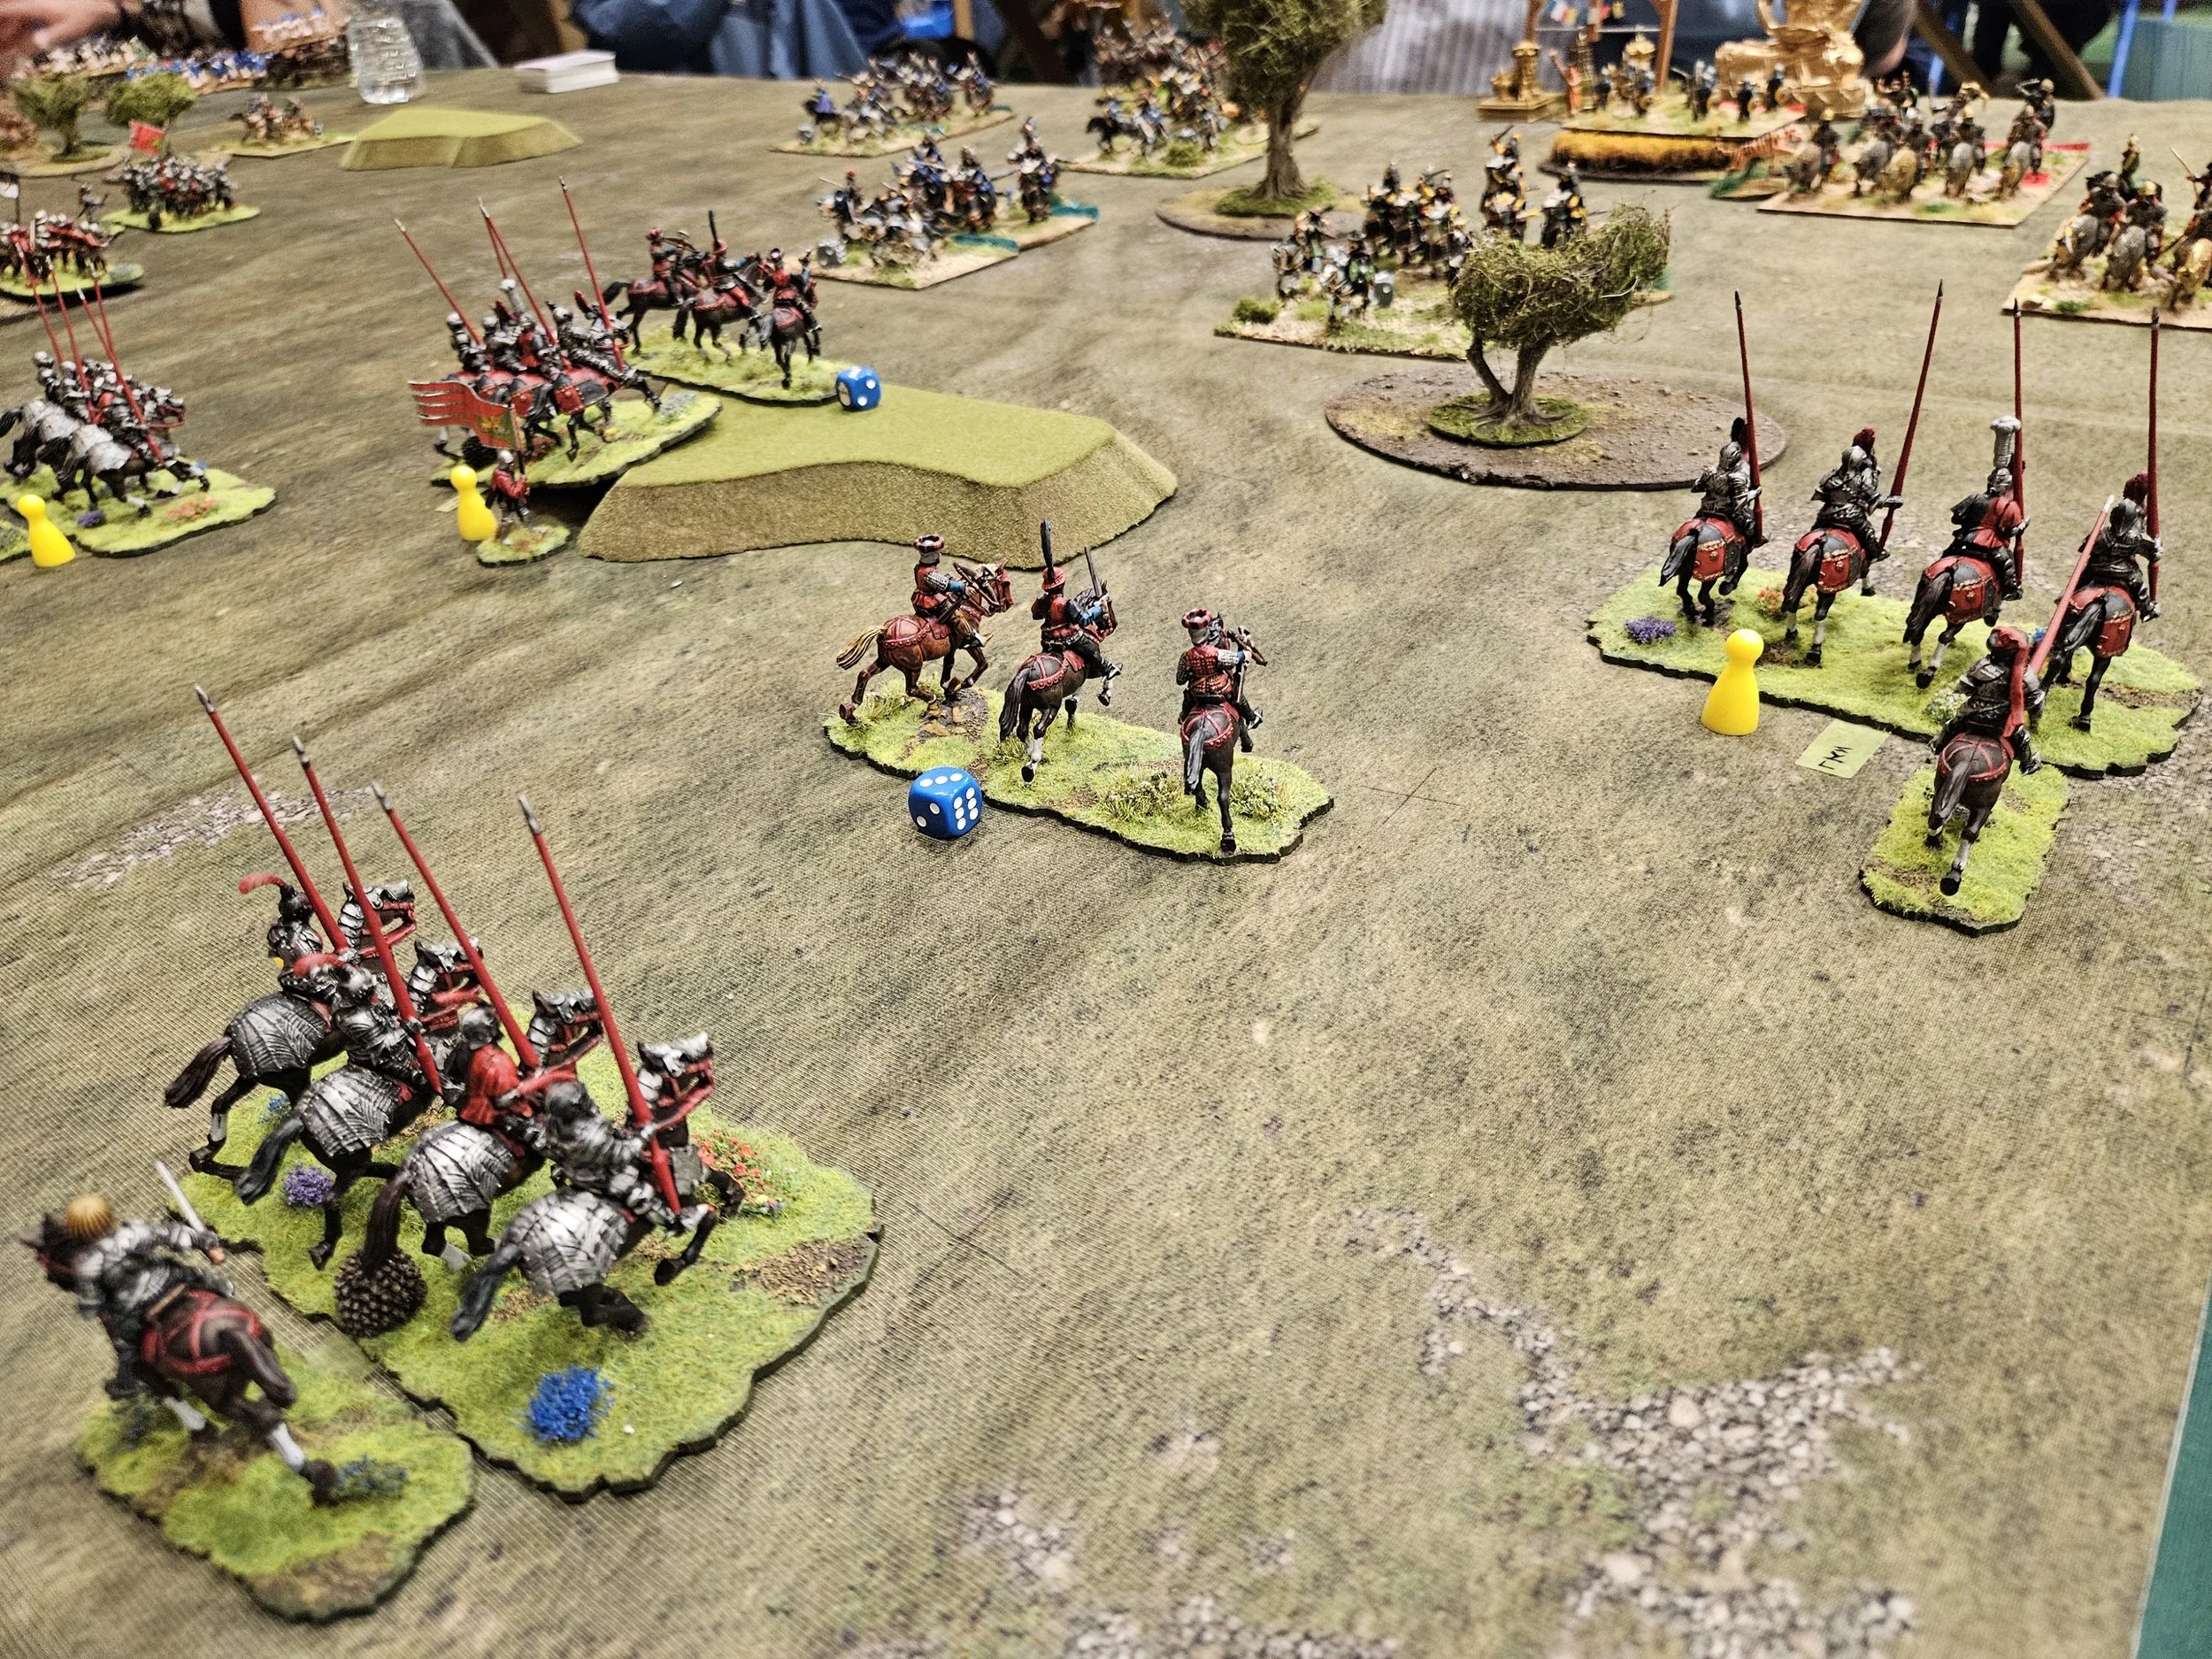
I had two chances to win the game (as we were both now down to minimal coins): the Knights I’ve already mentioned and the Later Knights who had punched through at the other end of the field and were now in as position to threaten the enemy camp.

Unfortunately, the Knights just couldn’t get anywhere against the Legionaries, despite still having their lances for the first clash. Frontally charging undisordered veteran infantry is not a an easy clash to win!

And although the Later Knights took one of the enemy camps, Si managed to get some light infantry into the other camp meaning it was just an activation too far to take that one as well and get enough coins to win the game.

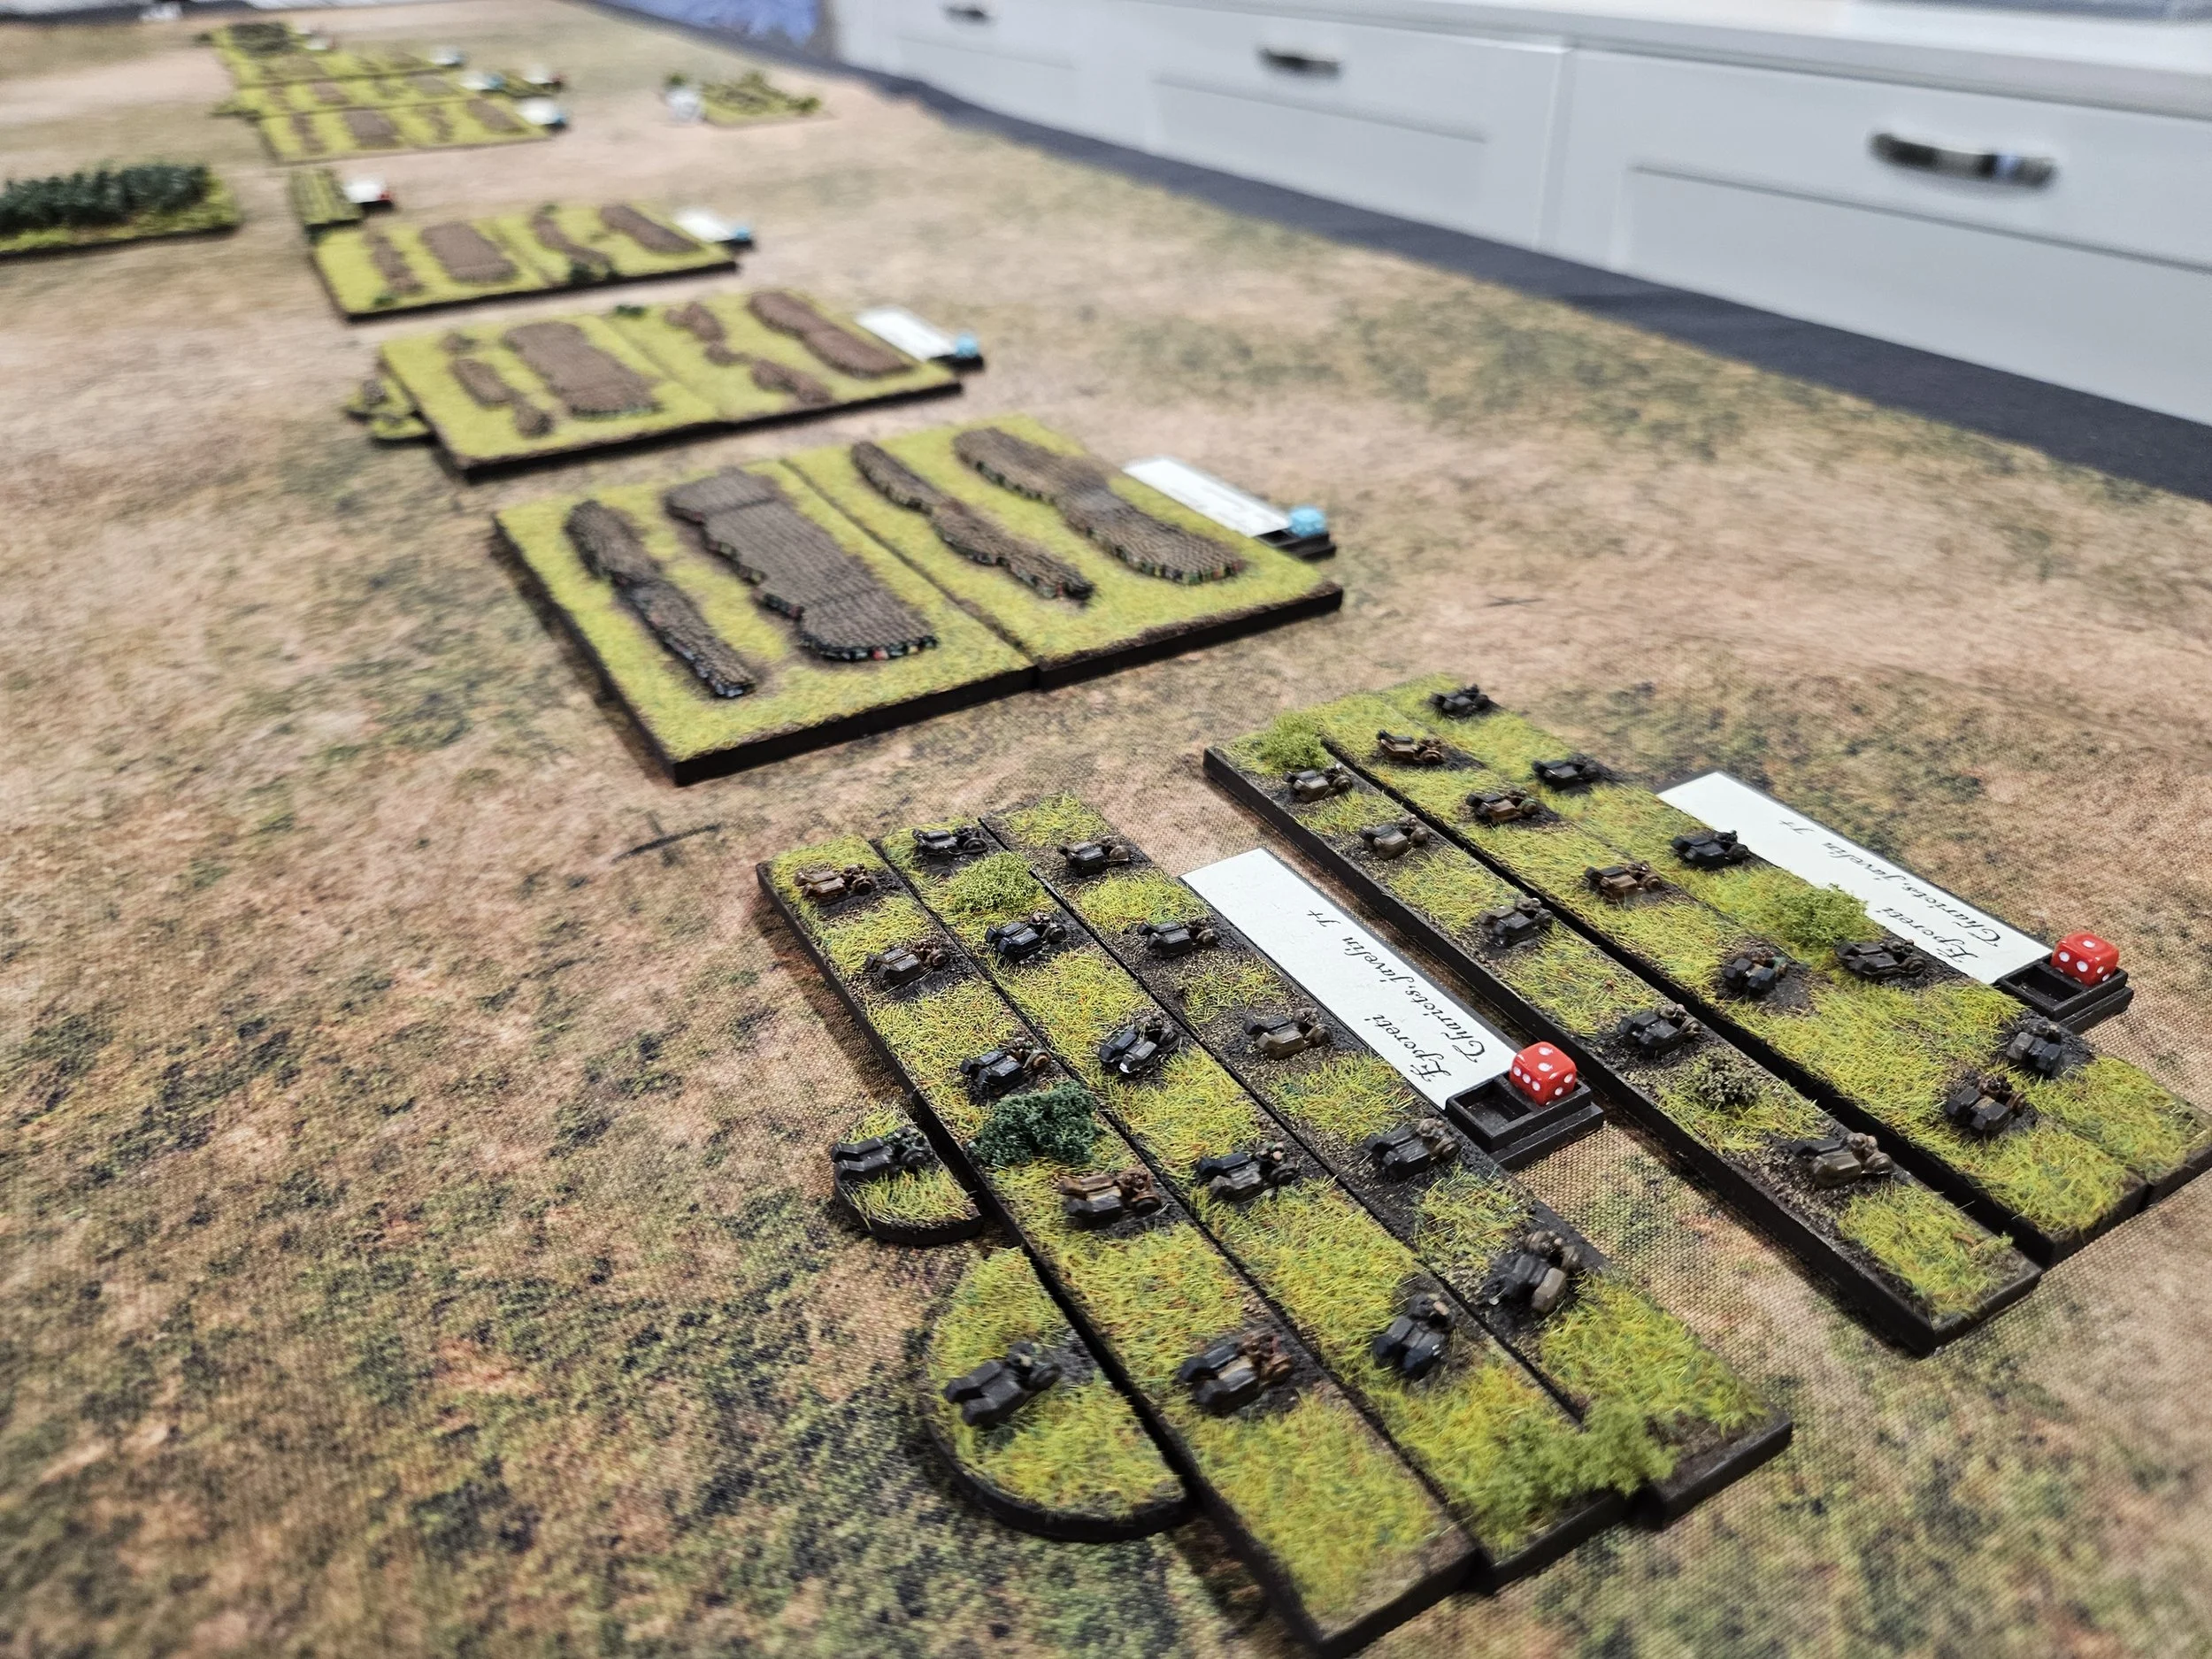
In the end, the game ended with a bit of a damp squib: with one of my Spear units falling foul of the javelins thrown by some Roman cavalry, and the game was lost before I could win it next turn.

Not a good result for the Venetians, but a great game of To The Strongest.

On the left, Si’s tactics gave him an immediate advantage but I managed to defend the position for longer than I expected to. On the right, the game could have gone to either side, mainly due to the unexpected efforts of the Venetian infantry, so it was just the way it goes that Si dealt the winning blow first.

Editor’s Note: Subsequent to the battle, Si has pointed out that although outside of competitions we have a fairly evenly matched success rate, I’ve never actually beaten him in a tournament. Thank you, mate, I’ll bear that in mind for next time!

TTS AAR: Ewelme 25 Game 2: Venice Abroad vs Ikko-Ikki

My second game at this year’s Ewelme tournament was against Colin’s Ikkio-Ikki: a nasty bunch of Japanese samurai monks who all happened to be (a) fanatic and (b) carry big choppers i.e. hard to kill and lethal in combat!

As expected, as the battle began, the Ikko-Ikki eschewed any tactics and just headed straight for my battle line intending to use their naginatas to deadly effect.

My plan was to weight everything away from the left flank, aiming to defeat half their army with two-thirds of mine on the frest of the table, and then turn back to defeat the second half in due course. The knights would punch through their line on the far left and far right of my line whilst my over-matched infantry just held on until the knights could turn and hit the Ikko-Ikki in the rear.

On the left flank, the Later Knights did their jobs very nicely, but the helmet-heads didn’t: the usual cardboard Venetian armour coming into play.

This effectively left my left flank wide open apart from some nervous looking light infantry, meaning that I really needed to win on the right as soon as possible, or see my super-expensive camps fall to the religeous nutters costing me a lot of coins!

Meanwhile, in the centre, my infantry were hanging on for dear life: only really surviving because I had one extra unit that could help hold the left part of the line…but the Ikko-Ikki were remorseless in attack, and soon the centre began to look very shaky indeed.

It was all down to the knights on the right, helped by the victorious later knights on the left.

They had indeed punched through the enemy line, and were now looking at how best to finish the game before the left and centre finally gave way.

Everything now worked out rather nicely.

The later knights that had been successful on the left swept into the centre and smashed some of the Ikko-Ikki cavalry reserve that had been coming forward to plug the gap, from the field.

This allowed the knights of the right to position themselves perfectly to turn the tide of the battle my way: one unit headed for the flank of the Ikko-Ikki line that was threatening my infantry, the other spotted a chance to make a sudden thrust forward and take the enemy camp, not undefended but currently unoccupied!

Here’s an overview of the positions as we moved into the final phase of the game. You can see that my plan has worked: four of Colin’s units on the left (as you look at the picture) are facing one unit of Venetian light infantry, leaving the rest of my army free to attack the rear and flanks of the rest of his troops.

Note the lone Ikko-Ikki unit at my baseline on the right. They could have caused me some trouble, but Colin was unlucky with the cards, and they never really got a look in to the action after their initial success.

The end of the game the came quickly, as my knights on the right went to work.

The enemy camp was taken, and the flank of the Ikko-Ikki infantry line was charged, with even the intervention of the rest of the enemy cavalry having no effect on the later knights that had come over from the left.

So a 158-83 victory for the Venetians, but it had not been the easy battle the scoreline suggest. Those fanatical, naginata-wielding Ikko-Ikki are very tasty in combat, and had Colin managed to get the whole lot of them in against my troops, things would have been very different indeed!

TTS AAR: Ewelme 25 Game 1: Venice Abroad vs Konmenon Byzantines

One of the great things about competitions is that you can never tell who you’re going to be fighting next.

Somewhat ironic, then, that my first game at this year’s Ewelme tournament was an exact repeat of my final game at Roll Call 2025, the last event I’d attended: my Venice Abroad versus Nigel’s Konmenon Byzantines…although both sides had slightly different armies as the set points totals were different between the two competitions.

The terrain was unusually dense, with significant patches of impassable or rough ground on the flanks. This had the effect of channelling the battle into the central zone, although it looked as if the Byzantines were going to try and slip round the outside of the poor going on their right flank.

As the game began, both sides advanced forward strongly on one wing. Nigel sent his troops forward against my right, and I slammed forward on my left, hoping to take advantage of the fact that some of the Byzantines were the opposite side of the impassable terrain so had effectively ruled themselves out of the first part of the battle.

I was unfortunately immediately in a bit of tactical trouble as, on the left, my veteran later knights managed to lose their initial charge and ended up disordered and, on the right, the Varangian Guard ran over the other unit of later knights. The famous Venetian cardboard armour striking again!

On the right, the situation was partly stabilised when the (normal) knights there managed to destroy the Byzantine Skutatoi but, in the meantime, battle had been joined in the centre and my men weren’t doing very well at all!

At this point Nigel made possibly the critical decision of the game. If you look at the picture above, you’ll see that (top, right) the Varangians have turned towards my victorious knights rather than turning towards the flank of my beleagured battle line.

Nigel was (quite rightly) very worried about his Varangians getting some knights charging right up their collective backsides, but if he’d turned towards my line, got a hit that killed the already-disordered right hand infantry unit (and his men did have big choppers!) he could perhaps have cascaded that disorder down the line and effectively ended the game.

But he didn’t, and the game went on…

Back to the left flank, and my knights there (both types) had recovered the situation nicely and driven his troops there from the field, apart from the units that had been on the other side of the poor terrain which were now busy driving my light troops on the left back and off the board.

So that is the situation as we hit the final stage of the game: one more significant hit would give me the win and it was still my initiative, but if I didn’t get that hit and win the game this turn, my main line was going to break, losing me at least three units, and probably give Nigel the win.

My crossbowmen had been sitting on a hill throughout the entire game doing sterling service shooting down Nigel’s light cavalry. As mentioned above, some Byzantine horse had driven my light troops back down the far left hand side, although I had managed to disorder them and wound their general as they did so.

The crossbowmen had one shot left so raised their weapons and opened fire: a hit and, I must confess, I can’t remember if it was the Byzantine horse or general who died, but it was enough to give me the last few coins I needed for the win!

Well that had been the closest of close run things, giving me a win 186-33 points: a scoreline that doesn’t reflect the actual situation at all. As I said, if my main battle line had collapsed, and it was about to do so, Nigel could easily had snatched victory from the jaws of defeat!

A great game of To The Strongest: very exciting until the very last moment.

TTS AAR: Arab Conquest on the Rampage

Neil and I had time for another go at the Arab Conquest versus Early Crusader. The picture below is from after my first turn, where I’ve taken full advantage of my mounted infantry to get as far forward as possible on my left flank, whilst refusing my right, leaving it covered by a couple of units of Jund cavalry.

With such a quick rush forward, battle was quickly joined, and before long I was well into the process of turning the Crusader right flank: the light camelry again proving their worth.

Everything was happening very quickly: my Arabs had also generally engaged across the centre:

On the right, however, the Crusader cavalry had come forward and was poised to cause me some problems.

Fortunately, a bit of clever manouevring largely countered the threat.

Meanwhile my troops on the left had largely won the combat there, and were starting to curl into the centre:

This was too much for the Crusaders to take, and they withdrew from the field of battle.

TTS AAR: The Arab Conquest Begins

Having finally painted and based enough 15mm Arab Conquest figures to make an army, it was time to get them onto the tabletop for the first time. Neil, my opponent, played an Early Crusader force which, whilst not exactly contemporary, was closer than many recent match-ups!

The Arabs were almost all resin prints of the Red Copper range augmented by a few metal figures from Essex and Blue Moon to fill in the gaps. The Early Crusaders were actually Normans from the excellent Museum Miniatures Z range.

The game opened with the Arabs charging forward as fast as possible in order to take full advantage of their mounted infantry bonus to try and avoid too much archery and crossbow fire from the Crusaders before getting stuck in to melee.

Superior numbers also gave me an overlap on both sides, especially as the Crusaders had deployed stacked quite deep, and I wanted to see if I could get my cavalry on the right and camelry on the left round and into the Crusader flanks: something achieved very successfully.

On the right flank, my cavalry were now in a perfect position to turn and roll up the Crusader line.

This, however, proved more difficult to do than expected due to a combination of clever defensive work from the Crusaders, taking advantage of the patch of rough terrain and their camp to anchor their formation, and some bad luck with the cards.

Eventually, however, that pesky unit of Crusader infantry in the rough ground gave way under sustained pressure from front and flank, and the roll up began.

This was good news indeed…but things were not going so well on the left flank.

Although I’d got the camelry around and into the Crusader rear, they had failed to deliver on their potential, with my Jund cavalry also not performing well against the Norman knights and being forced to retreat in disorder.

This left his cavalry free to do to me what I had been trying to do to Neil i.e. head back into the centre of the field and roll up my line, now generally engaged there.

Both the Arabs and Crusaders had now managed to roll up one of their opponent’s flanks, making the situation critical for both sides: one more unit lost would mean defeat.

Unfortunately for the Arabs, Neil had the advantage in both troops and positioning, meaning that unless I could pull something out of the hat, I would end up snatching defeat from the jaws of victory: I just had too many units on the verge of breaking to survive another Crusader turn, with the double-disordered warband about to be charged by a fresh unit of veteran Norman knights being the prime candidate to go first!

All I had left to try was to send my disordered Jund cavalry on the left, accompanied by an already-wounded general, into a desperate charge against an equally disordered unit of Crusader cavalry accompanied by their True Cross army standard.

This was a tad risky, as the Knights had a better save than I did, but I would attack first and, quite frankly, this was my only hope of victory! A ‘10’ was pulled for my activation card, so I was only going to get one go at this, and I reached for my attack card: a ‘9’, which was a hit despite my disorder.

Neil’s save card was pulled and, much to my surprise, the disordered Jund cavalry swept the Normans from field: a glorious victory that, as the True Cross fell, led to the rest of the Crusdaer army retreating just as it looked as though they would win the game!

A glorious victory for the Arabs: snatching victory from the jaws of defeat rather than the other way around!

More Teeny-Tiny TTS

Neil had time for another game of To The Stongest using his 2mm figures. I’d play the Romans again, Neil would take the Ancient Brits.

Following my previous defeat, I thought I’d try something a bit different this time, and stacked most of my troops on the right intending to overwhelm him there before turning back to destroy the rest of his army.

As the game began, my plan unfolded successfully, and at least a third of his troops ended up effectively out of the game until they could get across the table and back into the action.

Unfortunately things began going wrong shortly after that!

Part of the plan was for my veteran heavy cavalry to punch their way through the British chariots facing them on the far right. This didn’t happen and, in fact, the chariots won the encounter and thus blocked my flanking manoeuvre from happening.

Worse, the veteran Legionaries, advancing forward quickly to engage the warbands facing them, failed to dent the Celts, even with a numerical advantage. There really was something wrong with my troops today!

This, of course, gave Neil the time to bring his “missing” men back across the table and into combat, leading to a most unpleasant situation featuring the Legions being potentially attacked from front and flank…

Although the Roman cavalry had by now managed to dispose of the chariots, the time it had taken them to do so left them trapped in the top right hand corner of the battlefield as the Celtic warbands and Legionary units went at it to their left.

The Legionaries were still fighting very badly indeed, and had been pushed back into a position where the British could start to apply their by-now-superior numbers.

In the end, the British did to the Romans what the Romans had been trying to do to them: the Celtic cavalry arrived from the far reaches of the other side of the table and curled round to threaten to take the Romans in the flank.

So two defeats in a row for the teeny-tiny Romans. Admittedly I’d tried the bold tactic of severely weighting one flank, but that had worked until my troops failed to take advantage of their tactical position just after the beginning of the battle.

Captain Hindsight has pointed out that perhaps I was expecting too much from the Legionaries to quickly defeat the warbands in front of them (I should have anticipated the need for a slow, grinding victory) but the Roman infantry didn’t really achieve anything all game: not one warband was destroyed!

The real culprits, of course, were the veteran Roman cavalry. A pathetic initial performance that they admittedly recovered from, but too late to be useful.

So the manoeuvre phase was a success, but the execution of the combat phase didn’t: something to build on for next time!

Teeny-Tiny To The Strongest

Friend Neil invited me over for a game of To The Strongest using his 2mm figures. This was a new experience for me as I’d never played with anything so small before (quiet in the cheap seats!).

I would play the Early Imperial Romans, with Neil taking the Ancient Britons.

My plan was to hold the centre with my legionaries and auxiliaries whilst my cavalry (doubtless superior to the chariots in front of them) on the right flank smashed through what was in front of them and curled around to take the warbands in the centre in the rear.

Unfotunately, my cavalry were having an off day, and made no progess at all against the “Ancient British Panzer Division” in front of them.

This meant that I had to send the legions in against the British centre, but even that didn’t go very well as the command on the right got decisively mullered!

This was all very disappointing, and made worse when some Celtic cavalry that, up to now, I had kept bottled up on the left managed to get clear and take the same battered command in the flank.

So a fairly decisive win for the Brits as I wrestled with adjusting to the different scale.

TTS AAR: Roll Call #4: Venice Abroad vs Komnenon Byzantines

My fourth and last game at this year’s Roll Call was against Nigel’s Byzantines: a powerful army who had carved up my Romans at the rceent World Championships!

My stratagem was Flank March so I decided to leave my right flank very light and send my best unit of veteran Later Knights (with army standard) off that way to see if I could temp Nigel’s cavalry forward to then be neatly taken in the flank or rear by my Knights.

This worked very nicely (although I messed up how it should have been played, so thanks to Tim, as referee, for ruling so adroitly and to Nigel for waving off my error) with one unit of enemy cavalry being smashed right off the table immediately after the Knights’ arrival.

On the other flank, both sides had advanced rapidly towards each other and an enormous, sprawling melee broke out. Fortunately for the Venetians, Nigel’s Varangian Guard and Skoutatoi were not having a particularly good day (they were the lads who had eviscerated my Romans!) and were contained by my troops, helped by the terrain. The Venetians also manged to knock quite a few Byzantine light units off the table: perhaps not tactically significant but still a trickle of Byzantine coins lost.

Meanwhile, back to the other flank, and my Knights had polished off all the Byzantine cavalry they could find to kill. They were having a good day: also killing the enemy general and taking the Byzantine Holy Icon standard.

I was now significantly ahead on coins, but under huge pressure back on the left. It was, in fact, fair to say that my troops there were about to collapse!

My camps were also under attack, but the militia Spearmen (led by the chef-and-chicken) were doing their best to defend them.

I needed to finish the game quickly, especially as we were also just about out of time, and suddenly saw an opportunity to do so.

I had a unit of Spearmen plus attached General on a hill about two thirds of the way up the board. They had been killing Byzantine lights and were now in a position to turn and attack the rear of the Skoutatoi who were meleeing with more of my Knights.

This I was about to do when I noticed that actually there was a clear path to the enemy camp in front of them. Okay, it was a few squares away, but I had a general with me, and taking the camp would give me the coins I needed to win.

For once the cards were with me, and the Spearmen marched straight into the camp to take Nigel’s last three coins and victory!

This was another game where the result (14-3 to me) didn’t actually reflect the situation. Although I had won the right, taking nine of Nigel’s coins from eliminating three cavalry units, their general and a standard, and only lost a smattering of units myself, I had about four units disordered and ready to break in Nigel’s next turn. I think I would still have won (time allowing) but it would have been a much closer result.

The overall scores were totted up and, much to my surprise, I found that I had come second! I was expecting somewhere 4th or 5th, so it must have been a weird combination of results elsewhere to let me snatch the runner up position: that’s the joy of the Swiss Chess system!

Thanks to Tim for organising the tournament, and to all my opponents for giving me such great games. Congrats to Peter for winning: those of you who have read the AAR of our game will know that I almost had him (score notwithstanding!), which would, presumably, mean that I would hve won overall. Something to work towards next time!

TTS AAR: Roll Call #3: Venice Abroad vs Tibetans

My third game at this year’s Roll Call was against Peter and his Tibetans. Peter has sliced and diced me before with this lot, so I was determined to do better this time round.

I had a fair idea of what tactics he was going to employ: one command of light cavalry would dart forward from the outset and attempt to get around one of my flanks. If that worked, then the cataphracts would follow. Failing that, he would use the superior mobility of his all-cavalry army to weight one side of the table, forcing me to fight his whole army with only part of mine.

That was all well and good - I knew what he would try to do - but the real question was whether I could do anything about it!

Things started well when, much to my surprise, I won the scouting. This meant that I could try to counter his intended plans through my deployment.

Note that I have lights on the left to counter his lights, my knights are all in front of his army, and most of my infantry is in the right place as well. Okay, I would have to shift my left flank infantry over to the right as soon as possible, but this was a better position from which to start the battle than I could have anticipated!

The action began on the right, where the heavy cavalry forces on either side advanced cautiously towards each other. I knew I needed to get “first charge” advantage here, so it was a question of tempting Peter into advancing forward and then not quite reaching my troops so I could then charge forward myself.

I didn’t quite manage to do this, but Peter’s first charge on the far right proved unfortunate for him as a unit of Cataphracts disordered themselves charging a unit of my Later Knights whilst my militia Spearmen on hill survived everything the Tibetans could throw at them.

You’ll also see, in the picture above, how Peter has managed to concentrate his forces on my right flank despite me knowing that that was what he was going to do and making every effort to stop him doing so! If you count them up, you’ll see I have two units of Knights, one militia Spear and a Light Cavalry versus four units of Cataphracts, some veteran, and five units of horse archers.

And this is also actually where I lost the battle. On my next turn the Later Knights on the far right charged their disordered opponents and not only failed to sweep them from the board (potentially also taking out some of the light cavalry following through morale checks) but were actually dashed from the tabletop themselves! Extraordinary: but there’s not much you can do against luck like that!

This effectively let Peter through on that flank…but more of that in a moment.

Meanwhile, on the other side of the table, I had not only countered his annoying light cavalry but was actually driving the Tibetans backwards: the cunning use of Cry Havoc! caltrops giving me an initial advantage that I was quick to exploit.

Unfortunately I just couldn’t pin the mobile mounted Tibetans down for long enough to actually kill them, so although we were about even on medals won, I just couldn’t finish off the units I was fighting.

We had now been playing for almost the whole of the allocated 90 minutes, the scores were about even, and we went into Peter’s last turn.

Firstly, he took full advantage of his success on the right and cleared my troops from that side of the table, including the equally-cunning use of his stratagem Someone has Blundered! to take control of my last remaining unit of Knights there and make them retreat backwards off the table. That was four medals gone immediately, and you can see that the militia Spearmen, already disordered and hit in the flank, are next!

You can, by the way, also see just on the other side of the hill, a unit of my Knights hitting some of his horse. This was originally a flank charge by my Knights into his cavalry that should, by rights, have at least disordered the Tibetans but, no, they survived and by this time had turned to face me. That would have been four coins my way as their general would have gone as well.

At this point we were on for a draw: probably a winning draw in Peter’s favour but still a draw.

Unfortunately all this excitement had caused me to leave the tiniest gap in my defences which, with the last cards of the game, Peter managed to exploit and get into one of my camps.

This took the last of my victory medals and cost me a full loss rather than a losing draw. If only I’d found the time to move those light crossbowmen to the right at some earleir stage!

So I came close, but still ended up being trounced 14-3, with eleven coins lost in the final moments of the game.

I took some consolation, however, in the fact that the result didn’t really reflect the game, and in the thought that I’d pretty much countered Peter’s standard strategies through my deployment and tactics and had been on an even keel with him right up to when my Knights failed to take advantage of a great position on my right. I’ll ‘ave him next time!

TTS AAR: Roll Call #2: Venice Abroad vs Vikings

My second game at this year’s Roll Call tournament was against Andy and his Vikings: an infantry army full of large, hairy types armed with big choppers!

Somewhat unsurprisingly, I won the scouting and, having seen where the Vikings had positioned themselves decided to try and turn his left flank with my Knights whilst the rest of my army kept as far away from the enemy as possible, largely deploying on the edge of my side of the table.

This was all very well, but Andy then played the This Way Effendi stratagem on me, which meant that the infantry command that were supposed to be occupying my camp had been led astray by a guide who was in the pay of the enemy and would start the game one box to the rear which, as they were on the edge of the table, meant off-table…which meant that my lovely three fortified camps would start the game empty of any Venetians!

Obviously this wouldn’t be a problem, as all I needed to bring them on in the first turn was to draw a 4+ (camps are difficult terrain):

A good start to the game but, no matter, on with the plan as I sent my knights forwards as fast and as far as possible.

The cards were with me, and the Viking left flank was soon under huge pressure as a mass of heavily armoured horsemen his them in the front and flank and rapidly started to roll them up.

The rest of the Vikings, however. had rushed forward as fast as they could, intending to win the game by just running over the rest of my troops.

Although by now I had managed to get the force that was supposed to be guarding the camp back on the table, this didn’t stop one unit of Scandies punching through my line like a seax through butter and taking one of my camps. Ouch!

It was now a race to see who could exploit their situation fastest: could I polish off Andy’s left flank, taking his army standard and hopefully the game, before he could turn the hairies in my camp and take the other two sections to get the coins he needed to win.

My knights were. for once, on good form, and were able to totally clear the Vikings in front of them from the table.

Unfortunately, this still left me a two coins short of ultimate victory. The tension was now so great that one of my units suffered a casualty and had to be replaced from my reserves!

Things were also critical on my left flank. Although the Vikings in my camp had failed to make the turn that would have let them take the other two sections (presumably looting the fabulous luxuries that acompany my troops on their campaigns), my Alabardiers were being attacked by three Viking warbands, and surely couldn’t hold out for long.

Fortunately, I had chosen them to receive the Tonight we dine in hell! stratagem, so they were able to shrug off their first disorder, add a hero, and hold their own for that turn. They are top left in the picture below.

The Vikings then surrounded the Alabardiers, and things looked even more critical: I could see myself losing them, the other two camps, and the two Spearman units shown in the picture above in the Vikings’ next turn…and the victorious knights were still a square or two short of being able to return to the action and take the Vikings in the rear.

That would give the Vikings victory despite the fact that they themselves only now had two coins left and I had loads. Talk about snatching defeat from the jaws of victory!

Salvation, however, came from an unlikely source.

I had been covering my far left flank with a couple of units of Atmati di schioppe or handgunner light infantry, and one of these now crashed into the rear of the veteran Huscarls flanking the Alabardiers.

Incredibly, the handgunners managed to inflict two disorders on the veteran Huscarls, but that was still not enough to break them and win the game. I’d have to get a 7+ to go in again, and then hope that my two 8+ attacks would succeed against the ‘saving on a 6+’ Huscarls: not very good odds (just over 6% I think).

But wait…that’s a general with the Huscarls, and we haven’t checked to see if he is hit yet.

Andy pulled his chits…it was a hit and the general died: taken in the rear by a Venetian hand gunner!

Those two coins were Andy’s last, and the game was mine by 14 coins to 7…but it had been a close run thing and the tables would have been turned on Andy’s next turn if that general had survived.

What a great game!

TTS AAR: Roll Call #1: Venice Abroad vs Burgundian Ordnance

Off to Cranfield for the Medieval Mayhem competition at Roll Call. I would field a Venice Abroad force: a mixture of Knights and Spearmen with a good sprinkling of light troops as well.

My first game was against Dillon’s Brugundian Ordnance force: an army very similar to mine, the main difference being that Dillon’s infantry were spear and longbow combined whereas I had separate spear and light infantry missile troops.

The Burgundians pulled the Flank March stratagem, so would start the game with one unit off table. I was initially minded to hold back and see where this arrived, but then decided that boldness was the way forward with the huge open space on the right flank just too tempting: the plan being to overwhelm his cavalry there with my Knights leaving the rest of his force vulnerable to a roll-up from that flank.

Unfortunately the two patches of rough ground and the wood that you can see in the picture above created a bit of a bottleneck that would come back to haunt me later in the game.

This concentration of horse on my right did mean that my left flank was very light: two units of light handgunners, in fact, that seemed to be facing an awful lot of Burgundians panzers, especially as that is where Dillon’s flanking troops eventually turned up.

Back to the right, where my Knights and Light Horse were slowly battering their way through the opposition: the bottleneck initially preventing me from applying my superior number efficiently. Yes, I eventually “won” that flank, but it took far too long to do so!

Meanwhile, on the left, Dillon was trying to clear my inferior force away so that he could do to me there what I was intending to do to him on the right. Unfortunately, a combination of the cards and my Alabardiers refusing to go backwards made things very difficult for him, meaning that his Knights there spent a lot of time dominating an extremely useless empty space!

All this shilly-shallying around, however, meant that we were out of time. This was extremely frustrating as if we’d played one more turn I think I would have had victory: I only needed a couple more of Dillon’s victory medals to win outright, and I had three places where I had fresh troops able to attack disordered Burgundians.

I begged Tim, the refereee, to let us play one more turn…offered bribes of the finest entertainments that Venice has to offer…but all to no avail: the game ended in a draw with the resultant points slightly in my favour as I had killed a slightly greater proportion of Dillon’s troops than he had mine.

A great game, but I rued getting jammed between the rough ground and the woods on the right: open terrain would have meant that I could have applied superior numbers earlier. But it was not to be: all that was left was the faint cry of “please, just let me play one more card”!

TTS AAR: Hittites versus Neo-Assyrians

Great to get a game of To The Strongest in with friend Bevan. We went biblical, with Bevan using the Neo-Assyrians versus my Hittites.

Neither side wasted any time, both thundering towards the other…apart from one Assyrian infantry command on the flank that really didn’t want to be involved.

Note the Assyrian infantry peaking into the frame from the left hand side

Whilst the Syrian light chariots kept some of the finally-advancing Assyrian infantry on the left occupied, the left hand command of Hittite heavy chariots smashed into the rest of the left-hand Assyrian infantry and the Assyrian heavy chariots in the centre of the enemy line.

Amazingly (good cards!) the Hittite chariots smashed through both one unit of enemy infantry and one set of Assyrian chariots, punching a huge hole in the centre of the Assyrian line.

Breakthrough at the schwerepunkt!

The other unit of Assyrian Heavy Chariots would also soon be sent flying off table, along with the Assyrian commander-in-chief.

Meanwhile, on the other flank, the other Hittite heavy chariot command had slammed into the Assyrian heavy cavalry, and a fierce melee broke out.

New tech versus old tech on the right

Keeping that flank locked safe was vital to the Hittite cause, as their infantry and more chariots in the centre had fallen victim to a deluge of Assyrian bowfire, and were wavering as the Assyrians closed for combat!

Hittites suffering a nasty attack of the missile fire!

Fortunately the chariots rallied and the Hittite Royal Guard were able to intervene to protect the wavering infantry. Note the Gasgan tribesmen on the left also seeking to get into the action.

Royal Guard to the rescue

Meanwhile, back to the left flank, where the Syrians were still keeping the Assyrian javelinmen occupied.

Back t he right again, where even the Royal Guard had been forced backwards onto a hill. If the Assyrians got their act together and advanced their heavy infantry, the Hittie centre could collapse…especially as the rest of the Hittite chariots were losing the melee on the far right.

Things getting a bit critical on the right!

All the above, however, was just a distraction from the main event: the victorious Hittite chariots left/centre continuing their punch forward to take the Assyrian camp, already packed with the survivors/fleeing infantry/broken chariots of the initial clashes.

Although the first lot of chariots were resoundingly unsuccessful in their attempt to get into the camp, the Hittite chariot commander, briefly delayed by the need to wipe out the other Assyrian heavy chariots, soon arrived to seal the win for the Hittites: taking both their camp and their last few coins.

It had been a very exciting game.

The Hittites had had fantastic early success against the Assyrian heavy chariots, punching right through them, but the Assyrians had responded quickly, taking advantage of their extra strength on the right to put so much pressure on the Hittite line that it almsot buckled. If it hadn’t been for the Hittite Royal Guard intervening at the critical moment, the entire Hittite line could have routed.

Kudos also to the Syrian light chariots on the left. Their skirmishing prevented the Assyrian javelnmen from either rushing back to defend their camp or from intervening in the centre.

This allowed the Hittite chariots in the centre/left, the ones who had broken through, to take the Assyrian camp and thus rip the heart out of the remaining near-victorious army, forcing their retreat and giving the Hittites a win.

Napoleonics with Valour & Fortitude

A rare day off work so what better way to spend it than wargaming!

Friend Si was putting on a 28mm game of Valour & Fortitude, so I invited myself along and ended up joint-commanding a French rearguard trying to get away from some Prussians and Russians.

The Allied force headed straight for us, so our lead brigade stayed in column and headed towards the left hand ridge, whereas my brigade formed line and started side-stepping left as fast as they could!

Almost immediately some Russians Hussars charged our only battery of artillery. The Hussars were decimated by cannister fire but still managed to get in amongst the guns, sabres swinging. The result: retreating Hussars but no more artillery crew!

It was now fairly obvious that we were severely outnumbered, but all we could do is send off messengers asking for reinforcements whilst continuing with out plan.

My troops were now locked into a forefight with the advancing Prussians, but a very steady volley sent some enemy Militia scuttling backwards. There were, however, plenty more coming forward, and things were looking a bit dicey.

Then, huzzah: our reinforcements arrived. Two more brigades: one of which would reinforce Gary’s assault on the other ridge, one would bolster my wavering men.

Things were looking good at Gary’s end of the table, but a bit dicey at mine. Although I won the first melee I fought, the Prussian landwehr curling in from the right then destroyed my rearmost battalion.

My original brigade were, unfortunately doomed: especially as managed to roll ‘snake eyes’ for my two saves against losing a battalion.

But my reinforcements were now in position, and as the game ended we had certainly fought the enemy to at least a stalemate.

The umpire was consulted and ruled that this had been a French victory: I think that you achieved the mission. The Prussians had taken out most of your right but the left was quite intact and the Russians not too strong. They weren’t in a position to exit the table on your side after 10 turns.

Sacre bleu but that was a hard-fought battle! A French victory, but casualties had been high. My thanks to Si for hosting and running the game, and to Gary, my co-commander, and Dave, the Prussians!

Here are some shots of the table at the end of the game:

TTS AAR: Crusaders versus Sassanids

Time for a quick game of To The Strongest against friend Rob. As I wanted to use my ‘first time on the table’ pilgrims, I would play the early Crusaders. Rob chose to play the Sassanids.

The Sassanids won the scouting, and chose to deploy a long line of Savaran cavalry on the left, their cataphracts in the centre, all backed up by their infantry and elephants on their right.

The Crusaders deployed all their Knights on their left, their lesser troops (pilgrims etc) in the centre, and their shieldwall foot knights on the right.

On the left hand side of the battlefield, the Knights and cataphracts advanced towards each other slowly. I had four units of Knights handy, so was pretty confident that I could use my numbers to get an advantage here and then sweep into the flank of the rest of the Sassanid cavalry.

I was a little concerned about the horse-archers sweeping past my left flank, but I was about to charge forward so would worry about them later!

Or rather not, as a pair of Aces prevented me from getting that first charge advantage!

Worse, once my Knights had received the Cataphract charge, I checked that my general had survived the combat only to see him murdered by a Sassanid spy! Things had not begun particularly well!

Meanwhile, on the other side of the field, the Savaran had advanced into contact with my infantry.

This was almost equally disastrous: with two of my shieldwall units fleeing the field after receiving a rain of arrows and a nasty lance-charge, one exposing a unit of archers as they did so. The Savaran then crashed into the archers and, to much hilarity on my side, were disordered then broken by the bowmen!

Back to the left, and I had somewhat recovered the situation, destroying both cataphract units and one lot of horse archers. Both units of Knights were, however, disordered, so I couldn’t afford to lose another combat.

Rob and I were both now so short of coins that one more unit broken would lose either of us the game. The initiative was with me, so I had a quick look around the table to see which Sassanid units were the most vulnerable.

I could charge the disordered Daylami in the woods in the right hand picture above, but I was disordered and couldn’t use my lance amidst the trees, and they were veteran javelinmen who would get saves for defending cover…no, I needed to pick an easier target.

Ah ha! The other unit of Daylami were out in the open, and I had two units of Knights that could charge them. Here was my victory!

In went the first unit of Knights: mutual disorder. Good enough, I had the others to follow.

In they went, but I just couldn’t break the insert expletive javelinmen. The cream of chivalry unable to break disordered mountain men out in the open: pitiful!

Well that was my best chance of a win gone, and I could only watch as his elephants thundered forward and broke the Knights in front of the woods. That was bye-bye two coins and bye-bye the game!

An excellent game that I so nearly managed to recover from early losses to win. So nearly!

My only consolation was the fact that I am painting up a couple of Daylami units for my Arab Conquest force. May they achieve similar success when they hit the tabletop!

IABSM AAR: The September War #01: Chojnice

Here’s a battle repot from a game of I Ain’t Been Shot Mum played in March.

It’s set on the first day of the second world war and involves advancing Germans trying to stop Polish engineers blowing a vital railway bridge so that they can bring up their armoured train.

Click on the picture below to see all:

FK&P AAR: Overlord!

Off to Overlord, Abingdon Wargames society’s annual show, to play a game of For King & Parliament - Eastern Front variant pit on as a demonstration game by friends Si and Mark.

I would play the Polish-Lithuanians versus Gary and Si playing the Ottomans.

The set up was an approximate version of the end of a very important battle in the Vienna campaign (they’ll never know that I can’t remember which one!) in which the Polish-Lithuanian cavalry, headed by the Winged Hussars, destroyed the Ottoman cavalry and won the day.

I had set up hoping that history would repeat itself, with the Hussars and Pancieri heavy cavalry on the right of the line facing the Ottoman horse, and with my lighter cavalry and Haiduk levy infantry on the left. The Ottomans had their guns and Janissery veteran infantry in the centre, but only their Azabs on the right, so I was hoping that even if the Hussars didn’t do the business, my infantry could defeat the far right of the Ottoman line and then loop in to roll up the fiendish Turk.

The battle began with the Poles pushing forward strongly across the whole front except the far right, where the cavalry command there stubbornly refused to move forward.

Confident in the quality of the Hussars, my tactics on the right were just “get stuck in”…which seemed to work very well as before long the Ottoman cavalry had melted away in front of me.

At the other end of the table, the Janisseries unwittingly played into my plan by not coming forward but choosing to exchange inconclusive long range fire with my Haiduks.

This meant that I could then, as planned, try to get around the left-hand end of his line…which sort of worked in that I did manage to get into a decent flanking position, but just couldn’t deliver a coup de grace that would let me start rolling it up.

Meanwhile, the Polish-Lithuanian cavalry, having defeated their Ottoman equivalents, turned in (well, those who weren’t pursuing did) and started to roll up the enemy line from the other end.

This culminated in a flank charge into the Guard Janisseries plus “marching band army standard” that should have swept them off the board but unfortunately just bounced off!

There was still nothing much happening at the other end of the table. My flanking manoeuvre was still sort of working, the Janisseries were still hanging back…

…which gave me the opportunity to hit the pesky Guard Janisseries with another unit, and this time the extraordinary chits I pulled from the bag did the damage and destroyed them.

This actually won me the game as I think I took five medals from that one unit (two for the unit, two for an officer and one from the marching band standard) which was quite lucky as the rest of the Ottoman line had finally realised that they needed to do something and had moved forward in a threatening manner!

But they were too late. As mentioned above, the game was already mine not, I hasten to add, as a result of any great tactical manoeuvring on my part: it was the Winged Hussars crashing through the Ottoman horse that did the trick. I was having a good day on the chits as well: saving far more often than I should have, and getting some cracking attack chits in as well.

All in all it was a most enjoyable game and a great chance to play with Si’s beautifully painted toys. The Overlord show was good as well: heartily recommended for a visit and definitely on the list for next year.