
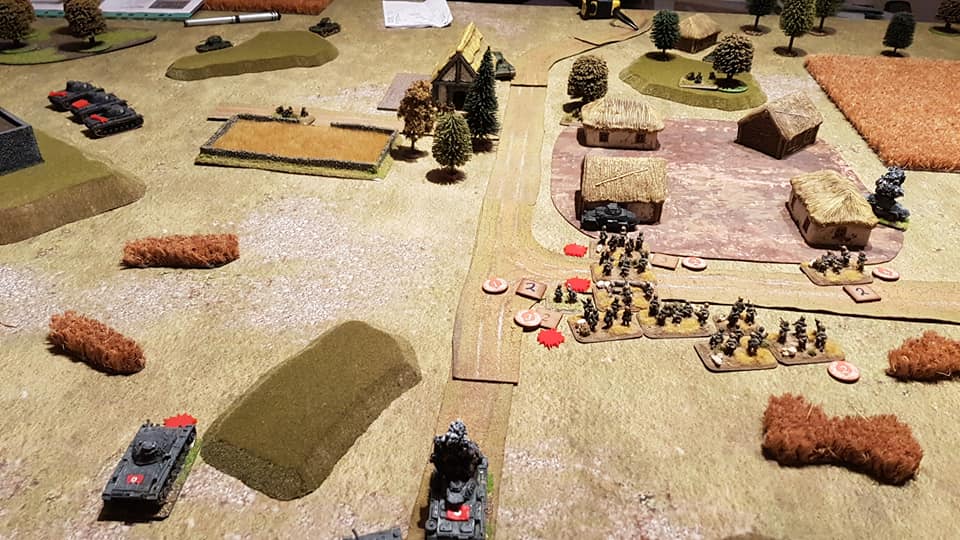
IABSM AAR: Anzio Scenario Pack #19: Fischfang Day 2
/Dan Albrecht and friends have a jolly time playing out the nineteenth scenario from the Anzio: Wildcat to Whale scenario pack.
Click on the picture below to see all…

Dan Albrecht and friends have a jolly time playing out the nineteenth scenario from the Anzio: Wildcat to Whale scenario pack.
Click on the picture below to see all…

This year is the 75th anniversary of the successful assault on Pegasus Bridge by glider infantry of the 2nd Battalion, the Oxfordshire and Buckinghamshire Light Infantry, British 6th Airborne Division, commanded by Major John Howard. The successful taking of the bridges played an important role in limiting the effectiveness of a German counter-attack in the days and weeks following the Normandy invasion.
The Soldiers of Oxfordshire Museum (SOFO) is putting on an exhibition to celebrate the anniversary, and it looks as if a few of us might be able to run a demo game of IABSM one weekend at the museum to help bring the event to life for the general public.
All the running for this is being done by friend Dave, so all I had to do recently was to take part in a playtest of the game to be run. Click on the picture below to see all…

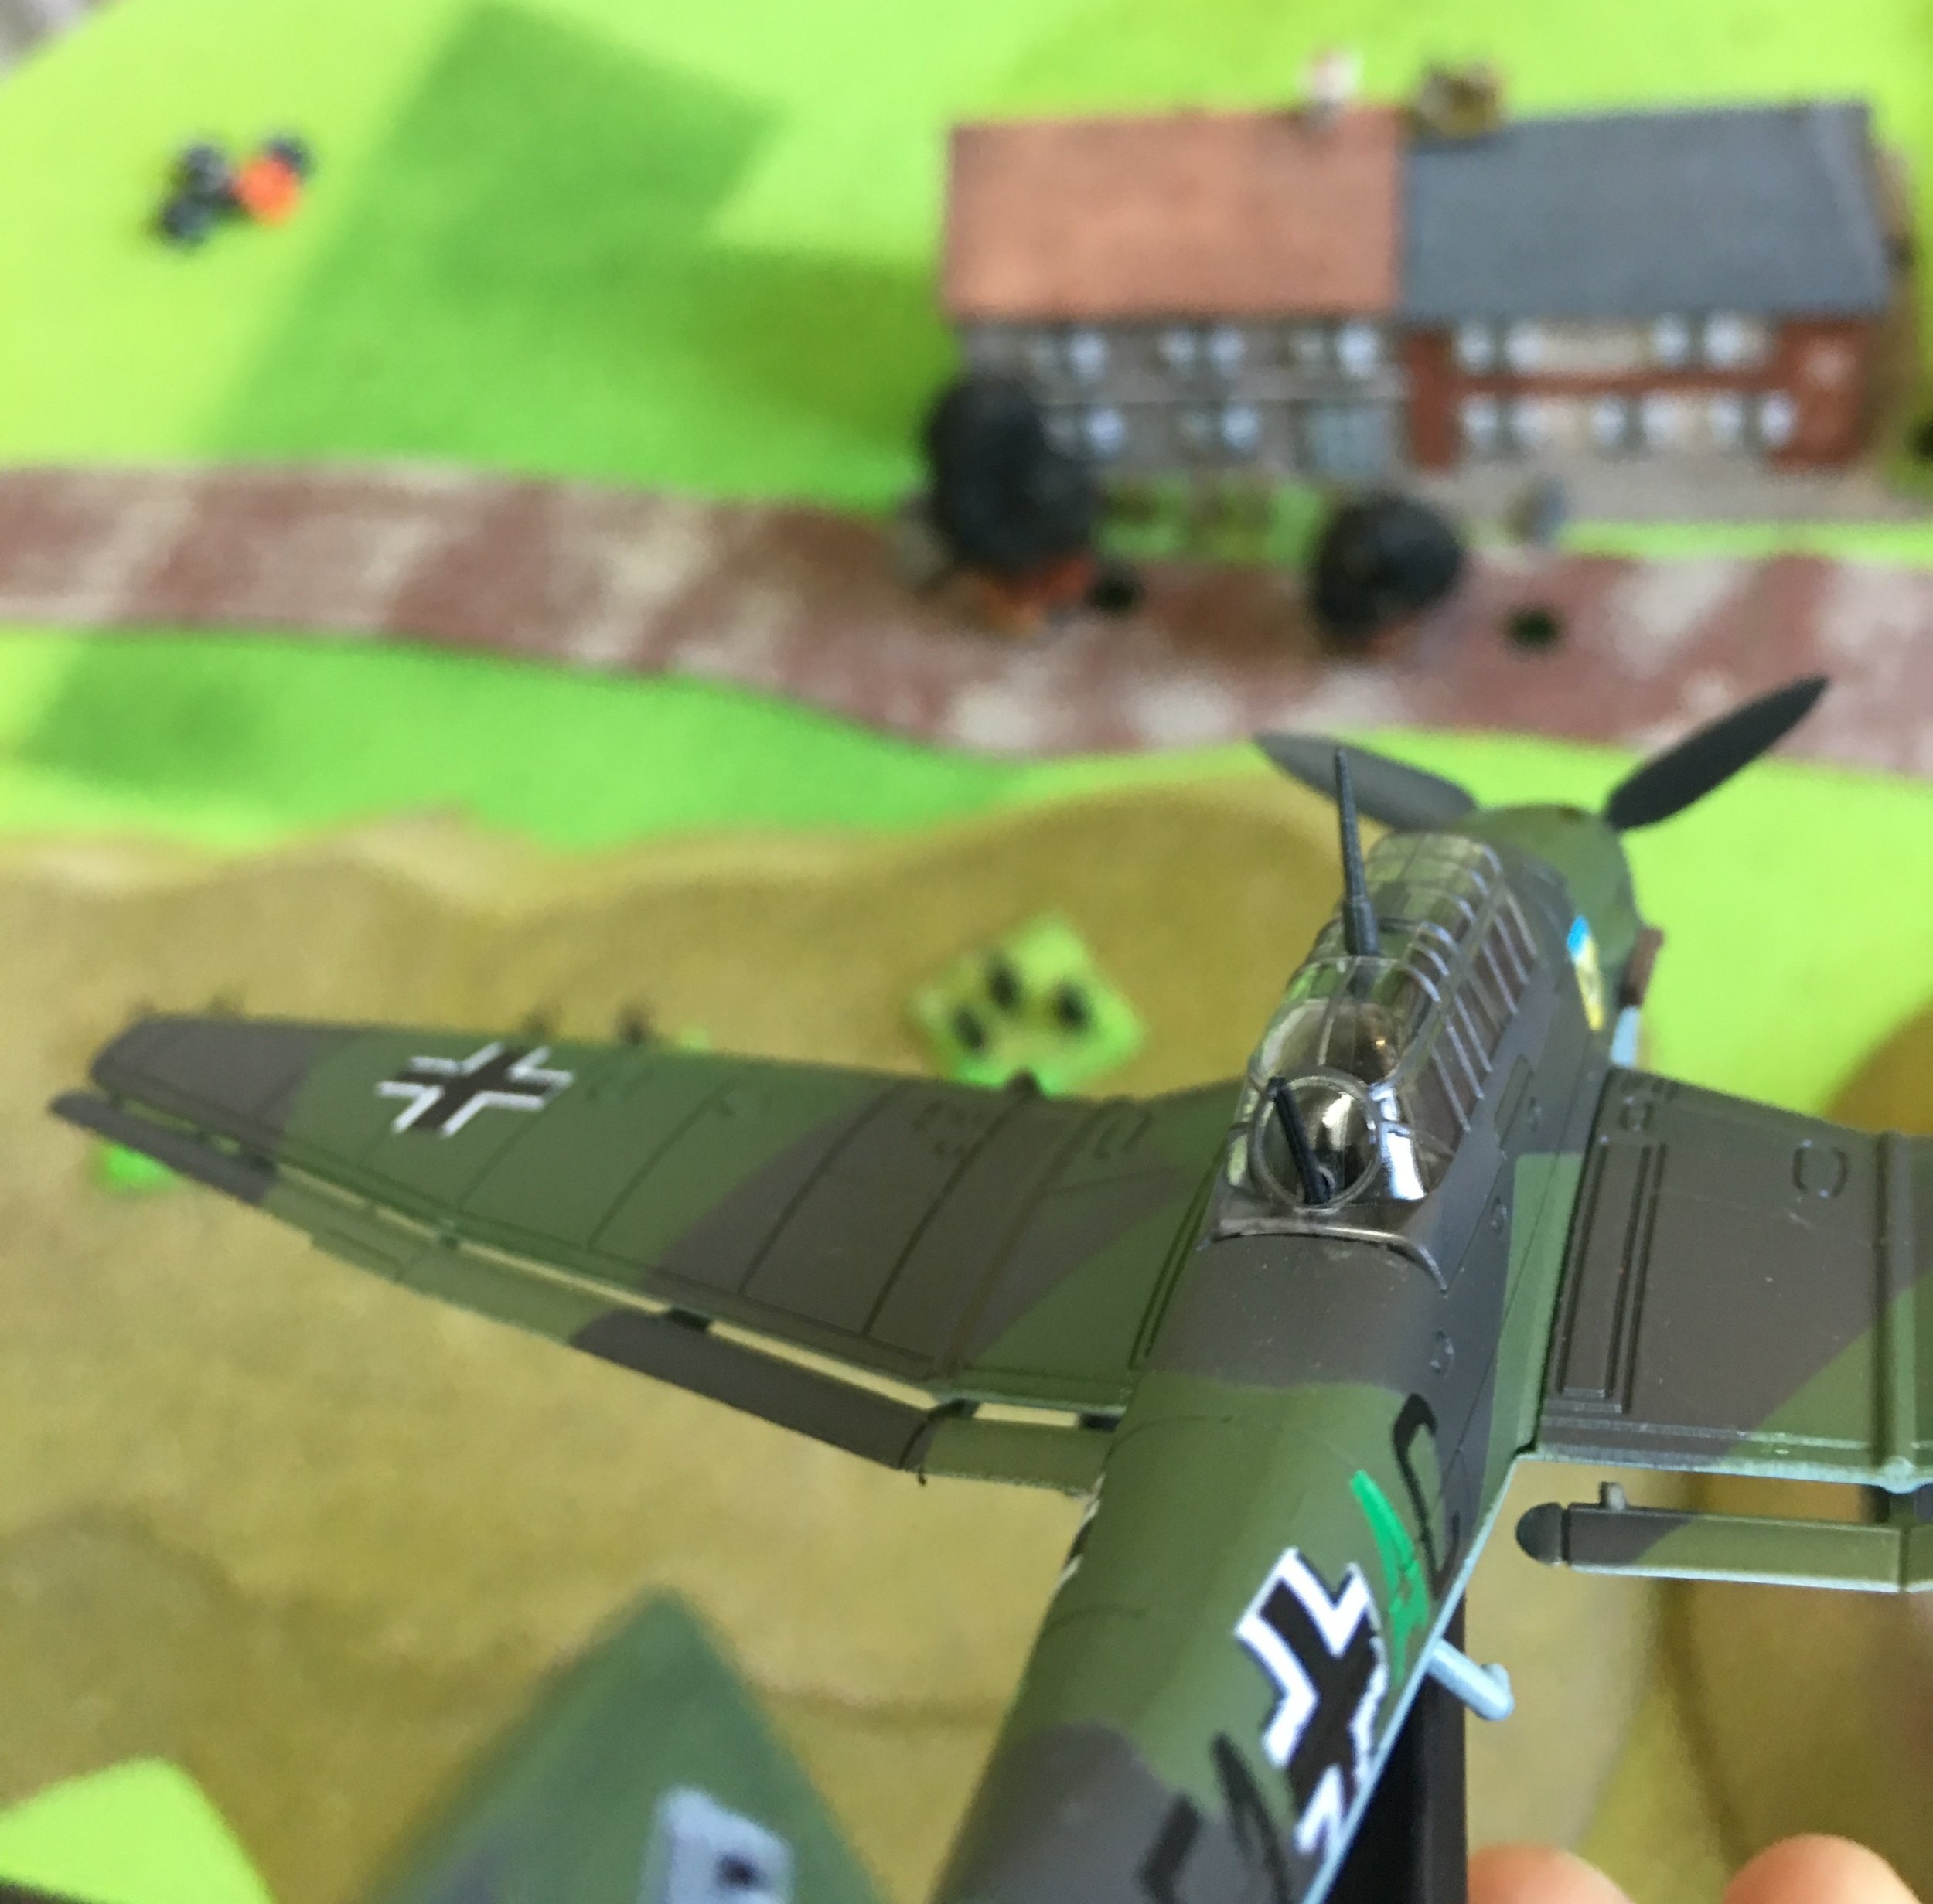
Here’s another great after action report from Alistair Birch and friends, first appearing on the IABSM Facebook page.
Click on the picture below to see if the Germans can hold back the Soviet hordes…

Always nice to see people using my support material to play their games, so here’s an after action report from Tim Whitworth and the Like a Stonewall wargamers using the Sochaczew scenario that I wrote for the TwoFatLardies Summer Special 2017.
Set in 1939, Polish troops are desperately defending the town as the German infantry and Panzers sweep in. Click on the picture below to see what happened…

Lovely little battle report from Iain Fuller from his excellent Tracks and Threads blog.
Here, a German reconnaissance force bump up against a French position and wreak havoc with their armoured cars and Kradschutzen troops…until, that is, the Somua’s arrive.
Click on the picture below to see all:

Another superb AAR from Desmondo Darkin based on his D-Day St. Aubin scenario.
This time, he and the South London Warlords are using a bigger piece of coast and a sandy beach instead of shingle. For rules, they used I Ain’t Been Shot, Mum! with Desmondo’s Chain of Command-modified activation system.
Click on the picture below to see all:

Fellow Lardy Desmondo Darkin and gang have played their first game using their new winter terrain.
They had just over three hours to play a German attack on a Soviet held village in 1944, and used I Ain’t Been Shot, Mum! with Desmondo’s Chain of Command-modified activation system.
Both sides had a core Infantry Company and each side then picked support options using a Support list which is basically the Chain of Command list but sized up to IABSM-sized games.
Click on the picture below to see loads of pictures of Desmondo’s superb terrain and some shots of the game itself:

Great little battle report from Alistair Birch, lifted from the I Ain’t Been Shot, Mum Facebook Group.
It’s France, May 1940, and the Brits are conducting a holding action in the face of a German advance.
Click on the picture below to see all:

Another great battle report from Captain Cliche this time featuring action from the second scenario from the Bashnya or Bust! scenario pack.
After a Soviet victory in the first battle of the campaign, this clash takes place around the small town of Osen. The Germans are holding out whilst their engineers set charges on the last remaining bridge , before withdrawing their remaining troops over the river and blowing the bridge to bits. They are outnumbered and face a swift Soviet attack that features plenty of T34s and SMG-armed tank-riders. The Russians need to drive through and capture the bridge.
Click on the picture below to see if the Soviets took the bridge.

Desmondo Darkin and friends replayed the St Aubin scenario featured here a couple of days ago…so another chance to see DD’s wonderful terrain and figures in action.
Click on the pic below to see all:

Some of you may know that I am currently writing the I Ain’t Been Shot, Mum theatre handbooks for the Far East, starting with the Japanese armies that invaded the Pacific region: Malaya, Burma, the Philippines, Borneo, the Dutch East Indies etc.
All the research, particularly into the 7th (Medium) Tank Regiment that fought in the Philippines, inspired me to finally get around to painting the two boxes of Type 89 Chi Ro tanks that have been sitting in my lead mountain since Salute two years ago. These I bought from Troll Trader for the princely sum of £12 each: a huge discount off ratecard at only £2.40 per tank.
These went together really nicely: even the back sled-things weren’t too hard to build. Not only that, but this makes 23 tanks consecutively from Battlefront without a single piece missing. Given my previous rants about quality control, this is a real (and very welcome) improvement.
Painting was just a matter of following the patterns shown on the box art. I now just need to tone down the gloss lacquer a bit with some mat spray.
My only disappointment was that when I went to enter my new Type 89 tanks into my Japanese roster, I found that I already had five of them, bought and painted some time previously. Ah well: you can never have too much of a good thing!
Recommended.
A lovely and impressive set of photographs from Desmondo Darkin that first appeared on the I Ain’t Been Shot, Mum Facebook group.
Desmondo and friends play a slight variant of IABSM where dice rather than cards/chips are used to govern unit activation. Now whilst we don’t countenance such heresy here at VL, if it helps spread the Lard, then go, Desmondo, go!
Click on the picture below to see the action:

More Soviet vehicles rolling off the production line as a result of Battlefront’s last sale: this time it’s the SU-57 self-propelled guns.
More correctly called the T48 Gun Motor Carriage, the Samokhodnaya ustanovka 57 was what the Soviets called the M3 half-track with a 57mm anti-tank gun mounted on top. The Russians received 650 of them, and used the SP AT guns in Operation Bagration et al. in 1943/4.
I usually hate putting Battlefront artillery together, especially those with a gun shield, so was pleasantly surprised at how easily I could build the four SU-57s. The M3 body has a fits-just-right post for the gun, with a lovely little ledge just in front of it for the edge of the gun shield. No swearing required at all!
The crew are good too. I chose to mount them as part of the initial build (as opposed to painting them separately then putting them into the painted vehicles) and this seemed to work quite well. There’s enough room to get a brush right their way down to the feet, if necessary, so my standard block colour-wash-highlight technique worked well.
Almost to my surprise, another highly recommended.
Here’s an AAR from Alastair Birch first published onto the I Ain’t Been Shot, Mum Facebook page, so I hope he doesn’t mind me reproducing it here.
This is a cracking little encounter written by the big man himself, Richard Clarke, back in about 2005. I actually have a Word version of the scenario, designed for IABSM v2, although where I got it from I have no idea!
Adolf himself has told his troops that “the Soviet Union is a rotten structure, that we only need to kick in the door, and the whole thing will collapse before us”. Click on he picture below to see if that’s true!
I’m continuing to work my way through all the tanks I bought last time Battlefront had a significant sale, moving on from the Germans (Jagdpanzer IVs) to the Soviets.
The first batch of Stalin’s toys off the painting table were a company of heavy tanks: KV-85s to be exact. These filled the gap between the KV-1E (and a few lend lease Churchills) until the arrival in 1944 of the JS-III.
I’ve always liked the shape of the KV class of Soviet tank: nice and chunky!
These, the usual Battlefront combination of resin body/turret and metal tracks/gun/hatches, went together really easily (makers of plastic vehicles take note), and were a joy to paint up as well.
I did add a bit of extra stowage to a few of them: somewhat ironically given my previous comment, the canvas rolls on the front two tanks are actually the furled up canvas tops to the PSC Steyrs that I posted about a few days ago. Nothing ever goes to waste!
KV-85s from Battlefront: highly recommended.
Another great Sealion AAR, but not this time from Karim and friends at the Stipsicz Hussars. No, this time it’s Tim Whitworth and his friends at the “Like a Stonewall” wargames group who are playing out the action.
Click on the pic below to see whether the Hyde Home Guard Platoon, under the watchful eye of their daring commander Major fforbes-Cole MC (retired) can defend Paddlesworth against the Fallschirmjaeger Hun.

Another great AAR from Karim Van Overmeire and friends at the Stipsicz Hussars, again from the Operation Sealion scenario pack for I Ain’t Been Shot, Mum!
This battle report features Scenario #03: Capture the Port, in which elements of the London Irish Rifles defend the small sea side village of Seabrook against the German 21st Infantry Regiment. The Germans had to capture this position on their way to Folkestone: securing the port of Folkestone was necessary to allow German armour to be brought ashore.
Click on the picture below to see if Seabrook will fall under the Nazi jackboot!
Julian Whippy and friends fought a cracking game of I Ain’t Been Shot, Mum, details of which Julian posted on the IABSM Facebook group.
Click on the picture below to see all:

I’m always a sucker for a bargain, so when Battlefront recently had a 25% sale in preparation for withdrawing some models from sale whilst they re-model, I took full advantage and added another peak to the lead mountain.
One gap in my collection that I was happy to fill in were some Jagdpanzer IVs: the infamous very low profile tank hunters.
These were easy to build (therapy after the Steyrs!) and easy to paint. Spray dunkelgelb, then use the sponge pad that Battlefront use as packaging to protect their models to dab on some dark green then brown. Wash with the ubiquitous Agrax Earthshade, highlight with Screaming Skull, do the tracks, crewman and decals and away you go. Simple.
Can’t wait to get them onto the table.
It’s September 29th, 1939, and Independent Operational Group Polesie are marching south towards Koch. Attacked by Soviet cavalry and tanks, the Poles are at first beaten back, but then counter-attack and manage to re-take the village of Milanow. This they then prepare to hold in the face of further attacks from Russian infantry with tank support.
The above is a condensed version of the background given to scenario #31: The Battle at Parczew from the September War scenario pack. I would play the Poles, defending Milanow; with John and Dave commanding the advancing Soviets.
Click on the picture below to see all…

Vis Lardica is a website devoted to wargaming and military history, with a special emphasis on the company-sized rulesets produced by the TooFatLardies: I Ain't Been Shot Mum (WW2); Charlie Don't Surf (Vietnam); and Quadrant 13 (science fiction)

Welcome to Vis Lardica, a not-for-profit website mostly dedicated to the company-sized wargaming rules produced by the TooFatLardies, but encompassing my other gaming interests as well.


If you need to contact me, you can do so at:
vislardica@gmail.com
If you have enjoyed visiting this site, please add a link to it on your own wargaming blog: www.vislardica.com.
