Napoleonic AAR: Austerlitz on Zoom!
/
Another remote game: this time a re-fight of Austerlitz.
The set up was similar to that for Ostrolenka (see earlier this year) but with a few improvements. Two teams of three players each: the French (Mark, Peter and I) and the Austro-Russians (Dave, Steve and Trevor) each in their own Zoom breakout room.
Each team could see each other and a limited view of the battlefield, and each was periodically visited by an Aide de Camp (Bevan) who took our orders and passed them on to the Umpire (Edward) who ran the table.
Eight participants, eight different locations: the wonders of modern communication!
Set Up
The game would be played with the Age of Eagles ruleset but scaled at divisional level i.e. the smallest units were divisions grouped into corps.
Each turn would be one hour of battle time, and the battlefield was about 8 by 9 miles in size. Each side would decide their deployment and send in orders for their first (7.00am battle time) turn before the day of the game itself, with the aim being that each turn would take 20 minutes to play, meaning that playing nine turns would give us all a game lasting from 7pm to about 10pm.
Each turn, each team would be able to move their Army Command location and issue orders to each of their Corps. Or the team could decide to “ride about a mile and a half round your army to inspect things for yourself” instead of issuing orders.
As a guideline, we could issue a one sentence order with a one sentence advisory to each corps:
"V Corps to deploy between villages A and B. Artillery well to the front"
"II Corps to attack enemy to front. Cavalry in reserve prepared to take opportunities"
"IX Corps to assault village C. Watch out for enemy Corps behind hill to your left"
"III Corps to advance and pin enemy to front. Attack only if enemy corps disordered"
"VII Corps to withdraw behind XX stream line. Conscripts to form rearguard"
Corps would continue to follow their previous order until changed. We were further warned that:
If you issue an order to each Division you will run out of competent Aides de Camp to take orders before you get very far.
If you issue long and complicated orders with multiple conditions and sub clauses the Aide de camp will pass on a random selection that he remembers to the Corps commander.
Background
For those of you unfamiliar with Austerlitz, our briefing was as follows:
Napoleon’s successes against the Austrians during the second half of 1805 have been extraordinary, with Vienna taken and many prisoners seized. However, Czar Alexander of the Russian Empire has now come west to help his ally Emperor Francis. Despite the French triumphs, Paris is swirling with rumours about Napoleon’s imminent defeat and fall from power, especially after Nelson’s victory at Trafalgar. The French Emperor needs one final triumph on the battlefield, and the hilly ground near Austerlitz makes a perfect setting.

Deployment
Our army could deploy anywhere in the western third of the map (roughly bordered by the line of the stream running between Kritschen and Tellnitz). The Emperor Napoleon could place his HQ wherever he likes within that area, but the battle is lost instantly if he is captured or killed.
Terrain
Streams were all easy to cross with only a modest loss of pace. Ponds and marshes were frozen, but would hinder movement somewhat. The battlefield was very hilly, with various plateaus. Santon Hill and the Goldbach Heights tower above all the other ground.
Victory Conditions
Our victory conditions were simple: victory would be achieved if significantly more casualties were inflicted on the enemy than were suffered by the French army, or if Czar Alexander was captured or killed. In either case, Austria would sue for peace and the Confederation of the Rhine could be established.
Our Troops
Our army consisted of six corps:
Bernadotte
Rivaux’s Infantry Division (some 5,500 men)
Drouet’s Infantry Division (some 6,500 men)
1 Foot Artillery Detachment
Davout
Friant’s Infantry Division (some 7,700 men)
Bourcier’s Heavy Cavalry Division (2,700 Dragoons)
Soult
Vandamme’s Infantry Division (some 8,700 men)
St Hilaire’s Infantry Division (some 9,000 men)
Legrand’s Infantry Division (some 8,600 men)
Beaumont’s Heavy Cavalry Division (2,700 Dragoons)
2 Foot Artillery Detachments (1 with heavy guns)
Lannes
Suchet’s Infantry Division (some 8,600 men)
Cafarelli’s Infantry Division (some 7,600 men)
Oudinot’s Infantry Division (some 5,400 Grenadiers)
2 Foot Artillery Detachments
Murat
Kellerman’s Light Cavalry Division (about 2,100 Chasseurs and Hussars)
Wathier’s Heavy Cavalry Division (1,700 Dragoons)
Nansouty’s Armoured Heavy Cavalry Division (1,700 Cuirassiers)
d’Hautpol’s Armoured Heavy Cavalry Division (1,600 Cuirassiers)
1 Horse Artillery Detachment
Bessieres (Imperial Guard)
Hulin’s Old Guard Foot Division (some 4,500 of the finest veterans)
Savary’s Old Guard Heavy Cavalry Division (1,600 elite horsemen)
1 Foot Artillery Detachment
The Plan
As we didn’t expect the enemy to follow history and conveniently deploy in two easily-beatable chunks, we decided that we would go for the Pratzen Heights and then hold against all comers, waiting for the opportunity to exploit an opportunity.
We therefore issued the following orders to our corps commanders:
SOULT:
Deploys on Schlappanitz.
Turn 1 Orders:
Orders: Move as fast as possible east, keeping south of Girschkowitz and Blasowitz and up onto the northern end of the Heights.
Commentary: You must get up onto the Heights before the enemy.
Anticipation: Deploy along the edge of the Heights facing N-NE, with left flank covering Krug.
LANNES:
Deploys on Puntowitz.
Turn 1 Orders:
Orders: Move as fast as possible east keeping north of Pratzen and up onto the central mass of the Heights.
Commentary: You must get up onto the Heights before the enemy.
Anticipation: Form on Soult's right flank.
BERNADOTTE:
Deploys on Kobelnitz (or as close as our deployment limit allows)
Turn 1 Orders:
Orders: Move as fast as possible east via Pratzen and up onto the southern part of the northern end of the Heights.
Commentary: You must get up onto the Heights before the enemy.
Anticipation: Form on Lannes' right flank.
DAVOUT:
Deploys on Marxdorf
Turn 1 Orders:
Orders: Move to Puntowitz.
Commentary: Keep a sharp eye for Allied troops approaching from the south.
Anticipation: Guard against an Allied approach from the South
MURAT:
Deploys on Kritschen
Turn 1 Orders:
Orders: Move east to where the road crosses the Bosenitz Brook.
Commentary: Send scouts up onto the Santon Hill
Anticipation: Be ready to head either east or south dependent on what the enemy does.
BESSIERES:
Deploys on the Zurian Heights.
Turn 1 Orders:
Orders: Move to Girschkowitz.
FRENCH HQ & NAPOLEON:
Deploys with Lannes.
Turn 1 Orders:
Orders: Establish yourselves at the juncture between Soult and Lannes.

The idea was that once our strong centre had encountered the enemy, we would either crush them straight on (if they had come straight at us) or pin them so that a flank could roll them up (if they had weighted their opposite flank).
We actually predicted to ourselves that they would go strong up north, so we were anticipating Soult and Lannes being engaged, Murat pinning, and Bernadotte swinging north and rolling the enemy up from the south.
The Game
In the event, I think it fair to say that things went sort, but not entirely to plan!
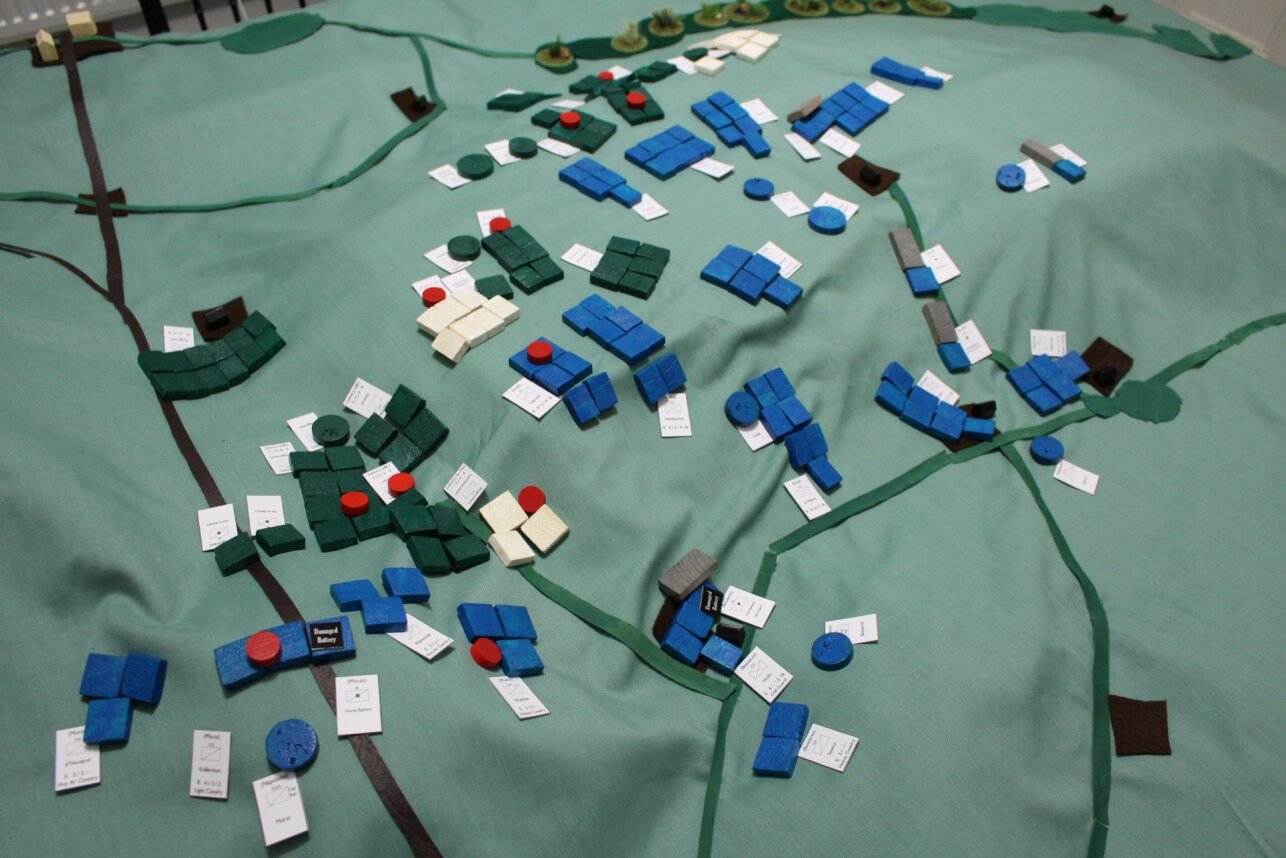
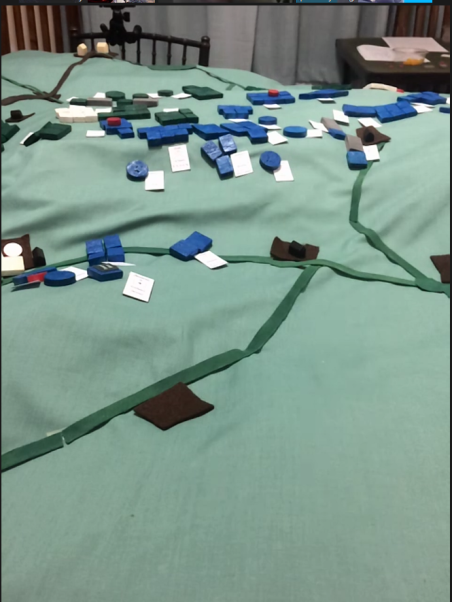
Here’s a series of snapshots from the game, with commentary where appropriate:
From left to right:
Bessieres takes the Guard forward to Girschkowitz to protect the left flank.
Soult (the three central columns) heads up the hill and encounters Russians
Lannes (top centre right) is already engaged!
Bernadotte is moving forward slowly, Davoult is in reserve. Why is all our artillery (the grey blocks) in a stream bed?

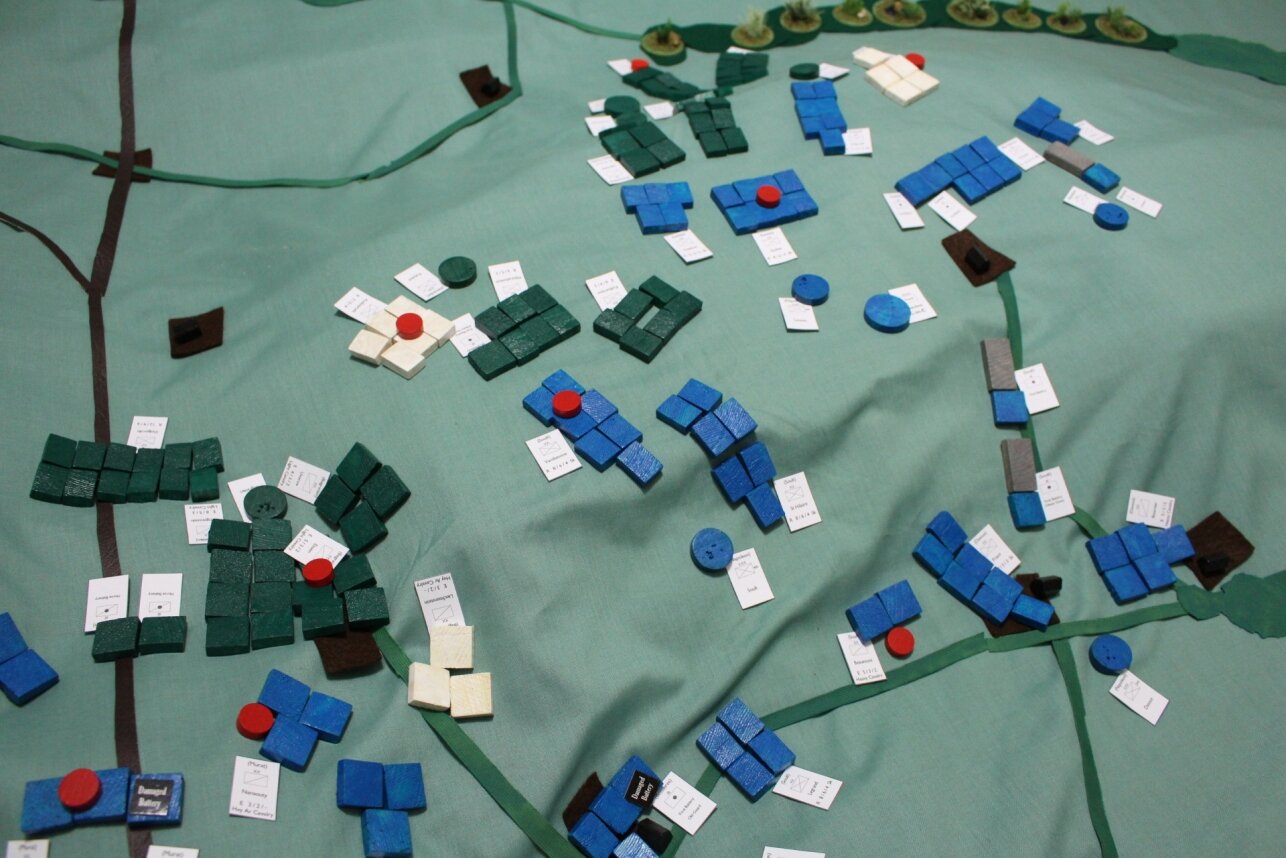
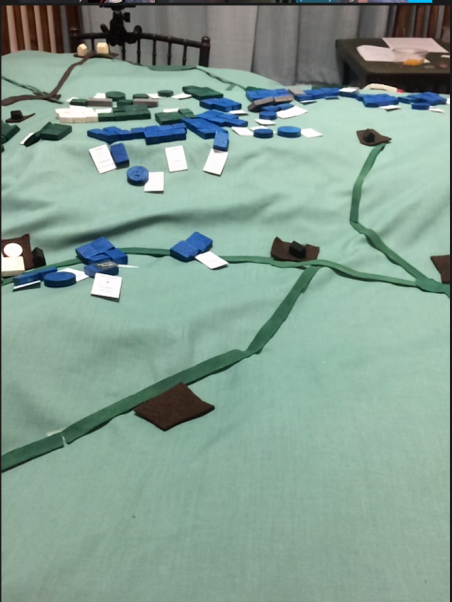
The Guard have been hit by three divisions of Austrian Cuirassiers. Better send Murat to help.
Soult has a 3:2 advantage: should be okay.
Lannes still going strong.
Come on Bernadotte: get moving!
And will someone please get our artillery out of the stream!

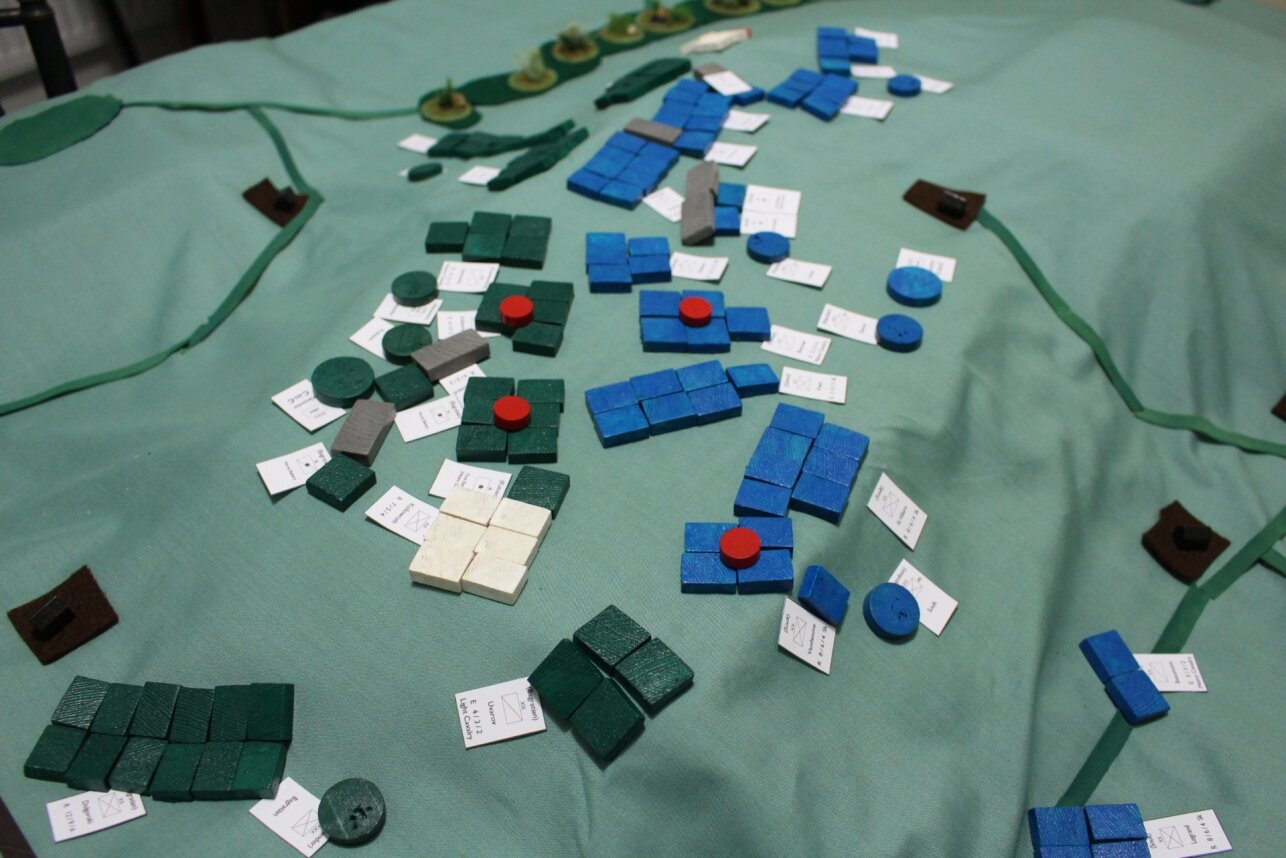
The Guard have been smashed backwards! How can this be? Bessieres is sacked!
Murat (off screen to the left) is engaged and reports that he’s doing well.
Soult has been pushed back? Does not compute: we had a massive advantage! Get back up the hill immediately!
Lannes is still going strong.
Urgent messages going to Bernadotte, and don’t even talk to me about our artillery!

Murat still doing well to the left, but there seem to be lots of Russians coming towards him. No probs, we’ll break their centre and turn their right flank soon!
The Guard have retreated to a village and are sorting themselves out.
Soult goes back up the hill…but why has one division stayed behind?
Bernadotte is finally moving forward on the right. We bring Davoult forward to breakthrough the centre.

Murat is starting to feel the pressure…but he needs to keep fighting to hold our left.
Soult is knocked back again! What is wrong with you, man, you are French and outnumber the enemy! Get up that hill now!
Lannes (lovely boy, lovely boy) is back moving forwards again.
Bernadotte est un escargot (snail) reborn as a French marshal. Will you please hurry up and hit them hard on the right so you can swing round and roll them up!
The guns! The guns!
Murat has been dispersed, with only one division left, holding the Santon Hill. This is not good, but his sacrifice should have bought us time to win the centre and right and, as he said himself, any Hussar who is still alive at 30 is a blaggard and a coward!
The Guard have been pushed back (again!) but have determined to re-take the village. They’d better, Bessieres, as your future prospects are right in the middle of it!
Soult, Lannes and Bernadotte are pushing forward hard. Looking good: lots of blue, not so much green and white!
The guns are finally moving as well!
Hmmm…there are some Russian coming from the left now but (Gallic shrug) the battle seems to be won in the centre and on the right.
We just need Bernadotte to push forward, but he’s whining about Austrian cavalry holding him up!
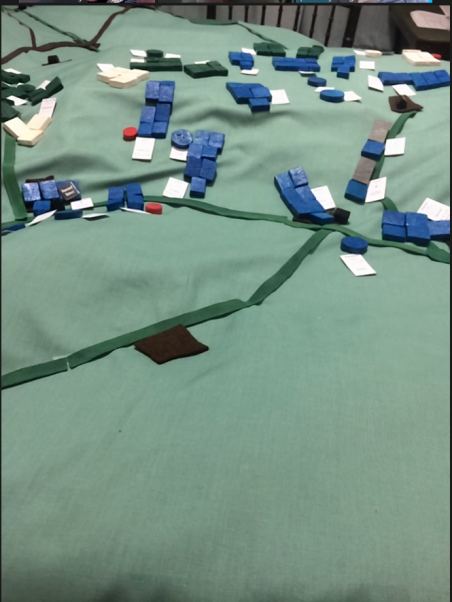
A pity the battle didn’t end last picture: the enemy is resurgent!
This is where the battle ended.
Soult is barely holding, Davolut is under pressure, but Lannes and Bernadotte seem to be doing okay.

The End
And that is, indeed where the battle ended.
Up to that last picture, we thought we’d been doing pretty well, but we were starting to come under lots of pressure.
Remembering the victory conditions, casualties were counted. We had taken 50% more than the opposition! Oops! Throwing Murat away like that had not been very helpful, and it was hard fighting all the way.
The Austro-Russians were claiming a glorious victory, but we thought that, situationally, we were on the cusp of a massive roll up, and we had taken the Heights and pushed the enemy back. That said, the victory claims from the French camp were much more muted: we knew that, whatever the situation, we had been quite badly roughed up.
Analysis
What did we do wrong?
Well, we deployed to perfection, but underestimated how long it would take to get our guns into play.
We were also a bit passive in issuing orders sometimes. I think we could have pushed some divisional orders onto our marshals to improve the tactical situation (although there wasn’t that much room for tactics given our charge forward!) and definitely used ADCs to get the guns and Bernadotte moving forwards more quickly.
Using Capitaine ‘Indsight again, Soult initial set back was a real surprise and really turned the tide against us really early on. The unit that turned him back was the Russian Guard, who were, to coin a phrase “immense” and held us up far too long. Without their resistance, we’d have been over the hill and into Austerlitz by lunchtime!
Our huge mistake, however, was not going to see what was going on with Murat. We left him to get on with it, even when things turned against him. we then threw him away…in that he should have disengaged and pinned the Russian right flank advance. That’s how cavalry do things, after all, but we just ordered him to keep fighting. Funnily enough, it’s what the Austrian cavalry did to Bernadotte on our right.
So, in summary, a good plan, that could have worked, but we should have been more active. I blame the hours I’d already spent on Zoom working that day: my equivalent of Napoleon’s Waterloo malaise!
Good play from the enemy too. We might have had a good plan, but I think it fair to say that they made no serious mistakes once battle was joined. Well done Dave, Trevor and Steve!
Anyway, onto…
The Result
For a final decision, let’s hear from the Umpire:
It was something of a heavy-weight bout, with both sides launching head-on attacks! It felt like two battering rams crashing into each other!
I'd call it a costly draw, although strategically more of a set-back for Napoleon perhaps.
To be honest, as one of the French players, I think we were relieved to be awarded a draw, but a draw had been declared and all that now remained was for Napoleon’s excellent propaganda machine to spin it into glorious victory!
To finish, my thanks to Edward and Bevan for running the game so smoothly, and to all the players for participating. It was a brilliant experience, and one I look forward to repeating soon.
From the Austro-Russians
A very enjoyable account, much like the reports I think Le Moniteur printed from time to time!
Very roughly, the Allies anticipated where your main attack would come from and placed our strongest Corps to block it. Sadly, Buxhowden was apparently a little hungover and they moved very slowly at the start. Our main plan was to hold the French on the Heights, with as compact a line as possible, whilst Bagration’s huge cavalry Corps savaged whatever you had on your left and then swung down the valley to smash into your advancing infantry on their flank. The Russian Imperial Guard were nicely positioned to help stop and then drive back the initial French attack.
Like a lot of things on the battlefield it don’t quite work out that way! Still Kutusov fought like a lion whilst always being outnumbered, Constantine’s Guards were magnificent, Bagration’s Cavalry did the business (Murat was always all trousers and whiskers) and once Buxhowden sobered up he know what to do. Oh and I suspect we got a few very timely dice rolls…
However our troops were all ordered to cut out the glorious but fatal charges on the French and to cause maximum casualties in defence. This seemed to work and according to our victory conditions it looked like an Allied victory – but half way through we would have settled on the draw, so no complaints about the decision.
Yes, a really good idea which produced a great game. Well done Edward & Bevan.
Finally…
Here are some final, Umpire’s, shots of the game: