

A Game...Finally!
/What with work and Christmas and everything, it’s been weeks since I actually got to have a battle, so thanks to friend John for braving the freezing fog coming over this morning for a couple of games of To The Strongest.
I had two new armies that were ready to try the tabletop: the first were the Burgundian Ordnance boys I had bought complete ay Colours; the second were my Vikings, finally complete after some time with the figure painter I like to use.
Ideally I would have fought them as is, but these days I try to make encounters as contemporaneous as possible, so the Burgundians would fight as Burgundians but the Vikings would, with the aid of a unit of lancers borrowed from my 17th Transylvanians, manifest as Medieval Scandinavians. Still not exactly contemporaneous, but close enough for jazz! For the first game, I would take the Scandies and John would take the Burgs.
My force consisted of only three commands. The first, headed by the CinC, consisted of my single unit of Frasle or “tax free” Later Knights and two unit of light archers. The second comprised three deep units of Hird: hard men with axes and extra bows. Finally there were the Leidangr bondi types: three of them in a third command.
The Burgs consisted of four commands, each a unit of Later Knights accompanied by a unit of foot. Three of the foot units were either billmen or spearmen with extra longbows, the third were crossbowmen, with the command with the crossbowmen also having a unit of organ gun artillery.
The First Game
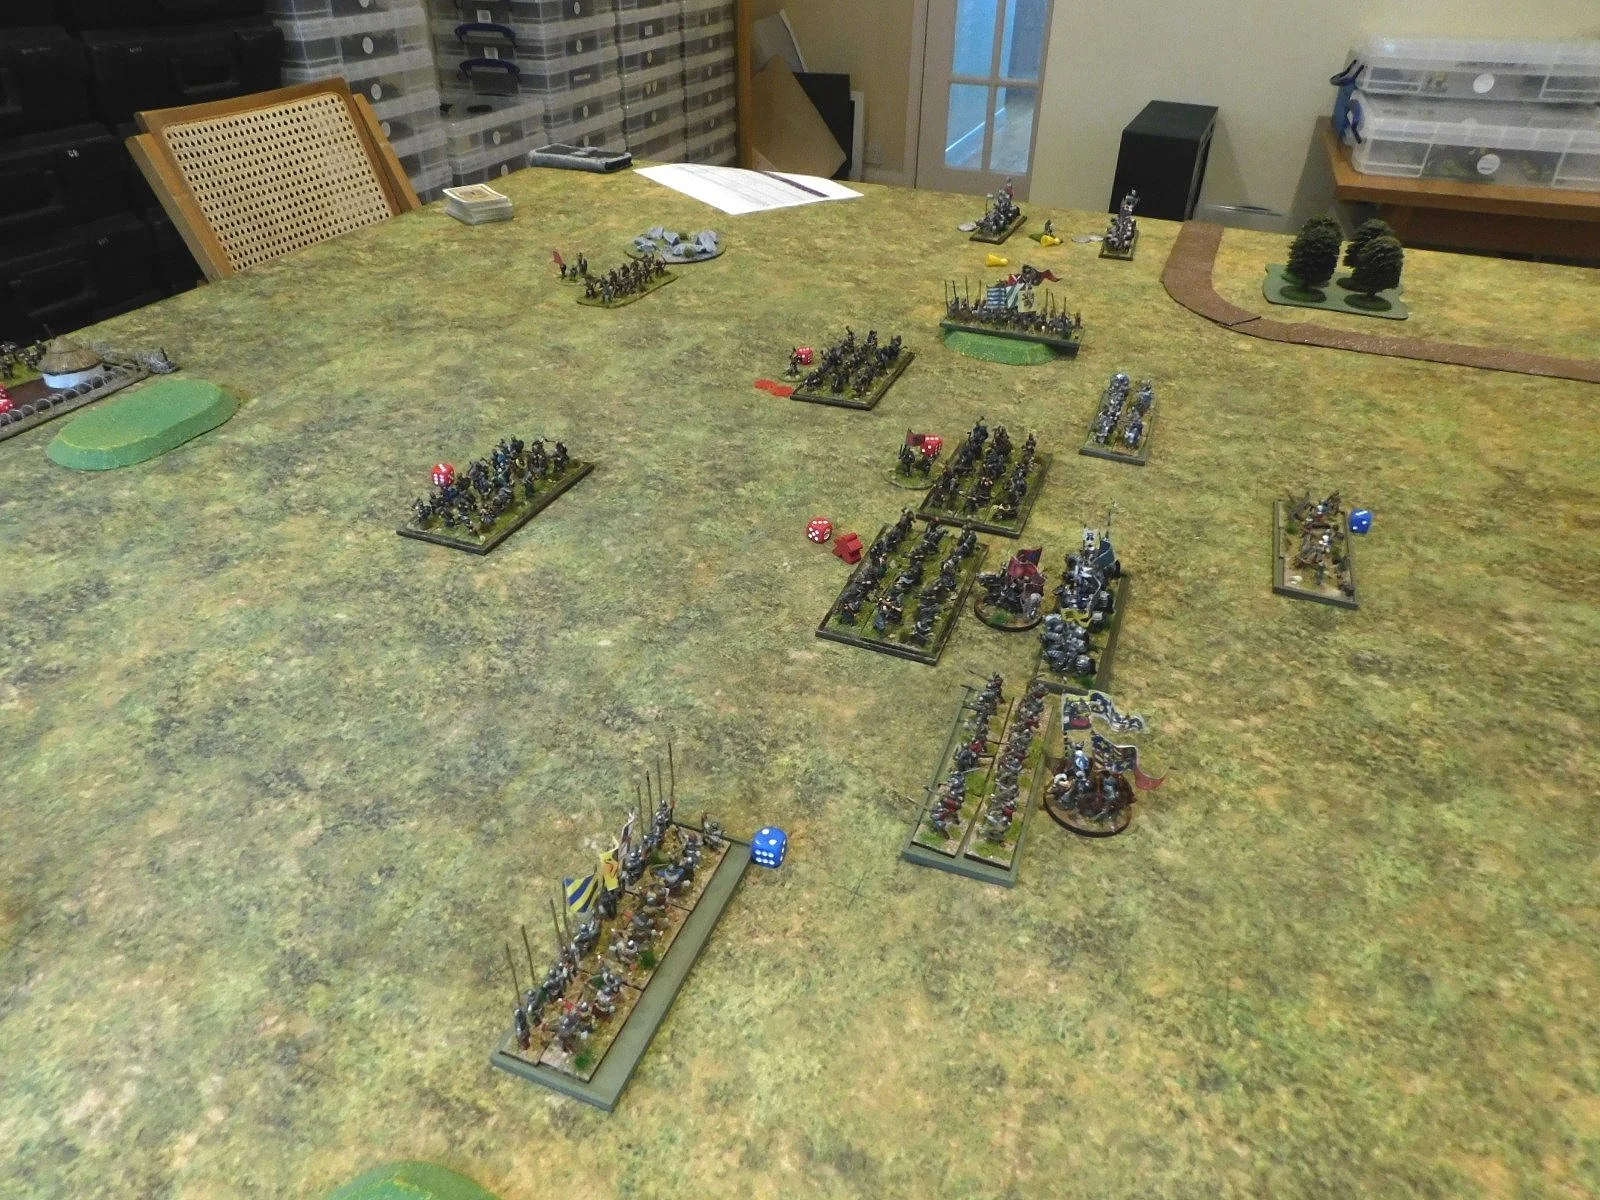
With neither side being particularly hot on scouting - Later Knights don’t scout! - a straight draw of the cards meant the John and the Burgs had the initiative. I set the Scandies up in a long line with the Frasle and lights on the left, Leidangr in the centre and Hird on the right. With two camps and almost no cavalry, I was nervous about his cavalry lapping around my flanks.
The Burgs remained in attack columns: coming forward with their infantry sheltering their Gendarmes.
I was keen to get my Hird into his troops as soon as possible, so ignored my bows and headed forward on the right asap. As I came into range, his infantry fired a couple of longbow volleys which actually did me more damage than I had anticipated. At the same time, one unit of his Knights managed to get past his sheltering infantry and charge into one Hird warband. This proved disastrous for the Scandies: with a glorious or pitiful (dependent on your point of view!) run of cards leading to me losing both a unit of Hird and their general!
Meanwhile on my left wing, my Frasle had proved themselves victory-free as well as tax-free: being sent fleeing from the field through a combination of bow fire and the attentions of some Gendarmes. The battle was definitely not going well!
I continued to lose ground on the right - my remaining Hird were outnumbered but putting up a good fight, and those deep units are hard to finish off - but it was in the centre and centre-left that a unit of Leidangr started to properly fight back.
The Gendarmes that had dealt so summarily with my cavalry were wounded by some light bowmen and then polished off by a warband; and another unit of Gendarmes was smashed from the field by some Hird. I was still down to only four coins, so would lose the game if I lost another two units/generals, but now John was down to only five coins, meaning I would win the game if I could kill three of his units/generals.


Unfortunately I could not sustain this momentum (you can see in the gallery above that most of my units were by now disordered) and was soon down to just one coin.
The final action of the game was for a unit of Gendarmes to lap around my right flank, and although I had some Leidangr to face them, Later Knights versus damaged Shieldwall was a foregone conclusion.


Post-Match Analysis
A good first game with the two new armies. I was surprised at how effective the Burgundian shooting was, and how fragile my deep units were in the first half of the game. That was, however, probably an atypical result of the actions that took place, as the second half of the game saw my surviving Hird and Leidangr soak up huge amounts of damage whilst still dishing it out effectively.
So the game was probably decided in that first clash, when I lost a unit of Hird and their general in a shock result. After that, even with things being 50/50, I was on the road to a defeat. All kudos to John, though, for maintaining the pressure and not giving me the opportunity I needed to turn the tables.
The next game will see us swap sides…


